
42LC53-ZA - TV LG - Free user manual and instructions
Find the device manual for free 42LC53-ZA LG in PDF.


| Product Type | LCD TV |
| Brand | LG |
| Model | 42LC53-ZA |
| Screen Size (Diagonal) | 42 inches |
| Dimensions with Stand (W x H x D) | 1033.4 x 750.0 x 287.6 mm (40.7 x 29.5 x 11.3 in) |
| Dimensions without Stand (W x H x D) | 1033.4 x 686.8 x 88.5 mm (40.7 x 27.0 x 3.5 in) |
| Weight with Stand | 24.9 kg (54.9 lbs) |
| Weight without Stand | 20.4 kg (45.0 lbs) |
| Power Requirement | AC 100-240V, 50/60Hz, 2.2A |
| Power Consumption | 200W |
| Display Resolution | 1366 x 768 (recommended PC mode) |
| Television System | PAL/SECAM B/G/D/K, PAL I/II, SECAM L/L' |
| Antenna Impedance | 75 Ohms |
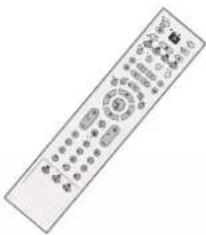
| Accessories Included | Owner's Manual, Remote Control, Batteries (2x AA), Power Cord, Polishing Cloth, Cable Management, Wall Brackets (for Plasma models - not for this model) |
| Key Connectors | HDMI (2), Component, RGB (PC), S-Video, Composite, SCART (AV1/AV2), Antenna, Variable Audio Out, RS-232C |
| Picture Features | XD Picture Improvement, 6 Aspect Ratios (Spectacle, Full, Original, 4:3, 16:9, 14:9, Zoom1/2), Picture Modes (Dynamic, Standard, Mild, User1/2), Color Temperature (Cool, Medium, Warm, User), Cinema Mode, Black Level |
| Sound Features | Auto Volume Leveler, Sound Modes (Surround MAX, Standard, Music, Movie, Sports, User), Balance, TV Speaker On/Off, Stereo/Dual Reception, NICAM |
| Convenience Features | SIMPLINK, Sleep Timer, Auto On/Off Timer, Key Lock, ISM Method (White Wash, Orbiter, Inversion for Plasma only), Low Power Mode (Plasma only), Teletext (SIMPLE, TOP, FASTEXT) |
| Cleaning & Maintenance | Use soft cloth with mild detergent for screen; dry cloth for cabinet. Unplug before cleaning. Avoid wet cloth on cabinet. |
| Safety Note | Attach TV to wall using eye-bolts and sturdy rope to prevent tipping. Ensure 4 inches clearance on each side for ventilation. |
| Operating Temperature | 0 to 40°C (32 to 104°F) |
Frequently Asked Questions - 42LC53-ZA LG
User questions about 42LC53-ZA LG
0 question about this device. Answer the ones you know or ask your own.
Ask a new question about this device
Download the instructions for your TV in PDF format for free! Find your manual 42LC53-ZA - LG and take your electronic device back in hand. On this page are published all the documents necessary for the use of your device. 42LC53-ZA by LG.
USER MANUAL 42LC53-ZA LG
LCD TV | PLASMA TV OWNER'S MANUAL
LCD TV MODELS
26LC4* 26LC5*
32LC4* 32LC5*
37LC4* 37LC5*
42LC4* 42LC5*
26LC3*
PLASMA TV MODELS
42PC5*
42PC5RV*
50PC5*
Please read this manual carefully before operating your set. Retain it for future reference.
Record model number and serial number of the set.
See the label attached on the back cover and quote this information to your dealer when you require service.
ACCESSORIES
Ensure that the following accessories are included with your TV. If an accessory is missing, please contact the dealer where you purchased the product.

Owner's Manual Batteries
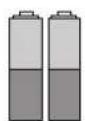
natural_image
Front view of a remote control with various function keys and buttons (no readable text or symbols)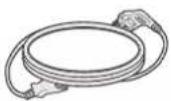
Remote Control Power Cord
Plasma TV models
This feature is not available for all models.

2-Wall brackets

2-eye-bolts
Polishing Cloth
Polish the screen with the cloth
This feature is not available
for all models.
* Slightly wipe stained spot on the exterior only with the cleansing cloths for the product exterior if there is stain or fingerprint on surface of the exterior.
Do not wipe roughly when removing stain. Please be cautious of that excessive power may cause scratch or discoloration.
LCD TV models
This feature is not available for all models.

2- TV Brackets
2- Wall Brackets

2-bolts

Twister Holder Arrange the wires with the twister holder.
26LC4*, 32LC4*, 37LC4*, 42LC4*, 26LC5*, 32LC5*, 37LC5*, 42LC5* only
Cable Management
26", 32", 37" only

4-bolts for stand assembly Refer to p. 8
26LC3R* only

Cable Management
CONTENTS
ACCESSORIES....1
PREPARATION
Front Panel Controls.... 4
Back Panel Information 6
Stand Installation....8
Attaching the TV to a Wall 9
Back Cover for Wire Arrangement.... 10
Desktop Pedestal Installation.... 12
Wall Mount: Horizontal installation.... 13
Antenna Connection 14
EXTERNAL EQUIPMENT SETUP
HD Receiver Setup 15
DVD Setup.... 18
VCR Setup.... 21
Other A/V Source Setup 24
External Stereo.... 25
PC Setup....26
- Screen Setup for PC Mode ....28
WATCHING TV / PROGRAMME CONTROL
Remote Control Key Functions....32
Turning on the TV.... 34
Programme Selection 34
Volume Adjustment....34
On Screen Menu Selection and Adjustment .....35
Auto Programme Tuning.... 36
Manual Programme Tuning.... 37
Fine Tuning 38
Assigning a Station Name....39
Programme Edit 40
Favourite Programme 41
Calling the Programme Table.... 42
Key lock 43
* SIMPLINK 44
PICTURE CONTROL
Picture Size (Aspect Ratio) Control......46
Preset Picture Settings
- Picture Mode-Preset 48
- Auto Colour Tone Control(Warm/Medium/Cool).49
Manual Picture Adjustment
- Picture Mode-User Option ....50
- Colour Tone - User Option....51
XD - Picture Improvement Technology....52
XD Demo....53
Advanced - Cinema....54
Advanced - Black(Darkness) Level....55
Picture Reset....56
Image Sticking Minimization(ISM) Method .....57
Low-Power Picture Mode....58
SOUND & LANGUAGE CONTROL
Auto Volume Leveler 59
Preset Sound Settings - Sound Mode......60
Sound Setting Adjustment - User Mode ....61
Balance....62
TV Speakers On/Off Setup....63
I/II
- Stereo/Dual Reception....64
- NICAM Reception....65
- Speaker Sound Output Selection ....65
On-Screen Menu Language /Country Selection ..... 66
TIME SETTING
Clock Setup....67
Auto On/Off Timer Setting 68
Sleep Timer Setting 69
Auto Shut-off Setting 70
TELETEXT
Switch On/Off....71
SIMPLE Text 71
TOP Text 72
FASTEXT....72
Special Teletext Functions....73
APPENDIX
Troubleshooting....74
Maintenance 76
Product Specifications ....77
Programming the Remote Control 79
PREPARATION
FRONT PANEL CONTROLS
This is a simplified representation of the front panel. Here shown may be somewhat different from your TV. If your product has a protection film attached, remove the film and then wipe the product with a polishing cloth.
Plasma TV Models

text_image
Remote Control Sensor Power/Standby Indicator • illuminates red in standby mode. • illuminates green when the set is switched on.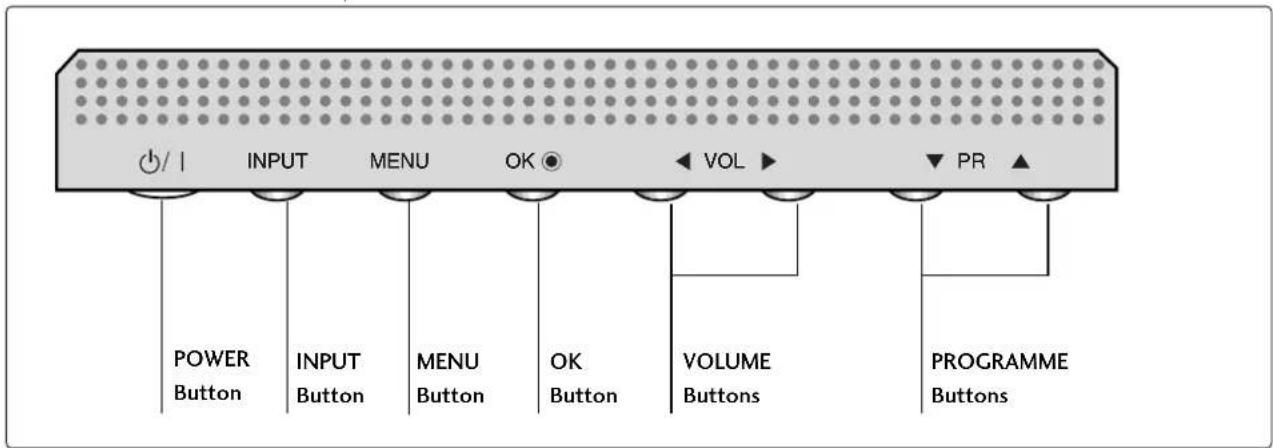
text_image
POWER Button INPUT Button MENU Button OK Button VOLUME Buttons PROGRAMME ButtonsLCD TV Models
26LC4*, 32LC4*, 37LC4*, 42LC4*, 26LC5*, 32LC5*, 37LC5*, 42LC5*
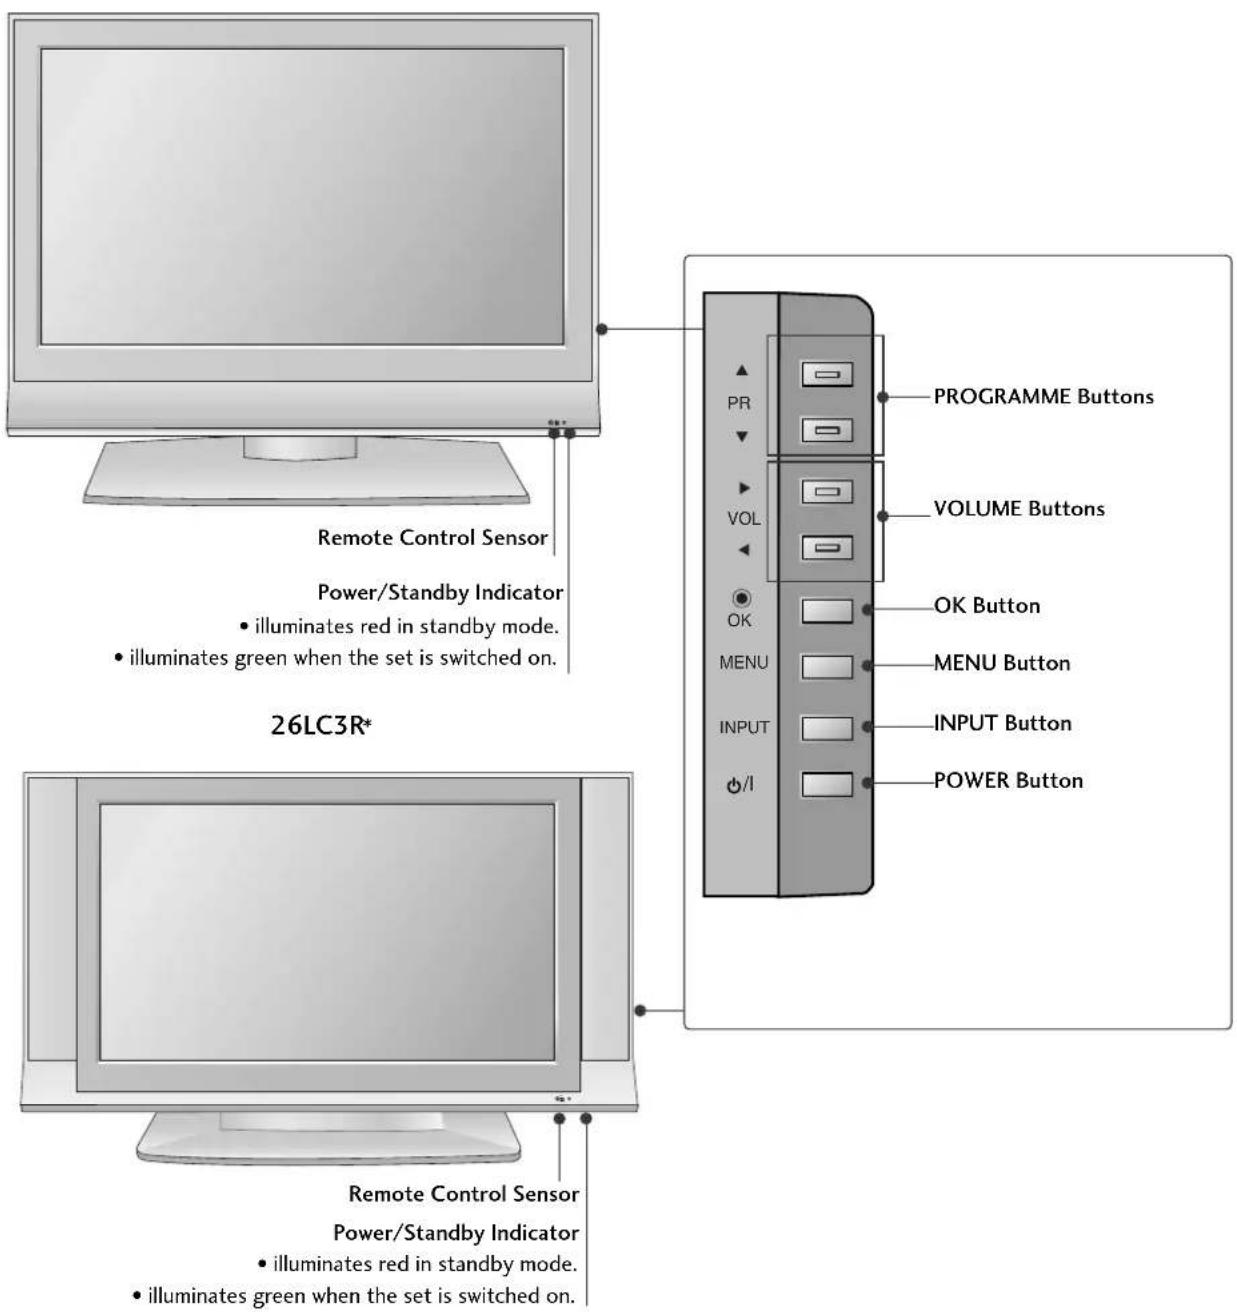
text_image
Remote Control Sensor Power/Standby Indicator • illuminates red in standby mode. • illuminates green when the set is switched on. 26LC3R* PR VOL OK MENU INPUT I/I PROGRAMME Buttons VOLUME Buttons OK Button MENU Button INPUT Button POWER Button Remote Control Sensor Power/Standby Indicator • illuminates red in standby mode. • illuminates green when the set is switched on.PREPARATION
BACK PANEL INFORMATION
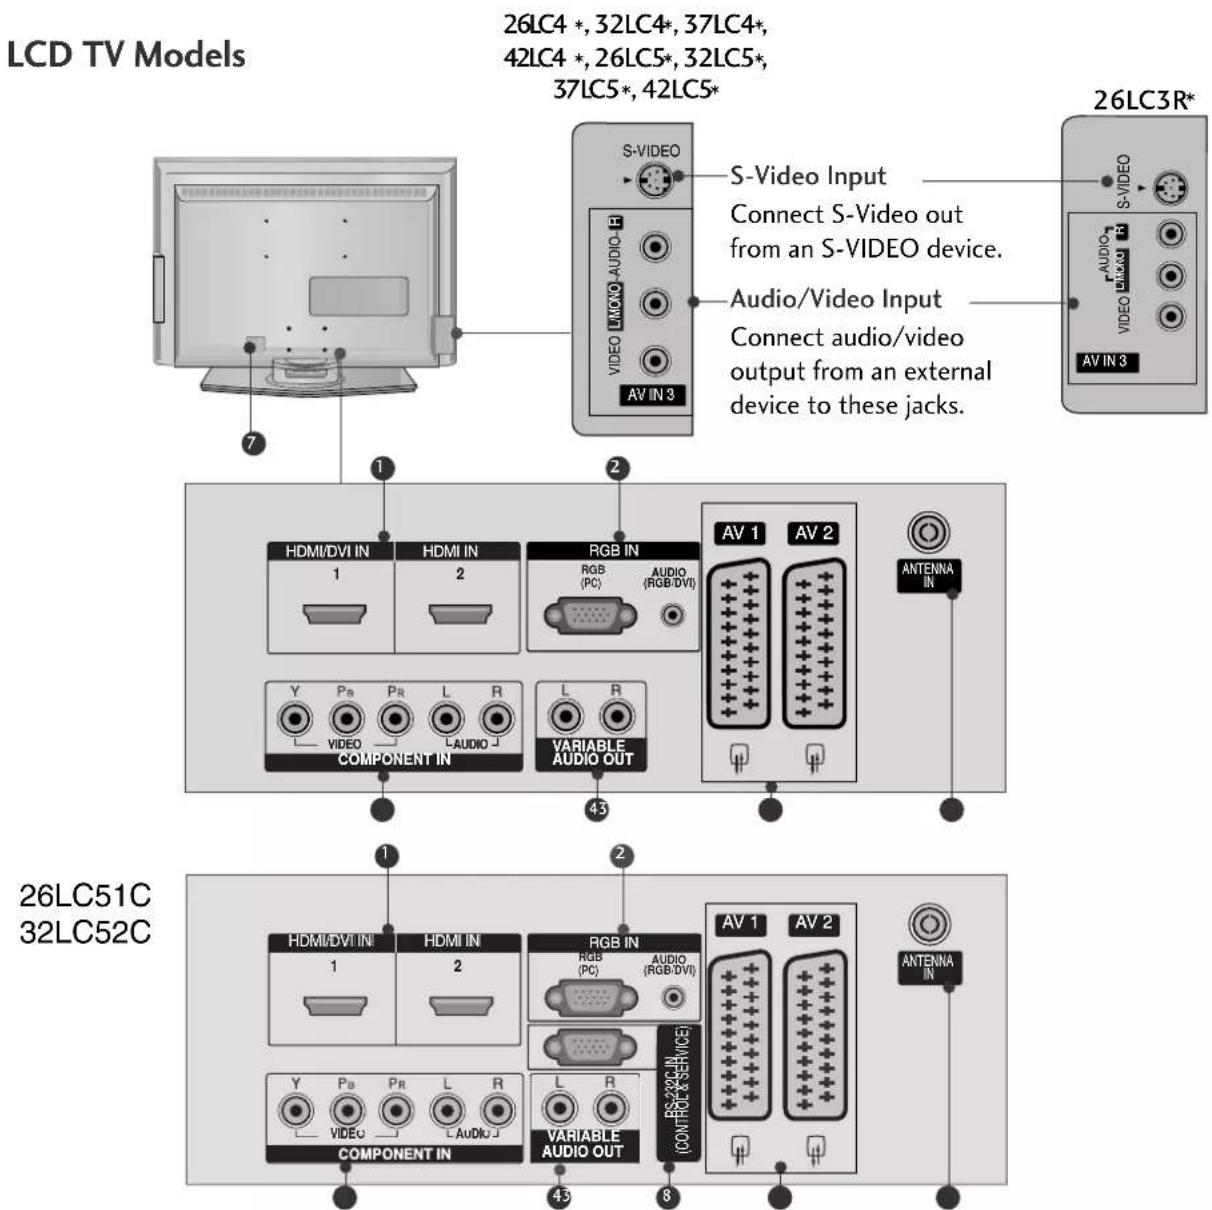
This is a simplified representation of the back panel. Here shown may be somewhat different from your TV.
Plasma TV Models
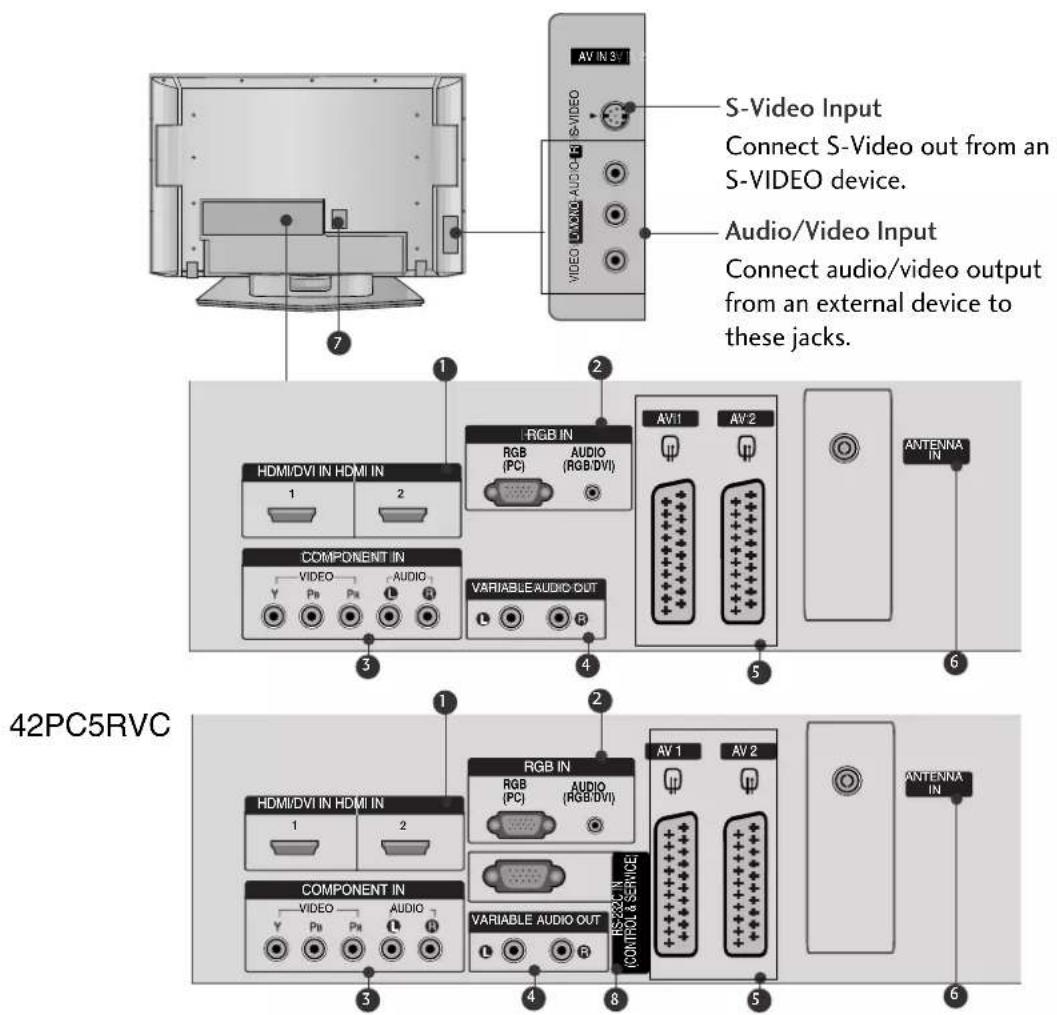
text_image
S-Video Input Connect S-Video out from an S-VIDEO device. Audio/Video Input Connect audio/video output from an external device to these jacks. HDMI/DVI IN HDMI IN RGB IN RGB (PC) AUDIO (RGB/DVI) COMPONENT IN VIDEO AUDIO VARIABLE AUDIO OUT 1 2 3 4 5 6 42PC5RVC RGB IN RGB (PC) AUDIO (RGB/DVI) COMPONENT IN VIDEO AUDIO VARIABLE AUDIO OUT 1 2 3 4 5 6 RESERCEIN CONTROL & SERVICE① HDMI Input
Connect a HDMI signal to HDMI IN.
Or DVI(VIDEO)signal to HDMI/DVI port with DVI to HDMI cable.
② RGB/Audio Input
Connect the monitor output from a PC to the appropriate input port.
3 Component Input Connect a component video/audio device to these jacks.
4 Variable Audio Output
Connect an external amplifier or add a subwoofer to your surround sound system.
5 Euro Scart Socket (AV1/AV2) Connect scart socket input or output from an external device to these jacks.
⑥ Antenna Input Connect over-the-air signals to this jack.
7 Power Cord Socket This TV operates on an AC power. The voltage is indicated on the Specifications page. Never attempt to operate the TV on DC power.
8 RS-232C Input(CONTROL&SERVICE)Port Connect the serial port of the control devices to the RS-232C jack.
text_image
LCD TV Models 26LC4 *, 32LC4*, 37LC4*, 42LC4 *, 26LC5*, 32LC5*, 37LC5*, 42LC5* S-Video Input Connect S-Video out from an S-VIDEO device. Audio/Video Input Connect audio/video output from an external device to these jacks. 26LC3R* AV IN 3 1 2 HDMI/DVI IN 1 HDMI IN 2 RGB IN RGB (PC) AUDIO (RGB/DVI) AV 1 AV 2 ANTENNA IN Y PA PA L R VIDEO AUDIO VARIABLE AUDIO OUT COMPONENT IN 43 26LC51C 32LC52C 1 2 HDMI/DVI IN 1 HDMI IN 2 RGB IN RGB (PC) AUDIO (RGB/DVI) AV 1 AV 2 Y PA PA L R VIDEO AUDIO VARIABLE AUDIO OUT COMPONENT IN 43 8① HDMI Input
Connect a HDMI signal to HDMI IN.
Or DVI(VIDEO)signal to HDMI/DVI port with DVI to HDMI cable.
② RGB/Audio Input
Connect the monitor output from a PC to the appropriate input port.
3 Component Input
Connect a component video/audio device to these jacks.
4 Variable Audio Output
Connect an external amplifier or add a subwoofer to your surround sound system.
5 Euro Scart Socket (AV1/AV2)
Connect scart socket input or output from an external device to these jacks.
6 Antenna Input
Connect over-the-air signals to this jack.
7 Power Cord Socket
This TV operates on an AC power. The voltage is indicated on the Specifications page. Never attempt to operate the TV on DC power.
8 RS-232C Input(CONTROL&SERVICE)Port
Connect the serial port of the control devices to the RS-232C jack.
PREPARATION
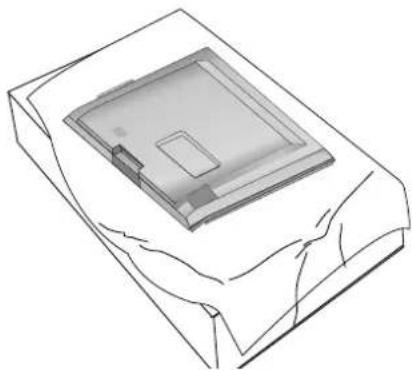
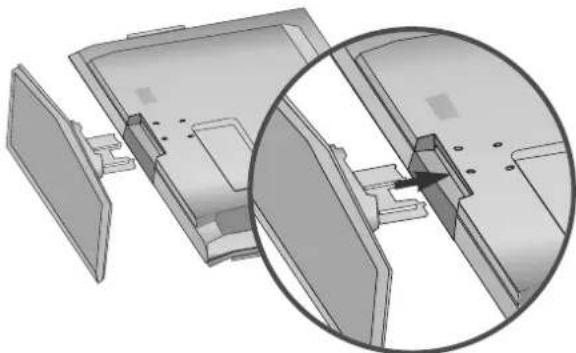
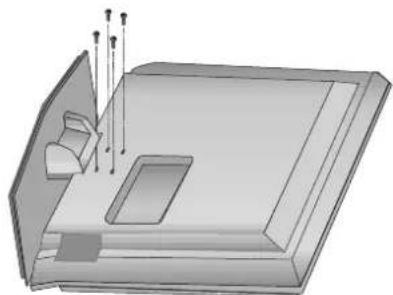
STAND INSTALLATION (Only 26, 32, 37 inch LCD TV models)
1 Carefully place the product screen side down on a cushioned surface that will protect product and screen from damage.
natural_image
Isometric line drawing of a rectangular electronic component with a central square and internal slot, placed on a textured base (no text or symbols)2 Assemble the product stand with the product as shown.
natural_image
Technical diagram of a mechanical assembly with a magnified inset showing a detail view (no text or symbols present)3 Install the 4 bolts securely, in the back of the product in the holes provided.
natural_image
3D rendering of a mechanical component with a rectangular base and protruding pins (no text or symbols visible)ATTACHING THE TV TO A WALL
■ This feature is not available for all models.
- Set it up close to the wall so the product doesn't fall over when it is pushed backwards.
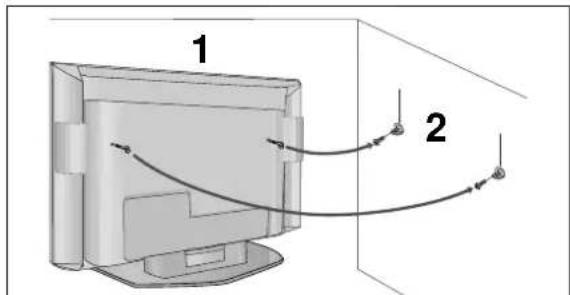
The instructions shown below is a safer way to set up the product, which is to fix it on the wall so the product doesn't fall over when it is pulled in the forward direction. It will prevent the product from falling forward and hurting people. It will also prevent the product from damage caused by fall. Please make sure that children don't climb on or hang from the product.
Plasma TV models LCD TV models
text_image
1 2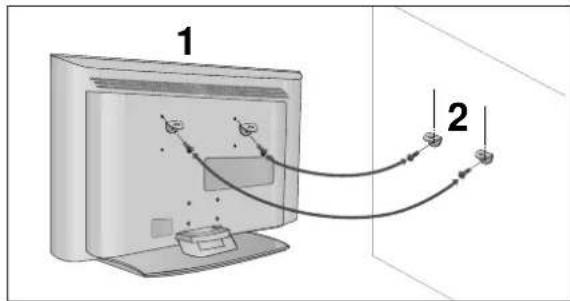
text_image
1 21 Use the eye-bolts or TV brackets/bolts to fix the product to the wall as shown in the picture. (If your product has the bolts in the eye-bolts position before inserting the eye-bolts, loosen the bolts.) * Insert the eye-bolts or TV brackets/bolts and tighten them securely in the upper holes.
2 Secure the wall brackets with the bolts (not provided as parts of the product, must purchase separately) on the wall. Match the height of the bracket that is mounted on the wall.
natural_image
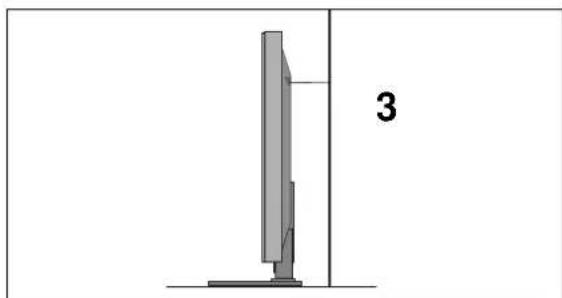
Diagram of a vertical computer monitor with a base, labeled '3' on the side (no text or symbols on the device itself)3 Use a sturdy rope (not provided as parts of the product, must purchase separately) to tie the product. It is safer to tie the rope so it becomes horizontal between the wall and the product.
NOTE
When moving the product to another place undo the ropes first.
▶ Use a product holder or a cabinet that is big and strong enough for the size and weight of the product.
To use the product safely make sure that the height of the bracket that is mounted on the wall is same as that of the product.
PREPARATION
BACK COVER FOR WIRE ARRANGEMENT
Plasma TV models
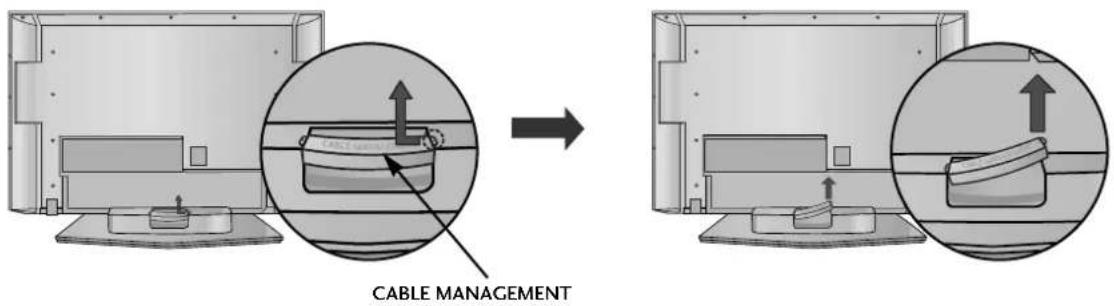
1 Hold the CABLE MANAGEMENT with hands and push it as shown.
text_image
CABLE MANAGEMENT2 Connect the cables as necessary.
To connect an additional equipment, see the External equipment Setup section.
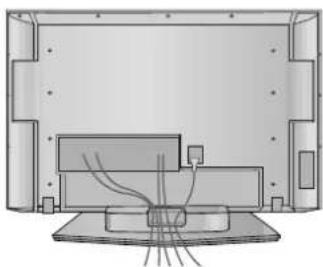
natural_image
Cross-sectional diagram of a TV or television setup showing internal components and wiring (no text or labels)3 Reinstall the CABLE MANAGEMENT as shown.
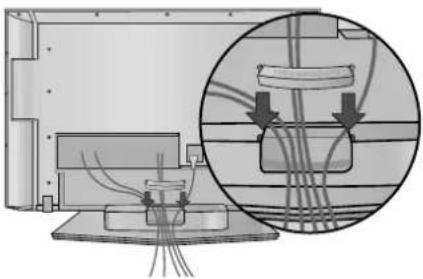
natural_image
Technical diagram showing a mechanical assembly with a magnified inset of cable routing (no text or symbols)LCD TV models
1 Connect the cables as necessary.
To connect an additional equipment, see the External equipment Setup section.
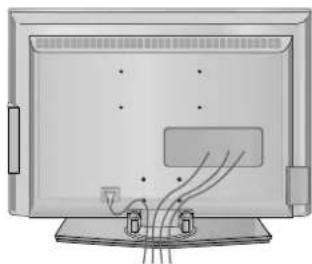
natural_image
Illustration of a flat-screen TV with ventilation grilles and cable routing (no text or symbols)2 Install the CABLE MANAGEMENT as shown.
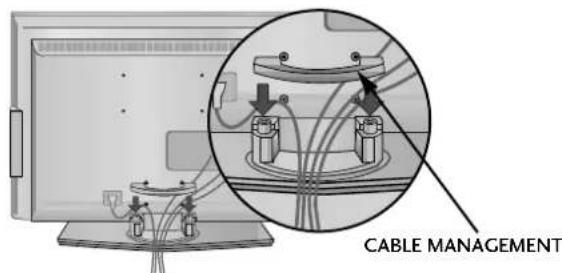
text_image
CABLE MANAGEMENT3 Bundle the cables using the supplied twister holder.
(This feature is not available for all models.)
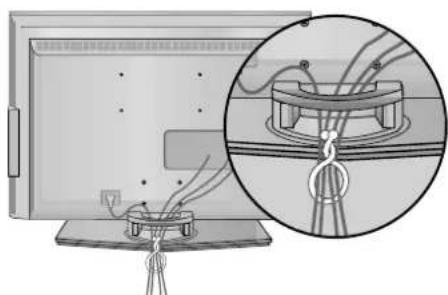
natural_image
Illustration of a monitor with cables and a hanging rope, showing a close-up inset of the cable being tied (no text or symbols present)How to remove the cable management
Hold the CABLE MANAGEMENT with both hands and pull it upward.
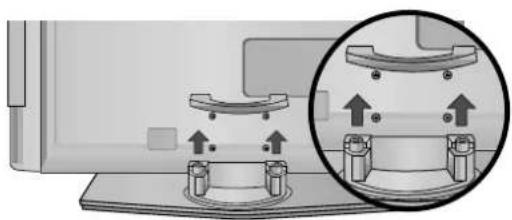
natural_image
Diagram showing mechanical components with an inset magnified view of a component (no text or symbols)NOTE
▶ Do not hold the CABLE MANAGEMENT when moving the product.
- If the product is dropped, you may be injured or the product may be broken.
PREPARATION
■ The TV can be installed in various ways such as on a wall, or on a desktop etc.
■ The TV is designed to be mounted horizontally.
text_image
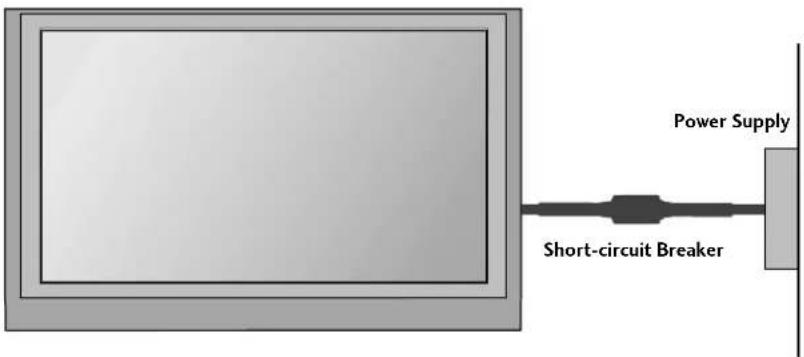
Power Supply Short-circuit BreakerGROUNDING
Ensure that you connect the earth ground wire to prevent possible electric shock. If grounding methods are not possible, have a qualified electrician install a separate circuit breaker.
Do not try to ground the unit by connecting it to telephone wires, lightening rods, or gas pipes.
DESKTOP PEDESTAL INSTALLATION
For proper ventilation, allow a clearance of 4 inches on each side from the wall.
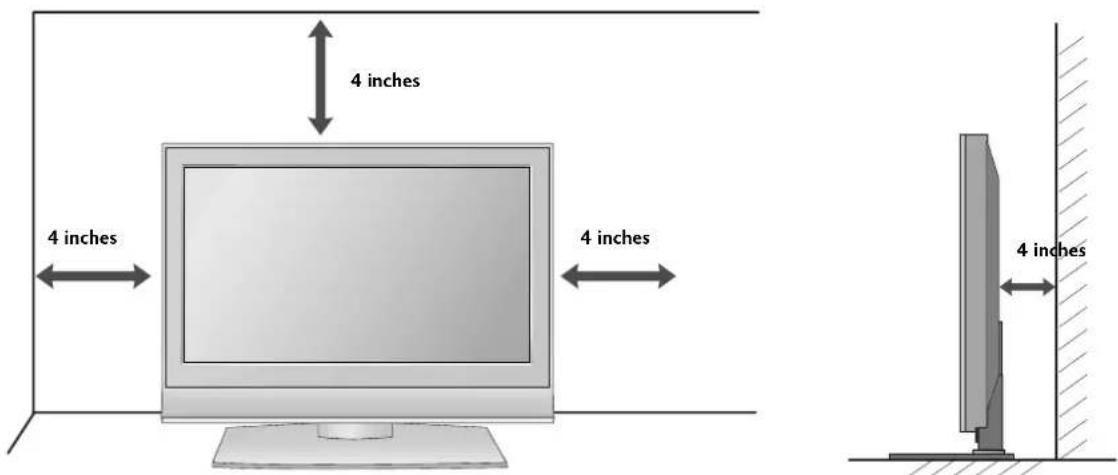
text_image
4 inches 4 inches 4 inches 4 inches 4 inchesWALL MOUNT: HORIZONTAL INSTALLATION
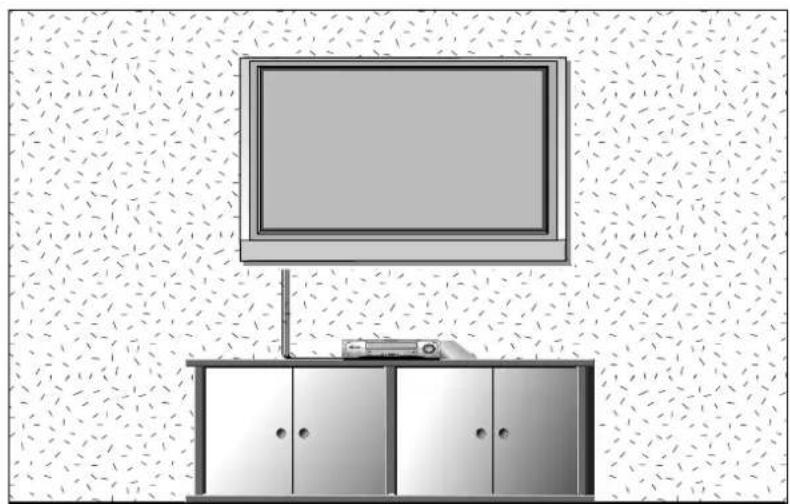
For proper ventilation, allow a clearance of 4" on each side and from the wall. Detailed installation instructions are available from your dealer, see the optional Tilt Wall Mounting Bracket Installation and Setup Guide.
natural_image
Interior view of a room with a TV set and cabinet (no visible text or symbols)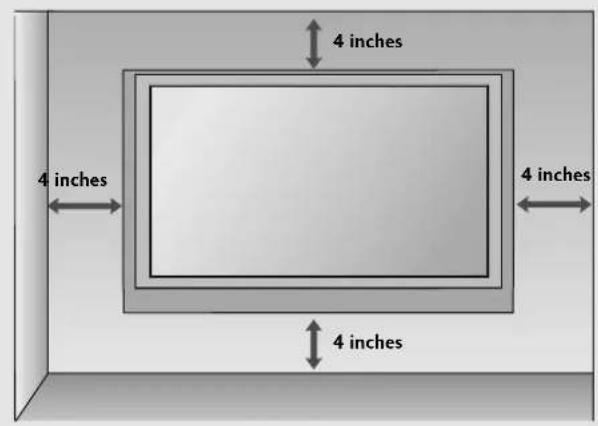
text_image
4 inches 4 inches 4 inches 4 inches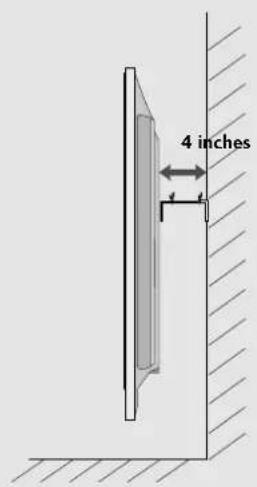
text_image
4 inchesPREPARATION
■ To prevent the equipment damage, never plug in any power cords until you have finished connecting all equipment.
ANTENNA CONNECTION
■ For optimum picture quality, adjust antenna direction.
■ An antenna cable and converter are not supplied.
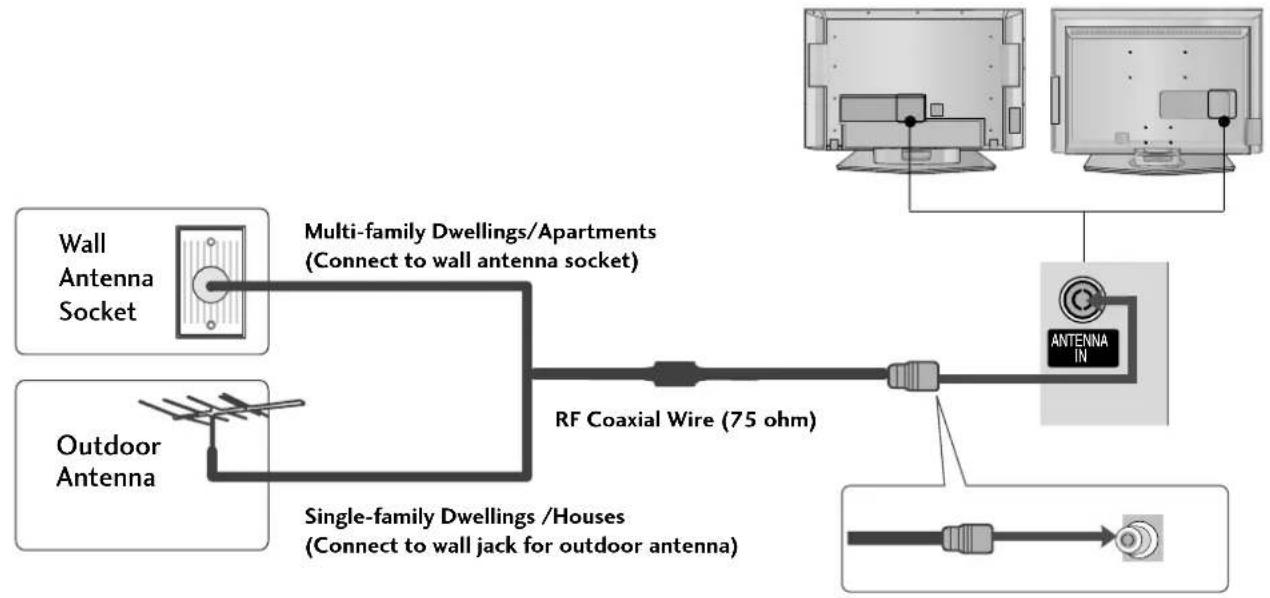
flowchart
graph LR
    A["Wall Antenna Socket"] --> B["Multi-family Dwellings/Apartments (Connect to wall antenna socket)"]
    C["Outdoor Antenna"] --> D["Single-family Dwellings/Houses (Connect to wall jack for outdoor antenna)"]
    B --> E["RF Coaxial Wire (75 ohm)"]
    D --> E
    E --> F["Antenna IN"]

flowchart
graph LR
    A["Antenna"] --> B["UHF"]
    A --> C["VHF"]
    B --> D["Signal Amplifier"]
    C --> D
    D --> E["Antenna IN"]
In poor signal areas, to get better picture quality, install a signal amplifier to the antenna as shown above.
■ If signal needs to be split for two TVs, use an antenna signal splitter for connection.
EXTERNAL EQUIPMENT SETUP
■ To prevent the equipment damage, never plug in any power cords until you have finished connecting all equipment.
■ This part of EXTERNAL EQUIPMENT SETUP mainly use pictures for the LCD TV models.
HD RECEIVER SETUP
When connecting with a component cable
1 Connect the video outputs (Y, PB, PR) of the digital set top box to the COMPONENT IN VIDEO jacks on the set.
2 Connect the audio output of the digital set-top box to the COMPONENT IN AUDIO jacks on the set.
3 Turn on the digital set-top box. (Refer to the owner's manual for the digital set-top box)
4 Select Component input source with using the INPUT button on the remote control.
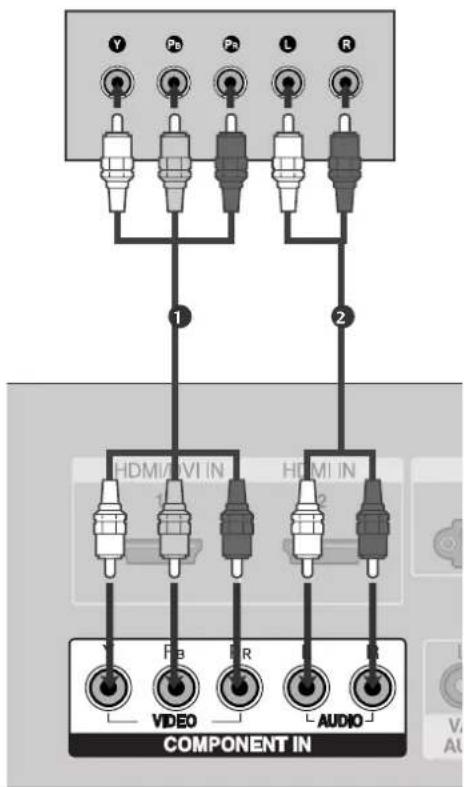
text_image
Y Pb Px L R 1 2 HDMI/VI IN HDMI IN 1 2 VIDEO R AUDIO COMPONENT IN| Signal | Component | HDMI1/2 |
| 480i/576i | Yes | No |
| 480p/576p | Yes | Yes |
| 720p/1080i | Yes | Yes |
| 1080p | No | Yes (except VGA Models) |
EXTERNAL EQUIPMENT SETUP
When connecting with a HDMI cable
1 Connect the HDMI output of the digital set-top box to the HDMI/DVI IN 1 or HDMI IN 2 jack on the set.
2 Select HDMI1 or HDMI2 input source with using the INPUT button on the remote control.
3 Turn on the digital set-top box.
(Refer to the owner's manual for the digital set-top box.)
NOTE
▶ TV can receive the video and audio signal simultaneously with using a HDMI cable.
▶ If the digital set-top box supports Auto HDMI function, the output resolution of the source device will be automatically set to 1280x720p.
▶ If the digital set-top box player does not support Auto HDMI, you need to set the output resolution appropriately.
To get the best picture quality, adjust the output resolution of the source device to 1280x720p.
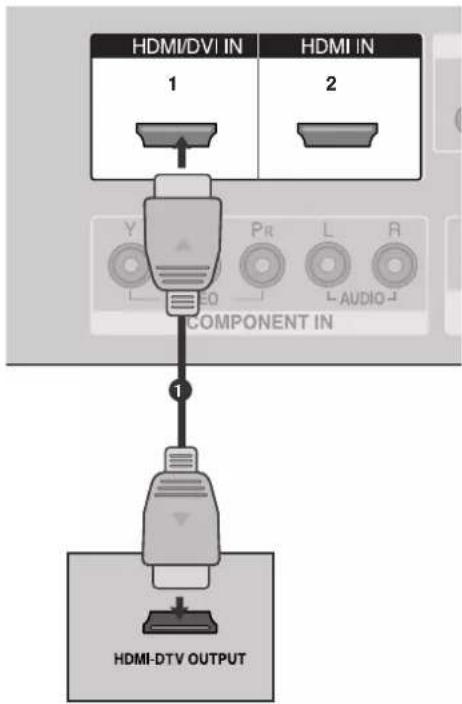
flowchart
graph TD
    A["HDMI/DVI IN 1"] --> B["Component IN Y"]
    C["HDMI IN 2"] --> D["Component IN PR"]
    E["HDMI-DTV OUTPUT"] --> F["Output"]
When connecting with a HDMI to DVI cable
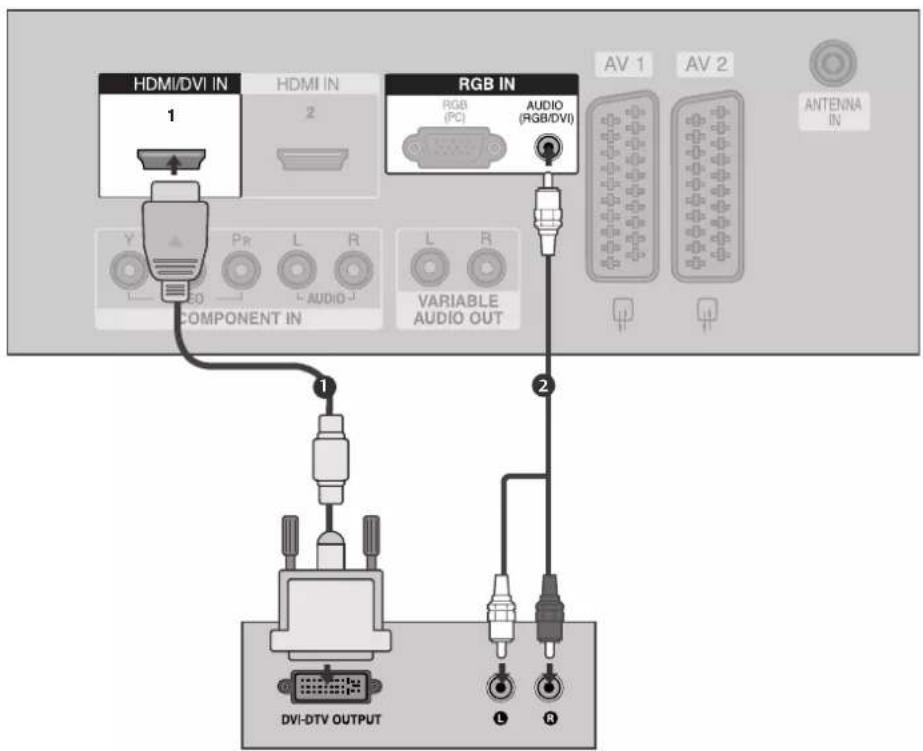
text_image
HDMI/DVI IN 1 HDMI IN 2 RGB IN RGB (PC) AUDIO (RGB/DVI) Y PR L R L R VARIABLE AUDIO OUT COMPONENT IN AV 1 AV 2 ANTENNA IN 1 2 DVI-DTV OUTPUT L R1 Connect the DVI output of the digital set-top box to the HDMI/DVI IN 1 jack on the set.
2 Connect the audio output of the digital set-top box to the AUDIO(RGB/DVI) jack on the set.
3 Turn on the digital set-top box. (Refer to the owner's manual for the digital set-top box)
4 Select HDMI1 input source with using the INPUT button on the remote control.
EXTERNAL EQUIPMENT SETUP
DVD SETUP
When connecting with a component cable
1 Connect the video outputs (Y, PB, PR) of the DVD to the COMPONENT IN VIDEO jacks on the set.
2 Connect the audio outputs of the DVD to the COMPONENT IN AUDIO jacks on the set.
3 Turn on the DVD player, insert a DVD.
4 Select Component input source with using the INPUT button on the remote control.
5 Refer to the DVD player's manual for operating instructions.
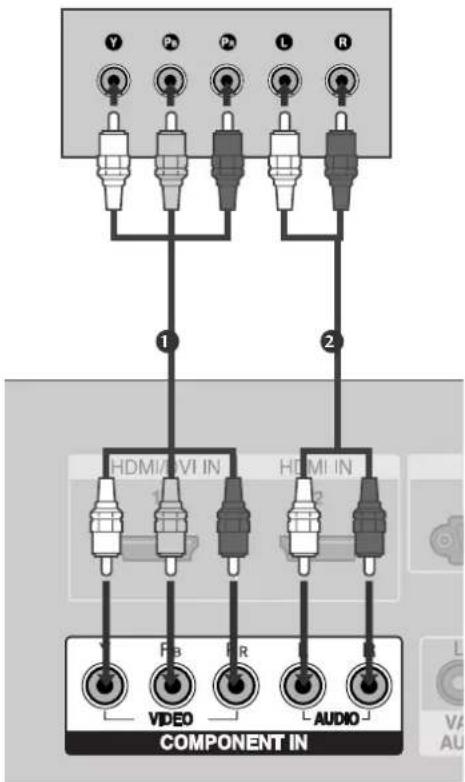
text_image
V 2 2 L R 1 2 HDMI/AVI IN HDMI IN 1 2 VIDEO AUDIO COMPONENT INComponent Input ports
To get better picture quality, connect a DVD player to the component input ports as shown below.
| Component ports on the TV | Y | P_B | P_R |
| Video output ports on DVD player | Y | P_B | P_R |
| Y | B-Y | R-Y | |
| Y | Cb | Cr | |
| Y | Pb | Pr |
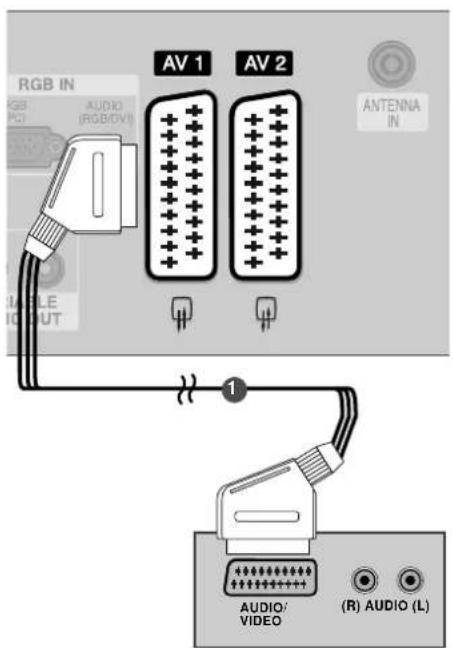
When connecting with a Euro Scart
1 Connect the Euro scart socket of the DVD to the AV1 Euro scart socket on the set.
2 Turn on the DVD player, insert a DVD.
3 Select AV1 input source with using the INPUT button on the remote control.
If connected to AV2Euro scart socket, select AV2input source.
4 Refer to the DVD player's manual for operating instructions.
NOTE
▶ Please use the shield scart cable.
text_image
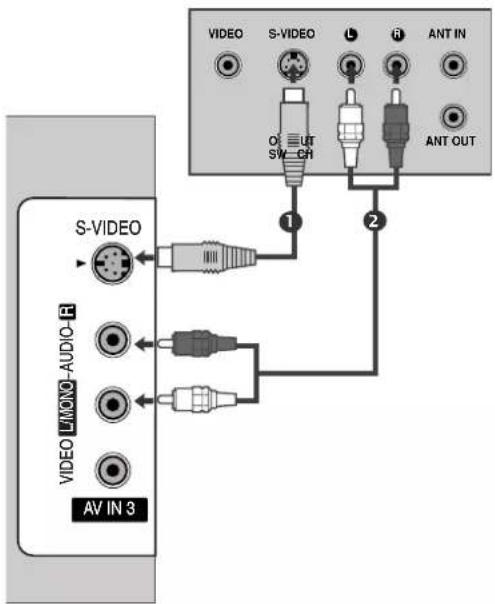
AV 1 AV 2 ANTENNA IN AUDIO (R) AUDIO (L) AUDIO VIDEO 1When connecting with an S-Video cable
1 Connect the S-VIDEO output of the DVD to the S-VIDEO input on the set.
2 Connect the audio outputs of the DVD to the AUDIO input jacks on the set.
3 Turn on the DVD player, insert a DVD.
4 Select AV3 input source with using the INPUT button on the remote control.
5 Refer to the DVD player's manual for operating instructions.
text_image
VIDEO S-VIDEO L R ANT IN AV IN 3 1 2EXTERNAL EQUIPMENT SETUP
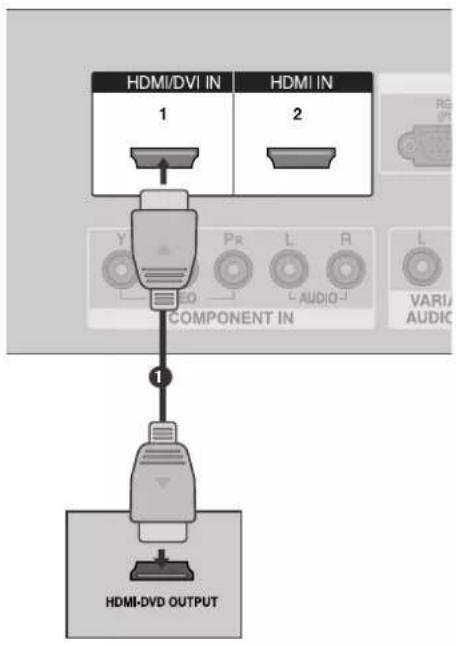
When connecting HDMI cable
1 Connect the HDMI output of the DVD to the HDMI/DVI IN 1 or HDMI IN 2 jack on the set.
2 Select HDMI1 or HDMI2 input source with using the INPUT button on the remote control.
3 Refer to the DVD player's manual for operating instructions.
NOTE
▶ TV can receive the video and audio signal simultaneously with using a HDMI cable.
▶ If the DVD supports Auto HDMI function, the output resolution of the source device will be automatically set to 1280x720p.
▶ If the DVD player does not support Auto HDMI, you need to set the DVD output resolution appropriately.
To get the best picture quality, adjust the output resolution of the source device to 1280x720p.
flowchart
graph TD
    A["HDMI/DVI IN 1"] --> B["Component IN Y"]
    C["HDMI IN 2"] --> D["Component IN PR"]
    B --> E["Output H1"]
    D --> F["Output H2"]
    G["HDMI-DVD OUTPUT"] --> H["Output H3"]
Supported Display Resolution (HDMI-DTV mode)
| Resolution | Horizontal Frequency(KHz) | Vertical Frequency(Hz) |
| 720x480 | 31.47 | 59.94 |
| 31.50 | 60.00 | |
| 720x576 | 31.25 | 50.00 |
| 1280x720 | 44.96 | 59.94 |
| 45.00 | 60.00 | |
| 37.50 | 50.00 | |
| 1920x1080i | 33.72 | 59.94 |
| 33.75 | 60.00 | |
| 28.125 | 50.00 | |
| 1920x1080p | 67.432 | 59.94 |
| 67.5 | 60 | |
| 56.25 | 50 |
(except VGA Models)
VCR SETUP
■ To avoid picture noise (interference), leave an adequate distance between the VCR and TV.
■ Typically a frozen still picture from a VCR. If the 4:3 picture format is used; the fixed images on the sides of the screen may remain visible on the screen.
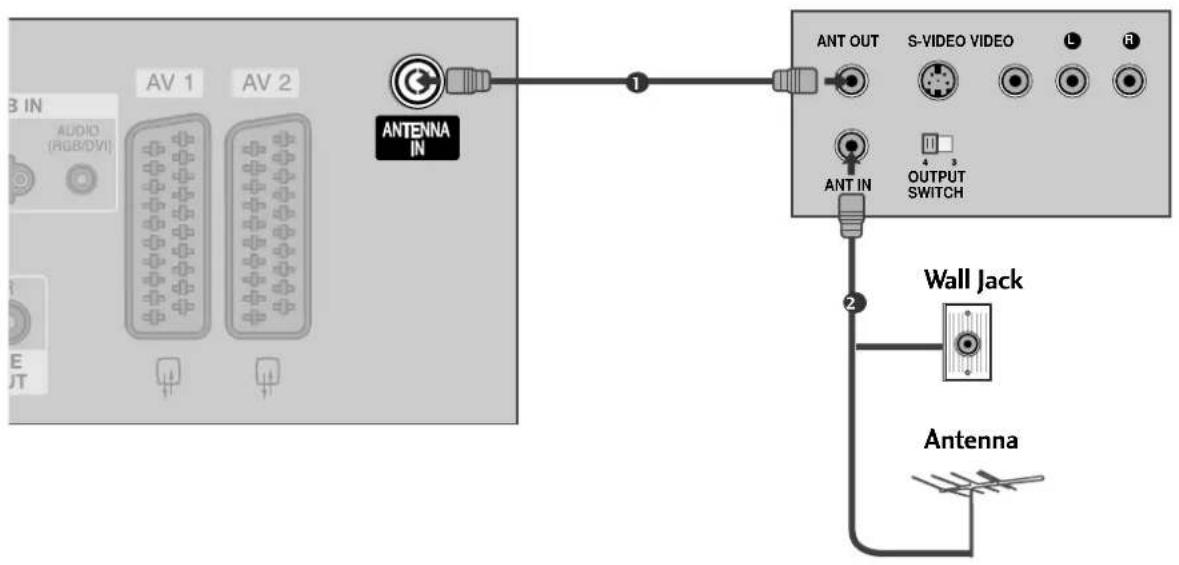
When connecting with an antenna
flowchart
graph TD
    A["AV 1"] --> B["ANTenna IN"]
    C["AV 2"] --> B
    B --> D["ANT OUT"]
    D --> E["S-VIDEO VIDEO"]
    E --> F["OUTPUT SWITCH"]
    F --> G["Antenna"]
    G --> H["Wall Jack"]
1 Connect the ANT OUT socket of the VCR to the ANTENNA IN socket on the set.
2 Connect the antenna cable to the ANT IN socket of the VCR.
3 Press the PLAY button on the VCR and match the appropriate programme between the TV and VCR for viewing.
EXTERNAL EQUIPMENT SETUP
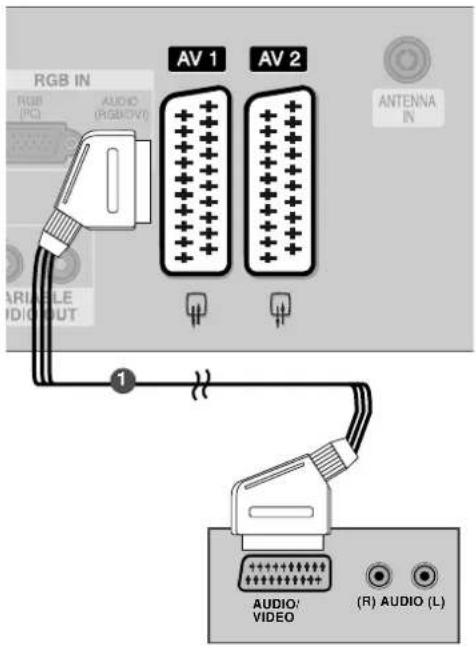
When connecting with a Euro Scart
1 Connect the Euro scart socket of the VCR to the AV1 Euro scart socket on the set.
2 Insert a video tape into the VCR and press PLAY on the VCR. (Refer to the VCR owner's manual.)
3 Select AV1 input source with using the INPUT button on the remote control.
If connected to AV2 Euro scart socket, select AV2input source.
text_image
RGB IN RGB (PC) AUDIO (RGB/0V) ARIMULE VIDEO AV 1 AV 2 ANTENNA IN 1 AUDIO/ VIDEO (R) AUDIO (L)NOTE
▶ If you want to use the EURO scart cable, you have to use the signal shielded Euro scart cable.
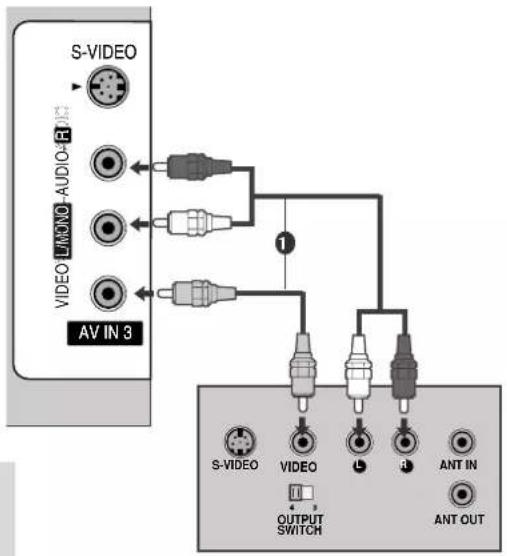
When connecting with a RCA cable
1 Connect the AUDIO/VIDEO jacks between TV and VCR. Match the jack colours (Video = yellow, Audio Left = white, and Audio Right = red)
2 Insert a video tape into the VCR and press PLAY on the VCR. (Refer to the VCR owner's manual.)
3 Select AV3 input source using the INPUT button on the remote control.
NOTE
▶ If you have a mono VCR, connect the audio cable from the VCR to the AUDIO L/MONO jack of the set.
text_image
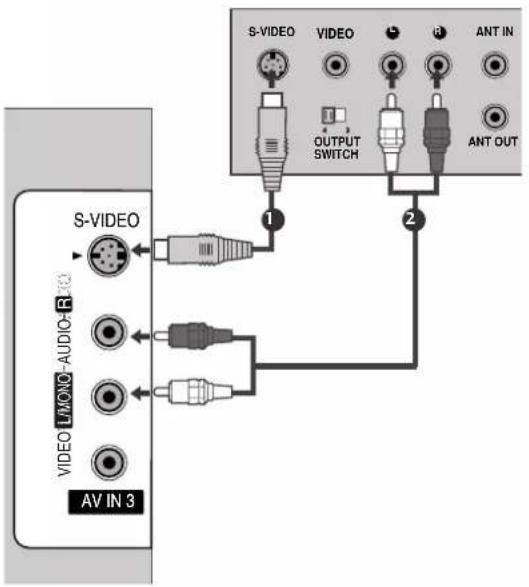
S-VIDEO VIDEO LIMINO AUDIO-R AV IN 3 1 S-VIDEO VIDEO OUTPUT SWITCH ANT IN ANT OUTWhen connecting with an S-Video cable
1 Connect the S-VIDEO output of the VCR to the S-VIDEO input on the set. The picture quality is improved; compared to normal composite (RCA cable) input.
2 Connect the audio outputs of the VCR to the AUDIO input jacks on the set.
3 Insert a video tape into the VCR and press PLAY on the VCR. (Refer to the VCR owner's manual.)
4 Select AV3 input source with using the INPUT button on the remote control.
NOTE
▶ If both S-VIDEO and VIDEO sockets have been connected to the S-VHS VCR simultaneously, only the S-VIDEO can be received.
text_image
S-VIDEO VIDEO AV IN 3 MONO-AUDIO-R 1 2 OUTPUT SWITCH ANT IN ANT OUTEXTERNAL EQUIPMENT SETUP
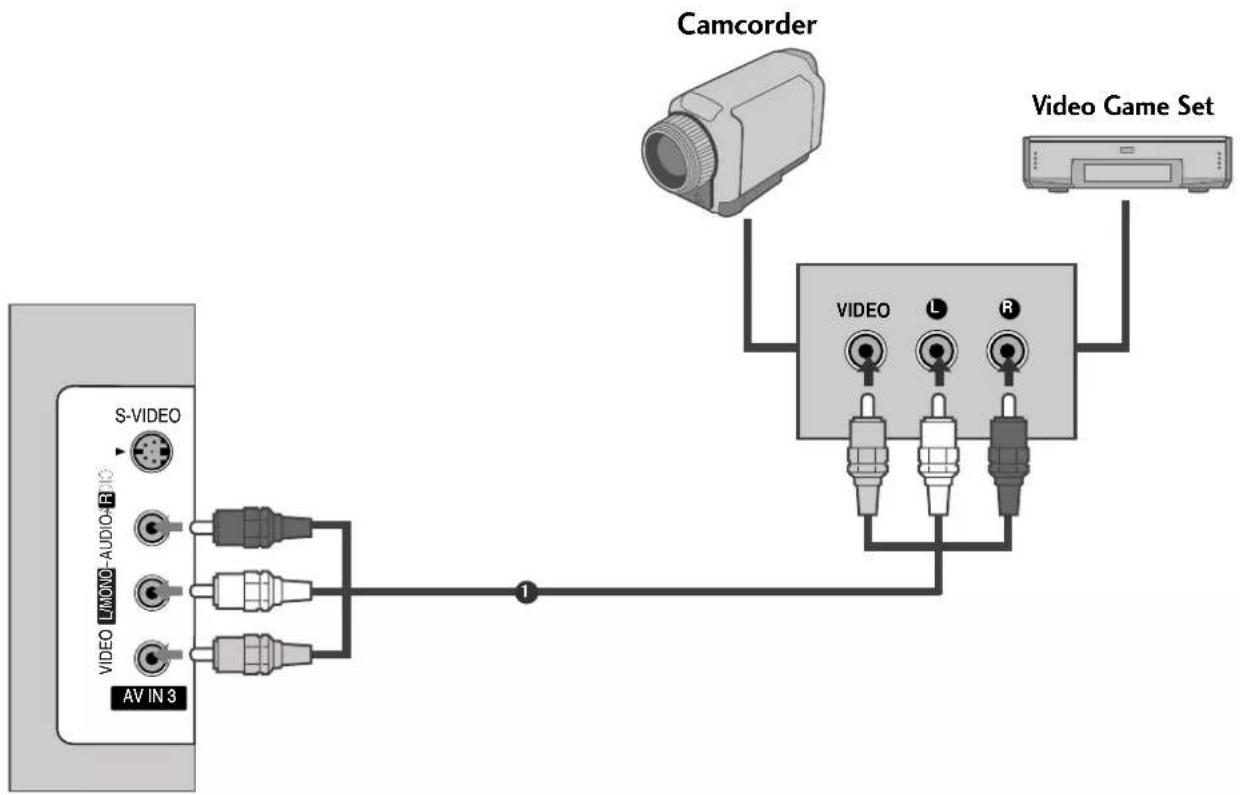
OTHER A/V SOURCE SETUP
flowchart
graph TD
    A["S-VIDEO"] -->|AV IN 3| B["AC"]
    C["Camcorder"] --> D["Video Game Set"]
    B -->|1| D
    style A fill:#f9f,stroke:#333
    style C fill:#ccf,stroke:#333
    style D fill:#cfc,stroke:#333
1 Connect the AUDIO/VIDEO jacks between TV and external equipment. Match the jack colours. (Video = yellow, Audio Left = white, and Audio Right = red)
2 Select AV3 input source with using the INPUT button on the remote control.
3 Operate the corresponding external equipment. Refer to external equipment operating guide.
EXTERNAL STEREO
Use to connected either an external amplifier, or add a subwoofer to your surround sound system.
1 Connect the input jack of the stereo amplifier to the VARIABLE AUDIO OUT jacks on the set.
2 Set up your speakers through your analog stereo amplifier, according to the instructions provided with the amplifier.
NOTE
When connecting with external audio equipments, such as amplifiers or speakers, please turn the TV speakers off. (▶ p.63)

text_image
L R AUDIO IN VARIABLE AUDIO OUT 1EXTERNAL EQUIPMENT SETUP
PC SETUP
This TV provides Plug and Play capability, meaning that the PC adjusts automatically to the TV's settings.
When connecting with a D-sub 15 pin cable
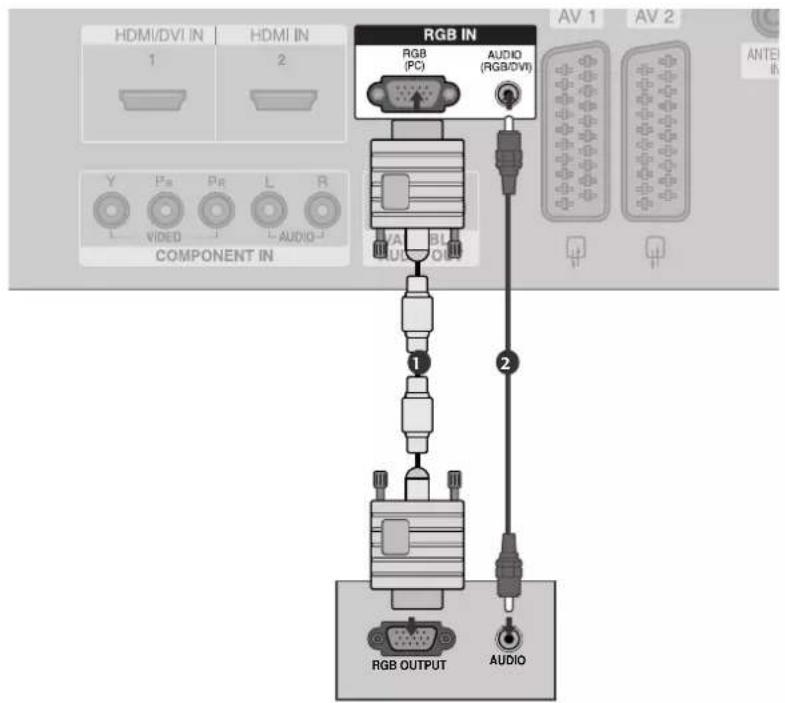
text_image
HDMI/DVI IN 1 HDMI IN 2 RGB IN RGB (PC) AUDIO (RGB/DVI) Y Pn Pn L R VIDEO AUDIO COMPONENT IN AV 1 AV 2 1 2 RGB OUTPUT AUDIO1 Connect the RGB output of the PC to the RGB (PP)ack on the set.
2 Connect the PC audio output to the AUDIO jack on the set.
3 Turn on the PC and the set.
4 Select RGB PC input source with using the INPUT button on the remote control.
NOTE
To enjoy vivid picture and sound, connect a PC to the set.
Avoid keeping a fixed image on the set's screen for a long period of time. The fixed image may become permanently imprinted on the screen; use a screen saver when possible.
Connect PC to the RGB (PC) port of the set; change the resolution output of PC accordingly.
There might be noise according to some resolution, vertical pattern, contrast or brightness in PC mode. Change the PC mode into another resolution or change the refresh rate into another rate or adjust the brightness and contrast on the menu until the picture is clean. If the refresh rate of the PC graphic card can not be changed, change the PC graphic card or consult it to the manufacturer of the PC graphic card.
The synchronization input waveform for Horizontal and Vertical frequencies are separate.
We recommend using 1366x768, 60Hz (LCD TV models) / 852x480, 60Hz (42 inch WVGA PLASMA TV models) / 1024x768, 60Hz (42 inch XGA PLASMA TV models) / 1360x768, 60Hz (50 inch PLASMA TV models) for the PC mode, they provide the best picture quality.
If the resolution of PC is over SXGA, there will be no picture on the set.
Connect the audio cable from the PC to the Audio input on the set.(Audio cables are not included with the set).
When you use too long RGB-PC cable, there might be a noise on the screen. We recommend using under 5m of the cable. It provides the best picture quality.
Supported Display Resolution (RGB-PC mode)
| Resolution | Horizontal Vertical Frequency(kHz) Frequency(Hz) |
| 640x350 | 31.5 70.1 |
| 720x400 | 31.5 70.1 |
| 640x480 | 31.5 59.9 |
| 848x480 | 31.5 60.0 |
| 852x480 | 31.5 60.0 |
| 800x600 | 37.9 60.3 |
| 1024x768 | 48.4 60.0 |
| 1280x768 | 47.8 59.9 |
| 1360x768 | 47.7 59.8 |
| 1366x768 | 47.7 59.8 |
NOTE
It's supported to 848x480, 852x480 in VGA modes. (VGA Models)
It's supported to 1280x768, 1360x768, 1366x768 in XGA modes. (XGA Models)
EXTERNAL EQUIPMENT SETUP
Screen Setup for PC mode
Auto Configure (RGB [PC] mode only)
Automatically adjusts picture position and minimizes image shaking. After adjustment, if the image is still not correct, your set is functioning properly but needs further adjustment.
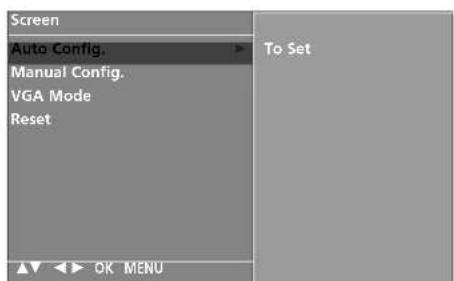
Auto configure
This function is for the automatic adjustment of the screen position, clock, and phase. The displayed image will unstable for a few seconds while the auto configuration is in progress.
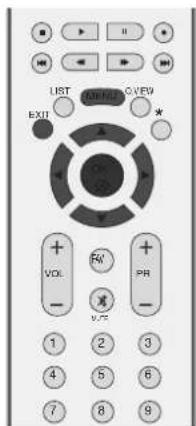
1 Press the MENU button and then use ▲/▼button to select the Picture menu.
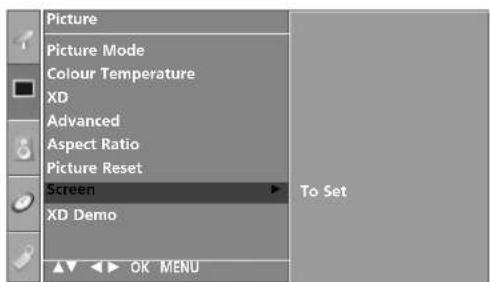
2 Press the ▶ button and then use ▲//▼ button to select Screen.
3 Press the ▶button and then use ▲//▼button to select Auto Config..
4 Press the ▶ button to start Auto Config..
- When Auto config. has finished, OK will be shown on screen.
- If the position of the image is still not correct, try Auto adjustment again.
- If picture needs to be adjusted more after Auto adjustment in RGB (PC), you can adjust the Manual Config..
5 Press the EXIT button to return to TV viewing.
text_image
LIST EXIT C:\VIEW VOL PR PR 1 2 3 4 5 6 7 8 9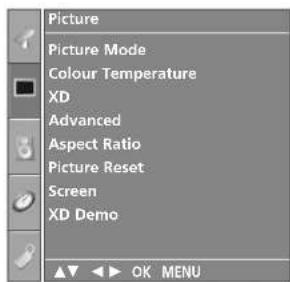
text_image
Picture Picture Mode Colour Temperature XD Advanced Aspect Ratio Picture Reset Screen XD Demo OK MENU1
text_image
Picture Picture Mode Colour Temperature XD Advanced Aspect Ratio Picture Reset Screen XD Demo OK MENU To Set2
text_image
Screen Auto Config. Manual Config. VGA Mode Reset To Set OK MENU34
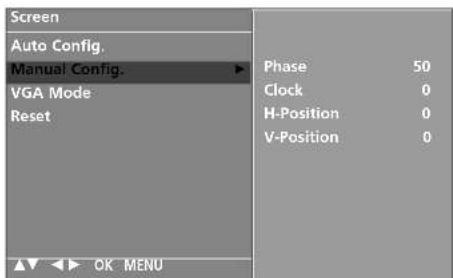
Adjustment for screen Phase, Clock, Position
If the picture isn't clear after auto adjustment and especially if characters are still trembling, adjust the picture phase manually.
To correct the screen size, adjust Clock.
This function works in the following mode: RGB[PC], COMPONENT (480i/480p/576i/576p/720p/1080i), HDMI (480p/576p/720p/1080i/1080p(except VGA Models)).
It's not available to use Phase, Clock function in COMPONENT (480i/480p/576i/576p/720p/1080i), HDMI (480p/576p/720p/1080i/1080p(except VGA Models)).
Clock This function is to minimize any vertical bars or stripes visible on the screen background. And the horizontal screen size will also change.
Phase This function allows you to remove any horizontal noise and clear or sharpen the image of characters.
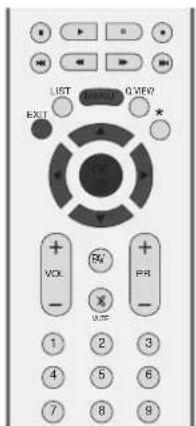
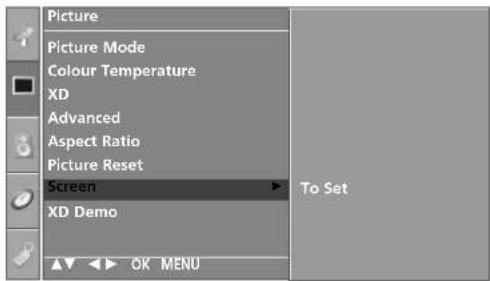
1 Press the MENU button and then use ▲ //▼ button to select the Picture menu.
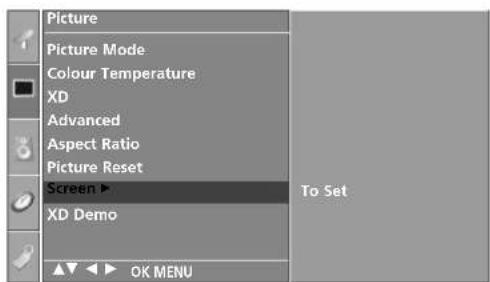
2 Press the ▶ button and then use ▲ //▼ button to select Screen.
3 Press the ▶ button and then use ▲ //▼ button to select Manual Config..
4 Press the ▶ button and then use ▲ //▼ button to select Phase, Clock, H-Position or V-Position.
5 Press the ◀ / ▶ button to make appropriate adjustments.
6 Press the EXIT button to return to TV viewing.
text_image
LIST EXIT VOL + - RX PR - 0.12 1 2 3 4 5 6 7 8 9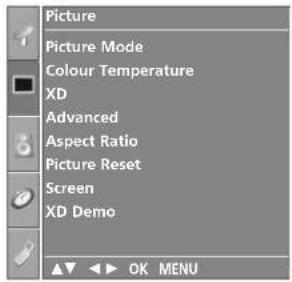
text_image
Picture Picture Mode Colour Temperature XD Advanced Aspect Ratio Picture Reset Screen XD Demo OK MENU1
text_image
Picture Picture Mode Colour Temperature XD Advanced Aspect Ratio Picture Reset Screen XD Demo To Set OK MENU2
text_image
Screen Auto Config. Manual Config. VGA Mode Reset Phase 50 Clock 0 H-Position 0 V-Position 0 OK MENU3 4 5
EXTERNAL EQUIPMENT SETUP
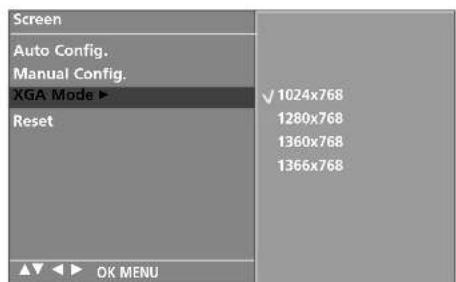
Selecting Wide VGA/XGA mode
To see a normal picture, match the resolution of RGB mode and selection of VGA/XGA mode.
This function works in the following mode: RGB[PC] mode.
1 Press the MENU button and then use ▲/▼ button to select the Picture menu.
2 Press the ▶ button and then use ▲/ ▼ button to select Screen.
3 Press the ▶ button and then use ▲/ ▼ button to select VGA Mode (or XGA Mode).
4 Press the ▶ button and then use ▲/ ▼ button to select the desired VGA/XGA resolution.
5 Press the EXIT button to return to TV viewing.
text_image
LIST VIEW EXIT VOL PR V/5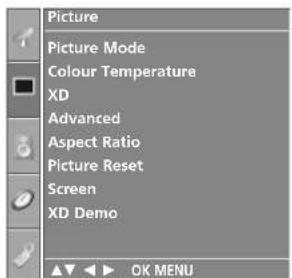
text_image
Picture Picture Mode Colour Temperature XD Advanced Aspect Ratio Picture Reset Screen XD Demo OK MENU1
text_image
Picture Picture Mode Colour Temperature XD Advanced Aspect Ratio Picture Reset Screen ▶ XD Demo OK MENU To Set2
text_image
Screen Auto Config. Manual Config. XGA Mode ▶ Reset 1024x768 1280x768 1360x768 1366x768 OK MENU34
Initializing
(Reset to original factory settings)
This function operates in current mode.
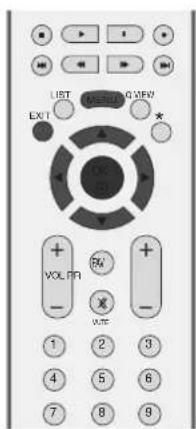
To initialize the adjusted value
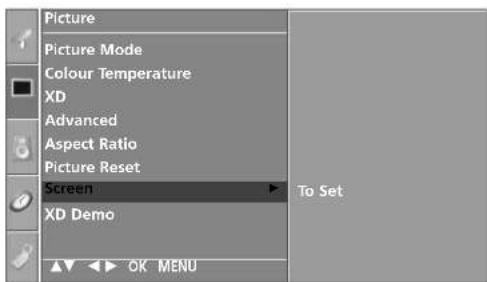
1 Press the MENU button and then use ▲//▼button to select the Picture menu.
2 Press the ▶ button and then use ▲/▼ button to select Screen.
3 Press the ▶ button and then use ▲//▼ button to select Reset.
4 Press the ▶ button.
5 Press the EXIT button to return to normal TV viewing.
text_image
LIST EXIT VOL FR OPEN 1 2 3 4 5 6 7 8 9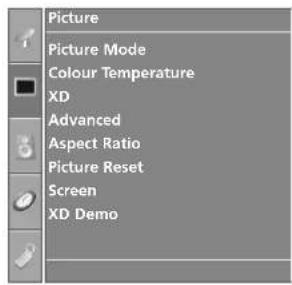
text_image
Picture Picture Mode Colour Temperature XD Advanced Aspect Ratio Picture Reset Screen XD Demo1
text_image
Picture Picture Mode Colour Temperature XD Advanced Aspect Ratio Picture Reset Screen XD Demo OK MENU To Set2
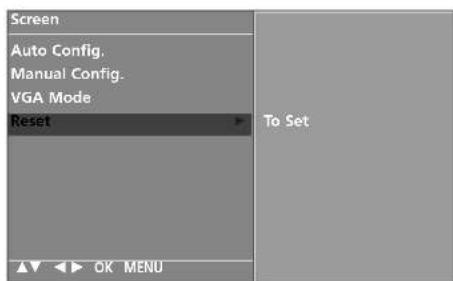
text_image
Screen Auto Config. Manual Config. VGA Mode Reset To Set OK MENU34
WATCHING TV / PROGRAMME CONTROL
REMOTE CONTROL KEY FUNCTIONS
When using the remote control, aim it at the remote control sensor on the TV.
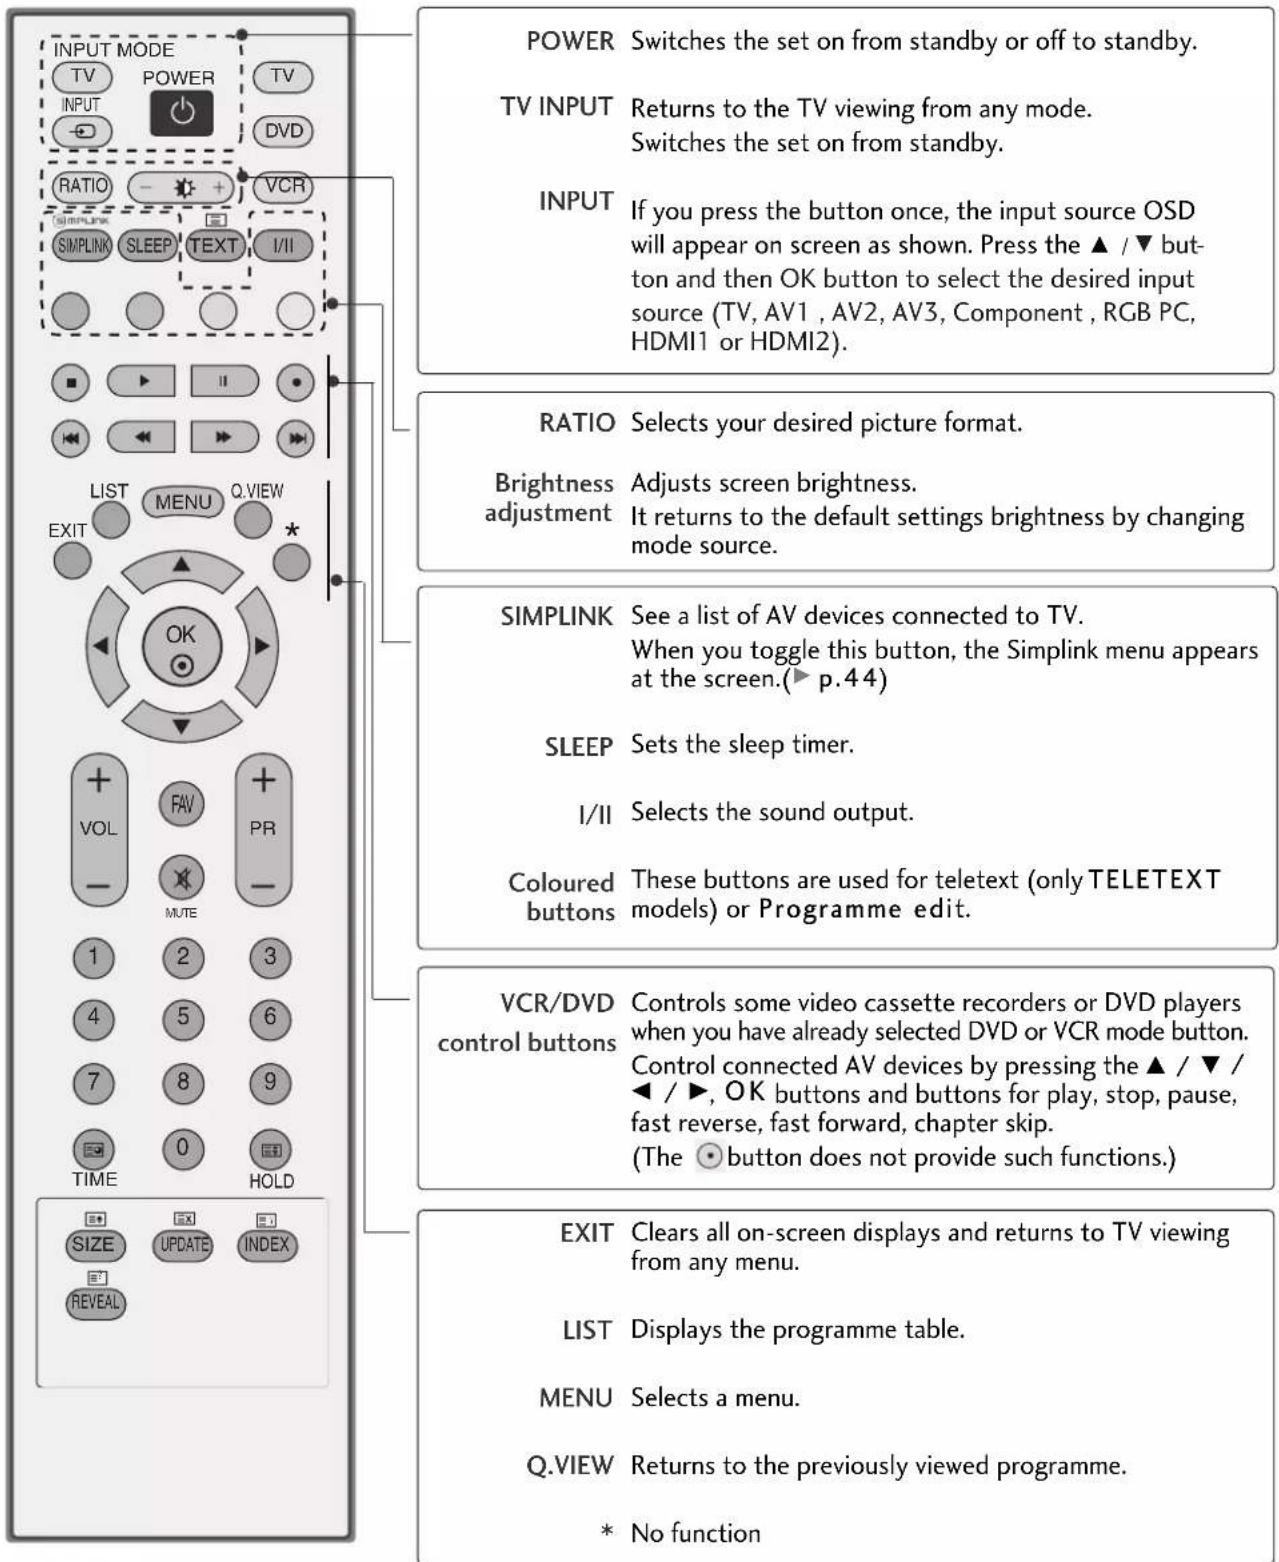
text_image
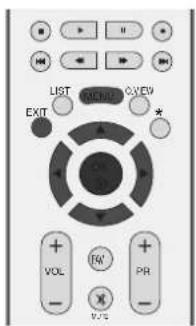
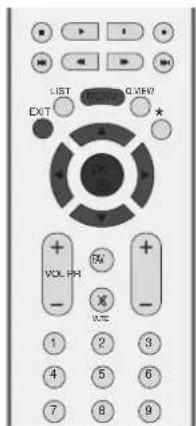
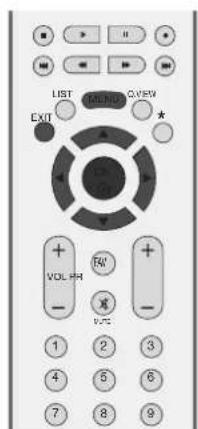
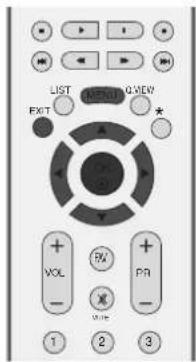
INPUT MODE TV POWER TV INPUT DVD RATIO VCR SIMPLINK SLEEP TEXT I/II LIST MENU Q.VIEW EXIT VOL FAV PR - MUTE 1 2 3 4 5 6 7 8 9 TIME 0 HOLD SIZE UPDATE INDEX REVEAL POWER Switches the set on from standby or off to standby. TV INPUT Returns to the TV viewing from any mode. Switches the set on from standby. INPUT If you press the button once, the input source OSD will appear on screen as shown. Press the ▲ / ▼ button and then OK button to select the desired input source (TV, AV1 , AV2, AV3, Component , RGB PC, HDMI1 or HDMI2). RATIO Selects your desired picture format. Brightness Adjustments adjustment Adjusts screen brightness. It returns to the default settings brightness by changing mode source. SIMPLINK See a list of AV devices connected to TV. When you toggle this button, the Simplink menu appears at the screen.(▶ p.44) SLEEP Sets the sleep timer. I/II Selects the sound output. Coloured These buttons are used for teletext (only TELETEXT models) or Programme edit. VCR/DVD controls some video cassette recorders or DVD players when you have already selected DVD or VCR mode button. Control connected AV devices by pressing the ▲ / ▼ / ◀ / ▶, OK buttons and buttons for play, stop, pause, fast reverse, fast forward, chapter skip. (The ● button does not provide such functions.) EXIT Clears all on-screen displays and returns to TV viewing from any menu. LIST Displays the programme table. MENU Selects a menu. Q.VIEW Returns to the previously viewed programme. * No function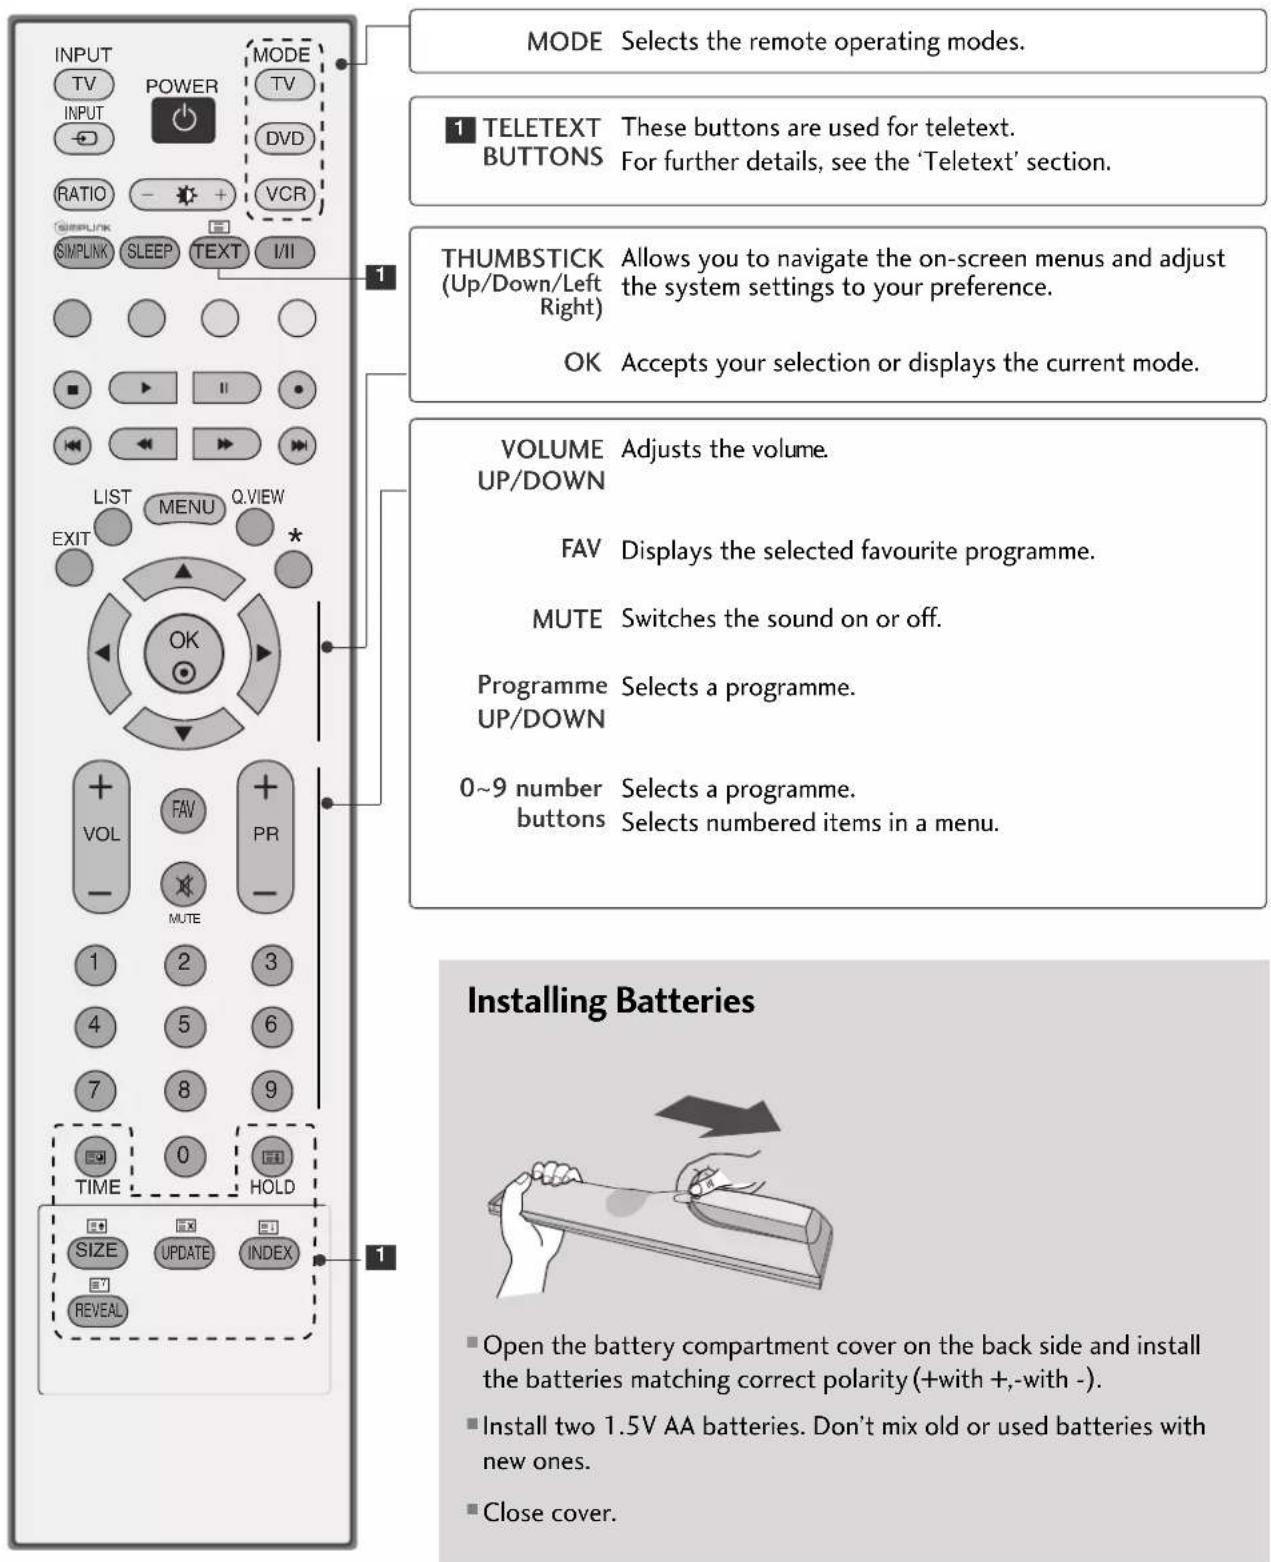
text_image
INPUT TV POWER MODE TV INPUT - DVD RATIO - + VCR SIMPLINK SLEEP TEXT I/II MODE Selects the remote operating modes. 1 TELETEXT BUTTONS These buttons are used for teletext. For further details, see the 'Teletext' section. THUMBSTICK (Up/Down/Left Right) Allows you to navigate the on-screen menus and adjust the system settings to your preference. OK Accepts your selection or displays the current mode. VOLUME Adjusts the volume. UP/DOWN FAV Displays the selected favourite programme. MUTE Switches the sound on or off. Programme Selects a programme. UP/DOWN 0~9 number Selects a programme. buttons Selects numbered items in a menu. 1 TIME 0 HOLD VOL - MUTE + PR - 1 2 3 4 5 6 7 8 9 SIZE UPDATE INDEX REVEAL Installing Batteries ■ Open the battery compartment cover on the back side and install the batteries matching correct polarity (+with +,-with -). ■ Install two 1.5V AA batteries. Don't mix old or used batteries with new ones. ■ Close cover.WATCHING TV / PROGRAMME CONTROL
TURNING ON THE TV
If your TV will be turned on, you will be able to use its features.
1 First, connect power cord correctly.
At this moment, the TV switches to standby mode.
In standby mode to turn TV on, press the ⏻/1, INPUT, PR ▲ / ▼ button on the TV or press the POWER, TTYINPUT, PR +/-, NUMBER(0\~9) buttons on the remote control and then the TV will switch on.
PROGRAMME SELECTION
1 Press the PR +/- or NUMBER buttons to select a programme number.
VOLUME ADJUSTMENT
1 Press the VOL +/- button to adjust the volume.
2 If you want to switch the sound off, press the MUTE button.
3 You can cancel the Mute function by pressing the MUTE, VOL +/- or I/II button.
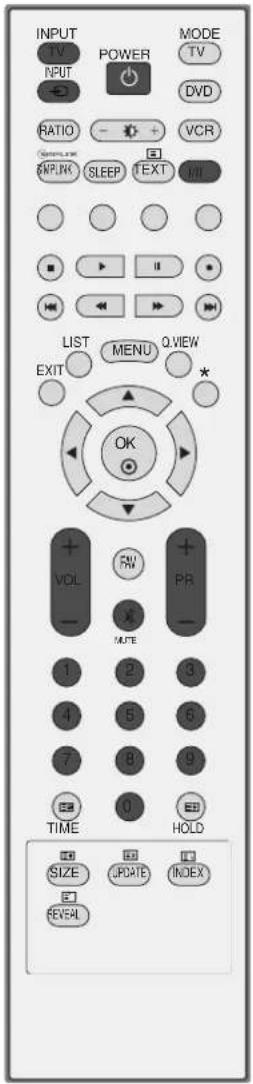
text_image
INPUT TV POWER MODE TV INPUT RATIO VCR SPEED TEXT LIST MENU Q.WIEW EXIT OK VOL RW PR MTE TIME HOLD SIZE UPDATE INDEX FEVERON SCREEN MENU SELECTION AND ADJUSTMENT
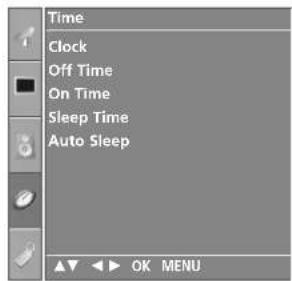
Your TV's OSD (On Screen Display) may differ slightly from what is shown in this manual. The OSD mainly use pictures for the Plasma TV models.
1 Press the MENU button and then ▲/▼ button to display each menu.
2 Press the ▶ button and then ▲/▼ button to select a menu item.
3 Change the setting of an item in the sub or pull-down menu with ◀ /▶ button. You can move to the higher level menu by pressing the O○ & K-MENU button.
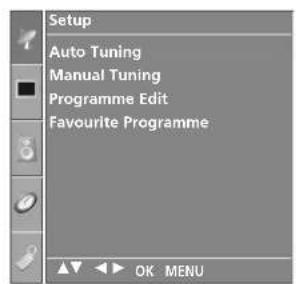
text_image
Setup Auto Tuning Manual Tuning Programme Edit Favourite ProgrammeSetup MENU

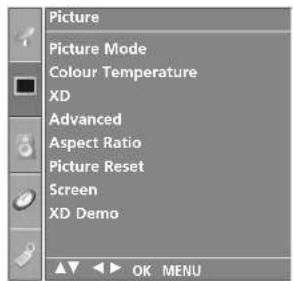
text_image
Picture Picture Mode Colour Temperature XD Advanced Aspect Ratio Picture Reset Screen XD Demo OK MENUPicture MENU

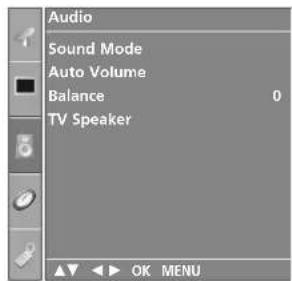
text_image
Audio Sound Mode Auto Volume Balance 0 TV Speaker OK MENUAudio MENU

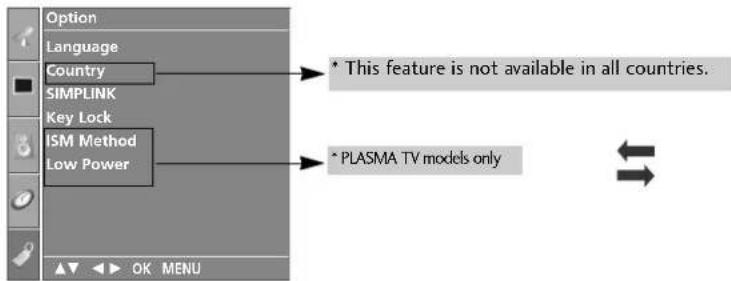
text_image
Option Language Country SIMPLINK Key Lock ISM Method Low Power * This feature is not available in all countries. * PLASMA TV models only OK MENUOption MENU

text_image
Time Clock Off Time On Time Sleep Time Auto Sleep OK MENUTime MENU
NOTE
a. The OSD (On Screen Display) function enables you to adjust the screen status conveniently since it provides graphical presentation.
b. In this manual, the OSD (On Screen Display) may be different from your TV's because it is just example to help the TV operation.
c. In the teletext mode, menus are not displayed.
WATCHING TV / PROGRAMME CONTROL
AUTO PROGRAMME TUNING
Up to 100 TV stations can be stored by programme numbers (0 to 99). Once you have preset the stations, you will be able to use the PR +/- or NUMBER buttons to scan the stations you have programmed. Stations can be tuned using automatic or manual modes.
All stations that can be received are stored by this method. It is recommended that you use auto programme during installation of this set.
1 Press the MENU button and then ▲ / ▼ button to select the Setup menu.
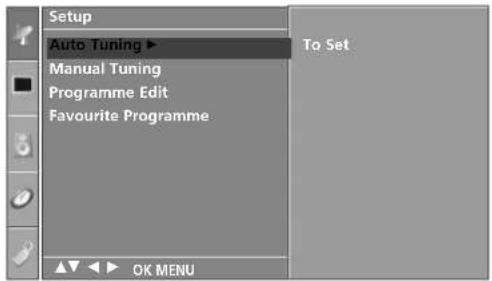
2 Press the ▶ button and then ▲ / ▼ button to select Auto Tuning.
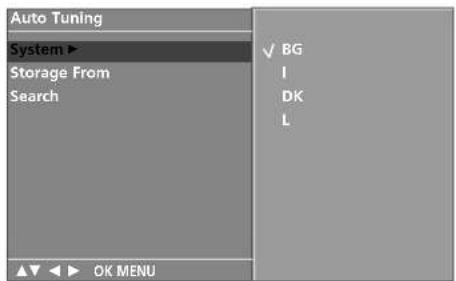
3 Press the ▶ button and then ▲ / ▼ button to select System.
4 Press the ▲ / ▼ button to select a TV system menu; BG: PAL B/G, SECAM B/G (Europe / East Europe / Asia / New Zealand / M.East / Africa / Australia)
I : PAL I/II (U.K. / Ireland / Hong Kong / South Africa) DK: PAL D/K, SECAM D/K (East Europe / China / Africa / CIS) L : SECAM L/L' (France) M : (USA / Korea / Philippines) (option)
5 Press the ▲ / ▼ button to select Storage From.
6 Press the ◀ / ▶ button or NUMBER buttons to select the beginning programme number. If you use NUMBER buttons, any number under 10 is entered with a numeric '0' in front of it, i.e.'05' for 5.
7 Press the ▲ / ▼ button to select Search.
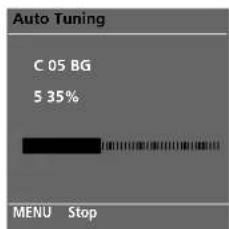
8 Press the ▶ button to begin auto tuning.
All receivable stations are stored. The station name is stored for stations which broadcast VPS (Video Programme Service), PDC (Programme Delivery Control) or TELETEXT data. If no station name can be assigned to a station, the channel number is assigned and stored as C (V/UHF 01-69) or S (Cable 01-47), followed by a number.
To stop auto tuning, press the MENU button.
When auto tuning is completed, the Programme edit menu appears on the screen. See the Programme edit section to edit the stored programme.
9 Press the EXIT button to return to normal TV viewing.
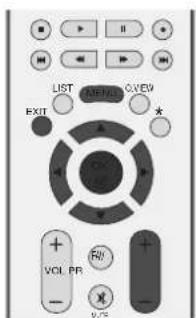
text_image
LIST EXIT VOLT PR VOUT OPEN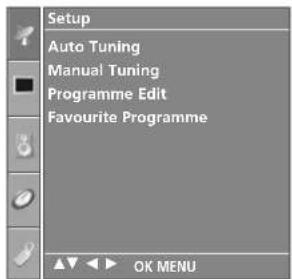
text_image
Setup Auto Tuning Manual Tuning Programme Edit Favourite Programme OK MENU1
text_image
Setup Auto Tuning ▶ Manual Tuning Programme Edit Favourite Programme To Set OK MENU2
text_image
Auto Tuning System ▶ Storage From Search ✓ BG I DK L OK MENU3 5 6 7
text_image
Auto Tuning C 05 BG 5 35% MENU Stop8
MANUAL PROGRAMME TUNING
Manual programme lets you manually tune and arrange the stations in whatever order you desire.
1 Press the MENU button and then ▲//▼ button to select the Setup menu.
2 Press the ▶ button and then ▲//▼ button to select Manual Tuning.
3 Press the ▶ button and then ▲//▼ button to select Storage.
4 Press the ◀/▶ button or NUMBER buttons to select the desired programme number (0 to 99). If you use NUMBER buttons, any number under 10 is entered with a numeric '0' in front of it, i.e. '0' for 5.
5 Press the ▲/▼ button to select System.
6 Press the ▲//▼ button to select a TV system menu; BG: PAL B/G, SECAM B/G (Europe / East Europe / Asia / New Zealand / M.East / Africa / Australia) I: PAL I/II (U.K. / Ireland / Hong Kong / South Africa) DK: PAL D/K, SECAM D/K (East Europe / China / Africa / CIS) L: SECAM L/L' (France) M: (USA / Korea / Philippines) (option)
7 Press the ▲/▼ button to select Bond.
8 Press the ▶ button and then ▲//▼ button to select V/UHF or Cable.
9 Press the ▲/▼ button to select Channel.
10 You can select the desired programme number with the ◀/▶ button or NUMBER buttons. If possible, select the programme number directly with the number buttons. Any number under 10 is entered with a numeric '0' in front of it, i.e. '00' for 5.
11 Press the ▲/▼ button to select Search.
12 Press the ◀//▶ button to commence searching. If a station is found the search will stop.
13 Press the O K button to store it.
14 To store another station, repeat steps 3 to 11.33
15 Press the EXIT button to return to normal TV viewing.
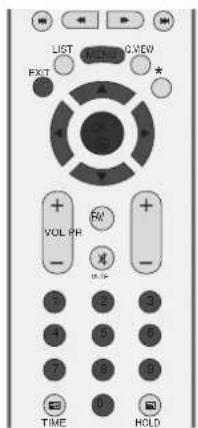
text_image
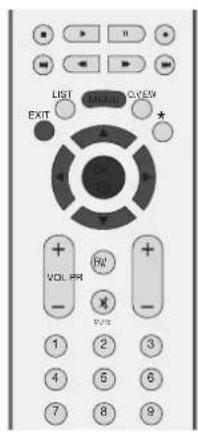
LIST EXIT VOL PH TIME HOLD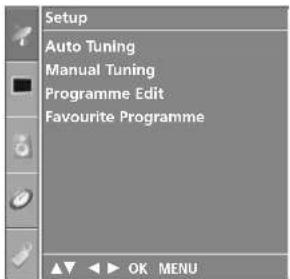
text_image
Setup Auto Tuning Manual Tuning Programme Edit Favourite Programme1
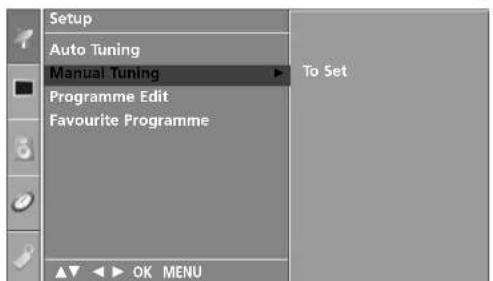
text_image
Setup Auto Tuning Manual Tuning Programme Edit Favourite Programme To Set OK MENU2
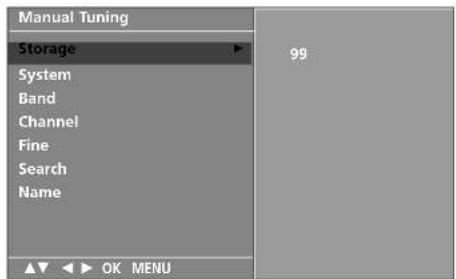
text_image
Manual Tuning Storage System Band Channel Fine Search Name 99 OK MENU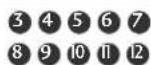
WATCHING TV / PROGRAMME CONTROL
FINE TUNING
Normally fine tuning is only necessary if reception is poor.
1 Press the MENU button and then ▲ //▼ button to select the Setup menu.
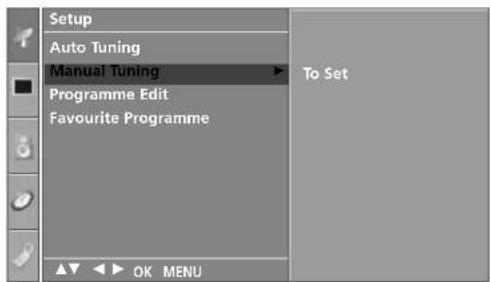
2 Press the ▶ button and then ▲ //▼ button to select Manual Tuning.
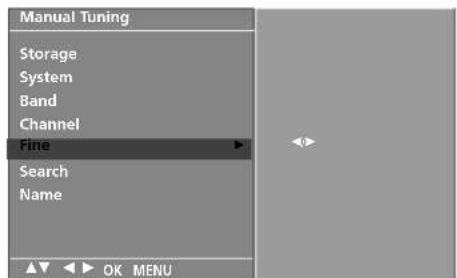
3 Press the ▶ button and then ▲ //▼ button to select Fine.
4 Press the ▶ button and then ◀ //▶ button to fine tune for the best picture and sound.
5 Press the O○ Kutton to store it.
6 Press the EXIT button to return to normal TV viewing.
text_image
LIST EXIT VOLT PR RUN VOUT 1 2 3 4 5 6 7 8 9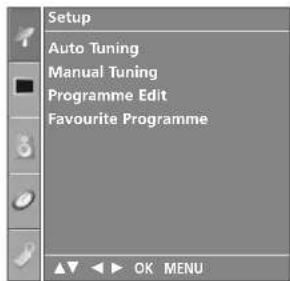
text_image
Setup Auto Tuning Manual Tuning Programme Edit Favourite Programme1
text_image
Setup Auto Tuning Manual Tuning Programme Edit Favourite Programme To Set OK MENU2
text_image
Manual Tuning Storage System Band Channel Fine Search Name OK MENU3 4 5
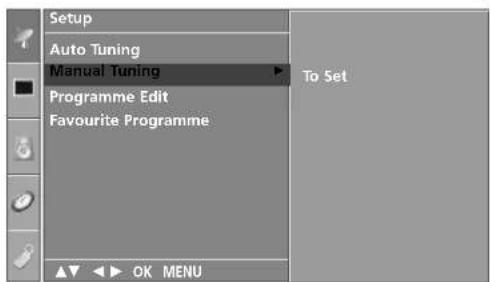
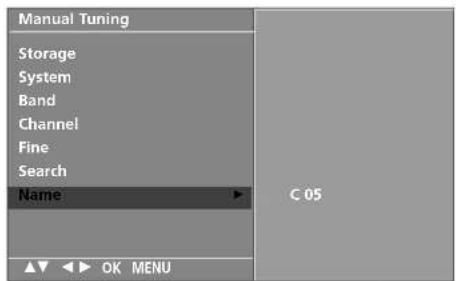
ASSIGNING A STATION NAME
You can assign a station name with five characters to each programme number.
1 Press the MENU button and then ▲//▼ button to select the Setup menu.
2 Press the ▶ button and then ▲ //▼ button to select Manual Tuning.
3 Press the ▶ button and then ▲//▼ button to select Name.
4 Press the ▶ button and then ▲//▼ button. You can use a blank, +, -, the number 0 to 9 and the alphabet A to Z.
5 Press the ◀/▶ button to select the position and make your choice of the second character, and so on.
6 Press the O ⊙ Kutton to store it.
7 Press the EXIT button to return to normal TV viewing.
text_image
LIST EXIT VOL. FM + - VOL. FM + - VOL. FM 1 2 3 4 5 6 7 8 9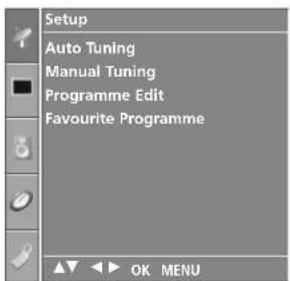
text_image
Setup Auto Tuning Manual Tuning Programme Edit Favourite Programme1
text_image
Setup Auto Tuning Manual Tuning Programme Edit Favourite Programme To Set OK MENU2
text_image
Manual Tuning Storage System Band Channel Fine Search Name C 05 OK MENU3 4 5 6
WATCHING TV / PROGRAMME CONTROL
PROGRAMME EDIT
This function enables you to delete or skip the stored programmes. Also you can move some stations to other programme numbers or copy a blank station data into the selected programme number.
1 Press the MENU button and then ▲ //▼ button to select the Setup menu.
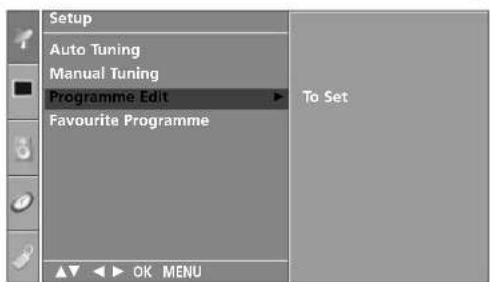
2 Press the ▶ button and then ▲ //▼ button to select Programme Edit.
3 Press the ▶ button to display the Programme edit menu.
■ Deleting a programme
- Select a programme to be deleted with the ▲//▼//◀//▶ button.
- Press the RED button twice.
The selected programme is deleted, all the following programmes are shifted up one position.
■ Copying a programme
- Select a programme to be copied with the ▲ /▼ /◄ /► button.
- Press the GREEN button.
All the following programmes are shifted down one position.
■ Moving a programme
- Select a programme to be moved with the ▲ /▼ /◄ /► button.
- Press the YELLOW button.
- Move the programme to the desired programme number with the ▲ //▼ //◀ //▶ button.
- Press the YELLOW button again to release this function.
■ Skipping a programme number
- Select a programme number to be skipped with the ▲ //▼ //◀ //▶ button.
- Press the BLUE button. The skipped programme turns to blue.
- Press the BLUE button again to release the skipped programme.
When a programme number is skipped it means that you will be unable to select it using the ▲//▼ button during normal TV viewing. If you want to select the skipped programme, directly enter the programme number with the NUMBER buttons or select it in the programme edit or table menu.
4 Press the EXIT button to return to normal TV viewing.
text_image
LIST VOL/HD VIEW EXIT TW VOL HM TW V-TC 1 2 3 4 5 6 7 8 9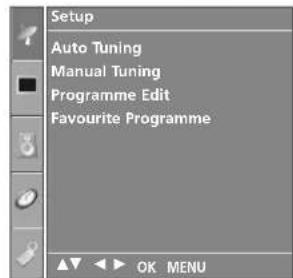
text_image
Setup Auto Tuning Manual Tuning Programme Edit Favourite Programme1
text_image
Setup Auto Tuning Manual Tuning Programme Edit Favourite Programme To Set OK MENU2

text_image
Programme Edit 0 C 03 5 S 69 1 BLN 03 6 S 17 2 C 12 7 S 22 3 S 66 8 C 09 4 S 67 9 C 11 Delete Copy Move Skip OK MENU3
FAVOURITE PROGRAMME
This function lets you select your favourite programmes directly.
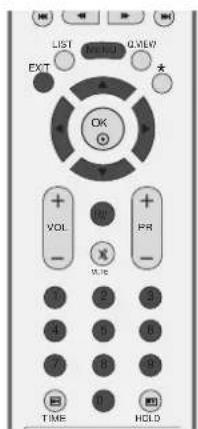
Repeatedly press the FAV button to select stored favourite programmes.
1 Press the MENU button and then ▲//▼ button to select the Setup menu.
2 Press the ▶ button and then ▲//▼ button to select Favourite Programme.
3 Press the ▶ button.
4 Press the ▲/▼ button to select - - - - - .
5 Select a desired programme with the ◀/▶ button or NUM-BER buttons. Any number under 10 is entered with a numeric '0' in front of it, i.e.'0⑤for 5.
6 To store another programme, repeat steps4 to 5. You can store up to 8 programmes.
7 Press the EXIT button to return to normal TV viewing.
text_image
LIST EXT Q.VLRP OK VOL FR TIME HOLD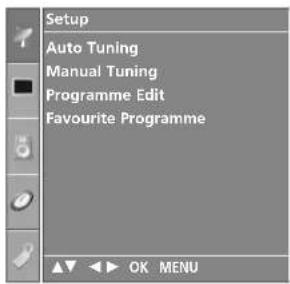
text_image
Setup Auto Tuning Manual Tuning Programme Edit Favourite Programme OK MENU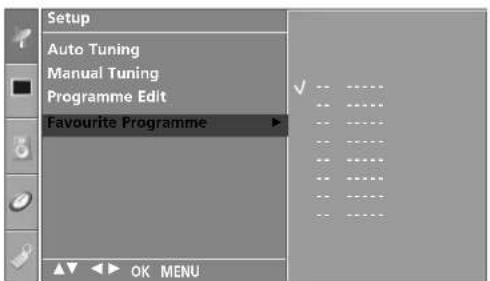
text_image
Setup Auto Tuning Manual Tuning Programme Edit Favourite Programme OK MENU
WATCHING TV / PROGRAMME CONTROL
CALLING THE PROGRAMME TABLE
You can check the programmes stored in the memory by displaying the programme table.
■ Displaying programme table
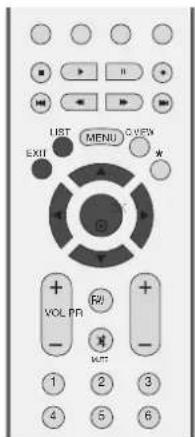
Press the LIST button to display the Programme table menu.
The programme table appears on the screen.
One programme table contains ten programmes as shown.

NOTE
a. You may find some blue programmes. They have been set up to be skipped by auto programming or in the programme edit mode.
b. Some programmes with the channel number shown in the programme table indicate there is no station name assigned.
■ Selecting a programme in the programme table
Select a programme with the ▲ / ▼ / ◀ / ▶ button.
Then press the OK button. The set switches to the chosen programme number.
■ Paging through a programme table
There are 10 programme table pages in which contain 100 programmes. Pressing the ▲ / ▼ / ◀ / ▶ button repeatedly turns the pages.
Press the LIST button to return to normal TV viewing.
text_image
LIST MENU VIEW EXIT VOL PR R/ WNT 1 2 3 4 5 6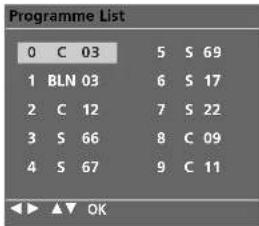
text_image
Programme List 0 C 03 5 S 69 1 BLN 03 6 S 17 2 C 12 7 S 22 3 S 66 8 C 09 4 S 67 9 C 11 OKKEY LOCK
The TV can be set so that the remote control is needed to control it.
This feature can be used to prevent unauthorized viewing.
This set is programmed to remember which option it was last set to even if you turn the set off.
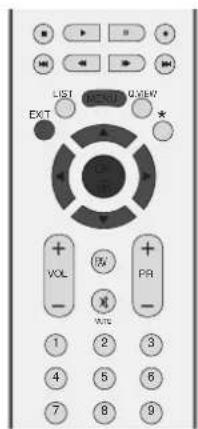
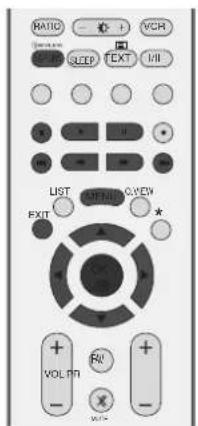
1 Press the MENU button and then ▲ // ▼ button to select the Option menu.
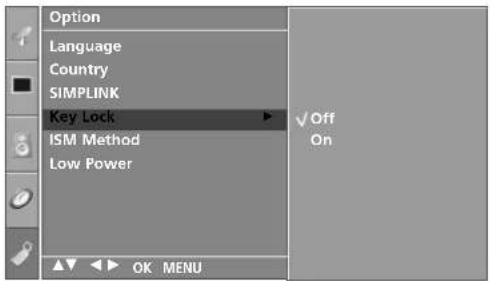
2 Press the ▶ button and then ▲ //▼ button to select Key Lock.
3 Press the ▶ button and then ▲ /▼ button to select On or Off.
4 Press the EXIT button to return to normal TV viewing.
text_image
LIST EXT VOL PR WTE 1 2 3 4 5 6 7 8 9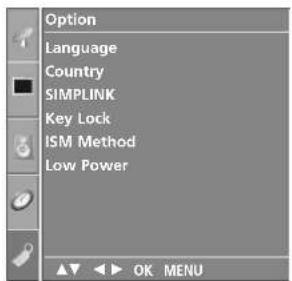
text_image
Option Language Country SIMPLINK Key Lock ISM Method Low Power1
text_image
Option Language Country SIMPLINK Key Lock ISM Method Low Power OK MENU23
NOTE
In Key Lock 'O', if the set is turned off, press the ⏻ / I, INPUT, PR ▲ //▼ button on the set or POWER, INPUT, TT, VPR +/- or NUMBER buttons on the remote control.
▶ With the Key Lock On, the display 'Key Lock On' appears on the screen if any button on the front panel is pressed while viewing the set.
WATCHING TV / PROGRAMME CONTROL

IMPLINK
This operates only for the devices with the SIMPLINK logo. Please check the SIMPLINK logo.
This allows you to control and play other AV devices connected to the display through HDMI cable without additional cables and settings.
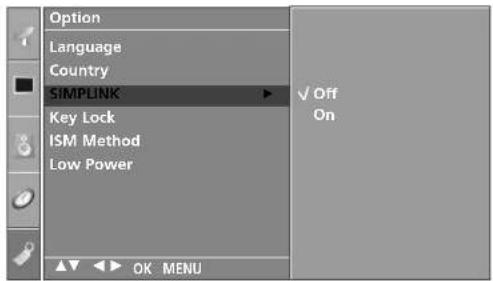
If you do not want SIMPLINK menu, select "Off".
text_image
RATIO VCH OFF LHP QCEP TEXT LHL LIST OFFSET OVIEW EXIT * - VOL/PR + - +/-1 Press the MENU button and then ▲//▼ button to select the Option menu.
text_image
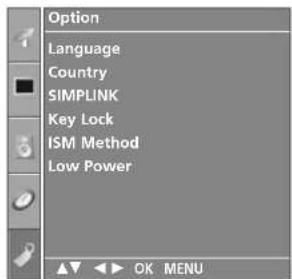
Option Language Country SIMPLINK Key Lock ISM Method Low Power OK MENU2 Press the ▶ button and then ▲/▼ button to select SIM-PLINK

3 Press the ▶button and then ▲/▼ button to select On or Off.
text_image
Option Language Country SIMPLINK Key Lock ISM Method Low Power OK MENU4 Press the EXIT button to return to normal TV viewing.

SIMPLINK Functions
Disc playback
Control connected AV devices by pressing the ▲/▼/◄/►, O◎buttons and buttons for play, stop, pause, fast reverse, fast forward, chapter skip.(The button does not provide such functions)
Direct Play
After connecting AV devices to TV, you can directly control the devices and play media without additional settings.
Select AV device
Enables you to select one of AV devices connected to TV and play it.
Power off all devices
When you power off TV, all connected devices are turned off.
Switch audio-out
Offers an easy way to switch audio-out.
* A device, which is connected to TV through HDMI cable but does not support SIMPLINK, does not provide this function.
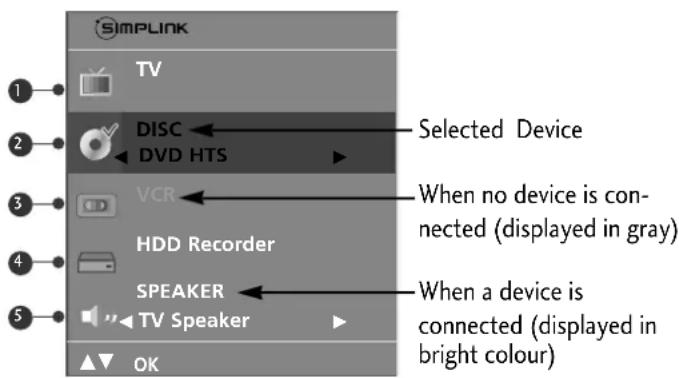
SIMPLINK Menu
Press the ▲/▼/◄/► button and then OK button to select the desired SIMPLINK source.
TV viewing : Switch to the previous TV programme regardless of the current mode.
2 DISC playback : Select and play discs. When multiple discs are available, the titles of the discs are conveniently displayed at the bottom of the screen.
3 VCR playback : Play and control the connected VCR.
4 HDD Recordings playback : Play and control recordings stored in HDD.
5 Audio Out to Home theater/Audio Out to TV : Select Home theater or TV speaker for Audio Out.
text_image
SIMPLINK TV DISC DVD HTS Selected Device VCR When no device is connected (displayed in gray) HDD Recorder SPEAKER TV Speaker When a device is connected (displayed in bright colour) OKNOTE
▶ Connect the HDMI/DVI IN or HDMI IN terminal of the TV to the rear terminal (HDMI terminal) of the SIMPLINK device with the HDMI cable.
▶ After connecting the HDMI terminal for the home theater with SIMPLINK function in the above method, connect the VARIABLE AUDIO OUT terminal on the back of the TV to the VARIABLE AUDIO IN terminal on the back of the SIMPLINK device with the VARIABLE AUDIO OUT cable.
▶ When operating the external device with SIMPLINK, press the TV button among the MODE button on the remote controller.
▶ When you switch the Input source with the INPUT button on the remote controller, you can stop the operation of device controlled by SIMPLINK.
▶ When you select or operate the media device with home theater function, the speaker automatically switches to home theater speaker (HT speaker).
PICTURE CONTROL
PICTURE SIZE (ASPECT RATIO)CONTROL
You can watch the screen in various picture formats; Spectacle, Full, Original, 4:3, 16:9, 14:9 and Zoom1/2.
If a fixed image is displayed on the screen for a long time, that fixed image may become imprinted on the screen and remain visible.
There might be uncomfortable in full mode. Then change into other mode.
You can adjust the enlarge proportion using ▲ / ▼ button.
This function works in the following signal.
text_image
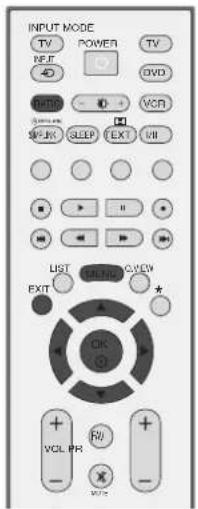
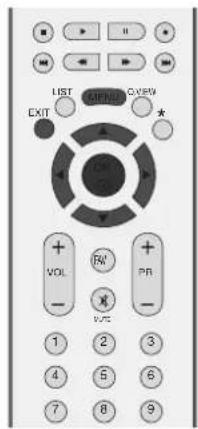
INPUT MODE TV POWER TV INFL DVD VDD - + VCR SIP.KS SLEEP TEXT VII LIST COLD C/VIEW EXIT VOL PR RW MUTE1 Press the RATIO button repeatedly to select the desired picture format. You can also adjust Aspect Ratio in the Picture menu.
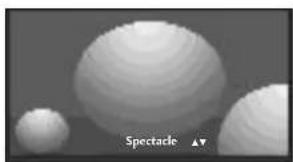
- Spectacle
When your TV receives the wide screen signal, when selected it will adjust the picture horizontally, in non-linear proportion, to fill the entire screen.
natural_image
Close-up of three spherical objects with textured surfaces, labeled 'Spectacle' in the corner (no other text or symbols)• Full
When your TV receives the wide screen signal, when selected it will adjust the picture horizontally or vertically, in a linear proportion, to fill the entire screen fully.
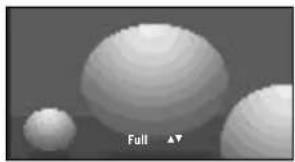
natural_image
Three spherical objects with curved surfaces, one small and one large, labeled 'Full' with a downward arrow (no other text or symbols)• Original
When your TV receives the wide screen signal, it will be automatically changed to the picture format to be sent.
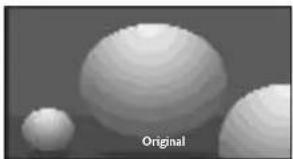
natural_image
Three white spherical objects with textured surfaces, labeled 'Original' below (no other text or symbols)• 4:3
Following selection will lead you to view a picture with an original 4:3 aspect ratio, with gray bars appearing at both the left and right sides.
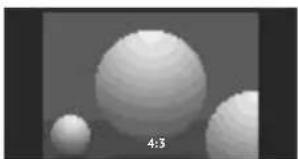
natural_image
Three spherical objects with a label '4:3' at the bottom (no other text or symbols visible)• 16:9
Following selection will lead you to adjust the picture horizontally, in a linear proportion, to fill the entire screen (useful for viewing 4:3 formatted DVDs).
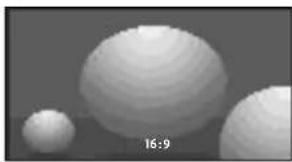
natural_image
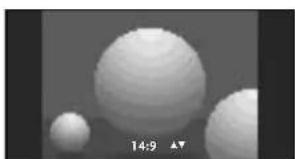
Close-up of three spherical objects with textured surfaces, labeled '16:9' at bottom left (no other text or symbols)• 14:9
You can enjoy the picture format of 14:9 or general TV programme through the 14:9 mode. The screen 14:9 is viewed just like that the screen 4:3 is magnified to the left / right.
natural_image
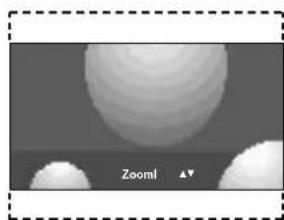
Close-up of three spherical objects with textured surfaces, no visible text or symbols- Zoom1
Following selection will lead you to view the picture without any alternation, while filling the entire screen. However, the top and bottom portions of the picture will be cropped.
natural_image
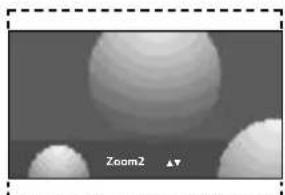
Grayscale image showing two spherical objects with concentric ridges, labeled 'Zooml' and a small triangle symbol (no readable text or symbols in the main image area)- Zoom2
Choose Zoom2 when you want the picture to be altered, both horizontally extended and vertically cropped. The picture taking a halfway trade off between alteration and screen coverage.
natural_image
Grayscale 3D-rendered abstract shapes with no visible text or symbols, labeled 'ZoomZ' and '▲▼' at bottom (no other readable text or symbols)
NOTE
▶ You can only select 4:3, 16:9 (Wide) in Component, RGB, HDMI mode only.
PICTURE CONTROL
PRESET PICTURE SETTINGS
Picture Mode-Preset
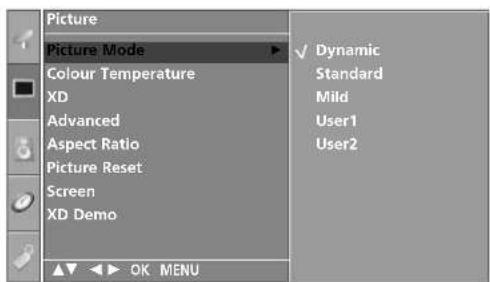
Dynamic Select this option to display with a sharp image.
Standard The most general and natural screen display status.
Mild Select this option to display with a mild image.
User1/2 Select this option to use the user-defined setting.
text_image
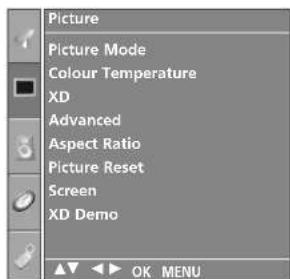
LIST METHI CVIEW EXIT VOL RW PR V/TC 1 2 3 4 5 6 7 8 91 Press the MENU button and then ▲/▼ button to select the Picture menu.
2 Press the ▶ button and then ▲/ ▼ button to select Picture Mode.
3 Press the ▶ button and then ▲/ ▼ button to select Dynamic, Standard, Mild, User1 or User2.
4 Press the EXIT button to return to normal TV viewing.
- Picture Mode adjusts the TV for the best picture appearance. Select the preset value in the Picture Mode menu based on the programme category.
- Dynamic, Standard and Mild are programmed for optimum picture reproduction at the factory and can't be changed.
text_image
Picture Picture Mode Colour Temperature XD Advanced Aspect Ratio Picture Reset Screen XD Demo OK MENU1
text_image
Picture Picture Mode Colour Temperature XD Advanced Aspect Ratio Picture Reset Screen XD Demo OK MENU ✓ Dynamic Standard Mild User1 User223
Auto Colour Tone Control(Warm/Medium/Cool)
To initialize values (reset to default settings), select the Cool option.
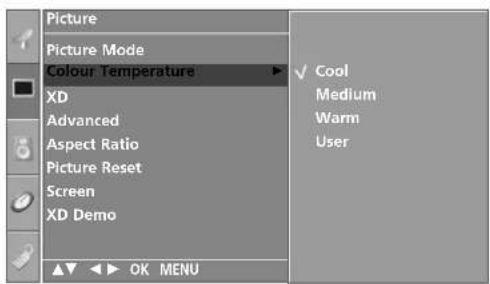
Choose one of three automatic colour adjustments. Set to warm to enhance hotter colours such as red, or set to cool to see less intense colours with more blue.
It's available to use this function in "User1/2" of Picture mode only.
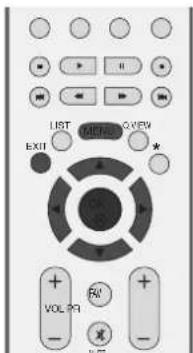
1 Press the MENU button and then ▲//▼ button to select the Picture menu.
2 Press the ▶ button and then ▲//▼ button to select Colour Temperature.
3 Press the ▶ button and then ▲//▼ button to select either Cool, Medium, Warm or User.
4 Press the EXIT button to return to normal TV viewing.
text_image
LIST OUTLET GNDAY EXIT VOL 7% PR VNC 1 2 3 4 5 6 7 8 9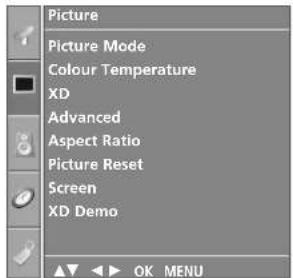
text_image
Picture Picture Mode Colour Temperature XD Advanced Aspect Ratio Picture Reset Screen XD Demo OK MENU1
text_image
Picture Picture Mode Colour Temperature XD Advanced Aspect Ratio Picture Reset Screen XD Demo OK MENU Cool Medium Warm User23
PICTURE CONTROL
MANUAL PICTURE ADJUSTMENT
Picture Mode-User Option
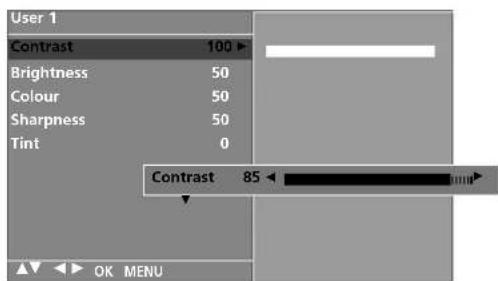
| Contrast | Adjusts the difference between the light and dark levels in the picture. |
| Brightness | Increases or decreases amount of white in the picture. |
| Colour | Adjusts intensity of all colours. |
| Sharpness | Adjusts the level of crispness in the edges between the light and dark areas of the picture. The lower the level, the softer the image. |
| Tint | Adjusts the balance between red and green levels. |
1 Press the MENU button and then ▲ //▼ button to select the Picture menu.
2 Press the ▶ button and then ▲ //▼ button to select Picture Mode.
3 Press the ▶ button and then ▲ //▼ button to select User1 or User2.
4 Press the ▶ button and then ▲ //▼ button to select the desired picture option (Contrast, Brightness, Colour, Sharpness and Tint).
5 Press the ◀ //▶ button to make appropriate adjustments.
6 Press the EXIT button to return to normal TV viewing.
NOTE
▶ You can't adjust colour, sharpness and tint in the RGB-PC mode to the levels you prefer.
text_image
LIST METER Q/VIEW EXIT VOLT P3 + - + - VOUT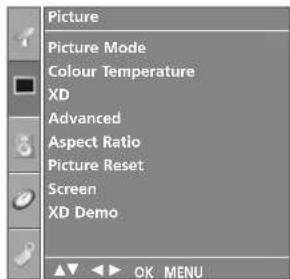
text_image
Picture Picture Mode Colour Temperature XD Advanced Aspect Ratio Picture Reset Screen XD Demo OK MENU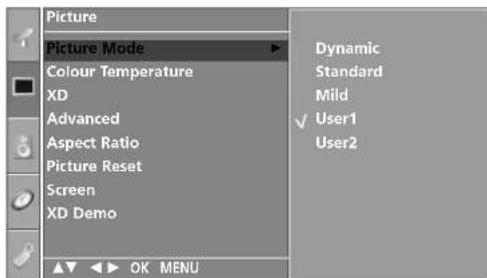
text_image
Picture Picture Mode Colour Temperature XD Advanced Aspect Ratio Picture Reset Screen XD Demo Dynamic Standard Mild ✓ User1 User2 OK MENU23
text_image
User 1 Contrast 100 Brightness 50 Colour 50 Sharpness 50 Tint 0 Contrast 85 OK MENU4 5
Colour Tone - User Option
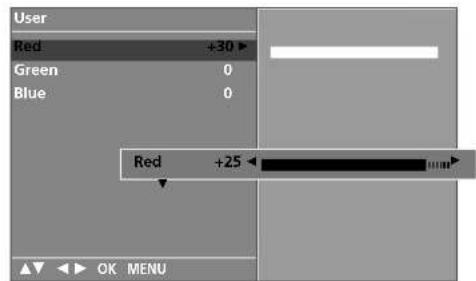
To adjust red, green, blue to any colour temperature you prefer.
It's available to use this function in "User1/2" of Picture mode only.
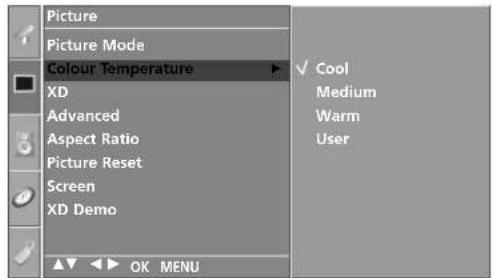
1 Press the MENU button and then ▲ / ▼ button to select the Picture menu.
2 Press the ▶ button and then ▲ / ▼ button to select Colour Temperature.
3 Press the ▶ button and then ▲ / ▼ button to select User.
4 Press the ▶ button and then ▲ / ▼ button to select Red, Green or Blue.
5 Press the ◀ / ▶ button to make appropriate adjustments.
6 Press the EXIT button to return to normal TV viewing.
text_image
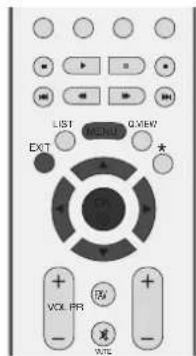
LIST MERRU Q-VIEW EXT + VOX PR - WTC +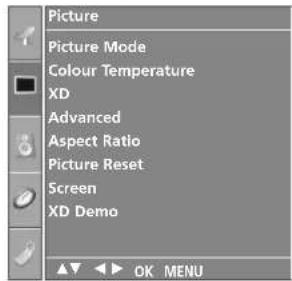
text_image
Picture Picture Mode Colour Temperature XD Advanced Aspect Ratio Picture Reset Screen XD Demo OK MENU1
text_image
Picture Picture Mode Colour Temperature XD Advanced Aspect Ratio Picture Reset Screen XD Demo OK MENU Cool Medium Warm User23
text_image
User Red +30 Green 0 Blue 0 Red +25 OK MENU4 5
PICTURE CONTROL
XD - PICTURE IMPROVEMENT TECHNOLOGY
XD is LG electronic's unique picture improving technology to display a real HD source through an advanced digital signal processing algorithm.
It's not available to use this function in RGB-PC mode.
1 Press the MENU button and then ▲//▼ button to select the Picture menu.
2 Press the ▶ button and then ▲//▼ button to select XD.
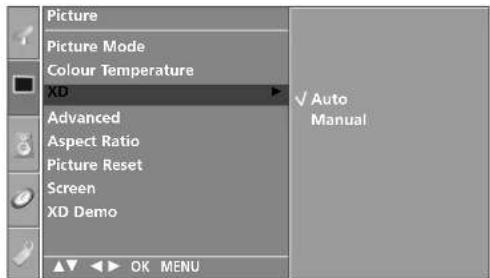
3 Press the ▶ button and then ▲/▼ button to select Auto or Manual.
4 Press the EXIT button to return to TV viewing.
\* Selecting the Manual
This menu is activated after selecting the User1 or User2 of Picture Mode.
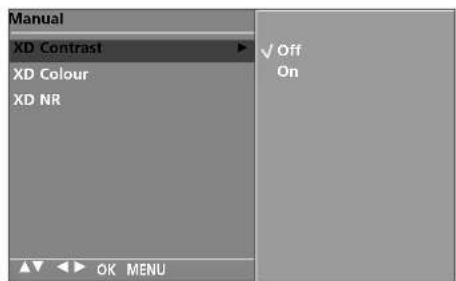
1 Press the ▶ button and then ▲//▼ button to select X×D0 Contrast, XD Colour or XD NR.
2 Press the ▶ button and then ▲//▼ button to select On or Off.
3 Press the EXIT button to return to normal TV viewing.
■ XD Contrast : Optimizing the contrast automatically according to the brightness of the reflection.
■ XD Colour : Adjusting the colours of the reflection automatically to reproduce as closely as possible to the natural colours.
- XD NR: Removing the noise up to the point where it does not damage the original picture. (It's not available to use this function in HDMI, Component (except 480i/576i), RGB-PC mode.)
text_image
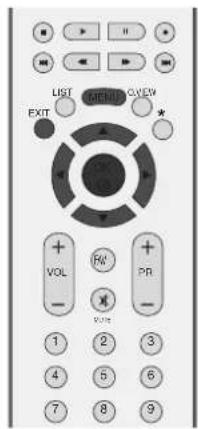
LIST EXIT VIEW VOL RV PR 1 2 3 4 5 6 7 8 9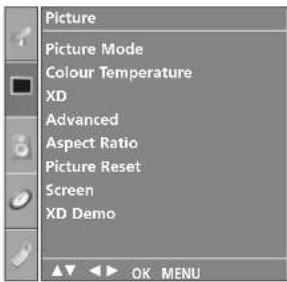
text_image
Picture Picture Mode Colour Temperature XD Advanced Aspect Ratio Picture Reset Screen XD Demo OK MENU1
text_image
Picture Picture Mode Colour Temperature XD Advanced Aspect Ratio Picture Reset Screen XD Demo OK MENU Auto Manual23
text_image
Manual XD Contrast XD Colour XD NR ✓ Off On OK MENU12

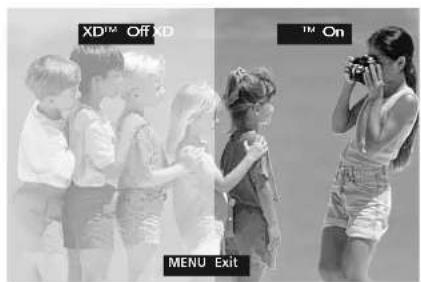
DEMO
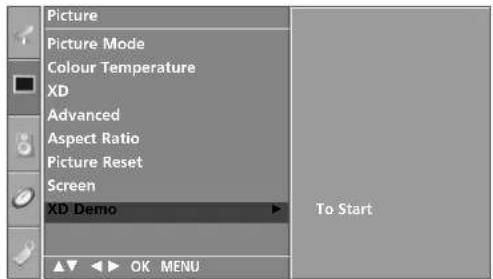
Use it to see the difference between XD Demo on and XD Demo off.
It's not available to use this function in RGB[PC] mode.
1 Press the MENU button and then ▲//▼button to select the Picture menu.
2 Press the ▶ button and then ▲/▼ button to select XD Demo.
3 Press the ▶ button to begin XD Demo.
4 To stop XD Demo, press the MENU button.
text_image
LIST VIEW EXIT VOUT VOUT 1 2 3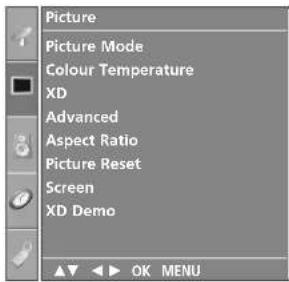
text_image
Picture Picture Mode Colour Temperature XD Advanced Aspect Ratio Picture Reset Screen XD Demo OK MENU1
text_image
Picture Picture Mode Colour Temperature XD Advanced Aspect Ratio Picture Reset Screen XD Demo To Start OK MENU23
- XD Demo
text_image
XDTM Off XD TM On MENU ExitPICTURE CONTROL
ADVANCED - CINEMA
Set up the TV for the best picture appearance for viewing movies.
This feature operates only in Analog TV, AV, S-video and Component 480i/576i mode.
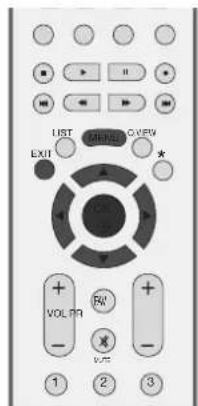
text_image
LIST EXIT VOL FQ RW VOUT 1 2 31 Press the MENU button and then ▲ //▼ button to select the Picture menu.
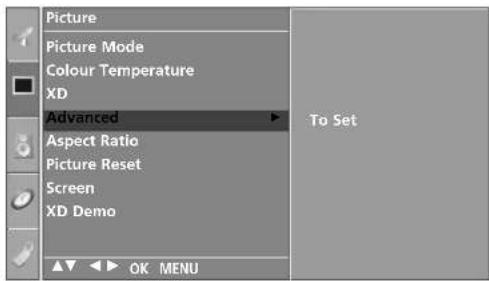
2 Press the ▶ button and then ▲ //▼ button to select Advanced.
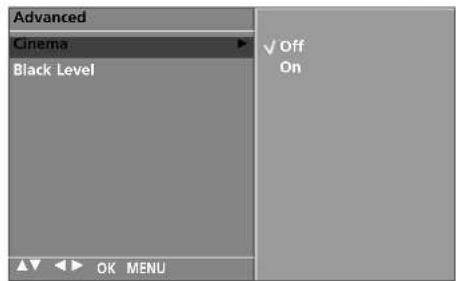
3 Press the ▶ button and then ▲ /▼ button to select Cinema
4 Press the ▶ button and then ▲ //▼ button to select On or Off.
5 Press the EXIT button to return to normal TV viewing.
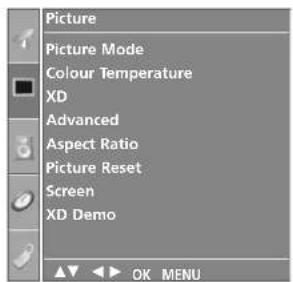
text_image
Picture Picture Mode Colour Temperature XD Advanced Aspect Ratio Picture Reset Screen XD Demo OK MENU1
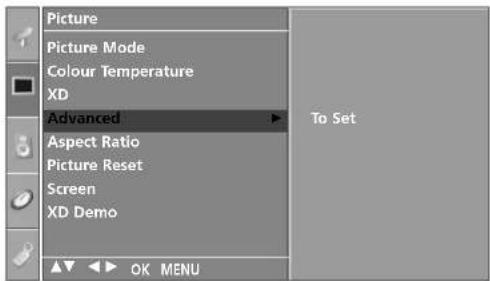
text_image
Picture Picture Mode Colour Temperature XD Advanced Aspect Ratio Picture Reset Screen XD Demo OK MENU To Set23
text_image
Advanced Cinema Black Level ✓ Off On OK MENU4
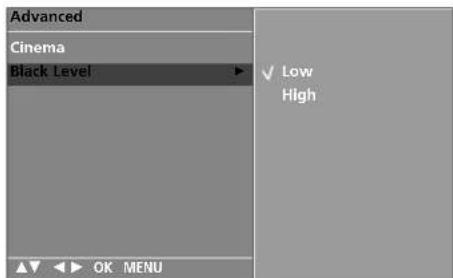
When you watch the movie, this function adjusts the set to the best picture appearance. Adjusting the contrast and the brightness of the screen using the black level of the screen.
This function works in the following mode: AV (NTSC-M), S-Video (NTSC-M) or HDMI.
1 Press the MENU button and then ▲//▼ button to select the Picture menu.
2 Press the ▶ button and then ▲//▼ button to select Advanced.
3 Press the ▶ button and then ▲//▼ button to select Black Level.
4 Press the ▶ button and then ▲/▼ button to select Low or High.
■Low : The reflection of the screen gets darker.
■High : The reflection of the screen gets brighter.
5 Press the EXIT button to return to normal TV viewing.
text_image
LIST G:\VHD EXIT + VOL TX PH WTC 1 2 3 4 5 6 7 8 9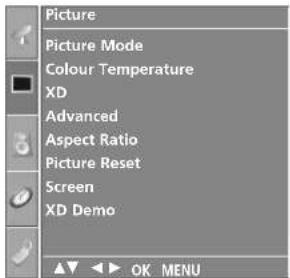
text_image
Picture Picture Mode Colour Temperature XD Advanced Aspect Ratio Picture Reset Screen XD Demo OK MENU1
text_image
Picture Picture Mode Colour Temperature XD Advanced Aspect Ratio Picture Reset Screen XD Demo OK MENU To Set23
text_image
Advanced Cinema Black Level ✓ Low High OK MENU4
PICTURE CONTROL
PICTURE RESET
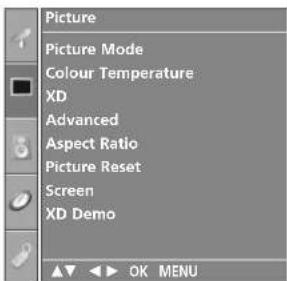
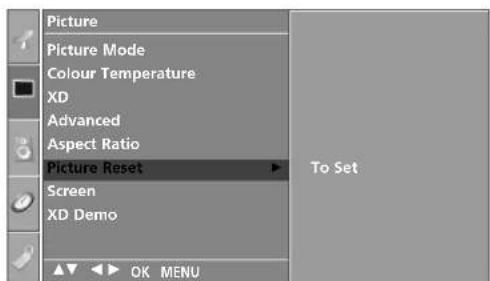
Returns to the default settings Picture Mode, Colour Temperature, XD, Advanced, Aspect Ratio at the factory.
text_image
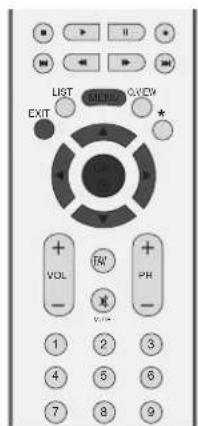
LIST VIEW EXIT VOL TW PH 1 2 3 4 5 6 7 8 91 Press the MENU button and then ▲//▼button to select the Picture menu.
2 Press the ▶ button and then ▲//▼ button to select Picture Reset.
3 Press the ▶ button to initialize the adjusted value.
4 Press the EXIT button to return to normal TV viewing.
text_image
Picture Picture Mode Colour Temperature XD Advanced Aspect Ratio Picture Reset Screen XD Demo OK MENU1
text_image
Picture Picture Mode Colour Temperature XD Advanced Aspect Ratio Picture Reset Screen XD Demo To Set OK MENU23
IMAGE STICKING MINIMIZATION(ISM)METHOD
A frozen of still picture from a PC/video game displayed on the screen for prolonged periods will result in a ghost image remaining even when you change the image. Avoid allowing a fixed image to remain on the set's screen for a long period of time.
It's not available to use this function in LCD models.
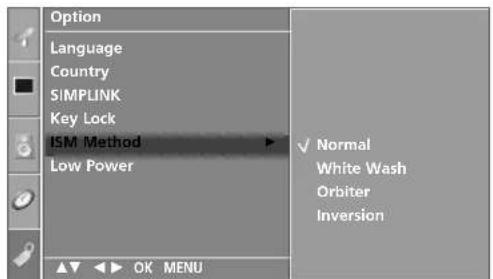
White Wash
White wash removes permanent images from the screen.
Note: An excessive permanent image may be impossible to clear entirely with White Wash.
Orbiter
Orbiter may help prevent ghost images. However, it is best not to allow any fixed image to remain on the screen. To avoid a permanent image on the screen, the screen will move every 2 minutes.
Inversion
This is the function to invert the panel colour of the screen. The panel colour is automatically inverted every 30 minutes.
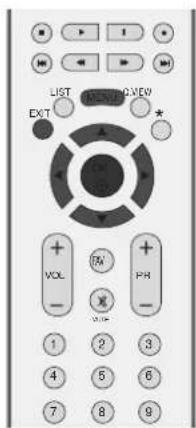
text_image
LIST EXIT VOL 7N PH 1 2 3 4 5 6 7 8 9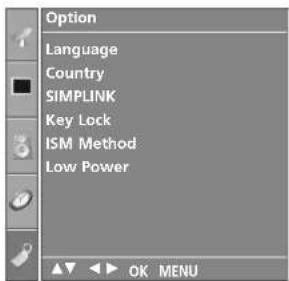
text_image
Option Language Country SIMPLINK Key Lock ISM Method Low Power OK MENU1
1 Press the MENU button and then ▲/▼ button to select the Option menu.
2 Press the ▶ button and then ▲///▼button to select ISM Method.
3 Press the ▶ button and then ▲/▼ button to select either Normal, White Wash, Orbiter or Inversion. If you unnecessary to set this function, set Normal.
4 Press the EXIT button to return to normal TV viewing.
text_image
Option Language Country SIMPLINK Key Lock ISM Method Low Power Normal White Wash Orbiter Inversion OK MENU23
PICTURE CONTROL
LOW-POWER PICTURE MODE
This is the function to reduce the power consumption of the set.
It's not available to use this function in LCD models.

text_image
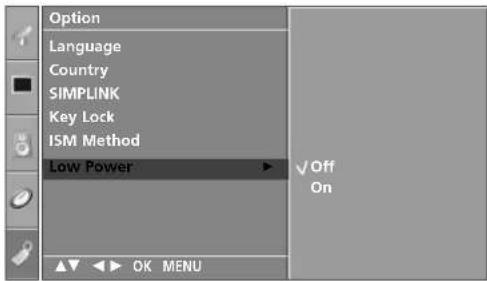
LIST EXIT VOL + - RW + - PR 1 2 3 4 5 6 7 8 91 Press the MENU button and then ▲//▼ button to select the Option menu.
2 Press the ▶ button and then ▲//▼ button to select Low Power.
3 Press the ▶ button and then ▲//▼ button to select On or Off.
4 Press the EXIT button to return to normal TV viewing.
text_image
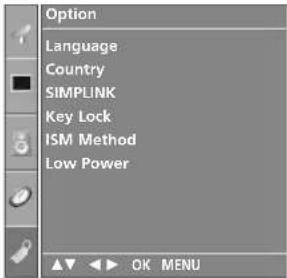
Option Language Country SIMPLINK Key Lock ISM Method Low Power OK MENU1
text_image
Option Language Country SIMPLINK Key Lock ISM Method Low Power ✓ Off On OK MENU23
SOUND & LANGUAGE CONTROL
AUTO VOLUME LEVELER
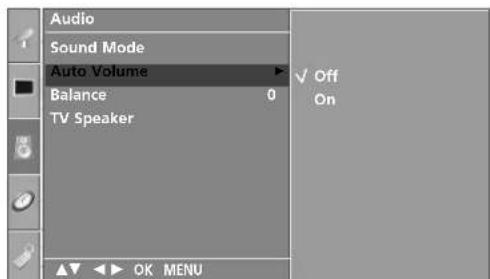
Auto Volume automatically keeps on an equal volume level even if you change programmes.
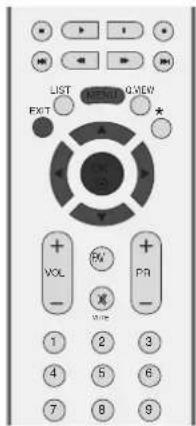
1 Press the MENU button and then ▲//▼button to select the Audio menu.
2 Press the ▶ button and then ▲//▼ button to select Auto Volume.
3 Press the ▶ button and then ▲//▼ button to select On or Off.
4 Press the EXIT button to return to normal TV viewing.
text_image
LIST VIEW EXIT VOL PR Write 1 2 3 4 5 6 7 8 9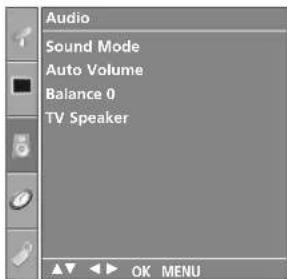
text_image
Audio Sound Mode Auto Volume Balance 0 TV Speaker1
text_image
Audio Sound Mode Auto Volume Balance 0 TV Speaker OK MENU23
SOUND & LANGUAGE CONTROL
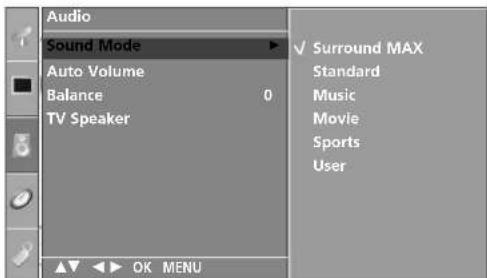
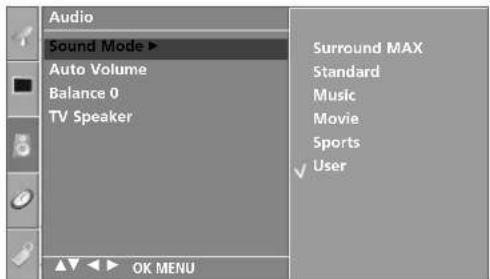
You can select your preferred sound setting; Surround MAX, Standard, Music, Movie or Sports and you can also adjust the sound frequency of the equalizer.
Sound Mode lets you enjoy the best sound without any Special adjustment because the TV sets the appropriate sound options based on the programme content.
Surround MAX, Standard, Music, Movie, and Sports are preset for good sound quality at the factory and are not adjustable.
Surround MAX Select this option to sound realistic.
Standard The most commanding and natural audio.
Music Select this option to enjoy the original sound when listening to the music.
Movie Select this option to enjoy sublime sound.
Sports Select this option to watch sports broadcasting.
User Select this option to use the user-defined audio settings.
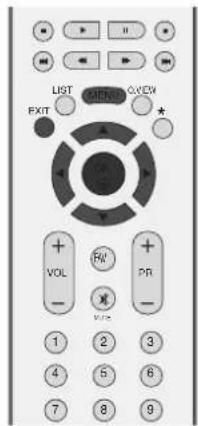
text_image
LIST EXIT VOL RW PR 1 2 3 4 5 6 7 8 9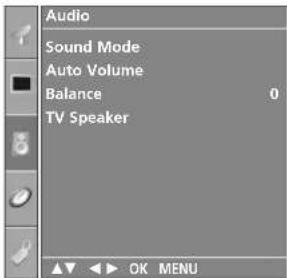
text_image
Audio Sound Mode Auto Volume Balance 0 TV Speaker OK MENU1
text_image
Audio Sound Mode Auto Volume Balance 0 TV Speaker ✓ Surround MAX Standard Music Movie Sports User OK MENU23
1 Press the MENU button and then ▲ //▼ button to select the Audio menu.
2 Press the ▶ button and then ▲ //▼ button to select Sound Mode.
3 Press the ▶ button and then ▲ /▼ button to select Surround MAX, Standard, Music, Movie, Sports or User.
4 Press the EXIT button to return to normal TV viewing.
SOUND SETTING ADJUSTMENT -USER MODE
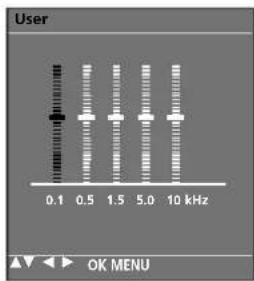
Adjust the sound equalizer.
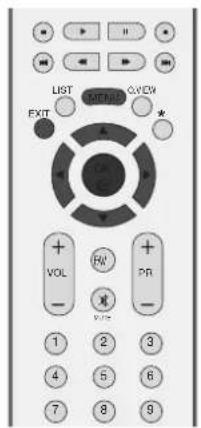
1 Press the MENU button and then ▲ / ▼ button to select the Audio menu.
2 Press the ▶ button and then ▲ / ▼ button to select Sound Mode.
3 Press the ▶ button and then ▲ / ▼ button to select User.
4 Press the ▶ button.
5 Select a sound band by pressing the ◀ / ▶ button. Make appropriate sound level with the ▲ / ▼ button.
6 Press the EXIT button to return to normal TV viewing.
text_image
LIST 0:VIEW EXIT VOUT PR PR 1 2 3 4 5 6 7 8 9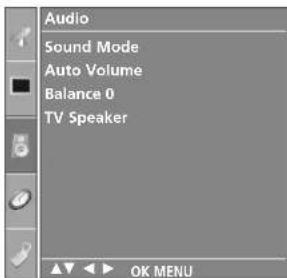
text_image
Audio Sound Mode Auto Volume Balance 0 TV Speaker OK MENU1
text_image
Audio Sound Mode ▶ Auto Volume Balance 0 TV Speaker Surround MAX Standard Music Movie Sports ✓ User OK MENU234
text_image
User 0.1 0.5 1.5 5.0 10 kHz OK MENU5
SOUND & LANGUAGE CONTROL
BALANCE
You can adjust the sound balance of speaker to the levels you prefer.
text_image
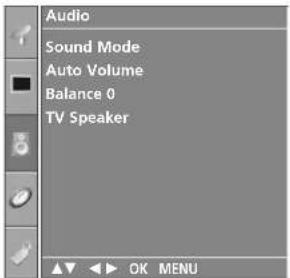
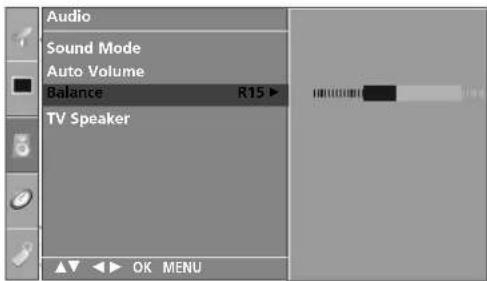
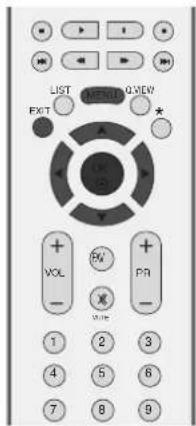
LIST EXIT OUTRUN GVIEW + VOL - F& PR - 1 2 3 4 5 6 7 8 91 Press the MENU button and then ▲/▼ button to select the Audio menu.
2 Press the ▶ button and then ▲ // ▼ button to select Balance.
3 Press the ▶ button and then ◀️/▶ button to make desired adjustment.
4 Press the EXIT button to return to normal TV viewing.
text_image
Audio Sound Mode Auto Volume Balance 0 TV Speaker1
text_image
Audio Sound Mode Auto Volume Balance R15 TV Speaker OK MENU23
TV SPEAKERS ON/OFF SETUP
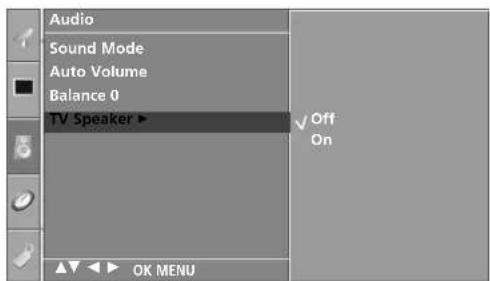
You can adjust the internal speaker status.
In AV, COMPONENT, RGB[PC] and HDMI mode, internal speaker audio can be outputted even though there is no video signal.
If you want to use your external hi-fi stereo system, turn off the internal speakers of the set.
1 Press the MENU button and then ▲ / ▼ button to select the Audio menu.
2 Press the ▶ button and then ▲ / ▼ button to select TV Speaker.
3 Press the ▶ button and then ▲ / ▼ button to select On or Off.
4 Press the EXIT button to return to normal TV viewing.
text_image
LIST EXIT 0 VIEW VOL PV PR 1 2 3 4 5 6 7 8 9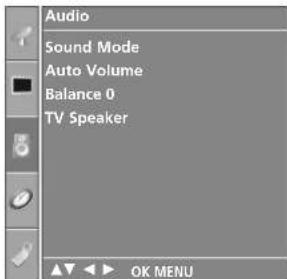
text_image
Audio Sound Mode Auto Volume Balance 0 TV Speaker OK MENU1
text_image
Audio Sound Mode Auto Volume Balance 0 TV Speaker ▶ Off On OK MENU23
SOUND & LANGUAGE CONTROL
I/II
Stereo/Dual Reception
When a programme is selected, the sound information for the station appears after the programme number and station name disappear.
| Broadcast | On Screen Display |
| Mono | MONO |
| Stereo | STEREO |
| Dual | DUAL I |
■ Mono sound selection
If the stereo signal is weak in stereo reception, you can switch to mono by pressing the I/II button twice. In mono reception, the depth of sound is improved. To switch back to stereo, press the I/II button twice again.
■ Language selection for dual language broadcast
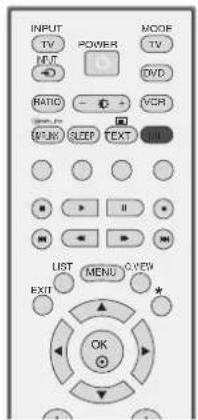
If a programme received two languages (dual language), you can switch to DUAL I, DUAL II or DUAL I+II by pressing the I/II button repeatedly.
DUAL I Sends the primary broadcast language to the loudspeakers.
DUAL II Sends the secondary broadcast language to the loudspeakers.
DUAL I+II Sends a separate language to each loudspeaker.
text_image
INPUT TV POWER MOOR TV INPUT RATIO VCP SLEEP TEXT LIST MENU VIEW EXIT OKNICAM Reception
If the set is equipped with the receiver for NICAM reception, the high quality NICAM (Near Instantaneous Companding Audio Multiplex) digital sound can be received.
Sound output can be selected according to the type of received broadcast as follows by pressing the I/II button repeatedly.
1 When NICAM mono is received, you can select NICAM MONO or FM MONO.
2 When NICAM stereo is received, you can select NICAM STEREO or FM MONO. If the stereo signal is weak, switch to FM MONO.
3 When NICAM dual is received, you can select NICAM DUAL I, NICAM DUAL II or NICAM DUAL I+II or MONO.
Speaker Sound Output Selection
In AV, S-Video, Component, RGB and HDMI mode, you can select output sound for the left and right loudspeakers.
Repeatedly press the I/II button to select the sound output.
L+R: Audio signal from audio L input is sent to the left loud speaker and audio signal from audio R input is sent to the right loudspeakers.
L+L: Audio signal from audio L input is sent to left and right loudspeakers.
R+R: Audio signal from audio R input is sent to left and right loudspeakers.
SOUND & LANGUAGE CONTROL
ON-SCREEN MENU LANGUAGE / COUNTRY SELECTION
This feature is not available in all countries.
Installation guide menu appears on TV screen when it is turned on for the first time.
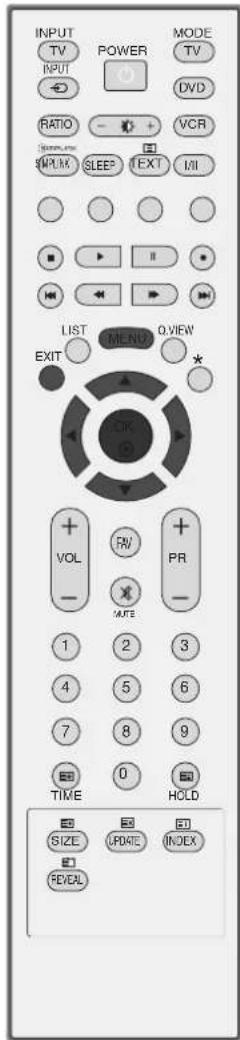
1 Press the ▲/√/▼/◄/► button and then, OK button to select your desired language.
2 Press the ▲/▼/◄/► button and then, OK button to select your country.
* If you want to change Language/ Country selection
1 Press the MENU button and then use ▲//▼button to select the Option menu.
2 Press the ▶ button and then use ▲//▼button to select Language. The menus can be shown on the screen in the selected language.
Or, Press the ▶ button and then use ▲//▼button to select Country.
3 Press the ▶ button and then use ▲/▼ button to select your desired language or country.
4 Press the OK button.
5 Press the EXIT button to return to normal TV viewing.
NOTE
If you don't finish set up Installation Guide by pressing EXIT button or time out of OSD (On Screen Display) display, it will continuously appear until completing set up whenever the set is turned on.
▶ If you select wrong local country, the teletext may not appear correctly on the screen and some problem may happen during teletext operation.
text_image
INPUT TV POWER MODE TV INPUT RATIO VCR SINK SLEEP TEXT I/II LIST MENUD OVIEW EXIT * LINK VOL RV PR - MATE 1 2 3 4 5 6 7 8 9 TIME 0 HOLD SIZE UPDATE INDEX REVEALTIME SETTING
CLOCK SETUP
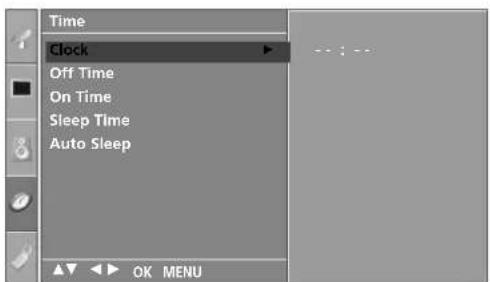
You must set the time correctly before using on/off time function.
If current time setting is erased by a power failure or the set is unplugged, reset the clock.
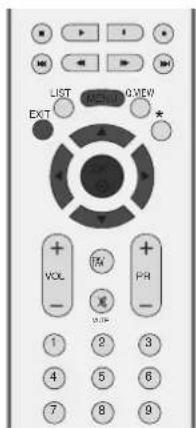
1 Press the MENU button and then ▲//▼ button to select the Time menu.
2 Press the ▶ button and then ▲/▼ button to select Clock.
3 Press the ▶ button and then ▲//▼ button to set the hour.
4 Press the ▶ button and then ▲//▼ button to set the minute.
5 Press the EXIT button to return to normal TV viewing.
text_image
LIST EXIT VOL TA PR 1 2 3 4 5 6 7 8 9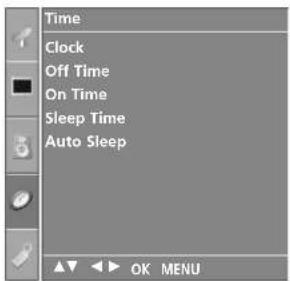
text_image
Time Clock Off Time On Time Sleep Time Auto Sleep1
text_image
Time Clock Off Time On Time Sleep Time Auto Sleep OK MENU2 3 4
TIME SETTING
AUTO ON/OFF TIMER SETTING
The Off time automatically switches the set to standby at the preset time.
Two hours after the set is switched on by the on time function it will automatically switch back to standby mode unless a button has been pressed.
Once the on time/off time is set, these functions operate daily at the preset time.
Off time function overrides On time function if they are set both to the same time.
The set must be in standby mode for the On timer to work.
1 Press the MENU button and then ▲//▼ button to select the Time menu.
2 Press the ▶ button and then ▲/▼ button to select Off Time/On Time.
3 Press the ▶ button and then ▲//▼ button to select On.
• To cancel On/Off Time function, select Off.
4 Press the ▶ button and then ▲//▼ button to set the hour.
5 Press the ▶ button and then ▲//▼ button to set the minutes.
6 For only On Time function
• Programme: Press the ▶button and then ▲//▼ button to select the programme.
• Volume: Press the ▶button and then ▲//▼ button to adjust volume level at turn-on.
7 Press the EXIT button to return to normal TV viewing.
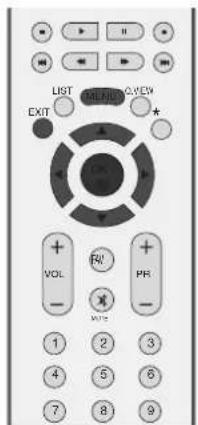
text_image
LIST EXIT VOL RW PR Wize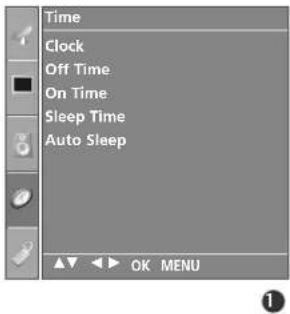
text_image
Time Clock Off Time On Time Sleep Time Auto Sleep OK MENU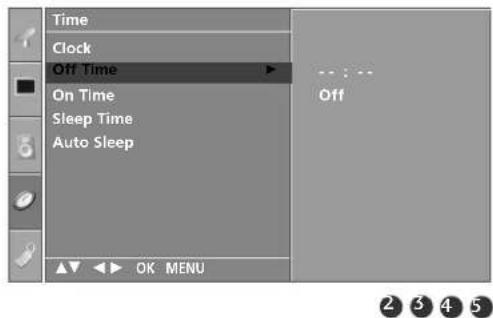
text_image
Time Clock Off Time On Time Sleep Time Auto Sleep OK MENU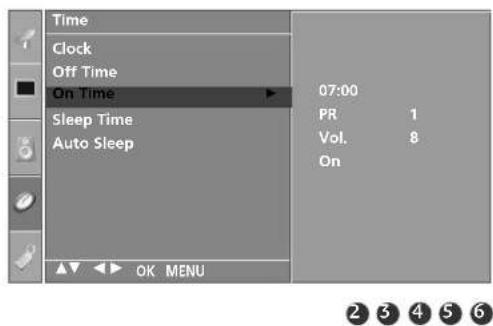
text_image
Time Clock Off Time On Time Sleep Time Auto Sleep 07:00 PR 1 Vol. 8 On OK MENUSLEEP TIMER SETTING
You don't have to remember to switch the set off before you go to sleep. The sleep timer automatically switches the set to standby after the preset time has elapsed.
1 Press the SLEEP button repeatedly to select the number of minutes. The display ' -z' will appear on the screen, followed by 10, 20, 30, 60, 90, 120, 180 and 240.
2 When the number of minutes you want is displayed on the screen, the timer begins to count down from the number of minutes selected.
■ You can also set up the Sleep Time in the Time menu.
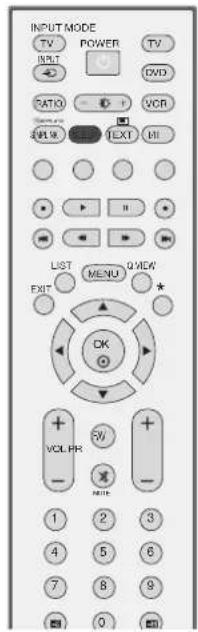
text_image
INPUT MODE TV POWER TV INTC DVD RATIO F VOR OK TEXT HI LIST MENU VIEW EXIT OK VOLPH SW + - 1 2 3 4 5 6 7 8 9 0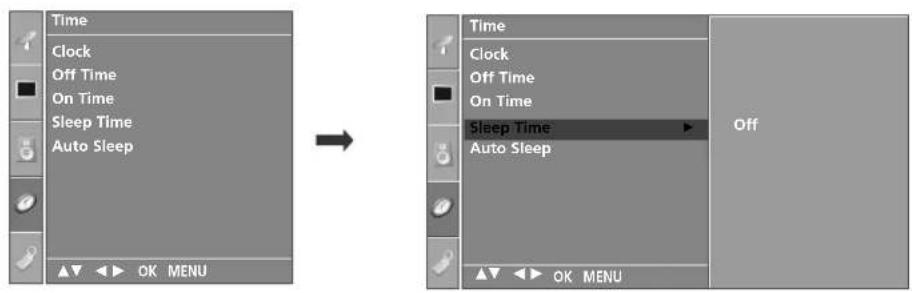
text_image
Time Clock Off Time On Time Sleep Time Auto Sleep OK MENU Time Clock Off Time On Time Sleep Time Auto Sleep Off OK MENUNOTE
▶ To view the remaining sleep time, press the SLEEP button once.
▶ To cancel the sleep time, repeatedly press the SLEEP button until the display ' -Lz ^b appears.
▶ When you switch the set off, the set releases the preset sleep time.
TIME SETTING
AUTO SHUT-OFF SETTING
If set to on and there is no input signal, the TV turns off automatically after 10 minutes.
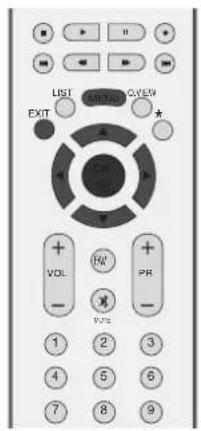
text_image
LIST EXIT VIEW VOL PR VHz 1 2 3 4 5 6 7 8 91 Press the MENU button and then ▲//▼ button to select the Time menu.
2 Press the ▶ button and then ▲//▼ button to select Auto Sleep.
3 Press the ▶ button and then ▲//▼ button to select On or Off.
4 Press the EXIT button to return to normal TV viewing.
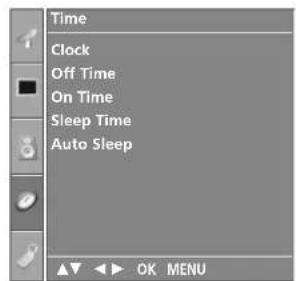
text_image
Time Clock Off Time On Time Sleep Time Auto Sleep1
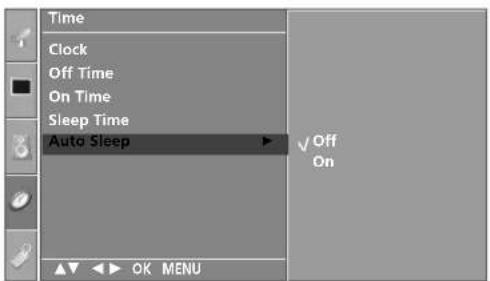
text_image
Time Clock Off Time On Time Sleep Time Auto Sleep ✓ Off On OK MENU23
TELETEXT
This feature is not available in all countries.
Teletext is a free service broadcast by most TV stations which gives up-to-the-minute information on news, weather, television programmes, share prices and many other topics.
The teletext decoder of this TV can support the SIMPLE, TOP and FASTEXT systems. SIMPLE (standard tele-text) consists of a number of pages which are selected by directly entering the corresponding page number. TOP and FASTEXT are more modern methods allowing quick and easy selection of teletext information.
SWITCH ON/OFF
Press the TEXT button to switch to teletext. The initial page or last page appears on the screen.
Two page numbers, TV station name, date and time are displayed on the screen headline. The first page number indicates your selection, while the second shows the current page displayed.
Press the TEXT or EXIT button to switch off teletext. The previous mode reappears.
SIMPLE TEXT
Page selection
① Enter the desired page number as a three digit number with the NUMBER buttons. If during selection you press a wrong number, you must complete the three digit number and then re-enter the correct page number.
② The PR+/- button can be used to select the preceding or following page.
TOP TEXT
The user guide displays four fields-red, green, yellow and blue at the bottom of the screen. The yellow field denotes the next group and the blue field indicates the next block.
■ Block / group / page selection
① With the blue button you can progress from block to block.
② Use the yellow button to proceed to the next group with automatic overflow to the next block.
③ With the green button you can proceed to the next existing page with automatic overflow to the next group. Alternatively the PR+ button can be used.
4 The red button permits to return to previous selection. Alternatively the PR- button can be used.
■ Direct page selection
Corresponding to the SIMPLE teletext mode, you can select a page by entering it as a three digit number using the NUMBER buttons in TOP mode.
FASTEXT
The teletext pages are colour coded along the bottom of the screen and are selected by pressing the corresponding coloured button.
Page selection
1 Press the button to select the index page.
② You can select the pages which are colour coded along the bottom line with the same coloured buttons.
③ Corresponding to the SIMPLE teletext mode, you can select a page by entering its three digit page number with the NUMBER buttons in FASTEXT mode.
4 The PR+/- button can be used to select the preceding or following page.
SPECIAL TELETEXT FUNCTIONS

REVEAL
Press this button to display concealed information, such as solutions of riddles or puzzles.
Press this button again to remove the information from the display.

SIZE
Selects double height text.
Press this button to enlarge the top half of the page.
Press this button again to enlarge the bottom half of the page.
Press this button again to return to the normal display.

UPDATE
Displays the TV picture on the screen while waiting for the new teletext page. The display will appear at the top left hand corner of the screen. When the updated page is available then display will change to the page number. Press this button to view the updated teletext page.

TIME
When viewing a TV programme, press this button to display the time at the top right hand corner of the screen. Press this button again to remove the display. In the teletext mode, press this button to select a sub page number. The sub page number is displayed at the bottom of the screen. To hold or change the sub page, press the RED/GREEN, PR+/- or NUMBER buttons.
Press again to exit this function.

HOLD
Stops the automatic page change which will occur if a teletext page consists of 2 or more sub pages. The number of sub pages and the sub page displayed is, usually, shown on the screen below the time. When this button is pressed the stop symbol is displayed at the top left-hand corner of the screen and the automatic page change is inhibited. To continue press this button again.
APPENDIX
TROUBLESHOOTING
| The operation does not work normally. | |
| The remote control doesn’t work | Check to see if there is any object between the product and the remote control causing obstruction.Are batteries installed with correct polarity (+ to +, - to -)?Correct remote operating mode set: TV, VCR etc.?Install new batteries. |
| Power is suddenly turned off | Is the sleep time set?Check the power control settings. Power interruptedNo broadcast on station tuned with Auto off activated. |
| The video function does not work. | |
| No picture & No sound | Check whether the product is turned on.Try another channel. The problem may be with the broadcast.Is the power cord inserted into wall power outlet?Check your antenna direction and/or location.Test the wall power outlet, plug another product's power cord into the outlet where the product's power cord was plugged in. |
| Picture appears slowly after switching on | This is normal, the image is muted during the product startup process. Please contact your service center, if the picture has not appeared after five minutes. |
| No or poor colour or poor picture | Adjust Colour in menu option.Keep a sufficient distance between the product and the VCR.Try another channel. The problem may be with the broadcast.Are the video cables installed properly?Activate any function to restore the brightness of the picture. |
| Horizontal/vertical bars or picture shaking | Check for local interference such as an electrical appliance or power tool. |
| Poor reception on some channels | Station or cable product experiencing problems, tune to another station.Station signal is weak, reorient antenna to receive weaker station.Check for sources of possible interference. |
| Lines or streaks in pictures | Check antenna (Change the direction of the antenna). |
| The audio function does not work. | |
| Picture OK & No sound | Press the VOL+/- (or Volume) button.Sound muted? Press MUTE button.Try another channel. The problem may be with the broadcast.Are the audio cables installed properly? |
| No output from one of the speakers | Adjust Balance in menu option. |
| Unusual sound from inside the product | A change in ambient humidity or temperature may result in an unusual noise when the product is turned on or off and does not indicate a fault with the product. |
| There is a problem in PC mode. (Only PC mode applied) | |
| The signal is out of range. | ■ Adjust resolution, horizontal frequency, or vertical frequency.■ Check the input source. |
| Vertical bar or stripe on background & Horizontal Noise & Incorrect position | ■ Work the Auto configure or adjust clock, phase, or H/V position. |
| Screen colour is unstable or single colour | ■ Check the signal cable.■ Reinstall the PC video card. |
APPENDIX
MAINTENANCE
Early malfunctions can be prevented. Careful and regular cleaning can extend the amount of time you will have your new TV. Be sure to turn the power off and unplug the power cord before you begin any cleaning.
Cleaning the Screen
Here's a great way to keep the dust off your screen for a while. Wet a soft cloth in a mixture of lukewarm water and a little fabric softener or dish washing detergent. Wring the cloth until it's almost dry, and then use it to wipe the screen.
2 Make sure the excess water is off the screen, and then let it air-dry before you turn on your TV.
Cleaning the Cabinet
■ To remove dirt or dust, wipe the cabinet with a soft, dry, lint-free cloth.
■ Please be sure not to use a wet cloth.
Extended Absence
CAUTION
If you expect to leave your TV dormant for a long time (such as a vacation), it's a good idea to unplug the power cord to protect against possible damage from lightning or power surges.
PRODUCT SPECIFICATIONS
| MODELS | 26LC41*26LC41-ZA | 32LC41*/32LC43*32LC44*32LC41-ZA/32LC43-ZE32LC43-ZA/32LC44-ZB | 37LC41*/37LC43*37LC41-ZA37LC43-ZA | 42LC41*/42LC43*42LC41-ZA42LC43-ZA | |
| Dimensions(Width x Height x Depth) | with stand | 676.4 x 529.2x 221.0 mm26.6 x 20.8 x 8.7 inches | 806.4 x 606.1 x 249.0 mm31.8 x 23.9 x 9.8 inches | 926.6 x 697.6x 280.4mm36.5x 27.5 x 11.0 inches | 1032.7 x 750.0 x 287.6 mm40.7x 29.5 x 11.3 inches |
| without stand | 676.4 x 474.3 x 85.0 mm26.6 x 18.7 x 3.3 inches | 806.4 x 548.4 x 80.5 mm31.8 x 21.6x 3.2 inches | 926.6 x 635.6 x 88.0mm36.5x 25.0 x 3.5 inches | 1032.7 x 685.5 x 88.5 mm40.7 x 27.0 x 3.5 inches | |
| Weight | with stand | 10.1kg/22.3 lbs | 13.9 kg/30.7 lbs | 20.0 kg/44.1 lbs | 24.5 kg/54.0 lbs |
| without stand | 9.1kg/20.1 lbs | 11.3 kg/24.9 lbs | 16.3 kg/35.9 lbs | 20 kg/44.1 lbs | |
| Power requirementPower Consumption | AC100-240V~ 50/60Hz 1.3A130W | AC100-240V~ 50/60Hz 1.5A150W | AC100-240V~ 50/60Hz 1.8A170W | AC100-240V~ 50/60Hz 2.2A200W | |
| MODELS | 26LC5*26LC51-ZA26LC51C-ZA | 32LC5*32LC51-ZA/32LC52-ZC32LC52C-ZC32LC53-ZA/32LC54-ZD | 37LC5*37LC51-ZA37LC53-ZA | 42LC5*42LC51-ZA42LC53-ZA42LC54-ZD | |
| Dimensions(Width x Height x Depth) | with stand | 676.6 x 531.0x 221.0 mm26.6 x 20.9 x 8.7 inches | 806.6 x 606.5 x 249 mm31.8 x 23.9 x 9.8 inches | 927 x 692.8x 280.5mm36.5x 27.3 x 11.1 inches | 1033.4 x 750.0 x 287.6 mm40.7x 29.5 x 11.3 inches |
| without stand | 676.6 x 478.7 x 84.0 mm26.6 x 18.9 x 3.3 inches | 806.6 x 552.3 x 79 mm31.8 x 21.8x 3.1 inches | 927 x 630 x 88.0mm36.5x 24.8 x 3.5 inches | 1033.4 x 686.8 x 88.5mm40.7 x 27.0 x 3.5inches | |
| Weight | with stand | 10.4kg/22.9 lbs | 13.7kg/30.2 lbs | 20.0 kg/44.1 lbs | 24.9 kg/54.9 lbs |
| without stand | 9.0kg/19.9 lbs | 11.2kg/24.7 lbs | 16.0 kg/35.3 lbs | 20.4 kg/45.0 lbs | |
| Power requirementPower Consumption | AC100-240V~ 50/60Hz 1.3A130W | AC100-240V~ 50/60Hz 1.5A150W | AC100-240V~ 50/60Hz 1.8A170W | AC100-240Y~ 50/60Hz 2.2A200W | |
| Television SystemProgram CoverageExternal Antenna Impedance | PAL/SECAM B/G/D/K, PAL I/II, SECAM L/L'VHF: E2 ~ E12, UHF: E21 ~ E69, CATV: S1 ~ S20, HYPER: S21 ~ S4775 Ω | ||||
| Environment condition | Operating TemperatureOperating Humidity | 0 ~ 40°C / 32 ~ 104°FLess than 80% | |||
| Storage TemperatureStorage Humidity | -20 ~ 60°C / -4 ~ 140°FLess than 85% | ||||
The specifications shown above may be changed without prior notice for quality improvement.
APPENDIX
PRODUCT SPECIFICATIONS
| MODELS | 26LC42* | 32LC42* | 37LC42* | 42LC42* | |
| 26LC42-ZC | 32LC42-ZC | 37LC42-ZC | 42LC42-ZC | ||
| Dimensions (Width x Height x Depth) | with stand | 676.4 x 529.2x 228.9 mm26.6 x 20.9 x 9.0 inches | 806.8 x 605.6 x 260.5 mm31.8 x 23.9 x 10.3 inches | 926.6 x 697.6x 280.4mm36.5x 27.5 x 11.1 inches | 1032.7 x 750.0 x 300.2 mm40.7x 29.6 x 11.8 inches |
| without stand | 676.4 x 474.3 x 85.0 mm26.6 x 18.7 x 3.4 inches | 806.8 x 605.5 x 79 mm31.8 x 23.9x 3.1 inches | 926.6 x 635.6 x 88.0mm36.5x 25.0 x 3.5 inches | 1032.7 x 685.5 x 88.5mm40.7 x 27.0x 3.5inches | |
| Weight | with stand | 9.62kg/21.2 lbs | 14.4kg/31.8 lbs | 20.0 kg/44.1 lbs | 24.5 kg/54.0 lbs |
| without stand | 8.62kg/19.0 lbs | 11.74kg/25.9 lbs | 16.3 kg/36.0 lbs | 20 kg/44.1 lbs | |
| Power requirement Power Consumption | AC100-240V~ 50/60Hz 1.3A130W | AC100-240V~ 50/60Hz 1.5A130W | AC100-240V~ 50/60Hz 1.8A170W | AC100-240V~ 50/60Hz 2.2A200W | |
| MODELS | 42PC5* | 42PC5RV* | 50PC5* | 26LC3* | |
| 42PC51-ZB42PC52-ZD | 42PC5RV-ZD42PC5RVC-ZD | 50PC51-ZB50PC52-ZD | 26LC3RA-ZA | ||
| Dimensions (Width x Height x Depth) | with stand | 1048.0 x 766.0 x 310.0 mm41.3 x 30.2 x 12.2 inches | 1048.0 x 766.0 x 310.0 mm41.3 x 30.2 x 12.2 inches | 1242.0 x 887.6 x 370.0mm48.9 x 34.9 x 14.6 inches | 680.0 x 550.0 x 235.0 mm26.8 x 21.7 x 9.3 inches |
| without stand | 1048.0 x 713.0 x 83.5 mm41.3 x 28.1 x 3.3 inches | 1048.0 x 713.0 x 83.5 mm41.3 x 28.1 x 3.3 inches | 1242.0 x 827.2 x 88.0 mm48.9 x 32.6 x 3.5 inches | 680.0x 436.6 x 119.4 mm26.8 x 17.2 x 4.7 inches | |
| Weight | with stand | 28.0 kg/61.7 lbs | 28.0 kg/61.7 lbs | 39.3 kg/86.6 lbs | 12.4 kg/27.3 lbs |
| without stand | 24.6kg/54.2 lbs | 24.6kg/54.2 lbs | 34.6kg/76.2 lbs | 11.5 kg/25.3 lbs | |
| Power requirement Power Consumption | AC100-240V~ 50/60Hz 3.5A310W | AC100-240V~ 50/60Hz 3A260W | AC100-240V~ 50/60Hz 5.0A450W | AC100-240V~ 50/60Hz 1.3A130W | |
| Television System Program Coverage External Antenna Impedance | PAL/SECAM B/G/D/K, PAL I/II, SECAM L/L'VHF: E2 ~ E12, UHF: E21 ~ E69, CATV: S1 ~ S20, HYPER: S21 ~ S4775 Ω | ||||
| Environment condition | Operating Temperature Operating Humidity | 0 ~ 40°C / 32 ~ 104°FLess than 80% | |||
| Storage Temperature Storage Humidity | -20 ~ 60°C / -4 ~ 140°FLess than 85% | ||||
■ The specifications shown above may be changed without prior notice for quality improvement.
PROGRAMMING THE REMOTE CONTROL
The remote is a multi-brand or a universal remote. It can be programmed to operate most remote-controllable devices of other manufacturers.
Note that the remote may not control all models of other brands.
Programming a code into a remote mode
1 Test your remote control.
To find out whether your remote control can operate the component without programming, turn on the component such as a VCR and press the corresponding mode button (such as a DVD or VCR) on the remote control, while pointing at the component. Test the POWER and PR + / - buttons to see if the component responds properly. If not, the remote requires programming to operate the device.
2 Turn on the component to be programmed, then press the corresponding mode button (such as a DVD or VCR) on the remote control. The remote control button of desired device is lighted.
3 Press the MENU and MUTE buttons simultaneously, the remote control is ready to be programmed for the code.
4 Enter a code number using the number buttons on the remote control. Programming code numbers for the corresponding component can be found on the following pages. Again, if the code is correct, the device will turn off.
5 Press the MENU button to store the code.
6 Test the remote control functions to see if the component responds properly. If not, repeat from step 2.
APPENDIX
Programming code
VCR
| Brand Codes Brand Codes Brand Codes | |||||||||||||
| AIWA 034 | MAGNAVOX | 031 | 033 | 034 | 041 | SAMSUNG | 032 | 040 | 102 | 104 | |||
| AKAI 016 043 046 124 | 067 | 068 | 105 | 107 | 109 | 112 | |||||||
| 125146 | MARANTZ | 012 | 031 | 033 | 067 | 113 | 115 | 120122 | |||||
| AMPRO 072 | 069 | 125 | |||||||||||
| ANAM 031 033 | 103 | MARTA | 101 | SANSUI | 022 | 043 | 048 | 135 | |||||
| AUDIO DYNAMICS | 012 | 023039043 | MATSUI | 027 | 030 | SANYO | 003 | 007 | 010 | 014 | |||
| BROKSONIC | 035 | 037 129 | MEI | 031 | 033 | 102 | 134 | ||||||
| CANON | 028 | 031 033 | MEMOREX | 003 | 010 | 014 | 031 | SCOTT | 017 | 037 | 112 | 129 | |
| CAPEHART | 108 | 033 | 034 | 053 | 072 | 131 | |||||||
| CRAIG | 003 | 040 135 | 101 | 102 | 134 | 139 | SEARS 003 008 | 009 | 010 | ||||
| CURTIS MATHES | 031 | 033 041 | MGA | 045 | 046 | 059 | 013 | 014 | 017 | 020 | |||
| DAEWOO | 005 | 007 010 064 | MINOLTA | 013 | 020 | 031 | 042 | 073 | 081 | ||||
| 065 | 108 110 111 | MITSUBISHI | 013 | 020 | 045 | 046 | 101 | ||||||
| 112 | 116 117 119 | 049 | 051 | 059 | 061 | SHARP 031 054 | 149 | ||||||
| DAYTRON | 108 | 151 | SHINTOM | 024 | |||||||||
| DBX | 012 | 023 039 043 | MTC 034 040 | SONY | 003 | 009 | 031 | 052 | |||||
| DYNATECH | 034 | 053 | MULTITECH | 024 | 034 | 056 | 057 | 058 | 076 | ||||
| ELECTROHOME | 059 | NEC | 012 | 023 | 039 | 043 | 077 | 078 | 149 | ||||
| EMERSON | 006 | 017 025 027 | 048 | SOUNDESIGN | 034 | ||||||||
| 029 | 031 034 035 | NORDMENDE | 043 | STS | 013 | ||||||||
| 036 | 037 046 101 | OPTONICA | 053 | 054 | SYLVANIA | 031 | 033 | 034 | 059 | ||||
| 129 | 131138 153 | PANASONIC | 066 | 070 | 074 | 083 | 067 | ||||||
| FISHER | 003 | 008 009 010 | 133140 | 145 | SYMPHONIC | 034 | |||||||
| FUNAI 034 | TANDY | 010 | 034 | ||||||||||
| GE | 031 | 033 063 072 | PENTAX | 013 | 020 | 031 | 033 | TATUNG | 039 | 043 | |||
| 107 | 109 144 147 | 063 | TEAC | 034 | 039 | 043 | |||||||
| GO VIDEO | 132 | 136 | PHILCO | 031 | 034 | 067 | TECHNICS | 031 | 033 | 070 | |||
| HARMAN KARDON | 012 045 | PHILIPS | 031 | 033 | 034 | 054 | TEKNIKA | 019 | 031 | 033 | 034 | ||
| HITACHI | 004 | 018 026 034 | 067 | 071 | 101 | 101 | |||||||
| 043 | 063 137 150 | PILOT | 101 | THOMAS | 034 | ||||||||
| INSTANTREPLAY | 031 | 033 | PIONEER | 013 | 021 | 048 | TMK | 006 | |||||
| JCL | 031 | 033 | PORTLAND | 108 | TOSHIBA | 008 | 013 | 042 | 047 | ||||
| JCPENNY | 012 | 013 015 033 | PULSAR | 072 | 059 | 082 | 112 | 131 | |||||
| 040 | 066 101 | QUARTZ | 011 | 014 | TOTEVISION | 040 | 101 | ||||||
| JENSEN 043 | QUASAR | 033 | 066 | 075 | 145 | UNITECH | 040 | ||||||
| JVC | 012 | 031 033 043 | RCA | 013 | 020 | 033 | 034 | VECTOR RESEARCH | 012 | ||||
| 048 | 050 055 060 | 040 | 041 | 062 | 063 | VICTOR | 048 | ||||||
| 130 | 150 152 | 107 | 109 | 140 | 144 | VIDEO CONCEPTS | 012 | 034 | 046 | ||||
| KENWOOD | 014 | 034 039 043 | 145 | 147 | VIDEOSONIC | 040 | |||||||
| 047 | 048 | REALISTIC | 003 | 008 | 010 | 014 | WARDS | 003 | 013 | 017 | |||
| LG (GOLDSTAR) | 001 | 012 013 020 | 031 | 033 | 034 | 040 | 031 | 033 | 034 | 040 | |||
| 101 | 106 114 123 | 053 | 054 | 101 | 053 | 054 | 131 | ||||||
| LLOYD | 034 | RICO 058 | YAMAHA | 012 | 034 | 039 | 043 | ||||||
| LXI | 003 | 009 013 014 | RUNCO | 148 | ZENITH | 034 | 048 | 056 | |||||
| 017 | 034 101 106 | SALORA | 014 | 058 | 072 | 080 | 101 | ||||||
| MAGIN | 040 | ||||||||||||
DVD
| Brand Codes Brand Codes Brand Codes | ||||||
| APEX DIGITAL 022 | MITSUBISHI | 002 | RCA | 005 | 006 | |
| DENON 020 014 | NAD | 023 | SAMSUNG | 011 | 015 | |
| GE 005 006 | ONKYO 008 017 | SONY | 007 | |||
| HARMAN KARDON 027 | PANASONIC | 003 009 | THOMPSON | 005 | 006 | |
| JVC 012 | PHILIPS | 013 | TOSHIBA | 019 | 008 | |
| LG | 001 010 016 025 | PIONEER | 004 026 | YAMAHA | 009 | 018 |
| MAGNAVOX | 013 | PROCEED | 021 | ZENITH 010 016 025 | ||
| MARANTZ | 024 | PROSCAN | 005 006 | |||