Expedition - Bag Wilderness Equipment - Free user manual and instructions
Find the device manual for free Expedition Wilderness Equipment in PDF.


User questions about Expedition Wilderness Equipment
0 question about this device. Answer the ones you know or ask your own.
Ask a new question about this device
Download the instructions for your Bag in PDF format for free! Find your manual Expedition - Wilderness Equipment and take your electronic device back in hand. On this page are published all the documents necessary for the use of your device. Expedition by Wilderness Equipment.
USER MANUAL Expedition Wilderness Equipment
text_image
WILDERNESS EQUIPMENTThe Australian Pack Maker BACKPACK INSTRUCTIONS
TELL US ABOUT YOUR PURCHASE!
Send us an email telling us which pack model you have purchased and where you bought it and we will put you in our quarterly draw to win a WE canvas daypack. We will also send you the guidelines and details of our offer to reward you for good photos of WE gear taken on your expeditions.
Send your email now to: henry@seatosummit.com.au
CONTENTS
BACKPACK BASICS
• FOUR ADJUSTMENT STEPS
• INTERCHANGEABLE HARNESS SIZES
- LOADING YOUR PACK
• ADJUSTING THE FRAME PROFILE
- CHECKING BACK LENGTH
GETTING THE MOST FROM YOUR WE PACK
- HEAVY LOADS
• DAY PACK NOTES - OFF-TRACK
- CLIMBING
- WET WEATHER
• BAGGAGE CONVEYORS & LUGGAGE COMPARTMENTS - ACCESSORIES
Whatever the load you are carrying, comfort and energy conservation depend on how you load your pack bag – what you put where - and then, each time you put on your pack, making simple harness adjustments in the correct sequence. Out there, we see far too many people with badly loaded and poorly adjusted packs. Everything we do in pack design is directed towards your backpacking enjoyment. You can finish off the job by taking care to follow these basic instructions.
Most of the weight in a heavy pack is best carried at hip level, on the pelvic structure and the associated posterior muscles. To achieve this, packs over about 50 litres capacity invariably have a stiff internal frame and a full hip harness, the two features that distinguish a 'backpack' from a 'day pack'. You should think of the frame as propping the pack bag up off the hip harness, concentrating the weight at hip level. If the pack bag can sag load will fall back onto your shoulders. With loads above 15 kilograms the hip harness design also becomes more and more important but, finally, it also all depends on the fitting and adjustment of your pack.
Successful adjustment is only possible if the back length of the pack you have purchased matches your torso length. This is the distance from your hip bones up to your shoulder level. It is normally your retailer's job to ensure your new pack is the right back length but, as a quick check, put on your pack and fasten the hip harness at the correct level, explained below. Looking from the side the general 'factory-set' curves of the pack's 'body' or 'harness' panel should line up well with those of your back profile. Often there is no need to change the frame curvature. A big gap in the middle of your back probably indicates the pack is too short for you. For more detail go to Checking Your Pack's Back Length at the end of this Backpack Basics section. Also, if you have a WE pack with our unique dual-back-length system make sure this is set for your torso length, another job for your retailer when fitting your pack.
Now, before attempting any adjustments, you must load your pack so it simulates a real trip load, settling the pack down on your body. Place about 10kg in the pack bag but don't just chuck everything in so it hangs like a sack of potatoes. Read the Loading Your Pack section several pages on. Make use of the pack compression straps to hold the load in place close to your body.
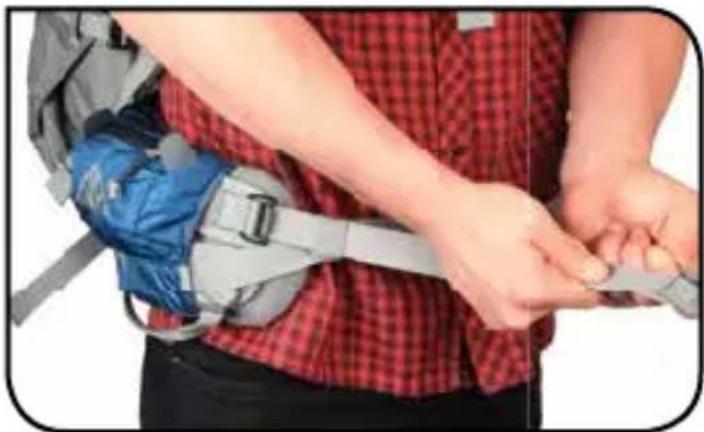
STEP 1: LOADING THE HIPS
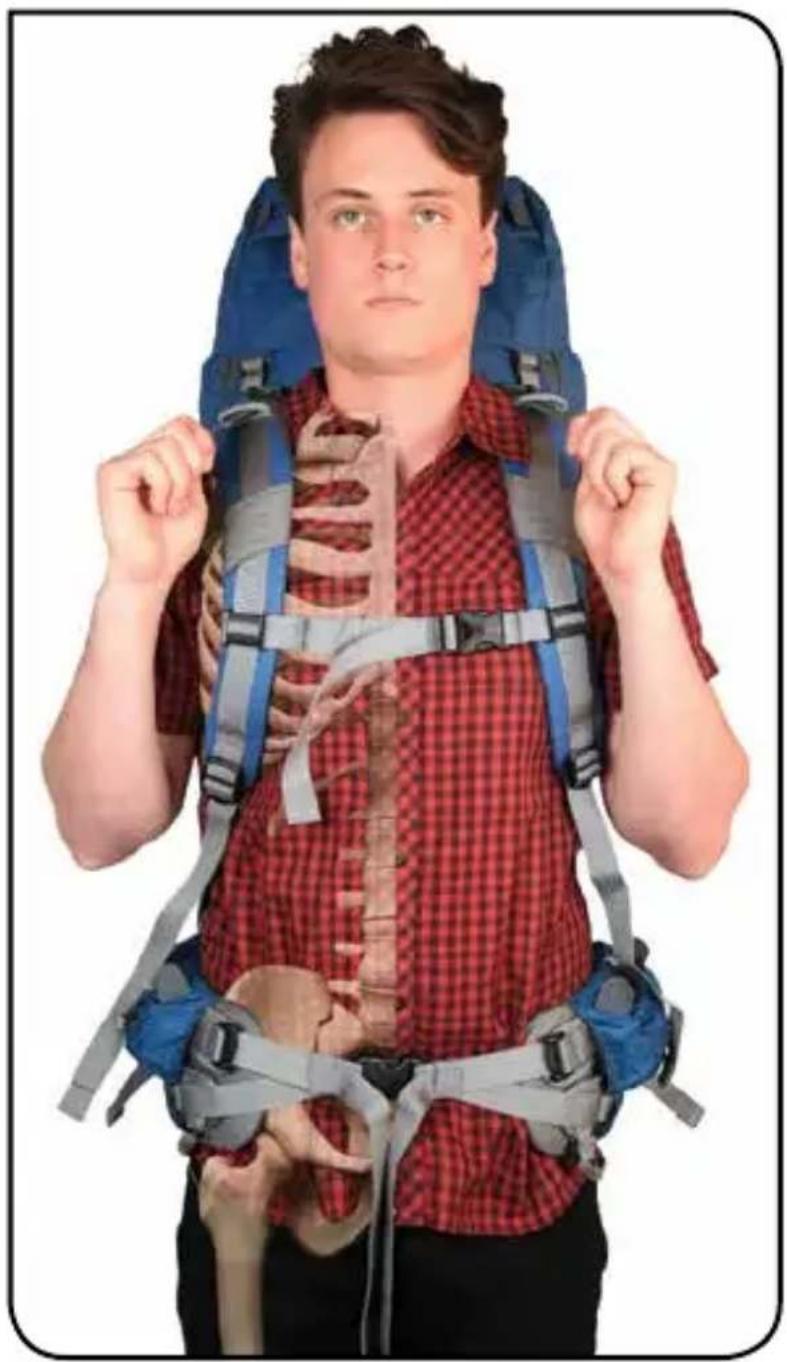
Put the pack on and check that the shoulder harness main adjustment straps and the top stabiliser straps are just loose enough to allow the hip harness to be firmly fastened down at the correct level on the hips. The idea is to transfer load to the upper part of the big muscles in your backside, not hang the harness over the hip bones or 'pelvic crests' where there is little muscle coverage.
The top edges of the hip harness wings should lie about level with your hip bones, maybe up a little if you are a female. The harness must be firmly tightened to maintain hip loading.
natural_image
Person wearing a blue and gray backpack with a white strap, handling a small object (no visible text or symbols)STEP 2: LOADING THE SHOULDERS
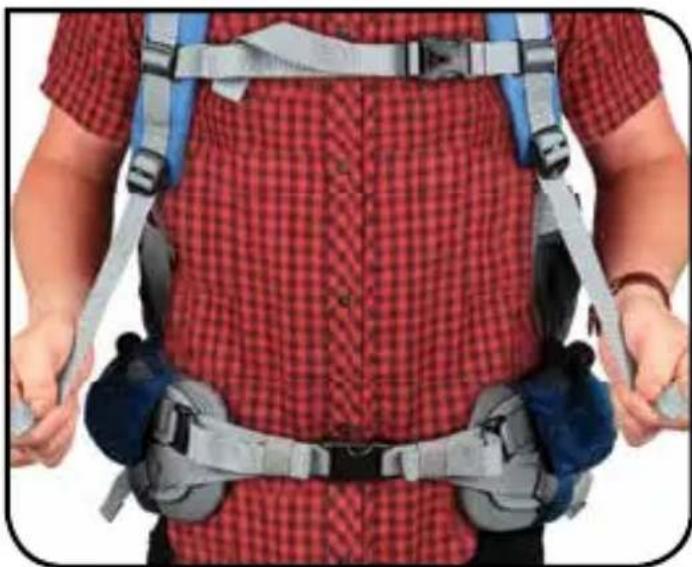
However you choose to share the load between hip and shoulder levels, it is the shoulder harness that stops the pack bag from peeling away backwards from your body. Tighten the main shoulder harness adjustment straps until they are fi rm.
When your pack is very heavy, tighten them a little further to move some load off the hips and up to the shoulders. (Visualise the shoulder harness as two padded slings, one over each shoulder, adjustable in length, with all four ends attached near the bottom of the pack bag).
natural_image
Person wearing a red checkered shirt and blue safety harness, hands visible in front (no text or symbols)The shoulder harness top stabiliser straps must be ‘just loose’ while you do this otherwise each arm of the shoulder harness will feel more and more like a bow string pushing back on your shoulders.
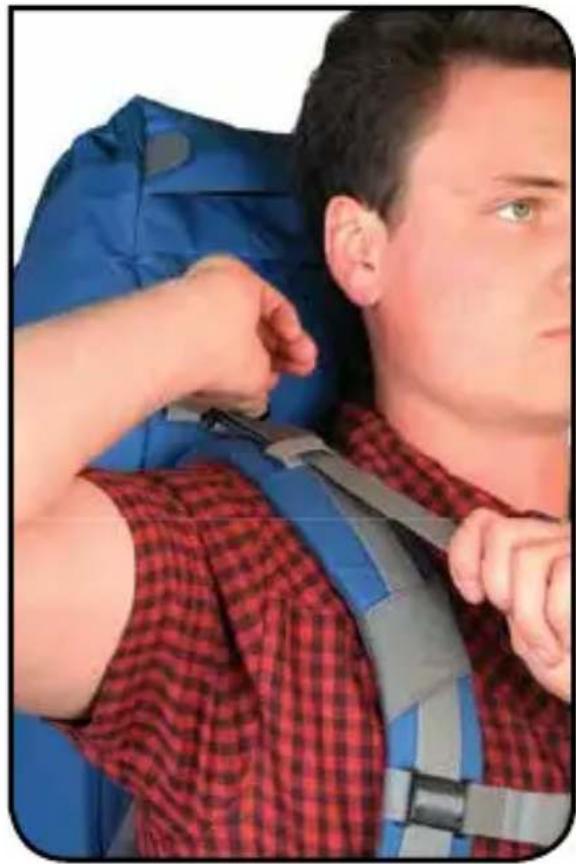
STEP 3: TOP STABILISERS
Next, firm up these top stabilisers to bring the pack bag comfortably in against your upper back. With this adjustment it is very important that the pack frame is shaped to closely follow the curvature of your upper back, over your shoulder blades.
(In some countries these straps are called 'load lifters'. We don't like that term because it confuses the simple function of these straps).
natural_image
Close-up of a person wearing a blue backpack and red plaid shirt, seated with hands adjusting the seat (no visible text or symbols)STEP 4: STERNUM STRAP
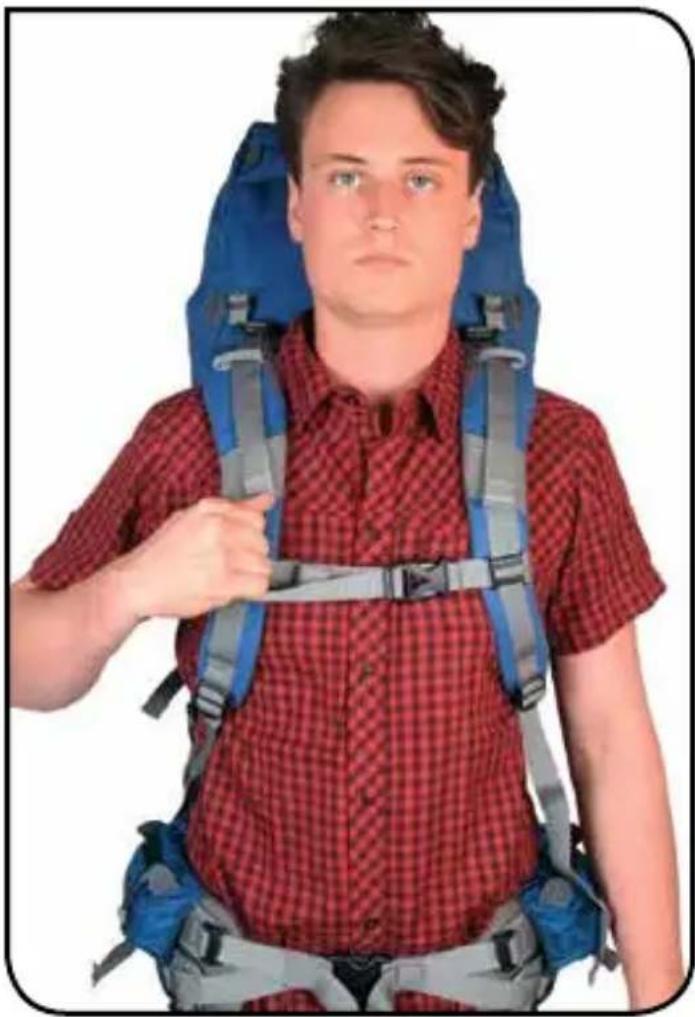
Finally, connect up the 'sternum' or 'chest' strap, slide it up or down to a comfortable level, and then tension it a little to bring the padded shoulder harness arms inwards onto the chest and clear of your arms. This is where you should feel the 'falling backwards' effect of your pack weight.
You can also use the sternum strap to distort the shoulder harness curvature and flatten the contact area of the harness arms over the top of your shoulders.
natural_image
Person wearing a blue and red checkered backpack, posing with one hand raised (no text or symbols visible)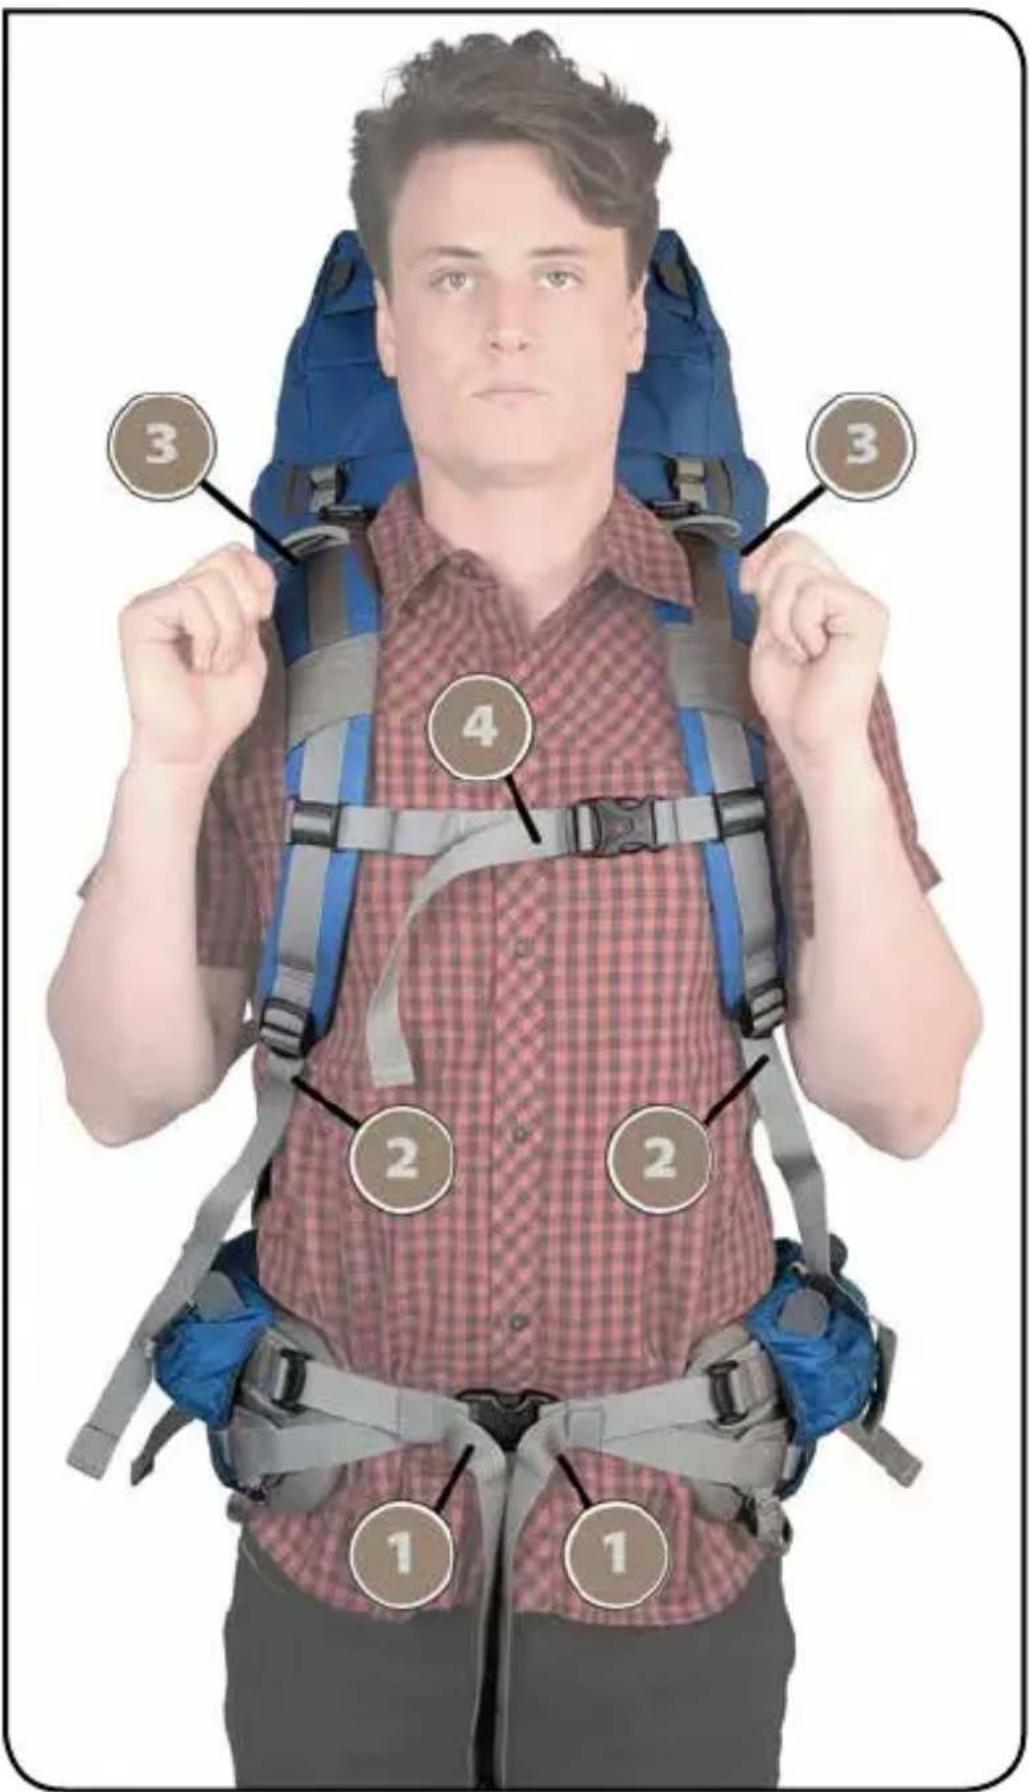
text_image
3 3 4 2 2 1 1HIP LEVEL SIDE-STABILISER STRAPS
All forms of WE hip harness - Synchro-FORM series and Perfect-FIT - are fitted with side-stabiliser straps linking the hip harness wings to the pack bag. These straps can be cinched in to add stability to the lower part of your pack (although the hip harness structure on WE packs is naturally very stable).
SHOULDER HARNESS ADJUSTMENTS
Depending on your build, the shoulder harness padded arms may seem too short or too long. Big-capacity WE packs are fitted with a very technical shoulder harness, the Synchro-FORM shoulder harness. Use the adjustment mechanism provided down behind the lumbar region of the hip harness to extend or retract the harness arms to suit your torso build.
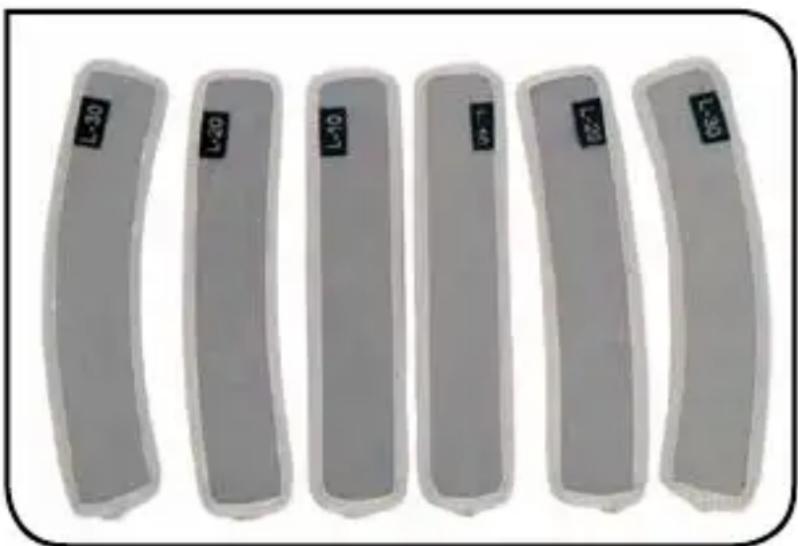
The Synchro-FORM shoulder harnesses on the most technical, large-capacity WE packs are further supplied with a selection of insert plates that can be used to change the curvature of the harness padded arms. You can tune each arm
to the slope of your shoulders and achieve even pressure distribution across the width of their padded surfaces. Detailed instructions are provided on the WE website.
Although very rarely necessary, the different sizes of Synchro-FORM shoulder harnesses (supplied matched to the pack back length) may be interchanged if you need less or more arm length to accommodate extremely slender or particularly heavy builds.
natural_image
Six gray rectangular objects with black labels (L-30, L-35, L-40, L-45, L-50, L-55) arranged horizontally, no text or symbols present.INTERCHANGEABLE HIP HARNESS SIZES
The standard hip harness span fitted to all models and all back lengths of WE backpacks is medium. This is because, for most people, it fits well. If you need a shorter or longer span these options are available and are normally set up at the time of purchase, at no extra cost.
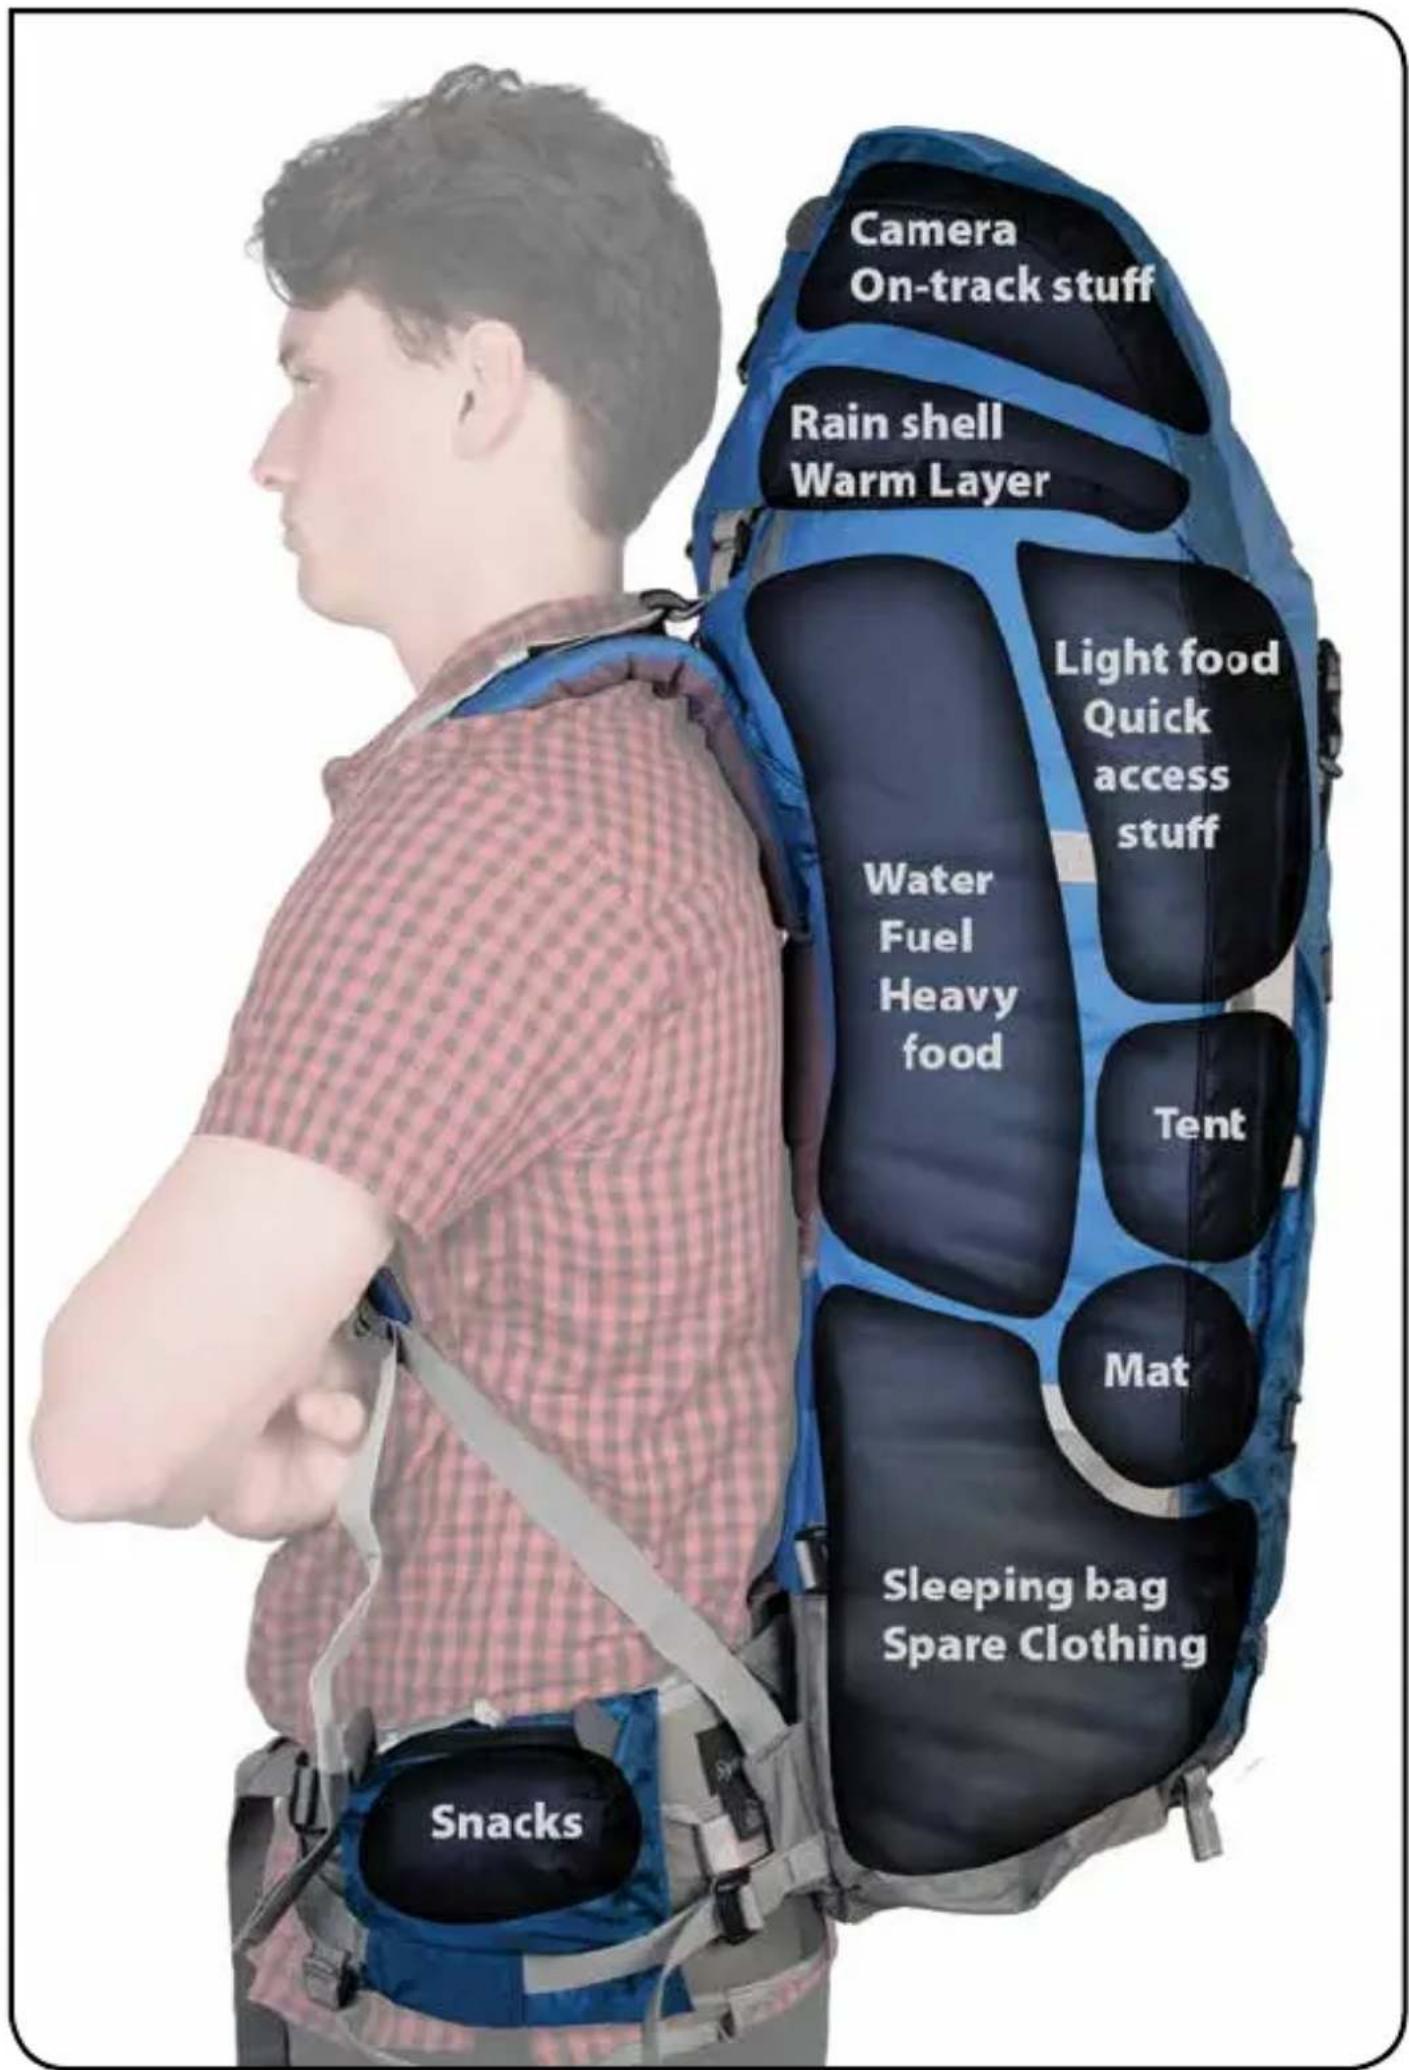
Good load distribution inside your pack bag is as essential as good pack adjustment. Carrying a backpack should disturb your normal posture as little as possible. Loading your pack is something of an art and you will get better at this with experience. The illustration on the facing page is a good guide. Start with these principles:
All the densest items, like water, fuel and many food packages should be placed against the inside of the pack harness panel, close to your back. If you are walking, put them just below shoulder level where they will least force you to lean forward. If you are skiing or climbing, move them down some way, lowering the pack's centre-of-gravity and improving dynamic balance. Use external pockets and the upper part of the pack bag for things you will or could need access to on the move. Never strap water bladders to the outside of your pack! You will come to appreciate the uniquely wide-opening throats on most WE pack bags. Think ahead: what group gear or food are you carrying that may be needed at the lunch stop? In wet weather your tent should be packed at mid-level where it can be reached without having to empty the pack. Also work out what needs to stay absolutely dry and put it inside your pack liner bag. Keep your rain shell handy and a warm layer to deal with changing weather and activity level, but your sleeping bag, sleeping mat and all spare clothing can safely go in the bottom of the liner bag and the pack.
ADJUSTING THE FRAME PROFILE
Frame shape critically affects pack comfort. WE packs with the AX Frame system use bars that are stiff enough to maintain excellent ventilation clearances between harness contact patches, even under heavy loads. Whatever system your model uses the frame should closely follow your back profile, doubly important over the shoulder blade region. At mid-level a hand thickness gap provides perfect ventilation - more is unnecessary, putting the pack bag too far away from your body.
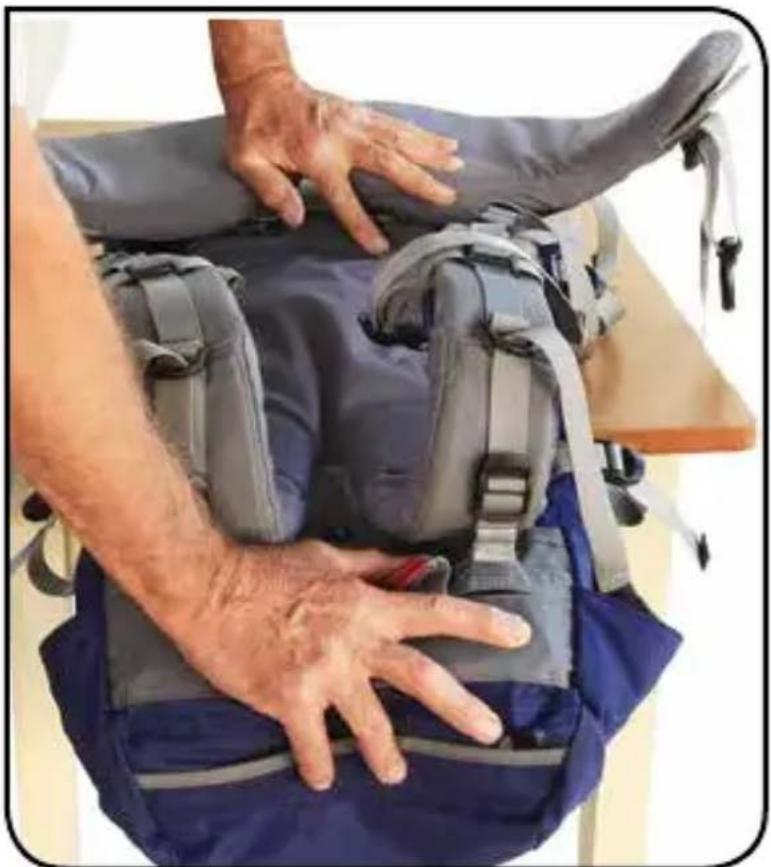
Making adjustments to the frame shape in an empty pack is as simple as resting the part of the frame to be bent over the edge of a bench and applying hand pressure at each side. Lay the pack face down or up according to the bend required. Have a picture in your head of the change you are going for. Push until you feel the aluminium yield and work a little at a time, checking between each adjustment. With the AX frame you can bend both bars at the same time to keep symmetry. Single spine bars are even easier. Refer to the illustrations overleaf.
text_image
Camera On-track stuff Rain shell Warm Layer Light food Quick access stuff Water Fuel Heavy food Tent Mat Sleeping bag Spare Clothing SnacksIf your pack frame needs special attention to match your back curvatures it is not difficult to remove any WE frame system and make the adjustments out where it is easy to see what you are doing and to make quick checks against your back profile. It is always possible to re-shape the frame in a WE pack to eliminate an uncomfortable contact sensation. Detailed instructions are available on the WE website, or consult your retailer directly.
natural_image
Close-up of hands adjusting a gray backpack with blue and gray accents (no text or symbols visible)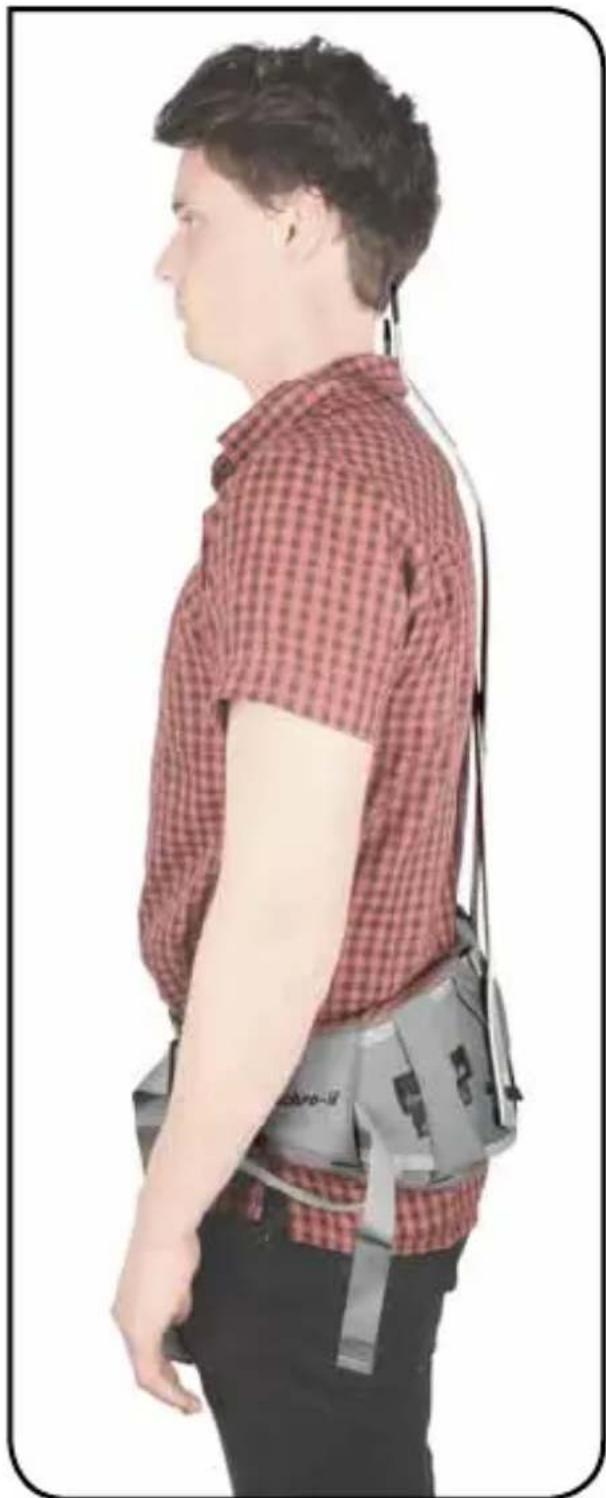
natural_image
Side profile of a person wearing a checkered shirt and carrying a gray bag (no text or symbols visible)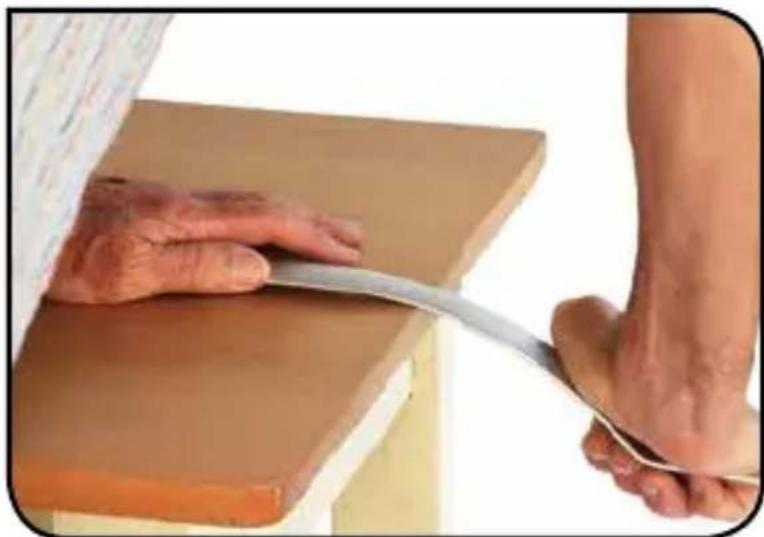
natural_image
Close-up of hands using a tool to lift a wooden plank, no text or symbols visibleWe have already noted that backpack comfort starts with a good match between the back length of your pack and your torso length. This is the reason WE backpacks come in various back lengths: XS (350mm), S (400mm), M (450mm) and L (500mm). The actual range depends on the model. Don't make the common mistake of confusing back length with bag capacity, often misleadingly also referred to as pack size. And do not be side-tracked by the bewildering array of adjustments on many modern packs. The true measurement of back length is the distance that the shoulder harness top stabiliser buckles are positioned above the hip harness level. This is a fixed measurement on almost every pack found on the market today. A rare exception is our dual-back- length system found on some WE pack models: top stabiliser anchor buckles can be 'plugged-in' to metal loops provided at
natural_image
Person wearing a blue and gray high jump backpack with exposed internal anatomy (no text or symbols visible)two separate levels on the upper part of the harness panel. The same pack can be adapted to different height wearers.
The Quick Check: With your pack loaded, the hip harness fastened at the optimum load-bearing level on your hips and all other adjustments completed, the shoulder harness 'top stabiliser' strap anchor buckles must be level with (ideal), or up to 4cm above the top surface of the shoulder harness arms. They must never be below this level.
Here are some useful tips on adapting your WE pack to your activity, the terrain and to the weather conditions. We start with daypacks, used every day in all sorts of situations.
DAY PACK BASICS
Most daypacks have quite light weight and relatively flexible body contact panels. If you are using your daypack capacity to the limit, how you load it will have a big impact on carrying comfort.
Always try to pack the bag so what you are putting in pushes its shape wider, rather than thicker. For items that can be rolled up to the same width as the bag, do this then place them in, across the bag. This preserves vertical flexibility so the pack can still adapt to the curves of your back.
Lacking a true hip harness, daypacks always slip down your back to the lowest point allowed by the shoulder harness arc. The backpack loading rules need some modification for daypacks. If you can spare an extra clothing layer and place it in the bottom of your daypack it will serve to pad other contents against impact and reduce the risk of fabric abrasion. Then put heavier items like water, food and spare camera lenses immediately above, always as close to your back as possible. Weight placed low improves daypack stability. Use other clothing layers and available side compression straps to hold these heavier things in against your back. WE daypacks come with a detachable waist strap for extra stability when required. Take it off if you don't need it. Keep reading - much of what follows applies to daypacks and backpacks alike.
No matter how carefully you distribute the load in your pack or how soft the harness cushioning is, as your pack weight climbs above 20 kilograms you will feel increasing pressure on your hips. At this point it pays to share more of the load onto the shoulders to maintain comfort. One thing you will also find is that the more irregular body movements of travelling off-track tend to relieve the harness pressures in a way that doesn't happen when you are walking hour after hour on evenly graded tracks. So, towards the end of a long day play around with the load sharing. Use the sternum strap setting to move shoulder harness contacts and relieve pressure points.
OFF-TRACK
In close bush you may want to reduce any ‘snag hazards’ on your pack. Shock cord lacing provided for convenience on some WE pack models can be easily unthreaded and removed. Likewise, side compression straps on many WE packs are detachable, in part also so they can be used in emergency for other purposes.
Whatever the circumstances, we are not fans of carrying gear on the outside of the pack, one good reason we will always have some huge, expedition-capacity models included in the WE pack range. Your pack bag is your main defence against gear loss and damage.
CLIMBING and SCRAMBLING
Depending on the steepness of the terrain, and the surface, you may find an advantage in moving your pack a little way up your body, carrying more load over the shoulders and upper back as you lean forward for hand holds and step high for foot holds.
Some WE pack models use the Synchro-FORM Convert hip harness wings. These can be quickly detached so they do not interfere with your climbing. Harness. Refer to the section on WE Back Systems for more information.
WET WEATHER
While our classic canvas packs have excellent overall resistance to water penetration you must double protect gear that can't afford to get wet. Use roll-top, seam-sealed, waterproof liner bags - when the rain sets in, when you need to cross a river or swim an estuary mouth, or when using your pack on a rafting trip.
Expect leakage through zips, touch taped flaps and seams (especially on all-synthetic fabric packs). Get into the habit of keeping ‘mission essential’ gear in dry bags and zip-locks whatever the conditions. Pack covers can work well for general travel but they are not a reliable or sensible solution in rough back country.
BAGGAGE CONVEYORS and LUGGAGE COMPARTMENTS
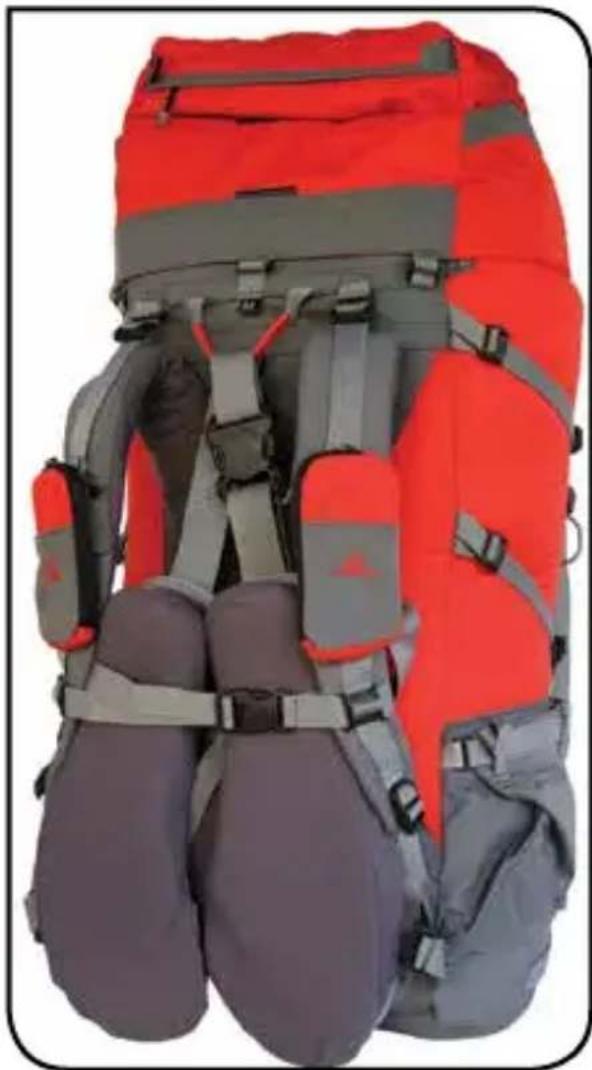
All WE packs have hip harness wings that can be either rotated or folded up over the pack's harness panel and secured in place. Look at this illustration closely. Connect the hip harness straps through the top grab loop then fully shorten all other harness straps, tucking their tails in behind. Fasten the sternum strap across the hip wings.
Setting your pack up like this is as good as having a harness cover to protect your pack from damage on baggage conveyors.
In bus luggage compartments take care that hard objects inside your pack bag are padded. Otherwise, on a long trip the shifting and vibration against the compartment floor can easily damage fabric.
natural_image
Red and gray hiking gear with attached straps and bags (no visible text or symbols)ACCESSORIES
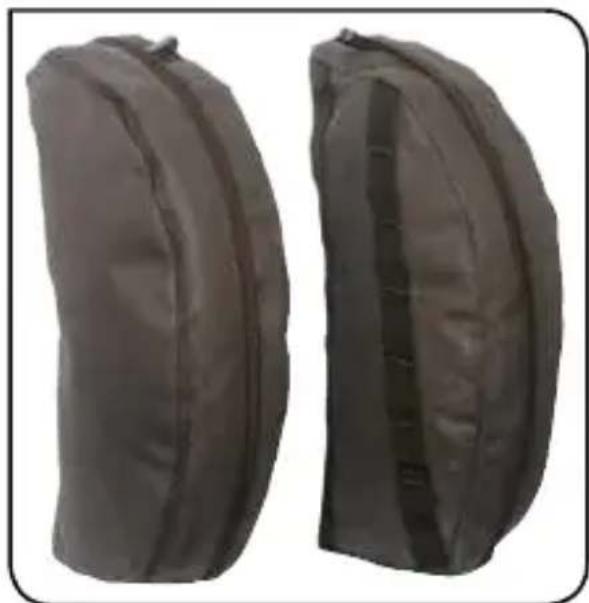
If you need extra options to organise your gear outside your pack our pairs of Modular Side Pockets attach to any model equipped with side compression straps.
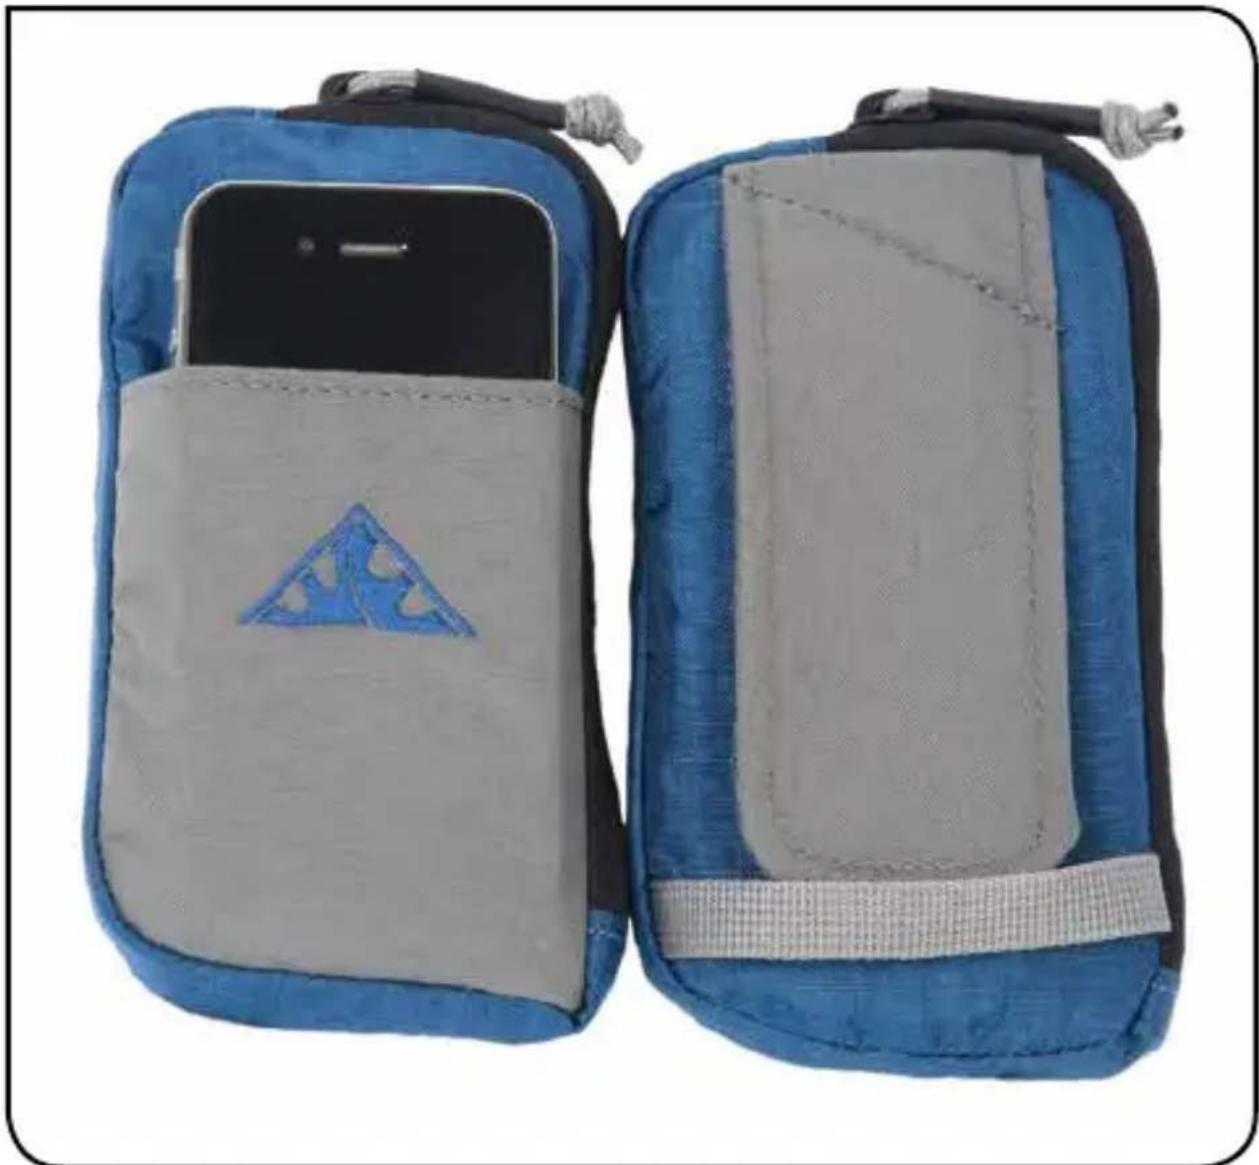
Many WE packs now come with a compact shoulder harness pouch (illustrated further below), and shoulder harness padded arms adapted to hold them.
Use these pouches for quick access to your compass, GPS or other electronics.
natural_image
Two dark gray fabric pouches with rounded ends, no visible text or symbols
natural_image
Black-and-white photo of a hiker walking on a misty forest trail, carrying backpacks and a backpack (no text or symbols visible)Most general precautions are common sense: avoid sparks, exposure to chemicals and foodstuffs, and contact with sharp or abrasive objects. One is not: avoid leaving your pack in an unventilated vehicle on summer days of extreme temperature.
There is a risk of collapsing closed-cell foams (and, by the way, tent seam tape delamination). Comprehensive notes on all aspects of maintaining your WE gear are provided on our website. Here are the essentials:
FABRICS
If you have a classic canvas WE pack model you can easily identify the canvas parts by the fabric's matte look, fine, tight weave and absence of any back coating. Special cleaning instructions apply to canvas. All the other fabrics used are pure synthetics – nylons mainly – and most have PU back coatings to make them waterproof or to stabilise the weave.
All fabrics are susceptible to mildew if stored damp for a long period but the most serious risk of leaving your pack damp is the breakdown, or 'hydrolysis', of the PU coatings. Unlike canvas, which can be 'reproofed' at any time during the life of the pack, PU coatings can't be restored.
ZIPS, ZIP SLIDERS and other FITTINGS
Accumulated dust and salt will lead to premature zip wear and corrosion of the zip sliders and other metal components. After trips in marine environments be sure to rinse your pack to remove the inevitable salt accumulation, even if it is not visible. Refer to the next section. When sliders are not running freely, zips benefit from the application of a lubricating silicone spray.
CLEANING & STORAGE
The best way to clean your pack is with a soft brush and running water from a hose. Never machine wash! Open all zips and compartments and shake out loose sand and grit. Use the hose and a soft brush to remove mud, blast out grit and dissolve salt. On synthetic materials you can use warm water and household detergent to help with stain removal but NOT ON CANVAS. Avoid using soaps – they are difficult to rinse out. If you really do need to remove a stain from canvas and choose to use detergent or a solvent, expect some dye to also be removed, leaving a visible mark.
You should also then re-proof the canvas where it was cleaned – see below.
Finish the cleaning process by thoroughly rinsing all parts of your pack then hang it out upside down to dry completely. Thick, multiple layers of fabric and open-cell foam layers in harnesses will be the last to dry. Store your pack in a dry, well ventilated place out of direct sunlight.
FIELD & DIY REPAIRS
WE packs have a unique system to allow the simple field replacement of critical side release buckle components. Spare parts are available on request. Fabric damage, although rare, is best ‘patched up’ in the field with tape. We find the effectiveness and versatility of Leukoplast® medical adhesive tape on the blue and white reel unbeatable. On long expeditions consider carrying some tubes of Seamgrip® PU adhesive in the group repair kit. The WE website contains comprehensive notes on repairs you can do yourself, including the recovery from many common zip problems. Take a look. Access is via the links on the product pages.
RE-PROOFING CANVAS
The last stage in the manufacture of our canvas fabric is the ‘proofing’ process - the saturation of the dyed fabric with a clear solution of waxy resins and mildew preventatives, followed by heat setting. This treatment complements the inherent, excellent water resistance due to the extremely tight weave and the cotton component of the yarns. With extended wear and tear this ‘proofing’ gradually diminishes. Restoration is worthwhile and easily done: make sure your pack is really clean, choose a warm day, wet-out the clean pack bag with liquid proofing and then hang it out to dry completely. Several days may be needed. Ask your retailer for recommended treatments, or contact us directly.
Your WE pack Back System is the combination of the harness parts, the frame and any other components that together make up the 'harness panel', sometimes also called the 'body panel'. For backpacks, it's where the 'rubber hits the road' and where Wilderness Equipment packs excel. Go to our website if you are interested in the detailed engineering. Here are the basics - all you need to know to remove and re-fit components, and better understand adjustments. Frames come first, then hip harnesses and shoulder harnesses.
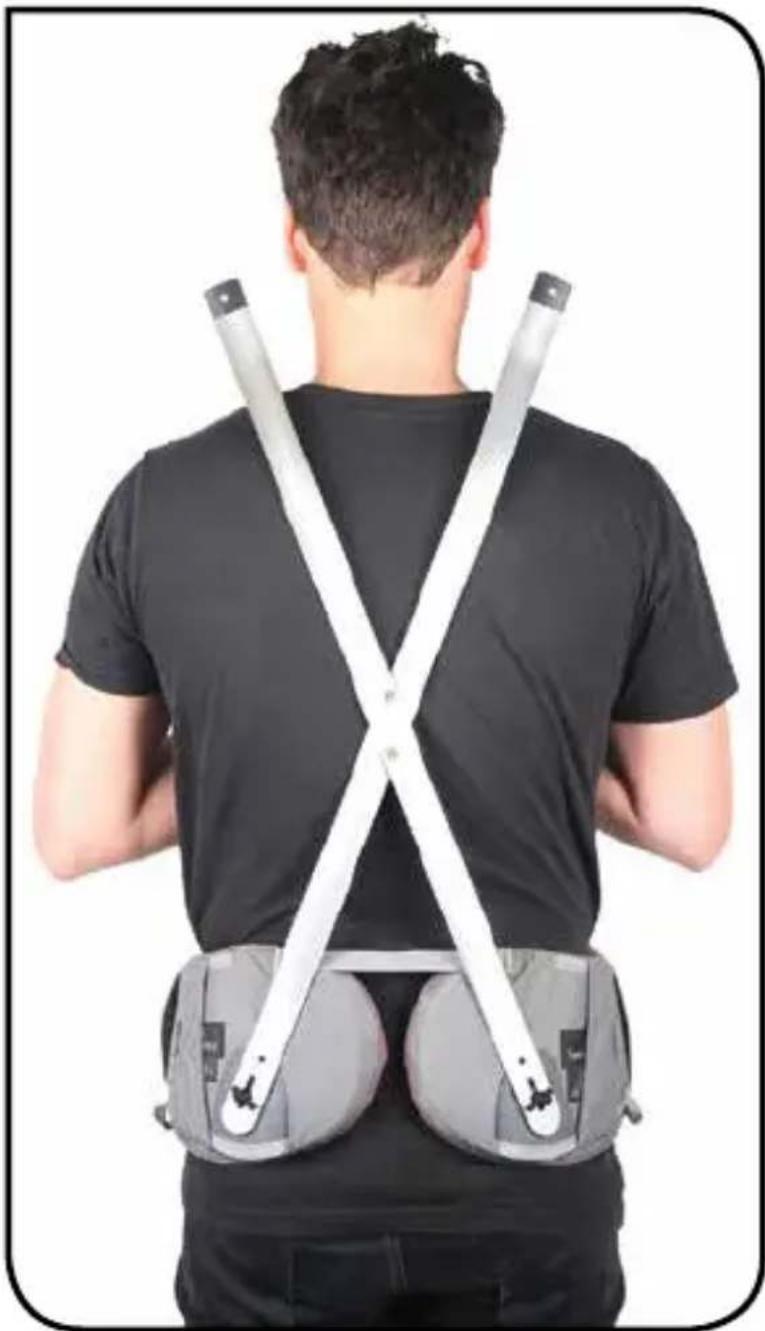
AX FRAME – LOST WORLD, MOUNTAIN EXPEDITION, WILDCHILD, BREAKOUT and OUTBREAK
Our AX ‘asymmetric-cross’ internal frame is the proven, heavy-duty structural platform used in all expedition capacity WE backpacks for more than 30 years. It remains the simplest yet most effective backpack frame system for big loads.
The WE hip harnesses used with the AX frame have direct mechanical connections into the bottom ends of the AX frame bars. Today, this connection is by a bayonet 'T-Pin' fi tting engaging a key hole in the frame. (Older versions used screws).
To remove AX frame bars from your pack unfasten and remove the hip harness following the notes below. Find the frame sleeve openings near the top inside your pack. Reach into the bottom of the pack bag, open the flap that covers the frame ends, pull each bar down and then push it back up so the top appears through the sleeve opening.
AX frame bars now have opposite twists. Mark them and the sleeve they belong in. Slowly withdraw each bar, wriggling it (so older model end fittings do not snag). Re-assemble in the reverse order, inserting both bars together, pushing them in progressively and alternately.
natural_image
Back view of a person wearing a black T-shirt and gray medical equipment, viewed from behind (no text or symbols visible)e-AX FRAME - PACK 101
This is a variation on the AX frame adapted for use in the Pack 101 model. The AX frame fi ts into its harness panel sleeves on the outside of the pack. The bottom ends of the frame are housed directly in reinforced pockets on the one-piece Convert 30 AX hip harness used by the Pack 101.
To remove the frame bars unfasten to top edge of the lumbar pad, fold the pad down, work the hip harness free of the frame ends and withdraw the frame bars downwards. Reassemble in the reverse order.
CONVERT T-PIN FRAME SHEET – PINDAR 50, 60 and 70^2
With an added hip level frame bar the Convert T-Pin frame sheet is adapted to accept WE Synchro-FORM independent hip wings. The Synchro-FORM T-Pin fastenings engage key holes in the ends of the hip bar.
The Convert T-Pin system allows hip harness wings to be removed quickly leaving the pack with just the lumbar pad and you with the freedom to wear a climbing harness. Unthread the side stabiliser straps from their buckles, detach one end of the elastic link between the upper edges of the Synchro-FORM wings then rotate the wings downwards until their T-Pin fittings can be extracted from the frame key holes.
natural_image
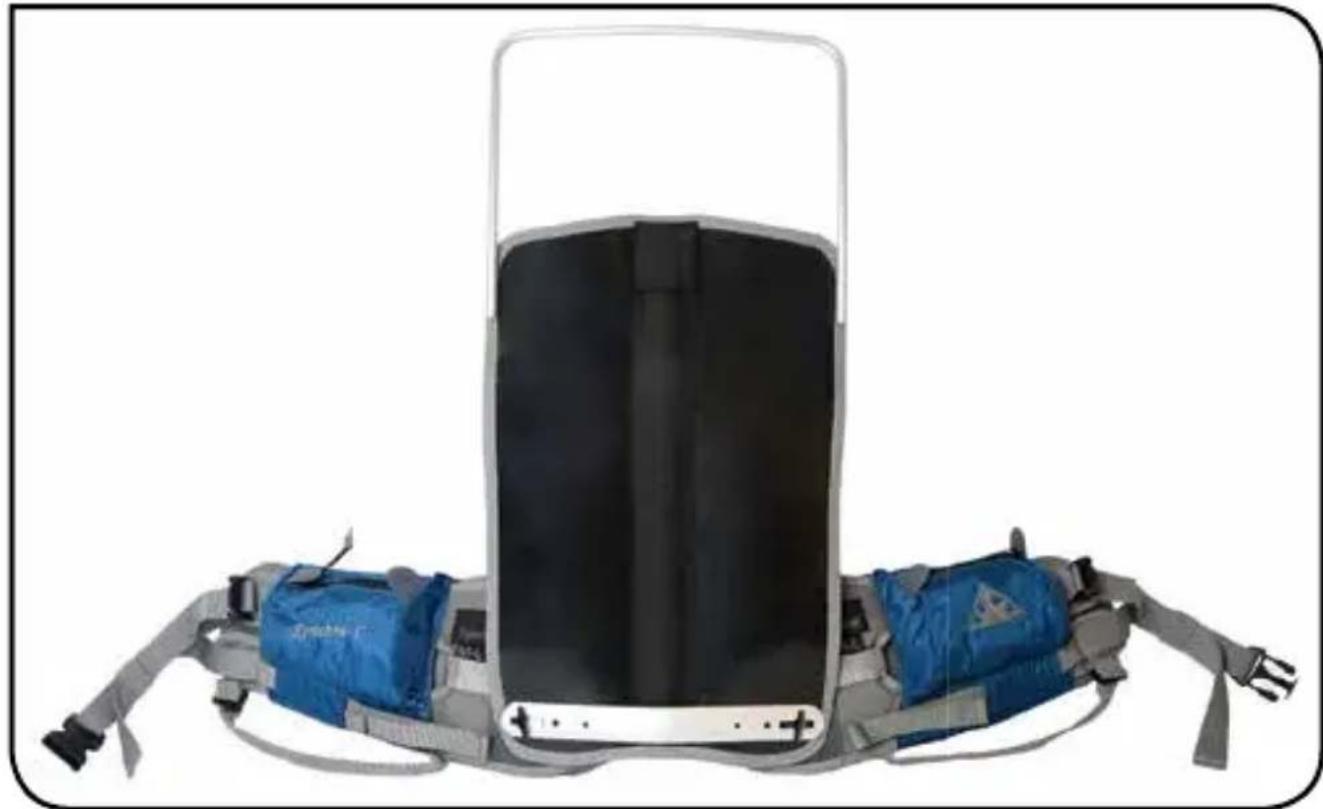
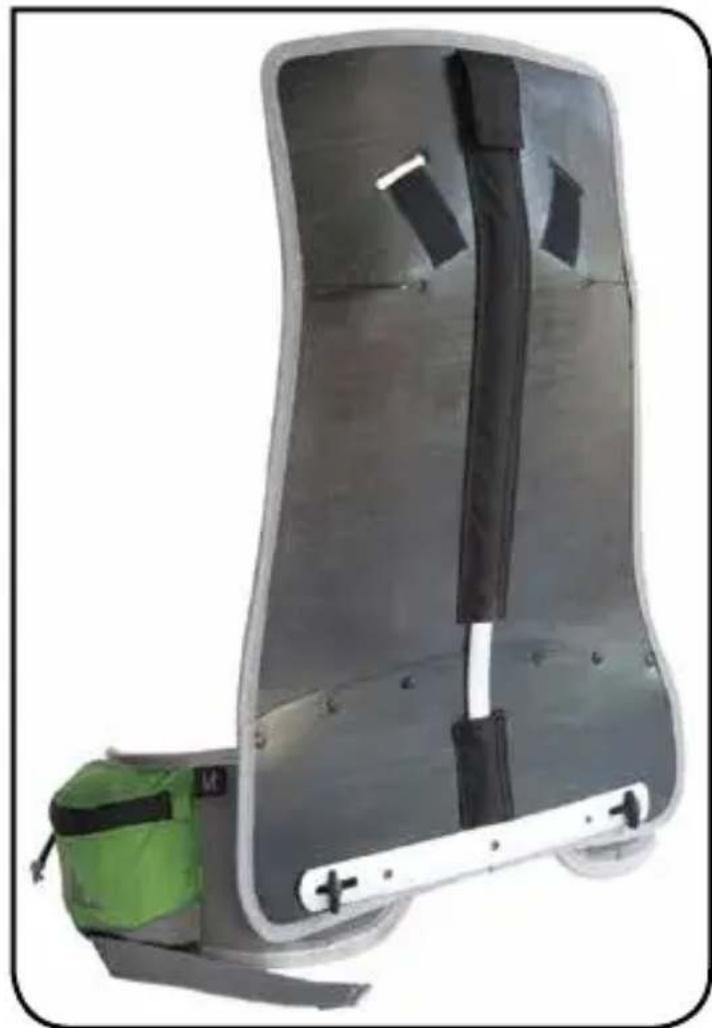
Exterior view of a modern office building (no signage)For mid-capacity backpacks the WE CONVERT frame sheet is simple and effective. This two-third-length panel is housed in a fabric sleeve between the shoulder harness attachment level and the upper edge of the lumbar pad. At its bottom end the frame sheet inserts directly into a pouch linking the hip harness's padded harness wings. A strong central spine bar controls the Convert frame sheet profile while the lightly-padded HDPE sheet, which spans the full width of the pack harness panel, keeps the bag from rounding out away from your back. It also insulates you from any lumpy pack contents. The padded lumbar panel folds up over the hip harness bridge and locks everything in place. To remove the frame sheet for adjustment or to change a hip harness for another span, simply separate the touch tape that fastens the lumbar pad's top edge under the lower edge of the frame sheet sleeve, fold the pad down, withdraw the frame sheet and remove the hip harness.
The other essential part of the Convert frame sheet system is the inverted-U tubular aluminium frame above it. Accessible from inside the pack and overlapping the frame sheet at its bottom ends, this compound-curved frame controls the shape of the upper harness panel. To remove it, unfasten the touch-tape and work the cross bar part of the frame from under its hood. Once it is free, withdraw the frame upwards, sliding the legs from their narrow sleeves down the side seams. If you are careful with getting the Convert spine bar profi le matched to your back there should be no need to actually adjust the U-frame profi le.
natural_image
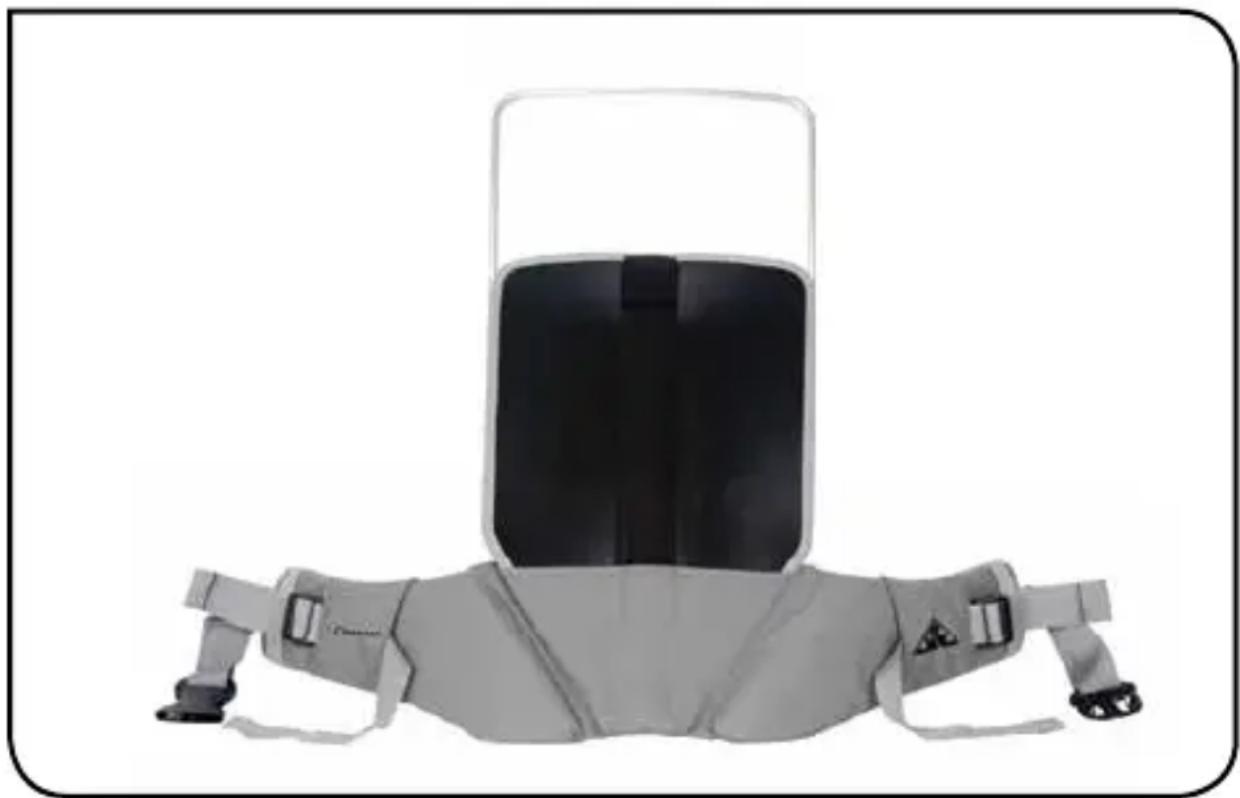
Illustration of a person wearing a full-body medical device with straps and a transparent cap (no text or symbols visible)The Dyna-FORM frame sheet is the WE full-length frame sheet used in smaller capacity packs. Two panels of HDPE are ingeniously shaped then joined to create a compound-curved surface that closely follows the contours of the human back, from hip to shoulder level. The sheet is lightly padded and carries two aluminium bars. The vertical spine bar provides stand-up stiffness to the pack bag and sets the final harness panel curvature. The horizontal bar at hip level bar carries the Mini Synchro-FORM hip wings. The curves in both these bars should be tuned to your back contours.
It is only necessary to remove a Dyna-FORM frame sheet for pack repairs. To do this fi rst detach the Mini Synchro-FORM hip wings. These will either be attached to the hip bar by screws fi xed to the hip wing, or by the more recent bayonet-action T-Pin fi tting engaging key holes in the hip bar. To remove screw system hip wings detach all webbing straps and links and simply unwind each hip wing until the screw is comes free, up to ten turns. For the T-Pin hip system simply rotate the wings so they are pointing downwards to a position where the T-Pin heads can be extracted from the hip bar key holes.
Depending on the version, the Dyna-FORM frame sheet will either be accessed via a zip opening inside the pack bag, or, more recently, through a touch tape flap outside the pack at the bottom of the harness panel. In any case reach in and upwards to unfasten the two touch tape webbing anchors that hold the shoulder harness attachment seams hard against the frame sheet. These anchors need to slide out of their slots in the frame sheet as the sheet is extracted from the pack. Assemble in the reverse order.
natural_image
Exterior view of a modern office building (no signage)Synchro-FORM HIP HARNESSES
Simple yet sophisticated, this independent-wing hip harness system comes in a number of variants. We introduced this truly innovative, shape-shifting hip system just over ten years ago. It adapts automatically to any hip contour and tracks hip movements without compromise to load transfer or pack stability.
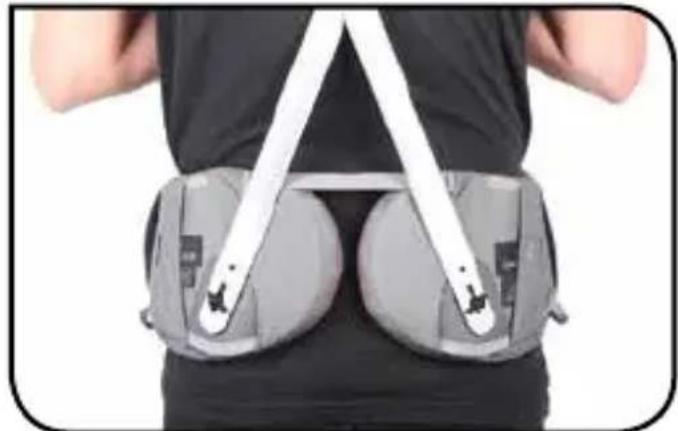
Synchro-Form Hip Wings comprise a structural HIP PLATE - with a direct swivel connection through the pack bag into the frame system. A separate, 3D-contoured HIP PAD fi ts snuggly over the plate. The Mini wings used on active-technical daypack models are the exception, where the pad and plate are integrated into one part.
HIP PLATES come in two variants, designated by the main buckle size: 38 or 25. The 25 plates are a forked design. The side stabiliser straps also mount on the plates. Riveted to the hip plates are the strong T-Pin fittings which engage key holes in the pack frame.
natural_image
Person wearing a gray safety belt with white straps, viewed from behind (no text or symbols visible)Hi-LOAD Hip System
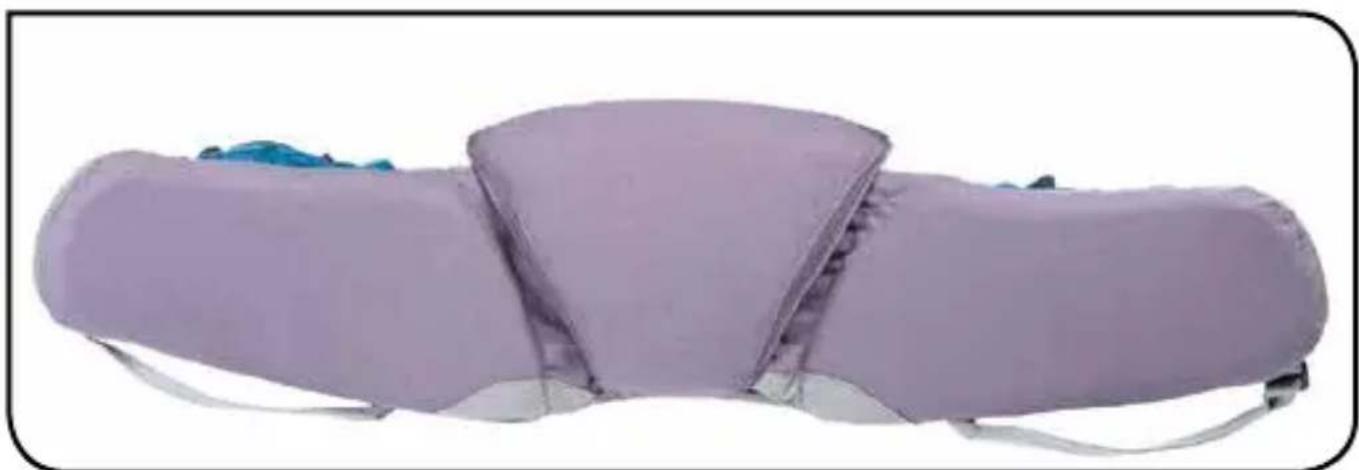
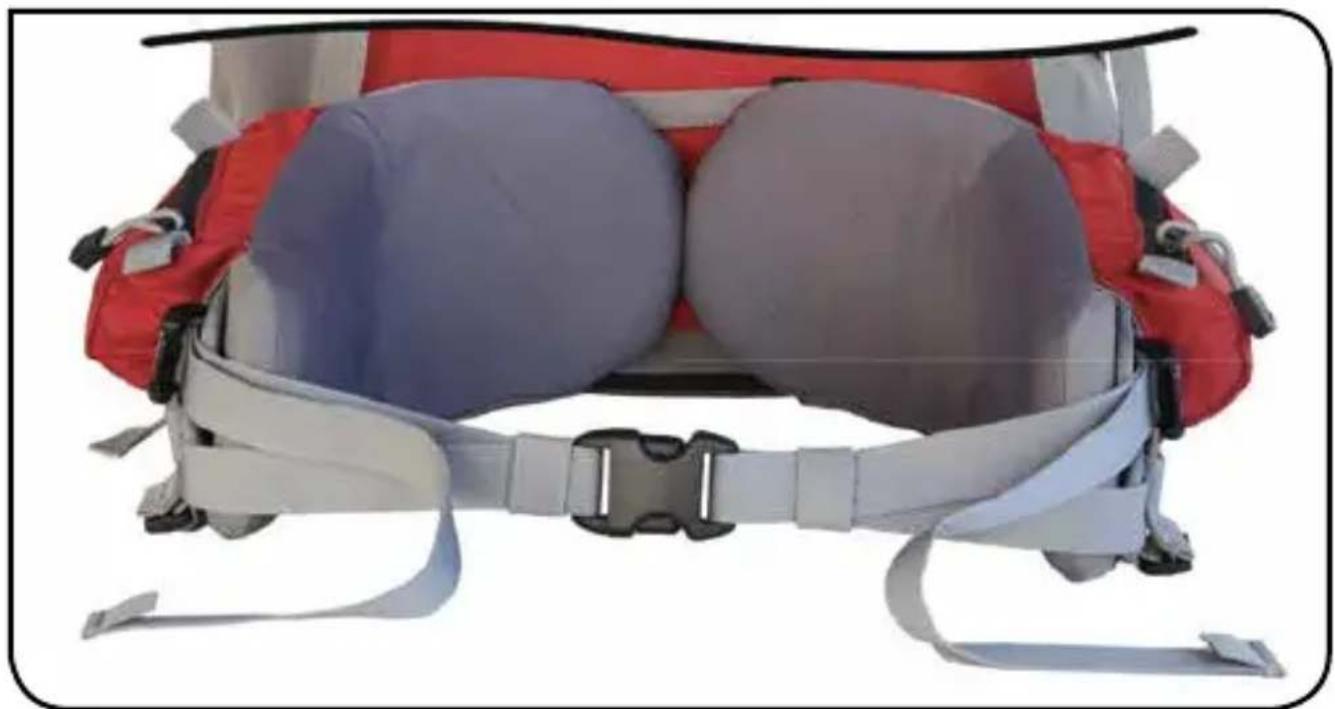
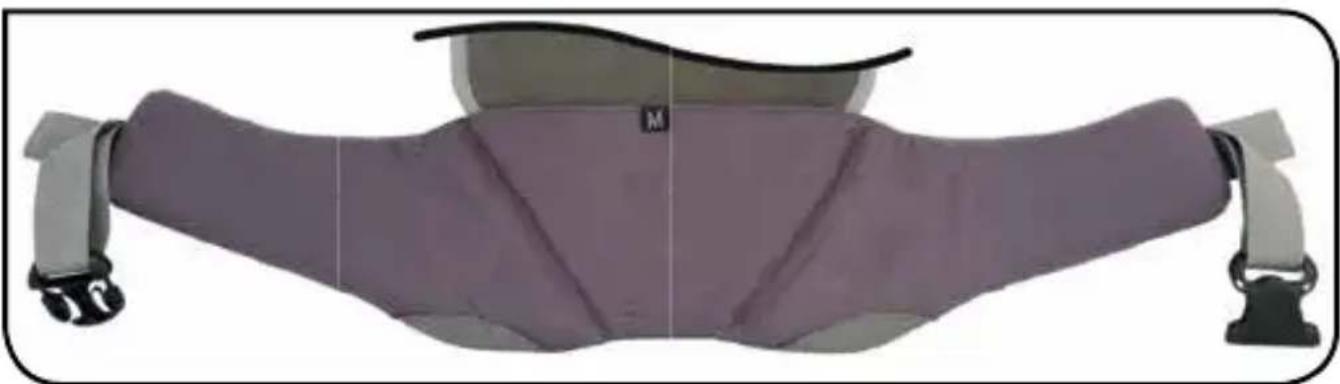
HIP PADS come in three variants, Hi-LOAD, Convert and Comfort-LOAD. The Hi-LOAD fi ts on the 38 plate, the Convert integrates with fi xed lumbar pads (Mountain Expedition and Pindar models), while the Comfort-Load is the more thickly and softly padded option used on the Haute Route and WildChild.
natural_image
Purple cushioned object with blue accents, no visible text or symbolsConvert Hip System
All variants of Synchro-FORM hip wings are detached by first releasing their side-stabiliser straps and one end of the central link between their top edges. Flatten the folded barb on either end of the link and pull it through the rectangular loop ft tting.
Current models use the T-Pin bayonet connector. Rotate the wing downward until the T-Pin connection can be withdrawn from its key hole in the end of the frame bars. To reconnect, align the T-Pin with its keyhole and press down firmly on the pad until the pin penetrates the frame keyhole end and the wing can be rotated up to its natural alignment.
Prior to the T-Pin system hip plates used screws to engage the frame bars. In ‘fixed-screw’ versions, including the Synchro-FORM Mini wings, the wing is removed by simply unwinding it – up to ten turns. Prior to this all screws were ‘loose’ and secured with Loctite® 262 high strength thread locking compound.
Reach behind the inner end of the hip wing, disengage the touch tape closures and peel the hip pad off its plate to reveal the screw head. Use a #2 point cross screw driver to remove the screw. See the website for detailed instructions.
natural_image
Back view of a red and white high-altitude fitness vest with blue and gray straps (no text or symbols visible)Comfort-LOAD Hip System
This one-piece hip harness is the more economical system used on pack models such as the Outbreak. The latest version uses bayonet-action T-Pins to connect it directly to the ends of AX frame bars. Previously screws were used.
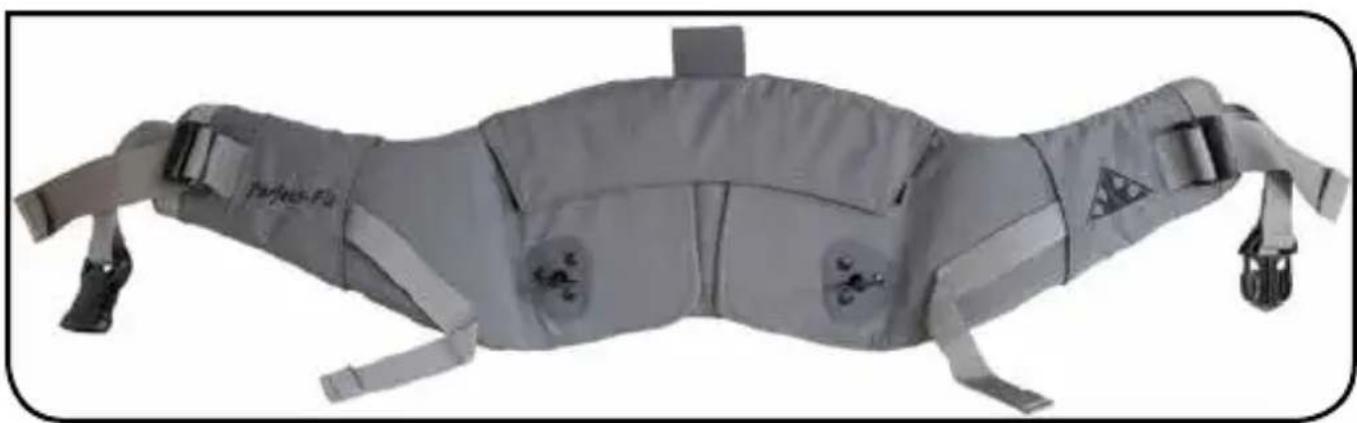
You will only need to remove a Perfect-FIT hip harness if a different span must be fitted, or to make repairs. First disconnect the harness side-stabiliser straps.
To remove T-Pin mounted versions open all touch tape contacts between the lumbar pad and the wings so the wings can then be rotated down, one at a time, to disengage the T-Pins for the frame key holes.
For screw-attached harnesses, fold up the wings and use a #2 point screw driver to remove the screws, pressing down firmly while turning.
Apply a drop of strong thread locker, like Loctite® 262 - available at hardware stores - when re-assembling.
natural_image
Exterior view of a beige medical or rehabilitation device with straps and buttons (no visible text or symbols)Deceptively simple, this hip harness integrates perfectly with the Convert Frame Sheet to achieve excellent load transfer to your hips. It is used on the Nornalup and Nullaki pack models. To remove a Convert hip harness, disengage the touch tape at the top of the lumbar pad where it fastens under the lower edge of the frame sheet pocket. Fold down the pad and withdraw the harness and frame sheet. Then reach into the lumbar pouch, release the touch tape holding the harness and frame sheet together and pull out the sheet. Re-fi t in the reverse order. Be sure to check that the three touch tape patches on the lumbar pad top fl ange are completely hidden after you reconnect them.
natural_image
Illustration of a purple and gray ergonomic seat with straps and buttons (no text or symbols)RAZOR HIP WING PADS
The ultra-light Razor backpack uses detachable, floating hip wings that lock against the side seam of the pack bag when the hip harness is tensioned. To further reduce weight or to remove the wings so a climbing harness can be worn freely just unthread the hip wing fastening straps and release the touchtape retaining tabs that keep the wings in position. Re-attach the strap ends into their loops in the side seams so the straps can still be used to provide stability at hip level.
Synchro-FORM SHOULDER HARNESSES
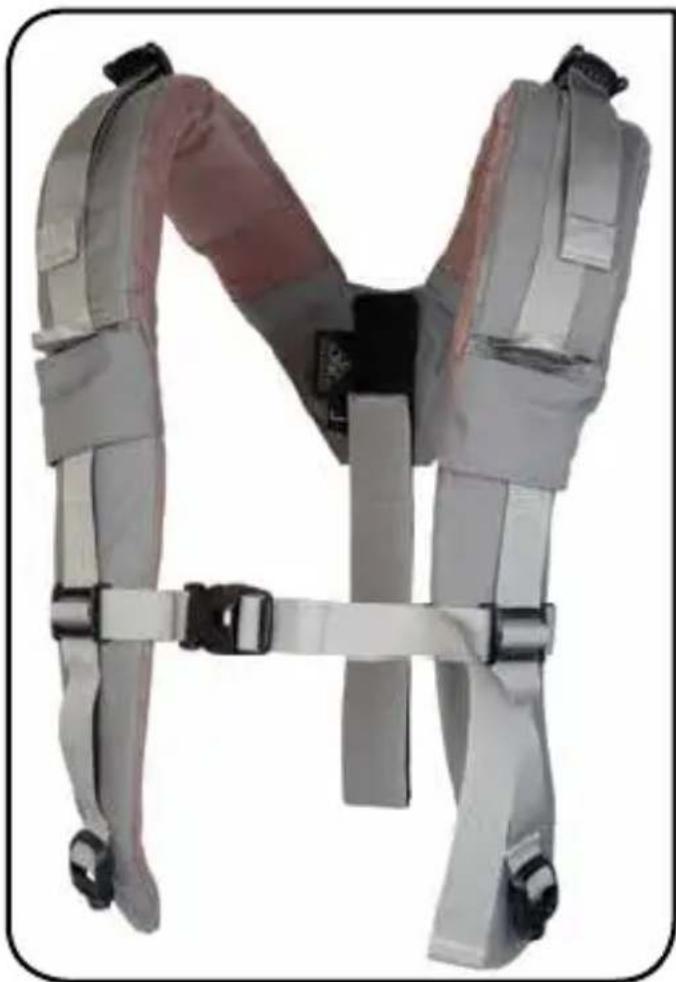
This thickly cushioned harness with unique 3D contouring provides excellent comfort over sensitive shoulder muscles and nerves. A defi ning feature of the Synchro-FORM shoulder harnesses fi tted to technical pack models is the insert plate system used to distort the harness shape to achieve even contact pressure for dif ferent shoulder slopes. Three pairs of insert plates are provided, designated 10, 20 and 30, corresponding closely to the downward angle of slope from horizontal of bare shoulders. The 20 plate is fi tted standard. To fl atten the padded arm use a 10 plate. For shoulders with highly developed trapezius muscles and a steep slope use a 30 plate. The plates are housed in tight pockets over the upper part of the padded arms and it is best to use a pair of general purpose pliers to extract a fitted plate.
natural_image
Exterior view of a modern office building (no signage)As noted in Backpack Basics, Synchro-FORM shoulder harnesses are adjustable for reach and interchangeable if even longer or shorter padded arm spans are required. For versions using a 3-bar adjustment buckle at the back anchor point be sure to double the webbing tail back up through the buckle once you are happy with the reach setting.
To remove a Synchro-FORM shoulder harness, detach all its webbing connections to the pack bag. Pull down on the harness tail to withdraw the padded arms from their guide tunnels, carefully folding the sternum strap parts along the harness and pushing them into the tunnels so they do not snag. To re-fi t, push one padded arm into its tunnel fi rst and pull it up part way to make room for the other arm.
CONVERT SHOULDER HARNESSES
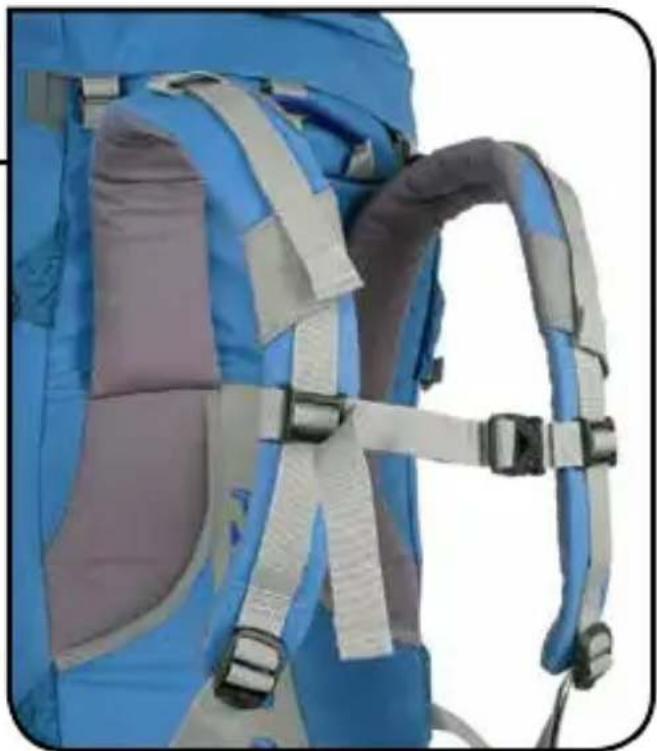
These shoulder harness arms are integrated into the pack bag. They have carefully proportioned lengths, according to pack back length so they are a good fit for most people.
Use the sternum strap to fi ne tune contact pressure: pulling the padded arms further onto the front of your chest will adapt the harness to more steeply sloping shoulders.
natural_image
Close-up of a blue and gray hiking backpack with attached straps (no text or symbols visible)DUAL BACK LENGTH SETTINGS
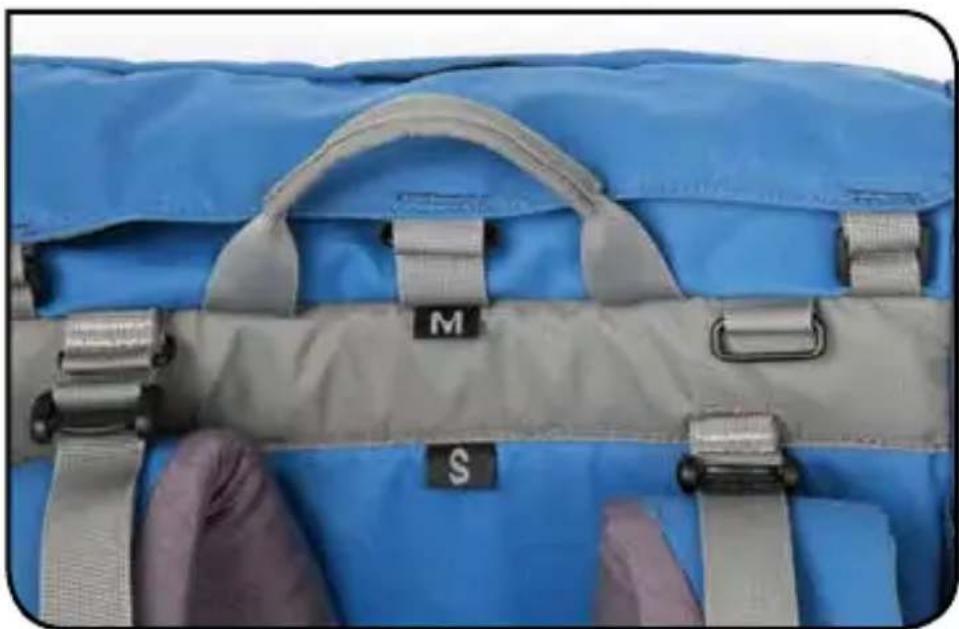
You can recognise if your pack has this feature by the two size labels and the two levels of steel loops (or fixed buckles on older packs) used to anchor the top stabiliser straps at the top of the harness panel.
On recent models strong and compact steel loops allow you to quickly unplug and reconnect the anchor buckles with no need to unthread any straps.
To unplug a buckle press the tip of the folded webbing barb behind the steel loop down fl at and into the loop opening so it can be pulled out.
natural_image
Close-up of a blue and gray backpack with straps labeled M and S, no visible text or symbols beyond labelsAll recent WE shoulder harnesses with open slanted patches above the sternum strap adjustment area are adapted to accept pouches on the face of the padded arms.
Many models are supplied with one of these pouches as standard equipment. For quick attachment pass the stiffened tongue at the back of the pouch behind the patch and press the touch tape closed.
For a more secure and permanent attachment fit the pouch so the padded shoulder harness arm also passes through the narrow webbing loop at the back of the pouch. You can work out what needs to be done with the various straps to thread on the pouch like this! The tongue is not pushed behind the slanted patch until last.
natural_image
Two blue and gray backpacks with a smartphone placed on the cover, one with a triangular logo (no text or symbols visible)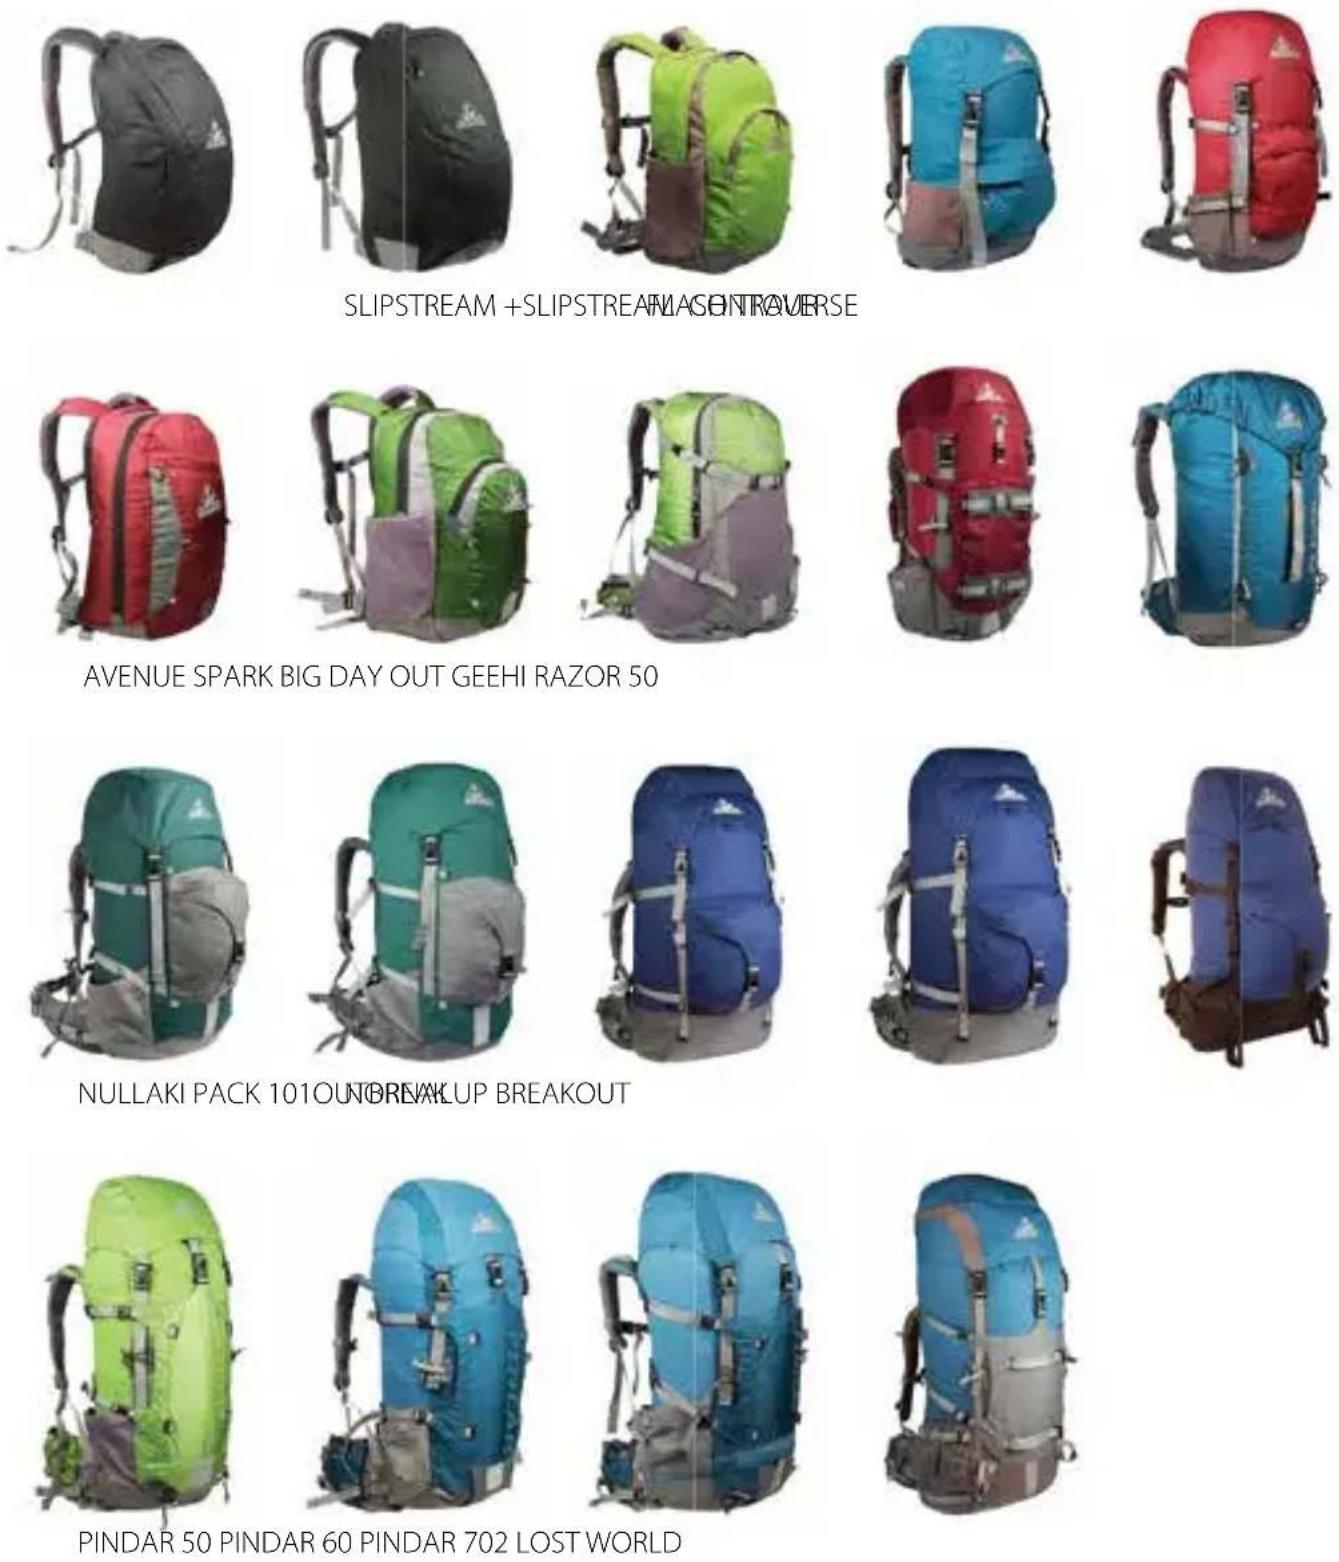
natural_image
Red hiking backpack with gray accents and visible straps (no text or symbols)HAUTE ROUTE
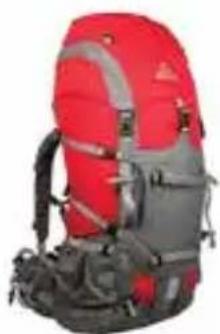
natural_image
Red and gray hiking backpack with mountain gear (no text or symbols visible)MOUNTAIN EXPEDITION
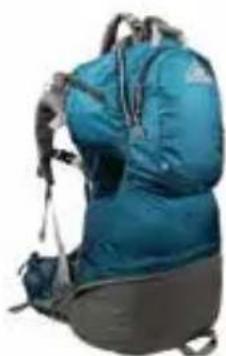
natural_image
Blue and gray athletic backpack with straps and shoulder clips (no visible text or symbols)WILDCHILD
FRAME SHEETS and BODY CONTACT PANELS
WE daypack body contact panel designs are carefully matched to the pack capacity and purpose. All have a base layer of foam cushioning, many also include HDPE frame sheets with aluminium spines that can be shaped to follow your back profile.
FRAME SHEETS
The frame sheet serves to maintain the shape and smooth surface of the daypack body panel. If a spine bar is fitted you will need to check and adjust its profile. First, load your daypack with a few kilos and put it on. Adjust the shoulder harness so the packs sits at what seems like a comfortable level on your back. Now bend the spine frame bar to suit this level. Put the pack on again and check how it feels. If you feel you need to move the pack up or down for more comfort, repeat the process.
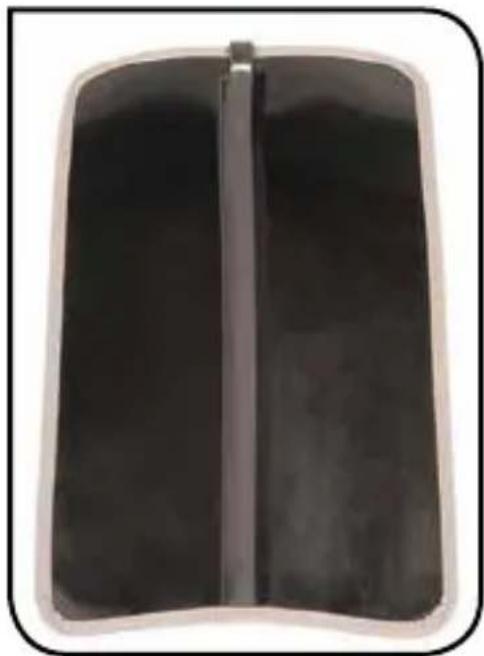
natural_image
Black rectangular object with a vertical line on top, resembling a medical or laboratory device (no visible text or symbols)QUADPAD BODY PANEL
FLASH, SLIPSTREAM and SLIPSTREAM+, AVENUE, SPARK, and GEEHI
The dynamic stability needed for skiing or climbing can be achieved with a body-hugging, wrap-around daypack shape, but at a big cost to ventilation comfort. The WE QuadPad body panel solves this problem by placing the body contact patches at its four corners leaving the spaces between free for air circulation. What's more, these carefully contoured, 3D patches are external to the pack bag and internal frame sheet. Pack carrying comfort and stability are better isolated from the effects of an overloaded of poorly packed daypack. Incredibly, the comfort of the QuadPad back system improves with increasing loads. All you have to do is make sure you follow the instructions for carefully shaping the frame sheet spine bar and wear the pack at the corresponding level.
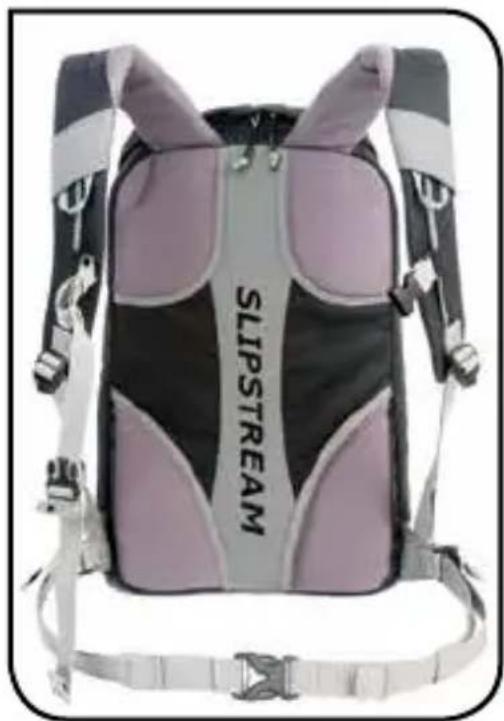
natural_image
Back view of a black and purple slipstream backpack with straps and branding (no visible text or symbols on the backpack body)SEGMENTED BODY PANEL
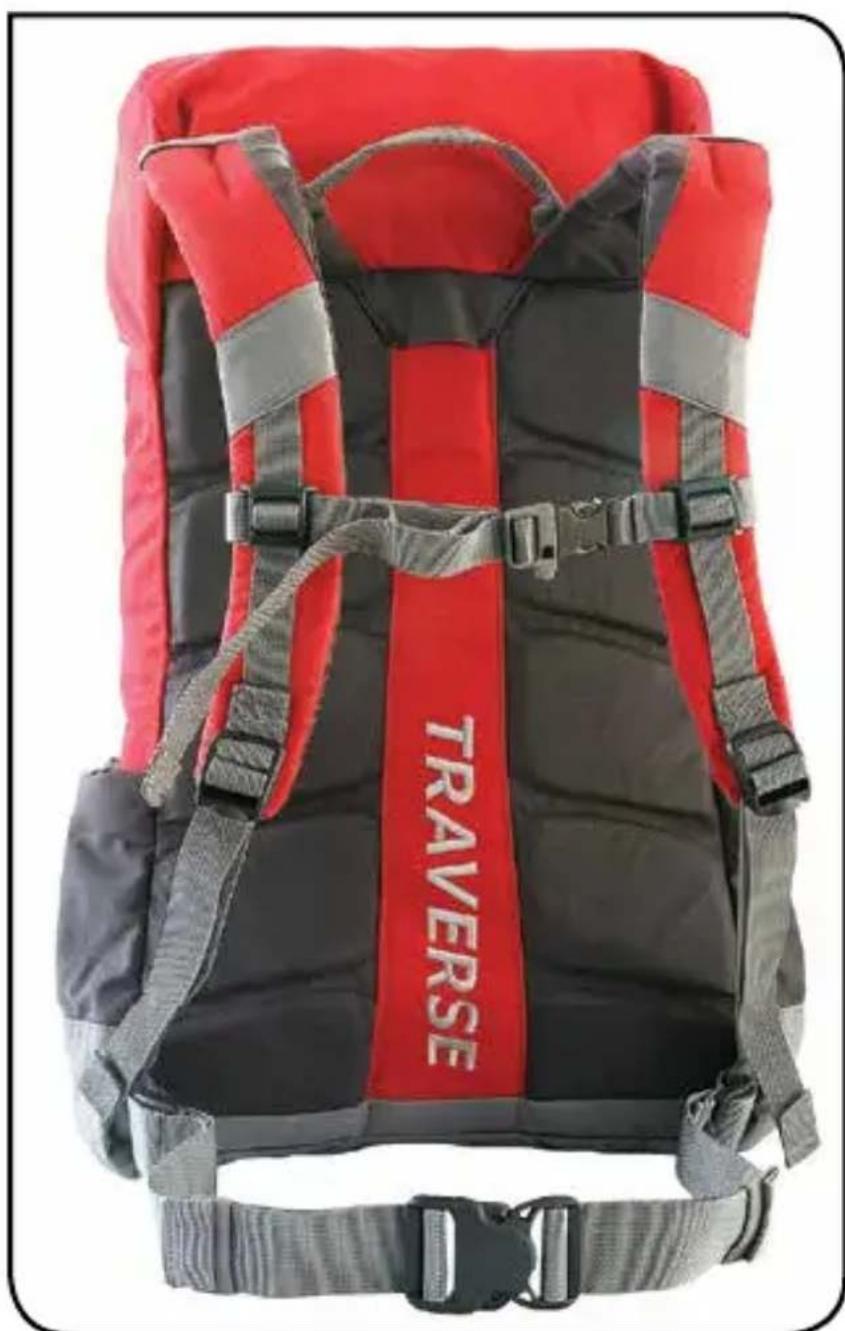
CONTOUR and TRAVERSE
We developed this special body panel system for our rugged, classic canvas, all-weather daypacks. It holds to our design standard for canvas packs: a layer of canvas must run through all bag panels to give the bag integrity. Canvas also has an excellent feel in close contact to the skin so it should be used accordingly. Our innovative, segmented design with thick blocks of closed-cell foam each side of the spine channel provides for ventilation and gives the panel excellent fl exibility to easily adapt to your back profi le. Follow the daypack loading notes above to get the most from this body panel design.
natural_image
Red and gray backpack with 'TRVERSE' branding, no visible text or symbols on the backpack itselfAll Wilderness Equipment brand products are warranted, subject to the exclusions that follow, against faulty materials and manufacturing for their life.
Excluded from this warranty are the deterioration of the product due to normal wear and tear, the natural and unavoidable deterioration of materials with extended use or with the passage of time, and damage caused by improper use or improper care. Improper use includes all use which, although conceivable, is use that the product could not reasonably be expected to withstand without suffering damage.
Should your WE product fail under normal use it will either be repaired or replaced, at the sole discretion of the wholesale distributor, free-of-charge upon the product's return to the distributor's warehouse.
RETURNING GEAR for REPAIR or WARRANTY ASSESSMENT
Unless it is inconvenient, please talk first to your retailer about a WE equipment problem. With a little knowledge and experience many things can be quickly and easily resolved without the need to send anything anywhere. Of course, if you do need our direct help we will be very pleased to give it.
We do ask your attention to the following points:
Any equipment being returned to our Distributor must be given a Return Authorisation Number before it is shipped. We don't want to lose track of your gear. Your retailer can arrange this. Otherwise send an email to one of the addresses on the back cover of this booklet, and get your 'RAN' before you send off the package.
PLEASE NOTE that it is YOUR RESPONSIBILITY to ensure that any equipment being returned is CLEAN and DRY before it is sent. This is very important. Humans are involved at every stage of handling and occupational health and safety is the concern of everyone. Repairs usually involve the use of expensive equipment not designed to operate with sand and grit in their mechanisms.
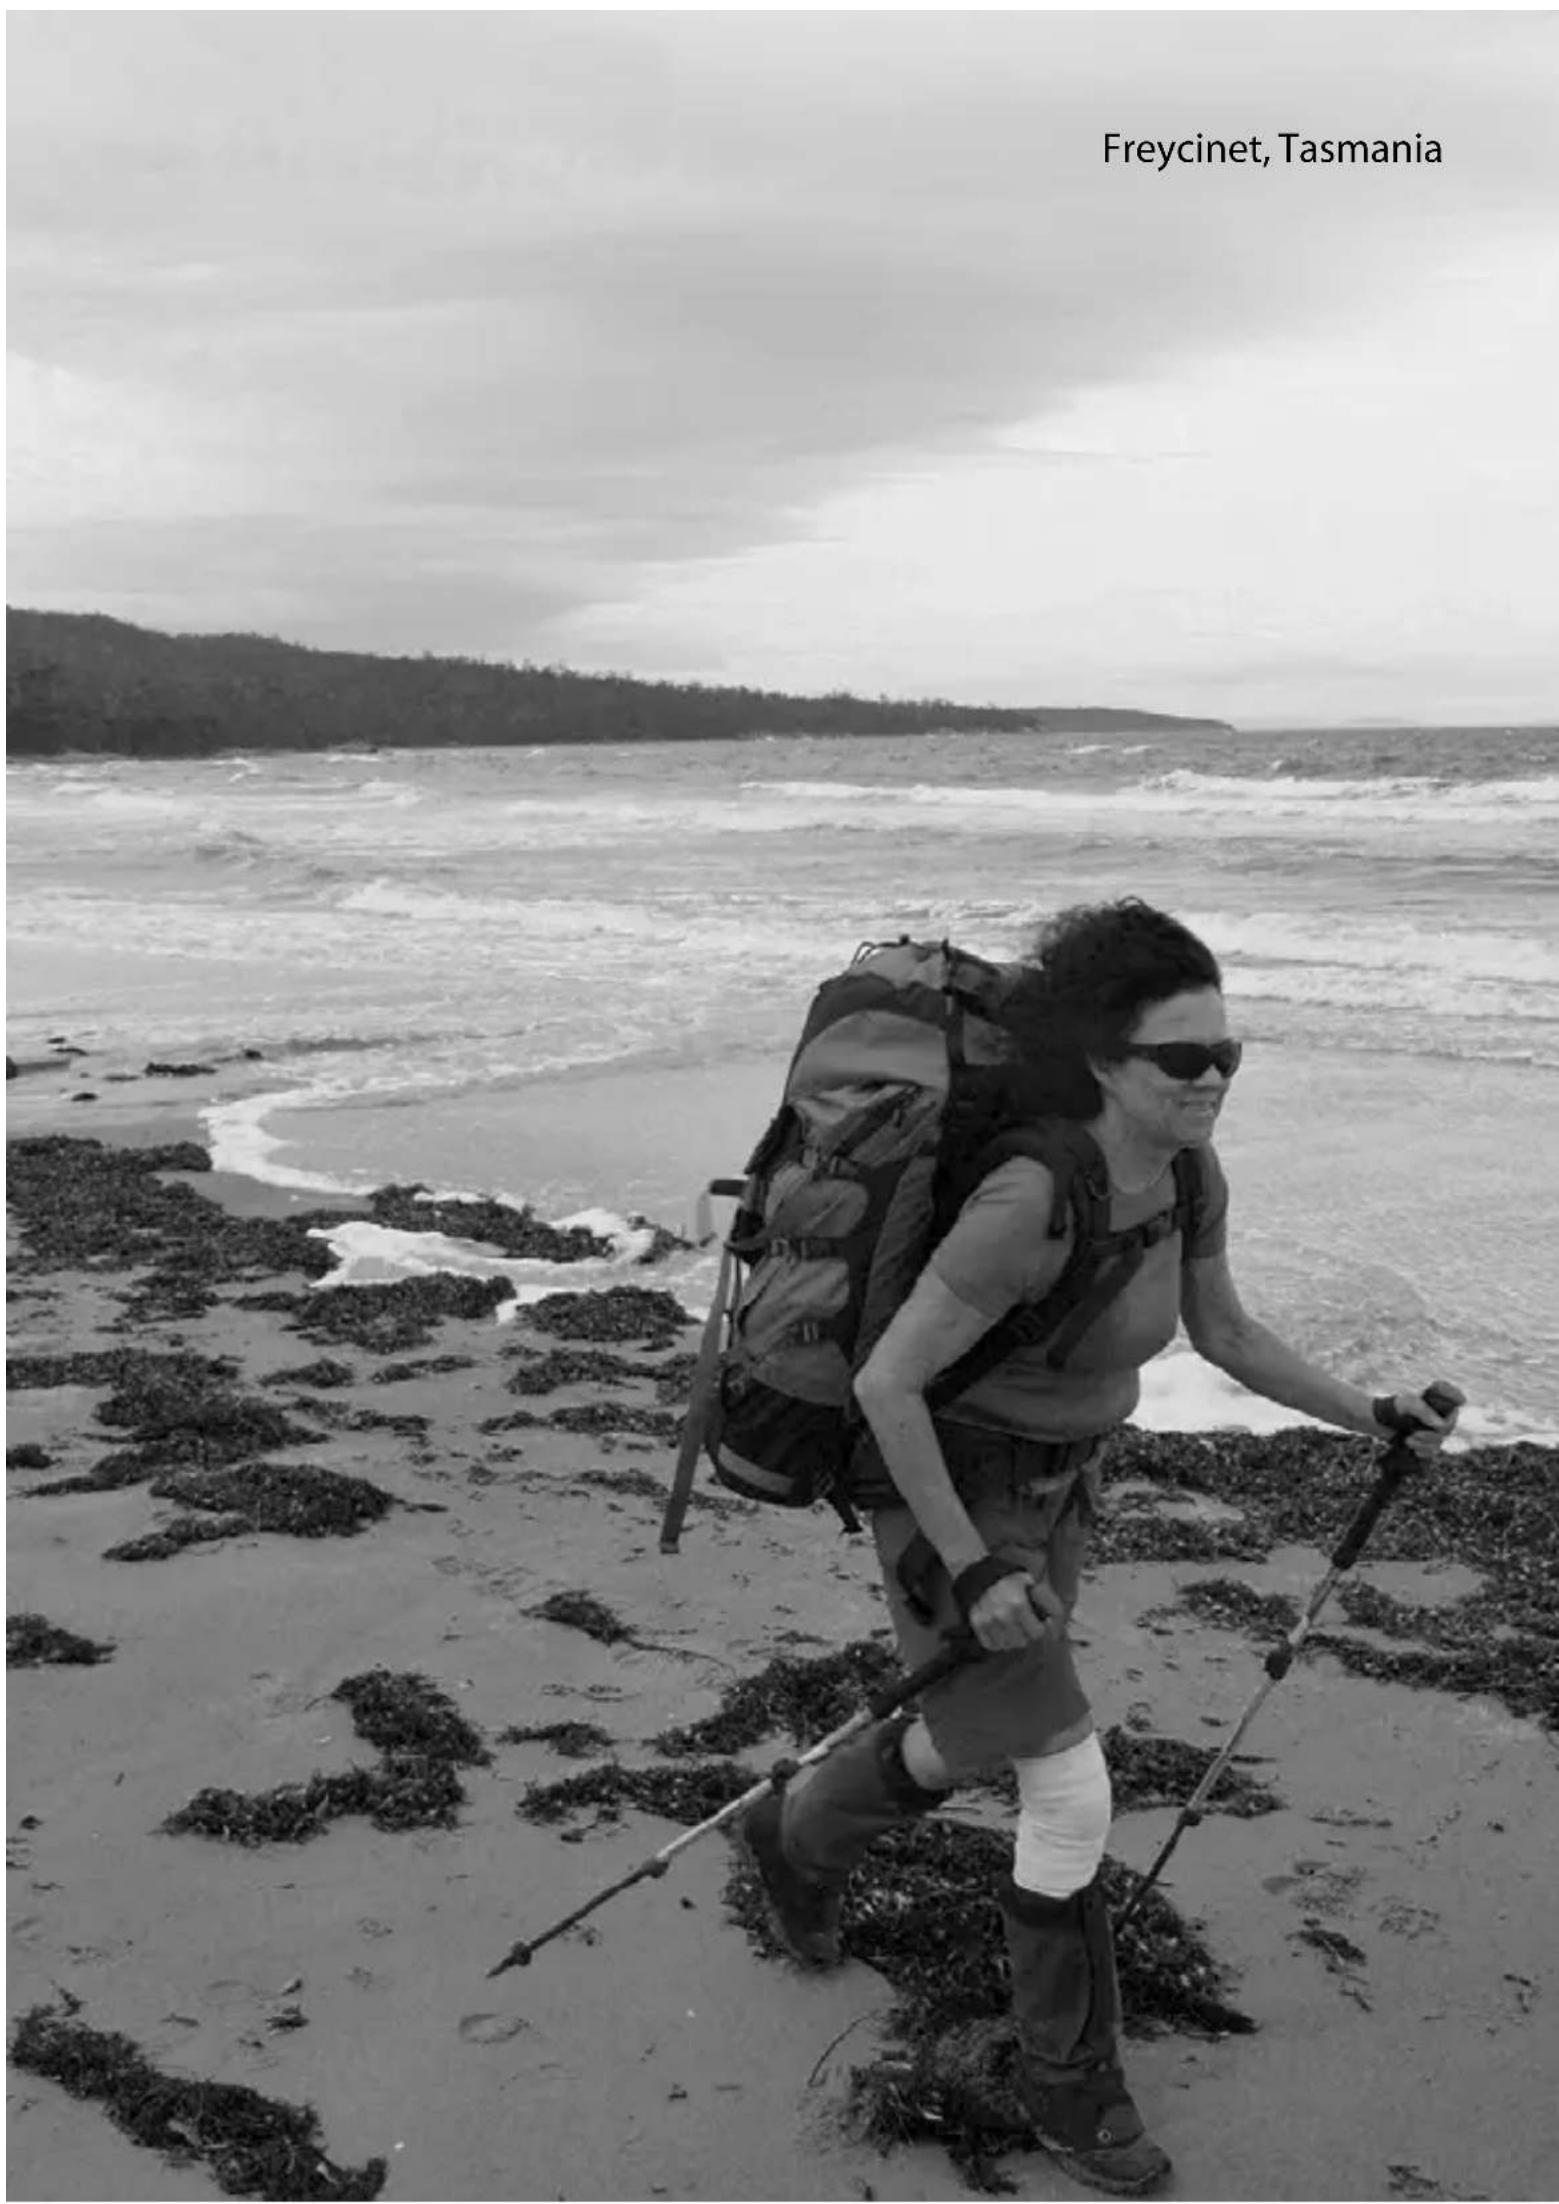
Freycinet, Tasmania
text_image
Freycinet, Tasmania
natural_image
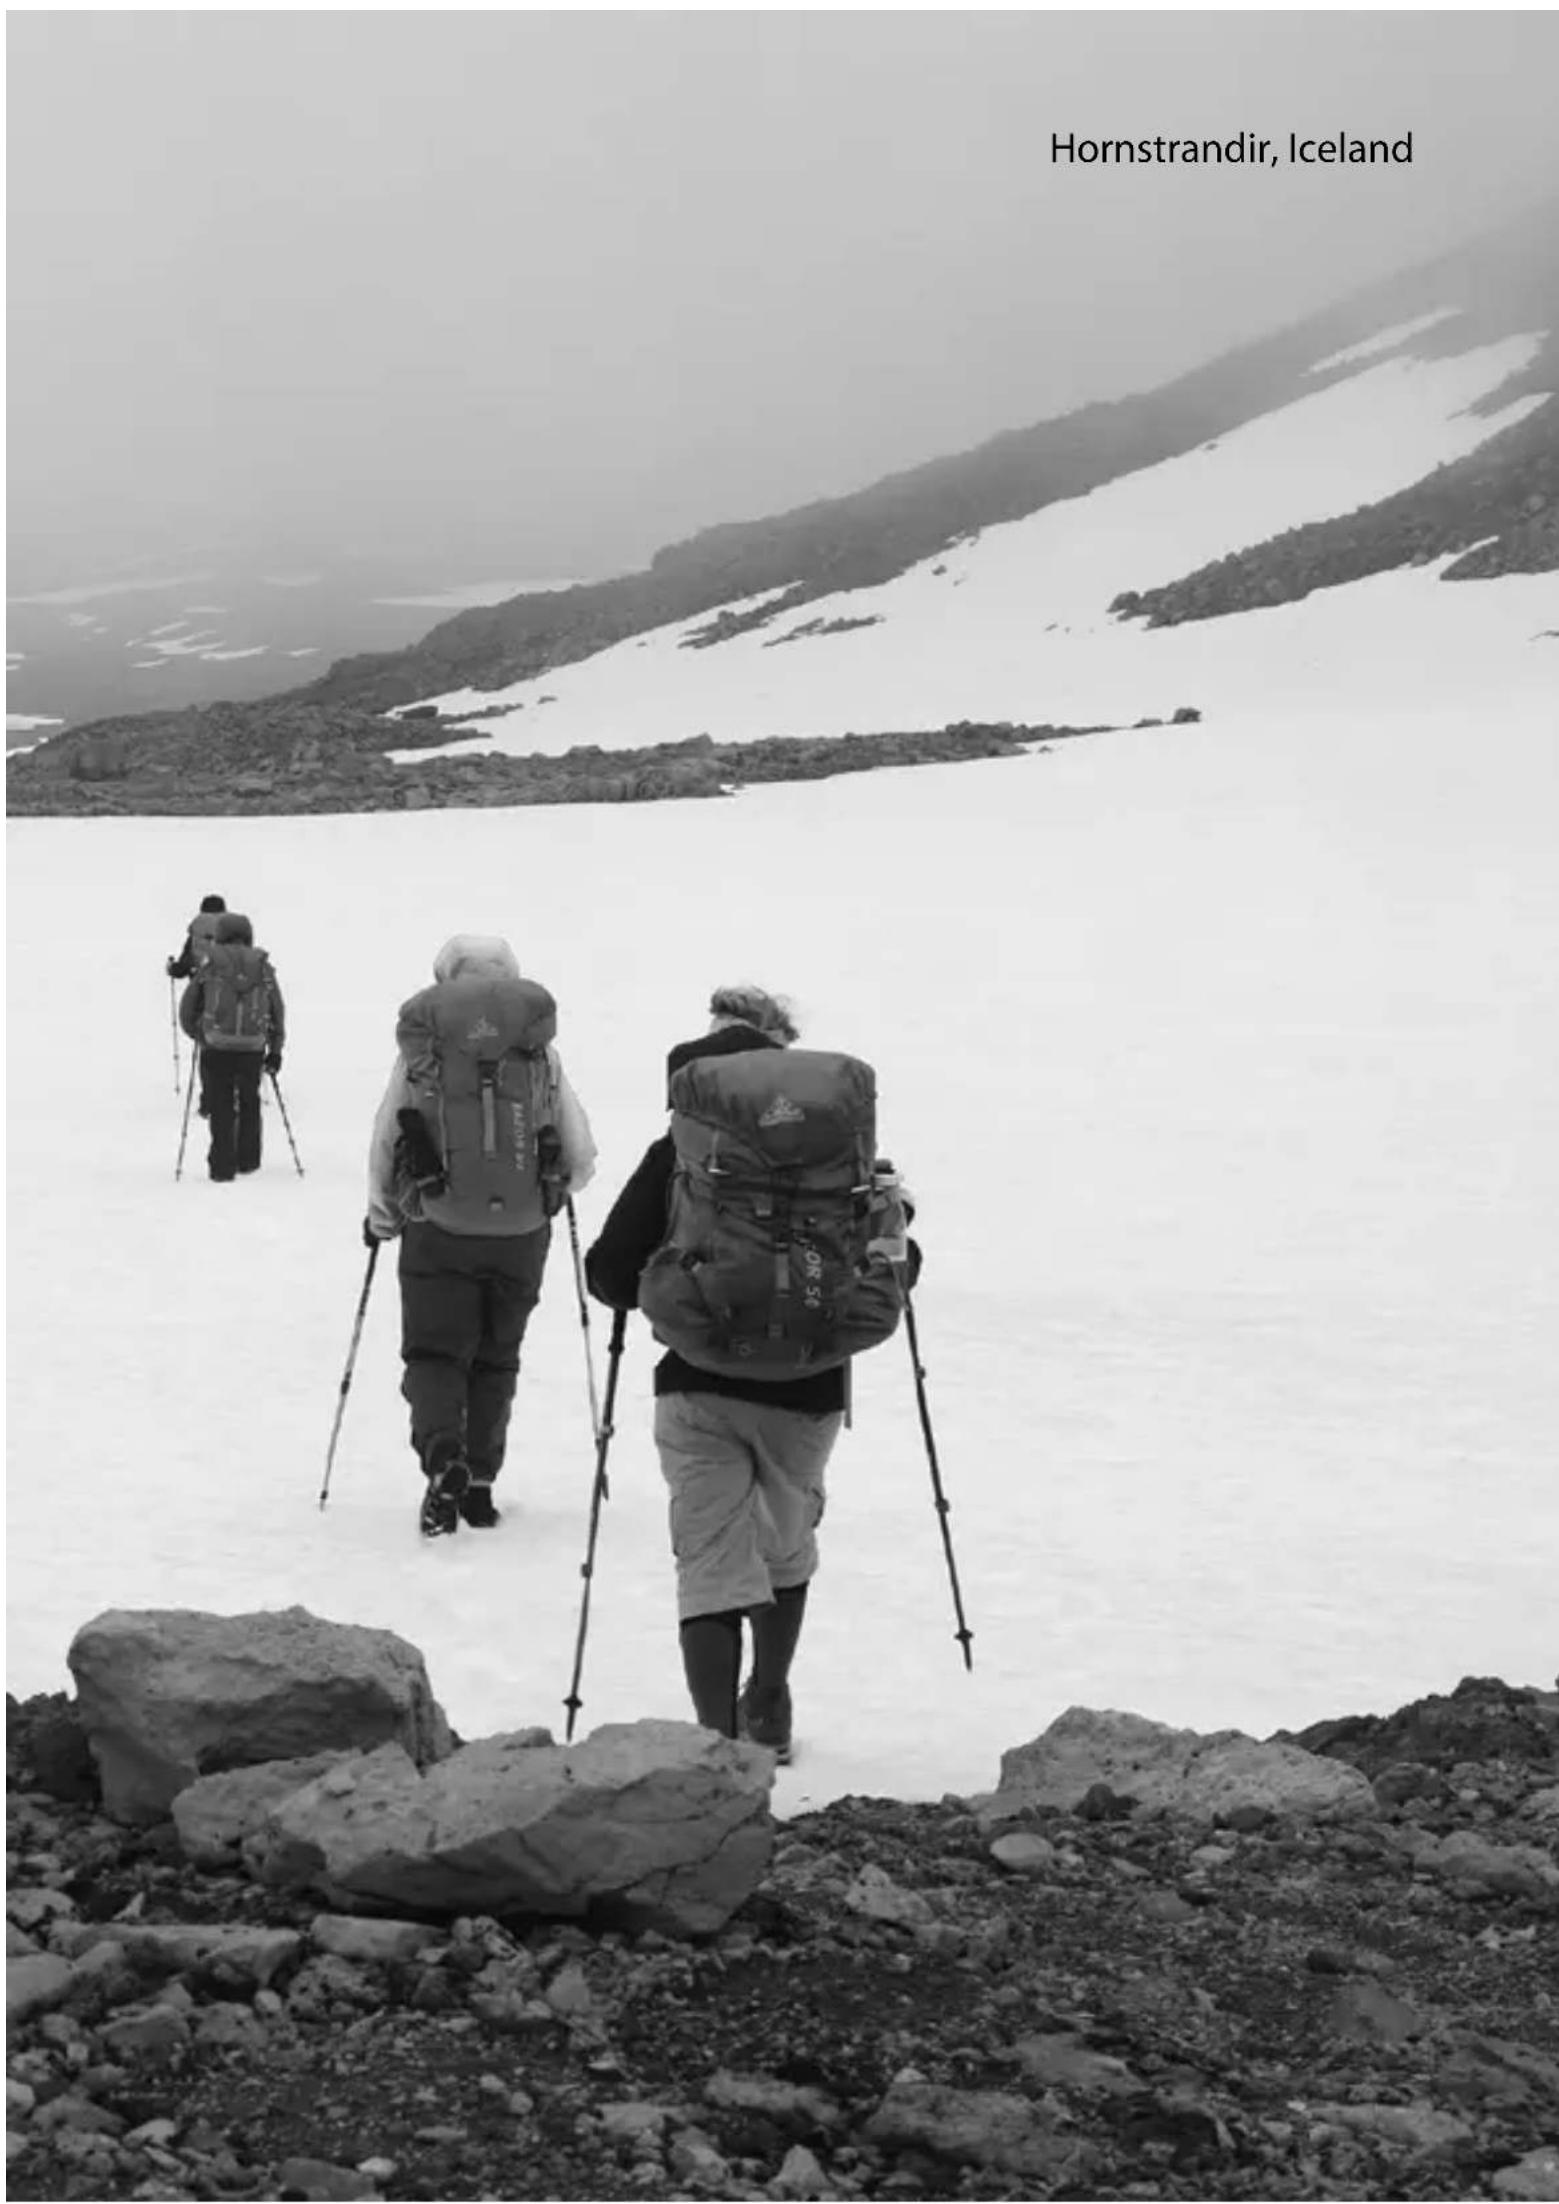
Black-and-white landscape photo showing a rocky shoreline with snow patches and a distant flat horizon (no text or symbols)Hornstrandir, Iceland
text_image
Hornstrandir, IcelandCONTACT US
Wilderness Equipment products are distributed in Australia by Sea to Summit Australia Pty Ltd, 5 Eyre St, Rivervale, 6103, Western Australia
Tel: +61 8 9221 6617
Fax: +61 8 9221 6618
Wilderness Equipment enquiries:
henry@seatosummit.com.au
General after sales service:
enquiries@seatosummit.com.au
© Wilderness Equipment 2016