Space Station - Tent Wilderness Equipment - Free user manual and instructions
Find the device manual for free Space Station Wilderness Equipment in PDF.


User questions about Space Station Wilderness Equipment
0 question about this device. Answer the ones you know or ask your own.
Ask a new question about this device
Download the instructions for your Tent in PDF format for free! Find your manual Space Station - Wilderness Equipment and take your electronic device back in hand. On this page are published all the documents necessary for the use of your device. Space Station by Wilderness Equipment.
USER MANUAL Space Station Wilderness Equipment
text_image
WILDERNESS EQUIPMENTThe Australian Tent Maker TENT INSTRUCTIONS
natural_image
Black-and-white landscape photo of a camping tent near a lake with snow-capped mountains in the background (no text or symbols visible)TELL US ABOUT YOUR PURCHASE!
Send us an email telling us which tent model you have purchased and where you bought it and we will put you in a quarterly draw to win a WE canvas daypack.
We will also send you the guidelines and details of our off er to reward you for good photos of WE gear taken on your expeditions. Send your email now to: henry@seatosummit.com.au
natural_image
Black-and-white photo of a tent in a hazy, forested field with no visible text or symbolsYour WE tent package contains the tent layers, framework components, pegs and some spare parts. A system of bags, including an outer 'carry bag', is provided to manage these components. Optional groundsheets, pegs for different ground conditions and a full range of other tent accessories are available separately.
Always look for a safe, well drained, level area that will allow the tent to be best orientated to the wind and terrain. Clear away loose debris on the ground that could damage the tent floor. Be aware of overhead or nearby branches that could cause injury or damage the tent.
If you are snow camping, use your skis or snowshoes to level and compact an area on which to pitch your tent. Avoid potential avalanche zones below unstable slopes as well as sites subject to heavy snow accumulation such as in tree bands and on the lee side of ridges.
Most of our tents have a preferred orientation to the wind. Pay attention to this when choosing the set-up site. Always prepare for the possibility of a fresh breeze or stronger wind, even if it seems unlikely.
Handle poles and frameworks with care. Make sure all tube sections are fully engaged before setting your tent up and ensure they do not partially separate during the set-up process. Place poles not being handled a little away from the set-up work area to avoid accidentally stepping on them. Get the tent pegs organised before you start, especially if it is windy. Put them in your pocket or distribute them out on the ground roughly to where they will be needed.
Please read this instruction booklet thoroughly, not just the set-up instructions for your particular tent model. Also make yourself familiar with the care instructions to avoid damage and premature deterioration of your tent. We think you will also appreciate our 'tips for use', based on our more than 40 years experience using WE tents in all conditions.
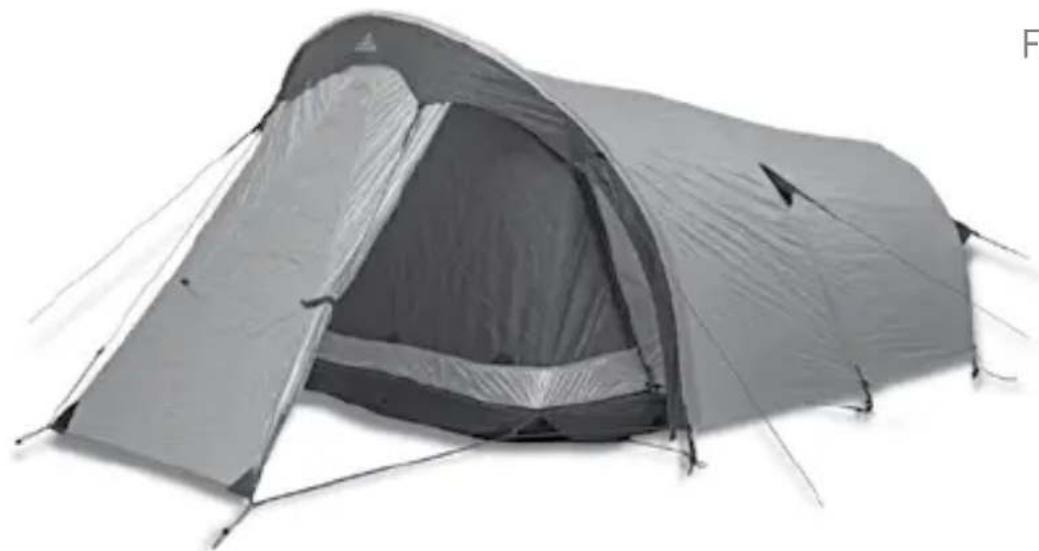
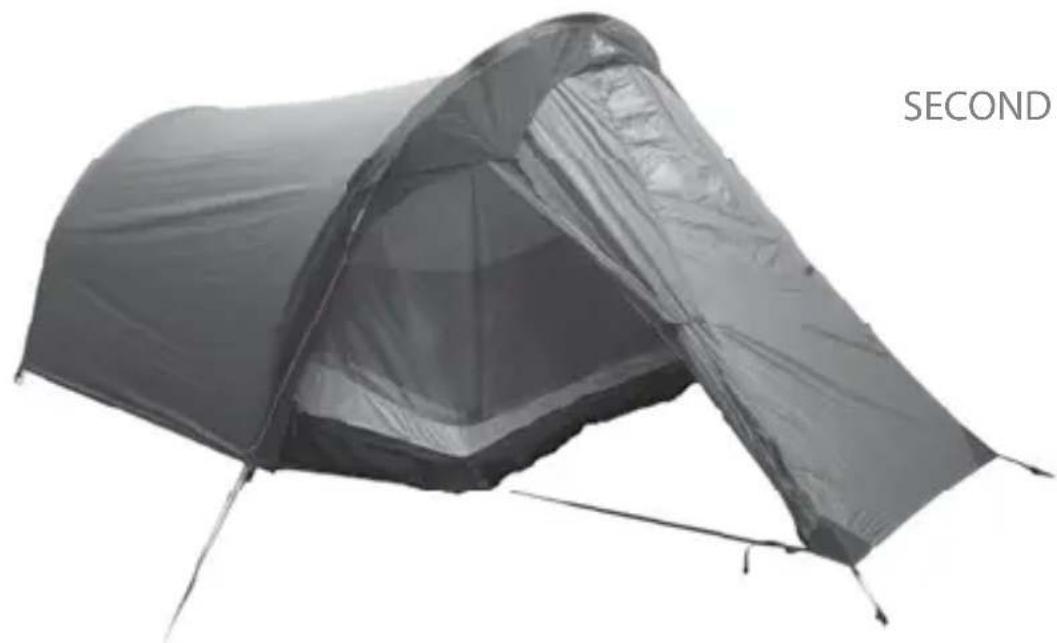
These three 'Outer-Pitch-First' WE tunnel tent models can be carried and set up with or without the inner layer pre-attached under the outer. The i-Shadow hex ground sheet option allows the i-Shadow outer tent to be used alone.
- The First and Second Arrows should always be set up with their small ends into the wind. The i-Shadow should always have its single pole lying along the wind direction, or near to it, entrance downwind.
-
Spread the tent out on the ground as it is to be erected. Locate the ends of the fabric pole sleeves on one side under the outer tent skin edge. If you are setting up in strong wind place some upwind pegs to control the tent until the poles are in and final pegging can be done. Match each pole with its corresponding sleeve in the outer tent. Insert the poles fully through their sleeves until both ends are visible, with fabric bunched along the pole. Start at the small end for the Arrows. Practise the technique of only pushing the pole into the sleeve or pulling the sleeve fabric onto the pole. (Never pull a pole out of its sleeve, or pull the fabric off the pole. Sections will separate and require careful reconnection before you can continue).
-
With the narrow tension straps at the end of the pole sleeve loosened, fi t each pole tip into either of the holes in its corresponding tough plastic pole foot. Now evenly re-tension the straps at each end of the pole.
-
Correctly orientate your tent and firmly place upwind pegs first. Once the upwind end/edge is secure move to the other end, take hold of the downwind peg points and briefly 'fly' the whole tent up clear of the ground so the poles can spring out freely into shape. Then drop these peg points down to the ground and place the pegs. A taut pitch is essential so place these downwind pegs as far out as you can (recent Arrow models can be further tensioned using the strap at the small end peg). Finally pick up each pole end to check it is fully spring out, deploy guys as required and re-check all tension adjustments.
-
The Arrow tents have adjustable ground straps under each side entrance. Be sure to check their adjustment so that outer skin entrance zips operate freely with the door panel fabric under just a little tension. Also check the eave guy lines at both ends. They should just balance the vestibule fabric tension and not be adjusted too tightly.
-
If the inner tent was carried disconnected from the outer tent it can now be attached from within the shelter of the outer skin.
FIRST ARROW
natural_image
Exterior view of a gray camping tent with open lid and visible bedding (no text or symbols)SECOND ARROW
natural_image
Exterior view of a gray camping tent with visible canopy and side supports (no text or symbols)i-SHADOW
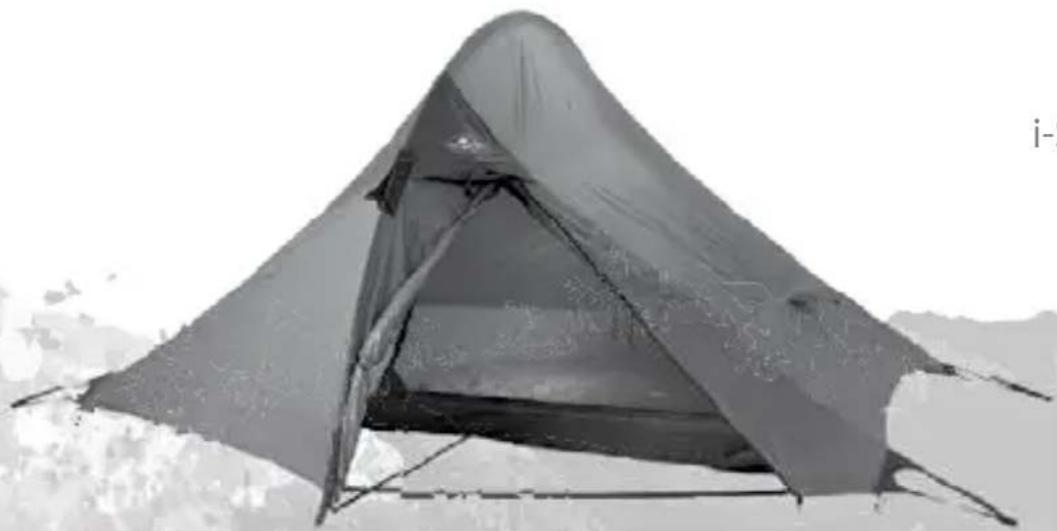
natural_image
Exterior view of a gray tent with a triangular canopy and visible interior structure (no text or symbols)Setting up the TECTITE models
WE Tectite models can be used with or without their detachable inner ceiling panels. The Tectite 2 and Tectite 4 models should always have their single poles lying along the wind direction, door openings downwind.
- Spread the tent out on the ground where it is to be erected and locate one end of the fabric pole sleeve. Insert the pole into the sleeve until it protrudes at the other end, fabric bunched up along the pole. Practise the technique of only pushing the pole into the sleeve or pulling the sleeve fabric onto the pole. (Do not try pulling a pole out of its sleeve – or pulling the fabric off a pole – sections will separate and require careful reconnection before you can continue setting up).
- With the narrow tension straps at the end of the pole sleeve loosened, fi t each pole tip into either of the holes in its corresponding tough plastic pole foot. Now evenly re-tension the straps at each end of the pole.
- Correctly orientate your tent and firmly place the upwind or first pair of pegs. Once these pegs are in, take hold of the peg points at the other, downwind end and 'fly' the whole tent up clear of the ground so it can spring out freely into shape. Then drop these peg points down to the ground and place the pegs. A taut pitch is essential so place these downwind pegs as far out as you can. This is very important, especially for Tectite tents. They are designed so their floors form a tensioned membrane clear above ground level, maximising ventilation through the mesh perimeter. A taut pitch also helps maintain clearances between the ceiling panel and canopy skin. Finally, pick up each pole end to check it is fully sprung out. Always deploy the two mid-panel canopy guys to improve internal space and stabilise these fabric areas. Deploy pole guys as required and re-check all tension adjustments.
- Enter the tent, set the vent openings and check the ceiling panel end tensions if you have this panel attached. They are adjustable. These panels are only required when frequent condensation is anticipated (see more notes under Getting the Most from your WE Tent).
TECTITE 2
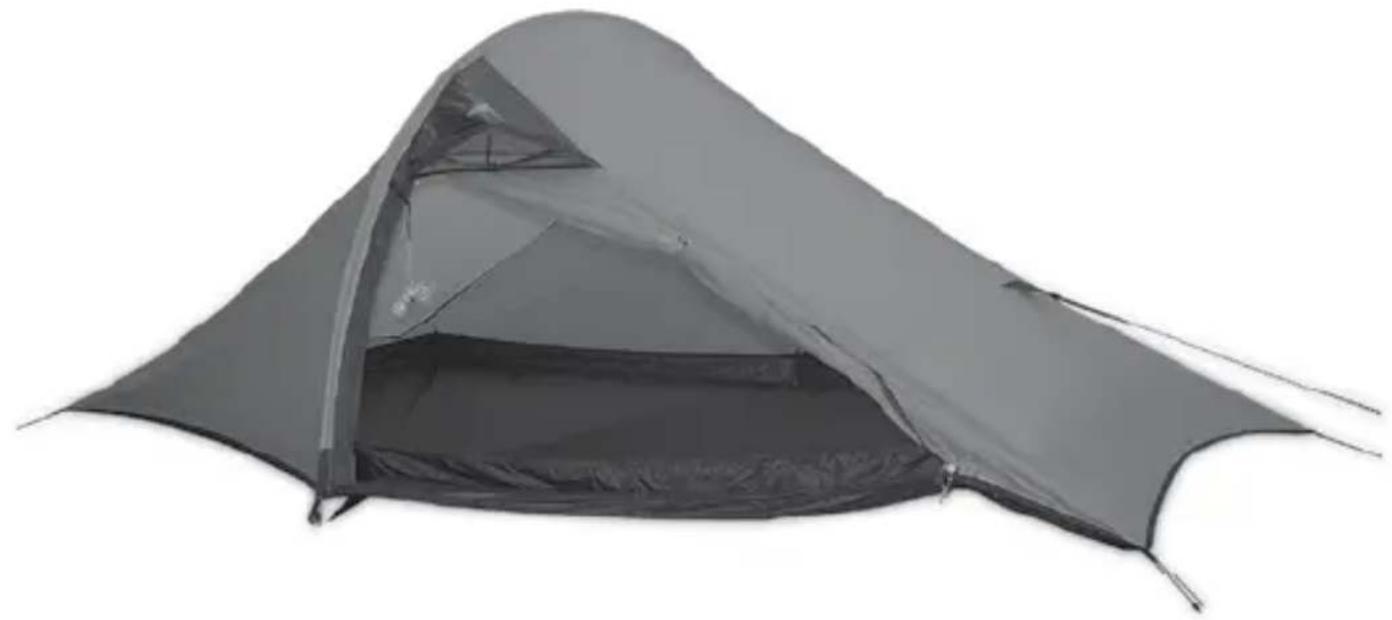
natural_image
Exterior view of a gray camping tent with open interior (no text or symbols visible)TECTITE 4
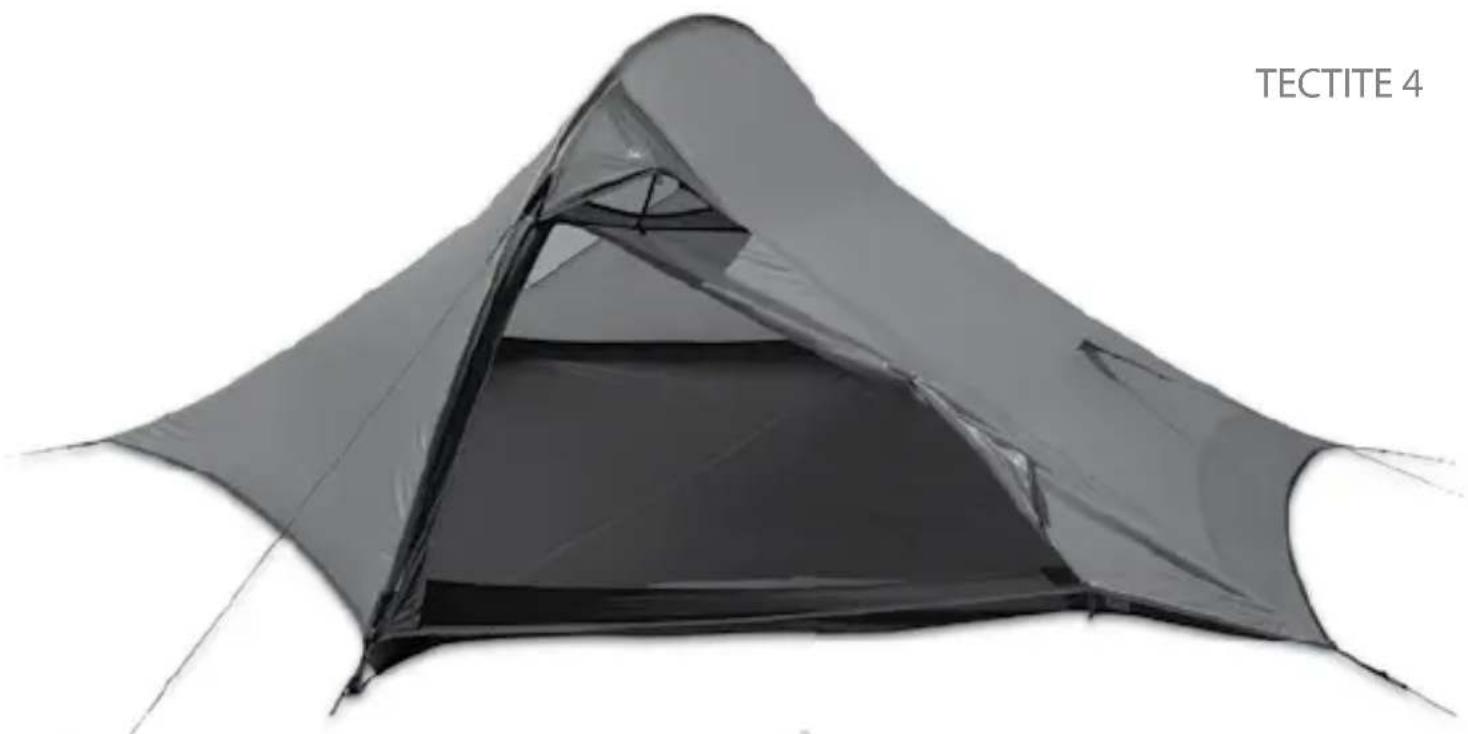
natural_image
Tectite tent with shaded canopy and visible internal structure (no text or symbols on the tent itself)
natural_image
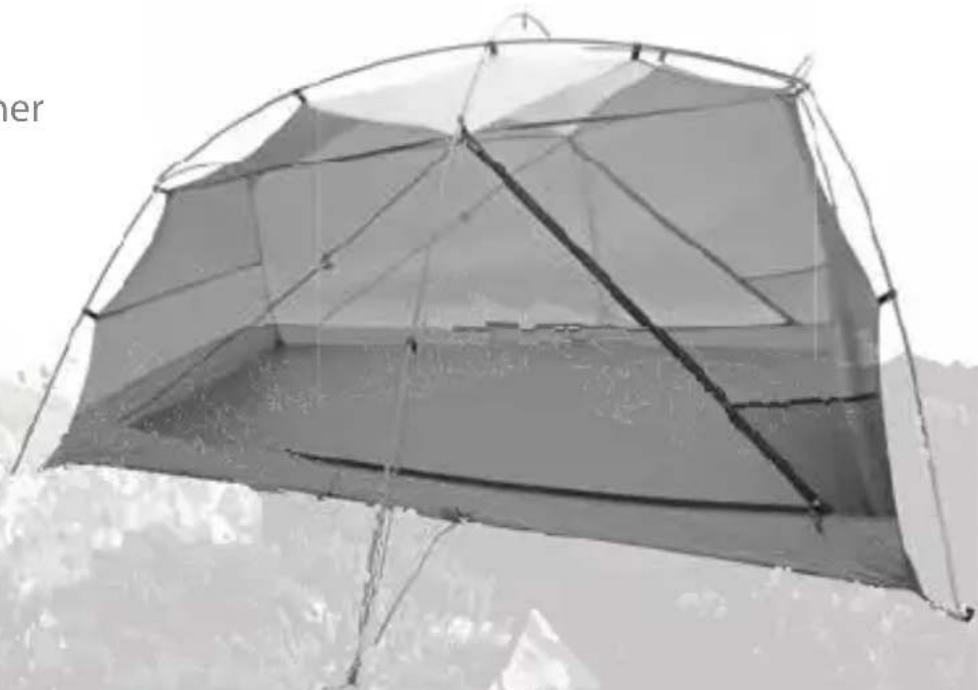
Mountainous landscape with dense forest and small buildings, no visible text or symbolsWE Space tent models use a unitary framework system with our unique dihedral hubs. The inner tents are set up first and can be used with or without the outer skin fitted. Outer tents can be set up without the inner if the ground sheet option is carried. The small end of the Space models should face the wind. The bigger Space 3 has an optional small end fairing to reduce wind loading on the tent in fresh and stronger wind conditions.
- Connect up all parts of the framework. With the inner tent laid out on the ground (pre-pegging the floor corners helps), insert the end-colour-coded pole tips into their pole feet fittings, first at one end of the tent, then the other.
- Clip the inner canopy up to the framework, starting at the hubs is best.
- On Space 1 and 2 models fit the short cross pole OVER the main arch, springing its ends into the webbing strap pockets. The eyelets also provided on these straps are for the tips of your walking or ski poles, inverted and adjusted to length. These give the tent incredible stability in strong wind but it must be firmly and reliably pegged so the poles can not dislodge. The Space 3 model uses a full length transverse pole, fitted UNDER the frame.
- All Space inner tents have an internal hub-to-hub tension system. Use this adjustable cord to maintain and improve headroom, stability in strong wind, resistance to snow accumulation and as a hanging line. Make sure it is connected if you are going away from your tent for some time.
- Now read the general 'Inner-Pitch-First' instructions but note that Space 1 and 2 outer tents have pockets under the ends of the cross ridge seam that must be fitted over the cross pole ends (before other outer skin connections).
- Space tents have very efficient vents. Space 1 and 2 vents zip down and the fabric triangles can also be toggled back to the inner tent to deflect rain.
- When folding Space frameworks start at the (overhead) mid-point/s. Hubs must be fully disconnected from tubes for most compact folding. With the 4-hub Space 3 framework separate the short poles linking the hubs at each end first, bring the two overhead poles together and start the folding, both poles together in one action, from the mid-point.
SPACE 2
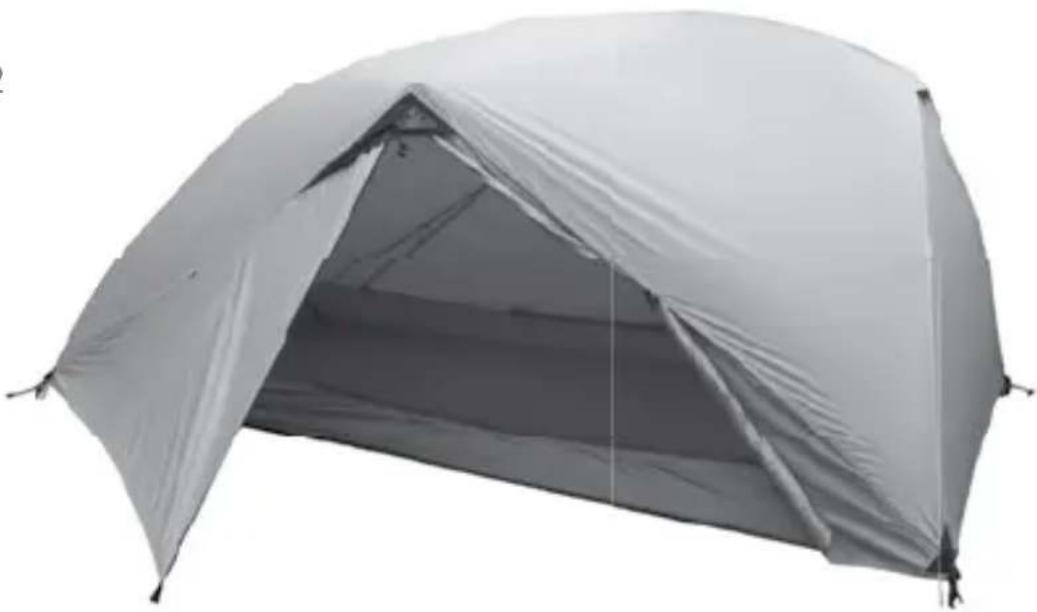
natural_image
Exterior view of a gray camping tent with a triangular roof and open interior (no text or symbols visible)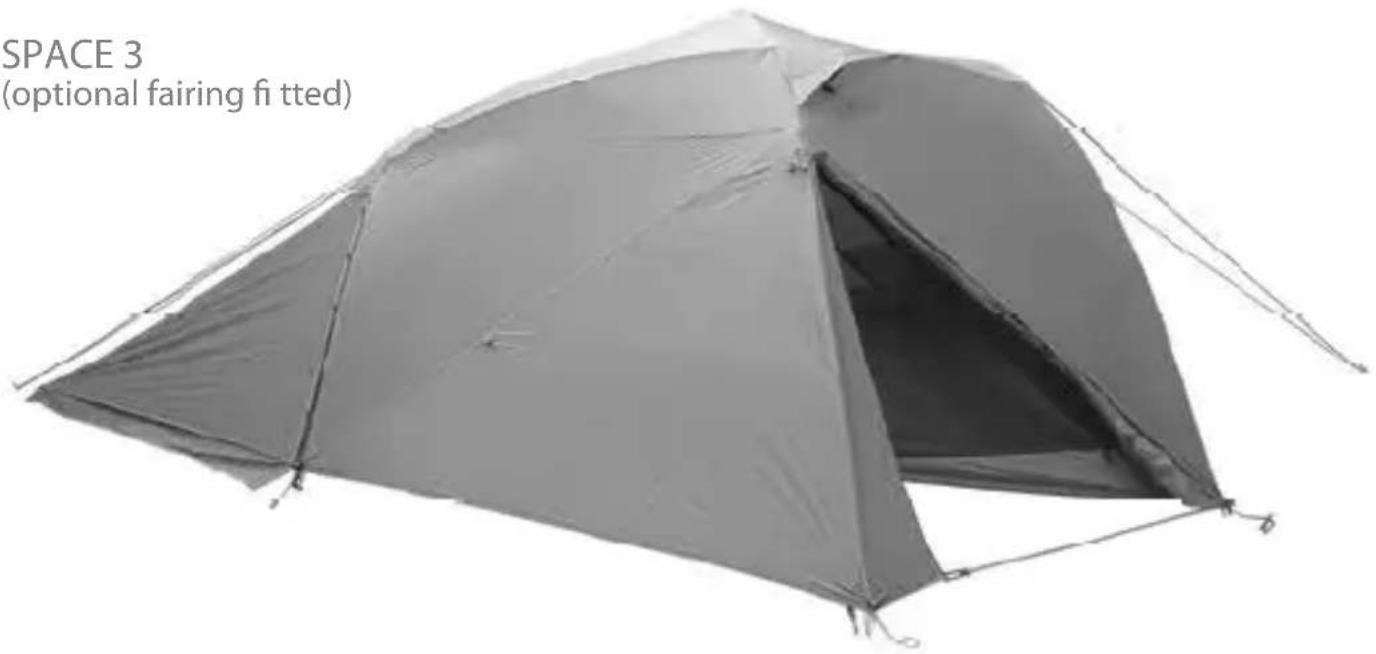
text_image
SPACE 3 (optional fairing fi tted)SPACE 3 Inner
natural_image
Exterior view of a modern office building (no signage)Setting up the i-EXPLORE 2 and i-EXPLORE 3
These WE 'Inner-Pitch-First' models use three poles, all the same length.
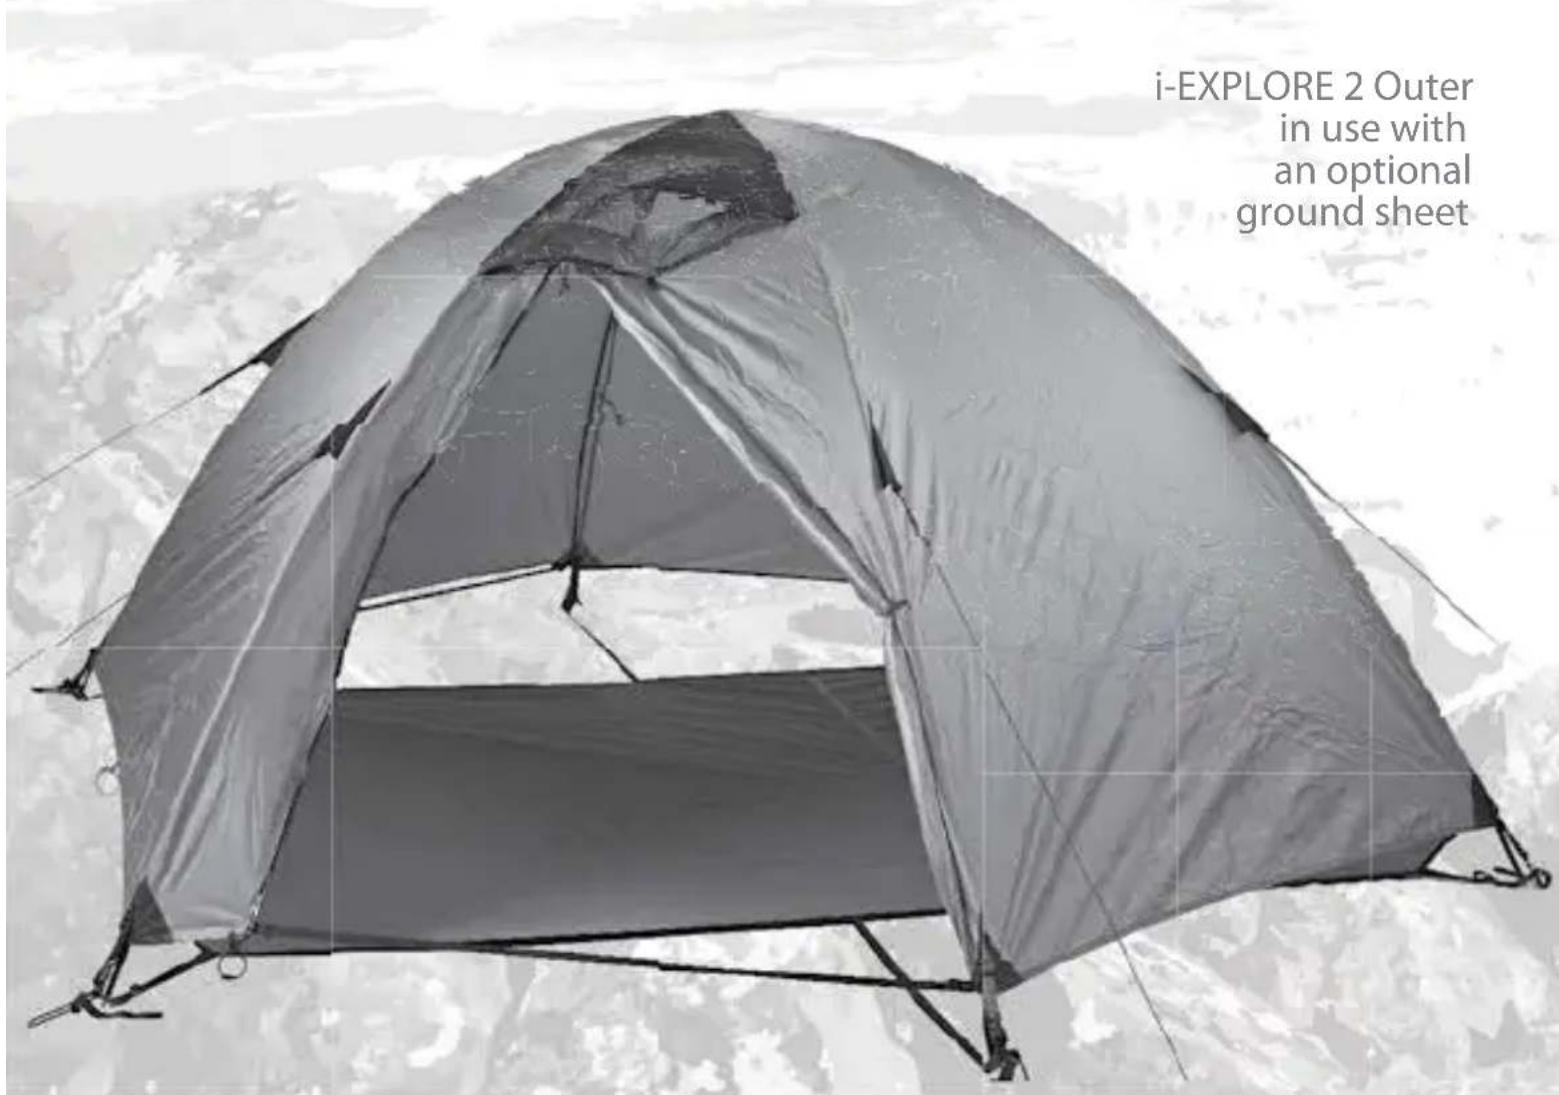
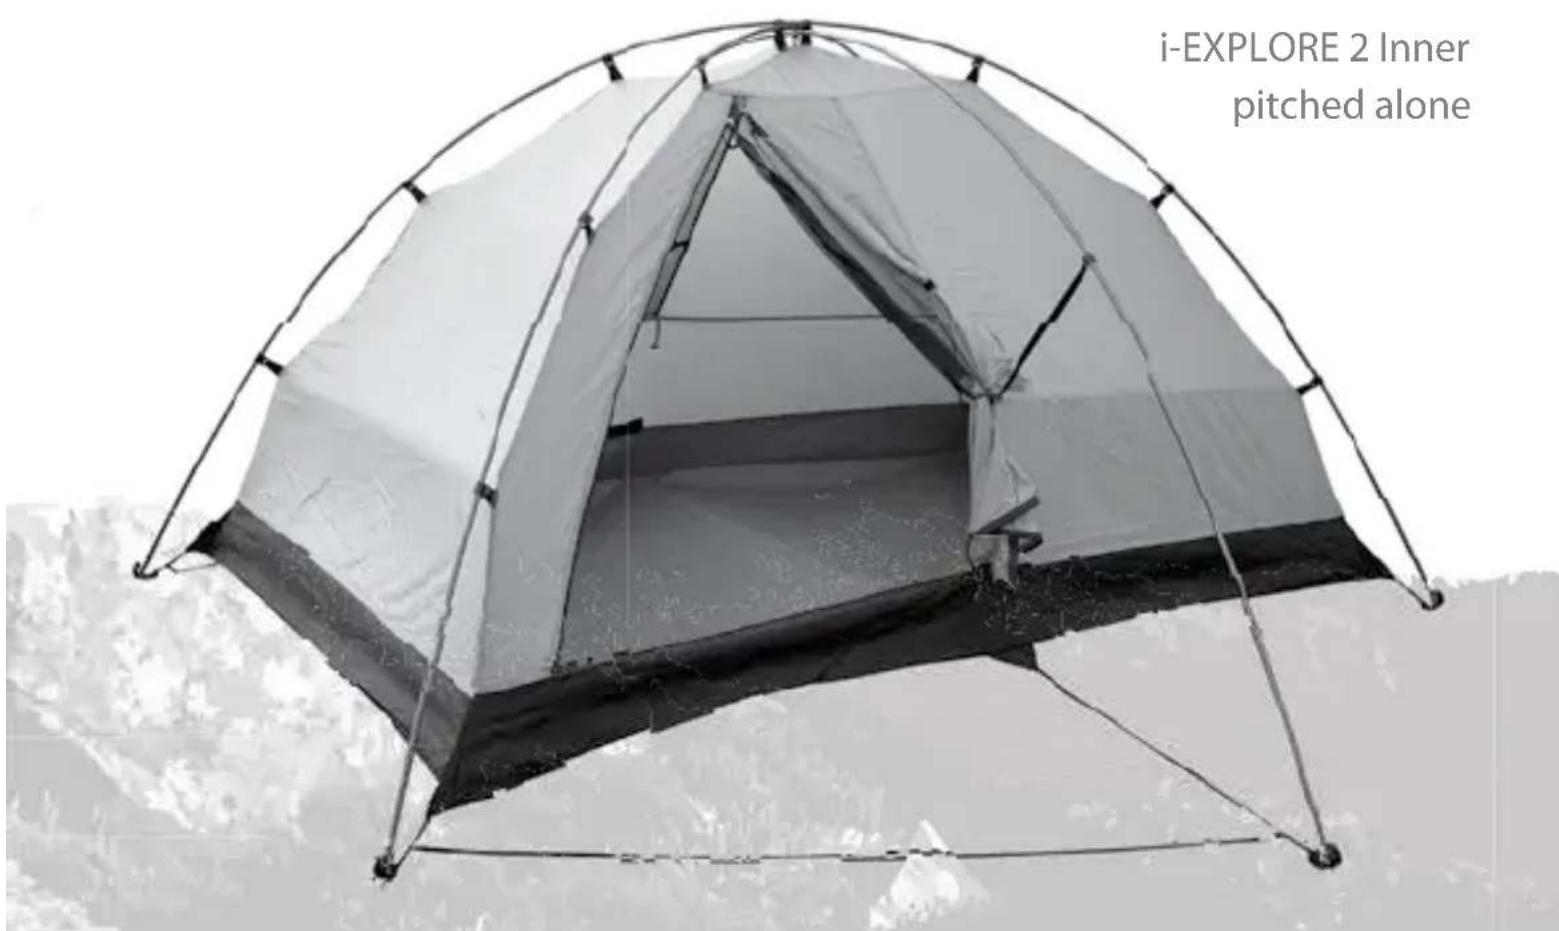
Orientate the tent so entrances are not facing the weather. Outer tents can be set up without the inner if the ground sheet option is carried.
-
Spread the inner tent on the ground and locate the pole feet fittings at the corners of the floor pan. Lay two poles diagonally across the inner. Insert the pole tips into their fittings at one end of the floor (any hole), go to the other end and spring each pole up in turn, inserting its tip into the corresponding fitting. Take care not to knock out a pole end tip and have a pole spring out before the inner is fully attached. It is easier if a second person holds the poles upright until step 2, following, is well underway.
-
Clip the inner tent up to the poles at all the 12 pole clip strap points.
-
If the outer tent is to be used, feed the third, transverse pole under the other poles, across the tent and insert the tips into the fittings at the ends of their ground tapes. At the inner tent apex, relocate two of the four pole clips onto the transverse pole so it is held in place. Clip out the inner tent side straps.
text_image
i-EXPLORE 2 Outer in use with an optional ground sheetOnce an inner tent has been fully set up with its poles or framework the outer tent can then be fitted over it. If you are not going to attach the outer skin then you should now place pegs at each pole foot cord loop to secure your shelter and obtain good fabric tension. If you are fitting the outer skin:
- Match up the red colour coding at one end of the outer tent to make sure it matches the red on the inner floor corners and entrances align. Standing upwind, spread the outer tent over the erected inner. (With the Space 1 and 2 models the pockets under the outer tent must now be slipped over the cross-ridge pole ends). Outer skins are fitted with narrow tension straps corresponding to all pole foot fittings around the base of the inner tent. Loosen these straps at their adjusting buckles so a loop of webbing can be caught under the strong hook at the top of the pole feet. Once all tension loops are hooked in adjust them carefully so the outer skin fabric is evenly taut.
- Some models of outer tent have touchtape tabs on their underside at pole lines close to door openings. Fasten these tabs around the poles to stabilise them against sideways movement.
- Now is the time to place pegs (or adjust the position of previously placed ones) and deploy guy lines according to the wind conditions.
text_image
i-EXPLORE 2 Inner pitched aloneSetting up the OVERHANG TARPS
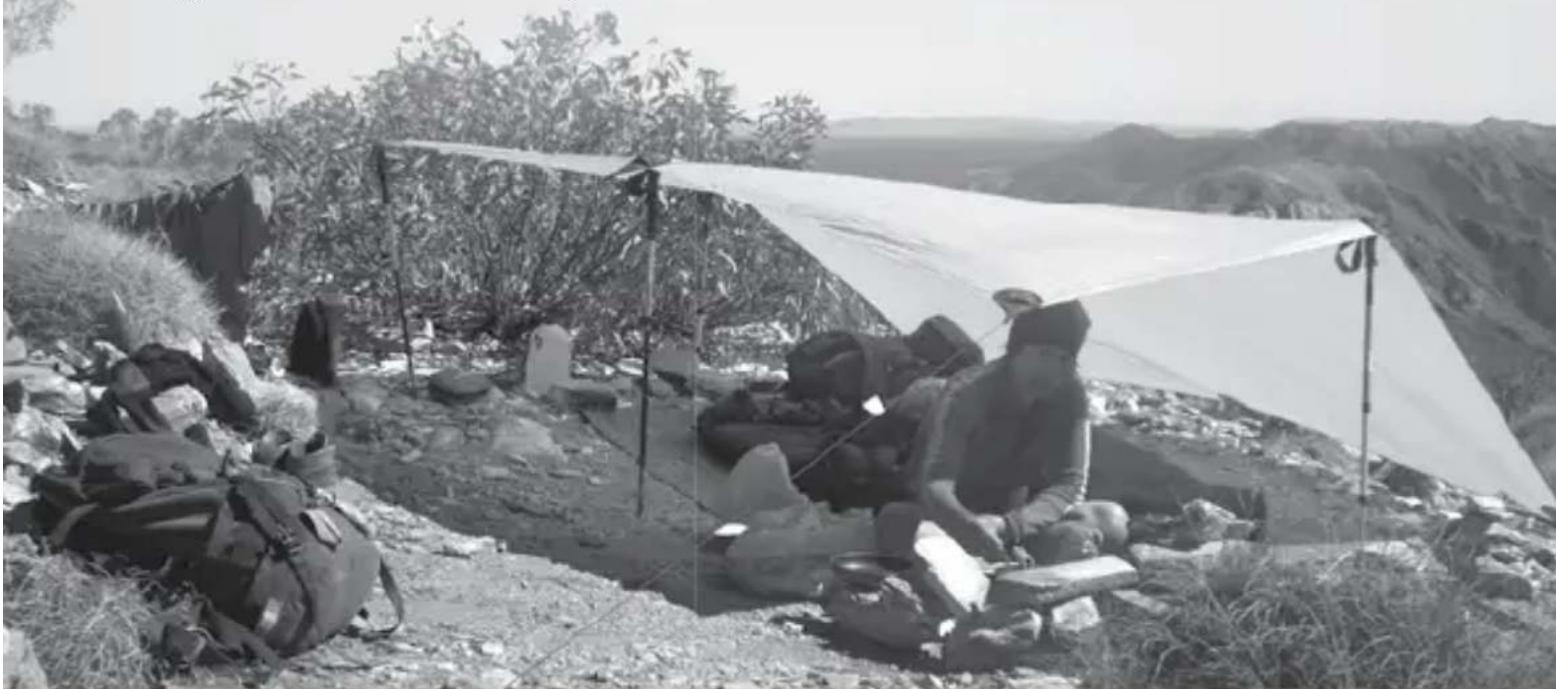
All models of WE OVERHANG tarps have carefully shaped, ‘catenary cut’ fabric panels and our unique and incredibly strong, tear-drop guy attachments. Overhangs can and should be pitched with high tension. If possible choose a site where you can make use of trees or other natural features to fi rst tension out the reinforced main ridge seam. This done, now work around the tarp edges running the guys to produce the shelter angles you want. As a fi nal step, review and balance guy tensions to eliminate any diagonal creases in the tarp panels. In extreme wind it is best to run the ridge seam along the wind direction and block off the open end with packs or other equipment.
A note about why FABRIC TENSION IS IMPORTANT
All WE tents and tarps are engineered tensile structures designed and constructed to resist storm-force winds. All models should be pitched so fabric panels are evenly taut – Tectite models depend on this for correct, ground-level ventilation. Strong, even tension greatly reduces the potential for fabric to flap. Like with the tail of a cracking whip, destructive forces far exceeding normal fabric tensions are generated with violent flap. You should move quickly to keep you tent under control.
Because all nylon fabrics go a little ‘slack’ when they get damp or wet you should also pay attention to retensioning your tent in these conditions. (This disadvantage of nylon is off set by its excellent strength and elasticity. When combined with silicone finishes, nylon fabrics are clearly still the best choice for the lightest outer tent skins).
natural_image
Black-and-white photo of a person sitting on rocky terrain with a tent and equipment, overlooking a hilly landscape (no visible text or symbols)GETTING THE MOST FROM YOUR WE TENT
WHAT YOU CAN DO ABOUT CONDENSATION?
No matter what design or how well ventilated your tent is, certain combinations of damp air and cold temperatures will produce condensation on any surface, even mesh. You can not expect your tent to defy the laws of physics but you can reduce the amount of condensation in the following ways: Adjust the tent's upper vents to allow warm, moist, exhaled breath – up to a litre per person overnight - to escape the tent. Camp high where the air is normally drier, and camp away from water bodies where the air is naturally more humid. Carefully site your tent under trees or overhangs, or close to boulders so these can return the heat energy in infra-red radiation that would otherwise disappear forever into the clear night sky - at the speed of light. When condensation is known to be unavoidable use a sleeping bag with a water-resistant shell fabric. We carry a small cloth to mop up excess moisture.
CONDENSATION INSIDE ON THE TENT FLOOR
The high-end polyurethane (PU) coatings used to waterproof most lightweight tent floor fabrics are not complete barriers to moisture vapour. Body heat and cold surroundings can result in some ground moisture passing through the coating and condensing inside a tent floor. (Coating types that would stop this, like PVC, are unsuitable - for many reasons). Focus on reducing atmospheric condensation as described in the section above. It is overwhelmingly more significant.
STOVES and TENTS
Like every tent manufacturer we warn against any use of a stove in a small tent. But the fact is that stoves do get used in tents when the weather is poor. So we say this: You must be a complete master of the stove's operation and maintenance, constantly monitor its operation and be prepared to deal with an emergency. Use it only in the vestibule, well clear of nearby and overhead gear. Beware of rising heat. Ventilation at ground level is essential to prevent carbon-dioxide accumulation. The combustion of gas and liquid fuels produces moisture vapour, adding to what comes out of the cooking pot. Provide good overhead ventilation to let this escape your tent.
HANDLING YOUR TENT IN STRONG WIND
There are three rules: Correct orientation, excellent fabric tension and intelligent guy deployment. Set guy angles that help support the tent structure against the wind drag. Make sure nothing is chafing or rubbing against the tent as it flexes with the wind gusts. Pegs and other improvised anchors must be utterly secure. In extreme wind use your body or pack to support upwind fabric panels. If you often use your tent in exposed locations consider adding some valences around the outer tent perimeter so these can be buried or weighted down to assist anchoring and reduce wind penetration. Ask us about that.
HANDLING YOUR TENT IN THE SNOW
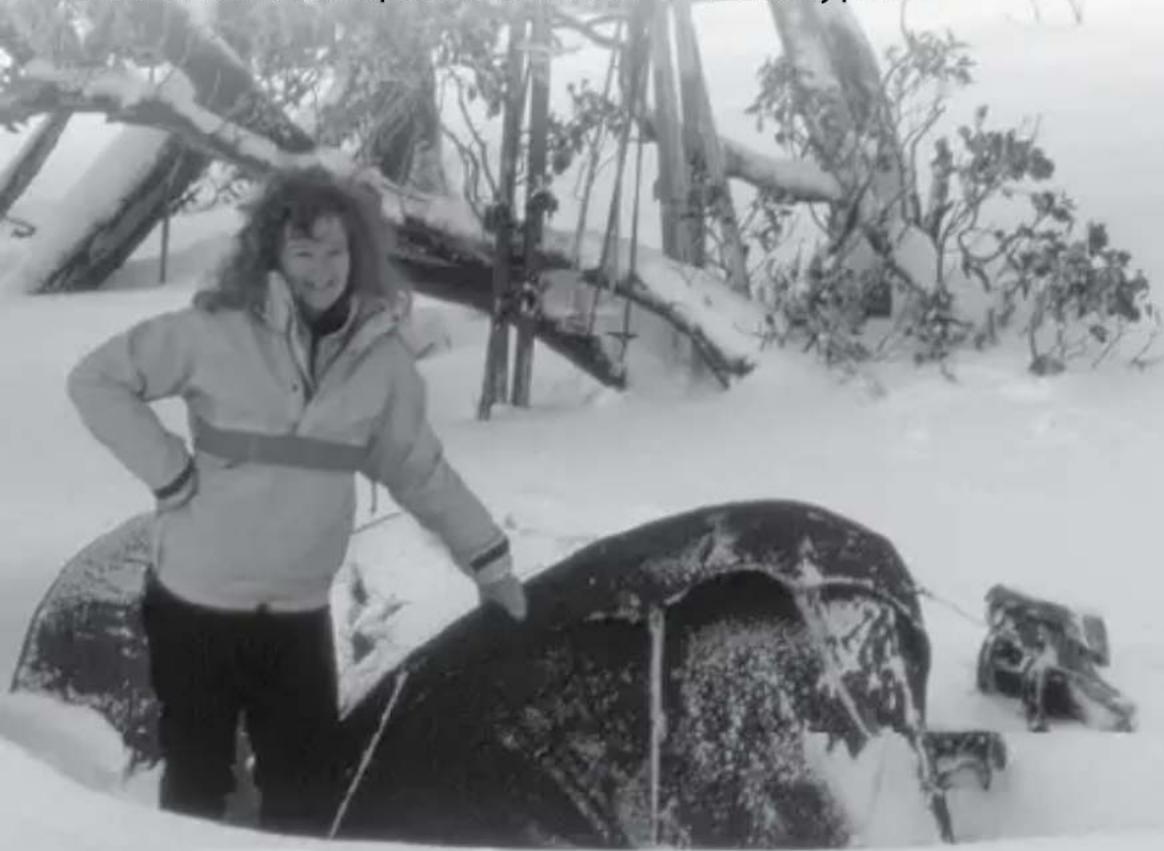
Excessive snow accumulation on the flatter, upper surface of your outer tent poses a far greater risk to your tent's structural integrity than high wind velocities. Site your tent in the open where the wind can scour away snow, not in turbulent areas on the lee side of ridges or in tree bands where snow drops out and accumulates. In still conditions snow build-up can go unnoticed. Clear it away regularly. Dig away accumulated snow at the tent sides so snow on the top has somewhere to fall to. Set a regular wake-up alarm if you need to. Maintain adequate ventilation when the snow depth increases.
IMPROVISATION and GOING LIGHTWEIGHT
We maintain a standard of equipment design and construction that is best summed up by ‘good gear for poor conditions’, not the other way around. There are seasons and places where you don’t always need this level of confidence and can save weight by leaving one of your tent layers at home.
Consider our ground sheet options, practise setting your outer tent up on its own, or see how you can use one of our lightweight Overhang tarps as shelter for the whole group.
Also experiment with improvisation to secure your tent in less-than-ideal circumstances: In soft sand you can bury a big stick or rock as a deadman anchor when the peg you have may be too narrow. Loose rocks around rock surfaces make good anchors - but put them back after! We always carry ten or so metres of strong, thin cord. It is invaluable for improvisation.
Our ingenious WE TUBULAR TOGGLES are used for door ties, braces and many suspension points. You can adjust the cord loop length by simply pulling out a cord tail and repositioning the overhand knot. Cord replacement is also easy.
Our lightest tent models use nylon fabrics with silicone fi nishes on both faces. They are stitched with highly water-repellent thread. If some seam seepage becomes a problem during the life of the tent, erect it and lightly smear some thinned liquid SILICONE sealant into the fl atter seams over the top of the tent.
In the event of a broken pole section or connector, slide a pole repair sleeve (included with your tent) over the break and tape it in position. Pole sections that have been bent out of shape can usually be straightened by hand, across a knee or around any smooth, rounded surface - such as the trunk of a sapling.
Leukoplast® 50mm medical adhesive plaster (blue and white reel) is the most versatile fi eld repair tape we know - for fi rst aid, strapping and fabric tears. But note, no tape will stick to silicone fabric fi nishes. For sil/sil fabrics you will need to carry a needle, thread and some repair fabric. Having said that, fabric tears are rare. Old tents with severely UV-weakened fabric or misadventure with crampons digging out snow-bound tents are the only instances we can recall.
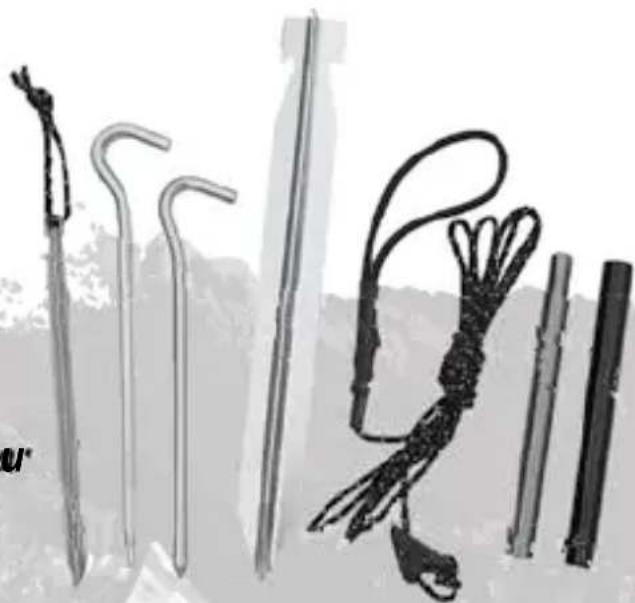
WE Quad pegs can be used to splint fractured ski and walking poles. Their stiff ness is far superior to the three-fl ute type.
natural_image
Person standing in snow with a large container of grain, surrounded by trees and debris (no visible text or symbols)TAKING CARE OF YOUR WE TENT
FABRICS
WE tents use lightweight, high-tenacity polyester and nylon fabrics, both ripstop and plain weaves. Finishes include PEU (poly-ether-urethane) back coatings, silicone elastomer surface finishes, regular DWR (durable water repellent) and FR (flame retardant) treatments. The insect screens are knitted nylon. Leaving aside accidental damage, the two main factors influencing the useful life-expectancy of fabrics are prolonged exposure to the UV component of direct sunlight, and prolonged exposure to dampness. UV weakens fabric yarns - although silicone is a good UV barrier. Prolonged dampness causes PU coatings to eventually degrade - although our poly-ether grade urethanes (PEU) have a much better resistance to this 'hydrolysis'. Do not leave your tent set up in the sun if you can avoid it. Never leave your tent packed wet when it could be dried. Never, ever, store your tent unless it is utterly dry. Even then, you should not store it tightly packed. The rest should be common sense: Avoid sparks, exposure to chemicals and foodstuff s, contact with sharp or abrasive objects, and never allow your tent to overheat. High summer temperatures in vehicles, above 60 degrees Celsius, can result in seam tape delamination. Synthetic fabrics, if left damp, may also develop mildew in the same way as cotton does. Mildew growth can be stopped by soaking the fabric in a very weak bleach solution. A few days of exposure to the UV in direct sunlight also works. Mildew stains are nearly impossible to remove and are best tolerated. We advise against using powerful bleaches or stain removers.
POLES
Your tent poles are highly engineered to achieve the best possible combination of light weight and strength. Even slight damage reduces pole strength - besides compromising the corrosion protection of the anodising or other finish. Take care to avoid dents, scratches and accidental bends. Before storing your tent poles, thoroughly rinse off salt accumulated during coastal trips, likewise remove dust, mud and grit, then allow components to dry completely before storage. Go to our website for comprehensive notes on tent pole repairs.
Accumulated dust and salt will lead to premature zip wear and slider failure. The best way to clean zips - and the whole tent - is to set it up on a warm day and use a sponge with mild detergent to loosen dirt, including that embedded in zip coils. Use a hose to blast this out and rinse the whole tent, then allow it to dry thoroughly, fi nishing with hanging over a line. When sliders are not running freely, zips benefit from the application of a silicone lubricant. Go to our website for comprehensive notes on zip care and repair.
STORING YOUR TENT
The message should now be clear. You tent and all its parts must be clean and absolutely dry before you store it. Do not store it packed tightly in its carry bag. The bags supplied are only for trips. Pack the layers loosely in an old pillow case or similar air-permeable bag, and store everything in a cool, dry place out of direct sunlight.
DIY REPAIRS
The WE website contains extensive product and technical information. We have also provided comprehensive notes on repairs you can do yourself. Access these pages from the links on the product pages. You may also be interested in reading the page on 'Staying Warm and Dry in the Outdoors', under 'Other Stuff' in the head menu bar. Take a look – it's all there for your benefit.
www.wildernessequipment.com.au
natural_image
Black-and-white photo of various metal tools including probes, wires, and clamps (no text or symbols visible)WARRANTY
All Wilderness Equipment brand products are warranted, subject to the exclusions that follow, against faulty materials and manufacturing for their life.
Excluded from this warranty are the deterioration of the product due to normal wear and tear, the natural and unavoidable deterioration of materials with extended use or with the passage of time, and damage caused by improper use or improper care. Improper use includes all use which, although conceivable, is use that the product could not reasonably be expected to withstand without suffering damage.
Should your WE product fail under normal use it will either be repaired or replaced, at the sole discretion of the wholesale distributor, free-of-charge upon the product's return to the distributor's warehouse.
Unless it is inconvenient, please first talk to your retailer about a WE equipment problem. With a little knowledge and experience many things can be quickly and easily resolved without the need to send anything anywhere. Of course, if you do need our direct help we will be very pleased to give it.
We do ask your attention to the following points:
Any equipment being returned to our Distributor must be given a Return Authorisation Number before it is shipped. We don't want to lose track of your gear. Your retailer can arrange this. Otherwise send an email to one of the addresses on the back cover of this booklet, and get your 'RAN' before you send off the package.
PLEASE NOTE that it is YOUR RESPONSIBILITY to ensure that any equipment being returned is CLEAN and DRY before it is sent. This is very important. Humans are involved at every stage of handling and occupational health and safety is the concern of everyone. Repairs usually involve the use of expensive equipment not designed to operate with sand and grit in their mechanisms.
text_image
WILDERNESS EQUIPMENTCONTACT US
Wilderness Equipment products are distributed in Australia by Sea to Summit Australia Pty Ltd, 5 Eyre St, Rivervale, 6103, Western Australia
Tel: +61 8 9221 6617
Fax: +61 8 9221 6618
Wilderness Equipment enquiries: henry@seatosummit.com.au
General after sales service: enquiries@seatosummit.com.au
© Wilderness Equipment 2016