AKZ 669/IX/03 - Oven WHIRLPOOL - Free user manual and instructions
Find the device manual for free AKZ 669/IX/03 WHIRLPOOL in PDF.


User questions about AKZ 669/IX/03 WHIRLPOOL
0 question about this device. Answer the ones you know or ask your own.
Ask a new question about this device
Download the instructions for your Oven in PDF format for free! Find your manual AKZ 669/IX/03 - WHIRLPOOL and take your electronic device back in hand. On this page are published all the documents necessary for the use of your device. AKZ 669/IX/03 by WHIRLPOOL.
USER MANUAL AKZ 669/IX/03 WHIRLPOOL
INSTRUCTIONS FOR USE
INSTALLATION profit 17
SAFEGUARDING THE ENVIRONMENT....20
IMPORTANT NOTES......20
BEFORE USING THE OVEN....21
OVEN ACCESSORIES....22
CARE AND MAINTENANCE....23
TROUBLESHOOTING GUIDE ......27
AFTER SALES SERVICE....27
To make the most of your new oven, read the user's instructions carefully and keep them on hand for consultation in the future.
INSTALLATION
Recommendations
IMPORTANT: Disconnect the oven from the mains before carrying out any installation work or servicing.
- Installation must be carried out by a qualified technician in accordance with the manufacturer's instructions and in compliance with local regulations.
- Unpack the oven and make sure that the oven has not been damaged during transport and that the oven door closes properly. If you are not sure contact the dealer or the nearest service centre.
- After removing the oven from its packaging, leave it on the polystyrene base to prevent it from being damaged.
- When installing the oven it is advisable to wear protective gloves.
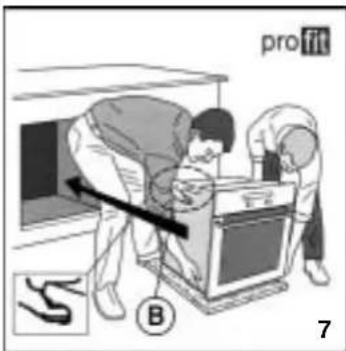
- The oven is provided with two side handles profit (B) to facilitate installation (fig. 7). Preparing the housing unit
- Kitchen units in contact with the oven must be heat resistant (90 °C min).
- Cut the kitchen unit and worktop to fit before installing the oven. Carefully remove any shavings or sawdust that could prevent the oven from running properly.
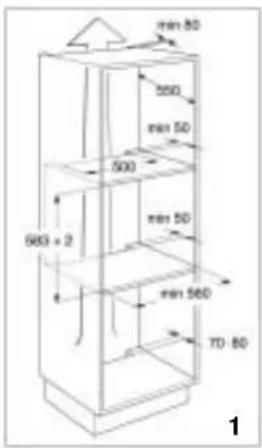
- The dimensions of the housing units in which the oven can be installed are shown in figures 1, 2 and 3. The dimensions of the oven are shown in figure 4.
- To allow for proper ventilation, an opening should be left at the bottom of the housing unit. Pay attention to the dimensions. The bottom of the oven must not be accessible after installation.
- During installation make sure that the sides of the oven do not touch the adjacent units.
text_image
min 50 560 min 50 500 min 50 560 + 2 min 560 70-80 1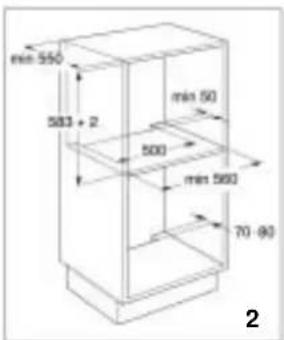
text_image
min 550 583 + 2 min 50 500 min 560 70 - 90 2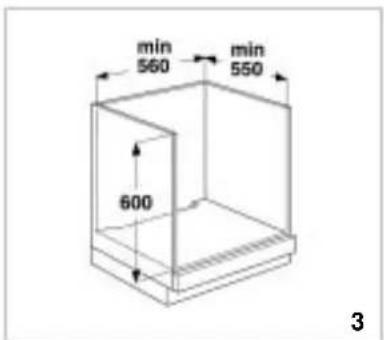
text_image
min 560 min 550 600 3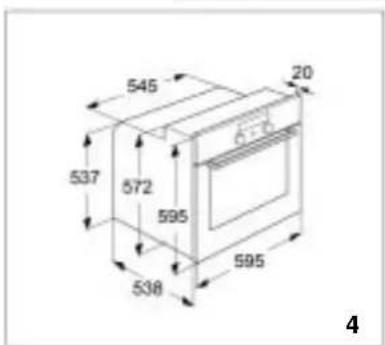
text_image
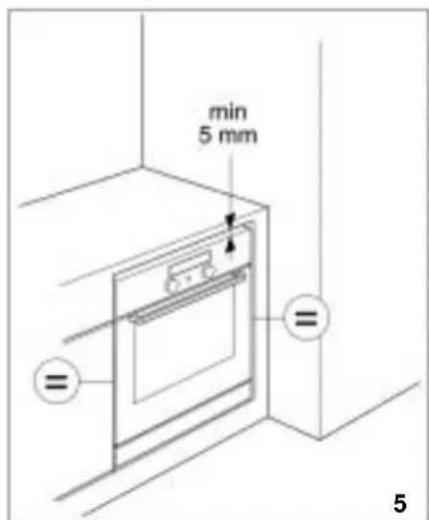
545 20 537 572 595 538 595 4- For ovens installed under the worktop, leave a minimum clearance of 5 mm between the upper edge of the oven and the lower edge of the worktop (fig. 5). For correct operation of the appliance, this clearance must always be unobstructed.
- If the kitchen unit is not securely fixed to the wall, it must be anchored with standard brackets (A) (fig. 6).
Electrical connection
Regulations require that the appliance be earthed.
- Connection to the mains must be carried out by a qualified technician in accordance with the manufacturer's instructions and in compliance with local regulations.
- The installer is responsible for connecting appliances correctly to the mains and for observing the safety regulations.
- The oven power cable must be long enough to connect the built-in oven to the mains.
- Observance of safety directives requires that a multi-pole switch with a minimum contact gap of 3 mm be used for the installation.
- Do not use multiple plug adapters or extension leads.
• After the oven has been installed, the electrical components must be inaccessible.
text_image
min 5 mm = = 5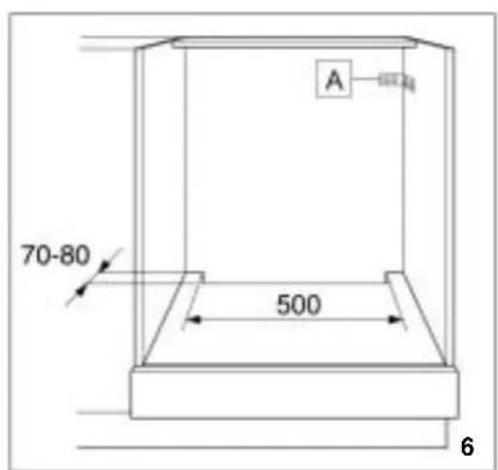
text_image
A 70-80 500 6Connecting the oven to the power supply
- Make sure that the voltage indicated on the rating plate is the same as the mains voltage. The rating plate is on the front edge of the oven (visible when the door is open).
-
If the power cable is not present proceed as follows:
-
Remove the two fastening screws of the terminal box cover located on the bottom part of the oven's rear covering.
-
Remove the cover to gain access to the terminal box and insert the power cable (see table) through the opening located on the bottom of the oven.
| Power supply cable table | |
| N° of conductors Type of cable | |
| 1N+ ~ | H05 RR-F 3 X 1.5 mm2 |
- Connect the cable to the terminal box, tighten the screws as far as they will go and secure it to the cable fastener.
- Put the cover back on by inserting the two blades in the slots and fasten it with the two screws.
Securing the oven
- Lift up the oven getting hold of it by the handles (B) profit on the sides and insert it into the housing unit, being careful not to trap the power supply cable (fig. 8).
• Center the oven in the housing unit before securing it. - The oven comes with spacers already fitted to facilitate the anchoring of the oven to the housing unit with the screws provided (as shown in fig. 9).
text_image
profit B 7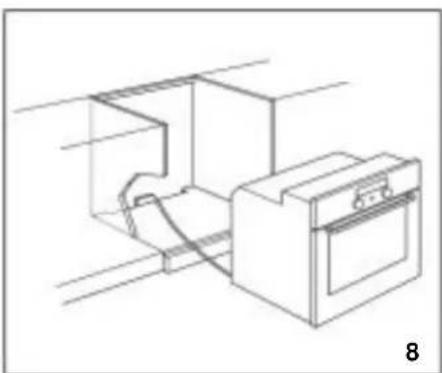
natural_image
Line drawing of an oven and cabinet with a coiled cable, no text or symbols present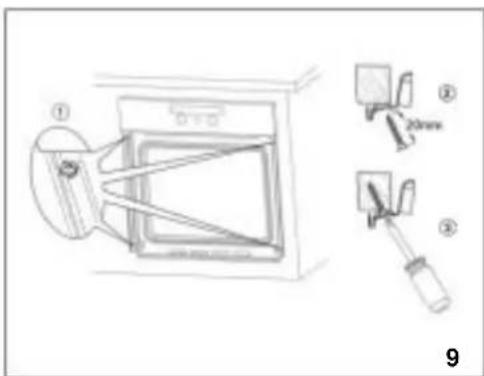
text_image
Technical diagram of a water safety device with labeled components and parts, including a 20mm scale indicator.SAFEGUARDING THE ENVIRONMENT
Disposal of packaging materials
- The packaging material is 100% recyclable and is marked with the recycle symbol.
- The various parts of the packing must therefore be disposed of responsibly and in full compliance with local authority regulations governing waste disposal.
natural_image
Simple black-and-white sketch of a four-leaf clover tree on a hill (no text or symbols)Disposal of used household appliances
This appliance is marked in conformity with European Directive 2002/96/EC, Waste Electrical and Electronic Equipment (WEEE).
IMPORTANT NOTES
Attention:
- Not intended for use by young children and infirm persons without supervision.
- Young children should be supervised to ensure they not play with the appliance.
- The accessible parts of the oven may get very hot during use. Keep children away.
- Never use abrasive materials or substances to clean the GLASS, to prevent damaging it.
- The unit gets very hot during use. Do not touch the heating elements in the oven.
- This oven is designed solely for use as a home appliance for cooking food. No other type of use is allowed. The Manufacturer declines all responsibility for inappropriate use or incorrect setting of the controls.
- Any repairs or adjustments must be carried out exclusively by a qualified technician.
- Never expose the oven to atmospheric agents.
- Do not put heavy objects on the door because they could damage the oven cavity and hinges. Do not cling to the door.
- Never hang anything heavy on the oven door handle.
- Do not cover the bottom of the oven with aluminium foil or other objects.
By ensuring that this product is correctly disposed of, the user helps prevent potential negative consequences for the environment and health.
The symbol on the product or on the accompanying documentation indicates that this product must not be treated as domestic waste but must be consigned to a suitable collection point for the recycling of electrical and electronic equipment.
When disposing of the product, comply with local waste-disposal regulations.
For further information on the treatment, recovery and recycling of this product, contact the respective local authority, the service for the collection of household waste, or the shop where the product was bought.
Energy saving
- Only pre-heat the oven if specified in the cooking table of the Product Description Sheet or in your recipe.
-
Use dark, black enamelled baking moulds as they absorb heat very well.
-
The oven door must close properly. The door seals must be kept clean.
- Do not pour water directly into the inside of a hot oven. The enamel coating could be damaged.
- Fruit juice drippings from the baking tray may leave permanent stains. We recommend the oven be cleaned before reusing it.
- Never drag pots and pans across the bottom of the oven to prevent the coating from being scratched.
-
Residual condensation after cooking could damage the oven and surrounding kitchen units in time. We recommend that you:
-
set the lowest temperature;
- cover food;
- remove food from the oven;
-
dry the wet parts when the oven is cool.
-
The front panel and the handle of the oven door warm up when the appliance is switched on for a long time at high temperatures.
- Never touch the oven with any wet part of the body and do not operate it with bare feet.
- Do not pull the appliance or the power supply cable to disconnect them from the electrical supply.
- Do not allow children to touch:
- the oven and its controls, especially when in operation and immediately afterwards to avoid injury.
- packaging (bags, polystyrene, metal parts, etc.)
-
an oven to be scrapped.
-
Make sure that the electrical cables of other appliances used near the oven do not touch hot parts and are not trapped in the oven door.
- Some oven models are equipped with an air cooling system to prevent the front of the oven and cabinet cavity from reaching excessively high temperatures.
Attention: Steam and smoke are vented through an opening located between the control panel and the oven door. Do not obstruct the vent opening.
- Do not place inflammable material in the oven or nearby: a fire may break out if the oven is inadvertently switched on.
-
Use oven gloves to remove pans and accessories, when the oven is hot.
-
If alcoholic beverages are added when roasting or cooking cakes and sweets (for example, rum, cognac, wine, etc.) remember that alcohol evaporates at high temperatures. It may happen that vapours released by the alcohol can catch fire when they are in contact with the electric heating element.
- Do not heat or cook sealed jars or containers in the oven. The pressure that develops inside the packaging might cause it to explode, damaging the oven.
- Do not use containers made of synthetic material for cooking (except for packages specifically designed for this purpose; see the manufacturer's instructions). They could melt at high temperatures.
• Always keep a watch on pans when cooking with oil and grease. Oil and fat can overheat and catch fire! - Never pull out fully loaded shelves. Use extreme caution.
- Remove the accessories from the oven and heat it 200°C for about an hour to eliminate the smell of the protective grease and insulating materials. Keep the window open during this operation.
- Before use, remove:
- stickers on the front and oven door, except for the rating plate;
- cardboard protection and protective plastic film from the front panel controls and other parts of the oven;
- any sticky labels from the accessories (for example, under the drip tray).
OVEN ACCESSORIES
Accessories supplied depend on the model. The accessories provided with the oven are listed in the Product Description Sheet provided separately (under Accessories).
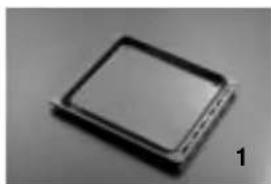
Drip tray (1)
The drip tray is designed to collect fat and food particles when it is positioned under the grid or as a plate, such as when cooking meat, chicken and fish with or without vegetables. Pour a little water into the drip tray to prevent spatters of fat and smoke.
Baking tray (2)
For cooking biscuits, cakes and pizzas.
Grid (3)
The grid can be used to grill food or as a support for baking trays, cake tins and other cooking receptacles. It can be placed on any of the runners in the oven. The grid can be inserted with its curved side facing upwards or downwards.
Turnspit (4)
Use the turnspit as indicated in the relevant chapter in the Product Description Sheet supplied separately.
Grill pan set (5)
The set comprises a grid (5a), an enamel drip tray (5b) and one or two handles (5c).
This set must be placed on the grid (3) and used with the Grill function.
Wflex baking tray (6)
The Wflex baking tray is ideal for cooking savoury or sweet dishes and can be used in place of metal baking trays. It is perfect for freezing and cooking (freezer, electric oven, gas oven and microwave).
It can also be used with the grill function, placing it on the bottom grid.
natural_image
Close-up of a square electronic component with a dark border and label '1' (no text or symbols on the object itself)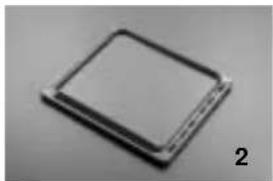
natural_image
Close-up of a square electronic component with a small metallic edge, labeled '2' in the corner (no other text or symbols visible)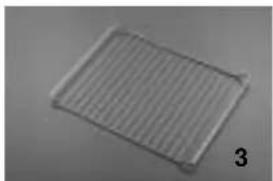
natural_image
Close-up of a rectangular grid-like object with horizontal ridges, labeled '3' in the corner (no other text or symbols)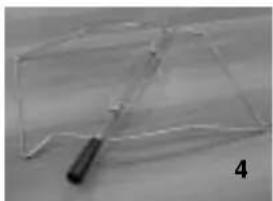
natural_image
Transparent rectangular object with a black handle and a diagonal line, labeled '4' in the corner (no other text or symbols)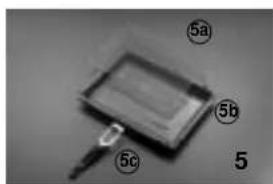
text_image
5a 5b 5c 5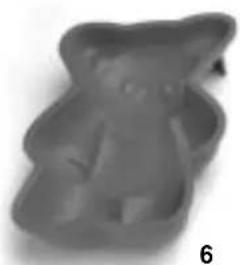
natural_image
Gray 3D-rendered object resembling a monkey inside a tray, labeled with number 6 (no text or symbols on the object itself)CARE AND MAINTENANCE
Important: never clean the appliance with high pressure water or steam cleaning equipment.
Exterior of the oven
- Clean with a damp cloth. If it is very dirty, add a few drops of washing up detergent to the water. Wipe with a dry cloth.
- Do not use corrosive or abrasive detergents, which dull the surface. In the event that one of these products comes into contact with the oven, immediately clean it using a damp cloth.
- Slight differences in colour on the front of the appliance are determined by the different materials used, such as glass, plastic and metal.
Ovens with aluminium front panel
- Clean using a delicate detergent and a soft window cleaning cloth or a microfibre cloth that does not leave fibres on the surface. Wipe horizontally, without exerting pressure.
- Do not use corrosive products, hard sponges or rough cloths. Clean the aluminium surfaces with a dry cloth.
Accessories
- Soak the accessories in water with washing up detergent immediately after use. Food residues can be easily removed using a brush or sponge.
Self-cleaning function (pyrolysis) Your oven is self-cleaning
It does this by burning off the fat spatters produced inside the oven during cooking, at a temperature of approx. 500 °C. At this high temperature, the deposits turn into a light ash which can be easily wiped away with a damp cloth, when the oven is cool.
- It is not necessary to select the pyrolytic function after every use, only when the oven is very dirty.
- If the oven is fitted under a hob, make sure that during the self-clean cycle (pyrolisis) all burners or electric hotplates are turned off.
-
Remove all accessories before running the pyrolytic function.
-
For optimal door cleaning results, wipe away any large deposits with a damp sponge before running the pyrolitic function.
• To make this function more efficient, the oven has 2 pyrolytic cleaning cycles: -
an energy saving one (PYRO EXPRESS) which consumes 25% less energy than the standard cycle. Used after the second or third time you cook meat, this feature will ensure the oven remains clean.
- a standard one (PYRO), suitable for cleaning a very dirty oven.
6th Sense models automatically detect how dirty the inside of the oven is and set the ideal cleaning time.
- As a safety measure, the oven door locks automatically after selecting the pyrolytic cycle. Due to the very high temperature inside the appliance during the self-cleaning cycle, the oven door will not open even by turning the selector to 0.
When to clean by pyrolysis
If your oven smokes during pre-heating or if there is a lot of smoke during a cooking cycle, run the pyrolytic cycle. You can also use this function if there is an unpleasant smell after cooking various foods (lamb, fish, grilled food...).
| FOOD WITH LITTLE SPATTERING | Biscuits, legumes, sweets, quiches, soufflés.Foodstuffs that do not spatter. |
| FOOD THAT SPATTERS | Meat, fish (in a heat-resistant dish), stuffed vegetables. |
| FOOD THAT SPATTERS BADLY | Large pieces of meat on the spit. |



INSTRUCTIONS FOR REMOVING THE DOOR
Attention: When carrying out the following operations it is advisable to wear protective gloves
These instructions should be carefully followed both to prevent injury and in order not to damage the oven and the hinges.
Take special care when removing the glass, because its position has been precisely chosen.
Do not touch the hinges when cleaning and/or removing the door (fig. 9)
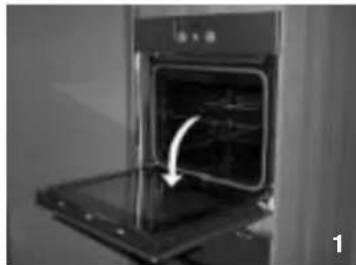
How to remove the oven door:
- Put on protective gloves
- Open the oven door fully (see fig. 1)
- Lift the two catches as far as they go (see fig. 2)
- Remove the door by closing it partially and pulling it upwards (see fig. 3)
natural_image
Interior view of an oven with a door and vent, showing internal structure and a curved arrow indicating rotation (no text or symbols)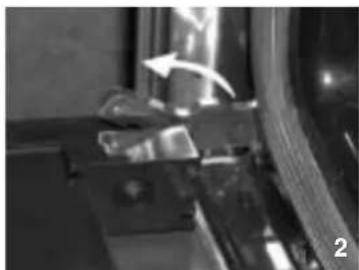
natural_image
Close-up of a mechanical component with an arrow indicating direction, no visible text or symbols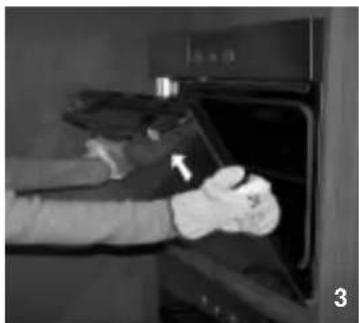
natural_image
Person placing a white object into an oven with a pointing arrow (no visible text or symbols)To disassemble the oven door:
-
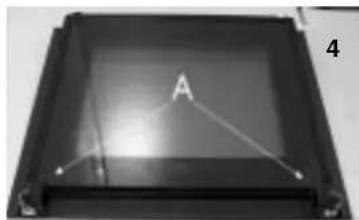
Place the oven door on a horizontal surface (fig. 4)
-
Unscrew and remove the 2 glass support screws A at the side of the hinges. (fig. 4, fig. 5)
natural_image
Black rectangular object with a triangular pattern and labeled point A, no readable text or symbols present.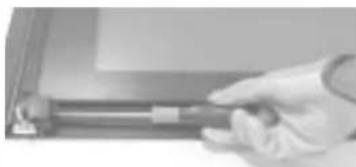
natural_image
Close-up of a hand holding a cylindrical tool inside a laptop (no visible text or symbols)5
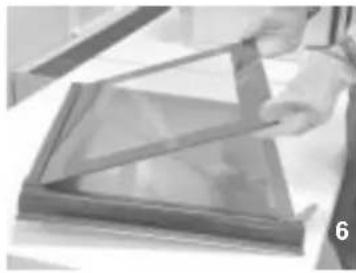
- Lift the bottom of the inside sheet of glass and remove it (fig. 6)
- Slip out the second and the third sheet of glass, paying particular attention to the position of the word SAFEGLASS (Fig. 7)
- Refit the sheets of glass in reverse order making sure that:
- The word SAFEGLASS on the intermediate sheets is facing upwards so as to be correctly legible (fig. 8);
- if one of the intermediate sheets does not have the word SAFEGLASS it must be inserted in the position closest to the internal glass.
ut the inside glass into position with the word SAFEGLASS cing the top of the door. (fig. 6)
Reposition and screw on the two glass supports A (fig. 4 and fig. 5)
Note: a slight play between the inside glass and the door uprights is to be considered normal as it compensates expansion of the glass caused by heat.
To remount the door:
- Insert the hinges into their grooves and lower the door fully (fig. 3)
- Lower the two catches again (fig. 2)
- Close the oven door fully.
natural_image
Close-up of a hand holding a transparent glass over a dark rectangular frame (no visible text or symbols)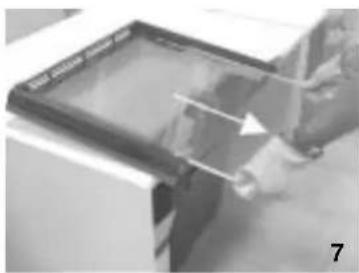
natural_image
Close-up of a mechanical component with a triangular arrow indicating direction (no visible text or symbols)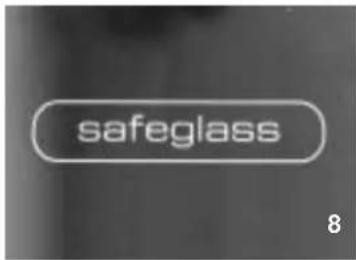
text_image
safeglass 8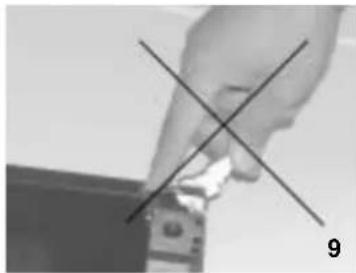
natural_image
Close-up of a hand holding a small electronic device with a black X mark, no visible text or symbolsPay attention to the hinges when cleaning and/or removing the door (fig. 9).
Changing the rear oven lamp bulb:
- Disconnect the oven from the electrical supply
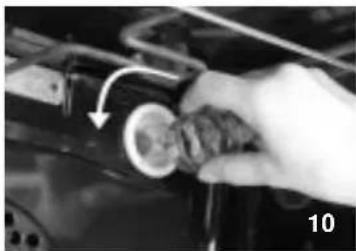
- Let the oven cool before turning the lamp cover left to unscrew it (see fig. 10).
- Change the bulb (see note).
- Screw the lamp cover back on.
- Reconnect the oven to the electrical supply.
Note: use only 25 W/230 V, E-14 type,
T500°C bulbs available from After Sales Service.
IMPORTANT: Do not use the oven until the lamp cover has been repositioned.
natural_image
Close-up of a hand holding a car hood with a circular component, no visible text or symbolsTROUBLESHOOTING GUIDE
Oven not working:
- Check for the presence of mains electrical power and if the oven is connected to the electrical supply.
- Turn off the oven and restart it to see if the fault persists.
The door is locked and will not release:
- Turn off the oven and restart it to see if the fault persists.
IMPORTANT:
- Check that the oven control knob is not turned to "0" or to "lamp".
If the electronic programmer (depending on model) display presents the message "S" consult the product description sheet provided separately and/or the electronic programmer description. - If the electronic programmer (depending on the model) presents the message "F HH", contact the nearest After Sales Service. Specify in this case the number that follows the letter "F".
AFTER SALES SERVICE
Before you call the After Sales Service
- Try to solve the problem yourself following the points described in "Troubleshooting Guide".
- Turn the appliance off and on again, to make sure that the problem has been solved.
If after the above checks the fault still occurs, get in touch with the nearest After Sales Service.
Please give:
- a short description of the fault;
• the oven type and model; - the service number (number after the word Service on the rating plate), located on the right hand edge of the oven cavity (visible when the oven door is open). The service number is also indicated on the guarantee booklet;
- your full address;
- your telephone number.
SERVICE
0000 000 00000

If any repairs are required, please contact an authorised After Sales Service (to guarantee that original spare parts will be used and repairs carried out correctly).
Failure to comply with these instructions may compromise the safety and quality of the product.
DECLARATION OF CONFORMITY CE
• These appliances are intended to come into contact with foodstuffs and they are constructed in compliance with Directive 89/109/EEC.
- This appliance is designed to be used for cooking only.
Any other use (for example, for room heating) is considered as improper use and potentially dangerous.
- This appliance has been designed, constructed and marketed in compliance with:
- The safety requirements of "Low Voltage" Directive 73/23/EEC;
- the protection requirements of EMC Directive 89/336/EEC
- the requirements of Directive 93/68/EEC.