
EG-SMS - Extension Module EnerGenie - Free user manual and instructions
Find the device manual for free EG-SMS EnerGenie in PDF.


| Product Type | Programmable Power Outlet Strip with GSM Interface |
| Model | EG-SMS |
| Input Voltage | 220–230 VAC, 50–60 Hz |
| Maximum Load | 10 A |
| Power Consumption | Up to 4.5 W |
| GSM Bands | 850/900/1800/1900 MHz |
| Power Supply | Built-in adapter + 500 mAh Li-Ion battery |
| Power Cord Length | 1.8 m |
| Hardware Schedule | Up to 10 independent events per socket; accuracy ≤2 sec/day (when powered) |
| Dimensions (W x D x H) | 378 x 100 x 55 mm |
| Net Weight | 1.0 kg |
| Number of Sockets | 6 total (4 manageable via GSM, 2 non-manageable) |
| External Sensors | Water (normally open), Locker (normally closed), Temperature (optional) |
| Password Protection | 64-bit password for SMS commands |
| Battery Backup | Maintains GSM connectivity for 2–4 hours after AC loss |
| Circuit Breaker | Integrated automatic circuit breaker in main rocker switch |
| Compliance | CE (LVD 2006/95/EC, EMC 2004/108/EC) |
| Compatible Operating Systems | Android 2.3+ or iOS 6.0+ (for app) |
| Package Contents | EG-SMS unit, user manual, quick installation guide, GSM antenna |
Frequently Asked Questions - EG-SMS EnerGenie
User questions about EG-SMS EnerGenie
0 question about this device. Answer the ones you know or ask your own.
Ask a new question about this device
Download the instructions for your Extension Module in PDF format for free! Find your manual EG-SMS - EnerGenie and take your electronic device back in hand. On this page are published all the documents necessary for the use of your device. EG-SMS by EnerGenie.
USER MANUAL EG-SMS EnerGenie
EG-SMS
PROGRAMMABLE POWER OUTLET STRIP
WITH GSM INTERFACE
USER MANUAL
HANDBUCH
HANDLEIDING
MANUEL DESCRIPTIF

1. Introduction
Congratulations with your purchase of this Programmable power outlet strip. Your EG-SMS is an advanced power outlet strip with power management features. Four sockets are individually manageable via the GSM interface.
The sockets can be switched on/off by a timer schedule, by user or different events. It is also possible to pre-program the unit event timer schedule (hardware schedule) and then disconnect EG-SMS from GSM network and use it elsewhere. The device can be used as an advanced standby-killer.
1.1. Features
• The main rocker switch enables switching all the sockets on and off
- In addition to it every manageable socket can be switched on and off via the software control window or SMS
- The unit can be pre-programmed via hardware-based schedule. The hardware schedule will work even when the managing computer is switched off
- The unit will keep performing the programmed hardware time schedule even after EG-SMS is disconnected from the power for some time (up to 4 hours)
energenie
EG-SMS PROGRAMMABLE POWER OUTLET STRIP WITH GSM INTERFACE
- The manageable sockets can then be switched on and off by the schedule, simple typical applications could be: “switch my peripherals on every working day at 8:50 AM” etc
- 64-bit password protected secure access
- External sensors: water (normally opened contact), locker (normally closed contact), temperature can be connected for it's monitoring, sending alarms and switching the sockets (optional, not included)
1.2. Specifications
- Input voltage: 220 – 230 VAC, 50 – 60 Hz
• Maximum load: 10 A
• Power consumption: up to 4.5 W
• GSM 850/900/1800/1900 MHz network support
• Power supply: built-in adapter and 500mAh Li-ION battery
• Power cord: 1.8 m
• Hardware schedule possibilities:
■ Maximum number of independent hardware schedule events – 10 per socket
■ Time in seconds
- Timer accuracy: no more than 2 seconds error per day providing power is always present.
• Dimensions: 378 x 100 x 55 mm
• Net weight: 1.0 kg
1.3. Hardware requirements
• GSM-900 or GSM-1800 network
- GSM SIM card
- Mobile phone supporting SMS or Smart phone running Android 2.3 OS or newer or iPhone, iPad running iOS 6.0 or newer
1.4. Package contents
- EG-SMS
- User manual and Quick installation guide
- GSM antenna
2. Indicators and controls of the EG-SMS
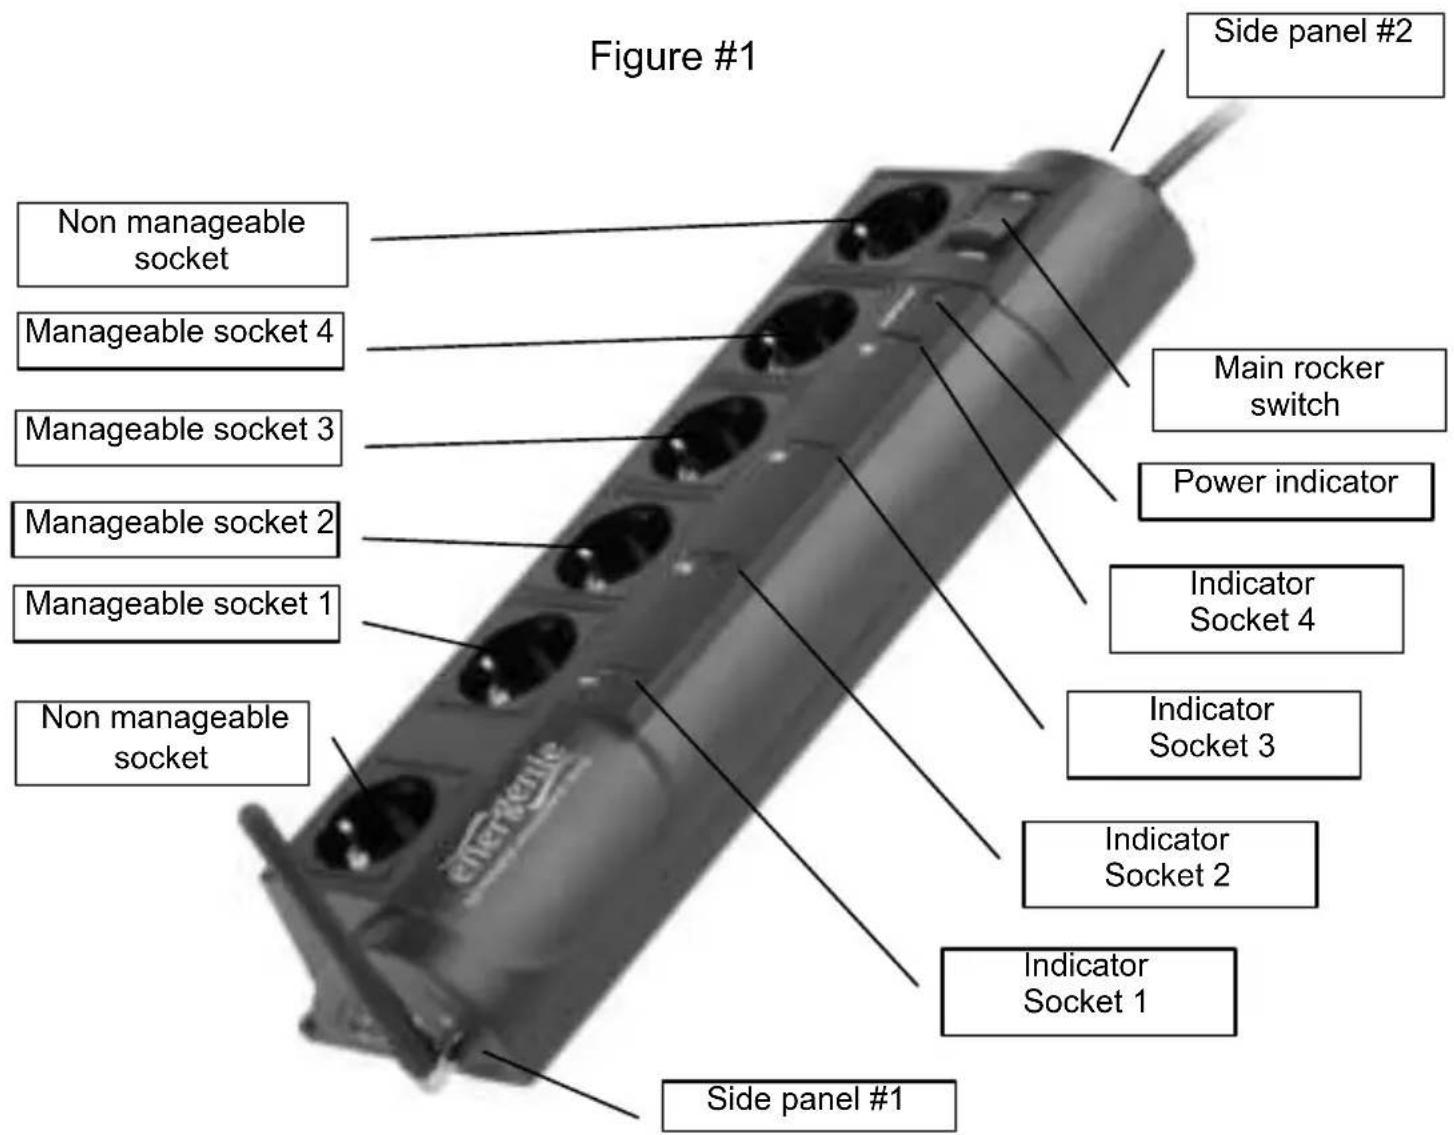
All brands and logos are registered trademarks of their respective owners
2.1. Side panel #1

All brands and logos are registered trademarks of their respective owners
2.2. Indicators
- Main rocker switch (Figure #1) is lit – this means that EG-SMS is connected to the power supply and active
- The indicator Socket 1 (2,3,4) (Figure #1) is lit – this means that this particular socket is switched on
- The green indicator Network status (Figure #2) blinks quickly – searching the network; blinks once in 3 seconds – connected to the network; permanently on – device is initializing after power on
- The red indicator Schedule status (Figure #2) is on – a schedule is present; off – schedule is absent; blinks up to 4 times – SMS is just received
• 3. Installation
- It is strongly recommended to avoid damp or wet places for installation.
- EG-SMS should be connected to the European AC wall socket of the standard DIN 49 440.
3.1. Getting started
- Connect EG-SMS to the wall socket first and connect the GSM antenna.
- EG-SMS can now be switched on and off by means of the Main rocker switch.
- Two (the first and the last) sockets of EG-SMS are marked with the symbol 📄. These two sockets are switched on and off by means of the Main rocker switch and cannot be managed by the computer – so they are called non-manageable sockets in this manual.
- If EG-SMS is switched on then the red indicator POWER is lit. In this case both non-manageable sockets are now live and connected to the power supply.
- The sockets: Socket 1, Socket 2, Socket 3 and Socket 4 can be managed or pre-programmed via GSM. They are called manageable sockets in this manual.
- The manageable sockets of EG-SMS can be programmed to be on or off. The current status of each manageable socket is represented by the corresponding indicator which will be lit if socket has power to it.
- If the Main rocker switch (Figure #1) is turned off then the manageable sockets cannot be switched on via either GSM or the hardware schedule.
- As soon as you turn the Main rocker switch (Z) on then it is be able to turn the manageable sockets on and off.
- Password button (Figure #2) When this button is pressed, the new password, which is received in incoming password SMS, will be applied. See Clause.3.3 or 5 for setting the password
- To protect the connected devices from possible high current and short circuit EG-SMS is equipped with the automatic circuit breaker, which is embedded in the Main rocker switch.
- When EG-SMS is powered off or disconnected from power mains it stays connected the GSM network and accessible via SMS for some hours (2-4 hours) because of Lilon battery. After the battery is discharged it becomes inaccessible until it is powered on. When battery is discharged, the device shall be kept in power on state for some 12 hours for full restore the battery charge.
NOTE: If the total power consumption (or peak power) of the devices, connected to EG-SMS exceeds 2200 Watts, the circuit breaker may power EG-SMS off. In this case, please, remove the excessive load
first and then press the Main rocker switch on to restore the power supply (Figure #3).
To be able to use EG-SMS you will now have to complete its configuration.
3.2. Power Manager software installation
For initial configuring EG-SMS it needs to carry out the following:
- For Android smartphone - use the Energenie Power Manager application from the Google Play
- For iPhone, iPad – use the PowerMan application from iTunes
Warning: if Android has other application processing the SMS messages, it can interphere with Power Manager application, they can prevent receiving SMS each to another.
3.3. Initial configuration
Insert the SIM card into device. Connect the antenna. Place the device in the area with good signal of current GSM network. Connect the device into power mains. Switch on the device. Network indicator shall start blinking fast, and after some seconds will start blinking once in 3 seconds. It means that device is on and registered in the GSM network. Press button “Password” and hold.
All brands and logos are registered trademarks of their respective owners
Send password SMS from mobile phone to the mobile number of the device. This SMS shall contain only with 8-symbols password.
Characters shall be english, all are allowed except “+” symbol. When the device received SMS, “Schedule” indicator will blink 4 times. Now release the “Password” button. Shortly after that an SMS with same password will be received by the mobile phone. Access password is successfully applied. The device is ready to work.
4. Operating EG-SMS with simple mobile phone by SMS
4.1 Controlling the sockets.
Send SMS with text:
PASSWORD200A0B0C0D
PASSWORD – access password
A,B,C,D – control for socket 1,2,3,4 respectively. Shall be 1 to switch the socket ON, or 0 to switch the socket off.
The device will switch sockets and send the response SMS to the mobile phone with new statuses of sockets:
SWITCH SOCKETS: ON OFF OFF ON, POWER OK
All brands and logos are registered trademarks of their respective owners
SWITCH – response to the SWITCH command ON/OFF – socket state for socket 1..4 respectively POWER OK – power from power mains is present
Example SMS: Gembird12001000001
Device action: switch Socket1 ON, Socket2 OFF, Socket3 OFF, Socket4 ON, Gembird1 is password.
Response SMS:
SWITCH SOCKETS: ON OFF OFF ON, POWER OK
4.2 Using alarms by WATER, LOCKER, TEMPERATURE sensors
First, enable sensors needed by command Enable/Disable sensors. For temperature alarm set the temperature limits, over which the alarm will be issued. Time on device can be set on this command. It is not necessary to set, it is needed for running the hardware schedule only, which can be set by Power Manager software, see Clause 3.2 for details.
PASSWORD000A0B0C0DSLLLSHHHTTTTTTTT
A-TEMPERATURE sensor B-LOCKER sensor
All brands and logos are registered trademarks of their respective owners
C-WATER sensor
D-Response SMS for all commands, except alarm and password response commands
Value: 1-Enable, 0-Disable
SLLL– low temperature limit, in degrees C. S is sign – or +.
Example: -001 equals to -1 degree C.
SHHH – high temperature limit, in degrees C
TTTTTTTT –inversion timestamp, hexadecimal coded, in seconds. It's time since Jan,1 1970, 00:00:00. Example: 5179191D equals to Thu, 25 Apr 2013 11:52:44 GMT. ( Time stamp is optional for input ).
TTTTTTTTT=1D197951
Note: If EG-SMS is powered off for some hours (more than 2 hours) internal timer can be timed out. Then it shall be set again by this SMS.
When the corresponding sensor is enabled, it issues alarm
For Temperature sensor alarm is issued once when temperature exceeds high limit or below low limit. For LOCKER sensor alarm is issued once, when contact is opened. For WATER sensor alarm is issued once, when contact is closed.
Alarm SMS (example):
STATUS SOCKETS: ON OFF OFF ON, LOCKER ALARM, WATER ALARM, TEMP +14C ALARM, NO POWER
For clearing all alarms send SMS to the device: PASSWORD03
Response SMS: ALARMS CLEARED
4.3 Control socket autonomously by WATER, LOCKER, TEMPERATURE sensors
First, enable the corresponding sensors and set temperature limits, as it is written in p4.2.
For controlling the socket by sensors use the following command.
It ties socket to sensors and controls it according to the current status of the sensor or temperature range. The device doesn't issue any alarm SMS, when sensor changes it's state or temperature is out of limits. This temperature limits are independent from limits in alarm section.
PASSWORD500A0B0CSLLLSHHH0F0G0H0I
A – Socket number, 0 for Socket 1, 1 for Socket 2, etc.
B - Temperature sensor is controlling the socket. 1 - yes, 0 - no
C – Socket control, when temperature is within the limits.
1 – Socket ON, 0 – Socket OFF
All brands and logos are registered trademarks of their respective owners
SLLL– low temperature limit, in degrees C. S is sign – or +.
Example: -001 equals to -1 degree C.
SHHH – high temperature limit, in degrees C
F - LOCKER sensor is controlling the socket. 1 - yes, 0 - no
G – Socket control, when LOCKER is opened (contact is open).
1 – Socket ON, 0 – Socket OFF
H - WATER sensor is controlling the socket. 1 – yes, 0 - no
G – Socket control, when WATER is present (contact is closed).
1 – Socket ON, 0 – Socket OFF
Response SMS:
500A0B0CSLLLSHHH0F0G0H0I
Example SMS:
Gembird150000101+000+03400000000
This command controls the Socket 1 ON when temperature drops below 0 or rises higher 34 deg C, and controls it OFF when temperature returns within these limits.
PASSWORD510A
A – Socket number, 0 for Socket 1, 1 for Socket 2, etc.
All brands and logos are registered trademarks of their respective owners
Response SMS:
SENSORS SCHEDULE CLEARED
For viewing control socket send SMS to the device:
PASSWORD520A
A – Socket number, 0 for Socket 1, 1 for Socket 2, etc.
Response SMS:
520A0B0CSLLLSHHH0F0G0H0I
4.4 Monitoring socket sensor states
This SMS message gives response SMS with statuses of all sockets and enabled sensors:
PASSWORD10
Response SMS (example):
STATUS SOCKETS: ON OFF OFF ON, LOCKER ALARM, WATER ALARM, TEMP +14C OK, NO POWER
All brands and logos are registered trademarks of their respective owners
4.5 Monitoring enable/disable sensor
This SMS message gives response SMS with information about enabled/disabled sensors, response sms, temperature limits and device timestamp:
PASSWORD11
Response SMS (example):
SENSOR SET: TEMP ON, LOCKER ON, WATER ON, ACKNOWLEDGE ON, RANGE+005+030, TIME78563412
This sms mean that TEMPERATURE sensor enabled, LOCKER sensor enabled, WATER sensor enabled, Response SMS enabled, low temperature limit +5 degrees C, high temperature limit +30 degrees C, device timestamp – 12345678.
4.6 Setting the hardware schedule
Setting the hardware schedule requires difficult calculations. Please, use Power Manager software for hardware schedule.
5. Energenie Power Manager software for Android OS
The Power Manager software is designed to support not only EG-SMS but also other power management family products (please visit www.energenie.com). This can be installed on smart phones with Android OS v.2.3 or newer.
Main controls in software:
Tap any screen element for the related functions and read. Use system menu for optional functions in each dialogue Use BACK button to return.
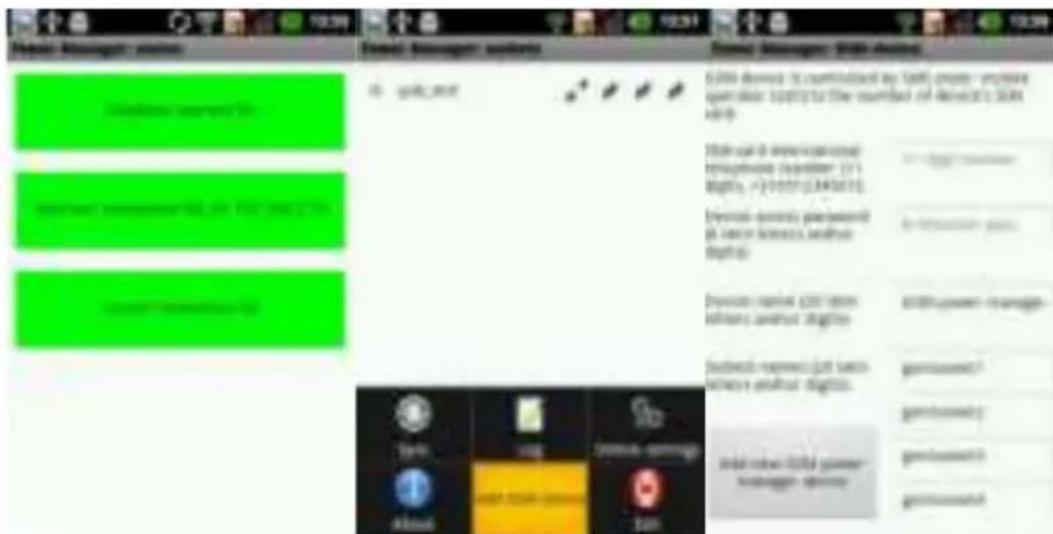
If you have LAN or WLAN product, which is tied to account in Energenie service, you can press “Online settings” (Figure 1), then input login and password of that account to control the devices (Figure 2). Choose Auto-update period for updating statuses of the devices (Figure 3). Make sure that Android has an active Internet connection (WiFi, mobile GPRS, EDGE, 3G...) for LAN or WLAN devices synchronization. You can check the status of the service parts (Figure 4).
GSM devices are controlled via SMS-messages and should be added manually. Note, application version with GSM devices support has the SMS sending permission for Android smartphones. It is normal situation, no any virus activity provided.
For adding a new device, use "Add GSM device" menu (Figure 5).
All brands and logos are registered trademarks of their respective owners
SIM card number and 8-character password are required for GSM device access. (Figure 6).
You can assign device name and socket names.
After that, press “Add new GSM power manager device” button. Warning message will appear (Figure 7).
Now you need to prepare device for saving new password. Press and hold “Password” button on the device and then press “Send” button on the message. When the red indicator on the device blink 4 times, meaning that SMS is received, release “Password” button. Now new password is saved in the device.
Newly added device “GSM power manager” appears in sockets window (Figure 8).
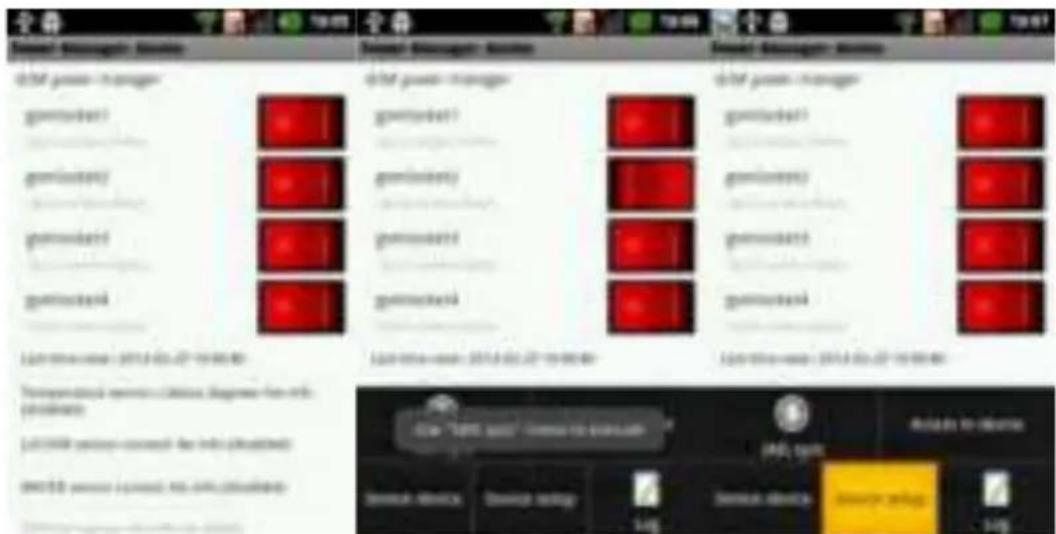
Tap the device name for opening window with device's info (Figure 10).
Status of all LAN and WLAN in the list can be updated by tapping "Sync" menu, but not EG-SMS devices that need individual SMS sending.
The log of commands sent to device, and it's replies can be opened "Log" menu. (Figure 25)
Long-tap invokes pop-up menu of the device (Figure 9). Here you can delete device, edit device settings, and get status. Get status is used for getting real status of socket states of the chosen device (on or off). Status of sockets will be updated in some seconds after that, when SMS from device is delivered to the phone.
For switching the sockets – tap knobs and then tap "SMS Sync" menu. (Figure 11)
Tap sensor info lines or "Device setup" from menu (Figure 12) for configuring sensors and device time. (Figure 13)
Note: If EG-SMS is powered off for some hours (more than 2 hours) internal timer can be timed out. Then device time shall be set again.
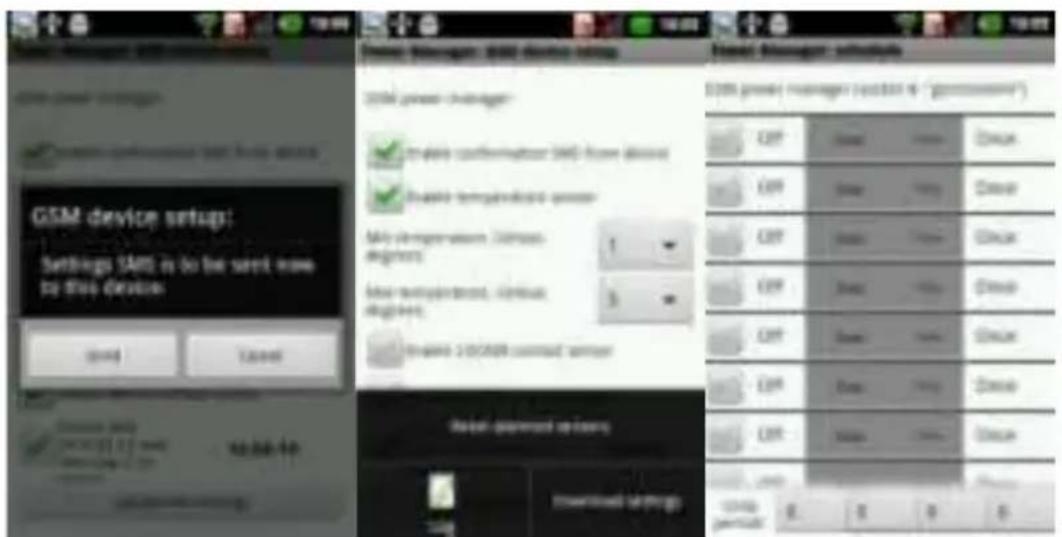
LOCKER is normally-closed contact, WATER is normally-open contact. The device sends you an alert SMS if temperature has got out the range, or any sensor has got alarmed (LOCKER open or WATER closed). Date and time setup is required for the hardware programmable schedule usage. Temperature limits can be set from -50 to +120 degree C. (Figures 14,15)
Note: program warns you every time before sending SMS message (excepting pop-up “Get status” menu). (Figure 16). Remember about money balance of device’s SIM card (usually SIM card’s balance can be controlled via your mobile operator web-site).
You can download device settings from by using "Download settings" menu. (Figure 17)
For resetting alarms from all sensors use "Reset alarmed sensors" menu (Figure 17).
Long tap of a socket (Figure 10) opens the time schedule dialogue of the socket. Each socket can execute up to 10 scheduled switches on/off. (Figure 18).
A switching event can be executed once or periodically.(Figure 19)
For periodic events loop period of days/hours/minutes/seconds shall be set. (Figures 20,21)
Each socket can be switched according to the change of temperature or if LOCKER, WATER sensors are triggered. (Figure 22,23)
Events info of the socket can be also downloaded from device by pressing "Download events" menu. (Figure 24)
GSM device can be deleted from the local smartphone database. (Figure 26)
Also GSM device can send you an alert if the AC 220V power supply has disappeared. (Figure 27)
Figure 1-3

Figure 4-6
All brands and logos are registered trademarks of their respective owners
Figure 7-9

Figure 10-12
All brands and logos are registered trademarks of their respective owners
Figure 13-15

Figure 16-18
All brands and logos are registered trademarks of their respective owners
Figure 19-21

Figure 22-24

All brands and logos are registered trademarks of their respective owners
Figure 25-27

All brands and logos are registered trademarks of their respective owners
- Troubleshooting
| Problem | Solution |
| The main rocker switch is off automatically. | The load connected to the device is too high, some of the devices connected to the EG-SMS should be disconnected. |
| The switching command is not carried out, the rocker switch is lit. | 1) There is no power supply to the EG-SMS and battery is exhausted. Make sure the EG-SMS is connected to the power supply and the rocker switch is switched on.2) No SIM-card or SIM-card is broken. Replace the SIM-card with good one.3) Password is not set well. Set the password.4) Mobile operator may process SMS messages with a delay – wait, please.5) Make sure SIM-card has sufficient money balance for receiving and sending SMS. |
| Wrong info about the device, or it's sockets, no info updates. Sockets are switched by Power Manager app well. | Android has other application processing the SMS messages, which interphere with Power Manager application. Temporarily remove other external SMS processing apps. |
This product is tested and complies with the essential requirements of the laws of member states concerning LVD(2006/95/EC), EMC(2004/108/EC). The CE declaration can be found under www.gembird.eu


All brands and logos are registered trademarks of their respective owners
Waste disposal:

Do not deposit this equipment with the household waste. Improper disposal can harm both the environment and human health. For Information about waste collection facilities for used electrical and electronic devices, please contact your city council or an authorized company for the disposal of electrical and electronic equipment.
All brands and logos are registered trademarks of their respective owners
| GARANTIE VOORWAARDEN | CONDITIONS DE GARANTIE |
| Op de aankoopbon moeten de aankoopdatum en productomschrijving duidelijk vermeld staan. Gelieve de aankoopbon de gehele garantieperiode te bewaren, deze is ten alle tijden benodigd voor alle garantie aanspraken. Tijdens de garantieperiode zullen alle gebreken verholpen of vervangen worden door de fabrikant d.m.v. reparatie, omruiling van het defecte onderdeel of het gehele apparaat. Aanspraken tijdens de garantieperiode leiden niet tot verlenging hiervan. Garantieaanspraak vervalt bij schade of gebreken die ontstaan zijn door oneigenlijk gebruik, misbruik of invloeden van buitenaf (vallen, stoten, water, stof, vuil of breken). Slijtagegevoelige onderdelen (b.v. batterijen) zijn uitgesloten van garantie. Bij ontvangst van de RMA goederen behoudt Gembird zich het recht om te kiezen tussen vervanging van de defecte waren of het uitgeven van een kreditnota. Het bedrag van de kreditnota zal altijd gecalculeerd zijn op basis van de huidige marktprijs voor het defecte produkt. | Le talon de garantie doit énumérer clairement la date d'achat et le type d'appareil. Conservez le reçu d'achat pendant toute la durée de la garantie car elle est nécessaire pour toute réclamation. Au cours de la période de garantie tous les défauts doivent être remplacé aux frais du fabricant, soit par la réparation ou la remplacement de la pièce défectueuse ou l'ensemble du produit. Les travaux effectués sous garantie ne prolongent pas la période de garantie ni ne commencent pas une nouvelle période de garantie. Le fabricant se réserve le droit d'annuler toute demande de garantie pour les dommages ou défauts dus à une mauvaise utilisation, abus ou les effets externes (chute, choc, pénétration de l'eau, la poussière, etc..). Les pièces d'usure (par exemple les piles rechargeables) sont exclus de la garantie. Dès réception de la marchandise sous garantie, le SAV de Gembird Europe BV se réserve le droit de choisir entre le remplacement des produits défectueux ou de délivrer un avoir. Le montant d'avoir sera toujours calculée sur la base de la valeur actuelle du marché des produits défectueux. |
| Gembird Europe B.V. Wittevrouwen 56, 1358CD Almere The Netherlands www.gembird.nl/support support@gmb.nl Tel. +31-36-5211588 € 0,15 p/m binnen Nederland Exclusief mobiele telefoonkosten | Gembird Europe B.V. Wittevrouwen 56 1358CD Almere, The Netherlands www.gembird.nl/support support@gmb.nl +33(0) 251 404849 Prix d'appel depuis telephone fixe Pays-Bas : 0.15 euro / min Prix d'appel depuis telephone mobile / autre pays - selon operateur |
ГАРАНТИЙНЫЙ ТАЛОН
- INTRODUCTION
- FEATURES
- ENERGENIE
- EG-SMS PROGRAMMABLE POWER OUTLET STRIP WITH GSM INTERFACE
- SPECIFICATIONS
- HARDWARE REQUIREMENTS
- PACKAGE CONTENTS
- INDICATORS AND CONTROLS OF THE EG-SMS
- SIDE PANEL #1
- INDICATORS
- 3. INSTALLATION
- GETTING STARTED
- POWER MANAGER SOFTWARE INSTALLATION
- INITIAL CONFIGURATION
- OPERATING EG-SMS WITH SIMPLE MOBILE PHONE BY SMS
- 4.1 CONTROLLING THE SOCKETS
- 4.2 USING ALARMS BY WATER, LOCKER, TEMPERATURE SENSORS
- 4.3 CONTROL SOCKET AUTONOMOUSLY BY WATER, LOCKER, TEMPERATURE SENSORS
- PASSWORD500A0B0CSLLLSHHH0F0G0H0I
- 4.4 MONITORING SOCKET SENSOR STATES
- 4.5 MONITORING ENABLE/DISABLE SENSOR
- 4.6 SETTING THE HARDWARE SCHEDULE
- ENERGENIE POWER MANAGER SOFTWARE FOR ANDROID OS
- WASTE DISPOSAL
- ГАРАНТИЙНЫЙ ТАЛОН
Brand : EnerGenie
Model : EG-SMS
Category : Extension Module