
NQuire 800 II - Tablet Newland - Free user manual and instructions
Find the device manual for free NQuire 800 II Newland in PDF.


| Product Type | Tablet |
| Brand | Newland |
| Model | NQuire 800 II (II Plus variant available) |
| Dimensions (HWD) | 235 x 147 x 22 mm |
| Weight | 870 g (typical) |
| Screen Size | 8.0" diagonal |
| Screen Resolution | 800 x 1280 pixels (aspect ratio 10:16) |
| Touchscreen | 10-point capacitive touch panel |
| Battery Type | Rechargeable Lithium-ion Polymer (internal, non-removable) |
| Battery Capacity | 8000 mAh, 3.7 V |
| Battery Life | 5-7 hours (approx, depending on usage) |
| CPU | Intel Atom x5-Z8350 (1.44 GHz up to 1.92 GHz, 64-bit quad-core) |
| RAM | 2 GB (NQuire-II) / 4 GB (NQuire-II Plus) |
| Storage | 32 GB (NQuire-II) / 64 GB (NQuire-II Plus) |
| Operating System | Windows 10 Pro |
| Rear Camera | 5.0 Megapixel CMOS |
| Connectivity | Wi-Fi 802.11 ac/a/b/g/n (2.4/5 GHz), Bluetooth 4.0, GPS + GLONASS |
| Ports | 1 x Micro USB, 1 x 3.5 mm headphone jack, 1 x Micro SD slot (behind cover), 1 x Micro SIM slot (behind cover) |
| IP Rating | IP67 (dustproof, waterproof up to 1 m for 30 minutes) |
| Drop Test | Tested to IEC-60068232 standards at 1.2 m |
| Included Accessories | Power adaptor (9 V / 1.5 A), USB OTG cable, stylus, hand strap panel (optional) |
| Cleaning | Wipe with a dry soft cloth; do not use harsh chemicals, solvents, or detergents |
| Operating Temperature | 0°C to 40°C |
| Safety Precautions | Do not expose to liquids or excessive heat; keep away from children; use only approved charger; avoid sharp objects on screen |
Frequently Asked Questions - NQuire 800 II Newland
User questions about NQuire 800 II Newland
0 question about this device. Answer the ones you know or ask your own.
Ask a new question about this device
Download the instructions for your Tablet in PDF format for free! Find your manual NQuire 800 II - Newland and take your electronic device back in hand. On this page are published all the documents necessary for the use of your device. NQuire 800 II by Newland.
USER MANUAL NQuire 800 II Newland
natural_image
Two black electronic devices with a Windows logo displayed on their screens, showing front and side views (no readable text or symbols)NQuire 800 II / II Plus
tablet
user guide
Thank You.
Thank You for choosing the NQuire800-II / II Plus as your new tablet.
This quick-start user guide will help you to get to know your new tablet and explain how to get the most out of all of its great features.
Contents.
| Important safety information. 5 | |
| Product overview. 6 | |
| Instructions for use. 8 | |
| Check the package contents 8 | |
| Charging your tablet. 8 | |
| Rechargeable Lithium-Ion Battery 8 | |
| Using your tablet. 8 | |
| Turning your tablet on 8 | |
| Putting your tablet into Sleep Mode 8 | |
| Turning your tablet off 8 | |
| Emergency reboot 9 | |
| Increasing and decreasing the volume 9 | |
| Using headphones with your tablet 9 | |
| Installing a Micro SD card 9 | |
| Installing a Micro SIM card 9 | |
| Using the Stylus | 10 |
| Scanning (Optional). | 10 |
| RFID Testing (Optional). | 10 |
| Using the touch screen. 10 | |
| Unlocking the screen | 10 |
| The main home screen | 10 |
| Changing between Tablet and PC mode | 11 |
| The Windows home button | 12 |
| Opening and closing apps | 12 |
| Switching apps | 12 |
| Accessing the main menu | 13 |
| Accessing the Action center | 13 |
| Using Cortana | 14 |
| The Date/Time | 14 |
| The back button | 15 |
| Using the On Screen Keyboard (OSK) | 15 |
| Hot Key Shortcuts (Optional) | 15 |
| Technical information. | 16 |
| General information. | 18 |
| Guarantee | 18 |
| Disclaimer | 18 |
| Trademarks | 18 |
| Recycling | 18 |
| Disposal of Waste Electrical & Electronic Equipment (WEEE) | 18 |
| Digital Rights Management | 19 |
| Rechargeable Lithium-Ion Battery 19 | |
| Battery and Charger Safety | 19 |
| Small children | 19 |
| Medical devices | 19 |
| Implanted medical devices | 19 |
| Hearing | 20 |

Important safety information.
Your tablet should be treated with care. The information below has been provided in the interest of safety and will help you to enjoy this product and the benefits it brings for many years.
- DO NOT use or press down on the label PC screen with any sharp objects, they may scratch the LCD screen.
- DO NOT place the tablet PC on uneven or unstable work surface.
- Avoid any heavy impacts caused by collisions or dropping your tablet above 1.2 metres as this may damage the product.
• DO NOT show any foreign objects into the Tablet PC. - DO NOT expose the label PC to strong magnetic or electrical fields
- DO NOT expose the tablet to direct sunlight, or leave the Tablet PC facing the sun for long periods of time as it can damage the LCD Screen.
- SAFE TEMP: This tablet PC should only be used in environments with ambient temperatures between 0°C and 40°C
- CAUTION: Risk of explosion if battery is replaced by an incorrect type. Dispose of used batteries according to the instructions.
- DO NOT throw the Tablet PC in municipal waste. Check local regulations for disposal of electronic products.
- DO NOT use harsh chemicals, clearing solvents or detergents to clean the product. Wipe with a dry soft cloth or tissue paper to clean.
- The underneath and sides of the product may become warm after a long period of use. This is normal,
- DO NOT leave the Tablet PC on your lap or any part of the body in order to prevent discomfort or injury from heat exposure.
- INPUT RATING: Refer to the rating label on the Tablet PC and be sure that the Power Adapter complies with the rating. Only use attachments or accessories specified by the manufacturer.
- Checking the connections between the main unit and attachments before turning on the Tablet PC.
-
DO NOT insert anything into the Tablet PC that may result in short circuit or damage the circuit.
-
Disconnect the Tablet PC from the electrical outlet and remove any installed batteries before cleaning.
- Keep the product and all of its part out of the reach of children.
- This product is not intended for use by persons (including children) with reduced physical, sensory or mental capabilities, or lack of experience and knowledge, unless they have been given supervision or instruction concerning the use of the appliance by a person responsible for their safety.
- NEVER use the tablet near emergency/intensive care medical equipment, if you have a pacemaker fitted or during an electrical storm.
- CAUTION: This Tablet PC has some metal parts to disperse heat.
- DO NOT block or cover slots, holes or openings on the product by placing on soft furnishings such as carpets, rugs or beds as these are provided for functionality and/or ventilation to ensure safe operation of the product.
• To prevent possible hearing damage, do not listen at high volume levels for long periods. - DO NOT leave it in low temperatures as moisture can form inside the product, which may damage the circuit board.
- DO NOT leave it in high temperatures as electronic devices and plastic parts may warp in heat.
- Disconnect your tablet from the mains power supply during thunderstorms.
- Only use the power supply that came with the product. Using an unauthorised power supply will invalidate your guarantee and may irrecoverably damage the product.
- CAUTION: When the mains power plug or an appliance coupler is used and then disconnected, the tablet PC shall remain with an electronic charge until power is drained.
- DO NOT attempt to open the product. This product does not contain any user serviceable parts. Unauthorised handling of the device may damage it and will void your warranty.
Product overview.
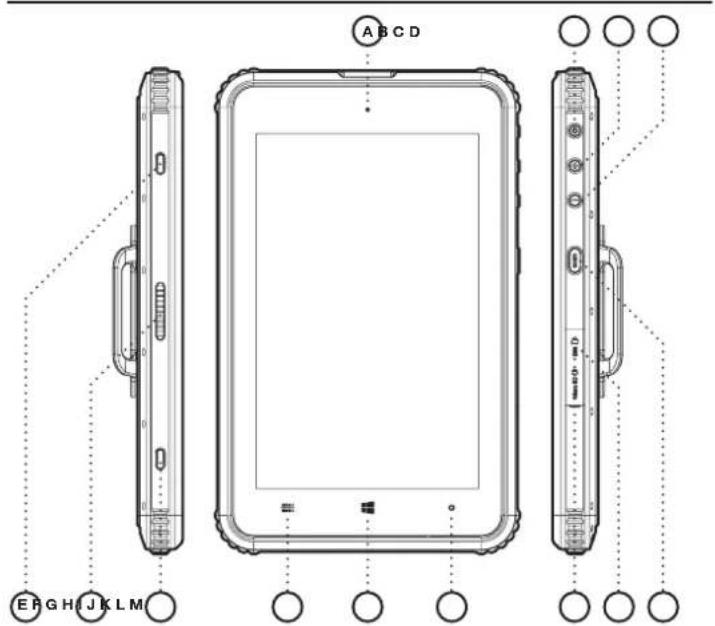
text_image
A B C D E F G H I J K L MSpecification.
| A | Power Indicator LED |
| B | Power/Sleep Button |
| C | Volume Up |
| D | Volume Down |
| E | Docking Mount Point |
| F | Pogo Pin Connector |
| G | Docking Mount Point |
| H | Scan Hotkey (Optional) |
| I | Windows Home |
| J | Shortcut Hotkey (Optional) |
| K | Micro SD Slot (Behind Cover) |
| L | Micro SIM Slot (Behind Cover) |
| M | Scan (Optional) |
Product overview.
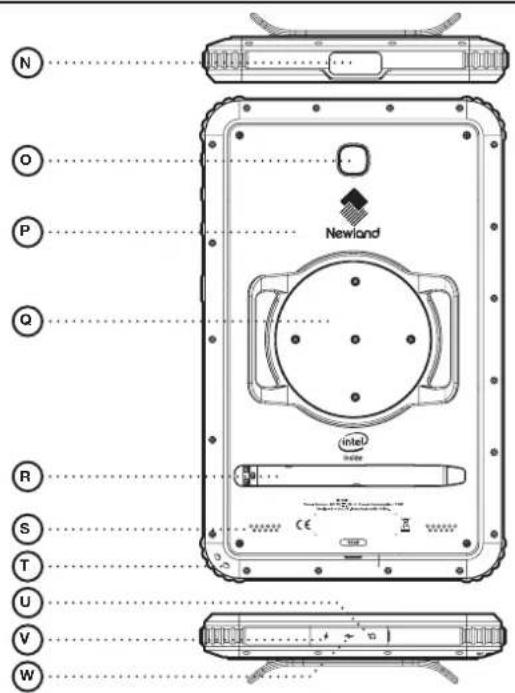
text_image
Newland Intel S T U V W N O P Q R S T V WSpecification.
| N | Scanner Module (Optional) |
| O | 5.0 Megapixel (MP) CMOS Camera |
| P | Backplate |
| Q | Rotating Hand Strap Panel (Optional) |
| R | Stylus |
| S | Loudspeaker |
| T | Lanyard Point |
| U | 3.5mm I headphone Socket (Behind Cover) |
| V | Charge Point (Behind Cover) |
| W | Micro USB Type-B (Behind Cover) |
Instructions for use.
Check the package contents.
The package contains:
• 1 x NQuire800-II / II Plus Tablet
• 1 x Power Supply Unit with Mains Plug Adaptor
• 1 x USB OTG Cable
- 1 x User Guide
- 1 x Hand Strap Panel (pre-assembled on Rotating Hand Strap Panel) (Optional)
Charging your tablet.
Your battery has been partially charged at the factory, but you may need to recharge it before you can switch the tablet on for the first time.
Note: It is recommended to recharge the battery of the tablet fully before turning on for the first time.
⚠️ Important: Use only the provided or approved chargers or cables with this tablet.
-
Plug the charger into a wall outlet
-
Connect the mains charger to your tablet via the connector on the charger. The Power indicator LED will light up when charging.
When the battery is full, disconnect the charger from the tablet, then from the wall outlet.
Note: To check the current charge level of the battery, press the icon located at the bottom right of the screen.
Note: You don't need to charge the tablet for specific length of time, and you can use the tablet while it is charging.
Note: If the battery is completely discharged, it may take several minutes before the tablet can be used.
Rechargeable Lithium-Ion battery
Your tablet has an internal Lithium-ion polymer battery which should last the lifetime of the product.
If you suspect that the battery is dead, try charging it several times and follow the steps for charging your tablet.
- Do NOT attempt to change the battery yourself.
- CAUTION: Danger of explosion if batteries are incorrectly replaced.
- NEVER use or charge the battery if it appears to be leaking, discoloured, deformed or in any way abnormal.
• NEVER expose the battery to any liquid. - NEVER expose the battery to excessive heat such as direct sunlight or fire.
- NEVER throw batteries in a fire or attempt to open the outer casing.
- Batteries are harmful if swallowed, so keep away from and out of reach of infants and young children.
Using your tablet.
Turning your tablet On
To turn your tablet on, press and hold the Power/Sleep button and the tablet will begin to power up.
Putting your tablet into Sleep mode
To put your tablet into Sleep mode, press the Power/Sleep button once. The screen should switch off and your tablet will be in Sleep mode.
To wake the tablet from Sleep mode, press the Power/Sleep button once. The screen should wake up and display the lock-screen.
Turning your tablet Off
To turn your tablet off, press and hold the Power/Sleep button until you are prompted with the 'Slide to shut down your PC' message. Slide and drag your finger down the screen to begin the shut down process and turn off your tablet.
Emergency reboot
To reboot your tablet if the screen becomes unresponsive, press and hold the Power/Sleep button for 10 seconds until the screen turns off.
Note: Leave the tablet for 15 seconds before trying to reboot the tablet.
Important: Avoid powering the tablet down by using the emergency reboot where possible. Always try to shut down your tablet using the correct shut down method to avoid loss or damage to data.
Increasing and decreasing the volume
To increase the volume level on your device, press the Volume up button. Repealedly press the Volume up button until the desired volume is reached.
To decrease the volume level on your device, press the Volume down button. Repeatedly press the Volume down button until the desired volume is reached.
Using headphones with your tablet
You can connect headphones with a 3.5mm plug (not included) to your tablet. The headphone socket can be found on the bottom of the device highlighted with ☉ When you have headphones connected the tablet speaker is switched off and all sound is via the headphones.
Installing a Micro SD card
Your tablet supports Micro SD cards (not included)
for additional storage of data and files.
⚠️ Important: Use only compatible memory cards approved for use with this device. Incompatible cards may damage both the memory card and the tablet, and may corrupt data stored on the card.
To install a Micro SD memory card:
- Locate the Micro SD card slot on the tablet.
- Insert the Micro SD card into the slot with the gold contacts facing up, carefully slide the memory card into the slot, pushing gently until it clicks into place.
Note: To remove a memory card, push the memory card gently until it clicks and the spring will push the card out to allow you to remove it from the tablet.
⚠️ Important: Do not remove a memory card when files are currently being used by the tablet. This may corrupt or lose the data stored on the memory card.
Installing a Micro SIM Card
Your tablet supports Micro SIM cards for 3G connectivity (where available).
Important: 3G Ready Micro SIM cards and data plans are sold separately and may be subject to additional contracts and fees. Contact your network operator for advice regarding connectivity or network charges.
Important: Please ensure that your tablet is turned off before installing or removing a Micro SIM card.
To install a Micro SIM card:
- Locate the Micro SIM card slot on the tablet.
- Insert the Micro SIM card into the slot facing
up and carefully slide the SIM card into the slot, pushing gently until it clicks into place.
To remove a Micro SIM card:
-
Locate the Micro SIM card slot on the tablet.
-
Gently push the installed Micro SIM card until it clicks. A spring will push the SIM card out slightly ready to be removed.
Using the Stylus
The NQuire Tough Tab 8 comes with a Built-in capacitive Stylus providing precision navigation and is designed to aid the function of any workforce.
The stylus can be removed, simply being unclipped from the location slot on the back of the device. Please ensure you take care when removing/storing the stylus.
Note: Please take care when handling the Stylus as incorrect operation/excessive force may damage the tablet or stylus.
Scanning.
This device is equipped with a scan module which is simple to operate.
Instructions:
Press the physical scan button on the side of the Tablet PC or the scan button on Touch Panel on the front bezel, then the scan module will enter the scan mode.
RFID Scanning (Optional).
This device can be fitted with an optional RFID module which will allow you to quickly and easily scan the data stored in RFID tags.
Instructions:
Ensure that the correct software for the RFID tag has been installed and start the application to open the RFID scanning software.
Some RFID scanning applications may automatically detect RFID tags and read the information without needing to interact further with the tablet, whereas some may involve pressing buttons on the Touch Panel to begin scanning.
For instructions on setting up and using the RFID scanning software, please consult the website of the software manufacturer for support and troubleshooting.
Using the touch screen
Unlocking the screen
To unlock your tablet, press the Power/Sleep button once to wake from sleep mode. When the lock-screen is displayed, slide the screen up to unlock.
The main home screen
natural_image
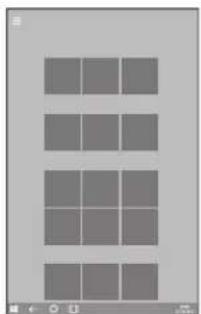
Grid of gray rectangular blocks arranged in three rows and three columns (no text or symbols)The main home screen is where all of the main applications tiles for your tablet will be located. From here you can select applications to run or open further menus to browse your files.
Note: The main home screen may differ if your tablet is set to 'PC' mode. Please see 'Changing between Tablet and PC mode' section for more details.
Changing between Tablet and PC mode
Windows 10 can be used in either Tablet mode or PC mode.
Tablet mode is enhanced for smaller touchscreen devices and is optimised to give the best Windows experience when used on tablets.
PC Mode provides users with a 'traditional' PC desktop experience including the Windows 'Start Menu' and file storage on your desktop.
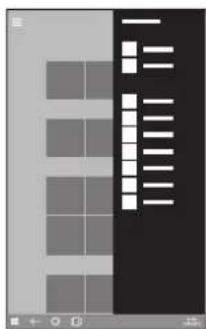
To switch between Tablet and PC Mode:
- Slide in from the right side of the screen
natural_image
Abstract graphic with a black arrow pointing from a grid of gray squares (no text or symbols)The Action center will now slide in from the right side of the screen:
text_image
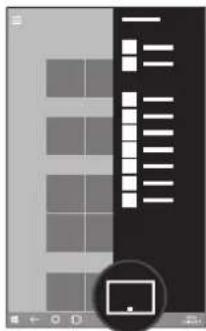
Scanned document page with a vertical list of items and a black header bar, likely a form or checklist.- To choose between Tablet and PC mode, tap the 'Tablet Mode' tile located at the bottom left of the Action center:
text_image
Scanned document page with placeholder text and a small icon in the bottom right cornerThe Windows home button
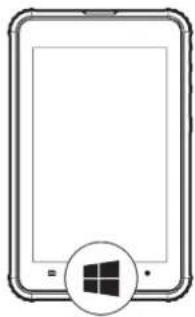
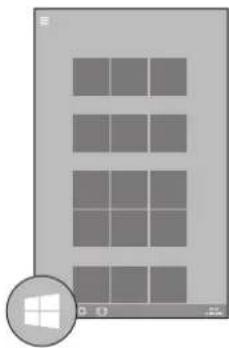
The Windows home button is used to take you back to the main home screen at any time.
This function can be accessed by using two different methods:
- By pressing the Windows icon located on the screen bezel on the front of your tablet:
natural_image
Illustration of a tablet device with a Windows logo icon (no text or symbols)- By pressing the Windows Icon located in the bottom-left of your tablet screen:
natural_image
Computer desktop with a blank grid layout and a Windows logo icon (no text or symbols on the main image)Opening and closing apps
To open an app, tap the app tile.
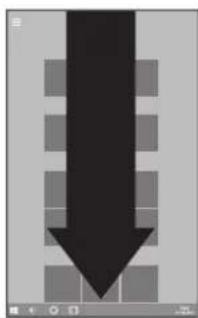
To close an app, slide your finger down from the top of the screen to the bottom of the screen:
natural_image
Abstract black downward arrow composed of gray rectangular blocks (no text or symbols)Switching apps
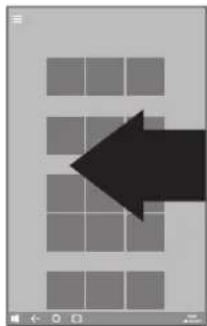
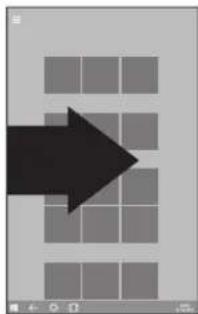
To switch between apps, swipe in from the left edge of the screen:
natural_image
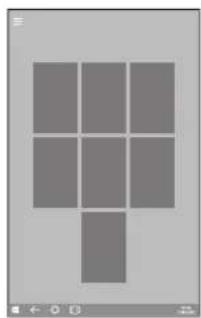
Abstract graphic with a large black arrow pointing right over a grid of gray squares (no text or symbols)The screen will change to now display all of the applications currently running on your tablet:
natural_image
Abstract geometric pattern composed of nine gray squares arranged in a grid (no text or symbols)To change to a different app, simply tap the tile of the app that you wish to switch to.
Accessing the main menu
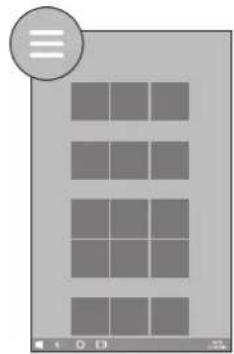
To access the main menu, tap the menu icon located in the top-left of the screen:
natural_image
Gray-scale icon showing a grid of squares with a circular element on the top-left corner (no text or symbols)The main menu will now slide in from the left side of the screen:

natural_image
Abstract geometric layout with gray rectangles and white lines on a dark background (no text or symbols)Accessing the Action center
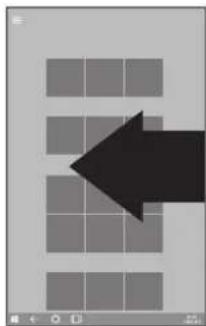
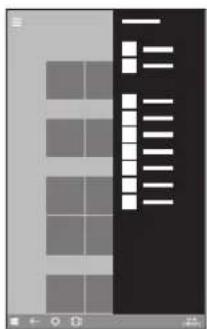
To access the Action center, slide in from the right side of the screen:
natural_image
Abstract graphic with a black arrow pointing right over a grid of gray squares (no text or symbols)The Action center will now slide in from the right side of the screen:
text_image
Scanned document page with a vertical list of items and a black header bar, likely a form or checklist.Using Cortana
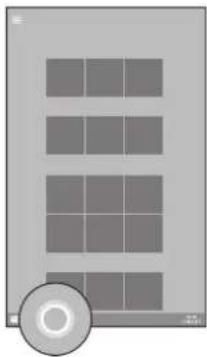
To use Cortana, tap the Cortana logo located at the bottom of the screen:
natural_image
Diagram of a CD or DVD device with four vertical panels and a circular lens (no text or symbols)When prompted, speak into the microphone to interact with Cortana.
Note: Cortana can help you with many tasks,
some of which include; Setting up a reminder, Searching the web for information and Check the latest weather forecasts.
The Date/Time
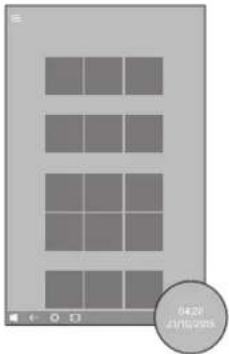
The current date and time are located at the bottom right of the screen:
natural_image
Gray-scale grid layout with a circular icon showing date and time (no readable text or symbols)For additional options like changing the settings, press on the Date/Time and an extra menu should pop up.
The back button
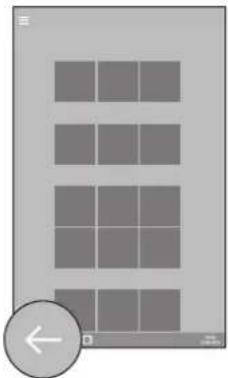
The back button takes you back to the previous menu or screen by tapping the 'back' arrow located at the bottom left of the screen:
natural_image
Gray rectangular grid layout with a circular icon containing an arrow pointing left (no text or symbols)Using the On Screen Keyboard (OSK)
text_image
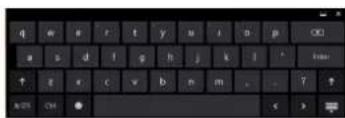
q e r t y u i o p OK a s d f g h j k l ↑ g x c v b n m . - ? ↑ OKTo gain access to the keyboard simply touch a text field to open the on-screen keyboard.
With the OSK you can get access to the numbers by pressing the numbers symbol at the bottom left or simply by tapping the target number key and sliding upwards.
Hot Key Shortcuts (Optional)
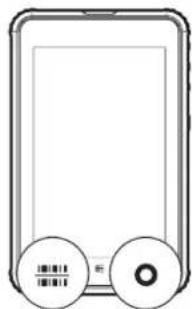
The NQuire Tough Tab 8 multi-touch capacitive display comes equipped with additional icons for
application shortcuts located on the screen bezel on the front of your tablet.
natural_image
Simple line drawing of a rectangular device with two circular buttons at the bottom (no text or symbols)Barcode Scanner
Using the scan button located on the front left-hand side of the touch panel, enables users to operate the scanner that is positioned on top of the device.
On Screen Keyboard (OSK)
By pressing the circular icon on the front right-hand side of the touch panel opens up the tablets on screen keyboard, press again to remove the on screen keyboard.
Note: Buttons will only work when the tablet is unlocked.
Technical information.
| Physical Properties. | |
| Dimensions (HWD) 235 × 147 × 22mm | |
| Weight 870g (Typical) | |
| Primary Orientation Portrait | |
| Screen Size 8.0" (diagonal) | |
| Screen Resolution / Aspect Ratio 800 × 1280 / 10:16 | |
| Touch Module 10-Point Capacitive Touch Panel | |
| Battery Type Rechargeable Lithium-ion Polymer | |
| Battery Capacity 8,000mAh / 3.7V | |
| Battery Life 5 - 7 Hours / Approx. (Dependent on use) | |
| IP67 Certified | Dustproof, Waterproof(Submersion up to 1m for 30mins) |
| Drop Tested Tested to IEC-60068232 standards at 1 | 2m |
| System Hardware Configuration. | |
| CPU Type | Intel Atom® x5-Z8350 |
| Clock Speed | 1.44 GHz up to 1.92 GHz, 64-Bit Quad Core |
| RAM | NQuire-II 2GB NQuire II Plus 4GB |
| ROM Flash | NQuire-II 32GB NQuire-II Plus 64GB |
| Camera 5.0 Megapixel (MP) CMOS (Rear) | |
| Speaker(s) 2 x Built-in 8Ω / 0.8W Speakers | |
| G-Sensor | Gravity Acceleration Sensor |
| Microphone Built-in | |
| Navigation Built-In GPS & GLCNASS | |
Technical information.
| Network Connections. | |
| Wi-Fi | 802.11 ac/a/b/g/n, 2.4Ghz and 5Ghz |
| Bluetooth Version | Bluetooth 4.0 |
| Interface Configuration. | |
| Expandable Memory Slot | Supports SDHC / SDXC up to 32GB |
| USB | 1 x Micro USB |
| Headphone Jack | 3.5mm Headphone Port |
| Keyboard Support | USB, BluetoothWired / Wireless |
| Mouse Support | USB, BluetoothWired / Wireless |
| Included Accessories. | |
| Power Adaptor | PSU (9V / 1.5A) |
| USB Patch Cord | USB OTG Cable |
| Software Configuration. | |
| Operating System | Windows 10 Pro |
Note: Specifications and external appearance are subject to change without notice.
General information.
Guarantee
Newland Europe BV warrants to the end user that this product will be free from defects in materials and workmanship in the course of normal use for a period of 12 months (1 year) from the date of purchase. This guarantee covers breakdowns due to manufacturing or design faults.
The guarantee is subject to the following provisions:
- The guarantee does not cover accidental damage, however caused, wear and tear, or negligence.
- It must be solely used for domestic purposes.
- The guarantee will be rendered invalid if the product is re-sold or is damaged through any adjustment, modification or repair not authorised by us.
- Specifications are subject to change without notice.
- The manufacturer disclaims any liability for the incidental or consequential damages.
- The guarantee is in addition to and does not diminish your statutory or legal right.
Should you have a problem with your unit please contact your supplier or contact Newland EMEA HQ at:
+31 (0)345 87 00 33
Or email us at: saleservice@newland-id.com
Guarantor: Newland Europe BV Rolweg 25 4104AV Culemborg The Netherlands
Disclaimer
Newland Europe BV makes no representation or warranties with respect to the content of this document and specifically disclaims any implied warranties of merchantability or fitness for any particular purpose. Further, Newland Europe BV reserves the right to revise this, or any other, publication and to make changes to the contents from time to time without the obligation of Newland Europe BV to notify any person or organisation of such revision or changes.
Trademarks
Newland, the Newland logo, NQuire, and the NQuire logo are trademarks or registered trademarks of Newland Europe BV.
Recycling
Always return your used electronic products, batteries, and packaging materials to dedicated collection points. This way you help to prevent uncontrolled waste disposal and promote the recycling of materials. All materials of the device can be recovered as material and energy.
Disposal of Waste Electrical & Electronic Equipment (WEEE)

This symbol on the product or on its packaging indicates that this product should not be treated as household waste. Instead it should be handed over to a suitable collection point for the recycling of electrical and electronic equipment. By ensuring this product is disposed of correctly, you will help prevent potential negative consequences for the environment and human health, which could otherwise be caused by inappropriate waste handling of this product. The recycling of materials will help to conserve natural resources. For more
information about the recycling of this product, please contact your local council office, your household waste disposal service or the shop where you purchased the product.
Digital Rights Management
When using this device, obey all laws and respect local customs, privacy and legitimate rights of others, including copyrights. Copyright protection may prevent you from copying, modifying, or transferring photos, music, and other content.
Rechargeable Lithium-Ion battery
This device has an internal, non-removable, rechargeable Lithium-ion polymer battery. Do not attempt to open the back cover or remove the battery, as you may damage the device. To replace the battery, take the device to the nearest authorised service facility.
Only use the power supply that came with the product. Using an unauthorised power supply could invalidate your guarantee and may irrecoverably damage the product.
The battery can be charged and discharged hundreds of times, but it will eventually wear out. When battery life is noticeably shorter than normal, to replace the battery, take the device to the nearest authorised service facility.
Battery and charger safety
To unplug a charger or an accessory, hold and pull the plug, not the cord.
When your charger is not in use, unplug it.
If your tablet is left unused on standby, a fully charged battery will still lose its charge over time.
Always keep the battery between 59°F and 77°F (15°C and 25°C) for optimal performance. Extreme temperatures reduce the capacity and lifetime of the battery. A device with a hot or cold battery may not work temporarily.
Do not dispose of batteries in a fire as they may
explode. Obey local regulations. Recycle when possible. Do not dispose as household garbage. Do not dismantle, cut, crush, bend, puncture, or otherwise damage the battery in any way. If a battery leaks, do not let liquid touch skin or eyes. If this happens, immediately flush the affected areas with water, or seek medical help.
Do not modify, attempt to insert foreign objects into the battery, or immerse or expose it to water or other liquids. Batteries may explode if damaged.
Use the battery and charger for their intended purposes only. Improper use, or use of unapproved or incompatible batteries or chargers may present a risk of fire, explosion, or other hazard, and may invalidate any approval of warranty. If you believe the battery or charger is damaged, take it to a service center before continuing to use it. Never use a damaged battery or charger.
Do not charge your device during a lightning storm. Only use the charger indoors.
Small children
Your device and its accessories are not toys. They may contain small parts. Keep them out of the reach of small children.
Medical devices
Operation of radio transmitting equipment, including wireless phones, may interfere with inadequately shielded medical devices' function. Consult a physician or the medical device's manufacturer to determine if it is adequately shielded from external radio energy.
Implanted medical devices
To avoid potential interference, manufacturers of implanted medical devices recommend a minimum separation of 6 inches (15.3 centimeters) between a wireless device and the medical device. Persons who have such devices should:
• Always keep the wireless device more than
6 inches (15.3 centimeters) from the medical device.
- Turn the wireless device off if there is any reason to suspect that interference is taking place.
- Follow the manufacturer directions for the implanted medical device.
If you have any questions about using your wireless device with an implanted medical device, consult your health care provider.
Hearing
Warning: When you use a headset or earphones, your ability to hear outside sounds may be affected. Do not use the headset where it can endanger your safety.
To prevent possible hearing damage, do not listen to audio at high volume levels for extended periods of time.

Newland
SCANNING MADE SIMPLE
Newland EMEA HQ
+31(0)345870033
info@newland-id.com
newland-id.com
D-A-C-H
+49 (0) 6182 82916-16
info@newland-id.de
Benelux
+31 (0) 345 87 00 33
benelux@newland-id.com
Italy
+39(0)3420562227
italy@newland-id.com
United Kingdom
+44 (0) 7771 631387
info@newland-id.co.uk
South Africa
Gauteng: +27 (0) 11 553 8010
Cape Town: +27 (0) 21 9140819
info@newland-id.co.za
Turkey
+90 (0) 544 538 40 49
turkey@newland-id.com
France
+39(0)3458804096
france@newland-id.com
Ibérica
+34 (0) 93 303 74 66
info@newland-id.es
Nordic & Baltic
+46 (0) 70 88 47 767
nordic@newland-id.com
Russia
+31(0)345870033
russia@newland-id.com
Middle East
+39 (0) 345 8804096
middleeast@newland-id.com
Iran
+90 (0) 544 538 40 49
iran@newland-id.com