EZ Pro Jr. Indoor 8276 - Automatic watering Nelson - Free user manual and instructions
Find the device manual for free EZ Pro Jr. Indoor 8276 Nelson in PDF.


| Product Type | Automatic Watering Timer / Controller |
| Brand | Nelson |
| Model | EZ Pro Jr. Indoor 8276 |
| Dimensions (L x W x H) | Approx. 5.5 x 4 x 1.5 inches |
| Weight | Approx. 0.5 lbs (without batteries) |
| Power Source | 2 AA batteries (not included) |
| Number of Stations | 1 |
| Watering Schedules | Up to 4 start times per day |
| Watering Duration | 1 minute to 12 hours per cycle |
| Manual Override | Yes (push-button) |
| Rain Delay | Up to 72 hours |
| Indoor Use Only | Yes |
| Water Inlet/Outlet | 1/4" quick-connect fitting |
| Operating Pressure | 20-80 psi |
| Maintenance | Clean inlet filter periodically; replace batteries as needed |
| Safety | Low voltage; for indoor use only; keep away from water splash |
| Warranty | Limited 1-year manufacturer warranty |
| Repairability | No user-serviceable parts; contact support for issues |
Frequently Asked Questions - EZ Pro Jr. Indoor 8276 Nelson
User questions about EZ Pro Jr. Indoor 8276 Nelson
0 question about this device. Answer the ones you know or ask your own.
Ask a new question about this device
Download the instructions for your Automatic watering in PDF format for free! Find your manual EZ Pro Jr. Indoor 8276 - Nelson and take your electronic device back in hand. On this page are published all the documents necessary for the use of your device. EZ Pro Jr. Indoor 8276 by Nelson.
USER MANUAL EZ Pro Jr. Indoor 8276 Nelson
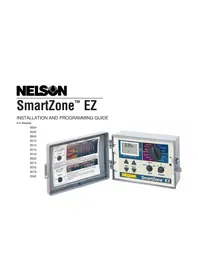
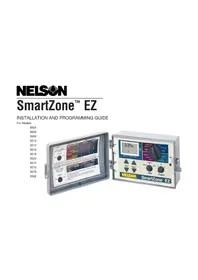
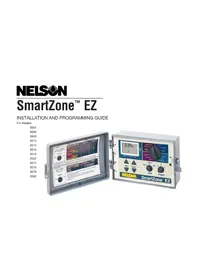
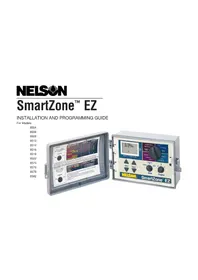
Installation and Programming Guide
For EZ Pro™ Jr. Indoor models:
8204 8274
8206 8276
8209 8279
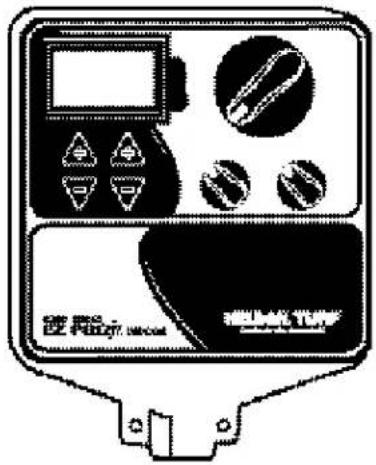
THANK YOU for purchasing the EZ Pro™ Jr. Indoor 8200 Series electronic irrigation controller. The EZ Pro™ Jr. Indoor 8200 Series is so “EZ”, you’ll probably be able to install and program this feature-packed controller without instructions. However, before installing and programming the controller, we recommend you read these instructions carefully to take full advantage of all the EZ Pro™ Jr. Indoor 8200 Series has to offer.
If you have questions, problems or comments on your new EZ Pro™ Jr. Indoor 8200 Series, please call our Technical Services Department toll-free at1-888-NELSON8, or by visiting us on our website at LRNelson.com.
Leaders in Turf Irrigation Since 1911
NOTE: In our efforts to continually improve and update our products, features and specifications in this manual may change without notice.
TABLE OF CONTENTS
FEATURES 5
INSTALLATION 6-8
Terminal Strip 6
Connecting Master Valve or Pump-Start Relay 6
Connecting Rain/Moisture Sensor 7
Connecting Battery & Starting Controller 7
Connecting Transformer 8
PROGRAMMING THE EZ PRO™ JR. INDOOR 9-19
Programming Overview 9
Front Panel Layout 10-11
Set Time of Day 12
Set Today's Date 12
Set Current Day 12
Select Zones and Set Their Run Times 12
Set Start Times 13
Set % Water Budget 13-14
Set % Water Budget by Month 14
Scheduling 14-15
Set Water Days Scheduling Option 15
Set Odd/Even Day Scheduling Option 16
Set Interval Scheduling Option 16
Set Event Day Scheduling Option 17
Program Review 17
Set Master Valve or Pump 18
Set Rain Delay 18
Turning the Controller Off 19
ADVANCED FEATURES 20-21
Run a Zone Manually 20
Run a Program Cycle Manually 21
Technical Data/Specifications 22-24
Troubleshooting/Service 25
FCC Rules 26
FEATURES
- Nelson exclusive SELECT&ADJUST™ programming
- Programmable delay between zones
• Three independent programs - Three start times per program (9 total starts)
- Stacking start times
- Three scheduling options to suit the needs of plant material or to comply with watering restrictions (days of the week, 1-30 day interval, true odd/even)
• Event days programming per program - Rain Sensor bypass option
- Leap year compatible-automatically includes Feb 29th every four years
• Water budget option reduces or increases watering 0-200 percent - Advanced water budget to set water budget for each month of the year
- Two test cycles (Manual with ManualAdvance™ feature and Cycle)
- Programmable run times from one minute to 1 hour 59 minutes
- Poly-fuse self resetting circuit protection
INSTALLATION INSTRUCTIONS
The EZ Pro™ Jr. Indoor 8200 Series can be easily mounted indoors. Find a location near a 120V receptacle (230/240V for 8274, 8276, and 8279 models). Install the EZ Pro™ Jr. Indoor near eye level if possible. Install the top screw in the wall and adjust the depth for a snug fit when the controller is suspended on the screw. Remove the wiring skirt and suspend the controller on the first mounting screw and insert and tighten the second screw through the lower hole provided in the case (pre-drilled or anchors as necessary).
Low Voltage Wiring
Low voltage output cables should be enclosed in conduit affixed near the controller. (For field connection, AC wires must have an insulation rated at 75^ C minimum). Conduit should be secured near the case (follow local codes). Field wiring is best accomplished with the AC disconnected from the unit.
Terminal Strip
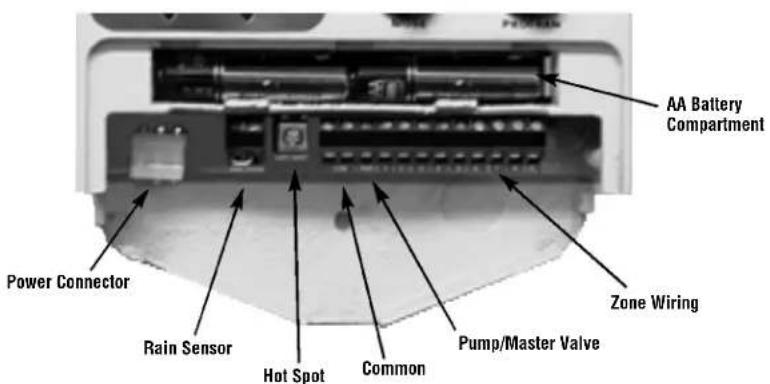
All zone, pump and sensor wire connections made inside the EZ Pro™ Jr. Indoor utilize screw type connectors that require a small screwdriver. The terminal strips in the controller accept 12 AWG (2.1mm) wire or smaller. (See figure 1)
Connecting Master Valve or Pump-Start Relay
The EZ Pro™ Jr. Indoor is equipped with a shared circuit to operate either a pumpstart relay or a master valve. Connect one wire from the pump-start relay to COM (common) on terminal strip, the other to PMP/MV (pump/master valve) on the terminal strip. Refer to the pump-start relay manufacturer's instructions for specific installation details. (See figure 1)
INSTALLATION INSTRUCTIONS
Connecting Rain/Moisture Sensor
The EZ Pro™ Jr. Indoor is equipped to operate a sensor with normally-closed leads. To install a sensor, remove the factory-installed jumper wire from the sensor connector on the terminal strip and insert the sensor wires. Refer to the sensor manufacturer's instructions for specific installation details. (See figure 1)
If a sensor has suspended watering, the sensor indicator segment will appear on the LCD. The symbol will go off when the sensor has dried out. The EZ Pro™ Jr. Indoor will resume operation based on the selected program.
NOTE: Manual operations will ignore the rain sensor
Connecting the batteries and starting the controller
Remove the wiring skirt. Insert two new AA Alkaline (LR6 in Europe) batteries into the battery clips in the pocket directly above the terminal strip. The AA batteries enable the EZ Pro™ Jr. Indoor to be programmed without AC power and maintain the programs and real time clock in the event of a power outage. If the batteries are not installed, the controller will lose real time and programs in the event of a power outage. The batteries should be replaced every five years, or when low battery symbol appears. Replace the batteries while the unit is AC Powered to prevent loss of clock and settings. (See figure 1)
INSTALLATION INSTRUCTIONS
Connecting the Transformer
120 VAC in United States, Canada and Mexico; 230 VAC in Europe, and 240 VAC in Australia and South Africa
NOTE: Refer to and follow local codes if different from these instructions.
CAUTION: Disconnect 120V (230/240V for 8274, 8276, 8279 models) power
Connect the AC Power connector from the transformer to the plug provided on the left side of the terminal strips and route the cable through the slot provided in the case.
Attach the wiring skirt to the unit
Plug the AC power adaptor into the nearest receptacle.
text_image
AA Battery Compartment Power Connector Rain Sensor Hot Spot Common Pump/Master Valve Zone WiringFIGURE 1
PROGRAMMING INSTRUCTIONS
Programming Overview
The EZ Pro™ Jr. Indoor can be programmed under AC power or powered from the two AA alkaline batteries. Before programming the EZ Pro™ Jr. Indoor, it may be helpful to become familiar with some general programming guidelines:
- If a segment(s) on the LCD is flashing, it means that it can be changed by the user.
- When using keys, hold the button three seconds to start a fast scroll.
- Be sure the appropriate program letter is displayed when you are programming; program changes are specific to the program letter displayed on the LCD.
- There is no "ENTER" key. Key-presses and dial settings are stored automatically for you.
- If you make a programming change while a program is running, the program terminates immediately. The new program starts at the next start time scheduled.
- When not running, the controller displays the current time and the current day.
- During manual operations, there is a 5-second delay before the operation begins. During this time, you can change your settings. Each time you make a change, the delay resets to 5 seconds.
- MANUAL and CYCLE procedures only operate with the Program dial set in the AUTO position.
- After a test procedure runs, the controller reverts back to the AUTO procedure and runs the next program scheduled.
- The test procedures ignore the sensor connection; this allows you to water or run your program even if the sensor has suspended operation.
- To clear all programs and start over, press and hold SELECT ‘–’ and ADJUST ‘–’ for three seconds.
PROGRAMMING INSTRUCTIONS
Front Panel Layout
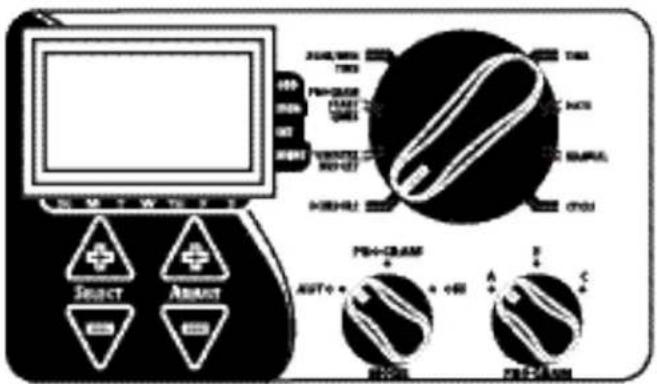
Looking at the front panel (see figure 2), you see a large LCD, 4 rubber buttons, one large rotary dial, and two small rotary dials. The rubber buttons are marked SELECT and ADJUST and are the core of Nelson's exclusive SELECT&ADJUST™ programming. The keys are identified with ‘+’ or ‘-’ for increasing or decreasing the segment you're working on.
SELECT&ADJUST™ works on the principle that you first SELECT what you want to set, and ADJUST the variables of what you selected. For example, if you want a run time of 10 minutes on zone 5, you would use the SELECT keys to select zone 5 and, once on zone 5, you would use the ADJUST keys to set the run time to 10 minutes.
There are instances when only SELECT or only ADJUST are required. They will be explained in this guide where appropriate.
PROGRAMMING INSTRUCTIONS
FIGURE 2
text_image
SELECT ASSIST PHC-GRAM AUTO + OFF A B C PHC-GRAM INTU INTU INTU INTU INTU INTU INTU INTU INTU INTU INTU INTU INTU INTU INTU INTU INTU INTU INTU INTU INTU INTU INTU INTU INTU INTU INTU INTU INTU INTU INTU INTU INTU INTUNOTE: The MODE dial must be in the PROGRAM position.
NOTE: Every time the '+' or '-' key is pressed, the display will increase or decrease one unit. Hold the '+' or '-' key for three seconds to initiate a fast scroll.
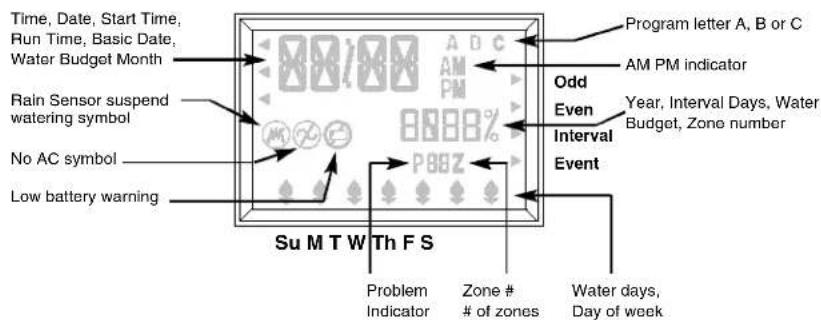
NOTE: Please refer to the Technical Data section for an explanation of the LCD segments.
PROGRAMMING INSTRUCTIONS - PROGRAM MODE
Set Time of Day
Turn the large dial to the TIME position. Press SELECT to select between hours, minutes, and 12/24 hour mode. Press ADJUST to scroll to the correct time or adjust between 12/24 mode. 'A.M.' will not appear on the LCD when in A.M. mode; 'P.M.' will appear on the LCD when in P.M. mode.
NOTE: In 24 hour mode, calendar is in D/M/Y format instead of M/D/Y
Set Today's Date and Current Day of the Week
Turn the large dial to the DATE position. Press SELECT keys to select between day, month and year positions. Press ADJUST keys to scroll to the current date. The correct day of the week will automatically show on LCD screen when today's date is adjusted. The EZ Pro™ Jr. Indoor controller is leap year compliant.
Select Zones and Set Their Run Times
A zone run time determines the duration a zone will run. Turn the large dial to the ZONE/RUN TIME position. Turn PROGRAM dial to choose program A, B or C. Press SELECT to choose the zone you want for the selected program (A, B, or C). With the zone number displayed on the LCD, press ADJUST to adjust the RUN TIME for that zone. RUN TIMES can be set from 1 minute to 1 hour 59 minutes. Continue selecting zones and adjusting their run times until you have all the zones you want in the selected program.
After the last zone and before the first zone, a RUN TIME summation is provided. This is useful for determining the total run time for a program. The LCD displays the letters "ALL" and a total RUN TIME is displayed. The time displayed is a summation of all the RUN TIMES for the selected program (100% water budget). (ex. A program has a run time of 5 minutes on zone 1; 12 minutes on zone 2; and 6 minutes on zone 4. The display at this position displays ALL and a run time of 23 minutes).
PROGRAMMING INSTRUCTIONS - PROGRAM MODE
Set Start Times
A START TIME is the time of day a program will start running. The EZ Pro™ Jr. Indoor allows three start times per program.
Turn the large dial to the START TIMES position. Press SELECT to select the start time you want to set (1, 2, or 3). Press ADJUST to set the time of day the program will start. Repeat as needed.
Start Time Stacking
The EZ Pro™ Jr. Indoor will stack start times if your program watering times overlap another start time. The additional start time will begin when the first cycle finishes.
Set % Water Budget
% WATER BUDGET changes the duration of run times in a program by the percentage entered 0 - 200% (i.e., a 10 minute run time at 50% water budget will run 5 minutes). This feature is useful when changes in weather occur. If it is unusually dry, you may want to extend your run time for each zone in a program. With % Water Budget, you can change one number, and all run times in the program are adjusted. If 24 hours of run time is exceeded 24 hr will flash on the LCD.
Turn the large dial to the \% WATER BUDGET position. A \% symbol will appear on the LCD to let you know you are working on the \% Water Budget amount. Press ADJUST to choose the desired percentage amount.
PROGRAMMING INSTRUCTIONS - PROGRAM MODE
If % WATER BUDGET is set for 110% or greater, the EZ Pro™ Jr. Indoor will split the run time in half to reduce runoff. Half of the calculated run time will operate for each zone in that program, followed by the second half of the run time for each zone.
NOTE: % WATER BUDGET is changeable by program. If you have programming in A, B, and C, you must enter three water budget values if you want every program to be changed.
Set Water Budget by Month (Advanced feature)
The EZ Pro™ Jr. Indoor allows you to set % WATER BUDGET by month. This feature allows you to customize your program by month over the year to allow for hot dry months and cooler wetter months.
Turn the large dial to the \% WATER BUDGET position. Press both SELECT '+' and SELECT '-' together. Use the SELECT to select months 1-12. Use the ADJUST to choose the desired percentage amount from 0-200%. If 0% is chosen, no watering will take place in that month.
Set the Watering Schedule (A quick note on scheduling and the EZ Pro™ Jr. Indoor...)
The EZ Pro™ Jr. Indoor controller has three scheduling options plus the option for Event Days Programming:
- WATER DAYS, or daily, lets you choose which days of the week you want to water (i.e., Monday, Wednesday, Friday only).
- ODD/EVEN tells the controller to water on either the odd or even days of the month (i.e., the controller will water on the 31st and the 1st when an ODD schedule is chosen).
PROGRAMMING INSTRUCTIONS - PROGRAM MODE
- INTERVAL waters every X number of days (from 1 to 30 days) (i.e., water every 3 days, waters every 10 days, etc.). A value of 1 in an interval schedule means to water every day. When using the interval option, you have the flexibility to tell the controller what day to start the interval program on (up to 30 days out).
- EVENT DAYS allows each program to block any specific day(s) from watering, regarding of the scheduling option (odd/even, interval, or daily).
The LCD will display the currently scheduled program (default is all WATER DAYS.) The SELECT keys will scroll the LCD display through each of the scheduling positions WATER DAYS, ODD, EVEN, INTERVAL, and INTERVAL START DATE. Be sure the PROGRAM dial is set on the program you want to change (A, B, or C) and that you want to change the current schedule. A scheduling option is chosen after you press a button, either SELECT or ADJUST. The old schedule is replaced with the new one. It's easy to program a schedule with the following procedures.
Set Water Days Scheduling Option
Turn the large dial to the SCHEDULE position. Use the SELECT till the raindrops appear above the days of the week. Press the ADJUST '+' button to select that day for watering or press ADJUST '-' for non-watering days. A flashing indicator appears over the day you're about to set. Raindrops appear over selected days to water. The indicator automatically moves one day to the right after an ADJUST '+' or '-' key press. Continue selecting or deselecting the days you want the controller to water until you have your 7-day calendar set.
PROGRAMMING INSTRUCTIONS - PROGRAM MODE
NOTE: Programming a WATER DAYS schedule deletes any other schedule for the selected program.
Set Odd/Even Day Scheduling Option
Turn the large dial to the SCHEDULE position. The last scheduling option chosen for the current program appears on the LCD. To set either an ODD or an EVEN schedule press the SELECT button till an arrow appears on the LCD next to the appropriate schedule (ODD or EVEN). A DATE must be set for odd/even watering). The SELECT buttons act as toggle keys and will toggle between odd or even.
NOTE: Programming an ODD/EVEN schedule deletes any other schedule for the selected program.
Set Interval Scheduling Option
Turn the large dial to the SCHEDULE position. The last scheduling option chosen for the current program appears on the LCD. Press SELECT to scroll to the interval days position. An arrow will appear on the LCD next to INT (Interval). Use the ADJUST to choose interval days between watering (1-30). The date displayed is day one of the interval schedule. (Today's date if one has been set). To change day 1 date use SELECT to go to the interval start date position. As needed, change the date for day one of the interval schedule with ADJUST (can only be set up to 30 days out).
NOTE: Programming an INTERVAL schedule deletes any other schedule for the selected program.
PROGRAMMING INSTRUCTIONS - PROGRAM MODE
Set Event Days Programming (Optional)
Turn the large dial to the SCHEDULE position. The last scheduling option chosen for the current program appears on the LCD. Press both the SELECT '+' and SELECT '-' together. A flashing indicator will appear next to Event Days on the LCD. Use the ADJUST '+' button to select that day for watering or press ADJUST '-' for non watering days. A flashing indicator appears over the day you'reabout to set. Raindrops appear over selected days to water. The indicator automatically moves one day to the right after an ADJUST '+' or '-' key press. Continue selecting or deselecting the days you want the controller to water until you have your 7 day calendar set.
NOTE: Programming an EVENT DAYS schedule does NOT delete any other schedule for the selected program.
Repeat the above procedures for each program (A, B, or C), as you require. That's it! Your EZ Pro™ Jr. Indoor is now programmed. Turn the MODE dial to the AUTO position to run the program you entered.
PROGRAM REVIEW
To review the current program, turn the MODE dial to the PROGRAM position and turn the large dial to the setting you wish to review (i.e., turn the large dial to TIME to review the time set for the controller). When you need to view different zones or run times (1, 2, 3), use the SELECT buttons only.
NOTE: Since you are in the program mode, the potential exists to change the program accidentally.
PROGRAMMING INSTRUCTIONS - PROGRAM MODE
Set Master Valve or Pump Delay
You can delay the time between when the Master Valve/Pump turns on and the time the zones start. Turn the large dial to Zone Run Times. Press both the SELECT '+' and SELECT '-' keys together. Use the ADJUST '+' or '-' key to adjust the time delay. The LCD will show the time of the delay (Adjustable between 1 second – 30 minutes) with "del" underneath. To return to setting the Zone Run Times, press both the SELECT '+' and SELECT '-' keys together.
NOTE: The Master Valve/Pump Delay will be the same for all 3 programs (A, B, and C).
PROGRAMMING INSTRUCTIONS - AUTO MODE
Set the Rain Sensor Bypass
The EZ Pro™ Jr. Indoor is equipped with a Rain Sensor Bypass. This will cause the controller to water even if the rain sensor is tripped. To activate bypass the controller must be in AUTO Mode. While in Auto Mode press both the SELECT '+' and SELECT '-' keys together. The Sensor Suspend symbol will flash. To deactivate Press both the SELECT '+' and SELECT '-' keys together, while in AUTO Mode. This will cause the Sensor symbol to stop flashing and show the current rain sensor status.
NOTE: Rain Sensor Bypass will remain on until it is deactivated.
PROGRAMMING INSTRUCTIONS - OFF MODE
Turning the Controller Off
Turn the MODE dial to the OFF position. This suspends all watering operations (including manual/test procedures) from operating. The clock continues to maintain the current time and date and your program(s) is retained until you want to run your program(s) again. To run your program, turn the MODE dial back to the AUTO position.
ADVANCED FEATURES - AUTO MODE
The EZ Pro™ Jr. Indoor incorporates two manual/test procedures for checking the function of the controller or allowing you to bypass the current program to water immediately. The following section will show you how to set up the controller to:
- Run a zone manually
- Run a program manually
NOTE: All test procedures are run with the MODE dial in the AUTO position. This allows the controller to reset to the AUTO setting after running a manual/test procedure. It also allows you the ability to walk away from the controller after setting up a manual/test procedure and not have to come back to reset the controller to AUTO.
NOTE: All manual/test procedures ignore the sensor connection. Therefore, you can water utilizing one of the manual/test procedures even if the sensor has suspended your scheduled program.
Run a Zone Manually
Turn the large dial to the MANUAL position. The default of zone 01 and 00:10 minutes will be flashing (recall that this means you can change them). Press SELECT to select the zone number that you want to run. Press ADJUST to set the run time for the selected zone. The controller will delay 5 seconds before starting the zone.
ADVANCED FEATURES - AUTO MODE
The EZ Pro™ Jr. Indoor incorporates Nelson's ManualAdvance™ feature in the MANUAL procedure. ManualAdvance™ allows you to cease the currently running zone and immediately advance to any new zone you select. With the MANUAL or CYCLE procedure running a zone, Press SELECT to advance to a new zone. The last entered run time will be displayed. Press ADJUST to enter a new run time for the new zone (the controller will delay 5 seconds before starting the new zone).
NOTE: Once the zone has started running, the run time cannot be adjusted without deselecting and reselecting the zone.
Run a Program Cycle Manually
Turn the large dial to the CYCLE position. The current program letter will flash. To change to a different program, turn the PROGRAM dial to the desired program (A, B, or C). The controller will delay five seconds before starting the selected program. After running, the controller resets to the AUTO procedure.
NOTE: CYCLE runs your current program immediately.
Can ManualAdvance™ through the zones.
TECHNICAL DATA
1. Transformer
24 VAC internal transformer; 20 VA, .83A for zones and logic. The transformer can run a pump or master valve and one zone valve, maximum.
2. Surge Protection
600 watts TVS on zone outputs 9J Mov on secondaries. (see Circuit Breaker below)
3. Sensor Operation
The EZ Pro™ Jr. Indoor is configured to operate the controller with or without a sensor. Sensors must have normally closed connections (leads). The factory-installed jumper wire must be in place if no sensor is used.
4. Zone Lines
The EZ Pro™ Jr. Indoor will operate a maximum of two (2) solenoids concurrently, providing one is the pump/master valve. Each zone output can operate one or two solenoids. I inrush .52A max I hold .33A max
5. Temperature Range
Operating: -20^ to +55^ C ( 23^ to 131^ Fahrenheit) Storage: -30^ to +85^ C ( -22^ to 185^ Fahrenheit)
TECHNICAL DATA
6. Display
text_image
Time, Date, Start Time, Run Time, Basic Date, Water Budget Month Rain Sensor suspend watering symbol No AC symbol Low battery warning Program letter A, B or C AM PM indicator Odd Even Interval Event Year, Interval Days, Water Budget, Zone number P88Z Su M T W Th F S Problem Indicator Zone #of zones
Water days, Day of week7. Batteries
Two (2) AA (LR6 in Europe) Alkaline batteries are required. Do not use NiCad batteries.
8. Case Dimensions (approx.)
7 5/16" H x 5 5/8" W x 2" D
TECHNICAL DATA
9. Reset Procedures
- To reset the controller to factory defaults, make sure you are in auto mode, press and hold the select minus and adjust minus keys until the display resets, then release the keys.
- In the event of a lock-up, there are 2 reset pads provided in the space to the right of the terminal strip that can be momentarily shorted with a small flat-blade screwdriver or other metallic object.
10. Default Settings (12 hour mode)
12:00 A.M.
Sunday
Date is 01/01 2003
No Run Times (zone 01, —:—)
No Start Times (start number 01, —:—)
100% Water Budget
Every day watering schedule
Mode dial is at OFF position
Program dial is on A program
5 second delay between zones
11. Circuit Breaker
A 1.0A electronic poly-switch is incorporated on the interconnect PCB of the controller. This type of circuit breaker does not require resetting or replacement by the user.
TROUBLESHOOTING/SERVICE
| SYMPTOM POSSIBLE CAUSE SOLUTION | ||
| No output to zone, pump, master • AC disconnected • Check AC source, if AC is not valve or no AC indicator lit detected by the controller, the no | ||
| AC indicator will be lit | ||
| No AC and blank display • No battery or dead battery • Replace battery and press reset | ||
| LCD is blank • No AC and no battery • Install battery to regain use of | display, check AC to ensure output to field | |
| “M-X” appears on the LCD when • MODE dial is in program position • Position the MODE dial in the trying to run a zone manually AUTO position to run a zone | ||
| “C-X” appears on the LCD when • MODE dial is in program position • Position the MODE dial in the trying to CYCLE a program | ||
| P with a zone number appears on LCD | • Wires not connected or short in wires or solenoid• More than 2 solenoids connected to a zone• TVS damaged due to lightning or improper grounding | • Check field wiring, check solenoid, replace solenoid• Remove zone wire if Pxxz still shows when run manually or automatically, unit needs service/replacement |
| ALL 24HR flashing on LCD | • Greater than 24 hours of run time programmed | • Check zone run times and % WATER BUDGET |
| Rain Sensor symbol on | • Rain sensor is activated or if no rain sensor installed, the jumper is missing | • Check to see if jumper is installed if there is no rain sensor |
| Controller not responding to any dial/key press | • Unit needs reset | • Screwdriver across pads marked Reset |
| No output to a single zone | • Wiring issues or bad solenoid | • Check wiring and/or solenoid |
| No output to any zone | • Broken on disconnected common• RS wired into common wire is open or disconnected | • Check common wire |
FCC RULES
This electronic irrigation controller generates and uses radio frequency energy and if not installed and used properly, that is, in strict accordance with the manufacturer's instructions, may cause interference to radio and television reception. It has been type tested and found to comply with the limits for a Class B computing device in accordance with the specifications in Subpart J of Part 15 of FCC Rules, which are designed to provide reasonable protection against such interference in a residential installation. However, there is no guarantee that interference will not occur in a particular installation. If this controller does cause interference to radio or television reception, which can be determined by turning the controller off and on, the user is encouraged to try to correct the interference by one or more of the following measures:
Reorient the receiving antenna
Relocate the controller with respect to the receiver
Move the controller away from the receiver
Plug the controller into a different outlet so that the controller and receiver are on different branch circuits
If necessary, the user should consult the dealer or an experienced radio/television technician for additional suggestions. The user may find the following booklet prepared by the Federal Communications Commission helpful:
"How to Identify and Resolve Radio-TV Interference Problems"
This booklet is available from the U.S. Government Printing Office, Washington, DC 20402. Stock No. 004-000-00345-4.
CANADIAN RADIO INTERFERENCE REGULATIONS
NOTE: This digital apparatus does not exceed the Class B limits for radio noise emissions from digital apparatus set out in the radio interference regulations of the Canadian Department of Communications.