
Viera TX-32LXD60EB - TV PANASONIC - Free user manual and instructions
Find the device manual for free Viera TX-32LXD60EB PANASONIC in PDF.


User questions about Viera TX-32LXD60EB PANASONIC
0 question about this device. Answer the ones you know or ask your own.
Ask a new question about this device
Download the instructions for your TV in PDF format for free! Find your manual Viera TX-32LXD60EB - PANASONIC and take your electronic device back in hand. On this page are published all the documents necessary for the use of your device. Viera TX-32LXD60EB by PANASONIC.
USER MANUAL Viera TX-32LXD60EB PANASONIC
OperatingInstructions
DigitalLCDTV
TX---32LXD60
TX---26LXD60
TX---23LXD60
VIERA
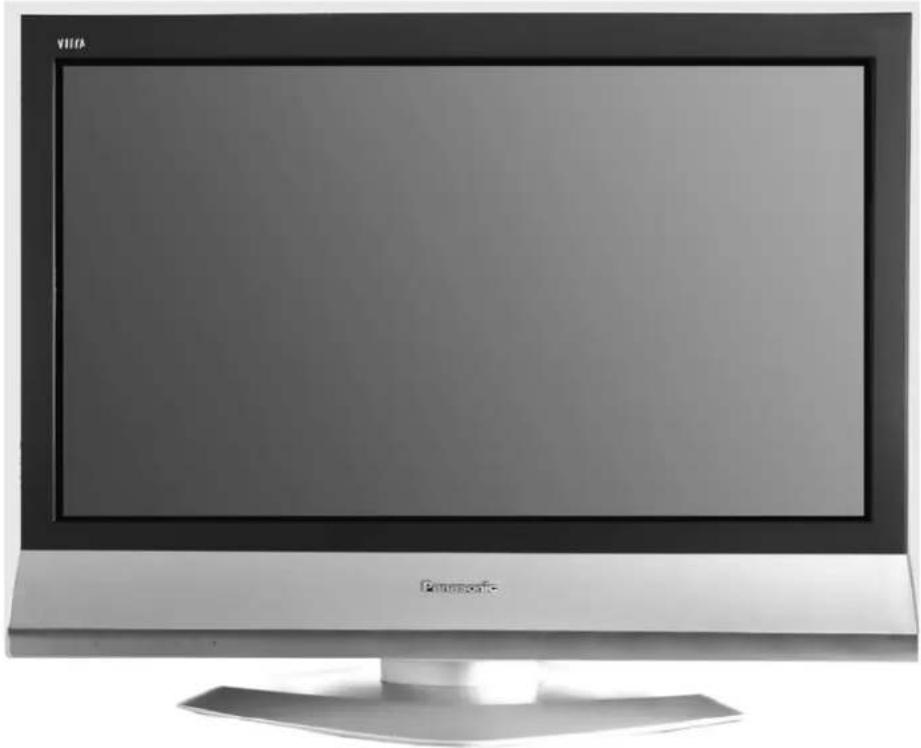
natural_image
Front view of a computer monitor with a blank screen and 'Grenosoft' branding (no additional text or symbols visible)




Please read these instructions before operating your set and retain them for future
(U.K. Standard)

TQB0E0233-1
Dear Panasonic Customer,
Welcome to the Panasonic family of customers.
We hope that you have many years of enjoyment from your new digital LCD televis advanced television; however, the Quick Start Guide will allow you to use the TV as possible. You can then read the instructions completely and retain them for future rel AnalogueandDigitaltelevision---whatarethey?
Analogue transmission is the system that has been used for many years for broadcasting television programmes. With continuous improvements in technology it is now possible to transmit programmes in a digital format, allowing clearer pictures, more stations and other set displayed on screen. Digital television is provided in three different ways; it can be connection direct to your house, broadcast from a satellite, or broadcast using tradition (terrestrial) transmitters. The first two options require you to have an extra ‘set top box’ decoder and in the case of satellite, a receiving dish mounted outdoors. While allowing you to receive analogue transmissions in the usual way, this television can also receive terrestrial dig using an integrated DVB (Digital Video Broadcasting) decoder. This allows you to enjoy the new era of digital terrestrial television, including future interactive services, without the need for a ‘set top box’ or satellite dish -- your current roof or loft mounted antenna is all you need. DVB is a trademark of the DVB Digital Video Broadcasting Project (1991 to 1996).
CONTENTS
WarningsandPrecautions 3
Accessories 4
Installation 5
Maintenance 5
BasicControls 6
QuickStartGuide 7
Analogue Programme Guide .... 11
DVBProgrammeGuide(EPG) 12
AspectControls 14
UsingOnScreenDisplays 17
PictureMenu 18
SoundMenu 19
SetupMenu 20
Tuning Menu - (Analogue mode) ..... 21
Tuning Menu - Programme Edit ..... 22
TuningMenu -- Autosetup
(AnalogueMode). 25
TuningMenu -- Manualtuning
(Analoguemode) 26
Setup Menu Owner I.D. 28
SetupMenuShippingCondition ..... 29
DVBSetupMenuOverview(DVB)Mode ... 30
Timer Programming Menu (DVB Mode) ... 31
Profile Edit Menu (DVB mode) 33
Child Lock Menu (DVB mode) 34
DVB Tuning Menu (DVB mode) 35
DVBSystemSetup(DVBmode) 36
Common Interface Module 37
SystemUpdateMenu(DVBmode) 38
Q-Link 39
VCR/DVD/R Operation 40
Teletext Operation 41
Connections (AV) 44
HDMI Functions 46
Connections (HDMI) 47
Troubleshooting 49
DVB Troubleshooting 50
Frequently asked Questions 51
On Screen Messages 52
For your guidance 54
Specifications 54
- This TV set is designed to operate on 220-240V, 50Hz A.C.
- To prevent damage which might result in electric shock do not expose this LCD television to rain or excessive moisture.
This TV must not be exposed to dripping or splashing and objects filled with liquid, such as vases, must not placed on top of or above the TV.
●WARNING:HIGHVOLTAGE!!!
Do not remove the rear cover as live parts are acces when it is removed. There are no user serviceable pa inside.
- Avoid exposing the TV set to direct sunlight and other sources of heat e.g. lit candles.
- Ensure that the mains plug is easily accessible.
●Never push objects of any kind into this LCD TV through cabinet slots as they may touch dangerous voltage points or short out parts that could result fire or electric shock.
- To prevent injury, this apparatus must be securely to the floor/wall in accordance with the installation instructions (mounting bracket is not supplied).
●The On/Off switch on this model does not fully dis the TV from the mains supply. Remove the mains the wall socket when the TV set is not used for period of time.
•CABINETANDLCDPANELCARE
Remove the mains plug from the wall socket. The and LCD panel can be cleaned with a soft cloth with mild detergent and water. Do not use solutions containing benzol or petroleum.
- Adequate ventilation is essential to prevent failure of
electrical components, we recommend that a gap of at least 10 cm is left all around this LCD television even when it is placed inside a cabinet or between shelves.
When ambient temperature is cool, the picture may take a short time to reach normal brightness, but this is not malfunction. (After brief moment, the picture will have normal brightness.)
●ventilation should not be impled by covering the parts ventilation openings with items such as newspapers, tablecloths and curtains.
•TVGAMES/HOMECOMPUTERS
Extended use of TV games or home computers with an television set can cause a permanent 'shadow' on the screen. This type of irreversible LCD panel damage, can limited by observing the following points:
- Reduce the brightness and contrast levels to a minimum viewing level.
- Do not operate the television set for a continuous period time while using TV games or home computers.
●Do not allow a still picture to be displayed for an extent connect period as this can cause a permanent after-image to plug from remain on the LCD TV screen. prolonged
- Examples of still pictures include logos, video games, computer images, teletext and images displayed in 4:3 mode.
cabinet moistened. This type of LCD panel damage is not an operating defect and as such is not covered by the Panasonic warranty.
FORYOURSAFETYPLEASEREADTHEFOLLOWINGTEXTCAREFULLY
This appliance is supplied with a fitted three pin mains plug for your safety and convenience. A 5 amp fuse is fitted in this plug. If the
fuse is replaced then the replacement fuse must be 5 amp rated and should be approved by ASTA or BSI to f
Check for the ASTA mark or the BSI mark on the body of the fuse.
If the fitted plug has a removable fuse cover you must ensure that it is refitted when the fuse is replaced. If you lose the fuse cover the plug must not be used until a replacement cover is obtained covers can be purchased through your local Panasonic dealer.
The plug fitted to this appliance incorporates a mains filter circuit. If this is removed or replaced with a non-filtered plug this television will no longer meet the European standards for Electromagnetic Compatibility (EMC). If the fitted plug is unsuitable for the socket outlet in your home an appropriate adapters should be used.
Nonetheless, if the fitted plug is replaced, the fuse should be taken out and the cut-off plug disposed of safely. There is danger of severe electrical shock if the cut off plug is inserted into any 13 amp socket.
If a new plug is to be fitted please observe the wiring code as shown below. If in any doubt please consult a qualified electrician.
How to replace the fuse (for plug type shown in example 1):
Lift out the removable fuse compartment with a screwdriver and replace the fuse, then refit securely into the mains plug (see example 1).
How to replace the fuse (for plug type shown in example 2):
Lift open the fuse compartment, in the mains plug, with a screwdriver, and replace the fuse, then press the fuse cover down securely (see example 2).
Example 1
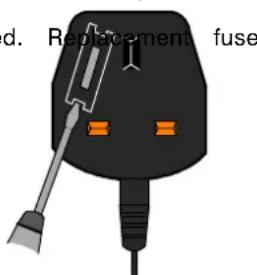
text_image
d. Replacement fuseExample 2
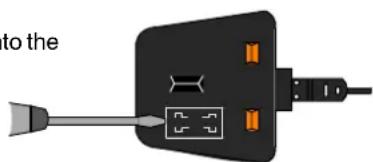
text_image
to theIMPORTANT :- The wires in the mains lead of this appliance are coloured in accordance with the following code :-
BLUE : NEUTRAL BROWN : LIVE
As the colours of the wires in the mains lead of this appliance may not correspond to the markings identifying the terminals in your plug, proceed as follows :-
- The BLUEwire must be connected to the terminal marked 'N' or coloured black.
- The BROWNwire must be connected to the terminal marked 'L' or coloured red.
IMPORTANTNOTE: Under no circumstances should either of these wires be connected to the Earth terminal of the three pin plug, marked with the letter 'E' or the earth symbol.
Checkthatyouhavetheaccessoriesanditemsshown


Operating
Instruction
book

Customer
Survey

1 Year
Guarantee
Registration

text_image
Panasonic VIEA TX=32LXD50 TX=96LXD50 TX=32LXD50 温度 DC 1000 LED LANOS


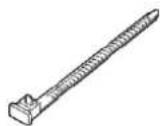
Clamper
(TX-26LXD60,
TX-32LXD60 only)

Remote Control
Transmitter
(EUR 7651050A)

Pan
European
Guarantee
Card



Batteries for
the Remote
Control
Transmitter.(2
x R6 (UM3)
size)


Remotecontrolbatteries
1
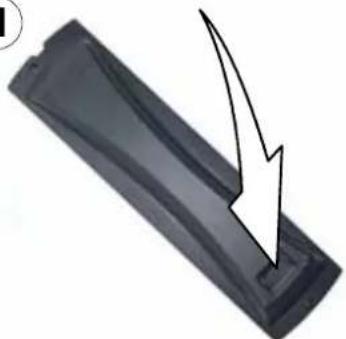
natural_image
Close-up of a black rectangular object with a white arrow pointing downward, no visible text or symbolsPull and hold the hook, then open the battery cover
2
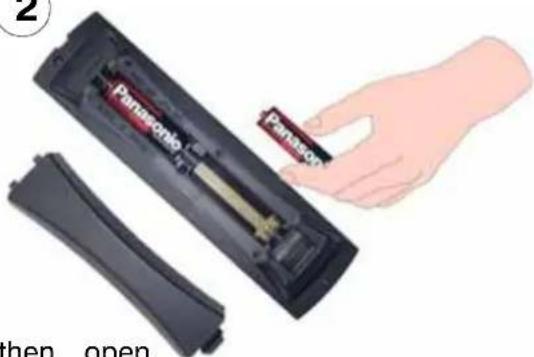
text_image
Pamsono Pamson then open
natural_image
Two black hard drives with visible brand labels, one partially filled and the other empty (no readable text or symbols)Insert batteries - note correct polarity (+ and -)
3
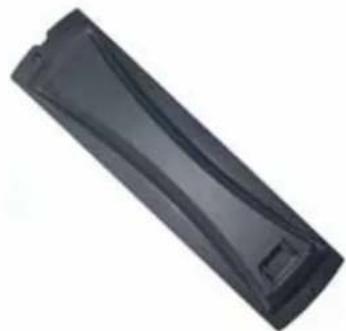
natural_image
Black rectangular object with a curved top and small protrusions, resembling a battery or plastic component (no text or symbols visible)Replace the cover
- Make sure that the batteries are fitted the correct way round.
- Do not mix old batteries with new batteries. Remove o exhausted batteries immediately.
- Do not mix different battery types, i.e. Alkaline and Manganese or use rechargeable (Ni–Cd, Ni–MH) batteries.
Pleaseusetheapparatusonlywiththestandssuppliedorwiththeappropriatewallmountkits.
ReceiverLocation
Locate for comfortable viewing. Avoid placing where sunlight or other bright light (including reflections) will fall on the screen.
Use of some types of fluorescent lighting can reduce remote control transmitter range.
Adequate ventilation is essential to prevent internal component failure. Keep away from areas of exces moisture.
OptionalExternalEquipment
The Video/Audio connection between components can be made with shielded video and audio cables. performance, Antenna cables should utilize 75 Ohm coaxial shielded wire. Cables are available from electronic supply store.
Before you purchase any cables, be sure you know what type of output and input connectors your require. Also determine the length of cable you'll need.
Foroptimumqualitypicture
When the LCD is exposed to light from outdoors or lighting fixtures, high - contrast pictures may not be displayed clearly.
Turn off fluorescent lamps near the LCD and place in location not exposed to outdoor light.
HowtousetheLCDstand
Adjust the stand to your desired angle. The stand angle can be adjusted in the following directions
TX---32/26/23LXD60
TX---23LXD60 only
20°Right 20°Left
natural_image
Front view of a flat-screen computer monitor (no visible text or symbols)20^

5°Forward
10°Backward
20°Right
20° Left

text_image
5°10°MAINTENANCE
Tocleanthisunit,wipewithasoft,drycloth.
If the surfaces are extremely dirty, use a soft cloth dipped in a soap and water solution detergent solution.
- Use eyeglass cleaner to remove stubborn dirt from the LCD.
- Never use alcohol, paint thinner or benzine to clean this set.
- Before using a chemically treated cloth, carefully read the instructions that came with the cloth.
- Do not wipe the LCD with water.

natural_image
Illustration of a hand washing fish from a bottle and a bowl (no text or symbols)Wipethecabinetwithasoftcloth.
If the cabinet is heavily soiled, wipe with a well-wrun soft cloth dipped in kitchen cleanser (neutral) diluted with water.
CAUTION: If water or similar substances get inside the monitor via the liquid crystal panel surface, a malfunction may result.
BASIC CONTROLS: TOP PANEL AND REMOTE CONTROL
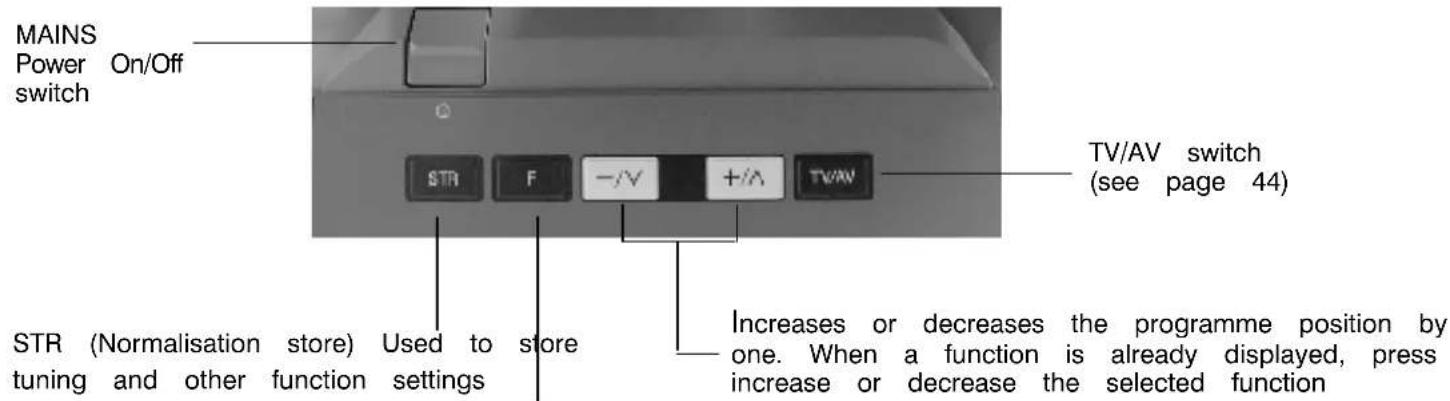
text_image
MAINS Power On/Off switch STR F -/V +/A TV/AV TR (Normalisation store) Used to store tuning and other functions settings TV/AV switch (see page 44) Increases or decreases the programme position by one. When a function is already displayed, press increase or decrease the selected functionF (Function select)
Displays the On Screen Display functions, use repeatedly to select from the available functions - Volume, Contrast, Brightness, Colour, Sharpness, Tint (in NTSC mode), Bass, Treble, Balance and Analogue mode
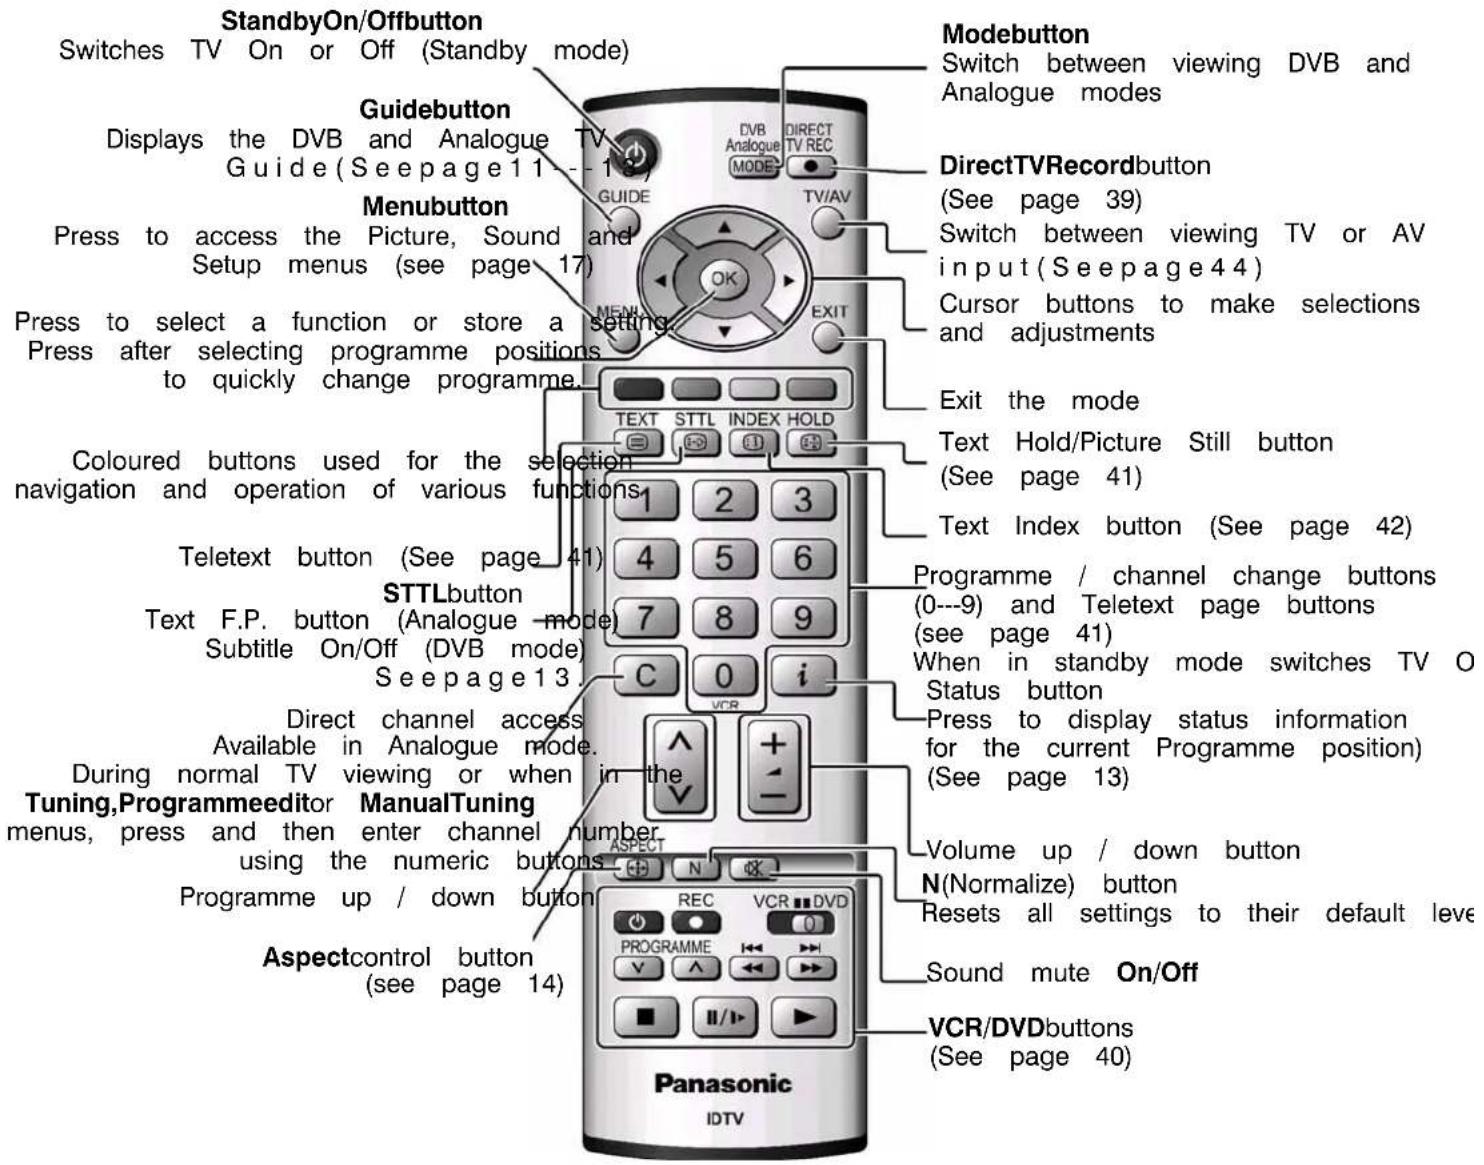
text_image
StandbyOn/Offbutton Switches TV On or Off (Standby mode) Guidebutton Displays the DVB and Analogue TV Guide (Seepage 11 - 12) Menubutton Press to access the Picture, Sound and Setup menus (see page 17) Press to select a function or store a setting Press after selecting programme positions to quickly change programme. Coloured buttons used for the selection navigation and operation of various functions Teletext button (See page 41) STTLbutton Text F.P. button (Analogue mode) Subtitle On/Off (DVB mode) Seepage 13 Direct channel access Available in Analogue mode. During normal TV viewing or when in the Tuning,Programmeeditor ManualTuning menus, press and then enter channel number using the numeric buttons Programme up / down button Aspectcontrol button (see page 14) Panasonic IDTV Modebutton Switch between viewing DVB and Analogue modes DirectTVRecordbutton (See page 39) Switch between viewing TV or AV input (Seepage 44) Cursor buttons to make selections and adjustments Exit the mode Text Hold/Picture Still button (See page 41) Text Index button (See page 42) Programme / channel change buttons (0---9) and Teletext page buttons (see page 41) When in standby mode switches TV O Status button Press to display status information for the current Programme position) (See page 13) Volume up / down button N(Normalize) button Resets all settings to their default level Sound mute On/Off VCR/DVDbuttons (See page 40)QUICKSTARTGUIDE
Connectionandsettingupoptions
- If connecting the TV using an RF cable only, proceed to option 1.
- If connecting the TV using SCART and RF cables, proceed to option 2.

ConnectionofTVusinganRFcableonly
Connect the RF cable into the TV Aerial socket
TV Aerial Input Socket
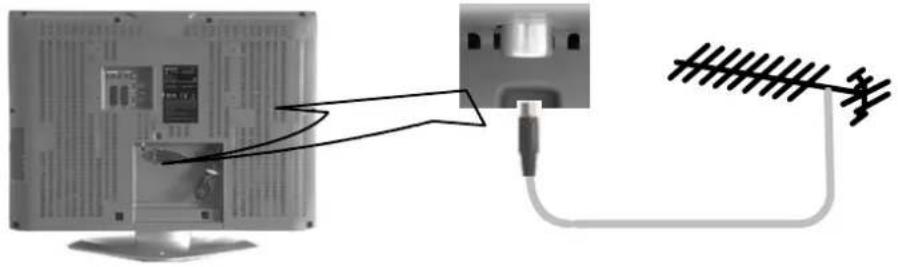
text_image
Diagram showing connection between a computer monitor and an antenna via cable, with Chinese text labels indicating components.
ConnectionofTVandVCR(DVD/R)usingSCARTandRFcables
SCARTconnections
The VCR (DVD/R) can be connected to the TV using a SCART cable if you are using a SCART equipped VCR Use the AV2 SCART socket of the TV for a VCR (DVD/R)
RFconnections
Connect the RF cable to the Aerial In socket of the VCR (DVD/R) and an RF cable from the VCR (DVD/R) Aeri to the TV Aerial socket
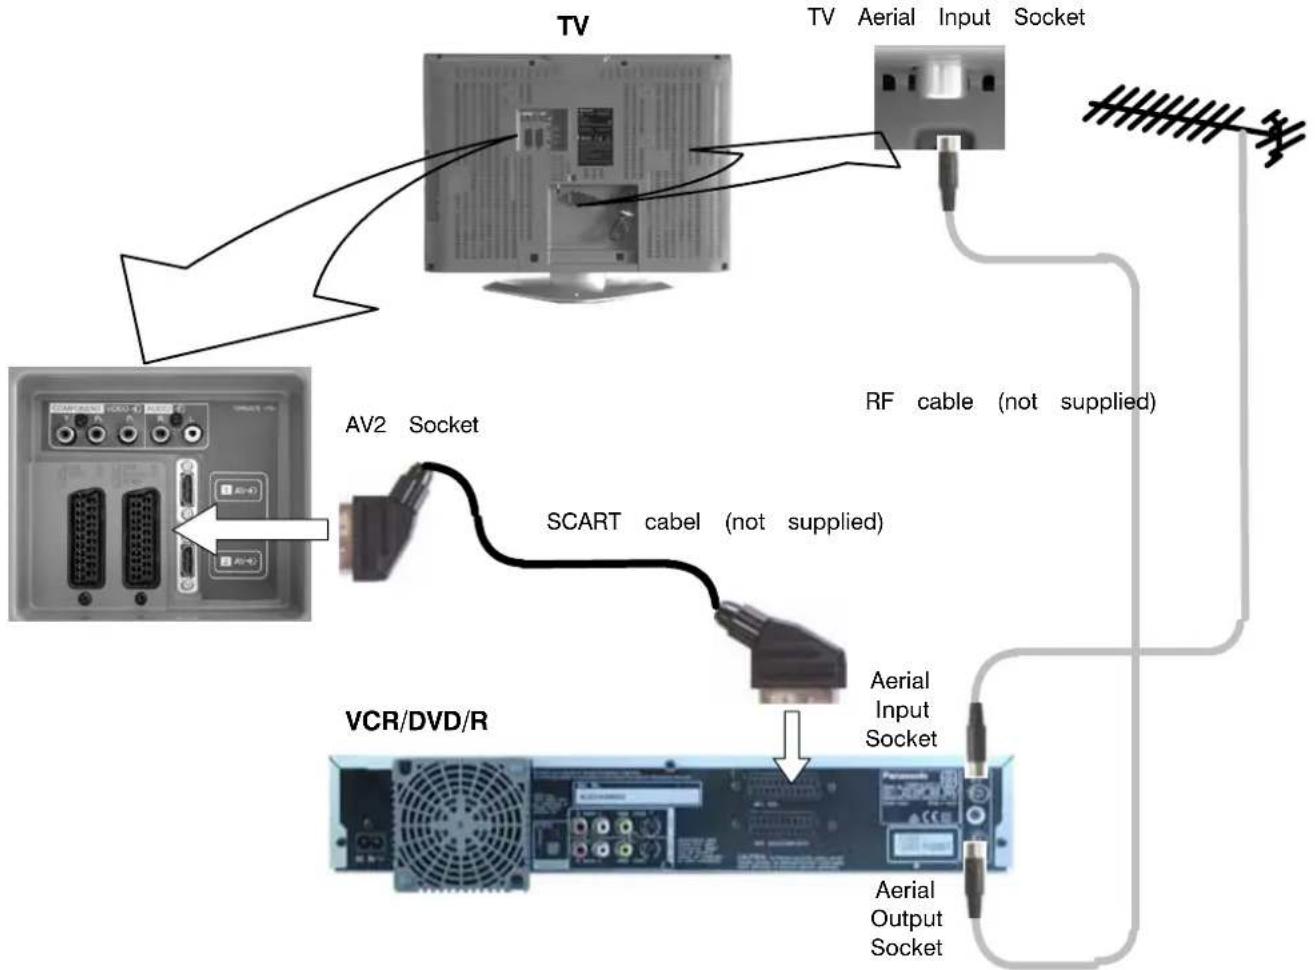
text_image
TV TV Aerial Input Socket AV2 Socket SCART cable (not supplied) VCR/DVD/R Aerial Input Socket Aerial Output Socket RF cable (not supplied)NOTES:
Additional equipment and cables are not supplied
Further details of Audio/Video connections can be found on pages 44---45.
3 ConnectionofTV,VCR(DVD/R)andSatelliteReceiverusingSCARTandRFcables
ScartConnections
- Fully wired SCART cables should be used for all the SCART connections.
• The AV2 SCART of the VCR (DVD/R) must be connected to the VCR socket of the Satellite Receiver
• The TV SCART socket of the Satellite Receiver must be connected to the AV1 SCART socket of the TV.
RFConnections
- Connect an RF cable to the Aerial In socket of the Satellite Receiver.
- Connect an RF cable from the RF Out socket of the Satellite Receiver to the RF In socket
- Connect an RF cable from the RF Out socket of the VCR (DVD/R) to the TV Aerial In socket
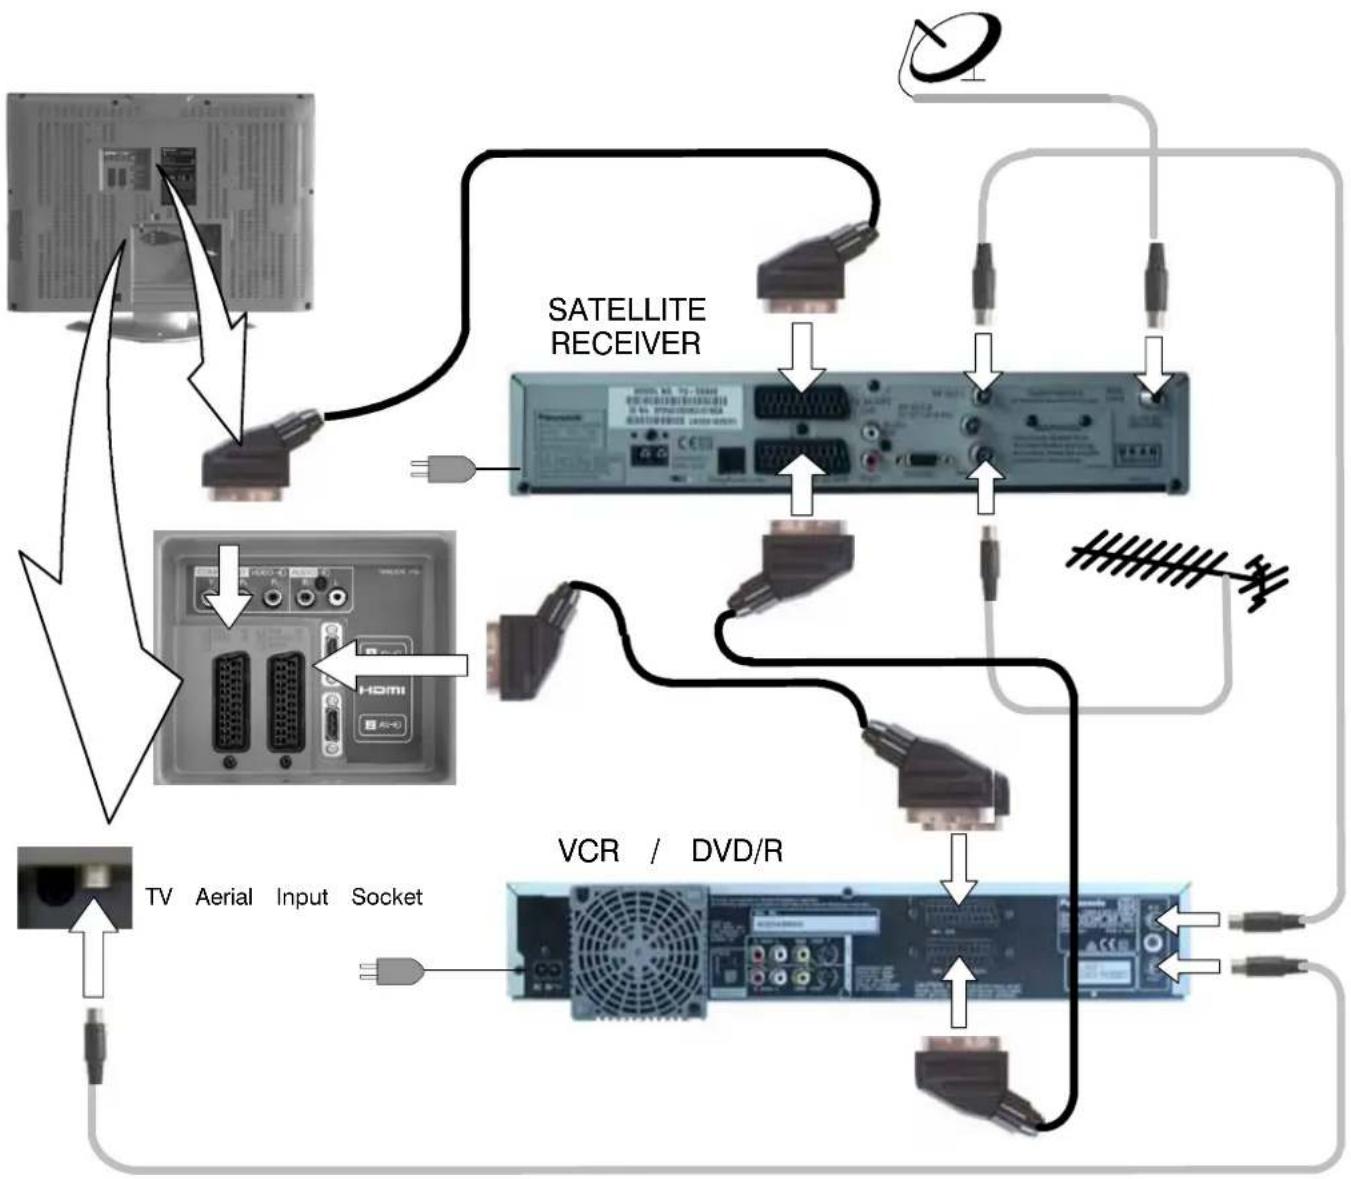
flowchart
graph TD
    A["TV"] --> B["Aerial"]
    B --> C["Input Socket"]
    C --> D["SATELLITE RECEIVER"]
    D --> E["VCR / DVD/R"]
    E --> F["Switch"]
    style A fill:#f9f,stroke:#333
    style B fill:#ccf,stroke:#333
    style C fill:#cfc,stroke:#333
    style D fill:#fcc,stroke:#333
    style E fill:#cff,stroke:#333
    style F fill:#ffc,stroke:#333
NOTES:
Additional equipment and cables are not supplied
Further details of Audio/Video connections can be found on pages 44---45.
QUICK START GUIDE
4
Programmes will appear immediately if your dealer has programmed the TV for you.
If the TV has not been programmed for you then Act will begin.
The TV will search for DVB stations and Analogue stations will be located, sorted into order and store for use. Stations are sorted into the following order:
•DVB Stations: Are sorted by their logical channel number sent by the broadcasters, which can be grouped into favourite channels list by using Profile Edit. See page
•Analogue Stati ons: Are sorted into channel order, but can be changed to your preference. See page 22. The sorted programme order depends upon the TV signal, the broadcasting system, and reception conditions.
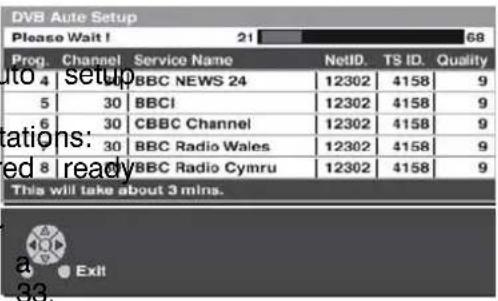
text_image
DVB Auto Setup Please Wait! 21 68 Prog. Channel Service Name NetID. TS ID. Quality 4 4 BBC NEWS 24 12302 4158 9 5 30 BBCI 12302 4158 9 6 30 CBBC Channel 12302 4158 9 30 BBC Radio Wales 12302 4158 9 8 8 BBC Radio Cymru 12302 4158 9 This will take about 3 mins. Exit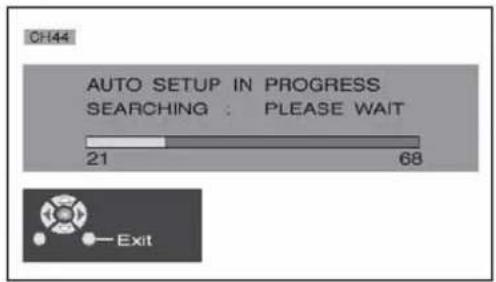
text_image
CH44 AUTO SETUP IN PROGRESS SEARCHING : PLEASE WAIT 21 68 — Exit5
TV to VCR or DVD Recorder Download
If a “Q-Link”, “NEXTVIEWLINK” or compatible recording device has been connected to a Scart terminal (AV1/AV2) before starting Step 1, programme information will be downloaded to that d Only the analogue programme positions will be downloaded to the recording device, in the order as stored in the TV. See page 24.
Not all VCRs / DVD Recorders support this download of programme information, some may be started manually.
Refer to the recording device's operating instruction book.
If a recording device other than those described above has been connected, then there will download operation.
- If the VCR (DVD/R) has not accepted download data from the TV, you may need to select the Download option from the VCR (DVD/R)'s menu.
- If Q-Link is not operating correctly, check it is connected to the television's AV1 or AV2 socket, the SCART lead is a "full function" type, and the VCR (DVD/R) is compatible with Q---Link, I or similar technologies. Ask your dealer for further details.
- For further information on Q---Link and connecting equipment, see pages 39 and 44.
6
OwnerID
As an added feature, this TV has the option of adding a security code (Owner ID) and personal details into its memory, so that in the unfortunate event of theft it will help the Policetotracetheowner.
Using the numeric buttons, 0 to 9 on your remote control, enter your own 4 digit Owner ID PINNUMBER.
If a 4 digit PINNUMBER was entered above, you will be taken automatically to the NAMEline.
If not, using the left or right cursor buttons move to the NAME line.
Change character using the up or down cursor buttons.
Select the character position using the left or right cursor buttons.
Repeat above until NAME, HOUSE NUMBER and POSTCODE are entered.
Press the OKbutton to store the details.
Press the OKbuttonagain, when you are asked "Are you sure?".


For further information on Owner I.D., see page 28.
7
Auto Setup is now complete
You are now ready to begin viewing programmes
The cursor controls provide the two basic functions:
Adjust Volume

Change Channel
Channels can selected directly using numeric key pad on the remote control
GUIDE
Access to channels can also be gained using the guide button. (See pages 11 and 12)

Theanalogueprogrammeguideshowsprogrammelist.
To view a list of the stations
that have been found, press
GUIDE
the GUIDE button on the

remote control
In this guide, use the


buttons to move the
bar around the list
Use the programme change
button to step through the
guidepagebypage

Pres the OK button to view
the selected programme

The Guide can be cleared
from the screen using
the EXIT or GUIDE button.
EXIT
GUIDE


text_image
Select Select Confirm Exit Page-- Page+ ^ ▼TVGuide---ElectronicProgrammeGuide(EPG)(DVBmode)
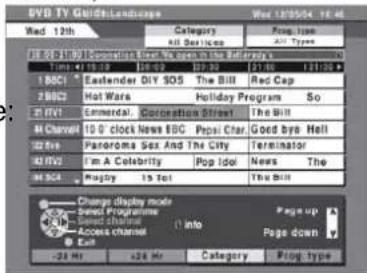
The DVB TV Guide displays the current programmes being transmitted, and forthcoming programmes of channel, up to about one week ahead (If broadcasters transmit the programmes information).
Press the GUIDEbutton.
Choose from Landscape or Portrait display style by pressing the
GUIDEbutton repeatedly.
Press the Redbutton to move the EPG listing to the previous day.
Press the Green button to move the EPG listing to next day.
Press the Yellowbutton to view a list of Categories.
You can create a favourites list can be customised using the Profile Edit menu (see page 27).
Press the Bluebutton to view a list of Prog. type.
EPG listing can besettodisplay by Category or Programme Typ
For example press the Yellowbutton and select "Free TV",
"Radio" services or "Profile 1" by pressing the up or down cursor buttons. Press the OK button to view a list of the selected category.
GUIDE




To view any of the current DVB programmes, select it with the cursor buttons and press the OKbutton.
Information andTimerProgramming(ex.Landscape)
You can view further information about the selected programme:
Select the programme for which you require further information using the cursor buttons.
Press the ibutton to display the information.
Press the ibutton again to return to the list of programmes.
When you select a future programme from the EPG listing, press the OKbutton to set timer programming for recording on a Q---Link compatible recorder. See page 39.
Press the MENUbuttontoreturntotheTVGuide.
Press the EXITbutton to exit the Guide
Landscape
text_image
DVD TV Guide Landscape Wed 12/05/24 16:46 Time 12:19 16:00 17:30 17:00 17:11 1 BCC1 Eastender DIY SOS The Bill Red Cap 2 BCC2 Hot Ware Holiday Program So 2 FV1 Communal Corporation Street The Bill M Channel 20 G clock News BBC Popl Chaq Good bye Hall 12 FV2 Panorama Sex And The City Terminator 42 FV2 I'm A Celebrity Pop Idol News The M 3G4 Murphy 15 Tot The Bill Change display mode Page up Send Programme Page down Send Archive Page down Access Channel Each -24 Hz +24 Hz Category Page typePortrait
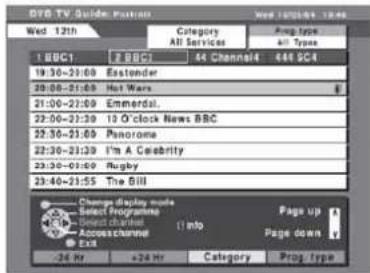
text_image
DVB TV Guide Posters Wed 12th Category All Services Prog type All Type 1 BBC1 7 BBC1 84 Channel4 446 2C4 19:30-21:00 Easterder 20:00-21:00 Hot Wars 21:00-22:00 Emmerdal. 22:00-23:30 10 O'clock News BBC 22:30-23:60 Panorama 22:30-23:30 I'm A Celebrity 23:30-23:00 Rogby 23:40-23:55 The Bill Change display mode Select Programs Select channels AccessChannel Exit Page up Page down -24 Hr +24 Hr Category Prog type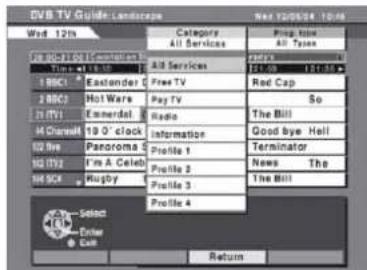
text_image
DVB TV Guide Landscape Wed 12th Category All Services Play All Types 1000000000000000000000000000000000000000000000000000000000000000000000000000000 1 NBCI 2 NBCI 3 NBCI 4 Channel 52 Rev 62 Rev 74 SIC 84 SIC Select Enter Call Return All Services Free TV Pay TV Radio Information Profile 1 Profile 2 Profile 3 Profile 4 Free Cap So The Bill Good bye Hell Terminator News The The Bill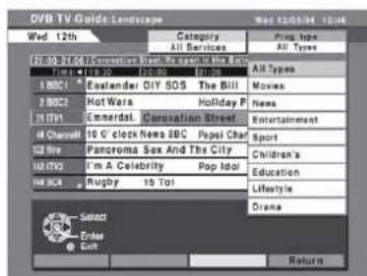
text_image
OVB TV Guide Landscape Wed 12th Category All Services Ping type All Types 1 NBC1 Easlander DIY SOS The Bill 2 NBC2 Hot Wara Holiday P 3 TV1 Emerald Corstation Street 48 Channel 16 C clock News IBC Popel Chad 52 Fire Panorama Sex And The City 107 TV2 I'm A Celebrity Pop Idol 108 SCA Rugby 15 Top Sports Children's Education Lifestyle Orana Spect Enter Exit ReturnTVGuide---ElectronicProgrammeGuide(EPG)(DVBmode)
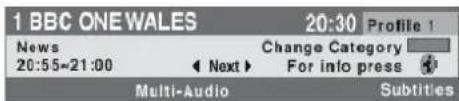
In DVBmode
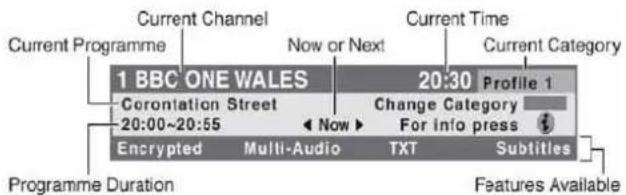
Information banner will appear when changing channel, or pressing the (Information) button. The bann information about the channel and programme currently being viewed. The banner will time out and screen after a set time period, this time period can be set in the DVB System Setup menu. See
text_image
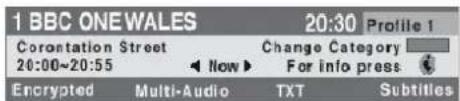
Current Programme Current Channel Now or Next Current Time Current Category 1 BBC ONE WALES 20:30 Profile 1 Coronation Street Change Category 20:00~20:55 For info press Encrypted Multi-Audio TXT Subtitles Programme Duration Features AvailablePress the left or right cursor button while banner is displayed to switch between Now and Next.
text_image
1 BBC ONEWALES 20:30 Profile 1 Corotation Street Change Category 20:00~20:55 Now For info press Encrypted Multi-Audio TXT Subtilies
text_image
1 BBC ONE WALES 20:30 Profile 1 News Change Category 20:55~21:00 Next For info press Multi-Audio SubtitlesThis switches between the information for the current Programme being shown (Now) and the next Programme to be shown (Next).
Press the up or down cursor button to step through the banner information for all channels.
Press the OK button to view a channel. Now and Next can also be used in this mode.
While the banner appears
Press the button to display an extended banner showing any information available on the current selected programme.
Press the button while in extended banner mode to return to normal banner view. To clear the banner from the screen while in extended banner mode, press the EXIT button.
ViewingCategory
Press the Blue button while in the banner to scroll through available categories.
For example
AllServices: AllavailableServices
Free TV : Free TV channels only
Pay TV: Encrypted TV channels
Radio : Radio channels only
Information: Information given on individual programmes
Profile Select one of four possible user defined profiles
Press the EXITbutton to exit the banner at any time.

EXIT

BLUE
i
In Analoguemode
Pressing the Information) button will display the analogue channel information for a few seconds. This will then be timed out to display just the programme position number near the top left corner of the screen.
To remove this programme position number, (he###m#tion) button again.
Subtitles On / Off (DVB mode)
In DVBmode
Press the STTLbutton to switch Subtitles ON.
Subtitles will appear (if available) by the language you select in
Preferred Subtitles in DVB System Setup menu. See page 30.
Press again to switch Subtitles OFF.
Digital text is not available whilst subtitles are switched on.
STTL
ThewidescreenTVwillallowyoutoenjoyviewingthepictureatitsoptimumsizeandaspect, includingwidescreen'cinemaformat'pictures.
PresstheASPECTbuttonrepeatedlytomove throughthesevenaspectoptions:Auto Aspect,16:9,14:9,4:3,Zoom1,Zoom2and Zoom3. OR PresstheASPECTbuttonthenusetheRED orGREENbuttonstomoveineitherdirection throughthesevenaspectoptions.
ASPECT


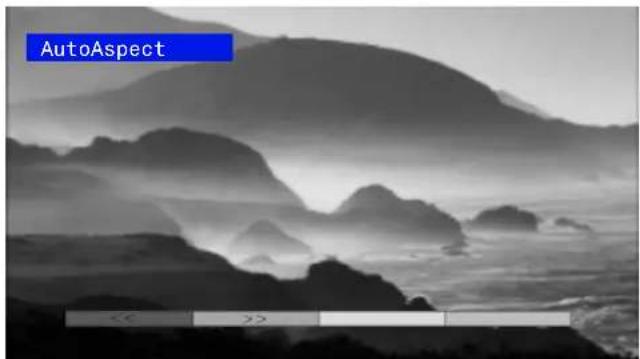
AutoAspect
AutoAspect determines the best aspect ratio to use to fill your screen. It does this using a step process to determine if the picture being viewed is a widescreen picture.
If AutoAspectdetects a widescreen signal it switches into the appropriate 16:9 or 14:9 widescreen mode. AutoAspectdoes not detect a widescreen signal then this advanced TV set enhances the picture for optimum viewing pleasure.
The text shown on the screen indicates how AutoAspectdetermined which ratio to use:
'WIDE' appears in the top left of the screen if widescreen identification signal (WSS) is found or a signal found through a Scart socket.
AutoAspectswitches to the appropriate 16:9 or 14:9 widescreen ratio 'Panasonic Auto' appears in the top left of the screen if black stripes above and below the picture are detected AutoAspect chooses the best ratio and expands the picture to fill the screen. This process can take several minutes, depending on the darkness of the picture.
You may prefer to manually select one of the other aspect options available to view the picture.
Notes:
- If, in Auto Aspect mode, you experience problems with the screen display size when playing back widescreen format recordings from your VCR then it is possible that the tracking control of your VCR requires adjustment (your VCR instruction book will contain adjustment details).
- The widescreen aspect ratios of different films and programmes can vary. If these are wider than a standard 16:9 aspect picture then a black band may be visible at the top and bottom of the screen.
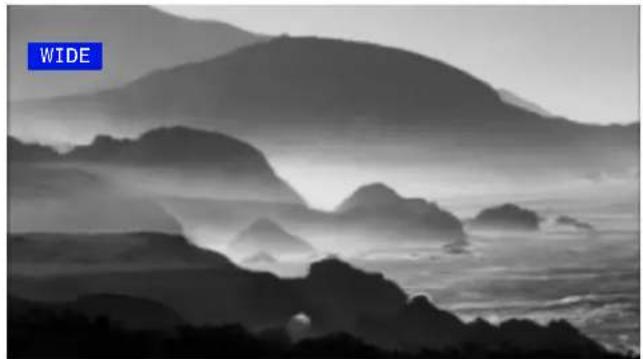
natural_image
Black-and-white landscape photo of rugged mountain peaks and ridges, no visible text or symbols'WIDE' appears in the top left of the screen, Auto Aspect switches four to the appropriate 16:9 or 14:9 widescreen ratio.
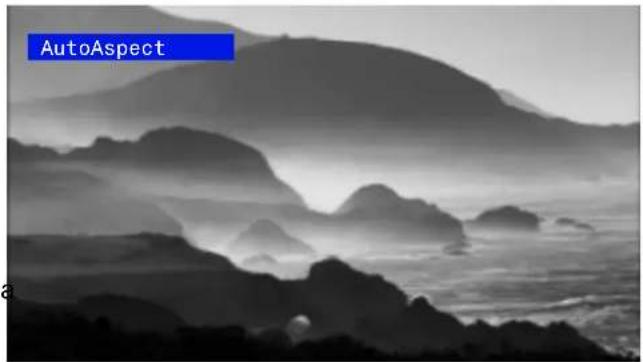
text_image
AutoAspect'AutoAspect' appears in the top left of the screen, The best ratio is chosen and the picture expanded to fill the
text_image
AutoAspectPress the ASPECT button, then use the RED or GREEN buttons to move in either direction through the seven aspect options.
ASPECTCONTROLS
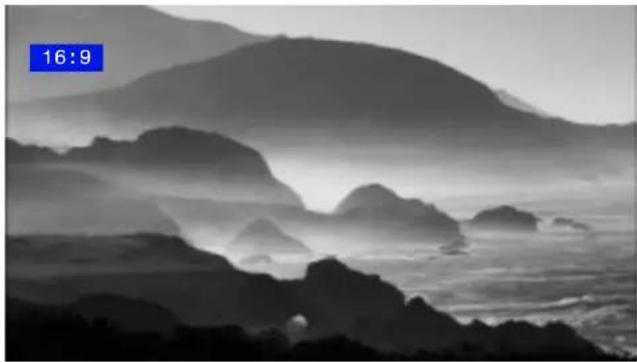
16:9
16:9 will display a true 16:9 (anamorphic) picture with no aspect distortions.
natural_image
Black-and-white landscape photo of misty mountain peaks and ridges, no text or symbols visible16:9
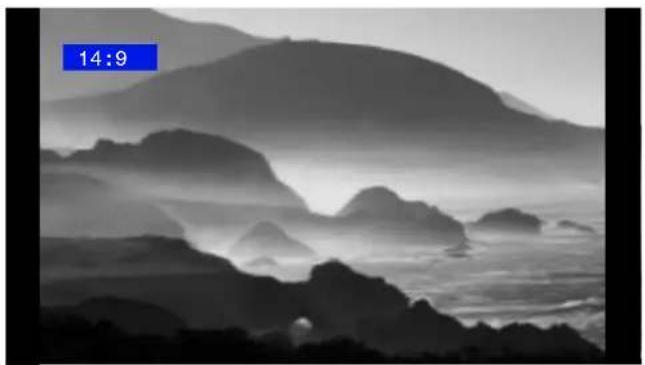
14:9
14:9 will display a 14:9 letterbox or 4:3 picture with no aspect distortions.
natural_image
Monochrome landscape photo of misty mountain peaks and ridges, no visible text or symbols14:9
4:3
4:3 will display a 4:3 picture at its standard 4:3 size with no aspect distortions.

natural_image
Black-and-white landscape photo of misty mountain peaks and ridges, no visible text or symbols4:3
ASPECTCONTROLS
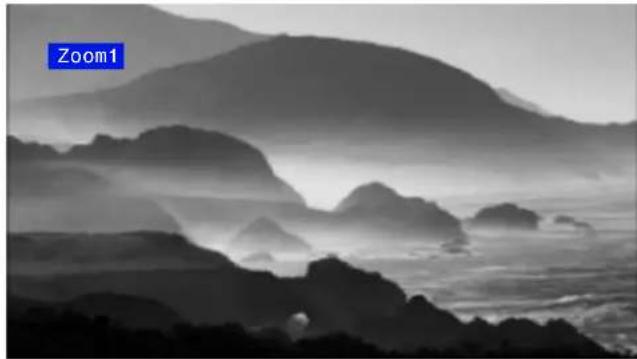
Zoom1
Zoom1will display 16:9
letterbox or 4:3 pictures with no aspect distortions
natural_image
Black-and-white landscape photo of misty mountain peaks and ridges, no visible text or symbolsZoom1
Zoom2
Zoom2will display 16:9
anamorphic letterbox pictures
as a full screen display with no
aspect distortions
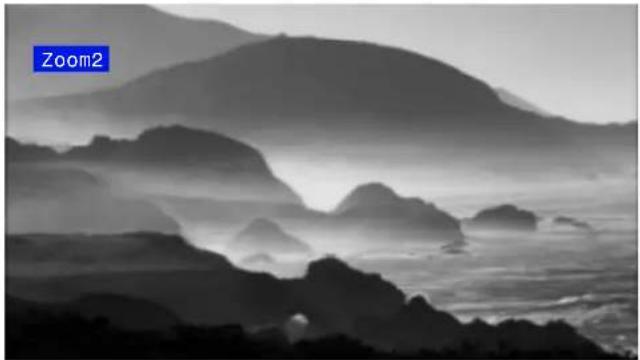
natural_image
Monochrome landscape photo of misty mountain peaks and ridges, no text or symbols visibleZoom2
Zoom3
Zoom3will display 21:9
letterbox pictures as a full
screen display with no aspect
distortions
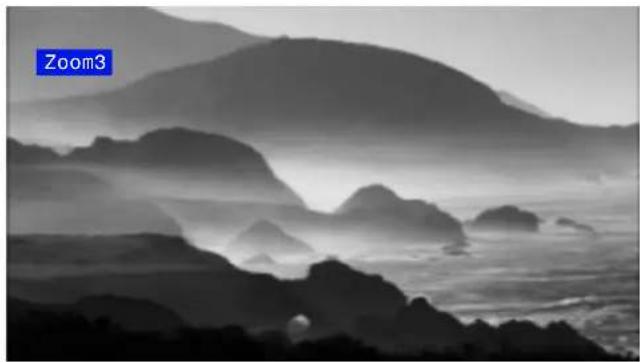
natural_image
Black-and-white mountain landscape with misty valleys and rocky peaks, no visible text or symbolsZoom3
ThisTVhasacomprehensivesystemofOnScreenDisplaymenustoaccess adjustmentsandoptions
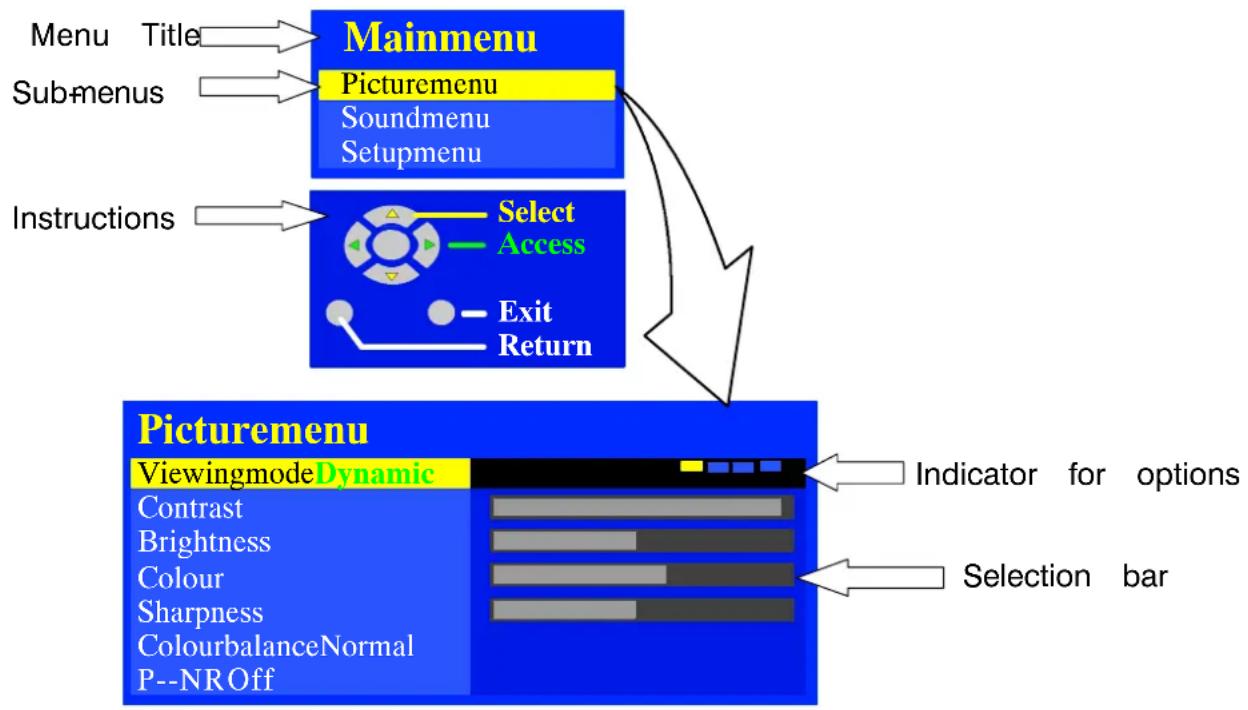
flowchart
graph TD
    A["Menu"] --> B["Mainmenu"]
    C["Title"] --> B
    D["Submenus"] --> B
    E["Instructions"] --> F["Picturemenu"]
    B --> G["Soundmenu Setupmenu"]
    F --> H["Select Access"]
    F --> I["Exit Return"]
    H --> J["Viewingmode Dynamic"]
    I --> J
    J --> K["Contrast Brightness Colour Sharpness ColourbalanceNormal P--NROff"]
    J --> L["Indicator for options"]
    J --> M["Selection bar"]
Some selections, for example, Contrast, Brightness, Colour and Sharpness will allow you to increase or decrease their level.
Some selections, for example, Off timer, allow a choice to be made.
Some selections, for example Tuning menu, will lead to a further menu.
The MENU button is used to open the main menu and also to return to the prev menu.
The up and down cursor buttons are used to move the cursor up and down the nus.
The left and right cursor buttons are used to access menus, adjust levels or to select from a range of options.
The OK button is used to store and confirm tuning, OSD functions and other settings
The EXIT button is used to exit the menu system and return to the normal viewing screen.
N (Normalise) button – resets all settings to their default levels
MENU
to the prev



EXIT
normal viewing
N
LastPositionMemory
Certain functions have a last position memory, i.e. the setting at the time of switch-off will be the setting used when the receiver is switched on again.
Thismenuallowsyoutomakeadjustmentstothepicturequality.
Open the Main menu
Move to Picture menu
Access Picture menu
Move to your choice
Increase or decrease levels or set options
Press the EXIT button to exit the menu system





Picturemenu
Viewingmode
Contrast
Brightness
Colour
Sharpness
Colour balance
P-NR
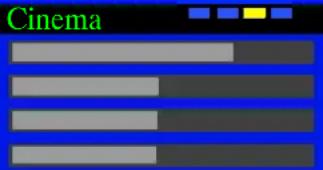
text_image
CinemaNormal Off

flowchart
graph TD
    A["Start"] --> B["Select"]
    B --> C["Change"]
    C --> D["Exit"]
    D --> E["Return"]
Picturemenu
Viewingmode
Contrast
Brightness
Colour
Sharpness
Colour balance
P-NR
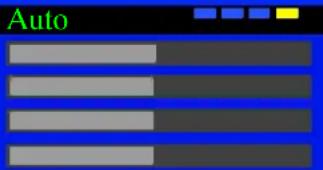
text_image
AutoNormal Off
Viewingmode

The Viewing mode in the Picture menu allows you to select, four different screen settings --- Dynamic, Normal
Cinemaand Auto
In each Viewing mode set Contrast, Brightness, Tint (NTSC only), Colour, and Sharpness can be adjusted and stored to suit your particular viewing requirement (for example
you may require different settings for viewing sport, films, news etc.). Viewing mode offers you up to a maximum of four separate settings.
By analysing and processing the incoming picture, all four modes feature automatic enhancement. You can restore the factory settings for the selected profile on the selected signal source by pressing the "N" button on the remote control.
, Picturemenu
Viewingmode
Contrast
Brightness
Colour
Sharpness
Colour balance
P-NR

text_image
AutoNormal Off
Contrast Brightness Colour
Sharpness
Tint( NTSConly)
The Contrast, Brightness, Colour, Tint (in NTSC only) and Sharpness levels (adjusted to suit your own preferences and the viewing conditions.
Colourbalance

The Colour balance setting allows you to set the overall colour tone of the picture.
Choose from Cool Normal and Warm.
P-NR

P-NR will automatically reduce unwanted picture noise.
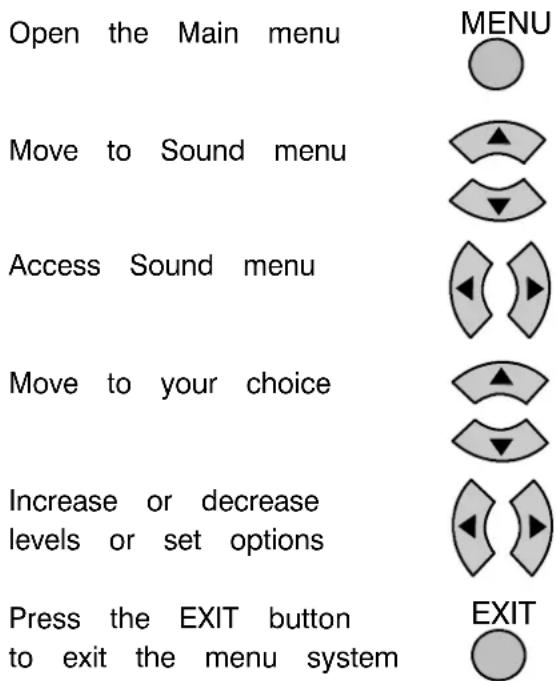
TheSoundmenuwillallowyoutosetyourpersonalpreferencesforallaspects ofsoundquality.
text_image
Open the Main menu MENU Move to Sound menu Access Sound menu Move to your choice Increase or decrease levels or set options Press the EXIT button to exit the menu system EXIT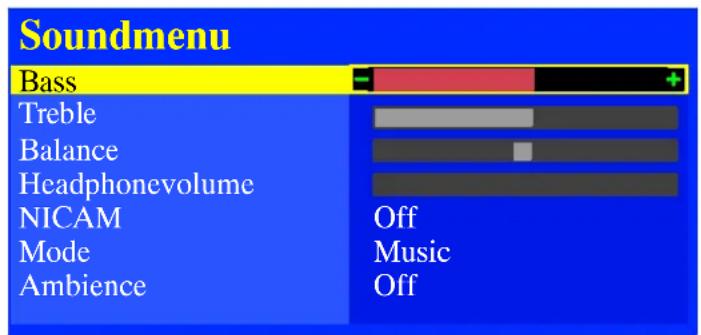
text_image
Soundmenu Bass Treble Balance Headphonevolume NICAM Mode Ambience Off Music Off
flowchart
graph TD
    A["Start"] --> B["Select"]
    B --> C["Adjust"]
    C --> D["Exit"]
    D --> E["Return"]
Bass
Bass adjustment will emphasise the lower, deeper frequencies and can be or decreased.
Treble
Treble adjustment will emphasise the sharper, higher frequencies and can increase or decreased.
Balance
Balance affects the levels of sound between the left and right speakers. can be made so that the level from the speakers will suit your listening
Headphone volume
Can be adjusted independently of the TV speakers so that everyone can listening at a level comfortable for them.
NICAM
(Not available with DVB programmes).

Select On to provide stereo sound reproduction. Select Off for FM Mono sound output. If reception deteriorates it may help to switch Nicam to Off.
Mode
The sound can be improved during Music or Speech mode by selecting appropriate function.

Ambience
Ambience provides a dynamic enhancer to simulate improved spatial effects

HDMI1 input
Displayed during HDMI1input mode.
Allows you to choose from Auto, Digital and Analogue Select to fit the input signal

Auto :Set in normal use
Digital HDMI cable connection
Analogue HDMI-DVI adaptor cable connection (Connecting Audio RCA inputs)
- Not available for HDMI2, HDMI1 input mode only.
- HDMI2 terminal is for digital Audio signal only.
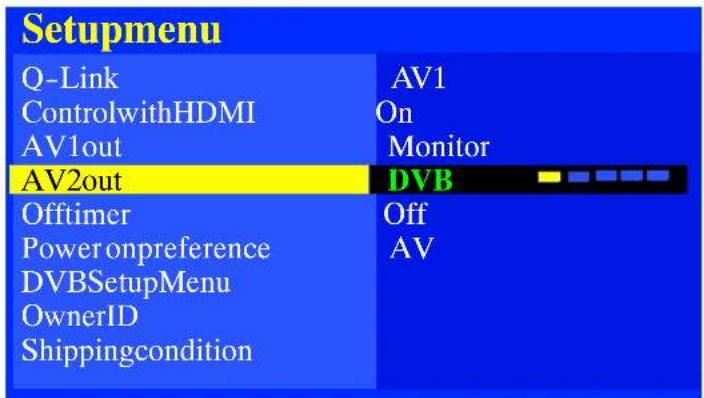
TheSetupmenuprovidesaccesstovariousadvancedfeaturesandalsotothe Tuningmenu.
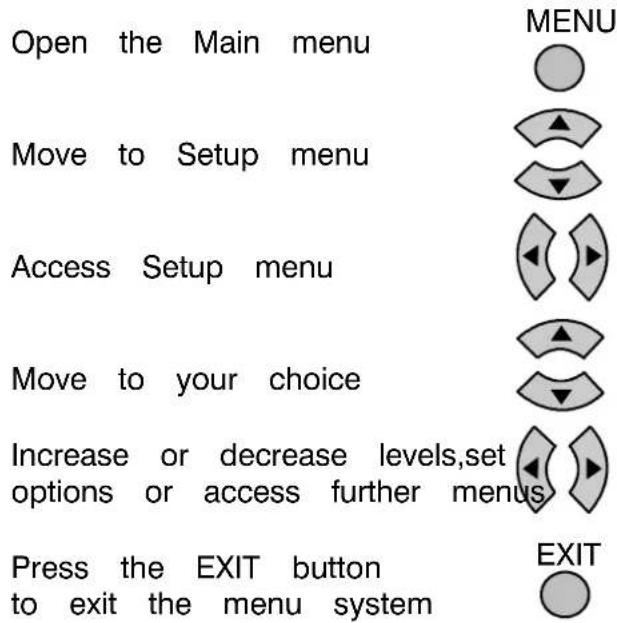
text_image
Open the Main menu MENU Move to Setup menu Access Setup menu Move to your choice Increase or decrease levels,set options or access further menus Press the EXIT button to exit the menu system EXITDVBmode
text_image
Setupmenu Q-Link ControlwithHDMI AV1out AV2out Offtimer Power onpreference DVBSetupMenu OwnerID Shippingcondition AV1 On Monitor DVB Off AV
flowchart
graph TD
    A["Start"] --> B["Select Change"]
    B --> C["Exit Return"]
    C --> D["Change"]
Qlik

QLink allows you to enable AV1 or AV2 See page 39
Controlwith HDMI
HDMI control allows for the external equipment (e.g. DVD) and television to con a digital connection Choose from Off or On.
AV1out
Offers a choice of signals to send to the AV1 Scart socket. You can choose TV (Analogue,DVB) programme position, the signal entering AV2 / AV3 or Monitor – the picture displayed on screen.

AV2out
Offers a choice of signals to send to the AV2 Scart socket. You can choose TV (Analogue,DVB) programme position, the signal entering AV1 / AV3 or Monitor – the picture displayed on screen.

The Teletext option allows you to choose between Fastext or List mode. See page 41.
Offtimer
Off timer will switch the TV off within a preset time which you can choose from 90 minutes in 15 minute intervals.

Poweron preference
Set to TV to view picture from TV tuner. Set to AV to view input from exter connected to a Scart socket e.g. satellite receiver Note: The external equipment must be switched on and sending a control signal for automatic switching at power on to occur

TuningMenu (Analogue only)
Provides access to many other features including Programme Edit and Auto Setu Provides access to setup the DVB operations. (See page 30)
DVBSetupMenu
Allows you to enter a security code and address information (See page 28)
OwnerID
Allows you to clear all tuning information and reset all control levels back to (See page 29)
Shipping condition
During AV mode, Volume correction is displayed. You can adjust volume level of AV mode. Volume level is memorised.
Volumecorrec. (AV mode only)
TUNINGMENU---(Analoguemode)
The Tuningmenuprovidesaccesstomanual, automaticandfinetuning menus.
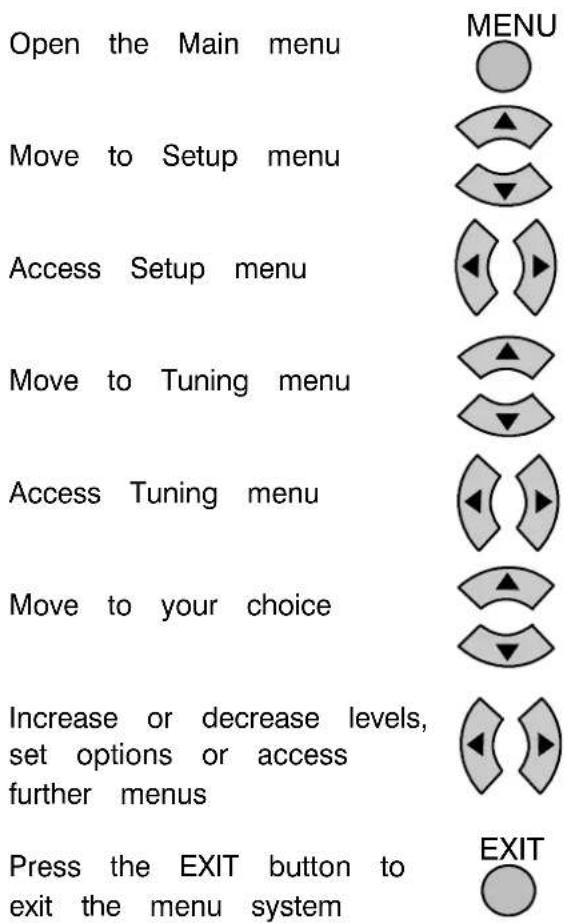
text_image
Open the Main menu Move to Setup menu Access Setup menu Move to Tuning menu Access Tuning menu Move to your choice Increase or decrease levels, set options or access further menus Press the EXIT button to exit the menu system MENU EXIT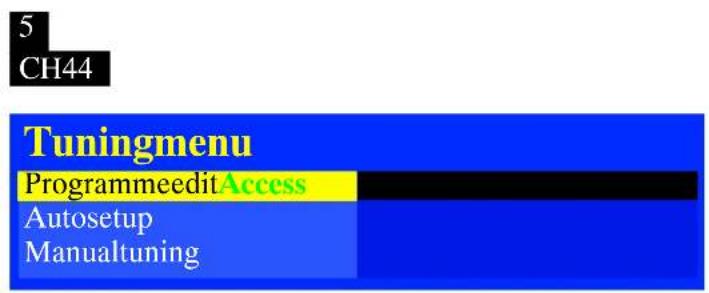
text_image
5 CH44 Tuningmenu ProgrammeeditAccess Autosetup Manualtuning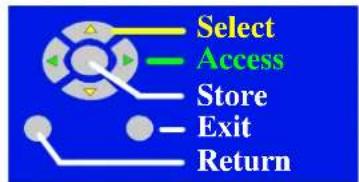
flowchart
graph TD
    A["Select"] --> B["Access"]
    B --> C["Store"]
    C --> D["Exit"]
    D --> E["Return"]
Programme edit
Accessing the Programme edit menu will allow stations to be moved, add namedorlockedandprovidesaccessstothetV-system. Seepage22.
Autosetup
The Auto setup menu allows you to automatically retune the TV. See pa
Manualtuning
The Manual tuning menu allows individual programme positions to be tune Seepage26.
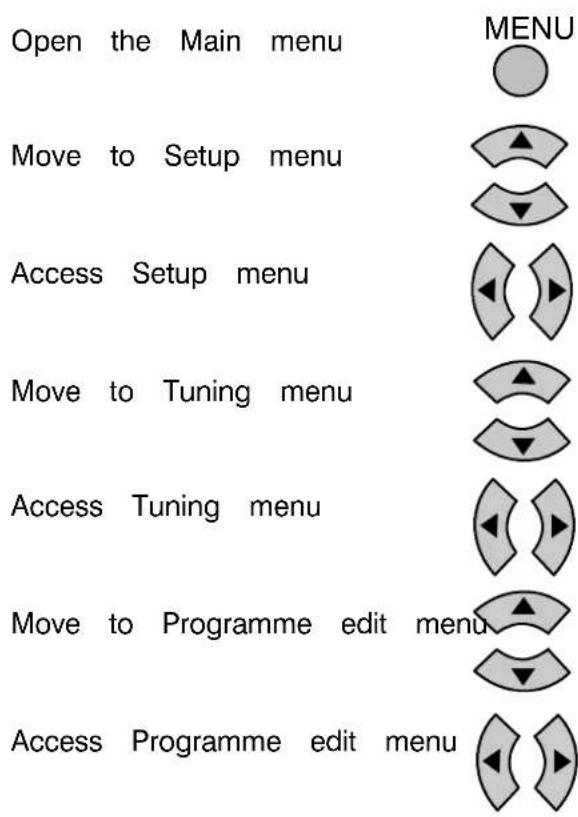
The Programme edit menu allows you to edit the programme position settings.
flowchart
graph TD
    A["Open the Main menu"] --> B["MENU"]
    C["Move to Setup menu"] --> D["▲"]
    E["Access Setup menu"] --> F["▼"]
    G["Move to Tuning menu"] --> H["▲"]
    I["Access Tuning menu"] --> J["▼"]
    K["Move to Programme edit menu"] --> L["▲"]
    M["Access Programme edit menu"] --> N["▼"]
Make required changes (see sections below)
Press OK button to store changes
If you have finished in the Programme edit menu, press the EXIT button to exit

EXIT

5
CH44
| Tuningmenu | |
| Programmeedit | Access |
| Autosetup | |
| Manualtuning | |
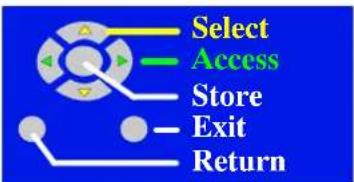
flowchart
graph TD
    A["Select"] --> B["Access"]
    B --> C["Store"]
    C --> D["Exit"]
    D --> E["Return"]
| Programmeedit | |||
| Prog. | Chan. | Name | Lock |
| 1:C141XYZOff | |||
| 2:-- | Off | ||
| 3:-- | Off | ||
| 4:-- | Off | ||
| 5:-- | Off | ||
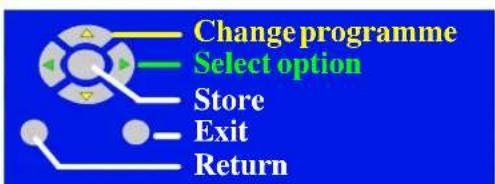
flowchart
graph TD
    A["Change programme"] --> B["Select option"]
    B --> C["Store"]
    C --> D["Exit"]
    D --> E["Return"]
Delete Add Move Download
Todeleteanunwantedprogramme position
Choose the programme position

Press the Red button on remote control

Press the Red button again to confirm

| Programmeedit | |||
| Prog. | Chan. | Name | Lock |
| 1:CH41XYZOff | |||
| 2:-- | Off | ||
| 3:-- | Off | ||
| 4:-- | Off | ||
| 5:-- | Off | ||
text_image
Exit ReturnDelete
Cancel
Toaddaprogrammeposition
Choose the programme position
where the new programme is
be inserted
Press the Green button

Press the Green button again

to confirm
Thisblankprogrammecanthenbe tuned, named, locked and be allocated your choice of TV system
| Programmeedit | |||
| Prog. | Chan. | Name | Lock |
| 1: | CH41 | XYZ | Off |
| 2: | - | Off | |
| 3: | - | Off | |
| 4: | - | Off | |
| 5: | - | Off | |
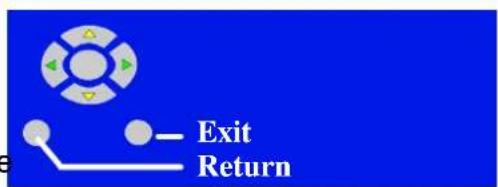
flowchart
graph TD
    A["Start"] --> B{Exit}
    B --> C["Return"]

Tomoveaprogrammeto anotherposition
Choose the programme position to be moved

Press the Yellow button on remote control


Choose new position

Press the Yellow button again to confirm

| Programmeedit | |||
| Prog. | Chan. | Name | Lock |
| 1: | CH41 | XYZ | Off |
| 2: | - | Off | |
| 3: | - | Off | |
| 4: | - | Off | |
| 5: | - | Off | |
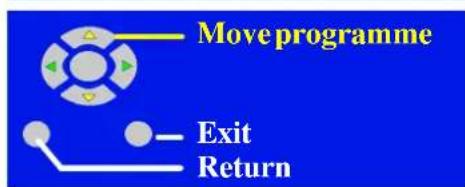
flowchart
graph TD
    A["Move programme"] --> B["Exit"]
    B --> C["Return"]
Confirm Cancel
Torenameaprogrammeposition
Choose the programme position

Move to the Name column

Choose the new character

Move to the next character position


Continue until renaming is done
| Programmeedit | |||
| Prog. | Chan. | Name | Lock |
| 1: | CH41 | XYZ | Off |
| 2: | - | Off | |
| 3: | - | Off | |
| 4: | - | Off | |
| 5: | - | Off | |
ABCDEFGHIJKLMNOPQRSTUVWXYZ NOPQRST
UVWXYZ+-.0123456789
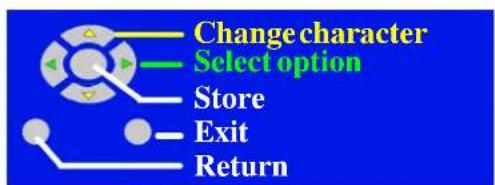
flowchart
graph TD
    A["Change character"] --> B["Select option"]
    B --> C["Store"]
    C --> D["Exit"]
    D --> E["Return"]
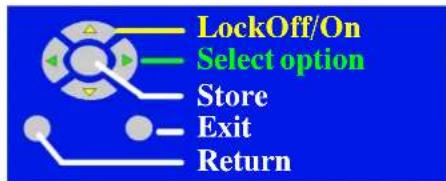
Tolockaprogrammepositionto preventaccess
Choose the programme position
Move to the lock column
Choose between lock on or lock off


| Programmeedit | |||
| Prog.Chan. | Name | Lock | |
| 1: | CH41 | XYZ | Off |
| 2: | - | Off | |
| 3: | - | Off | |
| 4: | - | Off | |
| 5: | - | Off | |
text_image
LockOff/On Select option Store Exit ReturnTocopyprogrammeinformation toacompatibleVCR(DVD/R) connectedtoAV1orAV2
Move to the Prog. column

Press the Blue button on the remote control Programme
data will now be sent to the VCR (DVD/R). This might take a few seconds, depending on the number of stations stored.
Note:
If the message "Q---Link? Feature not available"
- check Q---Link (AV1 or AV2)
- check your VCR (DVD/R)"
appears on the screen, the television is unable to send the programme information to the VCR (DVD/R). See the VCR (DVD/R) handbook for further information.
DOWNLOADINPROGRESS
PLEASEWAIT
Programme:48
Remotecontrolunavailable
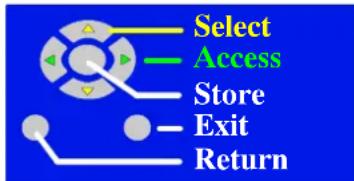
The AutosetupmenuwillallowyoutoautomaticallyretunetheTVtoyourlocal stations.Itisusefulifyoumovetoadifferentregion.
In Analoguemode
Open the Main menu
Move to Setup menu
Access Setup menu
Move to Tuning menu
Access Tuning menu
Move to Auto setup
Access Auto setup
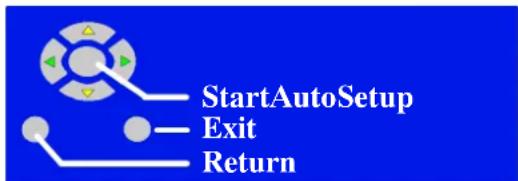
Press to start Auto setup
MENU











Notes:
- If you proceed with the next step analogue tuning data will be erased (all stations and their programme positions stored in your TV's memory will be wiped out so the new settings can be stored).
- If you exit the procedure after this point and before Auto setup is complete, no station information will be stored. Restart and complete the Auto setup procedure so that the TV is retune
The TV will search for, locate and sort order your local stations.
Once this operation is completed the TV will display programme position 1
5
CH44
Tuningmenu
Programmeedit
Autosetup
Manualtuning
Access
flowchart
graph TD
    A["Select"] --> B["Access"]
    B --> C["Store"]
    C --> D["Exit"]
    D --> E["Return"]
WARNING
Allcurrenttuningdatawillbe erased
flowchart
graph TD
    A["StartAutoSetup"] --> B["Exit"]
    B --> C["Return"]
CH41
AUTOSETUPINPROGRESS
SEARCHING:PLEASEWAIT
StoredCh44BBC1
2168
into


TUNINGMENUMANUALTUNING(Analoguemode)
ManualtuningoftheProgrammepositionsisavailableeitherfromtheOn ScreenDisplaymenuorfromthetoppanelcontrols.
Manualtuningmenu
Open the Main menu
Move to Setup menu
Access Setup menu
Move to Tuning menu
Access Tuning menu
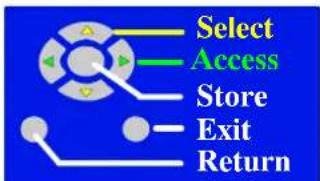
Move to Manual tuning
Access Manual tuning
Select the programme position to be tuned
Start tuning
When the desired programme is found, press OK button to store
MENU














1 CH41
Tuningmenu
Programmeedit
Autosetup
ManualtuningAccess
flowchart
graph TD
    A["Start"] --> B["Select"]
    B --> C["Access"]
    C --> D["Store"]
    D --> E["Exit"]
    E --> F["Return"]
1 CH41
Manualtuning

bar
| Category | Value | |---|---| | Green Bar | 2168 |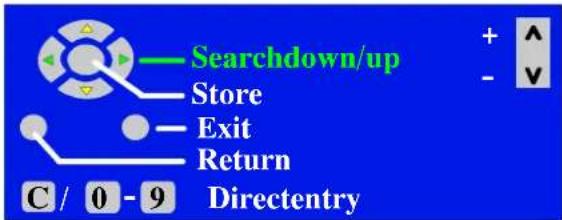
text_image
Searchdown/up Store Exit Return C / 0 - 9 DirectentryNote:
If your VCR is connected to this TV by an RF cable only, choose programme position "0" to tune to the VCR signals.
TUNINGMENUMANUALTUNING(Analoguemode)
Manualtuning
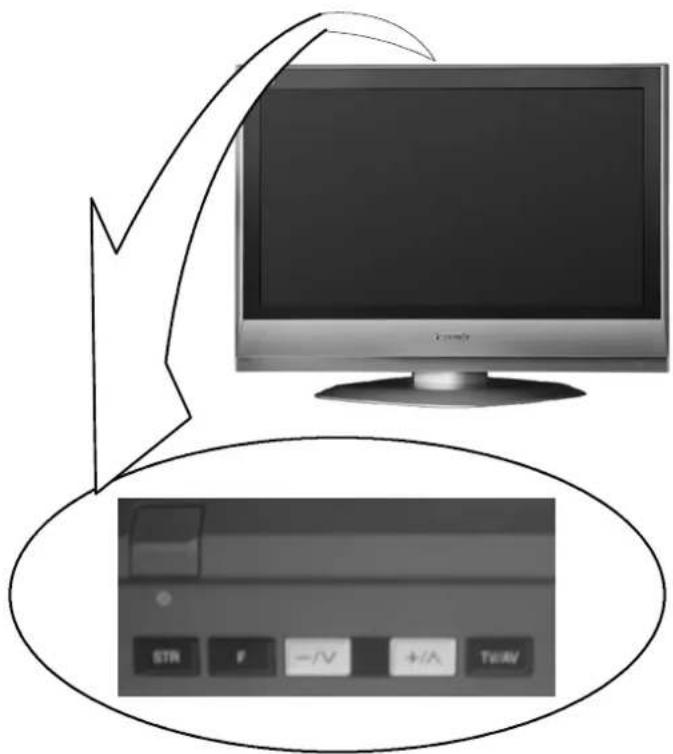
Press the F button
(Control panel) until
"Tuning mode" is reached

Press the or + button
to access Tuning mode
Press the TV/AV button
to move between "Change
programme" or "Search"
TV/AV

Press the or + button
to change programme
position, start search.
When the desired station
is found, press STR to
store the changes
The programme position
will flash
STR

Repeat above procedure
to tune additional
programmes or press
the F button to exit

text_image
Diagram showing a monitor connected to a TV control panel with buttons labeled STR, F, -/V, +/A, and Turn/V.Tuningmode
F: No --, +: Yes
text_image
STR F = / V + / A TV/VCH41 SC2
Manual tuning
--,+
Search
TV/AV
Movecursor
STR
Tostore
F
To exit

21
68
text_image
STR F -/√ +/∧ TurnoutOwnerl.D. allows you to enter a security code and address information so that in the unfortunate event of the first it will help the Policetodeterminethe owner.
If the Owner I.D. information was not entered after Auto setup or it is necessary to alter some of the I.D. information it can be re-accessed via the Setup menu (In both Analogue and DVB modes).
Open the Main menu
Move to Setup menu
Access Setup menu
Move to Owner I.D.
Access Owner I.D.
MENU

natural_image
Sequence of abstract geometric shapes with arrow indicators, no text or symbols present
Setupmenu
Q--LinkAV1
ControlwithHDMI
AV1out
AV2out
Offtimer
Power on preference
DVBSetupMenu
OwnerID
Shippingcondition
On
Monitor
DVB
Off
AV
Access
If the Owner I.D. has previously been set, enter the PIN NUMBER (using 0 to 9 on the remote control) followed by OK to proceed, this will take you to the NAME option.

If no Owner I.D. has previously been set, enter your own 4 digit Owner I.D. PIN NUMBER (using 0 to 9 on the remote control).
If a 4 digit PIN NUMBER was entered above, you will be taken automatically to the NAME line.
If not, move to the NAME line

Change character

Repeat above until NAME, HOUSE NUMBER and POSTCODEare

entered. Press the OKbutton to st the details. Press again when you asked, "Are you sure?"


Select
Access

Exit
Return
Younowhavetheopportunity toenteryourdetailsand helpthepolicecrackcrime seeinstructionbook
OwnerID
PINNUMBER:****
NAME:***************************
HOUSENO:**************************
POSTOCODE:************************
0123456789

Changecharacter
Selectcharacter
StoreOwnerID
Exit
Return
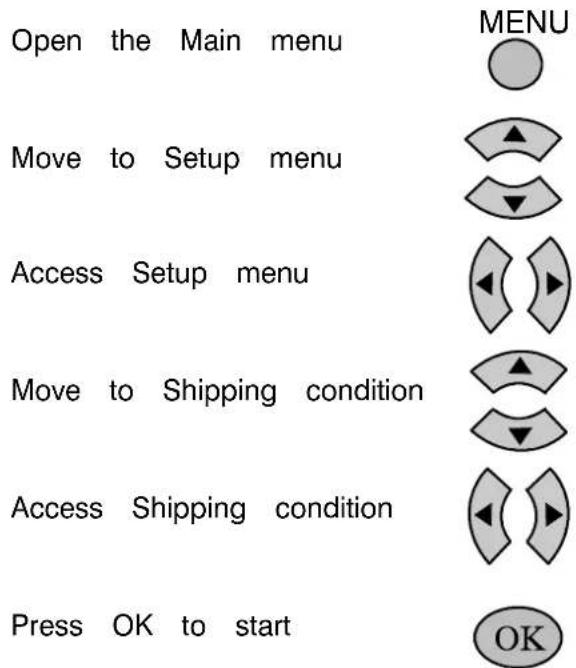
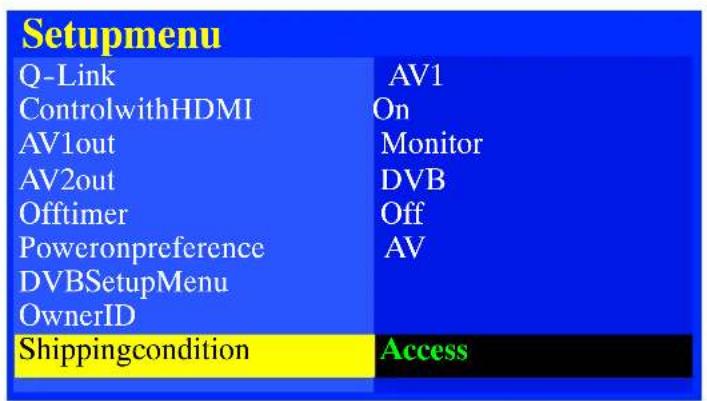
SETUPMENUSHIPPINGCONDITION
ShippingconditionallowsyoutoresettheTVtoitsoriginalcondition,i.e.no channelstunedin.
This is useful, for example, if you move to a different area when you will probably want your new local stations.
The Shipping condition menu will reset all data, except Owner I.D. information, clearing all DVB and Analogue tuning information and resetting all control levels back to factory settings
You may need to adjust your VCR (DVD/R) or programme position '0' VCR (DVD/R) after Shippingconditionmenu.
text_image
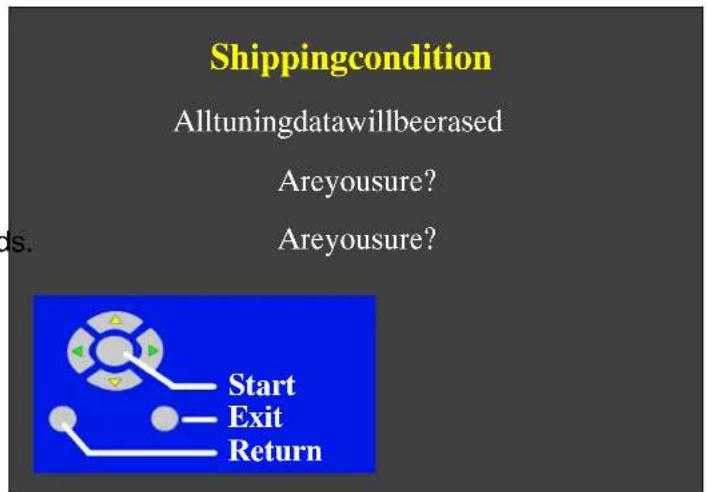
Open the Main menu MENU Move to Setup menu Access Setup menu Move to Shipping condition Access Shipping condition Press OK to start OKPress again, to confirm, each time that you are asked, "Are you sure?"
Switch TV off and wait for a few seconds. Switch TV on again.
Auto setup will begin, stations will be located, sorted and stored ready for use. Seepage25.
text_image
Setupmenu Q-Link AV1 ControlwithHDMI On AV1out Monitor AV2out DVB Offtimer Off Poweronpreference AV DVBSetupMenu OwnerID Shippingcondition Access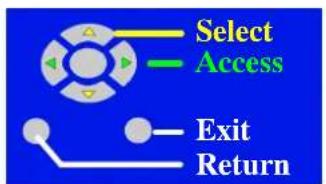
flowchart
graph TD
    A["Start"] --> B["Select"]
    B --> C["Access"]
    C --> D["Exit"]
    D --> E["Return"]
text_image
Shippingcondition Alltuningdatawillbeerased Areyousure? Areyousure?DVBSetupMenu---overview(DVBmode)
TheDVBSetupmenuprovidesaccesstovariousadvancedfeaturesandalso totheDVBTuningmenu.
In DVBmode
Press the MENUbutton.
Move to Setupmenu.
Access Setupmenu.
Move to DVBSetupMenu.
Access DVBSetupMenu.
Move to menu option
Adjust chosen option or access chosen menu.
Press the EXITbutton at any to go back to watching TV.






Setupmenu
| Q-Link | AV1 |
| ControlwithHDMI | On |
| AV1out | Monitor |
| AV2out | DVB |
| Offtimer | Off |
| Power on preference | AV |
| DVBSetupMenu | Access |
| OwnerID | |
| Shippingcondition |
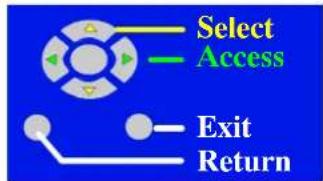
flowchart
graph TD
    A["Start"] --> B["Select"]
    B --> C["Access"]
    C --> D["Exit"]
    D --> E["Return"]
DVB Setup menu
| Timer Programming | Access |
| Profile Edit | |
| Child Lock | |
| DVB Tuning Menu | |
| DVB System Setup | |
| Multi Audio | eng |
Timer Programming
Allows you to enter programme times at which the DVB tuner must ready for recording. See page 31.
ProfileEdit
Allows you to select your favourite programme positions and display listintheTVGuideorInformationbanner(Seepage33)
ChildLock
You may wish to lock a DVB programme channel to prevent access (See page 34)
DVBTuningMenu
Provides access to many other DVB Tuning features. (See page 35)
DVBSystemSetup
Provides access to various specialised DVB options (See page 36)
MultiAudio
Multi audio, which will only appear when a DVB programme is selected you to select an alternative sound track. The number of options available depends on each broadcast.
Timerprogrammingmenu(DVBmode)
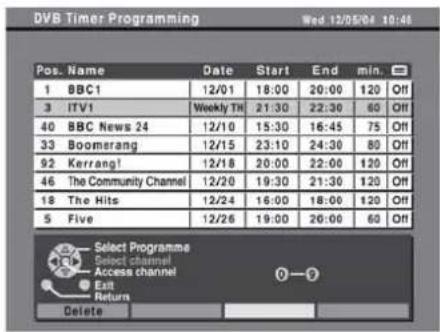
For an external recording device to record DVB programmes, the integrated DVB system must be at the signal. The Timer programming menu allows you to choose programmes that you wish to record time, the DVB system will switch on and tune to the correct station (even if the TV is in standby recording device is compatible with Q---Link or similar technologies (see page 39) and connected to AV2 terminal, you do not need to program the device --- the DVB system will control the recording device must be connected to the TV's AV1/AV2 terminal using a SCARTcabletorecc
In DVBmode
Press the MENUbutton.
Move to Setup menu.
Access Setup menu.
Move to DVB Setup Menu.
Access DVB Setup Menu.
Move to Timer Programming.
Access Timer Programming.
Press the OKbutton to begin programming.
Select the Programme position to be recorded
Move to the Date field.

text_image
MENU OK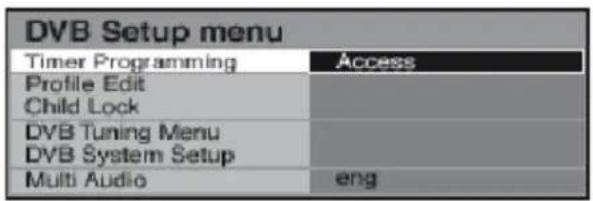
text_image
DVB Setup menu Timer Programming Access Profile Edit Child Lock DVB Tuning Menu DVB System Setup Multi Audio eng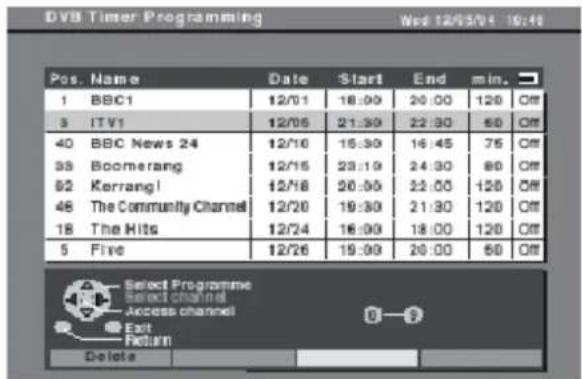
text_image
DVB Timer Programming Wed 12/15/04 19:48 Pos. Name Date Start End min. 1 BBC1 12/01 18:00 20:00 120 Off 3 ITV1 12/05 21:30 22:30 60 Off 40 BBC News 24 12/16 16:30 16:45 75 Off 33 Boomerang 12/15 23:10 24:30 80 Off 82 Kerrang! 12/18 26:50 22:00 120 Off 46 The Community Channel 12/20 19:30 21:30 120 Off 18 The Hits 12/24 16:00 18:00 120 Off 5 Five 12/26 19:00 20:00 60 Off Select Programme Select channel Access channel Exit Return DeleteSet the date on which the recording is to take place
The current Date and Time are shown at the top
themenu.Seepage32forfurtherDateoption
Move to the Start time field and set the Start tin
Move to the End time field and set the End time
The duration of the recording is shown in the mir
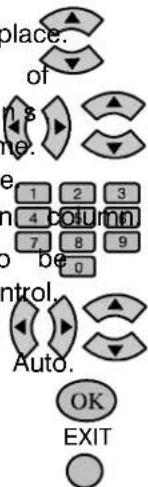
The channel position, start and end times can also
input using the numeric buttons on the remote con
Move to the Subtitles field.
If you wish to record subtitles (if available) select
Press the OKbutton to store.
Press the EXITbutton to leave
the DVB Timer Programming screen.
text_image
place. of e 1 2 3 4 column 7 8 9 0 Control. Auto. OK EXITNotes:
- To delete a timer programme, select the recording with the cursor bar and press the Red button.
• To edit a previously entered timer programme, select it with the cursor bar and press the OK button. - Timer programmes can also be entered from the TV Guide.
Two minutes before the recording is due to start, a reminder will appear on screen: Press the OK button to remove the reminder from the screen. If you wish to cancel the recording, press the EXIT button.
Notes: The above 2 operations will not be necessary if the TV set is in standby mode.
Six seconds before the recording is due to start the DVB system will tune to the correct station. If you were already watching another DVB station you will see the station change on screen. If you were watching an analogue channel, you will not see the change.
You can continue to watch analogue stations while a timer recording is in progress. If you attempt to switch to another DVB programme position while a timer recording is in progress the message "DVB Tuner Locked "will be displayed. Press the OK button to continue recording, or EXIT to unlock the programme position. Beware that if you press EXIT, timer programming for this DVB position will be immediately deleted. To immediately cancel a recording that is already in progress, press GUIDE then EXIT.
Timer programming menu (DVB mode)
DailyandWeeklyTimerProgrammes
While in the Date field of the DVB Timer Programming menu, you can select various options to determine how often a recording should be made. Press the down cursor button repeatedly to access the following options:
DailySu--Sa
The recording device will record at the same time every day.
DailyMo--Sa
The recording device will record at the same time each day from Monday to Saturday.
DailyMo--Fr
TherecordingdevicewillrecordatthesametimeeachdayfromMondaytoFriday.
WeeklySa, Fr, Th, We, Tu, Mo, or Su
Therecordingdevicewillrecordatthesametimeonthesamedayeachweek.
Note:
If new timer programme data overlaps any part of an existing timer programme, the message "Timer displayed and the new data will be cleared. If overlapping data is entered using the Timer function menu (see page 12), the message "Timer overlap with other timer!" will appear.
EncryptedProgrammes
In the future, some DVB programmes may be “encrypted”. This means that the DVB programme can or recorded unless you have the correct Common Interface module to decode the programme.
When you attempt to view or set Timer recording of an encrypted programme and you have no inserted, a message will appear on screen.
text_image
DVB Timer Programming Wed 12/05/04 18:46 Pos. Name Date Start End min. 1 BBC1 12/01 18:00 20:00 120 Off 3 ITV1 Weekly Th 21:30 22:30 60 Off 40 BBC News 24 12/10 15:30 16:45 75 Off 33 Boomerang 12/15 23:10 24:30 80 Off 92 Kerrang! 12/18 20:00 22:00 120 Off 46 The Community Channel 12/20 19:30 21:30 120 Off 18 The Hits 12/24 16:00 18:00 120 Off 5 Five 12/26 19:00 20:00 60 Off Select Programms Select channel Access channel Exit Return DeleteProfileEditmenu(DVBmode)
TheProfileEditmenuallowsyoutoselectyourfavouriteprogrammepositions anddisplaythemasalistintheTVGuideorInformationbanner,toallowquick andeasyaccesstotheprogramsyouwatchmostoften.
In DVBmode
Press the MENUbutton.
Move to Setupmenu.
Access Setupmenu.
Move to DVBSetupMenu.
Access DVBSetupMenu.
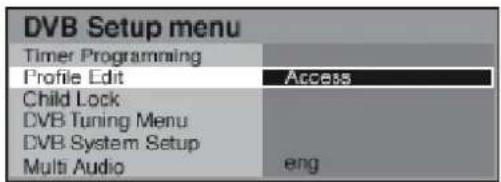
Move to ProfileEdit.
Access ProfileEdit.
AddachanneltotheProfilelist
Move to the programme position which you wish to add to the profile list.
Press the Redbutton repeatedly to cycle through the channel categories.
Press the Greenbutton repeatedly to cycle through the profiles.
Press the Yellowbutton to add a channel to the profile list.
Press the Bluebutton to add all the channels to the profile list.
Press the OKbutton to store your Profile list OK
EdittheProfilelist
When the profile list is highlighted
Press the Redbutton to edit the profile name.
Press the Greenbutton to move the channel.
Press the Yellowbutton to delete the channel.
Press the Bluebutton to delete the all channels.
Press the MENUbuttontoreturntotheDVB MENU
Setup Menu.
Press the EXITbutton at any time to exit Profile Edit.
A list of favourites can be accessed by pressing the GUIDE button or button.
See pages 12 and 13.
MENU










text_image
DVB Setup menu Timer Programming Profile Edit Access Child Lock DVB Tuning Menu DVB System Setup Multi Audio eng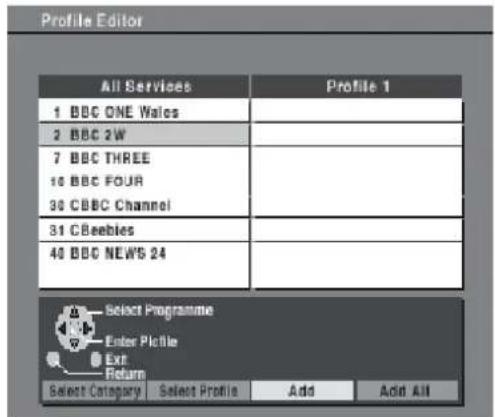
text_image
Profile Editor All Services Profile 1 1 BBC ONE Wales 2 BBC 2W 7 BBC THREE 10 BBC FOUR 30 CBBC Channel 31 CBeebles 40 BBC NEWS 24 Select Programme Enter Picture Ext Return Select Category Select Profile Add Add AllChildLockmenu(DVBmode)
YoumaywishtolockaDVBprogrammechaneltopreventaccesstoit.
Note:
The data of the PIN number and locked channel will be erased by operating the Shipping condition.
In DVBmode
Press the MENUbutton.
Move to Setupmenu.
Access Setupmenu.
Move to DVBSetupMenu.
Access DVBSetupMenu.
Move to ChildLock
Access ChildLock.
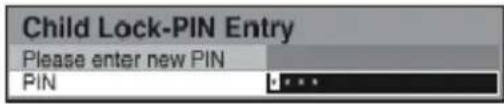
When entering Child Lock menu for the first time, new PIN number setting screen is displayed.
Create a 4---digit password.
Enter the password again to confirm.
After the first time you will only need to enter a password once to display Child Lock screen
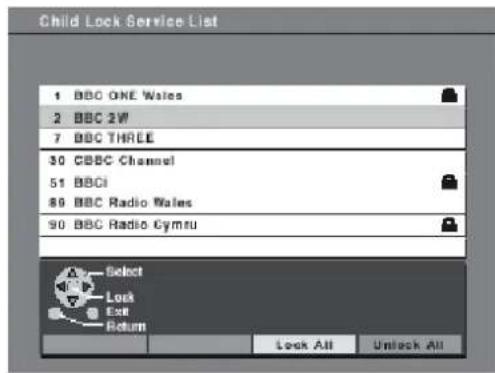
Move to ChildLockServiceList.
Access ChildLockServiceList.
Select the channel you want to lock and then press the OKbutton to lock. Press again to unlock OK
Press the Yellowbutton to lock all channels. Press the Bluebutton to unlock all channels.
The PIN number is required when you wish to watch a locked channel. If the unit is turned off it will be necessary to input the PIN number again to access any locked channels.
ChangethePINnumber
In Child Lock menu
Move to ChangePIN.
Access ChangePIN.
Create a 4---digit new password.
Enter the password again to confirm.
MENU

natural_image
Vertical sequence of stylized eye symbols with arrow indicators (no text or labels)| DVB Setup menu | |
| Timer Programming Profile Edit | |
| Child Lock | Access |
| DVB Tuning Menu DVB System Setup Multi Audio | eng |
text_image
Child Lock-PIN Entry Please enter new PIN PIN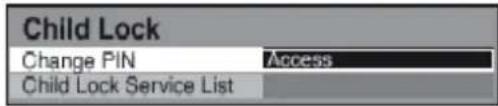
text_image
Child Lock Change PIN ACCESS Child Lock Service List


text_image
Child Lock Service List 1 BBC ONE Wales 2 BBC 2W 7 BBC THREE 30 CBBC Channel 51 BBCi 89 BBC Radio Wales 90 BBC Radio Gymru Select Lock Exit Return Look All Unlock AllDVBTuningMenu(DVBmode)
DVB Tuning Menu provides access to DVB Tuning features.
In DVBmode
Press the MENUbutton.
Move to Setupmenu.
Access Setupmenu.
Move to DVBSetupMenu.
Access DVBSetupMenu.
Move to DVBTuningMenu.
Access DVBTuningMenu.
Move to menu option
Adjust chosen option or access chosen
Press the EXITbutton at any time to go to watching TV.
MENU

flowchart
graph TD
    A["Circle"] --> B["▲"]
    B --> C["▼"]
    C --> D["◀"]
    D --> E["▲"]
    E --> F["▼"]
    F --> G["◀"]
    G --> H["▲"]
    H --> I["◀"]
    I --> J["▲"]
    J --> K["▼"]
    K --> L["◀"]
    L --> M["▲"]
    M --> N["◀"]
    N --> O["▲"]
    O --> P["▼"]
    P --> Q["◀"]
    Q --> R["▲"]
    R --> S["◀"]
    S --> T["▲"]
    T --> U["▼"]
    U --> V["◀"]
    V --> W["▲"]
    W --> X["◀"]
    X --> Y["▲"]
    Y --> Z["▼"]
    Z --> AA["◀"]
    AA --> AB["▲"]
    AB --> AC["◀"]
    AC --> AD["▲"]
    AD --> AE["▼"]
    AE --> AF["◀"]
    AF --> AG["▲"]
    AG --> AH["◀"]
    AH --> AI["▲"]
    AI --> AJ["▼"]
    AJ --> AK["◀"]
    AK --> AL["▲"]
    AL --> AM["◀"]
    AM --> AN["▲"]
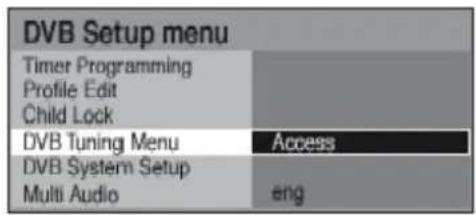
text_image
DVB Setup menu Timer Programming Profile Edit Child Lock DVB Tuning Menu Access DVB System Setup Multi Audio eng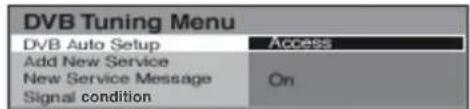
text_image
DVB Tuning Menu DVB Auto Setup Access Add New Service New Service Message Signal condition On







text_image
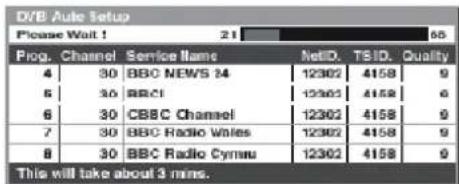
DVB Auto Setup Please Wait 1 21 55 Prog. Channel Service Name NetID. TSID. Quality 4 30 BBC NEWS 34 12362 4158 9 5 30 BBCI 12362 4158 9 6 30 CBBC Channel 12362 4158 9 7 30 BBC Radio Wales 12362 4158 9 8 30 BBC Radio Cymru 12362 4158 9 This will take about 3 mins.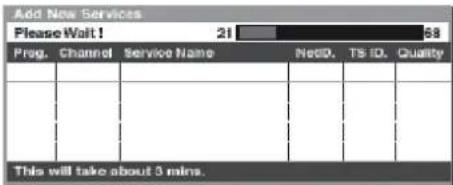
text_image
Add New Services Please Wait! 21 58 Prog. Channel Service Name NetD, TS ID, Quality This will take about 5 mins.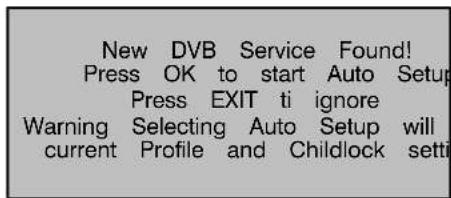
text_image
New DVB Service Found! Press OK to start Auto Setup Press EXIT ti ignore Warning Selecting Auto Setup will current Profile and Childlock settiDVB Auto Setup
Automatically retunes your TV. DVB stations will be located, sorted into stored. DVB tuning data will be erased. If you set the Child Lock Pll number is required before DVB Auto Setup.
Add New Service
You can add new DVB stations while retaining existing tuning data. WI Services Found message appears new DVB stations are available to ac existing DVB channel list.
New Service Message
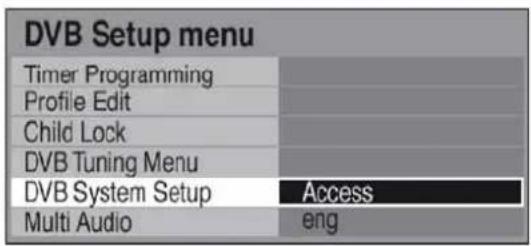
This TV continually scans for updated DVB services and notifies you o changes. Set to On to receive notification. Set to Off if you do not informed of any updates.
Signal Condition
The signal condition function displays indications of both signal quality strength for each DVB programme position.
The DVB system requires that the signal condition is of good quality best picture. When viewing analogue pictures, interference such as signal reflection from nearby buildings or mountains causes “ghosting”, but still a viewable picture. For the DVB system, interference such as this can flow of data causing the picture to appear to be made up of large blocks, or to freeze intermittently. If the picture disappears completely, this could mean signal condition is very poor. If this happens often, you may need to aerial system to provide a better signal.
Green bar Good
Red bar Poor (check the aerial)
DVBSystemSetup(DVBmode)
TheDVBSystemSetupmenuprovidesaccesstoDVBspecificoptions.
InDVBmode
PresstheMENUbutton.
MovetoSetupmenu.
AccessSetupmenu.
MovetoDVBSetupMenu.
AccessDVBSetupMenu.
MovetoDVBSystemSetup
AccessDVBSystemSetup
Movetomenuoption
Adjustchosenoptionoraccesschosenmenu
PresstheEXITbuttonatanytimetogobackto watchingTV.
PressingtheOKbuttonafterhavingadjustedsome featureswillstorethesettingasthedefault (replacingthefactorysetting).

flowchart
graph TD
    A["○"] --> B["▲"]
    B --> C["▼"]
    C --> D["◀"]
    D --> E["▲"]
    E --> F["▼"]
    F --> G["◀"]
    G --> H["▲"]
    H --> I["▼"]
    I --> J["◀"]
    J --> K["▲"]
    K --> L["▼"]
    L --> M["◀"]
    M --> N["▲"]
    N --> O["▼"]
    O --> P["◀"]
    P --> Q["▲"]
    Q --> R["▼"]
    R --> S["◀"]
    S --> T["▲"]
    T --> U["▼"]
    U --> V["◀"]
    V --> W["▲"]
    W --> X["▼"]
    X --> Y["◀"]
    Y --> Z["▲"]
    Z --> AA["▼"]
    AA --> AB["◀"]
    AB --> AC["▲"]
    AC --> AD["▼"]
    AD --> AE["◀"]
    AE --> AF["▲"]
    AF --> AG["▼"]
    AG --> AH["◀"]
    AH --> AI["▲"]
    AI --> AJ["▼"]
    AJ --> AK["◀"]
    AK --> AL["▲"]
    AL --> AM["▼"]
    AM --> AN["◀"]
    AN --> AO["▲"]
text_image
DVB Setup menu Timer Programming Profile Edit Child Lock DVB Tuning Menu DVB System Setup Access Multi Audio eng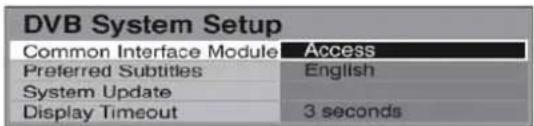
text_image
DVB System Setup Common Interface Module Access Preferred Subtitles English System Update Display Timeout 3 seconds

CommonInterface Module
TheCommonInterfaceModulemenuprovidesaccesstofunctionscontainedona CommonInterfaceModuleinsertedintotheCIslot,locatedattherearoftheTV.See page37.
PreferredSubtitles
Thisoptionallowsyoutoselectthelanguageinwhichsubtitlesshouldappear(if available)whentheSTTLbuttonispressed.
SystemUpdate
Thismenuallowsyoutodownloadnewsoftwaretothetelevision.Seepage38.
DisplayTimeout
Thisoptionallowsyoutosethowlongtheinformationbannerstaysonscreen.Select from0(Nodisplay)to10secondsin1secondincrements.
CommonInterfaceModulemenu(DVBmode)
TheCommonInterfaceModulemenuprovidesaccesstosoftwarecontainedonCommonInterface(CI)Modules. These can be inserted in the "CI" slotlocated at therearofthe TV.
IMPORTANTNOTES:
- SwitchofftheTVusingthefrontpanelswitchbeforeinsertingorremovingamodule.
- If you are installing a TV software update, please follow the dedicated instructions supplied with the module.
- Insert/removeamodulestraighttotheCIslot.
InserttheCImodule:
Some Common Interface Modules may be a two piece design consisting of a card reader together with the viewing card. When using this design of card, first insert the card reader firmly into the CI slot on the TV. Secondly, insert the viewing card into the reader.
SwitchontheTV.
InDVBmode
PresstheMENUbutton.
MENU

MovetoSetupmenu.

AccessSetupmenu.


MovctoDVBSetupMenu.

AccessDVBSetupMenu.

MovctoDVBSystemSetup.

AccessDVBSystemSetup.

MovetoCommonInterfaceModule


AccessCommonInterfaceModule


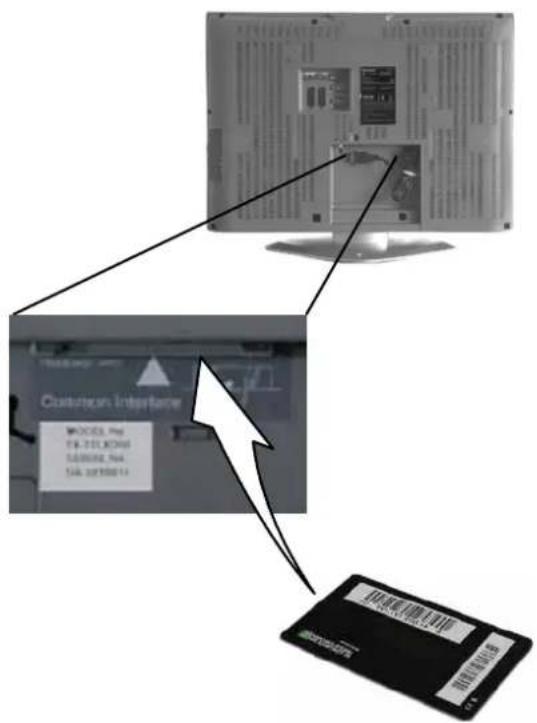
text_image
Circuitgun Interface WDCOS, Psp T4-T10LCHM SABRIN2, N4 SAB-1078011DVB System Setup
| Common Interface Module | Access |
| Preferred Subtitles | English |
| System Update | |
| Display Timeout | 3 seconds |
Common Interface
| Slot 1: No module inserted | Access |
Accessthemodule
Ifnomoduleisinsertedthemessage“NoModuleInserted!”willbedisplayed. (Ifyouhaveinsertedamodule,checkthatitisfullyinserted.)
The feature that now appear on screen are dependent on the content of these selected Common Interface Module.
Refertotheinstructionssuppliedwiththecardorcontactthevendor.
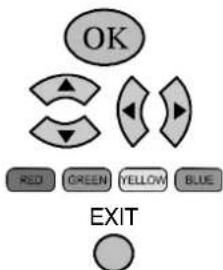
Inallcases,itispossibletonavigatethepagesusingbuttonsontheremotecontrol, butbecausethecommandsavailablemustapplytoallmanufacturersofDVBequipment, someone--screencommandsmaynotcorrespondexactlytotheremotecontrolbuttons.
Forexample:
For the on-screen command 'select' or 'go', use the OK button.
Ifyouseethe ◀ ▶ ▼ ▲ symbols, usethecursorkeys.
If you see a line of keywords displayed in red, green, yellow and blue, use the coloured multifunction button to operate the functions.
TheEXITbuttonshouldalwaysallowyoutoexittheCIsoftware.
text_image
OK RED GREEN YELLOW BLUE EXITSystemUpdatemenu(DVBmode)
Fromtimetotimenewversionsofsoftwarewillbecomeavailable
AutoUpdateSearchinStandby(Overnight)
Duringthenighttime, this TV will automatically search for any new available software being broadcast. If anew
software version is found, the unit will automatically download and install this new version. At the end of this process the unit will rcscct.AutoUpdateSearchinStandbywilloccurat03:00or05:00cveryday.
InDVBmode
PresstheMENUbutton.
MovctoSetupmenu.
AccessSetupmenu.
MovetoDVBSetupMenu.
AccessDVBSetupMenu.
MovctoDVBSystemSetup
AccessDVBSystemSetup
MovetoSystemUpdate
Movctomenuoption
Adjustchosenoptionoraccesschosenmenu
PresstheEXITbuttonatanytimetogobacktowatchingTV.
PressingtheOKbuttonafterhavingadjustedsomefeatures willstorethesettingasthedefault( replacingthefactorysetting).

flowchart
graph TD
    A["MENU"] --> B["Arrow Up"]
    B --> C["Arrow Down"]
    C --> D["Arrow Left"]
    D --> E["Arrow Right"]
    E --> F["Arrow Up"]
    F --> G["Arrow Down"]
    G --> H["Arrow Left"]
    H --> I["Arrow Right"]
    I --> J["Arrow Up"]
    J --> K["Arrow Down"]
    K --> L["EXIT"]
    L --> M["OK"]
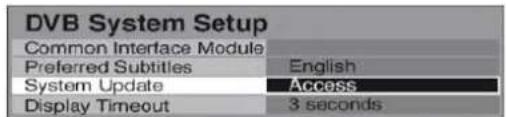
text_image
DVB System Setup Common Interface Module Preferred Subtitles English System Update Access Display Timeout 3 seconds
text_image
System Update Auto Update Search in Standby On System Update Search Now Software LicenceSet to On to search for new software and update automatically in Standby mode. This does not work when the unit is powered off. If there is an new version of software being broadcast, the TV will download this automatically.
AutoUpdateSearchinStandbywillonlyoccurif:
•TheunitisinStandbymode
• Notimerrecordingissetfor03:00or05:00(GMT)
•Norccordingisbeingmadcat03:00or05:00(GMT)
New version 1.00 found.
Do you really want to update the software and reboot the system?
Set to Off if you do not want new software to be automatically downloaded. In this case a new software banner will appear when the TV set is switched on and tuned to a BBC channel, if new software is being broadcast.
Press the OK button to download the new version. The TV will begin download of the new software version. This can take up to 15minutes.PresstheEXITbuttontoexitwithoutdownload .
SystemUpdateSearchNow(ManualDownload)
Tomanuallycheckifancwsoftwareversionisavailable,selectSystemUpdateSearchNowinSystemUpdate
menu and press the OK button. The TV will search for new versions of software and indicate whether a newer version is available or not. This search process may take a few minutes. If a newer software version is found, an on screen message will inform the user that it is available. The user is given the chance to download this version. Press the OK button to download the new version. The TVwillbegindownloadofthenewsoftwareversion.Thiscantakeupto15minutes.
PresstheEXITbuttontoexitwithoutdownload
Toensu rethatyou r TVautomaticallyupdateswhennewso ftwareisavailable,pleaseplacetheTVin
Standbylastthingatnightwhenyouhavefinishedviewing.
PresstheMENUbuttontoreturntoDVBSystemSetupmenu.
PresstheEXITbuttontoexitfrommenus.
SoftwareLicence
AccesstoshowtheinformationoftheSoftwareLicence.
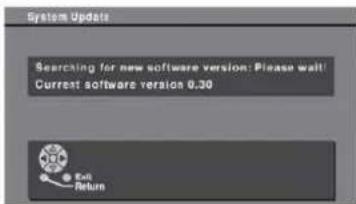
text_image
System Update Searching for new software version: Please wait! Current software version 0.30 Exit ReturnQ-Link allows the television to communicate with a compatible VCR or DVD Recorder.
For Q-Link communication to work, the TV must be connected to a recording device with the "Q-Link", "NEXTVIEWLINK", "DATA LOGIC", "Easy Link", "Megalogic" or "SMARTLINK" logo using a "fully wired" Scart cable between the AV2 socket of the television and the appropriate socket on your VCR, and the AV1 socket of the television and the appropriate socket on your DVD Recorder. For connection to the appropriate Scart socket on the recording device, refer to the device's operating instruction book.
Whenusinga“NEXTVIEWLINK”devicethemainfeaturespossiblearethefollowing:
PresetDownload
This allows the programme order from the TV to be downloaded to the recording device, helping to ensure that correct recordings are made; there are several ways to perform this operation :
- During installation as explained in the 'Quick Start Guide' beginning on page 7.
- When Auto setup is started from within the Tuning menu, see page 21.
- Preset download started from the recording device, refer to the device's operating instruction book.
Because a recording device cannot tune to DVB stations, only the analogue programme positions are downloaded to the device.
ImportantNote:
Not all recording devices support this type of data communication system. Some may support certain features, but not others. Refer to the recording device's operating instruction book.
If Q-Link is inoperative, first confirm that your Scart cable is a "fully wired" type. Ask your dealer for further details.
WhatYouSeelsWhatYouRecord(DIRECTTVRECORDING)(Not available with HDMI)
This will allow the immediate recording of the programme currently shown on the television, by the recording
device attached to the Scart socket, which can be chosen using "Q ---Link select". (see page13).
Press the DIRECTTVRECbutton on the remote control.
If the recording device is in Standby mode with usable recording media inserted, it will automatically switch on when you press the DIRECTTVRECbutton.

If a “Q-Link” device is connected, a message will appear on the TV screen showing what is being recorded, or if it is not possible to record. Some “Q-Link” compatible devices will only display the message when on the VCR programme position(0) or in AV mode. Refer to the device's operating instruction book.
Recordinginprogress
The recording device is recording the programme signal. The tape or disc may have been "write protected", miss from its own tuner. If you wish you can switch off the TV, or may be damaged. The device may already be received and leave the device recording in the normal way. Refer to the device's operating instruction book.
No recording - Check tape or disc
RecordingDVBstations
If you press the DIRECT TV REC button while watching a DVB station, the recording device will automatically switch to its AV input to record the DVB signal from the TV (via the SCART cable), and the DVB programme position will be locked. If you attempt to select another DVB programme position while recording, you will see the message "DVB programme is locked". Press the OK button to clear the message, or the EXIT button to unlock the programme. Beware that if you press EXIT, the DVB programme will be unlocked – switching to another DVB programme will spoil your intended recording.
Additionally, when using a "Q-Link" device the main features possible are the following :
The following features are only available from the device connected to the scart socket selected using "Q-Link select". (see page 13).
TV/RecordingdeviceAutoPowerOn
If you insert pre-recorded media into the recording device and press the Play button whilst the TV is in 'Standby' mode, the TV will automatically switch on and select the correct AV input so that you can view the content.
RecordingdeviceAutoPowerStandby
When the TV is switched into 'Standby' mode, the recording device will also switch into 'Standby' mode if there is no media inserted, or if there is media inserted and the device is in 'Rewind' or 'Stop' mode. If a VCR is rewinding a tape, it will not switch into 'Standby' mode until rewinding has finished.
RecordingdeviceImageViewOn
If the TV is in Standby mode and the recording device sends a menu to be displayed on the TV screen (e.g. Main menu), the TV will automatically switch On and the menu will be displayed.
Some other devices may support this feature. Refer to the device's operating instruction book.
ThisTVwillalsocommunicatewithotherrecordingdevice'sthatcarrythefollowinglogos:
- "DATA LOGIC" (a trademark of Metz Corporation). - "Easy Link" (a trademark of Philips Corporation).
- “Megalogic” (a trademark of Grundig Corporation).
- “SMARTLINK” (a trademark of Sony Corporation).
ImportantNote:
These recording devices may support some or all of the above functions. Refer to the device's operating instruction book.
Not all recording devices support this type of data communication system. Some may support certain features, but not others. Refer to the device's operating instruction book. Some features are only available from the device connected to the scart socket selected using "Q---Link select". (see page13).
If Q-Link is inoperative, first confirm that your Scart cable is a "fully wired" type. Ask your dealer for further details.
VCR/DVD/ROPERATION
The Remote Control is capable of operating some functions of selected Panasonic VCRs an Versatile Disc) equipment. Some VCR and DVD equipment have different functions, so to ens please refer to the equipment's instruction book or consult your dealer for details.
 | StandbyPress to switch the VCR or DVD/R to standby mode.Press again to switch back on. |
 | VCR/DVDswitchUse this switch to select whether controls operate DVD equipment or y VCR. |
 | PlayPress to playback the tape or DVD. |
 | StopPress to stop the tape or DVD. |
 | Skip/FastForward/CueVCR: Press to fast forward the tape. In Play mode, press to view the rapidly forward.DVD/R: Press once to skip to the next track. In play mode press and view the picture rapidly forward. |
 | Skip/Rewind/ReviewVCR: Press to rewind the tape. In Play mode, press to view the pict in reverse.DVD/R: Press once to skip to the previous track. In play mode press to view the picture rapidly in reverse. |
 | Pause/StillPress in playback mode, the picture will pause.Press again to restart play. |
PROGRAMME | ProgrammeUp/DownPress to increase or decrease the VCR (DVD/R) programme position by one. |
 | RecordPress this button to start recording. |
TELETEXT OPERATION (Analogue Mode)
- Teletext features may vary depending on the Broadcasting Companies and is only available if the channel selected is transmitting Teletext.
- Pressing the Menu button whilst in Teletext operation will display the contrast function with a cyan bar, press ◀ to alter the setting as required.
Pressing the Picture button whilst in Teletext operation will display special function options at the bottom of the screen.
- When in Teletext mode, the volume may still be altered to the desired listening level.
WhatisLISTmode?
In LIST mode, four differently coloured page numbers are situated at the bottom of the screen. Each of these numbers can be altered and stored in the TV's memory.
WhatisFASTEXT?
In FASTEXT mode, four differently coloured subjects are situated at the bottom of the display. To access more information about one of these subjects, press the appropriately coloured button. This facility enables fast access to information on the subjects shown.
TV/Teletextmode
Press the TEXTbutton.
The screen will display the Teletext page.
Press again when you wish to return to TV mode.


PageSelection
Pages can be selected in two ways :
a. Press the Up / Down buttons to increase or decrease the page number by b. By entering the page number, using 0 - 9 on the remote control.


Full / Top / Bottom
Press the MENU button to display special functions, followed by the Green button.
Press the Greenbutton again to expand the BOTTOM half.
Press again to return to normal (FULL) size.


Reveal
Press the MENU button to display special functions, followed by the Red button to reveal hidden words e.g. quiz page answers. Press again to hide.

Red/Green/Yellow/Bluebuttons
In FASTEXT mode these correspond to the differently coloured subjects. In LIST mode they correspond to the differently coloured page numbers.

ListStore
In LIST mode the four page numbers can be altered (only for analogue station on programme positions 1 - 25).
To do this, press one of the four coloured buttons and enter the new page Press and hold OK, the page numbers will change to white indicating that the page is stored.
Hold
In Text mode holds the current text page
In TVmode press the HOLD button to freeze the picture.
Press again to return to watching the current programme.
(Not available in HDMI or Component mode)
TELETEXTOPERATION(Analogue Mode)
It is not possible to change the programme position when in News flash, Update or Sub Coded Page Access of


DisplayCancel(UpdateDisplay)
Press the MENU button to display special functions, followed by the Yellow button to view the TV picture whilst searching for a Teletext page.
When found, the screen will display the page number at the top left.
Press the Yellowbutton to view the page.
Press TEXTagain to return to normal TV operation.
NewsFlash
When a news flash page has been selected, press MENU, Yellow, to view the TV
picture. When an update is received, the page number will be displayed on screen. Press the Yellowbutton to display the News Flash
Press TEXTto return to normal TV operation.
Update
Press MENU, Yellow to see the update of information on certain pages.
When an update is received, the page number will be displayed at the top left screen.
Press the Yellowbutton to view the page.
Press TEXTto return to normal TV operation.




SubCodedPageAccess
When Teletext information exceeds more than one page, it may take some time for automatic changing of the sub pages to reach the sub page you require. As each page is found its number is displayed at the top of the page so that you may more sub pages are picked up, the display at the top of the page changes, so are always offered the most recently transmitted selection of sub pages.
In Teletext operation, use the following procedure to access sub pages:
If the sub page you want to look at is not yet available, press the MENU button (to display special functions) followed by the Yellow button to view the TV picture whilst
waiting for more sub pages to be found. The sub pages found will be displayed the top of the screen.
When the sub page you are waiting for is available press the Yellow button to return to
viewing the Teletext pages, then use the left and right cursor buttons to select the page of your choice.
Note:
- If you have used the left and right cursor buttons to select a sub page whilst viewing the TV picture, you must press the MENU button then the Yellow button to display the Teletext page again.
Press TEXTtwicetoreturntonormalTVoperation.


Index
WheninFASTEXTOperation
Press INDEXto return to the main index page.
Depending on the way information is transmitted, this may have to be pressed more once to return to the main index page.


Pictureandtext
Press the MENU button twice to display special functions, followed by the left or right button to select Picture and text On or Off.
Picture and text mode lets you see the current programme and a page of teletext side. Whilst using this feature, the remote control affects the teletext page; if you will make changes to the programme viewed press the TEXT button to return to watchir programme on its own then make the desired changes.
TELETEXTOPERATION(DVBMode)
DVB teletextservices
DVB teletext services differ greatly from analogue teletext. When you switch to a DVB teletext service, the images you see can contain graphics and text, laid out and controlled in a manner decided by the broadcaster. In all cases, it is possible to navigate the pages using buttons on the remote control, but because the commands available must apply to all manufacture equipment, some on ---screen commands may not correspond exactly to the remote control buttons. For example:
- For the on-screen command 'select' or 'go', use the OK button (1).
- If you see the ▶▼ ▲ symbols, use the appropriate CURSOR keys (2).
- If you see a line of key words displayed in red, green, yellow and blue, use the coloured multifunction buttons (3) to operate the functions.
- For numbered options, use the numeric keypad (4).
- The TV/TEXT button (5) should allow you to exit the teletext system. Alternatively, press the CHANNEL UP / DOWN buttons (6) to select another channel.
(1)
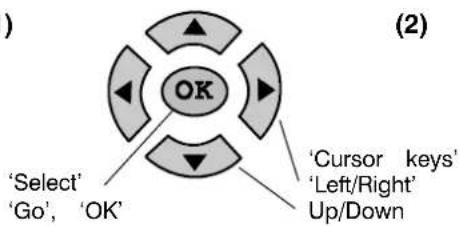
flowchart
graph TD
    A["OK"] --> B["'Select'"]
    A --> C["'Go', 'OK'"]
    A --> D["'Cursor keys'"]
    A --> E["'Left/Right'"]
    A --> F["Up/Down"]
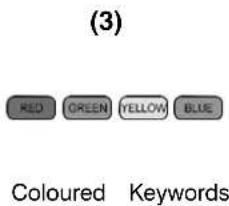
text_image
(3) RED GREEN YELLOW BLUE Coloured Keywords
text_image
(4) 1 2 3 4 5 6 7 8 9 0 Numbered options
text_image
(5) TEXT (6) Return to TV modeAs soon as you switch to a DVB channel with links to a teletext service, software is downloaded in the background to enable the teletext function. This means that when switching to a DVB channel, you should wait for approximately 5 seconds before pressing the TV/TEXT button (5) – this will allow the software to download. If you press the TV/TEXT button (5) before download is complete, there will be a short delay before the text screen is displayed.
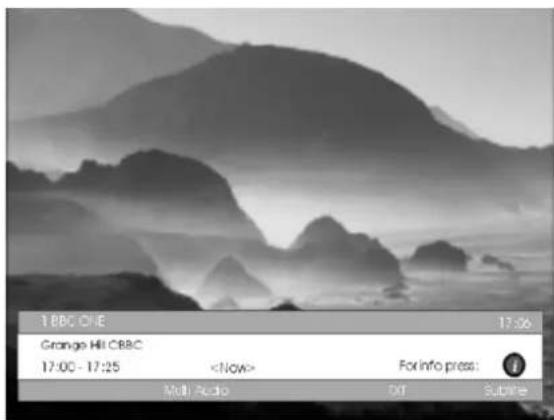
text_image
1 BBC ONE 17:00 Orange Hill CBC 17:00 - 17:25
text_image
Home 17:51 28 Feb News Sport Weather What's On Entertainment Travel Finance Help Use RED key to change channels Press GREEN for shortcut B B C L CHANGE TV SHORTSUTS BACK MENUWhile navigating DVB teletext, you will find there is a short delay when moving between pages while the page of There is often a prompt shown somewhere on the page (for example "Loading") to let you know that this is
CONNECTIONS (AV)
It is possible to connect a variety of additional equipment to this TV.
The following pages detail how to connect external equipment to the rear and side of the TV. Once your equipment is connected, use the following procedure to view the input:
Press the TV/AVmenu button
Whilst the on screen selector keys are displayed, select the page by pressing the Red or Blue button and then press coloured buttons to select the AV source you wish to view.

Redbutton : AV1 Scart terminal / Back page
Greenbutton : AV2 Video, S---Video Scart terminal
Yellow button : AV3 Audio, Video, S-Video terminals / Component terminals
Bluebutton : Next page / HDMI 1/2

The on screen selector keys that appear clear after a few seconds. If you want to select an input when the keys are not shown, press any of the coloured keys and the keys will reappear.
Notes: This television may automatically switch over to the AV mode
if the connected device sends a switch signal to the SCART cable connector.
In this case, the “EC” will be displayed in the left top corner of the screen and the signal from the AV equipment (for the RGB signal the “EC/RGB” will be displayed). The picture received will remain the same when the TV programme is changed. (See table below for full functionality)
- You may switch back to the television by pressing button TV/AV or by switching off the AV device.
- You can also select an AV source using the TV/AV button on the control panel on the top panel of your TV. Press the TV/AV button repeatedly until you reach the AV source you wish to view.
- When in AV mode a reduced number of options are available in the SOUND and SETUP menus (eg: in the Setup menu there is no Tuning menu option).
Screen displays
| Terminal | AV1 | AV2 | AV3 | Component | HDMI1 | HDMI2 |
| ManualInput Selection | AV1 | AV2AV2S(S---Video Input) | AV3AV3S(S---Video input) | Component | HDMI1 | HDMI2 |
| AutoInput Selection | EC1/RGBAV1/RGBRGB(Input) | EC2/RGBEC2S(S---Video Input) | - | - | EC/HDMI1 | - |
HeadphonesConnection
Output from Headphones socket
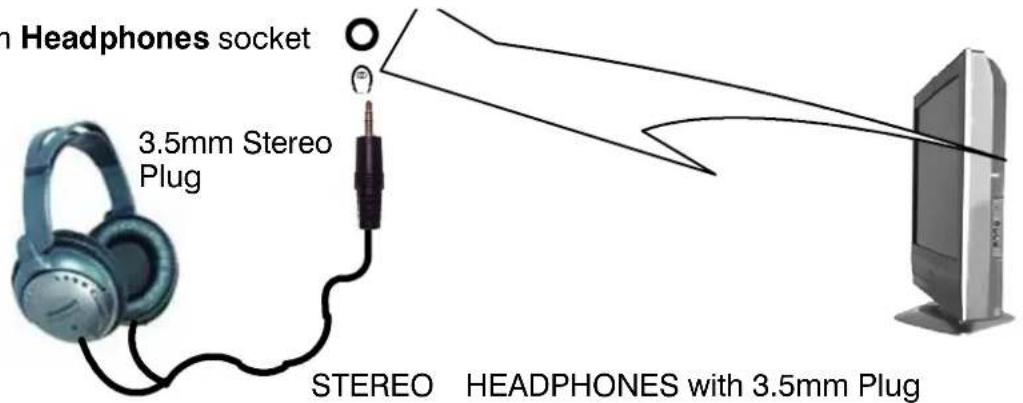
text_image
n Headphones socket 3.5mm Stereo Plug STEREO HEADPHONES with 3.5mm PlugNotes:
- Additional equipment and cables shown are not supplied with this TV set.
- The volume level of the headphones can be adjusted by selecting "Headphone volume" from the Sound menu.
CONNECTIONS (AV)
RearsocketsSideconnections
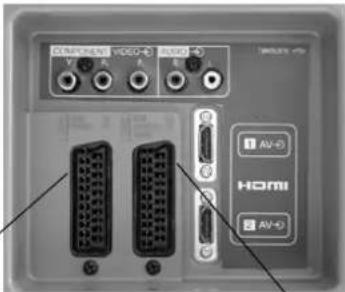
text_image
COMPRESSOR VIDEO+ VIDEO Y R F R AV-0 HOMI AV-0AV1:AV2:
VCR VCR / S---VIDEO VCR
Q-Link COMPATIBLE VCR Q-Link COMPATIBLE VCR
SET TOP BOX
DVD PLAYER
DVD RECORDER
CAMCORDER
GAME CONSOLE /
COMPUTER(RGB)
Q-Link COMPATIBLE
DVD RECORDER
Q-Link COMPATIBLE VCR
SET TOP BOX
DVD PLAYER
DVD RECORDER
Q-Link COMPATIBLE DVD
RECORDER
CAMCORDER / S-VIDEO
GAME CONSOLE /
COMPUTER(RGB)
CAMCORDER
Audio
input to
L/R
sockets
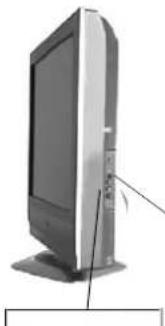
natural_image
Exterior view of a modern flat-screen monitor with a cable inserted, mounted on a stand (no text or symbols visible)S - VR - L V
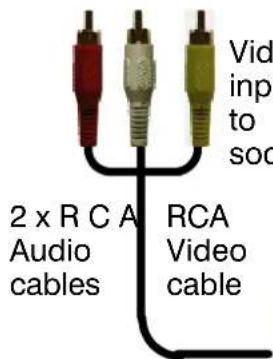
text_image
2 x RCA Audio cables Vid input to soc RCA Video cable
CAMCORDER
How to connect the Component Input terminals
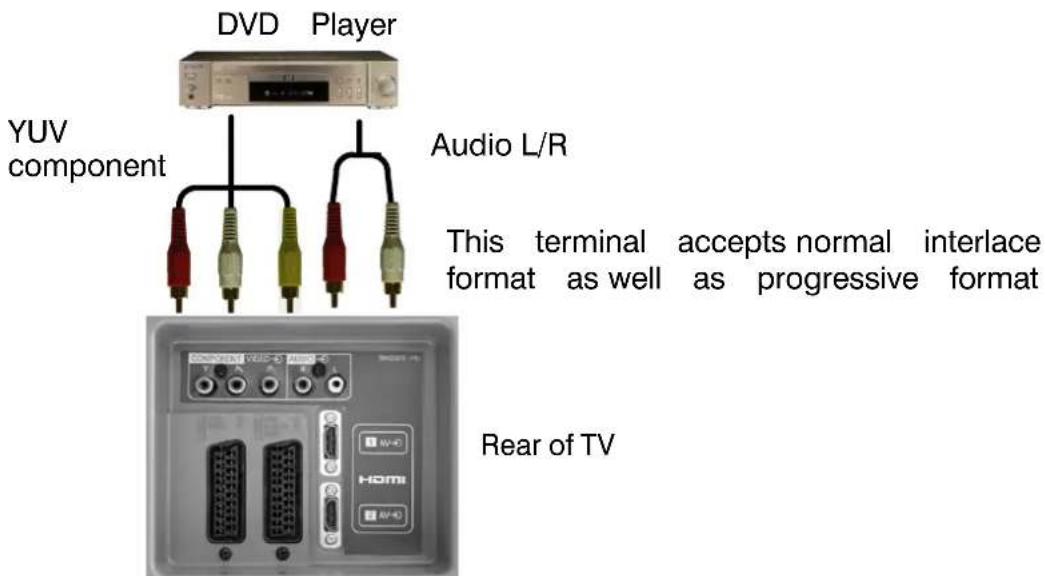
text_image
DVD Player YUV component Audio L/R This terminal accepts normal interlace format as well as progressive format Rear of TVNotes:
- Additional equipment and cables shown are not supplied with this TV set.
- Do not connect a computer with TTL output (5V) to this set.
- For Scart socket wiring information see page 48.
- When viewing an RGB signal on the screen, whether it is an internal source (i.e. IRD picture) or Ext source (AV-RGB) the product is restricted to output a combined S-Video source from the AV1 or AV2.
ControlwithHDMI“HDAVIControl”
EnjoyadditionalHDMIInter--OperabilitywithPanasonicproductswhichhave"HDAVIControl"function.
HDMI connections to some Panasonic equipment (Panasonic DVD Recorder DIGA) allow you to enjoy easy playback, poweronlink or powerofflink.
HDMI (High Definition Multi media Interface) is the first all-digital consumer electronics A/V interface that supports uncompressed standard. The HDMI terminals supports both video and audio information.
AnHDMI--compliantdevice,suchasaSetTopBoxorDVDplayerwithHDMIorDVIoutputterminalcanbe connectedtotheHDMIinputterminal.
EasyPlayback
AutomaticInputswitching. WhentheconnectedPanasonicequipmentis
operated, inputmodeisswitchedautomatically. Whenithasstoppedoperating, inputmodeisreturned.
PowerOnLink
Whentheconnectedequipmentstartsplaybackordirectnavigatororfunction
menuareactivated, theTVisautomaticallyturnedon. (OnlywhenTVisinStandbymode)
PowerOffLink
When TVissetto Standbymode, the connected Panasonic equipment is also
automaticallysettoStandby.
SummaryofControlFunctions( "o" indicates available "---" indicates not available)
| ConnectionsFunction | HDMIandSCART | SCART (Q-Link only) | HDMIonly |
| Easy Playback | 0 | 0 | 0 |
| Direct TV Recording | 0(Not when viewing HDMI input) | 0 | — |
| Power on Link | 0 | 0 | 0 |
| Power off Link | 0 | 0 | 0 |
| Analogue TV tuning download(See page 24. | 0 | 0 | — |
- Setuptheequipmenttoenablethisfunction.Readthemanualfortheequipment.
- If adding new equipment or reconnecting equipment or changing setup, using the TV/AV button on the remote controltoselectthecorrectconnection(i.e.HDMI1orHDMI2).(Seepage44)
- Thisfunctionmaynotworknormallydependingontheequipmentcondition.
- The equipment can be operated by TV's remote control with this function on even if TV is in Standby mode.
- Imageorsoundmaynotbeavailableforthefirstfewsecondswhentheplaybackstarts.
- Image or sound may not be available for the first few seconds when Input mode is switched.
- Volumefunctionwillbedisplayedwhenadjustingthevolumeoftheequipment.
-
Easy playback is also available by using the remote control for Amplifier. Read the manuals of the Amplifier.
-
IftheexternaldevicehasDVIoutputonly,useaDVItoHDMIadaptercabletoconnecttotheHDMI1terminalonly.
- ConnecttheaudiocablestotheAUDIOINterminalswhenusingaDVItoHDMIadaptercable.
(UseonlyafullycompliantHDMIcable(fullywired).
SelecttheaudiosettinginHDMIinput.Seepage19
NOTES
If adding new equipment or reconnecting equipment or changing setup, using the TV/AV button on the remote control to select the correct connection (i.e.
- Thisinputterminalisnotintendedforusewithcomputers.
- 720p/1080i signals will be re-formatted to view on your display
- If the external devices have aspect adjustment, set to 16:9
•ForapplicableHDMIsignalsinformationseepage47
•Non-HDMI-compliant cables cannot be utilized. - ItisrecommendedthatyouusePanasonic'sHDMIcable.
Recommendedpartnumbers:
RP-CDHG15(1.5m)
RP-CDHG30(3.0m)
RP-CDHG50(5.0m)
Set Top Box
DVD Player
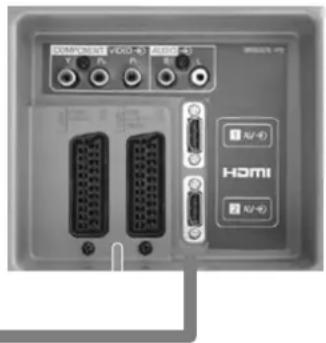
text_image
COMPROM +VDD-4 AV-4 HDMI AV-4UseonlyafullycompliantHDMI cable(fullywired)
CompatiblesamplingfrequencyofAUDIOsignalthroughHDMI(L.PCM):48kHz/44.1kHz/32kHz
•ThisHDMIconnectoristypeA.
- If you connect equipment without a digital output terminal, connect to the COMPONENT, S-Video or VIDEO input terminal on the TVsoyoucanreceiveananaloguesignal
•The HDMI IN terminal can only be used with 480i, 480p, 576i, 576p, 720p or 1080i picture signals. Set the Digital Set Top Box DIGITAL OUT terminal output setting to 480i, 480p, 576i, 576p, 720p or 1080i. For detailed information, refer to the Digital Set Top Box instruction manual. If you cannot display the picture because your Digital Set Top Box does not have a DIGITAL OUT terminal output setting, use the component input (or the S-Video input or Video input). In this case the picture will be displayed asananaloguesignal.
•HDMI--compliantdeviceswillalwaysdisplaytheHDMILogo.
•AlwaysuseafullycompliantHDMIcable(fullywired).
•HDMI2terminalisfordigitalaudiosignalonly.
- Whenviewinga1080iinputsourceitisnormalforthepicturetoshowlinejitter.
- WhenviewingaComponentorHDMIsourcethenAV--MonitorOutisnotavailable.
| Signalname | Aspectmodes | AspectRatio Signals | ||||||||||||||||
| Widescreen signal (WSS) | Control signal through SCART (pin8) or HDMI terminal | |||||||||||||||||
| Auto Aspect | 16:9 | 14:9 | 4:3 | Zoom 1 | Zoom 2 | Zoom 3 | TV | AV 1 | AV 2 | AV 3 | Com- ponent | AV1 | AV2 | HDMI1 | HDMI2 | |||
| TV/ AV1*/AV2/ AV3 | PAL I | o | o | o | o | o | o | o | o | o | o | o | - | o | o | - | - | |
| PAL 525/60 | o | o | o | o | o | o | o | o | o | o | o | - | o | o | - | - | ||
| DVB | o | o | o | o | o | o | o | o | - | - | - | - | o | o | - | - | ||
| MNTSC | o | o | o | o | o | o | o | - | - | - | - | - | o | o | - | - | ||
| NTSC/AV (Input only) | o | o | o | o | o | o | o | - | - | - | - | - | o | o | - | - | ||
| C om p o n e n t / H D M I | S D | 525(480)/60i | o | o | o | o | o | o | o | - | - | - | - | - | - | - | o | o |
| 525(480)/60p | o | o | o | o | o | o | o | - | - | - | - | - | - | - | o | o | ||
| 625(576)/50i | o | o | o | o | o | o | o | - | - | - | - | o | - | - | o | o | ||
| 625(576)/50p | o | o | o | o | o | o | o | - | - | - | - | - | - | - | o | o | ||
| H D | 750(720)/50p | o | o | o | o | o | o | o | - | - | - | - | - | - | - | o | o | |
| 750(720)/60p | o | o | o | o | o | o | o | - | - | - | - | - | - | - | o | o | ||
| 1125(1080)/50i | o | o | o | o | o | o | o | - | - | - | - | - | - | - | o | o | ||
| 1125(1080)/60i | o | o | o | o | o | o | o | - | - | - | - | - | - | - | o | o | ||
Applicable input signal for Component (Y, Pb, Pr) and HDMI ("O" indicates available)
| Signalname | Horizontal frequency(kHz) | Vertical frequency(kHz) | Component | HDMI |
| 525 (480) / 60i | 15.73 | 59.94/60 | O | O |
| 525 (480) / 60p | 31.47 | 59.94/60 | O | O |
| 625 (576) / 50i | 15.63 | 50.00 | O | O |
| 625 (576) / 50p | 31.25 | 50.00 | O | O |
| 750 (720) / 60p | 45.00 | 60.00 | O | O |
| 750 (720) / 50p | 37.50 | 50.00 | O | O |
| 1,125 (1,080) / 60i | 33.75 | 60.00 | O | O |
| 1,125 (1,080) / 50i | 28.13 | 50.00 | O | O |
Notes:
Signalsotherthantheabovemaynotbedisplayedproperly.
AV121pinSCARTterminal (RGB,VIDEO,Q-Link)
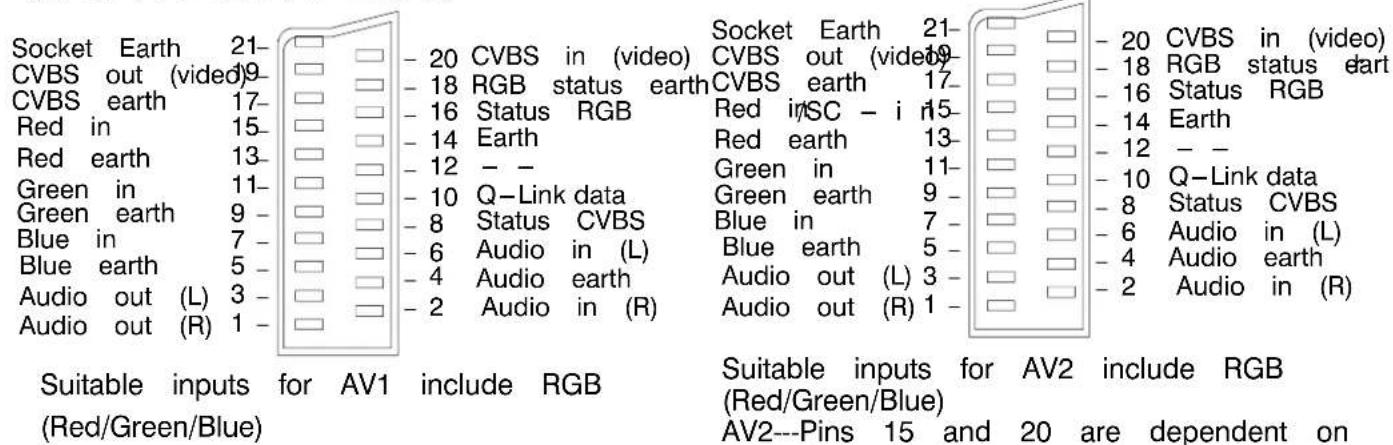
AV221 pin SCART terminal (RGB, VIDEO, S--Video, Q--Link)
AV2---Pins 15 and 20 are dependent on AV2 S---VHS / VIDEO switching
■ HDMI terminal
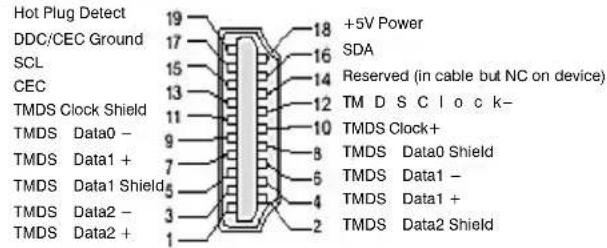
text_image
Hot Plug Detect DDC/CEC Ground SCL CEC TMDS Clock Shield TMDS Data0 - TMDS Data1 + TMDS Data1 Shield TMDS Data2 - TMDS Data2 + 19 17 15 13 11 9 7 5 4 2 +5V Power SDA Reserved (in cable but NC on device) TM D S C l o c k- TMDS Clock+ TMDS Data0 Shield TMDS Data1 - TMDS Data1 + TMDS Data2 Shield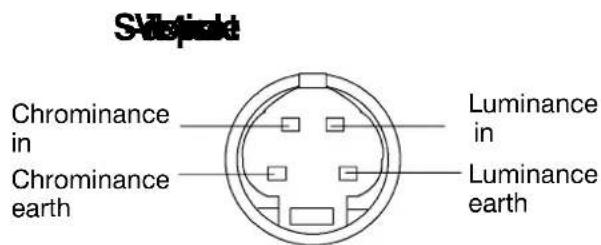
text_image
S1964 Chrominance in Chrominance earth Luminance in Luminance earth| Symptoms | Checks | |||
| PictureSound | ||||
 Snowy Picture Snowy Picture |  | Noisy Sound | Aerial location, direction or connection. | |
 Multiple Images Multiple Images |  | Normal Sound | Aerial location, direction or connection | |
 Interference Interference |  | Noisy Sound | Electrical appliances Cars / Motorcycles Switch on P--NR in Picture menu to reduce pic noise | |
 Normal Picture Normal Picture |  | No Sound | Volume level Sound mute switched on | |
 No Picture No Picture | N  | TV set to AV mode Not plugged into A.C. outlet Not switched on Picture / Sound controls set at minimum levels Check if in standby mode | ||
 No Colour No Colour |  | Normal Sound | Colour controls set at minimum levels | |
 Poor or Distorted Picture Poor or Distorted Picture |  | Weak or No Sound | Retune Channel(s) | |
 There may be red spots, blue spots and green spots on the screen. There may be red spots, blue spots and green spots on the screen. |  | Normal Sound | This is a characteristic of liquid crystal panels a a problem. The liquid crystal panel is built with high precision technology giving you fine picture details. Occasionally, a few non --active pixels m appear on the screen as a fixed point of blue red. Please note this does not affect the perform your LCD. | |
 Normal Picture Normal Picture |  | Weak or distorted sound | Sound reception may have deteriorated. Switch NICAM setting (Sound menu) to Off until reception improves. | |
| Poor Video(Snow noise, no picture, picture runs etc) | HDMI cable is not connected securely.Turn the p supply of the TV and connected equipment off turn back on. Check compatibility of input signal the connected equipment. The connected equipment must be EIA/CEA ---861/861B compliant | |||
| Poor Audio | Change the audio setting of the connected equi to L PCM. Check the setting of HDMI input in menu. If the problem is due to the digital auo nection, change to the analogue audio connection | |||
| The error message appears Please consult an Authorised dealer | ||||
DVB TROUBLESHOOTING
Some problems will only occur when viewing DVB channels. Due to the different techniques involved in digital reception, DVB signal quality can be poor even if you appear to have a strong signal when viewing analogue programmes.
The DVB system requires a good quality signal to provide the best picture. When viewing analogue pictures, interference such as signal reflection from nearby buildings or mountains causes 'ghosting', but still provides a viewable picture. For the DVB system, interference such as this can disrupt the flow of data causing the picture to appear to be made up of large blocks, or to freeze intermittently. If the picture disappears completely, this could mean that signal quality is very poor. If this happens often, you may need to improve your aerial system to provide a better signal.
| SymptomChecks | |
No DVB channels listed in the TV Guide after Auto Setup.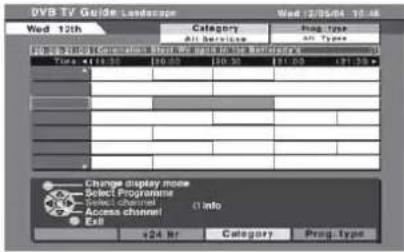 | Check that DVB transmissions are available from the transmitting you are currently using. If not, try directing the aerial at and local transmitter.Check analogue transmissions. If picture quality is poor, you need to improve or change your aerial system to receive DV channels. Consult a local installer. |
Blocky interference.Picture freezes intermittently. | Blocky interference indicates that the signal quality is poor.You should consider improving your aerial system.To check the quality of your signal use the Signal feature(seepage35).Good quality signal --- indication is green.Poor quality signal --- indication is red. |
I have a good aerial system, but still cannot receive DVB stations.TV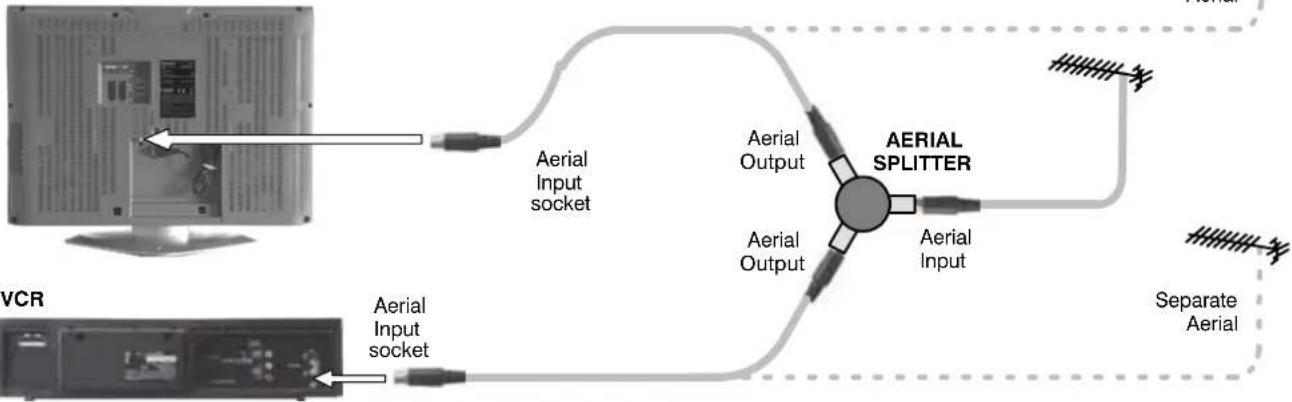 | If you have tried the previous solutions and are still unable to receive DVB channels, you may need to provide dedicated aerial feeds to the TV and other equipment.This can be implemented using an aerial splitterorseparate aerials.SeparateAerial |
| ProblemActions | ||
| SCREEN | Chaotic image, noisy Set "P---NR" in the Picture menu (to remove noise).(p. 18)Check nearby electrical products(car, motorcycle,fluorescent lamp). | |
| No image is displayed Is "Colour" or "Contrast" in the Picture menu set to the minimum? | ||
| Blurry or distorted image(no sound or low volume) | Retune channels (see pages 25 and 35) | |
| SOUND | No sound is produced Is "Sound Mute" active? (See page 6)Is the volume set to the minimum? | |
| Sound level is low or sound distorted | If digital sound connection has a problem, select analogue sound connection. (p. 19)Sound signal reception may be deteriorated.Set "NICAM" (p. 19) in the Sound menu to "Off".(Analogue only) | |
| HDMI | Sound is unusual Set the sound setting of the connected equipment to "2ch L.PCM".Check the "HDMI1 input" setting in the Sound me(p. 19) If digital sound connection has a problem, select analogue sound connection. (p. 19) | |
| Pictures from external equipment are unusual when the equipment connected via HDMI | Is the HDMI cable connected properly? (p. 46)Turn Off the TV unit and equipment, then turn th on again.Check input signal from the equipment. (p. 35)Use equipment compliant with EIA/CEA---861/861B. | |
| DVB | Interference or frozen /disappearing image in DVB | Check "Signal Condition". (p. 35)If "Signal Quality" or "Signal Strength" are displayed in red, check aerial. If problem persists, consult your local Panasonic dealer.Use the remote control to turn Off the TV unit, I turn it On again.Due to the digital reception technologies involved, quality of the DTV signals may be relatively low in some cases, despite good reception of analogue programmes. |
| OTHER | TV unit goes into "Standby mode" The sleep function is activated.The TV unit enters "Standby mode" about 30 min. after broadcasting ends. | |
| The remote control does not work Are the batteries installed correctly? (p. 4)Has the TV unit been switched On? |
| OnScreenMessagesActions/Meanings | |
| All tuning data will be erased "Shipping condition" will erase all tuning data. | |
| Are you sure? Confirm that this is the correct operation | |
| Bad Signal The signal is weak. Check the aerial. | |
| Are you sure you want to delete this timer? Confirm that this is the correct operationPress OK to delete timerPress Exit to return | |
| DOWNLOAD IN PROGRESS PLEASE WAIT Q---Link channel download is in progress. | |
| DVB Tuner LockedThis programme is locked for recording | If you want to unlock, cancel Direct TV Record 36) or Timer Programming (p. 34). |
| Feature not available Check the Q---Link connection and setting (p. 39).Confirm that you are not trying to record from unsuitable source (i.e. Component / HDMI / PC) | |
| Incorrect PIN Number The PIN number you entered is wrong. | |
| Invalid DVB Channel | Invalid DVB channel is selected. |
| Invalid system time. Please exit! | Cannot get the time information.Check the connection of the RF cable. |
| Max number of Timer already set! | Max number of Timer already set! |
| New DVB Service Found!Press OK start Auto SetupPress EXIT to Ignore.Warning! Selecting Auto Setup will delete current Profile and Childlock settings | There is a new DVB station. (p. 35) |
| New version 1.90 found.Do you really want to update the software and reboot the system?Press OK to download the new versionPress EXIT to Ignore | There is a new software available. (p. 38) |
| No DVB Service found | No DVB signal can be found in Auto Set |
| No module inserted | Check the CI module inserted completely (p. |
| No recording -Check Tape or Disc | The tape or disc may be "write protected", missing or damaged.The equipment may already be recording. |
| No recording --- UNKNOWN REASON | The recording cannot be made. Check the Disc or tape may be full. |
| No Service | The station has stopped the services. |
| No Signal | Check the connection of the RF cable. |
ding
up.
25).
e equ
ON SCREEN MESSAGES
| OnScreenMessagesActions/Meanings | |
| Please check aerial or local DVB service availability. Press OK to start Auto Setup | Please follow the message. If it still fails, consult your local Panasonic dealer. |
| Please check settings and connections on HDMI devices. | Communication error with Control on HDMI function (p. 46) |
| No stations found Please insert the aerial No | analogue signal can be found in Auto setup. |
| Please wait. A function is in progress. | |
| Recording in progress The recording equipment | is recording the programme signal from its own tuner. You can turn the TV off leave the equipment recording in the normal way. |
| Recording stopped --- TV source changed Direct | TV recording (analogue mode) will stop if channel or input source is changed. |
| Software successfully updated Press EXIT to continue | The software updating is finished |
| Software Update failed. Please try again later. Press EXIT to continue | Perform "System Update Search Now" in System Update (p. 38). If it is still failed, there may not be any new software (p. 34) |
| This service is locked! Press OK to enter PIN | The selected channel is locked in Child Lock |
| Timer already expired ! | Starting time in Timer Programming is already past. Set correctly (p. 31). |
| Timer Event Due to Start 1: BBC1 has been Programmed for recording at 20:00 | This message will appear 2 minutes before timer programming event due to start. |
| Timer incorrect ! | Set Starting and Ending times in Timer Programming correctly (p. 31). |
| Timer overlap! | The timer programme events are overlapped. Cannot record other channel at the same time. Check the timing and Ending times in Timer Programming (p. 31). |
| Unable to download, Check Equipment | The tape or disc is active. Stop the equipment and try again. |
| WARNING All analogue tuning data will be erased | Auto setup will erase all present analogue tuning data (p. 25). |
| WARNING All digital tuning data will be erased | DVB Auto Setup will be erased all present DVB tuning data (p. 35). |
FOR YOUR GUIDANCE
Service: Before requesting service for this LCD TV, please refer to the troubleshooting guide on previous page to determine the symptoms. To obtain service please contact your local Panasonic dealer who number and serial number (both are located at the rear of the LCD TV).
SPECIFICATIONS
| TX--32LXD60TX--26LXD60 | ||
| PowerSource220 240V A.C., | 50 Hz | |
| PowerConsumption | Average use : 153 WStandby condition :1W (Without DVB recording)10W (TV + DVB system set to record 10W(TV + DVB system set to record Timer programmes). | Average use : 105 WStandby condition :1W (Without DVB recording) |
| LCD | Wide XGA (1,366 x 768 pixels)16:9 aspect ratio LCD panel | Wide XGA (1,366 x 768 pixels)16:9 aspect ratio LCD panel |
| ScreenSize(Visiblediagonal)80 | cmV 66 cmV | |
| Audio output | 2 x 10 W | 2 x 10 W |
| Headphones | M3 (3,5 mm) Jack x 1 | M3 (3,5 mm) Jack x 1 |
| Receiving Systems/ Bandname | PAL I UHF E21-68.PAL 525/60 Playback of NTSC tape from some PAL Video recorders (VCR).DVB Digital terrestrial services via UHF aerial input.M.NTSC Playback from M.NTSC Videorecorders (VCR).NTSC(AVinputonly) Playback from NTSC Videorecorders (VCR). | |
| Aerial - Rear | UHF | |
| OperatingConditions | Temperature: 5°C---35°CHumidity: 5%-90% RH (non-condensing) | |
| ConnectionsRear | AV1 - 21 pin socket - Audio / Video in / out, RGB in,Q-LinkAV2 - 21 pin socket - Audio / Video in/out, S-Video in, RGB in,Q-Link.Component Y, Pb, Pr, Audio L+R 2 x RCAHDMI 1,2 Type A Connector | |
| Teletext pages | 500 | |
| AV - Side panel | AV3 - S-Video in, RCA Audio / Video in. | |
| Dimensions(inc.stand)(W x H x D) | 791 mm x 615 mm x 301 mm | 657 mm x 525 mm x |
| Dimensions(TVsetonly)(W x H x D) | 791 mm x 563 mm x 107 mm | 657 mm x 473 mm x |
| Weight | 19 kg Net | 14,5 kg Net |
Specifications are subject to change without notice. Weight and dimensions shown are approximate. HDMI, the HDMI Logo and High-Definition Multimedia Interface are trademarks or registered trademarks of HDMI Licensing LLC.
Trade Mark of the DVB Digital Video Broadcasting Project (1991 TX-32LXD60 Declaration of Conformity No 3700, 10th August 2005 TX-26LXD60 Declaration of Conformity No 3699, 10th August 2005 TX-23LXD60 Declaration of Conformity No 3698, 10th August 2005

| TX--23LXD60 | |
| PowerSource220 240V A.C., | 50 Hz |
| PowerConsumption | Average use: 100 WStandby condition:0,8W (Without DVB recording)10W (TV + DVB system set to record Timer programmes). |
| LCD | Wide XGA (1,366 x 768 pixels)16:9 aspect ratio LCD panel |
| ScreenSize(Visiblediagonal)58 | cmV |
| Audiooutput2 x 3 W | |
| HeadphonesM3 (3,5 mm) Jack x 1 | |
| Receiving Systems/ Bandname | PALIUHF E2168.PAL525/60Playback of NTSC tape from some PAL Video recorders (VCR).DVB Digital terrestrial services via UHF aerial input.M.NTSCPlayback from M.NTSC Videorecorders (VCR).NTSC(AVinputonly)Playback from NTSC Videorecorders (VCR). |
| Aerial - Rear | UHF |
| OperatingConditions | Temperature: 5°C-35°CHumidity: 5%-90% RH (non-condensing) |
| Teletext pages | 500 |
| ConnectionsRear | AV1 - 21 pin socket - Audio / Video in / out, RGB in,Q-LinkAV2 - 21 pin socket - Audio / Video in/out, S-Video in, RGB in,Q-Link.Component Y, Pb, Pr, Audio L+R 2 x RCAHDMI 1,2 Type A Connector |
| AV - Side panel | AV3 - S-Video in, RCA Audio / Video in. |
| Dimensions(inc.TVstand)(W x H x D) | 565 mm x 450 mm x 260 mm |
| Dimensions(TVsetonly)(W x H x D) | 565 mm x 411 mm x 115 mm |
| Weight | 10 kg Net |
Specifications are subject to change without notice. Weight and dimensions shown are approximate.
SalesandSupportInformation
CustomerCare Centre
• For customers within the UK: 08705 357357.
• For customers within the Republic of Ireland: 01 289 8333.
- Visit our website for product information
•E - ma i: customer.care@panasonic.co.uk
DirectSalesatPanasonic UK
- Order accessory and consumable items for your product with ease and confidence phoning our Customer Care Centre Monday---Thursday 9:00am---5:30pm, Friday 9:30am --- 5:30pm (Excluding public holidays).
- Or go on line through our Internet Accessory ordering application at www.panasonic.co.uk.
- Most major credit and debit cards accepted.
- All enquiries, transactions and distribution facilities are provided directly by Panasonic UK Ltd.
- It couldn't be simpler!
- Also available through our Internet is direct shopping for a wide range of finished products, take a browse on our website for further details.
Interested in purchasing an extended guarantee
Pleasecall08702406284orvisitWWW.Panasonic.co.uk/guarantee
InformationonDisposalforUsersofWasteElectrical&ElectronicEquipment (privatehouseholds)

This symbol on the products and/or accompanying documents means used electrical and electronic products should not be mixed with household waste.
For proper treatment, recovery and recycling, please take these product designated collection points, where they will be accepted on a free basis. Alternatively, in some countries you may be able to return products to your local retailer upon the purchase of an equivalent product.
Disposing of this product correctly will help to save valuable resources and prevent negative effects on human health and the environment which could otherwise arise from inappropriate waste handling. Please contact your local authority for further details of your nearest designated collection point.
Penalties may be applicable for incorrect disposal of this waste, in accordance with legislation.
ForbusinessusersintheEuropeanUnion
If you wish to discard electrical and electronic equipment, please contact your dealer for further information.
InformationonDisposalinotherCountriesoutsidetheEuropeanUnion
This symbol is only valid in the European Union.
If you wish to discard this product, please contact your local authorities or dealer correct method of disposal.