
TH-58PH10BK - TV PANASONIC - Free user manual and instructions
Find the device manual for free TH-58PH10BK PANASONIC in PDF.


| Product Type | 58-inch Progressive Wide Plasma Display |
| Brand/Model | Panasonic TH-58PH10BK |
| Screen Size (diagonal) | 1476 mm (58 inches) |
| Aspect Ratio | 16:9 |
| Native Resolution | 1,366 x 768 (WXGA) |
| Panel Drive Method | AC type |
| Dimensions (W x H x D) | 1,399 mm x 843 mm x 99 mm (without speakers) |
| Weight (main unit only) | Approx. 54.0 kg net |
| Power Supply | 220-240 V AC, 50/60 Hz |
| Power Consumption (On) | 630 W |
| Power Consumption (Standby) | 0.8 W (Save off) / 0.6 W (Save on) |
| Power Consumption (Off) | 0.3 W |
| Connectivity (Standard) | AV IN (BNC, S-Video, RCA audio), PC IN (Mini D-sub 15pin), SERIAL (RS-232C), Speakers (6Ω) |
| Optional Terminal Boards | Supports BNC/SCART/HDMI/SDI etc. via expansion slots |
| Remote Control | EUR7636090R with 2 x R6 batteries |
| MULTI PIP Support | Picture-in-Picture, Picture-and-Picture, Picture-out-Picture |
| Aspect Control Modes | 4:3, Zoom, 16:9, Just, Panasonic Auto |
| Image Retention Prevention | White bar scroll, image reversal, wobbling, side panel adjustment, peak limit |
| Timer Functions | Present time setup, power on/off timer, weekly command timer (64 commands) |
| Power Save Features | Power save, standby save, power management (PC), auto power off |
| Operating Temperature | 0°C to 40°C |
| Operating Humidity | 20% to 80% |
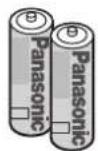
| Supplied Accessories | Operating instruction book, remote control, batteries, power cord, fixing bands (x2) |
| Safety Certifications | EN55022, EN55024, EN61000-3-2, EN61000-3-3 |
Frequently Asked Questions - TH-58PH10BK PANASONIC
User questions about TH-58PH10BK PANASONIC
0 question about this device. Answer the ones you know or ask your own.
Ask a new question about this device
Download the instructions for your TV in PDF format for free! Find your manual TH-58PH10BK - PANASONIC and take your electronic device back in hand. On this page are published all the documents necessary for the use of your device. TH-58PH10BK by PANASONIC.
USER MANUAL TH-58PH10BK PANASONIC
natural_image
Illustration of a flat-screen TV with a remote control unit beside it (no text or symbols visible)Operating Instructions Progressive Wide Plasma Display
Model No.
TH-42PS10BK
TH-42PS10BS
High Definition Plasma Display
Model No.
TH-42PH10BK
TH-42PH10BS
TH-50PH10BK
TH-50PH10BS
TH-58PH10BK
natural_image
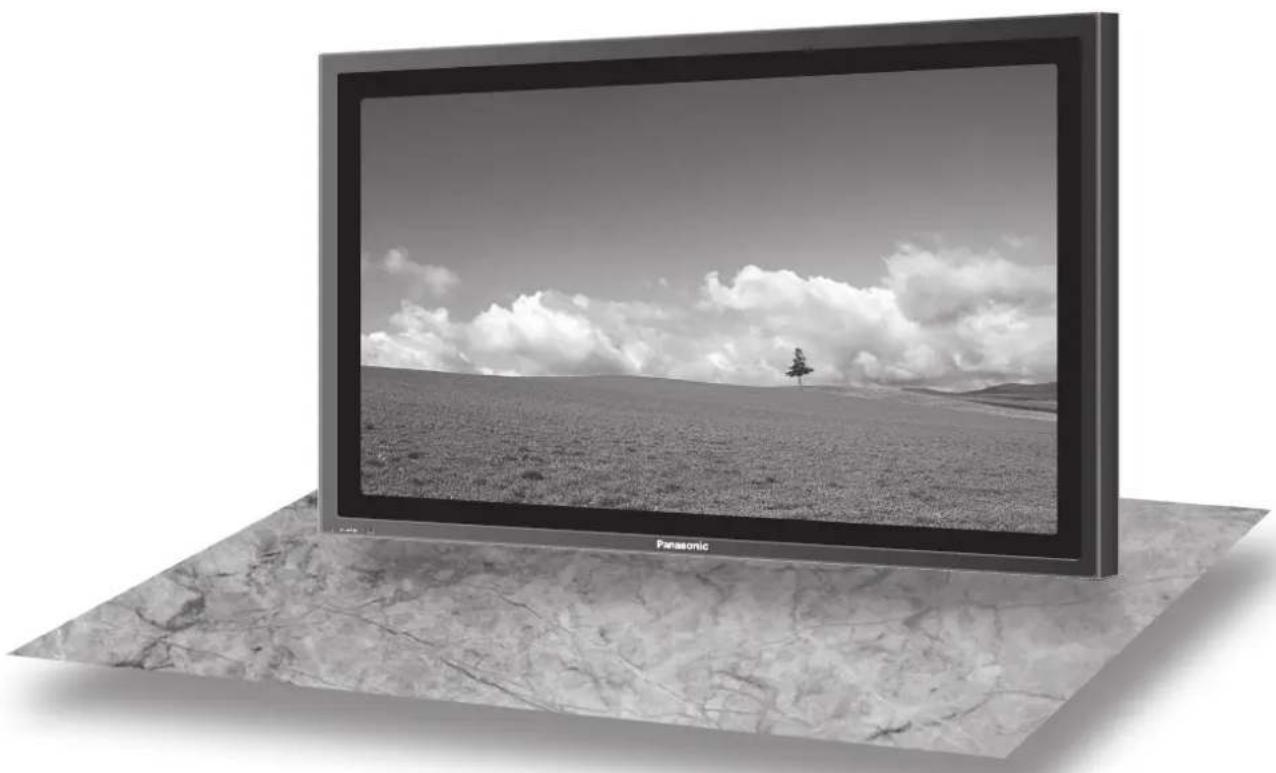
Black-and-white photo of a Panasonic TV displaying a landscape with a lone tree on a hill under a cloudy sky (no text or symbols on the screen)The illustration shown is an image.
Please read these instructions before operating your set and retain them for future reference.
English
Dear Panasonic Customer
Welcome to the Panasonic family of customers. We hope that you will have many years of enjoyment from your new Plasma Display.
To obtain maximum benefit from your set, please read these Instructions before making any adjustments, and retain them for future reference.
Retain your purchase receipt also, and note down the model number and serial number of your set in the space provided on the rear cover of these instructions.
Visit our Panasonic Web Site http://panasonic.net
Table of Contents
Important Safety Notice .... 3
Safety Precautions 4
Accessories 7
Accessories Supply 7
Remote Control Batteries 7
Connections......8
PC Input Terminals connection 9
SERIAL Terminals connection 10
AV connection
(for TH-42PH10BK/S, TH-50PH10BK/S, TH-58PH10BK) .. 11
Power On / Off 12
Initial selections 13
Selecting the input signal 13
Selecting the On-Screen Menu Language ...... 13
Basic Controls 14
On-Screen Menu Displays 16
ASPECT Controls 18
Adjusting Pos. / Size 19
MULTI PIP 20
Advanced PIP 21
Picture Adjustments ...... 22
Advanced settings 23
Sound Adjustment 25
Mute 25
Digital Zoom 26
PRESENT TIME Setup / Set up TIMER 27
PRESENT TIME Setup 27
Set up TIMER 28
Screensaver (For preventing image retention) .... 29
Setup of Screensaver Time 30
Reduces screen image retention 30
Side Panel Adjustment 31
Reduces power consumption 32
Customizing the Input labels 32
Setup for MULTI DISPLAY 33
(For TH-42PS10BK/S)
How to Setup MULTI DISPLAY 33
How to set the display location number
for each Plasma Display 34
(For TH-42PH10BK/S, TH-50PH10BK/S, TH-58PH10BK)
How to Setup MULTI DISPLAY 35
How to set the display location number
for each Plasma Display 35
F (Seam hides video) Setting 37
ID Remote Control Function 37
Setup for Input Signals 38
Component / RGB-in select 38
3D Y/C Filter 38
Colour system / Panasonic Auto 39
Cinema reality / P-NR 39
Sync 40
H-Freq. (kHz) / V-Freq. (Hz) 40
Options Adjustments 41
Weekly Command Timer
(for TH-42PH10BK/S, TH-50PH10BK/S, TH-58PH10BK) .. 48
Shipping condition 50
Troubleshooting 51
VIDEO/PC input signals 52
Command list of Weekly Command Timer .... 53
Specifications 54
Trademark Credits
• VGA is a trademark of International Business Machines Corporation.
• Macintosh is a registered trademark of Apple Computer, USA.
- S-VGA is a registered trademark of the video Electronics Standard Association.
Even if no special notation has been made of company or product trademarks, these trademarks have been fully respected.
Note:
Do not allow a still picture to be displayed for an extended period, as this can cause a permanent image retention to remain on the Plasma Display.
Examples of still pictures include logos, video games, computer images, teletext and images displayed in 4:3 mode.
Important Safety Notice
WARNING
1) To prevent damage which may result in fire or shock hazard, do not expose this appliance to dripping or splashing.
Do not place containers with water (flower vase, cups, cosmetics, etc.) above the set. (including on shelves above, etc.)
No naked flame sources, such as lighted candles, should be placed on / above the set.
2) To prevent electric shock, do not remove cover. No user serviceable parts inside. Refer servicing to qualified service personnel.
3) Do not remove the earthing pin on the power plug. This apparatus is equipped with a three pin earthing-type power plug. This plug will only fit an earthing-type power outlet. This is a safety feature. If you are unable to insert the plug into the outlet, contact an electrician.
Do not defeat the purpose of the earthing plug.
4) To prevent electric shock, ensure the earthing pin on the AC cord power plug is securely connected.
CAUTION
This appliance is intended for use in environments which are relatively free of electromagnetic fields. Using this appliance near sources of strong electromagnetic fields or where electrical noise may overlap with the input signals could cause the picture and sound to wobble or cause interference such as noise to appear. To avoid the possibility of harm to this appliance, keep it away from sources of strong electromagnetic fields.
IMPORTANT: THE MOULDED PLUG
FOR YOUR SAFETY, PLEASE READ THE FOLLOWING TEXT CAREFULLY.
This appliance is supplied with a moulded three pin mains plug for your safety and convenience. A 5 amp fuse is fitted in this plug. Shall the fuse need to be replaced, please ensure that the replacement fuse has a rating of 5 amps and that it is approved by ASTA or BSI to BS1362.
Check for the ASTA mark or the BSI mark on the body of the fuse.
If the plug contains a removable fuse cover, you must ensure that it is refitted when the fuse is replaced.
If you lose the fuse cover the plug must not be used until a replacement cover is obtained.
A replacement fuse cover can be purchased from your local Panasonic Dealer.
If the fitted moulded plug is unsuitable for the socket outlet in your home, then the fuse shall be removed and the plug cut off and disposed of safety. There is a danger of severe electrical shock if the cut off plug is inserted into any 13 amp socket.
If a new plug is to be fitted, please observe the wiring code as shown below.
If in any doubt, please consult a qualified electrician.
WARNING : — THIS APPARATUS MUST BE EARTHED.
IMPORTANT : —The wires in this mains lead are coloured in accordance with the following code: —
Green-and-Yellow : Earth
Blue: Neutral Brown: Live
As the colours of the wire in the mains lead of this appliance may not correspond with the coloured markings identifying the terminals in your plug, proceed as follows.
The wire which is coloured GREEN-AND-YELLOW must be connected to the terminal in the plug which is marked with the letter E or by the Earth symbol ⊕ or coloured GREEN or GREEN-AND-YELLOW.
The wire which is coloured BLUE must be connected to the terminal in the plug which is marked with the letter N or coloured BLACK.
The wire which is coloured BROWN must be connected to the terminal in the plug which is marked with the letter L or coloured RED.
How to replace the fuse. Open the fuse compartment with a screwdriver and replace the fuse.
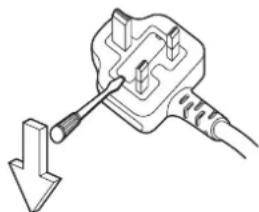
natural_image
Line drawing of a plug with a screwdriver inserted, showing a downward arrow (no text or symbols)Safety Precautions
WARNING
■ Setup
This Plasma Display is for use only with the following optional accessories. Use with any other type of optional accessories may cause instability which could result in the possibility of injury.
(All of the following accessories are manufactured by Matsushita Electric Industrial Co., Ltd.)
| • Speakers | TY-SP42P8W-K (TH-42PS10BK, TH-42PH10BK), | |
| TY-SP42P8W-S | (TH-42PS10B) | |
| TY-SP50P8W-K | (TH-50PH10B) | |
| TY-SP50P8W-S | (TH-50PH10B) | |
| TY-SP58P10WK | (TH-58PH10E) | |
| • Pedestal | TY-ST07-K (TH-42PS10BK, TH-42PH10BK, TH-50PH10BK), | |
| TY-ST07-S | (TH-42PS10BS, | |
| TY-ST08-K | (TH-42PS10BK, | |
| TY-ST08-S | (TH-42PS10BS, | |
| TY-ST58-K | (TH-58PH10BK) | |
| • Mobile stand | TY-ST42PF3 (TH-42PS10BK/S, TH-42PH10BK/S, TH-50PH10BK/S), | |
| TY-ST58PF10 | ||
| • Wall-hanging bracket (vertical) | TY-WK42PV7 | |
| • Wall-hanging bracket (angled) | TY-WK42PR7 | |
| • Wall-hanging bracket (drawer type) | TY-WK42DR1 (TH-42PS10BK/S, TH-42PH10BK/S, TH-50PH10BK/S) | |
| • Ceiling-hanging bracket | TY-CE42PS7 (TH-42PS10BK/S, TH-42PH10BK/S, TH-50PH10BK/S) | |
| • BNC Component Video Terminal Board | TY-42TM6A | |
| • BNC Composite Video Terminal Board | TY-42TM6B | |
| • BNC Dual Video Terminal Board | TY-FB9BD | |
| • SCART Terminal Board | TY-FB8SC | |
| • RCA Component Video Terminal Board | TY-42TM6Z | |
| • RCA Composite Video Terminal Board | TY-42TM6V | |
| • RGB (Digital) Terminal Board | TY-42TM6D | |
| • RGB Active Through Terminal Board | TY-42TM6G | |
| • PC Input Terminal Board | TY-42TM6P | |
| • Composite / Component Video Terminal Board | TY-42TM6Y | |
| • SDI Terminal Board | TY-FB7SD | |
| • HD-SDI Terminal Board | TY-FB9HD | |
| • HDMI Terminal Board | TY-FB8HM | |
| • Ir Through Terminal Board | TY-FB9RT | |
| • Wireless Presentation Board | TY-FB10WPE (TH-42PH10BK/S, TH-50PH10BK/S, TH-58PH10BK) | |
| • AV Terminal Box | TY-TB10AV | |
| • Touch Panel | TY-TP42P8-S (TH-42PS10BK/S, TH-42PH10BK/S), | |
| TY-TP50P8-S (TH-50PH10BK/S), TY-TP50P10S (TH-50PH10BK/S), | ||
| TY-TP42P10S | (TH-42PS10BK/ | |
| TY-TP58P10S | (TH-58PH10BK) | |
| • Anti glare filter | TY-AR50P9W (TH-50PH10BK/S), | |
| TY-AR42P9W | (TH-42PS10BK/ | |
| TY-AR58P10W | (TH-58PH10BK |
Always be sure to ask a qualified technician to carry out set-up.
Small parts can present choking hazard if accidentally swallowed. Keep small parts away from young children. Discard unneeded small parts and other objects, including packaging materials and plastic bags/sheets to prevent them from being played with by young children, creating the potential risk of suffocation.
Do not place the Plasma Display on sloped or unstable surfaces.
- The Plasma Display may fall off or tip over.
Do not place any objects on top of the Plasma Display.
- If water is spills onto the Plasma Display or foreign objects get inside it, a short-circuit may occur which could result in fire or electric shock. If any foreign objects get inside the Plasma Display, please consult your local Panasonic dealer.
Transport only in upright position!
- Transporting the unit with its display panel facing upright or downward may cause damage to the internal circuitry.
Ventilation should not be impeded by covering the ventilation openings with items such as newspapers, table cloths and curtains.
For suffi cient ventilation;
If using the pedestal (optional accessory) for the Plasma Display, leave a space of at least 10 cm at the top, left and right, at least 6 cm at the bottom, and at least 7 cm at the rear. If using some other setting-up method, leave a space of at least 10 cm at the top, bottom, left and right, and at least 7 cm at the rear.
■ When using the Plasma Display
The Plasma Display is designed to operate on 220 - 240 V AC, 50/60 Hz.
Do not cover the ventilation holes.
- Doing so may cause the Plasma Display to overheat, which can cause fire or damage to the Plasma Display.
Do not stick any foreign objects into the Plasma Display.
- Do not insert any metal or flammable objects into the ventilations holes or drop them onto the Plasma Display, as doing so can cause fire or electric shock.
Do not remove the cover or modify it in any way.
- High voltages which can cause severe electric shocks are present inside the Plasma Display. For any inspection, adjustment and repair work, please contact your local Panasonic dealer.
Ensure that the mains plug is easily accessible.
An apparatus with CLASS I construction shall be connected to a mains socket outlet with a protective earthing connection.
Do not use any power supply cord other than that provided with this unit.
- Doing so may cause fire or electric shocks.
Securely insert the power supply plug as far as it will go.
- If the plug is not fully inserted, heat may be generated which could cause fire. If the plug is damaged or the wall socket is loose, they shall not be used.
Do not handle the power supply plug with wet hands.
- Doing so may cause electric shocks.
Do not do anything that may damage the power cable. When disconnecting the power cable, pull on the plug body, not the cable.
- Do not damage the cable, make any modifications to it, place heavy objects on top of it, heat it, place it near any hot objects, twist it, bend it excessively or pull it. To do so may cause fire and electric shock. If the power cable is damaged, have it repaired at your local Panasonic dealer.
If the Plasma Display is not going to be used for any prolonged length of time, unplug the power supply plug from the wall outlet.
■ If problems occur during use
If a problem occurs (such as no picture or no sound), or if smoke or an abnormal odour starts to come out from the Plasma Display, immediately unplug the power supply plug from the wall outlet.
- If you continue to use the Plasma Display in this condition, fire or electric shock could result. After checking that the smoke has stopped, contact your local Panasonic dealer so that the necessary repairs can be made. Repairing the Plasma Display yourself is extremely dangerous, and shall never be done.
If water or foreign objects get inside the Plasma Display, if the Plasma Display is dropped, or if the cabinet becomes damages, disconnect the power supply plug immediately.
- A short circuit may occur, which could cause fire. Contact your local Panasonic dealer for any repairs that need to be made.

CAUTION
■ When using the Plasma Display
Do not bring your hands, face or objects close to the ventilation holes of the Plasma Display.
- Heated air comes out from the ventilation holes at the top of Plasma Display will be hot. Do not bring your hands or face, or objects which cannot withstand heat, close to this port, otherwise burns or deformation could result.
Be sure to disconnect all cables before moving the Plasma Display.
- If the Plasma Display is moved while some of the cables are still connected, the cables may become damaged, and fire or electric shock could result.
Disconnect the power supply plug from the wall socket as a safety precaution before carrying out any cleaning.
• Electric shocks can result if this is not done.
Clean the power cable regularly to prevent it becoming dusty.
- If dust built up on the power cord plug, the resultant humidity can damage the insulation, which could result in fire. Pull the power cord plug out from the wall outlet and wipe the mains lead with a dry cloth.
This Plasma Display radiates infrared rays, therefore it may affect other infrared communication equipment. Install your infrared sensor in a place away from direct or reflected light from your Plasma Display.
Cleaning and maintenance
The front of the display panel has been specially treated. Wipe the panel surface gently using only a cleaning cloth or a soft, lint-free cloth.
- If the surface is particularly dirty, wipe with a soft, lint-free cloth which has been soaked in pure water or water in which neutral detergent has been diluted 100 times, and then wipe it evenly with a dry cloth of the same type until the surface is dry.
- Do not scratch or hit the surface of the panel with fingernails or other hard objects, otherwise the surface may become damaged. Furthermore, avoid contact with volatile substances such as insect sprays, solvents and thinner, otherwise the quality of the surface may be adversely affected.
If the cabinet becomes dirty, wipe it with a soft, dry cloth.
- If the cabinet is particularly dirty, soak the cloth in water to which a small amount of neutral detergent has been added and then wring the cloth dry. Use this cloth to wipe the cabinet, and then wipe it dry with a dry cloth.
- Do not allow any detergent to come into direct contact with the surface of the Plasma Display. If water droplets get inside the unit, operating problems may result.
- Avoid contact with volatile substances such as insect sprays, solvents and thinner, otherwise the quality of the cabinet surface may be adversely affected or the coating may peel off. Furthermore, do not leave it for long periods in contact with articles made from rubber or PVC.
Accessories
Accessories Supply
Check that you have the accessories and items shown


Operating Instruction book
text_image
Panasonic
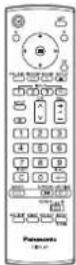
Remote Control Transmitter EUR7636090R

Batteries for the Remote Control Transmitter (2 × R6 (UM3) Size)

Power supply cord
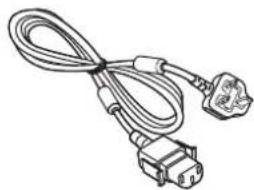
natural_image
Line drawing of a cable with two connectors (no text or symbols)
Fixing bands × 2
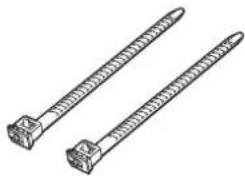
natural_image
Illustration of two threaded fasteners with screw heads (no text or symbols)Remote Control Batteries
Requires two R6 batteries.
-
Pull and hold the hook, then open the battery cover.
-
Insert batteries - note correct polarity (+ and -).
-
Replace the cover.
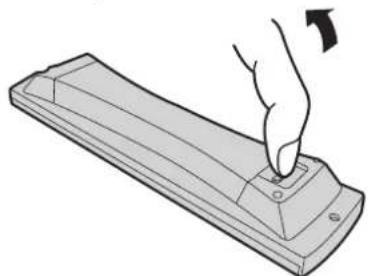
natural_image
Illustration of a hand pressing a button on a rectangular electronic device (no text or symbols)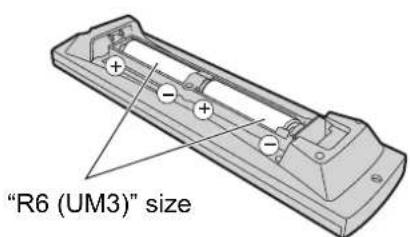
text_image
"R6 (UM3)" size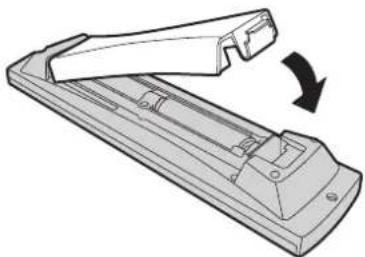
natural_image
Diagram of a flat-screen remote control with a scroll wheel and directional arrow indicating rotation (no text or symbols)Helpful Hint:
For frequent remote control users, replace old batteries with Alkaline batteries for longer life.

Precaution on battery use
Incorrect installation can cause battery leakage and corrosion that will damage the remote control transmitter.
Disposal of batteries should be in an environment-friendly manner.
Observe the following precaution:
- Batteries shall always be replaced as a pair. Always use new batteries when replacing the old set.
- Do not combine a used battery with a new one.
- Do not mix battery types (example: "Zinc Carbon" with "Alkaline").
- Do not attempt to charge, short-circuit, disassemble, heat or burn used batteries.
- Battery replacement is necessary when remote control acts sporadically or stops operating the Plasma Display set.
Connections
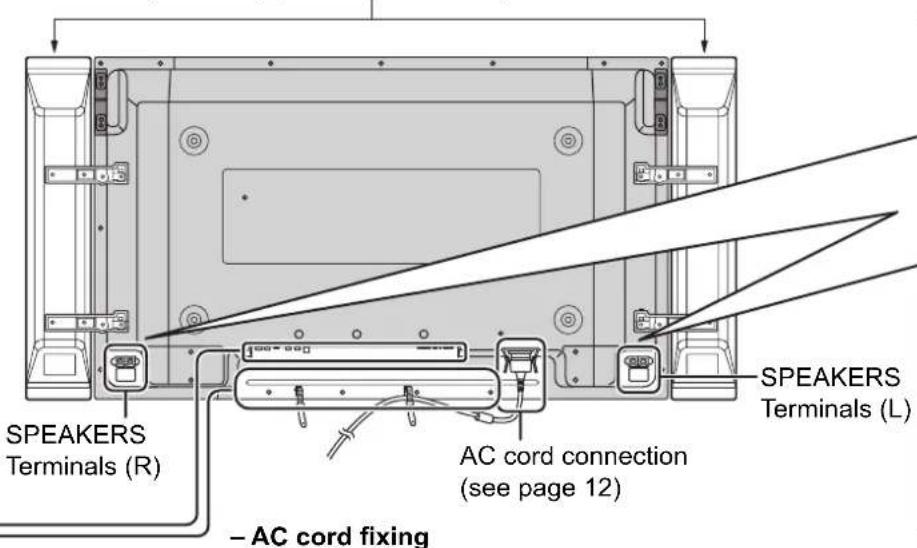
When connecting the speakers, be sure to use only the optional accessory speakers.
Refer to the speaker's Installation Manual for details on speaker installation.
(Example: TH-42PH10BK)
Speakers (Optional accessories)
text_image
SPEAKERS Terminals (R) – AC cord fixing SPEAKERS Terminals (L) AC cord connection (see page 12)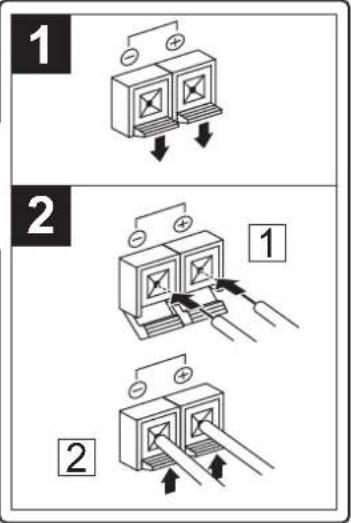
flowchart
graph TD
    A["Power Input"] --> B{Switch Operation}
    B --> C["Output"]
    subgraph Step 1
        D["Grid with + and - symbols"]
    end
    subgraph Step 2
        E["Switch with + and - symbols"]
    end
    subgraph Step 3
        F["Grid with + and - symbols"]
    end
    D --> G["Ground"]
    E --> H["Ground"]
    F --> I["Ground"]
text_image
Plug the A Plug the AC
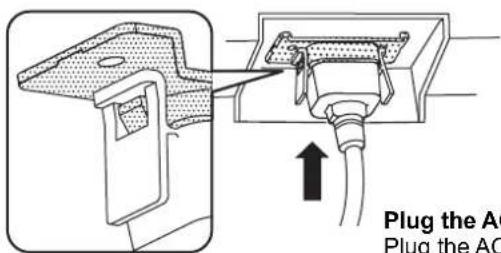
Plug the AC cord into the display unit. Plug the AC cord until it clicks.
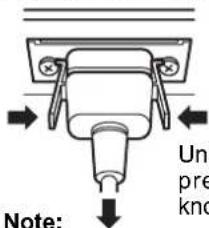
Unplug the AC cord
text_image
Unprekno Note:Unplug the AC cord pressing the two knobs.
Note: ↓ Knobs. When disconnecting the AC cord, be absolutely sure to disconnect the AC cord plug at the socket outlet first.
Note:
Make sure that the AC cord is locked on both the left and right sides.
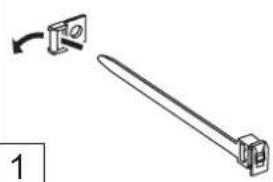
- Cable fixing bands Secure any excess cables with bands as required.
Pass the attached cable fixing band through the clip as shown in the figure.
natural_image
Simple line drawing of a mechanical lever with a rotating component (no text or symbols)To secure cables connected to Terminals, wrap the cable fixing band around them then pass the pointed end through the locking block, as shown in the figure. While ensuring there is sufficient slack in cables to minimize stress (especially in the power cord), firmly bind all cables with the supplied fixing band.
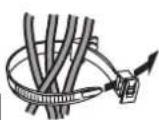
To tighten:
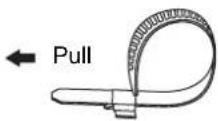
To loosen:
Push the catch
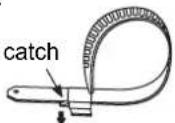
Pull →
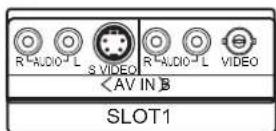
Dual Video Terminals (equivalent of BNC Dual Video Terminal Board (TY-FB9BD)) (see page 11)
Optional Terminal Board Insert Slot (covered)
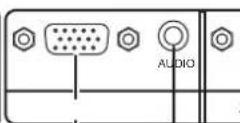
From EXTERNAL monitor terminal on Computer (see page 9)
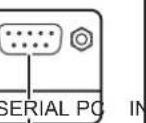
From SERIAL Terminal on Computer (see page 10)
Notes:
- On TH-42PH10BK/S, TH-50PH10BK/S and TH-58PH10BK, Terminal board is installed in SLOT 1 at factory shipment.
- On TH-42PS10BK/S, SLOT 1-3 are all empty at factory shipment.
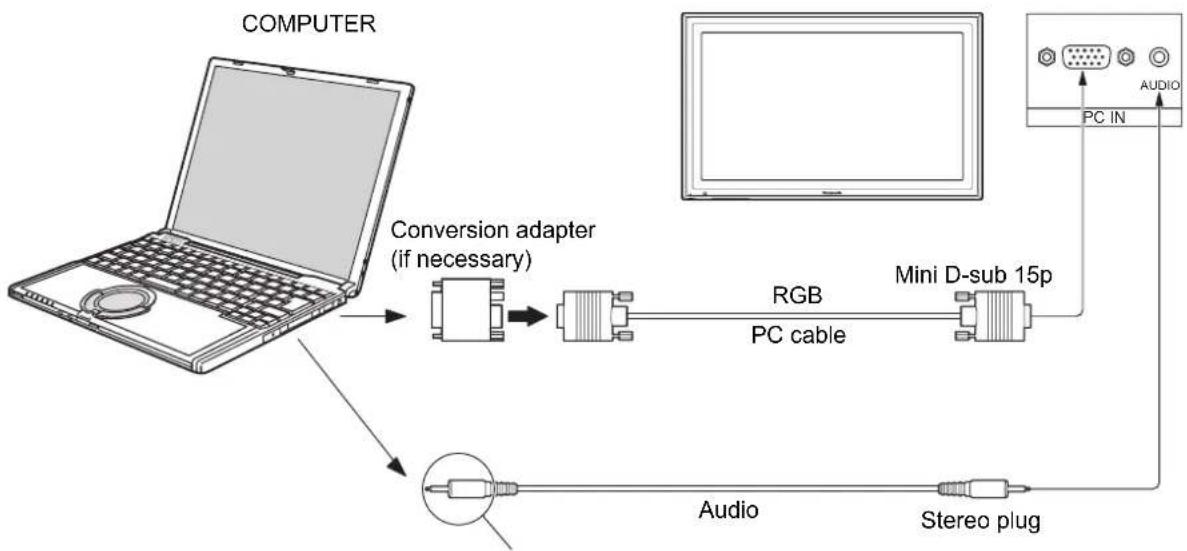
PC Input Terminals connection
flowchart
graph TD
    A["COMPUTER"] --> B["Conversion adapter (if necessary)"]
    B --> C["PC cable"]
    C --> D["Mini D-sub 15p"]
    D --> E["Audio"]
    D --> F["Stereo plug"]
    G["PC IN"] --> H["Audio"]
Connect a cable which matches the audio output terminal on the computer.
Notes:
- Due to space limitations, occasionally you may have trouble connecting Mini D-sub 15P cable with ferrite core to PC input Terminal.
- Computer signals which can be input are those with a horizontal scanning frequency of 15 to 110kHz and vertical scanning frequency of 48 to 120Hz . (However, the image will not be displayed properly if the signals exceed 1,200 lines.)
- The display resolution is a maximum of 640 × 480 dots (TH-42PS10BK/S), 768 × 768 dots (TH-42PH10BK/S), 1,024 × 768 dots (TH-50PH10BK/S, TH-58PH10BK) when the aspect mode is set to "4:3", and 852 × 480 dots (TH-42PS10BK/S), 1,024 × 768 dots (TH-42PH10BK/S), 1,366 × 768 dots (TH-50PH10BK/S, TH-58PH10BK) when the aspect mode is set to "16:9". If the display resolution exceeds these maximums, it may not be possible to show fi ne detail with suffi cient clarity.
- The PC input terminals are DDC2B-compatible. If the computer being connected is not DDC2B-compatible, you will need to make setting changes to the computer at the time of connection.
- Some PC models cannot be connected to the set.
- There is no need to use an adapter for computers with DOS/V compatible Mini D-sub 15P terminal.
- The computer shown in the illustration is for example purposes only.
• Additional equipment and cables shown are not supplied with this set. - Do not set the horizontal and vertical scanning frequencies for PC signals which are above or below the specified frequency range.
- Component Input is possible with the pin 1, 2, 3 of the Mini D-sub 15P Connector.
- Change the "Component/RGB-in select" setting in the "Setup" menu to "Component" (when Component connection) or "RGB" (when RGB signal connection). (see page 38)
- To use sync input VBS signals, use the connector which incorporates a 75-ohm termination resistance and which is available on the market, for the connection of the HD connector where the VBS signals are to be input.
Signal Names for Mini D-sub 15P Connector
| 5 | 4 | 3 | 2 | 1 |
| 10 | 9 | 8 | 7 | 6 |
| 15 | 14 | 13 | 12 | 11 |
Pin Layout for PC Input Terminal
| Pin No. | Signal Name | Pin | No. Signal Name | Pin No. | Signal Name | |
| 1 | R (P_R/C_R) | 6 | GND (Ground) | 11 | NC (not connected) | |
| 2 | G (Y) | 7 | GND (Ground) | 12 | SDA | |
| 3 | B ( P_B/C_B ) | 8 | GND (Ground) | 13 | HD/SYNC | |
| 4 | NC (not connected) | 9 | NC (not connected) | 14 | VD | |
| 5 | GND (Ground) | 10 | GND (Ground) | 15 | SCL | |
SERIAL Terminals connection
The SERIAL terminal is used when the Plasma Display is controlled by a computer.
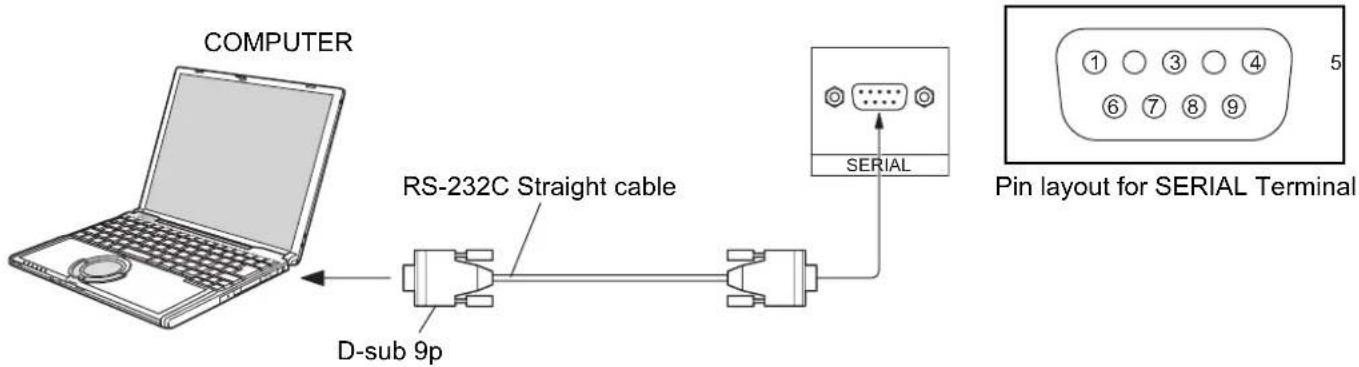
text_image
COMPUTER RS-232C Straight cable D-sub 9p SERIAL Pin layout for SERIAL TerminalNotes:
- Use the RS-232C cable to connect the computer to the Plasma Display.
- The computer shown is for example purposes only.
• Additional equipment and cables shown are not supplied with this set.
The SERIAL terminal conforms to the RS-232C interface specification, so that the Plasma Display can be controlled by a computer which is connected to this terminal.
The computer will require software which allows the sending and receiving of control data which satisfies the conditions given below. Use a computer application such as programming language software. Refer to the documentation for the computer application for details.
Communication parameters
| Signal level | RS-232C compliant |
| Synchronization method | Asynchronous |
| Baud rate | 9600 bps |
| Parity | None |
| Character length | 8 bits |
| Stop bit | 1 bit |
| Flow control | - |
Basic format for control data
The transmission of control data from the computer starts with a STX signal, followed by the command, the parameters, and lastly an ETX signal in that order. If there are no parameters, then the parameter signal does not need to be sent.
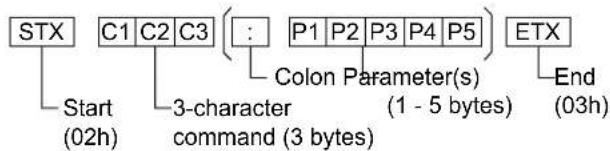
flowchart
graph TD
    A["STX"] --> B["Start (02h)"]
    B --> C["C1 C2 C3"]
    C --> D["3-character command (3 bytes)"]
    D --> E["P1 P2 P3 P4 P5"]
    E --> F["Colon Parameter(s) (1 - 5 bytes)"]
    F --> G["ETX"]
    G --> H["End (03h)"]
Notes:
- If multiple commands are transmitted, be sure to wait for the response for the first command to come from this unit before sending the next command.
- If an incorrect command is sent by mistake, this unit will send an "ER401" command back to the computer.
- SL1A, SL1B, SL2A and SL2B of Command IMS are available only when a dual input terminal board is attached.
| RS-232C Conversion cable | |
| D-sub 9-pin female | Details |
| 2 | R X D |
| 3 | T X D |
| 5 | GND |
| 4•6 | Non use |
| 78 | Shorted |
| 1•9 | NC |
Command
| Command | Parameter | Control details |
| PON | None | Power ON |
| POF | None | Power OFF |
| AVL | ** | Volume 00 - 63 |
| AMT | 0 | Audio MUTE OFF |
| 1 | Audio MUTE ON | |
| IMS | None | Input select (toggle) |
| SL1 | Slot1 input | |
| SL2 | Slot2 input | |
| SL3 | Slot3 input | |
| PC1 | PC input | |
| SL1A | Slot1 input (INPUT1A) | |
| SL1B | Slot1 input (INPUT1B) | |
| SL2A | Slot2 input (INPUT2A) | |
| SL2B | Slot2 input (INPUT2B) | |
| DAM | None | Screen mode select (toggle) |
| NORM | NORMAL (4 : 3) | |
| ZOOM | ZOOM | |
| FULL | FULL | |
| JUST | JUST | |
| SELF | Panasonic AUTO |
With the power off, this display responds to PON command only.
AV connection (for TH-42PH10BK/S, TH-50PH10BK/S, TH-58PH10BK)
This unit has a terminal board equivalent to BNC Dual Video Terminal Board (TY-FB9BD) as standard equipment.
Example of input signal source
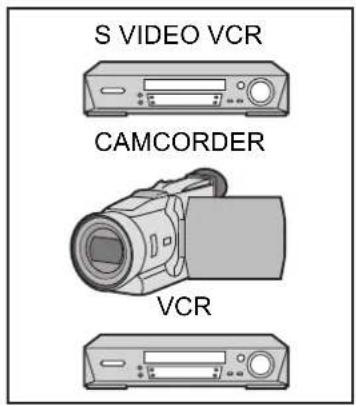
text_image
S VIDEO VCR CAMCORDER VCR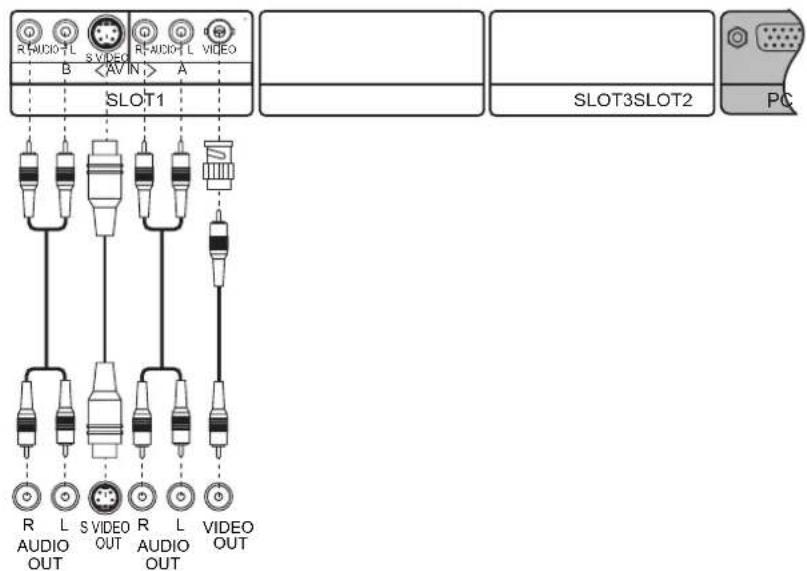
text_image
R-AUDIO-L S VIDEO R-AUDIO-L VIDEO BNote:
Additional equipment, cables and adapter plugs shown are not supplied with this set.
Power On / Off
Connecting the AC cord plug to the Plasma Display.
Fix the AC cord plug securely to the Plasma Display with the clamper. (see page 8)
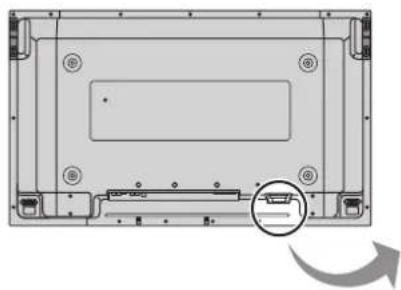
natural_image
Technical diagram of a device rear panel with a highlighted internal component and an arrow indicating rotation (no text or symbols present)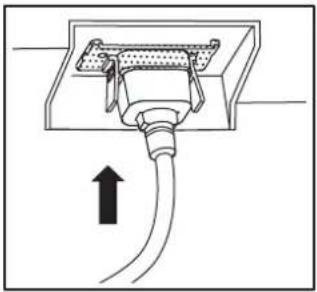
natural_image
Diagram of a cable connector with an upward arrow indicating direction (no text or symbols)Connecting the plug to the Wall Outlet
Notes:
- Main plug types vary between countries. The power plug shown at right may, therefore, not be the type fitted to your set.
- When disconnecting the AC cord, be absolutely sure to disconnect the AC cord plug at the socket outlet first.
Press the Power switch on the Plasma Display to turn the set on: Power-On.
Power Indicator: Green
Example: The screen below is displayed for a while after the Plasma Display is turned on (setting condition is an example).
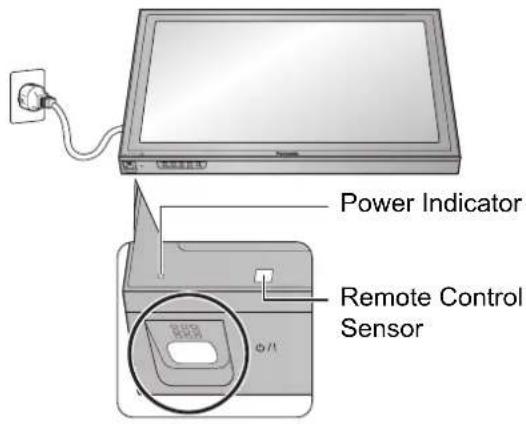
text_image
Power Indicator Remote Control SensorWhen the Power is turned on for the first time, the Language selection screen is displayed.
From the second time on, language selection can be done from the setup menu. (see page 13)
Select the desired language using the ▲ or ▼ button and press the ACTION (■) button.
Note:
Set with the remote control. Buttons on the main unit are unavailable for this setting.

text_image
OSD Language English (UK) Deutsch Français Italiano Español ENGLISH (US) 中文 日本語 SetSelectFrom the second time on, the below screen is displayed for a while (setting condition is an example).
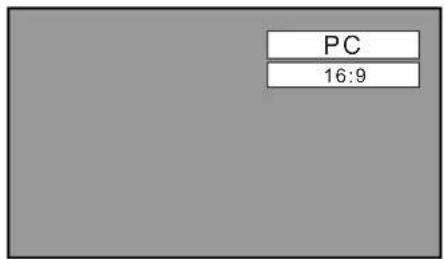
text_image
PC 16:9OFF

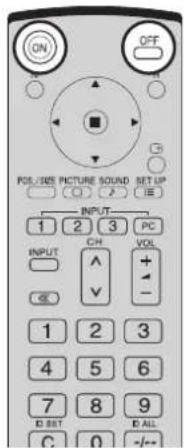
Press the OFF button on the remote control to turn the Plasma Display off.
Power Indicator: Red (standby)

Press the ON button on the remote control to turn the Plasma Display on.
Power Indicator: Green
Turn the power to the Plasma Display off by pressing the ⏻/I switch on the unit, when the Plasma Display is on or in standby mode.
Note:
During operation of the power management function, the power indicator turns orange in the power off state.
text_image
ON OFF POS/325 PICTURE SOUND SET UP INPUT 1 2 3 PC INPUT CH VOL ^ + - - OK 1 2 3 4 5 6 7 8 9 ID SET B ALL C 0 -/-Initial selections
Selecting the input signal
Select the input signals to be connected by installing the optional Terminal Boards.

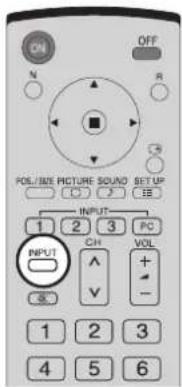
Press to select the input signal to be played back from the equipment which has been connected to the Plasma Display.
Input signals will change as follow:

text_image
• TH-42PS10BK/S → INPUT1→ INPUT2→ INPUT3→ PC →
text_image
• TH-42PH10BK/S, TH-50PH10BK/S, TH-58PH10BK → INPUT1A→ INPUT1B → INPUT2 → INPUT3 → PCSLOT1 is for dual input so that you can select INPUT1A or INPUT1B for INPUT1.
INPUT1A : VIDEO signal terminal in SLOT1 INPUT1B : S-VIDEO signal terminal in SLOT1
text_image
ON OFF N R PDL/SIZE PICTURE SOUND SET UP INPUT 1 2 3 PC CH VOL + - INPUT A V - 1 2 3 4 5 6Notes:
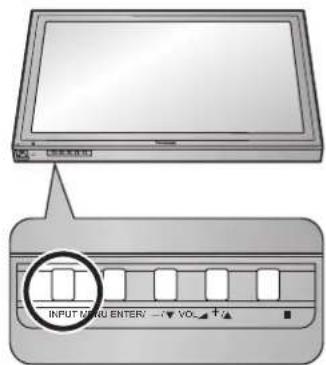
- Selecting is also possible by pressing the INPUT button on the unit.
- Input terminal will not be selected if the terminal board is not installed into the SLOT.
- Select to match the signals from the source connected to the component/RGB input terminals. (see page 38)
- In 2 screen display, the same input mode cannot be selected for the main picture and sub picture.
text_image
INPUT MENU ENTER: -1-2 V0Selecting the On-Screen Menu Language

flowchart
graph TD
    A["SET UP"] --> B((Central Square Node))
    B --> C["Arrow Up"]
    B --> D["Arrow Down"]
    B --> E["Arrow Left"]
    B --> F["Arrow Right"]
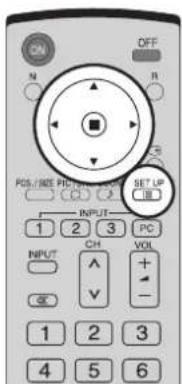
Press to display the Setup menu.
Press to select the OSD Language.
Press to select your preferred language.
text_image
ON OFF N R POS/REF PICT/RESET SET UP 1 2 3 PC INPUT CH VOL + - 1 2 3 4 5 6■ Selectable languages
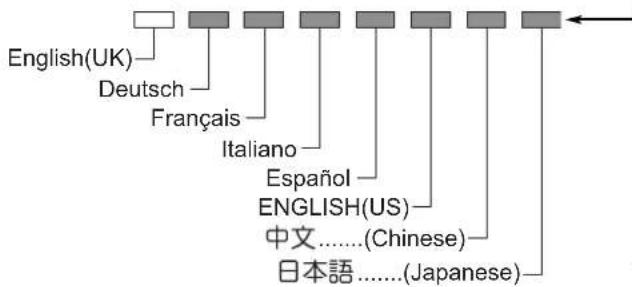
flowchart
graph TD
    A["English(UK)"] --> B["Deutsch"]
    A --> C["Français"]
    A --> D["Italiano"]
    A --> E["Español"]
    A --> F["ENGLISH(US)"]
    A --> G["中文......(Chinese)"]
    A --> H["日本語......(Japanese)"]
    I["←"] --> J["Next Page"]
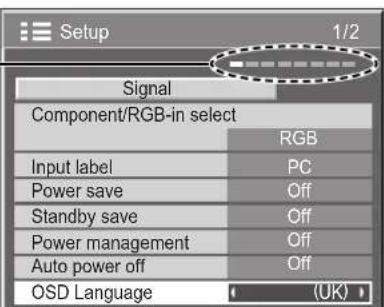
text_image
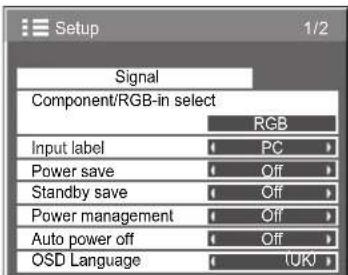
Setup 1/2 Signal Component/RGB-in select RGB Input label PC Power save Off Standby save Off Power management Off Auto power off Off OSD Language (UK)Basic Controls
Remote control sensor
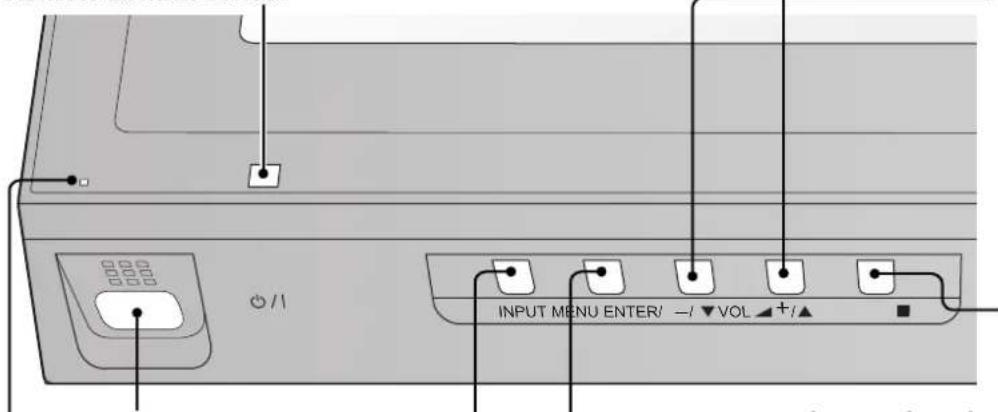
text_image
INPUT MENU ENTER/ -/ ▼ VOL +/▲ MENU Server SN+07Power Indicator
The Power Indicator will light.
- Power-OFF .... Indicator not illuminated (The unit will still consume some power as long as the power cord is still inserted into the wall outlet.)
- Standby ...... Red
• Power-ON ..... Green - DPMS ......Orange (With PC input signal and during operation of PC's screensaver.)
Volume Adjustment
Volume Up "+" Down "-"
When the menu screen is displayed:
“+”: press to move the cursor up
“−”: press to move the cursor down
(see page 16)
Enter / Aspect button
(see page 16, 18)
MENU Screen ON / OFF
Each time the MENU button is pressed, the menu screen will switch. (see page 16)

INPUT button
(INPUT1, INPUT2, INPUT3 and PC selection)
(see page 13)
SURROUND button
The surround setting switches on and off each time the SURROUND button is pressed.
The benefits of surround sound are enormous. You can be completely enveloped in sound; just as if you were at a concert hall or cinema.
Note:
The surround settings are memorized separately for each Sound Mode (Normal, Dynamic, Clear).
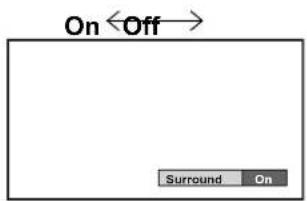
text_image
On ← Off → Surround OnN button (see page 19, 22, 23, 24, 25)
POS. / SIZE button (see page 19) ____
PICTURE button (see page 22)
INPUT button
(INPUT1, INPUT2, INPUT3 and PC selection)
Press to select INPUT1, INPUT2, INPUT3 and PC input SLOTS sequentially. (see page 13)
Sound mute On / Off (see page 25)
Numeric buttons (see page 37)
ASPECT button
Press to adjust the aspect. (see page 18)
MULTI Window buttons (see page 20)
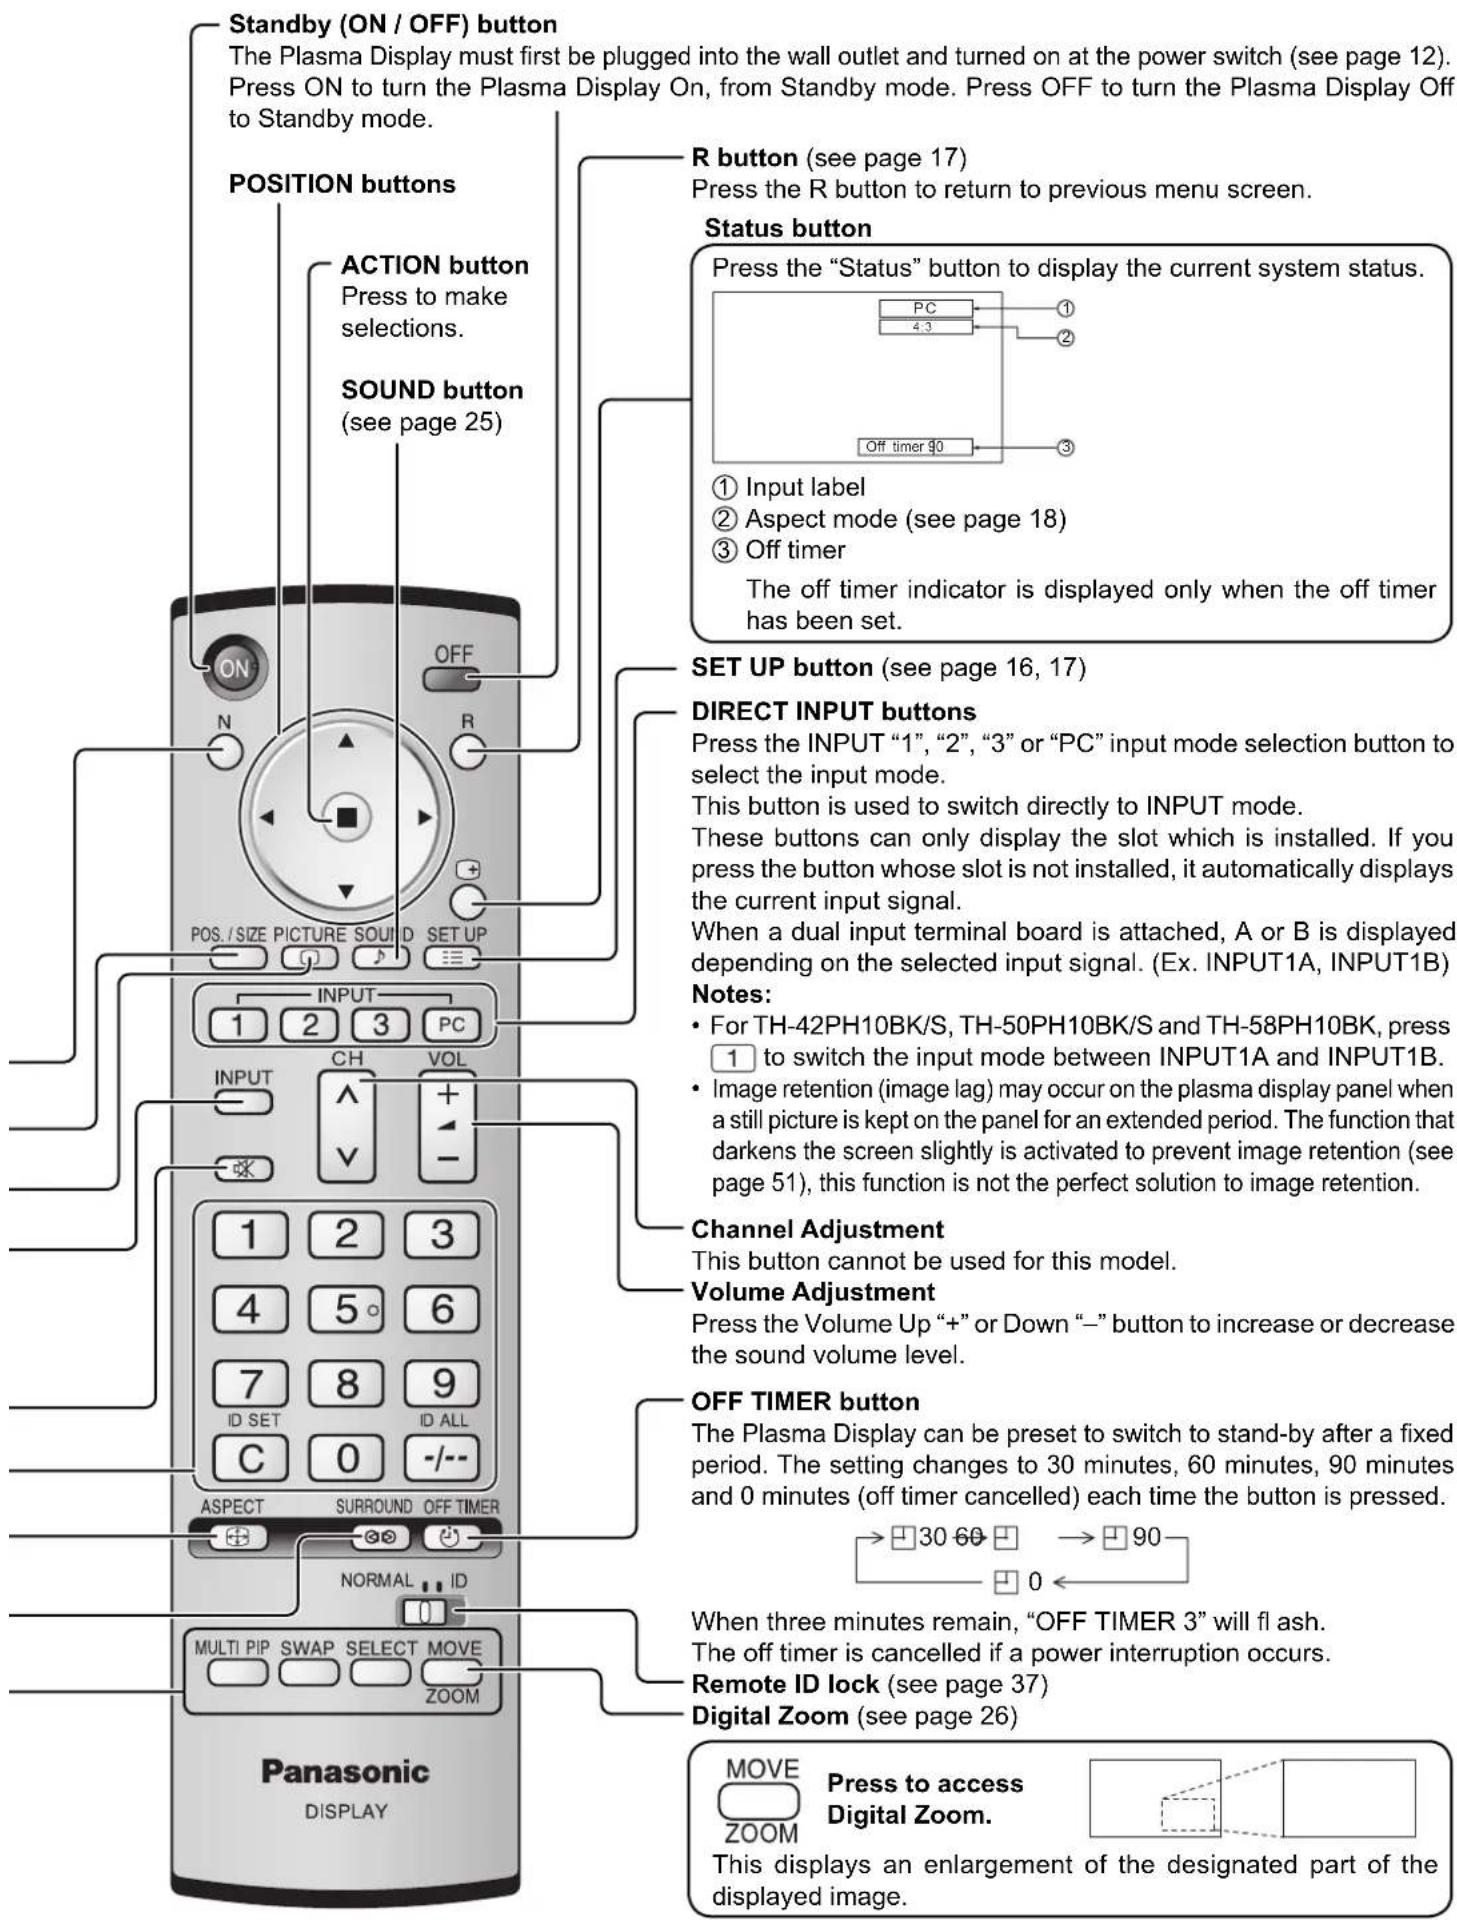
text_image
Standby (ON / OFF) button The Plasma Display must first be plugged into the wall outlet and turned on at the power switch (see page 12). Press ON to turn the Plasma Display On, from Standby mode. Press OFF to turn the Plasma Display Off to Standby mode. POSITION buttons ACTION button Press to make selections. SOUND button (see page 25) R button (see page 17) Press the R button to return to previous menu screen. Status button Press the "Status" button to display the current system status. ① Input label ② Aspect mode (see page 18) ③ Off timer The off timer indicator is displayed only when the off timer has been set. SET UP button (see page 16, 17) DIRECT INPUT buttons Press the INPUT "1", "2", "3" or "PC" input mode selection button to select the input mode. This button is used to switch directly to INPUT mode. These buttons can only display the slot which is installed. If you press the button whose slot is not installed, it automatically displays the current input signal. When a dual input terminal board is attached, A or B is displayed depending on the selected input signal. (Ex. INPUT1A, INPUT1B) Notes: • For TH-42PH10BK/S, TH-50PH10BK/S and TH-58PH10BK, press ① to switch the input mode between INPUT1A and INPUT1B. • Image retention (image lag) may occur on the plasma display panel when a still picture is kept on the panel for an extended period. The function that darkens the screen slightly is activated to prevent image retention (see page 51), this function is not the perfect solution to image retention. Channel Adjustment This button cannot be used for this model. Volume Adjustment Press the Volume Up "+" or Down "-" button to increase or decrease the sound volume level. OFF TIMER button The Plasma Display can be preset to switch to stand-by after a fixed period. The setting changes to 30 minutes, 60 minutes, 90 minutes and 0 minutes (off timer cancelled) each time the button is pressed. → 30 60 → 90 When three minutes remain, "OFF TIMER 3" will fl ash. The off timer is cancelled if a power interruption occurs. Remote ID lock (see page 37) Digital Zoom (see page 26) Panasonic DISPLAY MOVE Press to access Digital Zoom. This displays an enlargement of the designated part of the displayed image.On-Screen Menu Displays
To Picture adjust menu (see page 22)
text_image
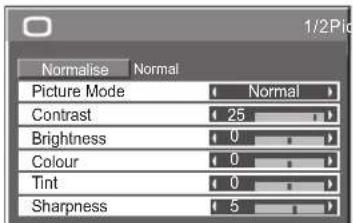
1/2Pic Normalise Normal Picture Mode Normal Contrast 25 Brightness 0 Colour 0 Tint 0 Sharpness 5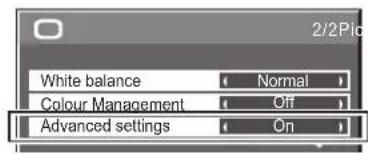
text_image
2/2Pic White balance Normal Colour Management Off Advanced settings On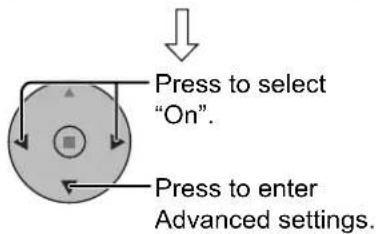
text_image
Press to select "On". Press to enter Advanced settings.To Advanced settings (see page 22, 23)
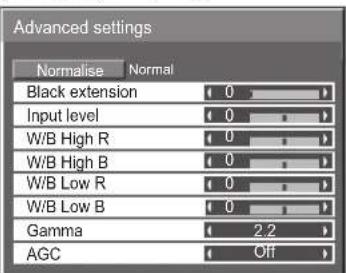
text_image
Advanced settings Normalise Normal Black extension 0 Input level 0 W/B High R 0 W/B High B 0 W/B Low R 0 W/B Low B 0 Gamma 2.2 AGC OffTo Pos./Size adjust menu (see page 19)
During "AV(S Video)", "Component" and "Digital" input signal.
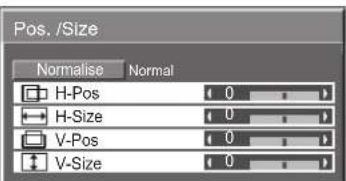
text_image
Pos. /Size Normalise Normal H-Pos 0 H-Size 0 V-Pos 0 V-Size 0During "RGB / PC" input signal.
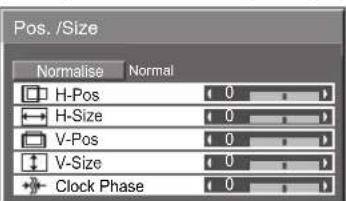
text_image
Pos. /Size Normalise Normal H-Pos 0 H-Size 0 V-Pos 0 V-Size 0 Clock Phase 0The MENU button on the unit can also be pressed.
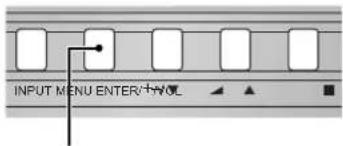
text_image
INPUT MENU ENTER/+WOLEach time the MENU button is pressed, the menu screen will switch.

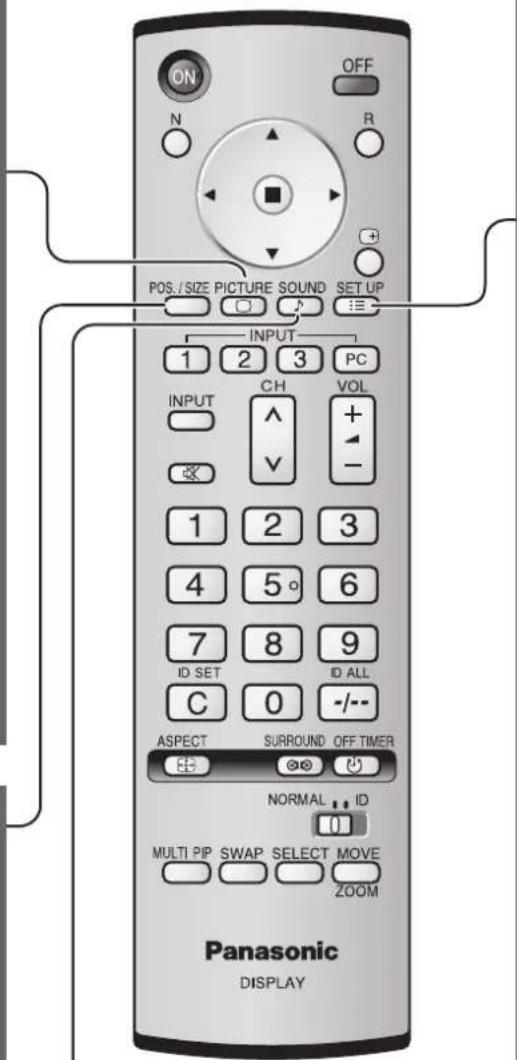
text_image
ON OFF N R POS./SIZE PICTURE SOUND SET UP INPUT 1 2 3 PC INPUT CH VOL ^ + - 1 2 3 4 5° 6 7 8 9 ID SET ID ALL C 0 -/-- ASPECT SURROUND OFF TIMER NORMAL ID MULTI PIP SWAP SELECT MOVE ZOOM Panasonic DISPLAYTo Sound adjust menu (see page 25)
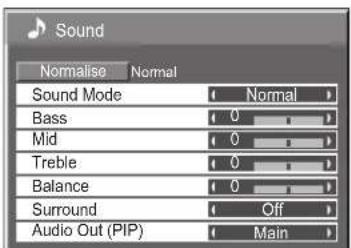
text_image
Sound Normalise Normal Sound Mode Normal Bass 0 Mid 0 Treble 0 Balance 0 Surround Off Audio Out (PIP) Main
① Press to select.
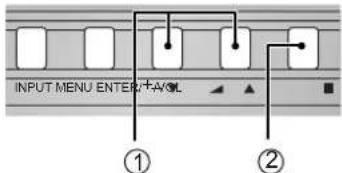
[from the unit]
text_image
INPUT MENU ENTER+AVOL ① ②① Press to select.
② Press to access each adjust screen.
text_image
Setup 1/2 Signal Component/RGB-in select RGB Input label PC Power save Off Standby save Off Power management Off Auto power off Off OSD Language (UK)
natural_image
Circular diagram with central square and directional arrows, no text or symbols present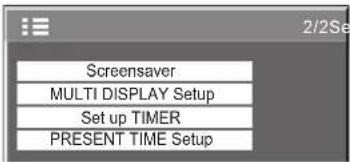
text_image
Screensaver MULTI DISPLAY Setup Set up TIMER PRESENT TIME SetupNote:
Menu that cannot be adjusted is grayout. Adjustable menu changes depending on signal, input and menu setting.

text_image
② Press to access each adjust screen. [ from the unit ] INPUT MENU ENTER/FAAT Press to return to next menu screen. Press the R button to return to previous menu screen.To Signal screen for AV (S Video) (see page 38, 39)
text_image
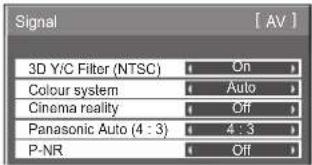
Signal 3D Y/C Filter (NTSC) On Colour system Auto Cinema reality Off Panasonic Auto (4 : 3) 4 : 3 P-NR OffTo Signal screen for Component (see page 39)
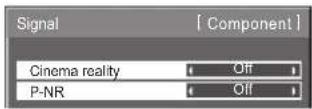
To Signal screen for RGB (see page 39, 40)
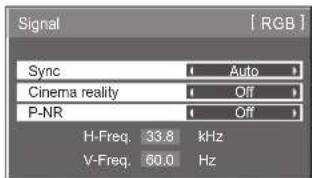
text_image
Signal Sync Cinema reality P-NR H-Freq. 33.8 kHz V-Freq. 60.0 Hz [ RGB ]To Signal screen for Digital (see page 39, 40)
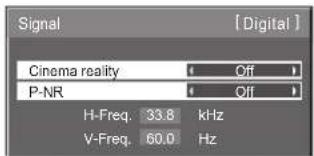
text_image
Signal Cinema reality P-NR Off Off H-Freq. 33.8 kHz V-Freq. 60.0 HzNote: "Signal" setup menu displays different setting condition for each input signals. (see page 13)
To setup Screensaver (see page 29-31)
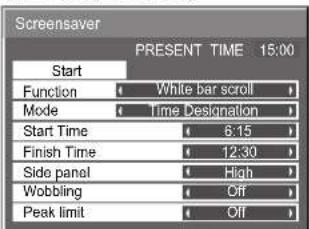
text_image
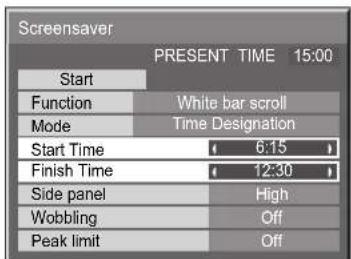
Screensaver PRESENT TIME 15:00 Start Function White bar scroll Mode Time Designation Start Time 6:15 Finish Time 12:30 Side panel High Wobbling Off Peak limit Off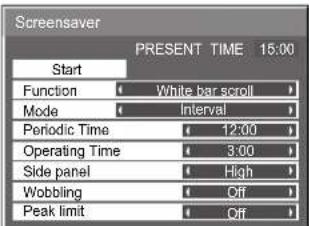
text_image
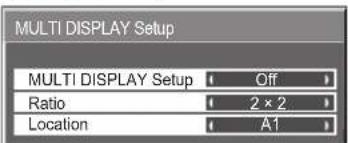
Screensaver PRESENT TIME 15:00 Start Function White bar scroll Mode Interval Periodic Time 12:00 Operating Time 3:00 Side panel High Wobbling Off Peak limit OffTo setup Multidisplay screen (see page 33)
text_image
MULTI DISPLAY Setup MULTI DISPLAY Setup Off Ratio 2 x 2 Location A1Press to select Start Time / Finish Time (When Time Designation is selected). Press to select Periodic Time / Operating Time (When Interval is selected).
text_image
Press to Setup. RPress the R button to return to "Setup" menu.
text_image
Screensaver PRESENT TIME 15:00 Start Function White bar scroll Mode Time Designation Start Time 6:15 Finish Time 12:30 Side panel High Wobbling Off Peak limit Off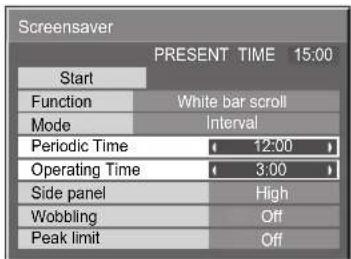
text_image
Screensaver PRESENT TIME 15:00 Start Function White bar scroll Mode Interval Periodic Time 12:00 Operating Time 3:00 Side panel High Wobbling Off Peak limit OffTo Set up Timer selection screen (see page 27, 28)
text_image
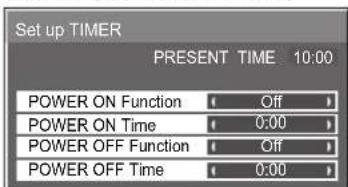
Set up TIMER PRESENT TIME 10:00 POWER ON Function ( Off ) POWER ON Time ( 0:00 ) POWER OFF Function ( Off ) POWER OFF Time ( 0:00 )To PRESENT TIME Setup (see page 27)
text_image
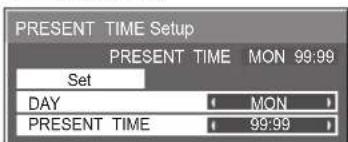
PRESENT TIME Setup PRESENT TIME MON 99:99 Set DAY MON PRESENT TIME 99:99Press to select POWER ON Time / POWER OFF Time.
text_image
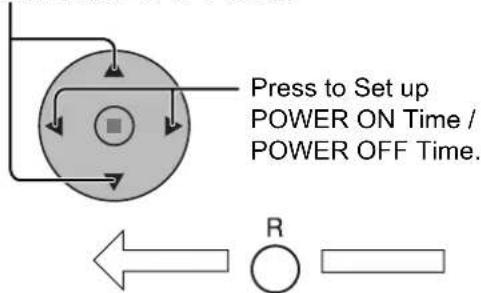
Press to Set up POWER ON Time / POWER OFF Time.Press the R button to return to "Setup" menu.
text_image
Set up TIMER PRESENT TIME 10:00 POWER ON Function Off POWER ON Time 12:00 POWER OFF Function Off POWER OFF Time 18:00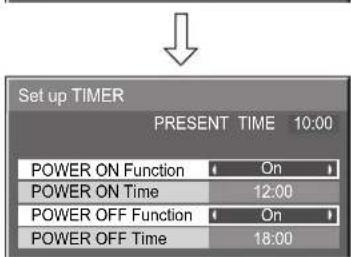
text_image
Set up TIMER PRESENT TIME 10:00 POWER ON Function On POWER ON Time 12:00 POWER OFF Function On POWER OFF Time 18:00ASPECT Controls
The Plasma Display will allow you to enjoy viewing the picture at its maximum size, including wide screen cinema format picture.
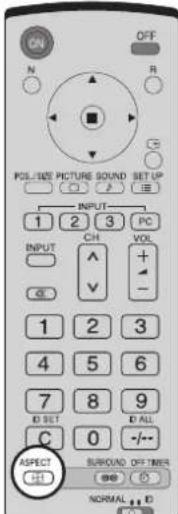
ASPECT

Press repeatedly to move through the aspect options:

Note:
[from the unit]
When selecting an input slot that attaches BNC Dual Video Terminal Board (TY-FB9BD), Panasonic Auto cannot be selected.
text_image
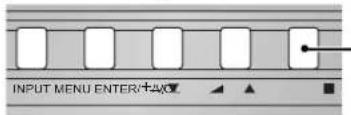
INPUT MENU ENTER/+ACIThe aspect mode changes each time the ENTER button is pressed.
[During MULTI PIP Operations]

• Picture and Picture, Picture in Picture :
- Others
: Aspect switching is not possible.
text_image
ON OFF N R POL/SIZE PICTURE SOUND SET UP INPUT 1 2 3 PC INPUT CH VOL ^ + - 1 2 3 4 5 6 7 8 9 D SET D ALL C 0 -/- ASPECT SUBOUND OFF TIMER 出 NORMAL DNotes:
- For PC signal input, the mode switches between "4:3", "Zoom" and "16:9" only.
- For a 1125 (1080) / 60i · 50i · 24p · 25p · 30p · 24sF, 1250 (1080) / 50i, 750 (720) / 60p · 50p signal input, the mode is set to "16:9" mode, and switching is not possible.
- Panasonic Auto can be selected only during Video signal input.
- The aspect mode is memorized separately for each input terminal.
| Mode Picture Explanation | ||
| 4:3 | 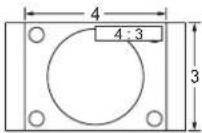 | 4:3 will display a 4:3 picture at its standard 4:3 size. |
| Zoom | 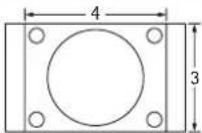 → → 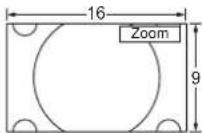 | Zoom mode magnifi es the central section of the picture. |
| 16:9 | 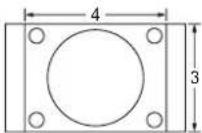 → → 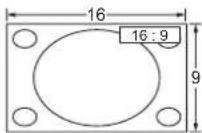 | 16:9 will display the picture at its maximum size but with slight elongation. |
| Just | 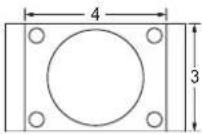 → → 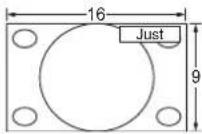 | Just mode will display a 4:3 picture at its maximum size but with aspect correction applied to the center of the screen so that elongation is only apparent at the left and right edges of the screen. The size of the picture will depend on the original signal. |
| Panasonic Auto | 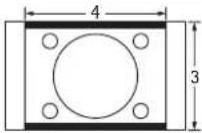 → → 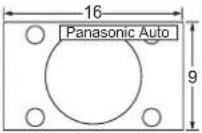 For an elongated image Image is expanded For an elongated image Image is expanded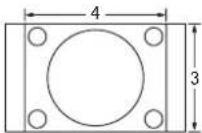 → →  For a 4:3 image For a 4:3 image | The display will automatically become enlarged (depending on the picture source), allowing you to view the picture at its maximum size.Notes:Panasonic Auto mode is designed to automatically adjust the aspect ratio to handle a mix of 16:9 and 4:3 program material. Certain 4:3 program material, such as stock market data screens, may occasionally cause the image size to change unexpectedly. When viewing such programs, it is recommended that the ASPECT be set to 4:3.If adjusting the Picture V-Pos/V-Size in Panasonic Auto with 16:9 mode, the adjustment is not memorized. When exiting the mode, the screen will return to a former adjustment.Panasonic Auto can not be selected while BNC Dual Video Terminal Board (TY-FB9BD) is installed. |
Note:
Do not allow the picture to be displayed in 4:3 mode for an extended period, as this can cause a permanent image retention to remain on the Plasma Display Panel.
Adjusting Pos. / Size
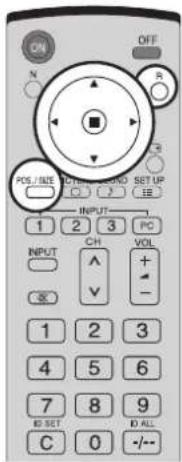
1
POS. / SIZE

Press to display the Pos. /Size menu.
2
natural_image
Simple diagram of a circular device with directional arrows and a central square, no text or symbols present.Press to select H-Pos / H-Size / V-Pos / V-Size / Clock Phase.
3
natural_image
Simple circular diagram with arrows and a central square, no text or symbols presentPress to adjust Pos. / Size.
4

Press to exit from adjust mode.
Notes:
- Adjustment details are memorized separately for different input signal formats (Adjustments for component signals are memorized for 525 (480) / 60i · 60p, 625 (575) / 50i · 50p, 1125 (1080) / 60i · 50i · 24p · 25p · 30p · 24sF, 1250 (1080) / 50i, 750 (720) / 60p · 50p each, and RGB/PC/Digital signals are memorized for each frequency.)
- If a "Cue" or "Rew" signal from a VCR or DVD player is received, the picture position will shift up or down. This picture position movement cannot be controlled by the Picture Pos./Size function.
- If adjusting the Picture V-Pos/V-Size in Panasonic Auto with 16:9 mode, the adjustment is not memorized. When exiting the mode, the screen will return to a former adjustment.
text_image
ON OFF N R R POS / I/O CTRL/START/SET UP C1 2 3 PC INPUT 1 2 3 VOL INPUT ^ + - OK 1 2 3 4 5 6 7 8 9 ID SET C 0 -/-During "AV(S Video)", "Component" and "Digital" input signal.
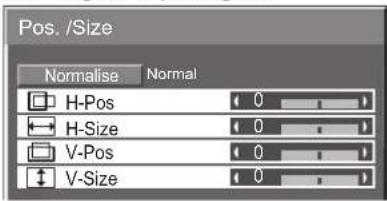
text_image
Pos. /Size Normalise Normal H-Pos 0 H-Size 0 V-Pos 0 V-Size 0During "RGB / PC" input signal.
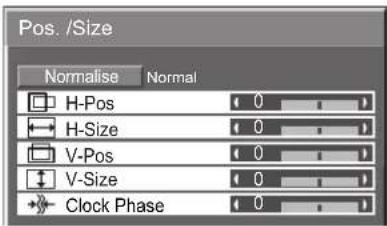
text_image
Pos. /Size Normalise Normal H-Pos 0 H-Size 0 V-Pos 0 V-Size 0 Clock Phase 0H-Pos
Adjust the horizontal position.
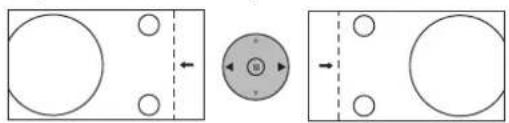
natural_image
Pure diagram showing three geometric shapes with circles and arrows, no text or symbols presentH-Size
Adjust the horizontal size.
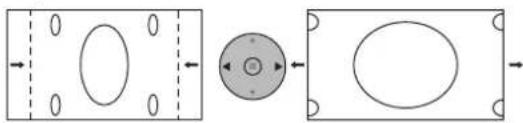
natural_image
Diagram showing two rectangular shapes with internal oval cutouts and a central circular element, no text or symbols present.V-Pos Adjust the vertical position. V-Size Adjust the vertical size.
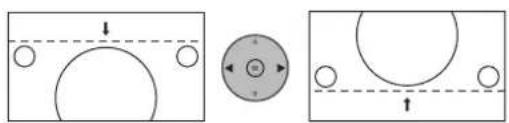
natural_image
Diagram showing three basketball court scenes: front view with circular cutouts, side view with a circular target and directional arrow (no text or symbols)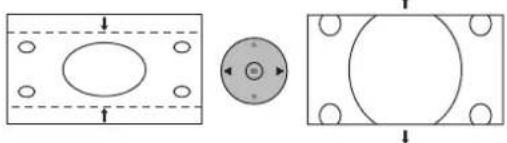
natural_image
Pure technical diagram showing two views of a mechanical component with holes and a central circular feature (no text or symbols)Clock Phase
(RGB/PC in mode)
Eliminate the fl ickering and distortion.
Helpful Hint ( Normalise Normalisation)
While the Pos. / Size display is active, if either the N button on the remote control is pressed at any time or the ACTION (■) button is pressed during "Normalise", then all adjustment values are returned to the factory settings.
MULTI PIP
MULTI PIP
Press repeatedly.
Each time pressing this button main picture and sub picture will be displayed as follows below.
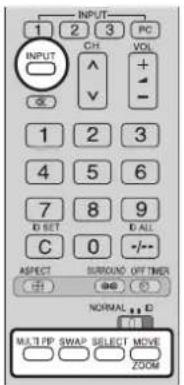
text_image
INPUT 1 2 3 PC INPUT CH VOL ^ + - OK V 1 2 3 4 5 6 7 8 9 ID SET D ALL C 0 -/-- ASPECT SURROUND OFFTER + + + NORMAL ID MULTIPP SWAP SELECT MOVE ZOOM[Picture and Picture] [Picture [Picture]lt Picture]
Main picture Sub picture
Main picture Sub picture Main picture Sub picture
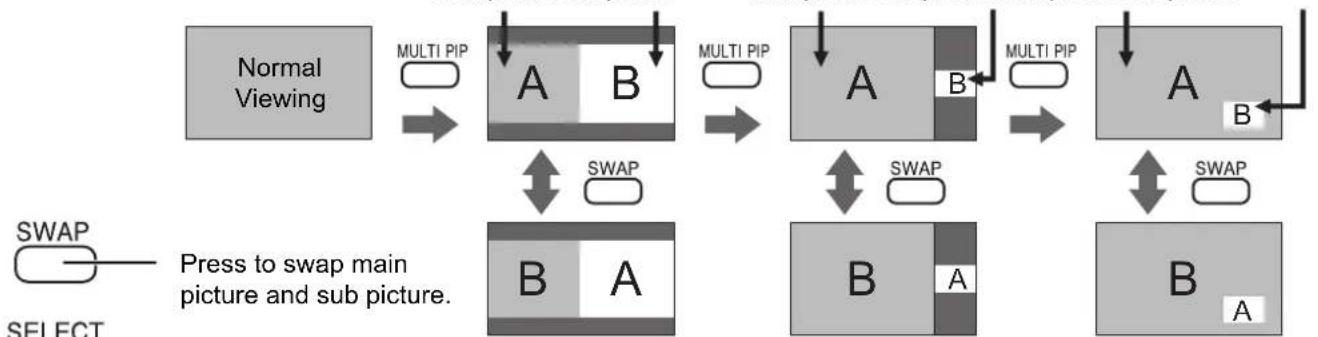
flowchart
graph TD
    A["Normal Viewing"] -->|MULTI PIP| B1["A"]
    B1 -->|SWAP| C1["B"]
    C1 -->|MULTI PIP| D1["A"]
    D1 -->|SWAP| E1["B"]
    E1 -->|MULTI PIP| F1["A"]
    F1 -->|SWAP| G1["B"]
    G1 -->|Multi PIP| H1["A"]
    H1 -->|Multi PIP| I1["B"]
    I1 -->|Multi PIP| J1["A"]
    J1 -->|Multi PIP| K1["B"]
    K1 -->|Multi PIP| L1["A"]
    L1 -->|Multi PIP| M1["B"]
    M1 -->|Multi PIP| N1["A"]
    N1 -->|Multi PIP| O1["B"]
    O1 -->|Multi PIP| P1["A"]
    P1 -->|Multi PIP| Q1["B"]
    Q1 -->|Multi PIP| R1["A"]
    R1 -->|Multi PIP| S1["B"]
    S1 -->|Multi PIP| T1["A"]
    T1 -->|Multi PIP| U1["B"]
    U1 -->|Multi PIP| V1["A"]
    V1 -->|Multi PIP| W1["B"]
    W1 -->|Multi PIP| X1["A"]
    X1 -->|Multi PIP| Y1["B"]
    Y1 -->|Multi PIP| Z1["A"]
    Z1 -->|Multi PIP| AA["B"]
    AA -->|Multi PIP| AB["SWAP"]
    AB -->|Multi PIP| AC["Select"]
    AC -->|Press to swap main picture and sub picture.|
Press to select the input mode.
Under main Picture and sub picture display, select the picture which you would like to change input modes.
Notes:
- The sub picture sound is heard while a sub picture operation is underway.
- The sub picture operation automatically returns to the main picture operation if a sub picture operation has not been performed for about 5 seconds or if any of the remote control buttons is pressed (except INPUT button).
[Example]
Main picture label is bright Sub picture label is bright
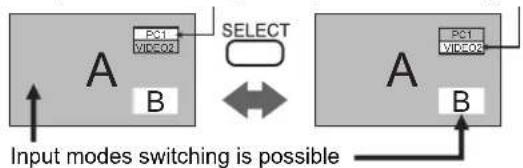
flowchart
graph TD
    subgraph Input Modes
        A1["Input Mode A"] -->|SELECT| B1["Output Signal"]
        A2["Input Mode B"] -->|SELECT| B2["Output Signal"]
    end
    style A fill:#f9f,stroke:#333
    style B fill:#bbf,stroke:#333
    note right of A1: 'P01' with 'VDC02' label
    note right of B1: 'P01' with 'VDC02' label
    note right of B2: 'P01' with 'VDC02' label
    note right of A2: 'Input modes switching is possible'
Main picture label is changed
Sub picture label is changed
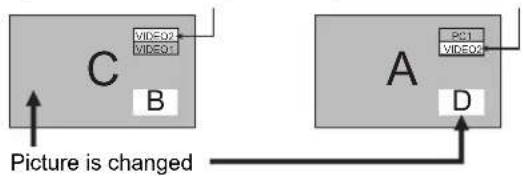
flowchart
graph TD
    C["Image C"] -->|Picture is changed| A["Image A"]
    A -->|Picture is changed| D["Image D"]
Press to change input signal.
Press to move the sub picture.
Each time the location of the sub picture will be moved.
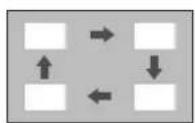
Notes:
- This button is effective only in the picture in picture.
- The sub picture may be hidden by the on screen display, depending on its position.
Notes:
- If "Input lock" in Options menu is set to other than "Off", MULTI PIP function isn't available.
- Sound output is from the picture which is selected in Audio Out (PIP) (See page 25).
- In 2 screen display, the same input mode cannot be selected for the main picture and sub picture.
- The main picture and sub picture are processed by different circuits, resulting in a slight difference in the clarity of the pictures. There may also be a difference in the picture quality of the sub picture depending on the type of signals displayed on the main picture and depending on the 2-picture display mode.
- Due to the small dimensions of the sub pictures, these sub pictures cannot be shown in detail.
- Computer screen picture is displayed in a simplified format, and it may not be possible to discern details on them satisfactorily.
- Following combinations of two analog signals cannot be displayed simultaneously;
Component - Component, Component - PC (RGB), PC (RGB) - Component, PC (RGB) - PC (RGB)
Advanced PIP
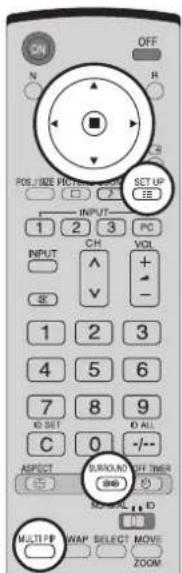
1

Press to display the Setup menu.
2
natural_image
Pure diagram of a circular object with arrows and central square, no text or symbols presentPress to select "OSD Language".
3


Press and hold until the Options menu is displayed.
4
natural_image
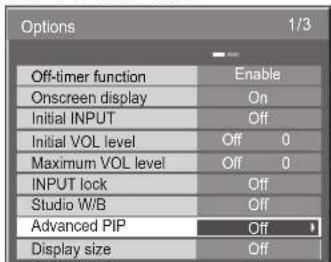
Simple diagram of a circular device with directional arrows and a central square, no text or symbols present.Press to select Advanced PIP.
5
natural_image
Simple circular diagram with arrows indicating direction and central square (no text or symbols)Press to adjust the menu.
Off : Sets normal two screen display mode (see page 20).
On : Sets Advanced PIP mode.
6
Press to exit from Options menu.
(When Advanced PIP is On)
7
Press repeatedly.
Each time pressing this button main picture and sub picture will be displayed as above.
text_image
ON OFF N R SET UP UP INPUT 1 2 3 PC VOLT INPUT ^ + V - 1 2 3 4 5 6 7 8 9 IO SET O ALL C 0 -/- ASPECT U/R/NO OFF TIME (00) MULTIP WAP SELECT MOVE ZOOMTH-42PH10BK/S, TH-50PH10BK/S, TH-58PH10BK
TH-42PS10BK/S
text_image
Options 1/3 Off-timer function Enable Onscreen display On Initial INPUT Off Initial VOL level Off 0 Maximum VOL level Off 0 INPUT lock Off Studio W/B Off Advanced PIP Off Display size Off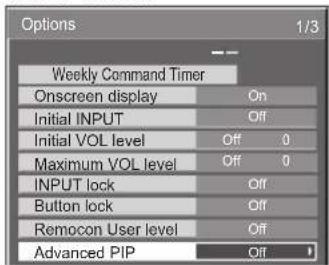
text_image
Options 1/3 Weekly Command Timer Onscreen display Initial INPUT Initial VOL level Maximum VOL level INPUT lock Button lock Remocon User level Advanced PIP On Off Off Off Off OffOne screen Advanced PIP
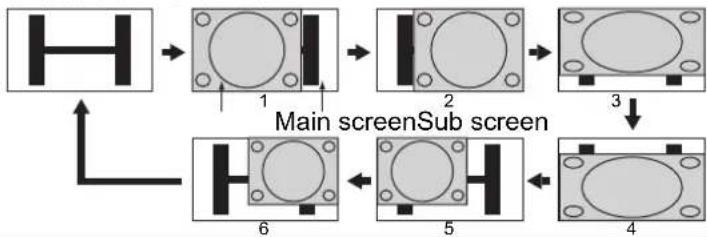
flowchart
graph TD
    A["Input"] --> B["1"]
    B --> C["2"]
    C --> D["3"]
    D --> E["4"]
    E --> F["5"]
    F --> G["6"]
    G --> H["Main screen Sub screen"]
Note:


To use


Notes:
- Advanced PIP corresponding signal
| Sub screen Main screen | |
| NTSC, PAL, SECAM (tuner, video)525i, 525p, 625i, 625p, 750/60p, 750/50p, 1125/60i, 1125/50i, 1250/50i (Component Video, RGB, DVI, SDI, HDMI) | 640x480@60Hz, 852x480@60Hz, 1024x768@60Hz, 1366x768@60Hz (RGB, DVI, HDMI)1280x768@60Hz (DVI) |
- If "Input lock" in Options menu is set to other than "Off", MULTI PIP function isn't available.
- Sound output is from the picture which is selected in Audio Out (PIP) (See page 25).
- In 2 screen display, the same input mode cannot be selected for the main picture and sub picture.
- The main picture and sub picture are processed by different circuits, resulting in a slight difference in the clarity of the pictures. There may also be a difference in the picture quality of the sub picture depending on the type of signals displayed on the main picture and depending on the 2-picture display mode.
- Due to the small dimensions of the sub pictures, these sub pictures cannot be shown in detail.
- Computer screen picture is displayed in a simplified format, and it may not be possible to discern details on them satisfactorily.
- Following combinations of two analog signals cannot be displayed simultaneously;
Component - Component, Component - PC (RGB), PC (RGB) - Component, PC (RGB) - PC (RGB) - Refer to each board's operating instruction for DVI, SDI, HDMI's corresponding signals.
Picture Adjustments
1
PICTURE

Press to display the Picture menu.
2
Select to adjust each item.
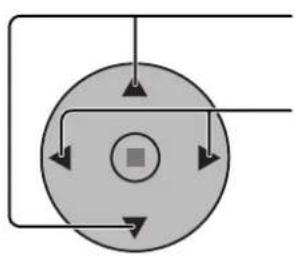
flowchart
graph TD
    A["Top Left Arrow"] --> B["Center Square"]
    B --> C["Bottom Right Arrow"]
    C --> D["Bottom Left Arrow"]
    D --> A
Press to select the menu to adjust.
Select the desired level by looking at the picture behind the menu.
Note:
Menu that cannot be adjusted is grayout. Adjustable menu changes depending on signal, input and menu setting.
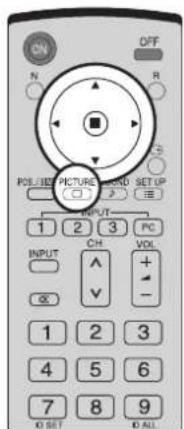
text_image
ON OFF N R POS/SET PICTURE SOUND SET UP 1 2 3 PC INPUT CH VOL + - OK V 1 2 3 4 5 6 7 8 9 IO SET IO ALL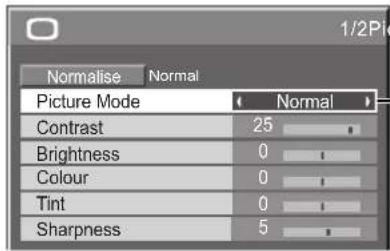
text_image
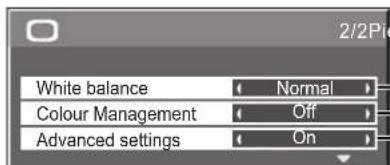
Normalise Normal Picture Mode Normal Contrast 25 Brightness 0 Colour 0 Tint 0 Sharpness 5Press “◀” or “▶” button to switch between modes.

text_image
2/2Pic White balance Normal Colour Management Off Advanced settings OnNormal
For viewing in standard (evening lighting) environments. This menu selects the normal levels of Brightness and Contrast.
Dynamic
For viewing in brighter environments. This menu selects higher than normal levels of Brightness and Contrast.
Cinema
Ideal for movies.
Press to select "On".
Press to enter Advanced settings.
Advanced settings On
Enables fine picture adjustment at a professional level.
For TH-42PS10BK/S : see page 23
For TH-42PH10BK/S,
TH-50PH10BK/S,
TH-58PH10BK : see page 24
Advanced settings Off
Displays images with settings of the Picture menu.
Note:
If you would like to change the picture and colour of the selected Picture menu to something else, adjust using the items in the Picture menu. (see next page)
Press “◀” or ▶” button to switch between modes.

Colour Management On
Enables vivid colour adjustment automatically.
Helpful Hint

Normalise
Normalisation)
While the "Picture" menu is displayed, if either the N button on the remote control is pressed at any time or the ACTION (■) button is pressed during "Normalise", then all adjustment values are returned to the factory settings.
| Item | Effect | Adjustments |
| Contrast |  | Selects the proper brightness and density for the room. |
| Brightness |  | Adjusts for easier viewing of dark pictures such as night scenes and black hair. |
| Colour |  | Adjusts colour saturation. |
| Tint |  | Adjusts for nice skin colour. |
| Sharpness |  | Adjusts picture sharpness. |
Notes:
- “Colour” and “Tint” settings cannot be adjusted for “RGB/PC” and “Digital” input signal.
- You can change the level of each function (Contrast, Brightness, Colour, Tint, Sharpness) for each Picture Mode.
- The setting details for normal, dynamic and cinema respectively are memorized separately for each input terminal.
- The “Tint” setting can be adjusted for NTSC signal only during “AV (S Video)” input signal.
- In Contrast, there is not a noticeable change even when contrast is increased with a bright picture or reduced with a dark picture.
Advanced settings
(For TH-42PS10BK/S)
| Advanced settings | |
| Normalise | Normal |
| Black extension | 0 |
| Input level | 0 |
| W/B High R | 0 |
| W/B High B | 0 |
| W/B Low R | 0 |
| W/B Low B | 0 |
| Gamma | 2.2 |
| AGC | Off |
| Item | Effect | Details | |
| Black extension | Less More | Adjusts the dark shades of the image in gradation. | |
| Input level | Less More | Adjustment of parts which are extremely bright and hard to see. (This cannot be adjusted when the input signal is Digital.) | |
| W/B High R | Less More | Adjusts the white balance for light red areas. | |
| W/B High B | Less More | Adjusts the white balance for light blue areas. | |
| W/B Low R | Less More | Adjusts the white balance for dark red areas. | |
| W/B Low B | Less More | Adjusts the white balance for dark blue areas. | |
| Gamma | Down Up | S Curve 2.0 2.2 2.5 | |
| AGC | Off On | Increases the brightness of dark signal automatically. | |
Notes:
- Carry out "W/B" adjustment as follows.
- Adjust the white balance of the bright sections using the "W/B High R" and "W/B High B" settings.
- Adjust the white balance of the dark sections using the "W/B Low R" and "W/B Low B" settings.
- Repeat steps 1 and 2 to adjust.
Steps 1 and 2 affect each other's settings, so repeat each step in turn to make the adjustment. - The adjustment values are memorized separately for each input terminal.
- The adjustment range values should be used as an adjustment reference.
| Helpful Hint (N Normalise Normalisation) |
| On the remote control unit, while the “Advanced settings” menu is displayed, if either the N button is pressed at any time or the ACTION (■) button is pressed during “Normalise”, then all adjustment values are returned to the factory settings. |
(For TH-42PH10BK/S, TH-50PH10BK/S, TH-58PH10BK)
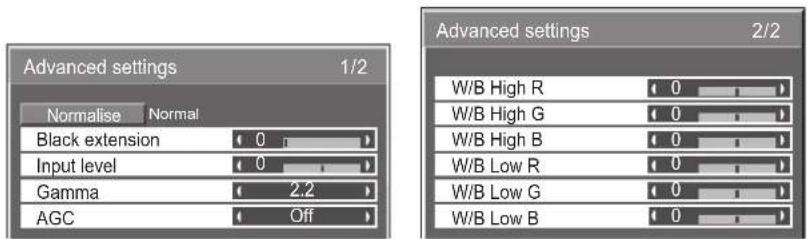
text_image
Advanced settings 1/2 Normalise Normal Black extension 0 Input level 0 Gamma 2.2 AGC Off Advanced settings 2/2 W/B High R 0 W/B High G 0 W/B High B 0 W/B Low R 0 W/B Low G 0 W/B Low B 0| Item | Effect | Details | |
| Black extension | Less More | Adjusts the dark shades of the image in gradation. | |
| Input level | Less More | Adjustment of parts which are extremely bright and hard to see.(This cannot be adjusted when the input signal is Digital.) | |
| Gamma | Down Up | S Curve 2.0 > 2.2 2.5 | |
| AGC | Off On | Increases the brightness of dark signal automatically. | |
| W/B High R | Less More | Adjusts the white balance for light red areas. | |
| W/B High G | Less More | Adjusts the white balance for light green areas. | |
| W/B High B | Less More | Adjusts the white balance for light blue areas. | |
| W/B Low R | Less More | Adjusts the white balance for dark red areas. | |
| W/B Low G | Less More | Adjusts the white balance for dark green areas. | |
| W/B Low B | Less More | Adjusts the white balance for dark blue areas. | |
Notes:
- Carry out "W/B" adjustment as follows.
- Adjust the white balance of the bright sections using the "W/B High R", "W/B High G" and "W/B High B" settings.
- Adjust the white balance of the dark sections using the "W/B Low R", "W/B Low G" and "W/B Low B" settings.
- Repeat steps 1 and 2 to adjust.
Steps 1 and 2 affect each other's settings, so repeat each step in turn to make the adjustment.
- The adjustment values are memorized separately for each input terminal.
- The adjustment range values should be used as an adjustment reference.
Helpful Hint

Normalise
Normalisation)
On the remote control unit, while the "Advanced settings" menu is displayed, if either the N button is pressed at any time or the ACTION (■) button is pressed during "Normalise", then all adjustment values are returned to the factory settings.
Sound Adjustment
1
SOUND
♪
Press to display the Sound menu.
2
Select to adjust each item.
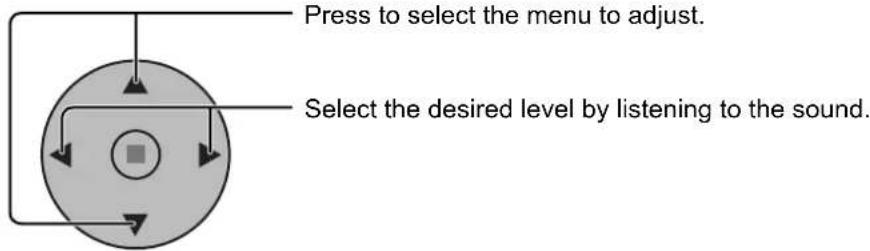
text_image
Press to select the menu to adjust. Select the desired level by listening to the sound.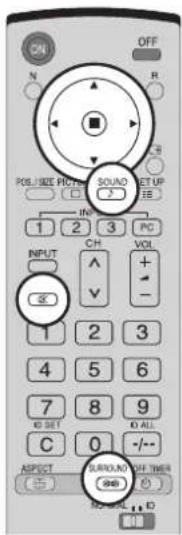
text_image
ON OFF N R POLD SIZE PITCH SQUAD SET UP IN 1 2 3 PC INPUT CH VOL ^ + V - 1 2 3 4 5 6 7 8 9 ID SET D ALL C 0 -/- ASPECT S/R/NO NOT TIMER OK OK OK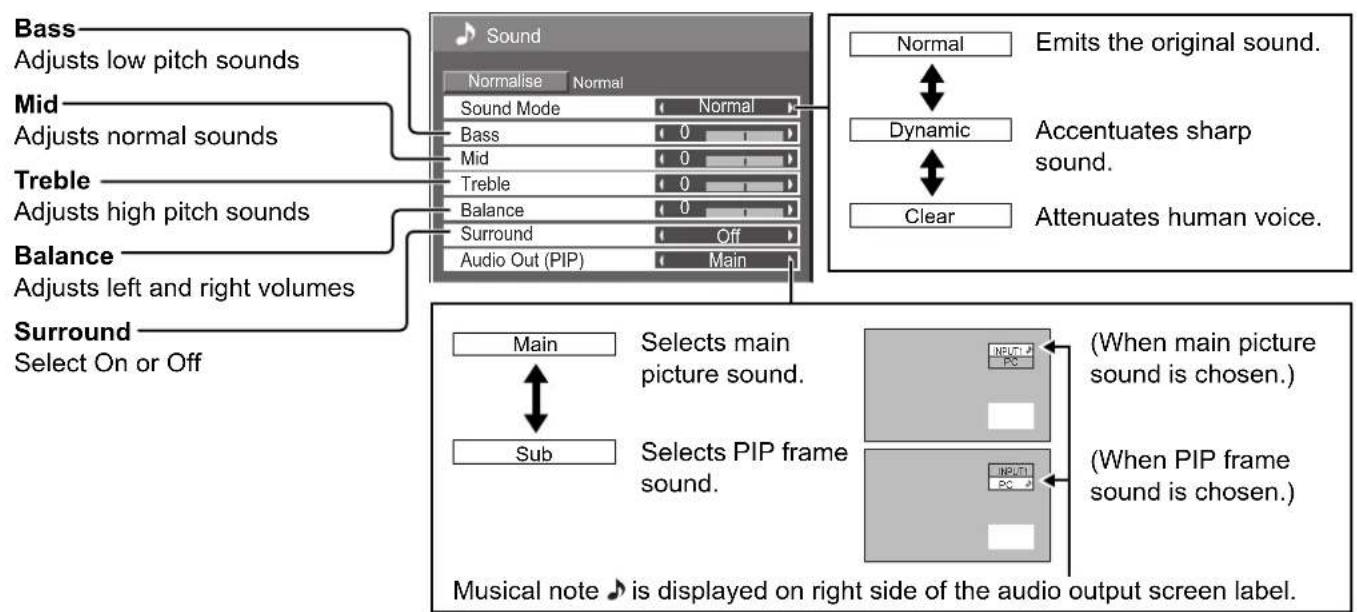
text_image
Bass Adjusts low pitch sounds Mid Adjusts normal sounds Treble Adjusts high pitch sounds Balance Adjusts left and right volumes Surround Select On or Off Sound Normalise Normal Sound Mode Normal Bass 0 Mid 0 Treble 0 Balance 0 Surround Off Audio Out (PIP) Main Normal Emits the original sound. Dynamic Accentuates sharp sound. Clear Attenuates human voice. Main Selects main picture sound. Sub Selects PIP frame sound. When main picture sound is chosen.) When PIP frame sound is chosen.) Musical note ▶ is displayed on right side of the audio output screen label.Notes:
- Press the SURROUND button to directly turn the surround effect On and Off. (see page 14)
- Bass, Mid, Treble and Surround settings are memorized separately for each Sound Mode.
| Helpful Hint ( [IMAGE] / Normalise Normalisation) |
| While the “Sound” menu is displayed, if either the N button on the remote control is pressed at any time or the ACTION (■) button is pressed during “Normalise”, then all adjustment values are returned to the factory settings. |
Mute
Useful when answering the phone or receiving unexpected visitors.
[NO TEXT]
Press to mute the sound.
Press again to reactivate sound. Sound is also reactivated when power is turned off or volume level is changed.
Digital Zoom
This displays an enlargement of the designated part of the displayed image.
1 Display the operation guide.
Press to access Digital Zoom. The operation guide will be displayed.

natural_image
Pure geometric diagram showing a rectangle intersected by two dashed lines forming an L-shape (no text or symbols)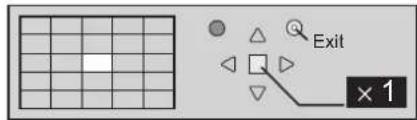
text_image
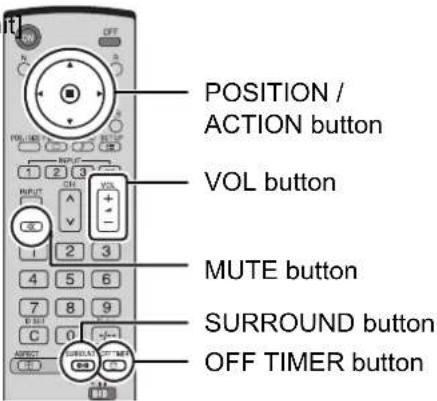
Exit × 1During Digital Zoom, only the following buttons can be operated.
[Remote control] [Un
text_image
POSITION / ACTION button VOL button MUTE button SURROUND button OFF TIMER button
text_image
INPUT MENU ENTER +VOL VOL button2 Select the area of the image to be enlarged.
natural_image
Pure diagram of a circular component with directional arrows and a central square, no text or symbols present.Press on the enlargement location to select.
The cursor will move.

text_image
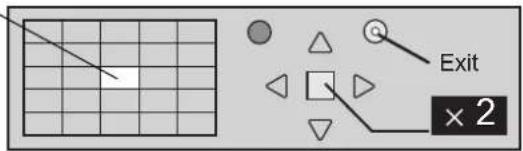
Exit × 23 Select the magnifi cation required for the enlarged display.
natural_image
Circular diagram with a central square and directional arrows, no text or symbols presentEach time this is pressed, the magnifi cation factor changes.
This is shown in the image being displayed.

flowchart
graph LR
    A["×1×2×3×4"] --> B[" "]
    B --> C[" "]
    C --> D[" "]
    D --> E[" "]
    E --> F[" "]
4 Return to normal display (quit Digital Zoom).

Press to exit from the Digital Zoom.
Notes:
- When power goes OFF (including "Off Timer" operation), Digital Zoom terminates.
- The Digital Zoom function cannot be selected while in the following operation state:
"Multi-viewer" (Picture in Picture, Picture out Picture, Picture and Picture) operation. (see page 20) - While Digital Zoom is in operation, "Adjusting Pos. / Size" cannot be used.
PRESENT TIME Setup / Set up TIMER
The timer can switch the Plasma Display On or Off.
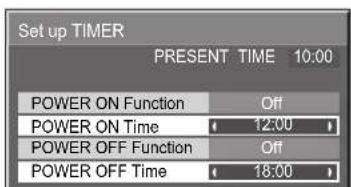
Before attempting Timer Set, confirm the PRESENT TIME and adjust if necessary. Then set POWER ON Time / POWER OFF Time.
1

text_image
SET UP Press to display the Setup menu.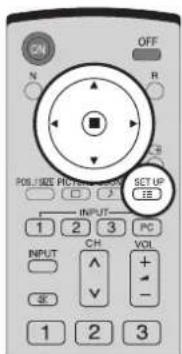
text_image
ON OFF N R POS SIZE PICTURE VIEW SET UP 1 2 3 PC INPUT CH VOL + - 1 2 32
natural_image
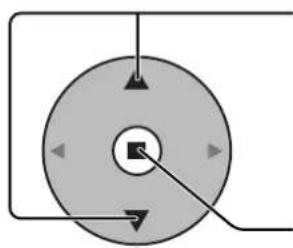
Pure diagram of a circular component with directional arrows and a central square, no text or symbols present.Press to select Set up TIMER or PRESENT TIME Setup.
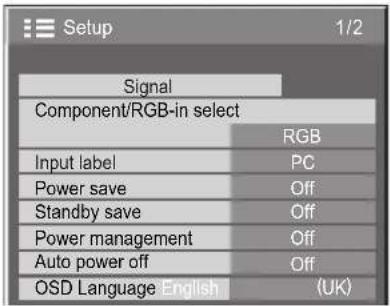
Press to display the Set up TIMER screen or PRESENT TIME Setup screen.
text_image
Setup 1/2 Signal Component/RGB-in select RGB Input label PC Power save Off Standby save Off Power management Off Auto power off Off OSD Language English (UK)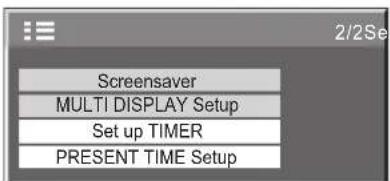
text_image
Screensaver MULTI DISPLAY Setup Set up TIMER PRESENT TIME SetupPRESENT TIME Setup
(For TH-42PS10BK/S)
Display the PRESENT TIME Setup screen.
To setup PRESENT TIME, follow the procedure described below.
1
flowchart
graph TD
    A["Start"] --> B((Center))
    B --> C["Process Step"]
    C --> D["End"]
    style B fill:#ccc,stroke:#333
    style C fill:#ccc,stroke:#333
    style D fill:#ccc,stroke:#333
Press to select PRESENT TIME.
Press to setup PRESENT TIME.
▶ button: Forward
button: Back
Notes:
- Pressing "◀" or "▶" button once changes PRESENT TIME 1minute.
- Pressing "◀" or "▶" button continuously changes PRESENT TIME by 15 minutes.

text_image
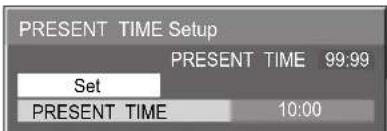
PRESENT TIME Setup PRESENT TIME 99:99 Set PRESENT TIME 99:992
natural_image
Circular diagram with directional arrows and a central square, no text or symbols presentPress to select Set.
Press to store PRESENT TIME Setup.
Note:
Set cannot be selected unless PRESENT TIME is set.
text_image
PRESENT TIME Setup PRESENT TIME 99:99 Set PRESENT TIME 10:003
Press to exit from PRESENT TIME Setup.
(For TH-42PH10BK/S, TH-50PH10BK/S, TH-58PH10BK)
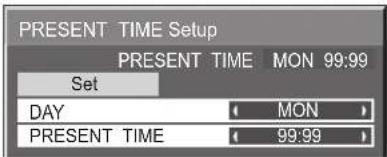
Display the PRESENT TIME Setup screen.
To setup DAY and PRESENT TIME, follow the procedure described below.
1
flowchart
graph TD
    A["Top Left Arrow"] --> B["Top Right Arrow"]
    B --> C["Bottom Left Arrow"]
    C --> D["Bottom Right Arrow"]
    D --> E["Center Square Node"]
    E --> F["Right Arrow"]
    style E fill:#ccc,stroke:#333,stroke-width:2px
Press to select DAY or PRESENT TIME.
Press to setup DAY or PRESENT TIME.
▶ button: Forward
button: Back
Notes:
- Pressing "◀" or "▶" button once changes PRESENT TIME 1minute.
- Pressing “◀” or “▶” button continuously changes PRESENT TIME by 15 minutes.
text_image
PRESENT TIME Setup PRESENT TIME MON 99:99 Set DAY Mon PRESENT TIME 99:992
natural_image
Pure diagram of a circular object with directional arrows and a central square, no text or symbols present.Press to select Set.
Press to store PRESENT TIME Setup.
text_image
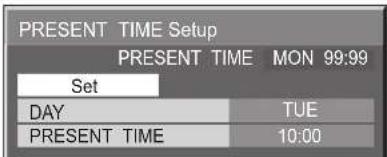
PRESENT TIME Setup PRESENT TIME MON 99:99 Set DAY TUE PRESENT TIME 10:00Notes:
- Set cannot be selected unless PRESENT TIME is set.
- Unless setting the present time other than "99:99", DAY setting is invalid.
3
SET UP

Press to exit from PRESENT TIME Setup.
Set up TIMER
Display the Set up TIMER screen.
1
flowchart
graph TD
    A["Top Left Arrow"] --> B["Top Right Arrow"]
    B --> C["Bottom Left Arrow"]
    C --> D["Bottom Right Arrow"]
    D --> E["Center Square Node"]
    E --> F["Right Arrow"]
    style E fill:#ccc,stroke:#333,stroke-width:2px
Press to select
- Pressing “◀” or “▶” button once changes POWER ON Time / POWER OFF Time 1 minute.
- Pressing “◀” or “▶” button continuously changes POWER ON Time / POWER OFF Time by 15 minutes.
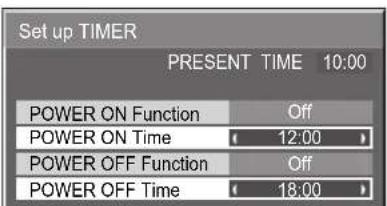
text_image
Set up TIMER PRESENT TIME 10:00 POWER ON Function Off POWER ON Time 12:00 POWER OFF Function Off POWER OFF Time 18:002
natural_image
Simple circular diagram with arrows and a central square, no text or symbols presentPress to select POWER ON Function/POWER OFF Function.
Press to select On.
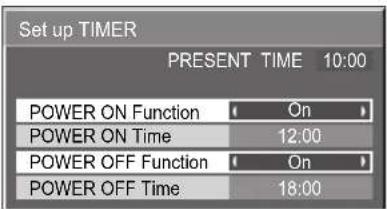
text_image
Set up TIMER PRESENT TIME 10:00 POWER ON Function On POWER ON Time 12:00 POWER OFF Function On POWER OFF Time 18:003

Press twice to exit from Setup.
Note:
Timer function will not work unless "PRESENT TIME" is set.
Screensaver (For preventing image retention)
Do not display a still picture, especially in 4:3 mode, for any length of time. If the display must remain on, a Screensaver should be used.
1

Press to display the Setup menu.
2
natural_image
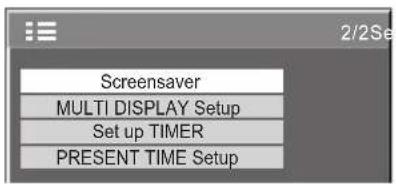
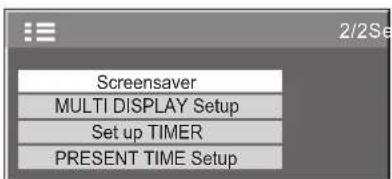
Pure diagram of a circular component with directional arrows and control points, no text or symbols present.Press to select Screensaver.
Press to display Screensaver screen.
text_image
Screensaver MULTI DISPLAY Setup Set up TIMER PRESENT TIME Setup3
Reversal / Scroll selection
flowchart
graph TD
    A["Top Left Arrow"] --> B["Center Square"]
    B --> C["Right Arrow"]
    C --> D["Bottom Right Arrow"]
    D --> E["Left Arrow"]
    E --> F["Right Arrow"]
    F --> G["Bottom Left Arrow"]
Press to select Function.
Press to select the desired function.
White bar scroll
text_image
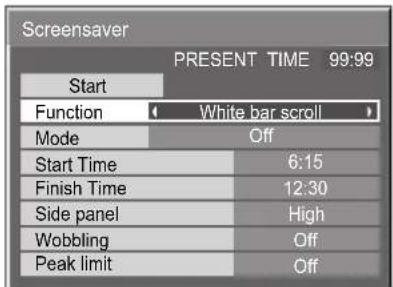
Screensaver PRESENT TIME 99:99 Start Function White bar scroll Mode Off Start Time 6:15 Finish Time 12:30 Side panel High Wobbling Off Peak limit OffWhite bar scroll : The white bar will scroll from left to right.
Image Reversal : Negative image will be displayed on the screen.
4
Mode selection
flowchart
graph TD
    A["Top Left Arrow"] --> B["Top Right Arrow"]
    B --> C["Bottom Left Arrow"]
    C --> D["Bottom Right Arrow"]
    D --> E["Center Square Node"]
    E --> F["Arrow Down"]
    F --> G["Arrow Up"]
    G --> H["Arrow Left Arrow"]
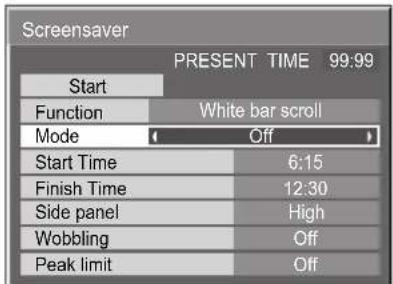
Press to select Mode.
Press to select each mode items.
text_image
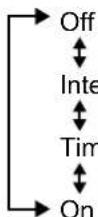
Screensaver PRESENT TIME 99:99 Start Function White bar scroll Mode Off Start Time 6:15 Finish Time 12:30 Side panel High Wobbling Off Peak limit OffInterval : Operates when Periodic Time and Operating Time are setup and those times arrive.
Time Designation : Operates when Start Time and Finish Time are setup and those times arrive.
On : Operates when Start is selected and the ACTION ( ) button is pressed.

5
Start setting
natural_image
Pure diagram of a circular component with directional arrows and a central square, no text or symbols present.When the Mode is set to On, press to select Start.
Press to start Screensaver.
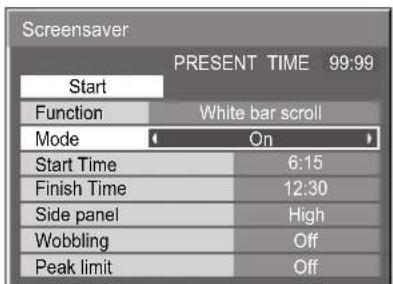
text_image
Screensaver PRESENT TIME 99:99 Start Function White bar scroll Mode On Start Time 6:15 Finish Time 12:30 Side panel High Wobbling Off Peak limit OffThe menu screen will disappear and the Screensaver will be activated. To stop the Screensaver under On, press the R button.
Setup of Screensaver Time
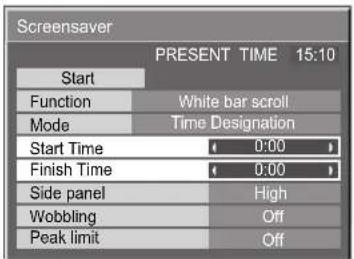
After selecting Time Designation or Interval, the relevant Time Setup will become available for selection and the Operating Time may be set. (Time cannot be set when "Mode" is "On" or "Off".)
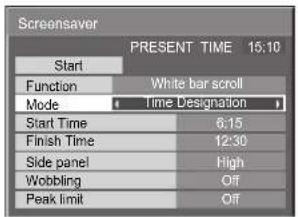
text_image
Screensaver PRESENT TIME 15:10 Start Function White bar scroll Mode Time Designation Start Time 6:15 Finish Time 12:30 Side panel High Wobbling Off Peak limit Off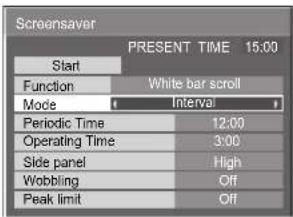
text_image
Screensaver PRESENT TIME 15:00 Start Function White bar scroll Mode Interval Periodic Time 12:00 Operating Time 3:00 Side panel High Wobbling Off Peak limit Off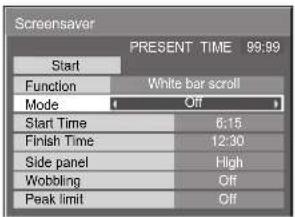
text_image
Screensaver PRESENT TIME 99:99 Start Function White bar scroll Mode Off Start Time 6:15 Finish Time 12:30 Side panel High Wobbling Off Peak limit Off
natural_image
Pure diagram of a circular component with directional arrows and central square, no text or symbols presentPress to select Start Time / Finish Time (When Time Designation is selected). Press to select Periodic Time / Operating Time (When Interval is selected).
Press to setup.
▶ button: Forward
button: Back
Notes:
- Pressing "◀" or "▶" button once changes the Time 1 minute.
[However, switching occurs every 15 minutes when Periodic Time is selected.] - Pressing "◀ or "▶ button continuously changes the Time by 15 minutes.
text_image
Screensaver PRESENT TIME 15:10 Start Function White bar scroll Mode Time Designation Start Time 0:00 Finish Time 0:00 Side panel High Wobbling Off Peak limit Off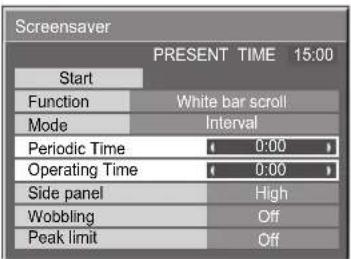
text_image
Screensaver PRESENT TIME 15:00 Start Function White bar scroll Mode Interval Periodic Time 0:00 Operating Time 0:00 Side panel High Wobbling Off Peak limit Off
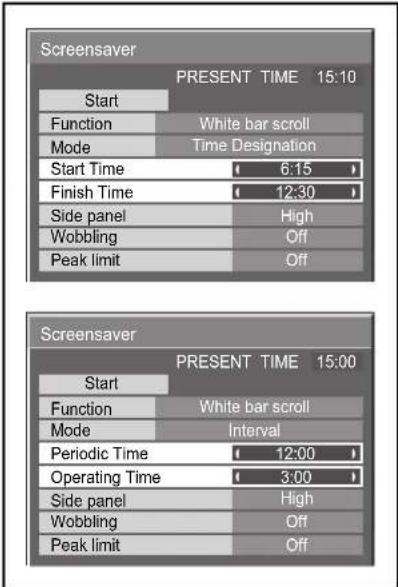
text_image
Screensaver PRESENT TIME 15:10 Start Function White bar scroll Mode Time Designation Start Time (6:15) Finish Time (12:30) Side panel High Wobbling Off Peak limit Off Screensaver PRESENT TIME 15:00 Start Function White bar scroll Mode Interval Periodic Time (12:00) Operating Time (3:00) Side panel High Wobbling Off Peak limit OffNote: Timer function will not work unless "PRESENT TIME" is set.
Reduces screen image retention
These functions prevent the occurrence of an "image retention" on the display when turned ON.
Wobbling: Automatically shifts the display image (therefore unnoticeable to the eye) to prevent image retention of sharper contour of image.
On1: Shifts the image every 30 seconds.
On2: Shifts the image at a dot level pitch depending on screen-detection.
Peak limit: Suppresses image contrast (peak brightness).
Note: When a still picture is viewed for an extended time, the screen may become slightly darker. (see page 51)
1
SET UP

Press to display the Setup menu.
2
natural_image
Circular diagram with arrows and a central square, no text or symbols presentPress to select "Screensaver".
3
flowchart
graph TD
    A["Outer Ring"] --> B["Inner Circle"]
    B --> C["Square Node"]
    C --> D["Arrow Right"]
    C --> E["Arrow Left"]
    C --> F["Arrow Up"]
    C --> G["Arrow Down"]
Press to display Screensaver menu.
Press to select "Wobbling" or "Peak limit".
Press to select "On1", "On2" or "Off" (Wobbling).
"On" or "Off" (Peak limit).
text_image
Screensaver MULTI DISPLAY Setup Set up TIMER PRESENT TIME Setup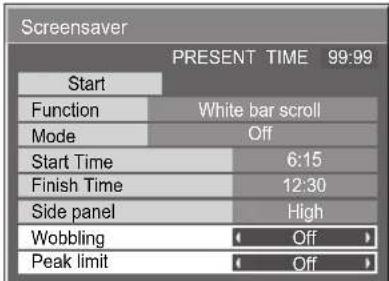
text_image
Screensaver PRESENT TIME 99:99 Start Function White bar scroll Mode Off Start Time 6:15 Finish Time 12:30 Side panel High Wobbling Off Peak limit OffSide Panel Adjustment
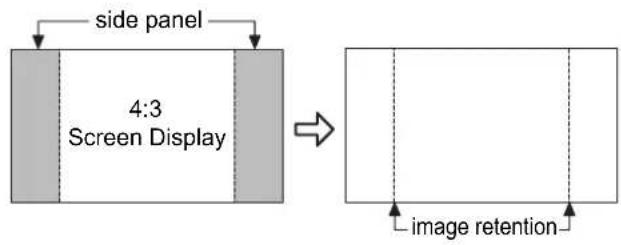
Do not display a picture in 4:3 mode for an extended period, as this can cause an image retention to remain on the side panels either side of the display fi eld.
To reduce the risk of such an image retention, illuminate the side panels.
flowchart
graph TD
    A["side panel"] --> B["4:3 Screen Display"]
    B --> C["image retention"]
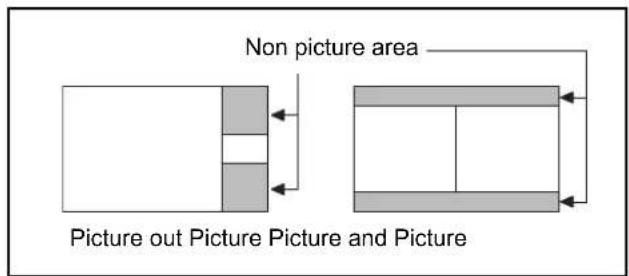
This function may be applicable to the non-picture area.
text_image
Non picture area Picture out Picture Picture and PictureDisplay the Screensaver screen.
(Refer to the previous page, operation guide steps 1 and 2)
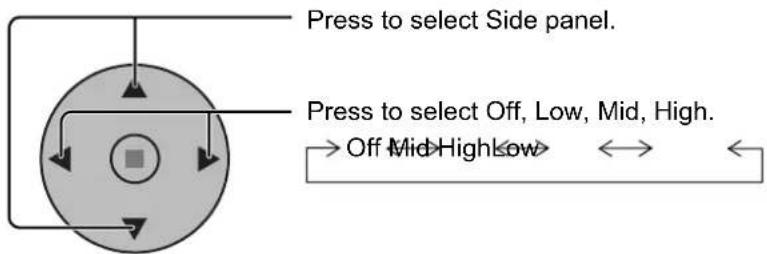
1
text_image
Press to select Side panel. Press to select Off, Low, Mid, High. → Off Mid High Low → ← ←
text_image
Screensaver PRESENT TIME 99:99 Start Function White bar scroll Mode Off Start Time 6:15 Finish Time 12:30 Side panel High Wobbling Off Peak limit Off2

text_image
R Press to exit from Screensaver.Notes:
• To reduce the occurrence of image retention, set the Side panel to High.
- The side panels may flash (alternate black / white) depending on the picture being shown on the screen. Using Cinema mode will reduce such flashing.
Reduces power consumption
- Power save: When this function is turned On, luminous level of the Plasma Display is suppressed, so power consumption is reduced.
- Standby save: When this function is turned On, power consumption of the microcomputer is reduced during power supply standby (see page 12, 14-15), so standby power of the set is reduced.
- Power management: The unit power supply is turned On or Off depending on whether or not there is a signal during PC input mode.
This function is enabled when it is turned On. (Only during input from PC (Mini D-sub) terminal)
• Auto power off: Equipment power supply is turned Off when there is no signal.
When this is set to On, the power supply of the unit goes Off 10 minutes after the input signals stop.
This function is effective for input signals except input from PC (Mini D-sub) terminal.
1
natural_image
Simple diagram of a circular device with directional arrows and a central square, no text or symbols present.Press to select
"Power save"
"Standby save"
"Power management"
"Auto power off".
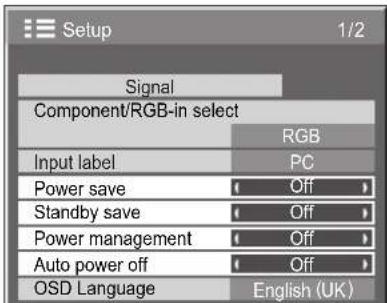
text_image
Setup 1/2 Signal Component/RGB-in select RGB Input label PC Power save Off Standby save Off Power management Off Auto power off Off OSD Language English (UK)2
natural_image
Simple circular diagram with arrows pointing inward and a central square, no text or symbols present.Press to select "On" or "Off".
3
SET UP

Press to exit from Setup.
Note:
"Power management" and "Auto power off" are effective during normal viewing (one picture screen) only.
Customizing the Input labels
This function can change the label of the Input signal to be displayed.
Select the input signal which you would like to change its label before customizing the Input labels. (see page 13,15)
flowchart
graph TD
    A["Top Left Arrow"] --> B["Center Square"]
    B --> C["Right Arrow"]
    C --> D["Bottom Right Arrow"]
    D --> E["Left Arrow"]
    E --> F["Top Right Arrow"]
Press to select Input label.
Press to change the Input label.
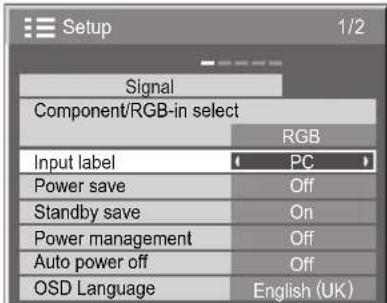
text_image
Setup 1/2 Signal Component/RGB-in select RGB Input label PC Power save Off Standby save On Power management Off Auto power off Off OSD Language English (UK)Note:
While selecting an Input signal through Optional Terminal Board connected to Slot1, Slot2 and Slot3, the Input label will depend on each Optional Terminal Board.
Input labels for Slot1, Slot2, Slot3 and Mini D-sub:
[Slot1 Input] INPUT1 / VIDEO1 / COMPONENT1 / RGB1 / DIGITAL1 / PC1 / DVD1 / CATV1 / VCR1 / STB1
[Slot2 Input] INPUT2 / VIDEO2 / COMPONENT2 / RGB2 / DIGITAL2 / PC2 / DVD2 / CATV2 / VCR2 / STB2
[Slot3 Input] INPUT3 / VIDEO3 / COMPONENT3 / RGB3 / PC3 / DVD3 / CATV3 / VCR3 / STB3
[PC (Mini D-sub) input] PC / COMPONENT / RGB / DVD / STB
When BNC Dual Video Terminal Board (TY-FB9BD) is used, an "A" or "B" is added at the end of each input label, depending on the input selected (see below).
| Addition sign “A” “B” | ||
| Selected Input Composite S VIDEO |
Setup for MULTI DISPLAY
(For TH-42PS10BK/S)
By lining up Plasma Displays in groups of 4, 9 or 16 as illustrated below, an enlarged picture may be displayed across all screens.
For this mode of operation, each plasma display has to be set up with a Display number to determine its location.
group of 4 (2 × 2 (F)) group of 9 (3 × 3 (F)) group of 16 (4 × 4 (F))
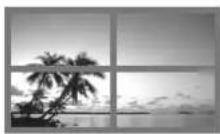
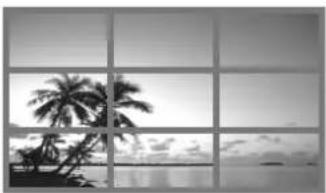
natural_image
Black-and-white photo of a tropical beach with palm trees and ocean waves, framed by a grid window (no text or symbols)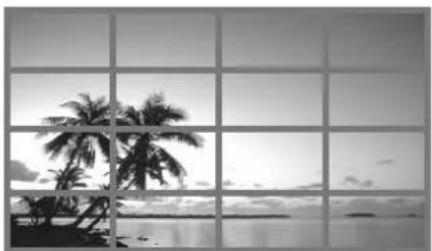
natural_image
Black-and-white photo of palm trees by the sea with a grid overlay (no text or symbols)Two options are selectable for MULTI DISPLAY (see next page).
How to Setup MULTI DISPLAY
1
Press to display the Setup menu.
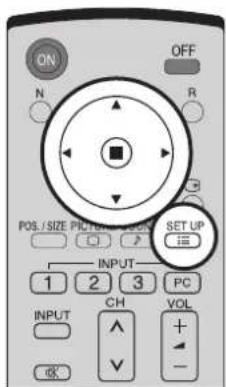
text_image
ON OFF N R POS./SIZE PICTURED ON SET UP INPUT 1 2 3 PC INPUT CH VOL + - OK2
natural_image
Pure diagram of a circular component with directional arrows and a central square, no text or symbols present.Press to select the MULTI DISPLAY Setup.
Press to display the "MULTI DISPLAY Setup" menu.
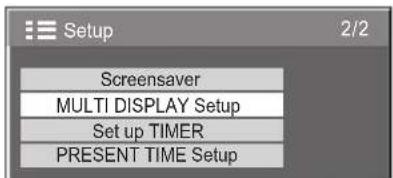
text_image
Setup 2/2 Screensaver MULTI DISPLAY Setup Set up TIMER PRESENT TIME Setup3
flowchart
graph TD
    A["Start"] --> B((Center))
    B --> C["Process Step"]
    C --> D["End"]
    style B fill:#ccc,stroke:#333
    style C fill:#fff,stroke:#333
Press to select the MULTI DISPLAY Setup.
Press to select "On" or "Off".
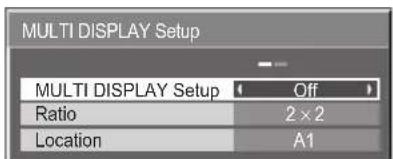
text_image
MULTI DISPLAY Setup MULTI DISPLAY Setup Off Ratio 2 × 2 Location A1How to set the display location number for each Plasma Display
4
flowchart
graph TD
    A["Top Left Arrow"] --> B["Center Square"]
    B --> C["Right Arrow"]
    C --> D["Bottom Right Arrow"]
    D --> E["Left Arrow"]
    E --> F["Top Right Arrow"]
Press to select Ratio (2nd step).
Press to select “2 × 2”, “2 × 2 F”, “3 × 3”, “3 × 3F”, “4 × 4”, “4 × 4F”.
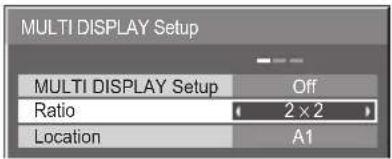
text_image
MULTI DISPLAY Setup MULTI DISPLAY Setup Off Ratio 2 × 2 Location A15
flowchart
graph TD
    A["Top Left Arrow"] --> B["Center Square"]
    C["Right Arrow"] --> B
    D["Bottom Right Arrow"] --> B
    B --> E["Left Arrow"]
Press to select Location.
Press to select the required arrangement number. (A1-D4 : Refer to the following)
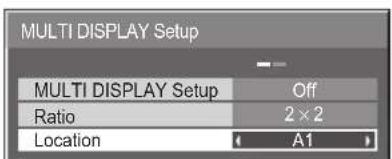
text_image
MULTI DISPLAY Setup MULTI DISPLAY Setup Off Ratio 2 × 2 Location < A1>Display Number locations for each arrangement
(2 × 2 (F)) (3 × 3 (F)) (4 × 4 (F))
| A1 | A2 |
| B1 | B2 |
| A1 | A2 | A3 |
| B1 | B2 | B3 |
| C1 | C2 | C3 |
| A1 | A2 | A3 | A4 |
| B1 | B2 | B3 | B4 |
| C1 | C2 | C3 | C4 |
| D1 | D2 | D3 | D4 |
6

Press twice to exit from Setup.
(For TH-42PH10BK/S, TH-50PH10BK/S, TH-58PH10BK)
By lining up Plasma Displays in groups, for example, as illustrated below, an enlarged picture may be displayed across all screens. For this mode of operation, each plasma display has to be set up with a Display number to determine its location.
(Example)
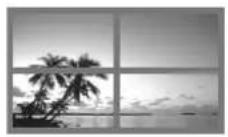
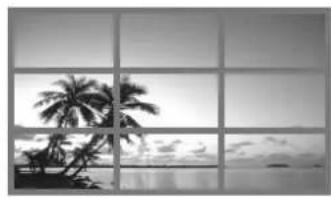
natural_image
Black-and-white photo of a palm tree by the sea, framed within a grid (no text or symbols)group of 16 (4 × 4) group of 4 (2 × 2) group of 9
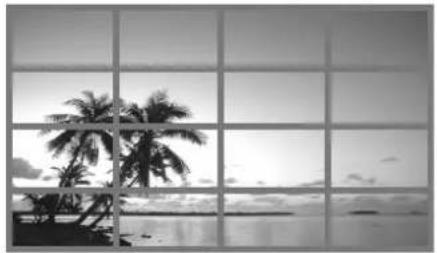
natural_image
Black-and-white photo of a tropical beach with palm trees and ocean in the foreground, framed by a grid of windows (no text or symbols)(see page 36 for more displays lineups.)
How to Setup MULTI DISPLAY
1
Press to display the Setup menu.
2

natural_image
Circular diagram with arrows and a central square, no text or symbols presentPress to select the MULTI DISPLAY Setup.
Press to display the "MULTI DISPLAY Setup" menu.
3
flowchart
graph TD
    A["Top"] --> B["Center"]
    B --> C["Bottom"]
    C --> D["Right"]
    D --> E["Left"]
    E --> F["Square Node"]
    style B fill:#ccc,stroke:#333
    style C fill:#ccc,stroke:#333
    style D fill:#ccc,stroke:#333
    style E fill:#ccc,stroke:#333
Press to select the MULTI DISPLAY Setup.
Press to select "On" or "Off".
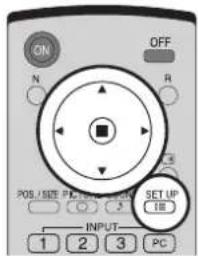
text_image
ON OFF N R POS./SIZE Ⓛ/SET UP Ⓛ/SET SET UP 1B INPUT 1 2 3 PC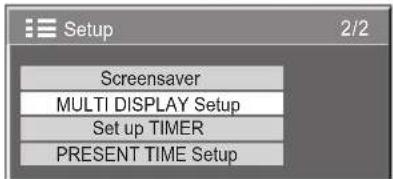
text_image
Setup 2/2 Screensaver MULTI DISPLAY Setup Set up TIMER PRESENT TIME Setup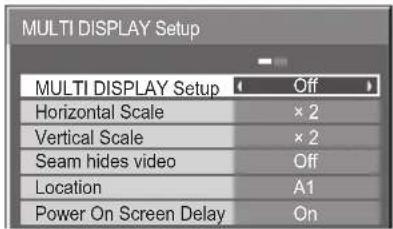
text_image
MULTI DISPLAY Setup MULTI DISPLAY Setup Off Horizontal Scale × 2 Vertical Scale × 2 Seam hides video Off Location A1 Power On Screen Delay OnHow to set the display location number for each Plasma Display
4
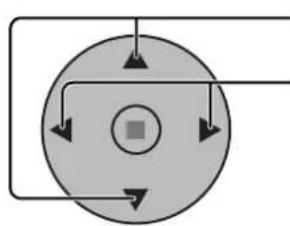
flowchart
graph TD
    A["Outer Ring"] --> B["Inner Circle"]
    B --> C["Square Node"]
    C --> D["Arrow Right"]
    C --> E["Arrow Left"]
    C --> F["Arrow Up"]
    style A fill:#ccc,stroke:#333
    style B fill:#ccc,stroke:#333
    style C fill:#ccc,stroke:#333
    style D fill:#ccc,stroke:#333
    style E fill:#ccc,stroke:#333
    style F fill:#ccc,stroke:#333
Press to select Horizontal Scale.
Press to select “× 1”, “× 2”, “× 3”, “× 4”.
5
flowchart
graph TD
    A["Outer Ring"] --> B["Inner Circle"]
    B --> C["Square Node"]
    C --> D["Arrow Right"]
    C --> E["Arrow Left"]
    C --> F["Arrow Up"]
    style A fill:#ccc,stroke:#333
    style B fill:#ccc,stroke:#333
    style C fill:#ccc,stroke:#333
    style D fill:#ccc,stroke:#333
    style E fill:#ccc,stroke:#333
    style F fill:#ccc,stroke:#333
Press to select Vertical Scale.
Press to select “× 1”, “× 2”, “× 3”, “× 4”.
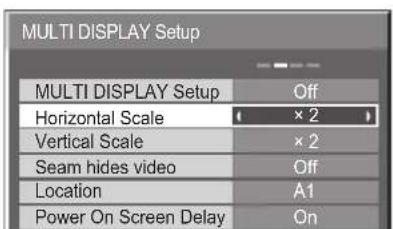
text_image
MULTI DISPLAY Setup MULTI DISPLAY Setup Off Horizontal Scale × 2 Vertical Scale × 2 Seam hides video Off Location A1 Power On Screen Delay On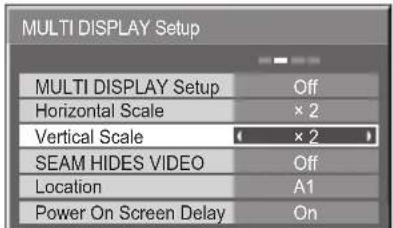
text_image
MULTI DISPLAY Setup MULTI DISPLAY Setup Off Horizontal Scale × 2 Vertical Scale ( × 2 ) SEAM HIDES VIDEO Off Location A1 Power On Screen Delay On6
flowchart
graph TD
    A["Top Left Arrow"] --> B["Center Square"]
    B --> C["Bottom Right Arrow"]
    C --> D["Bottom Left Arrow"]
    D --> A
Press to select Seam hides video.
Press to select "Off", "On".
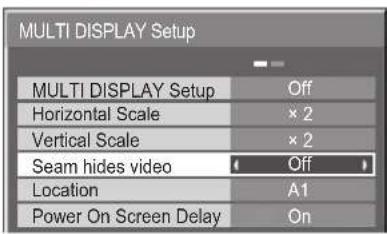
text_image
MULTI DISPLAY Setup MULTI DISPLAY Setup Off Horizontal Scale × 2 Vertical Scale × 2 Seam hides video Off Location A1 Power On Screen Delay On7
flowchart
graph TD
    A["Top Left Arrow"] --> B["Center Square"]
    C["Bottom Right Arrow"] --> B
    B --> D["Right Arrow"]
    B --> E["Left Arrow"]
Press to select Location.
Press to select the required arrangement number. (A1-D4 : Refer to the following)
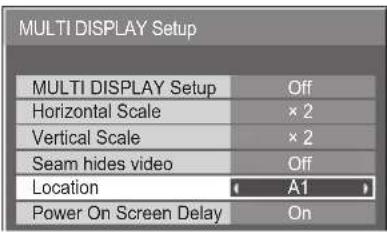
text_image
MULTI DISPLAY Setup MULTI DISPLAY Setup Off Horizontal Scale × 2 Vertical Scale × 2 Seam hides video Off Location (A1) Power On Screen Delay OnDisplay Number locations for each arrangement. (Examples)
| (2×1) ( | |
| A1 | A2 |
| A1 | A2 |
| B1 | B2 |
| C1 | C2 |
| A1 | A2 | A3 | A4 |
| B1 | B2 | B3 | B4 |
| A1 | A2 | A3 | A4 |
| B1 | B2 | B3 | B4 |
| C1 | C2 | C3 | C4 |
| D1 | D2 | D3 | D4 |
(4 × 4)
8 Power On Screen Delay
Turning the power on for the multiple displays system, each display is turned on with a time lag to reduce the power load.
flowchart
graph TD
    A["Top Left Arrow"] --> B["Top Right Arrow"]
    B --> C["Bottom Left Arrow"]
    C --> D["Bottom Right Arrow"]
    D --> E["Center Square Node"]
    E --> F["Right Arrow"]
    style E fill:#ccc,stroke:#333,stroke-width:2px
Press to select Power On Screen Delay.
Press to select Off or On.
Off: All the display turns on simultaneously. On: Each display turns on in the order of Location. Delay time=Location (difference from A1) × 1 sec.
Example) Case of B2 in 4 × 2 A1, A2, A3, A4, B1, B2 5 sec.
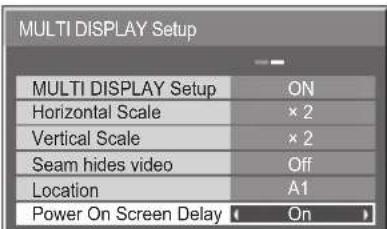
text_image
MULTI DISPLAY Setup MULTI DISPLAY Setup ON Horizontal Scale × 2 Vertical Scale × 2 Seam hides video Off Location A1 Power On Screen Delay OnNotes:
- This setting is valid when MULTI DISPLAY Setup is On.
- During this function is working, the power indicator is blinking green.
- This function also works when the power recovers from failure or after plugging off and in again the power cord. If unplugging and plugging the power cord while the unit is in standby mode and the power is being supplied to the board, each unit has time delay to start supplying the power to the attached board according to Location, and the power indicator lights up red first and it turns orange when the power starts being supplied to the board.
9
Press twice to exit from Setup.
F (Seam hides video) Setting
| Model No. Reference | To hide joints between displays.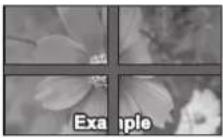 Suitable for moving image display. Suitable for moving image display. | To show joints between displays.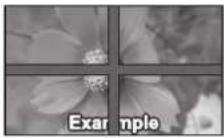 Suitable for still image display. Suitable for still image display. | |
| TH-42PS10BK/S Step | 4, Page 34 (2 × 2, 3 × 3, 4 × 4) (2 × 2F, 3 × 3F, 4 × 4F) | ||
| TH-42/50PH10BK/S, TH-58PH10BK | Step 6, Page 36 On | Off | |
ID Remote Control Function
You can set the remote control ID when you want to use this remote control on one of several different displays.
1 Switch to on the right side.
2 Press the button on the remote control.
3 Press one of 4, for the tens digit setting.
4 Press one of 1, for the units digit setting.
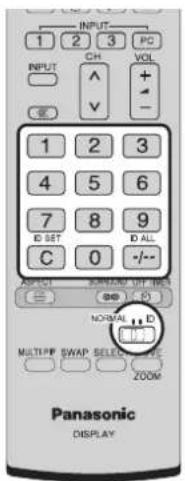
text_image
INPUT 1 2 3 PC INPUT CH VOL ^ + - 1 2 3 4 5 6 7 8 9 ID SET ID ALL C 0 -/-- ASOCI NORMAL OFF INS B@ B NORMAL D MULTIPP SWAP SELECT FUE ZOOM Panasonic DISPLAYNotes:
- The numbers in 2, 3 and 4 should be set up quickly.
- Adjustable ID number range is 0 - 99.
- If a number button is pressed more than two times, the first two numbers become the ID number for the remote control.
ID remote control button operation
The operation is the same as normal remote control except for the button.
ID Cancellation
Press Ⓐ ALL button on remote control. (This has the same effect as pressing the Ⓐ SET, 0, 0 buttons at the same time.)
Notes:
- Set the Remote ID "On" to operate the ID remote control.
If Remote ID is set to "On", you can use the remote control without identical ID number during option menu display. (see page 43, 46) - The ID remote control cannot be used when ID select is set to anything other than 0, and the remote control ID is not the same as the ID select number (see page 43, 46).
Setup for Input Signals
Component / RGB-in select
Select to match the signals from the source connected to the Component / RGB input terminals.
Y, P_B , P_R signals “Component”
R, G, B, HD, VD signals "RGB"
1
Press to display the Setup menu.
2
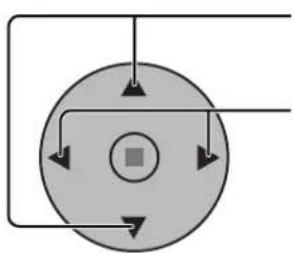
flowchart
graph TD
    A["Top Left Arrow"] --> B["Center Circle"]
    C["Right Arrow"] --> B
    D["Bottom Right Arrow"] --> B
    B --> E["Bottom Left Arrow"]
Press to select the "Component / RGB-in select".
Press to select the desired input signal.
Component RGB
3
Press to exit from adjust mode.
Note:
Selection may not be possible, depending on which optional board is installed.
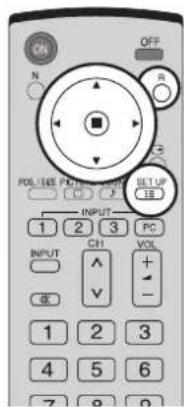
text_image
ON OFF N R PDL/IEEE PDL/IEEE SETUP 1 2 3 PC INPUT CH VOL V 1 2 3 4 5 6 7 8 9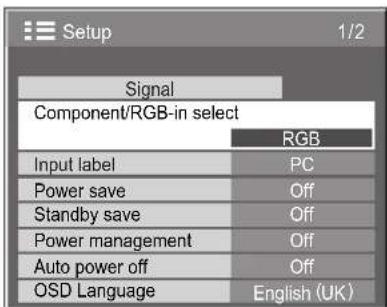
text_image
Setup 1/2 Signal Component/RGB-in select RGB Input label PC Power save Off Standby save Off Power management Off Auto power off Off OSD Language English (UK)3D Y/C Filter – For NTSC AV images
Select "Signal" from the "Setup" menu during AV(S Video) input signal. ("Signal [AV]" menu is displayed.)
1
flowchart
graph TD
    A["Top"] --> B["Center"]
    B --> C["Right"]
    B --> D["Left"]
    B --> E["Bottom"]
    B --> F["Square Node"]
    style B fill:#ccc,stroke:#333
Press to select the "3D Y/C Filter (NTSC)"
Press to set On / Off.
2
Press to exit from adjust mode.
Note:
When On, this setting only affects NTSC input signals.
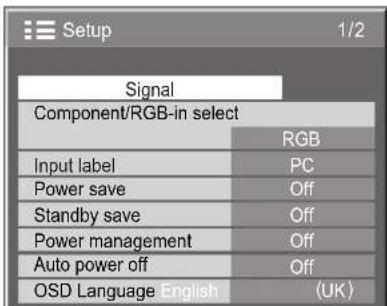
text_image
Setup 1/2 Signal Component/RGB-in select RGB Input label PC Power save Off Standby save Off Power management Off Auto power off Off OSD Language English (UK)
Press ACTION (■) button
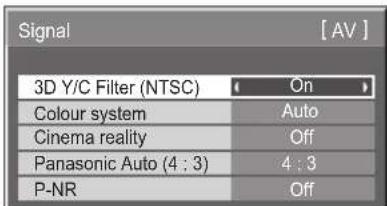
text_image
Signal [ AV ] 3D Y/C Filter (NTSC) On Colour system Auto Cinema reality Off Panasonic Auto (4 : 3) 4 : 3 P-NR OffColour system / Panasonic Auto
Select Signal from the "Setup" menu during AV(S Video) input signal. ("Signal [AV]" menu is displayed.)
flowchart
graph TD
    A["Top Left Arrow"] --> B["Center Square"]
    B --> C["Right Arrow"]
    C --> D["Bottom Right Arrow"]
    D --> E["Left Arrow"]
    E --> F["Right Arrow"]
    F --> G["Bottom Left Arrow"]
Press to select the "Colour system" or "Panasonic Auto".
Press to select each functions.
If the picture image becomes unstable:
With the system set on Auto, under conditions of low level or noisy input signals the image may in rare cases become unstable. Should this occur, set the system to match the format of the input signal.

text_image
Setup 1/2 Signal Component/RGB-in select RGB Input label PC Power save Off Standby save Off Power management Off Auto power off Off OSD Language English (UK)↓ Press ACTION (■) button

text_image
Signal 3D Y/C Filter (NTSC) On Colour system Auto Cinema reality Off Panasonic Auto (4 : 3) 4 : 3 P-NR Off| Mode Function | |
| Colour system | Set the colour system to match the input signal. When selecting “AUTO”, the colour system is automatically selected from NTSC/PAL/SECAM, however, M.NTSC signal is not displayed properly depending on the attached terminal board. To display M.NTSC signal, select “M.NTSC” in Colour system.→Auto SECAM M.NTSC NTSCPAL ↔ ← |
| Panasonic Auto(4:3) | Set to “4:3” to view 4:3 images in an unchanged format when Panasonic Auto is selected. If you would like to view 4:3 images in Just format, set to “Just”. |
Note:
Panasonic Auto does not function when BNC Dual Video Terminal Board (TY-FB9BD) is used.
Cinema reality / P-NR
Cinema reality:
When on, the display attempts to reproduce a more natural interpretation of sources such as movie pictures, which are recorded at 24 frames per second.
If the picture is not stable, turn the setting to off.
Note:
When On, this setting only affects the following signal input:
- NTSC / PAL signal input during "AV(S Video)" input signal.
- 525i(480i) 625i(575i), 1125(1080) / 60i signal input during “Component” input signal.
P-NR:
Automatically reduces unwanted picture noise.
Note:
P-NR cannot be adjusted while a PC signal is being applied.
1
flowchart
graph TD
    A["Top"] --> B["Center"]
    B --> C["Right"]
    B --> D["Left"]
    B --> E["Down"]
    B --> F["Up"]
    style B fill:#ccc,stroke:#333
Press to select Cinema reality or P-NR.
Press to set On / Off.
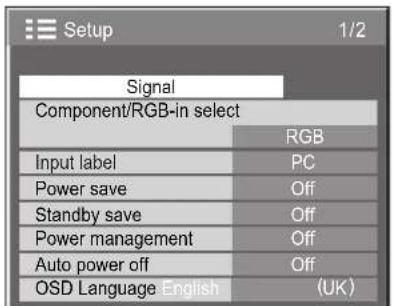
text_image
Setup 1/2 Signal Component/RGB-in select RGB Input label PC Power save Off Standby save Off Power management Off Auto power off Off OSD Language: English (UK)↓ Press ACTION (■) button
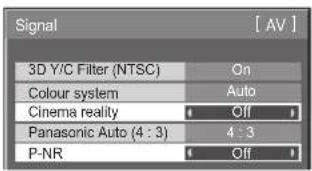
text_image
Signal 3D Y/C Filter (NTSC) On Colour system Auto Cinema reality Off Panasonic Auto (4 : 3) 4 : 3 P-NR Off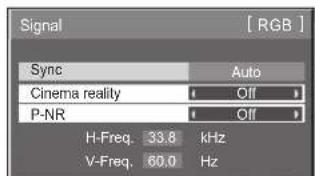
text_image
Signal Sync Cinema reality P-NR H-Freq. 33.8 kHz V-Freq. 60.0 Hz [ RGB ]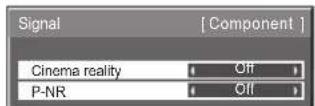
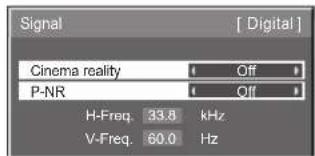
text_image
Signal Cinema reality P-NR H-Freq. 33.8 kHz V-Freq. 60.0 Hz [ Digital ]2

Press to exit from adjust mode.
Sync
Select Signal from the "Setup" menu during RGB input signal.
1
natural_image
Simple circular diagram with arrows pointing inward and a central square, no text or symbols present.Press to adjust.
2

Press to exit from adjust mode.
Setting RGB sync signal:
Confirm that the input is set to RGB input (this setting is valid only for RGB input signal).
Auto: The H and V sync or synchronized signal are automatically selected. If both input, it is selected the H and V sync.
on G: Uses a synchronized signal on the Video G signal, which is input from the G connector.
VBS: Uses a synchronized signal of Composite Sync input, which is input from the HD connector.
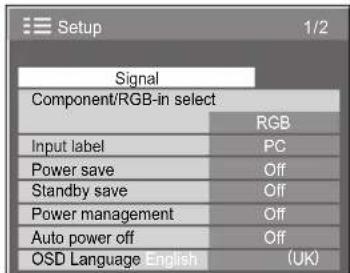
text_image
Setup 1/2 Signal Component/RGB-in select RGB Input label PC Power save Off Standby save Off Power management Off Auto power off Off OSD Language English (UK)
Press ACTION (■) button
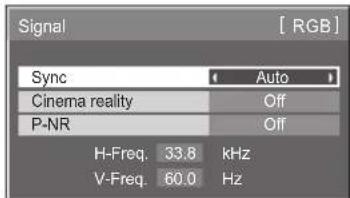
text_image
Signal Sync Cinema reality P-NR H-Freq. 33.8 kHz V-Freq. 60.0 Hz [ RGB ]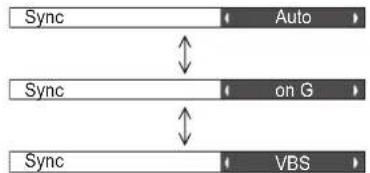
flowchart
graph TD
    A["Sync"] --> B["Auto"]
    C["Sync"] --> D["on G"]
    E["Sync"] --> F["VBS"]
    style A fill:#f9f,stroke:#333
    style C fill:#f9f,stroke:#333
    style E fill:#f9f,stroke:#333
    style B fill:#ccf,stroke:#333
    style D fill:#ccf,stroke:#333
    style F fill:#ccf,stroke:#333
H-Freq. (kHz) / V-Freq. (Hz)
Displays the H (Horizontal) / V (Vertical) frequencies.
This display is valid only for RGB / PC and Digital input signal.
Display range:
Horizontal 15 - 110 kHz
Vertical 48 - 120 Hz

Options Adjustments
(For TH-42PS10BK/S)
1
SET UP
≡ Press to display the Setup menu.
2 Press to select "OSD Language".
natural_image
Pure diagram of a circular object with directional arrows and central square, no text or symbols present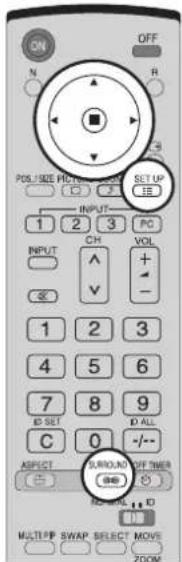
text_image
ON OFF N R POS/SIZE PDS/RESET SET UP IE INPUT 1 2 3 PC VOL INPUT ^ + - 1 2 3 4 5 6 7 8 9 ID SET D ALL C 0 -/-- ABJECT SHIFT/AV OFF/NEER OK/OK/IN ID MULTIPP SWAP SELECT MOVE ZOOM3 SURROUND
Press and hold until the Options menu is displayed.
Press to select your preferred menu.
natural_image
Simple diagram of a circular device with directional arrows and a central square, no text or symbols present.5 Press to adjust the menu.
natural_image
Simple circular diagram with arrows pointing inward and a central square, no text or symbols present.| Options | 1/3 |
| Off-timer function | Enable |
| Onscreen display | On |
| Initial INPUT | Off |
| Initial VOL level | Off 0 |
| Maximum VOL level | Off 0 |
| INPUT lock | Off |
| Studio W/B | Off |
| Advanced PIP | Off |
| Display size | Off |
6 SET UP Press to exit from Options menu.
| Item | Effect | Adjustments | |
| Off-timer function | Enable Disable | Enable: Enables the “Off-timer function”.Disable: Disables the “Off-timer function”.Note: When “Disable” is set, the Off-timer is cancelled. | |
| Onscreen display | On Off | On: Displays all the following on screen.• Power on display• Input signal switch display• No signal display• Mute and the remaining time of off-timer after was pressed.Off: Hides all the items above from view. | |
| Initial INPUT | OffPC INPUT1 INPUT2 INPUT3→Adjusts the input signal when the unit is turned on.Notes:• Only the adjusted signal is displayed. (see page 13).• Signal can be displayed when the Terminal board is installed.• This menu is available only when “INPUT lock” is “Off”.• When a dual input terminal board is attached, A or B is displayed depending on the selected input signal. (Ex. INPUT1A, INPUT1B) | ||
| Options | 1/3 | |
| Off-timer function | Enable | |
| Onscreen display | On | |
| Initial INPUT | Off | |
| Initial VOL level | Off | 0 |
| Maximum VOL level | Off | 0 |
| INPUT lock | Off | |
| Studio W/B | Off | |
| Advanced PIP | Off | |
| Display size | Off | |
| Item | Effect | Adjustments | |
| Initial VOL level | Off On | Press button to adjust the volume when the unit is turned on.Off OnOff: Sets normal volume.On: Sets your preferred volume.Notes:When “Maximum VOL level” is “On”, the volume can only be adjusted between 0 and your maximum range.You can hear the changed volume regardless of your volume setting before opening the options menu if you adjust the volume when “Initial VOL level” is “On” and cursor is on the menu. | |
| Maximum VOL level | Off On | Press button to adjust the maximum volume.Off OnOff: Sets auto maximum volume.On: Sets your preferred maximum volume.Notes:If the “Maximum VOL level” is set lower than the “Initial VOL level”, the “Initial VOL level” automatically becomes the same as the “Maximum VOL level”.The volume display can go up to 63 regardless of the settings.You can hear the changed volume regardless of your volume setting before opening the options menu if you adjust the volume when “Maximum VOL level” is “On” and cursor is on the menu. | |
| INPUT lock | Off | OffPC INPUT1 INPUT2 INPUT3→Locks the input switch operation.Notes:Only the adjusted signal is displayed (see page 13).Signal can be displayed when the Terminal board is installed.Input switch can be used when this is set to “Off”.In two screen display mode, if anything other than “Off” is set, the value will be fixed as the value input in the single screen display mode.When a dual input terminal board is attached, A or B is displayed depending on the selected input signal. (Ex. INPUT1A, INPUT1B) | |
| Studio W/B | Off On | Off: Nullify all the settings adjusted.On: Sets the colour temperature for TV studio.Note: Valid only when the low is set as colour temperature on screen adjustment. | |
| Advanced PIP | Off On | Off: Sets normal two screen display mode (see page 20).On: Sets Advanced PIP mode (see page 21).Notes:When “INPUT lock” is “On”, you cannot use all the two screen display functions.ASPCT Buttons are unavailable during Advanced PIP mode operation. | |
| Display size | Off On | Adjusts the image display size on screen.Off: Sets the normal image display size on screen.On: Sets the image display size approximately 95 % of the normal image display.Off OnNotes:This setting is valid only when the input signals are as follows; 525i, 525p, 625i, 625p, 750/60p, 750/50p, 1125/60i, 1125/50i, 1125/24sF, 1125/25p, 1125/24p, 1125/30p, 1250/50i (Component Video, RGB, DVI, SDI, HDMI)This setting is invalid when two screen display, digital zoom or Multi screen is selected.When “Display size” is set to “On”, Pos. /Size adjustment cannot be used.Refer to each board’s operating instruction for DVI, SDI, HDMI’s corresponding signals. | |
| Options | 2/3 |
| Button lock | Off |
| Remocon User level | Off |
| ID select | 0 |
| Remote ID | Off |
| Serial ID | Off |
| Item | Effect | Adjustments | |
| Button lock | Off←→ MENU&ENTER OnOff: All the buttons at the bottom of the main unit can be used.MENU & ENTER:Locks □ and □ buttons on bottom face of main unit.On: Locks all the button on bottom face of main unit. | ||
| RemoconUser level | Off<User1 User2→User3 ←>Off: You can use all of the buttons on the remote control.User1:You can only use ⏻OFF, INPUT, buttons on the remote control.User2:You can only use ⏻ON buttons on the remote control.User3:Locks all the buttons on remote control. | ||
| ID select | Sets panel ID number when panel is used in “Remote ID” or “Serial ID”.Set value range: 0 - 100(Standard value: 0) | ||
| Remote ID | Off: Disables ID remote control functions. You can use normal remote control operations.On: Enable ID remote control functions. | ||
| Serial ID | Sets the panel ID Control.Off: Disables external control by the ID.On: Enables the external control by the ID. | ||
| Options | 3/3 |
| Slot power | Off |
| V. Installation | Off |
| Rotate | Off |
| Serial Slot Select | Slot1 |
| Item | Effect | Adjustments | |
| Slot Power | Off←→ Auto OnOff: Power is not transmitted to the slot power.Auto: Power is transmitted to the slot power only when main power is on.On: Power is transmitted to the slot power when main power is on or in the standby state.Note: In some cases, power is transmitted to the slot power when main power is on or in the standby state regardless of the slot power setting. | ||
| V.Installation | Off: Sets fan to the horizontal installation mode.On: Sets fan to the vertical installation mode.Notes:This functions when display is turned on.Vertical installation is available without this mode setting.Turn up the power switch for the upward direction when you set Display vertically. | ||
| Rotate | Off: Does not rotate the image.On: Rotates the image 180 degrees. | ||
| Serial Slot Select | Slot1<Slot2 Slot3→Selects the slot which communicates serial.Note: The setting of an external command can be set only from the fixed serial terminal (see page 10). | ||
Normalization
When both main unit buttons and remote control are disabled due to the "Button lock", "Remocon User level" or "Remote ID" adjustments, set all the values "Off" so that all the buttons are enabled again.
Press the button on main unit together with button on the remote control and hold for more than 5 seconds.
The "SHIPPING" menu is displayed and the lock is released when it disappears.
(For TH-42PH10BK/S, TH-50PH10BK/S, TH-58PH10BK)
1 SET UP Press to display the Setup menu.
2 Press to select "OSD Language".
Press to select "OSD Language".
natural_image
Pure diagram of a circular component with directional arrows and central square, no text or symbols present3 SURROUND
Press and hold until the Options menu is displayed.
Press to select your preferred menu.
Press to select your preferred menu.
natural_image
Simple circular diagram with arrows and a central square, no text or symbols present
natural_image
Simple circular diagram with arrows pointing inward and a central square, no text or symbols present.5 Press to adjust the menu.
Press to adjust the menu.
6 SET UP Press to exit from Options menu.
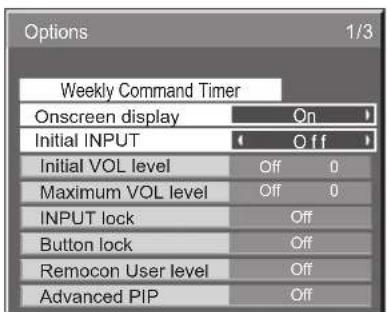
text_image
Options 1/3 Weekly Command Timer Onscreen display On Initial INPUT Off Initial VOL level Off 0 Maximum VOL level Off 0 INPUT lock Off Button lock Off Remocon User level Off Advanced PIP Off| Item | Effect | Adjustments | |
| Weekly Command Timer | —— | Sets Weekly Command Timer. (see page 48) | |
| Onscreen display | On Off | On: Displays all the following on screen.• Power on display• Input signal switch display• No signal display• Mute and the remaining time of off-timer after 5 was pressed.Off: Hides all the items above from view. | |
| Initial INPUT | ◀ ▶ | Off ↔ R€ INPUT1 ◁INPUT2 INPUT3Adjusts the input signal when the unit is turned on.Notes:• Only the adjusted signal is displayed. (see page 13).• Signal can be displayed when the Terminal board is installed.• This menu is available only when “INPUT lock” is “Off”.• When a dual input terminal board is attached, A or B is displayed depending on the selected input signal. (Ex. INPUT1A, INPUT1B) | |
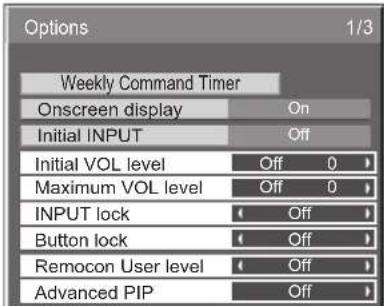
text_image
Options 1/3 Weekly Command Timer Onscreen display On Initial INPUT Off Initial VOL level Off 0 > Maximum VOL level Off 0 > INPUT lock Off Button lock Off Remocon User level Off Advanced PIP Off| Item | Effect | Adjustments | |
| Initial VOL level |  | Press button to adjust the volume when the unit is turned on.Off←→ OnOff: Sets normal volume.On: Sets your preferred volume.Notes:When "Maximum VOL level" is "On", the volume can only be adjusted between 0 and your maximum range.You can hear the changed volume regardless of your volume setting before opening the options menu if you adjust the volume when "Initial VOL level" is "On" and cursor is on the menu. | |
| Maximum VOL level |  | Press button to adjust the maximum volume.Off←→ OnOff: Sets auto maximum volume.On: Sets your preferred maximum volume.Notes:If the "Maximum VOL level" is set lower than the "Initial VOL level", the "Initial VOL level" automatically becomes the same as the "Maximum VOL level".The volume display can go up to 63 regardless of the settings.You can hear the changed volume regardless of your volume setting before opening the options menu if you adjust the volume when "Maximum VOL level" is "On" and cursor is on the menu. | |
| INPUT lock |  | Off←PC INPUT1 INPUT2 INPUTS→Locks the input switch operation.Notes:Only the adjusted signal is displayed (see page 13).Signal can be displayed when the Terminal board is installed.Input switch can be used when this is set to "Off".In two screen display mode, if anything other than "Off" is set, the value will be fixed as the value input in the single screen display mode.When a dual input terminal board is attached, A or B is displayed depending on the selected input signal. (Ex. INPUT1A, INPUT1B) | |
| Button lock |  | Off←→ MENU&ENTER OnOff: All the buttons at the bottom of the main unit can be used.MENU & ENTER:Locks □ and □ buttons on bottom face of main unit.On: Locks all the button on bottom face of main unit.Sets Button lock with the unit buttons in the following procedure.Off: Press four times→Press four times→Press four times→PressMENU & ENTER: Press four times→Press four times→Press four times→PressOn: Press four times→Press four times→Press four times→Press | |
| Remocon User level |  | Off←→ User1 ←User2 User3Off: You can use all of the buttons on the remote control.User1:You can only use ON, OFF, INPUT 1 2 3 PC, SURROAD buttons on the remote control.User2:You can only use ON, OFF buttons on the remote control.User3:Locks all the buttons on remote control. | |
| Advanced PIP |  Off On Off On | Off: Sets normal two screen display mode (see page 20).On: Sets Advanced PIP mode (see page 21).Notes:When "INPUT lock" is "On", you cannot use all the two screen display functions.ASPECT MODE buttons are unavailable during Advanced PIP mode operation. | |
| Options | 2/3 |
| Off-timer function | Enable |
| Initial Power Mode | Normal |
| ID select | 0 |
| Remote ID | Off |
| Serial ID | Off |
| Display size | Off |
| Studio W/B | Off |
| Studio Gain | Off |
| Item | Effect | Adjustments | |
| Off-timer function | Enable Disable | Enable: Enables the “Off-timer function”.Disable: Disables the “Off-timer function”.Note: When “Disable” is set, the Off-timer is cancelled. | |
| Initial Power Mode | ▶ | Normal ↔ Standby OnSets the power mode of the unit for when the power recovers from failure or after plugging off and in again.Normal: Power returns in as the same state as before the power interruption.Standby: Power returns in standby mode. (Power Indicator : red/orange)On: Power returns in power On. (Power Indicator : green)Note: When using multiple displays, “Standby” is preferred to be set in order to reduce a power load. | |
| ID select | ▶ | Sets panel ID number when panel is used in “Remote ID” or “Serial ID”.Set value range: 0 - 100(Standard value: 0) | |
| Remote ID | Off On | Off: Disables ID remote control functions. You can use normal remote control operations.On: Enable ID remote control functions. | |
| Serial ID | Off On | Sets the panel ID Control.Off: Disables external control by the ID.On: Enables the external control by the ID. | |
| Display size | Off On | Adjusts the image display size on screen.Off: Sets the normal image display size on screen.On: Sets the image display size approximately 95 % of the normal image display.Off OnNotes:This setting is valid only when the input signals are as follows;NTSC, PAL, SECAM, M.NTSC, PAL60, PAL-M, PAL-N (BNC Dual Video Terminal Board (TY-FB9BD))525i, 525p, 625i, 625p, 750/60p, 750/50p, 1125/60i, 1125/50i, 1125/24sF, 1125/25p, 1125/24p,1125/30p, 1250/50i (Component Video, RGB, DVI, SDI, HDMI)This setting is invalid when two screen display, digital zoom or Multi screen is selected.When “Display size” is set to “On”, Pos. /Size adjustment cannot be used.Refer to each board’s operating instruction for DVI, SDI, HDMI’s corresponding signals. | |
| Studio W/B | Off On | Off: Nullify all the settings adjusted.On: Sets the colour temperature for TV studio.Note: Valid only when the low is set as colour temperature on screen adjustment. | |
| Studio Gain | Off On | Sharpens the contrast for a better view when a part of the image is too light to see.Off: Disables “Studio Gain”.On: Enables “Studio Gain”.Note: This setting is valid only when the input signals are as follows:Component Video, RGB (analog), SDI, HDMI | |
| Options | 3/3 |
| Slot power | Off |
| V. Installation | Off |
| Rotate | Off |
| Serial Slot Select | Slot1 |
| Item | Effect | Adjustments | |
| Slot Power | Off←→ Auto OnOff: Power is not transmitted to the slot power.Auto: Power is transmitted to the slot power only when main power is on.On: Power is transmitted to the slot power when main power is on or in the standby state.Note: In some cases, power is transmitted to the slot power when main power is on or in the standby state regardless of the slot power setting. | ||
| V.Installation | Off: Sets fan to the horizontal installation mode.On: Sets fan to the vertical installation mode.Notes:This functions when display is turned on.Turn up the power switch for the upward direction when you set Display vertically. | ||
| Rotate | Off: Does not rotate the image.On: Rotates the image 180 degrees. | ||
| Serial Slot Select | Slot1<Slot2 Slot3→Selects the slot which communicates serial.Note: The setting of an external command can be set only from the fixed serial terminal (see page 10). | ||
Normalization
When both main unit buttons and remote control are disabled due to the "Button lock", "Remocon User level" or "Remote ID" adjustments, set all the values "Off" so that all the buttons are enabled again.
Press the button on main unit together with button on the remote control and hold for more than 5 seconds.
The "SHIPPING" menu is displayed and the lock is released when it disappears.
Weekly Command Timer (for TH-42PH10BK/S, TH-50PH10BK/S, TH-58PH10BK)
You can set 7-day timer programming by setting time and command.
Note:
Before setting Weekly Command Timer, set PRESENT TIME Setup. (see page 27)
1
flowchart
graph TD
    A["Top Left Arrow"] --> B["Center Square"]
    C["Right Arrow"] --> B
    D["Bottom Right Arrow"] --> B
    B --> E["Bottom Circle"]
Press to select Function.
Press to select "On".
Note:
- When Function is set to On, Set up TIMER (see page 28) is unavailable and Interval / Time Designation in Mode of Screensaver (see page 29) cannot be selected.
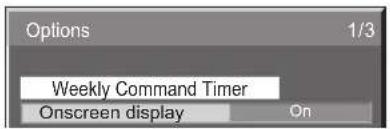
text_image
Options 1/3 Weekly Command Timer Onscreen display On
Press ACTION (■) button
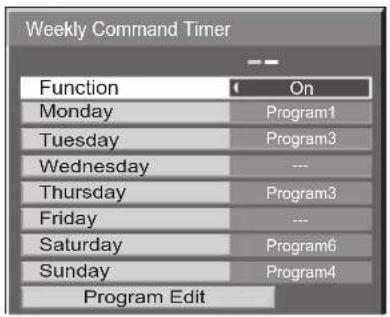
text_image
Weekly Command Timer Function On Monday Program1 Tuesday Program3 Wednesday --- Thursday Program3 Friday --- Saturday Program6 Sunday Program4 Program Edit2
flowchart
graph TD
    A["Top Left Arrow"] --> B["Center Square"]
    C["Right Arrow"] --> B
    D["Bottom Right Arrow"] --> B
    B --> E["Bottom Circle"]
Press to select a day.
Press to select a program number.
Note:
- You can set the program from 1 to 7. --- indicates unset.
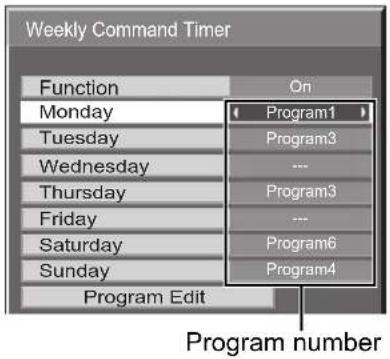
text_image
Weekly Command Timer Function On Monday Program1 Tuesday Program3 Wednesday --- Thursday Program3 Friday --- Saturday Program6 Sunday Program4 Program Edit Program number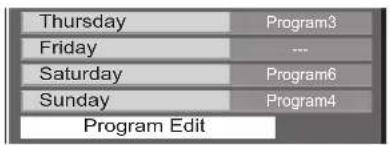
text_image
Thursday Friday Saturday Sunday Program Edit Program3 --- Program6 Program43
natural_image
Pure diagram of a circular component with directional arrows and a central square, no text or symbols present.Press to select Program Edit.
Press to show the Program Edit screen.
Program Edit screen
4
flowchart
graph TD
    A["Top Left Arrow"] --> B["Center Square"]
    C["Right Arrow"] --> B
    D["Bottom Right Arrow"] --> B
    B --> E["Bottom Circle"]
Press to select Program.
Press to change the program numbers (1-7).

text_image
Weekly Command Timer 1/8 Program 1 01 8:00 PON 02 10:30 IMS:SL1 03 ---- --- 04 ---- --- 05 ---- --- 06 12:00 DAM:ZOOM 07 9:12 AVL:10 08 ---- ---5
flowchart
graph TD
    A["Start"] --> B{Decision}
    B -->|Yes| C["Process"]
    B -->|No| D["End"]
Press to select a command number.
Press to show the previous / next command pages (1-8) of the selected program.
Press to show the command setting screen.
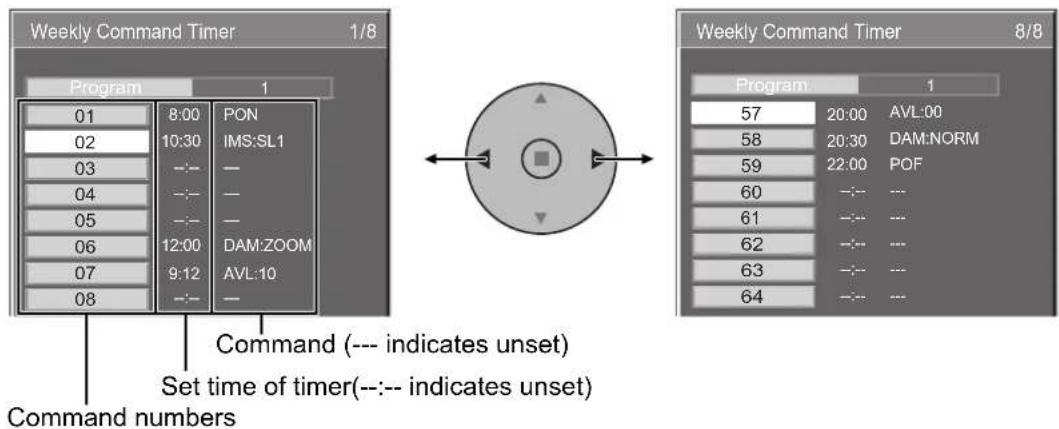
text_image
Weekly Command Timer 1/8 Program 1 01 8:00 PON 02 10:30 IMS:SL1 03 --- - 04 --- - 05 --- - 06 12:00 DAM:ZOOM 07 9:12 AVL:10 08 --- - Command (--- indicates unset) Set time of timer(--- indicates unset) Command numbers Weekly Command Timer 8/8 Program 1 57 20:00 AVL:00 58 20:30 DAM:NORM 59 22:00 POF 60 --- - 61 --- - 62 --- - 63 --- - 64 --- -6
flowchart
graph TD
    A["Outer Circle"] --> B["Inner Square"]
    B --> C["Arrow Right"]
    B --> D["Arrow Left"]
    B --> E["Arrow Up"]
    B --> F["Arrow Down"]
Press to select Command No.
Press to select a command number.
Command setting screen
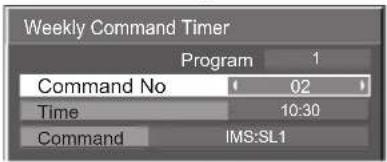
text_image
Weekly Command Timer Program 1 Command No 02 Time 10:30 Command IMS:SL17
natural_image
Circular diagram with arrows and a central square, no text or symbols presentPress to select Time / Command.
Press to set each item.
Time: Set the time to execute a command program.
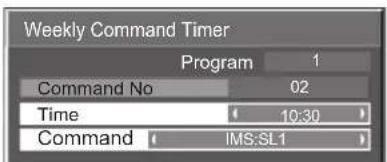
text_image
Weekly Command Timer Program 1 Command No 02 Time 10:30 Command IMS:SL1Pressing "◀ or " " button once changes "Time" 1 minute.
Pressing “◀” or “▶” button continuously changes “Time” by 15 minutes.
Command: Select a command to execute at the set time. This unit has 64 commands to set. (see page 53)
Notes:
- Command is performed in order of execution time, regardless of the command number.
- If a command execution time overlaps with that of other commands, these commands are performed in number order.
- Pressing ⏻, Time becomes --:-- and Command becomes ---.
Note:
- Press ○ to return to the previous screen.
Shipping condition
This function allows you to reset the unit to the factory setting.
1
Press to display the Setup menu.
2
natural_image
Simple diagram of a circular device with directional arrows and a central square, no text or symbols present.Press to select "OSD Language".
3
natural_image
Circular diagram with a central square and surrounding triangles, no text or symbols present.Press and hold till the SHIPPING menu is displayed.
4
natural_image
Simple diagram of a circular object with arrows pointing inward and a central square, no text or symbols present.Press to select "YES".
Press to confirm.
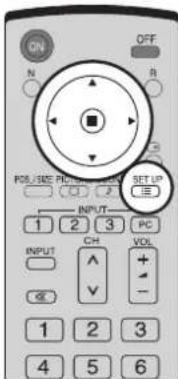
text_image
ON OFF N B POS/SEE PIN/RESET SET UP 1 2 3 PC INPUT CH VOL + - 1 2 3 4 5 6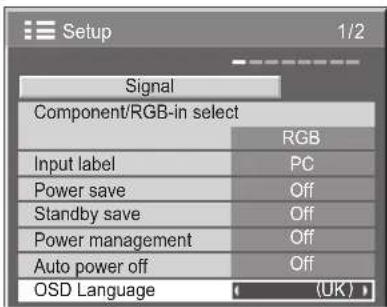
text_image
Setup 1/2 Signal Component/RGB-in select RGB Input label PC Power save Off Standby save Off Power management Off Auto power off Off OSD Language (UK)
[from the unit]
1 Press the MENU button till the Setup menu is displayed.
2 Press the Volume Up“+” or Down“-” button to select “OSD Language”.
3 Press and hold the ENTER button till the SHIPPING menu is displayed.
4 Press the Volume Up“+” or Down“-” button to select “YES”.
5 Press the ENTER button and wait for 10 sec.
Note:
Press the R button to return to Setup menu when SHIPPING menu is displayed.
Troubleshooting
Before you call for service, determine the symptoms and make a few simple checks as shown below.
| Symptoms | Checks | ||
| Picture Sound | |||
 | Interference Noisy Sound | Electrical AppliancesCars / MotorcyclesFluorescent light | |
 | Normal Picture No Sound | Volume(Check whether the mute function has been activated on the remote control.) | |
 | No Picture No Sound | Not plugged into AC outletNot switched onPicture and Brightness/Volume setting(Check by pressing the power switch or stand-by button on the remote control.) | |
 | No Picture Normal Sound | If a signal with a non-applicable colour system format, or frequency is input, only the input terminal indication is displayed. | |
 | No Colour Normal Sound | Colour controls set at minimum level(see page 22, 23)Colour system (see page 39) | |
| No remote control operations can be performed. | Check whether the batteries have discharged completely and, if they have not, whether they were inserted properly.Check whether the remote control sensor is exposed to an outdoor light or a strong fluorescent light.Check whether the remote control designed specifically for use with the unit is being used. (The unit cannot be operated by any other remote control.) | ||
| A cracking sound is sometimes heard from the unit. | If there is nothing wrong with the picture or sound, this is the sound of the cabinet undergoing very slight contractions in response to changes in the room temperature. There are no adverse effects on the performance or other aspects. | ||
| The top or bottom of the picture on the screen is cut off when I use the zoom function. | Adjust the position of the picture on the screen. | ||
| Areas at the top and bottom of the screen where the image is missing appear when I use the zoom function. | When using a video software program (such as a cinema size program) with a screen wider than one in the 16:9 mode, blank areas separate from the images are formed at the top and bottom of the screen. | ||
| I can hear sounds coming from inside the unit. | When the power is turned on, a sound of the display panel being driven may be heard: This is normal and not indicative of malfunctioning. | ||
| This Plasma Display uses special image processing. Hence a slight time lag may occur between image and audio, depending on the type of input signal. However, this is not a malfunction. | |||
Plasma Display panel
| Symptoms Check | |
| The screen darkens slightly when bright pictures with minimal movements are shown. | The screen will darken slightly when photos, still images of a computer or other pictures with minimal movements are shown for an extended period. This is done to reduce image retention on the screen and the shortening of the screen's service life: It is normal and not indicative of malfunctioning. |
| It takes a while for the picture to appear. | The unit digitally processes the various signals in order to reproduce esthetically pleasing images. As such, it sometimes takes a few moments for the picture to appear when the power has been turned on, when the input has been switched or when the images for the main picture and sub picture on the two screens are swapped. |
| The edges of the images flicker. | Due to the characteristics of the system used to drive the panel, the edges may appear to flicker in the fast-moving parts of the images: This is normal and not indicative of malfunctioning. |
| The brightness on both sides of images in the 4:3 mode changes. | When viewing the side panels at the “High” or “Mid” setting, the brightness on both sides may change depending on the kind of program shown: This is normal and not indicative of malfunctioning. |
| Some parts of the screen do not light up. | The plasma display panel is manufactured using an extremely high level of precision technology, however, sometimes some parts of the screen may be missing picture elements or have luminous spots. This is not a malfunction. |
 Image retention appears Image retention appears | Do not allow a still picture to be displayed for an extended period, as this can cause a permanent image retention to remain on the Plasma Display.Examples of still pictures include logos, video games, computer images, teletext and images displayed in 4:3 mode.Note:The permanent image retention on the Plasma Display resulting from fixed image use is not an operating defect and as such is not covered by the Warranty.This product is not designed to display fixed images for extended periods of time. |
| [for TH-42PH10BK/S, TH-50PH10BK/S, TH-58PH10BK] Whirring sounds can be heard from the display unit. | The display unit is fitted with a cooling fan to dissipate heat generated during normal use. The whirring sound is caused by rotation of the fan and is not a malfunction. |
VIDEO/PC input signals
VIDEO input (for TH-42PH10BK/S, TH-50PH10BK/S, TH-58PH10BK)
| Signal name | Horizontal Vertical frequency(kHz) frequency(Hz) | ||
| 1 NTSC 15.73 59.94 | |||
| 2 PAL 15.63 50.00 | |||
| 3 PAL60 15.73 59.94 | |||
| 4 SECAM 15.63 50.00 | |||
| 5 Modifi ed NTSC 15.73 59.94 | |||
Applicable input signals for Mini D-sub 15P (Component) / Mini D-sub 15P (RGB) (* Mark)
| Signal name | Horizontal frequency (kHz) | Vertical frequency (Hz) | Dot clock frequency (MHz) | Mini D-sub 15P (Component) | Mini D-sub 15P (RGB) | |
| 1 | 525 (480) / 60i | 15.73 | 59.94 | 13.5 | * | * |
| 2 | 525 (480) / 60p | 31.47 | 59.94 | 27.0 | * | **1 |
| 3 | 625 (575) / 50i | 15.63 | 50.00 | 13.5 | * | * |
| 4 | 625 (575) / 50p | 31.25 | 50.00 | 27.0 | * | * |
| 5 | 750 (720) / 60p | 45.00 | 60.00 | 74.25 | * | * |
| 6 | 750 (720) / 50p | 37.50 | 50.00 | 74.25 | * | * |
| 7 | 1,125 (1,080) / 60i | 33.75 | 60.00 | 74.25 | * | * |
| 8 | 1,125 (1,080) / 50i | 28.13 | 50.00 | 74.25 | * | * |
| 9 | 1,125 (1,080) / 24sF | 27.00 | 47.92 | 74.25 | * | * |
| 10 | 1,125 (1,080) / 30p | 33.75 | 30.00 | 74.25 | * | * |
| 11 | 1,125 (1,080) / 25p | 28.13 | 25.00 | 74.25 | * | * |
| 12 | 1,125 (1,080) / 24p | 27.00 | 24.00 | 74.25 | * | * |
| 13 | 1,250 (1,080) / 50i | 31.25 | 50.00 | 74.25 | * | * |
| 14 | 640 × 400 @70 Hz 31.46 | 70.07 | 25.17 | * | ||
| 15 | 640 × 480 @60 Hz 31.47 | 59.94 | 25.18 | **2 | ||
| 16 | 640 × 480 @72 Hz 37.86 | 72.81 | 31.5 | * | ||
| 17 | 640 × 480 @75 Hz 37.50 | 75.00 | 31.5 | * | ||
| 18 | 640 × 480 @85 Hz 43.27 | 85.01 | 36.0 | * | ||
| 19 | 852 × 480 @60 Hz 31.47 | 59.94 | 33.54 | **2 | ||
| 20 | 800 × 600 @56 Hz 35.16 | 56.25 | 36.0 | * | ||
| 21 | 800 × 600 @60 Hz 37.88 | 60.32 | 40.0 | * | ||
| 22 | 800 × 600 @72 Hz 48.08 | 72.19 | 50.0 | * | ||
| 23 | 800 × 600 @75 Hz 46.88 | 75.00 | 49.5 | * | ||
| 24 | 800 × 600 @85 Hz 53.67 | 85.06 | 56.25 | * | ||
| 25 | 1,024 × 768 @60 Hz | 48.36 | 60.00 | 65.0 | * | |
| 26 | 1,024 × 768 @70 Hz | 56.48 | 70.07 | 75.0 | * | |
| 27 | 1,024 × 768 @75 Hz | 60.02 | 75.03 | 78.75 | * | |
| 28 | 1,024 × 768 @85 Hz | 68.68 | 85.00 | 94.5 | * | |
| 29 | 1,152 × 864 @75 Hz | 67.50 | 75.00 | 108.0 | * | |
| 30 | 1,280 × 960 @60 Hz | 60.00 | 60.00 | 108.0 | * | |
| 31 | 1,280 × 960 @85 Hz | 85.94 | 85.00 | 148.5 | * | |
| 32 | 1,280 × 1,024 @60 Hz | 63.98 | 60.02 | 108.0 | * | |
| 33 | 1,280 × 1,024 @75 Hz | 79.98 | 75.03 | 135.0 | * | |
| 34 | 1,280 × 1,024 @85 Hz | 91.15 | 85.02 | 157.5 | * | |
| 35 | 1,600 × 1,200 @60 Hz | 75.00 | 60.00 | 162.0 | * | |
| 36 | 1,600 × 1,200 @65 Hz | 81.25 | 65.00 | 175.5 | * | |
| 37 | 1,066 × 600 @60 Hz | 37.64 | 59.94 | 53.0 | * | |
| 38 | 1,366 × 768 @60 Hz | 48.36 | 60.00 | 86.71 | * | |
| 39 | Macintosh13" (640 × 480) | 35.00 | 66.67 | 30.24 | * | |
| 40 | Macintosh16" (832 × 624) | 49.72 | 74.54 | 57.28 | * | |
| 41 | Macintosh21" (1,152 × 870) | 68.68 | 75.06 | 100.0 | * |
*1: When selected the RGB format and 525p signal input to the Mini D-sub 15P terminal, it is recognized as VGA 60Hz signal.
*2: When inputted VGA 60Hz format signal from the other than Mini D-sub 15P terminal, it is recognized as 525p signal.
Note: Signals without above specification may not be displayed properly.
Command list of Weekly Command Timer
| No. | Command Control details | |
| 1 | AAC:MENCLR Audio | Menu (Clear) |
| 2 | AAC:MENDYN Audio | Menu (Dynamic) |
| 3 | AAC:MENSTD Audio | Menu (Standard) |
| 4 | AAC:SURMON Surround (ON) | |
| 5 | AAC:SUROFF Surround (OFF) | |
| 6 | AMT:0 Audio Mute (OFF) | |
| 7 | AMT:1 Audio Mute (ON) | |
| 8 | ASO:M Audio out when PIP mode (Main Picture) | |
| 9 | ASO:S Audio out when PIP mode (Sub Picture) | |
| 10 | AVL:00 Audio Volume (00) | |
| 11 | AVL:10 Audio Volume (10) | |
| 12 | AVL:20 Audio Volume (20) | |
| 13 | AVL:30 Audio Volume (30) | |
| 14 | AVL:40 Audio Volume (40) | |
| 15 | AVL:50 Audio Volume (50) | |
| 16 | AVL:60 Audio Volume (60) | |
| 17 | DAM:FULL Aspect (16:9) | |
| 18 | DAM:JUST Aspect (Just) | |
| 19 | DAM:NORM Aspect (4:3) | |
| 20 | DAM:SELF Aspect (Panasonic Auto) | |
| 21 | DAM:ZOOM Aspect (Zoom) | |
| 22 | DWA:OFF Advanced PIP mode (OFF) | |
| 23 | DWA:OVL1 | Advanced PIP mode (1) (see page 21) |
| 24 | DWA:OVL2 | Advanced PIP mode (2) (see page 21) |
| 25 | DWA:OVL3 | Advanced PIP mode (3) (see page 21) |
| 26 | DWA:OVL4 | Advanced PIP mode (4) (see page 21) |
| 27 | DWA:OVL5 | Advanced PIP mode (5) (see page 21) |
| 28 | DWA:OVL6 | Advanced PIP mode (6) (see page 21) |
| 29 | DWA:OVLOF | Advanced PIP mode (OFF) (normal two screen display mode) |
| 30 | DWA:OVLON | Advanced PIP mode (ON) |
| 31 | DWA:PIN0 | The location of the sub picture (lower right) |
| 32 | DWA:PIN1 | The location of the sub picture (lower left) |
| 33 | DWA:PIN2 | The location of the sub picture (upper left) |
| 34 | DWA:PIN3 | The location of the sub picture (upper right) |
| 35 | DWA:PIP | Dual Picture mode (Picture in Picture) |
| 36 | DWA:POP | Dual Picture mode (Picture out Picture) |
| 37 | DWA:SWP | Swap main picture and sub picture when PIP mode |
| 38 | DWA:TWN | Dual Picture mode (Picture and Picture) |
| 39 | IMS:PC1 | Input select (PC1) (Main Picture when PIP mode) |
| 40 | IMS:SL1 | Input select (SLOT1) (Main Picture when PIP mode) |
| 41 | IMS:SL1A | Input select (SLOT1A) (Main Picture when PIP mode) |
| 42 | IMS:SL1B | Input select (SLOT1B) (Main Picture when PIP mode) |
| 43 | IMS:SL2 | Input select (SLOT2) (Main Picture when PIP mode) |
| 44 | IMS:SL2A | Input select (SLOT2A) (Main Picture when PIP mode) |
| 45 | IMS:SL2B | Input select (SLOT2B) (Main Picture when PIP mode) |
| 46 | IMS:SL3 | Input select (SLOT3) (Main Picture when PIP mode) |
| 47 | ISS:PC1 | Sub Picture Input Select (PC1) |
| 48 | ISS:SL1 | Sub Picture Input Select (SLOT1) |
| 49 | ISS:SL1A | Sub Picture Input Select (SLOT1A) |
| 50 | ISS:SL1B | Sub Picture Input Select (SLOT1B) |
| 51 | ISS:SL2 | Sub Picture Input Select (SLOT2) |
| 52 | ISS:SL2A | Sub Picture Input Select (SLOT2A) |
| 53 | ISS:SL2B | Sub Picture Input Select (SLOT2B) |
| 54 | ISS:SL3 | Sub Picture Input Select (SLOT3) |
| 55 | OSP:SCR0 | Screen Saver White bar scroll (OFF) |
| 56 | OSP:SCR1 | Screen Saver White bar scroll (ON) |
| 57 | POF | Power OFF |
| 58 | PON | Power ON |
| 59 | SSC:FNC0 Screen Saver function (White bar scroll) | |
| 60 | SSC:FNC1 Screen Saver function (Image Reversal) | |
| 61 | SSC:MOD0 | ScreenSaver (Mode (OFF)) |
| 62 | SSC:MOD3 | ScreenSaver (Mode (ON)) |
| 63 | VMT:0* | Picture Mute (OFF) |
| 64 | VMT:1* | Picture Mute (ON) |
* Picture Mute cannot be unlocked by powering off/on with the remote control. Turn off and on again with the button on the unit or enter the command VMT:0 to unlock Picture Mute.
Specifications
| TH-42PS10BK/S | ||
| Power Source 220 - 240 V AC, 50/60 Hz | ||
| Power Consumption | ||
| Power on 280 W | ||
| Stand-by condition Save off 0.8 W, Save on 0.6 W | ||
| Power off condition 0.2 W | ||
| Plasma Display panel Drive method : AC type42-inch, 16:9 aspect ratio | ||
| Screen size 920 mm (W) × 518 mm (H)× 1,056 mm (diagonal) | ||
| (No.of pixels) 408,960 (852 (W) × 480 (H))[2,556 × 480 dots] | ||
| Operating condition | ||
| Temperature 0 °C - 40 °C | ||
| Humidity 20 % - 80 % | ||
| Applicable signals | ||
| Scanning format 525 (480) / 60i · 60p, 625 (575) / 50i · 50p, 750 (720) / 60p · 50p, 1125 (1080) / 60i · 50i · 24p · 25p · 30p · 24sF .... SMPTE274M, 1250 (1080) / 50i | ||
| PC signals VGA | SVGA, XGA, SXGA, UXGA .... (compressed)Horizontal scanning frequency 15 - 110 kHzVertical scanning frequency 48 - 120 Hz | |
| Connection terminals | ||
| PC IN (HIGH-DENSITY MINI D-SUB 15PIN) Y or G with/sync 1.0 Vp-p (75 Ω)Y or G without/sync 0.7 Vp-p (75 Ω)B/PB/CB: 0.7 Vp-p (75 Ω)R/PR/CR: 0.7 Vp-p (75 Ω)HD/VD: 1.0 - 5.0 Vp-p (high impedance)VBS (use HD port) with/picture 1.0 Vp-p (high impedance)without/picture 0.3 Vp-p (high impedance)AUDIO IN (M3 JACK) 0.5 Vrms (high impedance) | ||
| SERIAL | EXTERNAL CONTROL TERMINAL (D-SUB 9PIN) RS-232C COMPATIBLE | |
| SPEAKERS (6 Ω) | 16 W [8 W + 8 W] (10 % THD) | |
| Accessories Supplied | ||
| Remote Control Transmitter | EUR7636090R | |
| Batteries | 2 × R6 Size | |
| Fixing bands | TMME203 × 2 | |
| Dimensions (W × H × D) | 1,020 mm × 610 mm × 89 mm | |
| Mass (weight) | ||
| main unit only | approx. 26.0 kg net | |
| with speakers | approx. 30.0kg | |
Notes:
- Design and specifications are subject to change without notice. Mass and dimensions shown are approximate.
- This equipment complies with the EMC standards listed below.
EN55022, EN55024, EN61000-3-2, EN61000-3-3.
| TH-42PH10BK/S TH-50PH10BK/S TH-58PH10BK | |||
| Power Source 220 - 240 V AC, 50/60 Hz | |||
| Power Consumption | |||
| Power on 365 W 485 W 630 W | |||
| Stand-by condition Save off 1.0 W, Save on 0.8 W Save off 0.8 W, Save on 0.6 W Save off 0.8 W, Save on 0.6 W | |||
| Power off condition 0.5 W 0.3 W 0.3 W | |||
| Plasma Display panel Drive method : AC type 42-inch, 16:9 aspect ratio | Drive method : AC type 50-inch, 16:9 aspect ratio | Drive method : AC type 58-inch, 16:9 aspect ratio | |
| Screen size | 922 mm (W) × 518 mm (H) × 1,057 mm (diagonal) | 1,106 mm (W) × 622 mm (H) × 1,269 mm (diagonal) | 1,287 mm (W) × 723 mm (H) × 1,476 mm (diagonal) |
| (No.of pixels) | 786,432 (1,024 (W) × 768 (H)) [3,072 × 768 dots] | 1,049,088 (1,366 (W) × 768 (H)) [4,098 × 768 dots] | 1,049,088 (1,366 (W) × 768 (H)) [4,098 × 768 dots] |
| Operating condition | |||
| Temperature | 0 °C - 40 °C | ||
| Humidity | 20 % - 80 % | ||
| Applicable signals | |||
| Colour System | NTSC, PAL, PAL60, SECAM, Modified NTSC | ||
| Scanning format | 525 (480) / 60i · 60p, 625 (575) / 50i · 50p, 750 (720) / 60p · 50p, 1125 (1080) / 60i · 50i · 24p · 25p · 30p · 24sF .... SMPTE274M, 1250 (1080) / 50i | ||
| PC signals | VGA, SVGA, XGA SXGA, UXGA .... (compressed) Horizontal scanning frequency 15 - 110 kHz Vertical scanning frequency 48 - 120 Hz | ||
| Connection terminals | |||
| AV IN | VIDEO IN (BNC) S VIDEO IN (MINI DIN 4PIN) AUDIO IN (RCA PIN JACK × 4) | 1.0 Vp-p (75 Ω) Y: 1.0 Vp-p (75 Ω), C: 0.286 Vp-p (75 Ω) 0.5 Vrms (high impedance) | |
| PC IN | (HIGH-DENSITY MINI D-SUB 15PIN) B/PB/CB: 0.7 Vp-p (75 Ω) R/PR/CR: 0.7 Vp-p (75 Ω) HD/VD: 1.0 - 5.0 Vp-p (high impedance) VBS (use HD port) without/picture 1.0 Vp-p (high impedance) without/picture 0.3 Vp-p (high impedance) AUDIO IN (M3 JACK) | Y or G with/sync 1.0 Vp-p (75 Ω) Y or G without/sync 0.7 Vp-p (75 Ω) | |
| SERIAL | EXTERNAL CONTROL TERMINAL (D-SUB 9PIN) RS-232C COMPATIBLE | ||
| SPEAKERS (6 Ω) | 16 W [8 W + 8 W] (10 % THD) | ||
| Accessories Supplied | |||
| Remote Control Transmitter | EUR7636090R | ||
| Batteries | 2 × R6 Size | ||
| Fixing bands | TMME203 × 2 | ||
| Dimensions (W × H × D) | 1,020 mm × 610 mm × 89 mm | 1,210 mm × 724 mm × 95 mm | 1,399 mm × 843 mm × 99 mm |
| Mass (weight) | |||
| main unit only | approx. 26.0 kg net | approx. 36.0 kg net | approx. 54.0 kg net |
| with speakers approx. 30.0 kg | approx. 40.0 kg | approx. 59.0 kg | |
Notes:
- Design and specifications are subject to change without notice. Mass and dimensions shown are approximate.
- This equipment complies with the EMC standards listed below.
EN55022, EN55024, EN61000-3-2, EN61000-3-3.
Panasonic
Sales and Support Information
Customer Care Centre
• For customers within the UK : 0844 844 3852
• For customers within the Republic of Ireland: 01 289 8333
- Visit our website for product information www.panasonic.co.uk
• E-mail: customer.care@panasonic.co.uk
Direct Sales at Panasonic UK
- Order accessory and consumable items for your product with ease and confidence by phoning our Customer Care Centre Monday – Thursday 9:00am – 5:30pm, Friday 9:30am – 5:30pm (Excluding public holidays).
- Or go on line through our Internet Accessory ordering application at www.panasonic.co.uk.
- Most major credit and debit cards accepted.
- All enquiries transactions and distribution facilities are provided directly by Panasonic UK Ltd.
- It couldn't be simpler!
- Also available through our Internet is direct shopping for a wide range of finished products, take a browse on our website for further details.
Exclusive to Plasma / DVD Ram / LCD Television / LCD Projector product:
Interested in purchasing an extended guarantee? Please contact your dealer or our Customer Support Department on 01344 476540 or customer.care@panasonic.co.uk for more details.
Information on Disposal for Users of Waste Electrical & Electronic Equipment (private households)

This symbol on the products and/or accompanying documents means that used electrical and electronic products should not be mixed with general household waste. For proper treatment, recovery and recycling, please take these products to designated collection points, where they will be accepted on a free of charge basis. Alternatively, in some countries you may be able to return your products to your local retailer upon the purchase of an equivalent new product. Disposing of this product correctly will help to save valuable resources and prevent any potential negative effects on human health and the environment which could otherwise arise from inappropriate waste handling. Please contact your local authority for further details of your nearest designated collection point.
Penalties may be applicable for incorrect disposal of this waste, in accordance with national legislation.
For business users in the European Union
If you wish to discard electrical and electronic equipment, please contact your dealer or supplier for further information.
Information on Disposal in other Countries outside the European Union
This symbol is only valid in the European Union.
If you wish to discard this product, please contact your local authorities or dealer and ask for the correct method of disposal.
Customer's Record
The model number and serial number of this product can be found on its back cover. You should note this serial number in the space provided below and retain this book, plus your purchase receipt, as a permanent record of your purchase to aid in identification in the event of theft or loss, and for Warranty Service purposes.
Model Number
Serial Number
Matsushita Electric Industrial Co., Ltd.
Web Site : http://panasonic.net
© 2007 Matsushita Electric Industrial Co., Ltd. All Rights Reserved.