
BD7310ANF - Refrigerator Profilo - Free user manual and instructions
Find the device manual for free BD7310ANF Profilo in PDF.


| Product Type | Refrigerator with Freezer Compartment |
| Brand | Profilo |
| Model | BD7310ANF |
| Power Supply | 220–240 V / 50 Hz AC |
| Climate Class | SN (+10°C to 32°C), N (+16°C to 32°C), ST (+16°C to 38°C), T (+16°C to 43°C) |
| Control Type | Electronic temperature control with buttons |
| Refrigerator Compartment Temperature Range | 1°C to 7°C (adjustable) |
| Freezer Compartment | Yes, with ice maker |
| Super Cooling Function | Yes (rapid cooling for fridge) |
| Water Dispenser | Yes (optional, depends on model) |
| Ice Maker | Built-in, automatic |
| Chiller Compartment | Yes, with adjustable regulator for fish/meat or fruit/vegetables |
| Fruit and Vegetable Drawer | Yes, with automatic humidity control and optional Vitamin Kit / Vita Light |
| Odour Filter | Yes (optional, rechargeable) |
| Door Alarm | Yes (beeps after 1 minute, repeats every 30 seconds) |
| Childproof Lock | Yes (button lock for controls) |
| Interior Light | Replaceable bulb (fridge and freezer) + optional Vita Light LED |
| Defrosting | Automatic (refrigerator), manual (freezer) |
| Refrigerant | R600a (or similar, based on typical Profilo models; check rating plate) |
| Spare Parts | Bulb (E14, 220-240V), odour filter, water container, ice cube trays |
| Customer Service | Provide E-Nr. and FD from rating plate (Fig. 18) |
| Compliance | EU Directive 89/336/EEC, EN 60335/2/24 |
| Disposal | WEEE compliant; refrigerant and insulation must be disposed properly |
Frequently Asked Questions - BD7310ANF Profilo
User questions about BD7310ANF Profilo
0 question about this device. Answer the ones you know or ask your own.
Ask a new question about this device
Download the instructions for your Refrigerator in PDF format for free! Find your manual BD7310ANF - Profilo and take your electronic device back in hand. On this page are published all the documents necessary for the use of your device. BD7310ANF by Profilo.
USER MANUAL BD7310ANF Profilo
natural_image
Line drawing of two white refrigerator units with doors and front panels, no text or symbols presentBD73..
BD75..
de
en
tr
de Inhalt
Connecting the appliance ..... 18
Setting the temperature ..... 18
Door alarm 19
Fridge section 19
Water dispenser (not all models) .. 21
The freezer compartment ..... 22
Ice maker 23
How to save energy 24
Defrosting 24
Operating noises 24
Cleaning the appliance ..... 25
Eliminating minor faults yourself . . . 25
Changing the bulbs 26
Customer service 26
tr İçindekiler
Before you switch ON the appliance
Carefully read the enclosed documents! They contain important information on how to install, use and maintain the appliance. Keep all documentation for subsequent use or for the next owner.
Technical safety
If damage has occurred
- Keep naked flames and/or ignition sources away from the appliance.
– Pull out the mains plug.
– Thoroughly ventilate the room for several minutes. - Notify customer service.
Important information when using the appliance
- Never use electrical appliances inside the appliance (e. g. heater, etc.). Explosion hazard!
- NEVER use a steam cleaner to defrost or clean the appliance! The steam may penetrate electrical parts and cause a short-circuit. Risk of electric shock!
- Do not store products which contain flammable propellants (e. g. spray cans) or explosive substances in the appliance. Explosion hazard!
- Do not stand or support yourself on the base, drawers or doors, etc.
- For cleaning and exchanging the bulb, pull the mains plug out or switch off the fuse.
Do not pull out the mains plug by tugging the cable.
- Bottles which contain a high percentage of alcohol must be sealed and stored in an upright position.
- Keep plastic parts and the door seal free of oil and grease. Otherwise, parts and door seal will become porous.
- Never cover or block the ventilation openings for the appliance.
- Do not store bottled or canned drinks (especially carbonated drinks) in the freezer compartment. Bottles and cans may explode!
- Never put frozen food straight from the freezer compartment into your mouth. Risk of low-temperature burns!
- Avoid prolonged touching of frozen food, ice or the evaporator pipes, etc.. Risk of low-temperature burns!
- Do not scrape off hoarfrost or stuck frozen food with a knife or pointed object. You could damage the refrigerant tubing. Leaking refrigerant may ignite or cause eye injuries.
- Only customer service may change the power cord and carry out any other repairs. Improper installations and repairs may put the user at considerable risk.
Children in the household
- Do not allow children to play with the appliance!
- If the appliance features a lock, keep the key out of the reach of children.
General requirements
The appliance is suitable
● for refrigerating and freezing food,
- for making ice.
The appliance is designed for domestic use.
The appliance is suppressed according to EU Directive 89/336/EEC.
The refrigerant circuit has been tested for leaks.
This product complies with the relevant safety regulations for electrical appliances (EN 60335/2/24).
Information concerning disposal
Disposal of your old appliance
When replacing your old appliance with a new one, please comply with the following:
Old appliances are not worthless rubbish! Valuable raw materials can be reclaimed by recycling old appliances.
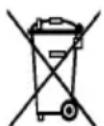
This appliance has been identified in accordance with the European directive 2002/96/EG on Waste Electrical and Electronic Equipment – WEEE.
The directive specifies the framework for an EU-wide valid return and recycling of old appliances.
Render your old appliance unusable:
- Pull out the mains plug.
- Cut off the power cord and discard with the mains plug.
- Remove the lock to prevent children from locking themselves in the refrigerator and suffocating.
Refrigerators contain refrigerants and the insulation contains gases. Refrigerant and gases must be disposed of properly.
Ensure that tubing of the refrigerant circuit is not damaged prior to proper disposal.
Disposal of packaging
Warning:
Keep children away from packaging materials. Danger of suffocation from folding cartons and plastic film!
You received your new appliance in a protective shipping carton. All packaging materials are environmentally friendly and recyclable. Please contribute to a better environment by disposing of packaging materials in an environmentally-friendly manner.
Please ask your dealer or inquire at your local authority about current means of disposal.
Your new appliance
Please fold out the illustrated pages at the end of these instructions.

These operating instructions refer to several models. The illustrations may differ.
Fig. 1
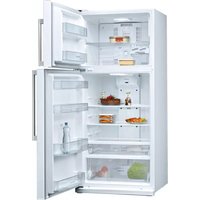
A Freezer compartment
1 Light
2 Shelves
3 Temperature control
4 Ice maker
5 Door storage compartment
B Fridge section
6 Odour filter (optional) *
7 Shelves
8 Light
9 Regelung Chiller compartment
10 Chiller compartment
11 Fruit and vegetable drawer
12 Butter and cheese compartment
13 Door storage compartment
14 Bottle storage compartment
15 Water dispenser (optional) *
16 Temperature control/Control panel
* depending on interior fittings
Note:
If some of the indicate parts are missing from your appliance, these parts belong to a different model.
Installation
Installation location
Install the appliance in a dry, well ventilated room. The appliance should not be installed in direct sunlight or near a heat source such as a cooker, radiator, etc. If installation next to a heat source is unavoidable, use a suitable insulating plate.
Observe the following minimum distances to heat sources:
- 3 cm to an electric cooker.
- 30 cm to an oil or coal-fired cooker.
Aligning the appliance
The appliance must be level.
If the floor is uneven, use the front height-adjustable feet (Fig. 2).
Room temperature
The climatic class can be found on the rating plate (Fig. 18). It states the room temperature within which the appliance can be operated.
| Atmosphere grade | permitted ambient temperature |
| SN | +10 °C to 32 °C |
| N | +16 °C to 32 °C |
| ST | +16 °C to 38 °C |
| T | +16 °C to 43 °C |
Ventilation
Ensure that the air can circulate around the appliance.
The minimum gap to all sides must be at least 5 cm.
Connecting the appliance
After installing the appliance, wait at least 12 hour before switching on the appliance. During transportation the oil in the compressor may have flowed into the refrigeration system.
Before switching on the appliance for the first time, clean the interior (see Cleaning).
The socket should be freely accessible. Connect the appliance to a 220–240 V/50 Hz ac current via a plug which has been properly installed. The socket must be fused with a 10 A to 16 A fuse or higher.
For appliances operated in non-European countries, the identification plate should be checked whether the electric supply and the current model stated match the vales of the mains supply. The rating plate is situated in the bottom left-hand side of the appliance. Any necessary exchanging of the mains lead should carried out by a specialist electrician.

Warning!
Never connect the appliance to electronic energy saver plugs (e.g. Ecoboy, Sava Plug) or to power inverters which convert the direct current to 230 V alternating current (e.g. solar equipment, power supplies on ships).
Setting the temperature
This refrigerator features a temperature controller for the freezer compartment and a temperature controller button for the refrigerator compartment.
Controls for the refrigerator compartment
Fig. 3
The factory setting of the temperature controller for the refrigerator compartment is 4^ C.
The cooling temperature can be set by pressing button Isý Ayarý °C.
Each time this button is pressed, the display advances 1 °step at a time (1–7 °C).
Super cooling button – “Süper Soğutma”
Function for rapid cooling of food which are to be stored in the refrigerator.
Press the Süper Soðutma button. Each time the button is pressed, the function is activated or deactivated.
If the button Süper Soðutma is not pressed within a specific time after fast cooling mode was activated, this mode is automatically deactivated.
If the childproof lock is activated, no settings are possible via the buttons Isý Ayarý °C and Süper Soðutma.
To activate/deactivate the function, hold down the button Çocuk Kilidi (3sn. basýnýz) for 3 seconds.
Controls for the freezer compartment
Fig. 4
The higher the set number, the lower the temperature in the freezer compartment.
As the temperature in the refrigerator and freezer compartments is regulated by a consistent volume of cool air, the temperature in the refrigerator compartment rises if the temperature in the freezer compartment drops.
If the freezer compartment in winter is not cold enough, set the temperature controller for the freezer compartment to a high setting (6–7).
Door alarm
If an appliance door is left open, an alarm signal (3 beeps) sounds after one minute.
If the door is not closed, the alarm signal sounds every 30 seconds.
The alarm signal stops when the door is closed.
Note:
If an appliance door is left open for longer than 7 minutes, the interior light automatically switches off. This prevents the appliance from warming up too quickly and saves energy.
Fridge section
Chiller compartment
Fig. 5
The chiller compartment is suitable for the storage of food which is to be kept particularly fresh.
The storage compartments and the chiller compartment must be in position. If they are moved, the chiller compartment may not fulfil its purpose.
If controller is moved, the temperature can be adjusted even better to the stored food.
- Regulator to right: Storage of fish and meat (lower temperature)
- Regulator to left: Storage of fruit and vegetables (higher temperature)
The controller should never be in the middle position.
Fruit and vegetable drawer
Fig. 6
The fruit and vegetable compartment automatically regulates the air humidity in the compartment. This retains the freshness and “crispiness” of the stored food for longer.
Vitamin kit (not all models)
Fig. 7
The vitamin kit retains the freshness of the fruit and vegetables stored in the fruit and vegetable compartment for even longer.
Important:
To ensure that the vitamin kit functions, it must be kept dry.
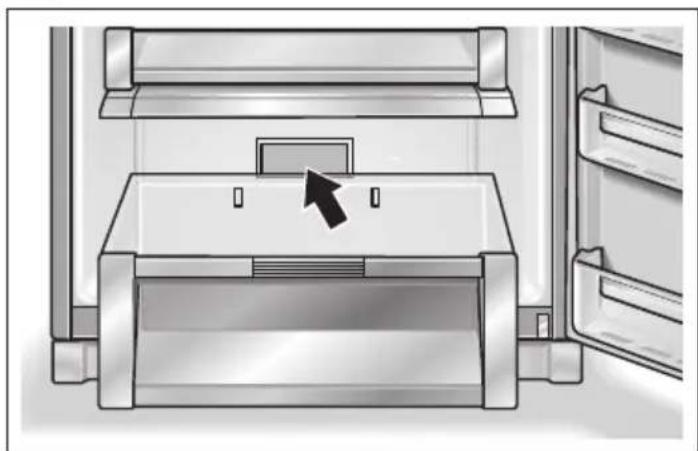
Vita Light (not all models)
Fig. 14
A special LED is installed in the fruit and vegetable compartment. This retains the freshness food for longer.
The LED works automatically and is permanent in operation if the appliance is switched on.
Caution! Class 1M laser lighting! Donot look directly into the lighting with optical instruments. Risk of eye injury!
Division wall (not all models)
Fig. 15
The partition can be inserted in the fruit and vegetable compartment to separate different types of fruit and vegetables.
Odour filter (not all models)
Unpleasant odours in the refrigerator compartment are prevented by the odour filter.
Tip: Highly odorous food should nevertheless be stored in sealable containers.
If the effect of the odour filter diminishes, it can easily be treated:
Fig. 8
- Take out the odour filter.
- Dry with a hair dryer.
- Place the odour filter in the sun to eliminate any residue of unpleasant odours (decomposition of the odour compounds by ultraviolet light).
- Re-insert odour filter.
Preserving food
Pay attention when arranging food:
- Allow warm food and drinks to cool down outside the appliance.
- Wrap or cover food before placing in the appliance. This way the aroma and freshness is preserved. This is done likewise to help avoid the transfer of odours and colours onto plastic parts.
- Keep plastic parts and the door seal free of oil and grease.
– Bottles which contain a high percentage of alcohol must be sealed and stored in an upright position.
When buying food, please note:
The “purchase freshness” is important for the shelf-life of your food. In principle the following applies: the fresher the food is placed in the "cool-fresh" compartment, the longer it will keep. When buying food, always note the degree of freshness.
Water dispenser
(not all models)
Fig. 9
1 Dispenser button
2 Collecting tray
3 Water container
4 Sealing cap
5 Cover
Filling the water container with water
Fig. 10
- Open the sealing cap on the water container.
- Pour water through the refill opening into the water container.
- Close the sealing cap.
Caution!
-Use water only – no soft drinks, milk or juice.
- If soft drinks, milk etc. have been added, pour water into the water container and dispense three to four glasses of water to clean the pipes. Then clean the water container.
-Hot water must cool down before it is poured into the water container.
—Firmly press on sealing cap. Otherwise there is a risk of water leaking out of the water container when the door is opened and closed.
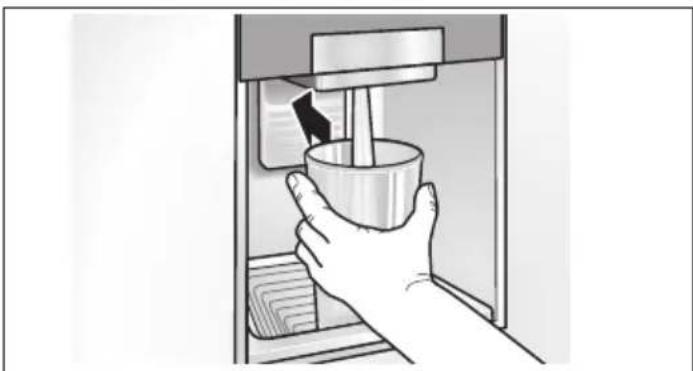
Dispensing water
Fig. 11
Press the glass against the dispenser button.
When the dispenser button is pressed, the water is dispensed.
Cleaning
Grille and collecting tray
- Take out collecting tray.
- Pour out the water and clean the collecting tray with a mild detergent.
Water container
- Undo catches on the side of the water container and remove water container.
- Remove cover by undoing the catches.
- Wash out container and cover with lukewarm water and a little washing-up liquid and rinse out thoroughly. Wipe the exterior with a soft cloth. Dry thoroughly.
- Attach the cover and fasten the catches.
- Insert water container. Ensure that the valve is seated correctly.
- Fasten the catches on the side of the water container.
The freezer compartment
- For storing deep-frozen food
- For making ice cubes
- For freezing fresh food
Note:
- Ensure that the freezer compartment door has been closed properly. If the door is open, the frozen food will thaw. The freezer compartment will become covered in thick ice.
- If the ambient temperature drops below +16 °C, the refrigerating unit will switch on less frequently. The freezer compartment may then become too warm. In an extreme case the frozen food will thaw.
Freezing food
Freeze fresh, undamaged food only. To prevent food from losing its flavour or drying out, place in airtight containers.
How to wrap food correctly:
- Place the food in the wrapping.
- Press out all the air.
- Seal the wrapping.
- Label the wrapping with the contents and date.
The following products are not suitable for wrapping food:
Wrapping paper, greaseproof paper, cellophane, refuse bags and used shopping bags.
The following products are suitable for wrapping food:
Plastic film, polyethylene blown film, aluminium foil and freezer tins.
These products can be purchased from your dealer.
The following products are suitable for sealing the wrapped food:
Rubber bands, plastic clips, string, cold-resistant adhesive tape or similar.
Bags and polyethylene blown film can be sealed with a film sealer.
Storage duration of the frozen food
Depends on the type of food. At a mean temperature:
- Fish, sausage, ready meals, cakes and pastries: up to 6 months
- Cheese, poultry and meat: up to 8 months
● Vegetables and fruit: up to 12 months
Ice maker
Fig. 12
- Take the water container out of the appliance and place it on a level surface.
- Fill the container with water. Maximum filling level: mark in the filler opening.
- Then close the water container by firmly pressing on the sealing cap.
Wipe up any water which has run over the water container. - Insert water container into the appliance.
The water runs into the ice cube trays.
Note:
- The ice cube trays must be emptied before the filled water container is inserted.
- It takes at least 5 hours until the first ice cubes are ready.
Frequent opening of the freezer compartment door may delay ice formation. - Before dispensing ice cubes, always check that there is still adequate space in the ice cube container. If required, empty the ice cube container beforehand.
- If no ice cubes are generated, check the outlet opening at the base of the water container. It may be frozen.
Defrost with warm water.
Caution!
When dispensing ice, do not pull too firmly on the lever. Ice maker may be damaged.
-
To remove the ice cubes, gently pull the lever down as far as the mark. The ice cubes fall into the ice cube container. If required, pull the lever another 1–2x.
-
To remove the ice cube container, lift slightly and pull forwards.
Cleaning the ice maker
Water tank/Ice cube container
Take out the water container and remove the cover. Wash out container and cover with lukewarm water and a little washing-up liquid and rinse out thoroughly. Open valves and rinse out to remove all detergent residue.
Wipe the exterior with a soft cloth.
Dry thoroughly.
Ice cube trays
Wipe ice cube trays with a damp cloth.
When the water container has been removed, clean the upper ice cube tray.
To clean the lower ice cube tray, take out the ice cube container and pull the lever down.
Note:
The ice maker can be taken out of the appliance and thoroughly cleaned. To do this, take out the door storage compartments.
Push up the ice maker slightly and take out (Fig. 13).
How to save energy
- Install the appliance in a dry, well ventilated room. The appliance should not be installed in direct sunlight or near a heat source (e.g. radiator, cooker). If required, use an insulating plate.
- Allow warm food and drinks to cool down before placing in the appliance!
- When thawing frozen products, place them in the refrigerator. Use the low temperature of the frozen food to cool the appliance!
- Open door as briefly as possible.
Defrosting
Defrosting is actuated automatically.
The water produced during the defrosting process runs into the evaporation pan on the rear panel of the appliance and evaporates automatically.
Operating noises
Normal operating noises
Humming — refrigerating unit is running. The fan in the circulating air system is running.
Bubbling, gurgling or whirring noises — refrigerant is flowing through the tubing.
Clicking — motor is switching on or off.
Noises which can be easily rectified
The appliance is not level
Align the appliance with the aid of a spirit level.
Use the height-adjustable feet or place something under the feet.
Drawers, baskets or storage areas are loose or sticking
Please check the removable parts and, if required, reinsert them.
Receptacles are touching each other
Please move bottles or receptacles away from each other.
Cleaning the appliance
- Attention: Pull out the mains plug or switch off the fuse!
- Wipe the door seal with water only and then dry thoroughly.
- Clean the appliance with tepid rinsing water. The rinsing water must not drip onto the fascia or light.
- After cleaning: reconnect and switch on the appliance.
Warning:
Never use a steam cleaner to clean the appliance. Steam may come into contact with electrical components and cause short-circuit or an electric shock! The steam may damage the plastic surfaces.
Do not use abrasive or acidic cleaning agents and solvents.
The rinsing water must not run into the ventilation opening on the door.
Never clean the shelves or containers in the dishwasher. The parts may warp!
Eliminating minor faults yourself
Before you call customer service:
Please check whether you can eliminate the fault yourself based on the following information. Customer service will charge you for advice, even if the appliance is still under guarantee!
| Fault Possible cause Remedial action | ||
| A fault code (e. g. E01) is indicated on the display. | The appliance has detected a fault during an automatic self-test. | Call customer service and report the fault code. |
| Interior light does not function;the refrigerating unit is running. | The bulb is defective. Replace bulb. | 1. Pull out the mains plug or disconnect the fuse.2. Change the bulb (Replacement bulb, 220-240V a.c., E14 bulb holder, see defective bulb for wattage). |
| The temperature in the refrigerator compartment is too cold. | Temperature has been set too low. | Increase the temperature. |
| If large quantities of fresh food are being frozen, the temperature in the refrigerator compartment drops temporarily, as the refrigerating unit runs for a long time. | Do not exceed max. freezing capacity. | |
| Refrigerator has no cooling capacity. | Power failure; the fuse has been switched off; the mains plug has not been inserted properly. | Check whether the power is on, check the fuses. |
Changing the bulbs
Bulb in the freezer compartment
Fig. 16
To remove the cover from the freezer compartment bulb, loosen the screw and pull off the cover with both hands.
Remove defective bulb by turning it anticlockwise.
Bulb in the refrigerator compartment
Fig. 17
To remove the cover from the refrigerator compartment bulb, take out all the shelves.
Then pull off the cover in the lower area.
Remove defective bulb by turning it anticlockwise.
Vita Light in the fruit and vegetable compartment
Fig. 14
The Vita Light in the fruit and vegetable compartment is a maintenance-free LED light.
Caution! Class 1M laser lighting! Donot look directly into the lighting with optical instruments. Risk of eye injury! Only customer service or authorised qualified personnel may conduct repairs on laser installations.
Customer service
Your local customer service can be found in the telephone directory or in the customer-service index. Please provide customer service with the appliance product number (E- Nr.) and production number (FD).
This information can be found on the rating plate (Fig. 18).
To prevent unnecessary call-outs, please assist customer service by quoting the product and production numbers. This will save you additional costs.
Güvenlik Bilgileri
Subject to alterations.
VDE Testing and Certification Institute
Section FG23
Merianstr. 28, 63069 Offenbach, Germany
2

natural_image
Interior view of a refrigerator showing the door, front shelf, and side drawer with an arrow indicating a location (no text or symbols present)5

natural_image
Diagram of a double-door refrigerator with an arrow indicating airflow or ventilation (no text or symbols present)6

7

8

9

10
natural_image
Hand inserting a cup into a device inside a container (no text or symbols visible)11

12

13
natural_image
Top-down view of a printer with an arrow pointing to the front panel (no text or symbols visible)14

natural_image
Interior view of a refrigerator with a hand inserting a fan into the front panel (no visible text or symbols)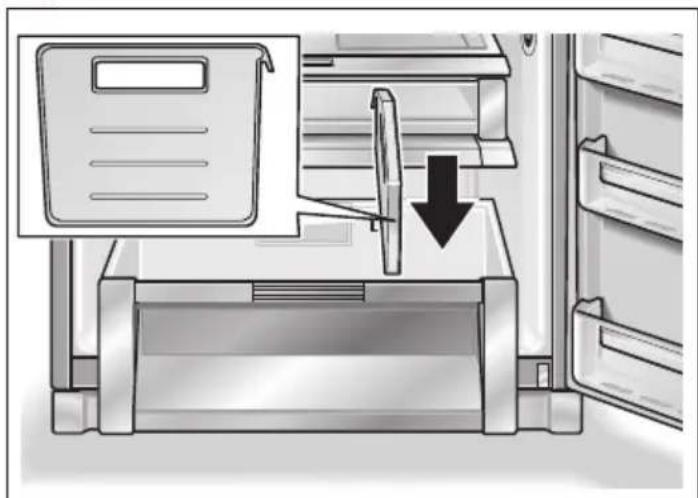
natural_image
Illustration of a printer being inserted into a rack, showing paper feeding into a holder (no text or symbols present)15

natural_image
Illustration showing hands operating a fan blade and a close-up of the blade being inserted (no text or symbols present)16

17

- de Inhalt
- tr İçindekiler
- Before you switch ON the appliance
- Technical safety
- If damage has occurred
- Important information when using the appliance
- Children in the household
- General requirements
- Information concerning disposal
- Disposal of your old appliance
- Disposal of packaging
- Warning:
- Your new appliance
- Fig. 1
- A Freezer compartment
- B Fridge section
- Note:
- Installation
- Installation location
- Aligning the appliance
- Room temperature
- Ventilation
- Connecting the appliance
- Warning!
- Setting the temperature
- Controls for the refrigerator compartment
- Super cooling button – “Süper Soğutma”
- Controls for the freezer compartment
- Fig. 4
- Door alarm
- Fridge section
- Chiller compartment
- Fig. 5
- Fruit and vegetable drawer
- Fig. 6
- Vitamin kit (not all models)
- Fig. 7
- Vita Light (not all models)
- Fig. 14
- Division wall (not all models)
- Fig. 15
- Odour filter (not all models)
- Fig. 8
- Preserving food
- Pay attention when arranging food:
- When buying food, please note:
- Water dispenser
- (not all models)
- Fig. 9
- Filling the water container with water
- Fig. 10
- Caution!
- Dispensing water
- Fig. 11
- Cleaning
- Grille and collecting tray
- Water container
- The freezer compartment
- Freezing food
- How to wrap food correctly:
- The following products are suitable for wrapping food:
- The following products are suitable for sealing the wrapped food:
- Storage duration of the frozen food
- Ice maker
- Fig. 12
- Cleaning the ice maker
- Water tank/Ice cube container
- Ice cube trays
- How to save energy
- Defrosting
- Operating noises
- Normal operating noises
- Noises which can be easily rectified
- The appliance is not level
- Drawers, baskets or storage areas are loose or sticking
- Receptacles are touching each other
- Cleaning the appliance
- Eliminating minor faults yourself
- Before you call customer service:
- Changing the bulbs
- Bulb in the freezer compartment
- Bulb in the refrigerator compartment
- Vita Light in the fruit and vegetable compartment
- Customer service
- Güvenlik Bilgileri
Brand : Profilo
Model : BD7310ANF
Category : Refrigerator