
WM14Y540EE - Washing machine SIEMENS - Free user manual and instructions
Find the device manual for free WM14Y540EE SIEMENS in PDF.


User questions about WM14Y540EE SIEMENS
0 question about this device. Answer the ones you know or ask your own.
Ask a new question about this device
Download the instructions for your Washing machine in PDF format for free! Find your manual WM14Y540EE - SIEMENS and take your electronic device back in hand. On this page are published all the documents necessary for the use of your device. WM14Y540EE by SIEMENS.
USER MANUAL WM14Y540EE SIEMENS
en Instruction Manual and Installation Instructions
WM14Y540EE
natural_image
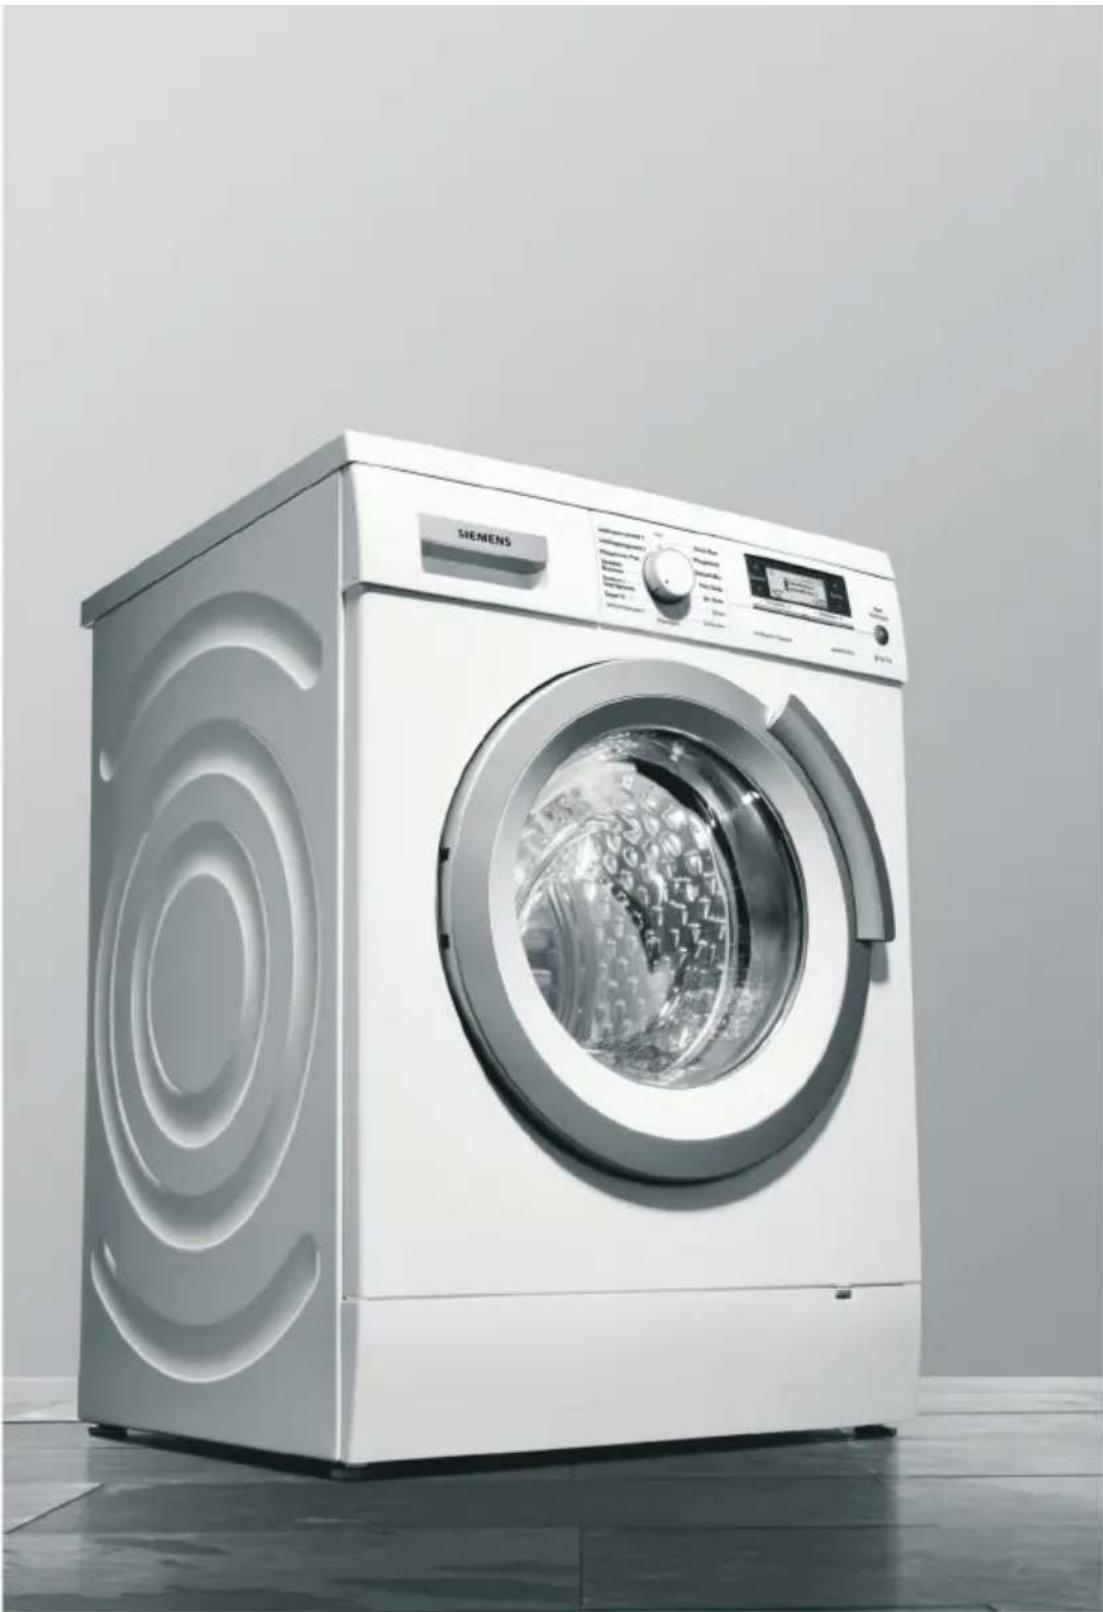
Exterior view of a Siemens washing machine with circular vented design (no visible text or symbols on the device itself)Washing machine
SIEMENS
Your new washing machine
You have chosen a premium washing machine made by Siemens. Thanks to its innovative technologies, the washing machine is distinguished by its perfect washing performance and its economic consumption of water and energy.
Please take a couple of minutes to read and become familiar with the advantages of your washing machine.
To meet the high quality demands of the Siemens brand, each washing machine, which leaves our factory, is inspected thoroughly to ensure that it functions properly and is in perfect condition.
Further information on our products, accessories, spare parts and services can be found at: www.siemens-home.com or contact our customer service centres.
If the instructions for use and assembly describe various models, reference is made to the differences at the appropriate places.
Explanation of the symbols
⚠ Warning!
This combination of symbol and signal word indicates a potentially dangerous situation which may result in death or serious injuries unless it is avoided.
Caution!
This combination of symbol and signal word indicates a potentially dangerous situation which may result in slight or minor injuries or damage to property and the environment.
i
Instructions on how best to use the appliance as well as other useful information.
Before washing
■ Intended use 4
■ Safety instructions 5
■ Protection of the environment 8
- Getting to know your appliance 9
Detergent drawer 10
- Operating elements/Display elements 11
■ The main points in brief 12
Operating the appliance
Before each washing 13
Washing 18
■ After washing 21
Programme overview 22
Programme settings 26
■ Consumption values 28
■ Appliance settings 29
- Sensors – Your washing machine is so intelligent 31
Cleaning and maintenance
■ Care and maintenance 32
Emergency lock release, e.g. if power failure occurs 36
Information on the display panel 37
■ Faults, what to do? 38
- Customer service 40
Installing the appliance
Standard accessories 41
■ Installation 43
■ Remove transportation protection devices 46
■ Connecting the water 48
■ Alignment 51
Electrical connection 52
Before the 1st washing 53
- Transportation, e.g. if moving house 54
Index 55

■ For use in the household only.
The washing machine is suitable for washing machine-washable textiles and hand-washable wool in wash liquor.
The washing machine is suitable to be operated with cold drinking water and commercially available detergents and care products which are suitable for use in washing machines.
- When dosing all detergents, cleaning aids, cleaning products and cleaning agents, always follow the manufacturer's instructions.
The washing machine may be operated by children from 8 years of age, by persons who have limited physical, sensory or mental abilities and by persons who have inadequate experience or knowledge, provided they are supervised or have been instructed by a responsible person.
- Keep pets away from the washing machine!
Read and follow the operating and installation instructions and all other information enclosed with the washing machine.
Retain documents for subsequent use.
⚠ Warning!
Danger of death from electric shock!
Danger of death if live parts are touched.
- Never pull out the mains plug by tugging the power cord.
- Insert/pull out the mains plug with dry hands only.
⚠ Warning!
Risk to children!
- Do not leave children unsupervised near the washing machine.
- Children must not play with the washing machine.
- This will prevent children from locking themselves in and suffocating.
On redundant appliances:
- Pull out the mains plug!
- Sever the power cord and discard together with the plug.
-
Destroy the lock on the washing-machine door.
-
Children must not perform any cleaning or maintenance work without supervision.
- When playing, children may become entangled in the packaging/film and packaging parts or pull them over their heads and suffocate.
Keep packaging, plastic film and packaging parts out of the reach of children.
- When washing at high temperatures, the glass of the washing machine door becomes hot.
Prevent children from touching the hot washing machine door.
- Detergents and care products may cause intoxication if consumed or eye and skin irritation if touched.
Keep detergents and care products out of the reach of children.
⚠ Warning!
Risk of explosion!
Items of washing pretreated with solvent detergents, e.g. stain remover/petroleum ether, may cause an explosion when the washing machine has been loaded.
Before hand thoroughly rinse items of washing by hand.
Caution!
Danger of scalding!
When washing at high temperatures, you may be scalded if you touch the hot wash liquor (e.g. if draining hot wash liquor into a washbasin or if draining the washing machine in an emergency). Allow detergent solution to cool down.
Caution!
Risk of damaging appliance!
- Cover plate may break!
Do not climb on the washing machine.
- Opened washing machine door may break off or washing machine may overturn!
Do not lean on the open washing machine door.
Caution!
Danger when reaching into/gripping the rotating drum!
If you reach into the rotating drum, you may injure your hands. Do not grip the rotating drum. Wait until the drum stops rotating.
Caution!
Risk of coming into contact with liquid detergents/care products!
If the detergent drawer is opened while the washing machine is running, detergent/care product may spray out.
Caution when opening the detergent drawer.
In case of eye/skin contact, rinse thoroughly.
If accidentally swallowed, seek medical advice.
Packaging/Old appliance

Dispose of packaging in an environmentally friendly manner.
This appliance has been identified in accordance with the European Directive 2002/96/EG on Waste Electrical and Electronic Equipment (WEEE).
The Directive specifies the framework for an EU-wide valid return and recycling of waste appliances.
Hints and tips
- Utilise the maximum amount of washing for the particular programme.
■ Wash normally soiled washing without Pre-wash.
Instead of Algodón (Cottons) 90 °C programme select Algodón (Cottons) 60 °C and ecoPerfect 📔 button. Comparable cleaning result with significantly lower energy consumption.
■ Energy saving mode: The display panel light goes out after several minutes, Inicio/Carga (Start/Reload) ▶II flashes. To activate the light, select any button.
The energy-saving mode is not activated if a programme is running.
■ Automatic switch off: If the appliance is not operated for a prolonged period, it automatically switches off before the programme starts and when the programme has ended to save energy. Switch on by pressing main switch① button.
If the washing is then dried in the tumble dryer, select spin speed according to the instructions of the dryer manufacturer.

Getting to know your appliance

text_image
Detergent drawer Operating elements/ Display elements Drum light (depending on model) Door Service flap clackOpening ... and closing the door Service flap

Detergent drawer

SIEMENS
text_image
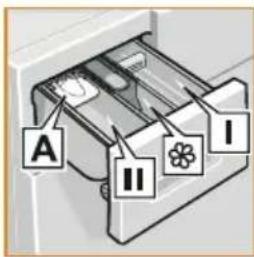
A II IDispenser I Detergent for prewash
Dispenser ✿ Softener, starch. Do not exceed the maximum load.
Dispenser II Detergent for main wash, water softener, bleach, stain remover
Dispenser A for dosing liquid detergent (not for all models)
For models with insert for liquid detergent:
The detergent drawer features an insert which is used as a dosing aid for liquid detergent.
i Do not use insert:
- For gel-like detergents and washing powders.
- For programmes with Prewash or Ready in option.
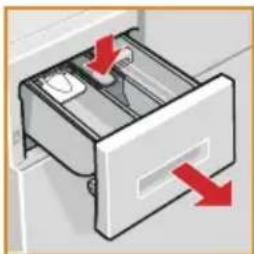
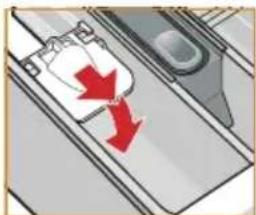
Position insert for dosing liquid detergent:
natural_image
Illustration of a refrigerator drawer with red arrows indicating left and right motion (no text or symbols)Completely remove detergent drawer.
natural_image
Diagram showing a device with red directional arrows indicating movement or change (no text or symbols present)Push insert forwards.
For models without insert for liquid detergent:
Dose liquid detergent according to the manufacturer's instructions.

Operating elements/Display elements
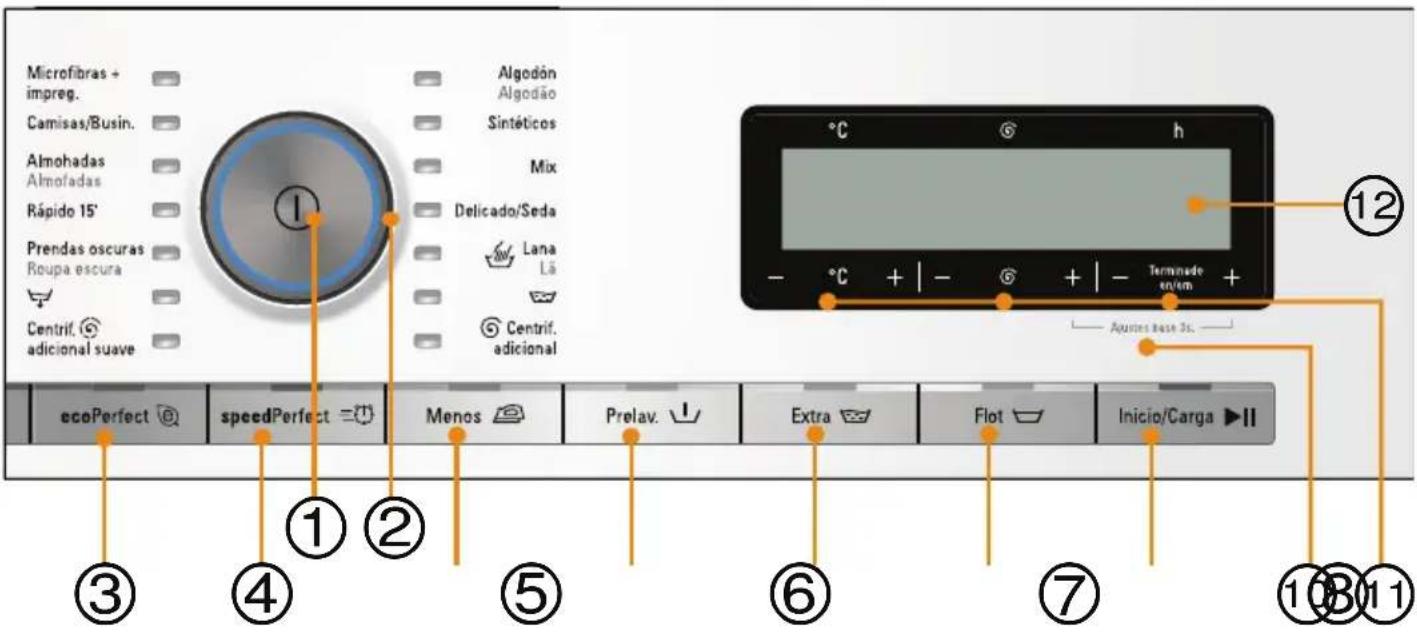
text_image
Microfibras + impreg. Camisas/Busin. Almohadas Almofadas Rápido 15' Prendas oscuras Roupa escura Centrif. adicional suave Algodón Algodão Sintéticos Mix Delicado/Seda Lana Lã Centrif. adicional °C h - °C + | - + | - Termnade en/em + Ajustes Base 3s. ① ② ③ ④ ⑤ ⑥ ⑦ ⑧ ⑨ ⑪ ⑪
i All buttons are sensitive, they only need to be touched gently.
① Press the main switch ① button. Switch on and off the appliance.
② Programme selector can be rotated in either direction. Programme overview, refer to → Page 22
Programme settings: → Page 16, → Page 22
③ ecoPerfect
④ speedPerfect =
⑤ Menos 📄 (Less Ironing)
⑥ Prelav. ⊥ (Pre-wash)
⑦ Extra 📋 (Extra rinse)
⑧ Flot ▽ (Rinse Hold)
⑪ Temperature selection, Select spin speed, End time preselection button
⑨ Inicio/Carga (Start/Reload) ▶II button to start, interrupt and cancel the programme (e.g. Topping up the washing).
⑩ Change appliance settings. Hold down Ajustes base 3s. (Basic settings 3 sec.) buttons for appliance settings (end signal, button signal, language, autom. switch off) for approx. 3 seconds. Overview of all settings → Page 29
⑫ Display panel for settings and information

The main points in brief
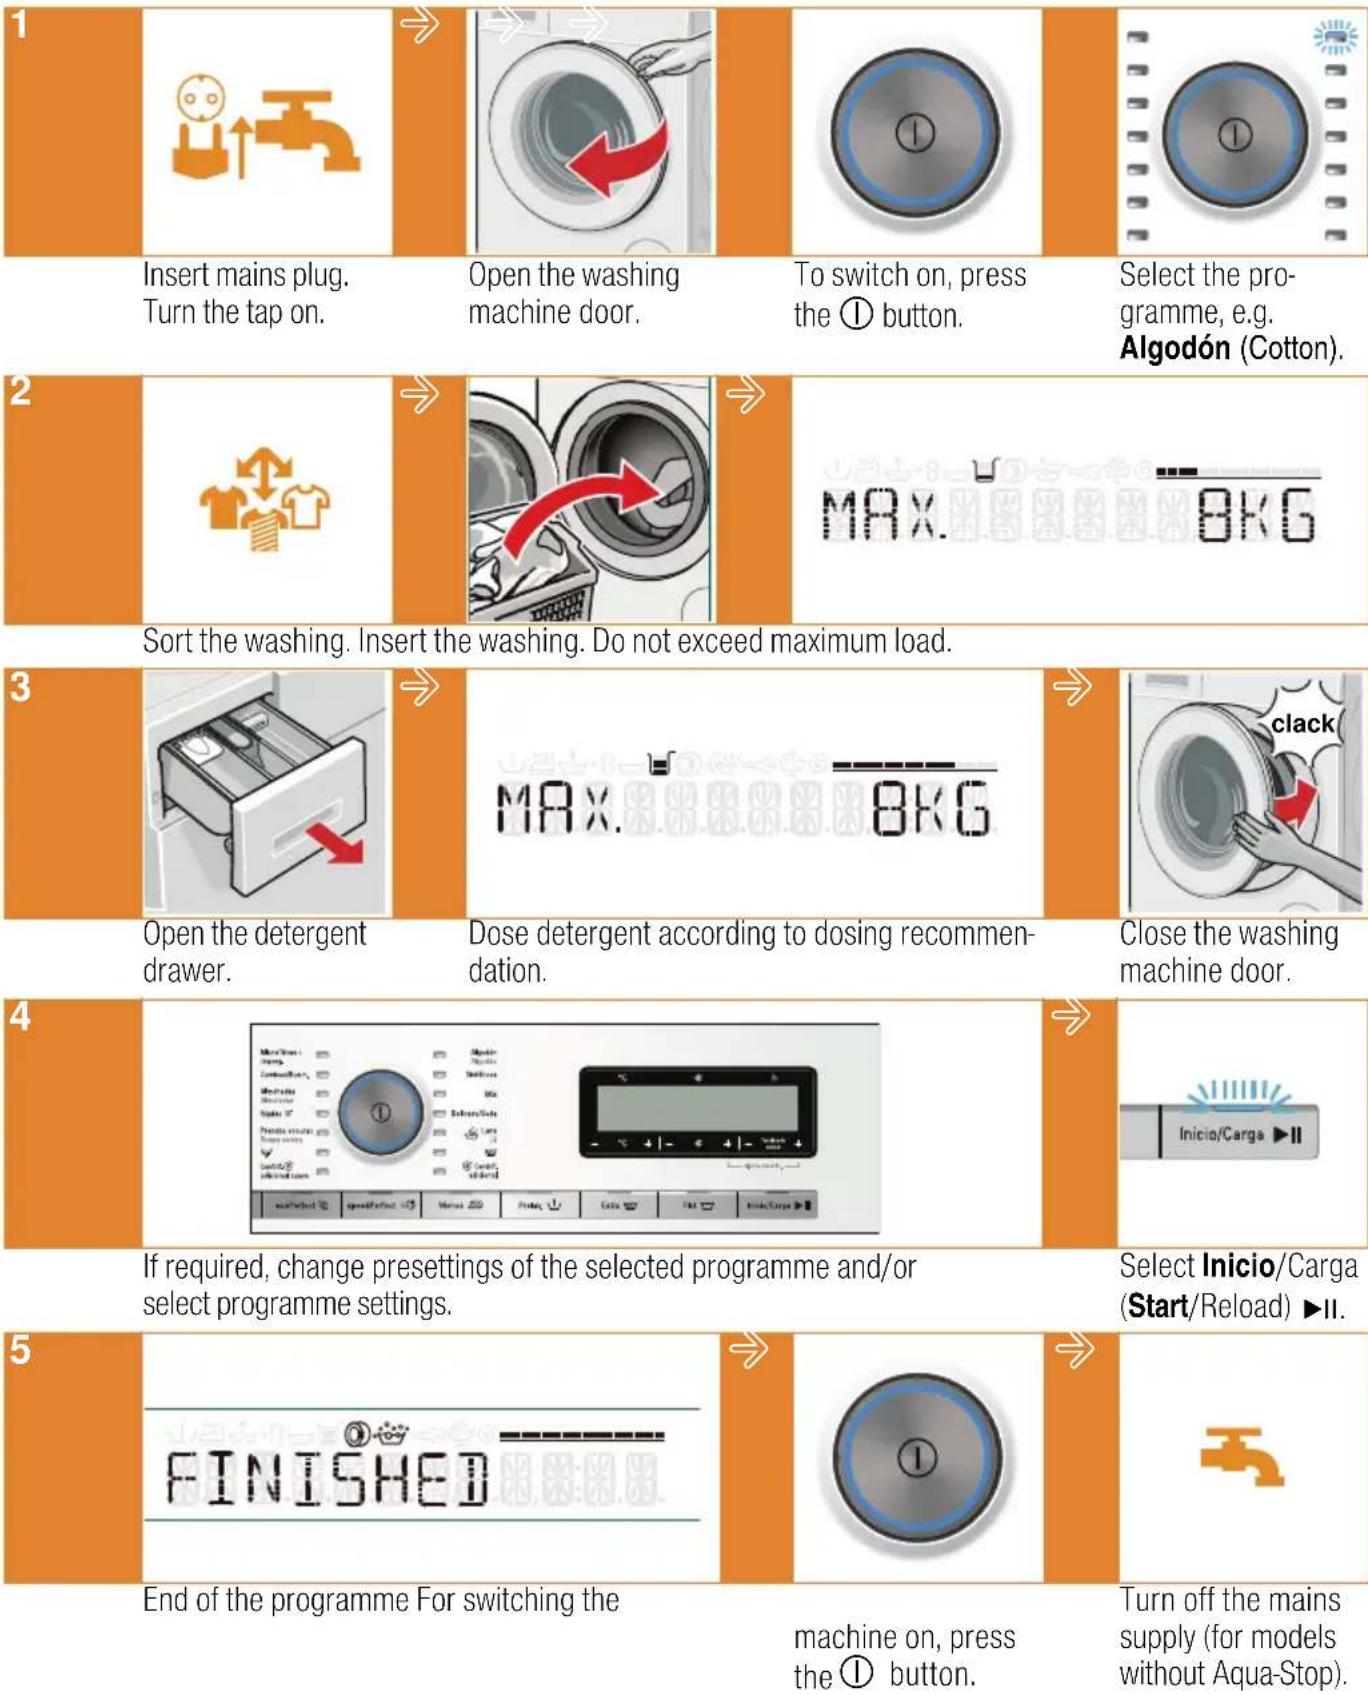
Insert mains plug.
Turn the tap on.
Open the washing machine door.
To switch on, press the Ⓐ button.
Select the pro-
gramme, e.g.
Algodón (Cotton).
Sort the washing. Insert the washing. Do not exceed maximum load.
Open the detergent drawer.
Dose detergent according to dosing recommendation.
Close the washing machine door.
If required, change presettings of the selected programme and/or select programme settings.
Select Inicio/Carga (Start/Reload) ▶II.
End of the programme For switching the
machine on, press the ① button.
Turn off the mains supply (for models without Aqua-Stop).
i - Install and connect washing machine properly.
Refer to → Page 43
- Before the 1st wash, wash once without any washing.
→ Page 53
1. Preparing the washing

natural_image
Three green icons representing T-shirts, one with diagonal stripes, another with up/down arrows, and a third with a striped shirt (no text or symbols)Sorting the washing according to:
■ Type of fabric/fibre.
Colour.
Soiling.
- Follow manufacturer’s care information.
■ Care label specifications:


Cottons 95 °C, 90 °C
Coloureds 60 °C, 40 °C, 30 °C
Easy-Care 60 °C, 40 °C, 30 °C
Delicates 40 °C, 30 °C
Hand and machine-washable silk and woollens cold, 40 °C, 30 °C
Do not wash laundry in the washing machine.
Protecting the washing and the machine:
i – When dosing all detergents, cleaning aids, cleaning products and cleaning agents, always follow the manufacturer's instructions.
- Keep detergents and agents for the pretreatment of washing (e.g. stain remover, prewash sprays, ...) away from the surfaces of the washing machine. Using a damp cloth, immediately remove any fine spray residue and other residue/droplets.
text_image
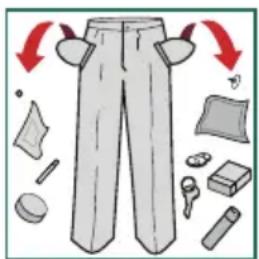
Illustration of a pair of pants with directional arrows indicating movement or change, surrounded by clothing items like bags, accessories, and accessories.- Empty pockets.
- Remove metal parts (paper clips, etc.).
- Wash delicates in the net/bag (tights, underwired bras).
- Close zips, button up cover
- Brush sand out of pockets and collars.
- Remove curtain fittings or include in the net/bag.
- Wash new items separately.
2. Preparing the appliance

Insert mains plug.
Turn on water tap.
3. Selecting programme and loading laundry in the drum
natural_image
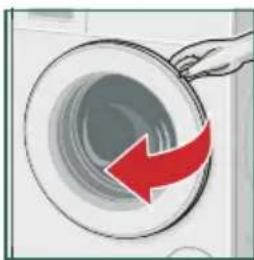
Hand holding a circular object with a red arrow indicating flow or direction (no text or symbols)- Open the washing machine door.
natural_image
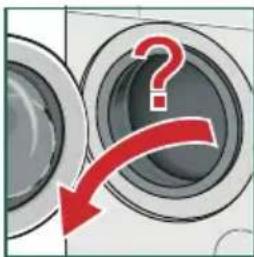
Diagram showing a red arrow pointing to a circular object with a question mark, no text or symbols present- Check whether the drum has been completely emptied. If required, empty. Otherwise, the load display may malfunction. → Page 31
natural_image
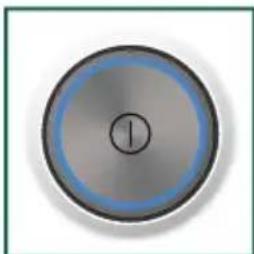
Circular metallic object with a central crosshair and blue ring, no visible text or symbols- Press the ① button. The appliance is switched on.
natural_image
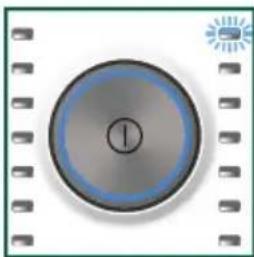
Circular button with number 1 and a small sun icon on the right (no text or symbols)Then always the Algodón (Cottons) programme preset at the factory is displayed.
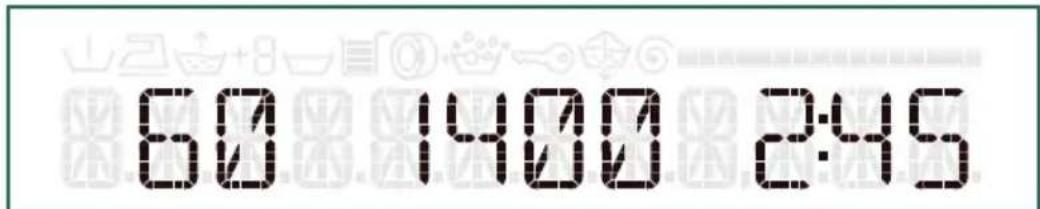
Displays for the Algodón (Cottons) programme:
text_image
60 1400 2:45- The indicator lamp is lit on the programme selector and the main menu for the selected programme is indicated on the display panel.
- For appliances with drum light: After switching on the appliance, after opening and closing the washing machine door as well as after starting the programme, the drum is lit. The light is automatically.
- Select the programme.
You can use the displayed programme
or select another programme. Programme overview, refer to → Page 22
natural_image
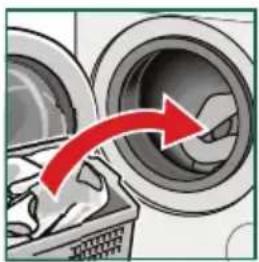
Diagram showing a red arrow pointing to a washing machine component (no text or symbols present)- Insert laundry
text_image
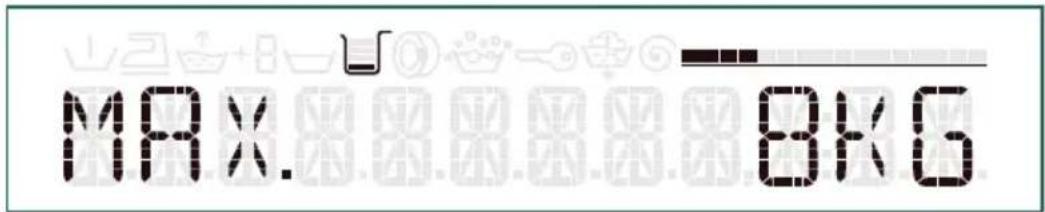
MAX. 8KGThe load screen for the selected programme (e.g. for Cottons) is indicated on the display panel. The load screen is indicated when the door is opened or when the amount of washing is changed.
i – Unfold and load presorted items of washing. Mix large and small items. Washing items of different size distribute themselves better during the spin cycle. Individual items of washing may cause an unbalanced load. Page 31
- Do not load the laundry until the main menu for the programme is displayed.
- The load bar progresses as the washing machine is loaded. If the max. load is exceeded, the bar flashes. Do not exceed indicated max. load. Overfilling reduces the washing result and encourages creasing.
4. Add detergent and fabric care product
-
Pull out the detergent drawer.
-
Dosing in dispenser → Page 10 according to:
- Dosage recommendation on the display panel, e.g. for Cottons:
text_image
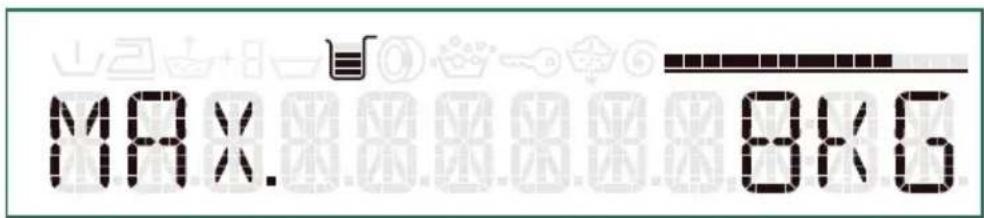
MAX. BK6Depending on the amount of washing in the washing machine, a dosing recommendation is indicated on the display panel. The indicated % refers to the dosage recommendation of the detergent manufacturer.

L = 40 % of the recommendation of the detergent manufacturer
= 60 %
= 75 %
= 100 %
- Soiling,
- Water hardness (depending on model can be determined using enclosed water hardness strip or is available from your water utility company).
- Manufacturer's instructions.
i - When dosing all detergents, cleaning aids, cleaning products and cleaning agents, always follow the manufacturer's instructions.
- Dilute viscous fabric softener and fabric conditioner with water.
Prevents blockage of the overflow!
5. Changing programme settings
Take care not to trap any items of clothing between the loading door and rubber seal.
Close the washing machine door.

text_image
clack60 1400 2:45
The main menu for the selected programme is indicated again on the display panel.
You can use the displayed presettings or adjust the selected programme optimally to the items of washing by changing the presettings or selecting additional settings.
text_image
- °C + |■ Change presettings for temperature, spin speed, finished in time; → Page 22, → Page 26
E.g. select and change - °C + (temperature) buttons :
40 1400 2:45
The settings are active without acknowledgement and are displayed in the main menu.
i - If the buttons are held down, the set values automatically run through (- downwards, + upwards).
- The respective programme duration is displayed by selecting the programme. The programme duration is adjusted while the programme is running if the programme duration requires changing, e.g. due to changes in the programme settings, foam detection, unbalanced load detection, the load or soiling.
■ Select addition programme settings: → Page 22, → Page 26
- ecoPerfect ⓔ
For saving energy with a comparable washing effect to the standard programme. When selected, the display lamp is lit.
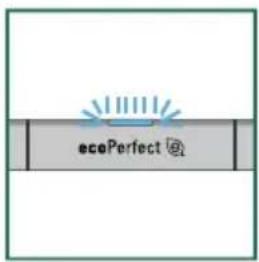
text_image
ecoPerfect @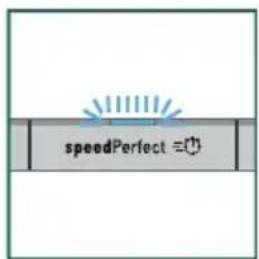
text_image
speedPerfect ≡- speedPerfect ≡
For a shorter wash time with a comparable washing effect to the standard programme. Observe maximum load. → Page 22 When selected, the display lamp is lit.
text_image
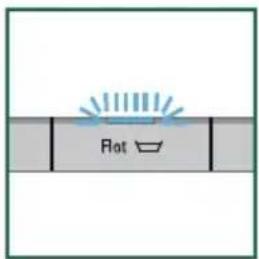
RotOther settings can be selected depending on the model, e.g. Flot ☐ (Rinse Hold) button:
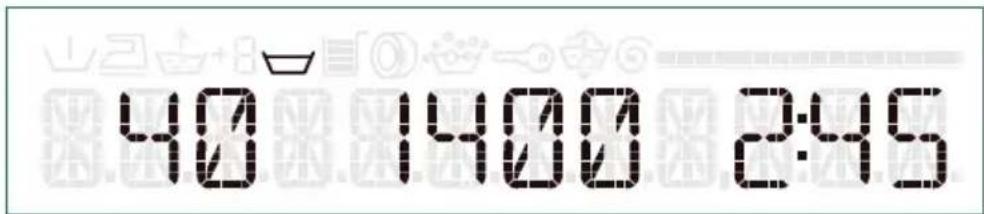
text_image
40 1400 2:45When selected, the button indicator lamp is lit and a corresponding symbol is indicated on the display panel:
Button Menos 📄 (Less Ironing)
Button Prelav. ⏻ (Pre-wash)
Button Extra 📋 (Extra rinse) - 🖱 + 1, 2, 3 (Rinse cycles)
Button Flot ☐ (Rinse Hold)
6. Starting the programme
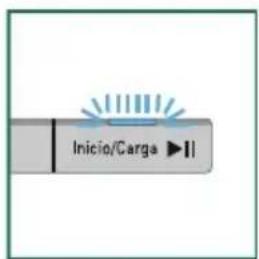
■ Select Inicio/Carga (Start/Reload) ▶II. The indicator light is on.

Washing
Programme sequence
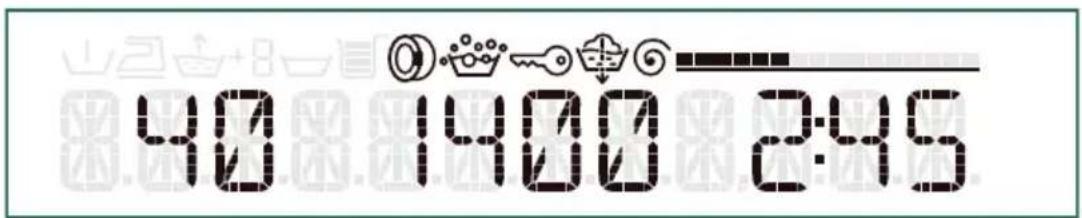
While the programme is running, the programme progress is indicated on the display panel via corresponding symbols and a progress bar. The bar progresses in the course of the wash cycles.
text_image
40 1400 2:45The combined symbol ⚙ indicates the following programme states:
Pre-wash
Wash
Rinse
Drain
Other symbols:
Spin
Childlock has been activated
Overdosage of the detergent detected, additional rinse cycles activated.
① is lit when the door is locked or unlocked.
During the washing
Childlock
To prevent the set functions of the washing machine from being accidentally changed, the childproof lock can be activated when the programme has started.
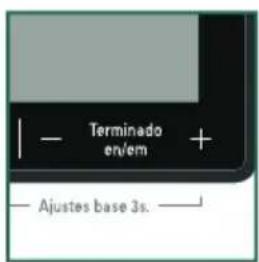
Activate/deactivate: press Terminado en/em + (Finished in +) for approx. 5 seconds.
text_image
Terminado en/em + Ajustes base 3s.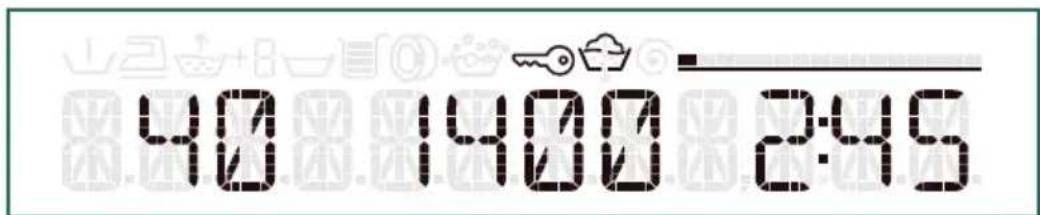
text_image
40 1400 2:45The activated childproof lock is indicated on the display panel by the symbol 🔍.
If the programme selector is adjusted or a button is selected while the childproof lock is active, the 🔗 symbol flashes briefly.
■ Topping up laundry
When the programme has started, washing can be reloaded or taken out as required.
Select Inicio/Carga (Start/Reload) ▶II.
i - If there is a high water level, high temperature or if the drum is rotating, the washing machine door remains locked for reasons of safety and reload is not possible. Follow the information on the display panel. To continue the programme, select the Inicio/Carga (Start/Reload) ▶II button. The washing machine door is locked and the programme continues automatically.
- Load display is not active during reloding.
- Do not leave washing machine door open for a prolonged period – water could run out of the washing.
■ Changing the programme
if you have mistakenly started a wrong programme.
- Select Inicio/Carga (Start/Reload) ▶II.
- Select another programme.
- Select Inicio/Carga (Start/Reload) ▶II. The new programme starts from the beginning.
■ Cancelling the programme
For programmes at high temperature:
- Select Inicio/Carga (Start/Reload) ▶II.
- Cool down laundry: select Rinse.
- Select Inicio/Carga (Start/Reload) ▶II.
For programmes at low temperature:
- Select Inicio/Carga (Start/Reload) ▶II.
- Select Ⓤ Centrif. adicional (Spin) or 🏠 (Drain).
- Select Inicio/Carga (Start/Reload) ▶II.
■ End of programme by Flot ☐ (Rinse Hold). Programme stops in the last rinse cycle.

text_image
RINSE HOLD- Select Inicio/Carga (Start/Reload) ▶II. The programme continues with the drain and spin cycles (if required change spin speed).
- If only the drain cycle, but not the spin cycle, is required, select and start the ☑ (Drain) programme.
End of the programme
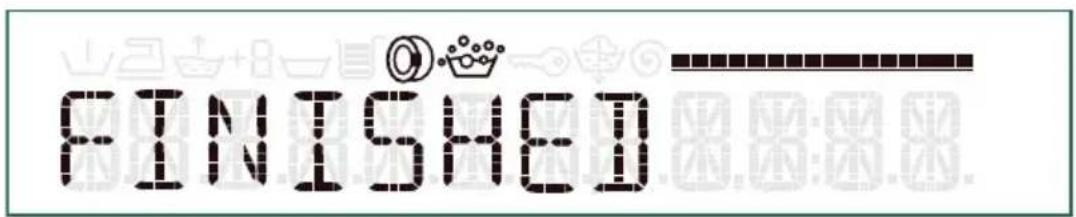
FINISHED is indicated on the display panel.
text_image
FINISHEDIf the symbol 🎨 is also indicated on the display panel, the washing machine has detected too much foam during the wash programme and therefore automatically activates additional rinse cycles to eliminate the foam.
i Dose less detergent in the next wash cycle with the same load.

After washing
natural_image
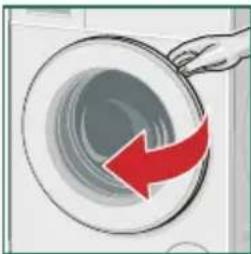
Illustration of a hand opening a circular device with a red arrow indicating clockwise motion (no text or symbols)- Open washing machine door and remove washing.
i – Do not leave any items of washing in the drum. In the next wash they may shrink or discolour something else.
natural_image
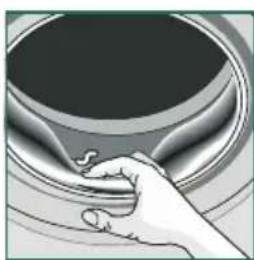
Hand pressing down on a curved surface with a dark circular top (no text or symbols visible)- Remove any foreign objects from the drum and the rubber seal – risk of rust.
- Leave detergent drawer and door open so that residual water can evaporate.
Before switching the machine off:
i – Always remove the washing. Otherwise, the load display may malfunction.
- Always wait until the programme ends, as the appliance could still be locked. Then switch the appliance on and wait for the unlocking device.
- Press the ① button. Appliance is switched off.
natural_image
Circular metallic button with a numbered circle at center, no text or symbols visible
- Turn off the tap. Not required for Aqua-Stop models. → Page 60

natural_image
Illustration of five clothing items: a dress, socks, bras, t-shirt, and hooded shirt (no text or symbols)The presettings of the programmes are highlighted in bold.
Programme/Type of washing Settings/Information
 | Name of the programmeBrief explanation of the programme and for which textiles it is suitable. | max. load | |
| selectable temperature as °C | |||
| selectable spin speeds in rpm, the max. spin speed and the pre-setting depends on the model | |||
| possible programme settings | |||
| at the “less ironing” programme setting: possible spin speeds in rpm | |||
 | Algodón/Algodão (Cottons)Hard-wearing textiles, heat-resistant textiles made of cotton or linen. i * reduced load for speedPerfect = option | max. 8 kg/5 kg* | |
| cold - 60 - 90 °C | |||
| 0 ... 1400 ... 1600 rpm | |||
| @, = , @, , @, @, @, @, @, @, @, @, @, @, @, @, @, @, @, @, @, @, @, @, @, @, @, @, @, @, @, @, @, @, @, @, @, @, @, @, @, @, @, @, @, @, @, @, @, @, @, @, @, @, @ | |||
| at @: 0 ... 800 rpm | |||
 | Sintéticos (Easy-Care)Textiles made of synthetic materials or blended fabrics. | max. 3.5 kg | |
| cold - 40 - 60 °C | |||
| 0 ... 1200 rpm | |||
| @, = , @, @, @, @, @, @, @, @, @, @, @, @, @, @, @, @, @, @, @, @, @, @, @, @, @, @, @, @, @, @, @, @, @, @, @, @, @, @, @, @, @, @, @, @, @, @, @, @, @, | |||
| at @: 0 ... 600 ... 800 rpm | |||
 | Mix (Mixed Fabrics)Mixed load consisting of textiles made of cotton and synthetics. | max. 3.5 kg | |
| cold - 40 °C | |||
| 0 ... 1400 ... 1600 rpm | |||
| @, = , @, @, @, @, @, @, @, @, @, @, @, @, @, @, @, @, @, @, @, @, @, @, @, @, @, @, @, @, @, @, @, @, @, @, @, @, @, @, @, @, @, @, @, @ | |||
| at @: 0 ... 600 ... 800 rpm | |||
 | Delicado/Seda (Delicates/Silk)For delicate, washable textiles, e.g. made of silk, satin, synthetic fibres or blended fabrics (e.g. silk blouses, silk scarf). i For machine wash use detergent suitable for delicates or silk. | max. 2 kg | |
| cold - 30 - 40 °C | |||
| 0 ... 600 ... 800 rpm | |||
| @, = , @, @, @, @, @, @, @, @, @, @, @, @, @, @, @, @, @, @, @, @, @, @, @, @, @, @, @, @, @, @, @, @, @, @, @, @, @, @, @, @, @, @, @, @ | at @: 0 ... 600 rpm |

natural_image
Illustration of five clothing items: a dress, socks, bras, T-shirt, and hooded sweater (no text or symbols)The presettings of the programmes are highlighted in bold.
Programme/Type of washing Settings/Information
 | Lana/Lã (Wool)Hand or machine-washable woolor rich-wool textiles.Especially gentle wash programmeto prevent shrinkage, longer pro-gramme pauses (textiles rest in washliquor).i Wool is of animal origin, e.g.:angora, alpaca, lama, sheep.i For machine wash use detergentsuitable for wool. | max. 2 kgcold - 30 - 40 °C0 ... 800 rpm |
 | (Rinse)Extra rinse with spin. | - |
| - | ||
| 0 ... 1200 ... 1600 rpm | ||
| at: 0 ... 800 rpm | ||
 | Centrif. adicional (Spin)Extra spin with selectable spin speed. | - |
| - | ||
| 0 ... 1200 ... 1600 rpm | ||
| at: 0 ... 800 rpm | ||
 | Centrif. adicional suave (Spin lowprogram)Extra spin cycle at reduced speed andwith especially gentle spin mechanism. | - |
| - | ||
| 0 ... 800 ... 1200 rpm | ||
| at: 0 ... 600 rpm | ||
 | (Drain)the rinsing water, e.g. after Flot (Rinse Hold) (without final spin cycle). | - |
| - | ||
| - | ||
| - |

natural_image
Illustration of five clothing items: a dress, socks, bras, t-shirt, and jacket (no text or symbols)The presettings of the programmes are highlighted in bold.
Programme/Type of washing Settings/Information
 | Prendas oscuras/Roupa escura(Easy-Care Plus)Dark textiles made of cotton and dark easy-care textiles.Wash textiles inside out. | max. 3.5 kg |
| cold - 30 - 40 °C | ||
| 0 ... 800 ... 1200 rpm | ||
| @,≡,@,⊥,⊥,⊥,⊥at @: 0 ... 600 ... 800 rpm | ||
 | Rápido 15 (Super 15')Extra short programme approx.15 minutes, suitable for lightly soiled washing as a small amounts of laundry. | max. 2 kg |
| cold - 30 - 40 °C | ||
| 0 ... 800 ... 1200 rpm | ||
 | Almohadas/Almofadas (Down Wear)Machine-washable textiles filled with down, pillows, blankets or duvets.i Wash large items individually. Use mild detergent. Measure detergent sparingly. | max. 2 kg |
| cold - 40 - 60 °C | ||
| 0 ... 1200 rpm | ||
| @,≡,@,⊥,⊥,⊥ | ||
 | Camisas/Busin. (Shirts/Business)Non-iron shirts/blouses made of cotton, linen, synthetics fibres or blended fabrics.For the Menos (Less Ironing) option, shirts/blouses are given a short spin only, hang up dripping wet. → Self-smoothing effect.i Wash shirts/blouses made of silk/delicate materials in the Delicates/Silk programme. | max. 2 kg |
| cold - 40 - 60 °C | ||
| 0 ... 800 rpm | ||
| @,≡,@,⊥,⊥,⊥,⊥at @: 0 ... 400 rpm |

Programme/Type of washing Settings/Information

Microfibras + impreg.
(Outdoor/Textileguard)
Washing followed by water proofing of weatherproof and outdoor clothing with membrane coating and water-resistant textiles.
max. 1 kg
cold - 30 - 40 °C
0 ... 800 rpm
e, = ⏱, ↑
Use special detergents suitable for machine wash. Dosage according to manufacturer's instructions.
- Pour into dispenser II special detergent and
- textile guard agent (max. 170 ml) into dispenser ⚙.
i The laundry must not be treated with fabric softener.
Before washing, remove all fabric softener residue from detergent drawer (all dispensers).
Starching
i The washing should not be treated with fabric softener.
Liquid starch can be used in all wash programmes. Pour starch into the dispenser ⚙ according to manufacturer's specifications (if required clean beforehand).
Dyeing/Discolouring
Dye in household quantities only. Salt may attack stainless steel! Observe specifications of the dye manufacturer!
Do not discolour washing in the washing machine!
Soaking
Pour soaking agent/detergent into dispenser II according to the manufacturer's instructions. Set programme selector to Algodón (Cottons) 30 °C and select Inicio/Carga (Start/Reload) ▶II.
After approx. 10 minutes select Inicio/Carga (Start/Reload) ▶II. After the required soaking time reselect Inicio/Carga (Start/Reload) ▶II, if the programme is to be continued or change the programme.
i Insert washing of the same colour. No additional detergent required, the soaking solution is used for washing.
Depending on the programme, you can use the programme settings to adjust the washing process even more efficiently to your items of washing.
Programme settings:
i – are active without acknowledgement.
- not retained after appliance is switched off.
- can be selected or deselected or changed depending on the programme progress.
Buttons Notes
| - °C +(Temperature) | Before and during the programme the presettings can be changed depending on the programme progress.Maximum spin speed depends on the programme and model. | |
| - Ⓥ + (Spin) | ||
| -Terminado en/em + (Finished in) | Delays the Finished in time (end of programme). Before the programme starts, the end of the programme can be preselected in h steps up to maximum 24h.When the programme has started, the preselected time is displayed e.g. for 8h and counts down until the wash programme starts. Then the programme duration is displayed, e.g. 2:30h.When the programme has started, the preselected time can be changed as follows:1. Select Inicio/Carga (Start/Reload) ▶II.2. Select - Terminado en/em + (Finished in) button and change Finish in time.3. Select Inicio/Carga (Start/Reload) ▶II. | |
| Terminado en/em + (Finished in +) | To activate/deactivate the childlock → Page 18 | |
| ecoPerfect Ⓠ | For saving energy. | |
| speedPerfect ≡ | For a shorter wash time. |
Buttons Notes
  | Menos (Less Ironing) | Reduces creasing by special spin sequence followed by fluffing and reduced spin speed.i Residual moisture of the washing is slightly increased. |
  | Prelav. (Pre-wash) | For heavily soiled washing.Pour detergent into dispensers I and II. |
  | Extra (Extra rinse)↑ + 1 Rinse↑ + 2 Rinses↑ + 3 Rinses | Additional rinse cycles depending on the programme, prolonged programme duration.i Recommended application: for particularly sensitive skin and/or in areas with very soft water. |
  | Flot (Rinse Hold) | The washing remains in the water after the last rinse cycle. End the programme. |
| Programme Load Energy | consumption *** | Water *** | Programme duration *** | ||
| Algodón/Algodão (Cottons) 30 °C * | 8 kg | 0.38 kWh | 76 l | 2:35 h | |
| Algodón/Algodão (Cottons) 40 °C * | 8 kg | 0.97 kWh | 76 l | 2:45 h | |
| Algodón/Algodão (Cottons) 60 °C * | 8 kg | 1.31 kWh | 76 l | 2:45 h | |
| Algodón/Algodão (Cottons) 90 °C | 8 kg | 2.40 kWh | 87 l | 2:35 h | |
| Sintéticos (Easy-Care) 40 °C * | 3.5 kg | 0.55 kWh | 55 l | 1:43 h | |
| Mix (Mixed Fabrics) 40 °C | 3.5 kg | 0.58 kWh | 49 l | 1:01 h | |
| Delicado/Seda (Deli-cates/Silk) 30 °C | 2 kg | 0.14 kWh | 34 l | 0.43 h | |
| Lana/Lã (Wool) 30 °C | 2 kg | 0.19 kWh | 39 l | 0:40 h | |
* Programme setting for tests according to currently valid European standard EN60456. Information about comparability tests: To test the test programmes, wash indicated load size at maximum spin speed.
| Programme Additional function | Load Annual energy consumption | Annual water consumption | ||
| Algodón/Algodão (Cottons) 40/60 °C | ecoPerfect ** | 8/4 kg | 189 kWh | 10500 l |
** Programme setting for testing and energy labelling according to directive 2010/30/EU with cold water (15 °C).
*** The values may deviate from the stated values depending on water pressure and hardness, room temperature, type and amount of laundry, detergents used, fluctuations in the mains voltage and selected additional functions.

Appliance settings
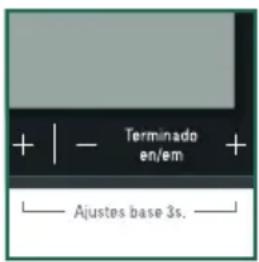
The Ajustes base 3s. (Basic settings 3 sec.) buttons
(◎ + and Terminado en/em (Finished in) +) can be used to change the set values of the appliance settings, e.g. the volume of the button signals.
text_image
+ | - Terminado en/em + — Ajustes base 3s.Simultaneously hold down Ajustes base 3s. (Basic settings 3 sec.) buttons for approx. 3 seconds:
BUTTON SIG: 2
The access menu for changing the appliance settings appears on the display panel.
The - Terminado en/em + (- Finished in +) button can be used to change the set values.
If the buttons are held down, the set values automatically run through.
The - Ⓤ + (- Spin +) button can be used to select other settings.
If the buttons are held down, the settings automatically run through.
To end the settings, wait or hold down the Ajustes base 3s. (Basic settings 3 sec.) buttons again.
i Settings are retained after appliance is switched off.
Settings Set values Notes
| END SIGNAL 0 = off | Adjust volume of the end signal. |
| 1 = quiet | |
| 2 = medium | |
| 3 = loud | |
| 4 = very loud | |
| BUTTON SIG. 0 = off | Adjust volume of the button signals. |
| 1 = quiet | |
| 2 = medium | |
| 3 = loud | |
| 4 = very loud |
Settings Set values Notes
| LANGUAGE IE = GermanGB = English... | Change displayed language. |
| AUTO OFF IS (min.)30 (min.)1:00 (h=hour)OFF | The appliance automatically switches off after the selected time (=0 kWh energy consumption). to switch on, press main switch button 1. |

Sensors – Your washing machine is so intelligent
Load adjust
Depending on the type of textile and load, the load adjust optimally adjusts the water consumption in each programme.
Aqua-Sensor depending on model
During the rinse cycle the Aqua sensor checks the degree of turbidity (turbidity is caused by dirt and detergent residue) of the rinsing water. The duration and the number of rinse cycles depend on the turbidity of the water.
Load sensor/Load display
The load sensor detects the load level in the washing machine when the door is open. This is indicated by a progressing bar on the display panel.
i To ensure that the load sensor measures all the laundry, the drum must be empty before the washing machine is switched on.
Dosing recommendation
A detergent dosage recommendation is displayed depending on the selected programme and the detected load. Page 15
i By observing the recommended dosage, you will protect the environment and reduce your household costs.
Unbalanced load detection system
The automatic unbalanced load detection system spins the laundry several times to ensure even distribution.
For reasons of safety the speed is reduced or does not perform a spin cycle if the washing is very unevenly distributed.
i Distribute small and large items of washing in the drum. Faults, what to do? → Page 38
⚠ Warning!
Danger of death from electric shock!
Danger of death if live parts are touched.
Switch off the appliance. Pull out the mains plug!
Caution!
Fire and explosion hazard!
If solvent cleaning agents, e.g. petroleum ether, are used in the washing machine, components may be damaged and toxic fumes generated.
Do not use solvent-based cleaning agents.
Caution!
Washing machine may be damaged!
If solvent cleaning agents, e.g. petroleum ether, are used on the washing machine, the surfaces may be damaged.
Do not use solvent-based cleaning agents.
Machine housing/Control panel
■ Remove detergent residue immediately.
■ Wipe with a soft, damp cloth.
- Do not clean the appliance with a water jet.
Drum
Use chlorine-free cleaning agent, not steel wool.
Descaling
Not required if detergent dosed correctly. However, if this does occur, follow the instructions of the descaling agent manufacturer. Suitable descalers can be purchased on our website or from customer service. → Page 40

Cleaning the detergent drawer
If it contains detergent or fabric softener residue:
natural_image
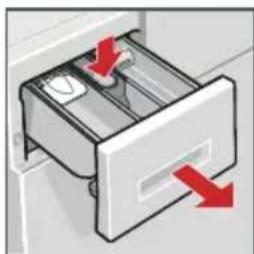
Illustration of a file drawer with red arrows indicating direction (no text or symbols)- Pull out, depress insert, take out drawer all the way.
natural_image
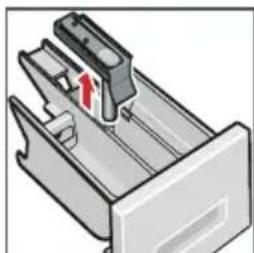
Diagram of a mechanical component with a red arrow indicating direction (no text or symbols)- Take out insert: using your finger, press insert upwards.
- Clean detergent dispenser and insert with water and a brush and dry.
- Attach insert and lock into position (push cylinder onto guide pin).
- Insert detergent drawer.
i Leave detergent drawer open so that residual water can evaporate.
Drain pump blocked
⚠ Warning! Danger of scalding!
Wash liquor is hot when washing at high temperatures. You may be scalded if you touch the hot wash liquor. Allow detergent solution to cool down.
i Turn the tap off to prevent more water from flowing in and to ensure that it is drained via the pump.
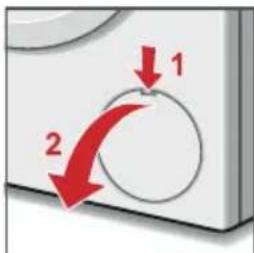
text_image
1 2- Switch off the appliance. Pull out the mains plug!
- Open service flap.
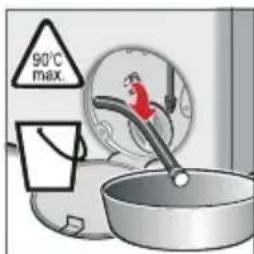
text_image
90°C max.- Take the drainage hose out of the holder.

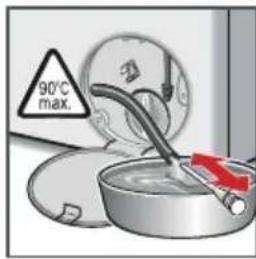
text_image
90°C max.- Remove sealing cap, allow detergent solution to flow out. Have a suitable container ready. Push up the closing cap and place the drain hose back in its holder.
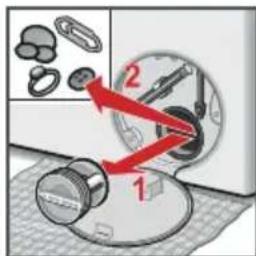
text_image
Diagram showing a washing machine with labeled parts and directional arrows indicating process flowNote: Residual water may run out.
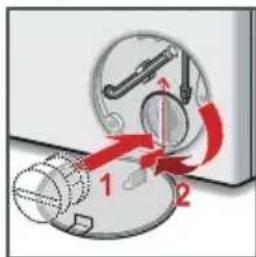
- Carefully unscrew the pump cover. Clean the interior, pump cover thread and pump housing (fan impeller in the detergent-solution pump must rotate).
text_image
Diagram illustrating mechanical assembly with labeled parts and directional arrows, likely from an engineering or manufacturing context.-
Reinsert and screw on pump cover. Handle should be vertical.
-
Close the service flap. If required, lock disengaged service flap beforehand.
To prevent unused detergent from flowing into the outlet during the next wash: Pour 1 litre of water into dispenser II and start the Drain programme.
Drainage hose on the siphon blocked
- Switch off the appliance. Pull out the mains plug!
Note: Residual water may run out!
text_image
Diagram showing a pipe installation with labeled components and a red arrow indicating direction of movement or repair.-
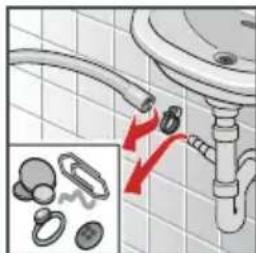
Loosen hose clip, carefully remove drainage hose.
-
Clean drainage hose and siphon spigot.
-
Re-attach drainage hose and secure connection point with hose clip.
Filter blocked in water inlet hose
First, release water pressure in the supply hose:
- Turn off the tap!
- Select any programme (except Centrif. adicional Ⓤ (Spin)/♀ (Drain)).
- Select Inicio/Carga (Start/Reload) ▶II. Leave programme for approx. 40 seconds.
- Press the ① button. Appliance is switched off. Pull out the mains plug!
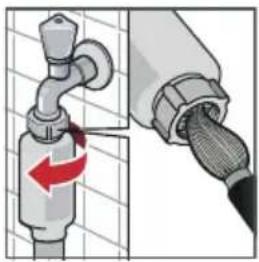
- Clean the filter:
Disconnect the hose from the water tap. Clean filter with small brush.
natural_image
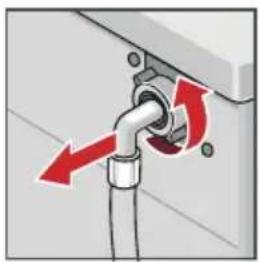
Diagram showing pipe connection with a red arrow indicating direction, no text or symbols presentand/or for standard and Aqua-Secure models:
natural_image
Diagram of a pipe fitting with red arrows indicating direction (no text or symbols)Remove hose from the rear of the appliance.
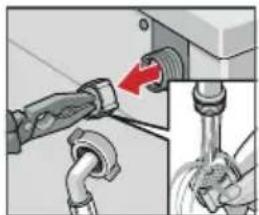
natural_image
Diagram showing pipe fittings and a valve assembly with a red arrow indicating direction (no text or symbols)Take out filter with pliers and clean.
- Connect the hose and check for leaks.
Emergency lock release, e.g. if power failure occurs
The programme continues running when the power supply is restored. If the washing is still to be removed, the door can be opened as described below:
⚠ Warning!
Danger of scalding!
Wash liquor and washing may be hot. If touched, there is a risk of scalding.
If required, leave to cool down.
Caution!
Danger when reaching into/gripping the rotating drum!
If you reach into the rotating drum, you may injure your hands.
Do not grip the rotating drum. Wait until the drum stops rotating.
Caution!
Water damage possible!
Leaking water may cause damage.
Do not open the door if you can still see water through the glass.
- Switch off the appliance. Pull out the mains plug!
- Drain the water. → Page 33
- Pull down emergency release with a tool and release. Door can then be opened.
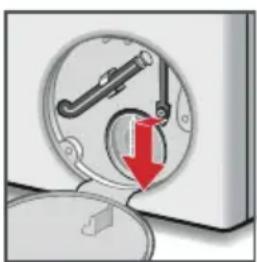
natural_image
Mechanical device with a red arrow indicating rotation or force application (no text or symbols)Display Cause/Remedy
| CLOSE DOOR | - Washing may be caught. Please open and close washing machine door again and selectInicio/Carga (Start/Reload) ▶II.- If required, shut washing machine door or remove washing and shut again.- If required, switch appliance off and on again; set programme and make individual settings; start programme. |
| LOW WATER PRESSURE OPEN TAP | - Turn on tap fully.- Supply hose kinked/jammed.- Water pressure too low. Clean the filter. |
| PUMP IS BLOCKED CLEAN PUMP | - Drain pump blocked. Clean the drain pump. → Page 33- The water drainage pipe/drain hose is blocked. Clean the drainage hose on the siphon. → Page 34 |
| DOOR IS LOCKED | Water level or temperature is too high.SelectInicio/Carga (Start/Reload) ▶II to continue the programme. |
| LOCKING... UNLOCKING... | If the Inicio/Carga (Start/Reload) ▶II button is pressed too frequently (e.g. repeatedly reloading items of washing), the door lock may overheat. Wait for the door lock to lock or unlock. |
| E:23 | not applicable without AquaStopWater in the base pan, appliance leaking.Call customer service! → Page 40 |
| Error E:XXX | Switch off appliance, wait 5 seconds and switch on again. If the display is indicated again, call customer service. → Page 40 |

Faults, what to do?
Faults Cause/Remedy
| Water is running out. - Correctly attach/replace drainage hose.- Tighten screw-fitting on the supply hose. | |
| Water not flowing in. Detergent not washed in. | -Inicio/Carga (Start/Reload) ▶II not selected?- Tap no t open?- Filter blocked? Clean the filter.- Supply hose kinked or jammed? |
| Washing-machine door cannot be opened. | -Safety function active. Stop programme?-Flot (without final spin) selected?- Can be opened via emergency release only? → Page 36 |
| Programme does not start. | -Inicio/Carga (Start/Reload) ▶II or Terminado en/em (Finished in) time selected?- Door closed?- Childlock active? Deactivate. |
| Detergent solution is not drained. | -Flot (without final spin) selected?- Clean the drain pump. → Page 33- Clean outlet pipe and/or drainage hose. |
| Water not visible in the drum. | Not a fault - water below the visible area. |
| Spin result not satisfactory.Washing wet/too damp. | - Not a fault - unbalanced load detection system has stopped the spin cycle, washing unevenly distributed.Distribute small and large items of washing in the drum.- Menos (Less Ironing) selected?- Too low speed selected? → Page 22 |
| Spin cycle actuated several times. | Not a fault - unbalanced load detection system adjusts imbalance. |
| Residual water in the dispenser for care product. | - Not a fault - effect of the care product not impaired.- If required, clean insert. → Page 33 |
| Odour formation in the washing machine. | Run Algodón (Cottons) 90 °C programme without washing.Use standard detergent. |
| Loud noise forma-tion, vibrations and “wandering” during spin cycle. | -Appliance aligned?Align the appliance. → Page 51-Appliance feet fixed?Secure appliance feet. → Page 51- Transportation safety devices removed?Remove transportation protection devices. → Page 46 |
Faults Cause/Remedy
| Display panel/indicator lights do not function while the appliance is running. | - Power failure? - Fuse tripped? Switch on/replace fuse. - If the fault occurs repeatedly, call customer service. → Page 40 |
| The programme takes longer than usual. | - Not a fault – unbalanced load detection system adjusts imbalance by repeatedly distributing the washing. - Not a fault – foam detection system active – several rinse cycles are switched on. |
| Detergent residue on the washing. | - Occasionally phosphate-free detergents contain water-insoluble residue. - Select (Rinse) or brush the laundry after washing. |
| In the pause status Inicio/Carga (Start/Reload) ▶II flashes very quickly and a signal sounds. | - Water level too high. Washing cannot be reloaded. Immediately close washing machine door. - Select Inicio/Carga (Start/Reload) ▶II to continue the pro-gramme. |
| If a fault cannot be rectified (switching the machine on and off) or a repair is required: - Switch off the appliance and pull out the mains plug. - Turn off the tap and call customer service. → Page 40 | |

Customer service
If you cannot rectify the fault yourself, Faults, what to do?
→ Page 38, please contact our customer service. We will always finds a suitable solution to avoid unnecessary visits by technicians.
Please give customer service the product number (E-Nr.) and the production number (FD) of the appliance.
E-Nr. FD
Product number Production number
These instructions can be found on: inside of washing machine door */open service flap * and rear of the appliance.
* depending on model
Rely on the competence of the manufacturer.
Contact us. You can therefore be sure that the repair is carried out by trained service technicians who carry original spare parts.
depending on model:
natural_image
Diagram of a medical or laboratory setup with tubing and blue markers, no visible text or symbols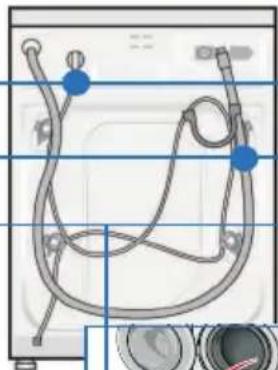
natural_image
Diagram of a washing machine with hoses and connectors (no text or labels)Mains cable
Water outlet
Water inlet
Instruction manual and Installation instructions
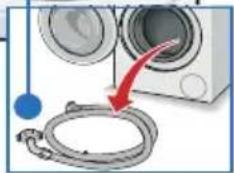
natural_image
Diagram showing a washing machine connected to a coiled hose, with a red arrow indicating direction (no text or symbols present)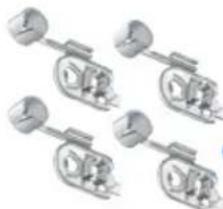
natural_image
Four identical mechanical components with circular ends and shafts, arranged in a grid (no text or symbols visible)Covers with hose clip
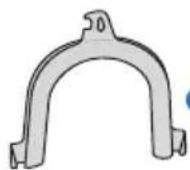
Elbow
for securing the water outlet hose
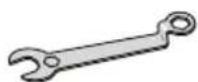
Spanner
Also required for connection of the water drainage hose to a siphon:
1 hose clip ∅ 24–40 mm (DIY store) is also required for connection to a siphon. Connecting the water → Page 50
Useful tools:
■ Spirit level for alignment.
Socket wrench
size 13: for loosening the transportation protection devices → Page 46 and
size 17: for aligning the appliance feet. → Page 51
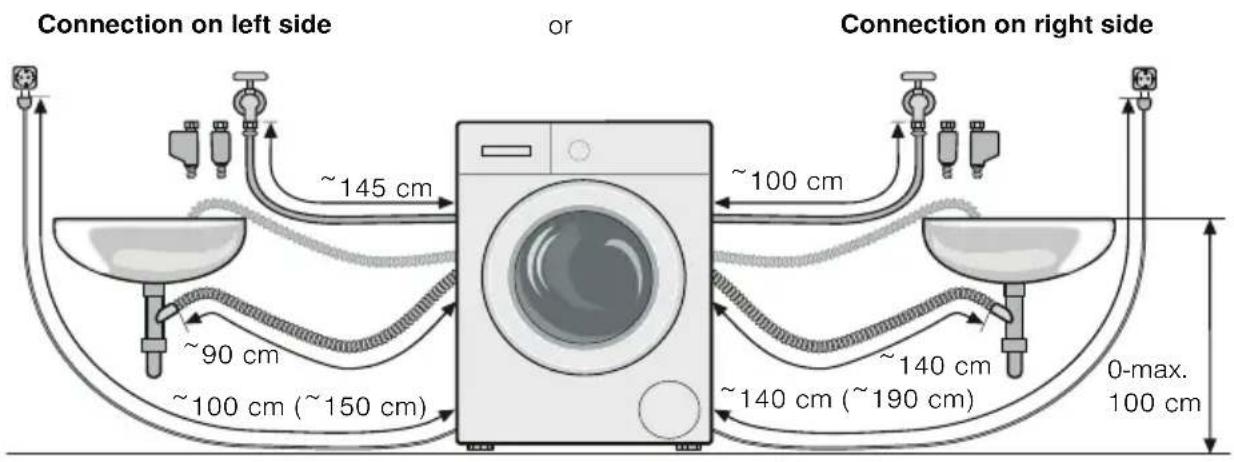
Hose and cable lengths
depending on model:
text_image
Connection on left side or Connection on right side ~145 cm ~90 cm ~100 cm (~150 cm) ~100 cm ~140 cm ~140 cm (~190 cm) 0-max. 100 cmi If the hose holders are used, the possible hose lengths are reduced!
Available from dealer/customer service:
■ Extension for Aqua-Stop or cold water inlet hose (approx. 2.50 m).
Order no. WMZ2380, WZ10130, CZ11350, Z7070X0
- Longer supply hose (approx. 2.20 m), for standard model.
Technical specifications
Dimensions 60 x 59 x 85 cm
(width x depth x height)
Weight depending on modell: 63–83 kg
Mains connection Nominal voltage 220–240 V, 50 Hz
Nominal current 10 A
Nominal power 2300 W
Water pressure 100–1000 kPa (1–10 bar)
i Humidity in the drum is caused by the final inspection.
Secure installation
⚠ Warning!
Risk of injury!
- The washing machine is heavy – caution: take care when lifting it.
- If the washing machine is raised by protruding components (e.g. washing machine door), the components may break off and cause injuries.
Donot lift the washing machine by its projecting parts.
Caution!
Risk of stumbling!
If the hoses and power cord are installed improperly, there is a risk of tripping and injury.
Lay hoses and cables in such a way that there is no risk of stumbling.
Caution!
Washing machine may be damaged!
- Frozen hoses may tear/burst.
Do not install the washing machine in an area where there is a risk of frost or outdoors. - If the washing machine is raised by protruding components (e.g. washing machine door), the components may break off and the washing machine may be damaged.
Do not lift the washing machine by its projecting parts.
i – In addition to the safety information listed here, the local water and electricity supplier may have special requirements.
- If in doubt, have the appliance connected by a technician.
⚠ Warning!
Risk of injury!
- The washing machine is heavy – caution: take care when lifting it.
- If the washing machine is raised by protruding components (e.g. washing machine door), the components may break off and cause injuries. Do not lift the washing machine by its projecting parts.
Caution!
Risk of stumbling!
If the hoses and power cord are installed incorrectly, there is a risk of tripping and injury.
Lay hoses and cables in such a way that there is no risk of stumbling.
Caution!
Washing machine may be damaged!
- Frozen hoses may tear/burst.
Do not install the washing machine in an area where there is a risk of frost or outdoors. - If the washing machine is raised by protruding components (e.g. washing machine door), the components may break off and the washing machine may be damaged.
Do not lift the washing machine by its projecting parts.
i – In addition to the safety information listed here, the local water and electricity supplier may have special requirements.
- If in doubt, have the appliance connected by a technician.
Installation area
i Stability is important to prevent the washing machine from wandering!
- The installation area must be firm and level.
- Soft floors/floor coverings are not suitable.

Installing the appliance on a base or on a wooden joist ceiling
⚠ Warning!
Washing machine may be damaged!!
The washing machine may wander during the spin cycle and topple/fall off the base.
Always secure the washing machine feet with fixing brackets.
Holding brackets: order no. WMZ 2200, WX 9756, CZ 110600, Z 7080X0
i If installing on a wooden joist ceiling:
- If possible, install the washing machine in a corner.
- Screw a water-resistant wooden panel (min. 30 mm thick) to the floor.
Appliance installed under/between kitchen units
⚠ Warning!
Danger of death from electric shock!
Danger of death if live parts are touched.
The appliance cover plate must not be removed.
i - 60 cm cavity width required
- Install washing machine only under a continuous worktop connected firmly to the adjacent cupboards.

Remove transportation protection devices
Caution!
Washing machine may be damaged!
Transit bolts which have not been removed may damage e.g. the drum while the washing machine is running.
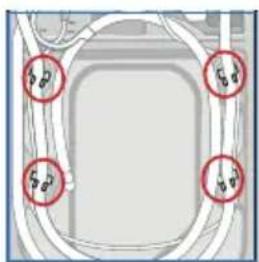
Before using the appliance for the first time, remove the 4 transportation protection devices completely and keep in a safe place.
Caution!
Washing machine may be damaged!
To prevent damage in transit when transporting the washing machine subsequently, always re-install the transit bolts prior to transportation. → Page 54
Keep screw and sleeve screwed together.

natural_image
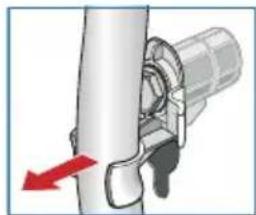
Diagram of a device with four circular annotations highlighting specific components (no text or symbols present)- Take the hoses out of the holders.
natural_image
Mechanical assembly diagram showing a pipe joint with a red arrow indicating direction (no text or symbols)
natural_image
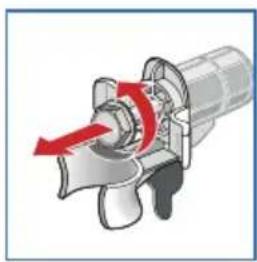
Diagram of a curved mechanical component with red directional arrows indicating force or movement (no text or symbols)- Take hoses out of the elbow and remove elbow.
natural_image
Mechanical component diagram showing a rotating shaft with red directional arrow (no text or symbols)- Loosen and remove all 4 transportation lock screws.
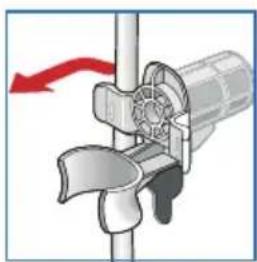
natural_image
Mechanical component diagram showing a propeller and fan assembly with a red arrow indicating motion (no text or symbols)- Take the power cord out of the holders. Remove sleeves.
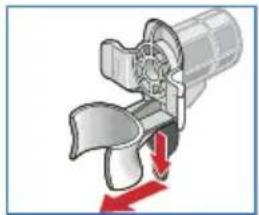
natural_image
Mechanical component diagram showing a propeller with red directional arrows indicating motion (no text or symbols)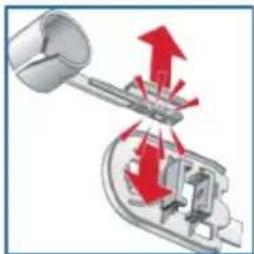
natural_image
Mechanical assembly diagram showing a lever mechanism with red arrows indicating motion (no text or symbols)- Prepare/separate cover.
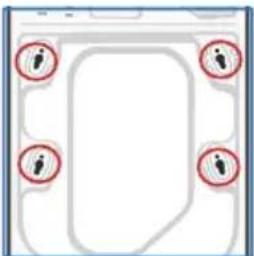
natural_image
Diagram of a device with four circular annotations pointing to a central screen area (no text or symbols present)- Insert covers.
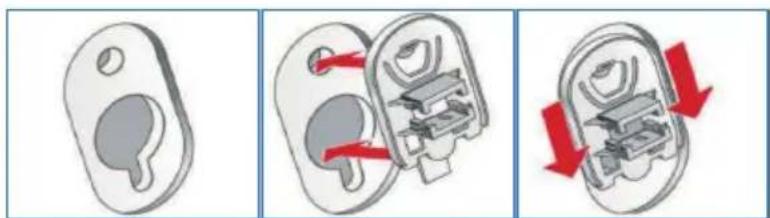
natural_image
Three-step diagram showing a mechanical component with red arrows indicating motion or change, no text or symbols present.i Lock covers firmly by pressing on the locking hook.
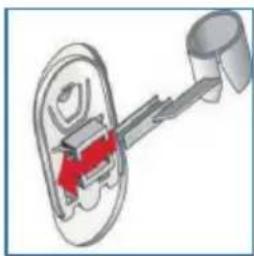
natural_image
Diagram of a mechanical device with a red arrow indicating motion or force, no text or symbols present- Insert hose holder.
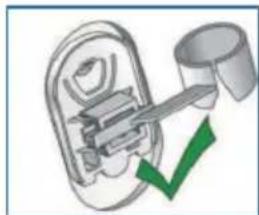
natural_image
Diagram of a mechanical component with a green checkmark indicating a detail (no text or symbols present)- Secure hoses in the hose holders.

Connecting the water
Warning!
Danger of death from electric shock!
Danger of death if live parts are touched.
Do not immerse Aqua-Stop safety device in water (contains an electric valve).
i - To prevent leakage or water damage, follow the instructions in this chapter!
- Operate the washing machine with cold drinking water only.
- Do not connect to the mixer tap of an unpressurised hot-water apparatus.
- Use only the supplied inlet hose or one purchased from an authorised specialist outlet, not a used one!
- If in doubt, have the appliance connected by a technician.
Water inlet hose
i Water inlet hose: do not kink, crush, modify or sever (strength is no longer guaranteed).
Optimum water pressure in the mains: 100–1000 kPa (1–10 bar)
When the tap is turned on, the water flow is at least 8 l/min.
If the water pressure is higher, install a pressure reducing valve.
- Connect the water supply hose.
Warning!
Threads for screw connections may be damaged!
If the screw connections are tightened too tightly using a tool (pliers), the threads may be damaged.
Tighten plastic screw-fittings by hand only.
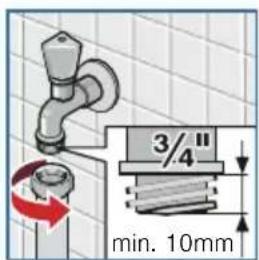
text_image
3/4" min. 10mmto the tap ( ^3/_4 " = 26.4 mm):

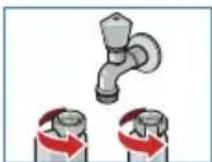
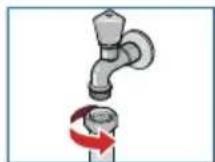
Aqua-Stop and Aqua-Secure Standard
natural_image
Diagram of a pipe fitting with red arrows indicating direction (no text or symbols)
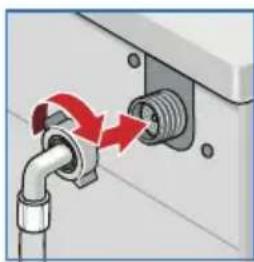
on the appliance:
for Standard and Aqua-Secure models
- Carefully turn on the tap and check that the connection points are not leaking.
i Screw connection is under water pipe pressure.
Water drainage hose
i - Do not kink or protract the the water supply hose.
- Height difference between the placement area and drainage point: 0–maximum 100 cm
Drainage into a wash basin
⚠ Warning!
Water damage possible!
If the attached drainage hose slips out of the washbasin due to high water pressure when draining the washing machine, leaking water may cause damage.
Secure the drainage hose to prevent it from slipping out of the sink.
Caution!
The appliance may be damaged.
If the end of the drainage hose is immersed in the drained water, water may be drawn back into the appliance!
- The plug must not be in the plug hole.
- When the water is being pumped out of the washing machine, check that the water drains away quickly enough.
- The end of the drainage hose must not be immersed in the drained water!
natural_image
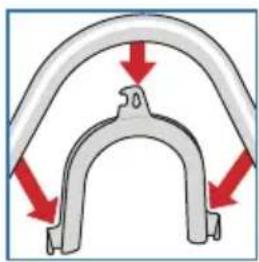
Diagram of a curved mechanical component with red arrows indicating force or direction (no text or symbols)Installing the drainage hose:
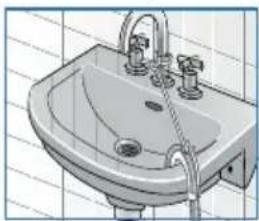
natural_image
Illustration of a single sink with faucet and water pipe, no text or symbols presentDrainage into a siphon
Warning!
Water damage possible!
If the drainage hose slips off the siphon connection due to high water pressure when draining the washing machine, leaking water may cause damage.
Connection point must be secured with hose clip, ∅ 24–40 mm (specialist outlet).
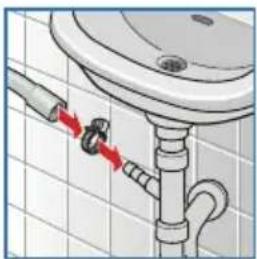
natural_image
Diagram of a pipe connection with red arrows indicating force or movement (no text or symbols present)Connecting
Drainage into a plastic pipe with rubber sleeve or into a gully:
⚠ Warning!
Water damage possible!
If the drainage hose slips off the plastic pipe due to high water pressure when draining the washing machine, leaking water may cause damage.
Secure the drainage hose to prevent it from slipping out of the sink.
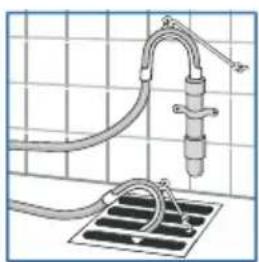
natural_image
Diagram of a mechanical device with tubing and a central component, mounted on a grid-patterned base (no text or symbols visible)Connecting

Alignment
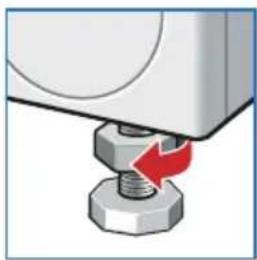
natural_image
Close-up of a mechanical component with a red arrow indicating rotation or movement (no text or symbols visible)- Loosen lock nut in a clockwise direction with a wrench.
natural_image
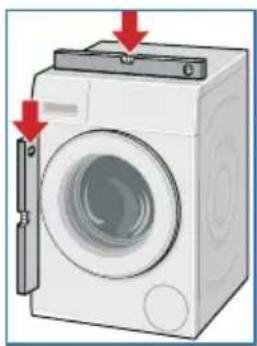
Illustration of a white washing machine with red arrows pointing to its side panel (no text or symbols present)- Check alignment of the washing machine with a spirit level and, if required, correct. Adjust the height by rotating the foot.
i All four feet must be firmly on the floor. The washing machine must not wobble!

natural_image
Close-up of a mechanical component with red arrows indicating rotation or movement (no text or symbols)- Tighten the lock nut against the housing. Grip the foot and do not adjust the height.
- The lock nuts on all four appliance feet must be screwed tightly against the housing! - Loud noise formation, intense vibrations and “wandering” may be due to incorrect alignment!

Electrical connection
Electrical safety
⚠ Warning!
Danger of death from electric shock!
Danger of death if live parts are touched.
- Never pull out the mains plug by tugging the power cord.
- Insert/pull out the mains plug with dry hands only.
- Never pull out the mains plug during operation.
- Connect the washing machine to an alternating current via a correctly installed earthed socket only.
- The mains voltage and voltage specifications on the washing machine (appliance rating plate) must match.
- Connected load as well as required fuse are indicated on the appliance rating plate.
Ensure that:
- Mains plug and socket match fit.
- Cable cross-section is adequate.
- Earthing system has been installed correctly.
- A damaged power cord may be replaced by an electrician only. A replacement mains cable can be obtained from customer service.
- Do not use multiple plugs/couplings or extension cables.
- If a residual-current-operated circuit breaker is used, use only a type which features this symbol:
Only this symbol guarantees compliance with currently valid regulations.
- The mains plug must be accessible at all times.

The washing machine was inspected thoroughly before leaving the factory. To remove any water left over from testing procedures, the first washing cycle should be carried out without laundry in the machine.
i The washing machine must have been installed and connected properly. See chapter Installing → Page 51
- Check the machine.
i Never switch on a damaged machine. Inform your customer service. → Page 40
- Remove protective film from the fascia.
- Insert mains plug.
- Turn the tap on.
- Switch on the appliance.
- Close the washing machine door. Do not load any washing.
- Select the Algodón (Cottons) programme.
- Select the temperature 90 °C.
- Open the detergent drawer.
- Pour approx. 1 litre of water ( 1^3/_4 pt) into dispenser II.
- Add standard detergent to dispenser II according to manufacturer's instructions for light soiling.
i To prevent frothing, use only half the recommended amount of detergent. Do not use any standard or mild detergents.
- Close the detergent drawer.
- Select Inicio/Carga (Start/Reload) ▶II.
- When the programme ends, switch off the appliance.
Your washing machine is now ready for use.

Transportation, e.g. if moving house
Preparatory work
- Turn off the tap.
- Release the water pressure in the supply hose. Maintenance – Filter in the water inlet hose
- Drain any residual detergent solution. Maintenance – Drain pump blocked → Page 33
- Isolate the washing machine from the power supply.
- Remove the hoses.
Installing transportation protection devices
natural_image
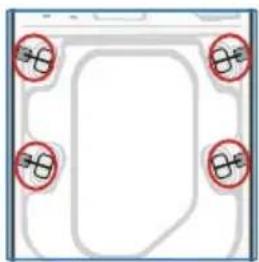
Simple diagram with four red circles and a central rectangular shape, no text or symbols present.- Remove covers and keep in a safe place.
natural_image
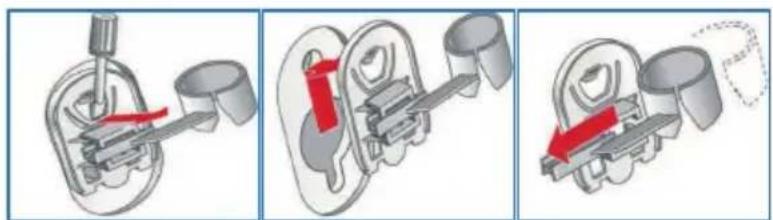
Three-step mechanical assembly diagram showing a piston-cranked mechanism with red arrows indicating motion (no text or symbols)If required, use a screwdriver.
natural_image
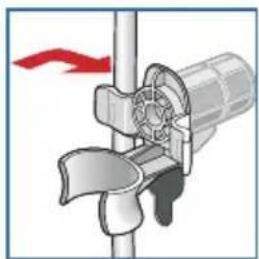
Diagram of a propeller or fan assembly with a red arrow indicating direction (no text or symbols present)- Insert all 4 sleeves.
natural_image
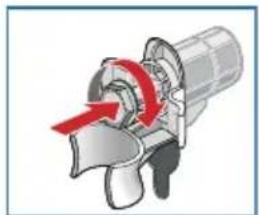
Mechanical assembly diagram showing a rotating component with red arrow indicating motion (no text or symbols)Clamp mains cable on the holders. Insert and tighten the bolts.
Before switching on the appliance:
i - Remove the transportation protection devices! → Page 46
- To prevent unused detergent from flowing into the outlet during the next wash: Pour 1 litre of water into dispenser II and start the (Drain) programme.

Index
A
Ajustes base 3s. (Basic settings 3 sec.), 11
Alignment, 51 Aqua-Sensor, 31
B
Button °C (Temperature), 11, 16, 26 ◎ (Spin), 11, 16, 26 ecoPerfect ⓔ, 11, 17, 26 Extra 🚗 (Extra rinse), 11, 17, 27 Flot 🚜 (Rinse Hold), 11, 17, 27 Inicio/Carga
(Start/Reload)▶II, 1 1 Menos 📄 (Less Ironing), 11, 17, 26 Prelav. ↓ (Pre-wash), 11, 17, 27 speedPerfect=∅, 1 1, 1 7, 2 6 Terminado en/em (Finished in), 1 1, 1 6, 2 Buttons Ajustes base 3s. (Basic settings 3 sec.), 11
C
Cancelling the programme, 19 Care, 32 Drum, 32 Machine housing/Control panel, 32 Changing the programme, 19 Childlock, 18, 26
Cleaning the detergent drawer, 33 the filter, 35 the siphon, 34 Connecting the water, 48 Water drainage, 49 Water supply, 48 Consumption values, 28 Customer service, 40
D
Descaling, 32 Detergent drawer, 10 Discolouring, 25 Display panel, 11
Dosing recommendation, 31 Drain pump blocked, 33 Drum light, 14 Dyeing, 25
E
ecoPerfect ⓔ, 1 1, 1 7, 2 6 Electrical connection, 52 Emergency lock release, 36
End of the programme, 20 Extra 📋 (Extra rinse), 11, 17, 27
F
Fascia, 11 Faults, what to do?, 38
Flot ☐ (Rinse Hold), 11, 17, 20, 27
G
Getting to know your appliance, 9
H
Hints and tips, 8 Hose and cable lengths, 42
|
Information on the display
panel, 37
Inserting
the laundry, 14, 15, 16
Installation, 43
Installing transportation
protection devices, 54
Intended use, 4
L
Load adjust, 31 Load sensor/Load display, 31
M
Maintenance, 32
Menos 📄 (Less
Ironing), 11, 17
0
Old appliance, 8
P
Packaging, 8
Prelav.
(Pre-wash), 11, 17, 27
Programme overview, 22
Programme selector, 11
Programme sequence, 18
Programme
settings, 16, 22, 26
Protection of the
environment, 8
Q
Quick-reference
instructions,
12
S
Safety instructions, 5
Selecting
the programme, 15
Settings 3 sec., 29
Soaking, 25
Sorting
the washing, 13
speedPerfect = 11, 17, 26
Standard accessories, 41
Starching, 25
Starting
the programme, 17
T
Technical specifications, 42
Terminado en/em
(Finished in), 17, 26
Topping up
laundry, 19
Transport bolts
, 46
U
Unbalanced load detection
system, 31
Unloading
the laundry, 21



Aqua-Stop warranty
For appliances with Aqua-Stop only
In addition to warranty claims against the seller based on the contract of sale and in addition to our appliance warranty we shall pay damages under the following conditions:
- If water damage is caused by a fault in our water safety system, we shall make reparation for the damage with respect to private users.
- The liability warranty applies to the service life of the appliance.
- A claim can only be made under the warranty if the appliance and Aqua-Stop have been correctly installed and connected according to our instructions; this also includes a correctly installed Aqua-Stop extension (original accessory).
- Our guarantee does not apply to defective cables/hoses or to fittings up to the connection on the tap.
- Appliances which feature Aqua-Stop can be left unattended during operation and it is not necessary to turn off the tap afterwards.
- The tap should only be turned off if you are away for a prolonged period, e.g. several weeks holiday.
To book an engineer visit and product advice
GB 0844 8928999 Calls from a BT landline will be charged at up to 3 pence per minute.
IE 01450 2655
Please find the contact data of all countries in the enclosed customer service list.