
Charger SRT (2019) - Automotive DODGE - Free user manual and instructions
Find the device manual for free Charger SRT (2019) DODGE in PDF.


| Product Type | Automobile |
| Brand | Dodge |
| Model | Charger SRT |
| Year | 2019 |
| Engine | 6.2L HEMI V8 Supercharged |
| Horsepower | 707 hp @ 6000 rpm |
| Transmission | 8-speed automatic |
| Drive Type | Rear-wheel drive |
| Fuel Type | Premium unleaded gasoline (91 octane recommended) |
| Fuel Tank Capacity | 18.5 gallons |
| Length | 198.4 in |
| Width | 75.0 in |
| Height | 58.2 in |
| Wheelbase | 120.2 in |
| Curb Weight | 4,586 lbs |
| Seating Capacity | 5 |
| Infotainment System | Uconnect 4C with 8.4-inch touchscreen |
| Safety Features | ABS, traction control, stability control, multiple airbags |
| Maintenance Interval | Every 6 months or 6,000 miles (oil and filter) |
| Tire Size | P275/40R20 (front) / P315/35R20 (rear) |
| Warranty | 3 years / 36,000 miles basic, 5 years / 60,000 miles powertrain |
Frequently Asked Questions - Charger SRT (2019) DODGE
User questions about Charger SRT (2019) DODGE
0 question about this device. Answer the ones you know or ask your own.
Ask a new question about this device
Download the instructions for your Automotive in PDF format for free! Find your manual Charger SRT (2019) - DODGE and take your electronic device back in hand. On this page are published all the documents necessary for the use of your device. Charger SRT (2019) by DODGE.
USER MANUAL Charger SRT (2019) DODGE
Drunkendrivingisoneofthemostfrequentcausesof accidents.
Yourdrivingabilitycanbeseriouslyimpairedwithblood alcohollevelsfarbelowthelegalminimum.Ifyouare drinking,don'tdrive.Ridewithadesignatednon-drinkingdriver,callacab,afriend,orusepublictransportation.
WARNING!
Drivingafterdrinkingcanleadtoanaccident. Yourperceptionsarelesssharp,yourreflexesare slower,andyourjudgmentisimpairedwhenyou havebeendrinking.Neverdrinkandthendrive.
Thismanualillustratesanddescribestheoperationof featuresandequipmentthatareeitherstandardorop-tionalonthisvehicle.Thismanualmayalsoincludea descriptionoffeaturesandequipmentthatarenolonger availableorwerenotorderedonthisvehicle.Please disregardanyfeaturesandequipmentdescribedinthis manualthatarenotonthisvehicle.
FCAUSLLCreservestherighttomakechangesindesign andspecifications,and/ormakeadditionstoorimprovementstoitsproductswithoutimposinganyobligation uponitselftoinstallthemonproductspreviouslymanufactured.
Copyright © 2021 FCA US LLC

SECTION PAGE
TABLE OF CONTENTS
1 INTRODUCTION....3
2 GRAPHICALTABLEOFCONTENTS. 7
3 GETTINGTOKNOWYOURVEHICLE. 13
4 GETTINGTOKNOWYOURINSTRUMENTPANEL....107
5 SAFETY....137
6 STARTING AND OPERATING....
7 INCASEOFEMERGENCY
8 SERVICINGANDMAINTENANCE. 327
9 TECHNICALSPECIFICATIONS. 385
10 MULTIMEDIA
11 CUSTOMER ASSISTANCE....471
12 | I N D E X....
INTRODUCTION
CONTENTS
■INTRODUCTION....4
■HOW TO USE THIS MANUAL....5
□Essential Information....5
□Symbols....5
■WARNINGS AND CAUTIONS....5
■VEHICLE MODIFICATIONS/ALTERATIONS ..... 5
4 INTRODUCTION
INTRODUCTION
Dear Customer,
Congratulations on selecting your new vehicle. Be assured that it represents precision workmanship, distinctive styling, and high quality. This Owner's Manual has been prepared with the assistance of service and engineering specialists to acquaint you with the operation and maintenance of your vehicle. It is supplemented by Warranty Information, and customer oriented documents. In the attached Warranty Booklet, you will find a description of the services that FCA offers to its customers, the Warranty Certificate and the details of the terms and conditions for maintaining its validity. Please take the time to read all of these publications carefully before driving your vehicle for the first time. Following the instructions, recommendations, tips, and important warnings in this manual will help assure safe and enjoyable operation of your vehicle. Be sure you are familiar with all vehicle controls, particularly those used for braking, steering, transmission, and transfer case shifting (if equipped). Learn how your vehicle handles on different road surfaces. Your driving skills will improve with experience.
This Owner's Manual describes all versions of this vehicle. Options and equipment dedicated to specific markets or versions are not expressly indicated in the text. Therefore, you should only consider the information which is related to the trim level, engine, and version that you have purchased. Any content introduced throughout the Owner's Information, that may or may not be applicable to your vehicle, will be identified with the wording "If Equipped". All data contained in this publication are intended to help you use your vehicle in the best possible way. FCA aims at a constant improvement of the vehicles produced. For this reason, it reserves the right to make changes to the model described for technical and/or commercial reasons. For further information, contact an authorized dealer.
NOTE: After reviewing the Owner's Information, it should be stored in the vehicle for convenient referencing, and remain with the vehicle when sold.
When it comes to service, remember that an authorized dealer knows your vehicle best, has factory-trained technicians and genuine MOPAR® parts, and cares about your satisfaction.
HOW TO USE THIS MANUAL
Essential Information
Consult the Table of Contents to determine which section contains the information you desire.
Since the specification of your vehicle depends on the items of equipment ordered, certain descriptions and illustrations may differ from your vehicle's equipment.
The detailed index at the back of this Owner's Manual contains a complete listing of all subjects.
Symbols
Some vehicle components have colored labels whose symbols indicate precautions to be observed when using this component. Refer to "Warning Lights and Messages" in "Getting To Know Your Instrument Panel" for further information on the symbols used in your vehicle.
WARNINGS AND CAUTIONS
This Owner's Manual contains WARNINGS against operating procedures that could result in a collision, bodily injury and/or death. It also contains CAUTIONS against procedures that could result in damage to your vehicle. If you do not read this entire Owner's Manual, you may miss important information. Observe all Warnings and Cautions.
VEHICLE MODIFICATIONS/ALTERATIONS
WARNING!
Anymodificationsoralterationstothisvehiclecould seriouslyaffectitsroadworthinessandsafetyandmay leadtoacollisionresultinginseriousinjuryordeath.
WARNING!
TopreventSERIOUSINJURYorDEATHwhenusing "Track-Use" partsandequipment:
- NEVERuseany"Track-Use"equipmentonpublicroads.FCAUSLLCdoesnotauthorizetheuseof"Track-Use"equipmentonpublicroads.
- Theintendeduseof"Track-Use"partsisforrace vehiclesonracetracks.Tohelpensurethesafety of theracedriver,engineersshouldsupervisetheinstallationof"Track-Use"parts.
- FCAUSLLCdoesnotauthorizetheinstallationor useofanypartnotedas"Track-Use"onanynew vehiclepriortoitsfirstretailsale.
WARNING!
TopreventSERIOUSINJURYorDEATH:
- ALWAYSremoveany"Track-Use"equipmentbefore drivingonpublicroads.
- ALWAYSproperlyuseyourthree-pointseatbelts whendrivingonpublicroads.
- Inacollision, you and your passengers can suffer much greater injuries if you are not properly buckled up. You can strik the interior of your vehicle or other passengers, or you can be thrown out of the vehicle.
GRAPHICAL TABLE OF CONTENTS
CONTENTS
■FRONT VIEW....8
■REAR VIEW....9
■INSTRUMENT PANEL....10
■INTERIOR....1 1
8 GRAPHICAL TABLE OF CONTENTS
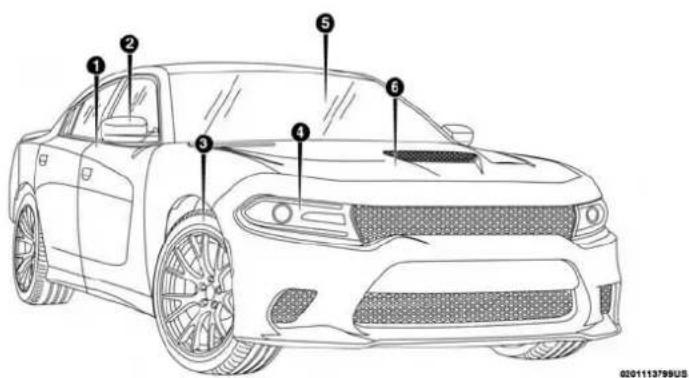
FRONT VIEW
text_image
Diagram of a car front view with numbered parts for identification and labelingFrontView
1 — Doors 4 — Headlights
2 — Exterior Mirrors 5 — Windshield
3 — Wheels/Tires 6 — Hood/Engine Compartment
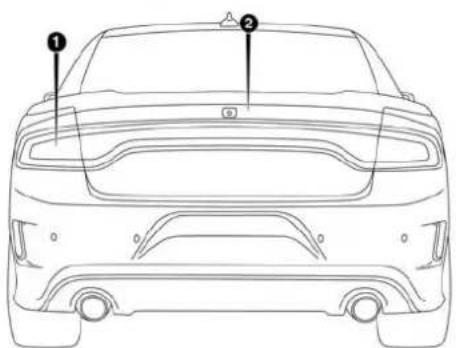
REAR VIEW
natural_image
Front view line drawing of a car with labeled parts (1 and 2), no text or symbols present.RearView
0202147105US
1 — Rear Lights
2—Trunk
10 GRAPHICAL TABLE OF CONTENTS
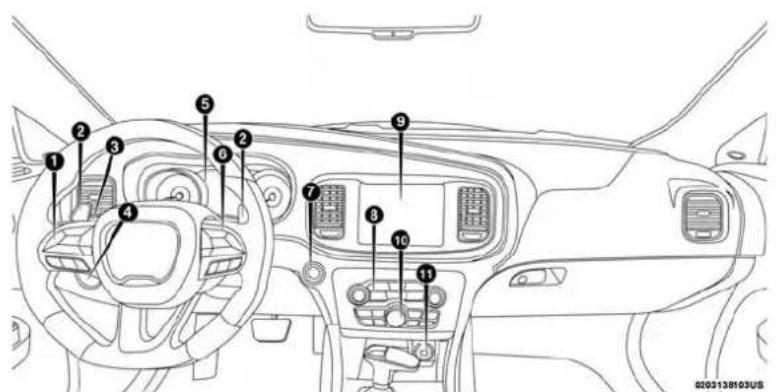
INSTRUMENT PANEL
text_image
Diagram of car interior with numbered components for identificationInstrumentPanel
1 — Instrument Cluster Display Controls 7 — Ignition
2 — Paddle Shifters 8 — Switch Panel
3 — Multifunction Lever (Behind Steering Wheel) 9 — Uconnect System
4 — Headlight Switch (Behind Steering Wheel) 10 — Climate Controls
5 — Instrument Cluster 11 — Front Power Outlet
6 — Speed Controls
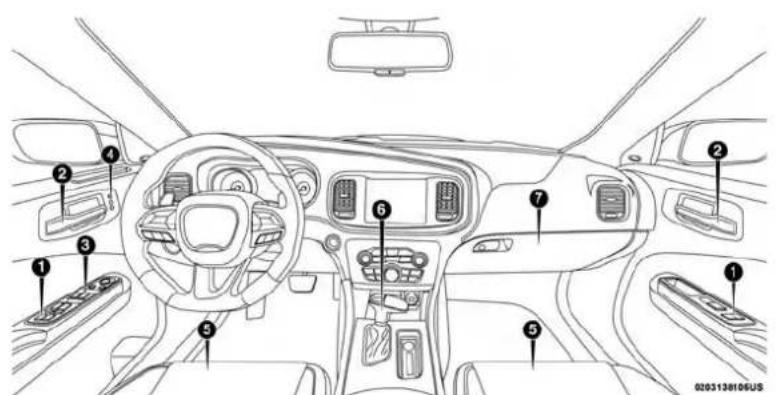
INTERIOR
text_image
Diagram of a car interior with numbered components for identification and assembly reference.Interior
1 — Door Locks 5 — Seats
2 — Door Handles 6 — Gear Selector
3 — Window Switches 7 — Glove Compartment
4 — Memory Seat Switches
GETTING TO KNOW YOUR VEHICLE
CONTENTS
■VEHICLE USER GUIDE — IF EQUIPPED ..... 1 7
■KEYS....19
□Key Fob 19
■IGNITION SWITCH....27
□Keyless Push Button Ignition....27
□Vehicle On Message....29
■REMOTE START — IF EQUIPPED ..... 3 0
□How To Use Remote Start — If Equipped . . . . . 3 0
☐Remote Start Abort Message On The Instrument Cluster Display — If Equipped . . . . . . . . . . . . . . 3 1
□To Enter Remote Start Mode....3 1
☐To Exit Remote Start Mode Without Driving The Vehicle....3 2
□To Exit Remote Start Mode And Drive The Vehicle....32
□Remote Start Comfort Systems — If Equipped . . .33
□General Information....3 3
■SENTRY KEY....3 3
□Key Programming....3 4
□Replacement Keys....3 4
□General Information....34
■VEHICLE SECURITY ALARM — IF EQUIPPED . . .35
□To Arm The System....3 5
□To Disarm The System....36
□Rearming Of The System....36
□Tamper Alert. 36
■DOORS....37
□Manual Door Locks....37
□Power Door Locks....37
14 GETTING TO KNOW YOUR VEHICLE
□Keyless Enter-N-Go — Passive Entry . . . . . . . . 3 8
□Automatic Unlock Doors On Exit....42
□Automatic Door Locks — If Equipped . . . . . . . 4 2
□Child-Protection Door Lock System —
Rear Doors....4 2
■SEATS 43
□Manual Rear Seat Adjustment....4 4
□Power Seats....46
□Driver Memory Seat — If Equipped . . . . . . . . . 4 8
□Heated Seats — If Equipped . . . . . . . . . . . . . . . . . . 5 1
□Front Ventilated Seats — If Equipped . . . . . . . . 5 3
■HEAD RESTRAINTS....54
□Reactive Head Restraints — Front Seats . . . . . . 5 4
□Rear Head Restraints....5 5
□Front Head Restraint Removal....56
■STEERING WHEEL....57
□Power Tilt/Telescoping Steering Column ..... 5 7
□ Heated Steering Wheel — If Equipped. . . . . . . . . .58
■MIRRORS 59
□Automatic Dimming Mirror — If Equipped . . . . . 5 9
□ Outside Mirrors .....60
□Driver's Outside Automatic Dimming Mirror — If Equipped 60
□Outside Mirrors Approach Light — If Equipped .60
□Power Mirrors....6 1
□ Heated Mirrors — If Equipped .....61
□ Tilt Side Mirrors In Reverse — If Equipped .....61
□Illuminated Vanity Mirrors — If Equipped . . . . . 6 2
■EXTERIOR LIGHTS 63
□Headlight Switch....63
□Multifunction Lever....63
□Daytime Running Lights (DRL) — If Equipped . .64
□High/Low Beam Switch....64
□Automatic High Beam — If Equipped . . . . . . . 6 4
GETTING TO KNOW YOUR VEHICLE
15
□Flash-To-Pass....65
□Automatic Headlights....65
□Parking Lights....65
□Headlights On With Wipers....65
□Headlight Time Delay....6 6
□Lights-On Reminder....6 6
□Fog Lights — If Equipped . . . . . . . . . . . . . . . . . . . . 6 6
□Turn Signals....67
□Lane Change Assist — If Equipped . . . . . . . . . 6 7
■INTERIOR LIGHTS....67
□Courtesy Lights....68
■WINDSHIELD WIPERS AND WASHERS ..... 7 1
□Wiper Operation....7 1
□Rain Sensing Wipers — If Equipped . . . . . . . . . 7 3
■CLIMATE CONTROLS....73
□Automatic Climate Control Overview ..... 7 4
□Climate Control Functions....79
□Automatic Temperature Control (ATC) ..... 7 9
□Operating Tips....80
■WINDOWS....82
□Power Window Controls....82
□Wind Buffeting....85
■POWER SUNROOF — IF EQUIPPED ..... 8 5
□ Opening Sunroof....86
□ Closing Sunroof. . . . . . . . . . . . . . . . . . . . . . . . . . . . . . . . . . . . . . . . . . . . . . . . . . . . . . . . 86
□Wind Buffeting....86
□ Sunshade Operation. . . . . . . . . . . . . . . . . . . . . . . . . . . . . . . . . . . . . . . . . . . . . . . . . . . . . 87
□Pinch Protect Feature....87
□ Sunroof Maintenance .....87
□ Ignition Off Operation .....87
□ Calibration Procedure....87
■HOOD....88
□To Open The Hood....8 8
□To Close The Hood....89
16 GETTING TO KNOW YOUR VEHICLE
■TRUNK....89
□Opening....89
□Closing....90
□Trunk Safety....9 1
□Cargo Area Features....9 1
■GARAGE DOOR OPENER — IF EQUIPPED . . . . 9 2
□Before You Begin Programming HomeLink ..... 9 3
□Canadian/Gate Operator Programming ..... 9 6
□Using HomeLink....97
□Security 97
□Troubleshooting Tips....98
□General Information. 98
■INTERNAL EQUIPMENT 99
□Storage....99
□Cupholders .....101
□Electrical Power Outlets....102
□ Wireless Charging Pad — If Equipped .....105
□Sunglasses Bin Door....106
VEHICLE USER GUIDE — IF EQUIPPED
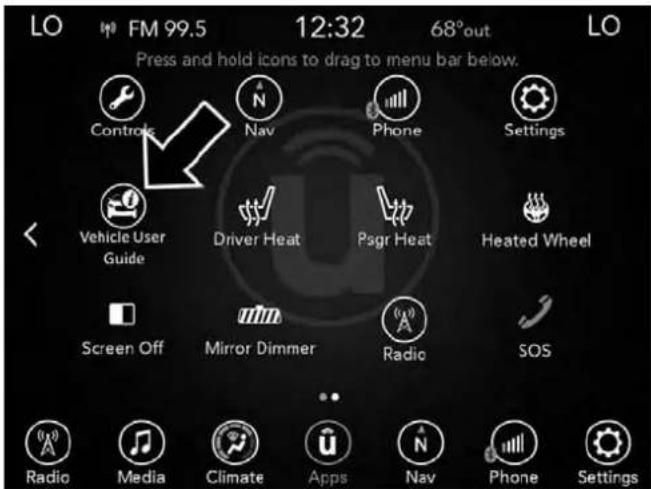
Access your Owner's Information right through your Uconnect 4C or 4C NAV touchscreen system — If Equipped.
To access the Vehicle User Guide on your Uconnect Touchscreen: Press the Uconnect Appsbutton. From there, press the VehicleUserGuideicon on your touchscreen. No Uconnect registration is required.
text_image
LO FM 99.5 12:32 68°out LO Press and hold icons to drag to menu bar below. Controls Nav Phone Settings Vehicle User Guide Driver Heat Psgr Heat Heated Wheel Screen Off Mirror Dimmer Radio SOS Radio Media Climate Apps Nav Phone SettingsUconnect4CNAVWith8.4-inchDisplayVehicleUser GuideTouchscreenIcon
NOTE: Vehicle User Guide features are not available while the vehicle is moving. If you try to access while the vehicle is in motion, the system will display: Feature not available while the vehicle is in motion.
18 GETTING TO KNOW YOUR VEHICLE
Pre-InstalledFeatures
| Your User Guide — Updated in real-time | Available when and where you need it |
| Touchscreen convenience Customizable interface | |
| Maintenance schedules and information | Multilingual |
| Comprehensive icon & symbol glossary | |
Once you launch your Vehicle User Guide, you will be able to explore your warranty information and radio manual when and where you need them. Your Uconnect system displays the Vehicle User Guide on your touchscreen radio to assist in better understanding your vehicle. There's no app to download, no phone to connect and no external device needed for playback. Plus, it's updated throughout the year, in real-time, so it never goes out of date.
Features/Benefits
- Pre-installed on your Uconnect touchscreen radio
•Enhanced search and browsing capability - Robust NAV application — If Equipped
- Add selected topics to a fast-access Favorites category
- Icon and symbol glossary
• Warranty information - Crucial driver information and assistance:
| Operating Instructions Maintenance Schedules |
| Warranty Information Emergency Procedures |
| Fluid Level Standards 911 Contact and More |
Tip: When viewing a topic, tap the star icon to add it to your Favorites, for easy access in the future.
KEYS
Key Fob
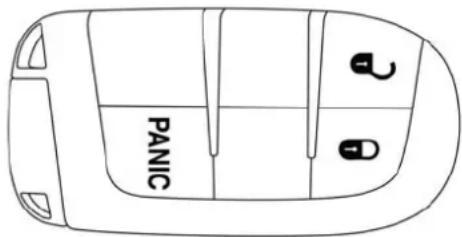
Your vehicle uses a keyless ignition system. The ignition system consists of a key fob with Remote Keyless Entry (RKE) and a START/STOP push button ignition system. The Remote Keyless Entry system consists of a key fob and Keyless Enter-N-Go feature if equipped.
NOTE: The key fob may not be found if it is located next to a mobile phone, laptop or other electronic device; these devices may block the key fob's wireless signal.
The key fob allows you to lock or unlock the doors and trunk from distances up to approximately 66 feet (20 m) using a handheld key fob. The key fob does not need to be pointed at the vehicle to activate the system.
NOTE:SRT vehicles, equipped with the 6.2L Super-charged engine, come with three key fobs (two red and one black) that allow for different engine power levels. Please refer to the "Drive Mode Supplement" for further descriptions.
NOTE: In the ON/RUN position, key fob commands are disabled if the vehicle is at or above 5 mph (8 km/h).
text_image
PANIC0301115708US
KeyFob
20 GETTING TO KNOW YOUR VEHICLE
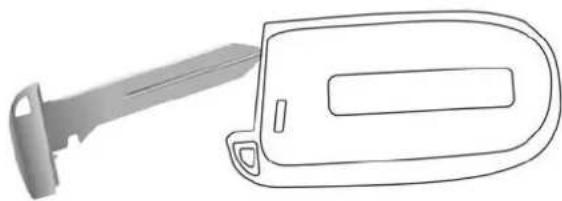
The key fob also contains an emergency key, which is stored in the rear of the key fob.
natural_image
Line drawing of a tool with a handle and rectangular device (no text or symbols)0301101915NA
EmergencyKey
The emergency key allows for entry into the vehicle should the battery in the vehicle or the key fob go dead. The emergency key is also for locking/unlocking the glove compartment. You can keep the emergency key with you when valet parking.
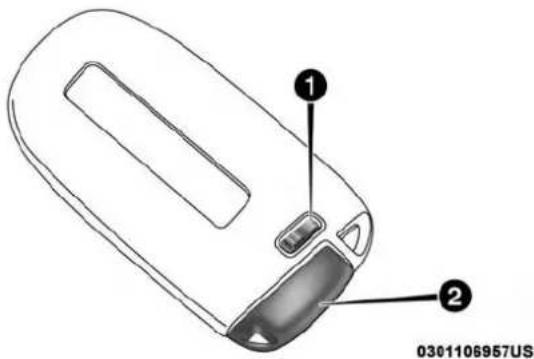
To remove the emergency key, slide the mechanical release button on the back of the key fob sideways with your thumb and then pull the key out with your other hand.
text_image
① ② 0301106957USEmergencyKeyRemovalProcess
1 — Mechanical Release Button
2 — Emergency Key
In case the ignition switch does not change with the push of a button, the key fob may have a low or fully depleted battery. A low key fob battery can be verified by referring to the instrument cluster, which will display directions to follow.
NOTE: In a situation of a low or fully depleted battery, a backup method can be used to operate the ignition switch. Put the nose side of the key fob (side opposite of the Emergency Key) against the ENGINE START/STOP button and push to operate the ignition switch.
ToUnlockTheDoors
Push and release the unlock button on the key fob once to unlock the driver's door or twice within five seconds to unlock all doors.
The turn signal lights will flash to acknowledge the unlock signal. The illuminated entry system will also be activated.
NOTE: All door unlock settings can be programmed to your convenience through Uconnect Settings. Refer to "Uconnect Settings" in "Multimedia" for further information.
- Unlock the driver door on the first push of the key fob unlock button.
- Unlock all doors on the first push of the key fob unlock button.
NOTE: To unlock doors and trunk with passive entry, refer to "Keyless Enter-N-Go — Passive Entry" located in "Doors" in "Getting To Know Your Vehicle" for further information.
NOTE: When you use the key fob to open any door, the courtesy lights, overhead lights, and approach lighting in the outside mirrors (if equipped) will turn on. Refer to "Interior Lights" in "Getting To Know Your Vehicle" for further information.
1stPressOfKeyFobUnlocks
This feature lets you program the system to unlock either the driver's door or all doors on the first push of the unlock button on the key fob.
To change the current setting, refer to "Uconnect Settings" in "Multimedia" for further information.
FlashLightsWithLock
This feature will cause the turn signal lights to flash when the doors are locked with the key fob. This feature can be turned on or turned off. To change the current setting, refer to "Uconnect Settings" in "Multimedia" for further information.
HeadlightIlluminationOnApproach
This feature activates the headlights for up to 90 seconds when the doors are unlocked with the key fob. The time for this feature is programmable, on vehicles equipped, through Uconnect Settings. To change the current setting, refer to "Uconnect Settings" in "Multimedia" for further information.
22 GETTING TO KNOW YOUR VEHICLE
ToUnlatchTheTrunk
Push the trunk button on the key fob two times within five seconds to unlatch the trunk.
If the vehicle is equipped with Passive Entry, refer to "Keyless Enter-N-Go — Passive Entry" under "Getting To Know Your Vehicle" for further information.
ToLockTheDoorsAndTrunk
Push and release the lock button on the key fob to lock all doors.
The turn signal lights will flash and the horn will chirp to acknowledge the signal if programmed. Refer to "Uconnect Settings" in "Multimedia" for further programmable information.
NOTE: To lock the doors with passive entry, Refer to "Keyless Enter-N-Go — Passive Entry" located in "Doors" in "Getting To Know Your Vehicle" for further information.
If one or more doors are open, or the trunk is open, the doors will lock. The doors will unlock automatically if the key fob is left inside the passenger compartment, otherwise the doors will stay locked.
SoundHornWithLock
This feature will cause the horn to chirp when the doors are locked with the key fob. This feature can be turned on or turned off. To change the current setting, refer to "Uconnect Settings" in "Multimedia" for further information.
UsingThePanicAlarm
To turn the Panic Alarm feature on or off, push the Panic button on the key fob. When the Panic Alarm is activated, the turn signals will flash, the horn will pulse on and off, and the interior lights will turn on.
The Panic Alarm will stay on for three minutes unless you turn it off by either pushing the Panic button a second time or drive the vehicle at a speed of 15 mph (24 km/h) or greater.
NOTE:
- The interior lights will turn off if you place the ignition in the ACC or ON/RUN position while the Panic Alarm is activated. However, the exterior lights and horn will remain on.
- You may need to be less than 35 ft (11 m) from the vehicle when using the key fob to turn off the Panic Alarm due to the radio frequency noises emitted by the system.
KeyFobBatteryReplacement
The recommended replacement battery is one CR2032 battery.
NOTE:
- Perchlorate Material — special handling may apply. See www.dtsc.ca.gov/hazardouswaste/perchlorate for further information.
-
Do not touch the battery terminals that are on the back housing or the printed circuit board.
-
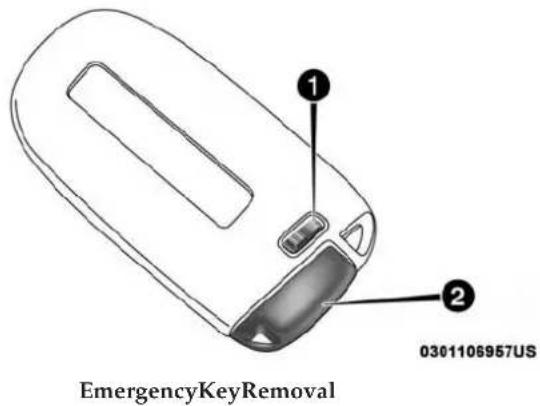
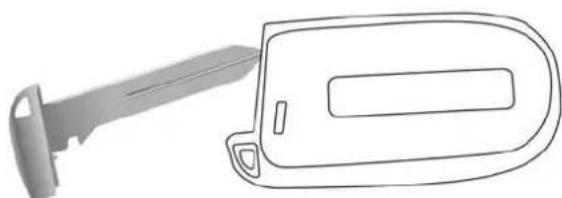
Remove the emergency key by sliding the mechanical latch on the back of the key fob sideways with your thumb and then pull the emergency key out with your other hand.
text_image
EmergencyKeyRemoval 0301106957US1 — Emergency Key Release Button
2 — Emergency Key
24 GETTING TO KNOW YOUR VEHICLE
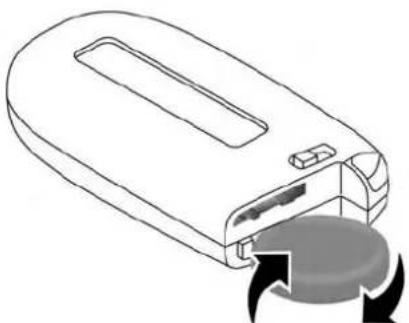
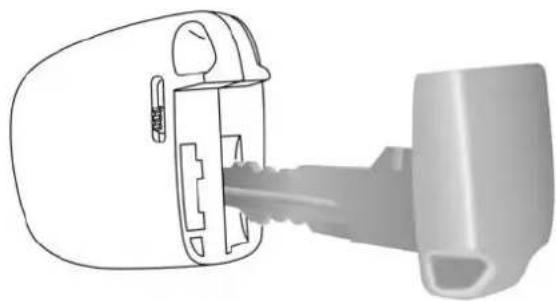
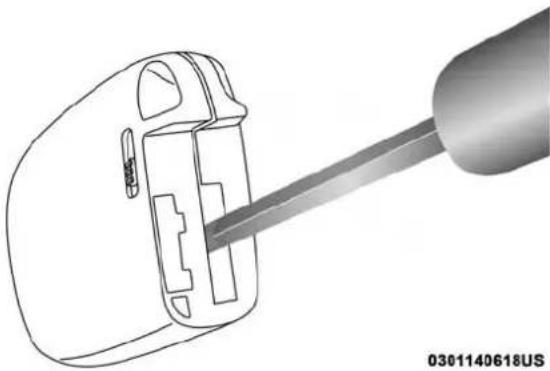
- Separate the key fob halves using the tip of the emergency key, a #2 flat blade screwdriver, or a coin and gently pry the two halves of the key fob apart. Make sure not to damage the seal during removal.
natural_image
Line drawing of a tool with a handle and rectangular device (no text or symbols)0301101915NA
EmergencyKeyRemoval
natural_image
Line drawing of a device with an open lid and internal ports, showing a circular button with arrows indicating rotation (no text or symbols)0301101916NA
SeparatingCaseWithACoin
NOTE: Separating the case can also be done with a key blade or a flat head screwdriver.
GETTING TO KNOW YOUR VEHICLE 25
natural_image
Diagram of a device with a connector inserted into a housing (no text or symbols visible)0301140620US
natural_image
Line drawing of a plug inserted into a socket (no text or symbols)SeparatingCaseWithAKeyBladeSeparatingCaseWithAFlatBladeScrewdriver
natural_image
Two views of a mobile phone showing front and side views with a circular button (no text or symbols)0301109726US
KeyFobBatteryReplacement
-
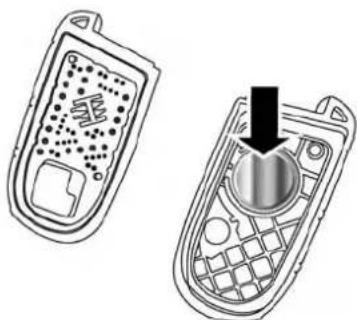
Remove the battery by turning the back cover over (battery facing downward) and tapping it lightly on a solid surface such as a table or similar surface, and then replace the battery. When replacing the battery, match the + sign on the battery to the + sign on the inside of the battery clip, located on the back cover. Avoid touching the new battery with your fingers because skin oils may cause battery deterioration. If you touch a battery, clean it with rubbing alcohol.
-
To assemble the key fob case, snap the two halves together.
ProgrammingAdditionalKeyFobs
Programming the key fob may be performed by an authorized dealer.
NOTE: Once a key fob is programmed to a vehicle, it cannot be repurposed and reprogrammed to another vehicle.
RequestForAdditionalRemoteControls
NOTE: Only key fobs that are programmed to the vehicle electronics can be used to start and operate the vehicle. Once a key fob is programmed to a vehicle, it cannot be programmed to any other vehicle.
WARNING!
• Alwaysremovethekeyfobsfromthevehicleand lockalldoorswhenleavingthevehicleunattended.
- ForvehiclesequippedwithKeylessEnter-N-Go—Ignition,alwaysremembertoplacetheignitionin theOFFmode.
Duplication of key fobs may be performed at an authorized dealer. This procedure consists of programming a blank key fob to the vehicle electronics. A blank key fob is one that has never been programmed.
NOTE: When having the Sentry Key Immobilizer System serviced, bring all vehicle keys with you to an authorized dealer.
GeneralInformation
The following regulatory statement applies to all radio frequency (RF) devices equipped in this vehicle:
This device complies with Part 15 of the FCC Rules and with Industry Canada license-exempt RSS standard(s). Operation is subject to the following two conditions:
- This device may not cause harmful interference, and
- This device must accept any interference received, including interference that may cause undesired operation.
NOTE: Changes or modifications not expressly approved by the party responsible for compliance could void the user's authority to operate the equipment.
IGNITION SWITCH
Keyless Push Button Ignition
This feature allows the driver to operate the ignition with the push of a button as long as the key fob is in the passenger compartment.
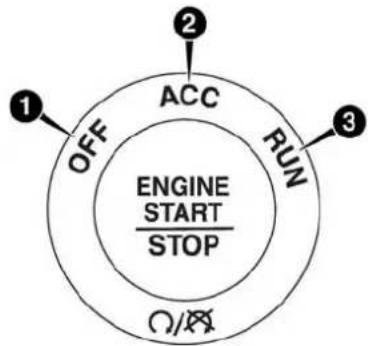
The Keyless Push Button Ignition has four operating positions, three of which are labeled and will illuminate when in position. The three positions are OFF, ACC, and ON/RUN. The fourth position is START. During start, ON/RUN will illuminate.
NOTE: If the ignition switch does not change with the push of a button, the key fob may have a low or dead battery. In this situation, a back up method can be used to operate the ignition switch. Put the nose side (side opposite of the emergency key) of the key fob against the ENGINE START/STOP button and push to operate the ignition switch.
28 GETTING TO KNOW YOUR VEHICLE
flowchart
graph TD
    A["1 OFF"] --> B["2 ACC"]
    B --> C["3 RUN"]
    C --> D["4 STOP"]
    style A fill:#f9f,stroke:#333
    style B fill:#ccf,stroke:#333
    style C fill:#cfc,stroke:#333
    style D fill:#fcc,stroke:#333
0301113478US
START/STOPIgnitionButton
1—OFF
2—ACC
3—ON/RUN
The push button ignition can be placed in the following modes:
OFF
• The engine is stopped.
- Some electrical devices (e.g. central locking, alarm, etc.) are still available.
ACC
•Engine is not started.
• Some electrical devices are available.
ON/RUN
- Driving position.
- All the electrical devices are available.
START
• The engine will start.
WARNING!
- Whenexitingthevehicle,alwaysremovethekeyfob fromthevehicleandlockyourvehicle.
- Neverleavechildrenaloneinavehicle,orwith accesstoanunlockedvehicle.
- Allowingchildrentobeinavehicleunattendedis dangerousforanumberofreasons.Achildorothers couldbeseriouslyorfatallyinjured.Children shouldbewarnednottotouchtheparkingbrake, brakepedalorthegearselector.
- Donotleavethekeyfobinornearthevehicle,orinalocationaccessibletochildren,anddonotleavethe
(Continued)
WARNING!(Continued)
ignitionofavehicleequippedwithKeylessEnter-N-GointheON/RUNmode.Achildcouldoperate powerwindows,othercontrols,ormovethevehicle.
- Donotleavechildrenoranimalsinsideparked vehiclesinhotweather.Interiorheatbuild-upmay causeseriousinjuryordeath.
CAUTION!
An unlocked vehicle is an invitation forthieves. Always remove key fob from the vehicle and lock all doors when leaving the vehicle unattended.
NOTE: Refer to "Starting The Engine," in "Starting And Operating" for further information.
Vehicle On Message
When opening the driver's door and the ignition is in ON/RUN (engine not running) position, a chime will sound to remind you to place the ignition in the OFF position.
In addition to the chime, the Vehicle On message will display in the cluster (if equipped).
NOTE: The power window switches and power sunroof (if equipped) will remain active for three minutes after the ignition is cycled to the OFF position. Opening either front door will cancel this feature. The time for this feature is programmable.
WARNING!
- Beforeexitingvehicle,alwayscometoacomplete stop,thenshifttheautomatictransmissioninto PARK,applytheparkingbrake,placetheenginein theOFFposition,removethekeyfobfromthe vehicleandlockyourvehicle.Ifequippedwith KeylessEnter-N-Go,alwaysmakesurethekeyless ignitionisin"OFF"position,removethekeyfob fromthevehicleandlockthevehicle.
- Neverleavechildrenaloneinavehicle,orwith accesstoanunlockedvehicle.
- Allowingchildrentobeinavehicleunattendedis dangerousforanumberofreasons.Achildorothers could be seriously or fatally injured. Children shouldbewarnednottotouchtheparkingbrake, brakepedalorthegearselector.
(Continued)
WARNING!(Continued)
- Donotleavethekeyfobinornearthevehicle,orin allocationaccessibletochildren,anddonotleavethe ignitionofavehicleequippedwithKeylessEnter-N-GointheON/RUNmode.Achildcouldoperate powerwindows,othercontrols,ormovethevehicle.
- Donotleavechildrenoranimalsinsideparked vehiclesinhotweather.Interiorheatbuild-upmay causeseriousinjuryordeath.
CAUTION!
An unlocked vehicle is an invitation forthieves. Always remove key of from the vehicle and lock all doors when leaving the vehicle unattended.
REMOTE START — IF EQUIPPED
How To Use Remote Start — If Equipped

Push remote start button on the key fob twice within five seconds. Pushing the remote start button a third time shuts the engine off.
To drive the vehicle, push the unlock button, and push the ignition to the ON/RUN position.
NOTE:
- With remote start, the engine will only run for 15 minutes (timeout) unless the ignition is placed in the ON/RUN position.
- The vehicle must be started with the key after two consecutive timeouts.
All of the following conditions must be met before the engine will remote start:
•Gear selector in PARK
- Doors closed
- Hood closed
- Trunk closed
- Hazard switch off
- Brake switch inactive (brake pedal not pushed)
- Battery at an acceptable charge level
- Check engine light shall not be present
- PANIC button not pushed
- System not disabled from previous remote start event
- Vehicle alarm system indicator flashing
- Ignition in STOP/OFF position
- Fuel level meets minimum requirement
- Vehicle Security Alarm is not signaling an intrusion
WARNING!
- Donotstartorrunanengineinaclosedgarageor confinedarea.ExhaustgascontainsCarbonMonoxide(CO)whichisodorlessandcolorless.Carbon Monoxideispoisonousandcancauseseriousinjury ordeathwheninhaled.
- Keepkeyfobsawayfromchildren.Operationofthe RemoteStartSystem,windows,doorlocksorother controlscouldcauseseriousinjuryordeath.
Remote Start Abort Message On The Instrument Cluster Display — If Equipped
The following messages will display in the instrument cluster display if the vehicle fails to remote start or exits remote start prematurely:
- Remote Start Aborted — Door Open
- Remote Start Aborted — Hood Open
-
Remote Start Aborted — Fuel Low
-
Remote Start Aborted — Trunk Open
- Remote Start Disabled — Start Vehicle To Reset
The message will stay active until the ignition is turned to the ON/RUN position.
To Enter Remote Start Mode
Push and release the remote start button on the key fob twice within five seconds. The vehicle doors will lock, the parking lights will flash, and the horn will chirp twice (if programmed). Then, the engine will start, and the vehicle will remain in the Remote Start mode for a 15-minute cycle.
NOTE:
- If an engine fault is present or fuel level is low, the vehicle will start and then shut down in 10 seconds.
- The park lamps will turn on and remain on during Remote Start mode.
- For security, power window and power sunroof operation (if equipped) are disabled when the vehicle is in the Remote Start mode.
- The engine can be started two consecutive times with the key fob. However, the ignition must be cycled by pushing the START/STOP button twice (or the ignition switch must be cycled to the ON/RUN position) before you can repeat the start sequence for a third cycle.
32 GETTING TO KNOW YOUR VEHICLE
To Exit Remote Start Mode Without Driving The Vehicle
Push and release the remote start button one time or allow the engine to run for the entire 15-minute cycle.
NOTE: To avoid unintentional shutdowns, the system will disable with a one time push of the remote start button for two seconds after receiving a valid remote start request.
To Exit Remote Start Mode And Drive The Vehicle
Before the end of 15-minute cycle, push and release the unlock button on the key fob to unlock the doors and disarm the vehicle security alarm (if equipped). Then, prior to the end of the 15-minute cycle, push and release the START/STOP button. If the START/STOP button is not present, insert the key fob into the ignition switch and turn the switch to the ON/RUN position.
NOTE:
- For vehicles not equipped with the Keyless Enter-N-Go — Passive Entry feature, the ignition switch must be in the ON/RUN position in order to drive the vehicle.
- For vehicles not equipped with the Keyless Enter-N-Go — Passive Entry feature, the message “Remote Start Active — Insert Key and Turn To Run” will show in the instrument cluster display until you insert the key.
- For vehicles equipped with the Keyless Enter-N-Go — Passive Entry feature, the message “Remote Start Active — Push Start Button” will show in the instrument cluster display until you push the START button.
ToCancelRemoteStart
Remote Starting will also cancel if any of the following occur:
- The engine stalls or engine speed exceeds 2500 rpm.
- Any engine warning lights come on.
- Low Fuel Light turns on.
• The hood is opened.
• The hazard switch is pushed.
• The gear selector is moved out of PARK.
• The brake pedal is pushed.
Remote Start Comfort Systems — If Equipped
When remote start is activated, the heated steering wheel and driver heated seat features will automatically turn on in cold weather. In warm weather, the driver vented seat feature will automatically turn on when the remote start is activated. These features will stay on through the duration of remote start or until the ignition switch is cycled to the ON/RUN position.
General Information
The following regulatory statement applies to all radio frequency (RF) devices equipped in this vehicle:
This device complies with Part 15 of the FCC Rules and with Industry Canada license-exempt RSS standard(s). Operation is subject to the following two conditions:
- This device may not cause harmful interference, and
- This device must accept any interference received, including interference that may cause undesired operation.
NOTE: Changes or modifications not expressly approved by the party responsible for compliance could void the user's authority to operate the equipment.
SENTRY KEY
The Sentry Key Immobilizer system prevents unauthorized vehicle operation by disabling the engine. The system does not need to be armed or activated. Operation is automatic, regardless of whether the vehicle is locked or unlocked.
The system uses a key fob, keyless push button ignition and a RF receiver to prevent unauthorized vehicle operation. Therefore, only key fobs that are programmed to the vehicle can be used to start and operate the vehicle. The system cannot reprogram a key fob obtained from another vehicle.
After turning the ignition switch to the ON/RUN position, the vehicle security light will turn on for three seconds for a bulb check. If the light remains on after the bulb check, it indicates that there is a problem with the electronics. In addition, if the light begins to flash after the bulb check, it indicates that someone attempted to start the engine with an invalid key fob. In the event that a valid key fob is used to start the engine but there is an issue with the vehicle electronics, the engine will start and shut off after two seconds.
34 GETTING TO KNOW YOUR VEHICLE
If the vehicle security light turns on during normal vehicle operation (vehicle running for longer than ten seconds), it indicates that there is a fault in the electronics. Should this occur, have the vehicle serviced as soon as possible by an authorized dealer.
CAUTION!
The SentryKeyImmobilizersystemisnotcompatible with some aftermarketremotestartingsystems.Useof thesesystemsmayresultinvehiclestartingproblems andlossofsecurityprotection.
All of the key fobs provided with your new vehicle have been programmed to the vehicle electronics.
Key Programming
Programming key fobs may be performed at an authorized dealer.
Replacement Keys
NOTE: Only key fobs that are programmed to the vehicle electronics can be used to start and operate the vehicle. Once a key fob is programmed to a vehicle, it cannot be programmed to any other vehicle.
CAUTION!
- Alwaysremovethekeyfobsfromthevehicleand lockalldoorswhenleavingthevehicleunattended.
- ForvehiclesequippedwithKeylessEnter-N-Go—Ignition,alwaysremembertoplacetheignitionin theOFFposition.
NOTE: Duplication of key fobs may be performed at an authorized dealer. This procedure consists of programming a blank key fob to the vehicle electronics. A blank key fob is one that has never been programmed.
When having the Sentry Key Immobilizer System serviced, bring all vehicle keys with you to an authorized dealer.
General Information
The following regulatory statement applies to all radio frequency (RF) devices equipped in this vehicle:
This device complies with Part 15 of the FCC Rules and with Industry Canada license-exempt RSS standard(s). Operation is subject to the following two conditions:
-
This device may not cause harmful interference, and
-
This device must accept any interference received, including interference that may cause undesired operation.
NOTE: Changes or modifications not expressly approved by the party responsible for compliance could void the user's authority to operate the equipment.
VEHICLE SECURITY ALARM — IF EQUIPPED
The vehicle security alarm monitors the vehicle doors for unauthorized entry and the keyless push button ignition for unauthorized operation. While the vehicle security alarm is armed, interior switches for door locks and trunk release are disabled. If something triggers the alarm, the vehicle security alarm will provide the following audible and visible signals: the horn will pulse, the park lamps and/or turn signals will flash, and the vehicle security light in the instrument cluster will flash.
To Arm The System
Follow these steps to arm the vehicle security alarm:
-
Make sure the vehicle's ignition is placed in the OFF mode. Refer to "Ignition Switch" in "Getting To Know Your Vehicle" for further information.
-
Perform one of the following methods to lock the vehicle:
-
Push lock on the interior power door lock switch with the driver and/or passenger door open.
- Push the lock button on the exterior Passive Entry Door Handle with a valid key fob available in the same exterior zone (refer to "Keyless Enter-N-Go — Passive Entry," located in "Doors" in "Getting To Know Your Vehicle" for further information).
-
Push the lock button on the key fob.
-
If any doors are open, close them.
NOTE:SecuritySystemManualOverride
The vehicle security alarm will not arm if you lock the doors using the manual door lock plunger.
36 GETTING TO KNOW YOUR VEHICLE
To Disarm The System
The vehicle security alarm can be disarmed using any of the following methods:
- Push the unlock button on the key fob.
- Grasp the Passive Entry Unlock Door Handle, if equipped. Refer to "Keyless Enter-N-Go — Passive Entry," located in "Doors" in "Getting To Know Your Vehicle" for further information.
- Push the Keyless Enter-N-Go ignition button (requires at least one valid key fob in the vehicle).
NOTE:
- The driver's door key cylinder and the trunk button on the key fob cannot arm or disarm the vehicle security alarm.
- When the vehicle security alarm is armed, the interior power door lock switches will not unlock the doors.
The vehicle security alarm is designed to protect your vehicle. However, you can create conditions where the system will give you a false alarm. If one of the previously described arming sequences has occurred, the vehicle security alarm will arm regardless of whether you are in the vehicle or not. If you remain in the vehicle and open a door, the alarm will sound. If this occurs, disarm the vehicle security alarm.
If the vehicle security alarm is armed and the battery becomes disconnected, the vehicle security alarm will remain armed when the battery is reconnected; the exterior lights will flash, the horn will sound. If this occurs, disarm the vehicle security alarm.
Rearming Of The System
If something triggers the alarm, and no action is taken to disarm it, the vehicle security alarm will turn the horn off after 29 seconds, five seconds between cycles, up to eight cycles if the trigger remains active and the vehicle security alarm will rearm itself.
Tamper Alert
If something has triggered the vehicle security alarm in your absence, the horn will sound three times and the exterior lights will blink three times when you disarm the vehicle security alarm. Check the vehicle for tampering.
DOORS
Manual Door Locks
To lock each door, push the door lock knob on each door trim panel downward. To unlock the front doors, pull the inside door handle to the first detent. To unlock the rear doors, pull the door lock knob on the door trim panel upward.
natural_image
Line drawing of a hand holding a small object near a curved line, with no visible text or symbolsDoorLockKnob
If the door lock knob is down when you shut the door, the door will lock. Therefore, make sure the key fob is not inside the vehicle before closing the door.
WARNING!
- Forpersonalsecurityandsafetyintheeventofacollision,lockthevehicledoorsbeforeyoudriveaswellaswhenyouparkandleavethevehicle.
- Whenexitingthevehicle,alwaysmakesurethe keylessignitionnodeisintheOFFmode,removethe keyfobfromthevehicleandlockyourvehicle.
- Neverleavechildrenaloneinavehicle,orwith accesstoan unlocked vehicle. Allowingchildrento beinavehicleunattendedisdangerousforanumber ofreasons.Achildorotherscouldbeseriouslyor fatally injured.Childrenshouldbewarnednotto touchtheparkingbrake,brakepedalorthegear selector.
- Donotleavethekeyfobinornearthevehicle,orinalocationaccessibletochildren,anddonotleavetheignitionofavehicleequippedwithKeylessEnter-N-GointheACCorON/RUNmode.Achildcouldoperatepowerwindows,othercontrols,ormovethevehicle.
Power Door Locks
A power door lock switch is on each front door trim panel. Use this switch to lock or unlock the doors.
38 GETTING TO KNOW YOUR VEHICLE

text_image
0301113488USPowerDoorLockSwitches
The doors can also be locked and unlocked with the Keyless Enter-N-Go — Passive Entry system. Refer to "Keyless Enter-N-Go — Passive Entry" in this section for further information.
If you push the power door lock switch while the ignition is in the ACC or ON/RUN position, and any front door is open, the power locks will not operate. This prevents you from accidentally locking the key fob in the vehicle. Placing the ignition in the OFF position or closing the door will allow the locks to operate. If the driver door is open, and the ignition is in the ACC or ON/RUN position, a chime will sound as a reminder to remove the key fob.
Keyless Enter-N-Go — Passive Entry
The Passive Entry system is an enhancement to the vehicle's Remote Keyless Entry system and a feature of Keyless Enter-N-Go. This feature allows you to lock and unlock the vehicle's door(s) without having to push the key fob lock or unlock buttons.
NOTE:
- Passive Entry may be programmed on or off. Refer to "Uconnect Settings" in "Multimedia" for further information.
- If wearing gloves on your hands, or if it has been raining/snowing on the Passive Entry door handle, the unlock sensitivity can be affected, resulting in a slower response time.
- If the vehicle is unlocked by Passive Entry and no door is opened within 60 seconds, the vehicle will re-lock and arm the security alarm (if equipped).
- The key fob may not be able to be detected by the vehicle passive entry system if it is located next to a mobile phone, laptop or other electronic device; these devices may block the key fob's wireless signal and prevent the passive entry handle from locking/unlocking the vehicle.
ToUnlockFromTheDriver'sSide
With a valid Passive Entry key fob within 5 ft (1.5 m) of the driver's door handle, grab the front driver door handle to unlock the driver's door automatically. The interior door panel lock knob will raise when the door is unlocked.
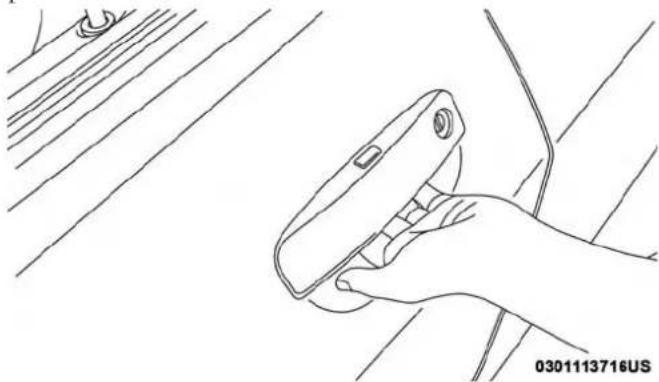
natural_image
Line drawing of a hand holding a small electronic device against a striped background (no text or symbols)GrabTheDoorHandleToUnlock
NOTE: If "Unlock All Doors 1st Press" is programmed, all doors will unlock when you grab hold of the front driver's door handle. For further information regarding selecting "Unlock Driver Door 1st Press" and "Unlock All Doors 1st Press," refer to "Uconnect Settings" in "Multimedia".
ToUnlockFromThePassengerSide
With a valid Passive Entry key fob within 5 ft (1.5 m) of the passenger door handle, grab the front passenger door handle to unlock all four doors automatically. The interior door panel lock knob will raise when the door is unlocked.
NOTE: All doors will unlock when the front passenger door handle is grabbed, regardless of the driver's door unlock preference setting ("Unlock Driver Door 1st Press" or "Unlock All Doors 1st Press").
PreventingInadvertentLockingOfPassiveEntryKey FobInVehicle
To minimize the possibility of unintentionally locking a Passive Entry key fob inside your vehicle, the Passive Entry system is equipped with an automatic door unlock feature which will function if the ignition switch is in the OFF position.
FOBIK-Safe only executes in vehicles with passive entry. There are three situations that trigger a FOBIK-Safe search in any passive entry vehicle.
- A lock request is made by a valid Passive Entry key fob while a door is open.
40 GETTING TO KNOW YOUR VEHICLE
- A lock request is made by the Passive Entry door handle while a door is open.
- A lock request is made by the door panel switch while the door is open.
When any of these situations occur, after all open doors are shut, the FOBIK-Safe search will be executed. If it finds a Passive Entry key fob inside the car and it does not find any Passive Entry key fobs outside the car, then the car will unlock and alert the customer.
NOTE: The vehicle will only unlock the doors when a valid Passive Entry key fob is detected inside the vehicle, and no valid Passive Entry key fob is detected outside the vehicle. The vehicle will not unlock the doors when any of the following conditions are true:
• The doors are locked manually using the door lock knobs.
- There is a valid Passive Entry key fob outside the vehicle and within 5 ft (1.5 m) of either Passive Entry door handle.
- Three attempts are made to lock the doors using the door panel switch and then close the doors.
ToEnterTheTrunk
With a valid Passive Entry key fob within 5 ft (1.5 m) of the deck lid, push the button located on the right side of the deck lid.
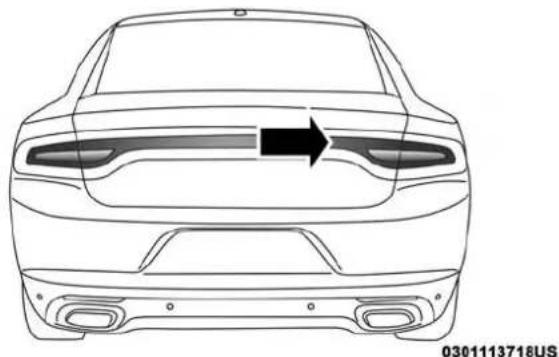
natural_image
Front view line drawing of a car showing the rear side and side profile with a black arrow indicating direction (no text or symbols)TrunkPassiveEntryButton
NOTE: If you inadvertently leave your vehicle's Passive Entry key fob in the trunk and try to close the deck lid, the deck lid will automatically unlatch, unless another one of the vehicle's Passive Entry key fobs is outside the vehicle and within 5 ft (1.5 m) of the deck lid.
ToLockTheVehicle'sDoors
With one of the vehicle's Passive Entry key fobs within 5 ft (1.5 m) of the driver or passenger front door handles, push the door handle lock button to lock all four doors.
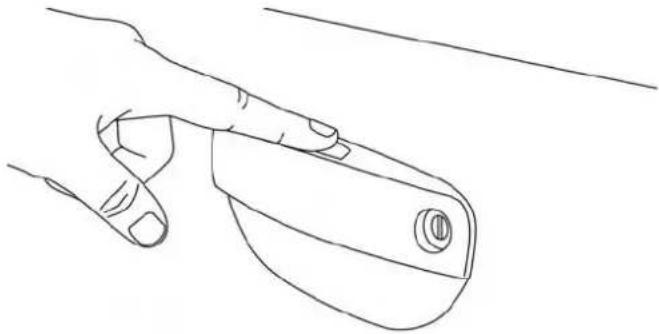
natural_image
Line drawing of a hand gripping a small object with a circular opening (no text or symbols)0301113713US
PushTheDoorHandleButtonToLock
Do NOT grab the door handle when pushing the door handle lock button. This could unlock the door(s).
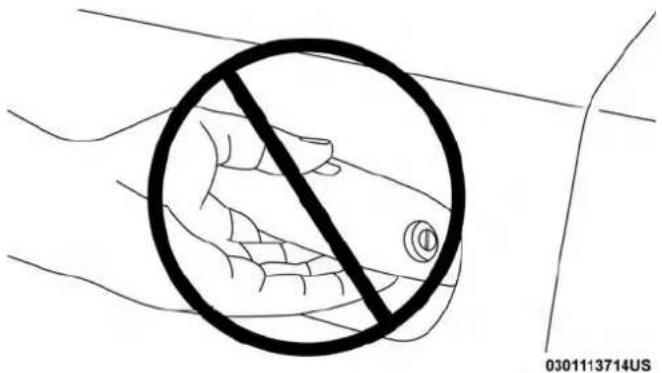
text_image
0301113714USDoNOTGrabTheDoorHandleWhenLocking
NOTE:
• After pushing the door handle button, you must wait two seconds before you can lock or unlock the doors, using either Passive Entry door handle. This is done to allow you to check if the vehicle is locked by pulling the door handle, without the vehicle reacting and unlocking.
- The Passive Entry system will not operate if the key fob battery is dead.
The vehicle doors can also be locked by using the key fob lock button or the lock button located on the vehicle's interior door panel.
42 GETTING TO KNOW YOUR VEHICLE
GeneralInformation
The following regulatory statement applies to all radio frequency (RF) devices equipped in this vehicle:
This device complies with Part 15 of the FCC Rules and with Industry Canada license-exempt RSS standard(s). Operation is subject to the following two conditions:
- This device may not cause harmful interference, and
- This device must accept any interference received, including interference that may cause undesired operation.
NOTE: Changes or modifications not expressly approved by the party responsible for compliance could void the user's authority to operate the equipment.
Automatic Unlock Doors On Exit
The doors will unlock automatically on vehicles with power door locks if:
- The Automatic Unlock Doors On Exit feature is enabled.
-
The vehicle was in motion, then speed returned to 0 mph (0 km/h) and the transmission is placed in PARK.
-
The driver door is opened.
- The doors were not previously unlocked.
NOTE: AutomaticUnlockDoorsOnExitProgramming
To change the current setting, refer to "Uconnect Settings" in "Multimedia" for further information.
Use the Automatic Unlock Doors On Exit feature in accordance with local laws.
Automatic Door Locks — If Equipped
The auto door lock feature default condition is enabled. When enabled, the door locks will lock automatically when the vehicle's speed exceeds 15 mph (24 km/h). The auto door lock feature can be enabled or disabled by an authorized dealer per written request of the customer. Please see an authorized dealer for service.
Child-Protection Door Lock System — Rear Doors
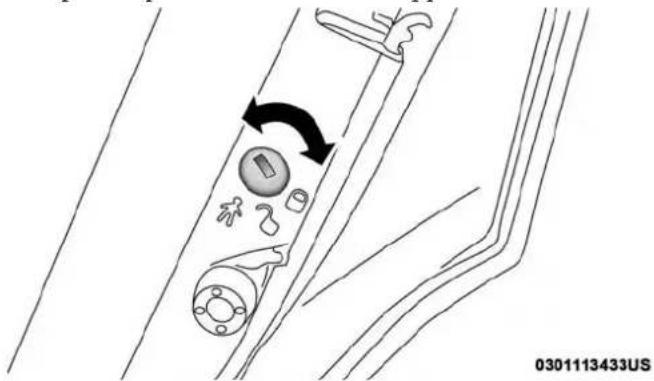
To provide a safer environment for small children riding in the rear seats, the rear doors are equipped with Child-Protection Door Lock system.
ToEngageOrDisengageTheChild-ProtectionDoorLock System
- Open the rear door.
- Insert the tip of the emergency key into the lock and rotate to the lock or unlock position.
- Repeat steps one and two for the opposite rear door.
text_image
0301113433USChild-ProtectionDoorLockFunction
WARNING!
Avoidtrappinganyoneinavehicleinacollision. Rememberthatthereardoorscanonlybeopenedfrom theoutsidewiththeChild-Protectionlocksareengaged(locked).
NOTE: For emergency exit from the rear seats when the Child-Protection Door Lock System is engaged, manually raise the door lock knob to the unlocked position, roll down the window, and open the door using the outside door handle.
SEATS
Seats are a part of the Occupant Restraint System of the vehicle.
WARNING!
- Itisdangeroustorideinacargoarea,insideor outsideofvehicle.Inacollision,peopleridingin theseareasaremorelikelytobeseriouslyinjuredor killed.
(Continued)
44 GETTING TO KNOW YOUR VEHICLE
WARNING!(Continued)
- Donotallowpeopleorideinanyareaofyour vehiclethatisnotequippedwithseatsandseatbelts. Inacollision,peopleridingintheseareasaremore likelytobeseriouslyinjuredorkilled.
- Besureeveryoneinyourvehicleisinaseatand usingaseatbeltproperly.
Manual Rear Seat Adjustment
WARNING!
Donotpile luggage or cargohigher than the top of the seat back. This could impair visibility or become a dangerous projectile in as sudden stop or collision.
FoldingRearSeat
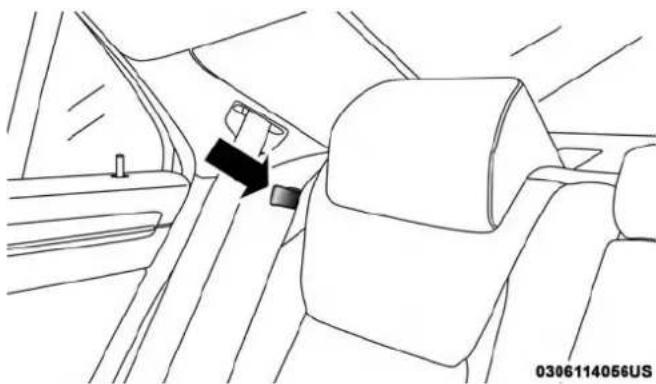
The rear seatbacks can be folded forward to provide an additional storage area. To fold the rear seatback, pull on the loops located on the upper seatback.
NOTE: These loops can be tucked away when not in use.
natural_image
Interior view of a car showing the seatbelt and dashboard compartment (no text or symbols visible)RearSeatbackLoop
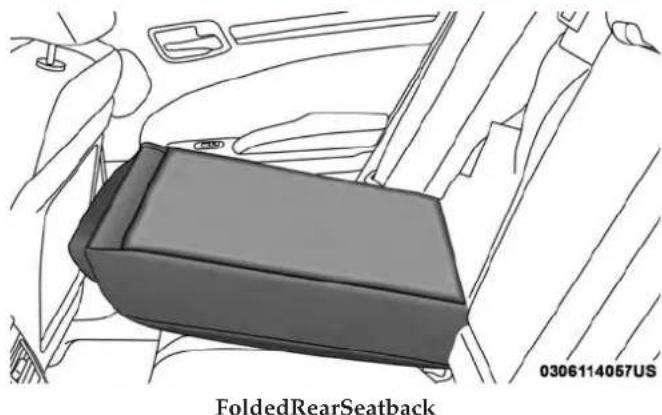
After releasing the seatback, it can be folded forward.
natural_image
Diagram of a FoldedRearSeatback car interior showing the seatbelt and dashboard (no text or symbols on the diagram itself)NOTE: You may experience deformation in the seat cushion from the seat belt buckles if the seats are left folded for an extended period of time. This is normal and by simply opening the seats to the open position, over time the seat cushion will return to its normal shape.
When the seatback is folded to the upright position, make sure it is latched by strongly pulling on the top of the seatback above the seat strap.
WARNING!
- Becertainthattheseatbackissecurelylockedinto position. If theseatbackisnotsecurelylockedinto position, theseatwillnotprovidetheproperstabilityforchildseatsand/orpassengers. Animproperly latchedseatcouldcauseseriousinjury.
- The cargo are in therear of the vehicle (with therear seatbacks in the locked-up or folded down position) should not be used as a play area by children when the vehicle is in motion. They could be seriously injured in a collision. Children should be seated and using the proper restraint system.
46 GETTING TO KNOW YOUR VEHICLE
Power Seats
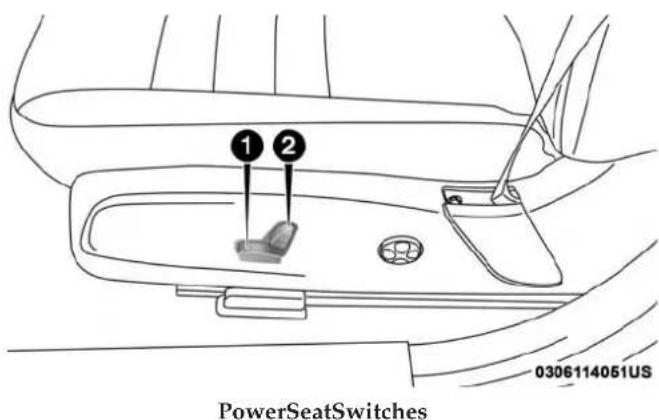
On models equipped with power seats, the switch is located on the outboard side of the seat near the floor. Use this switch to move the driver's seat up, down, forward, rearward, or to recline the seatback.
text_image
PowerSeatSwitches 0306114051US1 — Seat Control
2 — Seatback Control
AdjustingTheSeatForwardOrRearward
The seat can be adjusted both forward and rearward. Push the seat switch forward or rearward. The seat will move in the direction of the switch. Release the switch when the desired position has been reached.
AdjustingTheSeatUpUpDown
The height of the seats can be adjusted up or down. Pull upward or push downward on the seat switch; the seat will move in the direction of the switch. Release the switch when the desired position has been reached.
RecliningTheSeatback
The angle of the seatback can be adjusted forward or rearward. Push the seatback switch forward or rearward, the seat will move in the direction of the switch. Release the switch when the desired position is reached.
WARNING!
- Adjustingaseatwhiledrivingmaybedangerous. Movingaseatwhiledrivingcouldresultinlossof controlwhichcouldcauseacollisionandserious injuryordeath.
(Continued)
WARNING!(Continued)
- Seatsshouldbeadjustedbeforefasteningtheseat beltsandwhilethevehicleisparked.Seriousinjury ordeathcouldresultfromapoorlyadjustedseatbelt.
- Donotridewiththeseatbackreclinedsothatthe shoulderbeltisnolongerrestingagainstyourchest. Inacollisionyoucouldslideundertheseatbelt, whichcouldresultinseriousinjuryordeath.
CAUTION!
Donotplaceanyarticleunderapowerseatorimpede itsabilitytomoveasitmaycausedamagetotheseat controls.Seattravelmaybecomelimitedifmovement isstoppedbyanobstructionintheseat'spath.
TiltingTheSeatUpUpDown
The angle of the seat cushion can be adjusted up or down. Pull upward or push downward on the front of the seat switch. The front of the seat cushion will move in the direction of the switch. Release the switch when the desired position has been reached.
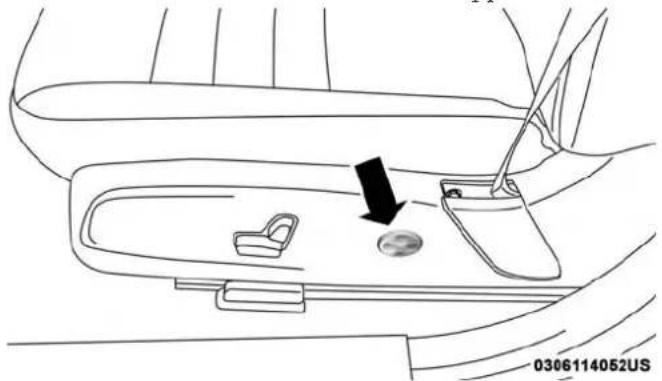
PowerLumbar—IfEquipped
Vehicles equipped with power driver or passenger seats may also be equipped with power lumbar. The power lumbar switch is located on the outboard side of the power seat. Push the switch forward or rearward to increase or decrease the lumbar support. Push the switch upward or downward to raise or lower the lumbar support.
natural_image
Line drawing of a car interior showing the seat, dashboard, and seatbelt with a black arrow pointing to a circular component (no text or symbols)PowerLumbarSwitch
48 GETTING TO KNOW YOUR VEHICLE
Driver Memory Seat — If Equipped
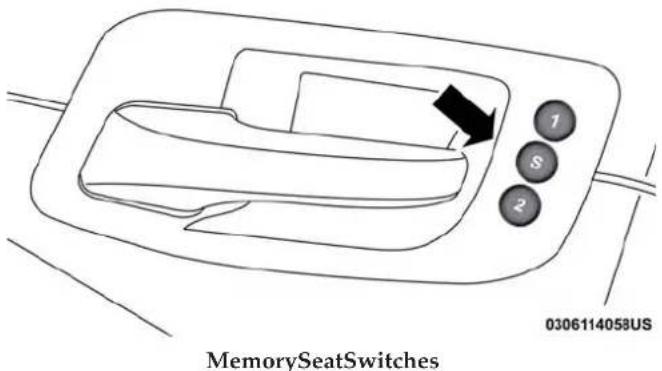
This feature allows the driver to store up to two different memory profiles for easy recall through a memory switch. Each memory profile contains desired position settings for the driver seat, side mirrors, and power tilt and telescopic steering column (if equipped) and a set of desired radio station presets. Your remote keyless entry key fob can also be programmed to recall the same positions when the unlock button is pushed.
NOTE: If your vehicle is equipped with two key fobs, one key fob can be linked to memory position 1 and the other key fob can be linked to memory position 2.
The memory seat switch is located on the driver's door trim panel. The switch consists of three buttons: The set (S) button, which is used to activate the memory save function, and the memory (1) and (2) buttons, which are used to recall either of two pre-programmed memory profiles.
text_image
MemorySeatSwitches 0306114058USProgrammingTheMemoryFeature
NOTE: To create a new memory profile, perform the following:
- Cycle the vehicle's ignition to the ON/RUN position (do not start the engine).
-
Adjust all memory profile settings to desired preferences (i.e., seat, side mirror, power tilt and telescopic steering column [if equipped], and radio station presets).
-
Push and release the set (S) button on the memory switch.
- Within five seconds, push and release either of the memory buttons (1) or (2). The instrument cluster display will display which memory position has been set.
NOTE:
- Memory profiles can be set without the vehicle in PARK, but the vehicle must be in PARK to recall a memory profile.
- To set a memory profile to your key fob, refer to "Linking And Unlinking The Remote Keyless Entry Key Fob To Memory" in this section.
LinkingAndUnlinkingTheRemoteKeylessEntry KeyFobToMemory
Your key fobs can be programmed to recall one of two pre-programmed memory profiles by pushing the unlock button on the key fob.
NOTE: Before programming your key fobs you must select the "Personal Settings Linked To Fob" feature through the Uconnect system screen. Refer to "Uconnect Settings" in "Multimedia" for further information.
To program your key fobs, perform the following:
- Place the vehicle's ignition to the OFF position.
- Select desired memory profile (1) or (2). The system will recall any stored settings for this profile. Wait for the system to complete the memory recall before continuing to step three.
NOTE: If a memory profile has not already been set, refer to "Programming The Memory Feature" in this section for instructions on how to set a memory profile.
- Once the profile has been recalled, push and release the set (S) button on the memory switch, then push and release memory button (1) or memory button (2) accordingly. "Memory Profile Set" (1 or 2) will display in the instrument cluster display.
- Push and release the lock button on the key fob within 10 seconds.
NOTE: Your key fobs can be unlinked from your memory settings by pushing the set (S) button, and within 10 seconds push the unlock button on the key fob.
50 GETTING TO KNOW YOUR VEHICLE
MemoryPositionRecall
NOTE: The vehicle must be in PARK to recall memory positions. If a recall is attempted when the vehicle is not in PARK, a message will display in the instrument cluster display.
To recall the memory settings for driver 1, push memory button (1) on the driver's door or the unlock button on the key fob linked to memory position 1.
NOTE: If the vehicle is equipped with Passive Entry, the memory settings will be recalled with a Passive Entry Unlock into the driver's door using the key fob linked to position 1.
To recall the memory setting for driver 2, push memory button (2) on the driver's door or the unlock button on the key fob linked to memory position 2.
NOTE: If the vehicle is equipped with Passive Entry, the memory settings will be recalled with a Passive Entry Unlock into the driver's door using the key fob linked to position 2.
A recall can be cancelled by pushing any of the memory buttons (S, 1, or 2) on the driver's door during a recall. When a recall is cancelled, the driver's seat or power tilt and telescopic steering column (if equipped) stop moving. A delay of one second will occur before another recall can be selected.
EasyEntry/ExitSeat
This feature provides automatic driver seat positioning to enhance driver mobility when entering and exiting the vehicle.
The distance the driver seat moves depends on where you have the driver seat positioned when you cycle the vehicle's ignition to the OFF position.
- When you cycle the vehicle's ignition to the OFF position, the driver seat will move about 2.4 inches (60 mm) rearward if the driver seat position is greater than or equal to 2.7 inches (67.7 mm) forward of the rear stop. The seat will return to its previously set position when you cycle the vehicle's ignition to the ACC or RUN position.
- The Easy Entry/Easy Exit feature is disabled when the driver seat position is less than 0.9 of an inch (22.7 mm) forward of the rear stop. At this position, there is no benefit to the driver by moving the seat for Easy Exit or Easy Entry.
Each stored memory setting will have an associated Easy Entry and Easy Exit position.
NOTE: The Easy Entry/Exit feature is not enabled when the vehicle is delivered from the factory. The Easy Entry/Exit feature is enabled (or later disabled) through the programmable features in the Uconnect system. Refer to "Uconnect Settings" in "Multimedia".
Heated Seats — If Equipped
On some models, the front and rear seats may be equipped with heaters located in the seat cushions and seat backs.
WARNING!
- Personswhoareunabletofeelpaintotheskin becauseofadvancedage,chronicillness,diabetes, spinalcordinjury,medication,alcoholuse,exhaustionorotherphysicalconditionmustexercisecare whenusingtheseatheater.Itmaycauseburnseven atlowtemperatures,especiallyifusedforlong periodsoftime.
(Continued)
WARNING!(Continued)
- Donotplaceanythingontheseatorseatbackthat insulatesagainstheat,suchasablanketorcushion. Thismaycausetheseatheatertooverheat.Sittingina seatthathasbeenoverheatedcouldcauseseriousburns duetotheincreasedsurfacetemperatureoftheseat.
FrontHeatedSeats
The front heated seat control buttons are located within the climate or controls screen of the touchscreen.
You can choose from HI, LO, or OFF heat settings. The indicator arrows in touchscreen buttons indicate the level of heat in use. Two indicator arrows will illuminate for HI, and one for LO. Turning the heating elements off will return the user to the radio screen.
- Press the heated seat button setting on.
# once to turn the HI
- Press the heated seat button the LO setting on.
a second time to turn
- Press the heated seat button heating elements off.
a third time to turn the
52 GETTING TO KNOW YOUR VEHICLE
If the HI-level setting is selected, the system will automatically switch to LO-level after approximately 60 minutes of continuous operation. At that time, the display will change from HI to LO, indicating the change. The LO-level setting will turn off automatically after approximately 45 minutes.
NOTE:
- Once a heat setting is selected, heat will be felt within two to five minutes.
- The engine must be running for the heated seats to operate.
VehiclesEquippedWithRemoteStart
On models that are equipped with remote start, the heated seats can be programmed to come on during a remote start.
This feature can be programmed through the Uconnect system. Refer to “Uconnect Settings” in “Multimedia” for further information.
WARNING!
- Persons who are unable to feel in to the skin because of advanced age, chronic illness, diabetes, spinal cord injury, medication, alcohol use, exhaustion or other physical condition must exercise care when using these at least a computer. It may cause burn even at low temperatures, especially if used for long period so time.
- Donotplaceanythingontheseatorseatbackthat insulatesagainstheat,suchasablanketorcushion. Thismaycausetheseatheatertooverheat.Sittingina seatthathasbeenoverheatedcouldcauseseriousburns duetotheincreasedsurfacetemperatureoftheseat.
RearHeatedSeats
On some models, the two outboard seats are equipped with heated seats. The heated seat switches for these seats are located on the rear of the center console. There are two heated seat switches that allow the rear passengers to operate the seats independently.
You can choose from HI, LO, or OFF heat settings. The indicator lights in each switch indicate the level of heat in use. Two indicator lights will illuminate for HI, one for LO, and none for off.
- Push the heated seat button heating.
# once to select HI-level
- Push the heated seat button LO-level heating.
a second time to select
- Push the heated seat button heating elements off.
a third time to turn the
NOTE:
- Once a heat setting is selected, heat will be felt within two to five minutes.
- The engine must be running for the heated seats to operate.
If the HI-level setting is selected, the system will automatically switch to LO-level after approximately 60 minutes of continuous operation. At that time, the number of illuminated LEDs changes from two to one, indicating the change. The LO-level setting will turn off automatically after approximately 45 minutes.
Front Ventilated Seats — If Equipped
Located in the seat cushion and seat back are fans that draw the air from the passenger compartment and move air through fine perforations in the seat cover to help keep the driver and front passenger cooler in higher ambient temperatures. The fans operate at two speeds, HI and LO.
The front ventilated seats control buttons are located within the Uconnect system. You can gain access to the control buttons through the climate screen or the controls screen.
- Press the ventilated seat button
* once to choose HI. - Press the ventilated seat button choose LO.
* a second time to - Press the ventilated seat button the ventilated seat off.
a third time to turn
NOTE: The engine must be running for the ventilated seats to operate.
VehiclesEquippedWithRemoteStart
On models that are equipped with remote start, the ventilated seats can be programmed to come on during a remote start.
54 GETTING TO KNOW YOUR VEHICLE
This feature can be programmed through the Uconnect system. Refer to “Uconnect Settings” in “Multimedia” for further information.
HEAD RESTRAINTS
Head restraints are designed to reduce the risk of injury by restricting head movement in the event of a rear-impact. Head restraints should be adjusted so that the top of the head restraint is located above the top of your ear.
WARNING!
- Allooccupants, including the driver, should not operate vehicle or sitin a vehicle's seat until the head restraints are placed in their proper positions in ordertominimize risk of neck injury in the event of acrash.
- Headrestraintsshouldneverbeadjustedwhilethe vehicleisinmotion.Drivingavehiclewiththehead restraintsimproperlyadjustedorremovedcould causeseriousinjuryordeathintheeventofa collision.
NOTE: Do not reverse the head restraints (making the rear of the head restraint face forward) in an attempt to gain additional clearance to the back of your head.
Reactive Head Restraints — Front Seats
The front driver and passenger seats are equipped with Reactive Head Restraints (RHR). In the event of a rear impact, the RHR will automatically extend forward minimizing the gap between the back of the occupant's head and the RHR.
The RHR will automatically return to their normal position following a rear impact. If the RHR do not return to their normal position, see an authorized dealer immediately.
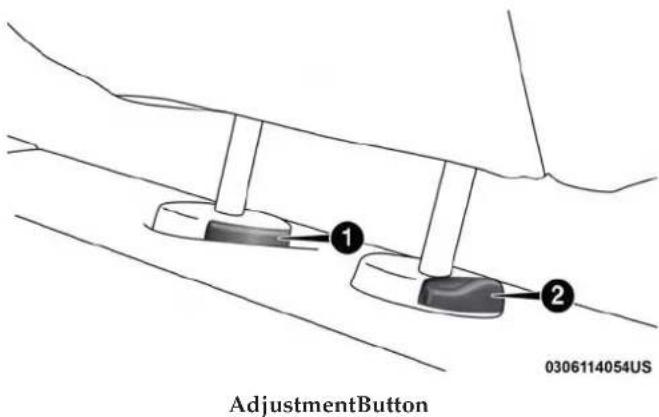
To raise the head restraint, pull upward on the head restraint. To lower the head restraint, push the adjustment button located at the base of the head restraint and push downward on the head restraint.
text_image
AdjustmentButton 0306114054US1 — Release Button
2 — Adjustment Button
WARNING!
- A loosehead restraintthrownforwardinacollision orhardstopcouldcauseseriousinjuryordeathto occupantsofthevehicle.Alwayssecurelystowremovedheadrestraintsinalocationoutsidethe occupantcompartment.
WARNING!(Continued)
- ALLtheheadrestraintsMUSTbereinstalledinthe vehicletoproperlyprotecttheoccupants.Followthe re-installationinstructionsabovepriortooperating thevehicleoroccupyingaseat.
- DonotplaceitemsoverthetopoftheReactiveHead Restraint,suchascoats,seatcoversorportableDVD players. TheseitemsmayinterferewiththeoperationoftheReactiveHeadRestraintintheeventofacollisionandcouldresultinseriousinjuryordeath.
Rear Head Restraints
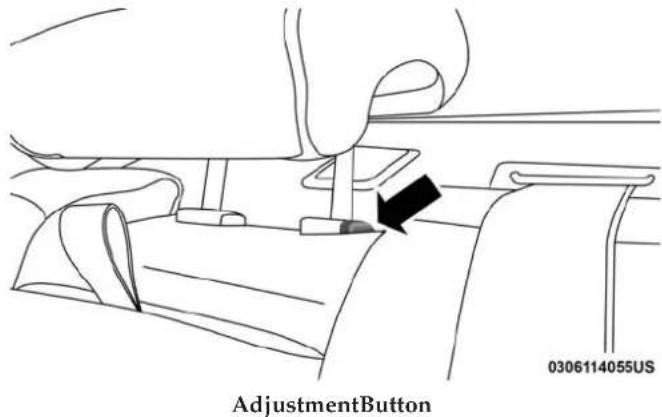
The center head restraint has two adjustable positions: up or down. When the center seat is being occupied, the head restraint should be in the raised position. When there are no occupants in the center seat, the head restraint can be lowered for maximum visibility for the driver.
To raise the head restraint, pull upward on the head restraint. To lower the head restraint, push the adjustment button located at the base of the head restraint and push downward on the head restraint.
(Continued)
56 GETTING TO KNOW YOUR VEHICLE
text_image
AdjustmentButton 0306114055USNOTE:
- The head restraint should only be removed by qualified technicians, for service purposes only. If the center rear head restraint requires removal, see an authorized dealer.
• The outboard head restraints are not adjustable.
WARNING!
ALLtheheadrestraintsMUSTbereinstalledinthe vehicletoproperlyprotecttheoccupants.Followthe re-installationinstructionsabovepriortooperatingthe vehicleoroccupyingaseat.
Front Head Restraint Removal
To remove the head restraint, raise it up as far as it can go. Then, push the adjustment button and the release button at the base of each post while pulling the head restraint up. To reinstall the head restraint, put the head restraint posts into the holes. Then, adjust it to the appropriate height.
NOTE: Do not reposition the head restraint 180 degrees to the incorrect position in an attempt to gain additional clearance to the back of the head.
WARNING!
- A looseheadrestraintthrownforwardinacollision orhardstopcouldcauseseriousinjuryordeathto occupantsofthevehicle.Alwayssecurelystowremovedheadrestraintsinalocationoutsidethe occupantcompartment.
- ALLtheheadrestraintsMUSTbereinstalledinthe vehicletoproperlyprotecttheoccupants.Followthe re-installationinstructionsabovepriortooperating thevehicleoroccupyingaseat.
STEERING WHEEL
Power Tilt/Telescoping Steering Column
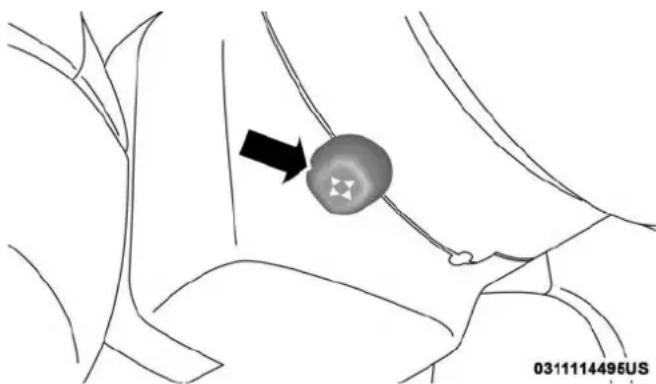
This feature allows you to tilt the steering column upward or downward. It also allows you to lengthen or shorten the steering column. The power tilt/telescoping steering column switch is located below the multifunction lever on the steering column.
natural_image
Medical illustration showing a surgical site with an arrow pointing to a circular anatomical structure (no text or symbols present)PowerTilt/TelescopingSwitch
To tilt the steering column, move the switch up or down as desired. To lengthen or shorten the steering column, pull the switch toward you or push the switch away from you as desired.
NOTE: For vehicles equipped with Driver Memory Seat, you can use your remote keyless entry key fob or the memory switch on the driver's door trim panel to return the tilt/telescopic steering column to pre-programmed positions. Refer to "Driver Memory Seat" in this section.
WARNING!
Donotadjustthesteeringcolumnwhiledriving. Adjustingthesteeringcolumnwhiledrivingordrivingwiththesteeringcolumnunlocked,couldcausethe drivertolosecontrolofthevehicle.Failuretofollow thiswarningmayresultinseriousinjuryordeath.
Heated Steering Wheel — If Equipped
The steering wheel contains a heating element that helps warm your hands in cold weather. The heated steering wheel has only one temperature setting. Once the heated steering wheel has been turned on, it will stay on for an average of 80 minutes before automatically shutting off. This time will vary based on environmental temperatures. The heated steering wheel can shut off early or may not turn on when the steering wheel is already warm.
The heated steering wheel control button is located within the Uconnect system. You can gain access to the control button through the climate screen or the controls screen.
- Press the heated steering wheel button the heating element on.
once to turn - Press the heated steering wheel button to turn the heating element off.
a second time
NOTE: The engine must be running for the heated steering wheel to operate.
VehiclesEquippedWithRemoteStart
On models that are equipped with remote start, the heated steering wheel can be programmed to come on during a remote start through the Uconnect system. Refer to "Uconnect Settings" in "Multimedia" for further information.
WARNING!
- Persons who are unable to feel in to the skin because of advanced age, chronic illness, diabetes, spinal cord injury, medication, alcohol use, exhaustion, or other physical conditions must exercise care when using the steering wheel heater. It may cause burn seven at low temperatures, especially if used for long periods.
- Donotplaceanythingonthesteeringwheelthat insulatesagainstheat,suchasablanketorsteering wheelcoversofanytypeandmaterial.Thismay causethesteeringwheelheatertooverheat.
MIRRORS
Automatic Dimming Mirror — If Equipped
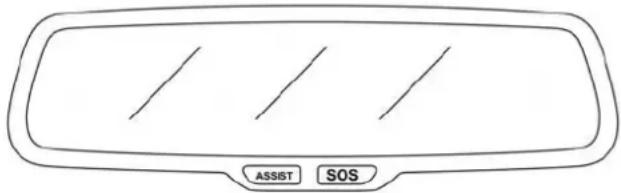
The mirror head can be adjusted up, down, left, and right for various drivers. The mirror should be adjusted to center on the view through the rear window.
This mirror automatically adjusts for headlight glare from vehicles behind you.
NOTE: The Automatic Dimming feature is disabled when the vehicle is in REVERSE to improve rear view viewing.
The Automatic Dimming feature can be turned on or off through the touchscreen.
- Press the mirror dimmer button once to turn the feature on.
- Press the mirror dimmer button a second time to turn the feature off.
natural_image
Front view of a car dashboard with three horizontal lines and two labeled buttons (ASSIST and SOS) at the bottom (no text or symbols on the dashboard itself)0306114048US
AutomaticDimmingMirror
Refer to "Uconnect Settings" in "Multimedia" for further information.
CAUTION!
Toavoiddamagetothemirrorduringcleaning,never sprayanycleaningsolutiondirectlyontothemirror. Applythesolutionontoacleanclothandwipethe mirrorclean.
Outside Mirrors
To receive maximum benefit, adjust the outside mirror(s) to center on the adjacent lane of traffic and a slight overlap of the view obtained from the inside mirror.
NOTE: The passenger side convex outside mirror will give a much wider view to the rear, and especially of the lane next to your vehicle.
WARNING!
Vehiclesandotherobjectsseeninanoutsideconvex mirrorwilllooksmallerandfartherawaythanthey reallyare.Relyingtoomuchonsideconvexmirrors couldcauseyoutocollidewithanothervehicleorother object.Useyourinsidemirrorwhenjudgingthesizeor distanceofvehicleseeninasideconvexmirror.
Driver's Outside Automatic Dimming Mirror — If Equipped
The driver's outside mirror will automatically adjust for glare from vehicles behind you. This feature is controlled by the inside automatic dimming mirror and will automatically adjust for headlight glare when the inside mirror adjusts.
Outside Mirrors Approach Light — If Equipped
Driver and passenger outside mirrors equipped with approach lighting contain one LED, which is located in the upper outboard mirror glass corner. The approach light supplies illuminated entry lighting, which turns on in both mirrors when you use the remote keyless entry key fob or open any door. This LED shines outward to illuminate the front and rear door handles. It also shines downward to illuminate the area in front of the doors.
Power Mirrors
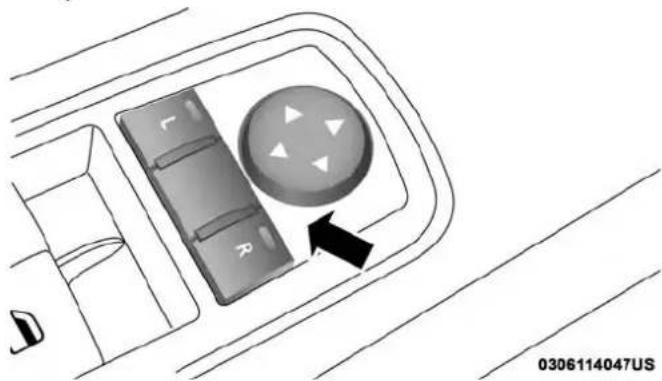
The power mirror controls are located on the driver's door trim panel.
natural_image
Diagram of a car intake console with a rotary knob and directional pad (no text or symbols)PowerMirrorControl
The power mirror controls consist of mirror select buttons and a four-way mirror control switch. To adjust a mirror, push either the L (left) or R (right) button to select the mirror that you want to adjust.
NOTE:A light in the select button will illuminate indicating the mirror is activated and can be adjusted.
Using the mirror control switch, push on any of the four arrows for the direction that you want the mirror to move.
Heated Mirrors — If Equipped

These mirrors are heated to melt frost or ice. This feature will be activated whenever you turn on the window defroster (if equipped). Refer to "Climate Tools" in "Getting To Know Your Vehicle" for further nation.
Tilt Side Mirrors In Reverse — If Equipped
Tilt Side Mirrors In Reverse provides automatic outside mirror positioning which will aid the driver's view of the ground rearward of the front doors. The outside mirrors will move slightly downward from the present position when the vehicle is shifted into REVERSE. The outside mirrors will then return to the original position when the vehicle is shifted out of the REVERSE position. Each stored memory setting will have an associated Tilt Side Mirrors In Reverse position.
NOTE: The Tilt Side Mirrors In Reverse feature is not turned on when delivered from the factory. The Tilt Side Mirrors In Reverse feature can be turned on and off using the Uconnect System. Refer to "Uconnect Settings" in "Multimedia" for further information.
Illuminated Vanity Mirrors — If Equipped
An illuminated vanity mirror is located on the sun visor. To use the mirror, rotate the sun visor downward and swing the mirror cover upward. The light turns on automatically. Closing the mirror cover turns off the light.
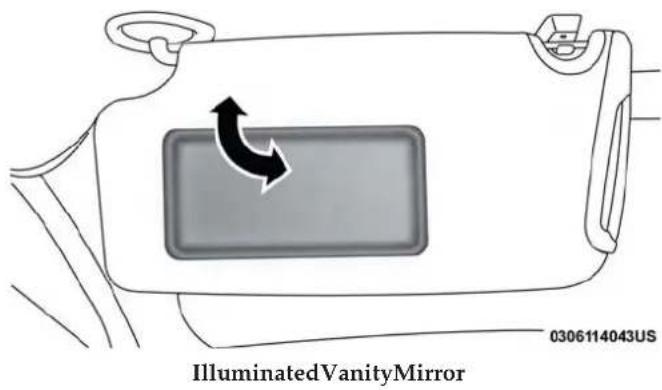
text_image
Illuminated VanityMirror 0306114043US"Slide-On-Rod"AndExtenderFeaturesOfSun Visor
To use the "Slide-On-Rod" feature of the sun visor, rotate the sun visor downward and swing the sun visor so it is parallel to the side window, grab the sun visor and pull rearwards until the sun visor is in the desired position. To use the extender feature of the sun visor, grab the extender which is located at the rear of the visor and pull rearward.
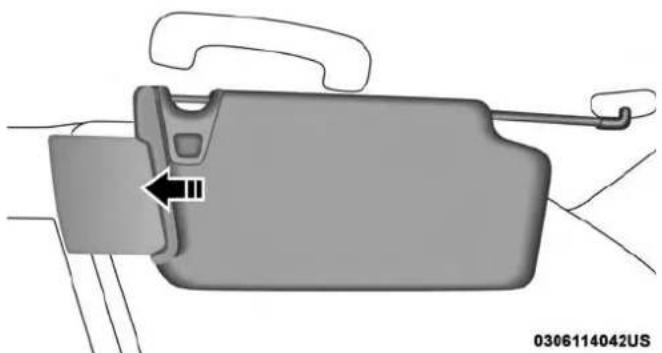
natural_image
Diagram of a car seatbelt device with a directional arrow indicating left side (no text or symbols on the diagram itself)Slide-On-RodFeature
EXTERIOR LIGHTS
Headlight Switch
The headlight switch is located on the left side of the instrument panel. This switch controls the operation of the headlights, parking lights, instrument panel lights, instrument panel light dimming, interior lights and fog lights (if equipped).
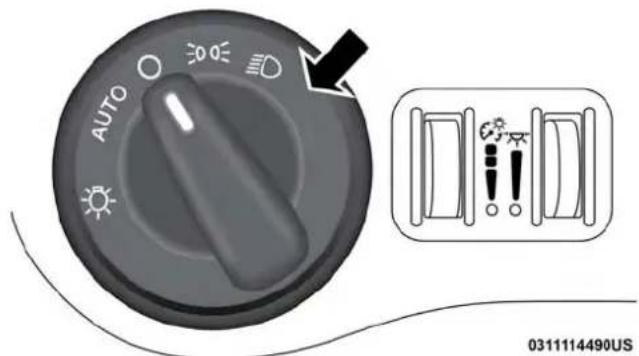
text_image
AUTO 0311114490USHeadlightSwitch
Rotate the headlight switch clockwise to the first detent for parking light and instrument panel light operation. Rotate the headlight switch to the second detent for headlight, parking light and instrument panel light operation. Push the switch to enable fog lights (if equipped).
Multifunction Lever
The multifunction lever controls the operation of the turn signals, headlight beam selection and passing lights. The multifunction lever is located on the left side of the steering column.
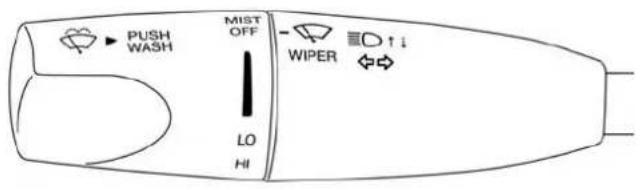
text_image
PUSH WASH MIST OFF - WIPER ↑↓ LO HI0311114106US
MultifunctionLever
Daytime Running Lights (DRL) — If Equipped
The Daytime Running Lights will turn on when the engine is started and will remain on unless the headlamps are turned to the on position, the parking brake is applied, or the engine is shut OFF.
NOTE: If allowed by law in the country in which the vehicle was purchased, the Daytime Running Lights can be turned on and off using the Uconnect System, refer to "Uconnect Settings" in "Multimedia" for further information.
High/Low Beam Switch
Push the multifunction lever away from you to switch the headlights to high beam. Pull the multifunction lever toward you to switch the headlights back to low beam.
Automatic High Beam — If Equipped
The Automatic High Beam Headlamp Control system provides increased forward lighting at night by automating high beam control through the use of a digital camera mounted on the inside rearview mirror. This camera detects vehicle specific light and automatically switches from high beams to low beams until the approaching vehicle is out of view.
NOTE:
- The Automatic High Beam Headlamp Control can be turned on or off by selecting "ON" under "Auto High Beam" within your Uconnect settings, as well as turning the headlight switch to the AUTO position. Refer to "Uconnect Settings" in "Multimedia" for further information.
- Broken, muddy, or obstructed headlights and taillights of vehicles in the field of view will cause headlights to remain on longer (closer to the vehicle). Also, dirt, film, and other obstructions on the windshield or camera lens will cause the system to function improperly.
If the windshield or Automatic High Beam Headlamp Control mirror is replaced, the mirror must be re-aimed to ensure proper performance. See a local authorized dealer.
ToActivate
- Turn the headlight switch to the AUTO headlight position.
- Push the multifunction lever away from you (toward front of vehicle) to engage the high beam mode.
NOTE: This system will not activate until the vehicle is at or above 15 mph (24 km/h).
ToDeactivate
- Pull the multifunction lever toward you (or rearward in vehicle) to manually deactivate the system (normal operation of low beams).
- Push back on the multifunction lever to reactivate the system.
The Automatic High Beams can also be deactivated through the Uconnect system. Refer to "Uconnect Settings" in "Multimedia" for further information.
Flash-To-Pass
You can signal another vehicle with your headlights by lightly pulling the multifunction lever toward you. This will turn on the high beam headlights until the lever is released.
NOTE: If the multifunction lever is held in the flash-to-pass position for more than 20 seconds, the high beams will shut off.
Automatic Headlights
This system automatically turns the headlights on or off according to ambient light levels. To turn the system on, rotate the headlight switch counterclockwise to the AUTO position. When the system is on, the headlight time delay feature is also on. This means the headlights will stay on for up to 90 seconds after you place the ignition into the OFF position. The headlight time delay can be programmed 0/30/60/90 seconds.
Refer to "Uconnect Settings" in "Multimedia" for further information.
To turn the automatic system off, move the headlight switch out of the AUTO position.
NOTE: The engine must be running before the headlights will come on in the automatic mode.
Parking Lights
Turn the headlight switch knob to the first detent to turn the parking lights on. This also turns on all instrument panel lighting.
Headlights On With Wipers
When this feature is active, the headlights will turn on after the wipers are turned on if the headlight switch is placed in the AUTO position and programmable feature is set to on. In addition, the headlights will turn off when the wipers are turned off if they were turned on by this feature.
66 GETTING TO KNOW YOUR VEHICLE
NOTE: The "Headlights On With Wipers" feature can be turned on or off using the Uconnect System. Refer to "Uconnect Settings" in "Multimedia" for further information.
Headlight Time Delay
This feature provides the safety of headlight illumination for up to 90 seconds when leaving your vehicle in an unlit area with the headlight switch in the O (off) position.
To activate the delay feature, turn OFF the ignition switch while the headlights are still on. Then, turn off the headlights within 45 seconds. The delay interval begins when the headlight switch is turned off.
NOTE: The lights must be turned off within 45 seconds of turning the ignition OFF to activate this feature.
If you turn the headlights, park lights or ignition switch ON again, the system will cancel the delay.
If you turn the headlights off before the ignition, they will turn off in the normal manner.
NOTE: The Headlight Time Delay is programmable using the Uconnect System, refer to "Uconnect Settings" in "Multimedia" for further information.
Lights-On Reminder
If the headlights or parking lights are on after the ignition is placed in the OFF position, a chime will sound to alert the driver when the driver's door is opened.
Fog Lights — If Equipped
The front fog light switch is built into the headlight switch.
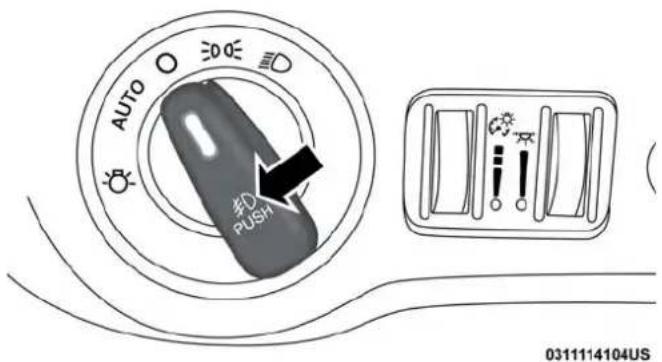
text_image
AUTO 300 PUSH 0311114104USFogLightSwitch
To activate the front fog lights, turn on the parking lights or the low beam headlights and push the headlight switch. To turn off the front fog lights, either push the headlight switch a second time or turn off the headlight switch.
An indicator light in the instrument cluster display illuminates when the fog lights are turned on.
NOTE: The fog lights will operate with the low beam headlights or parking lights on. However, selecting the high beam headlights will turn off the fog lights.
Turn Signals
Move the multifunction lever up or down and the arrows on each side of the instrument cluster display flash to show proper operation of the front and rear turn signal lights.
NOTE:
- If either light remains on and does not flash, or there is a very fast flash rate, check for a defective outside light bulb. If an indicator fails to light when the lever is moved, it would suggest that the indicator bulb is defective.
- A "Turn Signal On" message will appear in the instrument cluster display and a continuous chime will sound if the vehicle is driven more than 1 mile (1.6 km) with either turn signal on.
Lane Change Assist — If Equipped
Tap the multifunction lever up or down once, without moving beyond the detent, and the turn signal (right or left) will flash three times then automatically turn off.
INTERIOR LIGHTS
The interior lights come on when a door is opened.
To protect the battery, the interior lights will turn off automatically ten minutes after the ignition is moved to the OFF position. This will occur if the interior lights were switched on manually or are on because a door is open. The Battery Protection also includes the glove compartment light and the trunk light. To restore interior light operation after automatic battery protection is enabled (lights off), either place the ignition in the ON/RUN position or cycle the light switch.
68 GETTING TO KNOW YOUR VEHICLE
Courtesy Lights
The courtesy lights can be turned on by pushing the top corner of the lens. To turn the lights off, push the lens a second time.
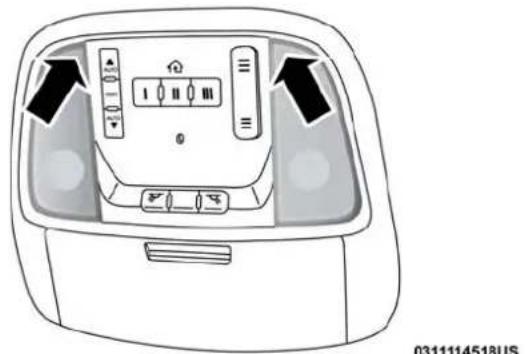
natural_image
Top-down view of a car dashboard with directional arrows and control buttons (no text or symbols)CourtesyLightsFrontMap/ReadingLights
FrontMap/ReadingLights—IfEquipped
Lights are mounted in the overhead console. Each light can be turned on by pushing the switch on either side of the console. These buttons are backlit for night time visibility.
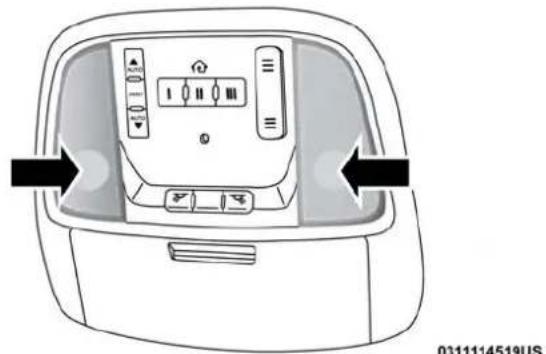
natural_image
Top-down view of a car air conditioner unit with control panel and buttons (no text or symbols visible)To turn the lights off, push the switch a second time. The lights also turn on when a door is opened. The lights will also turn on when the unlock button on the key fob is pushed.
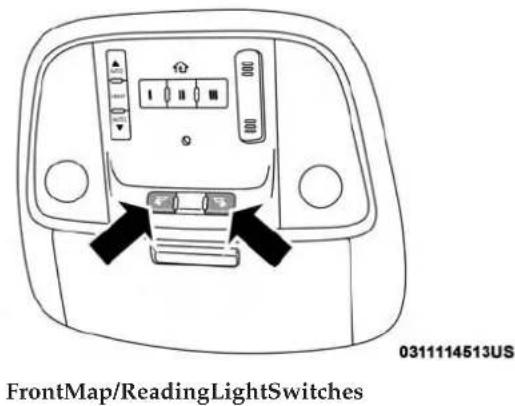
text_image
FrontMap/ReadingLightSwitches 0311114513USAmbientLight—IfEquipped
The overhead console is equipped with an ambient light feature. This light casts illumination for improved visibility of the floor and center console area.
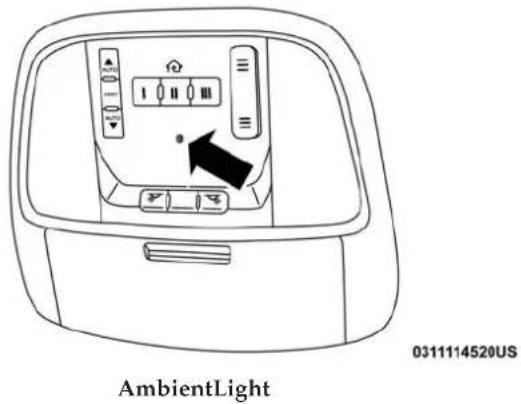
text_image
AmbientLight 0311114520US70 GETTING TO KNOW YOUR VEHICLE
DimmerControls
The dimmer control is part of the headlight switch and is located on the left side of the instrument panel.
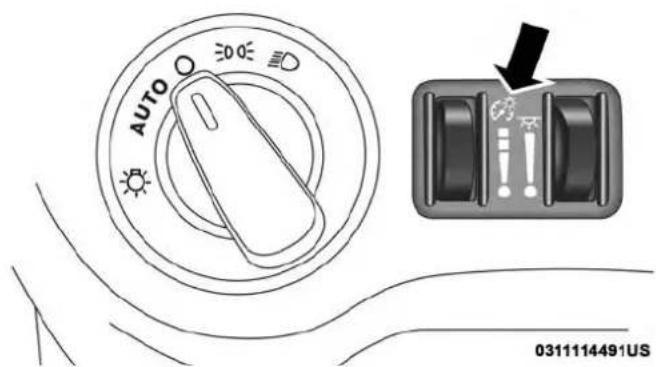
text_image
AUTO 0311114491USDimmerControls
With the parking lights or headlights on, rotating the left dimmer control upward will increase the brightness of the instrument panel lights and lighted cupholders (if equipped).
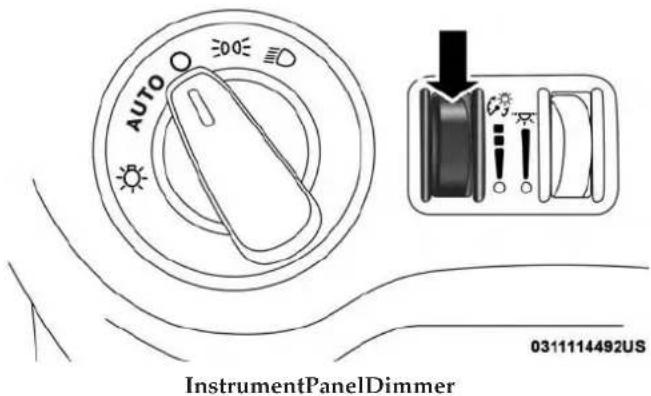
text_image
AUTO 300° 0311114492US InstrumentPanelDimmerDomeLightPosition
Rotate the dimmer control completely upward to the second detent to turn on the interior lights. The interior lights will remain on when the dimmer control is in this position.
InteriorLightDefeat(Off)
Rotate the instrument panel dimmer control to the extreme bottom (O) off position. The interior lights will remain off when the doors are open.
ParadeMode(DaytimeBrightnessFeature)
Rotate the instrument panel dimmer control upward to the first detent. This feature brightens all text displays such as the odometer, instrument cluster display, and radio when the position lights or headlights are on.
WINDSHIELD WIPERS AND WASHERS
The multifunction lever operates the windshield wipers and washer when the ignition is placed in the ON/RUN or ACC position. The multifunction lever is located on the left side of the steering column.
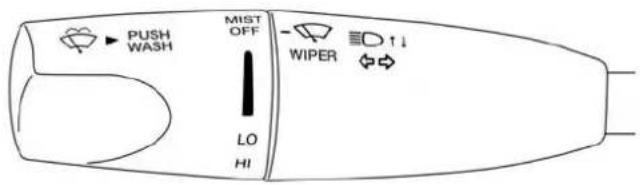
text_image
PUSH WASH MIST OFF - WIPER ↑↓ LO HI0311114106US
WindshieldWiper/WasherControl
Wiper Operation
Rotate the end of the multifunction lever to the first detent, past the intermittent settings for low-speed wiper operation, or to the second detent past the intermittent settings for high-speed wiper operation.
CAUTION!
- Turnthewindshieldwipersoffwhendriving throughanautomaticcarwash. Damagetothewindshieldwipersmayresultifthewipercontrolisleftin anypositionotherthanoff.
- Incoldweather, alwaysturnoffthewiperswitchand allowthewiperstoreturntotheparkpositionbefore turningofftheengine. Ifthewiperswitchislefton andthewipersfreezetothewindshield, damageto thewipermotormayoccurwhenthevehicleis restarted.
- Alwaysremoveanybuildupofsnowthatprevents thewindshieldwiperbladesfromreturningtothe off position. If the windshield wiper control is turnedoffandthebladescannotreturnto theoff position,damagetothewipermotormayoccur.
72 GETTING TO KNOW YOUR VEHICLE
IntermittentWiperSystem
Use the intermittent wiper when weather conditions make a single wiping cycle with a variable pause between cycles desirable. Rotate the end of the multifunction lever to the first detent position, and then turn the end of the lever to select the desired delay interval. There are four delay settings, which allow you to regulate the wipe interval from a minimum of one cycle every second to a maximum of approximately 36 seconds between cycles. The delay intervals will double in duration when the vehicle speed is 10 mph (16 km/h) or less.
WindshieldWashers
To use the washer, push the multifunction lever inward (toward the steering column) and hold it for as long as washer spray is desired.
If you activate the washer while the windshield wiper control is in the delay range, the wipers will operate for two wipe cycles after releasing the lever and then resume the intermittent interval previously selected.
If you activate the washer while the windshield wiper is turned off, the wipers will operate for three wipe cycles and then turn off.
WARNING!
Suddenlossofvisibilitythroughthewindshieldcould leadtoacollision.Youmightnotseeothervehiclesor otherobstacles.Toavoidsuddenicingofthewindshieldduringfreezingweather,warmthewindshield withthedefrosterbeforeandduringwindshield washeruse.
MistFeature
Rotate the end of the lever downward to the MIST position to activate a single wipe cycle to clear off road mist or spray from a passing vehicle. The wipers will continue to operate until you release the multifunction lever.
NOTE: The mist feature does not activate the washer pump; therefore, no washer fluid will be sprayed on the windshield. The wash function must be used in order to spray the windshield with washer fluid.
Rain Sensing Wipers — If Equipped
This feature senses rain or snowfall on the windshield and automatically activates the wipers for the driver. The feature is especially useful for road splash or overspray from the windshield washers of the vehicle ahead. Rotate the end of the multifunction lever to one of four settings to activate this feature.
The sensitivity of the system can be adjusted with the multifunction lever. Wiper delay position 1 is the least sensitive, and wiper delay position 4 is the most sensitive. Setting 3 should be used for normal rain conditions. Settings 1 and 2 can be used if the driver desires less wiper sensitivity. Setting 4 can be used if the driver desires more sensitivity. Place the wiper switch in the off position when not using the system.
NOTE:
- The Rain Sensing feature will not operate when the wiper switch is in the low or high-speed position.
- The Rain Sensing feature may not function properly when ice, or dried salt water is present on the windshield.
- Use of Rain-X or products containing wax or silicone may reduce Rain Sensing performance.
The Rain Sensing system has protection features for the wiper blades and arms, and will not operate under the following conditions:
- Low Ambient Temperature — When the ignition is first turned ON, the Rain Sensing system will not operate until the wiper switch is moved, vehicle speed is greater than 0 mph (0 km/h), or the outside temperature is greater than 32°F (0°C).
- TransmissionInNEUTRALPosition— When the ignition is ON, and the transmission is in the NEUTRAL position, the Rain Sensing system will not operate until the wiper switch is moved, vehicle speed is greater than 3 mph (5 km/h), or the gear selector is moved out of the NEUTRAL position.
NOTE: Rain Sensing can be turned on and off using the Uconnect System, refer to "Uconnect Settings" in "Multimedia" for further information.
CLIMATE CONTROLS
The Climate Control System allows you to regulate the temperature, air flow, and direction of air circulating throughout the vehicle. The controls are located on the touchscreen (if equipped) and on the instrument panel below the radio.
74 GETTING TO KNOW YOUR VEHICLE
Automatic Climate Control Overview
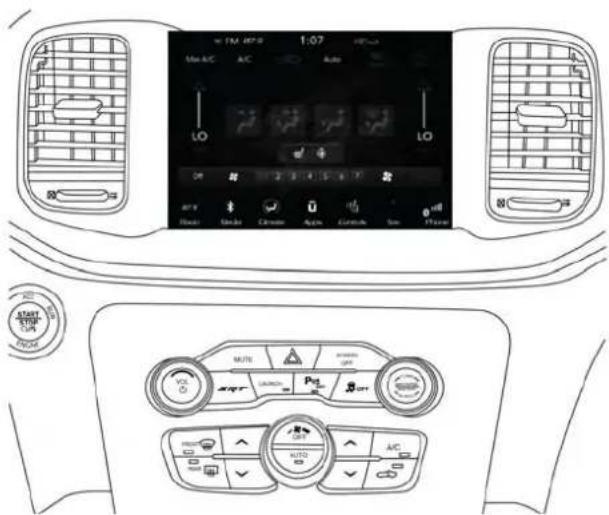
text_image
1:07 Max A/C A/C Auto LO LO OR 2 3 4 5 6 7 OFF Start Stop Air Condition Air Condition Air Condition Air Condition Air Condition Air Condition Air Condition Air Condition Air Condition Air Condition Air Condition Air Condition Air Condition Air Condition Air Condition Air Condition Air Condition Air Condition Air Condition Air Condition Air Condition Air Condition Air Condition Air Condition Air Condition Air Condition Air Condition Air Condition Air Condition Air Condition Air Condition Air Condition Air Condition Air ConditionUconnect4C/4CNAVWith8.4-inchDisplayAutomaticClimateControls
0313117831US
AutomaticClimateControlDescriptions
| IconDescription | |
 | MAXA/CButtonPress and release to change the current setting, the indicator illuminates when MAX A/C is on. Performing this function again will cause the MAX A/C operation to switch into manual mode and the MAX A/C indicator will turn off.NOTE:The MAX A/C button is only available on the touchscreen. |
 | A/CButtonPress and release to change the current setting, the indicator illuminates when A/C is on. |
 | RecirculationButtonPress and release this button on the touchscreen, or push the button on the faceplate, to change the system between recirculation mode and outside air mode. Recirculation can be used when outside conditions such as smoke, odors, dust, or high humidity are present. Recirculation can be used in all modes. Recirculation may be unavailable (button on the touchscreen greyed out) if conditions exist that could create fogging on the inside of the windshield. The A/C can be deselected manually without disturbing the mode control selection. Continuous use of the Recirculation mode may make the inside air stuffy and window fogging may occur. Extended use of this mode is not recommended |
76 GETTING TO KNOW YOUR VEHICLE
| IconDescription | |
| AUTO | AUTOButtonAutomatically controls the interior cabin temperature by adjusting airflow distribution and amount. Toggling this function will cause the system to switch between manual mode and automatic modes. Refer to “Automatic Operation” within this section for more information. |
 FRONT FRONT | FrontDefrostButtonPress and release to change the current airflow setting to Defrost mode. The indicator illuminates when this feature is on. Air comes from the windshield and side window demist outlets. When the defrost button is selected, the blower level may increase. Use Defrost mode with maximum temperature settings for best windshield and side window defrosting and defogging. When toggling the Front Mode Defrost button, the climate system will return to the previous setting. |
 REAR REAR | RearDefrostButtonPush and release the Rear Defrost Control button to turn on the rear window defroster and the heated outside mirrors (if equipped). An indicator will illuminate when the rear window defroster is on. The rear window defroster automatically turns off after ten minutes. |
 | DriverAndPassengerTemperatureUpAndDownButtonsProvides the driver and passenger with independent temperature control. Push the red button on the faceplate or touchscreen or press and slide the temperature bar towards the red arrow button on the touchscreen for warmer temperature settings. Push the blue button on the face-plate or touchscreen or press and slide the temperature bar towards the blue arrow on the touchscreen for cooler temperature settings. |
 | |
| SYNC | SYNCButtonPress the SYNC button on the touchscreen to toggle the Sync feature on/off. The SYNC indicator is illuminated when this feature is enabled. SYNC is used to synchronize the passenger temperature setting with the driver temperature setting. Changing the passenger temperature setting while in Sync will automatically exit this feature.NOTE:The SYNC button is only available on the touchscreen. |
FaceplateKnob Touchscreen Buttons[×K3×] Touchscreen Buttons[×K3×] | BlowerControlBlower Control is used to regulate the amount of air forced through the climate system. There are seven blower speeds available. The speeds can be selected using either the blower control knob on the faceplate or the buttons on the touchscreen.Faceplate: The blower speed increases as you turn the blower control knob clockwise from the lowest blower setting. The blower speed decreases as you turn the blower control knob counterclockwise.Touchscreen: Use the small blower icon to reduce the blower setting and the large blower icon to increase the blower setting. Blower can also be selected by pressing the blower bar area between the icons. |
PanelModePanel | ModeAir comes from the outlets in the instrument panel. Each of these outlets can be individually adjusted to direct the flow of air. The air vanes of the center outlets and outboard outlets can be moved up and down or side to side to regulate airflow direction. There is a shut off wheel located below the air vanes to shut off or adjust the amount of airflow from these outlets. |
78 GETTING TO KNOW YOUR VEHICLE
| IconDescription | |
Bi-LevelMode | Bi-LevelModeAir comes from the instrument panel outlets and floor outlets. A slight amount of air is directed through the defrost and side window demister outlets.NOTE:Bi-Level mode is designed under comfort conditions to provide cooler air out of the panel outlets and warmer air from the floor outlets. |
FloorMode - - | FloorModeAir comes from the floor outlets. A slight amount of air is directed through the defrost and side window demister outlets. |
MixMode | MixModeAir is directed through the floor, defrost, and side window demister outlets. This setting works best in cold or snowy conditions that require extra heat to the windshield. This setting is good for maintaining comfort while reducing moisture on the windshield. |
| OFF | ClimateControlOFFButtonPress and release this button to turn the Climate Controls off. |
Climate Control Functions
A/C(AirConditioning)
The Air Conditioning (A/C) button allows the operator to manually activate or deactivate the air conditioning system. When the air conditioning system is turned on, cool dehumidified air will flow through the outlets into the cabin. For improved fuel economy, press the A/C button to turn off the air conditioning and manually adjust the blower and airflow mode settings. Also, make sure to select only Panel, Bi-Level, or Floor modes.
NOTE:
- For Manual Climate Controls, if the system is in Mix, Floor or Defrost Mode, the A/C can be turned off, but the A/C system shall remain active to prevent fogging of the windows.
- If fog or mist appears on the windshield or side glass, select Defrost mode, and increase blower speed if needed.
- If your air conditioning performance seems lower than expected, check the front of the A/C condenser (located in front of the radiator), for an accumulation of dirt or insects. Clean with a gentle water spray from the front of the radiator and through the condenser.
MAXA/C
MAX A/C sets the control for maximum cooling performance.
Press and release to toggle between MAX A/C and the prior settings. The button illuminates when MAX A/C is on.
In MAX A/C, the blower level and mode position can be adjusted to desired user settings. Pressing other settings will cause the MAX A/C operation to switch to the selected setting and MAX A/C to exit.
Recirculation
In cold weather, use of Recirculation mode may lead to excessive window fogging. The Recirculation feature may be unavailable (button on the touchscreen greyed out) if conditions exist that could create fogging on the inside of the windshield.
Automatic Temperature Control (ATC)
AutomaticOperation
-
Push the AUTO button on the faceplate, or the AUTO button on the touchscreen on the Automatic Temperature Control (ATC) Panel.
-
Next, adjust the temperature that you would like the system to maintain by adjusting the driver and passenger temperature control buttons. Once the desired temperature is displayed, the system will achieve and automatically maintain that comfort level.
- When the system is set up for your comfort level, it is not necessary to change the settings. You will experience the greatest efficiency by simply allowing the system to function automatically.
NOTE:
- It is not necessary to move the temperature settings for cold or hot vehicles. The system automatically adjusts the temperature, mode, and blower speed to provide comfort as quickly as possible.
- The temperature can be displayed in U.S. or Metric units by selecting the US/Metric customer-programmable feature. Refer to the “Uconnect Settings” in “Multimedia” for further information.
To provide you with maximum comfort in the Automatic mode during cold start-ups, the blower fan will remain on low until the engine warms up. The blower will increase in speed and transition into Auto mode.
ManualOperationOverride
This system offers a full complement of manual override features. The AUTO symbol in the front ATC display will be turned off when the system is being used in the manual mode.
Operating Tips
NOTE: Refer to the chart at the end of this section for suggested control settings for various weather conditions.
SummerOperation
The engine cooling system must be protected with a high-quality antifreeze coolant to provide proper corrosion protection and to protect against engine overheating. OAT coolant (conforming to MS.90032) is recommended.
WinterOperation
To ensure the best possible heater and defroster performance, make sure the engine cooling system is functioning properly and the proper amount, type, and concentration of coolant is used. Use of the Air Recirculation mode during Winter months is not recommended, because it may cause window fogging.
Vacation/Storage
Before you store your vehicle, or keep it out of service (i.e., vacation) for two weeks or more, run the air conditioning system at idle for about five minutes, in fresh air with the blower setting on high. This will ensure adequate system lubrication to minimize the possibility of compressor damage when the system is started again.
WindowFogging
Vehicle windows tend to fog on the inside in mild, rainy, and/or humid weather. To clear the windows, select Defrost or Mix mode and increase the front blower speed. Do not use the Recirculation mode without A/C for long periods, as fogging may occur.
CAUTION!
Failure to follow these cautions can cause damage to the heating elements:
- Usecarewhenwashingtheinsideoftherearwindow.Donotuseabrasivewindowcleanersonthe
(Continued)
CAUTION!(Continued)
interiorsurfaceofthewindow.Useasoftclothanda mildwashingsolution,wipingparalleltotheheatingelements.Labelscanbepeeledoffaftersoaking withwarmwater.
- Donotusescrapers, sharpinstruments, or abrasive windowcleanersontheinteriorsurfaceofthewindow.
- Keepallobjectsasafedistancefromthewindow.
OutsideAirIntake
Make sure the air intake, located directly in front of the windshield, is free of obstructions, such as leaves. Leaves collected in the air intake may reduce airflow, and if they enter the plenum, they could plug the water drains. In Winter months, make sure the air intake is clear of ice, slush, and snow.
CabinAirFilter
The climate control system filters out dust and pollen from the air. Contact an authorized dealer to service your cabin air filter, and to have it replaced when needed.
82 GETTING TO KNOW YOUR VEHICLE
OperatingTipsChartWINDOWS
| WEATHER | CONTROL SETTINGS | ||
Hot weather and vehicle interior is very hot | Set the mode control to on high. Roll down the v the hot air. Once comfor comfort. |  |  |
      | |||
Warm weather | Turn  on and position. on and position. |     | |
| Cool Sunny | Operat  posit posit |   | |
Cool & Humid conditions _0  | Set the mode control to to keep windows clear. |     | |
Co  | Set the  control to fogging control to fogging  o occur, posilio.. o occur, posilio.. |     | Ivc] |
8000cb71
Power Window Controls
The window controls on the driver's door control all the door windows.
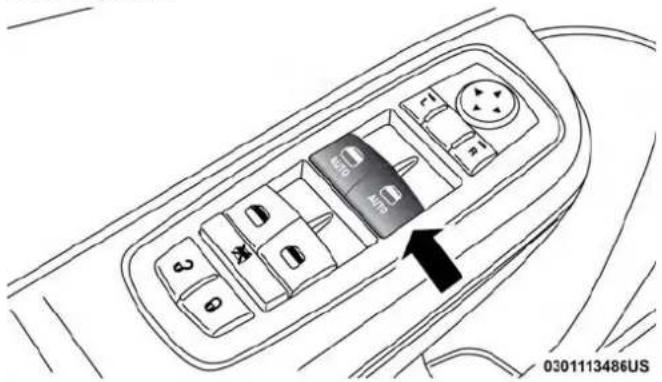
text_image
0301113486USPowerWindowSwitches
There are single window controls on each passenger door trim panel, which operate the passenger door windows. The window controls will operate only when the ignition is in the ACC or ON/RUN position.
NOTE: For vehicles equipped with the Uconnect system, the power window switches will remain active for up to ten minutes after the ignition is placed in the OFF position. Opening either front door will cancel this feature. The time is programmable. Refer to "Uconnect Settings" in "Multimedia" for further information.
WARNING!
Neverleavechildrenunattendedinvehicle, anddo notletchildrenplaywithpowerwindows.Donot leavethekeyfobinornearthevehicle, orinalocation accessibletochildren, anddonotleavetheignitionof avhicleequippedwithKeylessEnter-N-Gointhe ACCorON/RUNmode. Occupants, particularlyunattendedchildren, canbecomeentrappedbythewindowswhileoperatingthepowerwindowswitches. Suchentrapmentmayresultinseriousinjuryordeath.
Auto-DownFeature
The driver and, in some models, passenger power window switches have an Auto-Down feature. Push the window switch to the second detent, release, and the window will go down automatically.
To open the window part way, push the window switch to the first detent and release it when you want the window to stop.
To stop the window from going all the way down during the Auto-Down operation, pull up on the switch briefly.
Auto-UpFeatureWithAnti-PinchProtection—If Equipped
Pull window up switch to second detent for at least a half of a second and the window will go up automatically.
To stop the window during an Auto-Up operation, push or pull the window switch again.
To close the window part way, pull and hold the window switch briefly and release it when you want the window to stop.
NOTE:
- If the window runs into any obstacle during Auto-Closure, it will reverse direction and then go back down. Remove the obstacle and use the window switch again to close the window.
84 GETTING TO KNOW YOUR VEHICLE
- Any impact due to rough road conditions may trigger the Auto-Reverse function unexpectedly during autoclosure. If this happens, pull and hold the switch to close the window manually.
WARNING!
Thereisnoanti-pinchprotectionwhenthewindowis almostclosed.Besuretoclearallobjectsfromthe windowbeforeclosing.
ResetAuto-Up
Should the Auto-Up feature stop working, the window may need to be reset. To reset Auto-Up:
- Make sure the door is fully closed.
- Pull the window switch up to close the window completely and continue to hold the switch up for an additional two seconds after the window is closed.
- Push the window switch down firmly to the second detent to open the window completely and continue to hold the switch down for an additional two seconds after the window is fully open.
WindowLockoutSwitch
The window lockout switch on the driver's door trim panel allows you to disable the window controls on the rear passenger doors and the rear sunscreen (if equipped). To disable the window controls and the rear sunscreen, push and release the window lockout button (setting it in the down position). To enable the window controls and the rear sunscreen, push and release the window lockout button again (setting it in the up position).
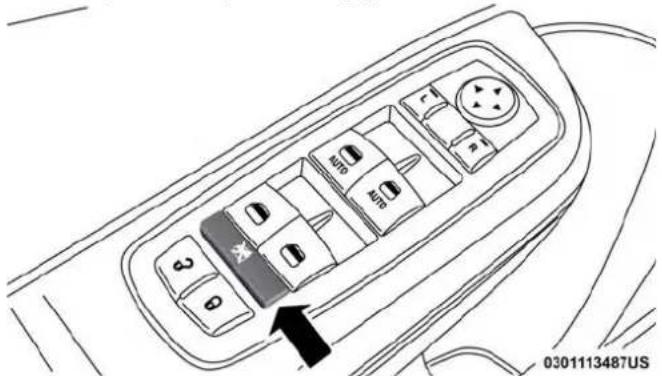
text_image
3 0 50 50 2 0 0 0301113487USWindowLockoutSwitch
Wind Buffeting
Wind buffeting can be described as the perception of pressure on the ears or a helicopter-type sound in the ears. Your vehicle may exhibit wind buffeting with the windows down, or the sunroof (if equipped) in certain open or partially open positions. This is a normal occurrence and can be minimized. If the buffeting occurs with the rear windows open, open the front and rear windows together to minimize the buffeting. If the buffeting occurs with the sunroof open, adjust the sunroof opening to minimize the buffeting or open any window.
POWER SUNROOF — IF EQUIPPED
The power sunroof switch is located between the sun visors on the overhead console.
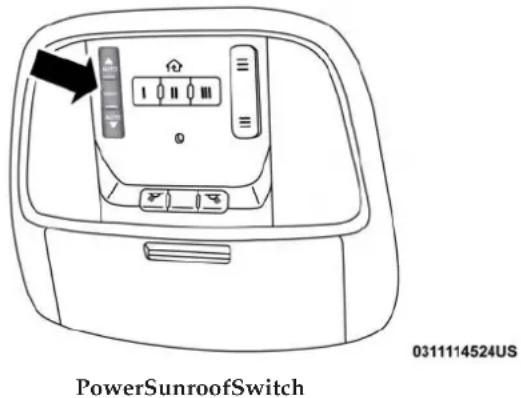
text_image
PowerSunroofSwitch 0311114524USWARNING!
- Neverleavechildrenunattendedinavehicle,orwith accesstoan unlocked vehicle. Neverleavethekeyfob inornearthevehicle,orinalocationaccessibleto children.Donotleavetheignitionofavehicle equipped with KeylessEnter-N-GointheACCor ON/RUN mode. Occupants, particularly unattended children,canbecomeentrappedbythepowersunroof while operating the power sunroof switch. Such entrapmentmayresultinseriousinjuryordeath.
(Continued)
WARNING!(Continued)
- Inacollision, thereisagreaterriskofbeingthrown fromvehiclewithanopensunroof. Youcouldalso beseriouslyinjuredorkilled. Alwaysfastenyour seatbeltproperlyandmakesureallpassengersare alsoproperlysecured.
- Donotallowsmallchildrentooperatethesunroof. Neverallowyourfingers,otherbodyparts,orany object,toprojectthroughthesunroofopening.Injurymayresult.
Opening Sunroof
ExpressOpen
Push the switch rearward and release it within one-half second, the sunroof and sunshade will open automatically and stop at full open position. During Express Open operation, any other actuation of the sunroof switches will stop the sunroof in a partially open position.
ManualOpen
Push and hold the switch rearward, the sunroof and sunshade will open and automatically stop at full open position. Releasing the switch while the sunroof is in motion will stop sunroof in a partially open position.
VentOpen
Push and release the Vent switch within one half second and the sunroof will open to the vent position. During Express Vent operation, any other actuation of the sunroof switches will stop the sunroof operation.
Closing Sunroof
ExpressClose
Push the switch forward and release it within one-half second and the sunroof will close automatically from any position. During Express Close operation, any other actuation of the sunroof switches will stop the sunroof in a partially open position.
ManualClose
Push and hold the switch forward and the sunroof will close from any position and stop at full closed position. Releasing the switch while the sunroof is in motion will stop sunroof in a partially open position.
Wind Buffeting
Wind buffeting can be described as the perception of pressure on the ears or a helicopter-type sound in the ears. Your vehicle may exhibit wind buffeting with the windows down, or the sunroof (if equipped) in certain open or
partially open positions. This is a normal occurrence and can be minimized. If the buffeting occurs with the rear windows open, then open the front and rear windows together to minimize the buffeting. If the buffeting occurs with the sunroof open, adjust the sunroof opening to minimize the buffeting or open any window.
Sunshade Operation
The sunshade can be opened manually. However, the sunshade will open automatically as the sunroof opens.
NOTE: The sunshade cannot be closed if the sunroof is open.
Pinch Protect Feature
This feature will detect an obstruction in the closing of the sunroof during the Express Close operation. If an obstruction in the path of the sunroof is detected, the sunroof will automatically retract. Remove the obstruction if this occurs.
NOTE: If three consecutive sunroof close attempts result in Pinch Protect reversals, Pinch Protect will disable and the sunroof must be closed in Manual Mode.
Sunroof Maintenance
Use only a non-abrasive cleaner and a soft cloth to clean the glass panel.
Ignition Off Operation
NOTE:
- The power sunroof switch can remain active in Accessory Delay for up to approximately 10 minutes after the vehicle's ignition is placed to the OFF position. Opening either front door will cancel this feature.
- This feature is programmable using the Uconnect System. Refer to “Uconnect Settings” in “Multimedia” for further information.
Calibration Procedure
If the sunroof "Express Operation" feature is no longer functioning, or the sunroof is auto-reversing while attempting to "Express Close" but no obstruction is in the roof opening, the sunroof can be re-calibrated per the following steps:
- Set the ignition to ACC or ON/RUN.
- Close sunroof glass.
88 GETTING TO KNOW YOUR VEHICLE
- With sunroof in closed position, push and hold the close switch.
- After 10 seconds of holding switch, the sunroof glass will cycle into the vent position and stop.
- Release the close switch, then within 5 seconds push and hold the close switch again. The sunroof will cycle open and back to closed as the switch is held.
- Once the sunroof has stopped in the full closed position, release the close switch. The sunroof is now reset and ready to use.
HOOD
To Open The Hood
Two latches must be released to open the hood.
- Pull the hood release lever located under the left side of the instrument panel.
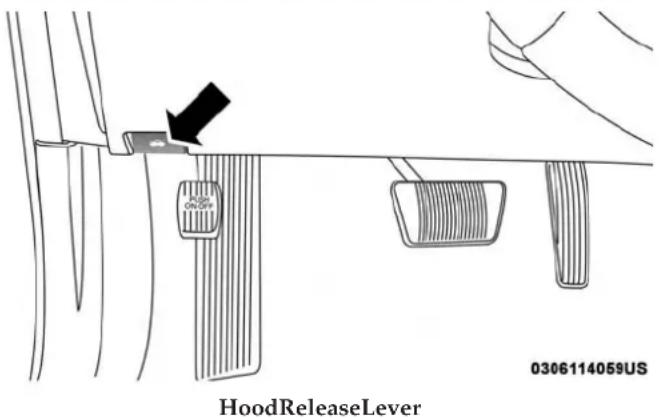
text_image
HoodReleaseLever 0306114059US- Move to the front of the vehicle.
- Reach under the center front edge of the hood and push and hold the safety catch lever to the left.
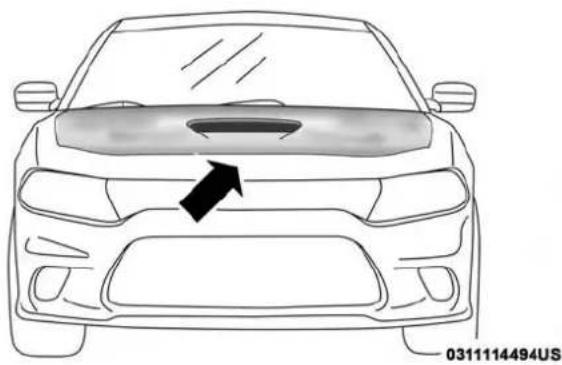
natural_image
Front view line drawing of a car with a black arrow pointing to the roof (no text or symbols on the car itself)SafetyCatchLeverLocation
- Lift the hood upward to the open position.
To Close The Hood
WARNING!
Besurethehoodisfullylatchedbeforedrivingyour vehicle.Ifthehoodisnotfullylatched,itcouldopen whenthevehicleisinmotionandblockyourvision. Failuretofollowthiswarningcouldresultinserious injuryordeath.
CAUTION!
Topreventpossibledamage,donotslamthehoodto closeit.Lowerhoodtoapproximately12inches(30cm) anddropthehoodtoclose.Makesurehoodisfully closedforbothlatches.Neverdrivevehicleunless hoodisfullyclosed,withbothlatchesengaged.
TRUNK
Opening
The trunk can be opened from inside the vehicle using the power trunk button located on the instrument panel to the left of the steering wheel.
The trunk lid can be released from outside the vehicle by pushing the trunk button on the key fob twice within five seconds or by using the external release switch located on the underside of the decklid overhang. The release feature will function only when the vehicle is in the unlock condition.
With the ignition in the ON/RUN position, the trunk open symbol will display in the instrument cluster indicating that the trunk is open. The odometer display will reappear once the trunk is closed.
With the ignition in the OFF position, the trunk open symbol will display until the trunk is closed.
NOTE: Refer to "Keyless Enter-N-Go — Passive Entry" in "Doors" in "Getting To Know Your Vehicle" for further information on trunk operation with the Passive Entry feature.
OpeningFromInsideTheVehicle
InteriorPowerTrunkRelease
PowerTrunk Release
The trunk can be opened from inside the vehicle using the power trunk release button located on the instrument panel to the left of the steering wheel.
NOTE: The transmission must be in PARK before the button will operate.
OpeningFromOutsideTheVehicle
ToUnlock/OpenTheTrunk
The trunk may be unlocked/opened using either of the following methods:
•Key Fob Trunk Release Button
- Passive Entry Button
KeyFobTrunkReleaseButton

Push the power trunk button on the key fob twice within five seconds to release the trunk.
PassiveEntryButton
Push the trunk passive entry button which is located on the back of the trunk lid. With a valid Passive Entry key fob within 5 ft (1.5 m) of the trunk, push the passive entry button to open the trunk.
Closing
With one or more hands placed on the outside trunk surface push the trunk lid down until you hear the trunk lock latch into place.
NOTE: Before closing the trunk lid make sure your key fob isn't inside the trunk area. The trunk will latch then automatically unlock if the key fob is sensed not allowing the key fob to be locked in the trunk area.
Trunk Safety
TrunkEmergencyRelease
As a security measure, a trunk internal emergency release lever is built into the trunk latching mechanism. In the event of an individual being locked inside the trunk, the trunk can be opened by actuating the glow-in-the-dark handle attached to the trunk latching mechanism.
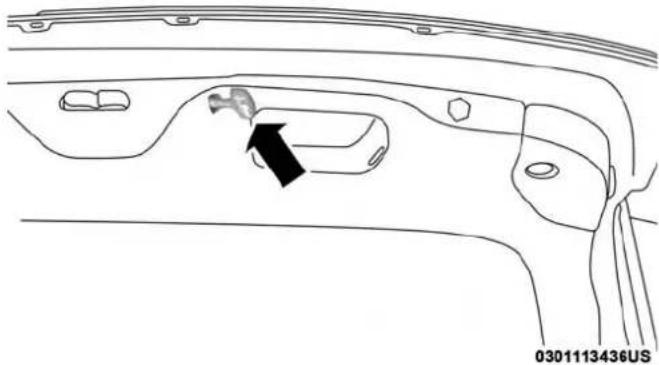
natural_image
Diagram of a car interior showing a handle and vent, with an arrow indicating direction (no text or symbols present)TrunkEmergencyRelease
WARNING!
Donotallowchildrentohaveaccesstothetrunk,either byclimbingintothetrunkfromoutside,orthroughthe insideofthevehicle.Alwaysclosethetrunklidwhen yourvehicleisunattended.Onceinthetrunk,young childrenmaynotbeabletoescape,eveniftheyentered throughtherearseat.Iftrappedinthetrunk,childrencan diefromsuffocationorheatstroke.
Cargo Area Features
CargoArea—VehiclesEquippedWith60/40 Split-FoldingRearSeat
The 60/40 split-folding rear seat provides cargo-carrying versatility. The seatbacks fold down easily by pulling nylon tabs between the seatbacks and the bolsters. When the seats are folded down, they provide a continuous, nearly-flat extension of the load floor.
When the seatback is folded to the upright position, make sure it is latched by strongly pulling on the top of the seatback above the seat strap.
WARNING!
- Becertainthattheseatbackissecurelylockedinto position.Iftheseatbackisnotsecurelylockedinto position,theseatwillnotprovidetheproperstabilityforchildseatsand/orpassengers.Animproperly latchedseatcouldcauseseriousinjury.
- The cargo are in therear of the vehicle (with therear seatbacks in the locked-up or folded down position) should not be used as a play area by children when the vehicle is in motion. They could be seriously injured in a collision. Children should be seated and using the proper restraint system.
- Tohelpprotectagainstpersonalinjury,passengers shouldnotbeseatedintherearcargoarea. Therear cargospaceisintendedforloadcarryingpurposes only,notforpassengers,whoshouldsitinseatsand useseatbelts.
Theweightandpositionofcargoandpassengerscan changethevehiclecenterofgravityandvehiclehandling.Toavoidlossofcontrolresultinginpersonal injury,followtheseguidelinesforloadingyourvehicle:
WARNING!(Continued)
- Alwaysplacecargoevenlyonthecargofloor.Put heavierobjectsaslowandasfarforwardaspossible.
- Placeasmuchcargoaspossibleinfrontoftherear axle.Toomuchweightorimproperlyplacedweight overorbehindtherearaxlecancausetherearofthe vehicletosway.
- Donotpile luggage or cargohigher than the top of the seat back. This could impair visibility or become a dangerous projectile in as sudden stop or collision.
GARAGE DOOR OPENER — IF EQUIPPED
HomeLink replaces up to three hand-held transmitters that operate devices such as garage door openers, motorized gates, lighting or home security systems. The HomeLink unit is powered by your vehicle's battery.
The HomeLink buttons, located on either the overhead console, headliner or sunvisor, designate the three different HomeLink channels. The HomeLink indicator is located above the center button.
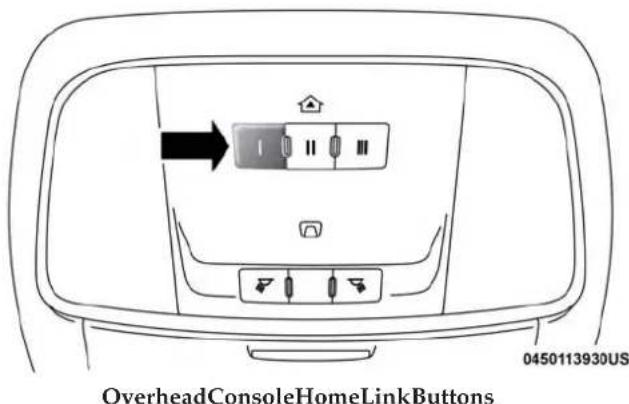
text_image
OverheadConsoleHomeLinkButtons 0450113930USNOTE: HomeLink is disabled when the Vehicle Security Alarm is active.
Before You Begin Programming HomeLink
Be sure that your vehicle is parked outside of the garage before you begin programming.
For more efficient programming and accurate transmission of the radio-frequency signal it is recommended that a new battery be placed in the hand-held transmitter of the device that is being programmed to the HomeLink system.
To erase the channels, place the ignition in the ON/RUN position, and push and hold the two outside HomeLink buttons (I and III) for up to 20 seconds or until the orange indicator flashes.
NOTE:
- Erasing all channels should only be performed when programming HomeLink for the first time. Do not erase channels when programming additional buttons.
- If you have any problems, or require assistance, please call toll-free 1-800-355-3515 or, on the Internet at HomeLink.com for information or assistance.
ProgrammingARollingCode
For programming garage door openers that were manufactured after 1995. These garage door openers can be identified by the "LEARN" or "TRAIN" button located where the hanging antenna is attached to the garage door opener.
NOTE: It is NOT the button that is normally used to open and close the door. The name and color of the button may vary by manufacturer.
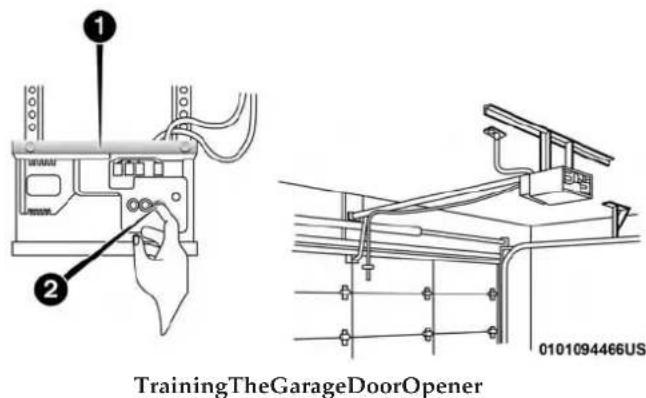
text_image
1 2 TrainingTheGarageDoorOpener 0101094466US1 — Door Opener
2 — Training Button
-
Place the ignition in the ON/RUN position.
-
Place the hand-held transmitter 1 to 3 inches (3 to 8 cm) away from the HomeLink button you wish to program while keeping the HomeLink indicator light in view.
-
Push and hold the HomeLink button you want to program while you push and hold the hand-held transmitter button.
-
Continue to hold both buttons and observe the indicator light. The HomeLink indicator will flash slowly and then rapidly after HomeLink has received the frequency signal from the hand-held transmitter. Release both buttons after the indicator light changes from slow to rapid.
-
At the garage door opener motor (in the garage), locate the "LEARN" or "TRAINING" button. This can usually be found where the hanging antenna wire is attached to the garage door opener/device motor. Firmly push and release the "LEARN" or "TRAINING" button. On some garage door openers/devices there may be a light that blinks when the garage door opener/device is in the LEARN/TRAIN mode.
NOTE: You have 30 seconds in which to initiate the next step after the LEARN button has been pushed.
- Return to the vehicle and push the programmed HomeLink button twice (holding the button for two seconds each time). If the garage door opener/device activates, programming is complete.
NOTE: If the garage door opener/device does not activate, push the button a third time (for two seconds) to complete the training.
To program the remaining two HomeLink buttons, repeat each step for each remaining button. DO NOT erase the channels.
ReprogrammingASingleHomeLinkButton(Rolling Code)
To reprogram a channel that has been previously trained, follow these steps:
- Cycle the ignition to the ON/RUN position.
- Push and hold the desired HomeLink button until the indicator light begins to flash after 20 seconds. Do not release the button.
- Without releasing the button proceed with "Programming A Rolling Code" step 2 and follow all remaining steps."
ProgrammingANon-RollingCode
For programming Garage Door Openers manufactured before 1995.
- Cycle the ignition to the ON/RUN position.
-
Place the hand-held transmitter 1 to 3 inches (3 to 8 cm) away from the HomeLink button you wish to program while keeping the HomeLink indicator light in view.
-
Press and hold the HomeLink button you want to program while you press and hold the hand-held transmitter button.
- Continue to hold both buttons and observe the indicator light. The HomeLink indicator will flash slowly and then rapidly after HomeLink has received the frequency signal from the hand-held transmitter. Release both buttons after the indicator light changes from slow to rapid.
- Press and hold the programmed HomeLink button and observe the indicator light.
- If the indicator light stays on constantly, programming is complete and the garage door/device should activate when the HomeLink button is pressed.
- To program the two remaining HomeLink buttons, repeat each step for each remaining button. DO NOT erase the channels.
96 GETTING TO KNOW YOUR VEHICLE
ReprogrammingASingleHomeLinkButton (Non-RollingCode)
To reprogram a channel that has been previously trained, follow these steps:
- Cycle the ignition to the ON/RUN position.
- Press and hold the desired HomeLink button until the indicator light begins to flash after 20 seconds. Do not release the button.
- Without releasing the button, proceed with "Programming A Non-Rolling Code" step 2 and follow all remaining steps.
Canadian/Gate Operator Programming
For programming transmitters in Canada/United States that require the transmitter signals to “time-out” after several seconds of transmission.
Canadian radio frequency laws require transmitter signals to time-out (or quit) after several seconds of transmission – which may not be long enough for HomeLink to pick up the signal during programming. Similar to this Canadian law, some U.S. gate operators are designed to time-out in the same manner.
It may be helpful to unplug the device during the cycling process to prevent possible overheating of the garage door or gate motor.
- Cycle the ignition to the ON/RUN position.
- Place the hand-held transmitter 1 to 3 inches (3 to 8 cm) away from the HomeLink button you wish to program while keeping the HomeLink indicator light in view.
- Continue to press and hold the HomeLink button, while you press and release ("cycle") your hand-held transmitter every two seconds until HomeLink has successfully accepted the frequency signal. The indicator light will flash slowly and then rapidly when fully trained.
- Watch for the HomeLink indicator to change flash rates. When it changes, it is programmed. It may take up to 30 seconds or longer in rare cases. The garage door may open and close while you are programming.
- Press and hold the programmed HomeLink button and observe the indicator light.
NOTE:
- If the indicator light stays on constantly, programming is complete and the garage door/device should activate when the HomeLink button is pressed.
- To program the two remaining HomeLink buttons, repeat each step for each remaining button. DO NOT erase the channels.
If you unplugged the garage door opener/device for programming, plug it back in at this time.
ReprogrammingASingleHomeLinkButton(Canadian/GateOperator)
To reprogram a channel that has been previously trained, follow these steps:
- Cycle the ignition to the ON/RUN position.
- Press and hold the desired HomeLink button until the indicator light begins to flash after 20 seconds. Do not release the button.
- Without releasing the button, proceed with "Canadian/ Gate Operator Programming" step 2 and follow all remaining steps.
Using HomeLink
To operate, push and release the programmed HomeLink button. Activation will now occur for the programmed device (i.e. garage door opener, gate operator, security system, entry door lock, home/office lighting, etc.). The hand-held transmitter of the device may also be used at any time.
Security
It is advised to erase all channels before you sell or turn in your vehicle.
To do this, push and hold the two outside buttons for 20 seconds until the orange indicator flashes. Note that all channels will be erased. Individual channels cannot be erased.
The HomeLink Universal Transceiver is disabled when the Vehicle Security Alarm is active.
Troubleshooting Tips
If you are having trouble programming HomeLink, here are some of the most common solutions:
- Replace the battery in the Garage Door Opener handheld transmitter.
- Push the LEARN button on the Garage Door Opener to complete the training for a Rolling Code.
- Did you unplug the device for programming and remember to plug it back in?
If you have any problems, or require assistance, please call toll-free 1-800-355-3515 or, on the Internet at HomeLink.com for information or assistance.
WARNING!
- Vehicleexhaustcontainscarbonmonoxide,adangerousgas.Donotrunyourvehicleinthegaragewhile programmingthetransceiver.Exhaustgascancause seriousinjuryordeath.
- Yourmotorizeddoororgatewillopenandclosewhile youareprogrammingtheuniversaltransceiver.Donot programthetransceiverifpeople,petsorotherobjects
WARNING!(Continued)
areinthepathofthedoororgate.Onlyusethis transceiverwithagaragedooropenerthathasa"stop and reverse" feature as required by Federal safety standards.Thisincludesmostgaragedooropenermodelsmanufacturedafter1982.Donotuseagaragedoor opener without these safety features. Call toll-free 1-800-355-3515or,ontheInternetatHomeLink.comfor safetyinformationorassistance.
General Information
The following regulatory statement applies to all Radio Frequency (RF) devices equipped in this vehicle:
This device complies with Part 15 of the FCC Rules and with Innovation, Science and Economic Development Canada license-exempt RSS standard(s). Operation is subject to the following two conditions:
- This device may not cause harmful interference, and
- This device must accept any interference received, including interference that may cause undesired operation.
NOTE: Changes or modifications not expressly approved by the party responsible for compliance could void the user's authority to operate the equipment.
INTERNAL EQUIPMENT
Storage
GloveCompartment
The glove compartment is located on the passenger side of the instrument panel.
To open the glove compartment, pull the release handle.
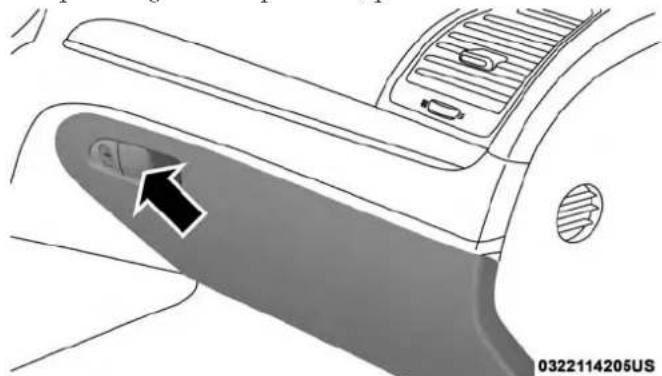
natural_image
Diagram of a car's side panel showing the nose and seat area with an arrow indicating direction (no text or symbols present)GloveCompartment
ConsoleFeatures
There is an open cubby bin located forward of the gear selector.
Two separate storage compartments are also located underneath the center console armrest.
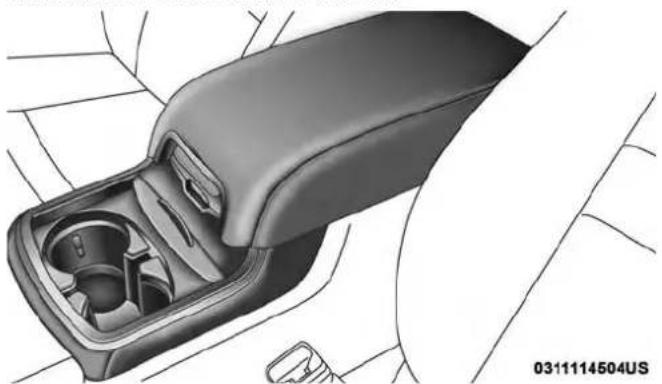
natural_image
Interior view of a car gear shift lever showing internal compartments and handle (no text or symbols)CenterConsole
Inside the center console armrest, there is a removable upper storage tray that can be slid forward/rearward on rails for access to the lower storage area. This tray has an integrated coin holder, along with additional area for small items and handheld devices. Below the upper tray, the
100 GETTING TO KNOW YOUR VEHICLE
lower storage compartment is made for larger items, like tissue boxes. In addition, the 12 volt power outlet, USB and Aux jack are located here.
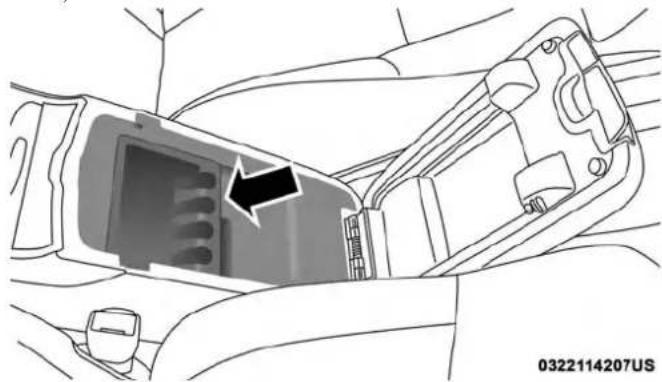
natural_image
Interior view of a car's head and side panel showing internal components (no text or symbols)UpperStorageTray
WARNING!
Donotoperatethisvehiclewithaconsolecompartmentlidintheopenposition.Drivingwiththeconsolecompartmentlidopenmayresultininjuryinacollision.
DoorStorage
The door panels contain storage areas.
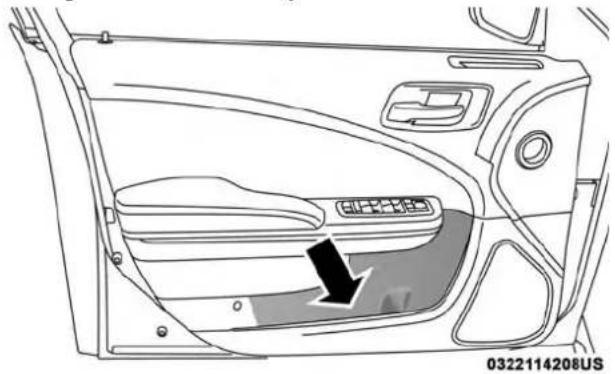
natural_image
Interior view of a car dashboard with a black arrow pointing to the side panel (no text or symbols)FrontDoorTrimStorage
Cupholders
The cupholders are located in the forward edge of the center console.
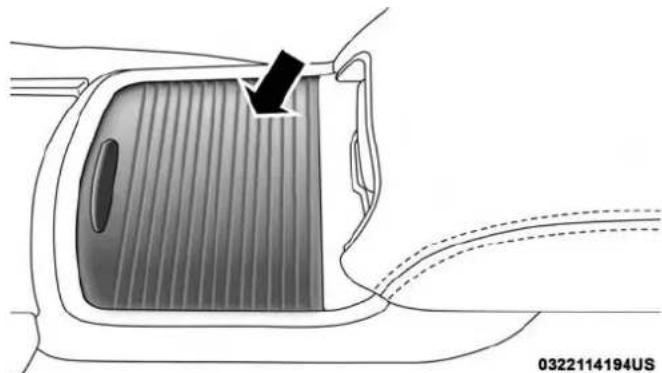
natural_image
Diagram of a car interior showing a lid with a black arrow pointing to the side panel (no text or symbols present)RetractableCover
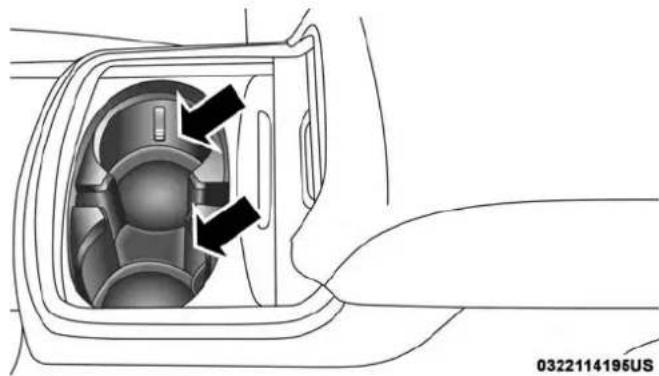
natural_image
Diagram of a car interior showing a gear or intake component with two arrows pointing to the inner gear (no text or symbols present)FrontCupholders
NOTE: Hellcat models are not equipped with a rear seat armrest.
102 GETTING TO KNOW YOUR VEHICLE
If equipped, the rear seat cupholders are located in the center armrest between the rear seats. The cupholders are positioned forward in the armrest and side-by-side to provide convenient access to beverage cans or bottles while maintaining a resting place for the rear occupant's elbows.
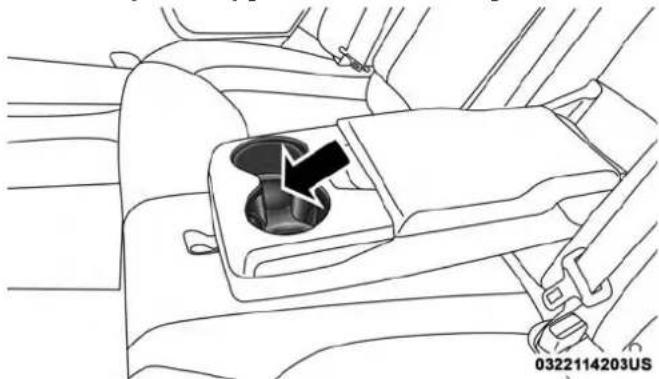
natural_image
Diagram of a car seatbelt with a black arrow pointing to the interior space (no text or symbols)RearSeatCupholders
LightedCupholders—IfEquipped
On some vehicles the rear cupholders are equipped with a light ring that illuminates the cupholders for the rear passengers. The light ring is controlled by the Dimmer Control. Refer to "Interior Lights" in "Getting To Know Your Vehicle" for further information.
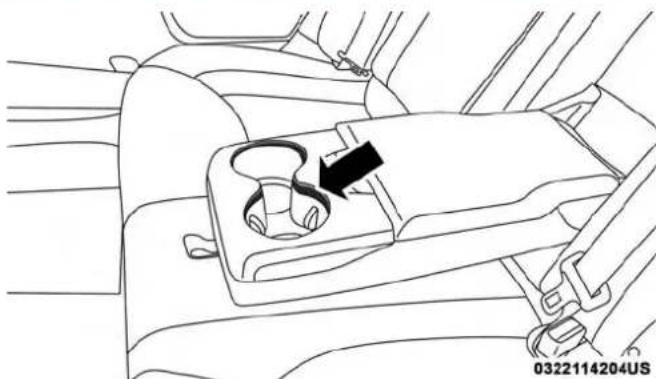
natural_image
Line drawing of a car interior showing a hand holding a car seatbelt with a black arrow pointing to the seat area (no text or symbols present)LightRingInRearCupholder
Electrical Power Outlets
Your vehicle is equipped with one 12 Volt (13 Amp) power outlet on the instrument panel and one 12 Volt (13 Amp) power outlet in the center console that can be used to power cellular phones, small electronics and other low powered electrical accessories. The power outlets are labeled with either a "key" or a "battery" symbol to indicate how the outlet is powered. Power outlets labeled with a "key" are powered when the ignition switch is in the ON or ACC position, while the outlets labeled with a "battery" are connected directly to the battery and powered at all times.
NOTE:
- All accessories connected to the "battery" powered outlets should be removed or turned off when the vehicle is not in use to protect the battery against discharge.
The front power outlet is located inside the storage area on the center stack of the instrument panel.
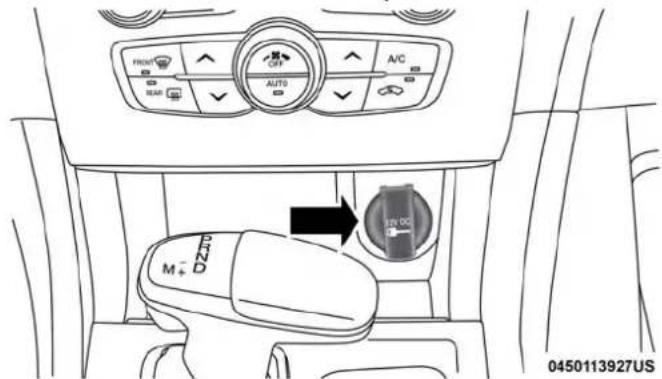
text_image
FRONT OFF A/C BEAT AUTO M+ DZS 0450113927USFrontPowerOutlet
WARNING!
Donotplaceashesinsidethecubbybinlocatedonthe centerconsoleonvehiclesnotequippedwiththeash receivevertray.Afireleadingtobodilyinjurycould result.
In addition to the front power outlet, there is also a power outlet located in the storage area of the center console.

text_image
0322132548USCenterConsolePowerOutlet
104 GETTING TO KNOW YOUR VEHICLE
NOTE: If the Media Hub is in use, do not exceed the maximum power of 100 Watts (8 Amps) for the center console power outlet. When the Media Hub is not in use, the outlet can deliver up to 160 Watts (13 Amps). If the power rating is exceeded, the fuse protecting the system needs to be replaced.
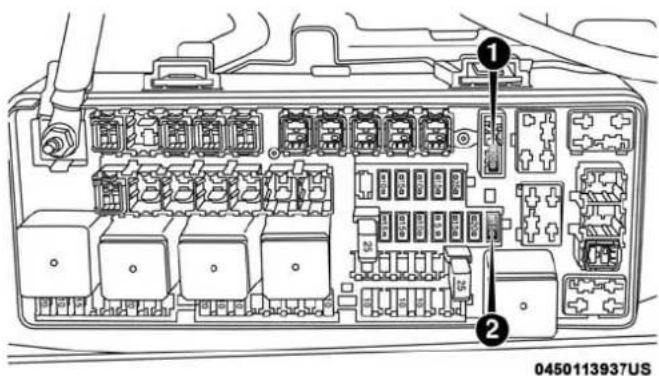
text_image
Technical diagram of an automotive battery pack with labeled components and part numbersPowerOutletFuseLocations
1 — #12 Fuse 20 Amp Yellow Instrument Panel Power Outlet/Dual USB Charge Only Ports 2 — #38 Fuse 20 Amp Yellow Center Console Power Outlet/Media Hub
NOTE: The instrument panel power outlet and dual rear console USB ports can be changed to "battery" powered all the time by moving the #12 20 Amp fuse from "IGN" to "B+". Refer to "Fuses" in "In Case Of Emergency" for further information.
WARNING!
Toavoidseriousinjuryordeath:
- Onlydevicesdesignedforuseinthistypeofoutlet shouldbeinsertedintoany12Voltoutlet.
• Donottouchwithwethands. - Closethelidwhennotinuseandwhiledrivingthe vehicle.
- If this outletismishandled, it may cause an electric shock and failure.
CAUTION!
- Manyaccessoriesthatcanbepluggedindrawpowerfrom thevehicle'sbatteryevenwhennotinuse(i.e.,cellular phones,etc.).Eventually,ifpluggedinlongenough,the vehicle'sbatterywilldischargesufficientlytodegrade batterylifeand/orpreventtheenginefromstarting.
(Continued)
CAUTION!(Continued)
- Accessories that draw higher power (i.e., coolers, vacuum cleaners, lights, etc.) will degrade the battery even more quickly. Only us these intermittently and with greater caution.
- Aftertheuseofhighpowerdrawaccessoriesorlong periodsofthevehiclenotbeingstarted(withaccessoriesstillpluggedin),thevehiclemustbedrivena sufficientlengthoftimetoallowthealternatorto rechargethevehicle'sbattery.
- Poweroutletsaredesignedforaccessoryplugsonly. Donothanganytypeofaccessoryoraccessory bracketfromtheplug.Improperuseofthepower outletcancausedamage.
Wireless Charging Pad — If Equipped
Your vehicle may be equipped with an Open Dots compatible wire-free phone charging surface located in the center console. The wireless charger features continuous wireless charging during vehicle operation and allows for uninterrupted Bluetooth streaming to properly equipped vehicle audio systems.
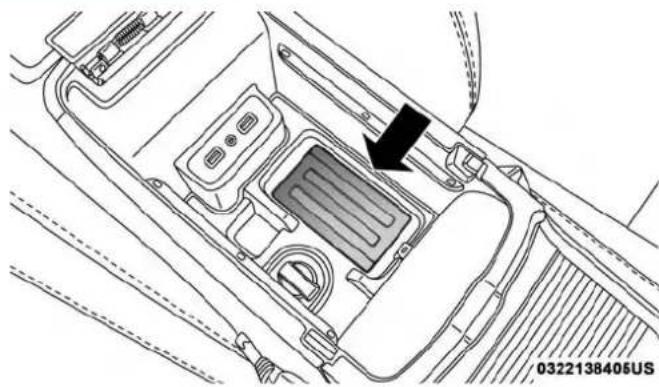
natural_image
Interior view of a car dashboard with no visible text or symbolsWirelessChargingPad
In order to enjoy the convenience of Open Dots wire-free charging, you must obtain an aftermarket wireless-enabled case and then install the case on your phone. Set the phone on the wireless charging pad face up. The charging indicator on your phone will light up indicating that your phone is charging.
NOTE: The charging pad is safe to the touch. However, if metallic items are placed on the charging surface while in use, the device will turn off. Clean all spills immediately and allow to dry before using.
For phones that already have built-in wireless charging capability (Samsung, Apple iPhone 8, 8 Plus and X Phones), a Qi Adapter is available to charge your phone using the Open Dot wire-free phone charging surface. Simply place the Qi Adapter (dot side down) on the charging surface and then place your built-in charging capable phone face up on top of the Qi Adapter. This product may not be compatible with all vehicle/Open Dots compatible wire-free phone charging surface combinations.
CAUTION!
The key fob should not be placed on the charging pad or within 15cm (150mm) of it. Doingsocan cause excessive heat build up and damage to the fob. Placing the fob in close proximity of the charging pad blocks the fob from being detected by the vehicle and prevent the vehicle from starting.
To get your free aftermarket phone case or Qi Adapter, go to http://invehiclewirelesscharging.com. You will need your vehicle/voucher identification number (located in your vehicle's glove box). If you have any questions or are not sure if you need a phone case or the Qi Adapter, please call our customer support line for assistance: 877-360-7702
Sunglasses Bin Door
At the front of the console a compartment is provided for the storage of a pair of sunglasses. The storage compartment access is a "push/push" design. Push the chrome pad on the door to open. Push the chrome pad on the door to close.
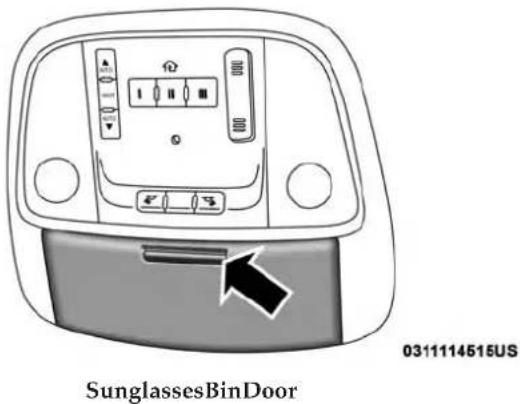
text_image
SunglassesBinDoor 0311114515USGETTING TO KNOW YOUR INSTRUMENT PANEL
CONTENTS
■INSTRUMENT CLUSTER....108
□Instrument Cluster Descriptions....108
■INSTRUMENT CLUSTER DISPLAY....110
□Location And Controls....1 1 0
□Engine Oil Life Reset....1 1 2
☐Performance Shift Indicator (PSI) — If Equipped....1 1 3
□Instrument Cluster Display Selectable Menu Items....1 1 3
☐Battery Saver On/Battery Saver Mode Message — Electrical Load Reduction Actions — If Equipped....120
■WARNING LIGHTS AND MESSAGES....122
□Red Warning Lights....122
□Yellow Warning Lights....126
□Yellow Indicator Lights. . . . . . . . . . . . . . . . . . . . . . . . . . . . . . . . . . . . . . . . . . . . . . . . . . . . . . . . . . 131
□Green Indicator Lights....131
□White Indicator Lights....132
□Blue Indicator Lights....133
■ONBOARD DIAGNOSTIC SYSTEM — OBD II . . .133
□Onboard Diagnostic System (OBD II) Cybersecurity....134
■EMISSIONS INSPECTION AND MAINTENANCE PROGRAMS ....135
108 GETTING TO KNOW YOUR INSTRUMENT PANEL
INSTRUMENT CLUSTER
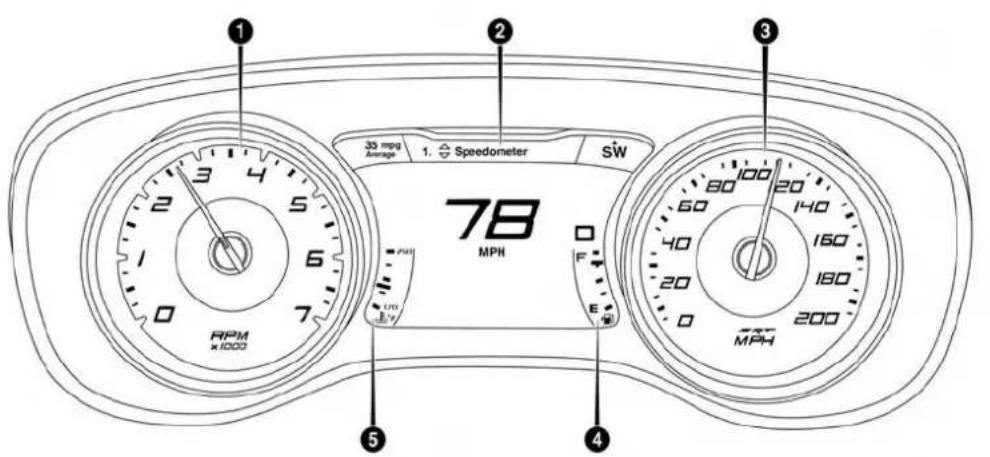
text_image
1 2 3 30 mph Average 1. Speedometer SW 78 MPH E F E LTD E/V RPM x 1000 80 20 60 140 40 160 20 180 0 200 MPH0401136477US
InstrumentClusterForSRT6.2LSuperchargedEngine
Instrument Cluster Descriptions
1. Tachometer
- Indicates the engine speed in revolutions per minute (RPM x 1000).
2. Instrument Cluster Display
- When the appropriate conditions exist, this display shows the instrument cluster display messages. Refer to "Instrument Cluster Display" in "Getting To Know Your Instrument Panel" for further information.
3. Speedometer
- Indicates vehicle speed.
4. Fuel Gauge
- The pointer shows the level of fuel in the fuel tank when the Keyless Push Button Ignition is in the ON/RUN position.
- The fuel pump symbol points to the side of the vehicle where the fuel door is located.
5. Temperature Gauge
- The temperature gauge shows engine coolant temperature. Any reading within the normal range indicates that the engine cooling system is operating satisfactorily.
- The gauge pointer will likely indicate a higher temperature when driving in hot weather, up mountain grades, or when towing a trailer. It should not be allowed to exceed the upper limits of the normal operating range.
WARNING!
Ahotenginecoolingsystemisdangerous. Youor otherscouldbebadlyburnedbysteamorboiling coolant. Youmaywanttocallanaauthorizeddealerfor serviceifyourvehicleoverheats. If youdecidetolook underthehoodyourself, see "ServicingAndMaintenance." FollowthewarningsundertheCoolingSystem PressureCapparagraph.
CAUTION!
Drivingwithahotenginecoolingsystemcoulddamageyourvehicle.Ifthetemperaturegaugereads"H,"pulloverandstopthevehicle.Idlethevehiclewiththeairconditionerturnedoffuntilthepointerdropsbackintothenormalrange.Ifthepointerremainsonthe"H,"turntheengineoffimmediatelyandcallanauthorizeddealerforservice.
NOTE: The hard telltales will illuminate for a bulb check when the ignition is first cycled.
110 GETTING TO KNOW YOUR INSTRUMENT PANEL
INSTRUMENT CLUSTER DISPLAY
Your vehicle will be equipped with an instrument cluster display, which offers useful information to the driver. With the ignition in the STOP/OFF mode, opening/closing of a door will activate the display for viewing, and display the total miles, or kilometers, in the odometer. Your instrument cluster display is designed to display important information about your vehicle's systems and features. Using a driver interactive display located on the instrument panel, your instrument cluster display can show you how systems are working and give you warnings when they are not. The steering wheel mounted controls allow you to scroll through the main menus and submenus. You can access the specific information you want and make selections and adjustments.
Location And Controls
The instrument cluster display features an interactive display which is located in the instrument cluster.
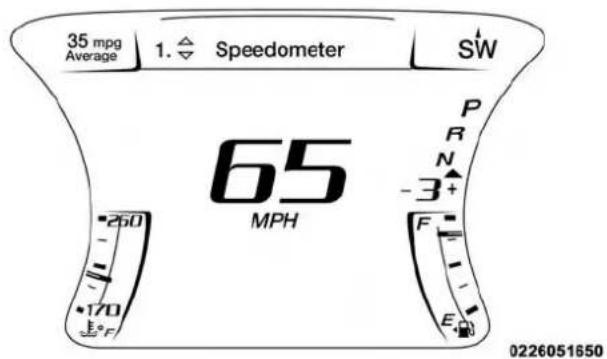
text_image
35 mpg Average 1. △ Speedometer SW 65 MPH P R N -3+ F E 250 170 °F 0226051650InstrumentClusterDisplay
This system conveniently allows the driver to select a variety of useful information by pushing the arrow buttons located on the left side of the steering wheel. The instrument cluster display menu items consist of the following:
•Speedometer
- Vehicle Info
- Performance
- Driver Assist — If Equipped
•Fuel Economy
- Trip
•Audio
- Messages
•Screen Setup
•Speed Warning
• Diagnostics
The system allows the driver to select information by pushing the following buttons mounted on the steering wheel:
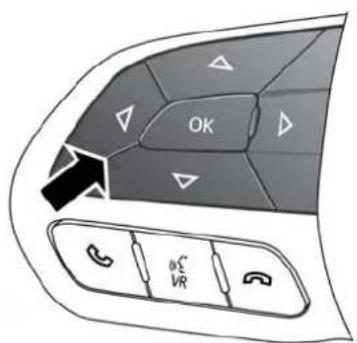
text_image
OK VR0402120688US
InstrumentClusterDisplayControls
UpAndDownArrowButtons:
Using the up or down arrows allows you to cycle through the Main Menu Items.
Changes the Main Screen area and Menu Title area.
LeftAndRightArrowButtons:
Using the leftor rightarrow button allows you to cycle through the submenu items of the Main menu item.
NOTE:
- Holding the up/down or left/right arrow button will loop the user through the currently selected menu or options presented on the screen.
- Main menu and submenus wrap for continuous scrolling.
- Upon returning to a main menu, the last submenu screen viewed within that main menu will be displayed.
OKButton:
For Digital Speedometer:
- Pushing the OKbutton changes units (mph or km/h).
112 GETTING TO KNOW YOUR INSTRUMENT PANEL
For Screen Setup:
- OKbutton allows user to enter menu and submenus.
- Within each submenu layer, the up and down arrows will allow the user to select the item of interest.
- Pushing the OKbutton makes the selection and a confirmation screen will appear (returning the user to the first page of the submenu).
- Pushing the leftarrow button will exit each submenu layer and return to the main menu.
Engine Oil Life Reset
OilChangeRequired
Your vehicle is equipped with an engine oil change indicator system. The "Oil Change Required" message will display in the instrument cluster display for five seconds after a single chime has sounded, to indicate the next scheduled oil change interval. The engine oil change indicator system is duty cycle based, which means the engine oil change interval may fluctuate, dependent upon your personal driving style.
Unless reset, this message will continue to display each time you place the ignition in the ON/RUN position. To turn off the message temporarily, push and release the OK or arrow buttons. To reset the oil change indicator system (after performing the scheduled maintenance), refer to the following procedure.
VehiclesEquippedWithKeylessEnter-N-Go—Ignition
Use the steering wheel instrument cluster display controls for the following procedure(s):
- Without pressing the brake pedal, push the ENGINE START/STOP button and place the ignition in the ON/RUN position (do not start the engine).
- Push and release the downarrow button to scroll downward through the main menu to "Vehicle Info."
-
Push and release the rightarrow button to access the "Oil Life" screen.
-
Push and hold the OKbutton to reset oil life. If conditions are met, the gauge and numeric display will update to show 100%. If conditions are not met a popup message of "To reset oil life engine must be off with ignition in run" will be displayed (for five seconds), and the user will remain at the Oil Life screen.
- Push and release the upor downarrow button to exit the submenu screen.
NOTE: If the indicator message illuminates when you start the vehicle, the oil change indicator system did not reset. If necessary, repeat this procedure.
SecondaryMethodOfResettingEngineOilLife
- Without pressing the brake pedal, push the ENGINE START/STOP button and place the ignition to the ON/RUN position (do not start the engine).
- Fully press the accelerator pedal, slowly, three times within ten seconds.
- Without pushing the brake pedal, push the ENGINE START/STOP button once to return the ignition to the OFF/LOCK position.
NOTE: If the indicator message illuminates when you start the vehicle, the oil change indicator system did not reset. If necessary, repeat this procedure.
Performance Shift Indicator (PSI) — If Equipped
The Performance Shift Indicator (PSI) is enabled on vehicles with manual transmission, or when a vehicle with automatic transmission is in manual shift mode. The PSI provides the driver with a visual indication within the instrument cluster display when the driver configured gear shift point has been reached and the driver is still accelerating. This indication notifies the driver to change gear corresponding to the configured RPMs in the head unit.
Instrument Cluster Display Selectable Menu Items
Push and release the upor downarrow button until the desired Selectable Menu item is displayed in the instrument cluster display.
Follow the Menu or submenu prompts as desired.
Speedometer
Push and release the upor downarrow button until the speedometer menu is displayed in the instrument cluster display. Push and release the OKbutton to toggle units (km/h or MPH) of the speedometer.
114 GETTING TO KNOW YOUR INSTRUMENT PANEL
VehicleInfo
Push and release the upor downarrow button until the "Vehicle Info" menu is displayed in the instrument cluster display. Push and release the rightor leftarrow button to scroll through the submenus items of "Vehicle Info." Follow the directional prompts to access or reset any of the following "Vehicle Info" submenu items:
•Tire Pressure Monitor
- Coolant Temp
- Trans Temp
- Oil Temp
- Oil Pressure
- Oil Life
- Battery Voltage
- Storage Mode
- Through this option, the vehicle can be placed into Storage Mode.
- Intake Air Temp
- Engine Torque
- Engine Power
• Air-Fuel Ratio — If Equipped
- Boost Pressure — If Equipped
- Intercooler (I/C) Temp — If Equipped
PerformanceFeatures
WARNING!
MeasurementofvehiclestatisticswiththePerformanceFeaturesisintendedforoff-highwayortrack useonlyandshouldnotbedoneonanypublic roadways.Itisrecommendedthatthesefeaturesbe usedinacontrolledenvironmentandwithinthelimits ofthelaw.Thecapabilitiesofthevehicleasmeasured bytheperformancepagesmustneverbeexploitedina recklessordangerousmanner,whichcanjeopardize theuser'ssafetyorthesafetyofothers.Onlyasafe, attentive,andskillfuldrivercanpreventaccidents.
Push and release the upor downarrow button until the Performance menu is displayed in the instrument cluster display. Push the rightor leftarrow button to enter the submenus.
GETTING TO KNOW YOUR INSTRUMENT PANEL 115
The Performance Features include the following:
- Will list the last five laps with the best lap highlighted in green.
- Top Speed
The following describes each feature and its operation:
DriverAssist—IfEquipped
The Driver Assist menu displays the status of the ACC and LaneSense systems.
Push and release the upor downarrow button until the Driver Assist menu is displayed in the instrument cluster display.
AdaptiveCruiseControl(ACC)Feature
The instrument cluster displays the current ACC system settings. The information displayed depends on ACC system status.
Push the Adaptive Cruise Control (ACC) on/off button (located on the steering wheel) until one of the following displays in the instrument cluster display:
AdaptiveCruiseControlOff
When ACC is deactivated, the display will read "Adaptive Cruise Control Off."
AdaptiveCruiseControlReady
When ACC is activated but the vehicle speed setting has not been selected, the display will read "Adaptive Cruise Control Ready."
Push the SET + or the SET- button (located on the steering wheel) and the following will display in the instrument cluster display:
ACCSET
When ACC is set, the set speed will display in the instrument cluster.
The ACC screen may display once again if any ACC activity occurs, which may include any of the following:
• Distance Setting Change
- System Cancel
- Driver Override
- System Off
- ACC Proximity Warning
- ACC Unavailable Warning
For further information, refer to "Adaptive Cruise Control (ACC)—If Equipped" in "Starting And Operating."
LaneSense—IfEquipped
The instrument cluster displays the current LaneSense system settings. The information displayed depends on LaneSense system status and the conditions that need to be met. For further information, refer to “LaneSense — If Equipped” in “Starting And Operating.”
FuelEconomy
Two submenu pages; one with Current Value (instantaneous calculation of the fuel economy) displayed and one without the Current Value displayed (toggle the leftor rightarrow button to select one):
- Current Fuel Economy (MPG, L/100 km, or km/L).
- Range To Empty (miles or km).
• Average Fuel Economy (MPG, L/100 km, or km/L). - The Max and Min values will correspond to the particular engine requirements.
- Lower end of gauge will be displayed in an amber color and turn green as Fuel Economy improves.
- Hold the OKbutton to reset average fuel economy information.
TripInfo
Push and release the upor downarrow button until the Trip Menu item is displayed in the instrument cluster display. Toggle the left or right arrow button to select Trip
A or Trip B. The Trip information will display the following:
- Distance – Shows the total distance (mi or km) traveled for Trip A or Trip B since the last reset.
- Average Fuel Economy – Shows the average fuel economy (MPG, L/100km or km/L) of Trip A or Trip B since the last reset.
- Elapsed Time – Shows the total elapsed time of travel since the last reset.
Hold the OKbutton to reset feature information.
Audio
This menu displays the Audio information of the currently playing audio source (e.g. FM radio).
Messages
This feature shows the number of stored warning messages, if any. Pushing the rightor leftarrow button will allow you to scroll through the stored messages.
118 GETTING TO KNOW YOUR INSTRUMENT PANEL
ScreenSetup
Push and release the upor downarrow button until the Screen Setup Menu displays in the instrument cluster display. Push and release the OKbutton to enter the submenus. The Screen Setup feature allows you to change what information is displayed in the instrument cluster as well as the location that information is displayed.
1. Upper Left
- Compass (default)
- Outside Temp.
- Time (default)
- Range to Empty (default)
• Average (MPG, L/100 km, or km/L)
• Current (MPG, L/100 km, or km/L) - Trip A Distance
- Trip B Distance
• None
2. Upper Right
- Compass
- Outside Temp (default)
• Time - Range to Empty
• Average (MPG, L/100 km, or km/L)
• Current (MPG, L/100 km, or km/L)
- Trip A Distance
- Trip B Distance
- None
3. Center
- Menu Title (default)
- Compass
- Outside Temp.
• Time - Range to Empty
• Average (MPG, L/100 km, or km/L)
• Current (MPG, L/100 km, or km/L) - Trip A Distance
- Trip B Distance
• Audio Information - Digital Speed
- None
4. Current Gear
• On
- Off (default)
- Odometer
•Show (default)
- Hide
- Gear Display
•Full (default)
•Single
- Restore Defaults
•Ok
- Cancel
SpeedWarning
Push and release the up or down arrow button until the Speed Warning Menu icon/title is displayed in the instrument cluster display. Push and release OKto enter speed warning. Use the up or down arrow button to select a desired speed, then push and release OKto set the speed. The white passive speed limiter telltale will light up with a notification text message (Speed Warning Set to XX, followed by the selected unit). When the set speed is just exceeded, a single chime will sound with a pop up message of "Speed Warning Exceeded". If the set speed is exceeded by 1.5 mph (3 km/h), an audible chime will sound for up to 10 seconds or until the speed is no longer exceeded.
The white passive speed limiter telltale will turn yellow and will flash, and a pop up message of "Speed Warning Exceeded" will display.
NOTE: You can turn the Speed Warning off by using the up/down arrows to scroll through speed list and select OFF at the bottom of the list.
Diagnostics
This feature allows the driver to view engine and emission vehicle faults.
- Push OK to have the most recent fault code sent.
- There is a delay when the next diagnostic code is requested during which the following message is displayed:
-
"CheckingSystemforDiagnosticCodes."
-
Driver must push the OKbutton again to see the next Pcode otherwise current message remains displayed.
- Driver exits when they cycle to another submenu (up or down).
-
Faults are displayed from newest to the oldest.
-
If the menu is exited before the end of codes is reached - when the driver re-enters the list will be restarted from the beginning.
- When no codes are present or the last code is reached = (P0000) and this message is displayed:
- "NoorEndofDiagnosticCodes."
Battery Saver On/Battery Saver Mode Message — Electrical Load Reduction Actions — If Equipped
This vehicle is equipped with an Intelligent Battery Sensor (IBS) to perform additional monitoring of the electrical system and status of the vehicle battery.
In cases when the IBS detects charging system failure, or the vehicle battery conditions are deteriorating, electrical load reduction actions will take place to extend the driving time and distance of the vehicle. This is done by reducing power to or turning off non-essential electrical loads.
Load reduction is only active when the engine is running. It will display a message if there is a risk of battery depletion to the point where the vehicle may stall due to lack of electrical supply, or will not restart after the current drive cycle.
When load reduction is activated, the message "Battery Saver On" or "Battery Saver Mode" will appear in the instrument cluster.
These messages indicate the vehicle battery has a low state of charge and continues to lose electrical charge at a rate that the charging system cannot sustain.
NOTE:
- The charging system is independent from load reduction. The charging system performs a diagnostic on the charging system continuously.
- If the Battery Charge Warning Light is on it may indicate a problem with the charging system. Refer to "Battery Charge Warning Light" in "Getting To Know Your Instrument Panel" for further information.
The electrical loads that may be switched off (if equipped), and vehicle functions which can be affected by load reduction:
• Heated Seat/Vented Seats/Heated Wheel
- Heated/Cooled Cup Holders — If Equipped
•Rear Defroster And Heated Mirrors
•HVAC System
•115V AC Power Inverter System
• Audio and Telematics System
Loss of the battery charge may indicate one or more of the following conditions:
- The charging system cannot deliver enough electrical power to the vehicle system because the electrical loads are larger than the capability of the charging system. The charging system is still functioning properly.
- Turning on all possible vehicle electrical loads (e.g. HVAC to max settings, exterior and interior lights, overloaded power outlets +12V, 115V AC, USB ports) during certain driving conditions (city driving, towing, frequent stopping).
- Installing options like additional lights, upfitter electrical accessories, audio systems, alarms and similar devices.
- Unusual driving cycles (short trips separated by long parking periods).
- The vehicle was parked for an extended period of time (weeks, months).
-
The battery was recently replaced and was not charged completely.
-
The battery was discharged by an electrical load left on when the vehicle was parked.
- The battery was used for an extended period with the engine not running to supply radio, lights, chargers, +12V portable appliances like vacuum cleaners, game consoles and similar devices.
Whattodowhenanelectricalloadreductionaction messageispresent("BatterySaverOn" or "BatterySaver Mode")
During a trip:
- Reduce power to unnecessary loads if possible:
- Turn off redundant lights (interior or exterior)
- Check what may be plugged in to power outlets +12V, 115V AC, USB ports
- Check HVAC settings (blower, temperature)
- Check the audio settings (volume)
After a trip:
- Check if any aftermarket equipment was installed (additional lights, upfitter electrical accessories, audio systems, alarms) and review specifications if any (load and Ignition Off Draw currents).
122 GETTING TO KNOW YOUR INSTRUMENT PANEL
- Evaluate the latest driving cycles (distance, driving time and parking time).
- The vehicle should have service performed if the message is still present during consecutive trips and the evaluation of the vehicle and driving pattern did not help to identify the cause.
WARNING LIGHTS AND MESSAGES
The warning/indicator lights will illuminate in the instrument panel together with a dedicated message and/or acoustic signal when applicable. These indications are indicative and precautionary and as such must not be considered as exhaustive and/or alternative to the information contained in the Owner's Manual, which you are advised to read carefully in all cases. Always refer to the information in this chapter in the event of a failure indication. All active telltales will display first if applicable. The system check menu may appear different based upon equipment options and current vehicle status. Some telltales are optional and may not appear.
Red Warning Lights
AirBagWarningLight
This warning light will illuminate to indicate a fault with the air bag, and will turn on for four to eight seconds as a bulb check when the ignition is placed in the ON/RUN or ACC/ON/RUN position. This light will illuminate with a single chime when a fault with the air bag has been detected, it will stay on until the fault is cleared. If the light is either not on during startup, stays on, or turns on while driving, have the system inspected at an authorized dealer as soon as possible.
BRAKE — BrakeWarningLight
This warning light monitors various brake functions, including brake fluid level and parking brake application. If the brake light turns on it may indicate that the parking brake is applied, that the brake fluid level is low, or that there is a problem with the anti-lock brake system reservoir.
If the light remains on when the parking brake has been disengaged, and the fluid level is at the full mark on the master cylinder reservoir, it indicates a possible brake hydraulic system malfunction or that a problem with the Brake Booster has been detected by the Anti-Lock Brake System (ABS) / Electronic Stability Control (ESC) system. In this case, the light will remain on until the condition has been corrected. If the problem is related to the brake booster, the ABS pump will run when applying the brake, and a brake pedal pulsation may be felt during each stop.
The dual brake system provides a reserve braking capacity in the event of a failure to a portion of the hydraulic system. A leak in either half of the dual brake system is indicated by the Brake Warning Light, which will turn on when the brake fluid level in the master cylinder has dropped below a specified level.
The light will remain on until the cause is corrected.
NOTE: The light may flash momentarily during sharp cornering maneuvers, which change fluid level conditions. The vehicle should have service performed, and the brake fluid level checked.
If brake failure is indicated, immediate repair is necessary.
WARNING!
Drivingvehiclewiththeredbrakelightonis dangerous.Partofthebrakesystemmayhavefailed.It willtakelongertostopthevehicle.Youcouldhavea collision.Havethevehiclecheckedimmediately.
Vehicles equipped with the Anti-Lock Brake System (ABS) are also equipped with Electronic Brake Force Distribution (EBD). In the event of an EBD failure, the Brake Warning Light will turn on along with the ABS Light. Immediate repair to the ABS system is required.
Operation of the Brake Warning Light can be checked by turning the ignition switch from the OFF position to the ON/RUN position. The light should illuminate for approximately two seconds. The light should then turn off unless the parking brake is applied or a brake fault is detected. If the light does not illuminate, have the light inspected by an authorized dealer.
The light also will turn on when the parking brake is applied with the ignition switch in the ON/RUN position.
NOTE: This light shows only that the parking brake is applied. It does not show the degree of brake application.
124 GETTING TO KNOW YOUR INSTRUMENT PANEL
—BatteryChargeWarningLight
This warning light will illuminate when the battery is not charging properly. If it stays on while the engine is running, there may be a malfunction with the charging system. Contact an authorized dealer as soon as possible.
This indicates a possible problem with the electrical system or a related component.
—DoorOpenWarningLight
This indicator will illuminate when a door is ajar/open and not fully closed.
NOTE: If the vehicle is moving, there will also be a single chime.
Theta — Electric Power Steering Fault Warning Light
This warning light will turn on when there's a fault with the EPS (Electric Power Steering) system. Refer to "Power Steering" in "Starting And Operating" for further information.
WARNING!
Continuedoperationwithreducedassistcouldposea safetyrisktoyourselfandothers.Serviceshouldbe obtainedassoonaspossible.
H—ElectronicThrottleControl(ETC)Warning Light
This warning light will illuminate to indicate a problem with the Electronic Throttle Control (ETC) system. If a problem is detected while the vehicle is running, the light will either stay on or flash depending on the nature of the problem. Cycle the ignition when the vehicle is safely and completely stopped and the transmission is placed in the PARK position. The light should turn off. If the light remains on with the vehicle running, your vehicle will usually be drivable; however, see an authorized dealer for service as soon as possible.
NOTE: This light may turn on if the accelerator and brake pedals are pressed at the same time.
If the light continues to flash when the vehicle is running, immediate service is required and you may experience reduced performance, an elevated/rough idle, or engine stall and your vehicle may require towing. The light will come on when the ignition is placed in the ON/RUN or ACC/ON/RUN position and remain on briefly as a bulb check. If the light does not come on during starting, have the system checked by an authorized dealer.
—EngineCoolantTemperatureWarningLight
This warning light warns of an overheated engine condition. If the engine coolant temperature is too high, this indicator will illuminate and a single chime will sound. If the temperature reaches the upper limit, a continuous chime will sound for four minutes or until the engine is able to cool: whichever comes first.
If the light turns on while driving, safely pull over and stop the vehicle. If the A/C system is on, turn it off. Also, shift the transmission into NEUTRAL and idle the vehicle. If the temperature reading does not return to normal, turn the engine off immediately and call for service.
Refer to "If Your Engine Overheats" in "In Case Of Emergency" for further information.
—OilPressureWarningLight
This warning light will illuminate to indicate low engine oil pressure. If the light turns on while driving, stop the vehicle, shut off the engine as soon as possible, and contact an authorized dealer. A chime will sound when this light turns on.
Do not operate the vehicle until the cause is corrected. This light does not indicate how much oil is in the engine. The engine oil level must be checked under the hood.
—OilTemperatureWarningLight
This warning light will illuminate to indicate the engine oil temperature is high. If the light turns on while driving, stop the vehicle and shut off the engine as soon as possible. Wait for oil temperature to return to normal levels.
—SeatBeltReminderWarningLight
This warning light indicates when the driver or passenger seat belt is unbuckled. When the ignition is first placed in the ON/RUN or ACC/ON/RUN position and if the driver's seat belt is unbuckled, a chime will sound and the light will turn on. When driving, if the driver or front passenger seat belt remains unbuckled, the Seat Belt Reminder Light will flash or remain on continuously and a chime will sound.
Refer to "Occupant Restraint Systems" in "Safety" for further information.
- TransmissionTemperatureWarningLight—If Equipped
This warning light will illuminate to warn of a high transmission fluid temperature. This may occur with strenuous usage such as trailer towing. If this light turns on, stop the vehicle and run the engine at idle or slightly faster, with the transmission in PARK or NEUTRAL, until the light turns off. Once the light turns off, you may continue to drive normally.
WARNING!
If you continue operating the vehicle when the Transmission Temperature Warning Light is illuminated you could cause the fluid to oil over, come in contact with hot engine exhaust components and cause a fire.
CAUTION!
ContinuousdrivingwiththeTransmissionTemperatureWarningLightilluminatedwilleventuallycauseseveretransmissiondamageortransmissionfailure.
—TrunkOpenWarningLight
This indicator will illuminate when the trunk is open and not fully closed.
NOTE: If the vehicle is moving, there will also be a single chime.
● —VehicleSecurityWarningLight—IfEquipped
This light will flash at a fast rate for approximately 15 seconds when the vehicle security alarm is arming, and then will flash slowly until the vehicle is disarmed.
Yellow Warning Lights
EngineCheck/MalfunctionIndicatorWarning Light(MIL)
The Engine Check/Malfunction Indicator Light (MIL) is a part of an Onboard Diagnostic System called OBD II that monitors engine and automatic transmission control systems. This warning light will illuminate when the ignition is in the ON/RUN position before engine start. If the bulb does not come on when turning the ignition switch from OFF to ON/RUN, have the condition checked promptly.
Certain conditions, such as a loose or missing gas cap, poor quality fuel, etc., may illuminate the light after engine start. The vehicle should be serviced if the light stays on through
several typical driving styles. In most situations, the vehicle will drive normally and will not require towing.
When the engine is running, the MIL may flash to alert serious conditions that could lead to immediate loss of power or severe catalytic converter damage. The vehicle should be serviced by an authorized dealer as soon as possible if this occurs.
WARNING!
Amalfunctioningcatalyticconverter, as referenced above, can reach high temperature than innormal operating conditions. This can cause fire if you drive slowly or park over flammable substances such as dry plants, wood, cardboard, etc. This could result in death or serious injury to the driver, occupants or others.
CAUTION!
ProlongeddrivingwiththeMalfunctionIndicator Light(MIL)oncouldcausedamagetothevehicle controlsystem.Italsocouldaffectfueleconomyand driveability.IftheMILisflashing,severecatalytic converterdamageandpowerlosswillsoonoccur. Immediateserviceisrequired.
GETTING TO KNOW YOUR INSTRUMENT PANEL
127
—ElectronicStabilityControl(ESC)Active WarningLight—IfEquipped
This warning light will indicate when the Electronic Stability Control system is Active. The “ESC Indicator Light” in the instrument cluster will come on when the ignition is placed in the ON/RUN or ACC/ON/RUN position, and when ESC is activated. It should go out with the engine running. If the “ESC Indicator Light” comes on continuously with the engine running, a malfunction has been detected in the ESC system. If this warning light remains on after several ignition cycles, and the vehicle has been driven several miles (kilometers) at speeds greater than 30 mph (48 km/h), see an authorized dealer as soon as possible to have the problem diagnosed and corrected.
- The "ESC Off Indicator Light" and the "ESC Indicator Light" come on momentarily each time the ignition is placed in the ON/RUN or ACC/ON/RUN position.
- The ESC system will make buzzing or clicking sounds when it is active. This is normal; the sounds will stop when ESC becomes inactive.
- This light will come on when the vehicle is in an ESC event.
128 GETTING TO KNOW YOUR INSTRUMENT PANEL
Off —ElectronicStabilityControl(ESC)OffWarning Light—IfEquipped
This warning light indicates the Electronic Stability Control (ESC) is off.
Each time the ignition is turned to ON/RUN or ACC/ON/RUN, the ESC system will be on, even if it was turned off previously.
The ESC OFF indicator will be lit any time the Traction Mode is set to Sport, Track or Full OFF in Drive Modes.
LowWasherFluidWarningLight—If Equipped
This warning light will illuminate when the windshield washer fluid is low.
(1) —TirePressureMonitoringSystem(TPMS) WarningLight
The warning light switches on and a message is displayed to indicate that the tire pressure is lower than the recommended value and/or that slow pressure loss is occurring. In these cases, optimal tire duration and fuel consumption may not be guaranteed.
Should one or more tires be in the condition mentioned above, the display will show the indications corresponding to each tire.
CAUTION!
Donotcontinuedrivingwithoneormoreflattiresas handlingmaybecompromised.Stopthevehicle, avoidingsharpbrakingandsteering.Ifatirepuncture occurs,repairimmediatelyusingthededicatedtire repairkitandcontactanauthorizeddealerassoonas possible.
Each tire, including the spare (if provided), should be checked monthly when cold and inflated to the inflation pressure recommended by the vehicle manufacturer on the vehicle placard or tire inflation pressure label. (If your vehicle has tires of a different size than the size indicated on the vehicle placard or tire inflation pressure label, you should determine the proper tire inflation pressure for those tires.)
As an added safety feature, your vehicle has been equipped with a Tire Pressure Monitoring System (TPMS) that illuminates a low tire pressure telltale when one or
more of your tires is significantly under-inflated. Accordingly, when the low tire pressure telltale illuminates, you should stop and check your tires as soon as possible, and inflate them to the proper pressure. Driving on a significantly under-inflated tire causes the tire to overheat and can lead to tire failure. Under-inflation also reduces fuel efficiency and tire tread life, and may affect the vehicle's handling and stopping ability.
Please note that the TPMS is not a substitute for proper tire maintenance, and it is the driver's responsibility to maintain correct tire pressure, even if under-inflation has not reached the level to trigger illumination of the TPMS low tire pressure telltale.
Your vehicle has also been equipped with a TPMS malfunction indicator to indicate when the system is not operating properly. The TPMS malfunction indicator is combined with the low tire pressure telltale. When the system detects a malfunction, the telltale will flash for approximately one minute and then remain continuously illuminated. This sequence will continue upon subsequent vehicle start-ups as long as the malfunction exists. When the malfunction indicator is illuminated, the system may not be able to detect or signal low tire pressure as intended. TPMS malfunctions may occur for a variety of reasons, including the installation of replacement or alternate tires or wheels on the vehicle that prevent the TPMS from functioning properly. Always check the TPMS malfunction telltale after replacing one or more tires or wheels on your vehicle to ensure that the replacement or alternate tires and wheels allow the TPMS to continue to function properly.
CAUTION!
TheTPMShasbeenoptimizedfortheoriginalequipmenttiresandwheels.TPMSpressuresandwarning havebeenestablishedforthetiresizeequippedon yourvehicle.Undesirablesystemoperationorsensor damagemayresultwhenusingreplacementequipmentthatisnotofthesamesize,type,and/orstyle. Aftermarketwheelscancausesensordamage.Using aftermarkettiresealantsmaycausetheTirePressure MonitoringSystem(TPMS)sensortobecomeinoperable. After using an aftermarket tire sealant it is recommendedthatyoutakeyourvehicletoyourauthorizeddealerttohaveyoursensorfunctionchecked.

—LowFuelWarningLight
When the fuel level reaches approximately 2 gal (7.5 L), this light will turn on and a chime will sound. The light will remain on until fuel is added.
130 GETTING TO KNOW YOUR INSTRUMENT PANEL

—Anti-LockBrake(ABS)WarningLight
This warning light monitors the Anti-Lock Brake System (ABS). The light will turn on when the ignition is placed in the ON/RUN or ACC/ON/RUN position and may stay on for as long as four seconds.
If the ABS light remains on or turns on while driving, then the Anti-Lock portion of the brake system is not functioning and service is required as soon as possible. However, the conventional brake system will continue to operate normally, assuming the Brake Warning Light is not also on.
If the ABS light does not turn on when the ignition is placed in the ON/RUN or ACC/ON/RUN position, have the brake system inspected by an authorized dealer.

—ServiceForwardCollisionWarning(FCW) ght—IfEquipped
This warning light will illuminate to indicate a fault in the Forward Collision Warning System. Contact an authorized dealer for service.
Refer to "Forward Collision Warning (FCW)" in "Safety" for further information.

—LaneSenseWarningLight—IfEquipped
The LaneSense system provides the driver with visual and steering torque warnings when the vehicle starts to drift out of its lane unintentionally without the use of a turn signal.
- When the LaneSense system senses a lane drift situation, the LaneSense indicator changes from solid green to solid yellow.
- When the LaneSense system senses the lane has been approached and is in a lane departure situation, the LaneSense indicator changes from solid white/green to flashing yellow.
- Refer to "LaneSense – If Equipped" in "Starting And Operating" for further information.

—ServiceLaneSenseWarningLight—If uipped
This warning light will illuminate when the LaneSense system is not operating and requires service. Please see an authorized dealer.
★!—ServiceAdaptiveCruiseControlWarning Light—IfEquipped
This light will turn on when a ACC is not operating and needs service. Refer to "Adaptive Cruise Control (ACC)" in "Starting And Operating" for further information.
Yellow Indicator Lights
\*—ForwardCollisionWarningOffIndicatorLight —IfEquipped
This indicator light illuminates to indicate that Forward Collision Warning is off.
Green Indicator Lights
—ECOModeIndicatorLight
This light will turn on when ECO Mode is active.
- AdaptiveCruiseControl(ACC)SetWith TargetVehicleLight—IfEquipped
This will display when the ACC is set and a target vehicle is detected. Refer to "Adaptive Cruise Control (ACC)" in "Starting And Operating" for further information.
—AdaptiveCruiseControl(ACC)SetWithout TargetVehicleLight—IfEquipped
This will display the distance setting for the ACC system when the system is engaged. Refer to "Adaptive Cruise Control (ACC)" in "Starting And Operating" for further information.
CruiseControlSetIndicatorLight—If Equipped
This indicator light will illuminate when the cruise control is set to the desired speed. Refer to "Speed Control" in "Starting And Operating" for further information.
≠0—FrontFogIndicatorLight—IfEquipped
This indicator light will illuminate when the front fog lights are on.
LaneSenseIndicatorLight—IfEquipped
The LaneSense indicator light illuminates solid green when both lane markings have been detected and the system is "armed" and ready to provide visual and torque warnings if an unintentional lane departure occurs.
Refer to "LaneSense — If Equipped" in "Starting And Operating" for further information.
132 GETTING TO KNOW YOUR INSTRUMENT PANEL
—Park/HeadlightOnIndicatorLight
This indicator light will illuminate when the park lights or headlights are turned on.
—TurnSignalIndicatorLights
When the left or right turn signal is activated, the turn signal indicator will flash independently and the corresponding exterior turn signal lamps will flash. Turn signals can be activated when the multifunction lever is moved down (left) or up (right).
NOTE:
- A continuous chime will sound if the vehicle is driven more than 1 mile (1.6 km) with either turn signal on.
- Check for an inoperative outside light bulb if either indicator flashes at a rapid rate.
White Indicator Lights
Custom —CustomModeIndicatorLight
This light will turn on when Custom Mode is active.
Refer to the "Drive Mode Supplement" for further information.
- AdaptiveCruiseControl(ACC)ReadyLight—IfEquipped
This light will turn on when Adaptive Cruise Control (ACC) has been turned on, but is not set. Refer to “Adaptive Cruise Control (ACC)” in “Starting And Operating” for further information.
—CruiseControlReadyIndicator
This indicator light will illuminate when the cruise control is ready, but not set. Refer to "Speed Control" in "Starting And Operating" for further information.
LaneSenseIndicatorLight—IfEquipped
When the LaneSense system is ON, but not armed, the LaneSense indicator light illuminates solid white. This occurs when only left, right, or neither lane line has been detected. If a single lane line is detected, the system is ready to provide only visual warnings if an unintentional lane departure occurs on the detected lane line.
Refer to "LaneSense — If Equipped" in "Starting And Operating" for further information.
Sport —SportModeIndicatorLight
This light will turn on when Sport Mode is active.
Refer to the "Drive Mode Supplement" for further information.
Track —TrackModeIndicatorLight
This light will turn on when Track Mode is active.
Refer to the "Drive Mode Supplement" for further information.
Valet — ValetModeSRTIndicatorLight
This light will turn on when Valet Mode is active.
Refer to the "Drive Mode Supplement" for further information.
③1 —SpeedWarningIndicatorLight
The indicator light will illuminate white along with a notification text message (Speed Warning Set to XX followed by unit). When the set speed is just exceeded, a single chime will sound along with pop up message of Speed Warning Exceeded. When the set speed is exceeded by 2 mph (3 km/h) or more, the indicator will light up yellow and flash along with a continuous chime (up to 10 seconds or until the speed is no longer exceeded).
NOTE: The number "31" is only an example of a speed that can be selected.
Blue Indicator Lights
ID—HighBeamIndicatorLight
This indicator light will illuminate to indicate that the high beam headlights are on. With the low beams activated, push the multifunction lever forward (toward the front of the vehicle) to turn on the high beams. Pull the multifunction lever rearward (toward the rear of the vehicle) to turn off the high beams. If the high beams are off, pull the lever toward you for a temporary high beam on, "flash to pass" scenario.
ONBOARD DIAGNOSTIC SYSTEM — OBD II
Your vehicle is equipped with a sophisticated Onboard Diagnostic system called OBD II. This system monitors the performance of the emissions, engine, and transmission control systems. When these systems are operating properly, your vehicle will provide excellent performance and fuel economy, as well as engine emissions well within current government regulations.
If any of these systems require service, the OBD II system will turn on the Malfunction Indicator Light (MIL). It will also store diagnostic codes and other information to assist
134 GETTING TO KNOW YOUR INSTRUMENT PANEL
your service technician in making repairs. Although your vehicle will usually be drivable and not need towing, see an authorized dealer for service as soon as possible.
CAUTION!
- ProlongeddrivingwiththeMILoncouldcause furtherdamagetotheemissioncontrolsystem.It couldalsoaffectfueleconomyanddriveability.The vehiclemustbeservicedbeforeanyemissionstests canbeperformed.
- IftheMILisflashingwhilethevehicleisrunning, severecatalyticconverterdamageandpowerloss willsoonoccur.Immediateserviceisrequired.
Onboard Diagnostic System (OBD II) Cybersecurity
Your vehicle is required to have an Onboard Diagnostic system (OBD II) and a connection port to allow access to information related to the performance of your emissions controls. Authorized service technicians may need to access this information to assist with the diagnosis and service of your vehicle and emissions system.
WARNING!
- ONLYanaauthorizedservicetechniciansshouldconnectequipmenttotheOBDIIconnectionportinordertoreadtheVIN,diagnose,orserviceyourvehicle.
- If unauthorized equipment is connected to the OBDI connection port, such as a driver-behavior tracking device, it may:
- Bepossible that vehiclesystems, including safety related systems, could be impaired or loss of vehicle control could occur that may result in an accident involving serious injury or death.
- Access, orallowotherstoaccess, information stored in your vehicle systems, including personal information.
For further information, refer to "Cybersecurity" in "Multimedia".
EMISSIONS INSPECTION AND MAINTENANCE PROGRAMS
In some localities, it may be a legal requirement to pass an inspection of your vehicle's emissions control system. Failure to pass could prevent vehicle registration.

For states that require an Inspection and Maintenance (I/M), this check verifies the "Malfunction Indicator Light (MIL)" is functioning and is not on when the engine is running, and that the
OBD II system is ready for testing.
Normally, the OBD II system will be ready. The OBD II system may not be ready if your vehicle was recently serviced, recently had a dead battery or a battery replacement. If the OBD II system should be determined not ready for the I/M test, your vehicle may fail the test.
Your vehicle has a simple ignition actuated test, which you can use prior to going to the test station. To check if your vehicle's OBD II system is ready, you must do the following:
- Cycle the ignition switch to the ON position, but do not crank or start the engine.
NOTE: If you crank or start the engine, you will have to start this test over.
GETTING TO KNOW YOUR INSTRUMENT PANEL 135
- As soon as you cycle the ignition switch to the ON position, you will see the "Malfunction Indicator Light (MIL)" symbol come on as part of a normal bulb check.
- Approximately 15 seconds later, one of two things will happen:
- The MIL will flash for about ten seconds and then return to being fully illuminated until you turn OFF the ignition or start the engine. This means that your vehicle's OBD II system is not ready and you should not proceed to the I/M station.
- The MIL will not flash at all and will remain fully illuminated until you place the ignition in the off position or start the engine. This means that your vehicle's OBD II system is ready and you can proceed to the I/M station.
If your OBD II system is notready, you should see an authorized dealer or repair facility. If your vehicle was recently serviced or had a battery failure or replacement, you may need to do nothing more than drive your vehicle as you normally would in order for your OBD II system to update. A recheck with the above test routine may then indicate that the system is nowready.
136 GETTING TO KNOW YOUR INSTRUMENT PANEL
Regardless of whether your vehicle's OBD II system is ready or not, if the MIL is illuminated during normal vehicle operation you should have your vehicle serviced before going to the I/M station. The I/M station can fail your vehicle because the MIL is on with the engine running.
SAFETY
CONTENTS
■SAFETY FEATURES....138
□Anti-Lock Brake System (ABS)....138
□Electronic Brake Control System (EBC) .....139
■AUXILIARY DRIVING SYSTEMS .....148
□Blind Spot Monitoring (BSM) — If Equipped . . .148
☐Forward Collision Warning (FCW) With Mitigation Operation....155
□Tire Pressure Monitoring System (TPMS) .....158
■OCCUPANT RESTRAINT SYSTEMS .....164
□Occupant Restraint Systems Features . . . . . . . .164
□Important Safety Precautions....164
□Seat Belt Systems....166
□Supplemental Restraint Systems (SRS) .....175
□Child Restraints....189
□Transporting Pets....204
■SAFETY TIPS....204
□Transporting Passengers....204
□Exhaust Gas....204
□Safety Checks You Should Make Inside The Vehicle....205
☐Periodic Safety Checks You Should Make Outside The Vehicle....207
SAFETY FEATURES
Anti-Lock Brake System (ABS)
The Anti-Lock Brake System (ABS) provides increased vehicle stability and brake performance under most braking conditions. The system automatically prevents wheel lock, and enhances vehicle control during braking.
The ABS performs a self-check cycle to ensure that the ABS is working properly each time the vehicle is started and driven. During this self-check, you may hear a slight clicking sound as well as some related motor noises.
ABS is activated during braking when the system detects one or more wheels begin to lock. Road conditions such as ice, snow, gravel, bumps, railroad tracks, loose debris, or panic stops may increase the likelihood of ABS activation(s).
You also may experience the following when ABS activates:
- The ABS motor noise (it may continue to run for a short time after the stop).
• The clicking sound of solenoid valves. - Brake pedal pulsations.
- A slight drop of the brake pedal at the end of the stop.
These are all normal characteristics of ABS.
WARNING!
- TheABScontainssophisticatedelectronicequipmentthatmaybesusceptibletointerferencecaused byimproperlyinstalledorhighoutputradiotransmittingequipment. Thisinterferencecancausepossible loss of anti-lock braking capability. Installation ofsuchequipmentshouldbeperformed byqualified professionals.
- Pumping of the Anti-Lock Brakes will diminish their effectiveness and may lead to a collision. Pumping makes the stopping distance longer. Just press firmly on your brake pedal when you need to slow down or stop.
- TheABScannotpreventthenaturallawsofphysics fromactingonthevehicle,norcanitincreasebrakingorsteeringefficiencybeyondthataffordedbythe conditionofthevehiclebrakesandtiresorthe tractionafforded.
- TheABScannotpreventcollisions,includingthose resultingfromexcessivespeedinturns,following anothervehicletooclosely,orhydroplaning.
(Continued)
WARNING!(Continued)
- The capabilities of an AB equipped vehicle must never be exploited in areckless or dangerous manner that could jeopardize the user's safety or the safety of others.
ABS is designed to function with the OEM tires. Modification may result in degraded ABS performance.
Anti-LockBrakeWarningLight
The yellow "Anti-Lock Brake Warning Light" will turn on when the ignition is turned to the ON/RUN mode and may stay on for as long as four seconds.
If the “Anti-Lock Brake Warning Light” remains on or comes on while driving, it indicates that the anti-lock portion of the brake system is not functioning and that service is required. However, the conventional brake system will continue to operate normally if the “Anti-Lock Brake Warning Light” is on.
If the “Anti-Lock Brake Warning Light” is on, the brake system should be serviced as soon as possible to restore the benefits of anti-lock brakes. If the “Anti-Lock Brake Warning Light” does not come on when the ignition is turned to the ON/RUN mode, have the light repaired as soon as possible.
Electronic Brake Control System (EBC)
Your vehicle is equipped with an advanced Electronic Brake Control system (EBC). This system includes Electronic Brake Force Distribution (EBD), Anti-Lock Brake System (ABS), Brake Assist System (BAS), Hill Start Assist (HSA), Traction Control System (TCS), Electronic Stability Control (ESC), and Electronic Roll Mitigation (ERM). These systems work together to enhance both vehicle stability and control in various driving conditions.
Your vehicle may also be equipped with Ready Alert Braking (RAB), and Rain Brake Support (RBS).
BrakeAssistSystem(BAS)
The BAS is designed to optimize the vehicle's braking capability during emergency braking maneuvers. The system detects an emergency braking situation by sensing the rate and amount of brake application and then applies optimum pressure to the brakes. This can help reduce braking distances. The BAS complements the anti-lock brake system (ABS). Applying the brakes very quickly results in the best BAS assistance. To receive the benefit of the system, you must apply continuous braking pressure during the stopping sequence, (do not “pump” the brakes).
Do not reduce brake pedal pressure unless braking is no longer desired. Once the brake pedal is released, the BAS is deactivated.
WARNING!
The Brake Assist System (BAS) cannot prevent the naturallawsof physics from acting on the vehicle, nor can it increase the traction afforded by prevailing road conditions. BAS cannot prevent collisions, including those resulting from excessive speed inturns, driving on very slipper surfaces, or hydroplaning. The capabilities of a BAS-equipped vehicle must never be exploited in areckless or dangerous manner, which could jeopardize the user's safety or the safety of others.
BrakeSystemWarningLight
The red “Brake System Warning Light” will turn on when the ignition is turned to the ON/RUN mode and may stay on for as long as four seconds.
If the "Brake System Warning Light" remains on or comes on while driving, it indicates that the brake system is not
functioning properly and that immediate service is required. If the "Brake System Warning Light" does not come on when the ignition is turned to the ON/RUN mode, have the light repaired as soon as possible.
ElectronicBrakeForceDistribution(EBD)
This function manages the distribution of the braking torque between the front and rear axles by limiting braking pressure to the rear axle. This is done to prevent overslip of the rear wheels to avoid vehicle instability, and to prevent the rear axle from entering ABS before the front axle.
ElectronicRollMitigation(ERM)
This system anticipates the potential for wheel lift by monitoring the driver's steering wheel input and the speed of the vehicle. When ERM determines that the rate of change of the steering wheel angle and vehicle's speed are sufficient to potentially cause wheel lift, it then applies the appropriate brake and may also reduce engine power to lessen the chance that wheel lift will occur. ERM can only reduce the chance of wheel lift occurring during severe or evasive driving maneuvers; it cannot prevent wheel lift due to other factors, such as road conditions, leaving the roadway, or striking objects or other vehicles.
NOTE:ERM is disabled anytime the ESC is in "Full Off" mode (if equipped). Refer to "Electronic Stability Control (ESC)" in this section for a complete explanation of the available ESC modes.
WARNING!
Many factors, such as vehicle loading, road conditions and driving conditions, influence the chancethat wheelliftor rollover may occur. ERM cannot prevent all wheelliftor rollovers, especially those that involve leaving the roadway or striking objects or other vehicles. The capabilities of an ERM-equipped vehicle must never be exploited in a reckless or dangerous manner which could jeopardize the user's safety or the safety of others.
ElectronicStabilityControl(ESC)
This system enhances directional control and stability of the vehicle under various driving conditions. ESC corrects for oversteering or understeering of the vehicle by applying the brake of the appropriate wheel(s) to assist in counteracting the oversteer or understeer condition. Engine power may also be reduced to help the vehicle maintain the desired path.
ESC uses sensors in the vehicle to determine the vehicle path intended by the driver and compares it to the actual path of the vehicle. When the actual path does not match the intended path, ESC applies the brake of the appropriate wheel to assist in counteracting the oversteer or understeer condition.
- Oversteer — when the vehicle is turning more than appropriate for the steering wheel position.
- Understeer — when the vehicle is turning less than appropriate for the steering wheel position.
The “ESC Activation/Malfunction Indicator Light” located in the instrument cluster will start to flash as soon as the ESC system becomes active. The “ESC Activation/Malfunction Indicator Light” also flashes when the TCS is active. If the “ESC Activation/Malfunction Indicator Light” begins to flash during acceleration, ease up on the accelerator and apply as little throttle as possible. Be sure to adapt your speed and driving to the prevailing road conditions.
WARNING!
- ElectronicStabilityControl(ESC) cannot prevent the naturallawsofphysicsfromactingonthevehicle, norcanitincreasethetractionaffordedbyprevailing roadconditions. ESC cannot prevent accidents, including those resulting from excessivespeedin turns, driving on very slipper surfaces, or hydroplaning. ESC also cannot prevent accidents resulting from loss of vehicle control duetoin appropriate driver input for the conditions. Only as safe, attentive, and skillful driver can prevent accidents. The capabilities of an ESC equipped vehicle must never be exploited in a reckless or dangerous manner which could jeopardize the user's safety or the safety of others.
- Vehiclemodifications, or failure to properly maintain your vehicle, may change the handling characteristics of your vehicle, and may negatively affect the performance of the ESC system. Changesthe steering system, suspension, braking system, tire type and size or wheels is easy to adversely affect ESC performance. Improperly inflated and unevenly worst tires may also degrade ESC performance. Any
WARNING!(Continued)
vehiclemodification orpoor vehiclemaintenance that reduces the effectiveness of the ESC system can increasetheriskoflossofvehiclecontrol,vehicle rollover,personalinjuryand death.
ESCOperatingModes
NOTE: Depending upon model and mode of operation, the ESC system may have multiple operating modes.
ESCON
This is the normal operating mode for the ESC. Whenever the vehicle is started, the ESC system will be in this mode. This mode should be used for most driving conditions. Alternate ESC modes should only be used for specific reasons as noted in the following paragraphs.
PartialOff
The “Partial Off” mode is intended for times when a more spirited driving experience is desired. This mode may modify TCS and ESC thresholds for activation, which allows for more wheel spin than normally allowed. This mode may be useful if the vehicle becomes stuck.
"Traction Sport" and "Traction Track" (if equipped) are ESC partial off mode(s). Upon the first push of the ESC button the system goes into SPORT mode, indication comes on in the cluster (a picture of the vehicle with the word SPORT), and the light in the cluster is illuminated. The second push of the ESC button the system will go into TRACK mode, indication comes on in the cluster (a picture of the vehicle with the word TRACK), and the light in the cluster remains illuminated. When it is pushed a third time the ESC will go back into ESC On, no indication, and the illumination in the cluster turns off.
WARNING!
Whenin"PartialOffTractionSport"mode,theTCS functionalityofESC,(exceptforthelimitedslipfeature describedintheTCSsection),hasbeendisabled andthe"ESCOffIndicatorLight"willbeilluminated. Whenin"PartialOffTractionTrack"mode,theTCS functionalityofESC,isenabledandthe"ESCOff IndicatorLight"willbeilluminated.Whenin"Partial Off"mode,theenhancedvehiclestabilityofferedby theESCsystemisreduced.
NOTE:
- For vehicles with multiple partial ESC modes a momentary button push will toggle the ESC mode. Multiple momentary button pushed may be required to return to ESC On.
- Trailer Sway control (TSC) is disabled when the ESC system is in the "Partial Off" mode.
- If Equipped — "ESC Sport" and "ESC Track" are ESC partial off mode(s).
FullOff-IfEquipped
This mode is intended for off-highway or off-road use only and should not be used on any public roadways. In this mode, TCS and ESC features are turned OFF. To enter the "Full Off" mode, push and hold the "ESC Off" switch for five seconds while the vehicle is stopped with the engine running. After five seconds, a chime will sound, the "ESC Off Indicator Light" will illuminate, and the "ESC OFF" message will display in the instrument cluster. To turn ESC ON again, momentarily push the "ESC Off" switch.
WARNING!
- IntheESC"FullOff"mode,theenginetorque reductionandstabilityfeaturesaredisabled.Therefore,enhancedvehiclestabilityofferedbytheESC systemisunavailable.Inanemergencyevasivemaneuver,theESCsystemwillnotengagetoassistin maintainingstability.ESC"FullOff"modeisintendedforoff-highwayoroff-roaduseonly.
- TheElectronicStabilityControl(ESC) cannot preventthenaturallawsofphysicsfromactingonthe vehicle,norcanitincreasethetractionaffordedby prevailingroadconditions.ESC cannot preventall accidents,includingthoseresultingfromexcessive speedinturns,drivingonveryslipperysurfaces,or hydroplaning.ESCalsocannotpreventcollisions.
ESCAvitation/MalfunctionIndicatorLightAnd ESCOFFIndicatorLight

The "ESC Activation/Malfunction Indicator Light" in the instrument cluster will come on when the ignition is turned to the ON mode. It should go out with the engine running. If the
"ESC Activation/Malfunction Indicator Light" comes on continuously with the engine running, a malfunction has been detected in the ESC system. If this light remains on after several ignition cycles, and the vehicle has been driven several miles (kilometers) at speeds greater than 30 mph (48 km/h), see an authorized dealer as soon as possible to have the problem diagnosed and corrected.
The “ESC Activation/Malfunction Indicator Light” (located in the instrument cluster) starts to flash as soon as the tires lose traction and the ESC system becomes active. The “ESC Activation/Malfunction Indicator Light” also flashes when TCS is active. If the “ESC Activation/Malfunction Indicator Light” begins to flash during acceleration, ease up on the accelerator and apply as little throttle as possible. Be sure to adapt your speed and driving to the prevailing road conditions.
NOTE:
- The "ESC Activation/Malfunction Indicator Light" and the "ESC OFF Indicator Light" come on momentarily each time the ignition is turned ON.
- Each time the ignition is turned ON, the ESC system will be on even if it was turned off previously.
- The ESC system will make buzzing or clicking sounds when it is active. This is normal; the sounds will stop when ESC becomes inactive following the maneuver that caused the ESC activation.

The "ESC OFF Indicator Light" indicates the customer has elected to have the Electronic Stability Control (ESC) in a reduced mode.
HillStartAssist(HSA)
The HSA system is designed to mitigate roll back from a complete stop while on an incline. If the driver releases the brake while stopped on an incline, HSA will continue to hold the brake pressure for a short period. If the driver does not apply the throttle before this time expires, the system will release brake pressure and the vehicle will roll down the hill as normal.
The following conditions must be met in order for HSA to activate:
• The feature must be enabled.
• The vehicle must be stopped.
- Park brake must be off.
- Driver door must be closed.
- The vehicle must be on a sufficient grade.
- The gear selection must match vehicle uphill direction (i.e., vehicle facing uphill is in forward gear; vehicle backing uphill is in REVERSE gear).
- HSA will work in REVERSE gear and all forward gears. The system will not activate if the transmission is in PARK or NEUTRAL. For vehicles equipped with a manual transmission, if the clutch is pressed, HSA will remain active.
WARNING!
TheremaybesituationswheretheHillStartAssist (HSA)willnotactivateandslightrollingmayoccur, suchasonminorhillsorwithaloadedvehicle,or whilepullingatrailer.HSAisnotasubstitutefor activatedrivinginvolvement.Itisalwaysthedriver's responsibilitytobeattentivetodistancetotherve- hicles,people,andobjects,andmostimportantlybrake operationtoensuresafeoperationofthevehicleunder allroadconditions.Yourcompleteattentionisalways requiredwhiledrivingtomaintainsafecontrolofyour vehicle.Failuretofollowthesewarningscanresultin acollisionorseriouspersonalinjury.
TowingWithHSA
HSA will also provide assistance to mitigate roll back while towing a trailer.
WARNING!
- If you use a trailer brake controller with your trailer, the trailer brakes may be activated and deactivated with the brakes switch. If so, there may not been enough brake pressure to hold both the vehicle and the trailer on a hill when the brake pedal is released. In order to avoid rolling down an inclinewhileresuming acceleration, manually activate the trailer brake or apply more vehicle brake pressure prior to releasing the brake pedal.
- HSAisnotaparkingbrake.Alwaysapplythe parkingbrakefullywhenexitingyourvehicle.Also, becertaintoplacethetransmissioninPARK.
- Failuretofollowthesewarningscanresultina collisionorseriouspersonalinjury.
DisablingAndEnablingHSA
This feature can be turned on or turned off. To change the current setting, proceed as follows:
- If disabling HSA using your instrument cluster display, refer to "Instrument Cluster Display" in "Getting To Know Your Instrument Panel" for further information.
- If disabling HSA using Uconnect Settings, refer to "Uconnect Settings" in "Multimedia" for further information.
For vehicles not equipped with an instrument cluster display, perform the following steps:
- Center the steering wheel (front wheels pointing straight forward).
- Shift the transmission into PARK.
- Apply the parking brake.
- Start the engine.
-
Rotate the steering wheel slightly more than one-half turn to the left.
-
Push the "ESC Off" button located in the lower switch bank below the climate control four times within 20 seconds. The "ESC Off Indicator Light" should turn on and turn off two times.
- Rotate the steering wheel back to center and then an additional slightly more than one-half turn to the right.
- Turn the ignition to the OFF mode and then back to ON. If the sequence was completed properly, the "ESC Off Indicator Light" will blink several times to confirm HSA is disabled.
- Repeat these steps if you want to return this feature to its previous setting.
RainBrakeSupport(RBS)
Rain Brake Support may improve braking performance in wet conditions. It will periodically apply a small amount of brake pressure to remove any water buildup on the front brake rotors. It functions when the windshield wipers are in LO or HI speed. When Rain Brake Support is active, there is no notification to the driver and no driver interaction is required.
ReadyAlertBraking(RAB)
Ready Alert Braking may reduce the time required to reach full braking during emergency braking situations. It anticipates when an emergency braking situation may occur by monitoring how fast the throttle is released by the driver. The EBC will prepare the brake system for a panic stop.
TractionControlSystem(TCS)
This system monitors the amount of wheel spin of each of the driven wheels. If wheel spin is detected, the TCS may apply brake pressure to the spinning wheel(s) and/or reduce engine power to provide enhanced acceleration and stability. A feature of the TCS, Brake Limited Differential (BLD), functions similar to a limited slip differential and controls the wheel spin across a driven axle. If one wheel on a driven axle is spinning faster than the other, the system will apply the brake of the spinning wheel. This will allow more engine power to be applied to the wheel that is not spinning. BLD may remain enabled even if TCS and ESC are in a reduced mode.
148 SAFETY
AUXILIARY DRIVING SYSTEMS
Blind Spot Monitoring (BSM) — If Equipped
The Blind Spot Monitoring (BSM) system uses two radar sensors, located inside the rear bumper fascia, to detect highway licensable vehicles (automobiles, trucks, motorcycles, etc.) that enter the blind spot zones from the rear/front/side of the vehicle.
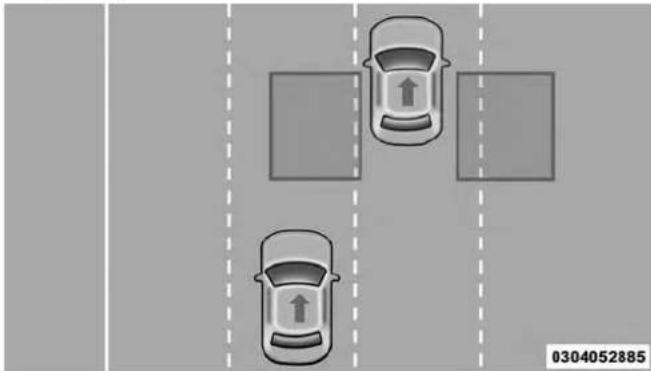
natural_image
Top-down view of a car layout with two cars and two rectangular spaces, no text or symbols presentRearDetectionZones
When the vehicle is started, the BSM warning light will momentarily illuminate in both outside rear view mirrors to let the driver know that the system is operational.
The BSM system sensors operate when the vehicle is in any forward gear or REVERSE.
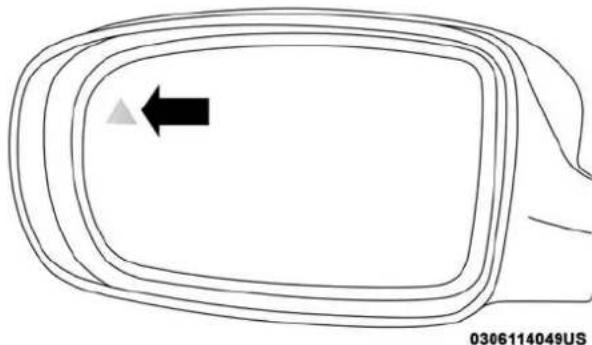
natural_image
Diagram of a vehicle door frame with an arrow indicating leftward motion (no text or symbols)BSMWarningLight
The BSM detection zone covers approximately one lane width on both sides of the vehicle 12 ft (3.8 m). The zone length starts at the outside rear view mirror and extends approximately 10 ft (3 m) beyond the rear bumper of the vehicle. The BSM system monitors the detection zones on both sides of the vehicle when the vehicle speed reaches approximately 6 mph (10 km/h) or higher and will alert the driver of vehicles in these areas.
NOTE:
- The BSM system does NOT alert the driver about rapidly approaching vehicles that are outside the detection zones.
- The BSM system detection zone DOES NOT change if your vehicle is towing a trailer. Therefore, visually verify the adjacent lane is clear for both your vehicle and trailer before making a lane change. If the trailer or other object (i.e., bicycle, sports equipment) extends beyond the side of your vehicle, this may result in the BSM warning light remaining illuminated the entire time the vehicle is in a forward gear.
- The Blind Spot Monitoring (BSM) system may experience drop outs (blinking on and off) of the side mirror Warning Indicator lamps when a motorcycle or any small object remains at the side of the vehicle for extended periods of time (more than a couple of seconds).
The area on the rear fascia where the radar sensors are located must remain free of snow, ice, and dirt/road contamination so that the BSM system can function properly. Do not block the area of the rear fascia where the radar sensors are located with foreign objects (bumper stickers, bicycle racks, etc.).
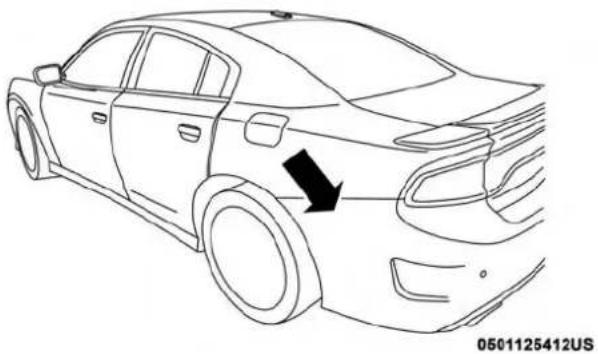
natural_image
Line drawing of a car side view showing front and rear sections with a black arrow indicating direction (no text or symbols)SensorLocation
The BSM system notifies the driver of objects in the detection zones by illuminating the BSM warning light located in the outside mirrors in addition to sounding an audible (chime) alert and reducing the radio volume. Refer to "Modes Of Operation" for further information.
The BSM system monitors the detection zone from three different entry points (side, rear, front) while driving to see if an alert is necessary. The BSM system will issue an alert during these types of zone entries.
150 SAFETY
EnteringFromTheSide
Vehicles that move into your adjacent lanes from either side of the vehicle.
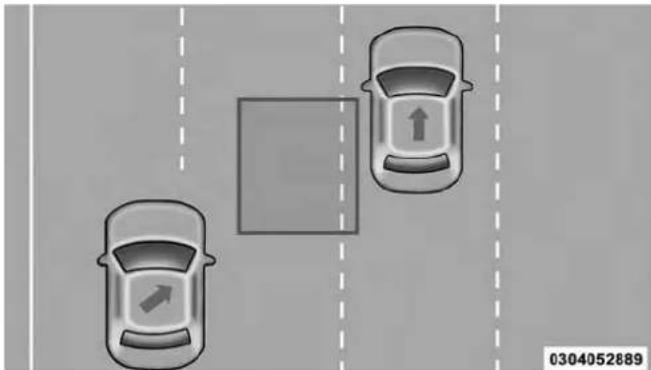
natural_image
Top-down view of two cars on a road with directional arrows and a parking sign (no text or symbols)SideMonitoring
EnteringFromTheRear
Vehicles that come up from behind your vehicle on either side and enter the rear detection zone with a relative speed of less than 31 mph (50 km/h).
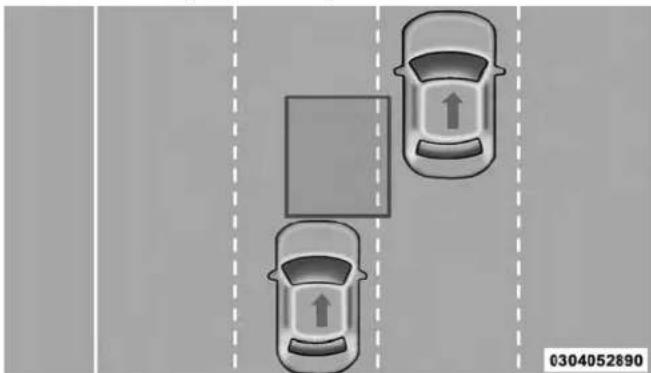
natural_image
Top-down view of two cars on a road with directional arrows, no text or symbols presentRearMonitoring
OvertakingTraffic
If you pass another vehicle slowly (with a relative speed of less than 15 mph (24 km/h)) and the vehicle remains in the blind spot for approximately 1.5 seconds, the warning light will be illuminated. If the difference in speed between the two vehicles is greater than 15 mph (24 km/h), the warning light will not illuminate.
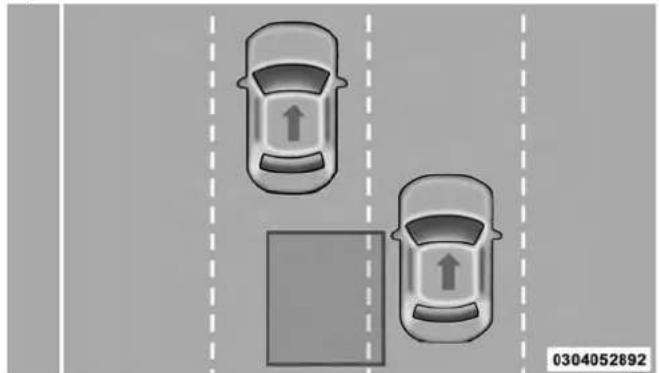
natural_image
Top-down view of two cars with upward arrows indicating directions, separated by a rectangular block (no text or symbols)Overtaking/Approaching
The BSM system is designed not to issue an alert on stationary objects such as guardrails, posts, walls, foliage, berms, etc. However, occasionally the system may alert on such objects. This is normal operation and your vehicle does not require service.

natural_image
Top-down view of two cars on a road with directional arrows, no text or symbols presentOvertaking/Passing
152 SAFETY
The BSM system will not alert you of objects that are traveling in the opposite direction of the vehicle in adjacent lanes.
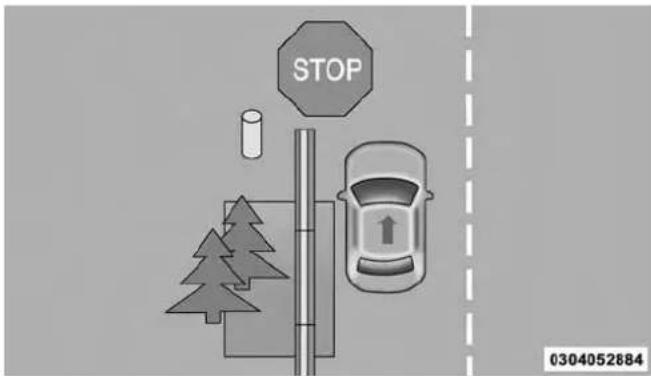
text_image
STOP 0304052884StationaryObjects
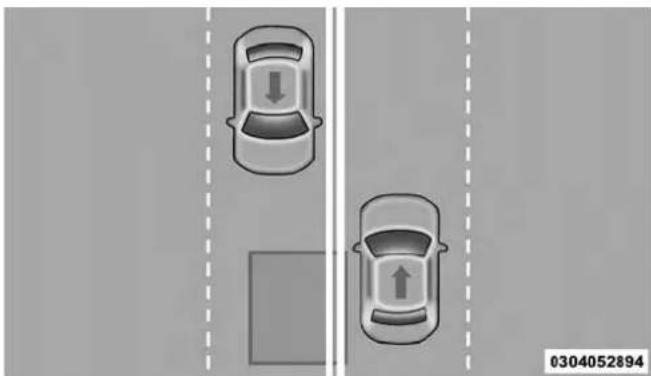
natural_image
Top-down view of two cars on a road with directional arrows, no text or symbols presentOpposingTraffic
WARNING!
TheBlindSpotMonitoringsystemisonlyanaidto helpdetectobjectsintheblindspotzones.TheBSM systemisnotdesignedtodetectpedestrians,bicyclists, oranimals.Evenifyourvehicleisequippedwiththe BSMsystem,alwayscheckyourvehicle'smirrors, glanceoveryourshoulder,anduseyourturnsignal beforechanginglanes.Failurertodosocanresultin seriousinjuryordeath.
RearCrossPath(RCP)
The Rear Cross Path (RCP) feature is intended to aid the driver when backing out of parking spaces where their vision of oncoming vehicles may be blocked. Proceed slowly and cautiously out of the parking space until the rear end of the vehicle is exposed. The RCP system will then have a clear view of the cross traffic and if an oncoming vehicle is detected, alert the driver.
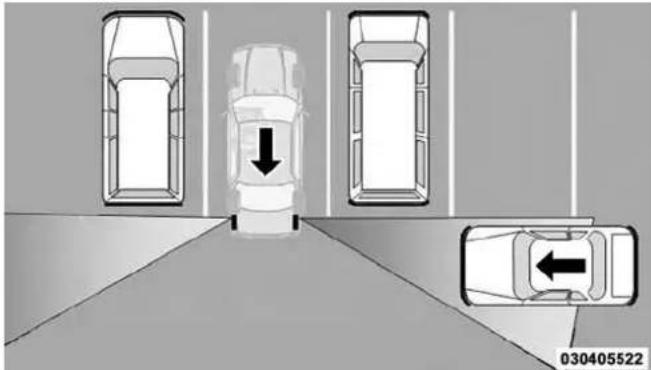
natural_image
Top-down view of a parking lot with three cars and one car, showing directional arrows indicating movement (no text or symbols)RCPDetectionZones
RCP monitors the rear detection zones on both sides of the vehicle, for objects that are moving toward the side of the vehicle with a minimum speed of approximately 3 mph
(5 km/h), to objects moving a maximum of approximately 20 mph (32 km/h), such as in parking lot situations.
NOTE: In a parking lot situation, oncoming vehicles can be obscured by vehicles parked on either side. If the sensors are blocked by other structures or vehicles, the system will not be able to alert the driver.
When RCP is on and the vehicle is in REVERSE, the driver is alerted using both the visual and audible alarms, including reducing the radio volume.
WARNING!
RearCrossPathDetection(RCP)isnotabackupaid system.Itisintendedtobeusedtohelpadriverdetect anoncomingvehicleinaparkinglotsituation.Drivers mustbecarefulwhenbackingup,evenwhenusing RCP.Alwayscheckcarefullybehindyourvehicle,look behindyou,andbesuretocheckforpedestrians, animals,othervehicles,obstructions,andblindspots beforebackingup.Failureretodosocanresultinserious injuryordeath.
154 SAFETY
ModesOfOperation
Three selectable modes of operation are available in the Uconnect System. Refer to "Uconnect Settings" in "Multimedia" for further information.
BlindSpotAlertLightsOnly
When operating in Blind Spot Alert mode, the BSM system will provide a visual alert in the appropriate side view mirror based on a detected object. However, when the system is operating in Rear Cross Path mode, the system will respond with both visual and audible alerts when a detected object is present. Whenever an audible alert is requested, the radio volume is reduced so that the alert can be better heard.
BlindSpotAlertLights/Chime
When operating in Blind Spot Alert Lights/Chime mode, the BSM system will provide a visual alert in the appropriate side view mirror based on a detected object. If the turn signal is then activated, and it corresponds to an alert present on that side of the vehicle, an audible chime will also be sounded. Whenever a turn signal and detected object are present on the same side at the same time, both the visual and audio alerts will be issued. In addition to the audible alert the radio (if on) volume will be reduced so that the alert can be better heard.
When the system is in RCP, the system shall respond with both visual and audible alerts when a detected object is present. Whenever an audible alert is requested, the radio volume is reduced so that the alert can be better heard.
BlindSpotAlertOff
When the BSM system is turned off there will be no visual or audible alerts from either the BSM or RCP systems.
NOTE: The BSM system will store the current operating mode when the vehicle is shut off. Each time the vehicle is started the previously stored mode will be recalled and used.
GeneralInformation
The following regulatory statement applies to all Radio Frequency (RF) devices equipped in this vehicle:
This device complies with Part 15 of the FCC Rules and with Industry Canada license-exempt RSS standard(s). Operation is subject to the following two conditions:
- This device may not cause harmful interference.
- This device must accept any interference received, including interference that may cause undesired operation.
NOTE: Changes or modifications not expressly approved by the party responsible for compliance could void the user's authority to operate the equipment.
Forward Collision Warning (FCW) With Mitigation Operation
The Forward Collision Warning (FCW) system with mitigation provides the driver with audible warnings, visual warnings (within the instrument cluster display), and may apply a brake jerk to warn the driver when it detects a potential frontal collision. The warnings and limited braking are intended to provide the driver with enough time to react, avoid or mitigate the potential collision.
NOTE:FCW monitors the information from the forward looking sensors, as well as the Electronic Stability Control (ESC) system, to calculate the probability of a forward collision. When the system determines that a forward collision is probable, the driver will be provided with audible and visual warnings and may provide a brake jerk warning. If the driver does not take action based upon these progressive warnings, then the system will provide a limited level of active braking to help slow the vehicle and mitigate the potential forward collision. If the driver reacts to the warnings by braking and the system determines that the driver intends to avoid the collision by braking but has not applied sufficient brake force, the system will compensate and provide additional brake force as required. If a Forward Collision Warning with Mitigation event begins at a speed below 20 mph (32 km/h), the system may provide the maximum or partial braking to mitigate the potential forward collision. If the Forward Collision Warning with Mitigation event stops the vehicle completely, the system will hold the vehicle at standstill for two seconds and then release the brakes.
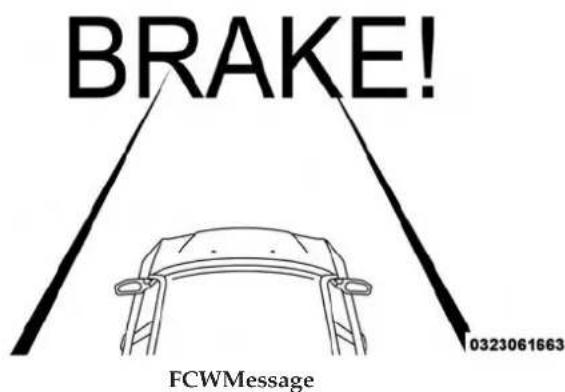
text_image
BRAKE! 0323061663 FCWMessageWhen the system determines a collision with the vehicle in front of you is no longer probable, the warning message will be deactivated.
NOTE:
• The minimum speed for FCW activation is 1 mph (2 km/h).
- The FCW alerts may be triggered on objects other than vehicles such as guard rails or sign posts based on the course prediction. This is expected and is a part of normal FCW activation and functionality.
- It is unsafe to test the FCW system. To prevent such misuse of the system, after four Active Braking events within an ignition cycle, the Active Braking portion of FCW will be deactivated until the next ignition cycle.
- The FCW system is intended for on-road use only. If the vehicle is taken off-road, the FCW system should be deactivated to prevent unnecessary warnings to the surroundings.
WARNING!
ForwardCollisionWarning(FCW)isnotintendedto avoidacollisiononitsown,norcanFCWdetectevery typeofpotentialcollision. Thedriverhastheresponsibilitytoavoidacollisionbycontrollingthevehicle viabrakingandsteering.Failureretofollowthiswarningcouldleadtoseriousinjuryordeath.
TurningFCWOnOrOff
NOTE: The default status of FCW is on; this allows the system to warn you of a possible collision with the vehicle in front of you.
The Forward Collision activation/deactivation is located in "Uconnect Settings" under "Safety And Driving Assistance". Forward Collision can be checked or unchecked.
When FCW is selected off, there will be an "FCW OFF" icon that appears in the instrument cluster display.
Changing the FCW status to off prevents the system from warning you of a possible collision with the vehicle in front of you.
NOTE: FCW system is temporarily turned off when ESC Full-Off Mode is active.
ChangingFCWAndActiveBrakingStatus
The FCW Sensitivity and Active Braking settings are programmable through the Uconnect System. Refer to "Uconnect Settings" in "Multimedia" for further information.
The default status of FCW is the "Far" setting and the Active Braking is set to "on"; this allows the system to warn you of a possible collision with the vehicle in front of you when you are farther away and it applies limited braking. This gives you the most reaction time to avoid a possible collision.
Changing the FCW status to the "Near" setting, allows the system to warn you of a possible collision with the vehicle in front of you when you are much closer. This setting provides less reaction time than the "Far" setting, which allows for a more dynamic driving experience.
NOTE:
- The system will retain the last setting selected by the driver after ignition shut down.
- FCW may not react to irrelevant objects such as overhead objects, ground reflections, objects not in the path of the vehicle, stationary objects that are far away, oncoming traffic, or leading vehicles with the same or higher rate of speed.
- FCW will be disabled like ACC, with the unavailable screens.
FCWLimitedWarning
If the instrument cluster display reads "ACC/FCW Limited Functionality" or "ACC/FCW Limited Functionality Clean Front Windshield" momentarily, there may be a condition that limits FCW functionality. Although the vehicle is still drivable under normal conditions, the active braking may not be fully available. Once the condition that limited the system performance is no longer present, the system will return to its full performance state. If the problem persists, see your authorized dealer.
158 SAFETY
ServiceFCWWarning
If the system turns off, and the instrument cluster display reads:
• ACC/FCW Unavailable Service Required
•Cruise/FCW Unavailable Service Required
This indicates there is an internal system fault. Although the vehicle is still drivable under normal conditions, have the system checked by an authorized dealer.
GeneralInformation
The following regulatory statement applies to all Radio Frequency (RF) devices equipped in this vehicle:
This device complies with Part 15 of the FCC Rules and with Industry Canada license-exempt RSS standard(s). Operation is subject to the following two conditions:
- This device may not cause harmful interference.
- This device must accept any interference received, including interference that may cause undesired operation.
NOTE: Changes or modifications not expressly approved by the party responsible for compliance could void the user's authority to operate the equipment.
Tire Pressure Monitoring System (TPMS)
The Tire Pressure Monitor System (TPMS) will warn the driver of a low tire pressure based on the vehicle recommended cold placard pressure.
The tire pressure will vary with temperature by about 1 psi (7 kPa) for every 12°F (6.5°C). This means that when the outside temperature decreases, the tire pressure will decrease. Tire pressure should always be set based on cold inflation tire pressure. This is defined as the tire pressure after the vehicle has not been driven for at least three hours, or driven less than 1 mile (1.6 km) after a three hour period. The cold tire inflation pressure must not exceed the maximum inflation pressure molded into the tire sidewall. Refer to “Tires” in “Servicing And Maintenance” for information on how to properly inflate the vehicle’s tires. The tire pressure will also increase as the vehicle is driven - this is normal and there should be no adjustment for this increased pressure.
The TPMS will warn the driver of a low tire pressure if the tire pressure falls below the low-pressure warning limit for any reason, including low temperature effects and natural pressure loss through the tire.
The TPMS will continue to warn the driver of low tire pressure as long as the condition exists, and will not turn off until the tire pressure is at or above the recommended cold placard pressure. Once the low tire pressure warning (TPMS Warning Light) illuminates, you must increase the tire pressure to the recommended cold placard pressure in order for the TPMS Warning Light to turn off. The system will automatically update and the TPMS Warning Light will turn off once the system receives the updated tire pressures. The vehicle may need to be driven for up to 20 minutes above 15 mph (24 km/h) in order for the TPMS to receive this information.
NOTE: When filling warm tires, the tire pressure may need to be increased up to an additional 4 psi (28 kPa) above the recommended cold placard pressure in order to turn the TPMS Warning Light off.
For example, your vehicle may have a recommended cold (parked for more than three hours) placard pressure of 30 psi (207 kPa). If the ambient temperature is 68°F (20°C) and the measured tire pressure is 27 psi (186 kPa), a temperature drop to 20°F (-7°C) will decrease the tire pressure to approximately 23 psi (158 kPa). This tire pressure is sufficiently low enough to turn on the TPMS Warning Light. Driving the vehicle may cause the tire pressure to rise to approximately 27 psi (186 kPa), but the TPMS Warning Light will still be on. In this situation, the TPMS Warning Light will turn off only after the tires are inflated to the vehicle's recommended cold placard pressure value.
CAUTION!
- TheTPMShasbeenoptimizedfortheoriginal equipmenttiresandwheels.TPMSpressuresand warninghavebeenestablishedforthetiresize equippedonyourvehicle.Undesirablesystemoperationorsensordamagemayresultwhenusing replacementequipmentthatisnotofthesamesize, type,and/orstyle.TheTPMsensorisnotdesigned foruseonaftermarketwheelsandmaycontributeto apooroverallsystemperformanceorsensordamage. CustomersareencouragedtouseOEMwheelsto assureproperTPMfeatureoperation.
- UsingaftermarkettiresealantsmaycausetheTire PressureMonitoringSystem(TPMS)sensortobecomeinoperable. Afterusinganaftermarkettire sealantitisrecommendedthatyoutakeyourvehicle toyourauthorizeddealertohaveyoursensorfunctionchecked.
(Continued)
CAUTION!(Continued)
- Afterinspectingoradjustingthetirepressurealways reinstallthevalvestemcap. Thiswillpreventmoistureanddirtfromenteringthevalvestem,which coulddamagetheTPMSsensor.
NOTE:
- The TPMS is not intended to replace normal tire care and maintenance or to provide warning of a tire failure or condition.
- The TPMS should not be used as a tire pressure gauge while adjusting your tire pressure.
- Driving on a significantly under-inflated tire causes the tire to overheat and can lead to tire failure. Under-inflation also reduces fuel efficiency and tire tread life, and may affect the vehicle's handling and stopping ability.
- The TPMS is not a substitute for proper tire maintenance, and it is the driver's responsibility to maintain correct tire pressure using an accurate tire pressure gauge, even if under-inflation has not reached the level to trigger illumination of the TPMS Warning Light.
- Seasonal temperature changes will affect tire pressure, and the TPMS will monitor the actual tire pressure in the tire.
PremiumSystem
The Tire Pressure Monitor System (TPMS) uses wireless technology with wheel rim mounted electronic sensors to monitor tire pressure levels. Sensors, mounted to each wheel as part of the valve stem, transmit tire pressure readings to the receiver module.
NOTE: It is particularly important for you to check the tire pressure in all of the tires on your vehicle monthly and to maintain the proper pressure.
The TPMS consists of the following components:
- Receiver module
- Four tire pressure monitoring sensors
- Various tire pressure monitoring system messages, which display in the instrument cluster
• Tire Pressure Monitoring System Warning Light
TirePressureMonitoringLowPressureWarnings
The Tire Pressure Monitoring System (TPMS) Warning Light will illuminate in the instrument cluster and a chime will sound when tire pressure is low in one or more of the four active road tires. In addition, the instrument cluster will display an "Inflate to XX" message and a graphic showing the pressure values of each tire with the low tire pressure values shown in a different color.
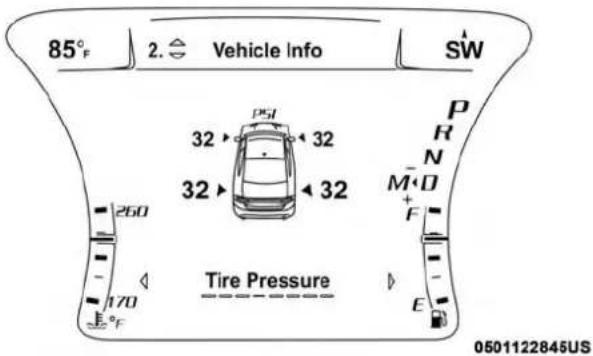
text_image
85°F 2. ⇌ Vehicle Info SW 32° 32° 32° P R N M D + F Tire Pressure - E 260 170 °F 0501122845USTirePressureMonitorDisplay
Should this occur, you should stop as soon as possible and inflate the tires with a low pressure condition (those shown in a different color in the instrument cluster graphic) to the vehicle's recommended cold placard pressure inflation value as shown in the "Inflate to XX" message. Once the system receives the updated tire pressures, the system will automatically update, the graphic display in the instrument cluster will change color back to the original color, and the TPMS Warning Light will turn off. The vehicle may need to be driven for up to 20 minutes above 15 mph (24 km/h) in order for the TPMS to receive this information.
162 SAFETY
NOTE: When filling warm tires, the tire pressure may need to be increased up to an additional 4 psi (28 kPa) above the recommended cold placard pressure in order to turn the TPMS Warning Light off.
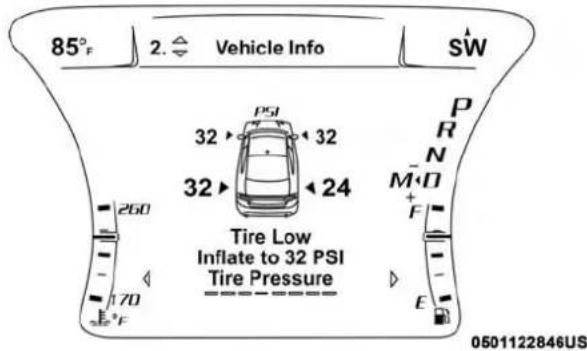
text_image
85°F 2. ⇌ Vehicle Info SW 32 → PSI 32 → 32 32 → 24 Tire Low Inflate to 32 PSI Tire Pressure P R N M+D + F - E 260 170 °F 0501122846USLowTirePressureMonitorDisplay
ServiceTirePressureSystemWarning
If a system fault is detected, the Tire Pressure Monitoring System (TPMS) Warning Light will flash on and off for 75 seconds and then remain on solid. The system fault will also sound a chime. In addition, the instrument cluster will display a "Service Tire Pressure System" message for a
minimum of five seconds and then display dashes (- -) in place of the pressure value to indicate which sensor is not being received.
If the ignition switch is cycled, this sequence will repeat, providing the system fault still exists. If the system fault no longer exists, the TPMS Warning Light will no longer flash, and the "Service Tire Pressure System" message will no longer display, and a pressure value will display in place of the dashes. A system fault can occur due to any of the following:
- Signal interference due to electronic devices or driving next to facilities emitting the same radio frequencies as the TPM sensors.
• Accumulation of snow or ice around the wheels or wheel housings.
• Using tire chains on the vehicle. - Using wheels/tires not equipped with TPM sensors.
VehiclesWithCompactSpare
-
The compact spare tire or non-matching full size does not have a tire pressure monitoring sensor. Therefore, the TPMS will not monitor the pressure in the compact or non-matching full size spare tire.
-
If you install the compact or non-matching full size spare tire in place of a road tire that has a pressure below the low-pressure warning limit, upon the next ignition key cycle, the TPMS Warning Light will remain on and a chime will sound. In addition, the graphic in the instrument cluster will still display a different color pressure value and an "Inflate to XX" message.
- After driving the vehicle for up to 20 minutes above 15 mph (24 km/h), the TPMS Warning Light will flash on and off for 75 seconds and then remain on solid. In addition, the instrument cluster will display a "Service Tire Pressure System" message for five seconds and then display dashes (- -) in place of the pressure value.
- For each subsequent ignition key cycle, a chime will sound, the TPMS Warning Light will flash on and off for 75 seconds and then remain on solid, and the instrument cluster will display a "Service Tire Pressure System" message for five seconds and then display dashes (- -) in place of the pressure value.
- Once you repair or replace the original road tire and reinstall it on the vehicle in place of the compact spare or non-matching full size, the TPMS will update automatically. In addition, the TPMS Warning Light will turn off and the graphic in the instrument cluster will display a
new pressure value instead of dashes (- -), as long as no tire pressure is below the low-pressure warning limit in any of the four active road tires. The vehicle may need to be driven for up to 20 minutes above 15 mph (24 km/h) in order for the TPMS to receive this information.
TPMSDeactivation—IfEquipped
The Tire Pressure Monitoring System (TPMS) can be deactivated if replacing all four wheel and tire assemblies (road tires) with wheel and tire assemblies that do not have TPMS Sensors, such as when installing winter wheel and tire assemblies on your vehicle.
To deactivate the TPMS, first replace all four wheel and tire assemblies (road tires) with tires not equipped with Tire Pressure Monitoring (TPM) Sensors. Then, drive the vehicle for 20 minutes above 15 mph (24 km/h). The TPMS will chime, the TPMS Warning Light will flash on and off for 75 seconds and then remain on. The instrument cluster will display the "Service Tire Pressure System" message and then display dashes (--) in place of the pressure values.
Beginning with the next ignition cycle, the TPMS will no longer chime or display the "Service Tire Pressure System" message in the instrument cluster but dashes (--) will remain in place of the pressure values.
To reactivate the TPMS, replace all four wheel and tire assemblies (road tires) with tires equipped with TPM sensors. Then, drive the vehicle for up to 20 minutes above 15 mph (24 km/h). The TPMS will chime, the TPMS Warning Light will flash on and off for 75 seconds and then turn off. The instrument cluster will display the "Service Tire Pressure System" message and then display pressure values in place of the dashes. On the next ignition cycle the "Service Tire Pressure System" message will no longer be displayed as long as no system fault exists.
GeneralInformation
The following regulatory statement applies to all radio frequency (RF) devices equipped in this vehicle:
This device complies with Part 15 of the FCC Rules and with Industry Canada license-exempt RSS standard(s). Operation is subject to the following two conditions:
(1) This device may not cause harmful interference, and
(2) This device must accept any interference received, including interference that may cause undesired operation.
NOTE: Changes or modifications not expressly approved by the party responsible for compliance could void the user's authority to operate the equipment.
OCCUPANT RESTRAINT SYSTEMS
Some of the most important safety features in your vehicle are the restraint systems:
Occupant Restraint Systems Features
- Seat Belt Systems
• Supplemental Restraint Systems (SRS) Air Bags - Child Restraints
Some of the safety features described in this section may be standard equipment on some models, or may be optional equipment on others. If you are not sure, ask an authorized dealer.
Important Safety Precautions
Please pay close attention to the information in this section. It tells you how to use your restraint system properly, to keep you and your passengers as safe as possible.
Here are some simple steps you can take to minimize the risk of harm from a deploying air bag:
-
Children 12 years old and under should always ride buckled up in the rear seat of a vehicle with a rear seat.
-
A child who is not big enough to wear the vehicle seat belt properly (Refer to "Child Restraints" in this section for further information) must be secured in the appropriate child restraint or belt-positioning booster seat in a rear seating position.
- If a child from 2 to 12 years old (not in a rear-facing child restraint) must ride in the front passenger seat, move the seat as far back as possible and use the proper child restraint (Refer to "Child Restraints" in this section for further information).
- Never allow children to slide the shoulder belt behind them or under their arm.
- You should read the instructions provided with your child restraint to make sure that you are using it properly.
- All occupants should always wear their lap and shoulder belts properly.
-
The driver and front passenger seats should be moved back as far as practical to allow the front air bags room to inflate.
-
Do not lean against the door or window. If your vehicle has side air bags, and deployment occurs, the side air bags will inflate forcefully into the space between occupants and the door and occupants could be injured.
- If the air bag system in this vehicle needs to be modified to accommodate a disabled person, refer to the "Customer Assistance" section for customer service contact information.
WARNING!
- Neverplacearear-facingchildrestraintinfrontofan airbag. Adeployingpassengerfrontairbagcan causedeathorseriousinjurytoachild12yearsor younger, includingachildinarear-facingchild restraint.
- Neverinstallarear-facingchildrestraintinthefront seatofavehicle.Onlyusearear-facingchildrestraintintherearseat.Ifthevehicledoesnothavea rearseat,donottransportarear-facingchildrestraint inthatvehicle.
166 SAFETY
Seat Belt Systems
Buckle up even though you are an excellent driver, even on short trips. Someone on the road may be a poor driver and could cause a collision that includes you. This can happen far away from home or on your own street.
Research has shown that seat belts save lives, and they can reduce the seriousness of injuries in a collision. Some of the worst injuries happen when people are thrown from the vehicle. Seat belts reduce the possibility of ejection and the risk of injury caused by striking the inside of the vehicle. Everyone in a motor vehicle should be belted at all times.
EnhancedSeatBeltUseReminderSystem(BeltAlert)
DriverandPassengerBeltAlert(ifequipped)
BeltAlert is a feature intended to remind the driver and outboard front seat passenger (if equipped with outboard front passenger seat BeltAlert) to buckle their seat belts. The Belt Alert feature is active whenever the ignition switch is in the START or ON/RUN position.
InitialIndication
If the driver is unbuckled when the ignition switch is first in the START or ON/RUN position, a chime will signal for a few seconds. If the driver or outboard front seat passenger (if equipped with outboard front passenger seat BeltAlert) is unbuckled when the ignition switch is first in the START or ON/RUN position the Seat Belt Reminder Light will turn on and remain on until both outboard front seat belts are buckled. The outboard front passenger seat BeltAlert is not active when an outboard front passenger seat is unoccupied.
BeltAlertWarningSequence
The BeltAlert warning sequence is activated when the vehicle is moving above a specified vehicle speed range and the driver or outboard front seat passenger is unbuckled (if equipped with outboard front passenger seat BeltAlert) (the outboard front passenger seat BeltAlert is not active when the outboard front passenger seat is unoccupied). The BeltAlert warning sequence starts by blinking the Seat Belt Reminder Light and sounding an intermittent chime. Once the BeltAlert warning sequence has completed, the Seat Belt Reminder Light will remain on until the seat belts are buckled. The BeltAlert warning sequence may repeat based on vehicle speed until the driver and occupied outboard front seat passenger seat belts are buckled. The driver should instruct all occupants to buckle their seat belts.
ChangeofStatus
If the driver or outboard front seat passenger (if equipped with outboard front passenger seat BeltAlert) unbuckles their seat belt while the vehicle is traveling, the BeltAlert warning sequence will begin until the seat belts are buckled again.
The outboard front passenger seat BeltAlert is not active when the outboard front passenger seat is unoccupied. BeltAlert may be triggered when an animal or other items are placed on the outboard front passenger seat or when the seat is folded flat (if equipped). It is recommended that pets be restrained in the rear seat (if equipped) in pet harnesses or pet carriers that are secured by seat belts, and cargo is properly stowed.
BeltAlert can be activated or deactivated by an authorized dealer. FCA US LLC does not recommend deactivating BeltAlert.
NOTE: If BeltAlert has been deactivated and the driver or outboard front seat passenger (if equipped with outboard front passenger seat BeltAlert) is unbuckled the Seat Belt Reminder Light will turn on and remain on until the driver and outboard front seat passenger seat belts are buckled.
Lap/ShoulderBelts
All seating positions in your vehicle are equipped with lap/shoulder belts.
The seat belt webbing retractor will lock only during very sudden stops or collisions. This feature allows the shoulder part of the seat belt to move freely with you under normal conditions. However, in a collision the seat belt will lock and reduce your risk of striking the inside of the vehicle or being thrown out of the vehicle.
WARNING!
- Relyingontheairbagsalonecouldleadtomore severeinjuriesinacollision.Theairbagsworkwith yourseatbelttorestrainyouproperly.Insome collisions,theairbagswon'tdeployatall.Always wearyourseatbelteventhoughyouhaveairbags.
- Inacollision, you and your passengers can suffer much greater injuries if you are not properly buckled up. You can strike the interior of your vehicle or other passengers, or you can be thrown out of the vehicle. Always besure you and others in your vehicle are buckled up properly.
(Continued)
WARNING!(Continued)
- Itisdangeroustorideinacargoarea,insideor outsideofvehicle.Inacollision,peopleridingin theseareasaremorelikelytobeseriouslyinjuredor killed.
- Donotallowpeopletorideinanyareaofyour vehiclethatisnotequippedwithseatsandseatbelts.
- Besureeveryoneinyourvehicleisinaseatand usingaseatbeltproperly.Occupants,includingthe driver,shouldalwaysweartheirseatbeltswhether ornotanairbagisalsoprovidedattheirseating positiontominimizetheriskofsevereinjuryor deathintheeventofacrash.
- Wearingyourseatbeltincorrectlycouldmakeyour injuriesinacollisionmuchworse.Youmightsuffer internalinjuries,oryoucouldevenslideoutofthe seatbelt.Followtheseinstructionstowearyourseat beltsafelyandtokeepyourpassengerssafe,too.
- Twopeopleshouldneverbebeltedintoasingleseat belt.Peoplebeltedtogethercancrashintooneanotherinacollision,hurtingoneanotherbadly.Never usealap/shoulderbeltoralapbeltformorethanone person,nomatterwhattheirsize.
WARNING!
- Alapbeltworntoohighcanincreasetheriskof injuryinacollision.Theseatbeltforceswon'tbeat thestronghipandpelvicbones,butacrossyour abdomen.Alwayswearthelappartofyourseatbelt aslowaspossibleandkeepitsnug.
- Atwistedseatbeltmaynotprotectyouproperly. In a collision, it could devencut into you. Besuretheseat beltis flat against your body, without twists. If you can't straightenase at beltiny our vehicle, take it to an authorized dealer immediately and have it fixed.
- Aseatbeltthatisbuckledintothewrongbucklewill notprotectyouproperly. Thelapportioncouldride toohighonyourbody, possiblycausinginternal injuries. Alwaysbuckleyourseatbeltintothe bucklenearestyou.
- Aseatbeltthatistooloosewillnotprotectyou properly.Inasuddenstop,youcouldmovetoofar forward,increasingthepossibilityofinjury.Wear yourseatbeltsnugly.
- Aseatbeltthatiswornunderyourarmisdangerous. Yourbodycouldstriketheinsidesurfacesofthe vehicleinacollision,increasingheadandneck
WARNING!(Continued)
injury.Aseatbeltwornunderthearmcancause internalinjuries.Ribsaren'tasstrongasshoulder bones.Weartheseatbeltoveryourshouldersothat yourstrongestboneswilltaketheforceinacollision.
- Ashoulderbeltplacedbehindyouwillnotprotect youfrominjuryduringacollision.Youaremore likelytohityourheadinacollisionifyoudonot wearyourshoulderbelt.Thelapandshoulderbelt aremeanttobeusedtogether.
- Afrayedortornseatbeltcouldripapartinacollision andleaveyouwithnoprotection.Inspecttheseat beltsystemperiodically,checkingforcuts,frays,or looseparts.Damagedpartsmustbereplacedimmediately.Donotdisassembleormodifytheseatbelt system.Seatbeltassembliesmustbereplacedaftera collision.
Lap/ShoulderBeltOperatingInstructions
-
Enter the vehicle and close the door. Sit back and adjust the seat.
-
The seat belt latch plate is above the back of the front seat, and next to your arm in the rear seat (for vehicles equipped with a rear seat). Grasp the latch plate and pull out the seat belt. Slide the latch plate up the webbing as far as necessary to allow the seat belt to go around your lap.

text_image
0502113726USPullingOutTheLatchPlate
170 SAFETY
- When the seat belt is long enough to fit, insert the latch plate into the buckle until you hear a "click."
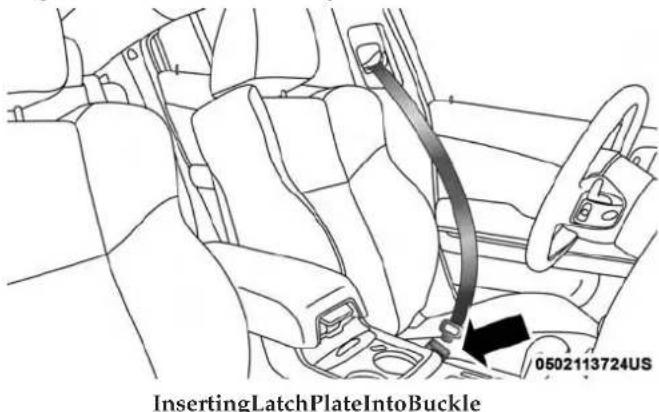
text_image
InsertingLatchPlateIntoBuckle 0502113724US- Position the lap belt so that it is snug and lies low across your hips, below your abdomen. To remove slack in the lap belt portion, pull up on the shoulder belt. To loosen the lap belt if it is too tight, tilt the latch plate and pull on the lap belt. A snug seat belt reduces the risk of sliding under the seat belt in a collision.
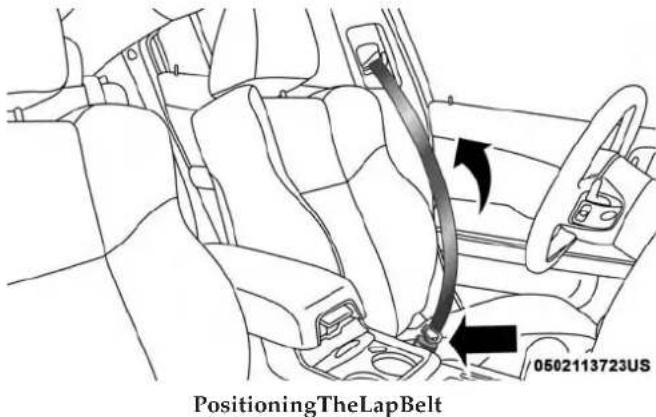
text_image
PositioningTheLapBelt 0502113723US-
Position the shoulder belt across the shoulder and chest with minimal, if any slack so that it is comfortable and not resting on your neck. The retractor will withdraw any slack in the shoulder belt.
-
To release the seat belt, push the red button on the buckle. The seat belt will automatically retract to its stowed position. If necessary, slide the latch plate down the webbing to allow the seat belt to retract fully.
SAFETY 171
Lap/ShoulderBeltUntwistingProcedure
Use the following procedure to untwist a twisted lap/shoulder belt.
- Position the latch plate as close as possible to the anchor point.
- At about 6 to 12 inches (15 to 30 cm) above the latch plate, grasp and twist the seat belt webbing 180 degrees to create a fold that begins immediately above the latch plate.
- Slide the latch plate upward over the folded webbing. The folded webbing must enter the slot at the top of the latch plate.
- Continue to slide the latch plate up until it clears the folded webbing and the seat belt is no longer twisted.
AdjustableUpperShoulderBeltAnchorage
In the driver and outboard front passenger seats, the top of the shoulder belt can be adjusted upward or downward to position the seat belt away from your neck. Push or squeeze the anchorage button to release the anchorage, and move it up or down to the position that serves you best.
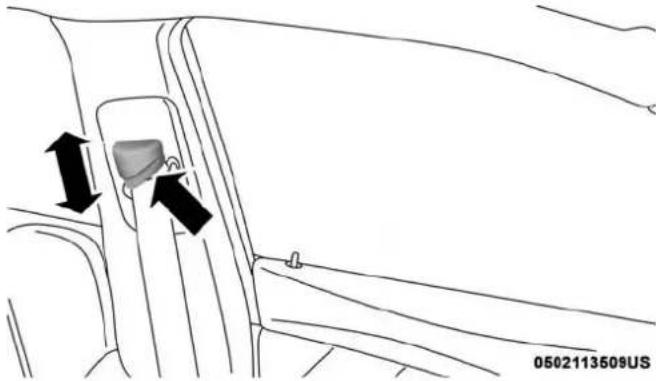
natural_image
Diagram of a car seatbelt with directional arrows indicating movement, no text or symbols presentAdjustableAnchorage
As a guide, if you are shorter than average, you will prefer the shoulder belt anchorage in a lower position, and if you are taller than average, you will prefer the shoulder belt anchorage in a higher position. After you release the anchorage button, try to move it up or down to make sure that it is locked in position.
172 SAFETY
NOTE: The adjustable upper shoulder belt anchorage is equipped with an Easy Up feature. This feature allows the shoulder belt anchorage to be adjusted in the upward position without pushing or squeezing the release button. To verify the shoulder belt anchorage is latched, pull downward on the shoulder belt anchorage until it is locked into position.
WARNING!
- Wearingyourseatbeltincorrectlycouldmakeyour injuriesinacollisionmuchworse.Youmightsuffer internalinjuries,oryoucouldevenslideoutofthe seatbelt.Followtheseinstructionstowearyourseat beltsafelyandtokeepyourpassengerssafe,too.
- Positiontheshoulderbeltacrosstheshoulderand chestwithminimal,ifanyslacksothatitiscomfortableandnotrestingonyourneck. Theretractorwill withdrawanyslackintheshoulderbelt.
- Misadjustmentoftheseatbeltcouldreducethe effectivenessofthesafetybeltinacrash.
- Alwaysmakeallseatbeltheightadjustmentswhen thevehicleisstationary.
SeatBeltExtender
If a seat belt is not long enough to fit properly, even when the webbing is fully extended and the adjustable upper shoulder belt anchorage (if equipped) is in its lowest position, an authorized dealer can provide you with a Seat Belt Extender. The Seat Belt Extender should be used only if the existing seat belt is not long enough. When the Seat Belt Extender is not required for a different occupant, it must be removed.
WARNING!
- ONLYuseaSeatBeltExtenderifitisphysically requiredinordertoproperlyfittheoriginalseatbelt system.DONOTUSEtheSeatBeltExtenderif, whenworn,thedistancebetweenthefrontedge of theSeatBeltExtenderbuckleandthecenterofthe occupant'sbodyisLESSthan6inches.
- UsingaSeatBeltExtenderwhennotneededcan increasetheriskofseriousinjuryordeathina collision.OnlyusetheSeatBeltExtenderwhenthe lapbeltisnotlongenoughandonlyuseinthe recommendedseatingpositions.Removeandstore theSeatBeltExtenderwhennotneeded.
SeatBeltsAndPregnantWomen
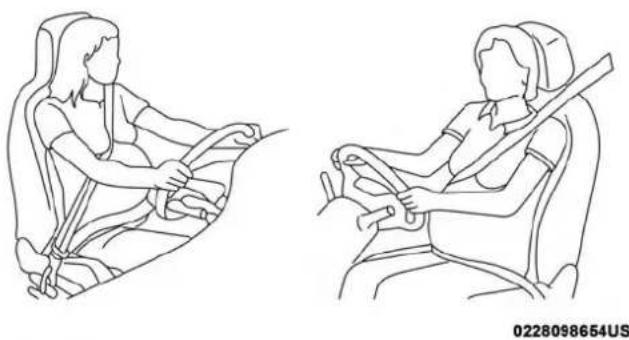
natural_image
Line drawings of a person seated in a car seat, showing two different positions (no text or symbols)PregnantWomenAndSeatBelts
Seat belts must be worn by all occupants including pregnant women: the risk of injury in the event of an accident is reduced for the mother and the unborn child if they are wearing a seat belt.
Position the lap belt snug and low below the abdomen and across the strong bones of the hips. Place the shoulder belt across the chest and away from the neck. Never place the shoulder belt behind the back or under the arm.
SeatBeltPretensioner
The front outboard seat belt system is equipped with pretensioning devices that are designed to remove slack from the seat belt in the event of a collision. These devices may improve the performance of the seat belt by removing slack from the seat belt early in a collision. Pretensioners work for all size occupants, including those in child restraints.
NOTE: These devices are not a substitute for proper seat belt placement by the occupant. The seat belt still must be worn snugly and positioned properly.
The pretensioners are triggered by the Occupant Restraint Controller (ORC). Like the air bags, the pretensioners are single use items. A deployed pretensioner or a deployed air bag must be replaced immediately.
EnergyManagementFeature
The front outboard seat belt system is equipped with an Energy Management feature that may help further reduce the risk of injury in the event of a collision. The seat belt system has a retractor assembly that is designed to release webbing in a controlled manner.
SwitchableAutomaticLockingRetractors(ALR)
The seat belts in the passenger seating positions are equipped with a Switchable Automatic Locking Retractor (ALR) which is used to secure a child restraint system. For additional information, refer to "Installing Child Restraints Using The Vehicle Seat Belt" under the "Child Restraints" section of this manual. The figure below illustrates the locking feature for each seating position.
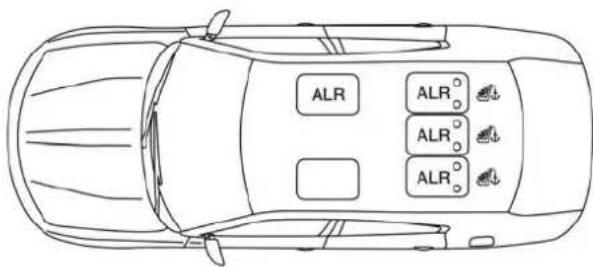
text_image
ALR ALR ALR ALR0502113727US
ALR—SwitchableAutomaticLockingRetractor
If the passenger seating position is equipped with an ALR and is being used for normal usage, only pull the seat belt webbing out far enough to comfortably wrap around the occupant's mid-section so as to not activate the ALR. If the ALR is activated, you will hear a clicking sound as the seat belt retracts. Allow the webbing to retract completely in this case and then carefully pull out only the amount of webbing necessary to comfortably wrap around the occupant's mid-section. Slide the latch plate into the buckle until you hear a "click."
In Automatic Locking Mode, the shoulder belt is automatically pre-locked. The seat belt will still retract to remove any slack in the shoulder belt. Use the Automatic Locking Mode anytime a child restraint is installed in a seating position that has a seat belt with this feature. Children 12 years old and under should always be properly restrained in the rear seat of a vehicle with a rear seat.
WARNING!
- Neverplacearear-facingchildrestraintinfrontofan airbag.Adeployingpassengerfrontairbagcan causedeathorseriousinjurytoachild12yearsor younger,includingachildinarear-facingchild restraint.
(Continued)
WARNING!(Continued)
- Neverinstallarear-facingchildrestraintinthefront seatofavehicle.Onlyusearear-facingchildrestraintintherearseat.Ifthevehicledoesnothavea rearseat,donottransportarear-facingchildrestraint inthatvehicle.
HowToEngageTheAutomaticLockingMode
- Buckle the combination lap and shoulder belt.
- Grasp the shoulder portion and pull downward until the entire seat belt is extracted.
- Allow the seat belt to retract. As the seat belt retracts, you will hear a clicking sound. This indicates the seat belt is now in the Automatic Locking Mode.
HowToDisengageTheAutomaticLockingMode
Unbuckle the combination lap/shoulder belt and allow it to retract completely to disengage the Automatic Locking Mode and activate the vehicle sensitive (emergency) locking mode.
WARNING!
- Theseatbeltassemblymustbereplacedifthe switchableAutomaticLockingRetractor(ALR)featureoranyotherseatbeltfunctionisnotworking properlywhencheckedaccordingtotheprocedures intheServiceManual.
- Failuretoreplacetheseatbeltassemblycouldincreaseetheriskofinjuryincollisions.
- DonotusetheAutomaticLockingModetorestrain occupantswhoarewearingtheseatbeltorchildren whoareusingboosterseats. Thelockedmodeisonly usedtoinstallrear-facingorforward-facingchild restraintsthathaveaharnessforrestrainingthe child.
Supplemental Restraint Systems (SRS)
Some of the safety features described in this section may be standard equipment on some models, or may be optional equipment on others. If you are not sure, ask an authorized dealer.
176 SAFETY
The air bag system must be ready to protect you in a collision. The Occupant Restraint Controller (ORC) monitors the internal circuits and interconnecting wiring associated with the electrical Air Bag System Components. Your vehicle may be equipped with the following Air Bag System Components:
AirBagSystemComponents
•Occupant Restraint Controller (ORC)
• Air Bag Warning Light
•Steering Wheel and Column
- Instrument Panel
- Knee Impact Bolsters
- Driver and Front Passenger Air Bags
- Seat Belt Buckle Switch
• Supplemental Side Air Bags
• Supplemental Knee Air Bags
•Front and Side Impact Sensors
- Seat Belt Pretensioners
- Seat Track Position Sensors
AirBagWarningLight

The ORC monitors the readiness of the electronic parts of the air bag system whenever the ignition switch is in the START or ON/RUN position. If the ignition switch is in the OFF position or in the
ACC position, the air bag system is not on and the air bags will not inflate.
The ORC contains a backup power supply system that may deploy the air bag system even if the battery loses power or it becomes disconnected prior to deployment.
The ORC turns on the Air Bag Warning Light in the instrument panel for approximately four to eight seconds for a self-check when the ignition switch is first in the ON/RUN position. After the self-check, the Air Bag Warning Light will turn off. If the ORC detects a malfunction in any part of the system, it turns on the Air Bag Warning Light, either momentarily or continuously. A single chime will sound to alert you if the light comes on again after initial startup.
The ORC also includes diagnostics that will illuminate the instrument panel Air Bag Warning Light if a malfunction is detected that could affect the air bag system. The diagnostics also record the nature of the malfunction. While the air
bag system is designed to be maintenance free, if any of the following occurs, have an authorized dealer service the air bag system immediately.
- The Air Bag Warning Light does not come on during the four to eight seconds when the ignition switch is first in the ON/RUN position.
- The Air Bag Warning Light remains on after the four to eight-second interval.
- The Air Bag Warning Light comes on intermittently or remains on while driving.
NOTE: If the speedometer, tachometer, or any engine related gauges are not working, the Occupant Restraint Controller (ORC) may also be disabled. In this condition the air bags may not be ready to inflate for your protection. Have an authorized dealer service the air bag system immediately.
WARNING!
IgnoringtheAirBagWarningLightinyourinstrument panelcouldmeanyouwon'thavetheairbagsystemto
(Continued)
WARNING!(Continued)
protectyouinacollision.Ifthelightdoesnotcomeon asabulbcheckwhentheignitionisfirstturnedon, staysonafteryoustartthevehicle,orifitcomesonas youdrive,haveanauthorizeddealerservicetheairbag systemimmediately.
RedundantAirBagWarningLight

If a fault with the Air Bag Warning Light is detected, which could affect the Supplemental Restraint System (SRS), the Redundant Air Bag Warning Light will illuminate on the instrument panel. The Redundant Air Bag Warning Light will stay on until the fault is cleared. In addition, a single chime will sound to alert you that the Redundant Air Bag Warning Light has come on and a fault has been detected. If the Redundant Air Bag Warning Light comes on intermittently or remains on while driving have an authorized dealer service the vehicle immediately.
For additional information regarding the Redundant Air Bag Warning Light refer to "Getting To Know Your Instrument Panel" section of this manual.
178 SAFETY
FrontAirBags
This vehicle has front air bags and lap/shoulder belts for both the driver and front passenger. The front air bags are a supplement to the seat belt restraint systems. The driver front air bag is mounted in the center of the steering wheel. The passenger front air bag is mounted in the instrument panel, above the glove compartment. The words "SRS AIRBAG" or "AIRBAG" are embossed on the air bag covers.
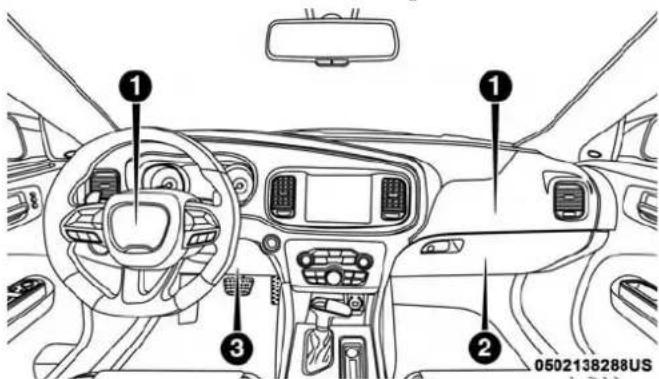
text_image
Diagram of a car interior with numbered components and US vehicle model labelFrontAirBag/KneeBolsterLocations
1 — Driver And Passenger Front Air Bags
2 — Passenger Knee Impact Bolster
3 — Driver Knee Impact Bolster/Supplemental Driver Knee Air Bag
WARNING!
- Beingtooclosetothesteeringwheelorinstrument panelduringfrontairbagdeploymentcouldcause seriousinjury,includingdeath.Airbagsneedroom toinflate.Sitback,comfortablyextendingyourarms toreachthesteeringwheelorinstrumentpanel.
- Neverplacearear-facingchildrestraintinfrontofan airbag.Adeployingpassengerfrontairbagcan causedeathorseriousinjurytoachild12yearsor younger,includingachildinarear-facingchild restraint.
- Neverinstallarear-facingchildrestraintinthefront seatofvehicle.Onlyusearear-facingchildrestraintintherearseat.Ifthevehicledoesnothavea rearseat,donottransportarear-facingchildrestraint inthatvehicle.
DriverAndPassengerFrontAirBagFeatures
The Advanced Front Air Bag system has multistage driver and front passenger air bags. This system provides output appropriate to the severity and type of collision as determined by the Occupant Restraint Controller (ORC), which may receive information from the front impact sensors (if equipped) or other system components.
The first stage inflator is triggered immediately during an impact that requires air bag deployment. A low energy output is used in less severe collisions. A higher energy output is used for more severe collisions.
This vehicle may be equipped with a driver and/or front passenger seat belt buckle switch that detects whether the driver or front passenger seat belt is buckled. The seat belt buckle switch may adjust the inflation rate of the Advanced Front Air Bags.
This vehicle may be equipped with driver and/or front passenger seat track position sensors that may adjust the inflation rate of the Advanced Front Air Bags based upon seat position.
WARNING!
- Noobjectsshouldbeplacedoverorneartheairbag ontheinstrumentpanelorsteeringwheelbecause anysuchobjectscouldcauseharmifthevehicleisin acollisionsevereenoughtocausetheairbagto inflate.
- Donotputanythingonoraroundtheairbagcovers orattempttoopenthemmanually.Youmaydamage
| WARNING!(Continued) |
| theairbagsandyoucouldbeinjuredbecausetheair bagsmaynolongerbefunctional.Theprotective coversfortheairbagcushionsaredesignedtoopen onlywhentheairbagsareinflating.·Relyingontheairbagsalonecouldleadtomore severeinjuriesinacollision.Theairbagsworkwith yourseatbelttorestrainyouproperly.Insome collisions,airbagswon’tdeployatall.Alwayswear yourseatbeltseventhoughyouhaveairbags. |
FrontAirBagOperation
Front Air Bags are designed to provide additional protection by supplementing the seat belts. Front air bags are not expected to reduce the risk of injury in rear, side, or rollover collisions. The front air bags will not deploy in all frontal collisions, including some that may produce substantial vehicle damage — for example, some pole collisions, truck underrides, and angle offset collisions.
On the other hand, depending on the type and location of impact, front air bags may deploy in crashes with little vehicle front-end damage but that produce a severe initial deceleration.
(Continued)
Because air bag sensors measure vehicle deceleration over time, vehicle speed and damage by themselves are not good indicators of whether or not an air bag should have deployed.
Seat belts are necessary for your protection in all collisions, and also are needed to help keep you in position, away from an inflating air bag.
When the ORC detects a collision requiring the front air bags, it signals the inflator units. A large quantity of non-toxic gas is generated to inflate the front air bags.
The steering wheel hub trim cover and the upper passenger side of the instrument panel separate and fold out of the way as the air bags inflate to their full size. The front air bags fully inflate in less time than it takes to blink your eyes. The front air bags then quickly deflate while helping to restrain the driver and front passenger.
KneeImpactBolsters
The Knee Impact Bolsters help protect the knees of the driver and front passenger, and position the front occupants for improved interaction with the front air bags.
WARNING!
- Donotdrill, cut, ortamper with the knee impact bolstersinanyway.
- Donotmountanyaccessoriestothekneeimpact bolsterssuchasalarmlights, stereos, citizenband radios, etc.
SupplementalDriverKneeAirBag
This vehicle is equipped with a Supplemental Driver Knee Air Bag mounted in the instrument panel below the steering column. The Supplemental Driver Knee Air Bag provides enhanced protection during a frontal impact by working together with the seat belts, pretensioners, and front air bags.
SupplementalSideAirBags
SupplementalSeat-MountedSideAirBags(SABs)
This vehicle is equipped with Supplemental Seat-Mounted Side Air Bags (SABs).
Supplemental Seat-Mounted Side Air Bags (SABs) are located in the outboard side of the front seats. The SABs are marked with "SRS AIRBAG" or "AIRBAG" on a label or on the seat trim on the outboard side of the seats.
The SABs may help to reduce the risk of occupant injury during certain side impacts, in addition to the injury reduction potential provided by the seat belts and body structure.
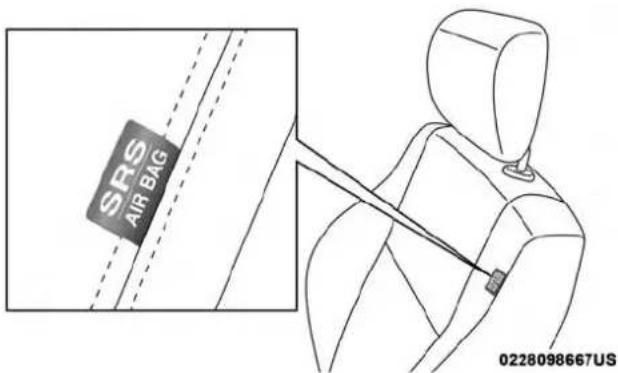
text_image
SRS AIR BAG 0228098667USFrontSupplementalSeat-MountedSideAirBagLabel
When the SAB deploys, it opens the seam on the outboard side of the seatback's trim cover. The inflating SAB deploys through the seat seam into the space between the occupant and the door. The SAB moves at a very high speed and with such a high force that it could injure occupants if they are not seated properly, or if items are positioned in the area where the SAB inflates. Children are at an even greater risk of injury from a deploying air bag.
182 SAFETY
WARNING!
Donotuseaccessoryseatcoversorplaceobjects betweenyouandtheSideAirBags;theperformance couldbeadverselyaffectedand/orobjectscouldbe pushedintoyou,causingseriousinjury.
SupplementalSideAirBagInflatableCurtains(SABICs)
This vehicle is equipped with Supplemental Side Air Bag Inflatable Curtains (SABICs).
Supplemental Side Air Bag Inflatable Curtains (SABICs) are located above the side windows. The trim covering the SABICs is labeled "SRS AIRBAG" or "AIRBAG."
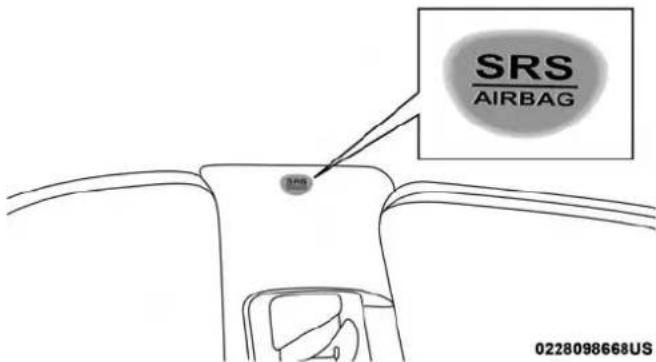
text_image
SRS AIRBAG 0228098668USSupplementalSideAirBagInflatableCurtain(SABIC) LabelLocation
SABICs may help reduce the risk of head and other injuries to front and rear seat outboard occupants in certain side impacts, in addition to the injury reduction potential provided by the seat belts and body structure.
The SABIC deploys downward, covering the side windows. An inflating SABIC pushes the outside edge of the headliner out of the way and covers the window.
The SABICs inflate with enough force to injure occupants if they are not belted and seated properly, or if items are positioned in the area where the SABICs inflate. Children are at an even greater risk of injury from a deploying air bag.
The SABICs may help reduce the risk of partial or complete ejection of vehicle occupants through side windows in certain side impact events.
WARNING!
- Donotmountequipment,orstackluggageorother cargouphighenoughtoblockthedeploymentofthe SABICs. Thetrimcoveringabovethesidewindows wheretheSABICanditsdeploymentpatharelocatedshouldremainfreefromanyobstructions.
- InorderfortheSABICstoworkasintended, donot installanyaccessoryitemsinyourvehiclewhich couldaltertheroof.Donotaddanaftermarket sunrooftoyourvehicle.Donotaddroofracksthat requirepermanentattachments(boltsorscrews)for installationonthevehicleroof.Donotdrillintothe roofofthevehicleforanyreason.
SideImpacts
The Side Air Bags are designed to activate in certain side impacts. The Occupant Restraint Controller (ORC) determines whether the deployment of the Side Air Bags in a particular impact event is appropriate, based on the severity and type of collision. The side impact sensors aid the ORC in determining the appropriate response to impact events. The system is calibrated to deploy the Side Air Bags on the impact side of the vehicle during impacts that require Side Air Bag occupant protection. In side impacts, the Side Air Bags deploy independently; a left side impact deploys the left Side Air Bags only and a right-side impact deploys the right Side Air Bags only. Vehicle damage by itself is not a good indicator of whether or not Side Air Bags should have deployed.
The Side Air Bags will not deploy in all side collisions, including some collisions at certain angles, or some side collisions that do not impact the area of the passenger compartment. The Side Air Bags may deploy during angled or offset frontal collisions where the front air bags deploy.
184 SAFETY
Side Air Bags are a supplement to the seat belt restraint system. Side Air Bags deploy in less time than it takes to blink your eyes.
WARNING!
- Occupants, including children, who are up against very closeto Side Air Bags can be seriously injured or killed. Occupants, including children, should never lean onorsleep against the door, sidewindows, or are a where the side air bags inflate, even if they are in an infant or child restraint.
- Seatbelts(and childrestraintswhereappropriate) are necessary for your protection in all collisions. They also help keep you in position, away from an inflating Side Air Bag. To get the best protection from the Side Air Bags, occupants must wear their seat belts properly and sit upright with their backs against these seats. Children must be properly restrained in child restraint or booster seat that is appropriate for the size of the child.
WARNING!
- SideAirBagsneedroomtoinflate.Donotlean againstthedoororwindow.Situprightinthecenter oftheseat.
- BeingtooclosetotheSideAirBagsduringdeploymentcouldcauseyoutobeseverelyinjuredorkilled.
- RelyingontheSideAirBagsalonecouldleadto moresevereinjuriesinacollision.TheSideAirBags workwithyourseatbelttorestrainyouproperly.In somecollisions,SideAirBagswon'tdeployatall. Alwayswearyourseatbelteventhoughyouhave SideAirBags.
NOTE: Air bag covers may not be obvious in the interior trim, but they will open during air bag deployment.
RolloverEvents
Side Air Bags are designed to activate in certain rollover events. The ORC determines whether the deployment of the Side Air Bags in a particular rollover event is appropriate, based on the severity and type of collision. Vehicle damage by itself is not a good indicator of whether or not Side Air Bags should have deployed.
The Side Air Bags will not deploy in all rollover events. The rollover sensing system determines if a rollover event may be in progress and whether deployment is appropriate. In the event the vehicle experiences a rollover or near rollover event, and deployment of the Side Air Bags is appropriate, the rollover sensing system will also deploy the seat belt pretensioners on both sides of the vehicle.
The SABICs may help reduce the risk of partial or complete ejection of vehicle occupants through side windows in certain rollover or side impact events.
AirBagSystemComponents
NOTE: The Occupant Restraint Controller (ORC) monitors the internal circuits and interconnecting wiring associated with electrical Air Bag System Components listed below:
•Occupant Restraint Controller (ORC)
• Air Bag Warning Light
•Steering Wheel and Column
- Instrument Panel
- Knee Impact Bolsters
- Driver and Front Passenger Air Bags
- Seat Belt Buckle Switch
• Supplemental Side Air Bags
• Supplemental Knee Air Bags
• Front and Side Impact Sensors
- Seat Belt Pretensioners
- Seat Track Position Sensors
IfADeploymentOccurs
The front air bags are designed to deflate immediately after deployment.
NOTE: Front and/or side air bags will not deploy in all collisions. This does not mean something is wrong with the air bag system.
If you do have a collision which deploys the air bags, any or all of the following may occur:
- The air bag material may sometimes cause abrasions and/or skin reddening to the occupants as the air bags deploy and unfold. The abrasions are similar to friction rope burns or those you might get sliding along a carpet or gymnasium floor. They are not caused by contact with chemicals. They are not permanent and normally heal quickly. However, if you haven't healed significantly within a few days, or if you have any blistering, see your doctor immediately.
- As the air bags deflate, you may see some smoke-like particles. The particles are a normal by-product of the process that generates the non-toxic gas used for air bag inflation. These airborne particles may irritate the skin, eyes, nose, or throat. If you have skin or eye irritation, rinse the area with cool water. For nose or throat irritation, move to fresh air. If the irritation continues, see your doctor. If these particles settle on your clothing, follow the garment manufacturer's instructions for cleaning.
Do not drive your vehicle after the air bags have deployed. If you are involved in another collision, the air bags will not be in place to protect you.
WARNING!
Deployedairbagsandseatbeltpretensionerscannot protectyouinanothercollision.Havetheairbags,seat beltpretensioners,andtheseatbeltretractorassembliesreplacedbyanauthorizeddealerimmediately. Also,havetheOccupantRestraintControllerSystem servicedaswell.
NOTE:
- Air bag covers may not be obvious in the interior trim, but they will open during air bag deployment.
- After any collision, the vehicle should be taken to an authorized dealer immediately.
EnhancedAccidentResponseSystem
In the event of an impact, if the communication network remains intact, and the power remains intact, depending on the nature of the event, the ORC will determine whether to have the Enhanced Accident Response System perform the following functions:
- Cut off fuel to the engine (If Equipped)
- Cut off battery power to the electric motor (If Equipped)
- Flash hazard lights as long as the battery has power
- Turn on the interior lights, which remain on as long as the battery has power or for 15 minutes from the intervention of the Enhanced Accident Response System.
- Unlock the power door locks.
Your vehicle may also be designed to perform any of these other functions in response to the Enhanced Accident Response System:
- Turn off the Fuel Filter Heater, Turn off the HVAC Blower Motor, Close the HVAC Circulation Door
- Cut off battery power to the:
•Engine
• Electric Motor (if equipped)
• Electric power steering
- Brake booster
• Electric park brake
•Automatic transmission gear selector
• Horn
- Front wiper
•Headlamp washer pump
NOTE: After an accident, remember to cycle the ignition to the STOP (OFF/LOCK) position and remove the key from the ignition switch to avoid draining the battery. Carefully check the vehicle for fuel leaks in the engine compartment and on the ground near the engine compartment and fuel tank before resetting the system and starting the engine. If there are no fuel leaks or damage to the vehicle electrical devices (e.g. headlights) after an accident, reset the system by following the procedure described below. If you have any doubt, contact an authorized dealer.
EnhancedAccidentResponseSystemResetProcedure
In order to reset the Enhanced Accident Response System functions after an event, the ignition switch must be changed from ignition START or ON/RUN to ignition OFF. Carefully check the vehicle for fuel leaks in the engine compartment and on the ground near the engine compartment and fuel tank before resetting the system and starting the engine.
MaintainingYourAirBagSystem
WARNING!
- Modificationstoanypartoftheairbagsystemcould causeittofailwhenyouneedit.Youcouldbe injurediftheairbagsystemisnottheretoprotect you.Donotmodifythecomponentsorwiring,includingaddinganykindofbadgesorstickerstothe steeringwheelhubtrimcoverortheupperpassenger sideoftheinstrumentpanel.Donotmodifythefront bumper,vehiclebodystructure,oraddaftermarket sidestepsorrunningboards.
(Continued)
WARNING!(Continued)
- Itisdangeroustotrytorepairanypartoftheairbag systemyourself.Besuretotellanyonewhoworkson yourvehiclethatithasanairbagsystem.
- Donotattempttomodifyanypartofyourairbag system. The airbag may inflate accidentally or may not function properly if modifications are made. Take your vehicle to an authorized dealer for any air bags systems service. If your seat, including your trim cover and cushion, need to be serviced in any way (including removal loosening / tightening of seat attachment bolts), take the vehicle to an authorized dealer. Only manufacturer approved seat accessories maybe used. If it is necessary to modify the airbag system for persons with disabilities, contact an authorized dealer.
EventDataRecorder(EDR)
This vehicle is equipped with an event data recorder (EDR). The main purpose of an EDR is to record, in certain crash or near crash-like situations, such as an air bag deployment or hitting a road obstacle, data that will assist in understanding how a vehicle's systems performed. The EDR is designed to record data related to vehicle dynamics
and safety systems for a short period of time, typically 30 seconds or less. The EDR in this vehicle is designed to record such data as:
- How various systems in your vehicle were operating;
- Whether or not the driver and passenger safety belts were buckled/fastened;
- How far (if at all) the driver was depressing the accelerator and/or brake pedal; and,
- How fast the vehicle was traveling.
These data can help provide a better understanding of the circumstances in which crashes and injuries occur.
NOTE:EDR data are recorded by your vehicle only if a non-trivial crash situation occurs; no data are recorded by the EDR under normal driving conditions and no personal data (e.g., name, gender, age, and crash location) are recorded. However, other parties, such as law enforcement, could combine the EDR data with the type of personally identifying data routinely acquired during a crash investigation.
To read data recorded by an EDR, special equipment is required, and access to the vehicle or the EDR is needed. In addition to the vehicle manufacturer, other parties, such as
law enforcement, that have the special equipment, can read the information if they have access to the vehicle or the EDR.
Child Restraints
Everyone in your vehicle needs to be buckled up at all times, including babies and children. Every state in the United States, and every Canadian province, requires that small children ride in proper restraint systems. This is the law, and you can be prosecuted for ignoring it.
Children 12 years or younger should ride properly buckled up in a rear seat, if available. According to crash statistics, children are safer when properly restrained in the rear seats rather than in the front.
WARNING!
Inacollision, an unrestrained child can become a projectile inside the vehicle. The forcerequired to hold even an infant on your lap could become so great that you could no hold the child, nomatter how strong you are. The child and others could be badly injured or killed. Any child riding in your vehicles should be a proper restraint for the child's size.
There are different sizes and types of restraints for children from newborn size to the child almost large enough for an adult safety belt. Always check the child seat Owner's Manual to make sure you have the correct seat for your child. Carefully read and follow all the instructions and warnings in the child restraint Owner's Manual and on all the labels attached to the child restraint.
Before buying any restraint system, make sure that it has a label certifying that it meets all applicable Safety Standards. You should also make sure that you can install it in the vehicle where you will use it.
NOTE:
- For additional information, refer to http://www.nhtsa.gov/parents-and-caregivers or call: 1-888-327-4236
- Canadian residents should refer to Transport Canada's website for additional information: http://www.tc.gc.ca/eng/motorvehiclesafety/safedrivers-childsafety-index-53.htm
SummaryOfRecommendationsForRestrainingChildrenInVehicles
| ChildSize,Height,WeightOrAge | RecommendedTypeOfChildRestraint | |
| Infants and Toddlers Children who are two years old or younger and who have not reached the height or weight limits of their child restraint | Either an Infant Carrier or a Convertible Child Restraint, facing rearward in a rear seat of the vehicle | |
| Small Children Children who are at least two years old or who have outgrown the height or weight limit of their rear-facing child restraint | Forward-Facing Child Restraint with a five-point Harness, facing forward in a rear seat of the vehicle | |
| Larger Children Children who have outgrown their forward-facing child restraint, but are too small to properly fit the vehicle's seat belt | Belt Positioning Booster Seat and the vehicle seat belt, seated in a rear seat of the vehicle | |
| Children Too Large for Child Restraints | Children 12 years old or younger, who have outgrown the height or weight limit of their booster seat | Vehicle Seat Belt, seated in a rear seat of the vehicle |
InfantAndChildRestraints
Safety experts recommend that children ride rear-facing in the vehicle until they are two years old or until they reach either the height or weight limit of their rear-facing child restraint. Two types of child restraints can be used rear-facing: infant carriers and convertible child seats.
The infant carrier is only used rear-facing in the vehicle. It is recommended for children from birth until they reach the weight or height limit of the infant carrier. Convertible child seats can be used either rear-facing or forward-facing in the vehicle. Convertible child seats often have a higher weight limit in the rear-facing direction than infant carriers do, so they can be used rear-facing by children who have outgrown their infant carrier but are still less than at least two years old. Children should remain rear-facing until they reach the highest weight or height allowed by their convertible child seat.
WARNING!
- Neverplacearear-facingchildrestraintinfrontofanair bag.Adeployingpassengerfrontairbagcancause deathorseriousinjurytoachild12yearsoryounger, includingachildinarear-facingchildrestraint.
(Continued)
WARNING!(Continued)
- Neverinstallarear-facingchildrestraintinthefront seatofavehicle.Onlyusearear-facingchildrestraintintherearseat.Ifthevehicledoesnothavea rearseat,donottransportarear-facingchildrestraint inthatvehicle.
OlderChildrenAndChildRestraints
Children who are two years old or who have outgrown their rear-facing convertible child seat can ride forward-facing in the vehicle. Forward-facing child seats and convertible child seats used in the forward-facing direction are for children who are over two years old or who have outgrown the rear-facing weight or height limit of their rear-facing convertible child seat. Children should remain in a forward-facing child seat with a harness for as long as possible, up to the highest weight or height allowed by the child seat.
All children whose weight or height is above the forward-facing limit for the child seat should use a belt-positioning booster seat until the vehicle's seat belts fit properly. If the child cannot sit with knees bent over the vehicle's seat cushion while the child's back is against the seatback, they
192 SAFETY
should use a belt-positioning booster seat. The child and belt-positioning booster seat are held in the vehicle by the seat belt.
WARNING!
- Improperinstallationcanleadtofailureofaninfant orchidrestraint.Itcouldcomelooseinacollision. Thechildcouldbebadlyinjuredorkilled.Follow thechildrestraintmanufacturer'sdirectionsexactly wheninstallinganinfantorchildrestraint.
- Afterachildrestraintisinstalledinthevehicle,do notmovethevehicleseatforwardorrearwardbecauseitcanloosenthechildrestraintattachments. Removethechildrestraintbeforeadjustingthevehicleseatposition.Whenthevehicleseathasbeen adjusted,reinstallthechildrestraint.
- When your child restraint is not in use, secure it in the vehicle with these seat belt or LATCH anchorages, or remove it from the vehicle. Don't leave it loose in the vehicle. In sudden stop or accident, it could strik the occupants or seat backs and causes serious personal injury.
ChildrenTooLargeForBoosterSeats
Children who are large enough to wear the shoulder belt comfortably, and whose legs are long enough to bend over the front of the seat when their back is against the seatback, should use the seat belt in a rear seat. Use this simple 5-step test to decide whether the child can use the vehicle's seat belt alone:
- Can the child sit all the way back against the back of the vehicle seat?
- Do the child's knees bend comfortably over the front of the vehicle seat – while the child is still sitting all the way back?
- Does the shoulder belt cross the child's shoulder between the neck and arm?
- Is the lap part of the belt as low as possible, touching the child's thighs and not the stomach?
- Can the child stay seated like this for the whole trip?
If the answer to any of these questions was “no,” then the child still needs to use a booster seat in this vehicle. If the child is using the lap/shoulder belt, check seat belt fit periodically and make sure the seat belt buckle is latched. A child’s squirming or slouching can move the belt out of position. If the shoulder belt contacts the face or neck, move the child closer to the center of the vehicle, or use a booster seat to position the seat belt on the child correctly.
| WARNING! |
| Neverallowachildtoputtheshoulderbeltunderan armorbehindtheirback.Inacrash,theshoulderbelt willnotprotectachildproperly,whichmayresultin seriousinjuryordeath.Achildmustalwayswearboth thelapandshoulderportionsoftheseatbeltcorrectly. |
RecommendationsForAttachingChildRestraints
| RestraintTypeCombined | UseAnyAttachmentMethodShownWithAn“X”Below | |||
| LATCH-Lower AnchorsOnly | SeatBeltOnlyLATCH-Lower Anchors+Top TetherAnchor | SeatBelt+Top TetherAnchor | ||
| Rear-Facing Child Restraint | Up to 65 lbs (29.5 kg) | X | X | |
| Rear-Facing Child Restraint | More than 65 lbs (29.5 kg) | X | ||
| Forward-Facing Child Restraint | Up to 65 lbs (29.5 kg) | X | ||
| Forward-Facing Child Restraint | More than 65 lbs (29.5 kg) | X | ||
194 SAFETY
LowerAnchorsAndTethersForCHILDREN(LATCH) RestraintSystem
text_image
Anchor, Tether. LATCH The next generation of child safety.022668173
LATCHLabel
Your vehicle is equipped with the child restraint anchorage system called LATCH, which stands for Lower Anchors and Tethers for CHildren. The LATCH system has three vehicle anchor points for installing LATCH-equipped child seats. There are two lower anchorages located at the back of the seat cushion where it meets the seatback and one top tether anchorage located behind the seating position. These anchorages are used to install LATCH-equipped child seats without using the vehicle's seat belts. Some seating positions may have a top tether anchorage but no lower anchorages. In these
seating positions, the seat belt must be used with the top tether anchorage to install the child restraint. Please see the following table for more information.
LATCHPositionsForInstallingChildRestraintsIn ThisVehicle
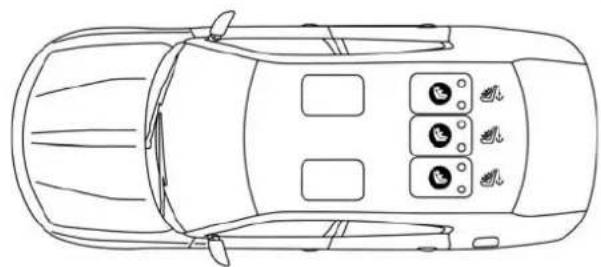
natural_image
Top-down line drawing of a car showing front, rear, and side views with no text or symbols0502113726US
LATCHPositionsForInstallingChildRestraintsInThis Vehicle
Lower Anchorage Symbol (2 Anchorage Per Seating Position)
Top Tether Anchorage Symbol
SAFETY 195
| FrequentlyAskedQuestionsAboutInstallingChildRestraintsWithLATCH | ||
| What is the weight limit (child's weight + weight of the child restraint) for using the LATCH anchorage system to attach the child restraint? | 65 lbs (29.5 kg) | Use the LATCH anchorage system until the combined weight of the child and the child restraint is 65 lbs (29.5 kg). Use the seat belt and tether anchor instead of the LATCH system once the combined weight is more than 65 lbs (29.5 kg). |
| Can the LATCH anchorages and the seat belt be used together to attach a rear-facing or forward-facing child restraint? | No Do not use the seat belt when you use the LATCH anchorage system to attach a rear-facing or forward-facing child restraint. Booster seats may be attached to the LATCH anchorages if allowed by the booster seat manufacturer. See your booster seat owner's manual for more information. | |
| Can two child restraints be attached using a common lower LATCH anchorage? | No Never "share" a LATCH anchorage with two or more child restraints. If the center position does not have dedicated LATCH lower anchorages, use the seat belt to install a child seat in the center position next to a child seat using the LATCH anchorages in an outboard position. | |
| Can the rear-facing child restraint touch the back of the front passenger seat? | Yes The child seat may touch the back of the front passenger seat if the child restraint manufacturer also allows contact. See your child restraint owner's manual for more information. | |
| Can the rear head restraints be removed? | No | |
196 SAFETY
LocatingTheLATCHAnchorage

The lower anchorages are round bars that are found at the rear of the seat cushion where it meets the seatback, below the anchorage symbols on the seatback. They are just visible when you lean into the rear seat to install the child restraint. You will easily feel them if you run your finger along the gap between the seatback and seat cushion.
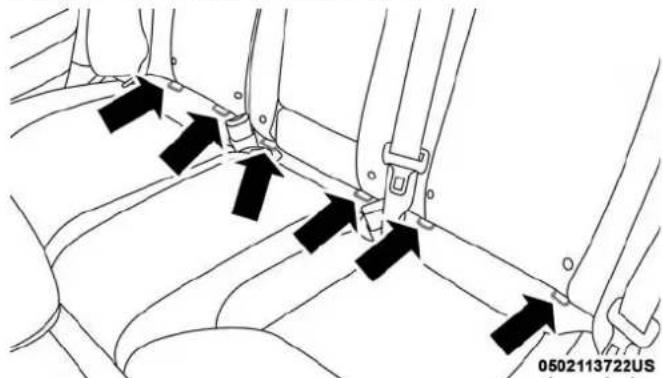
text_image
0502113722USLATCHAnchorage
LocatingTheUpperTetherAnchorage

There are tether strap anchorages behind each rear seating position located in the panel between the rear seatback and the rear window. They are found under a plastic cover with the tether anchorage symbol on it.
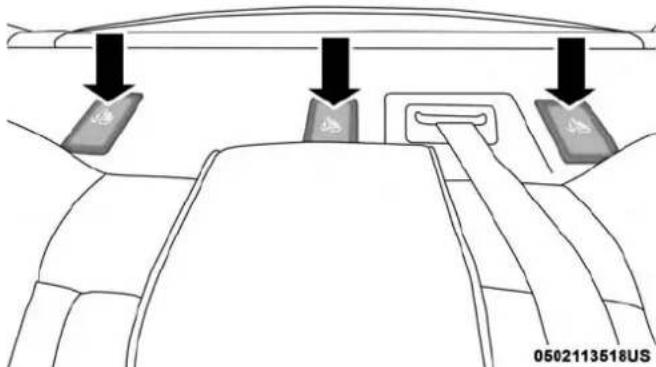
text_image
0502113518USTetherStrapAnchorage
LATCH-compatible child restraint systems will be equipped with a rigid bar or a flexible strap on each side.
Each will have a hook or connector to attach to the lower anchorage and a way to tighten the connection to the anchorage. Forward-facing child restraints and some rear-facing child restraints will also be equipped with a tether strap. The tether strap will have a hook at the end to attach to the top tether anchorage and a way to tighten the strap after it is attached to the anchorage.
CenterSeatLATCH
If a child restraint installed in the center position blocks the seat belt webbing or buckle for the outboard position, do not use that outboard position. If a child seat in the center position blocks the outboard LATCH anchors or seat belt, do not install a child seat in that outboard position.
WARNING!
Neverusethesameloweranchoragetoattachmore thanonechildrestraint.Pleasereferto"ToInstallALATCH-CompatibleChildRestraint"fortypicalinstallationinstructions.
Alwaysfollowthedirectionsofthechildrestraintmanufacturerwheninstallingyourchildrestraint.Notallchild restraintsystemswillbeinstalledasdescribedhere.
ToInstallALATCH-CompatibleChildRestraint
If the selected seating position has a Switchable Automatic Locking Retractor (ALR) seat belt, stow the seat belt, following the instructions below. See the section "Installing Child Restraints Using the Vehicle Seat Belt" to check what type of seat belt each seating position has.
- Loosen the adjusters on the lower straps and on the tether strap of the child seat so that you can more easily attach the hooks or connectors to the vehicle anchorages.
- Place the child seat between the lower anchorages for that seating position. For some second row seats, you may need to recline the seat and / or raise the head restraint (if adjustable) to get a better fit. If the rear seat can be moved forward and rearward in the vehicle, you may wish to move it to its rear-most position to make room for the child seat. You may also move the front seat forward to allow more room for the child seat.
-
Attach the lower hooks or connectors of the child restraint to the lower anchorages in the selected seating position.
-
If the child restraint has a tether strap, connect it to the top tether anchorage. See the section "Installing Child Restraints Using the Top Tether Anchorage" for directions to attach a tether anchor.
- Tighten all of the straps as you push the child restraint rearward and downward into the seat. Remove slack in the straps according to the child restraint manufacturer's instructions.
- Test that the child restraint is installed tightly by pulling back and forth on the child seat at the belt path. It should not move more than 1 inch (25.4 mm) in any direction.
HowToStowAnUnusedSwitchable-ALR(ALR) SeatBelt:
When using the LATCH attaching system to install a child restraint, stow all ALR seat belts that are not being used by other occupants or being used to secure child restraints. An unused belt could injure a child if they play with it and accidentally lock the seat belt retractor. Before installing a child restraint using the LATCH system, buckle the seat belt behind the child restraint and out of the child's reach. If the buckled seat belt interferes with the child restraint installation, instead of buckling it behind the child restraint, route the seat belt through the child restraint belt path and then buckle it. Do not lock the seat belt. Remind all children in the vehicle that the seat belts are not toys and that they should not play with them.
WARNING!
- Improperinstallationofachildrestrainttothe LATCHanchoragescanleadtofailureofthere-straint.Thechildcouldbebadlyinjuredorkilled. Followthechildrestraintmanufacturer'sdirections exactlywheninstallinganinfantorchildrestraint.
- Childrestraintanchoragesaredesignedtowithstand onlythoseloadsimposed by correctly-fittedchild restraints.Undernocircumstancesaretheytobe usedforadultseatbelts,harnesses,orforattaching otheritemsorequipmenttothevehicle.
InstallingChildRestraintsUsingTheVehicleSeat Belt
Child restraint systems are designed to be secured in vehicle seats by lap belts or the lap belt portion of a lap/shoulder belt.
WARNING!
- Improperinstallationorfailuretoproperlysecurea childrestraintcanleadtofailureoftherestraint.The childcouldbebadlyinjuredorkilled.
- Follow the child restraint manufacturer's directions exactly when installing an infant or child restraint.
The seat belts in the passenger seating positions are equipped with a Switchable Automatic Locking Retractor (ALR) that is designed to keep the lap portion of the seat belt tight around the child restraint so that it is not necessary to use a locking clip. The ALR retractor can be “switched” into a locked mode by pulling all of the webbing out of the retractor and then letting the webbing retract back into the retractor. If it is locked, the ALR will make a clicking noise while the webbing is pulled back into the retractor.
Refer to the “Automatic Locking Mode” description in “Switchable Automatic Locking Retractors (ALR)” under “Occupant Restraint Systems” for additional information on ALR.
Please see the table below and the following sections for more information.
Lap/ShoulderBeltSystemsForInstallingChild RestraintsInThisVehicle

text_image
ALR ALR° ALR° ALR°0502113727US
AutomaticLockingRetractor(ALR)Locations
ALR = Switchable Automatic Locking Retractor Top Tether Anchorage Symbol
200 SAFETY
| FrequentlyAskedQuestionsAboutInstallingChildRestraintsWithSeatBelts | ||
| What is the weight limit (child's weight + weight of the child restraint) for using the Tether Anchor with the seat belt to attach a forward facing child restraint? | Weight limit of the Child Restraint Always use the tether anchor when using the seat belt to install a forward facing child restraint, up to the recommended weight limit of the child restraint. | |
| Can the rear-facing child restraint touch the back of the front passenger seat? | Yes Contact between the front passenger seat and the child restraint is allowed, if the child restraint manufacturer also allows contact. | |
| Can the rear head restraints be removed? | No | |
| Can the buckle stalk be twisted to tighten the seat belt against the belt path of the child restraint? | No Do not twist the buckle stalk in a seating position with an ALR retractor. | |
InstallingAChildRestraintWithASwitchable AutomaticLockingRetractor(ALR):
Child restraint systems are designed to be secured in vehicle seats by lap belts or the lap belt portion of a lap/shoulder belt.
WARNING!
- Improperinstallationorfailuretoproperlysecurea childrestraintcanleadtofailureoftherestraint.The childcouldbebadlyinjuredorkilled.
-
Follow the child restraint manufacturer's directions exactly when installing an infant or child restraint.
-
Place the child seat in the center of the seating position. For some second row seats, you may need to recline the seat and/or raise the head restraint (if adjustable) to get a better fit. If the rear seat can be moved forward and rearward in the vehicle, you may wish to move it to its rear-most position to make room for the child seat. You may also move the front seat forward to allow more room for the child seat.
- Pull enough of the seat belt webbing from the retractor to pass it through the belt path of the child restraint. Do not twist the belt webbing in the belt path.
- Slide the latch plate into the buckle until you hear a "click."
- Pull on the webbing to make the lap portion tight against the child seat.
-
To lock the seat belt, pull down on the shoulder part of the belt until you have pulled all the seat belt webbing out of the retractor. Then, allow the webbing to retract back into the retractor. As the webbing retracts, you will hear a clicking sound. This means the seat belt is now in the Automatic Locking mode.
-
Try to pull the webbing out of the retractor. If it is locked, you should not be able to pull out any webbing. If the retractor is not locked, repeat step 5.
- Finally, pull up on any excess webbing to tighten the lap portion around the child restraint while you push the child restraint rearward and downward into the vehicle seat.
- If the child restraint has a top tether strap and the seating position has a top tether anchorage, connect the tether strap to the anchorage and tighten the tether strap. See the section "Installing Child Restraints Using the Top Tether Anchorage" for directions to attach a tether anchor.
- Test that the child restraint is installed tightly by pulling back and forth on the child seat at the belt path. It should not move more than 1 inch (25.4 mm) in any direction.
Any seat belt system will loosen with time, so check the belt occasionally, and pull it tight if necessary.
202 SAFETY
InstallingChildRestraintsUsingTheTopTether Anchorage:
WARNING!
Donotattachatetherstrapforarear-facingcarseatto anylocationinfrontofthecarseat,includingtheseat frameoratetheranchorage.Onlyattachthetether strapofarear-facingcarseattothetetheranchorage thatisapprovedforthatseatingposition,located behindthetopofthevehicleseat.Seethesection "LowerAnchorsandTethersforCHILDREN(LATCH) RestraintSystem" forthelocationofapprovedtether anchoragesinyourvehicle.
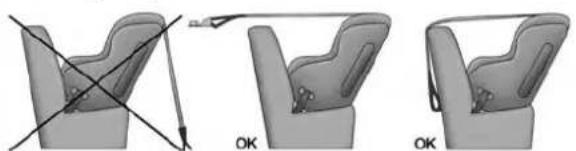
natural_image
Three-step illustration of a car seat assembly showing angle and positioning (no text or symbols)0226047162
- Look behind the seating position where you plan to install the child restraint to find the tether anchorage. You may need to move the seat forward to provide better access to the tether anchorage. If there is no top tether anchorage for that seating position, move the child restraint to another position in the vehicle if one is available.
- Rotate or lift the cover to access the anchor directly behind the seat where you are placing the child restraint.
- Route the tether strap to provide the most direct path for the strap between the anchor and the child seat. If your vehicle is equipped with adjustable rear head restraints, raise the head restraint, and where possible, route the tether strap under the head restraint and between the two posts. If not possible, lower the head restraint and pass the tether strap around the outboard side of the head restraint.
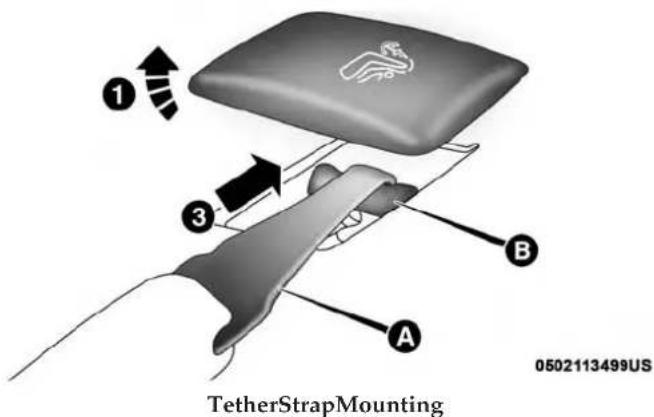
text_image
TetherStrapMounting 0502113499US1 — Cover A — Tether Strap Hook
3 — Attaching Strap B — Tether Anchor
4. Attach the tether strap hook of the child restraint to the top tether anchorage as shown in the diagram.
5. Remove slack in the tether strap according to the child restraint manufacturer's instructions.
WARNING!
- Anincorrectlyanchoredtetherstrapcouldleadto increasedheadmotionandpossibleinjurytothe child.Useonlytheanchoragepositiondirectlybehindthechildseattosecureachildrestrainttop tetherstrap.
- If your vehicle is equipped with a split rearseat, makes sure the ether strap does not slip into the opening between these at backs as you removes lack in the strap.
CenterTetherAttachment
- If adjustable, lower the adjustable center head restraint to the full down position.
- Route the tether strap over the seatback and head restraint.
- Attach the tether strap hook of the child restraint to the center tether anchorage located in the panel between the rear seatback and the rear window.
- Remove slack in the tether strap according to the child restraint manufacturer's instructions.
Transporting Pets
Air Bags deploying in the front seat could harm your pet. An unrestrained pet will be thrown about and possibly injured, or injure a passenger during panic braking or in a collision.
Pets should be restrained in the rear seat (if equipped) in pet harnesses or pet carriers that are secured by seat belts.
SAFETY TIPS
Transporting Passengers
NEVER TRANSPORT PASSENGERS IN THE CARGO AREA.
WARNING!
- Donotleavechildrenoranimalsinsideparked vehiclesinhotweather.Interiorheatbuild-upmay causeseriousinjuryordeath.
- Itisextremelydangeroustorideinacargoarea, insideoroutsideofvehicle.Inacollision,people ridingintheseareasaremorelikelytobeseriously injuredorkilled.
- Donotallowpeopletorideinanyareaofyour vehiclethatisnotequippedwithseatsandseatbelts.
WARNING!(Continued)
- Besureeveryoneinyourvehicleisinaseatand usingaseatbeltproperly.
Exhaust Gas
WARNING!
Exhaustgasescaninjureorkill. They contain carbon monoxide(CO), which is colorless and odorless.
Breathingitcanmakeyouunconsciousandcaneventuallypoisonyou.Toavoidbreathing(CO),follow thesesafetytips:
- Donotruntheengineinaclosedgarageorin confinedareasanylongerthanneededtomoveyour vehicleinoroutofthearea.
- If you are required to drivewith the trunk/lift gate/reardors open, makes sure that all windows are closed and the climate control BLOWER switch isset at high speed. DONOT usethere circulation mode.
- Ifitisnecessarytositinaparkedvehiclewiththe engineerunning,adjustyourheatingorcoolingcontrolstoforceoutsideairintothevehicle.Setthe blowerathighspeed.
The best protection against carbon monoxide entry into the vehicle body is a properly maintained engine exhaust system.
Whenever a change is noticed in the sound of the exhaust system, when exhaust fumes can be detected inside the vehicle, or when the underside or rear of the vehicle is damaged, have a competent mechanic inspect the complete exhaust system and adjacent body areas for broken, damaged, deteriorated, or mispositioned parts. Open seams or loose connections could permit exhaust fumes to seep into the passenger compartment. In addition, inspect the exhaust system each time the vehicle is raised for lubrication or oil change. Replace as required.
Safety Checks You Should Make Inside The Vehicle
SeatBelts
Inspect the seat belt system periodically, checking for cuts, frays, and loose parts. Damaged parts must be replaced immediately. Do not disassemble or modify the system.
Front seat belt assemblies must be replaced after a collision. Rear seat belt assemblies must be replaced after a collision if they have been damaged (i.e., bent retractor, torn webbing, etc.). If there is any question regarding seat belt or retractor condition, replace the seat belt.
AirBagWarningLight
The Air Bag warning light will turn on for four to eight seconds as a bulb check when the ignition switch is first turned to ON/RUN. If the light is either not on during starting, stays on, or turns on while driving, have the system inspected at an authorized dealer as soon as possible. After the bulb check, this light will illuminate with a single chime when a fault with the Air Bag System has been detected. It will stay on until the fault is removed. If the light comes on intermittently or remains on while driving, have an authorized dealer service the vehicle immediately.
Refer to "Occupant Restraint Systems" in "Safety" for further information.
Defroster
Check operation by selecting the defrost mode and place the blower control on high speed. You should be able to feel the air directed against the windshield. See an authorized dealer for service if your defroster is inoperable.
FloorMatSafetyInformation
Always use floor mats designed to fit your vehicle. Only use a floor mat that does not interfere with the operation of the accelerator, brake or clutch pedals. Only use a floor mat that is securely attached using the floor mat fasteners so it cannot slip out of position and interfere with the accelerator, brake or clutch pedals or impair safe operation of your vehicle in other ways.
WARNING!
Animproperlyattached,damaged,folded,orstacked floormat,ordamagedfloormatfastenersmaycause yourfloormattointerferewiththeaccelerator,brake, orclutchpedalsandcausealossofvehiclecontrol.To preventSERIOUSINJURYorDEATH:
- ALWAYSsecurelyattach yourfloormatusingthe floormatfasteners.DONOTinstallyourfloormat upsidedownorturnyourfloormatover.Lightlypull toconfirmmatissecuredusingthefloormatfastenersonaregularbasis.
- ALWAYSREMOVETHEEXISTINGFLOORMAT FROMTHEVEHICLE 🕒 beforeinstallinganyother floormat.NEVERinstallorstackanadditionalfloor matontopofanexistingfloormat.
(Continued)
WARNING!(Continued)
- ONLYinstallfloormatsdesignedtofityourvehicle. NEVERinstallafloormatthatcannotbeproperly attachedandsecuredtoyourvehicle.Ifafloormat needstobereplaced,onlyuseaFCAapprovedfloor matforthespecificmake,model,andyearofyour vehicle.
- ONLYYusethedriver'ssidefloormatonthedriver's sidefloorarea.Tocheckforinterference,withthe vehicleproperlyparkedwiththeengineoff,fully depresstheaccelerator,thebrake,andtheclutch pedal(ifpresent)tocheckforinterference.Ifyour floormatinterfereswiththeoperationofanypedal, orisnotsecuretothefloor,removethefloormat fromthevehicleandplacethefloormatinyour trunk.
- ONLYusethepassenger'ssidefloormatonthe passenger'ssidefloorarea.
- ALWAYSmakesureobjectscannotfallorslideinto thedriver'ssidefloorareawhenthevehicleis moving.Objectscanbecometrappedunderaccelerator,brake,orclutchpedalsandcouldcausealossof vehiclecontrol.
(Continued)
WARNING!(Continued)
- NEVERplaceanyobjectsunderthefloormat(e.g., towels, keys, etc.). Theseobjectscouldchangethe positionofthefloormatandmaycauseinterference withtheaccelerator,brake,orclutchpedals.
- If the vehicle carpet has been removed and re-installed, always properly attach carpet to the floor and check the floor at fasteners are secure to the vehicle carpet. Fully depresse each pedal to check for interference with the accelerator, brake, or clutch pedal sthenre - install the floor mats.
- It is recommended to only use mild soap and water to clean your floor mats. After cleaning, always check your floor math has been properly installed and is secured by your vehicle using the floor mat fasteners by lightly pulling mat.
Periodic Safety Checks You Should Make Outside The Vehicle
Tires
Examine tires for excessive tread wear and uneven wear patterns. Check for stones, nails, glass, or other objects lodged in the tread or sidewall. Inspect the tread for cuts and cracks. Inspect sidewalls for cuts, cracks, and bulges. Check the wheel nuts for tightness. Check the tires (including spare) for proper cold inflation pressure.
Lights
Have someone observe the operation of brake lights and exterior lights while you work the controls. Check turn signal and high beam indicator lights on the instrument panel.
DoorLatches
Check for proper closing, latching, and locking.
208 SAFETY
FluidLeaks
Check area under the vehicle after overnight parking for fuel, coolant, oil, or other fluid leaks. Also, if gasoline fumes are detected or if fuel, or brake fluid leaks are suspected. The cause should be located and corrected immediately.
WARNING!
TopreventSERIOUSINJURYorDEATHwhenusing "Track-Use" partsandequipment:
- NEVERuseany"Track-Use"equipmentonpublicroads.FCAUSLLCdoesnotauthorizetheuseof"Track-Use"equipmentonpublicroads.
- Theintendeduseof"Track-Use"partsisforrace vehiclesonracetracks.Tohelpensurethesafetyof theracedriver,engineersshouldsupervisetheinstallationof"Track-Use"parts.
- FCAUSLLCdoesnotauthorizetheinstallationor useofanypartnotedas"Track-Use"onanynew vehiclepriortoitsfirstretailsale.
WARNING!
TopreventSERIOUSINJURYorDEATH:
- ALWAYSremoveany"Track-Use"equipmentbefore drivingonpublicroads.
- ALWAYSproperlyuseyourthree-pointseatbelts whendrivingonpublicroads.
- Inacollision, you and your passengers can suffer much greater injuries if you are not properly buckled up. You can strike the interior of your vehicle or other passengers, or you can be thrown out of the vehicle.
STARTING AND OPERATING
CONTENTS
■STARTING THE ENGINE....212
□Automatic Transmission....212
□Normal Starting . . . . . . . . . . . . . . . . . . . . . . . . . . . . . . . . . . . . . . . . . . . . . 213
□Keyless Enter-N-Go — Ignition .....216
☐Cold Weather Operation (Below -22^ F Or -30^ C). .....216
□If Engine Fails To Start....216
□After Starting. .217
■ENGINE BLOCK HEATER — IF EQUIPPED . . .217
■ENGINE BREAK-IN RECOMMENDATIONS . . . 217
■PARKING BRAKE....218
■AUTOMATIC TRANSMISSION....220
□Ignition Park Interlock....222
□Brake/Transmission Shift Interlock System . . . .222
□ Eight-Speed Automatic Transmission .....222
■DRIVE MODES....230
□ Launch Control — If Equipped .....230
□ Guidelines For Track Use .....232
■HYDRAULIC POWER STEERING — IF EQUIPPED....234
□Power Steering Fluid Check....235
■SPEED CONTROL — IF EQUIPPED .....236
□ To Activate .236
□ To Set A Desired Speed .....237
□ To Vary The Speed Setting .....237
□ To Accelerate For Passing .....238
□ To Resume Speed .....238
□ To Deactivate .....238
■ADAPTIVE CRUISE CONTROL (ACC) — IF EQUIPPED....239
□Adaptive Cruise Control (ACC) Operation . . . . .241
□ Activating Adaptive Cruise Control (ACC) . . . . .241
□To Activate/Deactivate....242
□To Set A Desired ACC Speed. . . . . . . . . . . . . . . . . . . . . 243
□To Cancel....243
□To Turn Off....
□To Resume....244
□To Vary The ACC Speed .....244
□Setting The Following Distance In ACC .....246
□Overtake Aid . . . . . . . . . . . . . . . . . . . . . . . . . . . . . . . . . . . . . . . . . . . . . . . . . . . . . . . . . . . . 249
□ACC Operation At Stop . . . . . . . . . . . . . . . . . . . . . . . . . . . . . . . . . . . . . . . . . . . . 249
□Adaptive Cruise Control (ACC) Menu .....250
□Display Warnings And Maintenance .....251
□Precautions While Driving With ACC. . . . . . . . .253
□General Information....256
□Normal (Fixed Speed) Cruise Control Mode . . . .256
■PARKSENSE REAR PARK ASSIST — IF EQUIPPED .....259
□ ParkSense Sensors .....260
□ ParkSense Warning Display....260
□ParkSense Display....260
□ Enabling And Disabling ParkSense .....264
□Service The ParkSense Rear Park Assist System. .264
□Cleaning The ParkSense System. . . . . . . . . . . . . . . . . . . . . . . . . . . . . . . . . . . . . . . . . . . . . . . . . . . . . . . . . . . . . . 265
□ ParkSense System Usage Precautions .....265
■LANESENSE — IF EQUIPPED .....266
□LaneSense Operation .....266
□Turning LaneSense On Or Off . . . . . . . . . . . . . . . . . . . . . . . . . . . . . . . . . . . . . . . . . . . . . . . . . 267
□LaneSense Warning Message....267
□Changing LaneSense Status. . . . . . . . . . . . . . . . . . . . . . . . . . . . . . . . . . . . . . . . . . . . . 270
■PARKVIEW REAR BACK UP CAMERA .....271
■REFUELING THE VEHICLE....273
STARTING AND OPERATING 211
□Emergency Fuel Filler Door Release....275
■VEHICLE LOADING....275
□Vehicle Certification Label .....276
□Gross Vehicle Weight Rating (GVWR) .....276
□Gross Axle Weight Rating (GAWR) .....276
□Overloading....276
□Loading....277
■TRAILER TOWING....277
■RECREATIONAL TOWING (BEHIND MOTORHOME, ETC.) . . . . . . . . . . . . . . . . . . . . . . . . . . . . . . . . . . . . . . . . . . . . . . . . . . . . . . . . . . 277
■DRIVING TIPS....277
□Driving On Slippery Surfaces....277
□Driving Through Water....279
STARTING THE ENGINE
Before starting your vehicle, adjust your seat, adjust the inside and outside mirrors, fasten your seat belt, and if present, instruct all other occupants to buckle their seat belts.
WARNING!
- Whenexitingthevehicle,alwaysmakesurethe ignitionisin"OFF"mode,removethekeyfobfrom thevehicleandlockthevehicle.
- Neverleavechildrenaloneinvehicle,orwith accesstoan unlocked vehicle.Leavingchildrenina vehicleunattendedisdangerousforanumberof reasons.Achildorotherscouldbeseriouslyor fatally injured.Childrenshouldbewarnednotto touchtheparkingbrake,brakepedalorthetransmissiongear selector.
- Donotleavethekeyfobinornearthevehicle(orinalocationaccessibletochildren), and donotleave theignition(ofvehicleequipped with Keyless Enter-N-Go) in the ACCorON/RUNmode. Achild could operate powerwindows, other controls, or movethevehicle.
WARNING!(Continued)
- Donotleavechildrenoranimalsinsideparked vehiclesinhotweather.Interiorheatbuild-upmay causeseriousinjuryordeath.
Automatic Transmission
The gear selector must be in the PARK position before you can start the engine. Apply the brakes before shifting into any driving gear.
CAUTION!
Damagetothetransmissionmayoccurifthefollowing precautionsarenotobserved:
- ShiftintooroutofPARKorREVERSEonlyafterthe vehiclehascometoacompletestop.
- DonotshiftbetweenPARK, REVERSE, NEUTRAL, orDRIVEwhentheengineisaboveidlespeed.
- Beforeshiftingintoanygear,makesureyourfootis firmlypressingthebrakepedal.
Normal Starting
ToTurnOnTheEngineUsingTheENGINESTART/STOPButton
- The transmission must be in PARK.
- Press and hold the brake pedal while pushing the ENGINE START/STOP button once.
- The system takes over and attempts to start the vehicle. If the vehicle fails to start, the starter will disengage automatically after 10 seconds.
- If you wish to stop the cranking of the engine prior to the engine starting, push the button again.
NOTE: Normal starting of either a cold or a warm engine is obtained without pumping or pressing the accelerator pedal.
ToTurnOffTheEngineUsingENGINESTART/STOP Button
- Place the gear selector in PARK, then push and release the ENGINE START/STOP button.
-
The ignition will return to the OFF mode.
-
If the gear selector is not in PARK, the ENGINE START/STOP button must be held for two seconds or three short pushes in a row with the vehicle speed above 5 mph (8 km/h) before the engine will shut off. The ignition will remain in the ACC mode until the gear selector is in PARK and the button is pushed twice to the OFF mode. If the gear selector is not in PARK and the ENGINE START/STOP button is pushed once, the instrument cluster will display a "Vehicle Not In Park" message and the engine will remain running. Never leave a vehicle out of the PARK position, or it could roll.
NOTE: If the gear selector is in NEUTRAL, push and release the ENGINE START/STOP button with the vehicle speed below 5 mph (8 km/h) before the engine will shut off, and the ignition will remain in the ACC position. The system will automatically time out and the ignition will cycle to the OFF mode after 30 minutes of inactivity if the ignition is left in the ACC or RUN (engine not running) mode and the transmission is in PARK.
214 STARTING AND OPERATING
ENGINESTART/STOPButtonFunctions—WithDriver'sFootOFFTheBrakePedal(InPARKOrNEUTRAL Position)
The ENGINE START/STOP button operates similar to an ignition switch. It has three modes: OFF, ACC, and RUN. To change the ignition modes without starting the vehicle and use the accessories, follow these directions:
- Start with the ignition in the OFF mode.
- Push the ENGINE START/STOP button once to place the ignition to the ACC mode.
- Push the ENGINE START/STOP button a second time to place the ignition to the RUN mode.
- Push the ENGINE START/STOP button a third time to return the ignition to the OFF mode.
AutoPark
AutoPark is a supplemental feature to assist in placing the vehicle in PARK should the situations on the following pages occur. It is a back up system and should not be relied upon as the primary method by which the driver shifts the vehicle into PARK.
The conditions under which AutoPark will engage are outlined on the following pages.
WARNING!
- Driverinattentioncouldleadtofailuretoplacethe vehicleinPARK.ALWAYSDOAVISUALCHECK thatyourvehicleisinPARKbyverifyingthatasolid (notblinking)"P"isindicatedintheinstrument clusterdisplayandonthegearsector.Ifthe"P" indicatorisblinking,yourvehicleisnotinPARK.As anaddedprecaution,alwaysapplytheparkingbrake whenexitingthevehicle.
- AutoParkisasupplementalfeature.Itisnotdesignedtoreplacetheneedtoshiftyourvehicleinto PARK.Itisabackupsystemandshouldnotbe relieduponastheprimarymethodbywhichthe drivershiftsthevehicleintoPARK.
If the vehicle is not in PARK and the driver turns off the engine, the vehicle may Auto Park.
AutoPark will engage when all of these conditions are met:
- Vehicle is equipped with an 8-speed transmission
• Vehicle is not in PARK
• Vehicle Speed is 1.2 MPH (1.9 km/h) or less
- Ignition switched from RUN to ACC
NOTE: For Keyless Go equipped vehicles, The engine will turn off and the ignition switch will change to ACC mode. After 30 minutes the ignition switches to OFF automatically, unless the driver turns the ignition switch OFF.
If the vehicle is not in PARK and the driver exits the vehicle with the engineer running, the vehicle may Auto Park.
AutoPark will engage when all of these conditions are met:
- Vehicle is equipped with an 8-speed transmission
- Vehicle is not in PARK
• Vehicle speed is 1.2 MPH (1.9 km/h) or less - Driver's seat belt is unbuckled
- Driver's door is ajar
- Brake Pedal is not depressed
The MESSAGE "AutoParkEngagedShifttoPthenShift toGear" will display in the instrument cluster.
NOTE: In some cases the ParkSense graphic will be displayed in the instrument cluster. In these cases, the shifter must be returned to "P" to select desired gear.
IfthedrivershiftsintoPARKwhilemoving,thevehicle mayAutoPark.
AutoPark will engage ONLY when vehicle speed is 1.2 MPH (1.9 km/h) or less.
The MESSAGE “ VehicleSpeedisTooHightoShiftto P” will be displayed in the instrument cluster if vehicle speed is above 1.2 MPH (1.9 km/h).
WARNING!
If vehiclespeedis above 1.2 MPH (1.9 km/h), the transmission will default to NEUTRAL until the vehicles speed drops below 1.2 MPH (1.9 km). A vehicle left in the NEUTRAL position can roll. As an added precaution, always apply the parking brake when exiting the vehicle.
ALWAYSDOAVISUALCHECKthat your vehicle is in PARK by looking for the "P"in the instrument cluster display and on the shifter. As an added precaution, always apply the parking brake when exiting the vehicle.
216 STARTING AND OPERATING
Keyless Enter-N-Go — Ignition
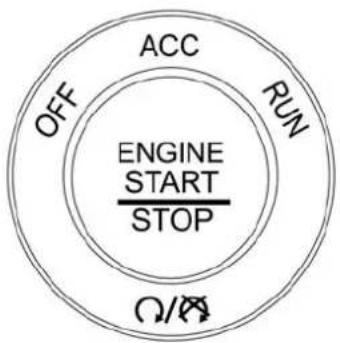
flowchart
graph TD
    A["ENGINE START STOP"] --> B["OFF"]
    A --> C["ACC"]
    A --> D["RUN"]
    A --> E["ON"]
0101113902US
KeylessPushButtonIgnition
This feature allows the driver to operate the ignition switch with the push of a button, as long as the Remote Start/Keyless Enter-N-Go key fob is in the passenger compartment.
Cold Weather Operation (Below -22°F Or -30°C)
To ensure reliable starting at these temperatures, use of an externally powered electric engine block heater (available from your authorized dealer) is recommended.
If Engine Fails To Start
If the engine fails to start after you have followed the "Normal Starting" or "Extreme Cold Weather" procedure it may be flooded. Push the accelerator pedal all the way to the floor and hold it there. Crank the engine for no more than 15 seconds. This should clear any excess fuel in case the engine is flooded. Leave the ignition key in the RUN position, release the accelerator pedal and repeat the "Normal Starting" procedure.
WARNING!
- Neverpourfuelorotherflammableliquidintothe throttlebodyairinletopeninginanattempttostart thevehicle.Thiscouldresultinflashfirecausing seriouspersonalinjury.
- Donotattempttopushortowyourvehicletogetit started. Vehiclesequippedwithanautomatictransmissioncannotbestartethisway.Unburnedfuel couldenterthecatalyticconverterandoncethe enginehasstarted,igniteanddamagetheconverter andvehicle.
(Continued)
WARNING!(Continued)
- If the vehicle has adischarged battery, boostercables maybe used to obtain a start from a booster battery or the battery in another vehicle. This type of start can be dangerous if done improperly. Referto "Jump Starting Procedure" in "In Case Of Emergency" for further information.
CAUTION!
Topreventdamagetothestarter, donotcontinuously cranktheengineformorethan25secondsatatime. Wait60secondsbeforetryingagain.
After Starting
The idle speed is controlled automatically, and it will decrease as the engine warms up.
ENGINE BLOCK HEATER — IF EQUIPPED
The engine block heater warms the engine, and permits quicker starts in cold weather. Connect the cord to a standard 110-115 Volt AC electrical outlet with a grounded, three-wire extension cord.
The engine block heater must be plugged in at least one hour to have an adequate warming effect on the engine.
The engine block heater cord is routed under the hood on the driver side of the vehicle. It has a removable cap that is located near the air box.
WARNING!
Remembertodisconnecttheengineblockheatercord beforedriving. Damagetothe110-115Voltelectrical cordcouldcauseelectrocution.
ENGINE BREAK-IN RECOMMENDATIONS
The following tips will be helpful in obtaining optimum performance and maximum durability for your new SRT vehicle.
Despite modern technology and World Class manufacturing methods, the moving parts of the vehicle must still wear in with each other. This wearing in occurs mainly during the first 500 miles (805 km) and continues through the first oil change interval.
218 STARTING AND OPERATING
It is recommended for the operator to observe the following driving behaviors during the new vehicle break-in period:
0to100miles(0to161km):
- Do not allow the engine to operate at idle for an extended period of time.
- Depress the accelerator pedal slowly and not more than halfway to avoid rapid acceleration.
- Avoid aggressive braking.
- Drive with the engine speed less than 3,500 RPM.
- Maintain vehicle speed below 55 mph (88 km/h) and observe local speed limits.
100to300miles(161to483km):
- Depress the accelerator pedal slowly and not more than halfway to avoid rapid acceleration in lower gears (1st to 3rd gears).
- Avoid aggressive braking.
- Drive with the engine speed less than 5,000 RPM.
- Maintain vehicle speed below 70 mph (112 km/h) and observe local speed limits.
300to500miles(483to805km):
- Exercise the full engine rpm range, shifting manually at higher rpms when possible.
- Do not perform sustained operation with the accelerator pedal at wide open throttle.
- Maintain vehicle speed below 85 mph (136 km/h) and observe local speed limits.
Forthefirst1500miles(2414km):
- Do not participate in track events, sport driving schools, or similar activities during the first 1500 miles (2414 km).
NOTE: Check engine oil with every refueling and add if necessary. Oil and fuel consumption may be higher through the first oil change interval. Running the engine with an oil level below the add mark can cause severe engine damage.
PARKING BRAKE
Before leaving the vehicle, make sure that the parking brake is fully applied and place the gear selector in the PARK position.
The foot operated parking brake is located below the lower left corner of the instrument panel. To apply the park brake, firmly push the park brake pedal fully. To release the parking brake, press the park brake pedal a second time and let your foot up as you feel the brake disengage.
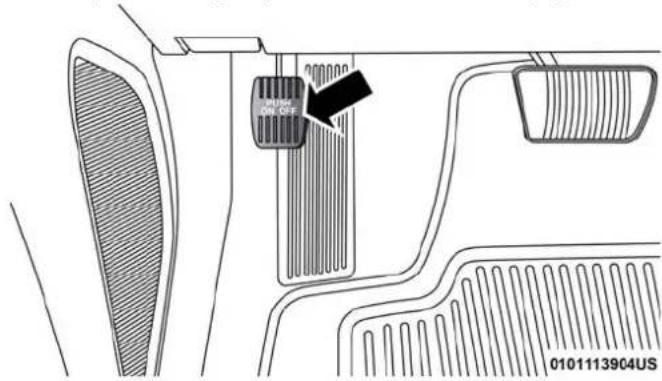
text_image
PUBO FOR OFF 0101113904USParkingBrake
When the parking brake is applied with the ignition switch in the ON/RUN position, the Brake Warning Light in the instrument cluster will illuminate.
NOTE:
- When the parking brake is applied and the transmission is placed in gear, the Brake Warning Light will flash. If vehicle speed is detected, a chime will sound to alert the driver. Fully release the parking brake before attempting to move the vehicle.
- This light only shows that the parking brake is applied. It does not show the degree of brake application.
When parking on a hill, it is important to turn the front wheels toward the curb on a downhill grade and away from the curb on an uphill grade. Apply the parking brake before placing the gear selector in PARK, otherwise the load on the transmission locking mechanism may make it difficult to move the gear selector out of PARK. The parking brake should always be applied whenever the driver is not in the vehicle.
WARNING!
- NeverusethePARKpositionasasubstituteforthe parkingbrake.Alwaysapplytheparkingbrakefully whenparkedtoguardagainstvehiclemovementand possibleinjuryordamage.
(Continued)
WARNING!(Continued)
- Whenexitingthevehicle,alwaysremovethekeyfob fromtheignitionandlockyourvehicle.
- Neverleavechildrenaloneinavehicle,orwith accesstoan unlocked vehicle. Allowingchildrento beinavehicleunattendedisdangerousforanumber ofreasons.Achildorotherscouldbeseriouslyor fatally injured.Childrenshouldbewarnednotto touchtheparkingbrake,brakepedalorthegear selector.
- Whenexitingthevehicle,alwaysmakesurethe keylessignitionnodeisintheOFFmode,removethe keyfobfromthevehicleandlockthevehicle.
- Donotleavethekeyfobinornearthevehicleorinalocationaccessibletochildren, and donotleavetheignitionofavehicleequipped with KeylessEnter-N-GointheACCorON/RUNmode. Achildcould operatepowerwindows, othercontrols, ormovethe vehicle.
- Besuretheparkingbrakeisfullydisengagedbefore driving;failuretodosocanleadtobrakefailureand acollision.
WARNING!(Continued)
- Alwaysfullyapplytheparkingbrakewhenleaving yourvehicle,oritmayrollandcausedamageor injury.Alsobecertaintoleavethetransmissionin PARK.Failureretodosomayallowthevehicletoroll andcausedamageorinjury.
CAUTION!
If the Brake Warning Lightremainson with the parking brakereleased, abrakesystemmalfunction is indicated. Havethebrakesystemserviced by an authorized dealer immediately.
AUTOMATIC TRANSMISSION
WARNING!
- NeverusethePARKpositionasasubstituteforthe parkingbrake.Alwaysapplytheparkingbrakefully whenexitingthevehicletoguardagainstvehicle movementandpossibleinjuryordamage.
(Continued)
WARNING!(Continued)
- Yourvehiclecouldmoveandinjureyouandothersif itisnotinPARK.Checkbytryingtomovethe transmissiongearselectoroutofPARKwiththe brakepedalreleased.Makesurethetransmissionis inPARKbeforeexitingthevehicle.
- The transmission may not engage PARK if the vehicle is moving. Always bring the vehicle to a completestop before shifting to PARK, and verify that the transmission gear position indicates solidly indicates PARK (P) without blinking. Ensure that the vehicle is completely stopped, and the PARK position is properly indicated, before exiting the vehicle.
- It is dangerous to shift out of PARK or NEUTRAL if the engines speed higher than needles speed. If your foot is not firmly pressing the brake pedal, the vehicle could accelerate quickly forward or in reverse. You could lose control of the vehicle and hit someone or something. Only shift into gear when the engine is idling normally and your foot is firmly pressing the brake pedal.
- Unintendedmovementofvehiclecouldinjure thoseinornearthevehicle.Aswithallvehicles,you
WARNING!(Continued)
shouldneverexitvehiclewhiletheengineis running.Beforeexitingavehicle,alwayscometoa completestop,thenapplytheparkingbrake,shift thetransmissionintoPARK,andturntheignition OFF.WhentheignitionisintheOFFmode,the transmissionislockedinPARK,securingthevehicle againstunwantedmovement.
- When exiting the vehicle, always makes sure the ignition is in the OFF mode, removes the key of from the vehicle, and lock the vehicle.
- Neverleavechildrenaloneinavehicle,orwith accesstoan unlocked vehicle. Allowingchildrento beinavehicleunattendedisdangerousforanumber ofreasons. Achildorotherscouldbeseriouslyor fatally injured. Childrenshouldbewarnednotto touchtheparkingbrake,brakepedalorthetransmissiongearselector.
- Donotleavethekeyfobinornearthevehicle(orin allocationaccessibletochildren), and donotleave theignitionintheACCorON/RUNmode. Achild could operate powerwindows, other controls, or movethevehicle.
CAUTION!
Damagetothetransmissionmayoccurifthefollowing precautionsarenotobserved:
- ShiftintooroutofPARKorREVERSEonlyafterthe vehiclehascometoacompletestop.
- DonotshiftbetweenPARK, REVERSE, NEUTRAL, orDRIVEwhentheengineisaboveidlespeed.
- Beforeshiftingintoanygear,makesureyourfootis firmlypressingthebrakepedal.
NOTE: You must press and hold the brake pedal while shifting out of PARK.
Ignition Park Interlock
This vehicle is equipped with an Ignition Park Interlock which requires the transmission to be in PARK before the ignition can be turned to the OFF mode. This helps the driver avoid inadvertently leaving the vehicle without placing the transmission in PARK. This system also locks the transmission in PARK whenever the ignition is in the OFF mode.
NOTE: The transmission is NOT locked in PARK when the ignition is in the ACC mode (even though the engine will be off). Ensure that the transmission is in PARK, and the ignition is OFF(not in ACC mode) before exiting the vehicle.
Brake/Transmission Shift Interlock System
This vehicle is equipped with a Brake Transmission Shift Interlock system (BTSI) that holds the transmission gear selector in PARK unless the brakes are applied. To shift the transmission out of PARK, the engine must be running and the brake pedal must be pressed. The brake pedal must also be pressed to shift from NEUTRAL into DRIVE or REVERSE when the vehicle is stopped or moving at low speeds.
Eight-Speed Automatic Transmission
The transmission gear range (PRNDM) is displayed both on the gear selector and in the instrument cluster.
To select a gear range, press the lock button on the gear selector and move the selector rearward or forward. To shift the transmission out of PARK, the engine must be running and the brake pedal must be pressed. You must also press the brake pedal to shift from NEUTRAL into DRIVE or REVERSE when the vehicle is stopped or moving at low speeds. Select the DRIVE range for normal driving.
NOTE: In the event of a mismatch between the gear selector position and the actual transmission gear (for example, driver selects PARK while driving), the position indicator will blink continuously until the selector is returned to the proper position, or the requested shift can be completed.
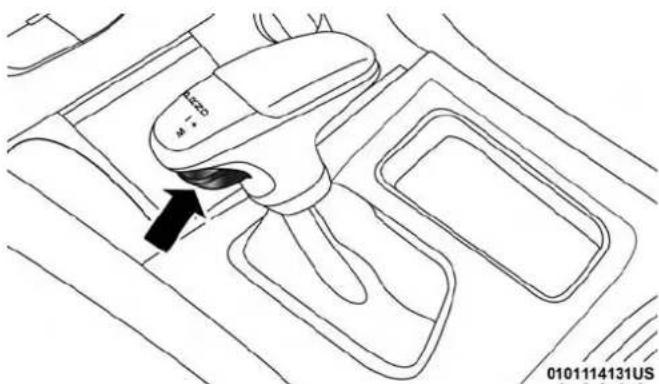
natural_image
Line drawing of a car gear shift lever system (no text or symbols)AutomaticTransmissionGearSelector
The electronically-controlled transmission adapts its shift schedule based on driver inputs, along with environmental and road conditions. The transmission electronics are self-calibrating; therefore, the first few shifts on a new vehicle may be somewhat abrupt. This is a normal condition, and precision shifts will develop within a few hundred miles (kilometers). Only shift from DRIVE to PARK or REVERSE when the accelerator pedal is released and the vehicle is stopped. Be sure to keep your foot on the brake pedal when shifting between these gears.
The transmission gear selector provides PARK, REVERSE, NEUTRAL, DRIVE, and MANUAL (Autostick) shift positions. Manual shifts can be made using the Autostick shift control. Toggling the gear selector forward (-) or rearward (+) while in the MANUAL (AutoStick) position (beside the DRIVE position) will manually select the transmission gear, and will display the current gear in the instrument cluster as M1, M2, M3, etc. Refer to "AutoStick" in this section for further information.
NOTE: If the gear selector cannot be moved to the PARK, REVERSE, or NEUTRAL position (when pushed forward) it is probably in the MANUAL (AutoStick, +/-) position (beside the DRIVE position). In MANUAL (AutoStick) mode, the transmission gear is displayed in the instrument cluster (as M1, M2, M3, etc.). Move the gear selector to the right (into the DRIVE [D] position) for access to PARK, REVERSE, and NEUTRAL.
GearRanges
Do not depress the accelerator pedal when shifting from PARK or NEUTRAL into another gear range.
224 STARTING AND OPERATING
NOTE: After selecting any gear range, wait a moment to allow the selected gear to engage before accelerating. This is especially important when the engine is cold.
PARK(P)
This range supplements the parking brake by locking the transmission. The engine can be started in this range. Never attempt to use PARK while the vehicle is in motion. Apply the parking brake when exiting the vehicle in this range.
When parking on a level surface, you may shift the transmission into PARK first, and then apply the parking brake.
When parking on a hill, apply the parking brake before shifting the transmission to PARK. As an added precaution, turn the front wheels toward the curb on a downhill grade and away from the curb on an uphill grade.
When exiting the vehicle, always:
- Apply the parking brake.
- Shift the transmission into PARK.
- Turn the ignition OFF.
- Remove the key fob from the vehicle.
WARNING!
- NeverusethePARKpositionasasubstituteforthe parkingbrake.Alwaysapplytheparkingbrakefully whenexitingthevehicletoguardagainstvehicle movementandpossibleinjuryordamage.
- Yourvehiclecouldmoveandinjureyouandothersif itisnotinPARK.Checkbytryingtomovethe transmissiongearselectoroutofPARKwiththe brakepedalreleased.Makesurethetransmissionis inPARKbeforeexitingthevehicle.
- ThetransmissionmaynotengagePARKifthevehicleismoving.Alwaysbringthevehicletoa completestopbeforeshiftingtoPARK,andverify thatthetransmissiongearpositionindicatorsolidly indicatesPARK(P)withoutblinking.Ensurethatthe vehicleiscompletelystopped,andthePARKpositionisproperlyindicated,beforeexitingthevehicle.
- It is dangerous to shift out of PARK or NEUTRAL if the engines speed higher than needles speed. If your foot is not firmly pressing the brake pedal, the vehicle could accelerate quickly forward or reverse. You could lose control of the vehicle and hit someone or something. Only shift into gear when the
(Continued)
WARNING!(Continued)
engineisidlingnormallyandyourfootisfirmly pressingthebrakepedal.
- Unintendedmovementofvehiclecouldinjure thoseinornearthevehicle.Aswithallvehicles,you shouldneverexitavehiclewhiletheengineis running.Beforeexitingavehicle,alwayscometoa completestop,thenapplytheparkingbrake,shift thetransmissionintoPARK,andturntheignition OFF.WhentheignitionisintheOFFmode,the transmissionislockedinPARK,securingthevehicle againstunwantedmovement.
- Whenexitingthevehicle,alwaysmakesurethe ignitionisintheOFFmode,removethekeyfobfrom thevehicle,andlockthevehicle.
- Neverleavechildrenaloneinavehicle,orwith accesstoanunlockedvehicle.Allowingchildrento beinavehicleunattendedisdangerousforanumber ofreasons.Achildorotherscouldbeseriouslyor fatallyinjured.Childrenshouldbewarnednotto touchtheparkingbrake,brakepedalorthetransmissiongearselector.
(Continued)
WARNING!(Continued)
- Do not leave the key fob in or near the vehicle (or in a locationaccessibletochildren), and donotleavethe ignitionintheACCorON/RUNmode. Achildcould operatepowerwindows, othercontrols, ormovethe vehicle.
CAUTION!
- Beforemoving the transmission gear selector out of PARK, you must start the engine, and also press the brake pedal. Otherwise, damageto the gear selector could result.
- DO NOT race the engine when shifting from PARK or NEUTRAL into another gear range, asthiscan damagethedrivetrain.
The following indicators should be used to ensure that you have properly engaged the transmission into the PARK position:
- Look at the transmission gear position display and verify that it indicates the PARK position (P), and is not blinking.
- With the brake pedal released, verify that the gear selector will not move out of PARK.
226 STARTING AND OPERATING
REVERSE(R)
This range is for moving the vehicle backward. Shift into REVERSE only after the vehicle has come to a complete stop.
NEUTRAL(N)
Use this range when the vehicle is standing for prolonged periods with the engine running. Apply the parking brake and shift the transmission into PARK if you must exit the vehicle.
WARNING!
DonotcoastinNEUTRALandneverturnoffthe ignitiontocoastdownahill.Theseareunsafepractices thatlimityourresponsetochangingtrafficorroad conditions.Youmightlosecontrolofthevehicleand haveacollision.
CAUTION!
Towingthevehicle,coasting,ordrivingforanyother reasonwiththetransmissioninNEUTRALcancause severetransmissiondamage.
CAUTION!(Continued)
Referto"RecreationalTowing"in"StartingAndOperating"and"TowingADisabledVehicle"in"InCaseOfEmergency"forfurtherinformation.
DRIVE(D)
This range should be used for most city and highway driving. It provides the smoothest upshifts and downshifts, and the best fuel economy. The transmission automatically upshifts through all forward gears. The DRIVE position provides optimum driving characteristics under all normal operating conditions.
When frequent transmission shifting occurs (such as when operating the vehicle under heavy loading conditions, in hilly terrain, or traveling into strong head winds), use the AutoStick shift control (refer to "AutoStick" in this section for further information) to select a lower gear. Under these conditions, using a lower gear will improve performance and extend transmission life by reducing excessive shifting and heat buildup.
During extremely cold temperatures (-22°F [-30°C] or below), transmission operation may be modified depending on engine and transmission temperature as well as vehicle
(Continued)
speed. Normal operation will resume once the transmission temperature has risen to a suitable level.
MANUAL(M)
The MANUAL (M, +/-) position (beside the DRIVE position) enables full manual control of transmission shifting (also known as AutoStick mode; refer to "AutoStick" in this section for further information). Toggling the gear selector forward (-) or rearward (+) while in the MANUAL (AutoStick) position will manually select the transmission gear, and will display the current gear in the instrument cluster as M1, M2, M3, etc.
TransmissionLimpHomeMode
Transmission function is monitored electronically for abnormal conditions. If a condition is detected that could result in transmission damage, Transmission Limp Home Mode is activated. In this mode, the transmission may operate only in certain gears, or may not shift at all. Vehicle performance may be severely degraded and the engine may stall. In some situations, the transmission may not re-engage if the engine is turned off and restarted. The Malfunction Indicator Light (MIL) may be illuminated. A message in the instrument cluster will inform the driver of the more serious conditions, and indicate what actions may be necessary.
In the event of a momentary problem, the transmission can be reset to regain all forward gears by performing the following steps:
NOTE: In cases where the instrument cluster message indicates the transmission may not re-engage after engine shutdown, perform this procedure only in a desired location (preferably, at an authorized dealer).
- Stop the vehicle.
- Shift the transmission into PARK, if possible. If not, shift the transmission to NEUTRAL.
- Push and hold the ignition switch until the engine turns OFF.
- Wait approximately 30 seconds.
- Restart the engine.
- Shift into the desired gear range. If the problem is no longer detected, the transmission will return to normal operation.
228 STARTING AND OPERATING
NOTE: Even if the transmission can be reset, we recommend that you visit an authorized dealer at your earliest possible convenience. An authorized dealer has diagnostic equipment to assess the condition of your transmission.
If the transmission cannot be reset, authorized dealer service is required.
AutoStick
AutoStick is a driver-interactive transmission feature providing manual shift control, giving you more control of the vehicle. AutoStick allows you to maximize engine braking, eliminate undesirable upshifts and downshifts, and improve overall vehicle performance.
This system can also provide you with more control during passing, city driving, cold slippery conditions, mountain driving, and many other situations.

text_image
1 2 0606116345US PaddleShifters1 — (−) Shift Paddle 2 — (+) Shift Paddle
Operation
When the gear selector is in the DRIVE (D) position, the transmission will operate automatically, shifting between the eight available gears. To activate AutoStick, move the gear selector into the MANUAL (M) position (beside the DRIVE position). The current transmission gear will be displayed in the instrument cluster, along with a highlighted "M"(Manual) indication. When the gear selector is
in the MANUAL (M) position, tap the gear selector forward (-) (or tap the (-) shift paddle on the steering wheel) to downshift the transmission to the next lower gear, or tap the lever rearward (+) (or tap the (+) shift paddle), to command an upshift.
NOTE:
- Tapping one of the steering wheel-mounted shift paddles (+/-), while the gear selector is in DRIVE, will activate a temporary AutoStick mode. Tapping (-) to enter AutoStick mode will downshift the transmission to the next lower gear, while using (+) to enter AutoStick mode will retain the current gear. The current gear will be displayed in the instrument cluster, but the "M" will not be highlighted. The transmission will revert back to normal operation (if the gear selector remains in DRIVE) after a period of time, depending on accelerator pedal activity.
- The shift paddles may be disabled (or re-enabled, as desired) using the SRT Drive Modes.
In AutoStick mode, the transmission will shift up or down when (+/-) is manually selected by the driver (using the gear selector, or the shift paddles), unless an engine lugging or overspeed condition would result. It will remain in the selected gear until another upshift or downshift is chosen, except as described below.
- In temporary AutoStick mode (gear selector in DRIVE), the transmission will automatically shift up when maximum engine speed is reached. Lack of accelerator pedal activity will cause the transmission to revert to automatic operation.
- If normal AutoStick mode is engaged (gear selector in MANUAL position), manual gear selection will be maintained until the gear selector is returned to DRIVE, or as described below. The transmission will not upshift automatically at redline in this mode, nor will downshifts be obtained if the accelerator pedal is pressed to the floor.
- The transmission will automatically downshift as the vehicle slows (to prevent engine lugging) and will display the current gear.
- The transmission will automatically downshift to first gear when coming to a stop. After a stop, the driver should manually upshift (+) the transmission as the vehicle is accelerated.
-
You can start out, from a stop, in first or second gear. Tapping (+) (at a stop) will allow starting in second gear. Starting out in second gear can be helpful in snowy or icy conditions.
-
If a requested downshift would cause the engine to over-speed, that shift will not occur.
- The system will ignore attempts to upshift at too low of a vehicle speed.
- Holding the (-) paddle depressed, or holding the gear selector in the (-) position, will downshift the transmission to the lowest gear possible at the current speed.
- Transmission shifting will be more noticeable when AutoStick is engaged.
- The system may revert to automatic shift mode if a fault or overheat condition is detected.
To disengage AutoStick mode, return the gear selector to the DRIVE position, or press and hold the (+) shift paddle (if the gear selector is already in DRIVE) until "D" is once again indicated in the instrument cluster. You can shift in or out of the AutoStick mode at any time without taking your foot off the accelerator pedal.
WARNING!
Donotdownshiftforadditionalenginebrakingona slipperysurface. Thedrivewheelscouldlosetheirgrip andthevehiclecouldskid,causingacollisionor personalinjury.
DRIVE MODES
Your vehicle is equipped with a SRT Drive Mode feature. This feature gives the driver control over the systems in the vehicle which affect its performance, enabling the driver to tune it for desired driving scenarios.
NOTE: Refer to "SRT Drive Modes" in "Multimedia" for further descriptions of these modes.
Launch Control — If Equipped
This vehicle is equipped with a Launch Mode system that is designed to allow the driver to consistently achieve maximum acceleration in a straight line. Launch Mode is a form of traction control that manages tire slip while aggressively launching the vehicle. Launch mode is intended for use during race events on a closed course where consistent acceleration is desired. The system is not intended to compensate for lack of driver experience or familiarity with the race track. The use of this feature in low traction (cold, wet, gravel, etc) conditions may result in excessive wheel slip outside of the system's control, resulting in an aborted launch. Launch Mode is calibrated to provide the most benefit on an unprepared surface and will degrade performance on prepared surfaces (such as a drag strip).
NOTE: Launch control is not available within the first 500 miles (804 km) of engine break-in.
Preconditions:
- Launch control should not be used on public roads. Always check track conditions and the surrounding area.
- Launch Control should only be used when the engine and transmission are at operating temperature.
- Launch Control is intended to be used on dry, paved road surfaces only. Use on slippery or loose surfaces may cause damage to vehicle components and is not recommended.
LaunchControlisavailablewhenthefollowingprocedureisfollowed:
- Push the LAUNCH button on the center stack switch bank.
NOTE: Pushing the SRT button on the center stack or pressing Race Options within Drive Modes, then selecting the Launch Control tab, followed by the soft, Launch Control button are two other options to access launch control features. Please refer to "SRT Drive Modes" in "Multimedia" for further information.
- Push the "Launch RPM Set-Up" button on the touchscreen. This screen will allow you to adjust your launch RPM's for optimum launch/traction.
- Push the "Activate Launch Control" button on the touchscreen.
- Make sure the vehicle is not moving.
- Make sure the steering wheel is pointing straight.
- Hold the brake and make sure the vehicle is in "DRIVE" or "AutoStick" position.
- While holding the brake, rapidly apply and hold the accelerator pedal to wide open throttle. The engine speed will hold at the RPM that was set in the "Launch RPM Set-up" screen.
NOTE:Messages will appear in the instrument cluster to inform the driver if one or more of the above conditions have not been met. - When conditions 4 through 7 have been met, the instrument cluster display will read "Launch Ready Release Brake".
- Keep the vehicle pointed straight.
232 STARTING AND OPERATING
Launch control will be active until the vehicle reaches 62 mph (100 km/h), at which point the ESC system will return to its current ESC mode.
Launch control will abort before launch completion, display "Launch Aborted" in the cluster under any of the following conditions:
- The accelerator pedal is released during launch. ESC system continues in ESC Full ON.
- The ESC system detects that the vehicle is no longer moving in a straight line.
- The "ESC OFF" button is pushed to change the system to another mode.
NOTE: After launch control has been aborted, ESC will return to its current ESC mode.
CAUTION!
Donotattempttoshiftwhenthedrivewheelsare spinninganddonothavetraction.Damagetothe transmissionmayoccur.
Guidelines For Track Use
NOTE: Because of the extreme conditions encountered during track use, any damage or wear associated with track use may not be covered by warranty.
- If your SRT vehicle is equipped with Drive Modes, they will alter the vehicle's performance in various driving situations. It is recommended that your vehicle operates in SPORT or TRACK modes during the track event.
- Prior to each track event/day, verify all fluids are at the correct levels. Refer to "Fluid Capacities" in "Technical Specifications" for further information.
- Prior to each track event, verify the front and rear brake pads have more than 12 pad thickness remaining. If the brake pads require changing, please burnish prior to track outing at full pace.
NOTE: Use of DOT 4 brake fluid is suggested for extended track usage due to increased thermal capacity.
- At the conclusion of each track event, it is recommended that a brake bleed procedure is performed to maintain the pedal feel and stopping capability of your Brembo High Performance brake system.
- It is recommended that each track outing should end with a minimum of one cool down lap using minimal braking.
- If equipped with a removable lower front fascia grille, it is recommended to remove it for track use during warm/hot weather to improve cooling airflow to critical powertrain and cooling system components.
- All SRT vehicles are track tested for 24 hours of endurance. However, it is recommended that suspension system, brake system, prop shaft, and 12 shaft boots should be checked for wear or damage after every track event.
- Track usage results in increased operating temperatures of the engine, transmission, clutch – if equipped, driveline and brake system. This may affect noise (NVH) countermeasures designed into your vehicle. New components may need to be installed to return the system to the original NVH performance.
- For race track usage it is recommended that the axle fluid be changed every 4 hours of on track time.
•Tire pressure: - 40psi (276kpa) hot, recommended 32psi (221kpa) front, 30psi (207 kpa) rear cold
NOTE: It is recommended that you target 40psi (276kpa) Hot Tire Pressure at the conclusion of each track session. Starting at 32psi (221kpa) Front and 30psi (207 kpa) Rear Cold and adjusting based on ambient & track conditions is recommended. Tire pressure can be monitored via the instrument cluster display and can assist with adjustments.
Trackburnishingyourbrakes:
To avoid "green lining fade" during track use, the brake pads and rotors must have a thermal burnish for factory installed components or when new brake friction components are installed:
- Use one track session to burnish brakes by driving at 75% speed. Brake at approximately 0.60-0.80g max without ABS intervention.
- Lap the track in this manner until you start smelling the brakes. Continue for another half lap at speed, then do a two lap cool down with minimal brake applies. Make sure the brakes are not smoking. If they are, do another cool down lap.
- Do not continue for more than one full burnishing lap after you start smelling the brakes. Do not get them smoking heavily. This will get them too hot and affect their life negatively in future track use.
234 STARTING AND OPERATING
- Allow vehicle to sit and cool in the paddock for at least 30 min. If an infrared thermal gun is available, allow rotors to cool to 200^ F ( 93.3^ C) before going back out.
- There should be a thin ash layer when inspecting the pads installed in the caliper. Having the ash layer go more than half the thickness of the pad material indicates too aggressive of a burnish.
- Sometimes, a second burnish session is required. If the pads start smelling in the next track session, reduce speed and braking decel to burnish targets and follow steps two through four.
- New pads installed on old rotors still need to be burnished. New rotors installed with old pads should be burnished at the track or street driven for 300 city miles to develop an adequate lining transfer layer on the rotor surface prior to track use.
- Rotors that pulsate during track use should be replaced. Resurfacing of the rotors is not recommended, as it removes mass from the rotor, reducing its thermal capacity. Resurfacing also thins the rotor cheek, making it less robust and increasing the likelihood of pulsation in further track use.
HYDRAULIC POWER STEERING — IF EQUIPPED
The hydraulic power steering system is sport tuned and will give you good vehicle response and increased ease of maneuverability in tight spaces. The system will provide mechanical steering capability if power assist is lost.
If for some reason the power assist is interrupted, it will still be possible to steer your vehicle. Under these conditions, you will observe a substantial increase in steering effort, especially at very low vehicle speeds and during parking maneuvers.
NOTE:
- Increased noise levels at the end of the steering wheel travel are considered normal and do not indicate that there is a problem with the power steering system.
- Upon initial start-up in cold weather, the power steering pump may make noise for a short amount of time. This is due to the cold, thick fluid in the steering system. This noise should be considered normal, and it does not in any way damage the steering system.
WARNING!
Continuedoperationwithreducedpowersteeringassistcouldposeasafetyrisktoyourselfandothers. Serviceshouldbeobtainedassoonaspossible.
CAUTION!
Prolongedoperationofthesteeringsystemattheend ofthesteeringwheeltravelwillincreasethesteering fluidtemperatureanditshouldbeavoidedwhen possible.Damagetothepowersteeringpumpmay occur.
Power Steering Fluid Check
Checking the power steering fluid level at a defined service interval is not required. The fluid should be checked at every oil change if a leak is suspected, abnormal noises are apparent, and/or the system is not functioning as anticipated. Coordinate inspection efforts through an authorized dealer.
WARNING!
Fluidlevelshouldbecheckedonalevelsurfaceand withtheengineofftopreventinjuryfrommoving partsandtoensureaccuratefluidlevelreading.Donot overfill.Useonlymanufacturer'srecommendedpower steeringfluid.
CAUTION!
Donotusechemicalflushesinyourpowersteering systemasthechemicalscandamageyourpowersteeringcomponents.Suchdamageisnotcoveredbythe NewVehicleLimitedWarranty.
If necessary, add fluid to restore to the proper indicated level. With a clean cloth, wipe any spilled fluid from all surfaces. Refer to "Fluids And Lubricants" in "Technical Specifications" for further information.
SPEED CONTROL — IF EQUIPPED
The Speed Control buttons are located on the right side of the steering wheel.
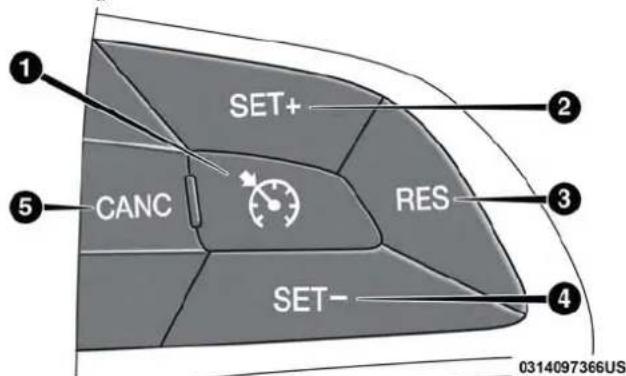
text_image
1 SET+ 2 3 4 5 CANC RES SET- 0314097366USSpeedControlButtons
1—On/Off 4—SET (-)/Decel
2 — SET (+)/Accel 5 — CANC/Cancel
3 — RES/Resume
NOTE: In order to ensure proper operation, the Speed Control System has been designed to shut down if multiple Speed Control functions are operated at the same time. If this occurs, the Speed Control System can be reactivated by pushing the Speed Control on/off button and resetting the desired vehicle set speed.
To Activate
Push the on/off button to activate the Speed Control. "CRUISE CONTROL READY" will appear in the instrument cluster display to indicate the Speed Control is on. To turn the system off, push the on/off button a second time. "CRUISE CONTROL OFF" will appear in the instrument cluster display to indicate the Speed Control is off. The system should be turned off when not in use.
WARNING!
LeavingtheSpeedControlsystemonwhennotinuse isdangerous.Youcouldaccidentallysetthesystemor causeittogofasterthanyouwant.Youcouldlose controlandhaveanaccident.Alwaysleavethesystem OFFwhenyouarenotusingit.
To Set A Desired Speed
Turn the Speed Control on. When the vehicle has reached the desired speed, push the SET (+) or SET (-) button and release. Release the accelerator and the vehicle will operate at the selected speed. Once a speed has been set, a message "CRUISE CONTROL SET TO MPH (km/h)" will appear indicating what speed was set. A cruise indicator lamp, along with set speed will also appear and stay on in the instrument cluster when the speed is set.
To Vary The Speed Setting
ToIncreaseSpeed
When the Speed Control is set, you can increase speed by pushing the SET (+)button.
The driver's preferred units can be selected through the instrument cluster display. Refer to "Getting To Know Your Instrument Panel" for more information. The speed increment shown is dependant on the chosen speed unit of U.S. (mph) or Metric (km/h):
U.S.Speed(mph)
- Pushing the SET (+)button once will result in 1 mph increase in set speed. Each subsequent tap of the button results in an increase of 1 mph.
- If the button is continually pushed, the set speed will continue to increase until the button is released, then the new set speed will be established.
MetricSpeed(km/h)
- Pushing the SET (+)button once will result in a 1 km/h increase in set speed. Each subsequent tap of the button results in an increase of 1 km/h.
- If the button is continually pushed, the set speed will continue to increase until the button is released, then the new set speed will be established.
ToDecreaseSpeed
When the Speed Control is set, you can decrease speed by pushing the SET (-)button.
The driver's preferred units can be selected through the instrument cluster display. Refer to "Getting To Know Your Instrument Panel" for more information. The speed decrement shown is dependant on the chosen speed unit of U.S. (mph) or Metric (km/h):
U.S.Speed(mph)
- Pushing the SET (-)button once will result in a 1 mph decrease in set speed. Each subsequent tap of the button results in a decrease of 1 mph.
238 STARTING AND OPERATING
- If the button is continually pushed, the set speed will continue to decrease until the button is released, then the new set speed will be established.
MetricSpeed(km/h)
- Pushing the SET (-)button once will result in a 1km / h decrease in set speed. Each subsequent tap of the button results in a decrease of 1km / h .
- If the button is continually pushed, the set speed will continue to decrease until the button is released, then the new set speed will be established.
To Accelerate For Passing
Press the accelerator as you would normally. When the pedal is released, the vehicle will return to the set speed.
UsingSpeedControlOnHills
The transmission may downshift on hills to maintain the vehicle set speed.
NOTE: The Speed Control system maintains speed up and down hills. A slight speed change on moderate hills is normal.
On steep hills, a greater speed loss or gain may occur so it may be preferable to drive without Speed Control.
WARNING!
SpeedControlcanbedangerouswherethesystem cannotmaintinaconstantspeed.Yourvehiclecould gotoofastfortheconditions,andyoucouldlose controlandhaveanaccident.DonotuseSpeedControl inheavytrafficoronroadsthatarewinding,icy, snow-coveredorslippery.
To Resume Speed
To resume a previously set speed, push the RES button and release. Resume can be used at any speed above 20 mph (32 km/h).
To Deactivate
A soft tap on the brake pedal, pushing the CANC button, or normal brake pressure while slowing the vehicle will deactivate the Speed Control without erasing the set speed from memory.
Pushing the on/off button or turning the ignition switch OFF erases the set speed from memory.
ADAPTIVE CRUISE CONTROL (ACC) — IF EQUIPPED
Adaptive Cruise Control (ACC) increases the driving convenience provided by cruise control while traveling on highways and major roadways. However, it is not a safety system and not designed to prevent collisions. Speed Controlfunctionperformsdifferently.Pleaserefertothe propersectionwithinthischapter.
ACC will allow you to keep cruise control engaged in light to moderate traffic conditions without the constant need to reset your cruise control. ACC utilizes a radar sensor and a forward facing camera designed to detect a vehicle directly ahead of you.
NOTE:
- If the sensor does not detect a vehicle ahead of you, ACC will maintain a fixed set speed.
- If the ACC sensor detects a vehicle ahead, ACC will apply limited braking or accelerate (not to exceed the original set speed) automatically to maintain a preset following distance, while matching the speed of the vehicle ahead.
The Cruise Control system has two control modes:
- Adaptive Cruise Control mode for maintaining an appropriate distance between vehicles.
- Normal (Fixed Speed) Cruise Control mode for cruising at a constant preset speed. For additional information, refer to "Normal (Fixed Speed) Cruise Control Mode" in this section.
NOTE: Normal (Fixed Speed) Cruise Control will not react to preceding vehicles. Always be aware of the mode selected.
You can change the mode by using the Cruise Control buttons. The two control modes function differently. Always confirm which mode is selected.
WARNING!
- Adaptive Cruise Control (ACC) is a convenience system. It is not a substitute for active driving involvement. It is always the driver's responsibility to be attentive of road, traffic, and weather conditions, vehiclespeed, distance to the vehicle ahead; and, most importantly, brake operation to ensure safe
(Continued)
WARNING!(Continued)
operationofthevehicleunderallroadconditions. Yourcompleteattentionisalwaysrequiredwhile drivingtomaintainsafecontrolofyourvehicle. Failuretofollowthesewarningscanresultina collisionanddeathorseriouspersonalinjury.
•TheACCsystem:
- Does not react topedestrians, oncoming vehicles, and stationary objects (e.g., astopped vehicle in a traffic jamoradisabled vehicle).
- Cannottakestreet,traffic,andweatherconditions intoaccount,andmaybelimiteduponadverse sightdistanceconditions.
- Does not always fully recognize complex driving conditions, which can result in wrong or missing distance warnings.
- Willbringthevehicletoacompletestopwhile followingatargetvehicleandholdthevehiclefor
WARNING!(Continued)
2secondsinthestopposition.Ifthetargetvehicle doesnotstartmovingwithintwosecondstheACC systemwilldisplayamessagethatthesystemwill releasethebrakesandthatthebrakesmustbe appliedmanually.Anaudiblechimewillsound whenthebrakesarereleased.
YoushouldswitchofftheACCsystem:
- Whendrivinginfog, heavyrain, heavysnow, sleet, heavytraffic, and complexdrivingsituations (i.e., in highwayconstructionzones).
- Whenenteringaturnlaneorhighwayofframp; whendrivingonroadsthatarewinding,icy,snow-covered,slippery,orhavesteepuphillordownhill slopes.
- Whentowingatralerupordownsteepslopes.
- Whencircumstancesdonotallowsafedrivingata constantspeed.
Adaptive Cruise Control (ACC) Operation
The Speed Control buttons (located on the right side of the steering wheel) operates the ACC system.
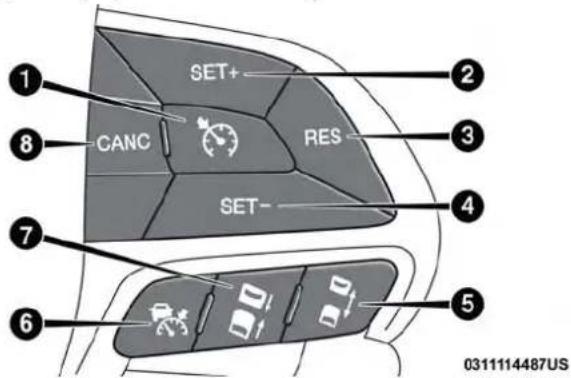
text_image
SET+ CANC RES SET- ① ② ③ ④ ⑤ ⑥ 0311114487USAdaptiveCruiseControlButtons
1 — Normal (Fixed Speed) Cruise Control On/Off
5 — Distance Setting Increase
2 — SET(+)/Accel 6 — Adaptive Cruise Control (ACC) On/Off
3 — RES/Resume 7 — Distance Setting Decrease 4 — SET (-)/Decel 8 — CANC/Cancel
NOTE: Any chassis/suspension or tire size modifications to the vehicle will effect the performance of the Adaptive Cruise Control and Forward Collision Warning System.
Activating Adaptive Cruise Control (ACC)
You can only engage ACC if the vehicle speed is above 0 mph (0 km/h).
The minimum set speed for the ACC system is 20 mph (32 km/h).
When the system is turned on and in the ready state, the instrument cluster displays "ACC Ready."
When the system is off, the instrument cluster displays "Adaptive Cruise Control (ACC) Off."
NOTE: You cannot engage ACC under the following conditions:
- When in Four-Wheel Drive Low.
- When you apply the brakes.
- When the parking brake is applied.
- When the automatic transmission is in PARK, REVERSE or NEUTRAL.
- When the vehicle speed is outside of the speed range.
242 STARTING AND OPERATING
- When the brakes are overheated.
- When the driver's door is open at low speeds.
- When the driver's seat belt is unbuckled at low speeds.
- ESC Full-Off Mode is active.
To Activate/Deactivate
Push and release the Adaptive Cruise Control (ACC) on/off button. The ACC menu in the instrument cluster displays "ACC Ready."
ACC Ready
0323001278
AdaptiveCruiseControlReady
To turn the system off, push and release the Adaptive Cruise Control (ACC) on/off button again. At this time, the
system will turn off and the instrument cluster displays "Adaptive Cruise Control (ACC) Off."
Adaptive Cruise Control (ACC) Off
0323001263
AdaptiveCruiseControlOff
WARNING!
LeavingtheAdaptiveCruiseControl(ACC)systemon whennotinuseisdangerous.Youcouldaccidentally setthesystemorcauseittogofasterthanyouwant. Youcouldlosecontrolandhaveacollision.Always leavethesystemoffwhenyouarenotusingit.
To Set A Desired ACC Speed
When the vehicle reaches the speed desired, push the SET (+) button or the SET (-) button and release. The instrument cluster display will display the set speed.
If the system is set when the vehicle speed is below 20 mph (32 km/h), the set speed shall be defaulted to 20 mph (32 km/h). If the system is set when the vehicle speed is above 20 mph (32 km/h), the set speed shall be the current speed of the vehicle.
NOTE: ACC cannot be set if there is a stationary vehicle in front of your vehicle in close proximity.
Remove your foot from the accelerator pedal. If you do not, the vehicle may continue to accelerate beyond the set speed. If this occurs:
- The message "DRIVER OVERRIDE" will display in the instrument cluster display.
- The system will not be controlling the distance between your vehicle and the vehicle ahead. The vehicle speed will only be determined by the position of the accelerator pedal.
To Cancel
The following conditions cancel the system:
• The brake pedal is applied.
• The CANC button is pushed.
- An Anti-Lock Brake System (ABS) event occurs.
- The gear selector is removed from the DRIVE position.
- The braking temperature exceeds normal range (overheated).
- The Electronic Stability Control/Traction Control System (ESC/TCS) activates.
• The vehicle parking brake is applied.
- Driver seatbelt is unbuckled at low speeds.
- Driver door is opened at low speeds.
- The driver switches ESC to full-off mode.
NOTE: If your vehicle stays at standstill for longer than two seconds, then the system will cancel and the brake force will be ramped-out. The driver will have to apply the brakes to keep the vehicle at a standstill.
244 STARTING AND OPERATING
To Turn Off
The system will turn off and clear the set speed in memory if:
- The Adaptive Cruise Control (ACC) on/off button is pushed.
- The Normal (Fixed Speed) Cruise Control on/off button is pushed.
• The ignition is turned OFF.
To Resume
If there is a set speed in memory push the RES (resume) button and then remove your foot from the accelerator pedal. The instrument cluster display will display the last set speed.
NOTE: ACC cannot be resumed if there is a stationary vehicle in-front of your vehicle in close proximity.
WARNING!
TheResumefunctionsshouldonlybeusediftraffic androadconditionspermit.Resumingassetspeedthat istoohighortoolowforprevailingtrafficandroid
WARNING!(Continued)
conditionscouldcausethevehicletoaccelerateor deceleratetoosharplyforsafeoperation.Failureto followthesewarningscanresultinacollisionand deathorseriouspersonalinjury.
To Vary The ACC Speed
ToIncreaseSpeed
While ACC is set, you can increase the set speed by pushing the SET (+)button.
The driver's preferred units can be selected through the instrument panel settings if equipped. Refer to "Getting To Know Your Instrument Panel" for more information. The speed increment shown is dependant on the chosen speed unit of U.S. (mph) or Metric (km/h):
U.S.Speed(mph)
- Pushing the SET (+)button once will result in a1mph increase in set speed. Each subsequent tap of the button results in an increase of 1 mph.
(Continued)
- If the button is continually pushed, the set speed will continue to increase in 5 mph increments until the button is released. The increase in set speed is reflected in the instrument cluster display.
MetricSpeed(km/h)
- Pushing the SET (+) button once will result in a 1 km/h increase in set speed. Each subsequent tap of the button results in an increase of 1 km/h.
- If the button is continually pushed, the set speed will continue to increase in 10km / h increments until the button is released. The increase in set speed is reflected in the instrument cluster display.
ToDecreaseSpeed
While ACC is set, the set speed can be decreased by pushing the SET (-)button.
The driver's preferred units can be selected through the instrument panel settings if equipped. Refer to "Getting To Know Your Instrument Panel" for more information. The speed decrement shown is dependant on the chosen speed unit of U.S. (mph) or Metric (km/h):
U.S.Speed(mph)
- Pushing the SET (-)button once will result in a 1 mph decrease in set speed. Each subsequent tap of the button results in a decrease of 1 mph.
- If the button is continually pushed, the set speed will continue to decrease in 5 mph decrements until the button is released. The decrease in set speed is reflected in the instrument cluster display.
MetricSpeed(km/h)
- Pushing the SET (-)button once will result in a 1km / h decrease in set speed. Each subsequent tap of the button results in a decrease of 1km / h .
- If the button is continually pushed, the set speed will continue to decrease in 10km / h decrements until the button is released. The decrease in set speed is reflected in the instrument cluster display.
246 STARTING AND OPERATING
NOTE:
- When you override and push the SET (+)button or SET (-)buttons, the new set speed will be the current speed of the vehicle.
- When you use the SET (-)button to decelerate, if the engine's braking power does not slow the vehicle sufficiently to reach the set speed, the brake system will automatically slow the vehicle.
- The ACC system applies the brake down to a full stop when following a target vehicle. If an ACC host vehicle follows a target vehicle to a standstill, the host vehicle will release the vehicle brakes two seconds after coming to a full stop.
- The ACC system maintains set speed when driving up hill and down hill. However, a slight speed change on moderate hills is normal. In addition, downshifting may occur while climbing uphill or descending downhill. This is normal operation and necessary to maintain set speed. When driving up hill and down hill, the ACC system will cancel if the braking temperature exceeds normal range (overheated).
Setting The Following Distance In ACC
The specified following distance for ACC can be set by varying the distance setting between four bars (longest), three bars (long), two bars (medium) and one bar (short). Using this distance setting and the vehicle speed, ACC calculates and sets the distance to the vehicle ahead. This distance setting displays in the instrument cluster display.
natural_image
Top-down line drawing of a car's front view with lane markings (no text or symbols)DistanceSetting4Bars(Longest)
STARTING AND OPERATING 247
natural_image
Line drawing of a car's front view with lane markings (no text or symbols)0323001261
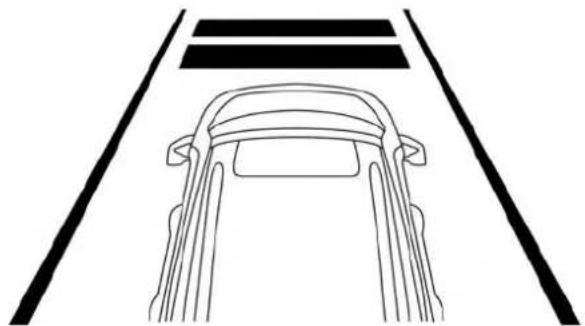
natural_image
Line drawing of a car's front view showing dashboard, rear seats, and lane markings (no text or symbols)0323001260
DistanceSetting3Bars(Long)DistanceSetting2Bars(Medium)
248 STARTING AND OPERATING
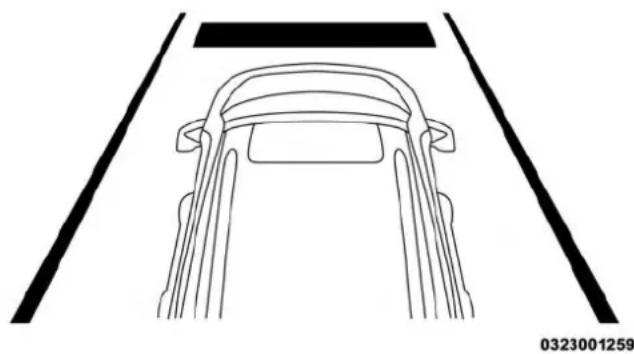
natural_image
Top-down line drawing of a car's front wheel and rear seats, no text or symbols presentDistanceSetting1Bar(Short)
To increase the distance setting, push the Distance Setting — Increase button and release. Each time the button is pushed, the distance setting increases by one bar (longer).
To decrease the distance setting, push the Distance Setting — Decrease button and release. Each time the button is pushed, the distance setting decreases by one bar (shorter).
If there is no vehicle ahead, the vehicle will maintain the set speed. If a slower moving vehicle is detected in the same lane, the instrument cluster displays the "Sensed Vehicle Indicator" icon, and the system adjusts vehicle speed automatically to maintain the distance setting, regardless of the set speed.
The vehicle will then maintain the set distance until:
- The vehicle ahead accelerates to a speed above the set speed.
- The vehicle ahead moves out of your lane or view of the sensor.
• The distance setting is changed. - The system disengages. (Refer to the information on ACC Activation).
The maximum braking applied by ACC is limited; however, the driver can always apply the brakes manually, if necessary.
NOTE: The brake lights will illuminate whenever the ACC system applies the brakes.
A Proximity Warning will alert the driver if ACC predicts that its maximum braking level is not sufficient to maintain the set distance. If this occurs, a visual alert “BRAKE” will flash in the instrument cluster display and a chime will sound while ACC continues to apply its maximum braking capacity.
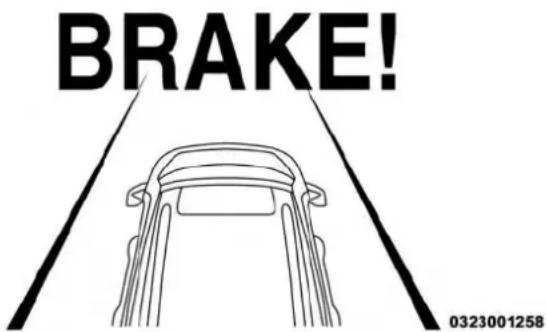
text_image
BRAKE! 0323001258BrakeAlert
NOTE: The "Brake!" Screen in the instrument cluster display is a warning for the driver to take action and does not necessarily mean that the Forward Collision Warning system is applying the brakes autonomously.
Overtake Aid
When driving with ACC engaged and following a vehicle, the system will provide an additional acceleration up to the ACC set speed to assist in passing the vehicle. This additional acceleration is triggered when the driver utilizes the left turn signal and will only be active when passing on the left hand side.
ACC Operation At Stop
If the ACC system brings your vehicle to a standstill while following a target vehicle, if the target vehicle starts moving within two seconds of your vehicle coming to a standstill, your vehicle will resume motion without the need for any driver action.
If the target vehicle does not start moving within two seconds of your vehicle coming to a standstill, the ACC with Stop system will cancel and the brakes will release. A cancel message will display on the instrument cluster display and produce a warning chime. Driver intervention will be required at this moment.
While ACC with Stop is holding your vehicle at a standstill, if the driver seatbelt is unbuckled or the driver door is opened, the ACC with Stop system will cancel and the brakes will release. A cancel message will display on the instrument cluster display and produce a warning chime. Driver intervention will be required at this moment.
WARNING!
When the ACC system is resumed, the driver must ensure that there are no pedestrians, vehicles or objects in the path of the vehicle. Failure to follow these warnings can result in a collision and death or serious personal injury.
Adaptive Cruise Control (ACC) Menu
The instrument cluster display will show the current ACC system settings. The instrument cluster display is located in the center of the instrument cluster. The information it displays depends on ACC system status.
Push the Adaptive Cruise Control (ACC) on/off button (located on the steering wheel) until one of the following appears in the instrument cluster display:
AdaptiveCruiseControlOff
When ACC is deactivated, the display will read "Adaptive Cruise Control Off."
AdaptiveCruiseControlReady
When ACC is activated, but the vehicle speed setting has not been selected, the display will read “Adaptive Cruise Control Ready.”
AdaptiveCruiseControlSet
When the SET (+) or the SET (-) button (located on the steering wheel) is pushed, the display will read "ACC SET."
When ACC is set, the set speed will show in the instrument cluster display.
The ACC screen may display once again if any ACC activity occurs, which may include any of the following:
- System Cancel
- Driver Override
- System Off
- ACC Proximity Warning
- ACC Unavailable Warning
- The instrument cluster display will return to the last display selected after five seconds of no ACC display activity
Display Warnings And Maintenance
"WipeFrontRadarSensorInFrontOfVehicle" Warning
The “ACC/FCW Unavailable Wipe Front Radar Sensor” warning will display and also a chime will indicate when conditions temporarily limit system performance.
This most often occurs at times of poor visibility, such as in snow or heavy rain. The ACC system may also become temporarily blinded due to obstructions, such as mud, dirt or ice. In these cases, the instrument cluster display will display “ACC/FCW Unavailable Wipe Front Radar Sensor” and the system will deactivate.
The “ACC/FCW Unavailable Wipe Front Radar Sensor” message can sometimes be displayed while driving in highly reflective areas (i.e. tunnels with reflective tiles, or ice and snow). The ACC system will recover after the vehicle has left these areas. Under rare conditions, when the radar is not tracking any vehicles or objects in its path this warning may temporarily occur.
NOTE: If the "ACC/FCW Unavailable Wipe Front Radar Sensor" warning is active Normal (Fixed Speed) Cruise Control is still available. For additional information refer to "Normal (Fixed Speed) Cruise Control Mode" in this section. If weather conditions are not a factor, the driver should examine the sensor. It may require cleaning or removal of an obstruction. The sensor is located in the center of the vehicle behind the lower grille.
To keep the ACC System operating properly, it is important to note the following maintenance items:
- Always keep the sensor clean. Carefully wipe the sensor lens with a soft cloth. Be cautious not to damage the sensor lens.
- Do not remove any screws from the sensor. Doing so could cause an ACC system malfunction or failure and require a sensor realignment.
- If the sensor or front end of the vehicle is damaged due to a collision, see your authorized dealer for service.
- Do not attach or install any accessories near the sensor, including transparent material or aftermarket grilles. Doing so could cause an ACC system failure or malfunction.
When the condition that deactivated the system is no longer present, the system will return to the "Adaptive Cruise Control Off" state and will resume function by simply reactivating it.
252 STARTING AND OPERATING
NOTE:
- If the "ACC/FCW Unavailable Wipe Front Radar Sensor" message occurs frequently (e.g. more than once on every trip) without any snow, rain, mud, or other obstruction, have the radar sensor realigned at your authorized dealer.
- Installing a snow plow, front-end protector, an aftermarket grille or modifying the grille is not recommended. Doing so may block the sensor and inhibit ACC/FCW operation.
"CleanFrontWindshield"Warning
The “ACC/FCW Limited Functionality Clean Front Windshield” warning will display and also a chime will indicate when conditions temporarily limit system performance. This most often occurs at times of poor visibility, such as in snow or heavy rain and fog. The ACC system may also become temporarily blinded due to obstructions, such as mud, dirt, or ice on windshield and fog on the inside of glass. In these cases, the instrument cluster display will display “ACC/FCW Limited Functionality Clean Front Windshield” and the system will have degraded performance.
The "ACC/FCW Limited Functionality Clean Front Windshield" message can sometimes be displayed while driving in adverse weather conditions. The ACC/FCW system will recover after the vehicle has left these areas. Under rare conditions, when the camera is not tracking any vehicles or objects in its path this warning may temporarily occur.
If weather conditions are not a factor, the driver should examine the windshield and the camera located on the back side of the inside rear view mirror. They may require cleaning or removal of an obstruction.
When the condition that created limited functionality is no longer present, the system will return to full functionality.
NOTE: If the "ACC/FCW Limited Functionality Clean Front Windshield" message occurs frequently (e.g. more than once on every trip) without any snow, rain, mud, or other obstruction, have the windshield and forward facing camera inspected at your authorized dealer.
ServiceACC/FCWWarning
If the system turns off, and the instrument cluster displays "ACC/FCW Unavailable Service Required" or "Cruise/FCW Unavailable Service Required", there may be an internal system fault or a temporary malfunction that limits ACC functionality. Although the vehicle is still drivable under normal conditions, ACC will be temporarily unavailable. If this occurs, try activating ACC again later, following an ignition cycle. If the problem persists, see your authorized dealer.
Precautions While Driving With ACC
In certain driving situations, ACC may have detection issues. In these cases, ACC may brake late or unexpectedly. The driver needs to stay alert and may need to intervene.
TowingATrailer
Towing a trailer is not advised when using ACC.
OffsetDriving
ACC may not detect a vehicle in the same lane that is offset from your direct line of travel, or a vehicle merging in from a side lane. There may not be sufficient distance to the vehicle ahead. The offset vehicle may move in and out of the line of travel, which can cause your vehicle to brake or accelerate unexpectedly.
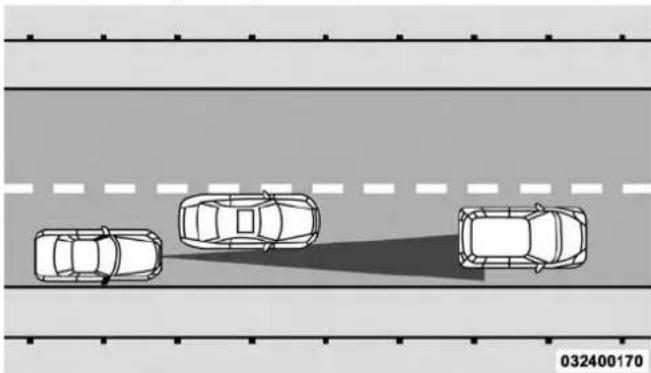
natural_image
Top-down view of three cars on a road with lane markings (no text or symbols)OffsetDriving ConditionExample
254 STARTING AND OPERATING
TurnsAndBends
When driving on a curve with ACC engaged, the system may decrease the vehicle speed and acceleration for stability reasons, with no target vehicle detected. Once the vehicle is out of the curve the system will resume your original set speed. This is a part of normal ACC system functionality.
NOTE: On tight turns ACC performance may be limited.
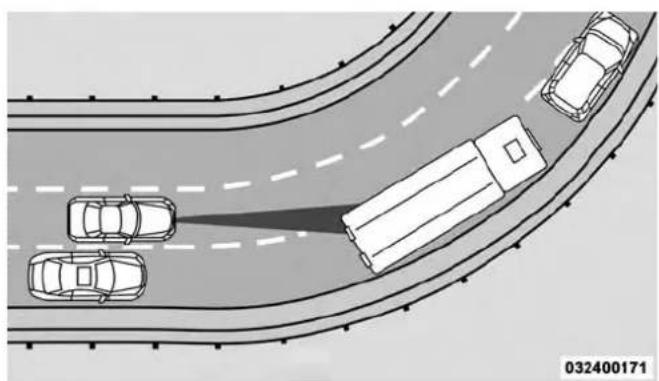
natural_image
Top-down diagram of a multi-lane highway with vehicles and a vehicle, showing a collision or perspective view (no text or symbols)TurnOrBendExample
UsingACCCOnHills
When driving on hills, ACC may not detect a vehicle in your lane. Depending on the speed, vehicle load, traffic conditions, and the steepness of the hills, ACC performance may be limited.
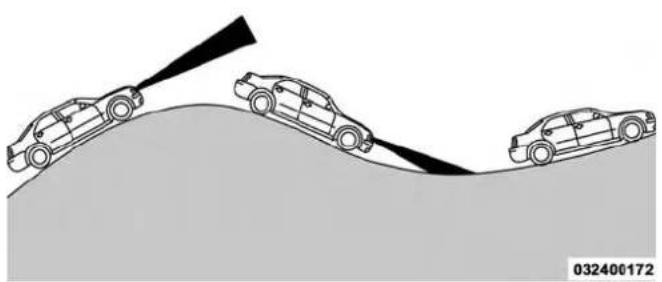
natural_image
Diagram showing three cars approaching a slope with a triangular object above them (no text or symbols)ACCHillExample
LaneChanging
ACC may not detect a vehicle until it is completely in the lane in which you are traveling. In the illustration shown, ACC has not yet detected the vehicle changing lanes and it may not detect the vehicle until it's too late for the ACC system to take action. ACC may not detect a vehicle until it is completely in the lane. There may not be sufficient distance to the lane-changing vehicle. Always be attentive and ready to apply the brakes if necessary.
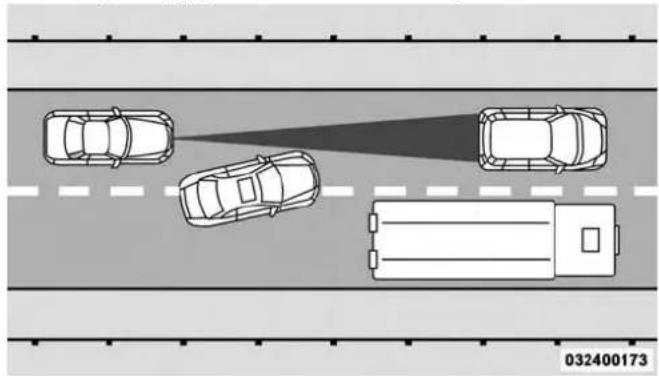
natural_image
Top-down diagram of a multi-lane road with vehicles and a truck, showing a collision or perspective projection (no text or symbols)LaneChangingExample
NarrowVehicles
Some narrow vehicles traveling near the outer edges of the lane or edging into the lane are not detected until they have moved fully into the lane. There may not be sufficient distance to the vehicle ahead.
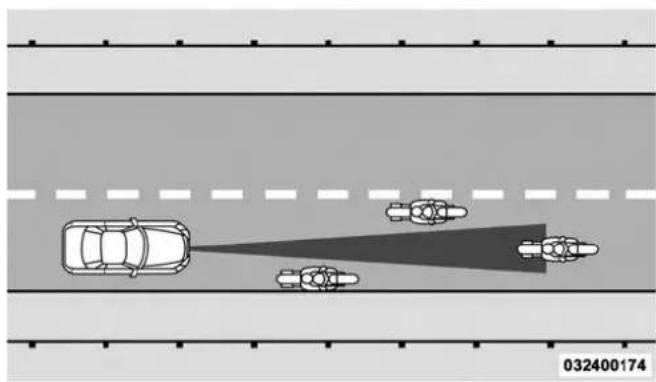
natural_image
Top-down diagram of a road with vehicles and a shaded lane, no text or symbols presentNarrowVehicleExample
256 STARTING AND OPERATING
StationaryObjectsAndVehicles
ACC does not react to stationary objects and stationary vehicles. For example, ACC will not react in situations where the vehicle you are following exits your lane and the vehicle ahead is stopped in your lane. Always be attentive and ready to apply the brakes if necessary.
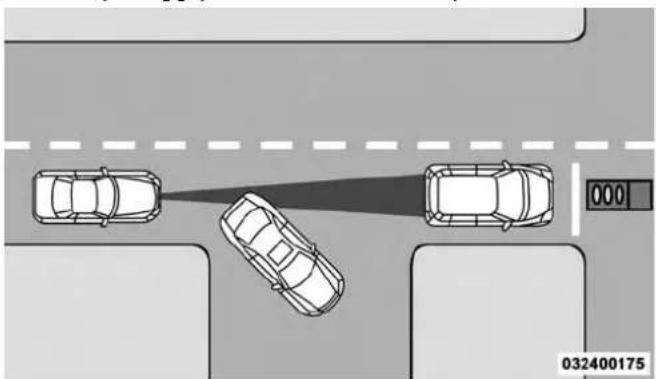
natural_image
Top-down diagram of three cars on a road with a distance measurement overlay (no text or symbols)StationaryObjectAndStationaryVehicleExample
General Information
The following regulatory statement applies to all Radio Frequency (RF) devices equipped in this vehicle:
This device complies with Part 15 of the FCC Rules and with Industry Canada license-exempt RSS standard(s). Operation is subject to the following two conditions:
- This device may not cause harmful interference.
- This device must accept any interference received, including interference that may cause undesired operation.
NOTE: Changes or modifications not expressly approved by the party responsible for compliance could void the user's authority to operate the equipment.
Normal (Fixed Speed) Cruise Control Mode
In addition to Adaptive Cruise Control mode, a Normal (Fixed Speed) Cruise Control mode is available for cruising at fixed speeds. The Normal (Fixed Speed) Cruise Control mode is designed to maintain a set cruising speed without requiring the driver to operate the accelerator. Cruise Control can only be operated if the vehicle speed is above 20 mph (32 km/h).
To change between the different control modes, push the Adaptive Cruise Control (ACC) on/off button which turns the ACC and the Normal (Fixed Speed) Cruise Control off. Pushing the Normal (Fixed Speed) Cruise Control on/off button will result in turning on (changing to) the Normal (Fixed Speed) Cruise Control mode.
WARNING!
IntheNormal(FixedSpeed)CruiseControlmode, the systemwillnotreacttovehiclesahead. In addition, the proximity warning does not activate and no alarm will sound even if you are too closely to the vehicle ahead since neither the presence of the vehicle ahead nor the vehicle-to-vehicled distance is detected. Besuretomain as a fed distance between your vehicle and the vehicle ahead. Always be aware which mode is selected.
ToSetADesiredSpeed

Turn the Normal (Fixed Speed) Cruise Control on. When the vehicle has reached the desired speed, push the SET (+) or SET (-) button and release. Release the accelerator and the vehicle will operate at the selected speed. Once a speed has been
set a message "CRUISE CONTROL SET TO MPH (km/h)" will appear indicating what speed was set. This light will turn on when the system is turned on via the on/off control. It turns green when the cruise control is set.
ToVaryTheSpeedSetting
ToIncreaseSpeed
When the Normal (Fixed Speed) Cruise Control is set, you can increase speed by pushing the SET (+)button.
The driver's preferred units can be selected through the instrument cluster display. Refer to "Getting To Know Your Instrument Panel" for more information. The speed increment shown is dependant on the speed of U.S. (mph) or Metric (km/h) units:
U.S.Speed(mph)
- Pushing the SET (+)button once will result in a1mph increase in set speed. Each subsequent tap of the button results in an increase of 1 mph.
- If the button is continually pushed, the set speed will continue to increase in 5 mph increments until the button is released. The increase in set speed is reflected in the instrument cluster display.
258 STARTING AND OPERATING
MetricSpeed(km/h)
- Pushing the SET (+) button once will result in a 1 km/h increase in set speed. Each subsequent tap of the button results in an increase of 1 km/h.
- If the button is continually pushed, the set speed will continue to increase in 10km / h increments until the button is released. The increase in set speed is reflected in the instrument cluster display.
ToDecreaseSpeed
When the Normal (Fixed Speed) Cruise Control is set, you can decrease speed by pushing the SET (-)button.
The driver's preferred units can be selected through the instrument cluster display. Refer to "Getting To Know Your Instrument Panel" for more information. The speed decrement shown is dependant on the speed of U.S. (mph) or Metric (km/h) units:
U.S.Speed(mph)
- Pushing the SET (-)button once will result in a 1 mph decrease in set speed. Each subsequent tap of the button results in a decrease of 1 mph.
- If the button is continually pushed, the set speed will continue to decrease in 5 mph decrements until the button is released. The decrease in set speed is reflected in the instrument cluster display.
MetricSpeed(km/h)
- Pushing the SET (-)button once will result in a 1km / h decrease in set speed. Each subsequent tap of the button results in a decrease of 1km / h .
- If the button is continually pushed, the set speed will continue to decrease in 10km / h decrements until the button is released. The decrease in set speed is reflected in the instrument cluster display.
ToCancel
The following conditions will cancel the Normal (Fixed Speed) Cruise Control without clearing the memory:
• The brake pedal is applied.
• The CANC button is pushed.
- The Electronic Stability Control/Traction Control System (ESC/TCS) activates.
• The vehicle parking brake is applied.
- The braking temperature exceeds normal range (overheated).
- The gear selector is removed from the DRIVE position.
- The driver switches ESC to full-off mode.
ToResumeSpeed
To resume a previously set speed, push the RES button and release. Resume can be used at any speed above 20 mph (32 km/h).
ToTurnOff
The system will turn off and erase the set speed in memory if:
- The Normal (Fixed Speed) Cruise Control on/off button is pushed.
• The ignition is turned OFF. - The Adaptive Cruise Control (ACC) on/off button is pushed.
PARKSENSE REAR PARK ASSIST — IF EQUIPPED
The ParkSense Rear Park Assist system provides visual and audible indications of the distance between the rear fascia and a detected obstacle when backing up, e.g. during a parking maneuver.
Refer to "ParkSense System Usage Precautions" in this section for limitations of this system and recommendations.
ParkSense will retain the last system state (enabled or disabled) from the last ignition cycle when the ignition is changed to the ON/RUN position.
ParkSense can be active only when the gear selector is in REVERSE. If ParkSense is enabled at this gear selector position, the system will remain active until the vehicle speed is increased to approximately 7 mph (11 km/h) or above. The system will become active again if the vehicle speed is decreased to speeds less than approximately 6 mph (9 km/h).
ParkSense Sensors
The four ParkSense sensors, located in the rear fascia/bumper, monitor the area behind the vehicle that is within the sensors' field of view. The sensors can detect obstacles from approximately 12 inches (30 cm) up to 79 inches (200 cm) from the rear fascia/bumper in the horizontal direction, depending on the location, type and orientation of the obstacle.
ParkSense Warning Display
The ParkSense Warning screen will only be displayed if "Sound and Display" is selected from the Customer - Programmable Features section of the Uconnect System. Refer to "Uconnect Settings" in "Multimedia" for further information.
The ParkSense Warning screen is located within the instrument cluster display. It provides visual warnings to indicate the distance between the rear fascia/bumper and the detected obstacle. Refer to “Instrument Cluster Display” in “Getting To Know Your Instrument Panel” for further information.
ParkSense Display
When the vehicle is in REVERSE, the warning display will turn on indicating the system status.
The system will indicate a detected obstacle by showing a single arc in one or more regions based on the obstacle's distance and location relative to the vehicle.
If an obstacle is detected in the center rear region, the display will show a single solid arc in the center rear region and will produce a one-half second tone. As the vehicle moves closer to the obstacle, the display will show the single arc moving closer to the vehicle and the sound tone will change from slow, to fast, to continuous.
If an obstacle is detected in the left and/or right rear region, the display will show a single flashing arc in the left and/or right rear region and will produce a fast sound tone. As the vehicle moves closer to the obstacle, the display will show the single arc moving closer to the vehicle and the sound tone will change from fast to continuous.
STARTING AND OPERATING 261
natural_image
Simple line drawing of a car viewed from above, no text or symbols present0327045850
natural_image
Simple line drawing of a car on a roof with a side arm, no text or symbols presentSingle1/2SecondTone/SolidArcSlowTone/SolidArc
0327045851
262 STARTING AND OPERATING
natural_image
Simple line drawing of a car on a curved surface (no text or symbols)0327045853
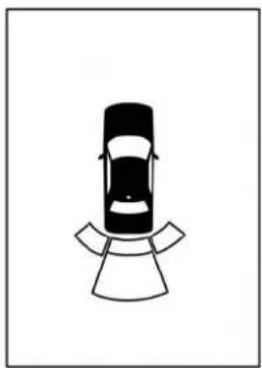
natural_image
Simple line drawing of a car on a roof with a curved base (no text or symbols)0327045854
FastTone/FlashingArcContinuousTone/FlashingArc
The vehicle is close to the obstacle when the warning display shows one flashing arc and sounds a continuous tone. The following chart shows the warning alert operation when the system is detecting an obstacle:
STARTING AND OPERATING 263
| WARNINGALERTS | |||||||
| Rear Distance (in/cm) | Greater than 79 inches (200 cm) | 79-59 inches (200-150 cm) | 59-47 inches (150-120 cm) | 47-39 inches (120-100 cm) | 39-25 inches (100-65 cm) | 25-12 inches (65-30 cm) | Less than 12 inches (30 cm) |
| Audible Alert Chime | None Single 1/2-Second Tone (for rear center only) | Slow (for rear center only) | Slow (for rear center only) | Fast (for rear center only) | Fast Continuous | ||
| Arc — Left Rear | None None None None None 2nd Flashing | ing | 1st Flashing | ||||
| Arc — Center Rear | None 6th Solid 5th Solid 4th Solid 3rd Flashing | ing | 2nd Flashing | 1st Flashing | |||
| Arc — Right Rear | None None None None None 2nd Flashing | ing | 1st Flashing | ||||
| Radio Volume Reduced | No Yes Yes Yes Yes Yes | ||||||
Enabling And Disabling ParkSense
ParkSense can be enabled and disabled with the ParkSense switch, located on the switch panel below the Uconnect display.

When the ParkSense switch is pushed to disable the system, the instrument cluster will display the "ParkSense Off" message for approximately five seconds. When the gear selector is moved to
REVERSE and the system is disabled, the instrument cluster display will display the "ParkSense Off" message for as long as the vehicle is in REVERSE.
Refer to "Instrument Cluster Display" in "Getting To Know Your Instrument Panel" for further information.
The ParkSense switch LED will be on when ParkSense is disabled or defective. The ParkSense switch LED will be off when the system is enabled. If the ParkSense switch is pushed and the system is disabled or requires service, the ParkSense switch LED will blink momentarily and then the LED will be on.
Service The ParkSense Rear Park Assist System
During vehicle start up, when the ParkSense Rear Park Assist System has detected a faulted condition, the instrument cluster display will actuate a single chime, once per ignition cycle, and it will display the "PARKSENSE UNAVAILABLE WIPE REAR SENSORS" or the "PARKSENSE UNAVAILABLE SERVICE REQUIRED" message. Refer to "Instrument Cluster Display". When the gear selector is moved to REVERSE and the system has detected a faulted condition, the instrument cluster display will show the "PARKSENSE UNAVAILABLE WIPE REAR SENSORS" or "PARKSENSE UNAVAILABLE SERVICE REQUIRED" message for as long as the vehicle is in REVERSE. Under this condition, ParkSense will not operate.
If "PARKSENSE UNAVAILABLE WIPE REAR SENSORS" appears in the instrument cluster display, make sure the outer surface and the underside of the rear fascia/bumper is clean and clear of snow, ice, mud, dirt or other obstruction and then cycle the ignition. If the message continues to appear, see an authorized dealer.
If "PARKSENSE UNAVAILABLE SERVICE REQUIRED" appears in the instrument cluster display, see an authorized dealer.
Cleaning The ParkSense System
Clean the Rear Park Assist sensors with water, car wash soap and a soft cloth. Do not use rough or hard cloths. In washing stations, clean sensors quickly keeping the vapor jet/high pressure washing nozzles at least 4 inches (10 cm) from the sensors. Do not scratch or poke the sensors. Otherwise, you could damage the sensors.
ParkSense System Usage Precautions
NOTE:
- Ensure that the rear bumper is free of snow, ice, mud, dirt and debris to keep the ParkSense system operating properly.
- Jackhammers, large trucks, and other vibrations could affect the performance of ParkSense or render the system temporarily unavailable.
-
When you turn ParkSense off in DRIVE, the instrument cluster will display "PARKSENSE OFF" for five seconds. Furthermore, once you turn ParkSense off, it remains off until you turn it on again, even if you cycle the ignition.
-
When you move the gear selector to the REVERSE position and ParkSense is turned off, the instrument cluster display will show the "PARKSENSE OFF" message for as long as the vehicle is in REVERSE.
- ParkSense will reduce the volume of the radio when it is sounding an audio tone.
- Clean the ParkSense sensors regularly, taking care not to scratch or damage them. The sensors must not be covered with ice, snow, slush, mud, dirt or debris. Failure to do so can result in the system not working properly. The ParkSense system might not detect an obstacle behind the fascia/bumper, or it could provide a false indication that an obstacle is behind the fascia/bumper.
- Ensure the ParkSense system is off if objects such as bicycle carriers, trailer hitches, etc., are placed within 12 inches (30 cm) from the rear fascia/bumper. Failure to do so can result in the system misinterpreting a close object as a sensor problem, causing the "PARKSENSE UNAVAILABLE SERVICE REQUIRED" message to be shown in the instrument cluster display.
WARNING!
Driversmustbecarefulwhenbackingupevenwhen usingtheRearParkAssistsystem.Alwayscheck carefullybehindyourvehicle,andbesuretocheckfor pedestrians,animals,othervehicles,obstructions,or blindspotsbeforebackingup.Youareresponsiblefor thesafetyofyoursurroundingsandmustcontinueto payattentionwhilebackingup.Failureretodosocan resultinseriousinjuryordeath.
CAUTION!
- ParkSenseisonyaparkingaidanditisunableto recognizeeveryobstacle, includingsmallobstacles. Parkingcurbsmightbetemporarilydetectedornot detectedatall.Obstacleslocatedaboveorbelowthe sensorswillnotbedetectedwhentheyareinclose proximity.
- The vehicle must bedrivenslowly when using ParkSense in order to be able to stop in tim when an obstacle is detected. It is recommended that the driver looks over his /hers shoulder when using ParkSense.
LANESENSE — IF EQUIPPED
LaneSense Operation
The LaneSense system is operational at speeds above 37 mph (60 km/h) and below 112 mph (180 km/h). The LaneSense system uses a forward looking camera to detect lane markings and measure vehicle position within the lane boundaries.
When both lane markings are detected and the driver unintentionally drifts out of the lane (no turn signal applied), the LaneSense system provides a haptic warning in the form of torque applied to the steering wheel to prompt the driver to remain within the lane boundaries. If the driver continues to unintentionally drift out of the lane, the LaneSense system provides a visual warning through the instrument cluster display to prompt the driver to remain within the lane boundaries.
The driver may manually override the haptic warning by applying torque into the steering wheel at any time.
When only a single lane marking is detected and the driver unintentionally drifts across the lane marking (no turn signal applied), the LaneSense system provides visual warnings through the instrument cluster display to prompt
the driver to remain within the lane. When only a single lane marking is detected, a haptic (torque) warning will not be provided.
NOTE: When operating conditions have been met, the LaneSense system will monitor if the driver's hands are on the steering wheel and provides an audible warning to the driver when the driver's hands are not detected on the steering wheel. The system will cancel if the driver does not return their hands to the wheel.
Turning LaneSense On Or Off
The default status of LaneSense is off.
The LaneSense button is located on the center stack below the Uconnect display.
To turn the LaneSense system on, push the LaneSense button (LED turns off). A "LaneSense On" message is shown in the instrument cluster display.
To turn the LaneSense system off, push the LaneSense button once (LED turns on).
NOTE: The LaneSense system will retain the last system state, on or off, from the last ignition cycle when the ignition is changed to the ON/RUN position.
LaneSense Warning Message
The LaneSense system will indicate the current lane drift condition through the instrument cluster display.
PremiumInstrumentClusterDisplayScreen—If Equipped
When the LaneSense system is on; the lane lines are gray when both of the lane boundaries have not been detected and the LaneSense telltale is solid white.
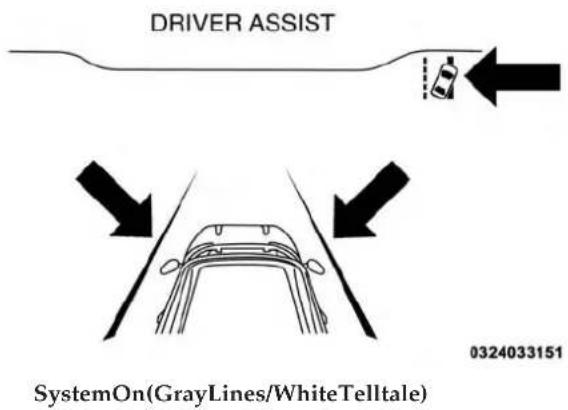
text_image
DRIVER ASSIST 0324033151 SystemOn(GrayLines/WhiteTelltale)268 STARTING AND OPERATING
LeftLaneDeparture—OnlyLeftLaneDetected
- When the LaneSense system is on, the LaneSense telltale is solid white when only the left lane marking has been detected and the system is ready to provide visual warnings in the instrument cluster display if an unintentional lane departure occurs.
- When the LaneSense system senses the lane has been approached and is in a lane departure situation, the left thick lane line flashes yellow (on/off), the left thin line remains solid yellow and the LaneSense telltale changes from solid white to flashing yellow.
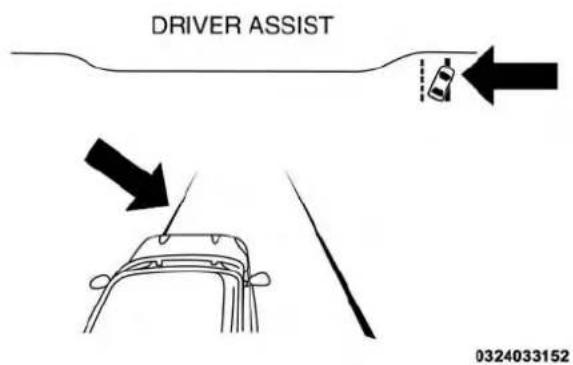
text_image
DRIVER ASSIST 0324033152LaneApproached(FlashingYellowThickLine, Solid YellowThinLine/FlashingYellowTelltale)
NOTE: The LaneSense system operates with the similar behavior for a right lane departure when only the right lane marking has been detected.
LeftLaneDeparture—BothLanesDetected
- When the LaneSense system is on, the lane lines turn from gray to white to indicate that both of the lane markings have been detected. The LaneSense telltale is solid green when both lane markings have been detected and the system is "armed" to provide visual warnings in the instrument cluster display and a torque warning in the steering wheel if an unintentional lane departure occurs.
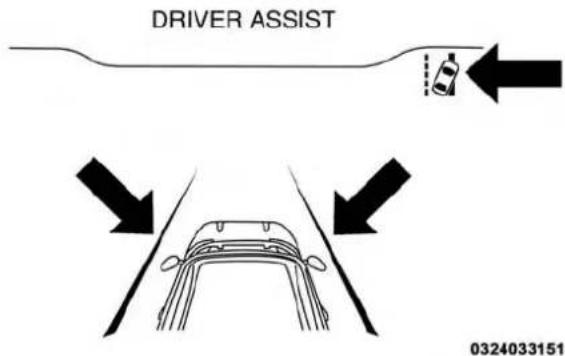
text_image
DRIVER ASSIST 0324033151LanesSensed(WhiteLines/GreenTelltale)
- When the LaneSense system senses a lane drift situation, the left thick lane line and left thin line turn solid yellow. The LaneSense telltale changes from solid green to solid yellow. At this time torque is applied to the steering wheel in the opposite direction of the lane boundary. - For example, if approaching the left side of the lane the steering wheel will turn to the right.
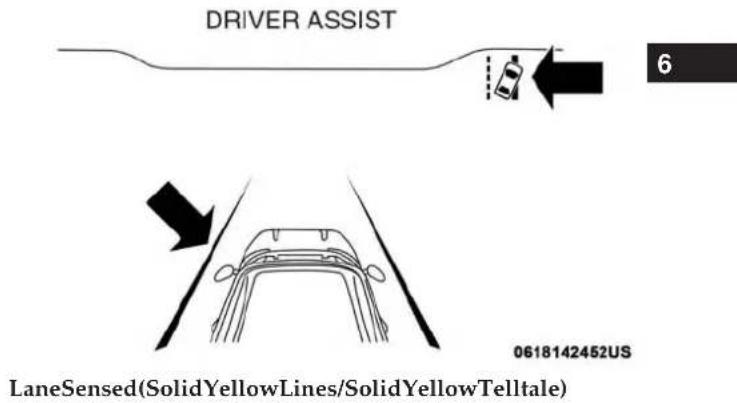
text_image
DRIVER ASSIST 6 0618142452US LaneSensed(SolidYellowLines/SolidYellowTelltale)270 STARTING AND OPERATING
- When the LaneSense system senses the lane has been approached and is in a lane departure situation, the left thick lane line flashes yellow (on/off) and the left thin line remains solid yellow. The LaneSense telltale changes from solid yellow to flashing yellow. At this time torque is applied to the steering wheel in the opposite direction of the lane boundary.
- For example, if approaching the left side of the lane the steering wheel will turn to the right.
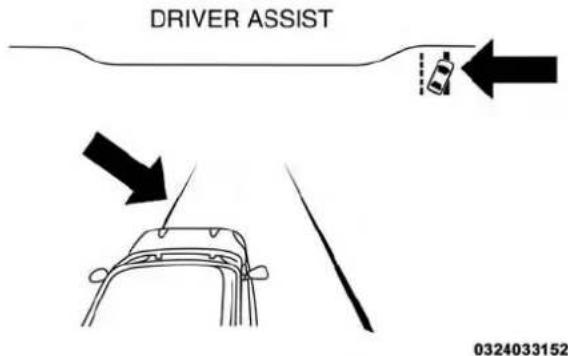
text_image
DRIVER ASSIST 0324033152LaneApproached(FlashingYellowThickLine, Solid YellowThinLine/FlashingYellowTelltale)
NOTE: The LaneSense system operates with the similar behavior for a right lane departure.
Changing LaneSense Status
The LaneSense system settings can be configured through the Uconnect system screen.
Follow these steps to change the LaneSense settings:
- Press the "Controls" button located on the bottom of the Uconnect touchscreen display.
- Press the "Settings" button.
- Press the "Safety & Driving Assistance" button.
When in the Safety & Driving Assistance screen, you can configure the intensity of the torque warning and the warning zone sensitivity (early/late) through the personalization settings.
NOTE:
- When enabled the system operates above 37 mph (60 km/h) and below 112 mph (180 km/h).
- Use of the turn signal suppresses the warnings.
- The system will not apply torque to the steering wheel whenever a safety system engages. (anti-lock brakes, traction control system, electronic stability control, forward collision warning, etc.)
PARKVIEW REAR BACK UP CAMERA
Your vehicle is equipped with the ParkView Rear Back Up Camera that allows you to see an on-screen image of the rear surroundings of your vehicle whenever the gear selector is put into REVERSE. The ParkView camera is located on the rear of the vehicle above the rear license plate. The image will be displayed in the touchscreen display along with a caution note to “check entire surroundings” across the top of the screen. After five seconds, this note will disappear.
ManualActivationOfTheRearViewCamera:
- Press the "Controls" button located on the bottom of the Uconnect display.
- Press the "Backup Camera" button to turn the Rear View Camera system on.
NOTE: The ParkView Rear Back Up Camera has programmable modes of operation that may be selected through the Uconnect System. Refer to "Uconnect Settings" in "Multimedia" for further information.
If your vehicle is equipped with the Camera Delay feature and it is turned on, the rear camera image will be displayed for up to 10 seconds when the vehicle is shifted out of REVERSE. However, this feature is canceled if the forward vehicle speed exceeds 8 mph (13 km/h), the transmission is shifted into PARK, the vehicle's ignition is cycled to OFF, or by pressing the image defeat [X] button.
When the vehicle is shifted out of REVERSE (with Camera Delay turned off), the rear camera mode is exited and the last touchscreen appears again.
When enabled, active guide lines are overlaid on the image to illustrate the width of the vehicle and its projected backup path based on the steering wheel position. The active guide lines will show separate zones that will help indicate the distance to the rear of the vehicle.
When manually activated, a counter will be initiated after the vehicle speed is above 8 mph (13 km/h). The rear view camera image will turn off when this counter reaches 10 seconds. The counter will be reset when the vehicle speed is 8 mph (13 km/h) or below.
If the vehicle speed remains below 8 mph (13 km/h), the rear view camera image will continue to be displayed until the transmission is shifted into PARK, the vehicle's ignition is cycled to the OFF position, or the image defeat [X] button is pressed.
Different colored zones indicate the distance to the rear of the vehicle.
272 STARTING AND OPERATING
The following table shows the approximate distances for each zone:
| ZoneDistanceToTheRearOfTheVehicle | |
| Red 0 - 1 ft (0 - 30 cm) | |
| Yellow 1 ft - 6.5 ft (30 cm - 2 m) | |
| Green 6.5 ft or greater (2 m or greater) | |
WARNING!
Driversmustbecarefulwhenbackingupevenwhen usingtheParkViewRearBackUpCamera.Always checkcarefullybehindyourvehicle,andbesureto checkforpedestrians,animals,othervehicles,obstructions,orblindspotsbeforebackingup.Youareresponsibleforthesafetyofyoursurroundingsandmust continuetopayattentionwhilebackingup.Failurereto dosocanresultinseriousinjuryordeath.
CAUTION!
- Toavoidvehicledamage, ParkViewshouldonlybe usedasaparkingaid. The ParkViewcamerais unabletovieweveryobstacleorobjectinyourdrive path.
- Toavoid vehicle damage, the vehicle must be driven slowly when using Park View to be able to stop in time when an obstacle is seen. It is recommended that the driver look frequently over his / her shoulder when using Park View.
NOTE: If snow, ice, mud, or any foreign substance builds up on the camera lens, clean the lens, rinse with water, and dry with a soft cloth. Do not cover the lens.
REFUELING THE VEHICLE
- Push the fuel filler door release switch (located in the driver's door map pocket).
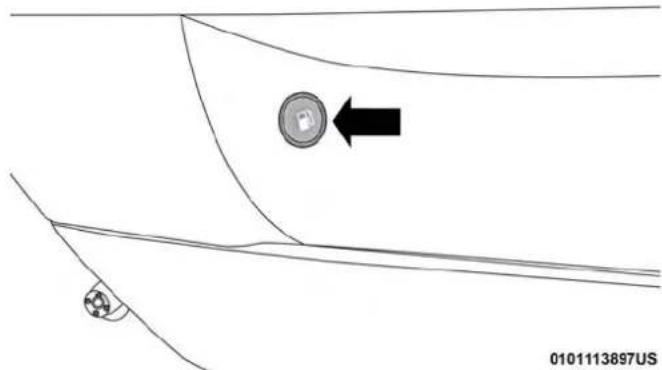
text_image
0101113897USFuelFillerDoorReleaseSwitch
- Open the fuel filler door.
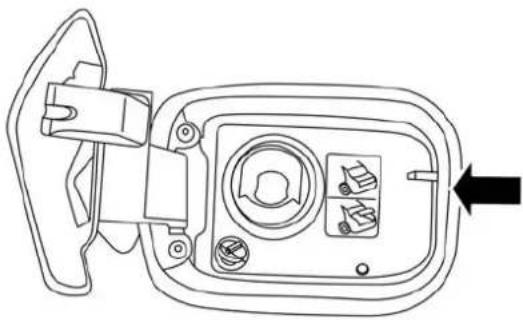
natural_image
Line drawing of a mechanical component with no visible text or symbols0101113899US
FuelFillerDoor
NOTE: In certain cold conditions, ice may prevent the fuel door from opening. If this occurs, lightly push on the fuel door to break the ice buildup and re-release the fuel door using the inside release button. Do not pry on the door.
- There is no fuel filler cap. A flapper door inside the pipe seals the system.
- Insert the fuel nozzle fully into the filler pipe – the nozzle opens and holds the flapper door while refueling.
NOTE: Only the correct size nozzle opens the latches allowing the flapper door to open.
274 STARTING AND OPERATING
- Fill the vehicle with fuel – when the fuel nozzle "clicks" or shuts off the fuel tank is full.
- Maintain nozzle in filler for 5 seconds to allow nozzle to drain.
- Remove the fuel nozzle and close the fuel door.
NOTE:A funnel is provided (located in the trunk in the spare tire area) to open the flapper door to allow for emergency refueling with a gas can.
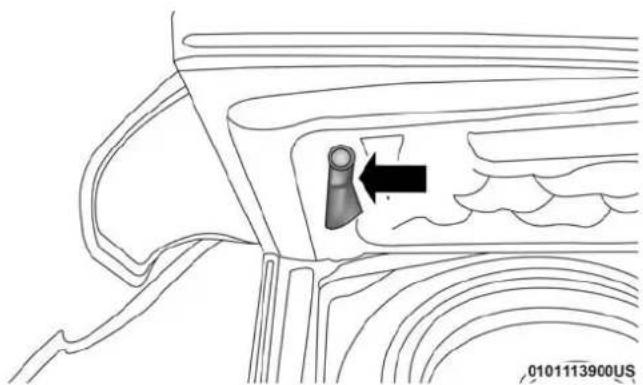
natural_image
Diagram of a vehicle's roof structure with airflow indicators and a directional arrow (no text or symbols)FuelFunnel
WARNING!
- Neverhaveanysmokingmaterialslitinornearthe vehiclewhenthefueldoorisopenorthetankis beingfilled.
- Neveraddfuelwhentheengineisrunning. This is inviolationofmoststateandfederalfireregulations andmaycausethe"MalfunctionIndicatorLight" to turnon.
- Afiremayresultiffuelispumpedintoaportable containerthatisinsideofavehicle.Youcouldbe burned.Alwaysplacefuelcontainersontheground whilefilling.
CAUTION!
Toavoidfuelspillageandoverfilling, donot "topoff" thefueltankafterfilling.
Emergency Fuel Filler Door Release
If you are unable to open the fuel filler door, use the fuel filler door emergency release located in the trunk.
Follow the steps below to open the fuel door in case of an emergency:
- Open the trunk.
- Remove the access cover (located on the left side inner trim panel).
natural_image
Simple 3D icon of a computer monitor with fuel pump and open book symbols, pointing up with an arrow (no text or labels)0101113894US
AccessCover
- Pull the release cable.
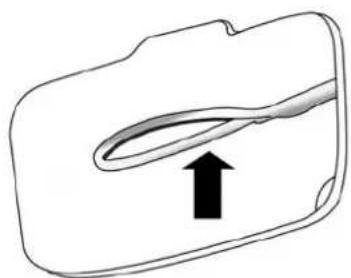
natural_image
Simple line drawing of a medical device with an arrow pointing to a curved internal structure (no text or symbols)0101113907US
ReleaseCable
VEHICLE LOADING
The load carrying capacity of your vehicle is shown on the "Vehicle Certification Label". This information should be used for passenger and luggage loading as indicated.
Do not exceed the specified Gross Vehicle Weight Rating (GVWR) or the Gross Axle Weight Rating (GAWR).
276 STARTING AND OPERATING
Vehicle Certification Label
Your vehicle has a Vehicle Certification Label affixed to the drivers side B-Pillar or the rear of the driver's door.
The label contains the following information:
• Name of manufacturer
•Month and year of manufacture
• Gross Vehicle Weight Rating (GVWR)
• Gross Axle Weight Rating (GAWR) front
• Gross Axle Weight Rating (GAWR) rear
• Vehicle Identification Number (VIN)
- Type of vehicle
•Month, Day, and Hour of manufacture (MDH)
The bar code allows a computer scanner to read the VIN.
Gross Vehicle Weight Rating (GVWR)
The GVWR is the total allowable weight of your vehicle. This includes driver, passengers, and cargo. The total load must be limited so that you do not exceed the GVWR.
Gross Axle Weight Rating (GAWR)
The GAWR is the maximum capacity of the front and rear axles. Distribute the load over the front and rear axles evenly. Make sure that you do not exceed either front or rear GAWR.
WARNING!
Because the front wheels steer the vehicle, it is important that you donot exceed them maximum front or rear GAWR. Adangerous driving condition can result if either rating is exceeded. You could lose control of the vehicle and have a collision.
Overloading
The load carrying components (axle, springs, tires, wheels, etc.) of your vehicle will provide satisfactory service as long as you do not exceed the GVWR and the front and rear GAWR.
The best way to figure out the total weight of your vehicle is to weigh it when it is fully loaded and ready for operation. Weigh it on a commercial scale to ensure that it is not over the GVWR.
Figure out the weight on the front and rear of the vehicle separately. It is important that you distribute the load evenly over the front and rear axles.
Overloading can cause potential safety hazards and shorten useful service life. Heavier axles or suspension components do not necessarily increase the vehicle's GVWR.
Loading
To load your vehicle properly, first figure out its empty weight, axle-by-axle and side-by-side. Store heavier items down low and be sure you distribute their weight as evenly as possible. Stow all loose items securely before driving. If weighing the loaded vehicle shows that you have exceeded either GAWR, but the total load is within the specified GVWR, you must redistribute the weight. Improper weight distribution can have an adverse effect on the way your vehicle steers and handles and the way the brakes operate.
NOTE:
- Refer to the "Vehicle Certification Label" affixed to the rear of the driver's door for your vehicle's GVWR and GAWRs.
- Refer to the "Tire Placard" for your vehicle's proper tire pressure.
TRAILER TOWING
Trailer towing is not permitted with this vehicle.
RECREATIONAL TOWING (BEHIND MOTORHOME, ETC.)
Recreational towing (with all four wheels on the ground, or using a tow dolly) is NOTALLOWED. The only acceptable method for towing this vehicle (behind another vehicle) is on a vehicle trailer with all four wheels OFFthe ground.
CAUTION!
Towing this vehicle inviolation of the aboverequirements can cause severe transmission damage. Damage from impropertowing is not covered under the New Vehicle Limited Warranty.
DRIVING TIPS
Driving On Slippery Surfaces
Information in this section will aid in safe controlled launches in adverse conditions.
278 STARTING AND OPERATING
Acceleration
Rapid acceleration on snow covered, wet, or other slippery surfaces may cause the driving wheels to pull erratically to the right or left. This phenomenon occurs when there is a difference in the surface traction under the rear (driving) wheels.
WARNING!
Rapidaccelerationonslipperysurfacesidangerous. Unequaltractioncancausesuddenpullingoftherear wheels.Youcouldlosecontrolofthevehicleand possiblyhaveacollision.Accelerateslowlyandcarefullywheneverthereislikelytobepoortraction(ice, snow,wet,mud,loosesand,etc.).
Traction
When driving on wet or slushy roads, it is possible for a wedge of water to build up between the tire and road surface. This is known as hydroplaning and may cause
partial or complete loss of vehicle control and stopping ability. To reduce this possibility, the following precautions should be observed:
- Slow down during rainstorms or when the roads are slushy.
- Slow down if the road has standing water or puddles.
- Replace tires when tread wear indicators first become visible.
- Keep tires properly inflated.
- Maintain sufficient distance between your vehicle and the vehicle in front of you to avoid a collision in a sudden stop.
Your vehicle may be equipped with a Limited Slip Differential (LSD) that reduces, but does not eliminate, the amount of wheel slip across a given axle for improved handling.
Driving Through Water
Driving through water more than a few inches/centimeters deep will require extra caution to ensure safety and prevent damage to your vehicle.
Flowing/RisingWater
WARNING!
Donotdriveonoracrossaroadorpathwherewateris flowingand/orrising(asinstormrun-off).Flowing watercanwearawaytheroadorpath'ssurface and causeyourvehicletosinkintodeeperwater.Furthermore,flowingand/orrisingwatercancarryyourvehiclealwaysswiftly.Failureretofollowthiswarningmay resultininjuriesthatareseriousorfataltoyou,your passengers,andothersaroundyou.
ShallowStandingWater
Although your vehicle is capable of driving through shallow standing water, consider the following Cautions and Warnings before doing so.
WARNING!
- Drivingthroughstandingwaterlimitsyourvehicle's tractioncapabilities.Donotexceed5mph(8km/h) whendrivingthroughstandingwater.
- Drivingthroughstandingwaterlimitsyourvehicle's brakingcapabilities,whichincreasesstoppingdistances.Therefore,afterdrivingthroughstanding water,driveslowlyandlightlypressonthebrake pedalseveraltimestodrythebrakes.
- Failuretofollowthesewarningsmayresultininjuriesthatareseriousorfataltoyou,yourpassengers, andothersaroundyou.
CAUTION!
- Alwayscheckthedepthofthestandingwaterbefore drivingthroughit.Neverdrivethroughstanding waterthatisdeeperthanthebottomofthetirerims mountedonthevehicle.
- Determinetheconditionoftheroadorthepaththat isunderwaterandifthereareanyobstaclesinthe waybeforedrivingthroughthestandingwater.
(Continued)
CAUTION!(Continued)
- Donotexceed5mph(8km/h)whendrivingthrough standingwater.Thiswillminimizewaveeffects.
- Drivingthroughstandingwatermaycausedamage toyourvehicle'sdrivetraincomponents.Alwaysinspectyourvehicle'sfluids(i.e.,engineoil,transmission,axle,etc.)forsignsofcontamination(i.e.,fluid thatismilkyorfoamyinappearance)afterdriving throughstandingwater.Donotcontinuetooperate thevehicleifanyfluidappearscontaminated,asthis mayresultinfurtherdamage.Suchdamageisnot coveredbytheNewVehicleLimitedWarranty.
- Gettingwaterinsideyourvehicle'senginecancause ittolockupandstallout,andcauseseriousinternal damagetotheengine.Suchdamageisnotcoveredby theNewVehicleLimitedWarranty.
IN CASE OF EMERGENCY
CONTENTS
■HAZARD WARNING FLASHERS....283
■ASSIST AND SOS MIRROR — IF EQUIPPED . . .283
■BULB REPLACEMENT....289
□Replacement Bulbs....289
□Replacing Exterior Bulbs....291
■FUSES....292
□General Information....293
□Underhood Fuses....293
□Rear Interior Fuses....297
■TIRE SERVICE KIT — IF EQUIPPED .....301
□Tire Service Kit Storage. . . . . . . . . . . . . . . . . . . . . . . . . . . . . . . . . . . . . . . . . . . . . . . . 302
☐Tire Service Kit Components And Operation . . .302
□Tire Service Kit Usage Precautions .....303
□Sealing A Tire With Tire Service Kit . . . . . . . . . .305
■TIRE SERVICE KIT — IF EQUIPPED .....309
□Tire Service Kit Storage. . . . . . . . . . . . . . . . . . . . . . . . . . . . . . . . . . . . . . . . . . . . . . . . 310
☐Tire Service Kit Components And Operation . . .310
☐ Tire Service Kit Usage Precautions .....311
□Sealing A Tire With Tire Service Kit . . . . . . . . .313
■JUMP STARTING .....317
□Preparations For Jump Start .....318
□Jump Starting Procedure....319
■IF YOUR ENGINE OVERHEATS .....320
■MANUAL PARK RELEASE — 8-SPEED
TRANSMISSION ....321
■FREEING A STUCK VEHICLE .....323
■TOWING A DISABLED VEHICLE .....325
282 IN CASE OF EMERGENCY
■ENHANCED ACCIDENT RESPONSE SYSTEM (EARS)....326
■EVENT DATA RECORDER (EDR) .....326
HAZARD WARNING FLASHERS
The Hazard Warning flasher switch is located on the switch bank just above the climate controls.

Push the switch to turn on the Hazard Warning flasher. When the switch is activated, all directional turn signals will flash on and off to warn oncoming traffic of an emergency. Push the
switch a second time to turn off the Hazard Warning flashers.
This is an emergency warning system and it should not be used when the vehicle is in motion. Use it when your vehicle is disabled and it is creating a safety hazard for other motorists.
When you must leave the vehicle to seek assistance, the Hazard Warning flashers will continue to operate even though the ignition is placed in the OFF position.
NOTE: With extended use, the Hazard Warning flashers may discharge the battery.
ASSIST AND SOS MIRROR — IF EQUIPPED
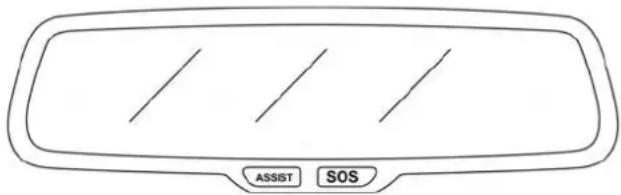
text_image
ASSIST SOS0306114048US
AssistAndSOSMirror
If equipped, the rearview mirror contains an ASSIST and a SOS button.
WARNING!
ALWAYSobeytrafficlawsandpayattentiontothe road.ALWAYSdrivesafelywithyourhandsonthe steeringwheel.YouhavefullresponsibilityandassumeallrisksrelatedtotheuseoftheUconnectand SiriusXMGuardianfeaturesandapplicationsinthis vehicle.OnlyuseUconnectfeaturesandSiriusXM Guardianserviceswhenitissafetodoso.Failureretodo somayresultinanaccidentinvolvingseriousinjuryor death.
NOTE:
- Your vehicle may be transmitting data as authorized by the subscriber.
- The SOS and ASSIST buttons will only function if you are connected to an operable LTE (voice/data) or 4G (data) network. Other Uconnect services will only be operable if your SiriusXM Guardian service is active and you are connected to an operable LTE (voice/data) or 4G (data) network.
ASSISTCall
The ASSIST Button is used to automatically connect you to any one of the following support centers:
- Roadside Assistance – If you get a flat tire, or need a tow, just push the ASSIST button and you will be connected to a representative for assistance. Roadside Assistance will know what vehicle you're driving and its location. Additional fees may apply for roadside Assistance.
- SiriusXM Guardian Customer Care – In-vehicle support for SiriusXM Guardian.
- Vehicle Customer Care – Total support for all other vehicle issues.
SOSCall
- Push the SOS Call button on the Rearview Mirror.
NOTE: In case the SOS Call button is pushed in error, there will be a ten second delay before the SOS Call system initiates a call to a SOS operator. To cancel the SOS Call connection, push the SOS call button on the Rearview Mirror or press the cancellation button on the Device Screen. Termination of the SOS Call will turn off the green LED light on the Rearview Mirror.
- The LED light located between the ASSIST and SOS buttons on the Rearview Mirror will turn green once a connection to a SOS operator has been made.
-
Once a connection between the vehicle and a SOS operator is made, the SOS Call system may transmit the following important vehicle information to a SOS operator:
-
Indication that the occupant placed a SOS Call.
• The vehicle brand.
•The last known GPS coordinates of the vehicle. -
You should be able to speak with the SOS operator through the vehicle audio system to determine if additional help is needed.
WARNING!
ALWAYSobeytrafficlawsandpayattentiontothe road.ALWAYSdrivesafelywithyourhandsonthe steeringwheel.YouhavefullresponsibilityandassumeallrisksrelatedtotheuseoftheUconnectand SiriusXMGuardianfeaturesandapplicationsinthis vehicle.OnlyuseUconnectfeaturesandSiriusXM
WARNING!(Continued)
Guardianserviceswhenitissafetodoso.Failureretodo somayresultinanaccidentinvolvingseriousinjuryor death.
NOTE:
- Your vehicle may be transmitting data as authorized by the subscriber.
-
Once a connection is made between the vehicle's SOS Call system and the SOS operator, the SOS operator may be able to open a voice connection with the vehicle to determine if additional help is needed. Once the SOS operator opens a voice connection with the vehicle's SOS Call system, the operator should be able to speak with you or other vehicle occupants and hear sounds occurring in the vehicle. The vehicle's SOS Call system will attempt to remain connected with the SOS operator until the SOS operator terminates the connection.
-
The SOS operator may attempt to contact appropriate emergency responders and provide them with important vehicle information and GPS coordinates.
WARNING!
- If anyone in the vehicle could be in danger (e.g., fire or smoke is visible, dangerous road conditions or location), donot wait for voice contact from an Emergency Services Agent. Alloccupant should exit the vehicle immediately and moveto as a felocation.
- Neverplaceanythingonornearthevehicle'soperablenetworkandGPSantennas.Youcouldprevent operablenetworkandGPSsignalreception,which canpreventyourvehiclefromplacinganemergency call.AnoperablenetworkandGPSsignalreception isrequiredfortheSOSCallsystemtofunction properly.
- TheSOSCallsystemisembeddedintothevehicle's electricalsystem.Donotaddaftermarketelectrical equipmenttothevehicle'selectricalsystem.This maypreventyourvehiclefromsendingasignalto initiateanemergencycall.Toavoidinterferencethat cancausetheSOSCallsystemtofail,neveradd aftermarketequipment(e.g.,two-waymobileradio, CBradio, datarecorder,etc.)toyourvehicle'selectricalsystemormodifytheantennasonryourvehicle.IF YOURVEHICLELOSESBATTERYPOWERFOR
WARNING!(Continued)
ANYREASON(INCLUDINGDURINGOR AFTER ANACCIDENT),THEUCONNECTFEATURES, APPSANDSERVICES,AMONGOTHERS,WILL NOTOPERATE.
- ModificationstoanypartoftheSOSCallsystem couldcausetheairbagsystemtofailwhenyouneed it.Youcouldbeinjurediftheairbagsystemisnot theretohelpprotectyou.
SOSCallSystemLimitations
Vehicles sold in Mexico DONOThave SOS Call system capabilities.
SOS or other emergency line operators in Mexico may not answer or respond to SOS system calls.
If the SOS Call system detects a malfunction, any of the following may occur at the time the malfunction is detected, and at the beginning of each ignition cycle:
- The Rearview Mirror light located between the ASSIST and SOS buttons will continuously be illuminated red.
- The Device Screen will display the following message "Vehicle device requires service. Please contact your dealer."
- An In-Vehicle Audio message will state "Vehicle device requires service. Please contact your dealer."
WARNING!
- IgnoringtheRearviewMirrorlightcouldmeanyou willnothaveSOSCallservices.IftheRearview Mirrorlightisilluminated,haveanaauthorized dealerservicetheSOSCallsystemimmediately.
- TheOccupantRestraintControlmoduleturnsonthe airbagWarningLightontheinstrumentpanelifa malfunctioninanypartofthesystemisdetected. If theAirBagWarningLightisilluminated,havean authorizeddealerservicetheOccupantRestraint Controlsystemimmediately.
Even if the SOS Call system is fully functional, factors beyond FCA US LLC's control may prevent or stop the SOS Call system operation. These include, but are not limited to, the following factors:
- Delayed accessories mode is active.
• The ignition is in the OFF position. -
The vehicle's electrical systems are not intact.
-
The SOS Call system software and/or hardware are damaged during a crash.
- The vehicle battery loses power or becomes disconnected during a vehicle crash.
- LTE (voice/data) or 4G (data) network and/or Global Positioning Satellite signals are unavailable or obstructed.
• Equipment malfunction at the SOS operator facility. - Operator error by the SOS operator.
- LTE (voice/data) or 4G (data) network congestion.
- Weather.
• Buildings, structures, geographic terrain, or tunnels.
WARNING!
ALWAYSobeytrafficlawsandpayattentiontothe road. ALWAYS drive safely with your hands on the steering wheel. You have full responsibility and assume all risks related to the use of the Uconnect and Sirius XM Guardian features and applications in this vehicle. Only use Uconnect features and Sirius XM
(Continued)
WARNING!(Continued)
Guardianserviceswhenitissafetodoso.Failureretodo somayresultinanaccidentinvolvingseriousinjuryor death.
NOTE:
- Your vehicle may be transmitting data as authorized by the subscriber.
- Never place anything on or near the vehicle's LTE (voice/data) or 4G (data) and GPS antennas. You could prevent LTE (voice/data) or 4G (data) and GPS signal reception, which can prevent your vehicle from placing an emergency call. An operable LTE (voice/data) or 4G (data) network connection and a GPS signal is required for the SOS Call system to function properly.
GeneralInformation
This device complies with Part 15 of the FCC Rules. Operation is subject to the following two conditions: (1) This device may not cause harmful interference, and (2) this device must accept any interference received, including interference that may cause undesired operation.
NOTE: Changes or modifications not expressly approved by the party responsible for compliance could void the user's authority to operate the equipment.
CAUTION!
Toavoiddamagethemirrorduringcleaning,never sprayanycleaningsolutiondirectlyontothemirror. Applythesolutionontoacleanclothandwipethe mirrorclean.
BULB REPLACEMENT
Replacement Bulbs
All of the interior bulbs are glass wedge base or glass cartridge types. Aluminum base bulbs are not approved and should not be used for replacement.
Interior Bulbs
| BulbNumber | |
| Rear Courtesy/Reading Lamps W5W | |
| Rear Compartment (Trunk) Lamp 562 | |
| Overhead Console Reading Lamp 578 | |
| Visor Vanity Lamps A6220 | |
| Glove Compartment Lamp – If Equipped 194 | |
| Door Courtesy 562 | |
| Shift Indicator Lamp JKLE14140 | |
| Center High-Mount Stop Lamp (CHMSL) LED (Serviced At Authorized Dealer) | |
| Optional Door Map Pocket/Cup Holder LED (Serviced At Authorized Dealer) | |
| For lighted switches, see your authorized dealer for replacement instructions. | |
Exterior Bulbs
| BulbNumber | |
| Low/High Beam Headlamp (Standard Halogen Bi Function Projector) | 9005SL+ |
| Low/High Beam Headlamp – High Intensity Discharge (Premium HID Bi Function Projector) | D3S (Serviced At Authorized Dealer) |
| Front Park/Turn Lamp LED (Serviced At Authorized Dealer) | |
| Front Fog Lamp – If Equipped LED (Serviced At Authorized Dealer) | Dealer) |
| Front Side Marker LED (Serviced At Authorized Dealer) | |
| Rear Tail Lamp LED (Serviced At Authorized Dealer) | |
| Rear Stop/Turn Lamp LED (Serviced At Authorized Dealer) | |
| Rear Side Marker LED (Serviced At Authorized Dealer) | |
| Backup Lamp LED (Serviced At Authorized Dealer) | |
| License LED (Serviced At Authorized Dealer) |
Replacing Exterior Bulbs
FrontLow/HighBeamHeadlamp—ModelsWith HalogenHeadlamps
- Open the hood.
NOTE: Removal of the air cleaner filter housing may be necessary prior to replacing bulbs in the headlamp assembly on the driver side of the vehicle.
-
Remove the large dust cap from the headlamp housing by turning it counterclockwise.
-
Turn the bulb counterclockwise, and remove.
CAUTION!
Donottouchthenewbulbwithyourfingers.Oil contaminationwillseverelyshortenbulblife.Ifthe bulbcomesincontactwithanyoilysurface,cleanthe bulbwithrubbingalcohol.
-
Disconnect the bulb from the socket assembly and install the replacement bulb.
-
Reinstall the bulb and socket assembly into the head-lamp assembly, and then turn it clockwise.
-
Reinstall the dust cap.
FrontLow/HighBeamHeadlamp—ModelsWith HighIntensityDischargeHeadlamps(HID)
The headlamps are a type of high voltage discharge tube. High voltage can remain in the circuit even with the headlamp switch off and the key removed. Because of this, you should not attempt to service a headlamp bulb yourself. If a headlamp bulb fails, take your vehicle to an authorized dealer for service.
WARNING!
Atransienthighvoltageoccursatthebulbsocketsof HIDheadlampswhentheheadlampswitchisturned ON.Itmaycauseseriselectricalshockorelectrocutionifnotservicedproperly.Seeyourauthorized dealerforservice.
NOTE: On vehicles equipped with HID headlamps, when the headlamps are turned on, there is a blue hue to the lights. This diminishes and becomes more white after approximately 10 seconds, as the system charges.
Front/RearSideMarkerLamp
The Side Markers use LED lamps that are not serviceable separately. The Side Markers must be replaced as an assembly, see your authorized dealer.
FrontFogLamp
The Front Fog Lamps use LED sources that are not serviceable separately. The Front Fog Lamp must be replaced as an assembly; see your authorized dealer.
FrontTurnSignalLamps
The Front Park/Turn function is part of the headlamp assembly and use LED lamps that are not serviceable separately. The headlamps must be replaced as an assembly, see your authorized dealer.
BackupLamps
The Backup Lamps use LED sources that are not serviceable separately. The Applique must be replaced as an assembly; see your authorized dealer.
LicenseLamp
The License Lamp uses an LED source that is not serviceable separately. The License Lamp must be replaced as an assembly; see your authorized dealer.
CenterHighMountedStopLamp(CHMSL)
The CHMSL Lamp uses LED sources that are not serviceable separately. The CHMSL Lamp must be replaced as an assembly; see your authorized dealer.
FUSES
WARNING!
- Whenreplacingablownfuse,alwaysuseanappropriatereplacementfusewiththesameampratingas theoriginalfuse.Neverreplaceafusewithanother fuseofhigheramprating.Neverreplaceablown fusewithmetalwiresoranyothermaterial.Donot placeafuseinsideacircuitbreakercavityorvice versa.Failureretouseproperfusesmayresultin seriouspersonalinjury,fireand/orpropertydamag
- Before replacing a fuse, make sure that the ignition is offandthatalltheotherservicesare switched off and/ordisengaged.
- If the replaced fuse blows again, contact an authorizeddealer.
- Ifageneralprotectionfuseforsafetysystems(air bagsystem,brakingsystem),powerunitsystems (enginesystem,transmissionsystem)orsteering systemblows,contactanauthorizeddealer.
General Information
The fuses protect electrical systems against excessive current.
When a device does not work, you must check the fuse element inside the blade fuse for a break/melt.
Also, please be aware that when using power outlets for extended periods of time with the engine off may result in vehicle battery discharge.

text_image
Technical diagram showing three labeled components of a mechanical or electrical component, with numbered annotations pointing to specific parts.0704085531US
BladeFuses
1 — Fuse Element
2 — Blade Fuse with a good/functional fuse element.
3 — Blade fuse with a NOT functional / BAD fuse element (blown fuse).
Underhood Fuses
The Front Power Distribution Center is located in the engine compartment. This module contains fuses and relays. Fuse cavity location and descriptions are printed on the inside of the power distribution center cover.
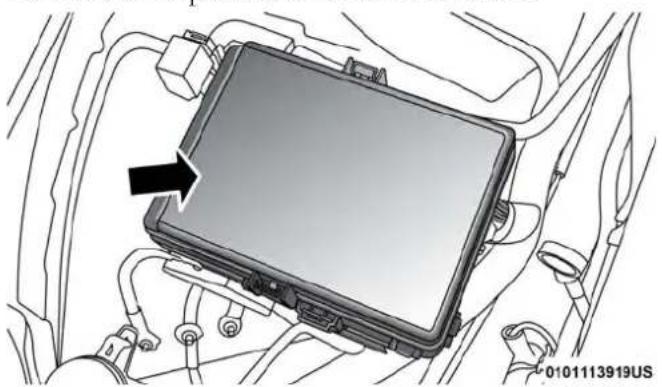
natural_image
Interior view of a car engine bay with a highlighted component and an arrow pointing to it (no text or symbols present)FrontPowerDistributionCenter
| CAUTION! |
| •Wheninstallingthepowerdistributioncentercover, itisimportanttoensurethecoversisproperlypositionedandfullylatched.Failureretodosomayallow watertogetintothepowerdistributioncenterand possiblyresultinanelectricalsystemfailure. |
| CAUTION!(Continued) |
| •Whenreplacingablownfuse,itisimportanttouse onlyafusehavingthecorrectamperagerating.The useofafusewitharatingotherthanindicatedmay resultinadangerouselectricalsystemoverload.Ifa properlyratedfusecontinuestoblow,itindicatesa probleminthecircuitthatmustbecorrected. |
(Continued)
| CavityCartridgeFuseMini-FuseDescription | |||
| 1 -- Fuse | - Spare | ||
| 2 40 Amp | Green - | Radiator Fan #1 - (Non 6.2L Supercharged) | |
| 3 | 50 Amp Red | - | Electric Power Steering #1 - If Equipped |
| 4 | 30 Amp Pink | - | Starter |
| 5 40 Amp | Green - | Anti Lock Brake | |
| 6 | 30 Amp Pink | - | Anti Lock Brake |
| 7 | 20 Amp Blue | - | Police Ignition Run / ACC #1 |
| 8 | 50 Amp Red / 20 Amp Blue | - | Radiator Fan (6.2L Supercharged) / Police Ignition Run / ACC # 2 |
| 9 - | 20 Amp Yellow | All-Wheel Drive Module - If Equipped | |
| 10 | - | 10 Amp Red | Intrusion MOD (300) - If Equipped / Under Hood Lamp - Police |
| 11 - 20 Amp Yellow Horns | |||
| 12 - 10 Amp Red Air Conditioning Clutch | |||
| 13 -- Fuse - Spare | |||
| 14 -- Fuse - Spare | |||
| 15 - 20 Amp Yellow Left HID - If Equipped | |||
| 16 - 20 Amp Yellow Right HID - If Equipped | |||
| 18 | 50 Amp Red - | Radiator Fan - (Non 6.2L Supercharged) | |
| 19 | 50 Amp Red - | Electric Power Steering #2 - If Equipped | |
| 20 | 30 Amp Pink | - | Wiper Motor |
| 21 | 30 Amp Pink20 Amp Blue - Po- lice | - | Headlamp Washers - If EquippedPolice Bat Feed #2 |
| 22 | 40 Amp Green /20 Amp Blue - Po- lice | - | Engine Cooling Pump (6.2L Supercharged) / PoliceBat Feed # 3 |
| 23 | 20 Amp Blue | - | Police Bat Feed # 1 |
| 24 | 50 Amp Red / 20Amp Blue | - | Radiator Fan (6.2L Supercharged) / Police IgnitionRun/ACC Feed # 3 |
| 28 -- Fuse - Spare | |||
| 29 | - | 15 Amp Blue | Transmission Control Module (Challenger / ChargerPolice) / Electronic Shift Module (Challenger) |
| 30 -- Fuse - Spare | |||
| 31 - 25 Amp Clear Engine Module | |||
| 32 -- Fuse - Spare | |||
| 33 -- Fuse - Spare | |||
| 34 - 25 Amp Clear Powertrain #1 | |||
| 35 - 20 Amp Yellow Powertrain #2 | |||
| 36 - 10 Amp Red Anti-Lock Brake Module / Steering Column Lock Module (300 if equipped) | |||
| 37 - 10 Amp Red Engine Controller / Rad Fan Relays (Charger/300) / Electric Power Steering Module (Charger/300) / 5-Speed TCM | |||
| 38 - 10 Amp Red Airbag Module | |||
| 39 - 10 Amp Red EPS (Challenger) / EHPS (Police) / AC Clutch Relay / Vacuum Pump Relay / Rad Fan Relays (Challenger) | |||
| 48 - 10 Amp Red AWD Module / Front Axle Disconnect - If Equipped | |||
| 49 -- Fuse - Spare | |||
| 50 -- Fuse - Spare | |||
| 51 - 20 Amp Yellow | Vacuum Pump | ||
| 52 - 5 Amp Tan | Adaptive Cruise - If Equipped | ||
| 53 -- Fuse - Spare | |||
Rear Interior Fuses
There is also a power distribution center located in the trunk under the spare tire access panel. This center contains fuses and relays. Fuse cavity location and descriptions are printed on the inside of the power distribution center cover.
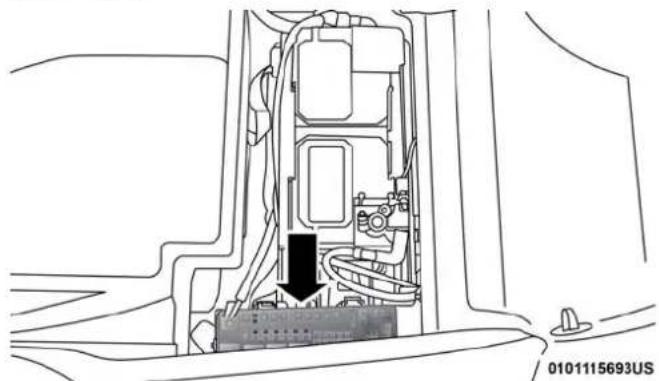
natural_image
Technical line drawing of a mechanical assembly with no visible text or symbolsRearPowerDistributionCenter(SRT)
CAUTION!
- Wheninstallingthepowerdistributioncentercover, itisimportanttoensurethecoversproperlypositionedandfullylatched.Failurertodosomayallow watertogetintothepowerdistributioncenterand possiblyresultinanelectricalsystemfailure.
- Whenreplacingablownfuse,itisimportanttouse onlyafusehavingthecorrectamperagerating.The useofafusewitharatingotherthanindicatedmay resultinadangerouselectricalsystemoverload. If a properlyratedfusecontinuestoblow,itindicatesa probleminthecircuitthatmustbecorrected.
| CavityCartridgeFuseMini-FuseDescription | ||
| 2 60 Amp Yellow – Front PDC Feed | #1 | |
| 3 -- Fuse - Spare | ||
| 4 60 Amp Yellow – Front PDC Feed | #2 | |
| CavityCartridgeFuseMini-FuseDescription | |||
| 5 30 Amp Pink20 Amp Blue – Police | – Sunroof/Dome Lamp – Police | ||
| 6 40 Amp Green – Exterior Lighting #1 | |||
| 7 40 Amp Green – Exterior Lighting #2 | |||
| 8 30 Amp Pink – Interior Lighting | |||
| 9 40 Amp Green – Power Locks | |||
| 10 30 Amp Pink – Driver Door Control Module | |||
| 11 30 Amp Pink – Passenger Door Control Module | |||
| 12 – 20 Amp Yellow Dual USB Center Console Rear/Cigar Lighter IP– If Equipped | |||
| 15 | 40 Amp Green – HVAC Blower | ||
| 16 20 Amp Blue | – Left Spot Lamp – Police | ||
| 17 20 Amp Blue | – Right Spot Lamp – Police | ||
| 18 30 Amp Pink – Mod Network Interface – Police | |||
| 19 – | – Fuse – Spare | ||
| 20 – | – Fuse – Spare | ||
| 21 30 Amp Pink – Fuel Pump (Non 6.2L SRT HO) | |||
| 22 – | 5 Amp Tan | Cyber Gateway Mod | |
| 23 – | 10 Amp Red | Fuel Door – If Equipped/Diagnostic Port | |
| 24 – | 10 Amp Red | Integrated Center Stack | |
| 25 – 10 | Amp Red Tire Pressure Monitor | ||
| 26 – 15 | Amp Blue Cygnus Transmission Module (Charger/300) / | Electronic Shift Module (Charger/300) | |
| 27 – 25 | Amp Clear Amplifier – If Equipped | ||
| 31 – 25 | Amp Breaker Power Seats – If Equipped | ||
| 32 – 15 | Amp Blue HVAC Module/Cluster | ||
| 33 – 15 | Amp Blue Ignition Switch/RF Hub Module/Steering Col- | umn Lock (300) – If Equipped | |
| 34 – 10 | Amp Red Steering Column Module/Clock (300) | ||
| 35 – | 5 Amp Tan Battery Sensor | ||
| 36 – 15 | Amp Blue Electronic Exhaust Valve – If Equipped | ||
| 37 – | 20 Amp Yellow Radio | ||
| 38 – | 20 Amp Yellow Power Outlet Inside Arm Rest/Console MediaHub | ||
| 40 | 30 Amp Pink – | Fuel Pump (6.2L SRT HO – If Equipped) | |
| 41 | 30 Amp Pink – | Fuel Pump (6.2L SRT HO – If Equipped) | |
| 42 | 30 Amp Pink – | Rear Defrost | |
| 43 – | 20 Amp Yellow Comfort Seat And Steering Wheel Module(Heated Steering Wheel/RR Heated Seats) | ||
| 44 – 10 | Amp Red Park Assist / Blind Spot / Rear View Camera | ||
| 46 -- Fuse - Spare | |||
| 47 – 10 | Amp Red Adaptive Front Lighting / Day Time Running | Lamps - If Equipped | |
| 48 – 20 | Amp Yellow Active Suspension - (6.4L / 6.2L) | ||
| 49 -- Fuse - Spare | |||
| 50 -- Fuse - Spare | |||
| 51 – 20 | Amp Yellow Front Heated / Vented Seats - If Equipped | ||
| 52 – 10 | Amp Red Heated Cupholders/Rear Heated Seat Switches - If Equipped | ||
| 53 | - | 10 Amp Red | HVAC Module/In Vehicle Temperature Sensor |
| 54 -- Fuse - Spare | |||
| 55 -- Fuse - Spare | |||
| 56 -- Fuse - Spare | |||
| 57 -- Fuse - Spare | |||
| 58 – 10 | Amp Red Airbag Module | ||
| 59 – 20 | Amp Yellow Adjustable Pedals - Police | ||
| 60 -- Fuse - Spare | |||
IN CASE OF EMERGENCY 301
| CavityCartridgeFuseMini-FuseDescription | |||
| 61 -- Fuse - Spare | |||
| 62 -- Fuse - Spare | |||
| 63 -- Fuse - Spare | |||
| 64 - 25 | Amp Breaker Rear Windows (Charger/300) | ||
| 65 - 10 | Amp Red Airbag Module | ||
| 66 -- Fuse - Spare | |||
| 67 - 10 | Amp Red Rain and Light Sensor / Sunroof / Inside RR | View Mirror / Police Run Acc Relay | |
| 68 - 10 | Amp Red Dual USB Power Outlet - R/A Sense (Charger/300) | ||
| 69 -- Fuse - Spare | |||
| 70 -- Fuse - Spare | |||
TIRE SERVICE KIT — IF EQUIPPED
Small punctures up to 1/4 inch (6 mm) in the tire tread can be sealed with Tire Service Kit. Foreign objects (e.g., screws or nails) should not be removed from the tire. Tire Service Kit can be used in outside temperatures down to approximately -4°F (-20°C).
This kit will provide a temporary tire seal, allowing you to drive your vehicle up to 100 miles (160 km) with a maximum speed of 50 mph (80 km/h).
302 IN CASE OF EMERGENCY
Tire Service Kit Storage
The Tire Service Kit is located in the trunk.
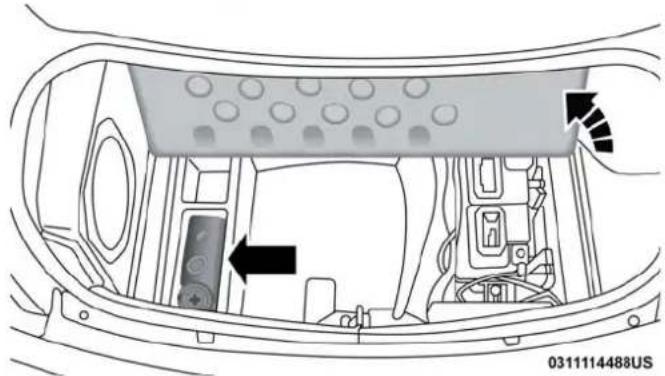
natural_image
Interior view of a car dashboard with visible controls and a directional arrow (no text or symbols)TireServiceKitLocation
Tire Service Kit Components And Operation
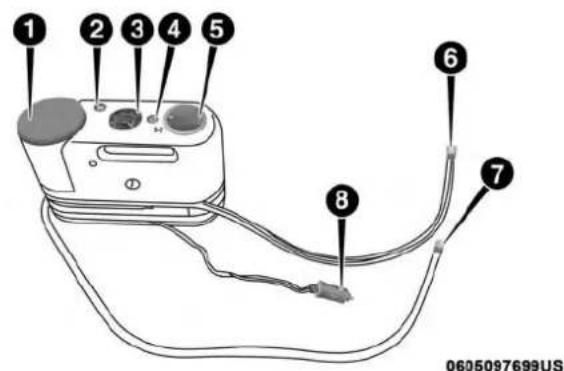
text_image
1 2 3 4 5 6 7 8 0605097699USTireServiceKitComponents
1 — Sealant Bottle 5 — Mode Select Knob
2 — Deflation Button 6 — Sealant Hose (Clear)
3 — Pressure Gauge 7 — Air Pump Hose (Black)
4 — Power Button 8 — Power Plug (located on the
bottom side of the Tire Service Kit)
UsingTheModeSelectKnobAndHoses
Your Tire Service Kit is equipped with the following symbols to indicate the air or sealant mode.
SelectingAirMode
Push in the Mode Select Knob (5) and turn to this position for air pump operation only. Use the Black Air Pump Hose (7) when selecting this mode.
SelectingSealantMode
Push in the Mode Select Knob (5) and turn to this position to inject the Tire Service Kit Sealant and to inflate the tire. Use the Sealant Hose (clear hose) (6) when selecting this mode.
UsingThePowerButton
Push and release the Power Button (4) once to turn on the Tire Service Kit. Push and release the Power Button (4) again to turn Off the Tire Service Kit.
UsingTheDeflationButton
Push the Deflation Button (2) to reduce the air pressure in the tire if it becomes over-inflated.
Tire Service Kit Usage Precautions
- Replace the Tire Service Kit Sealant Bottle (1) and Sealant Hose (6) prior to the expiration date (printed at the lower right hand corner on the bottle label) to assure optimum operation of the system. Refer to "Sealing A Tire With Tire Service Kit" section (F) "Sealant Bottle And Hose Replacement".
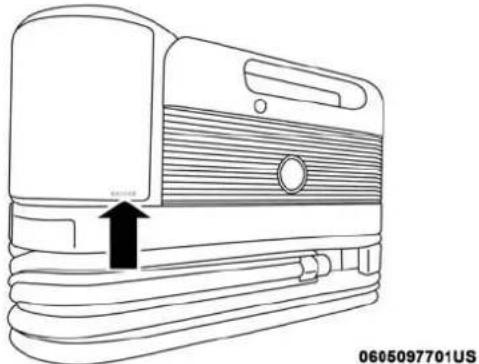
natural_image
Line drawing of a portable electronic device with a black arrow pointing to its side panel (no text or symbols on the device itself)TireServiceKitExpirationDateLocation
- The Sealant Bottle (1) and Sealant Hose (6) are a one tire application use and need to be replaced after each use. Always replace these components immediately at your original equipment vehicle dealer.
- When the Tire Service Kit sealant is in a liquid form, clean water and a damp cloth will remove the material from the vehicle or tire and wheel components. Once the sealant dries, it can easily be peeled off and properly discarded.
- For optimum performance, make sure the valve stem on the wheel is free of debris before connecting the Tire Service Kit.
- You can use the Tire Service Kit air pump to inflate bicycle tires. The kit also comes with two needles, located in the Accessory Storage Compartment (on the bottom of the air pump) for inflating sport balls, rafts, or similar inflatable items. However, use only the Air Pump Hose (7) and make sure the Mode Select Knob (5) is in the Air Mode when inflating such items to avoid injecting sealant into them. The Tire Service Kit Sealant is only intended to seal punctures less than 1/4 inch (6 mm) diameter in the tread of your tire.
- Do not lift or carry the Tire Service Kit by the hoses.
WARNING!
- Donotattempttosealatireonthesideofthevehicle closesttotraffic.Pullfarenoughofftheroadtoavoid the dangerofbeinghitwhenusingtheTireService Kit.
- DonotuseTireServiceKitordrivethevehicleunder the following circumstances:
- If the puncture in the tiretread is approximately 1/4 inch (6 mm) or larger.
-Ifthetirehasanysidewalldamage.
-If the tire has any damage from driving with extremely low tire pressure.
-If the tire has any damage from driving on a flat tire.
-Ifthewheelhasanydamage. - If you are unsure of the condition of the tire or the wheel.
- KeepTireServiceKitawayfromopenflamesorheat source.
(Continued)
WARNING!(Continued)
- AlooseTireServiceKitthrownforwardinacollisionorhardstopcouldendangertheoccupantsof thevehicle.AlwaysstowtheTireServiceKitinthe placeprovided.Failureretofollowthesewarningscan resultininjuriesthatareseriousorfataltoyou,your passengers,andothersaroundyou.
• TakecarenottoallowthecontentsofTireServiceKit tocomeincontactwithhair,eyes,orclothing.Tire ServiceKitsealantisharmfulifinhaled,swallowed, orabsorbedthroughtheskin.Itcausesskin,eye,and respiratoryirritation.Flushimmediatelywithplenty ofwaterifthereisanycontactwitheyesorskin. Changeclothingassoonaspossible,ifthereisany contactwithclothing. - TireServiceKitSealantsolutioncontainslatex.In caseofanallergicreactionorrash,consultaphysicianimmediately.KeepTireServiceKitoutofreach ofchildren.Ifswallowed,rinsemouthimmediately withplentyofwateranddrinkplentyofwater.Do notinducevomiting!Consultaphysicianimmediately.
Sealing A Tire With Tire Service Kit
(A)WheneverYouStopToUseTireServiceKit:
- Pull over to a safe location and turn on the vehicle's Hazard Warning flashers.
- Verify that the valve stem (on the wheel with the deflated tire) is in a position that is near to the ground. This will allow the Tire Service Kit Hoses (6) and (7) to reach the valve stem and keep the Tire Service Kit flat on the ground. This will provide the best positioning of the kit when injecting the sealant into the deflated tire and running the air pump. Move the vehicle as necessary to place the valve stem in this position before proceeding.
- Place the transmission in PARK (auto transmission) or in Gear (manual transmission) and place the ignition in the OFF position.
- Apply the parking brake.
(B)SettingUpToUseTireServiceKit:
- Push in the Mode Select Knob (5) and turn to the Sealant Mode position.
- Uncoil the Sealant Hose (6) and then remove the cap from the fitting at the end of the hose.
306 IN CASE OF EMERGENCY
- Place the Tire Service Kit flat on the ground next to the deflated tire.
- Remove the cap from the valve stem and then screw the fitting at the end of the Sealant Hose (6) onto the valve stem.
- Uncoil the Power Plug (8) and insert the plug into the vehicle's 12 Volt power outlet.
NOTE: Do not remove foreign objects (e.g., screws or nails) from the tire.
(C)InjectingTireServiceKitSealantIntoThe DeflatedTire:
- Always start the engine before turning ON the Tire Service Kit.
NOTE: Manual transmission vehicles must have the parking brake engaged and the gear selector in NEUTRAL.
- After pushing the Power Button (4), the sealant (white fluid) will flow from the Sealant Bottle (1) through the Sealant Hose (6) and into the tire.
NOTE: Sealant may leak out through the puncture in the tire.
If thesealant(whitefluid) does not flow within 0 - 1 0 secondsthroughtheSealantHose(6):
- Push the Power Button (4) to turn Off the Tire Service Kit. Disconnect the Sealant Hose (6) from the valve stem. Make sure the valve stem is free of debris. Reconnect the Sealant Hose (6) to the valve stem. Check that the Mode Select Knob (5) is in the Sealant Mode position and not Air Mode. Push the Power Button (4) to turn On the Tire Service Kit.
- Connect the Power Plug (8) to a different 12 Volt power outlet in your vehicle or another vehicle, if available. Make sure the engine is running before turning ON the Tire Service Kit.
- The Sealant Bottle (1) may be empty due to previous use. Call for assistance.
NOTE: If the Mode Select Knob (5) is on Air Mode and the pump is operating, air will dispense from the Air Pump Hose (7) only, not the Sealant Hose (6).
If thesealant(whitefluid)doesflowthroughtheSealant Hose(6):
- Continue to operate the pump until sealant is no longer flowing through the hose (typically takes 30 - 70 seconds). As the sealant flows through the Sealant Hose (6), the Pressure Gauge (3) can read as high as 70 psi (4.8 Bar). The Pressure Gauge (3) will decrease quickly from approximately 70 psi (4.8 Bar) to the actual tire pressure when the Sealant Bottle (1) is empty.
- The pump will start to inject air into the tire immediately after the Sealant Bottle (1) is empty. Continue to operate the pump and inflate the tire to the pressure indicated on the tire pressure label on the driver-side latch pillar (recommended pressure). Check the tire pressure by looking at the Pressure Gauge (3).
If the tired does not in flat to at least 26 psi (1.8 Bar) pressure within 15 minutes:
- The tire is too badly damaged. Do not attempt to drive the vehicle further. Call for assistance.
NOTE: If the tire becomes overinflated, push the Deflation Button (2) to reduce the tire pressure to the recommended inflation pressure before continuing.
If the tireinflatestotherecommended pressure or is at least 26 psi (1.8 Bar) pressure within 15 minutes:
- Push the Power Button (4) to turn off the Tire Service Kit.
- Remove the Speed Limit sticker from the top of the Sealant Bottle (1) and place the sticker on the instrument panel.
- Immediately disconnect the Sealant Hose (6) from the valve stem, reinstall the cap on the fitting at the end of the hose, and place the Tire Service Kit in the vehicle storage location. Quickly proceed to (D) "Drive Vehicle."
CAUTION!
- ThemetalendfittingfromPowerPlug(8)mayget hotafteruse,soitshouldbehandledcarefully.
- Failuretoreinstallthecaponthefittingattheendof theSealantHose(6)canresultinsealantcontacting yourskin,clothing,andthevehicle'sinterior.Itcan alsoresultinsealantcontactinginternalTireService Kitcomponentswhichmaycausepermanentdamage tothekit.
308 IN CASE OF EMERGENCY
(D)DriveVehicle:
Immediately after injecting sealant and inflating the tire, drive the vehicle 5 miles (8 km) or ten minutes to ensure distribution of the Tire Service Kit Sealant within the tire. Do not exceed 50 mph (80 km/h).
WARNING!
TireServiceKitisnotapermanentflattirerepair.Have thetireinspectedandrepairedorreplacedafterusing TireServiceKit.Donotexceed50mph(80km/h)until thetireisrepairedorreplaced.Failureretofollowthis warningcanresultininjuriesthatareseriousorfatal toyou,yourpassengers,andothersaroundyou.
(E)AfterDriving:
Pull over to a safe location. Refer to “(A) Whenever You Stop To Use Tire Service Kit” before continuing.
- Push in the Mode Select Knob (5) and turn to the Air Mode position.
- Uncoil the power plug and insert the plug into the vehicle's 12 Volt power outlet.
-
Uncoil the Air Pump Hose (7) (black in color) and screw the fitting at the end of hose (7) onto the valve stem.
-
Check the pressure in the tire by reading the Pressure Gauge (3).
Iftirepressureislessthan19psi(1.3Bar):
The tire is too badly damaged. Do not attempt to drive the vehicle further. Call for assistance.
Ifthetirepressureis19psi(1.3Bar)orhigher:
- Push the Power Button (4) to turn on Tire Service Kit and inflate the tire to the pressure indicated on the tire and loading information label on the driver-side door opening.
NOTE: If the tire becomes over-inflated, push the Deflation Button (2) to reduce the tire pressure to the recommended inflation pressure before continuing. - Disconnect the Tire Service Kit from the valve stem, reinstall the cap on the valve stem and unplug from 12 Volt outlet.
- Place the Tire Service Kit in its proper storage area in the vehicle.
-
Have the tire inspected and repaired or replaced at the earliest opportunity at an authorized dealer or tire service center.
-
Remove the Speed Limit sticker from the instrument panel after the tire has been repaired.
- Replace the Sealant Bottle (1) and Sealant Hose (6) assembly at an authorized dealer as soon as possible. Refer to “(F) Sealant Bottle And Hose Replacement”.
NOTE: When having the tire serviced, advise the authorized dealer or service center that the tire has been sealed using the Tire Service Kit.
(F) Sealant Bottle And Hose Replacement:
- Uncoil the Sealant Hose (6) (clear in color).
- Locate the round Sealant Bottle release button in the recessed area under the sealant bottle.
- Push the Sealant Bottle release button. The Sealant Bottle (1) will pop up. Remove the bottle and dispose of it accordingly.
-
Clean any remaining sealant from the Tire Service Kit housing.
-
Position the new Sealant Bottle (1) in the housing so that the Sealant Hose (6) aligns with the hose slot in the front of the housing. Push the bottle into the housing. An audible click will be heard indicating the bottle is locked into place.
- Verify that the cap is installed on the fitting at the end of the Sealant Hose (6) and return the hose to its storage area (located on the bottom of the air pump).
- Return the Tire Service Kit to its storage location in the vehicle.
TIRE SERVICE KIT — IF EQUIPPED
Small punctures up to 1/4 inch (6 mm) in the tire tread can be sealed with Tire Service Kit. Foreign objects (e.g., screws or nails) should not be removed from the tire. Tire Service Kit can be used in outside temperatures down to approximately -4°F (-20°C).
This kit will provide a temporary tire seal, allowing you to drive your vehicle up to 100 miles (160 km) with a maximum speed of 50 mph (80 km/h).
310 IN CASE OF EMERGENCY
Tire Service Kit Storage
The Tire Service Kit is located in the trunk.
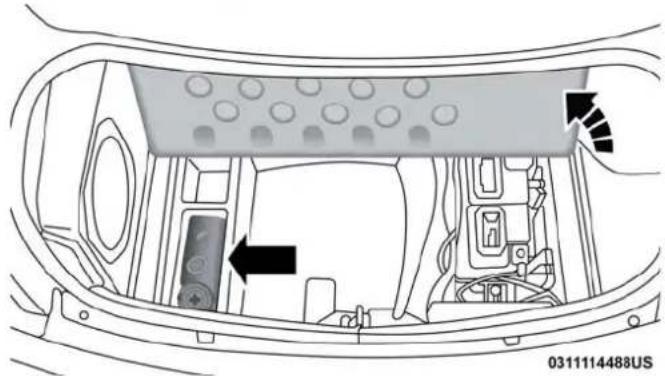
natural_image
Interior view of a car dashboard with visible air vent and control panel (no text or symbols)TireServiceKitLocation
Tire Service Kit Components And Operation
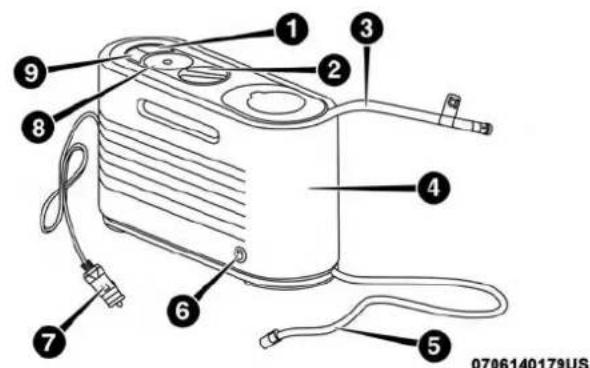
text_image
Labeled diagram of an air purifier with numbered parts and US flag markingTireServiceKitComponents
1 — Power Button 4 — Sealant Bottle 7 — Power Plug
2 — Mode Select Knob 5 — Air Pump Hose 8 — Pressure Gauge (Black)
3 — Sealant Hose 6 — Sealant Bottle 9 — Deflation Button (Clear) Release Button
UsingTheModeSelectKnobAndHoses
Your Tire Service Kit is equipped with the following symbols to indicate the air or sealant mode.
SelectingAirMode
Push in the Mode Select Knob (2) and turn to this position for air pump operation only. Use the Black Air Pump Hose (5) when selecting this mode.
SelectingSealantMode
Push in the Mode Select Knob (2) and turn to this position to inject the Tire Service Kit Sealant and to inflate the tire. Use the Sealant Hose (clear hose) (3) when selecting this mode.
UsingThePowerButton

Push and release the Power Button (1) once to turn on the Tire Service Kit. Push and release the Power Button (1) again to turn Off the Tire Service Kit.
UsingTheDeflationButton

Push the Deflation Button (9) to reduce the air pressure in the tire if it becomes over-inflated.
Tire Service Kit Usage Precautions
- Replace the Tire Service Kit Sealant Bottle (4) and Sealant Hose (3) prior to the expiration date (printed at the upper right hand corner on the bottle label) to assure optimum operation of the system. Refer to "Sealing A Tire With Tire Service Kit" section (F) "Sealant Bottle And Hose Replacement".
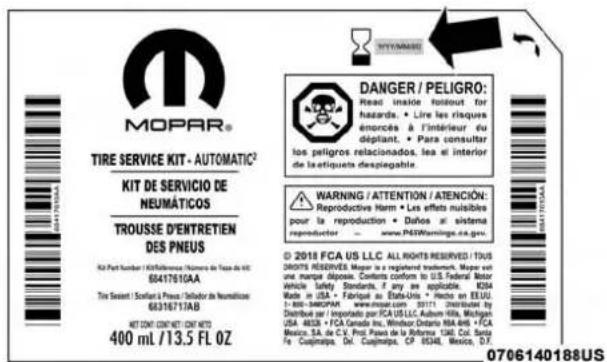
text_image
MOPAR® TIRE SERVICE KIT - AUTOMATIC® KIT DE SERVICIO DE NEUMÁTICOS TROUSSE D'ENTRETIEN DES PNEUS K3 Part Number : 64017610AA Tit Servient : Solan / Pres / Tóndor de Neumáticos 68316717AB NET CNT CONT-KIT CONT-KTD 400 mL /13.5 FL OZ DANGER / PELIGRO: Read iniciais fortouit for hazards. • Lire les étaques américées à l'intérieur du dépliant. • Para consultar los peligros relacionados, lesa si interior de la etiquets despeigable. WARNING / ATTENTION / ATENCIÓN: Reproductive Harm • Les effets nuisibles pour la reproduction • Dalhos al sistema reproduktor ... www.PELIGRWA##ngs.ca.gov © 2018 FCA US LLC ALL RIGHTS RESERVED / 17/05 DRIVITS RESERVES: Maier la régionalité deshauch. Maier est une marque déposse. Contants conform to U.S. Federal Motor Vehicle Safety Standards, if any applicable. KDS4 Made in USA - Fabrique au Étate-Unis - Diclo en ELIU. t-808-540PAP www.mopar.com 30771 Switzerland by Distribue par / Importado por FCA US LLC, Auburn 4916, Michigan USA - 4823 + FCA Canada Inc., Windsor Ontario 484 - FCA Mexico, S.A. de C.V. Projo Passes de la Réfrika. U&G. Col. Santa Fe Cuajimaipas. Del. Cuajimaipas. CP 85348, Mexico, D.F. 0706140188USTireServiceKitSealantExpirationDateLocation
312 IN CASE OF EMERGENCY
- The Sealant Bottle (4) and Sealant Hose (3) are a one tire application use and need to be replaced after each use. Always replace these components immediately at your original equipment vehicle dealer.
- When the Tire Service Kit sealant is in a liquid form, clean water and a damp cloth will remove the material from the vehicle or tire and wheel components. Once the sealant dries, it can easily be peeled off and properly discarded.
- For optimum performance, make sure the valve stem on the wheel is free of debris before connecting the Tire Service Kit.
- You can use the Tire Service Kit air pump to inflate bicycle tires. The kit also comes with two needles, located in the Accessory Storage Compartment (on the bottom of the air pump) for inflating sport balls, rafts, or similar inflatable items. However, use only the Air Pump Hose (5) and make sure the Mode Select Knob (2) is in the Air Mode when inflating such items to avoid injecting sealant into them. The Tire Service Kit Sealant is only intended to seal punctures less than 1/4 inch (6 mm) diameter in the tread of your tire.
- Do not lift or carry the Tire Service Kit by the hoses.
WARNING!
- Donotattempttosealatireonthesideofthevehicle closesttotraffic.Pullfarenoughofftheroadtoavoid the dangerofbeinghitwhenusingtheTireService Kit.
- DonotuseTireServiceKitordrivethevehicleunder the following circumstances:
-Ifthepunctureinthetiretreadisapproximately 1/4inch(6mm)orlarger.
-Ifthetirehasanysidewalldamage.
-If the tire has any damage from driving with extremely low tire pressure.
-If the tire has any damage from driving on a flat tire.
-Ifthewheelhasanydamage. - If you are unsure of the condition of the tire or the wheel.
- KeepTireServiceKitawayfromopenflamesorheat source.
(Continued)
WARNING!(Continued)
- AlooseTireServiceKitthrownforwardinacollisionorhardstopcouldendangertheoccupantsof thevehicle.AlwaysstowtheTireServiceKitinthe placeprovided.Failureretofollowthesewarningscan resultininjuriesthatareseriousorfataltoyou,your passengers,andothersaroundyou.
• TakecarenottoallowthecontentsofTireServiceKit tocomeincontactwithhair,eyes,orclothing.Tire ServiceKitsealantisharmfulifinhaled,swallowed, orabsorbedthroughtheskin.Itcausesskin,eye,and respiratoryirritation.Flushimmediatelywithplenty ofwaterifthereisanycontactwitheyesorskin. Changeclothingassoonaspossible,ifthereisany contactwithclothing. - TireServiceKitSealantsolutioncontainslatex.In caseofanallergicreactionorrash,consultaphysicianimmediately.KeepTireServiceKitoutofreach ofchildren.Ifswallowed,rinsemouthimmediately withplentyofwateranddrinkplentyofwater.Do notinducevomiting!Consultaphysicianimmediately.
Sealing A Tire With Tire Service Kit
(A)WheneverYouStopToUseTireServiceKit:
- Pull over to a safe location and turn on the vehicle's Hazard Warning flashers.
- Verify that the valve stem (on the wheel with the deflated tire) is in a position that is near to the ground. This will allow the Tire Service Kit Hoses (3) and (5) to reach the valve stem and keep the Tire Service Kit flat on the ground. This will provide the best positioning of the kit when injecting the sealant into the deflated tire and running the air pump. Move the vehicle as necessary to place the valve stem in this position before proceeding.
- Place the transmission in PARK (auto transmission) or in Gear (manual transmission) and place the ignition in the OFF position.
- Apply the parking brake.
(B)SettingUpToUseTireServiceKit:
- Push in the Mode Select Knob (2) and turn to the Sealant Mode position.
- Uncoil the Sealant Hose (3) and then remove the cap from the fitting at the end of the hose.
314 IN CASE OF EMERGENCY
- Place the Tire Service Kit flat on the ground next to the deflated tire.
- Remove the cap from the valve stem and then screw the fitting at the end of the Sealant Hose (3) onto the valve stem.
- Uncoil the Power Plug (7) and insert the plug into the vehicle's 12 Volt power outlet.
NOTE: Do not remove foreign objects (e.g., screws or nails) from the tire.
(C)InjectingTireServiceKitSealantIntoThe DeflatedTire:
- Always start the engine before turning ON the Tire Service Kit.
NOTE: Manual transmission vehicles must have the parking brake engaged and the gear selector in NEUTRAL.
- After pushing the Power Button (1), the sealant (white fluid) will flow from the Sealant Bottle (4) through the Sealant Hose (3) and into the tire.
NOTE: Sealant may leak out through the puncture in the tire.
If thesealant(whitefluid) does not flow within 0 - 1 0 secondsthroughtheSealantHose(3):
- Push the Power Button (1) to turn Off the Tire Service Kit. Disconnect the Sealant Hose (3) from the valve stem. Make sure the valve stem is free of debris. Reconnect the Sealant Hose (3) to the valve stem. Check that the Mode Select Knob (2) is in the Sealant Mode position and not Air Mode. Push the Power Button (1) to turn On the Tire Service Kit.
- Connect the Power Plug (7) to a different 12 Volt power outlet in your vehicle or another vehicle, if available. Make sure the engine is running before turning ON the Tire Service Kit.
- The Sealant Bottle (4) may be empty due to previous use. Call for assistance.
NOTE: If the Mode Select Knob (2) is on Air Mode and the pump is operating, air will dispense from the Air Pump Hose (5) only, not the Sealant Hose (3).
If thesealant(whitefluid)doesflowthroughtheSealant Hose(3):
- Continue to operate the pump until sealant is no longer flowing through the hose (typically takes 30 - 70 seconds). As the sealant flows through the Sealant Hose (3), the Pressure Gauge (8) can read as high as 70 psi (4.8 Bar). The Pressure Gauge (8) will decrease quickly from approximately 70 psi (4.8 Bar) to the actual tire pressure when the Sealant Bottle (4) is empty.
- The pump will start to inject air into the tire immediately after the Sealant Bottle (4) is empty. Continue to operate the pump and inflate the tire to the pressure indicated on the tire pressure label on the driver-side latch pillar (recommended pressure). Check the tire pressure by looking at the Pressure Gauge (8).
If the tiredoes not in flat to at least 26 psi (1.8 Bar) pressure within 15 minutes:
- The tire is too badly damaged. Do not attempt to drive the vehicle further. Call for assistance.
NOTE: If the tire becomes overinflated, push the Deflation Button to reduce the tire pressure to the recommended inflation pressure before continuing.
If the tireinflatestotherecommended pressure or is at least 26 psi (1.8 Bar) pressure within 15 minutes:
- Push the Power Button (1) to turn off the Tire Service Kit.
- Remove the Speed Limit sticker from the top of the Sealant Bottle (4) and place the sticker on the instrument panel.
- Immediately disconnect the Sealant Hose (3) from the valve stem, reinstall the cap on the fitting at the end of the hose, and place the Tire Service Kit in the vehicle storage location. Quickly proceed to (D) "Drive Vehicle."
CAUTION!
- ThemetalendfittingfromPowerPlug(8)mayget hotafteruse,soitshouldbehandledcarefully.
- Failuretoreinstallthecaponthefittingattheendof theSealantHose(6)canresultinsealantcontacting yourskin,clothing,andthevehicle'sinterior.Itcan alsoresultinsealantcontactinginternalTireService Kitcomponentswhichmaycausepermanentdamage tothekit.
316 IN CASE OF EMERGENCY
(D)DriveVehicle:
Immediately after injecting sealant and inflating the tire, drive the vehicle 5 miles (8 km) or ten minutes to ensure distribution of the Tire Service Kit Sealant within the tire. Do not exceed 50 mph (80 km/h).
WARNING!
TireServiceKitisnotapermanentflattirerepair.Have thetireinspectedandrepairedorreplacedafterusing TireServiceKit.Donotexceed50mph(80km/h)until thetireisrepairedorreplaced.Failureretofollowthis warningcanresultininjuriesthatareseriousorfatal toyou,yourpassengers,andothersaroundyou.
(E)AfterDriving:
Pull over to a safe location. Refer to “(A) Whenever You Stop To Use Tire Service Kit” before continuing.
- Push in the Mode Select Knob (2) and turn to the Air Mode position.
- Uncoil the power plug and insert the plug into the vehicle's 12 Volt power outlet.
-
Uncoil the Air Pump Hose (5) (black in color) and screw the fitting at the end of hose onto the valve stem.
-
Check the pressure in the tire by reading the Pressure Gauge (8).
Iftirepressureislessthan19psi(1.3Bar):
The tire is too badly damaged. Do not attempt to drive the vehicle further. Call for assistance.
Ifthetirepressureis19psi(1.3Bar)orhigher:
- Push the Power Button (1) to turn on Tire Service Kit and inflate the tire to the pressure indicated on the tire and loading information label on the driver-side door opening.
NOTE: If the tire becomes over-inflated, push the Deflation Button to reduce the tire pressure to the recommended inflation pressure before continuing. - Disconnect the Tire Service Kit from the valve stem, reinstall the cap on the valve stem and unplug from 12 Volt outlet.
- Place the Tire Service Kit in its proper storage area in the vehicle.
-
Have the tire inspected and repaired or replaced at the earliest opportunity at an authorized dealer or tire service center.
-
Remove the Speed Limit sticker from the instrument panel after the tire has been repaired.
- Replace the Sealant Bottle (4) and Sealant Hose (3) assembly at an authorized dealer as soon as possible. Refer to “(F) Sealant Bottle And Hose Replacement”.
NOTE: When having the tire serviced, advise the authorized dealer or service center that the tire has been sealed using the Tire Service Kit.
(F) Sealant Bottle And Hose Replacement:
- Uncoil the Sealant Hose (3) (clear in color).
- Locate the red colored round Sealant Bottle release button at the lower right hand corner of the kit.
- Push and hold the Sealant Bottle release button, then pull out the bottle holding the button.
- Clean any remaining sealant from the Tire Service Kit housing.
-
Position the new Sealant Bottle (4) in the housing so that the Sealant Hose (3) aligns with the hose slot in the front of the housing. Push and hold the Sealant Bottle release button, then push the bottle into the housing by holding the button. An audible click will be heard indicating the bottle is locked into place. Release the button.
-
Verify that the cap is installed on the fitting at the end of the Sealant Hose (3) and return the hose to its storage area (located on top of the housing).
- Return the Tire Service Kit to its storage location in the vehicle.
JUMP STARTING
If your vehicle has a discharged battery, it can be jump started using a set of jumper cables and a battery in another vehicle, or by using a portable battery booster pack. Jump starting can be dangerous if done improperly, so please follow the procedures in this section carefully.
WARNING!
Donotattemptjumpstartingifthebatteryisfrozen.It couldruptureorexplodeandcausepersonalinjury.
CAUTION!
Donotuseaportablebatteryboosterpackoranyother boostersourcewithasystemvoltagegreaterthan 12Voltsordamagetothebattery,startermotor,alternatororelectricalsystemmayoccur.
318 IN CASE OF EMERGENCY
NOTE: When using a portable battery booster pack, follow the manufacturer's operating instructions and precautions.
Preparations For Jump Start
The battery is stored under an access cover in the trunk. Remote battery posts are located on the right side of the engine compartment for jump starting.
NOTE: The remote battery posts are viewed by standing on the right side of the vehicle looking over the fender.
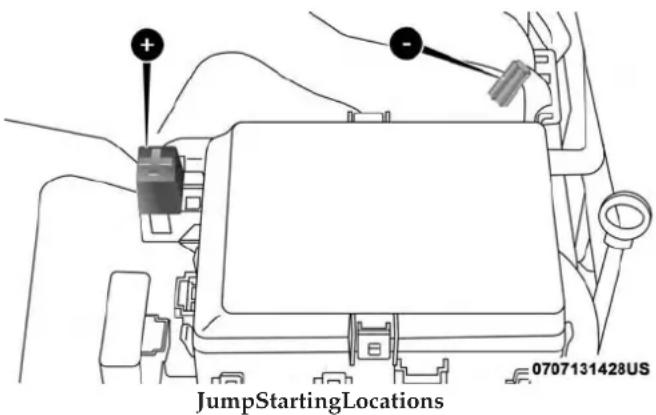
text_image
JumpStartingLocations 0707131428US(+) — Remote Positive Post
(-) — Remote Negative Post
WARNING!
• Takecaretoavoidtheradiatorcoolingfanwhenever thehoodisraised.Itcanstartanytimetheignition switchisON.Youcanbeinjuredbymovingfan blades.
- Removeanymetaljewelrysuchasrings, watch bandsandbraceletsthatcouldmakeaninadvertent electricalcontact. You could beseriously injured.
- Batteriescontainsulfuricacidthatcanburnyour skinoreyesandgeneratehydrogengaswhichis flammableandexplosive.Keepopenflamesor sparksawayfromthebattery.
- Apply the parking brake, shift the automatic transmission into PARK and place the ignition in the OFF position.
- Turn off the heater, radio, and all unnecessary electrical accessories.
- If using another vehicle to jump start the battery, park the vehicle within the jumper cable's reach, apply the parking brake and make sure the ignition is OFF.
WARNING!
Donotallowvehiclestotoucheachotherasthiscould establishagroundconnectionandpersonalinjury couldresult.
Jump Starting Procedure
WARNING!
Failuretofollowthisjumpstartingprocedurecould resultinpersonalinjuryorpropertydamagedueto batteryexplosion.
CAUTION!
Failure to follow these procedures could result in damage to the charging system of the booster vehicle orthedischarged vehicle.
ConnectingTheJumperCables
-
Connect the positive (+)end of the jumper cable to the remote positive (+)post of the vehicle with the discharged battery.
-
Connect the opposite end of the positive (+)jumper cable to the positive (+)post of the booster battery.
- Connect the negative (-)end of the jumper cable to the negative (-)post of the booster battery.
- Connect the opposite end of the negative (-)jumper cable to the remote negative (-)post of the vehicle with the discharged battery.
WARNING!
Donotconnectthejumpercabletothenegative(-)post ofthedischargedbattery. Theresultingelectricalspark couldcausethebatterytoexplodeandcouldresultin personalinjury. Onlyusethespecificgroundpoint,do notuseanyotherexposedmetalparts.
- Start the engine in the vehicle that has the booster battery, let the engine idle a few minutes, and then start the engine in the vehicle with the discharged battery.
320 IN CASE OF EMERGENCY
- Once the engine is started, remove the jumper cables in the reverse sequence:
DisconnectingTheJumperCables
- Disconnect the negative (-) end of the jumper cable from the remote negative (-) post of the vehicle with the discharged battery.
- Disconnect the opposite end of the negative (-)jumper cable from the negative (-)post of the booster battery.
- Disconnect the positive (+) end of the jumper cable from the positive (+) post of the booster battery.
- Disconnect the opposite end of the positive (+)jumper cable from the remote positive (+)post of the vehicle with the discharged battery.
If frequent jump starting is required to start your vehicle you should have the battery and charging system inspected at an authorized dealer.
CAUTION!
Accessoriespluggedintothevehiclepoweroutlets drawpowerfromthevehicle'sbattery,evenwhennot inuse(i.e.,cellulardevices,etc.).Eventually,ifplugged
CAUTION!(Continued)
inlongenoughwithoutengineoperation,thevehicle's batterywilldischargesufficientlytodegradebattery lifeand/orpreventtheenginefromstarting.
IF YOUR ENGINE OVERHEATS
In any of the following situations, you can reduce the potential for overheating by taking the appropriate action.
- On highways — slow down.
- In city traffic — while stopped, place the transmission in NEUTRAL, but do not increase the engine idle speed.
NOTE: There are steps that you can take to slow down an impending overheat condition:
- If your air conditioner (A/C) is on, turn it off. The A/C system adds heat to the engine cooling system and turning the A/C off can help remove this heat.
- You can also turn the temperature control to maximum heat, the mode control to floor and the blower control to high. This allows the heater core to act as a supplement to the radiator and aids in removing heat from the engine cooling system.
WARNING!
Youorotherscanbebadlyburnedbyhotengine coolant(antifreeze)orsteamfromyourradiator.Ifyou seeorhearsteamcomingfromunderthehood,donot openthehooduntiltheradiatorhashadtimetocool. Nevertrytoopenacoolingsystempressurecapwhen theradiatororcoolantbottleishot.
CAUTION!
Drivingwithahotcoolingsystemcoulddamageyour vehicle.Ifthetemperaturegaugereads240°F(116°C)or greaterpulloverandstopthevehicle.Idlethevehicle withtheairconditionerturnedoffuntilthepointer dropsbackintothenormalrange200-230°F(93-110°C). Ifthepointerremainsat240°F(116°C)orgreaterand youhearachime,turntheengineoffimmediately and callforservice.
MANUAL PARK RELEASE — 8-SPEED TRANSMISSION
WARNING!
Alwayssecureyourvehiclebyfullyapplyingthe parkingbrakebeforeactivatingtheManualParkRelease.Inaddition,youshouldbeseatedinthedriver's seatwithyourfootfirmlyonthebrakepedalwhen activatingtheManualParkRelease.Activatingthe ManualParkReleasewillallowyourvehicletoroll awayifitisnotsecuredbytheparkingbrake,orby properconnectiontoatowvehicle.Activatingthe ManualParkReleaseonanunsecuredvehiclecould leadtoseriousinjuryordeathforthoseinoraround thevehicle.
In order to move the vehicle in cases where the transmission will not shift out of PARK (such as a dead battery), a Manual Park Release is available.
322 IN CASE OF EMERGENCY
Follow these steps to use the Manual Park Release:
- Firmly apply the parking brake.
- Remove the console storage bin.
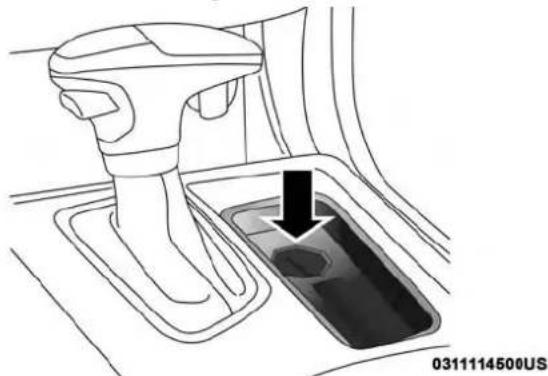
natural_image
Diagram of a car gear shift lever with a black arrow pointing to the intake area (no text or symbols present)ConsoleStorageBin
- Remove the plastic cover under the bin by using the slot provided to access the Manual Park Release lever.
- Using a small screwdriver or similar tool, fish the tether strap up through the opening in the console base.
-
Press and maintain firm pressure on the brake pedal.
-
Insert the screwdriver into the slot in the center of the lever, and disengage the lever locking tab by pushing it to the right.
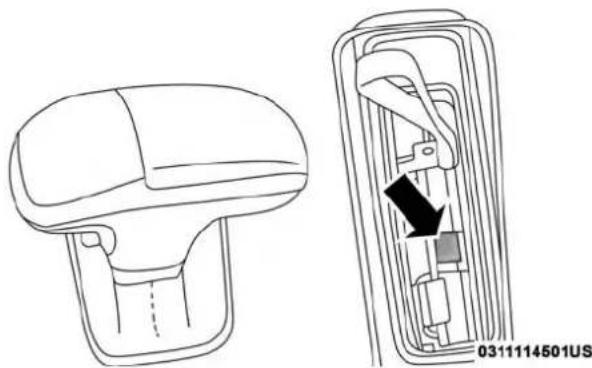
natural_image
Technical line drawing of a car seatbelt with internal components and a directional arrow (no text or symbols)LockingTab
- While holding the locking tab in the disengaged position, pull the tether strap to rotate the lever up and rearward, until it locks in place in the vertical position. The vehicle is now out of PARK and can be moved. Release the parking brake only when the vehicle is securely connected to a tow vehicle.
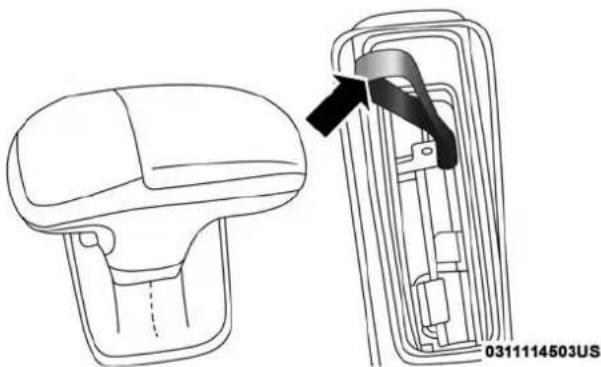
natural_image
Technical line drawing of a car seatbelt mechanism, showing internal components and a close-up view (no text or symbols)TetherStrap
ToResetTheManualParkRelease:
- Push the latch (at the base of the lever, on the rear side) rearward (away from the lever) to unlatch the lever.
- Rotate the Manual Park Release lever forward and down, to its original position, until the locking tab snaps into place to secure the lever.
- Pull up gently on the tether strap to confirm that the lever is locked in its stowed position.
- Tuck the tether strap into the base of the console. Reinstall the Manual Park Release cover and the console storage bin.
FREEING A STUCK VEHICLE
If your vehicle becomes stuck in mud, sand, or snow, it can often be moved using a rocking motion. Turn the steering wheel right and left to clear the area around the front wheels. Push and hold the lock button on the gear selector. Then, shift back and forth between DRIVE and REVERSE while gently pressing the accelerator. Use the least amount of accelerator pedal pressure that will maintain the rocking motion, without spinning the wheels or racing the engine.
NOTE:
- Shifts between DRIVE and REVERSE can only be achieved at wheel speeds of 5 mph (8 km/h) or less. Whenever the transmission remains in NEUTRAL for more than two seconds, you must press the brake pedal to engage DRIVE or REVERSE.
- Push the "ESC Off" switch, to place the Electronic Stability Control (ESC) system in "Partial Off" mode, before rocking the vehicle. Refer to "Electronic Brake Control System" in "Safety" for further information. Once the vehicle has been freed, push the "ESC Off" switch again to restore "ESC On" mode.
WARNING!
Fastspinningtirescanbedangerous. Forces generated by excessive wheels speedsmay caused damage, oreven failure, of the axle and tires. Atire could explode and injuresomeone. Donot spiny our vehicle's wheels faster than 30 mph (48 km/h) or for longer than 30 seconds continuously without stopping when you are stuck and donot let any on e aspinning wheel, no matter what the speed.
CAUTION!
- Racingtheengineorspinningthewheelsmaylead totransmissionoverheatingandfailure.Allowthe enginetoidlewiththetransmissioninNEUTRAL
CAUTION!(Continued)
for atleastoneminuteaftereveryfiverocking-motioncycles. Thiswillminimizeoverheatingand reducetheriskoftransmissionfailureduringprolongedeffortstofreeastuckvehicle.
- When "rocking"astuckvehiclebyshiftingbetween DRIVEandREVERSE, donotspinthewheelsfaster than 15mph(24km/h), or drivetraindamagemay result.
- Revvingtheengineorspinningthewheelstoofast mayleadtotransmissionoverheatingandfailure.It canalsodamagethetires.Donotspinthewheels above30mph(48km/h)whileingear(nottransmissionshiftingoccurring).
TOWING A DISABLED VEHICLE
This section describes procedures for towing a disabled vehicle using a commercial towing service.
| TowingConditionWheelsOFF | TheGroundAutomaticTransmission | |
| Flat Tow NONE Iftransmissionisoperable: | •Transmission in NEUTRAL•30 mph (48 km/h)maxspeed•30 miles (48 km)maxdistance | |
| Wheel Lift Or Dolly Tow Front N | NOTALLOWED | |
| Rear NOT RECOMMENDED | ||
| Flatbed ALLBESTMETHOD | ||
Proper towing or lifting equipment is required to prevent damage to your vehicle. Use only tow bars and other equipment designed for this purpose, following equipment manufacturer's instructions. Use of safety chains is mandatory. Attach a tow bar or other towing device to main structural members of the vehicle, not to bumpers or associated brackets. State and local laws regarding vehicles under tow must be observed.
If you must use the accessories (wipers, defrosters, etc.) while being towed, the ignition must be in the ON/RUN mode, not the ACC mode.
If the key fob is unavailable, or the vehicle's battery is discharged, refer to "Manual Park Release" in this section for instructions on shifting the transmission out of PARK for towing.
CAUTION!
- DONOTusesling-typeequipmentwhentowing. Vehicledamagemayoccur.
- Whensecuringthevehicletoaflatbedtruck, donot attachtofrontorrearsuspensioncomponents. Damagetoyourvehiclemayresultfromimpropertowing.
- Themanufacturerdoesnotrecommendtowingthis vehicleusingatowdolly.Vehicledamagemayoccur.
The manufacturer recommends towing your vehicle with all four wheels OFF the ground using a flatbed. If flatbed equipment is not available, and the transmission is operable, the vehicle may be flat towed (with all four wheels on the ground) under the following conditions:
- The transmission must be in NEUTRAL. Refer to "Manual Park Release" in this section for instructions on shifting the transmission to NEUTRAL when the engine is off.
- The towing distance must not exceed 30 miles (48 km).
• The towing speed must not exceed 30 mph (48 km/h).
If the transmission is not operable, or the vehicle must be towed faster than 30 mph (48 km/h) or farther than 30 miles (48 km), then the only acceptable method of towing is with a flatbed truck.
CAUTION!
Towing this vehicle inviolation of the aboverequirements can cause severe transmission damage. Damage from impropertowing is not covered under the New Vehicle Limited Warranty.
ENHANCED ACCIDENT RESPONSE SYSTEM (EARS)
This vehicle is equipped with an Enhanced Accident Response System.
Please refer to "Occupant Restraint Systems" in "Safety" for further information on the Enhanced Accident Response System (EARS) function.
This vehicle is equipped with an Event Data Recorder (EDR). The main purpose of an EDR is to record data that will assist in understanding how a vehicle's systems performed under certain crash or near crash-like situations, such as an air bag deployment or hitting a road obstacle.
Please refer to "Occupant Restraint Systems" in "Safety" for further information on the Event Data Recorder (EDR).
SERVICING AND MAINTENANCE
CONTENTS
■SCHEDULED SERVICING....329
□6.2L Supercharged Engine .....329
■ENGINE COMPARTMENT....333
□6.2L Supercharged Engine .....333
□Checking Oil Level....334
□Adding Washer Fluid....334
□Maintenance-Free Battery....335
■DEALER SERVICE....336
□Engine Oil....336
□Engine Oil Filter . . . . . . . . . . . . . . . . . . . . . . . . . . . . . . . . . . . . . . . . . . . . . . . . . . 338
□Engine Air Cleaner Filter....338
□Air Conditioner Maintenance....339
□Accessory Drive Belt Inspection....342
□Body Lubrication....343
□Windshield Wiper Blades....343
□Exhaust System....346
□ Cooling System . . . . . . . . . . . . . . . . . . . . . . . . . . . . . . . . . . . . . . . . . . . . . . . . . . 348
□Brake System .352
□Automatic Transmission....354
□Rear Axle....355
■RAISING THE VEHICLE....356
■TIRES....356
□ Tire Safety Information .....356
□ Tires — General Information .....365
□Tire Types....371
□ Spare Tires — If Equipped .....372
□Wheel And Wheel Trim Care . . . . . . . . . . . . . . . . . . . . . . . . . . . . . . . . . . . . . . . . . . . . . . . 375
□Tire Chains (Traction Devices) .....376
328 SERVICING AND MAINTENANCE
□Tire Rotation Recommendations. . . . . . . . . . . . . . . . . . . 376
■DEPARTMENT OF TRANSPORTATION UNIFORM TIRE QUALITY GRADES .....377
□Treadwear....377
□Traction Grades....377
□Temperature Grades....378
■VEHICLE STORAGE....378
□Battery Storage Mode....379
■BODYWORK....379
□Protection From Atmospheric Agents .....379
□Body And Underbody Maintenance .....380
□Preserving The Bodywork....380
■INTERIORS....381
□Seats And Fabric Parts . . . . . . . . . . . . . . . . . . . . . . . . . . . . . . . . . . . . . . . . . . . . . . . . . 381
□Plastic And Coated Parts. . . . . . . . . . . . . . . . . . . . . . . . . . . . . . . . . . . . . . . . . . . . 382
□Leather Parts....382
□Glass Surfaces....383
SCHEDULED SERVICING
6.2L Supercharged Engine
The scheduled maintenance services listed in this manual must be done at the times or mileages specified to protect your vehicle warranty and ensure the best vehicle performance and reliability. More frequent maintenance may be needed for vehicles in severe operating conditions, such as dusty areas and very short trip driving. Inspection and service should also be done anytime a malfunction is suspected.
The oil change indicator system will remind you that it is time to take your vehicle in for scheduled maintenance.
A “Oil Change Required” message will be displayed in the instrument cluster and a single chime will sound, indicating that an oil change is necessary.
Based on engine operation conditions, the oil change indicator message will illuminate. This means that service is required for your vehicle. Have your vehicle serviced as soon as possible, within the next 500 miles (800 km).
NOTE:
- The oil change indicator message will not monitor the time since the last oil change. Change your vehicle's oil if it has been six months since your last oil change, even if the oil change indicator message is NOT illuminated.
- Change your engine oil more often if you drive your vehicle off-road/track usage for an extended period of time.
- Under no circumstances should oil change intervals exceed 6,000 miles (10,000 km) or six months, whichever comes first.
An authorized dealer will reset the oil change indicator message after completing the scheduled oil change. If a scheduled oil change is performed by someone other than your authorized dealer, the message can be reset by referring to the steps described under “Instrument Cluster Display” in “Getting To Know Your Instrument Panel” for further information.
AtEachStopForFuel
- Check the engine oil level. Refer to "Engine Compartment" in this chapter for further information.
- Check the windshield washer solvent and add if required.
OnceAMonth
- Check tire pressure and look for unusual wear or damage.
- Inspect the battery, and clean and tighten the terminals as required.
- Check the fluid levels of the coolant reservoir, brake master cylinder, and power steering (6.2L only), and add as needed.
- Check all lights and other electrical items for correct operation.
MaintenancePlan
AtEachOilChange
- Change the engine oil filter.
- Inspect the brake hoses and lines.
| CAUTION! |
| Failuretoperformtherequiredmaintenanceitems mayresultindamagetothevehicle. |
| Miles: | 6,000 | 12,000 | 18,000 | 24,000 | 30,000 | 36,000 | 42,000 | 48,000 | 54,000 | 60,000 | 66,000 | 72,000 | 78,000 | 84,000 | 90,000 | 96,000 | 102,000 | 108,000 | 114,000 | 120,000 | 126,000 | 132,000 | 138,000 | 144,000 | 150,000 |
| Or Months: 6 12 18 24 30 36 42 48 54 60 66 72 78 84 | 90 96 102 108 114 120 126 132 138 144 150 | ||||||||||||||||||||||||
| Or Kilometers: | 10,000 | 20,000 | 30,000 | 40,000 | 50,000 | 60,000 | 70,000 | 80,000 | 90,000 | 100,000 | 110,000 | 120,000 | 130,000 | 140,000 | 150,000 | 160,000 | 170,000 | 180,000 | 190,000 | 200,000 | 210,000 | 220,000 | 230,000 | 240,000 | 250,000 |
| Change the engine oil and engine oil filter. | X | X | X | X | X | X | X | X | X | X | X | X | X | X | X | X | X | X | X | X | X | X | X | X | X |
| Rotatethetires,rotateatthefirstsignofirregu-larwear,evenifitoccursbeforescheduled maintenance. | X | X | X | X | X | X | X | X | X | X | X | X | X | X | X | X | X | X | X | X | X | X | X | X | X |
| Ifusingyourvehicleforanyofthefollowing:dustyoroff-roadconditions.Inspecttheengine aircleanerfilter;replaceifnecessary. | X | X | X | X | X | X | X | X | X | X | X | X | |||||||||||||
| Or Months: 6 12 18 24 30 36 42 48 54 60 66 72 7 | 8 84 | 90 96 | 102 108 | 114 120 | 126 132 | 138 | 144 | 150 | |||||||||||||||||
| Or Kilometers: | 10,000 | 20,000 | 30,000 | 40,000 | 50,000 | 60,000 | 70,000 | 80,000 | 90,000 | 100,000 | 110,000 | 120,000 | 130,000 | 140,000 | 150,000 | 160,000 | 170,000 | 180,000 | 190,000 | 200,000 | 210,000 | 220,000 | 230,000 | 240,000 | 250,000 |
| Inspectthebrakelinings;replaceifnecessary.XXXXXX | XXXX | XXXX | |||||||||||||||||||||||
| InspecttheCVjoints.XXXXXXXXXXX | |||||||||||||||||||||||||
| Inspecttheexhaustsystem.XXXXXXXXXXX | |||||||||||||||||||||||||
| Adjusttheparkingbrakeonvehiclesequipped withfourwheeldiscbrakes. | X | X | X | X | X | ||||||||||||||||||||
| Changetherearaxlefluidifusingyourvehicle foranyofthefollowing:police,taxi,fleetorfre-quenttrailertowing. | X | X | X | ||||||||||||||||||||||
| Inspecttherearaxlefluid.XXXXXXXXXX | |||||||||||||||||||||||||
| Inspectfrontsuspension,tierodends,andboot seals,forcracksorleaksandallpartsfordam-age,wear,improperloosenessorendplay;replaceifnecessary. | X | X | X | X | X | X | X | X | X | X | X | X | |||||||||||||
| Replacetheengineaircleanerfilter.XXXX | X | ||||||||||||||||||||||||
| Replacetheairconditioningfilter. | XXXX | XXXX | XXXX | XX | |||||||||||||||||||||
| InspectandreplacethePCVValveifnecessary | X | ||||||||||||||||||||||||
| Replacethsparkplugs-6.2L Supercharged Engine** | X | X | |||||||||||||||||||||||
| Flushandreplacetheenginecoolant/intercooler at120monthsifnotdoneat150,000miles (240,000km). | X | X | |||||||||||||||||||||||
332 SERVICING AND MAINTENANCE
** The spark plug change interval is mileage based only, yearly intervals do not apply.
WARNING!
- You can be badly injured working on or around a motor vehicle. Do only service work for which you have the knowledge and their right equipment. If you have any doubt about your ability to perform a service job, take your vehicle to a competent mechanic.
- Failuretoproperlyinspectandmaintainyourvehicle couldresultinacomponentmalfunctionandeffect vehiclehandlingandperformance.Thiscouldcause anaccident.
ENGINE COMPARTMENT
6.2L Supercharged Engine
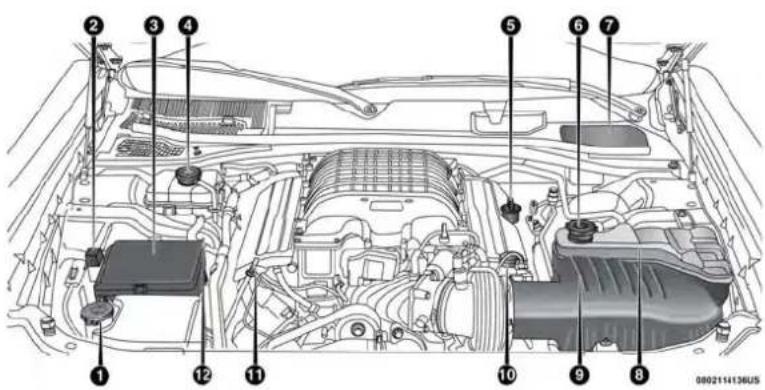
text_image
Technical diagram of a car engine bay with numbered components for identification1 — Washer Fluid Reservoir 7 — Brake Fluid Reservoir Access Cover
2 — Remote Jump Start (Positive Battery Post) 8 — Engine Coolant Reservoir
3 — Power Distribution Center (Fuses) 9 — Air Cleaner Filter
4 — Intercooler Fluid Reservoir 10 — Power Steering Reservoir
5 — Engine Oil Fill 11 — Engine Oil Dipstick
6 — Engine Coolant Pressure Cap 12 — Remote Jump Start (Negative Battery Post)
Checking Oil Level
To assure proper engine lubrication, the engine oil must be maintained at the correct level. Check the oil level at regular intervals, such as once a month. The best time to check the engine oil level is about five minutes after a fully warmed engine is shut off.
Checking the oil while the vehicle is on level ground will improve the accuracy of the oil level readings. Maintain the oil level in the "SAFE" range. Adding 1.0 quart (1 liter) of oil when the reading is at the bottom of the "SAFE" range will result in an oil level at the top of the "SAFE" range on these engines.
CAUTION!
Overfillingorunderfillingthecrankcasewillcause aerationorlossofoilpressure.Thiscoulddamageyour engine.
Adding Washer Fluid
The windshield washer fluid reservoir is located in the front of the engine compartment. Be sure to check the fluid level at regular intervals. Fill the reservoir with windshield washer solvent (not radiator antifreeze) and operate the system for a few seconds to flush out the residual water.
When refilling the washer fluid reservoir, apply some washer fluid to a cloth or towel and wipe the wiper blades clean. This will help blade performance.
To prevent freeze-up of your windshield washer system in cold weather, select a solution or mixture that meets or exceeds the temperature range of your climate. This rating information can be found on most washer fluid containers.
The fluid reservoir will hold nearly 1 gallon (4 liters) of washer fluid when the message "Low Washer Fluid" appears in the instrument cluster.
WARNING!
Commerciallyavailable windshieldwasher solvents areflammable. They could ignite and burn you. Care must be exercised when filling or working around the washers solution.
Maintenance-Free Battery
Your vehicle is equipped with a maintenance-free battery. You will never have to add water, nor is periodic maintenance required.
NOTE: The battery is stored under an access cover in the trunk. Remote battery terminals are located in the engine compartment for jump starting. Refer to "Jump Starting Procedures" in "In Case Of Emergency" for further information.
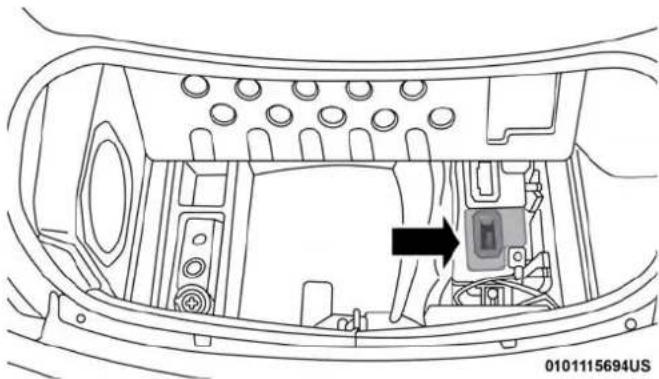
natural_image
Interior view of a car dashboard with visible engine compartment and control panel (no text or symbols)BatteryLocation
WARNING!
- Batteryfluidisacorrosiveacidsolutionandcan burnorevenblindyou.Donotallowbatteryfluidto contactyoureyes,skin,orclothing.Donotleanover abatterywhenattachingclamps.Ifacidsplashesin eyesoronskin,flushtheareaimmediatelywith largeamountsofwater.Referto"JumpStarting Procedure"in"InCaseOfEmergency"forfurther information.
- Batterygasisflammableandexplosive.Keepflame orsparksawayfromthebattery.Donotuseabooster batteryoranyotherboostersourcewithanoutput greaterthan12Volts.Donotallowcableclampsto toucheachother.
- Batteryposts,terminals,andrelatedaccessoriescontainleadandleadcompounds.Washhandsafter handling.
- Thebatteryinthisvehiclehasaventhosethat shouldnotbedisconnectedandshouldonlybe replacedwithabatteryofthesametype(vented).
CAUTION!
- It is essential when replacing the cables on the battery that the positive cable is attached to the positive post and then negative cable is attached to the negative post. Battery posts are marked positive (+) and negative (-) and are identified on the battery case. Cable clamp should be tight on the terminal posts and free of corrosion.
- Ifa "fastcharger" is used while the battery is in the vehicle, disconnect both vehicle battery cables before connecting the charger to the battery. Donotusea "fastcharger" to provide starting voltage.
DEALER SERVICE
An authorized dealer has the qualified service personnel, special tools, and equipment to perform all service operations in an expert manner. Service Manuals are available which include detailed service information for your vehicle. Refer to these Service Manuals before attempting any procedure yourself.
NOTE: Intentional tampering with emissions control systems may void your warranty and could result in civil penalties being assessed against you.
WARNING!
You can be badly injured working on or around a motor vehicle. Only doservicework for which you have the knowledge and the properequipment. If you have any doubt about your ability to perform a service job, take your vehicle to a competent mechanic.
Engine Oil
ChangeEngineOil
The oil change indicator system will remind you that it is time to take your vehicle in for scheduled maintenance. Refer to "Scheduled Servicing" in this section for the proper maintenance intervals.
NOTE: Under no circumstances should oil change intervals exceed 6,000 miles (10,000 km) or six months, whichever occurs first.
EngineOilSelection
For best performance and maximum protection under all types of operating conditions, the manufacturer only recommends full synthetic engine oils that meet the American Petroleum Institute (API) categories of SN.
The manufacturer recommends the use of a full synthetic SAE 0W-40 engine oil or equivalent meeting the requirements of FCA Material Standard MS-12633.
CAUTION!
Donotusechemicalflushesinyourengineoilasthe chemicalscandamageyourengine.Suchdamageisnot coveredbytheNewVehicleLimitedWarranty.
EngineOilViscosity
Use Pennzoil Ultra Platinum 0W-40 engine or equivalent Mopar oil meeting the FCA Material Standard MS-12633 for use in all operating temperatures.
The engine oil filler cap also shows the recommended engine oil viscosity for your engine. For information on engine oil filler cap location, refer to “Engine Compartment” in this section for further information.
MaterialsAddedToEngineOil
The manufacturer strongly recommends against the addition of any additives (other than leak detection dyes) to the engine oil. Engine oil is an engineered product and its performance may be impaired by supplemental additives.
EngineOilChangeRequirements—6.2L SuperchargedEngine(IfEquipped)
We recommend having your oil changed and vehicle serviced by an authorized dealer. You should only perform maintenance procedures and/or repairs for which you have the knowledge and the right equipment.
Your 6.2L Supercharged engine (if equipped) has a unique engine oil system. The system contains a drain in the engine oil pan and the engine oil cooler. It is necessary for the service technician to drain both the engine oil pan and the engine oil cooler to properly perform the engine oil change procedure. Failure to drain the engine oil cooler will result in overfilling your vehicle's engine oil system.
NOTE: Do not overfill crankcase with engine oil, pressure loss or oil foaming can result.
To access these oil drains, the vehicle needs to be safely lifted and supported to remove the front underbody shields (belly pan). Your service technician will refer to the Service Manual for proper under body shield (belly pan) removal and installation procedures.
338 SERVICING AND MAINTENANCE
An authorized dealer has the qualified service personnel, special tools, and equipment to perform all service operations in an expert manner. Service Manuals are available which include detailed service information for your vehicle. Refer to these Service Manuals before attempting any procedure yourself.
WARNING!
Youcanbebadlyinjuredworkingonorarounda motorvehicle.Doonlythatserviceworkforwhichyou havetheknowledgeandtherightequipment.Ifyou haveanydoubtaboutyourabilitytoperformaservice job,takeyourvehicletoacompetentmechanic.
DisposingOfUsedEngineOilAndOilFilters
Care should be taken in disposing of used engine oil and oil filters from your vehicle. Used oil and oil filters, indiscriminately discarded, can present a problem to the environment. Contact an authorized dealer, service station or governmental agency for advice on how and where used oil and oil filters can be safely discarded in your area.
Engine Oil Filter
The engine oil filter should be replaced with a new filter at every engine oil change.
EngineOilFilterSelection
This manufacturer's engines have a full-flow type disposable oil filter. Use a filter of this type for replacement. The quality of replacement filters varies considerably. Only high quality filters should be used to assure most efficient service. Mopar engine oil filters are high quality oil filters and are recommended.
Engine Air Cleaner Filter
Refer to the "Maintenance Plan" in this section for the proper maintenance intervals.
WARNING!
Theairinductionsystem(aircleaner,hoses,etc.)can provide a measure of protection in the case of engine backfire. Donot remove the air induction system (air cleaner, hoses, etc.) unless such removal is necessary for repair or maintenance. Makes sure that no one is near the engine compartment before starting the vehicle with the air induction system (air cleaner, hoses, etc.) removed. Failure to dosocan result in serious personal injury.
EngineAirCleanerFilterSelection
The quality of replacement engine air cleaner filters varies considerably. Only high quality filters should be used to assure most efficient service. Mopar engine air cleaner filters are a high quality filter and are recommended.
Air Conditioner Maintenance
For best possible performance, your air conditioner should be checked and serviced by an authorized dealer at the start of each warm season. This service should include cleaning of the condenser fins and a performance test. Drive belt tension should also be checked at this time.
WARNING!
- Useonlyrefrigerantsandcompressorlubricantsapprovedbythemanufacturerforyourairconditioning system.Someunapprovedrefrigerantsareflammableandcanexplode,injuringyou.Otherunapprovedrefrigerantsorlubricantscancausethesystemtofail,requiringcostlyrepairs.Referto WarrantyInformationBook,forfurtherwarranty information.
(Continued)
WARNING!(Continued)
- The air conditioningsystem contains refrigerant under high pressure. To avoid risk of personal injury or damage to the system, adding refrigerant or any repair requiring linestobed disconnected should be done by an experienced technician.
CAUTION!
Donotusechemicalflushesinyourairconditioning systemasthechemicalscandamageyourairconditioningcomponents.Suchdamageisnotcoveredbythe NewVehicleLimitedWarranty.
Refrigerant Recovery And Recycling R-134a—If Equipped
R-134a Air Conditioning Refrigerant is a hydrofluorocarbon (HFC) that is an ozone-friendly substance. The manufacturer recommends that air conditioning service be performed by an authorized dealer or other service facilities using recovery and recycling equipment.
NOTE: Use only manufacturer approved A/C system PAG compressor oil and refrigerants.
340 SERVICING AND MAINTENANCE
Refrigerant Recovery And Recycling—R-1234yf
R-1234yf Air Conditioning Refrigerant is a hydrofluoroolefin (HFO) that is endorsed by the Environmental Protection Agency and is an ozone-friendly substance with a low global-warming potential. The manufacturer recommends that air conditioning service be performed by an authorized dealer using recovery and recycling equipment.
NOTE: Use only manufacturer approved A/C system PAG compressor oil, and refrigerants.
A/CAirFilter
The filter is located in the fresh air inlet under the hood, behind a removable panel in the cowl on the passenger side of the vehicle, next to the windshield wipers. When installing a new filter, ensure its proper orientation.
- Remove the access door in the cowl screen by pressing the retaining clips.
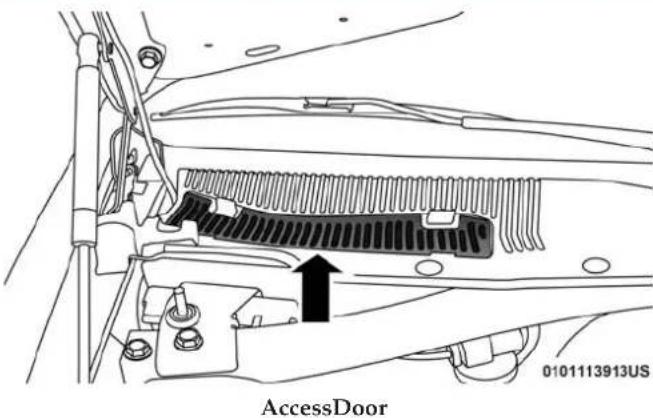
text_image
AccessDoor 0101113913US- Unsnap both ends and lift the filter access cover.
SERVICING AND MAINTENANCE 341
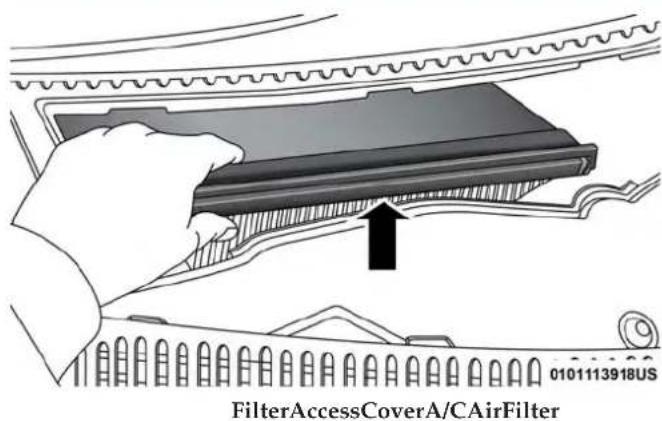
text_image
FilterAccessCoverA/CAirFilter 0101113918US-
Remove the used filter.
-
Install the new filter with arrows pointing in the direction of airflow, which is toward the rear of the vehicle (text and arrows on the filter will indicate this).
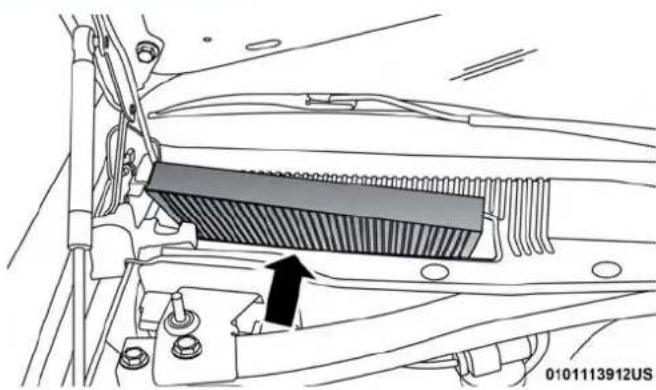
natural_image
Technical diagram of a car's front suspension bracket showing internal components and a black arrow indicating a specific part (no text or symbols present)- Close the filter access cover.
Refer to "Scheduled Servicing" in this section for the proper maintenance intervals.
342 SERVICING AND MAINTENANCE
Accessory Drive Belt Inspection
WARNING!
- Donotattempttoinspectanaccessorydrivebelt withvehiclerunning.
- Whenworkingneartheradiatorcoolingfan, disconnectthefanmotorlead. The fanistemperature controlled and can start at any time regardless of ignition mode. You could be injured by themoving fan blades.
- Youcanbebadlyinjuredworkingonorarounda motorvehicle.Onlydoserviceworkforwhichyou havetheknowledgeandtheproperequipment.If youhaveanydoubtaboutyourabilitytoperforma servicejob,takeyourvehicletoacompetentmechanic.
When inspecting accessory drive belts, small cracks that run across ribbed surface of belt from rib to rib, are considered normal. These are not a reason to replace belt. However, cracks running along a rib (not across) are not normal. Any belt with cracks running along a rib must be replaced. Also have the belt replaced if it has excessive wear, frayed cords or severe glazing.
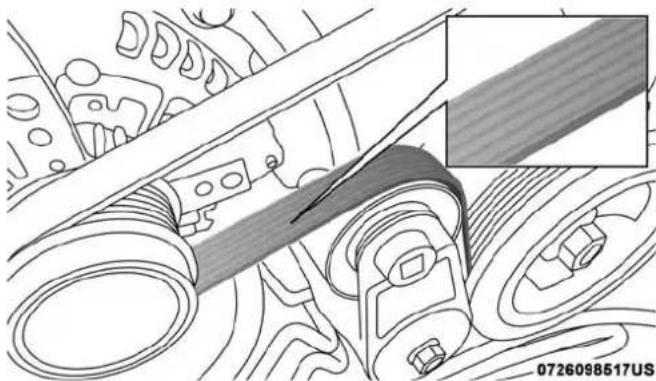
natural_image
Technical line drawing of a mechanical assembly with no visible text or symbolsAccessoryBelt(SerpentineBelt)
Conditions that would require replacement:
- Rib chunking (one or more ribs has separated from belt body)
- Rib or belt wear
- Longitudinal belt cracking (cracks between two ribs)
- Belt slips
- "Groove jumping"(belt does not maintain correct position on pulley)
- Belt broken (note: identify and correct problem before new belt is installed)
- Noise (objectionable squeal, squeak, or rumble is heard or felt while drive belt is in operation)
Some conditions can be caused by a faulty component such as a belt pulley. Belt pulleys should be carefully inspected for damage and proper alignment.
Belt replacement on some models requires the use of special tools, we recommend having your vehicle serviced at an authorized dealer.
Body Lubrication
Locks and all body pivot points, including such items as seat tracks, door hinge pivot points and rollers, liftgate, tailgate, decklid, sliding doors and hood hinges, should be lubricated periodically with a lithium based grease, such as Mopar Spray White Lube to assure quiet, easy operation and to protect against rust and wear. Prior to the application of any lubricant, the parts concerned should be wiped clean to remove dust and grit; after lubricating excess oil and grease should be removed. Particular attention should also be given to hood latching components to ensure proper function. When performing other underhood services, the hood latch, release mechanism and safety catch should be cleaned and lubricated.
The external lock cylinders should be lubricated twice a year, preferably in the Fall and Spring. Apply a small amount of a high quality lubricant, such as Mopar Lock Cylinder Lubricant directly into the lock cylinder.
Windshield Wiper Blades
Clean the rubber edges of the wiper blades and the windshield periodically with a sponge or soft cloth and a mild nonabrasive cleaner. This will remove accumulations of salt or road film.
Operation of the wipers on dry glass for long periods may cause deterioration of the wiper blades. Always use washer fluid when using the wipers to remove salt or dirt from a dry windshield.
Avoid using the wiper blades to remove frost or ice from the windshield. Keep the blade rubber out of contact with petroleum products such as engine oil, gasoline, etc.
NOTE: Life expectancy of wiper blades varies depending on geographical area and frequency of use. Poor performance of blades may be present with chattering, marks, water lines or wet spots. If any of these conditions are present, clean the wiper blades or replace as necessary.
344 SERVICING AND MAINTENANCE
WiperBladeRemoval/Installation
CAUTION!
Donotallowthewiperarmtospringbackagainstthe glasswithoutthewiperbladeinplaceortheglassmay bedamaged.
- Lift the wiper arm to raise the wiper blade off of the glass, until the wiper arm is in the full up position.
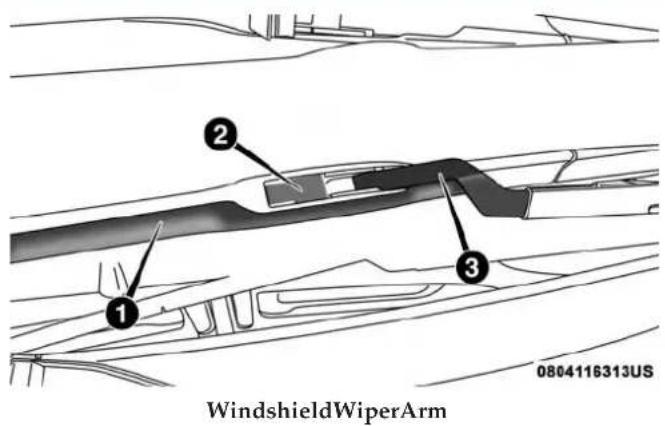
text_image
WindshieldWiperArm 0804116313US1-Wiper
2 — Locking Tab
3 — WiperArm
- To disengage the wiper blade from the wiper arm, flip up the locking tab.
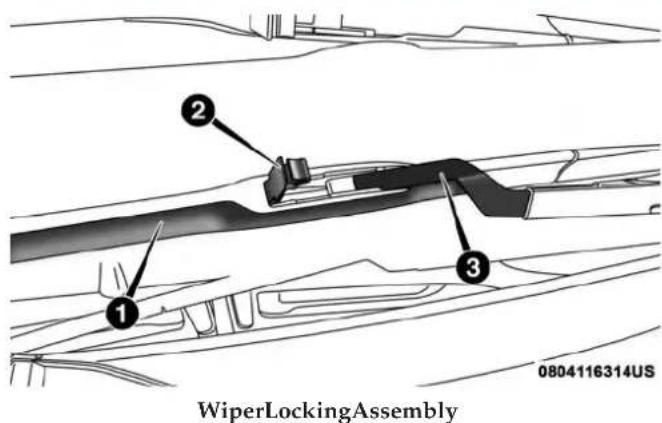
text_image
WiperLockingAssembly 0804116314US1-Wiper
2 — Locking Tab
3 — WiperArm
- Slide the wiper blade down towards the base of the wiper arm.
- With the wiper blade disengaged, remove the wiper blade from the wiper arm by holding the wiper arm with one hand and separating the wiper blade from the wiper arm with the other hand (move the wiper blade down toward the base of the wiper arm and away from the J hook in the end of the wiper arm).
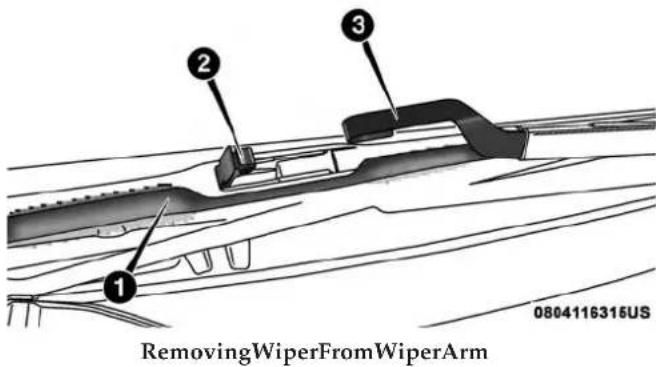
text_image
RemovingWiperFromWiperArm 0804116315US1 — Wiper
2 — Locking Tab
3 — Wiper Arm J Hook
- Gently lower the wiper arm onto the glass.
InstallingTheFrontWipers
- Lift the wiper arm off of the glass, until the wiper arm is in the full up position.
- Position the wiper blade under the hook on the tip of the wiper arm with the wiper locking tab open.
346 SERVICING AND MAINTENANCE
- Insert the receiver bracket on the wiper assembly into the hook on the tip of the arm through the opening in the wiper blade under the locking tab.
- Slide the wiper blade onto the arm until motion stops, then fold down the locking tab to secure.
NOTE: The locking tab will not snap into place until the blade is properly positioned on the wiper arm hook.
- Gently lower the wiper blade onto the glass.
Exhaust System
The best protection against carbon monoxide entry into the vehicle body is a properly maintained engine exhaust system.
If you notice a change in the sound of the exhaust system; or if the exhaust fumes can be detected inside the vehicle; or when the underside or rear of the vehicle is damaged; have an authorized technician inspect the complete exhaust system and adjacent body areas for broken, damaged, deteriorated, or mispositioned parts. Open seams or loose connections could permit exhaust fumes to seep into the passenger compartment. In addition, have the exhaust system inspected each time the vehicle is raised for lubrication or oil change. Replace as required.
WARNING!
- Exhaustgasescaninjureorkill. They contain carbon monoxide(CO), which is colorless and odorless. Breathing it can make you unconscious and can eventually poison you. To avoid breathing CO, refer to "Safety Tips" in "Safety" for further information.
- Ahotexhaustsystemcanstartafireifyouparkover materialsthatcanburn.Suchmaterialsmightbe grassorleavescomingintocontactwithyourehaust system.Donotparkoroperateyourvehicleinareas whereyourehaustsystemcancontactanythingthat canburn.
CAUTION!
- The catalytic converter requires the use of unleaded fuel only. Leaded gasoline will destroy the effectiveness of the catalyst as an emissions control device and may seriously reduce engine performance and causes serious damage to the engine.
(Continued)
CAUTION!(Continued)
- Damagetothecatalyticconvertercanresultifyour vehicleisnotkeptinproperoperatingcondition.Inthe eventofenginemalfunction,particularlyinvolving enginemisfireorotherapparentlossofperformance, haveyourvehicleservicedpromptly.Continuedoperationofyourvehiclewithaseveremalfunctioncould causetheconvertertooverheat,resultinginpossible damagetotheconverterandvehicle.
Under normal operating conditions, the catalytic converter will not require maintenance. However, it is important to keep the engine properly tuned to assure proper catalyst operation and prevent possible catalyst damage.
NOTE: Intentional tampering with emissions control systems can result in civil penalties being assessed against you.
In unusual situations involving grossly malfunctioning engine operation, a scorching odor may suggest severe and
abnormal catalyst overheating. If this occurs, stop the vehicle, turn off the engine and allow it to cool. Service, including a tune-up to manufacturer's specifications, should be obtained immediately.
To minimize the possibility of catalytic converter damage:
- Do not shut off the engine or interrupt the ignition when the transmission is in gear and the vehicle is in motion.
- Do not try to start the engine by pushing or towing the vehicle.
- Do not idle the engine with any spark plug wires disconnected or removed, such as when diagnostic testing, or for prolonged periods during very rough idle or malfunctioning operating conditions.
NOTE: Your vehicle's exhaust system may be equipped with an Electronic Exhaust Valve (EEV) system, if the exhaust system is replaced with aftermarket products a Malfunction Indicator Lamp (MIL) will illuminate.
Cooling System
WARNING!
- Youorotherscanbebadlyburnedbyhotengine coolant(antifreeze)orsteamfromyourradiator.If youseeorhearsteamcomingfromunderthehood, donotopenthehooduntiltheradiatorhashadtime tocool.Neveropenacoolingsystempressurecap whentheradiatororcoolantbottleishot.
- Keephands, tools, clothing, and jewelry away from the radiator cooling fan when the hood is raised. The fan starts automatically and may start at any time, whether the engine is running or not.
- When working near the radiator cooling fan, disconnect the fan motor lead to turn the ignition to the OFF mode. The fan is temperature controlled and can start at any time the ignition is in the ON mode.
CoolantChecks
Check engine coolant (antifreeze) protection every 12 months (before the onset of freezing weather, where applicable). If the engine coolant (antifreeze) is dirty, the system should be drained, flushed, and refilled with fresh OAT coolant (conforming to MS.90032) by an authorized dealer. Check the front of the radiator for any accumulation of
bugs, leaves, etc. If dirty, clean by gently spraying water from a garden hose vertically down the face of the condenser.
Check the coolant recovery bottle tubing for brittle rubber, cracking, tears, cuts, and tightness of the connection at the bottle and radiator. Inspect the entire system for leaks. DO NOT REMOVE THE COOLANT PRESSURE CAP WHEN THE COOLING SYSTEM IS HOT.
CoolingSystem—Drain, Flush And Refill
NOTE: Some vehicles require special tools to add coolant properly. Failure to fill these systems properly could lead to severe internal engine damage. If any coolant is needed to be added to the system please contact an authorized dealer.
If the engine coolant (antifreeze) is dirty or contains visible sediment, have an authorized dealer clean and flush with OAT coolant (antifreeze) (conforming to MS.90032).
NOTE: If equipped with the 6.2L Supercharged engine the intercooler must be vacuum flushed and filled. If any coolant is needed to be added to the system please contact an local authorized dealer.
Refer to the "Maintenance Plan" in this section for the proper maintenance intervals.
SelectionOfCoolant
Refer to "Fluids And Lubricants" in "Technical Specifications" for further information.
NOTE:
- Mixing of engine coolant (antifreeze) other than specified Organic Additive Technology (OAT) engine coolant (antifreeze), may result in engine damage and may decrease corrosion protection. Organic Additive Technology (OAT) engine coolant is different and should not be mixed with Hybrid Organic Additive Technology (HOAT) engine coolant (antifreeze) or any “globally compatible” coolant (antifreeze). If a non-OAT engine coolant (antifreeze) is introduced into the cooling system in an emergency, the cooling system will need to be drained, flushed, and refilled with fresh OAT coolant (conforming to MS.90032), by an authorized dealer as soon as possible.
-
Do not use water alone or alcohol-based engine coolant (antifreeze) products. Do not use additional rust inhibitors or antirust products, as they may not be compatible with the radiator engine coolant and may plug the radiator.
-
This vehicle has not been designed for use with propylene glycol-based engine coolant (antifreeze). Use of propylene glycolbased engine coolant (antifreeze) is not recommended.
- Some vehicles require special tools to add coolant properly. Failure to fill these systems properly could lead to severe internal engine damage. If any coolant is needed to be added to the system please contact an authorized dealer.
AddingCoolant
Your vehicle has been built with an improved engine coolant (OAT coolant conforming to MS.90032) that allows extended maintenance intervals. This engine coolant (anti-freeze) can be used up to ten years or 150,000 miles (240,000 km) before replacement. To prevent reducing this extended maintenance period, it is important that you use the same engine coolant (OAT coolant conforming to MS.90032) throughout the life of your vehicle.
Please review these recommendations for using Organic Additive Technology (OAT) engine coolant (antifreeze) that meets the requirements of FCA Material Standard MS.90032. When adding engine coolant (antifreeze):
- We recommend using Mopar Antifreeze/Coolant 10 Year/150,000 Mile (240,000 km) Formula OAT (Organic Additive Technology) that meets the requirements of FCA Material Standard MS.90032.
- Mix a minimum solution of 50% OAT engine coolant that meets the requirements of FCA Material Standard MS.90032 and distilled water. Use higher concentrations (not to exceed 70%) if temperatures below -34^ ( -37^ ) are anticipated. Please contact an authorized dealer for assistance.
- Use only high purity water such as distilled or deionized water when mixing the water/engine coolant (anti-freeze) solution. The use of lower quality water will reduce the amount of corrosion protection in the engine cooling system.
NOTE:
- It is the owner's responsibility to maintain the proper level of protection against freezing according to the temperatures occurring in the area where the vehicle is operated.
- Some vehicles require special tools to add coolant properly. Failure to fill these systems properly could lead to severe internal engine damage. If any coolant is needed to be added to the system, please contact a local authorized dealer.
- Mixing engine coolant (antifreeze) types is not recommended and can result in cooling system damage. If HOAT and OAT coolant are mixed in an emergency, have a authorized dealer drain, flush, and refill with OAT coolant (conforming to MS.90032) as soon as possible.
CoolingSystemPressureCap
The cap must be fully tightened to prevent loss of engine coolant (antifreeze), and to ensure that engine coolant (antifreeze) will return to the radiator from the coolant expansion bottle/recovery tank if so equipped.
The cap should be inspected and cleaned if there is any accumulation of foreign material on the sealing surfaces.
NOTE: Be sure you do not mix the engine coolant system pressure cap with the intercooler system pressure cap. These caps are not interchangeable.
WARNING!
- Donotopenhotenginecoolingsystem.Neveradd enginecoolant(antifreeze)whentheengineisoverheated.Donotloosenorremovethecaptocoolan overheatedengine.Heatcausespressureobuildup inthecoolingsystem.Topreventscaldingorinjury, donotremovethepressurecapwhilethesystemis hotorunderpressure.
- Donotuseapressurecapotherthantheonespecifiedforyourvehicle.Personalinjuryorengine damagemayresult.
DisposalOfUsedCoolant
Used ethylene glycol-based coolant (antifreeze) is a regulated substance requiring proper disposal. Check with your local authorities to determine the disposal rules for your community. To prevent ingestion by animals or children, do not store ethylene glycol-based coolant in open containers or allow it to remain in puddles on the ground. If ingested by a child or pet, seek emergency assistance immediately. Clean up any ground spills immediately.
CoolantLevel
The coolant bottle provides a quick visual method for determining that the coolant level is adequate. With the engine OFF and cold, the level of the engine coolant (antifreeze) in the bottle should be between the ranges indicated on the bottle.
The radiator normally remains completely full, so there is no need to remove the radiator/coolant pressure cap unless checking for engine coolant (antifreeze) freeze point or replacing coolant. Advise your service attendant of this. As long as the engine operating temperature is satisfactory, the coolant bottle need only be checked once a month.
352 SERVICING AND MAINTENANCE
When additional engine coolant (antifreeze) is needed to maintain the proper level, only OAT coolant that meets the requirements of FCA Material Standard MS.90032 should be added to the coolant bottle. Do not overfill.
PointsToRemember
NOTE: When the vehicle is stopped after a few miles/kilometers of operation, you may observe vapor coming from the front of the engine compartment. This is normally a result of moisture from rain, snow, or high humidity accumulating on the radiator and being vaporized when the thermostat opens, allowing hot engine coolant (anti-freeze) to enter the radiator.
If an examination of your engine compartment shows no evidence of radiator or hose leaks, the vehicle may be safely driven. The vapor will soon dissipate.
- Do not overfill the coolant expansion bottle.
- Check the coolant freeze point in the radiator and in the coolant expansion bottle. If engine coolant (antifreeze) needs to be added, the contents of the coolant expansion bottle must also be protected against freezing.
-
If frequent engine coolant (antifreeze) additions are required, the cooling system should be pressure tested for leaks.
-
Maintain engine coolant (antifreeze) concentration at a minimum of 50% OAT coolant (conforming to MS.90032) and distilled water for proper corrosion protection of your engine which contains aluminum components.
- Make sure that the coolant expansion bottle overflow hoses are not kinked or obstructed.
- Keep the front of the radiator clean. If your vehicle is equipped with air conditioning, keep the front of the condenser clean.
- Do not change the thermostat for Summer or Winter operation. If replacement is ever necessary, install ONLY the correct type thermostat. Other designs may result in unsatisfactory engine coolant (antifreeze) performance, poor gas mileage, and increased emissions.
Brake System
In order to assure brake system performance, all brake system components should be inspected periodically. Refer to the “Maintenance Plan” in this section for the proper maintenance intervals.
WARNING!
Ridingthebrakescanleadtobrakefailureandpossiblyacollision.Drivingwithyourfootrestingorridingonthebrakepedalcanresultinabnormallyhighbraketemperatures,excessiveliningwear,andpossiblebrakedamage.Youwouldnothaveyourfullbrakingcapacityinanemergency.
FluidLevelCheck—BrakeMasterCylinder
Check the fluid level in the master cylinder immediately if the brake system warning light indicates system failure.
Check the fluid level in the master cylinder when performing underhood services.
Clean the top of the master cylinder area before removing the cap. Add fluid to bring the level up to the top of the "FULL" mark on the side of the master cylinder reservoir.
Overfilling of fluid is not recommended because it may cause leaking in the system.
Add enough fluid to bring the level up to the requirements described on the brake fluid reservoir. With disc brakes, fluid level can be expected to fall as the brake pads wear. However, low fluid level may be caused by a leak and a checkup may be needed.
Use only brake fluid that has been recommended by the manufacturer, and has been kept in a tightly closed container to avoid contamination from foreign matter or moisture.
Refer to "Fluids And Lubricants" in "Technical Specifications" for further information.
WARNING!
- Useonlymanufacturer's recommended brakefluid. Referto "FluidsAndLubricants" in "Technical Specifications" for further information. Using the wrong type of brakefluid can severely damage your brakesystem and/or impair performance. The property of brakefluid for your vehicle is also identified on the original factory installed hydraulic master cylinder reservoir.
(Continued)
WARNING!(Continued)
- To avoid contamination from foreign matter or moisture, use only new brake fluid or fluid that has been inatightly closed container. Keep them master cylinder reservoir or capscured at all times. Brake fluid in a open container absorbsmoisture from the air resulting in alower boiling point. This may cause it to boil unexpectedly during hard or prolonged braking, resulting in sudden brake failure. This could result in a collision.
• Overfillingthebrakefluidreservoircanresultin spillingbrakefluidonhotengineparts, causing the brakefluidtocatchfire. Brakefluidcanalsodamage paintedandvinylsurfaces, careshouldbetakento avoiditscontactwiththesesurfaces. - Donotallowpetroleumbasedfluidtocontaminate thebrakefluid.Brakesealcomponentscouldbe damaged,causingpartialorcompletebrakefailure. Thiscouldresultinacollision.
Automatic Transmission
SelectionOfLubricant
It is important to use the proper transmission fluid to ensure optimum transmission performance and life. Use only the manufacturer's specified transmission fluid. Refer to "Fluids And Lubricants" in "Technical Specifications" for fluid specifications. It is important to maintain the transmission fluid at the correct level using the recommended fluid.
NOTE: No chemical flushes should be used in any transmission; only the approved lubricant should be used.
CAUTION!
Usingatransmissionfluidotherthanthemanufacturer'srecommendedfluidmaycausedeteriorationintransmissionshiftqualityand/ortoqueconvertershudder. Referto "FluidsAndLubricants" in "TechnicalSpecifications" forfluidspecifications.
SpecialAdditives
The manufacturer strongly recommends against using any special additives in the transmission. Automatic Transmission Fluid (ATF) is an engineered product and its performance may be impaired by supplemental additives. Therefore, do not add any fluid additives to the transmission. Avoid using transmission sealers as they may adversely affect seals.
CAUTION!
Donotusechemicalflushesinyourtransmissionas thechemicalscandamageyourtransmissioncomponents.SuchdamageisnotcoveredbytheNewVehicle LimitedWarranty.
FluidLevelCheck
The fluid level is preset at the factory and does not require adjustment under normal operating conditions. Routine fluid level checks are not required; therefore the transmission has no dipstick. An authorized dealer can check your transmission fluid level using special service tools. If you notice fluid leakage or transmission malfunction, visit an authorized dealer immediately to have the transmission fluid level checked. Operating the vehicle with an improper fluid level can cause severe transmission damage.
CAUTION!
Ifatransmissionfluidleakoccurs, visitanaauthorized dealerimmediately. Severetransmissiondamagemay occur. Anauthorizeddealerhasthepropertoolsto adjustthefluidlevelaccurately.
FluidAndFilterChanges
Under normal operating conditions, the fluid installed at the factory will provide satisfactory lubrication for the life of the vehicle.
Routine fluid and filter changes are not required. However, change the fluid and filter if the fluid becomes contaminated (with water, etc.), or if the transmission is disassembled for any reason.
Rear Axle
For normal service, periodic fluid level checks are not required. When the vehicle is serviced for other reasons the exterior surfaces of the axle assembly should be inspected. If gear oil leakage is suspected inspect the fluid level. Refer to "Fluids And Lubricants" in "Technical Specifications" for further information.
356 SERVICING AND MAINTENANCE
RAISING THE VEHICLE
In the case where it is necessary to raise the vehicle, go to an authorized dealer or service station.
TIRES
Tire Safety Information
Tire safety information will cover aspects of the following information: Tire Markings, Tire Identification Numbers, Tire Terminology and Definitions, Tire Pressures, and Tire Loading.
TireMarkings
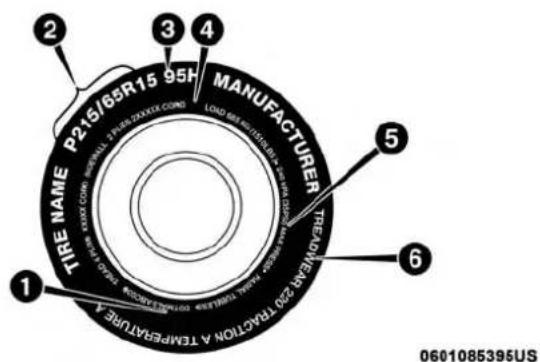
text_image
P215/65R15 95H TIRE NAME LOAD RINJ INTELLATION TIRE NAME MANUFACTURER TREASWING ZS0 TRACTION A TEMPERATURE 0601085395USTireMarkings
1 — U.S. DOT Safety 4 — Maximum Load
Standards Code (TIN)
2 — Size Designation 5 — Maximum Pressure
3 — Service Description 6 — Treadwear, Traction and Temperature Grades
NOTE:
- P (Passenger) — Metric tire sizing is based on U.S. design standards. P-Metric tires have the letter "P" molded into the sidewall preceding the size designation. Example: P215/65R15 95H.
- European — Metric tire sizing is based on European design standards. Tires designed to this standard have the tire size molded into the sidewall beginning with the section width. The letter "P" is absent from this tire size designation. Example: 215/65R15 96H.
- LT (Light Truck) — Metric tire sizing is based on U.S. design standards. The size designation for LT-Metric
TireSizingChart
tires is the same as for P-Metric tires except for the letters "LT" that are molded into the sidewall preceding the size designation. Example: LT235/85R16.
- Temporary spare tires are designed for temporary emergency use only. Temporary high pressure compact spare tires have the letter "T" or "S" molded into the sidewall preceding the size designation. Example: T145/80D18 103M.
- High flotation tire sizing is based on U.S. design standards and it begins with the tire diameter molded into the sidewall. Example: 31x10.5 R15 LT.
EXAMPLE:
ExampleSizeDesignation:P215/65R15XL95H,215/65R1596H,LT235/85R16C,T145/80D18103M,31x10.5R15LT
| P= Passenger car tire size based on U.S. design standards, or"....blank....." = Passenger car tire based on European design standards, orLT= Light truck tire based on U.S. design standards, orT o r S = Temporary spare tire or31= Overall diameter in inches (in) |
215,235,145= Section width in millimeters (mm)
358 SERVICING AND MAINTENANCE
EXAMPLE:
65,85,80= Aspect ratio in percent (%) – Ratio of section height to section width of tire, or
10.5= Section width in inches (in)
R= Construction code
- "R" means radial construction, or
- "D" means diagonal or bias construction
15,16,18= Rim diameter in inches (in)
ServiceDescription:
95= Load Index
- A numerical code associated with the maximum load a tire can carry
H= Speed Symbol
- A symbol indicating the range of speeds at which a tire can carry a load corresponding to its load index under certain operating conditions
- The maximum speed corresponding to the speed symbol should only be achieved under specified operating conditions (i.e., tire pressure, vehicle loading, road conditions, and posted speed limits)
LoadIdentification:
Absence of the following load identification symbols on the sidewall of the tire indicates a Standard Load (SL) tire:
- XL= Extra load (or reinforced) tire, or
- LL= Light load tire or
- C, D, E, F, G = Load range associated with the maximum load a tire can carry at a specified pressure
MaximumLoad- Maximum load indicates the maximum load this tire is designed to carry
Maximum Pressure – Maximum pressure indicates the maximum permissible cold tire inflation pressure for this tire
TireIdentificationNumber(TIN)
The TIN may be found on one or both sides of the tire; however, the date code may only be on one side. Tires with white sidewalls will have the full TIN, including the date code, located on the white sidewall side of the tire. Look for
the TIN on the outboard side of black sidewall tires as mounted on the vehicle. If the TIN is not found on the outboard side, then you will find it on the inboard side of the tire.
| EXAMPLE: |
| DOT MA L9 ABCD 0301 |
| DOT= Department of Transportation- This symbol certifies that the tire is in compliance with the U.S. Department of Transportation tire safety standards and is approved for highway use |
| MA= Code representing the tire manufacturing location (two digits) |
| L9= Code representing the tire size (two digits) |
| ABCD= Code used by the tire manufacturer (one to four digits) |
| 03= Number representing the week in which the tire was manufactured (two digits)- 03 means the 3rd week |
| 01= Number representing the year in which the tire was manufactured (two digits)- 01 means the year 2001- Prior to July 2000, tire manufacturers were only required to have one number to represent the year in which the tire was manufactured. Example: 031 could represent the 3rd week of 1981 or 1991 |
TireTerminologyAndDefinitions
| TermDefinition | |
| B-PillarThe vehicle B-Pillar is the structural member of the body located behind the front door. | |
| Cold Tire Inflation Pressure | Cold tire inflation pressure is defined as the tire pressure after the vehicle has not been driven for at least three hours, or driven less than 1 mile (1.6 km) after sitting for a minimum of three hours. Inflation pressure is measured in units of PSI (pounds per square inch) or kPa (kilopascals). |
| MaximumInflationPressureThe maximum inflation pressure is the maximum permissible cold tire inflation pressure for this tire. The maximum inflation pressure is molded into the sidewall. | |
| Recommended Cold Tire Inflation Pressure | Vehicle manufacturer's recommended cold tire inflation pressure as shown on the tire placard. |
| TirePlacardA label permanently attached to the vehicle describing the vehicle's loading capacity, the original equipment tire sizes and the recommended cold tire inflation pressures. | |
SERVICING AND MAINTENANCE 361
TireLoadingAndTirePressure
NOTE: The proper cold tire inflation pressure is listed on the driver's side B-Pillar or the rear edge of the driver's side door.
Check the inflation pressure of each tire, including the spare tire (if equipped), at least monthly and inflate to the recommended pressure for your vehicle.
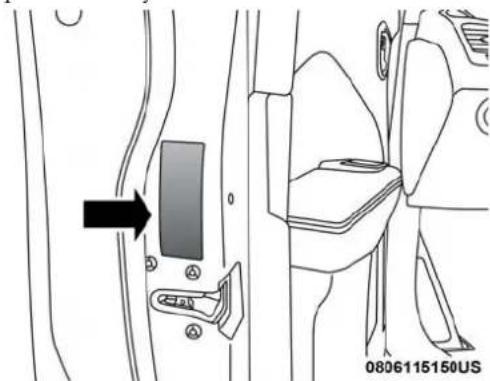
text_image
0806115150USExampleTirePlacardLocation(Door)
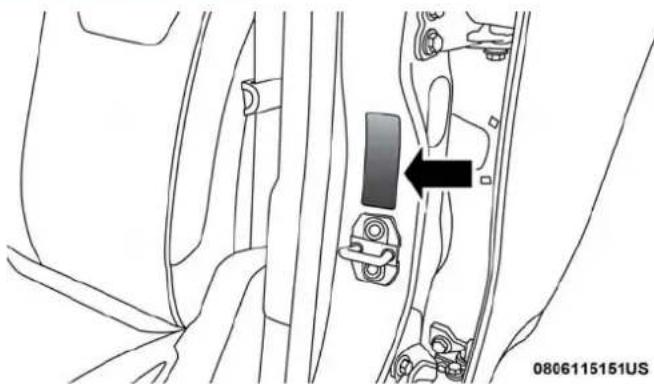
natural_image
Technical line drawing of a car interior showing structural components and a directional arrow (no text or symbols)ExampleTirePlacardLocation(B-Pillar)
TireAndLoadingInformationPlacard
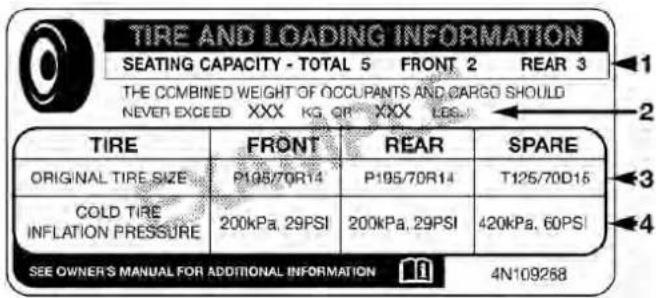
text_image
TIRE AND LOADING INFORMATION SEATING CAPACITY - TOTAL 5 FRONT 2 REAR 3 THE COMBINED WEIGHT OF OCCLIPANTS AND CARGO SHOULD NEVER EXCEED XXX KG QF XXX LEG. TIRE FRONT REAR SPARE ORIGINAL TIRE SIZE P195/70R14 P195/70R14 T125/70D15 COLD TIRE INFLATION PRESSURE 200kPa, 29PSI 200kPa, 29PSI 420kPa, 60PSI SEE OWNER'S MANUAL FOR ADDITIONAL INFORMATION 4N109268811b5a9a
TireAndLoadingInformationPlacard
This placard tells you important information about the:
- Number of people that can be carried in the vehicle.
- Total weight your vehicle can carry.
- Tire size designed for your vehicle.
- Cold tire inflation pressures for the front, rear, and spare tires.
Loading
The vehicle maximum load on the tire must not exceed the load carrying capacity of the tire on your vehicle. You will not exceed the tire's load carrying capacity if you adhere to the loading conditions, tire size, and cold tire inflation pressures specified on the Tire and Loading Information placard in "Vehicle Loading" in the "Starting And Operating" section of this manual.
NOTE: Under a maximum loaded vehicle condition, gross axle weight ratings (GAWRs) for the front and rear axles must not be exceeded.
For further information on GAWRs, vehicle loading, and trailer towing, refer to "Vehicle Loading" in the "Starting And Operating" section of this manual.
To determine the maximum loading conditions of your vehicle, locate the statement "The combined weight of occupants and cargo should never exceed XXX kg or XXX lbs" on the Tire and Loading Information placard. The combined weight of occupants, cargo/luggage and trailer tongue weight (if applicable) should never exceed the weight referenced here.
StepsForDeterminingCorrectLoadLimit—
(1) Locate the statement "The combined weight of occupants and cargo should never exceed XXX kg or XXX lbs." on your vehicle's placard.
(2) Determine the combined weight of the driver and passengers that will be riding in your vehicle.
(3) Subtract the combined weight of the driver and passengers from XXX kg or XXX lbs.
(4) The resulting figure equals the available amount of cargo and luggage load capacity. For example, if "XXX" amount equals 1400 lbs. and there will be five 150 lb passengers in your vehicle, the amount of available cargo and luggage load capacity is 650 lbs. (1400-750 (5x150) = 650 lbs.)
(5) Determine the combined weight of luggage and cargo being loaded on the vehicle. That weight may not safely exceed the available cargo and luggage load capacity calculated in Step 4.
(6) If your vehicle will be towing a trailer, load from your trailer will be transferred to your vehicle. Consult this manual to determine how this reduces the available cargo and luggage load capacity of your vehicle.
MetricExampleForLoadLimit
For example, if "XXX" amount equals 635 kg and there will be five 68 kg passengers in your vehicle, the amount of available cargo and luggage load capacity is 295 kg (635-340 (5x68) = 295 kg) as shown in step 4.
NOTE:
- If your vehicle will be towing a trailer, load from your trailer will be transferred to your vehicle. The following table shows examples on how to calculate total load, cargo/luggage, and towing capacities of your vehicle with varying seating configurations and number and size of occupants. This table is for illustration purposes only and may not be accurate for the seating and load carry capacity of your vehicle.
- For the following example, the combined weight of occupants and cargo should never exceed 865 lbs (392 kg).
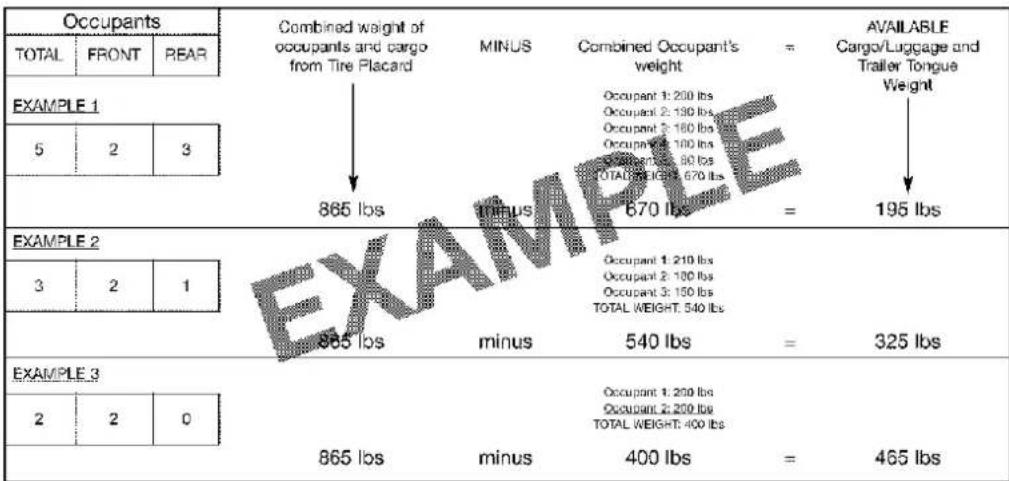
text_image
Occupants TOTAL FRONT REAR EXAMPLE 1 5 2 3 865 lbs MINUS MINUS 670 lbs = AVAILABLE Occupant 1: 200 lbs Occupant 2: 190 lbs Occupant 3: 180 lbs Occupant 4: 170 lbs TOTAL WEIGHT: 670 lbs EVA EVA EVA EVA EVA EVA EVA EVA EVA EVA EVA EVA EVA EVA EVA EVA EVA EVA EVA EVA EVA EVA EVA EVA EVA EVA EVA EVA EVA EVA EVA EVA EVA EVAB11add11
WARNING!
Overloading of your tires is dangerous. Overloading can cause it failure, affect vehicle handling, and increase your stopping distance. Usetires of there recommended load capacity for your vehicle. Never overload them.
Tires — General Information
TirePressure
Proper tire inflation pressure is essential to the safe and satisfactory operation of your vehicle. Four primary areas are affected by improper tire pressure:
•Safety and Vehicle Stability
• Economy
•Tread Wear
- Ride Comfort
Safety
WARNING!
- Improperlyinflatedtiresaredangerousandcan causecollisions.
- Underinflationincreasestireflexingandcanresult inoverheatingandtirefailure.
• Overinflationreducesatire'sabilitytocushion shock. Objectsontheroadandchuckholescancause damagethatresultintirefailure.
WARNING!(Continued)
• Overinflatedorunderinflatedtirescanaffectvehicle handlingandcanfailsuddenly,resultinginlossof vehiclecontrol.
- Unequal tire pressures can cause steering problems. You could close to control your vehicle.
- Unequaltirepressuresfromonesideofthevehicle totheothercancausethevehicletodrifttotheright orleft.
- Alwaysdrivewitheachtireinflatedtotherecommendedcoldtireinflationpressure.
Both under-inflation and over-inflation affect the stability of the vehicle and can produce a feeling of sluggish response or over responsiveness in the steering.
NOTE:
- Unequal tire pressures from side to side may cause erratic and unpredictable steering response.
- Unequal tire pressure from side to side may cause the vehicle to drift left or right.
FuelEconomy
Underinflated tires will increase tire rolling resistance resulting in higher fuel consumption.
TreadWear
Improper cold tire inflation pressures can cause abnormal wear patterns and reduced tread life, resulting in the need for earlier tire replacement.
RideComfortAndVehicleStability
Proper tire inflation contributes to a comfortable ride. Over-inflation produces a jarring and uncomfortable ride.
TireInflationPressures
The proper cold tire inflation pressure is listed on the driver's side B-Pillar or rear edge of the driver's side door.
At least once a month:
- Check and adjust tire pressure with a good quality pocket-type pressure gauge. Do not make a visual judgement when determining proper inflation. Tires may look properly inflated even when they are underinflated.
- Inspect tires for signs of tire wear or visible damage.
CAUTION!
Afterinspectingoradjustingthetirepressure,always reinstallthevalvestemcap.Thiswillpreventmoisture anddirtfromenteringthevalvestem,whichcould damagethevalvestem.
Inflation pressures specified on the placard are always "cold tire inflation pressure". Cold tire inflation pressure is defined as the tire pressure after the vehicle has not been driven for at least three hours, or driven less than 1 mile (1.6 km) after sitting for a minimum of three hours. The cold tire inflation pressure must not exceed the maximum inflation pressure molded into the tire sidewall.
Check tire pressures more often if subject to a wide range of outdoor temperatures, as tire pressures vary with temperature changes.
Tire pressures change by approximately 1 psi (7 kPa) per 12^ F ( 7^ C) of air temperature change. Keep this in mind when checking tire pressure inside a garage, especially in the Winter.
Example: If garage temperature = 68^ F ( 20^ C) and the outside temperature = 32^ F ( 0^ C) then the cold tire inflation
pressure should be increased by 3 psi (21 kPa), which equals 1 psi (7 kPa) for every 12^ F ( 7^ C) for this outside temperature condition.
Tire pressure may increase from 2 to 6 psi (13 to 40 kPa) during operation. DO NOT reduce this normal pressure build up or your tire pressure will be too low.
TirePressuresForHighSpeedOperation
The manufacturer advocates driving at safe speeds and within posted speed limits. Where speed limits or conditions are such that the vehicle can be driven at high speeds, maintaining correct tire inflation pressure is very important. Increased tire pressure and reduced vehicle loading may be required for high-speed vehicle operation. Refer to an authorized tire dealer or original equipment vehicle dealer for recommended safe operating speeds, loading and cold tire inflation pressures.
WARNING!
Highspeeddrivingwithyourvehicleundermaximum loadisdangerous.Theaddedstrainonyourtirescould causethemtofail.Youcouldhaveaseriouscollision. Donotdrivevehicleloadedtothemaximumcapacity atcontinuousspeedsabove75mph(120km/h).
RadialPlyTires
WARNING!
Combiningradialplytireswithothertypesoftireson yourvehiclewillcauseyourvehicletohandlepoorly. Theinstabilitycouldcauseacollision.Alwaysuse radialplytiresinsetsoffour.Nevercombinethem withothertypesoftires.
TireRepair
If your tire becomes damaged, it may be repaired if it meets the following criteria:
- The tire has not been driven on when flat.
- The damage is only on the tread section of your tire (sidewall damage is not repairable).
- The puncture is no greater than a 14 of an inch (6 mm).
Consult an authorized tire dealer for tire repairs and additional information.
Damaged Run Flat tires, or Run Flat tires that have experienced a loss of pressure should be replaced immediately with another Run Flat tire of identical size and service description
368 SERVICING AND MAINTENANCE
(Load Index and Speed Symbol). Replace the tire pressure sensor as well as it is not designed to be reused.
RunFlatTires—IfEquipped
Run Flat tires allow you the capability to drive 50 miles (80 km) at 50 mph (80 km/h) after a rapid loss of inflation pressure. This rapid loss of inflation is referred to as the Run Flat mode. A Run Flat mode occurs when the tire inflation pressure is of/or below 14 psi (96 kPa). Once a Run Flat tire reaches the run flat mode it has limited driving capabilities and needs to be replaced immediately. A Run Flat tire is not repairable. When a run flat tire is changed after driving with underinflated tire condition, please replace the TPM sensor as it is not designed to be reused when driven under run flat mode (14 psi (96 kPa)) condition.
NOTE: TPM Sensor must be replaced after driving the vehicle on a flat tire condition.
It is not recommended driving a vehicle loaded at full capacity or to tow a trailer while a tire is in the run flat mode.
See the tire pressure monitoring section for more information.
TireSpinning
When stuck in mud, sand, snow, or ice conditions, do not spin your vehicle's wheels above 30 mph (48 km/h) or for longer than 30 seconds continuously without stopping.
Refer to "Freeing A Stuck Vehicle" in "In Case Of Emergency" for further information.
WARNING!
Fastspinningtirescanbedangerous. Forces generated by excessive wheels speeds may cause it to damage or failure. Atire could explode and injuresome one. Do not spiny our vehicle's wheels faster than 30 mph (48 km/h) form more than 30 seconds continuously when you are stuck, and donotlet any on e a r aspinning wheel, nomatter what the speed.
TreadWearIndicators
Tread wear indicators are in the original equipment tires to help you in determining when your tires should be replaced.
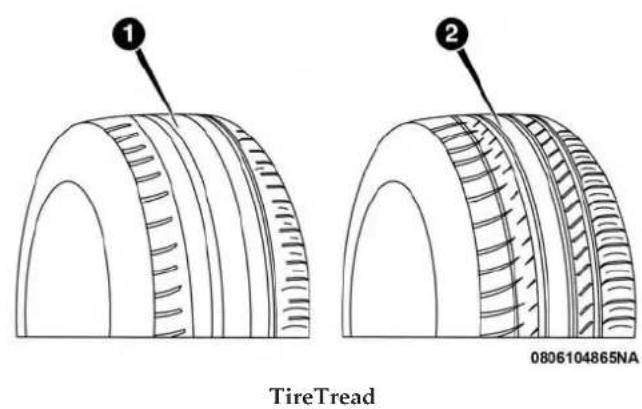
1—WornTire
2—NewTire
These indicators are molded into the bottom of the tread grooves. They will appear as bands when the tread depth becomes a 1/16 of an inch (1.6 mm). When the tread is worn to the tread wear indicators, the tire should be replaced.
Refer to "Replacement Tires" in this section for further information.
LifeOfTire
The service life of a tire is dependent upon varying factors including, but not limited to:
- Driving style.
- Tire pressure - Improper cold tire inflation pressures can cause uneven wear patterns to develop across the tire tread. These abnormal wear patterns will reduce tread life, resulting in the need for earlier tire replacement.
- Distance driven.
- Performance tires, tires with a speed rating of V or higher, and Summer tires typically have a reduced tread life. Rotation of these tires per the vehicle scheduled maintenance is highly recommended.
WARNING!
Tiresandthesparetireshouldbereplacedaftersix years,regardlessoftheremainingtread.Failureto followthiswarningcanresultinsuddentirefailure. Youcouldlosecontrolandhaveacollisionresultingin seriousinjuryordeath.
NOTE: Wheel Valve Stem must be replaced as well when installing new tires due to wear and tear in existing tires.
Keep dismounted tires in a cool, dry place with as little exposure to light as possible. Protect tires from contact with oil, grease, and gasoline.
ReplacementTires
The tires on your new vehicle provide a balance of many characteristics. They should be inspected regularly for wear and correct cold tire inflation pressures. The manufacturer strongly recommends that you use tires equivalent to the originals in size, quality and performance when replacement is needed. Refer to the paragraph on “Tread Wear Indicators” in this section. Refer to the Tire and Loading Information placard or the Vehicle Certification Label for the size designation of your tire. The Load Index and Speed Symbol for your tire will be found on the original equipment tire sidewall.
See the Tire Sizing Chart example found in the "Tire Safety Information" section of this manual for more information relating to the Load Index and Speed Symbol of a tire.
It is recommended to replace the two front tires or two rear tires as a pair. Replacing just one tire can seriously affect your vehicle's handling. If you ever replace a wheel, make sure that the wheel's specifications match those of the original wheels.
It is recommended you contact an authorized tire dealer or original equipment dealer with any questions you may have on tire specifications or capability. Failure to use equivalent replacement tires may adversely affect the safety, handling, and ride of your vehicle.
WARNING!
- Donotuseatire, wheelsize, loadrating, orspeed rating other than that specified for your vehicle. Some combinations of unapproved tires and wheels may change suspension dimensions and performance characteristics, resulting in changest steering, handling, and braking of your vehicle. This can cause unpredictable handling and stress steering and suspension components. You could lose control and have a collision resulting in serious injury or death. Use only the tire and wheels sizes with load ratings approved for your vehicle.
- Neveruseatirewithasmallerloadindexorcapacity, otherthanwhatwasoriginallyequippedonyour vehicle. Usingatirewithasmallerloadindexcould resultintireoverloadingandfailure. Youcouldlose controlandhaveacollision.
(Continued)
WARNING!(Continued)
- Failuretoequipyourvehiclewithtireshavingadequatespeedcapabilitycanresultinsuddentirefailureandlossofvehiclecontrol.
CAUTION!
Replacingoriginaltireswithtiresofadifferentsize mayresultinfalsespeedometerandodometerreadings.
Tire Types
AllSeasonTires—IfEquipped
All Season tires provide traction for all seasons (Spring, Summer, Fall, and Winter). Traction levels may vary between different all season tires. All season tires can be identified by the M+S, M&S, M/S or MS designation on the tire sidewall. Use all season tires only in sets of four; failure to do so may adversely affect the safety and handling of your vehicle.
SummerOrThreeSeasonTires—IfEquipped
Summer tires provide traction in both wet and dry conditions, and are not intended to be driven in snow or on ice. If your vehicle is equipped with Summer tires, be aware these tires are not designed for Winter or cold driving conditions. Install Winter tires on your vehicle when ambient temperatures are less than 40^ F ( 5^ C) or if roads are covered with ice or snow. For more information, contact an authorized dealer.
Summer tires do not contain the all season designation or mountain/snowflake symbol on the tire sidewall. Use Summer tires only in sets of four; failure to do so may adversely affect the safety and handling of your vehicle.
WARNING!
DonotuseSummertiresinsnow/iceconditions. You could lose vehicle control, resulting in severe injury or death. Driving to fast for conditions also creates the possibility of loss of vehicle control.
372 SERVICING AND MAINTENANCE
SnowTires
Some areas of the country require the use of snow tires during the Winter. Snow tires can be identified by a "mountain/snowflake" symbol on the tire sidewall.

If you need snow tires, select tires equivalent in size and type to the original equipment tires. Use snow tires only in sets of four; failure to do so may adversely affect the safety and handling of your vehicle.
Snow tires generally have lower speed ratings than what was originally equipped with your vehicle and should not be operated at sustained speeds over 75 mph (120 km/h). For speeds above 75 mph (120 km/h) refer to original equipment or an authorized tire dealer for recommended safe operating speeds, loading and cold tire inflation pressures.
While studded tires improve performance on ice, skid and traction capability on wet or dry surfaces may be poorer than that of non-studded tires. Some states prohibit studded tires; therefore, local laws should be checked before using these tire types.
Spare Tires — If Equipped
NOTE: For vehicles equipped with Tire Service Kit instead of a spare tire, please refer to "Tire Service Kit" in "In Case Of Emergency" for further information.
CAUTION!
Because of the reduced ground clearance, donottake your vehicle through an automatic car wash with a compactor limited usetemporary spare installed. Damageto the vehicle may result.
Refer to the "Towing Requirements - Tires" in "Starting And Operating" for restrictions when towing with a spare tire designated for temporary emergency use.
SpareTireMatchingOriginalEquippedTireAnd Wheel—IfEquipped
Your vehicle may be equipped with a spare tire and wheel equivalent in look and function to the original equipment tire and wheel found on the front or rear axle of your vehicle. This spare tire may be used in the tire rotation for your vehicle. If your vehicle has this option, refer to an authorized tire dealer for the recommended tire rotation pattern.
CompactSpareTire—IfEquipped
The compact spare is for temporary emergency use only. You can identify if your vehicle is equipped with a compact spare by looking at the spare tire description on the Tire and Loading Information Placard located on the driver's side door opening or on the sidewall of the tire. Compact spare tire descriptions begin with the letter "T" or "S" preceding the size designation. Example: T145/80D18 103M.
T, S = Temporary Spare Tire
Since this tire has limited tread life, the original equipment tire should be repaired (or replaced) and reinstalled on your vehicle at the first opportunity.
Do not install a wheel cover or attempt to mount a conventional tire on the compact spare wheel, since the wheel is designed specifically for the compact spare tire. Do not install more than one compact spare tire and wheel on the vehicle at any given time.
WARNING!
Compactandcollapsiblesparesarefortemporary emergencyuseonly.Withthesespares,donotdrive morethan50mph(80km/h).Temporaryusespares
WARNING!(Continued)
havelimitedtreadlife.Whenthetreadisworntothe treadwearindicators,thetemporaryusesparetire needstobereplaced.Besuretofollowthewarnings, which apply to your spare. Failure to do so could result insparetirefailureandlossofvehiclecontrol.
CollapsibleSpareTire—IfEquipped
The collapsible spare is for temporary emergency use only. You can identify if your vehicle is equipped with a collapsible spare by looking at the spare tire description on the Tire and Loading Information Placard located on the driver's side door opening or on the sidewall of the tire.
Collapsible spare tire description example: 165/80-17 101P.
Since this tire has limited tread life, the original equipment tire should be repaired (or replaced) and reinstalled on your vehicle at the first opportunity.
Inflate collapsible tire only after the wheel is properly installed to the vehicle. Inflate the collapsible tire using the electric air pump before lowering the vehicle.
Do not install a wheel cover or attempt to mount a conventional tire on the collapsible spare wheel, since the wheel is designed specifically for the collapsible spare tire.
WARNING!
CompactandCollapsiblesparesarefortemporary emergencyuseonly.Withthesespares,donotdrive morethan50mph(80km/h).Temporaryusespares havelimitedtreadlife.Whenthetreadisworntothe treadwearindicators,thetemporaryusesparetire needstobereplaced.Besuretofollowthewarnings, whichapplytoyourspare.Failurertodosocouldresult insparetirefailureandlossofvehiclecontrol.
FullSizeSpare—IfEquipped
The full size spare is for temporary emergency use only. This tire may look like the originally equipped tire on the front or rear axle of your vehicle, but it is not. This spare tire may have limited tread life. When the tread is worn to the tread wear indicators, the temporary use full size spare tire needs to be replaced. Since it is not the same as your original equipment tire, replace (or repair) the original equipment tire and reinstall on the vehicle at the first opportunity.
LimitedUseSpare—IfEquipped
The limited use spare tire is for temporary emergency use only. This tire is identified by a label located on the limited use spare wheel. This label contains the driving limitations for this spare. This tire may look like the original equipped tire on the front or rear axle of your vehicle, but it is not. Installation of this limited use spare tire affects vehicle handling. Since it is not the same as your original equipment tire, replace (or repair) the original equipment tire and reinstall on the vehicle at the first opportunity.
WARNING!
Limitedusesparesareforemergencyuseonly.Installationofthislimitedusesparetireaffectsvehicle handling.Withthistire,donotdrivemorethanthe speedlistedonthelimitedusesparewheel.Keep inflatedtothecoldtireinflationpressureslistedon yourTireandLoadingInformationPlacardlocatedon thedriver'ssideB-Pillarortherearedgeofthedriver's sidedoor.Replace(orrepair)theoriginalequipment tireatthefirstopportunityandreinstallitonyour vehicle.Failureretodosocouldresultinlossofvehicle control.
Wheel And Wheel Trim Care
All wheels and wheel trim, especially aluminum and chrome plated wheels, should be cleaned regularly using mild (neutral Ph) soap and water to maintain their luster and to prevent corrosion. Wash wheels with the same soap solution recommended for the body of the vehicle and remember to always wash when the surfaces are not hot to the touch.
Your wheels are susceptible to deterioration caused by salt, sodium chloride, magnesium chloride, calcium chloride, etc., and other road chemicals used to melt ice or control dust on dirt roads. Use a soft cloth or sponge and mild soap to wipe away promptly. Do not use harsh chemicals or a stiff brush. They can damage the wheel's protective coating that helps keep them from corroding and tarnishing.
CAUTION!
Avoidproductsorautomaticcarwashesthatuseacidic solutionsorstrongalkalineadditivesorharshbrushes. Manyaftermarketwheelcleanersandautomaticcar washesmaydamagethewheel'sprotectivefinish. SuchdamageisnotcoveredbytheNewVehicle LimitedWarranty.Onlycarwashsoap,MoparWheel Cleanerorequivalentisrecommended.
When cleaning extremely dirty wheels including excessive brake dust, care must be taken in the selection of tire and wheel cleaning chemicals and equipment to prevent damage to the wheels. Mopar Wheel Treatment or Mopar Chrome Cleaner or their equivalent is recommended or select a non-abrasive, non-acidic cleaner for aluminum or chrome wheels.
CAUTION!
Donotusescouringpads,steelwool,abristlebrush, metalpolishesorovencleaner. These products may damage the wheel's protective finish. Such damage is not covered by the New Vehicle Limited Warranty. Only car wash soap, Mopar Wheel Cleaner or equivalent is recommended.
NOTE: If you intend parking or storing your vehicle for an extended period after cleaning the wheels with wheel cleaner, drive your vehicle and apply the brakes to remove the water droplets from the brake components. This activity will remove the red rust on the brake rotors and prevent vehicle vibration when braking.
376 SERVICING AND MAINTENANCE
DarkVaporChrome, BlackSatinChrome, or LowGloss ClearCoatWheels
CAUTION!
If your vehicle is equipped with the these specialty wheels, DONOTUSEwheel cleaners, abrasives, or polishing compounds. They will permanently damage this finish and such damage is not covered by the New Vehicle Limited Warranty. HANDWASHONLY USING MILDSOAPANDWATERWITHASOFT CLOTH. Used on a regular basis; this is all that is required to maintain this finish.
Tire Chains (Traction Devices)
Due to limited clearance, tire chains or traction devices are not recommended.
Tire Rotation Recommendations
Tires on the front and rear axles of vehicles operate at different loads and perform different steering, driving, and braking functions. For these reasons, they wear at unequal rates.
These effects can be reduced by timely rotation of tires. The benefits of rotation are especially worthwhile with aggressive tread designs such as those on all season type tires. Rotation will increase tread life, help to maintain mud, snow and wet traction levels, and contribute to a smooth, quiet ride.
Refer to “Scheduled Servicing” in “Servicing And Maintenance” for the proper maintenance intervals. The reasons for any rapid or unusual wear should be corrected prior to rotation being performed.
TireRotation—SameTireSizeOnFrontAndRearAxle
The suggested rotation method for vehicles equipped with non directional three season and all season tires is the "forward-cross" as shown in the following diagram.
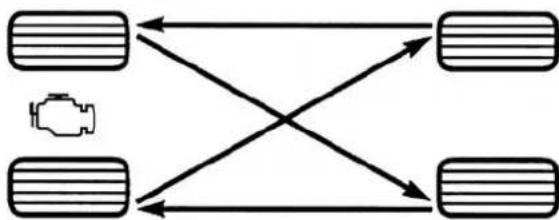
flowchart
graph TD
    A["Vehicle Icon"] --> B["Left Vehicle"]
    A --> C["Right Vehicle"]
    B --> D["Left Vehicle"]
    B --> E["Right Vehicle"]
    C --> F["Left Vehicle"]
    C --> G["Right Vehicle"]
055703771
TireRotation
DEPARTMENT OF TRANSPORTATION UNIFORM TIRE QUALITY GRADES
The following tire grading categories were established by the National Highway Traffic Safety Administration. The specific grade rating assigned by the tire's manufacturer in each category is shown on the sidewall of the tires on your vehicle.
All passenger vehicle tires must conform to Federal safety requirements in addition to these grades.
Treadwear
The Treadwear grade is a comparative rating, based on the wear rate of the tire when tested under controlled conditions on a specified government test course. For example, a tire graded 150 would wear one and one-half times as well on the government course as a tire graded 100. The relative performance of tires depends upon the actual conditions of their use, however, and may depart significantly from the norm due to variations in driving habits, service practices, and differences in road characteristics and climate.
Traction Grades
The Traction grades, from highest to lowest, are AA, A, B, and C. These grades represent the tire's ability to stop on wet pavement, as measured under controlled conditions on specified government test surfaces of asphalt and concrete. A tire marked C may have poor traction performance.
WARNING!
Thetractiongradeassignedtothistireisbasedon straight-aheadbrakingtractiontests, and does not include acceleration, cornering, hydroplaning, or peaktraction characteristics.
Temperature Grades
The Temperature grades are A (the highest), B, and C, representing the tire's resistance to the generation of heat and its ability to dissipate heat, when tested under controlled conditions on a specified indoor laboratory test wheel.
Sustained high temperature can cause the material of the tire to degenerate and reduce tire life, and excessive temperature can lead to sudden tire failure. The grade C corresponds to a level of performance, which all passenger vehicle tires must meet under the Federal Motor Vehicle Safety Standard No. 109. Grades B and A represent higher levels of performance on the laboratory test wheel, than the minimum required by law.
WARNING!
Thetemperaturegradeforthistireisestablished for atirethatisproperlyinflatedandnotoverloaded. Excessivespeed,under-inflation,orexcessiveloading,eitherseparatelyorincombination,cancause heatbuildupandpossibletirefailure.
VEHICLE STORAGE
If you are leaving your vehicle dormant for more than 21 days, you may want to take these steps to protect your battery.
- Disconnect the negative cable from the battery.
- Anytime you store your vehicle, or keep it out of service (e.g., vacation) for two weeks or more, run the air conditioning system at idle for about five minutes in the fresh air and high blower setting. This will ensure adequate system lubrication to minimize the possibility of compressor damage when the system is started again.
Battery Storage Mode
With the ignition in the ON position, engine not running, navigate to the battery gauge page on the instrument cluster display, then press and hold the OK button. The vehicle will be put into battery storage mode, which will greatly increase the amount of time the vehicle can sit and restart without needing to disconnect the battery. Going into battery storage mode will increase the amount of time between starts to about 60 days.
NOTE: The key fob buttons will not work while the vehicle is in battery storage mode, pulling the door handle will wake the vehicle and allow it to recognize the key fob to unlock the door.
BODYWORK
Protection From Atmospheric Agents
Vehicle body care requirements vary according to geographic locations and usage. Chemicals that make roads passable in snow and ice and those that are sprayed on trees and road surfaces during other seasons are highly corrosive to the metal in your vehicle. Outside parking,
which exposes your vehicle to airborne contaminants, road surfaces on which the vehicle is operated, extreme hot or cold weather and other extreme conditions will have an adverse effect on paint, metal trim, and underbody protection.
The following maintenance recommendations will enable you to obtain maximum benefit from the corrosion resistance built into your vehicle.
WhatCausesCorrosion?
Corrosion is the result of deterioration or removal of paint and protective coatings from your vehicle.
The most common causes are:
- Road salt, dirt and moisture accumulation.
- Stone and gravel impact.
• Insects, tree sap and tar. - Salt in the air near seacoast localities.
• Atmospheric fallout/industrial pollutants.
380 SERVICING AND MAINTENANCE
Body And Underbody Maintenance
CleaningHeadlights
Your vehicle is equipped with plastic headlights and fog lights that are lighter and less susceptible to stone breakage than glass headlights.
Plastic is not as scratch resistant as glass and therefore different lens cleaning procedures must be followed.
To minimize the possibility of scratching the lenses and reducing light output, avoid wiping with a dry cloth. To remove road dirt, wash with a mild soap solution followed by rinsing.
Do not use abrasive cleaning components, solvents, steel wool or other aggressive material to clean the lenses.
Preserving The Bodywork
Washing
- Wash your vehicle regularly. Always wash your vehicle in the shade using Mopar Car Wash, or a mild car wash soap, and rinse the panels completely with clear water.
-
If insects, tar, or other similar deposits have accumulated on your vehicle, use Mopar Super Kleen Bug and Tar Remover to remove.
-
Use a high quality cleaner wax, such as Mopar Cleaner Wax to remove road film, stains and to protect your paint finish. Take care never to scratch the paint.
- Avoid using abrasive compounds and power buffing that may diminish the gloss or thin out the paint finish.
CAUTION!
- Donotuseabrasiveorstrongcleaningmaterialssuch assteelwoolorscouringpowderthatwillscratch metalandpaintedsurfaces.
- Useofpowerwashersexceeding1,200psi(8,274kPa) canresultindamageorremovalofpaintanddecals.
SpecialCare
- If you drive on salted or dusty roads or if you drive near the ocean, hose off the undercarriage at least once a month.
- It is important that the drain holes in the lower edges of the doors, rocker panels, and trunk be kept clear and open.
-
If you detect any stone chips or scratches in the paint, touch them up immediately. The cost of such repairs is considered the responsibility of the owner.
-
If your vehicle is damaged due to a collision or similar cause that destroys the paint and protective coating, have your vehicle repaired as soon as possible. The cost of such repairs is considered the responsibility of the owner.
- If you carry special cargo such as chemicals, fertilizers, de-icer salt, etc., be sure that such materials are well packaged and sealed.
- If a lot of driving is done on gravel roads, consider mud or stone shields behind each wheel.
- Use Mopar Touch Up Paint on scratches as soon as possible. An authorized dealer has touch up paint to match the color of your vehicle.
INTERIORS
Seats And Fabric Parts
Use Mopar Total Clean to clean fabric upholstery and carpeting.
WARNING!
Donotusevolatilesolventsforcleaningpurposes. Manyarepotentiallyflammable,andifusedinclosed areastheymaycauserespiratoryharm.
SeatBeltMaintenance
Do not bleach, dye, or clean the belts with chemical solvents or abrasive cleaners. This will weaken the fabric. Sun damage can also weaken the fabric.
If the belts need cleaning, use Mopar Total Clean, a mild soap solution, or lukewarm water. Do not remove the belts from the vehicle to wash them. Dry with a soft cloth.
Replace the belts if they appear frayed or worn or if the buckles do not work properly.
WARNING!
Afrayedortornbeltcouldripapartinacollisionand leaveyouwithnoprotection.Inspectthebeltsystem periodically,checkingforcuts,frays,orlooseparts. Damagedpartsmustbereplacedimmediately.Donot disassembleormodifythesystem.Seatbeltassemblies mustbereplacedafteracollisioniftheyhavebeen damaged(i.e.,bentretractor,tornwebbing,etc.).
Plastic And Coated Parts
Use Mopar Total Clean to clean vinyl upholstery.
CAUTION!
- Directcontactofairfresheners,insectrepellents, suntanlotions,orhandsanitizerstotheplastic, painted,ordecoratedsurfacesoftheinteriormay causepermanentdamage.Wipeawayimmediately.
- Damagecausedbythesetypeofproductsmaynotbe coveredbyyourNewVehicleLimitedWarranty.
CleaningPlasticInstrumentClusterLenses
The lenses in front of the instruments in this vehicle are molded in clear plastic. When cleaning the lenses, care must be taken to avoid scratching the plastic.
-
Clean with a wet soft cloth. A mild soap solution may be used, but do not use high alcohol content or abrasive cleaners. If soap is used, wipe clean with a clean damp cloth.
-
Dry with a soft cloth.
Leather Parts
Mopar Total Clean is specifically recommended for leather upholstery.
Your leather upholstery can be best preserved by regular cleaning with a damp soft cloth. Small particles of dirt can act as an abrasive and damage the leather upholstery and should be removed promptly with a damp cloth. Stubborn soils can be removed easily with a soft cloth and Mopar Total Clean. Care should be taken to avoid soaking your leather upholstery with any liquid. Please do not use polishes, oils, cleaning fluids, solvents, detergents, or ammonia-based cleaners to clean your leather upholstery. Application of a leather conditioner is not required to maintain the original condition.
NOTE: If equipped with light colored leather, it tends to show any foreign material, dirt, and fabric dye transfer more so than darker colors. The leather is designed for easy cleaning, and FCA recommends Mopar total care leather cleaner applied on a cloth to clean the leather seats as needed.
CAUTION!
DonotuseAlcoholandAlcohol-basedand/orKetone basedcleaningproductstocleanleatherupholstery,as damagetotheupholsterymayresult.
Glass Surfaces
All glass surfaces should be cleaned on a regular basis with Mopar Glass Cleaner, or any commercial household-type glass cleaner. Never use an abrasive type cleaner. Use caution when cleaning the inside rear window equipped with electric defrosters or windows equipped with radio antennas. Do not use scrapers or other sharp instruments that may scratch the elements.
When cleaning the rear view mirror, spray cleaner on the towel or cloth that you are using. Do not spray cleaner directly on the mirror.
TECHNICAL SPECIFICATIONS
CONTENTS
■IDENTIFICATION DATA....386
□Vehicle Identification Number....386
□6.2L Supercharged Engine .....388
□Reformulated Gasoline....389
□Materials Added To Fuel . . . . . . . . . . . . . . . . . . . . . . . . . . . . . . . . 389
□Gasoline/Oxygenate Blends....390
☐Do Not Use E-85 In Non-Flex Fuel Vehicles . . . 390
□CNG And LP Fuel System Modifications .....390
□MMT In Gasoline. . . . . . . . . . . . . . . . . . . . . . . . . . . . . . . . . . . . . . . . . . . . . . 391
□Fuel System Cautions....391
□Carbon Monoxide Warnings....392
■FLUID CAPACITIES....392
■FLUIDS AND LUBRICANTS....393
□Engine....393
□Chassis 395
386 TECHNICAL SPECIFICATIONS
IDENTIFICATION DATA
Vehicle Identification Number
The Vehicle Identification Number (VIN) is on the left front corner of the instrument panel. The VIN is visible from outside of the vehicle through the windshield. This number also appears on the Automobile Information Disclosure Label affixed to a window on your vehicle, the vehicle registration, and the title.
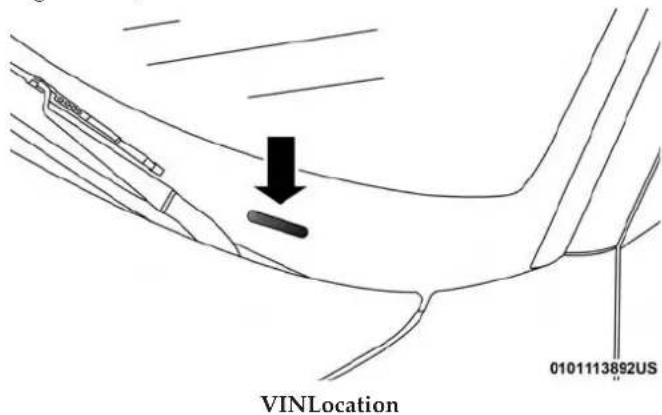
text_image
VINLocation 0101113892USThe Vehicle Identification Number (VIN) is also located on the right front strut tower inside the engine compartment.
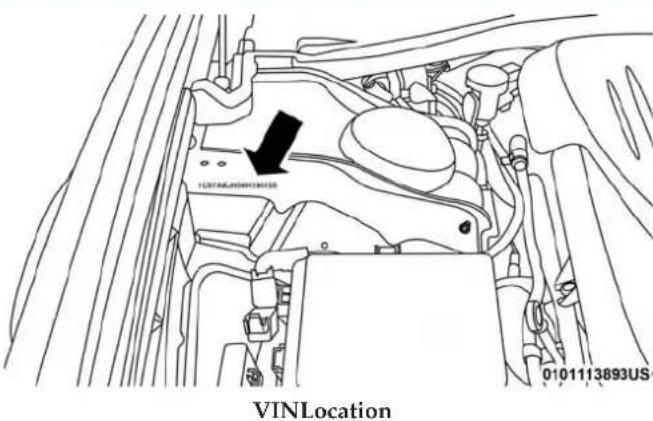
text_image
VINLocation 0101113893USNOTE: It is illegal to remove or alter the VIN.
BRAKE SYSTEM
Your vehicle is equipped with dual hydraulic brake systems. If either of the two hydraulic systems loses normal capability, the remaining system will still function. There will be some loss of overall braking effectiveness. This may be evident by increased pedal travel during application, greater pedal force required to slow or stop, and potential activation of the Brake Warning Light.
In the event power assist is lost for any reason (for example, repeated brake applications with the engine OFF), the brakes will still function. The effort required to brake the vehicle will be much greater than that required with the power system operating.
NOTE: Your vehicle is equipped with a high performance braking system. The brake pads are a semi-metallic compound, which offer superior fade resistance for consistent operation. A compromise to using this type of brake pad is that the brakes may produce more brake dust and may squeal slightly under certain weather and operating conditions (i.e., during light brake applications). These are considered normal conditions.
WHEEL AND TIRE TORQUE SPECIFICATIONS
Proper lug nut/bolt torque is very important to ensure that the wheel is properly mounted to the vehicle. Any time a wheel has been removed and reinstalled on the vehicle, the lug nuts/bolts should be torqued using a properly calibrated torque wrench using a high quality six sided (hex) deep wall socket.
Torque Specifications
| LugNut/Bolt Torque | **LugNut/Bolt Size | LugNut/Bolt SocketSize |
| 111 Ft-Lbs (150 N·m) | M14 x 1.50 22 mm |
**Use only your authorized dealer recommended lug nuts/bolts and clean or remove any dirt or oil before tightening. Inspect the wheel mounting surface prior to mounting the tire and remove any corrosion or loose particles.
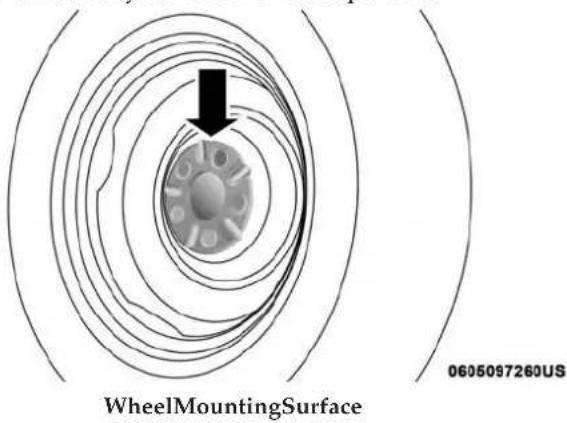
text_image
WheelMountingSurface 0605097260USTighten the lug nuts/bolts in a star pattern until each nut/bolt has been tightened twice. Ensure that the socket is fully engaged on the lug nut/bolt (do not insert it half-way).
NOTE: If in doubt about the correct tightness, have them checked with a torque wrench by your authorized dealer or service station.
After 25 miles (40 km), check the lug nut/bolt torque to be sure that all the lug nuts/bolts are properly seated against the wheel.
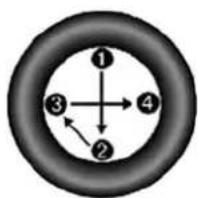
flowchart
graph TD
    1 --> 2
    2 --> 3
    3 --> 4
    4 --> 1
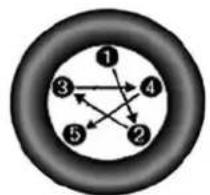
flowchart
graph TD
    1 --> 2
    2 --> 3
    3 --> 4
    4 --> 5
    5 --> 1
    1 --> 3
    3 --> 4
    4 --> 5
0605006372
TorquePatterns
WARNING!
Toavoidtheriskofforcingthevehicleoffthejack,do nottightenthelugnuts/boltsfullyuntilthevehiclehas beenlowered.Failureretofollowthiswarningmay resultinpersonalinjury.
FUEL REQUIREMENTS
6.2L Supercharged Engine
Do not use E-85 flex fuel or ethanol blends greater than 15% in this engine.
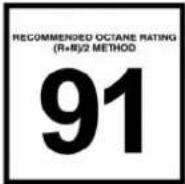
These engines are designed to meet all emissions regulations, provide optimal fuel economy and performance when using high-quality unleaded "Premium" gasoline having a posted octane number of 91 as specified by the (R + M) / 2 method. The use of 91 or higher octane "Premium" gasoline is required in these engines.
While operating on gasoline with the required octane number, hearing a light knocking sound from the engine is not a cause for concern. However, if the engine is heard making a heavy knocking sound, see your dealer immediately. Use of gasoline with a lower than recommended octane number can cause engine failure and may void or not be covered by the New Vehicle Limited Warranty.
Poor quality gasoline can cause problems such as hard starting, stalling, and hesitations. If you experience these symptoms, try another brand of gasoline before considering service for the vehicle.
Reformulated Gasoline
Many areas of the country require the use of cleaner burning gasoline referred to as “Reformulated Gasoline”. Reformulated gasoline contains oxygenates and are specifically blended to reduce vehicle emissions and improve air quality.
The use of reformulated gasoline is recommended. Properly blended reformulated gasoline will provide improved performance and durability of engine and fuel system components.
Materials Added To Fuel
Besides using unleaded gasoline with the proper octane rating, gasolines that contain detergents, corrosion and stability additives are recommended. Using gasolines that have these additives will help improve fuel economy, reduce emissions, and maintain vehicle performance.

Designated TOP TIER Detergent Gasoline contains a higher level of detergents to further aide in minimizing engine and fuel system deposits. When available, the usage of TOP TIER Detergent gasoline is recommended. Visit www.toptiergas.com for a list of TOP
TIER Detergent Gasoline Retailers.
Indiscriminate use of fuel system cleaning agents should be avoided. Many of these materials intended for gum and varnish removal may contain active solvents or similar ingredients. These can harm fuel system gasket and diaphragm materials.
390 TECHNICAL SPECIFICATIONS
Gasoline/Oxygenate Blends
Some fuel suppliers blend unleaded gasoline with oxygenates such as ethanol.
CAUTION!
DONOTuseE-85, gasoline containing methanol, or gasoline containing more than 15% ethanol (E-15). Use of these blends may result in starting and drivability problems, damage critical fuel system components, cause emission to exceed the applicable standard, and/or cause the Malfunction Indicator Light to illuminate. Please observe pump labels as they should clearly communicate if a fuel contains greater than 15% ethanol (E-15).
Problems that result from using gasoline containing more than 15% ethanol (E-15) or gasoline containing methanol are not the responsibility of the manufacturer and may void or not be covered under New Vehicle Limited Warranty.
Do Not Use E-85 In Non-Flex Fuel Vehicles
Non-Flex Fuel Vehicles (FFV) are compatible with gasoline containing up to 15% ethanol (E-15). Use of gasoline with higher ethanol content may void the New Vehicle Limited Warranty.
If a Non-FFV vehicle is inadvertently fueled with E-85 fuel, the engine will have some or all of these symptoms:
- Operate in a lean mode.
- OBD II Malfunction Indicator Light on.
- Poor engine performance.
- Poor cold start and cold drivability.
- Increased risk for fuel system component corrosion.
CNG And LP Fuel System Modifications
Modifications that allow the engine to run on Compressed Natural Gas (CNG) or Liquid Propane (LP) may result in damage to the engine, emissions, and fuel system components. Problems that result from running CNG or LP are not the responsibility of the manufacturer and may void or not be covered under the New Vehicle Limited Warranty.
MMT In Gasoline
Methylcyclopentadienyl Manganese Tricarbonyl (MMT) is a manganese-containing metallic additive that is blended into some gasoline to increase octane. Gasoline blended with MMT provides no performance advantage beyond gasoline of the same octane number without MMT. Gasoline blended with MMT reduces spark plug life and reduces emissions system performance in some vehicles. The manufacturer recommends that gasoline without MMT be used in your vehicle. The MMT content of gasoline may not be indicated on the gasoline pump; therefore, you should ask your gasoline retailer whether the gasoline contains MMT. MMT is prohibited in Federal and California reformulated gasoline.
Fuel System Cautions
CAUTION!
Followtheseguidelinestomaintainyourvehicle's performance:
- The useofleadedgasolineisprohibitedbyFederal law.Usingleadedgasolinecanimpairengineperformanceanddamagetheemissionscontrolsystem.
CAUTION!(Continued)
- Anout-of-tuneengineorcertainfuelorignition malfunctionscancausethecatalyticconverterto overheat. If you notice apungentburningodor or somelightsmoke, you'renginem maybe out of tune or malfunctioning and may require immediateservice. Contact an authorized dealer for service assistance.
- Theuseoffueladditives, which are now beings sold as octaneenhancers, is not recommended. Most of these products contain high concentration of methanol. Fuelsystemdamage or vehicle performance problems resulting from the use of such fuels or additives is not the responsibility of the manufacturer and may avoid or not be covered under the New Vehicle Limited Warranty.
NOTE: Intentional tampering with the emissions control system can result in civil penalties being assessed against you.
(Continued)
Carbon Monoxide Warnings
WARNING!
Carbonmonoxide(CO)inexhaustgasesisdeadly. Followtheprecautionsbelowtopreventcarbonmonoxidepoisoning:
- Donotinhaleexhaustgases. They contain carbon monoxide, acolorless and odorless gas, which can kill. Never run the engine in a closed area, such as a garage, and never sit in a parked vehicle with the
WARNING!(Continued)
engine running for an extended period. If the vehicle is stopped in an open area with the engine running form more than a short period, adjust the ventilation system to force fresh, outside air into the vehicle.
- Guardagainstcarbonmonoxidewithpropermaintenance.Havetheexhaustsysteminspectedevery timethevehicleisraised.Haveanyabnormalconditionsrepairedpromptly.Untilrepaired,drivewith allsidewindowsfullyopen.
(Continued)
FLUID CAPACITIES
| U.S.Metric | ||
| Fuel(Approximate) | ||
| 6.2L Supercharged Engine (91 Octane or higher, 0-15% Ethanol) 18.5 Gallons 70 Liters | ||
| EngineOilWithFilter | ||
| 6.2L Supercharged Engine (SAE 0W-40, Synthetic API Certified) 7 Quarts 6.6 Liters | ||
| CoolingSystem* | ||
| 6.2L Supercharged Engine (Mopar Antifreeze/Engine Coolant (OAT coolant conforming to MS.90032) 10 Year/150,000 Mile (240,000 km) Formula or equivalent) | 15.2 Quarts | 14.4 Liters |
TECHNICAL SPECIFICATIONS 393
| U.S.Metric | ||
| 6.2L Supercharged Engine Intercooler (Mopar Antifreeze/Engine Cool-ant (OAT coolant conforming to MS.90032) 10 Year/150,000 Mile (240,000 km) Formula or equivalent) | 5 Quarts 4.7 Liters | |
| * Includes heater and coolant recovery bottle filled to MAX level. | ||
FLUIDS AND LUBRICANTS
Engine
| ComponentFluid,Lubricant,orGenuine | Part |
| Engine/Intercooler Coolant We recommend | end you use Mopar Antifreeze/Coolant 10 Year/150,000 Mile (240,000 km) Formula OAT coolant conforming to MS.90032. |
| Engine Oil For best performance and max | maximum protection under all types of operating conditions, the manufacturer only recommends full synthetic engine oils. The manufacturer recommends the use of Pennzoil Ultra Platinum 0W-40 or equivalent Mopar engine oil meeting the requirements of FCA Material Standard MS-12633 for use in all operating temperatures. |
| Engine Oil Filter Mopar Engine Oil Filter or equivalent. | |
| Spark Plugs We recommend you use Mopar Spark Plugs. | |
| Fuel Selection 91 Octane or higher, 0-15% Ethanol. | |
CAUTION!
- Mixingofenginecoolant(antifreeze)otherthan specifiedOrganicAdditiveTechnology(OAT)enginecoolant(antifreeze),mayresultinenginedamageandmaydecreasecorrosionprotection.Organic AdditiveTechnology(OAT)enginecoolantisdifferentandshouldnotbemixedwithHybridOrganic AdditiveTechnology(HOAT)enginecoolant(anti-freeze)orany"globallycompatible"coolant(anti-freeze).Ifanon-OATenginecoolant(antifreeze)is introducedintothecoolingsysteminanemergency, thecoolingsystemwillneedtobedrained,flushed,
CAUTION!(Continued)
andrefilledwithfreshOATcoolant(conformingto MS.90032),byanauthorizeddealerassoonaspossible.
- Donotusewateraloneoralcohol-basedengine coolant(antifreeze)products.Donotuseadditional rustinhibitorsorantirustproducts,astheymaynot becompatiblewiththeradiatorenginecoolantand mayplugtheradiator.
- This vehicle has not been designed for use with propyleneglycol-based engine coolant (antifreeze). Use of propyleneglycol-based engine coolant (antifreeze) is not recommended.
(Continued)
Chassis
| ComponentFluid,Lubricant,orGenuinePart | |
| Automatic Transmission Use only Mopar ZF 8&9 Speed ATF | Automatic Transmission Fluid, or equivalent. Failure to use the correct fluid may affect the function or performance of your transmission. |
| Brake Master Cylinder | We recommend you use Mopar DOT 3 brake fluid. If DOT 3 brake fluid is not available, then DOT 4 is acceptable. |
| Hydraulic Power Steering Reservoir — If Equipped We recommend you use Mopar Hydraulic System Power Steering Fluid or equivalent meeting the requirements of FCA Material Standard MS-10838. | |
| Rear Axle We recommend you use Mopar LSD Synthetic Gear Lubricant SAE 75W85 (API GL-5). | |
MULTIMEDIA
CONTENTS
■UCONNECT SYSTEMS....399
■DRAG & DROP MENU BAR....399
■CYBERSECURITY....400
■UCONNECT SETTINGS....401
□Customer Programmable Features — Uconnect 4C/4C NAV Settings .....402
■PERFORMANCE PAGES — IF EQUIPPED .....424
□Home....425
□Timers. 426
□Gauges....429
□G-Force....430
□Engine....432
□Dynamometer (Dyno)....433
■SRT DRIVE MODES....434
□Track Mode....437
□Sport Mode....437
□Auto Mode....438
□Custom Mode....438
■RACE OPTIONS....445
□Launch Control....445
□Shift Light....448
□RaceCooldown — If Equipped . . . . . . . . . . . . . . . . . . . . . . . . . . . . . . . . . . . . . . . . . . . . . . . . . . . . . . . . . . . . . . . .
■VALET MODE....450
■ECO MODE — IF EQUIPPED .....452
■STEERING WHEEL AUDIO CONTROLS — IF EQUIPPED 453
□Radio Operation. . . . . . . . . . . . . . . . . . . . . . . . . . . . . . . . . . . . . . . . . . . . . . . . . . . 453
□Media Mode....453
■AUX/USB/MP3 CONTROL....454
□Introducing Uconnect....456
□Get Started....457
□Basic Voice Commands....458
□Radio....458
□Media....459
□Phone....459
□Voice Text Reply — If Equipped . . . . . . . . . . . . . . . . . . . . . . . . . . . . 460
□Climate....462
□Navigation (4C NAV)....462
□SiriusXM Guardian (4C/4C NAV) — If Equipped....463
□Register (4C/4C NAV)....464
□Vehicle Health Report/Alert (4C/4C NAV) . . . . .464
□Mobile App (4C/4C NAV)....464
□SiriusXM Travel Link (4C NAV). . . . . . . . . . . . . . . . . . . . . . . . . . . . . . . . . . . . . . . . . . . . . . . . . . . . . . . . . . .
□Siri Eyes Free — If Equipped . . . . . . . . . . . . . . . . . . . . . . . . . . 466
□Do Not Disturb....467
□Android Auto — If Equipped .....467
□ Apple CarPlay — If Equipped....468
□General Information....469
□ Additional Information....469
UCONNECT SYSTEMS
For detailed information about your Uconnect system, refer to your Uconnect Owner's Manual Supplement.
NOTE: Uconnect screen images are for illustration purposes only and may not reflect exact software for your vehicle.
DRAG & DROP MENU BAR
The Uconnect features and services in the main menu bar are easily changed for your convenience. Simply follow these steps:
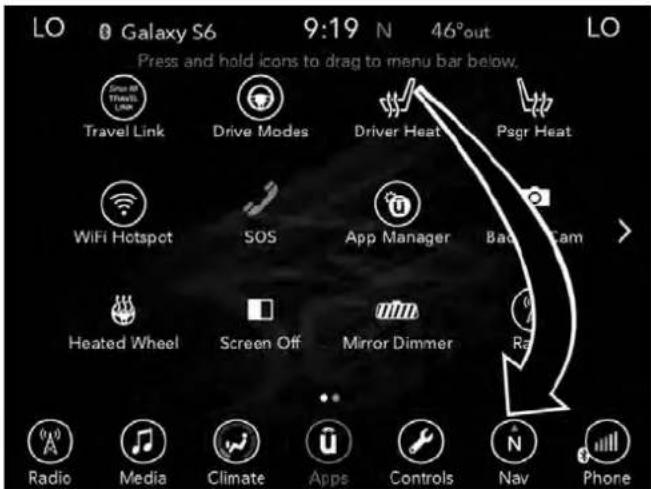
text_image
LO Galaxy S6 9:19 N 46°out Press and hold icons to drag to menu bar below. Travel Link Drive Modes Driver Heat Psgr Heat WiFi Hotspot SOS App Manager Bad Cam Heated Wheel Screen Off Mirror Dimmer Radio Media Climate Apps Controls Nav PhoneUconnect4C/4CNAVMainMenu
- Press the "Apps Ⓞ" button to open the App screen.
- Press and hold, then drag the selected App to replace an existing shortcut in the main menu bar.
The new app shortcut, that was dragged down onto the main menu bar, will now be an active App/shortcut.
NOTE: This feature is only available if the vehicle is in park.
CYBERSECURITY
Your vehicle may be a connected vehicle and may be equipped with both wired and wireless networks. These networks allow your vehicle to send and receive information. This information allows systems and features in your vehicle to function properly.
Your vehicle may be equipped with certain security features to reduce the risk of unauthorized and unlawful access to vehicle systems and wireless communications. Vehicle software technology continues to evolve over time and FCA US LLC, working with its suppliers, evaluates and takes appropriate steps as needed. Similar to a computer or other devices, your vehicle may require software updates to improve the usability and performance of your systems or to reduce the potential risk of unauthorized and unlawful access to your vehicle systems.
The risk of unauthorized and unlawful access to your vehicle systems may still exist, even if the most recent version of vehicle software (such as Uconnect software) is installed.
WARNING!
- Itisnotpossibletoknowortopredictallofthe possibleoutcomesifyourvehicle'ssystemsare breached.Itmaybepossiblethatvehiclesystems, includingsafetyrelatedsystems,couldbeimpaired oralossofvehiclecontrolcouldoccurthatmay resultinanaccidentinvolvingseriousinjuryor death.
- ONLYinsertmedia(e.g.,USB,SDcard,orCD)into yourvehicleifitcamefromattrustedsource.Media ofunknownorigincouldpossiblycontainmalicious software,andifinstalledinyourvehicle,itmay increasethepossibilityforvehiclesystemstobe breached.
- Asalways, if you experience unusual vehicle behavior, take your vehicle to your nearest authorized dealer immediately.
NOTE:
• FCA US LLC or your dealer may contact you directly regarding software updates.
- To help further improve vehicle security and minimize the potential risk of a security breach, vehicle owners should:
- Routinely check www.driveuconnect.com (U.S. Residents) or www.driveuconnect.ca (Canadian Residents) to learn about available Uconnect software updates.
- Only connect and use trusted media devices (e.g. personal mobile phones, USBs, CDs).
Privacy of any wireless and wired communications cannot be assured. Third parties may unlawfully intercept information and private communications without your consent. For further information, refer to "Data Collection & Privacy" in your Uconnect Owner's Manual Supplement or "Onboard Diagnostic System (OBD II) Cybersecurity" in "Getting To Know Your Instrument Panel".
UCONNECT SETTINGS
The Uconnect system uses a combination of buttons on the touchscreen and buttons on the faceplate located on the center of the instrument panel that allows you to access and change the customer programmable features.
CAUTION!
DoNOTattachanyobjecttothetouchscreen,doingso canresultindamagetothetouchscreen.
text_image
LO FM 47.9 9:53 AM/Temp 1 Serial & Locks Auto-On Comfort Engine Off Options Audio Phone Settings SerialM Setup 2 0313117842USUconnect4C/4CNAVButtonsOnTouchscreenAnd ButtonsOnFaceplate
1 — Uconnect Buttons On The Touchscreen
2 — Uconnect Buttons On The Faceplate
Customer Programmable Features — Uconnect 4C/4C NAV Settings
Press the "Apps 🔒" button (if equipped), and then press the "Settings" button on the touchscreen to display the menu setting screen. In this mode, the Uconnect system allows you to access programmable features that may be equipped such as Language, Display, Units, Voice, Clock & Date, Safety & Driving Assistance, Mirrors & Wipers, Lights, Doors & Locks, Auto-On Comfort, Key Off Options, Audio, Phone/Bluetooth, SiriusXM Setup, Reset, and System Information.
NOTE: Depending on the vehicle's options, feature settings may vary.
When making a selection, press the button on the touchscreen to enter the desired mode. Once in the desired mode, press and release the preferred setting "option" until a check-mark appears next to the setting, showing that setting has been selected. Once the setting is complete, press the "X" button on the touchscreen to close out of the settings screen. Pressing the up or down arrow button on the right side of the screen will allow you to toggle up or down through the available settings.
Language
After pressing the "Language" button on the touchscreen, the following settings will be available:
| SettingNameSelectableOptions | |||
| Set Language | English | Français | Español |
Display
After pressing the "Display" button on the touchscreen, the following settings will be available:
| SettingNameSelectableOptions | ||
| DisplayModeAuto Manual | ||
| DisplayBrightnessWithHeadlights ON | + | - |
| NOTE:When in the "Display Brightness With Headlights ON" display, you may select the brightness with the headlights on.To make changes to the "Display Brightness With Headlights ON" setting, the headlights must be on and the interior dimmer switch must not be in the "party" or "parade" positions. | ||
| DisplayBrightnessWithHeadlights OFF | + | - |
| NOTE:When in the "Display Brightness With Headlights OFF" display, you may select the brightness with the headlights off. Adjust the brightness from (1–10) with the "+" and "-" buttons on the touchscreen.To make changes to the "Display Brightness With Headlights OFF" setting, the headlights must be off and the interior dimmer switch must not be in the "party" or "parade" positions. | ||
404 MULTIMEDIA
| SettingNameSelectableOptions | ||
| SetThemeList Of Themes | ||
| NOTE:When in the “Set Theme” display, you may select the theme for the display screen. To make your selection, press the "Set Theme" button on the touchscreen, then select the desired theme option button until a check-mark appears showing that the setting has been selected. | ||
| TouchscreenBeepOn Off | ||
| ControlsScreen Time-Out—If Equipped | On Off | |
| NOTE:When the “Control Screen Time-Out” feature is selected, the controls screen will stay open for five seconds before the screen times out. With the feature deselected, the screen will stay open until it is manually closed. | ||
| NavigationNextTurnPop-UpsDis-playedInCluster—IfEquipped | On Off | |
| NOTE:When the “Navigation Turn-By-Turn Displayed In Cluster” feature is selected, the turn-by-turn directions will appear in the instrument cluster display as the vehicle approaches a designated turn within a programmed route. | ||
Units
After pressing the "Units" button on the touchscreen, you may select each unit of measure independently displayed in the instrument cluster display, and navigation system (if equipped). The following selectable units of measure are listed below:
| SettingNameSelectableOptions | |||
| UnitsUS Metric | Custom | ||
| NOTE: When the “Custom” setting is selected, units will appear according to your personally configured settings. To configure these settings, press the “Custom” bar. The following settings will appear: | |||
| SpeedMPH km/h | |||
| Distancemi km | |||
| FuelConsumptionMPG (US) MPG (UK) L/100 | km | km/L | |
| Pressure | psi | kPa | bar |
| Temperature | °F | °C | |
Voice
After pressing the "Voice" button on the touchscreen, the following settings will be available:
| SettingNameSelectable | eOptions | ||
| VoiceResponseLengthBrief | Detailed | ||
| ShowCommandListNever | w/Help Always | ||
Clock&Date
After pressing the "Clock & Date" button on the touchscreen, the following settings will be available:
| SettingNameSelectableOptions | ||
| SyncTimeWithGPS—IfEquipped | On Off | |
| NOTE:The “Sync Time With GPS” feature will allow you to automatically have the radio set the time. | ||
| SetTimeHours+ | - | |
| SetTimeMinutes+ | - | |
| TimeFormat12 hrs | 24 hrs | |
| AM | PM | |
| ShowTimeInStatusBar—IfEquipped | On Off | |
| NOTE:The “Show Time In Status Bar” feature will allow you to turn on or shut off the digital clock in the status bar. | ||
Safety&DrivingAssistance
After pressing the "Safety & Driving Assistance" button on the touchscreen, the following settings will be available:
| SettingNameSelectableOptions | ||
| ParkViewBackupCamera Delay | On Off | |
| NOTE:The “ParkView Backup Camera Delay” setting determines whether or not the screen will display the rear view image with dynamic grid lines for up to ten seconds after the vehicle is shifted out of REVERSE. This delay will be canceled if the vehicle’s speed exceeds 8 mph (13 km/h), the transmission is shifted into PARK, or the ignition is switched to the OFF position. | ||
408 MULTIMEDIA
| SettingNameSelectableOptions | ||
| ActiveParkViewBackup CameraGuidelines | On Off | |
| NOTE:The “Active ParkView Backup Camera Guidelines” feature overlays the Rear Backup Camera image with active, or dynamic, grid lines to help illustrate the width of the vehicle and its project back up path, based on the steering wheel position when the option is checked. A dashed center line overlay indicates the center of the vehicle to assist with parking or aligning to a hitch/receiver. | ||
| ForwardCollisionWarning—IfEquipped | On Off | |
| NOTE:Changing the FCW status to “Off” prevents the system from warning you of a possible collision with the vehicle in front of you.The FCW system state is kept in memory from one ignition cycle to the next. If the system is turned off, it remains off when the vehicle is restarted. | ||
| ForwardCollisionWarningSensitivity—If Equipped | Near Far | |
| SettingNameSelectable | eOptions | ||
| NOTE:The Front Collision Warning (FCW) feature provides an audible and/or visual warning to potential forward collisions. The feature can be set to Far, or set to Near. The default status of FCW is the Far setting. This means the system warns you of a possible collision with the vehicle in front of you when you are farther away. This gives you the most reaction time. To change the setting for more dynamic driving, select the Near setting. This warns you of a possible collision when you are much closer to the vehicle in front of you. | |||
| ForwardCollisionWarning(FCW)—ActiveBraking | On Off | ||
| NOTE:The FCW system includes Advanced Brake Assist (ABA). When this feature is selected, the ABA applies additional brake pressure when the driver requests insufficient brake pressure to avoid a potential frontal collision. The ABA system becomes active at 5 mph (8 km/h). To make your selection, press the “Forward Collision Warning Active Braking” button on the touchscreen, until a check-mark appears next to setting, indicating that the setting had been selected. | |||
| LaneSenseWarning—If Equipped | Early Med Late | ||
| NOTE:When the “LanseSense Warning” feature is selected, it sets the distance at which the steering wheel provides feedback for potential lane departures. The LDW sensitivity can be set to provide either an “Early,” “Medium,” or “Late” warning zone start point. | |||
410 MULTIMEDIA
| SettingNameSelectableOptions | |||
| LaneSenseStrength—IfEquipped | Low Med High | ||
| NOTE:When the “LaneSense Strength” feature is selected, it sets the strength of the steering wheel feedback for potential lane departures. | |||
| ParkSense—IfEquippedSound Only Sound & Display | |||
| NOTE:The ParkSense system scans for objects behind the vehicle when the transmission gear selector is in REVERSE and the vehicle speed is less than 11 mph (18 km/h). It provides an alert (audible and/or visual) to indicate the proximity to other objects. The system can be enabled with Sound Only, or Sound & Display. | |||
| RearParkSenseVolumeLow | Med High | ||
| NOTE:The Rear ParkSense Chime Volume settings can be selected from the instrument cluster display or Uconnect System. The chime volume settings include LOW, MEDIUM, and HIGH. The factory default volume setting is MEDIUM. ParkSense retains its last known configuration state through ignition cycles. | |||
| ElectricPowerSteeringDefault—IfEquipped | Normal Sport Comfort | ||
| NOTE:When “Electric Power Steering Default” is selected, it allows you to change the default setting of your vehicle to either normal, sport, or comfort. | |||
| BlindSpotAlert—If Equipped | Off Lights Lights | & Chime | |
| NOTE:When the “Blind Spot Alert” feature is selected, the Blind Spot Alert feature Provides alerts, visual and/or audible, to indicate objects in your blind spot. The Blind Spot Alert feature can be activated in “Lights” mode. When this mode is selected, the Blind Spot Monitor (BSM) system is activated and only shows a visual alert in the exterior mirrors. When “Lights & Chime” mode is activated, the Blind Spot Monitor (BSM) will show a visual alert in the exterior mirrors as well as an audible alert when the turn signal is on.If your vehicle has experienced any damage in the area where the sensor is located, even if the fascia is not damaged, the sensor may have become misaligned. Take your vehicle to an authorized dealer to verify sensor alignment. Having a sensor that is misaligned results in the BSM not operating to specification. | |||
| HillStartAssist—If Equipped | On Off | ||
| NOTE:When the “Hill Start Assist” feature is selected, the Hill Start Assist (HSA) system is active. | |||
Mirrors&Wipers
After pressing the "Mirrors & Wipers" button on the touchscreen, the following settings will be available:
| SettingNameSelectableOptions | ||
| RainSensingAutoWipers—IfEquipped | On Off | |
| NOTE:When this feature is selected and the wipers are on, the system will automatically activate the windshield wipers if it senses moisture on the windshield. | ||
| TiltSideMirrorsinReverseOn Off | ||
| NOTE:When the “Tilt Side Mirror In Reverse” feature is selected, the exterior sideview mirrors will tilt downward when the ignition is in the RUN position and the transmission gear selector is in the REVERSE position. The mirrors will move back to their previous position when the transmission is shifted out of REVERSE. | ||
| HeadlightswithWipers—IfEquipped | On Off | |
Lights
After pressing the “Lights” button on the touchscreen, the following settings will be available:
| SettingNameSelectableOptions | ||||
| HeadlightOffDelay0 | 3 | 0 | 6 | 0 |
| HeadlightIlluminationOnApproach | 0 | 3 | 0 | 6 |
| HeadlightsWith Wipers—If Equipped | On Off | |||
| AutoDimHigh Beams—If Equipped | On Off | |||
| DaytimeRunning Lights—If Equipped | On Off | |||
| SteeringDirected Lights—If Equipped | On Off | |||
| FlashLightsWith Lock | On Off | |||
414 MULTIMEDIA
Doors&Locks
After pressing the "Doors & Locks" button on the touchscreen, the following settings will be available:
| SettingNameSelectableOptions | |||
| AutoDoorLocks—IfEquipped | On Off | ||
| AutoUnlockOnExitOn Off | |||
| NOTE:When the “Auto Unlocks On Exit” feature is selected, all doors unlock when the vehicle is stopped, the transmission is in the PARK or NEUTRAL position and the driver’s door is opened. | |||
| FlashLightsWithLockOn Off | |||
| NOTE:When the “Flash Lights With Lock” feature is selected, the exterior lights flash when the doors are locked or unlocked with the key fob, or when using the passive entry feature. This feature may be selected with or without the “Sound Horn on Lock” feature selected. | |||
| SoundHornWithLockOff 1st Press 2nd Press | |||
| SoundHornWithRemote Start—IfEquipped | On Off | ||
| 1stPressOfKeyFobUn- locks | Driver Door All Doors | ||
| SettingNameSelectable | eOptions | ||
| NOTE:When "Driver Door" is selected with 1st Press Of Key Fob Unlocks, only the driver's door unlocks with the first press of the key fob unlock button. You must press the key fob unlock button twice to unlock the passenger's doors. When "All Doors" is selected for 1st Press Of Key Fob Unlocks, all doors unlock on the first press of the key fob unlock button.If the vehicle is programmed 1st Press Of Key Fob Unlocks "All Doors," all doors unlock no matter which Passive Entry equipped door handle is grasped. If 1st Press Of Key Fob Unlocks "Driver Door" is programmed, only the driver's door unlocks when the driver's door is grasped. With Passive Entry, if 1st Press Of Key Fob Unlocks "Driver Door" is programmed, touching the handle more than once results in only the driver's door opening. If "Driver Door" is selected, once the driver door is opened, the interior door lock/unlock switch can be used to unlock all doors (or use key fob). | |||
| PassiveEntry—IfEquipped | On Off | ||
| NOTE:The "Passive Entry" feature allows you to lock and unlock the vehicles door(s) without having to push the key fob lock or unlock buttons. To make your selection, press the "Passive Entry" button on the touchscreen, until a check-mark appears next to the setting, showing that the setting has been selected. | |||
416 MULTIMEDIA
| SettingNameSelectableOptions | ||
| PersonalSettingsLinkedToKeyFob—IfEquipped | On Off | |
| NOTE:This feature provides automatic recall of all settings stored to a memory location (driver's seat, exterior mirrors, power steering column position and radio station pre-sets) to enhance driver mobility when entering and exiting the vehicle.The seat returns to the memorized seat location (if Personal Settings Linked to Key Fob is set to on) when the key fob is used to unlock the door. | ||
AutoComfortSystems—IfEquipped
After pressing the "Auto-On Comfort" button on the touchscreen, the following settings will be available:
| SettingNameSelectable | eOptions | ||
| Auto-OnDriverHeated/VentedSeat&Steering Wheel | Off Remote Start | All Starts | |
| NOTE:When this feature is selected the driver's heated seat and heated steering wheel will automatically turn on when temperatures are below 40°F (4.4°C). When temperatures are above 80°F (26.7°C) the driver vented seat will turn on. | |||
KeyOffOptions
After pressing the "Key Off Options" button on the touchscreen, the following settings will be available:
| SettingNameSelectableOptions | ||
| EasyExitSeat—IfEquippedOn Off | ||
| NOTE:When the “Easy Exit Seat” feature is selected, the driver’s seat will automatically move rearward once the engine is shut off. | ||
| KeyOffPowerDelay0 sec 45 sec | ||
| 5 mins 10 mins | ||
| NOTE:When the “Key Off Power Delay” feature is selected, the power window switches, radio, Uconnect Phone system (if equipped), DVD video system (if equipped), power sunroof (if equipped), and power outlets will remain active for up to ten minutes after the ignition is cycled to OFF. Opening either front door will cancel this feature. To change the Key Off Power Delay setting, press the “+” or “-” button on the touchscreen to select your desired time interval, and choose from “0 seconds,” “45 seconds,” “5 minutes” or “10 minutes.” | ||
418 MULTIMEDIA
| SettingNameSelectableOptions | ||
| HeadlightOffDelay0 sec 30 sec | ||
| 60 sec 90 sec | ||
| NOTE:When the “Headlight Off Delay” feature is selected, the driver can choose to have the headlights remain on for 0, 30, 60, or 90 seconds when exiting the vehicle. To change the Headlight Off Delay status press the “+” or “-” button on the touchscreen to select your desired time interval. | ||
Audio
After pressing the "Audio" button on the touchscreen, the following settings will be available:
| SettingNameSelectableOptions | ||
| Balance/Fade“Speaker” Icon Arrow Buttons | ||
| NOTE:The “Balance/Fade” feature allows you to adjust the Balance and Fade settings. Press and drag the speaker icon, use the arrows to adjust, or tap the “Speaker” icon to readjust to the center. | ||
| SettingNameSelectableOptions | ||||
| Equalizer+ | - | |||
| NOTE:The “Equalizer” feature allows you to adjust the Bass, Mid and Treble settings. Adjust the settings with the “+” and “-” setting buttons on the touchscreen or by selecting any point on the scale between the “+” and “-” buttons on the touchscreen.Bass/Mid/Treble allow you to simply slide your finger up or down to change the setting as well as press directly on the desired setting. | ||||
| SpeedAdjustedVol-ume | Off 1 2 3 | |||
| NOTE:The “Speed Adjusted Volume” feature increases or decreases volume relative to vehicle speed. To change the Speed Adjusted Volume press the “Off,” “1,” “2” or “3” button on the touchscreen. | ||||
| SurroundSound—IfEquipped | On Off | |||
| NOTE:The “Surround Sound” feature provides simulated surround sound mode. To make your selection, press the “Sur-round Sound” button on the touchscreen, select “On” or “Off.” | ||||
420 MULTIMEDIA
| SettingNameSelectableOptions | ||
| AUXVolumeOffset—IfEquipped | -3 +3 | |
| NOTE:The “AUX Volume Offset” feature provides the ability to tune the audio level for portable devices connected through the AUX input. To make your selection, press the AUX Volume Match button on the touchscreen, choose a level from -3 to +3. | ||
| AutoPlayOn Off | ||
| NOTE:The “Auto Play” feature allows a media device to begin playing when the media device is plugged in. To make your selection, press the On or Off buttons to activate or deactivate Auto Play. | ||
Phone/BluetoothSettings
After pressing the "Phone/Bluetooth Settings" button on the touchscreen, the following settings will be available:
| SettingNameSelectableOptions |
| DoNotDisturbList of Settings |
| NOTE:Press “Do Not Disturb” to access the available settings. The following settings are: Auto Reply (both, text, call), Auto Reply Message (custom, default), and Custom Auto Reply Message (create message). |
MULTIMEDIA 421
| SettingNameSelectableOptions | ||
| PairedPhonesandAudioSourcesList Of Paired Phones and Audio Sources | ||
| NOTE:The “Paired Phones and Audio Sources” feature shows which phones and audio sources are paired to the Phone and Audio Sources Settings system. For further information, refer to the Uconnect Owner’s Manual Supplement. | ||
| SmartphoneProjectionManagerOn Off | ||
| NOTE:Pressing “Smartphone Projection Manager” feature allows you to see a list of all connected phones and gives you the option to determine which phone will be used for projection (Apple CarPlay or Android Auto). | ||
SiriusXMSetup—IfEquipped
After pressing the "SiriusXM Setup" button on the touchscreen, the following settings will be available:
| SettingNameSelectableOptions | ||
| TuneStartOn Off | ||
| ChannelSkipName of Channel | ||
| NOTE:SiriusXM can be programmed to skip channels. To make your selection, press the “Channel Skip” button on the touchscreen, select the channels you would like to skip. | ||
422 MULTIMEDIA
| SettingNameSelectableOptions |
| SubscriptionInformationSubscription Info |
| NOTE:New vehicle purchasers or lessees will receive a free limited time subscription to SiriusXM Satellite Radio with your radio. Following the expiration of the free services, it will be necessary to access the information on the Subscription Information screen to re-subscribe.1. Press the “Subscription Info” button on the touchscreen to access the Subscription Information screen.2. Write down the SIRIUS ID numbers for your receiver. To reactivate your service, either call the number listed on the screen or visit the provider online.SiriusXM Travel Link is a separate subscription. |
Reset
After pressing the "Reset" button on the touchscreen, the following settings will be available:
| SettingNameSelectableOptions | |||
| ResetAppDrawertoDefault | OK Cancel | ||
| RestoreAppsOK Cancel | |||
| RestoreSettingstoDefaultOK | Cancel X | ||
| SettingNameSelectable | Options | ||
| NOTE:When this feature is selected, it will reset all of the radio features to their default settings. To restore the settings to their default setting, press the “Restore Settings” button on the touchscreen. A pop-up will appear asking "Are you sure you want to reset your settings to default?" | |||
| ClearPersonalDataOK Cancel X | |||
| NOTE:When this feature is selected, it will remove all personal data including Bluetooth devices and presets. To remove personal information, press the “Clear Personal Data” button and a pop-up will appear asking "Are you sure you want to clear all personal data?" | |||
| ModemResetOK Cancel | |||
SystemInformation
After pressing the "System Information" button on the touchscreen, the following settings will be available:
| SettingNameSelectableOptions | |
| SoftwareLicenseSystem Software Information Screen | |
| NOTE:When the “Software License” feature is selected, a “System Software Information” screen will appear, displaying the system software version. You can also update your maps with a USB device. Please see your authorized dealer for further information. | |
PERFORMANCE PAGES — IF EQUIPPED
Performance Pages is an application that provides a display for performance indicators, as received from the instrument cluster, that will help you gain familiarity with the capabilities of your vehicle in real-time.
To access the Performance Pages, press the "Apps" button on the touchscreen then press the "Performance Pages" button on the touchscreen. Press the desired button on the touchscreen to access that specific Performance Page.
WARNING!
MeasurementofvehiclestatisticswiththePerformancePagesisintendedforoff-highwayoroff-road useonlyandshouldnotbedoneonanypublic roadways.Itisrecommendedthatthesefeaturesbe usedinacontrolledenvironmentandwithinthelimits ofthelaw.Thecapabilitiesofthevehicleasmeasured bythePerformancePagesmustneverbeexploitedina recklessordangerousmanner,whichcanjeopardize theuser'ssafetyorthesafetyofothers.Onlyasafe, attentive,andskillfuldrivercanpreventaccidents.
The Performance Pages include the following:
•Home
- Timers
•Gauges
•G-Force
•Engine
•Dyno
If a USB drive is installed in the media hub, press the Camera icon on the top right of the touchscreen when using Performance Pages. A screen shot of the page will be taken and saved onto the USB.
The following describes each feature and its operation:
Home
text_image
68° 7:07 71° SRT Performance Pages Modes Home Timers Gauges G-Force Engine Dyno 240° 140 330 Oil Temp Best 220 FT FROM 128 MI Braking Distance Best 5.21 SEC 0-60 Timer Best 9.41 SEC 0-100 Timer Media Controls Climate Apps Drive Mode Phone PartPagePerformancePages—Home
When Home is selected, a series of widgets (gauges) can be customized by the user. Follow these steps to change a widget:
-
Press any of the gauges to change them.
-
Press the pencil icon and select the following option from the menu:
-
Set Widget: Top Left
- Set Widget: Top Right
- Set Widget: Bottom Left
-
Set Widget: Bottom Right
-
After selecting a Widget location: select the gauge to display:
•Gauge: Oil Temp
•Gauge: Oil Pressure
•Gauge: Coolant Temp
•Gauge: Battery Voltage
•Gauge: Trans Temp — If Equipped with an Automatic Transmission
•Gauge: Boost Pressure — If Equipped
•Gauge: Air/Fuel Ratio — If Equipped
•Gauge: I/C Coolant Temp — If Equipped
•Gauge: Intake Air Temp
•Gauge: Engine Torque
•Gauge: Engine Power
•Gauge: G-Force
•Gauge: Steering Angle
426 MULTIMEDIA
•Gauge: Current Gear
•Gauge: Current Speed
- Timer: 0-60 MPH
- Timer: 0-100 MPH
- Timer: 1/8 Mile
- Timer: 1/4 Mile
- Timer: Brake Distance
- Timer: Reaction Time
Timers
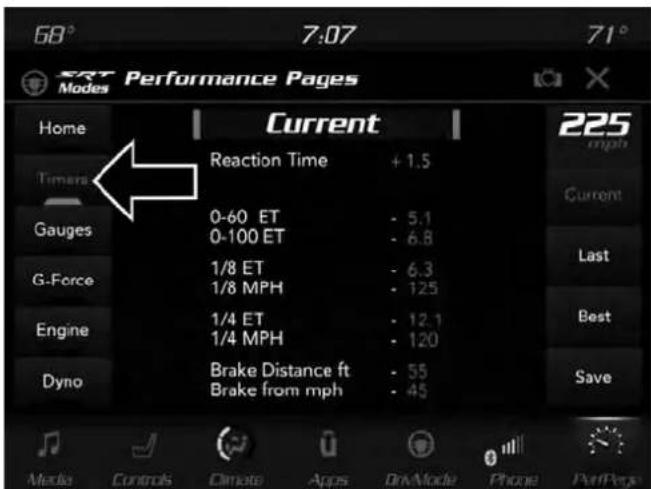
text_image
68° 7:07 71° ERT Modes Performance Pages Home Current 225 mph Timers Reaction Time +1.5 Current Gauges 0-60 ET - 5.1 0-100 ET - 6.8 Last G-Force 1/8 ET - 6.3 1/8 MPH - 125 Engine 1/4 ET - 12.1 1/4 MPH - 120 Dyno Brake Distance ft - 55 Brake from mph - 45 Best Save Models Controls Dimote Apps DrvMode Phone PerfPageWhen the Timers Page is selected, you will be able to select from following "Tickets":
- Current
Pressing the "Current" button displays a "real time" summary of performance timers.
• Last
Pressing the "Last" button displays the last recorded run of performance timers.
•Best
Pressing the "Best" button displays the best recorded run of performance timers, except for braking data.
- Save
Pressing the "Save" button will let you save the visible page, current/last/best. Any saved run over ten will overwrite the last saved run for Uconnect System storage. The operation of the Save feature is listed below:
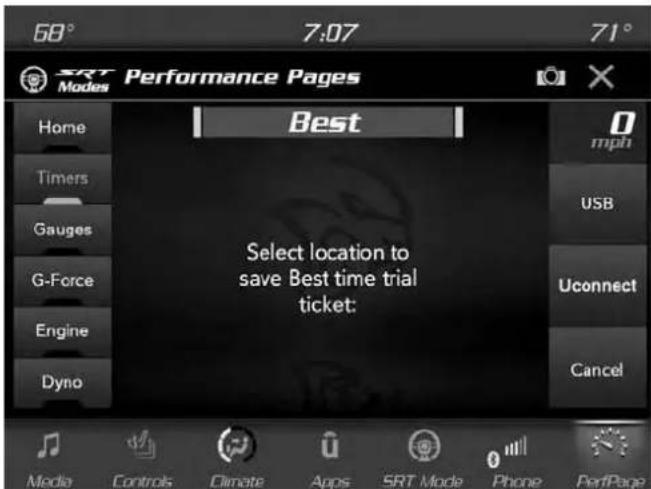
text_image
68° 7:07 71° SRT Modes Performance Pages Home Best 0 mph Timers Select location to save Best time trial ticket: Gauges USB G-Force Uconnect Engine Cancel Dyno Media Controls Climate Apps SRT Mode Phone PerfPagePerformancePages—Save
- With a USB jump drive installed, press the "USB" button to save to the jump drive.
- Press the "Uconnect" button to save the runs to the Owner web page.
- Press the "Cancel" button to view the last timer "Ticket".
428 MULTIMEDIA
The "Tickets" contain the timers listed below:
- ReactionTime
Measures the driver's reaction time for launching the vehicle against a simulated drag strip timing light (behavior modeled after 500 Sportsman Tree) displayed in the instrument cluster display.
NOTE: The Reaction Time, MPH, 18 and 14 Mile timers will be “ready” when the vehicle is at 0 MPH (0 km/h).
- 0-60MPH(0-100km/h)
Displays the time it takes for the vehicle to go from 0 to 60 mph (0 to 100 km/h).
- 0-100MPH(0-160km/h)
Displays the time it takes for the vehicle to go from 0 to 100 mph (0 to 160 km/h).
• 18 Mile(200meter)ET
Displays the time it takes for the vehicle to go an 18 mile (200 meters).
• ^1/_8 Mile(200meter)MPH
Displays the vehicle speed at the time 18 mile (200 meters) was reached.
• ^1/_4 Mile(400meter)ET
Displays the time it takes for the vehicle to go 14 mile (400 meters).
• ^1/_4 Mile(400meter)MPH
Displays the speed the vehicle was at when 14 mile (400 meters) was reached.
- BrakeDistanceft
Displays the distance it takes the vehicle to make a full stop.
NOTE: The distance measurement will be aborted if the brake pedal is released or the parking brake is engaged, before the vehicle comes to a complete stop.
- BrakefromMPH
Displays the speed the vehicle is traveling when the brake pedal is pressed.
NOTE: Brake Distance and Speed timers only displays "ready" when vehicle is traveling at greater than 30 MPH (48 km/h).
Gauges
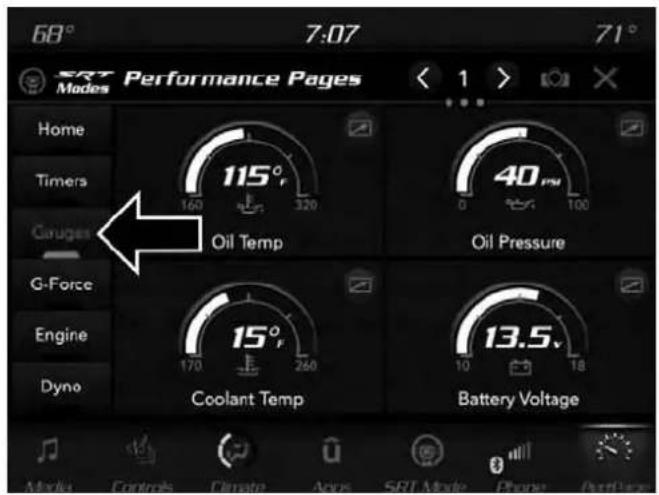
text_image
68° 7:07 71° SRT Performance Pages Modes Home Timers Gauges G-Force Engine Dyno 115° 160 320 Oil Temp 40 psm Oil Pressure 15° 170 260 Coolant Temp 13.5v Battery Voltage Media Controls Climate Area SRL Audio Power OutlinePerformancePages—Gauges
When selected, this screen displays the following values:
- OilTemperature
Shows the actual oil temperature.
- OilPressure
Shows the actual oil pressure.
MULTIMEDIA 429
- CoolantTemperature
Shows the actual coolant temperature.
- BatteryVoltage
Shows the actual battery voltage
•TransOilTemp—IfEquippedwithanAutomatic Transmission
Shows the actual transmission oil temperature.
- BoostPressure—IfEquipped
Shows current air fuel ratio
• I/CCoolantTemp—IfEquipped
- IntakeAirTemperature
Shows the actual intake air temperature.
If a gauge is selected, the Gauge Detail View page will appear on the screen. This page shows further information on the selected gauge.
430 MULTIMEDIA
Press the left and right arrows will cycle through the details for each of the gauges. Pressing the minimize button above the graph will return to the gauge menu.
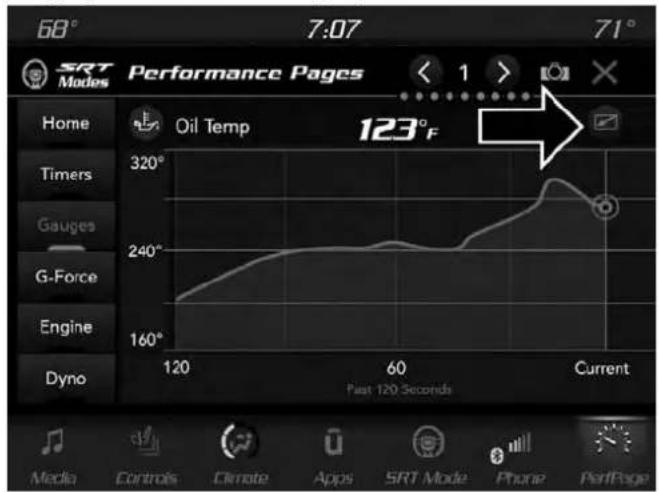
text_image
68° 7:07 71° SRT Modes Performance Pages Home Oil Temp 123°F Timers Gauges G-Force Engine Dyno Past 120 Seconds Current Media Controls Climate Apps SRT Mode Phone PerfPageGaugeDetailViewPage
G-Force
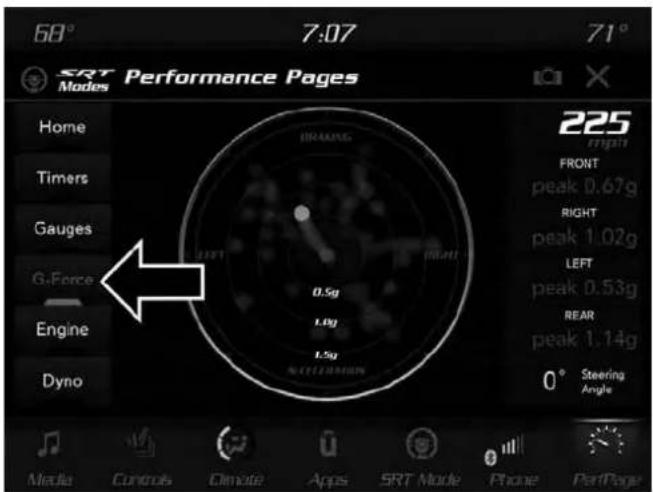
text_image
68° 7:07 71° SRT Modes Performance Pages Home Timers Gauges G.Force Engine Dyno 225 High FRONT peak 0.67g RIGHT peak 1.02g LEFT peak 0.53g REAR peak 1.14g 0° Steering Angle Media Controls Climate Apps SRT Mode Phone PartPageG-Force
When selected, this screen displays all four G-Force values as well as steering angle.
When G-Force is selected, the following features will be available:
- VehicleSpeed:
Measures the current speed of the vehicle in either mph or km/h, starting at zero with no maximum value.
- FrontG-Force:
Measures the deceleration force present on the driver during a braking maneuver.
• RightG-Force:
Measures the force pulling toward the right during a left turn maneuver.
- LeftG-Forces:
Measures the force pulling toward the left during a right turn maneuver.
•RearG-Forces:
Measures the acceleration force present on the driver.
NOTE: Front, Right, Left, and Rear G-Froces are all peak values. These readings can be reset by clearing peak G-Force on the instrument cluster
- SteeringWheelAngle:
Steering Wheel Angle utilizes the steering angle sensor to measure the degree of the steering wheel relative to zero. The zero degree measurement indicates a steering wheel straight ahead position. When the steering angle value is negative, this indicates a turn to the left, and when the steering angle value is positive, a turn to the right.
The friction circle display shows instantaneous G-Force as a highlight and previous G-Force as dots within the circle. The system records previous G-Force for three minutes. If there are multiple samples at a given point, the color of the dot will darken from blue to red. Vectors more frequent will show in red; infrequent vectors will show in blue.
432 MULTIMEDIA
Engine
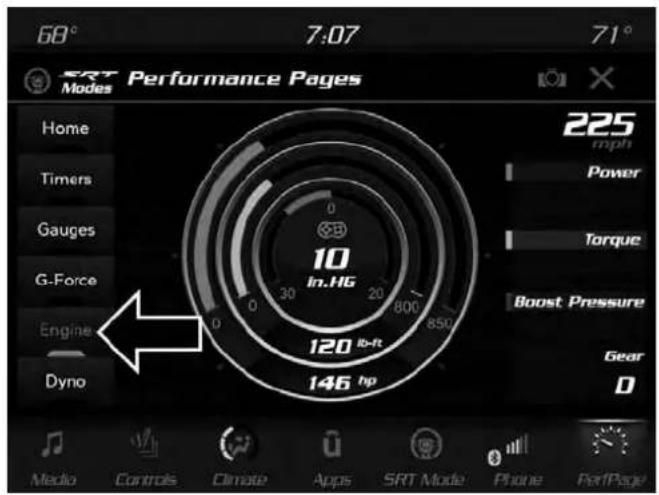
text_image
68° 7:07 71° SRT Modes Performance Pages Home 225 mph Timers Power Gauges Torque G-Force Boost Pressure Engine Gear Dyno 10 In.HG 120 Ib-Rt 146 hp D Media Controls Climate Apps SRT Mode Phone PerfPageEngine
When selected, this screen displays the following values:
- VehicleSpeed
Shows the actual vehicle speed.
- EnginePower
Shows the instantaneous power.
- EngineTorque
Shows the instantaneous torque.
• Gear(AutomaticTransmissionOnly)
Shows the current (or pending) operating gear of the vehicle.
- BoostPressure—IfEquipped
The system will start drawing graphs for Power and Torque. The graph will fill to the right side of the page (based on History time selected). Once the right side of the page is reached, the graph will scroll with the right side always being the most recent recorded sample.
The following options can be selected:
- Pressing the STOP button will freeze the graph. Selecting Play will clear the graph and restart the process over
- Press the "+" or "-" buttons to change the history of the graph. The selectable options are 30, 60, 90, 120 seconds. The graph will expand or constrict depending on the setting selected.
- Select the "Gear" display setting to turn the graph gear markers on and off.
NOTE: The Gear on/off feature will only display if your vehicle is equipped with an Automatic Transmission.
434 MULTIMEDIA
SRT DRIVE MODES
KeyFob6.2LSuperchargedEngine—IfEquipped
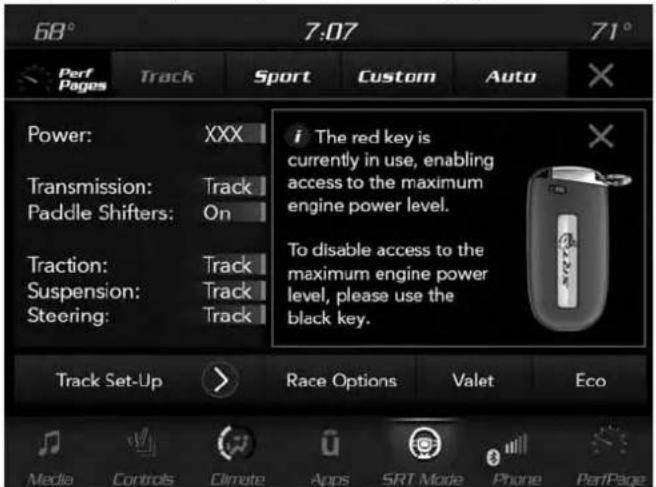
text_image
68° 7:07 71° Perf Pages Track Sport Custom Auto Power: XXX Transmission: Track Paddle Shifters: On Traction: Track Suspension: Track Steering: Track i The red key is currently in use, enabling access to the maximum engine power level. To disable access to the maximum engine power level, please use the black key. Track Set-Up > Race Options Valet Eco Media Controls Climate Apps SRT Mode Phone PerfPageRedKeyFob
NOTE: Your vehicle's Horsepower may vary based upon trim levels and calibration, as indicated on the radio screen by "XXX." Refer to the chart below for your vehicle's specifications:
| VehicleHorsepower | |
| Charger6.2L707 | |
| Challenger6.2L717 | |
| Challenger6.2LHighOutput797 |
If your vehicle is equipped with the 6.2L supercharged engine, it will support an additional engine power level configuration as part of SRT Drive Modes. Use of the red key fob unlocks the full potential of the engine's output, and allows the driver to select from two power levels within SRT Mode Set-Up.
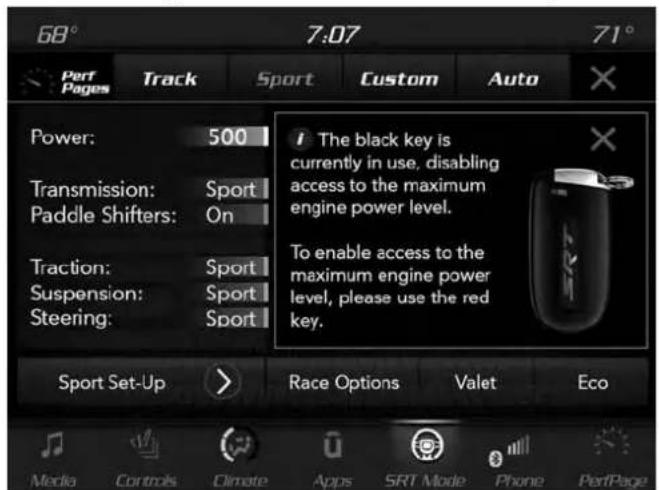
text_image
68° 7:07 71° Perf Pages Track Sport Custom Auto Power: 500 Transmission: Sport Paddle Shifters: On Traction: Sport Suspension: Sport Steering: Sport The black key is currently in use. disabling access to the maximum engine power level. To enable access to the maximum engine power level, please use the red key. Sport Set-Up > Race Options Valet Eco Media Controls Climate Apps SRT Mode Phone PerfPageBlackKeyFob
Use of the black key fob limits the driver to a reduced engine output. This information is also available within the SRT Drive Modes interface, and can be accessed by pressing the "KEY FOB" button on the touchscreen in the SRT Drive Modes menu.
DriveModes
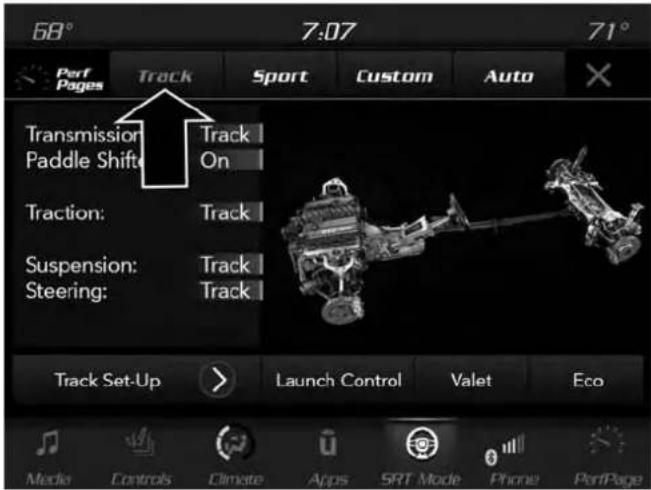
text_image
68° 7:07 71° Perf Pages Track Sport Custom Auto Transmission Paddle Shift Track On Traction: Track Suspension: Steering: Track Track Launch Control Valet Eco Mode Controls Climate Apps SRT Mode Phone PerfPageDriveModes
Your SRT vehicle is equipped with a Drive Modes feature which allows for coordinating the operation of various vehicle systems depending upon the type of driving behavior desired. The Drive Modes feature is controlled
through the Uconnect system and may be accessed by performing any of the following:
- Pushing the SRT button on the instrument panel switch bank.
- Selecting "SRT Modes" from the "Apps" menu.
- Selecting "Drive Modes" from within the Performance Pages menu.
NOTE: Not all options listed in this manual are available on every vehicle. Refer to the chart below for all available Drive Mode vehicle configurations.
| Engine/Transmission | RedKey/700+to717/797HP | BlackKey/500HP | Transmission | Paddle Shifters | Suspension | Steering-If Equipped | Traction |
| 6.2L MTX X | X N/A N/A X | X | |||||
| 6.2L ATX | X | X | X | X | X | If Equipped | X |
The SRT Drive Modes main screen displays the current drive mode and real-time status of the vehicle's performance configuration. The selectable Drive Modes buttons are Track, Sport, Custom, or Auto and will be highlighted when displaying the current configuration. Information shown below each drive mode button will indicate the actual status of each system, along with a graphic that displays the status of the vehicle's components. The color red indicates "Track," orange "Sport," and yellow "Street."
If the system status shown does not match the current drive mode set up, a message will be displayed indicating which values are not matching the current mode and why.
NOTE: ESC Full-Off can be activated across all of the Drive Mode features by pushing and holding the ESC Off button on the instrument panel switch bank for five seconds.
Listed below are the available Drive Modes:
Track Mode
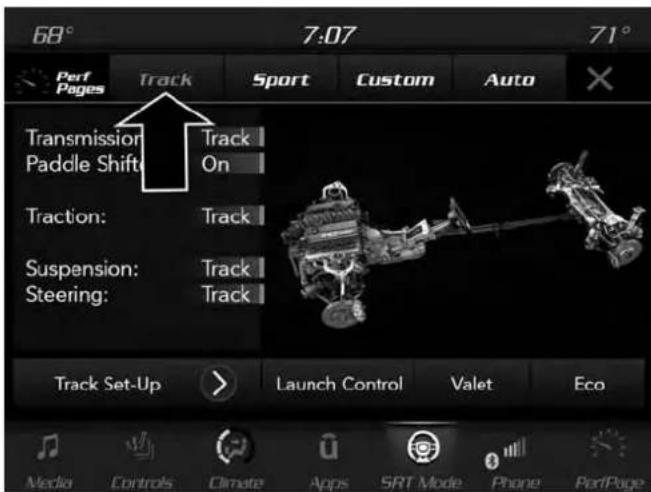
text_image
68° 7:07 71° Perf Pages Track Sport Custom Auto Transmission Paddle Shift Track On Traction: Track Suspension: Steering: Track Track Launch Control Valet Eco Media Controls Climate Apps SRT Mode Phone PerfPageDriveModes(Track)
Pressing the "Track" button on the touchscreen will activate the configuration for typical track driving. The Transmission, Traction, Steering, and Suspension systems are all set to their "Track" settings highlighted in red. The Paddle Shifters are enabled.
MULTIMEDIA 437
Sport Mode
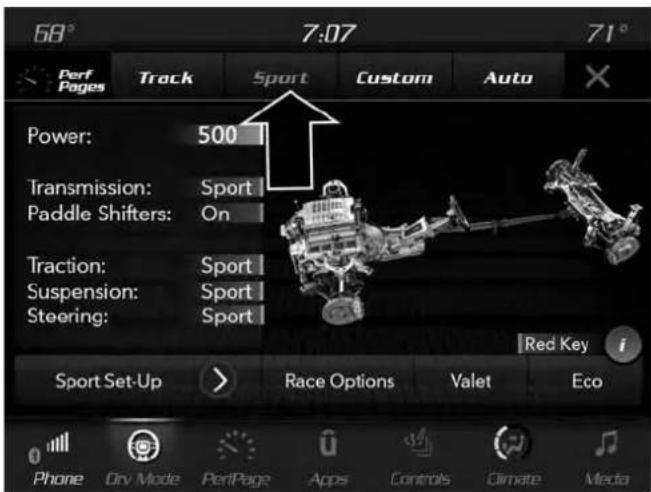
text_image
68° 7:07 71° Perf Pages Track Sport Custom Auto Power: 500 Transmission: Sport Paddle Shifters: On Traction: Sport Suspension: Sport Steering: Sport Red Key i Sport Set-Up > Race Options Valet Eco Phone Dir Mode PerfPage Apps Controls Climate MediaDriveModes(Sport)
Pressing the "Sport" button on the touchscreen will activate the configuration for typical enthusiast driving. The Traction, Transmission, Steering, and Suspension systems are all set to their "Sport" settings highlighted in orange. The Paddle Shifters are enabled.
438 MULTIMEDIA
Auto Mode
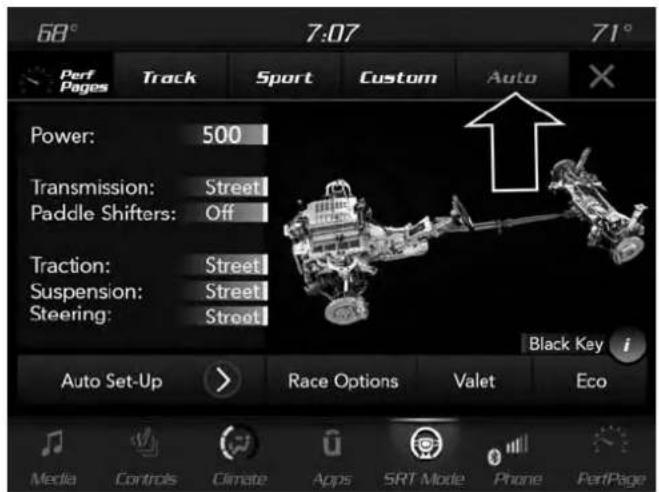
text_image
68° 7:07 71° Perf Pages Track Sport Custom Auto Power: 500 Transmission: Street Paddle Shifters: Off Traction: Street Suspension: Street Steering: Street Black Key i Auto Set-Up > Race Options Valet Eco Media Controls Climate Apps SRT Mode Phone PerfPageAutoMode
This mode is for typical driving conditions where the Traction and Transmission will be operating in their Street settings, which cannot be changed while in this mode. The Steering and Suspension can be configured in either the "Street," "Sport," or "Track" modes and the Paddle Shifters may be enabled or disabled while in this mode.
NOTE: If Valet Mode is active, the vehicle will start in Valet Mode, not Auto Mode.
Custom Mode
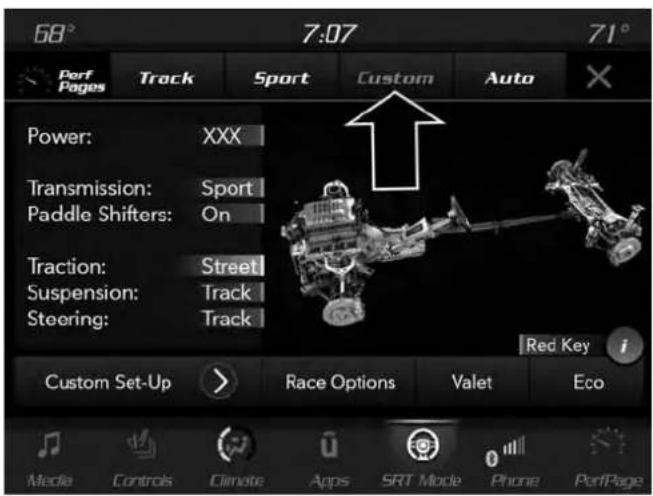
text_image
68° 7:07 71° Perf Pages Track Sport Custom Auto Power: XXX Transmission: Sport Paddle Shifters: On Traction: Street Suspension: Track Steering: Track Red Key i Custom Set-Up Race Options Valet Eco Media Controls Climate Apps SRT Mode Phone PerfPageCustomMode
If your vehicle is equipped with a 6.4L engine, the Custom Mode may be selected quickly by pushing the SRT button on the instrument panel switch bank two times, or pressing the "Custom" button on the touchscreen. Custom Mode allows you to create a custom configuration that is saved for quick selection of your favorite settings. While in Custom Mode, the Power, Traction, Transmission, Steering, Suspension, and Paddle Shifter settings are shown in their current configuration.
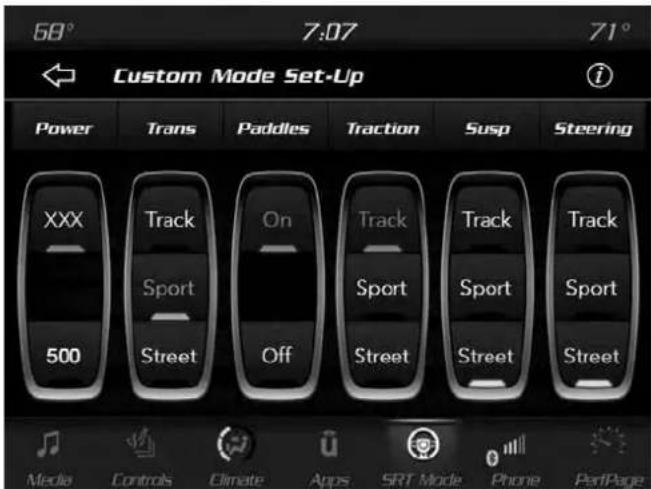
text_image
68° 7:07 71° ← Custom Mode Set-Up Power Trans Paddles Traction Susp Steering XXX Track On Track Track Track Sport Sport Sport 500 Street Off Street Street Street Media Controls Climate Apps SRT Mode Phone PerfPageCustomModeSet-Up—6.2LExample
While in the Custom Drive Mode screen, press the "Custom Set-Up" button on the touchscreen to access the selectable options. In the Custom Mode Set-Up screen, the individual current configuration will be displayed. Select which mode suits your driving needs for a custom driving experience.
440 MULTIMEDIA
DriveModeSet-UpInfo
Within the Drive Modes Set-Up screen, press the left / right arrows to scroll through all the available Drive Modes systems giving you a description of their operation and current configuration. The last page is a description of the Mode you are currently in.
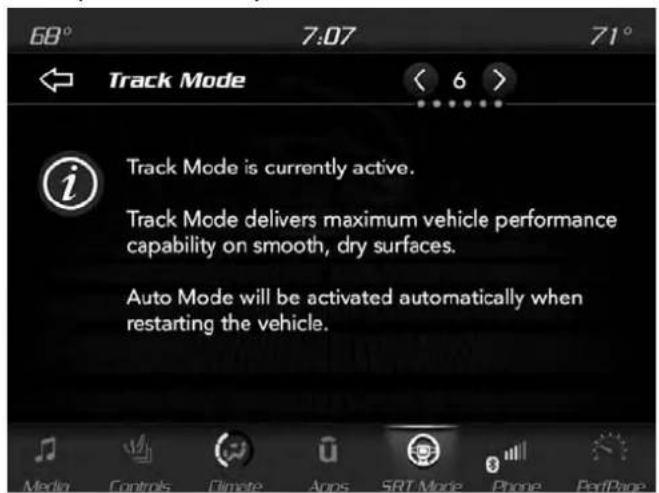
text_image
68° 7:07 71° Track Mode i Track Mode is currently active. Track Mode delivers maximum vehicle performance capability on smooth, dry surfaces. Auto Mode will be activated automatically when restarting the vehicle.TrackModeInfo
Power—IfEquippedWith6.2LSupercharged Engine

text_image
68° 7:07 71° Power XXX: Modifies the power output of the engine to XXX XXX: Modifies the power output of the engine to XXX Media Controls Climate Apps SRT Mode Phone PerfPagePower—6.2LSuperchargedEngineOnly
The screen above modifies the Horsepower between the two settings based off customer preference.
NOTE: The higher Horsepower rating is only available when using the Red Key.
Transmission
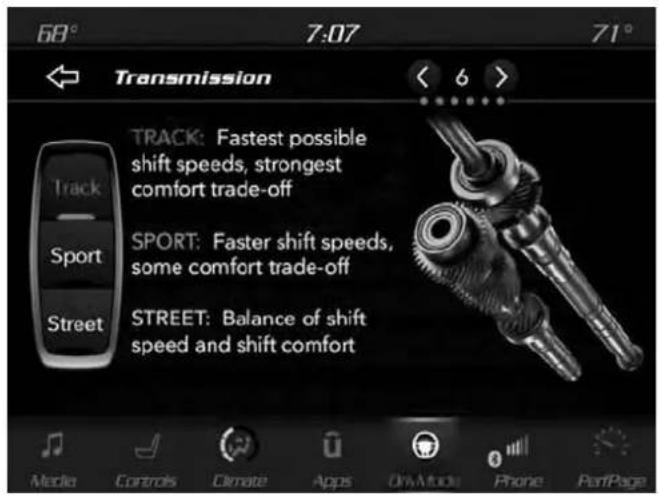
text_image
68° 7:07 71° Transmission Track: Fastest possible shift speeds, strongest comfort trade-off Sport: Faster shift speeds, some comfort trade-off Street: Balance of shift speed and shift comfortTransmission
- Track
Press the "Track" button on the touchscreen to provide the fastest shift speeds and will have the highest comfort trade-off.
•Sport
Press the "Sport" button on the touchscreen to provide faster shift speeds and will have a moderate comfort trade-off.
• Street
Press the "Street" button on the touchscreen to provide a balance of shift speed and comfort for typical daily driving.
442 MULTIMEDIA
PaddleShifters
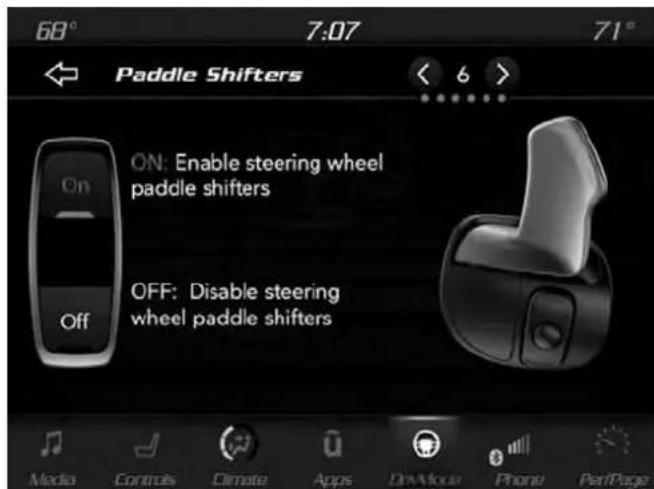
text_image
68° 7:07 71° Paddle Shifters ON: Enable steering wheel paddle shifters OFF: Disable steering wheel paddle shifters Media Controls Climate Apps DrawMou Phone PartPagePaddleShifters
• ON
Press the "ON" button on the touchscreen to enable steering wheel paddle shifters.
• OFF
Press the "OFF" button on the touchscreen to disable steering wheel paddle shifters.
Traction
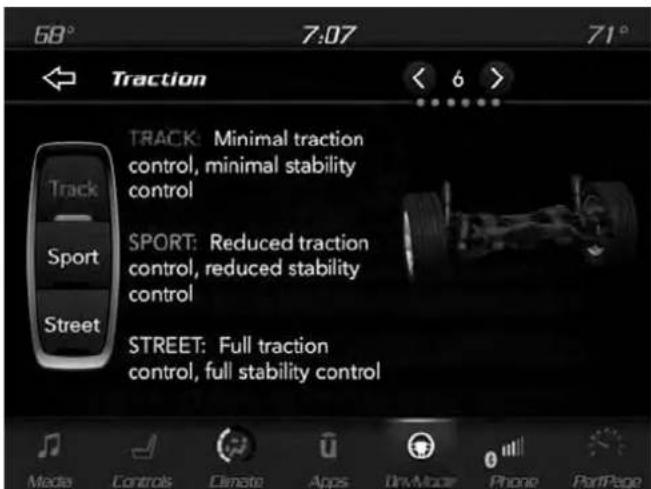
text_image
68° 7:07 71° Traction TRACK: Minimal traction control, minimal stability control Track Sport Street SPORT: Reduced traction control, reduced stability control STREET: Full traction control, full stability controlTraction
-Track
Press the "Track" button on the touchscreen to modify traction control to optimize track performance with the least stability control.
•Sport
Press the "Sport" button on the touchscreen to turn off traction control and reduce stability control.
• Street
Press the "Street" button on the touchscreen to provide full traction control and full stability control.
MULTIMEDIA 443
Suspension
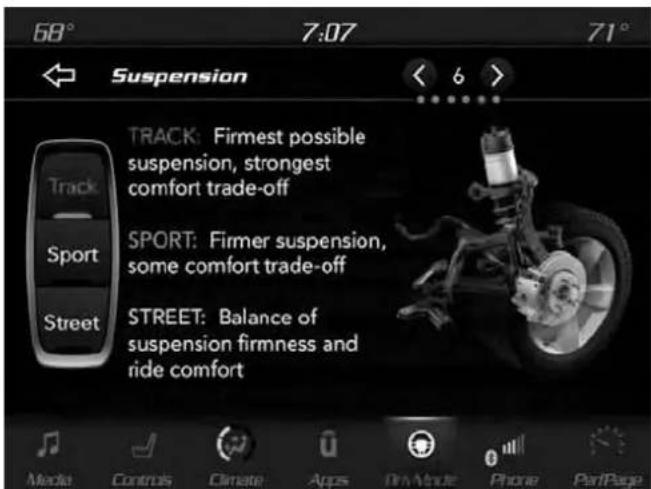
text_image
68° 7:07 71° Suspension TRACK: Firmest possible suspension, strongest comfort trade-off SPORT: Firmer suspension, some comfort trade-off STREET: Balance of suspension firmness and ride comfort Track Sport Street Media Controls Climate Apps DrawAute Phone PartPageSuspension
- Track
Press the "Track" button on the touchscreen to provide the firmest possible suspension stiffness with the highest amount of comfort trade-off.
444 MULTIMEDIA
•Sport
Press the "Sport" button on the touchscreen to provide a firmer suspension stiffness with moderate comfort trade-off.
• Street
Press the "Street" button on the touchscreen to provide a balance of suspension stiffness and ride comfort for typical daily driving.
Steering—IfEquipped
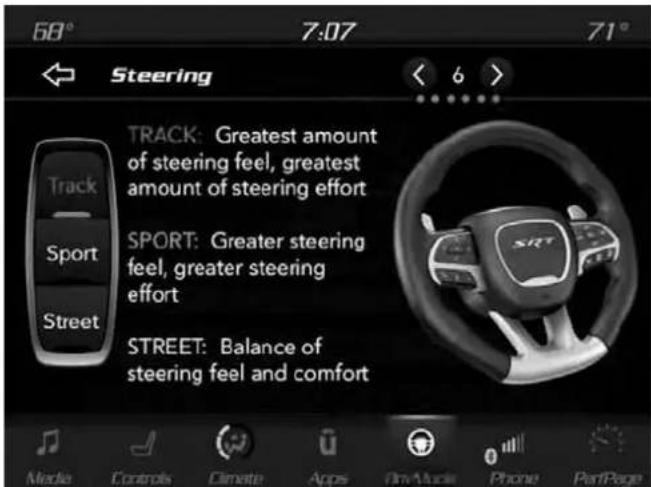
text_image
68° 7:07 71° Steering TRACK: Greatest amount of steering feel, greatest amount of steering effort SPORT: Greater steering feel, greater steering effort STREET: Balance of steering feel and comfort Track Sport Street Media Controls Climate Apps Fin+Audio Phone PartPageSteering
- Track
Press the "Track" button on the touchscreen to adjust the steering effort to the highest level.
•Sport
Press the "Sport" button on the touchscreen to adjust the steering effort to the higher level.
• Street
Press the "Street" button on the touchscreen to adjust the steering effort to the lowest level.
RACE OPTIONS
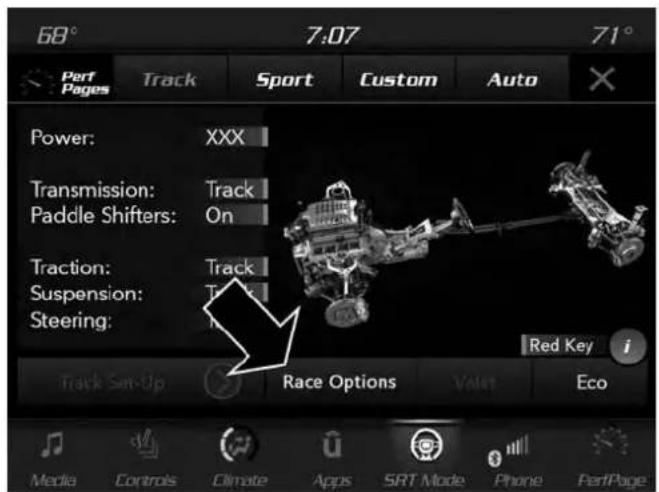
text_image
68° 7:07 71° Perf Pages Track Sport Custom Auto Power: XXX Transmission: Track Paddle Shifters: On Traction: Track Suspension: Steering: Red Key i Track Set-Up Race Options Voice Eco Media Controls Climate Apps SRT Mode Phone PerfPageRaceOptions
Press the "Race Options" button on the touchscreen while in the Drive Modes screen, to display the vehicle's Launch Control screen. Within Race Options, you can activate, deactivate, and adjust the RPM values for the Launch Control, Shift Light, Line Lock, Race Cooldown, and Chiller (if equipped with a 6.2L High Output engine) features.
Launch Control
WARNING!
LaunchModeisintendedforoff-highwayoroff-road useonlyandshouldnotbeusedonanypublic roadways.Itisrecommendedthatthisfeaturebeused inacontrolledenvironment,andwithinthelimitsof thelaw.Thecapabilitiesofthevehicleasmeasuredby theperformancepagesmustneverbeexploitedina recklessordangerousmanner,whichcanjeopardize theuser'ssafetyorthesafetyofothers.Onlyasafe, attentive,andskillfuldrivercanpreventaccidents.
WARNING!
ALWAYSdrivesafelyandpayattentiontotheroad. ALWAYSdrivesafelywithyourhandsonthesteering wheel.Youhavefullresponsibilityandassumeall risksrelatedtotheuseofthefeaturesandapplications inthisvehicle.Onlyusethefeaturesandapplications whenitissafetodoso.Failureretodosomayresultin anaccidentinvolvingseriousinjuryordeath.
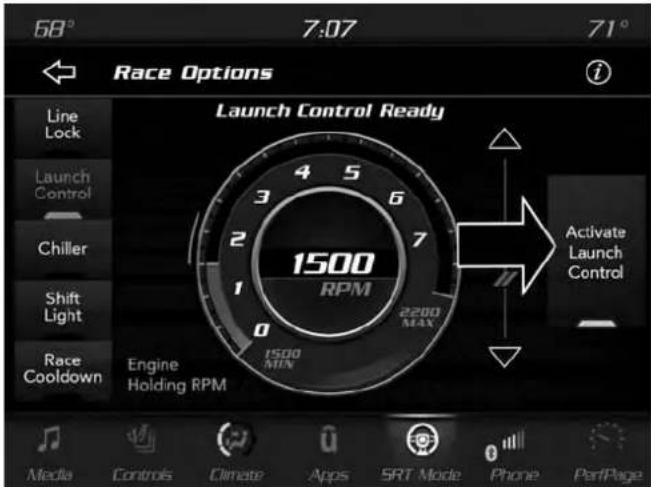
text_image
68° 7:07 71° Race Options Launch Control Ready Line Lock Launch Control Chiller Shift Light Race Cooldown Engine Holding RPM 1500 RPM 2200 MAX 1500 MIN Activate Launch Control Media Controls Climate Apps SRT Mode Phone PerfPageActivateLaunchControl
Launch Control can be accessed by pushing the Launch Control button on the instrument panel switch bank or pressing the SRT button on the instrument panel switch bank then selecting the "Race Options" button on the touchscreen. Press the "Activate Launch Control" button on the touchscreen to activate the feature. Use the "Launch RPM Set-Up" vertical bar to set the holding RPM. Launch Mode can be turned on or off by either pushing the Launch
Control button on the instrument panel switch bank (if activated), or by pressing the "Cancel Launch Mode" button on the touchscreen.
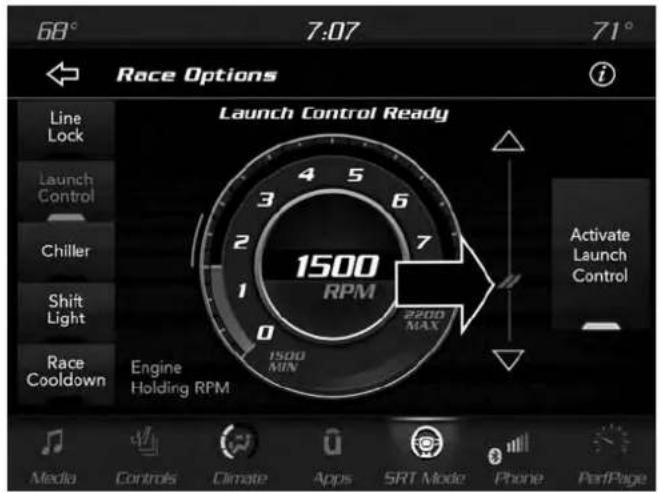
text_image
68° 7:07 71° Race Options i Line Lock Launch Control Ready 2 3 4 5 6 7 1500 RPM 2200 MAX Chiller Shift Light Race Cooldown Engine Holding RPM 1500 MIN Activate Launch Control Media Controls Climate Apps SRT Mode Phone PerfPageLaunchRPMSet-Up
To adjust the Launch RPM, drag the slider bar or press the arrows on the touchscreen to adjust the holding RPM. The launch RPM limit will display digitally on the gauge.
Chiller-IfEquipped
The Chiller feature will be enabled any time the vehicle is in TRACK drive mode.
NOTE: Chiller is only functional in ambient temperatures above 55 degrees Fahrenheit (13 degrees Celsius). On vehicles equipped with a 6.2L High Output engine, the Chiller feature will not be not available.
LineLock-IfEquipped
This feature is used to turn Line Lock on or off. Follow instruction on Line Lock usage in the instrument cluster.
448 MULTIMEDIA
Shift Light
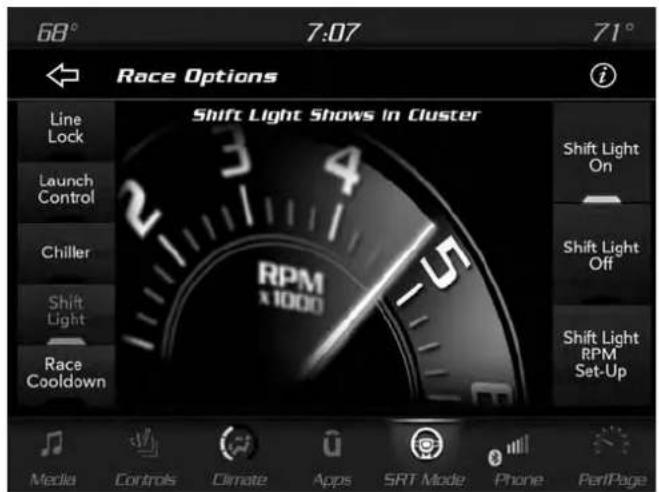
text_image
68° 7:07 71° Race Options i Shift Light Shows in Cluster Line Lock Launch Control Chiller Shift Light Race Cooldown 2 3 4 RPM x1000 Shift Light On Shift Light Off Shift Light RPM Set-Up Media Controls Climate Apps SRT Mode Phone PartPageShiftLight
To actuate the Shift Light feature, press the "Shift Light" button on the touchscreen, and then press the "Shift Light On" button on the touchscreen. Activation is shown on the instrument cluster display. Pressing the "Shift Light RPM Set-Up" button on the touchscreen will take you to the Shift Light RPM Set-Up screen.
NOTE: The only time the shift light comes on, is when the shifter is placed into Sport Mode. It will not work with paddle shifters.
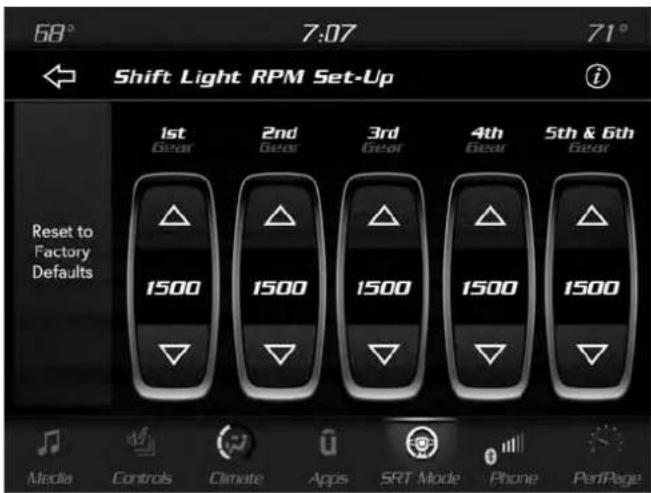
text_image
68° 7:07 71° Shift Light RPM Set-Up Reset to Factory Defaults 1st Gear 2nd Gear 3rd Gear 4th Gear 5th & 6th Gear 1500 1500 1500 1500 1500 Media Controls Climate Apps SRT Mode Phone PerfPageShiftLightRPMSet-Up
The Shift Light RPM Set-Up allows you to set the shift light to actuate for gears 1, 2, 3, 4, and 5-8. By pressing and releasing the up/down arrow buttons on the touchscreen above and below each listed gear, the RPM values will
change in increments of 250 RPM. Pressing and holding the arrows will change the RPM values in increments of 500 RPM, ranging from 2000–6000 RPM (6.2L) and 2000–6250 (6.2L High Output). The Shift Light setup screen may only be accessed if the feature is enabled. Press the "Reset to Factory Default" button on the touchscreen to change back to factory settings, or press the "Shift Light Off" button on the touchscreen to turn the system off completely.
Race Cooldown — If Equipped
Race Cooldown is a selectable After-Run Cooling Feature.
Race Cooldown is a feature activated by selecting the Race Cooldown button under Race Options within the Drive Modes pages.
To enable this feature, the vehicle will check to ensure the engine is off, the hood is closed, the status of the battery and system are good, and determine if cooling is required.
After making a pass down the drag strip, this feature helps cool the car after the engine has been shut down. The radiator fan and low temperature radiator coolant pump remain on after engine shutdown for a period up to 10 minutes or until target temperature is reached.
A graph in the radio can show the resulting intercooler coolant temperature in real time while the vehicle ignition is in run position with the engine off.
NOTE: Race Cooldown feature (After-Run) will only come on with engine off. The temperature will display with engine running also, but After-Run Cooling will not be functioning.
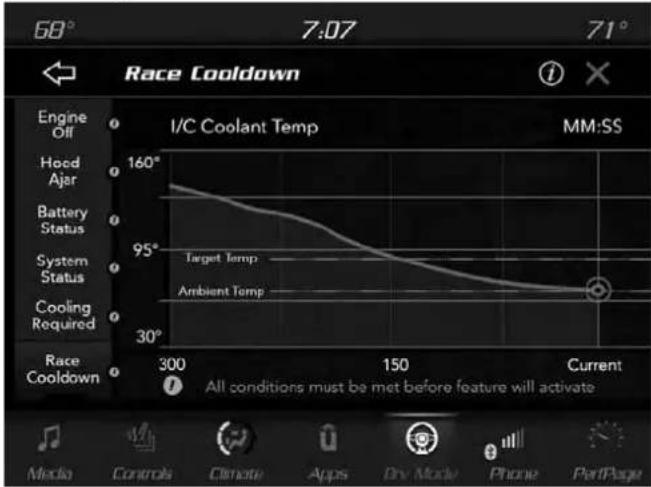
text_image
68° 7:07 71° Race Coldown Engine Off Hood Ajar Battery Status System Status Cooling Required Race Coldown I/C Coolant Temp MM:SS 160° 95° 30° Target Temp Ambient Temp 300 300 150 Current All conditions must be met before feature will activate Media Controls Climate Apps Dry Mode Phone PartPageRaceCooldown
450 MULTIMEDIA
This feature will automatically deactivate after extended driving at road speeds, or when one or more of the following conditions apply:
- If coolant temperatures reaches the target temperature and cooling is no longer required.
- If battery voltage or state of charge drops below a threshold.
• The hood is opened.
VALET MODE
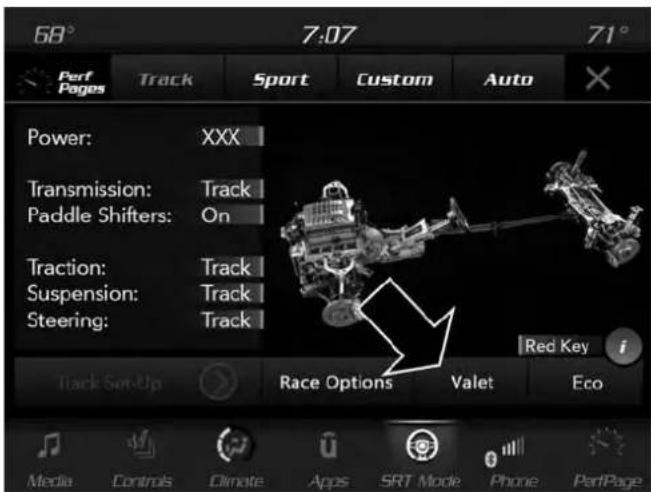
text_image
68° 7:07 71° Perf Pages Track Sport Custom Auto Power: XXX Transmission: Track Paddle Shifters: On Traction: Track Suspension: Track Steering: Track Red Key i Track Set-Up Race Options Valet Eco Media Controls Climate Apps SRT Mode Phone PerfPageValetModeActivation
To enter Valet Mode, press the "Valet" button on the touchscreen and a popup screen will ask you if you would like to enter Valet Mode. After selecting "Yes", you will be asked to enter a four digit PIN code. The PIN code is not set, so you are free to select any four digit numeric combination that will be easy to remember.
While in Valet Mode, the following vehicle configurations are set and locked to prevent unauthorized modification:
• Engine limited to the lowest power output state.
- On automatic transmission, transmission locks out access to first gear and up-shifts earlier than normal.
- Traction, steering, and suspension are set to their STREET settings.
- Steering wheel paddle shifters are disabled.
- The Drive Modes interface is not available. Pressing the SRT button on the touchscreen will display the unlock keypad.
• The ESC Off button is disabled.
• The Launch Control button is disabled.
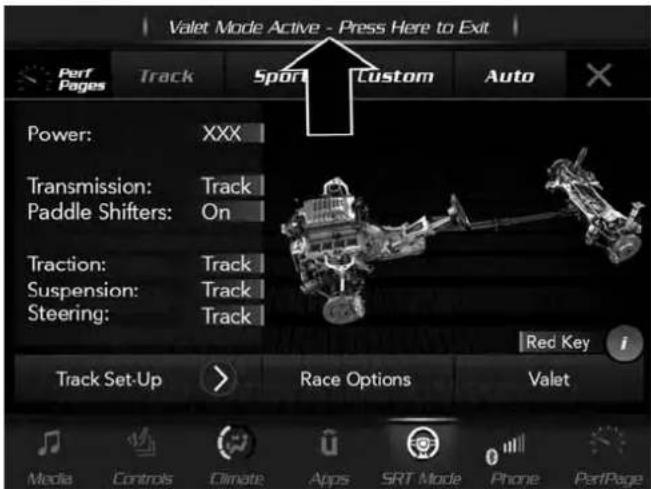
text_image
Valet Mode Active - Press Here to Exit Perf Pages Track Sport Custom Auto Power: XXX Transmission: Track Paddle Shifters: On Traction: Track Suspension: Track Steering: Track Red Key Track Set-Up > Race Options Valet Media Controls Climate Apps SRT Mode Phone PerfPageValetModeDeactivation
To exit Valet Mode, you must enter the same four digit PIN that was used to enter the mode. The unlock keypad can be accessed by either pushing the SRT button on the faceplate, or pressing the "Valet Mode Active – Press Here to Exit" button on the touchscreen.
452 MULTIMEDIA
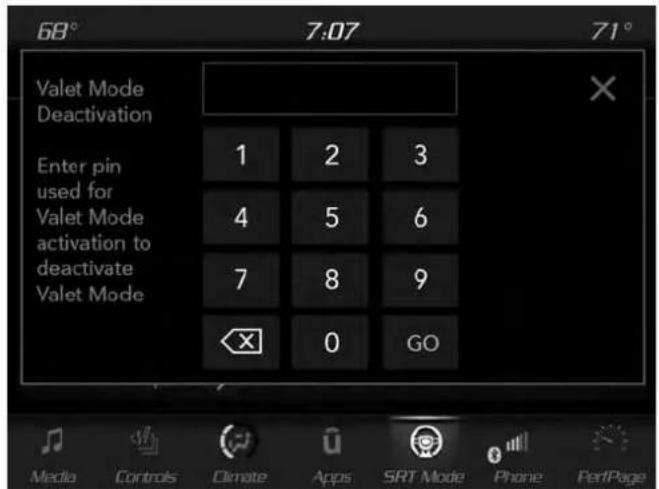
text_image
68° 7:07 71° Valet Mode Deactivation Enter pin used for Valet Mode activation to deactivate Valet Mode 1 2 3 4 5 6 7 8 9 X 0 GO Media Controls Cimate Apps SRT Mode Phone PertPageValetModeDeactivationPIN
The Valet Mode Deactivation key pad will then prompt you for your four digit PIN code. Enter your PIN code, and press the "OK" button on the touchscreen. Your vehicle will return to the default state whenever exiting Valet Mode.
NOTE: If your four digit PIN is lost or forgotten, the vehicle will exit Valet Mode after a battery disconnect for approximately five minutes. Reconnect the battery and cycle the ignition to the RUN position; the vehicle will be in Auto Mode.
ECO MODE — IF EQUIPPED
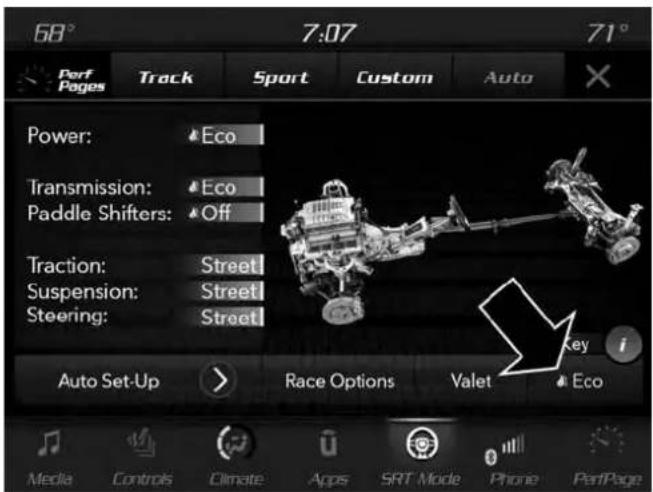
text_image
68° 7:07 71° Perf Pages Track Sport Custom Auto Power: Eco Transmission: Eco Paddle Shifters: Off Traction: Street Suspension: Street Steering: Street Auto Set-Up Race Options Valet Eco Media Controls Climate Apps SRT Mode Phone ParfPageEcoMode
The Paddle Shifters will be disabled while in Eco mode.
- Changing the Drive Mode will deactivate Eco.
- Eco will be disabled when another Drive Mode is selected or "Eco" button is pressed.
STEERING WHEEL AUDIO CONTROLS — IF EQUIPPED
The remote sound system controls are located on the rear surface of the steering wheel. Reach behind the wheel to access the switches.
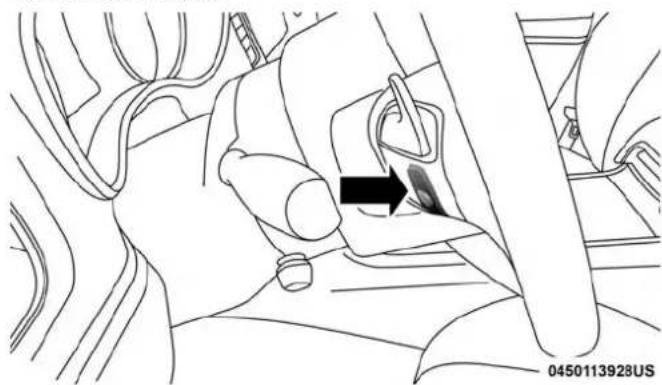
natural_image
Line drawing of a car seatbelt mechanism with a black arrow indicating the grip (no text or symbols present)SteeringWheelAudioControls(BackViewOfSteering Wheel)
The right-hand control is a rocker-type switch with a push-button in the center and controls the volume and mode of the sound system. Pushing the top of the rocker switch will increase the volume, and pushing the bottom of the rocker switch will decrease the volume.
Pushing the center button will make the radio switch between the various modes available (AM/FM/SAT/AUX, etc.).
The left-hand control is a rocker-type switch with a push-button in the center. The function of the left-hand control is different depending on which mode you are in.
The following describes the left-hand control operation in each mode.
Radio Operation
Pushing the top of the switch will "Seek" up for the next listenable station and pushing the bottom of the switch will "Seek" down for the next listenable station.
The button located in the center of the left-hand control will tune to the next preset station that you have programmed in the radio preset button.
Media Mode
Pushing the top of the switch once goes to the next track on the selected media (AUX/USB/Bluetooth). Pushing the bottom of the switch once goes to the beginning of the current track, or to the beginning of the previous track if it is within eight seconds after the current track begins to play.
454 MULTIMEDIA
AUX/USB/MP3 CONTROL
This feature allows an external USB device to be plugged into the USB port.
For further information, refer to the Uconnect Owner's Manual Supplement.
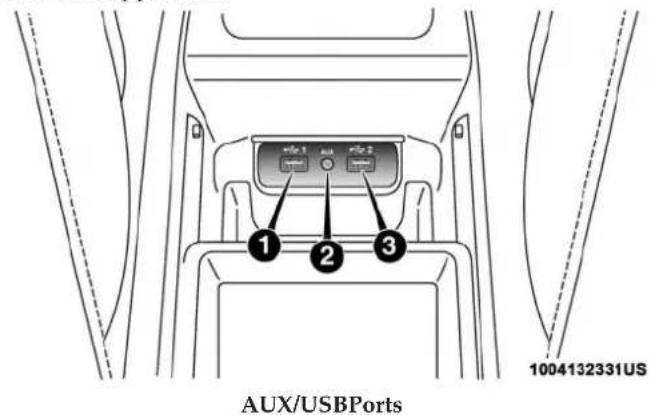
text_image
1 2 3 1004132331US AUX/USBPorts1 — USB 1 Port
2 — AUX Jack
3—USB 2 Port
Located on the rear of the front center console are dual USB "Charge Only" ports.
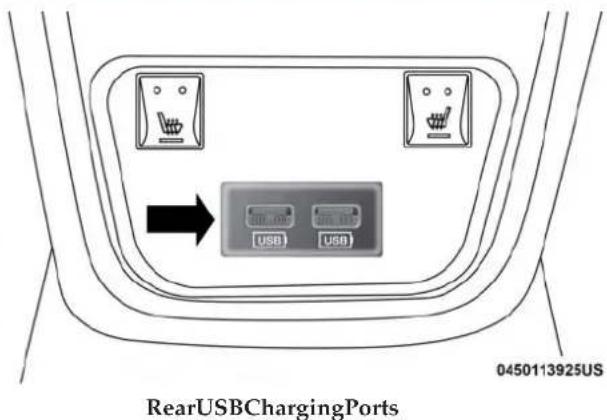
text_image
RearUSBChargingPorts 0450113925USThe USB "Charge Only" ports will recharge battery operated USB devices when connected.
Under certain conditions, the mobile phone being on in your vehicle can cause erratic or noisy performance from your radio. This condition may be lessened or eliminated by relocating the mobile phone antenna. This condition is not harmful to the radio. If your radio performance does not satisfactorily "clear" by the repositioning of the antenna, it is recommended that the radio volume be turned down or off during mobile phone operation when not using Uconnect (if equipped).
Regulatory And Safety Information
USA/CANADA
Exposure to Radio Frequency Radiation
The radiated output power of the internal wireless radio is far below the FCC and IC radio frequency exposure limits. Nevertheless, the wireless radio will be used in such a manner that the radio is 8 in (20 cm) or further from the human body.
The internal wireless radio operates within guidelines found in radio frequency safety standards and recommendations, which reflect the consensus of the scientific community.
The radio manufacturer believes the internal wireless radio is safe for use by consumers. The level of energy emitted is far less than the electromagnetic energy emitted by wireless devices such as mobile phones. However, the use of wireless radios may be restricted in some situations or
environments, such as aboard airplanes. If you are unsure of restrictions, you are encouraged to ask for authorization before turning on the wireless radio.
The following regulatory statement applies to all Radio Frequency (RF) devices equipped in this vehicle:
This device complies with Part 15 of the FCC Rules and with Industry Canada license-exempt RSS standard(s). Operation is subject to the following two conditions:
- This device may not cause harmful interference, and
- This device must accept any interference received, including interference that may cause undesired operation.
NOTE: Changes or modifications not expressly approved by the party responsible for compliance could void the user's authority to operate the equipment.
456 MULTIMEDIA
NOTE:
- This equipment has been tested and found to comply with the limits for a Class B digital device, pursuant to Part 15 of the FCC Rules. These limits are designed to provide reasonable protection against harmful interference in a residential installation. This equipment generates, uses and can radiate radio frequency energy and, if not installed and used in accordance with the instructions, may cause harmful interference to radio communications. However, there is no guarantee that interference will not occur in a particular installation.
- If this equipment does cause harmful interference to radio or television reception, which can be determined by turning the equipment off and on, the user is encouraged to try to correct the interference by one or more of the following measures:
-
Increase the separation between the equipment and receiver.
-
Consult an authorized dealer or an experienced radio technician for help.
UCONNECT VOICE RECOGNITION QUICK TIPS
Introducing Uconnect
Start using Uconnect Voice Recognition with these helpful quick tips. It provides the key Voice Commands and tips you need to know to control your Uconnect system.
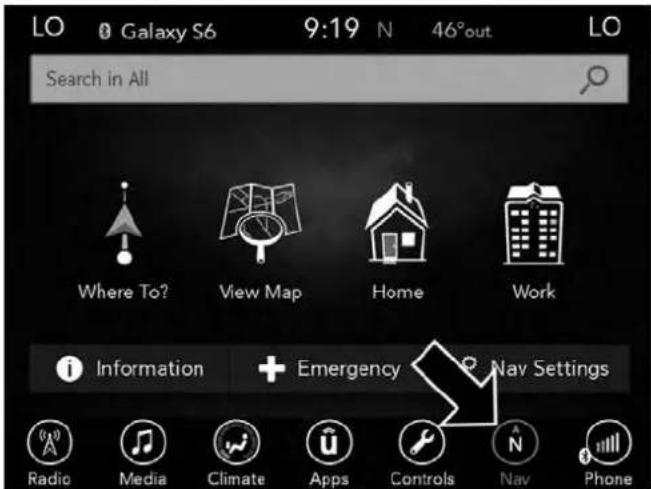
text_image
LO 8 Galaxy S6 9:19 N 46°out LO Search in All Where To? View Map Home Work Information + Emergency Nav Settings Radio Media Climate Apps Controls Nav PhoneUconnect4CNAV
NOTE: If you see the NAV icon on the bottom bar, or in the Apps menus, of your touchscreen, you have the Uconnect 4C NAV system. If not, you have a Uconnect 4C system.
Get Started
All you need to control your Uconnect system with your voice are the buttons on your steering wheel.
Helpful hints for using Voice Recognition:
- Visit UconnectPhone.com to check mobile device and feature compatibility and to find phone pairing instructions.
- Reduce background noise. Wind and passenger conversations are examples of noise that may impact recognition.
- Speak clearly at a normal pace and volume while facing straight ahead. The microphone is positioned on the rearview mirror and aimed at the driver.
• Each time you give a Voice Command, you must first push either the Voice Recognition (VR) or Phone button, wait until after the beep, then say your Voice Command.
- You can interrupt the help message or system prompts by pushing the VR or Phone button and saying a Voice Command from the current category.
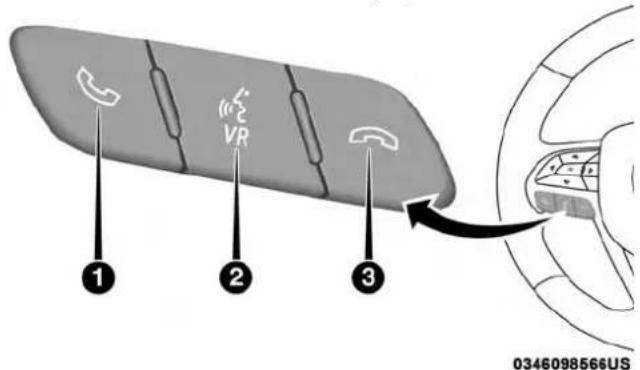
text_image
1 2 3 0346098566USUconnectVoiceCommandButtons
1 — Push To Initiate Or To Answer A Phone Call, Send Or Receive A Text
2 — For All Radios: Push To Begin Voice Commands
3 — Push To End Call
458 MULTIMEDIA
Basic Voice Commands
The basic Voice Commands below can be given at any point while using your Uconnect system.
Push the VR button _EVR . After the beep, say:
- "Cancel" to stop a current voice session
- "Help" to hear a list of suggested Voice Commands
- "Repeat" to listen to the system prompts again
Notice the visual cues that inform you of your voice recognition system's status. Cues appear on the touchscreen.
Radio
Use your voice to quickly get to the AM, FM or SiriusXM Satellite Radio stations you would like to hear. (Subscription or included SiriusXM Satellite Radio trial required.)
Push the VR button _EVR . After the beep, say:
• "Tunetoninety-five-point-five FM"
• " TunetoSatelliteChannelHits 1"
TIP: At any time, if you are not sure of what to say or want to learn a Voice Command, push the VR button and say "Help." The system provides you with a list of commands.
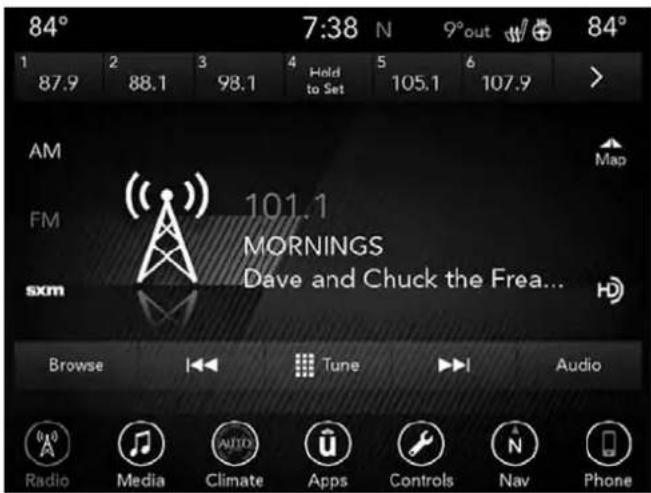
text_image
84° 7:38 N 9°out 84° 1 2 3 4 Hold to Set 5 6 7 87.9 88.1 98.1 105.1 107.9 > AM FM 101.1 MORNINGS Dave and Chuck the Frea... sxm Browse Tune Audio Radio Media Climate Apps Controls Nav PhoneUconnect4C/4CNAVRadio
Media
Uconnect offers connections via USB, Bluetooth and auxiliary ports (if equipped). Voice operation is only available for connected USB and AUX devices.
Push the VR button o#vnr. After the beep, say one of the following commands and follow the prompts to switch your media source or choose an artist.
- "ChangesourcetoBluetooth"
- "ChangesourcetoAUX"
- "ChangesourcetoUSB"
- "Play artist Beethoven"; "Play album Greatest Hits"; "PlaysongMoonlight Sonata"; "PlaygenreClassical"
TIP:Press the Browse button on the touchscreen to see all of the music on your USB device. Your Voice Command must match exactly how the artist, album, song and genre information is displayed.
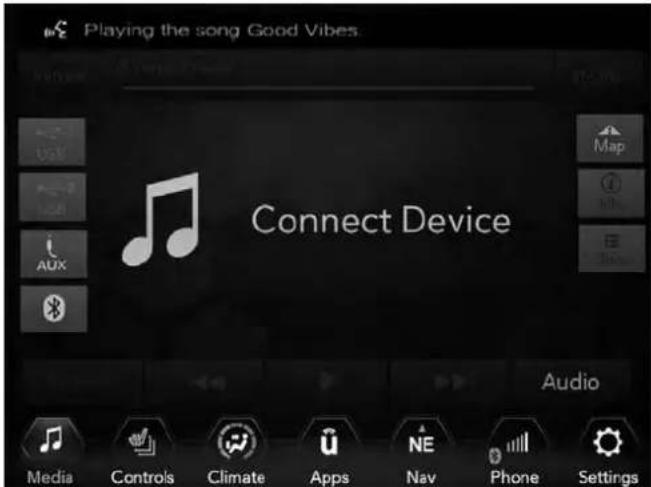
text_image
Playing the song Good Vibes. Connect Device Audio Media Controls Climate Apps Nav Phone SettingsUconnect4C/4CNAVMedia
Phone
Making and answering hands-free phone calls is easy with Uconnect. When the Phonebook button is illuminated on your touchscreen, your system is ready. Check UconnectPhone.com for mobile phone compatibility and pairing instructions.
460 MULTIMEDIA
Push the Phone button 📋. After the beep, say one of the following commands:
- "CallJohn Smith"
- "Dial123-456-7890 and follow the system prompts"
- "Redial(call previous outgoing phone number)"
- "Callback(call previous incoming phone number)"
TIP: When providing a Voice Command, push the Phone button and say "Call," then pronounce the name exactly as it appears in your phone book. When a contact has multiple phone numbers, you can say "Call John Smith work."
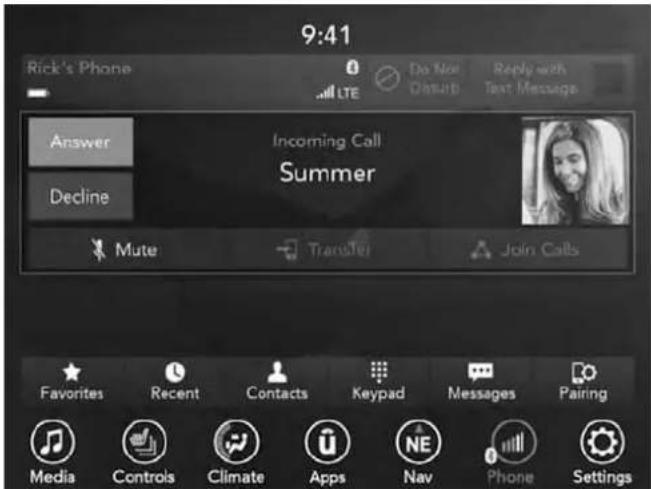
text_image
9:41 Rick's Phone LTE Do Neal Oasubi Reply with Text Messages Answer Incoming Call Summer Decline Mute Transfer Join Calls Favorites Recent Contacts Keypad Messages Pairing Media Controls Climate Apps NE Nav Phone SettingsUconnect4C/4CNAVPhone
Voice Text Reply — If Equipped
Uconnect announces incoming text messages. Push the VR button “or Phone button (if enabled) and say “Listen.” (Must have compatible mobile phone paired to Uconnect system.)
-
Once an incoming text message is read to you, push the VR button (or Phone button (Enabled). After the beep, say: "Reply."
-
Listen to the Uconnect prompts. After the beep, repeat one of the pre-defined messages and follow the system prompts.
| PRE-DEFINEDVOICETEXTREPLYRESPONSES | ||
| Yes. Stuck in traffic. See you later. | ||
| No. Start without me. | I'll be late. | |
| Okay. Where are you? I will be 5 | minutes late. | |
| Call me. Are you there yet? | ||
| I'll call you later. I need direc-tions. | See you in 5minutes. | |
| I'm on my way. Can't talk right | ||
| I'm lost. Thanks. now. | ||
NOTE: Only use the numbering listed, otherwise the system does not transpose the message.
TIP: Your mobile phone must have the full implementation of the Message Access Profile (MAP) to take advantage of this feature. For details about MAP, visit UconnectPhone.com.
Apple iPhone iOS 6 or later supports reading incoming text messages only. To enable this feature on your Apple iPhone, follow these four simple steps:
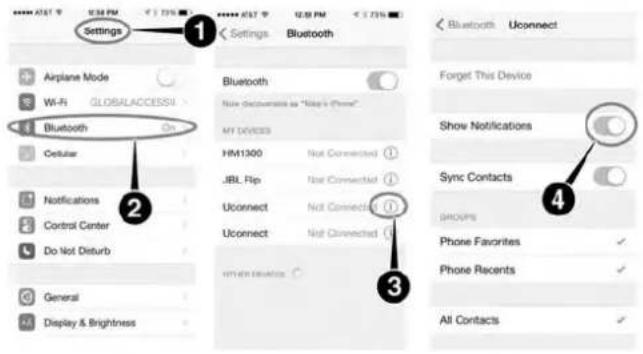
text_image
Settings Airplane Mode Wi-Fi GLOBALACCESS Bluetooth Cellular Notifications Control Center Do Not Disturb General Display & Brightness 1 2 3 Settings Bluetooth Bluetooth Note documents as "Sleep's Phone" MY DEVICES HM1300 Not Connected ① JBL Flip Not Connected ① Uconnect Not Connected ① Uconnect Not Connected ① Other Devices 4 Bluetooth Uconnect Forget This Device Show Notifications Sync Contacts GROUPS Phone Favorites ✓ Phone Recents ✓ All Contacts ✓iPhone NotificationSettings
1 — Select "Settings"
2 — Select "Bluetooth"
3 — Select The (i) For The Paired Vehicle
4 — Turn On "Show Notifications"
TIP: Voice Text Reply is not compatible with iPhone, but if your vehicle is equipped with Siri Eyes Free, you can use your voice to send a text message.
462 MULTIMEDIA
Climate
Too hot? Too cold? Adjust vehicle temperatures hands-free and keep everyone comfortable while you keep moving ahead. (If vehicle is equipped with climate control.)
Push the VR button OFVR. After the beep, say one of the following commands:
- "Setdrivertemperatureto70 degrees"
- "Setpassengertemperatureto70 degrees"
TIP: Voice Command for Climate may only be used to adjust the interior temperature of your vehicle. Voice Command will not work to adjust the heated seats or steering wheel if equipped.
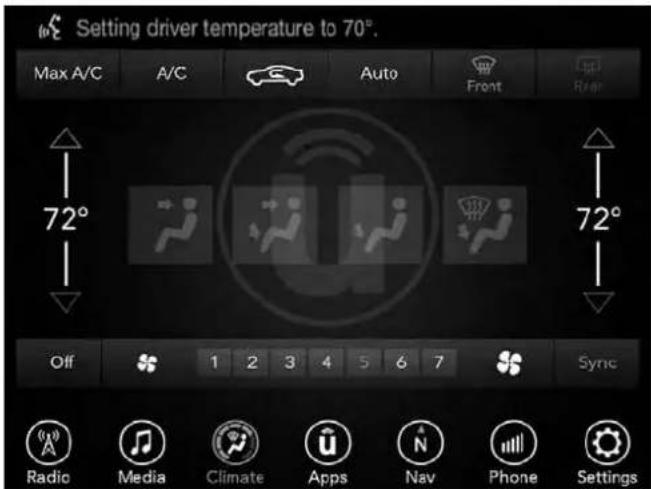
text_image
Setting driver temperature to 70°. Max A/C A/C Auto Front Rear 72° 72° Off 1 2 3 4 5 6 7 Sync Radio Media Climate Apps Native Phone SettingsUconnect4C/4CNAVClimate
Navigation (4C NAV)
The Uconnect navigation feature helps you save time and become more productive when you know exactly how to get to where you want to go.
- To enter a destination, push the VR button 06VR. After the beep, say: "Find address 800 Chrysler Drive Auburn Hills, Michigan."
2. Then follow the system prompts.
TIP: To start a POI search, push the VR button of VR. After the beep, say: "Findnearestcoffee shop."
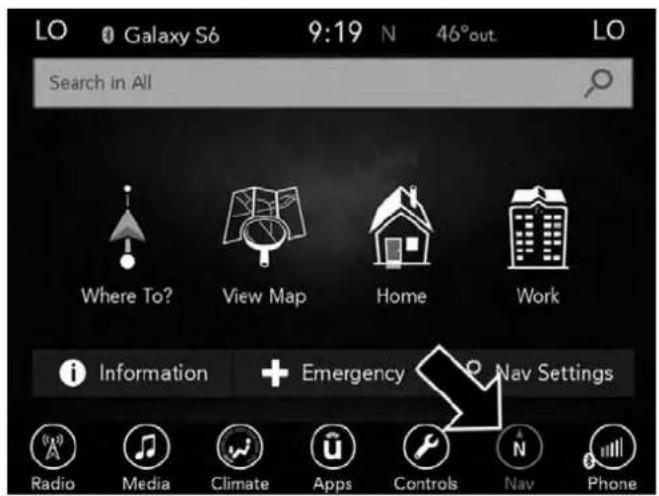
text_image
LO Galaxy S6 9:19 N 46°out. LO Search in All Where To? View Map Home Work Information + Emergency Nav Settings Radio Media Climate Apps Controls Nav PhoneUconnect4CNAVWith8.4-inchDisplayNavigation
SiriusXM Guardian (4C/4C NAV) — If Equipped
CAUTION!
SomeSiriusXMGuardianservices,includingSOSCall andRoadsideAssistanceCallwillNOTworkwithout anoperableLTE(voice/data)or3Gor4G(data)networkconnectioncompatiblewithyourdevice.
NOTE: Your vehicle may be transmitting data as authorized by the subscriber.
An included trial and/or subscription is required to take advantage of the SiriusXM Guardian services in the next section of this guide. To register with SiriusXM Guardian, press the Apps button on the Uconnect 4C/4C NAV touchscreen to get started.
NOTE:SiriusXM Guardian is available only on equipped vehicles purchased within the continental United States, Alaska, Hawaii and Canada. Services can only be used where coverage is available; see coverage map for details.

SOS Call

Theft Alarm Notification

Remote Door Lock/Unlock
464 MULTIMEDIA
Send & Go
Vehicle Finder
Stolen Vehicle Assistance
Remote Vehicle Start**
Remote Horn & Lights
Roadside Assistance Call
Vehicle Health Reports**
Vehicle Health Alert**
Performance Pages Plus**
**If vehicle is equipped.
Register (4C/4C NAV)
To unlock the full potential of SiriusXM Guardian in your vehicle, you must activate your SiriusXM Guardian services.
-
Press the Apps icon on the bottom of your in-vehicle touchscreen.
-
Select the Activate Services icon from your list of apps.
-
Select "Customer Care" to speak with a SiriusXM Guardian Customer Care agent who will activate services in your vehicle, or select "Enter Email" to activate on the web.
• U.S. residents visit: www.siriusxm.com/guardian.
•Canadian residents visit: www.siriusxm.ca/guardian.
Vehicle Health Report/Alert (4C/4C NAV)
Your vehicle will send you a monthly email report, which summarizes the performance of your vehicle's key systems so you can stay on top of your vehicle's maintenance needs if you are registered for SiriusXM Guardian. Your vehicle will also send you Vehicle Health Alerts when it detects issues with its key systems that need your attention. For further information, refer to your Uconnect Owner's Manual Supplement.
Mobile App (4C/4C NAV)
You're only a few steps away from using remote commands and sending a destination from your phone to your vehicle.

text_image
Uconnect Enter Password Enter Password Accept PasswordMobileApp
To use the Uconnect Mobile App:
- Once you have registered your SiriusXM Guardian services, download the Uconnect App to your mobile device. Use your Owner Account login and password to open the app.
-
Once on the "Remote" screen, you can begin using Remote Door Lock/Unlock, Remote Vehicle Start, and activate your horn and lights remotely, if equipped.
-
Press the "Location" button on the bottom menu bar of the app to bring up a map to locate your vehicle or send a location to your Uconnect Navigation using Vehicle Finder and Send & Go, if equipped.
- Press the "Settings" side menu in the upper left corner of the app to bring up app settings.
NOTE: For further information please visit DriveUconnect.com (U.S. Residents) or DriveUconnect.ca (Canadian Residents).
SiriusXM Travel Link (4C NAV)
Need to find a gas station, view local movie listings, check a sports score or the 5-day weather forecast? SiriusXM Travel Link is a suite of services that brings a wealth of information right to your Uconnect 4C NAV system. (Not available for Uconnect 4 system.)
Push the VR button _VR . After the beep, say one of the following commands:
• " Showfuelprices"
• " Show5-dayweatherforecast"
• " Showextendedweather"
MULTIMEDIA 465
466 MULTIMEDIA
TIP: Traffic alerts are not accessible with Voice Command.
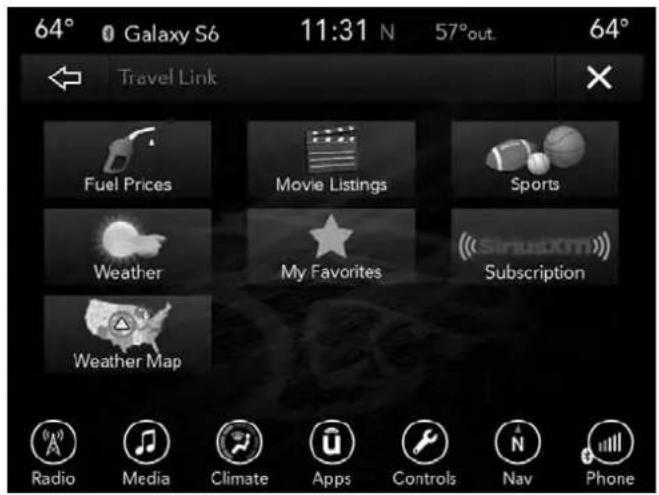
text_image
64° Galaxy S6 11:31 N 57°out. 64° Travel Link Fuel Prices Movie Listings Sports Weather My Favorites Subscription Weather Map Radio Media Climate Apps Controls Nav PhoneSiriusXMTravelLink
Siri Eyes Free — If Equipped
Siri lets you use your voice to send text messages, select media, place phone calls and much more. Siri uses your natural language to understand what you mean and responds back to confirm your requests. The system is
designed to keep your eyes on the road and your hands on the wheel by letting Siri help you perform useful tasks.
To enable Siri, push and hold, then release the Uconnect Voice Recognition (VR) button on the steering wheel. After you hear a double beep you can ask Siri to play podcasts and music, get directions, read text messages and many other useful requests.
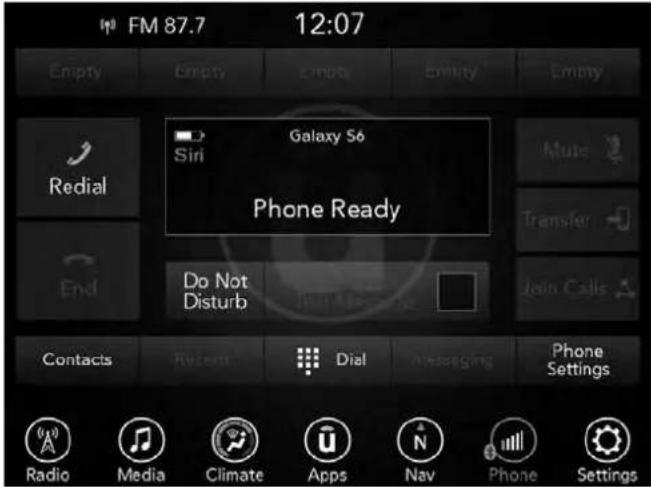
text_image
FM 87.7 12:07 Empty Empty Empty Empty Empty Redial Galaxy S6 Siri Phone Ready Transfer End Do Not Disturb Join Calls Contacts Recent Dial Messaging Phone Settings Radio Media Climate Apps Nav Phone SettingsUconnect4C/4CNAVWith8.4-inchSiriEyesFree Available
Do Not Disturb
With Do Not Disturb, you can disable notifications from incoming calls and texts, allowing you to keep your eyes on the road and hands on the wheel. For your convenience, there is a counter display to keep track of your missed calls and text messages while you were using Do Not Disturb.
Do Not Disturb can automatically reply with a text message, a call or both, when declining an incoming call and send it to voicemail.
Automatic reply messages can be:
- "I am driving right now, I will get back to you shortly."
- Create a custom auto reply message up to 160 characters.
NOTE: Only the first 25 characters can be seen on the touchscreen while typing a custom message.
While in Do Not Disturb, Conference Call can be selected so you can still place a second call without being interrupted by incoming calls.
NOTE:
- Reply with text message is not compatible with iPhones.
- Auto reply with text message is only available on phones that support Bluetooth MAP.
Android Auto — If Equipped
NOTE: Feature availability depends on your carrier and mobile phone manufacturer. Some Android Auto features may or may not be available in every region and/or language.
Android Auto allows you to use your voice to interact with Android's best-in-class speech technology through your vehicle's voice recognition system, and use your smartphone's data plan to project your Android powered smartphone and a number of its apps onto your Uconnect touchscreen. Connect your Android 5.0 (Lollipop), or higher, to one of the media USB ports, using the factory-provided USB cable, and press the new Android Auto icon that replaces your "Phone" icon on the main menu bar to begin Android Auto. Push and hold the VR button on the steering wheel, or press and hold the "Microphone" icon within Android Auto, to activate Android's VR, which recognizes natural voice commands, to use a list of your smartphone's features:
- Maps
•Music - Phone
- Text Messages
468 MULTIMEDIA
• Additional Apps
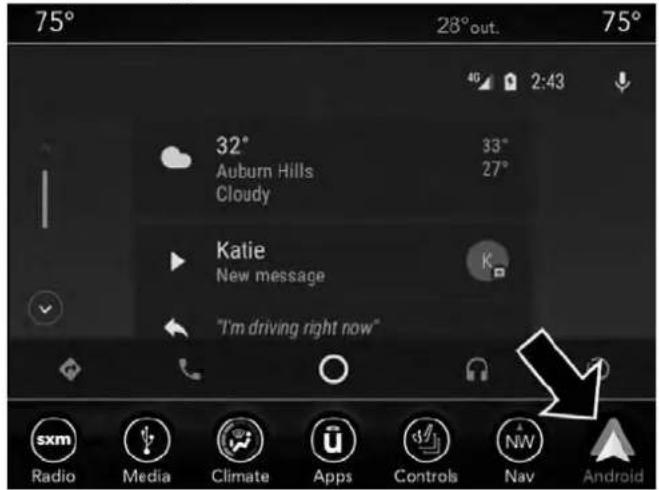
text_image
75° 28°out. 75° 46 2:43 32° 33° Auburn Hills Cloudy 27° Katie New message "I'm driving right now" sxm Radio Media Climate Apps Controls NW AndroidAndroidAutoOn8.4-inchDisplay
Refer to your Uconnect Owner's Manual Supplement for further information.
NOTE: Requires compatible smartphone running Android 5.0 Lollipop or higher and download app on Google Play. Android, Android Auto, and Google Play are trademarks of Google Inc.
Apple CarPlay — If Equipped
NOTE:Feature availability depends on your carrier and mobile phone manufacturer. Some Apple CarPlay features may or may not be available in every region and/or language.
Apple CarPlay allows you to use your voice to interact with Siri through your vehicle's voice recognition system, and use your smartphone's data plan to project your iPhone and a number of its apps onto your Uconnect touchscreen. Connect your iPhone 5, or higher, to one of the media USB ports, using the factory-provided Lightning cable, and press the new CarPlay icon that replaces your "Phone" icon on the main menu bar to begin Apple CarPlay. Press and hold the VR button on the steering wheel, or press and hold the "Home" button within Apple CarPlay, to activate Siri, which recognizes natural voice commands to use a list of your iPhone's features:
- Phone
• Music - Messages
- Maps
• Additional Apps
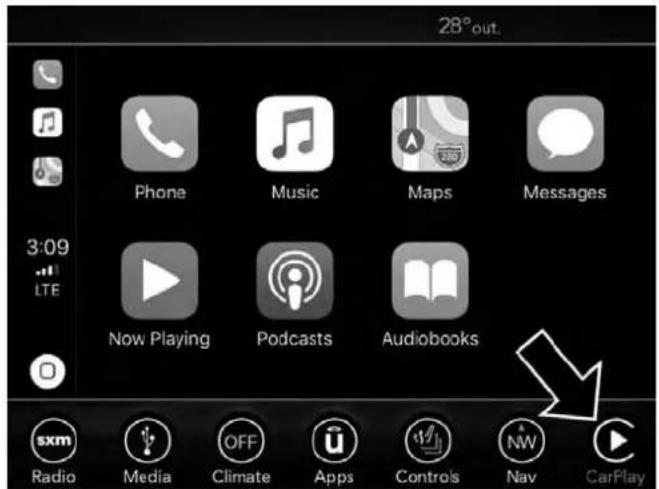
text_image
28° out. Phone Music Maps Messages 3:09 LTE Now Playing Podcasts Audiobooks sxm Radio Media OFF Climate Apps Controls NW Nav CarPlayAppleCarPlayOn8.4-inchDisplay
Refer to your Uconnect Owner's Manual Supplement for further information.
NOTE: Requires compatible iPhone. See dealer for phone compatibility. Data plan rates apply. Vehicle user interface is a product of Apple. Apple CarPlay is a trademark of Apple Inc. iPhone is a trademark of Apple Inc., registered in the US and other countries. Apple terms of use and privacy statements apply.
General Information
The following regulatory statement applies to all Radio Frequency (RF) devices equipped in this vehicle:
This device complies with Part 15 of the FCC Rules and with Industry Canada license-exempt RSS standard(s). Operation is subject to the following two conditions:
- This device may not cause harmful interference, and
- This device must accept any interference received, including interference that may cause undesired operation.
NOTE: Changes or modifications not expressly approved by the party responsible for compliance could void the user's authority to operate the equipment.
Additional Information
© 2021 FCA US LLC. All rights reserved. Mopar and Uconnect are registered trademarks and Mopar Owner Connect is a trademark of FCA US LLC. Android is a trademark of Google Inc. SiriusXM and all related marks and logos are trademarks of SiriusXM Radio Inc.
470 MULTIMEDIA
Uconnect System Support:
• U.S. residents visit www.DriveUconnect.com or call: 1-877-855-8400 (24 hours a day 7 days a week)
- Canadian residents visit www.DriveUconnect.ca or call: 1-800-465-2001 (English) or 1-800-387-9983 (French)
SiriusXM Guardian services support:
- U.S. residents visit www.siriusxm.com/guardian or call: 1-844-796-4827
- Canadian residents visit www.siriusxm.ca/guardian or call: 1-877-324-9091
CUSTOMER ASSISTANCE
CONTENTS
■SUGGESTIONS FOR OBTAINING SERVICE FOR YOUR VEHICLE....472
□Prepare For The Appointment....472
□Prepare A List....472
□Be Reasonable With Requests .....472
■IF YOU NEED ASSISTANCE....472
□FCA US LLC Customer Center .....473
□FCA Canada Inc. Customer Center. . . . . . . . . . . 473
□In Mexico Contact....473
□Puerto Rico And U.S. Virgin Islands. . . . . . . . . . . . . . . . . . . . . . . . . . . . . . . . . . . . . . . . . . . . . . . . . . . . . . . . . . . . . . . . . . . . .
□Customer Assistance For The Hearing Or Speech Impaired (TDD/TTY)....474
□Service Contract....474
■WARRANTY INFORMATION....475
■MOPARPARTS .....475
■REPORTING SAFETY DEFECTS .....475
□In The 50 United States And Washington, D.C. . .475
□In Canada....476
■PUBLICATION ORDER FORMS .....476
SUGGESTIONS FOR OBTAINING SERVICE FOR YOUR VEHICLE
Prepare For The Appointment
If you are having warranty work done, be sure to have the right papers with you. Take your warranty folder. All work to be performed may not be covered by the warranty. Discuss additional charges with the service manager. Keep a maintenance log of your vehicle's service history. This can often provide a clue to the current problem.
Prepare A List
Make a written list of your vehicle's problems or the specific work you want done. If you've had an accident or work done that is not on your maintenance log, let the service advisor know.
Be Reasonable With Requests
If you list a number of items and you must have your vehicle by the end of the day, discuss the situation with the service advisor and list the items in order of priority. At many authorized dealers, you may obtain a rental vehicle at a minimal daily charge. If you need a rental, it is advisable to make these arrangements when you call for an appointment.
IF YOU NEED ASSISTANCE
The manufacturer and its authorized dealer are vitally interested in your satisfaction. We want you to be happy with our products and services.
Warranty service must be done by an authorized dealer. We strongly recommend that you take the vehicle to an authorized dealer. They know your vehicle the best, and are most concerned that you get prompt and high quality service. The manufacturer's authorized dealer have the facilities, factory-trained technicians, special tools, and the latest information to ensure the vehicle is fixed correctly and in a timely manner.
This is why you should always talk to an authorized dealer service manager first. Most matters can be resolved with this process.
- If for some reason you are still not satisfied, talk to the general manager or owner of the authorized dealer. They want to know if you need assistance.
- If an authorized dealer is unable to resolve the concern, you may contact the manufacturer's customer center.
Any communication to the manufacturer's customer center should include the following information:
- Owner's name and address
- Owner's telephone number (home and office)
- Authorized dealer name
• Vehicle Identification Number (VIN)
• Vehicle delivery date and mileage
FCA US LLC Customer Center
P.O. Box 21-8004
Auburn Hills, MI 48321-8004
Phone: (800) 423-6343
FCA Canada Inc. Customer Center
P.O. Box 1621
Windsor, Ontario N9A 4H6
Phone: (800) 465-2001 English / (800) 387-9983 French
In Mexico Contact
In Mexico City: 800-505-1300
Outside Mexico City: +(52)55 50817568
Puerto Rico And U.S. Virgin Islands
FCA Caribbean LLC
P.O. Box 191857
San Juan 00919-1857
Phone: (800) 423-6343
Fax: (787) 782-3345
474 CUSTOMER ASSISTANCE
Customer Assistance For The Hearing Or Speech Impaired (TDD/TTY)
To assist customers who have hearing difficulties, the manufacturer has installed special TDD (Telecommunication Devices for the Deaf) equipment at its customer center. Any hearing or speech impaired customer, who has access to a TDD or a conventional teletypewriter (TTY) in the United States, can communicate with the manufacturer by dialing 1-800-380-CHRY.
Canadian residents with hearing difficulties that require assistance can use the special needs relay service offered by Bell Canada. For TTY teletypewriter users, dial 711 and for Voice callers, dial 1-800-855-0511 to connect with a Bell Relay Service operator.
Service Contract
You may have purchased a service contract for a vehicle to help protect you from the high cost of unexpected repairs after the manufacturer's New Vehicle Limited Warranty expires. The manufacturer stands behind only the manufacturer's service contracts. If you purchased a manufacturer's service contract, you will receive Plan Provisions and an Owner Identification Card in the mail within three weeks of the vehicle delivery date. If you have any questions about the service contract, call the manufacturer's Service Contract National Customer Hotline at 1-800-521-9922 (Canadian residents, call (800) 465-2001 English / (800) 387-9983 French).
The manufacturer will not stand behind any service contract that is not the manufacturer's service contract. It is not responsible for any service contract other than the manufacturer's service contract. If you purchased a service contract that is not a manufacturer's service contract, and you require service after the manufacturer's New Vehicle Limited Warranty expires, please refer to the contract documents, and contact the person listed in those documents.
We appreciate that you have made a major investment when you purchased the vehicle. An authorized dealer has also made a major investment in facilities, tools, and training to assure that you are absolutely delighted with the ownership experience. You will be pleased with their sincere efforts to resolve any warranty issues or related concerns.
WARNING!
Engineexhaust(internalcombustionenginesonly), someofitsconstituents,andcertainvehiclecomponentscontain,oremit,chemicalsknowntotheStateof Californiatocausecancerandbirthdefects,orother reproductiveharm.Inaddition,certainfluidscontainedinvehiclesandcertainproductsofcomponent wearcontain,oremit,chemicalsknowntotheStateof Californiatocausecancerandbirthdefects,orother reproductiveharm.
WARRANTY INFORMATION
See the Warranty Information Booklet for the terms and provisions of FCA US LLC warranties applicable to this vehicle and market.
MOPAR PARTS
Mopar fluids, lubricants, parts, and accessories are available from an authorized dealer. They are recommended for your vehicle in order to help keep the vehicle operating at its best.
REPORTING SAFETY DEFECTS
In The 50 United States And Washington, D.C.
If you believe that your vehicle has a defect that could cause a crash or cause injury or death, you should immediately inform the National Highway Traffic Safety Administration (NHTSA) in addition to notifying FCA US LLC.
If NHTSA receives similar complaints, it may open an investigation, and if it finds that a safety defect exists in a group of vehicles, it may order a recall and remedy campaign. However, NHTSA cannot become involved in individual problems between you, an authorized dealer or FCA US LLC.
To contact NHTSA, you may call the Vehicle Safety Hotline toll free at 1-888-327-4236 (TTY: 1-800-424-9153); or go to http://www.safercar.gov; or write to: Administrator, NHTSA, 1200 New Jersey Avenue, SE., West Building, Washington, D.C. 20590. You can also obtain other information about motor vehicle safety from http://www.safercar.gov.
In Canada
If you believe that your vehicle has a safety defect, you should contact the Customer Service Department immediately. Canadian customers who wish to report a safety defect to the Canadian government should contact Transport Canada, Motor Vehicle Defect Investigations and Recalls at 1-800-333-0510 or go to http://www.tc.gc.ca/roadsafety/.
PUBLICATION ORDER FORMS
To order the following manuals, you may use either the website or the phone numbers listed below.
ServiceManuals
These comprehensive Service Manuals provide the information that students and professional technicians need in diagnosing/troubleshooting, problem solving, maintaining, servicing, and repairing FCA US LLC vehicles. A complete working knowledge of the vehicle, system, and/or components is written in straightforward language with illustrations, diagrams, and charts.
DiagnosticProcedureManuals
Diagnostic Procedure Manuals are filled with diagrams, charts and detailed illustrations. These practical manuals make it easy for students and technicians to find and fix problems on computer-controlled vehicle systems and features. They show exactly how to find and correct problems the first time, using step-by-step troubleshooting and drivability procedures, proven diagnostic tests and a complete list of all tools and equipment.
Owner's Manuals
These Owner's Manuals have been prepared with the assistance of service and engineering specialists to acquaint you with specific FCA US LLC vehicles. Included are starting, operating, emergency and maintenance procedures as well as specifications, capabilities and safety tips.
Call toll free at:
•1-800-890-4038(U.S.)
•1-800-387-1143(Canada)
Or
Visit us on the Worldwide Web at:
• www.techauthority.com (U.S.)
INDEX
478 INDEX
About Your Brakes . . . . . . . . . . . . . . . . . . . . . . . . . . . . . . . . . . . . . . . . . . . . . . . . . . . . . . . . . 386
Adaptive Cruise Control (ACC) (Cruise Control) . . . 239
Adding Engine Coolant (Antifreeze) .....349
Adding Fuel....273
Adding Washing Fluid . . . . . . . . . . . . . . . . . . . . . . . . . . . . . . . . . . . . . . . . 334
Additives, Fuel ....389
Adjust
Forward 46
Rearward 46
Air Bag 178
Advance Front Air Bag .....178
Air Bag Operation....179
Air Bag Warning Light....176
Driver Knee Air Bag . . . . . . . . . . . . . . . . . . . . . . . . . . . . . . . . . . . . . . . . . . . . . . . . . . 180
Enhanced Accident Response .....186, 326
Event Data Recorder (EDR) .....326
Front Air Bag ....
If Deployment Occurs .....185
Knee Impact Bolsters .....180
Maintaining Your Air Bag System . . . . . . . . . . . . . . . . . . 187
Maintenance 187
Redundant Air Bag Warning Light . . . . . . . . . . . . . . . . . . . . . . . . . . . . . . . . . . . . . . . . . . . . . . . . . . . . . . . . . . . . 177
Side Air Bags....181
Transporting Pets 204
Air Bag Light. . . . . . . . . . . . . . . . . . . . . . . . . . . . . . . . . . . . . . . . . . . . . . . . . . . . 122, 176, 205
Air Cleaner, Engine (Engine Air Cleaner Filter). . . . . .338
Air Conditioner Maintenance . . . . . . . . . . . . . . . . . . . . . . . . . . . 339
Air Conditioner Refrigerant . . . . . . . . . . . . . . . . . . . . . . . . . . . . . 339, 340
Air Conditioner System . . . . . . . . . . . . . . . . . . . . . . . . . . . . . . . . . . . . . . 339
Air Conditioning....74,79
Air Conditioning Filter . . . . . . . . . . . . . . . . . . . . . . . . . . . . . . . . . . . . . . . . . . . . . . . . . . . . . . . . . . . . . . . 81, 340
Air Conditioning, Operating Tips 80
Air Filter....338
Air Pressure Tires....366
Alarm
Arm The System . . . . . . . . . . . . . . . . . . . . . . . . . . . . . . . . . . . . . . . . . . . . . . . . . . . . 35, 36
Panic 22
Rearm The System 36
Security Alarm . . . . . . . . . . . . . . . . . . . . . . . . . . . . . . . . . . . . . . . . . . . . . . . . . . . . 35, 126
Alarm System
17\$ecurity Alarm 3 5
Alterations/Modifications Vehicle 5
Android Auto 467
Antifreeze (Engine Coolant) . . . . . . . . . . . . . . . . . . . . . . . . . . . . . . . . . . . . . . . . . . . 349, 392
Disposal . . . . . . . . . . . . . . . . . . . . . . . . . . . . . . . . . . . . . . . . . . . . . . . . . . . . . . 351
Anti-Lock Brake System (ABS)....138
Anti-Lock Warning Light....130
Apple CarPlay . . . . . . . . . . . . . . . . . . . . . . . . . . . . . . . . . . . . . . . . . . . . . . . . . . 468
INDEX 479
Arming System
Security Alarm 35
Assist, Hill Start .....145
Audio Systems (Radio). 399
Auto Down Power Windows 83
Automatic Door Locks. 42
Automatic Headlights 65
Automatic High Beams 64
Automatic Temperature Control (ATC) .....74, 79
Automatic Transmission .....222
Adding Fluid . . . . . . . . . . . . . . . . . . . . . . . . . . . . . . . . . . . . . . . . . . . . . . . 355, 393, 395
Fluid And Filter Change .....355
Fluid Change....355
Fluid Level Check . . . . . . . . . . . . . . . . . . . . . . . . . . . . . . . . . . . . . . . . . . 354, 355
Fluid Type . . . . . . . . . . . . . . . . . . . . . . . . . . . . . . . . . . . . . . . . . . . . . . . . . . . . . 354, 393, 395
Special Additives....355
Automatic Transmission Limp Home Mode . . . . .42, 227
AutoPark....214
Autostick
Operation....228
Auto Up Power Windows 83
AUXCord
Auxiliary Electrical Outlet (Power Outlet) .....102
Axle Fluid 393,395
Axle Lubrication....393, 395
Back-Up.271
Battery....124,335
Charging System Light 124
Keyless Key Fob Replacement 2 3
Location....335
Belts, Seat....205
Body Mechanism Lubrication....343
B-Pillar Location . . . . . . . . . . . . . . . . . . . . . . . . . . . . . . . . . . . . . . . . . . . . . . . . . . . . . . . . . . 361
Brake Assist System....139
Brake Control System. 139
Brake Fluid . . . . . . . . . . . . . . . . . . . . . . . . . . . . . . . . . . . . . . . . . . . . . . . . . . . . . . . . . . . . . . . 353, 393, 395
Brake System . . . . . . . . . . . . . . . . . . . . . . . . . . . . . . . . . . . . . . . . . . . . . . . . . . . . . . . . . . . 352, 386
Fluid Check....353, 393, 395
Master Cylinder .353
Parking 218
Warning Light....122,386
Brake/Transmission Interlock....222
Brightness, Interior Lights 70
Bulb Replacement....289
.45Bulbs, Light....207, 289
Camera, Rear .....271
Capacities, Fluid . . . . . . . . . . . . . . . . . . . . . . . . . . . . . . . . . . . . . . . . . . . . . . . . . . . . . . . . . . 392
480 INDEX
Caps, Filler
Oil (Engine)....333, 337
Power Steering . . . . . . . . . . . . . . . . . . . . . . . . . . . . . . . . . . . . . . . . . . . . . . . . . . . . . . . . . . . . 235
Radiator (Coolant Pressure) . . . . . . . . . . . . . . . . . . . . . . . . . . . . . . . . . 351
Carbon Monoxide Warning....204,392
Cargo
Vehicle Loading....275
Cargo Area Cover 91
Cargo Compartment 91
Car Washes. 380
Cellular Phone 454
Certification Label . . . . . . . . . . . . . . . . . . . . . . . . . . . . . . . . . . . . . . . . . . . . . . . . . . . . . . . . . . . 276
Chains, Tire . . . . . . . . . . . . . . . . . . . . . . . . . . . . . . . . . . . . . . . . . . . . . . . 376
Changing A Flat Tire . . . . . . . . . . . . . . . . . . . . . . . . . . . . . . . . . . . . . . . . . . . . . . . . . . . . . . . . 356
Charging
Wireless....105
Chart, Tire Sizing. 357
Check Engine Light (Malfunction Indicator Light)....135
Checking Your Vehicle For Safety . . . . . . . . . . . . . . . . . . . . 204
Checks, Safety. 204
Child Restraint....189
Child Restraints
Booster Seats....192
Child Seat Installation .....200
How To Stow An unused ALR Seat Belt .....198
Infant And Child Restraints .....191
Lower Anchors And Tethers For Children .....194
Older Children And Child Restraints .....191
Seating Positions....193
Child Safety Locks 4 2
Clean Air Gasoline 389
Cleaning
Wheels....375
Climate Control 73
Automatic....74
Coin Holder 9 9
Cold Weather Operation. . . . . . . . . . . . . . . . . . . . . . . . . . . . . . . . . . . . . . . . . . . . . 216
Compact Spare Tire . . . . . . . . . . . . . . . . . . . . . . . . . . . . . . . . . . . . . . . . . . . . . . . . . . . . 373
Console
Floor 99
Contract, Service . . . . . . . . . . . . . . . . . . . . . . . . . . . . . . . . . . . . . . . . . . . . . . . . . . . . 474
Cooling Pressure Cap (Radiator Cap) .....351
Cooling System....348
Adding Coolant (Antifreeze)....349
Coolant Level....348, 351
Cooling Capacity . . . . . . . . . . . . . . . . . . . . . . . . . . . . . . . . . . . . . . . . . . . . . . . . 392
Disposal Of Used Coolant .351
Drain, Flush, And Refill .....348
Inspection....351
Points To Remember .352
INDEX 481
Pressure Cap . . . . . . . . . . . . . . . . . . . . . . . . . . . . . . . . . . . . . . . . . . . . . . . . . . . . . . . . . . . . . 351
Radiator Cap. . . . . . . . . . . . . . . . . . . . . . . . . . . . . . . . . . . . . . . . . . . . . . . . . . . . . . . . . . . . 351
Selection Of Coolant (Antifreeze) .....349, 392, 393
Corrosion Protection....379
Cruise Control (Speed Control). . . . . . . . . . . . . . . . . . . . . . . . . . . . . . . . . . . . . . . . . . . . . . 236, 239
Cruise Light....131, 132
Cupholders. 101
Customer Assistance....472
Cybersecurity....400
Daytime Running Lights 64
Dealer Service....336
Deck Lid Power Release....8 9
Defroster, Windshield. 205
Delay (Intermittent) Wipers 7 2
Diagnostic System, Onboard....133
Dimmer Switch Headlight 6 4
Dipsticks Oil (Engine)....334 Power Steering....235
Disposal Antifreeze (Engine Coolant) .....351
Do Not Disturb....467
Door Ajar....124
Door Ajar Light. 124
Door Locks
Automatic....4 2
Child-Protection Door Lock — Rear Doors....4 2
Doors. 37
Drag And Drop Menu....399
Drive Modes....230
Driver's Seat Back Tilt 43
Driving
Through Flowing, Rising, Or Shallow Standing
Water....279
Electric Brake Control System . . . . . . . . . . . . . . . . . . . . . . . . . . . . . . . . . . . . . . . . . . . . . . . . . 139
Anti-Lock Brake System....138
Electronic Roll Mitigation .....140, 147
Electric Remote Mirrors 61
Electronic Power Distribution Center (Fuses) .....293
Electronic Speed Control (Cruise Control) .....236
Electronic Stability Control (ESC) .....141
Electronic Throttle Control Warning Light .....124
Emergency, In Case Of
Freeing Vehicle When Stuck ....323
Hazard Warning Flasher ....283
Jacking ....356
482 INDEX
Jump Starting . . . . . . . . . . . . . . . . . . . . . . . . . . . . . . . . . . . . . . . . . . . . . . . . . . . . . . . . . . . 317, 319
Overheating....320
Emission Control System Maintenance. . . . . . . . . . . . . 135
Engine....333
Air Cleaner....338
Block Heater....217
Break-In Recommendations .....217
Checking Oil Level . . . . . . . . . . . . . . . . . . . . . . . . . . . . . . . . . . . . . . . . . . . . . . . 334
Compartment Identification....333
Coolant (Antifreeze) . . . . . . . . . . . . . . . . . . . . . . . . . . . . . . . . . . . . . . . . . . . . . . 348, 393
Cooling....348
Exhaust Gas Caution .....204, 392
Fails To Start....216
Flooded, Starting .....216
Fuel Requirements....388,392
Jump Starting . . . . . . . . . . . . . . . . . . . . . . . . . . . . . . . . . . . . . . . . . . . . . . . . . . . . . . 317, 319
Oil 336,392,393
Oil Filler Cap . . . . . . . . . . . . . . . . . . . . . . . . . . . . . . . . . . . . . . . . . . . . . . . . . . . 333, 337
Oil Filter 338
Oil Selection....392
Overheating....320
Starting....212, 213
Engine Oil Viscosity. . . . . . . . . . . . . . . . . . . . . . . . . . . . . . . . . . . . . . . . . . . . . . . . . . . 337
Enhanced Accident Response Feature .....186, 326
Ethanol. 390
Exhaust Gas Cautions . . . . . . . . . . . . . . . . . . . . . . . . . . . . . . . . . . . . . . . . . . . . . . . . . 204, 392
Exhaust System . . . . . . . . . . . . . . . . . . . . . . . . . . . . . . . . . . . . . . . . . . . . . . . . . . . . . . 204, 346
Exterior Lighting. 63
Exterior Lights....63,207
Air Cleaner 338
Air Conditioning....81,340
Engine Oil . . . . . . . . . . . . . . . . . . . . . . . . . . . . . . . . . . . . . . . . . . . . . . . . . . . . . . . . . . 338, 393
Engine Oil Disposal....338
Flashers . . . . . . . . . . . . . . . . . . . . . . . . . . . . . . . . . . . . . . . . . . . . . . . . . . 283
Hazard Warning....283
Turn Signals . . . . . . . . . . . . . . . . . . . . . . . . . . . . . . . . . . . . . . . . . . . . . . . . . . . . . . . . . . . . . . . . . . . . 67, 132, 207
Flash-To-Pass 65
Flooded Engine Starting. . . . . . . . . . . . . . . . . . . . . . . . . . . . . . . . . . . . . . . . . . . . 216
Floor Console 9 9
Fluid, Brake 393, 395
Fluid Capacities. . . . . . . . . . . . . . . . . . . . . . . . . . . . . . . . . . . . . . . . . . . . . . . . . . . 392
Fluid Leaks. 208
Brake....353
Cooling System . . . . . . . . . . . . . . . . . . . . . . . . . . . . . . . . . . . . . . . . . . . . . . 348
Engine Oil. 334
Power Steering . . . . . . . . . . . . . . . . . . . . . . . . . . . . . . . . . . . . . . . . . . . . . . . . . . . . . . 235
Fluids And Lubricants . . . . . . . . . . . . . . . . . . . . . . . . . . . . . . . . . . . . . . . . . . 393
Filters
Fluid Level Checks
INDEX 483
Fog Lights 6 6
Fold-Flat Seats 43
Folding Rear Seats 4 4
Forward Collision Warning. 155
Four-Way Hazard Flasher. . . . . . . . . . . . . . . . . . . . . . . . . . . . . . . . . . . . . . . . . . . . . . . 283
Freeing A Stuck Vehicle....323
Fuel 388
Additives....389
Clean Air 389
Ethanol....390
Gasoline....388
Materials Added . . . . . . . . . . . . . . . . . . . . . . . . . . . . . . . . . . . . . . . . . . . . . 389
Methanol....390
Octane Rating . . . . . . . . . . . . . . . . . . . . . . . . . . . . . . . . . . . . . . . . . . . . . . . . . . . . . . . . . . . . . . 388, 393
Requirements....388,392
Specifications....393
Tank Capacity....392
Fuses....292
Garage Door Opener (HomeLink). 9 2
Gasoline, Clean Air .....389
Gasoline, Reformulated .....389
Gear Ranges....223
Glass Cleaning....383
Gross Axle Weight Rating. . . . . . . . . . . . . . . . . . . . . . . . . . . . . . . . . . . . . . . . . . . . . . 276
Gross Vehicle Weight Rating....276
GVWR....276
Hazard
Driving Through Flowing, Rising, Or Shallow Standing Water. 279
Hazard Warning Flashers . . . . . . . . . . . . . . . . . . . . . . . . . . . . . . . . . . . . . . . . . . . . . . . . 283
Headlights
Automatic 65
Cleaning....380
High Beam/Low Beam Select Switch ..... 6 4
Lights On Reminder 6 6
On With Wipers .65
Passing 65
Switch 63
Time Delay 6 6
Washers....334
Head Restraints....54, 55
Head Rests....54, 55
Heated Mirrors....6
Heater, Engine Block .....217
High Beam/Low Beam Select (Dimmer) Switch ..... 6 4
Hill Start Assist....145
Holder, Coin. 9 9
HomeLink (Garage Door Opener). 9 2
484 INDEX
Hood Prop....8 8
Hood Release 88
Ignition 27
Switch 27
Information Center, Vehicle. 1 1 0
Inside Rearview Mirror .....59, 283
Instrument Cluster. 108
Descriptions....132
Display....1 1 0 , 1 1 3
Instrument Panel Lens Cleaning .....382
Interior Appearance Care . . . . . . . . . . . . . . . . . . . . . . . . . . . . . . . . . . . . . . . . . . . . . . . . . 381
Interior Lights. 67
Intermittent Wipers (Delay Wipers). 7 2
Introduction 4
In Vehicle Help
Vehicle User Guide....17
Jack Operation ....356
Jump Starting . . . . . . . . . . . . . . . . . . . . . . . . . . . . . . . . . . . . . . . . . . . . . . . . . . . . . . . . . . . . . 317, 319
Key Fob
Arm The System....3 5
Panic Alarm 22
Programming Additional Key Fobs .....26, 34
Unlatch The Trunk 22
Key Fob Battery Service (Remote Keyless Entry) ..... 2 3
Key Fob Programming (Remote Keyless Entry) ..... 2 6
Key-In Reminder. 29
Keyless Enter-N-Go....38,216
Enter The Trunk 2 2
Passive Entry 38
Passive Entry Programming 38
Keys 19
Replacement 26,34
Lane Change And Turn Signals 67
Lane Change Assist....67
LaneSense. 266
Lap/Shoulder Belts....167
Latches. 207
Hood 88
Lead Free Gasoline....388
Leaks, Fluid .208
Life Of Tires .369
Light Bulbs....207, 289
Lights. 207
Air Bag....122, 176, 205
Automatic Headlights 65
Brake Assist Warning....144
INDEX 485
Brake Warning....122,386
Bulb Replacement....289
Cruise....131, 132
Daytime Running 64
Dimmer Switch, Headlight . . . . . . . . . . . . . . . . . . . . . . . . . . . . . . . . . . . . . . . . . . . . . . . . . . . . . . . . . . . . . 63, 64
Electronic Stability Program(ESP) Indicator .....125
Exterior . . . . . . . . . . . . . . . . . . . . . . . . . . . . . . . . . . . . . . . . . . . . . . . . . . . . . . . . . . . . . . . . . . . . 63, 207
Fog 66
Hazard Warning Flasher . . . . . . . . . . . . . . . . . . . . . . . . . . . . . . . . . . . . . . . . . . . . 283
Headlights....63,66
Headlights On With Wipers 6 5
Headlight Switch....6 3
High Beam 64
High Beam/Low Beam Select 6 4
Instrument Cluster 63
Intensity Control 70
Interior 67
License....292
Lights On Reminder 6 6
Malfunction Indicator (Check Engine) .....126
Park....65,132
Passing 65
Reading....68
Seat Belt Reminder....125
Security Alarm....126
Service....289
Traction Control....144
Turn Signals . . . . . . . . . . . . . . . . . . . . . . . . . . . . . . . . . . . . . . . . . . . . . . . . . . . . . . . . . . . . . . . . . 63, 67, 132, 207
Vanity Mirror 62
Warning Instrument Cluster Descriptions . . . .125, 132
Loading Vehicle . . . . . . . . . . . . . . . . . . . . . . . . . . . . . . . . . . . . . . . . . . . . . . . . . . . . . . . . . . . 275, 277
Capacities....277
Tires....361
Load Shed Battery Saver On. . . . . . . . . . . . . . . . . . . . . . . . . . . . . . . . . . . . . . . 120
Load Shed Electrical Load Reduction. . . . . . . . . . . . . . 120
Load Shed Intelligent Battery Sensor .....120
Locks
Automatic Door 42
Auto Unlock....4 2
Child Protection 42
Power Door .37
Low Tire Pressure System. . . . . . . . . . . . . . . . . . . . . . . . . . . . . . . . . . . . . . . . . . . 158
Lubrication, Body .343
Lug Nuts/Bolts....387
Maintenance....87
Maintenance Free Battery . . . . . . . . . . . . . . . . . . . . . . . . . . . . . . . . . 335
Maintenance Schedule....329, 330
Malfunction Indicator Light (Check Engine) .....126, 135
Manual
Service....476
Media Hub 454
Memory Feature (Memory Seats) 4 8
Memory Seat 48
Memory Seats And Radio 48
Methanol....390
Mirrors 59
Electric Powered 61
Electric Remote 61
Heated 61
Outside 60
Rearview....59,283
Vanity 62
Modifications/Alterations
Vehicle 5
Monitor, Tire Pressure System. . . . . . . . . . . . . . . . . . . . . . . . . . . . . . . 158
Mopar Parts .....475
MP3 Control 454
Multi-Function Control Lever....63
Occupant Restraints....164
Octane Rating, Gasoline (Fuel) .....388, 393
Oil Change Indicator 11 2
Reset 112
Oil, Engine. . . . . . . . . . . . . . . . . . . . . . . . . . . . . . . . . . . . . . . . . . . . . . . . . . . . . . . . . . . . . 336, 393
Capacity....392
Change Interval .336
Checking 334
Dipstick 334
Disposal....338
Filter 338,393
Filter Disposal 338
Materials Added To . . . . . . . . . . . . . . . . . . . . . . . . . . . . . . . . . . . . . . . . . . . . . 337
Pressure Warning Light....125
Recommendation....392
Viscosity .337, 392
Oil Filter, Change....338
Oil Filter, Selection. . . . . . . . . . . . . . . . . . . . . . . . . . . . . . . . . . . . . . . . . . . . . . . . . . 338
Oil Pressure Light....125
Onboard Diagnostic System....133
Operating Precautions....133
Operator Manual
Owner's Manual 5,476
Outside Rearview Mirrors....60
Overheating, Engine . . . . . . . . . . . . . . . . . . . . . . . . . . . . . . . . . . . . . . . . . . . . 320
Owner's Manual (Operator Manual)....5
Paddle Shifters .....228
Paddle Shift Mode. 228
INDEX 487
Paint Care. 379
Panic Alarm 22
Parking Brake . . . . . . . . . . . . . . . . . . . . . . . . . . . . . . . . . . . . . . . . . . . . . . . . . . . . . . . . . . . . . . . . 218
ParkSense System, Rear .....259
Passing Light 65
Passive Entry 38
Performance....1 1 4
Personalized Main Menu....399
Pets....204
Pinch Protection 87
Placard, Tire And Loading Information .....361
Power
Brakes....386
Deck Lid Release 89
Distribution Center (Fuses) .....297
Door Locks 37
Mirrors 61
Outlet (Auxiliary Electrical Outlet) .....102
Seats 46
Steering....235
Sunroof 85
Tilt/Telescoping Steering Column 57
Windows 82
Power Seats
Forward 46
Lumbar 47
Rearward 46
Recline 46
Power Steering Fluid. 393, 395
Pregnant Women And Seat Belts....173
Pretensioners
Seat Belts....173
Radial Ply Tires....367
Radiator Cap (Coolant Pressure Cap). . . . . . . . . . . . . . . . . . . . . 351
Radio Frequency
General Information. . . . . . . . . . . . . . . . . . . . . . . . . . . . . . . . . . . . . . . . . . . . . . . . . . . . . . . . . . . . 27, 33, 34, 42
Radio Operation....454
Rain Sensitive Wiper System 73
Rear Axle (Differential) .....355
Rear Camera....271
Rear Cross Path. 153
Rear ParkSense System .259
Rear Seats, Folding 44
Recreational Towing. 277
Reformulated Gasoline. . . . . . . . . . . . . . . . . . . . . . . . . . . . . . . . . . . . . . . 389
Refrigerant....339, 340
Release, Hood. 8 8
Reminder, Lights On....66
Reminder, Seat Belt .....166
Remote Keyless Entry
Arm The Alarm 35
Panic Alarm 2 2
Programming Additional Key Fobs .....26, 34
Unlatch The Trunk 2 2
Remote Starting
Exit Remote Start Mode 32
Uconnect Customer Programmable Features ..... 3 3
Uconnect Settings 3 3
Remote Trunk Release 89
Replacement Bulbs . . . . . . . . . . . . . . . . . . . . . . . . . . . . . . . . . . . . . . . . . . . . . . . . . . . . . . . . . . . 289
Replacement Keys . . . . . . . . . . . . . . . . . . . . . . . . . . . . . . . . . . . . . . . . . . . . . . . . . . . . . 26, 34
Replacement Tires . . . . . . . . . . . . . . . . . . . . . . . . . . . . . . . . . . . . . . . . . . . . . . . . . 370
Reporting Safety Defects . . . . . . . . . . . . . . . . . . . . . . . . . . . . . . . . . . . . . . 475
Restraints, Child .....189
Restraints, Head. . . . . . . . . . . . . . . . . . . . . . . . . . . . . . . . . . . . . . . . . . . . . . . . . . . . . . . . . . . 54, 55
Rocking Vehicle When Stuck. . . . . . . . . . . . . . . . . . . . . . . . . . . . . . . . . . . . . . . . . . . 323
Rotation, Tires. 376
Safety Checks Inside Vehicle. . . . . . . . . . . . . . . . . . . . . . . . . . . . . . . . . . . . . . . . . . . . . 205
Safety Checks Outside Vehicle....207
Safety Defects, Reporting .....475
Safety, Exhaust Gas . . . . . . . . . . . . . . . . . . . . . . . . . . . . . . . . . . . . . . . . . . . . . . . . . . 204
Safety Information, Tire . . . . . . . . . . . . . . . . . . . . . . . . . . . . . . . . . . . . . . . . . . 356
Safety Tips....204
Schedule, Maintenance. . . . . . . . . . . . . . . . . . . . . . . . . . . . . . . . . . . . . . . . . . . . 329
Seat Belt Reminder....125
Seat Belts....166,205
Adjustable Shoulder Belt .....171
Adjustable Upper Shoulder Anchorage .....171
Adjustable Upper Shoulder Belt Anchorage .....171
Automatic Locking Retractor (ALR) .....174
Child Restraints....189
Energy Management Feature .....173
Extender....172
Front Seat 166,167,169
Inspection....205
Lap/Shoulder Belt Operation....169
Lap/Shoulder Belts .....167
Lap/Shoulder Belt Untwisting .....171
Operating Instructions .....169
Pregnant Women....173
Pretensioners .....173
Rear Seat....167
Reminder 166
Seat Belt Extender....172
Seat Belt Pretensioner....173
Untwisting Procedure .....171
Seat Belts Maintenance. . . . . . . . . . . . . . . . . . . . . . . . . . . . . . . . . . . . . . . . . . . . . . 381
Seats . . . . . . . . . . . . . . . . . . . . . . . . . . . . . . . . . . . . . . . . . . . . . . . . . . . . . . . . . . . . . . . . . 43, 46, 51
INDEX 489
Adjustment....43, 46
Easy Entry 50
Head Restraints . . . . . . . . . . . . . . . . . . . . . . . . . . . . . . . . . . . . . . . . . . . . . . . . . . . . . . . . . . . 54, 55
Heated 51
Height Adjustment....46
Memory 48
Power 46
Rear Folding....43, 44
Seatback Release 4 4
Tilting. . . . . . . . . . . . . . . . . . . . . . . . . . . . . . . . . . . . . . . . . . . . . . . . . . . . . . . . . . . . . . . 43, 46
Vented 53
Ventilated 53
Security Alarm....35,126
Arm The System 35
Selection Of Coolant (Antifreeze)....393
Sentry Key
Key Programming 34
Sentry Key (Immobilizer) 3 3
Sentry Key Replacement .....26,34
Service Assistance....472
Service Contract 474
Service Manuals....476
Shifting. .220
Automatic Transmission....220
Shoulder Belts. 167
Side View Mirror Adjustment. 60
Signals, Turn . . . . . . . . . . . . . . . . . . . . . . . . . . . . . . . . . . . . . . . . . . . . . . . . . . . . . . . . . . . . . . . . . . . . . . . 67, 132, 207
Siri. 466
SiriusXM Guardian
Vehicle Health Alert . . . . . . . . . . . . . . . . . . . . . . . . . . . . . . . . . . . . . . . . 464
Snow Chains (Tire Chains)....376
Snow Tires....372
Spare Tires. .372, 373, 374
Spark Plugs....393
Specifications
Fuel (Gasoline)....393
O i 1....393
Speed Control
Accel/Decel. . . . . . . . . . . . . . . . . . . . . . . . . . . . . . . . . . . . . . . . . . . . . . . . . . . . . . . . . . . . . . 237, 238
Accel/Decel (ACC Only) .....244
Cancel....238
Resume 238
Se t . . . . . . . . . . . . . . . . . . . . . . . . . . . . . . . . . . . . . . . . . . . . . 237
Speed Control (Cruise Control). . . . . . . . . . . . . . . . . . . . . . . . . . . . . . . 236, 239
SRT Drive Modes....434
Eco Mode....452
Racing....445
Valet Mode . . . . . . . . . . . . . . . . . . . . . . . . . . . . . . . . . . . . . . . . . . . . . . . . . . 450
Starting....212, 213
Automatic Transmission .....212
490 INDEX
Button....27
Cold Weather....216
Engine Fails To Start .....216
Starting And Operating....212, 213
Starting Procedures....212, 213
Steering 57
Power 235
Tilt Column 57
Wheel, Heated 58
Wheel, Tilt 57
Steering Wheel Audio Controls....453
Steering Wheel Mounted Sound System Controls . . . .453
Storage....99,378
Storage, Vehicle . . . . . . . . . . . . . . . . . . . . . . . . . . . . . . . . . . . . . . . . . . . . . . . . . . . . . . . . . . . . . . . . . 81, 378
Storing Your Vehicle....378
Stuck, Freeing .....323
Sunglasses Storage....106
Sun Roof....85,87
Supplemental Restraint System – Air Bag. .....178
Telescoping Steering Column 57
Temperature Control, Automatic (ATC) 7 9
Tilt Steering Column 57
Time Delay
Headlight 6 6
Tire And Loading Information Placard. . . . . . . . . . . . . . . . . . . . . . . . . . . . . . . . . . . . . . . . . . . . . . . . . . . . . . . . . . . . . .
Tire Markings....356
Tires....207,365,372,377
Aging (Life Of Tires)....369
Air Pressure 365
Chains 376
Changing 356
Compact Spare . . . . . . . . . . . . . . . . . . . . . . . . . . . . . . . . . . . . . . . . . . . . . . . . 373
General Information....365, 372
High Speed . . . . . . . . . . . . . . . . . . . . . . . . . . . . . . . . . . . . . . . . . . . . . . . . . . . . . 367
Inflation Pressure....366
Jacking....356
Life Of Tires . . . . . . . . . . . . . . . . . . . . . . . . . . . . . . . . . . . . . . . . . . . . . . . 369
Load Capacity . . . . . . . . . . . . . . . . . . . . . . . . . . . . . . . . . . . . . . . . . . . . . . . 361, 362
Pressure Monitoring System (TPMS) .....128, 158
Quality Grading 377
Radial....367
Replacement....370
Rotation 376
Safety .356, 365
Sizes....357
Snow Tires....372
Spare Tires . . . . . . . . . . . . . . . . . . . . . . . . . . . . . . . . . . . . . . . . . . . . . . . . . . . . . . . . . . . . . . . 372, 374
Spinning....368
Tread Wear Indicators 368
INDEX 491
Wheel Nut Torque . . . . . . . . . . . . . . . . . . . . . . . . . . . . . . . . . . . . . . . . . . . . . . . . . . . . . . . . . . 387
Tire Safety Information. 356
Tire Service
Kit.....301,302,303,305,309,310,311,313,316,317
To Open Hood 8 8
Towing. 277
Behind A Motorhome .277
Recreational....277
Traction....277, 278
Traction Control....147
Trailer Towing. 277
Transfer Case
Fluid 393
Transmission
Automatic....222,354
Fluid 393,395
Maintenance....354
Shifting....220
Transporting Pets....204
Tread Wear Indicators . . . . . . . . . . . . . . . . . . . . . . . . . . . . . . . . . . . . . . . . . . . . 368
Trunk Lid (Deck Lid). 8 9
Trunk Release Remote Control 89
Turn Signals. . . . . . . . . . . . . . . . . . . . . . . . . . . . . . . . . . . . . . . . . . . . . . . . . . . . . . . . . . . . . . . . . . . 67, 132
Uconnect
Uconnect Settings . . . . . . . . . . . . . . . . . . . . . . . . . . . . . . . . . . . . . . . . . . . . . . . . . . . . . . . . 21, 22, 33, 401
Uconnect 4C/4C Nav With 8.4-Inch Display. . . . . . . . .402
Uconnect Settings
Customer Programmable Features .....33, 38, 401
Passive Entry Programming 38
Uniform Tire Quality Grades .....377
Universal Garage Door Opener (HomeLink) ..... 9 2
Universal Transmitter 92
Unleaded Gasoline 388
Untwisting Procedure, Seat Belt .....171
U S B . 454
Vanity Mirrors 62
Vehicle Certification Label . . . . . . . . . . . . . . . . . . . . . . . . . . . . . . . . . . . . . . . . . . . . 276
Vehicle Identification Number (VIN) .....386
Vehicle Loading....275, 277, 362
Vehicle Modifications/Alterations. 5
Vehicle Security Alarm. 35
Vehicle Storage. . . . . . . . . . . . . . . . . . . . . . . . . . . . . . . . . . . . . . . . . . . . . . . . . . . . . . . . . . . . . . . . . . 81, 378
Vehicle User Guide
In Vehicle Help 17
Navigation 17
Operating Instructions....17
Searching User Guide 17
Viscosity, Engine Oil . . . . . . . . . . . . . . . . . . . . . . . . . . . . . . . . . . . . . . . . . . . . . . . . . . 337
Voice Command....456
Voice Recognition System (VR) .....456
Warning Flashers, Hazard .....283
Warning Lights (Instrument Cluster Descriptions)....128
Warnings And Cautions 5
Warranty Information .....475
Washer
Adding Fluid . . . . . . . . . . . . . . . . . . . . . . . . . . . . . . . . . . . . . . . . . . . . . . . 334
Washers, Windshield. . . . . . . . . . . . . . . . . . . . . . . . . . . . . . . . . . . . . . . . . . . . . . . . . . . . . . . . . . . 72, 334
Washing Vehicle....380
Water
Driving Through .279
Wheel And Wheel Tire Care . . . . . . . . . . . . . . . . . . . . . . . . . . . . . . . . . . . . . . . . . . . . . . . . . 375
Wheel And Wheel Tire Trim . . . . . . . . . . . . . . . . . . . . . . . . . . . . . . . . . . . . . . . . . . . 375
Wind Buffeting....85, 86
Window Fogging 81
Windows....82
Power 82
Reset Auto-Up 84
Windshield Defroster .....205
Windshield Washers....71,72
Fluid . . . . . . . . . . . . . . . . . . . . . . . . . . . . . . . . . . . . . . . . . . . . . . . . . . . . . . . 334
Windshield Wiper Blades . . . . . . . . . . . . . . . . . . . . . . . . . . . . . . . . . . . . . . . . . . 343
Windshield Wipers 71
Wipers Blade Replacement....343
Wipers, Intermittent 7 2
Wipers, Rain Sensitive 73
Wireless Charging Pad....105
INSTALLATIONOFRADIOTRANSMITTING EQUIPMENT
Specialdesignconsiderationsareincorporatedinto this vehicle'selectronicsystemtoprovideimmunitytoradio frequencysignals.Mobiletwo-wayradiosandtelephone equipmentmustbeinstalledproperlybytrainedpersonnel.Thefollowingmustbeobservedduringinstallation.
The positive power connections should be made directly to the battery and fused as close to the battery as possible. Then negative power connections should be made to body sheet metal adjacent to the negative battery connection. This connections should not be fused.
Antennasfortwo-wayradiosshouldbemountedonthe roofotherearareaofthevehicle.Careshouldbeused inmountingantennaswithmagnetbases.Magnetsmay affecttheaccuracyoroperationofthecompasson vehiclessoequipped.
Theantennacableshouldbeasshortaspracticaland routedawayfromthevehiclewiringwhenpossible.Use onlyfullyshieldedcoaxialcable.
Carefully match the antenna and cable to other radioto ensure a low standing wave ratio (SWR).
Mobileradioequipmentwithoutoutputpowergreaterthan normalmayrequirespecialprecautions.
All installation should be checked for possible interference between the communication equipment and the vehicle's electronics systems.
WARNING:
Operating, servicing and maintaining a passenger vehicle or off-road highway motor vehicle can expose you to chemicals including engine exhaust, carbon monoxide, phthalates, and lead, which are known to the State of California to cause cancer and birth defects or other reproductive harm. Tominimize exposure, avoid breathing exhaust, donotidyle the engine except as necessary, service your vehicle in a well-ventilated area and wear gloves or wash your hands frequently when servicing your vehicle. Formoreinformation goto www.P65Warnings.ca.gov/passenger-vehicle.

text_image
DODGE19_LD_OM_EN_USC
©2021 FCA US LLC. All Rights Reserved.
Dodge is a registered trademark of FCA US LLC.

Second Edition V1
Printed in the U.S.A.