Leddura 2Mee - Screen CTOUCH - Free user manual and instructions
Find the device manual for free Leddura 2Mee CTOUCH in PDF.


User questions about Leddura 2Mee CTOUCH
0 question about this device. Answer the ones you know or ask your own.
Ask a new question about this device
Download the instructions for your Screen in PDF format for free! Find your manual Leddura 2Mee - CTOUCH and take your electronic device back in hand. On this page are published all the documents necessary for the use of your device. Leddura 2Mee by CTOUCH.
USER MANUAL Leddura 2Mee CTOUCH
- Changes or modifications not expressly approved by the party responsible for compliance could void the user's authority to operate the equipment.
• This user manual includes detailed usage instructions for your product. Please read this manual thoroughly. - Figures and illustrations in this user manual are provided for reference only and may differ from actual equipment appearance.
• Equipment design and specifications may be changed without notice.
CONTENTS
| Important Information | 1 | |
| Important Safety Precautions | 2 | |
| Standard Accessories | 4 | |
| Identification of Controls | 5 | |
| Remote Control | 7 | |
| Connections | 8 | |
| Basic Operations | 9 | |
| 2Meet Operating | 10 | |
| Remote Meetings | 11 | |
| Operating the navigation bar | 12 | |
| Menu list | 13 | |
| Troubleshooting | 14 | |
| Specifications | 15 |
Note: A digital PDF manual to zoom in for better viewing can be found at: www.ctouch.eu
IMPORTANT INFORMATION
If the unit is not positioned in a stable location, it can be potentially hazardous due to falling. Many injuries, particularly to children, can be avoided by taking simple precautions such as:
- Using cabinets or stands recommended by the manufacturer of the unit.
- Only use furniture that can safely support the unit.
- Ensure the CTOUCH interactive display is not hanging over the edge of the supporting furniture.
- Do not place the CTOUCH interactive display on tall furniture (for example, cupboards or bookcases) without anchoring both the furniture and the CTOUCH interactive display to a suitable support.
- Do not place cloth or other materials between the CTOUCH interactive display and supporting furniture.
- Do not let children climb on furniture to reach the CTOUCH interactive display or its controls.
- CTOUCH is not necessarily responsible nor obligate providing support for the App operation on the inside Android OS.
- Do not use immediately after moving from a low temperature to high temperature environment, as this causes condensation, which may result in fire, electric shock, or other hazards.
- To avoid possible condensation it is recommended to not use the device within 24 hours after its arrival, to avoid possible condensation.
Warning:
To prevent the spread of fire, keep candles or other open flames away from the CTOUCH interactive display all the times.
IMPORTANT SAFETY PRECAUTIONS

CAUTION RISK OF ELECTRIC SHOCK DO NOT OPEN


This symbol indicates that dangerous voltage constituting a risk of electric shock is present within your CTOUCH interactive display. This label is located on the back of your CTOUCH interactive display.

This symbol indicates that there are important operating and maintenance instructions in the literature accompanying your CTOUCH interactive display.
Electricity may cause personal injuries and property damage if handled improperly. The CTOUCH interactive display has been engineered and manufactured with the highest priority on safety. But IMPROPER USE CAN RESULT IN POTENTIAL ELECTRIC SHOCK OR FIRE HAZARD. In order to prevent potential danger, please observe the following instructions when installing, operating and cleaning the product. To ensure your safety and prolong the service life of your CTOUCH interactive display, please read the following precautions carefully before using the product.
- Read these instructions---All operating instructions must be read and understood before the product is used.
- Keep these instructions—These safety and operating instructions must be kept in a safe place for future reference.
- Note all warnings—All warnings on the product and in the instruction manual must be observed closely.
- Follow all instructions—All operating instructions must be followed.
- Attachments---Only use attachments/accessories specified by the manufacturer. Do not use attachments which are not recommended by the manufacturer. Use of improper attachments can result in accidents.
- Power source—This product is intended to be supplied with a listed power supply indicated on the marking label. If you are not sure of the type of power supply at your location, consult your product dealer or local power company. For added protection for this product during a lightning storm, or when it is left unattended and unused for a long period of time, unplug it from the wall outlet and disconnect the cable system.
- Power cord protection—Protect the power cord from being walked on or pinched particularly at plugs, wall outlet, and the point where they exit from the device.
NOTE: Where the mains plug or an appliance coupler is used as the disconnected device, the disconnected device shall remain readily operable.
8. Overloading—Do not overload wall outlets, extension cords, or convenience receptacles on other equipment as this can result in a risk of fire or electric shock.
9. Entering of objects and liquids---Never insert an object into the product through vents or openings. High voltages are present in the product and inserting an object can cause electric shock and/or short circuit internal parts. For the same reason, do not spill water or liquid on the product.
10. Servicing---Refer all servicing to qualified service personnel. Servicing is required when the device has been damaged in any way, such as the power-supply cord or plug is damaged, liquid has been spilled, objects have fallen into the device, the device has been exposed to rain or moisture, does not operate normally or has been dropped.
11. Damage requiring service---If any of the following conditions occurs, unplug the power cord from the AC outlet and request a qualified service technician to perform repairs.
a. When the power cord or plug is damaged.
b. When liquid is spilled on the product or when objects have fallen into the product. c. When the product has been exposed to rain or water.
d. When the product does not operate properly as described in the operating instructions. Do not touch the controls other than those described in the operating instructions. Improper adjustment of controls not described in the instructions can cause damage, which often requires extensive adjustment work by a qualified technician.
e. If the product has been dropped or the cabinet has been damaged in any way.
f. When the product displays an abnormal condition or exhibits a distinct change in performance. Any noticeable abnormality in the product indicates that the product needs servicing.
- Replacement parts—In case the product needs replacement parts, make sure that the service person uses replacement parts specified by the manufacturer, or those with the same characteristics and performance as the original parts. Use of unauthorized parts can result in fire, electric shock and/or other danger.
- Safety checks---Upon completion of service or repair work, request the service technician to perform safety checks to ensure that the product is in proper operating condition.
- Wall or ceiling mounting---When mounting the device on a wall or ceiling, be sure to install the product according to the method recommended by the manufacturer. This is a safety issue.
- Stand—Use only with the trolley stand or wall mount specified by the manufacturer, or sold with the device. Do not place the product on an unstable trolley stand or wall mount. Placing the product on an unstable base can cause the product to fall, resulting in possible serious injuries as well as damage to the device. When mounting the product on a wall, be sure to follow the manufacturer's instructions. Use only the mounting hardware recommended by the manufacturer.
-
Careful move--When a trolley is used, be cautious when moving the trolley/device combination to avoid injury from the device tipping over. Sudden stops, excessive force and uneven floor surfaces can cause the product to fall from the trolley. Never attempt to move the CTOUCH interactive display unless the AC power cord has been disconnected.
-
Lightning--Unplug this device during thunder storm or when unused for long periods of time.
For added protection during a thunder storm, or when the CTOUCH interactive display is left unattended and unused for long periods of time, unplug it from the wall outlet and disconnect the antenna. This will prevent damage to the equipment due to lightning and power-line surges. - Do not use this device near water---for example near a bathtub, washbowl, kitchen sink, laundry tub, in a wet basement or near a swimming pool. The device should not be exposed to dripping or splashing liquids and that no objects filled with liquids, such as vases, shall be placed on the device.
- Clean only with dry cloth--Unplug the device from the power before cleaning. Do not use liquid cleaners or aerosol cleaners. Use a soft cloth for cleaning.
- Ventilation--Do not block any ventilation openings. Install the CTOUCH interactive display in accordance with the manufacturer instructions. The vents and other openings in the cabinet are designed for ventilation. Do not cover or block these vents and openings since insufficient ventilation can cause overheating and/or shorten the life of the product. Do not place the product on a bed, sofa, rug or other similar surface, since they can block ventilation openings. This product is not designed for built-in installation; therefore do not place the product in an enclosed space such as a bookcase or rack, unless proper ventilation is provided or the manufacturer's instructions are followed.
- Heat sources---Do not install near any heat sources such as radiators, heat registers, sloves, or other device (including amplifiers) that produce heat.
- Panel protection---The display panel used in this product is made of glass. Therefore, it can break when the product is dropped or impacted upon by other objects. Be careful not to be injured by broken glass pieces in case the display panel breaks.
23.Pixel defect---The display panel is a very high technology product, giving you fine detailed pictures. Occasionally, a few non-active pixels may appear on the screen as a fixed point of blue, green or red. Please note that this does not affect the performance of your product.
WARNING: For continued safety, device with class I construction shall be connected to a mains socket outlet with a protective earthing connection.
IMPORTANT SAFETY PRECAUTIONS
| About Location/Environment | Do not use in hot and cold rooms (locations)When the unit is used in rooms (locations) with low temperature, the picture may leave trails or appear slightly delayed. This is not a malfunction. The unit will recover when the temperature returns to normal.Do not leave the unit in a hot or cold location. Also, do not leave the unit in a location exposed to direct sunlight to near a heater or in high humidity, as this may cause the cabinet to deform and the screen to malfunction and affect the CTOUCH interactive display's performance.Environment condition:Operating temperature: 5^ - 35^ Operating humidity: 20% - 80% (no moisture condensation)Storage temperature: -15^ - 45^ Storage humidity: 10% - 80% Atmospheric pressure: 86 kPa ~106 kPa | CAUTIONS:The permanent after-image on the screen resulting from fixed image use is not an operating defect and as such is not covered by the warranty.This product is not designed to display fixed images for extended periods of time.It is not advised to put the screen in portrait mode because this will affect the warranty. |
| Cleaning and MaintenanceTo clean this unit, wipe with a soft, dry cloth.Clean the cabinet with a soft, lint-free cloth. If the cabinet is especially dirty, moisten a soft, lint-free cloth in a weak detergent Solution, squeeze the excess moisture from the cloth, then wipe the cabinet with the cloth. Use a clean cloth to dry the cabinet.Use eyeglass cleaner to remove stubborn dirt from the screen.Never use alcohol, paint thinner or benzine to clean this device. | ||
| About After-Image | The extended use of fixed image program material can cause a permanent after-image on the screen.This background image is viewable on normal programs in the form of a stationary fixed image. This type of irreversible screen deterioration can be limited by observing the following steps:A. Reduce the brightness/contrast setting to a minimum viewing level.B. Do not display the fixed image for extended periods of time.C. Turn the power off when the display is not in actual use.Important Information Regarding Use of Video Games, Computers, Captions or Other Fixed Image Displays.Do not allow a still picture to be displayed for an extended period of time, as this can cause a permanent after-image to remain on the screen.Examples of still pictures include logos, video games, computer images, teletext and images displayed in 4:3 mode. | Carrying or Moving the CTOUCH interactive displayWhen you move the CTOUCH interactive display, hold the frame of the CTOUCH interactive display.Be aware of the danger or harm which may caused by carrying or moving the CTOUCH interactive display, as the bezel is very thin.When transporting, do not subject the unit to shocks or vibration, or excessive force. |
Environmental ProtectionWaste electrical products should not be disposed of with household waste. Please recycle where facilities exist. Check with your Local Authority or retailer for recycling advice.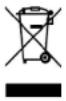 |
STANDARD ACCESSORIES
Unpacking
The following items are included in your product box.
CTOUCH interactive display Remote Control Touch Pen AC Power Cord UK AC Power Cord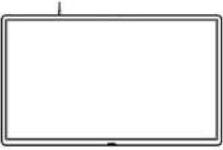 | 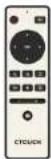 | 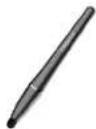 | 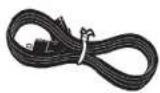 | 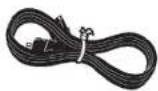 |
HDMI Cable USB Cable Quick Start Guide Warranty Card Welcome Letter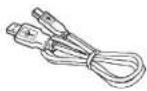 | 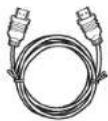 |  |  |  |
Notes:
The illustrations may differ slightly from the items shipped with your product.
IDENTIFICATION OF CONTROLS
Viewing the control panel

text_image
Technical diagram of a monitor with labeled components including front, back, and internal ports| nt. | Description | |
| 1 | USB(2.0)(for camera) | This port is connected to internal PC solutions.Notes: Please open the dust cover before being used. |
| 2 | Microphone | Far field audio input for internal PC solutions. |
| 3 | OPS module slot | Insert an OPS module (Optional) |
| 4 | Power LED | Red: In standby mode.White: In power on mode. |
| Remote control sensor | Aim the remote control towards this spot on the CTOUCH interactive display. | |
| Power | Press to turn on or off the CTOUCH interactive display.Note: When the CTOUCH interactive display is turned on, press the button in middle to show the navigation bar. Press the button for about 2 seconds and the screen will go into stand-by mode. | |
| 5 | USB | Connect USB devices to this port for OPS and 2Meet solutions. |
| 6 | AC IN | Plug the AC cord into this jack and into a power outlet.(AC 100-240V 50/60Hz) |
| 7 | Fuse | 12A 250V |
| 8 | Power Switch | Push (1) to connect the power, push (0) to cut off the power.Note: Don't cover the power switch. |
IDENTIFICATION OF CONTROLS
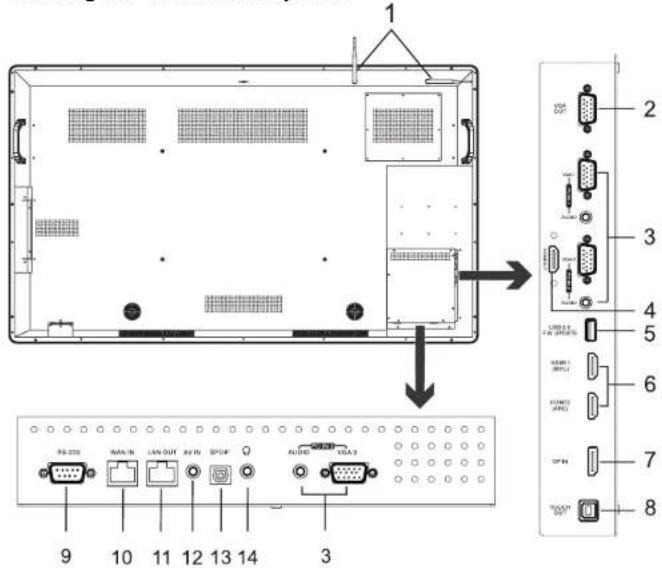
Viewing the connection panel
text_image
1 2 3 4 5 6 7 8 9 10 LAN OUT AV IN SPSP ALON VEA 3 9 10 LAN OUT AV IN SPSP ALON VEA 3
HIGH-DEFINITION MULTIMEDIA INTERFACE
The terms HDMI and HDMI High-Definition Multimedia Interface, and the HDMI Logo are trademarks or registered trademarks of HDMI Licensing LLC in the United States and other countries.
| Nr. | |
| 1 | Antenna |
| 2 | VGA OUT |
| 3 | PC IN1/2/3 |
| 4 | HDMI OUT |
| 5 | USB3.0 |
| 6 | HDMI1/2 INPUT |
| 7 | DP(DisplayPort) INPUT |
| 8 | TOUCH OUT |
| 9 | RS232 |
| 10 | WAN IN |
| 11 | LAN OUT |
| 12 | AV IN |
| 13 | S/PDIF digital audio output |
| 14 | |
Description
| WiFi antenna. (Tighten the WiFi antenna in clockwise direction) |
| Output of the currently selected PC IN 1/2/3 signal. |
| Connect the video/audio of a computer to these ports. |
| Connect an external display to this port, output of the current source. |
| For software upgrades. |
| Connect an HDMI or DVI device to this jack.HDMI(MHL): Connect a MHL-enabled device such as a smart phone to this jack to view the external device's screen on your screen.HDMI2(ARC): Connect an ARC-enabled home theater receiver to this jack. |
| Connect an external device to DP out jack. |
| Output for external devices connected to PCx, HDMIx or DP ports, which support touch systems. |
| For remote control of the CTOUCH interactive display. |
| The built-in router input port. Connects the external network. |
| The built-in router output port. Connection to another computer or other Internet enabled devices. |
| Input port for composite video. |
| Connect a digital sound system to this S/PDIF socket. |
| Connect headphones to this jack. The current selected source is audible. |
Note: If the VGA does not get any signal it will go into stand-by after two minutes, while others source does not get any signal it will go into stand-by mode after 10 minutes.
REMOTE CONTROL
text_image
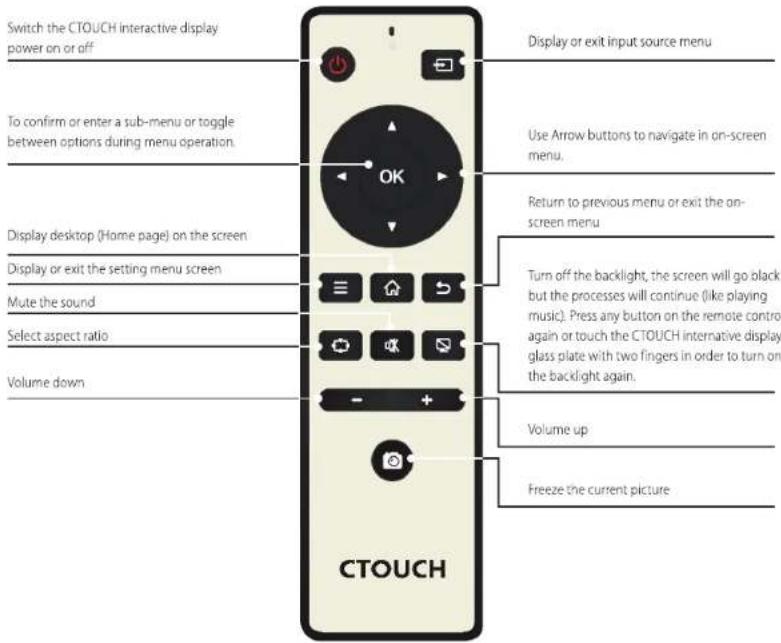
Switch the CTOUCH interactive display power on or off To confirm or enter a sub-menu or toggle between options during menu operation. Display desktop (Home page) on the screen Display or exit the setting menu screen Mute the sound Select aspect ratio Volume down Display or exit the on-screen menu Use Arrow buttons to navigate in on-screen menu. Return to previous menu or exit the on- screen menu Turn off the backlight, the screen will go black but the processes will continue (like playing music). Press any button on the remote control again or touch the CTOUCH interactive display glass plate with two fingers in order to turn on the backlight again. Volume up Freeze the current picture CTOUCHThese USB tokens are for visitors or adhoc users, so no installation of the MirrorOp software is required.
To connect wireless to the screen, insert USB stick in your device. Click on the file to run the sharing software;
For PC click on: "Download&Show_v1071"
For MAC use Airplay or click on: "MirrorOp1.0.46.dmg"
*Nothing will be installed it is only an executable which run the sharing software. *We suggest to place these tokens near the Leddura 2Meet (on the table in front).
For more information and manual check: www.leddura2meet.eu
text_image
2MEET CTOUCH 2MEETNOTES:
- This operation manual provides a description based on operating functions with the remote control.
- In different mode, some buttons may have different function.
CONNECTIONS
Cautions Before Connecting
- When connecting an external device to the CTOUCH interactive display, make sure that the CTOUCH and the external device are turned off.
- Check the plugs at the ends of the cables to make sure that they are the correct type before plugging them into the jacks on the CTOUCH interactive display.
- Make sure that all plugs are securely inserted into the jacks. Loose connections can result in image or color problems.
-
The illustration of the external device may be different depending on your model.
• Refer to the operating manual of the external device as well. -
Connect the female plug to the AC socket on the unit.
-
Connect the male plug to the wall outlet as illustrated.
Notes:
- This product should be operated only from the type of power source indicated on the marking label.
- Always unplug the AC cord from power outlet when you won't use the screen for a long period of time.

Computer, etc.


Internet de
Audio input devices
Serial port cable
(1) (2)
(1)基因通过控制 通过控制____,____的合成来控制代谢过程,进而控制生物体的性状。
The Ground Truth image displays a single, solid horizontal line. According to Rule 2 (UNDERSCORE & LINE RULES), this is a stylistic or background line, not a placeholder underscore. Therefore, the OCR result must ignore it and output nothing or only meaningful text. The provided OCR content is "____", which consists of four underscores. This is an incorrect interpretation of the line as a placeholder, violating the rule that stylistic lines must be ignored. The OCR has hallucinated underscores where none should exist based on the GT's visual context. Hence, the OCR result is inconsistent with the Ground Truth.
2023年
Network cable
ON
16
-
i
Network cable
1. 2023年1月1日
!
er, etc. ;
devides
-
1. 2. 3. 4. 5. 6. 7. 8. 9. 10. 11. 12. 13. 14. 15. 16. 17. 18. 19. 20. 21. 22. 23. 24. 25. 26. 27. 28. 29. 30. 31. 32. 33. 34. 35. 36. 37. 38. 39. 40. 41. 42. 43. 44. 45. 46. 47. 48. 49. 50. 51. 52. 53. 54. 55. 56. 57. 58. 59. 60. 61. 62. 63. 64. 65. 66. 67. 68. 69. 70. 71. 72. 73. 74. 75. 76. 77. 78. 79. 80. 81. 82. 83. 84. 85. 86. 87. 88. 89. 90. 91. 92. 93. 94. 95. 96. 97. 98. 99.
AV cable
2.3 100%
“
图 1
(1)
return :
system
1. 本次重组涉及事项
ices : "HFO
. . . . .
Before using headphones, adjust the device volume to avoid excessive volume, as hearing damage may result.
text_image
ed on the en for a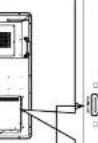
图
a
。
。
1
1
1
1
1
1
1
OMI cable
(1) 2017年1月1日
1
[NO TEXT]
M
1
1
:
1
1
(1) 本次股东大会的召集和召开程序
-
1
图 1
[图3]
1
-
□
(二) 本次股东大会的召集和召开程序
[Non-Text]
The Ground Truth image displays a single, solid horizontal line. According to Rule 2 (UNDERSCORE & LINE RULES), this is a stylistic or background line, not a placeholder underscore. Therefore, the OCR result must ignore it and output nothing or only meaningful text. The provided OCR content is "____", which consists of four underscores. This is an incorrect interpretation of the line as a placeholder, violating the rule that stylistic lines must be ignored. The OCR has hallucinated placeholder underscores where none should exist in the GT. Hence, the OCR result is inconsistent with the Ground Truth.
2

PC, etc.
VGA devices
Connect TOUCH OUT with USB cable to PC USB port.
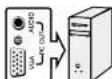
Connect PC with VGA cable, HDMI cable or DP cable. Please choose the proper method of connection based on your device.
Note: After installation of the driver, it can control the external computer by native touch control. (Only for PC, HDMI, DP signal)
Turning the CTOUCH interactive display on or off
- Plug the power cord into an AC power outlet.
- Press Power Switch on the CTOUCH interactive display.
- Now the CTOUCH is in standby mode. Wait a moment until the power indicator lights up, then press ⏻ button to turn on the CTOUCH interactive display.
Note: Be sure to wait for a few seconds before pressing ⏻ button. If you promptly press button then the CTOUCH interactive display may not respond or act wrongly. - Press ⏻ button again to turn off the CTOUCH and put the display in standby mode.
- To cut off the power completely, press Power Switch on the back of the CTOUCH.
Note: If the VGA does not get any signal it will go into stand-by after two minutes, while others source does not get any signal it will go into stand-by mode after 10 minutes.
The first time installation
Connect to power source and turn on the screen, the below installation menu page will display on the screen.
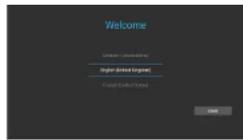
Select desired menu language, then press START and go to the next page.
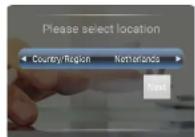
Select location and go to the next page.
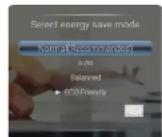
Select energy save mode and go to the next page.
2MEET OPERATING
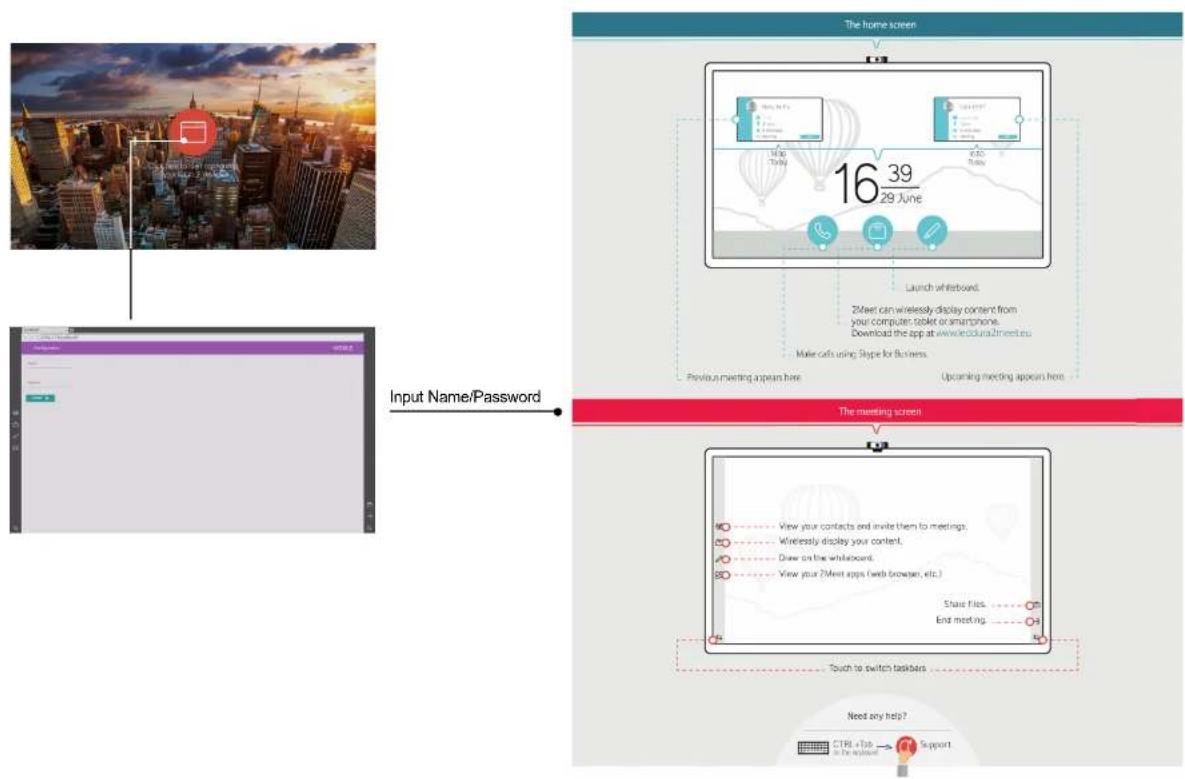
text_image
The home screen 16 39 29 June Launch whiteboard. Zifest can wirelessly display content from your computer tablet or smartphone. Download the app at www.indura/incentru Make calls using Slope for Business. Previous meeting appears here. Upcoming meeting appears here. Input Name/Password The meeting screen View your contacts and invite them to meetings. Wirelessly display your content. Draw on the whiteboard. View your 24Mnt apps (web browser, etc.) Share Files... End meeting... Touch to switch tasklists Need any help? CTRL +Top → Support in the interface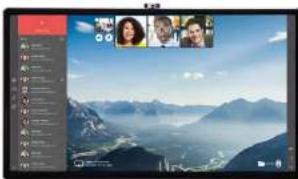
natural_image
Mountain landscape with misty peaks and a video call interface overlay (no readable text or symbols in the scene)Call other Skype for Business or consumer Skype users, H323 devices, phone numbers, or anyone who has email and internet connection.
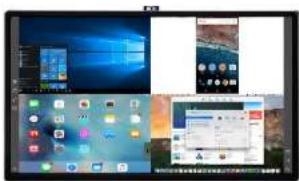
text_image
Screenshot of a desktop computer with open Start menu and system icons visiblePut it on display! Display your iPhone, Android, Windows phone, Mac or PC. Regardless the technology you use, display it easily via your Wi-Fi. Up to four devices at a time.
text_image
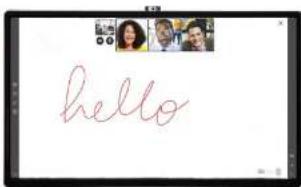
helloLaunch the multi-touch whiteboard instantly, with one touch, and simply start drawing. Add pages, share it with meeting participants, or use it locally.
text_image
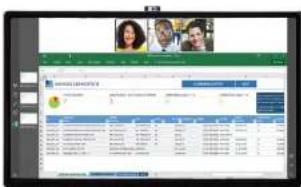
Screenshot of a web-based social media interface with user profile photos and a data table section showing user counts and timestamps.You can use Microsoft Office 2016, browse the internet, or even install your own company's apps with Kickle.
text_image
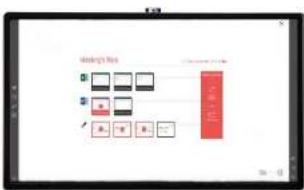
Marketing Box F1When the meeting's all wrapped up, don't forget to share all the files and notes with your participants. Select the whiteboard pages or office documents you created and either send them directly from the Kickle screen or save them to a safe location.
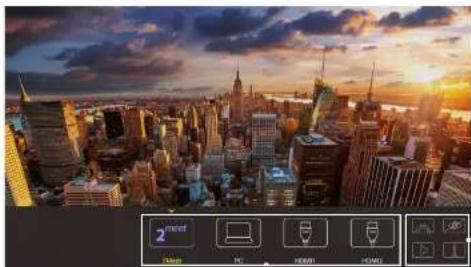
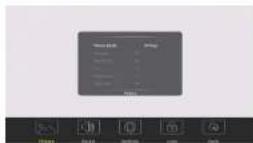
Press on central button on CTOUCH to activate input and settings menu or slide up from the bottom of the screen center by two or more fingers to activate the input and settings menu.
natural_image
City skyline at sunset with illuminated skyscrapers and orange sky (no visible text or symbols)Source menu:
Note: This menu is dynamic as the icons can be enabled or disabled.
2 ^meet


Display menu

Mute the display

Volume bar

User manual
Adjusting Picture mode Adjusting Setting menu
| 100% | ||||
| 100% | 95% | 90% | 85% | |
| Picture | Picture Mode Select picture mode |
| Contrast Adjust the contrast | |
| Brightness Adjust the brightness | |
| Hue Adjust the image hue (Only for NTSC system) | |
| Sharpness Adjust the sharpness | |
| Saturation Adjust the color saturation | |
| Backlight Set up the overall brilliance of the screen | |
| Energy Save Mode The backlight brightness is decreased | |
| Screen | Clock Adjust the screen size |
| Phase Adjust the focus of stable images | |
| H-Position Move the image right or left | |
| V-Position Move the image up or down | |
| Auto Adjust Automatically adjust the image settings such as position and phase | |
| Color Temperature | Select the color temperature If you select User, you can set the level of the red/green/blue as your desired |
| Zoom Mode | Select the aspect ratio (display proportions) according to your video signal type or personal preference |
| OverScan | Adjust the reproduction ratio, you may activate this function to obtain a cleaner picture |
| Image NR | Turn on or off the noise reduction mode to reduce picture noise |
Adjusting Sound mode
| 100% | ||
| 100% | 100% | |
| 100% | 100% | |
| Sound | JBL Sound Mode | Select sound mode |
| Bass | Adjust Bass (low sounds) | |
| Treble | Adjust Treble (high sounds) | |
| Balance | Adjust volume level of right and left speakers | |
| AVC | Select [On] to equalize overall volume levels across all channelsSelect [Off] to turn off the auto volume control | |
| JBL LiveStage | Turn the surround sound effect on or off | |
| SPDIF Output(digital signal only) | Select the digital audio output mode for S/PDIFSelect [RAW] to output audio signal as its original formatSelect [PCM] to output audio signal by PCM format | |
| SPDIF Volume | Adjust SPDIF volume | |
| Alone | Turn off the picture on your monitor and listen to the program audio onlyWake up by any key or touch with two or more fingers |
| Device set: MDA | |
| Package: 100% | |
| Color Range: | |
| RGB/100% | RGB/10 |
| R/W/100% | 80 |
| R/W/AC* | 80 |
Adjusting Lock menu
| User Phone | 40 |
| User Address | 40 |
| All Numbers | |
| Phone ID: | |
| Phone to Email: | 96526 |
| Phone to Website: | 96526 |
The default password is 0000
| Source Auto Switch | Select On to automatically recognition source |
| Language Change | Select on-screen language |
| Color Range | Select color range (Only for HDMI mode) |
| HDMI EDID Ver. | Select HDMI EDID Ver. |
| MHL Auto Switch | Select On to automatically switch to the MHL input when it connected |
| HDMI ARC | Select On to turn on enable HDMI ARC |
| HDMI out | Select HDMI output resolution |
| Movie Mode | Turn on or off the movie mode |
| Menu Timeout | Select OSD menu display time |
| Sleep Time | Set the duration of time until the monitor automatically goes into Standby mode[Off] / [10 Minutes] / [20 Minutes] / [30 Minutes] / [60 Minutes] / [90 Minutes] / [120 Minutes] / [180 Minutes] / [240 Minutes] |
| Lock Touch | To disable the function of the touch panel | |
| Lock Keypad | In order to lock the CTOUCH buttons | |
| Set Password | Password settings | |
| Change Logo | Set logoNote: Before setting the logo, save the logo picture (should be "JPEG" format and size <512KByte) you want to use on root of USB disk and named "boot0.jpg". Insert the USB disk into the USB port on the Android board. | |
| Power on Source | Power on Source Setting, in Memory mode, when the CTOUCH is turned on, it will automatically switch to the source where it powered off last time. Otherwise, it is in setting mode. | |
| Power on Volume | Power on Volume SettingIn Memory mode, when the CTOUCH is powered on, volume will same as the power off.In Settings mode, every time the CTOUCH turns on, volume is the value of this setting. | |
| Volume Settings | ||
| Edit Input | Source | Select the input source you want to label |
| Source Enable | Select Off to the selected source will not show in the source menu. | |
| Label | Edit the label of the selected input source | |
| Reset | Reset labels to defaults | |
| System ID | Setting the device ID (The ID must be in the range of 0-255, but 135 and 168 are unused ID. 0 is for broadcast.) | |
| Wake up by gesture | Select On to enable two or more fingers touch the bottom of the screen and drag upward to turn on the CTOUCH when the CTOUCH is in standby mode. | |
| Restore To Default | Reset all settings to factory defaults | |
TROUBLESHOOTING
If, after reading these operating instructions, you have additional questions related to the use of your CTOUCH interactive display, please call the services center in your local area, for contact information and full warranty conditions refer to www.ctouch.eu/warranty.
Before calling service, please check the symptoms and follow suggested solutions.
Remote Control
| Problem Possible Solutions | |
| Remote control does not operate | Make sure the power cord is plugged in.Check the orientation of the batteries.The batteries could be weak. Replace the batteries. |
Video and Audio
| Problem Possible Solutions | |
| No picture (screen not lit) but no sound | Make sure the power cord is plugged in.Press POWER on the CTOUCH interactive display or on the remote control.Test another source. |
| Dark, poor or no picture (Screen lit) but good sound | Select a proper picture mode.Adjust the brightness in the video setting.Test another source. |
| No color, dark picture or abnormal color | Adjust the color saturation in the video setting. |
| Good picture but no sound | The sound may be muted. Press MUTE again to cancel.Verify if sound should output and/or test another source. |
| Audio noise | Communication problems may occur if infrared communication equipment (e.g., infrared cordless headphones) is used near the CTOUCH interactive display. Move the infrared communication equipment away from the CTOUCH until the noise is eliminated. |
General
| Problem Possible Solutions | |
| Some items can not be accessed | If a setting option appears in gray, this indicates that the settings option is unavailable in current input mode. Some display menu items may be different when the unit works in different sources. |
| Remote control command is not working in some cases | During the timing of USB device detection (i.e. when the CTOUCH interactive display is turned on with USB device connected, or when you plug in USB device during the working of the CTOUCH), the display may not react on remote control buttons in such case. Wait a moment before the remote control should function again. |
| Control buttons do not operate | Disconnect the power cord and wait for a few seconds. Then re-plug the power cord and turn on the unit again. |
| Touch does not work | If you use a Apple-device, please download the Mac-driver from our website. |
| Screen puts itself in stand-by mode as external device or Easy Air PC goes in sleeping mode. | Change the energy settings/sleeping-mode of the external device or Easy Air PC. |
Note: If your problem is not solved, turn off your unit and then on again.
Cautions: Never attempt to repair a defective CTOUCH interactive display yourself.
| Model No. CL2M-65UHD | CL2M-75UHD CL2M-86UHD | ||
| Visible screen size 65inches(diagonal) 75inches (diagonal) 86inches(diagonal) | |||
| Power Source AC 100-240V, 50/60Hz | |||
| Current 2.8 A 5.2 A 6.5 A | |||
| Power Consumption 255 W 495 W 600 W | |||
| Standby condition * | <3 W | <3 W | <3 W |
| Number of pixels(Display panel ) | 3840×2160 | 3840×2160 | 3840×2160 |
| Dimensions(W×D×H) (Unit: mm) | 1513.6×116×901.6 | 1735.6×108×1027.6 | 1994×127×1178 |
| Weigh | 58 kg Net | 85 kg Net | 112 kg Net |
| Operating conditions | Operating temperature: 5°C - 35°C, Storage temperature: -15°C - 45°C,Storage humidity: 10% - 80%Operating humidity: 20% - 80% (no moisture condensation),Atmospheric pressure: 86kPa ~ 106kPa | ||
| Connection terminals of the CTOUCH interactive display | |||
| AV IN | 1 | WAN IN | 1 |
| PC IN | 3 | LAN OUT | 1 |
| VGA OUT | 1 | S/PDIF OUT | 1 |
| HDMI Input | 2 | Headphone | 1 |
| HDMI OUT | 1 | RS232 | 1 |
| DP Input | 1 | TOUCH OUT | 1 |
| USB | 3 | ||
Notes:
- Design and specifications are subject to change without notice.
- Weight and dimensions shown are approximate.
- Specifications and external appearance may be changed for the sake of improvement.
* Due to different standby conditions, the standby power consumption of some models could be higher than 3W.