
TX-47P800H - TV PANASONIC - Free user manual and instructions
Find the device manual for free TX-47P800H PANASONIC in PDF.


User questions about TX-47P800H PANASONIC
0 question about this device. Answer the ones you know or ask your own.
Ask a new question about this device
Download the instructions for your TV in PDF format for free! Find your manual TX-47P800H - PANASONIC and take your electronic device back in hand. On this page are published all the documents necessary for the use of your device. TX-47P800H by PANASONIC.
USER MANUAL TX-47P800H PANASONIC
natural_image
Simple diagram of a monitor with a vertical screen and a triangular stand at the bottom (no text or symbols)
Panasonic
Operating Instructions
Wide Projection Television
TX-47P800H Model Nc
natural_image
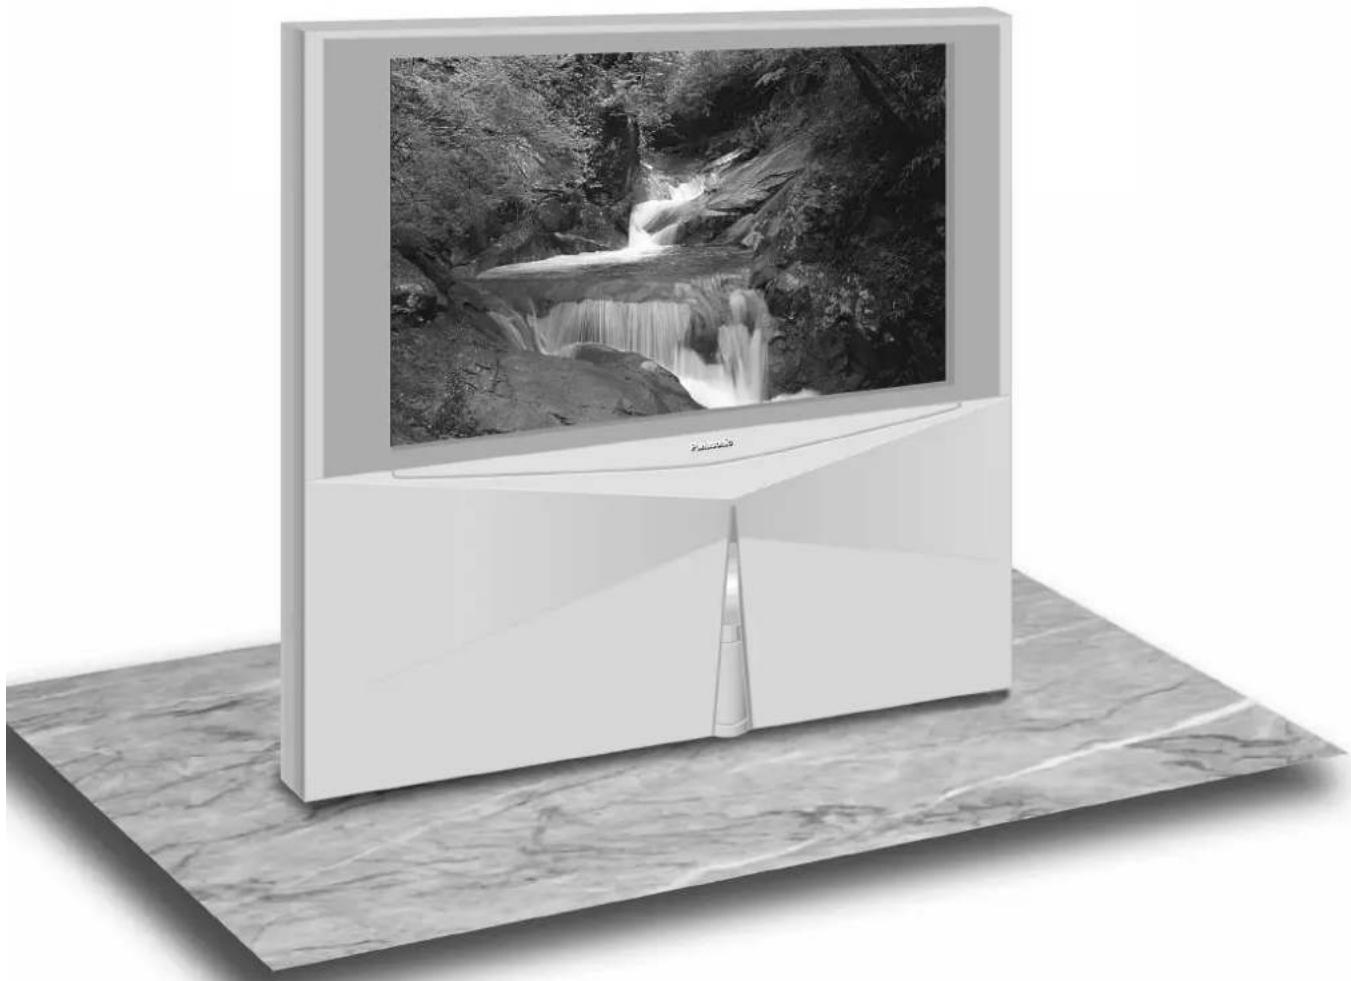
Modern white TV stand with a waterfall image displayed on its screen, placed on a marble surface (no text or symbols visible)T[tau]
GIGA

BBE® DIGITAL
Manufactured under license from BBE Sound, Inc.
Licensed by BBE Sound, Inc. under USP4638258, 5510752 and 5736897.
BBE and BBE symbol are registered trademarks of BBE Sound, Inc.
Please read these instructions before operating your set and retain them for future reference.
Dear Panasonic Customer
Welcome to the Panasonic family of customers. We hope that you will have many years of enjoyment from your new Wide Projection television set.
To obtain maximum benefit from your set, please read these Instructions
before making any adjustments, and retain them for future reference.
Retain your purchase receipt also, and note down the Model Number and
Serial Number of your set in the space provided on the rear cover of these Instructions.
Visit our Panasonic Web Site
(1) The long time (max. 2 hours) use of a TV game on this set is not recommended, since the signal from the TV game may cause damage to the picture projection tubes of the set.
(2) Do not allow a still picture to be displayed for an extended period, as this can cause a permanent after-image to remain on the Projection TV screen.
Examples of still pictures include logos, video games, computer images and teletext.
If still picture cannot be avoided, reduce the brightness and contrast levels of the picture to minimize any damage that might occur.
(3) In order to minimize any damage to the projection tubes, this set uses the PICTURE SHIFT function (Refer to page 23) to change (shift) the entire pictures approximately 2 mm every 15 minutes.
Table of contents
Warnings and Cautions .... 3
Before Operating This Set 5
Safety Precaution 5
Securing the casters 5
Connecting the Aerial Cable to the RF in Terminal ..... 5
Connecting Headphones 5
Connecting the Plug to the Wall Outlet 6
How to Turn the Power On 6
Battery Installation 6
Battery cautions 6
Location of Controls 7
Controls and Terminals on the TV 7
Connections 8
How to connect the "AV1, 2, 3 or 4" Input Terminals ..... 8
How to connect the DVD Input Terminals 9
How to connect the AV Monitor Output Terminals to other equipment ....9
General Operation 10
On-Screen menu Display from Remote Control .. 12
Convergence Adjustment 14
Convergence Adjustment mode 14
Convergence 1 Adjustment for RED, BLUE and GREEN .14
Convergence 2 Adjustment for RED and BLUE ..... 15
Tuning Channels 15
Channel Selection 16
Channel Allocation 17
Automatic Tune....18
Manual Tune 19
Fine Tuning 20
How to Cancel the Fine Tuning 20
Programme Number Skip 20
How to Cancel the Skip Function 21
Sound System Selection (Different region use differing systems) .. 21
Colour System Selection (Different region use differing systems) ..... 21
Owner ID 22
Setup Adjustment 23
OFF TIMER 23
CH COLOUR SET 23
CHILD LOCK 23
BLUE BACK 23
ILLUMINATION 23
FLICKER REDUCTION 23
3D-COMB 23
PICTURE SHIFT 23
VCR/GAME 23
COLOUR SYSTEM 23
Picture Adjustment 24
Sound Adjustment 26
Aspect Controls 28
Multi Screen 29
Multi PIP 29
TELETEXT 30
Advanced Remote Control Operation 33
Stereo Bilingual Sound Selection 33
VCR / DVD Control 33
Manufacturer setting 34
Troubleshooting 35
Cleaning 35
Specifications ...... Back cover
Warnings and Cautions

Warnings
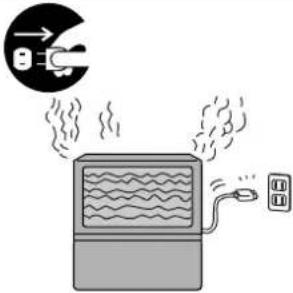 | Unplug the power cord in the event of any malfunction (screen goes blank, no sound, odd sounds, smoke or unusual odors coming from the unit). Unplug the power cord if foreign matter or water falls into the unit, or if the unit is dropped or the cabinet is damaged. | 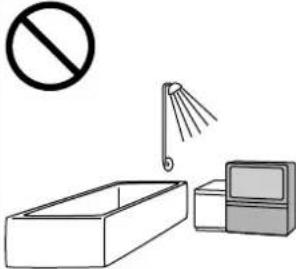 | DO NOT use this unit near water. (Near a bath tub, etc.) |
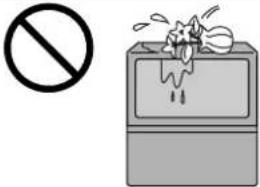 | DO NOT place any of the following on the unit: Flower vases, flower pots, cups, small metal objects, or cosmetics containers, chemicals or water. | 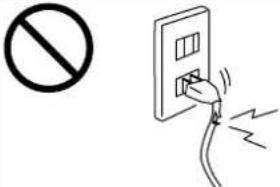 | DO NOT use if the power cord or power plug is damaged, or if the plug does not fit tightly into the socket. |
 | DO NOT insert foreign objects (metal or easily flammable objects). | 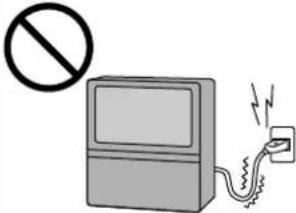 | DO NOT use at a voltage other than indicated |
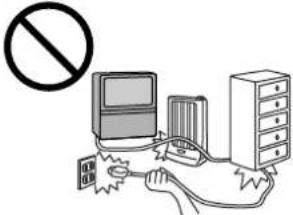 | TAKE CARE NOT to damage the power cord. | 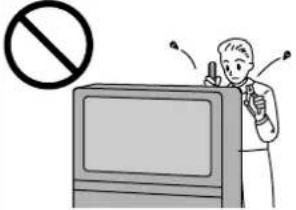 | DO NOT remove the rear cover as live parts and High Voltage components are accessible when the rear cover is removed. |
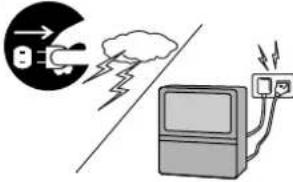 | DO NOT touch the aerial cable and this unit when there is lightning. | 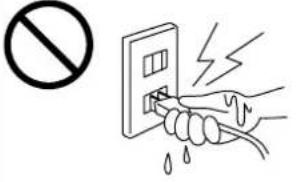 | DO NOT touch the power plug if your hands are wet. |

Cautions
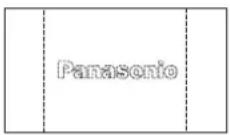 After-images appear After-images appear | Do not allow a still picture to be displayed for an extended period, as this can cause a permanent after-image to remain on the Wide Projection TV screen.Examples of still pictures include logos, video games, computer images, teletext and images displayed in 4:3 mode.Note:The permanent after-image on the Wide Projection TV screen resulting from fixed image use is not an operating defect and as such is not covered by the Warranty.This product is not designed to display fixed images for extended periods of time. | ||
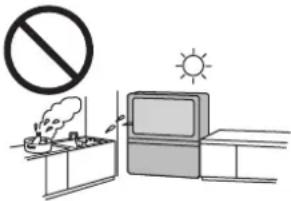 | DO NOT place in humid or dusty location, or areas exposed to smoke or steam.DO NOT place in direct sunlight and other sources of direct heat. | 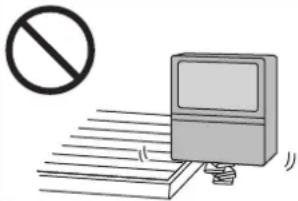 | DO NOT place in an unstable location. |
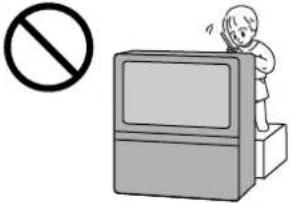
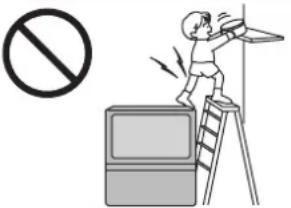 | DO NOT stand, or place heavy objects on the unit.Particular care should be taken by families with small children. | 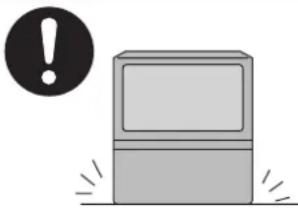 | Place in a safe location.Fix the TV to a wall.(refer to page 5) |
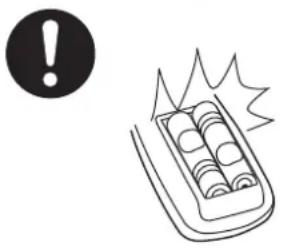 | When inserting batteries, ensure that the polarities (positive and negative) are correctly aligned. Insert as shown on remote control. If inserted incorrectly, battery fluid may leak, and fire, injury, or damage to surrounding components may result. | 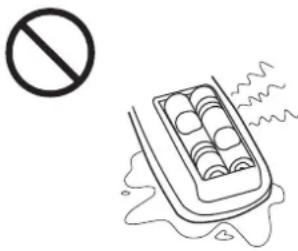 | Do not mix new and old batteries. Use only the specified batteries. Failure to follow this precaution may result in leakage of battery fluid. Fire, injury, or damage to surrounding components may also result. |
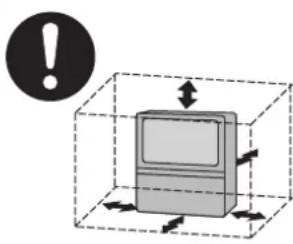 | Adequate ventilation is essential to prevent failure of electrical components, we recommend that a gap of at least 10 cm (↔) is left all around this unit even when it is placed inside a cabinet or between shelves. | 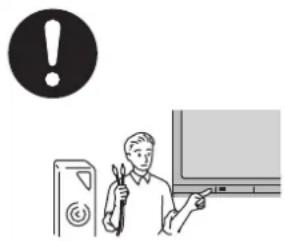 | Turn the power “Off” before connecting other electrical equipment. |
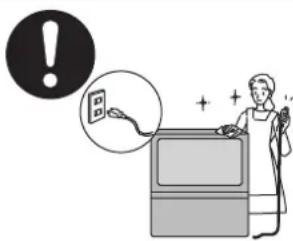 | Before cleaning, unplug the power plug from the socket. | 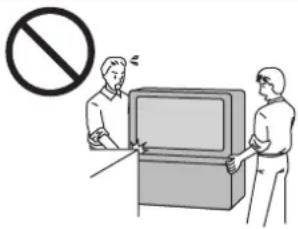 | DO NOT Jolt the unit. |
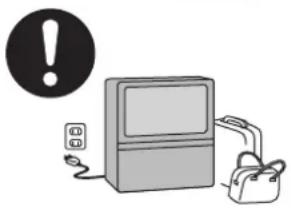 | Unplug the power plug from the socket if you are not going to use the unit for an extended period. | 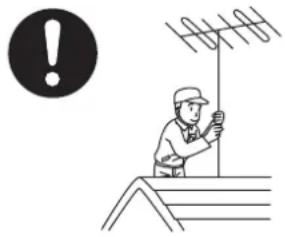 | Ask your sales outlet to install the aerial. |
To ensure continued excellent performance by this product, periodic cleaning is recommended. See page 35 for more information.
Before Operating This Set
Securing the castersSafety Precal
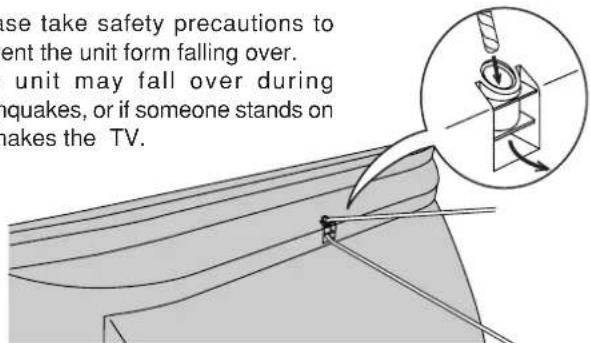
Please take safety precautions to prevent the unit form falling over.
The unit may fall over during earthquakes, or if someone stands on or shakes the TV.
text_image
use take safety precautions to ent the unit form falling over. unit may fall over during quakes, or if someone stands on makes the TV.Fixing to a wall
Use a strong rope or a chain to fasten the TV firmly to a strong support such as a wall or a pillar.
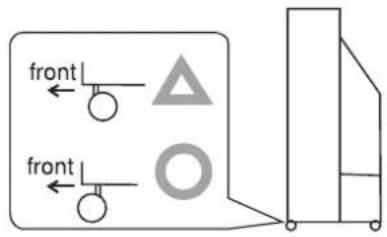
To prevent the set from tipping forward, turn the two casters on the front of the TV so they face forward, as shown in the picture.
text_image
front frontConnecting the Aerial Cable to the RF in Terminal
text_image
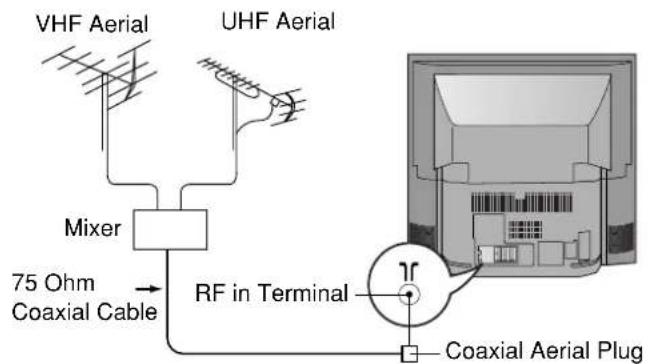
VHF Aerial UHF Aerial Mixer 75 Ohm Coaxial Cable RF in Terminal Coaxial Aerial Plug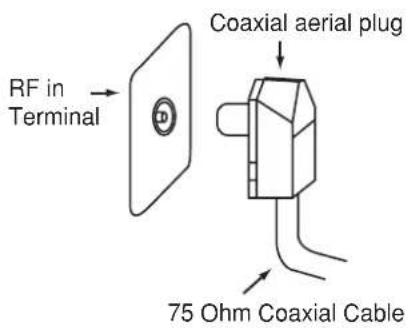
text_image
RF in Terminal Coaxial aerial plug 75 Ohm Coaxial CableTo obtain optimum quality picture and sound, an Aerial, the correct cable (75 Ohm coaxial) and the correct terminating plug are required. If a communal Aerial system is used, you may require the correct connection cable and plug between the wall Aerial socket and your set. Your local Television Service Centre or Dealer may be able to assist you in obtaining the correct Aerial system for your particular area and accessories required.
Any matters regarding Aerial installation, upgrading of existing systems or accessories required, and the costs incurred, are the responsibility of you, the Customer.
Connecting Headphones
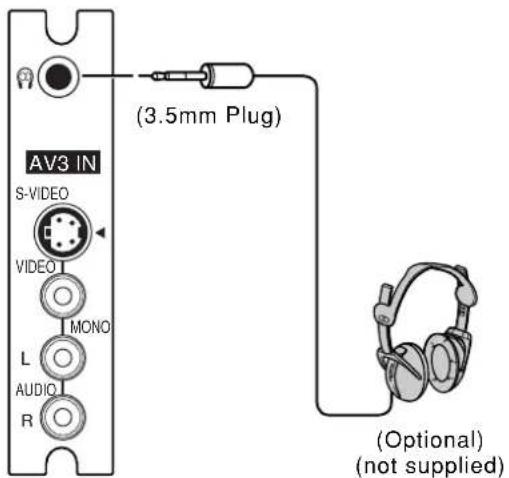
Connect headphones as follows.
text_image
AV3 IN S-VIDEO VIDEO MONO L AUDIO R (3.5mm Plug) (Optional) (not supplied)You can listen to sound from the headphones plugs as shown below.
| Screen condition | Speaker Sound | Headphones | Monitor Output | |
| Single picture/Teletext | A (Stereo) | A (Stereo) | A (Stereo) | |
| Picture in Picture | A (Stereo) | A (Stereo) | A (Stereo) | |
| Picture and Picture | A (Stereo) | A (Stereo) | A (Stereo) | |
| Picture out Picture | A (Stereo) | A (Stereo) | A (Stereo) | |
Headphones plug:
When a Headphones plug is inserted into the Headphones socket, all speakers will be automatically disconnected; only the Headphones will function. Use Volume Up "+" or Down "-" button to control volume level.
Connecting the Plug to the Wall Outlet
natural_image
Simple line drawing of a wall-mounted electrical outlet connected to a power plug (no text or symbols)Notes:
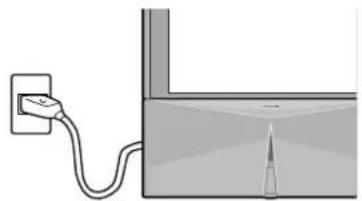
- Main plug types vary between countries. The main plug shown at left may therefore not be the type fitted to your set.
- The On/Off switch on this model does not full disconnect the TV from the mains supply.
How to Turn the Power On
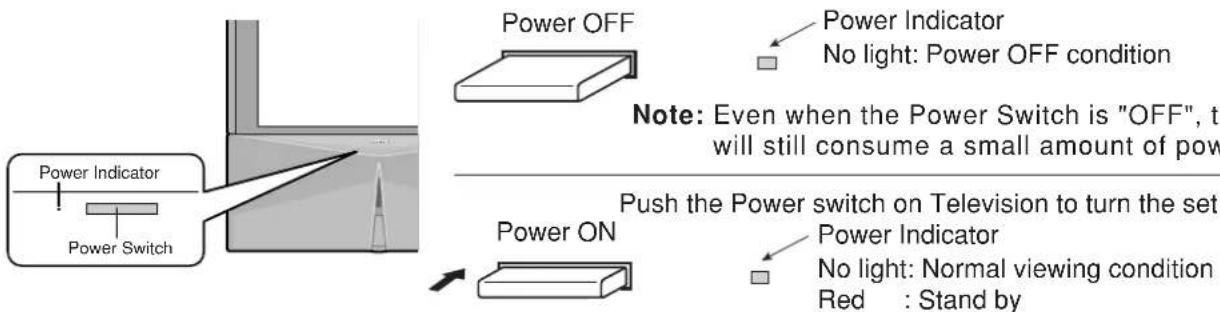
Note: Even when the Power Switch is "OFF", the TV set will still consume a small amount of power.
Push the Power switch on Television to turn the set on.
Power Indicator
No light: Normal viewing condition
Red : Stand by
Notes:
- When in the Stand-by condition (Refer to page 11), it is also possible to turn the TV set on by pressing any of the "Direct Programme Number Selection buttons" (0 - 9) or "Programme Number Up or Down buttons" on the TV set or on the Remote Control.
- If the Wall Outlet is switched OFF or the Main Plug is unplugged, when the TV set is again turned ON (by either connecting the Main Plug to the Wall Outlet or switching the Wall Outlet ON), it will have returned to the original state.
Battery Installation
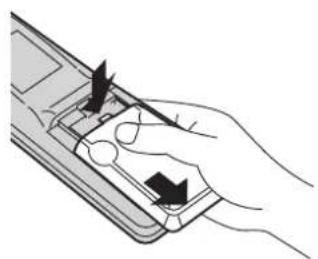
1 Open the cover.
Apply slight downward pressure while pulling towards the bottom.
natural_image
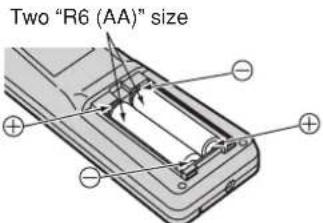
Hand holding a mobile phone with a hand pointing to the screen (no text or symbols visible)2 Batteries: Use two "R6 (AA)" size batteries.
Insert the batteries ensuring the correct polarities.
This is identifiable by the "+" and "-" symbols on the batteries and inside the battery compartment.
text_image
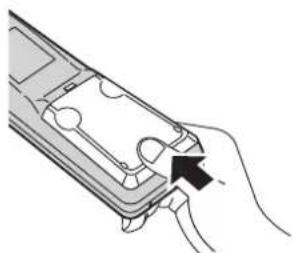
Two "R6 (AA)" size3 Replace the cover.
natural_image
Line drawing of a hand holding a device with a black arrow pointing to the handle (no text or symbols present)Do not use rechargeable (Ni-Cd) batteries.
They are different in shape and performance and may fail to ensure correct operation.

Battery cautions
The incorrect use of batteries can cause electrolyte leakage which will corrode the Remote Control or cause the batteries to burst.
Observe the following precaution:
- Batteries shall always be replaced as a pair. Always use new batteries when replacing the old set.
- Do not combine a used battery with a new one.
- Do not mix battery types (example: "Zinc Carbon" with "Alkaline").
- Do not attempt to charge, short-circuit, disassemble, heat or burn used batteries.
- Battery replacement is necessary when remote control acts sporadically or stops operating the TV set.
Location of Controls
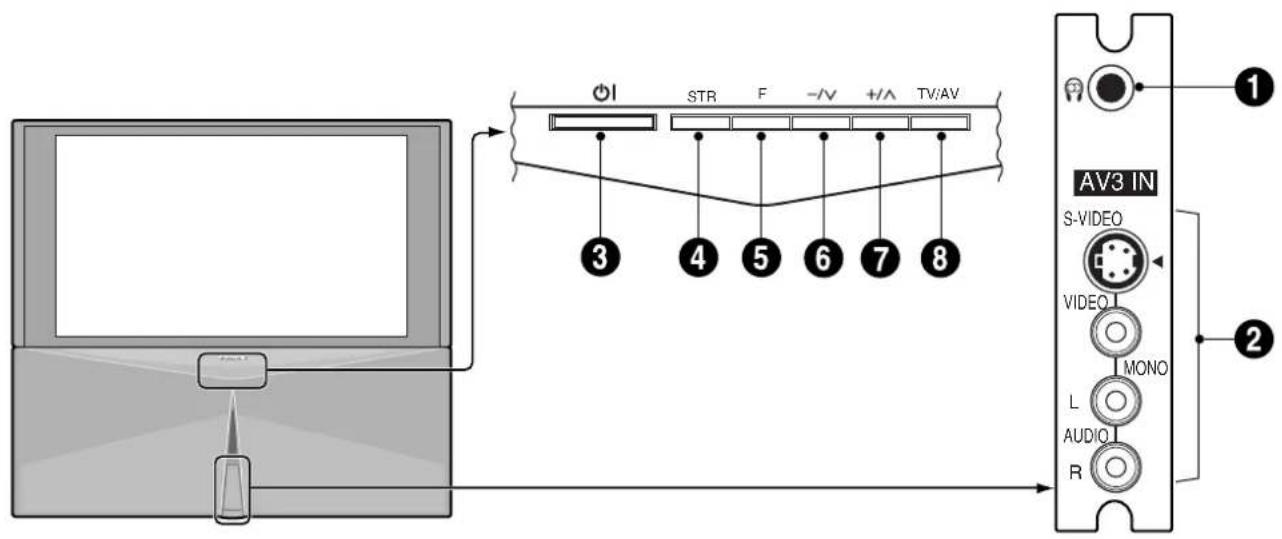
Controls and Terminals on the TV
text_image
1 AV3 IN S-VIDEO VIDEO MONO L AUDIO R 2 3 4 5 6 7 8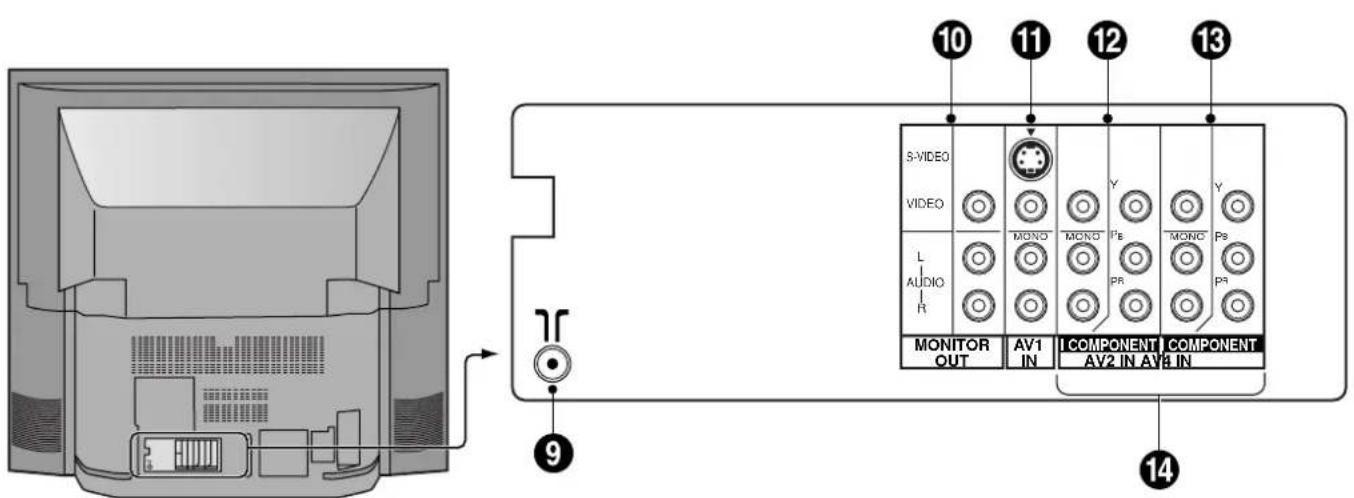
text_image
S-VIDEO VIDEO L AUDIO R MOND Y MOND Ps Y MOND Ps PR MONITOR OUT AV1 IN COMPONENT AV2 IN AV3 IN COMPONENT 10 11 12 13 9 14| Item No. | Function | Refer to Page | Item No. | Function | Refer to Page |
| 1 | Headphones Jack | 5 | 8 | TV/AV Selection | 10 |
| 2 | AV3 Input Terminals | 5 | 9 | Aerial Terminal (RF In Terminal) | 5 |
| 3 | Power Switch | 10 | 10 | Monitor Output Terminals | 9 |
| 4 | STR | 10 | 11 | AV1 Input Terminals | 8 |
| 5 | Function Selection | 10 | 12 | AV2 Input Terminals | 8 |
| 6 | Volume Down (-) / Programme Number Down (V) | 10 | 13 | AV4 Input Terminals | 8 |
| 7 | Volume Up (+) / Programme Number Up (Λ) | 10 | 14 | DVD (Y. PB. PR) Input | 9 |
Connections
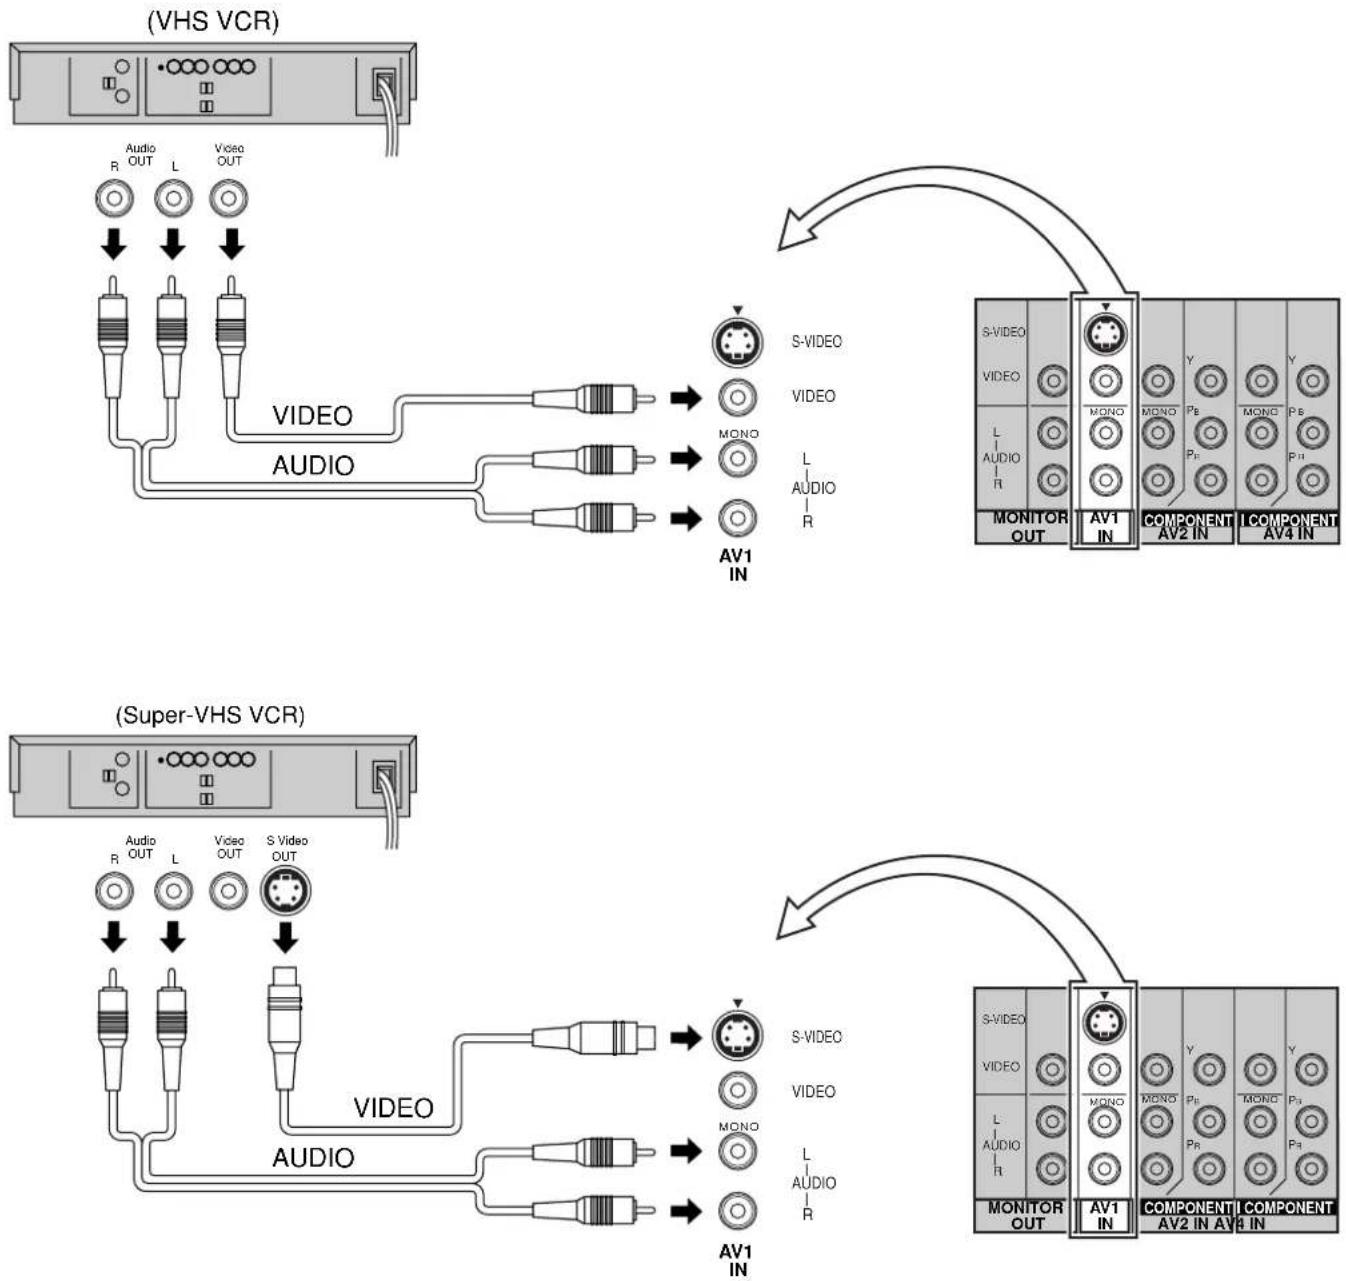
How to connect the "AV1, 2, 3 or 4" Input Terminals
Connect VCRs and other peripheral equipment
flowchart
graph TD
    A["(VHS VCR)"] --> B["Audio OUT"]
    A --> C["Video OUT"]
    B --> D["↓"]
    C --> E["↓"]
    D --> F["↓"]
    E --> G["↓"]
    F --> H["VIDEO"]
    G --> I["AUDIO"]
    H --> J["S-VIDEO"]
    I --> K["VIDEO"]
    J --> L["S-VIDEO"]
    K --> M["MONO"]
    L --> N["L AUDIO R"]
    M --> O["AV1 IN"]
    N --> P["AV1 IN"]
    O --> Q["MONO AV2 IN"]
    P --> R["MONO AV2 IN"]
    Q --> S["MONO AV4 IN"]
    R --> T["MONO AV4 IN"]

    U["(Super-VHS VCR)"] --> V["Audio OUT"]
    U --> W["Video OUT"]
    U --> X["S Video OUT"]
    V --> Y["↓"]
    W --> Z["↓"]
    X --> AA["↓"]
    Y --> AB["VIDEO"]
    Z --> AC["VIDEO"]
    AA --> AD["VIDEO"]
    AB --> AE["S-VIDEO"]
    AC --> AF["S-VIDEO"]
    AD --> AG["S-VIDEO"]
    AE --> AH["MONO AV1 IN"]
    AF --> AI["MONO AV1 IN"]
    AG --> AJ["MONO AV2 IN AV3 IN"]
    AH --> AK["S-VIDEO"]
    AI --> AL["S-VIDEO"]
Notes:
- When an S-Video cable is connected to the S-Video terminal, the corresponding Video input will be switched off and the signal from the S-Video input will be used.
- When a Monaural VCR is used, connect the Monaural Audio cable to the Audio "L" (Left) terminal.
- Select the desired AV input position by pressing the TV/AV button. (Refer to page 10)
- Input 3 is located on the front of the unit.
• The AV2 and AV4 audio input terminals serve as the audio input terminal for both the Video input and the DVD input.
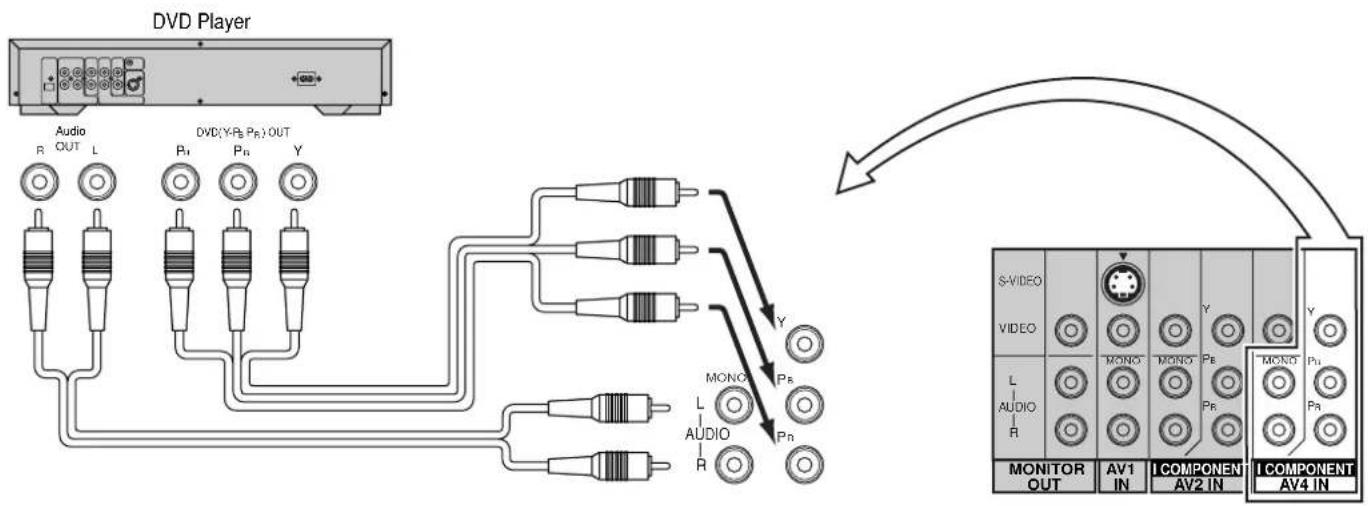
How to connect the DVD Input Terminals
flowchart
graph TD
    A["DVD Player"] --> B["Audio OUT L"]
    A --> C["DVD(Y-PB PR) OUT P1 P2 Y"]
    A --> D["Audio R"]
    A --> E["Audio L"]
    A --> F["Audio R"]
    A --> G["Audio L"]
    A --> H["Audio R"]
    A --> I["Video Y"]
    A --> J["Video MONG"]
    A --> K["Video MONG"]
    A --> L["Video MONG"]
    A --> M["Video MONG"]
    A --> N["Video MONG"]
    A --> O["Video MONG"]
    A --> P["Video MONG"]
    A --> Q["Video MONG"]
    A --> R["Video MONG"]
    A --> S["Video MONG"]
    A --> T["Video MONG"]
    A --> U["Video MONG"]
    A --> V["Video MONG"]
    A --> W["Video MONG"]
    A --> X["Video MONG"]
    A --> Y["Video MONG"]
    A --> Z["Video MONG"]
    A --> AA["Video MONG"]
    A --> AB["Video MONG"]
    A --> AC["Video MONG"]
    A --> AD["Video MONG"]
    A --> AE["Video MONG"]
    A --> AF["Video MONG"]
    A --> AG["Video MONG"]
    A --> AH["Video MONG"]
    A --> AI["Video MONG"]
    A --> AJ["Video MONG"]
    A --> AK["Video MONG"]
    A --> AL["Video MONG"]
    A --> AM["Video MONG"]
    A --> AN["Video MONG"]
    A --> AO["Video MONG"]
    A --> AP["Video MONG"]
    A --> AQ["Video MONG"]
    A --> AR["Video MONG"]
    A --> AS["Video MONG"]
    A --> AT["Video MONG"]
    A --> AU["Video MONG"]
    A --> AV["Video MONG"]
    A --> AW["Video MONG"]
    A --> AX["Video MONG"]
    A --> AY["Video MONG"]
    A --> AZ["Video MONG"]
    A --> BA["Video MONG"]
    A --> BB["Video MONG"]
    A --> BC["Video MONG"]
    A --> BD["Video MONG"]
    A --> BE["Video MONG"]
    A --> BF["Video MONG"]
    A --> BG["Video MONG"]
    A --> BH["Video MONG"]
    A --> BI["Video MONG"]
    A --> BJ["Video MONG"]
    A --> BK["Video MONG"]
    A --> BL["Video MONG"]
    A --> BM["Video MONG"]
    A --> BN["Video MONG"]
    A --> BO["Video MONG"]
    A --> BP["Video MONG"]
    A --> BQ["Video MONG"]
    A --> BR["Video MONG"]
    A --> BS["Video MONG"]
    A --> BT["Video MONG"]
    A --> BU["Video MONG"]
    A --> BV["Video MONG"]
    A --> BW["Video MONG"]
    A --> BX["Video MONG"]
    A --> BY["Video MONG"]
    A --> BZ["Video MONG"]
    A --> CA["Video MONG"]
    A --> CB["Video MONG"]
    A --> CC["Video MONG"]
    A --> CD["Video MONG"]
    A --> CE["Video MONG"]
    A --> CF["Video MONG"]
    A --> CG["Video MONG"]
    A --> CH["Video MONG"]
    A --> CI["Video MONG"]
    A --> CJ["Video MONG"]
    A --> CK["Video MONG"]
    A --> CL["Video MONG"]
    A --> CM["Video MONG"]
    A --> CN["Video MONG"]
    A --> CO["Video MONG"]
    A --> CP["Video MONG"]
    A --> CQ["Video MONG"]
    A --> CR["Video MONG"]
    A --> CS["Video MONG"]
    A --> CT["Video MONG"]
    A --> CU["Video MONG"]
    A --> CV["Video MONG"]
    A --> CW["Video MONG"]
Notes:
• The AV4 audio signal is common for both AV4 and DVD input signal terminals.
- The DVD signal input terminal takes priority over the AV4 video signal input terminal.
- Similar connection are available at the COMPONENT VIDEO input 2 terminal.
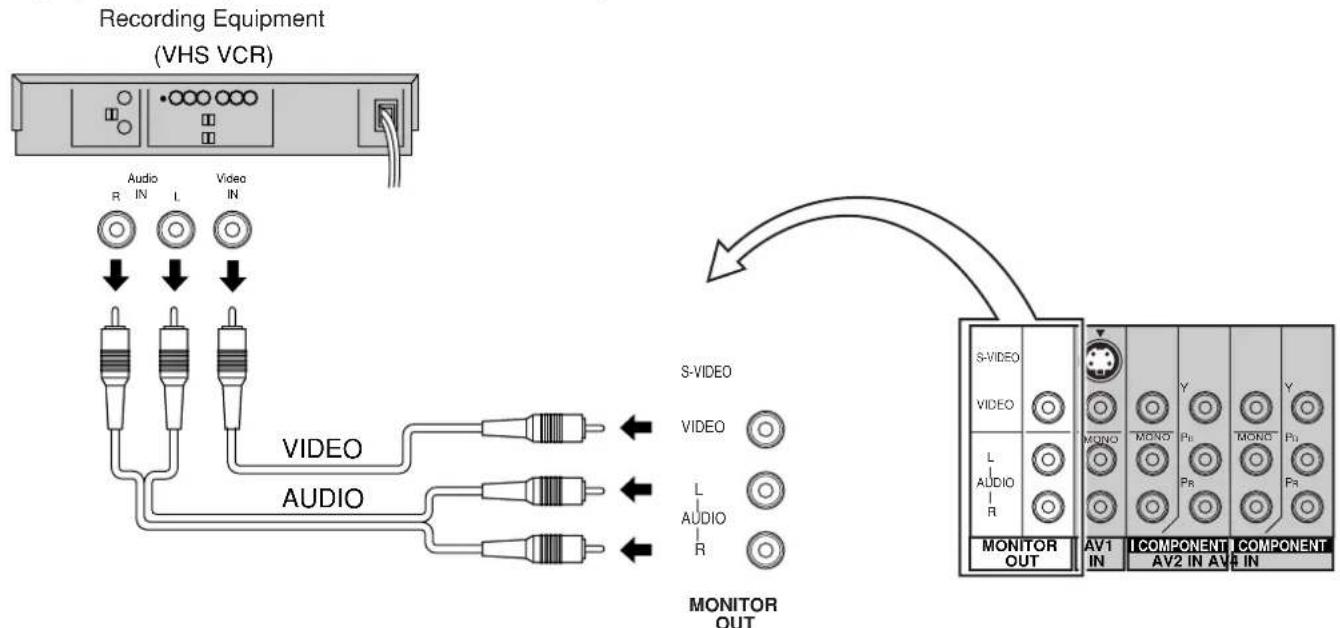
How to connect the AV Monitor Output Terminals to other equipment
The "Monitor Out" Terminals output the same signals as main picture on the TV screen and sound from the speaker at that time, e.g. TV programmes or signals from AV1, AV2, AV3 or AV4 input.
flowchart
graph TD
    A["Recording Equipment (VHS VCR)"] --> B["Audio IN L Video IN"]
    B --> C["Video R"]
    B --> D["Video L"]
    B --> E["Video IN"]
    C --> F["VIDEO"]
    D --> G["VIDEO"]
    E --> H["VIDEO"]
    I["MONITOR OUT"] --> J["S-VIDEO"]
    I --> K["VIDEO"]
    I --> L["L AUDIO R"]
    I --> M["MONITOR OUT"]
    N["S-VIDEO"] --> O["VIDEO"]
    N --> P["L AUDIO R"]
    N --> Q["MONITOR OUT"]
    R["MONITOR OUT"] --> S["AV1 IN"]
    R --> T["COMPONENT AV2 IN AV3 IN"]
    R --> U[COMPONENT AV3 IN AV4 IN AV5 IN AV6 IN AV7 IN AV8 IN AV9 IN AV10 IN AV11 AV12 AV13 AV14 AV15 AV16 AV17 AV18 AV19 AV20 AV21 AV22 AV23 AV24 AV25 AV26 AV27 AV28 AV29 AV30 AV31 AV32 AV33 AV34 AV35 AV36 AV37 AV38 AV39 AV40 AV41 AV42 AV43 AV44 AV45 AV46 AV47 AV48 AV49 AV50 AV51 AV52 AV53 AV54 AV55 AV56 AV57 AV58 AV59 AV60 AV61 AV62 AV63 AV64 AV65 AV66 AV67 AV68 AV69 AV70 AV71 AV72 AV73 AV74 AV75 AV76 AV77 AV78 AV79 AV80 AV81 AV82 AV83 AV84 AV85 AV86 AV87 AV88 AV89 AV90 AV91 AV92 AV93 AV94 AV95 AV96 AV97 AV98 AV99 AV100 AV101 AV102 AV103 AV104 AV105 AV106 AV107 AV108 AV109 AV110 AV111 AV112 AV113 AV114 AV115 AV116 AV117 AV118 AV119 AV120 AV121 AV122 AV123 AV124 AV125 AV126 AV127 AV128 AV129 AV130 AV131 AV132 AV133 AV134 AV135 AV136 AV137 AV138 AV139 AV140 AV141 AV142 AV143 AV144 AV145 AV146 AV147 AV148 AV149 AV150 AV151 AV152 AV153 AV154 AV155 AV156 AV157 AV158 AV159 AV160 AV161 AV162 AV163 AV164 AV165 AV166 AV167 AV168 AV169 AV170 AV171 AV172 AV173 AV174 AV175 AV176 AV177 AV178 AV179 AV180 AV181 AV182 AV183 AV184 AV185 AV186 AV187 AV188 AV189 AV190 AV191 AV192 AV193 AV194 AV195 AV196 AV197 AV198 AV199 AV200
Notes:
- Never connect the same video recorder with both the VIDEO IN and MONITOR OUT terminals on this TV set, as this could cause incorrect operation.
- The monitor output emits the main picture normal video and audio signals.
- Teletext display on screen will not be output at the MONITOR OUT terminals.
- Even if the television is in picture-in-picture condition, MONITOR OUT terminals output the same signals as main picture on the screen and sound from speakers. Sub picture including strobe, still, channel search, etc. will not be output at the MONITOR OUT terminals.
- The DVD signal (Y, PB, PR) is not output at the MONITOR out terminals.
General Operation
text_image
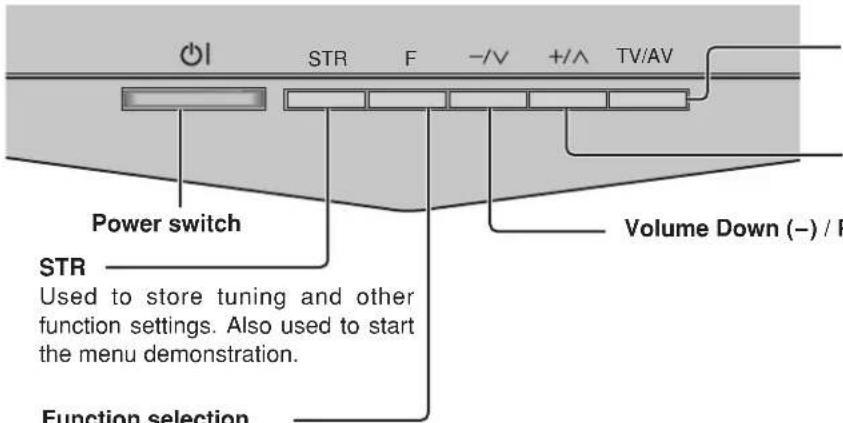
Power switch STR Used to store tuning and other function settings. Also used to start the menu demonstration. Function selection STR Volume Down (−) / F +/-V +/A TV/AVFunction selection
Displays the on screen display functions, use repeatedly to select from the available functions.
The following adjustments can be accessed directly.
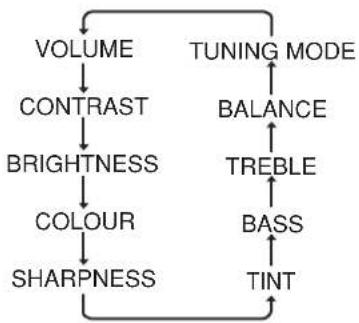
flowchart
graph TD
    A["VOLUME"] --> B["CONTRAST"]
    B --> C["BRIGHTNESS"]
    C --> D["COLOUR"]
    D --> E["SHARPNESS"]
    F["TUNING MODE"] --> G["BALANCE"]
    G --> H["TREBLE"]
    H --> I["BASS"]
    I --> J["TINT"]
    J --> E
Notes:
• TINT:
Displayed when receiving NTSC and YUV625i signals.
• TUNING MODE :
Not displayed during AV mode.
TV/AV Selection
Press to select TV, AV1, AV2, AV3 and AV4 input signal modes sequentially.
Volume Up (+) /
Programme Number Up (∧)
Volume Down (−) / Programme Number Down (γ)
Picture Menu (see page 12, 24)
Sound Menu (see page 12, 26)
Set up Menu (see page 13, 23)
Stereo/Bilingual Sound Selection
(see page 33)
TEXT Favorite Page Selection
(see page 31)
TV/TEXT Selection (see page 30, 31)
100Hz/PROGRE (see page 25)
Surround (see page 26, 27)
Aspect Controls (see page 28)
Press to select the different Aspect options.
Picture in Picture Selection
(see page 29)
Recall
Press to display the current system status, for example, Programme number, Channel number, Stereo mode, Picture menu, Sound menu, Scan mode, Sound system and colour system.
VCR/DVD Rewind/Review
Normalization (see page 25, 27)
Store (see page 18, 19, 20, 21, 31)
Stores some settings in TUNING menus and TELETEXT.
text_image
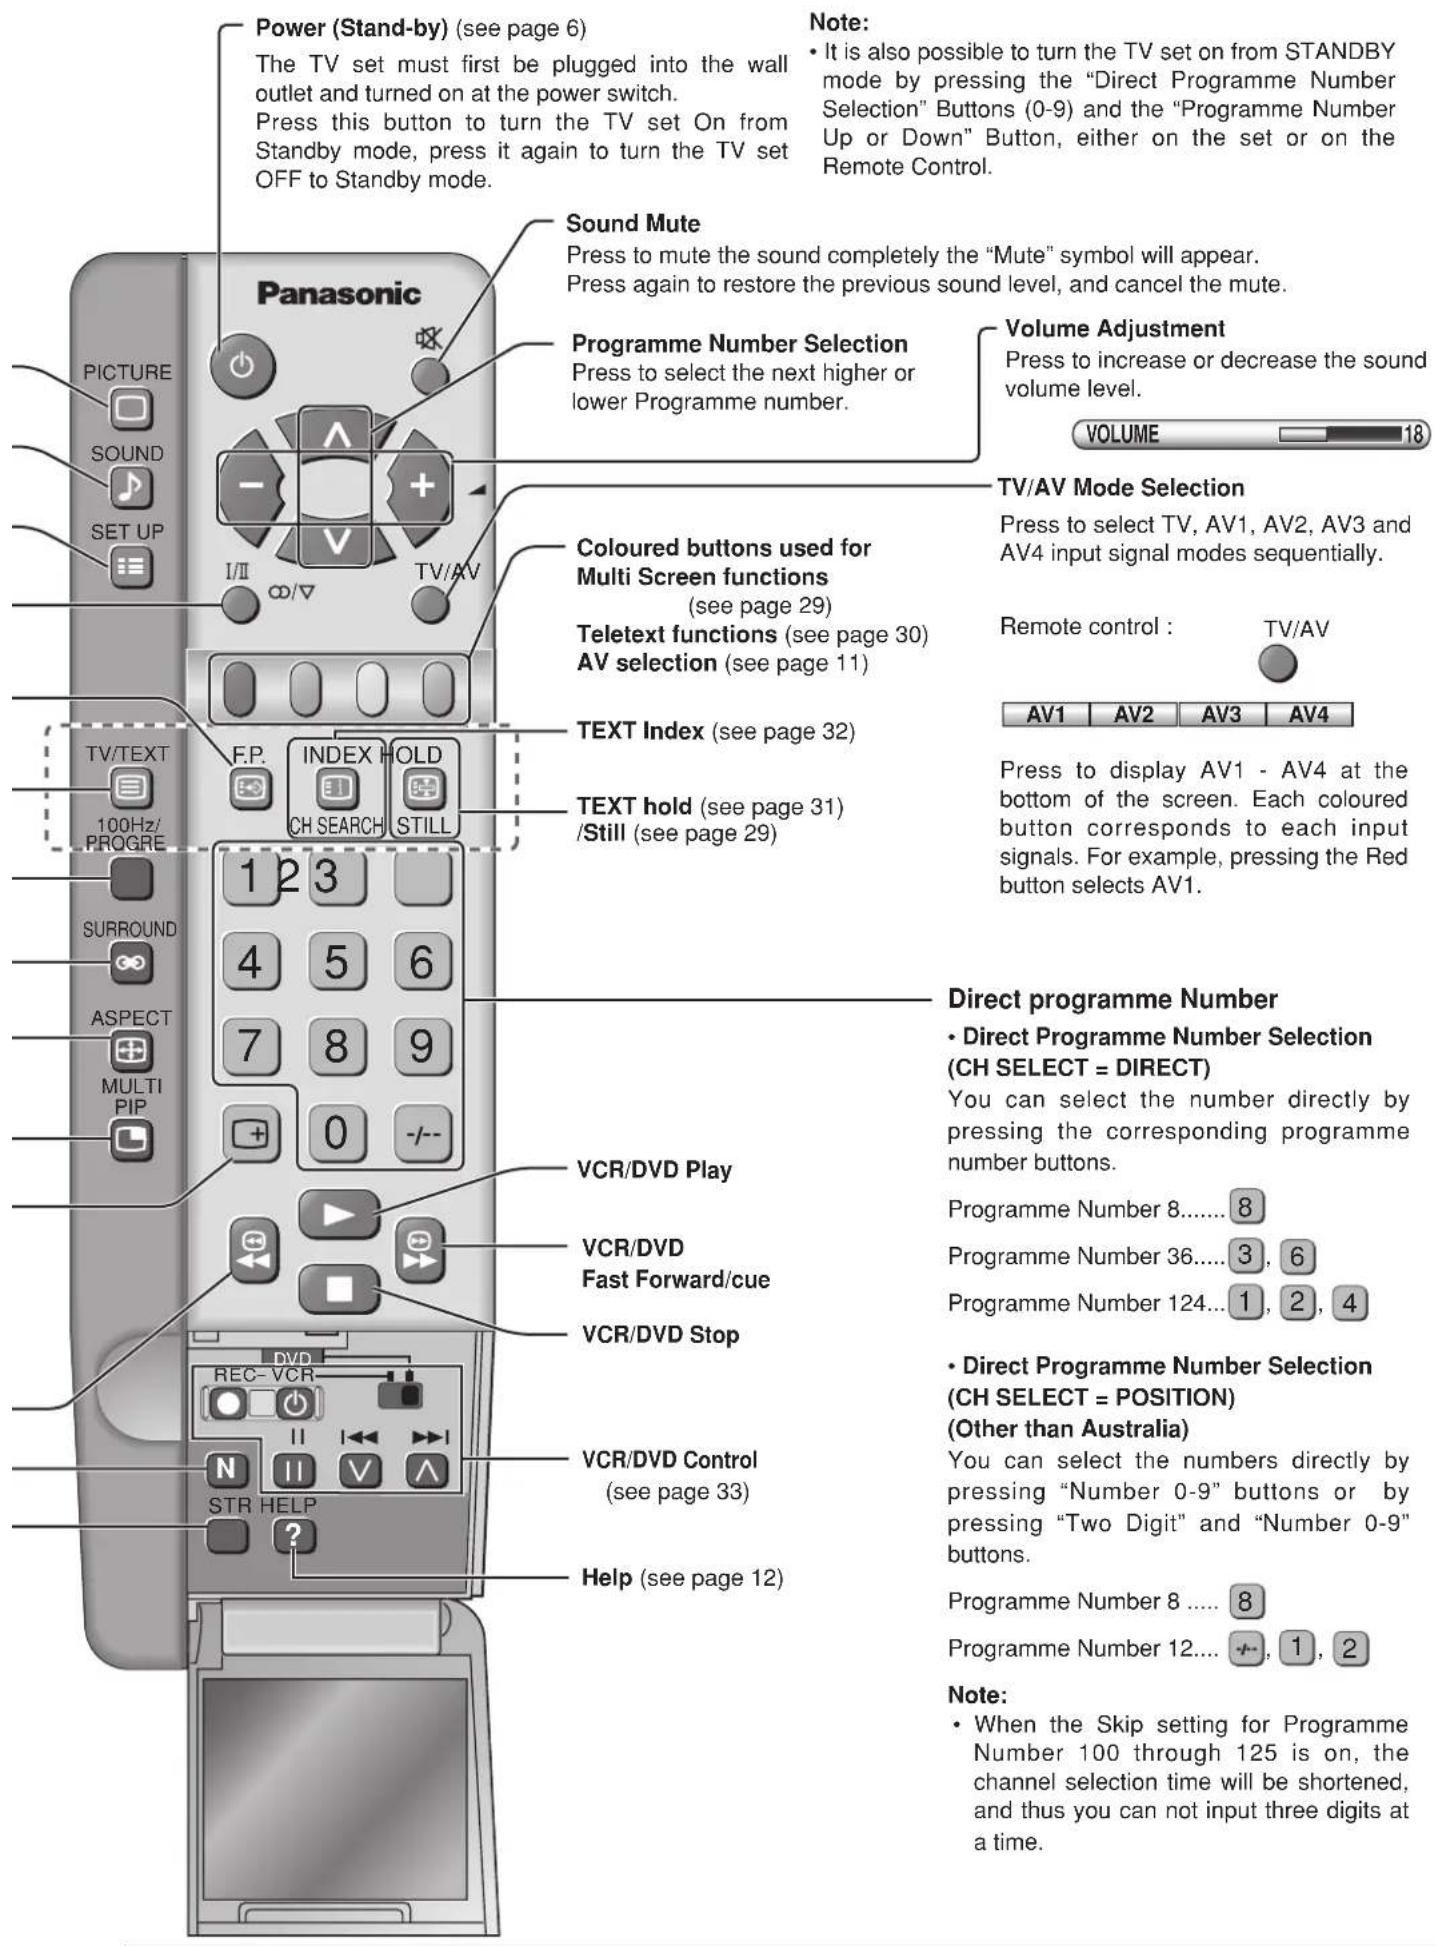
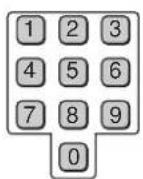
Power (Stand-by) (see page 6) The TV set must first be plugged into the wall outlet and turned on at the power switch. Press this button to turn the TV set On from Standby mode, press it again to turn the TV set OFF to Standby mode. Note: • It is also possible to turn the TV set on from STANDBY mode by pressing the "Direct Programme Number Selection" Buttons (0-9) and the "Programme Number Up or Down" Button, either on the set or on the Remote Control. Panasonic Sound Mute Press to mute the sound completely the "Mute" symbol will appear. Press again to restore the previous sound level, and cancel the mute. Programme Number Selection Press to select the next higher or lower Programme number. Volume Adjustment Press to increase or decrease the sound volume level. VOLUME TV/AV Mode Selection Press to select TV, AV1, AV2, AV3 and AV4 input signal modes sequentially. Remote control : TV/AV AV1 AV2 AV3 AV4 TV/TEXT F.P. INDEX HOLD 100Hz/ PROGRE CH SEARCH STILL TEXT Index (see page 32) TEXT hold (see page 31) /Still (see page 29) 1 2 3 4 5 6 7 8 9 0 ASPECT MULTI PIP VCR/DVD Play VCR/DVD Fast Forward/cue VCR/DVD Stop VCR/DVD Control (see page 33) ? REC-VCR STR HELP Help (see page 12) Direct programme Number • Direct Programme Number Selection (CH SELECT = DIRECT) You can select the number directly by pressing the corresponding programme number buttons. Programme Number 8......8 Programme Number 36......3, 6 Programme Number 124...1, 2, 4 • Direct Programme Number Selection (CH SELECT = POSITION) (Other than Australia) You can select the numbers directly by pressing "Number 0-9" buttons or by pressing "Two Digit" and "Number 0-9" buttons. Programme Number 8 ......8 Programme Number 12....+,-, 1, 2 Note: • When the Skip setting for Programme Number 100 through 125 is on, the channel selection time will be shortened, and thus you cannot input three digits at a time.On-Screen menu Display from Remote Control
text_image
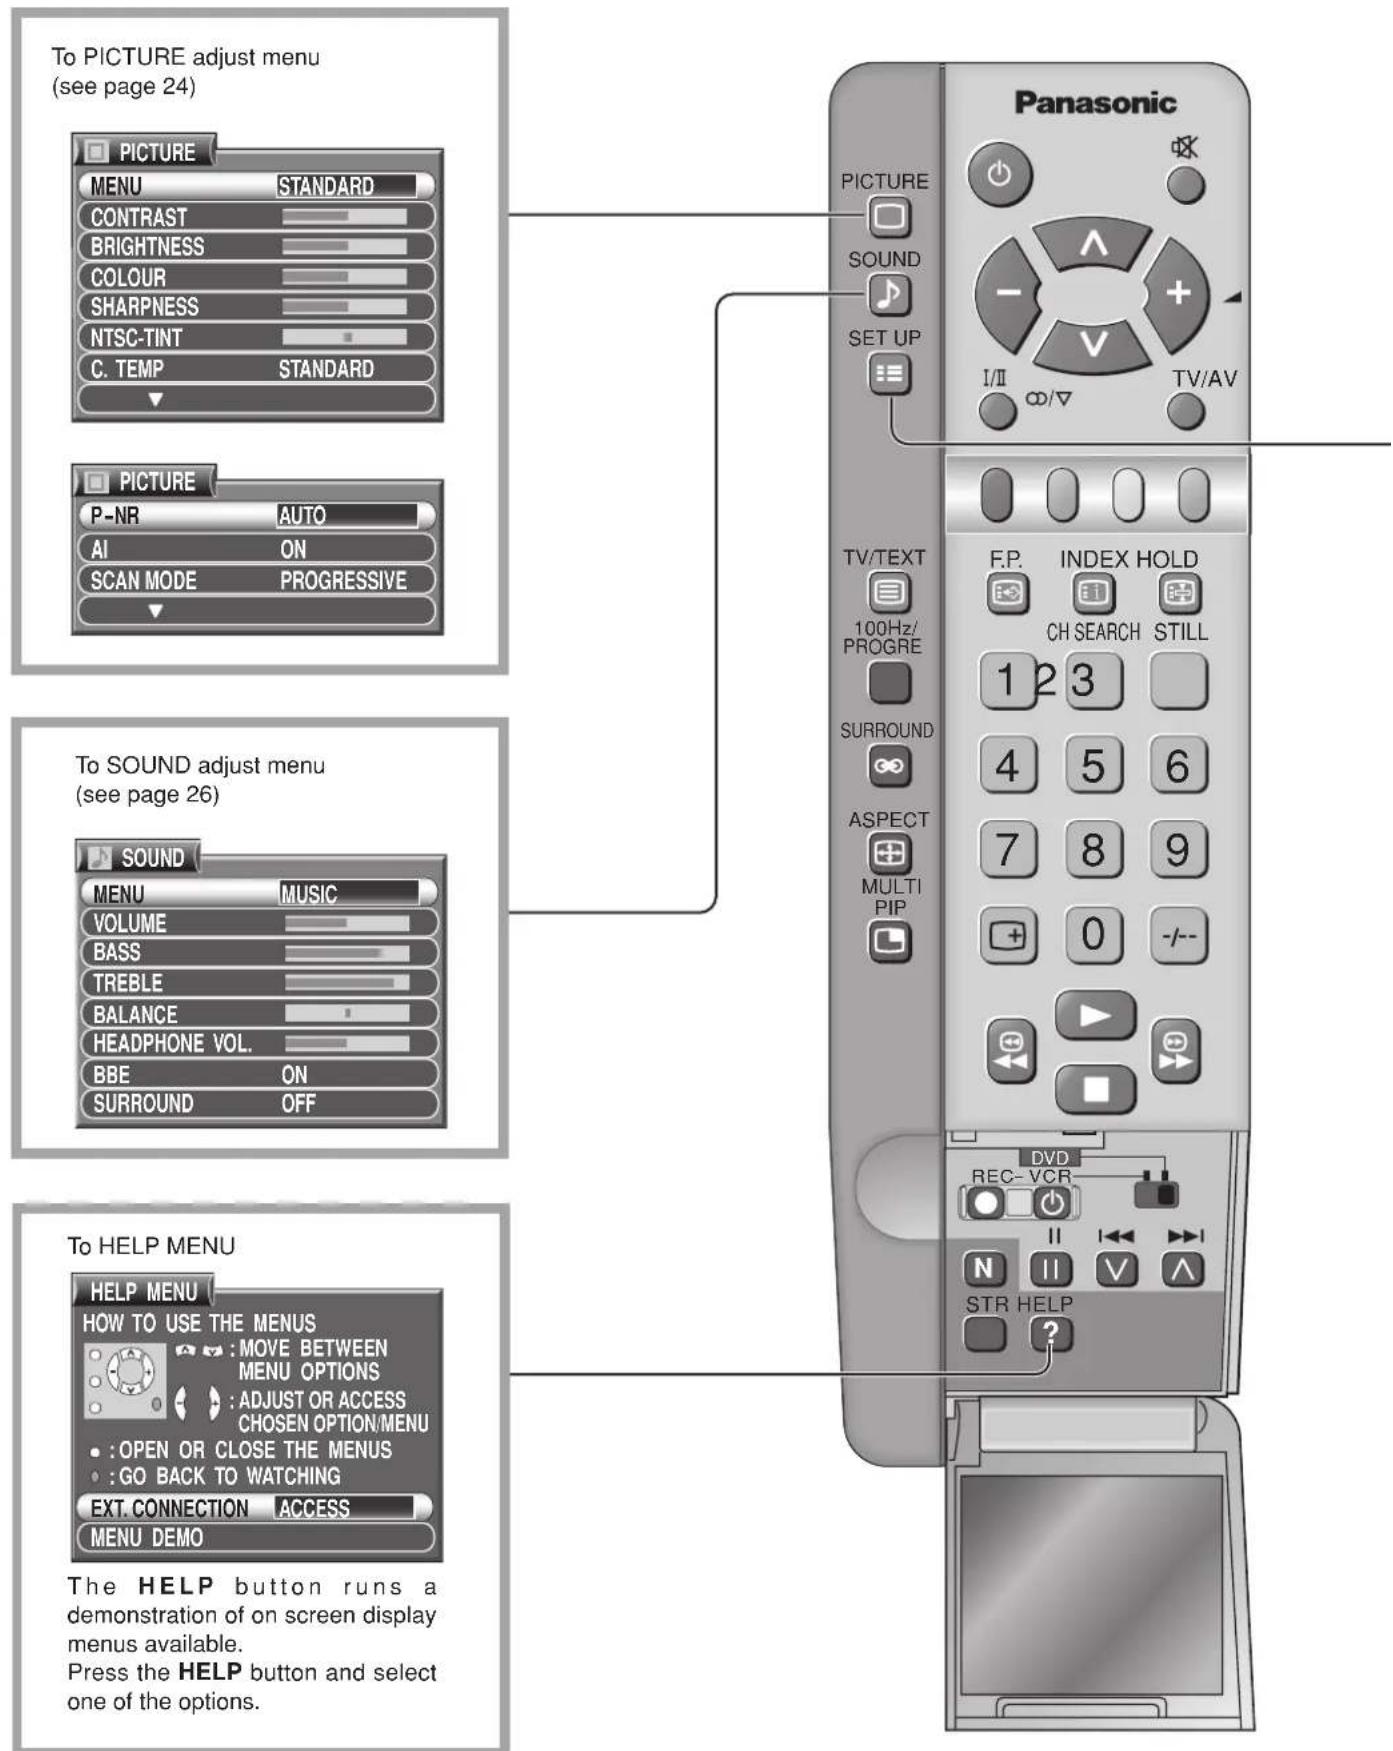
To PICTURE adjust menu (see page 24) PICTURE MENU STANDARD CONTRAST BRIGHTNESS COLOUR SHARPNESS NTSC-TINT C. TEMP STANDARD PICTURE P-NR AUTO AI ON SCAN MODE PROGRESSIVE To SOUND adjust menu (see page 26) SOUND MENU MUSIC VOLUME BASS TREBLE BALANCE HEADPHONE VOL. BBE ON SURROUND OFF To HELP MENU HELP MENU HOW TO USE THE MENUS : MOVE BETWEEN MENU OPTIONS : ADJUST OR ACCESS CHOSEN OPTION/MENU : OPEN OR CLOSE THE MENUS : GO BACK TO WATCHING EXT. CONNECTION ACCESS MENU DEMO Panasonic PICTURE SOUND SET UP TV/TEXT 100Hz/ PROGRE SURROUND ASPECT MULTI PIP F.P. INDEX HOLD CH SEARCH STILL 1 2 3 4 5 6 7 8 9 0 -/-- - DVD REC-VCR N II V A STR HELP The HELP button runs a demonstration of on screen display menus available. Press the HELP button and select one of the options.To SETUP MENU (see page 23)
text_image
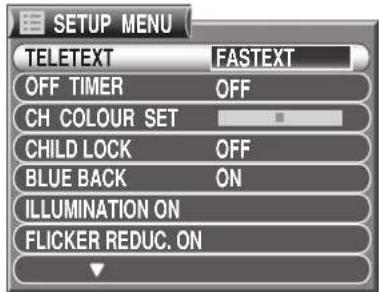
SETUP MENU TELETEXT FASTEXT OFF TIMER OFF CH COLOUR SET CHILD LOCK OFF BLUE BACK ON ILLUMINATION ON FLICKER REDUC. ON(TV mode)
text_image
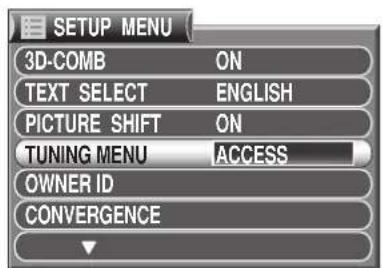
SETUP MENU 3D-COMB ON TEXT SELECT ENGLISH PICTURE SHIFT ON TUNING MENU ACCESS OWNER ID CONVERGENCE(TV mode)
text_image
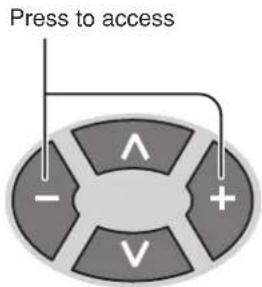
Press to access - ∧ + V
To TUNING MENU (see page 15)
text_image
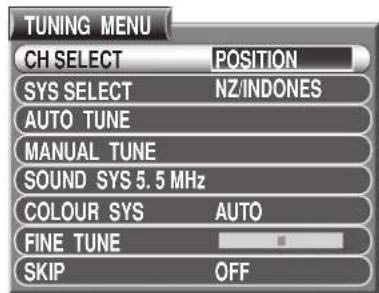
TUNING MENU CH SELECT POSITION SYS SELECT NZ/INDONES AUTO TUNE MANUAL TUNE SOUND SYS 5.5 MHz COLOUR SYS AUTO FINE TUNE SKIP OFF(Other than Australia)
text_image
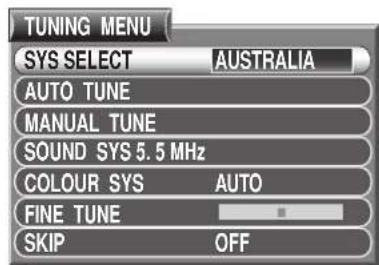
TUNING MENU SYS SELECT AUSTRALIA AUTO TUNE MANUAL TUNE SOUND SYS 5.5 MHz COLOUR SYS AUTO FINE TUNE SKIP OFF(For Australia)
To Owner ID (see page 22)
text_image
Change character Select character Return - TV / AV • -Exit "STR" Button-Store Owner ID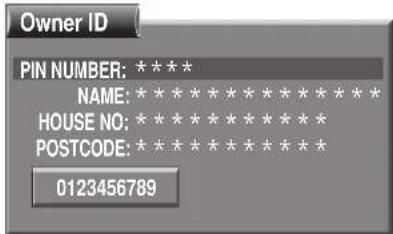
text_image
Owner ID PIN NUMBER: ***** NAME: ***** * * * * * * * HOUSE NO: ***** * * * * * * POSTCODE: ***** * * * * * * 0123456789To CONVERGENCE (see page 14)
text_image
SELECT ACCESS RETURN - • TV / AV • - EXIT CONVERGENCE 1 ACCESS CONVERGENCE 2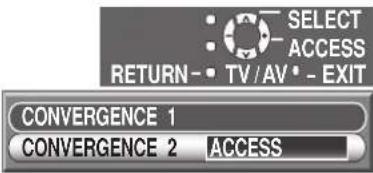
text_image
SELECT ACCESS RETURN- • TV / AV * - EXIT CONVERGENCE 1 CONVERGENCE 2 ACCESSConvergence Adjustment
Convergence Adjustment mode
text_image
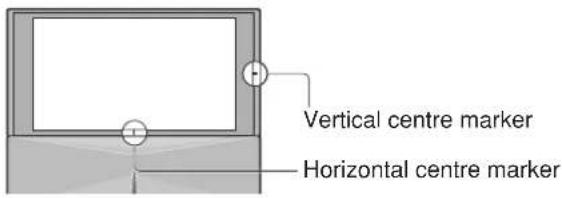
Vertical centre marker Horizontal centre markerPrior to adjustment, tune the broadcast signal to the video input signal and operate the set for more than 60 minutes. If the location or direction of the set is changed or moved, the display may be out of alignment. If necessary, carry out the following procedures once with PAL signal and again with the NTSC signal.
1
SET UP

Press to display the Setup Menu.
2
Press to select the "CONVERGENCE".
Press to access to the "CONVERGENCE" menu.
3
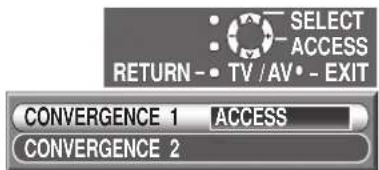
Press to select the "CONVERGENCE 1" or the "CONVERGENCE 2".
Press to access to the function.
Example:
CONVERGENCE 1
is selected.
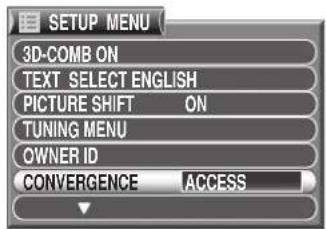
text_image
SETUP MENU 3D-COMB ON TEXT SELECT ENGLISH PICTURE SHIFT ON TUNING MENU OWNER ID CONVERGENCE ACCESS
Convergence 1 Adjustment for RED, BLUE and GREEN
RED
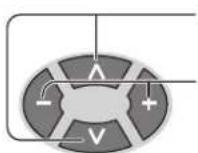
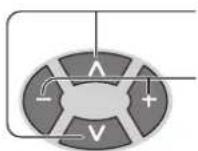
Press to align the horizontal red line with the horizontal blue line.
(Becomes a white line)
Press to align the vertical red line with the vertical blue line.
(Becomes a white line)
Press N button to adjust the blue mode.
(Stores RED)
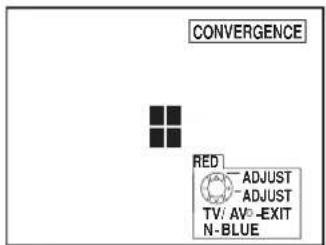
text_image
CONVERGENCE RED ADJUST ADJUST TV: AV-EXIT N-BLUEBLUE
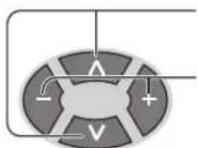
Press to align the horizontal blue line with the horizontal yellow line.
(Becomes a white line)
Press to align the vertical blue line with the vertical yellow line.
(Becomes a white line)
Press N button to adjust the green mode.
(Stores BLUE)
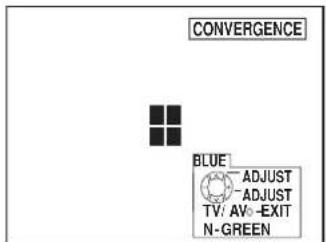
text_image
CONVERGENCE BLUE ADJUST ADJUST TV: AV-EXIT N-GREENOnly when you cannot adjust with RED and BLUE proceed to the following GREEN adjustment.
GREEN
Repeat above adjustment for each position.
Press to align the horizontal green line with the vertical centre maker.
Press to align the vertical green line with the horizontal centre maker.
Press N button to adjust the red mode. (Stores GREEN)
TV/AV

Press at any time to return to the normal viewing.
Vertical centre marker
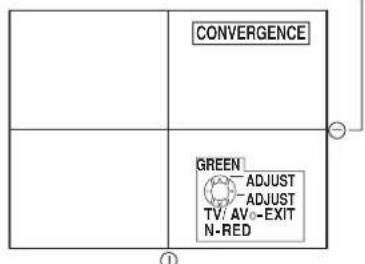
text_image
CONVERGENCE GREEN ADJUST ADJUST TV/ AV-EXIT N-REDHorizontal centre marker
Convergence 2 Adjustment for RED and BLUE
This function adjust the convergence of the side part of the screen.
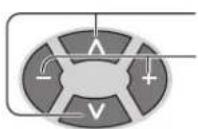
Press to select the CONVERGENCE 2.
Press to access to the function.
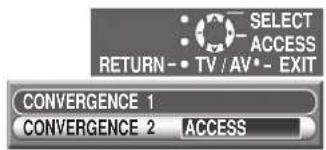
text_image
SELECT ACCESS RETURN - • TV / AV * - EXIT CONVERGENCE 1 CONVERGENCE 2 ACCESS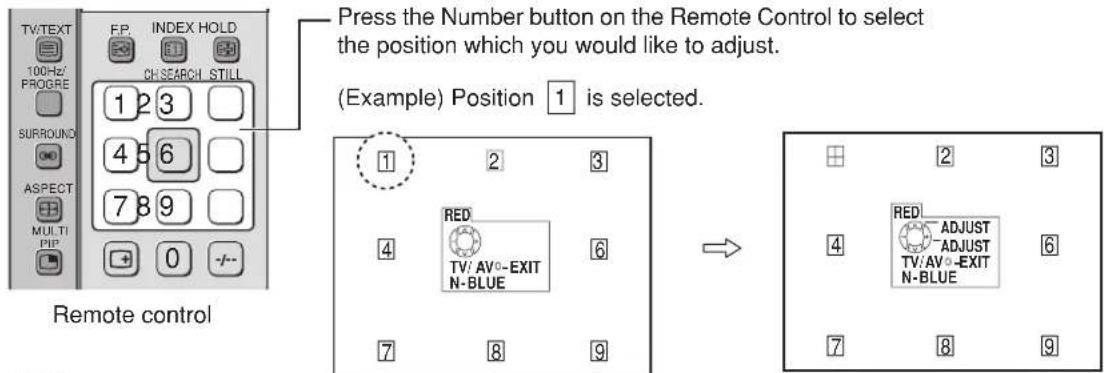
text_image
Press the Number button on the Remote Control to select the position which you would like to adjust. (Example) Position 1 is selected. Remote control 1 2 3 RED TV/AV-EXIT N-BLUE 7 8 9 RED ADJUST ADJUST TV/AV-EXIT N-BLUE 7 8 9RED
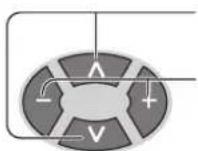
Press to align the horizontal red line with the horizontal blue line. (Becomes a white line)
Press to align the vertical red line with the vertical blue line. (Becomes a white line)
Press N button to adjust the blue mode. (Stores RED)
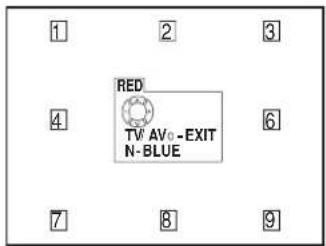
text_image
1 2 3 RED TV AV₀ -EXIT N-BLUE 4 6 7 8 9BLUE
Press to align the horizontal blue line with the horizontal yellow line. (Becomes a white line)
Press to align the vertical blue line with the vertical yellow line. (Becomes a white line)
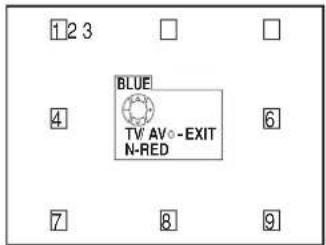
text_image
123 BLUE TV AV-EXIT N-RED 4 6 7 8 9
Press to return to the normal viewing. (Stores BLUE)
Note:
If you wish to view a video with a different colour system (PAL / SECAM, NTSC), repeat the steps above while displaying a picture.
Tuning Channels
1 Display the TUNING MENU

SET UP

Press to display the SETUP MENU.

Press to select the TUNING MENU.
Press to access TUNING MENU.
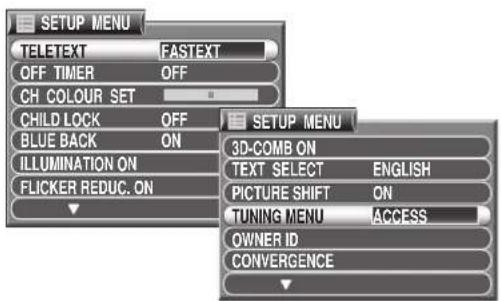
text_image
SETUP MENU TELETEXT FASTEXT OFF TIMER OFF CH COLOUR SET CHILD LOCK OFF BLUE BACK ON ILLUMINATION ON FLICKER REDUC. ON SETUP MENU 3D-COMB ON TEXT SELECT ENGLISH PICTURE SHIFT ON TUNING MENU ACCESS OWNER ID CONVERGENCE2
1 Select the "POSITION" or the "DIRECT" (Other than Australia) CH SELECT
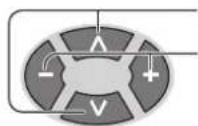
Press to select the "CH SELECT (Channel Select)" Mode.
Press to select the "POSITION" or the "DIRECT".
Setting range when the "POS." (Position) has been selected: Position 0-99
Setting range when the "DIRECT" has been selected: Channel 0-125
The channel select indicator will change as follows. DIRECT POSTOIN
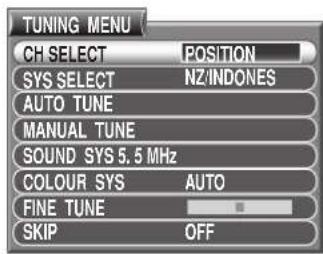
text_image
TUNING MENU CH SELECT POSITION SYS SELECT NZ/INDONES AUTO TUNE MANUAL TUNE SOUND SYS 5.5 MHz COLOUR SYS AUTO FINE TUNE SKIP OFF2 Regional System Selection
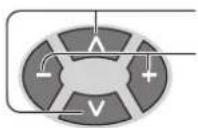
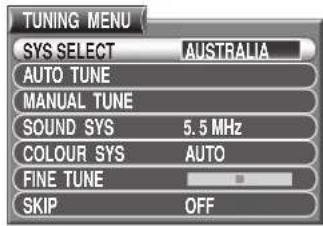
Press to select the "SYS SELECT".
Press to select the appropriate system.
The system select indicator will change as follows.

flowchart
graph LR
    A["CHINA HK/UK"] --> B["ASIA/M.EAST"]
    B --> C["NZ/INDONES"]
    C --> D["AUSTRALIA"]
    E["JAPAN GATV AMERICA"] --> F["SPECL VER"]
    F --> G["E.EUROPE"]
text_image
TUNING MENU SYS SELECT AUSTRALIA AUTO TUNE MANUAL TUNE SOUND SYS 5.5 MHz COLOUR SYS AUTO FINE TUNE SKIP OFFSystem Select by Regional
| SYSTEM SELECT | Region | SYSTEM SELECT | Region |
| CHINAHK / UKASIA/M.EASTNZ / INDONESAUSTRALIA | ChinaHong Kong, United KingdomMalaysia, Singapore, Thailand, Asia countries,Kuwait, Saudi Arabia, United Arab Emirates,Middle East countries, etc.New Zealand, Indonesia, etc.Australia | E.EUROPE SPECL VER AMERICACATVJAPAN | CIS, Poland, etc.South AfricaU.S.A., Chile, Mexico, Panama, Peru,Philippines, Taiwan, Venezuela, etc.USA CATVJapan |
Channel Selection
Select the most easily viewed channel selection method.
POSITION SELECT (Other than Australia)
When the Channel Selection is on POS. (Position), and Auto Tune is performed, the unit memories the channels tuned in order from programme No.1.
Press the button 1 to view channel 2.
Press the button 2 to view channel 4.
Press the button 3 to view channel 6.
During position mode various reception channels can be viewed.
Example
| Programme Number | Channel Display | Received Channel |
| 1 | 2 | 2 |
| 2 | 4 | 4 |
| 3 | 6 | 6 |
| 4 | 8 | 8 |
| 5 | 10 | 10 |
| 6 | 12 | 12 |
| 7 | 14 | 14 |
| 8 | 16 | 16 |
| 9 | 18 | 18 |
| 10 | 20 | 20 |
DIRECT SELECT
When the Channel Selection is on DIRECT, and Auto Tune is performed, the unit memories the programme number which is the same as the channel tuned.
This method allows you to select the desired channel by pushing the channel display number directly on the remote control to select the station. The channel display numbers for the broadcast stations in each region are listed on page 17.
Example
| Programme Number | Channel Display | Received Channel |
| 1 | - | - |
| 2 | 2 | 2 |
| 3 | - | - |
| 4 | 4 | 4 |
| 5 | - | - |
| 6 | 6 | 6 |
| 7 | - | - |
| 8 | 8 | 8 |
| 9 | - | - |
| 10 | 10 | 10 |
| 20 | 20 | 20 |
Channel Allocation
- CATV (USA CATV) channel numbers as recommended by the joint EIA/NCTA Engineering committee and published as EIA INTERIM STANDARD No.6-CABLE TELEVISION CHANNEL IDENTIFICATION PLAN-MAY 1983.
• The receiving channels are as follows;
| SYS SELECT | CHINA HK/UK | ASIA/M.EAST | NZ/INDONES | AUSTRALIA | E.EUROPE | SPECL VER | AMERICA | CATV JAPAN | ||
| CH DISPLAY | RECEIVE CHANNEL | |||||||||
| 0 | - | - | - | - | - | - | - | - | - | - |
| 1 | 1 | - | - | 1 | 0 | 1 | 1 | - | 1 | 1 |
| 2 | 2 | - | 2 | 2 | 1 | 2 | 2 | 2 | 2 | 2 |
| 3 | ( ) | - | ( ) | ( ) | 2 | ( ) | ( ) | ( ) | ( ) | ( ) |
| 4 | ( ) | - | ( ) | ( ) | 3 | ( ) | ( ) | ( ) | ( ) | ( ) |
| 5 | ( ) | - | ( ) | ( ) | 4 | ( ) | ( ) | ( ) | ( ) | ( ) |
| 6 | ( ) | - | ( ) | ( ) | 5 | ( ) | ( ) | ( ) | ( ) | ( ) |
| 7 | ( ) | - | ( ) | ( ) | S2 | ( ) | ( ) | ( ) | ( ) | ( ) |
| 11 | ( ) | - | 11 | 11 | ( ) | 11 | 11 | ( ) | ( ) | ( ) |
| 12 | 12 | - | 12 | - | ( ) | 12 | 12 | ( ) | ( ) | 12 |
| 13 | 13 | - | - | - | ( ) | - | 13 | 13 | ( ) | 13 |
| 14 | ( ) | - | - | - | ( ) | - | - | 14 | ( ) | ( ) |
| 15 | ( ) | - | - | - | S10 | - | - | ( ) | ( ) | ( ) |
| 16 | ( ) | - | - | - | 6 | - | - | ( ) | ( ) | ( ) |
| 19 | ( ) | - | - | - | ( ) | - | - | ( ) | ( ) | ( ) |
| 20 | ( ) | - | - | - | 9A | - | - | ( ) | ( ) | ( ) |
| 21 | ( ) | 21 | 21 | 21 | 10 | 21 | 21 | ( ) | ( ) | ( ) |
| 22 | ( ) | ( ) | ( ) | ( ) | 11 | ( ) | ( ) | ( ) | ( ) | ( ) |
| 23 | ( ) | ( ) | ( ) | ( ) | 12 | ( ) | ( ) | ( ) | ( ) | ( ) |
| 24 | ( ) | ( ) | ( ) | ( ) | S11 | ( ) | ( ) | ( ) | ( ) | ( ) |
| 28 | ( ) | ( ) | ( ) | ( ) | ( ) | ( ) | ( ) | ( ) | ( ) | ( ) |
| 57 | 57 | ( ) | ( ) | ( ) | S44 | ( ) | ( ) | ( ) | ( ) | ( ) |
| 58 | - | ( ) | ( ) | ( ) | 20 | ( ) | ( ) | ( ) | ( ) | ( ) |
| 59 | - | ( ) | ( ) | ( ) | 21 | ( ) | ( ) | ( ) | ( ) | ( ) |
| 62 | - | 62 | 62 | 62 | ( ) | 62 | 62 | 62 | 62 | 62 |
| 63 | - | 63 | 63 | 63 | ( ) | 63 | 63 | 63 | 63 | C13 |
| 69 | - | 69 | 69 | 69 | ( ) | 69 | 69 | 69 | ( ) | ( ) |
| 70 | - | - | - | - | ( ) | - | - | - | ( ) | ( ) |
| 73 | - | - | - | - | ( ) | - | - | - | ( ) | ( ) |
| 74 | - | S'1 | S'1 | S'1 | ( ) | S'1 | S'1 | - | ( ) | ( ) |
| 75 | - | S'2 | S'2 | S'2 | ( ) | - | S'2 | - | ( ) | ( ) |
| 76 | - | S'3 | S'3 | S'3 | ( ) | - | S'3 | - | ( ) | ( ) |
| 77 | - | - | - | - | ( ) | - | - | - | ( ) | ( ) |
| 78 | - | - | - | - | ( ) | - | - | - | ( ) | ( ) |
| 79 | - | - | - | - | ( ) | - | - | - | ( ) | ( ) |
| 80 | - | S1 | S1 | S1 | ( ) | S1 | S1 | - | ( ) | ( ) |
| 81 | Z1 | S2 | S2 | S2 | ( ) | S2 | S2 | - | ( ) | ( ) |
| 89 | Z9 | S10 | S10 | S10 | ( ) | S10 | S10 | - | ( ) | ( ) |
| 90 | Z10 | S11 | S11 | S11 | ( ) | S11 | - | - | ( ) | ( ) |
| 91 | Z11 | S12 | S12 | S12 | ( ) | S12 | - | - | ( ) | ( ) |
| 92 | Z12 | S13 | S13 | S13 | ( ) | S13 | - | - | ( ) | ( ) |
| 93 | Z13 | S14 | S14 | S14 | ( ) | S14 | S14 | - | ( ) | ( ) |
| 94 | Z14 | S15 | S15 | S15 | ( ) | S15 | S15 | - | ( ) | ( ) |
| 95 | Z15 | S16 | S16 | S16 | ( ) | S16 | S16 | - | ( ) | ( ) |
| 96 | Z16 | S17 | S17 | S17 | ( ) | S17 | S17 | - | ( ) | ( ) |
| 97 | Z17 | S18 | S18 | S18 | ( ) | S18 | S18 | - | ( ) | ( ) |
| 98 | Z18 | S19 | S19 | S19 | ( ) | S19 | S19 | - | ( ) | ( ) |
| 99 | Z19 | S20 | S20 | S20 | ( ) | S20 | S20 | - | 99 C49 | |
| 100 | Z20 | S21 | S21 | S21 | ( ) | S21 | S21 | - | 100 | - |
| 107 | ( ) | ( ) | ( ) | ( ) | 69 | ( ) | ( ) | - | ( ) | - |
| 117 | Z37 | ( ) | ( ) | ( ) | - | ( ) | ( ) | - | ( ) | - |
| 118 | - | ( ) | ( ) | ( ) | - | ( ) | ( ) | - | ( ) | - |
| 120 | - | S41 | S41 | S41 | - | S41 | S41 | - | ( ) | - |
| 125 | - | - | - | - | - | - | - | - | 125 | - |
Automatic Tune
This TV uses automatic tuning to determine whether or not the TV can receive a broadcast signal which is being sent, and automatically prepares so that the channel selection can respond to both the position select and direct select modes. Before Automatic Tune, Channel Select and Regional System must already be set (Refer to pages 16).
1 AUTO TUNE
Press to select the "AUTO TUNE".
Press to access to the "AUTO TUNE".

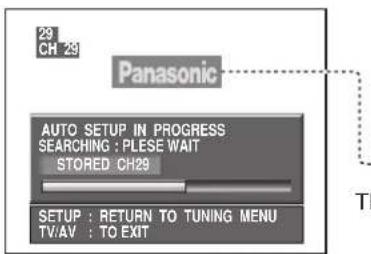
Search Start.
text_image
29 CH 29 Panasonic AUTO SETUP IN PROGRESS SEARCHING : PLESE WAIT STORED CH29 SETUP : RETURN TO TUNING MENU TV:AV : TO EXIT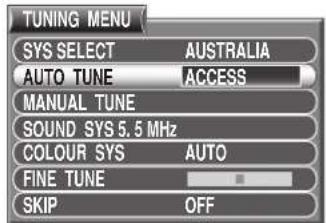
text_image
TUNING MENU SYS SELECT AUSTRALIA AUTO TUNE ACCESS MANUAL TUNE SOUND SYS 5.5 MHz COLOUR SYS AUTO FINE TUNE SKIP OFFWhen a station is found.
The best tuning position is automatically memorized.
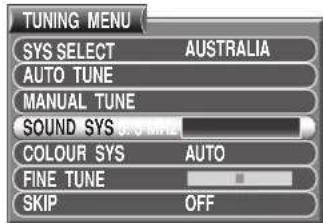
2 SOUND SYS
After all stations are tuned, the on-screen display will automatically change from "AUTO TUNE" to "SOUND SYS" Position.
Press to improve the Sound quality, if the Sound is not clear or no sound is produced on a programme Number Position.
text_image
TUNING MENU SYS SELECT AUSTRALIA AUTO TUNE MANUAL TUNE SOUND SYS 0.5 MHz COLOUR SYS AUTO FINE TUNE SKIP OFF
Press to store the Sound System.
Press to exit from the Tuning Menu.
This returns the set to the normal viewing condition.
Note:
When the sound volume is too small to confirm, turn it up by using the sound volume button on the remote control.
3
Under the normal viewing condition press to enter each programme Number. Confirm the tuning condition.
If necessary, repeat step 2 for each Programme Number.
Manual Tune
Before Manual Tune, Channel Select and Regional System must already be set (Refer to page 16).
1 MANUAL TUNE
①
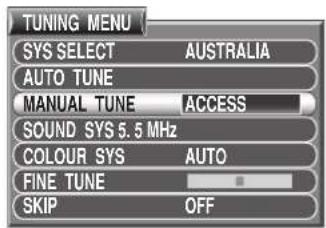
Press to select the MANUAL TUNE.
Press to access to the MANUAL TUNE.
text_image
TUNING MENU SYS SELECT AUSTRALIA AUTO TUNE MANUAL TUNE ACCESS SOUND SYS 5.5 MHz COLOUR SYS AUTO FINE TUNE SKIP OFF②
Press to select the desired Programme Number.
Press to select the higher or lower channel.
↓ Search Start.
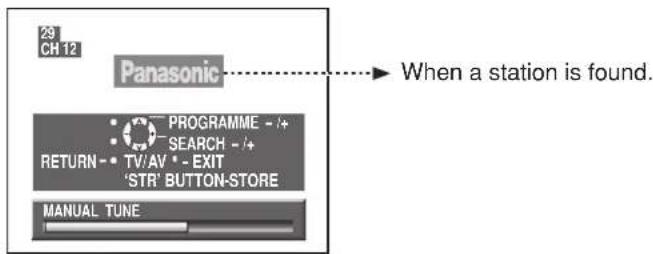
text_image
29 CH 12 Panasonic When a station is found. PROGRAMME -/+ SEARCH -/+ RETURN - TV:AV * - EXIT 'STR' BUTTON-STORE MANUAL TUNE
When the desired station is found, press to store.
The tuning position is memorized.
Press to exit from the Tuning Menu.
This returns the set to the normal viewing condition.
2 SOUND SYS

Press to display the SETUP MENU.

Proceed to the TUNING MENU, and then to the SOUND SYS (refer to page 13).
3 Adjust the Sound System (refer to page 18 step 2 to 3).

Helpful Hint
(1) If a clear picture with correct colours cannot be obtained when a Broadcast or AV signal is received, refer to the "Colour System Selection" operation on page 21.
(2)
After the Manual tune or the Automatic tune is finished, under the normal viewing condition press this button to confirm the tuning condition for each Programme Number. If some Programme Numbers are unused (no TV stations), it is possible to skip such Programme Numbers. Please refer to the Programme Number Skip operation on page 20.
(3) When using a VCR without video and audio input/output terminals, it is convenient to connect the aerial cable as indicated in the instruction manual of VCR and to set the designated channel to programme No. "0". In that case, perform manual tune after setting the colour system and sound system in advance. Further, in multi-system VCR, it is more convenient to set the designated channel to several programme Numbers.
Fine Tuning
Under normal reception conditions this function is not required or necessary.
However, in areas of poor reception or constant interference, a slight adjustment of the tuning may improve the picture and sound quality.
1
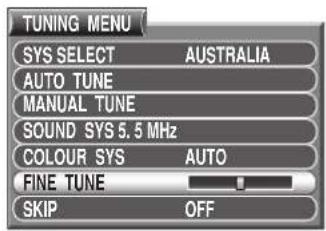
Press to select the FINE TUNE.
Press until the clear picture is received.
text_image
TUNING MENU SYS SELECT AUSTRALIA AUTO TUNE MANUAL TUNE SOUND SYS 5.5 MHz COLOUR SYS AUTO FINE TUNE SKIP OFF2
Press to store the FINE TUNE.
This stores the FINE TUNE to the selected Programme Number.
3
Press to exit from the FINE TUNE.
This returns the set to the normal viewing condition.
How to Cancel the Fine Tuning
Canceling previously adjusted (manually) fine tuning, means re-activating the AFT (Automatic Fine Tuning). Re-activating the Automatic Fine Tuning means allowing the set to automatically tune to the optimum tuning position, for that programme Number.
1
Select the Programme Number which you would like to return to Automatic Fine Tuning (cancel the manual fine tuning).
2
Press to display the SETUP MENU.

Proceed to the TUNING MENU (refer to page 16).
3
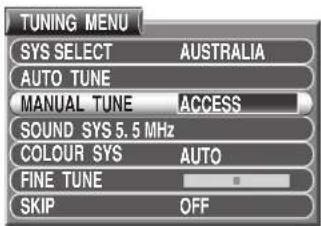
Press to select the MANUAL TUNE.
Press to access to MANUAL TUNE. Press briefly to tune the best position.
text_image
TUNING MENU SYS SELECT AUSTRALIA AUTO TUNE MANUAL TUNE ACCESS SOUND SYS 5.5 MHz COLOUR SYS AUTO FINE TUNE SKIP OFF4
Press to store the AFT.
This stores the re-activated AFT.
5
Press to exit from the MANUAL TUNE.
This returns the set to the normal viewing condition.
Programme Number Skip
It is possible to skip Programme Number on which no TV stations are tuned appearing on the screen. The function is only effective when selecting Programme Numbers by pressing the Programme Number Up or Down button either on the TV set or on the Remote control.
1
Under the normal viewing condition press to select the Programme Number you would like to skip.
2
Press to display the SETUP MENU. Proceed to the TUNING MENU (refer to page 15).
3
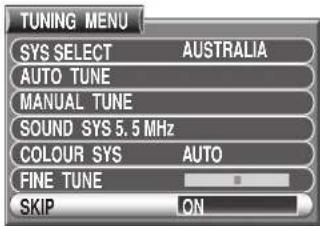
Press to select the SKIP. Press to change the mode to "ON".
text_image
TUNING MENU SYS SELECT AUSTRALIA AUTO TUNE MANUAL TUNE SOUND SYS 5.5 MHz COLOUR SYS AUTO FINE TUNE SKIP ON4
Press to store the Skip function.

5
Press to exit from the SKIP. This returns the set to the normal viewing condition.
Repeat Step1 to 4 for each Programme Number for which the Skip function is desired.
How to Cancel the Skip Function
1
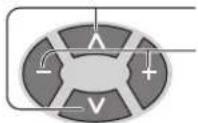
Press to select the SKIP.
Press to change the mode to "OFF".
2
Press to store the Skip function.
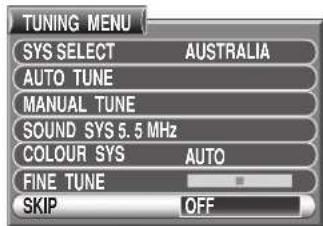
text_image
TUNING MENU SYS SELECT AUSTRALIA AUTO TUNE MANUAL TUNE SOUND SYS 5.5 MHz COLOUR SYS AUTO FINE TUNE SKIP OFFSound System Selection (Different region use differing systems)
This function is used only in the TV mode when the sound is not clear or no sound is produced on a Programme Number, and is not applicable in AV mode.
1
Press to select the "SOUND SYS".
Press until the optimum sound is obtained.
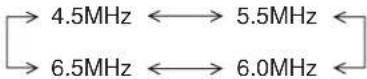
The sound system will change as shown.
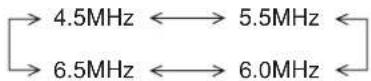
Sound System Condition.
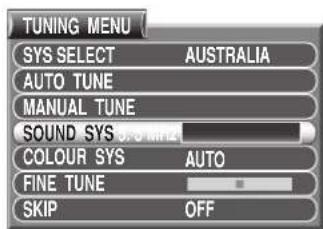
text_image
TUNING MENU SYS SELECT AUSTRALIA AUTO TUNE MANUAL TUNE SOUND SYS 3.0 MHz COLOUR SYS AUTO FINE TUNE SKIP OFFNote:
These are different sound broadcast transmission systems applicable to differing countries.
2
Press to store the Sound System.
Press to exit from the "SOUND SYS".
This returns the set to the normal viewing condition.
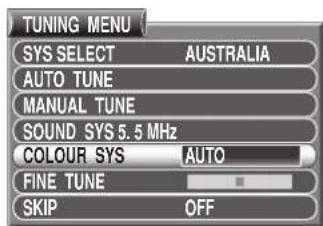
Colour System Selection (Different region use differing systems)
If a clear picture with correct colours cannot be obtained when a Broadcast or AV signal is received, this function is used.
1
Press to select the "COLOUR SYS".
Press to produce the optimum image.
The colour system will change as shown.

Colour System Condition.
text_image
TUNING MENU SYS SELECT AUSTRALIA AUTO TUNE MANUAL TUNE SOUND SYS 5.5 MHz COLOUR SYS AUTO FINE TUNE SKIP OFFNote:
PAL, SECAM and NTSC 3.58 are different colour signal broadcast transmission systems applicable to differing countries. NTSC 4.43 is a trick playback mode used in special VCR to playback NTSC recorded video tapes through PAL television equipment.
2
Press to store the Colour System.
Press to exit from the "COLOUR SYS".
This returns the set to the normal viewing condition.
Owner ID
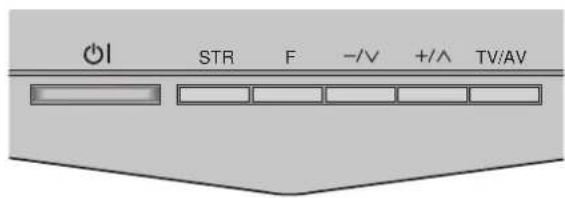
Owner ID allows you to enter a security code (Owner ID) and your personal details into the memory, so that in the unfortunate event of theft it will help the police to trace the owner.
text_image
I STR F -/√ +/∧ TV/AVIf you wish to check the personal details already entered into the TV, press the F (Front panel) and hold for 5 seconds. The details already entered are displayed on screen.
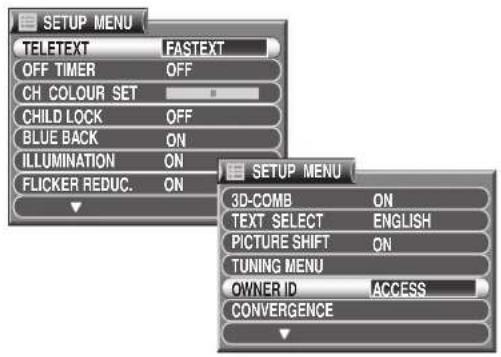
If Owner ID information was not entered when you switched on your TV for the first time or it is necessary to alter some of the information, Owner ID can be re-accessed via the Tuning menu.
1
SET UP

Press to display the Setup Menu.
2
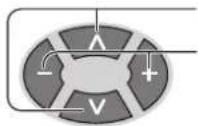
Press to select the "Owner ID".
Press to access "Owner ID".
text_image
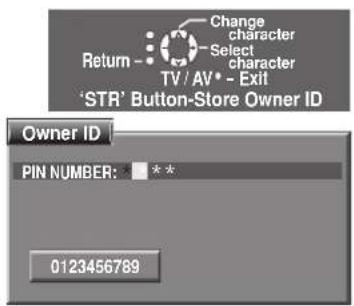
SETUP MENU TELETEXT FASTEXT OFF TIMER OFF CH COLOUR SET CHILD LOCK OFF BLUE BACK ON ILLUMINATION ON FLICKER REDUC. ON SETUP MENU 3D-COMB ON TEXT SELECT ENGLISH PICTURE SHIFT ON TUNING MENU OWNER ID ACCESS CONVERGENCEIf the Owner ID has previously been set, enter the PIN NUMBER (using 0 to 9 on the remote control) followed by STR to proceed, this will take you to the NAME option.
If no Owner ID has previously been set, enter the required 4 digit Owner ID PIN NUMBER (using 0 to 9 on the remote control).
If a 4 digit PIN NUMBER was entered above, you will be taken automatically to the NAME line.
If not, move to the NAME line by using - or + .
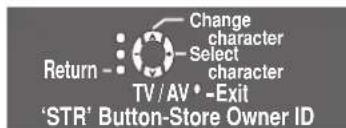
Change character by using ∧ or ∨.
Select character position by using - or + .
Repeat above until NAME, HOUSE NUMBER and POSTCODE are entered.
STR Press □ to store the details. Press again when you are asked, "Are you sure?"
The Owner ID is now stored.
text_image
Change character Select character Return - TV / AV* - Exit 'STR' Button-Store Owner ID Owner ID PIN NUMBER: *** 0123456789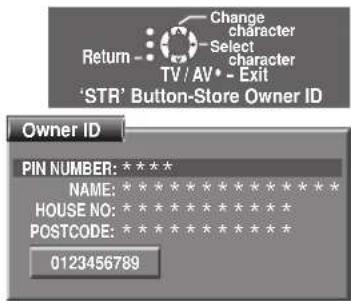
text_image
Return - Change character Select character TV / AV • - Exit *STR' Button-Store Owner ID Owner ID PIN NUMBER: ***** NAME: ***** HOUSE NO: ***** POSTCODE: ***** 0123456789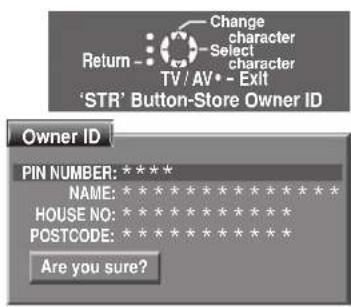
text_image
Change character Select character TV / AV • - Exit 'STR' Button-Store Owner ID Owner ID PIN NUMBER: ***** NAME: **** **** **** ****** HOUSE NO: **** **** **** ****** POSTCODE: **** **** **** ****** Are you sure?Setup Adjustment
1
SET UP

Press to display the SETUP MENU.
2
Press to select the desired function.
Press to adjust or change the function.
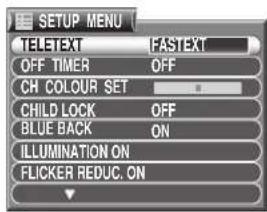
text_image
SETUP MENU TELETEXT FASTEXT OFF TIMER OFF CH COLOUR SET CHILD LOCK OFF BLUE BACK ON ILLUMINATION ON FLICKER REDUC. ON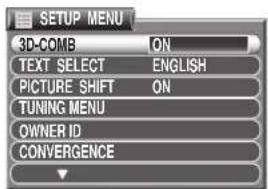
text_image
SETUP MENU 3D-COMB ON TEXT SELECT ENGLISH PICTURE SHIFT ON TUNING MENU OWNER ID CONVERGENCE3
TV/AV

Press to go back to watching TV.
OFF TIMER
Switches the TV off within a preset time which you can choose from between 0 to 90 minutes in 15 minutes intervals.

CH COLOUR SET
Colour density varying between broadcast channels can be adjusted to three levels for each reception channel.
CHILD LOCK
If the Child-Lock function is set ON, picture and sound of the TV/AV mode being viewed will disappear and a Black screen will appear.
BLUE BACK
You can choose Blue Back display ON or OFF when there is no signal.
ILLUMINATION
Select "ON" to illuminate the ILLUMINATION LIGHT on the front panel. Otherwise, select "OFF".
FLICKER REDUCTION
Lets you control any picture movement. Set to ON to activate motion compensation, to smooth the image and get rid of picture movement. Set to Off to have no flicker reduction at all, occasional broadcasts may benefit from using this setting.
ON ←→ OFF
3D-COMB
You can choose 3D-COMB function ON or OFF. If the 3D-COMB function is ON, dot interference or cross colour will be reduced. Note: Not available in component and RGB input.
PICTURE SHIFT
For use as a screen saver, this function changes the entire picture position (shift) approximately 2 mm every 15 minutes.
During AV mode, the appearance of the SETUP MENU will differ from that of the TV mode, with the following function adjustments becoming available.
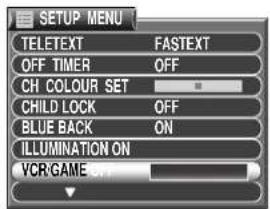
text_image
SETUP MENU TELETEXT FASTEXT OFF TIMER OFF CH COLOUR SET CHILD LOCK OFF BLUE BACK ON ILLUMINATION ON VCR GAME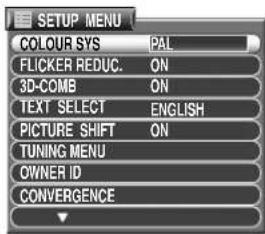
text_image
SETUP MENU COLOUR SYS PAL FLICKER REDUC. ON 3D-COMB ON TEXT SELECT ENGLISH PICTURE SHIFT ON TUNING MENU OWNER ID CONVERGENCEVCR/GAME
Reproduction of irregular signals, such as certain TV games and rental video tapes, may be improved.
COLOUR SYSTEM
During AV mode, COLOUR SYSTEM is displayed.
If a clear picture with current colours cannot be obtained when a Broadcast or AV signal is received, then the colour system will change as shown.

PAL, SECAM and NTSC 3.58 are different colour signal broadcast transmission systems applicable to differing countries. NTSC 4.43 is a trick playback mode used in special VCR to playback NTSC recorded video tapes through PAL television equipment.
Picture Adjustment
1
PICTURE

Press to display the Picture Menu.
2
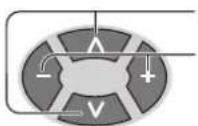
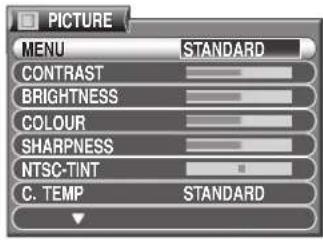
Press to select the desired function.
Press to adjust or change the function.
3
TV/AV

Press to go back to watching TV.
text_image
PICTURE MENU STANDARD CONTRAST BRIGHTNESS COLOUR SHARPNESS NTSC-TINT C. TEMP STANDARD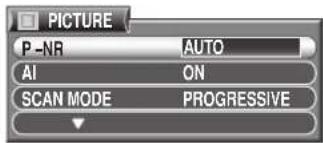
text_image
PICTURE P-NR AUTO AI ON SCAN MODE PROGRESSIVEMENU
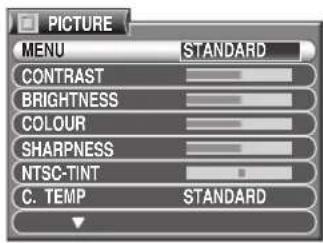
Picture menu mode will be memorized for each TV, AV1, AV2, AV3 and AV4 mode.
- You can change the level of each Item (CONTRAST, BRIGHTNESS, COLOUR, SHARPNESS, NTSC-TINT, C.TEMP, P-NR and AI) for each Picture Menu (DYNAMIC, STANDARD and CINEMA).
| Picture Menu Function | |
| DYNAMIC | For viewing in brighter environments.This menu selects a higher than normal levels of Brightness and Contrast. |
| STANDARD | For viewing in normal (evening lighting) environments.This menu selects the normal levels of Brightness and Contrast. |
| CINEMA | Ideal for movies.Can be selected for VIDEO/COMPONENT. |
text_image
PICTURE MENU STANDARD CONTRAST BRIGHTNESS COLOUR SHARPNESS NTSC-TINT C. TEMP STANDARD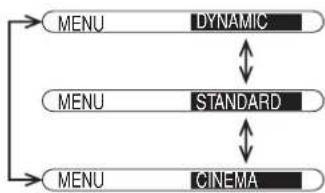
flowchart
graph TD
    A["MENU"] --> B["DYNAMIC"]
    B --> C["STANDARD"]
    C --> D["CINEMA"]
    D --> A
CONTRAST, BRIGHTNESS, COLOUR, SHARPNESS, NTSC-TINT
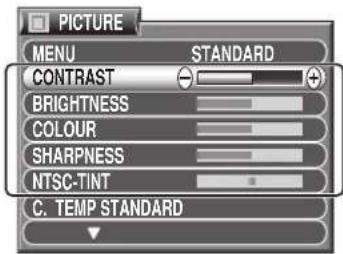
Increase or decrease the levels of CONTRAST, BRIGHTNESS, COLOUR and SHARPNESS options according to your personal preference.
With an NTSC-TINT signal source connected to the TV, the picture hue can be adjusted to suit your taste.
| Item Function | onEffect | |
| CONTRAST | Less More | Adjust for contrast. |
| BRIGHTNESS | Darker Brighter | Adjusts for easier viewing of dark pictures such as night scenes and hair. |
| COLOUR | Less More | Adjusts slightly to a lighter colour. |
| SHARPNESS | Less More | Displays a sharp image. |
| NTSC-TINT | Reddish Greenish | Adjust for proper skin colour. |
text_image
PICTURE MENU STANDARD CONTRAST BRIGHTNESS COLOUR SHARPNESS NTSC-TINT C. TEMP STANDARDNotes:
- When set to Multi PIP mode, the main and sub pictures are both adjusted simultaneously.
- When the TV is receiving NTSC signals, NTSC-TINT is displayed and level adjustment would be possible.
- Only CONTRAST will be displayed during TEXT mode.
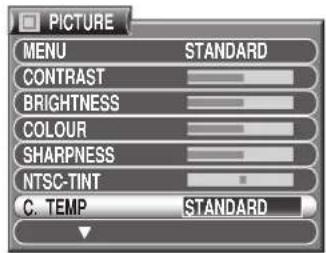
C. TEMP (Colour Temperature)
Set the overall colour tone of the picture.
Press to switch between modes

flowchart
graph LR
    A["COOL WARM STANDARD"] --> B["Process Step"]
    B --> C["Process Step"]
    C --> D["Process Step"]
text_image
PICTURE MENU STANDARD CONTRAST BRIGHTNESS COLOUR SHARPNESS NTSC-TINT C. TEMP STANDARDP-NR (Picture Noise Reduction)
Automatically reduces undesired picture noise.
Press to switch between modes

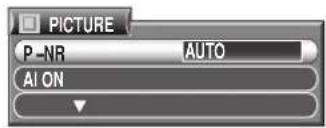
text_image
PICTURE P-NR AUTO AI ONAI (Artificial intelligence)
Automatically analyses the incoming picture and processes it to give improved contrast and optimum depth of field.
ON ←→ OFF
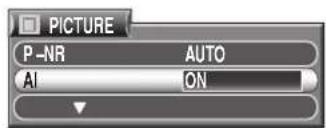
text_image
PICTURE P-NR AUTO AI ONSCAN MODE
When receiving PAL or SECAM Signal, SCAN MODE is displayed.
Choose the screen refresh method:
Press to switch between modes
100 Hz MODE ← → PROGRESSIVE
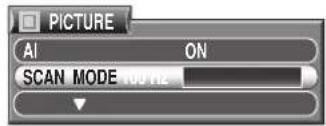
text_image
PICTURE AI ON SCAN MODE 100 HzWhen receiving PAL or SECAM Signal
| MODE Function | |
| 100 Hz MODE | 100Hz will give a steady picture for most signal transmission. |
| PROGRESSIVE | Avoids “snaking/jaggy” effect when viewing TV program with moving characters. |
Switching is also possible using 100Hz/PROGRE on the remote control.
Note:
When viewing a PAL transmission (other than PAL 60) with Scan mode set to Progressive, the screen will flicker, this is not a fault.

Helpful Hint (NNormalization)
By pressing the Normal "N" Button on the Remote Control while the Picture menu is displayed, the selected menu will be changed to the Normal Mode.
Normalization will not occur if the menu is not displayed when the "N" Button is pressed.
The Normal mode is the factory preset condition. Returning to this original condition is called "Normalization".
Sound Adjustment
1
SOUND

Press to display the Sound Menu.
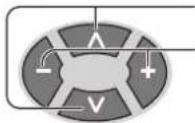
2
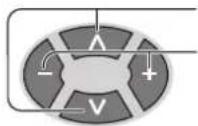
Press to select the desired function.
Press to adjust or change the function.
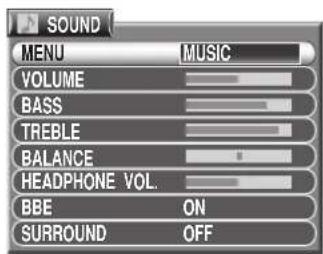
Press to go back to watching TV.
Note:
Some features are only available with the Surround feature switched off. Press ∞ to switch between On and Off.
MENU
Sound menu mode will be memorized for each TV, AV1, AV2, AV3 and AV4 mode.
- You can change the level of each Item (VOLUME, BASS, TREBLE, BALANCE and HEADPHONE VOL) for each Sound Menu (MUSIC, CINEMA and NEWS).
| Sound Menu Function | |
| MUSIC | Amplifies the Low frequencies and outputs optimum sound.For music programmes for example. |
| NEWS | Human voices (middle pitch sounds) will sound more clear. |
| CINEMA | For movie and drama programmes. |
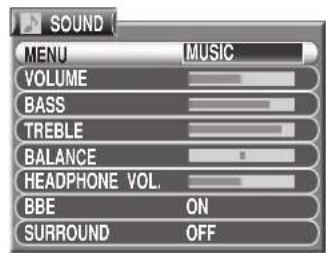
VOLUME, BASS, TREBLE, BALANCE, HEADPHONE VOL.
| Item FunctionEffect | ||
| VOLUME |  Less More Less More | Adjusts output volume. |
| BASS |  Less More Less More | Adjusts low sounds. |
| TREBLE |  Less More Less More | Adjusts high sounds. |
| BALANCE |  Left SP, Right SP. Left SP, Right SP. | Adjust left and right volumes. |
| HEADPHONE VOL. |  Less More Less More | Adjust Headphone volume. |
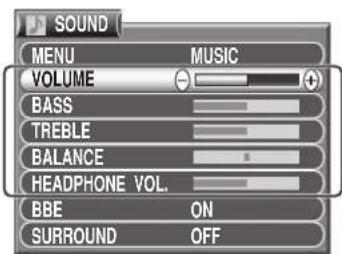
- When set to Multi PIP mode, the main and sub sound are both adjusted simultaneously.
- When using one of the double window features, note that the headphones will relay the soundtrack for the programme in the main window, not the smaller window.
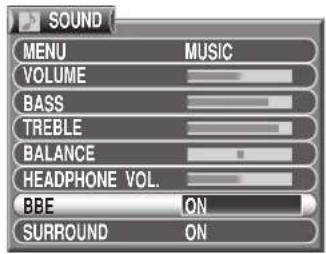
BBE
Use special signal processing to accurately reproduce the "attack" of each sound, in order to make it immediate and superbly faithful to the original, while retaining its natural feel.
Press to select the BBE.
Press to select ON or OFF.
text_image
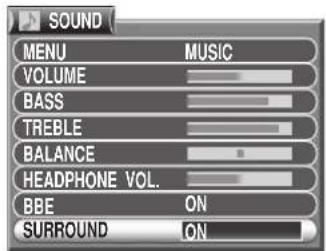
SOUND MENU MUSIC VOLUME BASS TREBLE BALANCE HEADPHONE VOL. BBE ON SURROUND ONSURROUND MENU
Press to switch between ON and OFF.

OR
Press to display the Sound Menu.
Press to select the SURROUND function.
Press to switch between ON and OFF.
text_image
SOUND MENU MUSIC VOLUME BASS TREBLE BALANCE HEADPHONE VOL. BBE ON SURROUND ONThe benefits of surround sound are enormous. You can be completely enveloped in sound; just as if you were at a concert hall or cinema. The surround effect can be obtained without the use of external surround speakers.

Helpful Hint (NNormalization)
By pressing the Normal "N" Button on the Remote Control while the Sound menu is displayed, the selected menu will be changed to the Normal Mode.
Normalization will not occur if the menu is not displayed when the "N" Button is pressed.
The Normal mode is the factory preset condition. Returning to this original condition is called "Normalization".
Aspect Controls
text_image
TV/TEXT 100Hz/ PROGRE SURROUND ASPECT PIP F.P. INDEX HOLD CH SEARCH STILL 1 2 3 4 5 6 7 8 9 + 0 -/-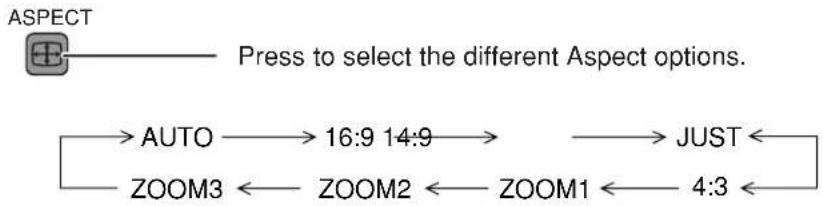
flowchart
graph TD
    A["ASPECT"] --> B["Press to select the different Aspect options."]
    B --> C["AUTO"]
    C --> D["16:9 14:9"]
    D --> E["JUST"]
    E --> F["ZOOM3"]
    F --> G["ZOOM2"]
    G --> H["ZOOM1"]
    H --> I["4:3"]
Notes:
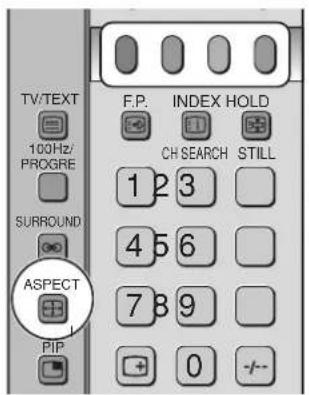
- Simply press 📊 to display mode information in the top left of the screen.
• 16:9 picture has been used to illustrate all of the aspect modes described in this section.
The on screen selector keys (corresponding to the four coloured buttons on the remote control) appear for some Aspect functions and disappear after a few seconds. If you would like to select an operation when the keys are not shown, press ASPECT once more and the keys will reappear.

Helpful Hint (NNormalization)
By pressing the Normal "N" Button on the Remote Control while the Aspect menu is displayed, the selected menu will be changed to the Normal Mode.
Normalization will not occur if the menu is not displayed when the "N" Button is pressed.
The Normal mode is the factory preset condition. Returning to this original condition is called "Normalization".
| Mode | Picture | Explanation | |
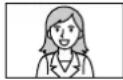
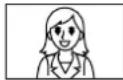
| AUTO | 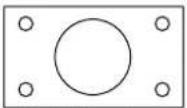 16:9 Signal 16:9 Signal | 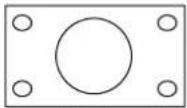 4:3 Signal 4:3 Signal | The AUTO position can be set to 16 : 9. When a wide screen signal is detected at the Video terminal the TV will select the 16:9 aspect ratio. |
| 16 : 9 | 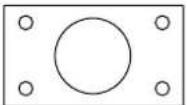 16:9 Signal 16:9 Signal | 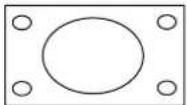 4:3 Signal 4:3 Signal | The 16:9 option will display the picture at its maximum size. Signals in the 4:3 format will be stretched to fit the picture. |
| 14 : 9 | 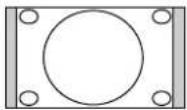 | The 14:9 option will display a 4:3 signal in simulated wide screen. The picture is slightly stretched. It is also slightly cropped top and bottom. | |
| JUST | 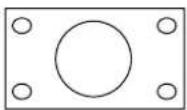 | JUST gives you a best fit option when showing 4:3 on wide screen. The centre of the picture is not affected but there is some stretching at the edges. | |
| 4 : 3 | 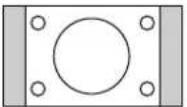 | This option will display a standard 4:3 picture without any stretching or compression. There will be vertical gray lines down either side of the picture. | |
| ZOOM1 | 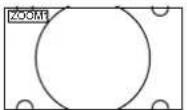 | This option allows you to magnify the picture. | |
| ZOOM2,ZOOM3 | 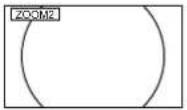 | The picture becomes larger and larger when you change the mode ZOOM2 and ZOOM3. | |
Notes:
- ASPECT operations cannot be made during progressive (Y, PB, PR) or 1080i signal input.
• The Red and Green buttons let you change the mode during the mode displays.
Multi Screen
Multi PIP
text_image
TV/TEXT 100Hz/ PROGRE SURROUND ASPECT MULTI PIP F.P. INDEX HOLD CHSEARCH STILL 1 2 3 4 5 6 7 8 9 0 -/-
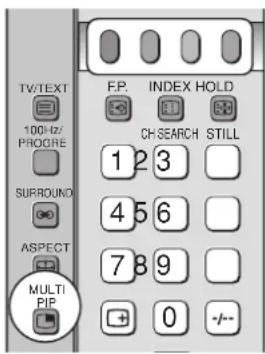
Press ☐ to select the current programme, the picture in picture, picture out picture, or picture and picture feature.
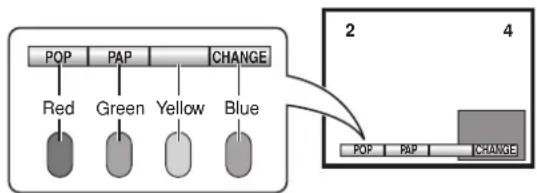
The on screen selector keys for the features (corresponding to the four coloured buttons on the remote control) appear and disappear after a few seconds. If you would like to select an operation when the keys are not shown, press MULTI _PIP once more and the keys will reappear.

Allows two pictures to be viewed at the time.
Use the remote control to select a TV channel or an AV source to appear in the main window.
flowchart
graph TD
    A["POP"] --> B["Red"]
    C["PAP"] --> D["Green"]
    E["CHANGE"] --> F["Yellow"]
    G["Blue"] --> H["Blue"]
    I["2"] --> J["4"]
    K["POP"] --> L["CHAXIE"]
    M["PAP"] --> N["CHAXIE"]
Picture in Picture (PIP)

Red
Press the Red button:
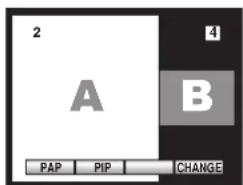
text_image
2 A B PAP PIP CHANGEPicture out Picture (POP)

Blue
Press the Blue button:
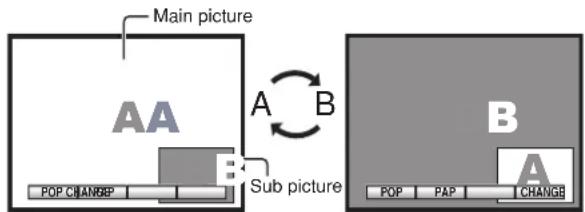
flowchart
graph TD
    A["Main picture"] --> B["Sub picture"]
    B --> C["A"]
    B --> D["B"]
    C --> E["POP CHANGE"]
    D --> F["PAP CHANGE"]
Each time the main picture and the sub picture are swapped.

Green
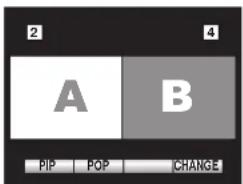
text_image
2 A B PIP POP CHANGEPicture and Picture (PAP)

PIP

Press to exit.
Note:
MULTI PIP operations cannot be made during RGB mode, or progressive signal input (Y, PB, PR).
Picture and text
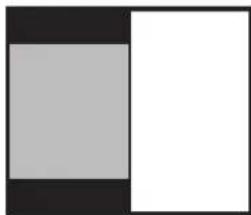
Picture and text lets you see the current programme and a page of teletext side by side.


Press to select watching the current programme, the teletext or the picture and text feature.
Note:
The remote control affects the teletext page; so select watching the current programme before making any changes to the programme.
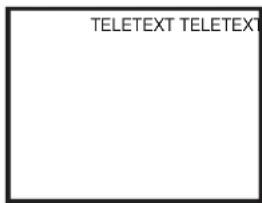
text_image
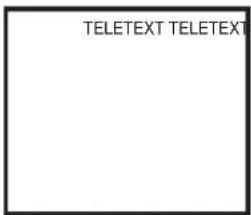
TELETEXT TELETEXTTELETEXT mode

natural_image
Two adjacent rectangular blocks, one gray and one white, with no text or symbols.Picture and text mode
Still


STILL
Press to freeze the picture, press again to return to watching the current programme.
TELETEXT
Teletext features may vary depending on the Broadcasting Companies and are only available when the channel selected is transmitting Teletext.
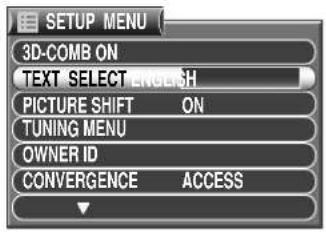
TEXT SELECT
Select character set, so that all characters needed are available for text on teletext pages (eg: cyrillic characters, etc).
ENGLISH ← → PERSIAN
text_image
SETUP MENU 3D-COMB ON TEXT SELECT ENGLISH PICTURE SHIFT ON TUNING MENU OWNER ID CONVERGENCE ACCESSTV / Teletext mode
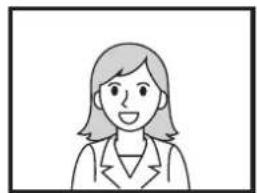
TV/TEXT

Press to select the current programme, the teletext and the picture or the teletext feature.
natural_image
Simple line drawing of a person with shoulder-length hair and a blazer (no text or symbols)MULTI


During Teletext mode, press to select the teletext feature or the teletext and the picture feature.
Current programme
text_image
TELETEXT TELETEXTTELETEXT
natural_image
Two adjacent squares, one gray and one white, with no text or symbols.Picture and text
PICTURE

Press to display the contrast function with a cyan bar.
SOUND

Press to display the volume function with a green bar.
Press to alter the setting as required.
CONTRAST
VOLUME


SET UP

Press to display special function options at the bottom of the screen.


Press to select the desired function.
Red
Green Yellow Blue
LIST / FASTEXT mode
Choose 2 modes.
LIST ←FASTEXT
LIST mode:
Four differently coloured page numbers are situated at the bottom of the screen. Each of these numbers can be altered and stored in the TV's memory.
FASTEXT mode:
Four differently coloured subjects are situated at the bottom of the display. To access more information, press the appropriately coloured button. This mode enables fast access to information on the subjects shown.
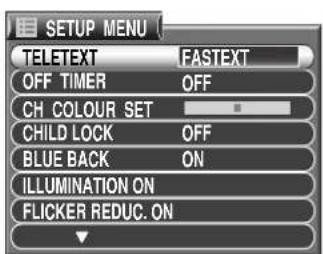
text_image
SETUP MENU TELETEXT FASTEXT OFF TIMER OFF CH COLOUR SET CHILD LOCK OFF BLUE BACK ON ILLUMINATION ON FLICKER REDUC. ONPage Selection (Two ways)
Press to increase or decrease the page number by one.
text_image
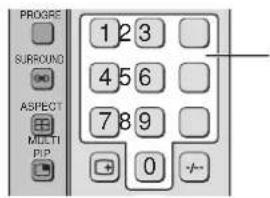
PROGRESS SURROUND ASPECT MULTI PIP 1 2 3 4 5 6 7 8 9 0 + -Enter the page number directly using 0-9 on the remote control.
Full / Top / Bottom
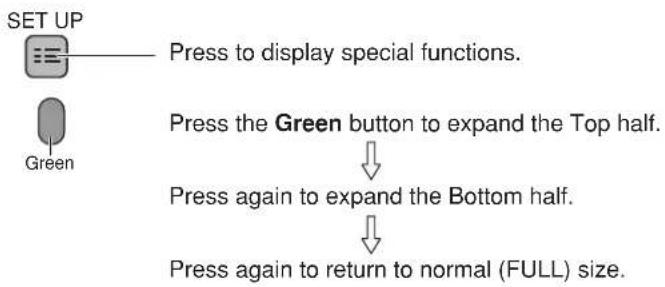
flowchart
graph TD
    A["SET UP"] --> B["Press to display special functions."]
    C["Green"] --> D["Press the Green button to expand the Top half."]
    D --> E["Press again to expand the Bottom half."]
    E --> F["Press again to return to normal (FULL) size."]
Reveal
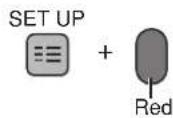
Press to reveal hidden words e.g. quiz page answers. Press again to hide.
List Store
In LIST mode the four page numbers can be altered (programme positions 1 - 25 only). Press one of the four coloured buttons and enter the new page number.
Press and hold, the page numbers will change to white indication and the page is stored.
Hold
Press to hold the Teletext page when viewing multi-page information. is displayed on the top left of the screen.
Press again to return to automatic page update.
Favorite Page (F.P.)
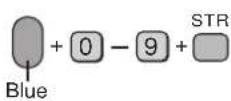
Stores a favorite page in memory for instant recall. (programme positions 1 - 25 in List mode only). Press the Blue button, select the page number, then press and hold ☐. The page number is now stored.

Press to recall the stored page number.
| Teletext page | News Flash Update | ||
§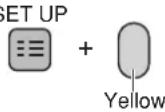 | Press to display special functions to view the TV picture whilst searching for a Teletext page .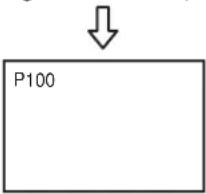 When found a page. When found a page. | Press to view the TV picture when a news flash page has been selected. TV picture viewing TV picture viewing | Press to see the update of information on certain pages.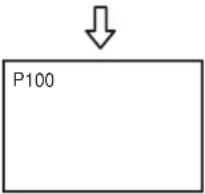 When an update is received. When an update is received. |
 | Press to view the page. | Press to display the News Flash. | Press to view the page. |
 | Return to normal TV operation. | ||
Index
Press to return to the main index page.
Depending on the way information is transmitted, this may have to be pressed more than once to return to the main index page.
Sub Coded Page Access

When Teletext information exceeds more than one page, it may take some time for the automatic changing of the sub pages to reach the sub page you require.
It is possible to enter your required sub page and continue watching the normal programme until the correct sub page is found.
Select the required page number using buttons 0 - 9.
If the top of the page indicates that sub pages are being transmitted yet the page does not change, then the number at the top of the page is there to indicate that the broadcaster has updated the page's contents, there are no sub pages.
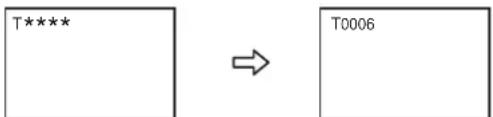
flowchart
graph LR
    A["T*****"] --> B["T0006"]
Enter desired sub page number before the T**** disappears. To select page 6 enter 0, 0, 0 and 6.

Viewing a normal TV programme. Viewing the Teletext page.

Select a new page number.
Press to return to normal TV operation.
Advanced Remote Control Operation
Stereo Bilingual Sound Selection
When you receive the stereo/bilingual sound system, sound output modes can be selected by pressing the stereo/bilingual sound selection button.
| Audio Signal | STEREO MAIN I | SUB II MONQ | = | |
| Mode Indicator | ○○ | I | II | ▽ |
NICAM .....used in New Zealand, Singapore and Hong Kong
| Type of broadcast | Regular broadcast(Standard Audio) | Regular + NICAM MONO I(MAIN I) | NICAM STEREO | NICAM DUAL MONO(MAIN I / SUB II) |
| Mode Indicator | No Indicator ↔ ▽ | I ↔ ▽ | ○ ↔ ▽ | I → II↓▽← |
A2(German) ......used in Australia, Malaysia, Thailand, Indonesia etc.
| Type of broadcast | Regular broadcast(Standard Audio) | BILINGUAL or DUAL MONO:MAIN I / SUB II | STEREO |
| Mode Indicator | No Indicator ↔ ▽ | I ↔ II | ○○ ↔ ▽ |
Notes:
- If the stereo signal is poor or the receiving conditions are not optimum or if STEREO:MONO automatic switching occurs, it is recommended you switch from STEREO to MONO.
- Even when the contents of the receiving signal undergo changes, selection mode is kept intact.
- When the receiving conditions deteriorate, listening will be easier if the mode is set to the "MONO" position, using the stereo/bilingual sound selection button.
- "DUAL", also known as "DUAL MONO" or as "BILINGUAL" is not currently transmitted in some countries.
VCR / DVD Control
The Remote Control is capable of operating some functions of selected Panasonic VCRs and DVD (Digital Versatile Disc) equipment. Some VCR and DVD equipment have different functions. So to ensure compatibility please refer to the equipment's instruction book or consult your dealer for details.
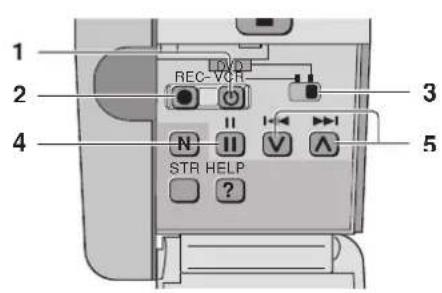
text_image
1 2 3 4 5 REC-VOR N II V ▲ STR HELP ?| Button | Function | ||
| VCR | DVD | ||
| 1 | Power Switch | ||
| 2 | REC (Record) | ||
| 3 | VCR, DVD Select button | ||
| 4 | Pause/Still | ||
| 5 | Programme Number Up and Down | Programme Skip | |
Manufacturer setting
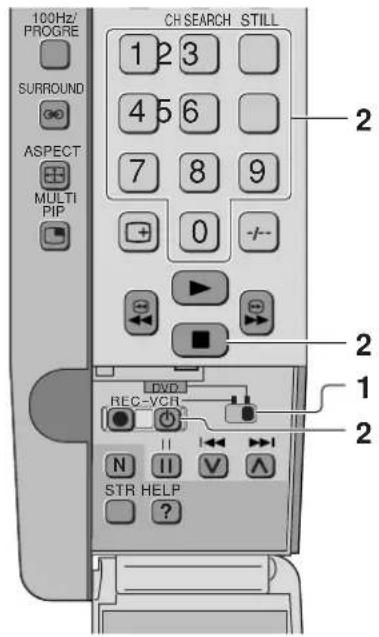
Remote Control Operation is possible for the VCR's and DVD's of the various manufacturers. After completion of setting, execute the various operations.
text_image
100Hz/ PROGRE SURROUND ASPECT MULTI PIP CH SEARCH STILL 1 2 3 4 5 6 7 8 9 + 0 -/- DVD REC-VCR N II V A STR HELP ?Note:
After setting, execute operation confirmation. If there is no operation, set a different code.
1

Press to select VCR / DVD.
2


While pressing the VCR / DVD Power button, press the manufacturer code (enter the two digit code), and press the VCR / DVD Stop button.
VCR
| Manufacturer | Code | Manufacturer | Code |
| Panasonic/NationalAIWAFUJITSUHITACHIJVCMITSUBISHI | 10,11,12,1315,162025,26,2730,31,3235,36 | NECORIONPHILIPSSANYOSHARPSONYTOSHIBA | 40,41,42,4345,465055,56,57,5860,6165,66,6770,71 |
DVD
| Manufacturer | Code |
| Panasonic | 70, 71 |

Helpful Hint
(1) The respective VCR / DVD manufacturer code is cancelled when battery has been exchanged. Please set it again.
(2) Depending on the model, operation of VCR's or DVD's of the manufacturers listed above may not be possible.
(3) In some cases, new products may not be operative.
(4) It will not operate with other than the above manufactures.
Troubleshooting
Before you call for service, determine the symptoms and make a few simple checks as shown below.
| Symptoms | Checks | |||
| Picture Sound | ||||
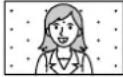 | Snowy Picture |  | Noisy Sound | Aerial Location, direction or Connections |
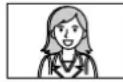 | Multiple Image |  | Normal Sound | Aerial Location, direction or Connections |
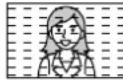 | Interference |  | Noisy Sound | Electrical AppliancesCars/MotorcyclesFluorescent Lamps |
 | Normal Picture |  | No Sound | Volume (Refer to page 10, 11)(Check whether the mute function has been activated on the Remote Control.) |
 | No Picture |  | No Sound | Not plugged into AC outlet Not switched onContrast and Brightness/Volume setting (Check by pressing the Power Switch or Stand-by Button on the Remote Control.) |
 | No Colour |  | Normal Sound | Colour Control (Refer to page 24, 25)Colour System (Refer to page 21) |
 | Scrambled |  | Normal or Weak Sound | Retune Channels (Refer to page 15) |
 | Coloured Patches |  | Normal Sound | Magnetic interference from unshielded equipment;TV set moved while “ON”.Turn the TV set off for 30 minutes, using the “Power” Switch on the TV set. |
 | No Colour |  | Noisy Sound | Sound System (Refer to page 21)Colour System (Refer to page 21) |
Projection TV screen
| Symptoms | Checks |
 After-images appear After-images appear | Do not allow a still picture to be displayed for an extended period, as this can cause a permanent after-image to remain on the Wide Projection TV screen.Examples of still pictures include logos, video games, computer images, teletext and images displayed in 4:3 mode.Note:The permanent after-image on the Wide Projection TV screen resulting from fixed image use is not an operating defect and as such is not covered by the Warranty.This product is not designed to display fixed images for extended periods of time. |
Cleaning
To ensure continued excellent performance by this product, periodic cleaning is recommended.
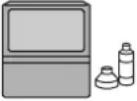 | The unit contains many plastic parts. For this reason DO NOT use benzine, thinner or other chemicals to clean the unit. |  | Dust will accumulate on the picture screen. Please wipe with a soft cloth from time to time. If you use a chemically treated cloth, please be careful to follow the instructions that come with the cloth. |
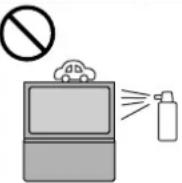 | DO NOT bring into contact with insecticide or other volatile substances.DO NOT allow the unit to come into contact for extended periods with rubber or vinyl products. | 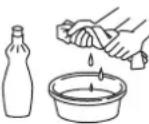 | Remove dirt and soiling by wiping with a light cloth. Even if the unit is heavily soiled, do not apply cleaner directly to the unit. Soak a cloth in a solution of neutral cleanser thinned with water. Then wring out the cloth, wipe the unit clean, and finish by wiping with a dry cloth.Do not use any type of cleansers on the picture screen. |
Specifications
| Power Source | AC 220-240 V, 50/60 Hz | |||||
| Power Consumption | Stand-by condition 0.5 WNormal viewing 178 W | |||||
| Dimensions (W × H × D) | 1298 mm × 1207.5 mm × 567 mm | |||||
| Mass (Weight) | 62 kg (Net) | |||||
| Remote controlTransmitter | EUR511267R6 (AA) Battery × 2 | |||||
| Receiving System | 21 Systems Function | 21 Systems Function | ||||
| 1 | PAL B, G, H | Reception ofbroadcasttransmissions andPlayback fromVideo CassetteTape Recorders. | 15 | PAL 60 Hz/5.5 MHz | Playback fromSpecial DiscPlayers andSpecial VCR's | |
| 2 | PAL I | 16 | PAL 60 Hz/6.0 MHz | |||
| 3 | PAL D, K | 17 | PAL 60 Hz/6.5 MHz | |||
| 4 | SECAM B, G | 18 | SECAM 60 Hz/5.5 MHz | |||
| 5 | SECAM D, K | 19 | SECAM 60 Hz/6.0 MHz | |||
| 6 | SECAM K1 | 20 | SECAM 60 Hz/6.5 MHz | |||
| 7 | NTSC M (NTSC 3.58/4.5 MHz) | 21 | NTSC 50 Hz/4.5 MHz | |||
| 8 | NTSC 4.43/5.5 MHz | Playback fromSpecial VCR's | ||||
| 9 | NTSC 4.43/6.0 MHz | |||||
| 10 | NTSC 4.43/6.5 MHz | |||||
| 11 | NTSC 3.58/5.5 MHz | |||||
| 12 | NTSC 3.58/6.0 MHz | |||||
| 13 | NTSC 3.58/6.5 MHz | |||||
| 14 | SECAM I | |||||
| Receiving Channels | Regular TVVHF BANDUHF BANDCATV2-12 (PAL/SECAM B, K1)21-69 (PAL G, H, I/SECAM G, S1-S20 (OSCAR)0-12 (PAL B AUST.)K, K1)1-125 (U.S.A CATV)1-9 (PAL B N.Z)28-69 (PAL B AUST.)C13-C49 (JAPAN)1-12 (PAL/SECAM D)13-57 (PAL D, K)S21-S41 (HYPER)1-12 (NTSC M Japan)13-62 (NTSC M Japan)Z1-Z37 (CHINA)2-13 (NTSC M U.S.A)14-69 (NTSC M U.S.A)5A, 9A (AUST.) | |||||
| Receiving Stereo System | NICAM I, NICAM B/G, NICAM D, A2 (German) | |||||
| Tuning System | Frequency synthesizer Auto Search TuningPOSITION : 100 PositionDIRECT : 125 Position | |||||
| Audio Output | 40 W [20 W + 20 W] (10 % THD) | |||||
| Speaker System | Woofer (13 cm) × 2 + Tweeter (5 cm) × 2 + Scooker (12 cm × 6 cm) × 2 | |||||
| Headphones | 3.5 mm Plug × 1 | |||||
| Aerial Impedance | 75 Ω Unbalanced coaxial | |||||
| Video/Audio/Component Terminals | AV 1, 2, 3, 4 S Video In Y:1 Vp-p, 75 ΩC:0.3 Vp-p, 75 ΩDVD (Y/PB/PR)Video In 1 Vp-p, 75 ΩAudio In Approx. 0.5 V 47 KΩMonitor Out Video Out 1 Vp-p, 75 ΩAudio Out Approx. 0.5 V 1 KΩAV1 IN (Rear) : S Video, Video, Audio L/R terminalsAV2 IN (Rear) : Video or Y/PB/PR, Audio L/R terminalsAV3 IN (Front) : S Video, Video, Audio L/R terminalsAV4 IN (Rear) : Video or Y/PB/PR, Audio L/R terminalsApplicable signal to AV2, AV4 Y/PB/PR input terminals:480i(525i), 576i(625i), 480P(525P), 576P(625P) and 1080i(1125i)/50 | |||||
Note: Design and Specifications are subject to change without notice. Weight and Dimensions shown are approximate.
Customer's Record
The model number and serial number of this product can be found on its cabinet. You should note this serial number in the space provided below and retain this book plus your purchase receipt as a permanent record of your purchase to aid in identification in the event of theft or loss and for Warranty Service purposes.
Model Number TX-47P800H Serial Number