
Panafax DX-1000 - Fax PANASONIC - Free user manual and instructions
Find the device manual for free Panafax DX-1000 PANASONIC in PDF.


User questions about Panafax DX-1000 PANASONIC
0 question about this device. Answer the ones you know or ask your own.
Ask a new question about this device
Download the instructions for your Fax in PDF format for free! Find your manual Panafax DX-1000 - PANASONIC and take your electronic device back in hand. On this page are published all the documents necessary for the use of your device. Panafax DX-1000 by PANASONIC.
USER MANUAL Panafax DX-1000 PANASONIC
natural_image
Line drawing of a cozy room interior with stairs, potted plants, and a modern office machine (no text or symbols)How to Set Documents.
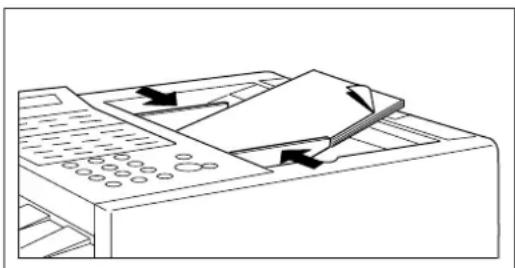
Set the documents face down and adjust the document guides.
natural_image
Line drawing of a printer with paper and arrows indicating motion (no text or symbols)You can set the documents on the ADF (Automatic Document Feeder) up to 50 pages* at one time.
^* : (Based on 75 g/m ^2 (0.12 mm) weight A4 size document)
The display message is as shown below when the documents are set properly.
ENTER STATION(S)
THEN PRESS START 00%
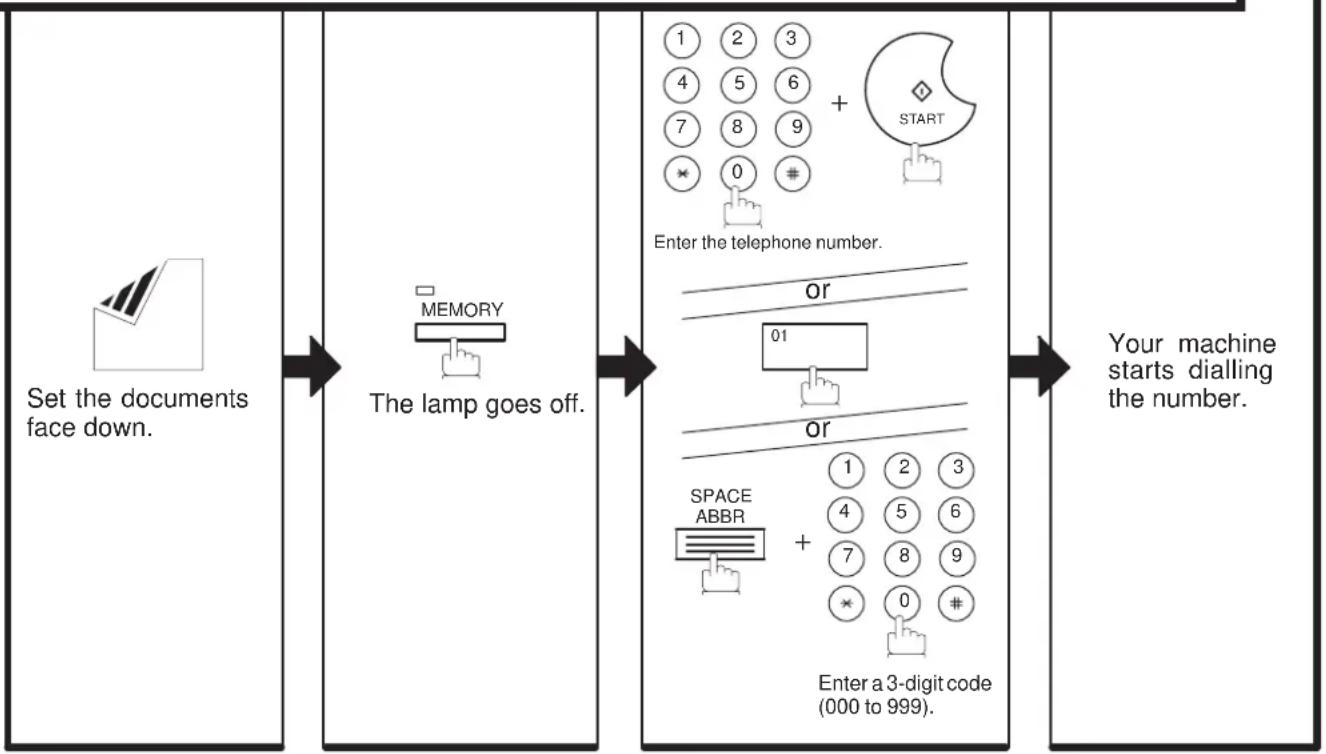
How to Send Using Manual Dialling.

Set the documents face down.
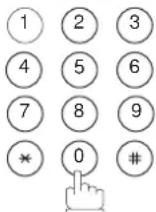
Enter the telephone number.

The document is stored in memory. Then, your machine starts dialling.
How to Send Using One-Touch/Abbreviated Key.

Set the documents face down.
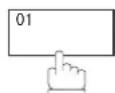
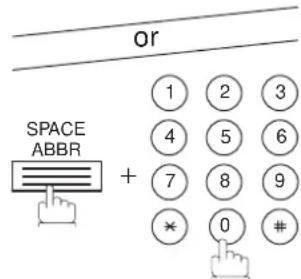
text_image
or SPACE ABBR + 1 2 3 4 5 6 7 8 9 * 0 # #Enter a 3-digit code (000 to 999).

The document is stored in memory. Then, your machine starts dialling.
How to Send without storing into memory.
flowchart
graph LR
    A["Set the documents face down."] --> B["The lamp goes off."]
    B --> C["Enter the telephone number."]
    C --> D["Enter a 3-digit code (000 to 999)."]
    D --> E["Your machine starts dialling the number."]
How to Print Journals and Reports.
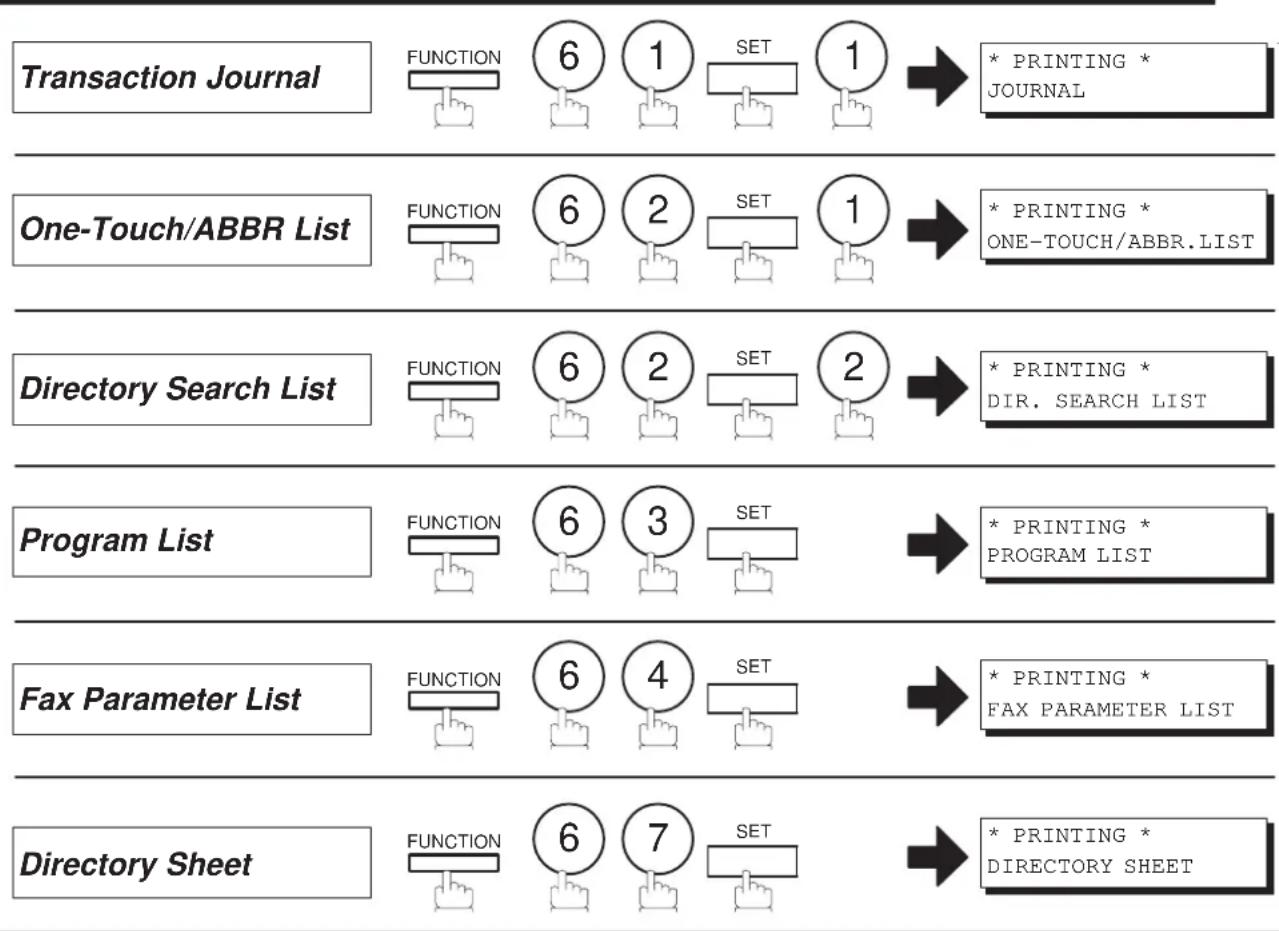
flowchart
graph LR
    A["Transaction Journal"] --> B["FUNCTION 6"]
    B --> C["1"]
    C --> D["SET 1"]
    D --> E["* PRINTING * JOURNAL"]

    F["One-Touch/ABBR List"] --> G["FUNCTION 6"]
    G --> H["2"]
    H --> I["SET 1"]
    I --> J["* PRINTING * ONE-TOUCH/ABBR.LIST"]

    K["Directory Search List"] --> L["FUNCTION 6"]
    L --> M["2"]
    M --> N["SET 2"]
    N --> O["* PRINTING * DIR. SEARCH LIST"]

    P["Program List"] --> Q["FUNCTION 6"]
    Q --> R["3"]
    R --> S["SET"]
    S --> T["* PRINTING * PROGRAM LIST"]

    U["Fax Parameter List"] --> V["FUNCTION 6"]
    V --> W["4"]
    W --> X["SET"]
    X --> Y["* PRINTING * FAX PARAMETER LIST"]

    Z["Directory Sheet"] --> AA["FUNCTION 6"]
    AA --> AB["7"]
    AB --> AC["SET"]
    AC --> AD["* PRINTING * DIRECTORY SHEET"]
IMPORTANT INFORMATION
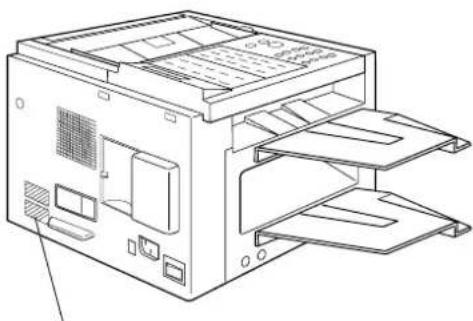
When requesting information, supplies or service, always refer to the model and serial number of your machine. The model and serial number plate (Main Name Plate) is located on the machine as shown below. For your convenience, space is provided below to record information you may need in the future.
Model No.
Serial
Date of Purchase
Dealer
Address
Telephone Number ( ) -
Supplies Telephone Number ( ) -
Service Telephone Number ____ ( ) ____ -
For the total system to work properly via LAN, certain information and additional parameters must be set. Please contact your network administrator for the required information and connection to the LAN.
| User Information | ||
| Company Name: | ||
| Address: | ||
| Dept.: | ||
| City: | State: | Zip Code: |
| Tel. No.: | Fax No.: | |
| Internet Fax Parameters (See pages 40 to 44) | ||
| IP Address: | ||
| Subnet Mask: | ||
| SMTP Server Name: | or | SMTP Server IP Address: |
| Default Router IP Address: | ||
| Email Address: | ||
| DNS Server IP Address: | ||
| POP Server Name: | or | POP Server IP Address: |
| POP User Name: | ||
| POP Password: (for security, do not write it in – but keep it in a safe place) | ||
| Host Name: | ||
natural_image
Line drawing of a computer tower case with multiple drive bays and ventilation slots (no text or labels)Model and Serial Number
Copyright © 1999 by Matsushita Graphic Communication Systems, Inc. All rights reserved. Unauthorized copying and distribution is a violation of law. Printed in Japan.
The contents of this User's Guide are subject to change without notice.
Table of Contents
1 GETTING TO KNOW YOUR MACHINE
Safety Information 5
Introduction 7
Function Key 8
External View 9
Control Panel 10
Pre Installation Information 12
Setup as SMTP mail server 13
Setup as POP3 Client 14
Internet Communication Features 17
Internet Fax Transmission 17
Internet Mail Reception 17
Inbound Routing 18
Fax Forward 19
Network Scanner 19
Network Printer 20
Relayed Transmission 21
Important Information 22
Differences between Internet Fax and Regular Fax 22
Transmitted Document Confirmation 22
DX-1000 Cannot Make a Phone Call via LAN 22
Transmission Resolution 22
Internet Mail Reception 22
Sending Document Size via LAN 23
Sending a Document to a PC via LAN 23
Internet Relayed Transmission 23
2 INSTALLING YOUR MACHINE
Main Unit and Accessories 25
Installing the Accessories 26
Installing the Toner Cartridge 28
Loading the Recording Paper 30
Paper Specifications 30
How to Load the Recording Paper 30
Connecting the Telephone Line Cord and Power Cord 32
Setting the Dialling Method (Tone or Pulse) 34
Adjusting the Volume 35
Setting the Monitor Volume 35
Setting the Ringer Volume 35
User Parameters 36
Setting the Date and Time 36
Setting Your LOGO 37
Setting Your Character ID 38
Setting Your ID Number (Fax Telephone Number) 39
Setting the Internet Parameters 40
Setting the parameters for the LAN Interface 40
Setting the Internet Relay Station 44
3 PROGRAMMING YOUR MACHINE
Programming Email Address and Telephone Numbers 45.
Entering One-Touch/Abbreviated Dialling Numbers 45
Changing or Erasing One-Touch/Abbreviated Dialling Numbers 49
Printing Out a Directory Sheet 52
Programming Auto Dialer Remotely via Email 53.
Using a PC to Update the Auto Dialer Remotely 53
To Program One-Touch / ABBR. No. for the First Time 54
To Retrieve One-Touch / ABBR. No. Data for Backup 56
To Edit the Retrieved One-Touch / ABBR. No. Data 58
Customizing Your Machine 59
Setting the Fax Parameters 59
Fax Parameter Table 60
4 BASIC OPERATIONS
Loading Documents 65
Documents You Can Send 65
Documents You Cannot Send 65
How to Load Documents 66
Basic Transmission Settings 67
Contrast 67
Resolution 67
Halftone 68
Verification Stamp 68
Sending Documents via LAN 69
Manual Number Dialling 70
One-Touch Dialling 71
Abbreviated Dialling 72
Directory Search Dialling 73
Returned Email 74
Multi-Station Transmission (Broadcasting) 75
Using a Mailing List 76
Transmission Reservation 77
Memory Transmission Reservation (Dual Access) 77
Sending Documents via Telephone Line 78
Memory Transmission 78
Manual Number Dialling 80
One-Touch Dialling 81
Abbreviated Dialling 82
Directory Search Dialling 83
Multi-Station Transmission (Broadcasting) 84
Direct Transmission 85
Manual Number Dialling (Direct Transmission) 85
One-Touch Dialling (Direct Transmission) 86
Abbreviated Dialling (Direct Transmission) 87
Directory Search Dialling (Direct Transmission) 88
Voice Mode Transmission 89
Off-Hook Dialling 89
On-Hook Dialling 90
Transmission Reservation 91
Memory Transmission Reservation (Dual Access) 91
Direct Transmission Reservation (Priority Transmission Reservation) 92
Redialling 93
Automatic Redialling 93
Manual Redialling 93
Receiving Documents via LAN 94
Internet Fax Received on a PC 94
Receiving Email from a POP Server 96
Setting the POP Parameters 96
Unattended Reception from the POP Server 99
Manual Reception from the POP Server 99
Receiving Documents via Telephone Line 100
Automatic Reception 100
Manual Reception 100
Print Reduction 101
Selecting the Print Reduction Mode 101
Receiving Oversized Documents 102
Substitute Memory Reception 103
Print Collation Mode 103
Making Copies 104
5 ADVANCED FEATURES
Program Keys 105
Entering an Email Address 105
Entering a Telephone Number 107
Setting for Group Dialling 108
Setting the POP Access Key 109
Using the POP Access Key 110
Sender Selection 111
General Description 111
Setting the Sender Selection 111
Sending Document with Sender Selection 113
Printing the Sender Selection List 114
Subject Line Entry 115
General Description 115
Sending Email with Subject Line Entry 115
Inbound Routing 116
Setting the Routing Parameters 116
Entering One-Touch/Abbreviated Dialling Numbers for Inbound Routing 119
Sub-addressing 121
General Description 121
To set the Sub-address into a One-Touch/ABBR. Dialling Numbers 122
To send a Document with Sub-address 123
Fax Forward 124
Setting Fax Forward 124
Edit File Mode 125
Printing a File List 125
Viewing the Contents of a File List 126
Deleting a File 127
Distinctive Ring Detector (DRD) 128
Transaction Journal 129
Ifax Return Receipt 130
Polling 131
Setting Polling Password 131
To Poll Documents from Another Station 132
6 NETWORK FEATURES
Network Scanner 133
Network Printer 134
Relayed Transmission 135
General Description 135
Relay Network 136
Setting up your DX-1000 as an Internet Relay Station 138
Setting Up Your Machine for Relayed Transmission 139
Programming the End Receiving Station into your Auto Dialer 139
Sending Documents via Internet Relay 141
To a Location That Has a Pre-programmed Relay Station 141
To a Location That Does Not Have a Pre-programmed Relay Station 142
Sending Text Document(s) from a PC to a G3 fax machine 144
Printouts and Reports 145
7 PRINT OUT JOURNALS AND LISTS
Journals and Lists 147
Transaction Journal 147
Communication Journal (COMM. JOURNAL) 150
One-Touch/Abbreviated and Directory Search List 152
Program List 155
FAX Parameter List 156
Power Failure Report 158
8 PROBLEM SOLVING
Troubleshooting 159
If You Have Any of These Problem 159
Information Codes 161
Email ABBR Programming Errors 164
Error Message Sent to the Sender 164
Internet FAX Return Receipt Errors Messages 164
Clearing a Recording Paper Jam 165
Clearing a Document Jam 166
Cleaning the Document Scanning Area 167
Cleaning the Printer Roller 168
Adjusting the Automatic Document Feeder (ADF) 169
Verification Stamp 170
Checking the Telephone Line 171
9 APPENDIX
Specifications 173
Recording Paper Specifications 176
Options and Supplies 177
Environmental Information 178
ATTENTION 178
To remove the battery 178
Glossary 179
INDEX 193
This product complies with the requirements of EC Council Directives 73/23/EEC amended by 93/68/EEC, and 89/336/EEC amended by 92/31/EEC and 93/68/EEC.
WARNING
denotes a potential hazard that could result in serious injury or death.
• TO PREVENT FIRE OR SHOCK, DO NOT EXPOSE THIS PRODUCT TO RAIN OR ANY TYPE OF MOISTURE.
• TO MINIMIZE THE POSSIBILITY OF SHOCK OR DAMAGE TO THE MACHINE, IT MUST BE PROPERLY GROUNDED.
- THIS PRODUCT CONTAINS HAZARDOUS RADIATION. IF YOU DO NOT FOLLOW THESE INSTRUCTIONS OR USE CONTROLS, MAKE ADJUSTMENTS OR PROCEDURES OTHER THAN THOSE SPECIFIED HEREIN, YOU MAY EXPOSE YOURSELF TO HAZARDOUS RADIATION.
- WHEN YOU OPERATE THIS EQUIPMENT, THE SOCKET-OUTLET SHOULD BE NEAR THE EQUIPMENT AND BE EASILY ACCESSIBLE.
- MAKE SURE THAT THE MACHINE IS INSTALLED IN A SPACIOUS OR WELL-VENTILATED ROOM SO AS NOT TO INCREASE THE AMOUNT OF OZONE IN THE AIR. SINCE OZONE IS HEAVIER THAN AIR, IT IS RECOMMENDED THAT AIR AT FLOOR LEVEL BE VENTILATED.
- PLUG POWER SUPPLY CORD INTO ORDINARY AC OUTLET BEFORE CONNECTING TELEPHONE LINE CORD. DISCONNECT TELEPHONE LINE CORD BEFORE UNPLUGGING POWER SUPPLY CORD FROM AC OUTLET.
- DISCONNECT THE EQUIPMENT IMMEDIATELY SHOULD IT EVER SUFFER PHYSICAL DAMAGE WHICH RESULTS IN THE INTERNAL PARTS BECOMING ACCESSIBLE IN NORMAL USE. IN THIS INSTANCE USERS SHOULD HAVE THE EQUIPMENT REPAIRED OR DISPOSE OF.
- IF THE POWER SUPPLY CORD AND/OR TELEPHONE LINE CORD OF THIS EQUIPMENT ARE DAMAGED, THEY MUST BE REPLACED BY THE SPECIAL CORDS SUPPLIED BY AN AUTHORIZED PANASONIC SERVICE CENTRE.
CAUTION
1 When you know that a thunderstorm is coming, we recommend that you:
(1) Unplug the telephone line cord from the phone jack.
(2) Turn off the power and unplug the power supply cord from AC outlet.
2 This equipment may not necessarily provide for the effective hand-over of a call to or from a telephone connected to the same line.
3 The operation of this equipment on the same line as telephones or other equipment with audible warning devices or automatic ring detectors will give rise to bell tinkle or noise and may cause false tripping of the ring detector. Should such problem occur, the user is not to contact telecom (telephone company) faults service.
For New Zealand Users
The grant of a Telepermit for any item of terminal equipment indicates only that Telecom has accepted that the item complies with minimum conditions for connection to its network. It indicates no endorsement of the product by Telecom, nor does it provide any sort of warranty. Above all, it provides no assurance that any item will work correctly in all respects with another item of Telepermitted equipment of a different make or model, nor does it imply that any product is compatible with all of Telecom's network services.
This equipment is not capable, under all operating conditions, of correct operation at the higher speeds for which it is designed. Telecom will accept no responsibility should difficulties arise in such circumstances.
IMPORTANT NOTICE
Under power failure conditions, this telephone may not operate. Please ensure that a separate telephone, not dependent on local power, is available for emergency use in emergencies.
This equipment should not be used under any circumstances which may constitute a nuisance to other Telecom customers.
This equipment shall not be set to make automatic calls to the Telecom '111' Emergency Service.
Not all telephones will respond to incoming ringing when connected to the extension socket.

Safety Information

CAUTION
denotes hazards that could result in minor injury or damage to the machine.
natural_image
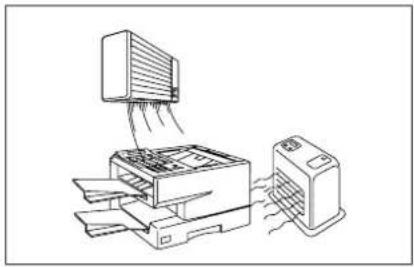
Diagram of a printer emitting a fan or scanner to a printer, showing internal structure and wiring (no text or symbols)Do not install the machine near a heating or air conditioning unit.
natural_image
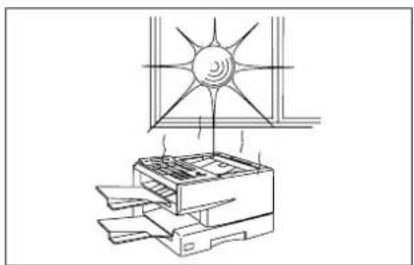
Line drawing of a printer under a sunlight, showing internal components and no text or symbolsAvoid exposure to direct sunlight.
natural_image
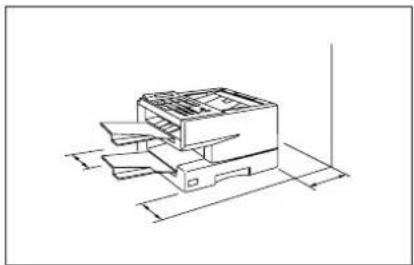
Line drawing of a printer with internal compartments and base stations (no text or symbols)Install the machine on a flat surface, and leave at least 10 cm of space between the machine and other objects.
natural_image
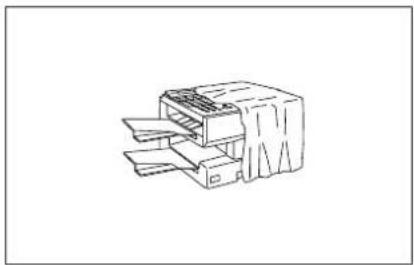
Line drawing of a mechanical device with internal components (no text or symbols)Do not block the ventilation openings.
natural_image
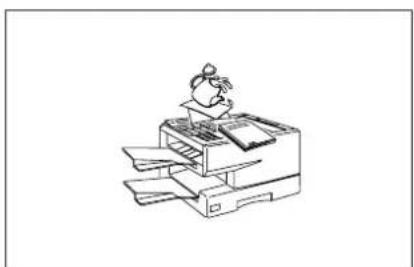
Line drawing of a person using a printer (no text or symbols present)Do not place heavy objects or spill liquids on the machine.
Thank you very much for purchasing the Panafax DX-1000.
The DX-1000 is one of the most advanced models in the Panafax family of G3 compatible, desktop facsimile machines.
Some of its many features are
- Plain Paper Printing
Plain paper printing means you can easily write on received documents with a pen or pencil. Documents do not curl, making filing easier. In addition, plain paper does not fade, making it ideal for long term storage of important documents. - Quick Scanning
The DX-1000 Quick Scan speeds up the fax process by scanning and storing documents into memory in about 2.8 seconds per page. This means that you no longer have to wait around until a transmission is completed before retrieving your documents. - Easy Maintenance Maintenance requires only changing a toner cartridge, making it quicker and easier than with other types of plain paper fax machines.
- Memory Function A standard image memory feature allows you to store up to standard 350 pages into the document memory. After the DX-1000 stores your documents, it can send them to selected station(s) automatically. You do not have to wait until the transmission ends before retrieving your originals.
- Dual Access Operation
The DX-1000 can reserve the next transmission even during reception or memory transmission. It can also receive during document storage. - Internet Communication
Connected to an Ethernet LAN (local area network), the DX-1000 allows you to send documents over the Internet to a remote Internet fax or a PC terminal. It also allows you to receive and print an email transmitted by a remote PC. Furthermore, the DX-1000 is capable of performing email and fax forwarding functions. Execute relayed transmission requests, and can be used as a network scanner and printer.
With a little practice, anyone can learn how to use the most popular features of the DX-1000.
This User's Guide will help you to use your DX-1000 quickly and easily. Although we recommend that you review each section briefly, it will only be necessary to read the sections that contain the feature(s) you will be using.

Function Key
Any function can be started by first pressing FUNCTION and then enter the function number, or by pressing √ or √scroll key repeatedly until the desired function appears on the display.
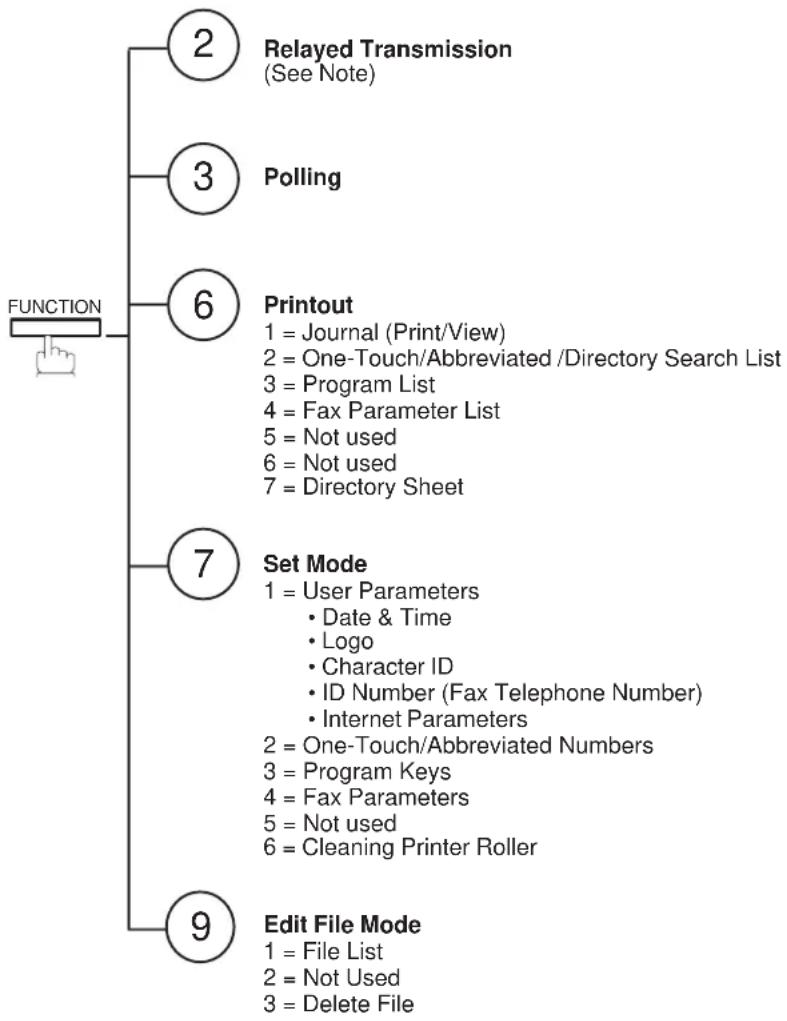
flowchart
graph TD
    A["FUNCTION"] --> B["2 Relayed Transmission (See Note)"]
    A --> C["3 Polling"]
    A --> D["6 Printout\n1 = Journal (Print/View)\n2 = One-Touch/Abbreviated /Directory Search List\n3 = Program List\n4 = Fax Parameter List\n5 = Not used\n6 = Not used\n7 = Directory Sheet"]
    A --> E["7 Set Mode\n1 = User Parameters\n• Date & Time\n• Logo\n• Character ID\n• ID Number (Fax Telephone Number)\n• Internet Parameters\n2 = One-Touch/Abbreviated Numbers\n3 = Program Keys\n4 = Fax Parameters\n5 = Not used\n6 = Cleaning Printer Roller"]
    A --> F["9 Edit File Mode\n1 = File List\n2 = Not Used\n3 = Delete File"]
Note: If the Fax Parameter is not preset to a Valid position that enables its use, the display will not show the function.
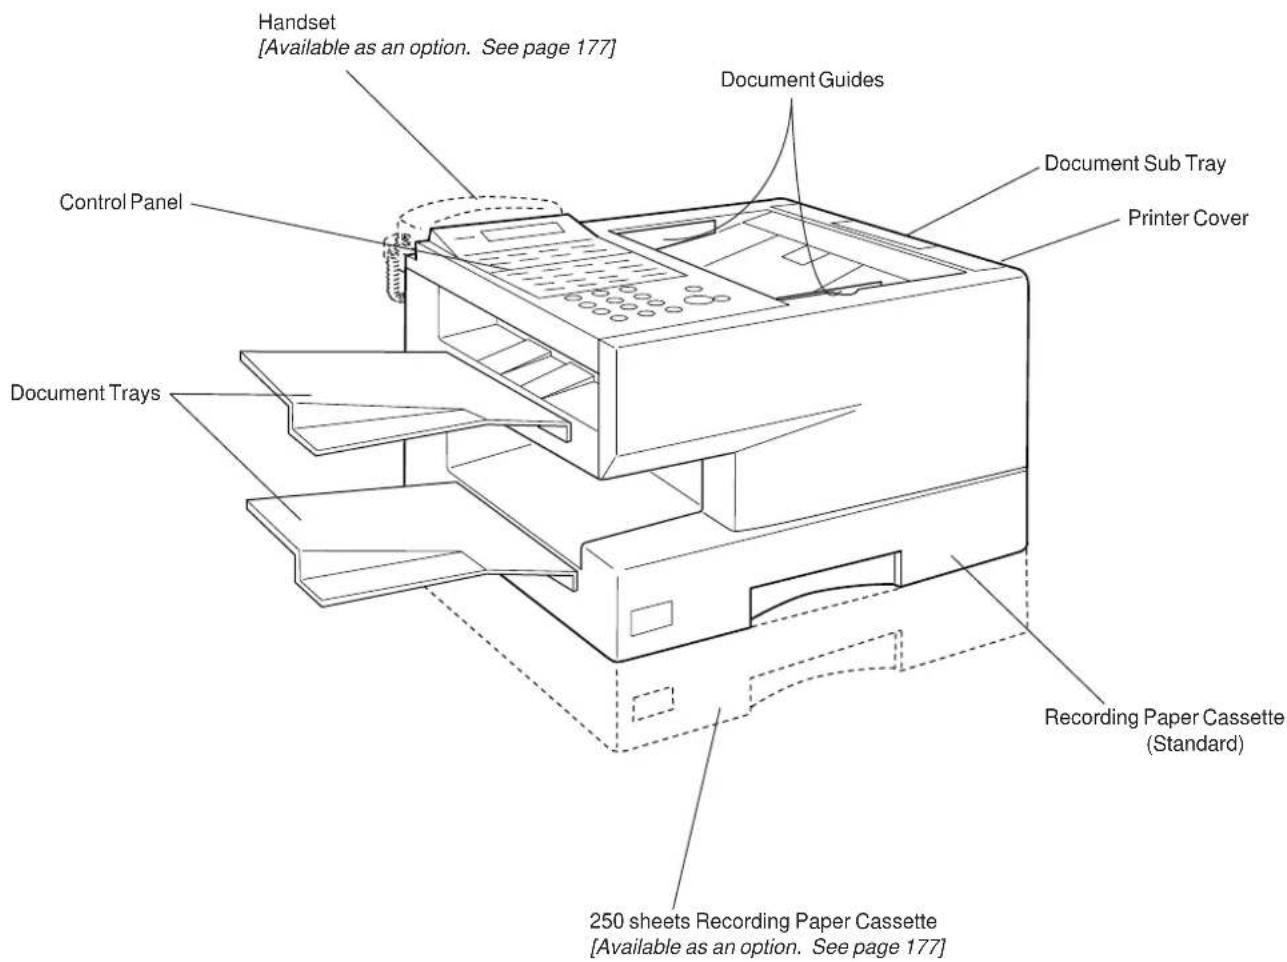
text_image
Handset [Available as an option. See page 177] Control Panel Document Trays Document Guides Document Sub Tray Printer Cover Recording Paper Cassette (Standard) 250 sheets Recording Paper Cassette [Available as an option. See page 177]Note: For some countries, the handset may not be available because of the country's regulation or specification.

Control Panel
LCD Display
Indicates date and time, or the current operation.
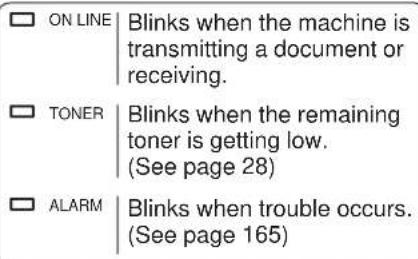
text_image
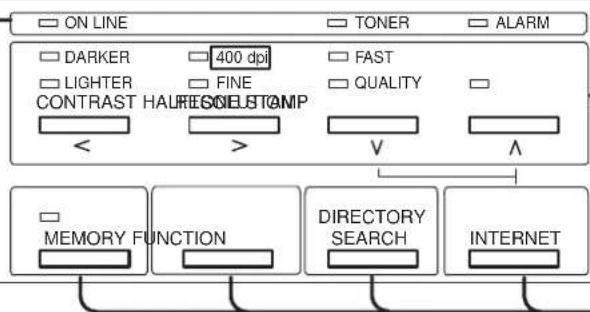
ON LINE | Blinks when the machine is transmitting a document or receiving. TONER | Blinks when the remaining toner is getting low. (See page 28) ALARM | Blinks when trouble occurs. (See page 165)One-Touch Keys (01-32)
Used for One-Touch Dialling. (See pages 81 and 86)
Program Keys (P1-P8)
Used to record long dialling procedures or Group Dialling Number keys. (See pages 105 to 109)
Character Keys
The One-Touch Keys and Program Keys also serve as character and symbol input keys which are used to record Email address, your LOGO and station name. The character key template is printed on the panel under the directory sheet cover.
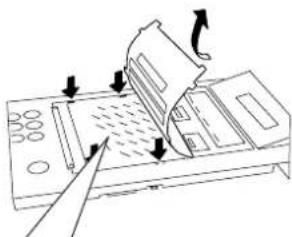
natural_image
Diagram of a printer or scanner with arrows indicating process flow (no text or symbols present)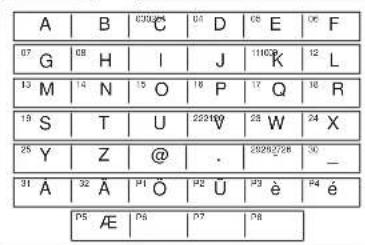
text_image
A | B | C0024 | 01 D | 08 E | 06 F 07 G | 08 H | I | J | 11103 K | 12 L 13 M | 14 N | 15 O | 16 P | 17 Q | 18 R 19 S | T | U | 22210 V | 23 W | 24 X 25 Y | Z | @ | . | 23262728 | 30 _ 31 Á | 32 Á | P1 Ö | P2 Ú | P3 è | P4 é P5 Æ | P6 | P7 | P8SPACE
Used to insert a space while entering LOGO, character ID and station name.
SYMBOLS
Used to enter a symbol (+ & ( ) ', :) for LOGO, character ID and station name. Use v or ^ to select the symbols.
CAPS
Used to switch between upper and lower character set. Upper characters are unavailable for "è", "é" and "Æ".
Panasonic
text_image
ON LINE TOLER ALARM DARKER 400 dpi LIGHTER FINE CONTRAST HAURE/SELESTAMP FAST QUALITY < > V ^ MEMORY FUNCTION DIRECTORY SEARCH INTERNET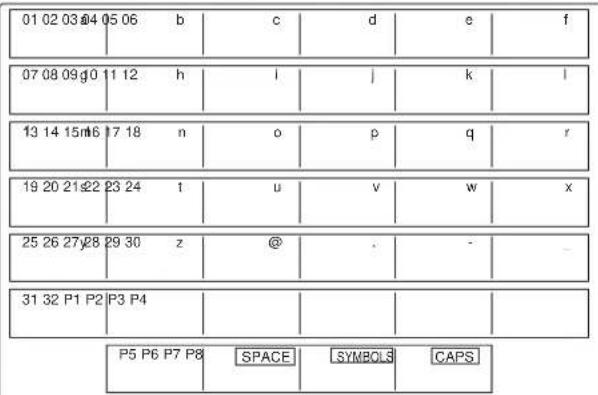
text_image
01 02 03 04 05 06 b c d e f 07 08 09 g0 11 12 h l j k l 13 14 15 m6 17 18 n o p q r 19 20 21 22 23 24 t u v w x 25 26 27 y28 29 30 z @ - - - 31 32 P1 P2 P3 P4 P5 P6 P7 P8 SPACE SYMBOLS CAPS
text_image
PAUSE REDIAL ABBR SUB-ADDR FLASH CLEAR SET MONITOR - VOL - + _______________________________1
② ③

4
5 6
7
8 9

TONE
0 #
text_image
I START COPY
| CONTRAST< | Used to set Normal, Lighter, or Darker. (See page 67) Also serves as an arrow key (<) to move the cursor over recorded numbers and characters. | RESOLUTION> | Used to set Standard, Fine and 400 dpi. (See page 67) Also serves as an arrow key (>) to move the cursor over recorded numbers and characters. |
| HALFTONEV | Provides OFF, QUALITY or FAST settings for halftone documents. (See page 68) Also used for the followingSearch station name for Directory Search Dialling.Confirm entered station for multi-station communication.Select functions. | STAMP^ | Used to turn the verification stamp ON or OFF. (See page 68)Also used for the followingSearch station name for Directory Search Dialling.Confirm entered station for multi-station communication.Select functions. |
| MEMORY Used to select either memory or direct communication. (See pages 78 to 88) | FUNCTION | Used to start or select the function and sub-functions. (See page 8) | |
| DIRECTORY SEARCH | Used to perform search dialling directly. Allows quick-sending a fax by searching for a station name programmed in One-Touch keys or Abbreviated dialling numbers. (See pages 73 and 83) | INTERNET | Used to select communications over the Internet. (See page 70) |
| PAUSE REDIAL | Used to enter a pause when recording or dialling a telephone number, or to redial the last dialed number. (See page 93) | — VOL CLEAR | Used to erase the previously entered input. Also used to turn down the monitor and ringer volume. (See page 35) |
| ABBR | Used to start Abbreviated Dialling (See pages 82 and 87) | VOL — + SET | Used to set operations. Also used to turn up the monitor and ringer volume. (See page 35) |
| SUB-ADDR FLASH | Used to separate the Sub-address from the telephone number when dialling, or to access some features of your PBX. | MONITOR | Used to start On-Hook Dialling. (See page 90) |
| 1 2 34 5 67 8 9TONE 0 # | Used for Manual Number Dialling, programming phone numbers, and selecting functions. | STOP | Used to cancel operations. When it is pressed, the machine will return to standby. |
| COPY | Used to make copies.(See page 104) | ||
| TONE * | Used to temporarily change Dialling Mode to Tone when Pulse mode is set. | START | Used to start operations. |
| TONE *and | Used to confirm current communication modes (e.g. Page number, ID, Dialed Telephone number, File number) when unit is ON LINE. |

Pre Installation Information
Before setting up the DX-1000 on your network, please read this entire section to be familiar with its functions.
The DX-1000 is able to perform the following when connected to a 10Base-T Ethernet LAN (local area network):
- Send paper-based information as an Internet Email.
- Receive and print an Internet Email automatically.
- Forward received G3 fax message or Email automatically to the preprogrammed Email address or regular G3 fax machine (see "Fax Forward" on pages 124).
- Route received G3 fax message automatically to the sender-specified Email address or G3 fax machine using ITU-T SUB-Address (see "Inbound Routing" on pages 116 to 120).
- Route received G3 fax messages automatically to the preprogrammed Email address or G3 fax machine using the sender's fax ID code (see "Inbound Routing" on pages 116 to 120).
- Relay an Internet Email to a G3 fax machine via regular fax transmission (see “Relay Transmission” on pages 135 to 146).
• Network scanning and printing.

Note: 1. To function as SMTP mail server, the DX-1000's email address must include its unique Host name within your company domain. This unique Host name must be registered within your network's DNS (Domain Name System) server. Example: DX1000@fax01.panasonic.com
-
Automatically refers to immediate SMTP transfer or immediate POP3 retrieval. Manually refers to manual retrieval of mail when configured as POP3 client.
-
The DX-1000 will receive, print, forward or relay emails in text message format and TIFF-F image file attachment only.
To utilize the above functions, the DX-1000 needs to be set up properly on your network. Please contact your network administrator for actual network setup.
Copy the Pre-installation Information form found at the end of this section on page 15, record the MAC Address on the form and ask your network administrator to complete the remaining information on the form. The MAC Address of your DX-1000 can be found on the 2nd page of the Fax Parameter List printout (press FUNCTION 6.4 SET).
The DX-1000 can be set up as either SMTP mail server or POP3 client. Dependent on the type of setup, different functions are available as follows.
| Function | SMTP Server Setup | POP3 Client Setup |
| Sending paper-based information as an Internet Email | Yes | Yes |
| Receive and print an Internet Email automatically | Yes | Yes |
| Receive and print an Internet Email manually | No | Yes |
| Forward received G3 fax message or Email automatically | Yes | Yes |
| Route received G3 fax message automatically | Yes | Yes |
| Relay an Internet Email to G3 fax machine | Yes | No |
Setup as SMTP mail server
To install the DX-1000 as SMTP mail server, the following network parameters need to be programmed on your network and on the DX-1000.
- IP Address of the DNS Server (if not available, see Note)
• IP Address of the DX-1000 - Subnet Mask of the DX-1000
- Name or IP Address of the Default SMTP mail server
• IP Address of the Default Router - Email Address of the DX-1000 (see Note)
- Host Name

Note: 1. To function as SMTP mail server, the DX-1000's email address must include its unique Host name within your company domain. This unique Host name must be registered within your network's DNS (Domain Name System) server. Example: DX1000@fax01.panasonic.com
- By default the machine requires the IP Address of the DNS Server and prompts you to enter the SMTP Server Name. If the DNS Server is not available, change the Fax Parameter No. 94 (DNS SERVER) to "1:Invalid". Then the machine will prompt you to enter the IP Address of the SMTP Server.
Email Transmission (from the DX-1000 to a PC)
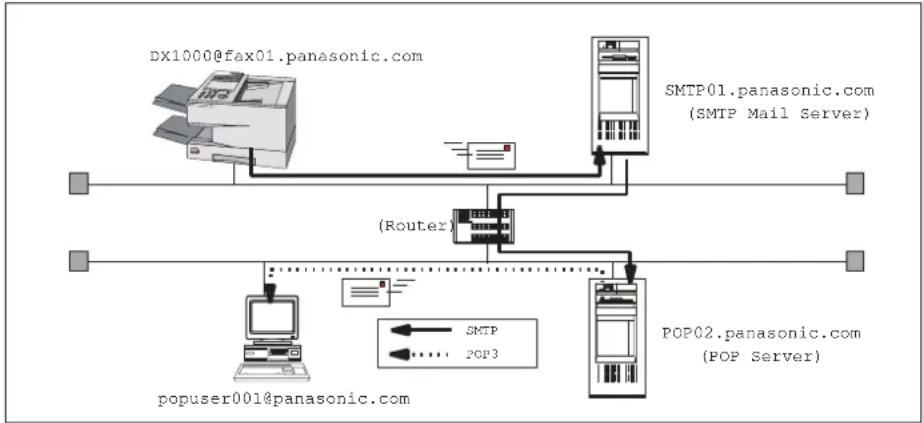
flowchart
graph TD
    A["DX1000@fax01.panasonic.com"] --> B["(Router)"]
    C["SMTP01.panasonic.com (SMTP Mail Server)"] --> B
    D["POPuser001@panasonic.com"] --> E["SMTP"]
    D --> F["POP3"]
    G["POP02.panasonic.com (POP Server)"] --> H["SMTP"]
Email reception (from a PC to the DX-1000)
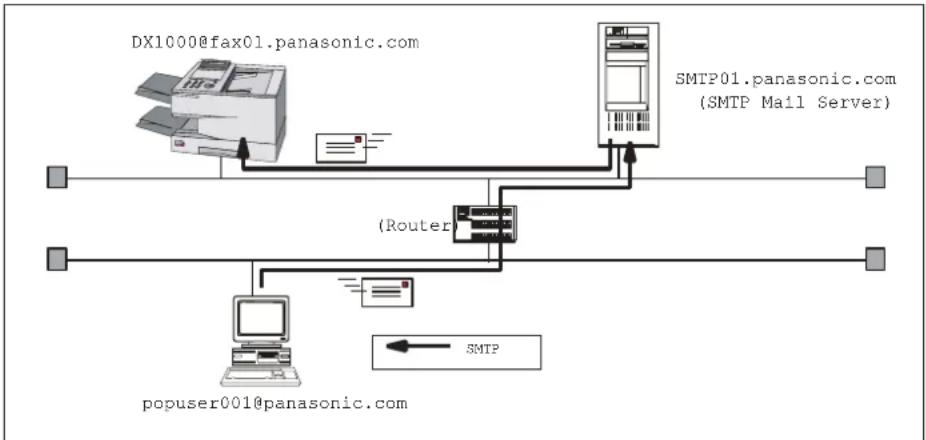
flowchart
graph TD
    A["DX1000@fax01.panasonic.com"] --> B["(Router)"]
    C["SMTP01.panasonic.com (SMTP Mail Server)"] --> B
    B --> D["popuser001@panasonic.com"]
    B --> E["SMTP"]
    B --> F["Computer"]

Pre Installation Information
Setup as POP3 Client
To install the DX-1000 as POP3 Client, the following network parameters need to be programmed on your network.
- IP Address of the DNS Server (if not available, see Note)
• IP Address of the DX-1000 - Subnet Mask of the DX-1000
- Name or IP Address of the Default SMTP mail server
• IP Address of the Default Router - POP Server Name or IP Address
- POP User Account Name
- POP Password
- Email Address of the DX-1000 (see Note)

Note: 1. The email address format can be the same as your regular email address. If your email address is popuser001@panasonic.com, the DX-1000's email address can be DX1000@panasonic.com.
- By default the machine requires the IP Address of the DNS Server and prompts you to enter the SMTP and POP Server Names. If the DNS Server is not available, change the Fax Parameter No. 94 (DNS SERVER) to "1:Invalid". Then the machine will prompt you to enter the IP Address of the SMTP and POP Servers.
Email transmission (from the DX-1000 to a PC)
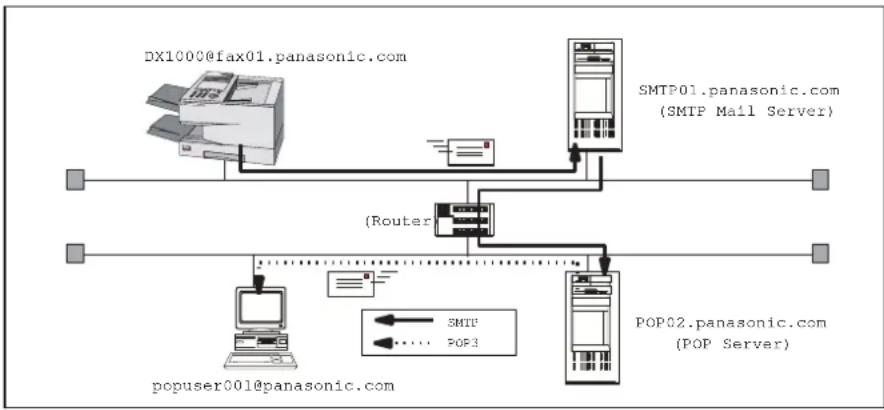
flowchart
graph TD
    A["DX1000@fax01.panasonic.com"] --> B["(Router)"]
    B --> C["SMTP"]
    B --> D["POP3"]
    B --> E["POP02.panasonic.com (POP Server)"]
    F["SMTP01.panasonic.com (SMTP Mail Server)"] --> B
    G["popuser001@panasonic.com"] --> H["Computer"]
    style A fill:#f9f,stroke:#333
    style F fill:#ccf,stroke:#333
    style G fill:#cfc,stroke:#333
Email reception (from a PC to the DX-1000)
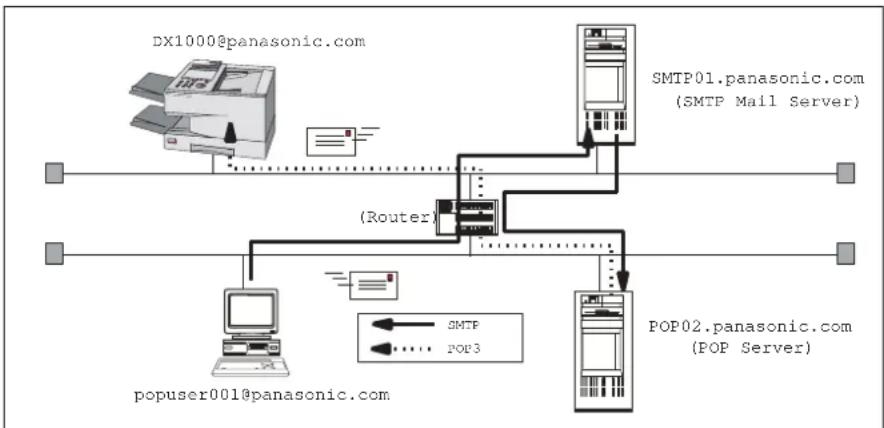
flowchart
graph TD
    DX1000["DX1000@panasonic.com"] -->|Data Bus| SMTP01["SMTP01.panasonic.com (SMTP Mail Server)"]
    DX1000 -->|Data Bus| POPuser001["popuser001@panasonic.com"]
    SMTP01 -->|Data Bus| POP2["POP02.panasonic.com (POP Server)"]
    POPuser001 -->|Data Bus| SMTP
    POPuser001 -->|Data Bus| POP3["POP3"]
    SMTP -->|Data Bus| Router["Router"]
    POP3 -->|Data Bus| Router
    Router -->|Data Bus| SMTP
    Router -->|Data Bus| POP3
For the total system to work properly via LAN, certain information and additional parameters must be set. Please contact your network administrator for the required information and connection to the LAN.
| User Information | ||
| Company Name | ||
| Address | ||
| Dept. | ||
| City | State | Zip Code |
| Tel. No. | Fax No. | |
| Internet Fax Parameters (See page 40 to 44) | ||
| (1) IP Address: | ||
| (2) Subnet Mask: | ||
| (3) *SMTP Server Name: | or | *SMTP Server IP Address: |
| (4) Default Router IP Address: | ||
| (5) Email Address: | ||
| (6) DNS Server IP Address: | ||
| (7) POP Server Name: | or | *POP Server IP Address: |
| (8) POP User Name: | ||
| (9) POP Password: | ||
| (10) Host Name: | ||
| (11) Default Subject: | ||
| (12) Default Domain: | ||
| (13) Remote Password: | ||
| (14) Relay XMT Password: | ||
| (15) Manager's Email Address: | ||
| (16) Acceptable Domain Name(s) for Relay Transmission: | ||
| 1. | 6. | |
| 2. | 7. | |
| 3. | 8. | |
| 4. | 9. | |
| 5. | 10. | |

Note: 1. Items in Bold, depict information obtained from you Network Administrator.
-
By default the machine requires the IP Address of the DNS Server and prompts you to enter the SMTP and POP Server Names (items 3 and 7 above). If the DNS Server is not available, change the Fax Parameter No. 94 (DNS SERVER) to "1:Invalid". Then the machine will prompt you to enter the IP Address of the SMTP and POP Servers.
-
If required, the MAC Address of the DX-1000 can be obtained from the 2nd page of the Fax Parameter List printout, by pressing FUNCTION 64 SET.
Explanation of Contents
| MAC Address | MAC Address from the 2nd page of the Fax Parameter List printout (press [FUNCTION][6][4][SET]). |
| (1) IP Address The Internet Protocol (IP) address assigned to your machine. | |
| (2) Subnet Mask The Subnet Mask number. | |
| (3) SMTP Server Name or SMTP Server IP Address | The SMTP Server Name (up to 60 characters). The SMTP Server IP Address. |
| (4) Default Router IP Address The Default Router's IP Address. | |
| (5) Email Address The email address assigned to your machine. (Up to 60 characters) | |
| (6) DNS Server IP Address The IP address of the DNS Server. | |
| (7) POP Server Name or POP Server IP Address | The POP Server Name. (Up to 60 characters) The POP Server IP Address. |
| (8) POP User Name POP User Name. (Up to 40 characters) | |
| (9) POP Password POP Password. (Up to 10 characters) | |
| (10) Host Name The name assigned to your DX-1000. (Up to 60 characters) | |
| (11) Default Subject The information to be added to the Subject Line for all outgoing emails. (Up to 40 characters) | |
| (12) Default Domain Specify the Domain Name (up to 50 characters) to be added to frequently used or incomplete outgoing email addresses (i.e. @yourcompany.com) | |
| (13) Remote Password Enter a security password (up to 10 characters) to allow Remote Programming of your auto dialer via email. | |
| (14) Relay XMT Password | Enter a password to provide network security to your Relay Station (for G3 relay purposes). Up to 60 characters. |
| (15) Manager's Email Address | Enter you Department Manager's email address for notification of all Internet relayed transmissions for supervision and cost control purposes. (Up to 60 characters) |
| (16) Domain Name (01 to 10) | Enter up to 10 Domain Names that are authorized to access your Internet Fax for Relayed Transmission Request. (Up to 30 characters) |

Note: All IP Addresses consist of 4 parts separated by dots (i.e. 165.113.245.2)
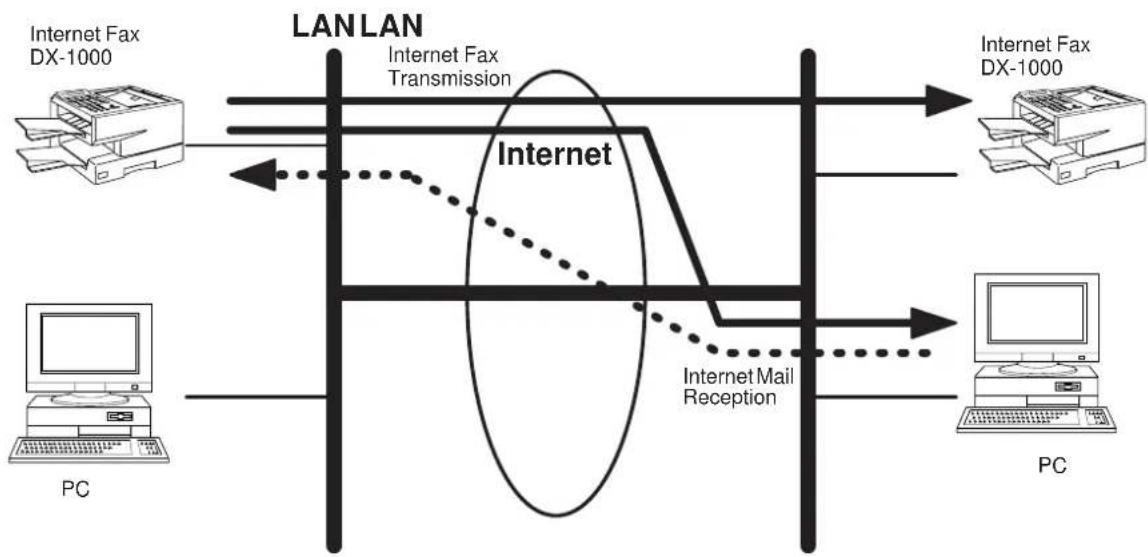
Internet Fax Transmission
The DX-1000 allows you to transmit documents over the Internet to another Internet Fax or a PC. The document is first scanned and converted into a TIFF-F formatted image file, and then transmitted to the remote location as an attachment file to an email using MIME encoding.
The email system at the receiving end must support MIME. Otherwise, the attachment file will be detached and lost.
When you send an email message to someone, the DX-1000 uses Simple Mail Transfer Protocol (SMTP) to transfer your outgoing mail to your SMTP mail server, which in turn uses SMTP to send your mail to the Internet.
Internet Mail Reception
The DX-1000 allows you to receive and print a PC transmitted email automatically or manually, depending on its setup configuration. However, if the received email includes file attachment in a format other than TIFF-F, such as Word, Excel, Power Point, the DX-1000 prints an error message instead.
flowchart
graph TD
    A["Internet Fax DX-1000"] --> B["Internet"]
    C["PC"] --> D["Internet"]
    B --> E["Internet"]
    D --> F["Internet"]
    E --> G["Internet Fax DX-1000"]
    F --> H["Internet Fax DX-1000"]
    I["Internet"] --> J["Internet"]
    K["Internet Mail Reception"] --> L["Internet"]
    M["PC"] --> N["PC"]

Internet Communication Features
Inbound Routing
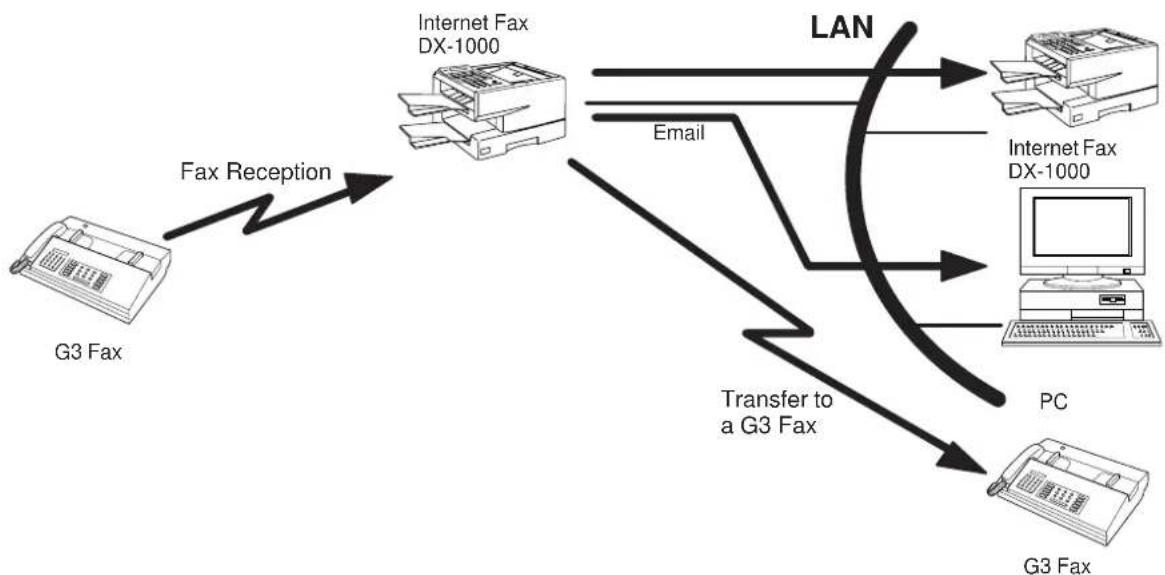
Using the Inbound Routing feature, the DX-1000 can route documents received from a G3 fax machine to email address(s) or to Internet Fax machine(s) connected to a LAN as an email, as well as to other G3 fax machine(s) over the telephone line.
When an incoming Internet Fax, email or a regular fax document is received, the DX-1000, checks for the following:
-
First, the DX-1000 checks whether a sub-address is included. If it is, it will look for a sub-address match within its auto dialer and will route the documents to the corresponding stations email address(s) or telephone number(s).
-
If no sub-address is specified, then the DX-1000 tries to match the originating fax machine's Numeric ID (TSI) with the TSI routing within its auto dialer and will route the documents to the corresponding stations email address(s) or telephone number(s).
flowchart
graph TD
    A["G3 Fax"] -->|Fax Reception| B["Internet Fax DX-1000"]
    B -->|LAN| C["Internet Fax DX-1000"]
    B -->|Email| D["PC"]
    B -->|Transfer to a G3 Fax| E["G3 Fax"]

Note: 1. If the originating fax machine does not support the above sub-address function, sub-address destination(s) cannot be selected.
- The DX-1000 can not perform routing to mixed address locations (email address(s) and telephone number(s)) within the same operation.
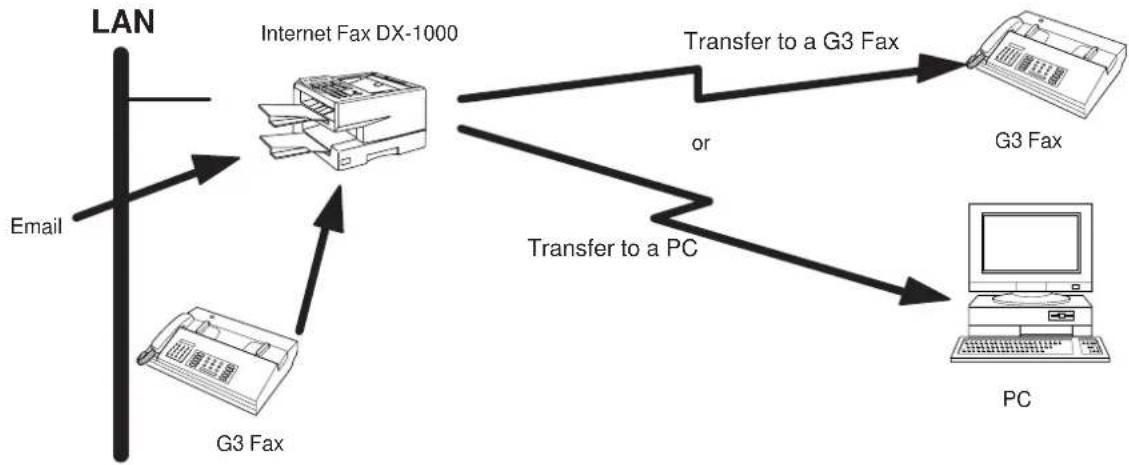
Fax Forward
The DX-1000 is capable of transferring all received Internet email or regular G3 fax documents to a pre-programmed G3 fax or a PC destination.
flowchart
graph TD
    A["LAN"] --> B["Internet Fax DX-1000"]
    B --> C["Transfer to a G3 Fax"]
    B --> D["Transfer to a PC"]
    C --> E["G3 Fax"]
    D --> F["PC"]
    B --> G["or"]
    G --> C
    B --> H["Email"]
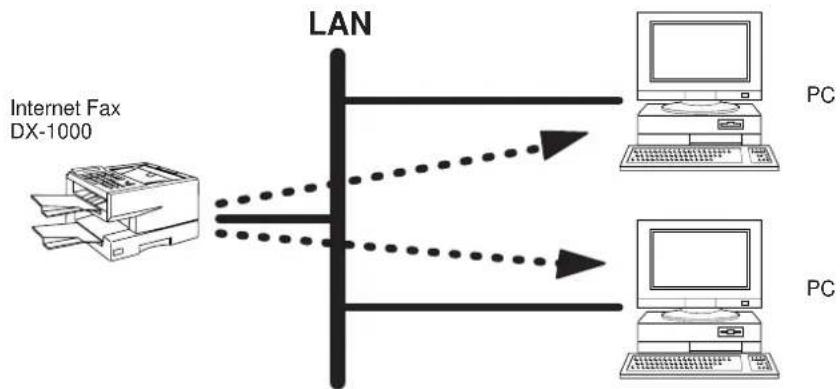
Network Scanner
The DX-1000 can be utilized as a network scanner by simply transmitting an image to a PC as TIFF-F attachment to an email.
flowchart
graph LR
    A["Internet Fax DX-1000"] -->|LAN| B["PC"]
    A -->|LAN| C["PC"]
    B --> D["Computer"]
    C --> E["Computer"]

Internet Communication Features
Network Printer
The DX-1000 can be utilized as a network printer by simply sending the documents created on your PC using various software applications to the DX-1000 via TCP/IP protocol.
There a two parts to setting up the DX-1000 as a network printer. Part 1 requires you to download the software (printer driver and LPR) from the web site listed below.
The second part requires you to install and configure the software on your PC to work with the DX-1000. (See the web site for details about the printer driver installation and operation)
You can download the Panasonic's printer driver and LPR monitor from any the following URL addresses:
http://www.panasonic.co.jp/mgcs/internetfax/
http://www.panasonic.com/internetfax
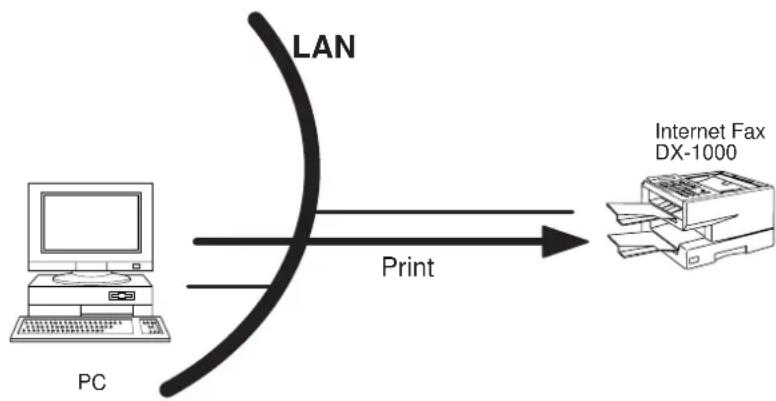
flowchart
graph LR
    PC["PC"] -->|LAN| InternetFax["Internet Fax DX-1000"]
    InternetFax -->|Print| PC
Relayed Transmission
The DX-1000 allows you to transmit an email received from an Internet Fax or PC connected to the LAN to multiple fax machines via a telephone line. You can attach files with the TIFF-F format to this email.
Using the Sub-address specified by the originating fax machine, the DX-1000 can then route the received documents to the remote DX-1000 via an email, which can then relay these documents to final destinations where the final recipient is a regular G3 fax machine.
The DX-1000 also allows you to convert a data file from various application programs such as spreadsheet into a TIFF-F format file and then transmit this file attached to an email.
To convert applications into a TIFF-F formatted file, however, requires you to first download the software (printer driver) from the web site listed below. The second part requires you to install the software on your PC. (See the web site for details about the printer driver installation and operation)
You can download the Panasonic's printer driver from any of the following URL addresses:
http://www.panasonic.co.jp/mgcs/internetfax/
http://www.panasonic.com/internetfax
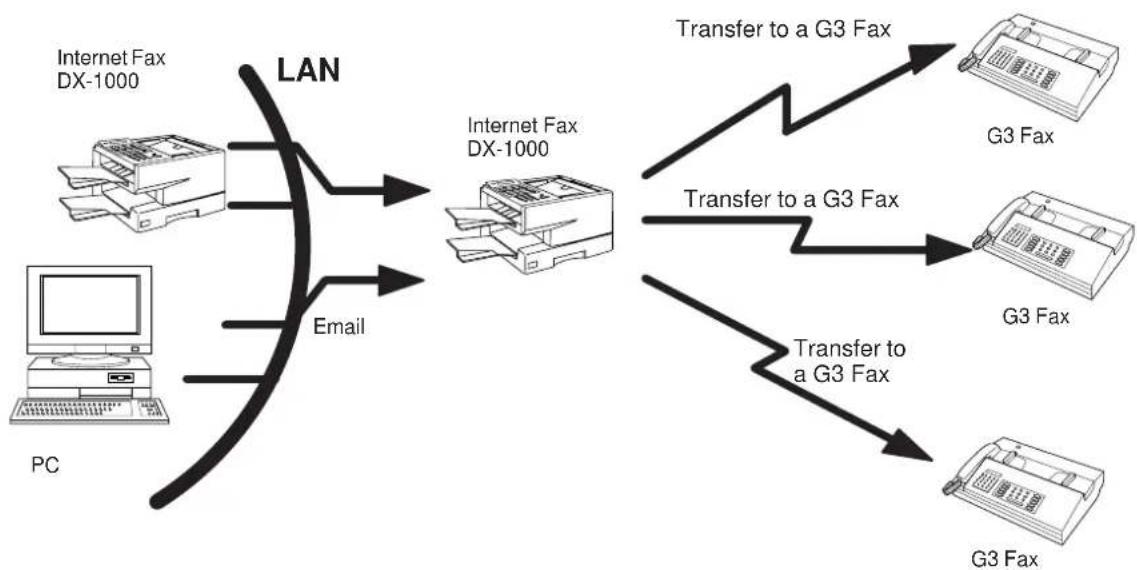
flowchart
graph LR
    A["PC"] -->|Email| B["Internet Fax DX-1000"]
    A --> C["Internet Fax DX-1000"]
    B --> D["Transfer to a G3 Fax"]
    C --> E["Transfer to a G3 Fax"]
    D --> F["G3 Fax"]
    E --> G["G3 Fax"]
    style A fill:#f9f,stroke:#333
    style B fill:#ccf,stroke:#333
    style C fill:#ccf,stroke:#333
    style D fill:#cfc,stroke:#333
    style E fill:#cfc,stroke:#333
    style F fill:#fcc,stroke:#333
    style G fill:#fcc,stroke:#333

Important Information
The DX-1000 uses the same communication protocols as email: the Simple Mail Transfer Protocol (SMTP). The differences from a standard G3 fax communication using the Public Telephone Network (PSTN) are as follows.
Differences between Internet Fax and Regular Fax
A regular Fax machine goes off-hook, dials, and the phone network completes a circuit over phone lines to the receiving fax. You pay for the circuit. The two faxes negotiate a connection, synchronize and exchange image data.
The Internet Fax works like an email, the image data is broken down into packets and transmitted through your Local Area Network (LAN) to the Internet or Intranet instead of using a telephone company's network, thus saving you long distance costs.
Transmitted Document Confirmation
- The DX-1000 does not directly connect to the final destination, but rather connects to a Mail Server via LAN. Therefore, if a document cannot be correctly transmitted due to an error, the erroneous mail may be returned from the Mail Server to the DX-1000.
- The erroneous mail may take a long time to return (20 to 30 minutes) depending on the destination location, traffic on the network or LAN system configuration.
- Depending on the Mail Server, it is also possible that erroneous mail is not returned at all. Therefore, when transmitting important or time sensitive documents, it is recommended that you follow up with a telephone call to confirm reception.
- Documents cannot be transmitted correctly if the destination Mail Server does not conform to the MIME protocol. Erroneous mail may not be returned depending on the Mail Server.
DX-1000 Cannot Make a Phone Call via LAN
- The DX-1000 can only make a phone call using a regular telephone line (PSTN).
- During LAN communication, telephone or fax communication through PSTN is not available.
Transmission Resolution
In view of PC transmission, the factory default setting for the resolution is set to FINE mode. If required, this setting can be changed to Normal.
Internet Mail Reception
- The DX-1000 can receive text email from a PC and print ANSI characters. It will print a "■" symbol if an unrecognized character is received.
- Received email font and character size are fixed and cannot be changed.
- Text email will be printed at about 72 lines per page. It is recommended that you use A4/Letter size recording paper.
- If the received text email includes a file attachment in a format other than TIFF-F, such as Word, Excel, Power Point, the DX-1000 prints an error message instead.
- If the received email includes attached TIFF-F formatted image files, the text and TIFF-F formatted image file will be printed on separate pages.
Sending Document Size via LAN
When transmitting via LAN, the transmitter is incapable of identifying the receiver's recording paper size capability, and thus it will not reduce the document size. Therefore, when transmitting via LAN, it is recommended that you use only A4/Letter size documents. If a B4 size document is transmitted and the receiver is only able to print A4 size, the communication will fail when the Fax Parameter No. 59 (LAN XMT REDUCTION) is set to "1:Invalid". (See page 62.)
Sending a Document to a PC via LAN
When transmitting a document to an email address, the following instructions are sent as text message in addition to the TIFF-F formatted image file.
An Image data in TIFF-F format has been attached to this email.
You can download the TIFF-F Image Viewer from the following URL addresses:
http://www.panasonic.co.jp/mgcs/internetfax/
http://www.panasonic.com/internetfax/
Internet Relayed Transmission
To prevent unauthorized stations from accessing your Relay Station for Internet Relayed Transmission, you must set up your Network security. Enter a Relay Station Name, which is concealed from the final destinations and a Manager's Email Address for notification of all Internet Relayed Transmissions.
This page is intentionally left blank.
Unpack the carton and check that you have all the accessories illustrated.
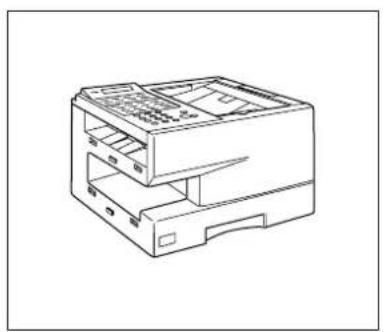
natural_image
Line drawing of a computer case with internal components (no text or symbols)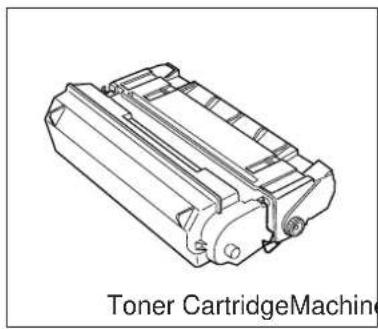
natural_image
Technical line drawing of a Toner CartridgeMachine component (no text or symbols on the diagram itself)
natural_image
Two simple line drawings of metal trapezoidal trays, labeled 'ument Trays' at the bottom (no other text or symbols)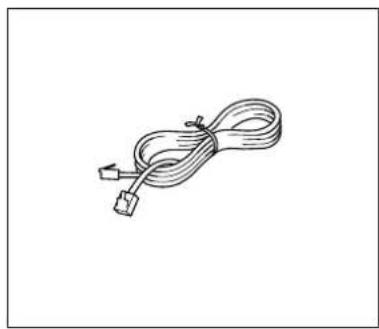
natural_image
Simple line drawing of a coiled cable with a connector (no text or symbols)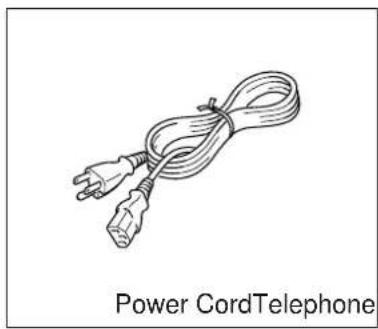
natural_image
Line drawing of a power cord telephone with two leads tied together (no text or symbols on the diagram itself)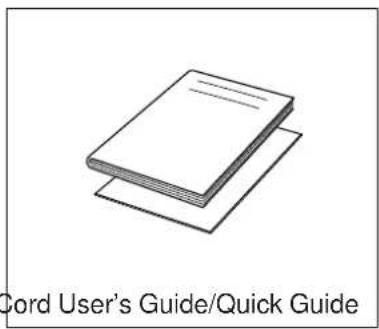
text_image
Cord User's Guide/Quick Guide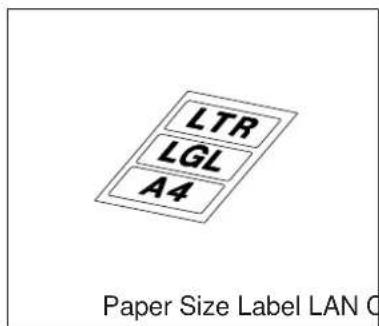
text_image
LTR LGL A4 Paper Size Label LAN C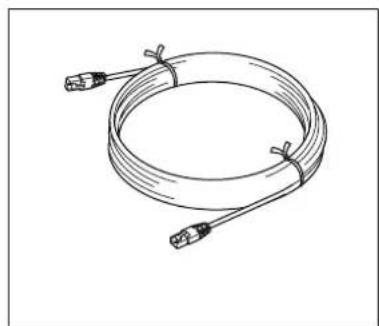
natural_image
Line drawing of a coiled cable with two connectors (no text or symbols)
Installing the Accessories
natural_image
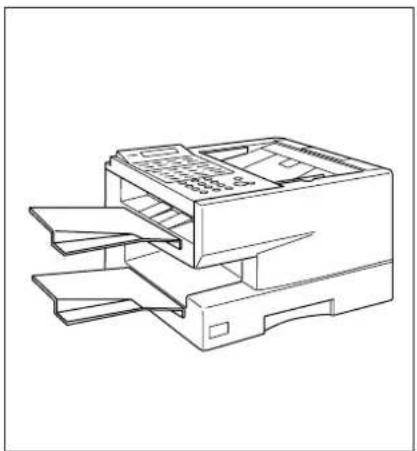
Line drawing of a printer with paper sheets and a keypad (no text or symbols)Final Installed View
Handset Cradle [Available as an Option]
Hook the projections into the square holes on the machine.
Connect the cable into the HANDSET jack on the machine.
![PANASONIC Panafax DX-1000 - Handset Cradle [Available as an Option] - 1](/content/2026/05/794558/images/3cfe4651790f6f4988d4496f4ff48ad1c889e7bf5a90e4cdfb24f5518d55d20b.jpg)
text_image
Handset [Available as an Option] Document Trays Hook the projections into the square holes on the machine. Handset Cable [Available as an Option]![PANASONIC Panafax DX-1000 - Handset Cradle [Available as an Option] - 2](/content/2026/05/794558/images/98d41cd00aa72be52df803501718ac06af261f228e4f4e7704c95ec60baea28a.jpg)
Note: For some countries, the handset may not be available because of the country's regulation or specification.
This page is intentionally left blank.
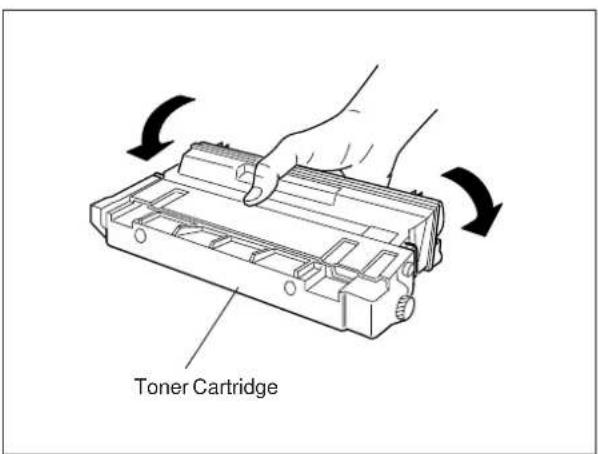
Installing the Toner Cartridge
1
text_image
Toner CartridgeUnpack the Toner Cartridge and rock it back and forth as shown for 5 or 6 times to even the toner inside.
2
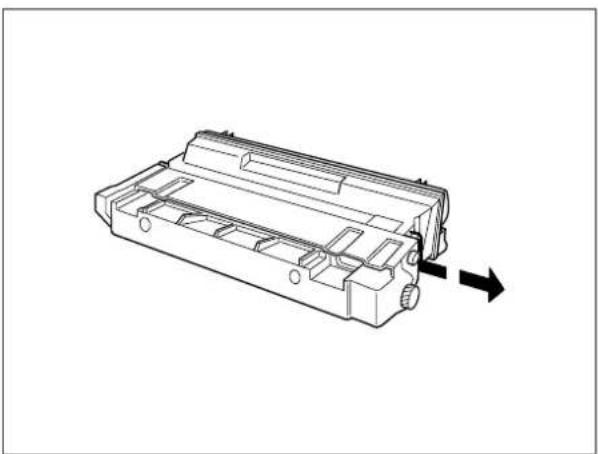
natural_image
Technical line drawing of a mechanical component with an arrow indicating direction (no text or symbols present)Remove the protective seal.
Note: Pull on the seal slowly and straight out.
3
text_image
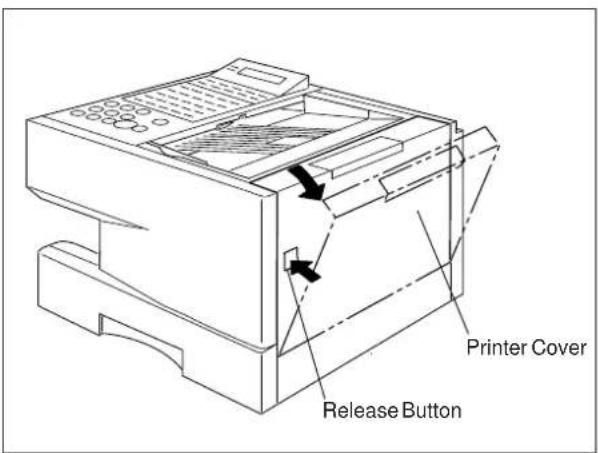
Printer Cover Release ButtonPush the Release Button to open the Printer Cover.
Continued on the next page.
Installing the Toner Cartridge
4
Align the arrow and the projection on both sides as shown and insert the Toner Cartridge into the machine.
2
5
Close the Printer Cover firmly.
Printer Cover
6
If you are replacing the Toner Cartridge, it is recommended to clean the Printer Roller to maintain good printing quality. To clean the Printer Roller, follow the procedure on page 168.

Loading the Recording Paper
Paper Specifications
Generally, most bond papers will produce excellent results. Most photocopy papers will also work very well. There are many "name" and "generic" brands of paper available. We recommend that you test various papers until you obtain the results you are looking for. For detailed recommended paper specifications, see page 176.
How to Load the Recording Paper
1
text_image
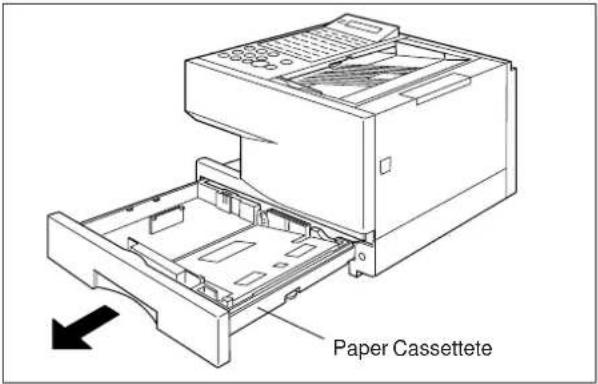
Paper CassetteteSlide the Paper Cassette out from the machine.
2
text_image
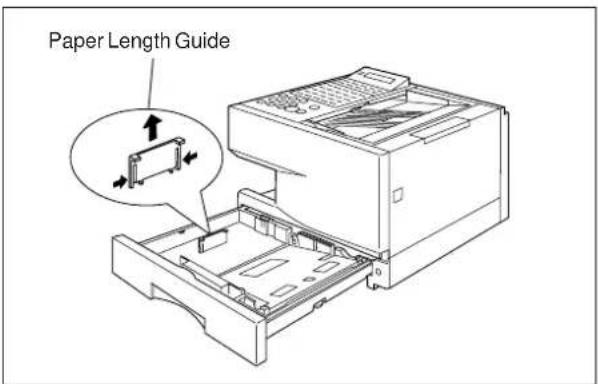
Paper Length GuideAdjust the Paper Length Guide to the proper paper size (A4, LTR, or LGL).
For LGL size paper, remove the Paper Length Guide and store it in the provided slot in the front left side of the Paper Cassette.
If reloading the same size of paper, skip steps 2 and 3.
3
text_image
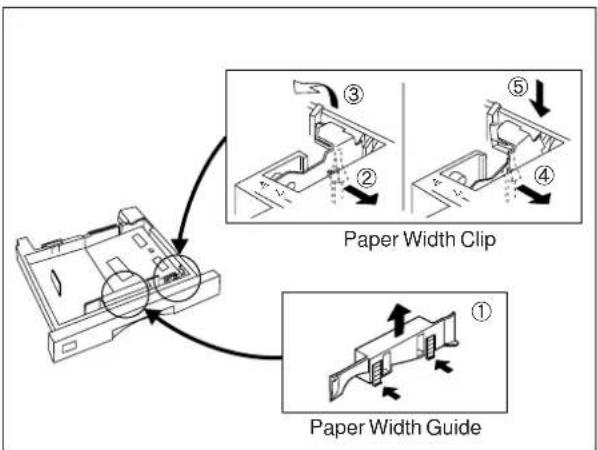
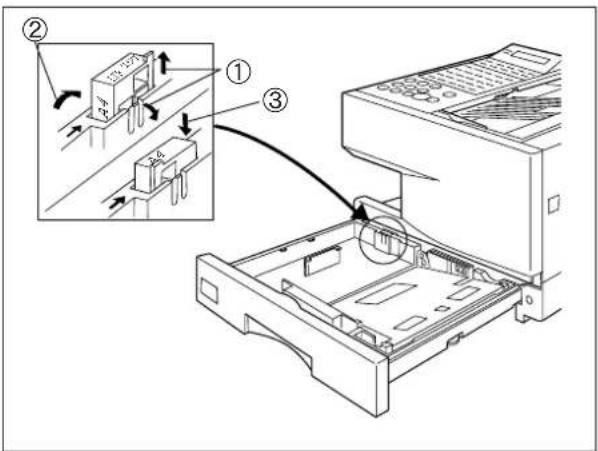
Paper Width Clip Paper Width GuideAdjust the Paper Width Guide and Clip to the proper paper (A4, or LTR/LGL).
The factory default for the Paper Width Guide and Clip are on A4 position. For LTR/LGL paper size, adjust by following the steps below.
①Replace the Paper Width Guide into the proper slot (A4 or LTR/LGL).
②Release the Paper Width Clip latch.
③Pull upwards to remove the Paper Width Clip.
④Replace the Paper Width Clip into the A(A4) or L(LTR/LGL) slot.
⑤Push down on the Paper Width Clip to latch it in place.
Loading the Recording Paper

4
text_image
Technical diagram showing a printer's internal structure with labeled parts and an inset view of the device's internal components.5
text_image
Clip Clip ① ② Recording Paperer ③ Clip6
text_image
Paper Cassette① Release the hook and remove the Paper Size Selector.
②Rotate the Paper Size Selector until the appropriate setting marked on the Selector is facing upward and the wording is upright.
③Reinstall the Paper Size Selector.
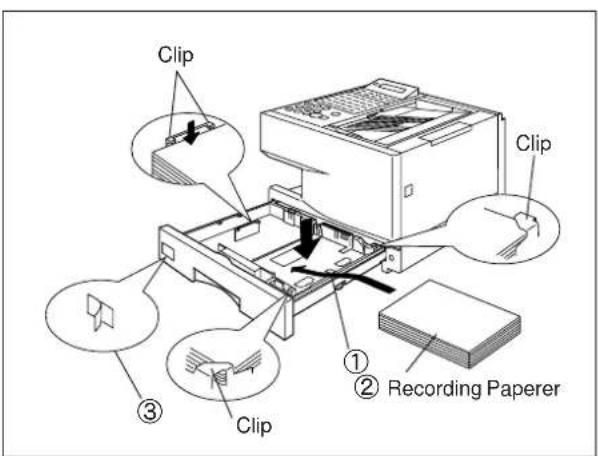
①Push the Pressure Plate until it is locked down.
②Load the paper into the Paper Cassette.
Caution: Make sure that the paper is set under the clips of the Paper Cassette. You can load about 250 sheets with standard weight paper (20 lb. or 75 g/m²). For paper specification see page 176.
③Set the proper paper size label.
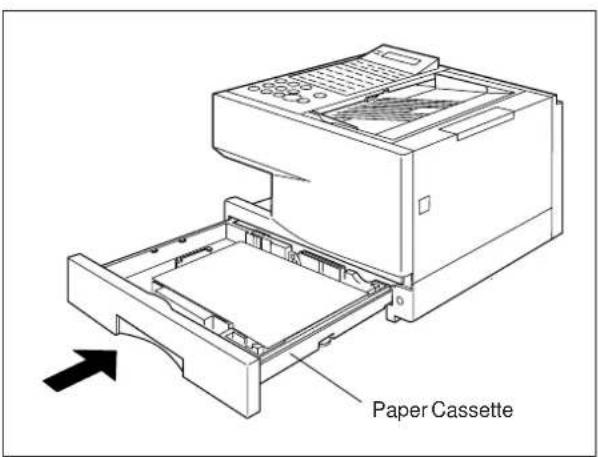
Slide the Paper Cassette into the machine.

Note: Your machine will properly print on A4, Letter and Legal size paper only. If other size of paper (B4, B5, A5) is used, your machine may not print properly.

Connecting the Telephone Line Cord and Power Cord
10Base-T Ethernet Hub
Ethernet LAN (10Base) Cable (not included)
Telephone Line Cord
Plug one end of the telephone line cord into the telephone jack supplied by the telephone company and the other end into the LINE jack on the left side of the machine.
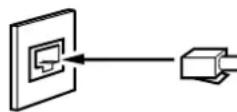
Telephone Line Cable (Included)
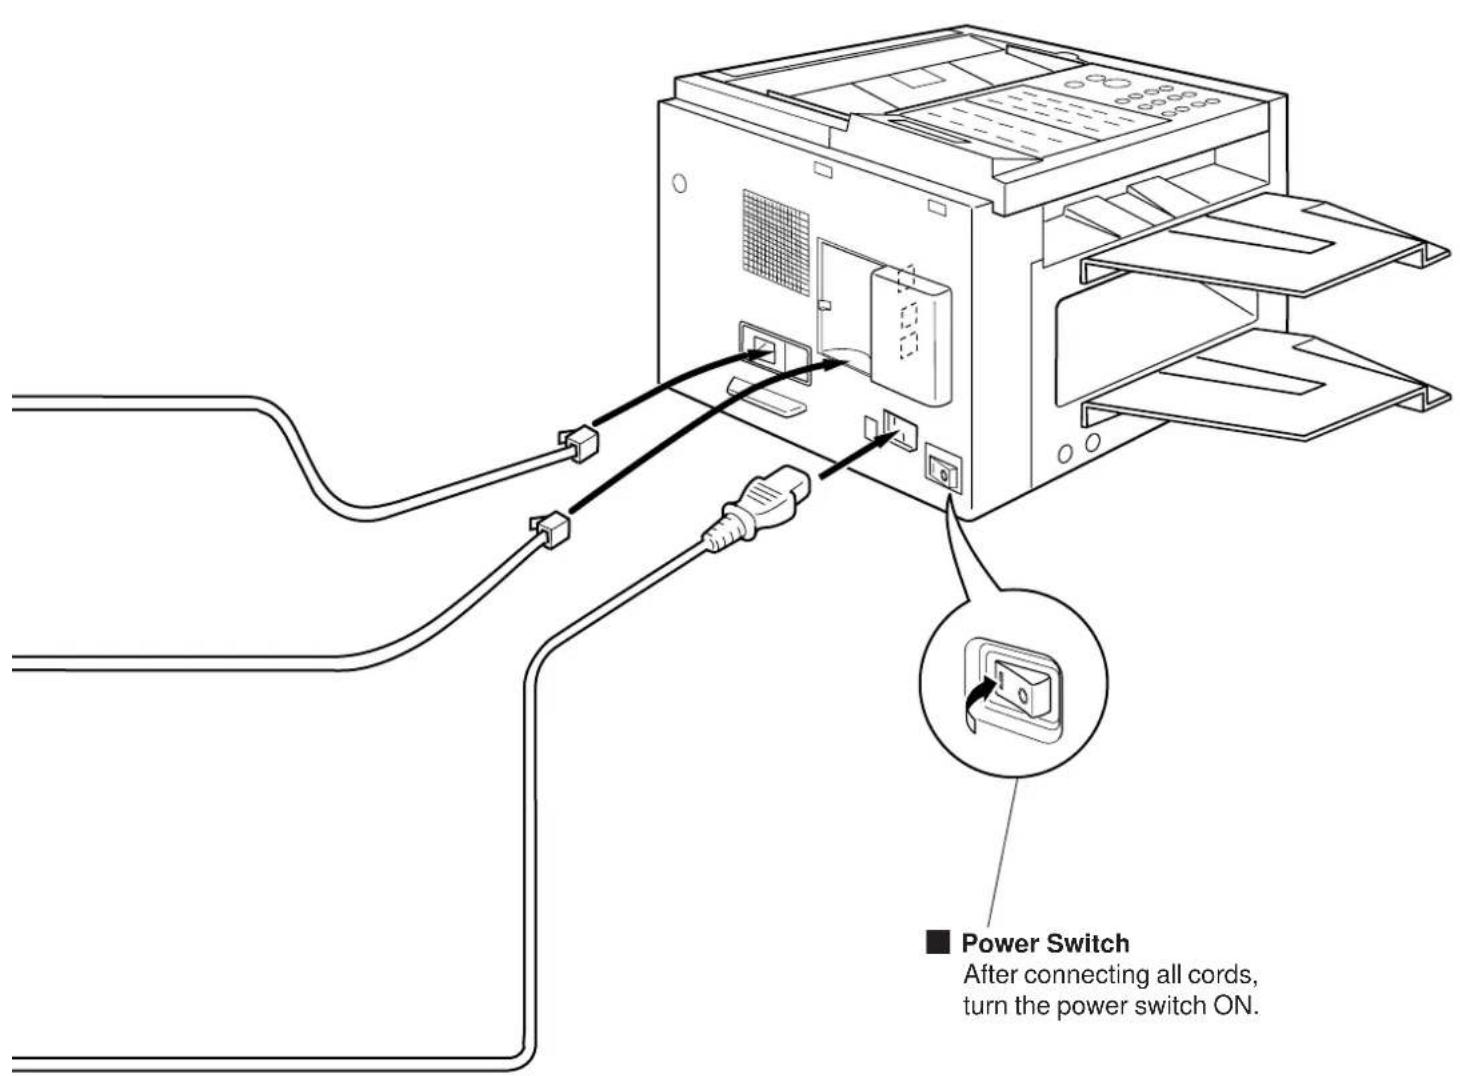
Power Cord
Plug one end of the power cord into an ordinary AC outlet and the other end into the receptacle on the back of the machine.
Warning : This apparatus must be properly earth grounded through an ordinary AC outlet.

Power Cord (Included)

Note: 1. Your machine uses little power and you should keep it ON at all times. If the power is turned OFF for too long, the contents of the memory may be lost.
- DX-1000 has 2 separate rechargeable batteries to preserve the memory contents in case of a short term power failure. One for the machine parameters (such as LOGO, ID Number, Auto-dialer Telephone Number, etc.) which can back up for 10 days and the other one for the document memory, which can back up for 1 hour when fully charged.
- The built-in rechargeable batteries require 48 hours to be fully charged in the machine.
Connecting the Telephone Line Cord and Power Cord

text_image
Power Switch After connecting all cords, turn the power switch ON.

Setting the Dialling Method (Tone or Pulse)
Your machine can operate with either of two dialling methods (Tone or Pulse), depending on the type of telephone line you are connected to. If you need to change the dialling method to Tone or Pulse, follow the procedure below.
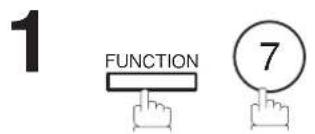
text_image
1 FUNCTION 7SET MODE (1-6) ENTER NO. OR V ∧
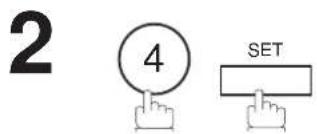
text_image
2 4 SETFAX PARAMETER (01-99) NO.=
text_image
3 0 6 SET06 DIALLING METHOD 2:TONE
text_image
4 1 or for Pulse.06 DIALLING METHOD 1:PULSE
06 DIALLING METHOD 2:TONE
text_image
5 SET STOPNote: For some countries, this feature is not available depending on the country's regulation. The display may not show this feature.
You can adjust the monitor and ringer volume on your machine. The built-in speaker enables you to hear the dial tone, dialling signals, and busy tone. The ringer sounds when your machine receives a call.
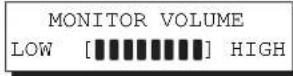
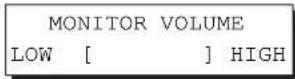
Setting the Monitor Volume
1

You will hear the dial tone through the speaker.
* MONITOR *
2
or
repeatedly to raise the volume.
repeatedly to lower the volume.
3

Setting the Ringer Volume
1
Standby
08-OCT-1999 15:00
00%
2
or
repeatedly to raise the volume.
repeatedly to lower the volume.

3


Note: You can also adjust the volume of the key touch tone and the volume of the buzzer in the Fax Parameter No. 10 (KEY/BUZZER VOLUME). (see page 60)

User Parameters
Your facsimile machine has several basic settings (User Parameters) to help you keep records of the documents you send or receive. For example, the built-in clock keeps the current date and time, and your LOGO and ID Number help to identify you when you send or receive documents.
If a power failure occurs, a built-in battery will back up this information for up to 10 days when it is fully charged.
Setting the Date and Time
At standby the display will show the date and time. Once the standby display is set, it will automatically be updated.
1

SET MODE (1-6) ENTER NO. OR V^
2

1:USER PARAMETERS? PRESS SET TO SELECT
3
DATE & TIME 1-01-1999 00:00
4
Enter the new date and time.
Ex: 08 Date : 8th
① 0 Month : October
①999 Year:1999
①500 Time : 3:00 PM
DATE & TIME 08-10-1999 15:00
If you make a mistake, use the < or > keys to move the cursor to the incorrect number and enter the new number over it.
5

Setting Your LOGO
When you send a document, your LOGO appears at the top of the copy printed out at the other station. The LOGO helps to identify you to someone who receives your document.
text_image
1 FUNCTION 7SET MODE (1-6) ENTER NO. OR V ∧
1: USER PARAMETERS? PRESS SET TO SELECT

text_image
3 SET repeatedly until display shows;
4 Enter your LOGO (max. 25 characters and digits) by using the Character keys (see page 10).
Ex: P A P8 CAPS n a s o n i c □ □ □ □

If you make a mistake, use < or > to move the cursor over the incorrect character, then overwrite it with a correct one.
If more than 19 characters are entered, the left side characters will scroll off the display. (See note 2)
text_image
5 SET STOP
Note: 1. Your Company Name or your name must be set as your LOGO because it is required by the Telephone Consumer Act of 1991. (For details, see FCC NOTICE at the end of this User's Guide)
- To switch between upper and lower character set, press P8 CAPS key. After the character is entered, the cursor remains on the character awaiting for the next entry or change of character set.
Setting Your Character ID
If the remote machine has Character ID capabilities, your Character ID will appear on the remote machine's display and the remote machine's Character ID will appear on your display when you are sending or receiving.
1
SET MODE (1-6) ENTER NO. OR V ∧
2

1: USER PARAMETERS? PRESS SET TO SELECT
3

repeatedly until display shows;
CHARACTER ID
4
Enter your Character ID (max. 16 characters and digits) by using the Character keys (see page 10).
Ex: HEADSPACEOFFICE □ □ □
CHARACTER ID HEAD OFFICE
If you make a mistake, use the
5


Note: 1. The special characters, Å, Ä, Ö, Ü, Æ, è and é cannot be used for Character ID.
- To switch between upper and lower character set, press P8 CAPS key. After the character is entered, the cursor remains on the character awaiting for the next entry or change of character set.
Setting Your ID Number (Fax Telephone Number)
If the remote machine does not have a Character ID but it has an ID Number, your ID Number will appear on the remote machine's display and their ID Number will appear on your display when sending or receiving.
We suggest you use your facsimile telephone number as your ID number. (max. 20 digits)
text_image
1 FUNCTION 7SET MODE (1-6) ENTER NO. OR VΛ
1: USER PARAMETERS? PRESS SET TO SELECT

text_image
3 SET repeatedly until display shows;ID NO.
4 Enter your ID (max. 20 digits) by using the key pad and SPACE.
Ex: 201SPACE 555 SPACE 1212
ID NO. 201 555 1212
If you make a mistake, press CLEAR to erase the number then reenter the correct number.

text_image
5 SET STOPNote: 1. You may use ⚙ to enter a "+" character at the beginning of the ID number to indicate the following digit(s) for your country code.
Ex : +1 201 555 1212 +1 for U.S.A. country code.
+81 3 111 2345 +81 for Japan country code.
2. For some countries, this feature is not available depending on the country's regulation. The display may not show this feature.
3. To enter a space, press P6 SPACE.
Setting the parameters for the LAN Interface
Depending on how the DX-1000 will be configured to communicate on the LAN, the appropriate parameters listed in the table below must be first stored. (See pages 12 to 16)
| Parameter Comments | ||
| 1 DATE & TIME Current Date and Time. (See page 36) | ||
| 2 LOGO Up to 25 characters & digits. (See page 37) | ||
| 3 CHARACTER ID Up to 16 characters & digits. (See page 38) | ||
| 4 ID NO. Your Fax Telephone Number. (up to 20 digits, See page 39) | ||
| 5 | MAC ADDRESS | Hardware Address hard-coded into the DX-1000. (If required, can be obtained from the 2nd page of the Fax Parameter List printout, by pressing [FUNCTION][6][4][SET]) |
| 6* IP ADDRESS IP Address assigned to your DX-1000. | ||
| 7* SUBNET MASK Subnet Mask assigned by the Network Administrator. | ||
| 8* SMTP SERVER NAME The name of the SMTP Mail Server. (Up to 60 characters) | ||
| 8* | SMTP SERVER IP ADDR | IP Address of the SMTP Mail Server. |
| 9* | DEF. ROUTER IP ADDR | IP Address of your Default Router. |
| 10* | EMAIL ADDRESS | The Email Address assigned to your DX-1000 for sending and receiving. (Up to 60 characters) |
| 11* | DNS SERVER IP ADDRESS | IP Address of the DNS Server. |
| 12* | POP SERVER NAME | Name of the POP Mail Server. |
| 12* | POP SERVER IP ADDR | IP Address of the POP Mail Server. |
| 13* | POP USER NAME | User Name assigned to your DX-1000. (Up to 40 characters) |
| 14* | POP PASSWORD | Password assigned to your DX-1000. (Up to 10 characters) |
| 15* | HOST NAME | The Host Name assigned to your DX-1000. (Up to 60 characters) |
| 16 | DEFAULT SUBJECT | The default information to be added to the Subject Line for all outgoing email (up to 40 characters). To manually input this information before transmission, change the Fax Parameter No. 92 (SUBJECT LINE ENTRY) to "2:Valid". |
| 17 | DEFAULT DOMAIN | When the outgoing email address is incomplete by SMTP standards, the Frequently Sent Domain specified here will be automatically added to the email address. This feature is also useful as a shortcut when manually entering email addresses to a frequently used Domain. (Up to 50 characters) |
| 18 | REMOTE PASSWORD | This is a security password that allows Remote Programming of Dialer via an Email. (Up to 10 characters) |
| 19 | RELAY XMT PASSWORD | A password that provides Network security for your Relay Station (used exclusively for G3 relay purposes). (Up to 10 characters) |
| 20 | MANAGER'S EMAIL ADDR | Department Manager's Email Address for notification of all Internet relayed transmissions for supervision and cost control purposes. (Up to 60 characters) |
| 21 | DOMAIN NAME (01) | Enter the Domain Name(s) that have been authorized to access your Internet Fax for Relayed XMT Request. (Up to 30 characters) |
| 22 | DOMAIN NAME (02) | |
| 23 | DOMAIN NAME (03) | |
| 24 | DOMAIN NAME (04) | |
| 25 | DOMAIN NAME (05) | |
| 26 | DOMAIN NAME (06) | |
| 27 | DOMAIN NAME (07) | |
| 28 | DOMAIN NAME (08) | |
| 29 | DOMAIN NAME (09) | |
| 30 | DOMAIN NAME (10) | |
* Contact your Network Administrator for this Information.
Setting the Internet Parameters

1

SET MODE (1-6) ENTER NO. OR V A
2
2

1:USER PARAMETERS? PRESS SET TO SELECT
3

repeatedly until display shows:
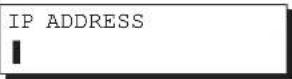
4
Enter the IP Address using the keypad. Press 28 for the period "."

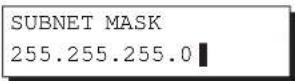
Enter the Subnet Mask using the keypad. Press 28 for the period "."

text_image
Ex: 255○28 · 255○28 · 255○ 28 · 0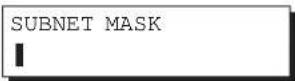
6

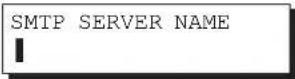
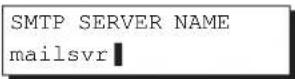
Enter the SMTP Server Name using the Character Key. (Up to 60 characters) (See Note 3).
Ex: mails □ □ v r

Setting the Internet Parameters
7
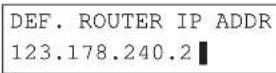
Enter the Default Router IP Address using the keypad.
Press ^28 for the period ".".

text_image
Ex: 1 2 3 ○ ○ 28 · 1 7 8 ○ 28 · 2 4 0 ○ 28 · 2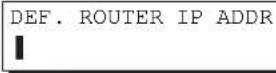
8
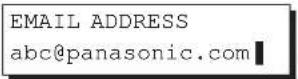
Enter the Email Address using Character keys (up to 60 characters).

text_image
Ex: a b c 27 @ p a n a s o n i c □ □ 28 c o m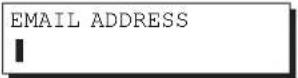
9
Enter DNS Server IP Address using the keypad. Press to enter the period "."

text_image
Ex: ①3③○28 · ①8⑤○28 · ②4⑦○ 28 · ④⑤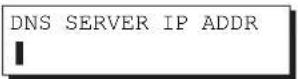
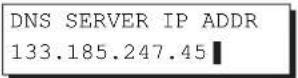
10
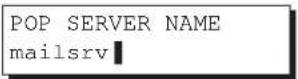
Enter the POP Server Name using the Character Key. (Up to 60 characters) (See Note 3)
Ex: mails □ □ v r
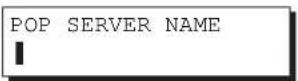
11
Enter the POP User Name (up to 40 characters).
Enter the POP Password (up to 10 characters).
Enter the Host Name (up to 60 characters).
Ex: f a x00 ○ ○
14
Enter the Default Subject (up to 40 characters).
Ex: in □ t e n e □ t SPACE m a i l □ SPACE abc □
15
Enter the Default Domain (up to 50 characters).
Ex: p a n a s o n i c □□□ 28 c o m
16
Enter the Remote Password (up to 10 characters).
Ex: a b c d e f □ □ g h i j
17
Enter your Relay XMT Password if applicable.
(up to 10 characters) (See page 44.)
To return to standby, press STOP.
POP PASSWORD
1
POP PASSWORD
efghik124
HOST NAME
1
HOST NAME
fax00
DEFAULT SUBJECT
1
DEFAULT SUBJECT
internet mail abc
DEFAULT DOMAIN
|
DEFAULT DOMAIN
panasonic.com
REMOTE PASSWORD
1
REMOTE PASSWORD
abcdefghijklmnopqrstuvwxyz
RELAY XMT PASSWORD
1

Note: 1. Use < or > to move the cursor over the incorrect character, then overwrite it with a correct one.
-
You can search for the User Parameters by pressing √ or ∧
-
If the DNS Server is not available, change the setting of the Fax Parameter No. 94 (DNS Server) to "Invalid", then enter the IP Address instead.

Setting the Internet Parameters
Setting the Internet Relay Station
To use the Internet Relayed Transmission, you must first store the following parameters into your machine.
text_image
1 FUNCTION 7SET MODE (1-6) ENTER NO. OR V ∧
1: USER PARAMETERS? PRESS SET TO SELECT

text_image
3 SET repeatedly until display shows:RELAY XMT PASSWORD
4 Enter the Relayed Transmission Password using the Character keys (up to 10 characters).
Ex: n ∈ □ w y o r k
RELAY XMT PASSWORD newyork
MANAGER'S EMAIL ADDR
Enter the Manager's Email Address using the Character keys (up to 60 characters).

text_image
Ex: m g r 27 @ p a n a s o n i c □ □ 28 . c o mMANAGER'S EMAIL ADDR mgr@panasonic.com
DOMAIN NAME (01)
DOMAIN NAME (02)
You can now set additional Domain Names by repeating the procedures from Steps 8 to 9, or return to standby by pressing STOP.

Note: 1. Use < or > to move the cursor over the incorrect character, then overwrite it with a correct one.
- You can search for the User Parameters by pressing √ or ∧
- Register up to ten Domain Names that are authorized to use your DX-1000 for Relayed XMT Requests. (If the Domain Name fields are left blank, anyone can access your machine for Relayed XMT)
Entering One-Touch/Abbreviated Dialling Numbers
One-Touch and Abbreviated Dialling are two fast ways of dialling full telephone numbers or email addresses. To use these dialling methods, you must first store the telephone number or email address using the following procedure.
To enter a One-Touch key, follow these steps below
1

SET MODE (1-6) ENTER NO. OR V A
3
2

To change the input mode (between "ENTER EMAIL ADDRESS" and "ENTER TEL. NO."), press INTERNET
or <01> ENTER TEL. NO.
5
Enter the email address using character keys (up to 60 characters).

text_image
Ex: a b c 27 @ p a n a s o n i c □ □ 28 : c o m<01> abc@panasonic.com
or
or
Enter the telephone number (up to 36 digits including pauses and spaces).
Ex: 9 PAUSE 5 5 5 SPACE 1 2 3 4
<01> 9-555 1234

Programming Email Address and Telephone Numbers
6
<01> ENTER NAME abc@panasonic.com
or
<01> ENTER NAME 9-555 1234
7
Enter the station name using character keys (up to 15 characters).
Ex: SALES SPACE DEPT
<01> SALES DEPT abc@panasonic.com
or
<01> SALES DEPT 9-555 1234
8
To record another number, repeat step 4 to 8.
To return to standby, press STOP.
To set an Abbreviated Dialling Number, follow these steps below
1

SET MODE (1-6) ENTER NO. OR V A
3
2

Ex: 022 (000 to 999, up to 160 stations)
To change the input mode (between "ENTER EMAIL ADDRESS" and "ENTER TEL. NO."), press INTERNET
[022] ENTER EMAIL ADDRESS
or
[022] ENTER TEL. NO.
5
Enter the email address using character keys (up to 60 characters).

text_image
Ex: a b c 27 @ p a n a s o n i c □ □ 28 c o m[022] abc@panasonic.com
or
or
Enter the telephone number
(up to 36 digits including pauses and spaces).
Ex: 9 PAUSE 5 5 5 SPACE 2 3 4 5
[022] 9-555 2345

Programming Email Address and Telephone Numbers
6
[022] ENTER NAME abc@panasonic.com
or
[022] ENTER NAME 9-555 2345
7
Enter the station name using character keys (up to 15 characters).
Ex: A C C O □ U N T I N G □
[022] ACCOUNTING abc@panasonic.com
or
[022] ACCOUNTING 9-555 2345
8
ABBR. [■] ENTER ABBR. NO.
To record another number, repeat steps 4 to 8. To return to standby, press STOP.

Note: 1. If you require a special access number to get an outside telephone line, enter it first and then press
PAUSE.
A hyphen "-" is displayed for pause.
-
Use SPACE to enter a space between the numbers to make it easier to read.
-
The built-in battery can back up One-Touch/ABBR. Numbers for up to 10 days when a power failure occurs. However, if the One-Touch/ABBR. Numbers are lost, they can be Remotely restored using the email backup copy that you have previously saved. (See page 53)
-
If you are using Pulse dialling and you wish to change to Tone dialling in the middle of dialling, press TONE (represented by a"/"). The dialling method will be changed from Pulse to Tone after dialling the digit "/".
Ex : 9 PAUSE TONE 5551234
Changing or Erasing One-Touch/Abbreviated Dialling Numbers
If you have to change or erase any of the One-Touch/Abbreviated dialling numbers, follow the steps below.
To change the settings of a One-Touch/ABBR. dialling number
text_image
1 FUNCTION 7 2 SET1:ONE-TOUCH
2:ABBR. NO.
2 Select 1 for One-Touch Dialling number. Select 2 for ABBR. Dialling Number.
Ex:①
3 Enter the station you wish to change.
Ex: 01
<01> SALES DEPT abc@panasonic.com
or
<01> SALES DEPT 9-555 1234
<01> SALES DEPT ENTER EMAIL ADDRESS
or
<01> SALES DEPT ENTER TEL. NO.
5 To change the input mode (between "ENTER EMAIL ADDRESS" and "ENTER TEL. NO."), press INTERNET.
6 Enter a new email address. (See Note 1 and 2.)

text_image
Ex: x y z 27 @ p a n a s o n i c □ □ 28 c o m<01> SALES DEPT xyz@panasonic.com
or
or
Enter a new telephone number. (See Note 1 and 2.)
Ex: 9 PAUSE 5 5 5 SPACE 3 4 5 6
<01> SALES DEPT 9-555 3456

Programming Email Address and Telephone Numbers
7
<01> SALES DEPT xyz@panasonic.com
8

<01> ENTER NAME xyz@panasonic.com
or <01> ENTER NAME 9-555 3456
then enter a new station name. (See Note 1 and 3.)
Ex: P A N A F A X □ □
<01> PANAFAX xyz@panasonic.com
or <01> PANAFAX 9-555 3456
9
Note: 1. Use the < or > keys to move the cursor to an incorrect number and then enter the correct number over it.
-
Use COPY to insert a space between the numbers you set. If the telephone number is 36 digits in length, COPY cannot be used to insert a space.
-
COPY cannot be used to insert a space in setting of the station name.
-
If the One-Touch/Abbreviated dialling number has been used for a communication reservation, the settings cannot be changed or erased until the communication has finished.
-
If you press INTERNET in step 5, a previously entered telephone number or email address is erased.
To erase the settings of One-Touch/ABBR. Dialling number
1


Select 1 for One-Touch Dialling number. Select 2 for ABBR. Dialling Number.
Ex: 1
Enter the station you wish to change.
Ex:

<01> SALES DEPT abc@panasonic.com
or
<01> SALES DEPT 9-555 1234
4

<01> SALES DEPT ENTER EMAIL ADDRESS
or
<01> SALES DEPT ENTER TEL. NO.
5

Note: If the One-Touch/Abbreviated dialling number has been used for a communication reservation, the settings cannot be changed or erased until the communication has finished.

Programming Email Address and Telephone Numbers
Printing Out a Directory Sheet
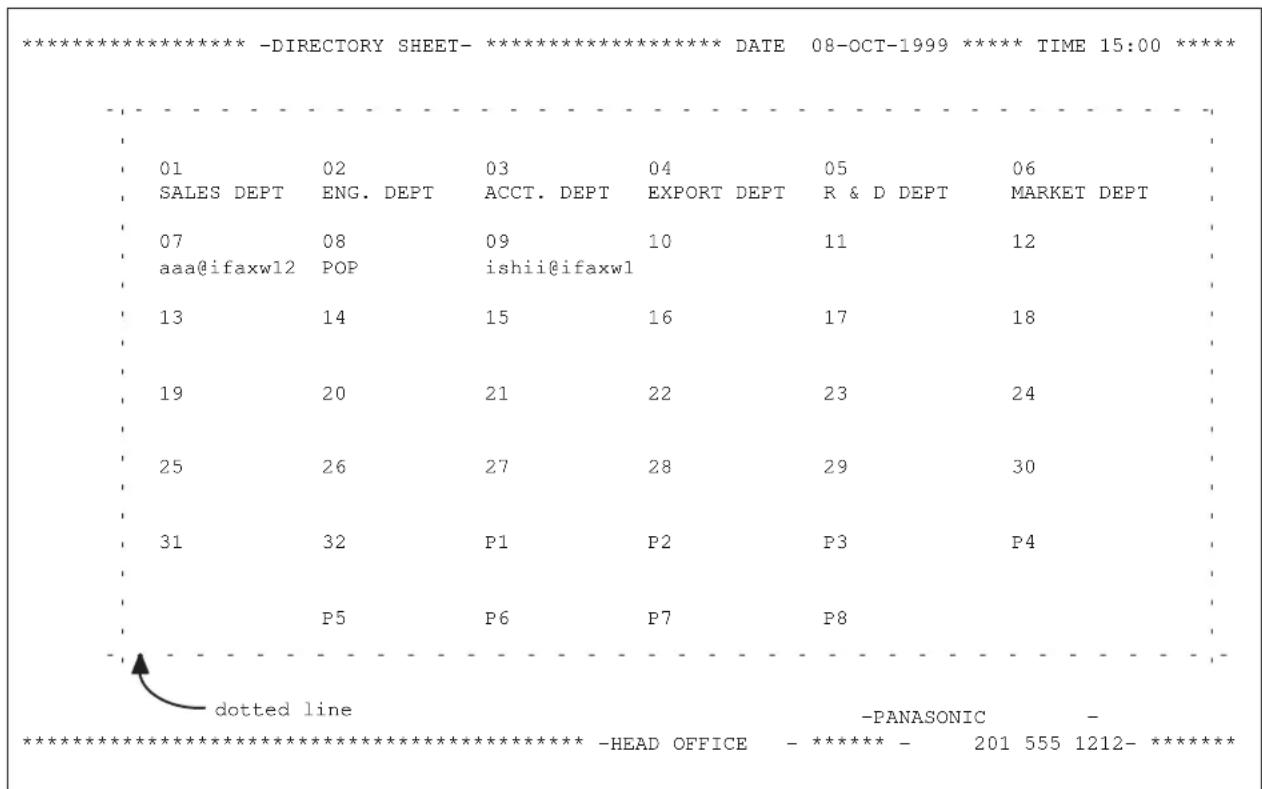
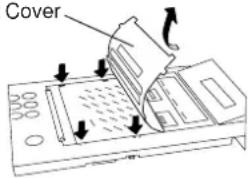
After programming one-touch dialling numbers, you can print out the directory sheet which includes the first 12 characters of each station name. Cut along the dotted line and place it over the One-Touch keys under the Directory Sheet Cover. To print out a directory sheet, follow the steps below.
text_image
1 FUNCTION 6PRINT OUT (1-7) ENTER NO. OR V ∧
text_image
2 7 SET* PRINTING * DIRECTORY SHEET
Your machine prints out the directory sheet.
text_image
********** -DIRECTORY SHEET- ********** DATE 08-OCT-1999 ***** TIME 15:00 ****** 01 02 03 04 05 06 SALES DEPT ENG. DEPT ACCT. DEPT EXPORT DEPT R & D DEPT MARKET DEPT 07 08 09 10 11 12 aaa@ifaxw12 POP ishii@ifaxw1 13 14 15 16 17 18 19 20 21 22 23 24 25 26 27 28 29 30 31 32 P1 P2 P3 P4 P5 P6 P7 P8 dotted line -PANASONIC - ********** -HEAD OFFICE - ***** - 201 555 1212- *******Directory Sheet Cover
text_image
Cover
Note: When a station name is not programmed for an email auto dialer, the email address is printed on the Directory Sheet. For stations with telephone numbers, no information is printed if the station's name is not programmed.
Using a PC to Update the Auto Dialer Remotely
This feature provides a convenient and an easy way to Update, Backup or Restore the One-Touch and Abbreviated dialling numbers right from your PC by sending a text email message to the DX-1000.
Note: To activate this feature, change the Fax Parameter No. 91 (REMOTE DIALER UPDATE) to "2:Valid". (See page 64.
The DX-1000 interprets the command that you enter in the "Subject" line of your email message and performs one of the following functions, it Retrieves or Stores data into the Auto Dialer (One-Touch and/or ABBR. No.).
The two types of commands that can be entered in the "Subject" line of your email:
1) To Store data : #set abbr(password)# : where the password is the Remote Password programmed in the DX-1000's User Parameters (i.e. 123456789).
2) To Retrieve data: #get abbr(123456789)#
You can enter One-Touch / ABBR. No. (email addresses or dialling numbers) for the first time if the auto dialer is empty. However, if the auto dialer contains preprogrammed email addresses or dialling numbers, you cannot change, add to, or overwrite the preprogrammed data. Any attempt to change or overwrite will be ignored by the DX-1000.
Preprogrammed One-Touch / ABBR. No. must be erased first with a "delete" command, which clears the entire auto dialer, then new data is allowed to be entered. However, before deleting the auto dialer, you should retrieve the data from the auto dialer first for backup purposes. (See example on page 56)

Programming Auto Dialer Remotely via Email
To Program One-Touch / ABBR. No. for the First Time
Create a script in the message body of a plain text email and send it to the DX-1000's email address. The "Subject" line of the email must be as follows:
set abbr(password)#: where the password is the Remote Password programmed in the DX-1000's User Parameters.
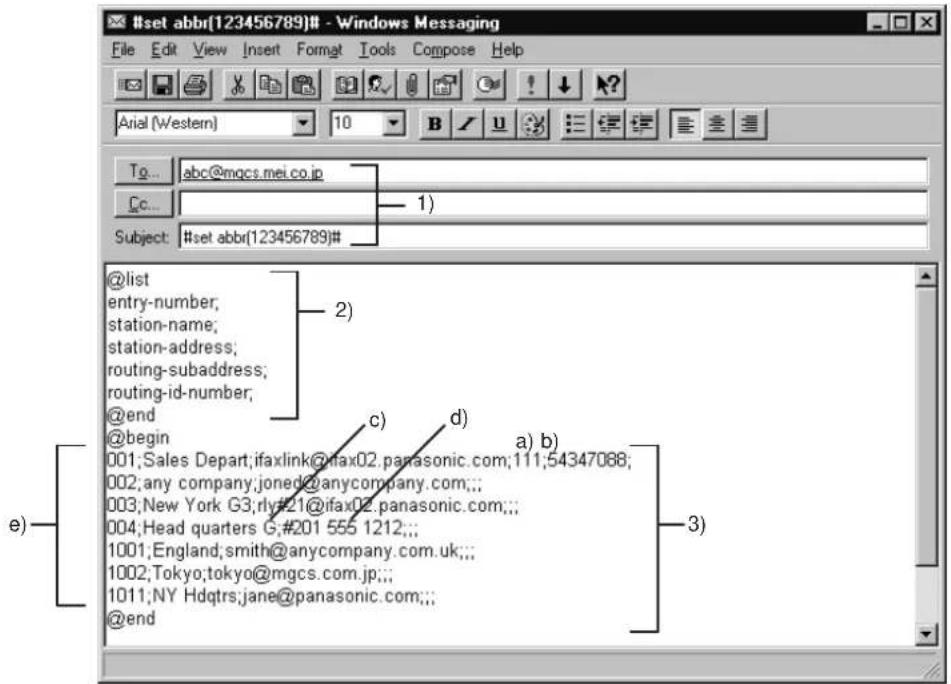
The script sample to program One-Touch / ABBR. No. for the first time is shown in the illustration on the following page.
First Time Remote Programming of One-Touch / ABBR. No. Sample
text_image
#set abbr(123456789)# - Windows Messaging File Edit View Insert Format Tools Compose Help Arial (Western) 10 B U To: abc@mgcs.mei.co.jp Cc: 1) Subject: #set abbr(123456789)# @list entry-number; station-name; station-address; routing-subaddress; routing-id-number; @end @begin 001;Sales Depart;ifaxlink@ifax02.panasonic.com;111;54347088; 002;any company;joned@anycompany.com.; 003;New York G3;rly#21@ifax02.panasonic.com.; 004;Head quarters G,#201 555 1212.; 1001;England;smith@anycompany.com.uk.; 1002;Tokyo;tokyo@mgcs.com.jp.; 1011;NY Hdqtrs;jane@panasonic.com.; @end 2) c) d) a) b) 3)1) To : The DX-1000's email address.
From : Your email address, for retrieving One-Touch / ABBR. No. data and error message notification
(It may be programmed with the configuration tool of your email program.)
Subject : To Store data: #set abbr(password)# / To Retrieve data: #get abbr(password)#
2) @list to @end block : Defines the data to be set into One-Touch / ABBR. No. in section 3) between @begin to @end block.
entry-number: One-Touch or ABBR. No. to be programmed
station-name: name of the station being programmed
station-address: email address or telephone number of the station being programmed
routing-subaddress: sub-address to be used for routing
routing-id-number: TSI to be used for routing
3) @begin to @end block : Defines the data to be programmed between @begin to @end block, described in 2) above.
Separate each data field with a semicolon (;). (If the remaining fields are to remain blank, insert a semicolon (;) for each blank field) The data string for each station should be defined within a single line.
a) Sub-address for routing (20-digit maximum)
b) TSI for routing (20-digit maximum)
c) Station name (15 alpha-numeric characters maximum)
d) Telephone number is entered after a hash sign (#)
e) 000 to 999: indicates ABBR. No.s 000 to 999 (160 numbers maximum)
1001 to 1032: indicates One-Touch numbers from 01 to 32
1033 to 1040: indicates Program keys (P1 to P8 programmed as One-Touch dialling numbers)

Note: 1. If a POP server is programmed into the P1 to P8 program keys, the data programmed for this key cannot be deleted, even when the delete command is specified.
-
The email address and the telephone number cannot be programmed via email when:
-
An Abbreviated Dialling number is programmed for fax forward feature.
- A One-Touch Dialling number has been used for communication reservation.
- Received documents are stored in the image data memory of the machine.
-
While the machine is communicating or printing.
-
When the email address and telephone number are programmed via email, a program result email is sent back.
-
Some email applications automatically insert a line feed in the middle of a line when a number of characters in a line exceed a specific number. Turn Off the automatic line feed, or define a number of characters per line to prevent a line feed, or the data will be ignored.

Programming Auto Dialer Remotely via Email
To Retrieve One-Touch / ABBR. No. Data for Backup
To retrieve the existing auto dialer data, send a plain text email to the DX-1000's email address with the following command in the "Subject" line:
get abbr(password)# : where the password is the Remote Password programmed in the DX-1000's User Parameters (i.e. 123456789)
Make sure that the CC, Bcc lines and the body of the email message is Blank.
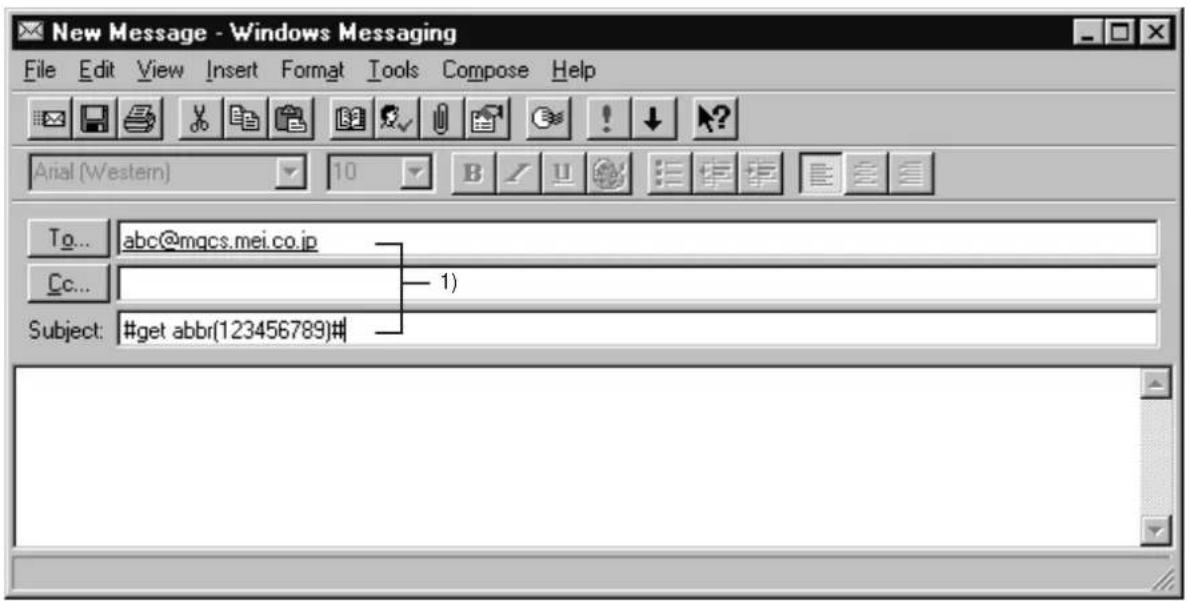
Retrieving One-Touch / ABBR. No. Data Sample
text_image
New Message - Windows Messaging File Edit View Insert Format Tools Compose Help Anal (Western) 10 B I U To... abc@mqcs.mei.co.jp Cc... 1) Subject: #get abbr(123456789)#To : The DX-1000's email address.
From : Your email address, for retrieving One-Touch / ABBR. No. data and error message notification (It may be programmed with the configuration tool of your email program.)
Subject : To Retrieve data: #get abbr(password)#
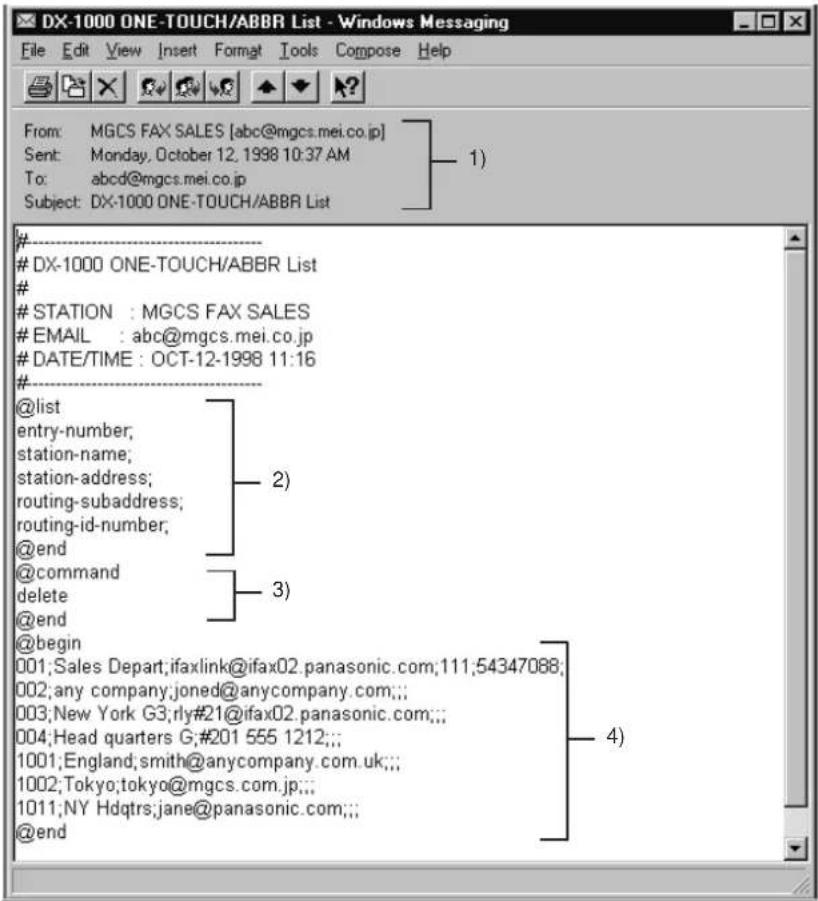
After receiving the above email message, the DX-1000 sends back an email to the address specified in the "From:" line with the auto dialer information in the body of the email.
DX-1000 Auto Dialer Email Sample
text_image
DX-1000 ONE-TOUCH/ABBR List - Windows Messaging File Edit View Insert Format Tools Compose Help From: MGCS FAX SALES [abc@mgcs.mei.co.jp] Sent: Monday, October 12, 1998 10:37 AM To: abcd@mgcs.mei.co.jp Subject: DX-1000 ONE-TOUCH/ABBR List #DX-1000 ONE-TOUCH/ABBR List
#STATION : MGCS FAX SALES
EMAIL : abc@mgcs.mei.co.jp
DATE/TIME : OCT-12-1998 11:16
# @list entry-number; station-name; station-address; routing-subaddress; routing-id-number; @end @command delete @end @begin 001;Sales Depart;ifaxlink@ifax02.panasonic.com;111;54347088; 002;any company;joned@anycompany.com.; 003;New York G3;rly#21@ifax02.panasonic.com.; 004;Head quarters G;#201 555 1212.; 1001;England;smith@anycompany.com.uk.; 1002;Tokyo,tokyo@mgcs.com.jp.; 1011;NY Hdqtrs;jane@panasonic.com.; @end 2) 3) 4)1) To : The DX-1000's email address.
From : Your email address, for retrieving One-Touch / ABBR. No. data and error messages notification (It may be programmed with the configuration tool of your email program.)
Subject : To Store data: #set abbr(password)# / To Retrieve data: #get abbr(password)#
2) @list to @end block : Defines the data to be set into One-Touch / ABBR. No. in section 3) between @begin to @end block.
entry-number : One-Touch or ABBR. No. to be programmed
station-name : name of the station being programmed
station-address : email address or telephone number of the station being programmed
routing-subaddress : sub-address to be used for routing
routing-id-number : TSI to be used for routing
3) These command lines, delete the existing programmed data before reprogramming with new data between @begin to @end in section 4).
4) @begin to @end block :Defines the data to be programmed between @begin to @end block, described in 2) above.
To Edit the Retrieved One-Touch / ABBR. No. Data
Before changing, adding or overwriting, the entire auto dialer has to be erased with a "Delete" command and then restored with the retrieved data that has been updated.
After receiving the DX-1000 email with the auto dialer data, store the email file as text (.txt) on your PC for backup purposes.
To change or update the auto dialer, follow the steps below:
1) Create a New Email Message, fill out the "To" and "From" Address line and the Subject line information for section 1) below:
To : The DX-1000's email address.
From : Your email address, for retrieving One-Touch / ABBR. No. data and error message notification Subject : To Store data: #set abbr(password)#
2) Open the backup, auto dialer text file. Copy the body text and paste it on the body of the newly created email message.
3) Delete any headers that may be present in the body of the email, as unsupported data will be rejected. The information following the "#" sign is ignored by the DX-1000.
4) Insert the "@command", "delete" and "@end" commands in section 3) of the email body.
5) Edit and/or add additional One-Touch / ABBR No. stations.
6) When finished, use the "File/Save as.." command and save the updated file with ".txt" extension as a backup.
7) Send the email message to the DX-1000 to update the auto dialer.
DX-1000 Auto Dialer Email Sample
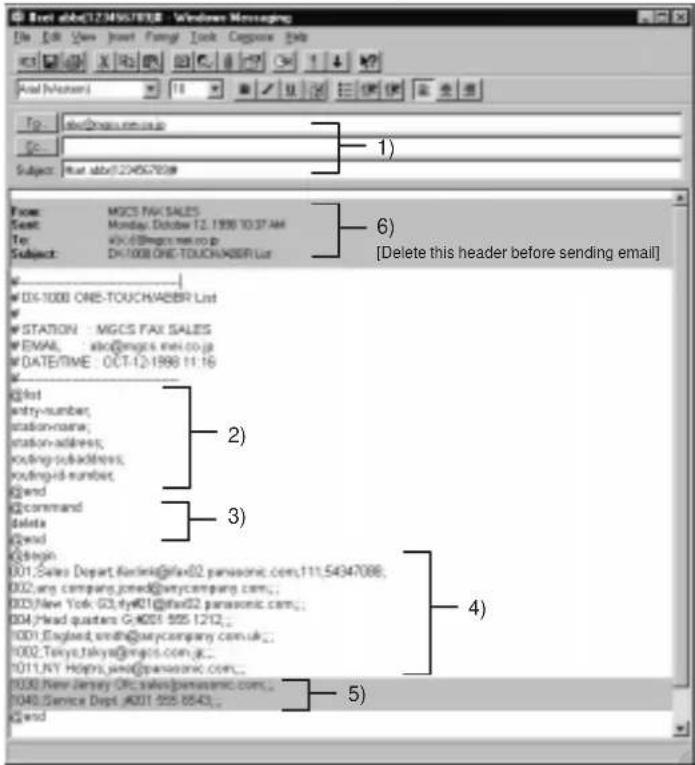
text_image
File Edit View Insert Format Tools Corporate Help Arial (Notes) 18 To: abx@nau.com.jp Subject: Mut abx(224567039) 1) 6) [Delete this header before sending email] Form: MGCS FAX SALES Set: Monday, October 12, 1998 10:37 AM To: wix.d@mgcs.net.co.jp Subject: DH-1008 ONE-TOUCH/ADBR List w w DS-1008 ONE-TOUCH/ADBR List w w STATION : MGCS FAX SALES w EMAIL: atc@mgcs.net.co.jp w DATE/TIME : OCT-12-1998 11:16 w @first entry-number; station-name; station-address; routing-out-address; routing-id-number; @and @command delete @good @begin 001,Sales Depart,flank@faxd2.panasonic.com,111.54347088; 002,wq company.jone&@wqcompany.com.; 003/new York GS,flyk01@faxd2.panasonic.com.; 004 head quarters G,K001 995 1212.; 1001,England,Smith@wqcompany.com.uk.; 1002,Takyo,takya@mgcs.com.jp.; 1011,NY.Hopins,jewd@panasonic.com.; 1030.New Jersey OFC,sales@panasonic.com.; 1040,Service Dept A001 995 8543.; @and 2) 3) 4) 5)1) To: The DX-1000's email address.
From : Your email address, for retrieving One-Touch / ABBR. No. data and error messages notification (It may be programmed with the configuration tool of your email program.)
Subject: To Store data: #set abbr(password)
/ To Retrieve data: #get
abbr(password)#
2) @list to @end block:
Defines the data to be set into One-Touch / ABBR. No. in section 4) between @begin to @end block. station-name: name of the station being programmed station-address: email address or telephone number of the station being programmed routing-subaddress: sub-address to be used for routing outing-id-number: TSI to be used for routing
3) These command lines, delete the existing programmed data before reprogramming with new data between @begin to @end in section 4).
4) @begin to @end block: Defines the data to be programmed between @begin to @end block, described in 2) above.
5) These 2 One-Touch stations were added to the list.
6) This header must be deleted before the email is sent to the DX-1000 for reprogramming of One-Touch / ABBR. No.
Your facsimile machine has a variety of adjustable Fax Parameters. These parameters, listed in the Parameter Table, are preset for you and do not need to be changed. If you do want to make a change, read the table carefully. Some parameters, such as the Resolution, Contrast, and Verification Stamp parameters, can be temporarily changed by a simple key operation just before a transmission is made. When the transmission ends, however, these parameters return to their preset values (Home position). Other parameters can only be changed by the procedure described below.
Setting the Fax Parameters
1

SET MODE (1-6) ENTER NO. OR V ∧
2
FAX PARAMETER (01-99) NO.=
3
Enter Fax Parameter number from the Parameter Table (see pages 60 to 64).
Ex: 01 for CONTRAST
FAX PARAMETER(01-99) NO.=01
4
01 CONTRAST 1:NORMAL
5
Enter the new setting value.
Ex: ② for LIGHTER
01 CONTRAST 2:LIGHTER
6
02 RESOLUTION 1: STANDARD
To set another parameter, press CLEAR to return to step
3, or, to return to standby, press STOP.

Note: 1. To scroll the Fax Parameters in Step 4, press the ▼ or keys.
-
To print out a Fax Parameter List, see page 156.
-
The built-in battery when fully charged can back up the Fax Parameter settings for up to 10 days when a power failure occurs.
Fax Parameter Table
| No. | Parameter | Setting Number | Setting Comments |
| 01 | CONTRAST 1 Normal Setting | the home position of the CONTRAST key. | |
| 2 Lighter | |||
| 3 Darker | |||
| 02 | RESOLUTION 1 Standard Setting | the home position of the RESOLUTION key. | |
| 2 Fine | |||
| 3 S-Fine | |||
| 04 | STAMP | 1 | Off |
| 2 | On | ||
| 05 | MEMORY | 1 | Off |
| 2 | On | ||
| 06 | DIALLING METHOD | 1 | Pulse |
| 2 | Tone | ||
| 07 | HEADER PRINT | 1 | Inside |
| 2 | Outside | ||
| 3 | No print | ||
| 08 | HEADER FORMAT | 1 | Logo, ID No. |
| 2 From | To | ||
| 09 | RCV'D TIME PRINT | 1 | Invalid |
| 2 | Valid | ||
| 10 | KEY/BUZZER VOLUME | 1 | Off |
| 2 | Soft | ||
| 3 | Loud | ||
| 12 | COMM. JOURNAL | 1 | Off |
| 2 Always | |||
| 3 | Inc. only | ||
Continued on the next page.
| No. | Parameter | Setting Number | Setting Comments |
| 13 | AUTO JOURNAL PRINT | 1 | InvalidSelecting whether the machine prints the journal automatically after every 32 transactions. |
| 2 Valid | |||
| 14 FILE ACCEPTANCE REPORT | 1 Invalid Selecting whether the machine prints the file acceptance journal.If you set this parameter to valid, the journal will be printed out after entering any communications using memory. | ||
| 2 Valid | |||
| 17 | RECEIVE MODE | 1 | ManualSetting the reception mode to either automatic or manual. |
| 2 Auto | |||
| 22 | SUBSTITUTE RCV | 1 | InvalidSelecting whether the machine receives to memory when recording paper runs out, toner runs out or recording paper is jammed. |
| 2 Valid | |||
| 24 PRINT REDUCTION | 1 Fixed | Selecting print reduction mode.Fixed: Reduce received document according to the setting of Parameter No. 25.Auto: Reduce received document according to the length of received documents. | |
| 2 Auto | |||
| 25 | REDUCTION RATIO | 70 | 70%Selecting fixed print reduction ratio from 70% to 100%. This parameter functions only when fixed print reduction is selected on fax parameter no. 24. |
| --- | --- | ||
| 100 | 100% | ||
| 26 | POLLING PASSWORD | (----)Setting a 4-digit password for secured polling. | |
| 28 | STAMP AT MEM. XMT | 1 | InvalidSelecting whether or not the machine stamps the original documents when storing the documents into memory.(depending on the Stamp setting on the Control Panel.) |
| 2 Valid | |||
| 30 | DRD SERVICE | 1 Invalid | Selecting whether or not the machine is available "DRD Service". If this parameter is set to "Valid", your machine detects the specified ring pattern only to receive a document automatically. |
| 2 Valid | |||
| 32 | COPY REDUCTION | 1 | InvalidSelecting whether or not the machine performs copy reduction in accordance with the setting of Parameter No. 24 and 25. |
| 2 Valid | |||
| 33 | XMT REDUCTION | 1 | InvalidSelecting whether the machine performs reduction when the transmitting document is wider than the recording paper used at the receiving machine. |
| 2 Valid | |||
| 34 | POWER SAVE TIMER | 000 – 120 min. | |
Continued on the next page.
| No. | Parameter | Setting Number | Setting Comments |
| 40 | LAN RELAY XMT REQUEST | 1 Invalid | Selecting whether the machine performs LAN Relay XMT Request. |
| 2 Valid | |||
| 48 | TELEPHONE LINE 1 PSTN Selecting the type of line connected. | ||
| 2 PBX | |||
| 49 | PSTN ACCESS CODE | 0--- | |
| 50 | FLASH KEY | 1 | Earth |
| 2 Flash | |||
| 52 | DIAGNOSTIC PASSWORD | (----) | |
| 53 | SUB-ADDRESS PASSWORD | (----) | |
| 54 | FAX FORWARD | 1 | Invalid |
| 2 Valid | |||
| 58 | LANGUAGE | 1 | French |
| 2 | German | ||
| 3 English | |||
| 59 | LAN XMT REDUCTION | 1 | Invalid |
| 2 Valid | |||
| 60 | RELAY XMT (a.k.a. LAN RELAY STATION on UF-770i) | 1 Invalid | Selecting whether the machine accepts and performs G3 relayed transmission. (Relay Station Functions) |
| 2 Valid | |||
| 61 | RELAY XMT REPORT | 1 | Off |
| 2 | Always | ||
| 3 | Inc. only | ||
| 63 | EMAIL CHARACTER SET | 1 | Japanese |
| 2 English | |||
| 65 | PRINT COLLATION | 1 | Invalid |
| 2 Valid | |||
Continued on the next page.
| No. | Parameter | Setting Number | Setting Comments |
| 77 | SENDER SELECTION | 1 | InvalidSelecting a pre-programmed sender's name and email address before each transmission. (See page 111) |
| 2 Valid | |||
| 78 | POP TIMER | -- | 0 to 60 min.Setting the time interval for the machine to check for email on the POP Server.(0 = Does not check the POP Server for email.) |
| 3 3 min. | |||
| 79 | AUTO POP RCV | 1 | InvalidSelecting whether the machine automatically downloads an email from the POP Server. |
| 2 Valid | |||
| 80 | DELETE POP RCV EMAIL | 1 Invalid Selecting whether the email will be deleted automatically after retrieval from the POP Server. | |
| 2 Valid | |||
| 81 | DELETE POP ERR EMAIL | 1 Invalid Selecting whether to delete the email that includes an incompatible file attachment from the POP Server. | |
| 2 Valid | |||
| 82 | IFAX RETURN RECEIPT | 1 | InvalidSelecting whether to send a return receipt when receiving from another Panafax Internet Fax. |
| 2 Valid | |||
| 83 | EMAIL HEADER FORMAT | 1 | AllSelecting the header information to print when an email is received. (Normally used for Troubleshooting. It shows the path of the email transmission before arriving at the DX-1000.) |
| 2 Subject/From/To | |||
| 3 Off | |||
| 85 | SUB-ADDRESS ROUTING | 1 Invalid Selecting whether to automatically route a received fax or email using ITU-T sub-address. | |
| 2 Valid | |||
| 86 | TSI ROUTING | 1 | InvalidSelecting whether to route a received fax to a telephone number or an email address preprogrammed in One-Touch, ABBR. No. or Program Key using the originating fax's Numeric ID (TSIframe information). |
| 2 Valid | |||
| 87 | ROUTING HEADER FORMAT | 1 | OriginatorSelecting the type of email header to be included in the "From" field of each routed faxes.Originator: The originating fax machine's TSI will appear in the "From" field of the routed email.Relay Station: The routing station's email address will appear in the "From" field of the routed email. |
| 2 Relay Station | |||
| 88 PRINT ROUTED DOCUMENT | 1 | Inc. onlySelecting whether a received fax to be routed is always printed or only when the routing operation fails. | |
| 2 Always | |||
| 89 | PRINT FORWARDED DOCUMENT | 1 | Inc. onlySelecting whether a memory received fax or email to be forwarded is always printed or only when forwarding is incomplete. |
| 2 Always | |||
Continued on the next page.
| No. | Parameter | Setting Number | Setting Comments |
| 90 | TRANSACTION JOURNAL | 1 Invalid | Selecting whether the machine sends a transaction journal to the pre-programmed email address. |
| 2 Valid | |||
| 91 | REMOTE DIALER UPDATE | 1 Invalid | Selecting whether to accept the One-Touch and ABBR. No. programming, from a.P.C via an email. |
| 2 Valid | |||
| 92 | SUBJECT LINE ENTRY | 1 | Invalid |
| 2 Valid | |||
| 93 | DEFAULT DOMAIN | 1 | Invalid |
| 2 Valid | |||
| 94 | DNS SERVER | 1 | Invalid |
| 2 Valid | |||
| 95 | TIFF VIEWER URL | 1 | None |
| 2 | English | ||
| 3 | English +Japanese | ||
| 96 | ROUTING HEADER | 1 | Invalid |
| 2 Valid |

Note: 1. The contents of Fax Parameter may differ depending on the each country's regulation or specification. 2. The standard settings are printed on the Fax Parameter List. To print out Fax Parameter List, see page 156.
Documents You Can Send
In general, your machine will send any document printed on A4 size paper.
Document Size
Maximum Size Minimum Size
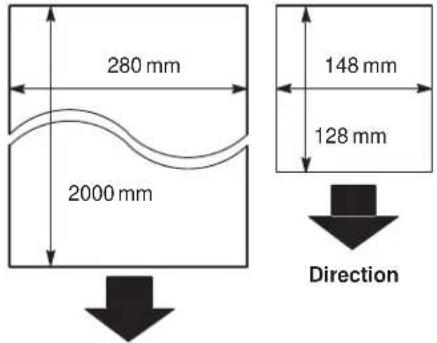
text_image
280 mm 2000 mm 148 mm 128 mm DirectionDirection
Document Thickness
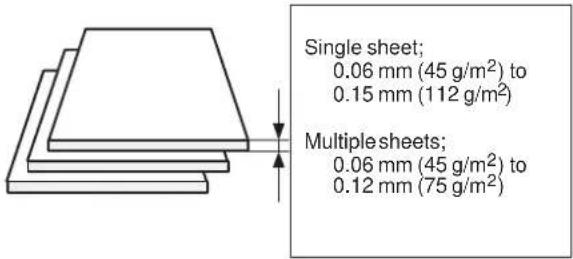
text_image
Single sheet; 0.06 mm (45 g/m²) to 0.15 mm (112 g/m²) Multiple sheets; 0.06 mm (45 g/m²) to 0.12 mm (75 g/m²)Documents You Cannot Send
You must never try to send documents that are

natural_image
Simple line drawing of a tilted rectangular shape with a small droplet hanging from its side (no text or symbols)Wet
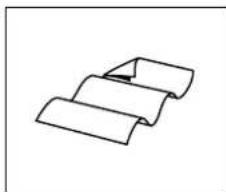
natural_image
Simple line drawing of three overlapping paper sheets (no text or symbols)Too thin (e.g., onionskin, airmail paper, pages from some magazines, etc.)
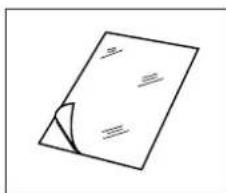
natural_image
Simple line drawing of a folded paper with a triangular edge (no text or symbols)Coated (e.g., glossy paper, etc.)
text_image
ABCCovered with wet ink or paste
natural_image
Simple line drawing of a rolled-up document or scroll (no text or symbols)Wrinkled, curled or folded
text_image
Hand-drawn sketch of a document with Chinese text, showing a page with annotations and a folded paper.Chemically processed (e.g., pressure-sensitive paper, carbon-coated paper, etc.) or made of cloth or metal
To transmit these kinds of documents, make a photocopy first and then transmit the copy instead.
How to Load Documents
- Be sure the document(s) is free of staples, paper clips and is not torn, greasy or covered by foreign objects.
- Place the document(s) Face Down on the ADF until the leading edge placed into the machine stops. If you are sending multiple pages, make sure that the bottom sheet enters first. You can also stack up to 50 pages on the ADF at one time. If you have more than 50 pages, wait until transmission or storing to memory starts, as pages feed through, place any remaining pages on top of the last page in the feeder.
- Adjust the Document Guides to center the document on the ADF.
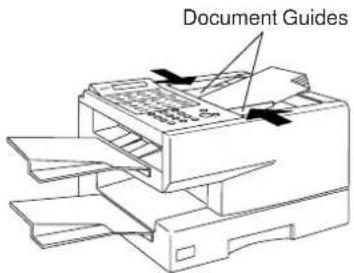
text_image
Document GuidesCORRECT INCORRECT
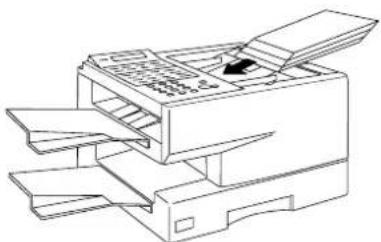
natural_image
Line drawing of a printer with paper sheets and a paper feeding into the cover (no text or symbols)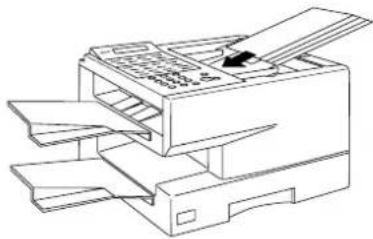
natural_image
Line drawing of a printer with paper sheets and a paper feeding into the cover (no text or symbols)When you set a document on the ADF, the display message will change from date and time (standby) to the following message. You can now change basic transmission settings, or begin the dialling procedure.
ENTER STATION(S) THEN PRESS START 00%

Note: 1. Transmitting documents longer than 356 mm requires user's assistance.
- When transmitting documents longer than A4 size, please extend the sub-tray as shown below.
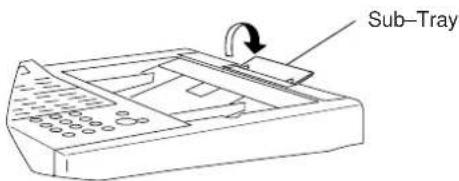
text_image
Sub-TrayYou can temporarily change the following transmission settings either before or after you place the document on the ADF or Platen Glass.
- Contrast
- Resolution
- Stamp
• Communication Journal
After your document has been sent, your machine will automatically return to the preset settings.
Contrast
Your machine is preset to Normal contrast. If you wish to send a document with lighter contrast, change the setting to Lighter. If you wish to send a document with darker contrast, change the setting to Darker. Press CONTRAST to:

flowchart
graph LR
    A[" "] --> B[" "]
    B --> C[" "]
    C --> D[" "]
CONTRAST = Normal CONTRAST = Lighter CONTRAST = Darker
Note: To change the preset Contrast position, change the setting of Fax Parameter No. 01, see page 60.
Resolution
Your machine is preset to Fine resolution, this setting is suitable for most business documents. If required, this setting can be changed to Normal or 400 dpi. However, care should be exercised when using the 400 dpi setting as some Internet Fax models may not support the 400 dpi resolution, such as UF-770i.
Press RESOLUTION to:

flowchart
graph LR
    A["400 dpi"] --> B["FINE RESOLUTION"]
    B --> C["400 dpi"] --> D["FINE RESOLUTION"]
    D --> E["400 dpi"] --> F["FINE RESOLUTION"]
RESOLUTION = Standard
RESOLUTION = Fine RESOLUTION = 400 dpi
Note: To change the preset Resolution position, change the setting of Fax Parameter No. 02, see page 60.

Basic Transmission Settings
Halftone
The Halftone setting is useful when sending photographs or illustrations with gray tones. Your machine is preset to HALFTONE = Off. You can select either Fast mode or Quality mode.
Press HALFTONE to:

flowchart
graph LR
    A["FAST"] --> B["QUALITY"]
    B --> C["HALFTONE"]
    D["FAST"] --> E["QUALITY"]
    E --> F["HALFTONE"]
    G["FAST"] --> H["QUALITY"]
    H --> I["HALFTONE"]
HALFTONE = Off HALFTONE = Quality HALFTONE = Fast
Verification Stamp
The Verification Stamp helps you to confirm successful transmissions by stamping the bottom of each successfully transmitted page with a small mark.
Press STAMP to:
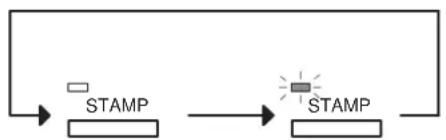
flowchart
graph LR
    A["STAMP"] --> B["STAMP"]
    B --> C["STAMP"]
STAMP = Off STAMP = On

Note: 1. When you store a document in memory, the Verification Stamp will stamp on the document if it is successfully stored in memory. In this case the Verification Stamp is not a confirmation that the document was successfully transmitted. If you wish to disable the use of the Verification Stamp when storing document in memory, change the setting of Fax Parameter No. 28, see page 61.
- To change the preset Verification Stamp position, change the setting of Fax Parameter No. 04, see page 60.
Document(s) can be sent via LAN to a single or multiple email addresses. The following dialling methods can be selected:
- Manual Number Dialling
- One-Touch Dialling
- Abbreviated Dialling
- Directory Search Dialling
- Multiple Station Dialling
The Memory Transmission mode is automatically selected by your machine if an email address is registered into the chosen One-Touch key(s), Program key(s), or Abbreviated Number key(s).
The document is always stored into memory first, then the machine starts to send the email message.
Direct Transmission, Voice Mode Transmission, and Redialling features are not available for sending documents via LAN.
▶ Sending Documents via LAN
Manual Number Dialling
1

Set document(s) face down.
ENTER STATION(S) THEN PRESS START 00%
You can temporarily change the transmission settings.
2

To choose Internet communication
EMAIL ADDRESS
3
Enter the full email address by using Character keys (up to 60 characters). or enter part of an email address and use ▼ or ▶ keys to display the email address you want to send to.
abc@panasonic.com

text_image
Ex: a b c 27 @ p a n a s o n i c □ □ 28 . c o mIf you make a mistake, press CLEAR to erase the character then reenter the correct character.
or Ex: a b c
abc
The machine will complete the email address. (see note 3)
4

The document(s) is stored into memory with a file number. Then starts to send the email message.
* STORE * NO.001 PAGES=01 01%
* STORE * COMPLETED TOTAL PAGES=05 25%
ON LINE * MEM.XMT * abc@panasonic.com

Note: 1. If your machine sounds an alarm (pi-pi-pi) at Step 2, this indicates that the Dialer is Full (more than 50 full email addresses are entered or 30 transmission reservations including G3 communication have been already reserved).
-
If the transmission can not be completed for any reason, the email may be returned undelivered, otherwise no reply will be printed.
-
For the machine to perform the email address completion the Fax Parameter No. 93 (DEFAULT DOMAIN) must be set to "Valid" and the DEFAULT DOMAIN must be preprogrammed in the Setting the Internet Parameters. (See page 40)
One-Touch Dialling
One-Touch Dialling allows you to dial a full email address or telephone number by pressing a single key. To use this method, you must first preprogram the email address or telephone number into the One-Touch keys.
1

Set document(s) face down.
ENTER STATION(S) THEN PRESS START 00%
You can temporarily change the transmission settings.
2
Press a One-Touch key (01–32).
Ex: 01
<01> (Station name) abc@panasonic.com
If a telephone number is stored into the One-Touch key, the display shows:
<01>(Station name) 5551234
3

The document(s) is stored into memory with a file number. Then starts to send the email message.
* STORE * NO.001 PAGES=01 01%
* STORE * COMPLETED TOTAL PAGES=05 25%
ON LINE * MEM.XMT * abc@panasonic.com

Note: 1. If your machine sounds an alarm (pi-pi-pi) at Step 2, this indicates that the Dialer is Full (more than 30 transmission reservations including G3 communication have been already reserved).
- If the transmission can not be completed for any reason, the email may be returned undelivered, otherwise no reply will be printed.

Sending Documents via LAN
Abbreviated Dialling
Abbreviated Dialling is a speedy way to dial a frequently dialed email address or telephone number.
To use this method, you must first preprogram the email address or telephone number into the built-in auto-dialer with a 2-digit abbreviated code.
1

Set document(s) face down.
ENTER STATION(S) THEN PRESS START 00%
You can temporarily change the transmission settings.
2
Press ABBR and then enter a 3-digit code (000 to 999).
[100] (Station name) xyz@panasonic.com
Ex:



If a telephone number is stored into the ABBR key, the display shows:
[100] (Station name) 5553456
3

The document(s) is stored into memory with a file number. Then starts to send the email message.
* STORE * NO.001 PAGES=01 01%
* STORE * COMPLETED TOTAL PAGES=05 25%
ON LINE * MEM.XMT * xyz@panasonic.com

Note: 1. If your machine sounds an alarm (pi-pi-pi) at Step 2, this indicates that the Dialer is Full (more than 30 transmission reservations including G3 communication have been already reserved).
- If the transmission can not be completed for any reason, the email may be returned undelivered, otherwise no reply will be printed.
Directory Search Dialling
When sending via LAN, Directory Search function allows you to dial a full email address or telephone number by searching for the station name or email address entered in One-Touch keys or Abbreviated dialling numbers.
1

Set document(s) face down.
ENTER STATION(S) THEN PRESS START 00%
You can temporarily change the transmission settings.
2a

to search for the station name.
ENTER LETTER(S) PRESS A-Z
2b

to search for email address.
EMAIL ADDRESS
3a
Enter the full or part of a station name using the Characters keys.
Ex: PANA to search for PANASONIC
PANA [200] PANAFAX
If you make a mistake, press CLEAR to erase the character and then reenter the correct character.
3b
Enter the full or part of an email address using the Character keys.
Ex: X to search for XYZ@PANASONIC.COM
X xyz@panasonic.com
4
repeatedly until display shows the station name or email address you want to send to.
PANA [100] PANASONIC
5

The document(s) is stored into memory with a file number. Then starts to send the email message.
or x xyz@panasonic.com
* STORE * NO.001 PAGES=01 01%
* STORE * COMPLETED TOTAL PAGES=05 25%
ON LINE * MEM.XMT * xyz@panasonic.com

Note: 1. If your machine sounds an alarm (pi-pi-pi) at Step 2, this indicates that the Dialer is Full (more than 30 transmission reservations including G3 communication have been already reserved).
- If the transmission can not be completed for any reason, the email may be returned undelivered, otherwise no reply will be printed.

Sending Documents via LAN
Returned Email
When using the Internet communication mode, a failure report will print automatically for each transaction if the email is returned undelivered by the mail server. The one page printout will consist of the undelivered message contents supplied by the mail server and a portion of the first page's image for that particular transaction.
Failure Report Sample (User unknown)
Received: from localhost (localhost) by ifeif1.rdmg.mgcs.mei.co.jp (8.6.12/3.4W3) with internal id TAA21025; Mon, 28 Sep 1998 19:33:50 +0900
Date: Mon, 28 Sep 1998 19:33:50 +0900
From: Mail Delivery Subsystem (MAILER-DAEMONeifeif1.rdmg.mgcs.mei.co.jp)
Subject: Returned mail: User unknown
Message-Id: 199809281033.TAA21025eifeif1.rdmg.mgcs.mei.co.jp
To: :fax@ifaxp60.rdmg.mgcs.mei.co.jp;
The original message was received at Mon, 28 Sep 1998 19:33:40 +0900
from ifaxp60.rding.mgcs.mei.co.jp [133.185.249.216]
---- The following addresses had delivery problems ----
(mgcs@1faxp60: (unrecoverable error)
---- Transcript of session follows ----
... while talking to ifaxp60.rdmg.mgcs.mei.co.jp.:
) ) RCPT To: (mgcs@ifaxp60.rdmg.mgcs.mei.co.jp)
111 550 User unknown
550 «ngcs@ifaxp60|... User unknown
11) RSET
421 Command not support
---- Original message follows ----
Return-Path: fax@ifaxp60.rdmg.mgcs.me1.co.jp
Received: from InternetFAX (ifaxp60.rdmg.mgcs.mei.co.jp [133.185.249.216]) by ifeif1.rdmg.
mgcs.mei.co.jp (8.6.12/3.4W3) with SMTP id TAA21024 for (mgcs@ifaxp60); Mon, 28 Sep 1998 19:
33:40 +0900
Date: Mon, 28 Sep 1998 19:33:40 +0900
Message-Id: (199809281033.TAA2102481fe1f1.rdmg.mgcs.me1.co.jp)
Mime-Version: 1.0
Content-Type: image/tiff-f; name="image.tif"; application=s
Content-Transfer-Encoding: base64
Content-Description: image.tif
X-Mailer: Internet FAX, MGCS
From: "MGCS" :fax@ifaxp60.rdng.mgcs.mei.co.jp
Subject: dx-1000
To: mgcs@ifaxp60.rdng.mgcs.mei.co.jp
SEP-28-1998 19:40
MGCS
P.01/01

THE SLEREXE COMPANY LIMITED
SAPORS LANE - BOOLE - DORSET - BH 25 & ER
TELEPHONE DOOLE (945 13) 51617 - TELEX' 123456
Our Ref. 350/PJC/EAC
18th January, 1972.
Dr. P.N. Cundall,
Mining Surveys Ltd.,
Holroyd Road.
Reading,
Berks.
Dear Pete,
Permit me to introduce you to the facility of facsimile transmission.
Multi-Station Transmission (Broadcasting)
You can store the document(s) into memory and then send it to multiple stations (up to 200 addresses) via LAN.
1

Set document(s) face down.
ENTER STATION(S) THEN PRESS START 00%
You can temporarily change the transmission settings.

2
Enter email addresses
(a) Enter by any combination of the following methods: (Up to 200 stations)
- One-Touch Dialling
- Abbreviated Dialling
- Directory Search Dialling, press SET after each email address is entered.
(b) Enter the full email address (up to 50 addresses).
- Manual Number Dialling, press SET after each station is entered.
- Manual Number Dialling can not be used in combination with One-Touch and Abbreviated Dialling.
3

The document(s) is stored into memory with a file number. Then starts to send the email message.
* STORE * NO.001 PAGES=01 01%
* STORE * COMPLETED TOTAL PAGES=05 25%
ON LINE * MEM.XMT * abc@panasonic.com

Note: 1. If your machine sounds an alarm (pi-pi-pi) at Step 2, this indicates that the Dialer is Full (more than 50 full email addresses are entered or 30 transmission reservations including G3 communication have been already reserved).
- If the transmission can not be completed for any reason, the email may be returned undelivered, otherwise no reply will be printed.
- The unit will not accept a combination of email addresses and PSTN dialling numbers.
- When multiple stations are selected, the total number of stations will be shown in top left corner of the display.

Sending Documents via LAN
Using a Mailing List
Using a Mailing List stored in the mail server simplifies the process of entering multiple locations and allows you to send to an unlimited number of email addresses with one easy operation.
Ask your Network System administrator for information on how to utilize the Mailing List.
Transmission Reservation
You can reserve the next transmission into memory for up to 30 different documents while sending a document from memory or receiving a document via LAN.
Memory Transmission Reservation (Dual Access)
If your machine is on-line and busy transmitting from memory, receiving, or printing received documents, you can reserve transmission by using the following procedure.
1 Your machine is on-line, the ON LINE lamp is blinking or printing received documents.
ON LINE * MEM.XMT * ID: (Identification)
ON LINE * RCV * ID: (Identification)
* PRINTING * MEMORY RCV'D DOC
ENTER STATION(S) THEN PRESS START 00%
2 Set document(s) face down.
3 MEMORY Make sure that the MEMORY lamp is on. If not, press MEMORY to set "On".
4 Enter email addresses (a) Enter by any combination of the following methods: (Up to 200 stations) • One-Touch Dialling • Abbreviated Dialling • Directory Search Dialling, press SET after each email address is entered. (b) Enter the full email address (up to 50 addresses). • Manual Number Dialling, press SET after each station is entered. • Manual Number Dialling can not be used in combination with One-Touch and Abbreviated Dialling.
5 START
Your machine will store the document into memory.
* STORE * NO.005 PAGES=01 01%
* STORE * COMPLETED TOTAL PAGES=05 25%
Note: To cancel the memory transmission reservation, see page 127.

Sending Documents via Telephone Line
You can choose either Memory or Direct Transmission.
Use Memory Transmission if:
- You want to send the document to multiple stations.
- You have to retrieve the document immediately.
- You want to take the advantage of Dual Operation design.
Use Direct Transmission if:
• The memory is full.
- You want to send the document real time.
Use Voice Mode Transmit if:
- You want to send the document after talking with the other party.
- You want to send the document after listening to a voice prompting.
Memory Transmission
Your machine quickly stores the document into the machine's memory. Then, it starts to dial the telephone number. If the transmission fails, your machine will re-transmit the remaining unsuccessful page(s) automatically.
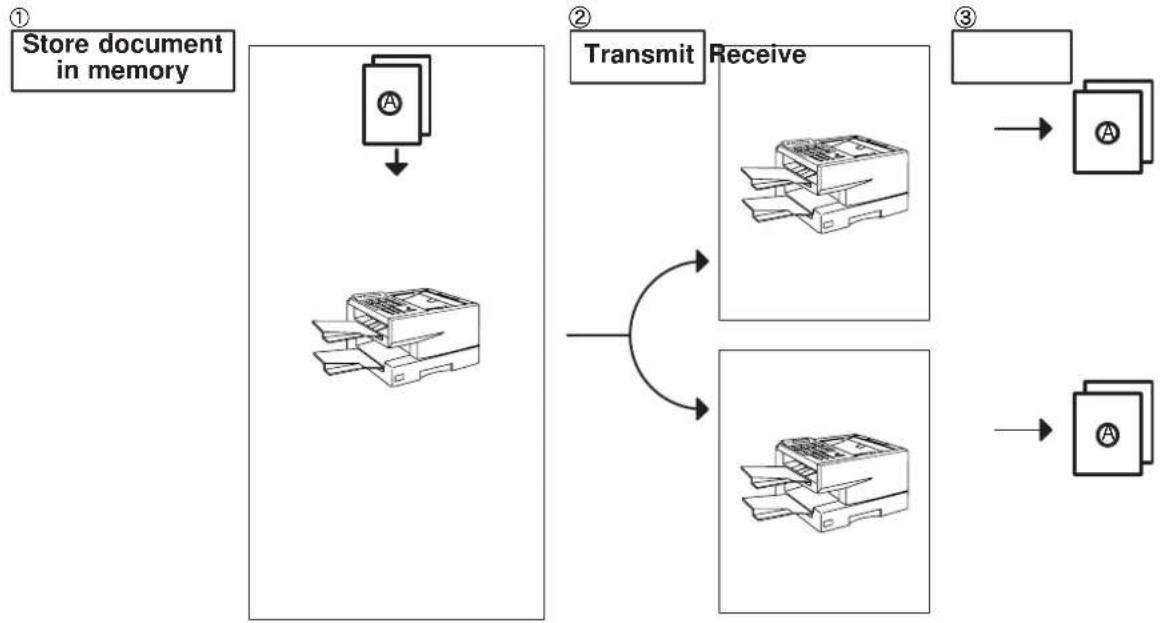
flowchart
graph TD
    A["Store document in memory"] --> B["File"]
    B --> C["Receipt"]
    C --> D["Transmit"]
    D --> E["Receive"]
    E --> F["Output Device 1"]
    E --> G["Output Device 2"]
    F --> H["Output Device 3"]
    G --> I["Output Device 4"]

Note: 1. The File Number of the document being stored is shown at the upper right corner of the display while storing the document. It is also printed on the Communication Journal (COMM. JOURNAL), Transaction Journal and File List. The percentage of memory used is shown on the lower right corner of the display after each page is stored.
- If a memory overflow occurs while storing documents into memory, all the remaining documents in the ADF will be ejected. The machine will prompt on the display, whether to start transmitting those pages which are successfully stored or to delete them. Press ① to delete; press ② to transmit. See Specifications on page 174 for the image memory capacity.
If no action is taken within 10 seconds, the machine will start transmitting the stored pages.
- An Information Code will be displayed if the transmission has failed or no answer at the receiving side after the last automatic redial. The document stored for this transmission will be erased from the memory automatically and the information code is printed for the transmission on the Communication Journal (COMM.JOURNAL).
* STORE * NO.003 PAGES=02 10%
* STORE * COMPLETED TOTAL PAGES=05 30%
MEMORY OVERFLOW INFO.CODE=870
15 PAGES COMPLETED DELETE? 1:YES 2:NO
INCOMPLETE INFO.CODE=XXX
-
When a power failure occurs, the document information stored in memory will be lost and a Power Failure Report will be printed automatically after the power is restored. (see page 158)
-
To stop the transmission, press STOP.
The display shows:
COMMUNICATION STOP ? 1: YES 2: NO
Press ① to stop the transmission. The document you stored will be erased automatically.
- If you would like to print a Communication Journal (COMM. JOURNAL) after stopping a transmission, press ① when the display shows:
PRINT COMM. JOURNAL? 1: YES 2: NO
Sending Documents via Telephone Line
Manual Number Dialling
To dial the telephone number manually, follow the steps below.
1

Set document(s) face down.
ENTER STATION(S) THEN PRESS START 00%
2
Make sure that the MEMORY lamp is on. If not, press MEMORY to set "On".
3
Enter a telephone number from the keypad. Ex: 5551234○○○
TEL. NO. 5551234
4

The document is stored into memory with a file number. Then starts to dial the telephone number.
* STORE * NO.002 PAGES=01 05%
* STORE * COMPLETED TOTAL PAGES=05 25%
* DIALLING * NO.002 5551234

Note: 1. If you need a special access number to get an outside line, dial it first then press PAUSE to enter a pause (represented by a “-”) before dialling the full number.
Ex: 9 PAUSE 5551234
- If you are using Pulse dialling and you wish to change to Tone dialling in the middle of dialling, press TONE (represented by a "/").
The dialling mode will be changed from Pulse to Tone after dialling the digit "/".
Ex: 9 PAUSE TONE 5551234
One-Touch Dialling
One-Touch dialling allows you to dial a full telephone number by pressing a single key. To program a One-Touch key, see page 45.
1

Set document(s) face down.
ENTER STATION(S) THEN PRESS START 00%

2
Make sure that the MEMORY lamp is on. If not, press MEMORY to set "On".
3
Press a One-Touch key.
Ex: 01
<01>(Station name) 5551234
4

The document is stored into memory with a file number. Then starts to dial the telephone number.
* STORE * NO.002 PAGES=01 05%
* STORE * COMPLETED TOTAL PAGES=05 25%
* DIALLING * NO.002 5551234

Sending Documents via Telephone Line
Abbreviated Dialling
Abbreviated dialling is a speedy way to dial a frequently dialed telephone number by preprogramming the telephone number in the built-in auto-dialer with a 2-digit abbreviated code. To program an abbreviated dialling number, see page 47.
1

Set document(s) face down.
ENTER STATION(S) THEN PRESS START 00%
2
Make sure that the MEMORY lamp is on. If not, press MEMORY to set "On".
3
Press ABBR then enter a 3-digit code.
Ex:


[100] (Station name) 5553456
4

The document is stored into memory with a file number. Then starts to dial the telephone number.
* STORE * NO.002 PAGES=01 05%
* STORE * COMPLETED TOTAL PAGES=05 25%
* DIALLING * NO.002 5553456
Directory Search Dialling
Directory search dialling allows you to dial a full telephone number by searching for its station name entered in One-Touch keys or Abbreviated dialling numbers.
1

Set document(s) face down.
ENTER STATION(S) THEN PRESS START 00%

2
Make sure that the MEMORY lamp is on.
If not, press MEMORY to set "On".
3

ENTER LETTER(S) PRESS A-Z
4
Enter the full station name or part of a station name by using the Character keys (see page 10).
PANA [200] PANAFAX
Ex: PANA for searching PANASONIC
5
repeatedly until display shows the station name you want to send to.
PANA [100] PANASONIC
6

* STORE * NO.002 PAGES=01 05%
The document is stored into memory with a file number. Then starts to dial the telephone number.
* STORE * COMPLETED TOTAL PAGES=05 25%
* DIALLING * NO.002 5553456

Sending Documents via Telephone Line
Multi-Station Transmission (Broadcasting)
If you have to send the same document(s) to multiple stations, you can save the time in feeding the document(s) by using memory transmission. That is, you can store the document(s) into memory and then send it automatically to the station(s).
1

Set document(s) face down.
ENTER STATION(S) THEN PRESS START 00%
2
Make sure that the MEMORY lamp is on.
If not, press MEMORY to set "On".
3
Dial by any combination of the following methods:
• One-Touch Dialling
• Abbreviated Dialling
- Manual Number Dialling, press SET after each station is entered (up to 50 stations).
- Directory Search Dialling, press SET after each station is entered
(For details, see pages 80 to 83.)
Ex: 01
<01>(Station name) 5551234


If you want to confirm the number of stations you have entered, press SET.
[100] (Station name) 5553456
2 STN(S) ARE SET ADD MORE OR START
4

The document is stored into memory with a file number. Then starts to dial the telephone number in sequence.
* STORE * NO.001 PAGES=01 01%
* DIALLING * NO.001 5551234

Note: You can review the stations you entered in step 3 before storing your document into memory by pressing ▼ or ▲ Press CLEAR to clear an entered station show on display if needed.
Direct Transmission
If your machine's memory is full or you wish to send the document real time, use Direct Transmission.
Manual Number Dialling (Direct Transmission)
To dial the telephone number manually, follow the steps below.
1

Set document(s) face down.
ENTER STATION(S) THEN PRESS START 00%

2

Make sure that the lamp is off.
If not, press MEMORY to set it "Off".
3
Enter a telephone number from the keypad.
Ex: 5551234○○○
PRESS START TO DIAL 5551234
4

Your machine starts to dial the telephone number.
* DIALLING * 5551234

Note: 1. If you need a special access number to get an outside line, dial it first then press PAUSE to enter a pause (represented by a “-”) before dialling the full number.
Ex: 9 PAUSE 5551234
- If you are using Pulse dialling and you wish to change to Tone dialling in the middle of dialling, press TONE (represented by a "/").
The dialling mode will be changed from Pulse to Tone after dialling the digit "/".
Ex: 9 PAUSE TONE 5551234
- To stop the transmission, press STOP.
The display shows:
COMMUNICATION STOP ? 1: YES 2: NO
Press ① to stop the transmission. The Communication Journal will not print out regardless of the printout mode setting of the Communication Journal.

Sending Documents via Telephone Line
One-Touch Dialling (Direct Transmission)
One-Touch dialling allows you to dial a full telephone number by pressing a single key. To program a One-Touch key, see page 45.
1

Set document(s) face down.
ENTER STATION(S) THEN PRESS START 00%
2
Make sure that the lamp is off.
If not, press MEMORY to set it "Off".
3
Press a One-Touch key.
Ex: 01
<01>(Station name) 5551234
The display will show the One-Touch number and station name. The full number (e.g. 5551234) will then be dialed.
* DIALLING * 5551234
Abbreviated Dialling (Direct Transmission)
Abbreviated dialling is a speedy way to dial a frequently dialed telephone number by preprogramming the telephone number in the built-in auto-dialer with a 2-digit abbreviated code. To program an abbreviated dialling number, see page 47.
1

Set document(s) face down.
ENTER STATION(S) THEN PRESS START 00%

2
Make sure that the lamp is off.
If not, press MEMORY to set it "Off".
3
Press ABBR and a 3-digit code.
Ex:


[100] (Station name) 5553456
The display will show the ABBR number and station name. The full number (e.g. 5553456) will then be dialed.
* DIALLING * 5553456

Sending Documents via Telephone Line
Directory Search Dialling (Direct Transmission)
Directory search dialling allows you to dial a full telephone number by searching for its station name entered in One-Touch keys or Abbreviated dialling numbers.
1

Set document(s) face down.
ENTER STATION(S) THEN PRESS START 00%
2
Make sure that the lamp is off.
If not, press MEMORY to set it "Off".
3

ENTER LETTER(S) PRESS A-Z
4
Enter the full station name or part of a station name by using the Character keys (see page 10).
PANA [200] PANAFAX
Ex: PANA for searching PANASONIC
5
repeatedly until display shows the station name you want to send to.
PANA [100] PANASONIC
6

The full number (e.g. 5553456) will be dialed.
* DIALLING * 5553456
Voice Mode Transmission
If you wish to send the document after talking with other party, use Voice Mode Transmission. Your machine requires an optional fax handset or an external telephone.
Off-Hook Dialling
For Off-Hook Dialling, follow these steps
1

Set document(s) face down.
ENTER STATION(S) THEN PRESS START 00%

2 Lift the fax handset or the external telephone and dial the telephone number from the keypad.
Ex: ⑤551234◯◯◯
3 When you hear the voice of the other party, tell the other party to prepare to receive a document.
Then, when you hear a beep,

and hang up the handset.

Note: To stop the transmission, press STOP.
The display shows:
COMMUNICATION STOP ? 1: YES 2: NO
Press ① to stop the transmission. The Communication Journal will not print out regardless of the printout mode setting of the Communication Journal.

Sending Documents via Telephone Line
On-Hook Dialling
For On-Hook Dialling, follow these steps
1

Set document(s) face down.
ENTER STATION(S) THEN PRESS START 00%
2

You will hear dial tone through the monitor speaker.
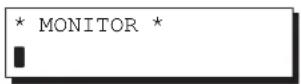
3
Dial the telephone number from the keypad.
Ex: 5551234○○○
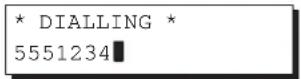
4
When you hear a beep,

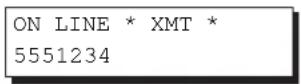

Note: 1. If you need a special access number to get an outside line, dial it first then press PAUSE to enter a pause (represented by a “-”) before dialling the full number.
Ex: 9 PAUSE 5551234
- If you are using Pulse dialling and you wish to change to Tone dialling in the middle of dialling, press TONE (represented by a "/").
The dialling mode will be changed from Pulse to Tone after dialling the digit "/".
Ex: 9 PAUSE TONE 5551234
Transmission Reservation
You can do the following while sending a document from memory or receiving a document.
- Reserve the next transmission into memory for up to 30 different files.
- Reserve a priority transmission.
Memory Transmission Reservation (Dual Access)
If your machine is on-line and busy transmitting from memory, receiving, or printing received documents, you can reserve transmission by using the following procedure.
1 Your machine is on-line, the ON LINE lamp is blinking or printing received documents.
ON LINE * MEM.XMT *
ID: (Identification)
ON LINE * RCV *
ID: (Identification)
* PRINTING *
MEMORY RCV'D DOC
2 Set document(s) face down.
ENTER STATION(S)
THEN PRESS START 00%
3 MEMORY
Make sure that the MEMORY lamp is on.
If not, press MEMORY to set "On".
4 Dial by any combination of the following methods:
- One-Touch Dialling
- Abbreviated Dialling
- Manual Number Dialling, press SET after each station is entered (up to 50 stations).
- Directory Search Dialling, press SET after each station is entered (For details, see pages 80 to 83.)
Ex: 01
<01>(Station name) 5551234
5 START
Your machine will store the document into memory.
* STORE * NO.005 PAGES=01 01%
* STORE * COMPLETED TOTAL PAGES=05 25%
Note: To cancel the memory transmission reservation, see page 127.


Sending Documents via Telephone Line
Direct Transmission Reservation (Priority Transmission Reservation)
If you are in a rush to send an urgent document, however, there are many files for transmission in memory, use Direct Transmission Reservation to send the urgent document. The urgent document will be sent immediately after the current communication is finished. Note that you cannot send urgent documents to multiple stations.
To reserve your machine for sending the urgent documents
1 Your machine is on-line, the ON LINE lamp is blinking or printing received documents.
ON LINE * MEM.XMT * ID: (Identification)
ON LINE * RCV * ID: (Identification)
* PRINTING * MEMORY RCV'D DOC
ENTER STATION(S) THEN PRESS START 00%
2 Set document(s) face down.
3 MEMORY Make sure that the lamp is off. If not, press MEMORY to set it "Off".
4 Dial by using any one of the following methods: • One-Touch Dialling • Abbreviated Dialling • Manual Number Dialling and press START • Directory Search Dialling and press START (For details, see pages 85 to 88.)
Ex: 01
You can reserve sending an urgent document to a single station only.
A message "DIRECT XMT RESERVED" will be shown on the display.
<01>(Station name) 5551234
DIRECT XMT RESERVED <01>(Station name)
To cancel the direct transmission reservation
1 Make sure the document is on the ADF.
2 STOP
3 1 and then remove the document from ADF.
DIRECT XMT RESERVED <01>(Station name)
CANCEL XMT RESERVE ? 1: YES 2: NO
Redialling
Automatic Redialling
If the line is busy or there is no answer, your machine will redial the number up to 3 times at 3-minute intervals. During that time, a message will appear as shown to the right.
WAIT TO DIAL NO.001 (Telephone number)
A file number is shown at the upper right corner of the display if it is a memory transmission file.
Manual Redialling
You can also redial the last dialed number manually by pressing REDIAL key.
To redial the last dialed number through memory
1

Set document(s) face down.
Make sure that the MEMORY lamp is on.
ENTER STATION(S) THEN PRESS START 00%
2
TEL. NO. 5551234
3

* STORE * NO.002 PAGES=01 01%
The document is stored into memory with a file number. Then dials the last dialed number.
* DIALLING * NO.002 5551234
To redial the last dialed number without memory
1

Set document(s) face down.
ENTER STATION(S) THEN PRESS START 00%
2
Make sure that the lamp is off.
If not, press MEMORY to set it "Off".
3
Your machine starts to dial the last dialed number.
TEL. NO. 5551234
* DIALLING * 5551234

Note: 1. While the unit is displaying "WAIT TO DIAL", you can press REDIAL to start redialling immediately. 2. While the unit is displaying "DIALLING" and a message is heard through the monitor that the circuits are busy....., you can press REDIAL to start redialling immediately.

Receiving Documents via LAN
The DX-1000 offers you a choice to receive Fax documents unattended (by default) or manually over regular telephone lines.
The DX-1000 also offers the same choice to receive and print Internet email messages via LAN unattended or manually when subscribing to a POP mail server. However, when the DX-1000 is configured to receive email using SMTP protocol, the email can only be received and printed unattended.
Internet Fax Received on a PC
Figure 1: Windows Messaging Inbox Sample
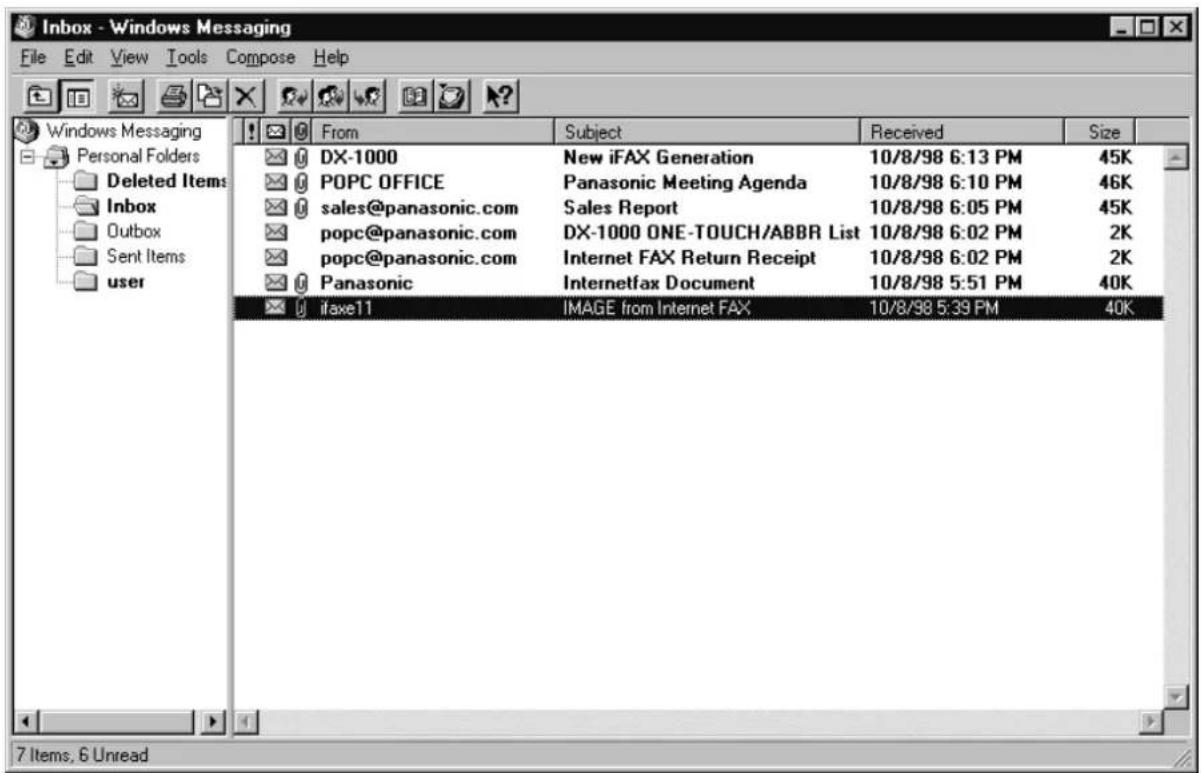
text_image
Inbox - Windows Messaging File Edit View Tools Compose Help Windows Messaging Personal Folders Deleted Items Inbox Outbox Sent Items user From Subject Received Size DX-1000 New iFAX Generation 10/8/98 6:13 PM 45K POPC OFFICE Panasonic Meeting Agenda 10/8/98 6:10 PM 46K sales@panasonic.com Sales Report 10/8/98 6:05 PM 45K popc@panasonic.com DX-1000 ONE-TOUCH/ABBR List 10/8/98 6:02 PM 2K popc@panasonic.com Internet FAX Return Receipt 10/8/98 6:02 PM 2K Panasonic Internetfax Document 10/8/98 5:51 PM 40K ifaxe11 IMAGE from Internet FAX 10/8/98 5:39 PM 40K 7 Items, 6 Unread■ The "Subject" column in the above example shows samples of email messages received on a PC from the DX-1000, and Internet FAX.
■ For your reference, the above example is from Windows Messaging Inbox running under Microsoft Windows 95. If you are using a different email application software, please refer to your application's User Manual.
Figure 2: Internet Fax Received on a PC
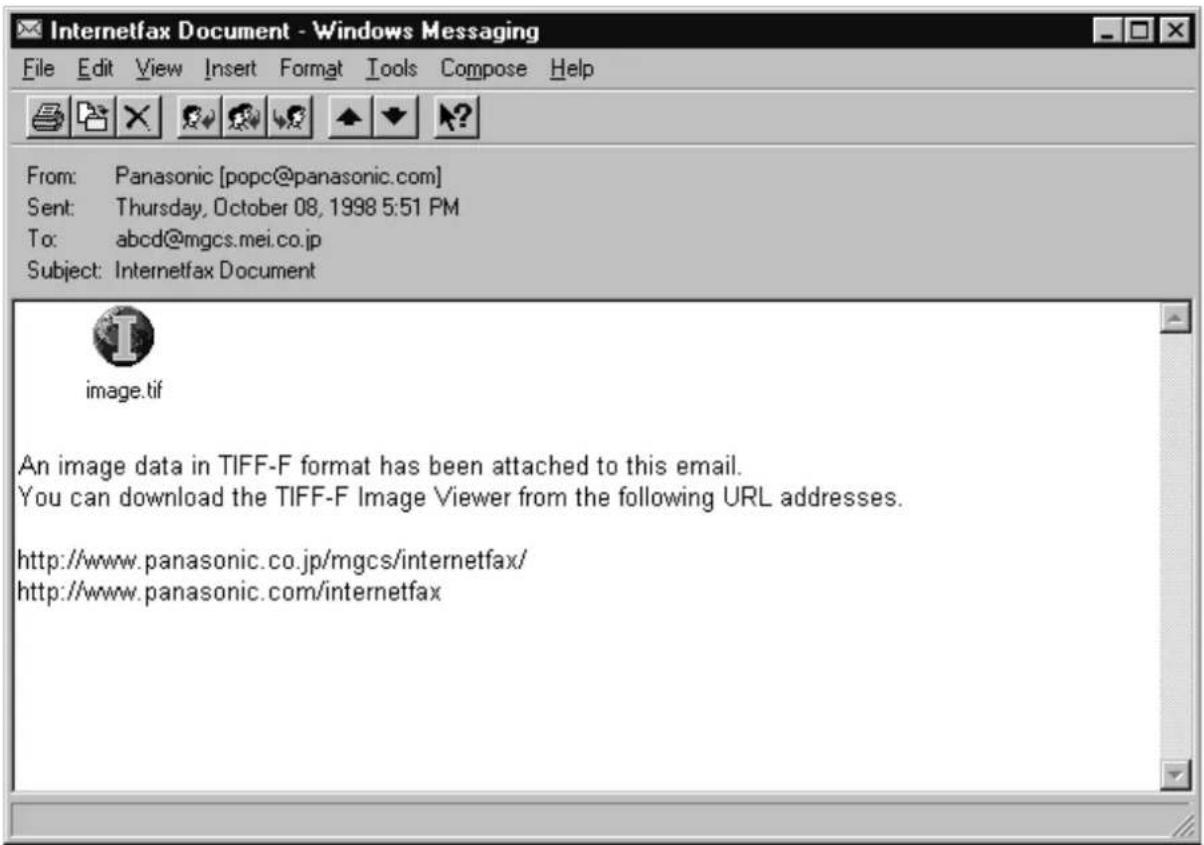
text_image
Internetfax Document - Windows Messaging File Edit View Insert Format Tools Compose Help From: Panasonic [popc@panasonic.com] Sent: Thursday, October 08, 1998 5:51 PM To: abcd@mgcs.mei.co.jp Subject: Internetfax Document image.tif An image data in TIFF-F format has been attached to this email. You can download the TIFF-F Image Viewer from the following URL addresses. http://www.panasonic.co.jp/mgcs/internetfax/ http://www.panasonic.com/internetfax■ For your reference, the above example is from Windows Messaging running under Microsoft Windows 95 ^☐ .
- To run the Viewer, please refer to your application's User Manual. The attached file is composed of TIFF-F (Tagged Image File Format with Modified Hoffman coded image). TIFF Viewers come in many flavors, a majority of TIFF Viewers will open and view this file, however, a handful of Viewers may not support this format.
■ You can download the TIFF-F Image Viewer into your PC from the following URL addresses:
http://www.panasonic.co.jp/mgcs/internetfax/
http://www.panasonic.com/internetfax/
■ License agreement of Panasonic's TIFF-F Image Viewer application
You must carefully read the license agreement before installing the TIFF-F Image Viewer application on your PC. If you do not agree to all the terms of this agreement, do not use the software and destroy all of the copies thereof.
You must assume full responsibility for selection of the software and its operation/non-operation and results obtained therefrom.

Receiving Documents via LAN
Receiving Email from a POP Server
The DX-1000 offers a choice to receive and print Internet email messages via LAN unattended or manually when subscribing to a POP mail server.
Setting the POP Parameters
Set the parameters pertinent to the POP server (Fax Parameters Nos. 78 to 81).
No. 78 (POP TIMER): Enter the interval to check and retrieve email from the POP server (0 to 60 minutes). If "0 minutes" is entered, the POP server is not checked for mail.
No. 79 (AUTO POP RCV): When there is mail to be retrieved from the POP server, the DX-1000 will retrieve it and print the email unattended. If this parameter is set to "1:Invalid", the machine will not retrieve it, but displays the number of mails on the POP server.
No. 80 (DEL POP RCV EMAIL): Select whether the email is deleted from the POP server after it is retrieved by the DX-1000.
No. 81 (DEL POP ERR EMAIL): Select whether to delete the email from the POP server when the file attachment format is not supported.
To set the above POP parameters, follow the steps below.
1

SET MODE (1-6) ENTER NO. OR V A
2

FAX PARAMETER (01-99) NO.=
3

78 POP TIMER 3 MIN. (0-60)
4
Enter the desired download interval (0 to 60 minutes).
Ex: 05 for 5 minutes.
78 POP TIMER 05 MIN. (0-60)
If you make a mistake, press CLEAR to erase the digit and then reenter the correct value.
Receiving Documents via LAN

5
79 AUTO POP RCV 2:VALID
6
① for "INVALID"
or
② for "VALID"
79 AUTO POP RCV 2:VALID
7

80 DEL POP RCV EMAIL 2:VALID
8
① for "INVALID"
or
② for "VALID"
80 DEL POP RCV EMAIL 2:VALID
9

81 DEL POP ERR EMAIL 1: INVALID
10
① for "INVALID"
or
② for "VALID"
81 DEL POP ERR EMAIL 1: INVALID
11

82 IFAX RET. RECEIPT 1: INVALID

12


Note: 1. When an unsupported file attachment is received, and error message is printed to inform you that the file attachment could not be printed.
- When Fax Parameter No. 80 (DEL POP RCV EMAIL) and/or Fax Parameter No. 81 (DEL POP ERR EMAIL) are set to 1:Invalid, email with errors will not be erased. This will allow you to retrieve this email from your PC later.
Furthermore, if these Fax Parameters are set to "1:Invalid", you will need to delete mails from the POP server periodically. POP servers allocate a certain amount of space per account and if mail is not deleted regularly, your mail box will overflow and new incoming mail will be rejected.
Either retrieve these mails from your PC or set the Fax Parameters to "2:Valid" triggering your DX-1000 to receive, print and delete all the mails from the POP server. This procedure, however, might cause mail that had been printed before to print again.
Unattended Reception from the POP Server
When the Fax Parameter No. 78 (POP TIMER) is set to a value between 1 and 60 minutes, and Fax Parameter No. 79 (AUTO POP RCV) is set to "2:Valid", the machine will query the POP server at the specified interval for new mail.
Any mail on the POP server is retrieved and printed unattended.
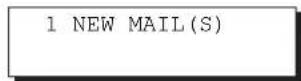
When the Fax Parameter No. 78 (POP TIMER) is set to "0", the machine will not query the POP server and the mail is not retrieved automatically. With this setting, mail must be retrieved manually from the POP server.
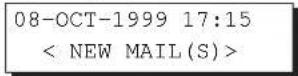
When the Fax Parameter No. 79 (AUTO POP RCV) is set to "1:Invalid", the machine will query the POP server for new mail at the interval specified by Fax Parameter No. 78. If new mail has arrived at POP server, the machine will not retrieve it, but displays the number of mails on the POP server.
Manual Reception from the POP Server
To receive manually from the POP server, follow the steps below:
or
2 If the POP server has not received any new mail, the following message is displayed.
3 If POP server received new mail, the machine will display the number of mails on the server, then receive and print the email.

Note: 1. If you program a user name and password in the Program key, you can receive mail from the POP server using a user name other than the name set as the user parameter.
- The number of emails that can be retrieved during a single operation is 20. Even if POP server has more than 20 emails, only 20 will be displayed on the machine. After retrieving the first 20 emails, repeat the procedure from beginning to ensure all emails were retrieved from the POP server.

Receiving Documents via Telephone Line
Your machine is provided with both automatic and manual reception modes. The selection of either reception mode is made with Fax Parameter No. 17 (RCV MODE).
Automatic Reception
Your machine will receive documents automatically if the Fax Parameter No. 17 (RECEIVE MODE) is set to "Auto" (see page 61).
Manual Reception
You may wish to receive documents manually if you use the telephone line in your office primarily as a personal telephone and occasionally for your facsimile machine. To receive documents manually, change the Fax Parameter No. 17 (RECEIVE MODE) to "Manual" (See page 61) and the following message will be shown on the display.
08-OCT-1999 15:00 MANUAL RCV 00%
To receive documents manually
1 When the telephone rings, lift the handset (See Note). If you hear a beep, the sound tells you that someone wants to send a document.
2 Remove any documents from the ADF.
3 START
4 Hang up the telephone.

Note: Your machine requires an optional fax handset or an external telephone connected to the TEL jack on the rear of the machine.
Print Reduction
This machine can use Letter, Legal or A4 size plain paper for recording. Sometimes, oversized documents sent to you by the other parties cannot be printed within a single page. When this occurs, the document will be divided into separate pages.
This machine is equipped with a Print Reduction function to solve this problem. You may select the most appropriate setting from the selections described below.
1. Automatic Reduction
Each page of a received document is first stored in memory. Based on the document length, your machine will automatically calculate the suitable reduction ratio (70% to 100%) to print the entire document on a single page. If the received document is extremely long (over 39% longer than the recording paper), the document will be divided into separate pages and printed with no reduction.
2. Fixed Reduction
You can predetermine the reduction ratio from 70% to 100% in 1% steps. The document(s) you received will be reduced to this ratio regardless of the size.
Selecting the Print Reduction Mode
Set Fax Parameters as shown below. (see page 61)
- To set Automatic Reduction mode.
(1) No. 24 Print Reduction set to "Auto".
- To set Fixed Reduction mode.
(1) No. 24 Print Reduction set to "Fixed".
(2) No. 25 Reduction Ratio set to any number between 70% through 100%. (see Note)
Ex:A4 to A4 - 96%
A4 to Letter - 90%
Letter to Letter - 96%
Legal to Letter - 75%
Note: If the sending side is set to print the header on the outside of the copy area, a greater reduction ratio will be required.

Receiving Documents via Telephone Line
Receiving Oversized Documents
If received document is extremely long (over 39% longer than the recording paper), the document will be divided into separate pages. When printing on separate pages, the bottom 10 mm of first page will be overlapped on top of the next page.
Transmitted Document Received Document
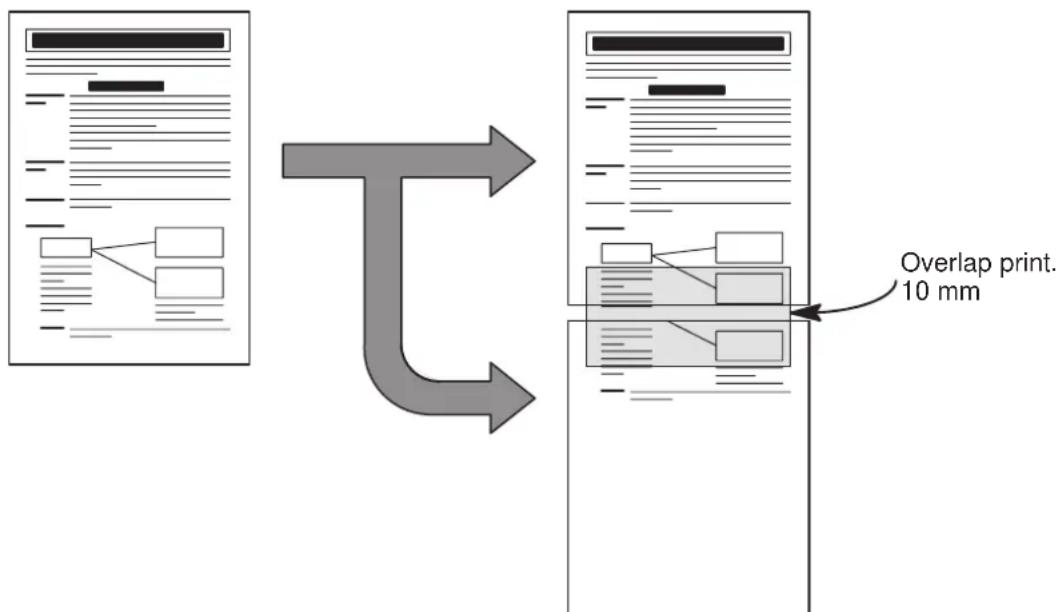
flowchart
graph TD
    A["Document with header icon"] --> B["Overlap print. 10 mm"]
    B --> C["Arrow pointing to a diagram of a document layout with internal layout and text blocks"]
The receiving document is divided into two sheets with overlap printing.

Note: If the reduction method is set to Automatic Reduction mode, the document is printed out with no reduction when printing out separate pages. If the reduction method is set to Fixed Reduction mode, the document is printed out by the ratio you set in Fax Parameter No. 25.
Substitute Memory Reception
If the recording paper runs out or jams or if the toner runs out during reception, the machine automatically starts receiving document into its image data memory. Stored documents are printed automatically after replacing the recording paper or toner cartridge.
When the machine finishes the memory reception and there is no recording paper or toner, an Information Code appears on the display.
NO RECORDING PAPER INFO.CODE=010
OUT OF TONER INFO.CODE=041
2 Replenish the recording paper (see page 30) or replace the toner cartridge (see page 28).
The machine will automatically start printing the document stored in the memory.
* PRINTING * MEMORY RCV'D DOC

Note: 1. If the memory overflows, the machine will stop receiving and release the communication line. The document(s) stored in the memory up to that moment will be printed out.
-
If a power failure occurs, the document information stored in memory will be saved for up to 1 hour, when the battery is fully charged.
-
If you wish to turn off the substitute reception function, change the setting of Fax Parameter No. 22 to "Invalid" (see page 61).
Print Collation Mode
The printing mechanism of the DX-1000 is a Reverse Order Stacking construction. The DX-1000 has a Print Collation Mode that stacks received documents in the correct order. When the Print Collation Mode is enabled, all received documents are stored into memory first, then printed out in Correct Order Stacking. The requirements for the Print Collation Mode to be active are; 1) Fax Parameter No. 65 PRINT COLLATION set to "Valid", and 2) enough remaining memory.
The unit will print in Reverse Order Stacking (Non-Collation Mode) whenever one of the above requirements is not met.
| Sending Document Order Stacking Document Order | ||
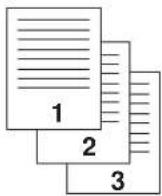 | Correct Order Stacking (Collation Mode) | Reverse Order Stacking (Non-Collation Mode) |
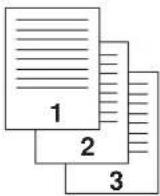 | 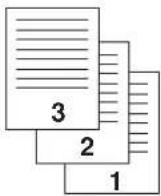 | |

Making Copies
Your machine has a copy function which can make single or multiple copies.
1

Set document(s) face down.
ENTER STATION(S) THEN PRESS START 00%
2

COPY NO. OF COPY=1
3
Enter the number of copies.
Ex:①0
COPY NO. OF COPY=10
4

* STORE * NO.005 PAGES=01 01%
The machine stores the document, then prints the copies.
* STORE * COMPLETED TOTAL PAGES=05 25%
* COPY * NO. OF COPY=01/10

Note: The copy will be reduced automatically depending on the length of original document. If you wish to disable reduction function in copy mode, change the setting of Fax Parameter No. 32 (COPY REDUCTION) to "Invalid" (see page 61).
Your fax machine has special Program Keys (P1 to P8). These keys are useful if you frequently need to send to the same group of stations. You can use these keys to store an additional One-Touch key or a One-Touch group key.
Entering an Email Address
Once you program an email address in the Program Keys (P1 to P8), you can specify the station simply by pressing the associated Program Key.
1

PROGRAM[P] PRESS PROGRAM KEY

2
Enter the Program key that you wish to set. (P1 to P8) Ex: P3
PROGRAM[P3] NO.=1:DIAL 2:POP
3

For One-Touch group key.
PROGRAM[P3] NO.=1:GROUP 2:ONE-TOU
4
For One-Touch key.
[P3] ENTER TEL. NO.
5
Enter the email address using the Character keys (up to 60 characters).
[P3] abc@panasonic.com
If you make a mistake, you can use < or > to move the cursor over the incorrect character, then overwrite it with a correct one.
Program Keys
6
[P3] ENTER NAME abc@panasonic.com
7 Enter the station name by using the Character keys (up to 15 characters).
[P3] SALES DEPT abc@panasonic.com
8
PROGRAM[P] PRESS PROGRAM KEY
You can now set other Program Keys by repeating the procedures from Steps 2 to 8, or return to standby by pressing STOP.
Entering a Telephone Number
Once you program a telephone number in the Program Keys (P1 to P8), you can specify the station simply by pressing the associated Program Key.
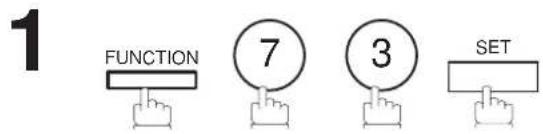
text_image
1 FUNCTION 7 3 SETPROGRAM[P] PRESS PROGRAM KEY
2 Ex: P3 (P1 to P8)
PROGRAM[P3] NO.=1:DIAL 2:POP
3 1
PROGRAM[P3] NO.=1:GROUP 2:ONE-TOUCH
4 2
[P3] ENTER EMAIL ADDRESS
5 To enter a telephone number, press INTERNET.
[P3] ENTER TEL. NO.
6 Enter a telephone number (up to 36 digits including pauses and spaces).
[P3] 9-555 1234
Ex: 9 PAUSE 5 5 5 SPACE 1 2 3 4 ○○○○
[P1] ENTER NAME 9-555 1234
8 Enter the station name (up to 15 character) using the Character keys (see page 10).
Ex:PROG.A and SET
PROGRAM[P] PRESS PROGRAM KEY
You can now set other Program Keys by repeating the procedures from Step 2, or return to standby by pressing STOP.
Setting for Group Dialling
Once you program group dialling numbers in the Program Keys (P1 to P8), you can specify the multi-station transmission (broadcasting) to multiple stations simply by pressing the associated Program Key.
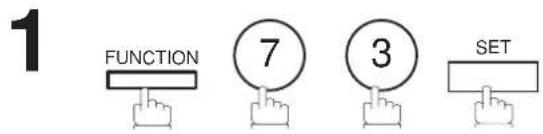
text_image
1 FUNCTION 7 3 SETPROGRAM[P] PRESS PROGRAM KEY

PROGRAM[P3] NO.=1:DIAL 2:POP
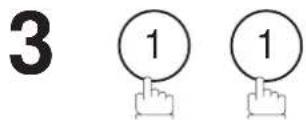
PROGRAM[P3] NO.=1:GROUP 2:ONE-TOUCH
4 Enter the station numbers by using One-Touch Key, Abbreviated Number, or Program Key. You can enter two or more station numbers.
ENTER STATION(S) THEN PRESS START
Ex: 01 and

<01>(Station name) 5551234
[100] (Station name) 5553456
You may use the vor keys to review the entered station(s) before going to next step. If you find an error, press CLEAR to erase the displayed station.
xxx STN(S) ARE SET ADD MORE OR START
If you want to confirm the number of stations you have entered, press SET.
PROGRAM [P3] NAME
6 Enter the station name (up to 15 character) using the Character keys (see page 10).
Ex:PROG.A and SET
PROGRAM[P] PRESS PROGRAM KEY
You can now set other Program Keys by repeating the procedures from Step 2, or return to standby by pressing STOP.
Setting the POP Access Key
This function allows others to share the DX-1000 to retrieve their emails from the POP server by preprogramming their POP User Names and POP Passwords into the Program Keys (P1 to P8). They will be able to retrieve their emails by simply pressing the associated Program Key. (See Note)
text_image
1 FUNCTION 7 3 SET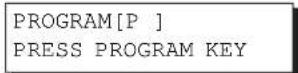
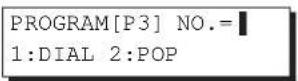

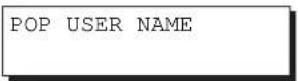

text_image
4 Enter a POP User Name (up to 40 characters) using the Character keys and press SET.
Ex: k a □ t e and SET
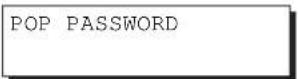

text_image
5 Enter a POP Password (up to 10 characters) using the Character keys and press SET.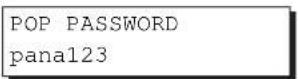
Ex: P a n a123 and SET
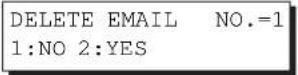
text_image
6 ① for disabling mail deletion or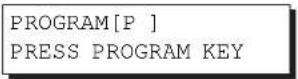
② for enabling mail deletion
You can now set other Program Keys by repeating the procedure from step 2, or return to standby by pressing STOP.

Note: If security is a concern and to prevent unauthorized personnel from retrieving your email from the POP server, when programming the Program Key, leave the POP Password field "Blank". By leaving it "Blank", the machine will prompt you to enter the POP Password when the Program Key is pressed for retrieving mail.

Program Keys
Using the POP Access Key
To retrieve your Email from the POP Server by using the Program Key, follow the procedure below.

text_image
1 Press the Program key programmed for POP Access Key. Ex: P1POP RCV USER NAME kate
If the POP User Name is not entered in the Program Key, enter the POP User Name (up to 40 characters).
If the POP Password is not entered in the Program Key, enter the POP Password (up to 10 characters) and press START.
3 If the POP server has not received any new mail, the following message is displayed.
NO NEW MAIL
4 If POP server received new mail, the machine will display the number of mails on the server, then receive and print the email.
1 NEW MAIL(S)
ON LINE *RCV* abc@panasonic.com

Note: The number of emails that can be retrieved during a single operation is 20. Even if the POP server has more than 20 emails, only 20 will be displayed on the machine. After retrieving the first 20 emails, repeat the procedure from the beginning to ensure all emails were retrieved from the POP server.
General Description
This operation allows the user to select one of the 25 preset User Names and Email Addresses before a transmission. The selected User Names is printed on the Header of each page sent and on the COMM. Journal. When sending email, the selected user name and/or email address appears in the "From:" field of the email message.
Setting the Sender Selection
1

SET MODE (1-6) ENTER NO. OR V A
5
2

FAX PARAMETER (01-99) NO.=
3


77 SENDER SELECTION 1: INVALID
4
77 SENDER SELECTION 2:VALID
5

SENDER SELECTION ENTER NO. OR V A
6
Enter the Sender Selection number.
Ex: 12(01 to 24)
ENTER USER NAME 12

Sender Selection
7 Enter your User Name (max. 25 characters and digits) by using character keys (see page 10).
Ex: P A N A S O N I C S P A C E S A L E S and S E T (See Note.)
ENTER USER NAME 12 PANASONIC SALES
8 Enter an email address to be printed on the "From" field of the email message (max. 60 characters).
Ex: abc □ 27 @ p a n a s o n i c □ □ 28 . c o m
ENTER EMAIL ADDRESS 12
ENTER EMAIL ADDRESS 12 abc@panasonic.com
9 SET
To record another User Name, repeat step 6 to 9. To return to standby, press STOP.
ENTER USER NAME 13
Note: Use COPY to copy the default User Name that was programmed in the User Parameters. You can add the department name following the default User Name.
Sending Document with Sender Selection
1

Set document(s) face down.
ENTER STATION(S) THEN PRESS START 00%
2
Enter email address or telephone number. (See Note 3)
3

SELECT SENDER(00-24) ENTER NO. OR V A
4
Enter a number or use ☐ or to select the User Name that you want to use. (See Note 2)
12 PANASONIC SALES abc@panasonic.com
Ex:①2○
5

The document is sent as an email message with the selected user name and/or email address appearing in the "From" field of the email message.

Note: 1. The Sender Selection function cannot be used in the Voice Dialling Mode for ordinary transmission.
-
If you do no select a User Name in the step 4, the unit selects the default User Name (00) that was programmed in the User Parameters for ordinary transmission.
-
Email address(s) and telephone number(s) can not be mixed within the same communication. (For detailed dialling options see pages 69 to 92)

Sender Selection
Printing the Sender Selection List
The Sender Selection List can be printed out following the Fax Parameter List.

text_image
1 FUNCTION 6PRINT OUT (1-7) ENTER NO. OR V ∧
text_image
2 4 SET* PRINTING * FAX PARAMETER LIST
Sample Sender Selection List (Prints following the Fax Parameter List)
| ********** -FAX PARAMETER LIST- ******* DATE 08-OCT-1999 ******* TIME 15:00 *** P.02 | ||
| SENDER SELECTION LIST | ||
| (1) | (2) | (3) |
| NO. | USER NAME | EMAIL ADDRESS |
| 01 | Panafax Sales | sales@panasonic.com |
| 02 | Panafax Service | service@panasonic.com |
| 03 | Panafax Accounting | account@panasonic.com |
| 24 | Panafax Engineering | engineering@panasonic.com |
| -PANASONIC - | ||
| ********** -HEAD OFFICE - ******* - 201 555 1212 - ******* | ||
Explanation of Contents
(1) Sender Seceltion Number : 01–24
(2) User Name : Up to 25 characters
(3) Email Address : Up to 60 characters
General Description
The DX-1000 will automatically add the Default Subject information that was entered during the User Parameter setup, to the Subject Line of all outgoing emails.
If you would like for the machine to prompt you for the Subject before each email transmission, change the Fax Parameter No. 92 (SUBJECT LINE ENTRY) to "2:VALID".
Sending Email with Subject Line Entry
1

Set document(s) face down.
ENTER STATION(S) THEN PRESS START 00%
5
2
Enter email addresses
(a) Enter by any combination of the following methods:
- One-Touch Dialling
- Abbreviated Dialling
- Directory Search Dialling, press SET after each email address is entered.
(b) Enter the full email address (up to 50 addresses).
- Manual Number Dialling, press SET after each station is entered.
- Manual Number Dialling can not be used in combination with One-Touch and Abbreviated Dialling.
Ex:
<01> (Station name) abc@panasonic.com
3

ENTER SUBJECT OR PRESS START TO SEND
4
Enter the Subject (max. 40 characters and digits) by using the Character keys (see page 10). To use the Default Subject pre-programmed in the User Parameter, just press
START
Ex: f P8 CAPS A P8 CAPS x
P6 SPACE
fro m P6 SPACE m P8 CAPS R
P8 CAPS 28 . P6 SPACE j
P8 CAPS O P8 CAPS n e s.
SUBJECT FAX from Mr. Jones
5

* STORE * NO.001 PAGES=01 01%
The document(s) is stored into memory with a file number. Then starts to send the email message.
* STORE * COMPLETED PAGES=01 10%
ON LINE * MEM.XMT * abc@panasonic.com

Note: If no default subject is programmed, the unit is shown as "IMAGE from Internet FAX" as the subject.
Setting the Routing Parameters
The DX-1000 can route documents received from a G3 fax machine to email address(s) or to Internet Fax machine(s) connected to a LAN as an email, as well as to other G3 fax machine(s) over the telephone line.
To use this feature, the Fax Parameter No. 85 "SUB-ADDRESS ROUTING" and/or No. 86 "TSI ROUTING" must be set to "2:Valid".
No. 85 SUB-ADDRESS ROUTING: Set this parameter to perform an ITU-T sub-address query within its auto dialer and to route the received document(s) to the corresponding stations email address(s) or telephone number(s).
No. 86 TSI ROUTING: Set this parameter to perform a Numeric ID (TSI frame information) query within its auto dialer and to route the received document(s) to the corresponding stations email address(s) or telephone number(s).
No. 87 ROUTING HEADER FORMAT: Use this parameter to select the type of email header to be included in the "From" field of each routed faxes. (Default setting is "1:Original")
Originator : The originating fax machine's TSI will appear in the "From" field of the routed email.
Relay Station : The routing station's email address will appear in the "From" field of the routed email.
No. 88 PRINT ROUTED DOCUMENT : Set this parameter to select whether a received fax to be routed is always printed on the DX-1000 or only when the routing operation fails.
To set the above Inbound Routing parameters, follow the steps below.
1

SET MODE (1-6) ENTER NO. OR V A
2
FAX PARAMETER (01-99) NO.=
3

85 SUB-ADDR. ROUTING 1: INVALID
4
① for "INVALID"
or
② for "VALID"
85 SUB-ADDR. ROUTING 1: INVALID
85 SUB-ADDR. ROUTING 2:VALID
5
86 TSI ROUTING 1: INVALID
6
① for "INVALID"
or
② for "VALID"
86 TSI ROUTING 1: INVALID
86 TSI ROUTING 2:VALID
7
87 ROUTE HEADER FMT 1:ORIGINATOR
8
① for "ORIGINATOR"
or
② for "RELAY STATION"
87 ROUTE HEADER FMT 1:ORIGINATOR
87 ROUTE HEADER FMT 2:RELAY STATION
9
88 PRINT ROUTED DOC. 1: INC. ONLY
10
① for "INC. ONLY"
or
② for "ALWAYS"
88 PRINT ROUTED DOC. 1: INC. ONLY
88 PRINT ROUTED DOC. 2: ALWAYS
11
89 PRT FORWARDED DOC 1: INC. ONLY
Inbound Routing
12
① for "INC. ONLY"
or
② for "ALWAYS"
89 PRT FORWARDED DOC 1: INC. ONLY
89 PRT FORWARDED DOC 2: ALWAYS
13

Entering One-Touch/Abbreviated Dialling Numbers for Inbound Routing
If the Inbound Routing parameters are set, an ITU-T sub-address and/or originator's Numeric ID (TSI frame information) can be programmed with each email address in One-Touch, Abbreviated numbers or Program Keys. (See page 17)
text_image
1 FUNCTION 7 2 SET2 Select 1 for One-Touch Dialling number. Select 2 for ABBR. Dialling Number. Ex: ①
To change the input mode (between "ENTER EMAIL ADDRESS" and "ENTER TEL. NO."), press INTERNET
or <01> ENTER TEL. NO.
4 Enter an email address (up to 60 characters) or a telephone number (up to 36 digits).
<01> abc@panasonic.com
5 SET
or <01> 55512342762
<01> ENTER NAME abc@panasonic.com
or <01> ENTER NAME 55512342762
6 Enter the station name using the character keys (up to 15 characters).
<01> SALES DEPT abc@panasonic.com
Ex: SALES SPACE DEPT
or <01> SALES DEPT 55512342762
Inbound Routing
7
ROUTING:SUB-ADDRESS
8 Enter the sub-address (up to 20 characters) and press SET.
ROUTING: SUB-ADDRESS 1234567
ROUTING: TSI
9 Enter a Numeric ID (TSI) (up to 20 characters) and press SET.
ROUTING: TSI 1234567
To return to stanby, press STOP.
Note: "+" and "SPACE" entries in the "ROUTING: TSI" field are ignored by the receiving machine.
General Description
This feature is only available for sending documents via telephone line.
The Sub-addressing function allows you further routing, forwarding or relaying of document(s) to the desired recipient(s). This function conforms to the ITU-T recommendation for T. Routing-Facsimile Routing utilizing the Sub-address.
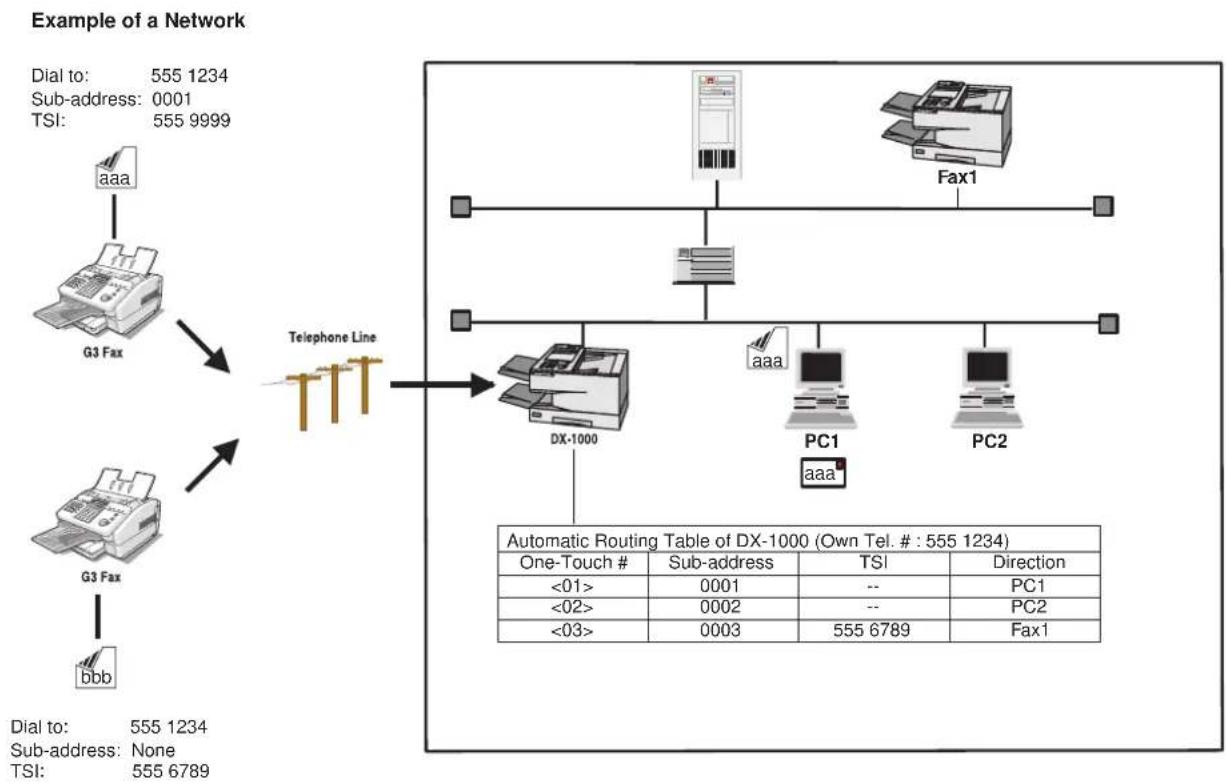
flowchart
graph TD
    A["aaa"] --> B["G3 Fax"]
    C["bbb"] --> D["G3 Fax"]
    B --> E["Telephone Line"]
    D --> E
    E --> F["DX-1000"]
    F --> G["PC1"]
    F --> H["PC2"]
    I["Fax1"] --> J["Automatic Routing Table of DX-1000 (Own Tel. #: 555 1234)"]
    K["aaa"] --> L["PC1"]
    K --> M["PC2"]
    N["0001"] --> O["Sub-address"]
    P["0002"] --> Q["Sub-address"]
    R["0003"] --> S["Sub-address"]
    T["555 6789"] --> U["Direction"]
    V["Dial to: 555 1234\nSub-address: None\nTSI: 555 6789"] --> W["Telephone Line"]
Compatibility with Other Panafax Machines
- DX-1000 as a Sub-address Transmitter: DF-1100/DX-1000/UF-332/342/344/550/560/770/788/880 (See Note 2.)
- DX-1000 as a Sub-address Receiver: DX-1000 or DF-1100//UF-342/344/550/560/770/788/880 with PC Interface using the Networking version of HydraFax/LaserFAX software.
Sub-addressing Transmission Methods
You can send a document with Sub-address information to the desired recipient by the following methods.
- By registering the Sub-address information into One-Touch/ABBR. Dialling Numbers.
- By specifying the Sub-address information in the Manual Number Dialling Mode.

Note: 1. UF-788 with PC Interface Option or the Option ROM installed. 2. This feature is only available for communications via telephone line.

Sub-addressing
To set the Sub-address into a One-Touch/ABBR. Dialling Numbers
1

Select 1 for One-Touch Dialling number. Select 2 for ABBR. Dialling Number.
Ex: 1
Enter the telephone number, press FLASH, then enter the Sub-address (up to 20 digits). (Up to 36 digits including telephone number, pauses, spaces, FLASH and Sub-address)
Ex:Telephone number = 5551234, Sub-address =2762 ⑤⑤⑤①②③④ FLASH 2 7 6 2 ○ ○ ○
<01> 5551234s2762
5
<01> SALES DEPT. 5551234s2762
Enter the station name.
6


Note: FLASH separates the Sub-address from the Telephone number and is indicated by an "s" in the display.
To send a Document with Sub-address
Using One-Touch/ABBR. Number Dialling
The operation is the same as for normal Dialling
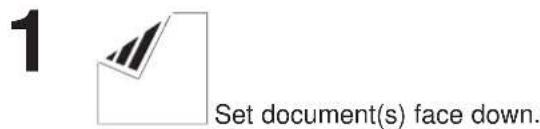
text_image
1 Set document(s) face down.ENTER STATION(S) THEN PRESS START 00%
<01> (Station name) 5551234s2762
* STORE * NO.001 PAGES=01 01%
The document is stored into memory and your machine starts to dial the number of the station and sends the document(s) with Sub-addressing information.
Using Manual Number Dialling
Use FLASH to separate the Telephone number and the Sub-address.
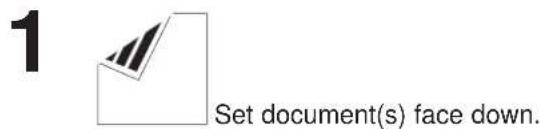
text_image
1 Set document(s) face down.ENTER STATION(S) THEN PRESS START 00%
2 Enter the telephone number, press FLASH, then enter the Sub-address (up to 20 digits).
(Up to 36 digits including telephone number, pauses, spaces, FLASH and Sub-address)
Ex:Telephone number = 5551234, Sub-address =2762
5551234 FLASH 2762
TEL. NO. 5551234s2762
* STORE * NO.001 PAGES=01 01%
The document is stored into memory and your machine starts to dial the number of the station and sends the document(s) with Sub-addressing information.
Note: 1. FLASH separates the Sub-address from the Telephone number and is indicated by an "s" in the display.
-
Manual Off-Hook or On-Hook Dialling cannot be used with the Sub-addressing Transmission.
-
The Sub-address is not transmitted during Manual Redial Mode.
Setting Fax Forward
This feature allows all incoming faxes or emails to be forwarded to the station registered in the abbreviated dialling number [000]. Once the faxes or emails are received in the memory, the machine will forward the received document(s) to the telephone number or the email address registered in the abbreviated dialling number [000].
This function is convenient when you would like to receive faxes or emails in another place (i. e. your home) at night or during a holiday.
1 First register the destination telephone number or email address into the abbreviated dialling number [000]. (See page 47)
text_image
2 FUNCTION 7SET MODE (1-6) ENTER NO. OR V ∧

text_image
3 4 SETFAX PARAMETER(01-99) NO.=
text_image
4 5 4 SET54 FAX FORWARD 1: INVALID
54 FAX FORWARD 2:VALID
08-OCT-1999 15:00 < FAX FORWARD >

Note: 1. When the Fax Forward feature is set, the abbreviated dialling number [000] will be restricted from editing. Please change this function to "Invalid" when you would like to edit the telephone number or email address.
- If the communication to transfer a received document or email fails, the received document or email will print out and then is erased from memory. If the Fax Parameter No. 89 (PRINT FAX FORWARD) is set to "Always", the received document or email will print even when the transmission is successful.
- It is not possible to receive a document if the memory of your machine overflows or is about 95% used.
Your machine has a document image memory which enables you to reserve memory transmission. After reserving the communications in memory, you may need to verify the contents of the file list.
Printing a File List
To print out a file list, follow the steps below.
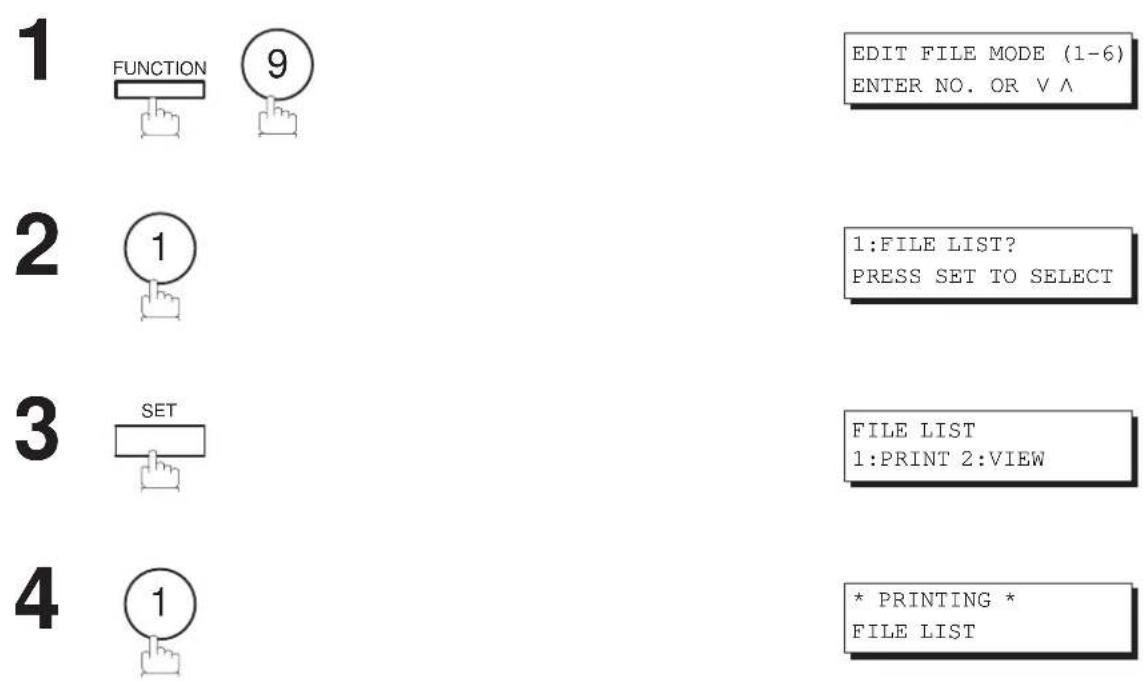
EDIT FILE MODE (1-6) ENTER NO. OR V A
1: FILE LIST? PRESS SET TO SELECT
FILE LIST 1:PRINT 2:VIEW
* PRINTING * FILE LIST
Sample File List
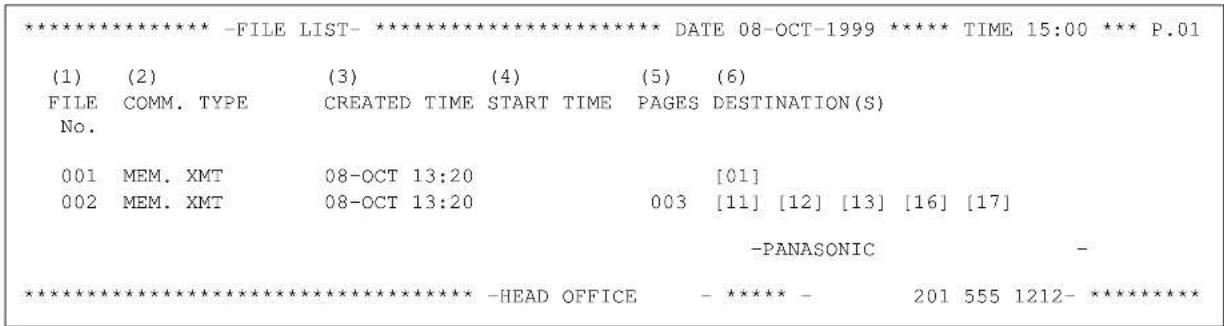
text_image
********** -FILE LIST- ********** DATE 08-OCT-1999 ***** TIME 15:00 *** P.01 (1) (2) (3) (4) (5) (6) FILE COMM. TYPE CREATED TIME START TIME PAGES DESTINATION(S) No. 001 MEM. XMT 08-OCT 13:20 [01] 002 MEM. XMT 08-OCT 13:20 003 [11] [12] [13] [16] [17] -PANASONIC - ********** -HEAD OFFICE - ***** - 201 555 1212- **********Explanation of Contents
(1) File number : If the file is now being executed, a "*" is indicated on the left of the file number.
(2) Communication type
(3) Created date/time : Date/time that these files were stored.
(4) Start time: If the file is an incomplete file, "INCOMP" is printed in this column.
(5) Number of stored page(s)
(6) Destination :ABBR. No./One-Touch No./Manual Dialling No.

Edit File Mode
Viewing the Contents of a File List
To view the contents of a file list on the display without printing it, follow the steps below.
1

EDIT FILE MODE (1-6) ENTER NO. OR V A
2

1: FILE LIST? PRESS SET TO SELECT
3
FILE LIST 1:PRINT 2:VIEW
4

USE THE V\A KEYS TO SCROLL EACH FILE
5
or repeatedly until the display shows a file you want to edit.
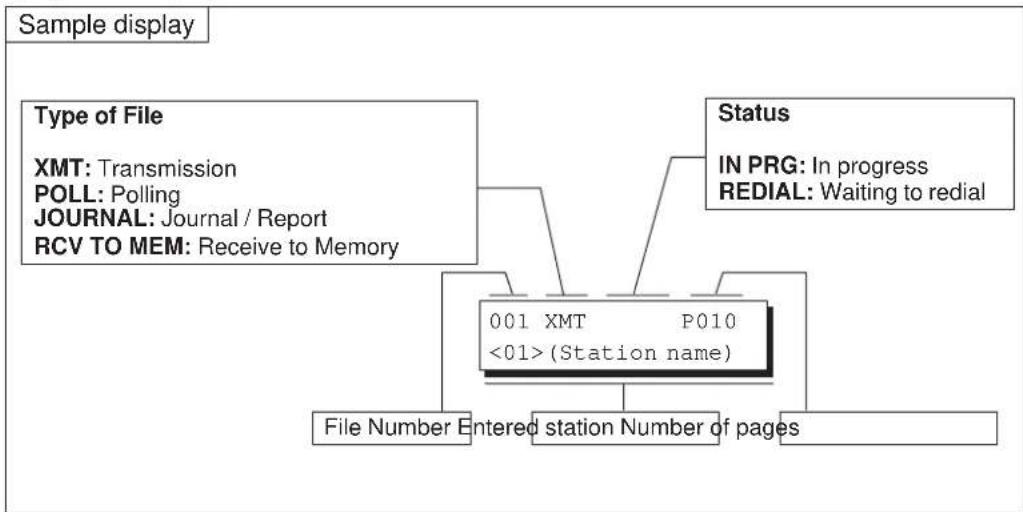
flowchart
graph TD
    A["Sample display"] --> B["Type of File"]
    B --> C["XMT: Transmission"]
    B --> D["POLL: Polling"]
    B --> E["JOURNAL: Journal / Report"]
    B --> F["RCV TO MEM: Receive to Memory"]
    G["Status"] --> H["IN PRG: In progress"]
    G --> I["REDIAL: Waiting to redial"]
    J["File Number Entered station Number of pages"] --> K["001 XMT P010 <01>(Station name)"]
6

Deleting a File
To delete the file in memory, follow the steps below.
text_image
1 FUNCTION 9EDIT FILE MODE (1-6) ENTER NO. OR V A
text_image
2 3 SETENTER FILE NO.OR V A FILE NO.=
3 Enter the file number or use the or keys to select the file that you want to delete. Ex: 001 (See Note 2.)
ENTER FILE NO.OR V A FILE NO.=001
DELETE FILE NO.001? 1:YES 2:NO
* DELETING * FILE NO.=001
Enter the next file number you want to delete or press STOP to return to standby.
ENTER FILE NO.OR V A FILE NO.=
Note: 1. Your machine cannot delete the file while it is being sent.
- Enter Ⓞ Ⓥ as the file number and press SET to delete all files (except the file in progress). The following message is shown on the display.
DELETE ALL FILES ? 1: YES 2: NO
Press ① to delete all files.

Distinctive Ring Detector (DRD)
This function is only effective for companies in countries which offer the DRD Service.
Your machine has a special feature in conjunction with an optional service provided by many local telephone companies. It can distinguish up to 2 telephone numbers with a corresponding ring pattern identifying each number. "DRD" lets you provide multiple phone numbers, one for your fax, business or personal use with only one single phone line.
Please check with your local telephone company on the availability of this service in your area.
Your machine can be programmed to respond to the specified ring pattern only for the DRD Service. To enable your machine to detect the ring pattern only for fax communication, change the setting of Fax Parameter No. 30 (see page 61).
The following table shows a typical example with 2 telephone numbers on a single phone line.
| Telephone No. | Usage Distinctive Ring Sound Ring Pattern | ||
| 555-1111 Phone | Riing......Riing...... | Standard Ring | |
| 555-2222 Fax | Ring...Ring......Ring...Ring...... | Double Ring |

Note: 1. "Riiing" means a long ringing sound and "Ring" means a short ringing sound.
- This feature is available only for G3 communication.
The following illustration shows a typical set up, with your machine set to detect "double ring" pattern.
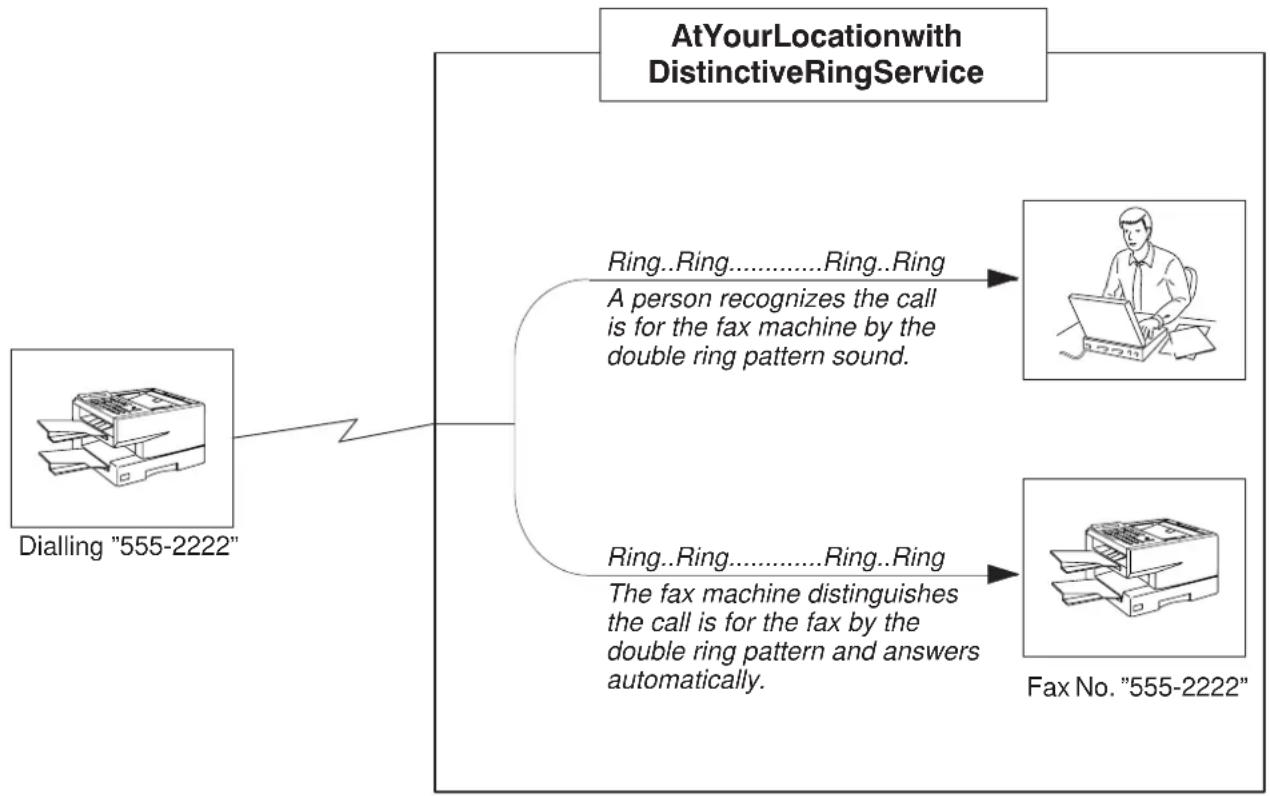
flowchart
graph TD
    A["Dialling "555-2222""] --> B["AtYourLocationwith DistinctiveRingService"]
    B --> C["Ring..Ring......Ring..Ring\nA person recognizes the call is for the fax machine by the double ring pattern sound."]
    B --> D["Ring..Ring......Ring..Ring\nThe fax machine distinguishes the call is for the fax by the double ring pattern and answers automatically."]
    B --> E["Fax No. "555-2222""]
The DX-1000 lets you send a Transaction Journal to a specified email address.
To set Fax Parameter No. 90 "TRANSACTION JOURNAL", follow the steps below.
text_image
1 FUNCTION 7SET MODE (1-6) ENTER NO. OR V A
text_image
2 4 SETFAX PARAMETER (01-99) NO.=
text_image
3 9 0 SET90 TRANSACTION JRNL 1: INVALID
text_image
4 2 for "VALID"90 TRANSACTION JRNL 2:VALID
EMAIL ADDRESS
6 Enter an email address (up to 60 characters) to which you want to send the journal.
XYA@PANASONIC.COM
text_image
7 SET STOPNote: The Transaction Journal is automatically sent when the number of communications exceed 100.

Ifax Return Receipt
The DX-1000 will automatically send an Ifax Return Receipt to the sender confirming email reception from another Panafax Internet Fax.
To set Fax Parameter No. 82 "IFAX RETURN RECEIPT", follow the steps below.

text_image
1 FUNCTION 7SET MODE (1-6) ENTER NO. OR V A
text_image
2 4 SETFAX PARAMETER (01-99) NO.=
text_image
3 8 2 SET82:IFAX RET. RECEIPT 2:VALID
text_image
4 1 for "INVALID"82 IFAX RET. RECEIPT 1: INVALID
text_image
5 SET STOPNote: The DX-1000 sends the Ifax Return Receipt only when receiving from another Panasonic brand Internet Fax. It will not confirm email sent from a PC. (The default setting for this parameter is "2:VALID")
Polling means calling other station(s) to retrieve a document. The other station must know in advance that you will call and must have a document set on the ADF or stored in the memory. You may need to set a polling password, shared by the other station, to ensure security.
Setting Polling Password
If the polling password does not match with the polled station, your polling request will be refused automatically.
To set the polling password, follow the steps below.
1

SET MODE (1-6) ENTER NO. OR V ∧
5
2

FAX PARAMETER (01-99) NO.=
3
26 POLLING PASSWORD
4
Enter a 4-digit polling password.
Ex:①②③④◯◯
26 POLLING PASSWORD 1234
5


Note: 1. Polling might not function with all fax machines. We suggest you attempt a trial polling before you actually poll important documents.
- If a password is not set in the polled station, you may poll the other station even though your machine has a password.
To Poll Documents from Another Station
The following procedure lets you poll a document from one or multiple stations. Be sure to set the polling password before polling (see page 131).
text_image
1 FUNCTION 3POLLING PASSWORD=1234
2 Enter a 4-digit polling password. (see Note 2) Ex: ①①①
POLLING PASSWORD=1111
ENTER STATION(S) THEN PRESS START
4 Dial by any combination of the following methods: • One-Touch Dialling • Abbreviated Dialling • Manual Number Dialling, press SET after each station is entered (up to 50 stations). • Directory Search Dialling, press SET after each station is entered (For details, see pages 80 to 83.)
Ex: 01
<01>(Station name) 5551234
* STORE * NO.001
Note: 1. You can review the entered stations in step 4 by pressing the √ or ∧ key, press CLEAR to erase the displayed station as needed.
2. If you have set the polling password in Fax Parameter No. 26, the password will appear on the display. You can still change the password temporarily by overwriting it with a new one.
3. This feature is available only for G3 communication.
You can import Fax images by using the DX-1000 transmission function.
Storing a specific email address into a One-Touch key/Program key allows you to import picture images by pressing a single key.
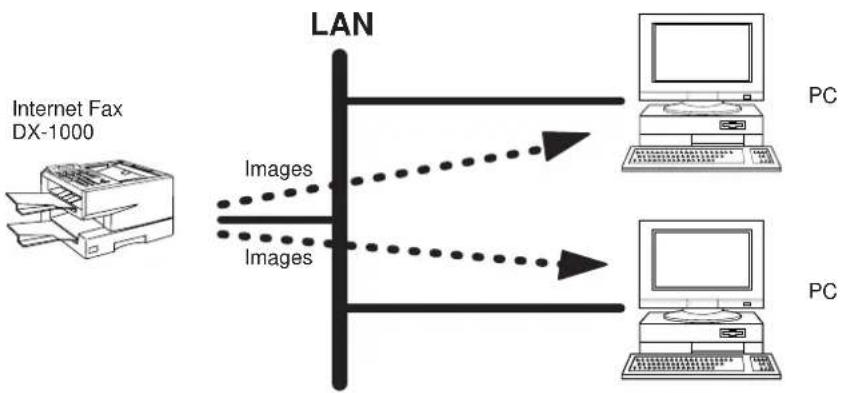
flowchart
graph TD
    A["Internet Fax DX-1000"] -->|Images| B["LAN"]
    B --> C["PC"]
    B --> D["PC"]
    style A fill:#f9f,stroke:#333
    style B fill:#ccf,stroke:#333
    style C fill:#dfd,stroke:#333
    style D fill:#dfd,stroke:#333
1

Set document(s) face down.
ENTER STATION(S) THEN PRESS START 00%
2
Enter the destination by using by any combination of the following methods:
• One-Touch Dialling
• Abbreviated Dialling
- Directory Search Dialling
• Program Key Dialling
- Manual Dialling
Ex:
<01> SALES DEPT NY ABC@PANASONIC
3


Note: You can specify multiple email addresses in step 2. Specify up to 200 email addresses when using One-Touch Dialling, Abbreviated Dialling, Directory Search Dialling and Program Key Dialling method or up to 50 email addresses when entering manually.

Network Printer
The DX-1000 allows you to print documents created on your PC using various software applications.
To be able to use this function, install the Printer Driver and LPR software downloaded from the web site first. (See page 20)
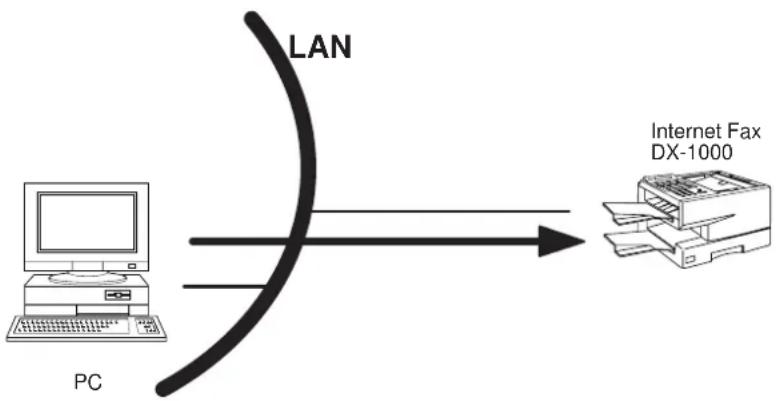
flowchart
graph LR
    A["PC"] -->|LAN| B["Internet Fax DX-1000"]
1 Select the "DX-1000" as your default printer on the PC.
2 From any software application, instruct your PC to print to the DX-1000.
3 The DX-1000 receives and prints the document.
ON LINE * RCV * Printing data
Note: The DX-1000 is unable to receive print jobs while it is engaged in a communication task. After the communication job is completed, the PC will transfer the print job to the DX-1000 for printing.
General Description
The Internet Relayed Transmission feature can save you time and transmission costs if you need to send the same documents to multiple G3 fax machines.
This is especially true if the transmissions are long distance.
You can send documents to any G3 fax machine by using the Internet via a LAN from your DX-1000 to another Relay Station (DX-1000).
You can also send an email with attached TIFF-F file(s) to any G3 fax machine from your PC using your current email application through a Relay Station (DX-1000).
To use the Internet Relayed Transmission, the Relay Station must be set up properly.
Example:
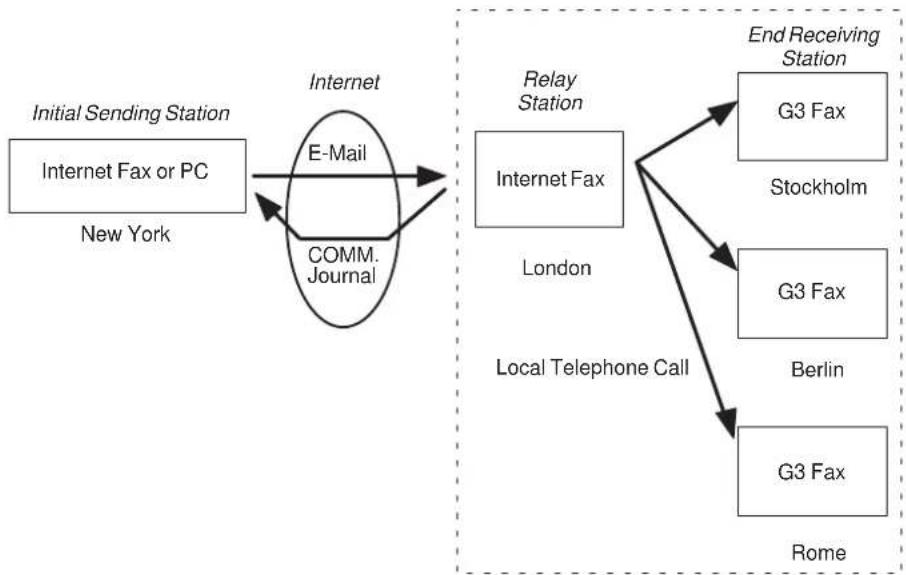
flowchart
graph TD
    A["Initial Sending Station\nInternet Fax or PC\nNew York"] -->|E-Mail| B["COMM. Journal"]
    B --> C["Relay Station\nInternet Fax"]
    C --> D["End Receiving Station\nG3 Fax\nStockholm"]
    C --> E["Local Telephone Call\nG3 Fax\nBerlin"]
    C --> F["Rome"]
From your PC or DX-1000 you can send documents to a Relay Station with the telephone number of the End Receiving Station(s).
After the Relay Station completes its transmission to the End Receiving Station, your PC or the DX-1000 receives a COMM. Journal from the Relay Station. This COMM. Journal confirms whether the Internet Relayed Transmission was successful.
Relay Network
This Feature saves you time and long distance phone line costs when sending an Internet Fax directly from your machine to the end receiving station(s).
A Relay Network is basically composed of an Originating Station, which can be an Internet Fax Machine (DX-1000) or a PC, a Relaying Internet Fax Machine (another DX-1000), and End-receiving station(s), which can be regular G3 Fax machines.
By simply sending a Document(s) from your DX-1000 or an email message from a PC, to the DX-1000 (Relay machine), which is then transmitted by the DX-1000 to the end receiving station(s) using regular phone lines as a normal G3 Fax message. (PC can have TIFF-F or text (.txt) file attachment)
The end receiving station(s) are usually local in relation to the Relay Station, which incurs a local telephone charge for the Fax Transmission.
After the Relay Station completes its transmission to the end receiving station(s), a Communication Journal is sent back to the originator from the Relaying Internet Fax (DX-1000) confirming whether the Internet Relayed Transmission was successful. Any Relay activity information is sent by email from the Relaying Internet Fax to its Manager's Email Address, which is programmed in the Relaying Internet Fax machine's User Parameters. (See page 44)
To use the Internet Relayed Transmission, just follow the set up procedure described on pages 141 to 146 and obtain certain information provided by the Relaying machine (DX-1000) operator. A sample network is shown in Figure 1.
Figure 1 shows a sample network as seen from New York (Initiating Station), London and Singapore are (Relay Stations) connected to New York, and the (End Receiving Stations) are Stockholm, Rome, Tokyo, Hong Kong, and Sydney.
With this simple network using two Relay Stations, you can send a document with one operation to any combination of stations in the network via the London Relay Station and/or Singapore Relay Station.
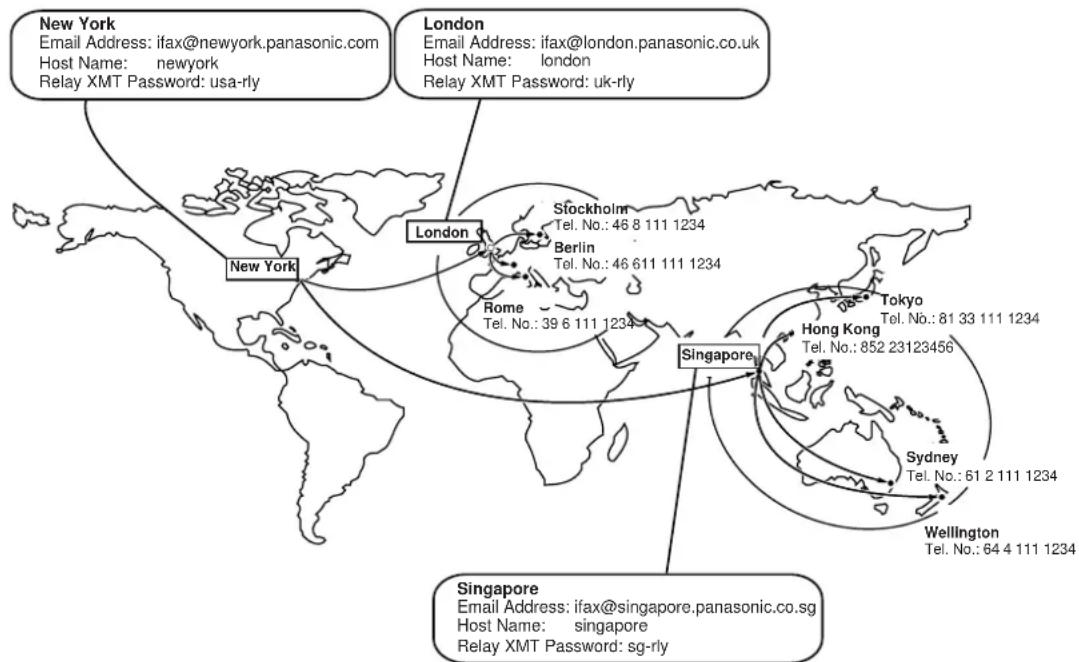
text_image
New York Email Address: ifax@newyork.panasonic.com Host Name: newyork Relay XMT Password: usa-ry London Email Address: ifax@london.panasonic.co.uk Host Name: london Relay XMT Password: uk-ry London New York London Stockholm Tel. No.: 46 8 111 1234 Berlin Tel. No.: 46 611 111 1234 Rome Tel. No.: 39 6 111 1234 Singapore Tokyo Tel. No.: 81 33 111 1234 Hong Kong Tel. No.: 852 23123456 Sydney Tel. No.: 61 2 111 1234 Wellington Tel. No.: 64 4 111 1234 Singapore Email Address: ifax@singapore.panasonic.co.sg Host Name: singapore Relay XMT Password: sg-ryFigure 1: Sample Network
Table 2, 3 and 4 sample settings for a Sample Network.
Table 2: Sample Parameter and One Touch/Abbreviated Dialling Number Table for New York (Originating Station)
| Telephone Number : 212 111 1234 |
| Email Address(SMTP) : ifax@newyork.panasonic.com |
| Host Name : newyork |
| Relay XMT Password : usa-rly |
| One-Touch/ABBR. No. | Station Name | Email Address / Telephone Number | Relay Station Address |
| <01> | London | Ifax@london.panasonic.co.uk | --- |
| <02> | Stockholm | 46 8 111 1234 | [001] |
| <03> | Singapore | Ifax@singapore.panasonic.co.sg | --- |
| <04> | Tokyo | 81 33 111 1234 | [002] |
| [001] | London Relay | uk-rly@london.panasonic.co.uk | --- |
| [002] | Singapore Relay | sg-rly@singapore.panasonic.co.sg | --- |
| [003] | Rome | 39 6 111 1234 | [001] |
| [004] | Hong Kong | 85223123456 | [002] |
| [005] | Sydney | 61 2 111 1234 | [002] |
Table 3: Sample Parameter and One Touch/Abbreviated Dialling Number Table for London(Relaying Station)
| Telephone Number : 71 111 72341 |
| Email Address (SMTP) : ifax@londonpanasonic.co.uk |
| Host Name : london ndon |
| Relay XMT Password : uk-ry -rly |
| One-Touch/ABBR. No. | Station Name | Email Address / Telephone Number | Relay Station Address |
| <01> | New York | Ifax@newyork.panasonic.com | --- |
| <02> | Stockholm | 46 8 111 11234 | [005] |
| <03> | Singapore | Ifax@singapore.panasonic.co.sg | --- |
| <04> | Tokyo | 81 33 111 11234 | [001] |
| [001] | Singapore Relay | sg-rly@singapore.panasonic.co.sg | --- |
| [002] | Rome | 39 6 111 11234 | [005] |
| [003] | Hong Kong | 852 231 23456 | [001] |
| [004] | Sydney | 61 2 111 1234 | [001] |
| [005] | London Relay | uk-rly@london.panasonic.co.uk | --- |
Table 4: Sample Parameter and One Touch/Abbreviated Dialling Number Table for Singapore (Relaying Station)
| Telephone Number : 65 111 1234 |
| Email Address (SMTP) : ifax@sinjgaprepanasonic.co.sg |
| Host Name : singapore : singapore |
| Relay XMT Password : sg-rysg-ry |
| One-Touchi/ABBR. No. | Station Name | Email Address / Telephone Number | Relay Station Address |
| <01> | London | Ifax@london.panasonic.co.uk | --- |
| <02> | Stockholm | 46 8 111 11234 | [001] |
| <03> | New York | Ifax@newyork.panasonic.com | --- |
| <04> | Tokyo | 81 33 111 1234 | [005] |
| [001] | London Relay | uk-rly@london.panasonic.co.uk | --- |
| [002] | Rome | 39 6 111 11234 | [001] |
| [003] | Hong Kong | 85223123456 | [005] |
| [004] | Sydney | 61 2 111 1234 | [005] |
| [005] | Singapore Relay | sg-rly@singapore.panasonic.co.sg | --- |

Note: 1. The Relay XMT Password must be registered for the DX-1000 to work as a Relay Station. (See page 140)
- To prevent unauthorized stations from accessing your Relay Station for Internet Relayed Transmissions, you must setup your network security. Enter acceptable Domain Name(s) and the Manager's Email Address for notification of all Internet Relayed Transmissions. (See page 140)
Setting up your DX-1000 as an Internet Relay Station
To set up your machine as a Relay Station, the following parameters must be set properly.
1. Relay XMT (Fax Parameter No. 60)
Selecting whether the machine will accept and performs G3 relayed transmission. (See page 62)
1:Invalid - Machine will not accept a Relay XMT request.
2: Valid - Machine will accept a Relay XMT request.
2. Relay XMT Report (Fax Parameter No. 61)
Selecting how the COMM. Journal for relayed transmission is sent to the originator.
1:Off - Do not send
2:Always - The COMM. Journal is always sent after a Relay Communication is completed or failed.
3:Inc. Only - The COMM. Journal is sent if the Relay Communication to the destination has failed.
3. Relay XMT Password (User's Parameter)
Enter a Relay XMT Password (up to 10 characters) to be used for protection against unauthorized (outside) stations from accessing your machine to relay messages to a G3 fax machine via PSTN. This password should be given out to authorized people only.

Note: This should be different than the DX-1000's Email Address used to receive regular email / Internet Fax, as DX-1000's Email Address is always included in the header of all email messages sent. So, anyone receiving an Internet Fax from the machine will easily know the Relay XMT Password if it is the same as the Email Address.
4. Relay Address (Auto Dialer)
Enter a 3-digit Abbreviated Number which will assign the Relay Email Address of the Relay Station your machine will use.
5. Manager's Email Address (User's Parameter)
Register the Department Manager's Email Address for supervision and cost control purposes. Once registered, the machine will send an email notification to this email address for each Relayed XMT Request received from a remote station. The following information is sent.
(From : The email address of the originating station.)
(To : The telephone number of the destination G3 fax machine.)
6. Domain Names (User's Parameter)
Register up to 10 Domain Names (up to 30 characters) that your machine will accept Relayed Transmission Requests to relay a message to another G3 fax machine via PSTN.
Ex: Registered Domain Names
(01): rdnn.mgcs.co.jp
(02): rdmg.mgcs.co.jp
(03): panasonic.com
In the example above, the Relayed XMT Request will be accepted only from the email addresses that include the Domain Name of rdnn.mgcs.co.jp, rdmg.mgcs.co.jp or panasonic.com.

Note: If all the Domain Names are left blank, the Internet Fax will accept Relayed XMT Requests from any domain.
Setting Up Your Machine for Relayed Transmission
Programming the End Receiving Station into your Auto Dialer
If the Relayed XMT Request (FAX Parameter No. 40) is set to LAN, you can enter the Relay Address (ABBR.NO.) by the following procedure.
To set a One-Touch/ABBR for Relayed Transmission Request
text_image
1 FUNCTION 7 2 SET1:ONE-TOUCH
2:ABBR. NO.
text_image
4 To change the input mode (between "ENTER EMAIL ADDRESS" and "ENTER TEL. NO."), press INTERNET<01> ENTER TEL. NO.
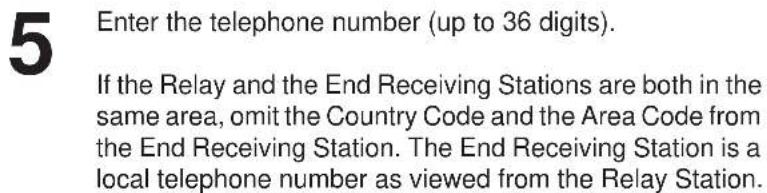
text_image
5 Enter the telephone number (up to 36 digits). If the Relay and the End Receiving Stations are both in the same area, omit the Country Code and the Area Code from the End Receiving Station. The End Receiving Station is a local telephone number as viewed from the Relay Station.<01> 3961111234
▶ Relayed Transmission
6
<01> ENTER NAME 3961111234
7
Enter the station name by using the character keys (up to 15 characters).
Ex: R O M E □
<01> ROME 3961111234
8
<01> RELAY ADDRESS
9
Enter the 3-digit Abbreviated number of the Relay Station that you want to assign to this End Receiving Station.
The Abbreviated number must contain the Relay XMT Password of the Relay Station.
text_image
Ex: 0 0 1<01> RELAY ADDRESS 001
10
You can now set an additional One-Touch/Abbreviated numbers for Relayed Transmission Request by repeating the procedures from Step 3 to 8, or return to standby by pressing STOP.
Sending Documents via Internet Relay
Once you have recorded all the necessary parameters in your machine, you can send a document to one or multiple G3 fax machines automatically through the Internet Relay Station by using the procedure described below. The Internet Relay Station must have all the necessary parameters setup.
■ To a Location That Has a Pre-programmed Relay Station
1 Set document(s) face down.
ENTER STATION(S) THEN PRESS START 00%
2 Enter only the telephone number(s) of the End Receiving Station(s) using any combination of the following methods.
<02> STOCKHOLM 4681111234
• One-Touch Dialling.
- Abbreviated Dialling.
- Manual Number Dialling (up to 50 stations), press SET after each station is entered. (See Note)
- Directory Search Dialling, press SET after each station is entered. (For details, see pages 80 to 83)
Ex: 02
The document(s) is stored into memory and your machine starts to send the document(s) to the Relay email address of the Relay Station with the telephone number for the End Receiving Station.
* STORE * NO.002 PAGES=01 05%
Ex: End Receiving Station:4681111234
(Telephone number)
[See Note]
Relay Station :uk-rly@london.panasonic.co.uk
* STORE * COMPLETED TOTAL PAGES=05 25%
After the Relay Station completes its transmission to the End Receiving Station(s), your machine receives a COMM. Journal from the Relay Station. This Journal confirms whether the Internet Relayed Transmission was successful.
ON LINE *MEM.XMT* uk-rly#4681111234@if
Note: If the Relay Station requires a special access number to get an outside line, enter that access number first then press PAUSE to enter a pause (represented by a "-" before entering the full number.

Relayed Transmission
■ To a Location That Does Not Have a Pre-programmed Relay Station
1

Set document(s) face down.
ENTER STATION(S) THEN PRESS START 00%
2


RELAY XMT ENTER RELAY STATION
3
Assign a Relay Station by either one of the following methods.
- Manual Dialling (press the INTERNET key first, then enter the email address for the Relay Station)
• One-Touch Dialling - Abbreviated Dialling
- Directory Search Dialling (For details, see page 80 to 83.)
Ex: ABBR 0 0 1 ○ ○
[001] LONDONRELAY uk-rly@london.panas
RELAY XMT ENTER STATION(S)
4
Enter only the telephone number(s) of the End Receiving Station(s) using any combination of the following methods.
• One-Touch Dialling
- Abbreviated Dialling
- Manual Number Dialling, press SET after each station is entered (up to 50 stations).
- Directory Search Dialling, press SET after each station is entered.
(For details, see pages 80 to 83.)
Ex: 02
<02> STOCKHOLM 4681111234
5

The document(s) is stored into memory and your machine starts to send the document(s) to the Relay email address of the Relay Station with the telephone number for the End Receiving Station.
Ex: End Receiving Station:4681111234 (Telephone number) [See Note.]
Relay Station :uk-rly@london.panasonic.co.uk
After the Relay Station completes its transmission to the End Receiving Station(s), your machine receives a COMM. Journal from the Relay Station. This Journal confirms whether the Internet Relayed Transmission was successful.
* STORE * NO.002 PAGES=01 05%
* STORE * COMPLETED TOTAL PAGES=05 25%
ON LINE *MEM.XMT* uk-rly#4681111234@if

Note: 1. If the Relay Station requires a special access number to get an outside line, enter that access number first then press PAUSE to enter a pause (represented by a “-”) before entering the full number.
- The "#" character is not available for the email address of the relay station.
Sending Text Document(s) from a PC to a G3 fax machine
Using your email application, you can send text document(s) from your PC to one or multiple G3 fax machines automatically through the Internet Relay Station.
The Internet Relay Station (DX-1000) must be properly setup with all the required parameters.
Ex: In the "To:" box of your email application, type the following:
sg-rly#81331111234@singapore.panasonic.co.sg
- Relay XMT Password :sg-rly
-
+ End Receiving Station :#81331111234 (see Note)
- @ + Relay Station's Domain Name :@singapore.panasonic.co.sg
Your PC sends the text document(s) to the Relay email address of the Relay Station with the telephone number of the End Receiving Station.
After the Relay Station completes its transmission to the End Receiving Station(s), your PC receives a COMM. Journal from the Relay Station. This Journal confirms whether the Internet Relayed Transmission was successful.

Note: 1. The "#" symbol must be entered after the Relay XMT Password as it indicates to the DX-1000 that a phone number for the End Receiving Station will follow.
- If the Relay Station requires a special access number to get an outside line, enter that access number first then enter a hyphen (represented by a “—”) before entering the full number.
Printouts and Reports
When you use Relayed Transmission, your machine will print the following two reports to help you check and keep track of your faxes.
1. Relay XMT Report (COMM. JOURNAL)
When your machine finishes transmitting to the Relay Station, it will print a COMM. Journal when the Fax Parameter No. 61 is set to "2"(Always) or "3" (Inc. Only), this tells you whether the transmission was successful or not.
2. Transmission Journal
When the Relay Station receives instructions for a relayed transmission, a notification is emailed to the registered manager (see "Setting up your DX-1000 as an Internet Relay Station" on page 140)
Sample Relay XMT Report (COMM. JOURNAL)
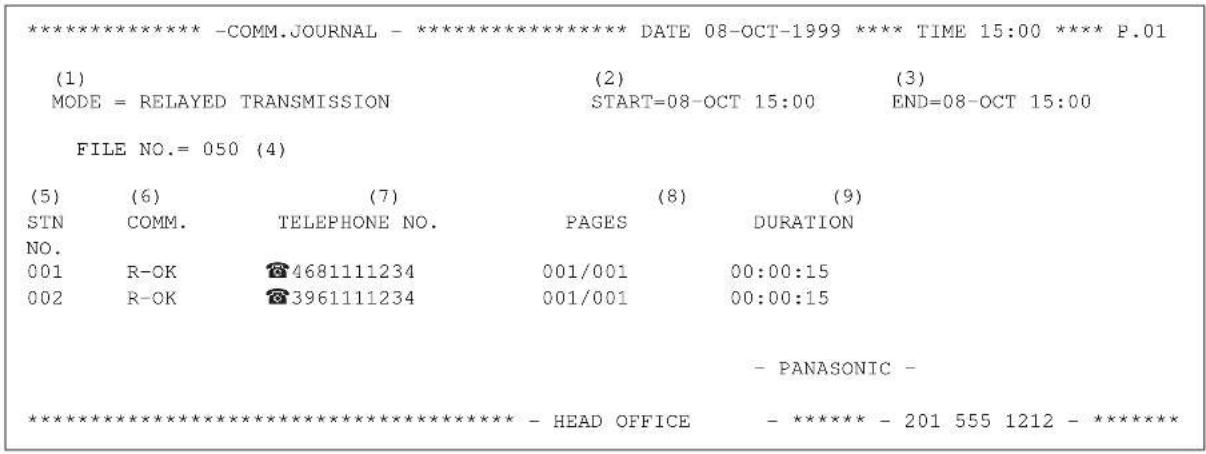
text_image
*************************** -COMM.JOURNAL - *************************** DATE 08-OCT-1999 **** TIME 15:00 **** P.01 (1) MODE = RELAYED TRANSMISSION (2) START=08-OCT 15:00 (3) END=08-OCT 15:00 FILE NO.= 050 (4) (5) (6) (7) (8) (9) STN COMM. TELEPHONE NO. PAGES DURATION NO. 001 R-OK 4681111234 001/001 00:00:15 002 R-OK 3961111234 001/001 00:00:15 - PANASONIC - *************************** - HEAD OFFICE - ********* - 201 555 1212 - **************************(1) Indicates the communication mode
(2) Start time of communication
(3) End time of communication
(4) File number : 001 to 255
(5) Sequential number of the stations :
(6) Communication result: "R-OK" indicates that the Relayed XMT Request was successful. 3-digit Info Code (see page 161) indicates that the communication has failed.
(7) Telephone Number of the end receiving station :[telephone symbol 📞] mark indicates telephone number dialed.
(8) Number of pages transmittedv : 3-digit number represents the number of pages successfully transmitted.
(9) Duration of communication

Note: If you transmit through more than one Relay Station, you will receive a separate Result Report.

Relayed Transmission
Sample Relayed Transmission Notification Email to a Manager
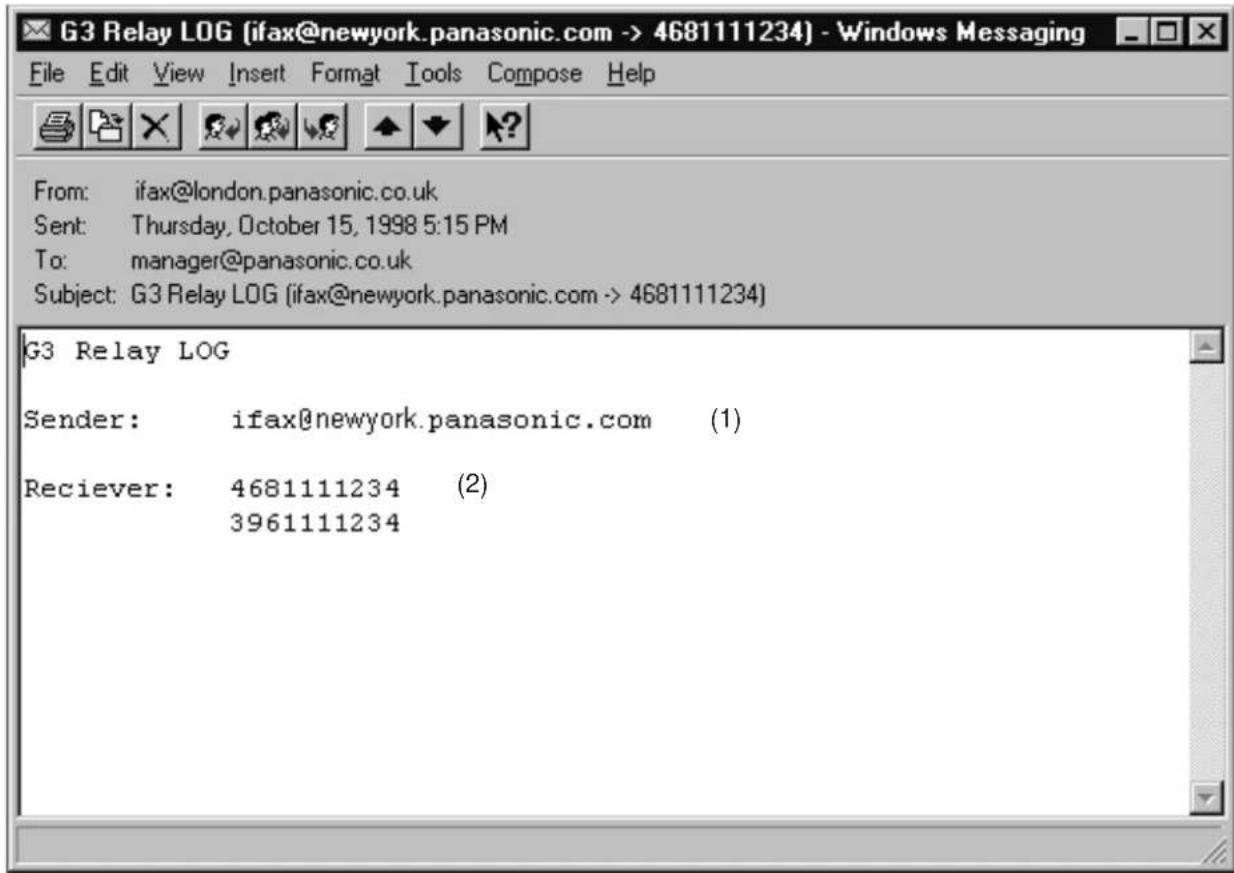
text_image
G3 Relay LOG (ifax@newyork.panasonic.com -> 4681111234) - Windows Messaging File Edit View Insert Format Tools Compose Help From: ifax@london.panasonic.co.uk Sent: Thursday, October 15, 1998 5:15 PM To: manager@panasonic.co.uk Subject: G3 Relay LOG (ifax@newyork.panasonic.com -> 4681111234) G3 Relay LOG Sender: ifax@newyork.panasonic.com (1) Receiver: 4681111234 (2) 3961111234Explanation of Contents
(1) Email address of the sender's Internet Fax (DX-1000) or PC
(2) End Receiving Station's G3 fax telephone number(s)
To help you maintain records of the documents you sent and received, as well as lists of the numbers you record, your facsimile machine is equipped to print the following journals and lists: Transaction Journal, Communication Journal, One-Touch/Abbreviated/Directory Search No. List, Program List, Fax Parameter List, and Power Failure Report.
Transaction Journal
The "Journal" is a record of the last 100 transactions (a transaction is recorded each time you send or receive a document). It is printed out automatically after every 100 transactions (see Note), but you can print or view it manually by using the following procedure:
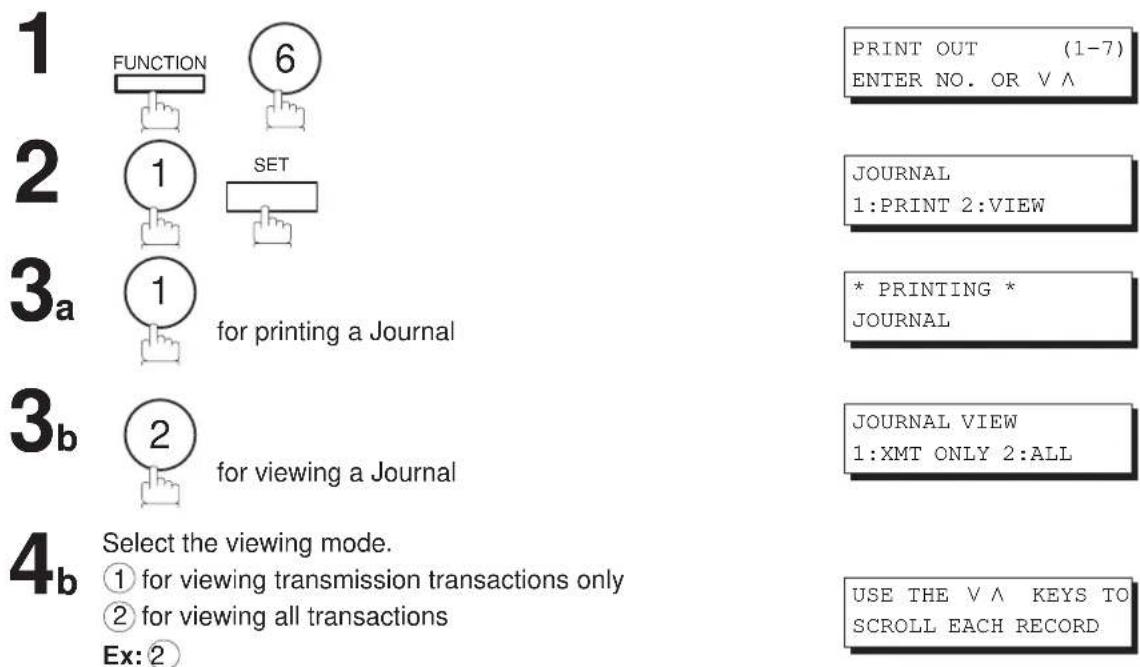
text_image
1 FUNCTION 6 2 1 SET 3a 1 for printing a Journal 3b 2 for viewing a Journal 4b Select the viewing mode. ① for viewing transmission transactions only ② for viewing all transactions Ex: ② PRINT OUT (1-7) ENTER NO. OR V ^ JOURNAL 1:PRINT 2:VIEW * PRINTING * JOURNAL JOURNAL VIEW 1:XMT ONLY 2:ALL USE THE V ^ KEYS TO SCROLL EACH RECORDYou can view the transactions in the journal by pressing ▼ or .^Press STOP to return to standby.
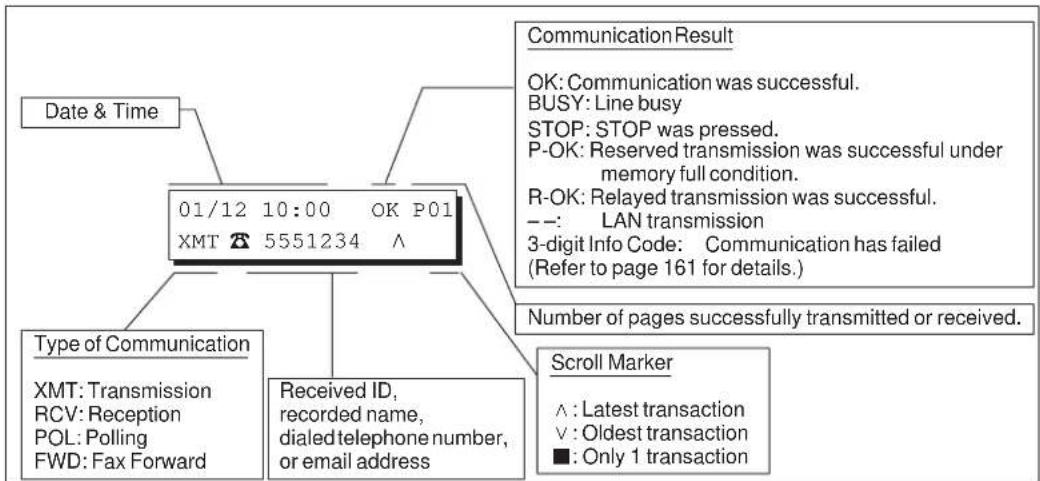
text_image
Date & Time 01/12 10:00 OK P01 XMT 5551234 ^ Communication Result OK: Communication was successful. BUSY: Line busy STOP: STOP was pressed. P-OK: Reserved transmission was successful under memory full condition. R-OK: Relayed transmission was successful. --: LAN transmission 3-digit Info Code: Communication has failed (Refer to page 161 for details.) Number of pages successfully transmitted or received. Type of Communication XMT: Transmission RCV: Reception POL: Polling FWD: Fax Forward Received ID, recorded name, dialed telephone number, or email address Scroll Marker ^ : Latest transaction ✓ : Oldest transaction ■ : Only 1 transaction
Note: If you wish to disable the automatic print out of the Transaction Journal, change the setting of Fax Parameter No. 13 to "Invalid". (See page 61)
Sample Transaction Journal
| ********** -JOURNAL-********** DATE 08-OCT-1999**** TIME 15:00**** P.01 | |||||||||
| (3) | (4) | (5) | (6) | (7) | (8) | (9) | (10) | (11) | (12) |
| NO. | COMM. | PAGES | FILE | DURATION | X/R | IDENTIFICATION | DATE | TIME | DIAGNOSTIC |
| 01 | OK | 001/001 | 149 | 00:00:52 | XMT | 215 | 08-OCT | 20:04 | C8444B0577000 |
| 02 | -- | 001/001 | 151 | 00:00:02 | XMT | TEST | 08-OCT | 20:07 | 01 STN(s) LAN |
| 03 | -- | 003/003 | 153 | 00:00:20 | XMT | fax@nwfax1 | 08-OCT | 20:09 | 01 STN(s) LAN |
| 04 | OK | 003 | 154 | 00:00:21 | RCV | fax@nwfax1.rdmg.mgcs | 08-OCT | 20:10 | LAN |
| 05 | OK | 001 | 155 | 00:00:19 | RCV | 215 | 08-OCT | 20:11 | C0542B0577000 |
| 06 | 634 | 000/003 | 156 | 00:00:00 | XMT | 216 | 08-OCT | 20:14 | 0800420000000 |
| 07 | 408 * | 003 | 00:02:14 | XMT | 217 | 08-OCT | 21:17 | 0040440A30080 | |
| 31 | STOP | 000/001 | 159 | 00:00:07 | XMT | TEL XMT | 08-OCT | 20:18 | CA40462000000 |
| 32 | OK | 001/001 | 160 | 00:00:16 | XMT | TEL XMT | 08-OCT | 20:19 | C8444B0577000 |
| (13) | |||||||||
| -PANASONIC | - | ||||||||
| ********** -HEAD OFFICE -**** - (15) | 201 555 | 1212-********** (14) | |||||||

Note: Email transmission sent to multiple locations is recorded as a single transaction on the Journal.
Explanation of Contents
(1) Printout date
(2) Printout time
(3) Journal number
(4) Communication result: "OK" indicates that the communication was successful.
"BUSY" indicates that the communication has failed because of busy line.
"STOP" indicates that STOP was pressed during communication.
"P-OK" indicates that memory overflow occurred while storing the documents into memory for transmission but successfully stored document(s) was sent.
"R-OK" indicates that the Relayed XMT was successful.
“—” indicates the transmission to LAN.
"3-digit Info Code" (see page 161) indicates that the communication has failed.
(5) Number of pages transmitted or received
: The 3-digit number is the number of pages successfully transmitted or received.
When the documents are stored into memory, two 3-digit numbers will appear. The first 3-digit number represents the number of pages successfully transmitted. The second 3-digit number represents the total number of pages that were attempted to be transmitted. Asterisk "*" indicates that the quality of some received copies was poor.
(6) File number : 001 to 255 (If the communication is stored into memory, a file number is assigned for each communication.)
(7) Duration of communication
(8) Type of communication : "XMT" means Transmission.
"RCV" means Reception.
"POL" indicates Polling.
"FWD" means Fax Forward.
(9) Remote station identification : Name : Recorded name in One-Touch or ABBR. Numbers or remote station's Character ID.
number : Dialed telephone number (PIN code will not be shown)
Number : Remote station's ID number.
Email address
(10) Communication date
(11) Communication Start time
(12) Diagnostic : For service personnel only
(13) Own LOGO: Up to 25 characters
(14) Own ID number : Up to 20 digits
(15) Own Character ID : Up to 16 characters
Communication Journal (COMM. JOURNAL)
The Communication Journal (COMM. JOURNAL) lets you verify whether the transmission or polling was successful. You may select the printout condition (Off/Always/Inc. only) in Fax Parameter No. 12.
Sample COMM. JOURNAL
| ********** - COMM. JOURNAL -********** DATE 08-OCT-1999 **** TIME 15:00 **** P.01 | |||||
| (1) | (2) | (3) | |||
| MODE = MEMORY TRANSMISSION | START=08-OCT 14:50 | END=08-OCT 15:00 | |||
| FILE NO.= 050 (4) | |||||
| (5) | (6) | (7) | (8) | (9) | (10) |
| STN | COMM. | ABBR | STATION NAME/EMAIL ADDRESS/TELEPHONE NO. | PAGES | DURATION |
| NO. | NO. | ||||
| 001 | OK | <01> | SERVICE DEPT. | 001/001 | 00:01:30 |
| 002 | OK | <02> | SALES DEPT. | 001/001 | 00:01:25 |
| 003 | 407 | <03> | ACCOUNTING DEPT. | 000/001 | 00:01:45 |
| 004 | BUSY | ☎ | 021 111 1234 | 000/001 | 00:00:00 |
| ... variations of print density o.. cause the photocell to generate an analogous electrical video signal. This signal is used to modulate a carrier, which is transmitted to a remote destination over a radio or cable communications link. At the remote terminal, demodulation reconstructs the video signal, which is used to modulate the density of print produced by a printing device. This device is scanning in a raster scan synchronised with that at the transmitting terminal. As a result, a facsimile copy of the subject document is produced. Probably you have uses for this facility in your organisation. Yours sincerely, Phil.P.J. CROSS Group Leader - Facsimile Research |
Explanation of Contents
(1) Indication of communication mode
(2) Start time of communication
(3) End time of communication
(4) File number : 001 to 255 (When the communication is stored into memory, a file number is assigned for each communication.)
(5) Station number : Sequential number of the Stations.
(6) Communication result: "OK" indicates that the communication was successful.
"BUSY" indicates that the communication has failed because of busy line.
"STOP" indicates that STOP was pressed during communication.
"P-OK" indicates that memory overflow occurred while storing the documents into memory for transmission but successfully stored document(s) was sent.
"R-OK" indicates that the Relayed XMT was successful.
“--” indicates the transmission to LAN.
"3-digit Info Code" (see page 161) indicates that the communication has failed. In this case, the machine will print out the attached report with first page of your document as shown on the previous page.
(7) One-Touch/Abbreviated number or mark
(8) Recorded name in One-Touch, ABBR., direct dialling number, or email address
(9) Number of pages transmitted or received
: ☎ mark indicates dialed by direct number dial.
: The 3-digit number is the number of pages successfully transmitted or received.
When the documents are stored into memory, two 3-digit numbers will appear. The first 3-digit number represents the number of pages successfully transmitted. The second 3-digit number represents the total number of pages that were attempted to be transmitted.
(10) Duration of Communication

Journals and Lists
One-Touch/Abbreviated and Directory Search List
To print a One-Touch/Abbreviated Number and Directory Search List of the telephone numbers you have stored.
text_image
1 FUNCTION 6PRINT OUT (1-7) ENTER NO. OR V A
2:ONE-TCH/ABBR LIST? PRESS SET TO PRINT
1:ONE-TOUCH/ABBR.NO. 2:DIR. SEARCH
4 1 for One-Touch/ABBR. Number List
2 for Directory Search List
* PRINTING * ONE-TOUCH/ABBR. LIST
* PRINTING * DIR. SEARCH LIST
Sample One-Touch List
| ********** -ONE-TOUCH LIST-********** DATE 08-OCT-1999 ***** TIME 11:11 *** P.01 | ||||
| (1) | (2) | (3) | (7) | |
| ONE-TOUCH | STATION NAME | EMAIL ADDRESS / TELEPHONE NO. | ||
| ROUTING SUB-ADDR (5) ROUTING TSI (6) | RELAY ADDR (ABBR. NO.) | |||
| <01> | John Smith | 201 555 3456 | ||
| 4452 +1 201 123 4567 | [001] | |||
| <02> | Jane Smith | 201 555 1212 | ||
| 1212 212 555 1234 | [002] | |||
| <03> | Bob Jones | jonesb@abcdefg.com | ||
| 123456 201 555 1212 | ||||
| <04> | Panafax1 | panafax1@rdmg.mgcs.mei.co.jp | ||
| 4827 +81 03 5251 1234 | ||||
| <05> | Panafax2 | panafax2@rdnn.mgcs.mei.co.jp | ||
| 1773 +81 0467 5251 1234 | ||||
| -PANASONIC | - | |||
| **********-HEAD OFFICE - ***** - 201 555 1212-********** | ||||
Sample ABBR. Number List
| ********** -ABBR NO. LIST-********** DATE 08-OCT-1999 ***** TIME 11:11 *** P.01(1) | ||||
| ABBR NO. | STATION NAME | EMAIL ADDRESS / TELEPHONE NO. | ||
| ROUTING SUB-ADDR | ROUTING TSI | RELAY ADDR (ABBR. NO.) | ||
| [001] | John Smith | 201 555 3456 | ||
| 4452 | +1 201 123 4567 | [009] | ||
| [002] | Jane Smith | 201 555 1212 | ||
| 1212 | 212 555 1234 | [010] | ||
| [003] | Bob Jones | jonesb@abcdefg.com | ||
| 123456 | 201 555 1212 | |||
| [004] | Panafax1 | panafax1@rdmg.mgcs.mei.co.jp | ||
| 4827 | +81 03 5251 1234 | |||
| [005] | Panafax2 | panafax2@rdnn.mgcs.mei.co.jp | ||
| 1773 | +81 0467 5251 1234 | |||
| -PANASONIC | - | |||
| **********-HEAD OFFICE - ***** - 201 555 1212-********** | ||||
Sample Directory Search List
| ********** -DIR. SEARCH LIST-********** DATE 08-OCT-1999 ***** TIME 11:11 *** P.01 | |||||
| (8) | (2) | (1) | (3) | (7) | |
| STATION NAME | ONE-TOUCH/ABBR. NO. | EMAIL ADDRESS / TELEPHONE NO.ROUTING SUB-ADDR (5) | ROUTING TSI (6) | RELAY ADDR (ABBR. NO.) | |
| [B] | Bob Jones | [003] | jonesb@abcdefg.com123456 | 201 555 1212 | |
| [J] | John Smith | [001] | 201 555 34564452 | +1 201 123 4567 | [009] |
| Jane Smith | [002] | 201 555 12121212 | 212 555 1234 | [010] | |
| [K] | Panafax1 | [004] | panafax1@rdmg.mgcs.mei.co.jp4827 | +81 03 5251 1234 | |
| [M] | PAnafax2 | [005] | panafax2@rdnn.mgcs.mei.co.jp1773 | +81 0467 5251 1234 | |
| NO. OF STATIONS = 06 (4) | |||||
| -PANASONIC -**********-HEAD OFFICE - ***** - 201 555 1212-********** | |||||
Explanation of Contents
(1) One-Touch or Abbreviated number :
[nnn] = Abbreviated number
(2) Station name recorded in the machine : Up to 15 characters
(3) Telephone number recorded in the machine Email address recorded in the machine
: Up to 36 digits (Telephone number)
: Up to 60 characters (Email address)
number:Telephone Number programmed into
One-Touch / ABBR. NO.
(4) Number of recorded One-Touch and ABBR. numbers
(5) Routing Sub-address : Up to 20 digits
(6) Routing TSI : Up to 20 digits
(7) Relay Address : 3-digit
(8) The first letter of station name recorded in your machine
Program List
To print a Program List of the Dialling Patterns that you have previously entered into the Program Keys.
text_image
1 FUNCTION 6PRINT OUT (1-7) ENTER NO. OR V ∧
3:PROGRAM LIST? PRESS SET TO PRINT
* PRINTING * PROGRAM LIST
Sample Program List
| ****************-PROGRAM LIST-**************** DATE 08-OCT-1999 ***** TIME 15:00 *** P.01 | ||||
| (1) | (2) | (3) | (4) | (5) |
| PROGRAM | PROGRAM/USER NAME | TYPE | ONE-TOUCH/ABBR. NO./PASSWORD | DELETE E-MAIL |
| [P1] | TEST | ONE-TOUCH | 5551234 | |
| [P2] | ACCOUNT | POP | ***** | Invalid |
| [P3] | ACC | POP | Invalid | |
| [P4] | PROG. B | ABBR/GRP | <01> <03> | |
| -PANASONIC | - | |||
| ****************-HEAD OFFICE - ***** - 201 555 1212-**************** | ||||
Explanation of Contents
(1) Program key
(2) Program name : Up to 15 characters
(3) Type of communication: "ABBR/GRP" indicates that the Program key is programmed as a group key.
"ONE-TOUCH" indicates that the Program key is programmed as a One-Touch key.
"POP" indicates that the Program key is programmed as a POP access key.
(4) Numbers recorded in the program: One-Touch numbers, ABBR. numbers or password.
number: Telephone Number programmed into Program Key.
(5) Deletion of received Email: "Valid" means that the received email will be deleted. "Invalid" means that the received email will be retained.
FAX Parameter List
To print out a FAX Parameter List:
text_image
1 FUNCTION 6PRINT OUT (1-7) ENTER NO. OR V ∧
4: FAX PARA LIST? PRESS SET TO PRINT
* PRINTING * FAX PARAMETER LIST
Sample FAX Parameter List
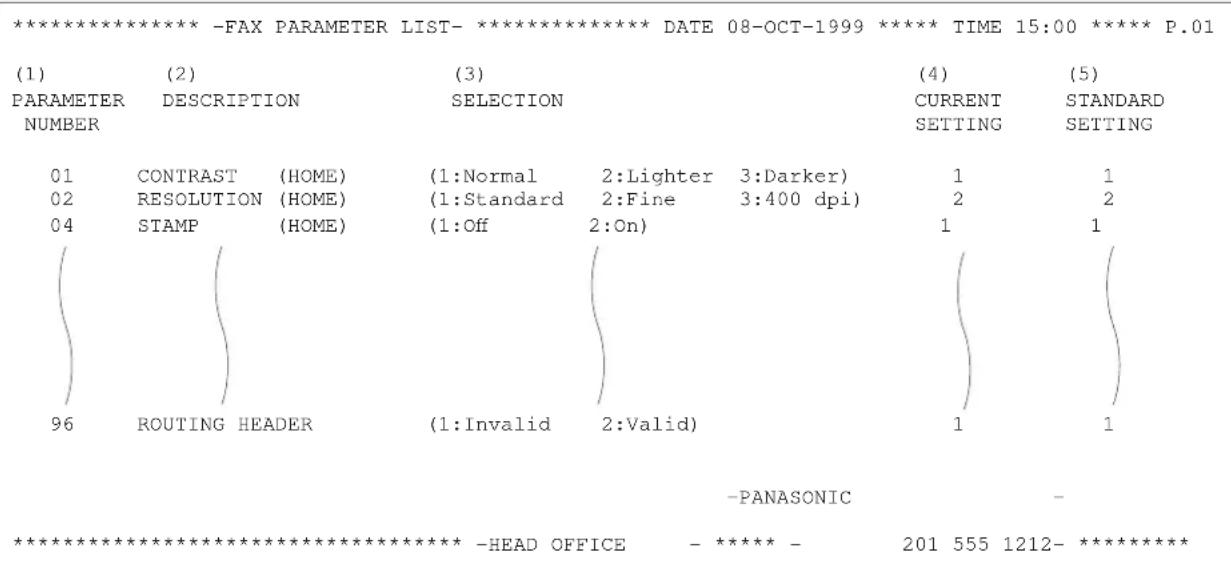
text_image
**************** -FAX PARAMETER LIST-**************** DATE 08-OCT-1999 ***** TIME 15:00 ***** P.01 (1) (2) (3) (4) (5) PARAMETER DESCRIPTION SELECTION CURRENT STANDARD NUMBER SETTING SETTING 01 CONTRAST (HOME) (1:Normal 2:Lighter 3:Darker) 1 1 02 RESOLUTION (HOME) (1:Standard 2:Fine 3:400 dpi) 2 2 04 STAMP (HOME) (1:Off 2:On) 1 1 96 ROUTING HEADER (1:Invalid 2:Valid) 1 1 -PANASONIC - **************** -HEAD OFFICE - ***** - 201 555 1212- ******************Explanation of Contents
(1) Parameter number
(2) Description : "(HOME)" means home position setting.
(3) Selection
(4) Current setting : "----" indicates code or password is not set. When the code or password is set, it is represented by asterisk(*).
(5) Standard setting : Factory preset standard setting
Sample Internet Parameter List
*************************** -FAX PARAMETER LIST- ****************************** DATE 08-OCT-1999 ***** TIME 11:11 *** P.02
*** INTERNET PARAMETERS ***
MAC ADDRESS : 080023000FF9
IP ADDRESS : 140.212.123.125
SUBNET MASK : 255.255.255.255
SMTP SERVER NAME : ifeif1.mgcs.mei.co.jp
DEF. ROUTER IP ADDR : 172.21.22.1
EMAIL ADDRESS : fax@nwfax1
DNS SERVER IP ADDRESS : 133.185.247.45 (See Note)
POP SERVER NAME : ifeif1.mgcs.mei.co.jp
POP USER NAME : Panasonic
POP PASSWORD : *****
HOST NAME : nwfax1
DEFAULT SUBJECT : xyz
DEFAULT DOMAIN : ifeif1
REMOTE PASSWORD : *****
RELAY XMT PASSWORD : *****
MANAGER'S EMAIL ADDR : iwama@nwws1
DOMAIN NAME
(01) : jp
(02) : com
(03) :
(04) :
(05) :
(06) :
(07) :
(08) :
(09) :
(10) :
-PANASONIC -

Note: By default the machine will prompt you to enter the SMTP and POP Server Names. To change the prompt to IP Address, change the Fax Parameter No. 94 (DNS SERVER) to "1:Invalid".
Power Failure Report
The DX-1000 has a built-in rechargeable battery installed to retain the document information for up to 1 hour when a power failure occurs.
However, if the battery system has problems, the document information might be lost. In this case, a Power Failure Report will be printed automatically for each file separately, after the Power is turned ON again. This report is not printed if there were no files in the memory.
Sample Power Failure Report
| ********** -POWER FAILURE REPORT- ******* DATE 08-OCT-1999 ***** TIME 15:00 *** P.01 | ||||
| POWER FAILURE OCCURRED ! | ||||
| FROM *** 08-OCT-1999 10:00 *** (1) | ||||
| TO *** 08-OCT-1999 15:00 *** (2) | ||||
| FOLLOWING FILE(S) HAS BEEN LOST. | ||||
| (3) | (4) | (5) | (6) | (7) |
| FILE NO. | COMM.TYPE | ONE-TOUCH/ABBR. NO. | STATION NAME/EMAIL ADDRESS/TELEPHONE NO. | PAGES |
| 002 | MEM.XMT | 003 | ||
| 003 | RCV TO MEMORY | 005 | ||
| 015 | MEM.XMT | <01> | SALES DEPT. | 000/003 |
| <02> | SERVICE DEPT | 000/003 | ||
| 018 | MEMORY XMT | <03> | ACCOUNTING DEPT. | 005/005 |
| ☎ | 021 111 1234 | 000/005 | ||
| -PANASONIC | - | |||
| ********** -HEAD OFFICE - ***** - 201 555 1212- ******* | ||||
Explanation of Contents
(1) Power failure date and time
(2) Power return date and time
(3) File number : 001 to 255.
(4) Communication type
(5) One-Touch/Abbreviated number or ℜ mark : ℜ mark indicates dialed by Manual Number dialling
(6) Recorded name in One-Touch, ABBR., direct dialling number, or email address
(7) Number of pages stored : The first 3-digit number represents the number of page successfully transmitted. The second 3-digit number represents the number of pages stored in memory.
If You Have Any of These Problems
| Mode Symptom | Action page | ||
| During Installation | The display is blinking | Battery discharged completely. This may happen at first installation. After setting the clock, the blinking will stop. | 36 |
| During Transmission | Document doesn't feed/multiple feed | 1. Check that your document is free of staples and paper clips, and that it is not greasy or torn.2. Check that your document is the right type to send through a fax machine by consulting the list on "Documents You Cannot Send". If your document has the characteristics listed, make a photocopy of your document and send the copy instead.3. Check that the document is loaded properly.4. Adjust the ADF Pressure Plate. | 6566169 |
| Document jam | The information code 031 will appear on the display if the document becomes jammed. | 166 | |
| Does not stamp | 1. Check if Stamp LED is lit.2. Check Fax parameter No. 04 and No. 28 settings. | 6860,61 | |
| Stamp too light | Replace stamp or refill ink. 170 | ||
| Transmission Copy Quality | Vertical lines on the transmitted document | Check own copy quality. If copy is OK, your machine has no problem, report to receiving party that they have a problem. If copy is NG, clean the Document Scanning Area. | 167 |
| Transmitted document is blank | 1. Make sure the document is set face down.2. Check own copy quality. If copy is OK, your machine has no problem, report to receiving party that they have a problem. If copy is NG, clean the Document Scanning Area. | 167 | |
| During Reception | No recording paper | The information code 010 will appear on the display if the paper runs out. | 30 |
| Recording paper jam | The information code 001, 002 or 003 will appear on the display if the paper gets jammed. | 165 | |
| Recording paper does not advance into machine | Make sure that there is paper in the Paper Cassette. Follow the instructions for loading paper. | 30 | |
| Recording paper does not eject after printing | Check to see if the recording paper is jammed inside of the machine. | 165 | |
| Recording papers are not stacked in sequence. Machine does not print from the last page received. | 1. Check if Fax Parameter No. 65 is set to valid.2. If memory becomes full during reception, the machine will start to print from the 1st page received. We recommend that optional memory is installed if this symptom is encountered frequently. | 62177 | |
| Document auto reduction does not work | Check Print Reduction settings. 101 | ||
| Out of toner | The information code 041 will appear on the display if the Toner Cartridge runs out of toner. | 28 | |
| Print Copy Quality | Vertical lines printing on the received document | Printout a Journal report (e.g. [FUNCTION], [6], [1] and [SET]) and check quality to make sure whether your machine has a trouble.If Journal report quality is OK, your machine has no problem, report to the sending party that they have a problem.If copy is NG, replace the Toner Cartridge. | 14728 |
| Fuzzy print 1. Make sure | you are using the correct paper for the best possible print quality.2. Try reversing the recording paper to the other side. | 176 | |
| Missing dots or lines/inconsistent darkness within print | 1. Make sure you are using the correct paper for the best possible print quality.2. Replace the Toner Cartridge. | 17628 | |
| Fading print | The Toner Cartridge may be running out of toner. Replace the Toner Cartridge. | 28 | |
| Faint print | You may need to choose a different paper for the best possible print quality. | 176 | |
| Communication | No dial tone | 1. Check the connection of the telephone line.2. Check the telephone line. | 171 |
| No auto answer | 1. Check the connection of the telephone line.2. Check the Reception mode setting.3. Check if machine is printing a report. (e.g.: Transaction Journal, Fax Parameter List).If machine is printing a report, machine cannot receive until printing is completed.4. If the printed document is the final Transaction to print the Transaction Journal automatically, machine will usually print the Transaction Journal automatically after printing out the document. In this case, the machine cannot receive until the Transaction Journal has been printed. | 171100 | |
| Cannot transmit or receive | An information code will be shown on the display. Refer to the information code table to find out the trouble. | 161 | |
| No Unit Operation | No unit operation | To reset the machine, turn-off the Power Switch for a few second then turn-on again. | 33 |
Information Codes
When something unusual occurs, the display may show one of the Information Codes below. These will help you to identify and correct the problem.
| Info. Code | Meaning Action Page | ||
| 001/002 | Recording paper jam. Remove jammed paper. 165 | ||
| 010 No | recording paper. Load the paper. 30 | ||
| 011 | Recording Paper Cassette is not installed properly. | Install the Recording Paper Cassette. | -- |
| 017 | Incorrect paper size loaded in the Paper Cassette. | Load the Paper Cassette with proper paper size (A4, LTR or LGL). | 30 |
| 030 Document misfeeding. 1. Reload the document properly. | 2. Remove document jam.3. Adjust ADF. | 66166169 | |
| 031 Document paper is too long or jammed.Document length exceeds ??? meters. | 1. Reload the document properly.2. Remove document jam. | 66166 | |
| 041 | Out of toner. | Replace the Toner Cartridge. | 28 |
| 045 | Toner Cartridge is not installed. | Install the Toner Cartridge. | 28 |
| 060 | Printer Cover is opened. | Close the Printer Cover. | -- |
| 061 | ADF Door is open. | Close the ADF Door. | -- |
| 063 Jam | Access Cover (Optional 2nd Feeder Unit) is open. | Close the Jam Access Cover. | -- |
| 064 Jam | Access Cover (Optional 3rd Feeder Unit) is open. | Close the Jam Access Cover. | -- |
| 400 During initial handshake, receiving station did not respond or communication error occurred. | 1. Check with other party.2. Reload the document and send again. | -- | |
| 401 Remote station requires your ID Number.Remote station required a Receiving Password to receive the document.Mailbox is full. | Program your ID Number.Check the remote station. | -- | |
| 402 During initial handshake, communication error occurred. | Reload the document and send again. | -- | |
| 403 | No polling capability at the remote side. | Ask remote side to set "POLLED=ON". | -- |
| 404/405 During initial handshake, communication error occurred. | Reload the document and send again. | -- | |
| 407 No | confirmation from the receiving station for the previous page sent. | Wait a few minutes and send again. | -- |
| 408/409 | Remote side confirmation of previous page is illegible. | Wait a few minutes and send again. | -- |
| 411 | Polling password does not match. | Check polling password. | 131 |
| 412 No | data from the transmitting side. Check with the other party. -- | ||
| 414 Polling | password does not match. Check polling password. 131 | ||
| 415 Polling | transmission error. Check polling password. 131 | ||
| 416/417 418/419 | Received data has too many errors. Check with the other party. -- | ||
| 420 Machine goes to receiving mode, but receives no command from the transmitting side. | 1. Remote side misdial.2. Check with the other party. | -- | |
| 422/427 Interface is incompatible. Check with the other party. -- | |||
| 430/434 | Communication error occurred while receiving. Check with the other party. -- | ||
| 436/490 | Received data has too many errors. Check with the other party. -- | ||
| 492/493 494 | Communication error occurred while receiving. Check with the other party. -- | ||
| 495 Telephone line disconnected. Check with the other party. -- | |||
| 540/541 542 543/544 | Communication error occurred while transmitting. 1. Reload the document and send again.2. Check with the other party. | -- | |
| 550 Telephone line disconnected. Check with the other party. -- | |||
| 552/553 554/555 | Communication error occurred while receiving. Check with the other party. -- | ||
| 580 Sub-address transmission to a unit that has no Sub-address function. | Check the remote station. | 121 | |
| 581 Sub-address Password transmission to a unit that has no Password Sub-address function. | Check the remote station. | 121 | |
| 601 | ADF Cover was opened during ADF transmission. | Close the ADF Cover. | 166 |
| 623 | No document was on the ADF. | Reload the document and send again. | -- |
| 630 Redial | was not successful due to a busy line or no response from the called station. | Reload the document and send again. | -- |
| 631 | During dialling, STOP was pressed. | Reload the document and send again. | -- |
| 634 Redial | was not successful due to a busy line or no response from the called station. | Reload the document and send again. | -- |
| 638 | Power failure occurred during the communication. | Check the power cord and plug. | 32 |
| 712 | Incorrect email address. | Check the registered email address. Check the IP Address of the SMTP Server with the Network Administrator. | -- |
| 713 | Memory overflow in the LAN Interface. | The document data exceeded 1.6 MB/page and cannot be sent. | -- |
| 714 | Cannot logon to the LAN. | Check the 10Base-T cable connection. An unexpected LAN problem occurred. Contact the Network Administrator. | -- |
| 715 | TCP/IP connection timed out. | Check the Internet Fax parameter settings. Verify the IP Address, Default Router IP Address, SMTP Server IP Address. | -- |
| 716 | Cannot logon to the designated SMTP Server. | Check the SMTP Server IP Address setting. Contact the Network Administrator. | -- |
| 717 | Incomplete SMTP Protocol transmission. SMTP Server's hard disk may be full. | SMTP Server is defective. Contact the Network Administrator. | -- |
| 718 | Page Memory Overflow occurred while receiving printing data. The paper size selected within your application to print is larger than the paper size loaded in the cassette(s). | Check the document size and resolution. Ask originator to re-send in a supported size and resolution. | -- |
| 719 | Received data via LAN is in a format that is not supported. | Ask the originator to re-send with a supported file attachment format: * In a TIFF-F format. * Image data conforming to A4/Letter size. | -- |
| 720 | Cannot connect to the POP Server.(Incorrect POP Server IP Address) POP Server is down. | Check the POP Server IP Address. Contact the Network Administrator. | -- |
| 721 | Cannot connect to the POP Server.(User Name or Password error) | Check the POP User Name and Password. Contact the Network Administrator. | -- |
| 725 | DNS Server connection timed out. DNS Server is down. | Check the DNS Server IP Address. Contact the Network Administrator. | -- |
| 726 | Received an error response from the DNS Server. | Check the POP Server Name. Check the SMTP Server Name. | -- |
| 730 | Cannot program the Auto Dialer remotely via email from a PC. | Check that the Fax Parameter No. 91 is set to "2:Valid". | 64 |
| 731 | The dialer buffer for manual dialling was full (50 stations) when the Relay Transmission Request was received. | Request the originator to re-send the Relay Transmission Request after the reserved communication is finished. | -- |
| 870 Memory overflow occurred while storing documents into memory for transmission. | Transmit documents without storing into memory. Order additional memory option. | 85 | |
| 879 Memory overflow occurred while receiving documents into memory. Receiving documents with data that is greater than the memory size. | 1. Check recording paper and toner cartridge.2. Install Optional Memory Card. | 2830 | |
| 975 DR AMAP address over the document information in memory is lost. | 1. Unit will print out a Power Failure Report.2. Resend the lost document. | 158 | |

Note: After identifying the problem and verifying the recommended action, if the Information Codes keep reoccurring or for help on Information Codes that appear on your machine but are not listed above, please contact your local Panasonic Authorized Dealer.
Email ABBR Programming Errors
Error Message Sent to the Sender
Error messages that are emailed from the DX-1000 to the original sender during remote programming of the One-Touch / ABBR. No. via email.
| Error message | Possible cause | |
| 1 | 554 Data transfer error (broken header) | The header or sub header decoding is being processed while the message finished, try again. |
| 2 | 554 Data transfer error (broken data) | Multiple contents are present and being processed while the message finished, try again. |
| 3 | 554 Data transfer error (FAX module) | Data transfer error occurred in the FAX module while communicating with the LAN module, try again. |
| 4 | 554 MIME attachment not supported (message/file) | MIME attachment is not supported during this operation, re-send using plain text in the message body only. |
| 5 | 554 MIME format not supported | MIME file type is not supported, re-send using plain text in the message body only. |
| 6 | 554 ABBR. Dialer contains programmed data | Can not overwrite existing programmed data, use the "Delete" command to erase existing data first. |
| 7 | 554 ABBR format error | Incorrectly used script in the "SET ABBR" command of the Subject line. Correct the script and try again. |
| 8 | 554 Incorrect password | Incorrect password specified in the "SET ABBR" command of the Subject line. Correct the password and try again. |
| 9 | 554 Memory full (FAX module) | FAX Memory is full, try again later. |
| 10 | 554 Data transfer error | Other errors not listed above, try again later. |
Internet FAX Return Receipt Errors Messages
Error messages that are printed on the Internet Fax Return Receipt when remote programming of the One-Touch // ABBR. No. via email fails.
| Error message | Possible cause | |
| 1 | Format Error: <@list block, the "@end" command is missing.> | The block termination command "@end" is missing in the "@list" block, add the "@end" command and try again. |
| 2 | Format Error: <@command block, the "@end" command is missing.> | The block termination command "@end" is missing in the "@command" block, add the "@end" command and try again. |
| 3 | Format Error: <@begin block, the "@begin" command is missing.> | The block start command "@begin" is missing in the "@begin" block, add the "@begin" command and try again. |
| 4 | Format Error: <@begin block, the "@end" command is missing.> | The block termination command "@end" is missing in the "@begin" block, add the "@end" command and try again. |
| 5 | Permission denied: <Fax Forward parameter is set to "Valid".> | Change the Fax Forward parameter to "Invalid" and try again. |
| 6 | Permission denied: <Fax machine is busy performing a task.> | Try again later when the machine is not busy. |
| 7 | Error: <ABBR. Dialer contains programmed data.> | Can not overwrite existing programmed data, use the "Delete" command to erase the existing data first. |
| 8 | Permission denied: <Password is incorrect.> | Correct the password and try again. |
| 9 | Permission denied: <Remote Dialer Update parameter is set to "Invalid".> | Set the Remote Dialer Update parameter to "Valid". |
| 10 | Format Error: <line no.> | The format of the Entry is incorrect / incomplete or the data string for each station is not defined within a single line. |
| 11 | Warning: <line no.> | The format of the Entry is incorrect or the number of characters entered, exceed the maximum allowed in the field. Correct it and try again. |
Clearing a Recording Paper Jam
If the recording paper becomes jammed in the machine, the display will show an Information Code 001 or 002.
To clear the jam, Info. Code 001
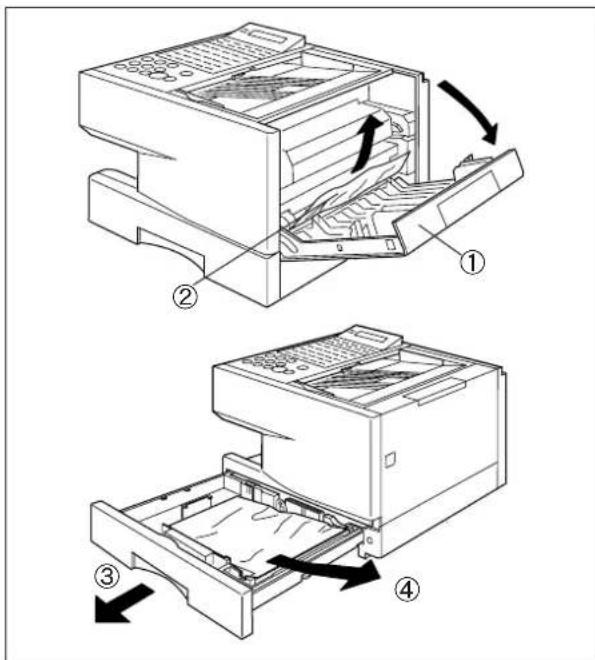
text_image
Technical diagram showing two views of a printer's internal structure with numbered annotations and directional arrows indicating process flow.①Open the Printer Cover.
②Remove the jammed paper.
③Slide out the Paper Cassette.
④Remove the jammed or wrinkled paper and reload the recording paper into the paper cassette.
Caution: Make sure that the paper is set under the clips of the Paper Cassette. You can load about 250 sheets with standard weight paper (20 lb. or 75 g/m ^4 ). For paper specification see page 176
To clear the jam, Info. Code 002
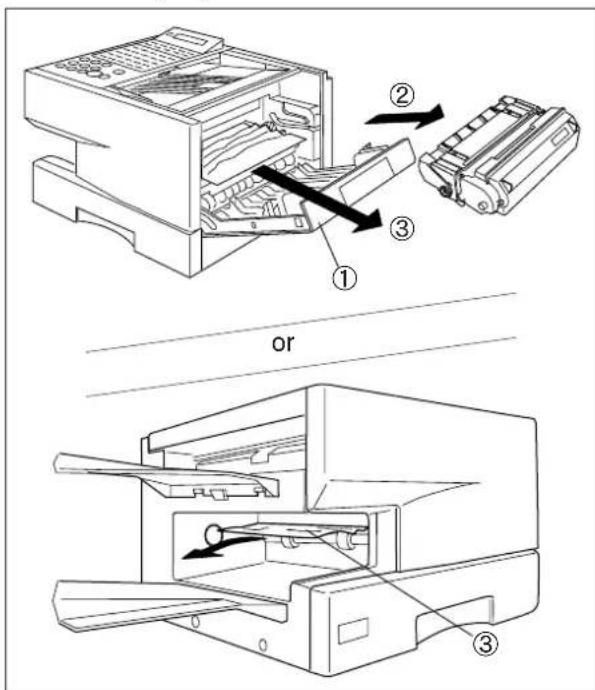
text_image
Technical diagram showing assembly steps of a printer with labeled parts and directional arrows indicating process flow.① Open the Printer Cover.
② Remove the Toner Cartridge.
③ Remove the jammed paper.

Note: The Recording Paper Jam message display is reset only by opening and closing of the Printer Cover.

Troubleshooting
Clearing a Document Jam
If a document becomes jammed in the machine, the display will show the Information Code 031.
To clear the jam
1
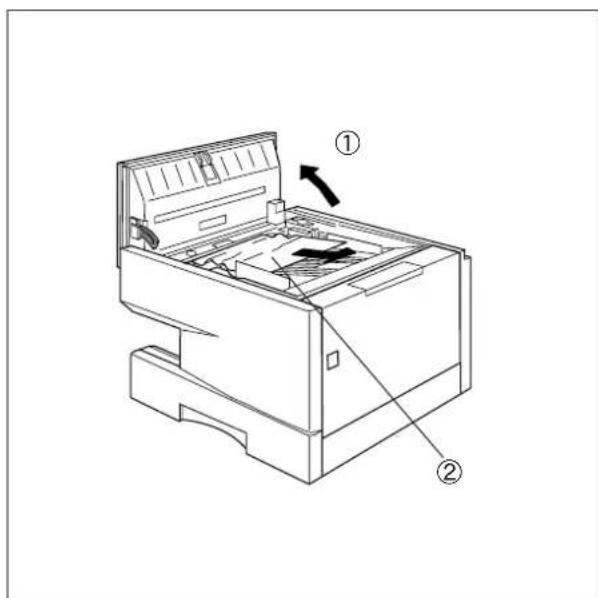
text_image
Technical diagram of a printer with labeled parts and directional arrow indicating rotation or movement①Open the ADF Door.
②Remove the jammed document.
Cleaning the Document Scanning Area
If the receiving party reports that the received documents were black, or contained black lines, make a copy on your unit to verify. If the copy is black or has black lines, the document Scanning Area is probably dirty and must be cleaned.
To clean the Scanning Area
1
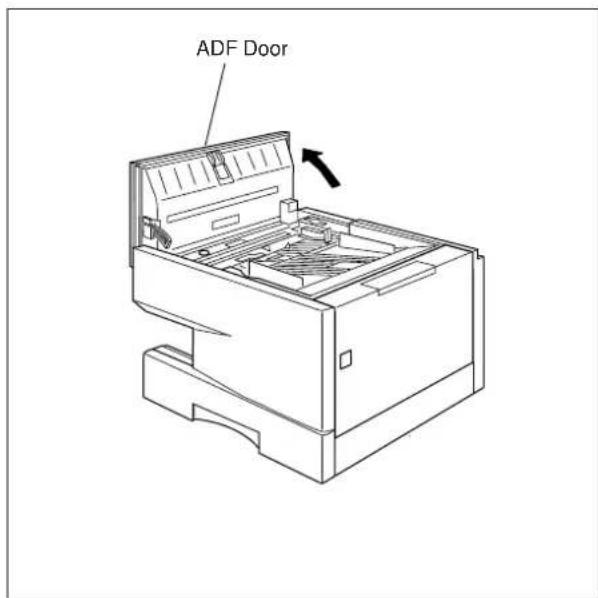
text_image
ADF DoorOpen the ADF door.
2
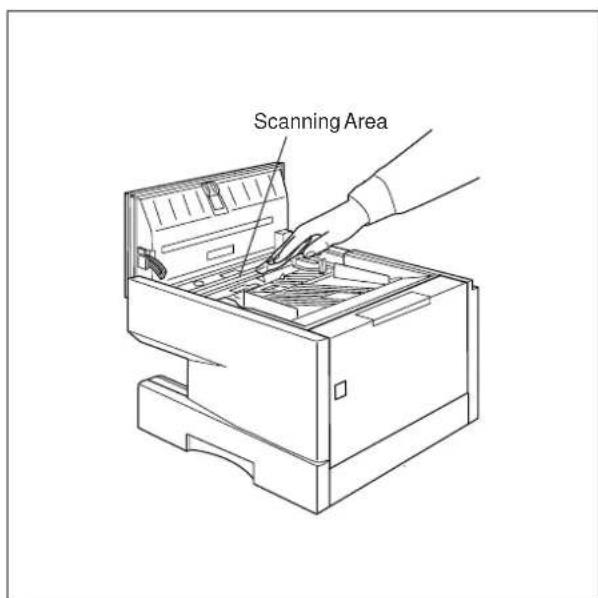
text_image
Scanning AreaWipe the Scanning Area gently with a soft cloth gauze wet with ethyl alcohol. Be sure to use a clean cloth, the scanning area can be easily scratched.

Troubleshooting
Cleaning the Printer Roller
If you find toner on the back of the recording paper, the printer roller in the fuser unit is probably dirty. To clean the printer roller
1
FUNCTION


SET MODE (1-6)
ENTER NO. OR V A
2


PLEASE WAIT FOR
PRINTOUT TEST CHART
Machine will print out 3 pages of the Cleaning Chart.
HOW TO LOAD CLEANING CHART
- OPEN THE PAPER CASSETTE
(If multiple cassette configuration, 1. OPEN THE UPPER PAPER CASSETTE)
2.SET THESE 3 CLEANING CHARTS IN THE CASSETTE FACE UP - CLOSE THE PAPER CASSETTE
- UNIT WILL START CLEANING THE PRINTER ROLLER AUTOMATICALLY
- DISPOSE CLEANING CHART

text_image
*** SET THIS END TOWARDS THE RIGHT, FACE UP ***After printing the Cleaning Charts, the following message will appear.
LOAD CHART IN PAPER CASSETTE FACE UP
3
Slide out the paper cassette from the machine. Then, load the Cleaning Charts into the cassette face up. (See Note)
4
Close the paper cassette. Machine will automatically feed out the charts in order to clean the printer roller.
* CLEANING * PRINTER ROLLER

Note: If you have installed the optional 2nd cassette, load the Cleaning Chart into the upper cassette.
Adjusting the Automatic Document Feeder (ADF)
If document misfeeding occurs frequently, we suggest you to adjust the ADF.
To adjust the ADF,
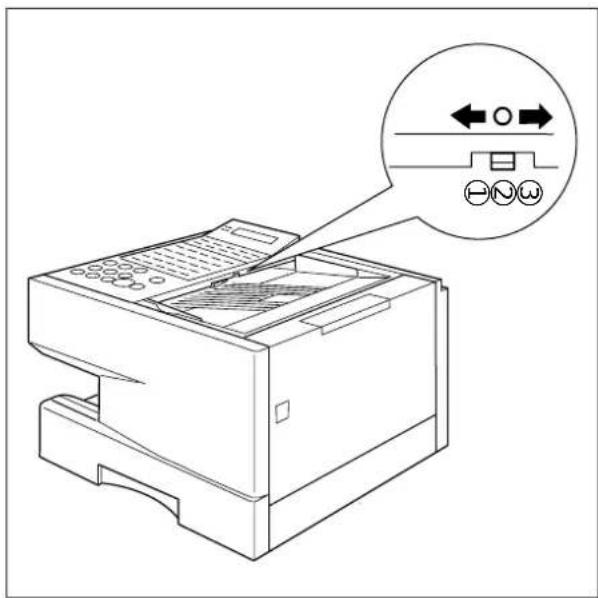
text_image
Technical diagram of a printer with an inset showing a circular component labeled with directional arrows and icons.Pull the blue Pressure Adjusting Lever upward and slide it to the desired position depending on the condition.
| Position Condition |
| 1 To prevent no feed trouble |
| 2 Standard position |
| 3 To prevent multiple feed trouble |


Troubleshooting
Verification Stamp
The Verification Stamp contains ink. When the stamp mark appears faded or hard to see, the stamp should be replaced or refilled with ink.
To remove the stamp
1
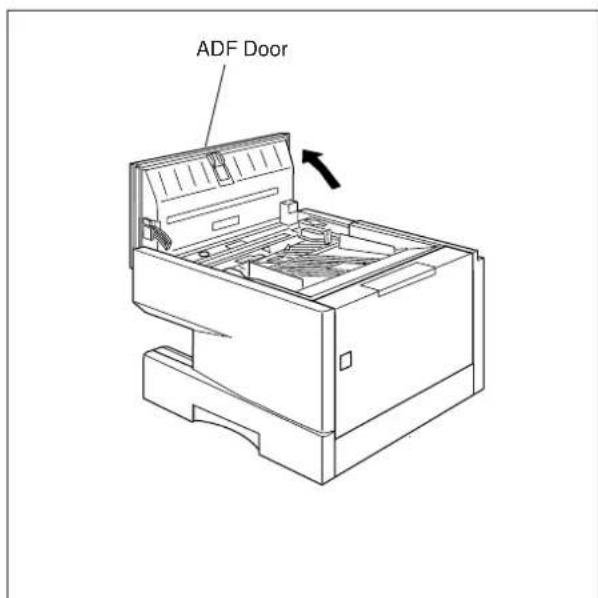
text_image
ADF DoorOpen the ADF door.
2
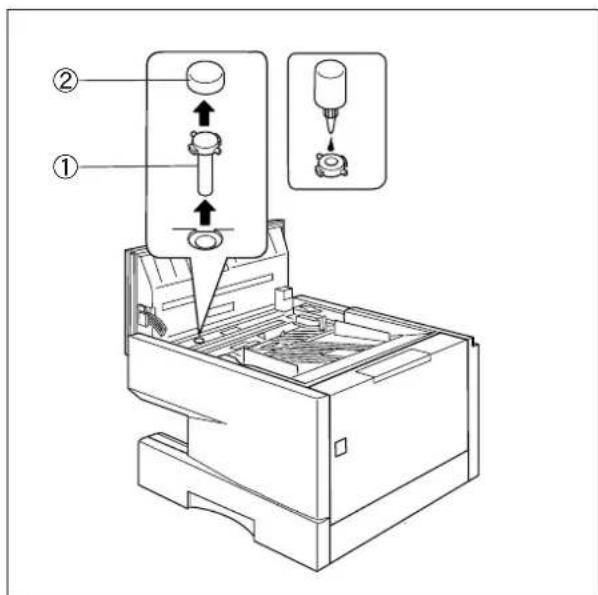
text_image
Technical diagram of a printer with labeled parts and assembly instructions in Chinese①Remove the Stamp Assembly upward.
②Remove the Stamp. Replace the stamp with a new one or refill the stamp with a few drops of the specified ink into the back of the stamp.

Note: Please contact your local Panasonic dealer to purchase a new stamp. See page 177 for order number.
Checking the Telephone Line
When you do not hear a dial tone through the telephone connected to the machine or when the telephone does not ring (No automatic receive).
1
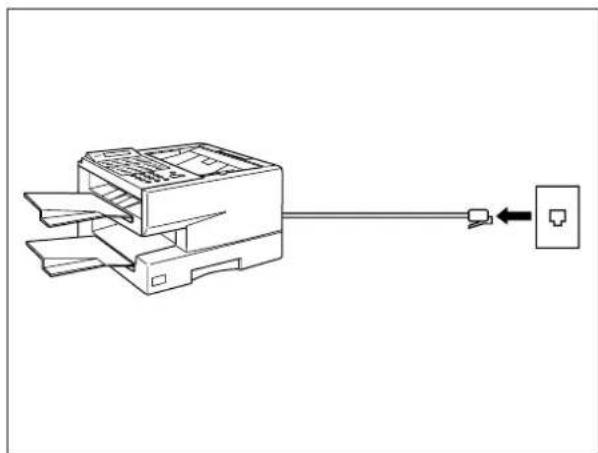
natural_image
Line drawing of a printer with an Ethernet cable pointing to it (no text or symbols present)Unplug the Telephone Line Cord from the telephone jack that was supplied by the telephone company.
2
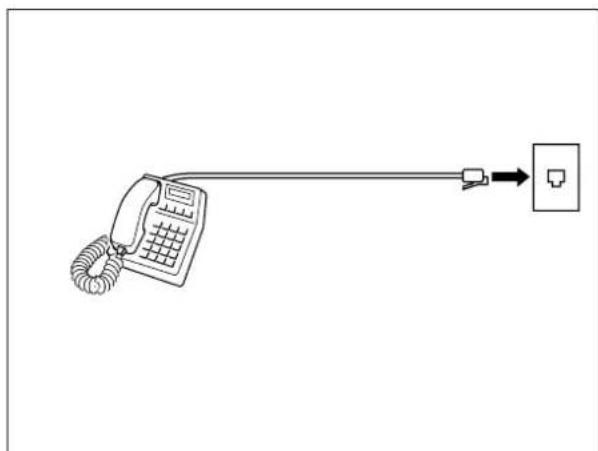
natural_image
Line drawing of a telephone handset connected to a socket via a cable, with no text or symbols present.Plug a different regular telephone into the same telephone jack.
3
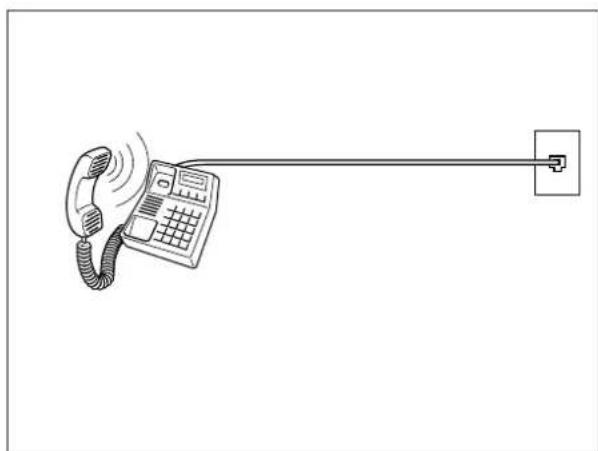
natural_image
Line drawing of a telephone handset with a cord, connected to a wall-mounted device (no text or symbols present)Check for dial tone through the handset. If there is still no dial tone, report it to your local telephone company.
or
Call from another telephone to this number. If the telephone does not ring, report it to your local telephone company.
This page is intentionally left blank.
Compatibility ITU-T/CCITT Group 3
Coding Scheme MH, MR, MMR (Conforms to ITU-T/CCITT Recommendations)
Modem Type ITU-T/CCITT V.17, V.33, V.29, V.27 ter and V.21
Modem Speed 14400–2400 bps
Document Size Max.: 280 mm x 2000 mm
(with operator's assistance)
Min. : 148 mm x 128 mm
Document Thickness Single sheet : 0.06 mm (45 g/m ^2 ) to 0.15 mm (112 g/m ^2 )
Multiple sheets : 0.06 mm (45 g/m ^2 ) to 0.12 mm (75 g/m ^2 )
ADF Capacity
(Automatic Document Feeder)
Built-in, up to 50 sheets
Scanning Method Sheet Feeding with CCD type image sensor
Effective Scanning Width 248 mm
Scanner Resolution Horizontal : 8 pels/mm
Vertical : 3.85 lines/mm
7.7 lines/mm
15.4 lines/mm : Transmission only
Recording Method Laser printer
Recording Paper Plain Paper
Recording Paper Size Letter, A4 or Legal
Printer Resolution 406 × 391 dpi
Effective Recording Size Letter : 208 mm x 271 mm
A4 : 202 mm x 289 mm
Legal : 208 mm x 348 mm
Print Margin
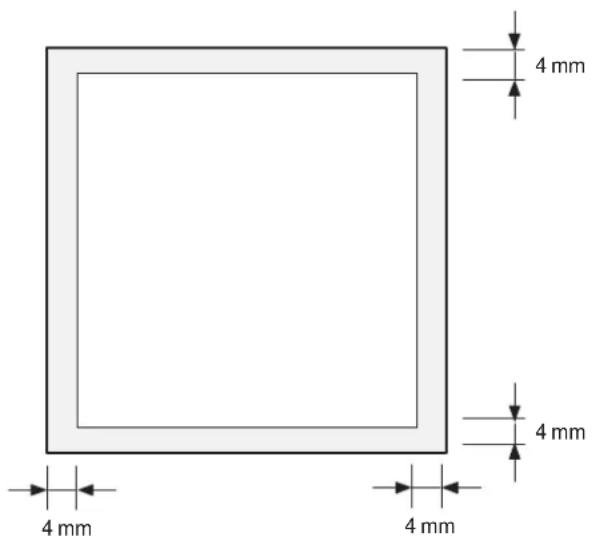
text_image
4 mm 4 mm 4 mm 4 mmRecording Paper Capacity Approx. 250 sheets (using 75 g/m ^2 paper)
One-Touch/Abbreviated
200 stations
Dialling Memory Capacity
(including 32 One-Touch keys and 8 Program keys)
Each station can register up to 36 digits for each telephone number and up to 60 characters for each email address (including pauses and spaces) and up to 15 characters for each station name
Image Memory Capacity Approx. 350 pages
(Based on ITU-T/CCITT Image No.1 using Standard Resolution)
Power Supply 180–246 VAC, 47–63Hz, Single Phase : 200 V version
(90-138 VAC, 47-63Hz, Single Phase : 100 V version)
Power Consumption Standby : Approx. 10Wh (100 V version)
12Wh (200 V version)
(Power Saver Mode : On)
: Approx. 80Wh
(Power Saver Mode : Off)
[Room temperature : 25°C]
Transmission: Approx. 20W
Reception : Approx. 460W
Copy: Approx. 460W
Max : Approx. 460W
Network Connection Local Area Network (LAN) Ethernet/IEEE 802.3 Physical Interface; RJ-45 (10Base-T)
Communication Protocol TCP/IP, SMTP/POP3 and MIME
Communication Speed Ethernet 10Base-T
File Format TIFF-F
Email Receiving Width A4 size only
Dimensions 430 mm (W) x 415 mm (D) x 280 mm (H)
(excluding Projections and optional Paper Cassette)
Weight Approx. 14 kg
(excluding consumable supplies and options)
Operating Environment
Temperature : 10 to 35°C
Relative Humidity : 15 to 70%

Recording Paper Specifications
In general, most photocopy papers will also work very well. There are many "name" and "generic" brands of paper available. We recommend that you test various papers until you obtain the results you are looking for.
The following table summarizes the major specifications to consider when selecting white or colored paper.
Basic Weight 60 to 90 g/m ^2
Cut Edge Conditions Cut with sharp blades, no visible frayed edges
Grain Long grain
Moisture Content 3.7% to 5.3% by weight
Opacity 88% minimum
Packing Polylaminated moisture-proof ream wrap
Sizes A4 : 210 mm x 297 mm
Letter : 216 mm x 279 mm
Legal : 216 mm x 356 mm
Type Cut sheet (No curled)

Note: It is possible that paper could meet all of the specifications listed above and still not print well because of the variations in paper manufacturing. Therefore, we recommend that you test paper thoroughly before purchasing.
Please contact your local Panasonic dealer for availability.
A. Options:
| Order No. Picture Description | ||
| UE-403117 Hanc |  | ( countries only) |
| UE-409057 |  | 250 sheets Letter / Legal / A4 Size Paper Cassette with the Feeder Unit |
B. Supplies:
| Order No. Picture Description | |
FX-13-2P Verification Star  | |
UG-3313 Toner Cart 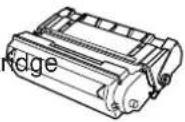 |

Environmental Information
ATTENTION
Your machine contains nickel-cadmium rechargeable batteries, which are recyclable. The batteries must be recycled or disposed of properly.
To remove the battery
1
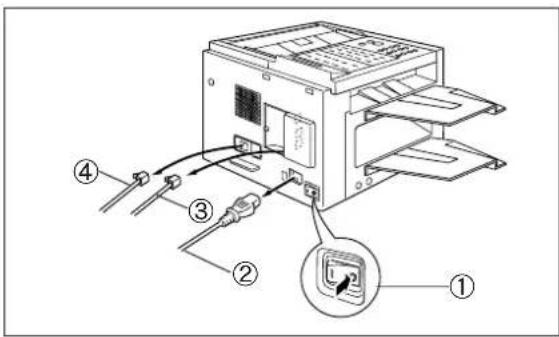
text_image
Diagram of a computer setup with numbered components and labeled parts, showing connections between ports and a control panel.① Turn the Power Switch to the "O" (OFF) position.
② Unplug the Power Supply Cord.
③ Unplug the Telephone Line Cords.
④ Unplug the LAN Cable.
2
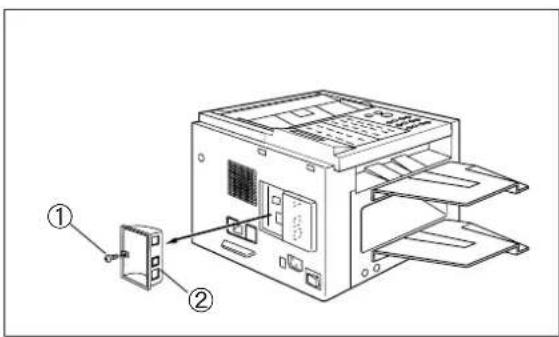
text_image
Technical diagram of a computer tower with labeled components, showing internal layout and connection points.① Remove 1 Screw with a Phillips Head Screw-Driver.
② Remove the Battery Cover.
3
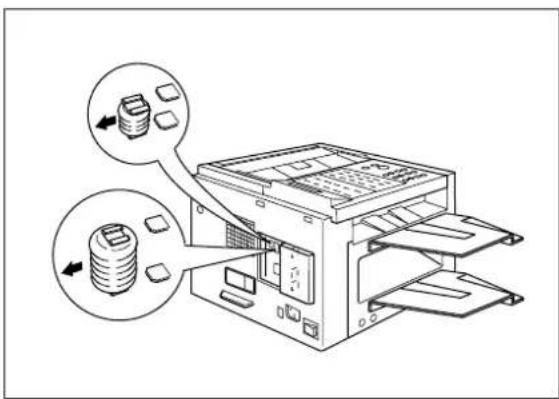
text_image
Diagram illustrating the process of inserting a stack into a computer, with magnified insets showing the device's internal structure.Remove the Batteries.
| 10base-T An Ethernet standard for cable. The 10 refers to its 10 Mbps bandwidth, the base to single channel baseband, and the T to the Twisted pair. The cable uses two pairs of unshielded twisted wires. | |
| ABBR. No.(Abbreviated Number) | The ability to store full phone numbers into the dialer and then utilizing a short series of keystrokes to speed dial that number in the future. |
| ADF(Automatic Document Feeder) | The mechanism that delivers a stack of document pages to the scanner one page at a time. |
| Automatic reception The mode that allows you to receive fax documents without user intervention. | |
| Auto print reduction | The method of automatically reducing a received document so that it can be printed onto a standard size piece of plain paper. For example, your machine will reduce an incoming legal size page to 75% of its original size so it could fit on a letter size page. |
| BPS(Bits Per Second) | The amount of data that is transmitted over the phone line. Your machine can start at each Max. Modem speed and automatically steps down to suitable speed depending on the phone line condition and the receiving machines capabilities.(Max. Modem Speed 14400 BPS) |
| C.C.I.T.T. Consultative Committee on International Telegraph and Telephone. This organization has presently developed four groups of industry standards that insure facsimile compatibility. | |
| CCITT Image No.1(ITU-T/CCITT) | An industry standard document that allows comparisons of the transmission speeds and capabilities of facsimile machines. |
| Character ID A programmed proprietary code name that allows up to 16 alphanumeric characters identifying your facsimile machine. | |
| Character keys The keys that are used to enter letters and symbols for various programming functions. | |
| Coding scheme The data compression method used by facsimile machines. Your machine utilizes Modified Huffman (MH), Modified Read (MR), and Modified Modified Read (MMR) coding schemes. | |
| Client Clients are computers that run software programs used to contact and obtain data from Server software program on another computer, often across a great distance. | |
| COMM. JOURNAL Refers to either the Communication Journal or Relay Transmission Report. | |
| CONTRAST Signifies the scanning sensitivity in terms of lightness and darkness of your original transmitting pages. | |
| DDD(Direct Distance Dialling) | A telephone service that allows unassisted dialling, no operator assistance is required. |
| Default Router IP Address | This is your Router's Address, it is used by other Networks to determine which route to take when communicating with your Internet Fax. |
Direct Dialling The method of dialling where you enter the entire telephone number through the keypad.
Directory Search Dialling Allows you to dial a full telephone number by searching the station's name or email address entered in the One-Touch keys or Abbreviated dialling numbers.
Directory Sheet The list that contains the station names that are programmed into your unit.
DNS (Domain Name Server) The purpose of the DNS is to store records containing domain information, such as Fully Qualified Domain Names (FQDN) and translate them to TCP/IP addresses.
Domain Name A unique name that identifies an Internet site. Domain Names always have 2 or more parts, separated by dots. The part on the left is the most specific, and the part on the right is the most general.
DTMF (Dual Tone Multi-Frequency) Dialling method that sends a different set of frequencies for each digit of the telephone keypad. Commonly refers to touch tone Dialling.
ECM (Error Correction Mode) The ability to correct transmission errors as detected during the transmitting phone call.
Email Address The address for sending and receiving data by email. It consists of User name, Sub-domain name and Domain name.
End receiving station In a relay network, the final station designated to receive the document.
Ethernet A very common method of networking computers and equipment in a LAN. Ethernet can handle about 10 Mbps and can be used with almost any kind of computer.
FAX Access code A 4-digit programmable code that prevents unauthorized operation of your Fax.
FAX Forward The ability to forward all incoming faxes to the station registered in the ABBR. No. [00].
FAX Parameter List The list that contains the home FAX parameters settings that you have programmed into your machine.
F.C.C. Federal Communications Commission. The U.S. Government organization that regulates communications originating or terminating in the United States.
File A task that has been stored into the memory of your unit. Examples are deferred transactions.
File Transmission A feature that allows you to store a perpetual File (until it is erased) in the memory that can be sent to a single or multiple stations repeatedly.
Fixed print reduction The method that allows you to determine one reduction rate, such as 75%, for all incoming documents.
FUNCTION The control panel key that will be utilized to begin an operation or configuration of a feature.
G3 mode (Group 3) Refers to the standards and transmission capabilities of the current generation of facsimile machines.
Group dialling The ability to program many telephone numbers into a single station so that many locations can be dialed in sequence utilizing a single keystroke.
HALFTONE A scanning technique to distinguish levels of gray from black and white. Your machine can detect up to 64 levels of gray in halftone mode.
Handshaking The exchange of a group of control signals that communicate between the transmitter and receiver. These signals determine the condition at which communication can occur.
Header A row of information that is transmitted by the sending machine and printed on the top of each page by the receiving unit. This identifies the transmitting unit and information about the transmission, such as time and date.
Home Page The page that your Browser displays when it starts up or the main web page for a business, organization, etc.
Host Any computer on a network that is a repository for services available to other computers on the network. A Host must have a unique Host name within a domain. The host is the first (left most) section of the Fully Qualified Domain Name (FQDN). The remainder of the FQDN is the domain and often tells you something about where the DX-1000 is located (i.e., at Panasonic).
Example:
Your DX-1000's email address is: Fax@fax01.panasonic.com In the example above "fax01" is the host and "panasonic.com" is the domain.
ITU-T International Telecommunication Union - Telecommunication, formerly known as C.C.I.T.T.
ID A programmable address of up to 20 digits identifying your machine.
Image memory capacity This signifies the amount of memory available in your unit capable of storing pages of documents. All page units of measure are based on the ITU-T Image No.1.
Industry Canada (D.O.C) Department of Communications. The Canadian Government organization that regulates communications originating or terminating in Canada.
Information code A code that is internally generated by your Fax stating a specific operational error or machine failure.
Initial sending station In a relay network, the station that is originating the document transmission.
Internet The vast collection of inter-connected networks that all use the TCP/IP protocols. The Internet connects independent networks into a vast global internet.
Intranet A private network inside a company or organization that uses the same kinds of software that you would find on the public Internet, but that is only for internal use.
IP Address A unique number used to identify equipment or host computers on the Internet.
ISP (Internet Service Provider) An institution that provides access to the Internet in some form, usually for money.
Journal A report that is printed by your unit listing the last 32 transmitting and receiving transactions.
Keypad A group of numeric keys located on your control panel.
LAN (Local Area Network) A computer network system and printer limited to an immediate area, such as an Office, Factory, and University used to integrate and exchange data.
LCD Liquid Crystal Display. The display area of your machine.
LOGO Your programmed company name or identification up to 25 alphanumeric characters.
MAC Address Its the hardware address, often referred to as MAC (Media Access Control) address that is assigned to the equipment. MAC address is hard-coded and is not configurable. The MAC address consists of 6 hexadecimal numbers separated by colons. Example: 00:00:c0:34:f1:50
Mail Gateway IP Address The Address of the Mail Server. The Internet Fax communicates with your existing Mail Server for all communication traffic.
Mailing List A system that allows people to send an email to one address, whereupon their message is conveyed to multiple subscribers on the Mailing List.
MAPI Acronym for Message Application Programming Interface. A standard Windows interface for messaging that enables different mail programs and other mail-aware applications like word processors and spreadsheets to exchange messages and attachments with each other.
Manual reception A mode that requires operator intervention to receive an incoming document.
Memory transmission The documents are scanned into memory before actual connection to the phone line for transmission.
MIME (Multipurpose Internet Mail Extension) A standard used for attaching non-text (image) files to Internet email messages.
Modem A device that converts signals from your fax machine into signals that can be transmitted over telephone lines.
| Multi-file transmission | The ability to store many files into your machine's memory before actual telephone connection occurs. |
| Multi-station transmission | The ability to broadcast the same set of documents to a programmed number of locations. |
| Network Any time you connect 2 or more computers together so that they can share resources, you have a computer network. Connect 2 or more networks together and you have an internet. | |
| Network address An individual 4-digit addressing number assigned to a One-Touch/Abbreviated number that identifies a particular station in a relay network. | |
| Network password A 4-digit password assigned to a network address to prevent unauthorized stations from accessing a relay station. | |
| Off-hook dialling | The direct dialling of a telephone number with the handset out of the cradle or "off the hook." |
| On-hook dialling | The direct dialling of a telephone number with the handset in the cradle or "on the hook." |
| One-Touch dialling The ability to dial an entire telephone number by pressing one key. | |
| Overlap Printing Documents too long to be reduced are automatically printed on two pages with approximately 10 mm overlap. | |
| Panasonic Super Smoothing | An electronic image enhancement (Panasonic Super Smoothing) that will create a particular pattern for the improvement of copy quality. |
| Polling The ability to retrieve a document from another facsimile machine. | |
| Polling password A 4-digit programmed code that enables the security of a document being polled. | |
| POP (Post Office Protocol) | POP refers to the way email software such as Eudora or the DX-1000 gets email from a mail server. You must always have a POP account that you tell your email software to use to retrieve your mail. |
| Power Failure Report | A report that contains information on the last transaction that took place during a power outage. |
| Power Saver Mode To reduce the power consumption of the machine in standby, select the time period to turn OFF the high temperature fuser unit when the printer is idle. | |
| Print Collation | The ability to stack received documents in the correct order. |
| Print reduction modes The methods used to determine how an incoming document will be reduced to print onto the paper loaded in your machine. | |
| Program keys | Keys that are defined for storing a sequence of stations to be dialed or polled. |

Protocol A protocol is the special set of rules for communicating that the end points in a telecommunication connection use when they send signals back and forth. Both end points must recognize and observe the protocol.
PSTN Public Switched Telephone Network. Network of interconnected switching equipment and transmission facilities.
Relay station A certain type of facsimile machine that can store and forward documents to an end receiving station and/or a relay station in another relay network. Your machine can not be used as a relay station.
Relay network A group of facsimile machines that communicate via a relay station.
Relay Transmission Sending a document to a relay station, which in turn, sends the document to the end receiving station.
Relay Transmission Report A report that contains information regarding the last document transmission to a relay station.
Relay address A 2-digit code that identifies your machine is programmed in a relay network.
RESOLUTION Relates to the number of dots scanned or printed per certain square. The quality of the image increases as the number of dots per certain square increases.
Router A special purpose computer (or software package) that handles the connection between 2 or more networks. Routers act like traffic cops, they spend their time looking at the destination addresses of the packets passing through them and deciding which route to send them on.
Sender Selection The user can select one of 24 pre-programmed sender's name and email address/telephone number before each transmission.
Server A computer, or a software package, that provides a specific kind of service to client software running on other computers. A single server machine could have several different server software packages running on it, thus providing many different servers to clients on the network.
SMTP (Simple Mail Transfer Protocol) This is the main communication protocol used to send and receive email on the Internet.
Station name Alphanumeric ID which can be programmed for each One-Touch dialling and Abbreviated dialling number.
Stored documents Documents that have been scanned and now are stored in your machine's memory.
Sub-address ITU-T recommendation for further routing, forwarding or relaying of incoming faxes.
Sub-address Password ITU-T recommendation for additional security that corresponds to the Sub-address.
Subnet Mask A mask bit used to manage sub-segments of the network which is defined with network IDs.
| Substitute memory reception | Your machine's ability to store an incoming document into its memory, when it runs out of recording paper or toner. |
| TCP/IP (Transmission Control Protocol/Internet Protocol) | TCP/IP is a suite of protocols used to connect to the Internet and wide-area networks. |
| TIFF Image Viewer An application software to view the contents of TIFF-F File. Some TIFF Image Viewers may not display the data properly. | |
| TIFF-F (Tagged Image File Format) | An image file format for attachments of graphic data for smooth transmission between different units. The coding method of this format supports the same coding as Modified Huffman (MH) and multiple-page image data. |
| Transmission reservation | The ability to preset a telephone number so that you may reserve a transmission while your unit is performing another function. |
| User parameter Programmed parameters that provide information to other stations.Examples are logo, character ID, date and time. | |
| Verification stamp A user selectable transmission verification stamp can be placed on scanned documents that are successfully transmitted or stored in memory. | |
| View Mode - File List | Allows you to view the brief contents of the memory files through the LCD display without having to print the Memory File List. |
| View Mode - Journal | Allows you to view the brief contents of the journal through the LCD display without having to print the journal. |

INDEX
A
ABBR. Number List 153.
Abbreviated Dialling Numbers 45.
ADF Capacity 173.
Automatic Document Feeder 66.
Automatic Reception 100.
Automatic Reduction 101....
B
Battery 178.
C
Character ID 38.
Character Key 10.
Communication Journal (COMM. JOURNAL) ..... 150
Contrast 67
Copy 104
D
Date and Time 36
Diagnostic Password 62
Dialling Method (Tone or Pulse) 34
Dimensions 175
Direct Transmission 85
Direct Transmission Reservation 92
Directory Search Dialling 88
Directory Sheet 52
Distinctive Ring Detect 128
Document Jam 166
Document Misfeeding 169
Document Size 173
Document Thickness 173
Document Tray 25
Dual Access 77, 91
E
Edit File Mode 125
Email Address 42,105
F
Fax Forward 124
Fax Parameter List 156
Fax Parameter Table 60
FCC Registration Number 175
File List 125
Fixed Reduction 101
Flash 11
Function Key List 8
G
Group Dialling 108
H
Halftone 68
Header Format 60.
Header Print 60
Host Name 43
|
ID Number 39
Ifax Return Receipt 130
Image Memory Capacity 174
Inbound Routing 116
Information Codes 161
J
Journal 147
Journal Forward 129
K
Key/Buzzer Volume 60
L
LOGO 37
M
Mailing List 76
Memory Transmission 78
Monitor Volume 35
Multi-Station Transmission 75,84
N
Network Printer 134
Network Scanner 133
0
Off-Hook Dialling 89
On-Hook Dialling 90
One-Touch Dialling Numbers 45
One-Touch Keys 45
One-Touch List 153
Operating Environment 175
Overlap Printing 102
P
Paper Specification 30
Pause 11
Polling 131
Polling Password 131
POP Access Key 109
POP Server 96.
POP Server Name 42.
POP User Name 42.
Power Consumption 175.
Power Failure Report 158.
Pressure Adjusting Lever 169.
Print Collation 103.
Print Margin 174.
Print Reduction 101....
Priority Transmission Reservation 92
Program Keys 105
Program List 155
R
Received Time print 60
Recording Paper Jam 165
Recording Paper Specification 176
Redial 93
Reduction Ratio 101
Relay XMT Report (COMM. JOURNAL) 145
Ringer Equivalence 175
Ringer Volume 35
S
Scanner Resolution 173
Sender Selection 111
Sub-address Password 62
Sub-addressing 121
Substitute Memory Reception 103
T
Toner Cartridge 28
Transmission Reservation 77, 91
U
User Parameters 36
V
Verification Stamp 68,170
View Mode - File List 126
W
Weight 175
Facsimile Number Directory
Name Number
Panafax®
Facsimile