NGT-STND-2.0 NGTouch - Thermostat Heat Mat - Free user manual and instructions
Find the device manual for free NGT-STND-2.0 NGTouch Heat Mat in PDF.


User questions about NGT-STND-2.0 NGTouch Heat Mat
0 question about this device. Answer the ones you know or ask your own.
Ask a new question about this device
Download the instructions for your Thermostat in PDF format for free! Find your manual NGT-STND-2.0 NGTouch - Heat Mat and take your electronic device back in hand. On this page are published all the documents necessary for the use of your device. NGT-STND-2.0 NGTouch by Heat Mat.
USER MANUAL NGT-STND-2.0 NGTouch Heat Mat
How to confirm or cancel ..... 5
What the icons mean 1/2 .....6
What the icons mean 2/2 .....7
Getting started: Setting up .....9
Default Heating Schedule....10
Mode Menu....11
Manual Mode 12
Comfort Mode....13
Boost 14
Frost Protection....15
Holiday 16
Main Menu 18
Schedule
Heating Schedule 1/3 .....19
Heating Schedule 2/3 .....20
Heating Schedule 3/3 .....21
Basic Settings - Display
Screen Brightness 22
Screen Lock 23
Screen Saver. 24
°C/°F Unit 25
Basic Settings - Support & Info
QR Code 26
System Info & Support. . . . . . . . . . 27
Factory Reset 28
Basic Settings - Date & Time
Time 29
Time Format 30
Date 31
Date Format 32
Basic Settings - Energy Tariff
Energy Tariff Menu 33
System Power....34
Energy Use....35
Advanced Settings - Advanced
Options
Adaptive Function 36
Open Window 37
Daylight Saving Time. . . . . . . . . . . . 38
Eco Mode....39
Advanced Settings - Sensor
Sensor Application 40
Min/Max Temp. 1/2....41
Min/Max Temp. 2/2....42
Room Sensor Calibration ..... 43
Floor Sensor Calibration. 44
Sensor Value....45
Energy Use....46
Factory Settings. 48
Troubleshooting 1/2 ..... 49
Troubleshooting 2/2 .....50
Contact Details 51
Introduction
Welcome to your Heat Mat NGTouch thermostat.
We hope you enjoy the ease of use the touchscreen provides and find the layout intuitive and simple to follow.
You can program the thermostat to suit your needs using the options under Schedule and Basic Settings.
The thermostat will switch on your heating system at predetermined times each day of the week. You can set separate temperatures for up to six individual periods, called events, for each day of the week.
Lowering the temperature when your home is unoccupied will reduce your energy costs without reducing comfort.
The thermostat comes with a default heating schedule. Unless you change the settings, the thermostat will operate according to this schedule.
The resistive touchscreen only requires a soft tap with your fingertip to register the touch.
In this manual, the touch areas on the screen will be referred to as buttons.
text_image
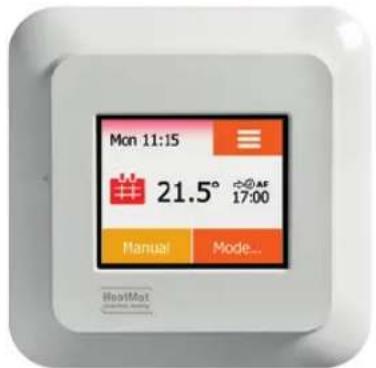
Mon 11:15 21.5° 17:00 Manual Mode...Home Screen
text_image
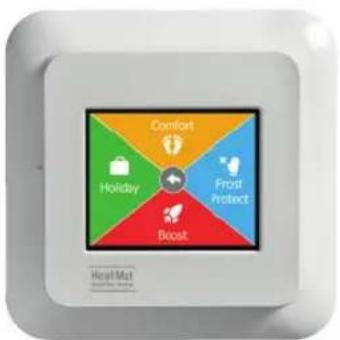
Comfort Holiday Frost Protect Boost HeatMatMode Menu Main Menu
flowchart
graph TD
    A["Energy Use"] --> B["Advanced Settings"]
    C["Basic Settings"] --> D["Schedule"]
    E["Schedule"] --> A
    style A fill:#f9f,stroke:#333
    style B fill:#ccf,stroke:#333
    style C fill:#cfc,stroke:#333
    style D fill:#fcc,stroke:#333
    style E fill:#cff,stroke:#333
Switch on
text_image
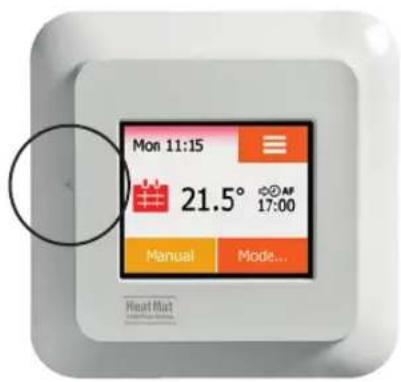
Mon 11:15 21.5° 17:00 Manual Mode...The thermostat has an ON/OFF switch on the left side of the screen.
The thermostat is intuitively operated via the high-resolution colour touchscreen, which is used to navigate through the menus and to change the settings.
text_image
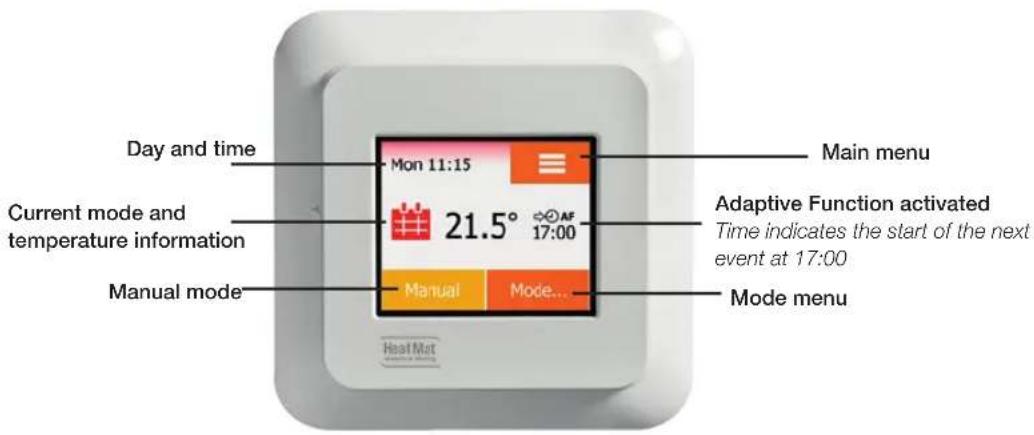
Day and time Mon 11:15 Current mode and temperature information 21.5° Main menu Adaptive Function activated Time indicates the start of the next event at 17:00 Manual mode Manuai Mode... Mode menuHow to confirm or cancel
1.
text_image
4 Events per Day 6 Events per Day × ✓2.
text_image
Your Week Type: Work days/home days All days are different3.
text_image
Comfort 23.5° 11:00- Whenever you change a setting, you must "Accept" by pressing the √ button on the thermostat to acknowledge the change.
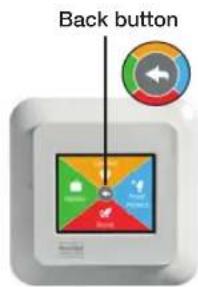
- "Back" is shown on the screen as a button marked with an arrow pointing to the left. In the various menus and sub-menus, you will find the "Back" button in the middle of the touchscreen.
Some screens include a "Left Arrow" button (2). Press this to return to the previous menu.
- "Cancel" is shown on the screen as a button marked X.
Although "Cancel" has the same effect as "Back", it also results in all unsaved settings being discarded. As soon as you leave a home screen and enter one of the menus, either a "Back" or "Cancel" button will be shown.
To return to the home screen, press "Back/Cancel" once or multiple times depending on where you are in the menu structure.
text_image
Back button
Left arrow

Cancel button
What the icons mean (1/2)
Icon symbol:

Icon meaning:
Scheduled Operation

Manual Override

Comfort Mode

Boost Mode

Frost Protection

Holiday Mode

Eco Function

Icon symbol:

Icon meaning:
Schedule

Energy Use

Basic Settings

Screen Lock

Display Brightness

Screen Saver

Energy Tariff

Date
Icon symbol:

Icon meaning:
Date Format

Time

Time Format

Daylight Saving Time

Temperature Unit

System Info

Support

QR Code
What the icons mean (2/2)
Picture of icon:

Meaning of icon:
Engineer Settings

Adaptive Function

Open Window

Sensor Application

Sensor Type

Floor Sensor Calibration

Room Sensor
Calibration

Temperature Scale
Picture of icon:

Meaning of icon:
Factory Reset

Error Message

Accept

Cancel

Next change in event/function at the given time

The time is AM

The time is PM

Week type

Events per day

Currency

Price per kW
USER GUIDE
Getting started: Setting up the NGTouch
1.
text_image
Date 01 02 20142.
text_image
Time 12 : 48 AM3.
text_image
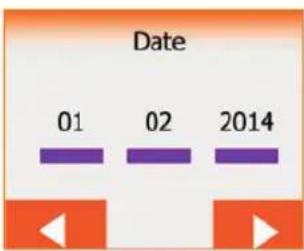
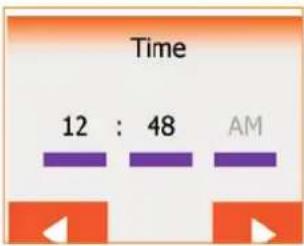
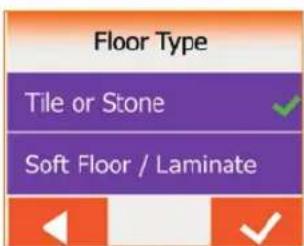
Floor Type Tile or Stone Soft Floor / LaminateWhen the system has been installed and turned on for the first time, or after you have performed a factory reset, you must set the Date, Time and Floor Type. The thermostat will automatically guide you through the process.
- Date - set the current date
Press the item you want to change. Use the Up Arrow or Down Arrow to set the day, month and year Confir rm each setting with √
- Time - set the current time
Press the item you want to change. Use the Up Arrow or Down Arrow to set the hours and minutes Confir rm each setting with √
-
Floor Type – choose between:
-
Tile or Stone
- Soft Floor/Laminate
Confir rm your choice with "✓" or go back with the left arrow
The thermostat is now ready for use and will control the underfl oor heating according to the default heating schedule. If you want to change the heating schedule, instructions are given in the section on pg. 19-21 called Heating Schedule. Details of the default heating schedule can be found on pg. 48 in the section titled Factory Settings.
Default Heating Schedule
text_image
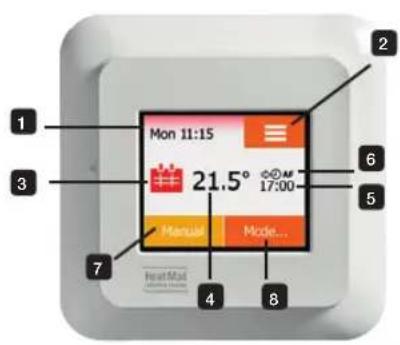
Mon 11:15 21.5° 17:00 Manual Mode... Real MailThe system will operate in 'default heating schedule' (unless you choose to override this schedule with your own programmed settings - see pg. 19-21).
During ‘default heating schedule’, the temperature is controlled automatically according to the default schedule.
Default heating schedule home screen:
- Day and time info
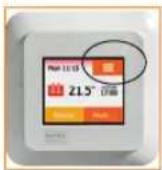
- Press here to access the menus
- Icon indicating the current operating mode. The calendar represents the default heating schedule or your own programmed operation
- Current target temperature (if shown in red, heating is being provided)
- Time of next scheduled event change
- If shown, the adaptive function is enabled
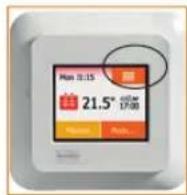
- Press here to access Manual override. Alternatively, if Eco Function is enabled, pressing here activates the Eco function
- Press here to access alternative modes (Comfort, Boost, Frost Protection and Holiday)
If the thermostat is programmed to use the default heating schedule, Manual and Mode are accessible from the home screen. If the Eco function is enabled, Eco and Mode will be accessible from the home screen.
Mode Menu
text_image
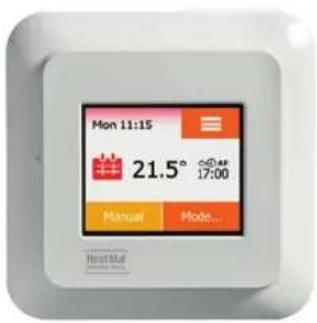
Mon 11:15 21.5° 17:00 Manual Mode...The thermostat has a number of modes of temperature control. These can be found in the mode menu, accessed via the 'Mode' button in the bottom right of the home screen.
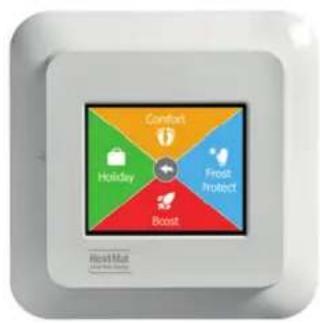
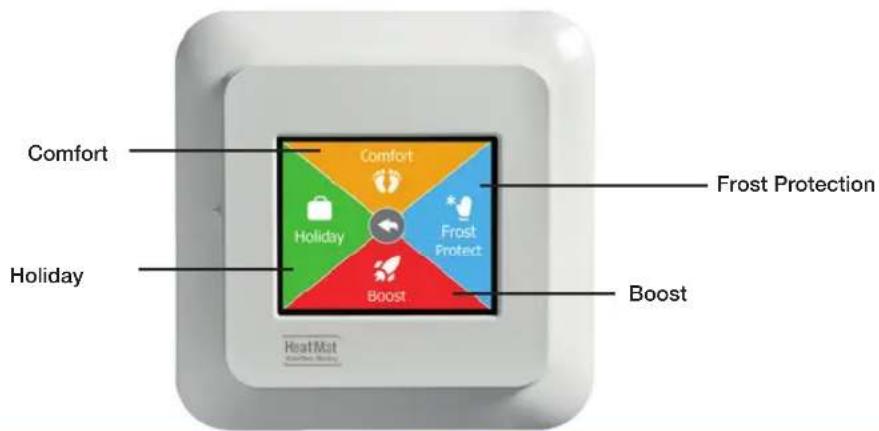
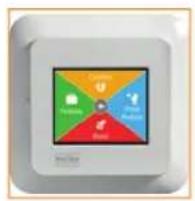
The mode menu consists of four modes which can be used for easy programming. These modes include Comfort, Boost, Frost Protection and Holiday. There are also two other modes Manual and Eco. Manual mode allows manual operation of the thermostat and Eco mode is an energy saving function. See page 12 for information on Manual Mode and page 39 for Eco mode.
text_image
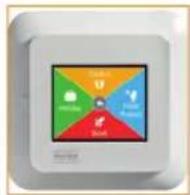
Comfort Holiday Frost Protect Boost Host MutThe mode menu includes:
text_image
Comfort Comfort Holiday Frost Protection Frost Protect Boost Holiday HeatMatManual Mode
text_image
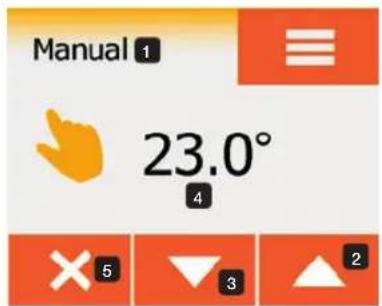
Manual 1 23.0° 4 5 3 2You can use Manual to override the current schedule and maintain a specified temperature around the clock. The thermostat will continue to operate in Manual Mode until you return to the heating schedule.
- From the heating schedule home screen, press the Manual button to access manual override. The mode name is visible in the top left corner (1)
- Use the Up Arrow (2) or Down Arrow (3) button to select the temperature (4)
Then simply leave the thermostat to control your underfloor heating system.
While in manual override, an X is shown in the lower left corner (5) of the home screen. Press X to return the thermostat to the heating schedule.
Comfort Mode
1.
2.
3.
4.
5.
6.
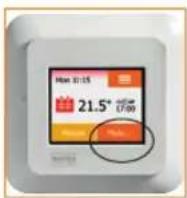
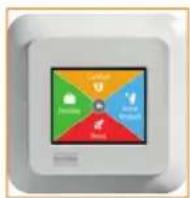
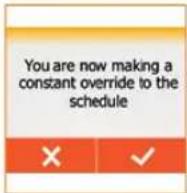
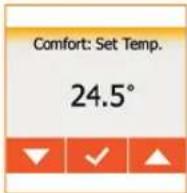
You can use Comfort Mode when you want to temporarily override an event program and adjust the target temperature. For instance, if you want to heat a room that would normally be unheated, for an evening or a short period of time.
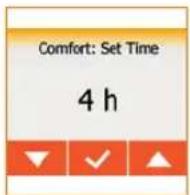
You can manually set a comfortable temperature, which the thermostat will maintain for your chosen period of time (from 1 to 23 hours) before returning to the heating schedule.
- From the home screen, press Mode to access the alternative modes
- Choose Comfort
- Press √ to confirm that you wish to override the current heating schedule
- Use the Up or Down Arrow to select the required temperature Confirm with √
- Use the Up or Down Arrow to set the required duration of Comfort mode. Confir rm with √
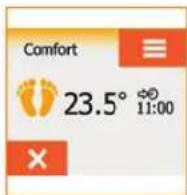
- A confirmation screen will briefly appear before the Comfort mode home screen is visible
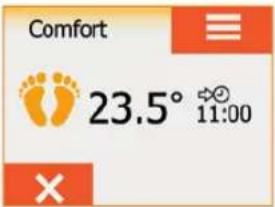
While in Comfort mode an X is shown on the home screen. Press this button to return the thermostat to heating schedule.
Note: The function of the buttons and symbols shown on the home screen will change depending on the chosen operating mode.
Boost
1.
2.
3.
4.
5.
text_image
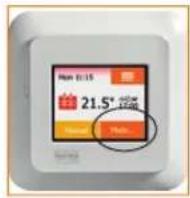
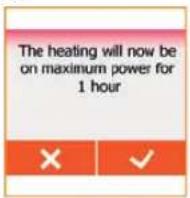
Boost 2 11:00 3 4 ×In Boost mode, the underfloor heating is boosted to full power for one hour.
After one hour, the thermostat returns to the heating schedule. This could be used when returning to a cold room which you want to warm up as quickly as possible.
- From the home screen, press Mode to access the alternative modes
- Choose Boost
- Confirm that you wish the thermostat to activate Boost by pressing √
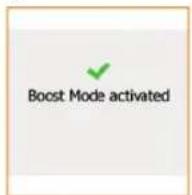
- A confirmation screen will briefly appear. The thermostat automatically enters the Boost home screen
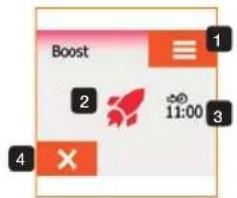
The Boost home screen explained:
- Press here to access the main menu
- The rocket icon indicates Boost is the current operating mode
- The time at which the thermostat will return to the heating schedule
- Press the "X" to quit Boost mode and return to the heating schedule
Frost Protection
1.
2.
3.
4.
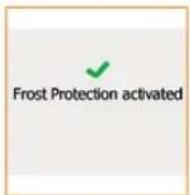
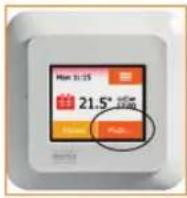
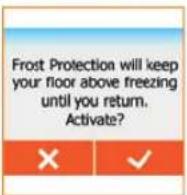
Frost Protection mode is used when heating is not needed but the temperature must be kept above freezing until changed manually. This is usually used in holiday cottages, outbuildings or similar properties that may be left unattended for long periods of time in the winter.
-
Press the Mode button on the home screen
-
Select Frost Protection
-
Select "√" to activate
-
A confirmation screen will be displayed briefly before the thermostat automatically enters the Frost Protection home screen
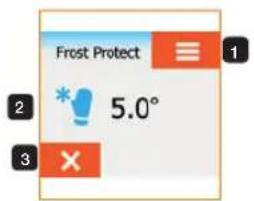
While in Frost Protection mode an ice crystal and glove icon are displayed on the home screen together with the target/set point temperature (5.0°C).
The Frost Protection home screen explained:
text_image
Frost Protect 5.0°- Press to access the main menu
- Glove icon indicates Frost Protection is activated
- Press "X" to return to heating schedule
Holiday Mode
1.
2.
3.
4.
5.6.
7.
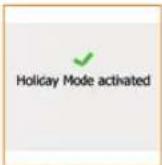
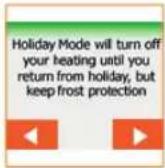
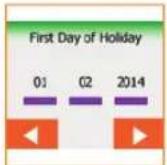
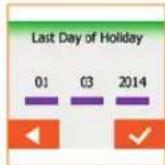
Holiday Mode allows you to set your heating to a minimum while you are away on holiday, saving both energy and money. You must set holiday start and end dates. The thermostat will ensure that your floor is kept above freezing and your home is warm when you return.
This is accomplished in just a few steps:
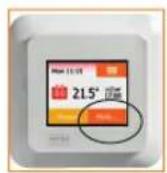
- From the home screen, press Mode
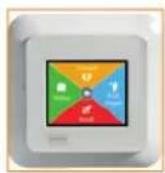
- Select Holiday
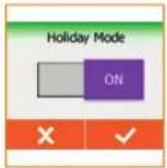
- Press OFF/ON towards the right to switch holiday mode on, confirm with √
- Press the Right Arrow on the confirmation screen to set your dates
- Set the date you are going on holiday by pressing the day, month and year then press the Right Arrow
- Set your return date in the same way and then confirm with √
A confirmation screen is then displayed before the thermostat automatically enters the Holiday home screen. You can cancel an active holiday period and return to the heating schedule by pressing the "X" button.
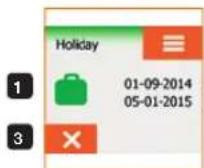
The Holiday home screen explained:
- A suitcase icon indicates Holiday mode is activated
- Holiday mode start date and finish dates
- Press "X" to quit Holiday mode and return to the heating schedule
If holiday dates have been entered but Holiday mode isn't yet active, the home screen will display a green suitcase below the date and time.
MAIN MENU GUIDE
Main Menu
text_image
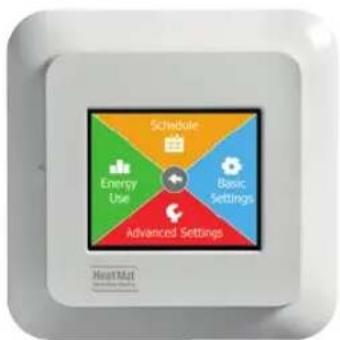
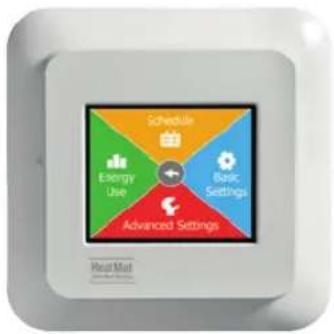
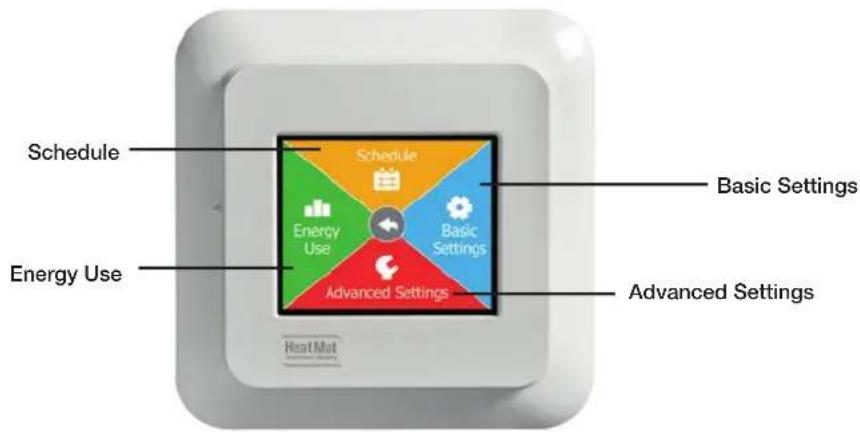
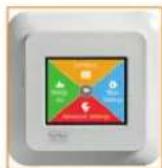
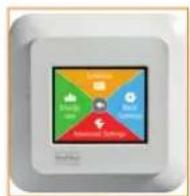
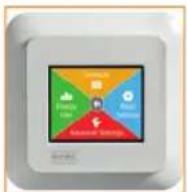
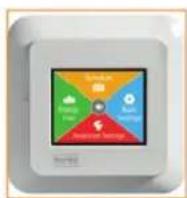
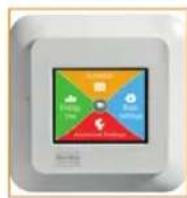
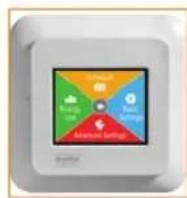
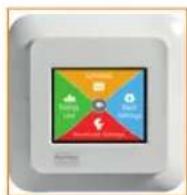
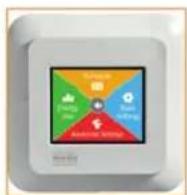
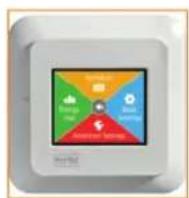
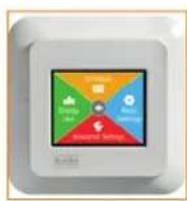
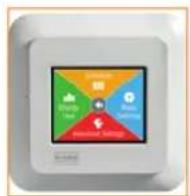
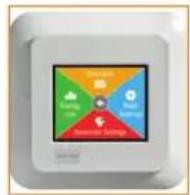
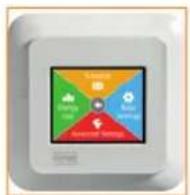
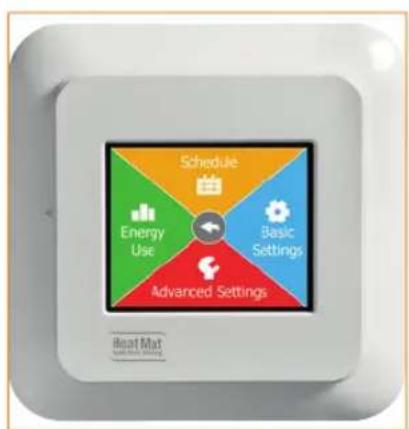
Schedule Energy Use Basic Settings Advanced Settings HeatMatThe main menu consists of four options which can be used to configure your thermostat. This menu is accessed via the Menu button in the top right of the home screen.
The main menu includes:
- Schedule - for programming your underfloor heating
• Energy Use - allows you to monitor energy use weekly, monthly or annually - Basic Settings - for changing the display, date format or obtaining support
- Advanced Settings - for accessing the advanced options
text_image
Schedule Energy Use Schedule Basic Settings Basic Settings Advanced Settings Advanced Settings Heat MatSchedule : Heating Schedule 1/3
1.
3.

5.6.
7.
2.
4.
The heating schedule allows you to control temperature automatically according to a programmed schedule of your choice. The thermostat comes with a default heating schedule for easy and economic heating control (see Default Heating Schedule under Factory Settings on page 48).
The heating schedule can easily be changed in the following way:
- Press the Menu button on the home screen
- Then press the Schedule button to access heating schedule options
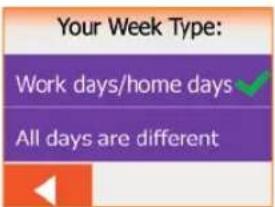
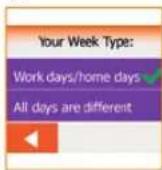
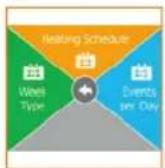
- Select the Week Type
- Choose between "Work days/home days" or "All days are different"
- If you chose "Work days/home days" an information screen will be shown
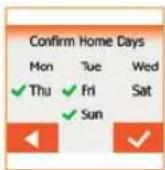
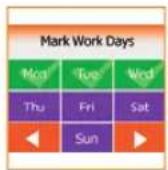
- Press the Right Arrow to proceed and select the days on which you work by pressing the day (Green indicates a work day and purple a home day). The thermostat will automatically designate the remaining days as home days
- Press the √ button to accept. Tap the Left Arrow button to return to Week Type and again to return to the Heating Schedule menu
I) For a varied programme select "All days are different" (4.)
II) Accept by pressing √
III) Scroll back to the Heating Schedule screen (3.)
Schedule : Heating Schedule 2/3
1.
2.
3.
4.
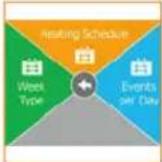
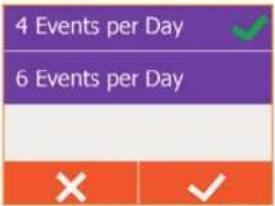
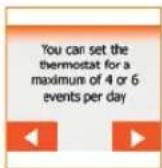
The thermostat allows you to program a number of events per day to suit your lifestyle. An event is a scheduled time of day when the thermostat automatically changes the temperature setting. You can choose between a 4 or 6 event schedule.
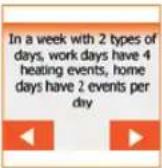
With a 4 event schedule, you can set 4 different events during work days and 2 different events during home days. – For example if your day is as follows: You get up in the morning, you go to work, you return home and you go to sleep.
With a 6 event schedule, you can set 6 different events during work days and 2 different events during home days. – For example if your day is as follows: You get up in the morning, you go to work, you return home for lunch, you go back to work, you return home and you go to sleep.
The thermostat is preset to operate a default heating schedule with 4 events per work day and 2 events per home day. This can be changed to 6 events per work day and 2 events per home day as follows:
- In the Heating Schedule menu, press the Events per Day
- On the explanation screen, press the Right Arrow
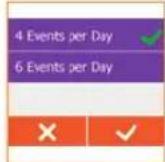
- Choose between 4 and 6 events per day. Confirm with √
- You will return to the heating schedule and can begin programming the times for each event. See pages: 19, 20 and 21.
*4 events per day include: Morning, Daytime, Evening and Overnight
*6 events per day include: Morning, Daytime, Daytime 2, Daytime 3, Evening and Overnight
Schedule : Heating Schedule 3/3
1.
2.
3.
4.
5.6.
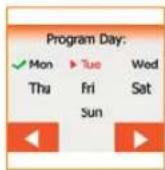
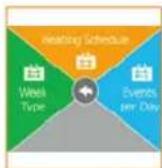
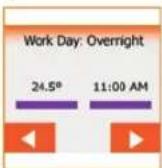
- Press the Heating Schedule button to program your days, set up the target temperature and start time for each event
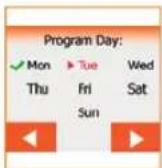
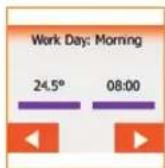
- Programming begins on Monday (Mon) if the schedule is set to "All days are different", or "Work Day: Morning" if you have selected "Work days/ weekend days" in Week Type. Press the Right Arrow to program this day's events
- Press the temperature, if you want to change it, then press the Up Arrow or Down Arrow to set the temperature. Confirm with √ icon Press the time, if you want to change it, then tap the Up Arrow or Down Arrow to set the time in intervals of 15 minutes. Confirm with √ icon
- Press the Left Arrow or Right Arrow to toggle through the week and set events
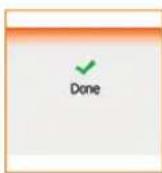
- Once you have set all the daily events, press the Right Arrow to view a confirmation screen (6) or return to the Heating Schedule menu
Basic Settings: Display - Screen brightness
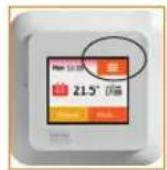
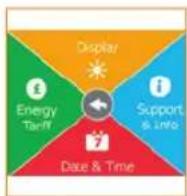
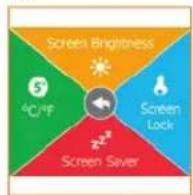
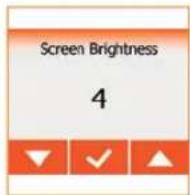
This option allows you to change the brightness of the display.
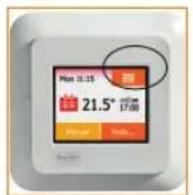
- Press the Menu button in the top right of the home screen
- Press the Basic Settings button
- Select Display
- Select Screen brightness
- The screen brightness can be adjusted between 1 and 5 Select one of the five levels of brightness using the Up Arrow or Down Arrow. Confirm your choice with √
The thermostat will automatically return to the Display Settings menu.
Basic Settings: Display - Screen Lock
1.
3.
5.
2.
4.
6.
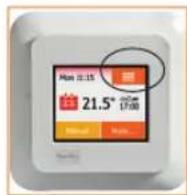
The screen lock prevents someone from changing any of the thermostat settings.
- Press the Menu button in the top right of the home screen
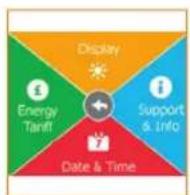
- Then press Basic Settings
- Select Display
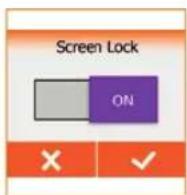
- Select Screen lock. The screen lock is set to OFF
- Press the OFF/ON button to the right to switch the screen lock to ON. Confirm your choice with √ or deactivate by pressing OFF followed by √
The thermostat will automatically return to Display Settings.
The screen lock is activated together with the screen saver if the thermostat has not been operated for approximately 3 minutes.
Before you can operate the thermostat again, you must unlock the screen in the following way from the home screen:
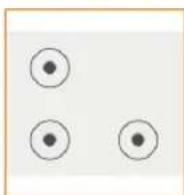
- Press the screen to activate it. Three circles containing dots will be displayed. Draw an "L" on the screen in a single stroke without lifting your finger from the screen. Start by touching the dot in the circle in the upper left corner, then slide your finger downwards to the dot in the circle in the lower left corner and continue sliding your finger to the dot in the circle in the lower right corner, forming an "L". If done correctly, the home screen will appear
Please note that the screen lock will be reactivated when the thermostat returns to screen saver mode – unless it is deactivated in the menu by repeating steps 1-5.
Basic Settings: Display - Screen saver
1.
3.
5.
2.
4.
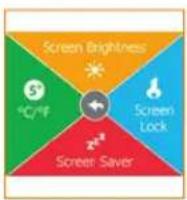
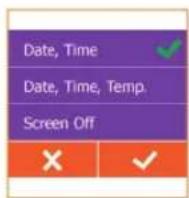
This option allows you to select the information to be shown on the idle home screen as a screen saver. Choose from:
- Date, Time
• Date, Time and Temperature (measured)
• Screen Off. This setting minimises energy consumption
To access and program the screen saver follow these steps:
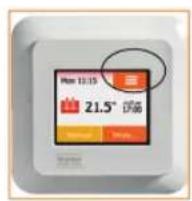
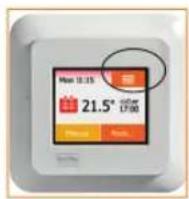
- Press the Menu button on the top right of the home screen
- Then press the Basic Settings button
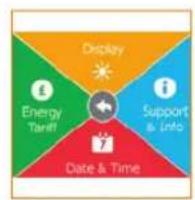
- Select Display
- Press Screen Saver
- Select the information you want to be shown in screen saver mode by pressing an option (Date, Time / Date, Time, Temp / Screen Off) Confirm your choice with √ or discard it with X
The thermostat will automatically return to the "Display Settings" menu and the screen saver will appear, when the screen has been idle for approximately three minutes.
Basic Settings: Display - °C / °F Unit
1.
3.
5.
2.
4.
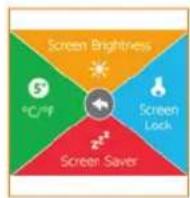
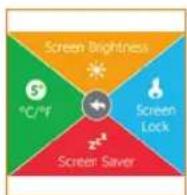
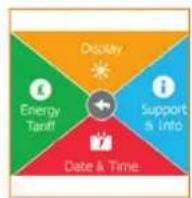
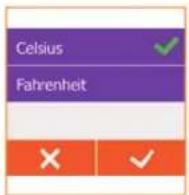
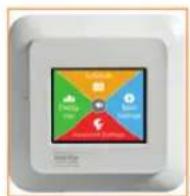
The thermostat can provide temperature data as °C or °F depending on what you prefer to use.
To change the temperature display settings to °C or °F follow the steps below:
- Press the Menu button on the home screen
- Then press the Basic Settings
- Select Display to access the display settings menu
- Press the green C/°F button
- Tap the unit you prefer:
• Celsius
- Fahrenheit
Confir rm your choice with √ or discard it with X
The thermostat will automatically return to the "Display Settings" menu.
Support & Info: QR Code
1.
3.

5.
2.
4.
6.
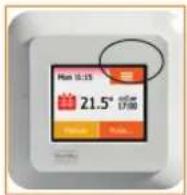
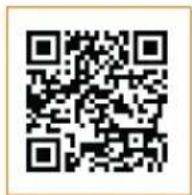
This function provides energy usage graphs and diagnostic assistance. Once the QR code has been scanned on your internet enabled device the data can be emailed to Heat Mat's Technical Support Team.
- Press the Menu button on the home screen
- Select Basic Settings
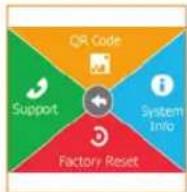
- Select Support & info
- Press the QR code button
- Scan the QR Code with a suitable internet enabled device (Software supporting QR Code scanning is necessary, e.g. an app)
-
Scanning the QR Code provides the following data from the thermostat:
-
Contact
- Serial Number & Software Version
- Sensor Type
- Application
- Mode
-
Adaptive Function
-
Open Window
- Screen Lock
- Time Format
- Temperature Unit
- Heating Schedule
- Energy Use
Press the QR Code to return to the "Support & Info" screen Press the Central Arrow (back) to return to "Display Settings"
QR Code is a registered trademark of DENSO WAVE INCORPORATED.
Support & Info: System Info & Support
1.
3.
5.
2.
4.
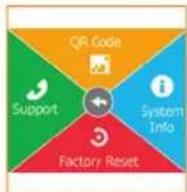
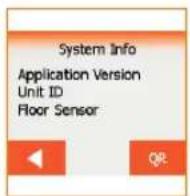
This function provides system information as follows: App. Version, Unit ID, current floor temperature, current room temperature.
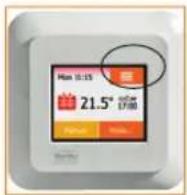
- Press the Menu button on the home screen
- Select Settings
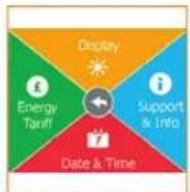
- Select Support & Info
- Press System Info
- Information about the thermostat will be displayed on the screen. To download this information select the QR code in the right corner. To exit press the QR code and scroll back to the "Support & Info" menu
Repeat steps 1 to 3 and select the green button Support for details of how to contact Heat Mat via phone or email.
Support & Info: Factory Reset
1.

3.
5.
2.
4.
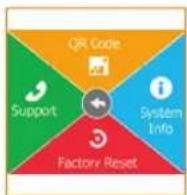
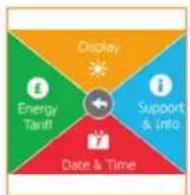
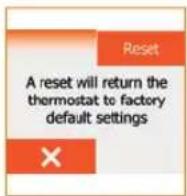
This option allows you to restore the thermostat to the original factory settings.
Note: This action cannot be undone, if you perform a factory reset all your personal settings will be lost.
To access Factory Reset follow these steps:
- Press the Menu button on the home screen
- Select Basic Settings
- Press Support & Info
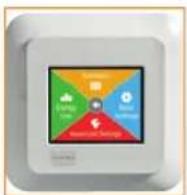
- Select the red Factory Reset option
- Press X if you want to maintain your settings and return to "Support & Info". Press "Reset" if you want to restore the factory settings. A confirmation screen will briefly be displayed
The thermostat will then be reset and the "Startup Wizard" will appear on the screen allowing you to reset the date, time and floor type.
Basic Settings: Date & Time - Time
1.
3.
2.

4.
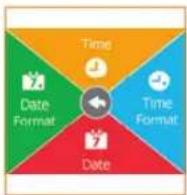
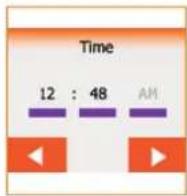
This option allows you to change the time, which is used by the clock to control heating schedule events during programmed operation.
To set the time follow these steps:
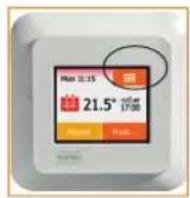
- Press the Menu button on the home screen
- Then press Basic Settings
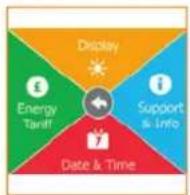
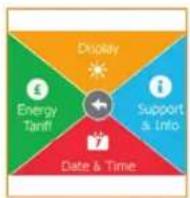
- Select Date & Time
- Select Time
- Press the hour digits to set the hour. Use the Up Arrow or Down Arrow to set the hours and minutes. Confirm each setting with √
Tap the Left Arrow button to return to the "Date & Time Settings".
5.
Basic Settings: Date & Time - Time Format
1.
3.
2.
4.
This option allows you to change the time format displayed.
To set the time format follow these steps:
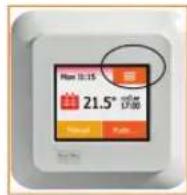
- Press the Menu button on the home screen
- Then press Basic Settings
- Select Date & Time
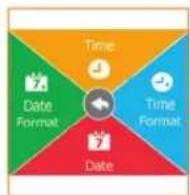
- Select Time Format
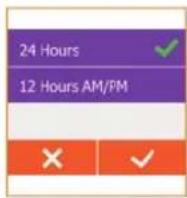
- Select the time format you prefer:
• 24 Hours
• 12 Hours AM/PM
Confir rm your choice with √ or discard with X
5.
The thermostat will automatically return to the "Date & Time Settings" menu.
Basic Settings: Date & Time - Date
1.
3.

5.
2.
4.
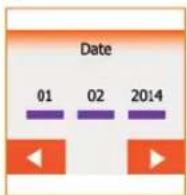
This option allows you to change the date, which may appear on the screen saver and is used for functions such as Holiday mode and Daylight Saving Time.
To set the time format follow these steps:
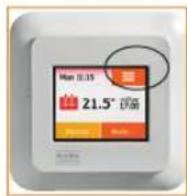
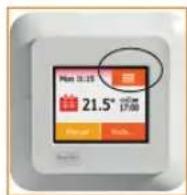
- Press the Menu button on the home screen
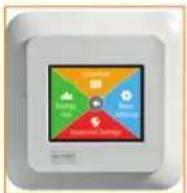
- Then press Basic Settings to access the Date & Time settings
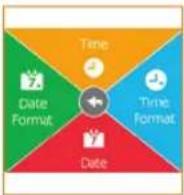
- Select Date & Time
- Select Date
- Press the day to begin setting the date. Use the Up Arrow or Down Arrow to set the month and year. Confi rm each setting with √
Press the Left Arrow to return to the "Date & Time Settings" menu.
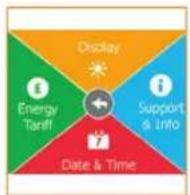
Basic Settings: Date & Time - Date Format
1.
3.
5.
2.
4.
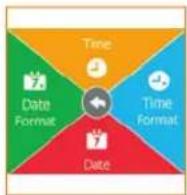
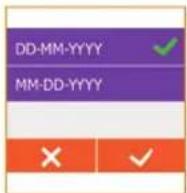
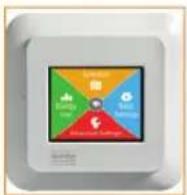
This option allows you to change the date format displayed.
To set the date format follow these steps:
- Press the Menu button on the home screen
- Then press Basic Settings
- Select Date & Time
- Select Date Format
-
Select the date format you prefer:
-
DD/MM/YYYY
- MM/DD/YYYY
Confir rm your choice with √ or discard with X
The thermostat will automatically return to the "Date & Time Settings" menu.
Basic Settings: Energy Tariff Menu
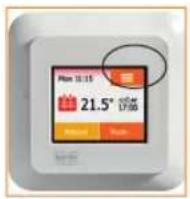
1.
3.
5.
2.
4.
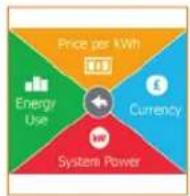
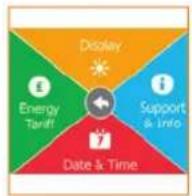
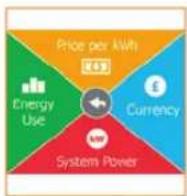
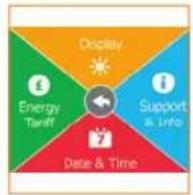
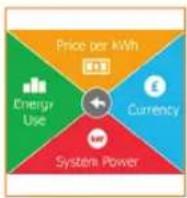
The Energy Tariff menu allows you to monitor the thermostat's energy use and set parameters for monitoring the cost of running your system.
Price per kWh
To specify the price per kW hour of your electricity follow these steps:
- Press the Menu button on the home screen
- Then press Basic Settings
- Select the Energy Tariff menu
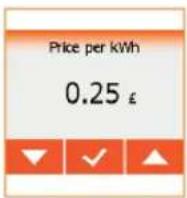
- Press Price per kWh
- Use the Up Arrow or Down Arrow to set the price in pounds and pence Confirm with √
Currency
The currency is set to GBP and cannot be altered on this version of the thermostat.
Basic Settings: Energy Tariff - System Power
1.
3.
5.
2.
4.
6.
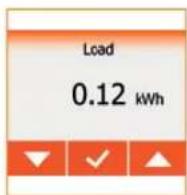
System Power calculates the power of the system connected to the thermostat and uses this information to feed into energy cost data. If the system is controlled by a contactor, this function must be switched off and the system power must be added manually. See below:
To access System Power information follow these steps:
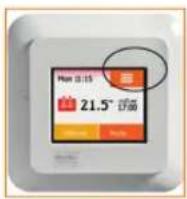
- Press the Menu button on the home screen
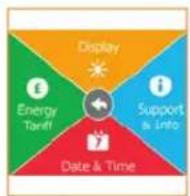
- Then press Basic Settings
- Select the Energy Tariff menu
- Press System power
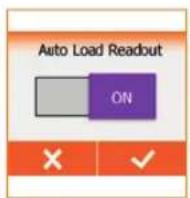
- Press the OFF/ON button to the right to switch the Auto Load Readout to ON to activate System Power. Confir rm with √ to view the power information screen
Or discard it with X to return to the "Energy Tariff" menu
- If the Auto Load Readout is turned off you will be given the option of setting the Load of the system manually on the next screen Confi rm with √ to view the power information screen
Basic Settings: Energy Tariff - Energy Use
1.
3.
5.

2.
4.
6.
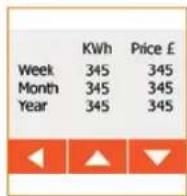
The Energy Use function uses the information provided for Price per kWh to calculate your electricity consumption and the cost of heating for a given period of time.
This option allows you to monitor your energy use over a week, month or a year.
To see your Energy Use follow these steps:
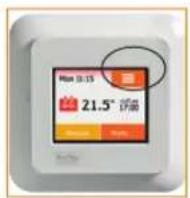
- PresstheMenu button on the home screen
- Then press the Basic Settings button
- Select Energy Tariff
- Select Energy Use
-
Use the Up Arrow or Down Arrow to see data for a week, month or year
-
Last 7 days: Displays a graph of usage for the past week measured in hours per day.
- Last month: Displays a graph of usage the past month measured in hours per 3 days.
-
Last year: Displays a graph of usage for each month of the past year measured in hours per month.
-
This screen displays an overview of electricity consumption (kWh) and heating costs (actual load, currency and price per kWh must be set in the “Energy Tariff” menu)
Press the left-hand arrow to exit and return to the "Energy Tariff" menu.
Advanced Settings: Adaptive Function
1.
3.
2.
4.
5.
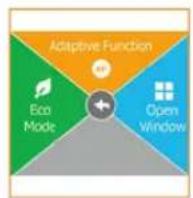
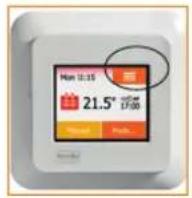
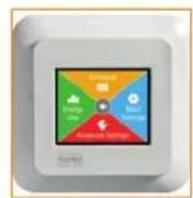
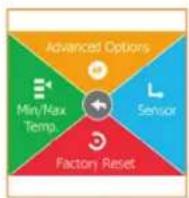
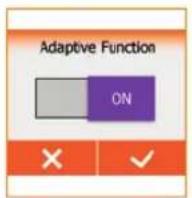
The Adaptive Function learns the heat characteristics of a room and enables the thermostat to bring the room up to temperature for the start of each programmed event. After a few days, the adaptive function will have automatically calculated when the heating must be turned on/off to achieve this and it will adapt with the seasons to ensure your system runs efficiently.
To access the Adaptive Function follow these steps:
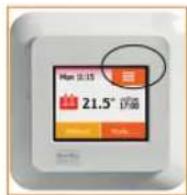
- PresstheMenu button on the home screen
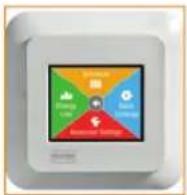
- Select Advanced Settings
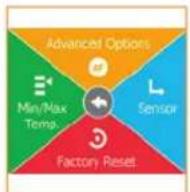
- Select Advanced Options
- PressAdaptive Function
- Press the OFF/ON button to the right for ON. Confirm with √ The thermostat will automatically return to Advanced Options
Select OFF if you simply want the heating to start at the beginning of a programmed event without Adaptive Function enabled.
Advanced Settings: Open Window
1.
2.
3.
4.
5.
6.
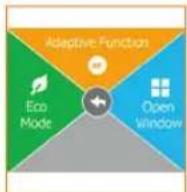
The Open Window function prompts the thermostat to detect an open window or door, by registering a rapid drop in temperature. With this function enabled, the thermostat shuts off the heating for 30 minutes to avoid needlessly heating a room and wasting heat.
To access the Open Window function follow these steps:
-
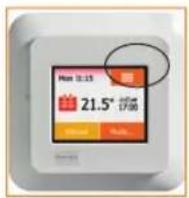
PresstheMenu button on the home screen
-
Select Advanced Settings
-
Select Advanced Options
-
PressOpen Window
-
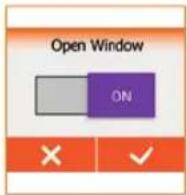
Press the OFF/ON button to the right for ON. Confirm with √
The thermostat will automatically return to Advanced Options.
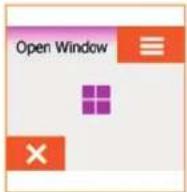
- The home screen is replaced by the Open Window screen with a purple window icon if the thermostat detects a rapid drop in temperature
Select OFF if you want to use the thermostat without Open Window activated and press X to exit.
If an open window is detected, the Open Window screen will appear. This function can be cancelled by pressing X.
Advanced Settings: Daylight Saving Time
1.
3.
5.
2.
4.
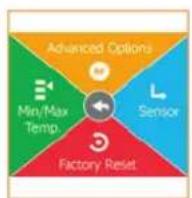
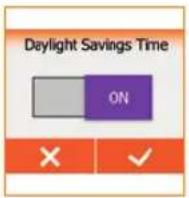
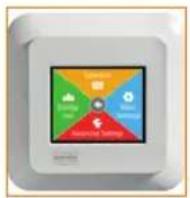
This option allows you to enable Daylight Saving Time.
The thermostat will automatically adjust the time for daylight saving.
To access Daylight Saving Time follow these steps:
-
Press the Menu button on the home screen
-
Scroll down and press Advanced Settings
-
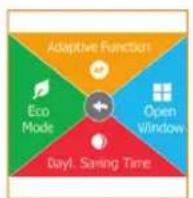
Press the Advanced Options button
-
Select Daylight Saving Time
-
Press the OFF/ON button to the right for ON. Confirm with √
Select OFF if you want to use the thermostat without Daylight Saving Time activated and press X to exit.
The thermostat will automatically return to the "Advanced Options" menu.
Advanced Settings: Advanced Options - Eco Mode
1.
3.
5.
2.
4.
6.

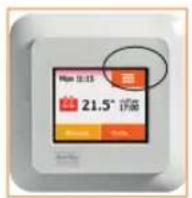
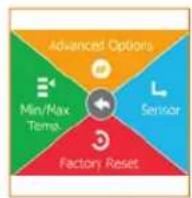
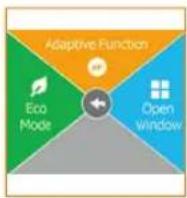
Eco Mode reduces the energy spent on unnecessary heating if you leave the room or house temporarily during a scheduled heating event. If you are going to bed early at 9pm, but your heating normally stays on until 11pm, pressing the Eco button will prevent the system heating needlessly for two hours.
-
Press the Menu button on the home screen
-
Scroll down and press Advanced Settings
-
Press the Advanced Options button
-
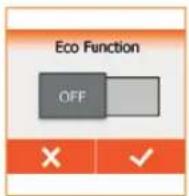
Select Eco Mode
-
Press the OFF/ON button to the right for ON. Confirm with √
The thermostat will automatically return to the "Advanced Options" menu.
- With Eco Function enabled, the programmed operation home screen is altered. The lower left button, Manual, is changed to Eco
If you press the Eco Mode button, the thermostat enters an energy-saving state, in which the lowest setback temperature in the event schedule is used as the temperature set point. This usually leads to the thermostat switching off at this point. At the next programmed event change, the thermostat returns to normal programmed operation.
Advanced Settings: Sensor - Sensor Application
1.
3.
5.
2.
4.
6.
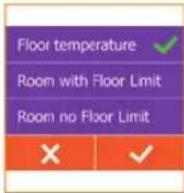
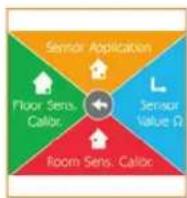
The Sensor Application allows you to choose which sensor is used to control the heating system. The options are:
- Floor temperature (default): With this setting, the floor sensor controls the heating system. Use the floor temperature option if the thermostat is in a cupboard, or not in the room to be heated. Also use if there is another form of heating regularly used in the room, such as a radiator system.
- Room/Floor Limit: With this setting, the room sensor controls the heating system subject to maximum and minimum limits for floor temperature. Floor Limit temperatures are set using the Min/Max Temp in the Advanced Options menu. Maximum temperature depends on floor type and temperature scale.
-
Room no Floor Limit: With this setting, the room sensor inside the thermostat controls the heating system. Only use this option if you have an alternative way to limit your floor temperature.
-
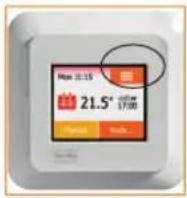
Press the Menu button on the home screen
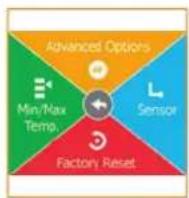
- Press Advanced Settings
- Press Sensor
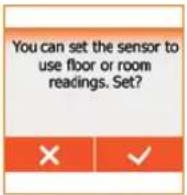
4.SelectSensor Application - An information screen will follow. Press √ confirm or X to return to the "Sensor menu"
- Select the application you want to use. Confirm your choice with √ or discard it with X. You will return to the "Sensor menu"
Advanced Settings: Min/Max Temp. 1/2
This function allows you to set a minimum and maximum temperature the thermostat can reach and the minimum and maximum limits for floor temperature.
Minimum Temp. Scale
15^


Maximum Temp. Scale
35^


Operating temperatures:
Minimum Temp. Scale and Maximum Temp. Scale set the highest and lowest temperatures that you can program the thermostat to reach.
- Minimum Temperature Scale can be set between 5°C and 15°C
• Maximum Temperature Scale can be set between 20°C and 40°C
(If Sensor Application is set to "Floor", a maximum temperature of 27^ C can protect wooden floors from drying out and overheating. For precise information, please ask your flooring supplier)
Floor limit temperatures:
Minimum Temp. Limit and Maximum Temp. Limit set the highest and lowest temperatures that the thermostat will allow the floor to reach. Remember: the thermostat can only sense the floor temperature wherever the floor sensor is located; it can't measure the entire floor temperature.
Floor limit temperatures allow you to set the lowest (Minimum Temp. Limit) and highest (Maximum Temp. Limit) permissible floor temperature during normal room temperature control. If the floor temperature drops below the Minimum Temp. Limit, the thermostat will activate the heating system to maintain the temperature above the set minimum. If floor temperature rises above the Maximum Temp. Limit, the thermostat will deactivate the heating system to maintain the temperature below the set maximum.
Floor Limit temperatures are only visible if "Room/Floor Limit" is selected under Sensor Application.
Advanced Settings: Min/Max Temp. 2/2
1.
2.
3.
4.
5.
6.
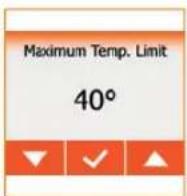
- Minimum Temp. Limit – use this setting to provide permanent frost protection to a fl oor, and to avoid sensitive fl oor coverings going below a certain temperature. - Maximum Temp. Limit – use this setting to protect non-tile and stone floors from excessive temperatures. Can be set between 10°C and 40°C.
NOTE: If the maximum limit for floor temperature is too high, sensitive floor types may be permanently damaged.
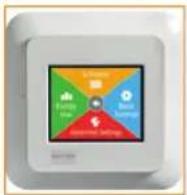
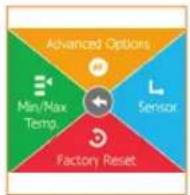
To change the Min/Max Temp. follow these steps:
- Press the Menu button on the home screen
- Press Advanced Settings
- Press Min/Max Temp.
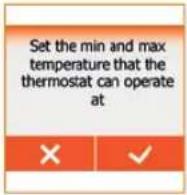
- Confi rm that you want to set minimum and maximum operating temperatures for the thermostat by tapping √ or cancel with X
If "Room/Floor Limit" or "Floor Temperature" has been selected under "Sensor Application" you can now set Minimum and Maximum temperature limits.
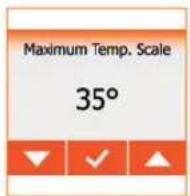
- Use the Up or Down arrows to set the Minimum and Maximum Temp. Scales Confir rm each setting with √
- Use the Up or Down arrows to set the Minimum and Maximum Temp. Limit Confir rm each setting with √
If "Room no Floor Limit" has been selected under "Sensor Application" you can only set the Minimum and Maximum temperature scale
A confirmation screen will be displayed. The thermostat will automatically return to the "Advanced Settings" menu.
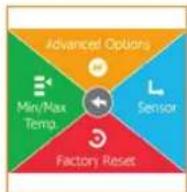
Advanced Settings: Sensor - Room Sensor Calibration
1.
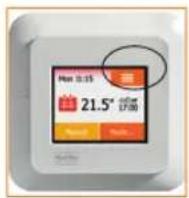
3.
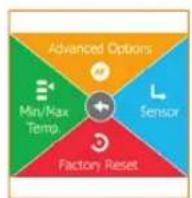
5.
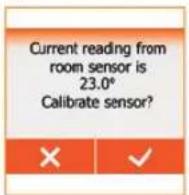
2.
4.
6.
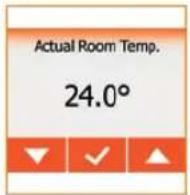
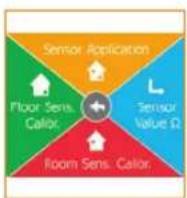
This option allows you to calibrate the room sensor.
You should calibrate the sensor if the temperature reading differs from the actual room temperature.
You can calibrate the sensor with +/- 10°C in steps of 0.5°C in the following way:
- Press the Menu button on the home screen
- Press Advanced Settings
- Press Sensor
- Press Room Sens. Calibr.
- Confirm that you want to calibrate the sensor with √ or cancel with X. If you decide to calibrate the sensor, you must measure the room temperature and manually adjust the thermostat to reflect the temperature reading you have taken
- Use the Up Arrow or Down Arrow to set the Actual Room Temp. Confir rm the value with √
A confirmation screen will be displayed briefly. The thermostat will automatically return to the "Sensor" menu.
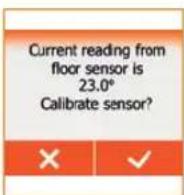
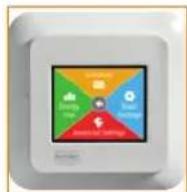
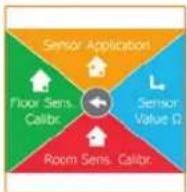
Advanced Settings: Sensor - Floor Sensor Calibration
1.
3.
5.
2.
4.
6.
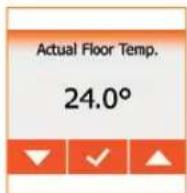
This option allows you to calibrate the floor sensor.
You should calibrate the sensor if the temperature reading differs from the actual fl oor temperature. Remember, the fl oor sensor sits beneath the fl oor covering so is likely to register a fl oor temperature above the temperature measured on the top of the fl oor covering.
Note: changes in the floor sensor characteristics may damage certain floors.
You can calibrate the sensor with +/- 10°C in steps of 0.5°C in the following way:
- Press the Menu button on the home screen
- Press Advanced Settings
- Press Sensor
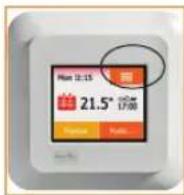
- Press Floor Sens. Calibr
- Confirm that you want to calibrate the sensor with √ or cancel with X. If you decide to calibrate the sensor, you must measure the floor temperature and manually adjust the thermostat to reflect the temperature reading you have taken
- Use the Up or Down Arrows to set the measured floor temperature. Confirm with √
A confirmation screen will be displayed briefly. The thermostat will automatically return to the "Sensor" menu.
Advanced Settings: Sensor Value
1.
3.
5.
2.

4.
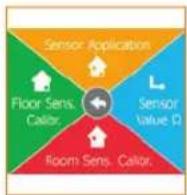
6.
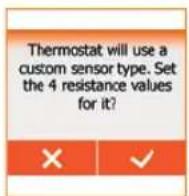
This option allows you to choose the type of floor sensor for the thermostat.
This setting is only required if you are using the NGTouch to control an old electric UFH thermostat and want to use the original sensor. Please contact the manufacturer of your old thermostat, or check the user manual, to confirm the sensor type it uses.
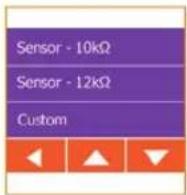
The sensor supplied with the thermostat is a Heat Mat sensor listed as: "Factory". Sensor options include:
- Factory (default)
- Sensor 10k at 25^
- Sensor 12 kΩ at 25°C
- Custom
To access the above options follow these steps:
- Press the Menu button on the home screen
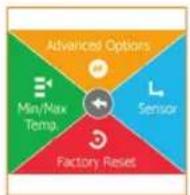
- Press Advanced Settings
- Press Sensor
- Press Sensor Value
- Select the value you prefer by using Up or Down arrows and pressing the text. Confi rm with √ or press the left arrow to exit
- If "Custom" is chosen, please provide resistance values for the sensor at 4 temperatures: 15^ , 20^ , 25^ and 30^ (ask the supplier of your sensor for these values). Use the Right Arrow or Left Arrow to toggle through the temperatures. Press the resistance value to change it. Press the Up or Down Arrows to set the resistance. Repeat until all 4 resistance values have been set Tap the Left Arrow button to return to the "Advanced Settings" menu
Energy Use
text_image
Schedule Energy Use Basic Settings Advanced Settings Beat MatSee page 39 for information on Energy Use. This function can also be accessed from:
Basic Settings - Energy Tariff menu.
ENGINEER INFORMATION
Factory Settings
| Operating mode Factory preset temperature | |
| Scheduled Operation See Default heating schedule* | |
| Manual Override 23°C* | |
| Comfort Mode 23°C* | |
| Boost Mode Max °C ≤ Maximum Limit | |
| Holiday Mode 5°C | |
| Frost Protection 5°C | |
*You can change the settings for these temperatures – see Modes on pages 12-16 in this manual.
Default Heating Schedule:
| Room Temperature | Floor Temperature | ||
| Wake up 6:00am | 20°C 20°C | ||
| Leave home 8:30am | 5°C 5°C | ||
| Daytime home* 12:00pm | 20°C 20°C | ||
| Daytime leave* 1:00pm | 5°C 5°C | ||
| Come home 4:30pm | 20°C 20°C | ||
| Go to sleep 10:30pm | 5°C 5°C | ||
| Wake up 7:00am | 20°C 20°C | ||
| Go to sleep 11:00pm | 5°C 5°C | ||
*Only available with 6-event schedule
Troubleshooting 1/2
Error messages:
text_image
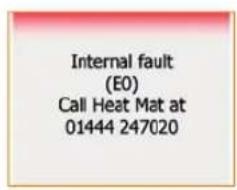
Internal fault (E0) Call Heat Mat at 01444 247020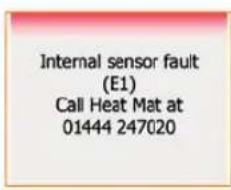
text_image
Internal sensor fault (E1) Call Heat Mat at 01444 247020
text_image
External wired floor sensor fault (E2) Call Heat Mat at 01444 247020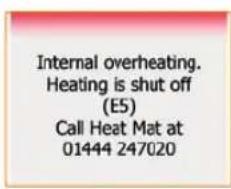
text_image
Internal overheating. Heating is shut off (ES) Call Heat Mat at 01444 247020
natural_image
Three black dots arranged in a 2x2 grid on a light background (no text or symbols)If a fault or error occurs, the thermostat will display one of the following error messages:
E0: Internal failure. The thermostat is defective. Contact Heat Mat. The thermostat must be replaced.
E1: Internal sensor defective or short-circuited. Contact Heat Mat. The thermostat must be replaced.
E2: External wired floor sensor disconnected, defective or short-circuited. Contact your heating engineer or Heat Mat for reconnection or replacement.
E5: Internal overheating. Contact your heating engineer in order to have the installation inspected.
- Three circles containing dots are displayed on the screen; the thermostat cannot be operated. The thermostat is in Screen Lock mode. See "Screen Lock" on page 23 of this manual for instructions on how to unlock it.
Troubleshooting 2/2
Q: Why does a specific function not work in a specific mode?
A: Not all functions are available in all modes or make sense in all modes.
| Mode vs function | Scheduled Operation | Manual Boost Comfort | Frost Protection | Holiday Eco | |||
| Open Window detection | Yes Yes | Not available | Yes Not available | Not available | Not available | ||
| Floor comfort override sensor | Yes Yes | Not available | Yes Not available | Not available | Not available | ||
| Eco Function | Changes the home screen to display the Eco button instead of Manual | Not available | Not available | Not available | Not available | Not available Not available | Not available |
Contact Details
Heat Mat Underfloor Heating
Ashwyn Business Centre
Marchants Way
Burgess Hill
West Sussex
RH15 8QY
Tel: 01444 247020
Fax: 01444 247121
Email: support@heatmat.co.uk or sales@heatmat.co.uk
www.heatmat.co.uk