Shokunin - Radio Audisse - Free user manual and instructions
Find the device manual for free Shokunin Audisse in PDF.


User questions about Shokunin Audisse
0 question about this device. Answer the ones you know or ask your own.
Ask a new question about this device
Download the instructions for your Radio in PDF format for free! Find your manual Shokunin - Audisse and take your electronic device back in hand. On this page are published all the documents necessary for the use of your device. Shokunin by Audisse.
USER MANUAL Shokunin Audisse
natural_image
Black audio amplifier device with visible sound waves, antenna, and control buttons (no text or symbols on main body)CONTENT
| Controls | 6 | ||
| Buttons | overview | 6 | |
| Front | view | 6 | |
| Top | view | 7 | |
| Bottom | view | 7 | |
| Side | view | 8 | |
| Important | safety instructions | 9 | |
| Introduction | of features | 10 | |
| Before you can use this product | 11 | ||
| Power | supply | 12 | |
| AC | operation | 12 | |
| Lithium battery operation and charging | 12 | ||
| Battery | safe mode | 12 | |
| User | safety precautions | 13 | |
| Navigation | controls | 15 | |
| Getting | started | 16 | |
| Installations using the “Setup Wizard” | 16 | ||
| Connecting to your computer network | 18 | ||
| Changing the network connection | 22 | ||
| Manual network configuration | 23 | ||
| Network remote control options | 27 | ||
| Network PIN setup (PIN number) | 27 | ||
| Keep | network connected | 27 | |
| Internet Radio - the basics | 28 | ||
| Selecting a radio station by location | 29 | ||
| If your radio cannot connect to a radio station | 31 | ||
| Selecting a radio station by genre | 32 | ||
| Searching for a radio station by name | 34 | ||
| Selecting a Podcast | 36 | ||
| Selecting a polupair station | 38 | ||
| Presetting stations | 39 | ||
| Storing a preset | 39 | ||
| Recalling a preset | 40 | ||
| Last listened | 40 | ||
| Display modes | 41 | ||
| Customising your radio | 43 | ||
| Registering an account | 43 | ||
| Configuring My Favourite Stations | 44 | ||
| Configuring My Added Stations | 44 | ||
| Selecting your favourite stations | 45 | ||
| Selecting your added stations | 46 | ||
| Spotify Connect | 48 | ||
| Spotify Connect - the basics | 48 | ||
| Setting up Spotify Connect | 48 | ||
| Playing music by Spotify Connect | 48 | ||
| Controlling Spotify on your radio | 50 | ||
| To select Spotify | 51 | ||
| Display modes | 51 | ||
| Streaming data rate | 52 | ||
| Friendly name | 53 | ||
| Music Player Use with Windows, Mac, Linux 53 | |||
| Accessing your audio files via a UPnP server 54 | |||
| Set up UPnP access on a Windows PC 54 | |||
| Locating and playing media files using UPnP 56 | |||
| Listening to a complete album 57 | |||
| Listening to a particular track 58 | |||
| Controlling playback | 58 | ||
| Repeat tracks | 59 | ||
| Play tracks in random order 59 | |||
| Display modes | 60 | ||
| Playlists | 61 | ||
| Adding a track to playlist 62 | |||
| Adding an album or folder 62 | |||
| Viewing your playlist | 62 | ||
| Erasing a track | 63 | ||
| Clearing the playlists | 64 | ||
| Playing your playlists | 65 | ||
| Prune servers | 65 | ||
| Using USB memory devices | 66 | ||
| Playing files from USB memory devices 67 | |||
| Display modes | 68 | ||
| Playlists | 70 | ||
| Adding a single track to your playlist 70 | |||
| Adding an entire album or folder 71 | |||
| Viewing your playlist | 71 | ||
| Erasing a track from the playlist 71 | |||
| Clearing the playlist | 72 | ||
| Playing your playlists | 73 | ||
| DAB+ Digital Radio | 74 | ||
| Using DAB mode for the first time 74 | |||
| Selecting a DAB radio station 75 | |||
| Secondary services | 76 | ||
| Display modes | 76 | ||
| Finding new DAB radio stations 78 | |||
| Manual Tuning | 79 | ||
| Dynamic Range Control settings 80 | |||
| Station order setup | 81 | ||
| Prune stations | 82 | ||
| FM Radio | 84 | ||
| Operating in FM mode | 84 | ||
| Manual tuning | 85 | ||
| Display modes | 85 | ||
| Scan setting | 86 | ||
| Stereo / Mono switching | 87 | ||
| Presetting stations in DAB and FM modes 89 | |||
| Recalling a preset in DAB and FM modes 90 | |||
| Bluetooth | 91 | |
| Connecting Bluetooth devices | 92 | |
| Playing audio files 93 | ||
| Display modes | 94 | |
| Answering incoming phone call 95 | ||
| Redialling last number | 95 | |
| Bluetooth Options | 96 | |
| Bluetooth Info of the radio 97 | ||
| Connected device to the radio 98 | ||
| Connecting a Bluetooth device 99 | ||
| Reconnecting the mobile devices ever connected 100 | ||
| Auxiliary input socket | 101 | |
| Inactive Standby feature | 102 | |
| Clock and Alarms | 102 | |
| Automatically updating the clock 102 | ||
| Manually setting the clock 103 | ||
| Setting the alarm clock | 106 | |
| When the alarm sounds | 109 | |
| Disabling alarms | 110 | |
| Snooze timer | 110 | |
| Sleep timer | 111 | |
| Equaliser function | 112 | |
| Setting up your My EQ profile 113 | ||
| Brightness control | 114 | |
| Factory reset | 115 | |
| Software update | 117 | |
| Network Profiles 118 | ||
| Software version display | 119 | |
| Volume | 120 | |
| Charging a mobile phone | 120 | |
| Audio FAQ | 120 | |
| Troubleshooting | 121 | |
| Music Player / UPnP problems 123 | ||
| Audio codecs | 123 | |
| About UNDOK app | 124 | |
| Specifications 126 | ||
| Environmental note | 126 |
The Bluetooth® word mark and logos are registered trademarks owned by Bluetooth SIG, Inc. and any use of such marks is under license.

text_image
CAUTION RISK OF ELECTRIC SHOCK DO NOT OPENWARNING!
WARRANTY BECOMES VOID ONCE THE DEVICE CABINET HAS BEEN OPENED OR ANY MODIFICATIONS OR ALTERATIONS TO THE ORIGINAL DEVICE HAVE BEEN MADE. NEVER OPEN THE DEVICE CASING. THE MANUFACTURER WILL NOT ACCEPT ANY LIABILITY FOR DAMAGE RESULTING FROM IMPROPER HANDLING. THE TYPE PLATE IS LOCATED ON THE BOTTOM OF THE DEVICE.
CONTROLS
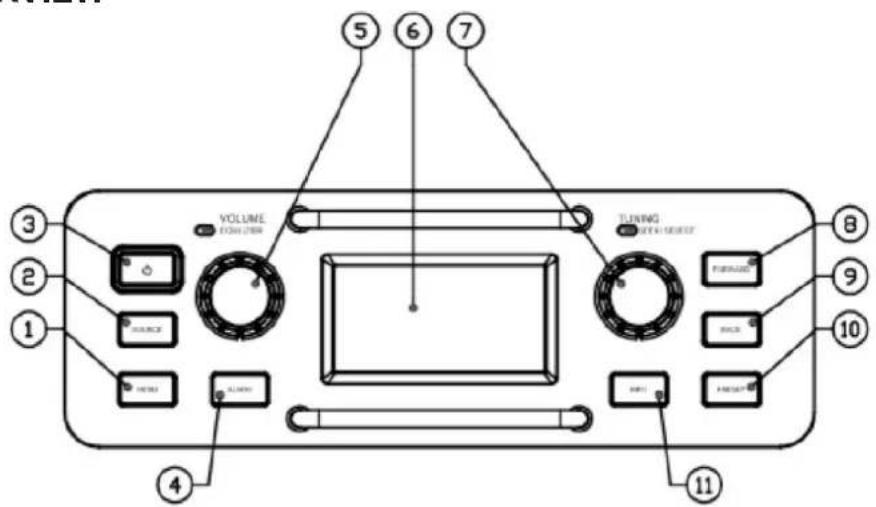
BUTTONS OVERVIEW
text_image
VOLUME ON/OFFICUMBER TUNING ON/OFFICUMBER ON/OFFICUMBER ON/OFFICUMBER ON/OFFICUMBER ON/OFFICUMBER ON/OFFICUMBER ON/OFFICUMBER ON/OFFICUMBER ON/OFFICUMBER ON/OFFICUMBER ON/OFFICUMBER ON/OFFICUMBER ON/OFFICUMBER ON/OFFICUMBER ON/OFFICUMBER ① ② ③ ④ ⑤ ⑥ ⑦ ⑧ ⑨ ⑩ ⑪- Menu 7. Tuning / Seek / Select / Phone Control
- Source 8. Preset + / Skip forward
- Power 9. Preset - / Skip backward
- Back 10. Preset / Play / Pause
- Volume / EQ Control 11. Info
- LCD Display
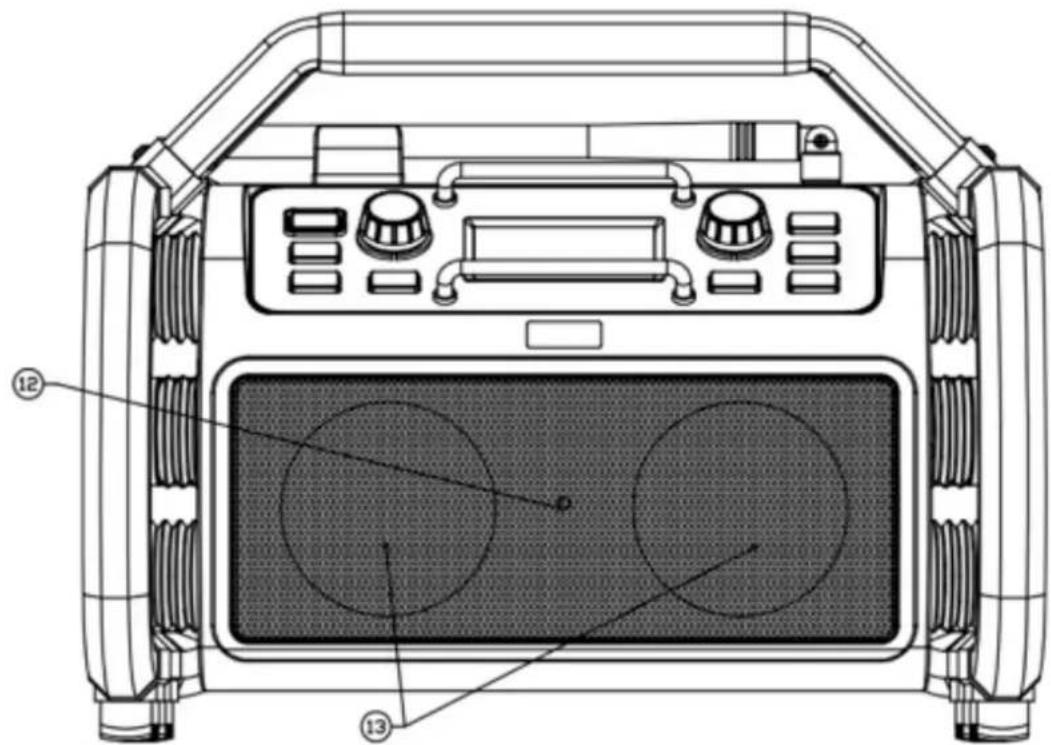
FRONT VIEW
text_image
Technical diagram of a portable electronic device with labeled components including front panel, top panel, and two circular buttons.- Bluetooth LED 13. Stereo speakers
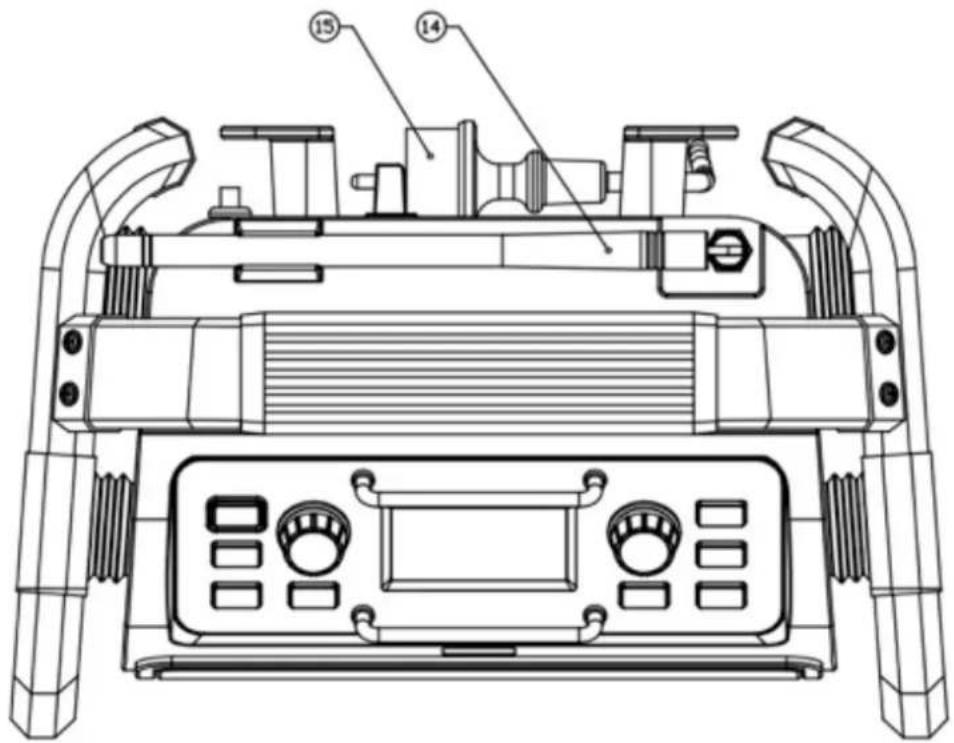
TOP VIEW
text_image
Technical diagram of a robotic device with labeled parts 14 and 15, showing internal components and wiring layout.- Rod antenna (only required for DAB and FM band)
- Power cord
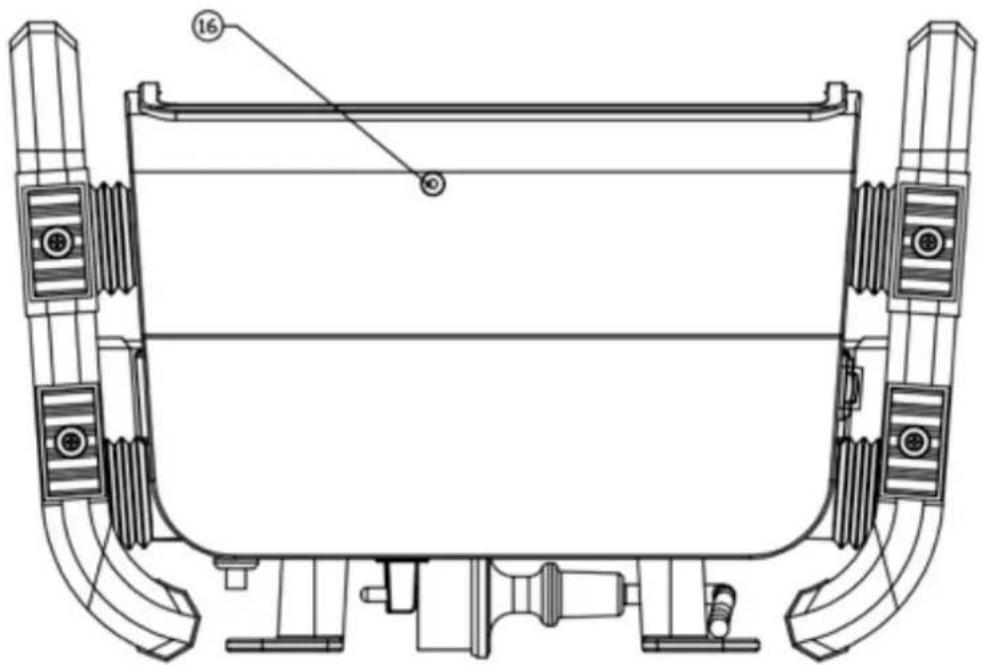
BOTTOM VIEW
natural_image
Technical line drawing of a vehicle chassis frame with mounting brackets and structural components (no text or symbols)16.
Microphone
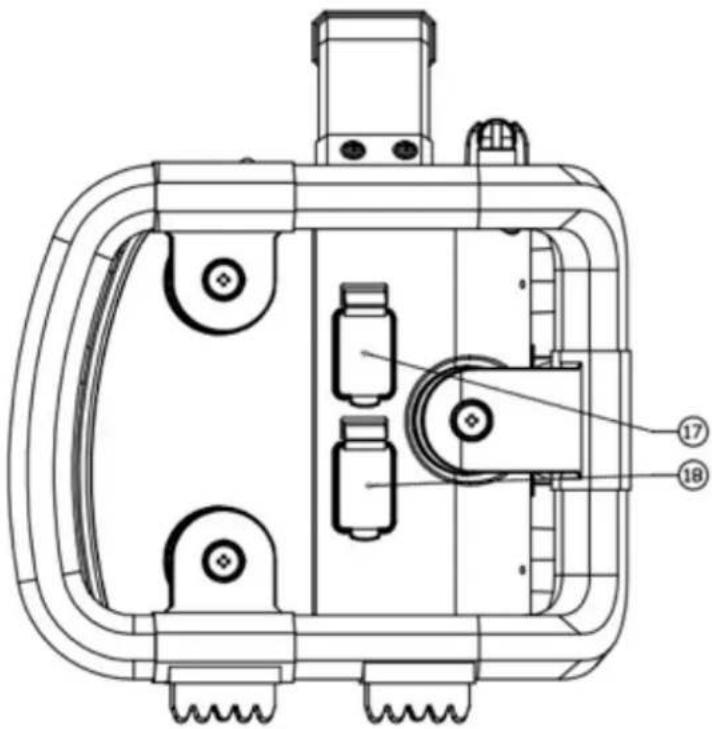
SIDE VIEW
text_image
Technical diagram of a mechanical device with numbered components, likely an electrical or mechanical assembly.- AUX-IN socket 18. USB Charge / USB host socket
IMPORTANT SAFETY INSTRUCTIONS
-
Read these instructions.
-
Keep these instructions.
-
Heed all warnings.
-
Follow all instructions.
-
Clean only with dry cloth.
-
Do not block any ventilation openings. Install in accordance with the instructions.
-
Do not install near any heat sources such as radiators, heat registers, stoves or other apparatus (including amplifiers) that produce heat.
-
Only use attachments/accessories specified by the manufacturer.
-
Use only with the cart, stand, tripod, bracket, or table specified by the manufacturer, or sold with the apparatus. When a cart is used, use caution when moving the cart/apparatus combination to avoid injury from tip-over.
-
Unplug this apparatus during lightning storms or when unused for long periods of time.
-
Refer all servicing to qualified service personnel. Servicing is required if the apparatus has been damaged in any, such as power-supply cord or plug is damaged, liquid has been spilled or objects have fallen into the apparatus, the apparatus has been exposed to rain or moisture, does not operate normally, or has been dropped.
-
To reduce the risk of fire or electric shock, do not expose this appliance to rain or moisture for non-battery operating mode.
-
Do not remove the cover; there are no user-serviceable parts inside.
-
No naked flame sources shall be placed on the apparatus.
-
For outdoors use, to avoid electric shock, use battery only during a raining day or the weather is wet. To prevent electric shock, if the sound system has been exposed to rain or water, the power supply cord and plug must be completely dried before plugging into the mains socket outlet.
-
The power plug should be closed to the apparatus, and easy to be approached that during emergency. To disconnect the power from the apparatus, just unplug the power plug from the AC power slot.
-
The marking information is located at the bottom of the apparatus.
-
This apparatus is provided with protection against splashing water (IP65) and under battery operation mode only.
-
In case of malfunction due to electrostatic discharge or fast transient (burst), remove and reconnect the power supply.
-
The apparatus must be used in a moderate climate.
-
To prevent possible hearing damage, do not listen at high volume levels for long periods.
INTRODUCTION OF FEATURES
The Audisse Shokunin provides the following features in an attractive compact unit:
- Listen to local, regional, national and international broadcasts using FM, DAB and Internet radio
- Listen to over 1000 radio stations from around the country, and over 10,000 from around the world without using your PC.
- Listen to previously broadcast material from the BBC (using Listen Again)
- Listen to podcasts from a wide range of broadcasters.
- 120 radio station presets (40 internet radio, 40 DAB and 40 FM).
- Use the Music Player to play your music collection from your computer (using Windows Media Player 12). Connection to Apple and Linux based computers is also possible using suitable software.
● Music playback by streaming from a Bluetooth device.
• Music playback by the Spotify Connect application. - MP3, WMA, AAC, FLAC, Apple Lossless and WAV formats are supported.
● Supports remote control from Apple iPhone, iPad and Android using UNDOK app. - The Audisse Shokunin connects to your home computer network by using WiFi.
- WiFi Protected Setup (WPS) is supported for simpler setting up with compatible wireless routers.
- All radio station presets, network configuration details and user settings are retained in the event of a power failure.
- Large clock display with time and date when in Standby (on AC mains power only).
- Two alarm timers with snooze feature to wake you to either buzzer or radio alarm (on AC mains power only).
- Adjustable sleep timer, can be set to turn the radio off between 15 and 120 minutes.
- Easy-to-read graphic LCD display with an adjustable display backlight.
- Auxiliary input for playing audio from MP3 players, iPods or other audio equipment.
- Mains or battery powered operation using supplied mains adapter, or Lithium Polymer battery.
BEFORE YOU CAN USE THIS PRODUCT
Before you can use Audisse Shokunin, you must have the following:
- A broadband Internet connection (not required for DAB, FM, Bluetooth, AUX-IN or Music Player functions).
- A wireless router (WiFi) connected to your broadband Internet Service Provider, preferably via a router. In many cases the broadband modem, router and wireless access point will be a single combined unit supplied by your Internet Service Provider or bought from a computer store.
- If your wireless network is configured to use Wired Equivalent Privacy (WEP) or WiFi Protected Access (WPA/WPA2) data encryption then you either need to know the WEP, WPA or WPA2 key used for encryption so you can get the sound system to communicate with the network, or your router needs to offer WiFi Protected Setup (WPS).
- Spotify Connect requires a Spotify Premium subscription.
If connecting using WiFi, the sound system will typically work within a 10-20 metres radius from your wireless access point. The actual range achieved will depend upon the building type, other nearby wireless networks, and possible interference sources. DAB and FM radio functions can operate wherever the sound system is able to receive a suitable broadcast signal.
IMPORTANT: Before you continue, make sure that your wireless access point or router is powered up and working with your broadband Internet service (use your computer to verify this). To get this part of the system working you must read the instructions supplied with the wireless access point or router.
POWER SUPPLY
AC OPERATION
Before plugging the power cable into the AC mains power socket, be sure the voltage is correct.
NOTE:
In order to disconnect the radio from the AC mains power completely, the Power cord should be removed from the AC mains power socket completely and it shall remain readily operable and should not be obstructed during intended use.
In case of malfunction due to electrostatic discharge or fast transient (burst), remove the Power cord from AC mains power socket and reconnect the power supply after approximately one minute.
LITHIUM BATTERY OPERATION AND CHARGING
NOTE ON FIRST USE : BEFORE OPERATING THE AUDISSE Shokunin FOR THE FIRST TIME ALWAYS FIRST FULLY CHARGE THE LITHIUM BATTERY.
The Audisse Shokunin can be operated by the built-in Lithium battery. During operation on battery power the approximate power level of the battery is displayed by the 4 segments battery icon in the top right corner of the LCD display. When the battery power level is very low, the “empty” icon will start flashing. Under this condition, the battery should be recharged as soon as possible to continue normal operation of the Audisse Shokunin.
Charging time from empty to full battery is approximately 5-6 hours (at room temperature with the radio in Standby mode). The Audisse Shokunin can be charged in Standby mode as well as in On mode while playing music. While playing music the charging time will be longer than in Standby mode. When charging is in process the battery icon segments will animate.
The Audisse Shokunin, for additional safety, will not start the charging process when the battery is already full or nearly full.
BATTERY SAVE MODE
When the Audisse Shokunin is operated on battery power and put into Standby mode, after 30 seconds the Audisse Shokunin will be turned off completely. This is normal in order to prevent the battery from draining fully in Standby mode.
When the radio is powered on again by pushing the power button it will have to start up fully again as well as reconnect to the WiFi network. It will first try to reconnect with the last used WiFi network. This may take up to one minute.
When the Audisse Shokunin is operated on AC power and put into Standby mode it will remain in Standby mode (date and clock display) and can remain connected to the WiFi network.
Note: In Standby mode the alarm function can only be used when the radio is operated on AC power. In Standby mode on battery power the radio will not be turned On by the alarm
function/settings.
NOTE ON PLAYING TIME ON BATTERY POWER: The achieved playing time on battery power depends on many factors such as: selected volume level, music type (bass heavy music consumes more energy), selected music source, selected EQ setting, ambient temperature and age of the battery. Depending on these variables a playing time of approximately 12-16 hours on a medium set volume level can be achieved.
NOTE: When playing on battery power and the energy level of the battery is very low, the sound may distort on higher volume and the WiFi-connection may become unstable.
NOTE ON LITHIUM BATTERY LIFE
If the Audisse Shokunin is not used for any extended period of time, always first charge the built-in battery until it is full. The optimum working life from the built-in battery will be obtained if it is kept topped up by recharging after each use of the Audisse Shokunin, even if it is only partially discharged. The battery's working life will be reduced if the product is left in a discharged condition for a long period of time.
WARNING:
Do not attempt to replace or repair the built-in lithium battery. If you have any doubts about the built-in lithium battery, please contact the service department for further assistance.
WARNING:
Danger of explosion if the battery is incorrectly replaced.
Do not expose the battery to excessive heat such as sunshine, fire or the like.
Batteries should not be disposed of by incineration and with household waste.
Disposable batteries should be taken to a suitable recycling centre if possible.
SAFETY INFORMATION FOR INTERNAL RECHARGEABLE LITHIUM-ION BATTERY
The internal rechargeable lithium-ion battery used in this device is able to supply power for a long period of time. However, even lithium-ion batteries reach a point where they cannot be recharged. If the battery does not recharge after several attempts, it may be drained (have a too low charge), please contact service@audisse.com for repair information.
However, if you do not want us to replace the battery, you will need to dispose of used batteries/ device in accordance to the laws and regulations in your area. In addition, you can contact your local electronics retailers or recycling centre for disposal.
USER SAFETY PRECAUTIONS
Check the room temperature range is 0^ - 45^ ( 32^ - 113^ Fahrenheit) before charging the battery.
Do not attempt to disassemble the plastic covering or any parts of the device, as the materials inside may be toxic and may damage skin and clothes.
Do not puncture, crush, modify, throw or cause any unnecessary shock to your battery, as the battery used in this device may present a risk of fire, explosion, or chemical burn if mistreated.
Do not leave, charge or use the battery in a car under direct sunlight, near fire or a heated source.
Do not immerse, throw, wet the battery in water/ seawater.
Do not use or charge the battery if it appears to be abnormally hot, discoloration, deformation or abnormal conditions is detected during use, charge or storage.
Do not leave a charging battery unattended. Keep the battery away from babies and children.
NAVIGATION CONTROLS
This page describes the basic means of controlling your Audisse Shokunin sound system. Instructions for each operating mode are given in the later sections of this book.

Pressing the Power button brings Audisse Shokunin out of Standby mode. Pressing Power button while the sound system is in use will cause it to return to the Standby mode with the clock display.

Pressing the Source button gives you access to each of the operating modes in turn: Internet Radio, Spotify, Music Player, DAB radio, FM radio, Bluetooth and Auxiliary Input.
Pressing the Menu button will access the menu system.
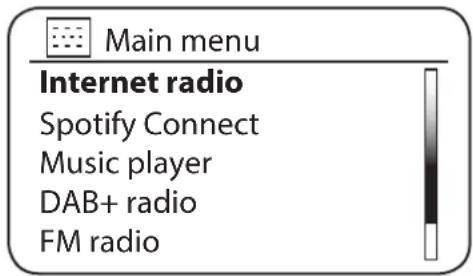
Many operations require the user to make a selection from the menu. This is done using the Tuning/Seek/Select control. Turn the control clockwise or anti-clockwise to highlight the desired menu item then press the control to select that item.

text_image
Main menu Internet radio Spotify Connect Music player DAB+ radio FM radioIf there are more than five items in a menu, then the display will automatically scroll up or down so that the additional items become visible. A sliding bar on the right will give an indication showing the current portion of the menu that is displayed.
If there are many items in a menu, then the sound system allows the menu to 'wrap around' in either direction. This can make it easier to reach items at the end of a long menu, such as a list of countries or Internet radio stations.

If an error is made when navigating the menus, it is generally possible to go back to a higher level menu by pressing the Back button.

The Info button allows the display of information relating to the radio station or music file being played.
GETTING STARTED
INSTALLATION USING THE "SETUP WIZARD"
Place Audisse Shokunin on a flat surface and plug the power cable into the socket.
IMPORTANT: The power cord is used to connect the radio to the mains supply. The mains socket used for the radio must remain accessible during normal use. In order to disconnect the radio from the mains, the power cord should be removed from the mains socket outlet completely.
When you apply power, the display on the sound system will light up and say: 'Audisse Shokunin'.
audisse
Shokunin
START UP

After a few seconds the radio will then enter Standby and the clock will display '00:00' as shown.
00 / 00 / 0000
00:00

To continue to setup Audisse Shokunin press the Power button. If this is the first time that you use Audisse Shokunin (or after a Factory Reset) the display will show ‘Setup wizard’ and ‘YES’ will be highlighted on the screen.

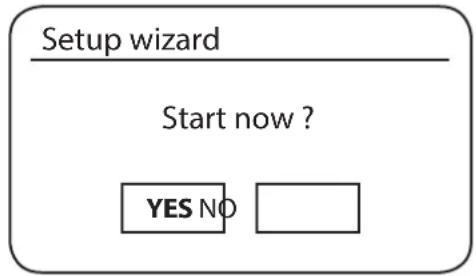
flowchart
graph TD
    A["Setup wizard"] --> B["Start now ?"]
    B --> C{YES}
    C --> D["NO"]
    D --> E[" "]
Press the Tuning/Seek/Select control to select 'YES' and to begin setting up Audisse
Shokunin.

TUNING
SEEK/SELECT
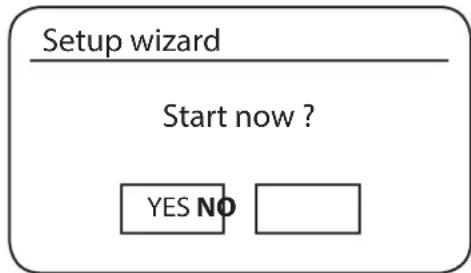
flowchart
graph TD
    A["Setup wizard"] --> B{Start now ?}
    B -->|YES| C["NO"]
    B -->|NO| D[" "]
The Language menu will be shown on the screen for you to select your preferred language. By default Audisse Shokunin will display all menus and messages in English. Rotate the Tuning/Seek/Select control until the desired language is highlighted on the screen. Press the Tuning/Seek/Select control to select the chosen language option. The set up procedure will be continued with Date/Time menu shown up with your desired language.
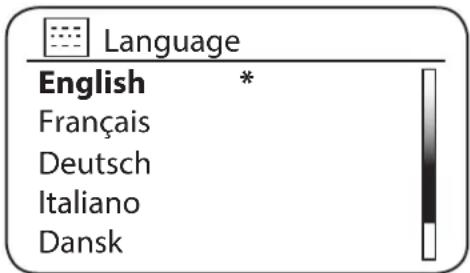
text_image
Language English * Français Deutsch Italiano DanskNext, the way in which the radio updates its clock is set. A menu allowing you to specify the auto-update option for the clock will be shown. The 'Update from Network' or "Update from DAB" option will be good for most users.
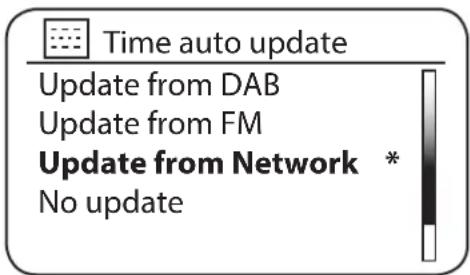
text_image
Time auto update Update from DAB Update from FM Update from Network * No update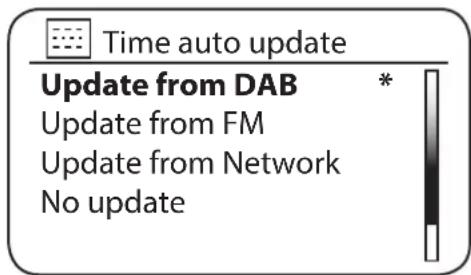
text_image
Time auto update Update from DAB * Update from FM Update from Network No updateRotate the Tuning/Seek/Select control to choose an auto-update option for the clock. This can be updated from DAB or FM radio, from the Network, or not updated. The default is to auto-update from the network. If you choose another option go to 'Connecting to your computer network'. Otherwise you will first need to select the correct time zone and daylight savings setting, see the next steps. If you choose 'No update', you will need to set the clock manually later. Press the control to confirm your choice.
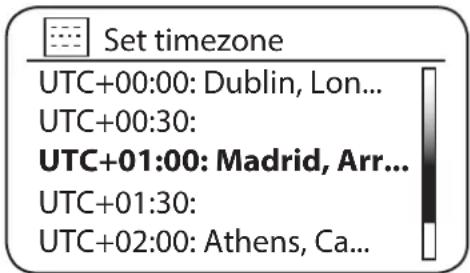
Rotate the Tuning/Seek/Select control to highlight the time zone for your current location. Press the Tuning/Seek/Select control to enter the setting.
text_image
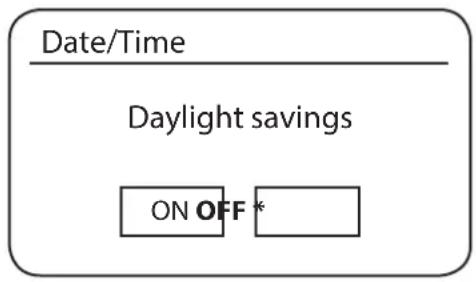
Set timezone UTC+00:00: Dublin, Lon... UTC+00:30: UTC+01:00: Madrid, Arr... UTC+01:30: UTC+02:00: Athens, Ca...You will then need to set the Daylight Savings option according to your location (Daylight Savings is also known as Summer/Winter time or CEST/ECT adjustment). Rotate the Tuning/Seek/Select control to highlight 'ON' or 'OFF' as required. The asterisk shows the current setting. For example, in the Germany, 'ON' is equivalent to Central European Summer Time (CEST) and 'OFF' is equivalent to Central European Time (CET).
text_image
Date/Time Daylight savings ON OFF *CONNECTING TO YOUR COMPUTER NETWORK
Before you can use your Audisse Shokunin sound system to listen to Internet radio or to music streamed from your computer, it must first be connected to your computer network.
This section of this book describes how to connect the sound system to your network using the wireless (WiFi) connection.
The following instructions assume that you have just set up the clock and time options using the Setup Wizard.
These instructions also apply to the Network Wizard in the Network Settings menu.
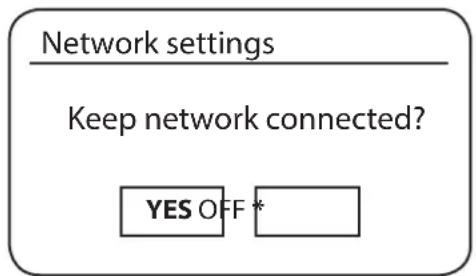
- After setting the Daylight Savings options, the display will show the 'Keep network connected?' option. You should choose 'Yes' if you wish to keep the sound system connected to the network when it is in Standby mode. This will allow remote control software to switch on Audisse Shokunin when needed. If you choose 'No' then Audisse Shokunin will shut down its WiFi connection when it is in Standby, DAB, FM, Bluetooth or Aux-in modes. This minimises power consumption but it does mean that you will need to switch the sound system on manually in order to use either the 'Play to' function or any remote control software such as UNDOK app.
Rotate the Tuning/Seek/Select control to highlight the required option and then press the control to make the selection.
text_image
Network settings Keep network connected? YES OFF *After setting the Keep Connected option, the display will show a list of supported WiFi regional options.
Rotate the Tuning/Seek/Select control to highlight the required region (for the European countries, choose ‘Europe’), and then press the control to make the selection. Audisse Shokunin will then scan for available WiFi networks.

Wlan region
Europe
Australia
- The sound system will enter the Network Settings Wizard and will display 'Scanning...'. The sound system will automatically scan the 2.4GHz or 5GHz WiFi band and after a short while the display will show a list of the available WiFi networks. If you are intending to use the WiFi connection.

Network settings
Network wizard Scanning ...
- If you plan to use a WiFi connection, you will first need to identify your network in the list of network names presented by the Network Wizard. If no networks are found then you may have to get your wireless router working (please see the instructions supplied with the wireless router) or you may be too far from the router.
When the sound system finds your wireless network, it displays the Network Name (SSID) for the wireless access point on the screen. This is a name that is allocated to the access point in your router by the person who set up the network - for example: 'Wilson' or 'Jame's group'. If the router supports WiFi Protected Setup, then '[WPS]' will be shown in front of the SSID.

TUNING
SEEK/SELECT

SSID
[WPS] Mathew's home
Jame's group
Wilson
[Rescan]
[Manual config]
It is possible, and in some locations highly likely, that Audisse Shokunin will find more than one wireless network, in which case you should choose which one you need to connect to.
- Rotate the Tuning/Seek/Select control to see the SSID for each wireless network that has been found. If your network is shown proceed to step 6. If it is not shown then proceed to step 5.
If you make a mistake at any point, use the Back button to go back to the previous screen.
- If your network is not found, it may be because the router is configured not to broadcast the SSID. You should then use the Tuning/Seek/Select control to highlight and select the '[Manual config]' option in order to enter the network details manually. This is described in 'Manual Network Configuration'.
BACK
SSID
[WPS] Mathew's home
Jame's group
Wilson
[Rescan]
[Manual config]
If your network name is being broadcast, and it was not found, then try re-scanning (press the Back button), and if necessary try moving Audisse Shokunin to a location closer to your access point / router.
- When the SSID for the wireless network you wish to connect to is highlighted on the screen, press the Tuning/Seek/Select control. If WiFi Protected Setup (WPS) was indicated, you will see an additional menu at this point, otherwise proceed to step 7.

SSID
[WPS] Mathew's home
Jame's group
Wilson
[Rescan]
[Manual config]
Choose one of the WPS menu options as required for your router (WPS may be via push button, or using an identification number).

WPS Menu
WPS Button
WPS PIN
Skip WPS
'WPS Button': the display prompts you to press the WPS button on your router and then the Select control on the sound system. The two devices should then connect with the encryption key sent automatically to the sound system.
'WPS PIN': the display shows an identification number that you must enter into your router using a web browser (refer to your router's user documentation). You should then press the Select control on the sound system.
The two devices should then connect with the encryption key sent automatically to the sound system. 'Skip WPS' - if you wish to enter the encryption key yourself (or if it was previously entered).
If you choose WPS Button or WPS PIN the screen will then show 'Connecting...' and then
'Setup wizard completed'. Press the Tuning/Seek/Select control to exit the setup wizard.

Network settings
Please wait Connecting ...
- If your network is configured without an encryption key, the screen should say 'Connecting...', and then 'Setup wizard completed'. Press the Tuning/Seek/Select control to exit the setup wizard and show the Main menu. If this is the case then you have successfully connected Audisse Shokunin to your network.
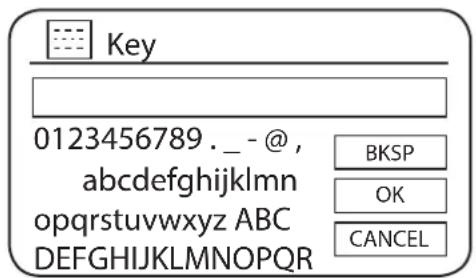
- If the screen displays 'Key:', it is because the network is using one of the encryption systems: Wired Equivalent Privacy (WEP) or WiFi Protected Access (WPA). You will need to enter the correct WEP or WPA key into the sound system to allow it to communicate with your wireless network. If you do not have the WEP or WPA key, then you should obtain it from the person who set up your network. Some wireless routers may come with an encryption key already set up by the supplier, in which case you should refer to the documentation provided with it. WPA is used here to also include WPA2.
text_image
Key 0123456789.__-@, abcdefghijklmnopqrstuvwxyz ABC DEFGHIJKLMNOPQRSTUVWXYZ BKSP OK CANCELWEP keys are 10 or 26 characters long (using 0 - 9, and A - F). Some wireless routers can also use pass-phrases for WEP but these are not supported by the sound system. WPA keys are usually set up using a pass-phrase of between 8 and 63 characters. Audisse Shokunin accepts pass-phrases for WPA keys.
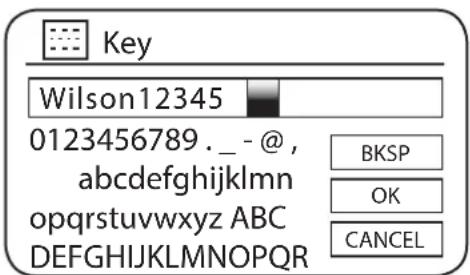
- To enter the WEP or WPA key, characters are selected and entered using the Tuning/Seek/Select control. As you rotate the control, the highlight scrolls through the available characters as well as the three controls on the right. The character currently highlighted will be entered when you press the Tuning/Seek/Select control.

text_image
Key Wilson12345 0123456789._-@, abcdefghijklmnopqrstuvwxyz ABC DEFGHIJKLMNOPQRSTUVWXYZ BKSP OK CANCELDo this as needed until the complete key has been entered. Remember, WEP keys only use the numbers 0-9 and letters A-F. WPA keys are sensitive to upper and lower case characters. You must enter the key exactly or the sound system will not connect to the network.
The three controls on the right-hand side of the screen have special functions. You can quickly access these by pressing the Info button and then using the Tuning/Seek/Select control as needed:
select 'BKSP' to erase a character just entered (long press to clear);
select 'OK' when the complete key has been entered
select 'CANCEL' to cancel and re-run the Network Wizard

Network settings
Please wait Connecting ...
After the final character of the WEP or WPA key has been entered, highlight the 'OK' symbol and press the Tuning/Seek/Select control. The screen will show 'Connecting...' and then 'Setup wizard completed'. Press the Tuning/Seek/Select control to the exit setup wizard. The sound system should now be able to connect to the network.
Setup wizard

Setup wizard completed
Press 'SELECT' to exit
- Once you have connected Audisse Shokunin to the network (and therefore also to the Internet) it will display the Main menu. Press the Power button to put the sound system into Standby/Off mode. It should then display the time as obtained from the Internet. If the time display is not correct for any reason, it can easily be adjusted later, 'Manually setting the clock'.

12 / 02 / 2016
09:30

CHANGING THE NETWORK CONNECTION
In the sections above, you chose how Audisse Shokunin would be connected to your network, either using a WiFi connection. From time to time, you may find that you need to connect to different computer networks. The Internet setup menu allows you to change your radio's network settings, scan for an alternative wireless network, or to manually configure
the network parameters.
The steps outlined below describe how you can do this - see also the section ‘Network profiles’.
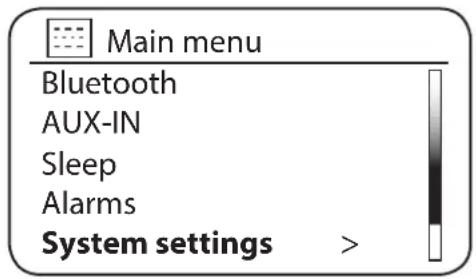
text_image
Main menu Bluetooth AUX-IN Sleep Alarms System settings >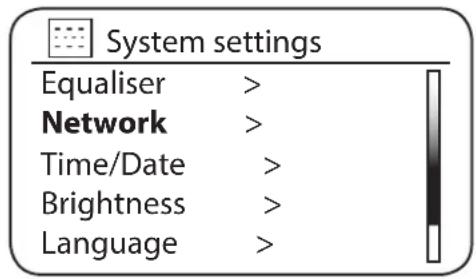
text_image
System settings Equaliser > Network > Time/Date > Brightness > Language >CONFIGURING THE SOUND SYSTEM TO USE AN ALTERNATIVE WIFI CONNECTION
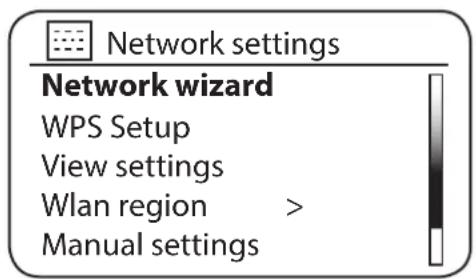
- From the Network settings menu select 'Network wizard'. This will present you with details of any WiFi networks that are found. Scroll down the list using the Tuning/Seek/Select control to the desired network name. Press the control to select this network.
text_image
Network settings Network wizard WPS Setup View settings Wlan region > Manual settings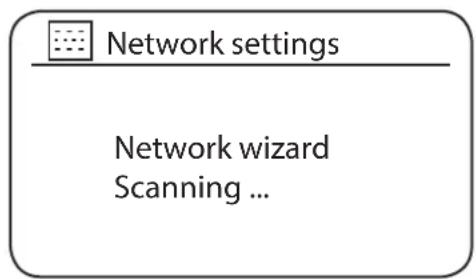
text_image
Network settings Network wizard Scanning ...The radio will then use its WiFi system to communicate with the network. Depending on the settings for the new network you may need to enter an encryption key. By default the sound system will then acquire an IP address and other network settings from your router using DHCP.
MANUAL NETWORK CONFIGURATION
If you do not wish to use DHCP for automatic configuration, or if your network is configured with a hidden SSID, then you will need to enter some network settings manually. (Note - a hidden SSID may prevent casual observers from detecting your network, but it is not recommended as a means of network security.)
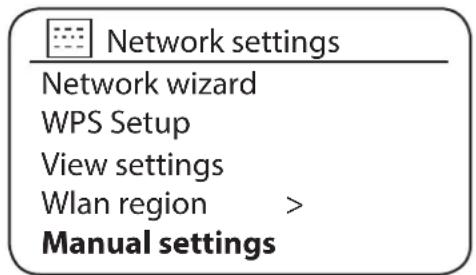
- From the sound systems Network settings menu, select 'Manual settings'. You must then choose whether to connect using 'Wireless' connections. If you choose 'Wireless' there are as many as nine settings screens, shown by the '1 of 9' progress marker in the top right corner of the display.
2.
text_image
Network settings Network wizard WPS Setup View settings Wlan region > Manual settings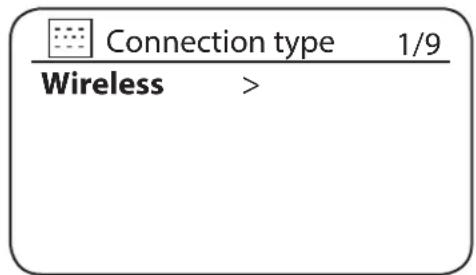
text_image
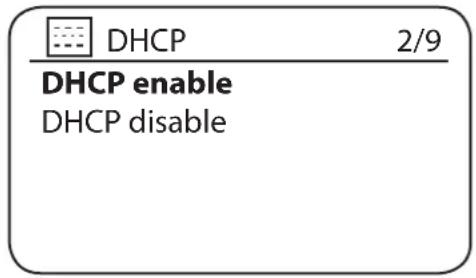
Connection type 1/9 Wireless >- The next menu asks whether you wish to use DHCP to configure your network parameters (IP address, subnet mask, gateway address, etc.). Unless you are familiar with networking and related terminology, we recommend that you allow the use of DHCP. Choose 'DHCP enable' unless you need to specify the network details manually. Please skip to step 11. If you chose 'Wireless' and 'DHCP enable', please skip to step 6 in order to set up the wireless connection details. If you chose 'DHCP disable' for either connection method, the next step is to set up the IP address.
text_image
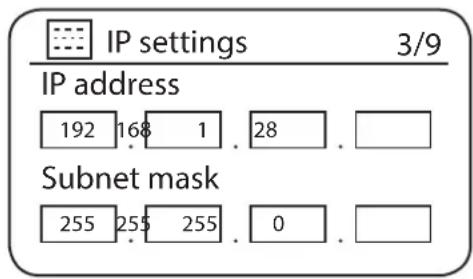
DHCP 2/9 DHCP enable DHCP disable- The manually specified IP address should be chosen to be compatible with the settings in your router and must be a unique address on your network. If you are using DHCP for some devices and static (manually configured) IP addresses for others, the IP address used should fall outside the range that the router may allocate using DHCP. Typically, the first three groups of digits will be the same for all devices on your network. To enter the IP address, rotate the Tuning/Seek/Select control to set the value for each group of digits and then press the control to enter the value and to move on to the next group. When the IP address has been entered, the subnet mask should be entered. The subnet mask defines which parts of the IP address are common across your network. For most small networks the subnet mask will be 255.255.255.0 and this is entered in the same way.
text_image
IP settings 3/9 IP address 192 168 1 . 28 . Subnet mask 255 255 255 . 0 .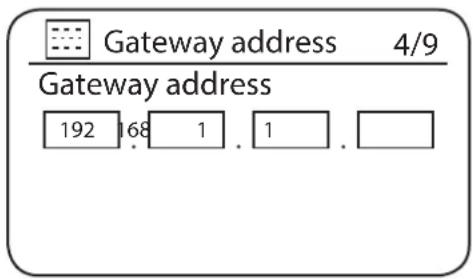
text_image
Gateway address 4/9 Gateway address 192 168 1 1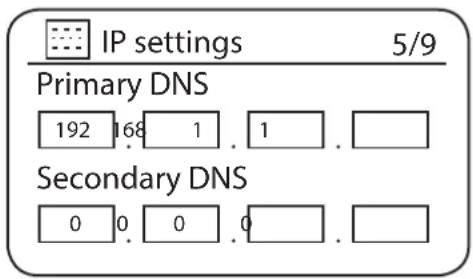
text_image
IP settings 5/9 Primary DNS 192 168 1 1 . Secondary DNS 0 0 0 0 .- The Gateway address is normally the IP address of the router through which the sound system connects to the Internet and is entered in the same way as the previous addresses.
- In most installations the DNS settings (DNS = Domain Name Server) will be set to the same IP address as your router. In this case the secondary DNS may be left at zero. To enter the DNS address, rotate the Tuning/Seek/Select control to set the value for each group of digits and then press the control to enter the value and to move on to the next group. Repeat this until all eight groups of digits have been entered.
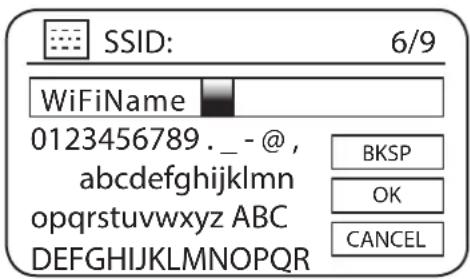
- The next step is to set up the WiFi connection, starting with the name of the wireless network (SSID) followed by the encryption options and password. To enter the SSID, characters are selected and entered using the Tuning/Seek/Select control. As you rotate the control, the radio scrolls through the available characters as well as the three controls on the right. The character currently highlighted will be entered when you press the Tuning/Seek/Select control. Do this as needed until the complete network name has been entered. The
SSID setting is sensitive to upper and lower case characters and symbols. You must enter it exactly as set up in your router. The three controls on the right-hand side of the screen have special functions. You can quickly access these by pressing the Info button and then use the Tuning/Seek/Select control as needed:
Select 'BKSP' to erase a character just entered (long press to clear)
Select 'OK' when the complete key has been entered
Select 'CANCEL' to cancel and go back to the DNS settings screen
text_image
SSID: 6/9 WiFiName 0123456789._-@, abcdefghijklmnopqrstuvwxyz ABC DEFGHIJKLMNOPQRSTUVWXYZ BKSP OK CANCEL- Having entered the SSID, you must enter details of the encryption system used on your wireless network. This should be the same as specified in your router settings. If your network does not use encryption, then select the 'Open' option. Audisse Shokunin should then connect to the network, so skip to step 11. If your network uses WEP (Wired Equivalent Privacy) select the 'Pre-Shared Key' option, then go to step 8. The remaining options are for WPA or WPA2 (WiFi Protected Access) - see step 9.
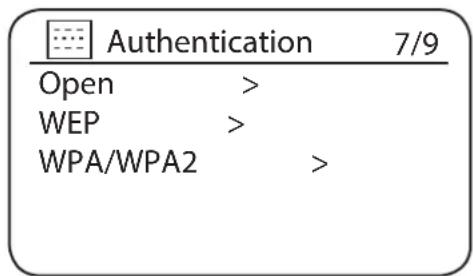
text_image
Authentication 7/9 Open > WEP > WPA/WPA2 >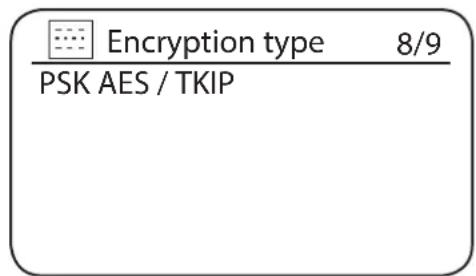
text_image
Encryption type 8/9 PSK AES / TKIP- If you chose 'Pre-Shared Key' in step 7, you should then choose the WEP option. The key should be entered using only the numbers 0-9 and the letters A-F. The key will be 10 characters long for 64-bit encryption and 26 characters long for 128-bit encryption. The radio will accept lower-case letters a-f as equivalent to upper-case A-F. Spaces or special symbols are not permitted in WEP keys.
text_image
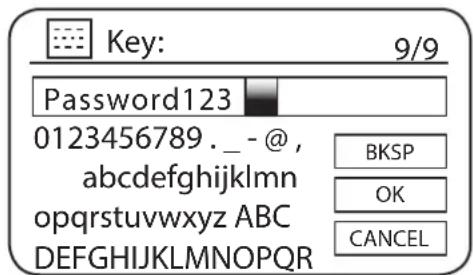
Key: 9/9 Password123 0123456789._-@, abcdefghijklmnopqrstuvwxyz ABC DEFGHIJKLMNOPQRSTUVWXYZ BKSP OK CANCELThe three controls on the right-hand side of the screen have special functions. You can quickly access these by pressing the Info button and then use the Tuning/Seek/Select control as needed:
Select 'BKSP' to erase a character just entered (long press to clear)
Select 'OK' when the complete key has been entered
Select 'CANCEL' to cancel and go back to the SSID settings screen
Once the key is entered the sound system should connect to your network. Please skip to step 11.
-
WPA and WPA2 are similar, although WPA2 offers a higher level of security. Whichever you selected in step 7, you then have to specify the variant used. They are TKIP (Temporal Key Integrity Protocol) and AES (Advanced Encryption Standard). As previously, the setting should match that used by your router. Some routers allow both to be specified, and the router will use whichever variant is supported by the connected device. AES is regarded as the more secure option if it is available.
-
The sound system will then require you to enter the encryption key. This must be a string of between 8 and 63 characters and must be identical to the key that has been entered into your router. Note - the encryption key is sensitive to the use of upper and lower case letters and symbols. Take care to enter the key exactly, or the radio will not be able to connect to your router. The three controls on the right-hand side of the screen have special functions. You can quickly access these by pressing the Info button and then use the Tuning/Seek/Select control as needed:
Select 'BKSP' to erase a character just entered (long press to clear)
Select 'OK' when the complete key has been entered
Select 'CANCEL' to cancel and go back to the SSID settings screen
Once the key is entered the sound system should connect to your network.
While the sound system is trying to connect to the network, it will display 'Processing...' when checking the encryption key (if using the WiFi connection) and then 'Connecting...'. If the connection is made successfully, the sound system will return to the Network settings menu. If the unit cannot connect, then it will display a 'Failed to connect' message and will return to the SSID entry screen (step 6). Once connected, the network settings are stored in the sound system. The settings are retained when the sound system is disconnected from the mains. You may now use the Back and Source buttons to access the functions of Audisse Shokunin.

Network settings
Please wait Connecting ...

Network settings
Network wizard WPS Setup View settings Wlan region > Manual settings
NETWORK REMOTE CONTROL OPTIONS
NETWORK PIN SETUP (PIN NUMBER)
Audisse Shokunin has the option of being controlled by an application installed on an Apple iPhone, iPod touch, iPad or equivalent Android device. The PIN number facility allows you to ensure that Audisse Shokunin can only be controlled by your own device rather than someone else's.
Details of how this feature can be used are explained in the separate documentation available from the Radio Website. The remote control app is called UNDOK and is available from the Apple App Store and Google Play Store for your device.
The default PIN is ‘1234’ and is entered in the UNDOK application on your device when it first connects to Audisse Shokunin. You may change the PIN if desired using the ‘NetRemote PIN Setup’ option in the Network settings menu. The updated PIN should then be used to reconnect the sound system to the application.
KEEP NETWORK CONNECTED
Audisse Shokunin has the option to shut down its WiFi when it is in Standby. This minimises power consumption but it does mean that you will need to switch the sound system on manually in order to use either the 'Play to' function or any remote control software such as the UNDOK app.
If you need to be able to remotely control the sound system even when it has been put into Standby, then you can choose to keep the network connected by using the 'Keep network connected' option in the network settings menu. In the Standby mode display the WiFi signal indicator is shown with or without a cross through it, according to the state of the connection.
INTERNET RADIO - THE BASICS
Before you can use Audisse Shokunin to listen to broadcasts via the Internet, it is necessary to have connected it to your computer network using the wireless (WiFi) connection.
There are literally many thousands of radio broadcasts available via the Internet as well as ‘Podcasts’. Audisse Shokunin provides several ways of searching for broadcasts in order to make finding and choosing them easier. Once you have found radio stations that you like, you may either store them as presets within the sound system, or add them to a list of your favourite stations that Audisse Shokunin can access. The number of presets is limited (there are preset+ and preset- buttons on the radio), but you can store as many favourites as you like.
You may search for an internet radio station by Location. If you know the name of the station and the country from which a station is broadcast this may be the easiest method to find a station. It is also a great way to experience radio from other parts of the world.
You may also search for an internet radio station by Genre. If you prefer a particular type of music, Blues for example, you may search for a radio station that broadcasts that type of music, and you can choose from a list of Blues radio stations regardless of location, or taking location into account.
If you know part of the name of an internet radio station, you can enter it into the sound system and it will search for stations that match that name. This can be helpful if you are unsure of the location or genre of a particular station.
The Audisse Shokunin sound system connects to a radio station database that serves many users in many countries. This means that there is a very wide range of programme content available. You can also search for stations that have been recently added to those available (new stations) or you can search for the most popular.
- Press the Power button to switch the sound system on. Then press the Source button to select the Internet radio mode display.
SOURCE
- Press the Menu button to enter the main Internet radio menu. Rotate the Tuning/Seek/Select control until 'Station list' is highlighted on the display and then press the control to select the option.
MENU

Internet radio
Last listened
Station list > System settings > Main menu >
- Rotate the Tuning/Seek/Select control until ‘Stations’ is highlighted on the display and the press the control to select. Note that the menu may offer one or more local selections based upon the country in which the unit is being used, according to your internet IP address ('United Kingdom' and 'BBC' stations, for example).

TUNING SEEK/SELECT

Internet radio
My Favourites Local Netherlands > Stations > Podcasts > My added stations >
- Rotate the Tuning/Seek/Select control until 'Location' is highlighted on the display and then press the control to select.

Stations
Location >
Genre >
Search stations >
Populair stations >
New stations >
- Rotate the Tuning/Seek/Select control to scroll through the list of continents. When the desired continent is highlighted press the control to enter your selection.

Location
Africa > Asia > Caribbean > Central America > Europe >
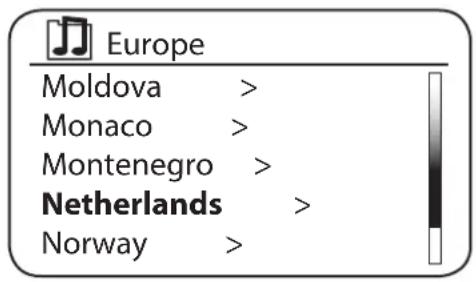
- The display will show a list of countries within the chosen continent. If there are many countries shown you can scroll through the list continually in either direction. For example, if the chosen continent was Europe, then to find the Netherlands scroll up from the top of the list to the bottom by turning the Tuning/Seek/Select control anti-clockwise. Press the Tuning/Seek/Select control to choose the desired country.
text_image
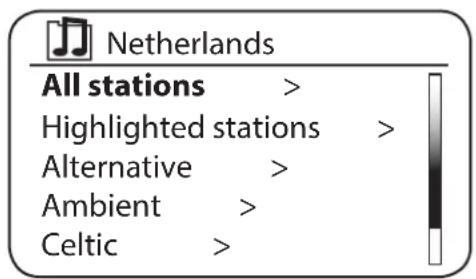
Europe Moldova > Monaco > Montenegro > Netherlands > Norway >- You will typically find that you then have the option to select either 'All Stations' or one of a number of categories. The lists are always sorted alphabetically, and long lists will wrap around from top to bottom or bottom to top.
text_image
Netherlands All stations > Highlighted stations > Alternative > Ambient > Celtic >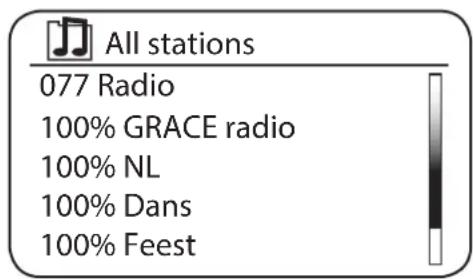
text_image
All stations 077 Radio 100% GRACE radio 100% NL 100% Dans 100% Feest- Rotate the Tuning/Seek/Select control to highlight your chosen radio station and then press the control to enter your selection. The display will show 'Connecting...' while the sound system connects to the new station. The station should then start playing. Adjust the volume as needed.
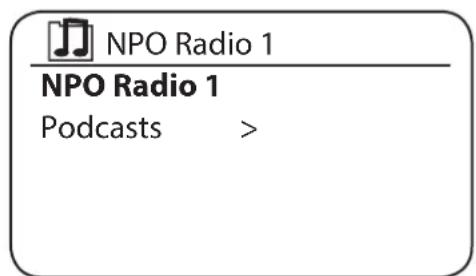
text_image
NPO Radio 1 NPO Radio 1 Podcasts >- If the station has on-demand content, that is, it gives the option of 8,9 listening to programmes that have already been broadcast or to Podcasts, there will be an additional screen showing the radio station name as well as a ‘Podcasts’ option.
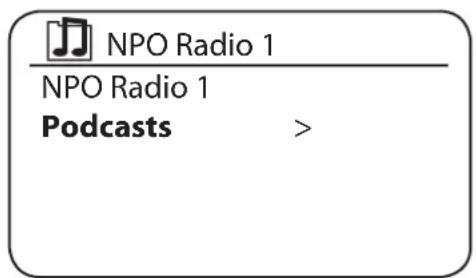
text_image
NPO Radio 1 NPO Radio 1 Podcasts >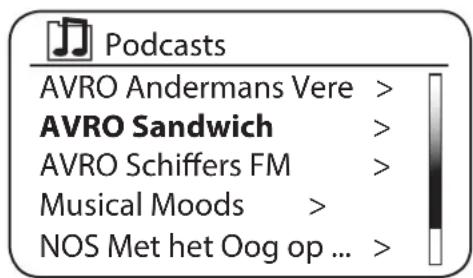
These are selected using additional menus, determined by the radio station and the content. There may simply be a list of programmes, or there may also be options to choose from broadcasts on particular dates or days of the week. The examples shown here are typical.
160228 AVROTROS R5 D..
160228 AVROTROS R5 D..
160221 AVROTROS R5 D..
160221 AVROTROS R5 D..
160214 AVROTROS R5 D..
Podcasts and Listen Again content can also be accessed separately from the main Internet Radio menu.
IF YOUR RADIO CANNOT CONNECT TO A RADIO STATION
Note: If Audisse Shokunin is unable to connect to an internet radio station it will generally either display ‘Network Error’ or ‘Stopped’. This can be for many reasons, but typically will be due to one of the following:
The radio station may not be broadcasting at the present time.
The radio station may not be able to accommodate any more connections from internet listeners.
The broadcaster may limit listening to specific countries or regions
There may be network congestion (either locally or at a distance) that is affecting the reliability of the connection.
If Audisse Shokunin can connect, but the audio is not continuous and the radio keeps having to reconnect, this may be due to the radio station only having limited connection capacity.
SELECTING A RADIO STATION BY GENRE
- Press the Menu button to enter the main Internet radio menu. Rotate the Tuning/Seek/Select control until 'Station list' is highlighted on the display and then press the control to select.
MENU

Internet radio
My Favourites
Local Netherlands >
Stations >
Podcasts >
My added stations >
- Rotate the Tuning/Seek/Select control until ‘Stations’ is highlighted on the display and then press the control to select.

TUNING
SEEK/SELECT

Stations
Location >
Genre >
Search stations >
Populair stations >
New stations >
- Rotate the Tuning/Seek/Select control until 'Genre' is highlighted on the display and then press the control to select.

Stations
Location >
Genre >
Search stations >
Populair stations >
New stations >
- Rotate the Tuning/Seek/Select control to scroll through the list of content types. This menu is normally cyclic - you can scroll the list continually in either direction. When the chosen genre is highlighted, press the Tuning/Seek/Select control.

Genre
Alternative >
Ambient >
Big Band >
Bluegrass >
Blues >
- You then have the choice of ‘All Stations’ of the chosen genre, or a list of countries. Note if a country is not shown then the station may still appear in the ‘All Stations’ list. Rotate and then press the Tuning/Seek/Select control to choose as needed

Alternative
All Stations >
Highlighted Stations >
Argentina >
Australia >
Austria >
- A list of radio stations is then shown. Rotate the Tuning/Seek/Select control until the desired station name is highlighted on the display.

All Stations
001A\_A Rock
1.Fm Alternative Rock ...
1.Fm Gorilla FM Radio
100.5 The Drive
100hitz - 90's Alternat ...
- Press the Tuning/Seek/Select control to select the station. The display will show 'Connecting...' while it finds the new station. If the radio is unable to connect this may be for one of the reasons explained.
- Adjust the Volume/EQ control as needed to set the listening level.

VOLUME
EQUALIZER
SEARCHING FOR A RADIO STATION BY NAME
There may be occasions when you know the name of a radio station but you do not know the location or genre. This facility allows you to search for the station using a part (or parts) of the radio station name.
- Press the Menu button to enter the main Internet radio menu. Rotate the Tuning/Seek/Select control until 'Station list' is highlighted on the display and then press the control to select.
MENU

Internet radio
Last listened
Station list > System settings > Main menu >
- Rotate the Tuning/Seek/Select control until ‘Stations’ is highlighted on the display and then press the control to select.

TUNING
SEEK/SELECT

Internet radio
My Favourites Local Netherlands > Stations > Podcasts > My added stations >
- Rotate the Tuning/Seek/Select control until 'Search stations' is highlighted on the display and then press the control to select.

Stations
Location > Genre >
Search stations > Populair stations > New stations >
- To enter the search word(s) rotate the Tuning/Seek/Select control to highlight each character for the search in turn, and press the Tuning/Seek/Select control to enter. If you make an error rotate the control or use the Info button to access the delete character 'BKSP' on the screen and then press the Tuning/Seek/Select control. Rotate the control or press Info again to go back to the character selection. After the final character of the search has been entered, use the Info button and then the Tuning/Seek/Select control to highlight the 'OK' symbol on the screen and then press the control to finish.
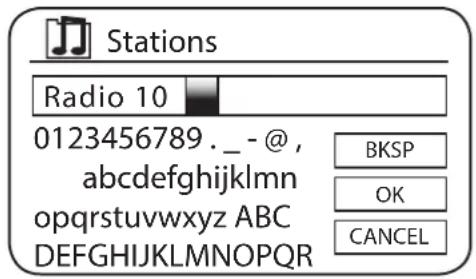
text_image
Stations Radio 10 0123456789._-@, abcdefghijklmnopqrstuvwxyz ABC DEFGHIJKLMNOPQRSTUVWXYZ BKSP OK CANCEL- The sound system will search for radio stations that match your search data. If you include a space between two search items, the sound system will look for station names that include both items. Thus a search for RADIO 10' could find a station called 'Raido10 Classic Rock Hits' as well as a station called 'Radio 10 Rocks'.
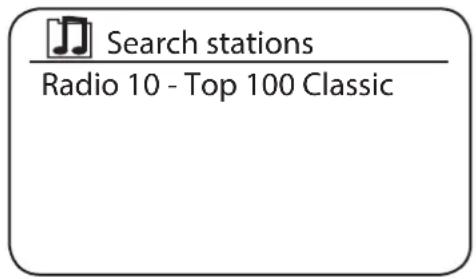
text_image
Search stations Radio 10 - Top 100 Classic- Rotate the Tuning/Seek/Select control to highlight the station that you wish to listen to and press the control to confirm your choice. The display will show ‘Connecting...’ while it finds a new station.
SELECTING A PODCAST
Some radio stations allow you to listen to programmes that have already been broadcast. The BBC's Listen Again service is an example of this. In addition, radio broadcasters and individuals may make programmes that are intended normally to be downloaded into a computer or copied onto a portable media player. These are commonly known as Podcasts.
On Audisse Shokunin, both Listen Again programmes and Podcasts are grouped together as Podcasts, and the same menu is used to access and listen to both types of programming. Listen Again programmes are also accessible via the Stations menu.
- Press the Menu button to enter the main Internet radio menu. Rotate the Tuning/Seek/Select control until 'Station list' is highlighted on the display and then press the control to select.
MENU

Internet radio
Last listened
Station list > System settings > Main menu >
- Rotate the Tuning/Seek/Select control until Podcasts' is highlighted on the display and then press the control to select.

TUNING
SEEK/SELECT

Internet radio
My Favourites Local Netherlands > Stations > Podcasts > My added stations >
- You may then search by location, genre, or using part of the name of the podcast. The searches operate in exactly the same way as when searching for a conventional radio station. Searching by location is done first by continent, then by country. You may then list 'All shows' or search within a country by genre. Searching by genre is more direct, since once the genre is chosen the next menu display shows a list of available podcasts. Searching by name operates in the same way as when searching for a named radio station, selecting the 'OK' symbol when you have entered the text. You may enter one or more pieces of text that will be used for the search.

Podcasts
Location >
Genre >
Search podcasts >

Podcasts
0123456789 ABC
DEFGHIJKLMNOPQ
RSTUVWXYZ
BKSP
OK
CANCEL
- Rotate the Tuning/Seek/Select control and then press the control to confirm your chosen podcast. The display will show ‘Connecting...’ while it finds the new programme.

Podcasts
AVRO Andermans Vere >
AVRO Sandwich >
AVRO Schiffers FM >
Musical Moods >
As described in the section ‘Internet Radio – the basics’, your radio connects via the Internet to a database of radio stations. This option is provided to highlight stations that are newly added to the list of those available, or stations that are particularly popular with listeners around the world. Your radio allows you to easily choose stations from these two categories, using menus very similar to those used when finding stations by locations and genre.
- Press the Menu button to enter the main Internet radio menu. Rotate the Tuning/Seek/Select control until 'Station list' is highlighted on the display and then press the control to select.
MENU

Internet radio
Last listened
Station list > System settings > Main menu >
- Rotate the Tuning/Seek/Select control until ‘Stations’ is highlighted on the display and then press the control to select.

TUNING
SEEK/SELECT

Internet radio
My Favourites Local Netherlands > Stations > Podcasts > My added stations >
- Rotate the Tuning/Seek/Select control until ‘Popular stations’ or ‘New stations’ is highlighted on the display. Press the Tuning/Seek/Select control to enter your choice.

Stations
Location > Genre > Search stations > Populair stations > New stations >
- Rotate the Tuning/Seek/Select control to highlight the station that you wish to listen to and then press the control to enter your choice. The display will show ‘Connecting...’ while the new station is found.

Popular stations
SWR3
1 LIVE
Antenne Bayern
1.Fm chillout Lounge
NDR 2
PRESETTING STATIONS IN THE INTERNET RADIO MODE
With so many Internet radio stations available, it is desirable to have a means of rapidly selecting the stations that you listen to most frequently. Audisse Shokunin has 40 memory presets that can easily be set to store the details of any Internet radio station. The radio station presets are retained in memory even when the sound system is switched off.
The Audisse Shokunin has the unique function of Preset + and Preset – This enables you to quickly zap through your whole preset list.
When performing a Factory Reset the whole Preset memory of the radio will be emptied. This in contrast to the stored Internet radio “Favourite stations” as that information is stored “outside” of the radio.
Please see also the sections 'Last Listened' and 'Configuring My Favourite Stations'.
STORING A PRESET
- Press the Power button to switch on Audisse Shokunin. Tune to the required station using one of the methods described on the preceding pages.
- To store the currently playing radio station as a preset, press and hold the Preset button until the display shows the "Save to preset" screen.
text_image
PRESET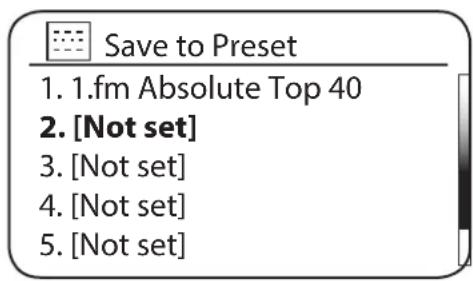
text_image
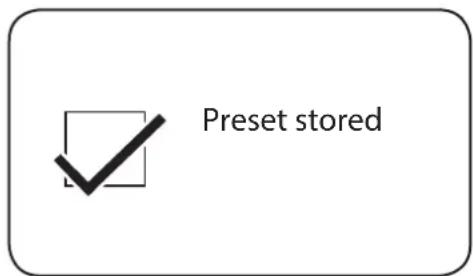
Save to Preset 1. 1.fm Absolute Top 40 2. [Not set] 3. [Not set] 4. [Not set] 5. [Not set]- Use the Tuning/Seek/Select control to scroll through the preset list until you reach an unused preset or a preset that you wish to change. Press and release the Tuning/Seek/Select control to store the preset. 'Preset stored' will be shown on the display. Repeat the procedures as needed for the remaining presets.

text_image
Preset stored- Stations that are already stored in the presets may be over-written by following the above procedure.
RECALLING A PRESET
- Press the Power button to switch on Audisse Shokunin. Select the Internet radio mode using the Source button.
- Press and release the Preset button until the display shows the "Recall from Preset" screen.

PRESET

Recall from Preset
- 1.fm Absolute Top 40
- NDR 2
- Antenne Bayern
- SWR3
-
NPO 3FM
-
Use the Tuning/Seek/Select control to scroll through the preset list until you reach the preset you want to select. Press and release the Tuning/Seek/Select control to select the preset.
- Or you can press and release the Preset + or Preset - button to directly skip to the next or previous preset stations.

PRESET -

PRESET +
LAST LISTENED
It is often helpful to be able to go back to a station that you have recently listened to. Audisse Shokunin has a ‘Last Listened’ feature that provides you with quick access to the ten most recently listened to radio stations or podcasts. As each new radio station is listened to the oldest item is deleted from the list. The Last Listened list is stored when the sound system is disconnected from the mains.
- With the sound system switched on and in Internet radio mode, press the Menu button. The first item on the menu is 'Last listened'. With this item highlighted press the Tuning/Seek/Select control.
MENU

Internet radio
Last listened
Station list > System settings > Main menu >
- The display will then show a list of the last ten Internet radio stations or podcasts. Rotate the Tuning/Seek/Select control to highlight whichever you wish to listen to and then press the control to cause Audisse Shokunin to reconnect to that radio station or podcast.

TUNING
SEEK/SELECT

Last listened
- 1.fm Absolute Top 40
- NDR 2
- Antenne Bayern
- SWR3
- NPO 3FM
Internet radio 10:02
NPO 3FM
Description: Serious Radio

DISPLAY MODES
Audisse Shokunin has a range of display options when in Internet Radio mode. Note that not all information may be available for all Internet radio stations
- Press the Info button to cycle through the different options.
INFO
a. Description Displays information about the radio station or scrolling text messages such as artist/track name, phone number etc.
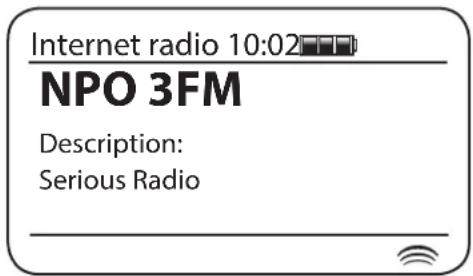
text_image
Internet radio 10:02 NPO 3FM Description: Serious Radiob. Genre Displays programme type information e.g. Pop, Classic, News, etc. and the location of the current radio station
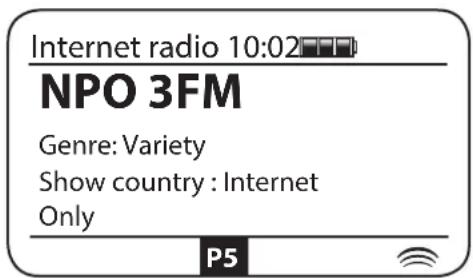
text_image
Internet radio 10:02 NPO 3FM Genre: Variety Show country : Internet Only P5c. Reliability Displays the reliability of the data stream from the station currently being received.
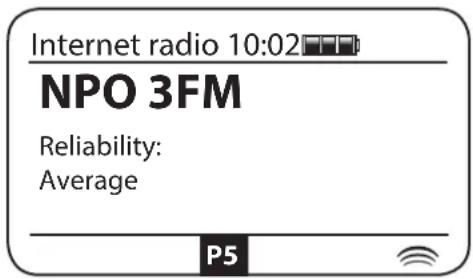
text_image
Internet radio 10:02 NPO 3FM Reliability: Average P5d. Format Displays the bit rate and format of the station being received.
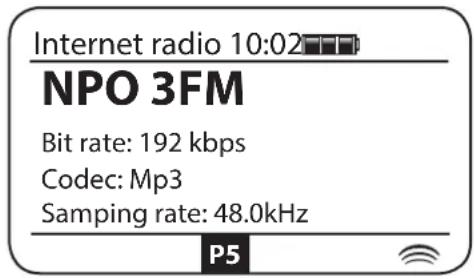
text_image
Internet radio 10:02 NPO 3FM Bit rate: 192 kbps Codec: Mp3 Samping rate: 48.0kHz P5e. Playback buffer Displays status when connecting to and playing a radio station. This indicates the reliability of the data stream to your radio. If there are no bars shown to the right of the dividing line then the data stream reliability may be poor and you may find that there are many breaks in the audio (this is not always the case for REAL audio streams).
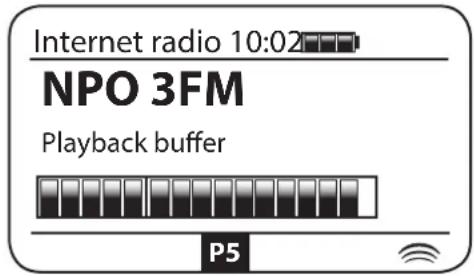
text_image
Internet radio 10:02 NPO 3FM Playback buffer P5f. Date Display the current date
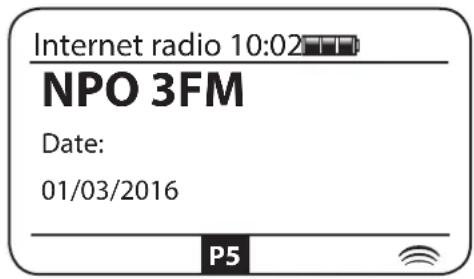
text_image
Internet radio 10:02 NPO 3FM Date: 01/03/2016 P5Additional or alternative information may be displayed when listening to Podcasts. Categories displayable can include:
| Episode name | Show genre |
| Show description | Show language |
| Episode URL | Bit rate |
| Codec | Sampling rate |
Whenever the sound system is displaying an information screen (as opposed to a menu screen), the time is displayed in the top-right corner of the display, and a WiFi strength is shown in the bottom-right corner.
CUSTOMISING YOUR RADIO
In addition to storing your favourite radio stations in the radio presets, Audisse Shokunin allows you to create customised lists of favourite stations which can appear in two special menus on the radio called ‘My Favourites’ and ‘My Added Stations’.
Audisse Shokunin uses a database that is accessed via the Internet in order to find out which radio stations are available and how it should connect to them. You are able to add your personal selections to this database. These will only be accessible by you using your PC or Audisse Shokunin. You can choose the stations which will appear in the 'My Favourites' menu from the large selection already listed. Additionally, if you find a radio station that is not listed then you may also add the Internet address (URL) of the station's audio stream to your selection. It will then appear on Audisse Shokunin via the 'My Added Stations' menu item.
REGISTERING AN ACCOUNT
- Open the web site http://www.WiFiradio-frontier.com using the Internet browser on your computer. Click on the 'Register here' link and follow the on-screen instructions to register an account. During the registration process the web site asks for an access code. This allows it to uniquely identify your internet radio from the many others that it also provides data for. To obtain the access code, please follow these steps.
- With Audisse Shokunin switched on and in Internet radio mode, press the Menu button, then select 'Station list' using the Tuning/Seek/Select control.
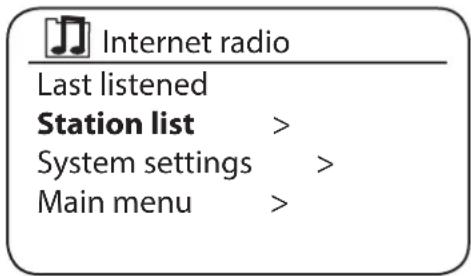
text_image
Internet radio Last listened Station list > System settings > Main menu >- Scroll down the Station list menu to the item called 'Help'. Press the Tuning/Seek/Select control to enter the Help menu.

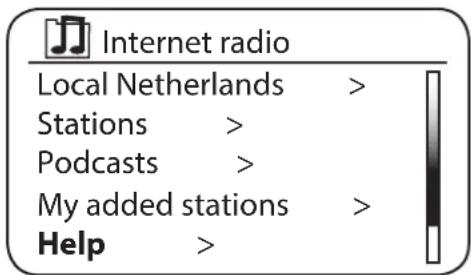
text_image
Internet radio Local Netherlands > Stations > Podcasts > My added stations > Help >- In the Help menu, select the menu item 'Get access code'. Provided that the sound system is connected to the Internet, a code will be displayed of typically seven characters (upper case letters and numbers). Make a note of this code for the next step. If you need to re-register later you must repeat this process to get a fresh access code.
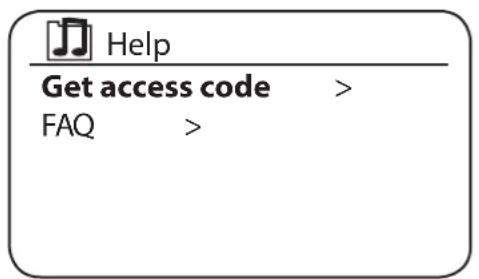
text_image
Help Get access code > FAQ >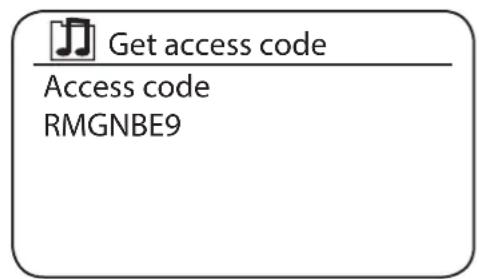
text_image
Get access code Access code RMGNBE9- You should then use the code displayed by the sound system to fill in the Access Code field on the web page when you set up your account.
Once you have your account set up, if you have other radios that use the same database, you may also add them to your account. You will need to get an access code from each radio in order to add it to the account. They may then share your favourite and added radio station details.
CONFIGURING MY FAVOURITE STATIONS
- Using the web site at http://www.WiFiradio-frontier.com it is possible to search among the many radio stations that are available by location, genre, or language. You may also choose from new or popular stations.
- When the radio stations that you have found are shown on your computer screen, they are shown with a 'Play' icon and an 'Add to favourites' icon (the plus symbol and heart). Clicking on the 'Play' icon will allow you to hear the radio station via your computer. Clicking on the 'Add to favourites' icon will cause the radio station to be added to the list accessible via your radio.
- To help you organise your favourites, and since you may have a great many after a while, the web site will allow you to specify the name for a category or group under which the radio station will be listed on Audisse Shokunin. Suitable names might be ‘Rock’, ‘Smooth’, ‘Mum’s stations’, and so on. When ever you add another radio station to your favourites you can either add it to an existing category or create a new one.
- Once you have Internet radio stations available in your My Favourite Stations list, you may play these stations from Audisse Shokunin. These stations will be available on Audisse Shokunin from the Internet radio menu item ‘My Favourites’.
- To look at, modify or delete your favourite stations lists on the web site, use the link ‘My favourites’ in the ‘My account’ area. To delete a favourite radio station, click on the icon with a heart and minus symbol.
CONFIGURING MY ADDED STATIONS
- If you wish to listen to a radio station that is not currently held in the database at http://www.WiFiradio-frontier.com it is possible to add the details yourself. You will need to obtain the internet address (URL) for the audio stream for the station that you wish to add. This may be information provided by the radio station itself, via its web site, or perhaps passed to you from another listener.
Note: The URL for the audio stream will generally not be the URL for the web page from which you listen to the station on your PC.
- Use the 'My added stations' link in the 'My account' area on the web site. This allows you to add details of new stations or to modify those already added. You can provide a name for the radio station that will be shown on your radio. You must also provide the web address, location and format details.
- Once you have Internet radio stations available in your My Added Stations list, you may play these stations from Audisse Shokunin. These stations will be available on Audisse Shokunin from the Internet radio menu item ‘My Added Stations’.
- It is possible to add the web addresses for audio streams that may not be playable by Audisse Shokunin. If you attempt to play such a stream, Audisse Shokunin will normally display an error message of some kind. The Audisse Shokunin can only play MP3, WMA, FLAC, AAC and Real Audio streams.
- To look at, modify or delete your added stations list on the web site, use the link 'My added stations' in the 'My account' area. To delete an added radio station, click on the icon with a heart and minus symbol.
SELECTING YOUR FAVOURITE STATIONS
- Press the Menu button to enter the main Internet radio menu.
MENU

Internet radio
Last listened
Station list > System settings > Main menu >
- Rotate the Tuning/Seek/Select control until 'Station list' is highlighted on the display. Press the Tuning/Seek/Select control to enter the menu.

TUNING
SEEK/SELECT

Internet radio
My Favourites
Local Netherlands >
Stations >
Podcasts >
My added stations >
- Rotate the Tuning/Seek/Select control until ‘My Favourites’ is highlighted on the display. Press the Tuning/Seek/Select control and your favourite stations list will appear on the display (set up as described on the preceding page).

My Favourites
myRadio list >
- Rotate the Tuning/Seek/Select control to highlight the required station and then press the control to confirm your selection. The display will show 'Connecting...' while it finds the new station.

My Favourites
Antenne Bayern
NPO 3FM
NDR 2
NPO 1 FM
If the station has on-demand content (that is, it gives the option of listening to programmes which have already been broadcast), 'Selecting a podcast / BBC Listen again'.
Should you be unable to connect to a particular station, please note that some radio stations do not broadcast 24 hours per day, and some stations are not always on-line.
SELECTING YOUR ADDED STATIONS
- Press the Menu button to enter the main Internet radio menu. Rotate the Tuning/Seek/Select control until 'Station list' is highlighted on the display and then press the control to select.
MENU

Internet radio
Last listened
Station list >
System settings >
Main menu >
- Rotate the Tuning/Seek/Select control until 'My Added Stations' is highlighted on the display and then press the control to select.

TUNING SEEK/SELECT

Internet radio
My Favourites
Local Netherlands >
Stations >
Podcasts >
My added stations >
- Rotate the Tuning/Seek/Select control to highlight the required station and then press the control to confirm your selection. The display will show 'Connecting...' while it finds the new station.

My Added stations
Antenne Bayern
NPO 3FM
NPO 1 FM
Should you be unable to connect to a particular station, please note that some radio stations do not broadcast 24 hours per day, and some stations are not always on-line.
In addition, it is possible to specify audio streams for 'My added stations' that are not compatible with Audisse Shokunin. In this event the station will not be playable. The Audisse Shokunin can only play MP3, WMA, FLAC, AAC and Real Audio streams.
Note that the audio coding formats listed are generic terms. There are many variations of each format, as well a variety of streaming protocols in use by different radio broadcasters. Audisse Shokunin has been designed to play the vast majority of coding and streaming formats in current use by broadcasters.
SPOTIFY CONNECT
SPOTIFY CONNECT - THE BASICS
Spotify is all the music you'll ever need. Millions of songs available instantly. Just search for the music you love, or let Spotify play you something great. Spotify works on your phone, tablet, computer and home speakers. So you'll always have the perfect soundtrack for whatever you're doing.
Spotify Connect allows your Spotify selections to be played through the radio, remotely controlled from your iPhone, iPad, Android device or any Desktop.
Connect also allows you to transfer the playing of the sound to other Spotify Connect enabled devices under the control of your smart-phone, tablet or any Desktop.
Once your Spotify account has been connected to your radio, you may start Spotify playing from the radio without needing to use the Spotify app.
Spotify Connect compatibility is shown with the following identifier:

text_image
Spotify®NOTE: Spotify Connect requires a Spotify Premium subscription.
SETTING UP SPOTIFY CONNECT
For more details about setting up Spotify Connect, please go to spotify.com/connect
To use Spotify with your AUDISSE Shokunin radio you will need to download the Spotify app and you will need a Spotify Premium account.
The Spotify software is subject to third party licenses found here: www.spotify.com/connect/third-party-licenses
Spotify Connect lets you push a button to control the music between your Connect enabled devices. While playing a song, you can switch playback from your smart-phone, tablet, Desktop or even to a Connect enabled radio.
- If you have selected 'Keep network connected' in the network settings menu, Spotify Connect will be able to access your radio even if your radio is in the Standby mode. If you have not selected 'Keep network connected' you will have to switch the radio on manually and select Internet Radio mode in order to cause your radio to connect to the network.

Network settings
Manual settings NetRemote PIN Setup Network profile > Clear network settings > Keep network connected
- Make sure that both your radio and Apple iOS / Android device are connected to the same network and that you have downloaded the latest Spotify app on your device.
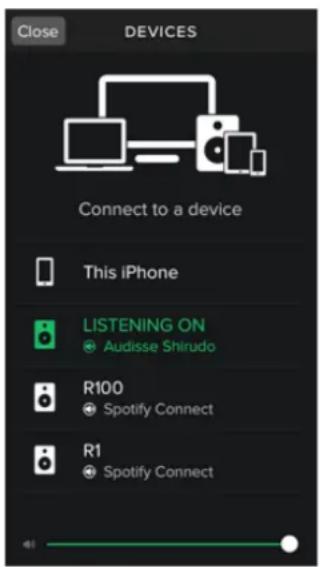
- Simply open Spotify on your Apple iOS / Android device and tap the Spotify Connect icon on the play screen. When the Spotify app has identified other devices that are compatible with Connect, the Connect icon will be shown with a circle. When another device is playing, the Spotify Connect icon will be become green. Tapping the Connect icon will show a list of Connect enabled devices and allow remote control of the volume.
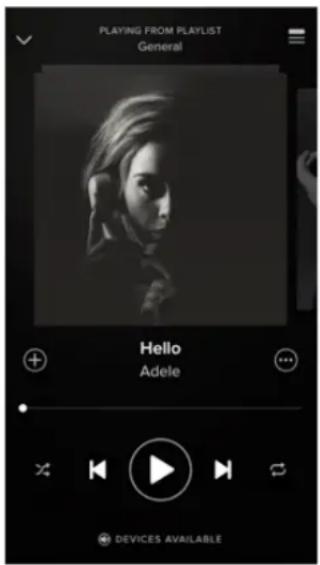
text_image
PLAYING FROM PLAYLIST General Hello Adele DEVICES AVAILABLE- To select your radio choose Audisse Shokunin on the Spotify Connect devices screen. You are now ready to play music through your radio using Spotify Connect.
text_image
Close DEVICES Connect to a device This iPhone LISTENING ON Audisse Shirudo R100 Spotify Connect R1 Spotify ConnectThe next time you open Spotify, it will continue playing from the previously selected device.
Note: On some devices the layout of controls within the Spotify app may be different from that shown and may also change with different versions of the app. Refer to spotify.com/connect if needed.
The music can be controlled using the controls on your radio as well as by any Spotify enabled device.
- Press the Preset/Play/Pause button to pause playback of the current track.

PRESET
- Press the Preset/Play/Pause button, playback will resume from the point where it was paused.
- Press the Preset +/Skip Forward button to start playback of the next track in the current Spotify playlist.

PRESET -
- Press the Preset -/Skip Backward button to start playback of the previous track in the current Spotify playlist.

PRESET +
- Rotate the Volume/EQ control to set the required volume level. The volume may also be controlled from within the current Spotify app.

VOLUME EQUALIZER
TO SELECT SPOTIFY
If you have previously connected using the Spotify Connect app you may select Spotify using the Source button on your radio.
- Press the Source button to select the Spotify mode.
SOURCE
Please note if the power is removed you will need to re-connect Spotify with your radio using the app once again.
DISPLAY MODES
Your radio has a range of display options when playing Spotify Connect.
- Press the Info button to cycle through the different options.
INFO
a. Progress bar Displays the playback progress for the track currently playing.
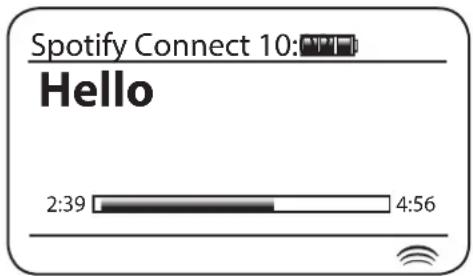
text_image
Spotify Connect 10: Hello 2:39 4:56b. Artist Displays the name of the artist for the track currently playing.
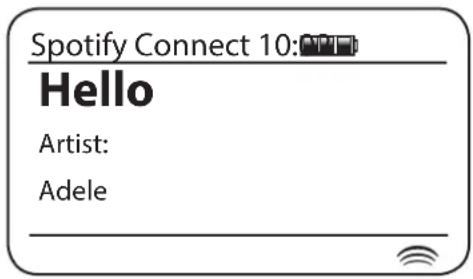
text_image
Spotify Connect 10: Hello Artist: Adelec. Album Displays the name of the album from which the current track is taken.
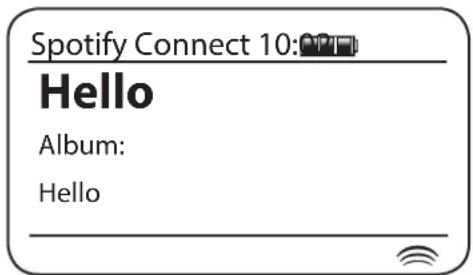
text_image
Spotify Connect 10: Hello Album: Hellod. Bit rate Displays the bit rate and sampling rate of the track currently playing.
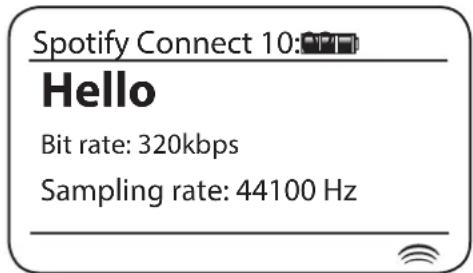
text_image
Spotify Connect 10:Hello Bit rate: 320kbps Sampling rate: 44100 Hze. Playback buffer Displays the radios internal buffer level.
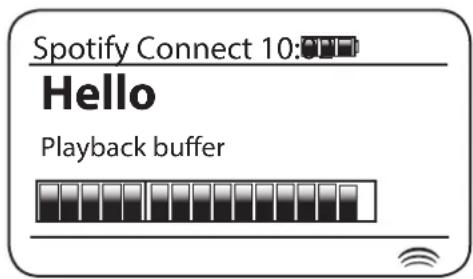
text_image
Spotify Connect 10:0 Hello Playback bufferWhenever the radio is displaying an information screen, the time is displayed in the top-right corner of the display, and a WiFi strength or Ethernet connection indicator is shown in the bottom-right corner.
STREAMING DATA RATE
Your radio is able to stream content from Spotify at different data rates. If your internet connection has a low data usage allowance, or has a relatively low maximum data rate, you may wish to specify that your radio uses a lower data rate for Spotify connections. In some cases this may allow more reliable streaming, although at the expense of some loss of audio quality.
The data rate used for Spotify Connect is configured via using a web browser. This is the same page this is used to change the Friendly Name of your radio.
- Access the radio's configuration web page.
- The Spotify options at the top of the web page allow you to specify the data rate used - either 96k, 160k or 320k bits per second. Select the rate according to your needs. For example, listening at a rate of 320kbps for 1 hour each day for a month equates to approximately 4.5 gigabytes of data usage. If you have a low data allowance you may wish to choose one of the lower data rates.
- The new data rate will be used by Spotify Connect to stream music to your radio when the radio plays from a new playlist.
FRIENDLY NAME
Your radio is identified within the Spotify app using its Friendly Name. By default, your radio's name will be shown as “Audisse Shokunin” followed by a 12 digit alphanumeric code that is the network MAC address that is unique to your radio.
If you would like to change this name to something more personalised.
MUSIC PLAYER USE WITH WINDOWS, APPLE MAC, LINUX
USE WITH WINDOWS, APPLE MAC, LINUX, USB MEMORY
The Music Player allows you to play audio files that are stored on a computer on your network or on a USB memory device plugged into the radio.
In order to play files from a computer on your network, Audisse Shokunin must connect to a file server application that uses the Universal Plug and Play (UPnP) protocol. If your computer uses Windows XP or Vista, then it is likely that your computer already has a UPnP server application available. Windows Media Player version 11 has this capability, and it is able to make your MP3 and WMA files available to Audisse Shokunin. It also allows you to select files by Album, Artist, and so on.
Windows Media Player is only able to serve MP3 and WMA files to Audisse Shokunin. If you have your audio files in either AAC or FLAC formats, or if you are an Apple Mac or Linux user, there are other UPnP server applications that you may use with Audisse Shokunin.
The Music Player on the sound system can playback audio files in MP3, FLAC, AAC and WMA formats. WMA Lossless files can also be played when using Windows Media Player 11 as it will convert these to a PCM format before streaming them to the sound system. Note that the playback of files encoded using WMA Voice, WMA 10 Professional, and files that have DRM protection is not supported.
When using a UPnP server, the search and selection criteria are determined by the server software, but typically include Artist, Album and Genre. Many server applications also allow you to access your files according to the folders within which they are stored as well as other criteria. Windows Media Player 11 is less flexible than some other UPnP servers, but is generally easy to set up. It is supplied as a standard component of Windows XP and Vista.
Many UPnP server applications are also capable of sharing pictures and video files to other network connected devices. If this is the case (as it is with Windows Media Player 11) you may see the option of choosing between ‘Music’, ‘Video’ and ‘Pictures’ on the Music Player’s menu. Clearly you should only select the ‘Music’ option. Content offered via the alternative options will not be playable on Audisse Shokunin.
Some third party server applications allow customisation of the search criteria and indexing methods. This can be useful if you have a very large collection of stored music files.
Here is a short selection of alternative UPnP server applications, although many others are available:
• Twonky Media Server (Windows, Apple Mac, Linux)
• TVersity (Windows) *
• Elgato EyeConnect (for Apple Mac OS X) *
• MediaTek (Linux) *
* = free of charge versions available
Please refer to the documentation for your chosen server application for full details of its configuration and usage.
ACCESSING YOUR AUDIO FILES VIA A UPNP SERVER
If your computer is running Windows (XP or Vista), then Windows Media Player version 11 includes a UPnP server which will make your files available to Audisse Shokunin. There are other UPnP server solutions available for non-Windows users and for Windows users who may wish to use an alternative (see the preceding page).
It is beyond the scope of this instruction book to cover all possible options for UPnP. We explain the use of Microsoft's Windows Media Player here since that will be the first choice for the majority of users.
SET UP UPNP ACCESS ON A WINDOWS PC
-
If your PC is running Microsoft Windows XP or Windows Vista then you can use Microsoft's Windows Media Player version 11 to act as your UPnP (Universal Plug and Play) media server. If not already installed on your PC, Windows Media Player 11 may be downloaded from Microsoft's web site and installed by following the instructions detailed in its installation wizard, or by using Microsoft's Windows Update facility.
-
Once installed, Windows Media Player 11 can create a library from all the media files available to it on your PC. To add new media files to the library, select the 'Library' tab, then 'Add to Library... > Advanced Options', click 'Add', choose the files you wish to add and click 'OK'.
The next step is to connect Audisse Shokunin to Windows Media Player 11 and to configure the program to allow the sound system to access your media library.
- Press the Power button to switch the unit on. Then press the Source button as needed until the Music Player mode display is shown. The main 'Music Player' menu will then be displayed.

text_image
Music player- Rotate the Tuning/Seek/Select control until 'Shared media' is highlighted and press the control to select. The sound system will scan for all available UPnP servers. It may take a few seconds for the radio to complete its scan. The radio will display '
' if no UPnP servers are found.

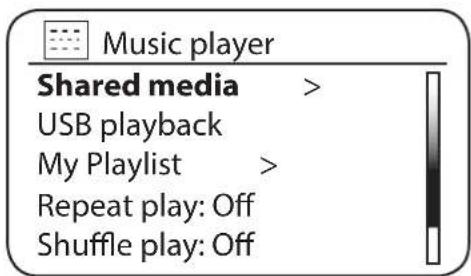
text_image
Music player Shared media > USB playback My Playlist > Repeat play: Off Shuffle play: Off- After scanning, select your UPnP server using the Tuning/Seek/Select control. If you are using WMP 11 as the server, Audisse Shokunin will then normally display 'Unauthorised - Select to retry' at this stage.
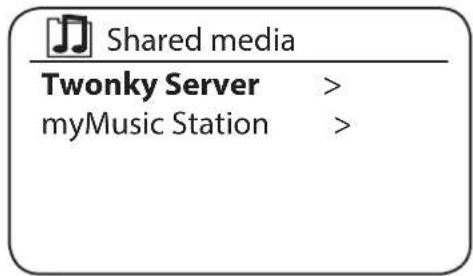
text_image
Shared media Twonky Server > myMusic Station >-
Your PC may prompt you that there has been a connection to your UPnP server. Whether prompted or not, in order that the sound system may access the music files, you will need to click the 'Library' tab in WMP 11 and select the 'Media Sharing...' item to open the 'Media Sharing' window. Make sure the box 'Share my media to:' is ticked.
-
In the 'Media Sharing' window, the sound system will be listed as an unknown device. Click on the unknown device shown to select it, then click the 'Allow' button and then click 'OK'. Note: If you are using Microsoft Windows' firewall software, this should be correctly configured by WMP 11. If you are using third party firewall software you may need to manually configure it to allow your unit and WMP 11 to communicate.
-
On the sound system, select the named server again using the Tuning/Seek/Select control. If WMP 11 is now able to communicate with Audisse Shokunin you will be presented with some media selection options on the display.
LOCATING AND PLAYING MEDIA FILES USING UPNP
Once the UPnP server has been configured to share media files with Audisse Shokunin, you may select the files that you wish to play as follows:
- Press the Power button to switch on the unit. Press the Source button as needed until the Music Player mode display is shown. The main Music Player menu will then be displayed.
SOURCE


Music player
- Rotate the Tuning/Seek/Select control until 'Shared media' is highlighted on the display and then press the control to cause the sound system to scan for UPnP servers. Note that it may take a few seconds for the sound system to complete its scan. The display will return to the Music Player menu if no UPnP servers are found.

TUNING
SEEK/SELECT

Music player
Shared media
USB playback
My Playlist >
Repeat play: Off
Shuffle play: Off

- After a successful scan, rotate the Tuning/Seek/Select control to highlight your UPnP server and then press the Tuning/Seek/Select control. If the display shows multiple media types, select 'Music'. (Some UPnP servers can serve pictures and video content to suitable devices.)

Shared media
Twonky Server > myMusic Station >

Twonky Server
Music >
Video >
Pictures >
Playlists >
- The sound system will now list the media categories that are made available by the UPnP server - for example, 'Album', 'Artist' and 'Genre'. Rotate the Tuning/Seek/Select control to highlight which category you wish to browse, then press the control to confirm your choice. If you wish to use the search function rotate the Tuning/Seek/Select control until 'Search' is selected on the display. You may select characters to build a keyword for searching for content to play.
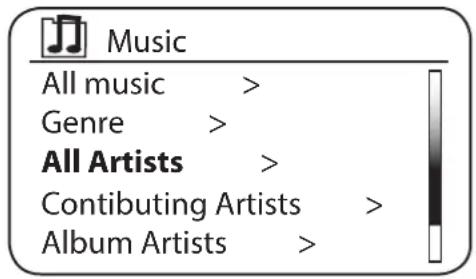
text_image
Music All music > Genre > All Artists > Contributing Artists > Album Artists >When you first set up sharing with a UPnP server, not all of your files will be available immediately. The UPnP server must look inside each file to identify the artist and album information from ‘tags’ embedded in them. The server may also need time to access the Internet to obtain additional information such as ‘album art’ that it can display when you examine your music library on your PC. For a library of many files this can take some time.
LISTENING TO A COMPLETE ALBUM
When searching via UPnP you will have a selection of search criteria as determined by the UPnP server software on your computer. This allows you to search by a given information type (Album, Artist, Genre, etc.) and then to narrow the search to an album or to a particular track within an album.
Some UPnP server applications allow the search options to be customised. The searches described here are just examples of the possibilities.
- Use the Tuning/Seek/Select control to choose content by Artist, Album, Genre, etc. according to your needs then press the control to enter your choice.
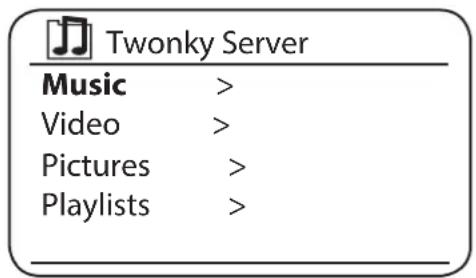
text_image
Twonky Server Music > Video > Pictures > Playlists >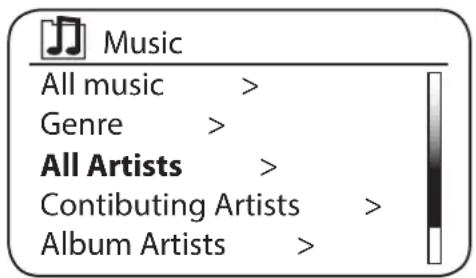
text_image
Music All music > Genre > All Artists > Contributing Artists > Album Artists >- When you reach the album or folder the menu will then switch to showing the tracks in that album or folder. When searching by UPnP they will normally be listed in track number order (but as with the search criteria, this can vary according to the server application used).
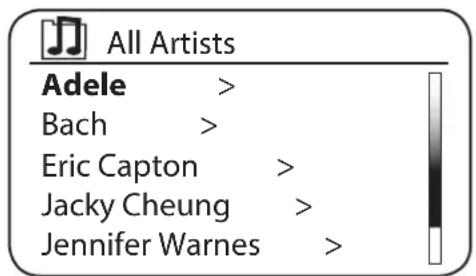
text_image
All Artists Adele > Bach > Eric Capton > Jacky Cheung > Jennifer Warnes >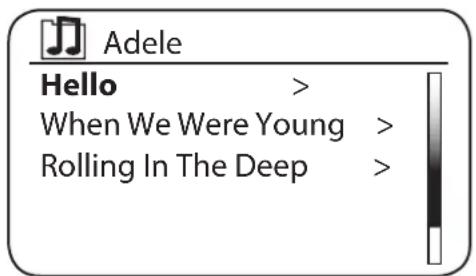
text_image
Adele Hello > When We Were Young > Rolling In The Deep >- With the first track in the album indicated, press the Tuning/Seek/Select control. The album will then begin playing.
While the sound system is playing from your media library, you may use the menus as described above to choose a different selection. When you select the track from which to play, the sound system will then immediately begin playing the new selection.
LISTENING TO A PARTICULAR TRACK
- If you wish to play only a particular track from an album or folder, first choose the album or folder as described on the preceding pages.
- Rotate the Tuning/Seek/Select control until the required track is highlighted.

TUNING
SEEK/SELECT
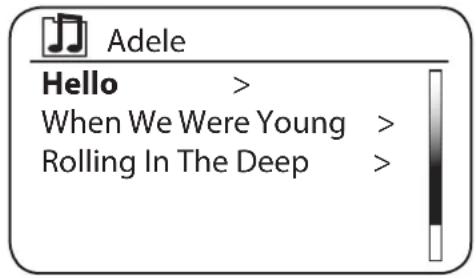
text_image
Adele Hello > When We Were Young > Rolling In The Deep >- Press the Tuning/Seek/Select control. The track will begin playing. The radio will then play subsequent tracks from the same album or folder.

text_image
Music player 10:02 Hello Artist: Adele UPnP- To pause playback of the current track, press the Preset/Play/Pause button.
- Press the Preset/Play/Pause button again, playback will resume from the point where it was paused.
- To start playback of the previous track in the list, press the Preset -/ Skip Backward button.
- To start playback of the next track in the list, press the Preset +/ Skip Forward button.
REPEAT TRACKS
- Ensure you are in the main Music Player menu.
- Rotate the Tuning/Seek/Select control until 'Repeat play' is highlighted.

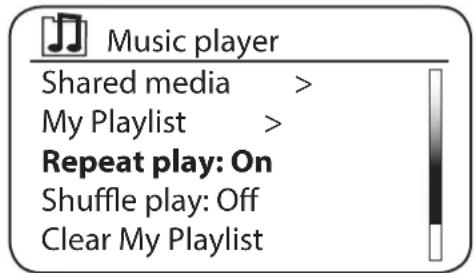
text_image
Music player Shared media > My Playlist > Repeat play: On Shuffle play: Off Clear My Playlist- To activate the repeat option press the Tuning/Seek/Select control so that 'On' appears on the display. Your selected tracks will be played repeatedly and the repeat indicator will show on the display.
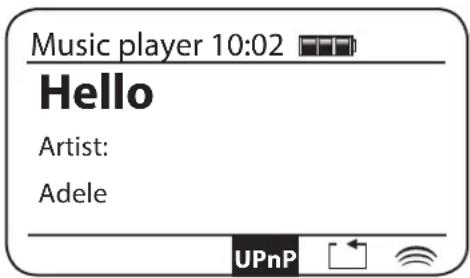
text_image
Music player 10:02 Hello Artist: Adele- To turn off the repeat option highlight ‘Repeat play’ and press the Tuning/Seek/Select control so that ‘Off’ appears on the display.
PLAY TRACKS IN RANDOM ORDER
- Ensure you are in the main Music Player menu.
- Rotate the Tuning/Seek/Select control until 'Shuffle play' is highlighted.

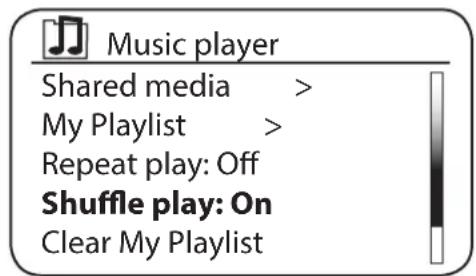
text_image
Music player Shared media > My Playlist > Repeat play: Off Shuffle play: On Clear My Playlist- To activate the random option press the Tuning/Seek/Select control so that 'On' appears on the display. Your selected tracks will be played in random order and the random indicator will show on the display.
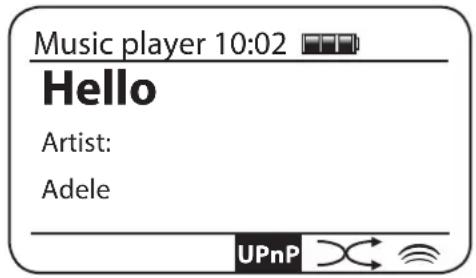
text_image
Music player 10:02 Hello Artist: Adele UPnP- To turn off the random option highlight ‘Shuffle play’ and press the Tuning/Seek/Select control so that ‘Off’ appears on the display.
If both Repeat and Shuffle playback options are set to 'On' then both Repeat and Shuffle icons will be shown in the display.
DISPLAY MODES
Audisse Shokunin has a range of display options when in Music Player mode. Note that the availability of information depends on the specific media files, their format and upon the server capability. (Not all UPnP servers make information from the media files available in the same way.)
- Press the Info button to cycle through the different options.
a. Progress bar Displays the playback progress for the track currently playing.
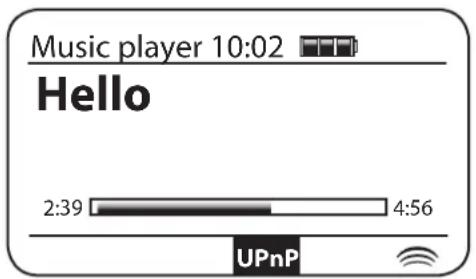
text_image
Music player 10:02 Hello 2:39 4:56 UPnPb. Artist Displays the artist information for the track currently playing.
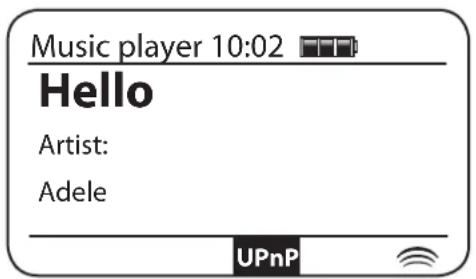
text_image
Music player 10:02 Hello Artist: Adele UPnPc. Album Displays the album information for the track currently playing.
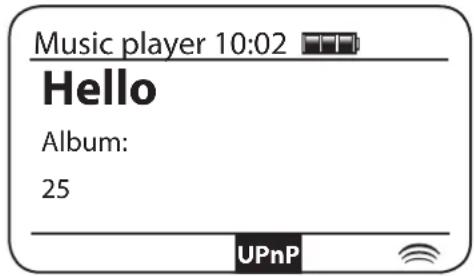
text_image
Music player 10:02 Hello Album: 25 UPnPd. Format Displays the bit rate and format of the track currently playing.
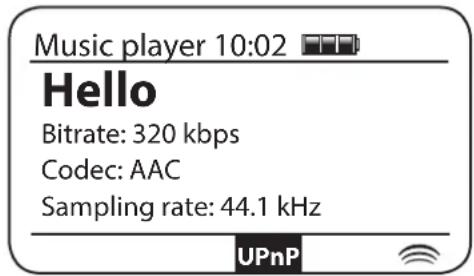
text_image
Music player 10:02 Hello Bitrate: 320 kbps Codec: AAC Sampling rate: 44.1 kHz UPnPe. Buffer Displays the radios internal buffer status during media playback.
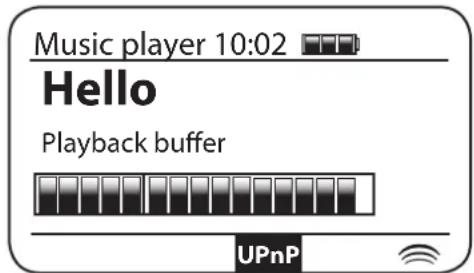
text_image
Music player 10:02 Hello Playback buffer UPnPWhenever the Music Player is displaying an information screen (as opposed to a menu screen), the time is displayed in the top-right corner of the display, and the WiFi strength is shown in the bottom-right corner together with an indicator showing the method by which the radio is obtaining the media - either from a UPnP server.
PLAYLISTS
Sometimes you may wish to set up a list of music tracks or albums that can then be played without further action - as background music for a party, for example.
Audisse Shokunin can be configured to hold a queue of up to 500 tracks in a playlist menu. The tracks or albums for the playlist can be selected from your UPnP serve. The playlist is held in memory in Audisse Shokunin until external power is removed, or until the playlist is cleared from the menu.
When selecting (or when playing) a track using a UPnP server press and hold the Tuning/Seek/Select control and the display will show ‘Added to My playlist’.

TUNING
SEEK/SELECT
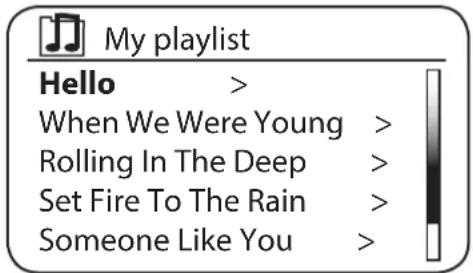
text_image
My playlist Hello > When We Were Young > Rolling In The Deep > Set Fire To The Rain > Someone Like You >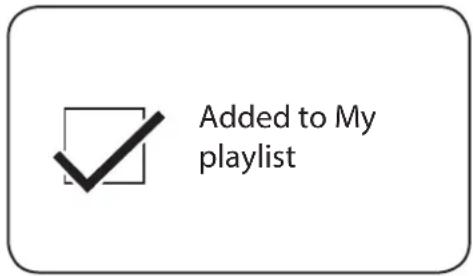
text_image
Added to My playlistThe track will be added to the playlist for playback later.
ADDING AN ALBUM OR FOLDER
- When using a UPnP server highlight the chosen album, artist or folder and press and hold the Tuning/Seek/Select control. The display will show ‘Added to My playlist’.

TUNING
SEEK/SELECT
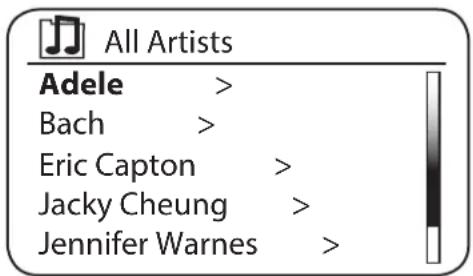
text_image
All Artists Adele > Bach > Eric Capton > Jacky Cheung > Jennifer Warnes >
text_image
Added to My playlist- Each of the tracks within the album, artist or folder selection will be added to the playlist individually. This allows any unwanted tracks to be removed from the playlist if needed.
VIEWING YOUR PLAYLIST
- Press the Power button to switch on the unit. Press the Source button as needed until the Music Player mode display is shown. The Music Player menu will then be shown on the display.

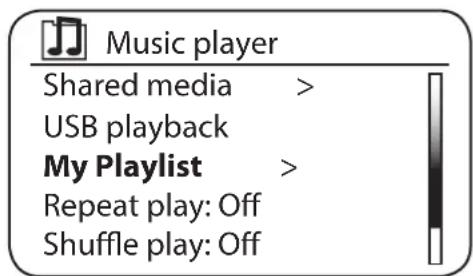
text_image
Music player Shared media > USB playback My Playlist > Repeat play: Off Shuffle play: Off- Rotate the Tuning/Seek/Select control until 'My Playlist' is highlighted on the display. Press the control to enter the playlist.

TUNING
SEEK/SELECT
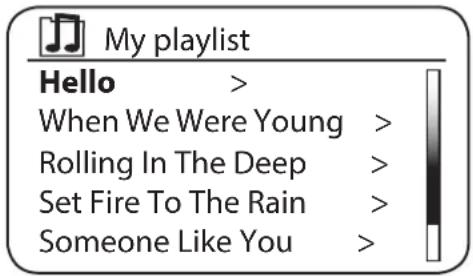
text_image
My playlist Hello > When We Were Young > Rolling In The Deep > Set Fire To The Rain > Someone Like You >- Rotate the Tuning/Seek/Select control to scroll through the playlist. Tracks that are served via UPnP will show their track name will show their file name.
ERASING A TRACK
- Press the Menu button to enter the main Music Player menu.
- Rotate the Tuning/Seek/Select control until 'My Playlist' is highlighted on the display. Press the control to enter the playlist.

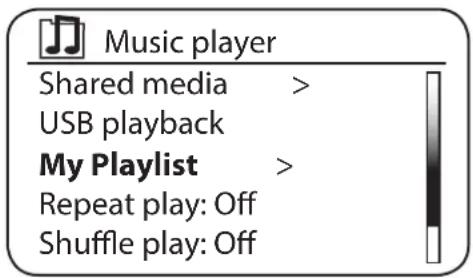
text_image
Music player Shared media > USB playback My Playlist > Repeat play: Off Shuffle play: Off- Rotate the Tuning/Seek/Select control until the track you wish to erase is highlighted. Press and hold the Tuning/Seek/Select control.
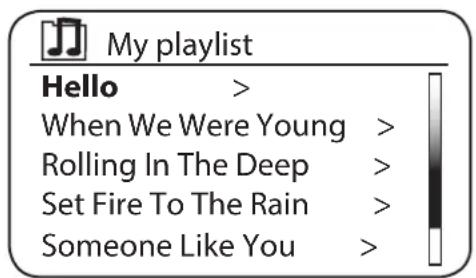
text_image
My playlist Hello > When We Were Young > Rolling In The Deep > Set Fire To The Rain > Someone Like You >- You will be asked to confirm the deletion. To delete the track rotate the Tuning/Seek/Select control until 'YES' is highlighted on the display. Press the control to cause the track to be deleted.
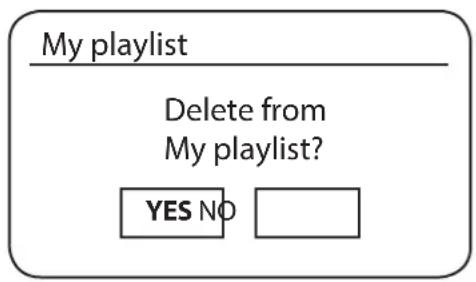
text_image
My playlist Delete from My playlist? YES NO- If you do not wish to delete the track from the list rotate the Tuning/ Select control to highlight 'NO' and press the control to cancel the operation.
CLEARING THE PLAYLISTS
- Press the Menu button to enter the main Music Player menu.
- To clear the whole playlist rotate the Tuning/Seek/Select control until 'Clear My playlist' is highlighted on the display. Press the control.

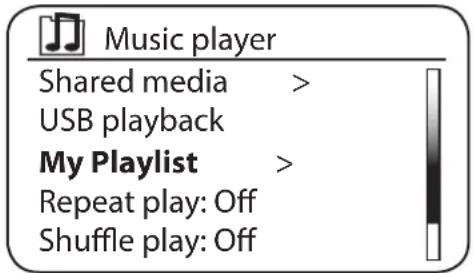
text_image
Music player Shared media > USB playback My Playlist > Repeat play: Off Shuffle play: Off- To clear the whole playlist rotate the Tuning/Seek/Select control until 'YES' is highlighted on the display. Press the control to cause the playlist to be cleared.
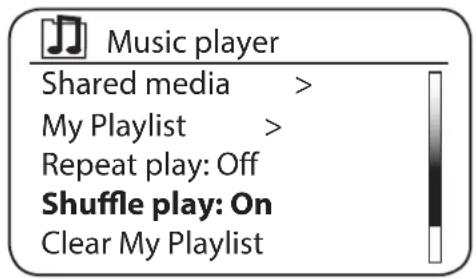
text_image
Music player Shared media > My Playlist > Repeat play: Off Shuffle play: On Clear My Playlist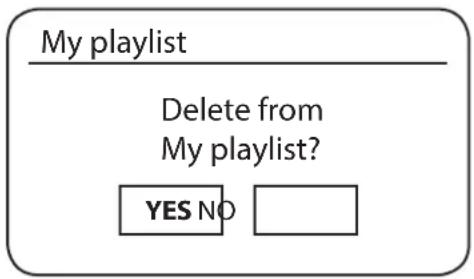
text_image
My playlist Delete from My playlist? YES NO- If you do not wish to clear the playlist rotate the Tuning/Seek/Select control to highlight 'NO' and press the control to confirm.
PLAYING YOUR PLAYLISTS
- Press the Menu button to enter the main Music Player menu.
MENU
- Rotate the Tuning/Seek/Select control until 'My playlist' is highlighted on the display. Press the control.

TUNING
SEEK/SELECT
Music player
Shared media >
USB playback
My Playlist >
Repeat play: Off
Shuffle play: Off

- To play the playlist from a particular track, rotate the Tuning/Seek/Select control until the desired track is highlighted then press the control to start play.

My playlist
Hello
When We Were Young >
Rolling In The Deep >
Set Fire To The Rain >
Someone Like You >
-
While playing from the playlist, you can use this function to jump to a particular track within the playlist.
-
While playing from the playlist, you may add additional tracks or albums or remove specific tracks.
Prune servers
Your radio stores details of UPnP servers that it has seen via its network connection in its internal memory. If you use the radio at different locations, you may find that there are servers listed by the radio that you are no longer interested in. This prune servers functions allows the list to be updated so that only active UPnP servers on the currently connected network are shown when selecting ‘Shared Media’ from the Music Player menu.
- Press the Menu button to enter the main Music Player menu.
MENU
-
Rotate the Tuning/Seek/Select control until ‘Prune servers’ is highlighted on the display. Press the control.
-
To remove servers that are no longer required rotate the Tuning/Seek/Select control until 'YES' is highlighted on the display. Press the control to cause the servers to be removed.
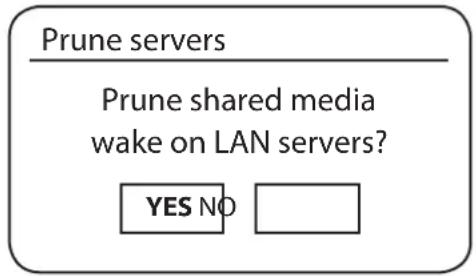
text_image
Prune servers Prune shared media wake on LAN servers? YES NO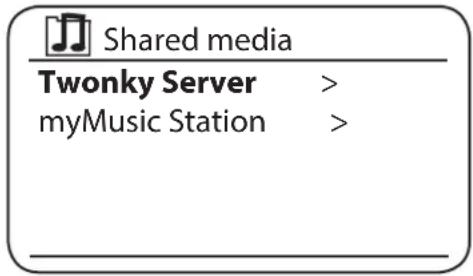
text_image
Shared media Twonky Server > myMusic Station >- If you do not wish to prune servers rotate the Tuning/Seek/Select control to highlight 'NO' and press the control to confirm.
USING USB MEMORY DEVICES
This section describes how to use your radio to access and playback your audio files via USB memory devices.
USB memory devices plug into the rectangular slot on the top of your radio on the left hand side.
Important: Your radio is only designed to work with USB flash memory devices. It is not intended to be connected to hard disk drives or any other type of USB device.
The Shokunin radio has been tested with a range of USB memory devices of up to 128GB capacity. USB memory must use the FAT or FAT 32 filing system in order to operate with your radio. Your radio is unable to play from media formatted using the exFAT or NTFS formats.
It is possible to use SD or SDHC cards for media storage and playback when held in a suitable USB adaptor. However, due to the wide variation of such adaptors, it is not possible to guarantee that all adaptor / card combinations will work in the radio.
Audio formats supported are MP3, WMA, AAC, FLAC and WAV. USB playback does not support files encoded using WMA Lossless, WMA Voice, WMA 10 Professional, nor files of any format, which have DRM protection.
Recommendations:
Unless you have only a few files on the USB memory device, do not place all files in the root folder.
The number of items (files / sub-folders) in any folder should be less than 2000.
Searching and playback will be more responsive if the number of files in any one folder is limited (we suggest not more than 250).
It is recommended that the USB memory is reformatted in your computer before adding your music files.
The maximum depth of folder nesting permitted is 8 folder levels (but playback is only from the currently selected level).
Shuffle and Playlist functions are limited to 500 tracks.
Cautions:
Remove the USB memory before carrying the unit or if not using the USB feature for a prolonged period.
Place the unit in Standby mode before removing your USB memory device.
WARNING: Never use the USB socket in rainy or moist conditions to prevent moist from entering the radio. Keep the rubber cover well closed under these conditions.
PLAYING FILES FROM USB MEMORY DEVICES
- Carefully insert the USB memory device into the USB slot. Press and release the Power button to switch on the radio. The radio may detect that the memory has been connected, in which case it will ask whether you wish to open the folder view of the memory contents. Press the Tuning/Select control to select 'Yes' and skip to step 4 below. If the USB memory was not automatically detected, proceed as follows.

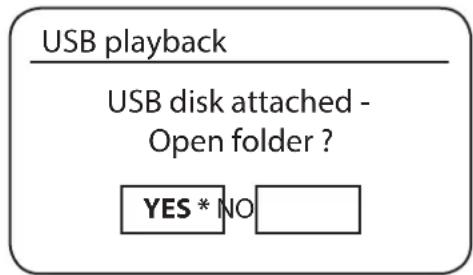
text_image
USB playback USB disk attached - Open folder ? YES * NO- To select USB playback mode press the Mode button as needed until the Music Player mode is selected.
- Rotate the Tuning/Seek/Select control until 'USB playback' is highlighted on the display and press the control. The radio will now list the content stored on the USB memory device. If there are many files or folders this may take a few seconds.

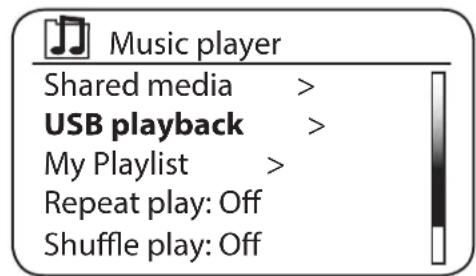
text_image
Music player Shared media > USB playback > My Playlist > Repeat play: Off Shuffle play: Off- Rotate the Tuning/Seek/Select control to highlight the required folder and press the control to enter the current folder. The list of tracks in the current folder will be displayed. Alternatively, if you have nested folders (such as album folders within an artist folder) then you will simply step to the next folder level.

TUNING
SEEK/SELECT

USB playback
AAC music >
FLAC >
Apple Lossless >
MP3 >
- Rotate the Tuning/Seek/Select control to select the track and press the control to begin playing from the highlighted track. All files in the current folder will then be played in turn. Files are sorted by file name in numeric-alpha order (0-9...A-Z) before being played. Albums will play in the current order if the file name begins with the track number (use leading zeroes if more than 9 tracks). Controlling playback from the USB memory device including Shuffle and Repeat functions is explained in the previous pages.
DISPLAY MODES
Audisse Shokunin has a range of display options when in Music Player mode. Note that the availability of information depends on the specific media files, their format and upon the server capability. (Not all UPnP servers make information from the media files available in the same way.)
- Press the Info button to cycle through the different options.
INFO
a. Progress bar Displays the playback progress for the track currently playing.
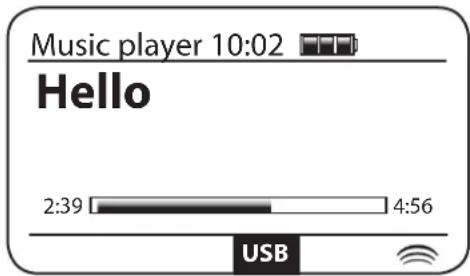
text_image
Music player 10:02 Hello 2:39 4:56 USBb. Artist Displays the artist information for the track currently playing.
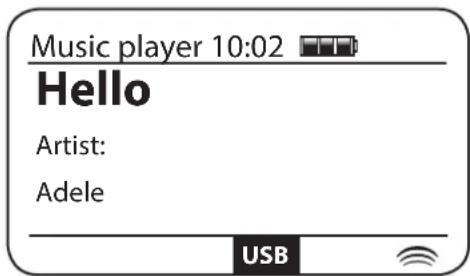
text_image
Music player 10:02 Hello Artist: Adele USBc. Album Displays the album information for the track currently playing.
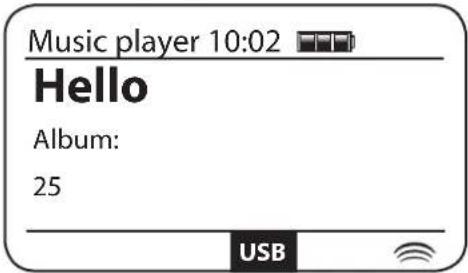
text_image
Music player 10:02 Hello Album: 25 USBd. Folder Displays the folder name of the current playing track.
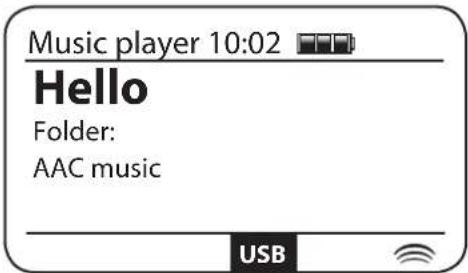
text_image
Music player 10:02 Hello Folder: AAC music USBe. Path Displays the path of current playing track in the USB.
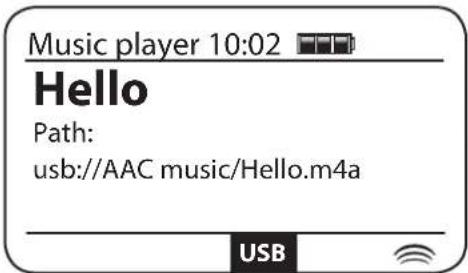
text_image
Music player 10:02 Hello Path: usb://AAC music/Hello.m4a USBf. Format Displays the bit rate and format of the track currently playing.
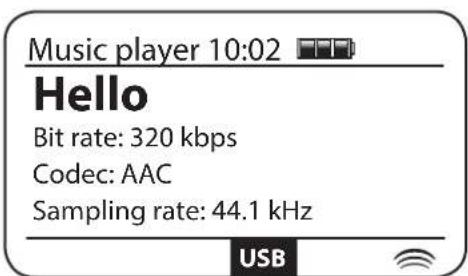
text_image
Music player 10:02 Hello Bit rate: 320 kbps Codec: AAC Sampling rate: 44.1 kHz USBg. Buffer Displays the radios internal buffer status during media playback.
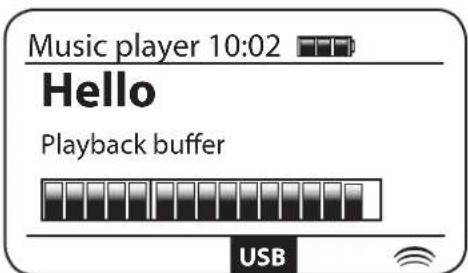
text_image
Music player 10:02 Hello Playback buffer USBh. Date Displays date information.
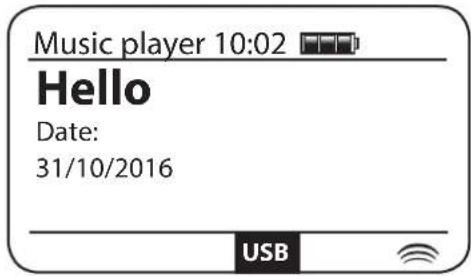
text_image
Music player 10:02 Hello Date: 31/10/2016 USBWhenever the USB Player is displaying an information screen (as opposed to a menu screen), the time is displayed in the top-right corner of the display, and a WiFi strength is shown in the bottom-right corner together with an indicator.
PLAYLISTS
Sometimes you may wish to set up a list of music tracks or albums that can then be played without further action - as background music for a party, for example. Your radio can be configured to hold a queue of up to 500 tracks in a playlist menu. The tracks or albums for the playlist can be selected from your UPnP server and from a USB memory device. The playlist is held in the memory in your radio until the external power is removed, or until the playlist is cleared from the menu. Note that the playlist is not retained in Standby mode when the radio is running on batteries.
ADDING A SINGLE TRACK TO YOUR PLAYLIST
- When selecting (or when playing) a track using a UPnP server or a USB memory device press and hold the Tuning/Seek/Select control and the display will show 'Added to My playlist'.

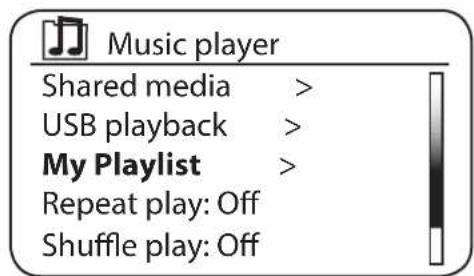
text_image
Music player Shared media > USB playback > My Playlist > Repeat play: Off Shuffle play: Off- The track will be added to the playlist for playback later.
text_image
Added to My playlistADDING AN ENTIRE ALBUM OR FOLDER
- When using a UPnP server or a USB memory device highlight the chosen album, artist or folder and press and hold the Tuning/Seek/Select control. The display will show 'Added to My playlist'.
- Each of the tracks within the album, artist or folder selection will be added to the playlist individually. This allows any unwanted tracks to be removed from the playlist if needed.
VIEWING YOUR PLAYLIST
- Press and release the Power button to switch on the unit. Press the Source button as needed until the Music Player mode display is shown. The Music Player menu will then be shown on the display.
- Rotate the Tuning/Seek/Select control until 'My Playlist' is highlighted on the display. Press the control to enter the playlist.

TUNING
SEEK/SELECT
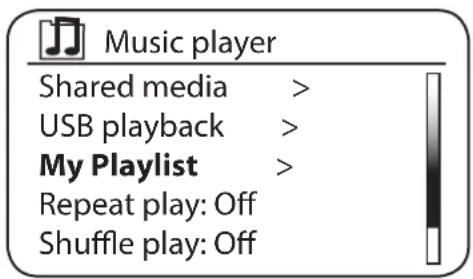
text_image
Music player Shared media > USB playback > My Playlist > Repeat play: Off Shuffle play: Off- Rotate the Tuning/Seek/Select control to scroll through the playlist. Tracks, which are served, via UPnP will show their track name and USB tracks will show their file name.
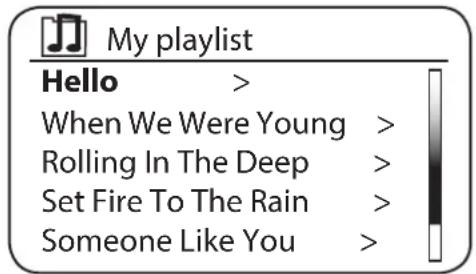
text_image
My playlist Hello > When We Were Young > Rolling In The Deep > Set Fire To The Rain > Someone Like You >ERASING A TRACK FROM THE PLAYLIST
- Press the Menu button to enter the main Music Player menu.
MENU
- Rotate the Tuning/Seek/Select control until 'My Playlist' is highlighted on the display. Press the control to enter the playlist.

TUNING
SEEK/SELECT
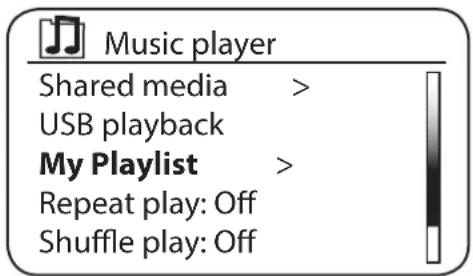
text_image
Music player Shared media > USB playback My Playlist > Repeat play: Off Shuffle play: Off- Rotate the Tuning/Seek/Select control until the track you wish to erase is highlighted. Press and hold the Tuning/Seek/Select control.
- You will be asked to confirm the deletion. To delete the track, rotate the Tuning/Seek/Select control until 'YES' is highlighted on the display. Press the control to delete the track.
- If you do not wish to delete the track from the list rotate the Tuning/ Select control to highlight 'NO' and press the control to cancel the operation.
CLEARING THE PLAYLIST
- Press the Menu button to enter the main Music Player menu.
MENU
- To clear the whole playlist rotate the Tuning/Seek/Select control until 'Clear My playlist' is highlighted on the display. Press the control.

TUNING
SEEK/SELECT
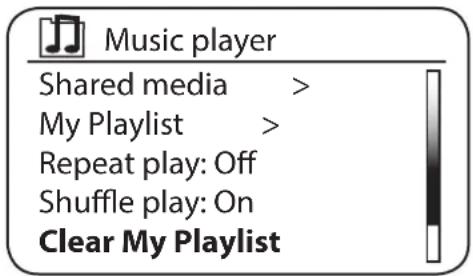
text_image
Music player Shared media > My Playlist > Repeat play: Off Shuffle play: On Clear My Playlist- To clear the whole playlist rotate the Tuning/Seek/Select control until 'YES' is highlighted on the display. Press the control to clear the playlist.

TUNING
SEEK/SELECT
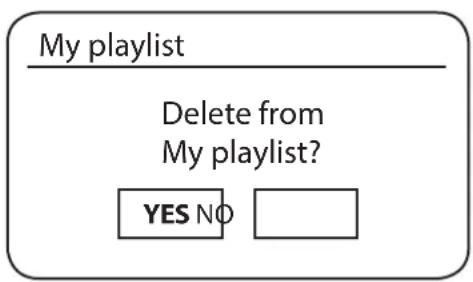
text_image
My playlist Delete from My playlist? YES NO- If you do not wish to clear the playlist rotate the Tuning/Seek/Select control to highlight 'NO' and press the control to confirm.
PLAYING YOUR PLAYLISTS
- Press the Menu button to enter the main Music Player menu.
MENU
- Rotate the Tuning/Seek/Select control until 'My playlist' is highlighted on the display. Press the control.

TUNING
SEEK/SELECT
Music player
Shared media >
USB playback
My Playlist >
Repeat play: Off
Shuffle play: Off

- To play the playlist from a particular track, rotate the Tuning/Seek/Select control until the desired track is highlighted then press the control to start play.

TUNING
SEEK/SELECT
My playlist
Hello >
When We Were Young >
Rolling In The Deep >
Set Fire To The Rain >
Someone Like You >

- While playing from the playlist, you can use this function to jump to a particular track within the playlist.
- While playing from the playlist, you may add additional tracks or albums or remove specific tracks.
DAB+ DIGITAL RADIO
USING DAB MODE FOR THE FIRST TIME
- Carefully extend the telescopic aerial.
Please make sure the antenna does not make contact with the metal handle. This influences the reception level. - Press the Power button to switch on the sound system. If the sound system has been used before the last used mode will be selected.
- Press the Source button as needed so that DAB radio mode is selected on the display.
SOURCE
11001011 10100111))
DAB radio
- If this is the first time, the display will show 'Scanning'. (If the sound system has been used before the last used station will be selected instead.)
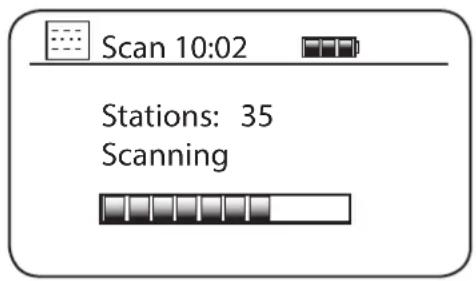
text_image
Scan 10:02 Stations: 35 ScanningDuring the scanning process, as new stations are detected the station counter will increase and the stations will be added to the list that is stored in the sound system. The bar graph indicates the progress of the scan.
- When scanning is completed the radio will list the stations found (in numeric-alpha order 0....9...A...Z), unless it has previously been tuned to a DAB station.
Rotate the Tuning/Seek/Select control to scroll through the list of available DAB radio stations.

TUNING
SEEK/SELECT
Station list
Antenne
Bayern 2 Sued
BR-KLASSIK
FH Europa
Fritz
Press the Tuning/Seek/Select control to select the highlighted station. The display may show 'Connecting...' while the radio re-tunes.

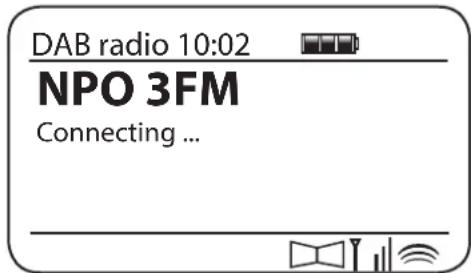
text_image
DAB radio 10:02 NPO 3FM Connecting ...Use the Volume/EQ control to set the sound level as needed.
- If the station list is still empty after the scan the display will show 'Service not available'. If no stations are found it may be necessary to relocate Audisse Shokunin to a position giving better reception.
SELECTING A DAB RADIO STATION
- When playing a DAB radio station, the display normally shows the name of the current station with other related information.
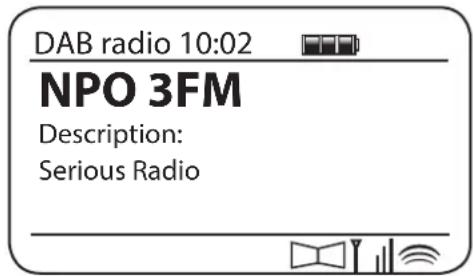
text_image
DAB radio 10:02 NPO 3FM Description: Serious Radio- Rotate the Tuning/Seek/Select control to access the radio station list and to scroll through the available stations.

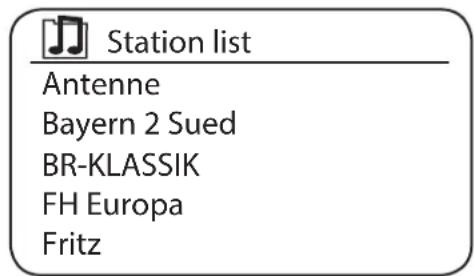
text_image
Station list Antenne Bayern 2 Sued BR-KLASSIK FH Europa Fritz- Press the Tuning/Seek/Select control to select the highlighted station. The display may show 'Connecting...' while the radio re-tunes.
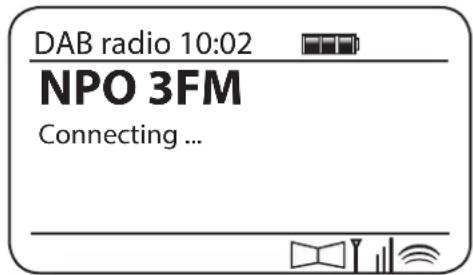
text_image
DAB radio 10:02 NPO 3FM Connecting ...- Use the Volume/EQ control to set the sound level as needed.

VOLUME EQUALIZER
Note: If the display shows ‘Station Not Available’ it may be necessary to relocate Audisse Shokunin to a position giving better reception.
A question mark in front of the station name merely indicates that the station has not recently been detected by the sound system. It may still be available.
SECONDARY SERVICES
Some DAB radio stations can have one or more secondary stations associated with them. Typically these are not broadcast continually. If a station has a secondary station available then the secondary will appear in the list of station names beneath the main (or primary) station.
To listen to a secondary service, use the Tuning/Seek/Select control to scroll to the chosen station, and press the control to tune to the station.

TUNING SEEK/SELECT

Station list
BBC Radio 3
BBC Radio 4
Daily Service
?Parliament
BBC Radio 5 Live
If the secondary service is not available (off-air) then the primary service will be selected.
DISPLAY MODES
Audisse Shokunin has a range of display options when in DAB mode:
- Press the Info button to cycle through the different options.
a. Text Displays text messages such as the artist or track name, phone in number, traffic alerts, etc.
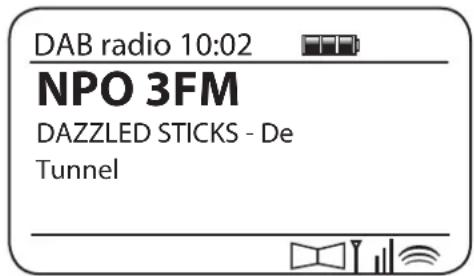
text_image
DAB radio 10:02 NPO 3FM DAZZLED STICKS - De Tunnelb. Program Type Displays the type of station being listened to such as Pop, Classic, News etc.
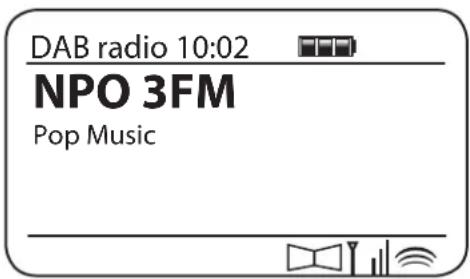
text_image
DAB radio 10:02 NPO 3FM Pop Musicc. Multiplex Name / Frequency Displays the name of the DAB multiplex to which the current station belongs as well as its broadcast frequency.
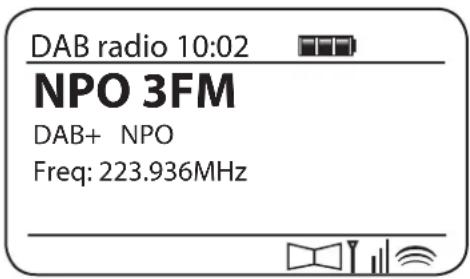
text_image
DAB radio 10:02 NPO 3FM DAB+ NPO Freq: 223.936MHzd. Signal strength Displays the signal strength for the station being listened to. The signal strength graph can be used when positioning the radio or its antenna. For good reception the graph should occupy three
or more blocks.

text_image
DAB radio 10:02 NPO 3FM Strength:e. Bit rate and audio type Displays the digital bit rate and audio coding information for the station being listened to.
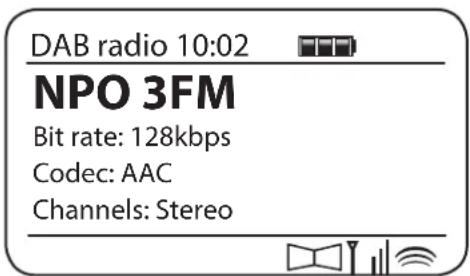
text_image
DAB radio 10:02 NPO 3FM Bit rate: 128kbps Codec: AAC Channels: Stereof. Date Displays the current date.
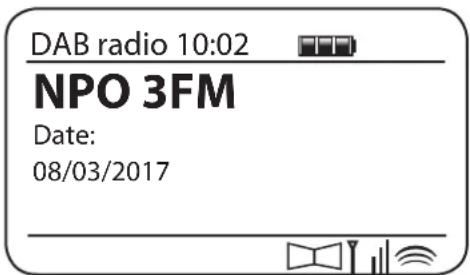
text_image
DAB radio 10:02 NPO 3FM Date: 08/03/2017g. Dynamic Label Plus(DL+) texts
Some stations may provide other
| programme related information for addition to the regular text. If none is available, a DAB radio 10:02 message [No DL+] | ['No DL+]’ is shown. |
A signal strength indicator is always shown in the lower area of the display on the right hand side.
If the broadcast being received is in stereo, then the stereo speaker symbol will be shown.
If the currently tuned station has been stored as a preset, then the preset number will also be shown.
FINDING NEW DAB RADIO STATIONS
Should you wish to use Audisse Shokunin for DAB reception in a new location, or if no stations were detected during the initial scan, you can follow this procedure to allow Audisse Shokunin to find out which DAB radio stations are available.
- Ensure that the telescopic antenna is extended, and then press the Source button as needed to select DAB radio mode.
SOURCE
11001011 10100111))
DAB radio
- Once in DAB mode press the Menu button.
MENU
DAB radio
Station list >
Full scan >
Manual tune >
Prune
DRC >
- Rotate the Tuning/Seek/Select control until 'Full scan' is highlighted on the display.

TUNING
SEEK/SELECT
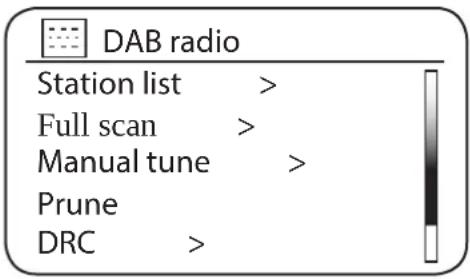
text_image
DAB radio Station list > Full scan > Manual tune > Prune DRC >- Press the Tuning/Seek/Select control to initiate the scan. The display will show 'Scanning' and your radio will perform a scan of the DAB frequencies used in the country. As new stations are found the station counter will increase and stations will be added to the list. The bar graph indicates the progress of the scan.

TUNING
SEEK/SELECT
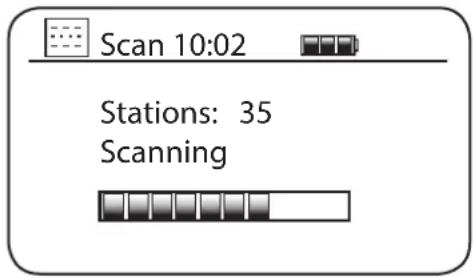
text_image
Scan 10:02 Stations: 35 ScanningMANUAL TUNING
Manual tuning allows you to tune directly to the various Band III DAB channels (5A to 13F).
- When in DAB mode press Menu button so that the display shows the DAB menu.

- Rotate the Tuning/Seek/Select control until 'Manual tune' is highlighted.

TUNING
SEEK/SELECT
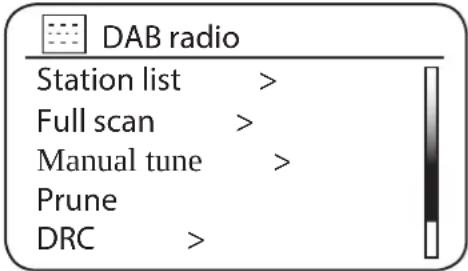
text_image
DAB radio Station list > Full scan > Manual tune > Prune DRC >- Press the Tuning/Seek/Select control to enter manual tune mode.
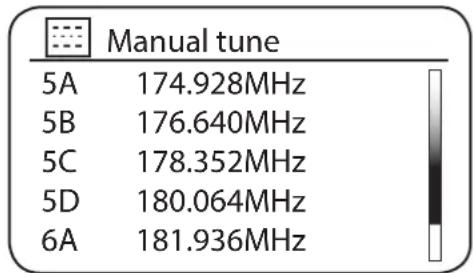
other
Manual tune | Category | Value (MHz) | |---|---| | 5A | 174.928 | | 5B | 176.640 | | 5C | 178.352 | | 5D | 180.064 | | 6A | 181.936 |- Rotate the Tuning/Seek/Select control to choose the required DAB channel.
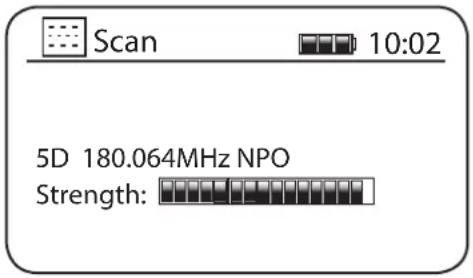
text_image
Scan 10:02 5D 180.064MHz NPO Strength:- Press the Tuning/Select to cause the radio to tune to the chosen channel.
When the radio has tuned, the display shows the channel number and frequency, and the name of the DAB multiplex found (if any).
A bar graph shows the signal strength and is useful if you need to reposition the radio or its aerial. The minimum signal marker ‘I’ that separates the left and right parts of the signal graph shows the minimum signal level required for satisfactory reception.
Any new radio stations found on the tuned DAB multiplex will be added to the list stored in the radio.
-
Press the Menu or Back button to choose a different frequency.
-
Press the Menu or Back button a second time to access the main DAB menu then select 'Station list' to return to normal tuning.
DYNAMIC RANGE CONTROL SETTINGS
Dynamic Range Control (also known as DRC) can make quieter sounds easier to hear when your radio is used in a noisy environment by reducing the dynamic range of the audio signal.
- Press the Power button to switch on Audisse Shokunin.
- Press the Source button as needed to select DAB radio mode.
SOURCE
11001011 10100111))
DAB radio
- Press the Menu button to enter the DAB menu.
MENU
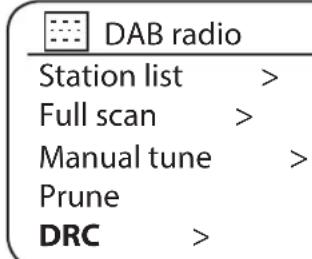
text_image
DAB radio Station list > Full scan > Manual tune > Prune DRC >- Rotate the Tuning/Seek/Select control until 'DRC' is highlighted on the display.

TUNING
SEEK/SELECT
- Press the Tuning/Seek/Select control to enter the DRC adjustment mode. The current DRC setting will be indicated with an asterisk.
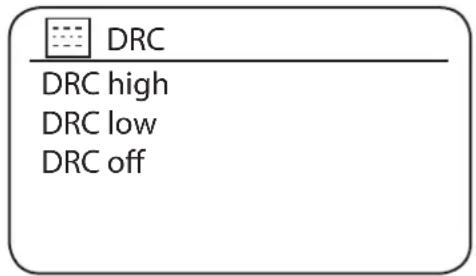
text_image
DRC DRC high DRC low DRC off- Rotate the Tuning/Seek/Select control to highlight the required DRC setting (the default is Off).
'DRC Off' - DRC is switched off, Broadcast DRC will be ignored.
'DRC high' - DRC is set as sent by broadcaster.
'DRC low' - DRC level is set to half that sent by broadcaster.
- Press the Tuning/Seek/Select control to confirm the setting.
Note: Not all DAB broadcasts use the DRC function. If the broadcast does not provide DRC information, then the DRC setting in the sound system will have no effect.
STATION ORDER SETUP
Audisse Shokunin has 3 station order settings from which you can choose. The station order settings are, alphanumeric, ensemble and valid.
Note: The default station order on your radio is alphanumeric.
-
Press the Power button to switch on your radio.
-
Press the Source button as needed to select DAB radio mode.

text_image
11001011 10100111)) DAB radio- Press the Menu button to enter the DAB menu list.
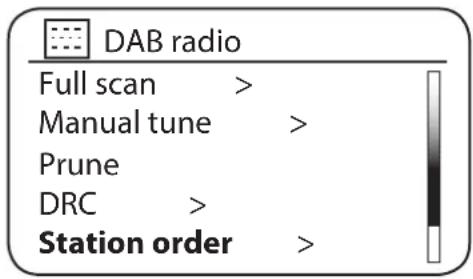
text_image
DAB radio Full scan > Manual tune > Prune DRC > Station order >- Rotate the Tuning/Seek/Select control until 'Station order' is highlighted. Press the Tuning/Seek/Select control to enter the station order adjustment mode.
- Rotate the Tuning/Seek/Select control to choose between ‘Alphanumeric’, ‘Ensemble’ and ‘Valid’. ‘Alphanumeric’ - sorts the station list alpha-numerically 0...9 A...Z. ‘Ensemble’ - organises the station list by DAB multiplex. ‘Valid’ - shows only those stations for which a signal can be found. The current setting is indicated by an asterisk.

TUNING
SEEK/SELECT
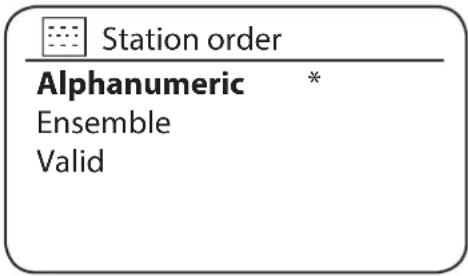
text_image
Station order Alphanumeric * Ensemble Valid- Press the Tuning/Seek/Select control to select the required station order.
- Press the Menu button as needed to return to the DAB menu or to the stations list.
PRUNE STATIONS
If you move to a different part of the country, some of the stations that were listed may no longer be available. Also, from time to time, some DAB services may stop broadcasting, or may change location or frequency. Stations which cannot be found, or that have not been received for a very long time are shown in the station list with a question mark.
The Prune stations function will delete the marked DAB stations from your station list.
- Press the Power button to switch on Audisse Shokunin.
- Press the Source button as needed to select DAB radio mode.

- Rotate the Tuning/Seek/Select control until ‘Prune invalid’ is highlighted. Press the Tuning/Seek/Select control.
- To cause the stations list to be pruned, eliminating unavailable stations rotate the Tuning/Seek/Select control until 'YES' is highlighted on the display.

Prune invalid
This removes all invalid stations, continue?
- Press the Tuning/Seek/Select control to cause the invalid station names to be removed from the station list.
If you do not wish to prune stations, highlight 'NO' and then press the control. The display will revert to the previous menu.
Note: If you have moved Audisse Shokunin to a different part of the country you should also carry out a search for new stations.
FM RADIO
OPERATING IN FM MODE
- Carefully adjust the rod antenna and press the Power button to switch on Audisse Shokunin.
- Press the Source button as needed to select FM radio mode.
SOURCE
FM ))
FM radio
- Rotate the Tuning/Seek/Select control in a clockwise direction. The displayed frequency will increase. Press the Tuning/Seek/Select control to carry out an auto-tune. Your radio will scan up the FM band from the currently displayed frequency and will stop scanning when it finds a station of sufficient strength.

TUNING
SEEK/SELECT
FM radio 10:02

101.00 MHz

- The display will show the frequency of the signal that has been found. If RDS information is available, after a few seconds the display will show the radio station name.
If you only hear hiss or interference, simply press the Tuning/Seek/Select control to scan further. Audisse Shokunin may have found a spurious interference signal.
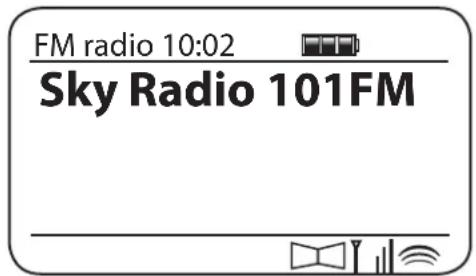
text_image
FM radio 10:02 Sky Radio 101FM- To find more FM stations press the Tuning/Seek/Select control to repeat the scan operation. To scan down in frequency, rotate the Tuning/Seek/Select control in a anticlockwise direction first and then press the control. Your radio will scan down the FM band from the currently displayed frequency and will stop scanning when it finds a signal of sufficient strength.
- When the end of the waveband is reached Audisse Shokunin will recommence tuning from the opposite end of the waveband.
- Use the Volume/EQ control to adjust the sound level as needed.
MANUAL TUNING
- Carefully extend the telescopic aerial and press the Power button to switch on Audisse Shokunin.
- Press the Source button as needed to select FM radio mode.
SOURCE
FM)
FM radio
- Rotate the Tuning/Seek/Select control to control the frequency that the radio will tune to. The frequency will change in steps of 50kHz. When the end of the waveband is reached the radio will recommence tuning from the opposite end of the waveband.

TUNING
SEEK/SELECT
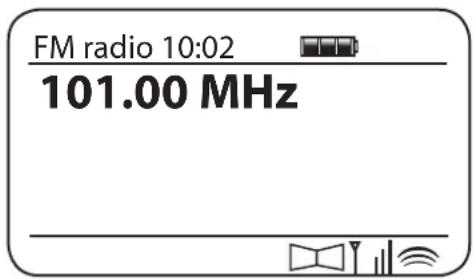
text_image
FM radio 10:02 101.00 MHz- Use the Volume/EQ control to adjust the sound level as needed.
DISPLAY MODES
Audisse Shokunin has a range of display options when in FM mode:
- Press the Info button to cycle through the different options.
a. Text Displays text messages such as the artist or track name, phone in number, traffic alerts, etc.
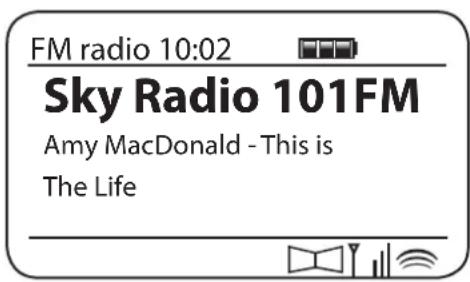
text_image
FM radio 10:02 Sky Radio 101FM Amy MacDonald - This is The Lifeb. Program Type Displays the type of station being listened to such as Pop, Classic, News etc.
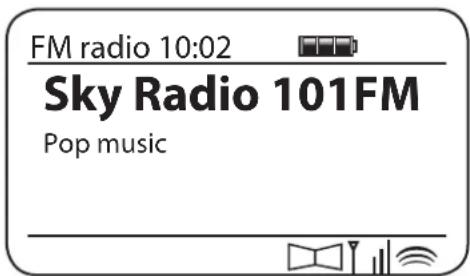
text_image
FM radio 10:02 Sky Radio 101FM Pop musicc. Frequency Displays the frequency of the FM signal.
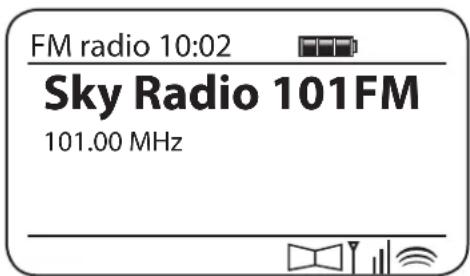
text_image
FM radio 10:02 Sky Radio 101FM 101.00 MHzd. Date Displays the current date.
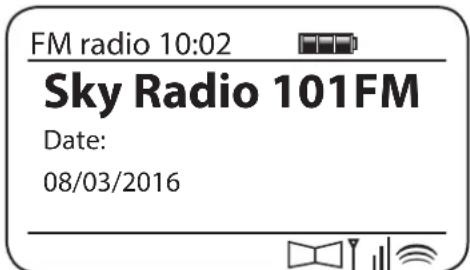
text_image
FM radio 10:02 Sky Radio 101FM Date: 08/03/2016Note: If no RDS information is available, then the radio will only be able to display the frequency. There will be no text or programme type information available under these conditions.
The sound system only provides displays when there is information available. So if there is no text, for example, that display is not available.
The stereo speaker display shows that the radio is receiving a stereo broadcast.
SCAN SETTING
When using the FM mode Audisse Shokunin can be set to either scan local stations or to scan all stations including distant radio stations.
- Press the Source button as needed to select FM radio mode.

text_image
FM ) FM radio- Press the Menu button to enter the FM menu.
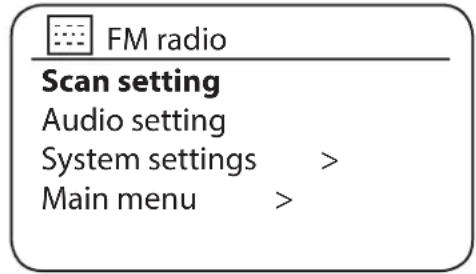
text_image
FM radio Scan setting Audio setting System settings > Main menu >- Rotate the Tuning/Seek/Select control until 'Scan setting' is highlighted and then press the control to enter the scan adjustment mode.
The current scan setting is indicated with an asterisk.

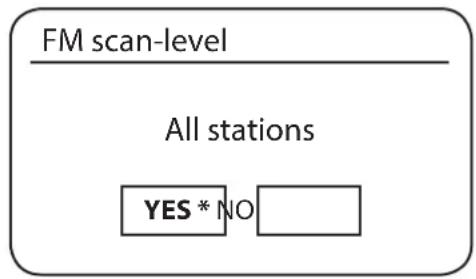
text_image
FM scan-level All stations YES * NO- To set your radio so that only the stations with the strongest signals are found during scanning rotate the Tuning/Seek/Select control until 'YES' is highlighted. Press the Tuning/Seek/Select control to confirm the setting. (Normally this will restrict scanning to local transmissions.)
Alternatively, to set your radio so that all available stations are found during scanning (local and distant transmissions) rotate the Tuning/Seek/Select control until 'NO' is highlighted. Press the Tuning/Seek/Select control to confirm the setting.
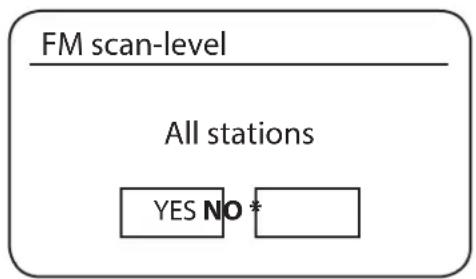
flowchart
graph TD
    A["FM scan-level"] --> B["All stations"]
    B --> C["YES NO *"]
- Press the Menu button to return to the normal FM mode display.
STEREO / MONO SWITCHING
If the FM radio station being listened to has a weak signal, some hiss may be audible. It is possible to reduce this hiss by forcing the radio to play the station in mono rather than stereo.
- Press the Source button as needed to select the FM radio mode display and tune to the required FM station as previously described.

text_image
FM FM radio- Press the Menu button to enter the FM menu.

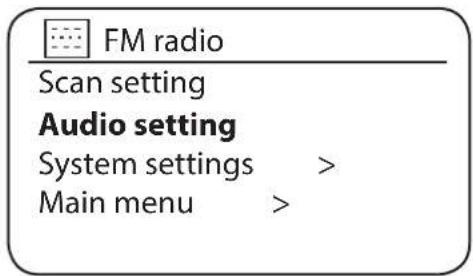
text_image
FM radio Scan setting Audio setting System settings > Main menu >- Rotate the Tuning/Seek/Select control until 'Audio setting' is highlighted on the display. Press the Tuning/Seek/Select control to enter the audio setting mode. The current setting is indicated with an asterisk.

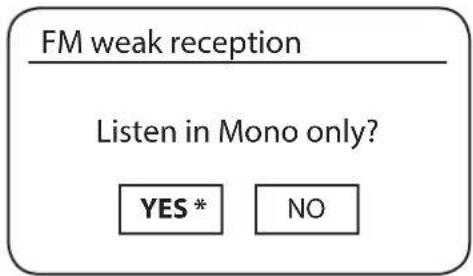
text_image
FM weak reception Listen in Mono only? YES * NO- To switch to mono in order to reduce the hiss from a weak FM signal rotate the Tuning/Seek/Select control until 'YES' is highlighted. Press the Tuning/Seek/Select control to confirm the setting.
Alternatively, to return to the normal automatic ‘stereo or mono’ mode rotate the Tuning/Seek/Select control until ‘NO’ is highlighted. Press the Tuning/Seek/Select control to confirm the setting.
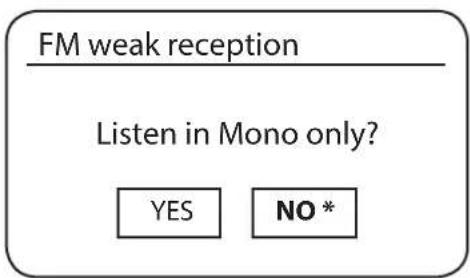
text_image
FM weak reception Listen in Mono only? YES NO *- Press the Menu button to return to the normal FM mode display.
PRESETTING STATIONS IN DAB AND FM MODES
There are 40 memory presets each for DAB and FM radio. They are used in the same way for each operating mode.
The Audisse Shokunin has the unique function of Preset + and Preset – This enables you to quickly zap through your whole preset list.
When performing a Factory Reset the whole Preset memory of the radio will be emptied.
To store radio stations into 40 memory presets by using Preset button.
- Press the Power button to switch on Audisse Shokunin.
-
Tune to the required radio station as previously described.
-
To store the station as a preset station, press and hold the Preset button until the display shows a preset menu 'Save to Preset'.
text_image
PRESET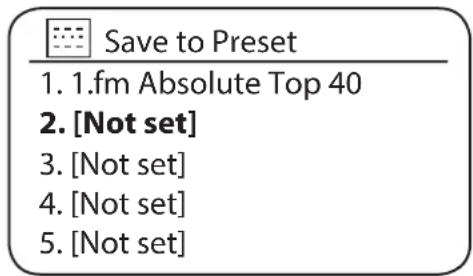
text_image
Save to Preset 1. 1.fm Absolute Top 40 2. [Not set] 3. [Not set] 4. [Not set] 5. [Not set]- Rotate the Tuning/Seek/Select control to the desired preset number until it is highlighted. Press the Tuning/Seek/Select control to confirm and the display shows 'Preset Stored'. The station will be stored under the chosen preset button. Repeat this procedure as needed for the remaining presets.

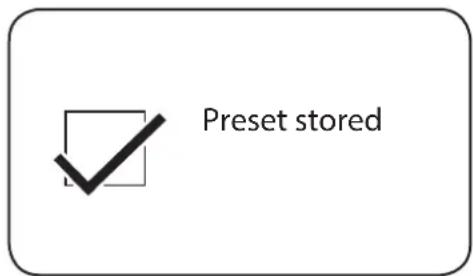
text_image
Preset stored- Stations that are already stored in the presets may be over written by following the above procedure.
Note: The radio station presets are retained in memory when the sound system is switched off and disconnected from the mains supply.
RECALLING A PRESET IN DAB AND FM MODES
- Press the Power button to switch on Audisse Shokunin.
- Select the required operating mode using the Source button.
SOURCE
- You can briefly press the Preset -/Skip Backward button to recall the previous one preset station. For example, if you are playing P2, the Preset -/Skip Backward button will recall the P1 station if it exists.

PRESET -
Note: If the P1 station is not existing in the preset menu, the sound system will directly search for the previous available station in the list, then play.
Note: If there is no available station in the preset list, the sound system will display a pop-up screen with an announcement "Preset empty".
- or you can briefly press the Preset +/Skip Forward button to recall the next one preset station in the list. For example, if you are playing
- P2, the Preset +/Skip Forward button will recall the P3 station if it exists.

PRESET +
Note: If the P3 station is not existing in the preset menu, the sound system will directly search for the next available station in the list, then play.
Note: If there is no available station in the preset list, the sound system will display a pop-up screen with an announcement "Preset empty".
Or press and release the Preset button until the display shows the "Recall from Preset" screen.
- Use the Tuning/Seek/Select control to scroll through the preset list until you reach the preset you want to select. Press and release the Tuning/Seek/Select control to select the preset.
BLUETOOTH
The Bluetooth mode on your sound system allows you to play audio, play sound from video files and stream music from Bluetooth capable devices such as your mobile phone, computer, tablet etc. through your Audisse Shokunin's loudspeakers.
- When a Bluetooth enabled device such as your Audisse Shokunin sound system is in a ‘discoverable’ state other Bluetooth devices can detect, pair with or connect to it.
- ‘Bluetooth pairing’ occurs when two Bluetooth enabled devices agree to establish a connection and communicate with each other.
- The blue Bluetooth connected LED on the front panel will blink fast with short intervals when it is discoverable or when it is trying to connect to a previously paired Bluetooth device. When a device is paired with and connects to the radio, the blue Bluetooth connected LED will blink slow with long intervals.
Bluetooth connectivity performance may vary depending on the connected Bluetooth devices. Please refer to the Bluetooth capabilities of your device before connecting to your sound system. All features may not be supported on some paired Bluetooth devices.
A Bluetooth connection can provide a link for audio up to a distance of approximately ten metres. When pairing two Bluetooth enabled devices, for convenience, we recommend they should be no more than 2 to 3 metres apart. The presence of other functioning Bluetooth devices during connection may lead to operational difficulties.
Bluetooth is a short-range radio communication system and generally Bluetooth devices can communicate with each other clearly within a regular sized room or office. The reliability of a Bluetooth connection between different rooms will greatly depend upon the construction of the building.
Bluetooth communication range may be substantially reduced if the signal passes through a solid object. Human bodies, brick and concrete walls, heavy furniture or bookcases will all reduce the operational range of your Bluetooth devices to a greater or lesser extent. Glass, dry-wall or wood panelled walls and office partitions may have a less severe but noticeable effect. Metal pipes, foil-lined plasterboard, metal window frames and domestic wiring can also have an effect. You should position your Bluetooth devices closer to each other if you observe communication difficulties.
WiFi networks and cordless phones generally use similar radio frequencies to Bluetooth and may interfere with one another. If any interference is noticed, then try relocating the sound system or one of the other devices.
The Bluetooth capabilities of your sound system enable it to receive audio from many Bluetooth capable devices including mobile phones, personal computers and tablets. Only one Bluetooth device can be connected to your sound system at a time. It supports the following Bluetooth profiles and functionality.
- Your Audisse Shokunin supports A2DP (Advanced Audio Distribution Profile) which is a stereo audio connection that streams stereo music from PCs, mobile phones etc. SBC
and AAC audio codecs are supported.
- Your sound system supports AVRCP (Audio Video Remote Control Profile) that allows your radio to control music playback from the connected device.
Note: Some mobile phones may temporarily disconnect from your sound system when you make or receive calls. Some devices may temporarily mute their Bluetooth audio streaming when they receive text messages, emails or for other reasons unrelated to audio streaming. Such behaviour is a function of the connected device and does not indicate a fault with your sound system.
CONNECTING BLUETOOTH DEVICES
The sound system allows to be connected to one Bluetooth device via Bluetooth connection.
- Ensure that the Bluetooth capability on your phone, tablet or PC is enabled. You may need to refer to the user documentation for your device, since the method will vary with each device.
- Press the Power button to switch on the Audisse Shokunin sound system.
- Press the Source button on your sound system until the Bluetooth is selected.
SOURCE
- Press the Menu button to enter Bluetooth menu;
MENU
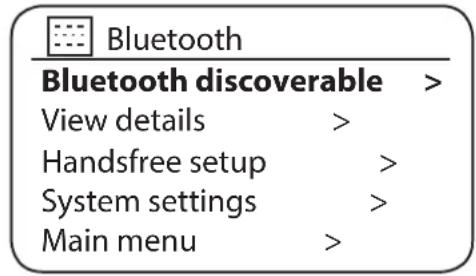
text_image
Bluetooth Bluetooth discoverable > View details > Handsfree setup > System settings > Main menu >- Press the Tuning/Seek/Select control to select "Discoverable" and press the control to start enter Bluetooth discovery mode.
The Audisse Shokunin sound system will immediately enter discovery mode by flashing its Bluetooth icon, and showing “Bluetooth Discoverable”, “Please connect with a device to: Audisse Shokunin” on the display.
- Using the Bluetooth settings of your phone, tablet or PC direct it to search for 'discoverable' devices. After a few seconds, you should see a device named 'Audisse Shokunin'. Just occasionally it may take longer for the sound system to be found by your device.
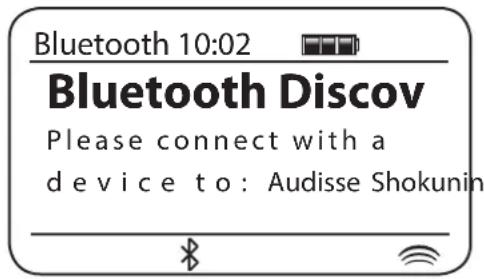
text_image
Bluetooth 10:02 Bluetooth Discov Please connect with a device to: Audisse Shokunin- Select ‘Audisse Shokunin’ to cause your phone, tablet or PC to pair with your sound system and to establish a connection.
- Once the connection is established, the Bluetooth icon on the LCD will stop flashing and will remain on. A message will be displayed briefly confirming and followed by a display with the name of the connected device.
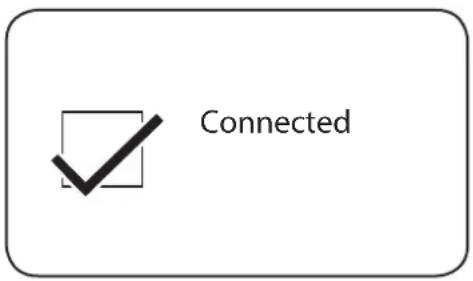
text_image
ConnectedYou can now begin playing music from your smart-phone, tablet, etc.
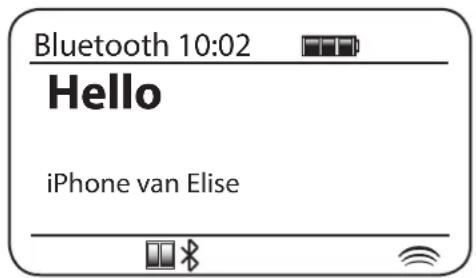
text_image
Bluetooth 10:02 Hello iPhone van EliseSome Bluetooth devices may require a 'Passkey' (an authentication key) in order to establish a link between devices. A passkey is similar to a password, although you only need to use the passkey once to establish a link. If your device asks for a passkey to be able to pair with your radio then enter a code of 0000 (four zeroes).
PLAYING AUDIO FILES
When you have successfully connected your sound system with your chosen Bluetooth device you can start to play your music using the controls on the device.
- Once playing has started adjust the volume to the required setting using the Volume buttons on your sound system or the connected Bluetooth device.
-
Provided that your phone, tablet or PC allows volume control when using Bluetooth we recommend that for normal Bluetooth listening the sound system's volume control is set to a high level. This will permit the audio volume to be controlled using the connected Bluetooth device. This will generally be the more convenient method of controlling the volume.
-
The audio player in your phone, tablet or PC may be able to respond to the Play/Pause, Next and Previous buttons on the radio system.

PRESET

PRESET +

PRESET -
Note: That not all player applications or devices may respond to all of these buttons.
DISPLAY MODES
In Bluetooth mode, the sound system can display a range of information of the current playing music on the display. Press the Info button to cycle through the various types.
a. Artist Displays the artist's name of the current playback music.
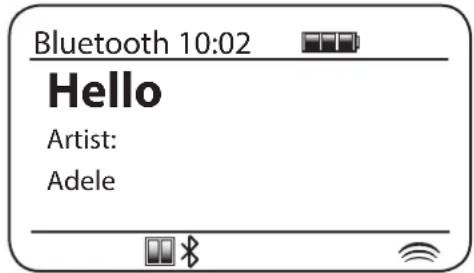
text_image
Bluetooth 10:02 Hello Artist: Adeleb. Album Displays the album name of current playback music.
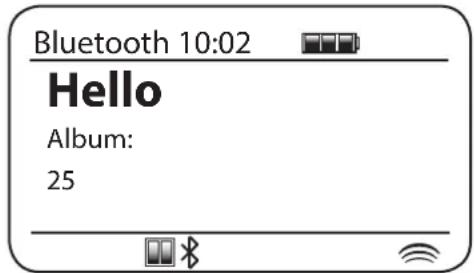
text_image
Bluetooth 10:02 Hello Album: 25c. Device Name Displays the Bluetooth name of current connecting device.
text_image
Bluetooth 10:02 Hello iPhone van EliseANSWERING INCOMING PHONE CALL
The Hands Free Calling feature allows you to answer an incoming phone call when the sound system has been connecting to a Bluetooth mobile phone.
- Press the Tuning/Seek/Select control (Phone icon) on the right to pick up an incoming call.

TUNING
SEEK/SELECT
- Speak towards the microphone (MIC) located bottom side of the radio.
- Adjust the conversation volume by rotating the Volume/EQ control. A lower volume setting can reduce a possible echo in the phone conversation.

VOLUME EQUALIZER
- Press the Tuning/Seek/Select control again to hang up the phone call.
Note: The volume of ring tone will be increased to maximum after the phone rings for about 10 seconds.
Note: The ringtone of iPhone will be streamed to the radio via Bluetooth. But because of Android system, the ringtone of Android phone or other phones will only be sounded on the mobile.
REDIALLING LAST NUMBER
The Hands Free Calling feature allows you redialling your last dialled phone number on your mobile phone (in Bluetooth mode only).
- Press the Power button to switch on the sound system.
- Select Bluetooth mode by pressing the Source button.

- After Bluetooth connection has been established, press and hold the Tuning/Seek/Select control (Phone icon) for more than 2 seconds. The last dialled phone number on your mobile phone will be redialled.

TUNING
SEEK/SELECT
- Adjust the conversation volume by rotating the Volume/EQ control if necessary.

VOLUME EQUALIZER
- Press the Tuning/Seek/Select control again to hang up the phone call.
BLUETOOTH OPTIONS
The Bluetooth function can be set to operate in different ways as below:
- Press the Power button to switch on the Audisse Shokunin sound system.
- Press the Source button on your sound system until the Bluetooth is selected.
SOURCE
- Press the Menu button to enter Bluetooth menu;
MENU
| Bluetooth | |
| Bluetooth discoverable | > |
| View details | > |
| Handsfree setup | > |
| System settings | > |
| Main menu | > |
- Press the Tuning/Seek/Select control to enter "Handsfree setup" from the menu.
- Rotate the Tuning/Seek/Select control to select "On in all modes" or "Only in Bluetooth mode" options, and press the control to select the setting.
Handsfree phone call
On in all modes
Only in Bluetooth mode *
a. On in all modes Bluetooth is turned on when the Audisse Shokunin sound system is on. You can playback music in the Bluetooth mode and use the Hands-Free-Calling feature to answer incoming phone calls in all operation modes, for example, also when you are listening to the radio. As an indication, the blue Bluetooth connected LED will be on (blinking with long intervals) in all operation modes.
b. Only in Bluetooth mode Bluetooth is turned on only in Bluetooth mode. You can playback music and use the Hands-Free-Calling feature to answer incoming phone calls in the Bluetooth mode only. As an indication, the blue Bluetooth connected LED will be on (blinking with long intervals) only in the Bluetooth mode and the Bluetooth indicator will also be shown in the display.
The Auto-Power management function will be activated in Bluetooth mode. If there is “Not connected” for a period over 15 minutes, the unit will automatically switch to standby mode. Pressing the Power button will wake up the sound system again.
BLUETOOTH INFO OF THE RADIO
In Bluetooth mode, it is possible to check the current Bluetooth status of the sound system.
- Press the Power button to switch on the Audisse Shokunin sound system.
- Press the Source button on your sound system until the Bluetooth is selected.
SOURCE
- Press the Menu button to enter Bluetooth menu.
MENU
- Rotate the Tuning/Seek/Select control to select "View details" from the menu.

TUNING
SEEK/SELECT
Bluetooth
Bluetooth discoverable >
View details >
Handsfree setup >
System settings >
Main menu >
- Press the Tuning/Seek/Select control to enter.
- Rotate the Tuning/Seek/Select control to select "Bluetooth Info" from the menu and press the control to enter.

View details
Bluetooth Info >
Connected Device >
Paired Device List >
- Press the Back button to exit from the menu display.
a. Bluetooth Status Displays the current Bluetooth connection status. If the radio has been connecting to a mobile device via Bluetooth, this will be updated to display as “Connected”; If the radio is not connecting to any Bluetooth device, the Bluetooth status will become “discoverable”
b. Bluetooth Friendly Name Displays the Bluetooth name of the sound system "Audisse Shokunin".
CONNECTED DEVICE TO THE RADIO
You can check the Bluetooth friendly name of current connected device in the sound system.
- Press the Power button to switch on the Audisse Shokunin sound system.
- Press the Source button on your sound system until the Bluetooth is selected.
SOURCE
- Press the Menu button to enter Bluetooth menu;
MENU
- Rotate the Tuning/Seek/Select control to select "View details" from the menu.

TUNING
SEEK/SELECT
Bluetooth
Bluetooth discoverable >
View details >
Handsfree setup >
System settings >
Main menu >
- Press the Tuning/Seek/Select control to enter.
- Rotate the Tuning/Seek/Select control to select "Connected device" from the menu and press the control to enter.

View details
| Bluetooth Info | > |
| Connected Device | > |
| Paired Device List | > |
After these, the radio will display the Bluetooth friendly name of current connected device right under "Connected to Device:".

Connected Device
Connected to Device:
iPhone van Elise
- Press the Back button to exit from the menu display.
CONNECTING A BLUETOOTH DEVICE
You can only have one Bluetooth device connected to the sound system at any one time although it may be paired with several devices. Once you have a Bluetooth enabled device connected to your sound system it cannot be interrupted by another Bluetooth device unless you choose to break the connection.
- To connect to a different device, press the Source button on your sound system until the Bluetooth is selected.
SOURCE
- Press the Menu button to enter Bluetooth menu.
MENU

Bluetooth
Bluetooth discoverable >
View details >
Handsfree setup >
System settings >
Main menu >
- Press the Tuning/Seek/Select control to enter "Bluetooth discoverable" from the menu to start enter Bluetooth discovery mode.
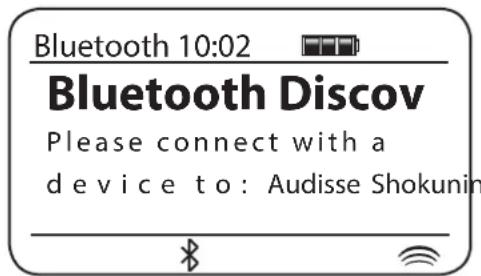
text_image
Bluetooth 10:02 Bluetooth Discov Please connect with a device to: Audisse ShokuninYour Audisse Shokunin sound system will become ‘discoverable’ by other devices. The Bluetooth indicator on the front panel will flash fast and showing “Bluetooth Discoverable”, “Please connect with a device to: Audisse Shokunin” on the display. The sound system will then be discoverable by other devices.
- Then pair the sound system with the new device using its Bluetooth settings (the sound system will be listed as ‘Audisse Shokunin’. The name of the newly connected device will be briefly shown on the sound system’s display. You may then play music from the new device through the sound system.
- If you no longer want your Bluetooth device to be paired with your sound system you will need to delete the ‘Audisse Shokunin’ pairing on the device. Please refer to your mobile device’s Bluetooth user manual.
RECONNECTING THE MOBILE DEVICES EVER CONNECTED
In the Audisse Shokunin sound system, you can check the last 8 connected mobile devices in the radio.
- Press the Power button to switch on the Audisse Shokunin sound system.
- Press the Source button on your sound system until the Bluetooth is selected.
SOURCE
- Press the Menu button to enter Bluetooth menu.
MENU
- Rotate the Tuning/Seek/Select control to select "View details" from the menu.

TUNING
SEEK/SELECT

Bluetooth
Bluetooth discoverable >
View details >
Handsfree setup >
System settings >
Main menu >
- Press the Tuning/Seek/Select control to enter.
- Rotate the Tuning/Seek/Select control to select "Paired Device List" from the menu and press the control to enter.

View details
Bluetooth Info >
Connected Device >
Paired Device List >
After these, the last 8 Bluetooth names of the mobile devices that have been connected to the sound system will be displayed.
iPhone van Elise
Toby's iPad
Herbert Galaxy
- Rotate the Tuning/Seek/Select control to select any of the Bluetooth devices in the list.
- If you want to connect this selected mobile device again, press the control to reconnect.
NOTE: Please be sure the Bluetooth function has also been enabled on the mobile device. Otherwise, the Bluetooth connection will be ended after a few trials.
- Press the Back button to exit from the menu display.
AUXILIARY INPUT SOCKET
WARNING: Never use the AUX-IN socket in rainy or moist conditions to prevent moist from entering the radio. Keep the rubber cover well closed under these conditions.
A 3.5mm Auxiliary Input socket located on the rear of Audisse Shokunin is provided for connecting the audio signal from an external audio source such as an MP3 or CD player.
- Connect a stereo lead from the headphone output of your MP3 or CD player to the Aux In socket located at the rear of the sound system. Typically this lead will have a 3.5mm stereo plug at both ends.
- Switch on Audisse Shokunin by pressing the Power button briefly.
- Press the Source button until AUX in mode is shown on the display.
SOURCE
- Press the 'play' on the connected audio device. If you are using its output for the connection, set its volume control to a level of somewhere between two-thirds and maximum (the objective is to get a strong audio signal but without too much distortion). Then adjust the volume on the sound system as required. Note, if using an iPod as the sound source, you may need to set its output to maximum to get an adequate audio signal level.
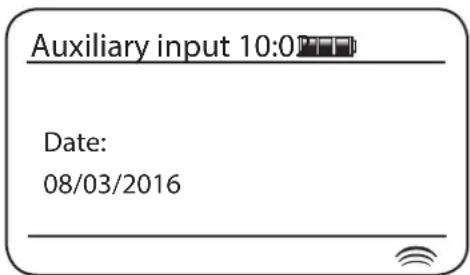
text_image
Auxiliary input 10:0 Date: 08/03/2016After use, disconnect your player in order to listen to Audisse Shokunin conventionally.
INACTIVE STANDBY FEATURE
In order to minimise the energy consumption when the radio is not in use, your radio includes an automatic Inactive Standby feature. This is designed to put your radio into standby if it detects that it is no longer being used in the Internet radio mode when streaming is stopped, or Music player mode when music playing is stopped, or Auxiliary input mode when there is no audio input signal.
If any of these conditions is detected for more than 10 minutes, then the radio will start a 5-minute countdown before entering standby. The display will show the time remaining. After 15 minutes of inactivity the radio will enter standby with the clock being displayed.
Pressing any button or resuming listening during the 15 minutes period will reset the standby timer.
Standby in 5 minutes.
Please press any button to cancel.
CLOCK AND ALARMS
AUTOMATICALLY UPDATING THE CLOCK
Audisse Shokunin will normally update the clock automatically when connected to the internet. If you enter a time setting manually, the sound system will calculate a local time offset, which is then stored in memory. Whenever it synchronises the clock using the internet, including after a power failure, Audisse Shokunin will then set the clock automatically using this information.
You may wish to use the sound system away from the internet, in which case you may specify that the unit sets its clock from DAB or FM radio broadcasts. After a power failure the radio will then set its clock the next time that you turn on the radio in DAB or FM mode. Alternatively you may specify that the time is not automatically updated. In this case the clock must always be set manually after a power interruption.
- With Audisse Shokunin switched on, press the Menu button to access the menu for the current mode.
MENU
- Rotate the Tuning/Seek/Select control until 'System settings' is highlighted on the display. Press the control to enter the system settings menu.

TUNING
SEEK/SELECT
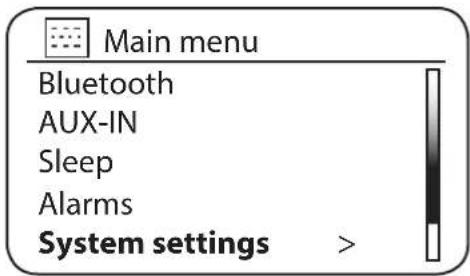
text_image
Main menu Bluetooth AUX-IN Sleep Alarms System settings >- Rotate the Tuning/Seek/Select control until 'Time/Date' is highlighted on the display. Press the control to enter the time setup.
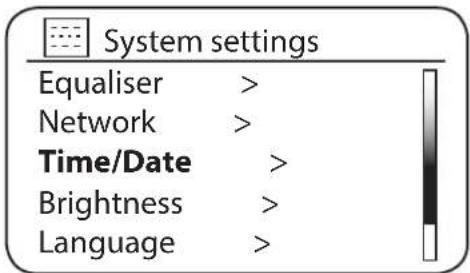
text_image
System settings Equaliser > Network > Time/Date > Brightness > Language >- Rotate the Tuning/Seek/Select control until 'Auto update' is highlighted on the display. Press the control to enter the auto-update menu.
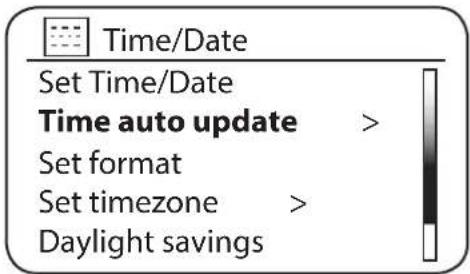
text_image
Time/Date Set Time/Date Time auto update > Set format Set timezone > Daylight savings- Rotate the Tuning/Seek/Select control to choose an update option from 'Update from DAB', 'Update from FM', 'Update from Network' or 'No update' as required. Press the control to confirm your choice. The sound system will then exit to the previous menu display.
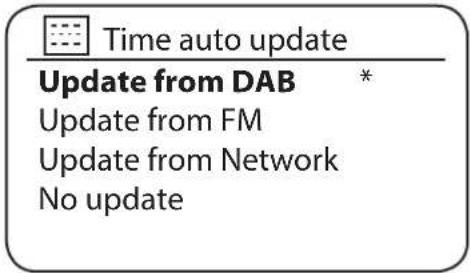
text_image
Time auto update Update from DAB * Update from FM Update from Network No updateMANUALLY SETTING THE CLOCK
The Audisse Shokunin sound system will normally set its clock automatically to the time zone as you selected in the setup wizard after a connection to the Internet has been established. Should you need to set the time manually, change the time zone, or manually switch from winter to summer time, then please follow this procedure.
-
Press the Power button to switch on Audisse Shokunin.
-
Press the Menu button to access the menu for the current mode.
MENU
- Rotate the Tuning/Seek/Select control until 'System settings' is highlighted on the display. Press the control to enter the system settings menu.

TUNING
SEEK/SELECT
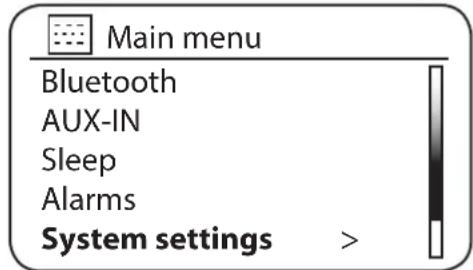
text_image
Main menu Bluetooth AUX-IN Sleep Alarms System settings >-
- To change the time zone setting go to step 11.
-
To change from winter to summer time go to step 13.
- To change the current time or date setting rotate the Tuning/Seek/Select control until 'Time/Date' is highlighted on the display, then press the control to enter the time and date setting screen.

Time/Date
Set Time/Date
Time auto update >
Set format
Set timezone >
Daylight savings

- Rotate the Tuning/Seek/Select control until 'Set Time/Date' is highlighted on the display. Press the control to enter the clock setup. The day digits will flash.

TUNING
SEEK/SELECT
Date/Time
08-03-2016 12:01
- Rotate the Tuning/Seek/Select control until the correct day is shown on the display. Press the control to enter the selection. The month digits will then flash.

TUNING
SEEK/SELECT
Date/Time
08-03-2016 12:01
- Rotate the Tuning/Seek/Select control to select the correct month. Press the control to enter the selection. The year digits will then flash.

TUNING
SEEK/SELECT
Date/Time
08-03-2016 12:01
- Rotate the Tuning/Seek/Select control to select the correct year. Press the control to enter the selection. The hour digits will then flash.

TUNING
SEEK/SELECT
Date/Time
08-03-2016 12:01
- Rotate the Tuning/Seek/Select control to select the correct hour. Press the control to enter the selection. The minute digits will then flash.

TUNING
SEEK/SELECT
Date/Time
08-03-2016 12:01
-
Rotate the Tuning/Seek/Select control to select the correct minutes. Press the control to enter the selection. The display will then return to the previous menu.
-
Rotate the Tuning/Seek/Select control until 'Set time zone' is highlighted on the display then press the control.

TUNING
SEEK/SELECT
Time/Date
Set Time/Date Time auto update > Set format Set timezone > Daylight savings
- Rotate the Tuning/Seek/Select control to highlight the time zone, which is applicable to your location, then press the control to confirm the setting. Press the Menu button to exit or go to step 13 to set the summer / winter time option.

TUNING
SEEK/SELECT

Set timezone
UTC+00:00: Dublin, Lon...
UTC+00:30:
UTC+01:00: Madrid, Arr...
UTC+01:30:
UTC+02:00: Athens, Ca...
- Rotate the Tuning/Seek/Select control until ‘Daylight savings’ is highlighted on the display then press the control. The asterisk shows the current setting. In Central European Countries, ON is equivalent to CEST (Central European Summer Time), OFF is equivalent to CET (Central European Time).

TUNING
SEEK/SELECT

Time/Date
Set Time/Date
Time auto update >
Set format
Set timezone >
Daylight savings
- Rotate the Tuning/Seek/Select control to highlight 'ON' or 'OFF' as required then press the control to confirm the setting.

TUNING
SEEK/SELECT
Daylight savings
Daylight savings?
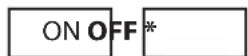
- Press the Menu button to exit.
SETTING THE ALARM CLOCK
Audisse Shokunin has two separate alarms that can be set to wake you to either the radio or a buzzer alarm. In the event of a power interruption Audisse Shokunin has built in memory that will retain your alarm settings.
Important note: In Standby mode the alarm function can only be used when the radio is operated on AC power. In Standby mode on battery power the radio will turn off fully after 30 seconds (battery power save mode) and will not be turned on by the alarm function/settings.
Ensure that the time is set correctly before setting the alarms.
- With Audisse Shokunin switched on, press the Menu button to access the menu for the current mode. Rotate the Tuning/Seek/Select control until 'Main menu' is highlighted on the display. Press the control to enter the 'Main menu'.
MENU
- Rotate the Tuning/Seek/Select control until 'Alarms' is selected on the display. Press the control to see the current alarm settings. If no change is required, press the Menu or Back buttons to exit.

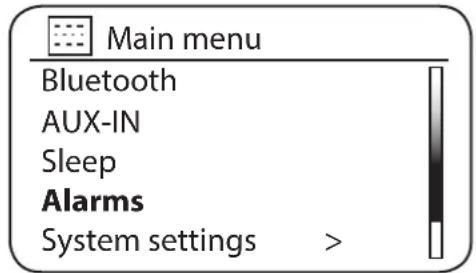
text_image
Main menu Bluetooth AUX-IN Sleep Alarms System settings >- Rotate the Tuning/Seek/Select control until the desired alarm (1 or 2) is highlighted on the display. Press the control to enter alarm setup.

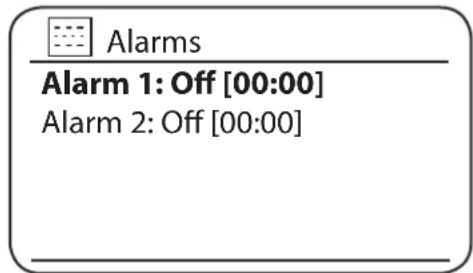
text_image
Alarms Alarm 1: Off [00:00] Alarm 2: Off [00:00]- Rotate the Tuning/Seek/Select control until 'Time' is highlighted on the display. Press the control to adjust the alarm time.

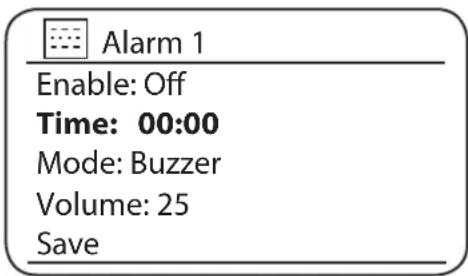
text_image
Alarm 1 Enable: Off Time: 00:00 Mode: Buzzer Volume: 25 Save- Rotate the Tuning/Seek/Select control to choose the alarm hour. Press the control to confirm the setting.

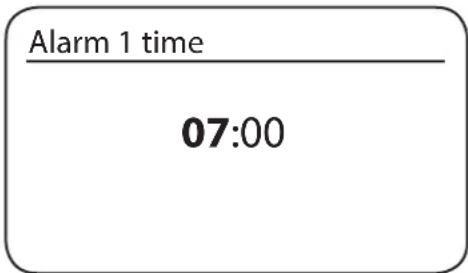
text_image
Alarm 1 time 07:00- Rotate the Tuning/Seek/Select control to choose the alarm minute. Press the control to confirm the setting. The display will then return to the alarm setting menu. If the sound system has been set to use a 12 hour clock format, there will also be an option here for setting AM or PM for the alarm time.

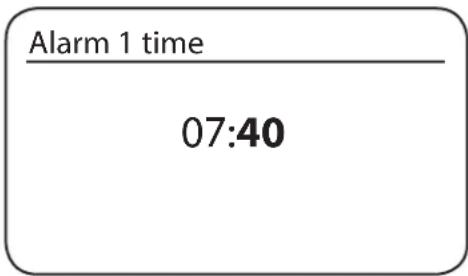
text_image
Alarm 1 time 07:40- Rotate the Tuning/Seek/Select control to highlight 'Enable' and press the control. The display will show the Frequency options for the alarm. The alarm frequency options are as follows: 'Off' - the alarm will be disabled 'Daily' - the alarm will sound everyday 'Once' - the alarm will sound once 'Weekends' - the alarm will sound only at weekends 'Weekdays' - the alarm will sound on weekdays only. Rotate the Tuning/Seek/Select control to choose the required alarm frequency option. Choosing Off will disable the alarm. Press the control to confirm the selection. If you choose to set the alarm to Once you will also need to set the date using the Tuning/Seek/Select control.

Alarm 1
Enable: Off
Time: 07:40
Mode: Buzzer
Volume: 25
Save

Alarm 1 frequency
Off
Daily
Once
Weekends
Weekdays
- The alarm can be set to buzzer, Internet radio, DAB radio or FM radio. For whichever radio mode is selected, the radio alarm may be set to any of the stations, which have been stored as presets or to the station most recently listened to. Rotate the Tuning/Seek/Select control to highlight the current 'Mode' option for the alarm, then press the control if you wish to change it. Rotate the Tuning/Seek/Select control to highlight either 'Buzzer' or the required radio mode. Press the control to confirm the selection.

Alarm 1
Enable: Off
Time: 07:40
Mode: Buzzer
Volume: 25
Save

Alarm 1 mode
Buzzer
Internet radio
DAB radio
FM radio
- If setting the alarm to a radio option, rotate the Tuning/Seek/Select control to highlight the 'Preset:' option then press the control if you wish to change it. Choose from either the radio station 'Last listened' to, or from the presets 1 - 40. Scroll to the chosen option and press the control to confirm the selection. Note that you can only set the alarm to use a preset that has already been stored.

Alarm 1
Enable: Off
Time: 07:40
Mode: Buzzer
Preset: Last listened
Volume: 25

Alarm 1 preset
-
1.fm Absolute Top 40
-
NDR 2
-
Antenne Bayern
-
SWR3
-
NPO 3FM
-
Rotate the Tuning/Seek/Select control until the 'Volume:' option is highlighted on the display and press the control if you wish to change it. The sound system uses the saved volume setting for each alarm when it sounds. Rotate the control to set the required volume and then press the control to confirm the setting.
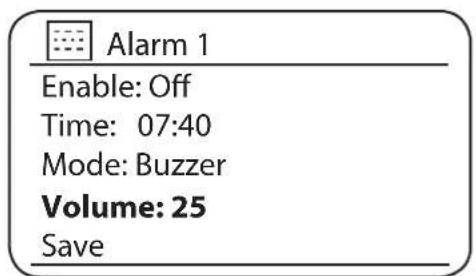
text_image
Alarm 1 Enable: Off Time: 07:40 Mode: Buzzer Volume: 25 Save
text_image
Date/Time 5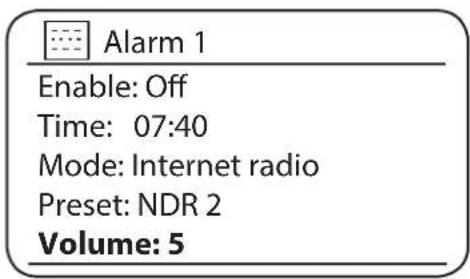
text_image
Alarm 1 Enable: Off Time: 07:40 Mode: Internet radio Preset: NDR 2 Volume: 5- In order to store the alarm settings rotate the Tuning/Seek/Select control until 'Save' is highlighted. Press the control to store the alarm settings. Your radio will show 'Alarm saved' and will then go back to the list of alarms with the new alarm setting shown in the display. If you decide not to save the settings, press the Back button. The display will show 'Save changes' with a 'YES' or 'NO' option. Rotate the Tuning/Seek/Select control to choose 'NO' and then press the control. 'Alarm not saved' will show on the display. Active alarms are shown using small alarm indicators at the bottom of the playing displays and on the clock display when in standby.
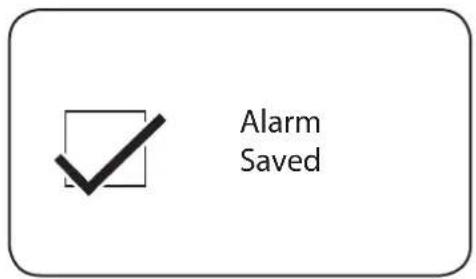
text_image
Alarm Saved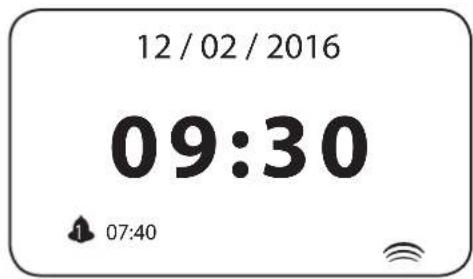
text_image
12 / 02 / 2016 09:30 07:40Note: If you make a mistake at any point while setting the alarms, use the Back button to go back to the previous screen.
WHEN THE ALARM SOUNDS
The buzzer or radio alarm will sound at the selected times for up to 60 minutes unless cancelled. The volume used for the alarm will be as specified during the alarm setting procedure. If the radio cannot connect to the specified radio station, the buzzer alarm will be used instead.
To cancel an alarm, press the Power button to return to standby mode. The alarm icon will flash at the bottom of the playing mode displays, and the radio will automatically switch back to stand-by mode when the 60 minutes have elapsed.
Note: If the radio is switched on because of an alarm you can control basic functions such as volume and selecting presets. You cannot perform operations that involve the Tuning/Seek/Select control since this also acts as the Snooze button.
DISABLING ALARMS
- To disable a single alarm enter the alarm setup menu and rotate the Tuning/Seek/Select control until the desired alarm is highlighted on the display. Press the Tuning/Seek/Select control.

TUNING
SEEK/SELECT
- Rotate the Tuning/Seek/Select control until the 'Enable:' option is highlighted on the display. Press the control.
- Rotate the Tuning/Seek/Select control to highlight 'Off' and press the control.
- Rotate the Tuning/Seek/Select control until the 'Save' option is highlighted on the display then press the control to save the new setting. The chosen alarm will now be disabled.
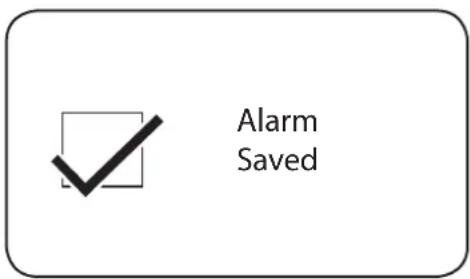
text_image
Alarm SavedSNOOZE TIMER
- The buzzer or radio alarm can be silenced for 5 minutes by pressing the Tuning/Seek/Select control. Should you wish for a longer snooze duration this can be extended. Pressing the control again while the sound system is snoozed will set the available snooze time to 5, 10, 15 or 30 minutes.

TUNING
SEEK/SELECT
- While the snooze timer is active the remaining snooze time is shown next to the flashing alarm icon on the clock display.
- In order to cancel the Snooze timer while the alarm is suspended, press the Power button. The display will briefly show an 'Alarm Off' message.

SLEEP TIMER
Your radio can be set to turn off after a preset time has elapsed. The sleep timer setting can be adjusted between 5 and 120 minutes in 5-minute increments.
- Press the Power button to switch on your radio.
- Access the menu for the current mode by pressing the Menu button. Rotate the Tuning/Seek/Select control until 'Main menu' is highlighted on the display. Press the control to enter the 'Main menu'.
MENU
- Rotate the Tuning/Seek/Select control until 'Sleep' is highlighted on the display then press the Tuning/Seek/Select control.

TUNING
SEEK/SELECT
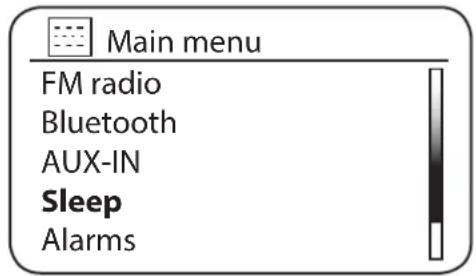
text_image
Main menu FM radio Bluetooth AUX-IN Sleep Alarms- Rotate the Tuning/Seek/Select control until the required sleep time setting is selected. Press the Tuning/Seek/Select control to confirm the setting. The sleep timer can be set to between 5 and 120 minutes, or to Off.
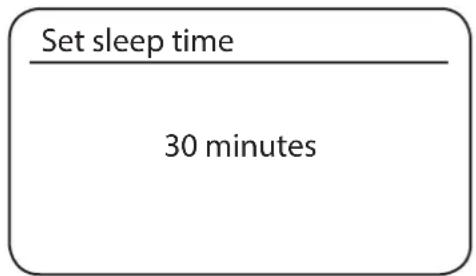
text_image
Set sleep time 30 minutes- Audisse Shokunin will switch into stand-by mode after the preset time has elapsed. An active sleep timer is shown using a small timer indicator at the bottom of the playing displays. This indicator also shows the sleep time remaining before the radio switches itself into standby mode.
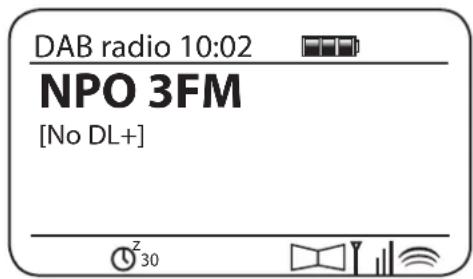
text_image
DAB radio 10:02 NPO 3FM [No DL+] Z 30- To cancel the sleep time before the preset time has elapsed and to turn off the sound system, press the Power button to turn the unit off manually.
EQUALISER FUNCTION
The sound on Audisse Shokunin can be adjusted to suit your personal taste for the material that you are listening to. The Audisse Shokunin has a range of equaliser modes. Alternatively you may set the treble and bass levels to your own preferences that can be accessed from the My EQ menu item.
- Press the Power button to switch on your radio. Access the menu for the current mode by pressing the Menu button.
- Rotate the Tuning/Seek/Select control until 'System settings' is highlighted on the display. Press the control to enter the system settings menu.

TUNING
SEEK/SELECT
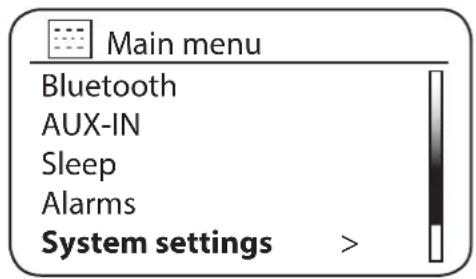
text_image
Main menu Bluetooth AUX-IN Sleep Alarms System settings >- Rotate the Tuning/Seek/Select control until ‘Equaliser’ is highlighted on the display. Press the control.

TUNING
SEEK/SELECT
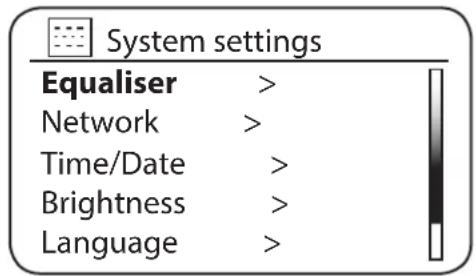
text_image
System settings Equaliser > Network > Time/Date > Brightness > Language >- Rotate the Tuning/Seek/Select control to cycle through and highlight the various modes. Press the control to confirm your selection.
a - 'Normal (Flat)'
b - 'Jazz'
c - 'Rock'
d - 'Movie'
e - 'Classic'
f - 'Pop'
g - 'News'
h - 'My EQ'
The currently selected mode is marked with an asterisk.
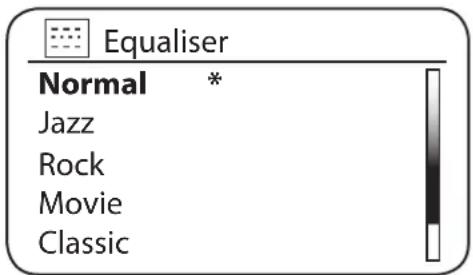
text_image
Equaliser Normal * Jazz Rock Movie ClassicSETTING UP YOUR MY EQ PROFILE
If you find the preset equaliser functions not to your liking, you may set up a custom treble and bass setting as follows:
- Follow steps 1-3 on the preceding page in order to enter the Equaliser menu.
- Rotate the Tuning/Seek/Select control until 'My EQ profile setup' is highlighted on the display. Press the control to enter the adjustment mode.
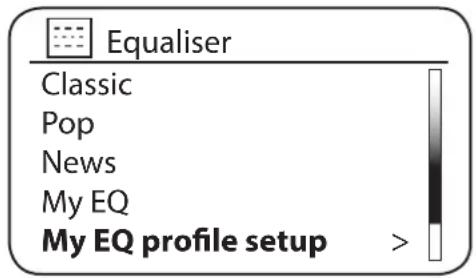
text_image
Equaliser Classic Pop News My EQ My EQ profile setup >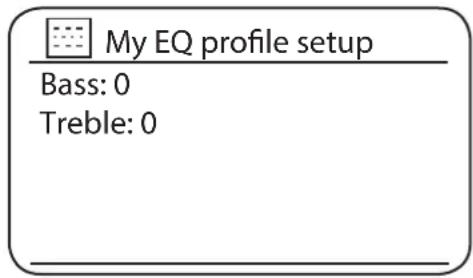
text_image
My EQ profile setup Bass: 0 Treble: 0- To adjust the bass level rotate the Tuning/Seek/Select control until 'Bass' is highlighted on the display. Press the control to enter the adjustment mode and rotate the control until the desired level (between -10 and +10) is displayed. The sound will change as you turn the control. Press the control when you are happy with the bass setting.
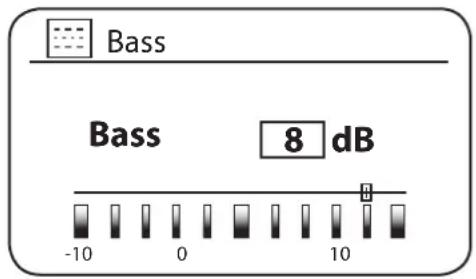
text_image
Bass Bass 8 dB -10 0 10- To adjust the treble level rotate the Tuning/Seek/Select control until 'Treble' is highlighted on the display. Press the control to enter adjustment mode and rotate the control until the desired level (between -10 and +10) is displayed. The sound will change as you turn the control. Press the control when you are happy with the treble setting.
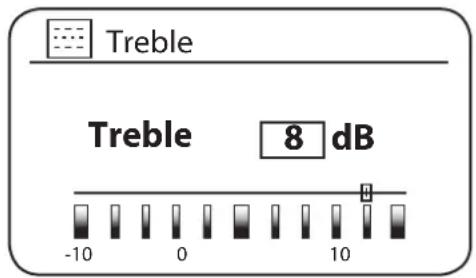
text_image
Treble Treble 8 dB -10 0 10- Press the Back button and the display will prompt you to save the changes. If you wish to save the changes rotate the control to highlight 'YES'. If you do not wish to save the changes highlight 'NO'. Press the Tuning/Seek/Select control to enter the selection.
BACK
- To use the 'My EQ' profile rotate the Tuning/Seek/Select control until 'My EQ' is highlighted, and then press the control to make the selection.
To quickly cancel the effect of the 'My EQ' profile rotate the Tuning/Seek/Select control until 'Normal (Flat)' is highlighted on the display and press the control to select. The treble and bass settings will be remembered for the next time that you wish to use the 'My EQ' setting.
BRIGHTNESS CONTROL
The brightness of the display can be adjusted for when the sound system is in Standby and for when it is in use. If you use the unit in the bedroom, you may prefer a lower standby brightness level than the standard setting. There are three brightness levels and an almost off ‘night-time’ setting.
- Press the Power button to switch on Audisse Shokunin. Access the menu for the current mode by pressing the Menu button.
MENU
- Rotate the Tuning/Seek/Select control until 'System settings' is highlighted on the display. Press the control to enter the system settings menu. Rotate the Tuning/Seek/Select control until 'Brightness' is highlighted on the display. Press the control.

TUNING
SEEK/SELECT
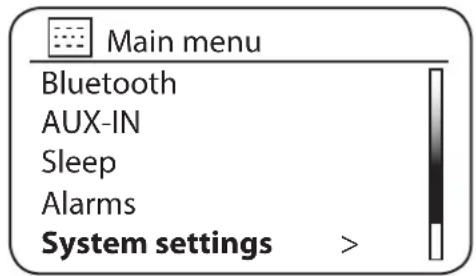
text_image
Main menu Bluetooth AUX-IN Sleep Alarms System settings >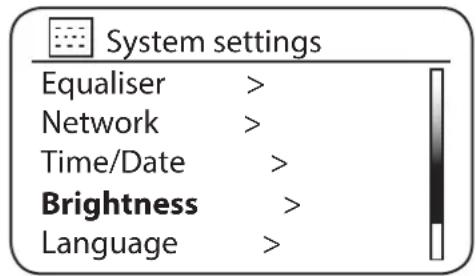
text_image
System settings Equaliser > Network > Time/Date > Brightness > Language >- To adjust the display brightness when the sound system is switched on rotate the Tuning/Seek/Select control until 'Normal' is highlighted on the display. To adjust the display brightness when the radio is in standby rotate the Tuning/Seek/Select control until 'Standby' is highlighted. Press the control to enter the selected brightness adjustment mode.
Brightness
Radio on > Radio standby >
- To adjust the brightness level rotate the Tuning/Seek/Select control clockwise to increase the brightness level and anti-clockwise to decrease it. The backlight level will change as the control is rotated so that you can see the effect of each setting. Note that the backlight is
almost completely off at the zero setting. Press the control to set the level. Press the Menu button to exit.

text_image
Brightness Medium High Medium Medium Low Low OffWhen the sound system is in Standby mode, pressing a button or turning the rotary control will cause the radio to switch to the Normal brightness level for a few seconds. This is so that even if the Standby brightness level is set to zero (almost off), it is still possible to see the time by quickly pressing a button.
FACTORY RESET
If you wish to completely reset Audisse Shokunin to its initial state this may be performed by following this procedure. By performing a factory reset, all user entered settings will be erased.
- Access the menu for the current mode by pressing the Menu button. Rotate the Tuning/Seek/Select control to highlight the 'Main menu' option, then press the control to select.
MENU
- Rotate the Tuning/Seek/Select control until 'System settings' is highlighted and then press the control to select.

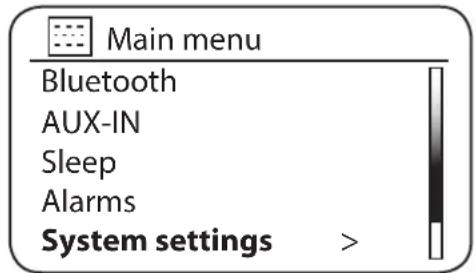
text_image
Main menu Bluetooth AUX-IN Sleep Alarms System settings >- Rotate the Tuning/Seek/Select control until ‘Factory Reset’ is highlighted and then press the control. Rotate the Tuning/Seek/Select control and highlight ‘YES’ to proceed.
If you do not wish to carry out a system reset, highlight 'NO' and then press the control. The display will revert to the previous menu.

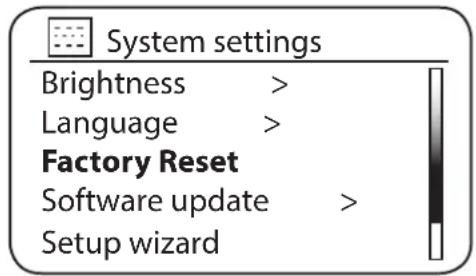
text_image
System settings Brightness > Language > Factory Reset Software update > Setup wizard >- With 'YES' highlighted, press the Tuning/Seek/Select control. A full reset will be performed and the sound system will restart as if first plugged in. The DAB stations list together with any preset stations will be erased and your wireless network connection details will be lost. All configuration settings will be restored to their defaults, the clock and alarms will be reset.

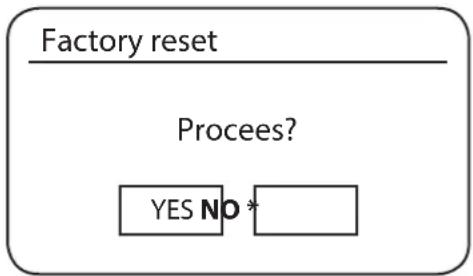
flowchart
graph TD
    A["Factory reset"] --> B{Proceed?}
    B --> C["YES NO *"]
In case of malfunction for any reason, reset the product as described above to resume normal operation. It may be necessary in some cases to disconnect the mains power, then reconnect power after 10 seconds.
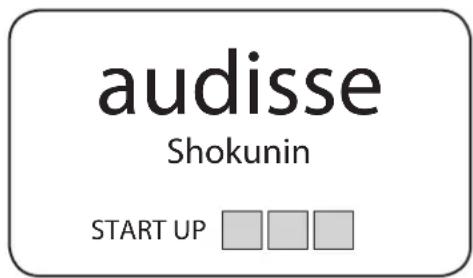
text_image
audisse Shokunin START UPIn case of malfunction due to electrical fast transient (burst), reset the product as above (reconnection of the power source may be required) to resume normal operation.
SOFTWARE UPDATE
From time to time, new software features for your radio may be developed. Audisse Shokunin has therefore been designed to allow its internal software to be updated using your Internet connection.
You should not attempt to update your radio unless it is recommended to you by Customer Services. Updating the software may remove all network settings, radio station presets and alarm settings from Audisse Shokunin.
It is important that you do not attempt this procedure unless you have a good Internet connection and a reliable mains power supply. If the radio connects to your router using a WiFi connection, make sure that this is also reliable before proceeding.
- The ‘Software update’ option is accessed via the ‘System settings’ menu. When you select ‘Software update’ the menu will display ‘Auto check setting’ and ‘Check now’. If you want Audisse Shokunin to check periodically for new software versions rotate the Tuning/Seek/Select control to highlight ‘Auto check settings’. Then press the control and select ‘YES’. If you do not want your radio to check for updates select the ‘NO’ option.

TUNING
SEEK/SELECT
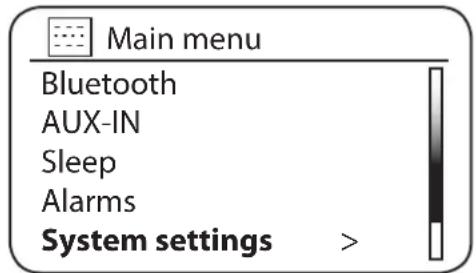
text_image
Main menu Bluetooth AUX-IN Sleep Alarms System settings >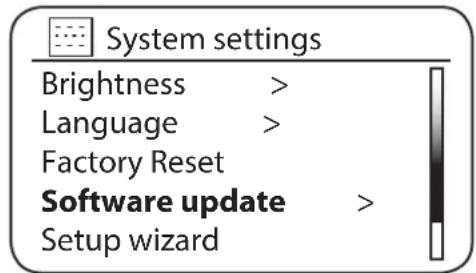
text_image
System settings Brightness > Language > Factory Reset Software update > Setup wizard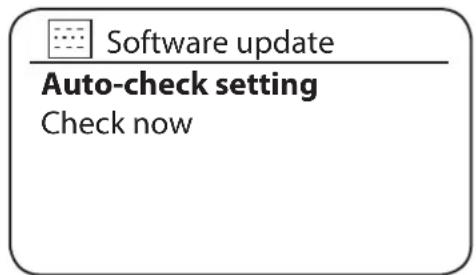
text_image
Software update Auto-check setting Check now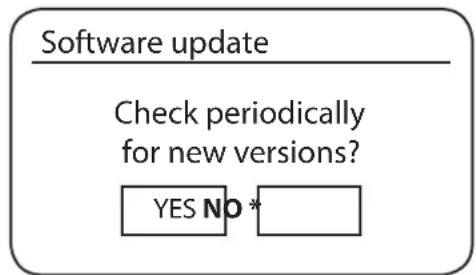
text_image
Software update Check periodically for new versions? YES NO *- To check if there are any software updates available currently, rotate the Tuning/Seek/Select control to highlight ‘Check now’ and then press the control. The sound system will check to see if an update is available. The display will show ‘Checking for new versions’. If there are no updates then the display will show ‘Software up to date’. If a software update is available your radio will then offer the choice of updating the software or not, displaying ‘New version available. Update software?’. Select the ‘YES’ option if you wish to go through the update process.

TUNING
SEEK/SELECT
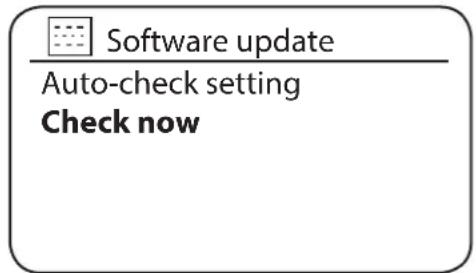
text_image
Software update Auto-check setting Check now- If you choose to update Audisse Shokunin it will first download the new software and will
then reprogram its internal memory. This may take a few minutes depending on the speed of your internet connection.
- Once the software update is completed, the sound system will prompt you to press Select to restart. Press the Tuning/Seek/Select control and Audisse Shokunin will then restart. You may find that you will need to reconfigure your network connection following an update. You may also need to re-enter all radio station presets, alarm settings, and configuration options.
VERY IMPORTANT: Do not switch off the power to the sound system until the update operation is complete and the radio has restarted, otherwise the unit may become permanently damaged.
NETWORK PROFILES
Each time that you connect your radio to a WiFi network, the radio will store the details of that connection (SSID, security key, DHCP/IP address settings) as a profile. Up to four such profiles are stored in the sound system so that if the unit is used in multiple locations there is no need to enter the network settings when returning to a location previously visited.
The sound system stores the four most recent profiles in memory identified by their SSID. Normally the sound system will attempt to connect to one of the stored profiles and only if it is unable to do so will you need to use the Network Wizard.
In the event that you visit a location only once you may wish to delete the profile for the network in that location to avoid losing other profiles.
- Access the menu for the current mode by pressing the Menu button. Rotate the Tuning/Seek/Select control until 'System settings' is highlighted on the display. Press the control to enter the settings menu.


TUNING
SEEK/SELECT
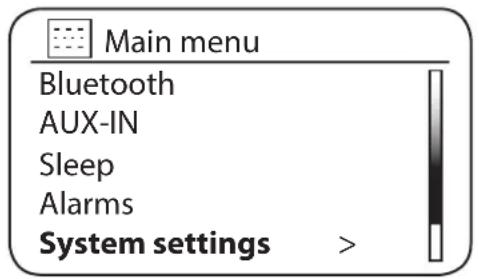
text_image
Main menu Bluetooth AUX-IN Sleep Alarms System settings >- Rotate the Tuning/Seek/Select control until 'Network' is highlighted on the display. Press the control to enter the Network settings menu.

TUNING
SEEK/SELECT
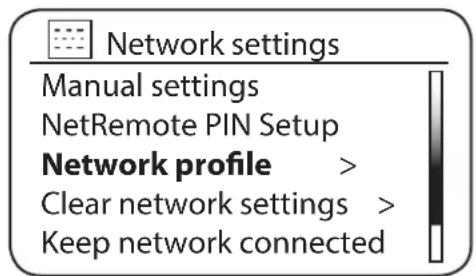
text_image
Network settings Manual settings NetRemote PIN Setup Network profile > Clear network settings > Keep network connected- Rotate the Tuning/Seek/Select control until 'Network profile' is highlighted on the display. Press the control to see the stored profiles. The profile that is currently in use (if any) is
marked with an asterisk.
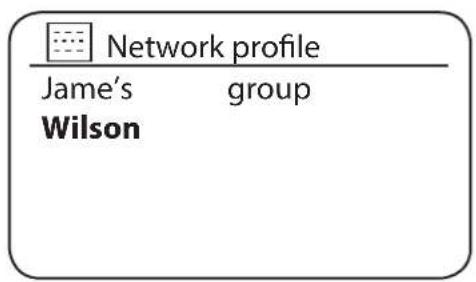
text_image
Network profile Jame's group Wilson- To remove a profile from memory, rotate the Tuning/Seek/Select control to highlight the profile to be deleted and then press the control.
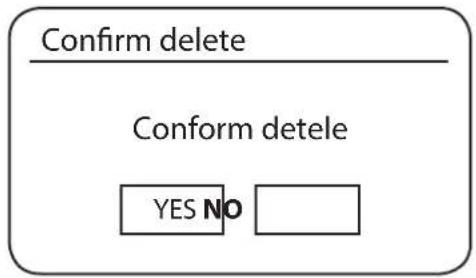
flowchart
graph TD
    A["Confirm delete"] --> B["Conform detele"]
    B --> C{YES NO}
    C --> D[" "]
- The radio will offer a 'YES' or 'NO' selection. Rotate the Tuning/Seek/Select control to select 'YES' and then press the control. The selected profile will be deleted.
Note that it is not possible to delete a profile that is currently in use.
SOFTWARE VERSION DISPLAY
The software version display is provided for reference and customer support purposes and cannot be changed.
- Access the menu for the current mode by pressing the Menu button. Rotate the Tuning/Seek/Select control until 'System settings' is highlighted on the display. Press the control to enter the System settings menu.
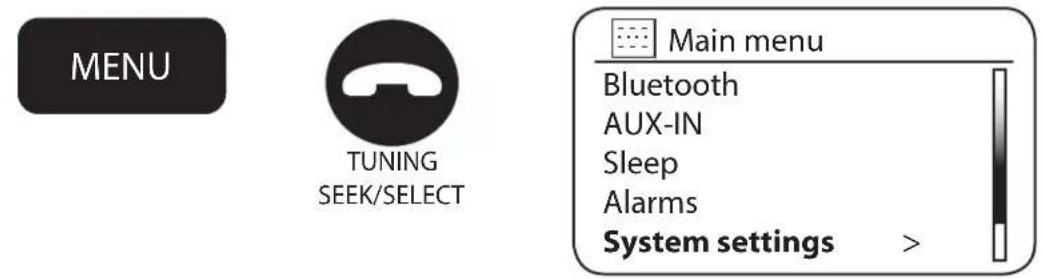
text_image
MENU TUNING SEEK/SELECT Main menu Bluetooth AUX-IN Sleep Alarms System settings >- Rotate the Tuning/Seek/Select control until 'Info' is highlighted on the display. Press the control to display the software version and radio ID.
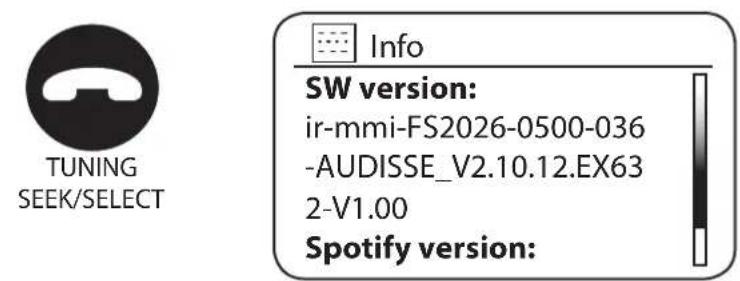
text_image
TUNING SEEK/SELECT Info SW version: ir-mmi-FS2026-0500-036 -AUDISSE_V2.10.12.EX63 2-V1.00 Spotify version: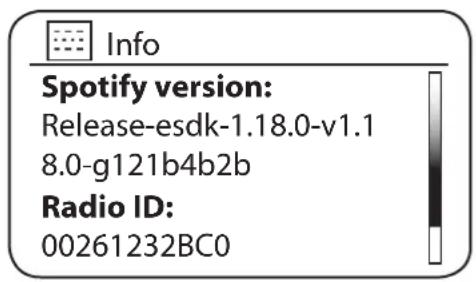
text_image
Info Spotify version: Release-esdk-1.18.0-v1.1 8.0-g121b4b2b Radio ID: 00261232BC0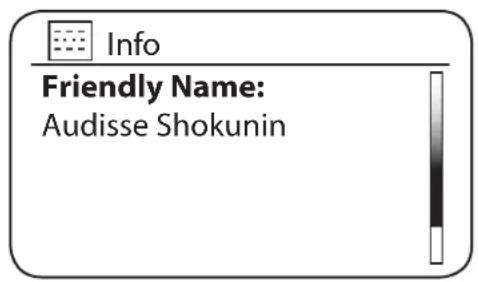
text_image
Info Friendly Name: Audisse Shokunin- Press the Menu button to exit.
VOLUME
To adjust the volume, simply rotate the Volume/EQ control when the sound system is playing in any of the powered on modes. The level of volume will be shown on the LCD in a sound level range from muted to a maximum level - volume 40.
Safety And Courtesy Note:
To prevent possible hearing damage, do not listen at high volume levels for long periods or put your ears too close to the speakers.
Please use the volume level responsibly with respectable consideration of the situation and other people or animals in the vicinity.
CHARGING A MOBILE PHONE
The USB socket on the back side can provide DC power of 5V/1A for charging a mobile phone. Connect the mobile phone to the USB socket with an appropriate cable (not included with Audisse Shokunin). The USB power is available in all the operating modes and including standby mode. Refer to the user manual or the manufacturer of the mobile phone to verify if it supports charging from an USB power.
Warning: Never use the USB socket in rainy or moist conditions to prevent moist from entering the radio and so to prevent potential short circuit. Always keep the rubber cover well closed under these conditions.
It is recommended to use AC power while charging a mobile phone via USB socket. On battery power it is also possible to charge a mobile phone from the USB socket, however using battery power to charge a mobile phone will consume much energy from the battery and so drain the battery fast.
AUDIO FAQ
Audisse Shokunin can access some audio help for Internet Radio use.
- With Audisse Shokunin switched on and in the Internet Radio mode, press the Menu button. Rotate the Tuning/Seek/Select control until 'Station list' is highlighted on the display. Press the Tuning/Seek/Select control.
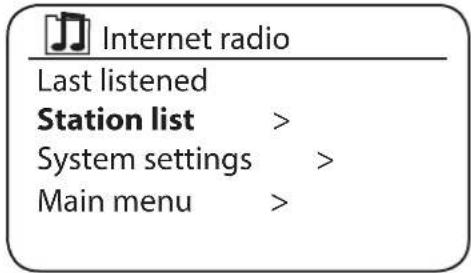
text_image
Internet radio Last listened Station list > System settings > Main menu >- Rotate the Tuning/Seek/Select control until 'Help' is highlighted on the display. Press the Tuning/Seek/Select control to enter the Help menu.

TUNING
SEEK/SELECT
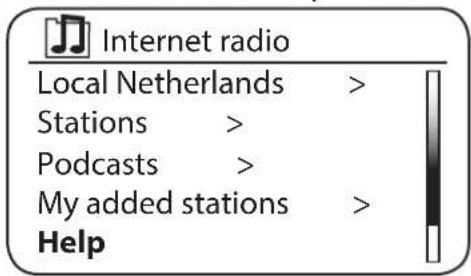
text_image
Internet radio Local Netherlands > Stations > Podcasts > My added stations > Help- Rotate the Tuning/Seek/Select control until 'FAQ' is highlighted. Press the control to display some frequently asked questions.

TUNING
SEEK/SELECT
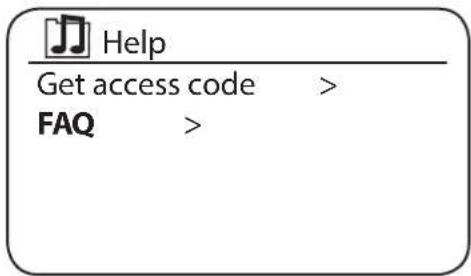
text_image
Help Get access code > FAQ >- Rotate the Tuning/Seek/Select control to choose a question that suits your requirements and press the control to listen to the answer. Adjust the volume as needed.
TROUBLESHOOTING
If you have difficulty connecting the radio to your computer network, some of these steps may help to resolve the problem:
-
Confirm that a WiFi connected PC can access the Internet (i.e. can browse the web) using the same network.
-
Check that a DHCP server is available (normally a router function). Your radio will by default use DHCP unless you choose to disable it. This may be configured using the menu items 'Main Menu' -> 'System settings' -> 'Network' -> 'Manual settings'. This will ask first whether you wish to configure a wireless connection. For wireless you then need to choose 'DHCP enable' or 'DHCP disable'. If you enable DHCP then the radio will negotiate with your router (or DHCP server) and will be provided with an IP address as well as the other settings needed. If you wish to set the network configuration manually, refer to paragraph 6.
-
Check that your network's firewall is not blocking any outgoing ports. As a minimum, the radio needs access to UDP and TCP ports 80 and 123. Port 53 may be required for DNS.
Some Internet radio services may require additional ports to be open. Windows Media Player 11 will allocate a port number for UPnP media sharing and will configure Microsoft's Windows built-in firewall appropriately. Other firewall software may require configuration for UPnP or to allow particular IP addresses to have trusted access.
- Check that your access point does not restrict connections to particular MAC addresses (sometimes called MAC address filtering).
You can view the radio's MAC address using the menu items 'Main Menu' -> 'System settings' -> 'Network' -> 'View settings' -> 'MAC address'.
The MAC address will typically be of the form
00:22:61:xx:xx:xx
-
If you have an encrypted network, check that you have entered the correct encryption key into the radio. Remember that text-format WPA keys are case sensitive. If your radio displays 'Network error' when attempting to connect to an encrypted network, then please ensure that you enter the correct key for the network. If the problem persists, then you may need to re-check your network configuration.
-
If you need to set up your radio's IP address manually, you will need to know low-level details of your network's configuration. Use the menu items 'Main Menu' -> 'System settings' -> 'Network' -> 'Manual settings' -> 'Wireless' -> 'DHCP disable'.
You will also need to enter the SSID, the encryption type, and the encryption key.
If Audisse Shokunin can connect to the network, but is unable to play a particular internet radio station, it may be due to one these causes:
- The station is not broadcasting at this time of the day.
- The station has reached its maximum allowed number of simultaneous connections.
- The Internet connection between your radio and the server (often located in a different country) is slow. This could be due to internet congestion, either locally or at a distance.
-
The station may choose to block internet connections to your geographic region (sometimes known as geo-locking).
-
The station is no longer broadcasting. The database of radio stations that your radio connects to is frequently updated and checked but may not always be completely accurate.
-
The radio station is broadcasting using an audio format that is not playable by your radio (although the Audisse Shokunin does play the most popular formats used by regular broadcasters).
Try using a PC to listen via the broadcaster's web site or via the radio station database web site at http://www.WiFiradio-frontier.com. If you can play the station with a PC, it may be that the internet feed or local network connection is poor. However, some broadcasters (such as
the BBC) provide different data streams for PC users and internet radio listeners, so this test is not always conclusive.
If you cannot play the station via your PC this may indicate that the problem is not necessarily due to your radio, but it could be your network, your internet connection, the broadcaster, or internet congestion.
MUSIC PLAYER / UPNP PROBLEMS
The use of the Music Player function with UPnP should be straightforward. However, the cleverness of UPnP means that it is often disabled by default by security applications and in routers.
If you are using Windows Media Player as your UPnP server, and if it fails to operate with Audisse Shokunin, please keep this fact in mind: A fresh installation of Windows and Windows Media Player when using Microsoft's built-in firewall software will normally work.
If it does not work, possible reasons may include:
UPnP functions blocked in firewall software UPnP functions turned off by security software UPnP functions 'hi-jacked' by other software UPnP functions blocked in the router Multi-cast packets blocked in the router IP address of system blocked in firewall software
Some third-party UPnP servers are much less dependent upon other parts of Windows than WMP 11. If the greater flexibility that these offer is attractive, then it may be found in some cases that they are easier to get working.
AUDIO CODECS
Your radio supports a range of audio codec that provide compatibility with a wide range of Internet Radio stations and also allow users to stream music from their computers.
Note that for any given audio codec, there are many streaming protocols available, and thus even if an Internet Radio station uses a supported format, this does not guarantee that every such station will work with your radio. The radio stations database to which your radio connects is checked for compatibility so that most stations should be playable without problems. Similarly when streaming media from a computer, while a codec may be supported, there can be many subtle variations in formats, tagging schemes and protocols (even within UPnP). In general your radio will play the supported formats with most common UPnP servers.
The following table summarises the maximum supported bit-rates for the various audio formats that are playable on your radio. Higher rates may be playable in some cases but performance of the product may be affected.
Codec Maximum supported data rate
Apple Lossless 1.536 Mbits/sec
| AAC(LC) | 320 kbits/sec | |
| FLAC^(1) | 1.536 Mbits/sec | |
| LPCM^(2) | 1.536 Mbits/sec | |
| MP3 | 320 kbits/sec | |
| Real Audio | 64 kbits/sec | |
| WAV^(3) | 1.536 Mbits/sec | |
| WMA^(4) | 320 kbits/sec | |
All codecs support 2-channel (stereo) coded files only.
All codecs support sample rates up to 48 kbits/sec (includes 32 and 44.1 kbits/sec).
Files that have Digital Rights Management (DRM) protection applied will not be playable on your radio.
(1) 16 and 24 bit samples are supported in FLAC files.
(2) The maximum supported bit-rate is for 48 kHz sampling, 2 channels and 16-bits per sample.
(3) 16 bit LPCM only
(4) WMA Lossless, WMA Voice, WMA 10 Professional, and files that have DRM protection are not supported.
CAUTIONS
- Do not leave the product where excessive heat could cause damage.
- The name plate is located on the bottom of the sound system.
- The product shall not be exposed to dripping or splashing and no objects filled with liquids, such as vases, shall be placed on the radio.
- It is recommended to operate the product such that there is a minimum distance (10cm recommended) to adjacent objects in order to ensure good ventilation.
- The ventilation of the product should not be restricted by covering it with items such as newspapers, tablecloths, curtains etc.
- No naked flame sources such as lighted candles should be placed on the product.
- It is recommended to avoid using or storing the product at extremes of temperature. Avoid leaving the unit in cars, on window sills, in direct sunlight etc.
- The product must be used in a moderate climate.
- If malfunctions occur due to static electricity charges or fast transient (burst), reset the device. To do this, pull out the power plug and connect it again after a few seconds.
ABOUT UNDOK APP
The Audisse Shokunin supports remote control from Apple iPhone, iPad and Android using the UNDOK app. The apps are available in Apple's app store and Google's android play.
The UNDOK app allows you to:
- Control all the modes of the Audisse Shokunin, including internet radio, Spotify, Media Player, USB playback, DAB, FM, Bluetooth and AUX-In;
- Adjust the volume level of current playback;
- Setting EQ for various audio presets;
- Setting Sleep timer;
- Editing the displayed name of the Audisse Shokunin.
INFORMATION ON THE METAL TELESCOPIC ANTENNA
The antenna placed on this radio is a long, metal telescopic antenna.
This antenna is NOT flexible or bendable and should be used with care.
When used in a dusty or dirty environment please clean the antenna from time to time with a dry cloth to ensure normal operation. When used in a wet, moist or dusty environment it is advised to regularly, after first cleaning with a dry cloth, thinly apply a universal protection oil (like e.g. WD40) with a cloth to prevent rust and corrosion and to ensure normal operation.
WARRANTY
This radio has a 2 year limited warranty.
WARNING ! Warranty becomes void once the radio cabinet has been opened or any modifications or alterations to the radio have been made !
The terms of the warranty of this radio do not cover the following:
- Damage caused by misuse, abuse, neglect, alterations, accidents or unauthorized repair.
- Normal wear and tear.
- Breaking or bending of the metal telescopic antenna
Never open the device casing. The manufacturer will not accept any liability for damage resulting from improper handling. The type plate is located on the bottom of the device.
SPECIFICATIONS
POWER REQUIREMENTS
AC adapter: 230 volts AC, 50Hz only
Built-in Lithium Polymer Battery: 11.1V, 4000mAh
Frequency Coverage
FM 87.5 - 108MHz
DAB 174.928 - 239.200 MHz
CONNECTIVITY
WiFi Dual modes to support 2.4GHz and 5GHz WiFi system
802.11b and 802.11g supported with WEP and WPA/WPA2 encryption
Compatible with 802.11n routers that offer mixed mode support for 802.11b/g.
Bluetooth Version 4.1 supports Bluetooth profiles A2DP and AVRCP
CIRCUIT FEATURES
Loudspeaker 2 x 76 mm
Output Power 2 x 15 Watts
Aux In socket 3.5mm, stereo
Aerial System WiFi Built-in antenna
DAB Telescopic aerial
FM Telescopic aerial
The company reserves the right to amend the specifications without notice.
ENVIRONMENTAL NOTE
natural_image
Symbol of a trash bin with a cross mark and a horizontal bar, representing waste sorting or disposal (no text or labels)This product has been manufactured with high quality parts and materials that can be reused and recycled.
Therefore, do not throw the product away with normal household waste at the end of its service life. Take it to a collection point for the recycling of electrical and electronic device. This is indicated by this symbol on the product, in the operating manual and on the packaging.
Please find out about collection points operated by your local authority.
Help protect the environment by recycling used products.

Prime Europe B.V.
Everdenberg 9a
4902 TT Oosterhout
The Netherlands
www.audisse.com