Flite+ - Tent Tentsile - Free user manual and instructions
Find the device manual for free Flite+ Tentsile in PDF.


User questions about Flite+ Tentsile
0 question about this device. Answer the ones you know or ask your own.
Ask a new question about this device
Download the instructions for your Tent in PDF format for free! Find your manual Flite+ - Tentsile and take your electronic device back in hand. On this page are published all the documents necessary for the use of your device. Flite+ by Tentsile.
USER MANUAL Flite+ Tentsile
natural_image
Abstract geometric symbol resembling a triangle with three legs, no text or labels presentTENTSILE
Flite+ Tree Tent
OWNERS MANUAL
It is important that all users read and understand the materials in this manual before any installation and use of the product.
WARNING
TENTSILE IS NOT A TOY
RISK OF SERIOUS INJURY
A VISUAL AND TACTILE INSPECTION OF YOUR TENTSILE'S FLOOR,
STRAPS AND RATCHETS SHOULD BE MADE BEFORE EACH USE.
FOR SAFETY REASONS, STRAPS AND RATCHETS SHOULD BE
REPLACED EVERY 2 YEARS.
DO NOT LEAVE OUTSIDE UNATTENDED FOR MORE THAN A WEEK.
CHECK THE HEALTH AND STRENGTH OF THE TREES
CHOSEN TO BE ANCHOR POINTS BEFORE USE.
Recommended set up height 1.2m / 4 feet
MAX LOAD 220kg / 485lbs.
DO NOT EXCEED MAXIMUM WEIGHT LOAD CAPACITY.
CONGRATULATIONS
YOU ARE NOW THE PROUD OWNER OF A
Tentsile Flite+ Tree Tent
IT IS IMPORTANT THAT ALL INFEES READ AND UNDERSTAND THE MATERIALS
IN THIS MANUAL STORE AND INSTALLATION AND USE OF THE PRODUCT
03: Introduction
04: Terms of Use
05: Specifications
06: Warnings & Disclaimers
07-08: Layout & Alignment
09-30: Set up instructions
31: Floor calibration
32: Ratchet usage
33: Policies
34: The small print
Introduction Terms of Use
The Tentsile Flite+ provides a unique opportunity for you and your friends to experience the great outdoors with a whole new level of freedom and comfort.
Tentsile invented Tree Tents as treehouses you can take anywhere; combining the versatility of a hammock with the comfort and security of a tent.
The Flite+ comprises of a double hammock, suspended in tension above the ground and enclosed in an elegantly simple insect mesh top and fly sheet cover.
The unique design creates a comfortable base camp, irrespective of ground conditions, as well as providing increased protection from insects, snakes and other predators – if you venture somewhere more exotic.
This product was created because Tentsile loves trees and believes that if we're all hanging out in trees, they can't cut them down!
3 trees are planted for every Tentsile Tree Tent sold. :)
PLAY, CAMP, EXPLORE...
Tentsile Tree Tent should be set up only as outlined in this manual.
NEVER jump into, onto or use it as a trampoline or swing. It is not intended to be used for rock climbing, cliff faces, overhangs or above or next to large drops.
DO NOT attempt to use this product for anything another than its intended purpose, and always observe height and weight limits.
DO NOT use walls, fences, street furniture, roof racks, movable platforms, posts or trees less than 25cm/10inches in diameter as anchor points, as they may not be strong enough.
DO NOT use tensioning components other than those supplied with this product.
DO NOT set up higher than 1.2 metre / 4 feet from the ground or above hard, sharp or pointy objects.
Tactile and visual checks should be made to ALL tent components and ALL anchor points before each use.
Replace any damaged elements if any are found.
Keep away from fire and sharp objects.
DO NOT use after the consumption of any intoxicating substances.
Children must be supervised by an adult at all times.
DO NOT attach to trees or branches that show signs of structural weakness.
DO NOT adjust/open ratchets whilst tent is occupied.
DO NOT use during lightning storms or high winds.
DO NOT use in areas of unstable ground.
Tentsile does not offer protection from all animals.
Specifications Warnings & Disclaimers
Size:
3.25 × 3.25 × 2.7m / 11 × 11 × 9ft
Floor area:
3.75sqm / 40sqf
Dry porch area at ground level:
5sqm / 55sqf
Entry Points:
x 2
Bag Size:
45 × 18 × 18cm / 18 × 8 × 8"
Height:
80cm / 2.5ft
Tent weight:
3.2kg / 7.0lbs
Poles:
x2 8.5mm diameter
anodised aluminium alloy.
Ratchet & straps:
3 x 25mm straps - 1.5 tonne
minimum breaking strength.
1 x 25mm Ratchet.
Roof:
Tear resistant insect mesh.
Flysheet:
70D PU coated waterproof
polyester, 3000HH
Floor:
40D polyester-nylon
composite, reinforced with
12 metres of 25mm webbing.
Maximum capacity:
2 adults.
Installation and use of the Tentsile Tree Tent may involve heights, can be dangerous and may lead to injury and/or death.
The installation must never be executed by minors, and extreme care and caution must be taken when executed by adults.
Do not use any other components, parts, tools or materials other than those included in the Tentsile Tree Tent package, recommended in this manual or in other Tentsile literature.
A hanging and/or suspension system is only as strong as its weakest link and all instructions and guidelines must be followed.
The Tentsile Tree Tent must only be used in the manner described in this manual. When assembled and installed, the Tentsile Tree Tent places significant force on the anchor points,
great care must be exercised when using it to decrease the risk of injury and/or death.
Overloading the Tentsile Tree Tent with more than 485 pounds (220 kg) increases the forces and may cause anchor, tree tent and/or any parts to fail, resulting in injury and/or death.
The manufacturer and resellers of the Tentsile Tree Tent explicitly disclaim any and all responsibility and liability for any death, paralysis, injury, and/or damage to any person or property that may occur that arises out of or is in any way related to the use of this product.
Using any equipment that is suspended above ground can be a dangerous activity that may result in serious injury and/or death even when used properly. Use at your own risk and always use common sense.
DO NOT EXCEED MAXIMUM LOAD 220kg / 485lbs
05 06
Positioning the Flite+
Tentsile tents need 3 secure and strong anchor points to suspend from. The distances are marked here. Once the location is found, lay out the main Flite+ on the ground as the reference point for the straps.
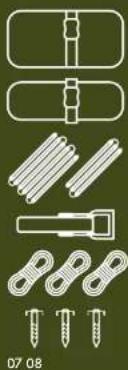
natural_image
Pure technical line drawings of mechanical components without any text or symbolsFlite+ Tent
Flysheet
x2 Pole sets Long and Short
x1 Ratchet
x3 Straps
x3 Screw Pogs
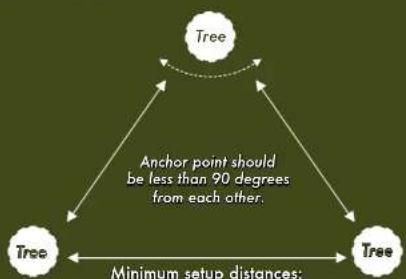
flowchart
graph TD
    A["Tree"] --> B["Tree"]
    B --> C["Tree"]
    C --> A
    style A fill:#fff,stroke:#000
    style B fill:#fff,stroke:#000
    style C fill:#fff,stroke:#000
    note1["Anchor point should be less than 90 degrees from each other."] --> A
    note2["Minimum setup distances:"] --> B
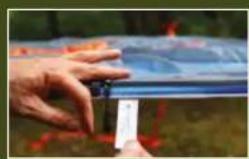
Alignment Sight Tag
Use the sight tag on the side of the tent. Look along the tag and ensure it and the strap are inline with the tree.
natural_image
Close-up of a hand holding a blue object with a small white tag, outdoors with blurred background (no visible text or symbols)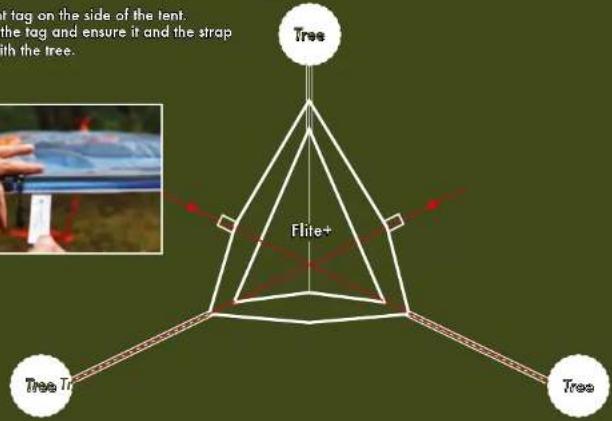
text_image
t tag on the side of the tent. the tag and ensure it and the strap with the tree. Tree Flite+ Tree Tr Tree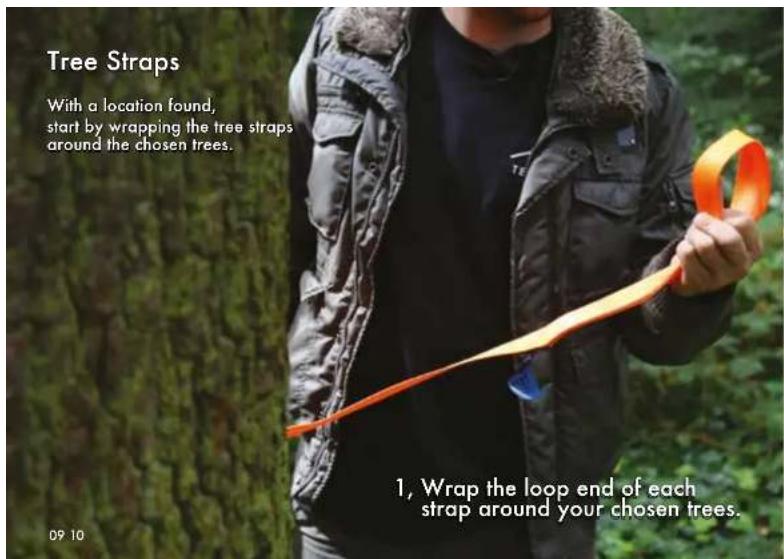
text_image
Tree Straps With a location found, start by wrapping the tree straps around the chosen trees. 1, Wrap the loop end of each strap around your chosen trees. 09 10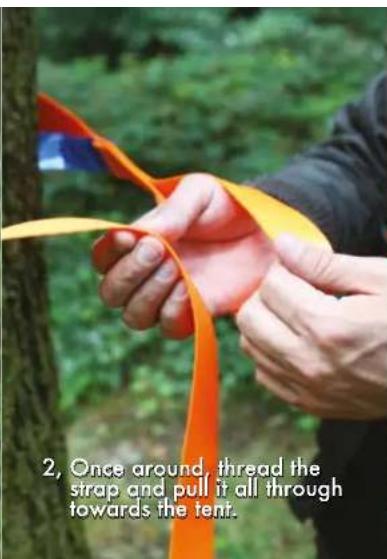
text_image
2, Once around, thread the strap and pull it all through towards the tent.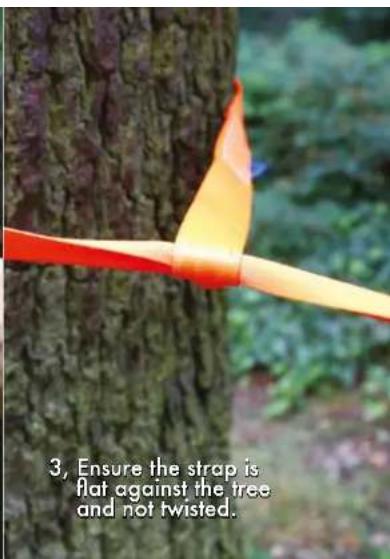
text_image
3, Ensure the strap is flat against the tree and not twisted.Tying the Cow Hitch
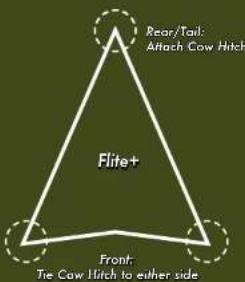
Once all 3 straps are around the selected trees, they can then be connected to the D-rings. 2 of the corners require Cow Hitch knots, one at the rear/tail and the other at either front corner.
text_image
Rear/Tail: Attach Cow Hitch Flite+ Front: Tie Cow Hitch to either side4, Pull the strap attached to tree through the D-ring.
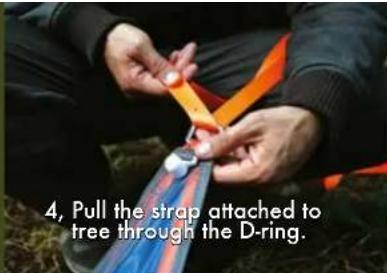
text_image
4, Pull the strap attached to tree through the D-ring.5, Wrap the loose end underneath the straight edge.
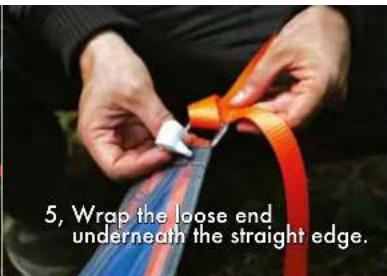
text_image
5, Wrap the loose end underneath the straight edge.6, Continue over the top and back underneath again and hold underneath.
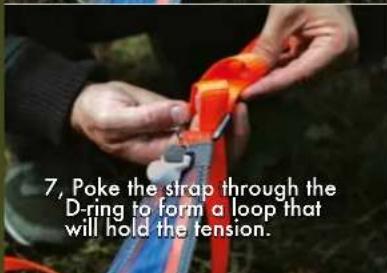
text_image
7. Poke the strap through the D-ring to form a loop that will hold the tension.8, Feed this loop underneath the top strap piece to form a tight knot.
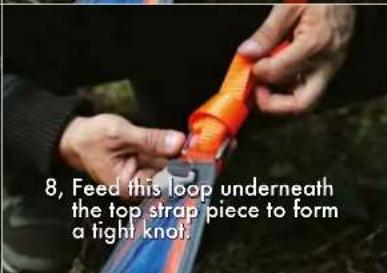
text_image
8, Feed this loop underneath the top strap piece to form a tight knot.9, This knot can be released by pulling the loose end.
Attaching the Ratchet
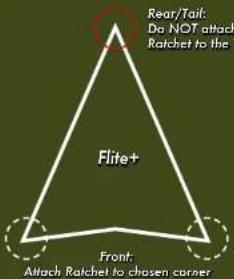
The chosen front corner for the ratchet strap can now be attached. This strap will control the amount of tension.
You will need to loosen and readjust the lengths of each strap until the tent is aligned for equal tension.
text_image
Rear/Tail, Do NOT attach Ratchet to the 1 Flite+ Front: Attach Ratchet to chosen corner13 14
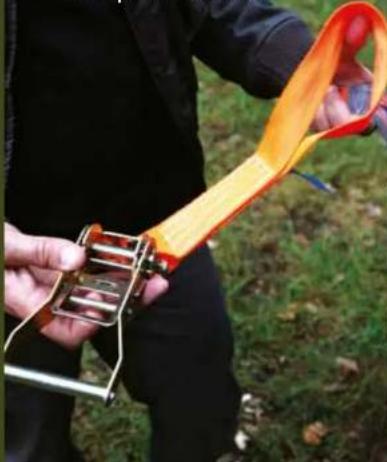
10, Begin by ensuring the strap is not twisted.
natural_image
Person holding a yellow and orange striped object outdoors on grass (no text or symbols visible)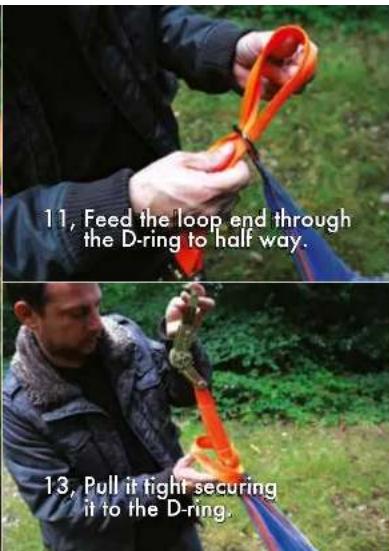
text_image
11, Feed the loop end through the D-ring to half way. 13, Pull it tight securing it to the D-ring.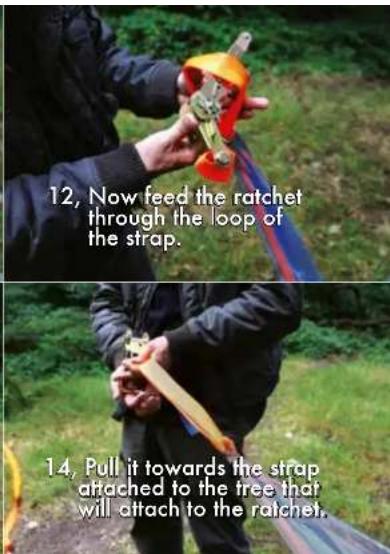
text_image
12. Now feed the ratchet through the loop of the strap. 14. Pull it towards the strap attached to the tree that will attach to the ratchet.Attaching the Ratchet
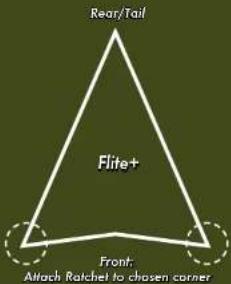
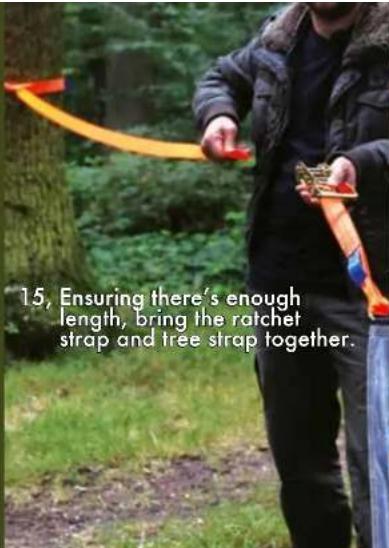
With the ratchet strap attached to the D-ring, it can now be connected to the tree strap length. Once attached, check the overall position of the Flite+ and that it is correctly aligned via the tag reference points on the tent.
text_image
Rear/Tail Flite+ Front: Attach Ratchet to chosen corner15 16
text_image
15, Ensuring there's enough length, bring the ratchet strap and tree strap together.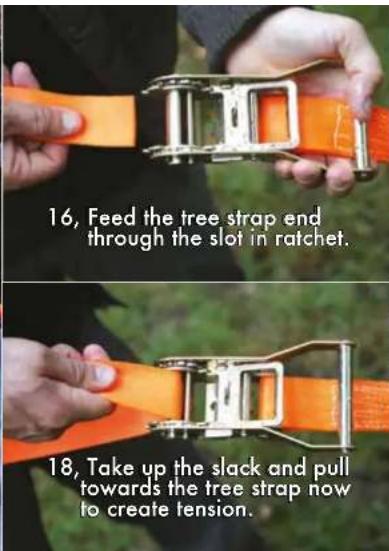
text_image
16, Feed the tree strap end through the slot in ratchet. 18, Take up the slack and pull towards the tree strap now to create tension.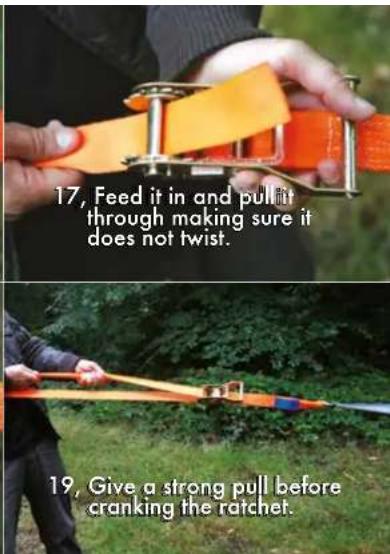
text_image
17, Feed it in and pull it through making sure it does not twist. 19, Give a strong pull before cranking the ratchet.Tightening the Ratchet
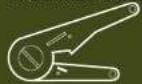
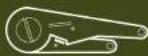
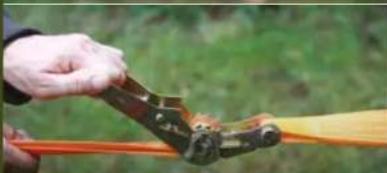
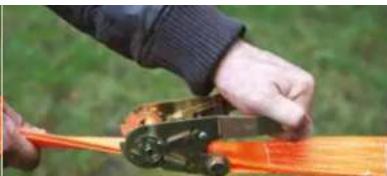
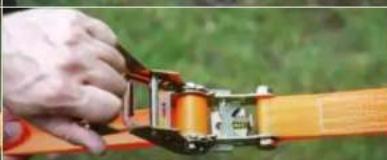
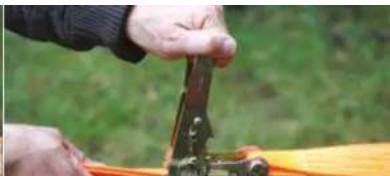
Cranking the Ratchet will give the tension needed and allows for easy adjustment. Ensure the Ratchet is correctly in the Locked position before entering the Stingray.
Attention - Ratchet Locking
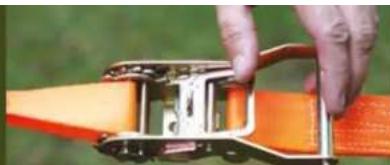
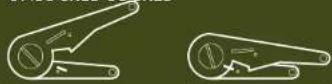
Crank the Ratchet handle back & forth 7-9 times to increase tension to straps.
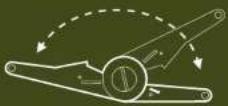
UNLOCKED LOCKED
18 18
natural_image
Close-up of a hand using a cable clamp to adjust a wooden object (no visible text or symbols)20, Release the ratchet lock by pushing the inner latch upwards.
natural_image
Close-up of hands using crimping tools to handle a yellow object, set against a blurred green background (no text or symbols visible)23, Do this until the handle has strong resistance.
natural_image
Close-up of hands using a power tool to handle an orange tool, outdoors on grass (no text or symbols visible)21, This will release the handle and allow it to be cranked.
natural_image
Close-up of a hand adjusting a mechanical component with orange cable (no visible text or symbols)24, Once achieved, move the handle to the closed position and lock.
natural_image
Close-up of hands using a tool to cut or mark a wooden object, outdoors with greenery background (no text or symbols visible)22, Pull the handle back and begin cranking it back and forth.
LOCKING RATCHET
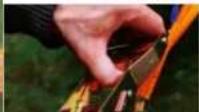
Lift the inner latch handle to disengage locking plate
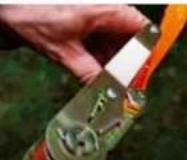
Push down so it latches flat.
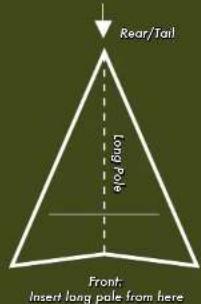
Inserting the long pole
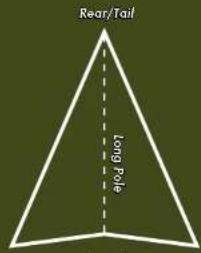
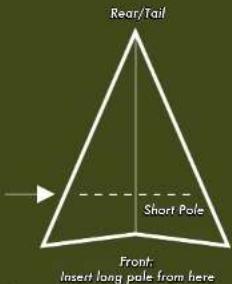
There are 2 poles that are supplied, one is long that runs the entire length and the other is short that runs across the width.
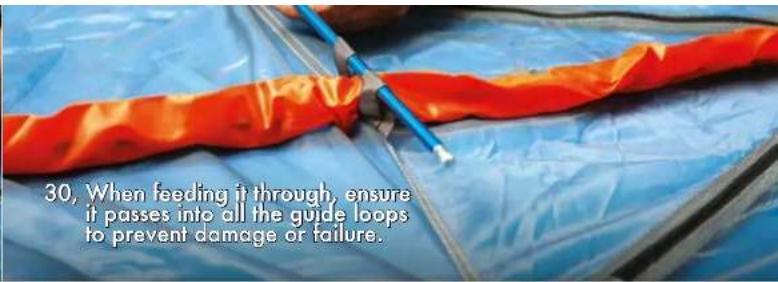
Ensure the poles go through all the guide loops attached to the Flite+
text_image
Rear/Tail Long PoleFront: Insert long pole from here
1920
text_image
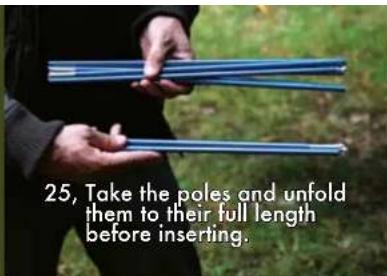
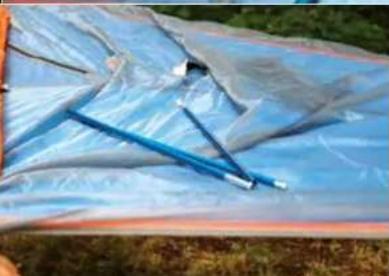
25, Take the poles and unfold them to their full length before inserting.25, Take the poles and unfold them to their full length before inserting.
text_image
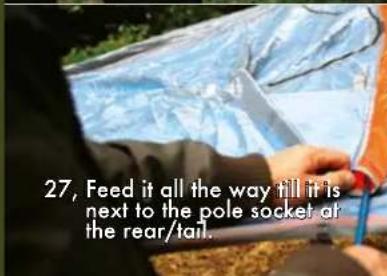
27, Feed it all the way till it is next to the pole socket at the rear/tail.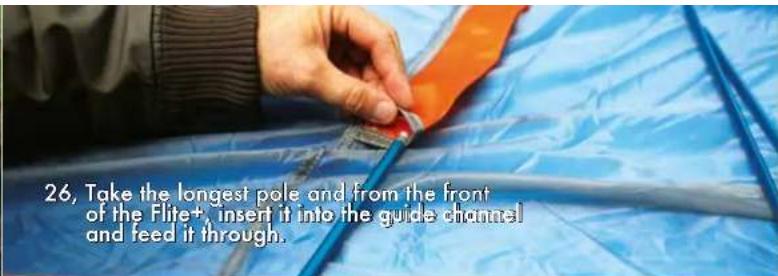
text_image
26, Take the longest pole and from the front of the Flite+, insert it into the guide channel and feed it through.26, Take the longest pole and from the front of the Flite+, insert it into the guide channel and feed it through.
natural_image
Tarp covered in blue plastic material outdoors, no visible text or symbols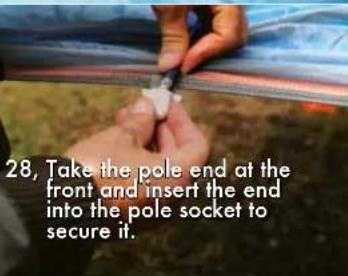
text_image
28, Take the pole end at the front and insert the end into the pole socket to secure it.Inserting the short pole
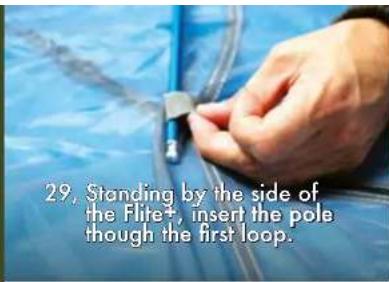
By standing by the side of the Flite+, the shorter pole can be inserted.
This will give the Flite+ extra space and usability so ensure it passes through all the guide loops.
text_image
Rear/Tail Short Pole Front: Insert long pale from here21 22
text_image
29. Standing by the side of the Flite+, insert the pole though the first loop.- Standing by the side of the Flite+, insert the pole though the first loop.
text_image
30. When feeding it through, ensure it passes into all the guide loops to prevent damage or failure.30, When feeding it through, ensure it passes into all the guide loops to prevent damage or failure.
text_image
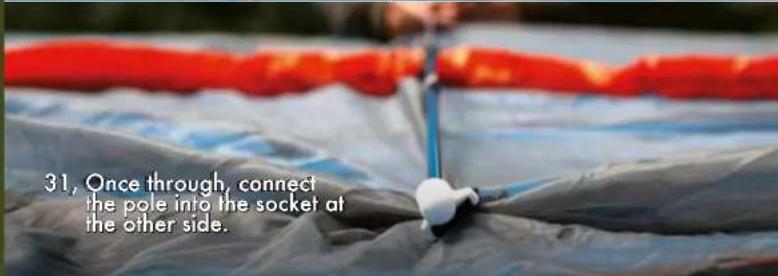
31, Once through, connect the pole into the socket at the other side.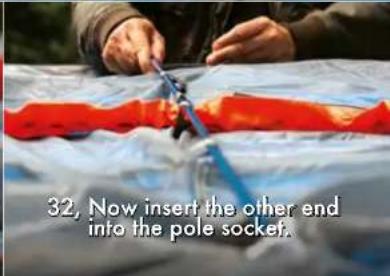
text_image
32, Now insert the other end into the pole socket.Raising the structure
With the poles correctly inserted the Flite+ can now be raised.
This is a simple action and will reveal the distinctive shape.
text_image
Rear/Tail [100%] Front: Insert long pale from here23 24
natural_image
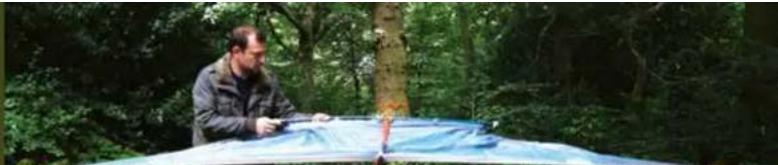
Man sitting on a blue tarp in a forest setting, no visible text or symbols33, At this point, you will have a tight base that is ready for raising.
text_image
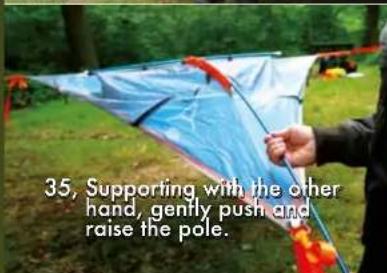
35, Supporting with the other hand, gently push and raise the pole.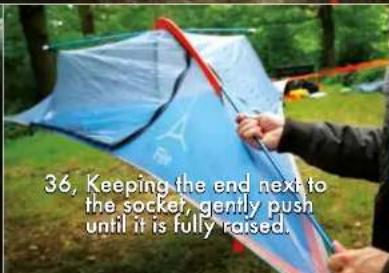
text_image
36, Keeping the end next to the socket, gently push until it is fully raised.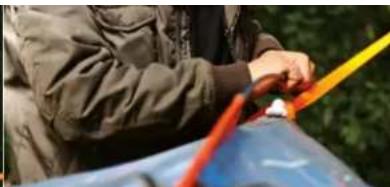
natural_image
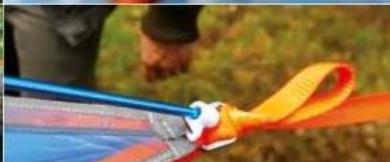
Person handling a red object with yellow tape outdoors (no visible text or symbols)- Move to the rear/tail of the Flite+ and take the free pole end.
natural_image
Close-up of a person's hand holding a blue and orange striped safety harness outdoors (no text or symbols visible)- Insert pole end into the socket to secure the pole and hold its structure.
Fitting the Flysheet
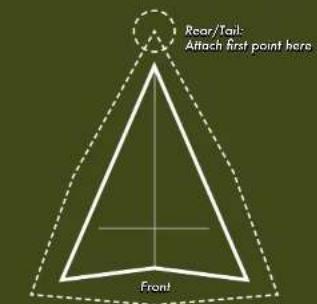
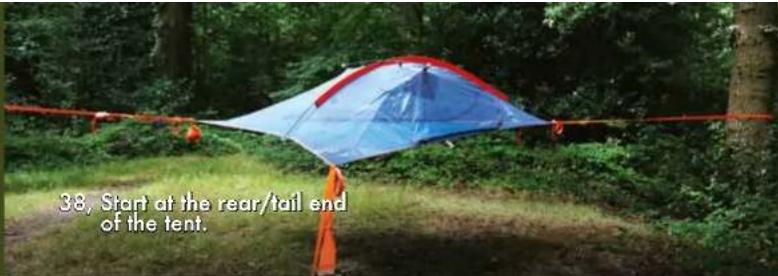
The flysheet is easily added to the Flite+. Each corner it is tied to should be approx 6" / 15cm along the Flite+ strap to ensure rain does not penetrate. The flysheet has elastic ties to be used with the ground pegs.
text_image
Rear/Tail: Attach first point here Front25 26
text_image
38. Start at the rear/tail end of the tent.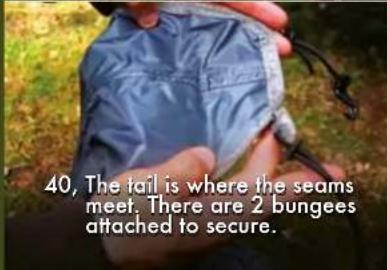
text_image
40, The tail is where the seams meet. There are 2 bungees attached to secure.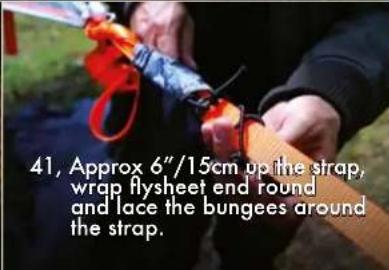
text_image
41, Approx 6"/15cm up the strap, wrap flysheet end round and lace the bungees around the strap.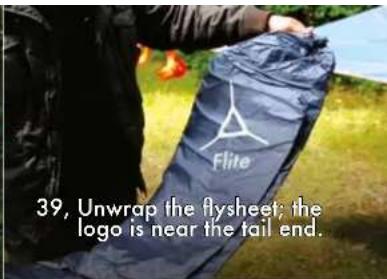
text_image
39, Unwrap the flysheet; the logo is near the tail end.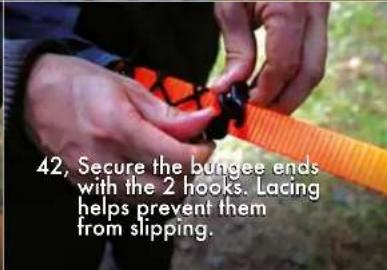
text_image
42, Secure the bungee ends with the 2 hooks. Lacing helps prevent them from slipping.Fitting the Flysheet
Once the rear point is tied off the flysheet can then be passed over the top. Get it in position and make sure it's hanging correctly before securing the front corners.
text_image
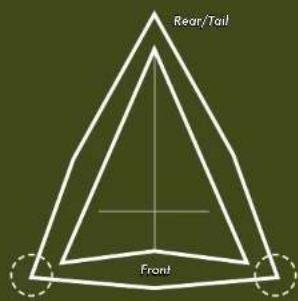
Rear/Tail Front27.28
43, Take the edge of the flysheet along the leading edge to the front corner.
45, Ensure it is not caught and is hanging correctly before securing the ends.
44, Pass it over the top to the final corner.
46, Wrap the end of the sheet over the strap. Lace and secure as the before.

text_image
43, Take the edge of the flysheet along the leading edge to the front corner.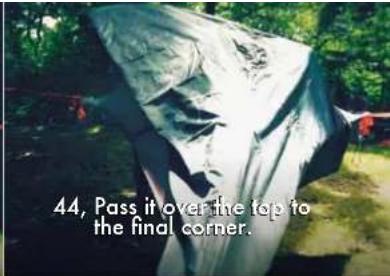
text_image
44, Pass it over the tops to the final corner.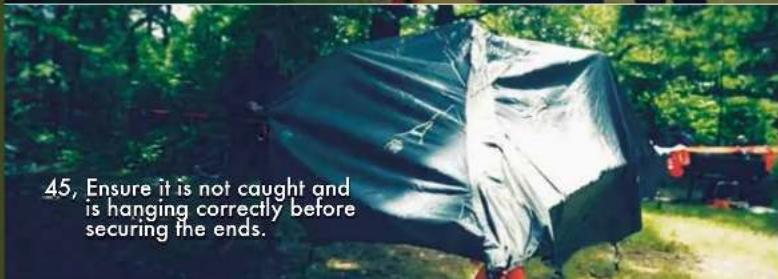
text_image
45, Ensure it is not caught and is hanging correctly before securing the ends.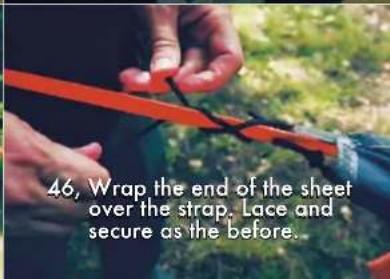
text_image
46, Wrap the end of the sheet over the strap. Lace and secure as the before.Peg out and you're done
The final part is to peg it out using the bungees and pegs provided.
Simply attach the bungee loop to the peg, pull until firm and then screw them into the ground to secure.
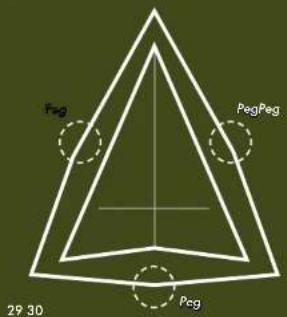
text_image
Peg PegPeg 29 30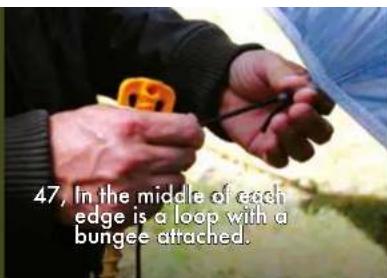
text_image
47. In the middle of each edge is a loop with a bungee attached.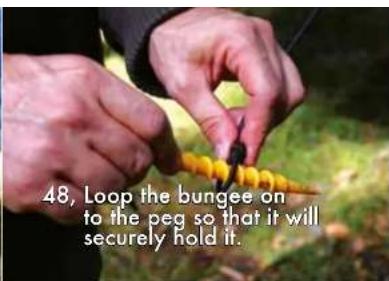
text_image
48, Loop the bungee on to the peg so that it will securely hold it.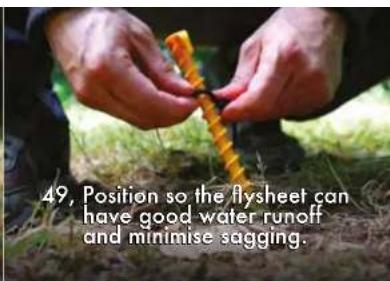
text_image
49, Position so the flysheet can have good water runoff and minimise sagging.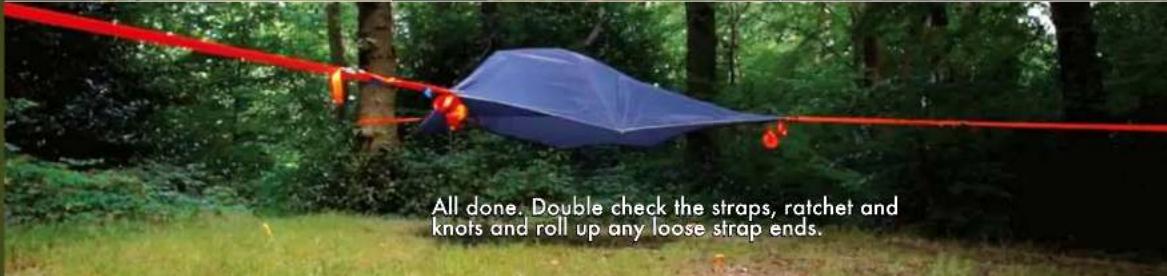
text_image
All done. Double check the straps, ratchet and knots and roll up any loose strap ends.Floor Strap Calibration
Tentsile Trees Tents come pre-calibrated, but stretch over time so will need you to tighten the under floor strap, using the buckle every so often. Here is how.
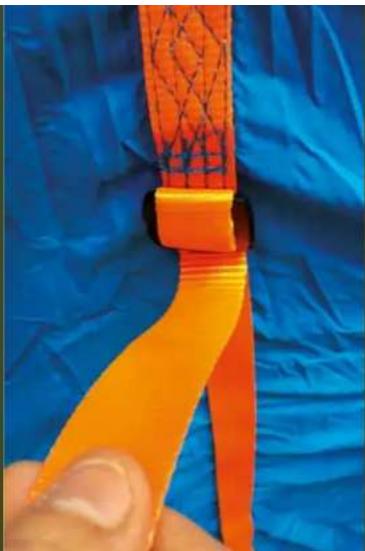
When the tent is up, the centre (underfloor) strap should provide a clear delineation between both hammock berths. To increase this tension (and therefore separation between the two hammocks) just tighten or loosen the adjuster buckle strap on the underside of the tent.
This re-tensioning will need to take place every so often as the materials stretch into full size over time.
If you are using the Tentsile Flite+ alone, you can slack off this strap completely and have the whole floor as a large single hammock berth to yourself.
31 32
natural_image
Close-up of a hand holding an orange ribbon against a blue textured background (no text or symbols visible)How to use the Ratchet
1) Take tail end of the long strap around your trees and thread through the loop and away from tree, towards your Tentsile.
2) Thread loop of the ratchet through the D-Ring at each corner of your Tentsile and take the buckle through the loop.
3) Take long strap tail and thread it through the ratchet buckle spindle, pulling through all excess orange strap. Crank ratchet until the orange strap has gone around the spindle at least 1.5 full revolutions to underlock it. This will prevent any slippage before moving to the next corner.
4) Repeat step 3 at each tent corner, trying as much as possible to keep the tent corners pointing towards their respective anchor points.
5) Revisit all corners and adjust as necessary. Use line of sight down each strap to centralise your Tentsile between your chosen anchor points. You have about a 7 ^th degree margin of tolerance in each direction.
6) Tighten ratchets as much as you can.
ENSURE RATCHETS ARE IN LOCKED POSITION
BEFORE ENTERING THE TREE TENT.
7) Roll and tidy up strap ends to avoid any possible trip hazzards.
Crank the ratchet handle back & forth 7-9 times to increase tension to straps.
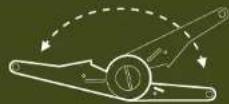
UNLOCKED LOCKED
32
Policies The small print
Maintenance
Visual and Tactile inspection of all components for structural damage before every use and dry out Tentsile thoroughly before packing away. Tentsiles should be stored safely in a dry environment.
Returns
You can return this product, unused, within 4 weeks of purchase and expect a full refund or replacement. If a manufacturing defect occurs within 1 year of reasonable* use, the product can be returned for repair or exchange.
Weather
The Tentsile Tree Tent is not intended to be used in severe weather. If there is weather that creates dangerous conditions, such as storms, heavy rain, high winds, and/or lightning, do not use or remain in the Tentsile Tree Tent in or during those conditions. It is recommended that the Tentsile Tree Tent is taken down and stored to avoid remaining inside and being subject to such conditions. Leaving the Tentsile Tree Tent out and installed in bad weather can lead to potential destruction and/or damage to it (not covered by warranty). If the Tentsile Tree Tent is subject to such
33 34
conditions, it and its anchor/hanging system should be inspected in detail prior to any future use. Be sure to thoroughly dry the Tentsile Tree Tent before storing.
Customer Service Charter
Quality first – We will manufacture, sell and distribute the best possible quality Tree Tents in the World.
Customer focus – We will provide prompt, courteous and efficient service, with honesty and integrity and expert, clear, and timely information to customers and colleagues.
Tentsile Promise - We will strive for a 'get it right first time, every time' in all our dealings in manufacturing, distribution, sales, and service.
This policy does not cover damage incurred by environmental conditions, weather conditions, or apocalyptic events.
Contact us
info@tentsile.com
*use as intended and outlined herein and no more than 3 months continuous use.
The Tensile Tree Tent is designed for play, relaxation, and camping/sleeping. Never jump into, onto or use it as a trampoline or swing. It is not intended to be used for rock climbing, cliff faces, overhangs or above or next to large drops. Do not attach or secure the Tensile Tree Tent to a movable platform or anchor; it is not intended to be used for such recreation or activities. Do not attempt to use this product for anything other than its intended purpose, and always observe height and weight limits.
Warranties
This one year warranty covers all manufacturing faults of fabrics, parts and workmanship. This warranty covers the functionality of the product for its normal, intended use as specified in Tentsile's consumer literature, incl. website.
It does not cover poles or malfunction of any component that has resulted from improper or unreasonable use or neglectful maintenance, the user's use of undersized or unhealthy trees, sharp objects or fire near the tent or the use by more than the recommended number of persons, at the recommended set up height.
This policy does not cover damage incurred by environmental conditions, weather conditions, or apocalyptic events.
The warranty herein will not be honoured for products that are purchased through an unauthorised dealer or secondary reseller.
Unauthorised and/or resold products are not backed up by the high quality standards and dependability of original products sold by authorized dealers. By buying from an unauthorized dealer you could get a product that is counterfeit, stolen, or re-manufactured, and being listed as new.
To redeem any potential warranty you will need to provide proof of purchase with the product.
Other than as described above, the manufacturer, sellers, and resellers of this product make no other representations and/or warranties, either express or implied, regarding the product, including without limitation, any warranties as to merchantability, quality, or fitness for a particular purpose.
The manufacturer, sellers, and resellers shall not be liable in any way whatsoever for special, indirect, consequential, or incidental damages, whether based on breach of contract, breach of warranty, tort (including negligence), product liability or otherwise, even if they have been advised of the possibility of such damages. Violation of the instructions and warnings herein operates as a waiver of claims by the user.
The Tentsile Tree Tent user agrees that his or her full remedy against the manufacturer, sellers, and resellers for any liability, claims, or damages, shall be limited to the purchase price of the Tentsile Tree Tent, and irrevocably waives all claims for any other damages that such user may have.

natural_image
Simple geometric symbol resembling a triangle with three legs, no text or labels presentTENTSILE
www.tentsile.com
All rights reserved Tentsile Ltd 2015
Patent Approved