
Vita-Spin 42580 - Deep fryer Gastroback - Free user manual and instructions
Find the device manual for free Vita-Spin 42580 Gastroback in PDF.


| Product Type | Deep Fryer with integrated centrifuge for oil removal |
| Brand | Gastroback |
| Model | Vita-Spin 42580 |
| Power Supply | 230 V AC, 50 Hz, 2000 W |
| Dimensions (W x D x H) | Approx. 25.5 cm x 35.0 cm x 25.5 cm |
| Weight | Approx. 4.65 kg |
| Oil Capacity | 2.3 Liters |
| Temperature Range | Up to 195 °C (adjustable) |
| Timer | Mechanical cooking timer (up to 15 minutes) and spin timer (up to 1 minute) |
| Centrifuge Speeds | Low and High |
| Safety Features | Overheat protection with reset button, safety interlocks (lid and basket position), fireproof filter in lid, non-slip pads and suckers |
| Filtration | Fireproof filter in lid (replaceable) |
| Basket Material | Metal wire basket with plastic handle |
| Oil Container Material | Plastic with MIN/MAX markings |
| Housing Material | Plastic with metal components |
| Cord Length | Approx. 1 meter |
| Certification | CE |
| Dishwasher Safe Parts | Basket, lid, filter cover, oil container, dripping cup (top rack recommended) |
| Not Dishwasher Safe | Control unit, housing, power cord |
| Maintenance | Regular cleaning after each use; replace filter if damaged |
| Warranty | 2 years (defects in materials or workmanship) |
Frequently Asked Questions - Vita-Spin 42580 Gastroback
User questions about Vita-Spin 42580 Gastroback
0 question about this device. Answer the ones you know or ask your own.
Ask a new question about this device
Download the instructions for your Deep fryer in PDF format for free! Find your manual Vita-Spin 42580 - Gastroback and take your electronic device back in hand. On this page are published all the documents necessary for the use of your device. Vita-Spin 42580 by Gastroback.
USER MANUAL Vita-Spin 42580 Gastroback
natural_image
Black Gastroback® air fryer with control knobs and a rotary knob (no visible text or symbols on device body)natural_image
Close-up of a mechanical component with concentric rings and mounting brackets (no visible text or symbols)natural_image
Two plastic containers, one open and one filled with a black handle, shown against a white background (no text or symbols visible)TECHNISCHE DATEN
natural_image
Black Gastroback® air fryer with control knobs and a rotary knob (no visible text or symbols on device body)Read all provided instructions before first usage!
Model and attachments are subject to change
For household use only!
We attach a certain importance to your safety. Thus, we ask you to read all provided instructions and information in this booklet carefully and completely, before you start running the appliance. This will help you to know all functions and properties of your new appliance. We especially ask you to adhere strictly to the safety information mentioned in these instructions.
TABLE OF CONTENTS
Important Safeguards 39
General Safety Instructions....39
Important Safeguards for all Electrical Appliances 42
High Temperatures — Risk of Burns 43
Moving Parts....44
Technical Specifications....45
Knowing Your Vita-Spin-Deep-Fryer 46
Properties of Your New Deep Fryer 47
Safety Concept 47
Overheat Protection....47
Connector of the Control Unit....48
Safety Interlocks....48
Fireproof Filter in the Lid 48
Non-Slip Pads and Suckers....48
Tips for Best Results 48
Before First Use....51
Operation....51
Preparing the Appliance....52
Frying 53
After Cooking 56
Solving Problems....57
Care and Cleaning 58
Disassembling the Appliance 58
Cleaning the Appliance 59
Reassembling the Appliance 60
Storage 61
Notes for Disposal 62
Information And Service....62
Warranty....63
DEAR CUSTOMER!
Congratulations! A series of new possibilities come with your new GASTROBACK » Vita-Spin-Deep-Fryer«.
This Deep Fryer offers all benefits of frying. Additionally, via a spinning feature, this appliance removes surplus oil after frying. Thus, the fat content of your meal can be reduced by up to 55 %, making your meal easier to digest. The exact, quick and reliable temperature control enables putting your best ideas into practice. Due to the special design, you can close the lid before lowering your food into the hot oil. This way, you can keep your workplace clean from annoying splashes of oil.
These instructions for use will inform you about the various functions and features, which make it easy to take pleasure in your new Deep Fryer.
We hope that you will enjoy your new Deep Fryer.
Carefully read all instructions before operating this appliance and save for further reference. Do not attempt to use this appliance for any other than the intended use, described in these instructions. Any other use, especially misuse, can cause severe injuries or damage by electric shock, moving parts, heat, or fire.
These instructions are an essential part of the appliance. Do not pass the appliance without this booklet to third parties.
Any operation, repair and technical maintenance of the appliance or any part of it other than described in these instructions may only be performed at an authorised service centre. Please contact your vendor.

GENERAL SAFETY INSTRUCTIONS
- This appliance is for household use only and NOT intended for use in moving vehicles. Do not operate or store the appliance in humid or wet areas or outdoors. Any use of accessories, attachments or spare parts that are not recommended by the manufacturer or damaged in any way may result in damage and/or injuries to persons.
- Check the entire appliance regularly for proper operation—especially the power cord (e.g. check for distortion, discolouration, cracks, corroded pins of the power plug). Do not operate the appliance, when the appliance or any part of it is likely to be damaged, to avoid risk of fire, electric shock or any other injuries to persons and/or damage. The appliance is likely to be damaged if the appliance has been subject to inadmissible strain (e.g. overheating, mechanical or electric shock), or if there are any cracks, excessively frayed or melted parts, or distortions, or if the appliance is not working properly. In this case, immediately unplug the appliance and return the entire appliance (including all parts and accessories) to an authorized service centre for examination and repair.
- Operate the appliance on a well accessible, stable, level, dry and suitable large table or counter that is resistant against water, fat, and heat.
- When heating oil, there is always a risk that vapours of hot oil could
catch fire. Always keep any type of source of ignition (e.g. burning cigarettes, candles, sparks) in appropriate distance from the appliance during operation, to avoid risk of fire and damage. If the oil catches fire, IMMEDIATELY unplug the appliance and close the lid to extinguish the fire. DO NOT attempt to extinguish burning oil with water! Water will evaporate explosively in hot oil, causing additional hazards by hot splashes of burning oil. Use a powder extinguisher or fire blanket. Call the fire brigade!
- Always keep the appliance and the table or counter clean and dry and wipe off spilled liquids immediately. Do not place any clothes or tissue or other objects under or on the appliance during operation, to avoid risk of fire, electric shock and overheating. Do not place the appliance over a power cord or any heat-, fat- or moisture-sensitive surfaces, or near the edge of the table or counter, or on wet or inclined surfaces.
- The appliance could move considerably during operation of the centrifuge. During operation keep the appliance in an appropriate distance of at least 30 cm on each side to the edge of the working space and furniture, walls, boards, other appliances, curtains, and any delicate objects. Leave at least 1 m of free space above the appliance. Exclusively use the appliance for domestic use and for processing food that is fit for consumption. Immediately unplug the appliance, if there is any kind of malfunction or problem (e.g. the motor of the centrifuge gets stuck, liquid running out, overheating).
- To avoid risk of fire: do not fill any inflammable liquids into the appliance. Do not place any inflammable objects or inflammable liquids (e.g. high-proof alcoholic drinks) directly beneath the appliance during operation.
- This appliance is NOT intended for use by persons (including children) with reduced physical, sensory or mental capabilities, or lack of experience and knowledge, unless they have been given supervision or instruction concerning use of the appliance by a person responsible for their safety. Children must always be supervised to ensure that they do not play with the appliance or any parts of the appliance or the packaging. Always keep the appliance where it is dry, frost-
free, and clean, and where young children cannot reach it. Do not leave the appliance or any part of it unattended, when in reach of young children.
- Do not place the appliance or any part of it on or near hot surfaces (e.g. burner, heater or oven). Do not use any parts of the appliance with any other device or for any other purpose. Before operation, always ensure that the appliance is assembled completely and correctly according to the instructions in this booklet. Do not handle the appliance or any part of it with violence.
- Do not insert your fingers or any foreign objects (e.g. clothes, cooking utensils) in the interior of the appliance (oil container or basket), with the appliance connected to the power supply. Do not use any hard, sharp or edged objects (e.g. knives, forks) with the appliance. For example, use barbecue tongs to take out your food.
- It is best to close the lid securely before operation. Especially when lowering fresh, moisten food into the hot oil, the oil could splash and froth vigorously and large amounts of hot steam could escape. During operation and shortly thereafter, hot steam could escape from the filter opening and under the lid even with the lid securely closed. Do not hold any parts of your body or any delicate objects over the appliance during operation. Also, when opening the lid, always ensure not to get scalded by splashes and steam.
- Do not overfill the oil container. Otherwise, the centrifuge cannot work properly and could get damaged. Additionally, liquids could run out. Always wipe off spilled liquids immediately. If liquids run out or are spilled on the housing, immediately unplug the appliance. However, do not operate the appliance without liquid. Always at least fill to the MIN filling level mark to avoid overheating.
- During operation and shortly thereafter, hot steam could escape from under the lid. Additionally, the appliance and especially the lid will become very hot. Only touch the appliance and all its parts by the handles. Beware of hot steam and condensate when opening the lid.
- Do not leave the appliance unattended, when it is connected to the power supply. Always switch off (temperature dial to MIN, SPIN timer
to 0) then unplug the appliance, before moving, or cleaning the appliance, or when the appliance is not in use. Always hold the housing at both sides near the bottom for moving or lifting. Do not hold the appliance at the lid, power cord, or handle of the control unit for moving the appliance. Do not place any hard and/or heavy objects on the appliance or any part of it.
- Do not use any abrasive cleaners, cleaning pads (e.g. metal scouring pads), or any corrosive chemicals (e.g. bleach) for cleaning. Do not immerse the control unit, housing or power cord in water or any other liquid. Do not spill or drip any liquids on the control unit, housing, or on the power cord to avoid risk of fire and electric shock. Do not place the control unit, housing or power cord in an automatic dishwasher.
- Do not leave any food dry on the appliance. Do not store the oil in the oil container of the appliance. Always clean the appliance after each use to prevent an accumulation of baked-on foods (see: >Care and Cleaning). Always keep the appliance and its parts clean.
-
This appliance is intended to be used in household and similar applications such as:
-
staff kitchen areas in shops, offices and other working environments;
- farm houses;
- by clients in hotels, motels and other residential type environments;
- bed and breakfast type environments.

IMPORTANT SAFEGUARDS FOR ALL ELECTRICAL APPLIANCES
The appliance is driven electrically. Place the appliance near a suitable wall power socket to connect the appliance directly to a protected mains power supply with protective conductor (earth/ground) connected properly. Ensure that the voltage rating of your mains power supply corresponds to the voltage requirements of the appliance (230 V, 50 Hz, AC, rated for at least 16 A). The power outlet socket must be installed separately from other power outlet sockets to avoid interference with other appliances.
The installation of a residual current operated circuit breaker (r.c.c.b.) with a maximum rated residual operating current of 30 mA in the supplying electrical circuit is strongly recommended. If in doubt, contact your electrician for further information.
In various foreign countries, the specifications for power supplies are subject to incompatible norms. Therefore it is possible that power supplies in foreign countries do not meet the requirements for safe operation of the appliance. Thus, before operating the appliance abroad, ensure that safe operation is possible.
- Do not to use any desk top multi socket outlet, external timer, remote control systems, or extension cord.
- Always handle power cords with care. Always completely unwind the power cord before use. Do not place the appliance on a power cord. Power cords may never be knotted, twisted, pulled, strained or squeezed. Do not let the plug or power cord hang over the edge of the table or counter. The power cord may not touch hot surfaces or sharp edges. Ensure that no one will pull the appliance by the power cord. Take care not to entangle in the power cord. Always grasp the plug to disconnect the power cord.
- For switching off: turn temperature dial to MIN, turn SPIN timer to 0, then remove plug from power outlet.
- DO NOT drip or spill any liquids on the housing, control unit or power cord. When liquids overflowed or are spilled on the housing, control unit or power cord, immediately unplug the appliance. Thereafter, clean the appliance and let it dry for at least 1 day (see: 'Care and Cleaning').

HIGH TEMPERATURES — RISK OF BURNS
The Deep Fryer is designed for heating oil to a temperature level of up to 195 °C. Additionally, the contents will need some hours to cool down. Please keep this in mind to avoid scalds and damage. Never move the appliance during use. Extreme caution must be used when moving the appliance or any vessel such as oil container with hot oil.
- Besides the containing oil, the lid, basket, control unit, and exterior of the appliance can get very hot during operation and thereafter. During operation and shortly thereafter, hot steam could escape from under the lid. Due to the extreme temperatures, the heated oil can cause very severe injuries and damage.
- Do not touch the hot surfaces with any parts or your body or any heat-sensitive objects during operation or when still hot. Only touch the appliance at the handles and operating elements during operation and when still hot.
- Do not move the appliance or oil container when still hot. Always leave the appliance and oil cool down before moving, emptying or cleaning the appliance. Do not place the hot basket on heat-sensitive surfaces.
- Even with the lid properly closed, steam could escape from the lid during operation and shortly thereafter. Condensate could accumulate under the lid and drip, when opening the lid. Beware of hot steam and condensate when opening the lid.
- DO NOT cook any high-proof alcoholic liquid or alcoholic food-stuffs (e.g. mulled wine, grog) within the appliance to avoid risk of explosion and fire.

MOVING PARTS
The lid must be closed and engaged and the basket must be engaged in the upper position to operate the centrifuge. Do not try to deactivate these safety interlocks. If the centrifuge will not work, even when handled correctly, then switch OFF the appliance (temperature dial to MIN, SPIN timer to 0) and unplug. Send the complete appliance to an authorised service centre for repair.
During spinning, the appliance could vigorously vibrate, thus moving around on the table or counter. Ensure to leave sufficient distance to any other objects. DO NOT place the appliance near the edge of the table or counter. If the appliance moves to the edge of the table/counter, IMMEDIATELY switch OFF the centrifuge (SPIN timer to 0). DO NOT attempt to move the appliance back to its place, with the oil in the oil container still hot! Otherwise hot oil could run out, causing severe injuries and damage.
TECHNICAL SPECIFICATIONS
| Model: | Art.-No. 42580 » Vita - Spin - Deep - Fryer « |
| Power supply: | 230 V AC, 50 Hz |
| Power consumption: | 2,000 W |
| Length of power cord: | appr. 1 m |
| Weight: | appr. 4,65 kg |
| Dimensions: | appr. 25.5 cm x 35.0 cm x 25.5 cm (width x depth x height) |
| Capacity: | 2.3 Liter |
| Certification: | CE |
These specifications may change without notice.
KNOWING YOUR VITA - SPIN - DEEP - FRYER
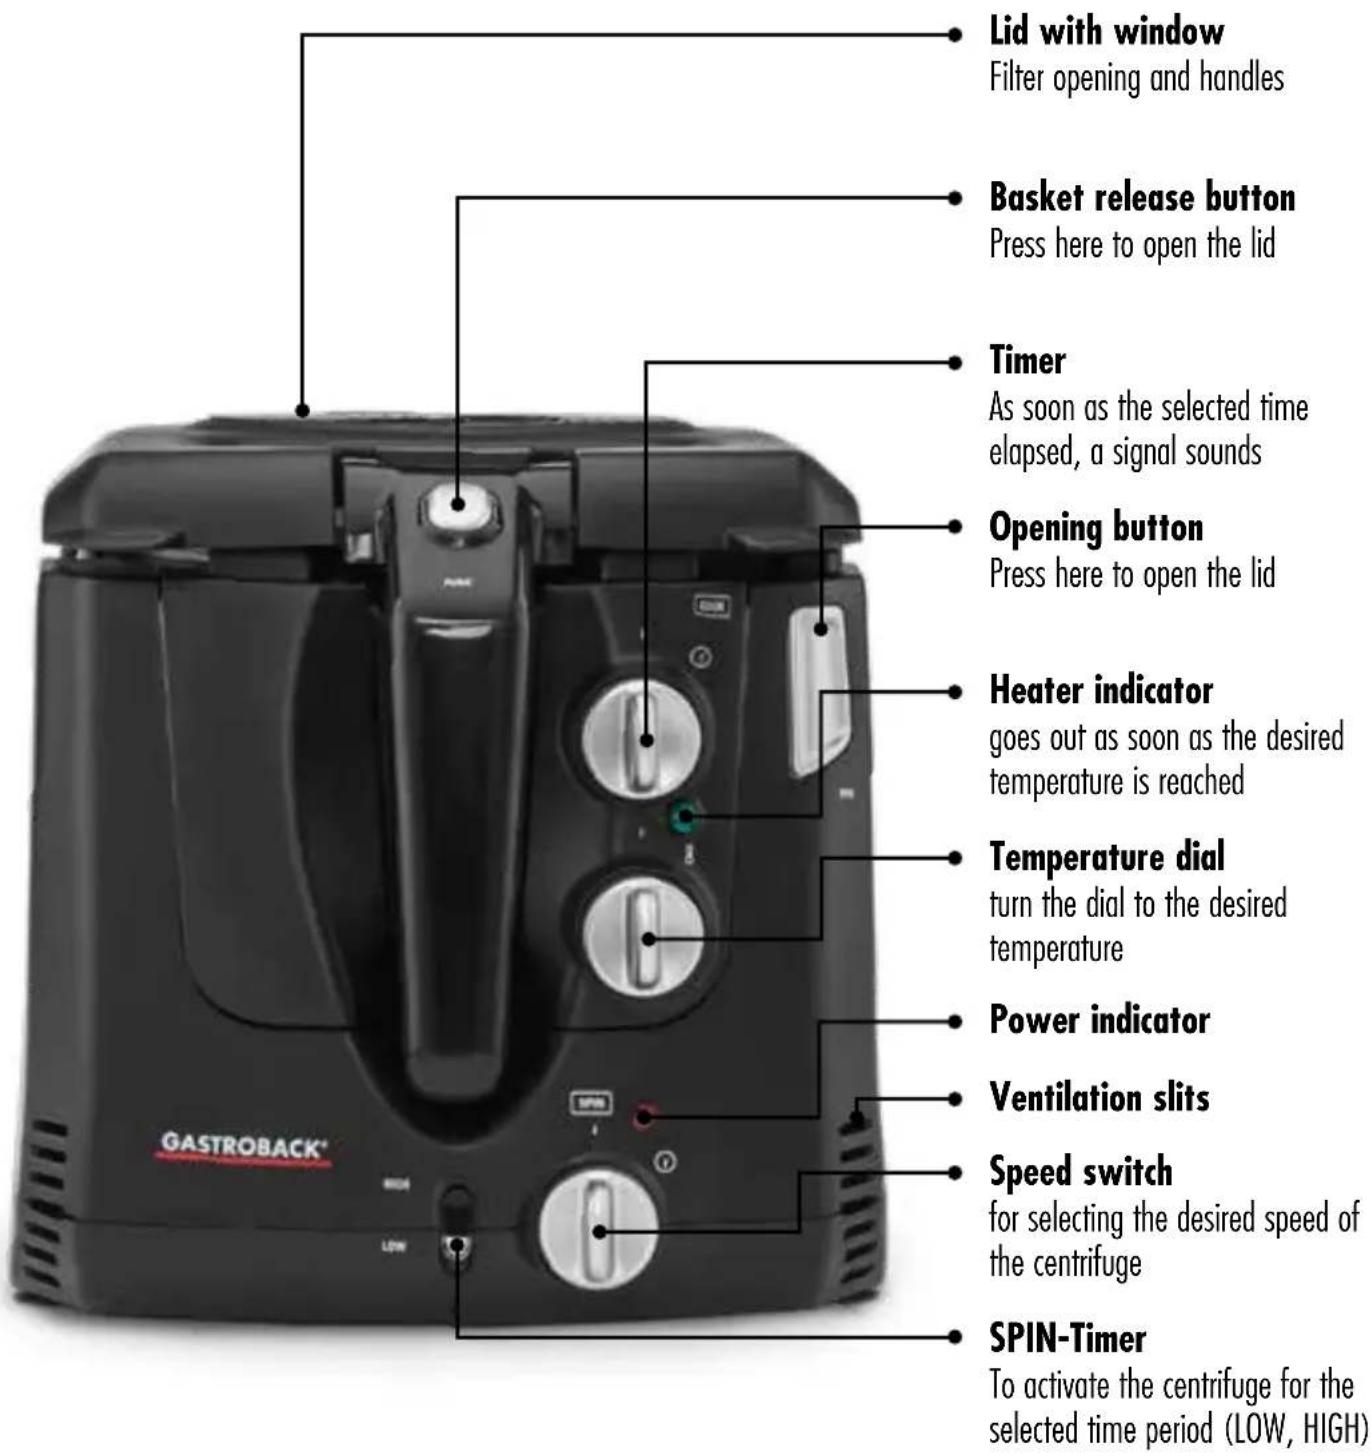
natural_image
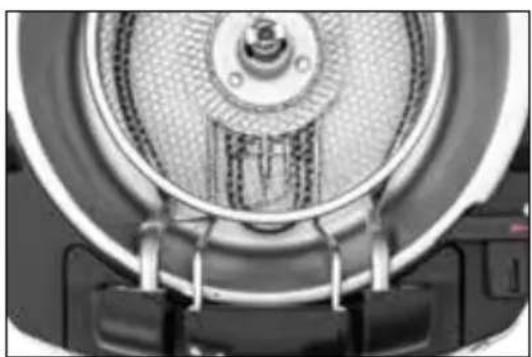
Close-up of a mechanical component with concentric rings and internal structure (no visible text or symbols)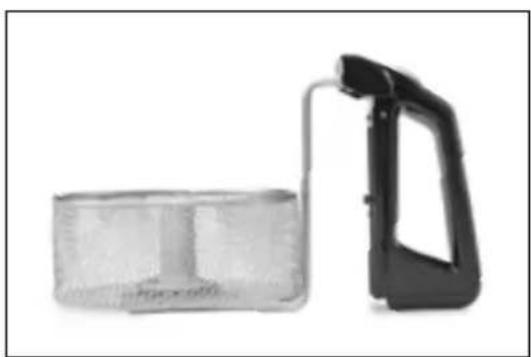
natural_image
Two plastic containers, one open and one filled with a black handle (no visible text or symbols)Top-View into the device Frying basket
PROPERTIES OF YOUR NEW DEEP FRYER
Frying is a gentle way of cooking even delicate food that will easily degrade. Your new Deep Fryer heats up cooking oil to a freely selectable temperature of up to 195^ C. Due to the exactly controlled temperature setting, you will always get the best results. As soon as the preselected temperature is reached, the food can be heated swimming in the hot oil bath, thus being cooked evenly at all sides.
However, the drawback of this cooking technique is an increased fat content in fried food. To overcome this disadvantage as far as possible, your new Deep Fryer is equipped with a spinning feature. This way, by hurling out surplus oil, the fat content of your meals can be reduced by one third, compared to other frying techniques. Thus you can enjoy fried meals that are easier to digest with less calories.
SAFETY CONCEPT
⚠ WARNING: For your protection and convenience, your new Deep Fryer is equipped with various safety features. Do not attempt to damage or by-pass the safety interlocks! Do not attempt to operate the appliance using others than the designated parts (e.g. oil container, basket).
OVERHEAT PROTECTION
At the back of the control unit is a thermal cut-out that prevents overheating. If the fryer does not heat up, the thermal cut-out could have been triggered and switched off the control unit. This could occur, for example, if the fryer has been operated with an insufficient amount of oil in the oil container. To re-start the appliance:
- Switch off (temperature dial to MIN), and unplug the appliance. Wait until the appliance and oil cooled down.
- Open the lid.
Important: Keep in mind that oil could drip from the basket and heating rods when taking out these parts.
- Take out the basket and place it, for example, on a flat dish.
- Take out the control unit (see: >Disassembling the Appliance). At the rear (pointing towards the housing of the appliance) is a small red reset button.
- Press the reset button.
- Ensure that the filling level in the oil container is between the MIN and MAX filling level marks. Reassemble the control unit and basket. Thereafter, you can operate the appliance quite normally (see: >Operation<).
If the thermal cut-out is triggered again after short operation without any apparent reason, send the appliance to an authorized service centre for repair.
CONNECTOR OF THE CONTROL UNIT
The control unit is connected via a separate electric power socket that is mounted at the housing. Thus, the fryer operates only with the control unit assembled properly in the housing.
SAFETY INTERLOCKS
This appliance features a special oil container interlock: The container release slider must be properly locked before use. Otherwise, you cannot close the lid.
To avoid injuries and damage due to splashes of hot oil, the centrifuge will work only with the lid properly closed. Additionally, the basket must be locked in the upper position.
FIREPROOF FILTER IN THE LID
When heating oil, there is always a risk that vapours of hot oil could catch fire. To avoid this as far as possible, the appliance is equipped with a fireproof filter in the lid, retaining splashes and a lot of vapour.
⚠ WARNING: Only use the designated filters with the appliance. Do not operate the appliance with unsuited filters to avoid risk of fire!
NON-SLIP PADS AND SUCKERS
The base of the appliance is coated with non-slip mats. Additionally four suckers are used as legs. Thus the appliance gets a stable standing on smooth, dry and fat-free surfaces. This way, vibrations due to the spinning process of the centrifuge are damped and, as far as possible, the appliance will not move around excessively during spinning. However, please keep in mind that it is not possible to completely prevent the appliance from moving, especially when spinning large pieces. Thus, always keep the appliance in sufficient distance from the edge of the table or counter. Additionally, do not operate the appliance unattended.
TIPS FOR BEST RESULTS
Only use high-grade frying oils (e.g. rapeseed, corn, or groundnut oil). Frequently, poor-quality oils contain too much protein and carbohydrate, leading to degradation
when heated. Also, oils containing a lot of highly unsaturated fatty acids (e.g. some high-quality salad oils) are prone to premature degradation when heated.
We strongly recommend avoiding the usage of solid frying fat (e.g. Palmin, coconut butter), because you will have to melt the fat before applying it to the appliance and cleaning after use could be difficulty.
To avoid early degradation of the oil, do not add salt or spices to the oil. Additionally, if possible, salt and spices should be added to your food after frying. Otherwise, you should change the oil more frequently.
As a rule of thumb, you should change the frying oil after frying 8 to 12 times; but this depends on the quality of the oil and the types of food, you have fried. If required, store the oil in the refrigerator. Do NOT leave oil in the appliance.
Do not cook food with wet batter using the basket. The basket will trap the batter and prevent successful circulation of oil because the batter will form a shell on the basket. It is also quite hard to clean the net of the basket. To cook battered food, open the lid and remove the basket. Carefully cook only a few pieces per batch. Do not cook the food completely, only harden the batter shell. Beware of oil spattering when adding batter to the oil. Cook until desired consistency with the basket. Thereafter you can try to spin your food with speed setting LOW.
Always try LOW spinning speed and shorter time for fragile or soft food to see whether it can withstand HIGH spinning speed.
This holds also for any heavy food (e.g. large pieces of beef), which may lead to excessive vibration of the appliance. Cut too large pieces before cooking. Try to get an even distribution in the basket, when filling in.
Excessive vibration of whole appliance may be caused by
- un-balance distribution
• overloading with food
• or too large pieces (e.g. whole chicken legs; huge piece of chicken breast).
Cut the food into 2 or 3 pieces before frying. Always cook and spin food according to recommended weight in the following table. Spinning of overloaded or unbalance distribution of food could lead to hazard due to spilled hot oil.
Dry damp food before frying. You can cook frozen food in the fryer. However, remove any loose ice first. Do not let the air get to frozen food for a long time period before cooking. Otherwise, a layer of ice will coat the food, causing the oil to extremely froth and splash, when lowering the food into the oil.
The frying time and temperature table below is for reference only and should be adjusted for different quantity of food and your own taste.
| Food Quantity | (gram) | Frying Temp (°C) | Frying Time (minute) | Spinning Speed | Spinning Time (seconds) |
| Fresh Chip 400 180 7-9 HIGH 1 | |||||
| Frozen Chip 450 190 5-7 HIGH 1 | |||||
| Chicken Piece/ Legs 400 170 9-14 LOW 1 | |||||
| Chicken Wings 500 160 7-9 HIGH 1 | |||||
| Chicken Breast 450 170 7-11 LOW 1 | |||||
| Shrimp (with shell) | 350 160 3-4 HIGH 3/4 | ||||
| Shrimp (without shell) | 300 160 2-3 HIGH 3/4 | ||||
| Fish Fillet 400 160 5-9 LOW 3/4 | |||||
| Frozen Onion Ring 200 150 2-4 HIGH 1/2 | |||||
| Mushroom | 200 140 2-3 HIGH 3/4 |
BEFORE FIRST USE
⚠ WARNING: DO NOT let young children play with the appliance, or any part of it, or the packaging!
- Unpack the appliance and all accessories carefully.
- Check that no parts are damaged or missing (see: >Knowing Your Vita-Spin-Deep-Fryer).
- Carefully remove all shipping materials and promotional materials, but DO NOT remove the model label. Especially ensure that there are no foreign objects (e.g. packaging material) in the interior of the oil container or basket.
⚠ WARNING: Always switch off (temperature dial to MIN), unplug, and let the appliance cool down, before cleaning. Do not immerse the housing, control unit, or power cord in water or other liquids or spill any liquids on the housing, control unit, or power cord. Do not place the housing, control unit, or power cord in an automatic dishwasher.
- Before first use and after a longer period of storage, clean the appliance and its parts (see: >Care and Cleaning).
OPERATION
⚠ WARNING: Always ensure that the appliance and all its parts and accessories are out of reach of young children.
The appliance is intended for heating food. Therefore, the appliance and its contents will get very hot during operation. Always observe the following safety precautions to avoid injuries and damage.
When heating oil, there is always a risk that vapours of hot oil could catch fire. Always keep all types of source of ignition (e.g. burning cigarettes, candles) in appropriate distance from the appliance during operation, to avoid risk of fire and damage. To reduce the risk of fire as far as possible, the appliance is equipped with a fire-proof filter in the lid. Thus, it is best to keep the lid closed during operation, whenever possible. However, steam and vapour could escape from the filter opening and under the brim of the lid during operation. Take care not to get scald. Always keep a safe distance from the appliance.
Only place the appliance on a stable, dry, level, and clean surface that is resistant against heat, moisture and fat. Do not place the appliance on inclined surfaces, to avoid injuries and damage due to overflowing hot oil. Do not place any clothes or tissue or other foreign objects on or under the appliance during operation, to avo-
id risk of fire or electric shock. Do not block the ventilation slots at the bottom and rear of the housing. During operation, the operating elements (see: »Knowing Your Vita - Spin - Deep - Fryer«) must be accessible all the time. The appliance could move during spinning. Ensure to keep the appliance in an appropriate distance of at least 30 cm on each side to the edge of the working space and any other objects. During operation leave at least 1 m of free space above the appliance.
Before assembling the appliance, always ensure that all parts are in proper working order (see: >General Safety Instructions). Do not use any damaged or unsuitable parts to avoid risk of injuries and damage.
The filling level in the oil container must always be between MIN and MAX filling level marks, indicated on the oil container (approx. 2.3 Litre): When filling in too less oil, the appliance could overheat. With too much oil, the oil could overflow, when inserting fresh, wet food. Additionally, too much oil could lead to failure of the spinning process and damage of the centrifuge, because the basket will stay in oil during spinning.
To avoid splashes, lock the basket in the upper position for adding food. Then close the lid and always lower the basket slowly into the oil to avoid overflowing. If oil has run out, immediately unplug the appliance and leave it cool down. Then clean the appliance to avoid risk of fire and electric shock.
Keep the lid closed as far as possible, during operation to avoid damage due to splashes and hot steam. Do not use violence for opening the lid or lifting up the basket. Lid and basket are locked securely for operation. Thus, always press the opening/release button to release these safety interlocks.
Exclusively use the appliance for processing food that is fit for consumption.
PREPARING THE APPLIANCE
- Press the opening button at the right upper side of the housing; then open the lid.
- Hold the basket at the handle, and with the basket release button at the top of the handle pressed, lift the basket up and out.
- Ensure that the appliance is assembled correctly, and oil container, lid, heating rods, and basket are completely dry (see: >Reassembling the Appliance).
CAUTION: Oil container, lid, heating rods and basket must be completely dry before use. Moisture could make hot oil froth and splash vigorously, when opening the lid. Additionally, always ensure that the filling level in the oil container is between the filling level marks MIN and MAX. Too little oil could lead to overheating; too much oil could overflow the brim of the oil container, causing injuries and damage. Additionally, too much oil could prevent a successful spinning process.
- Pour good quality oil (e.g. rapeseed, corn or groundnut oil) into the oil container. Ensure that the filling level is between the MIN and MAX filling level marks indicated on the oil container. You will need approx. 2.3 Litre.
- At the rear of the appliance, insert the dripping cup in the opening under the hinge of the lid.
- Close the lid.
Tip:
The dripping cup prevents hot oil and condensate from running down onto the table/counter, when opening the lid.
FRYING
- Prepare your food for frying. Cut your food into pieces fitting for the basket of the fryer. Damp food must be dried first. Remove any loose ice from frozen food (see also: >Tips for Best Results<).
- Ensure that the SPIN timer of the centrifuge is set to 0. Turn the temperature dial to the MIN position.
Tip:
As far as possible, you should avoid turning back the SPIN timer and cooking timer. It is better to wait, until the set time elapsed. The timers continue running even if the appliance is disconnected from the power supply.
- Connect the appliance to the power supply (see: >Important Safeguards for Electrical Appliances<). The red power indicator and the green heater indicator illuminate.
- Turn the temperature dial to the desired temperature (see: >Tips for Best Results<).
The appliance starts heating. As soon as the selected temperature is reached, the heater indicator goes out. Then, you can fill in your prepared food.
Tip:
You can alter the preselected temperature whenever you like. The appliance will always maintain the temperature selected at the temperature dial.
⚠ WARNING: The exterior of the appliance and especially the lid will become very hot. Additionally, steam will escape from the filter opening in the lid and under the brim of the lid. Always ensure not to get scald by steam and condensate. Only touch the appliance at the handles and operating elements to avoid scalding. Do not hold your hands or face over the appliance during operation and shortly thereafter. Beware of hot steam coming out from under the lid, especially when opening the lid during operation.
- Ensure that the prepared pieces of food are dry as far as possible and do not drip. Then, distribute the pieces of your food evenly in the basket.
⚠ WARNING: When frying food, for which you cannot use the basket (e.g. moist batter) you must add your food without the basket directly into the oil container with the lid open. For this, it is best to use a ladle to immerse the food slowly into the oil. Doing so, keep in mind that the oil could vigorously froth and splash and large amounts of steam could escape, when getting in contact with wet food. Keep a sufficient distance to the appliance, and protect your hands with oven gloves.
-
Press the opening button and grasp the lid at the handle to open it.
-
Put the basket into the oil container. For this, insert the shaft in the middle of the oil container in the opening in the middle of the basket. Leave the basket at the upper position, where the brim of the basket is on a level with the brim of the oil container. Ensure that the basket is fixed in this position.
-
Close the lid.
⚠ WARNING: When lowering the basket loaded with food, the hot oil could vigorously froth and splash and large amounts of hot steam will escape. Do not hold your hands and face over the appliance during operation. When working with the basket, always close the lid before lowering the basket. Be aware that, even with the lid closed properly, large amounts of steam could escape from the filter opening and under the brim of the lid. Especially, when opening the lid during or after a frying cycle, beware of hot steam escaping from under the lid.
- Grasp the handle of the basket, hold the basket release button pressed, while SLOWLY lowering the basket into the oil. Doing so, watch the process via the window in the lid without holding your face over the appliance. If your food is very humid, the oil could vigorously froth, and large amounts of steam could
escape from the filter opening and from under the brim of the lid. Keep sufficient distance to the appliance. Ensure that the oil will not overflow.
Tip:
When the oil temperature drops below the set value, the heating element will switch on automatically. Thus, the green heater indicator illuminates again. This will occur especially when lowering cold food into the oil container, and it indicates simply the proper functioning of the temperature control.
- Turn the cooking timer to the desired cooking time (in minutes). As soon as the set time has elapsed, a signal rings.
⚠ WARNING: Do not cut your food in the oil container or basket! When cutting food, juices could come out, drip into the hot oil, and vigorously splash, thus leading to injuries and damage. Additionally, basket and oil container will get damaged by cutting.
- You can check the consistency of your food at any time during cooking: With the basket release button pressed, lift the basket to its upper position. Thereafter, press the opening button and carefully open the lid, being aware of hot steam coming out from under the lid. It is best to use barbecue tongs for taking out a piece of food for inspection. Thereafter, if your food is not done already, close the lid again, and lower the basket.
- If your food is done, lift the basket to the upper position.
- Now you can use the centrifuge to remove surplus oil from your food. Switch the speed switch to the desired position (see: >Tips for Best Results<). LOW: for tender and delicate, or heavy food (e.g. fish, breaded meat); if in doubt, first try this setting. HIGH: for strong and firm ingredients (see also: >Tips for Best Results<).
CAUTION: The lid must be closed properly and the basket must be locked in the upper position for operation of the centrifuge. This way, you avoid splashing of hot oil. Take into account that the appliance could vibrate during spinning, thus moving around on the table/counter. For this reason, close supervision is necessary during the spinning process to prevent the appliance from falling from the table/counter.
Tip:
You cannot use the centrifuge, if you are friying without the basket.
- Ensure that the lid is closed properly. Then turn the SPIN timer to the desired spinning time (we recommend 12 to 1 minute). The centrifuge starts operation immediately,
and spins the basket until the set spinning time has elapsed. This way, surplus oil will be hurled out.
Tip:
There is no need to leave your food to drain. This task is taken on by the centrifuge.
⚠ WARNING: The lid will get very hot during operation. Only touch the lid at the handles. Additionally, a large amount of hot steam could escape from under the lid, when opening. Ensure not to get scalded. Always keep a sufficient distance to the appliance.
- As soon as the spinning time elapsed, and the centrifuge comes to a complete standstill, carefully open the lid. Doing so, beware of hot steam escaping from under the lid.
⚠️ CAUTION: The basket is very hot. Only touch the basket at the handle. Keep in mind that hot oil could drip from the basket, when removing the basket from the appliance. Do not place the hot basket on an inclined surface where it can tilt or fall. Do not place the hot basket on surfaces that are sensitive to heat, moisture and/or fat. It is good advice to place the basket on a suitable large dish. - Take your food out of the basket. You may use barbecue tongs to remove large pieces from the basket. For smaller pieces (e.g. chips), it is better to pour out the food into a large bowl. Doing so, keep in mind that hot oil could drip from the basket.
Thereafter you can fill the basket with the next portion of your food.
AFTER COOKING
- After you have processed your food as desired: close the lid, turn the temperature dial to MIN, and unplug the appliance.
- Wait until the appliance cooled down (at least 3 hours).
- Thereafter, empty the oil container and clean the appliance and all used parts and accessories immediately after use as described in section Care and Cleaning.
Important: Do not leave any food dry on the surfaces. Additionally, do not store the oil in the appliance. Pour out the oil into a suited well closing container. Do not dispose degraded oil in the sink! Use a well closed container and dispose the oil in domestic refuse (see: >Care and Cleaning).
SOLVING PROBLEMS
If any problems occur during operation, you will find solutions in this section. Further information on processing your food is given in section Tips for Best Results.
| Problem Reason The Solution | ||
| You cannot insert the control unit completely. | The control unit is tilted a little. Lift | the control unit a little, then try again. |
| You cannot insert the oil container properly. | The oil container is in wrong orientation. | The oil container can only be inserted in one orientation. Hold the oil container with the MIN/MAX filling level marks facing to the back of the appliance. Turn the oil container a little back and forth. |
| The container release slider is locked. | Push the container release slider to the right. | |
| The coupling of the centrifuge is positioned somewhat unfavourable. | Turn the oil container a little back and forth, until it slips onto the coupling. | |
| You cannot close the lid. The container release slider is not closed. | Push the container release slider to the oil container. | |
| Ensure that both hinges are inserted in the respective opening of the housing. Press down the hinges until they engage. | ||
| The centrifuge does not work. The centrifuge will only work with the lid closed properly. | Close the lid. | |
| Lift and lock the basket to the upper position. | ||
| The basket cannot be locked in the upper position. | The basket is not mounted correctly. | Take out the basket and insert it again. Doing so, ensure that you insert the black handle of the basket into the guide of the control unit. |
CARE AND CLEANING
⚠ WARNING: Always ensure that the appliance and any parts and accessories of it are out of reach of young children. Always switch OFF the appliance (temperature dial set to MIN, green indicator is illuminated), then unplug the appliance, and wait until the oil cooled down (at least 3 hours), before cleaning the appliance. It will take a long time after operation for the oil to cool down. Always ensure that the oil cooled down before disassembling, moving, and/or cleaning the appliance. Do not attempt to move the appliance with the oil in the oil container still hot! Otherwise, hot oil could be spilled, causing severe injuries and damage.
Keep in mind that the parts of the appliance are fatty and oil could drip, when removing any parts. Keep delicate objects in sufficient distance. Do not place the parts of the appliance on surfaces that are sensitive to fat or moisture. It is a good idea to have a large dish or bowl at hand.
DISASSEMBLING THE APPLIANCE
- Switch off (temperature dial to MIN) and unplug the appliance. Let the appliance cool down for at least 3 hours. The oil in the oil container may no longer be hot.
- Press the opening button to open the lid.
- You can clean the lid much more easily, when removing the lid. For this, push the little black lock buttons at both sides of the hinge to the hinge. Then you can lift the complete lid up and out.
Important: The filter insert in the lid is fragile. It may not be squeezed, bend, or pressed flat. Always handle the filter insert with special care to avoid damage! Do not clean the filter insert with any brushes or clothes.
- Remove the filter cover and carefully take out the filter insert. It is best to clean the filter insert in a small bowl with hot dishwater. Just toss the filter in the dishwater.
Thereafter rinse with clear tap water. Place the filter insert on a dry kitchen towel. Then leave it dry naturally.
Tip:
If the filter insert is damaged or soiled by oil vapour, you should replace it.
⚠ WARNING: Do not replace the filter insert by any other type of filter. Unsulted filters could catch fire during operation, thus causing severe injuries and damage! Only use filter inserts dedicated for the appliance. For replacement, get in contact with your vendor.
- Press the basket release button, lift up the basket, and remove it.
- Lift the control unit up and out.
For this, use the handle on top of the control unit. You can pull the handle somewhat out of the control unit to get a better grip. Pull the control unit upwards and out.
Important: Ensure, not to spill the oil, while removing the oil container.
- Carefully take out the oil container to avoid spilling the oil. Push the container release slider to the right side. Then turn the oil container counterclockwise to the stop, and lift it carefully up and out.
- Pour the oil into a suitable container.
- Remove the dripping cup from the rear of the appliance.
- Dispose degraded oil in a closed container in domestic refuse. DO NOT dispose oil in the sink!
CLEANING THE APPLIANCE
CAUTION: Do not use any abrasive cleaners, cleaning pads (e.g. metal scouring pads), or any corrosive chemicals (e.g. bleach) for cleaning the appliance or any parts of it, to avoid damage to the surfaces. Do not use any hard or sharpedged objects for cleaning. Do not immerse the housing, control unit, or power cord in water or any other liquid. Do not spill or drip any liquids on or in the housing, control unit, or power cord to avoid risk of fire and electric shock. Do not clean housing, control unit, or power cord in an automatic dishwasher. Do not use violence!
- It is a good idea to wipe residues of oil from the oil container first. For this, you may use paper towels or something similar.
- Basket, lid, filter cover, oil container, and dripping cup can be washed in warm soapy water. However, you can clean these parts in an automatic dishwasher. As far as possible, use the upper tray.
⚠️ CAUTION: Do not insert the control unit into liquids. Clean the heating rods and wires of the temperature probe with special care to avoid damage. Do not drip any liquids in the housing of the appliance or on the control unit or power cord.
-
Wipe the control unit and heating rods carefully with a cloth or SOFT brush, slightly damped with warm dishwater. Thereafter, wipe with clear tap water. Doing so, ensure not to spill water on the black body of the control unit.
-
Clean the inner and outer surfaces of the housing, using a cloth, damped with a little warm dishwater. Ensure not to drip any liquids into the housing of the appliance.
⚠ WARNING: Always ensure that the appliance and all parts of it are out of reach of young children.
- Dry the parts thoroughly after cleaning, and thereafter let dry naturally for approx. 1 hour, where it is out of reach of young children.
- Reassemble the components to the appliance as described below. Ensure that the lid and oil container are free from water after cleaning and before reassembling.
REASSEMBLING THE APPLIANCE
It is good advice to reassemble the appliance after cleaning. Thus you avoid damage to the parts of the appliance and the parts cannot get lost. Always let the parts of the appliance dry completely, before reassembling.
- Make sure that the container release slider is in open position (pulled outward).
- Insert the oil container in the oven compartment. For this, hold of the oil container by the brim, with the MIN/MAX filling level marks orientated towards the hinge of the lid. Then, without violence, turn the oil container slightly back and forth until it settles down in the oven compartment. Gently rotate the oil container clockwise until it engages tangibly (to the stop). Push the oil container release slider towards the oil container to lock the oil container safely in place.
Tip:
You cannot close the lid with the container release slider not closed completely.
- Insert the control unit. For this, insert the heating rods in the oil container, while the connector at the base of the control unit must slide on the power socket at the housing of the appliance. Gently press down the control unit. The black body of the control unit may not protrude the housing of the appliance.
- Insert the basket. The opening in the centre of the basket must slide on the shaft in the oil container, and the black plastic handle of the basket must be inserted in the guide in the centre of the control unit.
Tip:
The basket is inserted correctly, if it stops in the upper position and can only be lowered by pressing the basket release button.
-
Hold the basket release button pressed, while lowering the basket completely down.
-
Insert the hinges of the lid in the respective openings in the upper brim of the housing of the appliance. Then press the hinges down at both sides until they engage with a click.
- Close the lid.
- Insert the filter insert into the filter opening and close the filter cover.
- Insert the dripping cup at the rear of the appliance.
STORAGE
⚠ WARNING: Housing, lid, oil container and heating rod get very hot during operation. Always switch off (SPIN timer to O, temperature dial to MIN) and unplug the appliance when it is not in use. Let the appliance cool down, before cleaning or storing the appliance.
Always clean the appliance and all its parts before storing to avoid accumulation of dried-on food (see: >Care and Cleaning). Do not leave the appliance unattended while it is connected to the power supply to avoid risk of electric shock and fire.
Ensure to store the appliance where it is clean, dry and safe from frost, direct sunlight and inadmissible strain (mechanical or electric shock, heat, moisture) and where it is out of reach of young children. Place the appliance on a clean and stable surface, where it cannot fall. Do not place any hard or heavy objects on the appliance or any part of it.
Always handle the power cord with care. Power cords may never be knotted, twisted, pulled, strained, or squeezed.
Do not use any parts or accessories of the appliance for any other purpose than operating the appliance. It is good advice to store the parts and accessories of the appliance with the appliance. For this, completely reassemble the appliance after cleaning (see: >Care and Cleaning<), thus protecting all parts against damage and loss.
⚠️ CAUTION: Do not hold the appliance by the lid, power cord, or handle of the basket for moving the appliance. To move the appliance, always hold the housing at both sides near the bottom to avoid damage.
- Grasp the housing with both hands at its sides, and place it on a suitable surface, where it cannot fall, and is out of reach of young children.
- Wind the power cord loosely around the housing.
NOTES FOR DISPOSAL
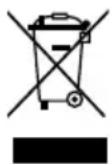
Dispose of the appliance and packaging must be effected in accordance with the corresponding local regulations and requirements for electrical appliances and packaging. Please contact your local disposal company.
Do not dispose of electrical appliances as unsorted municipal waste, use separate collection facilities. Contact your local government for information regarding the collection systems available. If electrical appliances are disposed of in landfills, dumps, or refuse incineration, hazardous substances can leak into the groundwater or can be emitted into air, thus getting into the food chain, and damaging your health and well-being as well as poisoning flora and fauna. When replacing old appliances with new once, the vendor is legally obligated to take back your old appliance for disposal at least for free of charge.
INFORMATION AND SERVICE
Please check www.gastroback.de for further information.
For technical support, please contact Gastroback Customer Care Center by phone: +49 (0)4165/22 25-0 or e-mail info@gastroback.de.
Please refer to our home page for a copy of these operating instructions in pdf format.
WARRANTY
We guarantee that all our products are free of defects at the time of purchase. Any demonstrable manufacturing or material defects will be to the exclusion of any further claim and within 2 years after purchasing the appliance free of charge repaired or substituted. There is no Warranty claim of the purchaser if the damage or defect of the appliance is caused by inappropriate treatment, over loading or installation mistakes. The Warranty claim expires if there is any technical interference of a third party without a written agreement. The purchaser has to present the sales slip in assertion-of-claim and has to bear all charges of costs and risk of the transport.
Note:
Customers from Germany and Austria: For repair and service, please send Gastroback products to the following address: Gastroback GmbH, Gewerbestr. 20, D-21279 Hollenstedt, Germany.
Customers from other countries: Please contact your dealer.
Please agree that we cannot bear the charge of receipt. Submission of appliances: Please ensure packing the appliance ready for shipment without accessories. Add the sales slip and a short fault description. The processing time after receipt of the defective appliance will be approx. 2 weeks; we will inform you automatically. After the warranty period, please send defective appliances to the given address. You will get a free quotation and, thereafter, can decide, whether we shall repair the appliance to the costs possibly accrued, send back the defective appliance for free of charge, or dispose of the appliance for free of charge.
The appliance is intended for household use only and NOT suited for commercial usage. Do not attempt to use this appliance in any other way or for any other purpose than the intended use, described in these instructions. Any other use is regarded as unintended use or misuse, and can cause severe injuries or damage. There is no warranty claim of the purchaser if any injuries or damages are caused by unintended use.
GASTROBACK GmbH
Gewerbestraße 20. 21279 Hollenstedt / Germany Telefon +49(0)4165/2225-0. Telefax +49(0)4165/2225-29 info@gastroback.de . www.gastroback.de
- TECHNISCHE DATEN
- TABLE OF CONTENTS
- DEAR CUSTOMER!
- GENERAL SAFETY INSTRUCTIONS
- IMPORTANT SAFEGUARDS FOR ALL ELECTRICAL APPLIANCES
- HIGH TEMPERATURES — RISK OF BURNS
- MOVING PARTS
- KNOWING YOUR VITA - SPIN - DEEP - FRYER
- PROPERTIES OF YOUR NEW DEEP FRYER
- SAFETY CONCEPT
- OVERHEAT PROTECTION
- CONNECTOR OF THE CONTROL UNIT
- SAFETY INTERLOCKS
- FIREPROOF FILTER IN THE LID
- NON-SLIP PADS AND SUCKERS
- TIPS FOR BEST RESULTS
- BEFORE FIRST USE
- ⚠ WARNING: DO NOT let young children play with the appliance, or any part of it, or the packaging!
- OPERATION
- PREPARING THE APPLIANCE
- Tip:
- FRYING
- AFTER COOKING
- SOLVING PROBLEMS
- CARE AND CLEANING
- DISASSEMBLING THE APPLIANCE
- CLEANING THE APPLIANCE
- ⚠ WARNING: Always ensure that the appliance and all parts of it are out of reach of young children.
- REASSEMBLING THE APPLIANCE
- STORAGE
- NOTES FOR DISPOSAL
- INFORMATION AND SERVICE
- WARRANTY
- Note:
- GASTROBACK GmbH
Brand : Gastroback
Model : Vita-Spin 42580
Category : Deep fryer