CraftArtist - Logiciel photo/vidéo SERIF - Free user manual and instructions
Find the device manual for free CraftArtist SERIF in PDF.


User questions about CraftArtist SERIF
0 question about this device. Answer the ones you know or ask your own.
Ask a new question about this device
Download the instructions for your Logiciel photo/vidéo in PDF format for free! Find your manual CraftArtist - SERIF and take your electronic device back in hand. On this page are published all the documents necessary for the use of your device. CraftArtist by SERIF.
USER MANUAL CraftArtist SERIF
Registration (UK only): (0800) 376 1989
Sales (UK only): (0800) 376 7070
Customer Service/
Technical Support:
http://www.support.serif.com/
General Fax: (0115) 914 2020
North American office
(USA, Canada):
The Software Centre
17 Hampshire Drive,
Suites 1 & 2,
Hudson NH 03051, USA
Main: (603) 889-8650
Registration: (800) 794-6876
Sales: (800) 489-6703
Customer Service/
Technical Support:
http://www.support.serif.com/
General Fax: (603) 889-1127
Online
Visit us on the Web at:
http://www.serif.com/
International
Please contact your local distributor/dealer. For further details, please contact us at one of our phone numbers above.
This User Guide, and the software described in it, is furnished under an end user License Agreement, which is included with the product. The agreement specifies the permitted and prohibited uses.
Trademarks
CraftArtist is a trademark of Serif (Europe) Ltd.
Microsoft, Windows, and the Windows logo are registered trademarks of Microsoft Corporation. All other trademarks acknowledged.
Windows Vista and the Windows Vista Start button are trademarks or registered trademarks of Microsoft Corporation in the United States and/or other countries.
Adobe Flash is a registered trademark of Adobe Systems Incorporated in the United States and/or other countries.
Copyrights
TrueType font samples from Serif FontPacks © Serif (Europe) Ltd.
Digital Images © 2008 Jupiterimages Corporation, All Rights Reserved.
Digital Images © 2008 Jupiterimages France SAS, All Rights Reserved.
Bitstream Font content © 1981-2005 Bitstream Inc. All rights reserved.
The Sentry Spelling-Checker Engine © 2000 Wintertree Software Inc.
Panose Typeface Matching System © 1991, 1992, 1995-1997 Hewlett-Packard Corporation.
Anti-Grain Geometry - Version 2.4 © 2002-2005 Maxim Shemanarev (McSeem)
© 2010 Serif (Europe) Ltd. All rights reserved. No part of this User Guide may be reproduced in any form without the express written permission of Serif (Europe) Ltd.
CraftArtist © 2010 Serif (Europe) Ltd. All rights reserved.
Companies and names used in samples are fictitious.
All screenshots were taken using the US version of CraftArtist 1.
Contents
1. Welcome .... 1
Key features....4
Installation....10
2. Getting started 13
Using the Startup Wizard.... 15
Understanding Craft Projects 18
Starting from a template 21
Starting projects from scratch 32
Make & Do projects....45
Opening and displaying projects.... 47
Saving your work 49
3. Digikits....51
Browsing....53
Buying Digikits 57
4. Pages and design aids ...... 61
Adding, moving and deleting pages....63
Navigating pages....67
Panning and zooming 68
Using design aids....70
5. Working with photos 75
Adding and positioning your photos....77
Replacing, resizing, and deleting photos....82
Cropping your photos....85
Retouching photos....88
Applying PhotoLab filters 89
Using Cutout Studio....97
6. Adding photos to frames 103
Adding photo frames to your project.... 105
Fitting photos to frames 108
Deleting frames and framed photos....115
Converting photos to frames 116
7. Working with text ...... 117
Editing and deleting text....124
Formatting text....125
Fitting text to a path....130
Adding outlines and edges to text....133
Sentiments....137
8. Applying effects ...... 143
Adding drop shadows 145
Applying other 2D filter effects....146
Applying 3D filter effects....147
Paper textures....148
Applying transparency....150
9. Adding lines and shapes ..... 157
Using QuickShapes 159
Drawing lines and shapes....160
Editing lines and shapes 164
Changing line style....174
Copying an item's formatting....177
10. Scissor cuts, crops, and erasing ....179
Scissor cuts 181
Combining, cropping, and joining items....188
Erasing and adding to items 196
Using stencils....201
11. Adding brush strokes....205
Adding brush strokes....207
Choosing brush types....208
Creating brush strokes....212
Setting brush stroke properties....214
12. Working with colour ....217
Changing fill and line colour....219
Applying gradient fills....222
Using colour palettes....226
13. Arranging items 233
Rotating and shearing items....235
Ordering items....241
Grouping items....243
Contents
14. Sharing and publishing 245
Sharing via website....247
Basic printing....251
Exporting as PDF 254
Sharing via email....255
15. Index 257
Welcome
natural_image
Decorative illustration of a wave pattern with a numbered tag (number 1) and decorative elements (no text or symbols)
text_image
Welcome to CRAFTARTISTWelcome to CraftArtist—the digital crafting solution that combines crafting fun with a wealth of powerful drawing and crafting tools for the very best results. In an instant, you'll be able to create beautiful print projects with that professional touch!
Projects such as greeting cards, scrapbooks, photobooks, stationery, gift wrap, and party crafts can be created from ready-to-go layouts or from scratch—it's your choice!
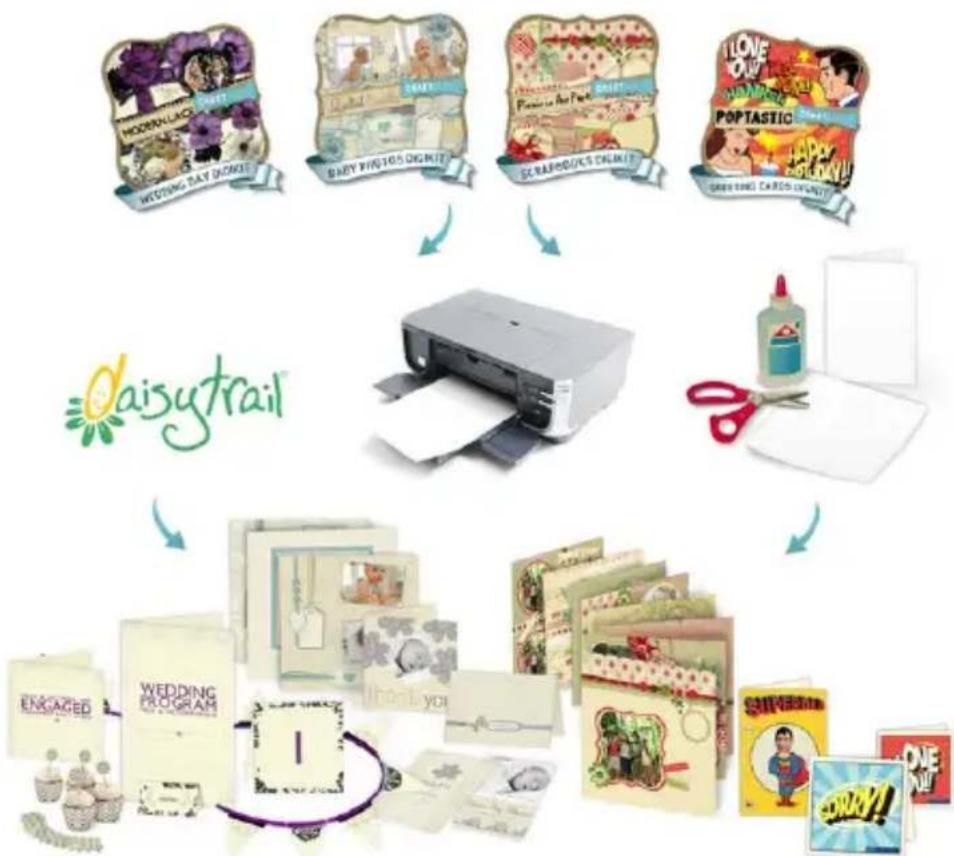
For unlimited design possibilities, CraftArtist works with a range of DaisyTrail Digikits, each offering themed items that you can use as starting points for your projects. Each Digikit includes a selection of drag-and-drop layouts, backgrounds, embellishments, materials, photo frames, and decorative letters.
flowchart
graph TD
    A["WEDDING DAY GINDY"] --> B["BABY WATINGS ONION"]
    B --> C["FLOWER FOR POST-DRIVE"]
    C --> D["CREAMINGS ONION"]
    D --> E["LEAVY ONION"]
    E --> F["SPOTASTIC & HAPPY"]
    F --> G["GRAPING CARDS ONION"]
    G --> H["Daisy trail"]
    H --> I["ENGAGED"]
    I --> J["WEDDING PROGRAM"]
    J --> K["Thank you"]
    K --> L["SIPWEDDER"]
    L --> M["ONE DAY"]
In addition to supplying ready-to-go content, CraftArtist lets you add decorative lines, shapes, and stencils. You can also apply natural or spray brush strokes using easy-to-use drawing and painting tools. Photos can be added to your project, and image adjustments and effects applied using the powerful PhotoLab. You can even cut out the subject of a photo, and create your own photo frames!
Once you've created your masterpiece, you'll want to share it. A lively web-based craft designing community—www.daisytrail.com—is available for you to share your projects freely or to selected groups. You'll make some new friends along the way too!
Don't forget to visit DaisyTrail.com to download your free Digikits—and purchase new ones!
Key features
Crafting essentials
- Create beautiful craft projects easily! (p. 18) Create greetings cards, photobooks, stationery, and gift wrap from your purchased Digikits. Simply select, edit, then print! Why not try Make & Do projects with step-by-step written and video instructions—create real greeting cards for friends and family!
- Digikits (p. 51) Digikits are rich in items perfect for craft designs. Your items, chosen from a powerful Digikit Browser, are loaded into Content tabs ready to drag and drop onto the page—nothing could be easier! You can increase the number of Digikits available to you by browsing and purchasing the latest Digikits hosted on the www.daisytrail.com website.
- Scissor cuts, erasing, and adding to items (p. 179) Take your ‘virtual’ scissors to materials with the Scissors tool—choose from a wide selection of scissor cut types (Square, Pinking, Shark Fin, ZigZag, and more). Use the Erase and Freeform Paint tools to remove and add to items.
- Add impact with a ready-to-go stencil (p. 201)
The Stencils tab provides a wide selection of ready-to-go stencil templates—designs include birds, people, plants, shapes, and more. The stencils are quick and easy to use, and provide endless opportunities for creativity. Simply drag and drop your chosen stencil onto your page, then paint over it with the Brush tool, or use it to cut out a design from a photograph.
• Design, print, and upload in high-resolution
In CraftArtist, 300dpi native working is the norm. All craft items are high-resolution so quality is guaranteed. Printing and upload at 300dpi gives truly outstanding high-quality output.
• Layer work made easy
For greater design control, store items on layers—work on items on one layer without affecting items on other layers. Layers can be created, merged, and hidden, and display a hierarchical tree view of associated items for easy selection. Apply paper textures to layer items (p. 148)!
Ease of use
• Total ease of use
Tabbed, collapsible, and dockable Studio tabs are always at hand. Choose from preset colours, line styles, brushes, and effects, or create your own. Use tabs to arrange, transform, and align items.
- Context toolbars
Context toolbars offer different tools and options depending on the currently selected item. Great for efficiency and simplifying your workflow.
• Design aids (p. 70)
Rotate your canvas through any angle, just like an artist would do in real life. For more focused design, use Solo Mode to work on items in isolation. Use the Rule of Thirds tool on your photos or on your project's pages for improved page composition.
Photos
• Adding photos (p. 77)
Personalize your projects by importing your own photos from hard disk, CD/DVD, digital camera or scanner. Store photos in the Photos tab before dragging directly onto a page or into a photo frame; optionally fill each photo frame automatically using AutoFlow! At any time, try dragging a frame onto an unframed photo or swap one frame for another by drag-and-drop.
• Cropping and fitting photos to frames (p. 108)
Use the Crop Tool to remove unwanted areas of your framed photo. For perfect photo placement, you can scale, pan, and rotate photos to your liking.
- Frame Editor allows you to create your own Digikit photo frames from a photo-based image of a frame.
- Convert photos to frameless frames (p. 116)
Photos you've added directly to your page (i.e., those that are not inside a decorative photo frame) can be converted so that they sit inside "frameless" frames. These frames function exactly like the decorative frames you've added from the Frames tab, allowing you to crop, zoom, and pan the photos inside them. You can even use the AutoFlow feature to automatically replace frame contents!
• Apply photo adjustments and effects (p. 88)
PhotoLab provides an impressive selection of editable non-destructive photo adjustments (White Balance, Lighting, Curves, to name just a few...) and creative effects (including a selection of artistic effects such as Pencil, Watercolour, and Oil).
You can apply single or multiple filters to an entire photo, or to selected areas using a mask. Your original photo remains intact. You can even save adjustment/effect combinations as Favourites for future use.
PhotoLab also includes Red-eye and Spot-repair tools for easy retouching. (See Applying PhotoLab filters on p. 89.)
• Photo cutouts (p. 97)
Cutout Studio makes light work of cutting out your photos. Use brushes to discard backgrounds (sky, walls, etc.) or keep subjects of interest (people, objects, etc.).
• Use QuickFrame, an ornate QuickShape, to frame your photos.
Brushes and Lines
• Realistic brush strokes (p. 205)
Unleash the painter within you with CraftArtist's powerful Brush tool! Apply natural or spray brush strokes using preset brush types from the Brush tab's galleries—additionally pick brushes from Digikits. Even apply a brush stroke around item edges!
• Natural brush strokes (p. 208)
The Natural Media category hosts Acrylic, Charcoal, Paint, Felt Tip, and Watercolour brushes. Use Embroidery brushes on cut materials, or why not adorn your page with lace and ribbon Photo brush effects which can be recoloured in an instant.
• Spray brush strokes (p. 208)
Have fun with spray brushes from categories such as Airbrush, Embroidery, Flowers, Fun & Celebrations, Glitter, and more.
• Versatile line and curve drawing (p. 160)
For natural smooth curves, click and drag with the Pen tool, even edit Bezier curve segments with selectable join options. Draw straight or freeform lines with the Pencil tool. Join any line's ends to create irregular filled shapes, with optional offset outlines!
• Brushes and lines get pressure sensitive!
Use in-built pressure sensitivity control for beautiful and realistic natural brush strokes or when drawing freeform lines; control the weight and opacity of your strokes as you apply pressure.
Text
- Sentiments for that special message (p. 137) Struggling to find the right words for your card? CraftArtist comes with pre-written and pre-formatted sentiments you can add to your cards with ease. Select birthday greetings, quotes, and messages for every occasion. If you've typed your own special message, save it as a custom sentiment for future use.
- Artistic and shape text (p. 119) Apply artistic text or text within QuickShapes right on the page... apply basic formatting from the always-at-hand Text context toolbar. Convert text to curves for text design freedom.
- Fitting text to a path (p. 130) Make your text flow along drawn curves, or even around closed shapes or QuickShapes. Preset text paths (e.g., spirals and waves) can be applied to any artistic text.
Drawing
- Design inspiration Use the Online tab to view video tutorials explaining how to use CraftArtist's tools and how to apply various creative techniques.
- QuickShapes (p. 159) QuickShapes work like intelligent clipart which can morph into a myriad of different shape variations. Even extremely complex shapes like spirals, stars, and webs are simple to draw.
- Copy fills and effects between objects! (p. 177) Use the Format Painter to copy fills and effects between objects.
- Colour and transparency control (p. 217) Apply solid colour or transparency to any drawn item's line or fill (or brush stroke) with the Colour tab. The tab hosts colour swatches from Digikits, an HSL colour wheel (for custom colour selection), and transparency slider. Use the Fill Tool to apply gradient, plasma, or mesh fills for exciting results—a gradient fill path lets you add or replace colours and/or transparency simultaneously for more subtle gradients.
- Design your own custom colour palettes with Colour Palette Designer
For quick results, simply pick your base colour and then choose from a range of related colours. You can add suggested colours automatically, or mix your own colours to create a new palette. (See Creating custom palettes in CraftArtist Help.)
• Filter effects (p. 143)
Give your project items depth with Material Depth or soft edges with Feather Edge. Why not apply drop shadows with the Shadow Tool? All are easy to apply and sure to impress.
• Astounding 3D lighting and surface effects (p. 147)
The Studio's Effects tab offers preset 3D effects (metals, elements, glass, stone, wood, and more) you can apply one or more effects, then customize by varying surface and source light properties.
Sharing
• Share via website (p. 247)
Upload projects to Serif's digital craft community website, www.daisytrail.com. View layouts using powerful zoom technology, comment on, or search for any project by tag. Create public or private groups for like-minded crafters—great for making new friends! Take part in craft discussions in DaisyTrail's forums.
- Email project images to friends and family
Send your project as Adobe PDF and the popular JPEG format—or simply email your *.craft file!
Installation
System requirements
Minimum:
• Windows-based PC with DVD drive and mouse
- Microsoft Windows® XP (32 bit), Windows® Vista, or Windows® 7 operating system
- 512MB RAM
- 266MB (recommended full install) free hard disk space (program only)*
• 1024 x 768 monitor resolution
* Does not include space requirements for Digikit collections and downloaded Digikits.
Additional disk resources and memory are required when editing large or complex documents.

To enjoy the full benefit of brushes and their textures, you'll need a computer whose processor supports SSE. On brush selection, an on-screen message will indicate if your computer is non-SSE.
Optional:
• Windows-compatible printer
• TWAIN-compatible scanner and/or digital camera
- Pen (graphics) tablet
- Internet account and connection required for accessing downloadable DaisyTrail.com Digikits, online resources, and project upload
Installation procedure
- Insert your purchased DVD into your DVD drive.
- If AutoPlay is enabled on the drive, this automatically starts the Setup Wizard. Follow the on-screen instructions for install.
-Or-
- If AutoPlay is not enabled (or doesn't start the install automatically), run setup.exe from your DVD.
Getting started
natural_image
Decorative illustration of a wave pattern with blue and pink floral motifs and a decorative banner with the number 2 (no text or symbols)Using the Startup Wizard
text_image
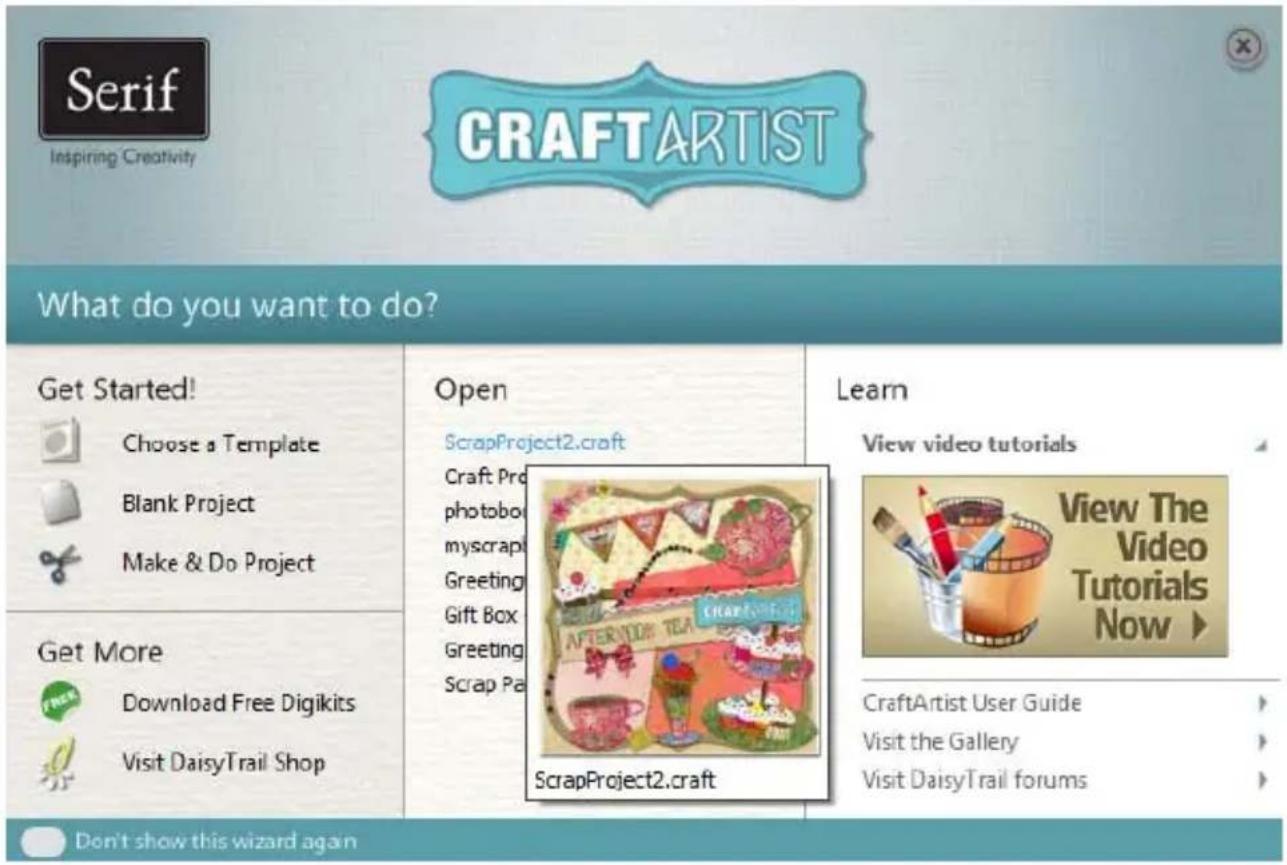
Serif Inspiring Creativity CRAFTARTIST What do you want to do? Get Started! Choose a Template Blank Project Make & Do Project Get More Download Free Digikits Visit DaisyTrail Shop Open ScrapProject2.craft Craft Pro photobo myscrap Greeting Gift Box Greeting Scrap Pa Learn View video tutorials View The Video Tutorials Now ▶ CraftArtist User Guide Visit the Gallery Visit DaisyTrail forums Don't show this wizard againOnce you have installed CraftArtist, you're ready to start crafting! By default, a Serif CraftArtist item is added to the All Programs submenu of the Windows Start menu.
Opening the Startup Wizard
• Use the Windows Start menu to open CraftArtist.
-or-
- If CraftArtist is already running, on the File menu, click New>New from Startup Wizard...
The Startup Wizard offers different routes into the program:
| Option | Allows you to... |
| Choose a Template | Create a CraftArtist Project (greeting card, scrapbook, photobook, etc.) based on a template. You can customize the layout to suit your needs by adding your own photos, text, and decorative items. |
| Blank Project | Create a new CraftArtist project from scratch. |
| Make & Do Project | Create physical projects (rather than electronic ones) such as greeting cards. Follow the written and video instructions step-by-step for beautiful cards you can pop in the post box! |
| Download Free Digikits | Access free to use Digikits hosted on DaisyTrail. |
| Visit DaisyTrail Shop | Buy Digikit Collections and individual Digikits on DaisyTrail. |
Use the Open section to launch recently opened and saved CraftArtist projects (plus unopened projects). Hover over each entry for a quick preview before clicking!
The Learn section allows you to access online video tutorials hosted on DaisyTrail, as well as the DaisyTrail gallery and forums. The CraftArtist User Guide (PDF format) tells you all you need to know about CraftArtist.
Turning the Startup Wizard off and on
If you don't want the Startup Wizard to display every time you open CraftArtist, you can turn it off.
To turn off the Startup Wizard:
- In the lower-left corner of the Startup Wizard, click Don't show this wizard again.
-or-
- On the Tools menu, click Options...
- In the Options dialog, under Ease of Use, clear the Startup Wizard check box.
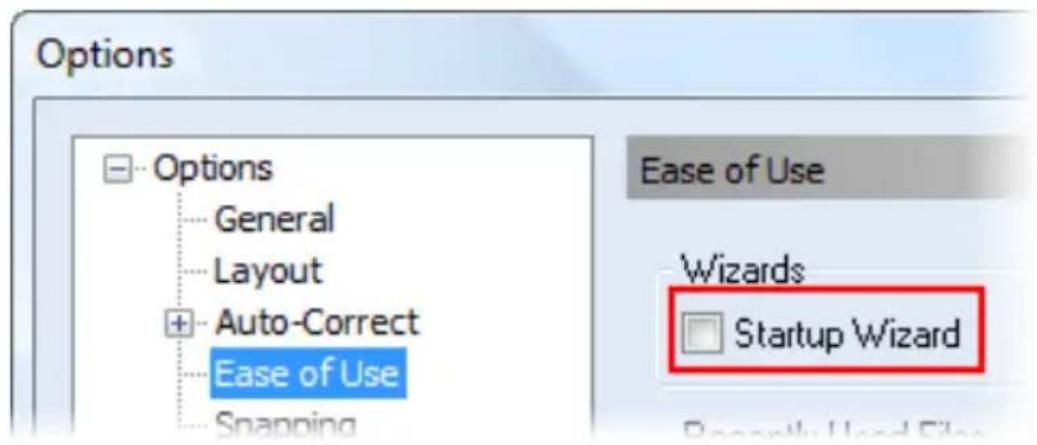
text_image
Options Options General Layout Auto-Correct Ease of Use Snapping Ease of Use Wizards Startup Wizard
Both methods only turn the Startup Wizard off when you open CraftArtist. Once the program is open, you can still access the Startup Wizard by clicking File>New>New from Startup Wizard.
To turn the Startup Wizard back on:
- On the Tools menu, click Options...
- In the Options dialog, under Ease of Use, select the Startup Wizard check box.
-or-
- On the File menu, click New>New from Startup Wizard.
- Click to clear the Don't show this wizard again box.
Understanding Craft Projects
CraftArtist is project based, and allows you to create greeting cards, scrapbooks, photobooks, stationery, gift wrap, and party crafts from project templates or from scratch. Your saved work can then be saved as a Craft Project (*.craft) file.
Template-based projects
The projects you can create depend on the product you've purchased and any installed Digikit you've downloaded and installed. As an example, the Greeting Cards Digikit Collection contains many Digikits, each packed with different layouts to make your Greeting Card project template. Similarly, the Scrapbooks Digikit Collection provides scrapbook layouts, the Baby Photos Digikit Collection provides baby-related layouts, etc.
The project types are as follows:
natural_image
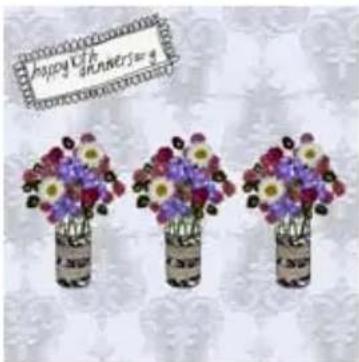
Three identical floral arrangements in a vase with purple and yellow flowers, no text or symbols visible.Greeting Cards
You can choose from greeting card layouts from your installed Digikits. Layout types include Side Fold, Tent Fold, Tri-Fold, Z-fold.
text_image
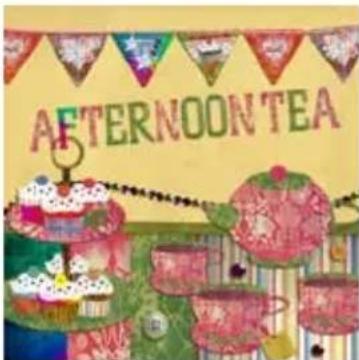
AFTERNOON TEAScrapbooks
This project type is for typical 12" x 12" scrapbook pages.
The Digikit layouts are all designed for the creation of stunning scrapbooks.
Embellishments, materials for cutting, and textured backgrounds all contribute to great layouts.

natural_image
Wedding couple photo with floral border (no text or symbols)Photobooks
Photobook layouts are packed with photo frames which automatically populate with your favourite hand-picked photos. Great for photo-rich wedding and baby albums!
Create your own personalized stationery including invitations, RSVPs, menus, thank you cards, and much more.
text_image
Famous Heat Therapy Patients who have been treated In the first 10 months of therapy In the following: PGift Wrap
Diverse layouts are provided for gift wrap (Gift bags, boxes, and tags).

text_image
WINE DRINK UP! thank you for coming this of home from the tocol 6 years Wine Little DecorationParty Crafts
Start celebrating with room, glass, and cupcake decorations, plus party masks, place cards, and table numbers!
Template-based projects are created from the Startup Wizard's Choose a Template option. (See Starting from a template on p. 21).

Whichever layout you then select, you'll also get all other items from the Digikit added to the Content tabs in your workspace.
Blank projects
By starting from scratch, you can still create any of the above project types, but as simple empty page layouts.
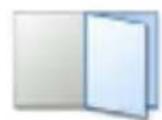

4"x6" Folded
4.25"x5.5" Folded
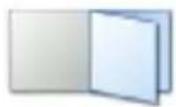
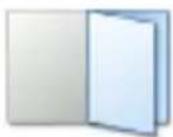
5"x5" Folded
5"x7" Folded
By using the Digikit Browser (see p. 53), you can then choose any installed Digikit to pick items to base your project on. This gives you more flexibility in design.
Blank projects are created from the Startup Wizard's Blank Project option. (See Starting projects from scratch on p. 32).
Starting from a template

text_image
Sean 11Digikits offer a selection of template layouts, backgrounds, frames, materials, letters, embellishments, brushes, swatches, and effects.
If you want to get started quickly, selecting a template will help you to create your first project in just a few easy steps.
There's no need to worry about your project paper sizes as your project will automatically scale to your printer's paper size.
You can also create original projects from scratch. See Starting a project from scratch on p. 32.

Additional Digikits are available from the www.daisytrail.com website.
Choosing a layout
- Launch CraftArtist, or click File>New>New from Startup Wizard...
- In the Startup Wizard, click Choose a Template.

If you've switched the Startup Wizard off, you can switch it on again. Click Tools>Options, select the Ease of Use option, and then select the Startup Wizard check box.
- From the dialog's Craft Projects tab, select the type of project you want to create, e.g. Greeting Cards, Scrapbook Pages, PhotoBooks, etc.
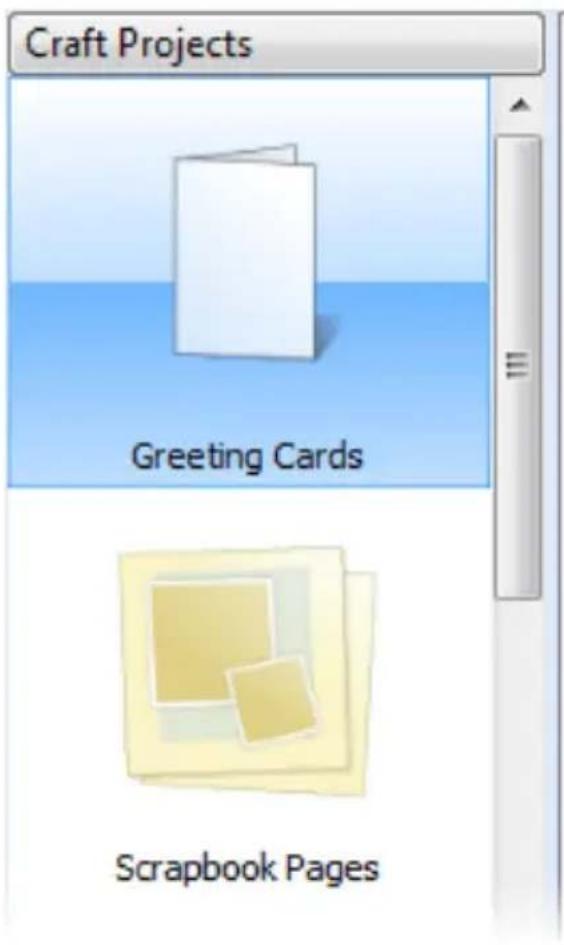
text_image
Craft Projects Greeting Cards Scrapbook Pages- In the middle pane, scroll to review each layout; on hover over, each layout's thumbnail gives a visual indication of your printed project. You'll see the same set of layouts repeated for each installed Digikit in turn.
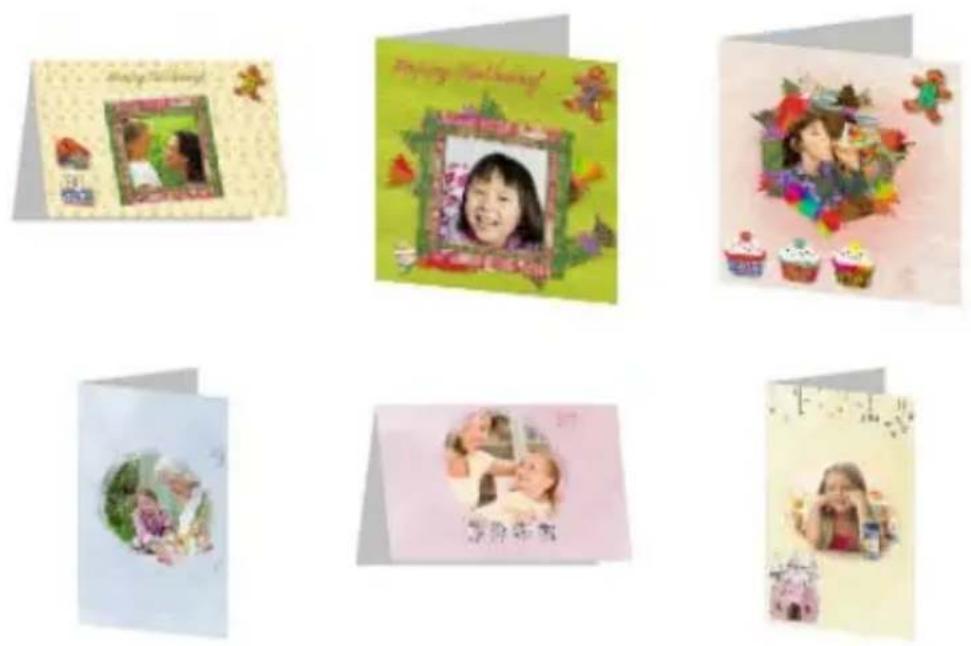
- Click to select the layout.
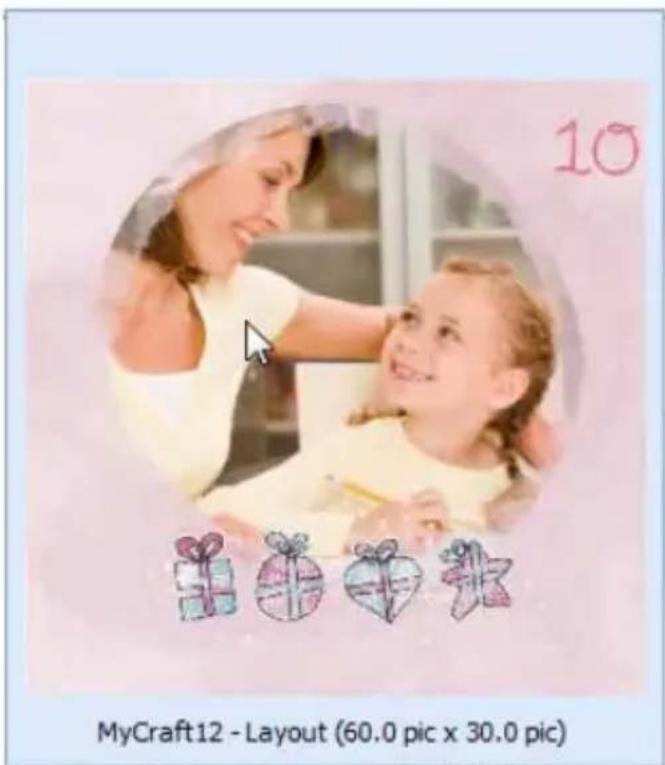
text_image
10 MyCraft12 - Layout (60.0 pic x 30.0 pic)- Click OK to exit the dialog. The first page of the layout opens in the workspace, and all of the design items contained in the Digikit are added to the Content tabs at the left of the workspace.
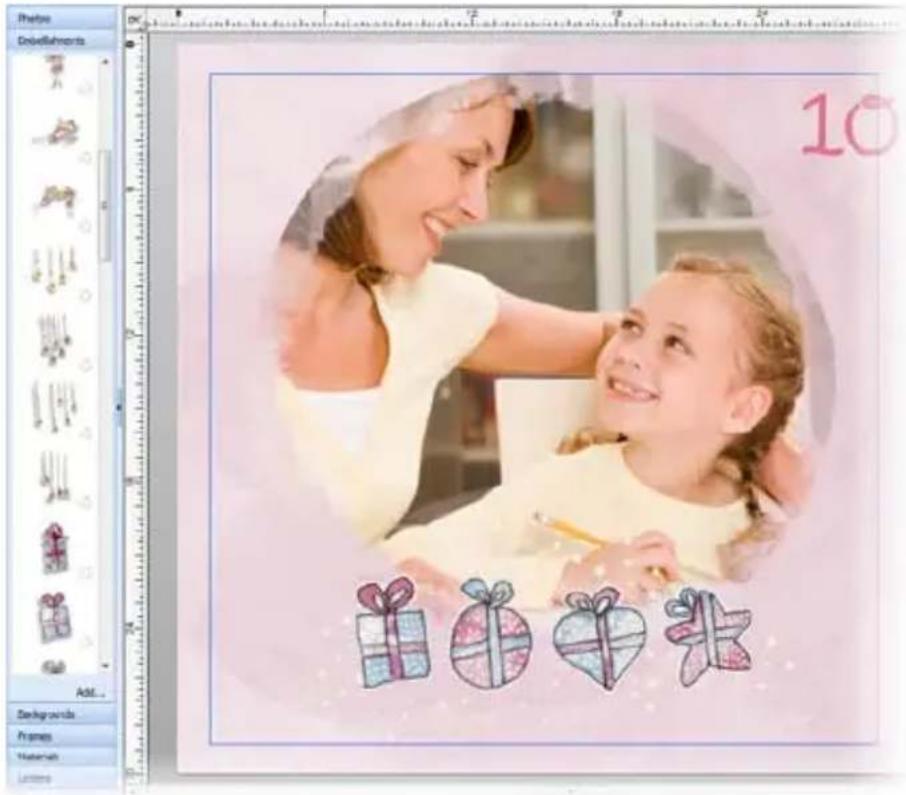
text_image
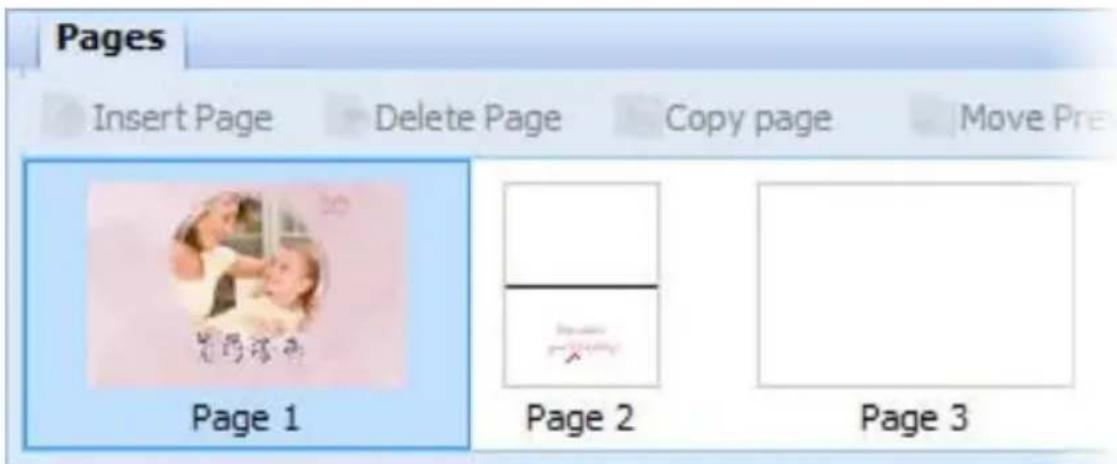
10 Add... Backgrounds Frames Materials Lines- Running horizontally along the lower edge of the workspace, the Pages tab displays the pages you chose to add to your project.
Click through the thumbnails to view these pages in the workspace and choose the page you want to work on first.
text_image
Pages Insert Page Delete Page Copy page Move Pre Page 1 Page 2 Page 3For fixed layouts such has greeting cards (above), your pages are added automatically. For other projects, you can insert, copy, move, and delete pages without constraint. (See Adding, moving, and deleting pages on p. 63.)
Adding your own photos
- On the Photos tab, click Add...
- In the Open dialog, browse to and select the photos you want to add to your project.
- To select multiple adjacent files, press and hold down the Shift key, click the first file in the list, and then click the last file.
- To select multiple non-adjacent files, press and hold down the Ctrl key, and then click to select.
- Click Open. Your photos are added to the Photos tab.
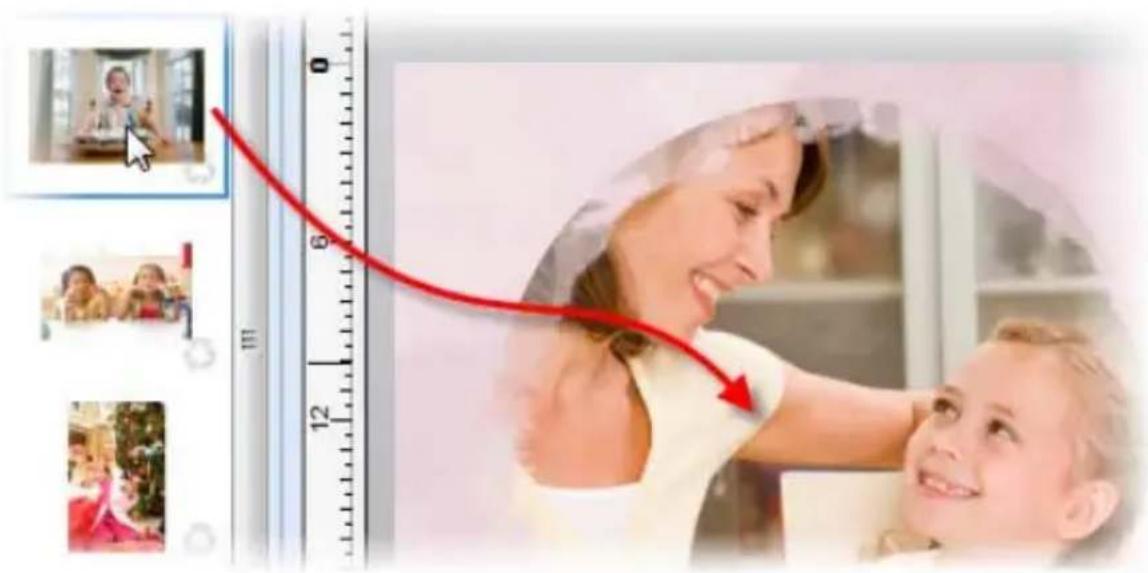
- To add a photo to your page, simply drag it from the Photos tab. You can drag directly onto the page, or onto an existing photo frame.
text_image
Digital illustration showing a woman pointing at a temperature scale with a red downward arrow, alongside photo thumbnails of children.Adjusting and replacing framed photos
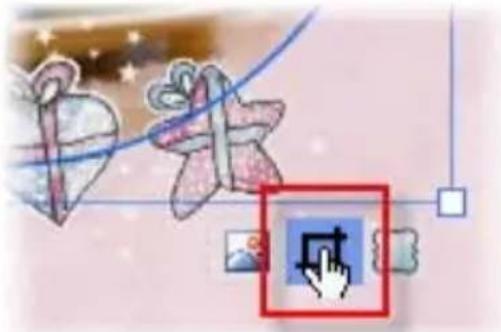
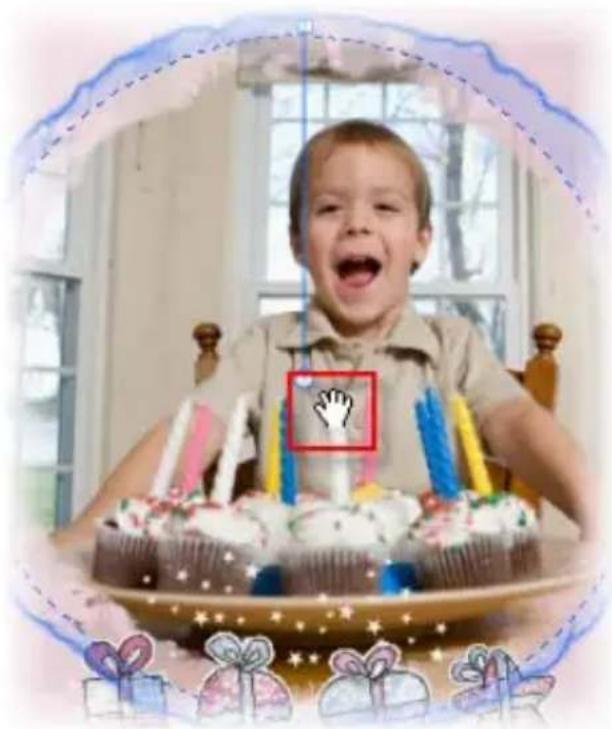
- Select the framed photo, and then click the Crop button.
natural_image
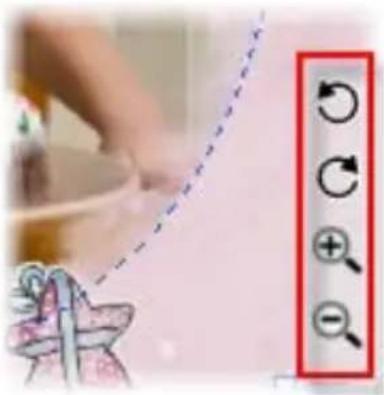
Illustration of a gift box with a cursor icon and a red button, surrounded by decorative elements (no text or symbols)- To rotate, or zoom into or out of the photo, click the buttons displayed at the right edge of the photo.
text_image
Hand-drawn illustration with a hand holding a curved line and a red vertical bar containing four icons: rotation arrow, refresh, add, and minus sign.- To pan the photo, click and drag on it.
natural_image
Child sitting at a birthday cake with colorful candles and decorations, smiling (no text or symbols visible)- To close the Crop window, click Back, or click elsewhere on the page or pasteboard area.
To replace a photo:
- Drag a different photo onto a frame from the Photos tab.
-or-
-
Select the framed photo you want to replace, then click the Select Cropped Object(s) button that displays below it.
-
Click the Replace Photo button on the Photo context toolbar.
-
Browse to and select the photo you want to add and click Open.

You can preview a photo in a frame by dragging the photos over the frame (without releasing the mouse button).
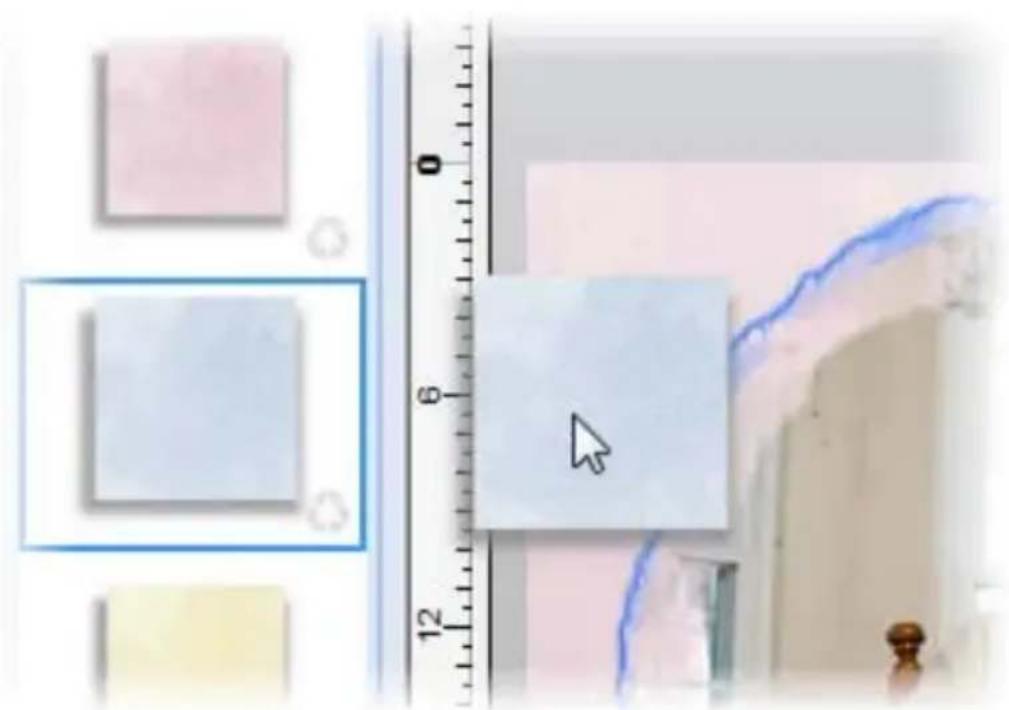
Changing backgrounds
- From the Backgrounds tab, drag a different thumbnail onto your existing background.
text_image
Image showing a ruler with a pointer icon pointing to a white rectangular object, alongside colored square blocks and a background scene.Sentiments
To insert a new sentiment:
- To add a preset sentiment, select Insert Sentiment from the Pages context toolbar (ensure Select tool is enabled).
- From the dialog, choose a sentiment category and then your sentiment from the right-hand pane.
- Click Insert.

For unwanted sentiments on your page, simply select with the Select tool and press Delete.
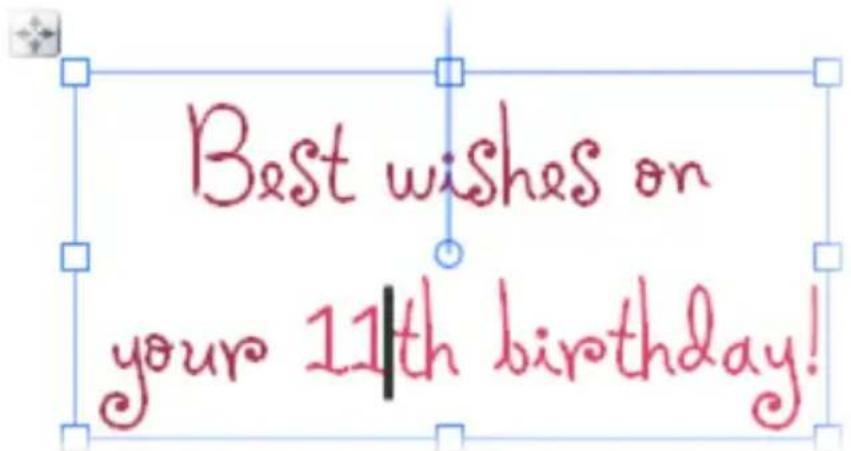
You can edit the sentiment as before to change age, dates, etc.
To edit an existing sentiment:
- Open the Pages tab.
- Select the page on which the sentiment is located.
- Click in the sentiment text and edit the sentiment. Great for changing the age on a greeting card!
text_image
Best wishes on your 11th birthday!

You can save any text as a sentiment for later use, by clicking Add as sentiment, appearing under the text.
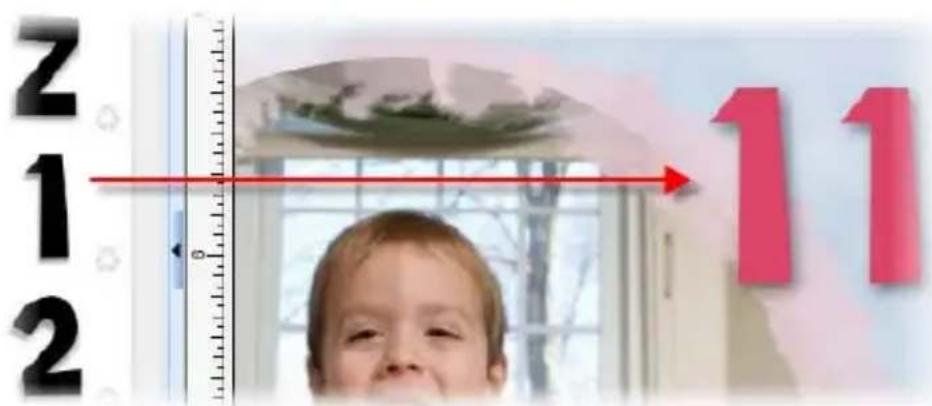
Adding letters and numbers
- Open the Letters tab.
- To add an individual letter or number, drag it from the tab onto your page.
text_image
Z 1 2 6 11-or-
To add an entire word or phrase all at once, type it into the text box at
the bottom of the tab and click Insert. The word is added directly onto the page.
Sean
Insert Add...

text_image
Sean- Use the Colour tab to colour the word or selected letters. Even add drop shadows using the Shadow tool.

text_image
SeanTo work with grouped and ungrouped letters:
• To move an individual letter or a group of letters, simply drag it.
• To resize a letter or group, select it, and then drag a corner handle.
• To rotate a letter or group, select it, and then drag its rotate handle.
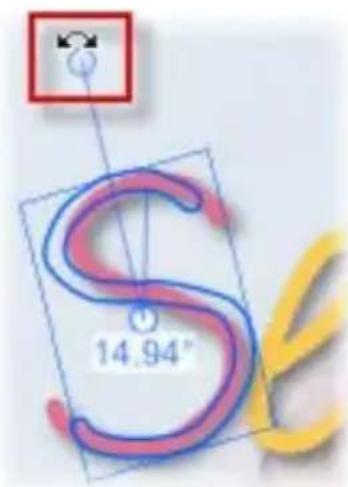
text_image
14.94°• To delete a letter or group, select it and press the Delete key.
- To group letters, click and drag to draw a selection marquee around them. (To avoid selecting the object beneath the letters, hold down the Alt key as you drag.)

text_image
SeanRelease the mouse button and then click the

Group button.
• To ungroup, select the group and click the

Ungroup button.
Adding decorative items
- In the Content tabs at the left of the workspace, open the Embellishments or the Materials tab.
- Scroll the tab to find the item you want to add, and then drag it onto your page.
- To move, resize, rotate, or delete an item, use the methods described above in Adding letters.

To remove a design item from a Content tab, click its button.

Remove
Starting projects from scratch
If you decide to create your project from scratch, the first step is to select the page size and layout for your project.
Creating a new blank project
- Launch CraftArtist, or click File>New>New from Startup Wizard...
- In the Startup Wizard, click Blank Project.

If you've switched the Startup Wizard off, you can switch it on again. Click Tools>Options, select the Ease of Use option, and then select the Startup Wizard check box.

If the Startup Wizard is turned off, or you cancel the wizard, a new blank page will open of the type and size you last created.
Choosing page size and layout
When starting a blank project, you'll be able to set up your page size and layout initially, using standard or custom page sizes.
Using standard page sizes
- From the Page Setup dialog, select your project type from the left-hand pane, e.g. Scrapbook Pages.
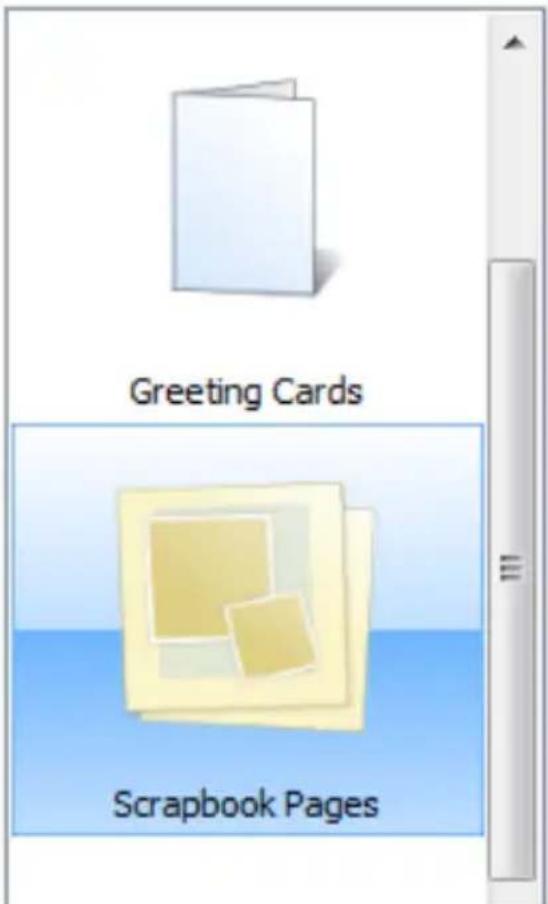
text_image
Greeting Cards Scrapbook Pages- From the middle pane, navigate the categories and click on your chosen page layout.
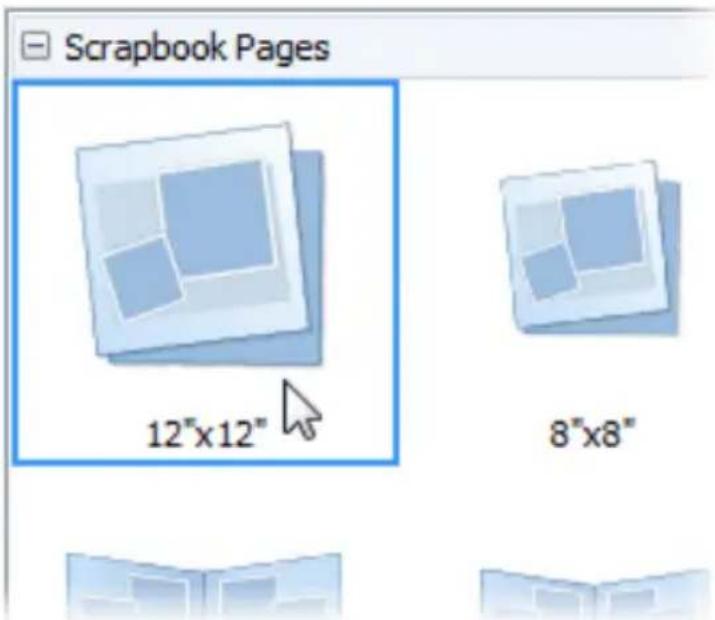
text_image
Scrapbook Pages 12"x12" 8"x8"
Page margins are represented on the page area by solid blue guides (Left, Top, Right, and Bottom).
- Click OK to accept the new dimensions. The updated settings are applied to the current project.
Instead of picking standard page sizes your project can be based on a custom page size instead.
Using custom page sizes
- From the Page Setup dialog's middle pane, scroll down to the Custom option, and click it.
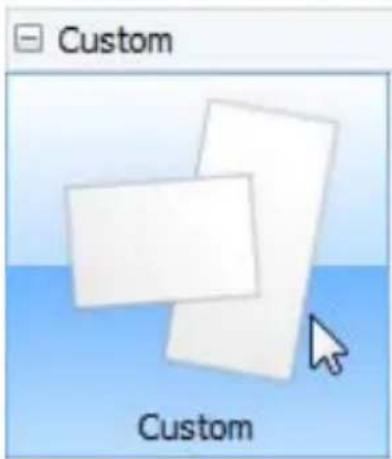
text_image
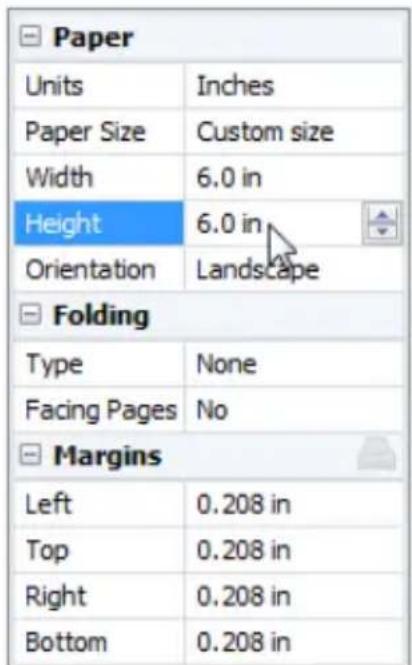
Custom Custom- From the right-hand pane, edit the settings to create your custom page. You can also swap to a different layout for folded documents.
text_image
Paper Units Inches Paper Size Custom size Width 6.0 in Height 6.0 in Orientation Landscape Folding Type None Facing Pages No Margins Left 0.208 in Top 0.208 in Right 0.208 in Bottom 0.208 inTo change your project's page setup at any time:
- On the Pages context toolbar, click

Page Setup.
- Select a project type and page layout as described above.
Changing page units
The width, height, and margins of your page (its printing dimensions) are shown in page units. You can change the unit without altering the page's actual dimensions.
- From the Page Setup dialog, choose different page Units in the right-hand pane.
-or-
- In your workspace, right-click the

box which intersects your right of your workspace.
- From the flyout menu, select a different page unit.

The page size and margin settings are automatically saved with your project. Normally, they are also recorded as 'master settings,' which will be in effect the next time you start CraftArtist or create a new project. You can change which settings become master settings. For details, see Recording master settings in CraftArtist Help.
For projects created from templates, you won't need to worry about page size and layout as this is automatically set according to the template you've chosen (your design will scale at print time). However, you may still wish to access Page Setup for several reasons:
- You may want to quickly view your page size and layout to check your project settings.
- You may need to work to a set paper size, perhaps if you're printing professionally.
Choosing page backgrounds
- In the Digikit Browser, you'll see installed Digikits, plus featured free and purchasable Digikits from the DaisyTrail.com shop. (See Buying Digikits on p. 57.) Select the Digikit you want to browse by clicking its thumbnail.
My Digikits
text_image
ARTICLE TEA CUCUSAfternoon Tea
text_image
MODERN LACE LATEModern Lace

- Scroll to the Backgrounds category. You'll see the backgrounds available from the selected Digikit.
Backgrounds
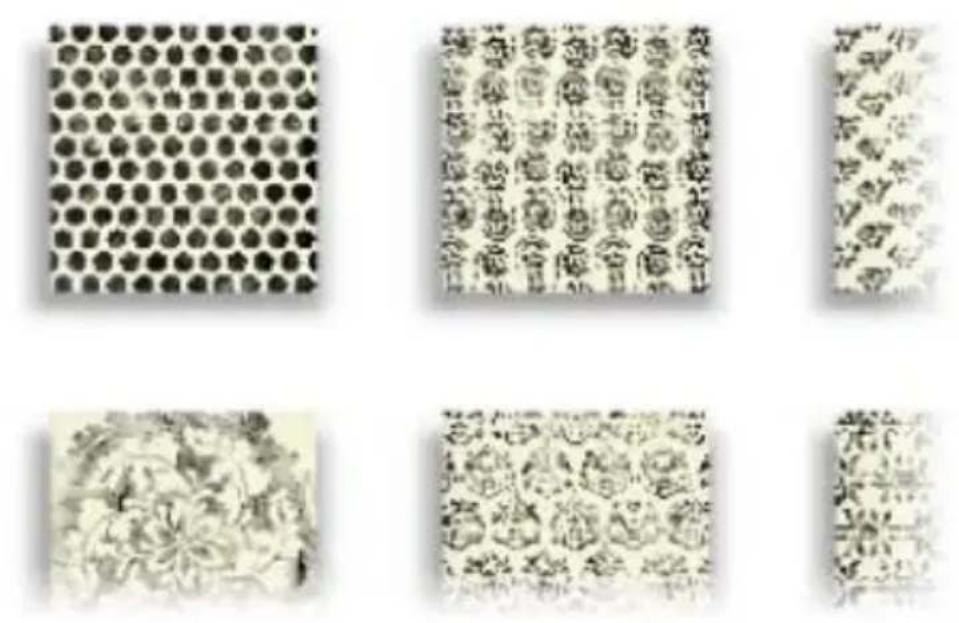
- Click the background(s) that you want to use in your project.
natural_image
Blank rectangular image with a green border and a cursor pointer icon (no text or symbols)-or-
To add all items from the Digikit, click Add all items .

If you select an item from a featured free or purchasable Digikit—the Digikit Not Installed dialog will display and you will be prompted to visit the DaisyTrail.com shop. Once you've installed your free or purchased Digikit, the item will be added to the relevant Contents tab on selection. (See Buying Digikits on p. 57.)
In the Content tabs at the left of the workspace, the Backgrounds tab displays the backgrounds you added to the project.
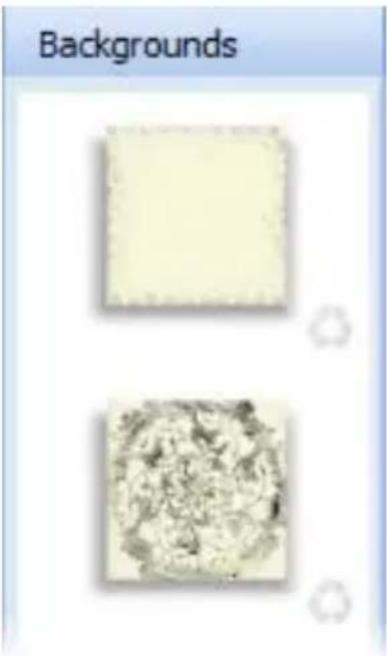
text_image
Backgrounds- (Optional) Click other Digikits.

Back to all Digikits to add backgrounds from
-
Click Done.
-
Drag the background you want to use onto your page.

To change the background, simply drag a new one onto the page.

To remove a background from the Backgrounds tab, click its Remove button.

Adding photo frames
- On the Frames tab, click Add...
- The Digikit Browser opens to display frames, categorized by the name of the Digikit to which they belong. Scroll to the Digikit category you want to add frames from. You can add frames from more than one Digikit.
- Click a frame to add it to your craft project, or click Add all items to add them all. The selected frames are added to the Frames tab.
- When you've finished selecting frames, click Done.
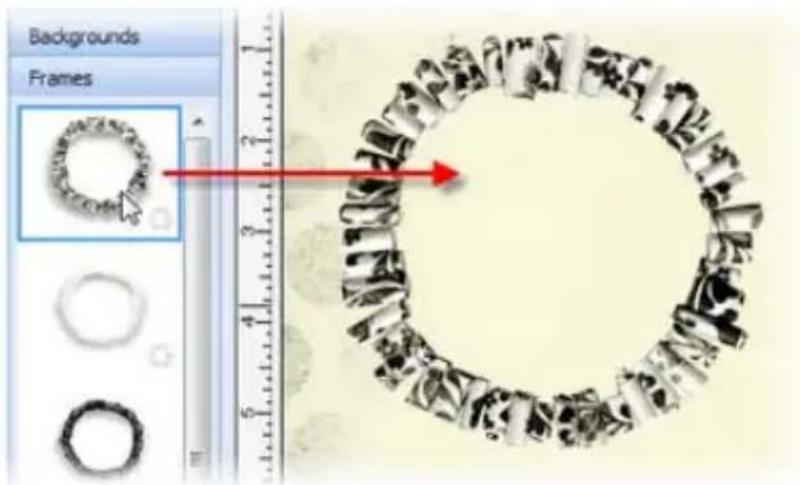
- Drag a frame from the Frames tab onto your page.
text_image
Backgrounds Frames 1 2 3 4 5 6 7 8 9 10 11 12 13 14 15 16 17 18 19 20 21 22 23 24 25 26 27 28 29 30 31 32 33 34 35 36 37 38 39 40 41 42 43 44 45 46 47 48 49 50 51 52 53 54 55 56 57 58 59 60 61 62 63 64 65 66 67 68 69 70 71 72 73 74 75 76 77 78 79 80 81 82 83 84 85 86 87 88 89 90 91 92 93 94 95 96 97 98 99 100Once the frame is added to the page, you can move, resize, and rotate it.

To remove a frame from the Frames tab, click its button.

Remove
Adding photos
-
On the Photos tab, click Add...
-
In the Open dialog, browse to and select the photos you want to add.
-
To select multiple adjacent files, press and hold down the Shift key, click the first file in the list, and then click the last file.
-
To select multiple non-adjacent files, press and hold down the Ctrl key, and then click to select.
-
Click Open. Your photos are added to the Photos tab.
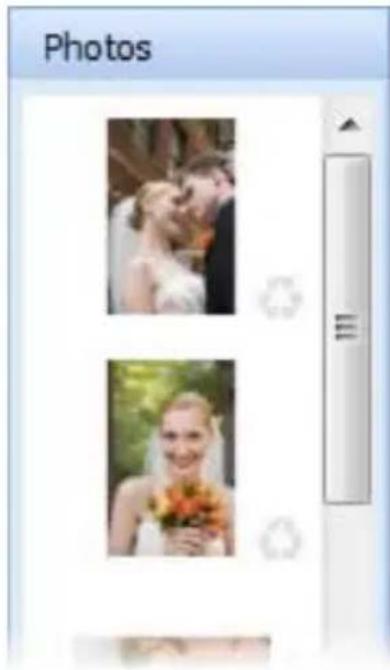
text_image
Photos- Drag a photo from the Photos tab and drop it onto a frame, or onto the page.
natural_image
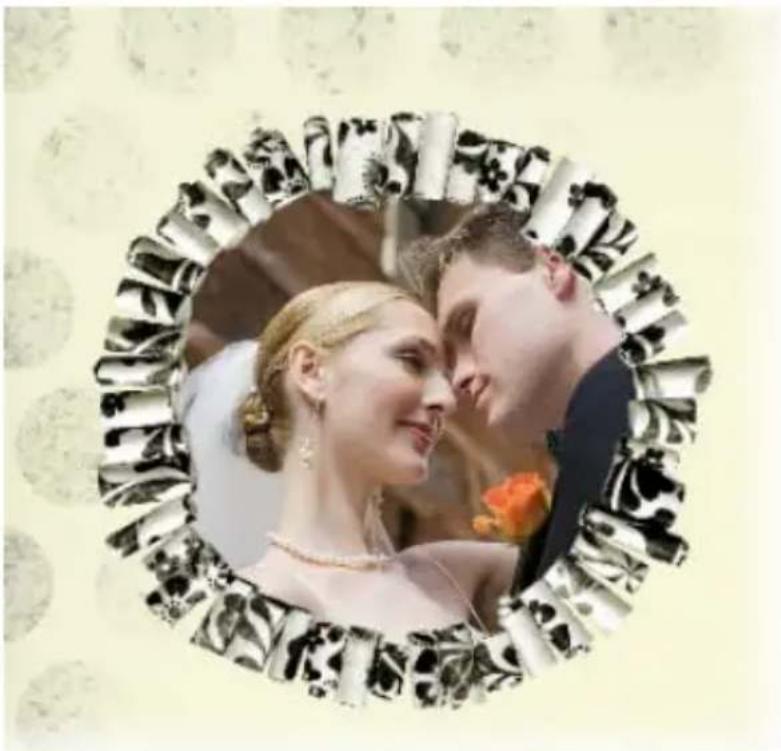
Wedding couple photo framed in a decorative circular frame, no visible text or symbols- (Optional) You can adjust your photo inside its frame, or even replace it if required. For details, see Adjusting framed photos on p. 112.

To remove a photo from the Photos tab, click its button.

Remove
See also Replacing and resizing photos and Fitting photos to frames on p. 115 and p. 108, respectively.
Adding decorative items
-
On the Embellishments or Materials tab, click Add...
-
The Digikit Browser opens to display Embellishments or Materials, categorized according to the Digikit to which they belong. Select the category from which you want to add items. (You can add items from more than one Digikit.)
-
Click an item to add it to your craft project, or click Add all items to add them all.
In the workspace, the items you added are displayed in the relevant Contents tab.
- When you've finished selecting items, click Done.
- To add an item to your page, drag it from its tab.
- Once an item is placed on the page, you can move, resize, and rotate it as required.

To remove a design item from a tab, click its

Remove button.
Adding letters
- On the Letters tab, click Add...
- The Digikit Browser opens to display letter sets, which are categorized by the name of the Digikit to which they belong. Scroll to the Digikit category you want to add letters from. You can add letters from more than one Digikit.
- Click the letter set to add all letters to your craft project. They are added to the Letters tab.
- When you've finished selecting your letter set, click Done.
- To add an individual letter, number, or special character (such as an accent,) drag it from the tab directly onto your page.
To add an entire word or phrase all at once, type it into the text box at the bottom of the tab and click Insert.
Dulcis Vita!
Insert
Add...

To remove a letter from the Letters tab, click its button.

Remove

You can now move, resize, rotate, and delete these letters individually, or you can work with them as a group by first clicking the Group button. (See Grouping items on p. 243.)
Adding text
-
On the Standard toolbar, click the Text tool.
-
To create text at the default size, click on your page to set a text insertion point.
-or-
Click and drag on your page to set the size of the text insertion point.
- To set text attributes (font, size, etc.) before typing: Make your selections on the Text context toolbar. (See Formatting text on p. 125.)
Humanst521 BT

36 pt


-
To set text colour, set the Line/Fill swatches on the Colour tab. (See Changing line and fill colour on p. 219.)
-
Start typing.

You can also create Shape Text, by typing directly inside a QuickShape or drawn shape. See Adding text on p. 120.
Creating brush strokes
- On the Standard toolbar, click the Brush tool.
- At the right of the workspace, open the Brushes tab and select a brush category from the upper drop-down list, and then a specific brush.
-
On the Brush context toolbar, set the brush stroke properties (width, opacity, smoothness, etc.).
-
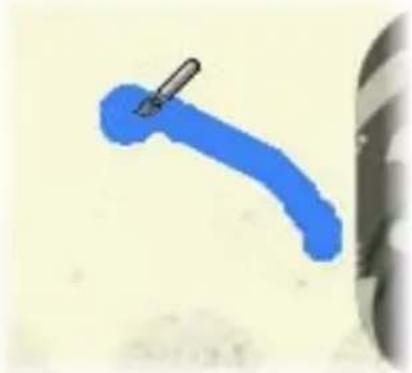
Drag a brush stroke across your page.
natural_image
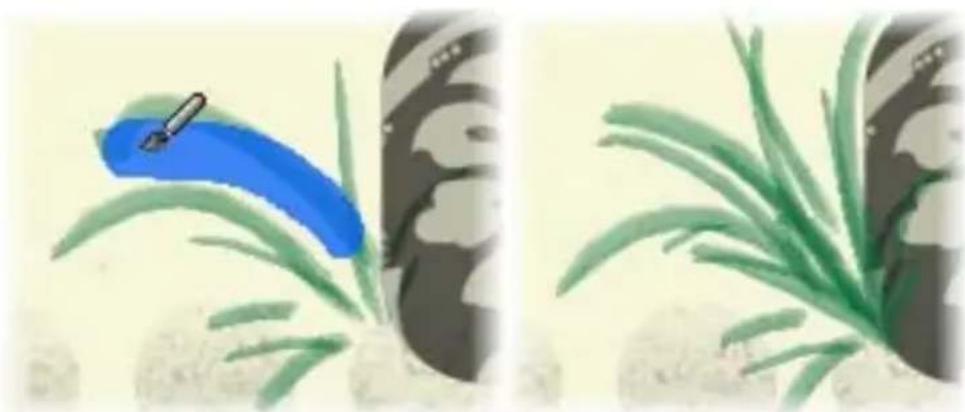
Simple blue curved object with a metallic rod, no text or symbols visible- To create new brush strokes, repeat the click and drag process.
natural_image
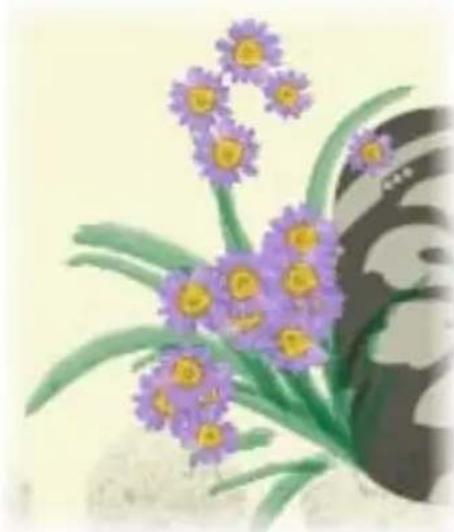
Illustration of a blue brush and green plant on textured ground, no text or symbols present- (Optional) Swap to a different brush on the Brushes tab for other brush effects, e.g. spray brushes for flowers, then continue painting.
natural_image
Illustration of purple flowers with yellow centers and green stems, accompanied by a butterfly silhouette (no text or symbols)- When you have finished painting, to deselect the brush stroke press the Esc key.

Brushes used in the current project are added to the Document category of the Brushes tab.
For more on brushes, see Adding brush strokes on p. 205.
Adding Digikit brushes
The Brushes tab's Digikit category displays the brushes added from Digikits. If you've previously chosen to add all the items from a Digikit, a selection of brush strokes will be displayed in this category.
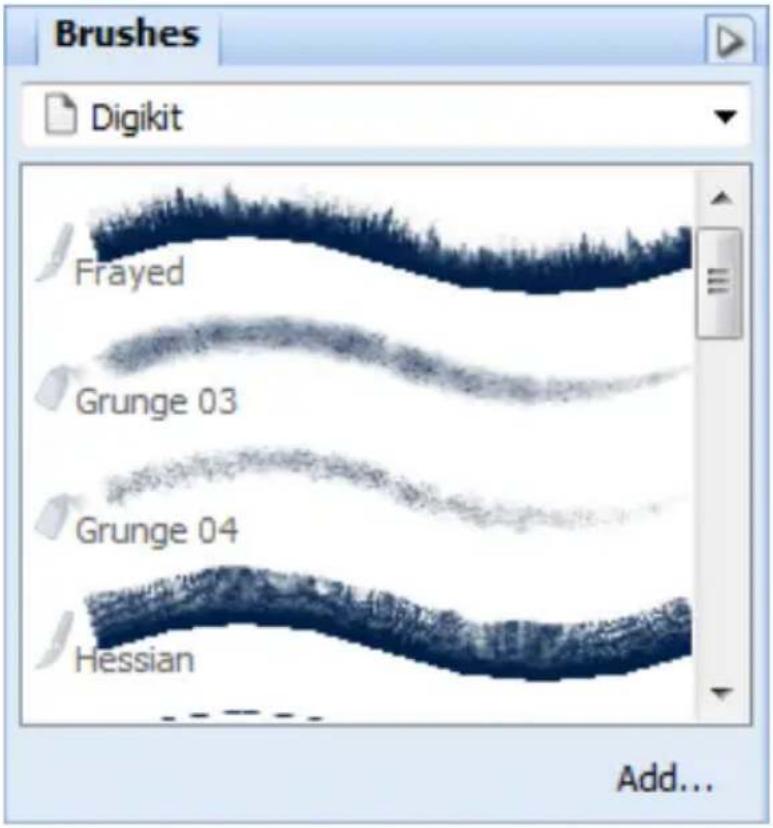
text_image
Brushes Digikit Frayed Grunge 03 Grunge 04 Hessian Add...
Some Digikits don't contain brushes.
To add Digikit brushes:
- On the Pages Context toolbar, click Add items from Digikits. The Digikit Browser dialog opens.
- Select the Browse my items tab.
- Select the Brushes category from the left-hand category list.
- Scroll the middle pane until you find a set of Digikit's brushes you like. Click to select the brush(es) you want to use.
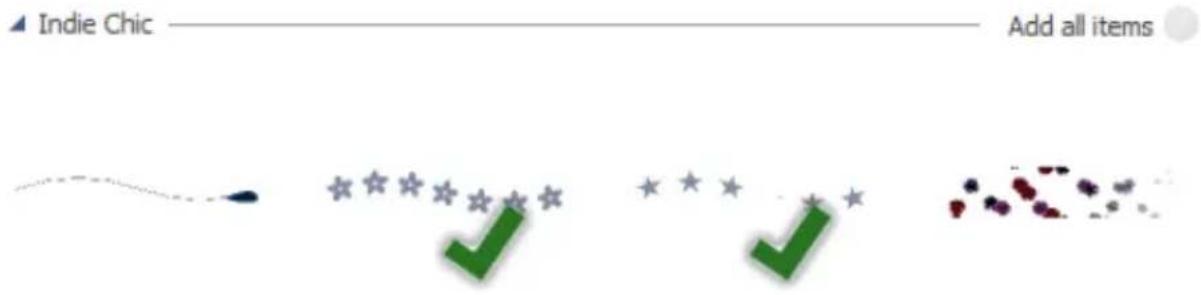
text_image
Indie Chic Add all items-
(Optional) Click Back to all Digikits to add brushes from other Digikits.
-
Click Done.
Make & Do projects
Make & Do projects are a great excuse to get the scissors and glue out and try your hand at some 'real' project. These are typically cards for occasions or simply based on a theme.
To make your project easy to complete, CraftArtist suggests equipment and materials needed. You'll also be able to follow a step-by-step video along with written How To instructions.
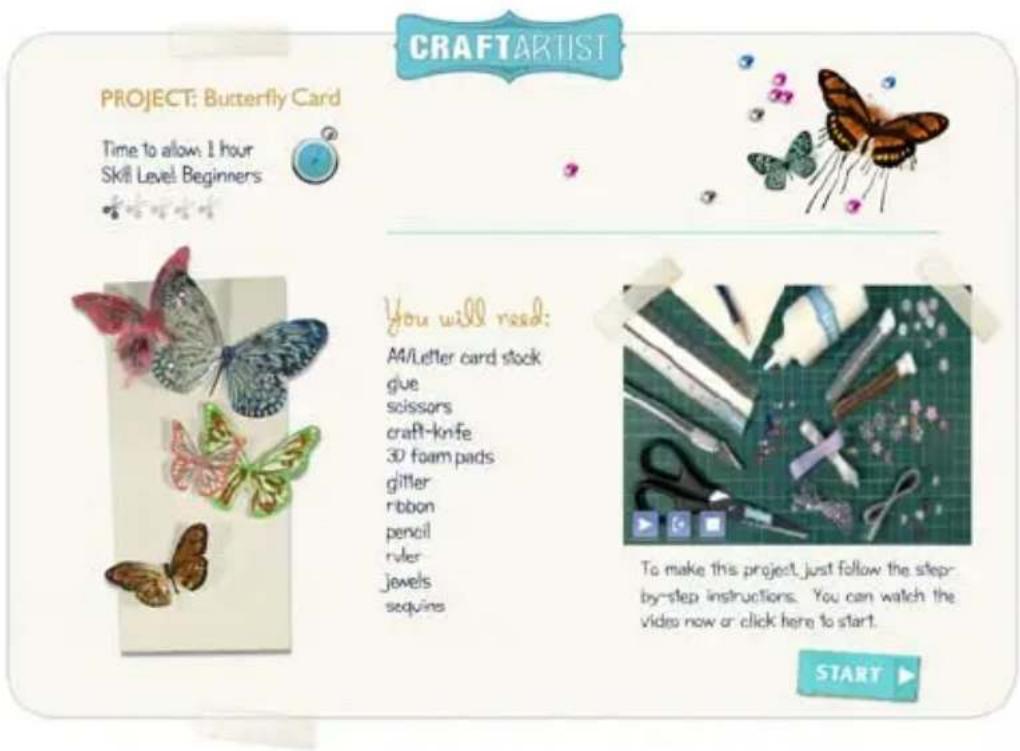
text_image
CRAFTARTIST PROJECT: Butterfly Card Time to allow 1 hour Skill Level Beginners You will need: A4/Letter card stock gue scissors craft-knife 3D foam pads glitter ribbon pencil ruler jewels sequins To make this project just follow the step- by-step instructions. You can watch the videos now or click here to start. STARTEach Make & Do project is actually a *.craft file, containing all the instructions, examples, and embellishments you'll need. The embellishments can be printed and cut out to complete your project.

Make & Do projects provide all the content you'll need to complete your project. As such you won't be able to add content from installed Digikits.
Starting a Make & Do Project
- Launch CraftArtist, or click File>New>New from Startup Wizard...
- In the Startup Wizard, click Make & Do Project.

If you've switched the Startup Wizard off, you can switch it on again. Click Tools>Options, select the Ease of Use option, and then select the Startup Wizard check box.
- From the dialog, choose a level which you feel most comfortable with—Beginner, Intermediate, or Advanced. Different Craft Projects will be offered for each level.
- Select the project you want to make, then click OK.
- Open the Pages tab, by clicking the ▲ button at the bottom of your workspace.
- Make your project by following the Start Page then Instructions page. Subsequent Print Template pages let you edit, print, and cutout embellishments for your project.
Opening and displaying projects
You can open an existing project from the Startup Wizard or the File menu. If you have more than one project open, you can switch between them using the Window menu or the document tabs.
Opening a recently opened project (via Startup Wizard)
- From the Startup Wizard (at startup time or via File>New...), select your project from the Open section. The most recently opened project will be shown at the top of the list. To see a thumbnail preview of any project before opening, hover over its name in the list.
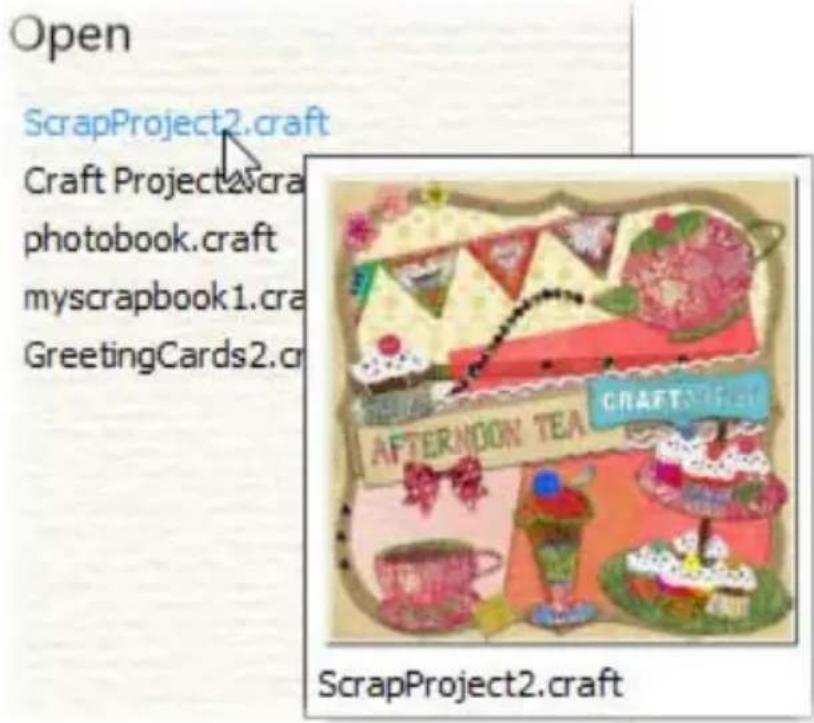
text_image
Open ScrapProject2.craft Craft Project2.cra photobook.craft myscrapbook1.cra GreetingCards2.cra AFTERNOON TEA CRAFTS.CRAF ScrapProject2.craft- Click the file name to open it.
CraftArtist opens the file as a maximized currently active project.

Recently viewed files also appear at the bottom of the File menu. Simply select the file name to open it.
Opening any project
- From the Startup Wizard (at startup time or via File>New...), click Open....
-or-
Choose Open... from the File menu (at any time).
-
In the Open dialog, select the folder and file name.
-
Click Open to open the desired project as a maximized document.
Browsing your projects
-
Choose Browse... from the File menu.
-
In the Open Saved Work dialog, in the Documents pane:
- Use the Folders tab to browse your computer's folder structure and locate your projects.
-or-
• Use the History tab to view your most recently used projects.
- On the right, preview thumbnails of your saved projects are displayed.
You can choose between Thumbnails View (displays thumbnails only), or Details View (displays thumbnails and information about the file—file size, creation date, and so on).
Click a thumbnail, and then click Open.
Displaying projects
If you have multiple craft projects open at the same time, there are several ways to jump between them quickly.
Displaying a project from the Window menu:
- Select a project name from the Window menu.
Unsaved projects are indicated with an asterisk.
The currently active project is indicated with a check mark.
Displaying a project from the document tabs:
- In the upper left area of the workspace, click on an open project's tab to make it active. The file names of projects that are not active are greyed out.
Saving your work
The first time you save your work:
- Click

Save.
-
In the Save As dialog:
-
Type a file name.
- Browse to and select the destination for your saved file.
- Click Save.
On subsequent saves:
• To save the project under its current name, click the

Save button (or use Ctrl+S on your keyboard). The existing project file is overwritten with your recent changes.
- To save the project under a different name, click File>Save As... to open the Save As dialog.

CraftArtist periodically autosaves your work to a temporary file, allowing you to recover as much as possible in the event of a system failure. You can set autosave frequency under the General option of the Tools>Options... dialog.

Craft projects are saved with a *.craft file extension.
Digikits
natural_image
Decorative scroll with wave pattern and a decorative letter '3' (no text or symbols)Browsing
The Digikit Browser provides access to your installed Digikits, and to featured free and purchasable Digikits from daisytrail.com. You can browse Digikits and preview the items they contain, before adding them to your workspace.
You can also use the search controls at the right of the dialog to narrow your search, or to find a specific item. There are two ways to browse Digikit items—by Digikit, or by item category.
Browsing Digikits
- On the Pages context toolbar, click Add items from Digikits.
- In the Digikit Browser, you'll see installed Digikits, plus featured free and purchasable Digikits from the DaisyTrail.com shop. (See Buying Digikits on p. 57.)
Browse the Digikits in My Digikits, Featured Free DaisyTrail.com Digikits and DaisyTrail.com Digikits categories. Hover over your chosen Digikit to see a zoomed-in preview for further inspection, then click its thumbnail.
- Scroll through the categories to browse items included in the Digikit.
-
(Optional) To narrow your search, filter items by clicking tag names (e.g., Flower) in the Categories section. (See Applying a search filter on p. 54.)
-
To browse another Digikit, click Back to 'All Digikits'.

Browsing items
- In the Digikit Browser dialog, click the Browse my items tab. You'll see items belonging to installed Digikits, plus featured free and purchasable Digikits from the DaisyTrail.com shop. (See Buying Digikits on p. 57.)
- On the left-hand side of the dialog, select an item category you want to browse, e.g., Embellishments.
- The items are categorized further in the middle pane by the name of the Digikit to which they belong, e.g., Afternoon Tea. Scroll through to browse the items included in each Digikit. To make browsing easier, you can expand and collapse the Digikit categories to hide or reveal the items.
- (Optional) To narrow your search, filter items by clicking tag names (e.g., Flower) in the Categories section. (See Applying a search filter.)
Applying a search filter
The filter searches preset and custom tags applied to all of the Digikits shown in the Digikit Browser (this includes Digikits you have installed, and Digikits available from the DaisyTrail.com shop). (See Tagging in CraftArtist Help.)
- Click Add items from Digikits.
- Click Browse Digikits or Browse my items, depending on which browsing method you prefer.
- There are two methods by which you can apply search filters, and both can be used together to further narrow your search.
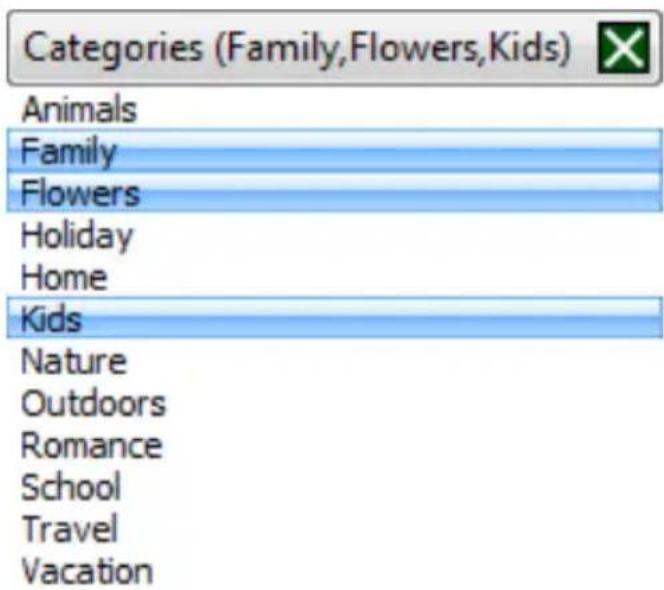
- Select a preset search tag from the drop-down menus.
text_image
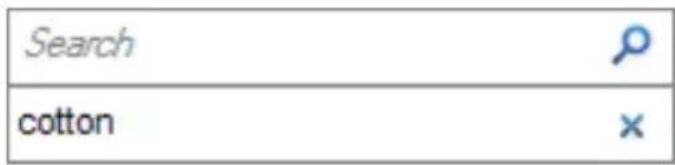
Categories (Family,Flowers,Kids) Animals Family Flowers Holiday Home Kids Nature Outdoors Romance School Travel Vacation- Type the word or letter you want to search for in the Search text box, situated at the right of the dialog. This is useful for retrieving items with custom tags attached.
text_image
Search cotton
Ctrl-click to select more than one filter. Click ✗ to remove the filter(s).
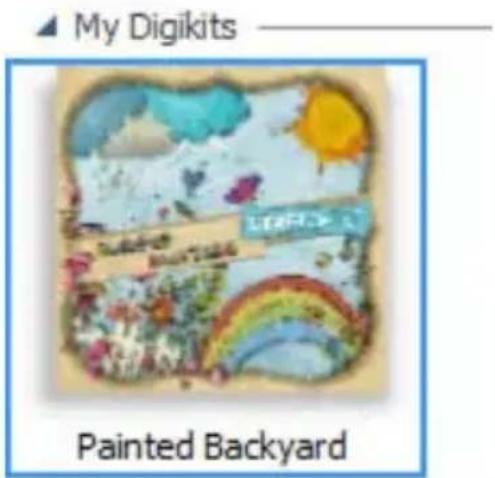
If you've searched via the Browse Digikits tab, the Digikit containing the relevant items is displayed for you to select and browse further.
text_image
My Digikits Painted BackyardIf you've searched via the Browse my items tab, click on each category, e.g., Frames, to reveal the relevant items.
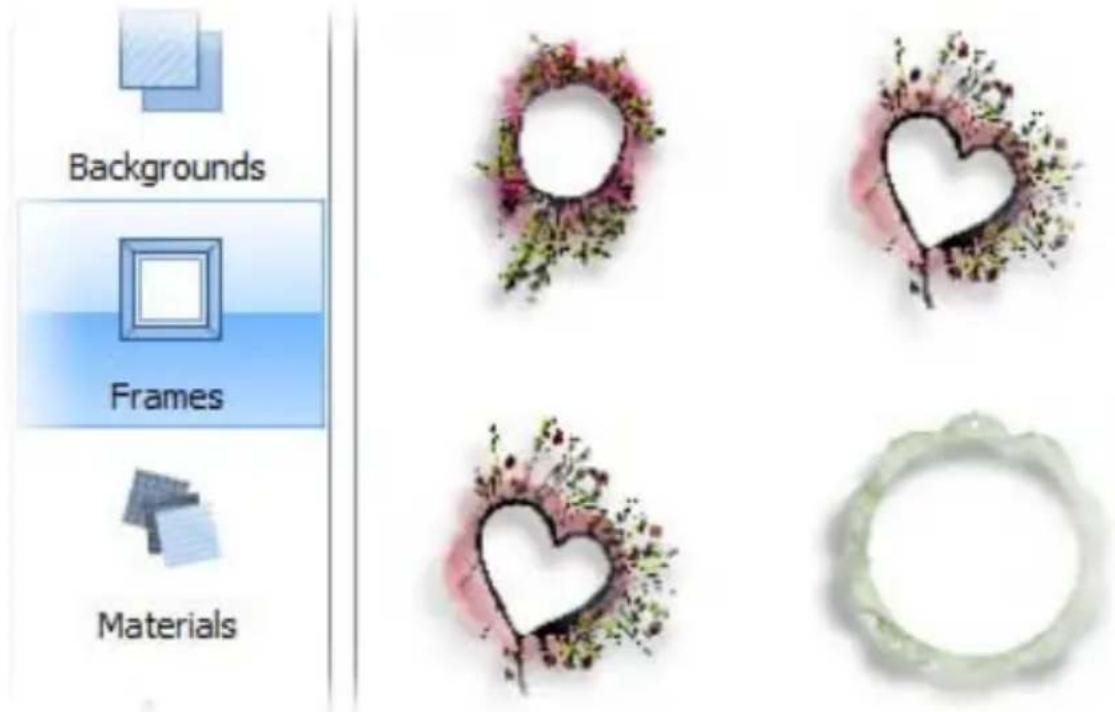
text_image
Backgrounds Frames MaterialsAdding items to your workspace
- To add items to your workspace via the Browse Digikits tab, select the Digikit you want to browse and then simply click the item you want to add.
- To add items to your workspace via the Browse my items tab, select the category you want to browse, and then simply click the item.
- To add all items from a selected Digikit, select the Digikit, and then click the Add Digikit button that displays in the lower-left corner of the dialog.
- To add all items in a category, click the Add all items button that displays in the upper-right corner of each category's thumbnail gallery.

If you select an item, or add all items, from a featured free or purchasable Digikit—the Digikit Not Installed dialog will display and you will be prompted to visit the DaisyTrail.com shop.
- To remove a specific item from your workspace, select the item and click the Remove button via the Digikit Browser or subsequently via the relevant Contents tab.
- To remove all items from your workspace, click the Clear All Categories button that displays in the lower-left corner of the dialog.
Buying Digikits
Buying Digikit collections
CraftArtist is supplied with at least one Digikit Collection for Baby Photos, Greeting Cards, Scrapbooks, or Wedding Day, depending on which product version you've bought. For any Digikit Collection you'll find an impressive selection of themed Digikits to choose from.

You can also buy a range of DaisyTrail Digikit Collections.
To buy other Digikit Collections:
- Launch CraftArtist, or click File>New>New from Startup Wizard...
- In the Startup Wizard, click Choose a Template.
- From the dialog's Digikit Collections tab, select the collection you wish to purchase.

text_image
Baby Photos BUY NOW- In the middle pane, follow the instructions to purchase your new Digikit collection. You'll be taken to daisytrail.com to carry out your purchase.
Once you've installed the new Digikit collection, you'll see all of your newly purchased Digikits appear in the Digikits tab directly under the dialog's Digikit Collections tab.
Buying individual Digikits
You can also buy individual Digikits from the DaisyTrail shop. Provided that you have an internet connection, the Digikit Browser will automatically update to display the Digikits currently available for purchase from the website.
To buy a Digikit:
- On the Pages context toolbar, click Add items from Digikits.
- In the Digikit Browser, scroll to the DaisyTrail.com Digikits category.
- Click the Digikit you want to buy and scroll through the categories to browse included items. You can also use the search controls on the right of the dialog to narrow the list of items, or search for a specific item. (See Browsing on p. 53.)
- Click any item. The Digikit Not Installed dialog is displayed and provides a brief summary of the Digikit.
text_image
CampingCamping
This Digikit is available to buy on DaisyTrail.com! If you would like to buy the Digikit, click Visit Shop below.
This pack contains:
- 34 embellishments
- 7 backgrounds
- 5 frames
- 14 materials
- 77 letters
- 4 layouts
- 10 brushes
Visit Shop
Close
- Click Visit Shop. The daisytrail.com shop opens in your web browser for you to proceed with your purchase.

If you've not already registered on daisytrail.com, you will have to register on the website.

If you don't want to immediately buy the Digikit, you can add the Digikit to a wishlist (click Add to Wishlist)—a list of items you want to have. You can return at a later date to make your purchase.
Downloading free Digikits
DaisyTrail.com offers a featured free Digikit for you to download to use in your projects.
Provided that you have an internet connection, the Digikit Browser will automatically update to display the Digikits currently available for free download. Digikits made available for free download are often themed according to current or upcoming seasons, celebrations, public holidays, and vacations—Independence Day, Mother's Day, Father's Day, Easter, Christmas, Halloween, and so on.
To download a free Digikit:
- On the Pages context toolbar, Add items from Digikits.
- In the Digikit Browser, scroll to the Featured Free DaisyTrail.com Digikits category.
- Click the Digikit you want to download and scroll through the categories to browse included items. You can also use the search controls on the right of the dialog to narrow the list of items, or search for a specific item. (See Browsing on p. 53.)
- Click any item. The Digikit Not Installed dialog is displayed and provides a brief summary of the Digikit.
- Click Download. DaisyTrail.com opens in your web browser for you to proceed with your free download.

If you've not already registered on DaisyTrail.com, you will have to register on the website.
Pages and design aids
natural_image
Decorative illustration of a wave pattern with a numbered page and decorative elements (no text or symbols)Adding, moving and deleting pages
All pages in your project are displayed in the Pages tab, which can be expanded from the bottom of your workspace.
To expand the Pages tab:
- Click on the ▲ button at the bottom of the workspace. Click the button again to collapse the tab.
Depending on your project, the way you work with multiple pages will vary.
For scrapbooks, photobooks, stationery, and gift wrap:
- Projects can consist of a single page, or a series of pages made up of various pre-defined layouts. You can add pages to your project designs by adding your own blank pages.
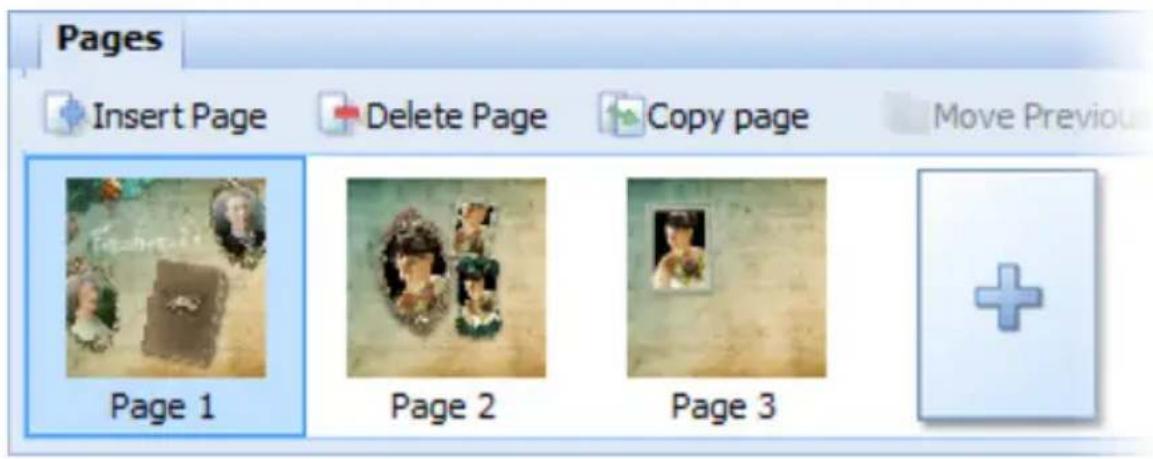
text_image
Pages Insert Page Delete Page Copy page Move Previous Page 1 Page 2 Page 3For greeting cards only:
- Cards use a "fixed" multiple page layout, with a back and front page and double inside pages. Due to the nature of folded cards, further pages cannot be added.
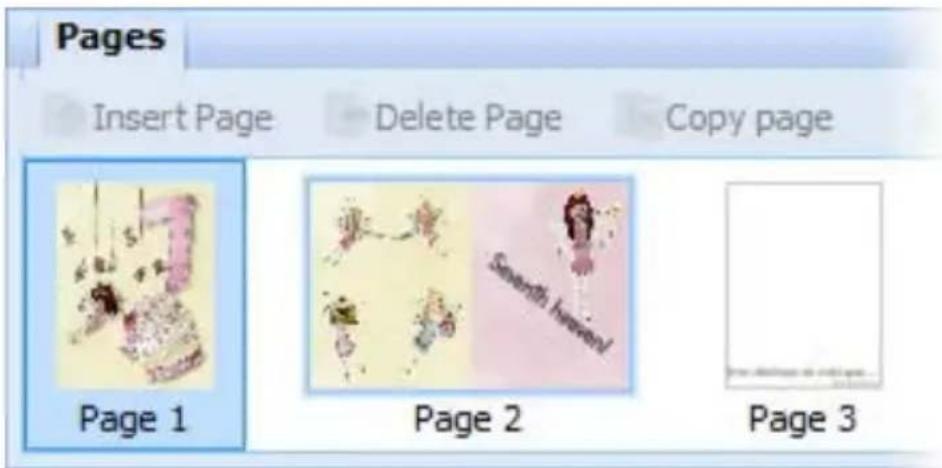
text_image
Pages Insert Page Delete Page Copy page Page 1 Page 2 Page 3Adding pre-designed layouts
CraftArtist offers a range of pre-designed layouts within each Digikit which you use as the basis of your new page. By customizing each layout further, you can quickly create your own professional looking designs.
natural_image
Simple medical cross icon on a white rectangular background (no text or symbols)- Click the Insert Page icon in the Pages tab to access your installed Digikits and their layouts. Once you've selected a layout from the categorized pane, click OK.
The layout is added as a new page as the last page in your project.
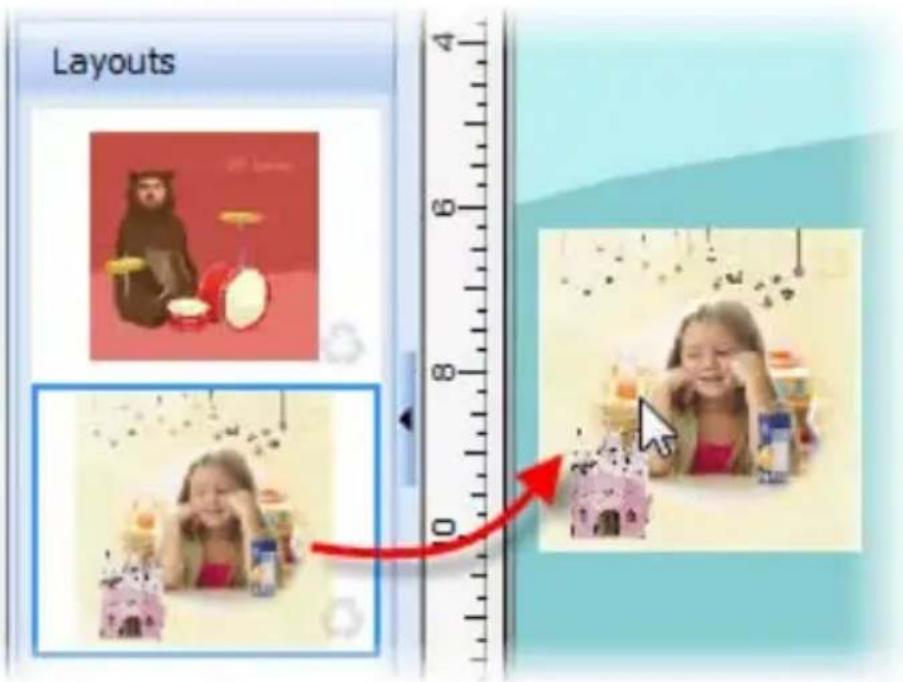
You can replace any page with a different layout by selecting the page first and simply dragging the layout from the Layouts tab onto it.
text_image
LayoutsAdding blank pages
text_image
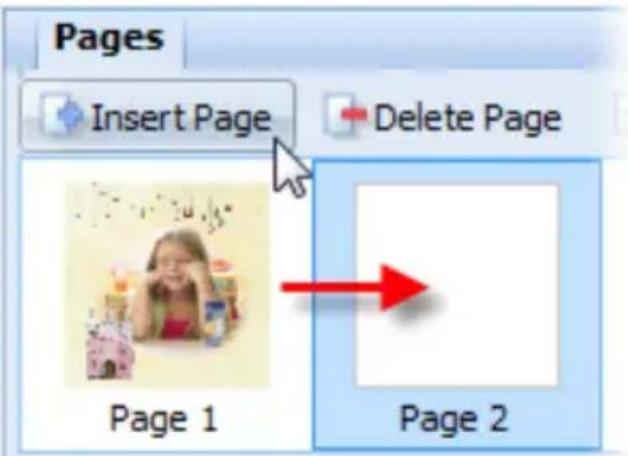
Pages Insert Page Delete Page Page 1 Page 2If you don't plan to work from a pre-designed layout, you can add blank pages from the Pages tab.
The new page is added after the currently selected page.
To add a new page:
-
On the Pages tab, select the page after which your new page will be added.
-
Click Insert Page. The new page is created and becomes the currently active page.
-or-
If on the last page, click the Next Page button on the HintLine toolbar and use the Page Manager's Insert Page tab.
Moving pages
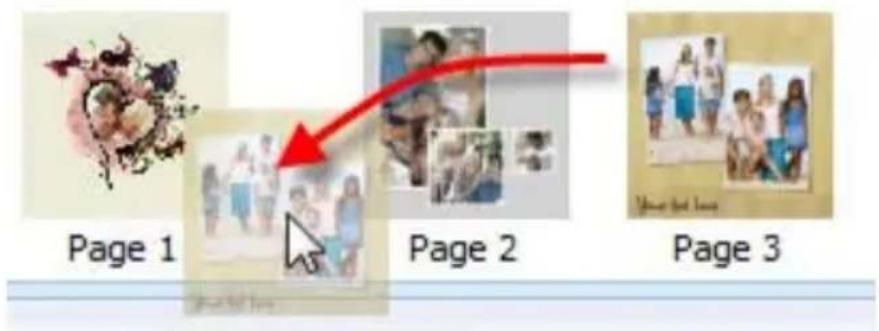
text_image
Page 1 Page 2 Page 3From the Pages tab, you can either:
- Click and drag a page to its new position in the tab (illustrated above).
-or-
- Select a page selected and click Move Previous or Move Next. The selected page jumps one position back or forward in the page order.
Deleting a selected page
On the Pages tab, select a page and click page and click Delete.

Delete Page, or right-click on the
Copying pages
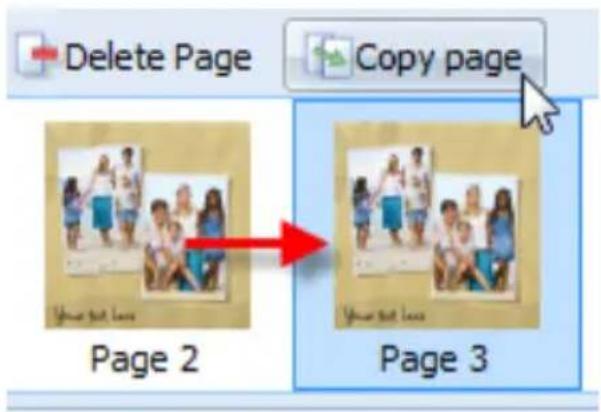
text_image
Delete Page Copy page Page 2 Page 3Use the Copy page button to base your new page on an existing page. Page items are copied across to the new page.
-
On the Pages tab, select the page you want to copy.
-
Click Copy Page to create an identical copy immediately after the selected page.
Navigating pages
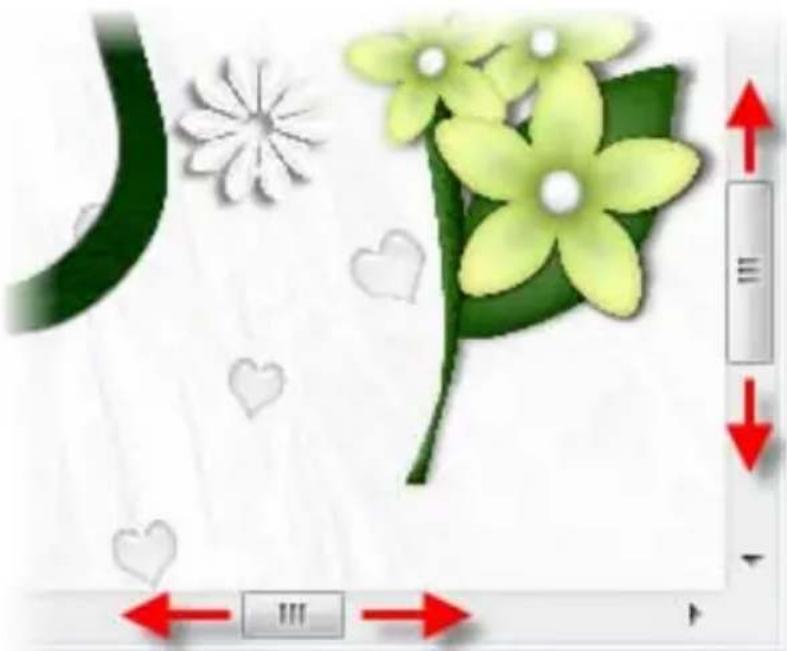
natural_image
Illustration of a green leaf with white flowers and heart shapes, no text or symbols presentYou can use the horizontal and vertical scroll bars to scroll the page and pasteboard area.
The Pages tab and HintLine toolbar provide additional controls to let you navigate between pages.
Navigating with the Pages tab
Once you have added pages, use the Pages tab to quickly navigate between pages.
- To expand the Pages tab, click on the ▲ button at the bottom of the workspace.
(Click the button again to collapse the tab.)
- To view a specific page, simply select its thumbnail.
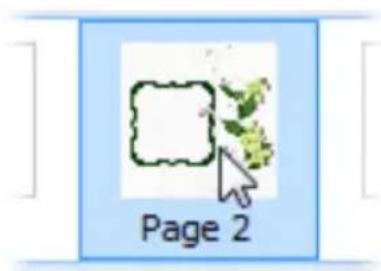
text_image
Page 2You can also use the page controls on the HintLine toolbar to navigate your pages. For details, see CraftArtist Help.
Panning and zooming
Use panning to move around zoomed-in areas of your project. A variety of tools and magnifying options are available for zooming into and out of your page.
The Pan and Zoom tools are located on the HintLine toolbar at the lower-right of the workspace.
Panning
natural_image
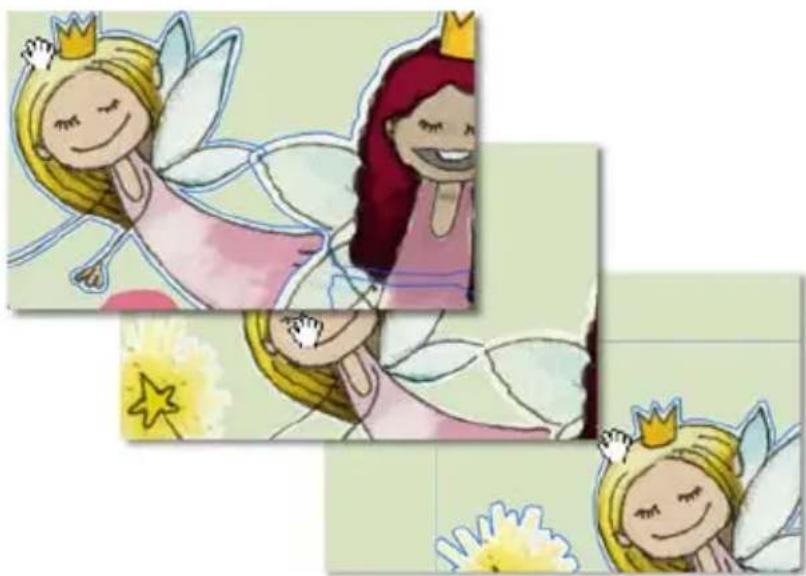
Illustration of three cartoon fairy characters with crowns and wings, surrounded by flowers and stars (no text or symbols)Click the Pan
Tool and then click and drag on the page to reposition it in the window.

If you're using a wheel mouse, you can hold down the middle button and drag anywhere on the page to reposition it in the window.
Zooming
natural_image
Illustration of two cartoon-style fairy characters with wings and a number 7, no text or symbols presentThe Zoom tools let you view and/or edit the page at different levels of detail.
You can zoom in/out in increments, or by a user-defined or preset amount.
- Current Zoom: Displays the current zoom percentage, with 100% representing an actual-size page. Click on the value to select a preset zoom from a pop-up menu, or type over the value for a custom zoom percentage.
- Zoom Out: Click to decrease the current zoom percentage with each click.
- Zoom In: Click to increase the current zoom percentage with each click.
- Zoom Tool: Click the tool and then drag out a rectangular selection marquee on the page to define a region to zoom in to. The zoom percentage adjusts accordingly, fitting the designated region into the window.
- To zoom out, hold down the Shift key when dragging or just right-click on the page. You can also pan around a zoomed-in page while the Ctrl key is pressed. To zoom to the currently selected item, choose Selection from the View menu.
• Fit Page: Click to adjust the zoom percentage so the entire page area is displayed in the window.

If you're using a wheel mouse, you can scroll the wheel forward or back to move up or down the page, or move horizontally left or right by using the Shift key and scrolling together. Try combining the Ctrl key and scrolling up or down for immediate in/out zoom control.
Using design aids
A number of tools are provided on the HintLine toolbar (at the bottom of the workspace) to assist you as you design. Typically the tools can be switched on or off as you go.
Rotating your canvas
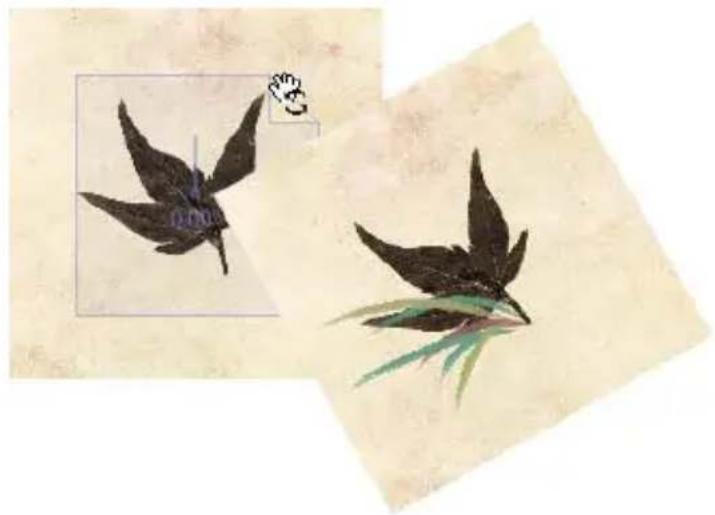
Rotating your canvas helps you to maintain natural flow when drawing freeform lines, curves, or brush strokes, where the artist uses the wrist as a pivot (especially when using a pen tablet). If you rotate the canvas by a chosen angle then the drawing becomes easier—taking advantage of the natural arc of the drawing hand.
natural_image
Two botanical illustrations of dark, green, and purple plant-like structures on textured paper (no text or symbols)The previous example illustrates how grass-like brush strokes can be added to a canvas once it has been rotated 30^ !
To rotate your canvas:
Either:
- Click the 📋 Rotate Canvas button (don't click the down arrow).
- Hover over your workspace until you see the cursor, then click and drag to rotate the canvas clockwise or anti-clockwise.
- Once you're happy with the degree of rotation, release the mouse button to reposition the canvas.
-or-
- Click the down arrow on the Rotate Canvas button and choose a preset angle from the drop-down list.

You can also select an item and then choose To Item from the Rotate Canvas drop-down list. The canvas adjusts so that the item is positioned square to the X and Y axes.
To reset your canvas:
- With the button enabled, double-click anywhere on the canvas to reset.
Applying the Rule of Thirds
text_image
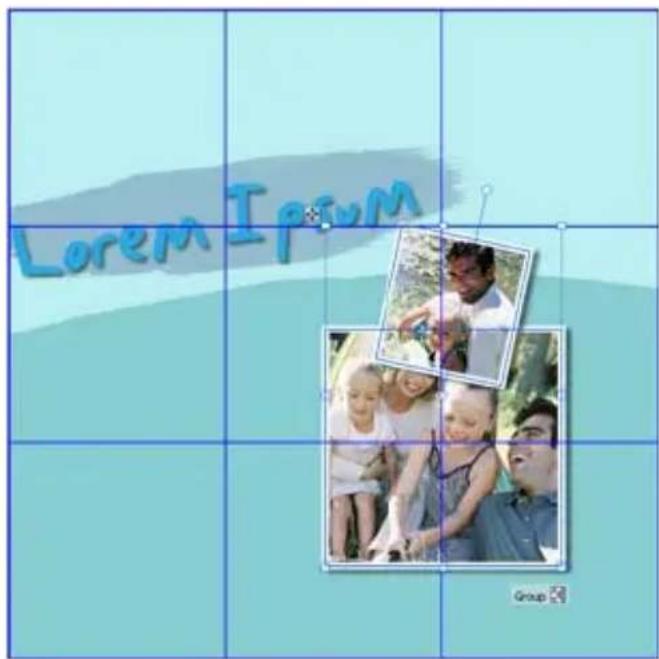
Lorem Ipsum GroupTraditionally a technique used in photography, the Rule of Thirds grid can also be applied to CraftArtist projects to help you with page composition.
By aligning items to intersecting horizontal and vertical lines (rather than just centreing items on the page) you can create greater visual interest.
When a grid is applied to your page the displayed context toolbar lets you alter the grid's colour and opacity. You can also add more grids, delete, and reset a grid. (See CraftArtist Help.)

The grid is actually an overlay which appears as an 'Overlay Layer' in the Layers tab.
To apply a Rule of Thirds grid:
- Click Rule of Thirds on the HintLine toolbar. A blue grid is overlaid over your page.
- (Optional) Drag a corner or edge handle to resize the grid; reposition the grid by dragging. Use over selected items (instead of the entire page) depending on what you're currently working on.
- Place embellishments, photos, or cut materials onto any of the intersecting blue lines.


If at any point the Rule of Thirds grid becomes deselected, simply click the Rule of Thirds button again to reselect it.
Isolating items
For focused editing, CraftArtist provides the Solo mode. This allows you to temporarily isolate selected item(s), such as embellishments or photos, on the page that you are currently designing (all unselected objects disappear!). In doing so, you avoid having to move objects to other layers or lock object unnecessarily.
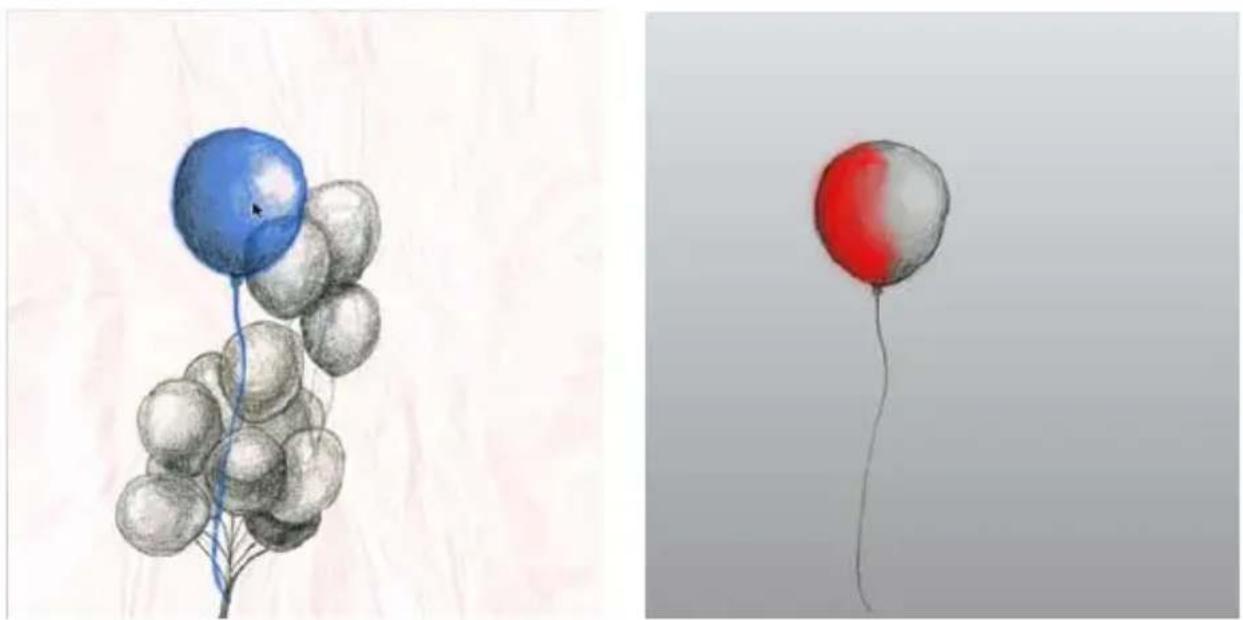
natural_image
Two pencil sketches: one with a blue balloon and gray balloons, the other with a red balloon (no text or symbols)The selected balloon (selection shown in blue) can be isolated for detailed painting with a red brush.
- Select the item(s), then click Solo Mode. Click the button again to return to normal editing mode.
Clipping items
Clipped mode cuts off (clips) items that hang over the edge of your canvas, and which would otherwise display on your grey pasteboard area. The option is turned on by default, but you can view your overlapping items unclipped if required.
To turn off Clipped mode:
- Disable the Clipped Mode button on the HintLine toolbar. Any overlapping items will then display in full. Click the button again to return to Clipped mode.
Working with photos
natural_image
Decorative ribbon with wave pattern and a numbered tag (no text or symbols)Adding and positioning your photos
natural_image
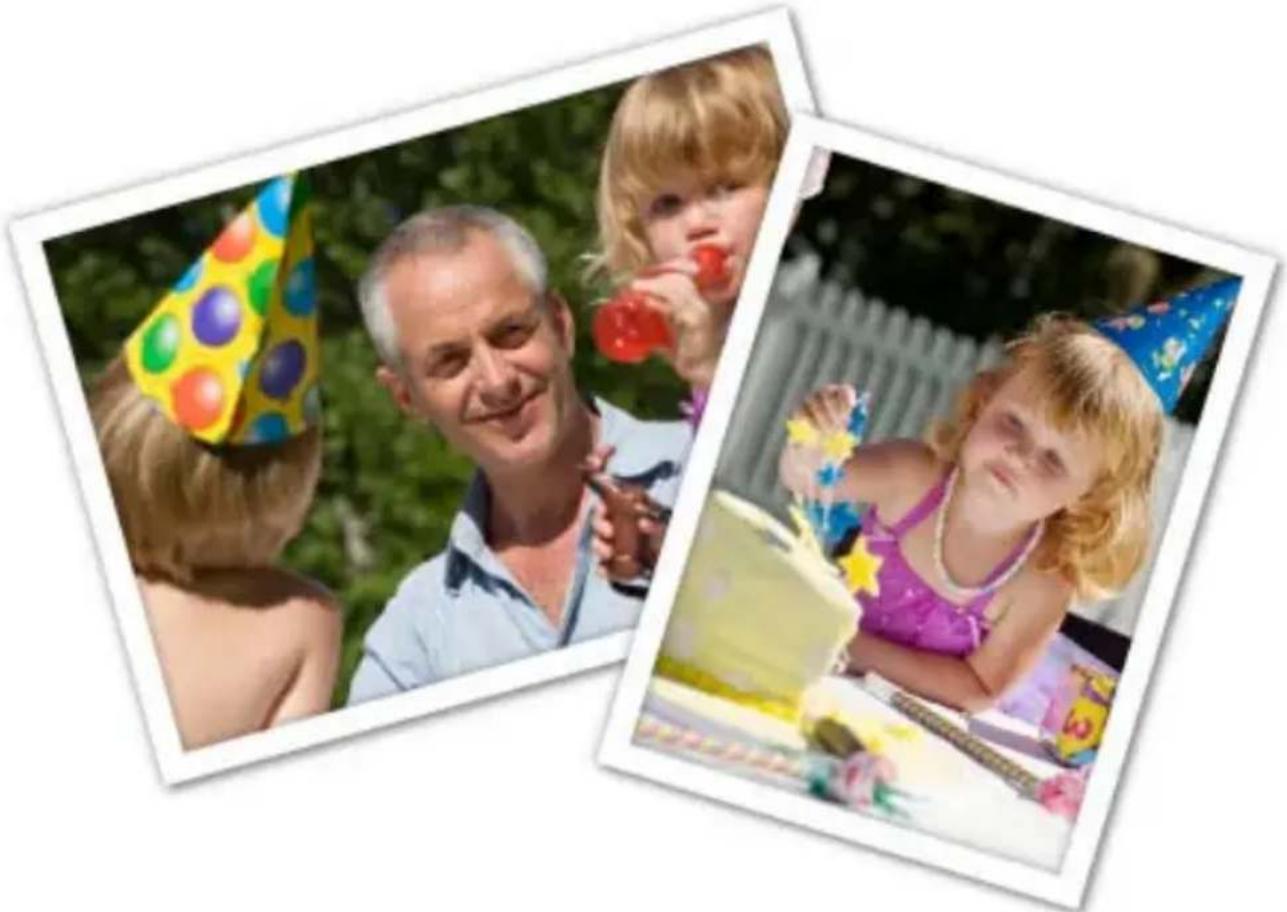
Two photos of children outdoors: one holding a red balloon, another with a birthday cake and party hat (no text or symbols visible)You can use the following methods to add photos to your project:
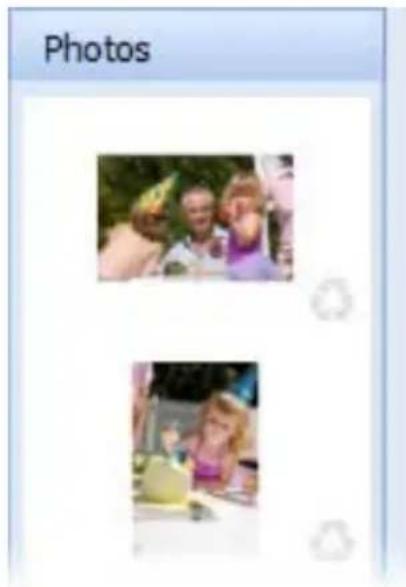
- Use the Photos tab to store photos that you want to use in your project. You can then drag them onto the page as you need them, or use AutoFlow (p. 109) to quickly add them to frames you have already placed on your page.
- Use the Photo button on the Standard toolbar to add individual images directly to the page.

Use the first method if you want to add multiple photos to your project all at once, or if you want to add your photos to photo frames.
Use the second method if you want to add photos to your page individually, or if you want to add your own embellishments to your layout.
Adding photos to the Photos tab
-
In the Contents tabs at the left of the workspace, click the Photos tab to open it. At the bottom of the tab, click Add...
-
In the Open dialog, browse to and select the photos you want to add to your project.
-
To select multiple adjacent files, press and hold down the Shift key, click the first file in the list, and then click the last file.
-
To select multiple non-adjacent files, press and hold down the Ctrl key, and then click to select.
-
Click Open. Your photos are added to the Photos tab.
text_image
PhotosAdding photos to the page
To add a photo from the Photos tab:
There are several ways to add photos to your page:
- Drag a photo from the Photos tab directly onto the page, or onto a photo frame. (See Adding photo frames on p. 103.)
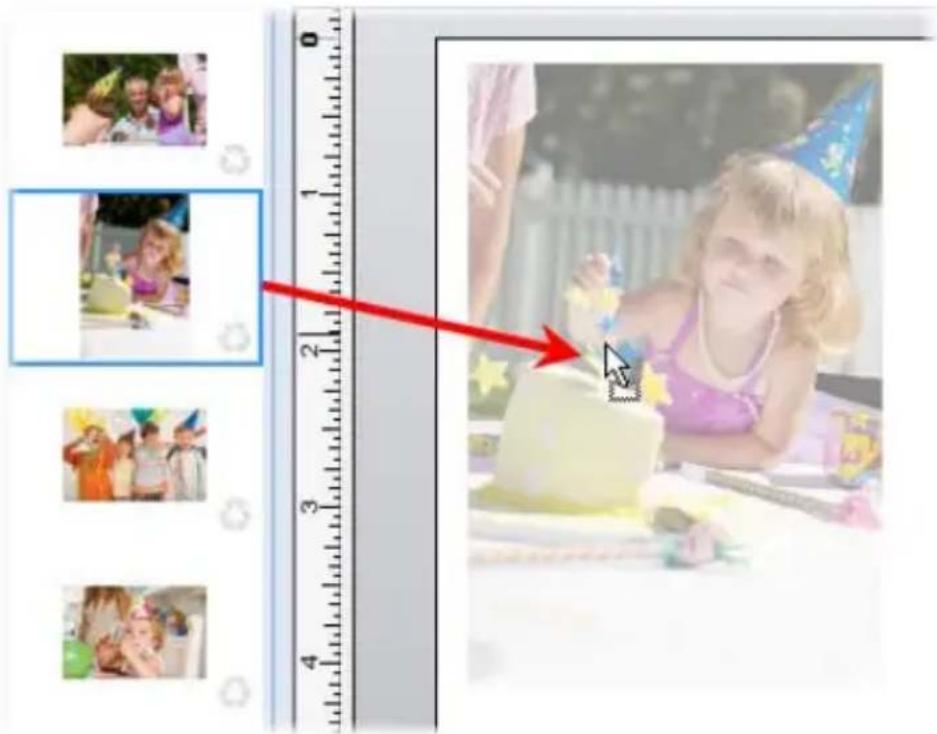
text_image
Screenshot of a children's birthday cake with a red arrow pointing to the cake and photo frames on the left.- Click AutoFlow to sequentially populate a series of photo frames with photos from the Photos tab. (See Using AutoFlow on p. 109.)
- Replace the contents of a photo frame by dragging a new photo onto the frame.
On the Photos tab, framed and unframed photos added to your project are denoted with a check mark icon. This lets you quickly and easily identify photos used in your project.
To add a photo from the Standard toolbar:
- On the Standard toolbar, click

Photo.
-or-
On the Insert menu, click Photo>From File...

You can also insert photos directly from an external device such as a camera or scanner. See Importing camera and scanner images in CraftArtist Help.
- In the Open dialog, browse to and select the photo you want to add, and then click Open.
- To insert the photo at default size, simply click the mouse.
-or-
To set the size of the photo, drag out a region and release the mouse button.
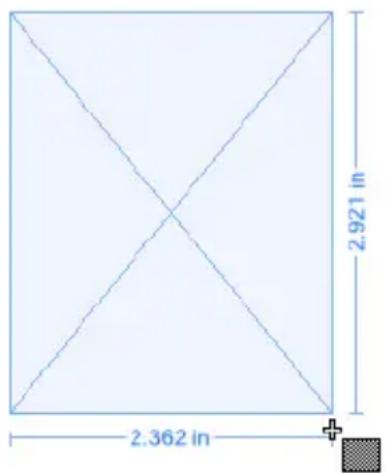
text_image
2.362 in 2.921 inTo add a photo by drag-and-drop:
- Drag and drop an image file or preview thumbnail into CraftArtist from Windows Explorer into the current workspace.

Images added in this way will not automatically be scaled to fit the page or be added to the Photos tab.
Moving photos
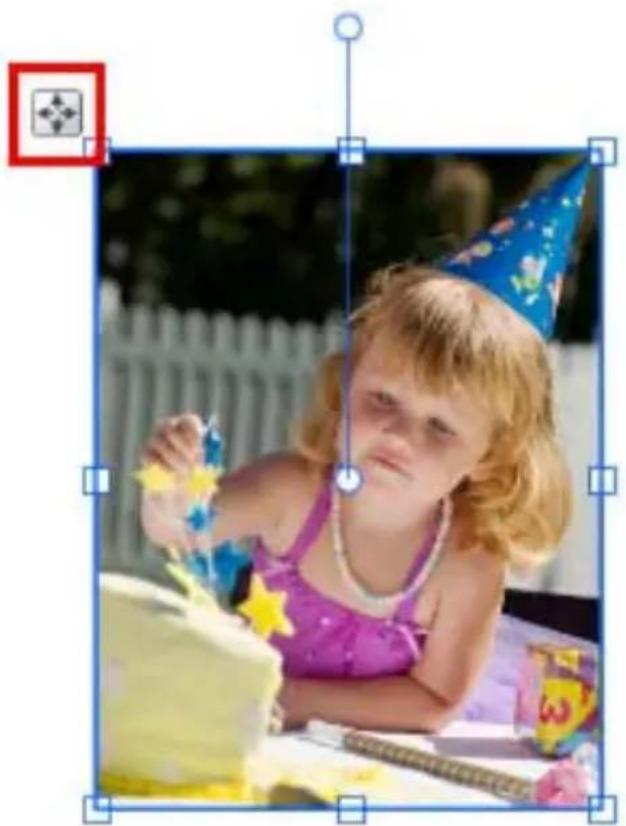
- Select the photo(s) with the Select tool.
- Click inside the photo (not on a handle), hold down the left mouse button, and then drag to a new location.
(Note that the cursor changes to a Move cursor.)
-or-
Click and drag the photo's Move button.
natural_image
A young girl in a party hat and pink dress sitting at a table with a birthday cake, surrounded by decorative items (no visible text or symbols)Replacing, resizing, and deleting photos
Once you've placed a photo on your page, you can replace, resize, or delete it as required.
Replacing photos
- On the Standard toolbar, click the select the photo you want to replace.

Select tool, and then click to
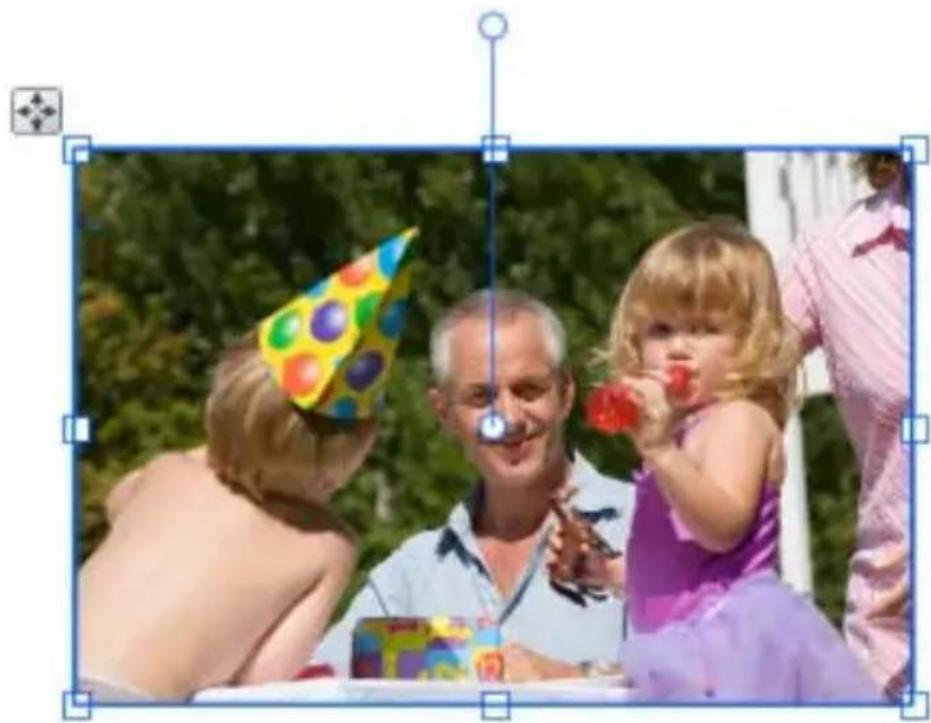
natural_image
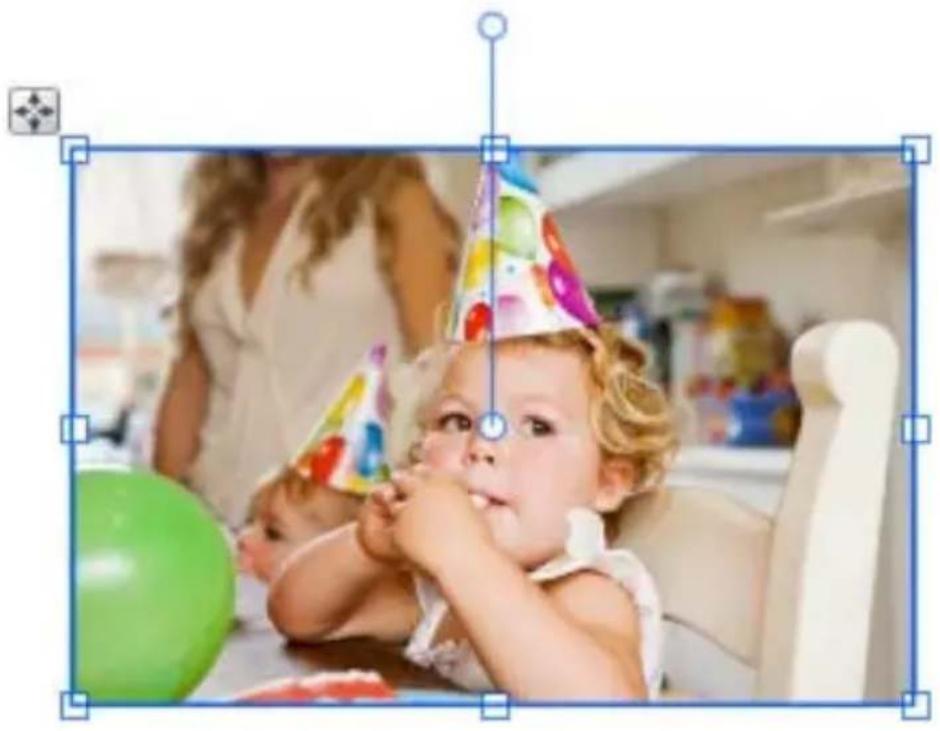
Family gathering outdoors with adults and children wearing party hats (no visible text or symbols)- On the Photo context toolbar, click Replace Photo.
- In the Open dialog, browse to and select the photo you want to add, and then click Open.
The image is replaced.
natural_image
Baby wearing colorful party hats sitting in a circle, with balloons and a green ball in the background (no text or symbols visible)
When you replace a photo in this way, the aspect ratio of the original photo is used. This is fine if both of your images are the same aspect ratio. However, if your photos are of different dimensions, then it is better to delete the original image and add the new one.
To replace a framed photo:
- Drag a different photo onto the frame from the Photos tab, or use AutoFlow to automatically replace the contents of multiple frames in a single step. (See Fitting photos to frames on p. 103.)
Resizing photos
- Select the photo with the

Select tool.
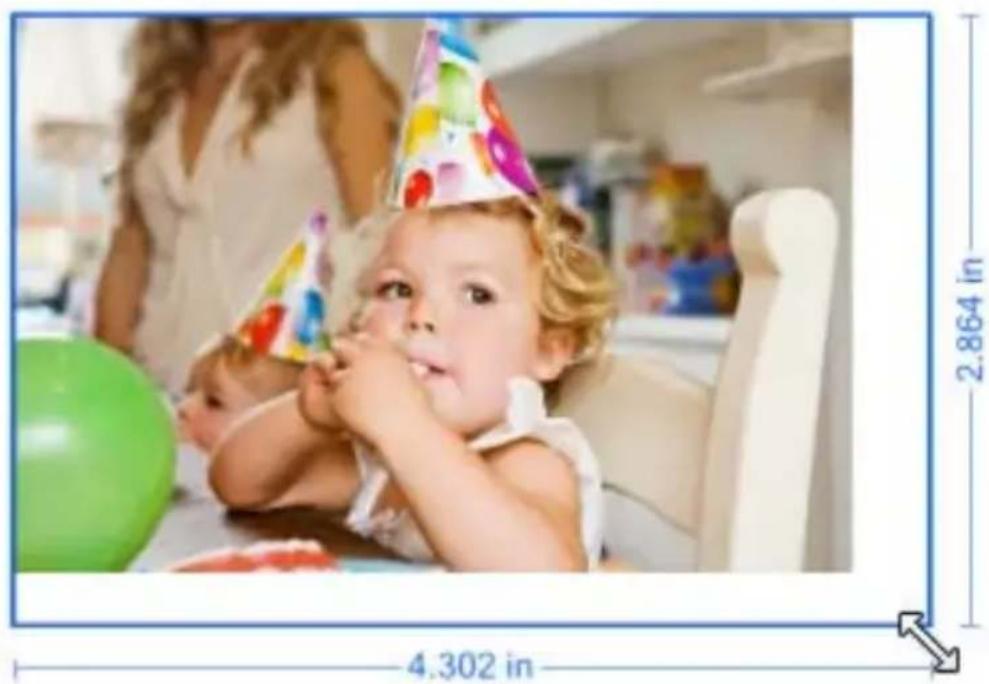
- To resize the photo, drag a corner handle.
text_image
4.302 in 2.864 inThe photo's aspect ratio is preserved. To allow free resizing to any aspect ratio, hold down the Shift key while dragging.
Deleting photos
- To remove a photo from the page, select the photo and press the Delete key.
• To remove a photo from the Photos tab, click its 📋 Recycle button.

For information on deleting framed photos, see Deleting frames and framed photos on p. 115.
Cropping your photos
CraftArtist includes the Crop Tool for cropping objects and photos on the page. The Crop context toolbar also provides a Rule of Thirds grid to help you with your photo composition (see p. 86).

For information on working with framed photos, see Fitting photos to frames on p. 108.
Cropping a photo
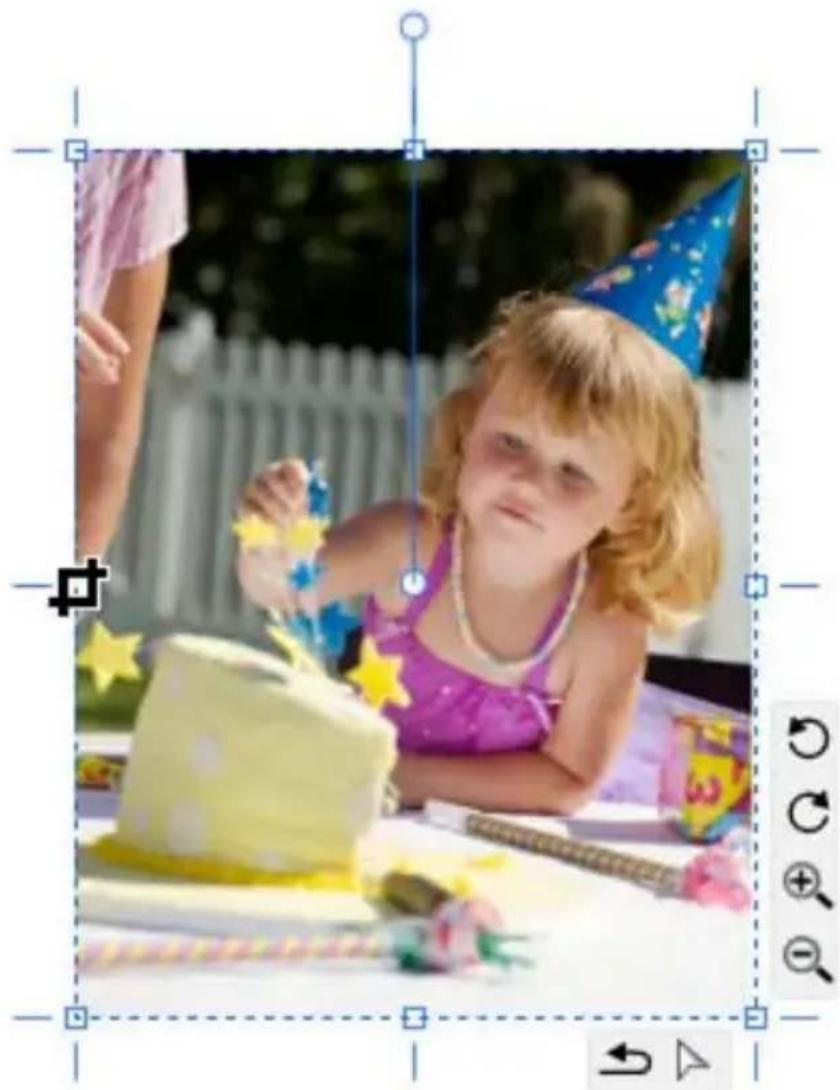
- Select a photo and then on the Standard toolbar, click the Tool.
Crop - Click and drag an edge or corner handle towards the centre of the photo.

natural_image
Child in party hat and pink dress sitting at a birthday cake with colorful decorations (no visible text or symbols)Using the Rule of Thirds
-
Select your photo and click the Crop Tool.
-
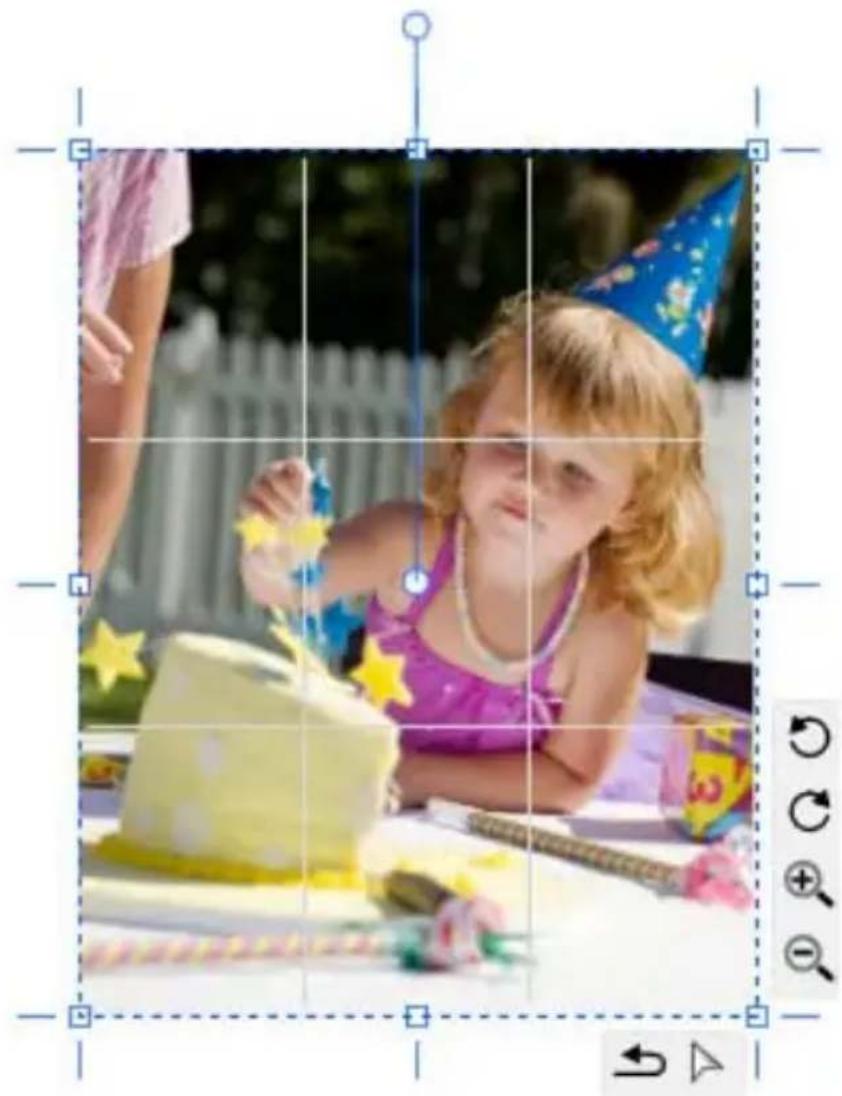
On the Crop context toolbar, click Show/Hide Thirds Grid.
-
A 3 x 3 grid is superimposed on top of the photo.
natural_image
Child in party hat and pink dress sitting at a table with a cake and decorations (no visible text or symbols)- Drag an edge handle to crop the photo. The grid repositions itself on release.
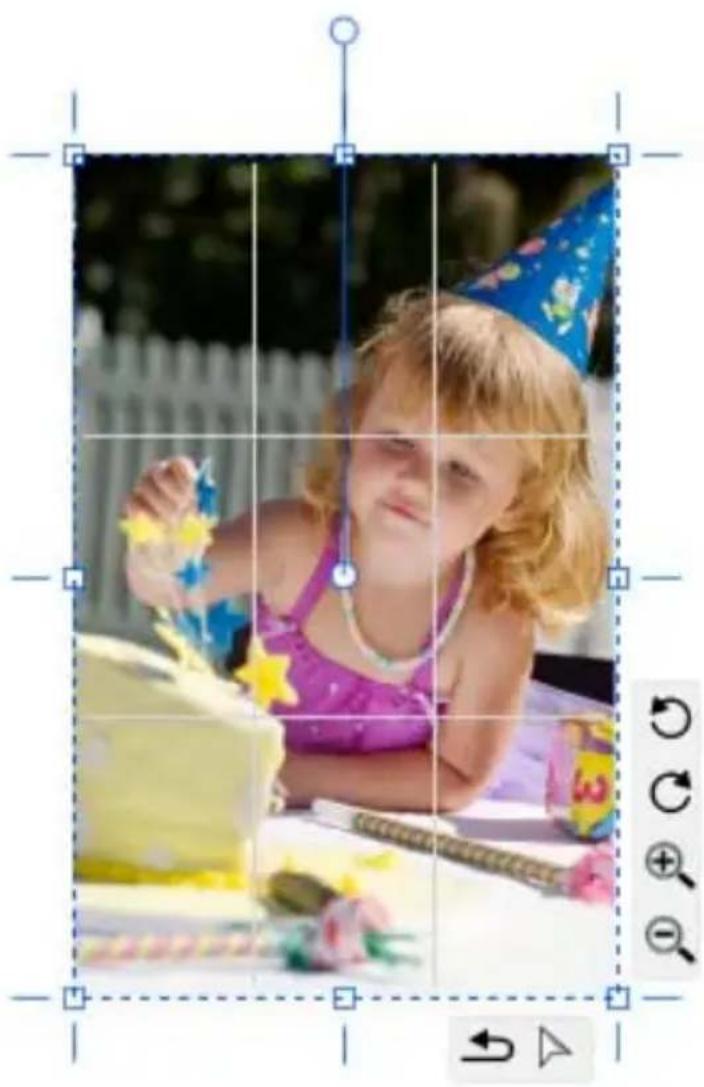
natural_image
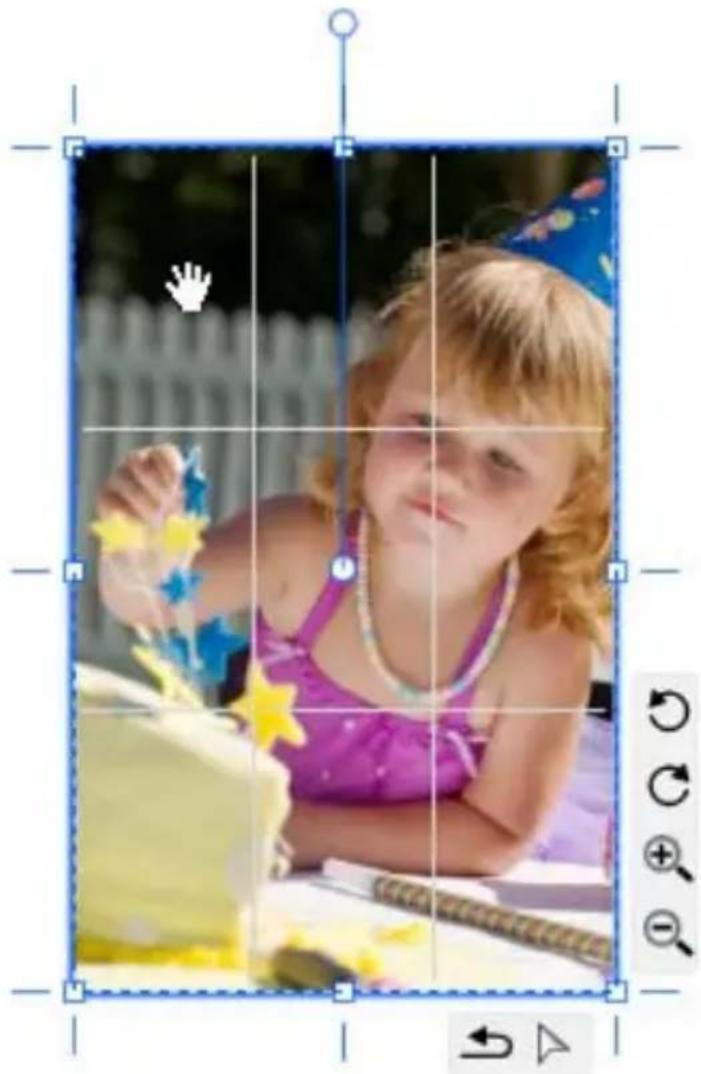
Child birthday cake with party hat and flower decoration, no visible text or symbols- To zoom into or out of the image, use the Zoom tools displayed to the right of the photo.
natural_image
Photo of a young girl birthday cake with a party hat and flower decoration (no text or symbols visible)Click and drag on the cropped photo to pan the image.
For best results, aim to position your main subject of interest at a point where any two gridlines intersect.
Retouching photos
When you select a photo on the page, the Photo context toolbar displays.
Replace Photo | 🎨️ 🎨️ 🎨️ 🎨️ 🎨️ 🎨️ 🎨️ 🎨️ 🎨️ 🎨️ 🎨️ 🎨️ 🎨️ 🎨️ 🎨️ 🎨️ 🎨️ 🎨️ 🎨️ 🎨️ 🎨️ 🎨️ 🎨️ 🎨️ 🎨️ 🎨> PhotoLab Cutout Studio Properties Convert To Frame
In addition to replacing photos, this toolbar lets you quickly remove red eye, adjust brightness and contrast, apply auto level and auto contrast adjustments, and access PhotoLab (p. 89) and Cutout Studio (p. 97). You can use these tools on unframed and framed photos.
You can also convert unframed photos to “frameless” frames. (See Converting photos to frames on p. 116.)
Applying PhotoLab filters
PhotoLab is a dedicated studio environment that lets you apply adjustment and effect filters to photos, individually or in combination.
PhotoLab offers the following key features:
- Adjustment filters
Apply tonal, colour, lens, and sharpening filters.
- Effect filters
Apply distortion, blur, stylistic, noise, render, artistic, and various other effects.
- Retouching filters
Apply red-eye and spot repair correction.
• Non-destructive operation
All filters are applied without affecting the original photo, and can be edited at any point in the future.
• Powerful filter combinations
Create combinations of mixed adjustment, retouching, and effect filters for savable workflows.
- Selective masking
Apply filters to selected regions using masks.
• Save and manage favourites
Save filter combinations to a handy Favourites tab.
- Viewing controls
Compare before-and-after previews, with dual- and split-screen controls. Use pan and zoom control for moving around your photo.
- Locking controls
Protect your applied filters from accidental change, then optionally apply them to other images on selection.
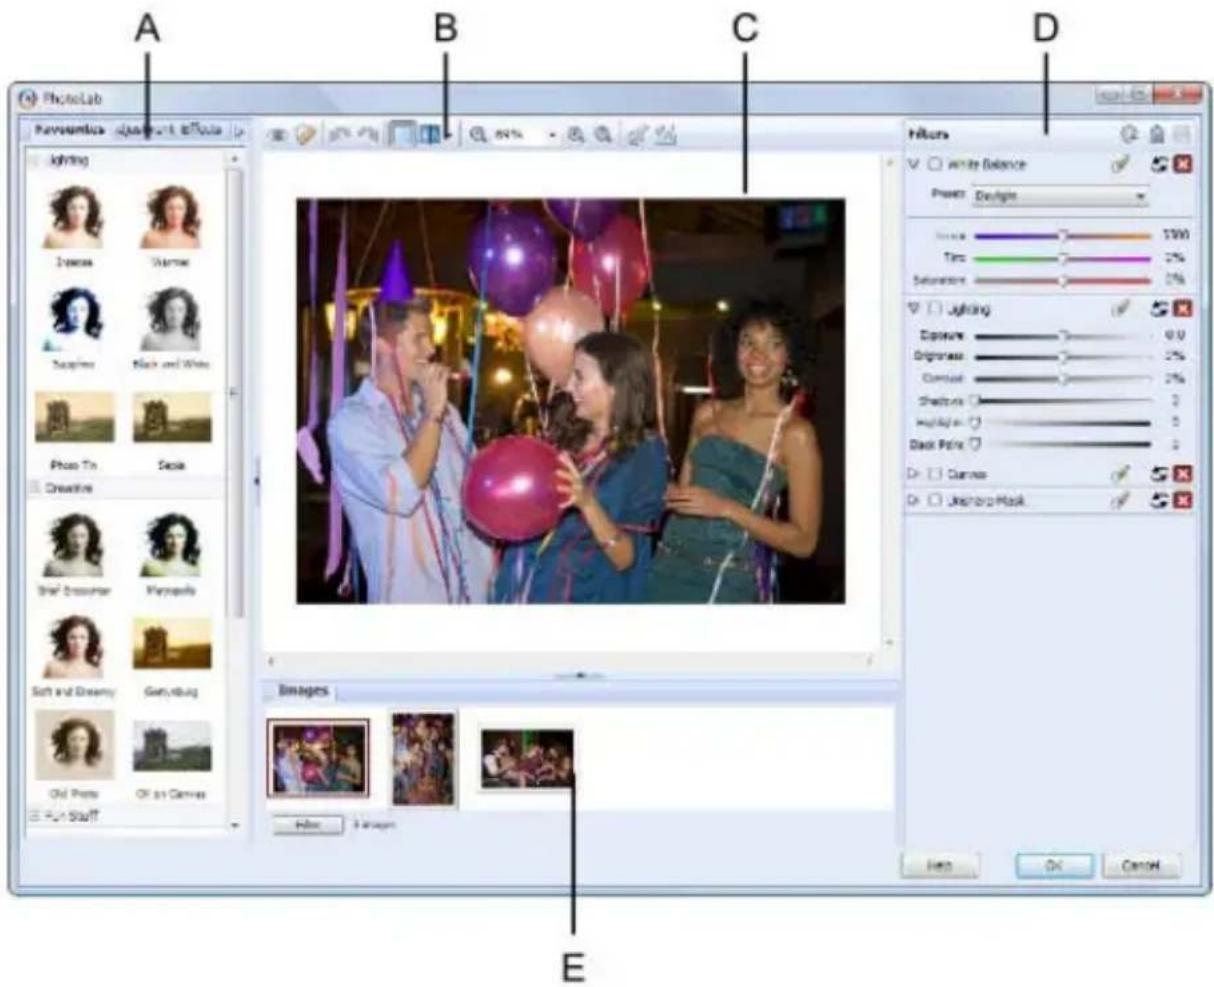
PhotoLab includes filter tabs, a main toolbar, and an applied filter stack around a central workspace.
Photos present in your project display in the Images tab.
- If you can't see the Images tab, simply click the ▲ button at the bottom of the dialog.
text_image
PhotoLab A B C D Preview Lighting 100% 2% 3% 4% 5% 6% 7% 8% 9% 10% 11% 12% 13% 14% 15% 16% 17% 18% 19% 20% 21% 22% 23% 24% 25% 26% 27% 28% 29% 30% 31% 32% 33% 34% 35% 36% 37% 38% 39% 40% 41% 42% 43% 44% 45% 46% 47% 48% 49% 50% 51% 52% 53% 54% 55% 56% 57% 58% 59% 60% 61% 62% 63% 64% 65% 66% 67% 68% 69% 70% 71% 72% 73% 74% 75% 76% 77% 78% 79% 80% 81% 82% 83% 84% 85% 86% 87% 88% 89% 90% 91% 92% 93% 94% 95% 96% 97% 98% 99% 100%A - Filter tabs
D - Filter stack
B - Main toolbar
E - Images tab
C - Main workspace
To launch PhotoLab:
-
Select the picture that you want to apply a filter to.
-
Click PhotoLab on the context toolbar.
Using the images tab
Pictures present in your publication will show in the Images tab (E in the previous screenshot), if the tab is expanded. You can show or hide the tab by clicking the button at the bottom of your workspace.
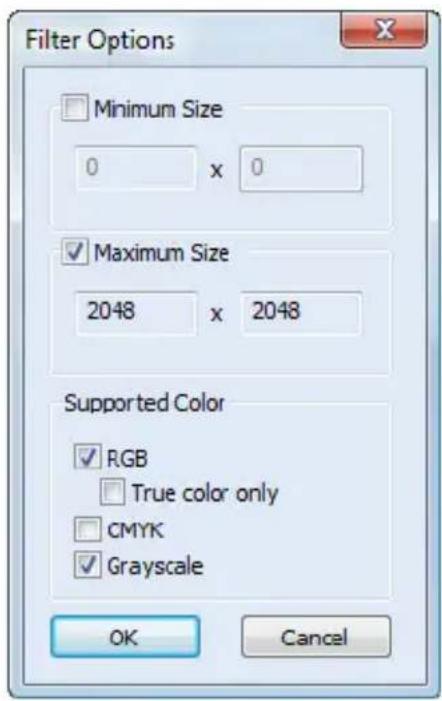
To search publication images:
- Click the Filter button on the Images tab.
- Select and define a minimum and maximum size, if required.
- Select or deselect RGB, CMYK and Greyscale to show only images in these colour modes.
text_image
Filter Options Minimum Size 0 x 0 Maximum Size 2048 x 2048 Supported Color RGB True color only CMYK Grayscale OK Cancel- Click OK.
The Images tab displays only images which comply to the criteria set above.
text_image
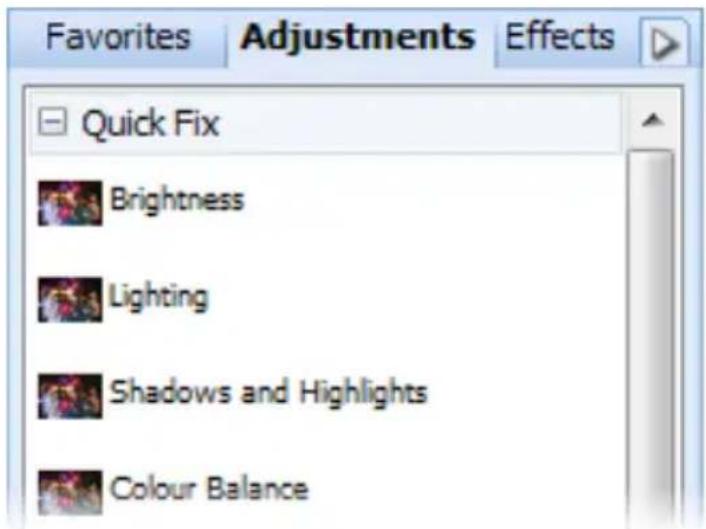
Favorites Adjustments Effects Quick Fix Brightness Lighting Shadows and Highlights Colour BalanceFilters are stored in the Favourites, Adjustments, and Effects filter tabs, and are grouped into categories.
For example, the Adjustments tab provides the Quick Fix and Pro Edit categories, while the Effects tab offers a wide range of creative effect categories.
On the Favourites tab, you'll find a selection of presets created with individual and combined filters. You can add your own custom filters to the Favourites tab. (See Saving Favourites on p. 96.)
When you apply a filter from one of these tabs, it is temporarily added to the Trial Zone that displays beneath the filter stack. This lets you preview and adjust filters before applying them.
Applying filters
- Select the photo you want to work on. (If the photo is framed, select it and click Select Cropped Object.)
- Click PhotoLab on the Photo context toolbar.
- For ease of use, when you open PhotoLab, the Filters stack on the right contains some commonly-used filters (such as White Balance and Lighting). These filters are disabled by default.
To apply one of the default filters, click its ☐ Enable/Disable control to enable it, and then adjust the filter settings by dragging the sliders.
To disable, reset, and delete a filter, see below.
To add a new filter:
- Browse the filter thumbnails displayed on the Favourites, Adjustments, and Effects tabs, and click the one you want to apply.
The selected filter is added to the Trial Zone, and the main window shows a preview of your photo with the filter applied.
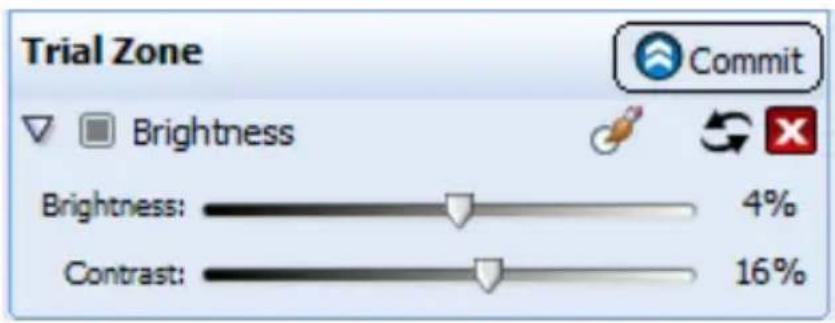
text_image
Trial Zone Brightness Brightness: 4% Contrast: 16% Commit- Experiment with the filter settings in the Trial Zone—you can drag the sliders, or enter values directly—to suit your requirements. (Note that some filters also offer check boxes, drop-down menus, and additional advanced controls.)
- (Optional) To replace the trial filter, click a different thumbnail.

Selecting a new filter always replaces the current filter in the trial zone.
- To apply the filter, click Commit to add it to the Filters stack.
- (Optional):
- Repeat steps 1 to 4 to add more filters to the Filters stack.
Filters are applied to a photo cumulatively, in the order in which they are added to the Filters stack. The most recently added filter always appears at the bottom of the stack. (See To reorder filters, below.)
- Disable, reset, and/or delete filters in the Filters stack. (See below.)
- Use zoom in/out buttons or a percentage magnification for detailed work.
-
Use the retouch tools to fix red eye and remove blemishes. (See Retouching, below.)
-
To apply all filters in the Filters stack and close PhotoLab, click OK.
To disable, reset, and delete filters:
• To disable a filter, click □. Click □ to re-enable.
- To reset filter values, click . Changes to settings revert to the filter's defaults.
• To delete a filter, click ✗.
To reorder filters:
- Drag and drop your filter into any position in the stack. A dotted line indicates the new position in which the entry will be placed on mouse release.
To add a filter directly (without trialling):
- Click Add Quick Filter at the top of the Filters stack and choose a filter from the flyout categories. The filter is applied directly to the stack without being added to the Trial Zone.
Retouching
PhotoLab's main toolbar provides some useful retouching tools. These are commonly used to correct photos before applying colour correction and effects.
• Red-eye tool, to remove red eye from a human subject.
- Spot-repair tool, to remove blemishes from human skin and material surfaces.
For instructions on using the retouching tools, see CraftArtist Help.
Selective masking
You may sometimes want to apply a filter to selected regions of a photo, rather than to the entire photo. In PhotoLab, you can do this by using a “mask” to define these region(s).
You can apply a mask:
• To the areas to which you want to apply the filter.
- or-
• To the areas you want to protect from the filter.
To apply a mask:
-
From the Mask drop-down menu, select New Mask.
-
In the Mask Brush pane, select the Add Region tool.
-
Adjust the settings to suit your requirements. For example, adjust Brush Size to paint larger or more intricate regions.

-
In the Mode drop-down menu, choose one of the following options:
-
Select: Choose this if you want to apply the filter only to the regions you paint. This is the default setting.
-
Protect: Choose this if you want to apply the filter to all areas of the photo, except for those that you paint.
-
Using the circular cursor, paint the regions to be masked (selected areas are painted in green; protected areas in red).
If you've not been as accurate as you'd like while painting, click Remove Regions then paint over the unwanted painted regions.

- Click ✅ to save your mask changes, or ✗ to cancel.
You can create additional masks for the same filter, as above, and then choose between them. You can only apply one mask at any one time. By using the Mask menu's New From> option you can also base your new mask on an existing mask, which may be applied to the current filter or to any other filter in the stack. This is useful when working with Favourites filters that contain multiple adjustments.
To edit a mask:
- Expand the drop-down Mask menu and select the mask you want to edit. Click Edit Mask.
Saving favourites

My Adjustments
Dark pencil
Sepia pencil
You can save specific filter settings, or combinations of filters, as favourites for future use.
PhotoLab stores all your favourites together in the Favourites tab. You can even create your own categories (e.g. My Adjustments) within the tab.
To save and manage favourites:
- Click Save Filter.
- In the dialog, type a name for your filter and choose the category in which to save it. (Click to create a new category.)
- (Optional) To organize your favourites into user-defined categories, click the ▶ Tab Menu button and choose Manage Favourites.
Using Cutout Studio

natural_image
Group portrait of five smiling adults in white shirts against a green field background (no text or symbols visible)CraftArtist includes Cutout Studio, a powerful integrated solution for separating objects from their backgrounds. Whether you're discarding or replacing a photo background, or isolating a section of an image to use in your layout, Cutout Studio lets you create eye-catching pictures quickly and easily.
Opening Cutout Studio
- Select the photo you want to work with.
- On the Photo context toolbar, click Cutout Studio.
- Follow the instructions outlined below.

You'll find detailed instructions in the Help tab at the right of the Cutout Studio window.
Choosing your approach
The approach you take depends on your photo content.
Discard Brush Tool
- If your subject of interest is placed against a simple, uniform background (sky, a wall, etc.), it's easier and quicker to select and discard the background.

Keep Brush Tool
- If the subject of interest is surrounded by a background consisting of complex colours or patterns (such as trees or buildings), it's easier to select and keep the subject.
Selecting areas to discard or keep
To select areas to discard or keep:
- Click the
Discard Tool or the
Keep Tool.
- On the horizontal toolbar, select a brush size.
- (Optional) To adjust the degree of precision with which areas are selected, select the Grow Tolerance check box and adjust the value.
- Click and drag on the image to mark the areas you want to discard/keep. As you do so, CraftArtist locates similar adjoining areas and includes them in your selection.
-
Repeat the click and drag process until your selection area is complete.
-
As you paint your image, you can view your progress using the buttons on the left toolbar.
-
Show original: The default view mode. The image is shown in its original form.
• Show tinted: Areas marked to be kept are shown with a green tint; areas to be discarded are shown with a red tint. - Show transparent: Areas marked for discarding are not shown. By default, these areas are replaced with a checkerboard background indicating transparency.
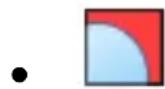
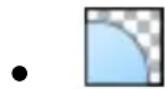
Choosing an output type
On the Output Settings tab, the Output Type drop-down list provides two output format options, Alpha-edged bitmap, and Vector-cropped bitmap. The format you choose depends on what you want to do with your resulting image.
General recommendations
Choose alpha-edged bitmap if you want to blend your cutout image into another image or background, or if your subject has poorly defined edges. Choose vector-cropped bitmap if you want to place your cutout image onto a plain or transparent background, or if your subject has more well-defined edges. (For more details on these output formats see CraftArtist Help.)
To create an alpha-edged bitmap:
- On the Output Settings tab, in the Output Type drop-down list, select Alpha-edged Bitmap.
- (Optional)
- Drag the Width slider to set the area of the image that is to be faded into the background. (Use a lower Width setting for small images, or those with intricate edges; use a higher setting for large images, or those with ‘cleaner’ edges.)
- Drag the Blur slider to smooth out the cutout edge.
- To preview the cutout area, click Preview.
- (Optional) Use the touch-up tools to further refine the cutout area (alpha-edged bitmaps only). (See Refining the cutout area on p. 100.)
- To complete the cutout and return to the CraftArtist workspace, click OK.
To create a vector-cropped bitmap:
- On the Output Settings tab, in the Output Type drop-down list, select Vector-cropped Bitmap.
-
(Optional)
-
Drag the Feather slider to adjust the softening effect around the edge of the cutout. This can improve the appearance of your image.
- Drag the Smoothness slider to smooth out the cutout edge.
- Drag the Inflate slider to adjust the cutout outline, moving it inward or outward.

The Inflate adjustment is particularly useful if the edges of the subject include hair or fur, which usually also incorporate some of the background colour.
- To preview the cutout area, click Preview.
- To complete the cutout and return to the CraftArtist workspace, click OK.
Refining the cutout area (alpha-edged bitmaps only)
- On the Output Setting tab, click the Preview button. (You can use this button to check your cutout as you work.)
- On the left toolbar, click the Restore Touch-up Tool or Erase Touch-up Tool.

- Paint the areas for restoring or erasing as you would with the brush tools.
-
(Optional) To increase or decrease the opacity of the restored or erased areas, drag the Hardness slider (located on the horizontal toolbar).
-
Higher values will result in more pixels being erased, producing a more defined edge.
-
Lower values will produce a softer, more blended edge.
-
To complete the cutout and return to the CraftArtist workspace, click OK.
Editing the cutout area
If you've missed a portion of the photo intended to be discarded (or just removed too much), you can redefine the cutout area at any time.
To edit a cutout (alpha-edged bitmaps only):
- Select your photo and on the Photo context toolbar, click Cutout Studio. The existing cutout area is displayed.
- Fine-tune your selection as described above.
To edit a cutout (vector-cropped bitmaps only):
- Select your photo and on the floating toolbar, click Select Cropped Object(s).
- On the Photo context toolbar, click Cutout Studio. The existing cutout area is displayed.
- Fine-tune your selection as described above.
Adding photos to frames
natural_image
Decorative textile with wave pattern and a decorative letter '6' (no text or symbols)Adding photo frames to your project
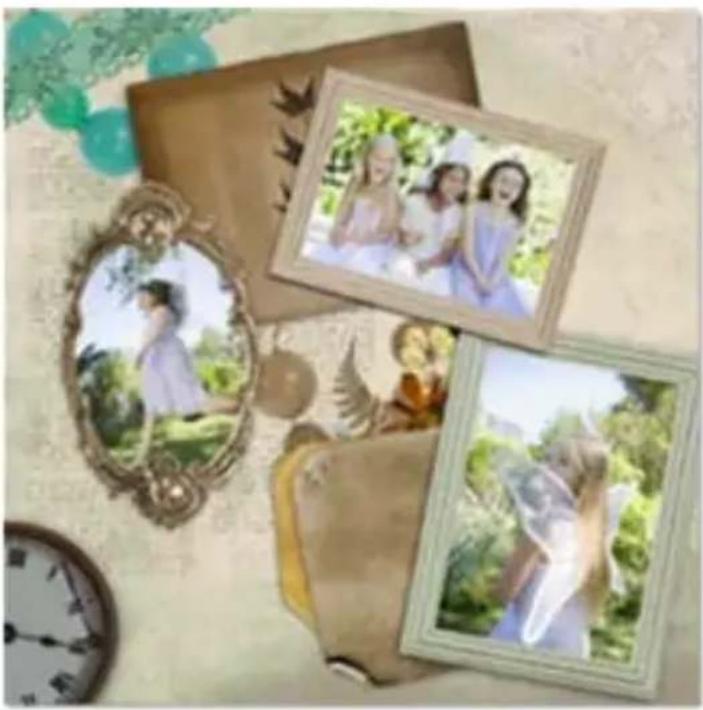
natural_image
Decorative collage featuring framed family photos and ornate ornaments on a table (no text or symbols)CraftArtist Digikits include a wide selection of photo frames that you can add to your page. Once you've placed a frame on your page, simply drag a photo onto it—CraftArtist automatically fits the photo to the frame. All frames can be moved, resized, and rotated on the page.
Adding frames to the Frames tab
-
In the Content tabs at the left of the workspace, click the Frames tab to open it.
-
At the bottom of the Frames tab, click Add...
-
The Digikit Browser opens to display available frames, categorized by Digikit. Scroll to the Digikit from which you want to add frames. You can add frames from more than one Digikit.
-
Click a frame to add it to your craft project, or click Add all items to add them all.
The selected frames are added to the Frames tab.
- Click Done to close the Digikit Browser.
Once the frame is added to the page, you can move, resize, and rotate it.

To remove a frame from the Frames tab, click its button.

Remove
Adding frames to the page
- Drag a frame from the Frames tab onto your page.
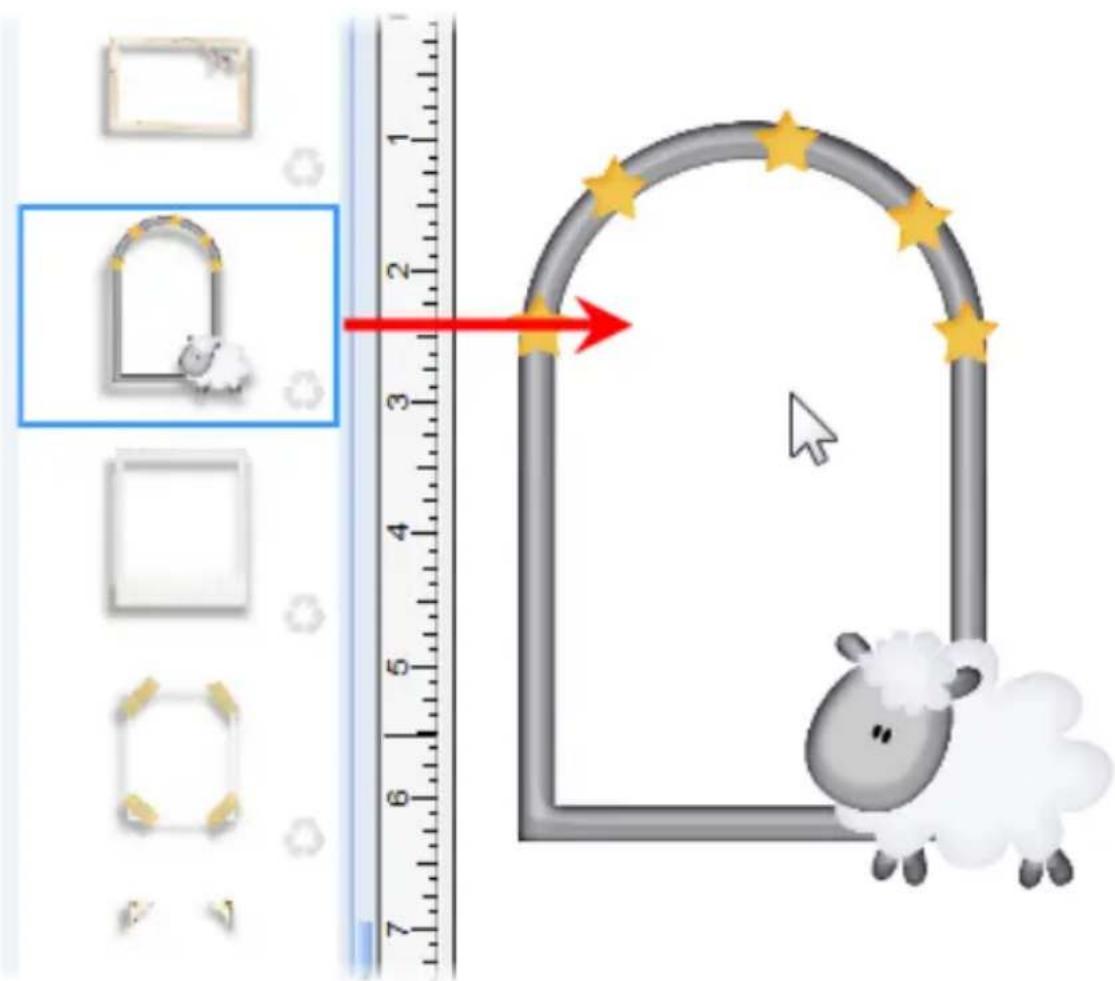
text_image
Illustration showing a sheep inside a frame with a red arrow pointing to it, alongside a ruler and small icons for image processing.- Once the frame is added to the page, there are various ways to work with it.
- To resize the frame, drag a corner handle.
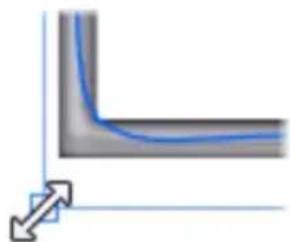
natural_image
Pure geometric L-shaped line diagram with no text, numbers, or symbols- To rotate the frame, drag the Rotate handle.
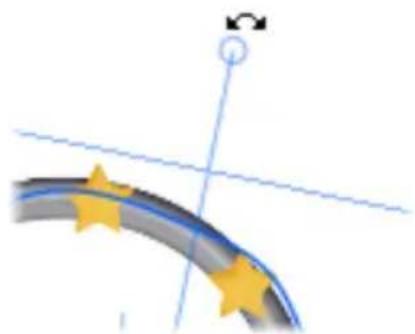
natural_image
Abstract curved line with yellow star markers and blue diagonal lines (no text or symbols)- To add a photo to a frame, drag it from the Photos tab and drop it onto a frame.
-or-
Click AutoFlow to sequentially populate a series of photo frames with photos from the Photos tab. (See Fitting photos to frames on p. 108.)
Adding frames to existing photos
If you've already added a photo to your page, you can easily add a frame to it.
To add a frame to an existing photo:
- Drag a frame from the Frames tab and drop it onto the photo. CraftArtist fits the photo to the frame automatically.
To preview a frame:
- Drag a frame from the Frames tab and hover over the photo without releasing the mouse button. The photo is displayed the frame.
• To apply the frame, release the mouse button.
- or -
To select a different frame, drop the currently selected frame back onto the Frames tab, then drag a new frame onto your photo.
Fitting photos to frames
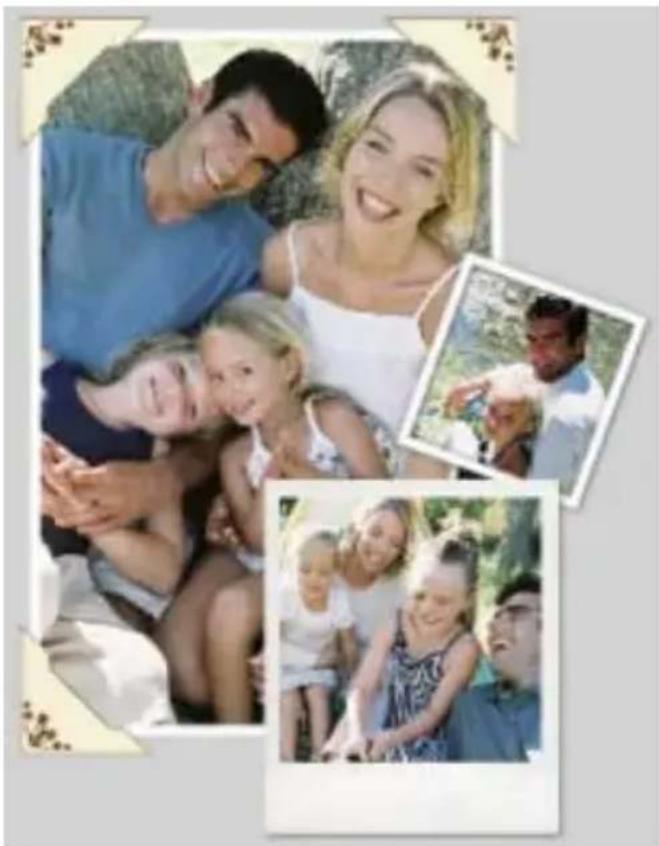
natural_image
Family photo collage showing a family of adults and children outdoors, with inset photos of an adult and two children (no text or symbols visible)Once you have added your photos to the Photos tab, you can frame them on the page—manually by clicking and dragging, or automatically using AutoFlow. CraftArtist lets you rotate, zoom, and pan your framed photos inside their frames. You can even crop a framed photo and adjust its frame to follow suit!
You can also convert photos so that they sit inside “frameless” frames. Once converted, these frames function exactly like the decorative frames you've added from the Frames tab. (See Converting photos to frames on p. 116.)
Adding individual photos to frames
- Add your photo(s) to the Photos tab. (See Adding photos to the Photos tab on p. 78.)
- Add a frame to your page. (See Adding frames to your project on p. 105.)
natural_image
Decorative square frame with ornamental scrollwork at corners (no text or symbols)- Drag a photo from the Photos tab and drop it onto the frame. CraftArtist fits the photo to the frame automatically.

natural_image
Family photo frame with three smiling adults (no text or symbols visible)On the Photos tab, photos added to your craft project are denoted with a check mark icon.
Using AutoFlow
- Add your photo(s) to the Photos tab. (See Adding photos to the Photos tab on p. 78.)
- Add a frame to your page. (See Adding frames to your project on p. 105.)
-
On the Photos tab, click AutoFlow to automatically populate multiple photo frames.
-
The AutoFlow Photos Into Frames dialog opens, offering various options for filling your frames. For example, you can choose to replace existing photos in frames; randomize photo order; insert new pages to accommodate extra photos, and so on.
Select any options you want to apply and click OK.
- Frames are filled sequentially, from back to front in the Z-order (see Ordering items on p. 241).
This means that if you haven't rearranged your frames (using the Arrange tab or the Arrange>Order Items... menu), they will be filled in the order in which you added them to your page. -
By default, photos are placed in available frames in the order they appear on the Photos tab (unless you selected the Randomize photo order fill option).
-
If you have more frames than photos, or vice versa, a dialog will display.
-
If you have more frames than photos: Delete the unused frames, or add more photos and then drag them from the Photos tab and drop them onto the frames.
- If you have more photos than frames: Add more frames to your page, and then drag the photos from the Photos tab and drop them onto the frames.
On the Photos tab, photos added to your page(s) are denoted with a check mark.

Cropping framed photos
-
Select the framed photo with the Select tool.
-
Click Crop.
-
Drag the handles to crop the photo.
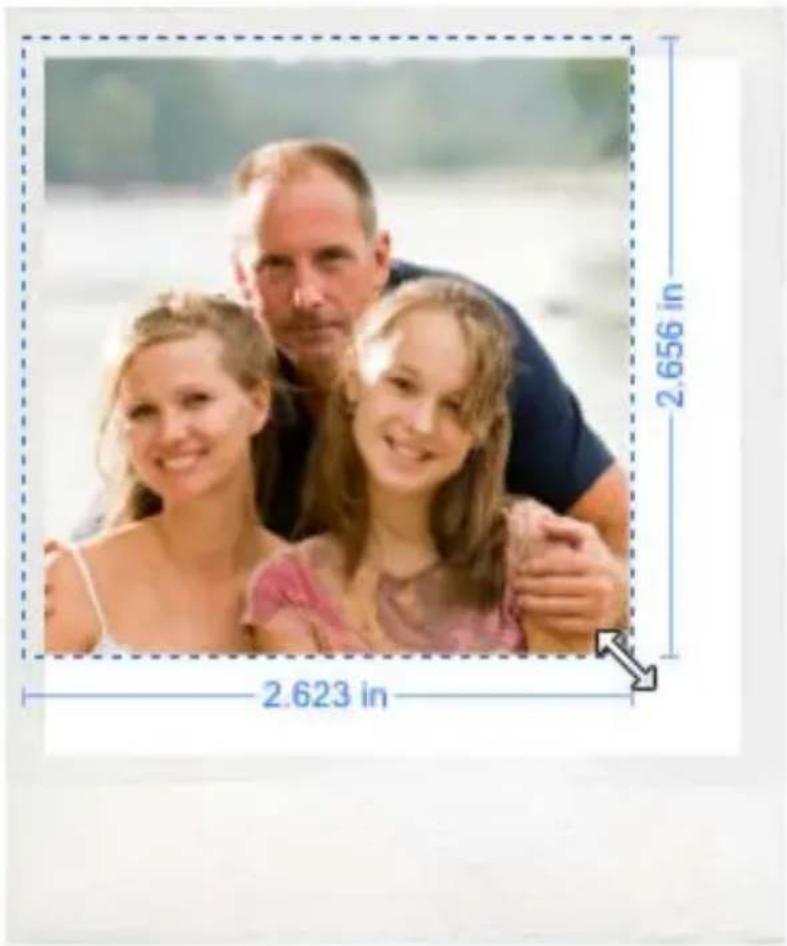
text_image
2.623 in 2.656 in(See also Cropping photos on p. 85.)
-
Click Back to return to the Select tool.
-
(Optional)
-
Rotate, zoom or pan your cropped photo. To help with the composition of your photo, see Using the Rule of Thirds on p. 86.
- Adjust the frame to fit the crop—see overleaf.
Adjusting frames
If a photo has been cropped inside a frame, you can adjust the size and shape of the frame to suit it. The frame can be, moved, rotated, resized and even recoloured independent of the photo. You can even add an effect or colour to the frame—without affecting the photo.
- Select the framed photo with the

Select tool.
- Click Select Frame Object.
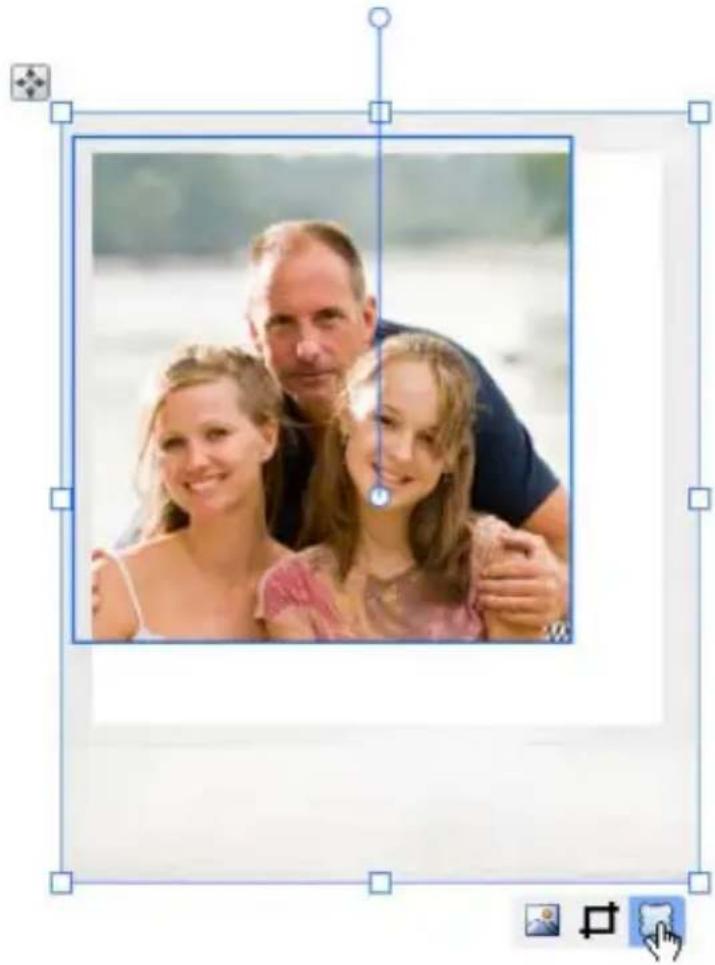
natural_image
Family photo frame with three people posing together (no text or symbols visible)- To resize the frame, drag a handle. The frame's aspect ratio is preserved. To resize to any aspect ratio, hold down the Shift key while dragging.
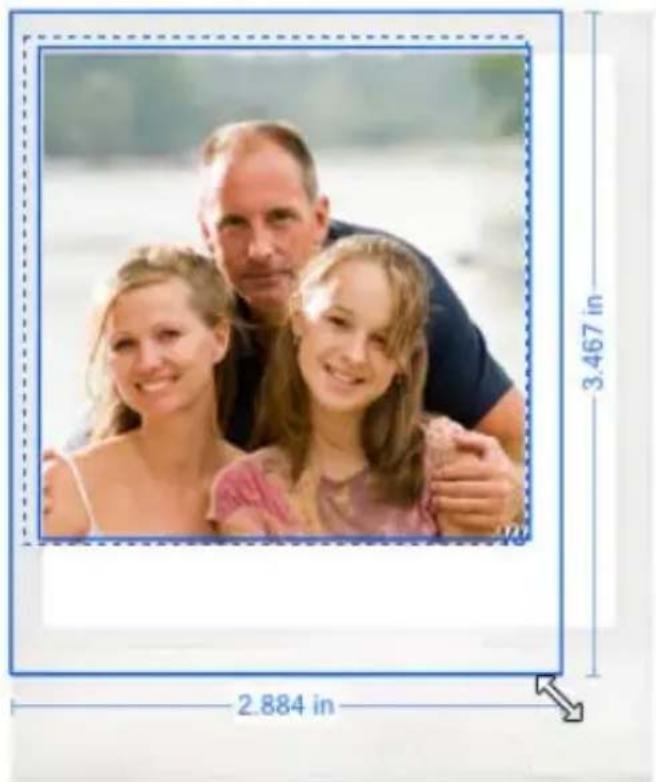
text_image
3.467 in 2.884 in-
(Optional) The Select Frame Object tool also lets you isolate the frame so you can add effects or change the frame's colour—without affecting the photo inside it.
-
Click Back to return to the Select tool.
Rotating, zooming, and panning
- Select the photo, and then click the Crop button.
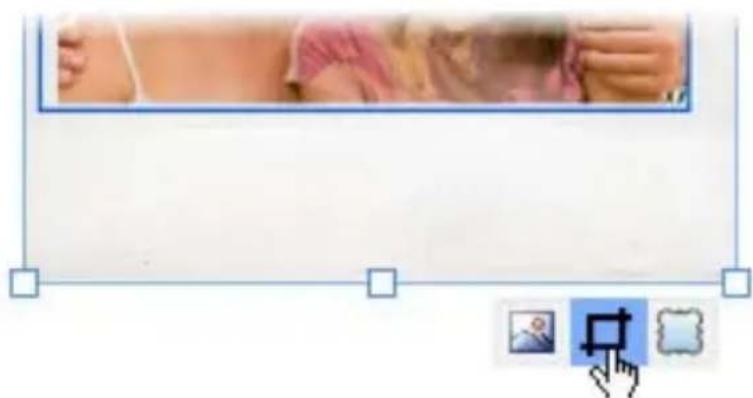
natural_image
Software interface element with tool icons and a photo frame (no readable text or symbols)- To rotate, or zoom into or out of the photo, click the buttons displayed at the right edge of the photo.
natural_image
Close-up of a hand holding a wrist with five circular icons (arrow, refresh, plus, magnifying glass, minus) arranged vertically on a dashed line (no text or symbols)- To pan the photo inside its frame, click and drag on the photo.
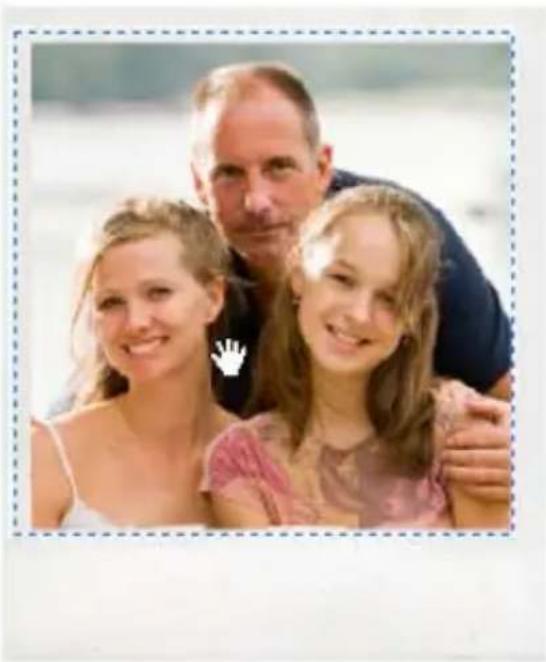
natural_image
Family portrait of three smiling adults (no text or symbols visible)- To use the Rule of Thirds to grid to help with your composition:
• On the Crop context toolbar, click Show/Hide Thirds Grid.
- Click and drag on the photo to pan the image, positioning your main subject of interest at a point where any two lines intersect. (See Using the Rule of Thirds Grid on p. 86.)
- To close the Crop window, click Back, or click elsewhere on the page or pasteboard area.
Replacing a framed photo
- Drag a new photo from the Photos tab and drop it onto the frame. CraftArtist fits the photo to the frame automatically.
Changing a photo frame
- Drag a new frame from the Frames tab and drop it onto the photo. CraftArtist replaces the existing frame and fits the photo to the new frame automatically.
Deleting frames and framed photos
You can delete frames (along with the photos inside them) from your pages. You can also remove frames from the Frames tab.
Deleting frames from the page
- Select a frame and press the Delete key.
If the frame contains a photo, this will also be deleted from the page.
Removing frames from the Frames tab
- On the Frames tab, select a frame and click its Remove button.

This process will only remove frames from the Photos tab; it will not delete frames already on your pages.
Converting photos to frames
Photos you've added directly to your page (i.e., those that are not inside a decorative photo frame) can be converted so that they sit inside "frameless" frames.
Once converted, these frames function exactly like the decorative frames you've added from the Frames tab. For example, if you use the AutoFlow feature to automatically populate frames in your project, photos in frameless frames will also be replaced. (See Using AutoFlow on p. 109.)

If you have used the Line tab to apply an outline or edge to your photo, when you convert the photo to a frame, the outline itself becomes the new frame. For information on applying outline and edge effects, see Changing line style on p. 174.
To convert a photo to a frame:
- Select the photo with the Select tool.
- On the context toolbar, click Convert to Frame.
The photo is converted to a frame, and the Frame controls display beneath it.


Notice also that the Photo context toolbar has been replaced with the Crop context toolbar.
You can now adjust the way your photo fits inside its frame by rotating, zooming, and panning. You can also crop the photo and adjust its frame to follow suit. See Fitting photos to frames on p. 108.
Working with text
natural_image
Decorative illustration of a wave pattern with a number 7 and decorative beads, no text or symbols present.You can create artistic text and shape text in CraftArtist. Both text types are fully editable, and you can apply formatting, styles, and colour fills before or after typing.

If you're looking to add decorative text to your project you should try adding Digikit letters from the Digikit Browser (see p. 53).
Text types overview
The following table outlines the main characteristics of artistic and shape text.
Text type
Use and characteristics
Artistic text

text_image
piscesShape text
text_image
lorem ipsum dolor lsit amet orem ipsum dolor lsit amet orem ipsum dolor lsit amet orem ipsum dolor lsit amet orem ipsum dolor lsit amet orem ipsum dolor- Great for decorative typographic design.
- Individual letters can be stretched, rotated, sheared, and combined with other items.
- Lends itself well to blocks of body text where shape and flow contribute to the overall layout.
- Conforms to the containing shape. You can't manipulate individual letters, but you can achieve unique text flow effect by varying the container's properties.
- Shape text does not have a line property.
Adding artistic text
-
On the Standard toolbar, click the A Text tool.
-
To create text at the default size, click on your page to set a text insertion point.
-or-
Click and drag on your page to set the size of the text insertion point.
text_image
A +66.75pt A- To set text attributes before typing, adjust the settings on the Text context toolbar. (See Formatting text on p. 125.)
- To set text colour before typing, set the Line and Fill swatches on the Colour tab. (See Changing line and fill colour on p. 219.)
- Start typing. To start a new line of text, press the Enter key.
Adding shape text
-
Create a shape either from the QuickShape flyout or by closing a drawn line.
-
With the shape selected, start typing. Text flows within the shape and the Text tool is automatically selected.
text_image
Lorem ipsum dolor
To set text attributes before typing, adjust the settings on the Text context toolbar. (See Formatting text on p. 125.)

To set text colour before typing, set the Line and Fill swatches on the Colour tab. (See Changing line and fill colour on p. 219.)
• (Optional) To start a new line of text, press the Enter key.
- If you've typed more text into a shape than it can display, an Overflow button displays below the shape when it's selected.
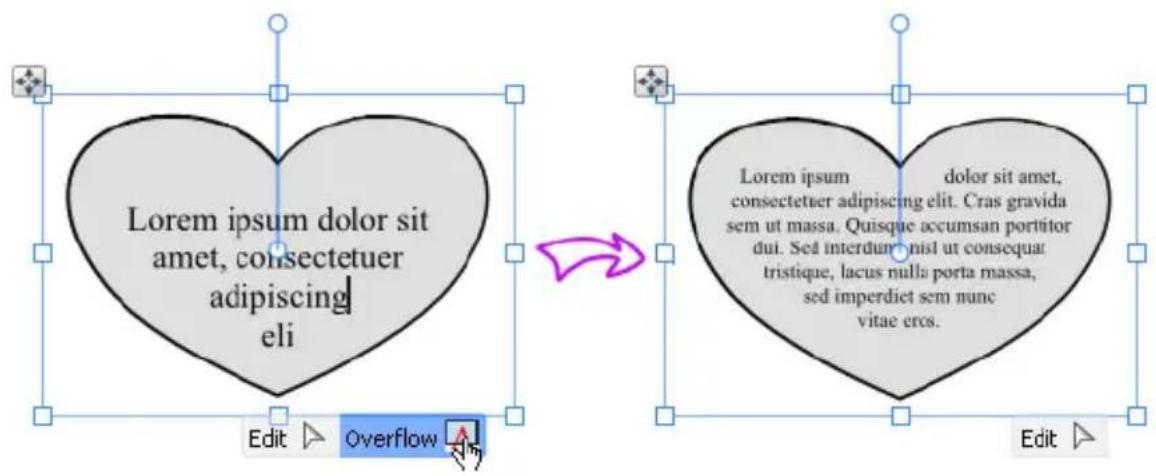
text_image
Lorem ipsum dolor sit amet, consectetur adipiscing elit Edit ↑ Overflow ↓ → Lorem ipsum dolor sit amet, consectetur adipiscing elit. Cras gravida sem ut massa. Quisque accumsan portitior dui. Sed interdum nisl ut consequat tristique, lacus nulla porta massa, sed imperdiet sem nunc vitae eros. Edit ↑Click the ⚠️ Overflow button (or the ⚡️ AutoFit button on the Text context toolbar) to reduce the size of the text.
-or-
To reveal all the text without changing the font size, enlarge the shape.
- To extract text from a shape (as an artistic text item), right-click the shape and click Detach as New Item>Text. To detach the text from its containing shape, simply drag it.
Working with text on the page
To select an entire artistic or shape text item:
- Click it with the

Select tool.
To edit a text item:
- Select the item with the

Select tool, and then click the
I
Edit button that displays below the item.
-or-
Select the item with the

Text tool.
A text edit cursor is inserted inside the text.
- Click and drag to select the text you want to edit, and then retype. See Editing and deleting text on p. 124.
To move a text item:
- Select it, and then drag it.
-or-
Click and drag its

Move button.
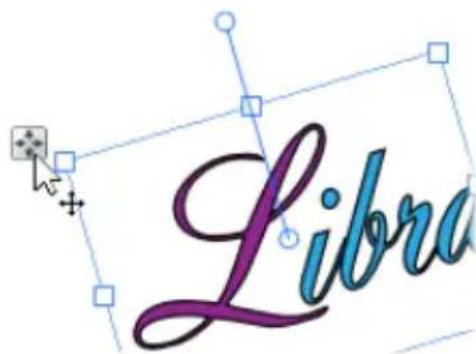
text_image
LibraTo resize a text item:
- Select it and drag a corner resize handle.
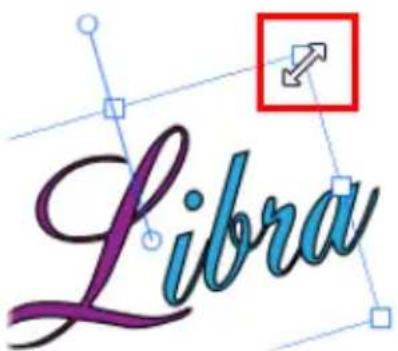
text_image
LibraTo rotate a text item:
- Select it and drag its Rotate handle.
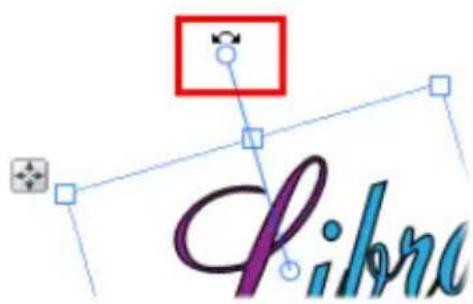
text_image
FilmTo apply text formatting:
- Select the text, and then adjust the settings on the Text context toolbar. See Formatting text on p. 125.
You can also rotate and shear text items, and apply shadows, transparency, and other effects. For details, see:
• Rotating and shearing items (p. 235)
• Adding drop shadows (p. 145)
• Applying transparency (p. 150)
• Adding outlines to text (p. 133)
• Applying 2D filter effects (p. 146)

You can also add frequently used text as a resusable sentiment. See Sentiments on p. 137.
Editing and deleting text
You can edit and delete artistic text and shape text directly on the page, or in the Edit Text dialog (for details on working in the Edit Text dialog, see CraftArtist Help).
To edit text on the page:
- Select the item with the Select tool, and then click the Edit button that displays below the item.
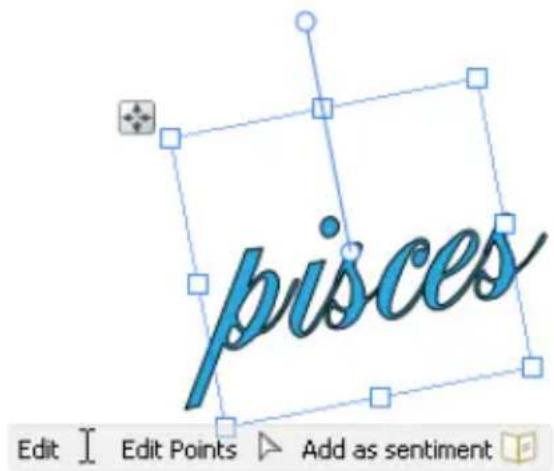
text_image
pisces Edit Edit Points Add as sentiment-or-
Select the item with the A Text tool.
- A flashing text edit cursor is inserted inside the text.
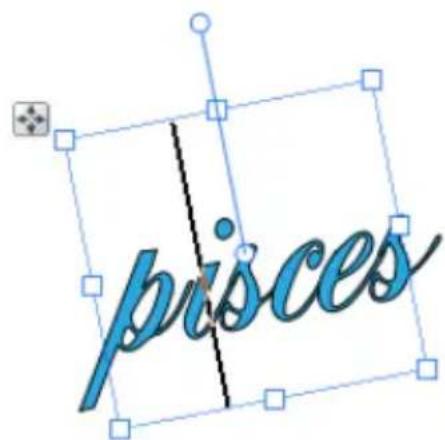
text_image
pisces- Type new text at the insertion point, or click and drag to select the text you want to edit.
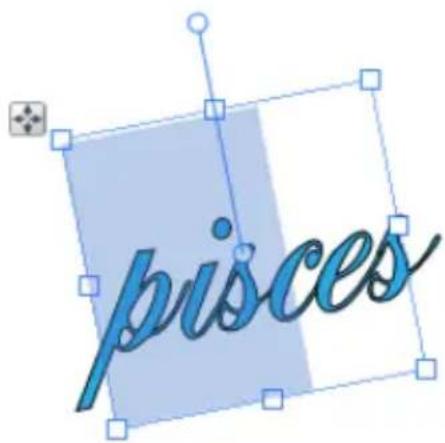
text_image
pisces- Type your new text.

To cut, copy, and paste text, use the standard Windows keyboard shortcuts.
To delete an entire text item:
- Select a text item or shape with the Select tool.
- Press the Delete key.
To delete selected characters or words:
- Select a text item or shape with the Select tool.
- Click the A Text tool.
A flashing text edit cursor is inserted inside the text.
- Click and drag to select the text you want to delete, and then press the Delete key.
Formatting text
You can select and format artistic text and shape text directly on the page using the Text context toolbar, the Format menu, or the Edit Text dialog.
Selecting text for formatting
To format an entire text item:
- Select the item with the

Select tool.
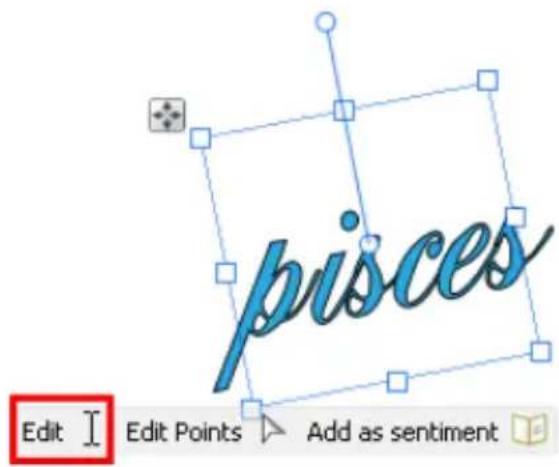
text_image
Edit I Edit Points Add as sentiment- Use the Text context toolbar or Format menu to apply formatting, as described below.
To format selected letters or words:
- Click the Text tool, and then click and drag to select one or more characters or words.
- Use the Text context toolbar or Format menu to apply formatting.

text_image
piscesUsing the Text context toolbar

text_image
Times New Roman 12 pt B I U A x A x Preset Text Paths:The Text context toolbar lets you apply basic text attributes, such as point size, font style, alignment options, and so on, to selected text.
To format text from the Text context toolbar:
- Select a text item, a character, or a group of characters.
- On the Text context toolbar, adjust the settings described below:
- Select a font from the Fonts drop-down list.

text_image
Times New Roman
Lists font names and provides a preview of the selected text. Icons indicate the font type (e.g., = TrueType ).
- Select a text size from the Point Size drop-down list.

Shows the height of the selected text in points.
- Click to apply bold, italic, or underline formatting.

- Click to apply left, centre, right, or justified text alignment.
- Click to apply a bullet or numbered list style.

- Click to incrementally decrease or increase text indents.
- Click AutoFit to increase or decrease the size of shape text to fit its containing shape.
- Click to incrementally increase or decrease text size.
- Click to apply super- or subscript to text.




Superscript formatting is automatically applied to ordinates, e.g., the 'st' in 1st will change to 1^st . See Using Auto-Correct in CraftArtist Help for more information.
- Click to display the Curved Text flyout. Click a preset path to apply it to a selected artistic text item.


You can only fit artistic text to a curve. See Putting text on a path on p. 130 for more information.
Using the Format menu
- Select a text item, a letter, or a group of letters.
-
On the Format menu, click Character, Paragraph, Tabs, Bullets & Numbering, or Text Flow.
-
Make your changes in the respective dialog(s), and then click OK.
See CraftArtist Help for a detailed description of these options.
For special adjustments on artistic text:
-
Select the text item with the Select tool.
-
Click the Edit Points button under the selected text.
Adjustment sliders and handles appear to the left of, and above and below the text. Hover the cursor over a slider to see its function.
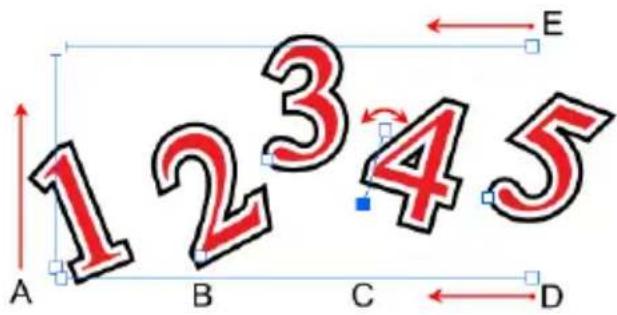
text_image
12345 A B C D E- Drag the WRAPPING (E) slider inward to change wrapping (how line wraps onto a new line).
- Drag the LEADING slider (A) to change leading (space between lines).
- Drag the LETTER SPACING slider (D) to change tracking (spacing between characters).
- To move a single character, select and drag the square handle at the character's lower-left corner (B).

To constrain movement horizontally or vertically, select a letter and then press and hold down the Shift key while dragging the letter.
- To move a group of letters, select them one at a time with the Shift key held down.
- To rotate a single character (illustrated), click its handle and drag the node on the opposite end of the displayed line to either side (C).
Fitting text to a path
CraftArtist allows you to make artistic text conform to a curved baseline (such as a drawn freeform line or curve), custom shape or a preset shape (QuickShape).
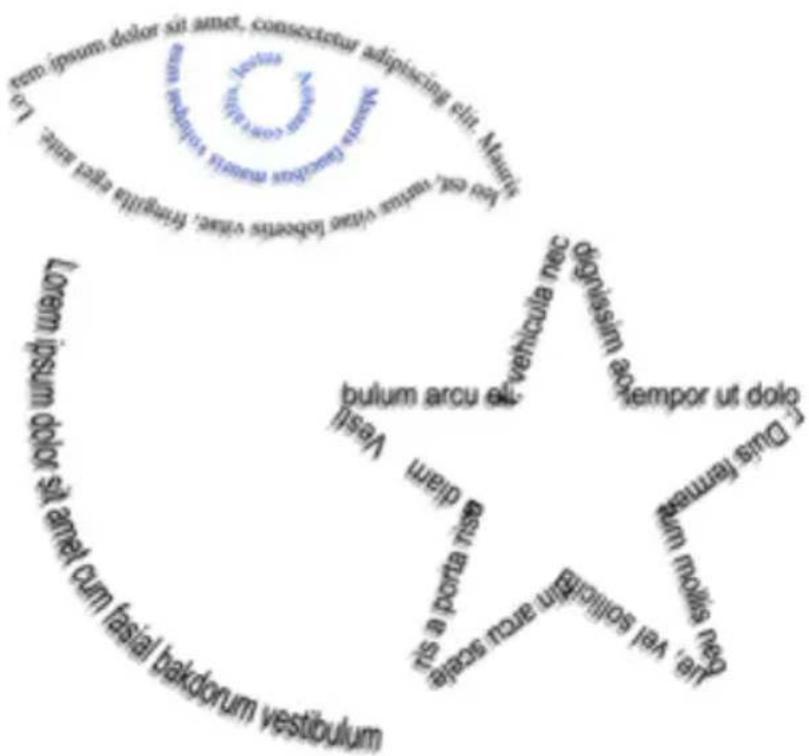
text_image
tem ipsum dolor sit amet, consectetur adipiscing cit. Maurit You do minus vice lobsters voice, Fringitta evel aie. 12. Lorem ipsum dolor sit amet cum fasial bakdorum vestibulum Ile, Veli sollicidum arcu sciale ris a porta risie Vestil olium arcu bulium Avehicula nec Jogendusim acere tempor ut doper drop in bodwes Crua Duae framme lum muoi um mui um chai, Veli sollicidum arcu scialePutting text on a path
To fit text to a path:
-
Select the curve or shape.
-
Click the A Text tool.
-
Hover over the curve or shape's outline until you see a cursor, then click at the point on the line where your text is to begin.
-
Begin typing your text. The text will be placed along the curve or shape.
Alternatively:
- Create your artistic text.
- Create a freehand, straight, or curved line or a shape.
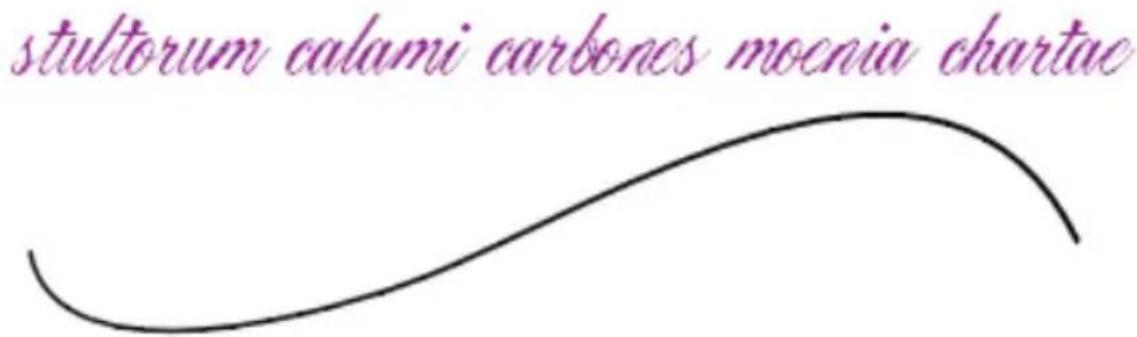
text_image
stultorum calami carbones moenia chartae- Select both objects and on the Tools menu, click Fit to Curve. The text now flows along the specified path.

text_image
Fullorum calami carbones moenia chartaeTo flow text along a preset path:
- Select your artistic text.
- From the context toolbar, click the down arrow on the Preset Text Paths button and select a preset curve from the drop-down menu on which the text will flow.
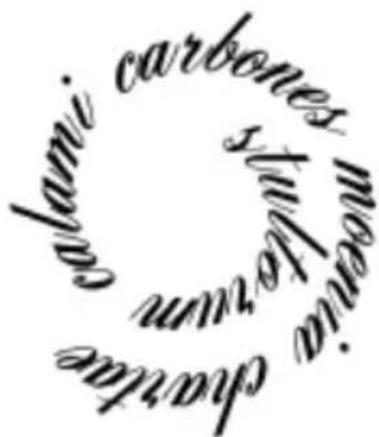
text_image
calami carbones stellarum charite calami carbones stellarumRefining a text path

Artistic text on a path remains editable as text. Likewise, you can continue edit its path using the Edit Points button as described in Editing lines and poses.
When a path text object is selected, you'll notice that text paths have several unique "handles" not found on other objects. You may need to zoom in a bit, but it's easy to select the handles—special cursors let you know when you're directly over them. To see what the handles do, carefully compare these two examples:
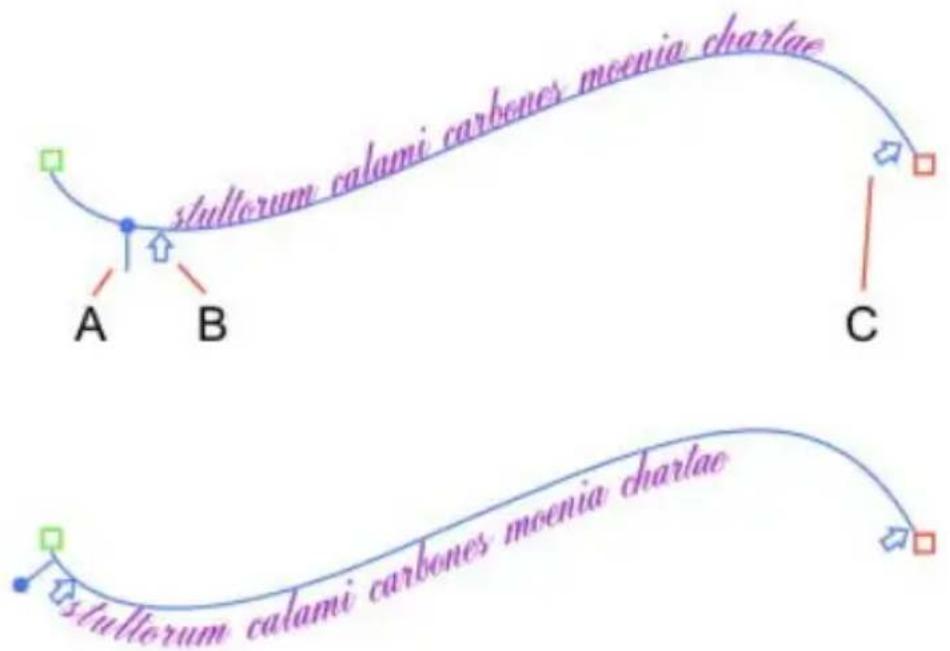
text_image
stullorum calami carbones moenia chartae A B C stullorum calami carbones moenia chartae- The Baseline Shift handle (A), resembles a QuickShape handle with a tiny slider control.
Drag the slider with the cursor to raise and lower the text with respect to the path. In the bottom example, we've lowered the original text.
• The Start (B) and End (C) handles, look like arrows on the text path.
Drag them with thestand cursors to adjust where the text begins and ends with respect to the path's start and end nodes. In the bottom example, we've moved the start of the path to the left.
To edit a text path:
-
Select the text object.
-
Click the A Text tool to display the text path.
-
Drag the Baseline Shift handle to raise or lower the path and/or drag the Start and End handles to alter the start and end points.
Adding outlines and edges to text

text_image
Lorem LoremLoremYou can create interesting text effects by adding various line, brush stroke, and "fringed" edge styles to your artistic text items.

You cannot apply lines and edges to shape text.
Adding outlines to artistic text
-
Select a text item with the Select tool.
-
Open the Line tab.

- To apply a line style, click one of the following buttons:
Line tab button
Effect achieved

Solid

text_image
A
Dash

text_image
A
Double

text_image
A
Calligraphic

text_image
A- Adjust the line width by dragging the slider.

text_image
3.0 pt
To remove an outline, click the

None button.
Adding brush stroke edges to artistic text
- Select a text item with the Select tool.
- On the Line tab, click the Stroke button.
- On the Brushes tab, select a brush stroke style.
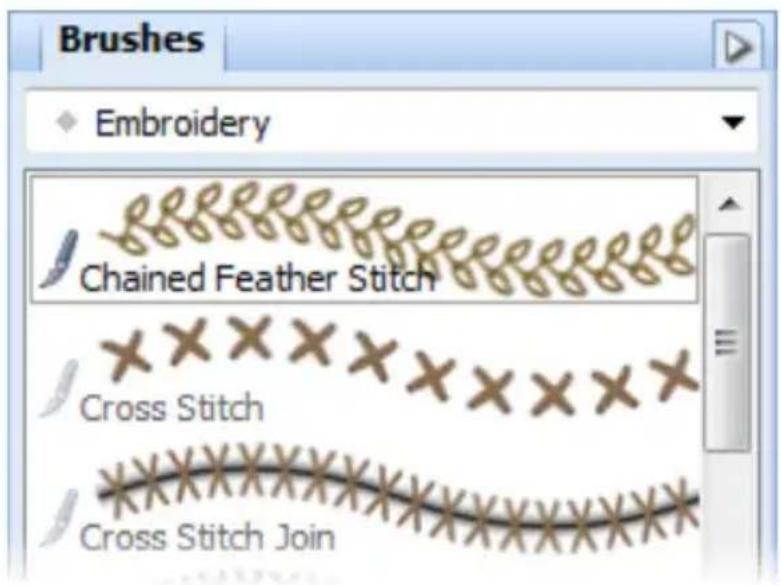
text_image
Brushes Embroidery Chained Feather Stitch Cross Stitch Cross Stitch JoinThe stroke is applied to the text outline.

text_image
A → A- Use the following Line tab controls to adjust the effect:
- Change the stroke width by dragging the slider.

text_image
3.0 pt- Increase or decrease the flow of the brush stroke by changing the brush Flow value.
Adding fringed edges to artistic text
- Select a text item with the Select tool.
- On the Line tab, click the Edge button.
- On the Brushes tab, select a brush stroke style.
-
Use the following Line tab controls to adjust the effect:
-
To apply the edge style inside the edge of the text, select the Inner Edge check box.
- Change the stroke width by dragging the slider.
- Increase or decrease the flow of the brush stroke by changing the Flow value.
Adjusting the outline distance
Use the Line tab's Offset value to change the distance between a text item and its outline.
To adjust line offset:
- Select a text item with the

Select tool.
- On the Line tab, adjust the Offset value to achieve the desired effect.
You can click the up/down arrow buttons; click the right arrow button and drag the slider; or type a value and press Enter.

text_image
A→A→ASentiments
You're invited to my party!
On:
A
3
Today!
AT THE TOUCH OF LOVE EVERYONE BECOMES A POET. PLATO
RSVP
"Age is an issue of mind over matter.
If you don't mind, it doesn't matter."
Mark Twain
If you're always stuck for words, CraftArtist can help you add sentiments and quotes to your designs with just a few simple clicks!
You can create a new sentiment from any artistic text object. In fact, you can even create a single sentiment from several text objects! This makes it really easy to design and use complex text designs over and over again quickly and easily!
Adding sentiments to the page
- On the page context toolbar, click Insert Sentiment.
-or-
On the Insert menu, click Sentiment or Quote...
-
In the Insert sentiment or quote dialog:
-
In the left pane, select the category and/or sub-category that fits your design.
• In the right pane, click on the sentiment that you want to use. -
Click Insert.
-
To create the sentiment at the default size, click on your page. -or-
Click and drag on your page to set the size of the sentiment.
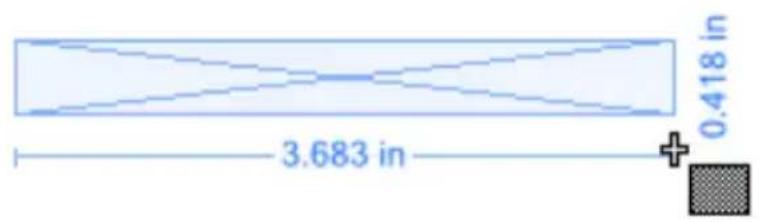
other
| Dimension | Value | | --------- | --------- | | Height | 0.418 in | | Width | 3.683 in |- The sentiment is added as an artistic text object(s).
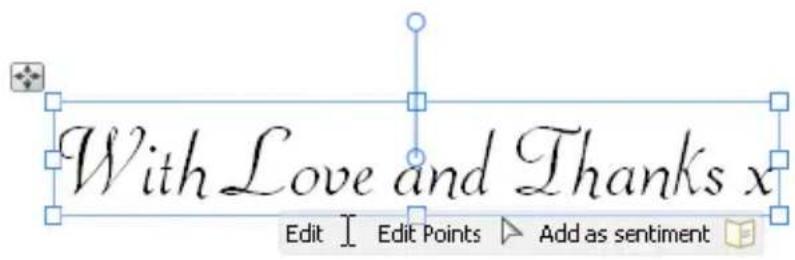
text_image
With Love and Thanks x Edit I Edit Points Add as sentimentEditing sentiments on the page
Once you have added your sentiment to the page, it behaves in the same way as any other artistic text object. See the help topics contained within Working with Text in the Table of Contents for further details.
Creating new sentiments
- Create and select your artistic text object(s).
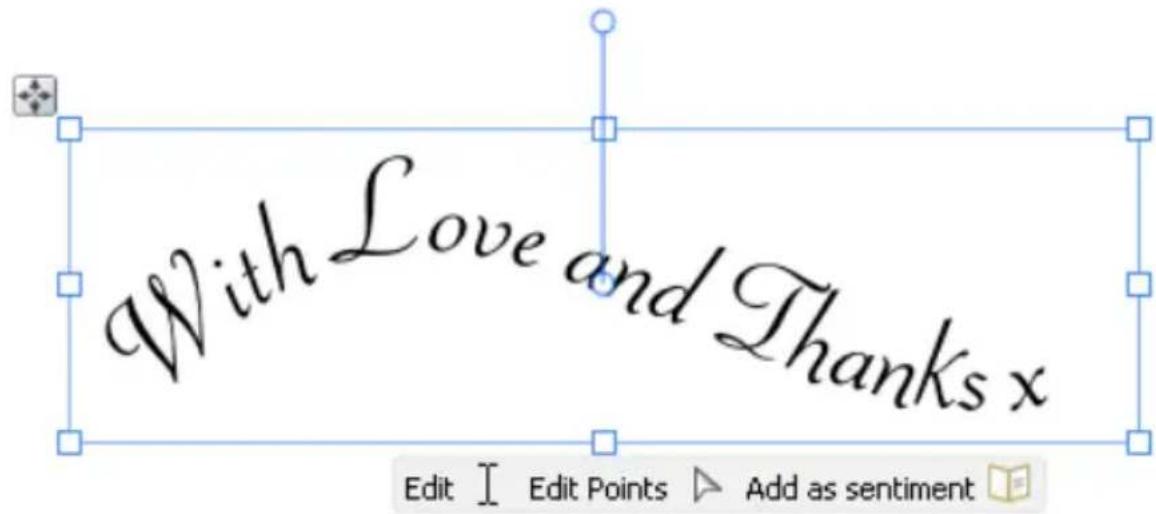
text_image
With Love and Thanks x Edit I Edit Points ▶ Add as sentiment E
Why not start with an existing sentiment and then personalize it as we've done in this example?
- Click the

Add as sentiment button.
- In the Create new sentiment or quote dialog, select the category (indicated by a yellow folder icon) into which you want to add the sentiment, then:
- Select and existing sub-category and click Add > Add to existing. -or-
• Type a name for the new sub-category and click Add > Add New.
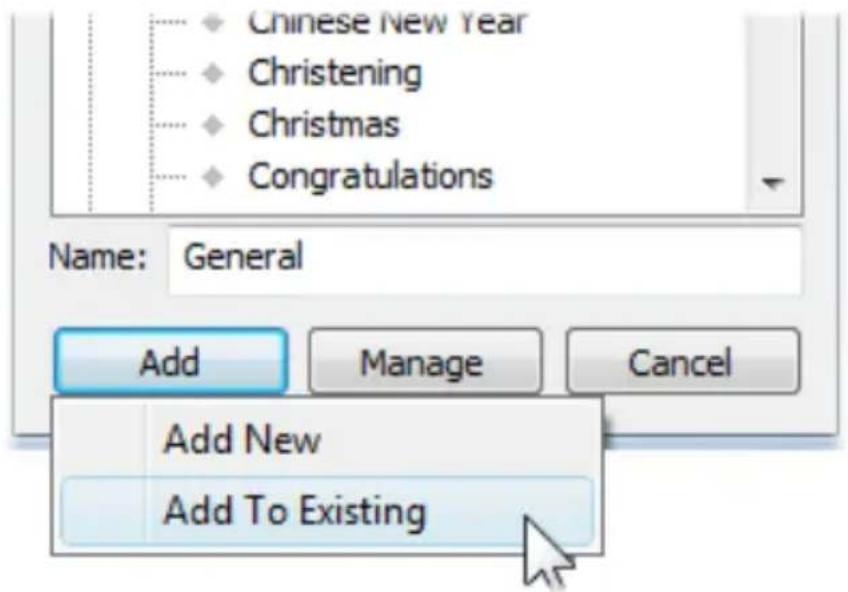
text_image
Chinese New Year Christening Christmas Congratulations Name: General Add Manage Cancel Add New Add To Existing
To create an entirely new category for your sentiments, see Managing sentiments in CraftArtist Help.
- Your new sentiment will now be available from the Insert sentiment or quote dialog.
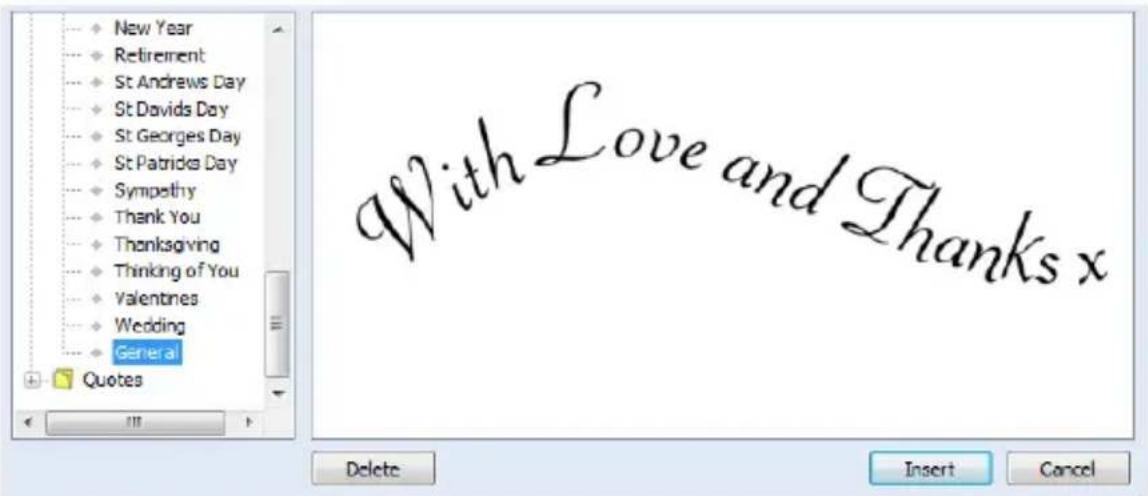
text_image
New Year Retirement St Andrews Day St Davids Day St Georges Day St Patricks Day Sympathy Thank You Thanksgiving Thinking of You Valentines Wedding General Quotes With Love and Thanks x Delete Insert Cancel
Having a party or two? You can also use sentiments to quickly create advance text layouts. In our example, we used several text objects to create this standard invitation sentiment.
Please come to my party!
On:
at
eSVP
Applying effects
natural_image
Decorative textile with wave patterns and a decorative plate featuring a number 8 (no text or symbols)Adding drop shadows
The Shadow Tool is great for allowing freeform control of a drop shadow effect. With its on-the-page control nodes and supporting Shadow context toolbar, the tool offers various adjustments such as Opacity, Blur, and X (or Y) Shear.
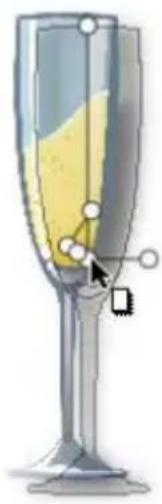
natural_image
Illustration of a glass with a yellow liquid and a small object inside, no text or symbols presentSimple shadow (drag from item centre)
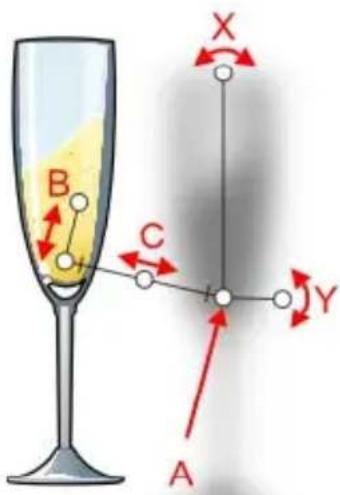
text_image
B C X Y AOffset shadow (adjusted origin) A - Origin of shadow B - Blur C - Opacity X - X-axis shear Y - Y-axis shear
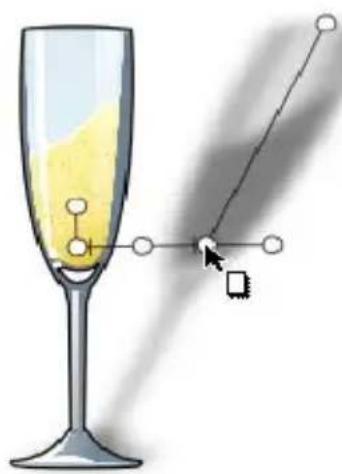
natural_image
Illustration of a glass with yellow liquid and connecting lines, showing a cursor pointing at a small object (no text or symbols present)Skewed offset shadow (adjusted Origin and X Shear)

Once you've created a basic shadow, you can further edit it as needed using the Filter Effects dialog.
Applying drop shadows with Shadow Tool

- Select the item and click the Shadow Tool on the Standard toolbar. Control nodes display to allow for shadow adjustment, as illustrated above.
- Drag across the item to create a drop shadow.
- Change blur, opacity, or shear properties by dragging the respective control nodes (or via the displayed context toolbar).
To change a shadow's colour:
- Select the item, choose the Shadow Tool, then select a colour from the Colour tab.
To remove the shadow from an item:
- Double-click the item while the Shadow Tool is selected.
Applying other 2D filter effects
Changing material depth

natural_image
Five-pointed star with a gradient shading effect (no text or symbols)If you've manipulated materials you've added to the page, perhaps by cutting out with the Scissors tool, you can apply some depth by applying an embossing effect.
- On the Effects tab, adjust the Material Depth setting. (The greater the value, the more pronounced the embossed effect.)
Material Depth
Making feathered edges
natural_image
Pink heart shape with horizontal lines, no text or symbols presentFeather Edge
Feathering applies a softer edge to design items such as embellishments or cut materials. The effect also looks great when applied to photo edges.
- In the lower-right corner of the Effects tab, enter a Feather Edge value.
(This is the distance inside the item's outline from which feathering will be applied.)

The Feather option in the Filter Effects dialog (see CraftArtist Help), offers independent control of Opacity and Blur, which can also be used in conjunction with other 2D filter effects.
Applying 3D filter effects
As well as 2D filter effects, CraftArtist provides a variety of 3D filter effects that you can use to transform any item. Such effects are selectable from an Effects tab which offers an impressive choice of ready-to-go simulated natural and manufactured surfaces. When applied to drawn items, previously "flat" appearances are brought to life by application of depth and texture.

natural_image
Six colorful geometric icons arranged horizontally: a flower, wood grain, cylinder, sunburst, shield, and clover (no text or symbols)The Effects tab displays a variety of thumbnail presets in various categories (Glass, Metal, Animals, etc.).
Click any thumbnail to apply it to the selected item.
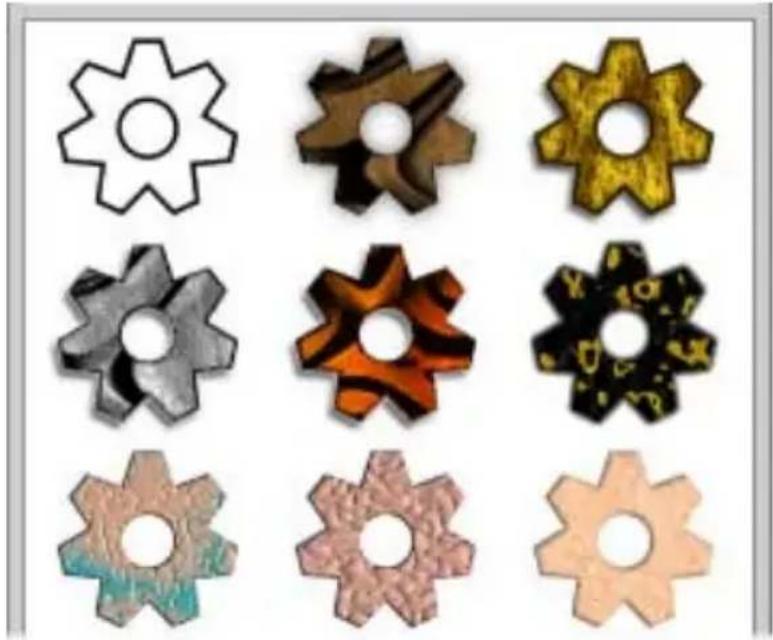
natural_image
Collection of nine different gear icons arranged in a 3x3 grid, no text or symbols present
None of these 3D effects will modify an unfilled item—you'll need to have a fill there to see the difference they make!
Paper textures
Paper textures simulate various real media textures of varying roughness and "feel", such as Canvas, Cartridge, Embossed, Parchment, and Watercolour.
As a paper texture is a layer property, the layer's texture is applied to all items on that layer. A different texture can only be applied to a different layer (and to all its items).

natural_image
Two stylized shapes: a blue heart on a textured red background and a yellow star on a striped background (no text or symbols)Applying paper textures
- On the Layers tab, select the layer on which to apply a paper texture.
- Click the Paper Texture button displayed after the chosen layer's name.
- In the Bitmap Selector dialog, select the Paper Textures category. A gallery of texture thumbnails displays.
- Choose a thumbnail and adjust Scale and Opacity values if required.
- Click OK.
On the Layers tab, the layer's Paper Texture button changes to ☐, indicating that a paper texture has been applied.
All existing items on the layer, and any new items added to the layer, will adopt the applied paper texture.
Removing a paper texture
- On the Layers tab, locate the layer whose texture you want to remove and click the ☐ Paper Texture button.
- In the Bitmap Selector dialog, click the Remove button. The paper texture is removed from the layer and all items on it.

You can also switch, edit, and remove paper textures from within the Layer Properties dialog. (Right-click on a layer entry, choose Layer Properties, and then click Edit).
Applying transparency
Transparency effects are great for highlights, shading and shadows, and for simulating realism. They can make the critical difference between flat-looking illustrations and images with depth and snap.
Transparency may seem a bit tricky because you can't "see" it the way you can see a colour fill applied to an item. In fact, it's there all the time in CraftArtist. Each new item has a transparency property: the default just happens to be "None"—that is, no transparency (opaque).
Transparencies work rather like fills that use "disappearing ink" instead of colour. The more transparency in a particular spot, the more "disappearing" takes place there, and the more the item(s) underneath will show through.
For example, in the illustration below, the butterflies have a solid (100% opaque) transparency, a gradient (100% to 0% opaque) transparency and a solid (50% opaque) transparency from left to right.

natural_image
Illustration of three pink butterfly wings with stems, framed within a black rectangular frame (no text or symbols)Solid transparency distributes the transparency equally across the item. Gradient transparencies are created by drawing a path across the item; Linear transparencies are drawn by default but other categories such as Radial, Ellipse, Conical, Plasma, Square, Three Points, and Four Points can be created.
Applying solid transparency
The Colour tab hosts a Transparency slider that controls the level of solid transparency applied to currently selected items.
The further right the slider, the more opacity; the further left the more transparency. Remember that opacity is the inverse of transparency—100% Opacity = 0% Transparency and vice versa.

To apply solid transparency from the Colour tab:
-
With your item(s) selected, go to the Colour tab.
-
Adjust the Transparency slider to set the level of transparency. The transparency is applied to the selected item(s) uniformly.
Applying gradient transparency
Just as a gradient fill can vary from light to dark, transparency can be applied as a opacity gradient, by drawing a gradient transparency path across the item. The gradient transparency path links the From and To nodes (e.g., from 100% opacity (black node) to 0% opacity (white node)).

natural_image
Illustration of a pink butterfly with blue streaks and a black eye on its wing (no text or symbols)For items with a gradient transparency applied, you can adjust the transparency effect by adding or subtracting nodes along the gradient transparency path.
The Transparency Tool displays an item's gradient transparency, indicated by two or more nodes situated along a path. You can reposition the nodes to adjust the transparency's starting point or end point.
For transparencies with multiple nodes, you can also adjust the intermediate levels of transparency. Each node has its own value, comparable to a key colour in a gradient fill (see Applying gradient fills on p. 222). Each selected node's value can be altered directly on the page or in the Gradient Transparency Editor dialog.
To apply gradient transparency with Transparency Tool:
-
Select an item.
-
Click the Transparency Tool on the Standard toolbar.
-
To apply a simple Linear transparency (grading from 100% opacity to 0% opacity), click and drag across the item to define the transparency path.
The effect starts where you place the start node, and ends where you place the end node.
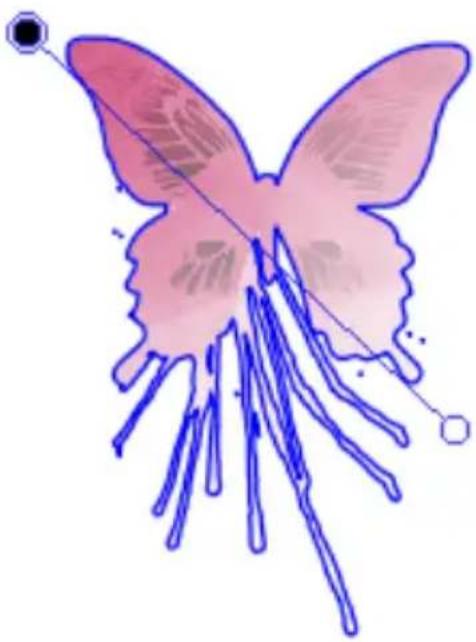
natural_image
Illustration of a pink butterfly with blue streaks and a diagonal line, no text or symbols presentChanging transparency type
By default, the Transparency Tool applies a simple linear transparency on the drawn path. However, the tool's context toolbar lets you change to one of several transparency, e.g., Radial, Conical, Ellipse, Plasma, etc.
The path's appearance may change to reflect the transparency type, but the principles of editing the transparency path are the same.
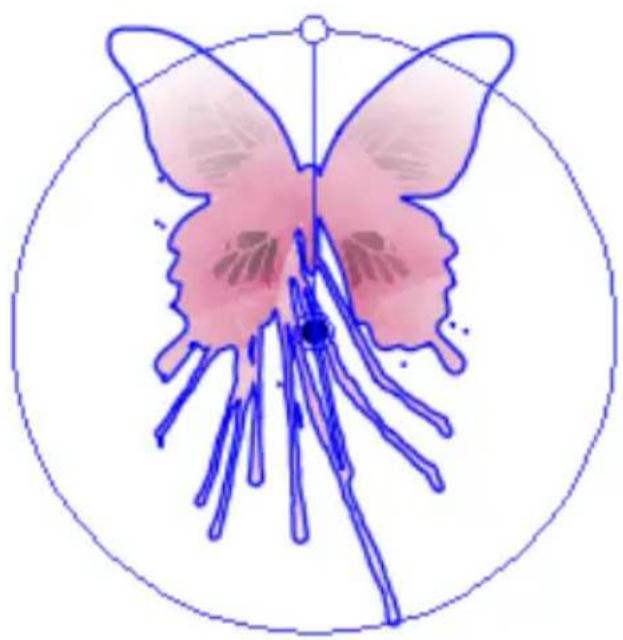
natural_image
Illustration of a pink butterfly with blue wings and internal stamens, enclosed in a circular frame (no text or symbols)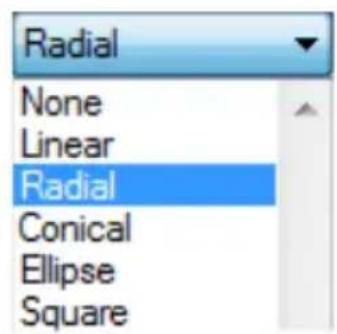
text_image
Radial None Linear Radial Conical Ellipse SquareEditing gradient transparency
Once you've applied a gradient transparency, you can adjust its path on the item, and the level of transparency along the path. You can even create more complex transparency effects by adding extra nodes to the path and assigning different values to each node.
Each node along the path is selectable by clicking and can therefore adopt its own transparency value.
To adjust the transparency path:
-
Select the item with a gradient transparency applied.
-
Click the Transparency Tool on the Standard toolbar.
-
Drag the displayed nodes to new positions. You'll notice the effect change as you drag a node.

Editing a gradient transparency path is similar to editing a solid gradient fill path (see Editing gradient fills on p. 224). Adding a level of transparency means varying the transparency gradient by introducing a new node, and assigning the node a particular value. For transparencies with multiple nodes, each node has its own value, comparable to a key colour in a gradient fill.
You can either edit the path directly using the Transparency Tool, or use the Gradient Transparency Editor dialog (similar to the Gradient Fill Editor). Both methods let you define key values along the path.
The Gradient Transparency Editor dialog lets you fine-tune the actual spread of transparency between pairs of key values, and displays the transparency gradient, with pointers marking the nodes (corresponding to nodes on the path) that define specific transparency values. Again, black represents 100 % opacity, and white represents 0 % opacity, with greyscale values in between. A sample window at the lower right shows the overall transparency effect.
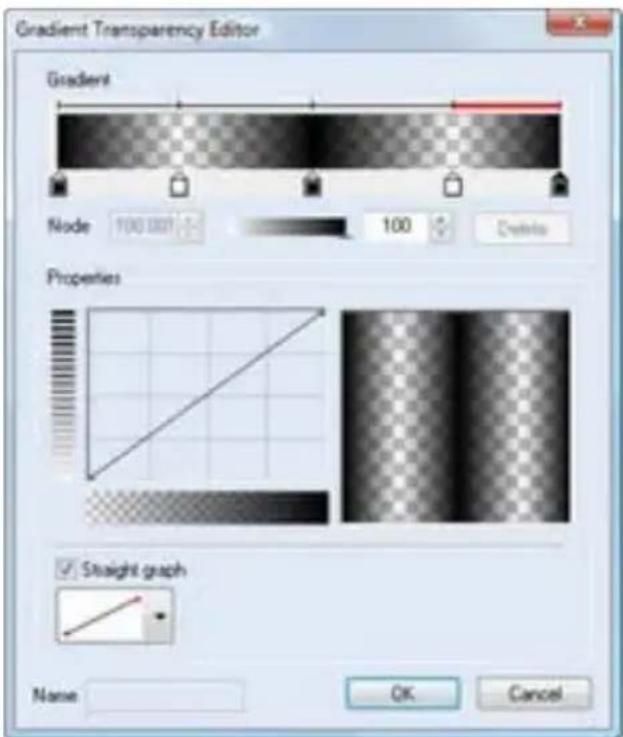
text_image
Gradient Transparency Editor Gradient Node 100.007 100 Delta Properties Straight graph Name OK CancelFor details of how to edit and manage transparency in the Gradient Transparency Editor dialog, see CraftArtist Help.
To edit gradient transparency directly:
-
Select the item, then the Transparency Tool button from the Standard toolbar. The item's transparency path appears, with start and end nodes.
-
To add a transparency node, hover over the path until the cursor changes then click on the point on the path where you want to add the node.
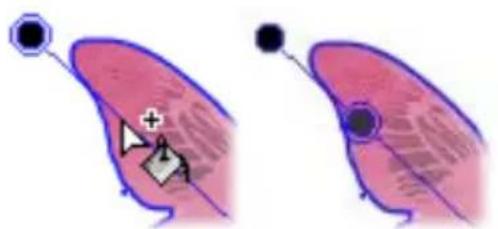
natural_image
Two biological diagrams showing a cell with a central device and surrounding structures, no text or symbols present.-
To change the greyscale/transparency value of any existing node, including the start and end nodes, select the node and move the Colour tab's transparency slider to the required value.
-
To move a node you've added, simply drag it to a new position along the transparency path.
-
To delete a node you've added, select it and press Delete.
Adding lines and shapes
natural_image
Decorative illustration of a scroll with wave patterns and a decorative banner featuring a large number 9 (no text or symbols)Using QuickShapes
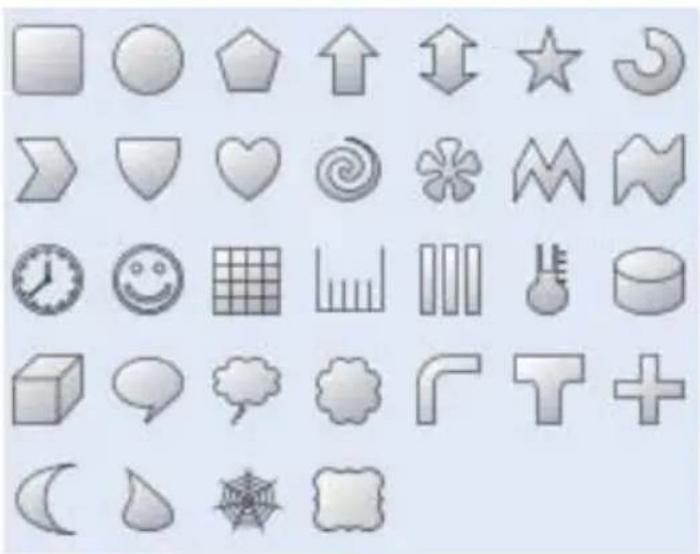
natural_image
Grid of grayscale icons representing various basic concepts or functions (e.g., squares, circles, stars, charts, calendar, speech bubbles, cloud shapes) on a light blue background.The QuickShapes flyout provides a wide variety of commonly used shapes that you can instantly add to your page.
To create a QuickShape:

-
Click Shapes on the Standard toolbar and select a shape from the flyout.
-
On your page, either:
• Double-click to place a default-sized QuickShape.
-or-
- Click and drag to draw your QuickShape at a specific size. To constrain the aspect ratio (for example, to obtain a square or circle), hold down the Shift key while dragging.

New QuickShapes adopt the currently set line and fill, as defined on the Colour tab. See Changing fill and line colour on p. 219.
Once you've drawn your QuickShape, you can adjust its properties—for example, apply solid fills (p. 220), gradient fills (p. 222), or transparency effects (p. 221). You can even use sliding control handles to create variations on the original QuickShape.
You can also use the QuickShape context toolbar, situated above the workspace, to swap QuickShapes and adjust line weight, colour, style, and more.
All QuickShapes can be positioned, resized, and rotated. What's more, you can adjust their appearance as soon as they are drawn, or at a later time.
To adjust the appearance of a QuickShape:
- Select the item with the
Select tool. - Click the Edit button displayed beneath the item. This reveals sliding round handles around the shape. (Different QuickShapes have different handles.)
- Drag the handle to change the appearance of a QuickShape.

For example, dragging the top sliding handle to the right on the Quick Star below will produce a very different star shape.
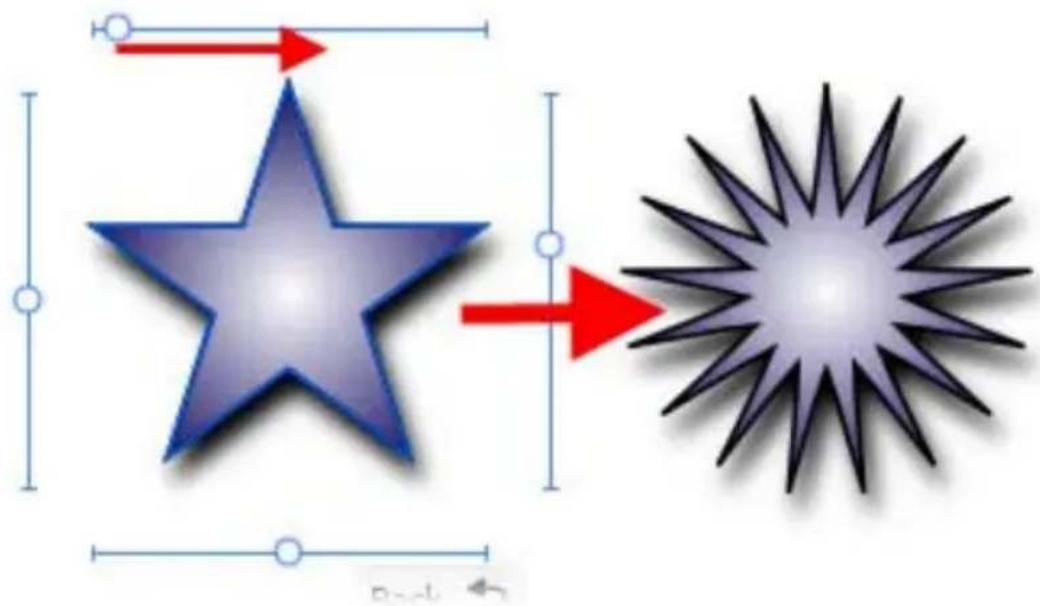
natural_image
Diagram showing a blue star with red arrows pointing to a spiky star shape, no text or symbols present.Drawing lines and shapes
You can draw straight or curved lines. As soon as you draw a line you'll see its points appear. The line between any two points is called a line segment. Freeform and curved lines usually have many points; straight lines have only two.
All lines and line segments have line properties such as colour and weight (thickness). For details on applying colour to lines and shapes, see Changing line and fill colour on p. 219.
When a line, or series of line segments, forms a complete, enclosed outline, it becomes a new closed item called a shape. Because shapes can be filled with a solid or gradient fill, they have fill properties as well as line properties.
natural_image
Abstract wavy line drawing with red dots and a small green arrow at the top (no text or symbols)Freeform Line (Pencil tool)
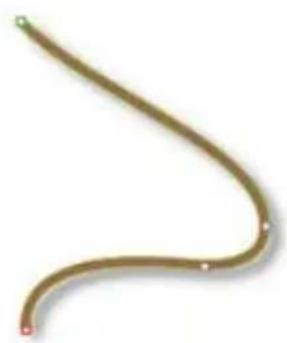
natural_image
Curved brown line with small red markers, no text or symbols presentCurved Line (Pen tool)
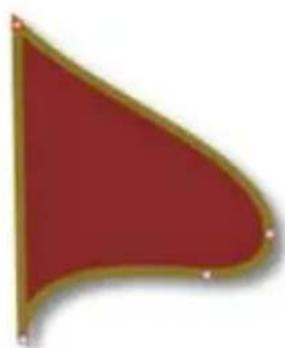
natural_image
Red triangular flag with a gold border, no text or symbols presentClosed Line (Shape) (Pen tool)
Drawing freeform lines
- Click the Pencil tool on the Standard toolbar.
- Click once, then drag across the page, drawing a line as you go. The line appears immediately and follows your mouse movements.
- To end the line, release the mouse button. The line will automatically smooth out using a minimal number of points. Note the dots indicating its points—at the two ends, and at each point where two line segments come together.
- (Optional) To set the degree of smoothing to be applied to the line (and subsequent lines), set the Smoothness value (by entering a value or adjusting the slider) on the context toolbar.
text_image
Smoothness 27%
To draw a straight line, hold down the Shift key down as you drag.
Drawing curved lines
Curved lines are created as a series of connected line segments (which may be curved or straight) using a series of "connect the dots" mouse clicks. New line segments are added all the time. The tool is designed for drawing complex, combination curves and shapes in a highly controlled way.
- Choose the Pen tool from the Standard toolbar.
- From the displayed context toolbar, choose to create your drawn segments in ⌐ Smooth joins or ⌘ Sharp joins creation mode. By default, you'll be in Smooth joins mode.
- Click where you want the line to start (1).
- Click again for a new point and drag out a pair of control handles which orbit the point (2). (Control handles act like "magnets," pulling the curve into shape. The distance between handles determines the depth of the resulting curved line.) Release the mouse button to create your curve segment (3).
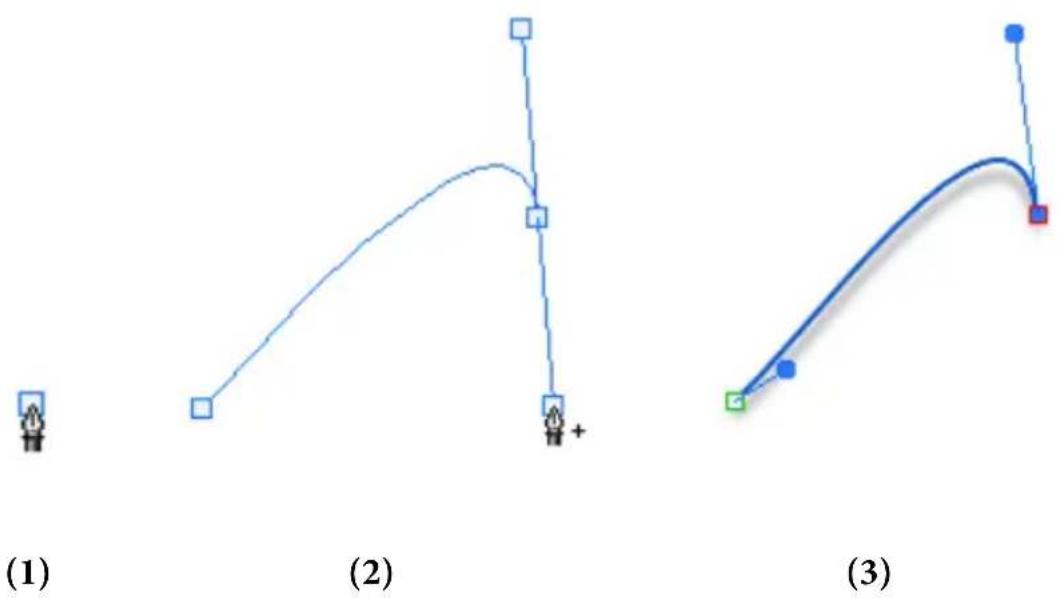
- To extend an existing line, click beyond the end of your current curve to create a new point (thus creating another curve segment). Normally, curve segments end in a symmetric (evenly rounded) corner (4), with control handles locked together.
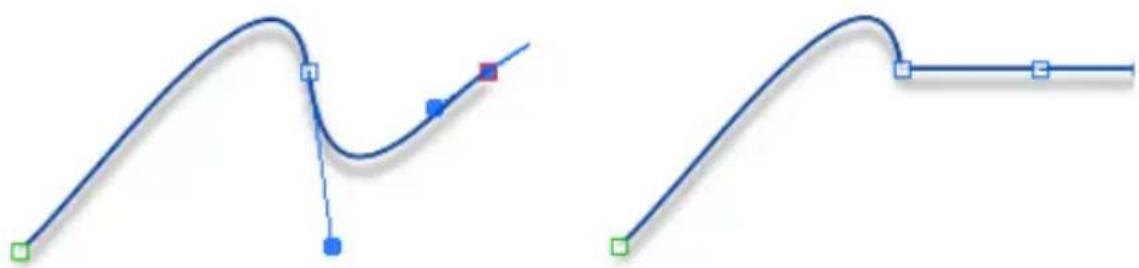
natural_image
Two abstract curved line segments with colored markers and connecting points, no text or symbols present.(4) (5)
-
However, you can press the Alt key while drawing the segment to define a "cusp" or sharp corner (5). This locks the control handle on the last created point. For more on line corners, see Editing lines and shapes on p. 164.
-
To end the line, press Esc or choose a different tool.
Drawing shapes
To close a freeform line or curve as you draw:
- For irregular shape, simply extend the line back to its starting point. Shapes have an interior which is filled with the current default fill (see Changing line and fill colours on p. 219) when the line or curve is closed.
To close an existing line or curve (with a straight line):
-
Select the line or curve with the Select tool (Standard toolbar).
-
Click the ▷ Edit Points button displayed beneath the item.
-
Select Close Curve button from the context toolbar. A Straight segment appears, closing the curve.
If you're trying to draw a cartoon outline made up of many independent curves (e.g., a cartoon ear, rose, etc.) you may want to fill each curve without closing it. This is made easy by using the Fill-on-Create feature.

natural_image
Abstract pink spiral design with no text or symbolsTo fill an unclosed curve automatically:
- Select the Pencil, Pen, or Brush tool (Standard toolbar).
- On the context toolbar, click to enable Fill-on-Create, and then select a fill from the Colour tab.
- Draw a freeform line and the resulting curve will automatically fill with the current fill colour.
Editing lines and shapes
All items, lines, and shapes are composed of one or more line segments (which can be straight or curved) that are joined at their points. To edit a line or shape, you can manipulate its segments and/or points, redraw lines, reshape lines (by moving or adding/deleting points), or join two or more lines together.
To: Do this:
Move a whole line
Using any selection tool, drag the line.
| Redraw part of a line | Draw a new portion with the Pencil tool while in Editing mode. |
| Extend a line | Drag away from a node, creating a new segment. |
| Reshape a line (or curve) | Drag points while in Editing mode. |
| Simplify a line (remove points) | Adjust the Smoothness setting on the Pencil tool's context toolbar.Select and delete points while in Editing mode.Use Clean Curves to remove unwanted points. |
| Enhance a line (add points) | Click anywhere on a line segment while in Editing mode. |
| Change the type of point or line segment | While in Editing mode, select a point then pick a different segment from the context toolbar. |
| Convert to straight line segments | Click the Straighten Line or Convert to Straight Lines buttons (Context toolbar). |
| Adjust a shape | Drag points while in Editing mode, and/or adjust control handles.Use the context toolbar to break open the shape, then add line segments. |
| Join two lines together | Select two lines, then choose Join Curves from the Tools menu. |
Redrawing part of a line
You can use the Pencil tool to redraw any portion of a line or curve.
To redraw part of a selected line:

- Select the line, then the Pencil tool. Hover the displayed cursor over the line, at the point where you want to begin redrawing.
The cursor changes to indicate you can begin drawing.
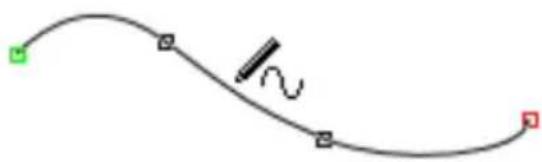
natural_image
Simple curved line with a small pencil icon and colored markers (no text or symbols)- Click on the line.
natural_image
Simple curved line with a small mark and wavy base, no text or symbols present- Keep the mouse button down and drag to draw a new line section, connecting it back to another point on the original line. Again, the cursor changes to include a curve when you're close enough to the line to make a connection.
When you release the mouse button, the original portion is replaced by the newly drawn portion.
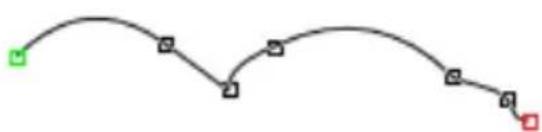
flowchart
graph TD
    A["Start"] --> B["Step 1"]
    B --> C["Step 2"]
    C --> D["Step 3"]
    D --> E["Step 4"]
    E --> F["End"]
Extending lines
Any kind of open line (that is, one that hasn't been closed to create a shape) can be resized. You can use any of the line tools to do so.
To extend a line:
- Select the drawn line with the line's drawing tool.

Select tool, and then select the
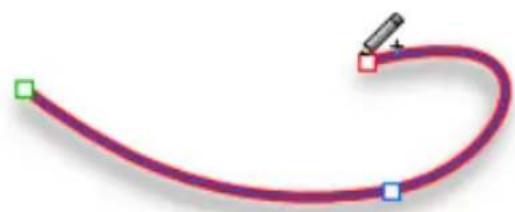
natural_image
Curved line with colored markers (green, red, blue) and a pencil icon at the end, no text or symbols present.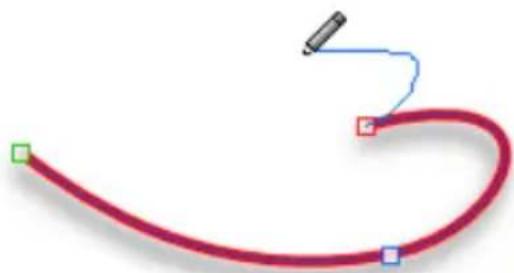
natural_image
Abstract curved line with colored markers (no text or symbols)Move the cursor over either of the end points, a small + cursor will appear. Click at that location.
Drag out to draw a freeform line beyond the end point.
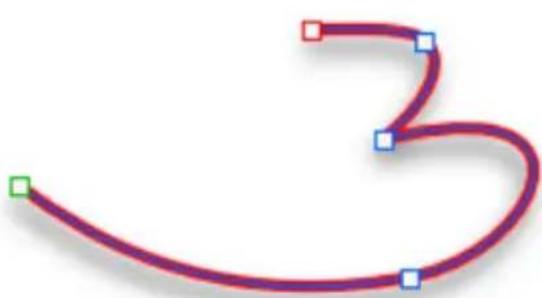
natural_image
Abstract curved line with colored square markers (no text or symbols)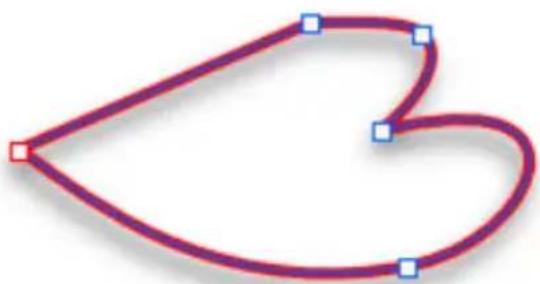
natural_image
Simple heart-shaped outline with red and blue square markers (no text or symbols)The line that you create will be a continuation of the existing line, as a new line segment.
You can optionally close the curve, creating a new shape that can take a fill!
Reshaping lines
To reshape a line, you can drag or adjust its points and segments.

To reshape a straight line segment, first convert it to curves (see Converting a shape to editable curves in CraftArtist Help).
To reshape a curved line:
-
Select the line with the Select tool.
-
Click the Edit Points button displayed beneath the item. The line's points appear, and a context toolbar displays. (Some of the toolbar's buttons may be 'greyed out.' These will become available when you select a point or part of the line/shape to work on.)
-
Either:
- Hover over a segment and drag the segment to form a new curve shape.
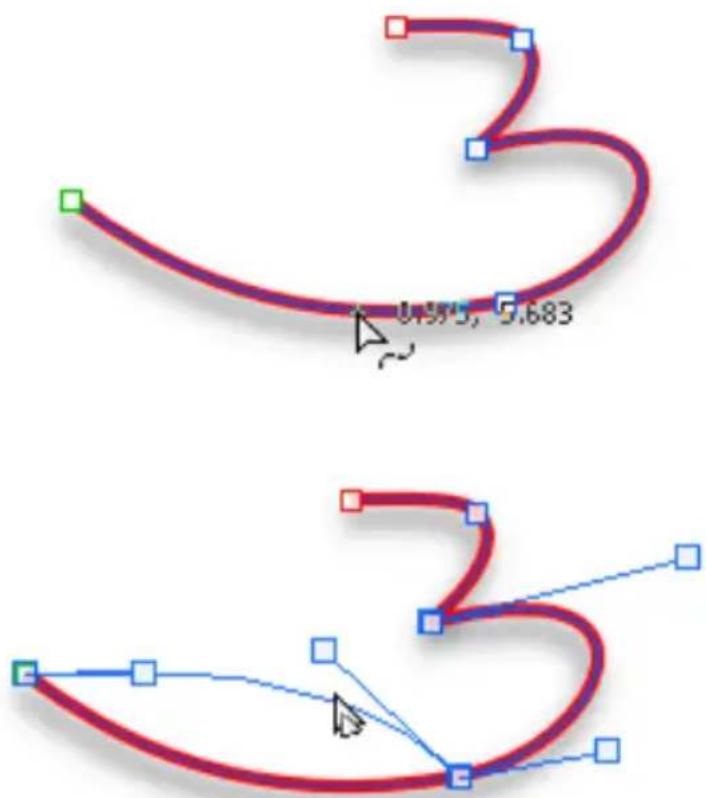
text_image
0.595, 5.683
text_image
-3-or-
- Hover over a point (the cursor will display) and click to select the point. Optionally, Shift-click or drag out a marquee to select multiple points.
Control handles (in blue) for the adjacent line segment(s) will appear.
Note that each segment in the line has a control handle at either end, so when you select an end point or interior point, you'll see either a control handle on each selected end point (one segment) or a pair of handles at a selected interior point (two segments), respectively.
Drag any selected point to reshape adjacent segment(s). All selected points move in the same direction, so you can reshape the curve by selecting specific points. (Shift-drag to constrain the movement to horizontal or vertical.)
Drag one or more control handles to change the curvature of the line on either side of a point. You can shorten or lengthen the handles, which changes the depth of the curve, or alter the handle angle, which changes the curve's slope.

By changing the type of point you can change how the adjacent segments behave.

As a shortcut when selecting points, you can press Tab or Shift-Tab to select the next or previous point along the line (following the order in which points were created).
Simplifying or enhancing lines and shapes
The more points there are on a line or shape, the more control over its shape you have. The fewer points there are, the simpler (smoother) the line or shape. You can adjust smoothness to refine the curve most recently drawn (as long as the line is still selected).
To adjust the smoothness of the most recent pencil line:
-
Click the Pencil tool and draw a freeform line.
-
On the context toolbar, click the right arrow on the Smoothness option and drag the displayed slider left or right to increase or decrease the number of points (you can also type absolute values into the input box).
The line is made less complex, i.e., smoother, by dragging the slider to the right to decrease the number of points.
To add a point to a line or curve:
- If the line is selected with the drawing tool used to create it, single-click (for a pen line) or double-click (for a pencil line) on the line to add a new point.
-or-
- If the line is not selected, select it with the Select tool, click Edit Points, and then single-click on the line to add a new point.
The new point is created and selected by default.
To delete a point:
- Select the line with the Select tool, and click Edit Points.
-or-
Select the line with the

Pen tool.
- On the context toolbar, click Delete Point (or press the Delete key).
You can also reposition the points, and reshape the line or shape, by dragging on its control handles (see below).
If you've converted a shape to curves you can clean up unwanted points by using the Clean Curves command. See Converting a shape to editable curves in CraftArtist Help.
Changing points and line segments
Each segment in a line has a control handle at either end, so at each interior or "corner" point (where two segments join) you'll see a pair of handles.
The behaviour of these handles—and thus the curvature of the segments on either side—depends on whether the point is set to be sharp, smooth, symmetric, or smart. You can quickly identify a point's type by selecting it and then checking to see which button is selected on the displayed context toolbar.
Each type's control handles behave differently as illustrated in the table below.
To change one or more points to a different type:
- Select the item with the

Select tool.
-
Click the Edit Points button displayed beneath the item, then click on the point you want to change (Shift-click or drag out a marquee to select multiple points).
-
Click one of the point buttons on the displayed context toolbar:

A Sharp Corner means that the line segments to either side of the point are completely independent so that the corner can be quite pointed.

A Smooth Corner means that the slope of the line is the same on both sides of the point, but the depth of the two joined segments can be different.

At a Symmetric Corner, points join line segments with the same slope and depth on both sides of the point.

Normally, custom segments you draw with the Pen tool end in a symmetric corner.

Smart Corner points automatically determine slope and depth for a rounded, best-fitting curve.
If you attempt to adjust a smart corner's handles, it changes to a smooth corner. You can always reset the point to smart—but to maintain smart points, be careful what you click on!
You can also use the context toolbar to define a line segment as either straight or curved.
To change a line segment from straight to curved, or vice versa:
- While in Editing mode, select the leading point of the line segment (the point nearer the start of the line).
- Then, either:
- To make a line segment straight, click Straighten Line on the context toolbar. The selected segment immediately jumps to a straight line.
-or-
- To make a line segment curved, click one of the point buttons (describe above) on the context toolbar: Sharp Corner, Smooth Corner, Symmetric Corner, or Smart Corner. You can then adjust the curvature of the newly created curved segment.
To convert to straight lines:
-
While in Editing mode, select the curve.
-
On the context toolbar, choose 📄 Convert to Straight Lines. The curve segments are replaced by straight line segments throughout the line.
Adjusting a shape
As described previously, you can easily turn a curve into a shape by connecting its end points. You can go the other way, too—break open a shape in order to add one or more line segments.
To break open a line or shape:
- Select the item with the Select tool.
- Click the Edit Points button displayed beneath the item.
- Select the point on the closed curve where you want the break to occur.
- Click the Break Curve button on the context toolbar so that the line will separate. A shape will become a line, with the selected point split into two points, one at each end of the new line.
- You can now reposition the points and reshape the line by dragging on the handles.

When you first break a curve the two points are in exactly the same location and so the curve may still look as if it is connected. If you drag one of the red point ends away you will quickly see the separation.

If the broken shape had a fill you can change the unwanted fill to be transparent by using the Colour tab's Fill swatch.
Joining lines
You can connect any two straight or curved lines to form a new line.
To join two lines together:
-
Select both lines by Shift-clicking with the Select tool.
-
Choose Join Curves from the Tools menu. The end control point of one line is connected with the start control point of the other.
Changing line style
natural_image
Illustration of an apple with a leaf and a chocolate chip, no text or symbols presentAll lines, including those that enclose shapes, have numerous properties, including colour, style, line ends, weight, join, cap, and offset.
Using the Line tab, you can adjust plain line properties for any freeform, straight, or curved line, as well as for the outline of a shape or photo.
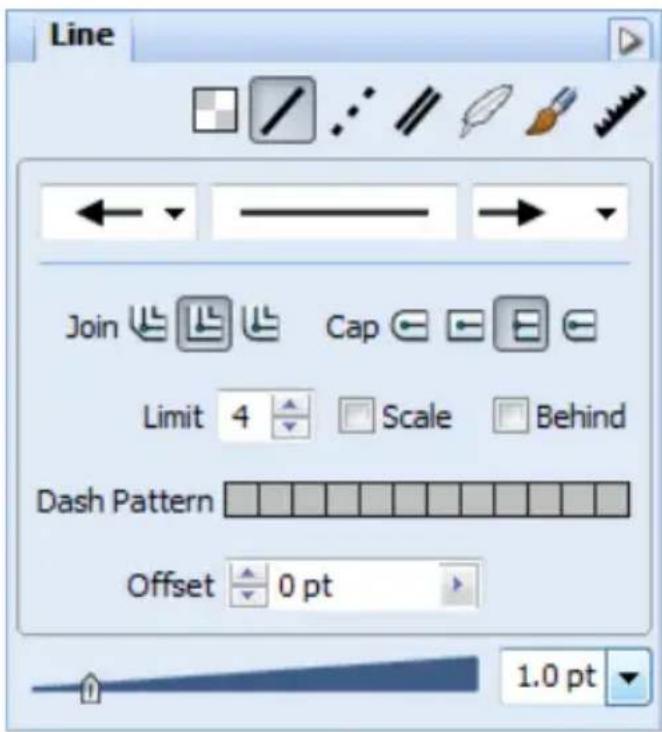
text_image
Line Join Cap Limit 4 Scale Behind Dash Pattern Offset 0 pt 1.0 ptChanging line colour
Colour swatches present in a Digikit automatically become available in the Colour tab when it is loaded. For details on adding or editing plain line colours, see Changing fill and line colour on p. 219.
Changing line style
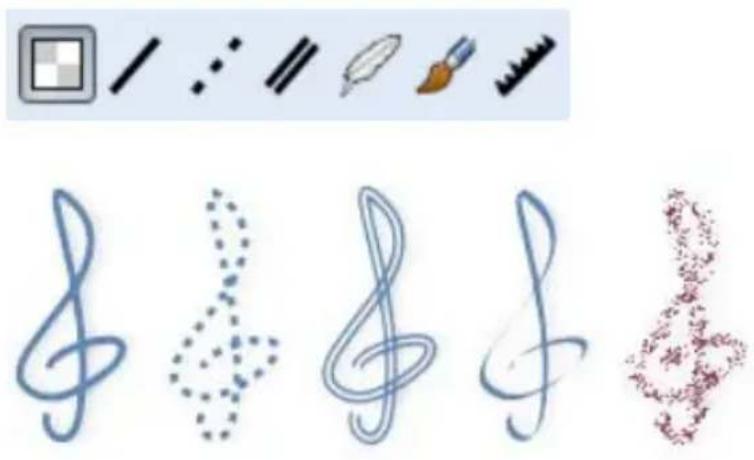
text_image
Handwritten musical notation symbols including treble clef, dotted line, string, and textured signatureA series of buttons arranged along the top of the Line tab set the line style.
Solid, Dash, Double, Calligraphic, and Stroke styles can be applied.
A fringed Edge style can also be applied to shapes, text, and photo edges.
To change line style:
- Click a button to set the line style—only one style can be set at any one time. Click another button to jump to that style.
Once a style is selected you can choose line ends for most styles (except Stroke and Edge).
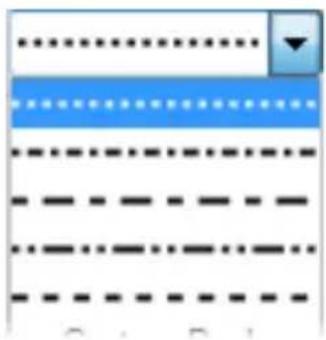
text_image
Screenshot of a document editing interface with dotted and dashed lines, likely representing text formatting or document navigation.For some styles, variations are also available.
For example, for a Dash or Double line style, additional dash patterns (below) and double line options can be selected.
To select a line end:
- From the ← and → drop-down menus, pick a line start and end.
Other styles such as Dash and Calligraphic offer further customization of the chosen style.
Two styles, Stroke and Edge, let you apply a brush, chosen from the Brushes tab, to the edge of a shape or edge. You'll see your current brush shown on the Line tab. Both styles look great when applied to artistic text. (See Adding outlines and edges to text on p. 133.)
For changing line caps and ends, see CraftArtist Help.
Changing line width
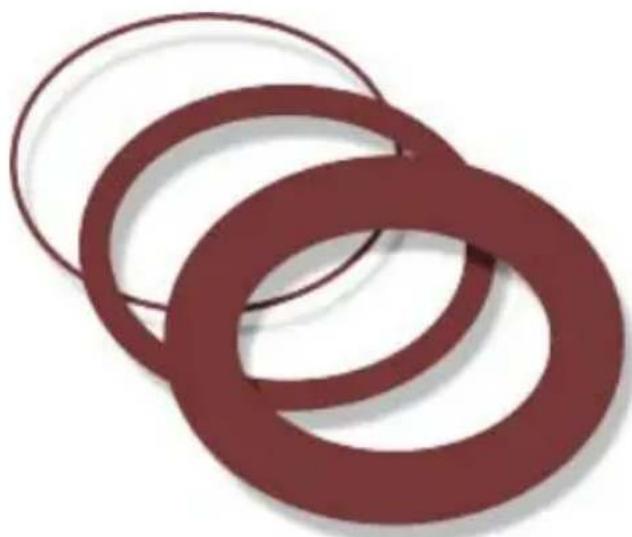
natural_image
Three overlapping maroon rings with white outlines, no text or symbols presentOn a selected line, curve, or shape, drag the Weight slider on the Line tab.
To turn off the line, set the value to 0.0pt

text_image
1.0 ptAdjusting line offset

natural_image
Three star shapes in orange and purple outlines, no text or symbols presentOn a selected line, curve, or shape, adjust the Line tab's Offset value. This lets you adjust the distance between an object, brush stroke, etc., and its outline. To do this, you can click the up/down arrow buttons, type a value directly, or click the right arrow and drag the slider.
Copying an item's formatting
Use Format Painter to copy an item's line and fill properties directly to another item (you can even copy between line/shape and text items).

text_image
LOREM IPSUM LOREM IPSUM
The Format Painter is particularly useful if you've taken the time to fine-tune an item's appearance (e.g., you may have applied a complex fill or combination of filter effects), and want to apply the same format to other items on your page.
To apply an item's formatting to another:
- Select the item whose formatting you wish to copy.

text_image
LOREM Edit I Edit Points Add as sentiment I P SUM- Click Format Painter on the Standard toolbar. When you click the button, the selected item's formatting is "picked up."
text_image
LOREM IPSUM- Click the item to which you want to apply the "picked up" formatting. The second item becomes selected and the formatting is applied.

text_image
IPSUM Edit I Edit Points Add as sentiment- To cancel Format Painter mode, press Esc, click on a blank area of the page, or click any other tool button.
- While in Format Painter mode, to select an item without pasting formatting, hold down the Shift key and then select the item.
- When copying formatting from one text item to another, text properties such as font and style are also passed along.
Scissor cuts, crops, and erasing
text_image
10Scissor cuts
natural_image
Pink decorative piece with a black textured square and a flower-like pattern on top (no text or symbols)
Use the Scissors tool to cut any item or group of items on your page. For example, you might want to cut a material or embellishment, or add a decorative cut edge to a photograph.
You can cut freeform shapes, or apply a preset "punch" shape.
Cutting freeform shapes
- Use the Select tool to select one or more items.

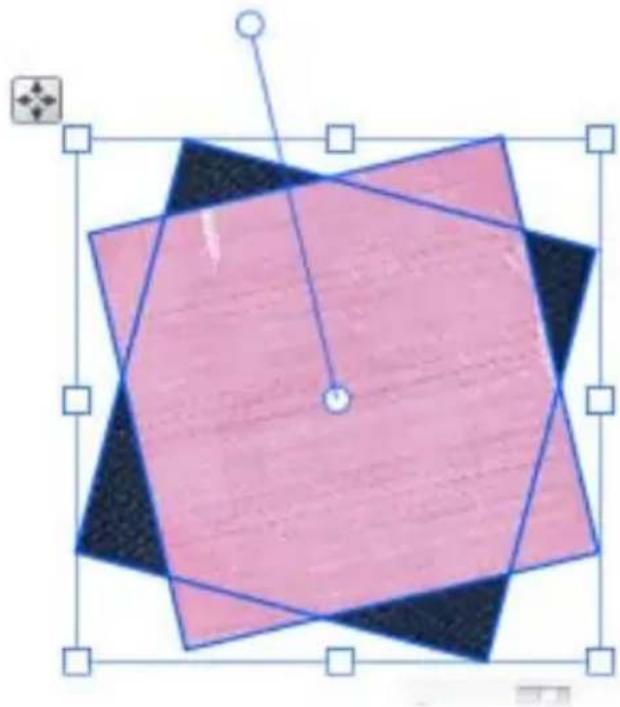
natural_image
Geometric diagram with overlapping pink and black polygons and a central circle, no text or symbols present

To cut through selected items on multiple layers, ensure that the Edit All Layers button, on the Layers tab, is selected. (See Working with layers in CraftArtist Help.)

-
On the Standard toolbar, click the Scissors tool.
-
On the Scissors context toolbar, select a scissor type from the dropdown list.
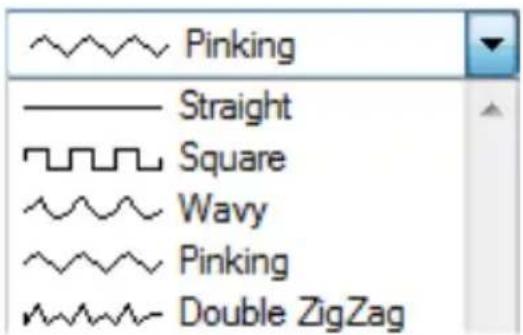
text_image
Pinking Straight Square Wavy Pinking Double ZigZag4. Optional:
- To adjust the regularity of the freeform cutting line, adjust the Smoothness setting.
To do this, click the up and down arrows, or click the right arrow and drag the slider.
- To adjust the length of each unit of the cutting edge, change the Wavelength setting.
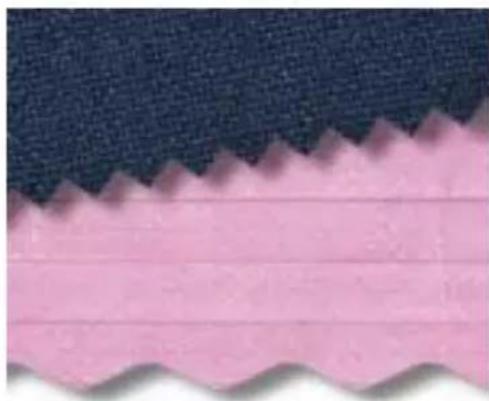
natural_image
Close-up of a fabric with wavy pink and black patterned sections (no text or symbols)- To adjust the depth of each unit of the cutting edge, change the Amplitude setting.
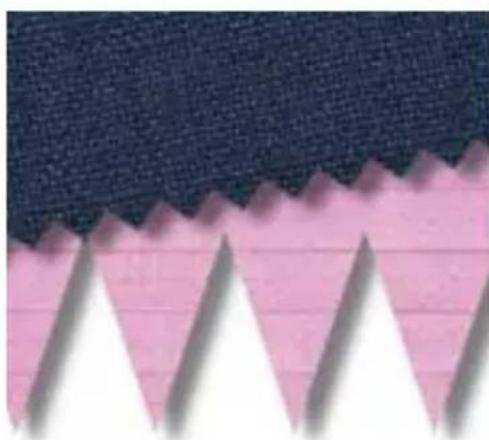
natural_image
Close-up of three white triangular blades against a dark textured background (no text or symbols)
You can't adjust wavelength or amplitude for Straight cutting lines.
- To create a freeform cut, click and drag across the item(s).
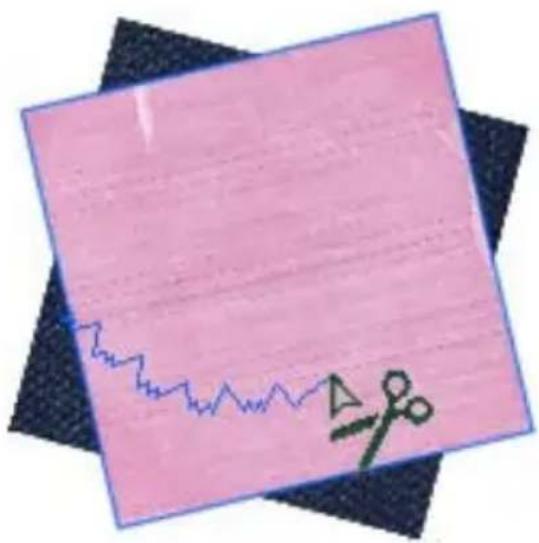
text_image
Handwritten signature with a blue zigzag line and green checkmark on pink paper, placed over a dark blue square frame.
Unselected items that the cutting line crosses will not be split.
- To remove a cut section, click it.
-or-
To retain a cut section, hold down the Shift key, and then click the section you want to retain. (All other portions of the item will be deleted.)
-or-
To retain both sections and split them apart:

- Click the Select tool and then click a cut section.
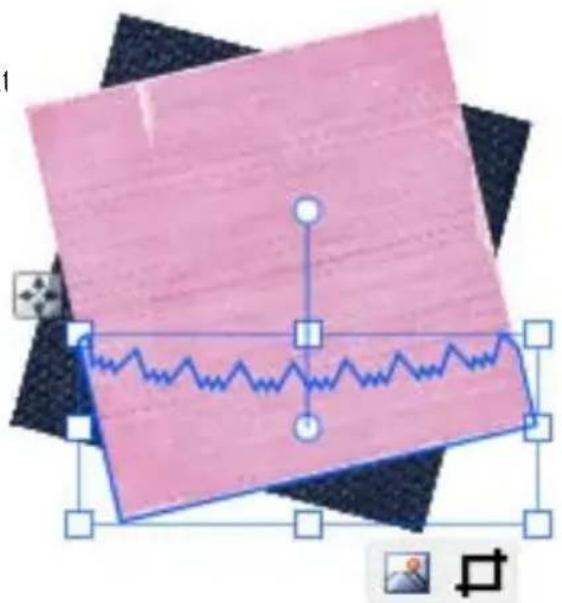
natural_image
Abstract graphic with pink background, blue wavy line, and geometric shapes (no text or symbols)- Drag the section into its new position.
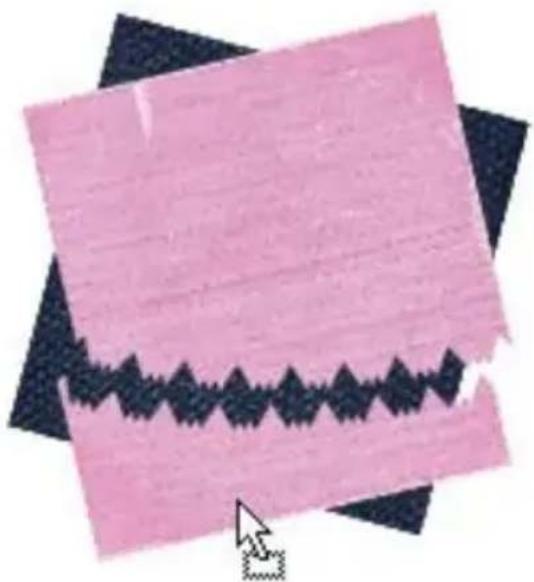
natural_image
Abstract composition of overlapping pink and black squares with a wavy black line at the center (no text or symbols)Punching shapes
1. Use the

Select tool to select one or more items.
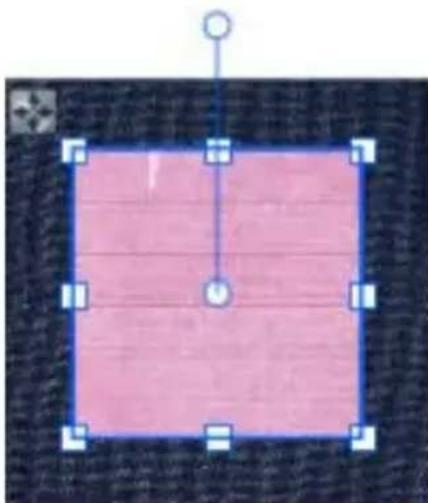
natural_image
Simple geometric diagram with a pink rectangle and blue border, no text or symbols present- On the Standard toolbar, click the

Scissors tool.
- On the Scissors context toolbar, select a scissor type from the dropdown list.
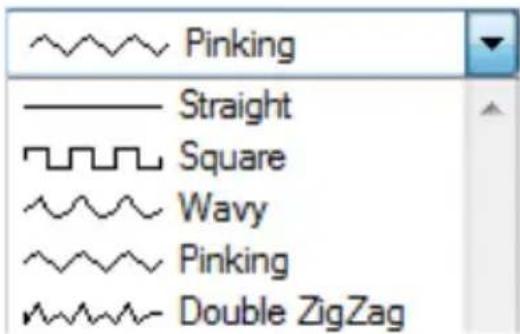
text_image
Pinking Straight Square Wavy Pinking Double ZigZag- Click to expand the Punches flyout, and then click a preset punch shape to apply it to your item.
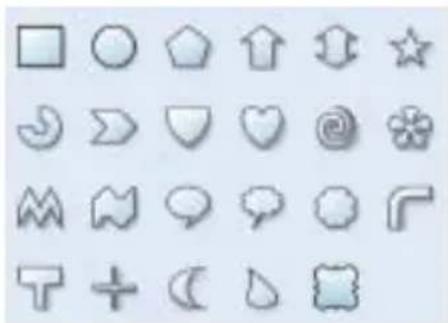
natural_image
Grid of 20 gray icon buttons arranged in a 4x4 layout, no text or symbols present.- The punch is applied to the item. Click the Cut button that displays below the item.
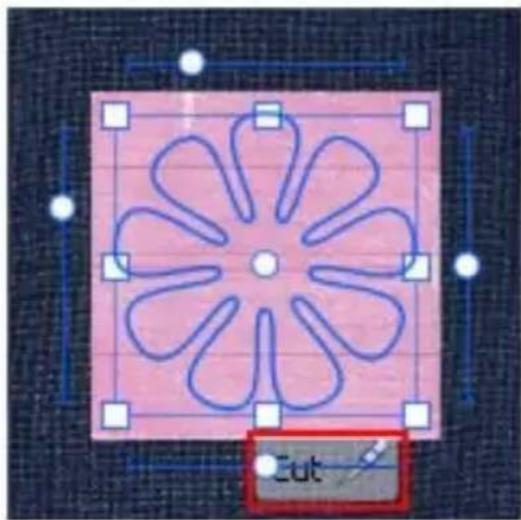
text_image
Cut- To delete or retain cut sections:
• To delete a cut section, click it.
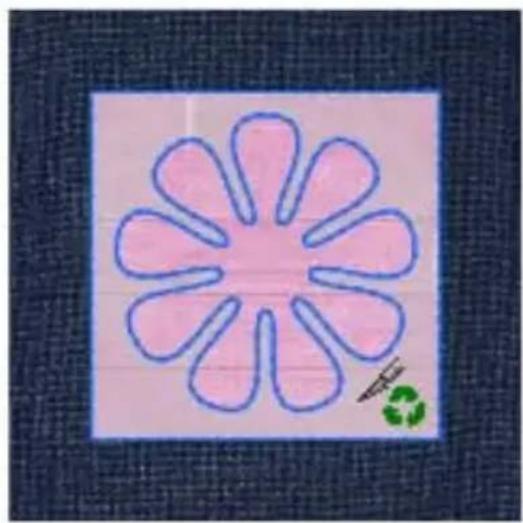
natural_image
Simple line drawing of a pink flower with eight petals and a small green recycling symbol at the bottom right (no text or symbols on the flower itself)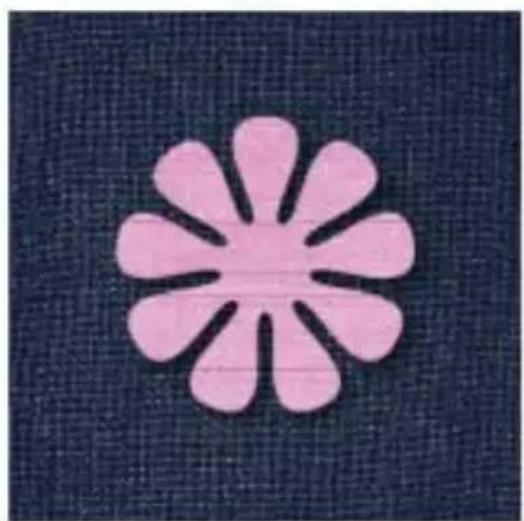
natural_image
Pink flower-like shape on a dark textured background (no text or symbols)- To retain a cut section, hold down the Shift key, and then click the section.
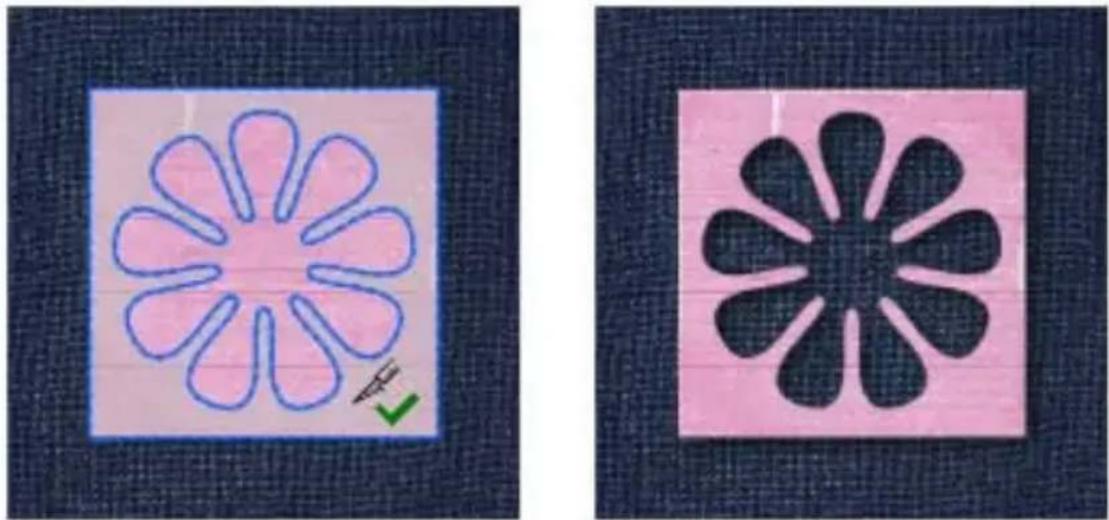
- To retain both sections and split them apart, click the Select tool, then click a cut section and drag it into its position.

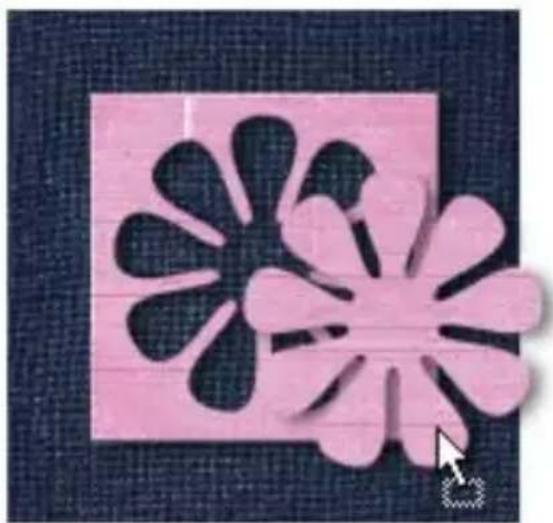
natural_image
Pink paper flower-like shape with five petals on a textured dark background, no text or symbols present.Combining, cropping, and joining items
CraftArtist provides the powerful Combine, Crop, and Join (Add, Subtract, and Intersect) commands, which you can use on multiple selections to create new shapes.
For easy access to these commands, use the buttons on the Arrange tab. You'll also find these commands on the Arrange menu, and from the menu accessed by right-clicking on a multiple selection.
Combining items
Combining merges selected items into a composite item, with a hole where filled regions overlap. The composite takes the line and fill of the bottom item.

natural_image
Two stylized heart shapes, one green and one pink with petal-like cutouts (no text or symbols)- Use the Select tool to create a multiple selection containing the items to be combined.
natural_image
Illustration of a green heart with a pink flower-like shape inside, surrounded by selection handles (no text or symbols)- On the Arrange tab, click the Combine button (you'll also find this option on the Arrange and right-click menus). The composite takes the line and fill of the back item.

natural_image
Green heart-shaped logo with a white flower-like shape inside, no text or symbols present.
To break apart the item, select it and click the button again.

You can also use the Crop tool to crop photos and other items on your page. See Cropping photos on p. 85.
Cropping items
- Use the Select tool to create a multiple selection containing the items to be cropped.
- On the Arrange tab, click the Crop button to display a flyout.
- To crop the bottom item to the outline of the top item, select Crop to Top.

natural_image
Simple graphic of a green heart and a pink flower with blue outlines (no text or symbols)
natural_image
Green leaf-shaped logo with six petals, no text or symbols present-or-
To crop the top item to the outline of the bottom item, click Crop to Bottom.

natural_image
Illustration of a green heart and a pink flower with blue outlines (no text or symbols)
natural_image
Abstract pink flower-like shape with blue outlines (no text or symbols)
To remove the crop, click Arrange>Crop>Uncrop.
Clipping items
-
Use the Select tool to create a multiple selection containing the items to be clipped.
-
On the Arrange tab, click the down arrow to expand the Crop flyout.
-
To clip the bottom item to the outline of the top item, click Clip to Top.

natural_image
Two stylized flower-like shapes, one green heart and one pink flower with blue outlines (no text or symbols)-or-
To clip the top item to the outline of the bottom item, click Clip to Bottom.

natural_image
Two heart-shaped icons, one green with pink flower-like design and the other solid green (no text or symbols)
To remove the clip, click Arrange>Crop>Uncrop.
Adding items
Adding creates a new item that's the sum of two or more selected items, whether or not they overlap.

natural_image
Two stylized heart shapes, one green and one pink with petal-like patterns (no text or symbols)- Use the Select tool to create a multiple selection of items. (The items need not overlap.)
natural_image
Illustration of a green heart with a pink flower-like shape inside, enclosed in a blue frame (no text or symbols)- On the Arrange tab, click Add.
The new item is a composite of the selected items, taking the line and fill of the bottom item.

natural_image
Green heart-shaped graphic with abstract splash-like shapes (no text or symbols)Subtracting items
Subtracting creates a new item, retaining only the portion of the bottom item that is not overlapped. This command is particularly useful for cutting out shapes from photos.

- Use the Select tool to create a multiple selection of overlapping items. (The items must overlap.)
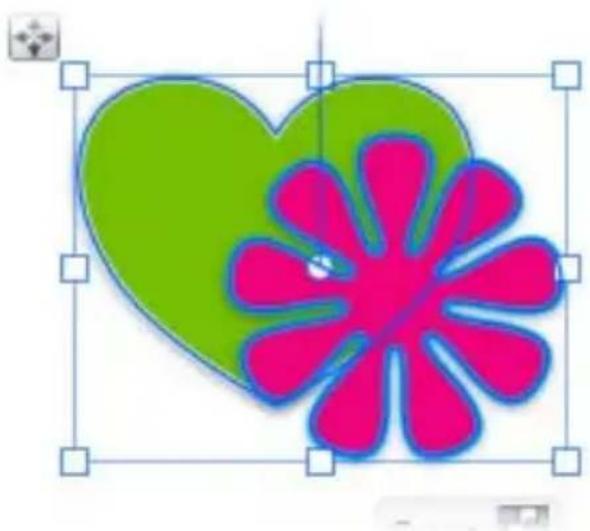
natural_image
Illustration of a green heart and pink flower with blue outlines, enclosed in a grid frame (no text or symbols)- On the Arrange tab, click

Subtract.
The new item consists of the non-overlapping portion(s) of the bottom selected item.

natural_image
Green heart-shaped logo with white abstract leaf-like design (no text or symbols)Intersecting items
Intersecting creates a new item by retaining the overlap and discarding the rest.

natural_image
Two stylized flower-like symbols: a pink flower with blue outline and a green leaf with white outline (no text or symbols)- Use the Select tool to select two overlapping items.
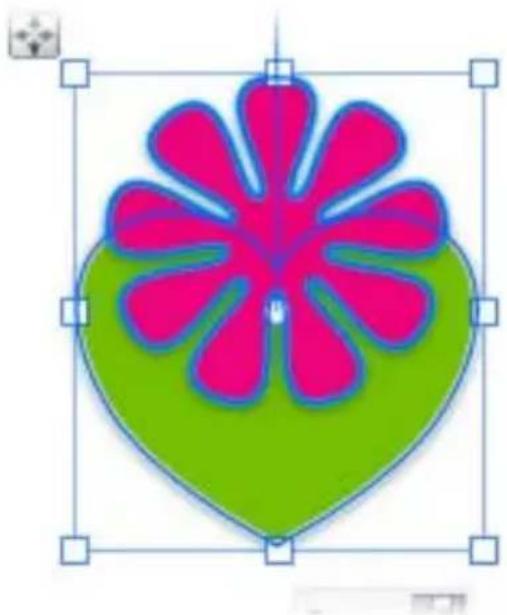
natural_image
Stylized flower icon with pink petals inside a green heart shape, enclosed in a blue square frame (no text or symbols)- On the Arrange tab, click Intersect.

natural_image
Abstract green leaf-like logo design with no text or symbolsThe new item consists of the overlapping portions of the previously selected items, taking the line and fill of the back item.

Add, Subtract, and Intersect produce a permanent new item out of any selected items. You can only break the resulting item apart immediately after creating it by clicking the Undo button on the Standard toolbar.
Erasing and adding to items

Erasing Adding to
CraftArtist provides the following tools for erasing and adding to existing lines and shapes.

Erase Tool
Lets you erase portions of a selected item or items. You can control the extent of erasing by setting eraser tip width and pressure (if using a graphics tablet).

You can erase on an individual layer or across multiple layers. (See Working with layers in CraftArtist Help.)

Freeform Paint Tool
Lets you add to or ‘grow’ the boundary of an existing shape or line. This tool is especially useful for reshaping existing items, or for creating unusual filled shapes.

If you add to or erase from a bitmap, QuickShape, or artistic text item, the item will be converted to curves, preventing further editing in their original form.
Erasing portions of an item
- Use the Select tool to select an item.
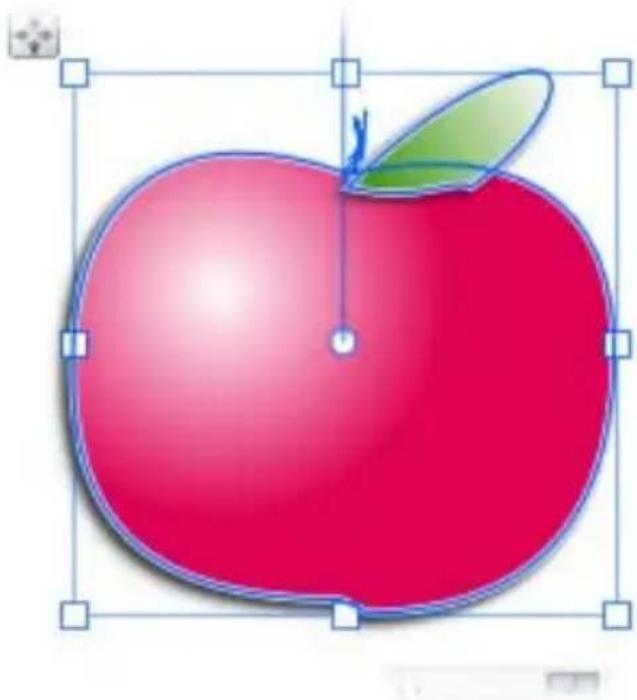
natural_image
Illustration of a red apple with a green leaf, enclosed in a blue frame (no text or symbols)- On the Standard toolbar, click the Erase Tool.
- On the context toolbar, choose an eraser tip shape.
-
(Optional) Set the tip width by adjusting the Width value.
-
Position the cursor, and drag over the item's edge. The area to be erased is drawn temporarily (use the Ctrl key to redefine the erase area while drawing).

natural_image
Illustration of a red apple with a green leaf and a circular button (no text or symbols)- Release the mouse button to erase the area drawn.

natural_image
Stylized pink apple logo with a green leaf, no text or symbols present
The erasing process shows the background colour belonging to any item behind it (either on the same layer or a layer below the current layer).
Adding to an item
- Use the

Select tool to select an item.
natural_image
Blue irregular shape with a white dot at center, enclosed in a square frame (no text or symbols)- On the Standard toolbar, click the Freeform Paint Tool.
- On the context toolbar, choose a shape for the tool's tip.
-
(Optional):
-
Set the tip width by adjusting the Width value.
-
To create a series of shapes without switching tools, click to disable the Select-on-Create button.
-
Position the cursor over the item and drag over an item boundary.
You'll see dark shading, which represents the area to be added.
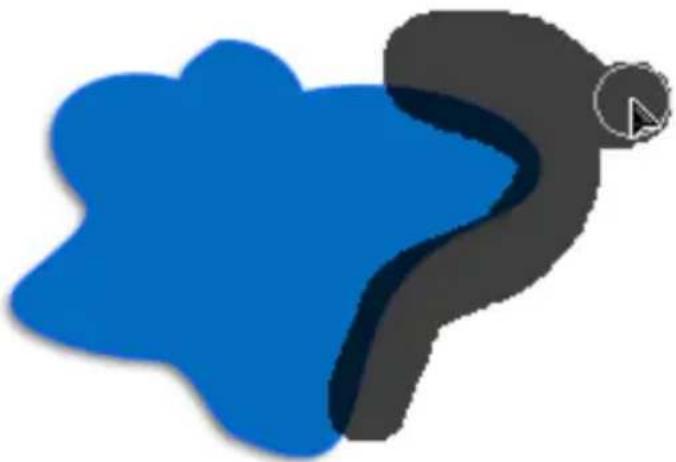
natural_image
Abstract graphic with blue and gray shapes, no text or symbols present- Release the mouse button to reshape the item to include the painted area.

natural_image
Abstract blue shape with irregular edges and a small circle, no text or symbols presentUsing stencils
natural_image
Abstract composition of blue butterfly-like shapes on white background (no text or symbols)The Stencils tab provides a selection of ready-to-go, fun stencils that will add impact to any page. Whether you paint over them with the Brush tool, or use them to cut out a design from a photo, stencils provide endless opportunities for creativity.
Adding stencils to your page
- On the Stencils tab, select a category from the drop-down list.
The lower gallery displays thumbnails of the stencils available in the selected category.
- Click and drag a thumbnail from the gallery onto your page.
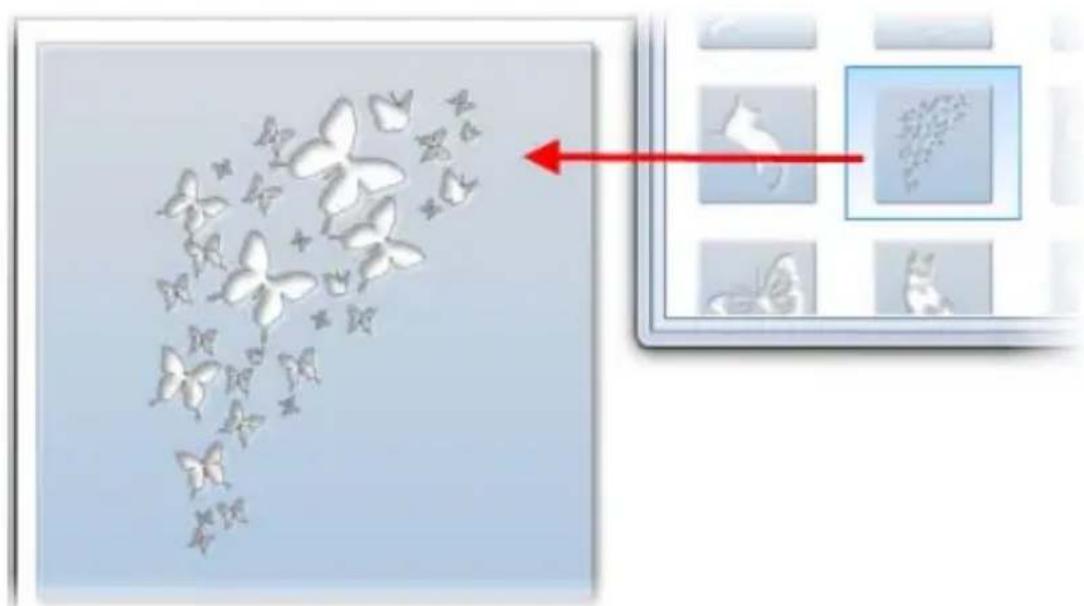
natural_image
Illustration showing a heart-shaped arrangement of butterflies with a red arrow pointing to a grid of butterfly icons on a tablet screen (no text or symbols)Painting over stencils
-
Add a stencil to you page.
-
Click the Brush tool.
-
Choose a brush type from the Brushes tab and set your brush colour on the Colour tab. (See Adding brush strokes on p. 207.)

Brushes in the Airbrushes, Glitter and Natural Media categories are particularly suited to stencil work.
- Paint over the stencil with your chosen brush.
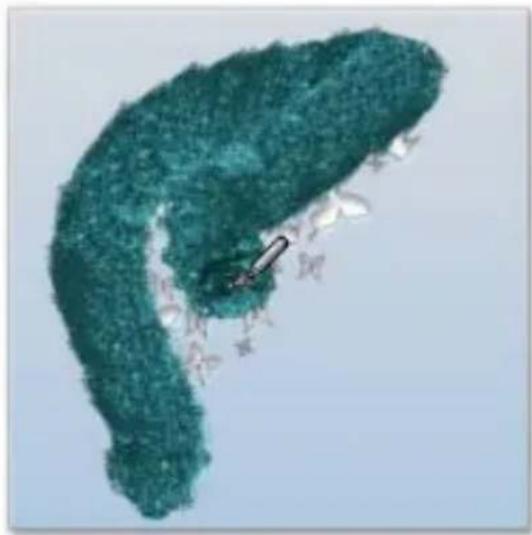
natural_image
Close-up of a teal-colored, elongated biological structure with a black arrow pointing to a small white object (no text or symbols visible)
By default, stencils are set up so that paint is applied to the inner edge. To switch to the outer edge, click Outer.
- Click Lift Stencil to remove the stencil and reveal the painted design beneath it.
natural_image
Illustration of stylized teal butterflies with white background (no text or symbols)Cutting out a stencil from a photo
-
Add a stencil to you page.
-
Drag a photo from the Photos tab and drop it on top of your stencil.
natural_image
Rustic wooden house in a grassy field with a pixelated arrow pointing to it, under a cloudy sky (no text or symbols)- Position the photo so that it displays as required inside the stencil outline.
natural_image
Abstract graphic with a central bird silhouette and surrounding fish-like shapes, enclosed by blue selection boxes (no text or symbols)- Select the stencil and click Lift Stencil to remove the stencil and reveal the cut out design beneath it.

natural_image
Abstract illustration of blue butterflies in flight against a white background (no text or symbols)Adding brush strokes
natural_image
Decorative illustration of a wave pattern with ornate border and '11' number, no readable text or symbolsAdding brush strokes

natural_image
Illustration of flowers and a red curved line with a stylized 'Z' (no text or symbols)Add artistic flair to your projects with the

Brush tool.
The Brushes tab provides a wide range of brushes. Choose from preset, categorized Global brushes, or add Digikit brushes to your workspace.
You can draw and paint with your mouse or with a pen tablet. The tablet's pressure-sensitive pen tip allows control of stroke width or transparency (see Pressure sensitivity in CraftArtist Help).
Choosing brush types
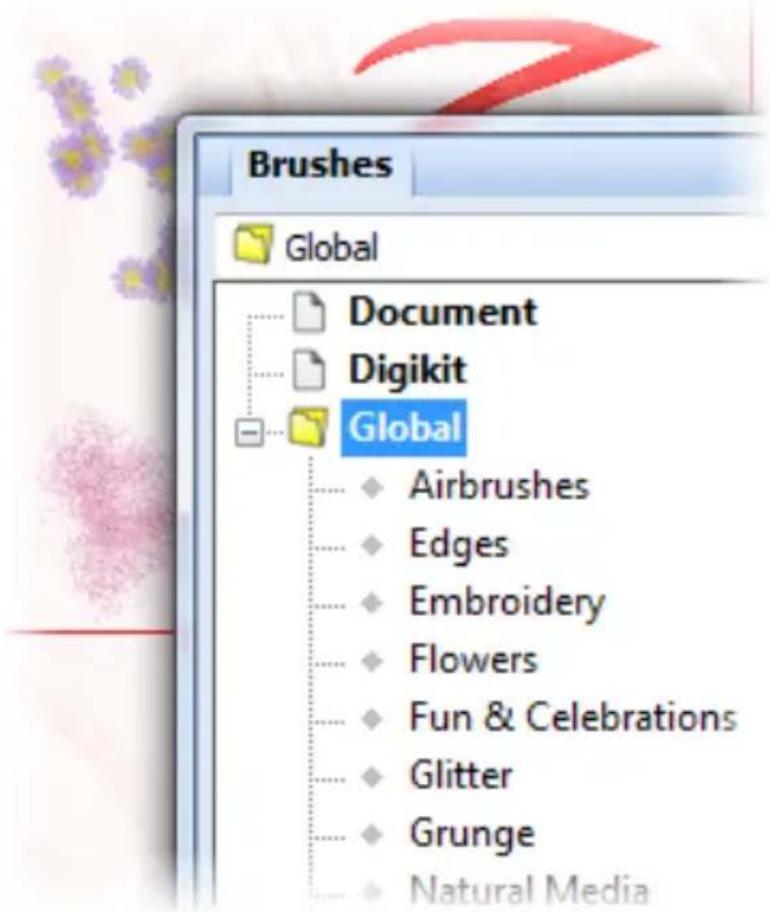
text_image
Brushes Global Document Digikit Global Airbrushes Edges Embroidery Flowers Fun & Celebrations Glitter Grunge Natural MediaBrush types
The Global category provides the following natural stroke and spray brushes:
- Airbrushes
Add dramatic, soft, or textured airbrush effects.
- Edges
Apply inner or outer edge effects to any shape or picture.
- Embroidery
'Stitch' items to your page with these colourful brushes.
- Flowers
Paint your pages with flower spray brushes.
- Fun & Celebrations
Create cheerful, fun layouts with confetti, sweets, and clouds.
- Glitter
Make your pages sparkle with glitter dust and glitter glue brushes.
- Grunge
Add aged and grunge effects to your layouts.
- Natural Media
Apply paint (dry, medium, and watery), acrylic, charcoal, pastel, pen, and watercolour natural media brush strokes.
- Photo
Add realistic lace, rope, ribbon, and rope effects with this collection of photo brushes.
- Special Effects
Paint with bubbles, fire, snowflakes, splats, and more!
Selecting brushes from the Brushes tab
The Brushes tab lets you view brushes currently being used in your project, and serves as a container for supplied brush presets, brushes from Digikits, and your own custom brush designs.
Document category
The Document category shows the brush types used in the currently active project.
This category is useful for automatically 'bookmarking' brushes for easy reuse.
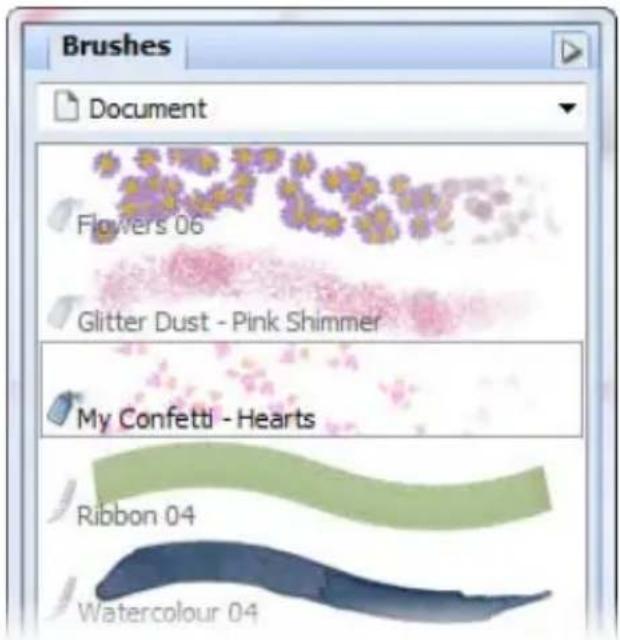
text_image
Brushes Document Flowers 06 Glitter Dust - Pink Shimmer My Confetti - Hearts Ribbon 04 Watercolour 04Global category
The Global category stores the supplied brush presets under a series of pre-defined subcategories.
These brushes are available to all projects currently open.
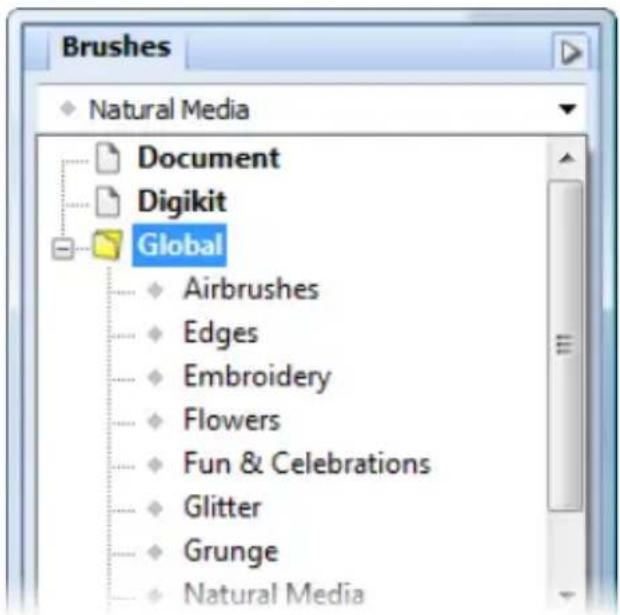
text_image
Brushes Natural Media Document Digikit Global Airbrushes Edges Embroidery Flowers Fun & Celebrations Glitter Grunge Natural MediaDigikit category
The Digikit category displays brushes added from free or purchased Digikits you've chosen in the Digikit Browser. Most Digikits contain brushes, but some may not be design.
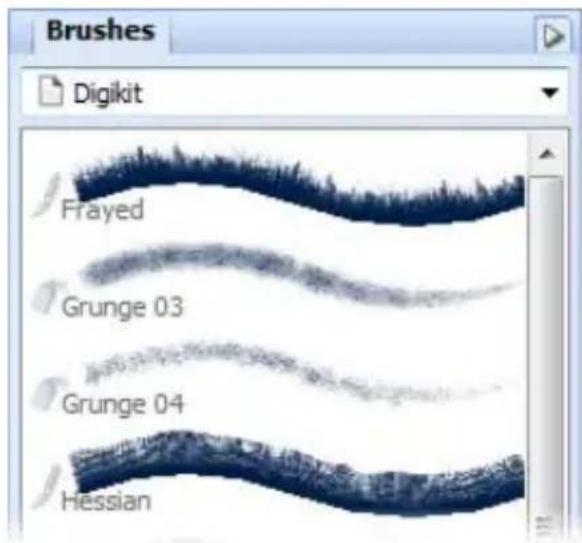
text_image
Brushes Digikit Frayed Grunge 03 Grunge 04 HessianAdding brushes from Digikits
- On the Pages context toolbar, click Add items from Digikits. The Digikit Browser dialog opens.
- In the Digikit Browser, select the Digikit from which you want to add brushes.
- Scroll to the Brushes category (if present), and then hover over the brush you want to use to. If you like the brush, double-click the preview to add it. To add all brushes from the Digikit, click Add all items at the top right of the category pane.
When a brush is added, a check mark appears on the brush thumbnail.
Picnic in the Park

text_image
Image showing three green checkmarks and a gray horizontal line, with scattered green dots on the right.
If you select a brush from a featured free or purchasable Digikit—the Digikit Not Installed dialog will display and you will be prompted to visit the DaisyTrail.com shop. Once you've installed your free or purchased Digikit, the brush will be added to the Digikit category of the Brushes tab on selection. (See Buying Digikits on p. 57.)
- (Optional) Click other Digikits.

Back to 'All Digikits' to add brushes from
- When you've finished selecting brushes, click Done.
Creating brush strokes
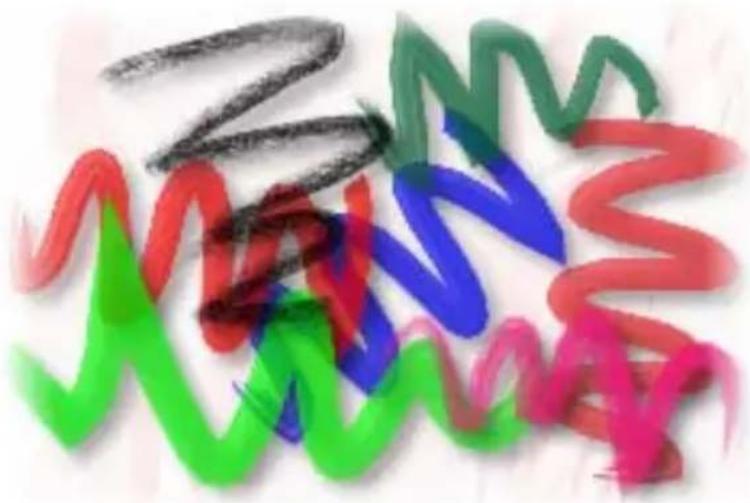
natural_image
Abstract wavy line art with red, green, blue, and black strokes (no text or symbols)You can apply brush strokes directly to the page using your mouse or pen tablet. If you're using a pen tablet, you can control stroke width and transparency by adjusting pressure sensitivity (see Pressure sensitivity in CraftArtist Help).
Applying brush strokes
- On the Standard toolbar, click the Brush tool.


The Brush cursor ( ) indicates that the Brush is selected and that you're ready to paint.
- On the Brushes tab, choose a brush category from the drop-down list, and then select a brush stroke style from the gallery.
At the top of the workspace, notice that the Brush context toolbar is displayed. Use the controls on this toolbar to set the properties of your brush stroke, as described in steps 3 to 6 below.
Brush: Color... Width: 23 pt Opacity: 100% Smoothness

The following steps provide an overview of the brush properties. For more details, see Setting brush stroke properties on p. 214.
-
Click the 📋 Colour button and select a brush stroke colour using the Colour Selector dialog.
-
Set the Width, Opacity, and Smoothness of your brush stroke. Click the up and down arrows, or click the right arrow and then drag the slider.
-
(Optional) Enable the Fill-on-Create button if you want to fill your closed or unclosed shape as you paint. (See Setting brush stroke properties.)
-
(Optional) Enable the Select-on-Create button if you want to be able to edit your strokes immediately after painting them.
-
With the brush cursor drag a brush stroke across your page.

The properties currently defined on the Brush context toolbar settings will be adopted for subsequent brush strokes.
A brush stroke can be extended or reshaped, as for a straight or curved line (see Editing lines and shapes in CraftArtist Help). The brush stroke path can also be reversed, closed, or opened.
Setting brush stroke properties
You can set the properties of your brush strokes (both before and after creating them) using the Brush context toolbar.
To set brush stroke properties:
- To set properties before painting, click the Brush tool and choose a brush style from the Brushes tab.
-or-
To set properties of an existing brush stroke, select the stroke.
The Brush context toolbar displays.

text_image
Brush: Color... Width: 23 pt Opacity: 100% Smoothness-
To change the brush design, select a category on the Brushes tab.
-
To change the brush colour:
- Set the line swatch on the Colour tab. (See Changing line and fill colours on p. 219.)
-or-
- Click the Colour... button on the context toolbar, and then choose your colour from the Colour Selector dialog. See Using the Colour Selector dialog in CraftArtist Help.

Brush strokes cannot take a gradient fill. If applied, the base colour of the fill is adopted.
-
To change brush stroke width:
-
Adjust the Width setting on the context toolbar (you can enter a value; click the up/down arrows; or click the right arrow and then drag the slider).
-or- - At the bottom of the Line tab, drag the slider or enter a value in the adjacent box.

text_image
1.0 pt- To adjust brush stroke opacity:
- Adjust the Opacity setting on the context toolbar. (100% opacity = no transparency; 0% opacity = fully transparent.)
-or-
- On the Colour tab, drag the Transparency slider to achieve the desired effect.

- If, in step 1, you selected the Brush tool rather than an existing brush stroke, you'll see three additional options on the context toolbar: Smoothness, Select-on-Create, and Fill-on-Create.
- Smoothness: Adjust the degree of smoothing to be applied to the brush stroke by entering a value; clicking the up/down arrows; or clicking the right arrow and then dragging the slider.

- Select-on-Create: Click to enable or disable this option.
Select-on-Create disabled:
When you release the mouse button, the stroke you just created is not selected. This means that if you want to edit or add to the stroke, you must first select it. Use this method when you're happy to set all your brush stroke properties before painting—and particularly if you intend to paint repeatedly with the same brush stroke style.
Select-on-Create enabled:
When you release the mouse button, the curve or stroke you just created is automatically selected, allowing you to add to or edit it immediately. Use this method when you want to change your brush stroke properties (colour, width, opacity, etc.) frequently.

Press the Esc key to deselect the current brush stroke.
• Fill-on-Create: Enable if you want to fill the unclosed curve produced with a brush stroke with the fill colour defined on the Colour tab. (See Changing line and fill colours on p. 219.)
natural_image
Illustration of stylized green eyes and a pencil hitting a circle (no text or symbols)Working with colour
natural_image
Decorative textile banner with wave pattern and '12' number, no readable text or symbolsChanging fill and line colour
You can apply colours to the outline and interior of closed shapes and text objects, and to lines and line segments.
In the Digikit Browser, the Swatches category (shown when browsing items) offers a selection of colours specifically chosen to complement your installed Digikits. Once a Digikit is selected, these colours become available in the Digikit palette, which displays on the Colour tab.
To apply fill and line colour, you can:
- Select a swatch from the Digikit palette. (See below.)
- Apply a colour tint or a transparent fill. (See below.)
- Use the Colour tab's Colour Picker to apply a colour used elsewhere on your page. (See below.)
- Use the Colour tab's Colour Wheel, Colour box, or sliders. (For more on the Colour tab, see CraftArtist Help.)
- Mix a custom colour in the Colour Selector dialog. (See Using the Colour Selector dialog in CraftArtist Help.)
- Apply a gradient fill. (See Applying gradient fills on p. 222.)
- Apply a plasma or mesh fill. (See CraftArtist Help.)
Applying colours from the Digikit palette
- Select a shape, line, or text object.
- On the Colour tab:
• To change line colour, click to select the Line swatch.
• To change fill colour, click to select the Fill swatch.
- Click a palette swatch previously loaded from a Digikit (via Digikit Browser). The colour is applied and the Line/Fill swatch updates with the selected colour.
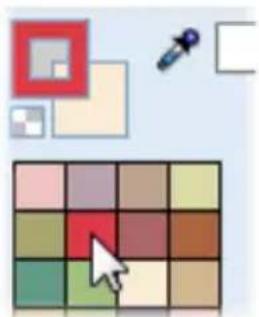
natural_image
Color palette grid with a red arrow pointing to a square, surrounded by selection boxes (no text or symbols)For information on switching palettes, see Using colour palettes on p. 226.
Applying colour tints
- Select a shape, line, or text object.
-
On the Colour tab:
-
Click to select the Line or Fill swatch, as described in step 2 above.
• In the Colour Mode drop-down list, select Tinting. -
Drag the slider to the right to lighten the tint, or to the left to darken the tint.
You can also enter a percentage value in the box (0% resets to the original colour).
Applying transparent fills
- Select a shape, line, or text object.
- On the Colour tab, click to select the Line or Fill swatch, as described above.
- On the Colour tab, click the ☐ No Fill swatch.

This applies transparency to items with line/fill properties, such as shapes and text. For pictures, clicking this swatch resets a recoloured picture back its original colours. See also Applying transparency on p. 150.
Applying colours with the Colour Picker
- Select a shape, line, or text object.
- On the Colour tab:
- Click to select the Line or Fill swatch, as described above.
- Click the
Colour Picker.
- On your page, click on your chosen pickup colour with the pickup cursor (to magnify the colour swatch, hold down the mouse button).
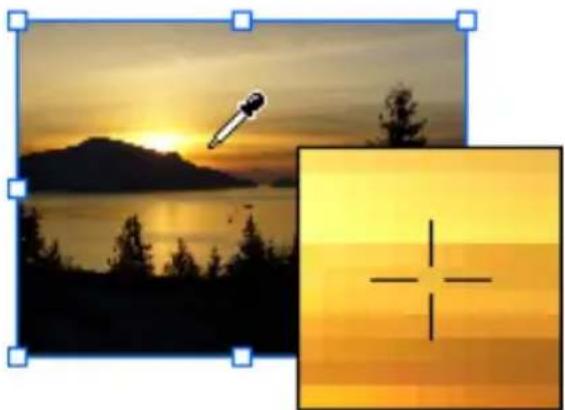
natural_image
Sunset over a lake with silhouetted trees and a small inset image showing a crosshair (no text or symbols)- The colour is picked up and displayed in the swatch. Picked Colour
- On the Colour tab, click the Picked Colour swatch to apply the colour.
- Optional: To add the colour to your Document palette, click the Colour Tab Menu button and select Add to Palette. (See also Using colour palettes on page 226.)
Applying gradient fills
Gradient fills include the Linear, Radial, Ellipse, Conical, Square, Three Colour, and Four Colour types. All of these apply colour ‘spectrums’ in a fill path spreading between two or more nodes. Once you've applied a gradient fill, you can edit its fill path and change its colours.
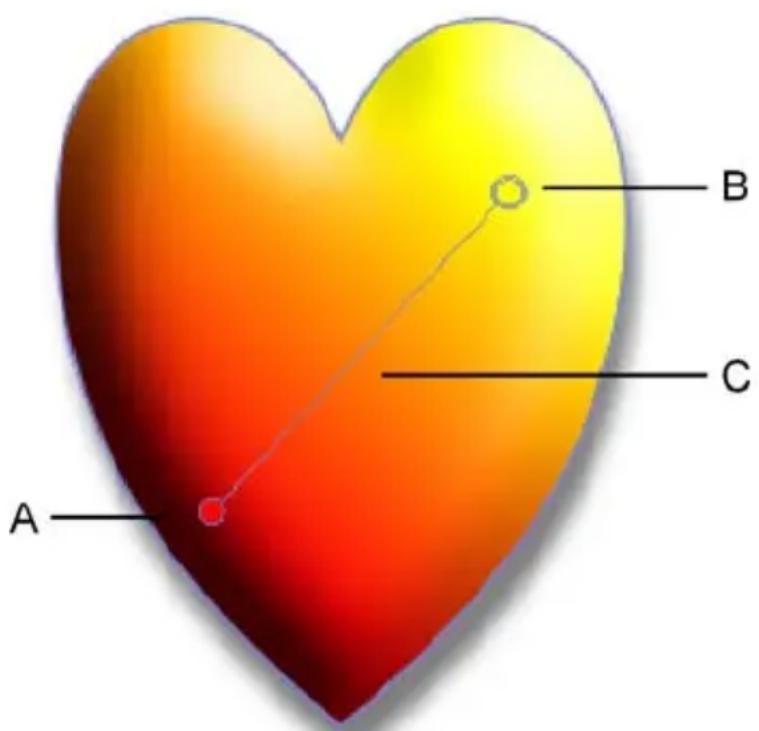
text_image
A B C(A) Start Node, (B) End Node, (C) Fill Path - Linear
Applying a gradient fill
-
Select an item on your page.
-
Click the Fill Tool.
-
Click and drag on the item to define the fill path. The item takes a simple Linear fill, grading from the current colour of the item, ending in white (items filled with white will grade from white to black, to show contrast).

natural_image
Red heart-shaped graphic with a white outline and two small dots, no text or symbols present.
To constrain the fill path in 15^ increments, hold down the Shift key while dragging.
- Optional: To change the fill style, choose from the drop-down list on the Fill context toolbar.
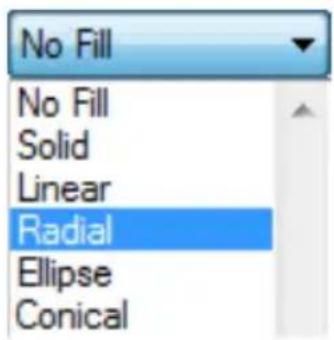
text_image
No Fill No Fill Solid Linear Radial Ellipse ConicalThe new fill path displays. Note that this will differ depending on the fill style selected.
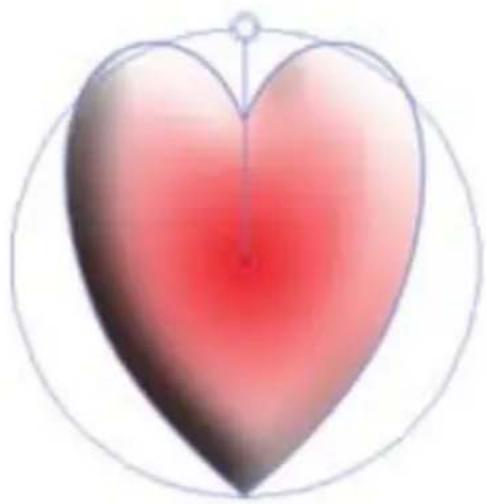
natural_image
Illustration of a heart with a small circle at the top, no text or symbols present.Editing a gradient fill path
- Select an item with a gradient fill applied.
- Click the Fill Tool to display the fill path.
- Move the fill path nodes by clicking and dragging them.

natural_image
3D-rendered heart shape with gradient shading and a pointer, enclosed by curved lines (no text or symbols)-or-
Click and drag across the item to define a new fill path.

To constrain the fill path in 15^ increments, hold down the Shift key while dragging.

To ensure that the origin of the gradient remains at the item's centre point, hold down the Ctrl key while dragging.
Adding and deleting fill path nodes
- Select an item with a gradient fill applied.
- Click the Fill Tool to display the fill path.
- To add a node, click anywhere on the fill path.
-or-
To delete a node, click to select it and then press the Delete key.
Changing node colours
- Select an item with a gradient fill applied.
- Click the Fill Tool to display the fill path.
-
Use any of the following methods to recolour fill path nodes:
-
For a simple gradient fill with two nodes, choose from the Fill Start and Fill End palettes on the context toolbar.
- For fills with three or more nodes, select a node on the fill path, and then choose from the Fill Colour palette on the context toolbar.
- Select a node and then on the Colour tab, click a colour swatch. See Editing gradient fills in CraftArtist Help.
- Right-click the filled item and choose Format>Fill... (or choose the command from the Format menu).
Use the Gradient Fill Editor to add/remove nodes, modify node colours and alter node positions along the path. See Editing gradient fills in CraftArtist Help.

Adjustment techniques, Fill Tool, and context toolbar options differ depending on the fill style.
Using colour palettes
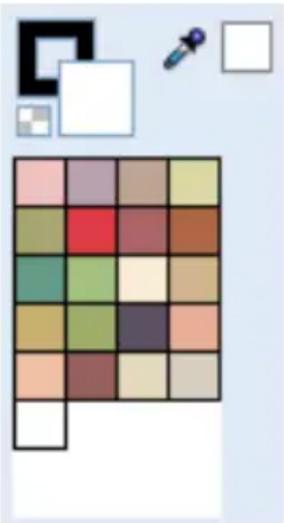
natural_image
Grid of colored squares with a small dropper and geometric shapes in the corner (no text or symbols)When you apply a solid fill or line colour, you choose a colour belonging to a colour palette.
Only one palette can be active at any one time. The currently active palette is displayed as a gallery of swatches on the Colour tab.
You can add, edit, and remove palette colours, and switch between different palettes at any time. You can also create your own custom palettes from colour spreads. (See Creating custom palettes in CraftArtist Help.)

Changes to palettes are saved globally and the new palette colours are automatically carried over to any new projects you create.
The following palette types are available:
- Digikit palette: These palette colours originate from your chosen Digikit—you'll see the Colour tab populate with Digikit colours when you select a Digikit for your new Craft Project (see p. 21 and p. 220).
You can modify your Digikit palette at any time via the Digikit Browser—select the Browse my items tab, then the Swatches category to add or remove colours to the current Digikit palette by clicking! (See below.)
Note: Some Digikits may not contain palette colours, in which case the default Document palette is displayed on the Colour tab.
- Document palette: If you start a blank project from scratch, rather than from a Digikit, the default Document palette is displayed on the Colour tab. This palette provides a set of commonly-used colours from which to choose.
You can edit the colours displayed in the Document palette—for example, you may want to add swatches from a Digikit or a themed palette, or add a colour you have mixed yourself on the Colour tab or Colour Selector dialog. You can also save your Document palette for use in other projects.
- Standard RGB and Standard CMYK palettes: Palettes based on industry-standard colour models.
- Themed palettes: CraftArtist also provides a range of designer-created themed palettes containing colours designed to work well together on the page.

When you save a project, its palette is saved along with it.
Switching palettes
- On the Colour tab, click More...
- In the Colour Palette Designer, the Palettes drop-down list displays all of the palettes installed with CraftArtist.
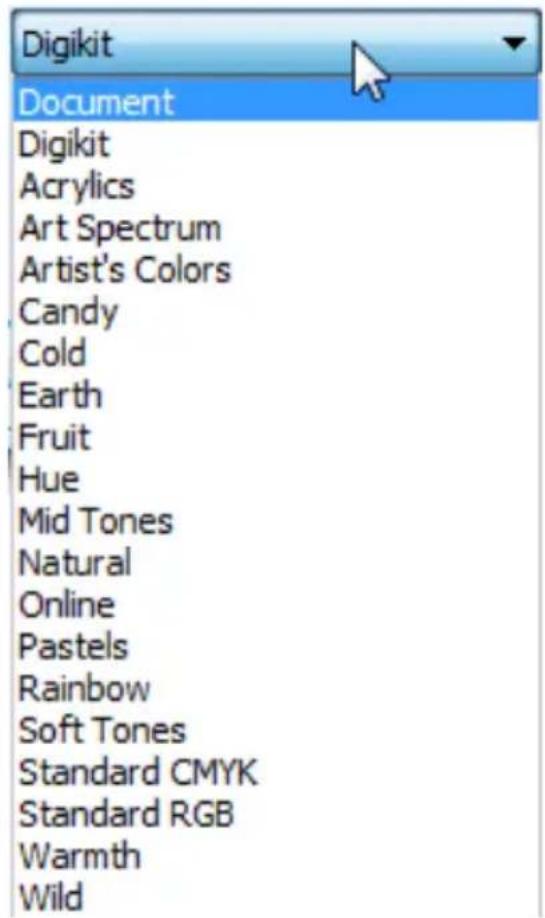
text_image
Digikit Document Digikit Acrylics Art Spectrum Artist's Colors Candy Cold Earth Fruit Hue Mid Tones Natural Online Pastels Rainbow Soft Tones Standard CMYK Standard RGB Warmth Wild- Click the palette you want to use.
The selected palette's colours appear as swatches in the Colour Palette Designer and on the Colour tab, replacing the swatches previously visible.
Adding swatches to the Digikit palette
- On the context toolbar, click Add items from Digikits.
- In Digikit Browser, click the Browse my items tab.
-
In the category list on the left, click Swatches.
-
Swatches already added to your Digikit palette are highlighted in the main window.
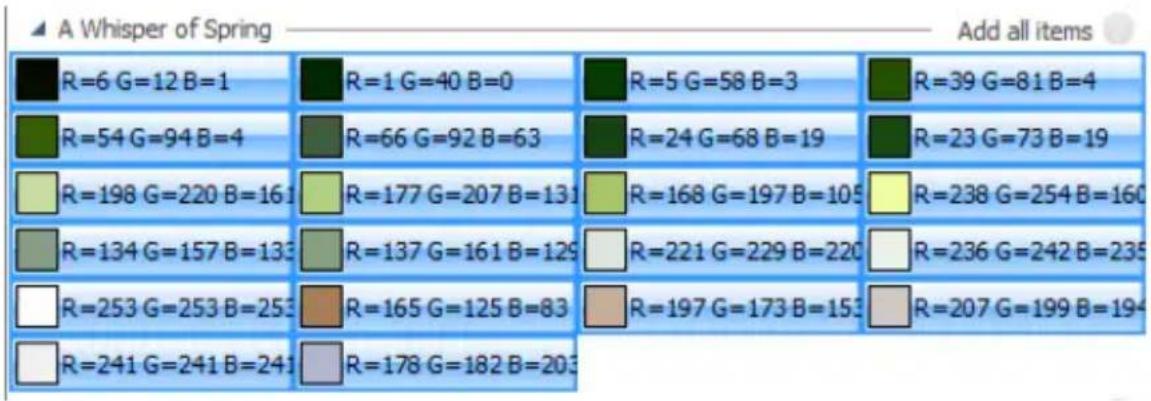
heatmap
| R | G | B | Value | |---|---|---|---| | 6 | 12 | 1 | | | 1 | 40 | 0 | | | 5 | 58 | 3 | | | 39 | 81 | 4 | | | 54 | 94 | 4 | | | 66 | 92 | 63 | | | 24 | 68 | 19 | | | 23 | 73 | 19 | | | 198 | 220 | 16 | | | 177 | 207 | 131 | | | 168 | 197 | 105 | | | 238 | 254 | 160 | | | 134 | 157 | 133 | | | 137 | 161 | 129 | | | 221 | 229 | 220 | | | 236 | 242 | 235 | | | 253 | 253 | 253 | | | 165 | 125 | 83 | | | 197 | 173 | 153 | | | 207 | 199 | 194 | | | 241 | 241 | 241 | | | 178 | 182 | 203 | | The image contains a color-coded legend (green to light brown) and a label 'Add all items' in the top right corner.- You can remove colours from the palette, and add colours from other installed Digikits.
• To remove a colour from the palette, click to deselect it.
• To add a colour, click to select it.
-
Click Done. Colours are automatically removed from/added to the Digikit palette displayed on the Colour tab.
-
Optional:
- To add the colour to your Document palette, click the ▶ Colour Tab Menu button and choose Add to Palette.
(You would do this if you intended to save your Document palette for use in other projects, for example.)
See also Editing palettes on p. 230.
Changing Document palette colours
You can add colours manually from the Colour tab, or take them directly from an item's fill. Once a colour is stored in the Document palette, you can edit it in the Colour Picker dialog.
To add a colour from an item's fill to the Document palette:
- Select an item that has a fill colour you want to add to your palette, then click the ▶ Colour Tab Menu button and select Add to palette.
To add a colour manually from the Colour tab:
- On the Colour tab:
- Click the Fill swatch, and then click to select your preferred colour.
-Or-
- Click the Colour Picker, hold down the mouse button, and then click anywhere in your workspace to pick up your new colour.
Click the Picked Colour swatch to transfer the colour to the Fill swatch.
- Click the ▷ Colour Tab Menu button and select Add to palette.
Editing palettes
To add a new palette swatch:
- On the Colour tab, right-click on the palette and click Add.
- In the Colour Selector dialog, choose your new colour and click OK. (See Using the Colour Selector dialog in CraftArtist Help.)
The colour is added to the currently loaded palette.
- Optional: To add the colour to your Document palette, click the Colour Tab Menu button and choose Add to Palette.
(You would do this if you wanted to save your Document palette for use in other projects, for example.)
To edit a palette swatch:
- On the Colour tab, right-click on the swatch you want to edit and click Edit.
- Follow step 2 above.
To remove a palette swatch:
- On the Colour tab, right-click on the swatch you want to remove and click Delete.
Saving palettes
To save the currently active palette (the palette displayed on the Colour tab):
- On the Colour tab, right-click the palette and select Palette Manager.
- In the Palette Manager dialog, click the Options button, and select Save Palette As.
- Save the palette to a new *.plt file.
To save a different palette:
- On the Colour tab, click More...
- In the Colour Palette Designer, in the Palettes drop-down list, select the palette you want to save.
- Click Save.
- Save the palette to a new *.plt file.

By default, palette files are saved to the Palettes folder of your installation directory.

If you store your palette to a different location, it will not appear in the Palettes drop-down list. To use a palette that is not saved in the Palettes folder, you need to load it.
Loading other palettes
In the Colour Palette Designer, the drop-down Palettes list lets you quickly switch to any of the palettes saved in the Palettes folder. However, you can also load palettes that are stored elsewhere on your computer.
To load a palette:
- On the Colour tab, click More...
- In the Colour Palette Designer, click Load.
- Navigate to and select the palette you want to load.
- Click Open.
The loaded palette's colours appear as swatches in the Colour Palette Designer and on the Colour tab, replacing the swatches previously visible.
Arranging items
natural_image
Decorative illustration of wave patterns with a numbered page (13) and decorative elements, no readable text or symbols.Aligning and distributing items

natural_image
Four yellow star shapes arranged horizontally on a pink background (no text or symbols)You can arrange, align, and distribute the items on your page quickly and easily. The resulting alignment of items differs depending on how you select the items.
Selecting items for alignment
Shift-click
- If you select items by holding down the Shift key and then clicking each item in turn, the items are aligned relative to the edges of the last selected item.
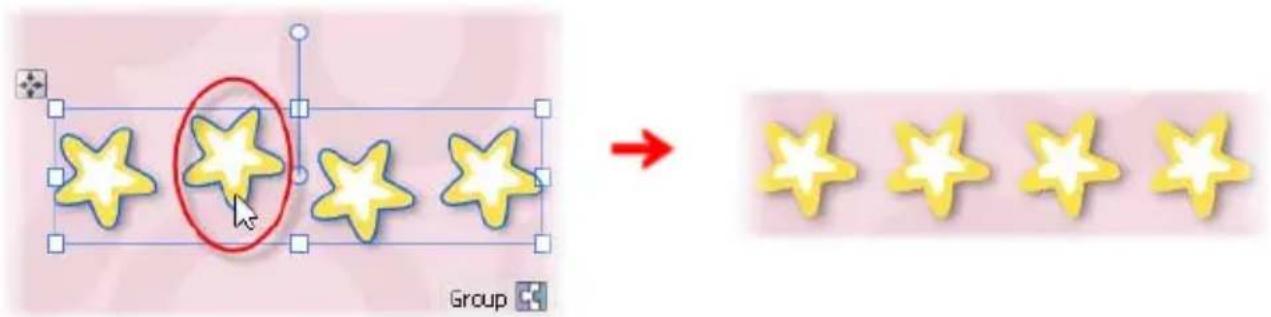
text_image
Diagram showing star selection process with highlighted selection and arrow, ending with five yellow stars on a group interfaceSelection marquee
- If you click and drag a selection marquee around the items to be aligned (or click Edit>Select All), the items are aligned relative to the item that is farthest back in the Z-order (the order in which items are placed on top of each other on the page).
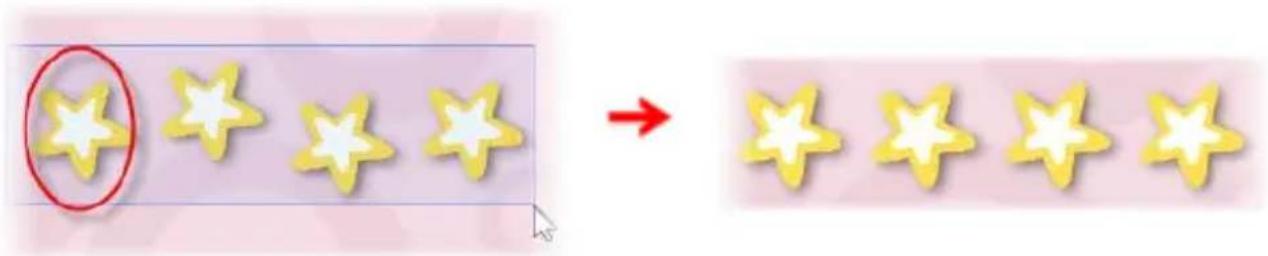
text_image
Diagram showing a sequence of yellow star icons with a red circle highlighting the first star, followed by a red arrow pointing to the final five stars.Alignment controls
Alignment controls are available on the Align tab or from the Arrange>Align Items menu item.
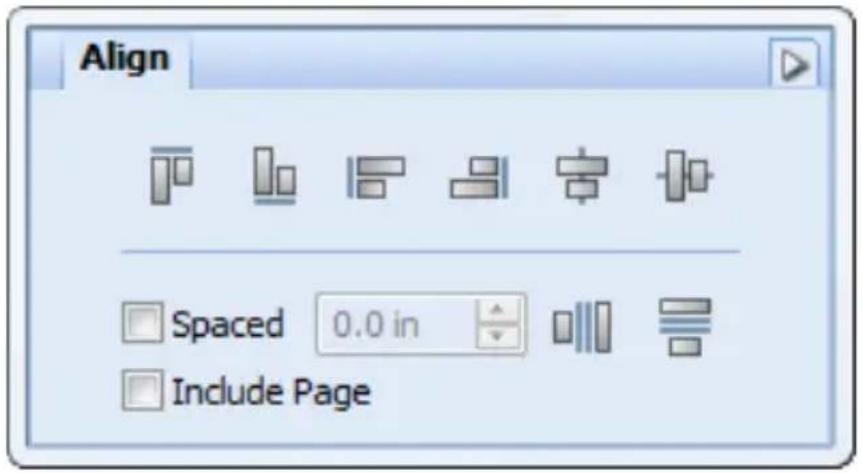
text_image
Align Spaced 0.0 in Include PageDistribution controls let you distribute items evenly (you can set the space between items if required).
You can also distribute items across your page by selecting Include Page. See Distributing items on p. 237.
Aligning two or more items
- On the Standard toolbar, click the

Select tool.
- Press and hold down the Shift key, and then click to select all the items you want to align.
-or-
Click and drag a selection marquee around the items.
-or-
Click Edit>Select All to select all items on the page.
- On the Align tab, select an option for vertical or horizontal alignment.
Aligning items with a page edge
Follow the steps above, selecting the Include Page option. The page is added to the set of items included in the alignment, e.g., selecting Align Top aligns all of the items in the selection to the top of the page.

If only one item is selected, page-edge alignment is automatic.
Distributing items
- On the Standard toolbar, click the Select tool.
- Press and hold down the Shift key, and then click to select all the items you want to align.
-or-
Click and drag a selection marquee around the items.
-or-
Click Edit>Select All to select all items on the page.
- On the Align tab, click Horizontal Distribute or Vertical Distribute to distribute items horizontally or vertically.
- (Optional) To set a fixed distance between vertically or horizontally distributed items, select the Spaced option and enter a measurement value (otherwise the items distribute evenly between end-most items).
Rotating and shearing items
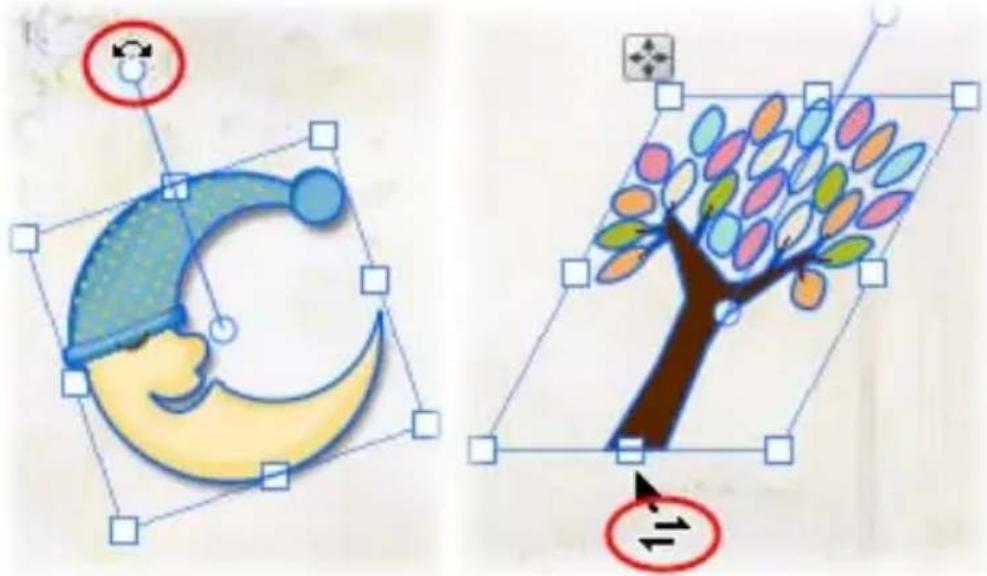
text_image
Two-step graphic editing interface showing a crescent moon and a tree with colored leaves, each annotated with a rotation arrow.Rotating items
- Select the item(s) with the

Select tool.
- Hover over the rotate handle, when you see the cursor change, drag in the direction in which you want to rotate the item.
As you drag, the angle of rotation is temporarily displayed around the item's origin point (shown as ^① ). This temporary display of information is known as tool feedback.
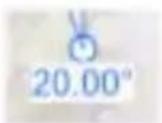

To rotate in 15^ intervals, press and hold down the Shift key while dragging.

To revert the rotation, double-click the rotate handle.
To change the rotation origin point:
- Click and drag the origin point to any position on the page. (This can be outside the item itself—useful for rotating grouped items around a central point.)
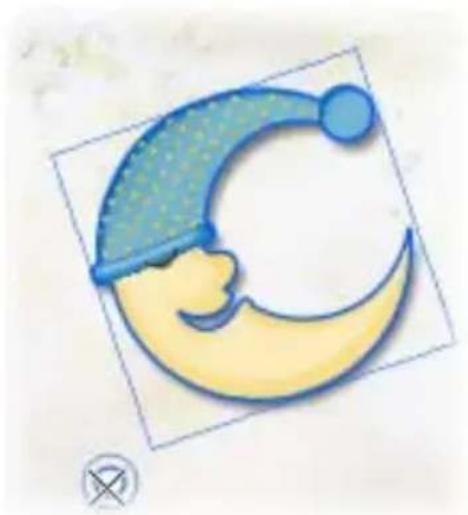
natural_image
Illustration of a crescent moon wearing a blue hat and yellow body, enclosed in a square frame (no text or symbols)- Drag the repositioned rotate handle. The item rotates about the new origin point.
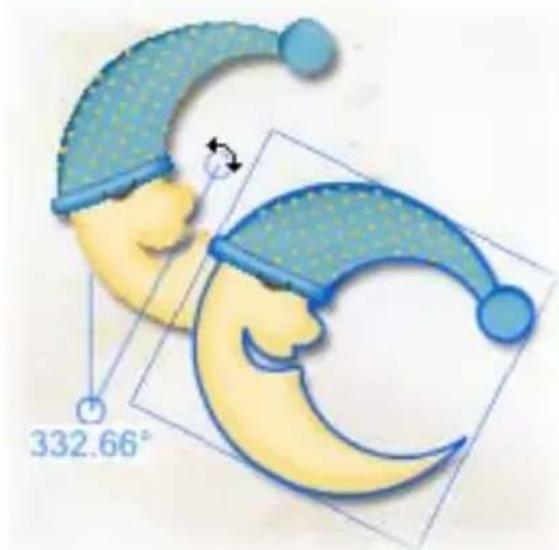
text_image
332.66°
Additional rotation options are provided on the Arrange and Transform tabs, and on the Arrange menu. For details, see CraftArtist Help.
Shearing items
- Select the item(s) with the

Select tool.
- Hover over a centre edge handle. When you see the Shear cursor, click and drag in the direction in which you want to shear the item, and then release.
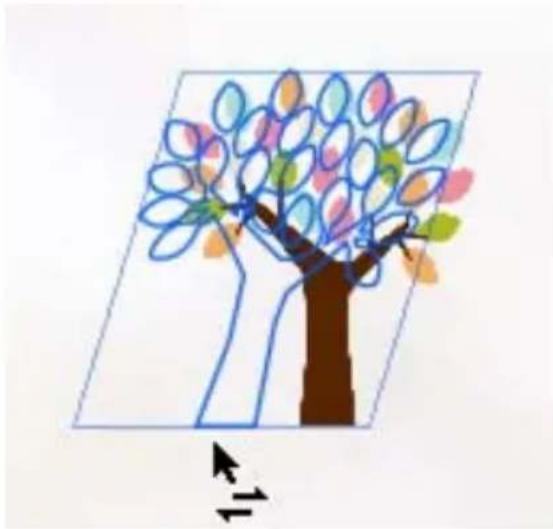
natural_image
Illustration of a stylized tree with colorful leaves and branches, enclosed in a blue rectangular frame (no text or symbols)- To copy and shear an item, press and hold down the Ctrl key while dragging—this preserves the original item, while shearing the new copied item as you drag.
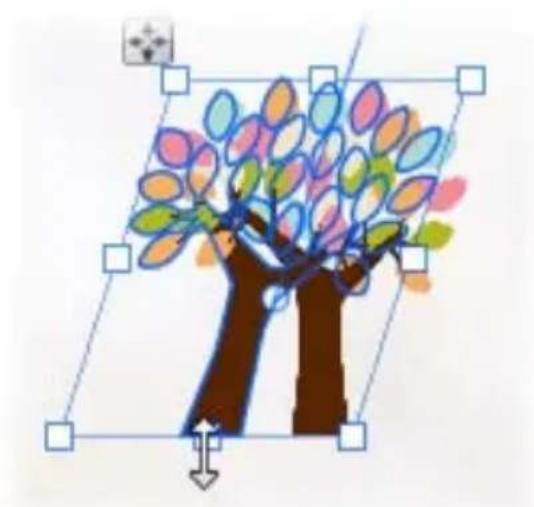
natural_image
Illustration of a stylized tree with colorful leaves and branches, enclosed in a blue frame (no text or symbols)- For precise shearing, enter an exact Shear value in the Transform tab.
Ordering items
natural_image
Close-up of a white daisy, yellow and purple flowers with a blue globe in the center (no text or symbols)
natural_image
Close-up of a white daisy flower with yellow and purple petals, one partially visible in the center (no text or symbols)The items on your page are ‘stacked’ on top of each other, the front-most item (e.g., lilac flower above) being the one on top of the stack (also known as Z-order).
Each time you create a new item, it is placed in front of the items already there. You can move any item to any position in the ordering sequence using the buttons on the Arrange tab below. The lilac flower in the second illustration above has been moved to the back.
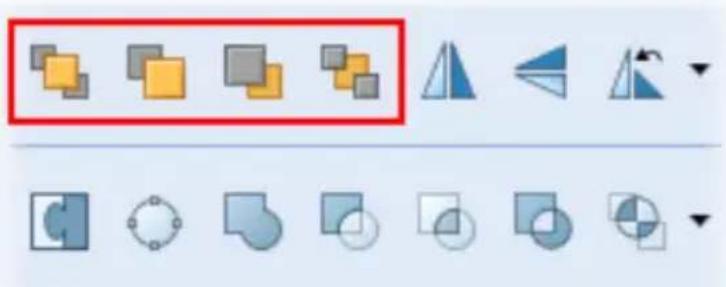
natural_image
Software toolbar with geometric shapes and selection icons (no text or symbols)
Equivalent commands are available from the Arrange menu's Order items submenu.
To change an item's position:
On the Arrange tab, click one of the following buttons:
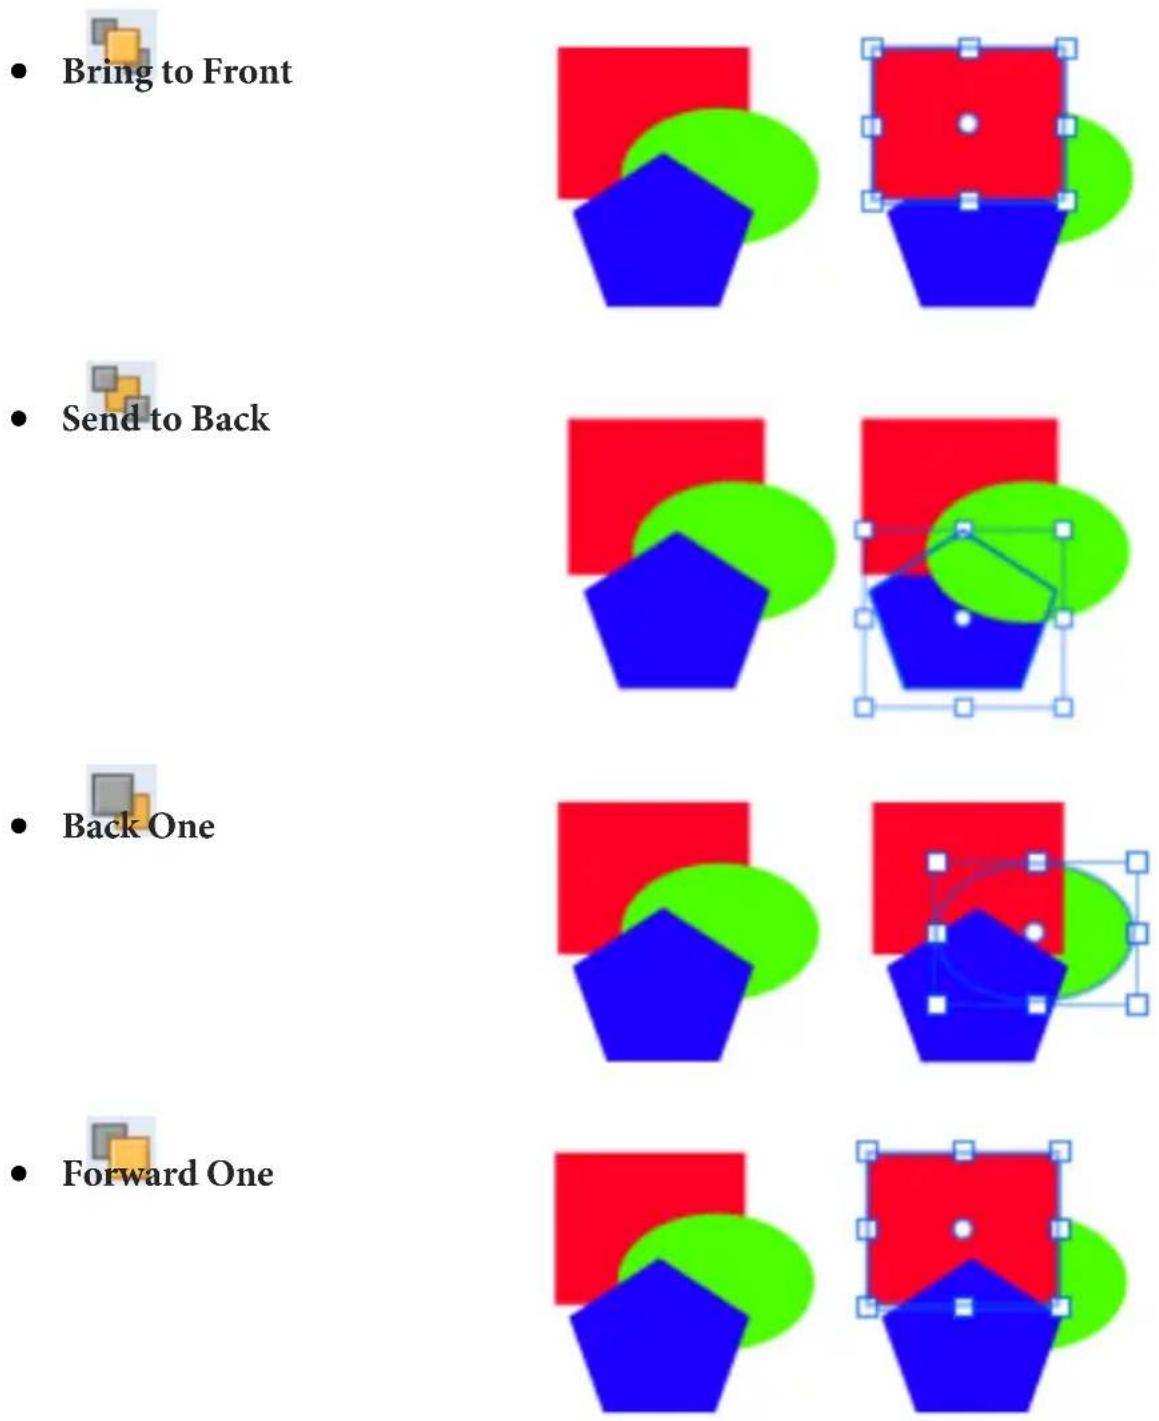
Alternatively, ordering is possible using the right-click Order Items> options.
Don't confuse the concept of item ordering with that of page layers. (See Working with layers in CraftArtist Help.)


Grouping items
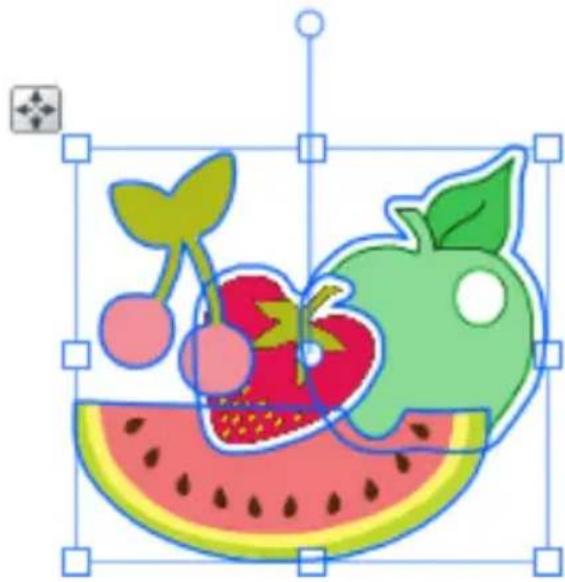
natural_image
Illustration of a watermelon slice with cherries and a green apple, enclosed in a blue grid frame (no text or symbols)Grouping items prevents you from accidentally altering them.
Grouping also allows you to move, rotate, and resize items all together, and to edit similar items all at the same time.
You can select multiple items at the same time but this is a temporary operation; grouped objects are always kept together until you physically ungroup them. The only requirement for grouping is that multiple items are selected in advance. (See Selecting, moving, and resizing items in CraftArtist Help.)
To create a group from a multiple selection:
- Click the Group button below the selection.
To ungroup (turn a group back into a multiple selection):
- Click the Ungroup button below the selection.
In general, any operation you carry out on a group affects each member of the group. For example, property changes applied to a group—such as changing line or fill—will affect all the items contained in the group.
Sharing and publishing
text_image
14Sharing via website
You can share your project by print, via email, as a distributable electronic PDF, or via the daisytrail.com website.

text_image
daisytrail™Publishing to DaisyTrail lets you contribute to the growing collection of published projects, and share your work with friends, family, and like-minded crafters!
To share your projects via website, simply complete the following steps:
• Register on the website.
- Login with your DaisyTrail account information in CraftArtist.
- Upload your chosen project.
The www.daisytrail.com website is designed specifically as a digital crafting community.
Main website features include:
- Free stuff
Daisytrail.com offers free Digikits for you to download which are often seasonal, based on events, or on occasions. - DaisyTrail shop
Buy and download individual Digikits or entire Digikit Collections, plus font collections, software, and other goodies.
- Commend and comment!
Praise and comment on other people's projects—and have your own designs assessed by the community. Click the like this button to commend your favourite projects.
- Search
Find projects, groups, or other users throughout the website.
• Make new friends!
Social networking meets craft designing! Use email or user discussion forums to build friendships with other crafters, especially those you add to your friends list.
• Work in groups
Create groups of users with similar interests—great for schools, clubs, or maybe just your network of "crafty" friends.
Registering
- Click DaisyTrail Upload on the Standard toolbar.
- If you've not registered before, click the Join Now! button. You'll be taken directly to www.daisytrail.com registration.
- From the registration form, enter your personal information, including an email address to which an activation message will be sent. If you need Help, use the link provided.
DaisyTrail Upload on the Standard toolbar.

- Click Create Account. For account activation, you'll need to check your email and click on the activation message sent to you. This may take time depending on your ISP and connection.

Remember your Username and Password. You'll need to re-enter this information into CraftArtist.
- Registration is complete after activation. All you need to do now is to create your craft project and upload it!

If you don't add your DaisyTrail user account details, you'll be reminded to do so every eight days. You can register on the website, then transfer your username and password over, or cancel to enter your details later.
Uploading
Once you've successfully created your account you can upload your project, with the option of including only specific or all pages.

natural_image
Illustration of a vintage-style illustration with a clock, bird, and framed picture (no readable text or symbols)
Page 1
text_image
Collage of photos and text featuring a person in a suit, with visible Chinese characters 'teen' and English text.
Page 2
natural_image
Illustration of framed photos and a globe with greenery, no text or symbols present
Page 3
To upload your project from CraftArtist:

-
Click DaisyTrail Upload on the Standard toolbar.
-
If you've registered (see above) and are uploading for the first time, enter the Username and Password you created on DaisyTrail. You won't need to do this again on subsequent uploads.
-
In the dialog, uncheck pages you don't want to upload (use the scroll bar to view all pages).
-
(Optional) For the upload you can choose a different account to upload to. Click My Account and enter a different Username and Password.
- Click Upload to transfer your selected pages.
- On upload, a progress bar indicates upload status.
On completion, click OK to close the dialog or click View to immediately see your uploaded project on the website.
Modifying account details in CraftArtist
- Select Options... on the Tools menu.
- In the Upload pane, enter your remembered Username and Password.
- (Optional) Click the Test button to verify that the account details are correct. If successful, a "Username and password valid" message is displayed.
If you've forgotten your password or you've not already registered, use the accompanying Reset Password and Register buttons. For the latter, you'll be directed to the Registration page on the website. Complete the registration details and click Create Account. - (Optional) Reduce the upload Quality to 96 DPI to speed up file transfer if your Internet connection is 56k dial-up modem (at the expense of zoom quality).
Otherwise, use the default 300 DPI for broadband and all other faster Internet connections.
Basic printing
CraftArtist supports printing directly to a physical printer (e.g., All-in-ones, Inkjet and Laser printers), with options for scaling and thumbnail printing.
Greeting cards (below), scrapbooks, and other projects can be printed quickly and easily.
text_image
Thank You Happy MuchTo print:
-
Click File>Print... (or right-click on the page or pasteboard area and click Print).
-
In the Print dialog, select a target printer from the drop-down list. Click the Properties button to set up the printer for the correct page size, etc. Set the page size from the Advanced tab if needed.
-
(Optional) If you want to create a print-ready *.prn file for printing at a later date, select the Print to file option.
-
Select the print range to be printed:
• Document: Exports the whole project.
• Current Page: Exports only the page currently displayed.
- Pages: Enter a page range (e.g., 3-5) to export a limited selection of pages (or individual page numbers, if separated by commas). If you've set a range, you can further export just odd or even pages in the range from the drop-down list.
-
Selection: If you've selected an item in advance, you can print it in isolation using this option.
-
Enter the Number of Copies to be printed.
- Check Crop Marks to add marks to the corner of your design when printing onto paper larger than your project's paper size. The marks indicate where to cut your design out after printing (using scissors, guillotine, etc.).
- Choose a Print Size option:
- As in document (default). Prints the project without scaling to fit the paper. If your project uses a paper size larger than that currently set for the printer, the resulting printed output will 'cut off' parts of your page.
- Shrink to fit paper size. Reduces the print size to fit the printer's currently set paper size.
- Scale to fit paper size. Reduces or enlarges the print size automatically to fit neatly on the printed page, taking printer margins into account.
- Best Fit. CraftArtist scales the print size to prevent any unwanted white borders around your design from being printed. This makes full use of your printable area.
- Print as thumbnails. Prints multiple pages at a reduced size on each printed page, taking printer margins into account. Specify the number of thumbnails per sheet in the Per sheet value box.
- Click Print.
The Preview window lets you review your print output before actually printing. It shows how your project pages map to the selected paper size. You can also choose Print Preview from the File menu.
Printing folded craft projects
If you've chosen a Greeting Card or Stationery craft project then the template you've chosen will automatically be set up to print your pages in the correct order, i.e. automatic imposition occurs.
Using purchased print media
For greeting cards, you'll probably want to use your own purchased card stock to print onto. For successful printing, you can either choose a print scaling option (p. 252) or you can use Page Setup (click File>Page Setup) to ensure the project matches the card stock used (by changing project layout and/or page size).
Using standard printer paper
If you're not using card stock, it's possible to make your own greeting cards from standard printer paper.
As an example, printing an A5 greeting card project to a desktop A4 printer, would output project pages 2 and 3 on the first printed sheet, with pages 1 and 4 on the second.
To create a double-sided card, it's popular to use the printer's manual feed to print the first printed sheet then flip this sheet over. Hey presto, you've got an double-sided A5 greeting card.
If you're happy to scale your project's paper size to your printer's default paper size (e.g., A4), you can choose Scale to fit paper size on the Print dialog when you print.

You may prefer to use the manual feed in any case if you're using thicker than usual print media such as card.
Exporting as PDF
The cross-platform Adobe PDF file format is a worldwide standard for document distribution, which works equally well for electronic or paper publishing. It excels as an electronic distribution medium as it is device- and platform-independent.
To make sharing easy, you can export your project as a PDF file (Acrobat 4.0 compatible). In doing so, all the colours you've used will be output to an RGB colour space, and all your pages will be rasterized (converted to bitmaps) on export.
Exporting as a PDF file
- Click File>Export>Export as PDF...
- In the dialog, select a Print Range:
• Entire document: Exports the whole project.
• Current page: Exports only the page currently displayed.
- Pages: Enter a page range (e.g., 3-5) to export a limited selection of pages (or individual page numbers, if separated by commas). If you've set a range, you can further export just odd or even pages in the range from the drop-down list.
For facing page spreads, enter the page number combination, e.g., 2, 3.
-
(Optional) Set other options as follows:
-
For more convenient on-screen viewing in Adobe Reader, specify how your project will initially appear by selecting the Fit to complete page or Fit to page width check box.
-
By default, your PDF file will display in your currently installed Adobe Reader immediately after export finishes. If you do not want to preview your file immediately after export, clear the Preview PDF file check box.
-
Select a Print Quality level from the drop-down list.

Best quality offers 300 dpi lossless export (no compression). Other list options offer lower resolution export, with smaller file sizes offered as quality decreases.
- Click OK.
- Choose a location and file name for your PDF file. Click Save.
Once export completes, the PDF displays if Preview PDF file was selected in step 3 above.
Sharing via email
You can share your projects via email, attached as a JPEG or PDF*, or as your original *.craft project.
To share your project via email:
- On the File menu, click Send...
- In the Send dialog, choose the format in which to send your project.
You can attach your project as a *.craft project file, as a JPEG image, or as a PDF document. - Your project is attached to a new email message, which opens in your default email program.
- Just add your email recipient(s) and message and send your project!
Index
text_image
152D filter effects, 146
3D filter effects, 147
adding pages, 64
adjusting
photo frames, 112
pictures, 88
QuickShapes, 160
Adobe PDF files, 254
publishing, 254
albums (photo), 19
Align tab, 236
alignment
of items, 235
artistic text, 119
AutoFlow, 109
Back One, 242
Bézier curves
drawing, 162
editing, 171
Break Apart, 190
Bring to Front, 242
browsing
Digikits, 53
items, 54
brush strokes
applying, 212
setting properties, 214
Brush Tool, 213
brushes, 207
adding from Digikits, 211
categories for, 208
Brushes tab, 210
canvas (rotating), 70
Clip to Bottom, 191
Clip to Top, 191
Clipped Mode, 73
clipping items, 191
closed lines (shapes), 163
colour, 219
colour palettes, 226
Colour Picker, 230
Colour tab, 175, 220, 226
combining items into new shapes, 189
conical transparency, 153
control handles (line editing), 171
corner nodes (line editing), 171
Crop to Bottom, 190
Crop to Top, 190
cropping, 85, 111, 190
framed photos, 111
items, 190
photos, 85, 111
Curve Smoothness slider, 162, 170
curves, 162
drawing, 162
editing, 164, 168
filling unclosed, 164
Cutout Studio, 97
cutting with Scissors Tool, 181
DaisyTrail, 247
deleting pages, 66
Index
Digikit Collections, 18, 22
buying, 57
viewing, 57
Digikits
accessing, 53
browsing, 53
downloading, 59
distribution
of items, 237
Document Palette, 230
saving, 231
drop shadows, 145
editing
brush strokes, 214
lines and shapes, 164
QuickShapes, 160
text, 122, 124
effects, 147
feathering, 147
filters, 147
textures, 148
Effects tab, 146
ellipse transparency, 153
Erase Tool, 196
Export as PDF, 254
exporting, 254
PDF files, 254
features, key, 4
Fill-on-Create, 164, 216
fills
gradient, 222
transparent, 221
filter effects, 146
format painter, 177
formatting text, 126
Forward One, 242
frames (photo)
adding, 105
adjusting, 112
converting photos to, 116
cropping, 111
deleting, 115
fitting photos to, 108
Freeform Paint Tool, 196
gift wrap, 19
gradient fills, 222
edit, 224
gradient transparency, 151
greeting cards, 18
printing, 253
Hintline toolbar, 68
images (see photos), 77
importing pictures, 77
installation, 11
intersecting items, 194
items
adding to, 199
adding to the workspace, 56
aligning with each other, 235
browsing, 54
clipping, 191
combining into new shapes, 189
cropping, 190
distributing, 237
erasing, 197
fills, 219
grouping and ungrouping, 243
intersecting, 194
isolating, 73
joining, 192
line settings, 174
ordering, 241
QuickShapes, 159
rotating, 238
searching for, 54
selecting one or more, 243
shearing, 240
splitting, 185, 188
subtracting, 193
transparency, 150
Join Curves, 174
joining items, 192
Line tab, 174
linear transparency, 153
lines, 160
adjusting offset of, 177
closed (shapes), 163
curved, 162
drawing, 160
editing, 164
extending, 167
filling unclosed, 164
joining, 174
reshaping, 168
smoothing, 161
straight, 161
styles for, 175
turning into shapes, 163
Make & Do project, 45
margins of page, 34
nodes, 170
editing, 170
offset, adjusting on Line tab, 177
opening projects, 16, 47
ordering items, 241
outline effects
adding to text, 133
Page Setup, 33
page size, 32
page units, 35
pages
adding, 64
deleting, 66
duplicating, 66
moving, 66
navigating, 67
Pages tab, 63
palettes, colour, 226
selecting from, 220
panning, 68
paper textures, 148
party crafts, 19
PDF files, 254
exporting, 254
Pen Tool, 162
Pencil Tool, 161
photobooks, 19
PhotoLab, 89
photos
adjusting, 82, 88
converting to frames, 116
cropping, 85, 111
Index
cutting out, 97
cutting with stencil, 203
deleting, 84, 115
fitting to frames, 108
importing, 77
replacing, 82
resizing, 84
using AutoFlow, 109
plasma transparency, 153
printing, 251
greetings cards, 253
PDF files, 255
stationery, 253
thumbnails, 252
projects
blank, 20, 32
Make & Do, 45
opening saved, 47
saving, 49
starting new, 32
template-based, 18, 21
QuickShapes, 159
adjusting, 160
creating, 159
radial transparency, 153
registration, for project upload, 248
rotating
canvas, 70
items, 238
rule of thirds, 72, 86
on photos, 86
on the page, 72
saving documents, 49 scaling (printing), 252
scissor cuts, 181
Scissors Tool, 181
scrapbooks, 18
Select-on-Create, 215
Send to Back, 242
sentiments, 28, 137
adding, 138
creating, 139
editing, 139
Shadow Tool, 145
shadows (drop), 145
shape text, 119
shapes, 159, 163
breaking open, 173
combining, cropping, and joining, 188
drawing, 159, 163
editing, 160, 164
using QuickShapes, 159
Sharing
by email, 255
by website, 247
shearing items, 240
solid transparency, 151
Solo Mode, 73
splitting items, 185, 188
square transparency, 153
stacking (ordering) items, 241
Startup Wizard, 15
stationery, 19
printing, 253
stencils, 201
Stencils Tab, 201
straight lines, 161
subtracting items, 193
system requirements, 10
tab
Align, 236
Arrange, 241
Brushes, 210
Colour, 175, 220
Effects, 146
Line, 174
Pages, 63
Stencils, 201
tablet, 70
templates, 21
text
artistic, 119
combining, cropping, and joining, 188
editing, 122, 124
flow on a path, 130
formatting, 123, 126
letter, 41
moving, 122
outlines, 133
resizing, 123
rotating, 123
selecting, 122
shape, 119
textures, paper, 148
themes, choosing, 22
tint, 220
Tool
Brush, 213
Erase, 196
Format Painter, 177
Freeform Paint, 196
Pen, 162
Pencil, 161
Scissors, 181
Shadow, 145
Transparency, 152
toolbar, HintLine, 68
transparency, 150
gradient, 151
path, 153
solid, 151
Transparency Tool, 152
transparent fills, 221
ungrouping items, 243
uploading (projects), 249
Weight of line (width), 176
Welcome, 3
zooming, 69