
LCDTV55FHD - TV VIVO - Free user manual and instructions
Find the device manual for free LCDTV55FHD VIVO in PDF.


User questions about LCDTV55FHD VIVO
0 question about this device. Answer the ones you know or ask your own.
Ask a new question about this device
Download the instructions for your TV in PDF format for free! Find your manual LCDTV55FHD - VIVO and take your electronic device back in hand. On this page are published all the documents necessary for the use of your device. LCDTV55FHD by VIVO.
USER MANUAL LCDTV55FHD VIVO
text_image
Vivo® ---Alove and Viovi LCDTV55FHD 55" LCD TV Vivo® ---Alove and Viovi Owner's Operation Manual * Design and specifications are subject to change without prior notice www.vivotvs.comLCD TV
Warning
To prevent fire or shock hazard. Do not use this plug with an extension cord. Receptacle or other outlet unless the blades can be fully inserted to prevent blade exposure. Do not expose this appliance to rain or moisture.
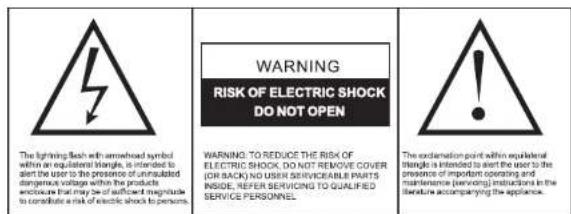
The lightning flash with arrowhead symbol within an equilateral triangle, is intended to alert the user to the presence of uninsulated dangerous voltage within the products enclosure that may be of sufficient magnitude to constitute a risk of electric shock to persons.
WARNING: TO REDUCE THE RISK OF ELECTRIC SHOCK, DO NOT REMOVE COVER (OR BACK) NO USER SERVICEABLE PARTS INSIDE, REFER SERVICING TO QUALIFIED SERVICE PERSONNEL
Important Safety Precautions
- Read these instructions.
- Keep these instructions.
- Heed all warnings.
• Follow all instructions
• Do not use this apparatus near water.
• Clean only with dry cloth. - Do not block any ventilation openings. Install in accordance with the manufacturer's instructions.
- Do not install near any heat sources such as radiators, heat registers, stoves or other apparatus (including amplifiers) that produce heat.
- Do not defeat the safety purpose of the polarized or grounding-type plug. A polarized plug has two blades with one wider than the other, A grounding type plug has two blades and a third grounding prong. The wide blade or the third prong is provided for your safety. If the provided plug does not fit into your out let, consult an electrician for replacement of the obsolete outlet.
- Protect the power cord from being damaged particularly at plugs, convenience receptacles, and the point where they exit from the product.
- Unplug this apparatus during lightening storms or when unused for long periods of time.
- Refer all servicing to qualified service personnel, Servicing is required when the product has been damaged in any way, such as power supply cord or plug is damaged. Liquid has been exposed to rain or moisture, does not operate normally or has been dropped.
LCD TV
Table of Contents
Warning....1
Table of Contents....2
Product Introduction....2
Safety Precaution....3
Safety....4
LCD TV Control Panel....6
LCD TV Panel 7
Remote Control....8
Battery Replacement....9
Connecting to Satellite Receiver or Decoder 10
Channel Selection....11
Channel Return....12
TV and DTV Searching 13
Channel 14
Picture 17
Sound 20
Time 22
Option 24
Lock 26
Shortcut....28
Connecting to Exterior Devices 29
Troubleshooting 30
Product Specification....31
Product Introduction
Product Introduction
Thank you for your purchasing the latest generation high definition LCD TV. Endowed with high display quality and light weight, it is power-saving and radiationless with high sensitivity television reception. This LCD TV will bring you safe & comfortable brand-new visual experience. Applying color active matrix TFT with brand-new technologies, the product can provide high quality display image, flicker free television, VCD & DVD programs. In addition, it can be used as definition digital television or computer display. We believe the product will surely make you satisfied.
LCD TV
Product Specification
Product name: Color LCD TV
◆ Color System:PAL/BG
Power supply: AC 100-240V
◆ Frequency:50/60Hz
Power:300W
(Note: Specifications to change without notice. Pictures for reference only, The picture is only for reference, the products are subject to material object, the power of interpretation belongs to our company)
LCD TV
Troubleshooting
No picture and no sound
Possible causes:
*Check whether the product is turned on.
*Try another channel. The problem may be with the broadcast.
* Is the power cord inserted into wall power outlet?
*Check your antenna direction and/or location.
*Test the wall power outlet, plug another product's power cord into the outlet where the product's power cord was plugged in
No audio
Possible causes:
*The volume is too low or muted.
*Incorrect sound system
solutions.
*Press Volume key to turn up the volume;
*Press Mute key to cancel Mute mode.
*Change the sound system in the menu.
Snow and noises:
Possible causes:
*The cable is damaged or is loose:
*Incorrect channel preset;
*Improper antenna positioning
solutions:
*Check whether the connection of the antenna cable
and other cables are correct;
*Reset channels or fine tune the channel;
*Adjust the direction of the antenna.
No or poor color or poor picture
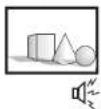
Possible causes:
*Adjust Color in menu option.
*Keep a sufficient distance between the product and the VCR.
*Try another channel. The problem may be with the broadcast.
*Are the video cables installed properly?
*Activate any function to restore the brightness of the picture.
The remote control doesn't work
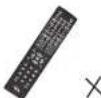
Possible causes:
*Check to see if there is any object between the product and the remote
control causing obstruction. Ensure you are pointing the remote control
directly at the TV
*Ensure that the batteries are installed with correct polarity (+ to +, - to -).
*Ensure that the correct remote operating mode is set: TV, VCR etc.
*Install new batteries
LCD TV
Safety Precaution
◆Do not place the TV on unstable places, from which it may be fell off.
◆ Do not expose the TV to extreme temperature and humid environment.
♦ Avoid subjecting the TV to direct sunlight and other heat sources.
◆ Do not put the TV into any liquid.
Do not put anything inside the TV, or place water container on top of the TV.
◆ In thunder rainy days (especially with lightening), please plug out the power plug and antenna plug
◆ Do not step on the power cable, or tangle them together.
◆Avoid overload of the exterior electric outlet to prevent fire hazard of electric shock.
◆Clean the TV with dry and soft cloth (without evaporative matter).
◆If your TV is broken, do not repair it by yourself, but contact the maintenance personnel
If the remote control is left unused for a long time, please take the batteries out and store them in dry places.
◆Avoid dropping the remote control.
◆If the LCD TV is installed for exhibition purpose, please do not place the overheated part on the ground or
carpet to prevent accident.
◆Please install the TV at proper position, such as wall or ceiling. Please install it under the guidance of
Professional staff. (When used or exhibit, please do not place the TV horizontally or vertically on the ground.)
This device complies with Part 15 of the FCC Rules. Operation is subject to the following two
conditions: (1) this device may not cause harmful interference, and (2) this device must accept any interference received, including interference that may cause undiased operation.
any interference received, including interference that may cause undistred operation.
This equipment should avoid from water droplets and things that fill with liquid, such as vases. cannot be placed on this equipment.
This equipment is predetermined to work constantly (unless adding switch on this equipment).
Please disconnect the power cord before long time unused.
If a television is not positioned in a sufficiently stable location, it can be potentially hazardous due to
falling. Many injuries, particularly to children, can be avoided by taking simple precautions such as
Using cabinets or stands recommended by the manufacturer of the television.
Only using furniture that can safely support the television
Ensuring the television is not overhanging the edge of the supporting furniture.
Not placing the television on fall furniture (for example, cupboards or bookcases) without
anchoring both the furniture and the television to a suitable support
Not standing the televisions on cloth or other materials placed between the television and
supporting furniture
Educating children about the dangers of climbing on furniture to reach the television or its
controls
Basic Operations
Power on/off
-
Use AC 100-240V power outlet for the TV power supply
-
If the screen of TV is not on, please press the power button on the remote control or on the TV.
-
If you want to shut the TV temporary, please press the power button on the remote control or on the TV.
-
If your want a shut off the TV completely, please plug out the power plug.
Auto screen shut off function
-
In TV/AV state, the TV will enter idle state if there is no signal input within 15 minutes.
-
In PC state, the TV will enter idle state if there is no signal input within 2 minutes.
Pre-shut off memory
- The setting and tuning of picture and sound will be saved when the TV is shut off, which will be working
in the pre-shut off state when the TV is turn on again.
Precaution of signal source application
- If PC signal source is used, please first set the resolution of the PC display card as the following modes:
(1360X768 60Hz, 1280X768 50Hz, 1024X768 60Hz/70Hz/75Hz, 800X600 60Hz/72Hz/75Hz)
- If there is line-by-line output of the signal used by the user, signal source with line-by-line output is recommended.
LCD TV
Safety
Please immediately pull out the AC power plug from adapter if there is an abnormal sound or smell or the LCD TV has sound but no picture, and the contact after sales support.

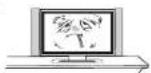

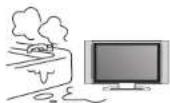
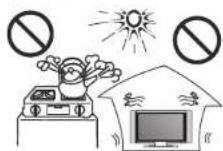
The LCD TV should be kept free from rain, damp and dust to prevent electrical shock and short circuits. Do not cover the ventilation openings with table clothes, curtains, newspapers etc.
The LCD TV should be kept away from high temperature objects or direct sunlight. It requires good ventilation. At least 10cm between the LCD TV and other appliances or built-in cabinet walls.
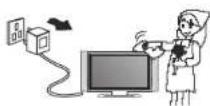
When you wipe the front cabinet, please make sure the power plug is pulled out and use a soft, dry, lint-free cloth and handle it with care. Do not repeatedly wipe the panel, nor scrape, tap or strike the panel with a hard object.
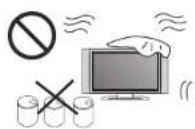
Do not wipe the LCD TV with any petrol, chemical or alcohol based solvents, it will damage of the product of the panel and cabinet.
LCD TV
Connecting to Exterior Devices
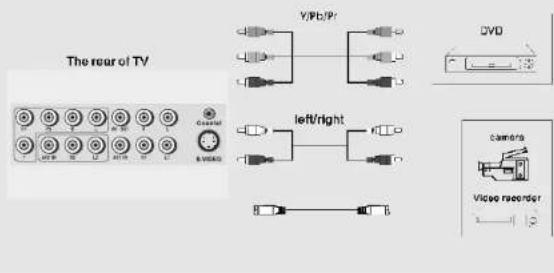
RCA terminal is used to connect the output device of DVD (480l/480p/576l/576p/1080l)
text_image
The rear of TV Y/Pb/Py DVD left/right Camers Video recorderNotes:
-
VIDEO1 and S-Video use a common Audio in.
-
Y -Pb-Prof DVD is corresponding to Y -Pb-Prof LCDT V.
LCD TV
Shortcut
below shortcut keys will be only available in DTV mode.
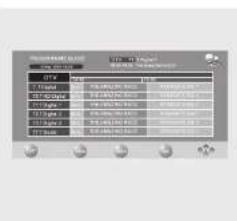
text_image
12.0 - 13.0 DCT 12.0 13.0 14.0 15.0 16.0 17.0 18.0 19.0 20.0 21.0 22.0 23.0 24.0 25.0 26.0 27.0 28.0 29.0 30.0 31.0 32.0 33.0 34.0 35.0 36.0 37.0 38.0 39.0 40.0 41.0 42.0 43.0 44.0 45.0 46.0 47.0 48.0 49.0 50.0 51.0 52.0 53.0 54.0 55.0 56.0 57.0 58.0 59.0 60.0 61.0 62.0 63.0 64.0 65.0 66.0 67.0 68.0 69.0 70.0 71.0 72.0 73.0 74.0 75.0 76.0 77.0 78.0 79.0 80.0 81.0 82.0 83.0 84.0 85.0 86.0 87.0 88.0 89.0 90.0 91.0 92.0 93.0 94.0 95.0 96.0 97.0 98.0 99.0 100.0EPG
EPG provide the program guide and program information that will be played in next some time of current channel. INFO: display the information of current channel.
DATE: press "C" button on remote control to select DATE list, press left/right button to adjust DATE.
OK: press ok button on remote control to confirm your selection.
EXIT: press exit button on remote control to exit the EPG menu.
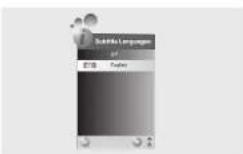
SUBTITLE
Press the "Subtitle" button in full screen, it can show a "Subtitle" window.
If the channel has subtitle, you can select the subtitle language.
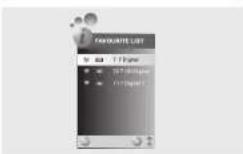
FAV
Press the "FAV" button display your favourite list.
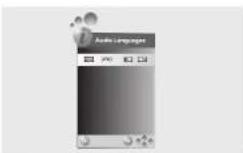
AUDIO
Press the "AUDIO" button display "Audio Languages" Press the "◀/▶" button to select left, right.
LCD TV
Safety
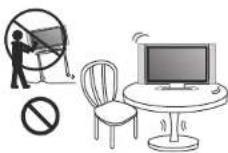
Do not place the LCD TV on an unstable surface.
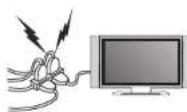
Do not place the power cord or other cables across a walkway in case it is trampled on. Do not overload any power cord or power socket.

Do not disassemble the back cover as it contains high voltage parts inside and may cause electric shock. Internal adjustments and checks should only be conducted by a qualified technician.
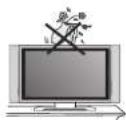
Do not place naked flame sources, such as lit candles on or near the LCD TV.
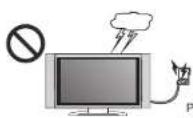
Pull out the power cord and antenna cable during electrical storms, keep LCD TV damage from possible electrical surge.
LCD TV
Control Panel
The control button for front panel is on the front housing panel of TV. Introduction for each key
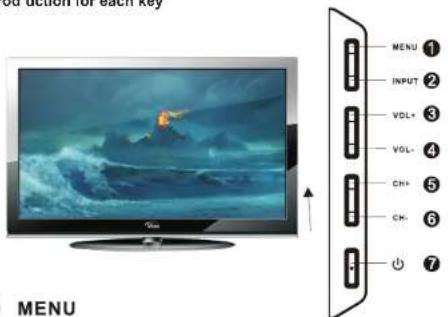
text_image
out action for each key MENU INPUT VOL+ VOL- CH+ CH- 7① MENU
Menu short cut key, enter the OSD menu, and return to upper menu.
② INPUT
Signal source selection button
③ VOL +
Volume increasing short cut key, and adjust OSD options (increasing).
④ VOL -
Volume decreasing short cut key, and adjust OSD options (decreasing).
⑤ CH+
Channel increasing short cut key, and select the last menu or menu item.
⑥ CH-
Channel decreasing short cut key, and select the next menu or menu item.
⑦
Turn the TV on or enter into standby mode.
LCD TV
Lock
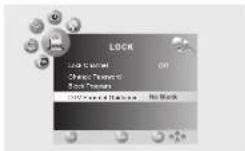
DTV Parental Guidance
Press the "▲/▼" button to select the "DTVParental Guidance" item, and then use "◄/►" button to select desired parental guidance.
LCD TV
Lock
- Press the "MENU" button on the remote control to enter the OSD menu, then press "◀/▶" button to select the "LOCK" menu.
- Press the "▼" or "OK" button to enter the "LOCK" menu setting, use "▲/▼" to move the menu bar, and then press "◀/▶" button to adjust the value of selected item.
- Press "MENU" button to return to the main menu.
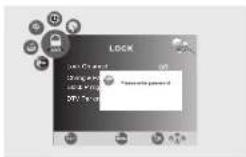
Lock
Press the "▼" button to "Lock" display "Please enter password" password is "0000".
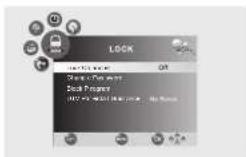
Lock Channel
Press the "▲/▼" button to select the "Lock Channel" item, and then use "◄/►" button to select the on/off lock system.
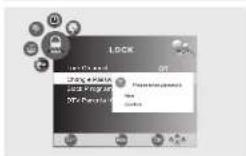
Change Password
Press the "▲/▼" button to select the "Change Password" item, and then use "▶" or "OK" button enter "Please enter password" New: Please input you new password. Confirm: Please Again input you new password.

Block Program
This item is disabled.
LCD TV
Terminal Wiring Diagram
This PLASMA TV has digital multimedia performance and can be connected to multiple external devices. The following diagram presents the connections to other video and audio appliances:
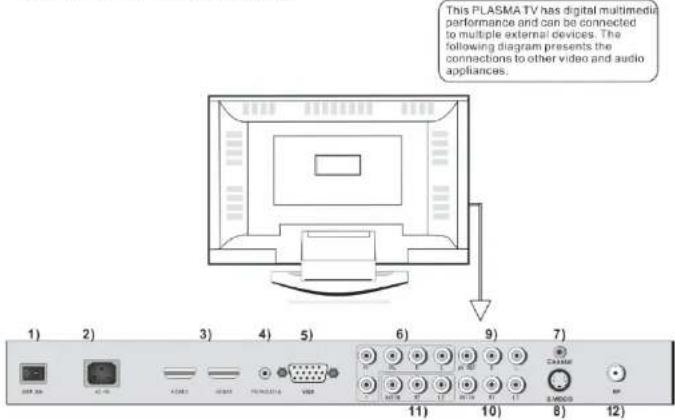
text_image
This PLASMA TV has digital multimedia performance and can be connected to multiple external devices. The following diagram presents the connections to other video and audio appliances. 1) 2) 3) 4) 5) 6) 9) 7) 11) 10) 8) 12)1) ☐: This button can be used to switch the set between ON and OFF
2) AC-IN: AC power input terminal.
3) HDMI1/HDMI2: HDMI1/HDMI2 High-definition multimedia interface.
Note: Acceptable video signal 480p/576p/720p/1080i/1080p
4)PC AUDIO IN: Sound input terminal of VGA input.
5)VGA: Input terminal of simulation signal of PC.
6) Y Pr Pb R/L: Connect the component video output of your AV devices here.
Audio(Audio input, L/R): Connect the audio output of your AV device here
7) COAXIAL: Digital TV sound output.
8) S-VIDEO: Colour and brightness separation input terminal.
9) AV OUT L OUT/R OUT: VIDEO and Audio left/right output.
10), 11): AV1 IN / AV2 IN / R1 IN / R2 IN / L1 IN / L2 IN
12) RF: Autenna / close circuit TV or Digital TV terminal.
LCD TV
Descriptions of Television Remote Control
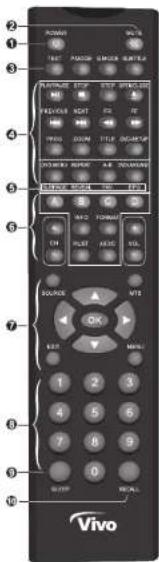
text_image
Vivo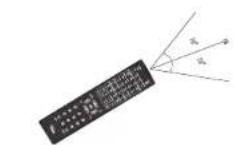
Handle the remote control with care. Avoid falling off or being trampled or splashed with liquids.
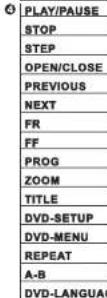
POWER Switches the set between ON and STANDBY.
② MUTE Switches the sound on or off.
⑧ TEXT Teletext switching.
P.MODE Selects the different picture mode directly.
S.MODE Selects the different sound mode directly.
SUBTITLE Recalls your preferred subtitle in digital mode.
③ SUBPAGE Display 6 the current sub-page.
REVEAL Display the characters hided.
FAV Displays the selected favorite programs.
EPQ Shows the Electronic Program Guide during on-menu state only.
Use in TXT, DTV and TV.
B Use In TXT, DTV and TV.
C Use in TXT, DTV and TV.
D Use in TXT, DTV and TV.
CH+/CH- Selects a program.
INFO Shows the present screen information.
FORMAT Select the different image format.
Pr.LIST Shows the channel list programme.
AUDIO Displays Audio Languages menu.
VOL+/VOL- Increases / decreases the sound level.
OK Accepts your selection or displays the current mode.
SOURCE Display ≤ the source list of input signal.
MTS Nicam function.
EXIT Returns to TV viewing from any menu.
MENU Selects a menu.
Decreases / Increases the option value.
▼/▲ Select x the previous/next function option.
⑧ 0-9 Figures 0-9 are used to directly input channel number.
⑨ SLEEP Sets the sleep timer.
RECALL Returns to the channel selected last time.
LCD TV
Option
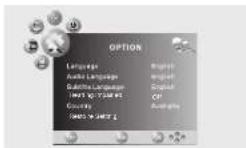
Country
This item is disabled.
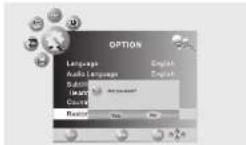
Restore Setting
Press the "▲/▼" button to select the "Restore Setting" item, and then use "▶" or "OK" button display "Are you sure?" Select "Yes" or "NO" restore factory default.
LCD TV
Option
- Press the "MENU" button on the remote control to enter the OSD menu, then press "◀/▶" button to select the "OPTION" menu.
- Press the "▼" or "OK" button to enter the "OPTION" menu setting, use "▲/▼" to move the menu box and then press "▲/▼" button to adjust the value of selected item
the menu bar, and then press ↕ ↗ button to ad 3. Press "MENU" button to return to the main menu. - Press the "MENU" button on the remote control to enter the OSD menu, then press "◀/▶" button to select the "OPTION" menu.
- Press the "▼" or "OK" button to enter the "OPTION" menu setting, use "▲/▼" to move the menu bar, and then press "◀/▶" button to adjust the value of selected item.
- Press "MENU" button to return to the main menu.
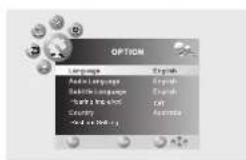
Language
Press the "▲/▼" button to select the "Language" item, and then use "◄/►" button to select desired language.
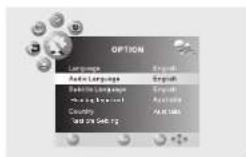
Audio Language
Press the "▲/▼" button to select the "Audio Language" item, and then use "◄/►" button to select desired language.
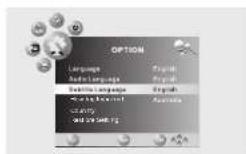
Subtitle Language
Press the "▲/▼" button to select the "Subtit e Language" item, and then use "◄/►" button to select desired language.
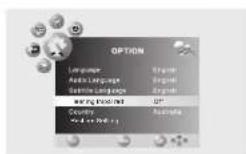
Hearing Impaired
Press the "▲" button to select the "Hearing Impaired" item, and then use "◀/▶" button to turn the hearing impaired function on/off.
LCD TV
Battery Replacement
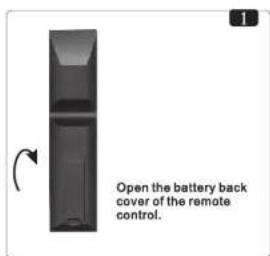
text_image
Open the battery back cover of the remote control.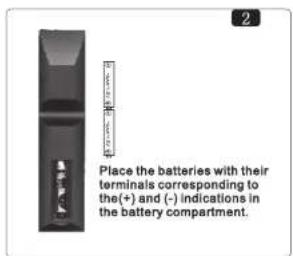
text_image
Place the batteries with their terminals corresponding to the(+) and (-) indications in the battery compartment.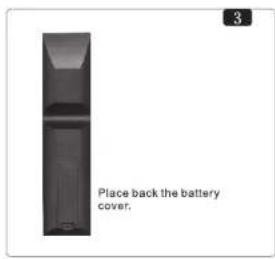
text_image
Place back the battery cover,Notes:
- If the remote control will not be used for a long time, please take out the batteries and place the remote control in a shady, cool and dry place.
- Be careful with handling damaged or leaking batteries, wash your hands with soap and water after handling them.
- Do not throw away old batteries at will. Enquire your local government authority about recycling or the proper disposal system.
LCD TV
Connecting to Satellite Receiver or Decoder
text_image
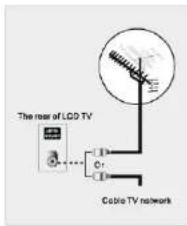
The rear of LCD TV Cable TV networkIn order to receive TV programs, signal should be received from one of the following signal sources:
◆Outdoor antenna.
♦ Cable TV network.
♦Satellite broadcast network.
-
In these three cases, the input cable of antenna or TV network should be plugged in the 75 Ohm.coaxial cable jack at the rear side of LCD-TV.
-
If you are using indoor antennas and the effect of TV program is not satisfactory, you can adjust the position of the antenna until the picture is clear.
When installing LCD TV, please use special 75 Ohm coaxial Cable. If other coaxial cable is used, there may be noise and image disturbances.

Connecting to Satellite Receiver or Decoder
text_image
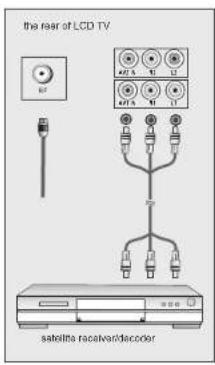
the rear of LCD TV satellite receiver/decoderIn order to receive TV programs emitted by satellite, a satellite receiver should be connected to the rear of the LCD TV. Mean while, in order to receive encoded emit signal, a decoder should be connected to the rear of LCD TV.
Using the coaxial cable Connect the coaxial cable connectors to
The disorder output terminal
◆ The antenna input terminal.
If you want to connect the TV to satellite receiver (or decoder) and video recorder at the same time, the following operation should be followed:
◆ Connect receiver (or decade) to video recorder.
Connect video recorder to LCD TV, or connect receiver (or decoder) directly to LCD TV.
LCD TV
Time
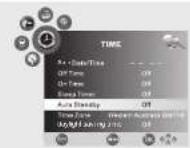
Auto Standby
Press the "▲/▼" button to select the "Auto Standby" item, and then use "◀/▶" button to select the auto sleep on/off.
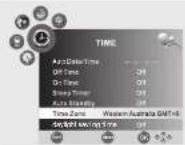
Time Zone
Press the "▲/▼" button to select the "Time Zone" item, and then use "◀/▶" button to select the time zone mode.
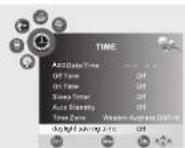
Daylight saving time
Press the "▲▼" button to select the "Daylight saving time" item, and then use "◄" button to select the daylight saving time mode.
LCD TV
Time
- Press the "MENU" button on the remote control to enter the OSD menu, then press "◀/▶" button to select the "TIME" menu.
- Press the "▼" or "OK" button to enter the "TIME" menu setting, use "▲/▼" to move the menu bar and then press "▲/▼" button to adjust the value of selected item
- Press "MENU" button to return to the main menu.
- Press the "MENU" button on the remote control to enter the OSD menu, then press "◀/▶" button to select the "TIME" menu.
- Press the "▼" or "OK" button to enter the "TIME" menu setting, use "▲/▼" to move the menu bar, and then press "◀/▶" button to adjust the value of selected item.
- Press "MENU" button to return to the main menu.
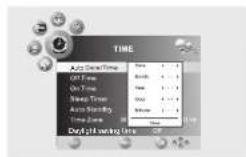
Auto Date/Time
Press the *▲/▼" button to select the "Date/Time" item, and then use "►" or "OK" button to enter time set. Press the *▲/▼" button select Date, Month, Year, Hour or Minute, Press "◀/►" button to set the time.
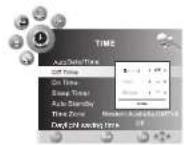
Off Time
Press the "▲/▼" button to select the "Off Time" item, and then use "▶" or "OK" button to enter time set. Press the "▲/▼" button select Repeat, Hour or Minute, Press "◀/▶" button adjust.
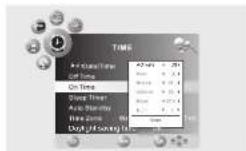
On Time
Press the "▲/▼" button to select the "On Time" item, and then use "▶" or "OK" button to enter time set. Press the "▲/▼" button select Activate, Hour Minute, Volume or Mode Press "◀/▶" button adjust.
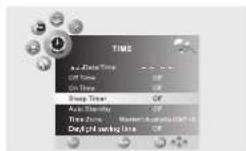
Sleep Timer
Press the "▲/▼" button to select the "Sleep Timer" item, and then use "◄/►" button to select sleep Time 10min, 20min, 30min, 60min, 90min, 120min, 180min, 240min or off.
LCD TV
Watching Television Programs
Connect the power cord, press ⏻ button to power on the television, then press the SOURCEbutton to select TV channel mode to watch television programs.
Select Channels Via Program No.
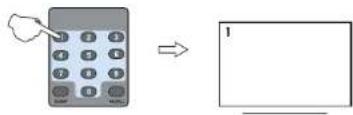
- If you want to select program no. from 0-9; directly press numeral key to input the program no., it will enter into the selected program, e.g. select program no. 1
text_image
Diagram showing a calculator and a blank screen with an arrow indicating transformation or change.- If you want to select program number from 10-99, input the channel number you desired, e.g. select channel 12.

text_image
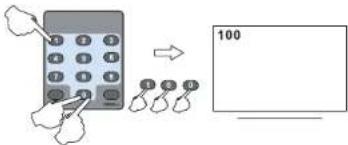
Illustration showing a hand using a calculator and a hand holding two keys, next to a blank page with the number 12.- If you want to select program number from 100-200: input the channel number you desired, e.g. select channel 100.
text_image
Diagram showing a hand inserting keys into a calculator and then to add 100 units to a blank display.Channel select
-
Use the button on the television panel to conduct channel selection. press "CH+/-" button on front panel to select channel.
-
"CH+/-" buttons of the remote control may also be applied to conduct channel selection.

LCD TV
Channel Return
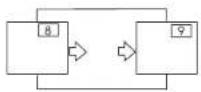
Return to previous channel
Press RECALL button on the remote control to return to previous channel.

Volume control
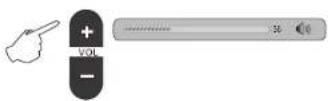
Use the button VOL+/VOL- of television panel to increase/decrease the volume.
VOL+/VOL- buttons on the remote control can also adjust the volume.
Sound elimination
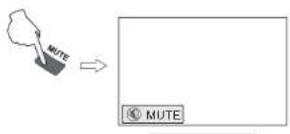
Press "MUTE" button to eliminate the sound. Press the button again for audio recovery.
System state display
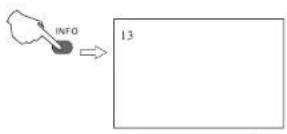
Press "INFO" button of the remote control, then it will display the current channel number, current input mode and relevant information.
LCD TV
Sound
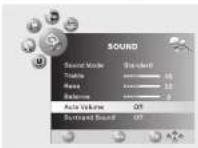
Auto Volume
Press the "▲/▼" button to select the "Auto Volume" item, and then use *◀/▶" button to turn the auto volume function on/off.
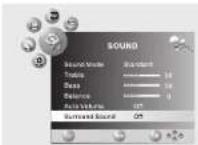
Surround Sound
Press the "▲/▼" button to select the "Surround Sound" item, and then use "◄/►" button to turn the surround sound function on/off.
LCD TV
Sound
- Press the "MENU" button on the remote control to enter the OSD menu, then press "◀/▶" button to select the "SOUND" menu.
- Press the "▼" or "OK" button to enter the "SOUND" menu setting, use "▲/▼" to move the menu bar, and then press "◀/▶" button to adjust the value of selected item.
- Press "MENU" button to return to the main menu.
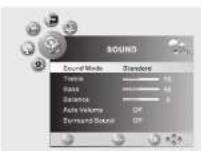
Sound Mode
Press the "▲/▼" button to select the "Sound Mode" item, and then use *◄/►* button to select the sound mode Standard, Music, Movie, Sports, User.
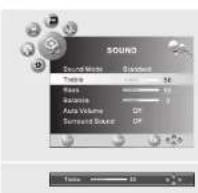
Treble
Press the "▲/▼" button to select the "Treble" item, and then use "◄/►" button to adjust the treble.
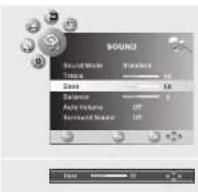
Bass
Press the "▲/▼" button to select the "Bass" item, and then use "◄/►" button to adjust the bass.
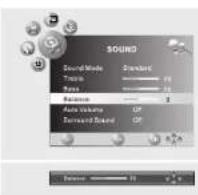
Balance
Press the "▲/▼" button to select the "Balance" item, and then use "◄/►" button to adjust the balance of sound.
LCD TV
TV and DTV Searching
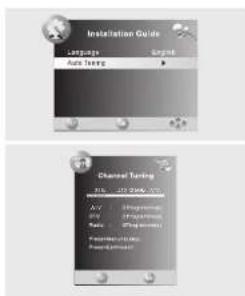
The first time you open the TV, it will be asking you to search channels.
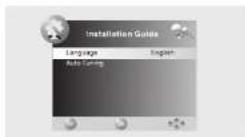
Language
Press the "▲/▼" button to select the "Language" item, and then use * ◀/▶ * button to select desired language.
text_image
Installation Guide Language Auto Swing Channel Swing 2016-2025-07 A.V. 1980-2005 and 1990-2005 Rate (Avg. per unit) Performance (10x100x) Performance (10x100x)Auto Tuning
Press the "▲/▼" button to select the "Auto Tuning" item, and then use "▶" or "OK" button to enter Auto Tuning search.
LCD TV
Channel
- Press the "MENU" button on the remote control to enter the OSD menu, then press "◀/▶" button to select the "CHANNEL" menu.
-
Press the "▼" or "OK" button to enter the "CHANNEL" menu setting, use "▲/▼" to move the menu bar, and then press "◀/▶" button to adjust the value of selected item.
-
Press "MENU" button to return to the main menu.
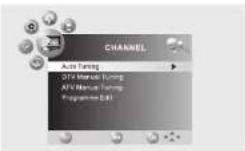
Auto Tuning
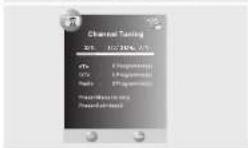
Press the "▲/▼" button to select the "Auto Tuning" item, and then use *▶* or "OK" button to enter Auto Tuning search.

DTV Manual Tuning
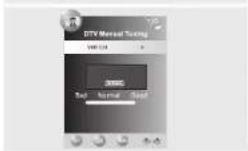
Press the "▲/▼" button to select the "DTV Manual Tuning" item, and then use "▶" or "OK" button to enter DTV manual tuning search.
Note: Please select channel then Press "OK" to search.
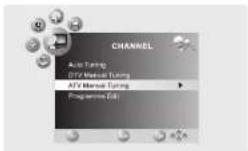
ATV Manual Tuning
Press the "▲/▼" button to select the "ATV Manual Tuning" item, and then use "▶" or "OK" button to enter ATV manual tuning sub-menu.
LCD TV
Picture
text_image
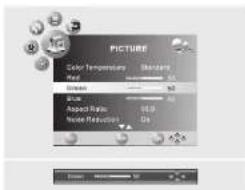
PICTURE Color Temperature Sket temp Red 50 Distance 50 Apoa Rate 100 Noise Reduction 0% OKGreen
Press the "▲/▼" button to select the "Green" item, and then use "◄/►" or "OK" button to select to adjust the green.
text_image
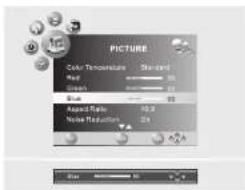
PICTURE Color Transitions Standard Red 30 Green 11 Blue 90 Aspect Ratio 15.2 Noise Reduction 24Blue
Press the *▲/▼" button to select the "Blue" item, and then use "◄/►" or "OK" button to select to adjust the blue.
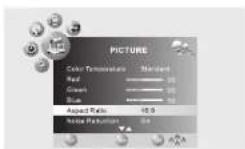
Aspect Ratio
Press the "▲/▼" button to select the "Aspect Ratio" item, and then use "◀/▶" button to select the display mode such as 16:9, 4:3, Zoom1, Zoom2, Auto.
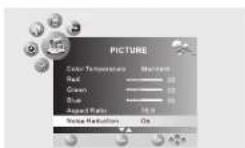
Noise Reduction
Press the *▲/▼" button to select the "Noise Reduction" item, and then use "◄/►" button to turn the surround function on/off.
LCD TV
Picture

text_image
PICTURE Picture Mode: Contrast Contrast: 50 Brightness: 60 Angle: 120° Sharpness: 60 OK: 0Sharpness
Press the "▲/▼" button to select the "Sharpness" item, and then use "◄/►" or "OK" button to adjust the sharpness of the picture.
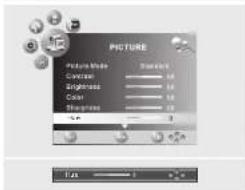
text_image
PICTURE Picture Mode Color Angle Color Black Balance Balance Balance Balance Balance Balance Balance Balance Balance Balance Balance Balance Balance Balance Balance Balance Balance Balance Balance Balance Balance Balance Balance Balance Balance Balance Balance Balance Balance Balance Balance Balance Balance Balance Balance Balance Balance Balance Balance Balance Balance Balance Balance Balance Balance Balance Balance Balance Balance Balance FinishHue
Press the "▲/▼" button to select the "Huc" item, and then use "◀/▶" or "OK" button to select to adjust the Tint.
Note: This function only works with NTSC input signal.
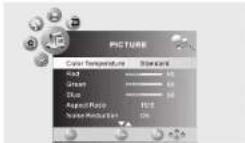
Color Temperature
Press the "▲/▼" button to select the "Color Temperature" item, and then use "◀/▶" button to select the color temperature mode Cool, User, Warm, Standard.
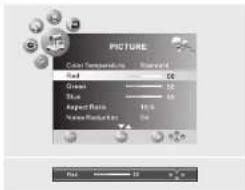
text_image
PICTURE Color Sensitivity: Standard Red: 0.0 Green: 50 Blue: 50 Aspect Ratio: 100% Name/Render: 0xRed
Press the "▲/▼" button to select the "Red" item, and then use "◀/▶" or "OK" button to select to adjust the red.
LCD TV
Channel
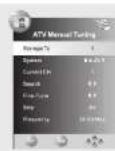
Storage To
Press "◀/▶" to select the channel number you want to save to.
System
Press "◀/▶" to select the system mode L/L', BG/DK/I.
Current CH
Press "◀/▶" to select the current channel.
Search
Press "◀/▶" to search backward/forward, MENU or EXIT to stop the searching.
Fine-Tune
Press "◀/▶" to fine tuning when the signal of the current channel is weak.
Skip
Press "◀/▶" to turn on/off the switch of skip. When the switch is turned on, the current channel will be skipped when you scan channels with CH+/CH- button.
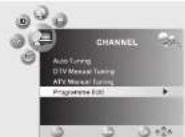
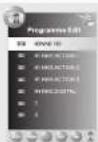
Programme Edit
Press the "▲/▼" button to select the "Programme Edit" item, and then use "▶" or "OK" button to enter Programme Edit sub-menu.
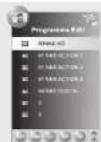
Delete
Press *▲/▼* to select the channel you want to delete, then press DELETE(RED), and the channel will be marked DELETE, press DELETE(RED) again to delete, or MENU to cancel.
Rename
Press "▲/▼" to select the channel you want to rename, press RENAME (CYAN), the channel will be marked RENAME, then press *◄/►* to select the position of word, press "▲/▼" to select the letter you want.
Swap
Press "▲/▼" to select the channel you want to swap, then press SWAP(YELLOW), and the channel will be marked SWAP, press SWAP (YELLOW) again to swap, or MENU to cancel.
LCD TV
Channel
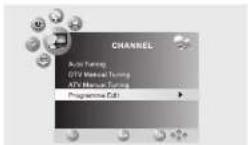
Skip
Press "▲/▼" to select the channel you want to skip, then press SKIP(BLUE) to mark or bismark the channel. The channel marked SKIP will be skipped when you scan channels with CH+/CH- button.
Favourite
Press "▲/▼" to select your favourite channel, then press FAV to mark or bismark the channel. The channel marked FAV will be storage to the favourite list.
LCD TV
Picture
- Press the "MENU" button on the remote control to enter the OSD menu, then press "◀/▶" button to select the "PICTURE" menu.
- Press the "▼" or "OK" button to enter the "PICTURE" menu setting, use "▲/▼" to move the menu bar and then press "▲/▼" button to adjust the value of selected item
- Press "MENU" button to return to the main menu.
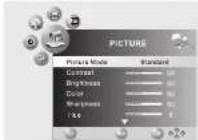
Picture Mode
Press the "▲/▼" button to select the "Picture Mode" item, and then use *◄/► * buttons to select to select the picture mode Dynamic, Standard, Mild, User.
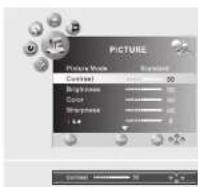
Contrast
Press the "▲/▼" button to select the "Contrast" item, and then use "◀/▶" or "OK" button to select to adjust the contrast.
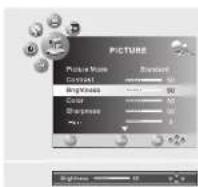
Brightness
Press the "▲/▼" button to select the "Brightness" item, and then use "◄/►" or "OK" button to select to adjust the brightness.
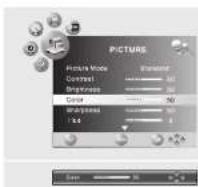
Color
Press the "▲/▼" button to select the "Color" item, and then use *◄/►* or "OK" button to select to adjust the color.