Roadster - Pet Accessories Pet Gear - Free user manual and instructions
Find the device manual for free Roadster Pet Gear in PDF.


User questions about Roadster Pet Gear
0 question about this device. Answer the ones you know or ask your own.
Ask a new question about this device
Download the instructions for your Pet Accessories in PDF format for free! Find your manual Roadster - Pet Gear and take your electronic device back in hand. On this page are published all the documents necessary for the use of your device. Roadster by Pet Gear.
USER MANUAL Roadster Pet Gear
text_image
For Pets Only Interior Dimensions: 33L x 20W x 21HTo see our full line of products, visit us online at: www.petgearinc.com
CUSTOMER SERVICE HELP DESK
customerservice@petgearinc.com
Toll-Free 877-752-9123 - Eastern Standard Time 8am-3pm, Monday through Friday
PARTS LIST
Check that you have all the parts shown BEFORE assembling your product. If any parts are missing, call Customer Service.
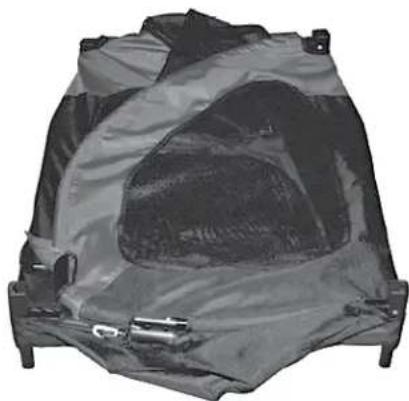
natural_image
Black-and-white photo of a dark, mesh-wrapped object with a central cavity and small protrusions (no visible text or symbols)Stroller

natural_image
Mechanical shaft with two flanged ends and a central rod (no text or symbols visible)Axle
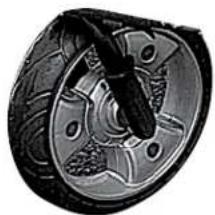
natural_image
Close-up of a mechanical component with no visible text or symbolsFront Wheel
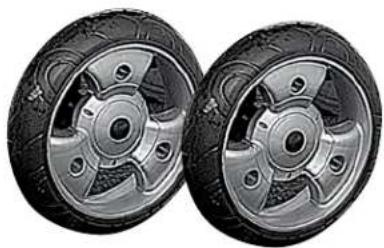
natural_image
Two identical car wheel rim components with visible tread and hub (no text or symbols)2-Back Wheels
BACK WHEEL ASSEMBLY INSTRUCTIONS
Step 1. Slide back wheel on axle as shown in Figure A.
Step 2. Push in axel until it clicks.
Step 3. Pull on wheel to make sure the wheel is engaged.
Repeat on other side.
When finished it should look like Figure B.
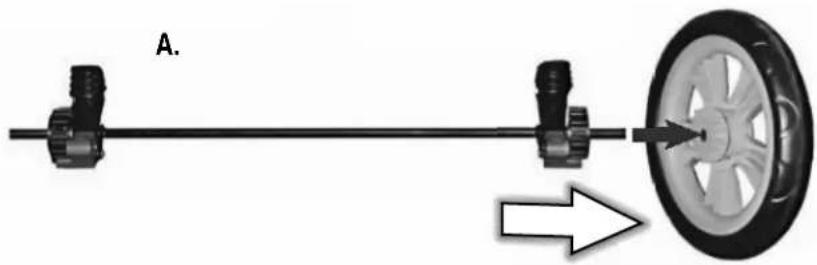
natural_image
Mechanical assembly diagram showing a shaft with two connectors and a wheel, with an arrow indicating direction (no text or symbols)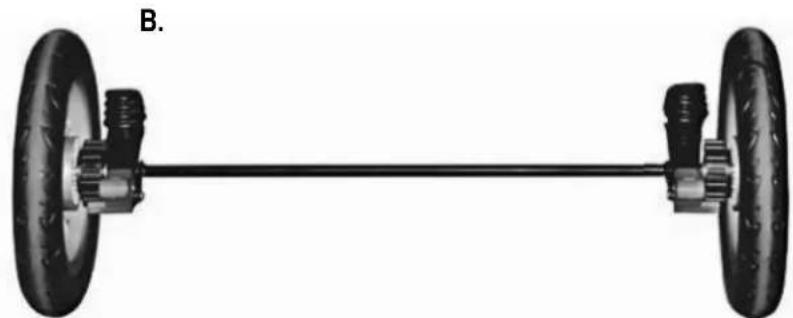
natural_image
Mechanical diagram showing a two-dot tire and two solid tires connected by a shaft (no text or symbols)BACK WHEEL ASSEMBLY INSTRUCTIONS
Back Wheels
Inside Outside
natural_image
Close-up of a car wheel rim and disc (no text or symbols visible)C.
natural_image
Close-up of a car wheel rim with a black arrow pointing to the center (no text or symbols visible)Lock/Release Button
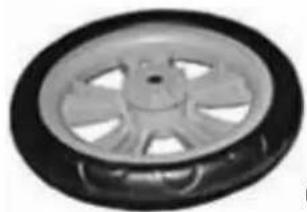
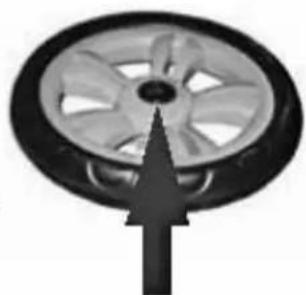
To remove wheel, push the lock/release button (Figure C) and pull wheel off.
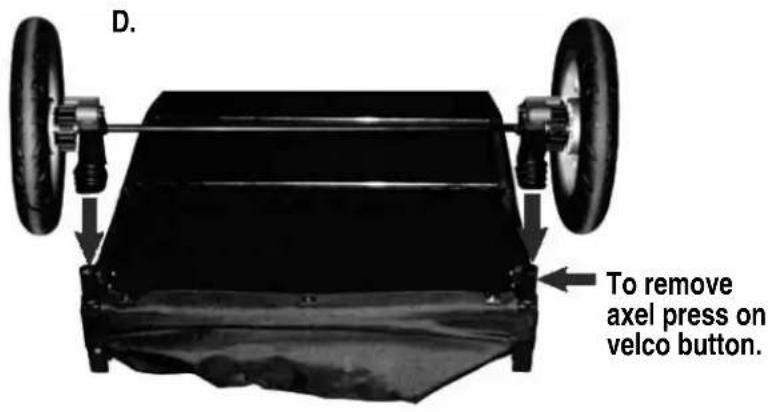
Step 4. Take rear wheels (on axel with brakes) and lock them into the 2" posts by placing leg tube over the posts and pressing down until they click (shown in Figure D).
Pull up to make sure wheels are locked.
Step 5. Place stroller so wheels are on the ground and back wheels are facing you (shown in Figure E).
text_image
D. To remove axel press on velco button.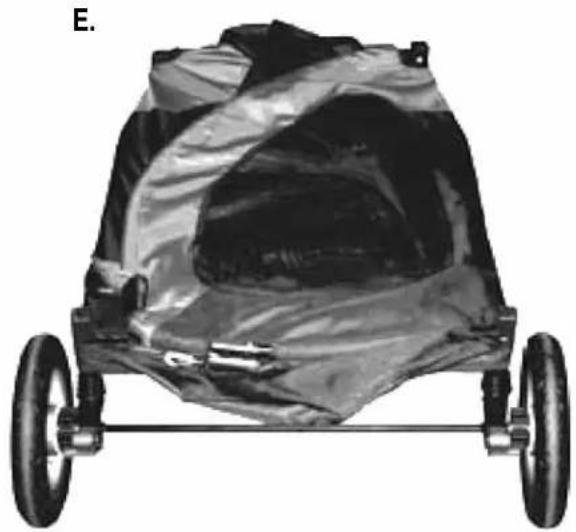
natural_image
Top-down view of a black-and-white photo of a car with a covered canopy and two wheels (no text or symbols visible)BACK WHEEL ASSEMBLY INSTRUCTIONS
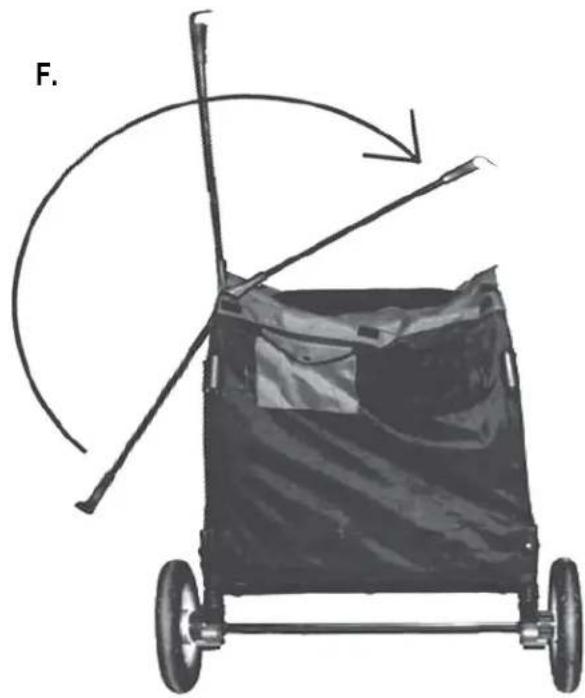
Step 6. Lift right and left side of stroller up (shown in Figure F).
Secure the support bar that goes from the left and latches down on the right side (shown in Figure F).
natural_image
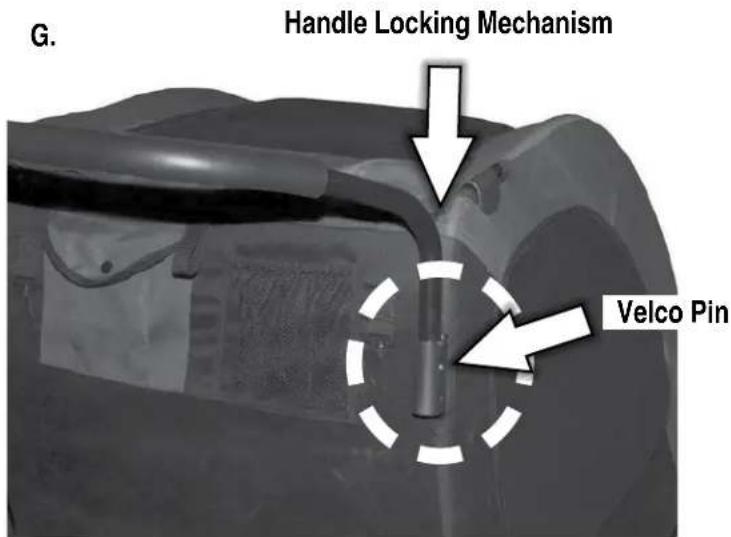
Diagram of a cart with a handle and arrow indicating rotation, no text or symbols presentStep 7. To install the handle, place handle ends into the handle-locking mechanisms on each side of the stroller.
Then, push down until you hear a click and the velco pins pop out on each side.
Choose height level (1 or 2), then release velco pins.
Pull up on handle to make sure it is securely locked.
This is shown in Figure G.
text_image
G. Handle Locking Mechanism Velco PinFRONT WHEEL ASSEMBLY INSTRUCTIONS
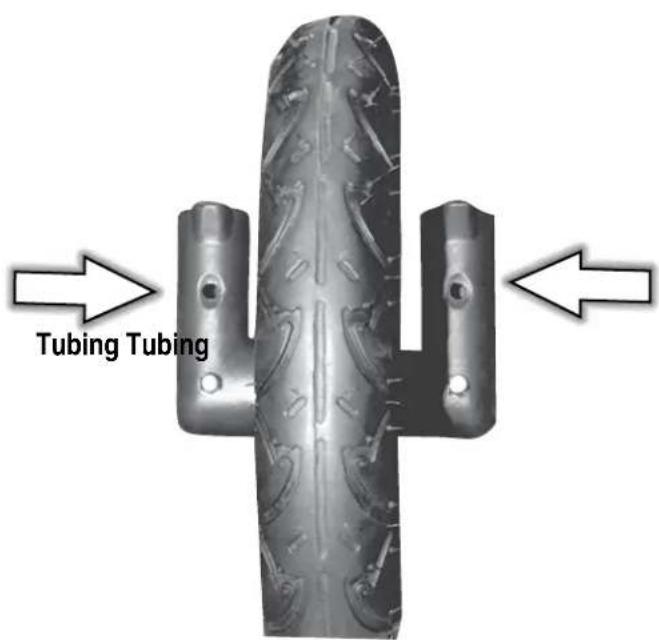
Step 1. To attach front wheel, slide plastic wheel support up and into tubing.
Step 2. Slide wheel up, until velco pins pop out of holes.
text_image
Tubing Tubing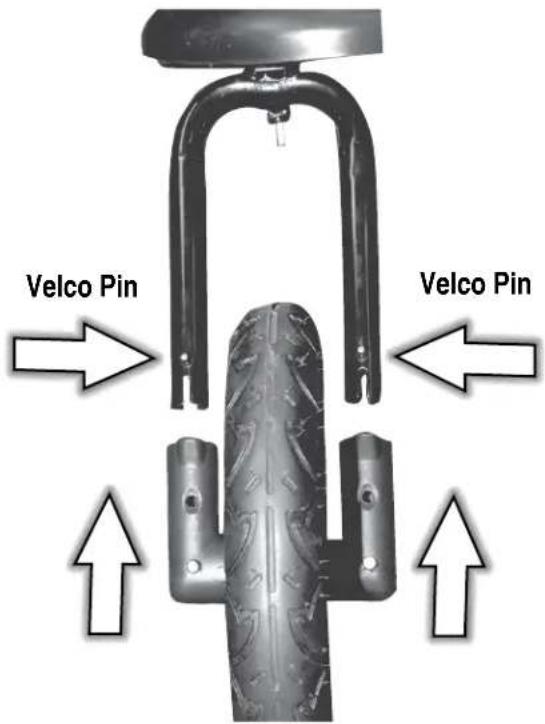
text_image
Velco Pin Velco PinStep 3. To use stroller in locked position for jogging, push pin in.
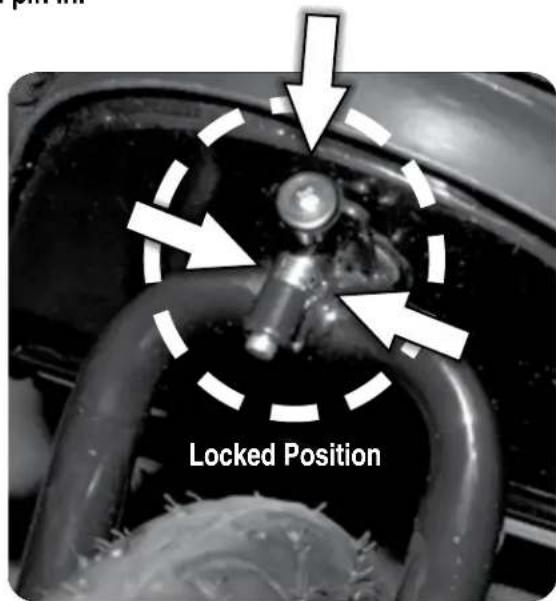
text_image
Locked PositionStep 4. To use stroller in swivel position, pull pin down, and to the right.
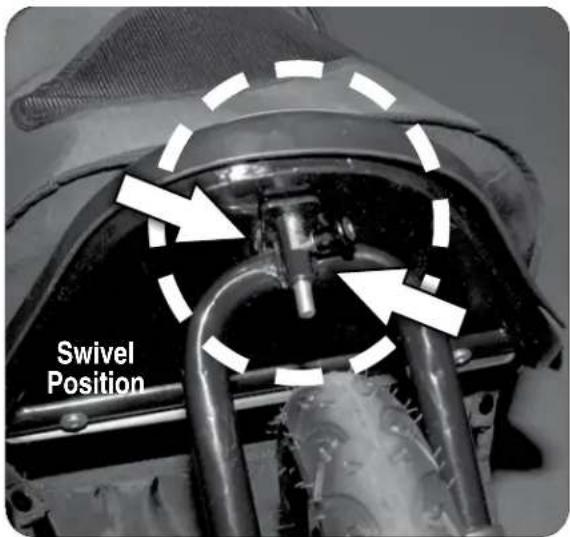
text_image
Swivel PositionStep 1. Remove handlebar, by pushing velco pins in to release.
Step 2. Pull support bar up to release and continue to swing the bar counter-clockwise.
Pull handlebar up and off.
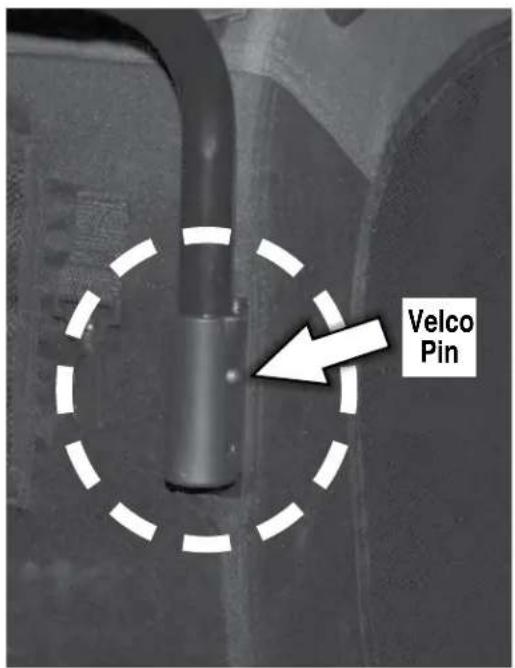
text_image
Velco Pin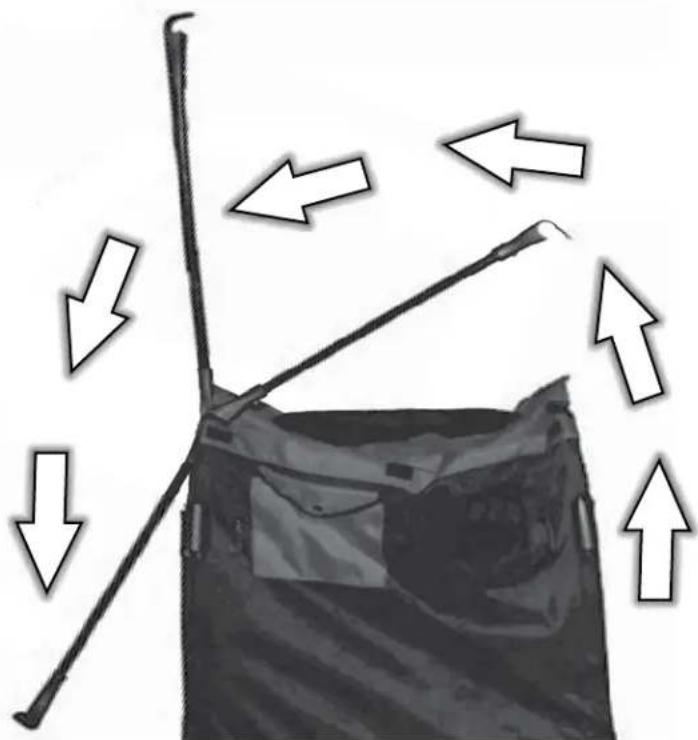
natural_image
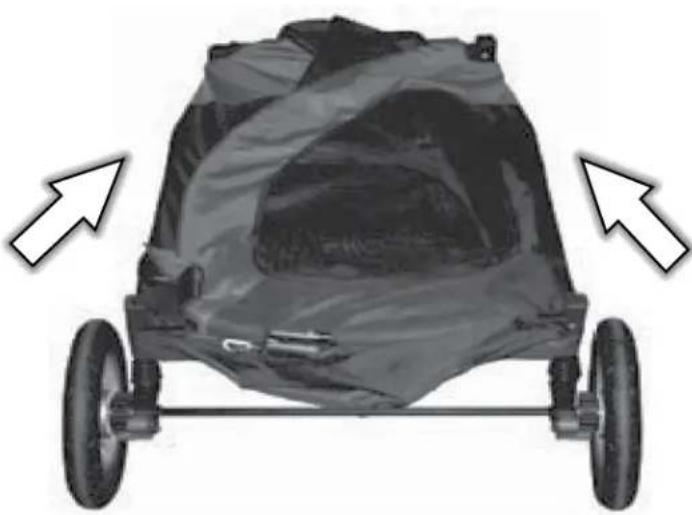
Diagram showing directional arrows pointing to a device or structure with no visible text or symbolsStep 3. Fold sides inward, until flat.
natural_image
Top-down view of a toy car with wheels and a covered cover, showing two white arrows pointing outward (no text or symbols)• Always store product in a clean, dry place.
• Not recommended for use on the beach.
- Do not put heavy items on top of the stroller.
- Clean frame by wiping with a lightly oiled cloth.
- Do not use detergent or abrasives. Spot clean fabric with dry cleaning fluid or mild soap and warm water.
- To ensure easy maneuverability and to minimize wear and tear, (especially wheels, axles, and swivels), keep all moving parts clean and lubricated with WD40® or light machine oil.
- NOTE: Do not lubricate brake components or swivel locks.
- Regularly check stroller for loose parts. These should be tightened or replaced.
WHEEL MAINTENANCE
- To clean and lubricate front and rear wheels, push out locking lever under wheel housing to release rear wheel.
- To ensure ease of maneuverability and to minimize wear and tear, keep all moving parts clean and lubricated with WD40® or light machine oil.
- Push wheel sets back on until they click and lock in position; pull on wheel housings to ensure they are secure.
- Push stroller back and forth and rotate swivels around to work in lubricant.
- Clean the rear wheel assembly and the rest of the frame with warm, soapy water; clean off with warm water and dry thoroughly.
- NOTE: Do not lubricate brake components or swivel locks.
WARNING!
FOR PETS ONLY.
Not intended to be used as a restraining device for aggressive or dangerous animals that dig, chew or paw aggressively. Do not leave your pet unattended. PET GEAR is not liable for any damage caused by aggressive, destructive, immature or untrained animals. Do not use near an open or exposed flame. Failure to follow these warnings and the instructions could result in serious injury or death.
- Do not carry additional bags, goods, or accessories in or on stroller except as recommended in the manufacturer's instructions.
- Recommended use of an approved safety restraint correctly fitted and adjusted.
- Do not leave pet unsupervised in stroller.
- Before making adjustments to stroller ensure that pet's body is clear of any moving parts.
• This stroller is designed for one pet only. - Do not hang bags from handles as this may cause the product to become unstable.
- Do not use on escalator or stairs; fold stroller and carry.
- Put on brake whenever you park the stroller.
- Ensure stroller is completely erected and check that all locks are engaged before placing pet in stroller.
- Do not overload as stroller may become unstable; maximum weight of pet using this stroller not to exceed 100 lbs.
- Any goods carried in the basket not to exceed 6 lbs.
REPLACEMENT PARTS
Use only PET GEAR replacement parts.
Please have your model number ready before calling.
You can also request parts: http://www.petgearinc.com/main.asp?sel=2

text_image
PET GEAR INC.PO Box 99·West Rutland, VT·05777·877-752-9123·www.petgearinc.com