
Series 1000 NT1152 - Trousse de soins PHILIPS - Free user manual and instructions
Find the device manual for free Series 1000 NT1152 PHILIPS in PDF.

| Product Type | Nose and Ear Hair Trimmer |
| Model | Series 1000 NT1152 |
| Brand | Philips |
| Power Source | 1.5V R6 AA alkaline battery (included) |
| Battery Life | Up to 2 hours with new AA alkaline battery |
| Dimensions (Approx.) | 13 cm x 2 cm (estimated) |
| Weight (Approx.) | 30 g (without battery, estimated) |
| Primary Functions | Trimming nose hair and ear hair |
| Cutting Element | Removable and washable |
| Max Insertion Depth | 0.5 cm into nostril or ear channel |
| Cleaning Method | Rinse cutting element under running water; immerse in warm water for thorough cleaning |
| Water Resistance | Safe to clean under tap (IEC compliant) |
| Safety Features | Not for use by persons with reduced capabilities without supervision; keep out of reach of children |
| Temperature Range | 15°C to 35°C for use and storage |
| Accessories / Spare Parts | Cutting element, trimming head, protection cap, sealing ring; available at www.shop.philips.com/service |
| Warranty | International guarantee; cutting units excluded due to wear |
| Environmental Compliance | EU Directive 2012/19/EU (WEEE) and 2006/66/EC (batteries) |
Frequently Asked Questions - Series 1000 NT1152 PHILIPS
User questions about Series 1000 NT1152 PHILIPS
0 question about this device. Answer the ones you know or ask your own.
Ask a new question about this device
Download the instructions for your Trousse de soins in PDF format for free! Find your manual Series 1000 NT1152 - PHILIPS and take your electronic device back in hand. On this page are published all the documents necessary for the use of your device. Series 1000 NT1152 by PHILIPS.
USER MANUAL Series 1000 NT1152 PHILIPS
Guidance in English 13\~26
●保証
保証とアフターサービス 27
仕様 28
無料修理規定 30
保証書 ...... 最終ページ
必ずお守り ください
安全上のご注意
natural_image
Simple line drawing of a battery and a U-shaped tube with an arrow indicating direction (no text or symbols)トリミングヘッドを取り外す
基本的な使い方
1 電源をONにする
natural_image
Simple diagram showing a sphere submerged in liquid with a curved arrow indicating flow or movement (no text or symbols)3 使用後について
natural_image
Two laboratory flasks with arrows indicating motion or movement, no text or symbols present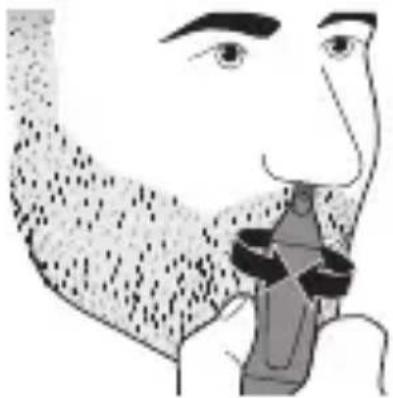
natural_image
Illustration of a person's face with abstract background patterns (no text or symbols)耳毛のトリミングをする
natural_image
Two laboratory flasks with arrows indicating motion or movement, no visible text or symbolsnatural_image
Illustration of a person using a handheld device to interact with a textured object (no text or symbols visible)お手入れ方法

注意
natural_image
Diagram of a medical procedure showing a syringe inserted into a cup with liquid, and a hand holding a shaded area (no text or symbols)2 電源スイの開にをして、乾かします。
natural_image
Symbol of a trash bin crossed with no text or numbers, representing waste sorting or restriction (no text present)
natural_image
Symbol of a trash bin crossed with no text or labels
Introduction
Congratulations on your purchase and welcome to Philips! To fully benefit from the support that Philips offers, register your product at www.philips.com/welcome.
Generaldescription(Fig.1)
1 Protectioncap
2Cuttingelement
3 Trimminghead
4Handle
5Settingindicator
6'On'indication
7'Offindication
8'Open'indication
9Batterycompartmentcover
10Lockingindicator
11'Unlocked'indicator
12Sealingring
13DisposableAAalkalinebattery
Important
Read this user manual carefully before you use the appliance and save it for future reference.
ENGLISH
Warning
- This appliance is not intended for use by persons (including children) with reduced physical, sensory or mental capabilities or lack of experience and knowledge unless they have been given supervision or instruction concerning use of the appliance by a person responsible for their safety.
- Children should be supervised to ensure that they do not play with the appliance.
Caution
- Always check the appliance before you use it. Do not use the appliance if any of its parts is damaged or broken, as this may cause injury.
- Only use this appliance for its intended purpose as shown in the user manual.
- For hygienic reasons, the appliance should only be used by one person.
- Never use compressed air, scouring pads, abrasive cleaning agents or aggressive liquids such as petrol or acetone to clean the appliance.
- Only operate the appliance on one non-rechargeable 1.5V R6 AA battery.
ENGLISH
- Use and store the appliance at a temperature between 15^ C and 35^ C.
- Do not expose the appliance to direct sunlight.
- Remove the battery from the appliance if you are not going to use it for some time.
Compliancewithstandards
- This Philips appliance complies with all applicable standards and regulations regarding exposure to electromagnetic fi elds.
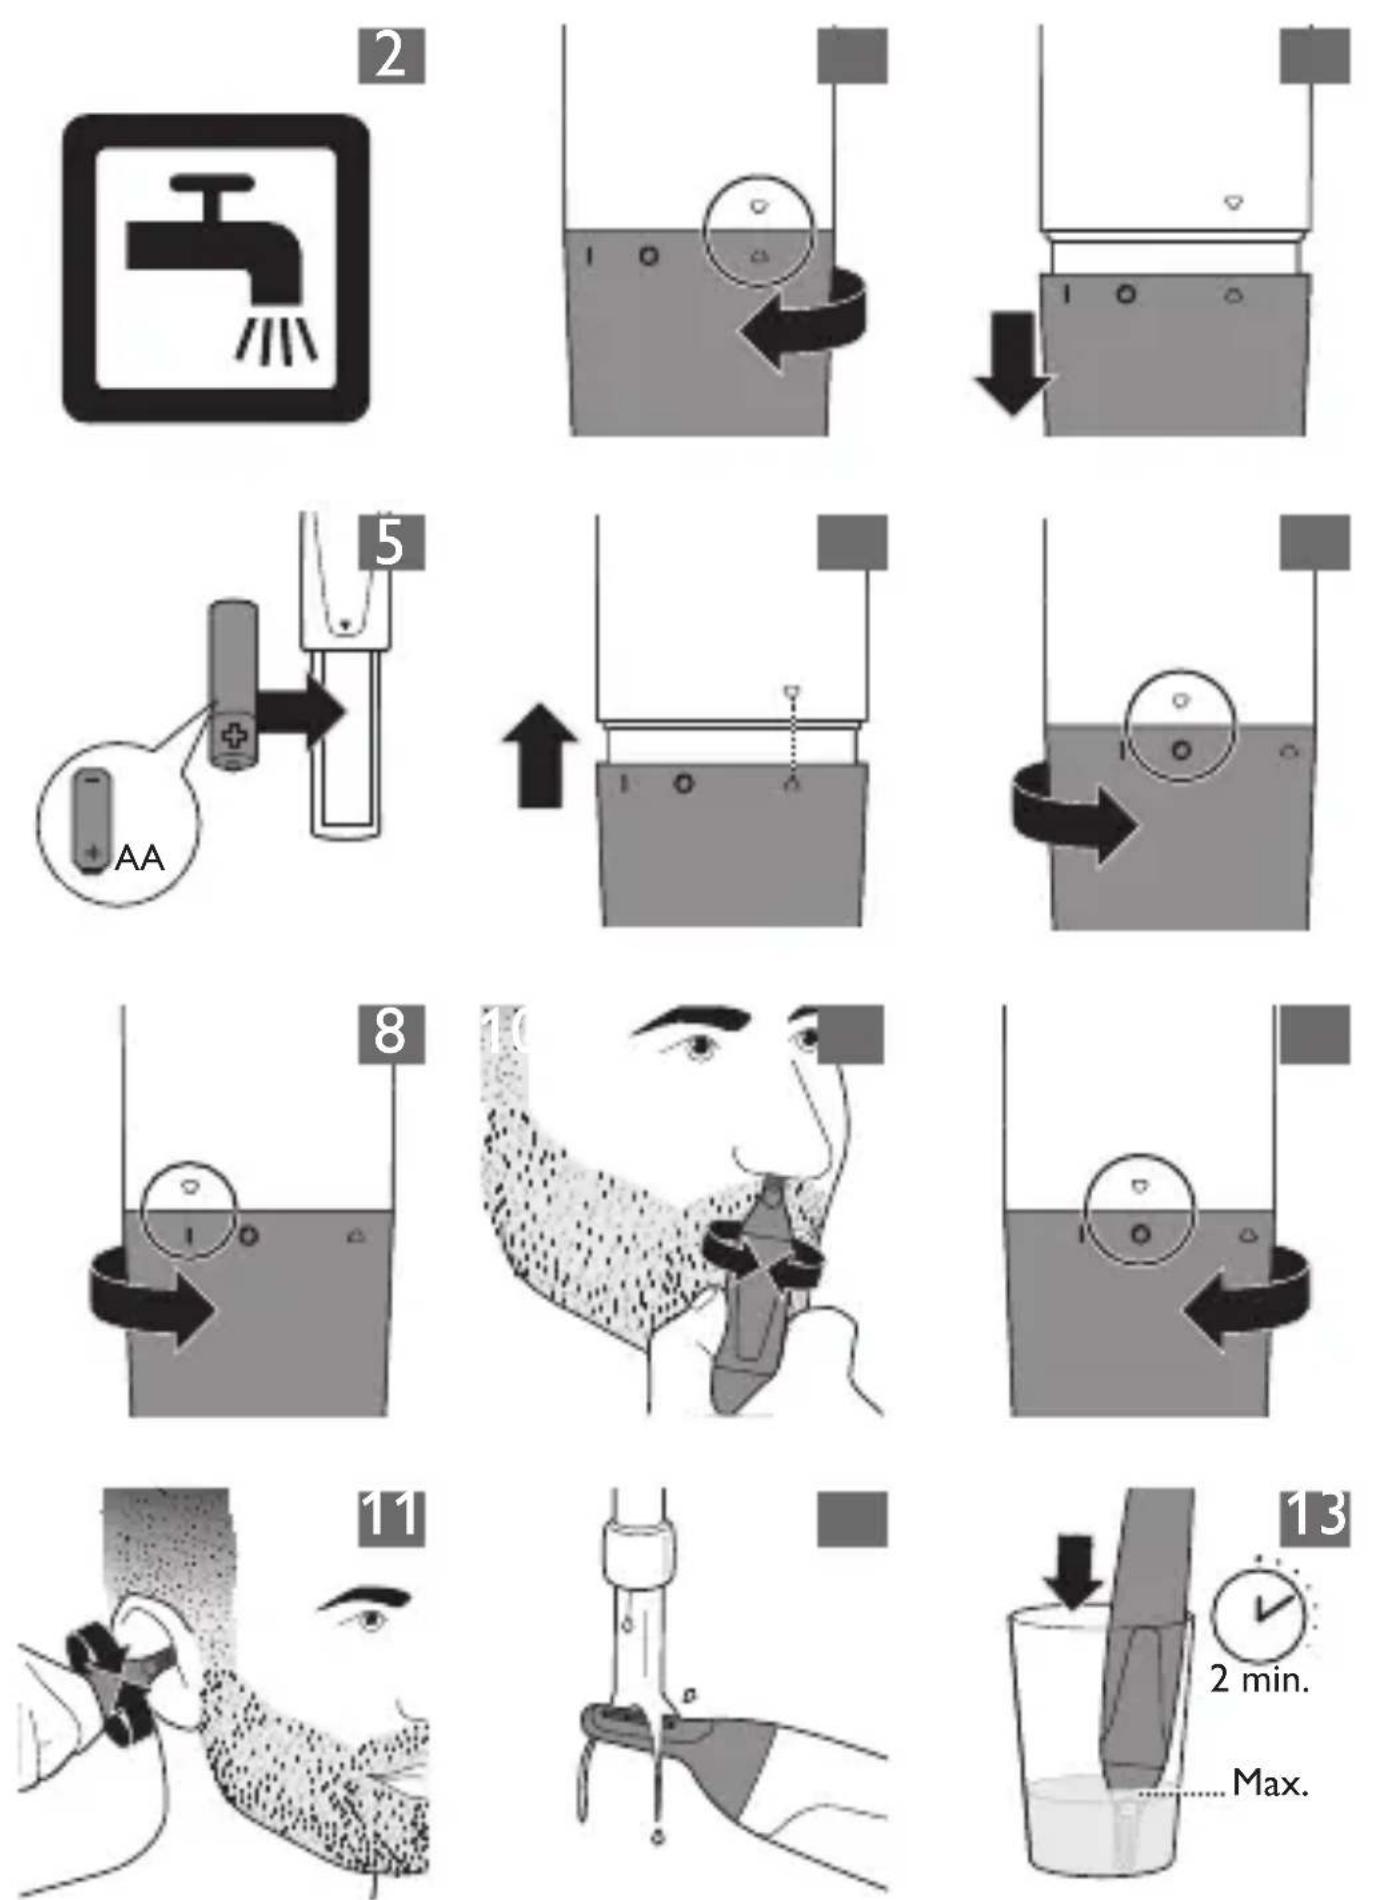
- This appliance complies with the internationally approved IEC safety regulations and can be safely cleaned under the tap (Fig. 2).
Preparingforuse
Placingthebatteries
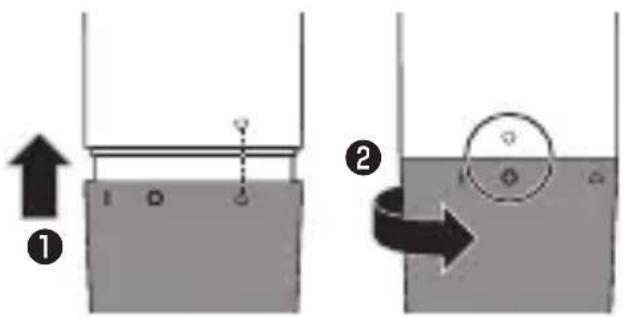
1 To remove the battery compartment cover, turn it clockwise until the setting indicator points to the ‘open’ indication. (Fig. 3)
2ull the battery compartment cover off the handle(Fig.4).
3. Put the battery in the battery compartment(Fig.5).
ENGLISH
Make sure the + and - poles of the battery point in the right direction.
Note: The appliance operates on one R6 AA 1.5-volt battery (included). Preferably use Philips alkaline batteries. A new AA alkaline battery has an operating time of up to 2 hours.
4 slide the battery compartment cover back onto the handle. (Fig. 6)
5 turn the battery compartment cover anticlockwise until the setting indicator points to the 'off' indication (0). (Fig. 7)
Toavoiddamageduetobattery leakage:
- do not expose the appliance to direct sunlight.
- do not expose the appliance to temperatures higher than 35^ C.
- remove the battery if you are not going to use the appliance for a month or more.
- do not leave an empty battery in the appliance.
Usingtheappliance
You can use the trimming head to trim your nose hair and ear hair.
Trimmingnosehair
Make sure your nostrils are clean.
1 To switch on the appliance, turn the battery compartment cover from the 'off' position (0) to the 'on' position (I) (Fig. 8).
2 Carefully insert the trimming head into one of your nostrils.
Do not insert the trimming head more than 0.5cm into your nostrils.
3 Slowly move the trimming head around to remove all unwanted hairs in your nostrils. (Fig. 9)
4 To switch off the appliance, turn the battery compartment cover to the 'off' indication (0)(Fig.10).
Trimmingearhair
Make sure your outer ear channels are clean and free from wax.
1 To switch on the appliance, turn the battery compartment cover from the 'off' position (0) to the 'on' position (I) (Fig. 8).
ENGLISH
- Lowly move the trimming head along the rim of the ear to remove hairs that stick out beyond the rim.
3 Insert the trimming head into the outer ear channel.
Do not insert the trimming head more than
0.5cm into your ear channel, as this could damage the eardrum.
- Lowly turn the trimming head around to remove all unwanted hairs from your outer ear channel (Fig. 11).
5 To switch off the appliance, turn the battery compartment cover to the 'off' indication (0)(Fig.10).
Cleaning
Clean the appliance immediately after use and when a lot of hair or dirt has accumulated on the cutting element.
Never use compressed air, scouring pads, abrasive cleaning agents or aggressive liquids such as petrol or acetone to clean the appliance.
ENGLISH
Do not tap on the cutting element.
Do not use any sharp objects to clean the cutting element.
1 Make sure the appliance is switched off.
2 Inse the cutting element of the nose/ear/eyebrow trimming head with hot water(Fig.12).
3 switch on the appliance and rinse the cutting element once more to remove any remaining hairs. Then switch off the appliance again.
Tip: The best way to clean the cutting element is to immerse it in a glass with warm water for a few minutes and then switch on the appliance (Fig. 13).
4 et all parts dry completely before you use the appliance again.
Replacement
To buy accessories or spare parts, visit www.shop.philips.com/service or go to your Philips dealer. You can also contact the Philips Consumer Care Centre in your country (see the worldwide guarantee leaflet for contact details).
Storage
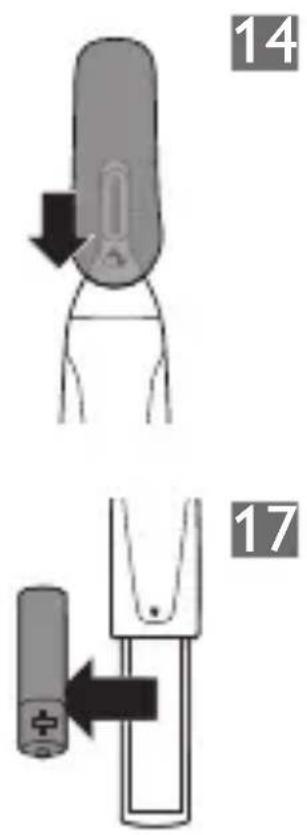
1 lace the protection cap on the nose/ear/eyebrow trimming head (Fig. 14).
Environment
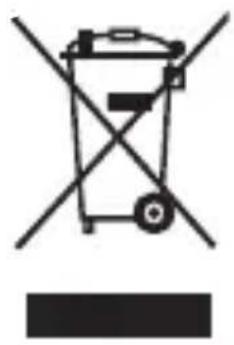
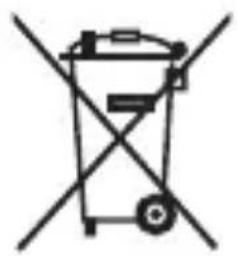
- This symbol on a product means that the product is covered by European Directive 2012/19/EU(Fig.15).
- This symbol means that the product contains batteries covered by European Directive 2006/66/EC which cannot be disposed of with normal household waste (Fig. 16).
- Inform yourself about the local separate collection system for electrical and electronic products and batteries. Follow local rules and never dispose of the product and batteries with normal household waste. Correct disposal of old products and batteries helps prevent negative consequences for the environment and human health.
Removingthedisposablebatteries
1 To remove the battery compartment cover, turn it to clockwise until the setting indicator points to the ‘open’ indication (▼). (Fig. 3)
2ull the battery compartment cover off the handle(Fig.4).
3 Remove the battery from the battery compartment(Fig.17).
Guaranteeandsupport
If you need information or support, please visit www.philips.com/support or read the separate worldwide guarantee leaflet.
Guaranteerestrictions
Cutting units are not covered by the terms of the international guarantee because they are subject to wear.
Troubleshooting
This chapter summarises the most common problems you could encounter with the appliance. If you are unable to solve the problem with the information below, visit www.philips.com/
ENGLISH
support for a list of frequently asked questions or contact the Consumer Care Centre in your country.
Problem PossiblecauseSolution
The appliance pulls at the hairs.
Youmovethe appliance too fast.
Donotmove the appliance too fast.
Thedisposable
battery is empty.
Insertanew battery.
The appliance does not work.
Thedisposable battery is empty or has been inserted incorrectly.
Replace the battery or insert it correctly.
Problem PossiblecauseSolution
Thecutting
element of the trimming head is very dirty, for instance because some nasal mucus has dried inside the cutting element.
Tocleanthe cutting element, immerse it in a glass with warm water for a few minutes. Then switch on the appliance.
保証と アフターサービス

MyPhilips登録のご案内
- 必ずお守り ください
- 安全上のご注意
- トリミングヘッドを取り外す
- 基本的な使い方
- 電源をONにする
- 使用後について
- 耳毛のトリミングをする
- お手入れ方法
- 注意
- Introduction
- Generaldescription(Fig.1)
- Important
- ENGLISH
- Warning
- Caution
- Compliancewithstandards
- Preparingforuse
- Placingthebatteries
- Toavoiddamageduetobattery leakage:
- Usingtheappliance
- Trimmingnosehair
- Trimmingearhair
- Cleaning
- Replacement
- Storage
- Environment
- Removingthedisposablebatteries
- Guaranteeandsupport
- Guaranteerestrictions
- Troubleshooting
- Problem PossiblecauseSolution
- Thecutting
- 保証と アフターサービス
- MyPhilips登録のご案内
Brand : PHILIPS
Model : Series 1000 NT1152
Category : Trousse de soins