
911LT - Screen SAMSUNG - Free user manual and instructions
Find the device manual for free 911LT SAMSUNG in PDF.


User questions about 911LT SAMSUNG
0 question about this device. Answer the ones you know or ask your own.
Ask a new question about this device
Download the instructions for your Screen in PDF format for free! Find your manual 911LT - SAMSUNG and take your electronic device back in hand. On this page are published all the documents necessary for the use of your device. 911LT by SAMSUNG.
USER MANUAL 911LT SAMSUNG
text_image
SyncMaster Model Safety Precautions Introduction Connections Using Linux Using the Software Adjusting the Monitor Troubleshooting Specifications Information Regulatory Manual ReaderInstall drivers Install


Microsoft Windows
programs


Natural Color


MagicTune™
SAMSUNG
text_image
The color and appearance of the product may vary depending on the model, and the product specifications are subject to change without prior notice for reasons of performance enhancement. ■ Safety Precautions ■ Introduction ■ Connections ■ Using Linux ■ Using the Software ■ Adjusting the Monitor ■ Troubleshooting ■ Specifications ■ Information
Safety Precautions
Notation
Power
Installation
Cleaning and Using
Others

Notation
These safety instructions must be followed to ensure your safety and prevent property damage. Make sure to read the instructions carefully and use the product in the correct manner.

Warning / Caution

Failure to follow directions noted by this symbol could result in bodily harm or damage to the equipment.

Notational Conventions

Prohibited Important to read and understand at all times

Do not disassemble Disconnect the plug from the outlet


Notation
Power
Installation
Cleaning and Using
Others

Power

When not used for extended period of time, set your computer to DPM.
If using screen saver, set it to active screen mode.
The images here are for reference only, and are not applicable in all cases (or countries).
Shortcut to Anti-Afterimage Instructions

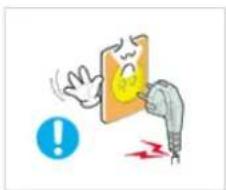
Do not use a damaged power cord or plug or a damaged or loose power outlet.
natural_image
Illustration of a hand holding an orange board with a warning symbol and a blue warning circle (no text or labels)Otherwise, this may result in electric shock or fire.
text_image
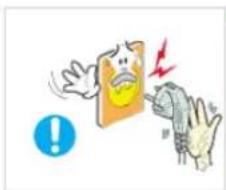
Illustration showing a warning sign with an angry face and a hand holding a document, indicating a workplace or safety hazard.Do not touch the power plug with wet hands when removing or plugging the plug into the outlet.
▶ Otherwise, this may result in electric shock.
natural_image
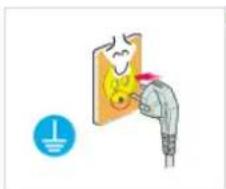
Illustration of a person using a power switch to press down a panel, with a warning symbol (no text or labels)Make sure to connect the power cord to a grounded power outlet.
▶ Otherwise, it may result in electric shock or personal injury.
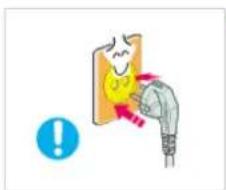
text_image
Safety warning illustration showing a person using a device to prevent injuries, with a blue warning symbol and red arrow indicating the injury.- Ensure that the power plug is plugged into the power outlet firmly and correctly.
▶ Otherwise, this may result in fire.
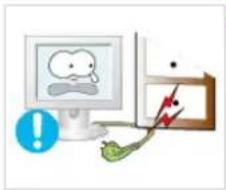
natural_image
Illustration of a computer monitor with a cartoon character and warning symbol (no text or labels)Do not forcefully bend or pull the power plug and do not place any heavy material on it.
▶ Otherwise, this may result in fire.
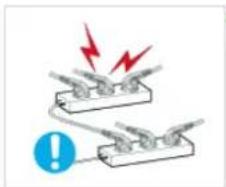
natural_image
Diagram of two electrical components with red lightning bolts and a warning symbol (no text or labels)Do not connect multiple appliances to the same power outlet.
▶ Otherwise, this may cause fire due to overheating.
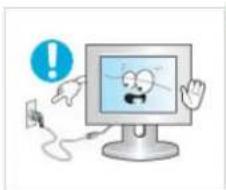
natural_image
Cartoon illustration of a computer monitor with an exclamation mark and a hand holding a phone (no text or symbols present)Do not disconnect the power cord while using the product.
▶ Otherwise, this may result in damage to the product due to electric shock.
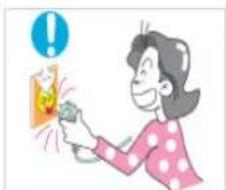
natural_image
Illustration of a person holding a green object with a warning symbol above (no text or symbols present)To disconnect the apparatus from the mains, the plug must be pulled out from the mains socket, therefore the mains plug shall be readily operable.
This may cause electric shock or fire.
Use only the power cord provided by our company. Do not use the provided power cord of another product.
Otherwise, this may result in fire or electric shock.
text_image
无铅锡金属粉Notation
Power
Installation
Cleaning and Using
Others
Installation

Be sure to contact an authorized Service Center when installing your monitor in a location with heavy dust, high or low temperatures, high humidity, and exposed to chemical substances and where it operates for 24 hours such as at airports, train stations etc.
Failure to do so may cause serious damage to your monitor.
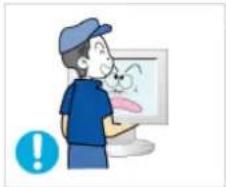
natural_image
Cartoon illustration of a person viewing a computer screen with a surprised emoji (no text or symbols)Do not drop the monitor when moving it.
This may cause damage to the product or the person carrying it.
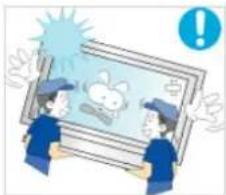
natural_image
Illustration of two people holding a framed picture with a surprised face and a warning symbol (no text or symbols present)▶ Ensure that at least two persons lift and move the product.
▶ Otherwise, it may be dropped and cause personal injury, and/or damage the product.
natural_image
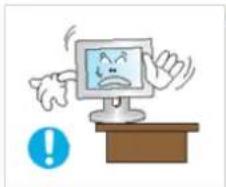
Cartoon illustration of a computer monitor with a sad face on top, showing surprise or shock (no text or symbols)When installing the product in a cabinet or rack, make sure that the front end of the bottom of the product does not project out.
▶ Otherwise, it may fall or cause personal injury.
▶ Use a cabinet or rack of a size appropriate to the product.
natural_image
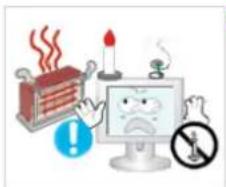
Illustration of a computer monitor with a sad face, warning symbols including a flame, smoke, and a warning sign (no text present)DO NOT PLACE CANDLES, MOSQUITO REPELLANT, CIGARETTES AND ANY HEATING APPLIANCES NEAR THE PRODUCT.
▶ Otherwise, this may result in fire.

natural_image
Illustration of a red steam stove next to a computer monitor with a cartoon speech bubble, connected to a green cable and a blue warning circle (no text or symbols)Keep heating appliances as far away from the power cord or the product as possible.
▶ Otherwise, this may result in electric shock or fire.
natural_image
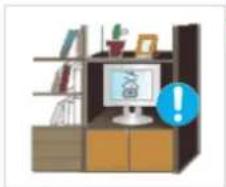
Illustration of a bookshelf with a computer monitor and an exclamation mark (no text or symbols on the main objects)Do not install it in a badly ventilated location such as a bookcase or closet.
Otherwise, this may result in fire due to an increase in the internal temperature.
natural_image
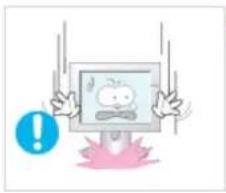
Cartoon illustration of a computer monitor with a surprised face and a blue exclamation mark (no text or symbols)Put down the monitor carefully.
▶ Failing to do so may damage the monitor.
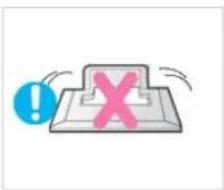
natural_image
Illustration of a computer monitor with a red X symbol and an exclamation mark, no text or symbols present.Do not place the front of the product on the floor.
▶ Otherwise, this may result in damage to the screen display.
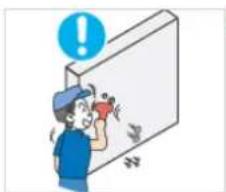
natural_image
Illustration of a person cleaning a wall with a magnifying glass (no text or symbols)Ensure that an authorized installation company installs the wall mount.
▶ Otherwise, it may fall and cause personal injury.
Make sure to install the specified wall mount.
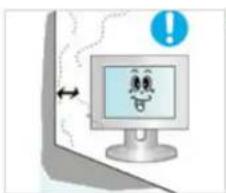
natural_image
Illustration of a computer monitor with a cartoon face on screen and an exclamation mark above (no text or symbols)Install your product in a well ventilated location. Ensure that there is a clearance of more than 10 cm from the wall.
▶ Otherwise, it may result in fire due to an increase in the internal temperature.
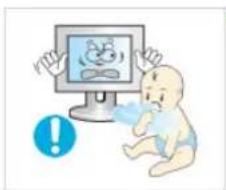
natural_image
Illustration of a baby crawling under a computer monitor with a surprised face, accompanied by an exclamation mark (no text or symbols on the image itself)Ensure that the packaging vinyl is kept away from children.
Otherwise, it may result in serious harm (suffocation) if children play with it.
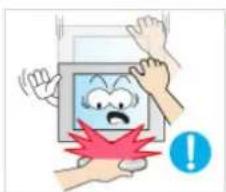
natural_image
Illustration of a hand holding a computer monitor with a sad face and a red explosion effect (no text or symbols)If the height of your monitor is adjustable, do not place any object or part of your body on the stand when lowering it.
This may cause damage to the product or the person carrying it.
Notation
Power
Installation
Cleaning and Using
Others
Cleaning and Using

When cleaning the monitor case or the surface of the TFT-LCD screen, wipe with a slightly moistened and soft fabric.
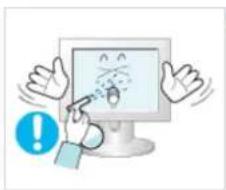
natural_image
Illustration of a hand pointing at a computer monitor displaying a cartoon face with a speech bubble, accompanied by a blue exclamation mark (no text or symbols on the monitor or background)Do not spray cleaner directly onto the surface of the product.
Otherwise, this may result in the discoloration and distortion of the structure and the screen surface may peel off.
Clean the product using a soft cloth with a monitor cleaner only. If you must use a
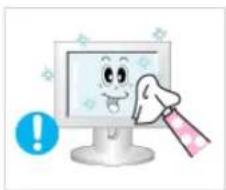
natural_image
Cartoon illustration of a smiling computer monitor with a hand holding a pink object, accompanied by a blue exclamation mark (no text or symbols on the monitor itself)cleaner other than the monitor cleaner, dilute it with water at a ratio of 1:10.

natural_image
Illustration of a person holding a microphone and a yellow object, with a blue exclamation mark in the background (no text or symbols on the main image)When cleaning the power plug pins or dusting the power outlet, clean it with a dry cloth.
▶ Otherwise, it may result in fire.
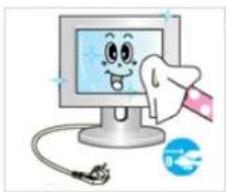
natural_image
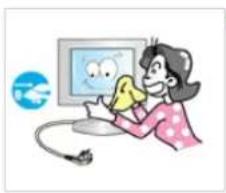
Illustration of a cartoon toothbrush touching a computer monitor with a smiling face, next to a blue circular logo (no text or symbols)When cleaning the product, make sure to disconnect the power cord.
▶ Otherwise, it may result in electric shock or fire.
natural_image
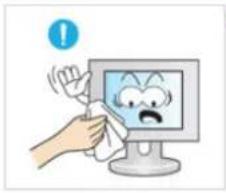
Illustration of a person using a computer with a cartoon face on screen (no text or symbols)When cleaning the product, disconnect the power cord and clean it softly with a dry cloth.
(Do not use chemicals such as wax, benzene, alcohol, thinner, mosquito repellant, lubricant, or cleaner.) These may change the appearance of the product surface and peel off the indication labels on the product.
natural_image
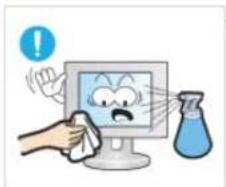
Illustration of a hand cleaning a computer monitor with a sad face (no text or symbols)Since the product housing is easily scratched, make sure to use the specified cloth only.
Use the specified cloth adding only a little water. As the product may be scratched if there is any foreign material on the cloth, make sure to shake it thoroughly before using it.
natural_image
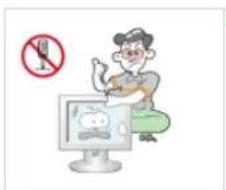
Illustration of a hand cleaning a computer monitor with a blue liquid, no text or symbols presentWhen cleaning the product, do not spray water directly onto the main body of the product.
- Ensure that water does not enter the product and that it is not wet. - Otherwise, this may result in electric shock, fire or a malfunction.
Notation
Power
Installation
Cleaning and Using
Others
Others
text_image
Cartoon illustration showing a person using a computer with a 'no smoking' symbol, indicating no smoking or smoking.The product is a high voltage product. Ensure that users do not disassemble, repair or modify the product themselves.
Otherwise, this may result in electric shock or fire. If the product needs to be repaired, contact a Service Center.
natural_image
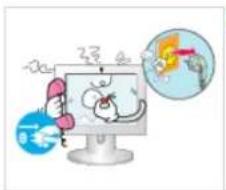
Cartoon illustration of a person reacting to a computer screen displaying a cat, with a thought bubble showing a bird (no text or symbols present)If there is a strange smell or a strange sound or smoke is coming from the product, disconnect the power plug immediately and contact a Service Center.
Otherwise, this may result in electric shock or fire.
natural_image
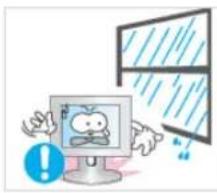
Illustration of a cartoon apple character on a computer monitor with a window and raindrops (no text or symbols)Do not place this product in a location exposed to moisture, dust, smoke, water, or in a car.
▶ Otherwise, this may result in electric shock or fire.

natural_image
Cartoon illustration of a computer monitor with a sad face and a thought bubble showing a magnifying glass (no text or symbols)When you drop the product or the case is broken, turn the power off and disconnect the power cord. Contact a Service Center.
Otherwise, this may result in electric shock or fire.
natural_image
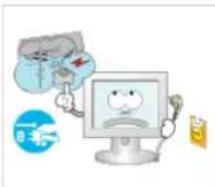
Illustration of a cartoon computer monitor with a sad face, accompanied by a speech bubble and a small card (no text or symbols present)If thunder or lightening is occurring, do not touch the power cord or antenna cable.
Otherwise, this may result in electric shock or fire.
natural_image
Illustration of a cartoon character holding a green plant, standing beside a computer monitor with a red speaker icon (no text or symbols)Do not try to move the monitor by pulling only the wire or the signal cable.
▶ Otherwise, it may fall and result in electric shock, damage to the product or fire due to damage to the cable.
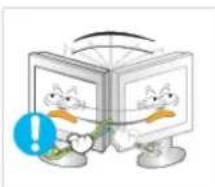
natural_image
Illustration of a cartoon character with a blue exclamation mark and green heart, surrounded by open book covers (no text or symbols)Do not lift or move the product back and forwards or right and left while only holding the power cord or signal cables.
▶ Otherwise, it may fall and result in electric shock, damage to the product or fire due to damage to the cable.
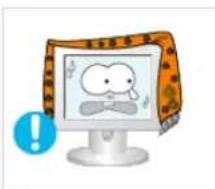
natural_image
Cartoon illustration of a computer monitor with a cartoon character and speech bubble, no text or symbols present.Make sure that the ventilating opening is not blocked by a table or curtain.
▶ Otherwise, it may result in fire due to an increase in the internal temperature.
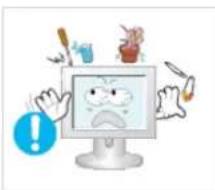
natural_image
Cartoon illustration of a computer monitor with a sad face and warning symbols (no text or labels)Do not place any containers containing water, vases, flowerpots, medicines as well as any metal on the product.
If water or a foreign material enters the product, disconnect the power cord and contact a Service Center.
This may result in a product malfunction, electric shock, or fire.
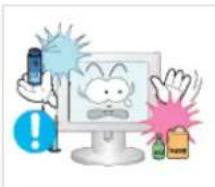
natural_image
Illustration of a cartoon character on a computer monitor with warning symbols and product labels (no readable text)Do not use or keep combustible spray or flammable material near the product.
▶ Otherwise, this may result in an explosion or fire.
Do not insert any metal, such as chopsticks, coins, pins and steels, or inflammable objects, such as matches or paper, inside the product (through the ventilating openings, input and output terminals, etc).
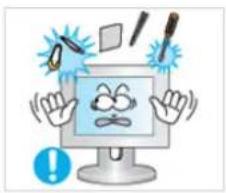
natural_image
Cartoon illustration of a computer monitor character with expressive faces and surrounding tools (no text or symbols)If water or foreign material enters the product, disconnect the power cord and contact a Service Center.
▶ Otherwise, this may result in electric shock or fire.
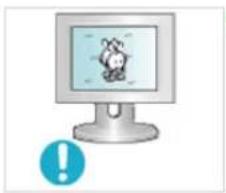
natural_image
Illustration of a computer monitor displaying a cartoon rabbit on screen, with a blue warning symbol below (no text or symbols on the monitor itself)When using a fixed screen for a long time, an afterimage or stain may occur.
If you are not using your product for a long period of time, put it into sleep mode or use a moving screen saver.
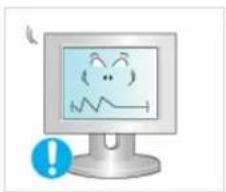
natural_image
Cartoon illustration of a computer monitor displaying a sad face emoji with a warning symbol (no text or symbols on the monitor itself)Set a resolution and frequency appropriate to the product.
▶ Otherwise, your eyesight may be damaged.
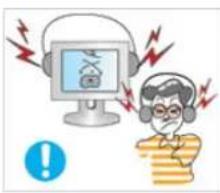
natural_image
Illustration of a person experiencing a computer screen with sound waves, symbolizing stress or noise (no text present)When using headphones or earphones, do not turn the volume too high.
Having the sound too loud may damage your hearing.
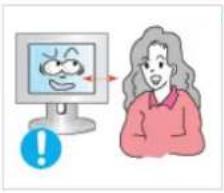
text_image
Illustration showing a person reacting to a computer screen displaying a smiling face, with an exclamation mark indicating alert.If you continually move closer to the product screen, your eyesight may be failing.
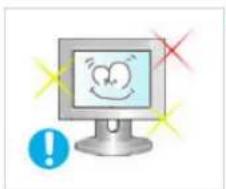
natural_image
Illustration of a computer monitor displaying a smiling emoji with a heart symbol, accompanied by a blue exclamation mark and red X marks (no text or symbols on the monitor itself)To ease eye strain, take at least a five-minute break after every hour of using the monitor.
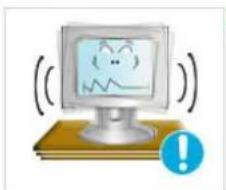
natural_image
Illustration of a computer monitor with a warning icon and exclamation mark (no text or symbols on the monitor)Do not install it in an unstable location such as an unstable rack or uneven surface or a location exposed to vibrations.
▶ Otherwise, it may fall and cause personal injury and/or damage the product.
If you use the product in a location exposed to vibrations, it may damage the product and result in fire.
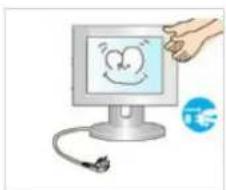
natural_image
Illustration of a computer monitor with a smiling face and cable, accompanied by a hand holding a pointer (no text or symbols)When moving the product, turn the power off and disconnect the power plug, antenna cable, and all the cables connected to the product.
▶ Otherwise, it may result in electric shock or fire.
Ensure that children do not hang onto the product or climb up onto the product.
The product may fall and cause personal injury or death.
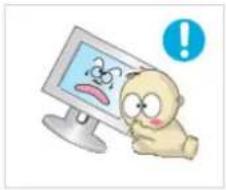
natural_image
Cartoon character using a computer monitor with a sad face, no text or symbols present
natural_image
Illustration of a desktop computer monitor with cable and a circular logo (no text or symbols)If you do not use the product for a long period of time, disconnect the power cord from the power outlet.
▶ Otherwise, this may result in overheating or fire due to dust, and may result in fire due to electric shock or leakage.
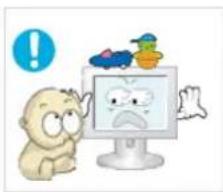
natural_image
Cartoon character reacting to a computer monitor displaying a sad face, with other colorful icons above (no text or symbols)Do not place any heavy items or toys or confectionery, such as cookies etc. that may attract the attentions of children onto the product.
Your children may hang onto the product causing it to fall and this may result in personal injury or death.
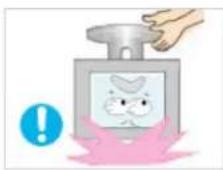
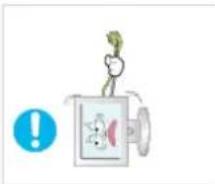
Do not turn the product upside down or move it while holding only the stand.
▶ Otherwise, it may fall and result in personal injury and/or damage to the product.
text_image
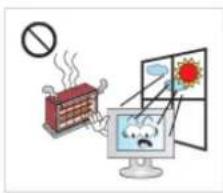
Illustration showing a factory with smoke and a computer monitor displaying a sad face, with a red prohibition symbol above.Do not place the product in a location exposed to direct sunlight or near any heat such as a fire or heater.
This may reduce the lifetime of the product, and may result in fire.
natural_image
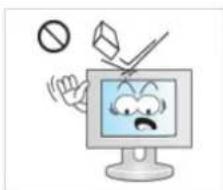
Cartoon illustration of a computer monitor with a sad face and a checkmark, showing a warning symbol (no text present)Do not drop any objects onto the product or cause any impact to the product.
▶ Otherwise, this may result in electric shock or fire.
text_image
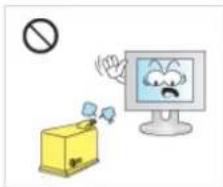
Cartoon illustration showing a yellow box with a stop sign and a computer monitor displaying a sad face, symbolizing online shopping or online behavior.Do not use a humidifier or kitchen table near the product.
▶ Otherwise, this may result in electric shock or fire.
natural_image
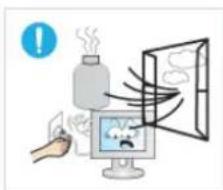
Illustration of a hand using a computer to interact with a bottle and fan, emitting smoke or vapor (no text or symbols)When there is a gas leak, do not touch the product or the power plug but ventilate immediately.
If a spark occurs, it may cause an explosion or fire.
If the product has been turned on for a long time, the display panel becomes hot. Do not touch it.
Keep the small accessories in a location out of the reach of children.
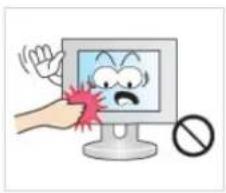
natural_image
Illustration of a hand holding a computer monitor displaying a cartoon face with a sad expression, next to a prohibition symbol (no text present)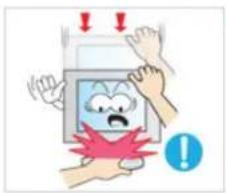
natural_image
Illustration of a cartoon character holding a computer monitor with red stress lines and warning symbols (no text or labels)Be careful when adjusting the angle of the product or the height of the stand.
This may result in personal injury as your hand or fingers may become caught.
Also, if you tilt the product too far, it may fall and cause personal injury.
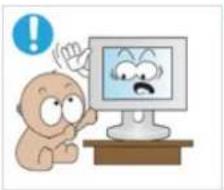
natural_image
Cartoon illustration of a surprised baby reacting to a computer screen displaying a sad face (no text or symbols present)Do not install the product in a location low enough for children to reach.
▶ Otherwise, it may fall and result in personal injury.
Since the front part of the product is heavy, install the product on a level and stable surface.
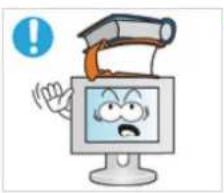
natural_image
Cartoon illustration of a computer monitor with a sad face and a graduation cap on top, accompanied by a blue warning symbol (no text or symbols present)Do not put any heavy objects on the product.
This may result in personal injury and/or damage to the product.
Proper Seating Posture During Monitor Use

natural_image
Illustration of a person sitting at a desk using a computer, with a 50 cm measurement label on the wall (no other text or symbols)When using the product, use it in the correct position.
- Keep your back straight while looking at the product.
- The distance between your eyes and the screen should be between 45 to 50 cm. Look at the screen from a slightly higher location than the height of the screen.
- When using the product, use it in the correct position.
- Adjust the angle so that light is not reflected on the screen.
- Place your arms perpendicular to your sides and allow your arms to be level with the back of the hand.
- Keep your elbow at 90 degrees.
- Keep your knees at greater than 90 degrees, and keep your heels firmly on the floor. Keep your arms lower than your heart.
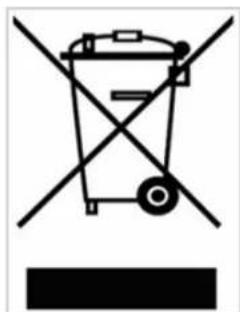
Correct Disposal of This Product
(Waste Electrical & Electronic Equipment) - Europe only
natural_image
Symbol of a trash bin crossed with no text or numbers, representing waste sorting or disposal (no text present)(Applicable in the European Union and other European countries with separate collection systems)
This marking shown on the product or its literature, indicates that it should not be disposed with other household wastes at the end of its working life. To prevent possible harm to the environment or human health from uncontrolled waste disposal, please separate this from other types of wastes and recycle it responsibly to promote the sustainable reuse of material resources.
Household users should contact either the retailer where they purchased this product, or their local government office, for details of where and how they can take this item for environmentally safe recycling.
Business users should contact their supplier and check the terms and
conditions of the purchase contract. This product should not be mixed with other commercial wastes for disposal.
SAMSUNG
text_image
The color and appearance of the product may vary depending on the model, and the product specifications are subject to change without prior notice for reasons of performance enhancement. ■ Safety Precautions ■ Introduction ■ Connections ■ Using Linux ■ Using the Software ■ Adjusting the Monitor ■ Troubleshooting ■ Specifications ■ Information
Introduction
Features
Package Contents
Your Monitor

Features
Tuning the power off while booting up a Client may damage the monitor In addition, exit all running programs before turning the monitor off.

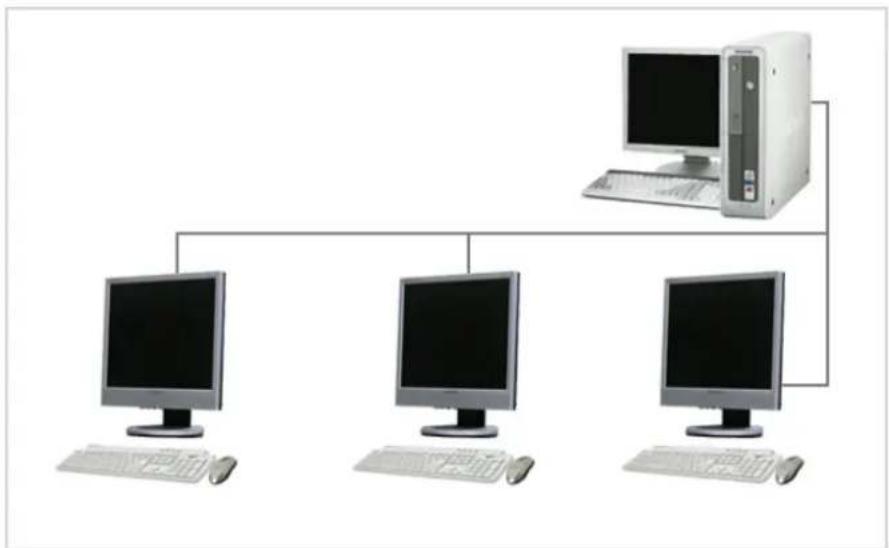
What is Client Monitor?
flowchart
graph TD
    A["Desktop Computer"] --> B["Client 1"]
    A --> C["Client 2"]
    A --> D["Client 3"]
D Client Monitor is a new type of monitor that can be used as a general monitor and can also be used as a terminal by connecting it to a host PC with a LAN connection so that you can use a Client Monitor to access the Internet, create a document and edit an image file. In addition, you can connect an external storage device (e.g. DSC, MP3, external storage, etc.) to the USB port and enjoy music, video and games saved on the device.
Moreover, you can display your screen on another display device such as a projector through the VGA OUT port so that the monitor can be utilized for various purposes such as video conferences, joint-work, etc.
In addition, since Win CE is integrated within the monitor, you can search the Internet or USB memory independently without connecting it to the host PC.
Features
Package Contents
Your Monitor

Package Contents
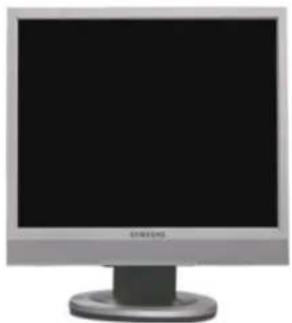
Please make sure the following items are included with your monitor.
If any items are missing, contact your dealer.
Contact a local dealer to buy optional items.
Unpacking
natural_image
Computer monitor with blank screen and metallic frame (no visible text or symbols)Without stand With Stand
natural_image
Front view of a silver CRT computer monitor with a black screen and circular base (no visible text or symbols)Manual

Quick

Warranty Card
Set(Not available in all
locations)

User's Guide, Monitor Driver,
GuidNatural Color software,
MagicTune™ software
Cable
natural_image
Line drawing of a plug with a coiled cable (no text or symbols)Power Cord
Sold separately
natural_image
Illustration of a classic computer keyboard with a USB cable (no text or symbols visible)
natural_image
Computer mouse with USB cable (no text or symbols visible)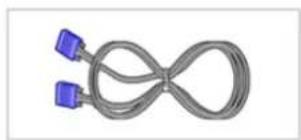
natural_image
Coiled cable with two blue connectors, no text or symbols visibleKeyboard (USB) Mouse (USB) D-Sub Cable
Features
Package Contents
Your Monitor
Your Monitor
Front
text_image
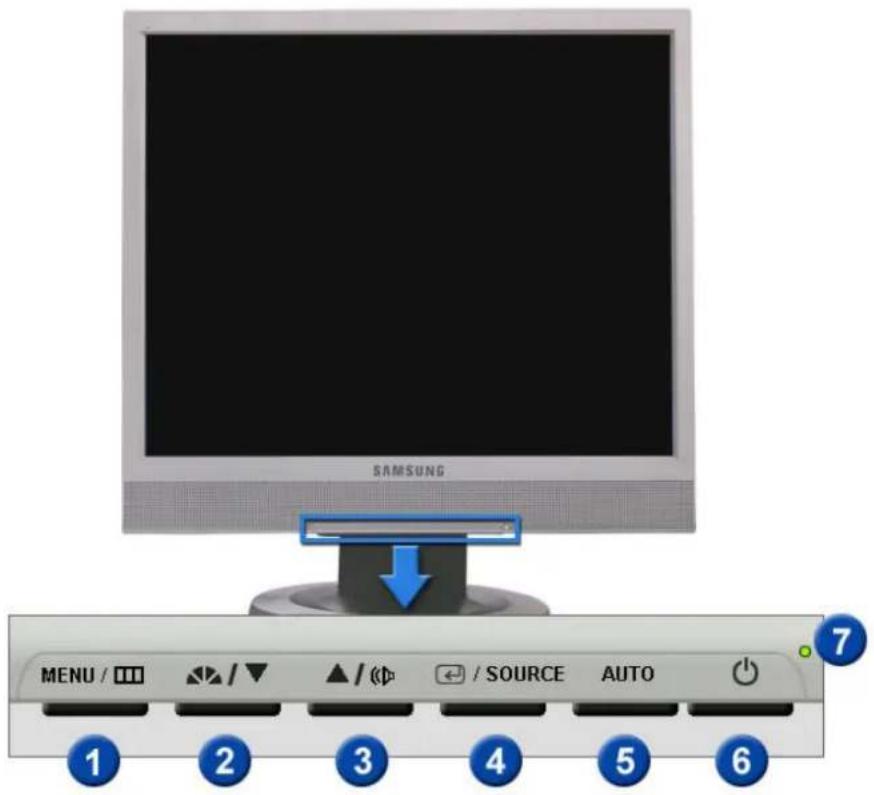
SAMSUNG MENU / / / / / SOURCE AUTO 1 2 3 4 5 6 71 MENU button [1]
Opens the OSD menu. Also use to exit the OSD menu or return to the previous menu.
② MagicBright™ button [◀◀]
MagicBright™ is a new feature providing optimum viewing environment depending on the contents of the image you are watching. Currently six different modes are available: Custom, Text, Internet, Game, Sport and Movie. Each mode has its own pre-configured brightness value. You can easily select one of six settings by simply pressing MagicBright™ control button.
1) Custom
Although the values are carefully chosen by our engineers, the pre-configured values may not be comfortable to your eyes depending on your taste.
If this is the case, adjust the brightness and contrast by using the OSD menu.
2) Text
For documentations or works involving heavy text.
3) Internet
For working with a mixture of images such as text and graphics.
4) Game
For watching motion pictures such as a game.
5) Sport
For watching motion pictures such as a sport.
6) Movie
For watching motion pictures such as a DVD or Video CD.
Click here to see an animation clip
3 Volume button [1]
When OSD is not on the screen, push the button to adjust volume.
2.3 Adjust buttons [▼]Adjust items in the menu.
4 Enter button [●] / SOURCE button
Activates a highlighted menu item. / Push the 'SOURCE', then selects the video signal while the OSD is off. (When the SOURCE button is pressed to change the input mode, a message appears in the upper left of the screen displaying the current
mode -- Analog or Client input signal.)
Click here to see an animation clip
5
AUTO button Use this button for auto adjustment.
Click here to see an animation clip
6
Power button [∅]
Use this button for turn the monitor on and off.
Be careful as pressing the Power button in client mode will shut down Windows XPe. Be careful that if you force shut down Windows it may cause damage.
In these cases your monitor will be forcefully shut down and this may cause damage to your operating sysetm. Therefore ensure that the EWF function is enabled.
-
Turn the power off by holding down the Power button after switching to Monitor mode from Client mode.
-
Turn the power off by holding down the Power button for more than five(5) seconds in Client mode.
When unable to boot up your computer because of a Windows crash, please contact your Administrator.
7
Power indicator
This light glows green during normal operation, and blinks green once as the monitor saves your adjustments.
See PowerSaver described in the manual for further information regarding power saving functions. For energy conservation, turn your monitor OFF when it is not needed, or when leaving it unattended for long periods.

Rear
text_image
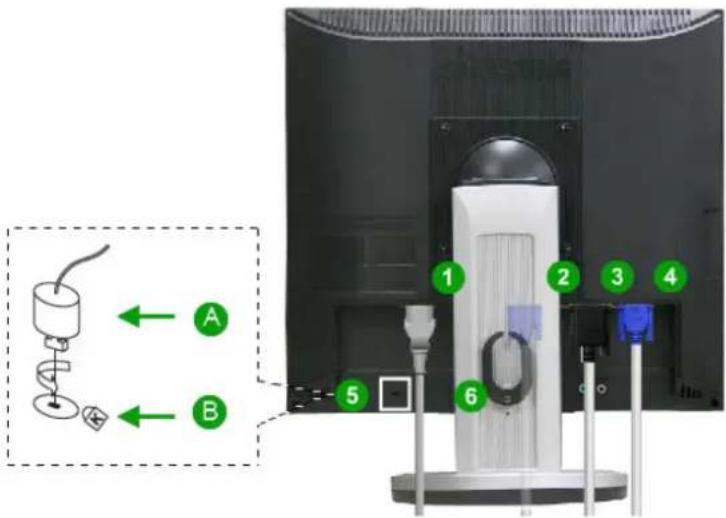
Technical diagram of a device with labeled components and directional arrows, including parts A, B, 1-6.The configuration at the back of the monitor may vary from product to product.
1 POWER IN port Connect the power cord for your monitor to the power port on the back of the monitor.
② VGA IN port Connect the signal cable to the 15-pin, D-sub port on the back of your monitor.
3 RS-232C Connection Terminal Connect a RS-232C cable to this terminal.
4 VGA OUT port Connect a monitor to another monitor through a D-Sub cable.
5 Kensington Lock The Kensington Lock is a device used to physically fix the system when using it in a public place. The locking device has to be purchased separately. The appearance and locking method may differ from the illustration depending on the manufacturer. Refer to the manual provided with the Kensington Lock for proper use. The locking device has to be purchased separately.
The location of the Kensington Lock may be different depending on its model.
Using the Anti-Theft Kensington Lock
- Insert the locking device into the Kensington slot on the Monitor (B)
and turn it in the locking direction ( )
- Connect the Kensington Lock cable.
- Fix the Kensington Lock to a desk or a heavy stationary object.
6 Cable Fix Ring When connecting the cable is finished, fix the cables to the Cable Fix Ring.
natural_image
Computer monitor with a white stand and a blue arrow pointing to the right side (no visible text or symbols)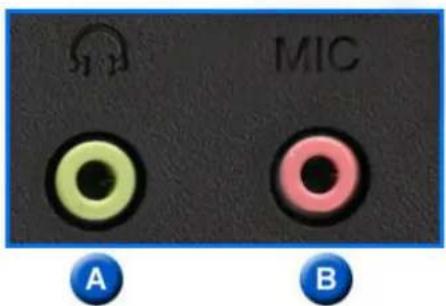
text_image
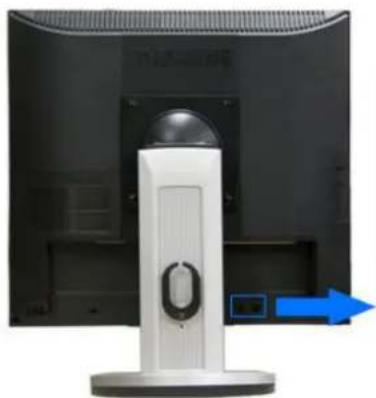
MIC A B
Earphone jack [n]
Headphone connection terminal.

The Microphone connection terminal (MIC)
Connect a microphone to the MIC terminal.
text_image
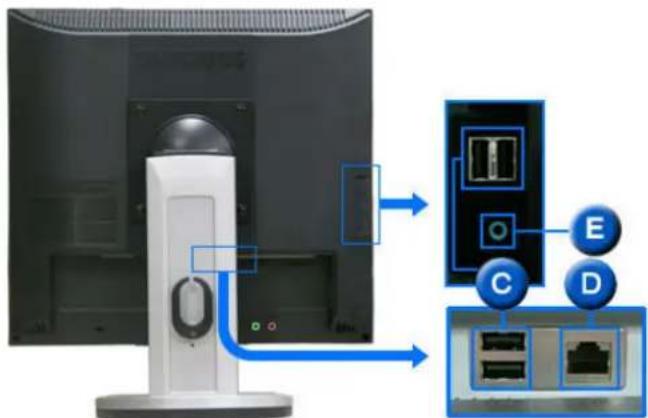
Diagram showing computer monitor rear panel connected to a device with labeled ports (C, D, E) and internal components.
USB
(USB Connection Terminal)
Connect USB devices such as a mouse, keyboard and external storage devices (DSC, MP3, external storage, etc.).

LAN (LAN Connection Terminal)
Connect when using it as a monitor.

AUDIO IN Connect the audio cable for your monitor to the audio port on the back of your computer.
✗ See Connecting Cables for further information regarding cable connections.
SAMSUNG
text_image
The color and appearance of the product may vary depending on the model, and the product specifications are subject to change without prior notice for reasons of performance enhancement. ■ Safety Precautions ■ Introduction ■ Connections ■ Using Linux ■ Using the Software ■ Adjusting the Monitor ■ Troubleshooting ■ Specifications ■ Information
Connections
Connecting Cables Using the Stand Using Other Stands

Connecting Cables
Connecting Cables (When used as a normal monitor)
text_image
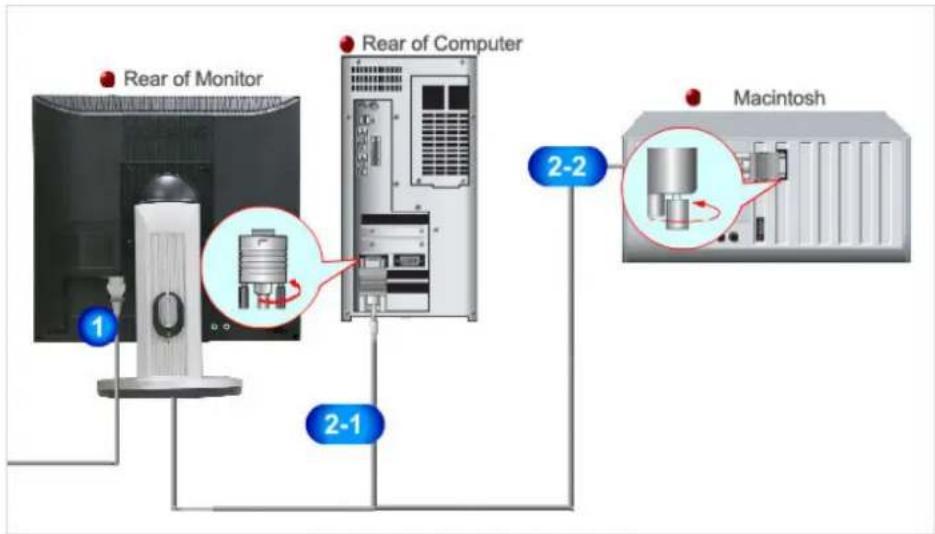
Rear of Monitor Rear of Computer Macintosh 1 2-1 2-21 Connect the power cord for your monitor to the power port on the back of the monitor. Plug the power cord for the monitor into a nearby outlet.
② Use appropriate connection for your computer.
2-1 Using the D-sub (Analog) connector on the video card.
- Connect the D-Sub Cable to the VGA IN port on the back of your monitor.
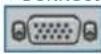
[VGA IN]
Using Macintosh
- Connect the monitor and the Macintosh computer using the computer connection cable.
If the monitor and the computer are connected, you can turn them on and use them.

External Device Connection
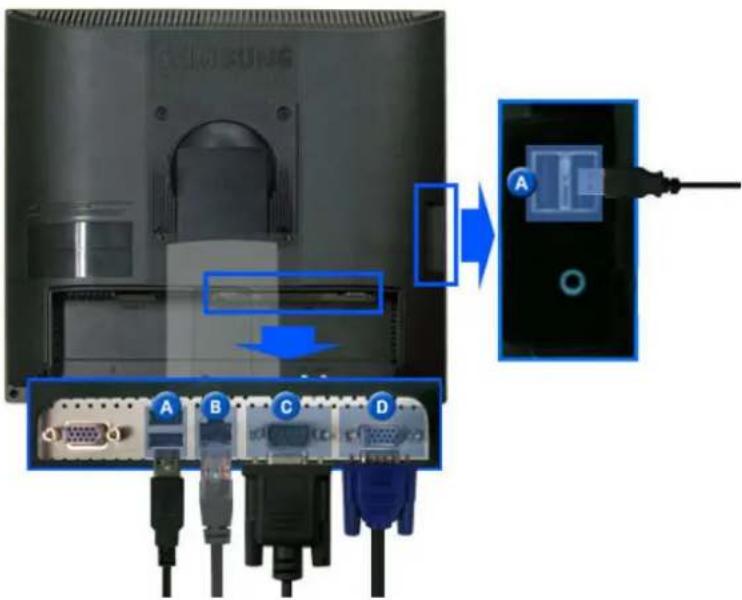
text_image
A B C D
USB
(USB Connection Terminal)

LAN
(LAN Connection Terminal)

RS-232C Connection
Terminal

D-sub 15-pin port
[VGA OUT]
Connect USB devices such as a mouse, keyboard and external storage devices (DSC, MP3, external storage, etc.).
Connect the LAN cable.
Connect a RS-232C cable to this terminal.
Use it by connecting it to another monitor. (The picture of the main monitor is displayed on the connected monitor.)
Connecting Cables
Using the Stand
Using Other Stands

Using the Stand

Tilt angle
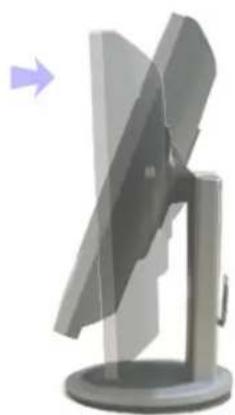
natural_image
Modern office chair with a curved glass panel and stand, no visible text or symbols✗ You can tilt the monitor screen forward to adjust the angle to a particular angle.

Swivel stand
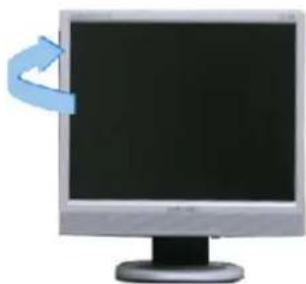
natural_image
Computer monitor with a blue arrow pointing to the left side (no text or symbols visible)You can easily adjust the position of the monitor screen from right to left using the rotating stand. Rubber stubs are attached at the bottom of the monitor to help fix it to the installation location.
Connecting Cables Using the Stand Using Other Stands
Using Other Stands
Attaching a Base
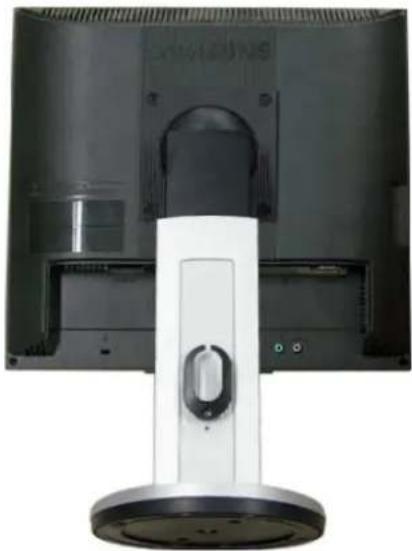
This monitor accepts a 100 mm x 100 mm VESA-compliant mounting interface pad.
natural_image
Computer monitor with a white stand and black lid, showing front and back views (no visible text or symbols)A Monitor Mounting interface pad ( Sold separately )
① Turn off your monitor and unplug its power cord.
② Lay the LCD monitor face-down on a flat surface with a cushion beneath it to protect the screen.
③ Remove four screws and then remove the stand from the LCD monitor.
4 Align the mounting interface pad with the holes in the rear cover mounting Pad and secure it with four screws that came with the arm-type base, wall mount hanger or other base.
!
- Do not use screws longer than the standard dimension, as they may damage the inside of the Monitor.
- For wall mounts that do not comply with VESA standard screw specifications, the length of the screws may differ depending on their specifications.
- Do not use screws that do not comply with the VESA standard screw specifications. Do not fasten the screws too tightly, as this may damage the product or cause the product to fall, leading to personal injury. Samsung is not liable for these kinds of accidents.
- Samsung is not liable for product damage or personal injury when a non-VESA or non-specified wall mount is used or the consumer fails to follow the product installation instructions.
• To mount the monitor on a wall, you should purchase the wall mounting kit that allows you to

mount the monitor at least 10cm away from the wall surface.
- Contact the nearest Samsung Service Center for more information. Samsung Electronics will not be responsible for damages caused by using a base other than those specified.
- Please use Wall Mount according to the International standards.
text_image
The color and appearance of the product may vary depending on the model, and the product specifications are subject to change without prior notice for reasons of performance enhancement. ■ Safety Precautions ■ Introduction ■ Connections ■ Using Linux ■ Using the Software ■ Adjusting the Monitor ■ Troubleshooting ■ Specifications ■ Information○ Using Linux
| Introduction | Quick Overview of Supported Features | Boot Procedure | Control Center (Global Settings) | Application Programs | Shutdown |
Introduction
Welcome
Congratulations on purchasing one of the Samsung Linux-based Thin Client models. The Samsung Thin Clients are composed of state-of-the-art hardware and an operating system based on the Samsung Flash Linux Technology. We have done our best to deliver an excellent product and we promise to provide support and service of the same quality.
Please refer to the "Software Feature Comparison List" to get an overview of the supported software features and protocols of the different Samsung Thin Client models.
How to Use This Guide
In this STC User Guide we describe the setup screens and options as well as the boot procedure. We do not describe common functionalities like TCP/IP, NFS, SMB, XDMCP, DHCP, and BOOTP, etc. If you have any questions concerning these matters please ask your system administrator or, if you would like to know more about protocols, please refer to the corresponding documentation.
| Introduction | Quick Overview of Supported Features | Boot Procedure | Control Center (Global Settings) | Application Programs | Shutdown |
Quick Overview of Supported Features
List of Supported Features in STC Linux
| Feature Name | 711 LT | 911 LT | |
| Citrix ICA 9 9 | |||
| RDP | Rdesktop | Rdesktop | |
| VNC Client Real VNC Real VNC | |||
| VNC Server x11vncserver x11vncserver | |||
| Xorg | 7.2 | 7.2 | |
| Samba Support Yes Yes | |||
| NFS Support Yes Yes | |||
| XDMCP | Yes | Yes | |
| Printer Support Thin Print, USB, Network | Printer (Postscript) | Thin Print, USB, Network Printer (Postscript) | |
| Mozilla Firefox | 1.0 | 1.0 | |
| PDF Reader | Xpdf | Xpdf | |
| Terminal Emulator | Xterm | Xterm | |
PXE Network Boot Support Yes Yes
| SSH | Yes | Yes | ||
| DHCP | Yes | Yes | ||
| DPMS | Yes | Yes | ||
| Screen Saver Yes Yes | ||||
| USB Mass Storage Yes Yes | ||||
| File Browser EmelFM2 EmelFM2 | ||||
| Smart Card Support Yes Yes | ||||
| Icewm | 1.2.32 | 1.2.32 | ||
| Thin Print Yes Yes | ||||
Introduction
Quick Overview of Supported Features
Boot Procedure
Control Center (Global Settings)
Application Programs
Shutdown
Boot Procedure
System BIOS
The BIOS looks for extensions in the appropriate memory area. The next step is the execution of the master boot record, which starts a secondary stage loader.
Secondary Stage Loader and Boot Menu
The secondary stage loader provides the user with a boot menu. The boot option can be selected by using arrow keys and then made to run by using the enter key. By default, the STC boots into the default choice after the specified timeout. You can then choose between 2 boot options and the option of starting the Thin Client in its factory defaults safe mode.
- Normal Boot
Silent Boot - Verbose Boot
- Safe Boot
1 Normal Boot
Silent Boot
"Silent Boot" is the standard boot mode; it suppresses all messages from the kernel and starts up the graphical desktop. It displays a progress bar along with a text message when major checkpoints in the boot process are reached.
Verbose Boot
If the "Verbose Boot" is chosen (by pressing the key "F2"), the boot messages are shown and there will be a detailed display of the boot process and its execution.
② Safe Boot
If you choose "Safe Boot" (setup only with standard parameter values), the secondary stage loader looks for a bootable system in the flash and continues the boot process as in the other boot modes. It basically does booting with a default X-server configuration without the bootsplash screen. This method will restore your display settings to default in main boot. This method is very useful in case you need to restore corrupted display to restore to the original settings of the system. Please beware that all your display related custom settings will get changed.
Networking
After loading the kernel the network configuration follows. Two different ways can be chosen to include the terminal in the network environment. According to the settings of the terminal, DHCP broadcast or manual configured IP address can be used for this purpose.
X-Server
The last step of the boot procedure is the start of the X-Server and the local window manager. Once the boot procedure completes, a desktop will be displayed on the screen as shown below.
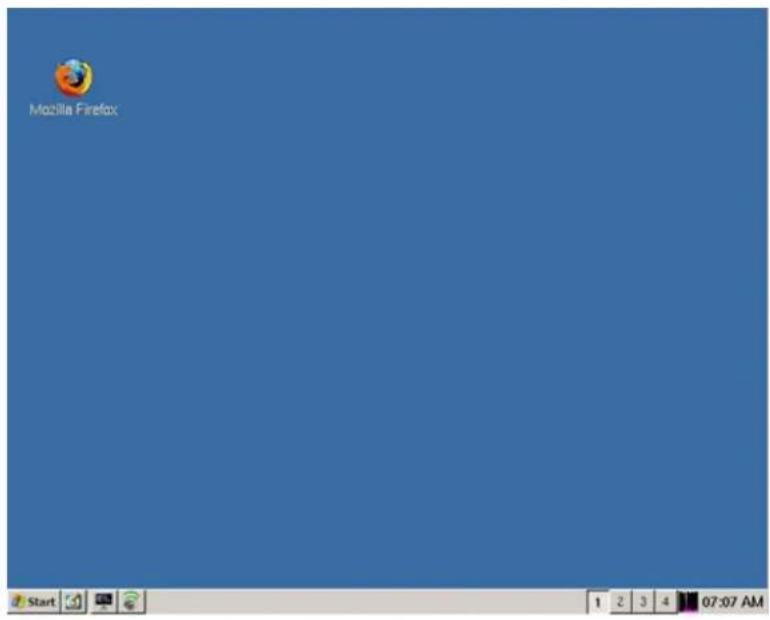
text_image
Mozilla Firefox Start 1 2 3 4 07:07 AM| Introduction | Quick Overview of Supported Features | Boot Procedure | Control Center (Global Settings) | Application Programs | Shutdown |
Control Center (Global Settings)
Starting the Control Center
Once the STC boots up, you have the option to set the STC as per your choice using the settings provided in the Control Panel. The Control Panel can be accessed using two methods.
From the start menu
Select the Settings option from the Start Menu. You can set up your STC using the options provided in the Settings tab. The various setting options provided are
• Display
• Input
Printer
- Network
Time
- System
- Upgrade
The following figures demonstrate how to open the Control Panel from the Start Menu.
• Click on the Start button.
- Choose Settings tab.
- Select any one of the 7 options (as shown below), to open the Control Panel Settings for the particular option selected.
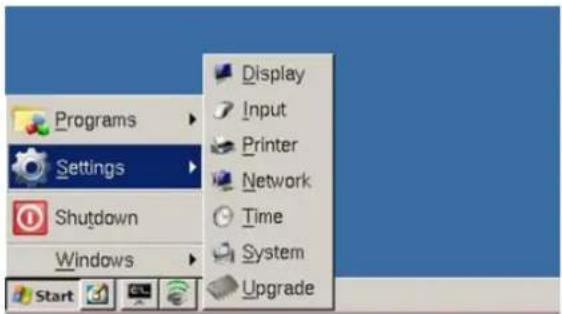
text_image
Programs Settings Shutdown Windows Start Display Input Printer Network Time System UpgradeDisplay
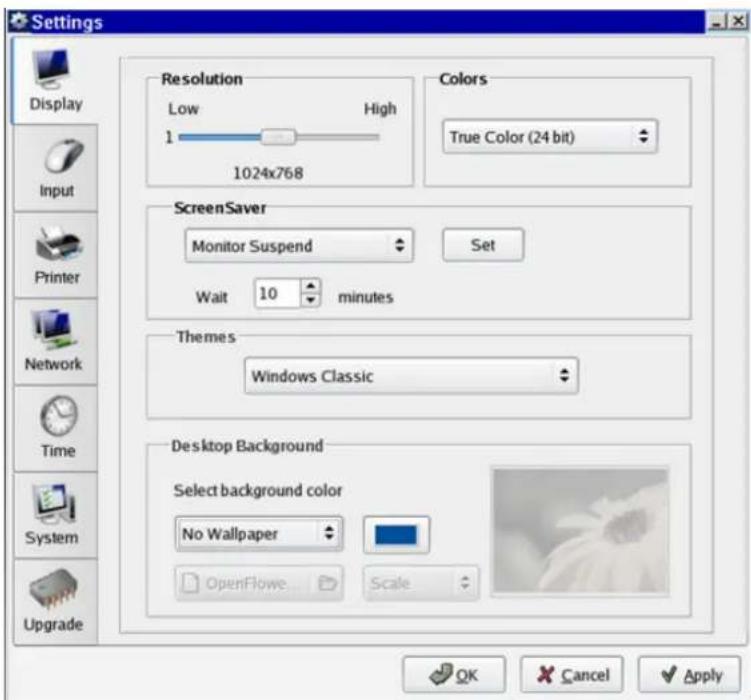
The Display Tab has five options that can be changed.
text_image
Settings Display Input Printer Network Time System Upgrade Resolution Low High 1 1024x768 Colors True Color (24 bit) ScreenSaver Monitor Suspend Set Wait 10 minutes Themes Windows Classic Desktop Background Select background color No Wallpaper OpenFlowe Scale OK Cancel Apply① Resolution
It can be set to any one of the following screen size.
- 800 x 600
. 1024 x 768
. 1280 x 1024
② Color
It can be set to any one of the following color depths.
. 8 bit (Low Color / 256 Colors)
• 16 bit ( High Color / 65,535 Colors)
• 24 bit (True Color / 16.7 Million Colors)
③ Screen Saver
It can be set to any one of following types with Waiting Time.
- None: In this, the screensaver option is disabled. This is the default choice.
- Floating : In this, a bitmap image is used as the screensaver by making the image to float all over on the monitor background once the system is left idle for the specified screensaver timeout.
- Monitor Suspend : This is the energy saving phase wherein the monitor is left blank once the screensaver timeout is exceeded.
Along with this, you can also set the waiting time before the screen saver is activated.
4 Themes
We can set the theme of the overall system among the three available options.
• Vista Black
- IceBuntu
- Windows Classic
⑤ Background
The background can be specified either by specifying wallpaper or letting the theme deciding the background color. The wallpaper can be set in three formats.
Input
① Mouse
Button Configuration
Set the type of the attached mouse device from these two options:
- Left Handed - Changes the orientation of the mouse to left hand by swapping the mouse buttons.
- Right Handed - Changes the orientation of the mouse to left hand by swapping the mouse buttons.
Pointer Speed
The mouse pointer speed can be changed using this option. The default speed is set as 5. It can be set as to be anywhere between 0.0 and 20.0, with the pointer tip speed increasing with increasing value.
② Keyboard
The keyboard settings can be used to configure the keyboard attached to the Samsung Thin Client.
Keyboard Type
Choose your keyboard type from the available options from the drop box.
Character Repeat
In this section you can set the auto repeat behavior for the keyboard:
- Repeat delay: - Sets the delay time (in relative value) between pressing a key and the start of the auto repeat mode.
- Repeat rate: - Sets the number of repeated characters per second (relative scale).
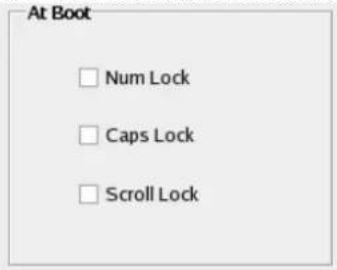
At Boot Option
This sub-menu has three options to be set
- Num Lock - Enable this if Num Lock is to be activated after reboot.
- Caps Lock: - Enable this if Caps Lock is to be activated after reboot.
- Scroll Lock: - Enable this if Scroll Lock is to be activated after reboot.
text_image
At Boot Num Lock Caps Lock Scroll LockPrinter
Here you can configure the printer to the settings you want. The available options are
- Add: -Here you can add a printer to your already configured settings.
- Modify: - Here you can modify an earlier configured printer settings.
- Delete: - Here you can delete an existing printer setting.
- Set Default: - Here you can select a printer as the default printer for your STC.
For more information regarding "ThinPrint" components, please refer to your "ThinPrint" manual.
Network
1 Network Adaptor
This menu allows you to configure the network settings for the STC. The available options here are
Network Adaptor
This drop down menu lists the available Ethernet cards for the STC. By default, eth0 is the chosen Ethernet card, but can be changed after the first boot. There is a check box at the bottom of the Network Adapter option which can be used to enable or disable the network connection.
Setting IP Information
- Get IP From DHCP Server : This option enables the STC to automatically fetch an IP from the local DHCP Server connected to it. It automatically sets all the information regarding IP, Subnet Mask, Gateway Address and DNS Server IP.
- Specify An IP Address: This option enables you to manually set an IP for your STC. Here you have to set the IP Address to be used by the STC, its Subnet Mask and Default Gateway address. Apart from these, the Primary DNS Server IP, and if needed, the Secondary DNS Server IP, are also required to be set if the STC is supposed to be connected to the internet.
- On successful completion of the network activation process, the network activation window will be closed on its own and will return to the ControlCenter.
Setting DNS Server Information
- Get DNS Server Address automatically : This option enables the STC to automatically fetch the DNS Server Address from the local DHCP Server connected to it.
- Specify DNS Server Address: This option enables you to manually set the DNS Server Address for your STC. Here you have to manually set the Primary DNS Server IP, and if needed, the Secondary DNS Server IP, for Internet access.
② NFS
NFS (Network File System) enables you to share files via the network. The NFS server exports a file system, and the NFS client (Samsung Thin Client) associates this to a mount point of its own file system. So afterwards the exported file system will be a logical part of the Samsung Thin Client's file system, while it physically remains on server side.
To set up NFS mount, the server has to be configured first. For detailed information about "NFS", refer to the corresponding "man pages" of your server operating system.
Add NFS Mount
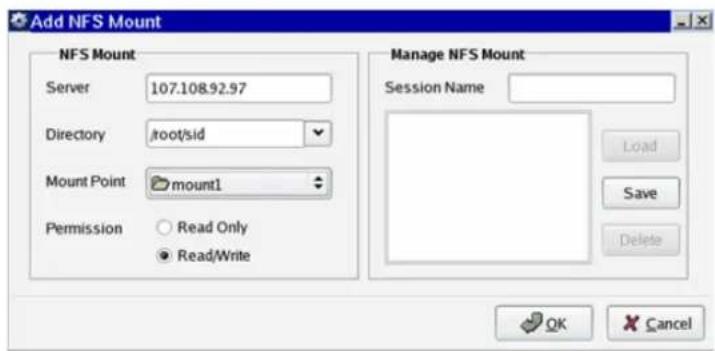
Click "Add..." to open the "Add NFS Mount" dialog-box with following options
• Server: - Enter the name or the IP address of the NFS server that provides the share.
- Directory: - Enter the directory name as it is exported by the NFS server.
- Mount Point: - Specify "Mount Point" where the NFS shared directory can be mounted in local file system of the STC.
- Permission: - Enter the permission for the NFS Mount to be "Read-Only" or "Read/Write".
- Session Name: - Enter the name for the session to be saved or loaded.
- Load / Save / Delete: - For loading, saving or deleting a saved session from memory.
text_image
Add NFS Mount NFS Mount Server 107.108.92.97 Directory /root/sid Mount Point mount1 Permission ○ Read Only ● Read/Write Manage NFS Mount Session Name Load Save Delete OK CancelIt is possible to select/create a new/existing mount point using the Control Centre dialog boxes itself. The process is described here along with figures.
- First the IP address of the NFS server is given.
- It automatically lists all the directories shared on that NFS server which can be seen like this.
- Then the directory where the share has to be mounted is selected.
- Then a new empty directory is created and named accordingly.
- Then the folder created is selected and then it becomes the new mount point, where the NFS share directory will be mounted.
Save NFS Mount Settings
Enter a name to save the NFS settings and click "Save" to save the settings.
Load NFS Mount Settings
Select the saved settings to be loaded. Click "Load" to load the settings.
Delete NFS Settings
Select the saved settings to be deleted. Click "Delete" to delete the settings.
Modify NFS Mount
Click "Modify..." to open the "Modify NFS Mount" dialog-box to modify an existing NFS Mount with following options (see figure).
Delete NFS Mount
Click "Delete" to open the "Remove NFS Mount" dialog-box with the text message "Are you sure you want to delete NFS Mount". The following options are provided.
③ Samba
The Samba, or SMB, protocol is very useful because it is used by Microsoft Windows NT, Windows 95/98, Windows 2000 and Window XP to share disks and printers. So as Unix (including Linux) can also handle this protocol with the Samba suite tools, it is possible to share disks and printers with Windows hosts. So it is possible on the Thin Client to mount SMB shares from Windows or Unix Samba hosts. The SMB (Server Message Block) protocol is only used for sharing files over the network (no printers). It is necessary that the shares you want to mount be created on the Windows or Unix host first!
Add Samba Mount
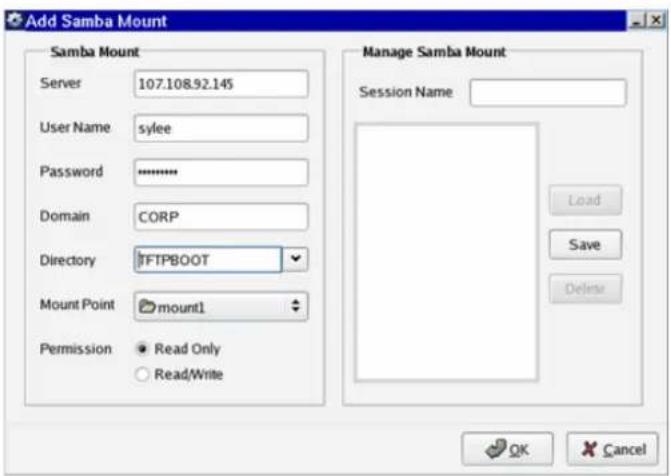
Click "Add..." to open the "Add Samba Mount" dialog-box with following options
- Server: - For a Windows host, the NetBIOS name has to be entered here. In the case of a Unix samba host, the host name or IP address is to be entered.
- User Name: - Enter the user name of your account on the Windows or Unix samba host.
- Password: - Enter the password of your account on the Windows or Unix samba host.
- Domain: - Enter domain name of your account on the Windows or Unix samba host.
- Directory: - Enter directory name as it is exported by the Windows or Unix samba host.
- Mount Point: - Specify the "Mount Point" where the share should be mounted in local file system of the Thin Client.
- Permission: - Enter the permission for Samba Mount to be "Read-Only" or "Read/Write", based on the properties of the Samba share provided by the Windows or Unix samba host.
text_image
Add Samba Mount Samba Mount Server 107.108.92.145 User Name sylee Password ............ Domain CORP Directory TFTPBOOT Mount Point mount1 Permission ● Read Only ○ Read/Write Manage Samba Mount Session Name Load Save Delete OK CancelIt is possible to select/create a new/existing mount point using the Control Centre dialog boxes itself. The process is described here along with figures.
- First the IP address of the Samba server is given.
- It automatically lists all the directories shared on that Samba server which can be seen as shown in the figure below.
- Then the directory where the share has to be mounted is selected.
- Then a new empty directory is created and named accordingly.
- Then the folder created is selected and then it becomes the new mount point, where the Samba share directory will be mounted.
Save Samba Mount Settings
Enter a name to save the Samba settings and click "Save" to save the settings.
Load Samba Settings
Select the saved settings to be loaded. Click "Load" to load the settings.
Delete Samba Settings
Select the saved settings to be deleted. Click "Delete" to delete the settings.
Modify Samba Mount
Click "Modify..." to open the "Modify Samba Mount" dialog-box to modify an existing Samba Mount with following options
- Directory: - Modify the directory name as it is exported by the Windows or Unix samba host.
- Server: - The NetBIOS name (Windows host) or host name/IP address (Unix host) is to be modified.
- Mount Point: - Modify "Mount Point" where the share should be mounted in local file system.
- User Name: - Enter the modified user name of your account on the Windows or Unix samba host.
- Password: -Enter the modified password of your account on the Windows or Unix samba host.
- Domain: - Enter modified domain name of your account on the Windows or Unix samba host.
- Permission: - Modify the permission for the Samba Mount to be "Read-Only" or "Read/Write", based on the properties of the Samba share provided by the Windows or Unix samba host.
Delete Samba Mount
Click "Delete" to open the "Remove Samba Mount" dialog-box with the text message "Are you sure you want to delete Samba Mount". The following options are provided.
4 VNC Server
This menu allows you to configure a VNC Server on the STC from a VNC Client. The available options here are
No authentication
Enabling this option allows anonymous VNC Client to connect to the Thin Client acting as a VNC Server.
VNC Password Authentication
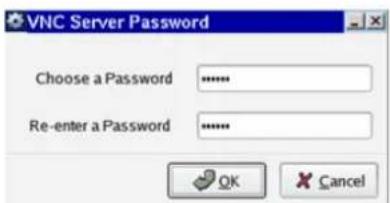
Enabling this option allows only authenticated VNC Client to connect to the Thin Client acting as a VNC Server. For this, a password has to be set or modified for authentication purpose. The Client has to enter this password along with proper user name to successfully connect to the server.
text_image
VNC Server Password Choose a Password ****** Re-enter a Password ****** OK CancelLaunch at Startup
Enabling this option ensures that the Thin Client can act as a VNC Server from the moment the OS boots up.
⑤ ICA Global Settings
Citrix® Independent Computing Architecture (ICA)® allows users to connect remotely to servers running Citrix MetaFrame. ICA Client offers quick, secure access to applications, content, and entire desktops published on servers running MetaFrame. ICA separates the user interface from the application while keeping the logic on the server. By doing this, only screen updates, mouse clicks and keystrokes traverse the connection media.
This "ICA Global Settings" section describes how to configure the "Global ICA Settings" that will be valid for all ICA sessions.
These are the default values for all ICA sessions. Most of these properties (especially color depth, resolution and server IP or name) can be altered for each session separately.
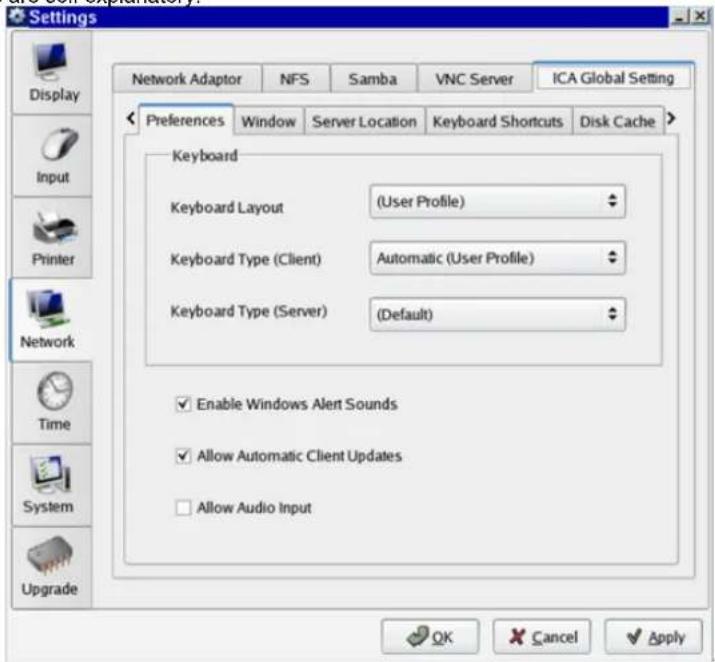
Preferences
The options are self explanatory.
text_image
Settings Network Adaptor NFS Samba VNC Server ICA Global Setting Preferences Window Server Location Keyboard Shortcuts Disk Cache > Keyboard Keyboard Layout (User Profile) Keyboard Type (Client) Automatic (User Profile) Keyboard Type (Server) (Default) Enable Windows Alert Sounds Allow Automatic Client Updates Allow Audio Input OK Cancel ApplyWindow
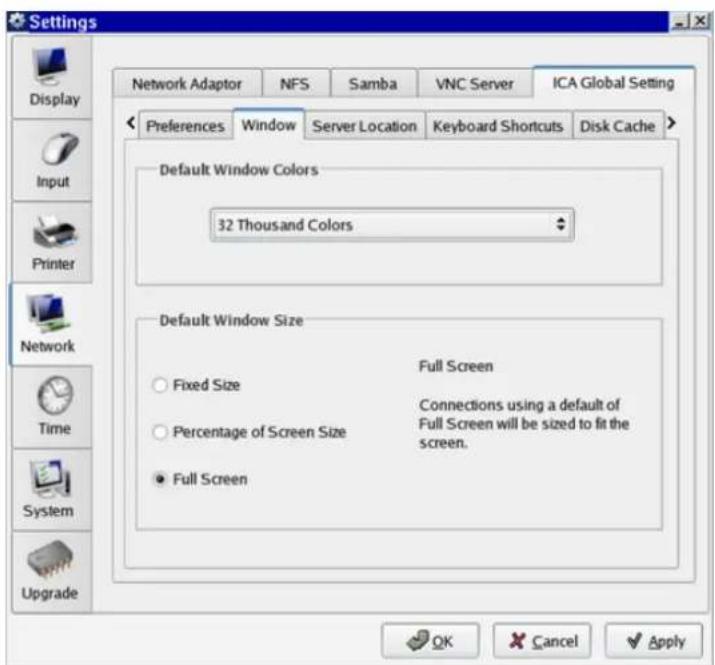
Default Number of Colors
You are allowed to set the default number of window colors to 256 (default), thousands (High Color) or millions (True Color). The color depth your sessions can run in also depends on your Metaframe server.
Resolution
Set the default window size by choosing the resolution from the given list. You can also select the screen size based on percentage of total screen size or Full screen.
text_image
Settings Network Adaptor NFS Samba VNC Server ICA Global Setting Preferences Window Server Location Keyboard Shortcuts Disk Cache > Default Window Colors 32 Thousand Colors Default Window Size Fixed Size Full Screen Percentage of Screen Size Connections using a default of Full Screen will be sized to fit the screen. Full Screen OK Cancel ApplyServer Location
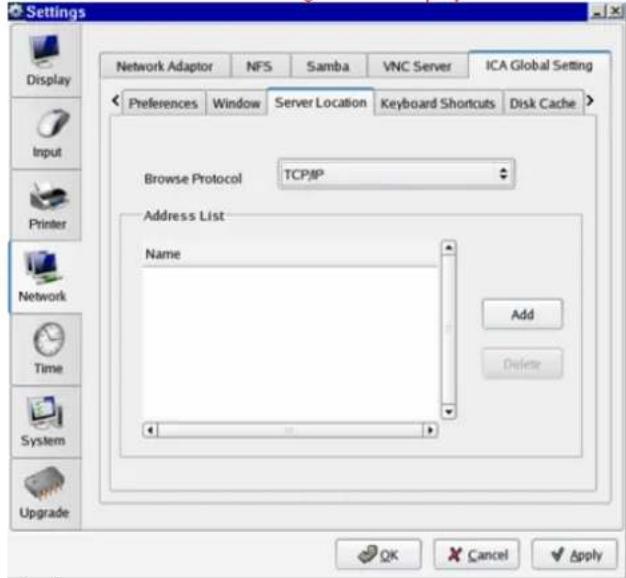
Server Location
The "Server Location" (also called server browsing) provides a method for a network-connected
Citrix ICA Client to view a list of all Citrix servers and Published Applications that are
accessible on the network and using the chosen browsing protocol.
TCP/IP
If your network configuration uses routers or gateways, or to eliminate additional network traffic by the broadcasts, you can set specific server addresses for the Citrix servers from which the list of available servers and/or published applications should be requested.
You can place more than one address in the "Address List" to continue allowing clients to connect and function even if one or several of the servers is/are not available.
TCP/IP + HTTP
You can also retrieve the information of available Citrix Servers and Published Applications across a firewall by using TCP/IP + HTTP server location.
× "TCP/IP + HTTP" server location does not support the "Auto-Locate" function.
SSL/TLS + HTTPS
ISecure Sockets Layer (SSL) and Transport Layer Security (TLS) encryption provide server authentication, encryption of data stream and message integrity checks.
If you attempt to make a non-SSL/TLS connection to a SSL/TLS server, you will not be connected and a "connection failed" message will be displayed.
text_image
Settings Network Adaptor NFS Samba VNC Server ICA Global Setting Preferences Window Server Location Keyboard Shortcuts Disk Cache Browse Protocol TCP/IP Address List Name Add Delete Network Time System Upgrade OK Cancel ApplyKeyboard Shortcuts
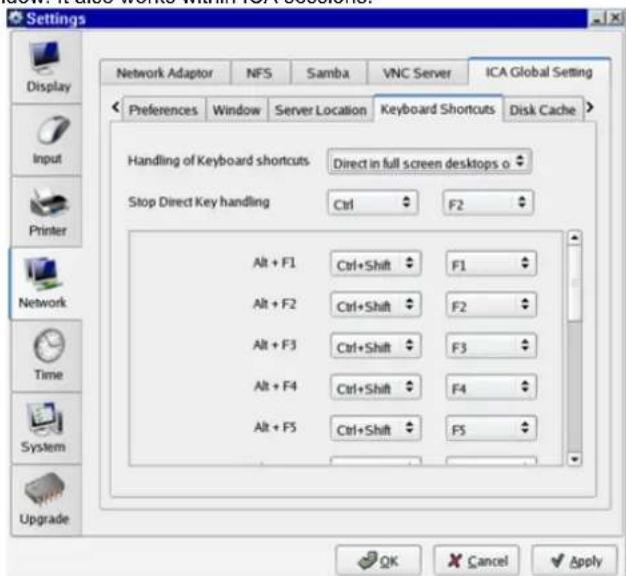
Use the "Keyboard Shortcuts" page to define alternative key combinations for the common hotkeys used within ICA sessions. For example in MS Windows, the key combination + closes the current window. It also works within ICA sessions.
text_image
Settings Network Adaptor NFS Samba VNC Server ICA Global Setting Preferences Window Server Location Keyboard Shortcuts Disk Cache Handling of Keyboard shortcuts Direct in full screen desktops o Stop Direct Key handling Ctrl F2 Alt + F1 Ctrl+Shift F1 Alt + F2 Ctrl+Shift F2 Alt + F3 Ctrl+Shift F3 Alt + F4 Ctrl+Shift F4 Alt + F5 Ctrl+Shift F5 OK Cancel ApplyIf you choose to disable the "Alternate switching sequence", many of these hotkey combinations will be occupied by the X Server (esp.
+ ). Therefore you will have to use the alternate sequences or map the affected combinations to different ones here to keep them available. Any key combination not used by your X Window manager may still be used as usual within the ICA session.
By default, the key alternatives are mapped to
If you want to use the PC key combination
Disk Cache
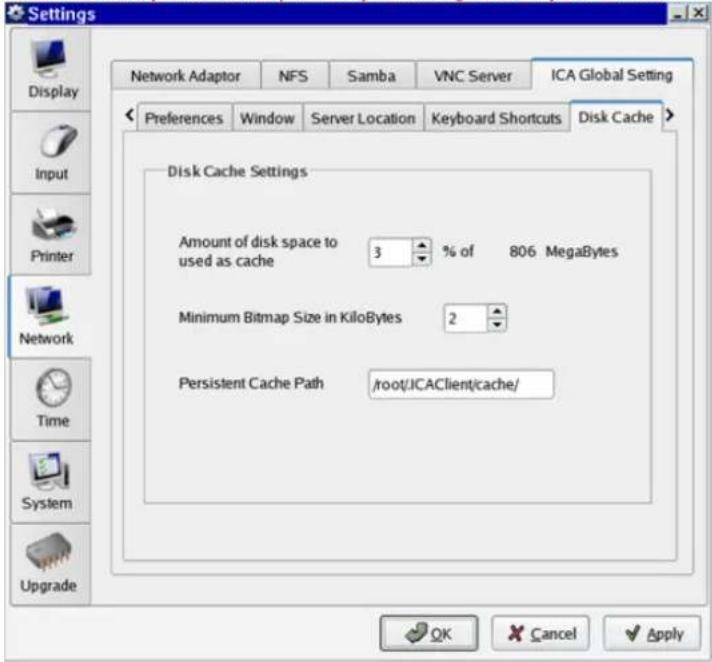
Here you can manipulate the settings for the Bitmap Cache. This may considerably improve the performance of your ICA session(s) if you are working with pictures that are displayed over
and over again.
Set the maximum size of local system memory (in kilobytes) to be used for caching and the minimum size of bitmaps to be cached and the directory the files should be stored locally.
A too high setting might leave the Thin Client with too low memory for its system and other applications! In doubt, you have the possibility of adding RAM to your Thin Client.
text_image
Settings Network Adaptor NFS Samba VNC Server ICA Global Setting Preferences Window Server Location Keyboard Shortcuts Disk Cache Disk Cache Settings Amount of disk space to used as cache 3 % of 806 MegaBytes Minimum Bitmap Size in KiloBytes 2 Persistent Cache Path /root/ICAClient/cache/ OK Cancel ApplyDrive Mapping
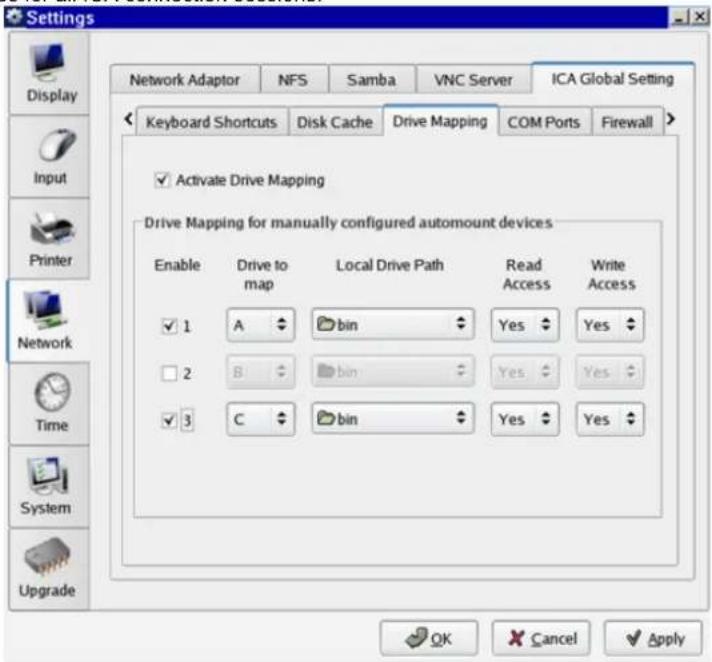
"Drive Mapping" makes any directory mounted on your Thin Client available to you during ICA sessions on Citrix servers. Use this page to specify which folders or drives to map at logon. This applies for all ICA connection sessions.
text_image
Settings Network Adaptor NFS Samba VNC Server ICA Global Setting Keyboard Shortcuts Disk Cache Drive Mapping COM Ports Firewall Activate Drive Mapping Drive Mapping for manually configured automount devices Enable Drive to map Local Drive Path Read Access Wayt 1 A bin Yes Yes 2 B bin Yes Yes 3 C bin Yes Yes OK Cancel ApplyThis option allows you to temporarily enable/disable the drive mapping. This gives you the advantage of not losing your stored settings, but being able to switch them on/off.
How to configure a "Drive Mapping":
Enable one of the three mappings to activate the corresponding entry fields. Then click on the corresponding button in the "Drive to map" column. Now select the drive letter under which the local device or folder should be mapped. In case the drive letter you selected is not available on the Citrix server anymore, the specified directory or local drive will be mapped to the next free drive letter at logon.
In the "Local Drive Path" field set the path name of the local directory the mapping should point to. When mapping a locally attached device, use the pre-defined path names as offered by the drop-down box. These are the directories the devices are mounted to by default at boot up.
Finally specify the access rights for the mapping. You can choose to grant "Read Access", "Write access" or to "Ask User" for each mapping separately.
✗ The same drive mappings and access settings will apply to all ICA connections.
COM Ports
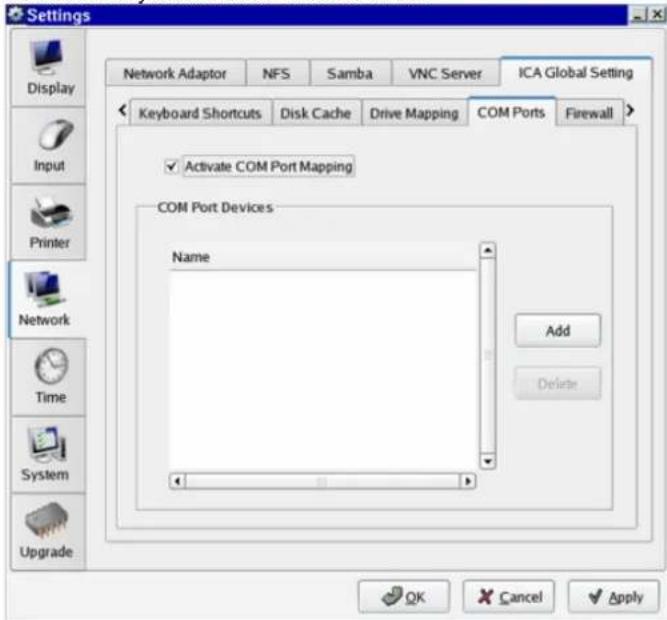
You can perform bi-directional mapping between serial devices that are attached to the Thin Client (e.g. scanners, serial printers) and the Citrix Server's COM ports. This enables programs running on the server to exchange data with the local devices.
COM Port Devices
Select the COM port your device is attached to from this drop-down box: /dev/ttyS0 stands for the local COM1 and /dev/ttyS1 stands for the local COM2.
text_image
Settings Network Adaptor NFS Samba VNC Server ICA Global Setting Keyboard Shortcuts Disk Cache Drive Mapping COM Ports Firewall Activate COM Port Mapping COM Port Devices Name Add Delete OK Cancel ApplyFirewall
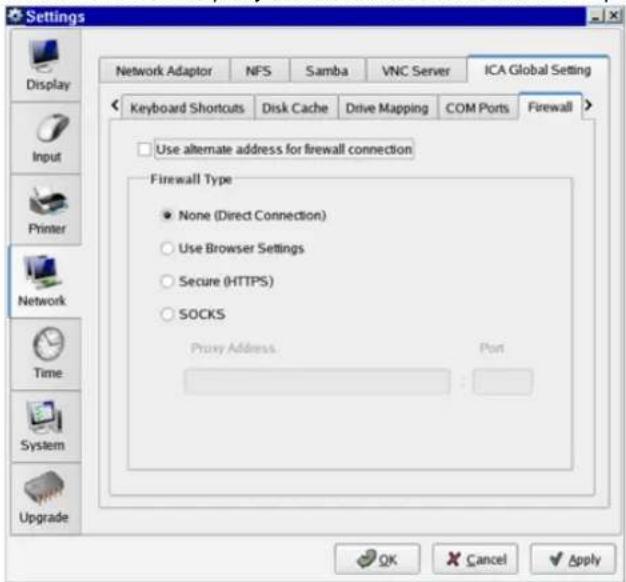
This "Firewall" page allows you to configure ICA connections through a firewall or a SOCKS proxy server. (Firewalls and SOCKS proxy servers are used on networks to improve security.)
text_image
Settings Network Adaptor NFS Samba VNC Server ICA Global Setting Keyboard Shortcuts Disk Cache Drive Mapping COM Ports Firewall Use alternate address for firewall connection Firewall Type None (Direct Connection) Use Browser Settings Secure (HTTPS) SOCKS Proxy Address.... Port OK Cancel ApplyUse Alternate Address
If you are using ICA sessions to connect to a specific Citrix server behind a firewall, you have to activate this option. The Citrix server (usually) has a different IP in the local network than from the outside world. (For details on server configuration, look up the "altaddr" command in your Metaframe admin manual.)
After enabling the alternate address, add the server in the "Address List" in the "Server Location" box of the "Global ICA Settings"
Connect via SOCKS or Secure Proxy Server
You can configure the ICA sessions to connect to a Citrix server through a SOCKS proxy server or a Citrix Secure Gateway (in relay mode).
To make the "Secure Gateway" field accessible, the "Browser Protocol" in the "Server Location" tab has to be set to "SSL/TLS + HTTPS"
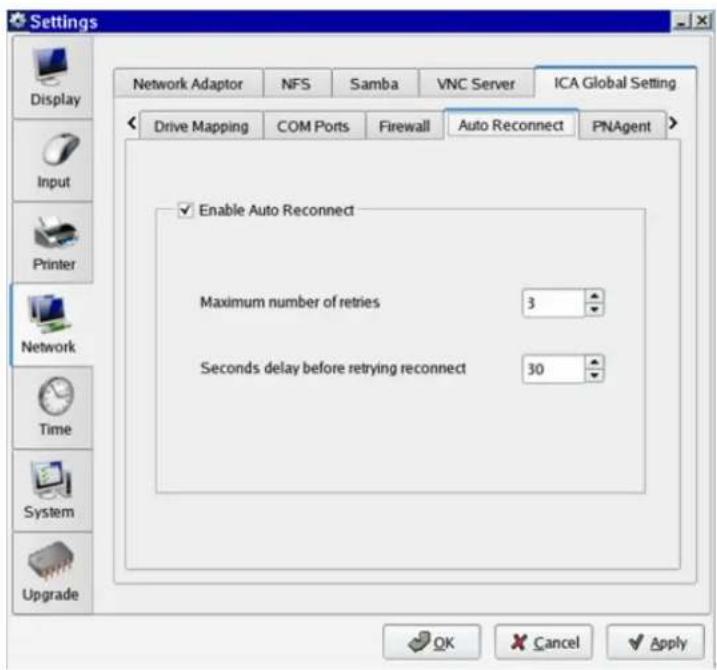
Auto Reconnect
The options are self explanatory
text_image
Settings Network Adaptor NFS Samba VNC Server ICA Global Setting Drive Mapping COM Ports Firewall Auto Reconnect PNAgent Enable Auto Reconnect Maximum number of retries 3 Seconds delay before retrying reconnect 30 OK Cancel ApplyPNAgent
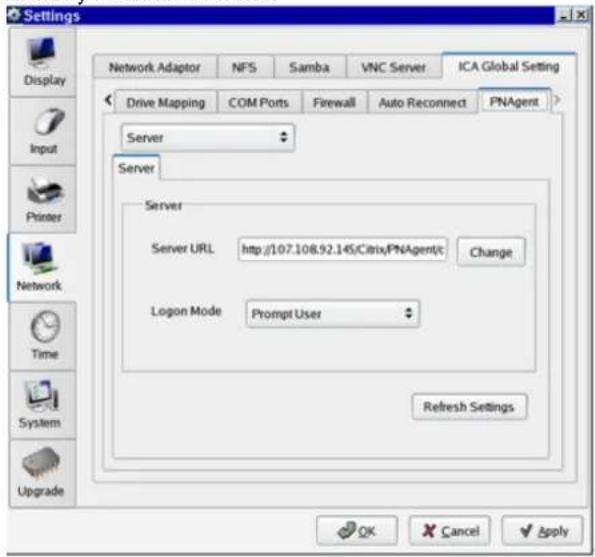
This "PNAgent" (Program Neighborhood Agent) page allows you to configure and search for published applications by Metaframe servers.
text_image
Settings Display Input Printer Network Time System Upgrade Network Adaptor NFS Samba VNC Server ICA Global Setting Drive Mapping COM Ports Firewall Auto Reconnect PNAgent Server Server Server URL:http://107.108.92.145/Citrix/PNAgent/t Change Logon Mode Prompt User Refresh Settings OK Cancel ApplyServer:
You need to provide the IP address of server with which you want to connect. The "Refresh Settings" or "Change->Update" settings will update the settings published by Metaframe server.
Logon Method:
Here you may want to specify how you want to connect to server. You can select either "Prompt User" or "Anonymous Logon".
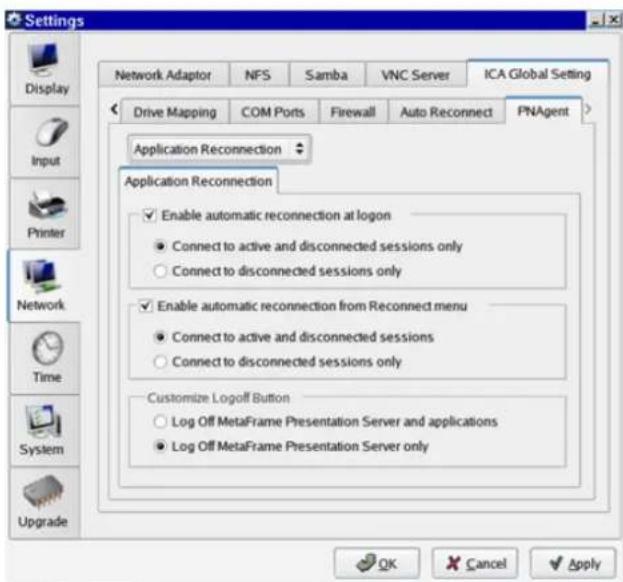
Application Reconnection:
text_image
Settings Network Adaptor NFS Samba VNC Server ICA Global Setting Drive Mapping COM Ports Firewall Auto Reconnect PNAgent Application Reconnection Application Reconnection Enable automatic reconnection at logon Connect to active and disconnected sessions only Connect to disconnected sessions only Enable automatic reconnection from Reconnect menu Connect to active and disconnected sessions Connect to disconnected sessions only Customize Logoff Button Log Off MetaFrame Presentation Server and applications Log Off MetaFrame Presentation Server only OK Cancel ApplyThis page allows you to configure how you want to connect to your Metaframe servers. However options are self explanatory.
The page is enabled only when the you have selected your Logon Method as "Prompt User" at Server page.
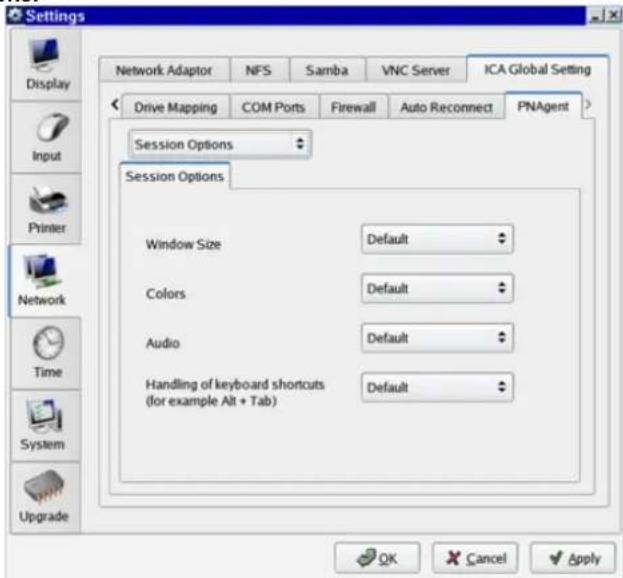
Session Options:
text_image
Settings Network Adaptor NFS Samba VNC Server ICA Global Setting Drive Mapping COM Ports Firewall Auto Reconnect PNAgent Session Options Session Options Window Size Default Colors Default Audio Default Handling of keyboard shortcuts Default (for example Alt + Tab) OK Cancel ApplyMost of the options in this page are self explanatory.
Handling of Keyboard Shortcuts
Translated applies keyboard shortcuts to the local desktop rather than the remote desktop. For example, pressing ALT+TAB switches between all the windows currently open on the local desktop, including both local and remote windows.
Direct applies keyboard shortcuts to the remote desktop rather than the local desktop. For example, pressing ALT+TAB switches between all the windows currently open on the remote desktop, excluding any windows open on the local desktop.
If you select Direct, keyboard shortcut translations are disabled to ensure that the keystrokes are applied to the remote desktop.
Direct in full screen desktops only applies keyboard shortcuts to the remote desktop rather than the local desktop when the remote session is running in full screen mode. If the session is running in any other window size mode, keyboard shortcuts are applied to the local desktop rather than the remote desktop.
If you select "Direct in full screen desktops" only and the remote session is running in full screen mode, keyboard shortcut translations are disabled to ensure that the keystrokes are applied to the remote desktop.
If you come across any issue with Samsung Connection Manager while configuring ICA settings, you can also use Citrix Connection Manager by running wfcmgr on command line.
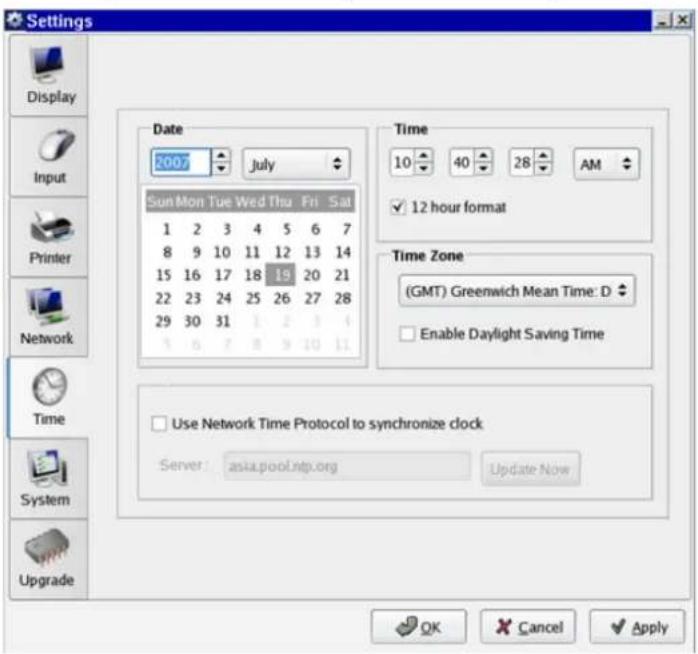
This menu allows time settings for the STC to be configured. The available options to be set are
text_image
Settings Display Input Printer Network Time System Upgrade Date 2007 July Sun Mon Tue Wed Thu Fri Sat 1 2 3 4 5 6 7 8 9 10 11 12 13 14 15 16 17 18 19 20 21 22 23 24 25 26 27 28 29 30 31 32 33 34 4 6 7 8 9 10 11 Time 10 40 28 AM ✓ 12 hour format Time Zone (GMT) Greenwich Mean Time: D Enable Daylight Saving Time Use Network Time Protocol to synchronize clock Server: asia.pool.ntp.org Update Now OK Cancel ApplyDate
This menu section allows you to configure the date settings for the STC. The available options are
• Year: - Enter the year you want to set the date to.
• Month: - Enter the month you want to set the date to.
- Date: - Enter the day number of the month you want to set the date to.
② Time
This menu section allows you to configure the time settings for the STC. The available options are
• Time to Set: - Set the time by setting hours, minutes and seconds.
- AM/PM Display: - This is activated only if 12 hour display format is chosen.
• Time Format to Be Used: - Use 12 hour or 24 hour format for time display.
③ Time Zone
This menu section allows you to configure the time zone settings for the STC. The available options are
• Time Zone Selection Menu
• Enabling/disabling Daylight Saving Time
4 Network Time Protocol (NTP)
This menu section allows you to configure the settings for updating time from a server using NTP. The only available options is the server IP where the time server is located from which the time is to be updated using NTP.
System
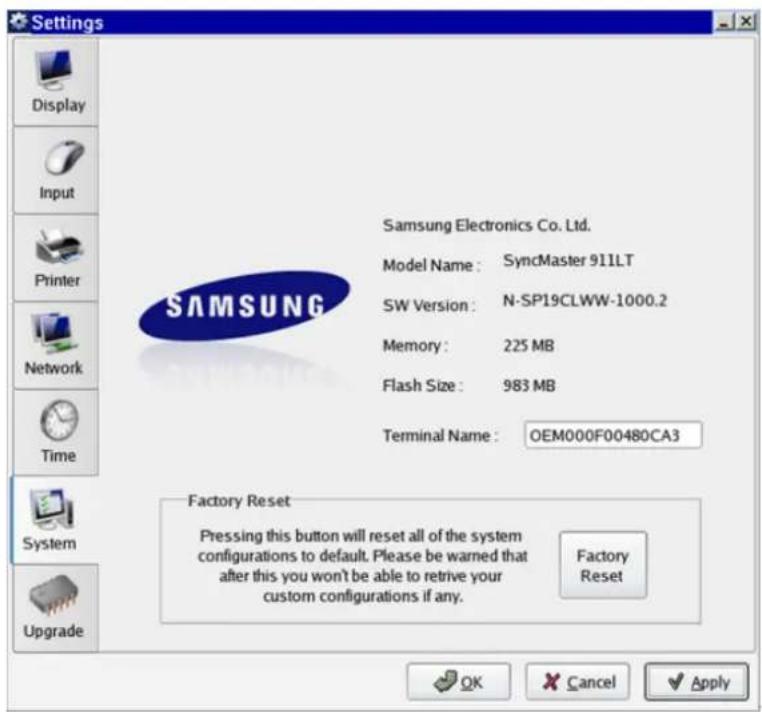
It contains the STC hardware and software configurations within the following fields:
- Manufacturer: - Displays the name of the Manufacturer.
- Model Name: - Displays the name of the STC Model. It can either be "Sync Master 711
LT" (for 17" panel device) or "Sync Master 911 LT" (for 19" panel device). - Software Version: - Denotes the version of the Software currently in use by the STC.
- Memory: - Displays the information regarding the memory that is currently available to the STC.
- Flash Size: - This field gives information regarding the Flash Disk Memory size of the STC.
- Terminal Name: - Here you can set the name of the terminal for your STC.
text_image
Settings Display Input Printer Network Time System Upgrade Samsung Electronics Co. Ltd. Model Name : SyncMaster 911LT SW Version : N-SP19CLWW-1000.2 Memory : 225 MB Flash Size : 983 MB Terminal Name : OEM000F00480CA3 Factory Reset Pressing this button will reset all of the system configurations to default. Please be warned that after this you won't be able to retrieve your custom configurations if any. Factory Reset OK Cancel ApplyApart from these options, there also is a Factory Reset option available that is used to reverse any unnecessary changes being made by the user knowingly/unknowingly. It replaces the main settings and configuration files in the system with the default files that were present at the time of installing the OS.
Upgrade
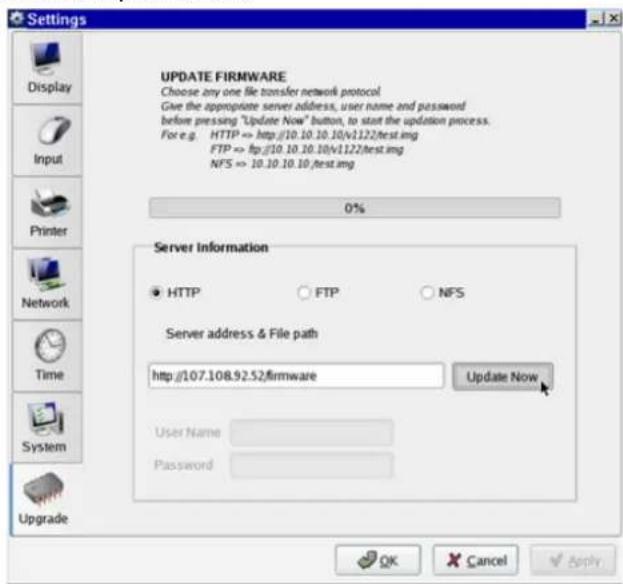
It is used to upgrade the STC OS. During the upgradation, the user preferences and other critical changes made by the user while operating the old OS are preserved and are made effective in the upgraded OS.
Firmware can be upgraded over following protocols
. HTTP
. FTP
. NFS
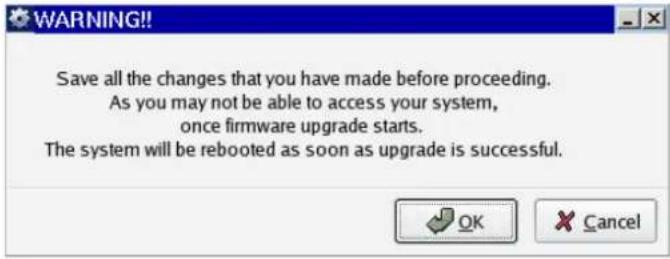
The different protocols used here provide different methods of accessing the firmware upgrade files present over the network. The upgrade function disables all other functions of the STC, so before starting the upgrade utility, the user is supposed to quit all other work that is under progress and save all the settings that is wished to be retained after the upgrade. For this, a warning message is popped up. On selecting OK in this dialog box, the upgrade process starts, else the upgrade process is cancelled.
① Upgrade Using HTTP
The firmware upgradation file is present in the location specified by the HTTP address. No username or password is required for this.
text_image
Settings Display Input Printer Network Time System Upgrade UPDATE FIRMWARE Choose any one file transfer network protocol. Give the appropriate server address, user name and password before pressing "Update Now" button, to start the update process. For e.g. HTTP => http://10.10.10.v1122/test.img FTP => fp://10.10.10.v1122/test.img NFS => 10.10.10.10./test.img 0% Server Information HTTP FTP NFS Server address & File path http://107.108.92.52/firmware Update Now User Name Password OK Cancel Apply② Upgrade Using FTP
The firmware file is present in the location specified by the FTP address. A username and
password has to be provided.
③ Upgrade Using NFS
The firmware file is present in the location specified by the NFS share address. No username or password is needed.
The upgrading process displays a warning message before starting the process. This warning message is used to remind the user that once the upgradation process starts, there is no way that the user can access the STC or the files present on it.
text_image
WARNING!! Save all the changes that you have made before proceeding. As you may not be able to access your system, once firmware upgrade starts. The system will be rebooted as soon as upgrade is successful.| Introduction | Quick Overview of Supported Features | Boot Procedure | Control Center (Global Settings) | Application Programs | Shutdown |
Application Programs
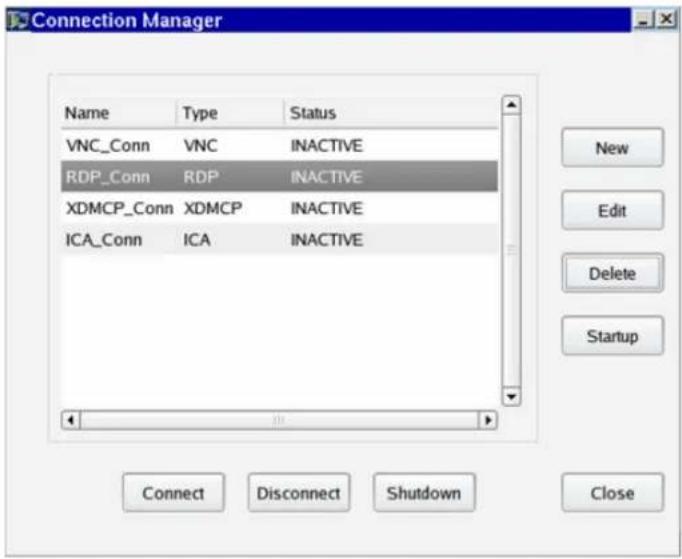
Connection Manager
Introduction
Connection Manager is the combined front end for Rdesktop, VNC Client, XDMCP and ICA. It can be configured to access a remote desktop using RDPv5 protocol, Connect to a Linux server over XDMCP, Citrix ICA server for Application publishing and connection as well as to connect to a VNC Server using VNC Client application. It has options to save the settings to a file as well as load saved settings from a file. Using connection Manager you can create desktop shortcuts and launch connections by simply clicking on that shortcut as well.
text_image
Connection Manager Name Type Status VNC_Conn VNC SINACTIVE RDP_Conn RDP SINACTIVE XDMCP_Conn XDMCP SINACTIVE ICA_Conn ICA SINACTIVE New Edit Delete Startup Connect Disconnect Shutdown Close1 RDP
You can configure RDP settings for a particular session as given below:
General
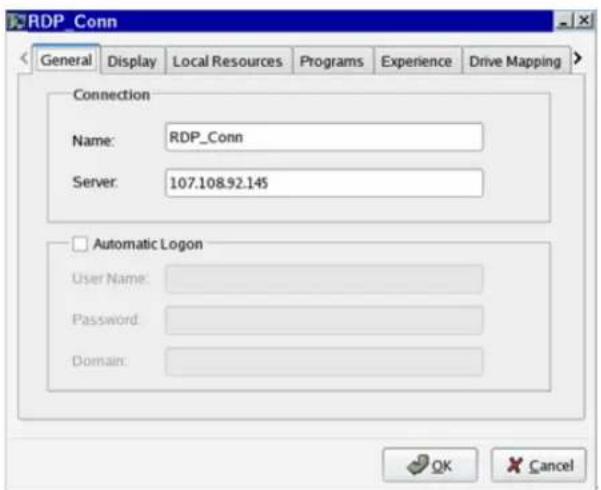
The General tab of the RDP Connection manager has the following connection information to be provided at the time of connection:
- Name : Provide Name by which you want the connection to be identified.
- Server : Provide IP address of the server whom you want to connect to.
text_image
RDP_Conn General Display Local Resources Programs Experience Drive Mapping Connection Name: RDP_Conn Server: 107.108.92.145 Automatic Logon User Name: Password: Domain:• Automatic Logon : Select if you want to logon automatically.
- User Name: User Name to be used for connection.
- Password: Password to be used for connecting to the system.
Domain: Domain name in which the system is present on the network.
Display
The Display tab of the Connection Manager has the following display properties to be set while connecting to the remote desktop / server
- Remote Desktop Size: - Size of the window when connection is established.
• Color Depth: - Color depth to be used while connecting to the server.
Local Resources
This section has the following connection properties to be set
- Remote Computer Sound: - Determines whether the multimedia files, when played on the connected server/desktop, should start the audio playback on the local system, the remote system or should totally suppress any such playback.
- Keyboard: -Select Keyboard layout to emulate.
- Reconnect: - Auto reconnects if session is disconnected by some unusual reason.
• Create desktop shortcut
Programs
Allows setting of a program to run when connection is established successfully. The default is desktop to be displayed on connection.
Experience
This menu section allows performance settings to be selected for better performance on connection. In case of performance problems, disable some not necessarily needed graphical features.
- No Encryption: This option is only needed (and will only work) if you have a French version of NT TSE.
- Do not send Motion Events: This saves bandwidth, although some Windows applications may rely on receiving mouse motion.
- NT4 Compatible: Use RDP version 4. The default is RDP v5.
- Speed Level: It changes default bandwidth performance behavior for RDPv5. By default only theming is enabled, and all other options are disabled (corresponding to modem (56 Kbps)). Setting experience to broadband enables menu animations and full window dragging. Setting experience to LAN will also enable the desktop wallpaper. Setting experience to modem disables all (including themes).
Drive Mapping
If you have mass storage devices attached, make them available to the user by mapping them here. Press the "Add" button, select the drive name, type and base directory (where device is mounted on local system) to be used finally press "OK" button to map it (see picture). The server requires Windows XP or newer. The share name is limited to 8 characters.
Device Mapping
As well as locally attached mass storage devices, you may also map the local COM ports of the Thin Client into the RDP session.
Enable COM port mapping and add the wanted port. /dev/ttyS0 stands for COM1 and /dev/ttyS1 for COM2.
② VNC
You can configure VNC Client settings for a particular session as given below:
General
The General tab of the VNC Settings has the following connection information to be provided at the time of connection:
- Name: Provide Name by which you want the connection to be identified.
• Server: Provide IP address of the server whom you want to connect to.
• Automatic Logon : Select if you want to logon automatically.
Password: - Password to be used for connecting to the system.
Display
The Display tab of the VNC Connection Manager has the following display properties to be set while connecting to the remote desktop / server
- Screen Size: - Size of the window when connection is established.
Color Depth: - Color depth to be used while connecting to the server.
Input
"View Only" Specifies that no keyboard or mouse events should be sent to the server. It is a useful feature if you want to view a desktop without interfering.
Misc
Shared: When you make a connection to a VNC server, all other existing connections are normally closed. This option request that they be left open, allowing you to share the desktop with someone already using it.
Render Cursor Locally: Render the mouse cursor locally if the server supports it (default is on). This can make the interactive performance feel much better over slow links.
③ XDMCP
You can configure XDMCP Client settings for a particular session as given below:
General
The General tab of the XDMCP Settings has the following connection information to be provided at the time of connection:
Name: Provide Name by which you want the connection to be identified.
- Server: Provide IP address of the server whom you want to connect to.
- Contact Style: Default is "Query".
- Query: - Contact named host for XDMCP.
- Broadcast: - Broadcast for XDMCP. The first server replying to broadcast request will be connected.
Display
The Display tab of the XDMCP Connection Manager has the following display properties to be set while connecting to the remote desktop / server
- Screen Size: - Size of the window when connection is established.
• Color Depth: -Color depth to be used while connecting to the server.
Local Resources
- Reconnect: - Auto reconnects if session is disconnected by some unusual reason.
. Create desktop shortcut
4 Citrix ICA Client
Introduction
The Citrix ICA Client is the front end used in STC for establishing a connection to an ICA Server present on the network. Most of the settings have already been explained above "ICA (Global ICA Settings)" across several pages, so we keep a bit briefer here. Many of the settings adjusted in the "ICA (Global ICA Settings)" are the defaults for new sessions.
The very first source of further details regarding ICA and Metaframe should always be the corresponding documentation from Citrix. This manual only gives some general configuration hints.
Interface
The Citrix ICA can be configured by using STC Connection Manager.
Establishing a New Connection
In order to establish a new connection to the ICA Server, the following steps are to be followed:
- Select "New..." option in the main GUI.
- Select "Citrix ICA Client" and "ADD".
- Select the Protocol to be used and enter the "Server Location" in the form of IP.
- Choose if you want to connect to server for desktop or for published applications.
- Once this is done, click on the button labeled "..." besides the "Description" and "Server" text boxes. If the server is found, its description will be shown in a separate window.
Click on the description provided to select the particular server as the default ICA Server.
Mozilla Firefox
Mozilla Firefox is the first choice browser used in the Thin Client. Because of its superior performance and reliability, it is the primary browser used to connect to the Internet and browse various HTTP as well as FTP sites. It already has PDF viewer and media player integrated into it, thus making it a multi-functional application.
text_image
Mozilla Firefox File Edit View Go Bookmarks Tools Help Quick Searches Firefox and Mozilla Li_Xterm
Xterm is the terminal used in STC wherein we can execute local commands using a shell. It is the basic busybox shell that is used in the Xterm as the command prompt. The X-term can be used to perform all the functionalities that we can do from the various application GUIs. The terminal can be invoked from the start menu, desktop icon, mouse right click or from shortcut provided on the taskbar.
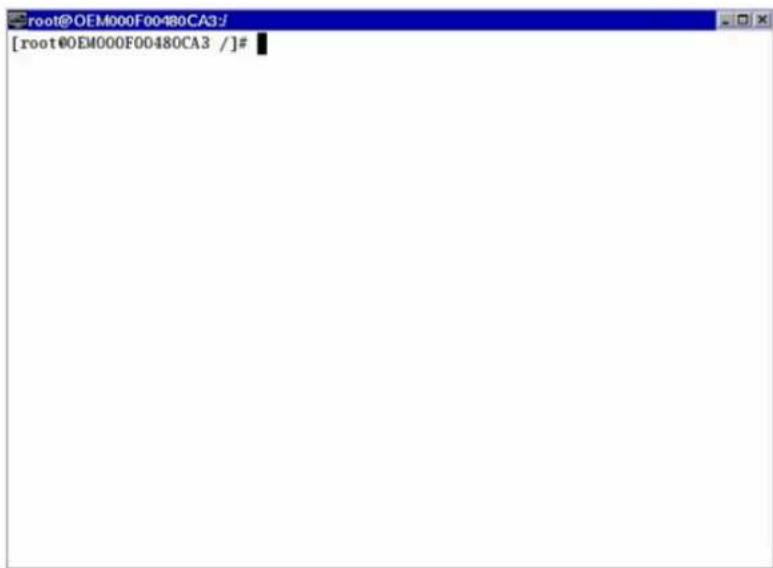
text_image
[root@OEM000F00480CA3 /]#We can also perform many functions with the Xterm using the local commands. One of them is to view the contents of a directory using the 'ls' command. Also we can use the commands like 'cp' and 'mv' for file management purpose. The Xterm is a shell similar to the Linux Terminal, but with far less number of applications. Here is a list of some of the common local commands that can be performed on the thin client:
List of Common Commands
Command
Description
Is Lists the contents of a directory
cp Copies file/directories from source to destination
mv Moves file/directories from source to destination
df Displays disk space usage by the filesystems mounted on the thin client
cal Displays the calendar
cat Displays the contents of a file
clear Clears the terminal window screen
date Displays the current time
dhclient Get IP information using DHCP broadcast
du Summarize disk space utilization for each file/directory
dmesg Print or control kernel ring buffer
echo Print a text or variable value on the terminal
firefox Starts Mozilla Firefox web browser
fdisk Used for getting or altering partition table information
free Displays the amount of free and used system memory
halt To halt/shutdown the system
ifconfig To get IP information for the system
insmod Insert a kernel module
kill Kills a specified application
killall Kills a specified process
Ismod Lists the kernel modules already inserted
mkdir Create an empty directory
modprobe Check whether particular kernel module is inserted
mount Mount a filesystem
ping Send echo request to network hosts
poweroff Switch off the power of the thin client
rdesktop Connect to a remote desktop using rdesktop client
rm Remove a file
rmdir Remove a directory
rmmod Remove a kernel module
reboot Restarts the thin client
shutdown Shutdown the system
top Display process activity information in real time
udevd Udev Daemon initialization command
umount Remove mounted filesystems
uname Print system information
vi File editor ( text mode only )
whoami Displays current user information
pwd Displays present working directory
x11vncserver Starts the x11vncserver
xpdf File reader for PDF files
xterm Open another terminal window
busybox Runs the multi-call single-executable busybox binary for the desired function to be invoked by the user
File Browser – EmelFM2
The local file browser for the STC is EmelFM2. This file browser can be used to
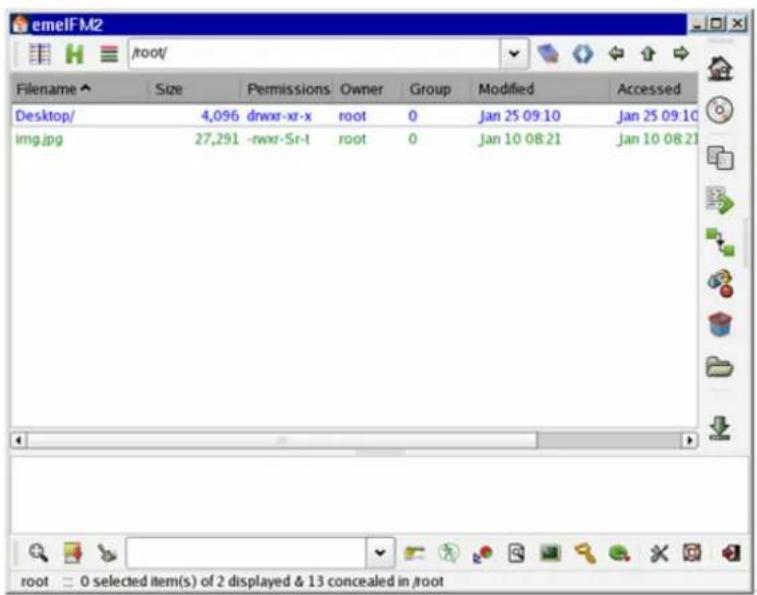
text_image
emelfM2 root/ Filename ▲ Size Permissions Owner Group Modified Accessed Desktop/ 4,096 dwxr-xx root 0 jan 25 09:10 jan 25 09:10 img.jpg 27,291 -rwxr-Sr-t root 0 jan 10 08:21 jan 10 08:21 root = 0 selected item(s) of 2 displayed & 13 concealed in /rootThe file browser can be used to perform many operations like.
- Opening a file/directory in the same/different window
• Mounting/unmounting directories
• View files - Renaming a file/directory
- Creating a new file/directory
• Viewing file information - Compressing / uncompressing files into/from zipped/tar archives and so on.
| Introduction | Quick Overview of Supported Features | Boot Procedure | Control Center (Global Settings) | Application Programs | Shutdown |
Shutdown
This option is used to shut down, suspend or reboot the STC. It can be either done from the
command prompt using the commands "shutdown" or "reboot", or using the shutdown interface as shown below. This interface is accessible using the start menu, mouse right click and from the power button of the thin client. The available options are as shown here
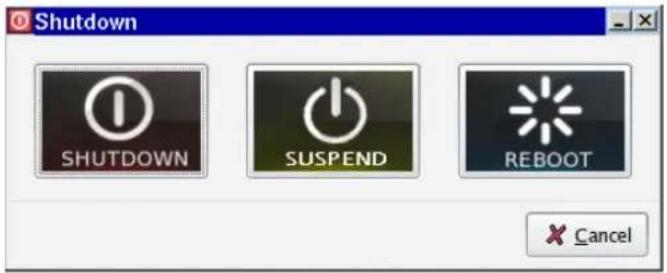
text_image
Shutdown SHUTDOWN SUSPEND REBOOT CancelThe suspend button will make the system to suspend state. Once the system is in suspend state you can get back to your previous session without much effort just by pressing power button on thin client panel.
text_image
The color and appearance of the product may vary depending on the model, and the product specifications are subject to change without prior notice for reasons of performance enhancement. ■ Safety Precautions ■ Introduction ■ Connections ■ Using Linux ■ Using the Software ■ Adjusting the Monitor ■ Troubleshooting ■ Specifications ■ Information- Using the Software
Monitor Driver Natural Color MagicTune™
Monitor Driver
When prompted by the operating system for the monitor driver, insert the CD-ROM included with this monitor. Driver installation is slightly different from one operating system to another. Follow the directions appropriate for the operating system you have.
Prepare a blank disk and download the driver program file at the Internet web site shown below.
Internet web site :http://www.samsung.com/ (Worldwide) http://www.samsung.com/monitor (U.S.A) http://www.sec.co.kr/monitor (Korea) http://www.samsungmonitor.com.cn/ (China)
Installing the Monitor Driver (Automatic)
1 Insert the CD into the CD-ROM drive.
② Click "Windows".
③ Choose your monitor model in the model list, then click the "OK" button.
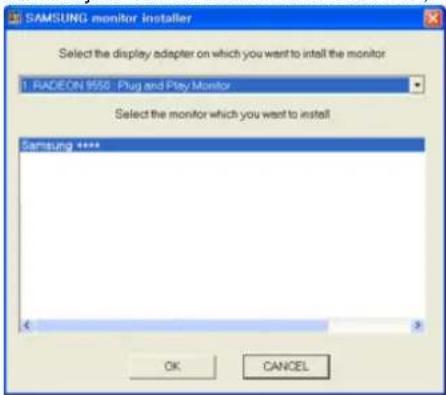
text_image
SAMSUNG monitor installer Select the display adapter on which you want to install the monitor 1. RADEON 9550: Plug and Play Monitor Select the monitor which you want to install Samsung **** OK CANCEL4
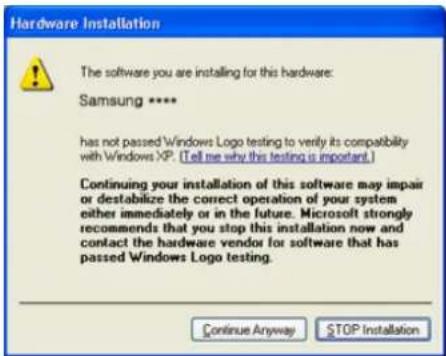
text_image
Hardware Installation The software you are installing for this hardware: Samsung **** has not passed Windows Logo testing to verify its compatibility with Windows XP. (Tell me why this testing is important.) Continuing your installation of this software may impair or destabilize the correct operation of your system either immediately or in the future. Microsoft strongly recommends that you stop this installation now and contact the hardware vendor for software that has passed Windows Logo testing. Continue Anyway STOP InstallationThis monitor driver is under certifying MS logo, and this installation doesn't damage your system. The certified driver will be posted on Samsung Monitor homepage
http://www.samsung.com/
⑤ Monitor driver installation is completed.
Installing the Monitor Driver (Manual)
Windows Vista | Windows XP | Windows 2000 | Windows ME | Windows NT | Linux
Microsoft® Windows Vista™ Operating System
Insert your Manual CD into your CD-ROM drive.
② Click (Start) and "Control Panel". Then, double-click on "Appearance and Personalization".
text_image
Software Start Menu Microsoft Office Microsoft Teams Microsoft Media Player Microsoft Photo Browser Microsoft Live Musician Download Microsoft Screening Master Windows System Internet Printing CS Internet Command Manager All Programs Open Web Download Paste Mouse Sears Search Recent Results Computer Network Current TV Download Format Default Programs Hide and Support
text_image
System and Maintenance Use desktopized Windows Only to your computer Security Check the security Check the security to access the security Use a program through Security Networks and Internet Use the Internet to access the Internet Use the Internet to access the Internet Hardware and Cloud Use the Internet to access the Internet Use the Internet to access the Internet Programs Use desktopized programs Change desktopized programs User Accounts Use desktopized user accounts Apprends and Personalization Change the application of Android Windows, Android, or other Linux for all platforms, in which these are used to access the Web Services and Web Management XML Language, and Graphic Change the XML language for all web services Ease of Access Change the Internet's usage Change user rights Additional Options③ Click "Personalization" and then "Display Settings".
text_image
Recommendation Data Analysis & Optimization - Description Change in the data analysis process (e.g. Data Analysis & Optimization) Database & Optimization Data Analysis & Optimization Data Analysis & Optimization Data Analysis & Optimization Data Analysis & Optimization Data Analysis & Optimization Data Analysis & Optimization Data Analysis & Optimization Data Analysis & Optimization Data Analysis & Optimization Data Analysis & Optimization Data Analysis & Optimization Data Analysis & Optimization Data Analysis & Optimization Data Analysis & Optimization Data Analysis & Optimization Data Analysis & Optimization Data Analysis & Optimization Data Analysis & Optimization Data Analysis & Optimization Data Analysis & Optimization Data A/C Data B/C Data C Data D Data E Data F Data G Data H Data I Data J Data K Data L Data M Data N Data O Data P Data Q Data R Data S Data T Data U Data V Data W Data X Data Y Data Z Data AA Data AB Data AC Data AD Data AE Data AF Data AG Data AH Data AI Data Analysis & Optimization Data Analysis & Optimization Data Analysis & Optimization Data Analysis & Optimization Data Analysis & Optimization Data Analysis & Optimization Data Analysis & Optimization Data Analysis & Optimization Data Analysis & Optimization Data Analysis & Optimization Data Analysis & Optimization Data Analysis & Optimization Data Analysis & Optimization Data Analysis & Optimization Data Analysis & Optimization Data Analysis & Optimization Data Analysis & Optimization Data Analysis & Optimization Data Analysis & Optimization Data Analysis & Organization Data Analysis & Organization Data Analysis & Organization Data Analysis & Organization Data Analysis & Organization Data Analysis & Organization Data Analysis & Organization Data Analysis & Organization Data Analysis & Organization Data Analysis & Organization Data Analysis & Organization Data Analysis & Organization Data Analysis & Organization Data Analysis & Organization Data Analysis & Organization Data Analysis & Organization Data Analysis & Organization Data Analysis & Organization Data Analysis & Organization Data Analysis & Organization Data Analysis & Enterprise
text_image
Sales Create new items Make new items on the Web Personalized applications and settings Provide the list to ensure that the product is used to make your own product to create new user applications. Create new items in order to build new items into a design tool. It is also an important component that is used to create new items in order to build new items into a design tool. Create new items in order to build new items into a design tool, or create new items into a design tool. Change the sales: The sales are using new products as well as the sales of new products, which are used to create new products. Change the sales: The sales are using new products as well as the sales of new products, which are used to create new products. Change the sales: The sales are using new products as well as the sales of new products, which are used to create new products. Change the sales: The sales are using new products as well as the sales of new products, which are used to create new products. Change the sales: The sales are using new products as well as the sales of new product, which are used to create new product. Change the sales: The sales are using new products as well as the sales of new product, which are used to create new product. Change the sales: The sales are using new products as well as the sales of new product, which are used to create new product. Change the sales: The sales are using new products as well as the sales of new product, which are used to create new product. Change the sales: The sales are using new products as well as the sales of new products, which are used to create new product. Change the sales: The sales are using new products as well as the sales of new product, which are used to create new product. Change the sales: The sales are using new products as well as the sales of new product, which are used to create new product. Change the sales: The sales are using new products as well as the sales of new product, which are used to create new product. Change the sales: The sales are using new product as well as the sales of new product, which are used to create new product. Change the sales: The sales are using new products as well as the sales of new product, which are used to create new product. Change the sales: The sales are using new products as well as the sales of new product, which are used to create new product. Change the sales: The sales are using new products as well as the sales of new product, which are used to create new product. Change then use the same number of items (e.g., 10 items) for each item. For any other item, there is no additional items. This item is not available.4
text_image
Display Settings Monitor Drag the icons to match your monitors. Identity Monitors 1 L (Multiple Monitors) on NVIDIA GeForce 900 LE (Microsoft Corporation - This is very much more Is found the desktop into this monitor Resolution Low High 3280 by 3024 pixels Colors: Highest (32 bit) How do I get the best display! Advanced Settings... OK Cancel Help5 Click "Properties" in the "Monitor" tab. If the "Properties" button is deactivated, it means the configuration for your monitor is completed. The monitor can be used as is. If the message "Windows needs..." is displayed, as shown in the figure below, click "Continue".
text_image
Generic Prof Monitor and NVIDIA GeForce 6000 LE (Microsoft Co... Adapter Monitor Doublesheet Color Management Monitor Type Generic Prof Monitor Properties Monitor Settings Screen refresh rates: 60 Herto ✓ side modes that this monitor cannot display Cleaning this checkbox allows you to select display modes that the monitor cannot display correctly. This may lead to an unusable display and/or damaged hardware. OK Cancel Apply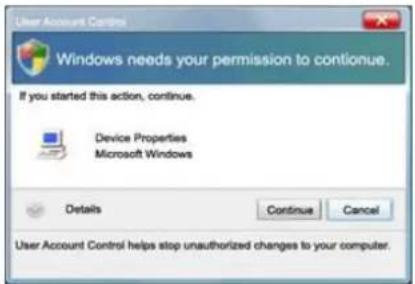
text_image
User Account Cardms Windows needs your permission to continue. If you started this action, continue. Device Properties Microsoft Windows Details Continue Cancel User Account Control helps stop unauthorized changes to your computer.This monitor driver is under certifying MS logo, and this installation doesn't damage your system. The certified driver will be posted on Samsung Monitor homepage
http://www.samsung.com/
⑥ Click "Update Driver..." in the "Driver" tab.
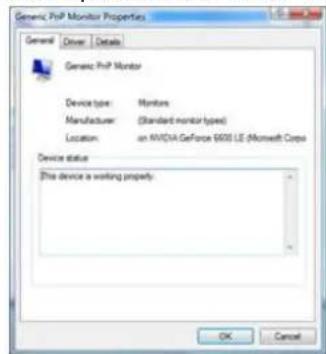
text_image
Generic PhIP Monitor Properties General Driver Details Generic PhIP Monitor Device type: Monitors Manufacturer: (Standard monitor types) Location: an NVIDIA GeForce 5600 LE (Microsoft Caps) Device status This device is working property. OK Cancel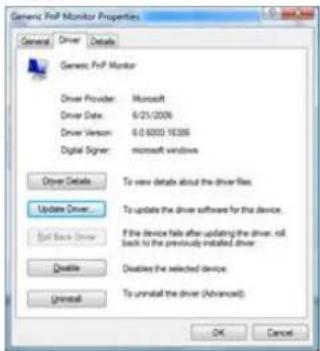
text_image
Generic Prof Monitor Properties General Driver Details Generic Prof Monitor Driver Provider: Microsoft Driver Date: 6/21/2006 Driver Version: 6.0.6000.16399 Digital Signer: microsoft versiona Driver Details To view details about the driver files. Update Driver: To update the driver software for this device. Build Back Driver: If the device fails after updating the driver, will back to the previously installed driver. Delete: Does not install the selected device. Uninstall To uninstall the driver (Advanced) OK CancelCheck the "Browse my computer for driver software" checkbox and click "Let me pick from a list of device drivers on my computer".

text_image
Update Driver Software - Getable PDF Movies How do you want to search for driver software? • Search automatically for updated driver software Windows will search your computer and the Internet for the latest driver software for your device. • Grow my computer for secret software Locate and install driver software manually. Cancel
text_image
Browse for driver software on your computer Search for drive software in this location Include subsets Let me pick from a list of device drivers on my computer This list will also install drive software compatible with the device, and all drive software in the same category is the device.⑧ Click "Have Disk..." and select the folder (for example, D:\Drive) where the driver setup file is located, and click "OK".
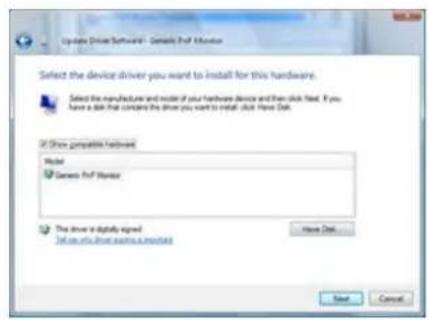
text_image
Update Driver Software - Generic Prof Monitor Select the device driver you want to install for this hardware. Select the manufacturer and model of your hardware device and then click Next. If you have a link that compares the driver you want to install, click Now Dash. If drive compatible hardware Model Generic Prof Monitor The drive is digitally signed Tell us via drive samples or updates New Dash Save Cancel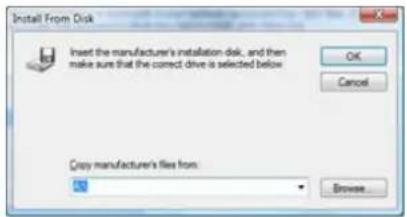
text_image
Install From Disk Insert the manufacturer's installation disk, and then make sure that the correct drive is selected below Copy manufacturer's files from: OK Cancel Browse9 Select the model that matches your monitor from the list of monitor models on the screen, and click "Next".
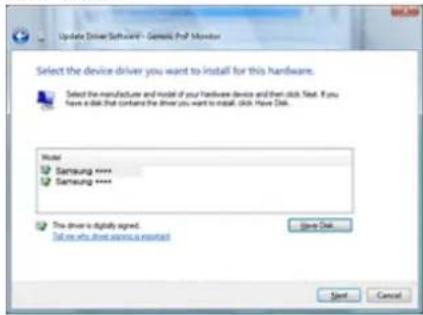
text_image
Update Driver Software - Genesis PDF Monitor Select the device driver you want to install for this hardware. Select the manufacturer and model of your hardware device and then click Text. If you have a disk that contains the driver you want to install, click Have Disk. Model Samsung **** Samsung **** This driver is digitally signed. Tell me who drive access is important Save Done Send CancelClick "Close" → "Close" → "OK" → "OK" on the following screens displayed in sequence.
text_image
Update Drive Software - Samsung **** Windows has successfully updated your driver software Windows has finished installing the drive software for the device Samsung ****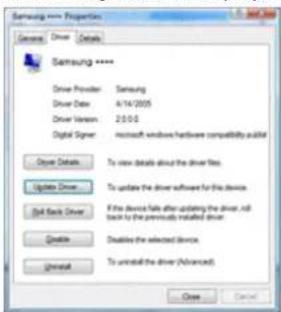
text_image
Samsung **** Properties General Driver Details Samsung **** Driver Provider: Samsung Driver Date: 4/14/2005 Driver Version: 20.0.0 Digital Signor: microsoft windows software compatibility publisher Drive Details To user details about the driver file: Update Driver To update the driver software for this device. Shift Back Driver If the device fails after updating the driver, it will back to the previously installed driver. Enable Disable the selected device. Uninstall To uninstall the driver (Advanced) Close Cancel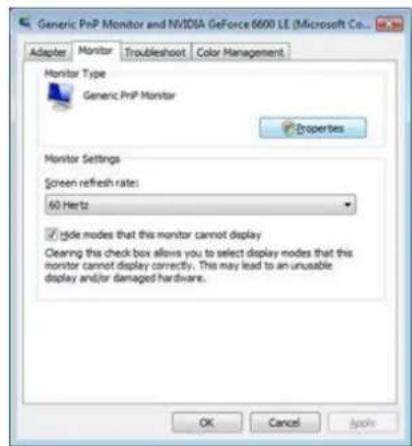
text_image
Generic PrnP Monitor and NVIDIA GeForce 6600 LE (Microsoft Co... Adapter Monitor Troubleshoot Color Management Monitor Type Generic PrnP Monitor Properties Monitor Settings Screen refresh rate: 60 Hertz Hide modes that this monitor cannot display Clearing this check box allows you to select display modes that this monitor cannot display correctly. This may lead to an unusable display and/or damaged hardware. OK Cancel Apply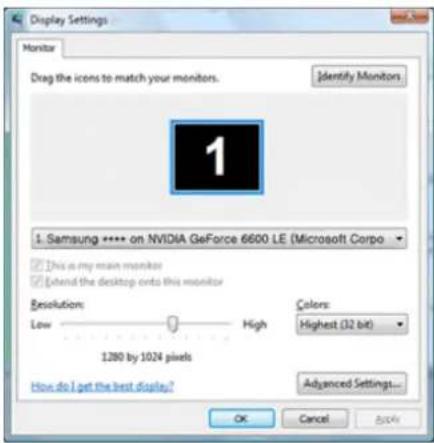
text_image
Display Settings Monitor Drag the icons to match your monitors. Identify Monitors 1 Samsung **** on NVIDIA GeForce 6600 LE (Microsoft Corpo This is my main monitor Extend the desktop onto this monitor Resolution: Low High 1280 by 1024 pixels Colors: Highest (32 bit) Advanced Settings... How do I get the best display? OK Cancel ApplyMicrosoft® Windows® XP Operating System
① Insert the CD into the CD-ROM drive.
②
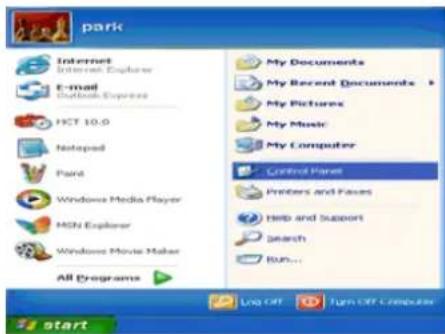
text_image
park Internet Internet Explorer E-mail Outlook Express HCT 10.0 Notepad Paint Windows Media Player MSN Explorer Windows Movie Maker All Programs My Documents My Recent Documents My Pictures My Music My Computer Control Panel Preters and Passes Help and Support Search Run... Log Off Turn Off Computer start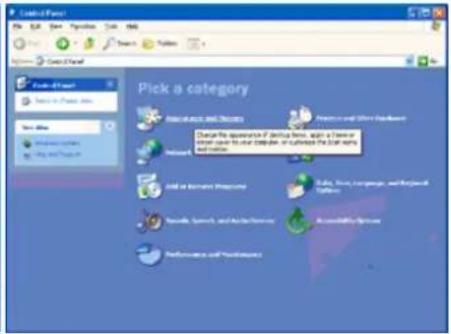
text_image
Control Panel File Edit View Options Edit Help Search Tools Finish Sheet Find out Select to Play Web View Web Importing Web Play and Print Pick a category Create actions and decisions Prepare and access Webpage Change the operation if created here, again a free or open user to our computer, or allows the next work and follow Find at server page Make a new language, and logbook follow Send to, save, return, export, and download Send to, save, return, export, and download Accessories Window Performance and Performance③ Click "Display" icon and choose the "Settings" tab then click "Advanced."
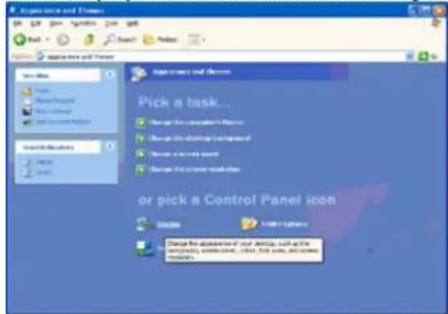
text_image
Apply new and Trimes Pick a task... Pick the command's menu. Change the action's menu. Change the action's menu. Change the action's menu. or pick a Control Panel icon Action Action Sequence Change the action of our items, such as the system, tools, tools, and other items.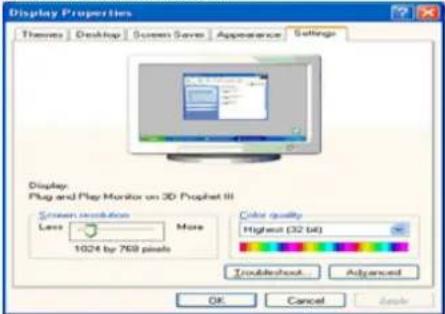
text_image
Display Properties Themes Desktop Screen Saves Appearance Settings Display Plug and Play Monitor on 3D Prophet III Screen Installation More Less 1024 by 769 pixels Color quality Highest (32 bit) Troubleshoot Advanced OK Cancel BackClick the "Properties" button on the "Monitor" tab and select "Driver" tab.
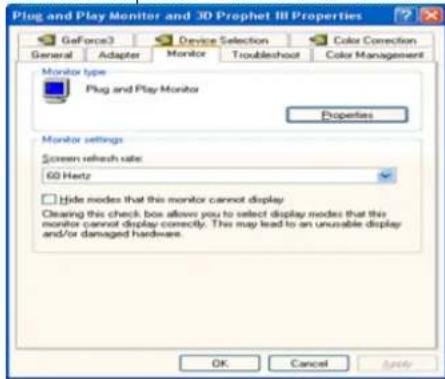
text_image
Plug and Play Monitor and 3D Prophet III Properties GeForce3 Device Selection Color Correction General Adapter Monitor Troubleshoot Color Management Monitor type Plug and Play Monitor Properties Monitor settings Screen refresh rate: 60 Hertz Hide modes that this monitor cannot display Clearing this check box allows you to select display modes that this monitor cannot display correctly. This may lead to an unusable display and/or damaged hardware. OK Cancel Apply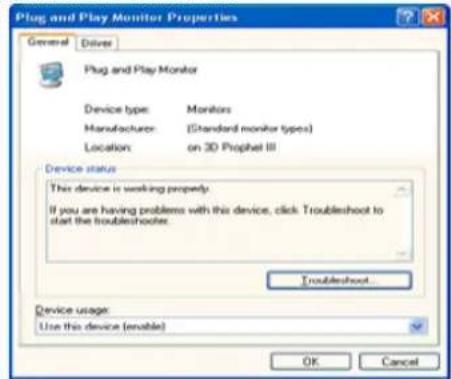
text_image
Plug and Play Monitor Properties General Driver Plug and Play Monitor Device type: Monitors Manufacturer: (Standard monitor types) Location:on 3D Prophet III Device status This device is working properly. If you are having problems with this device, click Troubleshoot to start the troubleshooter. Troubleshoot... Device usage: Use this device (enable) OK Cancel⑥ Click "Update Driver." and select "Install from a list or." then click the "Next" button.
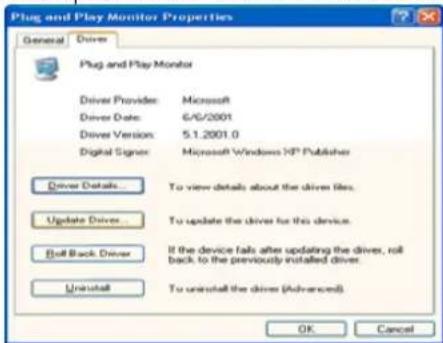
text_image
Plug and Play Monitor Properties General Driver Plug and Play Monitor Driver Provider: Microsoft Driver Date: 6/6/2001 Driver Version: 5.1.2001.0 Digital Signor: Microsoft Windows XP Publisher Driver Details... To view details about the drive files. Update Driver... To update the driver for this device. Ball Back Driver If the device fails after updating the driver, roll back to the previously installed driver. Uninstall To uninstall the drive (Advanced). OK Cancel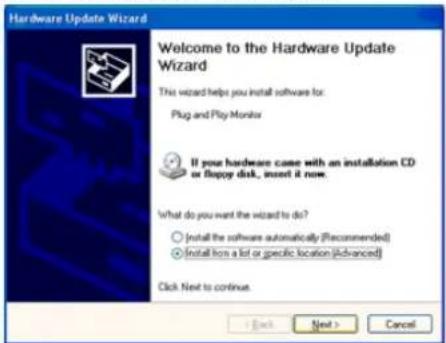
text_image
Hardware Update Wizard Welcome to the Hardware Update Wizard This wizard helps you install software for: Plug and Play Monitor If your hardware came with an installation CD or floppy disk, insert it now. What do you want the wizard to do? ○ install the software automatically (Recommended) ● install from a list or specific location (Advanced) Click Next to continue. < Back Next > Cancel6 Select "Don't search, I will." then click "Next" and then click "Have disk".
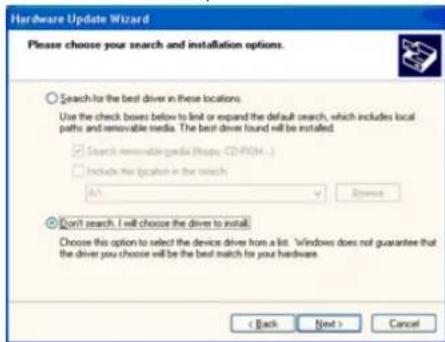
text_image
Hardware Update Wizard Please choose your search and installation options. Search for the best driver in these locations. Use the check boxes below to limit or expand the default search, which includes local paths and removable media. The best driver found will be installed. Search reasonable media (Happie CD-ROM...) Include the upcation in the search A1 Browse Don't search. I will choose the driver to install. Choose this option to select the device driver from a list. Windows does not guarantee that the driver you choose will be the best match for your hardware. < Back Next > Cancel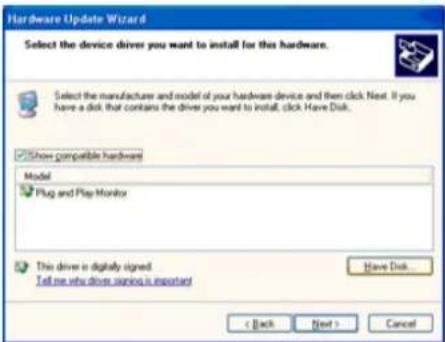
text_image
Hardware Update Wizard Select the device drives you want to install for this hardware. Select the manufacturer and model of your hardware device and then click. Next. If you have a disk, that contains the drivers you want to install, click Have Disk. Show compatible hardware Model Plug and Play Monitor This driver is displayed signed Tell me new driver service is important Have Disk... < Back Next > Cancel7 Click the "Browse" button then choose A:(D:\Driver) and choose your monitor model in the model
list and click the "Next" button.
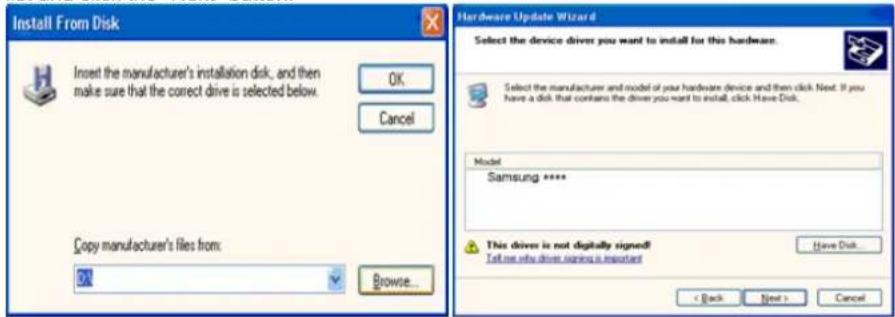
text_image
Install From Disk Insert the manufacturer's installation disk, and then make sure that the correct drive is selected below. OK Cancel Copy manufacturer's files from: OK Browse... Hardware Update Wizard Select the device driver you want to install for this hardware. Select the manufacturer and model of your hardware device and then click Next. If you have a disk that contains the driver you want to install, click Have Disk. Model Samsung **** This driver is not digitally signed!! Tell me why drive signing is important Have Disk... < Back Next > Cancel⑧ If you can see following "Message" window, then click the "Continue Anyway" button. Then click the "OK" button.
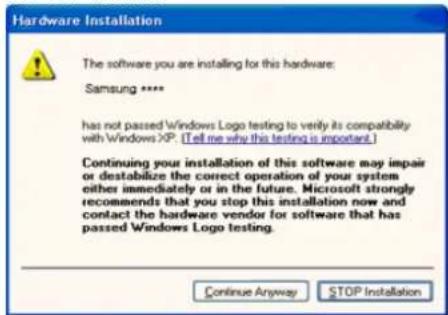
text_image
Hardware Installation The software you are installing for this hardware: Samsung **** has not passed Windows Logo testing to verify its compatibility with Windows XP. [Tell me why this testing is important.] Continuing your installation of this software may impair or destabilize the correct operation of your system other immediately or in the future. Microsoft strongly recommends that you stop this installation now and contact the hardware vendor for software that has passed Windows Logo testing. Continue Anyway STOP InstallationThis monitor driver is under certifying MS logo, and this installation doesn't damage your system.
The certified driver will be posted on Samsung Monitor homepage
http://www.samsung.com/
9 Click the "Close" button then click the "OK" button continually.
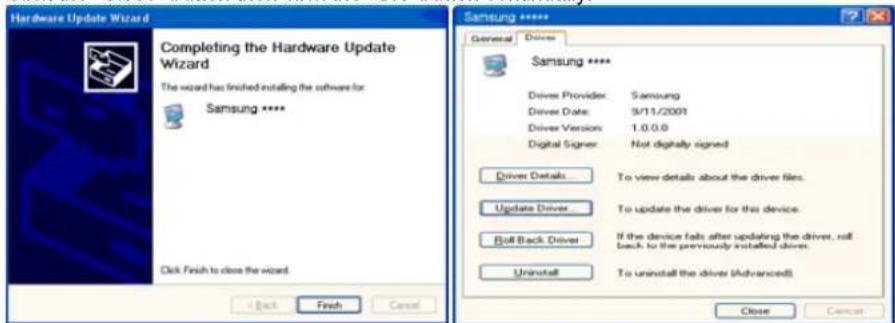
text_image
Hardware Update Wizard Completing the Hardware Update Wizard The wizard has finished installing the software for: Samsung **** Click Finish to close the wizard. < Back Finish Cancel Samsung ***** General Drivers Driver Provider: Samsung Driver Date: 9/11/2001 Driver Version: 1.0.0.0 Digital Signer: Not digitally signed Driver Details: To view details about the driver files. Update Driver: To update the driver for this device. Roll Back Driver: If the device fails after updating the driver, roll back to the previously installed driver. Uninstall: To uninstall the driver (Advanced). Close Cancel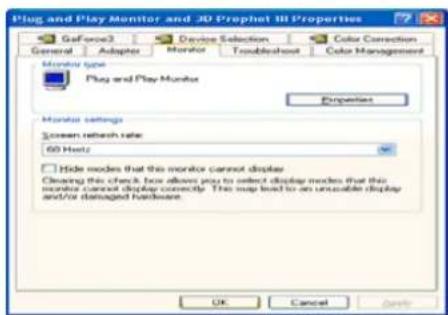
text_image
Plug and Play Monitor and JD Prophet III Properties General Adaptor Monitor Troublefoot Color Correction Monitor type Plug and Play Monitor Properties Monitor settings Screen refresh rate 60 Hz/Hz Hide modes that this monitor cannot display Cleaning this check box allows you to select display modes that this monitor cannot display correctly. This map lies to an accessible display and/or damaged hardware. OK Cancel Help⑩ Monitor driver installation is completed.

Microsoft® Windows® 2000 Operating System

When you can see "Digital Signature Not Found" on your monitor, follow these steps.
① Choose the "OK" button on the "Insert disk" window.
② Click the "Browse" button on the "File Needed" window.
③ Choose A:(D:\Driver) then click the "Open" button and then click the "OK" button.
How to install
① Click "Start," "Setting," and then "Control Panel."
② Double click the "Display" icon.
3 Select the "Settings" tab and click the "Advanced Properties" button.
④ Choose "Monitor."
Case1 : If the "Properties" button is inactive, it means your monitor is properly configured. Please stop installation
Case2 : If the "Properties" button is active, click the "Properties" button then follow next steps continually.
⑤ Click "Driver" and then click "Update Driver." then click the "Next" button.
6 Choose "Display a list of the known drivers for this device so that I can choose a specific driver" then click "Next" and then click "Have disk".
⑦ Click the "Browse" button then choose A:(D:\Driver).
⑧ Click the "Open" button, then click the "OK" button.
Choose your monitor model and click the "Next" button then click "Next" button.
⑩ Click the "Finish" button then the "Close" button.
If you can see the "Digital Signature Not Found" window then click the "Yes" button. And click the "Finish" button then the "Close" button.
Microsoft® Windows® Millennium Operating System
① Click "Start," "Setting," and then "Control Panel."
② Double click the "Display" icon.
3 Select the "Settings" tab and click the "Advanced Properties" button.
4 Select the "Monitor" tab.
⑤ Click the "Change" button in the "Monitor Type" area.
⑥ Choose "Specify the location of the driver."
⑦ Choose "Display a list of all the driver in a specific location." then click the "Next" button.
⑧ Click the "Have Disk" button.
9 Specify A: D: then click the "OK" button.
Select "Show all devices" and choose the monitor that corresponds to the one you connected to your computer and click "OK".
Continue choosing "Close" button and "OK" button until you close the Display Properties dialogue box.
Microsoft® Windows® NT Operating System
Click "Start," "Settings," "Control Panel," and then double-click "Display" icon.
② In the Display Registration Information window, click the Settings tab and then click "All Display Modes".
3 Select a mode that you wish to use (Resolution, Number of colors and Vertical frequency) and then click "OK".
4 Click the "Apply" button if you see the screen working normally after clicking "Test". If the screen is not normal, change to a different mode (lower mode of resolution, colors, or frequency).
If there is no Mode at All Display Modes, select the level of resolution and vertical frequency by referring to the Preset Timing Modes in the user guide.
Linux Operating System
To execute X-Window, you need to make the X86Config file, which is a type of system setting file.
① Press "Enter" at the first and the second screen after executing the X86Config file.
② The third screen is for setting your mouse.
③ Set a mouse for your computer.
④ The next screen is for selecting a keyboard.
⑥ Set a Keyboard for your computer.
⑥ The next screen is for setting your monitor.
⑦ First of all, set a horizontal frequency for your monitor. (You can enter the frequency directly.)
⑧ Set a vertical frequency for your monitor. (You can enter the frequency directly.)
⑨ "Enter" the model name of your monitor. This information will not affect the actual execution of X-Window.
You have finished setting up your monitor.
Execute X-Window after setting other requested hardware.

Natural Color

Natural Color
text_image
SAMSUNG ELECTRONICS Natural Color Pro color management system Monitor Cal. & Profiling Color Preference Copyright© 2003 Samsung Electronics Co., LtdOne of the recent problems in using a computer is that the color of the images printed out by a printer or other images scanned by a scanner or a digital camera are not the same as those shown on the monitor.
the Natural Color S/W is the very solution for this problem. It is a color administration system developed by Samsung Electronics in association with Korea Electronics & Telecommunications Research Institute (ETRI).
This is only available for Samsung monitors and ensures that the color of the images on the monitor are the same as the printed or scanned images.
For more information, refer to Help (F1) in the software program.

Installing the Natural Color Software
Insert the CD included with the Samsung monitor into the CD-ROM Drive. The initial Natural Color screen will appear. Click on Natural Color in the startup window to install the Natural Color software. To install the program manually, insert the CD included with the Samsung monitor into the CD-ROM Drive, click the Windows [Start] button, select [Run...] .
Enter D:\Color\NCProSetup.exe and then press the

Uninstalling the Natural Color Software Program
Select "Settings" / "Control Panel" from the "Start" menu and then double-click "Add/Delete a program"
Select Natural Color from the list and then click the "Add/Delete" button.
Monitor Driver Natural Color MagicTune™

MagicTune™

Installation
- Insert the installation CD into the CD-ROM drive.
- Click the MagicTune™ installation file
- Select installation Language, Click "Next".
- When the Installation Shield Wizard window appears, click "Next."
- Select "I agree to the terms of the license agreement" to accept the terms of use.
- Choose a folder to install the MagicTune™ program.
- Click "Install."
- The "Installation Status" window appears.
- Click "Finish."
- When the installation is complete, the MagicTune™ executable icon appears on your desktop.
Double-click the icon to start the program.

MagicTune™ execution icon may not appear depending on specification of computer system or monitor. If that happens, press F5 Key.

? Installation Problems (MagicTune™)
The installation of MagicTune™ can be affected by such factors as the video card, motherboard and the network environment.

System Requirements
os
• Windows 2000
• Windows XP Home Edition
• Windows XP Professional
- Windows Vista™

It is recommended using MagicTune™ in Windows® 2000 or later.
Hardware
• 32MB Memory above
. 60MB Hard disk space above
* For more information, visit the MagicTune™ website.
Uninstall
The MagicTune™ program can be removed only by using the "Add or Remove Programs" option of the Windows® Control Panel.
Perform the following steps remove MagicTune™.
- Go to [Task Tray]' [Start]' [Settings] and select [Control Panel] in the menu. If the program runs on Windows® XP, go to [Control Panel] in the [Start] menu.
- Click the "Add or Remove Programs" icon in Control Panel.
- In the "Add or Remove Programs" screen, scroll down to find "MagicTune™". Click on it to highlight it.
- Click the "Change/Remove" button to remove the program.
- Click "Yes" to begin the uninstall process.
- Wait until the "Uninstall Complete" dialog box appears.
Visit the MagicTune™ website for technical support for MagicTune™, FAQs (questions and answers) and software upgrades.
SAMSUNG
text_image
The color and appearance of the product may vary depending on the model, and the product specifications are subject to change without prior notice for reasons of performance enhancement. ■ Safety Precautions ■ Introduction ■ Connections ■ Using Linux ■ Using the Software ■ Adjusting the Monitor ■ Troubleshooting ■ Specifications ■ Information
Adjusting the Monitor
Control Buttons Direct Functions OSD Function

Control Buttons

text_image
Game interface screenshot showing a garden scene with a pagoda, colorful balloons, and menu controls labeled 1 to 4.[] Opens the OSD menu. Also use to exit the OSD menu or return to the previous menu.
② [▼These buttons allow you to adjust items in the menu.
3 [Press this button to Activates a highlighted menu item.
4 [AUTO] When the 'AUTO' button is pressed, the Auto Adjustment screen appears as shown in the animated screen on the center.
Control Buttons Direct Functions OSD Function

Direct Functions

AUTO
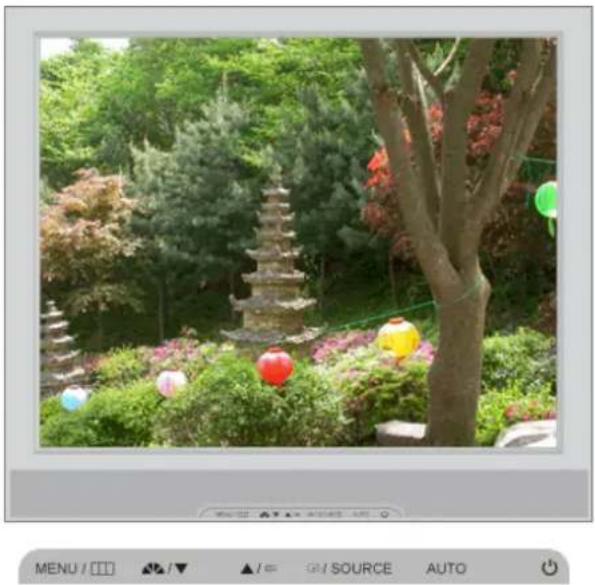
natural_image
Garden scene with traditional pagoda, red and yellow balloons, and trees (no visible text or symbols)Menu Description
When the 'AUTO' button is pressed, the Auto Adjustment screen appears as shown in the animated screen on the center. The values of fine, coarse and position are adjusted automatically.
AUTO
Available in analog Mode Only
If auto adjustment does not work properly, press 'AUTO' button again to adjust picture with more accuracy.
If you change resolution in the control panel, auto function will be executed automatically.
OSD Lock & Unlock
In case of pushing AUTO button after locking OSD
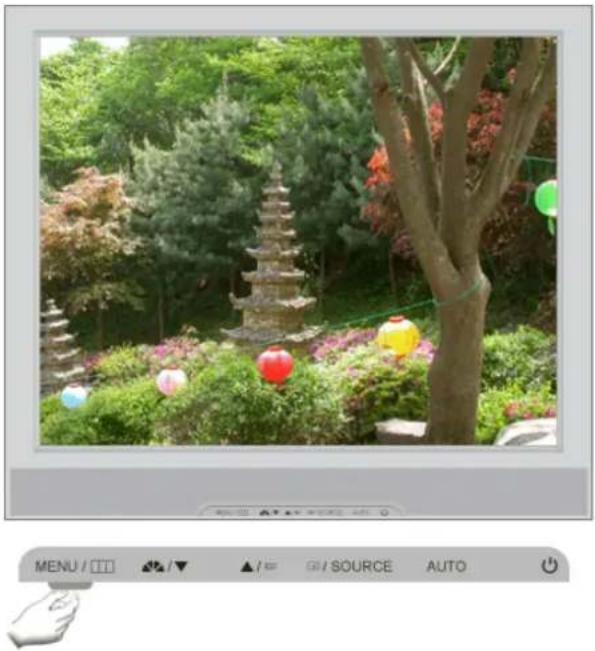
natural_image
Garden scene with a pagoda, trees, and colorful lanterns (no visible text or symbols)In case of pushing MENU button after locking OSD
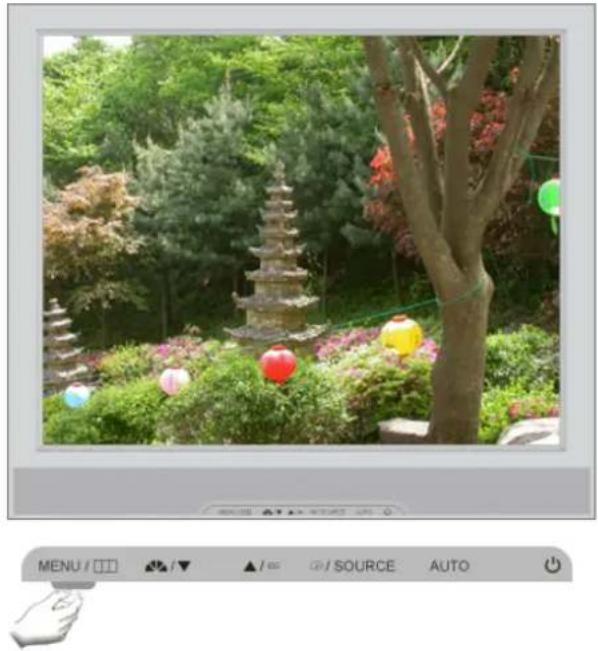
natural_image
Garden scene with a pagoda, trees, and colorful balloons (no visible text or symbols)Menu Description
This is the function that locks the OSD in order to keep the current states of settings or prevent others from adjusting the current settings.
Lock : Hold down the menu button for more than five (5) seconds to activate the OSD adjustment lock function.
OSD Lock & Unlock
Unlock : Hold down the menu button for more than five (5) seconds to deactivate the OSD adjustment lock function.
Though the OSD adjustment lock function is activated, you can still adjust the brightness and contrast, and adjust MagicBright (using the Direct button.
MagicBright™

natural_image
Garden scene with a pagoda, colorful balloons, and trees (no visible text or symbols)
MagicBright™
Push the MagicBright™ button to circle through available preconfigured modes.
- Six different modes (Custom/Text/Internet/Game/Sport/Movie)
Volume
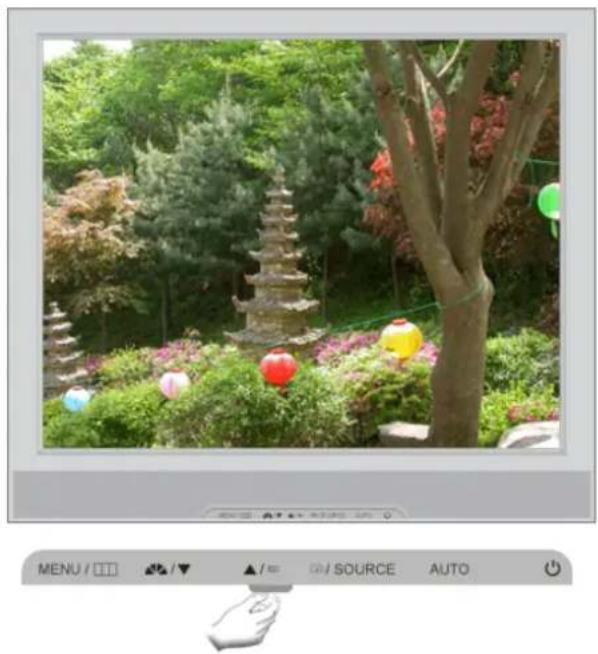
natural_image
Garden scene with a pagoda, colorful balloons, and trees (no visible text or symbols)Menu Description

Volume
When OSD is not on the screen, push [▲/]the button to adjust volume.
SOURCE
natural_image
Garden scene with a multi-tiered pagoda, colorful balloons, and lush greenery (no visible text or symbols)Menu Description
SOURCE Selects the Video signal while the OSD is off. (Analog/Client)
OSD Function
| Picture | Brightness | Contrast | ||||
| Color | MagicColor | Color Tone | Color Control | Gamma | ||
| Image | Coarse | Fine | Sharpness | H-Position | V-Position | |
| OSD | Language | H-Position | V-Position | Transparency | Display | Time |
| Setup | Image Reset | Color Reset | ||||
| Information |
Picture
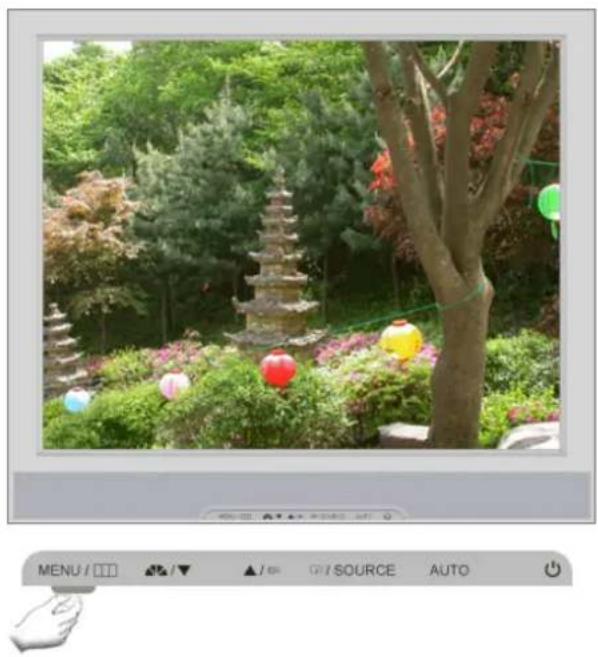
natural_image
Garden scene with a pagoda, colorful lanterns, and trees (no visible text or symbols)Menu Description Play/Stop
Brightness
You can use the on-screen menus to change the brightness according to personal preference.
MENU → ← → ← → ▲ ▼ → MENU

Contrast
You can use the on-screen menus to change the contrast according to personal preference.
( Not available in MagicColor mode of Full and Intelligent. )

MENU → ← → ▲ ▼ → ← → ▲ ▼ → MENU
Color
natural_image
Garden scene with a multi-tiered pagoda, colorful lanterns, and lush greenery (no visible text or symbols)
text_image
MENU / [ ][ ] ▲/▼ ▲/∞ G/SOURCE AUTOMenu Description Play/Stop
MagicColor is a new technology that Samsung has exclusively developed to improve digital image and to display natural color more clearly without disturbing image quality.
① Off Returns to the original mode.
② Demo The screen before applying MagicColor appears on the right and the screen after applying MagicColor appears on the left.
③ Full Displays not only vivid natural color but also more realistic natural skin color with clearness.
4 Intelligent Displays vivid natural color with clearness.
5 MagicZone The MagicZone ensures the clear and sharp display of animated multimedia or photo images by enhancing the brightness, sharpness, saturation, hue of a certain area on the screen. Especially, MagicZone is appropriate to using the moving picture.
MagicColor
▶ Hue This function is to adjust the hue of the MagicZone.
Saturation This function is to adjust the saturation of the MagicZone.
Brightness This function is to adjust the brightness of the MagicZone.
▶ Sharpness This function is to adjust the sharpness of the MagicZone.
H-Position This function is to move the MagicZone horizontally.
V-Position This function is to move the MagicZone vertically.
H-Size This function is to adjust the horizontal size of the MagicZone.
V-Size This function is to adjust the vertical size of the MagicZone.


The tone of the color can be changed and one of four modes can be selected -Cool, Normal, Warm and Custom.
Color Tone
( Not available in MagicColor mode of Full and Intelligent. )
MENU → ▲ ▼ → 📋 → ▲ ▼ → 📋 → ▲ ▼ → MENU

Color Control
Adjusts individual Red, Green, Blue color balance. - Red, Green, Blue
( Not available in MagicColor mode of Full and Intelligent. )

MENU → ▲ ▼ → 📋 → ▲ ▼ → 📋 → ▲ ▼ → 📋 → ▲ ▼ → MENU
Gamma correction changes the luminance of the colors with intermediate luminance.
Gamma
- Mode 1
- Mode 2
- Mode 3
natural_image
Garden scene with a multi-tiered pagoda, colorful lanterns, and lush greenery (no visible text or symbols)
text_image
MENU / [ ][ ] ▲/▼ ▲/≡ Ⓡ/ SOURCE AUTOMenu Description Play/Stop
Coarse
Removes noise such as vertical stripes.
Coarse adjustment may move the screen image area. You may relocate it to the center using the horizontal control menu.

Available in analog Mode Only
MENU → ▲ ↗ → ← → ← → ▲ ↘ → MENU

Removes noise such as horizontal stripes.
If the noise persists even after fine tuning, repeat it after adjusting the frequency (clock speed).
Fine
Available in analog Mode Only
MENU → ▲ ▼ → 📋 → ▲ ▼ → 📋 → ▲ ▼ → MENU

Changes the clearance of image.
( Not available in MagicColor mode of Full and Intelligent. )
Sharpness
text_image
Changes the horizontal position of the monitor's entire display. H-Position × Available in analog Mode Only MENU → ▲ ▼ → 📋 → ▲ ▼ → 📋 → ▲ ▼ → MENU Changes the vertical position of the monitor's entire display. V-Position × Available in analog Mode Only MENU → ▲ ▼ → 📋 → ▲ ▼ → 📋 → ▲ ▼ → MENU
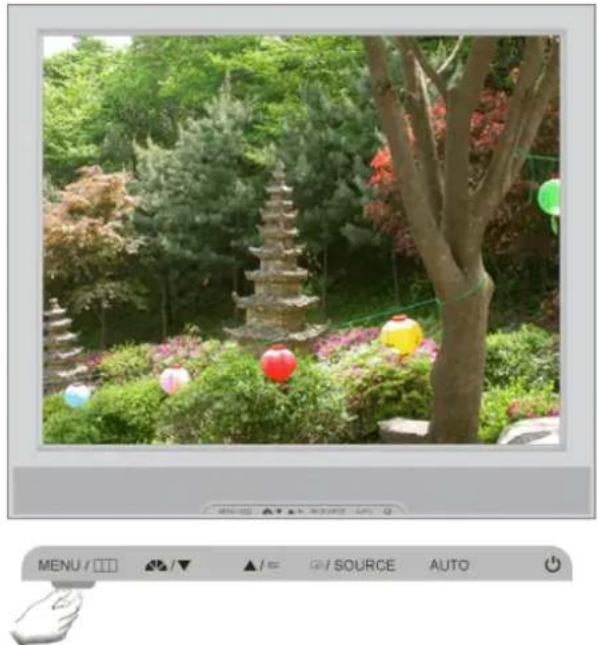
natural_image
Garden scene with a pagoda, colorful balloons, and trees (no visible text or symbols)Menu Description Play/Stop
| Language | You can choose one of the nine languages.English, Deutsch, Español, Français, Italiano, Svenska, Русский , Português , TürkçeThe language chosen affects only the language of the OSD. It has no effect on any software running on the computer. |
| MENU → ▲ ▼ → 📋 → 📋 → ▲ ▼ → MENU | |
| H-Position | You can change the horizontal position where the OSD menu appears on your monitor. |
| MENU → ▲ ▼ → 📋 → ▲ ▼ → 📋 → ▲ ▼ → MENU | |
| V-Position | You can change the vertical position where the OSD menu appears on your monitor. |
| MENU → ▲ ▼ → 📋 → ▲ ▼ → 📋 → ▲ ▼ → MENU | |
| Transparency | Change the transparency of the background of the OSD. |
| MENU → ▲ ▼ → 📋 → ▲ ▼ → 📋 → ▲ ▼ → MENU | |
| The menu will be automatically turned off if no adjustments are made for a certain time period.You can set the amount of time the menu will wait before it is |
Display Time
turned off.
- 5 Sec, 10 Sec, 20 Sec, 200 Sec
MENU → ▲ ▼ → ➕ → ▲ ▼ → ➕ → ▲ ▼ → MENU


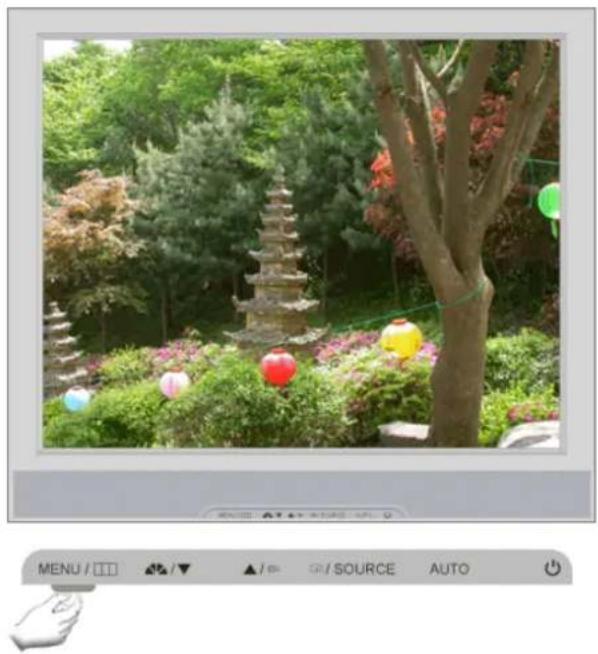
natural_image
Garden scene with a pagoda, colorful balloons, and lush greenery (no visible text or symbols)Menu Description Play/Stop
Image Reset
Image parameters are replaced with the factory default values.
MENU → ▲ ▼→←→←→ ▲ ▼→ MENU

Color Reset
Color parameters are replaced with the factory default values.
MENU → ▲ ▼ → ◀→ ▲ ▼→ ◀→ ▲ ▼ → MENU


natural_image
Garden scene with a multi-tiered pagoda, colorful lanterns, and lush greenery (no visible text or symbols)
text_image
MENU / [ ][ ] ▲/▼ ▲/ = Ⓗ/ SOURCE AUTOMenu Description
Information
Shows a video source, display mode on the OSD screen.
MENU → ▲ ▼
text_image
The color and appearance of the product may vary depending on the model, and the product specifications are subject to change without prior notice for reasons of performance enhancement. ■ Safety Precautions ■ Introduction ■ Connections ■ Using Linux ■ Using the Software ■ Adjusting the Monitor ■ Troubleshooting ■ Specifications ■ Information
Troubleshooting
Check List
Q&A
Self-Test

Check List
Before calling for service, check the information in this section to see if you can remedy any problems yourself. If you do need assistance, please call the phone number on the Information section or contact your dealer.
Symptom Check List Solutions
| No images on the screen.I cannot turn on the monitor. | Is the power cord connected properly? | Check the power cord connection and supply. |
| Can you see "Check Signal Cable" on the screen? | Check the signal cable connection. | |
| If the power is on,reboot the computer to see the initial screen(the login screen), which can be seen. | If the initial screen (the login screen) appears, boot the computer in the applicable mode (the safe mode for Windows ME/XP/2000) and then change the frequency of the video card.(Refer to the Preset Timing Modes)If the initial screen (the login screen) does not appear, contact the Service Center or your dealer. | |
| Can you see "Not Optimum Mode","Recommended Mode 1280 x 1024 60 Hz" on the screen? | You can see this message when the signal from the video card exceeds the maximum resolution and frequency that the monitor can handle properly.Adjust the maximum resolution and frequency that the monitor can handle properly.If the display exceeds SXGA or 75 Hz, a "Not Optimum Mode", "Recommended Mode 1280 x 1024 60 Hz" message is displayed. If the display exceeds 85 Hz, the display will work properly but the "Not Optimum Mode", "Recommended Mode 1280 x 1024 60 Hz" message appears for one minute and then disappears.Please change to the recommended mode during this one-minute period.(The message is displayed again if the system is rebooted.) | |
| There is no image on the screen.Is the power indicator on the monitor blinking at 1 second intervals? | The monitor is in PowerSaver mode.Press a key on the keyboard to activate the monitor and restore the image on the screen.If there is still no image, press the 'SOURCE' button.Then press any key on the keyboard again to activatethe monitor and restore the image on the screen. | |
| I cannot see the On Screen Display. | Have you locked the On Screen Display (OSD) Menu to prevent changes? | Unlock the OSD by pressing the [MENU/□□] button for at least 5 seconds. |
| The screen shows strange colors or just black and white. | Is the screen displaying only one color as if looking at the screen through a cellophane paper? | Check the signal cable connection.Make sure the video card is fully inserted in it's slot. |
| Have the screen colors become strange after running a program or due to a crash between applications? | Reboot the computer. | |
| Has the video card been set properly? | Set the video card by referring to the video card manual. | |
| The screen suddenly has become unbalanced. | Have you changed the video card or the driver? | Adjust screen image position and size using the OSD. |
| Have you adjusted the resolution or frequency to the monitor? | Adjust the resolution and frequency at the video card.(Refer to the Preset Timing Modes). | |
| The screen can be unbalanced due to the cycle of the video card signals. Readjust Position by referring to the OSD. | ||
| The screen is out of focus or OSD cannot be adjusted. | Have you adjusted the resolution or frequency on the monitor? | Adjust the resolution and frequency of the video card.(Refer to the Preset Timing Modes). |
| LED is blinking but no images on the screen. | Is the frequency properly adjusted when checking the Display Timing on the menu? | Adjust the frequency properly by referring to the video card manual and the Preset Timing Modes.(The maximum frequency per resolution may differ from product to product.) |
| There are only 16 colors shown on the screen. The screen colors have changed after changing the video card. | Have the Windows colors been set properly? | Windows XP:Set the resolution at the Control Panel → Appearance and Themes → Display → Settings.Windows ME/2000:Set the resolution at the Control Panel → Display → Settings. |
| Has the video card been set properly? | Set the video card by referring to the video card manual. | |
| There is a message that reads"Unrecognized monitor, Plug & Play (VESA DDC) monitor found". | Have you installed the monitor driver? | Install the monitor driver according to the Driver Installation Instructions. |
| See the video card manual to see if the Plug & Play (VESA DDC) function can be supported. | Install the monitor driver according to the Driver Installation Instructions. | |
| Problems related to Audio | No sound Ensure that the audio cable is firmly connected to both the audio-in port on your monitor and the audio-out port on your sound card.(Refer to Connecting the Monitor)Sound level is too low. | Check the volume level.Check the volume level.If the volume is still too low after turning the control to its maximum, check the volume control on the computer sound card or software program. |
| Check when MagicTuneTM does not function properly. | MagicTuneTMfeature is found only on PC (VGA) with Window OS that supports Plug and Play. | * To check whether your PC is available for MagicTuneTMfeature, follow the steps below (When WindowsTMis XP);Control Panel → Performance and Maintenance → System → Hardware → Device Manager → Monitors → After deleting Plug and Play monitor, find 'Plug and Play monitor' by searching new Hardware.MagicTuneTMis an additional software for the monitor. Some graphic cards may not support your monitor. When you have a problem with the graphic card, visit our website to check the compatible graphic card list provided.http://www.samsung.com/monitor/magictune |
| MagicTuneTMdoesn't work properly. | Have you changed your PC or video graphic card? | Download the latest program. The program can be downloadedhttp://www.samsung.com/monitor/magictune |
| Did you install the program? | Reboot the computer after installing the program for the first time. If a copy of the program is already installed, remove it, reboot the computer, and then install the program again. You need to reboot the computer for it to operate normally after installing or removing the program. | |
Visit the MagicTune™ website and download the installation software for MagicTune™ MAC.
Check the following items if there is trouble with the monitor.
Symptom Solutions
| The screen does not appear when I switch to the Client Mode. | When booting up, it takes about 30 seconds for the networking functions to be activated and no screen is displayed for about 3 to 4 seconds.Wait 30 seconds after the power is turned on, and try to switch modes again.If the operating system does not boot up due to damage to Windows or a blue screen is displayed, download the Windows XPe OS from this site and recover your operating system with it : http://www.syncsight.com |
| The client screen appears, but I cannot connect to the server. | 1) Check if the Hub port LED to which the LAN cable is connected blinks. If not, that indicates that the LAN connection is disconnected. In this case, connect using another LAN cable.2) Check if the settings of the 'Settings', 'Network' tab are properly set up. The default setting is "DHCP". If your network uses a static IP address, select 'Use the following IP address' and then enter the appropriate IP address information.3) Check if the 'User Name' and 'Password' set in the 'Remote Desktop' tab of 'Settings' are the same as those of the host PC. If not, match the 'User Name' and 'Password' of the 'Remote Desktop' with those of the host PC. |
| I cannot access the Internet in the Client screen. | 1) Check if the Hub port LED to which the LAN cable is connected blinks. If not, that indicates that the LAN connection is disconnected. In this case, connect using another LAN cable.2) Check if the settings of the 'Network' tab of 'Settings' have been properly set up. The default setting is "DHCP". If your network uses a static IP address, select 'Use the following IP address' and then enter the appropriate IP address information. |
| The contents (video, voice) on the server do not play smoothly on the Client Monitor. | This is because the data is transmitted over the LAN. Check your LAN connection status. |
I have connected a This model supports USB devices that support removable disk functions without
digital device such as a digital camera, camcorder or USB memory to the USB port, but they do not work.
an additional driver installation. Check if the device you want to connect to is a device that supports the removable disk function without an additional driver installation.
The file list does not appear.
1) Check the files on the card. If only abnormal files (e.g. 0KByte, broken JPEG) exist, the files do not appear on the screen.
2) The time required to display is determined by the size of the file. Wait a moment.
3) Check if the format of the file is supported by the Client Monitor. If the extension of the file has been changed, the file will not be played.
Check the following items if there is trouble with the monitor.
Check if the power cord and the video cables are properly connected to the computer.
Check if the computer beeps more than 3 times when booting. (If it does, request an a service for the main board of the computer.)
If you installed a new video card or if you assembled the PC, check if the installed the adaptor(video) driver and the monitor driver.
Check if the scanning ratio of the video screen is set at 56 Hz \~ 75 Hz. (Do not exceed 75 Hz when using the maximum resolution.)
If you have problems in installing the adaptor (video) driver, boot the computer in Safe Mode, remove the Display adaptor at the "Control Panel → System → Device Administrator" and then reboot the computer to reinstall the adaptor (video) driver.
If problems repeatedly occur, contact an authorized service center.
Check List
Q & A
Self-Test

Q & A
Question
Answer
How can I change the frequency? Frequency can be changed by reconfiguring the video card.
Note that video card support can vary, depending on the version of the driver used. (Refer to the computer or the video card manual for details.)
How can I adjust the resolution? Windows XP :
Set the resolution at the Control Panel → Appearance and Themes → Display → Settings.
Windows ME/2000 : Set the resolution at the Control Panel → Display → Settings.
✗ Contact the video card manufacturer for details.
How can I set the Power Saving function? Windows XP :
Set the resolution at the Control Panel → Appearance and Themes → Display → Screen Saver. Set the function at BIOS-SETUP of the computer.
Windows ME/2000 : Set the resolution at the Control Panel → Display → Screen Saver. Set the function at BIOS-SETUP of the computer.
Refer to Windows/Computer Manual
monitor with a soft cloth, using either a cleaning solution or plain water.
Do not leave any remains of the detergent nor scratch the case. Do not allow any water to go inside the monitor.
Check List
Q & A
Self-Test
Self-Test
Self-Test Feature Check | Warning Messages | Environment | Useful Tips
Your monitor provides a self test feature that allows you to check whether your monitor is functioning properly.
Self-Test Feature Check
1 Turn off both your computer and the monitor.
② Unplug the video cable from the back of the computer.
3 Turn on the monitor.
If the monitor is functioning properly, you will see a box in the illustration below.
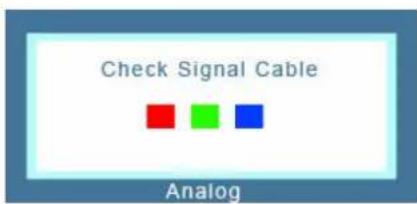
text_image
Check Signal Cable AnalogThis box appears during normal operation if the video cable becomes disconnected or damaged.
4 Turn off your monitor and reconnect the video cable; then turn on both your computer and the monitor.
If your monitor screen remains blank after using the previous procedure, check your video controller and computer system; your monitor is functioning properly.
Warning Messages
If there is something wrong with the input signal, a message appears on the screen or the screen goes blank although the power indicator LED is still on. The message may indicate that the monitor is out of scan range or that you need to check the signal cable.
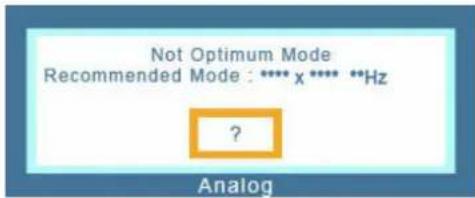
text_image
Not Optimum Mode Recommended Mode : **** x **** **Hz ? AnalogEnvironment
The location and the position of the monitor may influence the quality and other features of the monitor.
If there are any sub woofer speakers near the monitor, unplug and relocate the woofer to another room. Remove all electronic devices such as radios, fans, clocks and telephones that are within 3 feet (one meter) of the monitor.
Useful Tips
A monitor recreates visual signals received from the computer. Therefore, if there is trouble with the computer or the video card, this can cause the monitor to become blank, have poor coloring, noise,
Video mode not supported, etc. In this case, first check the source of the problem, and then contact the Service Center or your dealer.
Judging the monitor's working condition
If there is no image on the screen or a "Not Optimum Mode", "Recommended Mode 1280 x 1024 60 Hz" message comes up, disconnect the cable from the computer while the monitor is still powered on.
If there is a message coming up on the screen or if the screen goes white, this means the monitor is in working condition. In this case, check the computer for trouble.
text_image
The color and appearance of the product may vary depending on the model, and the product specifications are subject to change without prior notice for reasons of performance enhancement. ■ Safety Precautions ■ Introduction ■ Connections ■ Using Linux ■ Using the Software ■ Adjusting the Monitor ■ Troubleshooting ■ Specifications ■ InformationSpecifications
Specifications PowerSaver Preset Timing Modes
Specifications
General
Model Name SyncMaster 711LT
LCD Panel
Size 17 inch (43 cm)
Display area 337.92 mm (H) x 270.336 mm (V)
Pixel Pitch 0.264 mm (H) x 0.264 mm (V)
Synchronization
Horizontal 30 \~ 81 kHz
Vertical 56 \~ 75 Hz
Display Color
16.7 M
Resolution
Optimum resolution 1280 x 1024@60 Hz
Maximum resolution 1280 x 1024@75 Hz
Input Signal, Terminated
RGB Analog
0.7 Vp-p ± 5 %
separate H/V sync, Composite H/V sync
TTL level (V high ≥ 2.0 V, V low ≤ 0.8 V)
Maximum Pixel Clock
135 MHz
Power Consumption
AC 100 - 240 V \~ (+/- 10 %), 50/60 Hz
Signal Cable
15pin to 15pin D-sub cable, Detachable
Dimensions (W x H x D) / Weight
370.0 x 342.3 x 69 mm / 14.6 x 13.5 x 2.7 inch (Without Stand)
370.0 x 404.3 x 200 mm / 14.6 x 15.9 x 7.9 inch (With Basic Stand), 6.2 Kg / 13.7 (lbs)
VESA Mounting Interface
100 mm x 100 mm (For use with Specialty(Arm) Mounting hardware.)
Environmental considerations
Operating Temperature : 50°F \~ 104°F (10°C \~ 40°C)
Humidity : 10 % \~ 80 %, non-condensing
Storage Temperature: -4^ 113^ (-20°C \~ 45°C)
Humidity : 5 % \~ 95 %, non-condensing
Plug and Play Capability
This monitor can be installed on any Plug & Play compatible system. Interaction of the monitor and computer systems will provide the best operating conditions and monitor settings. In most cases, monitor installation will proceed automatically, unless the user wishes to select alternate settings.
Dot Acceptable
TFT LCD panel manufactured by using advanced semiconductor technology with precision of 1 ppm (one millionth) above is used for this product. But the pixels of RED, GREEN, BLUE and WHITE color seem to be bright sometimes or some of black pixels could be seen. This is not from bad quality and you can use it without uneasiness.
For example, the number of TFT LCD sub pixels that is contained in this product are 3,932,160.
✗ Design and specifications are subject to change without prior notice.
Class B Equipment (Information Communication equipment for residential use)
This product complies with the Electromagnetic Compatibility Directives for residential use and can be used in all areas including common residential areas.
(Class B equipment emits less electromagnetic waves than Class A equipment.)
Client
Item Specifications
LAN 100 Mbps
USB 2.0 x 4Ports
Server Requirement
Connect Client No CPU RAM Ethernet OS
| Minimum SPEC | Just can load Server Program | P3 400 MHz 64 Mbyte 100 Mbps | windows 2003 Server |
| Recommend SPEC | 1 P4 1.0 GHz 256 Mbyte | ||
| 2~4 | P4 2.4 GHz 512 Mbyte | windows 2003 | |
The content presented above is the result of testing a specific server. The information may change as the server may be different. For some products, the OS may not be supported. When purchasing a product, make sure to check whether or not the OS is supported.
Specifications PowerSaver Preset Timing Modes
PowerSaver
This monitor has a built-in power management system called PowerSaver. This system saves energy by switching your monitor into a low-power mode when it has not been used for a certain amount of time. The monitor automatically returns to normal operation when you press a key on the keyboard. For energy conservation, turn your monitor OFF when it is not needed, or when leaving it unattended for long periods. The PowerSaver system operates with a VESA DPM compliant video card installed in your computer. Use a software utility installed on your computer to set up this feature.
State Normal Operation Power saving mode
Power off EPA/ENERGY 2000
Power Indicator Green Green, Blinking Off
Power Consumption Less than 50 W Less than 4.7 W Less than 2.7 W

This monitor is EPA ENERGY STAR® compliant and ENERGY2000 compliant when used with a computer equipped with VESA DPM functionality.
As an ENERGY STAR® Partner, SAMSUNG has determined that this product meets the ENERGY STAR® guidelines for energy efficiency.
Specifications PowerSaver Preset Timing Modes
Preset Timing Modes
If the signal transferred from the computer is the same as the following Preset Timing Modes, the screen will be adjusted automatically. However, if the signal differs, the screen may go blank while the power LED is on. Refer to the video card manual and adjust the screen as follows.
Preset Timing Modes
| Display Mode | Horizontal Frequency (kHz) | Vertical Frequency (Hz) | Pixel Clock (MHz) | Sync Polarity (H/V) |
| IBM, 640 x 350 | 31.469 | 70.086 | 25.175 +/- | |
| IBM, 640 x 480 | 31.469 | 59.940 | 25.175 | -/- |
| IBM, 720 x 400 | 31.469 | 70.087 | 28.322 -/+ | |
| MAC, 640 x 480 | 35.000 | 66.667 | 30.240 | -/- |
| MAC, 832 x 624 | 49.726 | 74.551 | 57.284 | -/- |
| MAC, 1152 x 870 | 68.681 | 75.062 | 100.000 | -/- |
| /ESA, 640 x 480 | 37.861 | 72.809 | 31.500 | -/- |
| /ESA, 640 x 480 | 37.500 | 75.000 | 31.500 | -/- |
VESA, 800 x 600 35.156 56.250 36.000 +/+
VESA, 800 x 600 37.879 60.317 40.000 +/+
VESA, 800 x 600 48.077 72.188 50.000 +/+
VESA, 800 x 600 46.875 75.000 49.500 +/+
VESA, 1024 x 768 48.363 60.004 65.000 -/-
VESA, 1024 x 768 56.476 70.069 75.000 -/-
VESA, 1024 x 768 60.023 75.029 78.750 +/+
VESA, 1152 x 864 67.500 75.000 108.000 +/+
VESA, 1280 x 960 60.000 60.000 108.000 +/+
VESA, 1280 x 1024 63.981 60.020 108.000 +/+
VESA, 1280 x 1024 79.976 75.025 135.000 +/+
Horizontal Frequency

The time to scan one line connecting the right edge to the left edge of the screen horizontally is called Horizontal Cycle and the inverse number of the Horizontal Cycle is called Horizontal Frequency. Unit : kHz
Vertical Frequency
Like a fluorescent lamp, the screen has to repeat the same image many times per second to display an image to the user. The frequency of this repetition is called Vertical Frequency or Refresh Rate. Unit : Hz
text_image
The color and appearance of the product may vary depending on the model, and the product specifications are subject to change without prior notice for reasons of performance enhancement. ■ Safety Precautions ■ Introduction ■ Connections ■ Using Linux ■ Using the Software ■ Adjusting the Monitor ■ Troubleshooting ■ Specifications ■ Information
Specifications
Specifications
PowerSaver
Preset Timing Modes

Specifications
General
Model Name SyncMaster 911LT
LCD Panel
Size 19 inch(48 cm)
Display area 376.32 mm(H) x 301.056 mm(V)
Pixel Pitch 0.294(H) x 0.294(V)
Synchronization
Horizontal 30 \~ 81 kHz
Vertical 56 \~ 75Hz
Display Color
16.7 M
Resolution
Optimum resolution 1280x1024@60 Hz
Maximum resolution 1280x1024@75 Hz
Input Signal, Terminated
RGB Analog
0.7 Vp-p ± 5 %
separate H/V sync, Composite H/V sync
TTL level (V high ≥ 2.0 V, V low ≤ 0.8 V)
Maximum Pixel Clock
135MHz
Power Consumption
AC 100 - 240 V \~ (+/- 10 %), 50/60 Hz
Signal Cable
15pin-to-15pin D-sub cable, Detachable
Dimensions (W x H x D) / Weight
416.6 X 375.2 X 74.7 mm / 16.4 x 14.8 x 2.9 inch (Without Stand)
416.6 X 420.9 X 200.0 mm / 16.4 x 16.6 x 7.9 inch (With Stand) / 6.8 Kg / 15.0 (lbs)
VESA Mounting Interface
100 mm x 100 mm (For use with Specialty(Arm) Mounting hardware.)
Environmental considerations
Operating
Operating Temperature: 10°C\~40°C
Humidity : 10 % \~ 80 %, non-condensing
Storage
Storage Temperature : -20°C \~ 45°C
Humidity : 5 % \~ 95 %, non-condensing
Plug and Play Capability
This monitor can be installed on any Plug & Play compatible system. Interaction of the monitor and computer systems will provide the best operating conditions and monitor settings. In most cases, monitor installation will proceed automatically, unless the user wishes to select alternate settings.
Dot Acceptable
TFT LCD panel manufactured by using advanced semiconductor technology with precision of 1 ppm (one millionth) above is used for this product. But the pixels of RED, GREEN, BLUE and WHITE color seem to be bright sometimes or some of black pixels could be seen. This is not from bad quality and you can use it without uneasiness.
For example, the number of TFT LCD sub pixels that is contained in this product are 3,932,160.
Design and specifications are subject to change without prior notice.
Class B Equipment (Information Communication equipment for residential use)
This product complies with the Electromagnetic Compatibility Directives for residential use and can be used in all areas including common residential areas.
(Class B equipment emits less electromagnetic waves than Class A equipment.)
Client
Item Specifications
LAN 100 Mbps
USB 2.0 x 4Ports
Server Requirement
Connect Client No CPU RAM Ethernet OS
Minimum SPEC
Just can load Server Program
P3 400 MHz 64 Mbyte 100 Mbps
windows 2003 Server
Recommend SPEC
1 P4 1.0 GHz 256 Mbyte
2\~4
P4 2.4 GHz 512 Mbyte
windows 2003
5\~7 P4 3.0 GHz 1 Gbyte
Server
8\~10 P4 3.2 GHz 2 Gbyte
100 Mbps
The content presented above is the result of testing a specific server. The information may change as the server may be different. For some products, the OS may not be supported. When purchasing a product, make sure to check whether or not the OS is supported.
Specifications PowerSaver Preset Timing Modes
PowerSaver
PowerSaver
This monitor has a built-in power management system called PowerSaver. This system saves energy by switching your monitor into a low-power mode when it has not been used for a certain amount of time. The monitor automatically returns to normal operation when you press a key on the keyboard. For energy conservation, turn your monitor OFF when it is not needed, or when leaving it unattended for long periods. The PowerSaver system operates with a VESA DPM compliant video card installed in your computer. Use a software utility installed on your computer to set up this feature.
State Normal Operation Power saving mode
Power off EPA/ENERGY 2000
Power Indicator Green Green, Blinking Off
Power Consumption Less than 50 W Less than 4.7 W Less than 2.7 W

This monitor is EPA ENERGY STAR® compliant and ENERGY2000 compliant when used with a computer equipped with VESA DPM functionality.
As an ENERGY STAR ^® Partner, SAMSUNG has determined that this product meets the ENERGY STAR ^® guidelines for energy efficiency.
Specifications PowerSaver Preset Timing Modes
Preset Timing Modes
If the signal transferred from the computer is the same as the following Preset Timing Modes, the screen will be adjusted automatically. However, if the signal differs, the screen may go blank while the power LED is on. Refer to the video card manual and adjust the screen as follows.
▶ Preset Timing Modes
| Display Mode | Horizontal Frequency (kHz) | Vertical Frequency (Hz) | Pixel Clock (MHz) | Sync Polarity (H/V) |
| IBM, 640 x 350 | 31.469 | 70.086 | 25.175 +/- | |
| IBM, 640 x 480 | 31.469 | 59.940 | 25.175 | -/- |
| IBM, 720 x 400 | 31.469 | 70.087 | 28.322 -/+ | |
| MAC, 640 x 480 | 35.000 | 66.667 | 30.240 | -/- |
| MAC, 832 x 624 | 49.726 | 74.551 | 57.284 | -/- |
| MAC, 1152 x 870 | 68.681 | 75.062 | 100.000 | -/- |
| /ESA, 640 x 480 | 37.861 | 72.809 | 31.500 | -/- |
VESA, 640 x 480 37.500 75.000 31.500 -/-
VESA, 800 x 600 35.156 56.250 36.000 +/+
VESA, 800 x 600 37.879 60.317 40.000 +/+
VESA, 800 x 600 48.077 72.188 50.000 +/+
VESA, 800 x 600 46.875 75.000 49.500 +/+
VESA, 1024 x 768 48.363 60.004 65.000 -/-
VESA, 1024 x 768 56.476 70.069 75.000 -/-
VESA, 1024 x 768 60.023 75.029 78.750 +/+
VESA, 1152 x 864 67.500 75.000 108.000 +/+
VESA, 1280 x 960 60.000 60.000 108.000 +/+
VESA, 1280 x 1024 63.981 60.020 108.000 +/+
VESA, 1280 x 1024 79.976 75.025 135.000 +/+
Horizontal Frequency

The time to scan one line connecting the right edge to the left edge of the screen horizontally is called Horizontal Cycle and the inverse number of the Horizontal Cycle is called Horizontal Frequency. Unit : kHz
Vertical Frequency
Like a fluorescent lamp, the screen has to repeat the same image many times per second to display an image to the user. The frequency of this repetition is called Vertical Frequency or Refresh Rate. Unit : Hz
text_image
The color and appearance of the product may vary depending on the model, and the product specifications are subject to change without prior notice for reasons of performance enhancement. ■ Safety Precautions ■ Introduction ■ Connections ■ Using Linux ■ Using the Software ■ Adjusting the Monitor ■ Troubleshooting ■ Specifications ■ Information
Information
Contact SAMSUNG WORLDWIDE
Terms
For Better Display
Authority

Contact SAMSUNG WORLDWIDE
If you have any questions or comments relating to Samsung products, please contact the SAMSUNG customer care center.
North America
U.S.A 1-800-SAMSUNG (726-7864) http://www.samsung.com
CANADA 1-800-SAMSUNG (726-7864) http://www.samsung.com/ca
MEXICO 01-800-SAMSUNG (726-7864) http://www.samsung.com
Latin America
ARGENTINE 0800-333-3733 http://www.samsung.com/ar
BRAZIL 0800-124-421 4004-0000
http://www.samsung.com
CHILE 800-SAMSUNG(726-7864) http://www.samsung.com/cl
COLOMBIA 01-8000112112 http://www.samsung.com/co
COSTA RICA 0-800-507-7267 http://www.samsung.com/latin
ECUADOR 1-800-10-7267 http://www.samsung.com/latin
Middle East & Africa
SOUTH AFRICA 0860-SAMSUNG(726-7864) http://www.samsung.com
TURKEY 444 77 11 http://www.samsung.com
U.A.E 800-SAMSUNG (726-7864) 8000-4726 http://www.samsung.com
Contact SAMSUNG WORLDWIDE
Terms
For Better Display
Authority
Terms
Dot Pitch
The image on a monitor is composed of red, green and blue dots. The closer the dots, the higher the resolution. The distance between two dots of the same color is called the 'Dot Pitch'. Unit: mm
Vertical Frequency
The screen must be redrawn several times per second in order to create and display an image for the user. The frequency of this repetition per second is called the Vertical Frequency or Refresh Rate. Unit : Hz
Example : If the same light repeats itself 60 times per second, this is regarded as 60 Hz.
Horizontal Frequency
The time to scan one line connecting the right edge to the left edge of the screen horizontally is called the Horizontal Cycle. The inverse number of the Horizontal Cycle is called Horizontal Frequency. Unit : kHz
▶ Interlace and Non-Interlace Methods
Showing the horizontal lines of the screen from the top to the bottom sequentially is called the Non-Interlace method while showing odd lines and then even lines in turn is called the Interlace method. The Non-Interlace method is used for the majority of monitors to ensure a clear image. The Interlace method is the same as that used in TVs.
Plug & Play
This is a function that provides the best quality screen for the user by allowing the computer and the monitor to exchange information automatically. This monitor follows the international standard VESA DDC for the Plug & Play function.
Resolution
The number of horizontal and vertical dots used to compose the screen image is called the 'resolution'. This number shows the accuracy of the display. A high resolution is good for performing multiple tasks as more image information can be shown on the screen.
Example : If the resolution is 1280 x 1024, this means the screen is composed of 1280 horizontal dots (horizontal resolution) and 1024 vertical lines (vertical resolution).
Contact SAMSUNG WORLDWIDE
Terms
For Better Display
Authority
For Better Display
Adjust computer resolution and screen injection rate (refresh rate) oncomputer as described below to enjoy the best quality of picture. You can have an uneven quality of picture in the screen if the best quality of picture is not provided in TFT-LCD.
▶ Resolution : 1280 x 1024
▶ Vertical frequency (refresh rate) : 60 Hz
TFT LCD panel manufactured by using advanced semiconductor technology with precision of 1ppm (one millionth) above is used for this product. But the pixels of RED, GREEN, BLUE and WHITE color seem to be bright sometimes or some of black pixels could be seen. This is not from bad quality and you can use it without uneasiness.
For example, the number of TFT LCD sub pixels that is contained in this product are 3,932,160.
When cleaning the monitor and the panel outside, please apply the recommended small amount of cleaner by using a soft cloth to polish. Do not force the LCD area but rub softly. If excessive force is applied, you can have a stain on it.
If you are not satisfied with the picture quality, you can get better quality of picture by performing the "auto adjustment function" in display screen that is appeared as window termination button is pressed. If there's still noise after the automatic adjustment, use the FINE/COARSE adjustment function.
When viewing a fixed screen for an extended period of time, a residual image or blurriness may appear. Change the mode to energy save or set a screensaver to move the picture when you need to be away from the monitor for an extended period of time.
Contact SAMSUNG WORLDWIDE
Terms
For Better Display
Authority
Authority
Information in this document is subject to change without notice. © 2008 Samsung Electronics Co., Ltd. All rights reserved.
Reproduction in any manner whatsoever without the written permission of Samsung Electronics Co., Ltd. is strictly forbidden.
Samsung Electronics Co., Ltd. shall not be liable for errors contained herein or for incidental or consequential damages in connection with the furnishing, performance, or use of this material.
Samsung is the registered trademark of Samsung Electronics Co., Ltd.; Microsoft, Windows and Windows NT are registered trademarks of Microsoft Corporation; VESA, DPM and DDC are registered trademarks of Video Electronics Standard Association; the ENERGY STAR® name and logo are registered trademarks of the U.S. Environmental Protection Agency (EPA). As an ENERGY STAR® Partner, Samsung Electronics Co., Ltd. has determined that this product meets the ENERGY STAR® guidelines for energy efficiency. All other product names mentioned herein may be the trademarks or registered trademarks of their respective owners.
LCD Monitors and TVs may have an image retention when switching from one image to another especially after displaying a stationary image for a long time.
This guide is to demonstrate a correct usage of LCD products in order to protect them from Image retention.
Warranty
Warranty does not cover any damage caused by image retention. Burn-in is not covered by the warranty.
What is Image retention?
During normal operation of a LCD panel, pixel image retention doesn't occur. However, if the same image is displayed for a long time, a slight difference in electric charge accumulates between the two electrodes which encase the liquid crystal. This may cause the liquid crystal to build up in a certain areas of the display. Thus, the previous image is retained when switching to a new video image. All display products, including LCD, are subject to image retention. This is not a product defect.
Please follow the suggestions below to protect your LCD from image retention
Power Off, Screen Saver, or Power Save Mode Ex)
- Turn the power off when using a stationary pattern.
- Turn the power off for 4 hours after 20 hours in use
- Turn the power off for 2 hours after 12 hours in use
. Use a Screen saver if possible - Screen saver in one color or a moving image is recommended.
- Set the Monitor to power off with the PC Display Properties Power Scheme.
- Suggestions for specific applications
Ex) Airports, Transit Stations, Stock Markets, Banks, and Controlling Systems We recommend that you follow set up of your display system program as below:
- Display Information together with Logo or Moving image cycle. Ex) Cycle : Display Information for 1 hour followed by a Display Logo or moving image for 1 minute.
Change the Color Information periodically (Use 2 different colors). Ex) Rotate the Color Information with 2 colors every 30 minutes.
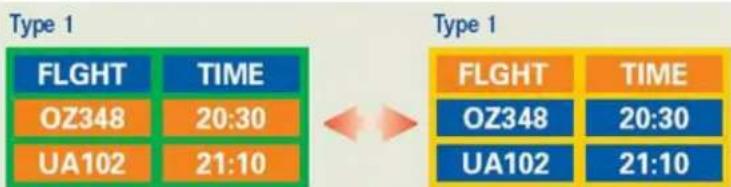
text_image
Type 1 FLIGHT TIME OZ348 20:30 UA102 21:10 Type 1 FLIGHT TIME OZ348 20:30 UA102 21:10Avoid using a combination of characters and background color with large difference in luminance.
Avoid using Grey colors, which can cause Image retention easily.
- Avoid: Colors with big difference in luminance (Black & White, Grey) Ex)

text_image
SYSTEM : 245 STATUS : NG SYSTEM : 245 STATUS : NG- Recommended settings: Bright colors with little difference in luminance - Change the characters color and background color every 30 minutes Ex)

text_image
SYSTEM : 245 STATUS : OK SYSTEM : 245 STATUS : OK SYSTEM : 245 STATUS : OK SYSTEM : 245 STATUS : OK- Every 30 minutes, change the characters with movement. Ex)
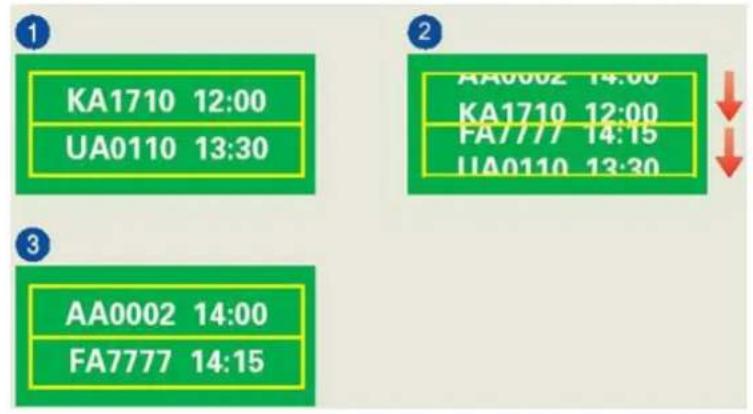
text_image
1 KA1710 12:00 UA0110 13:30 2 AA0002 14:00 KA1710 12:00 FA7777 14:15 UA0110 13:30 3 AA0002 14:00 FA7777 14:15The best way to protect your monitor from Image retention is to set your PC or System to operate a Screen Saver program when you are not using it.
Image retention may not occur when a LCD panel is operated under normal conditions.
Normal conditions are defined as continuously changing video patterns. When the LCD panel is operated for a long time with a fixed pattern (-over 12 hours-), there may be slight difference in voltage between electrodes that work the liquid crystal (LC) in a pixel. The voltage difference between electrodes increases with time, forcing the liquid crystal to lean. When this occurs, the previous image may be seen when the pattern is changed.
To prevent this, the accumulated voltage difference must be decreased.
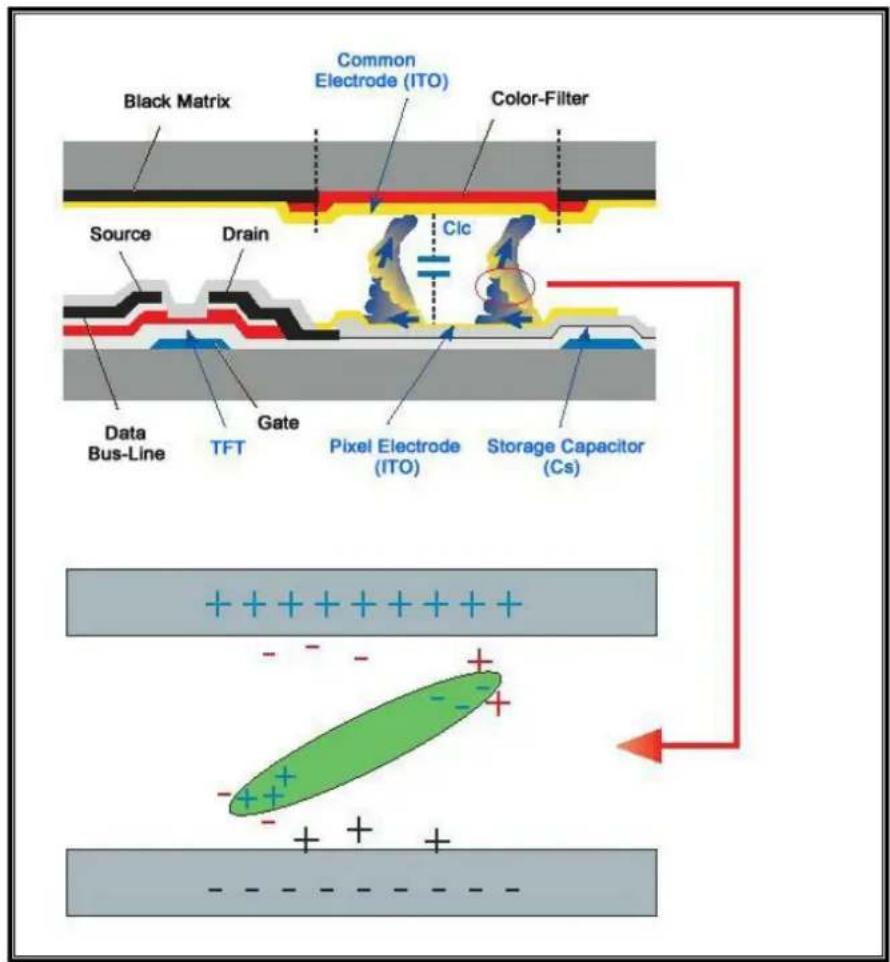
text_image
Black Matrix Common Electrode (ITO) Color-Filter Source Drain CIC Data Bus-Line TFT Gate Pixel Electrode (ITO) Storage Capacitor (Cs) +++Our LCD Monitor satisfies ISO13406-2 Pixel fault Class II