
931MP - Screen SAMSUNG - Free user manual and instructions
Find the device manual for free 931MP SAMSUNG in PDF.


User questions about 931MP SAMSUNG
0 question about this device. Answer the ones you know or ask your own.
Ask a new question about this device
Download the instructions for your Screen in PDF format for free! Find your manual 931MP - SAMSUNG and take your electronic device back in hand. On this page are published all the documents necessary for the use of your device. 931MP by SAMSUNG.
USER MANUAL 931MP SAMSUNG
text_image
SAMSUNG ELECTRONICS Safety Instructions Introduction Setup Adjusting Your Monitor Troubleshooting Specifications Regulatory Manual Reader Natural Color MagicBright
text_image
Install Drivers Install Pro Windows Me Windows 98 Windows 2000 Windows grams Natural ColorSyncMaster 931 MP
text_image
SAMSUNG ELECTRONICS SAMSUNG DIGITALL everyone's invited™ Safety Instructions ■ Introduction ■ Setup ■ Adjusting Your Monitor ■ Troubleshooting ■ Specifications ■ InformationNotational
Power
Installation
Clean
Others
Please read the following safety instructions as they are designed to prevent damage to property and harm to the user.
! Warning / Caution

Failure to follow directions noted by this symbol could result in bodily harm or damage to equipment.
Notational Conventions

Prohibited Important to read and understand at all times

Do not disassemble Disconnect the plug from the outlet

Do not touch Grounding to prevent an electric shock
Notational
Power
Installation
Clean
Others

Power

When not used for extended period of time, set your computer to DPMS. If using a screen saver, set it to the active screen mode.
Shortcut to Anti-Afterimage Instructions

Do not use a damaged or loose plug.
• This may cause an electric shock or fire.
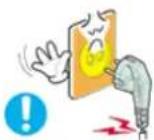
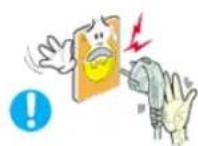
Do not pull the plug out by the wire nor touch the plug with wet hands.
• This may cause an electric shock or fire.
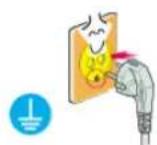
Use only a properly grounded plug and receptacle.
• An improper ground may cause electric shock or equipment damage.

Insert the power plug firmly so that it does not come loose.
• A bad connection may cause fire.

Do not excessively bend the plug and wire nor place heavy objects upon them, which could cause damage.
• This may cause an electric shock or fire.
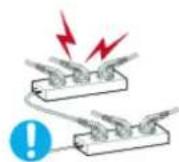
Do not connect too many extension cords or plugs to an outlet.
• This may cause fire.
Notational
Power
Installation
Clean
Others
Installation

Be sure to contact an authorized Service Center, when installing your monitor in a location with the heavy dust, high or low temperatures, high humidity, chemical substance and where it operates for 24 hours such as the airport, the train station or etc.
- Failure to do so may cause a serious damage to your monitor.
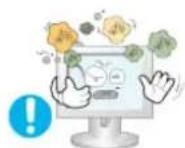
- Put your monitor in a location with low humidity and a minimum of dust.
- Failure to do so may cause an electric shock or fire inside the monitor.
Do not drop the monitor when moving it.
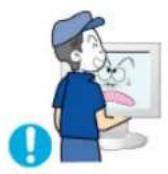
• This may cause damage to the product or human body.
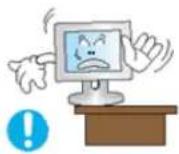
Install the monitor base in a showcase or shelf so that the end of the base does not protrude from the showcase or shelf.
- Dropping the product may cause damage to the product or personal injury.
natural_image
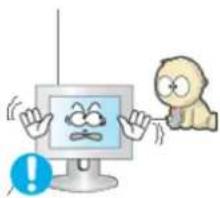
Cartoon illustration of a computer monitor with a sad face and a small dog, no text or symbols presentDo not place the product on the floor.
- Someone, specifically children could trip over it.
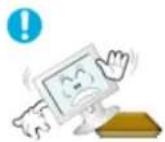
Do not place the product on an unstable or small surface area.
- Place the product on an even, stable surface, as the product may fall and cause harm to someone walking by, specifically children.
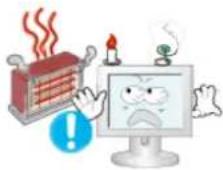
- Keep any flammable objects such as candles, insecticides or cigarettes away from the product.
- Otherwise, this may cause a fire.
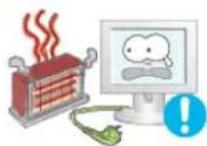
Keep any heating devices away from the power cable.
• A melted coating may lead to electric shock or fire.
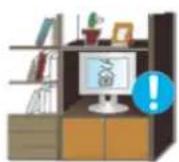
Do not install the product in places with poor ventilation, for instance, a bookshelf, closet, etc.
• Any increase in internal temperature may cause fire.
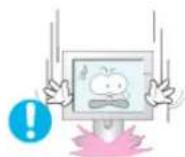
Set down the monitor carefully.
• The monitor could be damaged or broken.

Do not place the monitor face down.
• The TFT-LCD surface may be damaged.
- Installing a wall bracket must be done by a qualified professional.
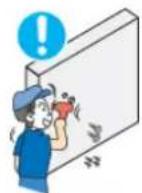
• Installation by unqualified personnel may result in injury.
• Always use the mounting device specified in the owner's manual.
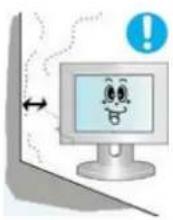
When installing the product, make sure to keep it away from the wall (more than 10cm/4inch) for ventilation purposes.
- Poor ventilation may cause an increase in the internal temperature of the product, resulting in a shortened component life and degraded performance.
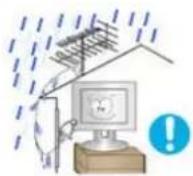
To prevent rainwater from running along the outdoor antenna cable and entering the house, be sure the outdoor portion of the cable hangs down below the point of entry.
• If rainwater enters the product, it may cause an electric shock or fire.
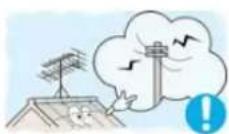
If you are using an outdoor antenna, be sure to put sufficient distance between your antenna and the electrical wires nearby so that they would not come in contact with each other in case the antenna is knocked over by strong wind.
• A knocked-over antenna may cause injury or an electric shock.
Notational
Power
Installation
Clean
Others

Clean

When cleaning the monitor case or the surface of the TFT-LCD screen, wipe with a slightly moistened, soft fabric.
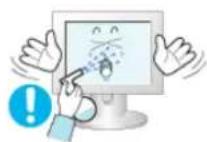
Do not spray water or detergent directly on the monitor.
• This may cause damage, electric shock or fire.
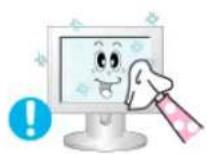
Use the recommended detergent with a smooth cloth.
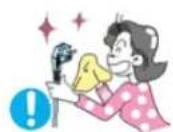
If the connector between the plug and the pin is dusty or dirty, clean it properly with a dry cloth.
• A dirty connector may cause an electric shock or fire.
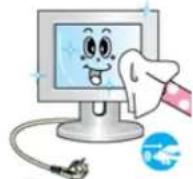
Make sure to unplug the power cord before cleaning the product.
• Otherwise, this may cause electric shock or fire.
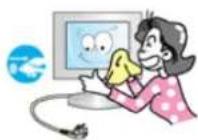
- Unplug the power cord from the power outlet and wipe the product using a soft, dry cloth.
- Do not use any chemicals such as wax, benzene, alcohol, thinners, insecticide, air freshener, lubricant or detergent.
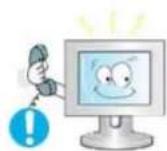
Contact the Service Center or Customer Center for interior cleaning once a year.
- Keep the product's interior clean. Dust which has accumulated in the interior over an extended period of time may cause malfunction or fire.
Notational
Power
Installation
Clean
Others

Others
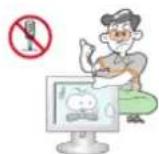
Do not remove cover (or back).
• This may cause an electric shock or fire.
• Refer servicing to qualified service personnel.
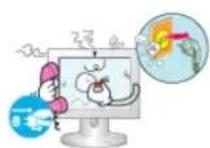
If your monitor does not operate normally - in particular, if there are any unusual sounds or smells coming from it - unplug it immediately and contact an authorized dealer or service.
• This may cause an electric shock or fire.
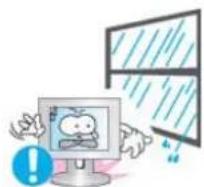
Keep the product away from places exposed to oil, smoke or moisture; do not install inside a vehicle.
• This may cause malfunction, an electric shock or fire.
- Especially avoid operating the monitor near water or outdoors where it could be exposed to snow or rain.
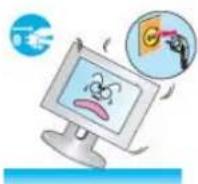
If the monitor is dropped or the casing is damaged, turn the monitor off and unplug the power cord. Then contact the Service Center.
• The monitor may malfunction, causing an electric shock or fire.
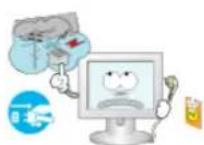
- Disconnect the plug from the outlet during storms or lightening or if it is not used for a long period of time.
- Failure to do so may cause an electric shock or fire.
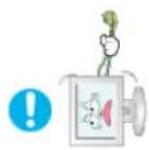
Do not try to move the monitor by pulling only the wire or the signal cable.
- This may cause a breakdown, electric shock or fire due to damage to the cable.
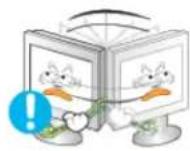
Do not move the monitor right or left by pulling only the wire or the signal cable.
- This may cause a breakdown, electric shock or fire due to damage to the cable.
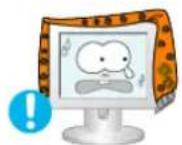
Do not cover the vents on the monitor cabinet.
• Bad ventilation may cause a breakdown or fire.
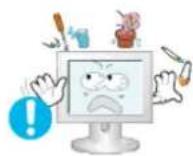
Do not place water containers, chemical products or small metal objects on the monitor.
• This may cause malfunction, an electric shock or fire.
- If a foreign substance enters the monitor, unplug the power cord and contact the Service Center.
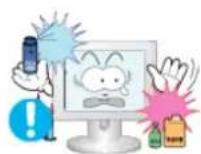
Keep the product away from combustible chemical sprays or inflammable substances.
• This may cause an explosion or fire.
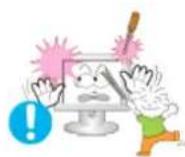
Never insert anything metallic into the monitor openings.
• This may cause an electric shock, fire or injury.
natural_image
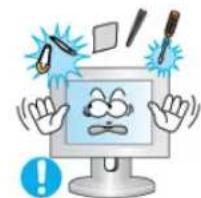
Cartoon illustration of a computer monitor character with expressive faces and surrounding tools (no text or symbols)Do not insert metal objects such as chopsticks, wire and gimlet or inflammable objects such as paper and match into the vent, headphone port or AV ports.
- It may cause a fire or an electric shock. If an alien substances or water flows into the product, turn the product off, unplug the power connector from the wall outlet and contact the Service Center.
If you view a fixed screen for an extended period of time, residual image or blurriness may appear.
- Change the mode to energy save or set a screensaver to moving picture when you need to be away from the monitor for an extended period of time.
Adjust the resolution and frequency to the levels appropriate for the model.
• Inappropriate resolution may cause undesirable picture quality.
19 inch - 1280 X 1024
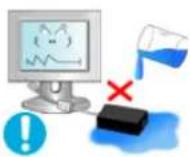
- Be careful that adapter should not be in contact with water and therefore not be wet.
• This may cause malfunction, an electric shock or fire.
- Do not use adapter by the waterside or outside particularly when it rains or snows.
- Be careful that adapter should not be wet while cleaning floor with water.

natural_image
Illustration of a computer monitor displaying a sad face with a warning symbol, next to a broken-out battery and a hand holding a tool (no text or symbols present)- Keep all power adapters apart.
- Failure to do so may cause fire.
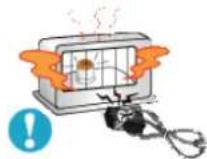
- Keep power adapter away from any other heat source.
- Failure to do so may cause fire.
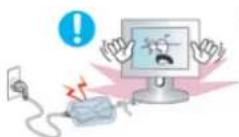
Remove and discard vinyl bag from power adapter before use.
- Failure to do so may cause fire.
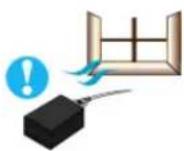
Always keep power adapter in well-ventilated area.
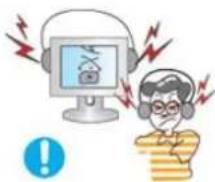
Keep the volume at a proper level when you use the headphones.
• Excessively loud volume levels may damage hearing.
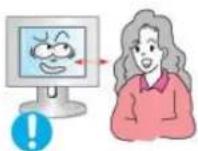
- Watching the monitor continuously at a too close angle may result in eyesight damage.
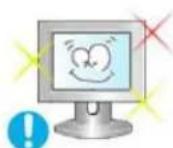
To ease eye strain, take at least a five-minute break after every hour of using the monitor.
Do not install the product on an unstable, uneven surface or a location prone
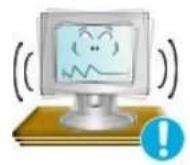
to vibrations.
- Dropping the product may cause damage to the product or personal injury. Using the product in a location prone to vibrations may shorten the lifetime of the product or may catch fire.

When moving the monitor, turn off and unplug the power cord. Make sure that all cables, including the antenna cable and cables connecting to other devices, are disconnected before moving the monitor.
- Failure to disconnect cables may damage it and lead to fire or an electric shock.
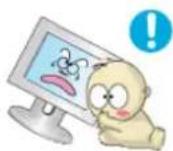
Place the product out of children's reach, as they could damage it by hanging onto it.
• A falling product could cause physical damage even death.
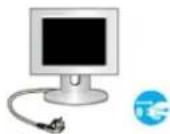
When not using the product for an extended time period, keep the product unplugged.
- Otherwise, this may cause heat emission from the accumulated dirt or degraded insulation, leading to electric shock or fire.
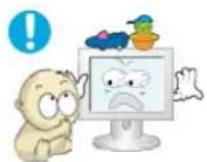
Do not place children's favorite objects (or anything else that may be tempting) on the product.
- children may try to climb on the product to retrieve an object. The product could fall, causing physical damage or even death.
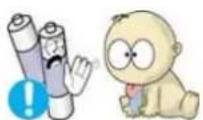
When you remove batteries from the remote, be careful that they are not swallowed by children. Keep batteries out of the reach of children.
• If swallowed, see a doctor immediately.
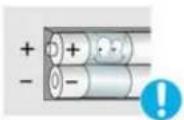
When replacing batteries, place the batteries in the correct +/- polarity position as indicated on battery holder.
- Incorrect polarity may cause a battery to break or leak and could lead to fire, injury, or contamination (damage).
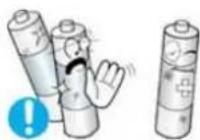
Use only specified standard batteries. Do not use new and used batteries together.
- This may cause a battery to break or leak and could lead to fire, injury, or contamination (damage).
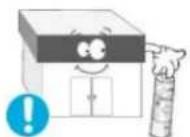
The battery (and rechargeable battery) are not ordinary refuse and must be returned for recycling purposes. The customer is responsible for returning the used or rechargeable battery for recycling purposes as the consumer of the battery.
- The customer can return the used or rechargeable battery to a nearby public recycling center or to a store selling the same type of the battery or rechargeable battery.
text_image
SAMSUNG ELECTRONICS SAMSUNG DIGITAL everyone's invited™ ■ Safety Instructions ■ Introduction ■ Setup ■ Adjusting Your Monitor ■ Troubleshooting ■ Specifications ■ InformationUnpacking
Front
Rear
Remote Control
Please make sure the following items are included with your monitor.
If any items are missing, contact your dealer.
Contact a local dealer to buy optional items.

Unpacking
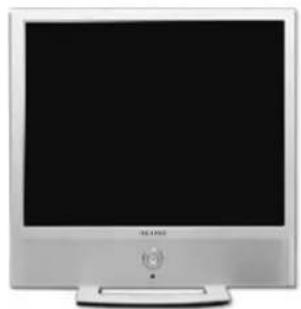
natural_image
Front view of a silver CRT television displaying a black screen (no visible text or symbols)Monitor

Manual
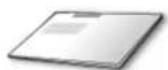
Quick Setup Guide

Warranty Card (Not available in all locations)

User's Guide, Monitor Driver, Natural Color software

Cable
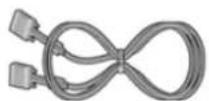
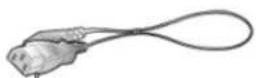

D-Sub Cable Power Cord Radio Antenna
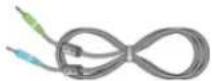
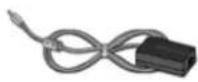
Audio Cable DC Adapter
Sold separately

DVI Cable
Others
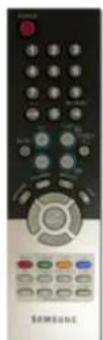
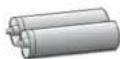
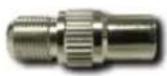
Remote Control Batteries (AAA X 2) Connector
Unpacking
Front
Rear
Remote Control
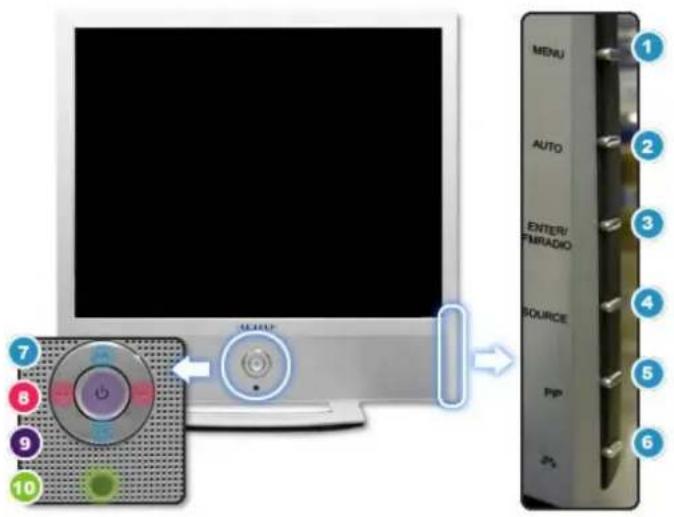
Front
-
MENU
-
AUTO
-
ENTER/FM RADIO
-
SOURCE
-
PIP
-
MagicBright™
-
A CNV
-
- VOL -
-
Power button / Power indicator
-
Remote Control Sensor
text_image
MENU AUTO ENTER/PMRADIO SOURCE Ppp 231. MENU
Use this button for open the on-screen menu and exits from the menu screen or closes screen adjustment menu.
2. AUTO-(Available in PC/DVI Mode Only)
Use this button for auto adjustment.
If you change resolution in the control panel, Auto function will be executed.
Click here to see an animation clip
3. ENTER / FM RADIO
ENTER : Activates a highlighted menu item.
FM RADIO : Turns on/off FM Radio.
In PC/DVI mode, sets only SOUND to FM Radio.
In general VIDEO SOURCE mode, sets to FM RADIO, turning off the screen.
In areas where signal is weak, noise may occur while FM radio is broadcast.
Click here to see an animation clip
4. SOURCE
Switches from PC mode to Video mode.
Changing the source is allowed only external devices that are connected to the monitor at the time.
To switch Screen modes:
[PC] [DVI] [TV] [AV] [S-Video] [Component] →
Click here to see an animation clip
NOTE : According to broadcasting type in each country, you may not be able to select one.
Scart is mainly used in Europe.
For more information > Broadcasting Systems
5. PIP (Available in PC/DVI Mode Only)
In PC Mode, turns on Video or TV screens in PIP Mode.
Click here to see an animation clip
6. MagicBright™ [▲▲] (Available in PC/DVI Mode Only)
MagicBright™ is a new feature providing optimum viewing environment depending on the contents of the image you are watching. Currently four different modes are available: Custom, Text, Internet, and Entertain. Each mode has its own pre-configured brightness value. You can easily select one of four settings by simply pressing MagicBright™ control buttons.
1) Text : Normal Brightness
For documentations or works involving heavy text.
2) Internet : Medium Brightness
For working with a mixture of images such as text and graphics.
3) Entertain : High Brightness
For watching motion pictures such as a DVD or VCD.
4) Custom
Although the values are carefully chosen by our engineers, the pre-configured values may not be comfortable to your eyes depending on your taste.
If this is the case, adjust the Brightness and Contrast by using the OSD menu.
Click here to see an animation clip
7. GH v
Moves from one menu item to another vertically or adjusts selected menu values. In TV mode, selects TV channels.
Click here to see an animation clip
-
- VOL -
Moves from one menu item to another horizontally or adjusts selected menu values. Also adjusts the audio volume.
Click here to see an animation clip
- Power button / Power indicator
Use this button to turn the monitor on and off./ Power Indicator shows PowerSaver mode by green blinking.
- Remote Control Sensor
Aim the remote control towards this spot on the Monitor.

See PowerSaver described in the manual for further information regarding power saving functions. For energy conservation, turn your monitor OFF when it is not needed or when leaving it unattended for long periods.
Unpacking
Front
Rear
Remote Control

Rear
text_image
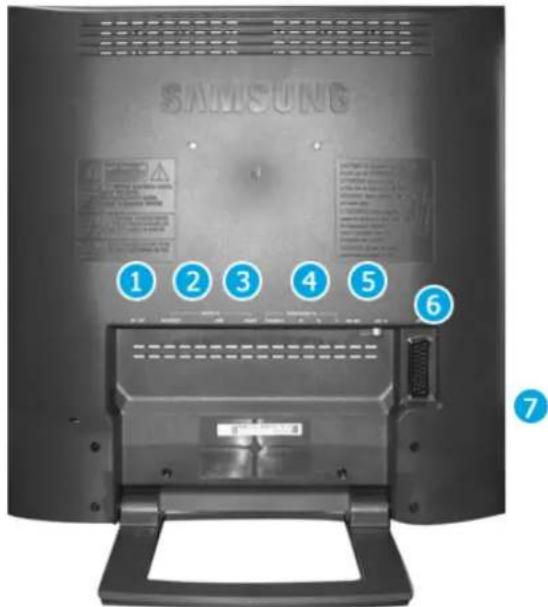
SAMSUNG ① ② ③ ④ ⑤ ⑥ 7(The configuration at the back of the monitor may vary from product to product.)
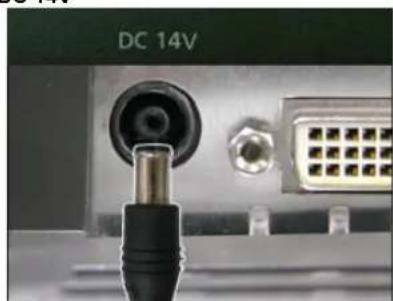
- DC 14V
natural_image
Close-up of a black PVC plug inserted into a CD 14V socket (no visible text or symbols on the socket itself)This product may be used with 90 \~ 264VAC.
(Voltage is automatically adjusted by the power adapter.)
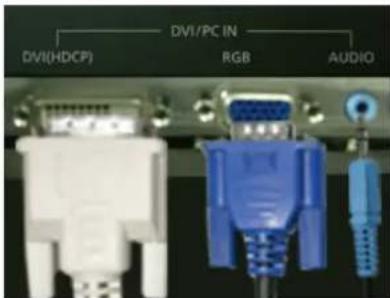
2. DVI/PC IN
• Computer connection terminal (DVI(HDCP))
• Computer connection terminal(15 Pin D-SUB)
• Audio connection terminal
text_image
DVI/PC IN DVI(HDCP) RGB AUDIO- COMPONENT IN
text_image
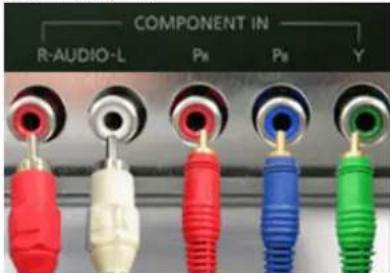
COMPONENT IN R-AUDIO-L Ps Ps Y• DVD/DTV left / right audio connection terminal (R/L)
• DVD/DTV Component(P R , P B , Y) terminal
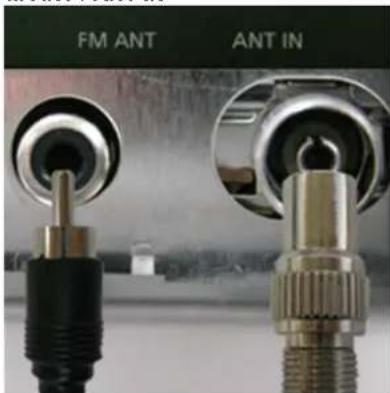
- FM ANT / ANT IN
text_image
FM ANT ANT IN• FM RADIO ANT connection terminal
• TV connection terminal
For more information > Connecting TV
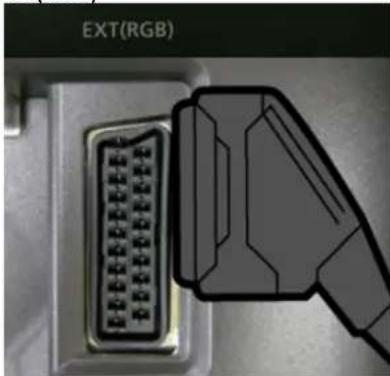
- EXT(RGB)
natural_image
Close-up of a USB connector with an external cable, showing the internal structure and pin layout (no text or symbols visible)EXT(RGB) connection terminal
- Scart is mainly used in Europe.
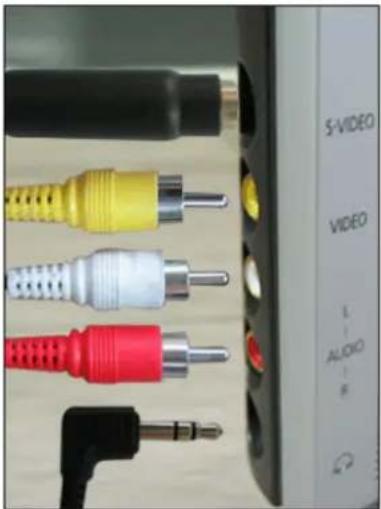
- S-VIDEO / VIDEO / L-AUDIO-R /
• S-Video connection terminal (Input)
• Video connection terminal (Input)
• Left(L) / Right(R) audio connection terminal (Input)
• Headphone connection terminal (Output)
natural_image
Close-up of audio/video connectors and a 5V/Video interface (no text or symbols on components)Unpacking
Front
Rear
Remote Control

Remote Control
The performance of the remote control may be affected by a TV or other electronic device operated near the monitor, causing malfunction due to interference with frequency.
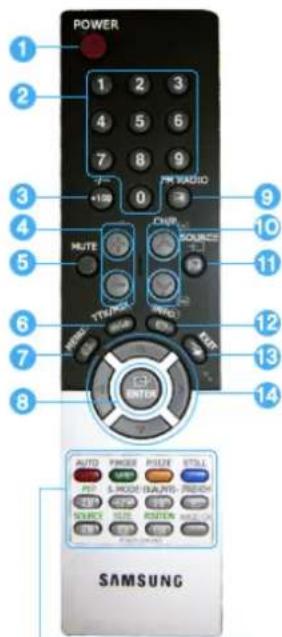
text_image
POWER 1 2 3 4 5 6 7 8 9 +100 PM RADIO 0 3 9 4 10 MUTE CHIR SOURCE 11 5 6 TURNO WPG TUR 12 7 8 POWER ENTER 13 AUTO PRESS EDIT SET & HOURS NET-BOX 339 340 341 342 TURNO SAMSUNG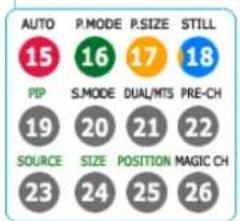
text_image
AUTO 15 P.MODE 16 P.SIZE 17 STILL 18 PIP S.MODE DUAL/MTS PRE-CH 19 SOURCE SIZE POSITION MAGIC CH 20 21 22 23 24 25 26-
POWER
-
Number button
-
+100, -/--
-
+
-
MUTE
-
TTX/MIX
-
MENU
-
ENTER
-
FM RADIO
-
QH/P
-
SOURCE
-
INFO
-
EXIT
-
Up-Down Left-Right Buttons
-
AUTO
-
P.MODE, M/B (MagicBright™)
-
P.SIZE
-
STILL
-
PIP
-
S.MODE
-
DUAL/MTS
-
PRE-CH
-
SOURCE
-
SIZE
-
POSITION
-
MAGIC-CH
1. POWER
Use this button to turn the monitor on and off.
2. Number button
Selects TV channels in the TV mode. You may use this button in PIP mode as well.
3.+100
Press to select channels over 100.
For example, to select channel 121, press "+100", then press "2" and "1".
-/- (One/Two-Digit channel selection)
Use to select a channel numbered ten or over.
Press this button, and the "--" symbol is displayed.
Enter the two-digit channel number.
-/- is mainly used in Europe.
4.


Adjusts the audio volume.
5. MUTE
Pauses (mutes) the audio output temporarily.
Displays on the lower left corner of the screen.
The audio resumes if Mute or - + is pressed in the Mute mode.
6. TTX/MIX
TV channels provide written information services via teletext.
For more information > TTX / MIX
TTX / MIX is mainly used in Europe.
7. MENU
Use this button to open the on-screen menu and exit from the menu screen or close screen adjustment menu.
8. ENTER
Activates a highlighted menu item.
9. FM RADIO
Turns on/off FM Radio.
In PC/DVI mode, sets only SOUND to FM Radio.
In general Video SOURCE mode, sets to FM RADIO, turning off the screen.
In areas where signal is weak, noise may occur while FM radio is broadcast.
10. CH/P
In TV mode, selects TV channels.
11. SOURCE
Switches from PC Mode to Video mode.
Changing the source is allowed only in external devices that are connected to the monitor at the time.
12. INFO
Current picture information is displayed on the upper left corner of the screen.
13. EXIT
Exits from the menu screen.
14. Up-Down Left-Right Buttons
Moves from one menu item to another horizontally, vertically or adjusts selected menu values.
15. AUTO
Adjusts the screen display automatically.(PC MODE)
16. P.MODE, M/B (MagicBright™)
When you press this button, current mode is displayed on the lower center of the screen.
TV / AV / Ext. / S-Video / Component Mode : P.MODE( Picture Mode )
The Monitor has four automatic picture settings that are preset at the factory.
Then push button again to circle through available preconfigured modes.
(Dynamic → Standard → Movie → Custom)
PC / DVI Mode : M/B ( MagicBright™ )
MagicBright™ is a new feature providing the optimum viewing environment depending on the contents of the image you are watching.
Then push button again to circle through available preconfigured modes.
( Entertain→Internet → Text → Custom )
17. P.SIZE - Not available in PC/DVI Mode
Press to change the screen size.
Zoom1, Zoom2 are not available in 1080i(or over 720p) of DTV.
18. STILL
Press the button once to freeze the screen. Press it again to unfreeze.
19. PIP
Push the PIP button to turn PIP screen On/Off.
When you press this button, current mode is displayed on the lower center of the screen.
The Monitor has a built-in high fidelity stereo amplifier.
Then push button again to circle through available preconfigured modes.
( Standard → Music → Movie → Speech → Custom )
21. DUAL / MTS
DUAL : STEREO/MONO, DUAL I / DUAL II and MONO/NICAM MONO/NICAM STEREO can be operated depending on broadcasting type by using DUAL button on the remote control while watching TV.
Toggles MONO/STEREO, DUAL 1/DUAL 2 and MONO/NICAM MONO/NICAM STEREO
MTS : You can select the MTS (Multichannel Television Stereo) mode.
• Mono, Stereo, SAP (Separate Audio Program)
Set 'MTS' to ON to choose Mono, Stereo or SAP.
22. PRE-CH
This button is used to return to the immediately previous channel.
23. SOURCE
Selects the Video source.(PIP Mode)
24. SIZE
You can switch the Picture Size.
25. POSITION
Changes the Position of the PIP window.
26. MAGIC-CH
MagicChannel enables you to watch only certain channels.
This function is available only in Korea.
text_image
SAMSUNG ELECTRONICS SAMSUNG DIGITALL everyone's invited™ ■ Safety Instructions ■ Introduction ■ Setup ■ Adjusting Your Monitor ■ Troubleshooting ■ Specifications ■ InformationConnecting the Monitor
Using the Stand
Installing the Monitor Driver (Automatic)
Installing the Monitor Driver (Manual)
Natural Color
Connecting the monitor
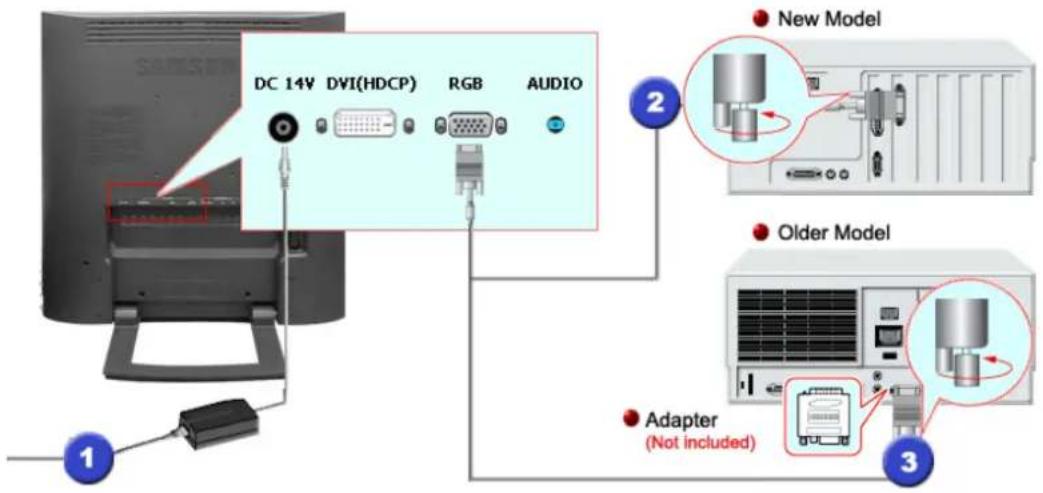
1. Connecting to a Computer
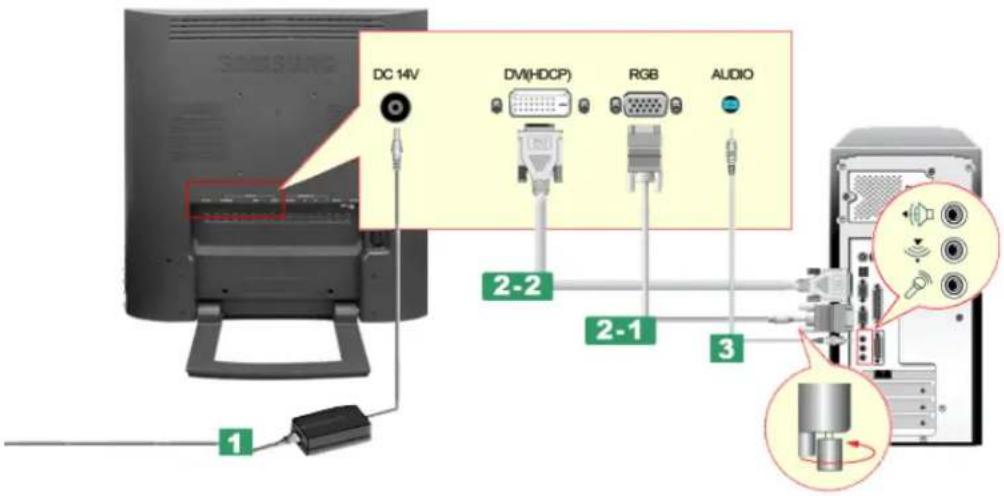
text_image
DC 14V DM(HDCP) RGB AUDIO 2-2 2-1 3 1- Connect the power cord to the DC adapter and then connect the adapter jack to the DC POWER port on the monitor. (Voltage is automatically adjusted by the power adapter.).
2-1. Using the D-sub (Analog) connector on the video card. Connect the signal cable to the 15-pin, D-sub connector on the back of your monitor.
2-2. Using the DVI (Digital) connector on the video card. Connect the DVI Cable to the DVI Port on the back of your Monitor.
- Connect the audio cable for your monitor to the audio port on the back of your computer.
- Connect the power cord insert a plug in a wall outlet.
- Turn on both your computer and the monitor.
- You may enjoy clear and quality sound from the computer sound card using the monitor speakers. (You don't need to install any separate speakers for your computer.)

You may get a blank screen depending on the type of video card you are using, if you connect simultaneously both the D-sub and DVI cables to one computer.
2. Connecting to a Macintosh
text_image
DC 14V DVI(HDCP) RGB AUDIO New Model Older Model Adapter (Not included)- Connect the power cord to the DC adapter and then connect the adapter jack to the DC POWER port on the monitor. (Voltage is automatically adjusted by the power adapter.)
- Using the D-sub (Analog) connector on the video card. Connect the signal cable to the D-SUB port on the Macintosh computer.
- For older model Macintoshes, you need to adjust the resolution control DIP switch on the Macintosh adapter (optional) referring to the switch configuration table shown on its rear.
- Turn on the monitor and Macintosh.
Connecting to other devices

This monitor allows the user to connect it to such input devices as a DVD player, a VCR or a camcorder, or a DTV or a TV without disconnecting the PC. For detailed information on connecting AV input devices, refer to User Controls under Adjusting Your Monitor.

The configuration at the back of the monitor may vary from product to product.
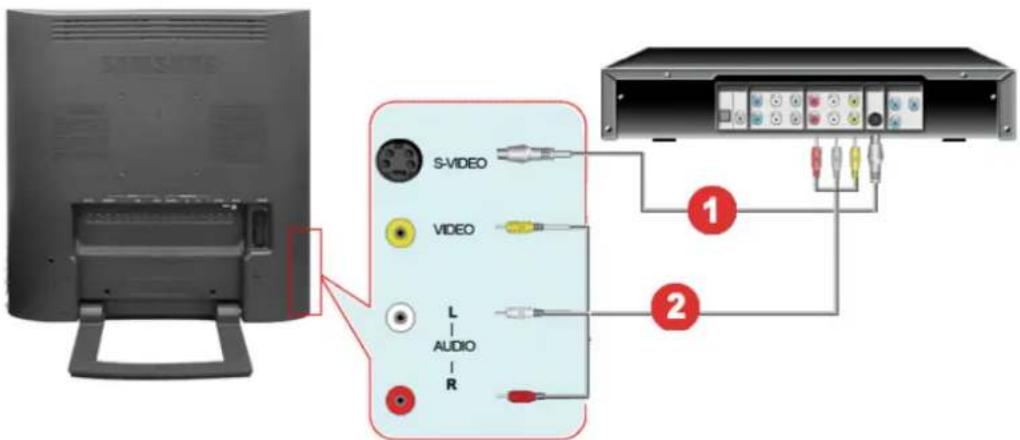
1-1. Connecting AV Devices

The monitor has AV connection terminals to connect AV input devices like DVDs, VCRs or Camcorders. You may enjoy AV signals as long as the monitor is turned on.
text_image
S-VIDEO VIDEO L AUDIO R 1 2- Input devices such as DVDs, VCRs or Camcorders are connected to the Video or S-Video terminal of the monitor using the RCA or S-Video cable.

S-Video, RCA cable and EXT(RGB) cable is optional.
- Then, start the DVD, VCR or Camcorders with a DVD disc or tape inserted.
- Select AV or S-Video using the SOURCE button on the monitor's front.
- Connect the Audio (R) and Audio (L) terminals of a DVD, VCR or Camcorders to the monitor's R and L audio input terminals using audio cables.
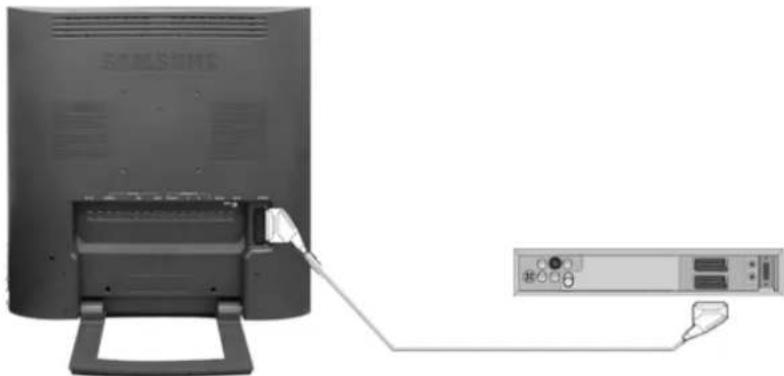
1-2. Connecting EXT(RGB) - It only applies to AV DEVICE that supports SCART.

Connect to the DVD Devices input if the device has a DVD connector. You can watch DVD simply by hooking up the DVD with the monitor as long as the power is on.
natural_image
Diagram showing a computer monitor connected to a server rack via cable (no text or symbols visible)- Connect a video cable between the EXT(RGB) jacks on the Monitor and the EXT(RGB) jacks on the DVD Player.
-
Select Ext. by pressing SOURCE button on the monitor.
-
Connecting TV

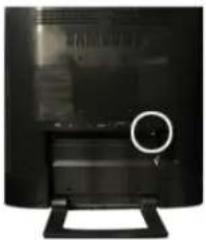
You may view television programs on the monitor if it is connected to an antenna or a CATV cable without installing any separate TV reception hardware or software on your computer.
natural_image
Close-up of a black electronic device with a circular lens and stand (no visible text or symbols)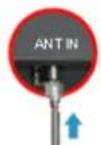
-
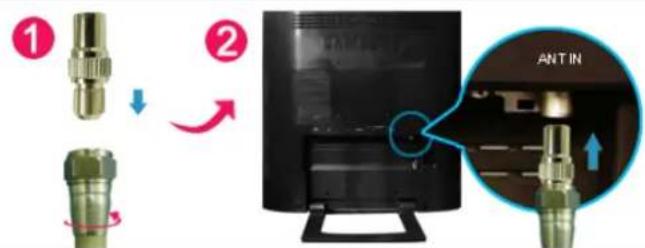
Connect the CATV or antenna coaxial cable to the Antenna terminal on the rear of the monitor. You need to use a coaxial antenna cable.
-
When using an interior antenna terminal:
Check the antenna terminal on the wall first and connect the antenna cable. - When using an outdoor antenna:
If you are using an outdoor antenna, use a professional for installation if possible.
To connect the RF cable to the antenna input terminal:
Keep the copper wire portion of the RF cable straight.
-
Turn on the monitor.
-
Select TV using Source button among the external signal adjustment buttons.
-
Select a desired TV channel.


Is weak signal causing poor reception?
Purchase and install a signal amplifier for better reception.
In areas where Antenna cable is not supported, first, attach Connector to TV antenna.
text_image
Diagram showing two connected pipe connectors (① and ②) interacting with a monitor, labeled with 'ANTIN' annotation.3. Connecting DVD/DTV Set Top Box

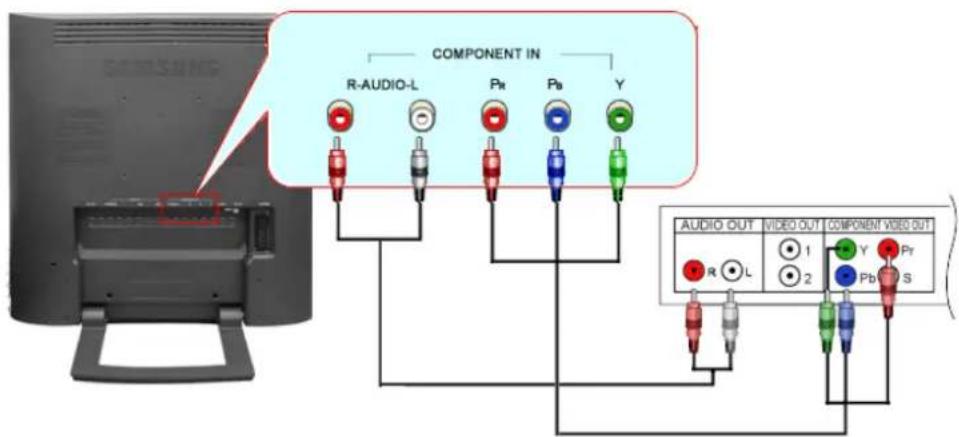
Connect to the DVD/DTVSet Top Box input if the device has a DVD/DTV connector. You can watch Component simply by hooking up the Component with the monitor as long as the power is on.
text_image
COMPONENT IN R-AUDIO-L Pt Pb Y AUDIO OUT VIDEO OUT COMPONENT VIDEO OUT R L 1 2 Y Pr Pb S-
Connect the Audio (R) and Audio (L) outputs on the DVD / DTV set top box to the Audio (R) and Audio (L) inputs on the monitor using audio cables.
-
Connect a video cable between the component( P_R, P_B, Y ) jacks on the Monitor and the P_R, P_B, Y jacks on the DVD / DTV set top box.
- Select Component using the SOURCE button on the monitor's front.
4. Connecting Headphone

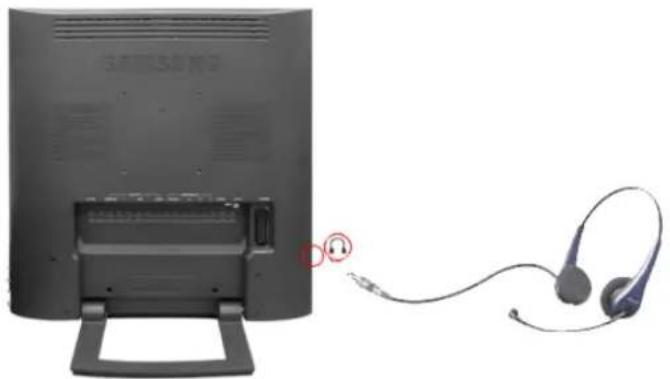
You may connect your Headphone to the monitor.
natural_image
Back view of a black Sony monitor connected to a headset, with a red circular icon highlighting the front panel (no text or symbols on the device itself)- Connect your Headphone to the Headphone connection terminal.
Connecting the Monitor
Using the Stand
Installing the Monitor Driver (Automatic)
Installing the Monitor Driver (Manual)
Natural Color
Using the Stand

This monitor supports various types of VESA-standard bases. You need to either fold or remove the base in use in order to install a VESA base.
Folding the base | Removing the base | Install a VESA base
1. Folding the base

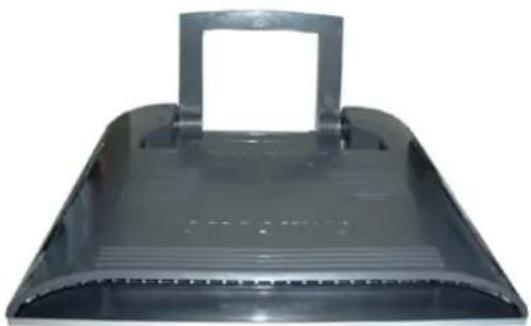
The monitor may be reclined from 0 to 90 degrees. When fully folded (reclined), the base becomes a handy holder for moving the monitor around.
natural_image
Exterior view of a dark, curved metal object with a handle and textured surface (no visible text or symbols)- Lay the LCD monitor face-down on a flat surface with a cushion beneath it to protect the screen.
- Disconnect the monitor cables.
-
Fully recline the monitor backward pressing the FOLD button.
-
Reconnect the monitor cables.

You may install a VESA base when the monitor base is fully folded.
2. Removing the base

You can separate the base from the monitor.
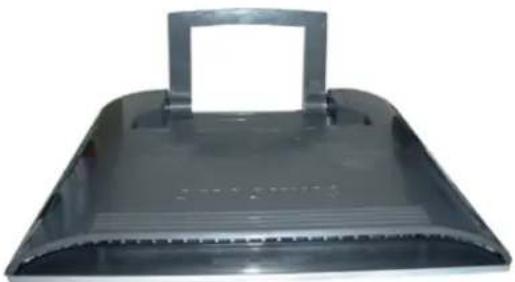
natural_image
Black plastic soap dispenser with handle and side panel (no text or symbols visible)3. Install a VESA base
- Lay the LCD monitor face-down on a flat surface with a cushion beneath it to protect the screen.
- Disconnect the monitor cables.
- Remove the four bolts that fasten the base to the monitor.
- Reconnect the monitor cables.

You may install a VESA base when the monitor base is separated.
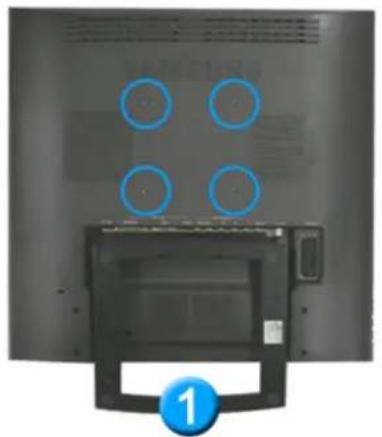
natural_image
Back view of a computer monitor with four circular blue annotations on top (no readable text or symbols)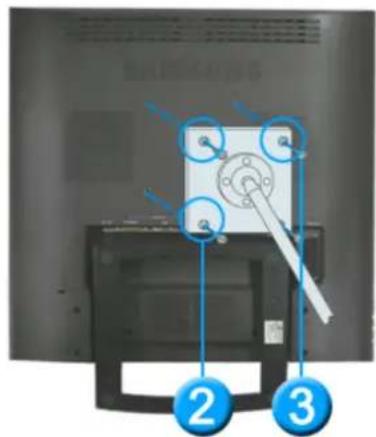
text_image
Diagram showing a mechanical assembly with labeled parts 2 and 3, likely illustrating a device or component assembly.
The monitor supports VESA mounting standard for use with various VESA mounting devices. This monitor accepts a 100mm x 100mm VESA-compliant mounting interface pad. You need to fold the monitor base before installing a VESA base.
Align four bolt holes ① on the monitor base with the holes ② on the VESA base and then fasten the base with four bolts ③

Samsung Electronics will not be responsible for damages caused by using a base other than those specified.
Connecting the Monitor
Using the Stand
Installing the Monitor Driver (Automatic)
Installing the Monitor Driver (Manual)
Natural Color

When prompted by the operating system for the monitor driver, insert the CD-ROM included with this monitor. Driver installation is slightly different from one operating system to another. Follow the directions appropriate for the operating system you have.
Prepare a blank disk and download the driver program file at the Internet web site shown here.
- Internet web site : http://www.samsung.com/ (Worldwide) http://www.samsung.com/monitor (U.S.A) http://www.sec.co.kr/monitor (Korea) http://www.samsungmonitor.com.cn/ (China)
Windows ME
- Insert CD into the CD-ROM drive.
- Click "Windows ME Driver"
- Choose your monitor model in the model list, then click the "OK" button.
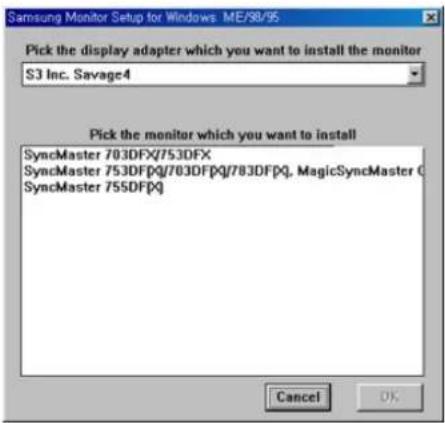
text_image
Samsung Monitor Setup for Windows ME/98/95 Pick the display adapter which you want to install the monitor S3 Inc. Savage4 Pick the monitor which you want to install SyncMaster 703DFX/753DFX SyncMaster 753DFPQ/763DFPQ/783DFPQ, MagicSyncMaster C SyncMaster 755DFPQ Cancel OK- Click the "Install" button in the "Warning" window.
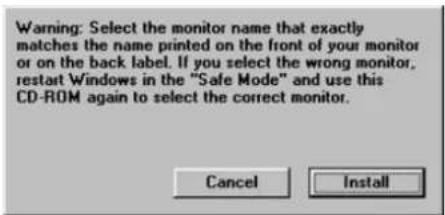
text_image
Warning: Select the monitor name that exactly matches the name printed on the front of your monitor or on the back label. If you select the wrong monitor, restart Windows in the "Safe Mode" and use this CD-ROM again to select the correct monitor.- Monitor driver installation is completed.
Windows XP/2000
- Insert CD into the CD-ROM drive.
- Click "Windows XP/2000 Driver"
- Choose your monitor model in the model list, then click the "OK" button.
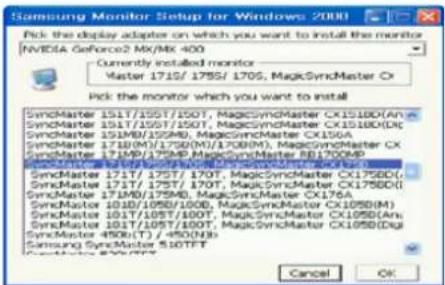
text_image
Samsung Monitor Setup for Windows 2000 Pick the display adapter on which you want to install the monitor NVIDIA GeForce2 MX/MK 400 Currently installed monitor Master 1715/1785/1705, MagicSyncMaster Ox Pick the monitor which you want to install SyncMaster 1517/1557/1507, MagicSyncMaster CX1518D(An SyncMaster 1517/1557/1507, MagicSyncMaster CX1518D(Dc SyncMaster 1519B/1559M), MagicSyncMaster CX156A SyncMaster 1713B/1758/1708(B), MagicSyncMaster CX SyncMaster 1719B/1759M, MagicSyncMaster RB1700MP SyncMaster 1717/1757/1707, MagicSyncMaster CX1756D( SyncMaster 1717/1757/1707, MagicSyncMaster CX1756D( SyncMaster 1719B/1759M, MagicSyncMaster CX176A SyncMaster 1818/1859/1808, MagicSyncMaster CX1858(M) SyncMaster 1818/1859/1808, MagicSyncMaster CX1858(Arn SyncMaster 1817/1857/1807, MagicSyncMaster CX1858(Du SyncMaster 1817/1857/1807, MagicSyncMaster CX1858(Du SyncMaster 4906(T) / 4906(Nb) Samsung SyncMaster 5.10TFT Cancel OK- If you can see following message window, then click the "Continue Anyway" button. Then click "OK" button.

This monitor driver is under certified MS logo, and this installation doesn't damage your system. The certified driver will be posted on Samsung Monitor homepage. http://www.samsung.com/.
- Monitor driver installation is completed.
Connecting the Monitor
Using the Stand
Installing the Monitor Driver (Automatic)
Installing the Monitor Driver (Manual)
Natural Color
Windows XP | Windows 2000 | Windows Me | Windows NT | Linux

When prompted by the operating system for the monitor driver, Insert the CD-ROM included with this monitor. Driver installation is slightly different from one operating system to another. Follow the directions appropriate for the operating system you have.
Prepare a blank disk and download the driver program file at the Internet web site shown here.
- Internet web site : http://www.samsung.com/ (Worldwide) http://www.samsung.com/monitor (U.S.A) http://www.sec.co.kr/monitor (Korea) http://www.samsungmonitor.com.cn/ (China)
Microsoft® Windows® XP Operating System
- Insert CD into the CD-ROM driver.
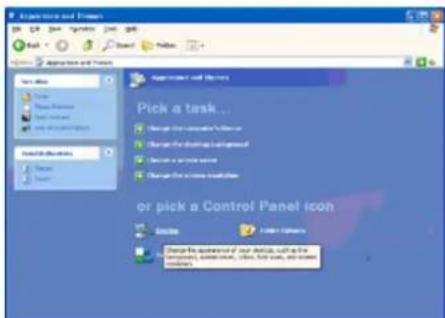
- Click "Start" → "Control Panel" then click the "Appearance and Themes" icon.
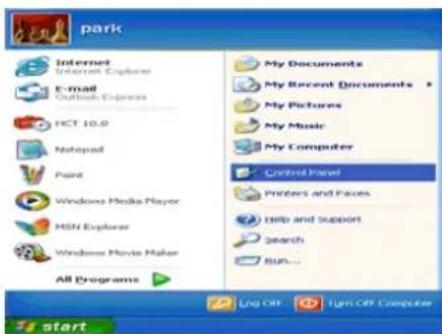
text_image
park Internet Internet Explorer E-mail Outlook Express HCT 10.0 Netspad Paint Windows Media Player MSN Explorer Windows Movie Maker All Programs My Documents My Recent Documents > My Pictures My Music My Computer Control Panel Printers and Faces Help and Support Search Run... Ling Off Light Off Computer start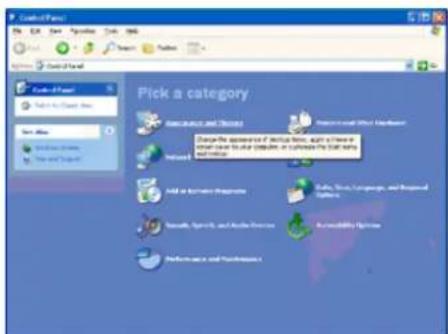
text_image
Control Panel File Edit View Insert Tools Help Search Favorites Options Control Panel Cable Panel Select to Clear Blue Turn All Show to Close White Show to Print Pick a category New Source and Close Remove and Use History Change the scope out of: Red, Black, White, Black, White, Black, White, Black, White, Black, White, Black, White, Black, White, Black, White, Black, White, Black, White, Black, White, Black, White, Black, White, Black, White, Black, White, Black, White, Black, White, Black, White, Black, White, Black, White, Black, White, Black, White, Black, White, Black, White, Black, White, Black, Black, White, Black, Black, White, Black, Black, White, Black, Black, White, Black, Black, White, Black, Black, White, Black, Black, White, Black, Black, White, Black, Black, White, Black, Black, White, Black, Black, White, Black, Black, White, Black, Black, White, Black, Black, White, Black, Black, White, Black, Black, White, Black, Black, Black, White, Black, Black, Black, White, Black, Black, Black, White, Black, Black, Black, White, Black, Black, Black, White, Black, Black, Black, White, Black, Black, Black, White, Black, Black, Black, White, Black, Black, Black, White, Black, Black, Black, White, Black, Black, Black, White, Black, Black, Black, White, Black, Black,Black- Click "Display" icon and choose the "Settings" tab then click "Advanced.".
text_image
Pick a task... or pick a Control Panel icon Find the answer of our device, call for the control, edit your own, print, file print, and other members.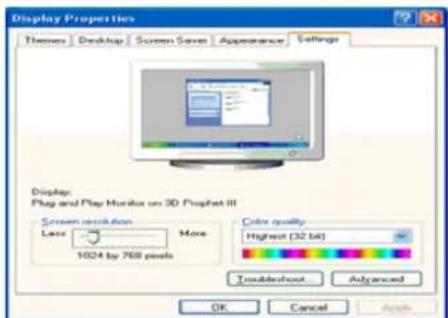
text_image
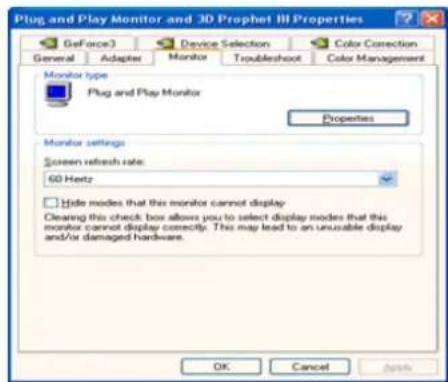
Display Properties Themes Desktop Screen Screen Appearance Settings Display Plug and Plug Murate on 3D Prophet III Screen resolution More Less 1024 by 768 pixels Color quality Highest (32 bit) Insubstitut Advanced OK Cancel Apply- Click the "Properties" button on the "Monitor" tab and select "Driver" tab.
text_image
Plug and Play Monitor and 3D Prophet III Properties GeForce3 Device Selection Color Correction General Adapter Monitor Troubleshoot Color Management Monitor type Plug and Play Monitor Properties Monitor settings Screen refresh rate: 60 Hertz Hide modes that this monitor cannot display Clearing this check box allows you to select display modes that this monitor cannot display correctly. This may lead to an unusable display and/or damaged hardware. OK Cancel Apply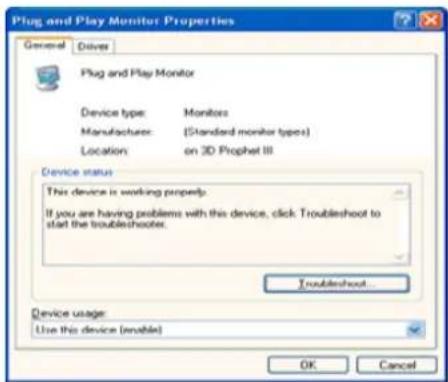
text_image
Plug and Play Monitor Properties General Drives Plug and Play Monitor Device type: Monitors Manufacturer: (Standard monitor types) Location:on 3D Prophet III Device status This device is working proper. If you are having problems with this device, click Troubleshoot to start the troubleshoots. Troubleshoot... Device usage: Use this device (unable) OK Cancel- Click "Update Driver.." and select "Install from a list or.." then click "Next" button.
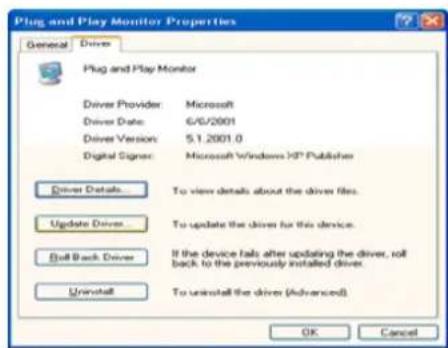
text_image
Plug and Play Monitor Properties General Driver Plug and Play Monitor Driver Provider: Microsoft Driver Date: C/5/2001 Driver Version: 5.1.2001.0 Digital Signor: Microsoft Windows XP Publisher Driver Details: To view details about the driver files. Update Driver: To update the driver for this device. Bull Back Driver: If the device fails after updating the driver, roll back to the previously installed driver. Uninstall To uninstall the driver (Advanced) OK Cancel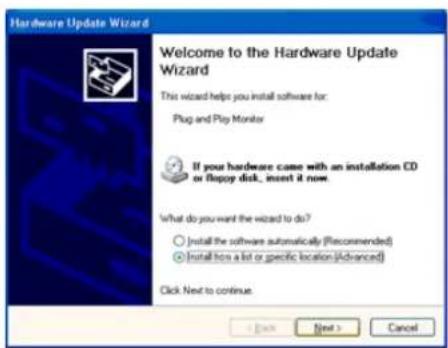
text_image
Hardware Update Wizard Welcome to the Hardware Update Wizard This wizard helps you install software for: Plug and Play Monitor If your hardware came with an installation CD or floppy disk, insert it now. What do you want the wizard to do? ○ Install the software automatically (Recommended) ● Install this a list or specific location (Advanced) Click Next to continue. < Back Next > Cancel- Select "Don't search, I will.." then click "Next" and then click "Have disk".
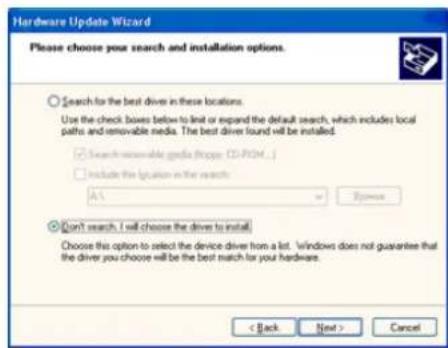
text_image
Hardware Update Wizard Please choose your search and installation options. Search for the best driver in these locations. Use the check boxes below to limit or expand the default search, which includes local paths and removable media. The best driver found will be installed. Search reasonable media (Rbps: [1] - PCM ...) Include the location in the search: A:\ Remove Don't search. I will choose the driver to install. Choose this option to select the device driver from a list. Windows does not guarantee that the driver you choose will be the best match for your hardware. < Back Next > Cancel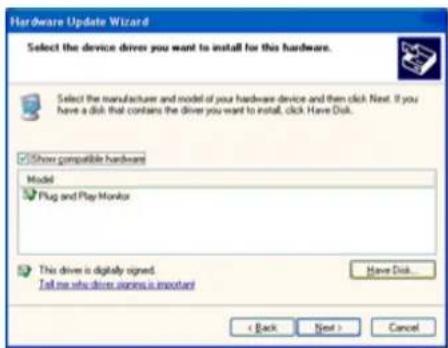
text_image
Hardware Update Wizard Select the device drives you want to install for this hardware. Select the manufacturer and model of your hardware device and then click. Next. If you have a disk that contains the driver you want to install, click Have Disk. Show compatible hardware Model Plug and Play Monitor This driver is digitally signed. Tell me who drive queries is important Have Disk... < Back Next > Cancel- Click the "Browse" button then choose A:(D:\Driver) and choose your monitor model in the model list and click the "Next" button.
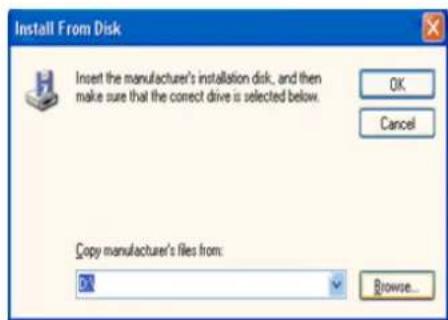
text_image
Install From Disk Insert the manufacturer's installation disk, and then make sure that the correct drive is selected below. OK Cancel Copy manufacturer's files from: OK Browse...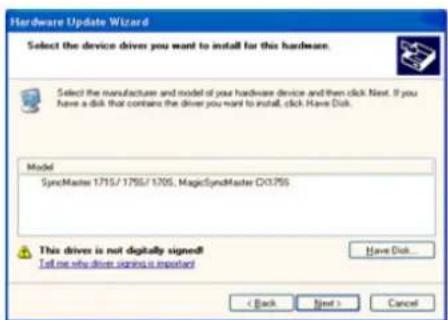
text_image
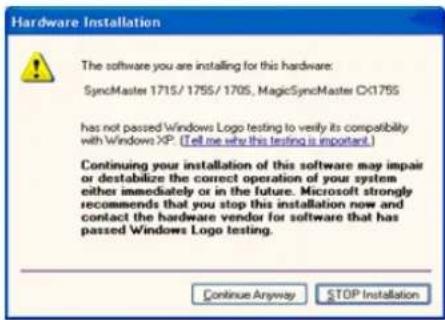
Hardware Update Wizard Select the device drives you want to install for this hardware. Select the manufacturer and model of your hardware device and then click Next. If you have a disk that contains the driver you want to install, click Have Disk. Model SynclMaster 1715/1755/1705, MagicSynclMaster CX1755 This driver is not digitally signed! Tell me why driver signs is important < Back Next > Cancel- If you can see following message window, then click the "Continue Anyway" button. Then click "OK" button.
text_image
Hardware Installation The software you are installing for this hardware: SyncMaster 1715/1755/1705, MagicSyncMaster CK1755 has not passed Windows Logo testing to verify its compatibility with Windows XP. (Tell me why this testing is important.) Continuing your installation of this software may impair or destabilize the correct operation of your system either immediately or in the future. Microsoft strongly recommends that you stop this installation now and contact the hardware vendor for software that has passed Windows Logo testing. Continue Anyway STOP InstallationThis monitor driver is under certified MS logo, and this installation doesn't damage your system. The certified driver will be posted on Samsung Monitor homepage. http://www.samsung.com/
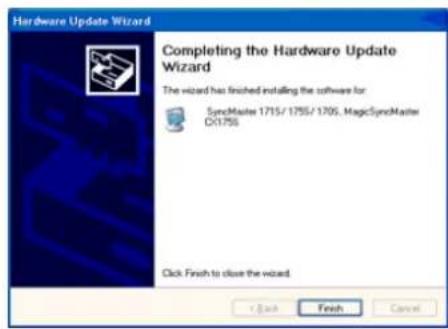
- Click the "Close" button, then click "OK" button continually.
text_image
Hardware Update Wizard Completing the Hardware Update Wizard The wizard has finished installing the software for SyncMaster 1715/ 1755/ 1705. MagicSyncMaster CX1756 Click Finish to close the wizard. < Back Finish Cancel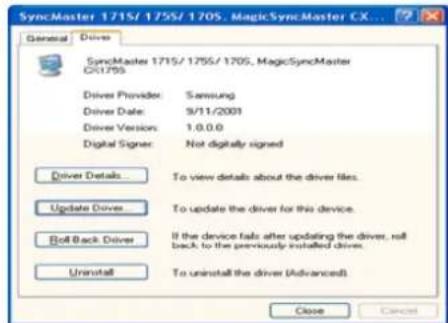
text_image
SyncMaster 1715/1755/1705, MagicSyncMaster CX... General Drivers SyncMaster 1715/1755/1705, MagicSyncMaster DX1793 Driver Provider: Samsung Driver Date: 9/11/2001 Driver Version: 1.0.0.0 Digital Signar: Not digitally signed Driver Details To view details about the driver files. Update Driver To update the driver for this device. Roll Back Driver If the device fails after updating the driver, roll back to the previously installed driver. Uninstall To uninstall the driver (Advanced) Close Cancel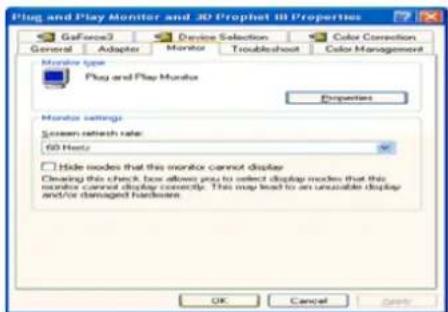
text_image
Plug and Play Monitor and 3D Prophet 8B Properties GasFace3 Device Selection Color Correction General Adaptor Monitor Troubleshoot Color Management Monitor type Plug and Play Monitor Properties Monitor settings: Screen refresh rate: 60 Hz/Hz Hide modes that this monitor cannot display Cleaning this check box allows you to select display modes that this monitor cannot display correctly. This may lead to an unusable display and/or damaged hardware. OK Cancel Cancel- Monitor driver installation is completed.
Microsoft® Windows® 2000 Operating System

When you can see "Digital Signature Not Found" on your monitor, follow these steps.
- Choose "OK" button on the "Insert disk" window.
- Click the "Browse" button on the "File Needed" window.
- Choose A:(D:\Driver) then click the "Open" button and then click "OK" button.

How to install
- Click "Start", "Setting", "Control Panel".
- Double click the "Display" Icon.
- Choose the "Settings" tab and then click "Advanced.".
- Choose "Monitor"
Case1: If the "Properties" button is inactive, it means your monitor is properly configured. Please stop installation
Case2: If the "Properties" button is active, click the "Properties" button then follow next steps continually. - Click "Driver" and then click on "Update Driver.." then click on the "Next" button.
- Choose "Display a list of the known drivers for this device so that I can choose a specific driver" then click "Next" and then click "Have disk".
- Click the "Browse" button then choose A:(D:\Driver).
- Click the "Open" button, then click "OK" button.
- Choose your monitor model and click the "Next" button then click "Next" button.
- Click the "Finish" button then the "Close" button.
If you can see the "Digital Signature Not Found" window then click the "Yes" button. And click
Microsoft® Windows® Millennium Operating System
- Click "Start", "Setting", "Control Panel".
- Double click "Display" icon.
- Select the "Settings" tab and click "Advanced Properties" button.
- Select the "Monitor" tab.
- Click the "Change" button in the "Monitor Type" area.
- Choose "Specify the location of the driver"
- Choose "Display a list of all the driver in a specific location.." then click "Next" button.
- Click the "Have Disk" button
- Specify A: D: then click "OK" button.
- Select "Show all devices" and choose the monitor that corresponds to the one you connected to your computer and click "OK".
- Continue choosing "Close" button and "OK" button until you close the Display Properties dialogue box.
Microsoft® Windows® NT Operating System
- Click Start, Settings, Control Panel, and then double-click Display icon.
- In Display Registration Information window, click Settings Tab and then click All Display Modes.
- Select a mode that you wish to use (Resolution, Number of colors and Vertical frequency) and then click OK.
- Click Apply button if you see the screen working normally after clicking Test. If the screen is not normal, change to a different mode (lower mode of resolution, colors or frequency).

If there is no Mode at All Display Modes, select the level of resolution and vertical frequency by referring to the Preset Timing Modes in the user guide.
Linux Operating System
To execute X-Window, you need to make the X86Config file, which is a type of system setting file.
- Press Enter at the first and the second screen after executing the X86Config file.
- The third screen is for setting your mouse.
- Set a mouse for your computer.
- The next screen is for selecting a keyboard.
- Set a Keyboard for your computer.
- The next screen is for setting your monitor.
- First of all, set a horizontal frequency for your monitor. (You can enter the frequency directly.)
- Set a vertical frequency for your monitor. (You can enter the frequency directly.)
- Enter the model name of your monitor. This information will not affect the actual execution of X-Window.
- You have finished setting up your monitor. Execute X-Window after setting other requested hardware.
Connecting the Monitor
Using the Stand
Installing the Monitor Driver (Automatic)
Installing the Monitor Driver (Manual)
Natural Color
Natural Color
Natural Color Software Program
text_image
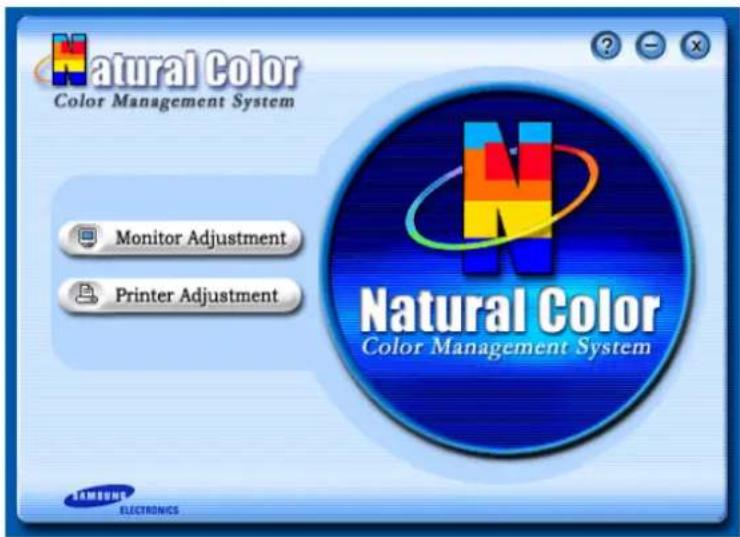
Natural Color Color Management System Monitor Adjustment Printer Adjustment N Natural Color Color Management System SAMSUNG ELECTRONICSOne of the recent problems in using a computer is that the color of the images printed out by a printer or other images scanned by a scanner or a digital camera are not the same as those shown on the monitor.
The Natural Color S/W is the very solution for this problem. It is a color administration system developed by Samsung Electronics in association with Korea Electronics & Telecommunications Research Institute (ETRI).
This system is available only for Samsung monitors and makes the color of the images on the monitor the same as the printed or scanned images.
For more information, refer to Help (F1) in the software program.
How to install the Natural Color software
Insert the CD included with the Samsung monitor into the CD-ROM Drive. Then, the initial screen of the program Natural Color will be executed. Click Natural Color on the initial screen to install the Natural Color software.
To install the program manually, insert the CD included with the Samsung monitor into the CD-ROM Drive, click the [Start] button of Windows and then select [Execute].
Enter D:\color\eng\setup.exe and then press the
(If the drive where the CD is inserted is not D:\, enter the applicable drive.)
How to delete the Natural Color software program
Select "Setting" / 'Control Panel" on the "Start" menu and then double-click "Add/Delete a program".
Select Natural Color from the list and then click the [Add/Delete] button.
text_image
SAMSUNG ELECTRONICS SAMSUNG DIGITALL everyone's invited™ ■ Safety Instructions ■ Introduction ■ Setup ■ Adjusting Your Monitor ■ Troubleshooting ■ Specifications ■ Information| Input | Picture | Sound | Channel | Setup |
Input
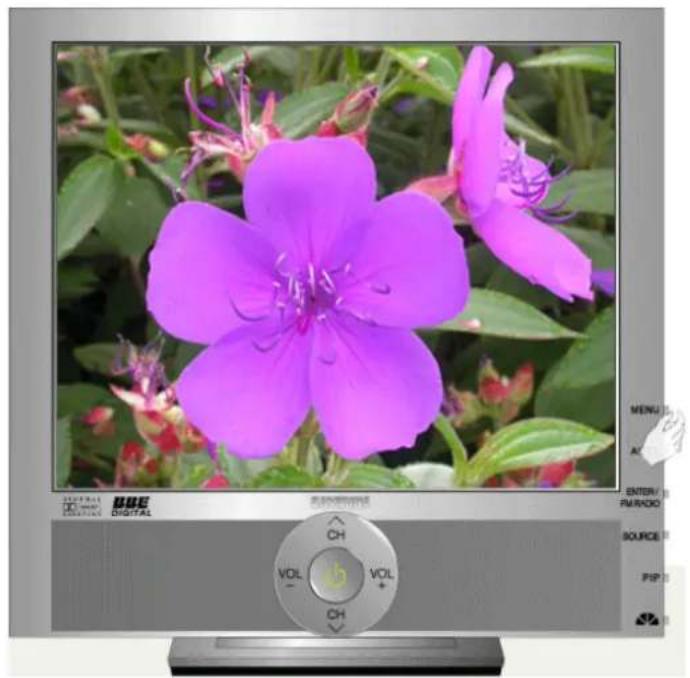
natural_image
Digital TV displaying a vibrant purple flower with green foliage, next to a control panel showing channel controls (no readable text on the flower image itself)Available Mode
P:PC/DVI
T:TV
A:AV
S: S-Video
C : Component
| OSD Description Play/Stop | ||
| Source List | Use to select PC, TV or other external input source connected to the Monitor.Use to select the screen of your choice.- The direct button on the remote control is 'SOURCE' button.PCDVI: HDCP supportedTVExt.- Scart is mainly used in Europe.AVS-VideoComponent |  |
| PIP | When external A/V devices such as VCRs or DVDs are connected to the monitor, PIP allows you to watch video from those devices in a small window super-imposed on the PC Video signal. (On/Off)While V-chip is in operation, the PIP function cannot be used.- Available In PC Mode Only1) PIP• ON/ Off: Turn the PIP Screen on or off.- The direct button on the remote control is 'PIP' button.2) Source• PC / DVI: TV / Ext.(Scart is mainly used in Europe.) / AV / S-Video / Component Mode: Select the input source for the PIP.- The direct button on the remote control is 'SOURCE' button.3) Size: Change the Size of the PIP window.If you select in Size, Position and Transparency will not be activated.- The direct button on the remote control is 'SIZE' button.4) Position: Change the Position of the PIP window.- The direct button on the remote control is 'POSITON' button.5) Transparency• High / Medium / Low / Opaque: Adjust the Transparency of PIP windows. | 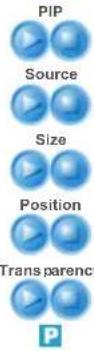 |
| Edit Name | Name the input device connected to the input jacks to make your input source selection easier.• PC• DVI• Ext. - Scart is mainly used in Europe.• AV• S-Video• Component |  |
Input
Picture
Sound
Channel
Setup
Picture
PC / DVI Mode
When you input video signal into DVI, TV / AV / S-Video / Component Modewill appear in the menu.
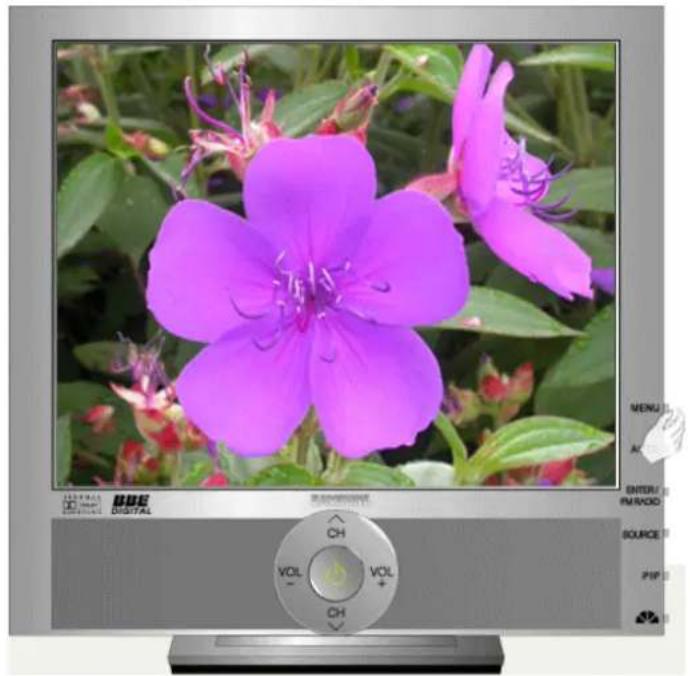
natural_image
Digital display showing a vibrant purple flower in a garden setting, with a control panel open for view (no readable text or symbols on the flower itself)Available Mode
P:PC/DVI
T:TV
A:AV
S: S-Video
C: Component
| OSD Description Play/Stop | ||
| MagicBrightTM | MagicBrightTMis a new feature providing the optimum viewing environment depending on the contents of the image you are watching.Currently four different modes are available: Entertain, Internet, Text and Custom.Each mode has its own pre-configured brightness value. You can easily select one of four settings by simply pressing the MagicBrightTMcontrol button.- The direct button on the remote control is 'M/B' button.1) Entertain: High BrightnessFor watching motion pictures such as a DVD or VCD.2) Internet: Medium BrightnessFor working with a mixture of images such as text and graphics.3) Text: Normal BrightnessFor documentations or works involving heavy text.4) CustomAlthough the values are carefully chosen by our engineers, the pre-configured values may not be comfortable to your eyes depending on your taste.If this is the case, adjust the Brightness and Contrast by using the OSD menu. |  |
| Custom | You can use the on-screen menus to change the contrast and brightness according to personal preference.1) Contrast: Adjust the Contrast.2) Brightness: Adjust the Brightness. |  |
| If you adjust picture using Custom function, MagicBright will turn to Custom mode. | ||
| Color Tone The tone of the color can be changed.- Available in PC Mode Only• Cool / Normal / Warm / Custom |  | |
| Color Control Adjust the individual R, G, B color controls.- Available in PC Mode Only1) Red2) Green3) Blue |  | |

If you adjust picture using Color Control function, Color Tone will turn to Custom mode.
| Image Lock | Image Lock is used to fine-tune and get the best image by removing noise that creates unstable images with jitter and shimmer. If satisfactory results are not obtained using the Fine adjustment, use the Coarse adjustment and then use Fine again.- Available in PC Mode Only1) Coarse: Removes noise such as vertical stripes. Coarse adjustment may move the screen image area. You may relocate it to the center using the Horizontal Control menu.2) Fine: Removes noise such as horizontal stripes. If the noise persists even after Fine tuning, repeat it after adjusting the frequency (clock speed).3) Position: Adjusts the screen location horizontally and vertically. |  |
| Auto Adjustment | The values of Fine, Coarse, position are adjusted automatically.If you change resolution in the control panel, Auto function will be executed.- The direct button on the remote control is 'AUTO' button.- Available in PC Mode Only |  |
| PIP Picture You | can adjust the PIP Screen Settings.1) Contrast: Adjusts the Contrast of the PIP window on the screen.2) Brightness: Adjusts the Brightness of the PIP window on the screen.3) Sharpness: Adjusts the difference between the lightest and darkest areas of the PIP window.4) Color: Adjusts the Color of the PIP window on the screen.5) Tint: Adds a natural tone to the PIP window. |  |
TV / Ext. / AV / S-Video / Component Mode
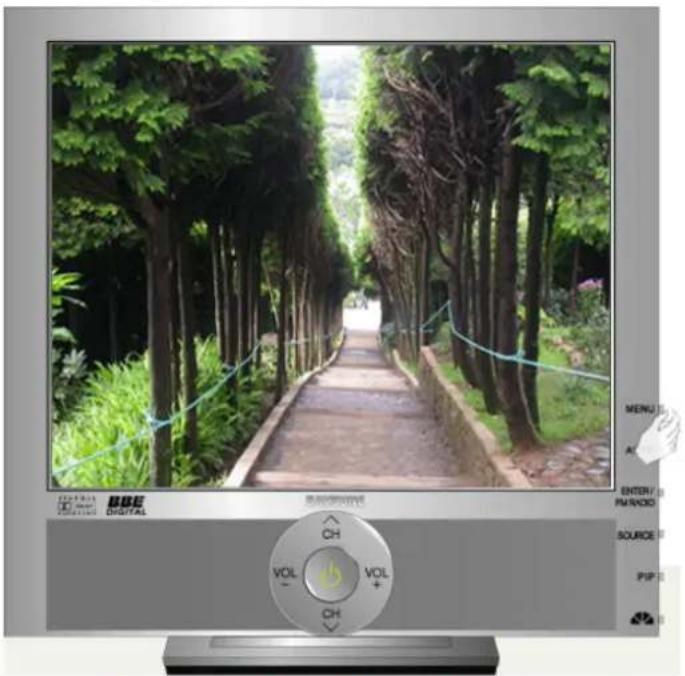
natural_image
Photo of a tree-lined rural road with lush greenery and a digital display control (no readable text or symbols on the main scene)Available Mode
P:PC/DVI
T: TV A
AV S: S-Video
C: Component
| OSD Description Play/Stop | ||
| Mode | The Monitor has four automatic picture settings ("Dynamic", "Standard", "Movie" and "Custom") that are preset at the factory.You can activate either Dynamic, Standard, Movie, or Custom. You can select "Custom" which automatically recalls your personalized picture | |
| settings.- The direct button on the remote control is 'P.MODE' button.• Dynamic• Standard• Movie• Custom |  | |
| Custom | You can use the on-screen menus to change the contrast and brightness according to personal preference.1) Contrast: Adjusts the Contrast.2) Brightness: Adjusts the Brightness.3) Sharpness: Adjusts the difference between the lightest and darkest areas of the display.4) Color: Adjusts the Color of the PIP window on the screen.5) Tint: Adds a natural tone to the display. |  |
| Color Tone | The tone of the color can be changed. The individual color components are also user adjustabls.• Cool2 / Cool1 / Normal / Warm1 / Warm2 |  |
| Size You can switch the Size.- The direct button on the remote control is 'P.SIZE' button.• 16:9• Normal• Zoom 1• Zoom 2- Zoom1, Zoom2 are not available in 1080i(or over 720p) of DTV. |  | |
| Digital NR - Digital Noise Reduction.You can turn the Noise Elimination feature On/Off.The Digital Noise Elimination feature allows you to enjoy clearer and crisper images.• On /Off |  | |
| Film Mode You can turn Film Mode On/Off.The Film Mode feature offers you a theater-quality viewing experience.• On /Off |  | |
Input
Picture
Sound
Channel
Setup
Sound
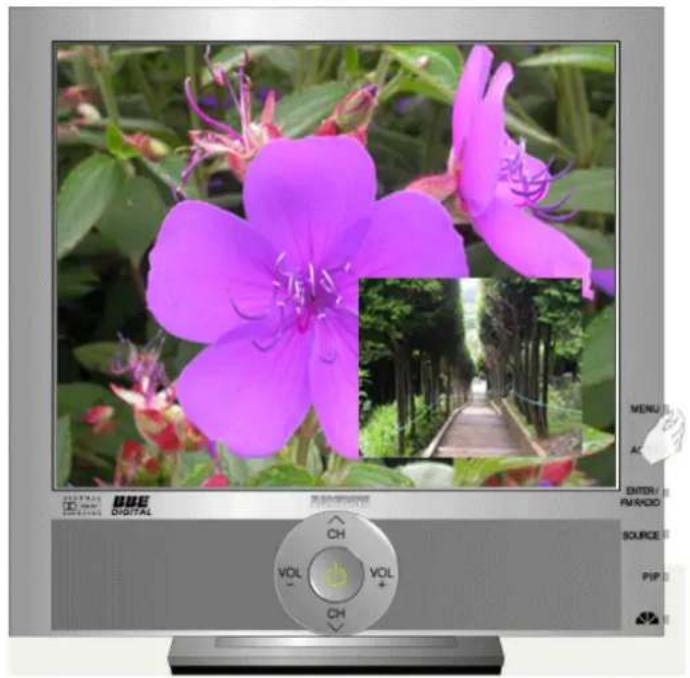
natural_image
Digital display showing a vibrant purple flower in a forest setting with a wooden pathway and greenery (no text or symbols on the flower or background)Available Mode
P:PC/DVI
T: TV
A:AV
S: S-Video
C : Component
| OSD Description Play/Stop | ||
| Mode | The Monitor has a built-in high fidelity stereo amplifier.- The direct button on the remote control is 'S.MODE' button.1) Standard: Choose Standard for the standard factory settings.2) Music: Choose Music when watching music videos or concerts.3) Movie: Choose Movie when viewing movies.4) Speech: Choose Speech when watching a show that is mostly dialogue (i.e., news).5) Custom: Choose Custom if you want to adjust the settings according to personal preference. |  |
| Custom | The sound settings can be adjusted to suit your personal preference.1) Bass: Emphasize low frequency audio.2) Treble: Emphasize high frequency audio.3) Balance: Allows you to adjust the sound balance between the left and right speakers.Balance allows you to adjust the sound balance between the left and right speakers and you can hear the sound even when the sound value is set to 0. |  |
| Auto Volume | Reduces the differences in volume level among broadcasters.• On /Off |  |
| Dolby Virtual | Dolby Virtual Sound On/Off (Dolby Virtual simulates the effect of the Dolby Surround sound system, recreating the movie-theatre or concert-hall- quality sound.)• On /Off |  |
| BBE | BBE (Barcus-Berry Electronics) recreates the natural sound and improves sound clarity through boosting high and low range frequencies.As a result, high sounds are clearer, brilliant and finely detailed while low sounds are tight, well-defined and harmonically rich.• On /Off |  |
| BBE and Dolby Virtual cannot be functioned at the same time. | ||
| Select Sound | You can select either Main or Sub when PIP is On.• Main / Sub |  |
| FM Radio | Press the button on the front or the "FM RADIO" button on the remote control to select the "FM RADIO" feature.- The direct button on the remote control is 'FM RADIO' button.• Auto StoreYou can scan the frequency ranges available on your FM Radio in your area and store all the channels found automatically.• Manual StoreYou can scan the frequency ranges available on your FM Radio in your area and store all the channels found manually.- Channel : Chooses the Radio channel through the adjustment of up/down under the current frequency.- Search : The tuner scans the frequency range until the first channel or the channel that you selected is received.- Store : Restores the number user inputs.• Add / DeleteAdds or deletes channels from the memory. |    |
| If you select FM Radio, picture will turn black while FM Radio is functioning in TV, EXT, AV, S-Video, Component modes except PC, DVI modes. | ||
Input
Picture
Sound
Channel
Setup
Channel
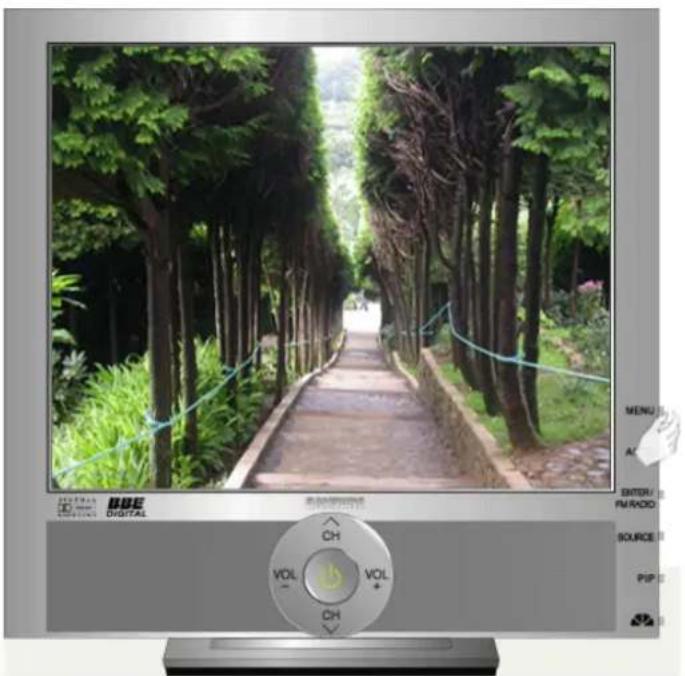
text_image
MENUS AL ENTER/ PANXID SOURCE PIP CH VOL CH CH CH CH CH CH CH CH CH CH CH CH CH CH CH CH CH CH CH CH CH CH CH CH CH CH CH CH CH CH CH CH CH CH CH CH CH CH CH CH CH CH CH CH CH CH CH CH CH CH ChAvailable Mode
P:PC/DVI
T: TV
A:AV
S: S-Video
C : Component
| OSD Description Play/Stop | ||
| Air/CATV | The channel system can be set in several different ways.• Air• STD• HRC | |
| • IRC• AFNSTD, HRC, IRC, AFN, and Air identify various types of cable TV systems.Contact your local cable company to identify the type of cable system that exists in your particular area. |  T T | |
| Auto Program | The TV automatically cycles through all of the available channels and stores them in memory. This takes about one to two minutes.In rare cases, "Auto program" may miss a few channels due to weak signals and the channels may not be added to the channel memory. |  T T |
| Add/Delete | Adds or deletes channels from the memory. |  T T |
| Fine Tune | Due to weak signals or an incorrect antenna configuration, some of the channels may not be tuned correctly. |  T T |
| LNA | Amplifies signals when antenna reception is poor. However, if incoming signals are interfering with each other, turn off LNA as it may malfunction.• On / Off |  T T |
T
T
T
T
T
Input
Picture
Sound
Channel
Setup
Setup
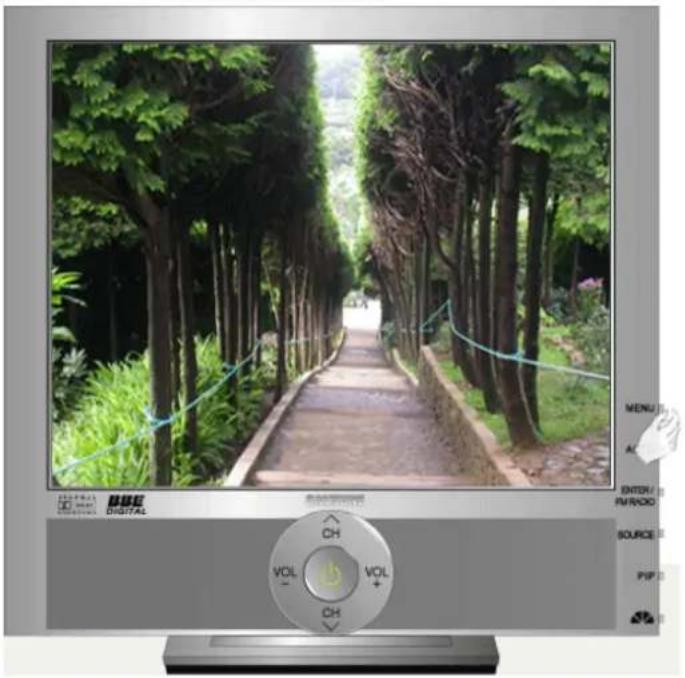
natural_image
View of a tree-lined rural path with dense green foliage and blue ropes, displayed on a monitor (no readable text or symbols)Available Mode
P:PC/DVI
T:TV A:AV
S: S-Video
C: Component
| OSD Description Play/Stop | ||
| AreaConfiguration | When you turn the power on of the product for the first time since it released from a factory, menu to select location will appear.Choose the region and country where you use the monitor.This is because broadcasting type varies according to region and country.You can select broadcasting type in OSD menu as well by selectingMENU-Setup-Area Configuration.Note: This product can be used worldwide if area configuration is set up regardless of broadcasting type.Note: If country is not selected properly, the product may not locate channels. |  T T |
| Language You | can choose one of 2 languages.• English,Note : The language chosen affects only the language of the OSD.It has no effect on any software running on the computer. |  |
| Sleep Timer | Use to set the Monitor to be turned off automatically the set in certain minutes.(Off, 30, 60, 90, 120, 150, 180) |  |
| Caption | Enables or disables the Caption feature and sets the appearance of closed caption text.1) Caption : Off / On2) Mode : Caption / Text3) Channel : 1 / 24) Field : 1 / 2 |  |
| Menu Transparency | Changes the opaqueness of the background of the OSD.• High• Medium• Low• Opaque |  |
| Blue Screen | If no signal is being received or the signal is very weak, a blue screen automatically replaces the noisy picture background. If you wish to continue viewing the poor picture, you must set the "Blue screen" mode to "Off".• On / Off |  |
| Reset | Picture parameters are replaced with the factory default values.- Available in PC Mode Only1) Image Reset2) Color Reset |  Color Reset Color Reset |
T
text_image
SAMSUNG ELECTRONICS SAMSUNG DIGITALL everyone's invited™ ■ Safety Instructions ■ Introduction ■ Setup ■ Adjusting Your Monitor ■ Troubleshooting ■ Specifications ■ InformationSelf-Test Feature Check
Check List
Q & A

Self-Test Feature Check

Check the following items yourself before calling for service. Contact the service center for problems that you cannot solve by yourself.
Self-Test Feature Check | Not Supported Mode | Not Optimum Mode | Display Adapter Driver
Maintenance and Cleaning | Symptoms & Recommended Actions
1. Self-Test Feature Check
Your monitor provides a self test feature that allows you to check whether your monitor is functioning properly.
- Turn off both your computer and the monitor.
- Unplug the video cable from the back of the computer.
- Turn on the monitor.
The figure shown below ("Check Signal Cable") appears on a black background when the monitor is in its normal working condition though it does not sense any video signal: While in the Self-Test mode, the LED power indicator remains green and the figure moves around on the screen.

Check Signal Cable PC
- Turn off your monitor and reconnect the video cable; then turn on both your computer and the monitor.
If your monitor screen remains blank after using the previous procedure, check your video controller and computer system; your monitor is functioning properly.
2. Not Supported Mode
This indicates the display resolution or refresh rate is not properly set on your computer video card. Reboot the computer in Safe Mode and select "Default" in the "Refresh Rate Unknown" box while setting Adapter for Display Properties.

Not Supported Mode PC 56.2kHz 90Hz

Contact the computer dealer or manufacturer for information on Safe Mode Booting.

Refer to Specifications > Preset Timing Modes for the resolutions or frequencies that are supported by the monitor.
Sometimes the screen turns black without the "Not Supported Mode" message appearing on the screen. This indicates the monitor is set for a frequency out of range or the PowerSaver mode is on.
3. Not Optimum Mode
If the vertical resolution is not in optimum mode, you can still see the display but the warning message below appears and disappears after one minute.
The user must adjust the frequency within that one minute.
Not Optimum Mode
Recommended Mode 1280x1024 60Hz

Refer to Specifications > Preset Timing Modes for the resolutions or frequencies that are supported by the monitor.
4. Display Adapter Driver

Display adapter refers to the computer video card driver.
If the adapter is not properly set, you cannot adjust resolution, frequency or color and you cannot install the monitor driver.
- Checking Adapter Driver
Click Start
Settings
Control
Panel
Display
Settings
Advanced
Adapter.
If "Default" or a wrong product model is indicated, it means that the adapter driver is not properly installed. Install the adapter driver again according to the information provided by the computer or video card manufacturers.
- Installing Adapter Driver

The instructions given below are for general circumstances.
For specific issues, contact the relevant computer or video card manufacturers.
1) Click Start Settings Control Panel Display Settings Advanced → → Adapter Update Driver Next→Display a list of the known drivers for this device so that I can choose a specific driver → Next → Have Disk (Insert Video Card Driver diskette) → OK Next Next→Finish. →
2) In case you have Adapter Driver Setup file on your computer: Run Setup.exe or Install.exe, which is found in the Adapter Driver Setup file.
5. Maintenance and Cleaning
- Maintaining the Monitor Case.
Clean with a soft cloth after disconnecting the power cord.
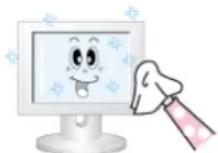
- Do not use benzene, thinner or other flammable substances, or a wet cloth.
-
We recommend a Samsung cleansing agent is used to prevent damage to the screen.
-
Maintaining the Flat Panel Display Screen.
Clean with a soft cloth (cotton flannel) smoothly.
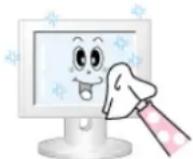
• Never use acetone, benzene or thinner.
(They may cause flaws or deformation of the screen surface.)
- The user will be required to pay costs and related expenses for repair of damages caused by him/her.
6. Symptoms and Recommended Actions

A monitor recreates visual signals received from the computer. Therefore, if there is trouble with the computer or the video card, this can cause the monitor to become blank, have poor coloring, noise, Video mode not supported, etc. In this case, first check the source of the problem, and then contact a service center or your dealer.
- Check if the power cord and the video cables are properly connected to the computer.
- Check if the computer beeps more than 3 times when booting.
(If it does, request an after-service for the main board of the computer.) - If you installed a new video card or if you assembled the PC, check if you installed the adapter(video) driver and the monitor driver.
- Check if the scanning ratio of the video screen is set at 56Hz or 85Hz. (Do not exceed 60Hz when using the maximum resolution.)
- If you have problems in installing the adapter (video) driver, boot the computer in Safe Mode, remove the Display Adapter at the "Control Panel, System, Device Administrator" and then reboot the computer to reinstall the adapter (video) driver.
Self-Test Feature Check
Check List
Q & A

The following table lists possible problems and their solutions. Before calling for service, check the information in this section to see if you can remedy any problems yourself. If you do need assistance, please call the phone number on the Information section or contact your dealer.
Installation | Screen | Audio | Remote Control
1. Problems related to Installation

Problems related to the monitor installation and their solutions are listed.
| Problems Solutions | |
| It appears the PC does not function normally. | Check if the Display Adapter Driver (VGA Driver) is properly installed.(Refer to Installing Driver) |
| The monitor screen flickers. | Check if the signal cable between the computer and the monitor is securely connected and tightened.(Refer to Connecting to a Computer) |
| TV screen is blurred or shows noise signals. | Check if the TV antenna connector is securely connected to the external antenna.(Refer to Connecting to TV) |
| TV signal is not received | Check "Channel system" and make sure you choose the correct channel system.(Refer to the Channel System)Select "Auto program" to configure the channel system automatically. (Refer to the Auto Program) |
2. Problems related to Screen

Problems related to the monitor screen and their solutions are listed.
| Problems Solutions | |
| Screen is blank and power indicator is off | ·Ensure that the power cord is firmly connected and the LCD monitor is on.(Refer to the Connecting the Monitor) |
| "Check Signal Cable" message | ·Ensure that the signal cable is firmly connected to the PC or video sources.(Refer to the Connecting the Monitor)·Ensure that the PC or video sources are turned on. |
| "Not Supported Mode" message | ·Check the maximum resolution and the frequency of the video adapter.·Compare these values with the data in the Preset Timing Modes Chart. |
| Picture rolls vertically. | ·Check if the signal cable is securely connected. Connect it again securely. (Refer to Connecting to a Computer) |
| Image is not clear. Picture is blurred. | ·Run Frequency Coarse and Fine tuning. ·Turn on again after removing all accessories (video extension cable, etc.) ·Set resolution and frequency to the recommended ranges. |
| Picture image is unstable and vibrates. | ·Check if the resolution and frequency set for the computer video card falls in the range supported by the monitor. If not, reset them referring to the current Information under the monitor menu and Preset Timing Modes. |
| Ghost images are shown in the picture. | |
| The image is too light or too dark | ·Adjust the Brightness and Contrast. (Refer to the Brightness, Contrast) |
| Screen color is Inconsistent. | ·Adjust color using Custom under OSD Color Adjustment menu. |
| Color image is distorted with dark shadows. | |
| White color is poor. | |
| Power Indicator blinks green. | ·The monitor is currently saving the changes made in settings to the OSD memory. |
| Screen is blank and power indicator light is steady green or blinks every 0.5 or 1 seconds | ·The monitor is using its power management system. ·Press a key on the keyboard |
3. Problems related to Audio

Problems related to audio signals and their solutions are listed below.
| Problems Solutions | |
| No sound | Ensure that the audio cable is firmly connected to both the audio-in port on your monitor and the audio-out port on your sound card.(Refer to the Connecting the Monitor)Check the volume level.(Refer to the Volume) |
| Sound level is too low. | Check the volume level.(Refer to the Volume)If the volume is still too low after turning the control to its maximum, check the volume control on the computer sound card or software program. |
| Sound is too high pitched or too low pitched | Adjust the Treble and Bass to appropriate level. |
4. Problems related to Remote Control

Problems related to the remote control and their solutions are listed.
| Problems Items to check | |
| The remote control buttons do not respond. | Check the battery polarities (+/-).Check if the batteries have been exhausted.Check if the power is on.Check if the power cord is securely connected. |
- Check if a special fluorescent or neon lamp is on in the vicinity.
Check List
Self-Test Feature Check
Q & A

Q&A
| Question Answer | |
| How can I change the frequency? | Frequency can be changed by reconfiguring the video card.Note that video card support can vary, depending on the version of the driver used. (Refer to the computer or the video card manual for details.) |
| How can I adjust the resolution? Windows ME/XP/2000 : Set the resolution at the Control Panel→Display→Settings.* Contact the video card manufacturer for details. | |
| How can I set the Power Saving function? | Windows ME/XP/2000 : Set the function at BIOS-SETUP of the computer or the screen saver. (Refer to Windows/Computer Manual). |
| How can I clean the outer case/LCD Panel? | Disconnect the power cord and then clean the monitor with a soft cloth, using either a cleaning solution or plain water.Do not leave any remains of the detergent nor scratch the case. Do not allow any water to go inside the monitor. |
text_image
SAMSUNG ELECTRONICS SAMSUNG DIGITALL everyone's invited™ ■ Safety Instructions ■ Introduction ■ Setup ■ Adjusting Your Monitor ■ Troubleshooting ■ Specifications ■ InformationGeneral
PowerSaver
Preset Timing Modes

General
General
Model Name SyncMaster 931MP
LCD Panel
Size 19,0" Diagonal
Display area 376.32mm (H) x 301.056mm (V)
Pixel Pitch 0.294mm (H) x 0.294mm (V)
Type a-si TFT active matrix
Synchronization
Horizontal 31 \~ 81kHz
Vertical 56 \~ 85Hz
Display Color
16,777,216 Colors
Resolution
Optimum resolution SXGA 1280 x 1024 @ 60Hz
Maximum resolution SXGA 1280 x 1024 @ 75Hz
Input Signal, Terminated
RGB Analog, DVI(Digital Visual Interface) Compliant Digital RGB,
0.7Vp-p± 5%, Positive bright, 75Ω ±10%(terminated),
Separate H/V sync, Composite, TTL level, positive or negative
TV / Video
Color system NTSC - M, PAL-M/N, PAL/SECAM-L/L', B/G, D/K, I
Video format CVBS, S-Video, Component, SCART(RGB), RF
Maximum Pixel Clock
140 MHz
Power Supply
AC 100 \~ 240 VAC(+/- 10%), 60/50Hz ± 3Hz
Signal Cable
15pin-to-15pin D-sub cable, detachable, 1.8m
DVI-D to DVI-D connector, detachable, 2.0m (Option)
Power Consumption
Less than 58W
Power Saving
Less than 2W
Dimensions (WxDxH)/ Weight
433 x 58 x 419.5 mm / 17.0 x 2.3 x 16.5 inch (Without stand) 433 x 198 x 436 mm / 17.0 x 7.8 x 17.2 inch/ 5.9 kg (With Stand)
VESA Mounting Interface
100 mm x 100 mm (for use with Specialty(Arm) Mounting hardware.)
Environmental considerations
Operating Temperature: 50°F \~ 104°F (10°C \~ 40°C) Humidity: 10% \~ 80%, non-condensing
Storage Temperature: -4°F \~113°F (-20°C \~ 45°C) Humidity: 5% \~ 95%, non-condensing
Plug and Play Capability
This monitor can be installed on any Plug & Play compatible system. Interaction of the monitor and computer systems will provide the best operating conditions and monitor settings. In most cases, monitor installation will proceed automatically, unless the user wishes to select alternate settings.
Dot Acceptable
TFT LCD panel manufactured by using advanced semiconductor technology with precision of 1ppm(one millionth) above is used for this product. But the pixels of RED, GREEN, BLUE and WHITE color seem to be bright sometimes or some of black pixels could be seen. This is not from bad quality and you can use it without uneasiness.
• For example, the number of TFT LCD sub pixels that is contained in this product are 3,932,160.

Design and specifications are subject to change without prior notice.
General
PowerSaver
Preset Timing Modes

Power Saver
This monitor has a built-in power management system called PowerSaver. This system saves energy by switching your monitor into a low-power mode when it has not been used for a certain amount of time. The monitor automatically returns to normal operation when you press a key on the keyboard. For energy conservation, turn your monitor OFF when it is not needed, or when left unattended for long periods. The PowerSaver system operates with a VESA DPMS compliant video card installed in your computer. Use a software utility installed on your computer to set up this feature.
| State Normal Operation | Power saving mode EPA/ENERGY 2000 | Power off (Power button) |
| Power Indicator Green Green, Blinking Black | ||
| Power Consumption Less than 58W | Less than 2W (Off-mode) | Less than 1W (110Vac) |

This monitor is EPA ENERGY STAR® compliant and ENERGY2000 compliant when used with a computer equipped with VESA DPMS functionality.
As an ENERGY STAR ^® Partner, SAMSUNG has determined that this product meets the ENERGY STAR ^® guidelines for energy efficiency.

Preset Timing Modes
If the signal transferred from the computer is the same as the following Preset Timing Modes, the screen will be adjusted automatically. However, if the signal differs, the screen may go blank while the power LED is on. Refer to the video card manual and adjust the screen as follows.
Table 1. Preset Timing Modes
| Display Mode | Horizontal Frequency (kHz) | Vertical Frequency (Hz) | Pixel Clock (MHz) | Sync Polarity (H/V) |
| IBM, 640 x 350 31.469 70.086 25.175 +/- | ||||
| IBM, 720 x 400 31.469 70.087 28.322 -/+ | ||||
| IBM, 640 x 480 31.469 59.940 25.175 -/- | ||||
| MAC, 640 x 480 35.000 66.667 30.240 -/- | ||||
| MAC, 832 x 624 49.726 74.551 57.284 -/- | ||||
| MAC,1152 x870 | 68.681 | 75.062 | 100.000 | -/- |
| VESA, 640 x 480 37.861 72.809 31.500 -/- | ||||
| VESA, 640 x 480 37.500 75.000 31.500 -/- | ||||
| VESA, 640 x 480 43.269 85.008 36.000 -/- | ||||
| VESA, 800 x 600 35.156 56.250 36.000 +,-/+, - | ||||
| VESA, 800 x 600 37.879 60.317 40.000 +/+ | ||||
| VESA, 800 x 600 48.077 72.188 50.000 +/+ | ||||
| VESA, 800 x 600 46.875 75.000 49.500 +/+ | ||||
| VESA, 800 x 600 53.674 85.061 56.250 +/+ | ||||
| VESA, 1024 x 768 48.363 60.004 65.000 -/- | ||||
| VESA, 1024 x 768 56.476 70.069 75.000 -/- | ||||
| VESA, 1024 x 768 60.023 75.029 78.750 +/+ | ||||
| VESA, 1024 x 768 68.677 84.977 94.500 +/+ | ||||
| VESA, 1152 x 864 67.500 75.000 108.000 +/+ | ||||
| VESA, 1280 x 1024 63.981 60.020 108.00 +/+ | ||||
| VESA, 1280 x 1024 79.976 75.025 135.00 +/+ |
Table 2. Broadcasting Systems

According to broadcasting type in each country, you may not be able to choose.
| Broadcasting Systems | NTSC | ||||
| NTSC -M | |||||
| Countries | U.S.ASouth KoreaJapanEcuadorMexicoGuatemalaCanada | ||||
| PAL | |||||
| Broadcasting Systems | |||||
| PAL-B/G | PAL-D/K | PAL-I | PAL-N | PAL-M | |
| Countries | ItalySwedenGermanyNorwaySpainIsraelDenmarkPortugalNetherlandsAustriaSingaporeIndonesiaAustralia | ChinaNorth KoreaRumania | IrelandEnglandSouth AfricaHongkong | ArgentinaUruguayParaguay | Brazil |
| Broadcasting Systems | SECAM | ||||
| SECAM-B SECAM-D SECAM-K | 1 SECAM-L | ||||
| Countries | IranIraqSaudi ArabiaSyriaLebanonEgypt | RussiaHungaryBulgariaPoland | France | ||

Horizontal Frequency
The time to scan one line connecting the right edge to the left edge of the screen horizontally is called Horizontal Cycle and the inverse number of the Horizontal Cycle is called Horizontal Frequency. Unit: kHz
Vertical Frequency
Like a fluorescent lamp, the screen has to repeat the same image many times per second to display an image to the user. The frequency of this repetition is called Vertical Frequency or Refresh Rate. Unit: Hz
text_image
SAMSUNG ELECTRONICS SAMSUNG DIGITALD everyone's invited™ ■ Safety Instructions ■ Introduction ■ Setup ■ Adjusting Your Monitor ■ Troubleshooting ■ Specifications ■ InformationService
Terms
For Better Display
Authority
Image Retention Free
Correct Disposal

Service

The address and phone number of the company can be changed without previous notice.
AUSTRALIA :
Samsung Electronics Australia Pty Ltd.
Customer Response Centre
7 Parkview Drive, Homebush Bay NSW 2127
Tel: 1300 362 603
http://www.samsung.com.au/
BRAZIL :
Samsung Electronics Canada Inc.,
Samsung Customer Care
55 Standish Court
Mississauga, Ontario
L5R 4B2
Vía Lopez Portillo No. 6, Col. San Fco. Chilpan
Tultitlán, Estado de México, C.P. 54940
Tel: 01-55-5747-5100 / 01-800-726-7864
Fax: 01-55-5747-5202 / 01-800-849-1743
RFC: SEM950215S98
Vía Lopez Portillo No. 6, Col. San Fco. Chilpan
Tultitlán, Estado de México, C.P. 54940
Tel: 01-55-5747-5100 / 01-800-726-7864
EXPORTADO POR: Samsung Electronics CO.,LTD.
416, Mae tan-3dong, Yeongtong - GU,
Suwon City, Gyeonggi-do Korea
NETHERLANDS/BELGIUM/LUXEMBOURG :
Samsung Electronics Benelux B. V.
Fleminglaan 12 2289 CP Rijiswijk, NEDERLANDS
Samsung Electronics,5 Libertas Road, Somerset Office Park,
Bryanston Ext 16. Po Box 70006, Bryanston,2021, South Africa
Tel:0027-11-549-1621
Fax:0027-11-549-1629
http://www.samsung.co.za/
SWEDEN/DENMARK/NORWAY/FINLAND :
Samsung Electronics AB
Box 713
S-194 27 UPPLANDS VÄSBY
SVERIGE
MPA COMPLEX BUILDING,1st-2nd Floor
175 SOI SUEKSA VIDHAYA SATHON SOI 12
SILOM ROAD, SILOM, BANGRAK
BANGKOK 10500
TEL:0-2635-2567
FAX:0-2635-2556
UKRAINE :
SAMSUNG ELECTRONICS REPRESENTATIVE OFFICE IN UKRAINE
4 Glybochitska str.
Kiev, Ukraine
Tel. 8-044-4906878
Fax 8-044-4906887
Toll-free 8-800-502-0000
< European Service Center & National Service >
Stafford Park 12 Telford, Shropshire, TF3 3BJ
400 Valley Road, Suite 201
Mount Arlington, NJ 07856
Sync (Synchronized) Signals refer to the standard signals that are required to display desired colors on the monitor. They are divided into Vertical and Horizontal Sync Signals. These signals display normal color images by the set resolution and frequency.
Types of Sync Signals
| Separate | This is a scheme of transmitting individual vertical and horizontal sync signals to the monitor. |
| Composite | This is a scheme of combining vertical and horizontal sync signals into one composite signal and transmitting it to the monitor. The monitor displays the color signals by separating the composite signal into original color signals. |
Dot Pitch
The image on a monitor is composed of red, green and blue dots. The closer the dots, the higher the resolution. The distance between two dots of the same color is called the 'Dot Pitch'. Unit: mm
Vertical Frequency
The screen must be redrawn several times per second in order to create and display an image for the user. The frequency of this repetition per second is called Vertical Frequency or Refresh Rate. Unit: hz
Example: If the same light repeats itself 60 times per second, this is regarded as 60 Hz.
Horizontal Frequency
The time to scan one line connecting the right edge to the left edge of the screen horizontally is called Horizontal Cycle. The inverse number of the Horizontal Cycle is called Horizontal Frequency. Unit: khz
Interlace and Non-Interlace Methods
Showing the horizontal lines of the screen from the top to the bottom in order is called the Non-Interlace method while showing odd lines and then even lines in turn is called the Interlace method. The Non-Interlace method is used for the majority of monitors to ensure a clear image. The Interlace method is the same as that used in TVs.
Plug & Play
This is a function that provides the best quality screen for the user by allowing the computer and the monitor to exchange information automatically. This monitor follows the international standard VESA DDC for the Plug & Play function.
Resolution
The number of horizontal and vertical dots used to compose the screen image is called 'resolution'. This number shows the accuracy of the display. High resolution is good for performing multiple tasks as more image information can be shown on the screen.
Example: If the resolution is 1280 x 1024, this means the screen is composed of 1280 horizontal dots (horizontal resolution) and 1024 vertical lines (vertical resolution).
RF Cable
A round signal cable generally used for TV antennas.
Satellite Broadcasting
Broadcasting service provided via satellite. Enables high picture quality and clear sound throughout the country regardless of the location of the viewer.
Sound Balance
Balances the levels of the sound coming from each speaker in televisions with two speakers.
Cable TV
Whereas the terrestrial broadcasting is delivered via frequency signals through the air, cable broadcasting is transmitted via a cable network. In order to view cable TV, one must purchase a cable receiver and hook it up to the cable network.
CATV
"CATV" refers to the broadcasting service offered at hotels, schools and other buildings through their own broadcasting system, apart from VHF or UHF broadcasting by terrestrial broadcasters. The CATV programs may include movies, entertainment and educational programs. (Different from cable TV.)
CATV can be viewed only within the area in which the CATV service is offered.
S-Video
Short for "Super Video." S-Video allows up to 800 lines of horizontal resolution, enabling high-quality video.
VHF/UHF
VHF indicates TV channels 2 to 13, and UHF indicates channels 14 through 69.
Channel Fine Tuning
This feature allows the viewer to fine-tune the TV channel to obtain the best viewing conditions. The Samsung LCD TV has both automatic and manual channel fine-tuning features to enable the viewer to adjust their desired settings.
External Device Input
External device input refers to video input from such external video devices as VCRs, camcorders and DVD players, separate from a TV broadcast.
DVD
A type of digital disk technology that takes up only the benefits of CD and LD, to implement a high resolution/quality, which enables the user to enjoy clearer images.
DTV Broadcasting (Digital TV Broadcasting)
An enhanced broadcasting technology to process digital video signals using a set-top box, which implements a high resolution and clearer digital images on the screen.
This derives from artificial satellite technology that amplifies weak signals even in poor reception areas for sharper images.
Antenna Converter
A connection part that is used to link a wide antenna cable (feeder cable) to the TV.
- English Caption (= Caption Setting)
A kind of language selection feature that provides English subtitles (caption) or character information services from broadcasting services (ex: AFKN) or video tapes (marked CC), and which are especially useful for studying English.
Multiplex Broadcasting
This enables the user to enjoy the broadcasting service in both Korean and foreign (original) language as well as in stereo mode.
A2
This system uses two carriers to transmit voice data. Countries such as South Korea and Germany use this system.
BTSC
Broadcast Television System Committee
The stereo broadcasting system that is used in most of the countries that have adopted the NTSC system, including the United States, Canada, Chile, Venezuela and Taiwan. It also refers to the organization that has been organized to promote its development and management.
EIAJ
Electronic Industries Association of Japan.
- Adjust computer resolution and screen injection rate (refresh rate) on computer as described below to enjoy the best quality of picture. You can have an uneven quality of picture in the screen if the best quality of picture is not provided in TFT-LCD.
Resolution: 1280 x 1024
- Vertical frequency (refresh rate): 60 hz
- TFT LCD panel manufactured by using advanced semiconductor technology with precision of 1ppm (one millionth) above is used for this product. But the pixels of RED, GREEN, BLUE and WHITE color seem to be bright sometimes or some of black pixels could be seen. This is not from bad quality and you can use it without uneasiness.
For example, the number of TFT LCD sub pixels that is contained in this product are 3,932,160.
- When you clean the monitor and the panel outside, please apply the recommended small amount of cleaner by using soft and dry cloth and polish it. Let LCD area not to be forced but to be scrubbed out softly. If excessive force is applied, you can have a stain on it.
- If you are not satisfied with the quality of picture, you can get better quality of picture by executing "auto adjustment function" in display screen that is appeared as window termination button is pressed. If there's still noise after automatic adjustment, use FINE/COARSE adjustment function.
- If you view a fixed screen for an extended period of time, residual image or blurriness may appear. Change the mode to energy save or set a screensaver to moving picture when you need to be away from the monitor for an extended period of time.
- Do not display a still image( such as on a video game or when hooking up a DVD to this LCD_TV ) on the Color TFT-LCD ( Thin Film Transister Liquid Crystal Display) panel for a long time as it can cause screen image retention. This image retention is also known as "screen burn". To avoid such image retention, reduce the degree of brightness and contrast of this screen when displaying a still image.
Service
Terms
For Better Display
Authority
Image Retention Free
Correct Disposal

Authority
Information in this document is subject to change without notice. © 2005 Samsung Electronics Co., Ltd. All rights reserved.
Reproduction in any manner whatsoever without the written permission of Samsung Electronics Co., Ltd. is strictly forbidden.
Samsung Electronics Co., Ltd. shall not be liable for errors contained herein or for incidental or consequential damages in connection with the furnishing, performance, or use of this material.
Samsung is the registered trademark of Samsung Electronics Co., Ltd.; Microsoft, Windows and Windows NT are registered trademarks of Microsoft Corporation; VESA, DPMS and DDC are registered trademarks of Video Electronics Standard Association; the ENERGY STAR® name and logo are registered trademarks of the U.S. Environmental Protection Agency (EPA). As an ENERGY STAR® Partner, Samsung Electronics Co., Ltd. has determined that this product meets the ENERGY STAR® guidelines for energy efficiency. All other product names mentioned herein may be the trademarks or registered trademarks of their respective owners.
Class B
This device is a Class B digital apparatus.
For Safety and EMC compliance guide, you may refer to "Regulatory" Guide.
Manufactured under license from Dolby Laboratories "Dolby" and the double-D symbol are trademarks of Dolby Laboratories.

BBE High Definition Sound is the core sound enhancement technology licensed by BBE Sound and featured in the BBE Sonic Maximizer range of professional audio signal processors.
LCD Monitors and TVs may have image retention when switching from one image to another especially after displaying a stationary image for a long time.
This guide is to demonstrate correct usage of LCD products in order to protect them from Image retention.
What is Image retention?
During normal operation of a LCD panel, pixel image retention doesn't occur. However, if the same image is displayed for a long time, a slight difference in electric charge accumulates between the two electrodes which encase the liquid crystal. This may cause the liquid crystal to build up in a certain areas of the display. Thus, the previous image is retained when switching to a new video image. All display products, including LCD, are subject to image retention. This is not a product defect.
Please follow the suggestions below to protect your LCD from image retention
Power Off, Screen Saver, or Power Save Mode Ex)
- Turn the power off when using a stationary pattern.
- Turn the power off for 4 hours after 24 hours in use
- Turn the power off for 2 hours after 12 hours in use
• Use a Screen saver if possible
Screen saver in one color or a moving image is recommended. - Set the Monitor to power off with the PC Display Properties Power Scheme.
- Suggestions for specific applications
Ex) Airports, Transit Stations, Stock Markets, Banks, and Controlling Systems We recommend that you follow set up of your display system program as below:
- Display Information together with Logo or Moving image cycle.
Ex) Cycle : Display Information for 1 hour followed by a
Display Logo or moving image for 1 minute.
Change the Color Information periodically (Use 2 different colors).
Ex) Rotate the Color Information with 2 colors every 30 minutes.
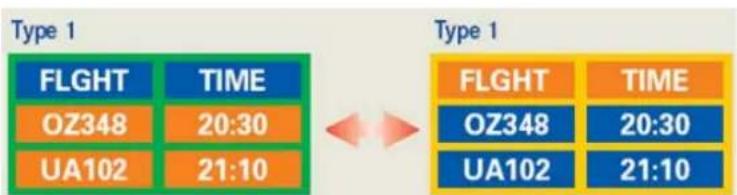
text_image
Type 1 FLIGHT TIME OZ348 20:30 UA102 21:10 Type 1 FLIGHT TIME OZ348 20:30 UA102 21:10Avoid using a combination of characters and background color with large difference in luminance.
Avoid using Grey colors, which can cause Image retention easily.
- Avoid: Colors with big difference in luminance (Black & White, Grey) Ex)

text_image
SYSTEM : 245 STATUS : NG SYSTEM : 245 STATUS : NG- Recommended settings: Bright colors with little difference in luminance - Change the characters color and background color every 30 minutes Ex)
- Every 30 minutes, change the characters with movement. Ex)
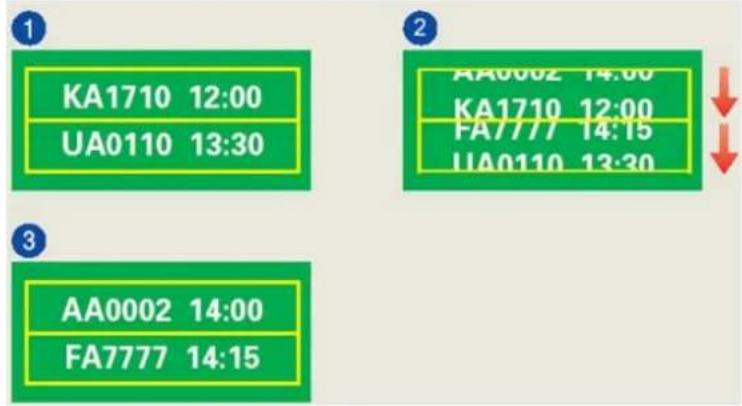
text_image
1 KA1710 12:00 UA0110 13:30 2 AA0002 14:00 KA1710 12:00 FA7777 14:15 UA0110 13:30 3 AA0002 14:00 FA7777 14:15The best way to protect your monitor from Image retention is to set your PC or System to operate a Screen Saver program when you are not using it.
Image retention may not occur when a LCD panel is operated under normal conditions.
Normal conditions are defined as continuously changing video patterns. When the LCD panel is operated for a long time with a fixed pattern (-over 12 hours-), there may be slight difference in voltage between electrodes that work the liquid crystal (LC) in a pixel. The voltage difference between electrodes increases with time, forcing the liquid crystal to lean. When this occurs, the previous image may be seen when the pattern is changed.
To prevent this, the accumulated voltage difference must be decreased.
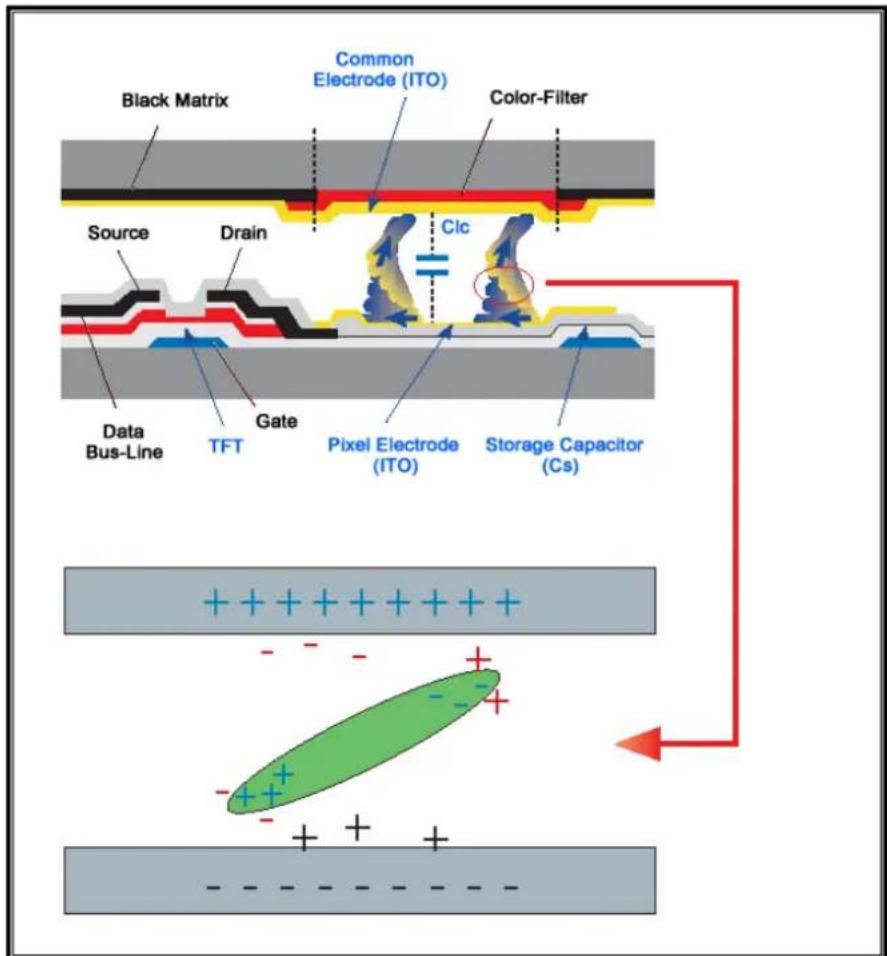
text_image
Black Matrix Common Electrode (ITO) Color-Filter Source Drain CIC Data Bus-Line TFT Gate Pixel Electrode (ITO) Storage Capacitor (Cs) +++Our LCD Monitor satisfies ISO13406-2 Pixel fault Class II
Correct Disposal of This Product (Waste Electrical & Electronic Equipment) - Europe only
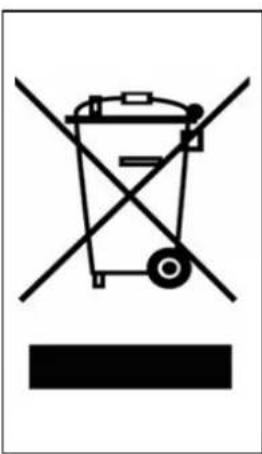
natural_image
Symbol of a trash bin crossed with a diagonal line, no text or numbers present(Applicable in the European Union and other European countries with separate collection systems)
This marking shown on the product or its literature, indicates that it should not be disposed with other household wastes at the end of its working life. To prevent possible harm to the environment or human health from uncontrolled waste disposal, please separate this from other types of wastes and recycle it responsibly to promote the sustainable reuse of material resources.
Household users should contact either the retailer where they purchased this product, or their local government office, for details of where and how they can take this item for environmentally safe recycling.
Business users should contact their supplier and check the terms and conditions of the purchase contract. This product should not be mixed with other commercial wastes for disposal.