
YP-P2JQB - Mp3 player SAMSUNG - Free user manual and instructions
Find the device manual for free YP-P2JQB SAMSUNG in PDF.


| Product Type | MP3 Player (Multimedia Player) |
| Brand | Samsung |
| Model | YP-P2JQB |
| Dimensions (W x H x D) | 52 x 100 x 9.95 mm |
| Weight | 86 g |
| Display | Color LCD Touch Screen |
| Battery Capacity | 830 mAh (built-in) |
| Charging Time | Approximately 4.5 hours |
| Music Play Time | Up to 35 hours (MP3 128kbps, Volume 20, Normal sound mode) |
| Video Play Time | Up to 5 hours |
| Audio Formats | MP3, WMA, AAC |
| Video Formats | SVI, WMV9 |
| Image Formats | JPG (Baseline only) |
| FM Radio | Yes (87.5–108.0 MHz) |
| Bluetooth | Yes (Version 2.0, supports stereo headset, file transfer, mobile phone) |
| USB | USB 2.0 |
| Earphone Output | 20mW/Ch (based on 16Ω) |
| Signal-to-Noise Ratio | 89 dB |
| Frequency Range | 20 Hz – 20 kHz |
| Operating Temperature | -5°C to 35°C (23°F to 95°F) |
| Sound Enhancement | DNSe (Digital Natural Sound Engine) |
| Touch Screen Navigation | Yes (tap and slide gestures) |
| Accessories Included | Earphones, USB Cable, Installation CD, Easy Holder, LCD Protective Film |
| PC Software | EmoDio (for file transfer and organization) |
Frequently Asked Questions - YP-P2JQB SAMSUNG
User questions about YP-P2JQB SAMSUNG
0 question about this device. Answer the ones you know or ask your own.
Ask a new question about this device
Download the instructions for your Mp3 player in PDF format for free! Find your manual YP-P2JQB - SAMSUNG and take your electronic device back in hand. On this page are published all the documents necessary for the use of your device. YP-P2JQB by SAMSUNG.
USER MANUAL YP-P2JQB SAMSUNG
Thank you for purchasing this Samsung product.
To receive a more complete service, please register your product at
www.samsung.com/global/register

features of your new MP3 Player
Good looking. Smart. Reliable. And lots of fun. Your new MP3 player is all this and more. Its state-of-the-art technology delivers rich sound, and vibrant pictures. You'll love your new MP3 player, whether you're exercising, downloading your favorite tunes, watching videos, or even listening to FM Radio.
Use it once, and you'll wonder how you ever lived without it.
PUTTING THE "MULTI" IN MULTIMEDIA
We call it an MP3 player, but it's much more than that. It allows you to view pictures, text, videos and listen to FM radio.
The built-in Bluetooth wireless technology turns your MP3 player into your own personal network.
TOUCH NAVIGATION!
You can tap on the touch screen to navigate through the menus.
COLOR LCD SCREEN DESIGN
Vivid color and images are delivered on the wide LCD screen.
WHERE FORM MEETS FUNCTION
Sure, it's sleek and good-looking. But it's easy to hold and use, too.
EASY SEARCH!
You can search for fi les with the easy-to-use File Brower, and also navigate through menus while listening to music.
LONGER PLAY TIME AND SHORTER DOWNLOADING!
A fully charged battery can play up to 35 hours of music and 5 hours of video.
Download times are shorter. Because of its USB 2.0 capability, the player is much faster than models with USB 1.1.
ACOUSTIC WONDER
Your new MP3 player has built-in DNSe ^™ (Digital Natural Sound engine), Samsung's unique sound technology created to deliver richer, deeper sound for an unbelievable listening experience.
safety information
What the icons and signs in this user manual mean :
 WARNING WARNING | Means that death or serious personal injury is a risk. |
 CAUTION CAUTION | Means that there is a potential risk for personal injury or material damage. |
 CAUTION CAUTION | To reduce the risk of fi re, explosion, electric shock, or personal injury when using your MP3 Player, follow these basic safety precautions: |
 NOTE NOTE | Means hints or referential pages that may be helpful to operate the player. |
 | Do NOT attempt. |
 | Do NOT disassemble. |
 | Do NOT touch. |
 | Follow directions explicitly. |
 | Unplug the power plug from the wall socket. |
 | Call the service center for help. |
These warning signs are here to prevent injury to you and others.
Please follow them explicitly.
After reading this section, keep it in a safe place for future reference.
safety information
This manual describes how to properly use your new mp3 player. Read it carefully to avoid damaging the player and injuring yourself. Pay particular attention to the following serious warnings:
PROTECT YOURSELF


- Do not disassemble, repair, or modify this product on your own.
- Do not get the product wet or drop it in water. If the product gets wet, do not switch it on because you could get an electric shock. Instead, contact a Samsung Customer Service Center near you.
- Do not use the product when it thunders with lightening. Otherwise, it will cause malfunction or a risk of electric shock.

- Do not use the earphones while you are driving a bicycle, automobile or motorcycle.
It can cause a serious accident, and furthermore, is prohibited by law in some areas.
Using the earphones while walking or jogging on a road, in particular, on a crosswalk can lead to a serious accident.
- For your safety, make sure the earphone cable does not get in the way of your arm or other surrounding objects while you are taking exercise or a walk.

- Do not place the product in damp, dusty, or sooty areas because these environments could lead to fire or electric shock.
PROTECT YOURSELF

- Using earphones or headphones for an extended time may cause serious damage to your hearing.
If you are exposed to sound louder than 85db for an extended time, you may adversely affect your hearing. The louder the sound is, the more seriously damaged your hearing may be (an ordinary conversation is between 50 to 60db and road noise is approximately 80db). You are strongly advised to set the volume level to medium (the medium level is usually less than 2/3 of the maximum).
- If you feel a ringing in the ear(s), lower the volume or stop using the earphones or headphones.
PROTECT YOUR MP3 PLAYER

- Do not leave the player in temperatures above 95°F (35°C), such as a sauna or a parked car.
- Do not cause excessive impact on the player by dropping it.
- Do not place heavy objects on top of the player.
■ Prevent any foreign particles or dust from entering into the product.
- Do not place the product near magnetic objects.

- Be sure to backup important data. Samsung is not responsible for data loss.
- Use only accessories provided by or approved by Samsung.

- Do not spray water on the product. Never clean the product with chemical substances such as benzene or thinner, as it may cause fire, electric shock or deteriorate the surface.

- Failure to follow these instructions may lead to physical injuries or damage to the player.

- When printing this user manual, we recommend that you print in color and check "Fit to Page" in the print option for better viewing.
contents
THE BASICS
10
10 What's included
11 Your MP3 Player
13 Screen displays
17 Using the touch screen
21 Charging the battery
22 Caring for the battery
22 Turning the Power on & off
23 Playing a video file
23 Controlling the volume
24 Disabling the buttons
25 Browsing for fi les using "File Browser"
25 Deleting fi les with "File Browser"
26 Changing the settings and preferences
26 Menu Style Settings
29 Sound Settings
30 Display Settings
31 Language Settings
33 Time Settings
34 System Settings
38 Resetting the system
EMODIO
39
39 PC requirements
40 Installing EmoDio
41 Transferring fi les to the player with EmoDio
contents
WATCHING A VIDEO

44 Pausing
45 To move to a specific frame
46 To play the previous video fi le
46 To play the next video fi le
47 Using the video menu
LISTENING TO MUSIC

54 Listening by category
56 Pausing
56 Playing from the beginning of the current track
56 Playing the previous track
57 Playing the next track
57 Searching within a track
58 Repeating a section
59 To view the album cover and the album information simultaneously
60 Creating a playlist using EmoDio
60 Creating a playlist
61 Adding music fi les to a playlist you've created
62 Transferring a playlist to your player using EmoDio
63 Creating a playlist on your MP3 player
64 Playing a playlist
65 Deleting a fi le from the playlist
65 Deleting all fi les from the playlist
66 Using the music menu
contents
VIEWING PICTURES

76 Viewing pictures
77 Using the picture menu
LISTENING TO FM RADIO

82 To use the mute function
83 To search for FM stations
84 Using the FM radio menu
USING THE DATACAST

90 Registering a channel
91 Creating a new channel group
91 Transferring a datacast from
92 Viewing Datacasts
93 Reading text
94 Using the text menu
98 Playing video games
102 Setting the alarm
105 Viewing the calendar
106 Viewing the address book
107 Viewing the world clock
108 Using the Calculator
109 Voice recording
111 Viewing the World Subway Map
contents
USING BLUETOOTH
112
112 What is bluetooth?
113 Using a Bluetooth stereo headset
116 Using a Bluetooth mobile phone
122 Transferring files to/from a bluetooth device
127 Using the Bluetooth menu
128 Bluetooth settings
TROUBLESHOOTING
130
130 Troubleshooting
APPENDIX
133
133 Menu tree
134 Product specifications
136 License
the basics
WHAT'S INCLUDED
Your new MP3 player comes with these accessories. If you're missing any of these items, please contact a Samsung Customer Customer Service Centre near you.
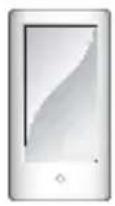
Player

Earphones
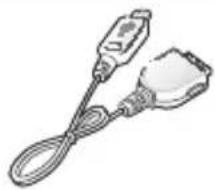
natural_image
Illustration of a cable and plug connector (no text or symbols)USB Cable
Installation CD
Easy Holder
LCD
Protective
Film
The accessories in your box may look slightly different to those pictured.
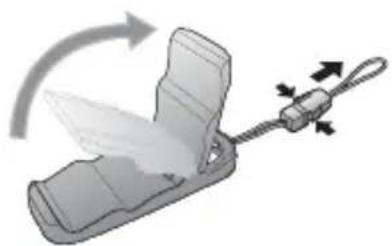
Using the Easy Holder
Mount the player onto the easy holder in a flat surface place. Doing this, you can enjoy video without holding the player.
natural_image
Illustration of a handheld device with a curved arrow indicating rotation or motion (no text or symbols)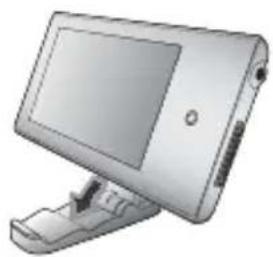
natural_image
Illustration of a silver electronic device with a screen and stand (no text or symbols visible)
- This is not a fixed holder, so be careful not to shake it.
10 _ the basics
text_image
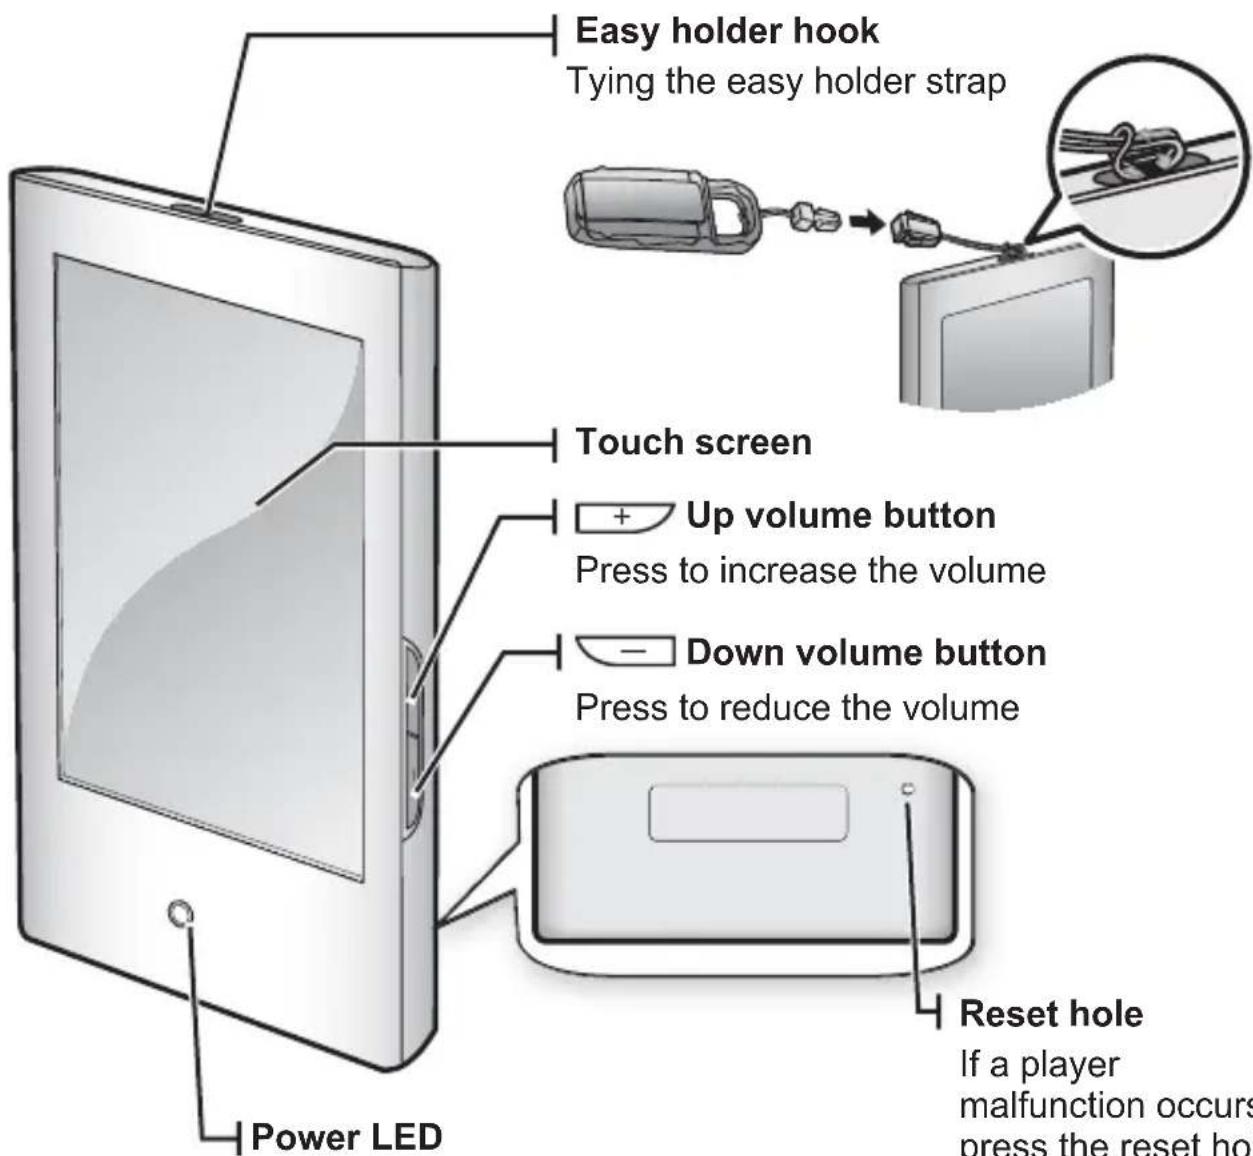
Easy holder hook Tying the easy holder strap Touch screen + Up volume button Press to increase the volume - Down volume button Press to reduce the volume Power LED Reset hole If a player malfunction occurs press the reset holeThe Power LED is lit in red while the battery is being charged. When done, it turns green.
If a player malfunction occurs, press the reset hole with a pointed object to re-initialize the system.
the basics _ 11
YOUR MP3 PLAYER (Continued)
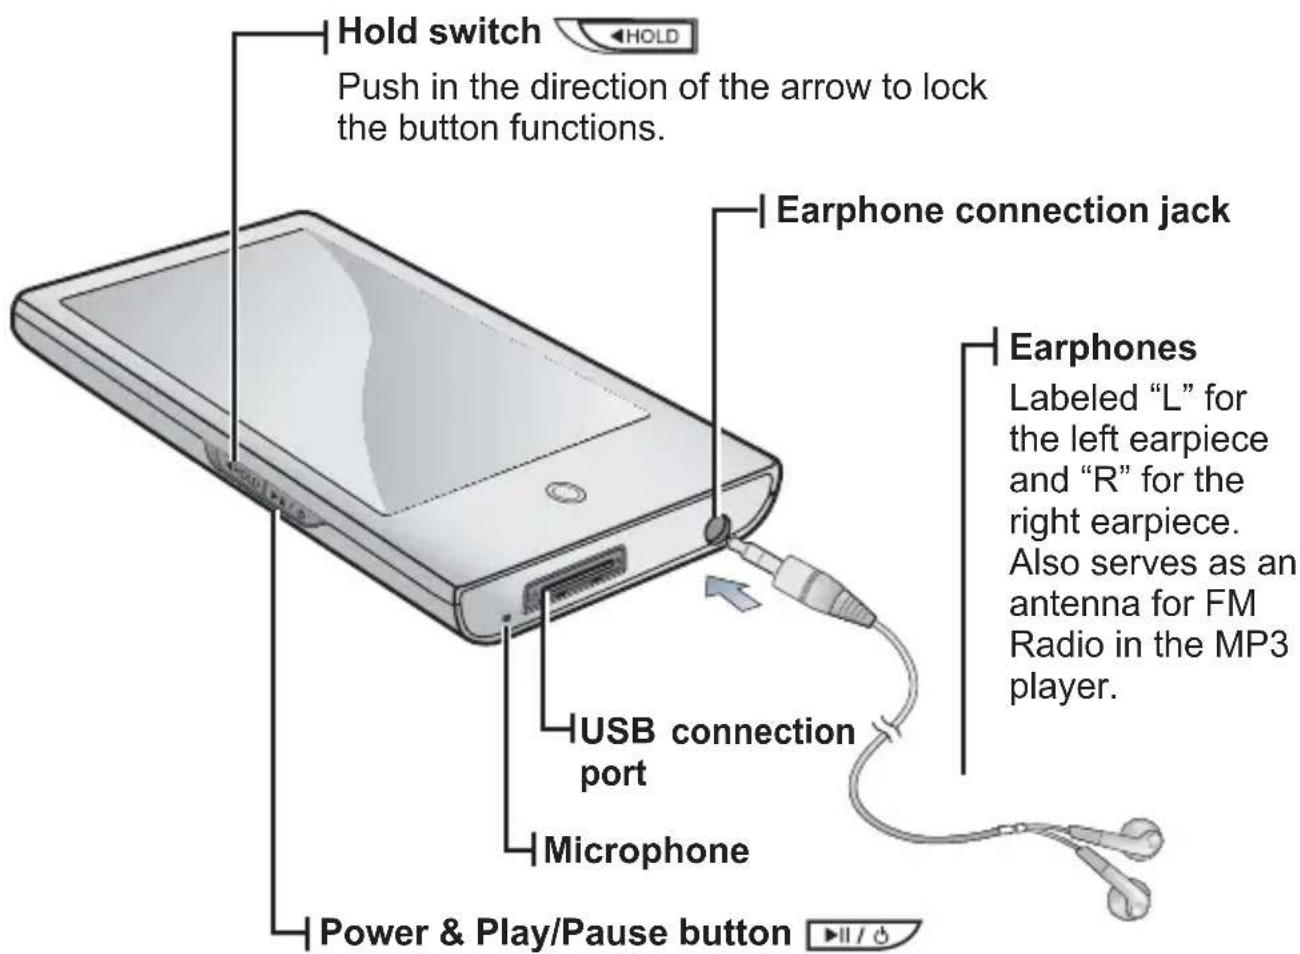
text_image
Hold switch Push in the direction of the arrow to lock the button functions. Earphone connection jack Earphones Labeled "L" for the left earpiece and "R" for the right earpiece. Also serves as an antenna for FM Radio in the MP3 player. USB connection port Microphone Power & Play/Pause buttonPress for play/pause.
Press and briefly hold for power on/off.
12 _ the basics
Video
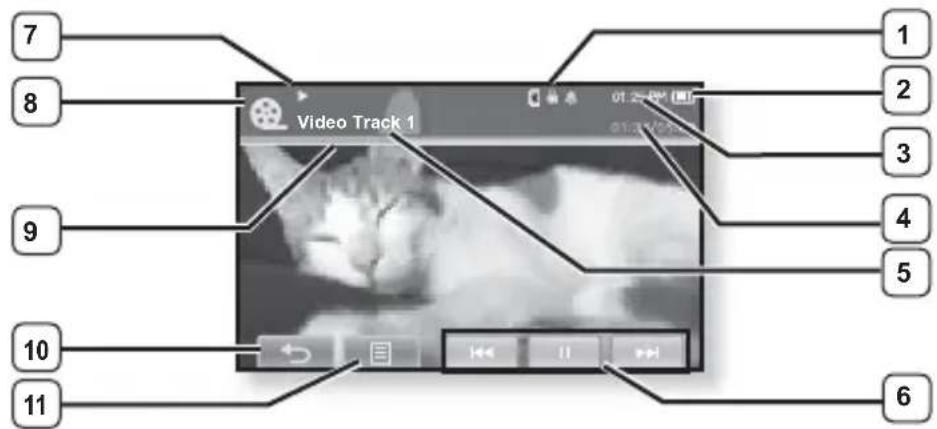
text_image
7 8 9 10 11 1 2 3 4 5 6 Video Track 1| 1 | Bluetooth/Lock/Alarm Indicator | 7 | Play/Pause, Search Indicator |
| 2 | Battery Status | 8 | Video Mode Indicator |
| 3 | Current Time | 9 | Play Status Bar |
| 4 | Current /Total Play Time | 10 | Back Icon |
| 5 | File Name | 11 | Menu Icon |
| 6 | Play/Pause, Search Icon |

NOTE
- The screen pictures are for illustration purposes only. The actual screen may differ.
■ Information and icons on the current video playback will disappear shortly. Tap on the screen if you want to display the video playback information and icons again.
SCREEN DISPLAYS (Continued)
Music
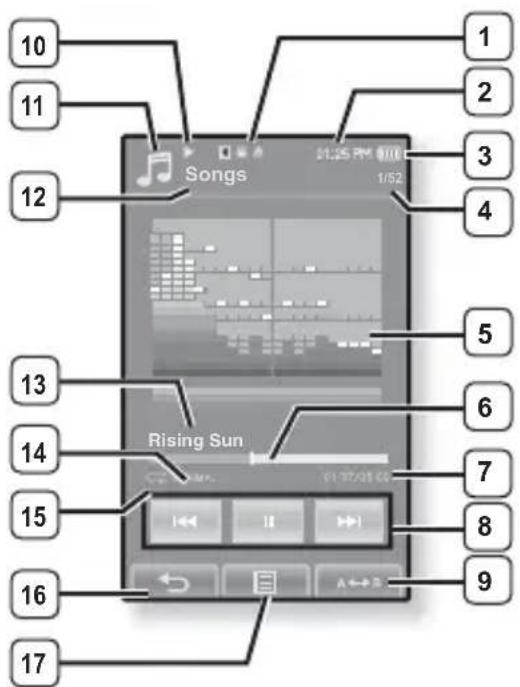
text_image
10 11 12 Songs Rising Sun 1/52 1 2 3 4 5 6 7 8 9 10 11 12 13 14 15 16 171 Bluetooth/Lock/Alarm Indicator
2 Current Time
3 Battery Status
4 Current track playing / Total number of tracks Indicator
5 Music Play Screen
6 Play Status Bar
7 Current /Total Play Time
8 Play/Pause, Search Icon
9 A-B Repeat Icon
10 Play/Pause, Search Indicator
11 Music Mode Indicator
12 Parent Menu Indicator
13 Music Title
14 DNSe Mode Indicator
15 Play Mode Indicator
16 Back Icon
17 Menu Icon
SCREEN DISPLAYS (Continued)
Picture
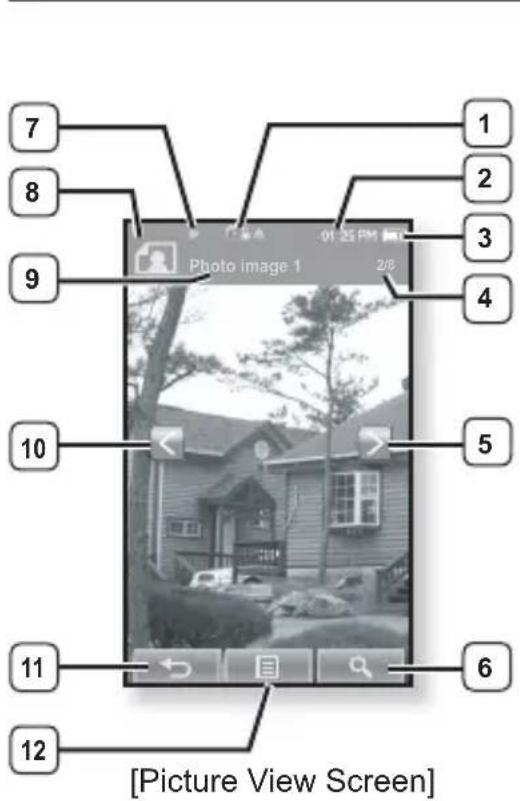
text_image
7 8 9 Photo image 1 10 11 12 [Picture View Screen] 1 2 3 4 5 6| 1 | Bluetooth/Lock/Alarm Indicator |
| 2 | Current Time |
| 3 | Battery Status |
| 4 | Current fi le /Total number of fi les Indicator |
| 5 | Next Image Icon |
| 6 | Zoom Icon |
| 7 | Music Play Status |
| 8 | Picture Mode Indicator |
| 9 | File Name |
| 10 | Previous Image Icon |
| 11 | Back Icon |
| 12 | Menu Icon |

■ Information and icons in the current picture display will disappear shortly. Tap on the screen if you want to display the picture information and icons again.
SCREEN DISPLAYS (Continued)
FM Radio
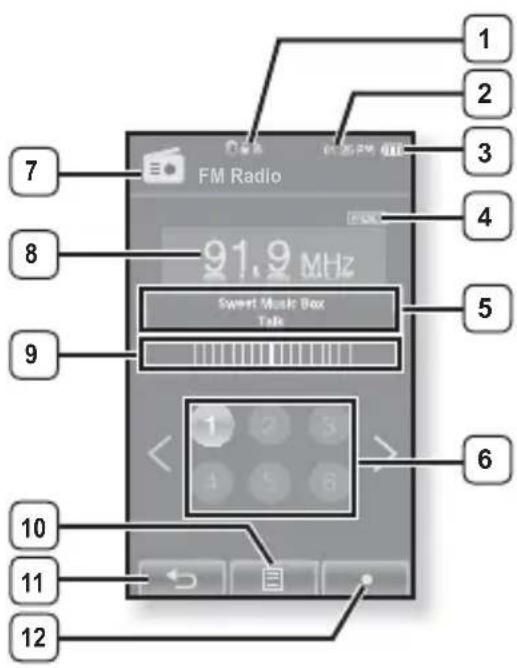
text_image
1 2 3 4 5 6 7 8 9 10 11 12 FM Radio 91.9 MHz Sweet Music Box Talk1 Bluetooth/Lock/Alarm Indicator
2 Current Time
3 Battery Status
4 Manual/Preset Indicator
5 RDS Indicator
6 Preset Number Icon
7 Radio Mode Indicator
8 Current Frequency(MHz) Indicator
9 Frequency location Indicator
10 Menu Icon
11 Back Icon
12 Record Icon

NOTE
- What is RDS?
Radio Data System(RDS) provides the reception and display of messages such as broadcasting information. The program information such as News, Sports or Music, or the broadcasting station information is displayed on the screen.
- If FM signal strength is weak, the RDS information might not be displayed.
Tap on the touch screen with your fi ngertip.
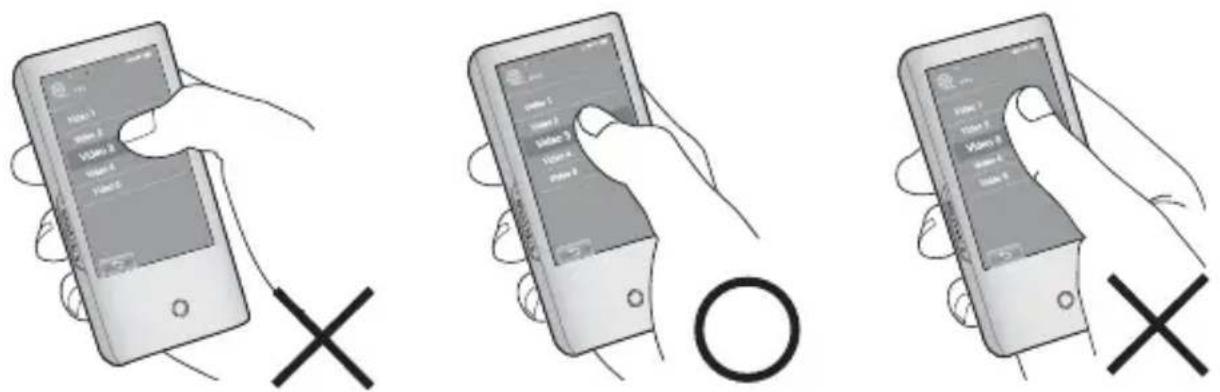

- Do not use force when touching the touch screen, as it may cause damage to the screen.
- To avoid damage to the touch screen, do not use any object other than your fingers to operate it.
- Do not tap on the touch screen if your fingers are not clean.
- Do not tap on the touch screen with gloves on.
- The touch screen may not function if you use a fingernail or other instruments such as a ballpoint pen.
USING THE TOUCH SCREEN (Continued)
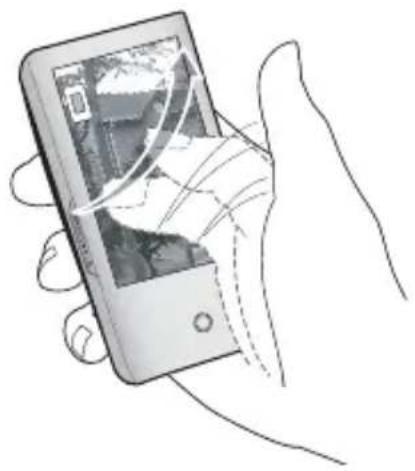
You can tap on the screen in four directions – up, down, left and right, according to the function.
ex) Play status bar for music
How To 1
Tap on and hold the play status bar on the screen and move your finger to a desired point before releasing it.
■ The player resumes playing at the point of release.
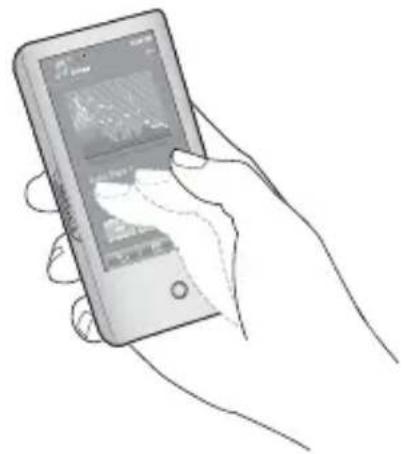
natural_image
Line drawing of a hand holding a smartphone with a screen displaying abstract data (no text or symbols visible)How To 2
Tap on a desired point in the play status bar.
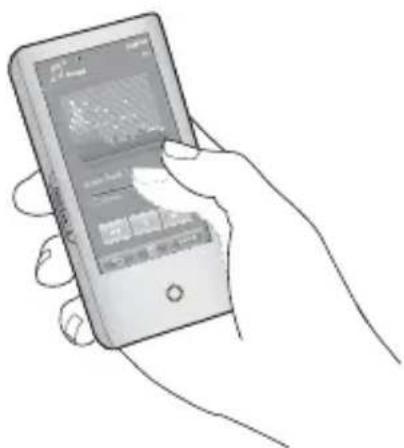
natural_image
Hand holding a smartphone displaying a digital interface (no visible text or symbols on screen)USING THE TOUCH SCREEN (Continued)
ex) Zoomed image
How To 3
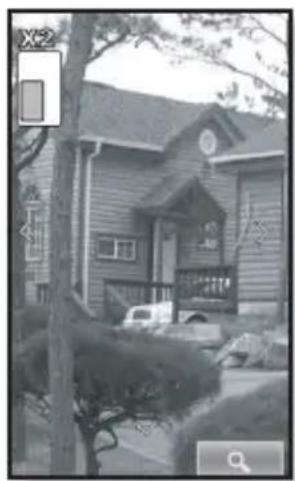
Tap on and hold the screen and slide your finger in the desired direction before releasing it as in the figure below.
- In zoom mode, move your finger in the desired direction. The picture moves and appears in that direction.
natural_image
Illustration of a hand holding a smartphone displaying a small screen (no text or symbols visible)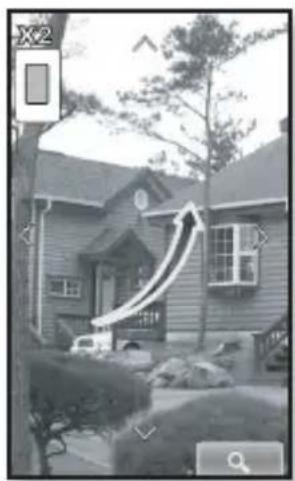
natural_image
Black-and-white photo of a house with a large upward arrow overlay, no visible text or symbols
natural_image
Exterior view of a wooden house with a tree and parked vehicle in front (no visible text or symbols)USING THE TOUCH SCREEN (Continued)
ex) Play the previous/next video fi le
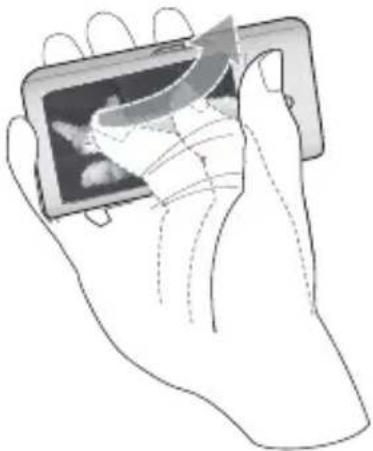
How To 4
Slide your finger to the left or right.
- Left: Moves to the next file (depending on the horizontal stroke setting. See page 52).
- Right: Moves to the previous file (depending on the horizontal stroke setting. See page 52).
natural_image
Illustration of a hand holding a smartphone with a curved arrow pointing to the screen (no text or symbols)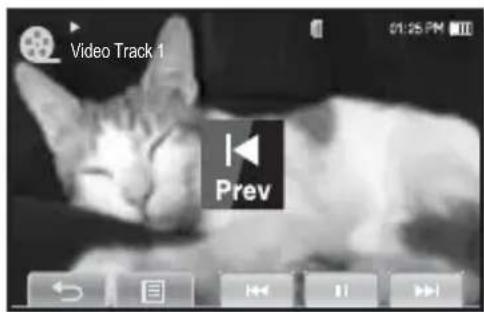
text_image
Video Track 1 Prev 01:25 PMCHARGING THE BATTERY
Charge it before using the player for the first time and when you haven't used it for a long time.
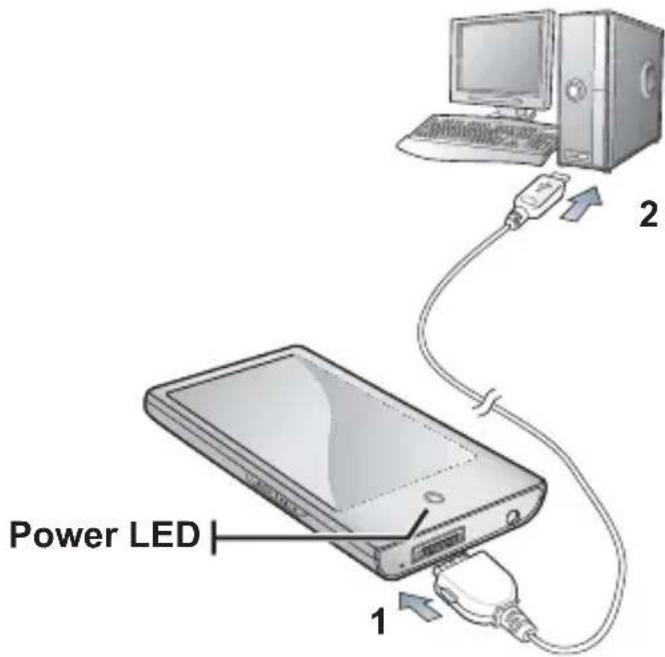
The battery for your mp3 player will fully charge in about 4 and a half hours, although total charging time varies depending on your PC environment.
text_image
Power LED 1 2-
Connect the larger end of the USB cable to the USB Connection Port on the bottom of the player.
-
Connect the USB cable to the USB port ( ) on your PC.
- The Power LED is lit in red while the battery is being charged. When done, it turns green.
CARING FOR THE BATTERY
Your battery will last longer if you follow these simple guidelines for caring for and storing it.
- Recharge and store the battery within the temperature range of 5^ 35^ (40°F\~95°F).
- Do not overcharge (longer than 12 hours). Excessive charging or discharging may shorten the battery's life.
- Battery life naturally shortens slowly over time.

NOTE
- If you are charging the player while it is connected to a laptop computer, make sure the laptop's battery is also fully charged or that the laptop is plugged into its power source.
- The battery is not charged in the PC Standby mode or when the hardware is safely removed.

CAUTION
The rechargeable battery incorporated in this product is not user replaceable. For information on its replacement, please contact your service provider.
Turning the Power on
Press and briefly hold the ▶/// ○ button.
■ Power is turned on.
Turning the Power off
Press and briefly hold the ▶/// ○ button.
■ Power is turned off.

NOTE
- Your mp3 player will be automatically turned off when none of the buttons and icons have been pressed for a specific length of time in the pause mode. The factory setting for
is 1 minute, but you can change this length of time. See page 34 for more information. - For using
in the main menu, refer to page 27.
22 _ the basics
text_image
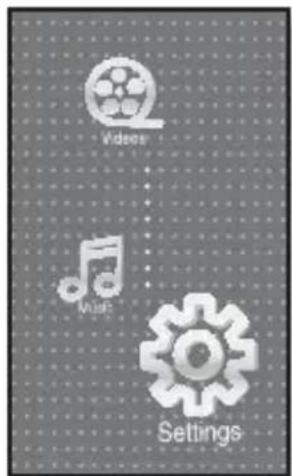
Videos Music SettingsLoad video files onto your new mp3 player using EmoDio.
Learn more about EmoDio on page 41.
- Tap the icon on the main menu screen.
■ The video list appears.
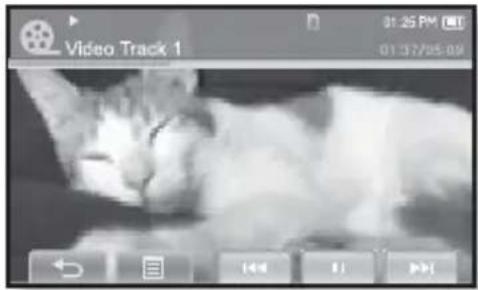
- Select a video file to play and tap on it.
- The selected video file starts to play horizontally.
text_image
Video Track 1 01:25 PM 01:37/05:09
NOTE
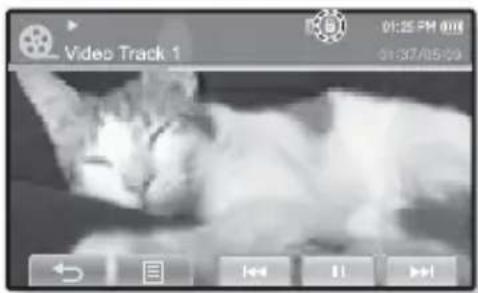
- Tap the [→] icon to move to the previous screen. Press and briefly hold the [→] icon to move to the main menu screen.
CONTROLLING THE VOLUME
You can adjust the volume while a file is stopped or in its playback.
How To 1
Press the ,+button:-
- The volume control bar appears. The range of volume is set between 0 to 30.
- Press the + button to increase the volume or the - button to decrease it.
How To 2
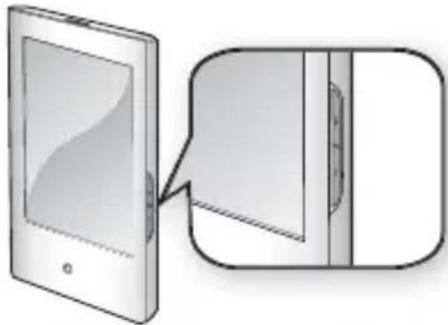
Slide your finger up or down from the middle right of the screen.
■ The volume control bar appears.
■ Sliding your finger upward will increase the volume and downward will decrease it.
natural_image
Diagram showing a device with a screen connected to a door panel, with an arrow pointing to the screen (no text or symbols present)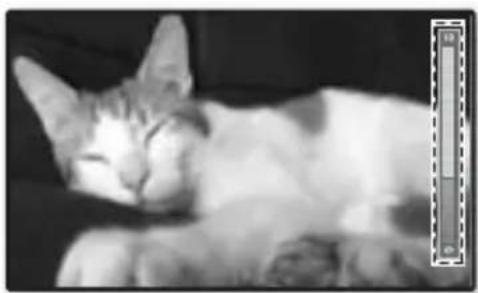
natural_image
Black-and-white photo of a sleeping tabby cat resting on its back (no text or symbols visible)the basics
DISABLING THE BUTTONS
The hold function disables all the other buttons and icons on the mp3 player, so that if you accidentally bump one-while working out, for example-your music won't be interrupted.
- Push the HOLD switch in the direction of the arrow.
- Push the HOLD switch in the opposite direction of the arrow to release the hold function.
text_image
Video Track 1 01:25 PM 008 01:37/05:09
- If
BROWSING FOR FILES USING "File Browser"
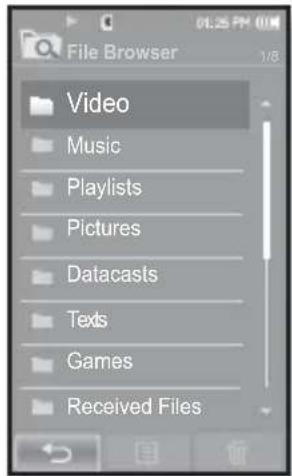
Search easily for files using the "File Browser" function.
- Tap the 📄 icon on the main menu screen.
- The
-
Select a desired folder.
-
Tap on a selected folder to bring up the file list.
- Tap the [] icon to move to the previous screen.
-
Select a desired file.
-
Tap on a selected file.
■ The fi le will start playing.
text_image
File Browser Video Music Playlists Pictures Datacasts Texts Games Received Files
-
DELETING FILES WITH "File Browser"
Follow the steps 1-4 above.
- Tap the [图标] icon.
- The delete confirmation window appears.
- Tap
.
■ The selected file is deleted.

- The selected file cannot be deleted while its playing back.

- Once files are deleted, they cannot be recovered.
CHANGING THE SETTINGS AND PREFERENCES
Your mp3 player comes with settings and preferences that were set up at the factory, but you can change these pre-set values to truly customize your player.

- Tap the [] icon to move to the previous screen.
Press and briefly hold the [→] icon to move to the main menu screen.
Menu Style Settings
You can change the menu design and font and delete the background image of the main menu.
- Tap the icon on the main menu screen.
- The
menu appears. - Select
- The
- Tap on a desired menu.
- Set the options you prefer and tap
.
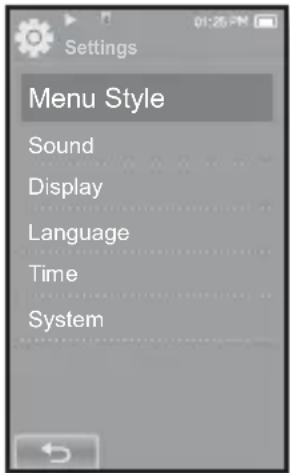
Menu Style Setting Options
text_image
Settings Menu Style Sound Display Language Time System- Menu Design : You can change the style of the main menu screen. Select from
, , , - Font : You can change the font type of the menu language. Select one from 3 font types. In some menu languages, will be disabled.
- Reset My Skin : Initializes the background image of the touch screen to its default image.

- If the
screen is open and you don't push any buttons for about 1 minute, the unsaved settings will be lost, and the player will return to the previous function. - Transferred UCI files using
can be found in
26 the basics further information on UCI, refer to
CHANGING THE SETTINGS AND PREFERENCES (Continued)
Using the Cosmos Menu
How To 1
Position your finger on the touch screen and slide upward or downward. Tap on the icon of the desired main menu.
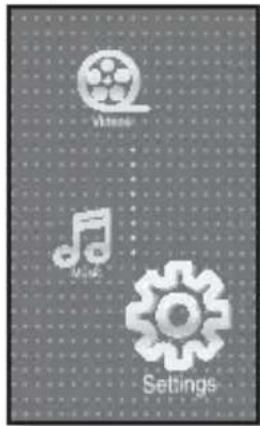
text_image
Video Music Settings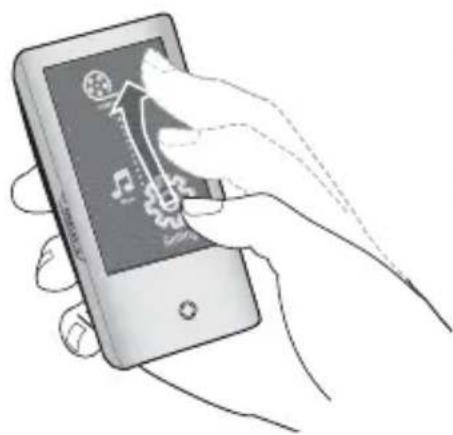
natural_image
Illustration of a hand holding a smartphone displaying a music note and gear icon (no text or symbols)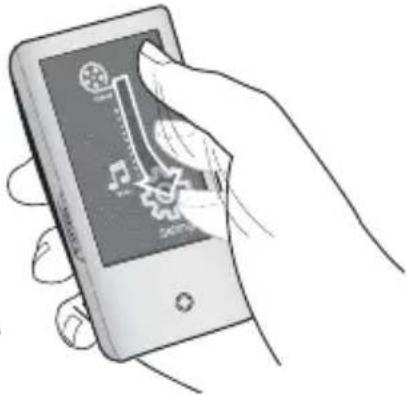
natural_image
Hand holding a smartphone displaying a digital interface with musical notes and icons (no text or symbols visible)How To 2
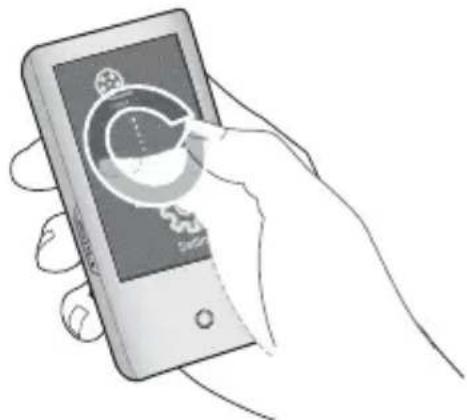
Position your finger on a blank space of the touch screen and circle around softly.
Tap on the icon of the desired main menu.
natural_image
Hand holding a smartphone displaying a circular icon with a gear symbol (no text or symbols on the device screen)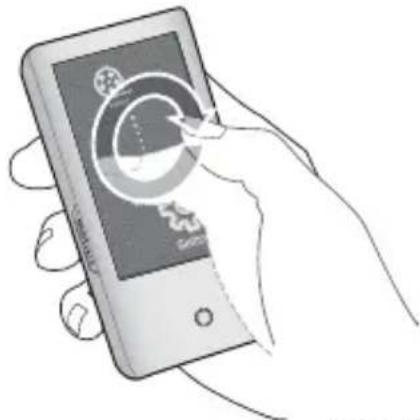
natural_image
Hand holding a smartphone displaying a circular app interface with icons (no text or symbols visible)the basics _ 27
CHANGING THE SETTINGS AND PREFERENCES (Continued)
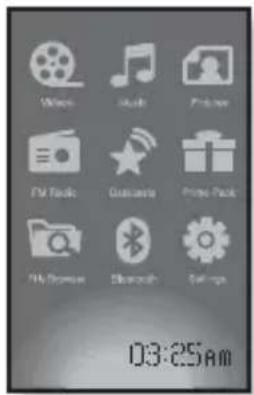
Using the Matrix Menu
Tap on the icon of the desired main menu.
text_image
Windows Audio Photo FM Audio Guidance Printed Pack File Browser Search Settings 03:25am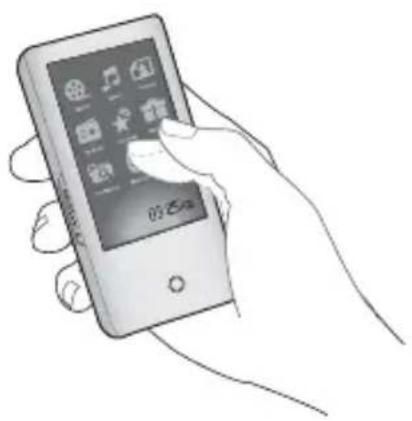
natural_image
Hand holding a handheld electronic device displaying app icons (no text or symbols visible)Using the My Skin Menu
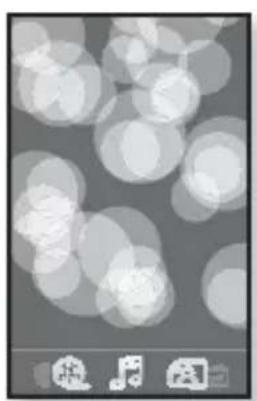
Position your finger on the touch screen and scroll and release left or right by moving your fingertip. Tap on the icon of the desired main menu.
natural_image
Abstract grayscale image with blurred circular shapes and small icons at bottom (no readable text or symbols)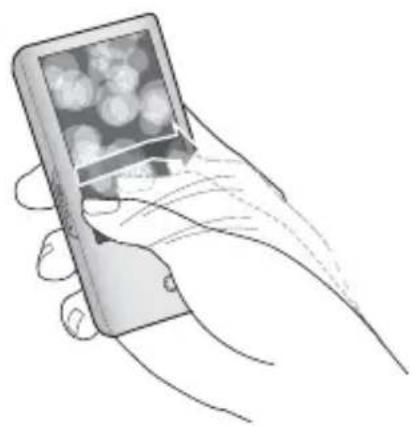
natural_image
Illustration of a hand holding a smartphone with a screen displaying blurred circular graphics (no text or symbols visible)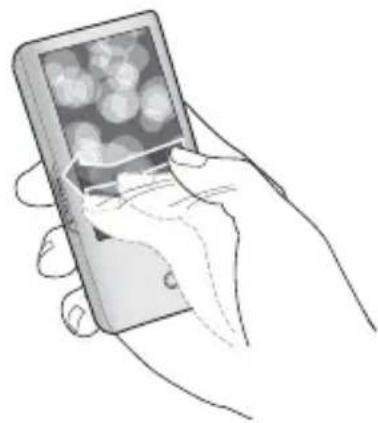
natural_image
Line drawing of a hand holding a smartphone with a blurred background (no text or symbols)28 _ the basics
CHANGING THE SETTINGS AND PREFERENCES (Continued)
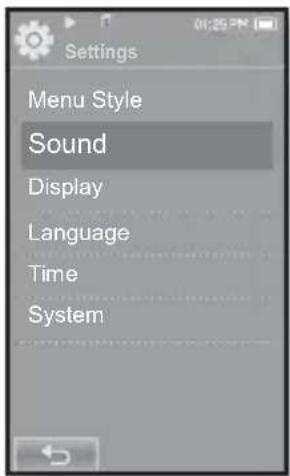
Sound Settings
You can set the master EQ, beep sound, volume limit.
- Tap the icon on the main menu screen.
- The
- Select
and tap on it.
■ The
-
Tap on a desired menu.
-
Set the options you prefer and tap
.
text_image
Settings Menu Style Sound Display Language Time SystemSound Setting Options
- Master EQ : You can optimize sound settings.
Tap the [◀,▶] icon to select the frequency you want to adjust.
The frequencies that can be adjusted are <60Hz>, <150Hz>, <400Hz>, <1.1KHz>, <3.5KHz>, <8KHz> and <14KHz>. Tap the [▼,^] icon to adjust the selected frequency's level and tap
- Beep Sound : Sets the beep sound for touch screen operations to on or off. Select from
- Volume Limit : You can avoid hearing damage by setting the limit of the volume when using the earphone.

- You can not set the
CHANGING THE SETTINGS AND PREFERENCES (Continued)
Display Settings
Change the display off time and brightness of your screen.
- Tap the icon on the main menu screen.
- The
menu appears. - Select
and tap on it. - The
menu appears. - Tap on a desired menu.
- Set the options you prefer and tap
.
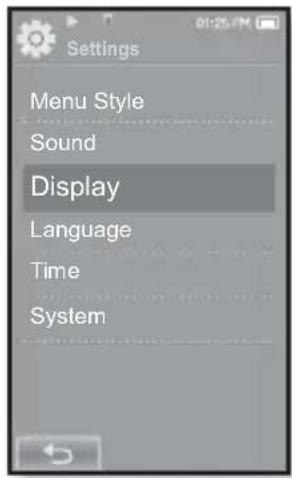
text_image
Settings Menu Style Sound Display Language Time SystemDisplay Setting Options
- Display Off : If no buttons or icons are tapped within the time set shown below, the touch screen will automatically be turned off. Select from <15sec>, <30sec>, <1min>, <3min>, <5min> and
. Press any button to turn it back on. - Brightness: You can adjust the brightness of the screen. Select a level from <0-10>, where 10 is the brightest.
CHANGING THE SETTINGS AND PREFERENCES (Continued)
Language Settings
The menus on your new mp3 player can be set to appear in any one of multiple languages. You can change your preference language easily.
- Tap the icon on the main menu screen.
- The
- Select
and tap on it.
- The
-
Tap on a desired menu.
-
Set the options you prefer and tap
.
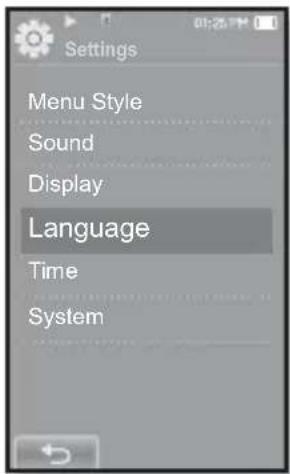
text_image
Settings Menu Style Sound Display Language Time SystemCHANGING THE SETTINGS AND PREFERENCES (Continued)
Language Setting Options
- Menu : Set the menu language. Tap the [▲,▼] icon to move to the previous/next page.
Select from, <한국어>, , , , <日本語>, <简体中文>, <繁體中文>, , <Русский>, , , , , , <ไทย>, <Čeština>, <Ελληνικά>, , , , , , , , , , , <Українська>, or . - Contents : Set the language in which the track information and Text will appear. Tap the [▲,▼] icon to move to the previous/next page. Select from
, , , , , , , , , , , , , , , , , , , , , , , , , , , , , , , or .

The supported languages can be changed or added.
CHANGING THE SETTINGS AND PREFERENCES (Continued)
Time Settings
Setting the time allows you to use the date/time set, date type and even time zone.
- Tap the icon on the main menu screen.
- The
menu appears. - Select
- The
- Tap on a desired menu.
- Set the options you prefer and tap
.
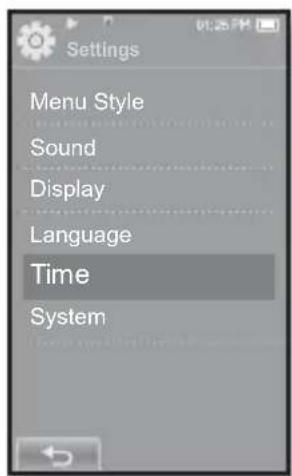
text_image
Settings Menu Style Sound Display Language Time SystemTime Setting Options
- Date/Time Set : Set the current date and time. Set each item of
, , , , and by sliding your finger upward or downward. - Date Type : You can set the time display type for the world clock. Select from
, and . - Time Zone : You can change the current time by selecting an international city specific time zone. You must set the time zone before you can display the world time information. See page 107.
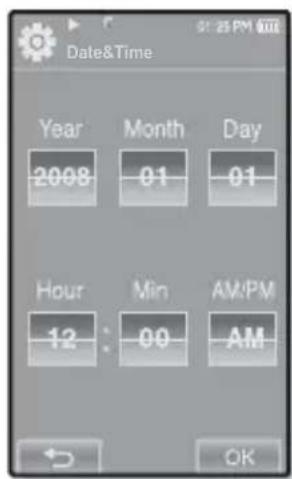
text_image
Date&Time Year Month Day 2008 01 01 Hour Min AM/PM 12: 00 AM OKCHANGING THE SETTINGS AND PREFERENCES (Continued)
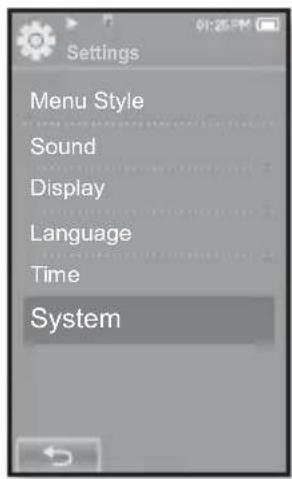
System Settings
System settings such as Sleep, Start Mode, Auto Power Off/On, Password, Hold Option, Default Set, Format and About are available in this menu.
- Tap the icon on the main menu screen.
- The
- Select
and tap on it.
■ The
-
Tap on a desired menu.
-
Set the options you prefer and tap
.
text_image
Settings Menu Style Sound Display Language Time SystemSystem Setting Options
- Sleep : Turns off power automatically after the preset time. Select either
- Start Mode: You can set the start screen displayed when you turn on the player. Select from
- Auto Power Off: Automatically turns power off when there is no button operation after the preset time in the pause mode. Select either <15sec>, <30sec>, <1min>, <3min>, <5min> or
CHANGING THE SETTINGS AND PREFERENCES (Continued)
System Setting Options (Continued)
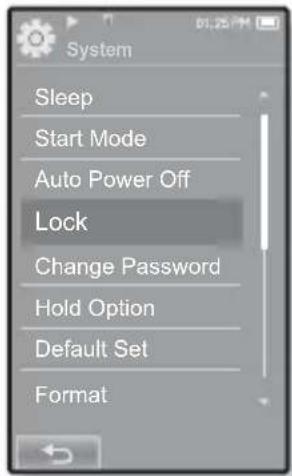
- Lock: Locks your player to prevent unauthorized access, using password protection.
To lock the player, selectand set your password. See page 36.
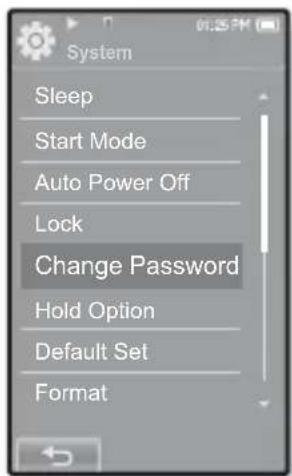
To disable locking, select. - Change Password: You can change the password of the Lock function.
- Hold Option: You can select the hold function to lock all buttons including touch screen or touch screen only. Select either one of
and . See page 24. - Default Set: Returns all settings to the default value. Select either
or . initializes all settings to default. cancels default settings. - Format: Formats the internal memory. Select either
or . Selecting will format the internal memory and delete all files on the player. Selecting does not format the internal memory. Check before formatting it. - About: Checks the firmware version and memory capacity.
- Firmware - Displays the current firmware version.
- Memory - Indicates the remaining memory capacity.

NOTE
■ Regarding the Built-In Memory
1GB=1,000,000,000 bytes : actual formatted capacity may be less as the internal firmware uses a portion of the memory.
CHANGING THE SETTINGS AND PREFERENCES (Continued)
Setting the Lock function
Locks your player to prevent unauthorized access, using password protection.
- Select
in the setting menu and tap on it.
- The
- Select
and tap on it.
- Lock Screen appears.
- Select
and tap .
■ The new password input screen will appear.
- Set the desired 4-digit password and then tap
.
- The confi rm password input screen will appear.
- Enter the same password set in step 4 and tap
.
■ The lock setting is completed.
- Turning power on will activate the Lock function.

NOTE
If
text_image
System Sleep Start Mode Auto Power Off Lock Change Password Hold Option Default Set Format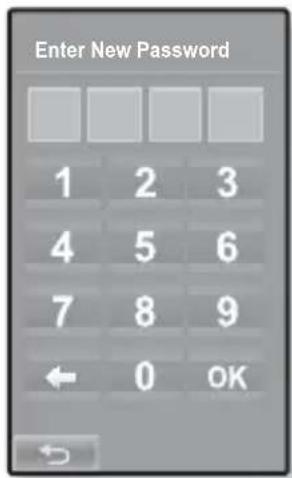
text_image
Enter New Password 1 2 3 4 5 6 7 8 9 ← 0 OKCHANGING THE SETTINGS AND PREFERENCES (Continued)
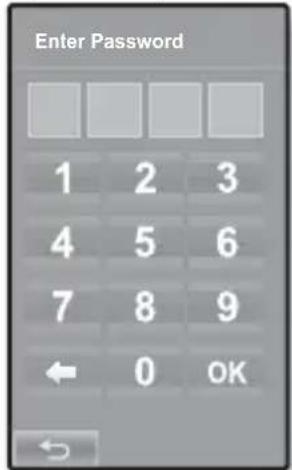
Releasing the Lock function
After setting the Lock function, the password input screen will appear when you turn on the player. Enter your 4-digit password, and tap
-

-

- If you forgot your Lock password, connect to a PC and run the EmoDio and reset the password in
text_image
Enter Password 1 2 3 4 5 6 7 8 9 ← 0 OKChanging Password
- Select
in the setting menu and tap on it.
- The
- Select
and tap on it.
- Password input screen appears.
- Enter the password, and tap
.
- The change password input screen will appear.
- Enter desired 4-digit password and tap
.
■ The confirm password input screen will appear.
- Enter the same password set in step 4 and tap
.
■ The password will be changed.
text_image
System Sleep Start Mode Auto Power Off Lock Change Password Hold Option Default Set FormatRESETTING THE SYSTEM
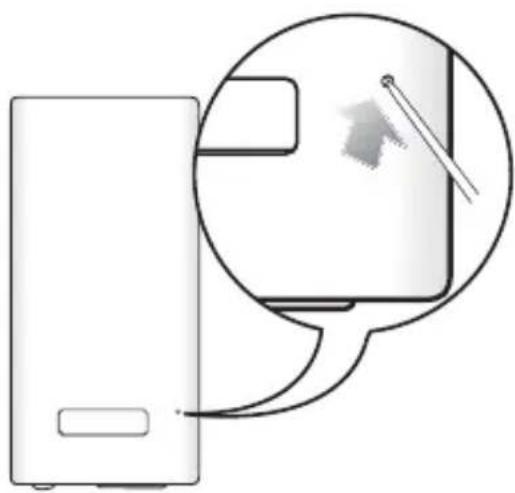
If your mp3 player won't turn on, won't play music, or isn't recognized by your computer when you connect it, you may have to reset the system.
natural_image
Illustration of a server unit next to a speech bubble containing a small diagram (no text or symbols)Press the Reset hole at the rear of the player with a pointed object such as a safety clip.
■ The system will be initialized.
- Your settings and fi les will not be affected.
EmoDio
EmoDio is the easy-to-use software application that helps you organize your fi les on your PC. With your fi les already sorted and organized in EmoDio, you can quickly transfer them to your mp3 without searching your entire hard drive for the right fi le.
PC REQUIREMENTS
Your PC system must meet the following minimum specifications in order to install and run EmoDio:
- Pentium 500MHz or higher
- USB Port 2.0
- Windows XP Service Pack 2 or higher
- DirectX 9.0 or higher
• 100MB of free hard disc space
• CD Rom Drive (2X or higher) - Windows Media Player 10.0 or higher
• Resolution 1024 X 768 or higher - Internet Explorer 6.0 or higher
- 512 MB RAM or higher
INSTALLING EMODIO

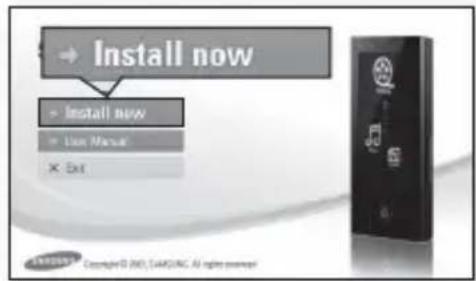
- Ensure that you run the
- Insert the Installation CD provided with the player into the CD-ROM drive of your computer.
text_image
→ Install now → Install now → Use Manual × Exit- Click
.
■ Follow the instruction to start installation.
-
TRANSFERRING FILES TO THE PLAYER WITH EMODIO
text_image
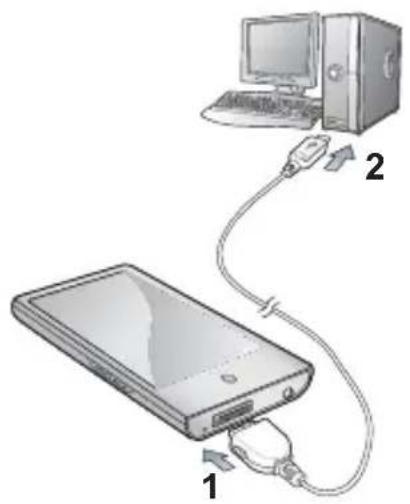
Diagram showing connection between a desktop computer and a device, labeled with components 1 and 2.- Connect the larger end of the USB cable to the USB Connection Port on the bottom of the player.
-
Connect the USB cable to the USB port (•) on your PC.
-
appears on the touch screen of the player. will automatically start when the player is connected to your PC. - If the program does not start automatically, double click the
icon on the desktop.

NOTE
Music recognition technology and related data are provided by Gracenote and Gracenote CDDB® Music Recognition ServiceSM.
- CDDB is a registered trademark of Gracenote. The Gracenote logo and logotype, the Gracenote CDDB logo and logotype, and the “Powered by Gracenote CDDB” logo are trademarks of Gracenote. Music Recognition Service and MRS are service marks of Gracenote.
TRANSFERRING FILES TO THE PLAYER WITH EMODIO (Continued)
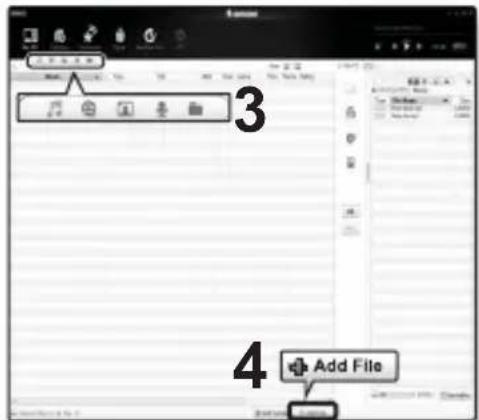
-
Click the icon for the type of file you want to transfer.
-
Click to display music list.
- Click to display video list.
-
Click to display picture list
-
Click
on the bottom of .
- The
- Select the files to add and click
.
- The files are added to the list on the left side the
-
Select the file to transfer from the list on the left side.
-
Click the icon.
■ The file you selected is transferred to the player.
text_image
3 4 Add File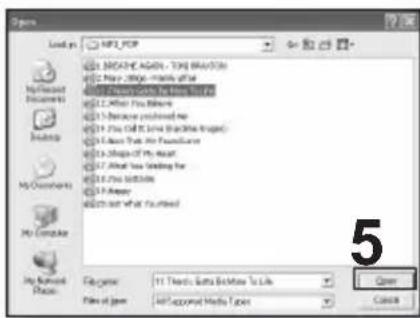
text_image
Open Load in: MP3_PCP MP3_PCP - 100% CHANGE - TOP BRIEFUS 5. Play a copy - mainly off the MP3_PCP file (the image is not available) 6. When the file is deleted 7. Before being inserted to 8. Play all the items (which include: 9. Close then the following 10. Shift to the file 11. About the following for 12. Use the file 13. Apply out what is needed 14. Not what is required My Documents My Computer My Newsp Place File name: 11 Text, Sets BeMade To Use File of jpm: All-Apposed Media Types Open Cancel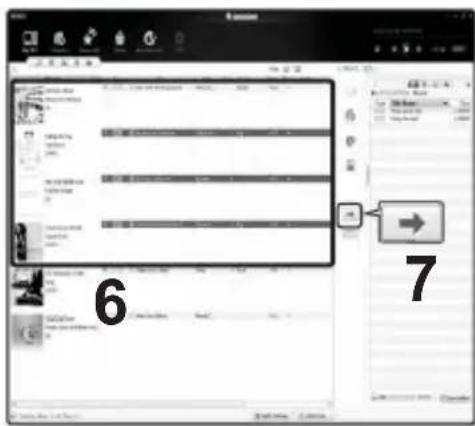
text_image
6 7TRANSFERRING FILES TO THE PLAYER WITH EMODIO (Continued)

- Do not disconnect the USB cable during file transfer. Disconnecting during transfer may damage the player or your PC.
- Connect the player to your computer directly rather than through a USB hub to avoid an unstable connection.

- When transferring a video file to the player using
, it is automatically converted into SVI format before transfer. The file size is automatically adjusted too. - When transferring a picture to the player using
, it is automatically converted into JPG format before transfer. The file size is automatically adjusted, too. - A picture that is transferred to the player without using
can look different on the screen from the original picture. - All functions are disabled during connection.
- If you connect the USB cable to the PC in the Low Battery condition, the player will be charged for several minutes before connecting to the PC.
- EmoDio has a thorough Help function. If you can't find the answer to your question about EmoDio, click
- What is SVI?
Samsung Audio Video interleaving(SVI) is a new video format developed and controlled by Samsung.
watching a video


NOTE
Before you start - Transfer video files to the player using
- Tap the [] icon to move to the previous screen.
Press and briefly hold the [→] icon to move to the main menu screen.
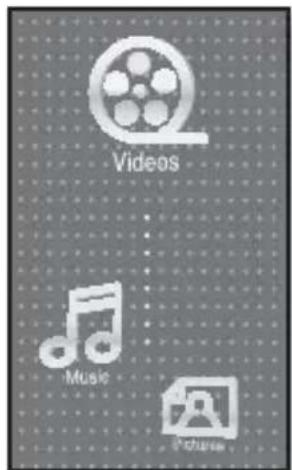
- Tap the icon on the main menu screen.
■ The video list appears. - Select a video file to play and tap on it.
■ The selected video file starts to play horizontally.
text_image
Videos Music PicturePAUSING
- Tap the [ " ] icon during playback.
■ The video playback will be paused.
- Tap the [▶] icon to resume playing.
■ The video will play from the point where it stopped.

NOTE
- Information and icons on the current video playback screen will disappear shortly. Tap on the screen if you want to display the video playback information and icons again.
- When transferring a video file to the player using
, it is automatically converted into SVI format before transfer. The file size is automatically adjusted, too.
44 _ watching a video
TO MOVE TO A SPECIFIC FRAME
How To 1
- In horizontal view, press and briefly hold the [◀◀,▶▶] icon during playback.
- This enables you to move backwards or forwards in the current video file.
- Release the icon when you have moved to the position you want.
■ The video starts playing from the position.
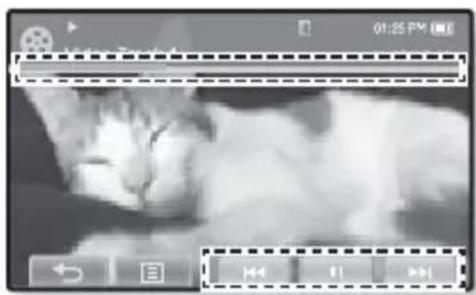
text_image
Screenshot of a mobile app interface showing a weather image with status bar and control buttonsHow To 2
Tap on the point on the video play status bar where you want playback to start.
- The video starts playing from the point you have selected.

NOTE
- Sliding your finger in the left / right direction will move playback forward or backward depending on the Horizontal Stroke setting. See page 52.
TO PLAY THE PREVIOUS VIDEO FILE
How To 1
Tap the [] icon within 3 seconds after the current video started playing.
Tap the [icon] twice 3 seconds after the current video started playing.
How To 2
Slide your finger to the right.
■ This will return to the previous video.
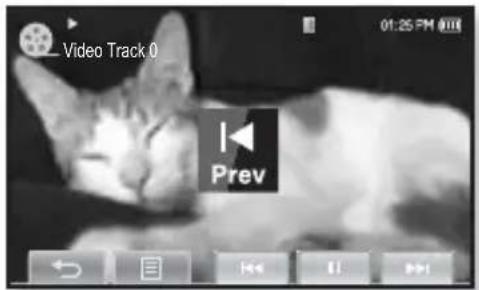
text_image
Video Track 0 Prev 01:25 PMHow To 2
Slide your finger to the left.
- This will move to the next video.
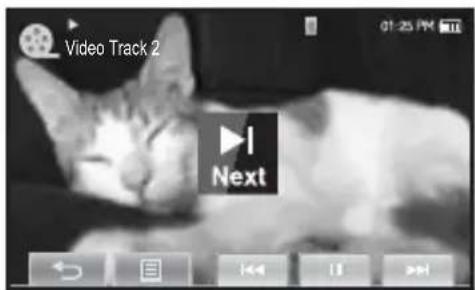
text_image
Video Track 2 01:25 PM NextHow To 2
To set a bookmark
Once you bookmark a specific scene that you want to see again, you can enjoy it at any time you want.
- Tap the [☐] icon at the scene you want during video playback.
- The
- Tap
.
- The
-
Tap
. -
The currently played/stopped point is set to a bookmark.
- You will see the [ | ] symbol on the play status bar.

NOTE
- The Overwrite window appears if there is a bookmark previously set. If you select
, the previously set bookmark is deleted and a new bookmark is added. - A bookmark can be set one for each video file, and you can set a maximum of 100 bookmarks.
- The bookmark point can be slightly different from the actual point.
- Tap the [icon to exit the menu.
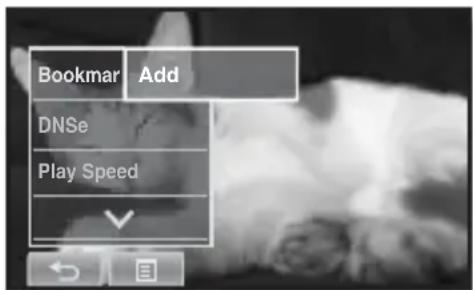
text_image
Bookmark Add DNSe Play SpeedUSING THE VIDEO MENU (Continued)
To move to (play) / remove the bookmark
- Tap the [目] icon on the video playback screen.
- The
- Tap
.
- The
- Tap
or .
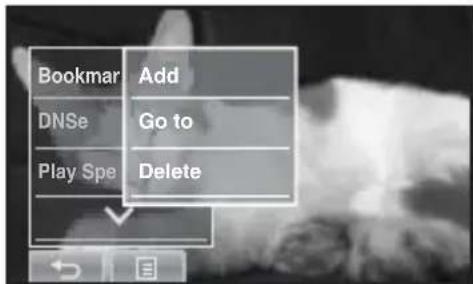
text_image
Bookmark Add DNSe Go to Play Spe Delete- When you selected
-
To set the Digital Natural Sound engine (DNSe)
Select the right sound for each video genre.
- Tap the [目] icon on the video playback screen.
- The
- Tap
.
- The
- Tap on a desired DNSe.
- Select from
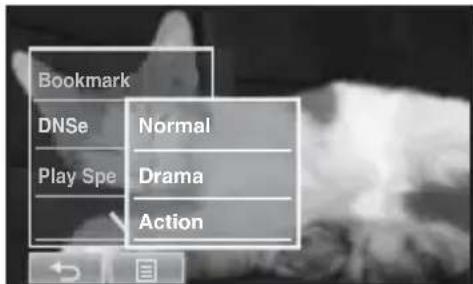
text_image
Bookmark DNSe Normal Play Spe Drama Action
NOTE
- What is DNSe?
Digital Natural Sound Engine (DNSe) is a sound effect function for MP3 players developed by Samsung. It provides various sound settings to enhance the type of music you're listening to.
USING THE VIDEO MENU (Continued)
To set the play speed
Speed up or slow down your favorite video by adjusting the play speed.
- Tap the [ ] icon on the video playback screen.
■ The
- Tap
.
■ The play speed setting screen appears.
- Tap the [◀, ▶] icon to select a desired play speed and tap
.

text_image
Bookmark DNSe Play Speed- Select from
- The higher the number is, the faster the speed is.

- The adjusted play speed may differ from the actual speed, depending on the file.
- For a .wmv file, the play speed may not appear up to X1.5.
USING THE VIDEO MENU (Continued)
To select the screen size
You can select the display size of the video playback.
- Tap the [ ] icon on the video playback screen.
■ The
- Tap
.
- The
- Tap
.
- The
- Tap on a desired Screen Size.
- Select from
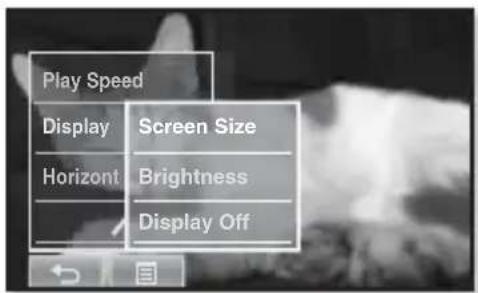
text_image
Play Speed Display Screen Size Horizont Brightness Display OffScreen Size Menu

natural_image
Pure geometric pattern of black dots arranged in a 9x9 grid within a rectangular frame (no text or symbols)
natural_image
Grid of nine black dots arranged in 3 rows and 2 columns (no text or symbols)
natural_image
Grid of nine black circles arranged in 3 rows and 2 columns (no text or symbols)
NOTE
- For some video files,
USING THE VIDEO MENU (Continued)
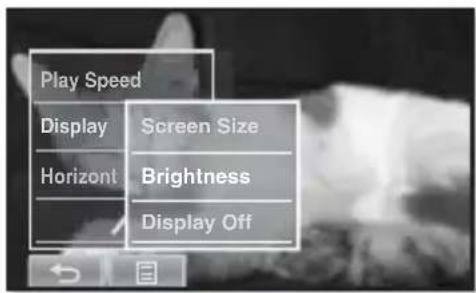
To adjust the brightness
You can adjust the brightness of the video screen.
- Tap the [ ] icon on the video playback screen.
- The
- Tap
.
- The
- Tap
.
■ The brightness setting screen appears.
- Select a desired brightness and tap
.
- Select a level from <0-10>.

NOTE
text_image
Play Speed Display Screen Size Horizont Brightness Display Off- The brightness adjustment menu only applies to the video screen.
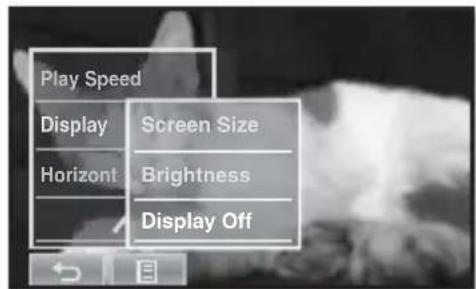
To set the display off
You can turn off the touch screen and only listen to the sound for power saving purpose.
Follow the same steps 1\~2 above.
- Tap
.
■ The touch screen turns off.
■ To turn the screen back on, tap on the touch screen
text_image
Play Speed Display Screen Size Horizont Brightness Display OffTo set the horizontal stroke
You can fast forward through a file at various intervals when you touch the screen to the left or right. Skip a whole file or skip several seconds at a time.
- Tap the [☐] icon on the video playback screen.
- The
- Tap
.
- The
- Tap on a desired horizontal stroke.
- Select from <1 File>,
- Left: Moves forward depending on the horizontal stroke interval setting.
- Right : Moves backward depending on the horizontal stroke interval setting.
- <1 File>: If you set
- When the

text_image
Play Spe 1 File Display Seek Horizont 10Sec Skip
- The horizontal stroke interval can be different from the actual skip interval, depending on the file.
USING THE VIDEO MENU (Continued)

■ Before you start - Use only a Bluetooth-certified stereo headset.
Check if to make sure your Bluetooth stereo headset has been registered.
To connect a Bluetooth stereo headset
You can directly connect to a registered Bluetooth headset during video playback.
- Tap the [☐] icon on the video playback screen.
- The
- Tap
.
- If
- When the connection is successfully done, you will see the [icon] icon on the screen.
- You can enjoy listening to audio on video file via the Bluetooth headset.

text_image
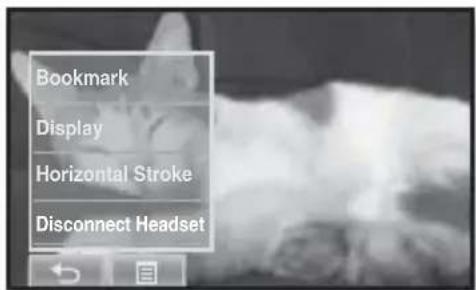
Display Horizontal Stroke Connect to HeadsetTo disconnect the Bluetooth stereo headset
- Tap the [目] icon on the video playback screen.
- The
- Tap
.
■ The Bluetooth headset is disconnected.
text_image
Bookmark Display Horizontal Stroke Disconnect Headset
- You can not select
listening to music

■ Before you start - Connect the earphones, then turn on the player, and check the battery.

- Tap the [→] icon to move to the previous screen. Press and briefly hold the [→] icon to move to the main menu screen.
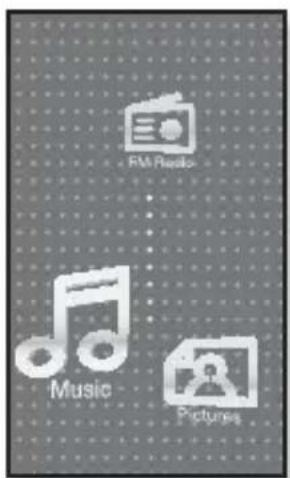
LISTENING BY CATEGORY
text_image
FM Radio Music Pictures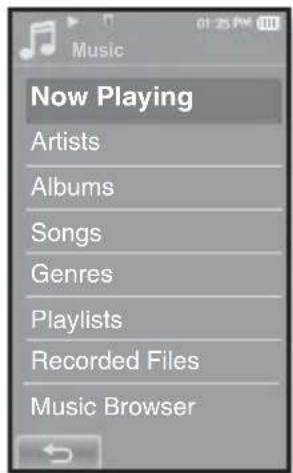
text_image
Music Now Playing Artists Albums Songs Genres Playlists Recorded Files Music Browser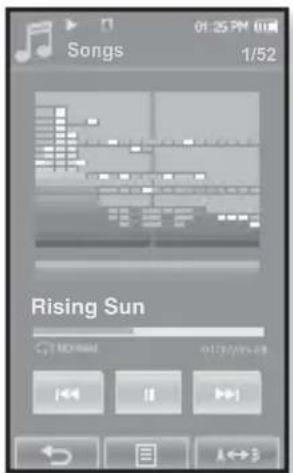
text_image
Songs 01:25 PM 1/52 Rising Sun BOMAN http://www.mn- Tap the icon on the main menu screen.
- The
- Select a desired item in the music list and tap on it.
■ The music fi le appear.
- Select a music file to play and tap on it.
■ The music will start playing.
54 _ listening to music
LISTENING BY CATEGORY (Continued)
Music List
File information including the artist name, album name, music title and genre will be displayed according to the ID3 Tag information on the appropriate music file. A file without an ID3 Tag is displayed as [Unknown].
- Now Playing : Plays a recently played file or moves to the playback screen of the current file.
■ Artists : To play by artist - Albums : To play by album. The album cover image will be displayed.
- Songs : To play in numeric or alphabetical order
- Genres : To play by genre
■ Playlists : To play by Playlist. - Recorded Files : Shows all recorded files.
■ Music Browser : Shows all the music files stored in the Music Folder.

NOTE
- MP3, WMA and AAC music files are compatible with the player.
- MP1 or MP2 files which only have a changed extension to MP3 may not play on the player.
- What is an ID3 Tag?
This is what is attached to an MP3 to carry information relevant to the file such as the title, artist, album, year, genre and a comment field.
PAUSING
- Tap the [Ⅲ] icon or press the ▶/// 🔍 button while the music is playing.
■ The music playback will be paused.
- Tap the [Ⅱ] icon or press the ▶/// button again.
■ The music will play from the point where it stopped.
PLAYING FROM THE BEGINNING OF THE CURRENT TRACK
- Tap the [◀◀] icon after 3 seconds of play.
- The current track starts playing from the beginning.
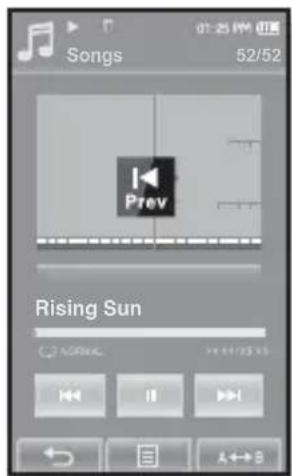
PLAYING THE PREVIOUS TRACK
How To 1
Tap the [] icon within 3 seconds of play. Tap the [] icon twice after 3 seconds of play.
How To 2
Slide your finger to the right.
■ The previous track will start playing.
text_image
Songs 52/52 Prev Rising SunHow To 2

- When playing VBR files, the previous track may not play even if you tap the [◀◀] icon within 3 seconds of the play.
56_1
listening to music
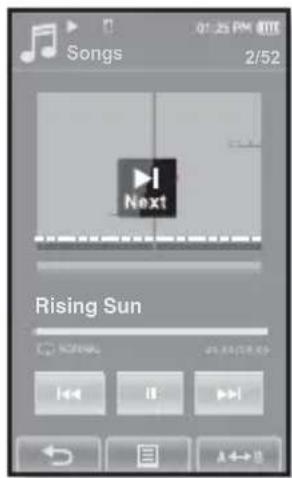
Slide your finger to the left.
■ The next track will start playing.
text_image
Songs 2/52 Next Rising SunHow To 2
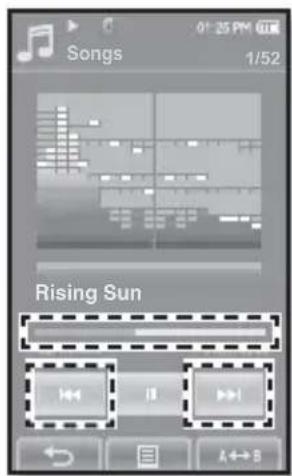
SEARCHING WITHIN A TRACK
How To 1
- Press and briefly hold the [◀◀] or [▶▶] icon while the selected track is playing.
- It searches to the beginning or the end of the track.
- Release the icon at the point you wish to start.
- It starts playing from the point you release the icon.
How To 2
Tap on a desired point in the play status bar.
text_image
Songs 1/52 Rising Sun
NOTE
- Sliding your finger in the left / right direction will move playback forward or backward depending on the Horizontal Stroke setting. See page 74.
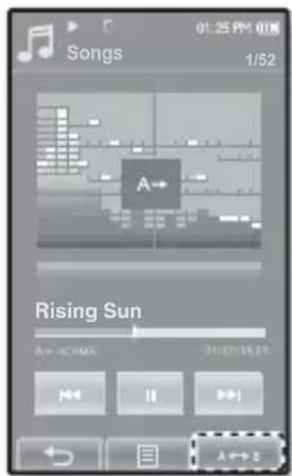
REPEATING A SECTION
This function enables you to listen to specific parts of a track repeatedly. It's helpful when learning a language, for example.
- Tap the [A↔B] icon at the beginning of the section you want to repeat.
- The starting point is set and <A> will appear.
- Tap the [ △←→ ] icon again to set the ending of the section you want to repeat.
-
text_image
Songs 0:25 PM 0.0K 1/52 A→ Rising Sun A→ A→ 3:30-15:30 M4 I B> A→STo cancel Repeating
Tap the [←→3] icon again during Section Repeat.
■ Section Repeat will be canceled.

- You can set the start and end points for repeating only within one file at a time.
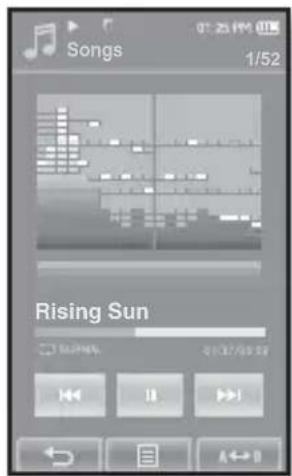
TO VIEW THE ALBUM COVER AND THE ALBUM INFORMATION SIMULTANEOUSLY
You can view the album cover image as well as the album information on the zoomed screen.
In the music playback screen, double-tap on the touch screen.
- You can view the album cover image and the album information simultaneously.
- To return to the previous screen, double-tap on the touch screen again.
text_image
Songs 1/52 Rising Sun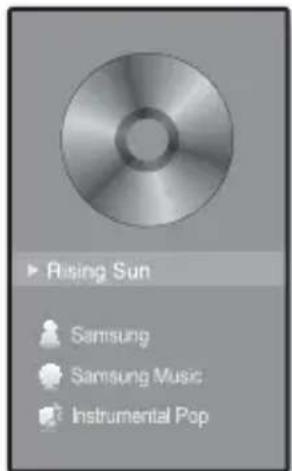
text_image
Rising Sun Samsung Samsung Music Instrumental PopCREATING A PLAYLIST USING EMODIO
With

- Before you start - Connect the player to your PC. EmoDio must be installed on your PC.
Creating a Playlist
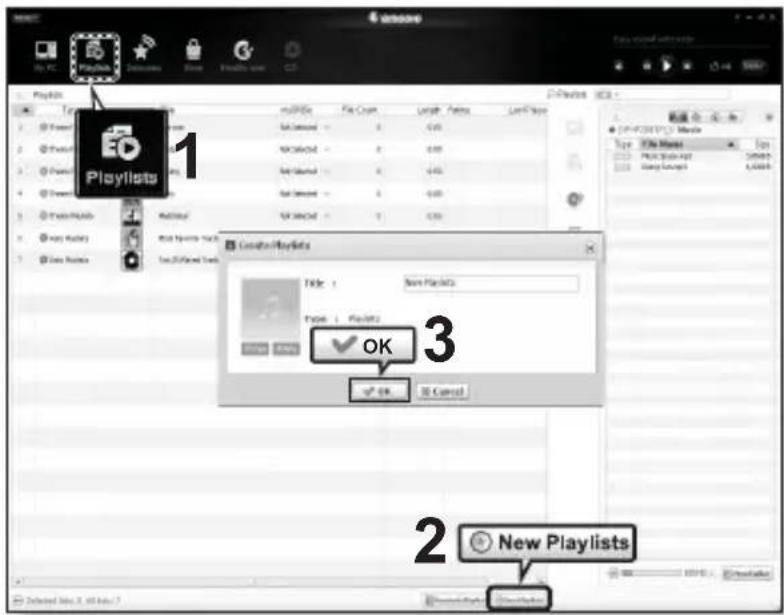
text_image
Playlists 1 Playlists 2 New Playlists 3 OK OK Cancel- Click
on the top of .
- The
- Click
on the bottom.
- The
- Type in the playlist title and click [OK].
- A new playlist will be named and stored in the
CREATING A PLAYLIST USING EMODIO (Continued)
Adding music fi les to a Playlist you've created

text_image
My PC 1 2 3 4 5 Selected Files 1. AllView 2. AllView 3.- Click
on the top of .
- The
- Click
in the right corner of the window.
- The
-
Double click on a playlist in the right window.
-
Select files that you want to transfer in the
window. -
Click . →
■ The selected fi les will be added to the playlist.
CREATING A PLAYLIST USING EMODIO (Continued)
Transferring a Playlist to your player using EmoDio
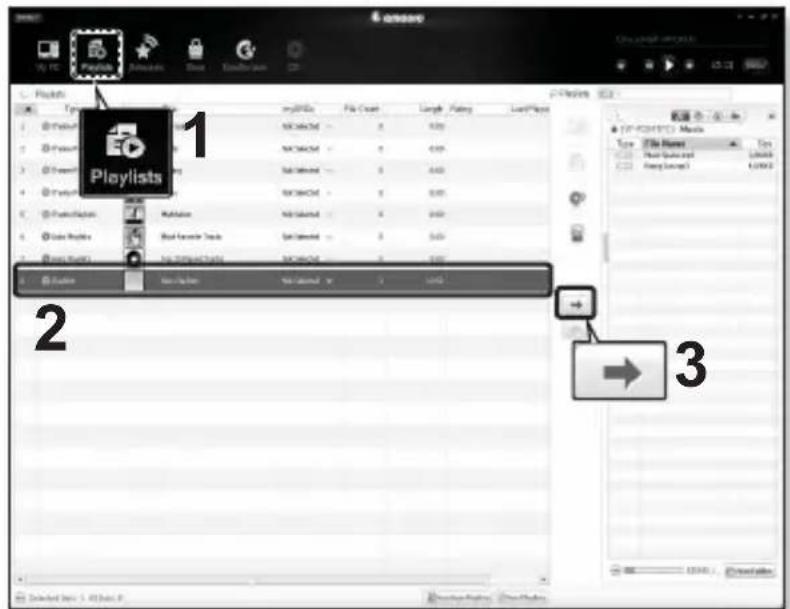
text_image
Playlists 1 Playlists 2 3- Click
on the top of .
■ The
-
Select a playlist in the
section. -
Click . →
- The selected playlist will be transferred to the player folder by folder in

NOTE
- The player can play up to 400 playlists and up to 400 music files for each playlist.
■ For further information on Playlist DNSe, refer to
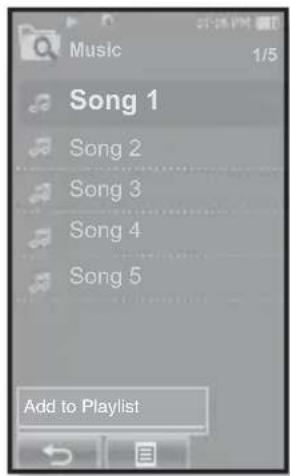
If you've already downloaded files to your mp3 player, you can create a "Favorites" playlist without EmoDio or your PC.
- Tap the Icon on the main menu screen.
- Select
and tap on it.
■ The music fi le list appears.
3 Select a file to add to the playlist and tap [目] icon.
■ The Playlist menu appears.
- Tap
.
-
-
Tap on the playlist number you want to add the selected file to.
-
The selected file is included in the playlist.
- You can check the playlist in
→ → to in the main menu.

- You can add up to 200 music files to each playlist(
text_image
Music 1/5 Song 1 Song 2 Song 3 Song 4 Song 5 Add to Playlist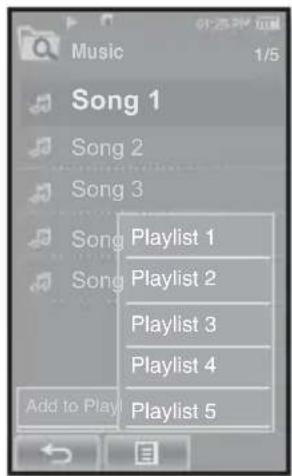
text_image
Music 1/5 Song 1 Song 2 Song 3 Song Add to Play Playlist 1 Playlist 2 Playlist 3 Playlist 4 Playlist 5PLAYING A PLAYLIST
- Tap the Icon on the main menu screen.
■ The music list appears.
- Select
and tap on it.
■ The Playlist(s) will appear.
- Select a desired playlist and tap on it.
- The music files saved in the selected playlist will appear.
- If there is no playlist found, you will see a
- Select a music file to play and tap on it.
■ The music fi le will start playing.

- See pages 60 and 62 to see how to transfer the playlist using
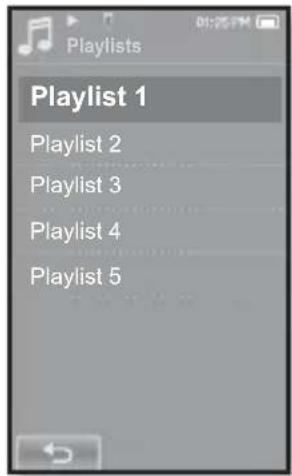
text_image
Playlists Playlist 1 Playlist 2 Playlist 3 Playlist 4 Playlist 5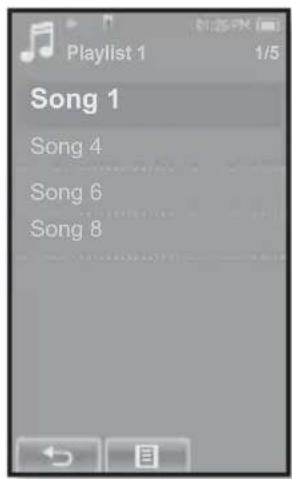
text_image
Playlist 1 1/5 Song 1 Song 4 Song 6 Song 8DELETING A FILE FROM THE PLAYLIST
- Tap the Icon on the main menu screen.
■ The music list appears.
- Select
and tap on it.
■ The Playlist(s) will appear.
- Select a desired playlist and tap on it.
- The music files saved in the selected playlist will appear.
- Select a file to delete from the playlist and tap [图标] icon.
■ The Playlist menu appears.
- Tap
.
- The delete confirmation window appears.
- Tap
.
- The selected file is deleted from the playlist.

NOTE
- The selected file in the playlist cannot be deleted while its playing back.
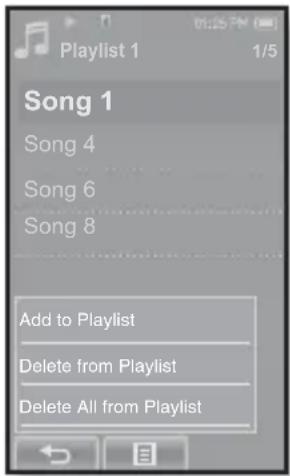
text_image
Song 1 Song 4 Song 6 Song 8 Add to Playlist Delete from Playlist Delete All from PlaylistDELETING ALL FILES FROM THE PLAYLIST
Follow the steps 1-3 above.
- Tap [目] icon.
■ The Playlist menu appears.
- Tap
.
- The delete confirmation window appears.
- Tap
.
- All files are deleted from the playlist.
The Music menu allows you manage all facets of listening - from repeating tracks and albums to choosing the background on the screen as you listen.
To set the sound effect
You can enjoy clearer sound.
- Tap the [☐] icon on the music play screen.
- The
- Tap
.
- The
- Tap on a desired sound effect.
- Select from
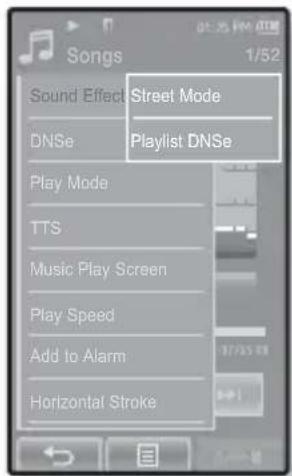
text_image
Songs 1/52 Sound Effect Street Mode DNSe Playlist DNSe Play Mode TTS Music Play Screen Play Speed Add to Alarm Horizontal StrokeSound Effect Options
- Street Mode: Allows you to hear the music outdoors clearly by filtering out some of the street noise. Select either
or . - Playlist DNSe : If a playlist transferred to the player using
includes a User DNSe, the Sound Effect will be set to the Playlist DNSe. If you select , it will be changed to the previous sound effect.

NOTE
- Setting the
For further information on Playlist DNSe, refer to
- Tap the [ ] icon to exit the menu.
To set the Digital Natural Sound engine (DNSe)
Select the right sound for each music genre.
- Tap the [目] icon on the music play screen.
- The
- Tap
.
- The
- Tap on one of the DNSe options.
- Select from
- Selecting
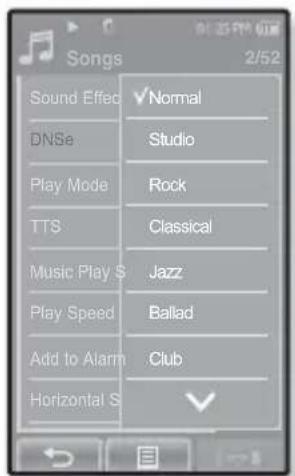
text_image
Songs 2/52 Sound Effect ✓ Normal DNSe Studio Play Mode Rock TTS Classical Music Play S Jazz Play Speed Ballad Add to Alarm Club Horizontal S ✓
NOTE
- What is DNSe?
Digital Natural Sound Engine (DNSe) is a sound effect function for MP3 players developed by Samsung. It provides various sound settings to enhance the type of music you're listening to.
To select myDNSe
You can set a User DNSe on your player or the User DNSe transferred from
- Tap the icon on the music play screen.
- The
- Tap
.
- The
- Tap
.
- The
- Select a desired User DNSe and tap on it.
■ The selected User DNSe is set.
- You can set
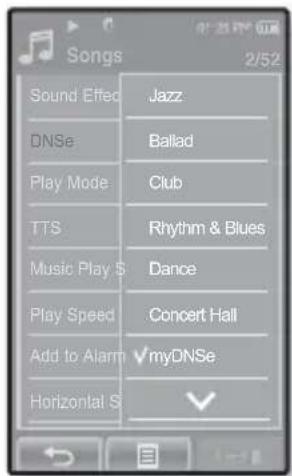
text_image
Songs Sound Effect Jazz DNSe Ballad Play Mode Club TTS Rhythm & Blues Music Play S Dance Play Speed Concert Hall Add to Alarm myDNSe Horizontal S
- For further information on setting a User DNSe using
- Up to 97 User DNSe settings excluding
To select myDNSe (Continued)
You can adjust individual frequencies to adjust the sound to your preference.
If you set the frequency by selecting one by one :
1 Select a desired User DNSe in the myDNSe menu and tap the [ ] icon.
■ User screen appears.
- Tap
.
- The
- Tap the [◀, ▶] i c o n to select the frequency you want to adjust and tap the [▲, ▼] icon to adjust the selected frequency's level.
- You can select from < -10 +10> for the selected frequency's level.
- Tap
.
■ The setting is completed.
If you set the entire frequency :
Follow the steps 1-2 above.
- Tap the [ Select All ]icon.
- Each tap of the [] toggles between the
- Tap the [▲, ▼] icon to adjust the frequency's level.
■ The entire frequencies will be changed.
- Tap
.
■ The setting is completed.
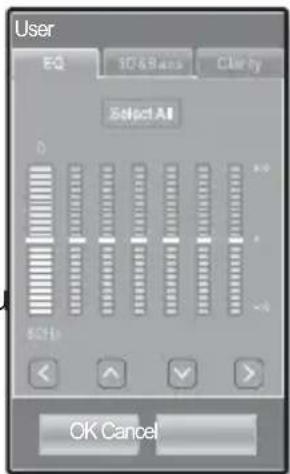
text_image
User EQ 1D & Base Clear by Select All 0 +0 - +0 - +0 - 62Hz OK Cancel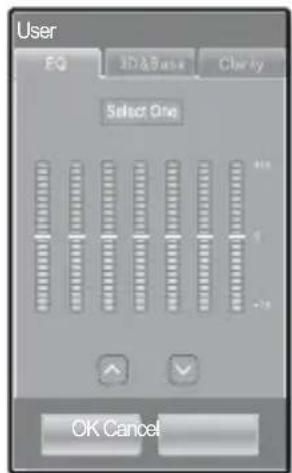
text_image
User EQ 3D&Base Clearly Select One OK CancelTo select myDNSe (Continued)
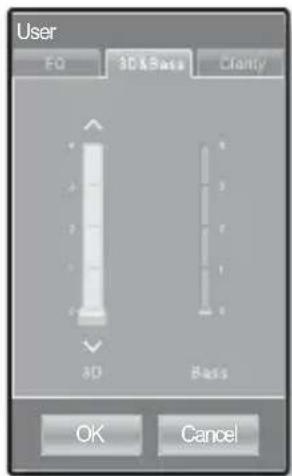
<3D&Bass>
Sets 3D sound effect and bass enhancement.
1 Select a desired User DNSe in the myDNSe menu and tap the [icon.
■ User screen appears.
- Tap <3D&Bass>.
- The <3D&Bass> setting screen appears.
- Select either <3D> or
and tap the [v, ^] icon to set the point you want.
- You can select from <0-4> for the <3D> and
- Tap
.
■ The setting is completed.
You can enjoy clearer sound with improved quality.
1 Select a desired User DNSe in the myDNSe menu and tap the [ ] icon.
■ User screen appears.
- Tap
.
- The
- Tap on the desired level.
- You can select from <0-2>.
- Tap
.
■ The setting is completed.
text_image
User FO 3D & Bass Cleanly 3D Bass OK Cancel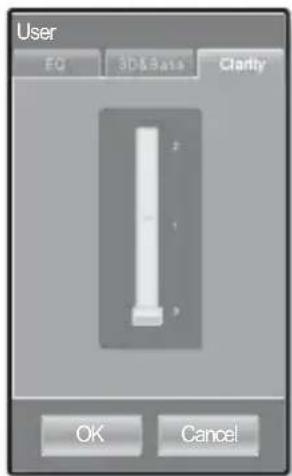
text_image
User EQ 3D & Bass Clarify OK CancelUSING THE MUSIC MENU (Continued)
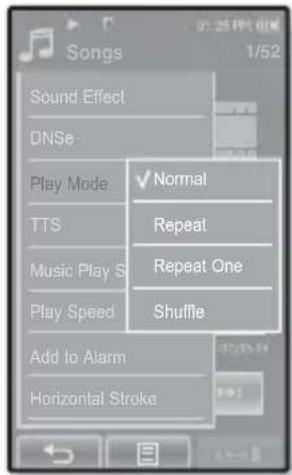
To set the play mode
Select playback mode such as repeat settings.
- Tap the [目] icon on the music play screen.
■ The
- Tap
.
- The
- Tap on a desired play mode.
- Select from
Play Mode Options
- Normal : To play all the tracks in order one time.
- Repeat: To repeat all files in the current folder.
- Repeat One : To repeat one file.
- Shuffle : To play files at random.
text_image
Songs Sound Effect DNSe Play Mode Normal TTS Repeat Music Play S Repeat One Play Speed Shuffle Add to Alarm Horizontal StrokeTo listen to TTS (Text to Speech)
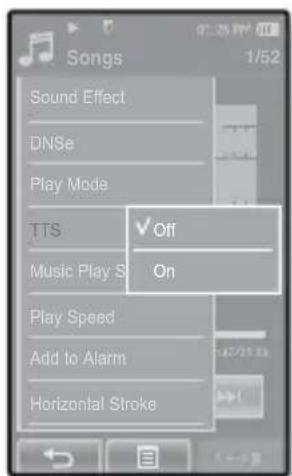
Using TTS function of
- Tap the [ ] icon on the music play screen.
- The
- Tap
.
■ The
- Tap
.
- You can listen to the fi le.

NOTE
- For further information on TTS function of
text_image
Songs Sound Effect DNSe Play Mode TTS Off Music Play S On Play Speed Add to Alarm Horizontal Strokelistening to music _ 71
USING THE MUSIC MENU (Continued)
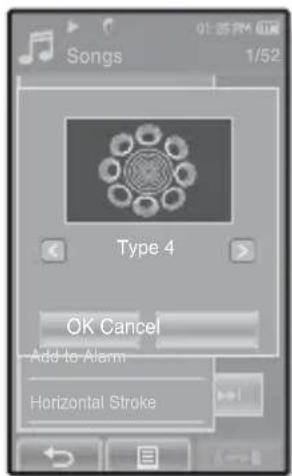
To select the music play screen
Choose a background image from those provided, or choose an image of your own to be displayed as you listen to music.
- Tap the [☐] icon on the music play screen.
- The
- Tap
.
- The
- Tap the [ < , ] icon to select a desired music play screen and tap
.
- Select from
text_image
Songs 1/52 Type 4 OK Cancel Add to Alarm Horizontal StrokeMusic Play Screen Options
- Type 1 \~ Type 4 : You can select a desired music play screen.
- Album Info.: Information on the artist name, album and genre displays if ID3 Tag information is stored on the music file.
- Album Art: The album cover image displays if an album cover image is included in the ID3 Tag information of the music file. Album cover images less than 200 pixel (horizontal) x 200 pixel(vertical) in size are supported.

NOTE
- What is an ID3 Tag?
This is what is attached to an MP3 to carry information relevant to the such as the title, artist, album, year, genre and a comment field.
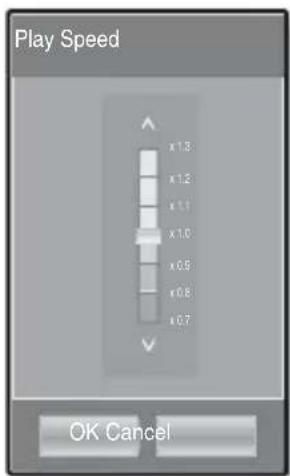
To set the play speed
Speed up or slow down your favorite music by adjusting the play speed.
- Tap the [目] icon on the music play screen.
- The
- Tap
.
- The
- Tap the [▲, ▼] icon to select a desired play speed.
- Select from
- The higher the number is, the faster the speed is.
text_image
Play Speed x 1.3 x 1.2 x 1.1 x 1.0 x 0.9 x 0.8 x 0.7 OK Cancel
NOTE
- The adjusted play speed may differ from the actual speed, depending on the file.
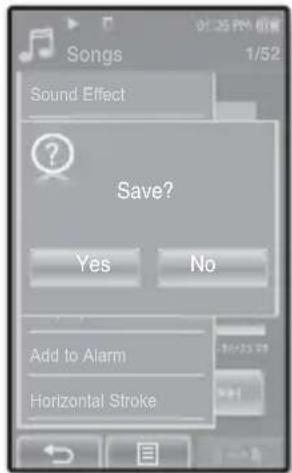
To add to alarm sound
You can add your favorite music file to the alarm sound list, so it can be heard the next time the alarm goes off. See page 102 to set the alarm.
- Select a music file to add to the alarm sound and tap the [目] icon.
- The
- Tap
.
■ The Save window appears.
- Tap
.
- The selected music will be added to the alarm sound list.
- One music fi le can be added to the alarm sound.
text_image
Songs 1/52 Sound Effect ? Save? Yes No Add to Alarm Horizontal StrokeTo set the horizontal stroke
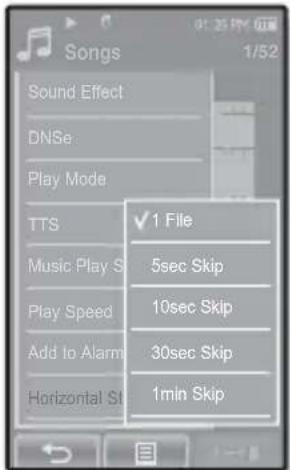
You can set the stroke interval of scrolling music file playback by sliding your finger to the left or right.
- Tap the [目] icon on the music play screen.
- The
- Tap
.
■ The
- Tap on a desired horizontal stroke.
- Select from <1 File>, <5sec Skip>, <10sec Skip>, <30sec Skip> and <1min Skip>.

NOTE
- If the file was developed with a variable bit rate(VBR), the actual length of the horizontal stroke may not be exactly what you select.
text_image
Songs Sound Effect DNSe Play Mode TTS Music Play S Play Speed Add to Alarm Horizontal St ✓ 1 File 5sec Skip 10sec Skip 30sec Skip 1min SkipUSING THE MUSIC MENU (Continued)

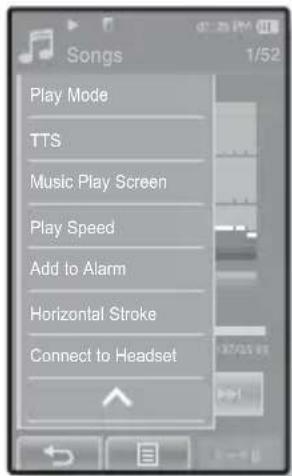
■ Before you start - Use only the Bluetooth-certified stereo headset. Check if your Bluetooth stereo headset has been registered.
To connect a Bluetooth stereo headset
You can connect directly to the registered Bluetooth stereo headset during music playback.
- Tap the [ ] icon on the music play screen.
- The
- Tap
.
- If
- When the connection is successfully done, you will see the [ ] icon on the screen.
- You can listen to music through the Bluetooth headset.
text_image
Songs 1/52 Play Mode TTS Music Play Screen Play Speed Add to Alarm Horizontal Stroke Connect to HeadsetTo disconnect the Bluetooth stereo headset
- Tap the [目] icon on the music play screen.
- The
- Tap
.
■ The Bluetooth headset is disconnected.

- You can not select
viewing pictures


NOTE
■ Before you start - Connect the earphones, then turn on the player, and check the battery.
- Tap the [] icon to move to the previous screen.
Press and briefly hold the [←] icon to move to the main menu screen.
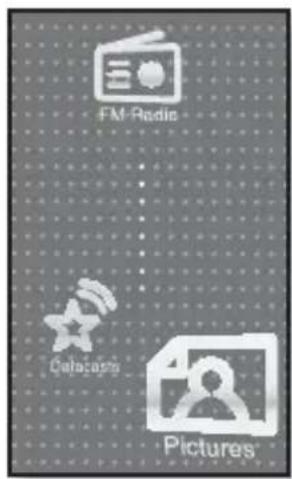
- Tap the Icon on the main menu screen.
■ The picture preview window appears.
- Select a picture to view and tap on it.
■ The selected picture is displayed.
- Tap the [←] icon to move to the preview window.
text_image
FM Radio Delacatino PicturesTo move to the previous/next picture
Tap [icon on the picture view screen.
- The previous/next picture will be displayed.

NOTE
- Information and icons on the currently viewed picture will disappear shortly. Tap on the screen if you want to display the picture information and icons again.
- Those JPG files with no thumbnail or wrong thumbnail information are displayed [ ] .
■ Some pictures can be displayed slowly.
- When transferring a picture to the player using
- You can also use the
- You can keep listening to music even if you select
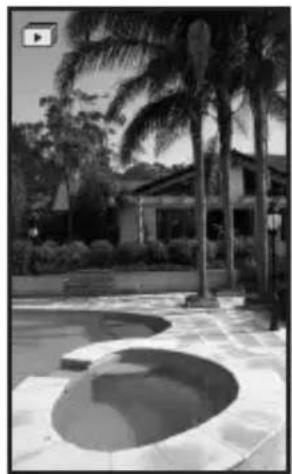
To watch a slideshow
How To 1
Tap the [icon] on the preview screen.
- The [icon] on the screen appears on the screen, and the slideshow will start.
How To 2
- Tap the [目] icon on the picture view screen.
- The
- Tap
.
- The [icon] on the screen appears on the screen, and the slideshow will start.
natural_image
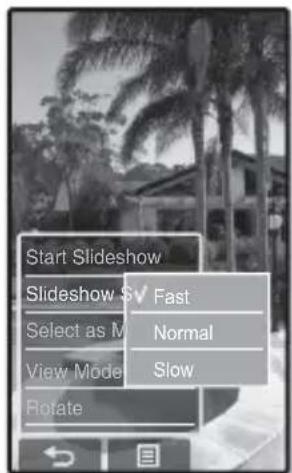
Black-and-white photo of a pool with palm trees and a small building in the background (no visible text or symbols)To set the slideshow speed
- Tap the [☐] icon on the picture view screen.
- The
- Tap
.
- The
- Tap on a desired speed.
- Select from
text_image
Start Slideshow Slideshow $▼ Fast Select as M Normal View Mode Slow Rotate
NOTE
- Tap the [☐] icon to exit the menu.
viewing pictures _ 77
USING THE PICTURE MENU (Continued)
To stop the slideshow
Tap on the screen in the slideshow mode.
■ This will stop the slideshow.
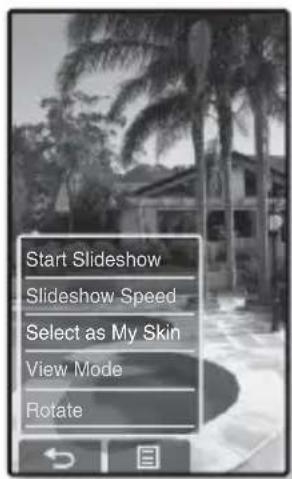
To select a picture as a background image
You can set a desired picture to the background image for the screen.
- Select a picture to set as a background image and tap the [icon.
- The
- Tap
■ The Save window appears.
- Tap
.
- The selected picture is set to a background image.
text_image
Start Slideshow Slideshow Speed Select as My Skin View Mode RotateUSING THE PICTURE MENU (Continued)
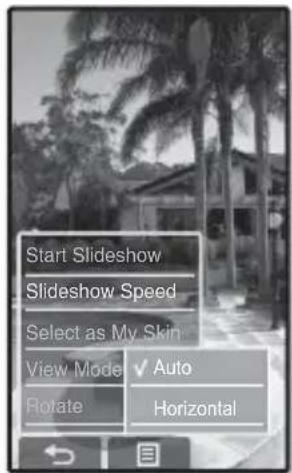
To select the picture view mode
- Tap the [目] icon on the picture view screen.
■ The
- Tap
.
■ The
- Tap on a desired mode.
- Select from
- If you select
text_image
Start Slideshow Slideshow Speed Select as My Skin View Mode ✓ Auto Rotate HorizontalUSING THE PICTURE MENU (Continued)
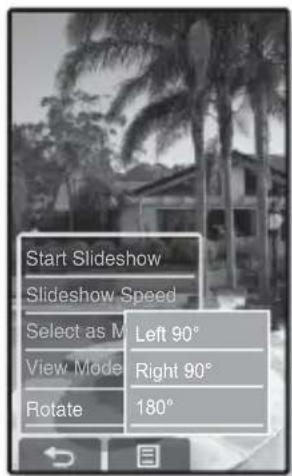
To rotate a picture
You can rotate a picture for your convenience.
How To 1
- Tap the [ ] icon on the picture view screen.
- The
- Tap
.
- The
- Tap on a desired angle.
- Select from
text_image
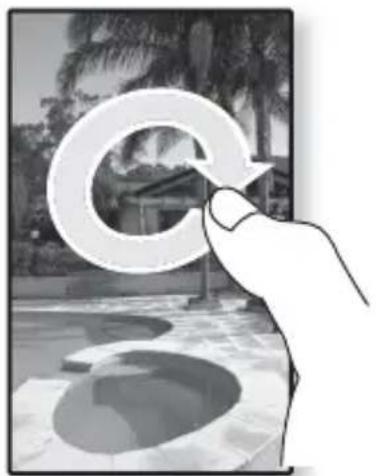
Start Slideshow Slideshow Speed Select as M Left 90° View Mode Right 90° Rotate 180°How To 2
Position your fingers on the touch screen and circle around softly in the desired direction.
■ The photo will be rotated.
natural_image
Hand interacting with a large circular icon, set against a palm tree and pool background (no text or symbols)USING THE PICTURE MENU (Continued)
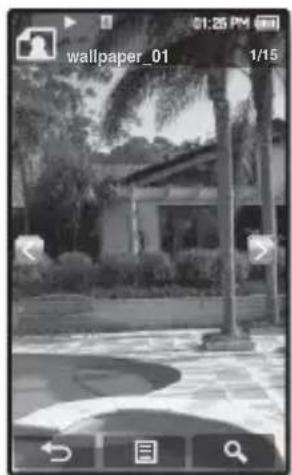
To enlarge a picture
You can zoom in a picture.
How To 1
Tap the [ 🔒 ] icon on the picture view screen.
■ The picture is enlarged.
- Each time you press the [Q] icon, the size of the picture is enlarged in the sequence of
- To cancel the picture enlarging, tap the [←] icon.
How To 2
Tap on the screen twice on the picture view screen.
- Each time you tap on the screen twice, the size of the picture is enlarged in the sequence of
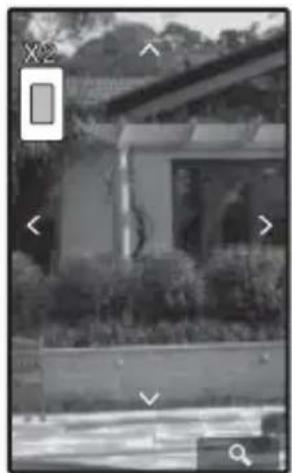
To view the enlarged photo
natural_image
Black-and-white photo of a residential area with palm trees and a paved path (no visible text or symbols)How To 1
Slide the enlarged photo in a desired direction as if you flip it.
■ The picture moves and appears in that direction.
How To 2
- Tap on the screen in a condition where no picture information nor icons are displayed.
- The [^, ,< ] icons appear.
- Tap the [^, ∨, <, >] icon to move the picture in a desired direction.
natural_image
Exterior view of a modern building with visible windows and surrounding greenery (no signage or text)listening to FM radio

■ Before you start - Connect the earphones, then turn on the player, and check the battery.

- Tap the [] icon to move to the previous screen. Press and briefly hold the [→] icon to move to the main menu screen.
NOTE
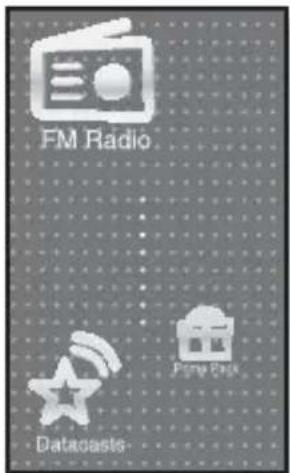
Tap the icon on the main menu screen.
■ FM radio reception will start.
text_image
FM Radio DatacastsTO USE THE MUTE FUNCTION
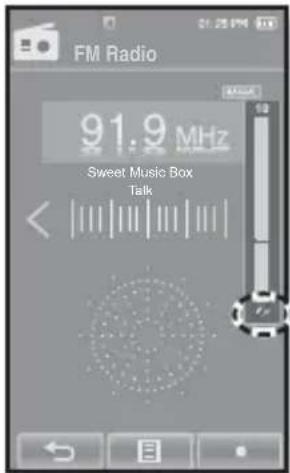
Press the button while listening to FM Radio.
■ Sound is muted.
- Press the ▶// / ○ button once again to resume listening.

NOTE
■ Always connect your earphones to the player when searching or setting frequencies. The earphones serve as antennas to receive FM Radio reception.
- In poor reception areas, the player may not find an available FM frequency.
- The Bluetooth function cannot be used while you are listening to FM Radio.
82 _ listening to FM radio
text_image
FM Radio 91.9 MHz Sweet Music Box TalkTO SEARCH FOR FM STATIONS
-
Press and briefly hold the [<,>] icon and then release in Manual mode.
-
appears on the screen. - The search will stop at the frequency nearest from the point the button is released.
OR,
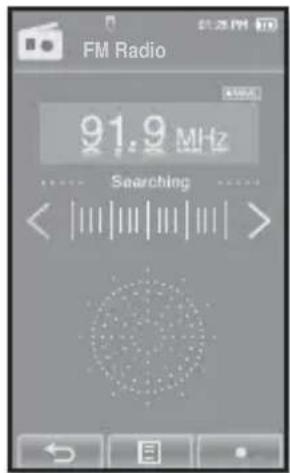
text_image
FM Radio 91.9 MHz Searching < <||||||||||||||>- Tap the [<,>] icon to progress through the frequencies one by one in Manual mode.
- Moves to frequencies whenever the icon is pressed.
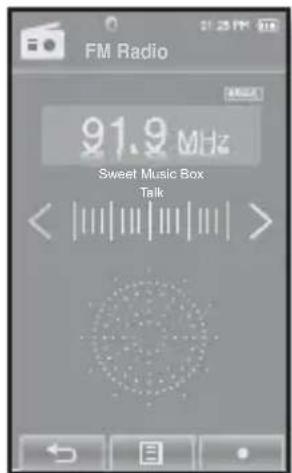
text_image
FM Radio 91.9 MHz Sweet Music Box TalkTo switch to Preset Mode
Select this mode if you want to search through your saved FM presets one preset at a time.
- Tap the [目] icon in Manual mode.
- The
- Tap
.
■ FM radio reception will start.
- You will see

NOTE
- If no frequencies were preset,
will appear and the player will not switch to Preset mode. - If
is selected from → , the saved preset lists are deleted. - Preset frequencies are stored in numeric sequence.
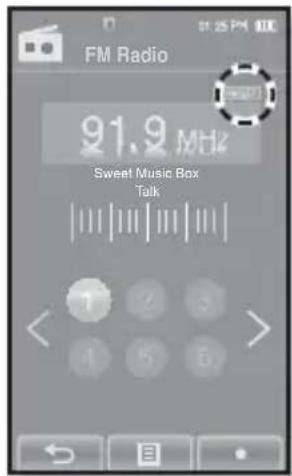
text_image
FM Radio 91.9 MHz Sweet Music Box TalkTo switch to Manual Mode
Select this mode if you want to manually search through the FM band one frequency at a time.
- Tap the [☐] icon in Preset mode.
- The
- Tap
.
- You will see
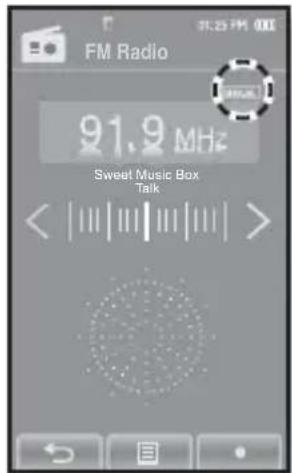
text_image
FM Radio 91.9 MHz Sweet Music Box TalkUSING THE FM RADIO MENU (Continued)
To store stations in the preset memory
You can store up to 30 stations in your MP3 player's memory and return to them with the press of just one number. Have the MP3 player choose only the stations you want using the manual process, or find and store the local stations automatically.
Manual - choose only the stations you want to store
- Tap the [<,>] icon to select a frequency to preset in Manual mode and tap [icon.
- Tap
.
- The selected station is set as a preset number.

NOTE
- If the same frequency is already set, the
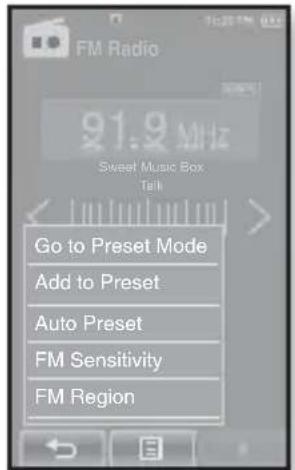
text_image
FM Radio 91.9 MHz Sweet Music Box Talk Go to Preset Mode Add to Preset Auto Preset FM Sensitivity FM RegionTo listen to preset stations
Tap on a desired preset number in Preset mode.
- The preset number is selected and you can listen to the radio frequency that is previously stored for the number.
- Tap the [<,>] icon to move to the previous or the next number list.

NOTE
- Tap the [☐] icon to exit the menu.
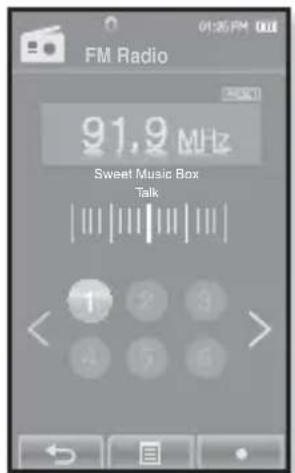
text_image
FM Radio 91.9 MHz Sweet Music Box TalkTo store stations in the preset memory (Continued)
Automatic – automatically store all the stations the player receives
- Tap the [☐] icon on the FM Radio screen.
- The
- Tap
.
- The< Auto Preset> window appears.
- Tap
.
- Up to 30 frequencies are automatically set.
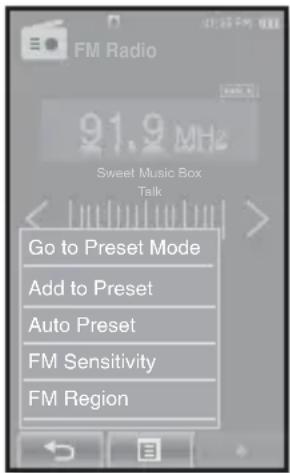
text_image
FM Radio 91.9 MHz Sweet Music Box Talk Go to Preset Mode Add to Preset Auto Preset FM Sensitivity FM RegionTo cancel Auto Preset
If you want to cancel the auto preset, touch the screen in the process.
- The auto preset setting is canceled, and only frequencies set up to that point are stored.

- You may want to re-set the stored stations if you're going to listen to your MP3 player in a different city. To delete the preset stations and store new ones, simply repeat the process.
To delete a preset
Follow the steps below to delete frequencies while listening to FM Radio.
- Tap the [☐] icon in Preset mode.
■ The
- Tap
.
■ The preset frequency list appears.
- Select a frequency to delete and tap on it.
- The confirmation window will appear.
- Tap
.
- The selected preset number is deleted.
- If you don't want to delete the preset number, select
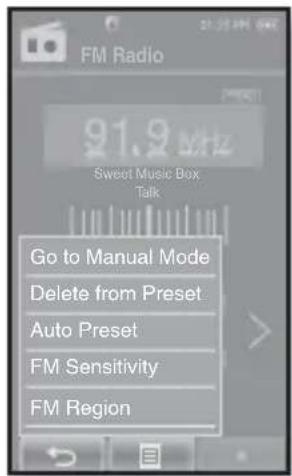
text_image
FM Radio 91.9 MHz Sweet Music Box Talk Go to Manual Mode Delete from Preset Auto Preset FM Sensitivity FM Region
NOTE
- When a preset frequency is deleted, the numbers of the following presets are moved up by one.
USING THE FM RADIO MENU (Continued)
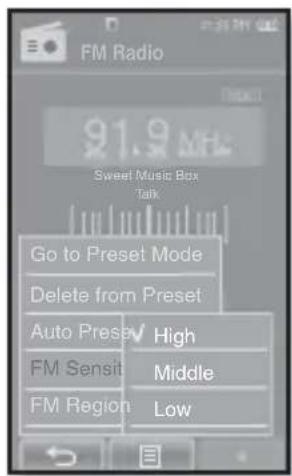
To set the FM sensitivity
To receive more or fewer FM radio frequencies, adjust the
- Tap the [目] icon on the FM Radio screen.
- The
- Tap
.
- The
- Tap on a desired reception sensitivity.
- Select from
- If you select
text_image
FM Radio 91.9 MHz Sweet Music Box Talk Go to Preset Mode Delete from Preset Auto Preset High FM Sensit Middle FM Region LowTo set the FM region
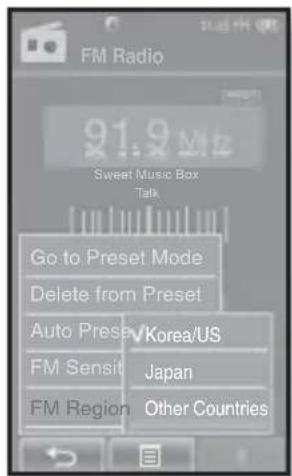
You can change an FM region setting in preparation for overseas travel.
- Tap the [ ] icon on the FM Radio screen.
- The
- Tap
.
- The
- Tap on a desired FM region.
- Select from

NOTE
■ Frequency range by region
- Korea/US: Search for FM frequencies in 100 kHz increments between 87.5 MHz\~108.0 MHz.
- Japan: Search for FM frequencies in 100 kHz increments between 76.0 MHz\~108.0 MHz.
- Other Countries: Search for FM frequencies in 50 kHz increments between 87.50 MHz\~108.00 MHz.
■ FM region can be deleted or changed according to the target region of the player.
- Your previously stored radio frequencies will be deleted when you change the
text_image
FM Radio 91.9 MHz Sweet Music Box Talk Go to Preset Mode Delete from Preset Auto Preset √Korea/US FM Sensit Japan FM Region Other CountriesUSING THE FM RADIO MENU (Continued)
To record FM Radio broadcasting
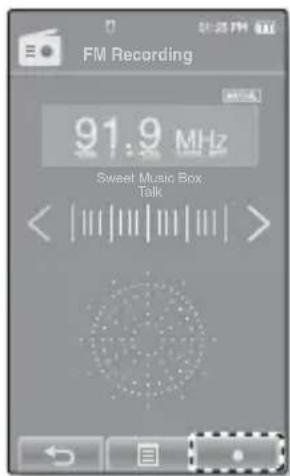
You can record a FM radio program at any time while listening to the radio.
- Select a radio frequency to record and tap the [] icon.
■ The
- Tap
.
- An automatically created file name appears and the recording starts.
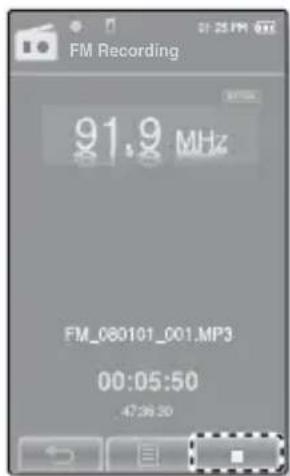
To stop recording
text_image
FM Recording 91.9 MHz Sweet Music Box. Talk<||||||||||||||||||>- Tap the [■] icon during the recording.
- The recorded file is stored in

■You can make a recording for up to approximately 18 hours (based on 128Kbps, 1GB)
- You can store a maximum of 999 fi les by the date for FM radio recording.
- The recording file name will be automatically specified, for example, as such as "FM_YYMMDD_XXX.MP3". "FM" indicates FM radio recording, "YYMMDD" means recording date and "XXX" means the number of the recording file.
text_image
FM Recording 91.9 MHz FM_080101_001.MP3 00:05:50 47:36:30using the datacast
Using

NOTE
- What is RSS?
RSS stands for Rich Site Summary or Really Simple Syndication. It is a xml-based data transmission system used to deliver information on frequently updated web sites such as news and blogs to users in a more convenient and easier way.
- What is Datacasts?
You can automatically receive updated information without having to visit your frequently visited news, blog and UCC sites every time.
- Before you start - EmoDio must be installed on your PC. See page 40.

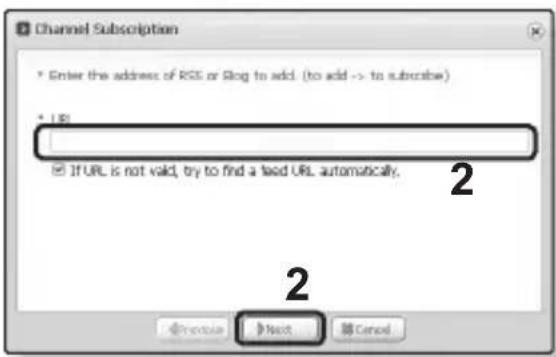
REGISTERING A CHANNEL
You can create a new channel by registering RSS-supported web sites or web pages.
- Click the
on the bottom of the of . -
Enter an address in the
and Click <▶Next>. -
When you copy a web address and click
, the copied address is displayed automatically in the . -
The setting confirmation window appears if the Web address supports RSS.
-
Click
.
■ The channel you want is registered.
■ The icon appears in Datacasts for the registered channel.

NOTE
90
- Refer to the
text_image
Channel Subscription * Enter the address of RGS or Blog to add. (to add -> to subscribe) * URL IFURL is not valid, try to find a lead URL automatically. 2 2 Preview Next Cancelusing the datacast
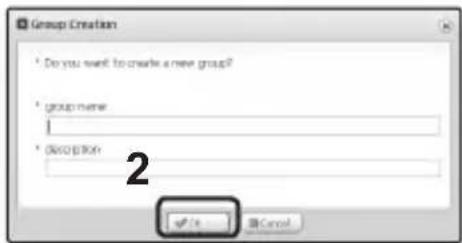
CREATING A NEW CHANNEL GROUP
You can create a new group to manage channels by the category.
- Click
on the bottom of of . - Type in a group name and description and click
.
text_image
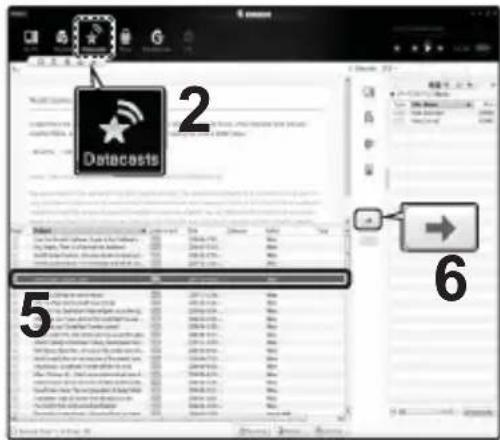
Group Creation * Do you want to create a new group? * group name: * Description: 2 OK CancelTRANSFERRING A DATACAST FROM

- Before you start - Connect the player to your PC. EmoDio must be installed on your PC. See page 40.
will automatically start when the player is connected to your PC. ■ If the program does not start automatically, double click the icon on the desktop. - Click
on the top of . - Datacasts group channel list appears.
- Click a desired group channel.
- Click a desired channel.
- Select the post you want to transfer.
- Click the → icon.
text_image
Datacasts 2 5 6- The Post of the selected channel will be transferred to the player in

NOTE
- Click ↑ on the top of
You can view channel posts added to

- Before you start - Transfer a desired channel post to the player using

- Tap the [←] icon to move to the previous screen. Press and briefly hold the [←] icon to move to the main menu screen.
NOTE
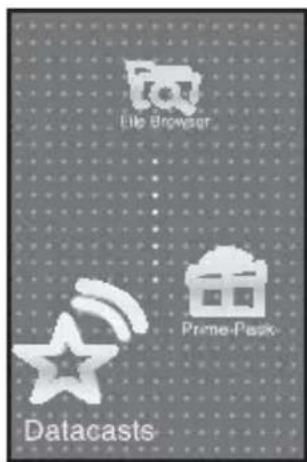
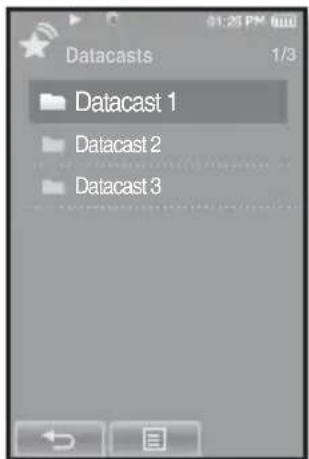
- Tap the ★icon on the main menu screen.
■ The Datacast list appears.
- Select a desired channel title and tap on it.
- The title is the same as that of the channel added to
- Select a desired post title and tap on it.
■ The fi le list appears.
- icon : main text for the transferred post
■ icon : picture fi le
■ icon : music fi le
■ icon : video fi le
text_image
File Browser Prime-Peak Datacasts- Select a file and tap on it.
- The selected file will start playing.
text_image
Datacasts 1/3 Datacast 1 Datacast 2 Datacast 3enjoying the prime pack
Prime Pack enables you to enjoy various functions such as reading text, the alarm setting and viewing the calendar or world clock.
READING TEXT
Whether it's a novel, the manuscript of a new story, or your research paper, your mp3 player allows you to read it... all while listening to music!

- Before you start - Turn on the player and check the battery. Transfer text files to the player using
Set a preferred text language for text in

NOTE
- Tap the [←] icon to move to the previous screen. Press and briefly hold the [←] icon to move to the main menu screen.
- Tap the icon on the main menu screen.
■ The
- Select
and tap on it.
■ The text fi le list appears.
- Select a text file and tap on it.
■ You will see the text on the screen.
- Press and briefly hold the touch screen to display in full screen. To return to the previous screen, press and briefly hold the touch screen again.

NOTE
- You can also use the
- Your mp3 player supports the TXT file format in Text mode.
- You can keep listening to music even if you select text file.
text_image
File Browser Bluetooth Prime Pack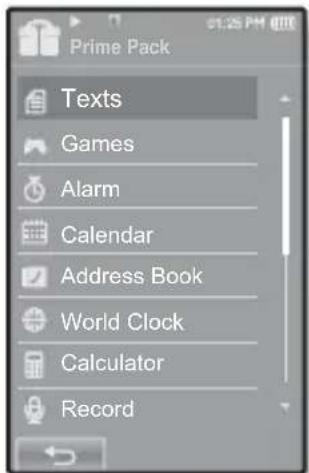
text_image
Prime Pack Texts Games Alarm Calendar Address Book World Clock Calculator RecordTo move to previous/next page
How To 1
Tap the [◀,▶] icon on the bottom of the touch screen.
How To 2
Slide your finger to the left or right.
- Sliding your finger to the left will display the next page, while to the right will display the previous page.
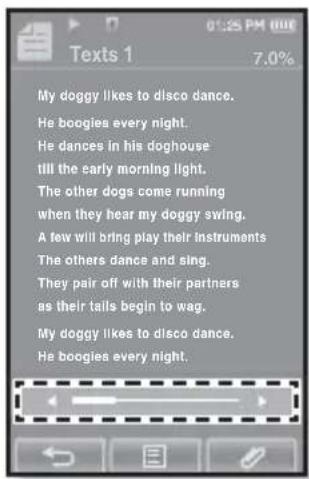
text_image
Texts 1 7.0% My doggy likes to disco dance. He boogies every night. He dances in his doghouse till the early morning light. The other dogs come running when they hear my doggy swing. A few will bring play their instruments The others dance and sing. They pair off with their partners as their tails begin to wag. My doggy likes to disco dance. He boogies every night.To set a bookmark
Set a bookmark to return to that point in the text at any time.
- Tap the [v] icon at the desired page you want on the text view screen.
- The
- Tap
.
- The current text screen is set to a bookmark with the [ 🔒] symbol displayed on the top left corner.

NOTE
- The Overwrite window appears if there is a bookmark previously set. If you select
- The bookmark can be set one for each text file, and you can set a maximum of 100 bookmarks.
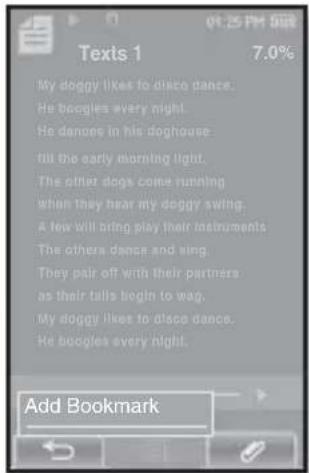
text_image
Texts 1 7.0% My doggy likes to disco dance. He boggles every night. He dances in his doghouse till the early morning light. The other dogs come running when they hear my doggy swing. A few will bring play their instruments The others dance and sing. They pair off with their partners as their tails begin to wag. My doggy likes to disco dance. He boggles every night. Add BookmarkUSING THE TEXT MENU (Continued)
To move to/remove the bookmark
- Tap the [∅] icon on the text view screen.
- The
- Tap
or .
- When you selected
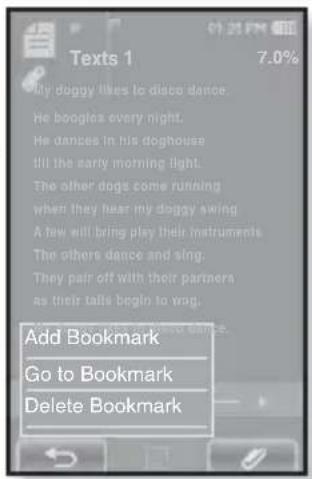
text_image
Texts 1 7.0% My doggy likes to disco dance. He boogles every night. He dances in his doghouse I'll the early morning light. The other dogs come running when they hear my doggy swing. A few will bring play their instruments. The others dance and sing. They pair off with their partners as their tails begin to wrap. Add Bookmark Go to Bookmark Delete BookmarkTo set the text viewer color
Choose what color you'd like the text to appear.
- Tap the [目] icon on the text view screen.
- The
- Tap
.
- The
- Tap the [☐, ▶] icon to select a color for the text viewer.
- Select from
- Tap
.
- The selected text viewer color is displayed.
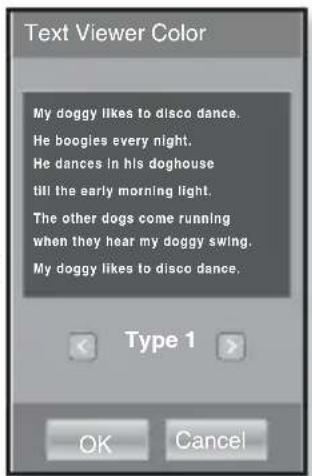
text_image
Text Viewer Color My doggy likes to disco dance. He boogles every night. He dances in his doghouse till the early morning light. The other dogs come running when they hear my doggy swing. My doggy likes to disco dance. Type 1 OK CancelTo change the font size
You can change the font size of the text.
- Tap the [☐] icon on the text view screen.
- The
- Tap .
- The menu appears.
- Tap the [☐, ▶] icon to select a desired font size.
- Select from ,
- Tap
.
■ The font size is changed.
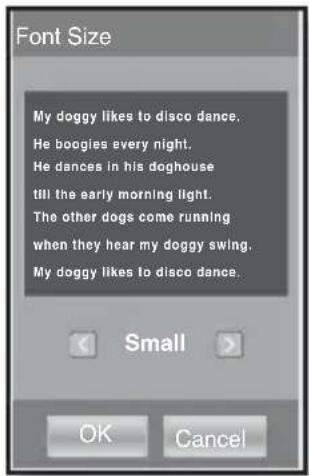
text_image
Font Size My doggy likes to disco dance. He boogies every night. He dances in his doghouse till the early morning light. The other dogs come running when they hear my doggy swing. My doggy likes to disco dance.USING THE TEXT MENU (Continued)
To set the Text View Mode
You can view text horizontally or vertically.
How To 1
- Tap the [icon] icon on the text view screen.
- The
- Tap
.
- The
- Tap
.
- The text screen will be rotated in horizontal view.
- Tapping
How To 2
Position your fingers on the touch screen and circle around softly in the desired direction.
- This will rotate the screen in a horizontal or vertical view mode.
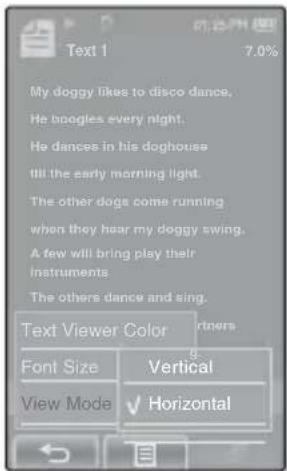
text_image
Text 1 7.0% My doggy likes to disco dance, He boogles every night. He dances in his doghouse till the early morning light. The other dogs come running when they hear my doggy swing. A few will bring play their instruments The others dance and sing. Text Viewer Color Font Size Vertical View Mode Horizontal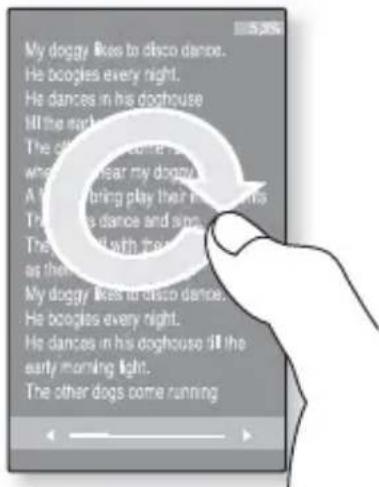
text_image
My doggy likes to disco dance. He boogles every night. He dances in his doghouse fill the earth The other game is where I hear my doggo A TV will bring play their own the dance and sing. They will add with the as there My doggy likes to disco dance. He boogles every night. He dances in his doghouse fill the early morning light. The other dogs come runningPLAYING VIDEO GAMES
Your mp3 player comes with the exciting games already loaded on!

■ Before you start - Connect the earphones, then turn on the player, and check the battery.
- Tap the icon on the main menu screen.
- The
- Select
and tap on it.
■ The game list appears.
- Select a desired game and tap on it.

NOTE
- Press the [ ] button to set a game sound or the current music as a background music.
If you select a music file to listen to, the game navigation may be slow down, depending on the use of the Bluetooth device or the fi le.
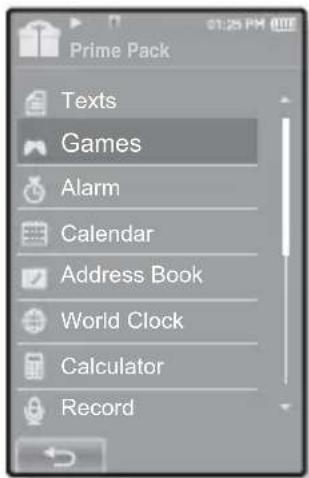
text_image
Prime Pack Texts Games Alarm Calendar Address Book World Clock Calculator RecordBubble Smile
You have to gain as many scores as possible by changing the order of three bubbles to fit them horizontally or diagonally.
Turn the three adjacent bubbles clockwise or counter clockwise in order.
The bubble will be moved in the selected direction.
You will gain scores only if three or more bubbles are fitted together.

text_image
Double Smile TIMED MODE SKILLED MODE HIGH SCORE HOW TO PLAY CREDITS EXITPLAYING VIDEO GAMES (Continued)
World Car Puzzle
You have the chance to enjoy the world's renowned cars while putting together the mosaic pieces.
The game will be displayed in the horizontal view.
Select a desired car and set the number of puzzles and hints, shape and the time limit.
Tap and hold an image piece and drag it to a desired position before releasing it. The puzzle piece will be moved to the release point.

text_image
World Car PuzzleALGGAGI
To win this game, remove all the opponent's pieces from the chessboard by hitting them with your piece.
The game will be displayed in the horizontal view.
Slide one of your pieces in the direction of your opponent's piece to remove it from the chessboard.
If you have not played your turn within the timeout, the turn goes to the opponent.
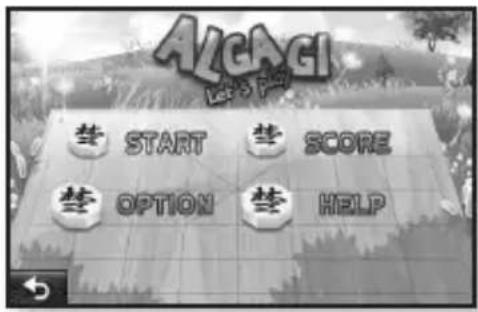
text_image
Alcagi START SCORE OPTION HELP
- To exit from the game screen in the middle of a round, tap on the bottom left corner of the touch screen.
PLAYING VIDEO GAMES (Continued)
Omok2
To win this strategy board game, put your pieces to make an unbroken row of five stones horizontally, vertically or diagonally before the opponent.
The game will be displayed in the horizontal view.
Tap on the area you want to put your stone, and the area is enlarged.
Tap on the exact position to put your stone while the area is enlarged.
Your stone is placed on the position.
If you have not played your turn within
the timeout, the turn goes to the opponent.
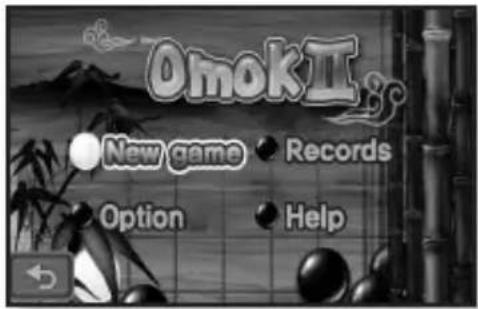
text_image
OmokII New game Records Option Help
NOTE
- To exit from the game screen in the middle of a round, tap on the bottom left corner of the touch screen.
Pow Wow
This is a shooting game where you can gain scores by shooting the moving target.
Tap the moving target.
If you want to reload your gun, tap

text_image
PowWOW™ ANIMALCRAFT Start Game Option High Score About ... Exit in 2007 online live games for all rights reservedTo play 2-player battle in Bluetooth mode

■ Before you start - Connect the earphones, then turn on the player, and check the battery.
If the player is connected to a Bluetooth stereo headset, mobile phone or external device, set the connection to off first.
Set
Set to
- Run the same game(
or ) on the two YP-P2 models and select the mode.
- Bluetooth
- Select
on one player and select on the other player.
- YP-P2 appears on the YP-P2 selected
- Tap on the
on the YP-P2 selected .
- The Bluetooth connection is done and starts the 2-player battle.

- When the player is connecting to the Bluetooth stereo headset, the 2-player battle Bluetooth game is not available.
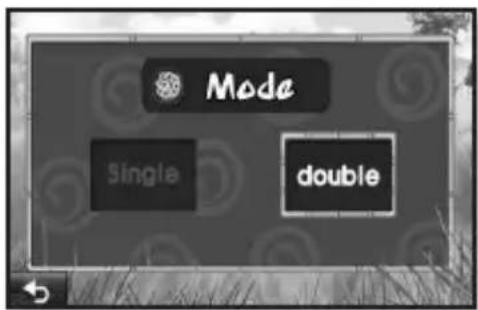
text_image
Mode Single doubleEx) Alggagi game – Mode Selection Screen
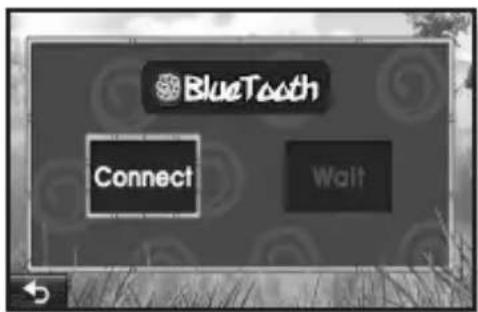
text_image
BlueTooth Connect WaitEx) Bluetooth Wait/Connect Screen
SETTING THE ALARM
This player has an alarm which can be set to go off at a scheduled time.

- Before you start - First, you should set the clock for the current time. See page 33.
- Tap the icon on the main menu screen.
■ The
-
Select
and tap on it. -
Tap
.
■ The alarm setting screen appears.
- Tap on the first item repeatedly to select the alarm frequency.
- Select from
- Tap on the second item.
■ The alarm time setting screen appears.
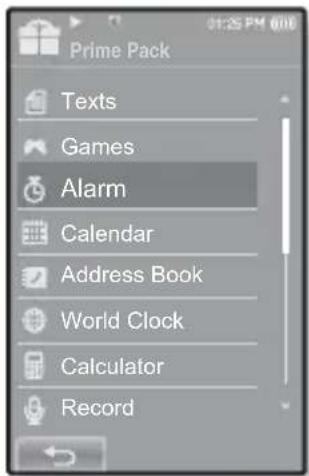
text_image
Prime Pack Texts Games Alarm Calendar Address Book World Clock Calculator Record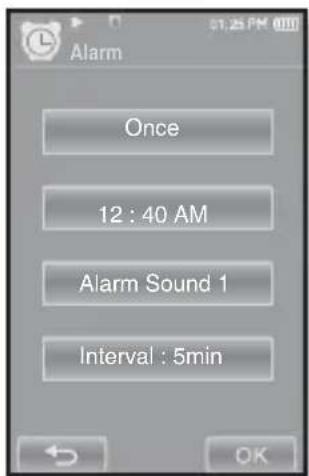
text_image
Alarm Once 12:40 AM Alarm Sound 1 Interval:5minSETTING THE ALARM (Continued)
- Set each item of the hour, minute and AM/PM by sliding up or down.
- Tap
. - Tap on the third item repeatedly to select the alarm sound.
- You can select from
- Tap on the fourth item repeatedly to set the alarm interval.
- Once you set the interval, the alarm repeats in the set time interval. Select from
- Tap
.
- The save confirmation window will appear.
- Tap
.
■ The alarm setting is added to the alarm list.

NOTE
- You can store up to 7 alarms.
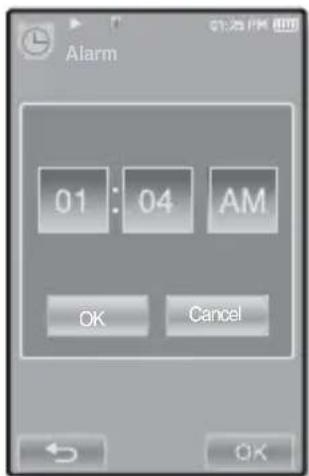
text_image
Alarm 01 : 04 AM OK CancelSETTING THE ALARM (Continued)
To edit the alarm setting
- In the Alarm screen, select an alarm setting to change and tap on it.
■ The alarm setting screen appears.
- Follow the same steps as the new alarm setting above to edit the setting. See page 102.
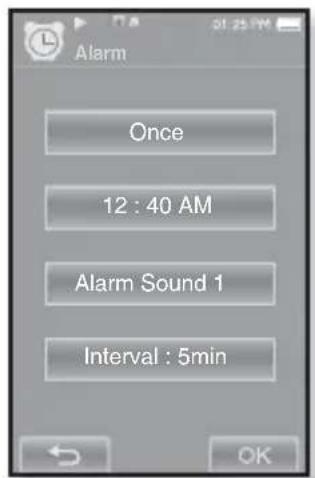
text_image
Alarm Once 12:40 AM Alarm Sound 1 Interval: 5minTo delete an alarm setting
- Tap on an alarm setting to delete on the alarm screen.
-
Tap the [图标] icon.
-
Tap the [icon to delete all of the alarm setting.
■ The Delete window appears. -
Tap
.
- The selected alarm will be deleted.
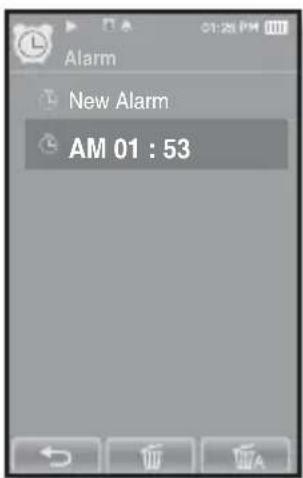
text_image
Alarm New Alarm AM 01 : 53
NOTE
- The player will sound the alarm when it reaches the scheduled time. To end the alarm, tap

- If the USB cable is connected to the player, the alarm function does not work.
You can check the calendar.

- Before you start - First, you should set the clock for the current time. See page 33.
- Tap the icon on the main menu screen.
■ The
- Select
and tap on it.
- The
- Tap the [<,>] icon to select a desired month.
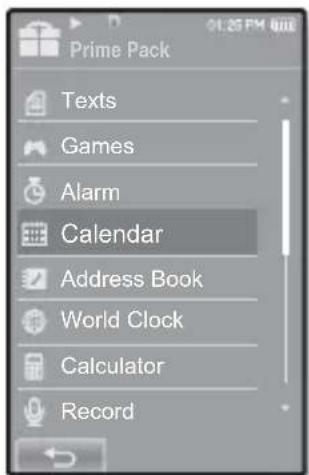
text_image
Prime Pack Texts Games Alarm Calendar Address Book World Clock Calculator RecordTo set the type of the calendar
You can view the calendar by changing the order of days of the week.
- Tap the [☐] icon on the calendar view screen.
- The
- Tap
.
- The
- Tap the [ < , > ] icon to select the view mode you want and tap
.
- Select either
-
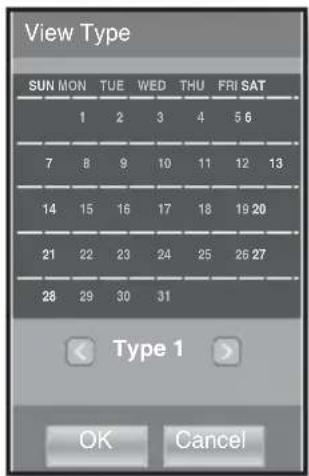
text_image
View Type SUN MON TUE WED THU FRI SAT 1 2 3 4 5 6 7 8 9 10 11 12 13 14 15 16 17 18 19 20 21 22 23 24 25 26 27 28 29 30 31 Type 1 OK CancelVIEWING THE ADDRESS BOOK
You can download the address book using Bluetooth function to check the phone number and directly call the other person on the player.

- Before you start - First, use the Bluetooth-based file transfer function to download the address book from an external device. For more information, refer to
You must pair your mobile phone with the player before you make a call in the address book window.
For more information, refer to
- Tap the icon on the main menu screen.
- The
- Select and tap on it.
■ The Address Book window appears.
- Select a name to check in the Address Book window, and tap on it.
■ The selected address information will appear.
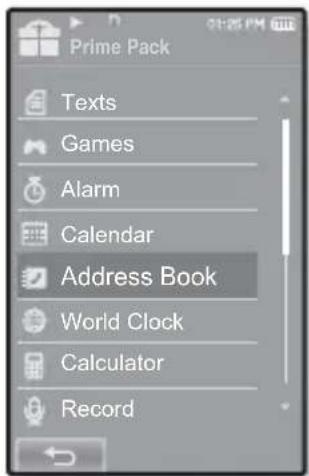
text_image
Prime Pack Texts Games Alarm Calendar Address Book World Clock Calculator RecordTo make a call in the address book
- Select a name to make a call in the Address Book window, and tap on it.
- The selected address information will appear.
- Select a desired phone number and tap the [ ↔ ] icon.
- You are now placing a call to the other person.

NOTE
- The address book will be displayed in alphabetical order.
- The address book files transferred to the player are saved in
→ folder. - Only the vCard file format is supported for the address book.
106 _ enjoying the prime pack
VIEWING THE WORLD CLOCK
You can check the location and date/time of major world cities based on their respective time zone.

Before you start - First, you should set the clock for the current time. See page 33. Set the time zone you want in the
- Tap the icon on the main menu screen.
- The
- Select
and tap on it.
■ The
- Tap the [<,>] icon to select a time zone.
- You can view the date/time of the city you select.
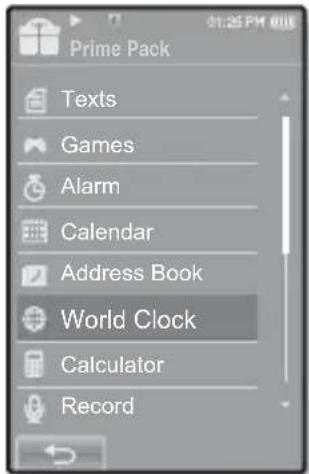
text_image
Prime Pack Texts Games Alarm Calendar Address Book World Clock Calculator RecordYou can check local time of the following time zone.
(/' indicates the standard time zone in the region)
Cape Verde, London/Lisbon, Rome/Paris, Athens/Helsinki, Moscow/Riyadh, Abu Dhabi/Muskat, Tashkent/Ashgabat, Alma Ata/Kathmandu, Bangkok/Jakarta, Hongkong/Beijing, Seoul/Tokyo, Guam/Sydney, Okhotsk, Wellingtons/Oakland, Samoa/Midway, Honolulu/Hawaii, Alyeska, Los Angeles/Seattle, Denver/Phoenix, Chicago/Mexico City, New York/Miami, Caracas/Santiago, Buenos Aires/Brasilia, The middle Atlantic
USING THE CALCULATOR
The calculator helps you with the four rules of arithmetic (addition, subtraction, multiplication and division).

■ Before you start - Connect the earphones, then turn on the player, and check the battery.
- Tap the icon on the main menu screen.
- The
- Select
and tap on it.
■ The calculator screen appears.
- Calculate numbers by tapping on the touch screen.
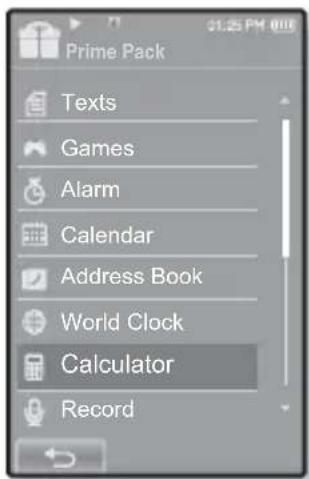
text_image
Prime Pack Texts Games Alarm Calendar Address Book World Clock Calculator Record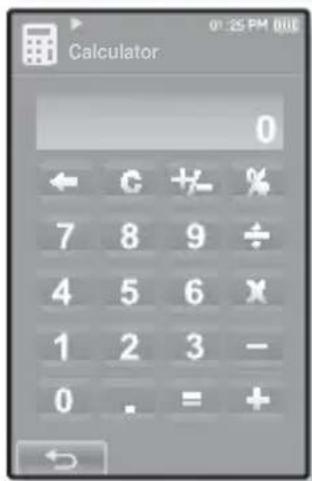
text_image
Calculator 0 ← C +/- % 7 8 9 ÷ 4 5 6 X 1 2 3 - 0 . = +You can make a voice recording.

■ Before you start - Connect the earphones, then turn on the player, and check the battery.
To make a voice recording
- Tap the icon on the main menu screen.
- The
- Select
and tap on it.
■ Voice Recording screen appears.
- Tap the [ ] icon.
■ The recording confirmation window appears.
- Tap
.
- Recording starts and the screen will be automatically turned off for better recording quality.
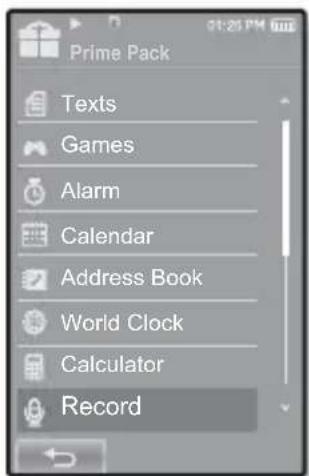
text_image
Prime Pack Texts Games Alarm Calendar Address Book World Clock Calculator Record
NOTE
- Do not put the microphone too close to or far away from your mouth as it may cause a poor recording.
■Voice recording does not perform properly when the battery is low.
To stop voice recording
- Press the [▶///○] button during the recording.
- The screen will be turned on again and the recorded file is stored.
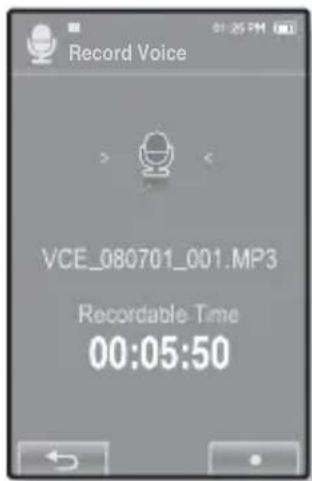
text_image
Record Voice VCE_080701_001.MP3 Recordable Time 00:05:50
- The recorded file is stored in
→ . - You can make a recording for up to approximately 18 hours (based on 128Kbps, 1GB)
- You can store a maximum of 999 files by the date for voice recording.
■ Each voice recording fi le can be as long as 5 hours. - The recording file name will be automatically specified, for example, as such as "VCE_YYMMDD_XXX.mp3". "VCE" means voice recording, "YYMMDD" indicates the recording date and "XXX" is the recording file number.
VIEWING THE WORLD SUBWAY MAP
You can browse through the World Subway Map and noted places around stations.
- Tap the icon on the main menu screen.
- The
- Select
and tap on it.
■ World Region selection screen appears.
-
Tap on the desired region.
-
Select one from
, , . -
Cities with Subway Map within the selected region are displayed.
-
Tap on the city name to display its subway map.
- The subway map of the selected city is displayed.
- To enlarge the map, tap on the portion to enlarge.
- Tap on the enlarged map again to display [icon, and move the map using these buttons.
- In case of having noted places near a station on the enlarged map, tap on the icon to display information on the place.

- Tap the [icon] icon to return to World Region selection screen.
- Tapping the [→] icon moves back to the previous screen, and pressing and hold the [→] icon moves to the main menu.
- It may differ from the actual subway map.
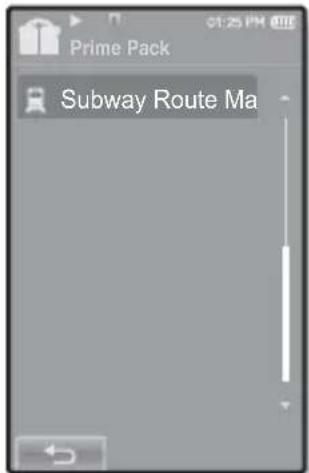
text_image
Prime Pack Subway Route Mausing bluetooth

NOTE
- Tap the [] icon to move to the previous screen.
Press and briefly hold the [→] icon to move to the main menu screen.
WHAT IS BLUETOOTH?
Bluetooth is an industry specification that describes how Bluetooth-compliant stereo headsets, mobile phones, and external devices can easily interconnect with each other using a short wireless connection.
- The Bluetooth device can cause a noise or malfunction, depending on the use conditions.
- Physical signal interference, for instance, if you hold the player in the hand and wear a stereo headset in your ears.
- When a part of the body is in contact with the receiving/transmitting system of the player or the stereo headset.
- Electrical variation from electrical jamming by the wall, corner or office partitioning.
-
Electrical interference from the same frequency-band devices including medical equipment, microwave oven and wireless LAN.
-
When pairing the Bluetooth device with the player, make it within as short distance as possible.
- The farther the distance between player and stereo headset is, the worse the quality is. If the distance exceeds the limit, the communications are disconnected.
- We do not recommend you use text and picture view modes while listening to the music with the stereo headset as it can cause deterioration of both player performance and Bluetooth communications.
- Depending on the model of the stereo headset, files less than 32 KHz can not be played.
- In poor reception-sensitivity areas such as inside an elevator or underground, the Bluetooth connection may not work properly.
- The maximum distance that enables wireless connection between the player and the bluetooth is 10 m. The connection will be automatically cut off if the distance is out of this range. Even within this range, the sound quality may be deteriorated by obstacles such as walls or doors.
112 _ using bluetooth
USING A BLUETOOTH STEREO HEADSET
You can use a Bluetooth stereo headset to let you enjoy music with high quality stereo sound, all without wires!

- Before you start - If the player is connected to a Bluetooth mobile phone or external device, set the connection to off first. Ensure that the Bluetooth device to connect is ready for pairing. (refer to the device's user manual)
To register the Bluetooth Stereo Headset
(you only need to register it once)
- Tap the ✿ icon on the main menu screen.
■ The Bluetooth settings window appears.
- Tap
.
- The
- The ✦ icon will light.
- Set the stereo headset ready for pairing.
- To set the headset ready for the pairing mode, refer to the headset's user manual.
-
Tap
. -
Tap the [ ] icon.
- This player automatically starts to search for any Bluetooth device even if the [💡] icon was not pressed.
■ The headset to be registered will be listed.
text_image
Wireless Bluetooth Settings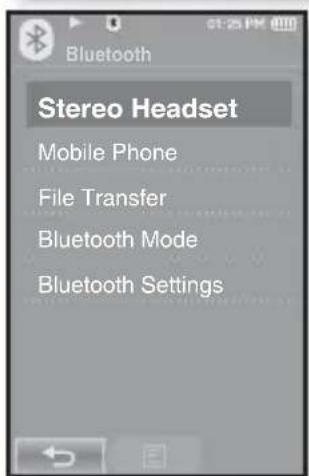
text_image
Bluetooth Stereo Headset Mobile Phone File Transfer Bluetooth Mode Bluetooth Settingsusing bluetooth_113
USING A BLUETOOTH STEREO HEADSET (Continued)
To register the Bluetooth Stereo Headset (continued)
-
Tap on the name of headset you want to register.
-
The password input window appears if the password for the headset is other than 0000. Refer to the headset's manual for the password.
■ The registration of the headset is completed.

- You can use the Bluetooth function only when playing music, video and games. It is not supported while you are listening to FM Radio.
■ Description of the Bluetooth icon
: Bluetooth mode off
Bluetooth mode on
*:Connected to a stereo headset :Connected to a mobile phone
If you want to turn off the Bluetooth function, set the Bluetooth Mode to
- Use only a Bluetooth-certified stereo headset. Mono hands-free headsets are not supported.
- When not in use, set the
- You can add up to 20 devices for the Bluetooth connection.
- Some Bluetooth stereo headsets may make poor communications with your player, depending on the model.
- The Bluetooth features of the player are optimized with Samsung products. If used with third party products, the Bluetooth features may not work properly.

- Do not use the Bluetooth function for illegal purposes (pirated copy, illegal wireless tapping and communications, etc. for commercial purposes) Samsung is not responsible for any of these illegal uses and the consequent results.
114 _ using bluetooth
USING A BLUETOOTH STEREO HEADSET (Continued)
To connect the registered Bluetooth stereo headset
- Tap the icon on the main menu screen.
- Tap
. -
Tap on the stereo headset to connect.
-
When the connection is successfully done, you will see the [ * ] icon.
-
You can connect up to 2 headsets.
-
Play a file of your choice.
- You can listen to the music using a stereo headset.
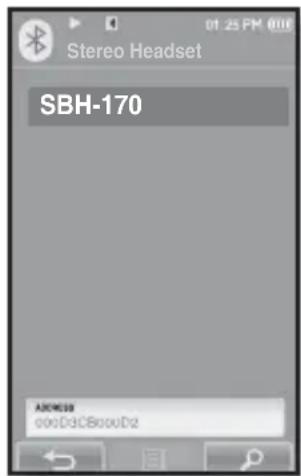
text_image
Stereo Headset SBH-170 ASCII:000D3C8000D2
- If you can't find the desired headset to connect, register it first. See page 113.
- If you turn off the player or the headset, and then turn it on, the bluetooth communication may be disconnected. If you want to listen to the music again using the stereo headset, repeat the instructions above.
- When two headsets are connected, the first-connected headset alone can be enabled for functional operation such as play/stop and volume control. For more information, refer to the headset's user manual.
■ Bluetooth-compliant Stereo Headsets
| Company Model | Company Model | ||
| Plantronics | PULSAR 590 LUBIX NC1 | ||
| wiREVO S300 | SAMSUNG SBH-170 | ||
| Sony Ericsson | HBH-DS970 Jabra BT-620S | ||
| SONY DR-BT | 30Q Motorola | HT-820 | |
| Fusion NFC | BT-55D |
USING A BLUETOOTH MOBILE PHONE
You can make and receive phone calls on your player once you connect a Bluetooth mobile phone. The player will function as a hands-free device.

- Before you start - If the player is connected to a Bluetooth stereo headset or external device, set the connection to off first. Ensure that the Bluetooth mobile phone you are going to connect is ready for pairing. (refer to the mobile phone's user manual) Set to
To register the Bluetooth mobile phone
(you only need to register it once)
- Tap the ✿ icon on the main menu screen.
■ The Bluetooth settings window appears.
- Tap
.
- The
- The ✦ icon will light.
- Search for YP-P2 in your mobile phone's menu.
- If you renamed the YP-P2 player, search the new name.
-
Enter the password when the password input window appears on the mobile phone.
-
If you see the message of
.
■ The PIN code (password) input window appears.
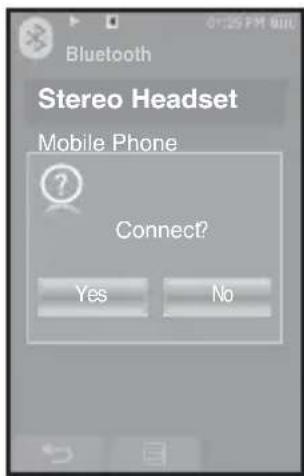
text_image
Bluetooth Stereo Headset Mobile Phone Connect? Yes No
- The password digits may differ, depending on the mobile phone. (refer to the mobile phone's user manual)
USING A BLUETOOTH MOBILE PHONE (Continued)
To register the Bluetooth mobile phone (Continued)
- Enter the password for the mobile phone to add to the player.
■ Make sure to enter the same password as in step 4 above.
- Tap
.
- The mobile phone registration is complete.
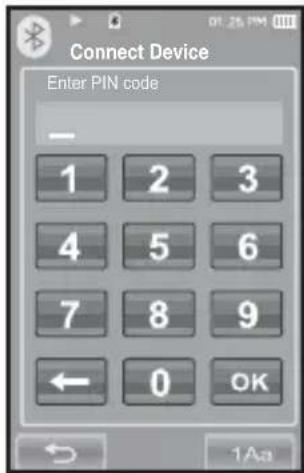
text_image
Connect Device Enter PIN code - 1 2 3 4 5 6 7 8 9 ← 0 OK 1 Aa
- With some mobile phones, the search device and mobile conversation (placing/receiving calls) functions may not work properly.
- If you press a button on the mobile phone or make or end a call when there is a Bluetooth connection between the player and the mobile phone, you may hear a noise from the player.
■ We recommended using English for the device name of the mobile phone.
■ Bluetooth-compliant Mobile Phones
| Company Model | |
| SAMSUNG | SPH-C3250, SPH-W2700, SPH-V7400, SPH-V6900, SCH-W270, SPH-B5600, SPH-B3200, SGH-X828, SGH-I718, SGH-E908, SGH-U608 |
| LG LG-KH1000 | LG-KV2400, LG-KG90, LG-KG77 |
| SKY | IM-U130 |
| NOKIA N72 | |
| PHILIPS S900 | |
| MOTOROLA Z3 | |
USING A BLUETOOTH MOBILE PHONE (Continued)
To connect to the registered Bluetooth mobile phone
- Tap the icon on the main menu screen.
- In the Bluetooth screen, select
and tap on it. - Select
and tap on it. - Select a mobile phone to connect to and tap on it.
- When the connection is successfully done, you will see the ✕ icon.
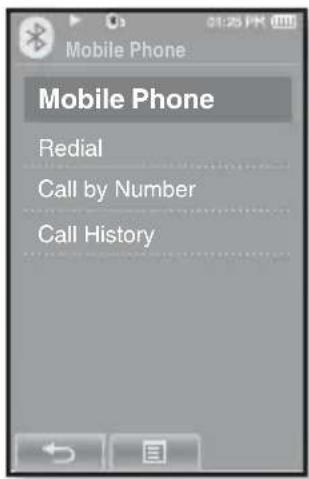
text_image
Mobile Phone Mobile Phone Redial Call by Number Call History
NOTE
- If you can't find a phone to connect to, register the phone with the player first. See page 116.
- The mobile phone connection can be set off if you turn off and restart the player. If the connection is set off, refer to the steps above to connect again.
USING A BLUETOOTH MOBILE PHONE (Continued)
To dial the last used number
- In the Bluetooth screen, select
and tap on it. -
Select
and tap on it. -
You are now placing a call to the last used phone number.
- The recent call history may appear depending on the mobile phone. Select the latest phone number in the call history to call.
To make a call using the player
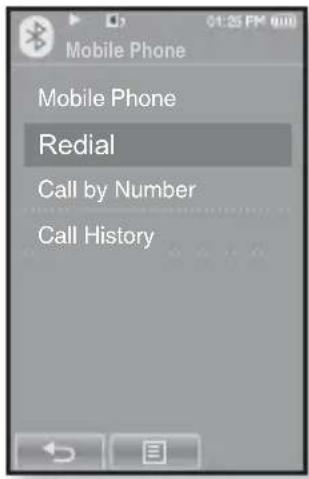
text_image
Mobile Phone Mobile Phone Redial Call by Number Call History- In the Bluetooth screen, select
and tap on it. - Select
and tap on it.
■ The phone number input window appears.
- Enter the phone number for the other person.
- Tap the [ ] icon.
- You are now placing a call to the other person.

■ If the connected mobile phone has set shortcut numbers, you can directly make a call on the player by pressing and holding the last number of the shortcut.
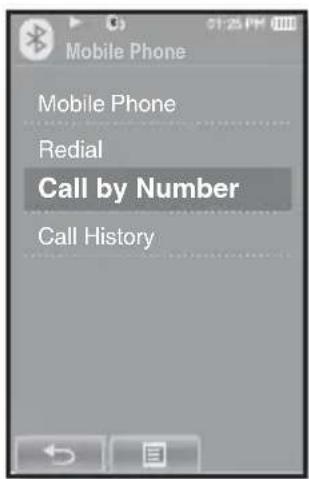
text_image
Mobile Phone Mobile Phone Redial Call by Number Call HistoryTo end the phone call
Tap
■ The call is hung up.
using bluetooth_119
USING A BLUETOOTH MOBILE PHONE (Continued)
To make a call using the phone number list
- In the Bluetooth screen, select
and tap on it. - Select
and tap on it.
■ The phone number list appears.
- Select a desired phone number and tap the [ ↔ ] icon.
- You are now placing a call to the other person.
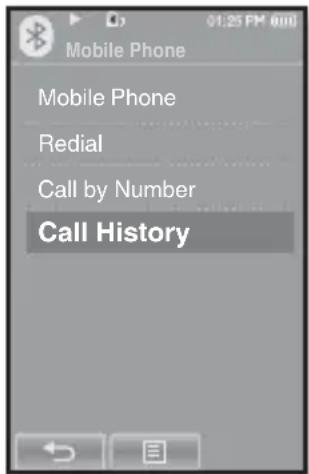
text_image
Mobile Phone Mobile Phone Redial Call by Number Call HistoryTo delete a phone number in the phone number list
- In the
, select a phone number to delete and tap the [icon. -
Tap
. -
If you want to delete all numbers in the phone number list, select
.
■ The confirmation window appears. -
Tap
.
■ The selected number will be deleted.
USING A BLUETOOTH MOBILE PHONE (Continued)
To answer the phone
- You will see
- Tap
.
- You can now make conversations.
To switch to the mobile phone while talking on the player (YP-P2)
While talking on the player, tap
- You can now make conversations on the mobile phone.
To switch to the player (YP-P2) while talking on the mobile phone
While talking on the mobile phone, tap
- You can now make conversations on the hands-free device.
To adjust the volume
While talking on the hands-free, press the [+,-] button to adjust the volume.
- You can select the volume from 0 to 30.
TRANSFERRING FILES TO/FROM A BLUETOOTH DEVICE
You can transfer music, picture and video files to Bluetooth-compliant external devices such as an MP3 player, mobile phone, etc. to the player or vice versa.

■ Before you start - If the player is connected to a Bluetooth stereo headset or mobile phone, set the connection to off first.
Ensure that the Bluetooth device you are going to connect is ready for pairing. (refer to the device's user manual)
Check if the Bluetooth device to support the file transfer function. (refer to the device's user manual)
To register an external device on the player
(you only need to register it once)
-
Tap the 🎨 icon on the main menu screen.
■ The Bluetooth settings window appears. -
Tap
. -
The
is set to . -
The ✦ icon will light.
-
Set the external device so it is ready for pairing.
- For information on setting the external device so it is ready for pairing, refer to the device's user manual.
-
Select
and tap on it. -
Tap the [ ] icon.
-
This player automatically starts to search for any Bluetooth device even if the [💡] icon was not pressed.
- The device to be registered will be listed.
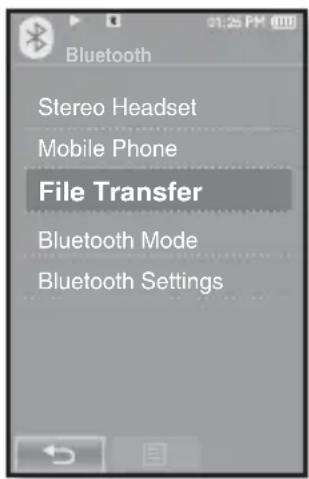
text_image
Bluetooth Stereo Headset Mobile Phone File Transfer Bluetooth Mode Bluetooth SettingsTRANSFERRING FILES TO/FROM A BLUETOOTH DEVICE (Continued)
To register an external device on the player (Continued)
- Tap on the name of device you want to register.
- The password input window appears if the password for the external device is other than 0000. Refer to the external device's manual for the password.
- Enter the password when the password input window appears on the external device.
- You must enter the same password as in step 6 above.
- When the pairing is completed, you will see the File Transfer screen.
- See step 3 of page 124 to transfer files on the player to an external device.
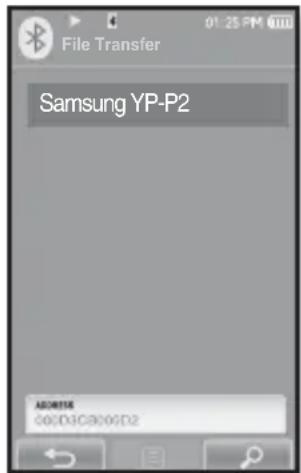
text_image
File Transfer Samsung YP-P2 ADDRESS 00(D3C8)06D2
- The password digits may differ, depending on the external device. (refer to the device's user manual)
- Some functions may not work properly if you use a Bluetooth device other than YP-P2 for file transfer.
TRANSFERRING FILES TO/FROM A BLUETOOTH DEVICE (Continued)
To transfer a fi le on the player to the external device

Before you start - If you can't find the external device to connect to, register it with the player first. See page 122. Ensure that the Bluetooth device you are connecting is ready for pairing. (refer to the device's user manual)
- In the Bluetooth screen, select
and tap on it. - Select an external device to connect to and tap on it.
- When the connection is completed, you will see the File Transfer screen.
- Select a desired folder and tap
- Select a file to transfer and tap
.
- The selected files on the player will be transferred to the external device.
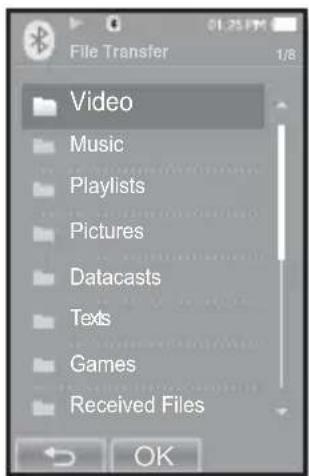
text_image
File Transfer 1/8 Video Music Playlists Pictures Datacasts Texts Games Received Files OKEx)

- When the file transfer is done, tap the [→] icon to exit the file transfer mode. See page 125.
- DRM files (chargeable) can not be played on the player.
- The connection can be set off if you turn off and restart the player or external device. If the connection is set off, refer to the steps above to connect again.
TRANSFERRING FILES TO/FROM A BLUETOOTH DEVICE (Continued)
To cancel transferring the fi le
Tap
■ The fi le transfer is stopped.
To exit the File Transfer mode
- Press and briefly hold the [→] icon in the file list window.
- Each time you tap the [] icon, the player will return to the previous screen and you will see the fi le transfer close window.
- Tap
.
■ The fi le transfer mode is closed.
TRANSFERRING FILES TO/FROM A BLUETOOTH DEVICE (Continued)
To transfer a fi le on the external device to the player
If you want to transfer an external file to the player, you must first make it ready for pairing.

■ Before you start - If the player is connected to a Bluetooth stereo headset or mobile phone, set the connection to off first.
Ensure that the Bluetooth device you are going to connect is ready for pairing. (refer to the device's user manual)
Check if the Bluetooth device to support the file transfer function.
(refer to the device's user manual)
Set
- Tap the icon on the main menu screen.
■ The Bluetooth settings window appears.
- Tap
.
- The
- The ✦ icon will light.
- You can transfer a file on the external device to the player.
- For pairing the external device with and transferring it to the player, refer to the device's user manual.
- Files transferred to the player are saved in
To disconnect the Bluetooth Device
- Tap the ✿ icon on the main menu screen.
- Tap the [ ] icon.
- The
- Tap
. - The Disconnection confirmation window appears.
- Tap
.
■ The currently connected device will be disconnected.
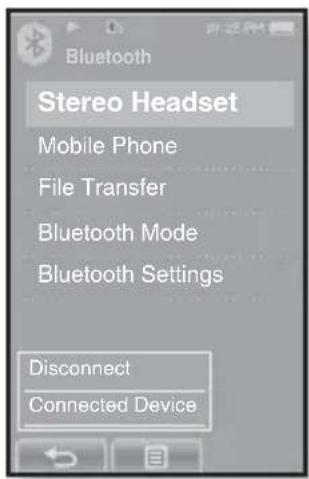
text_image
Bluetooth Stereo Headset Mobile Phone File Transfer Bluetooth Mode Bluetooth Settings Disconnect Connected DeviceTo check the Bluetooth Device connected
- Tap the icon on the main menu screen.
- Tap the [ ] icon.
- The
- Tap
.
- You can see information of the connected device.

- You can disconnect or check the connected device only when connecting Bluetooth stereo headset or mobile phone.
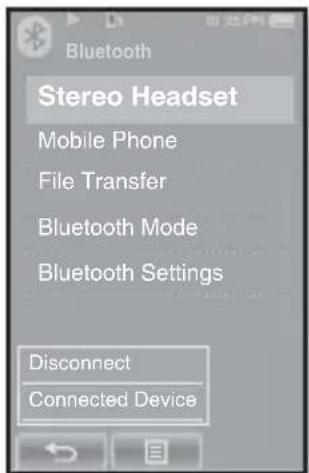
text_image
Bluetooth Stereo Headset Mobile Phone File Transfer Bluetooth Mode Bluetooth Settings Disconnect Connected Deviceusing bluetooth_127
BLUETOOTH SETTINGS

Before you start - Set
-
Tap the icon on the main menu screen.
-
Select
and tap on it.
- The
- Set the options you prefer and tap
.
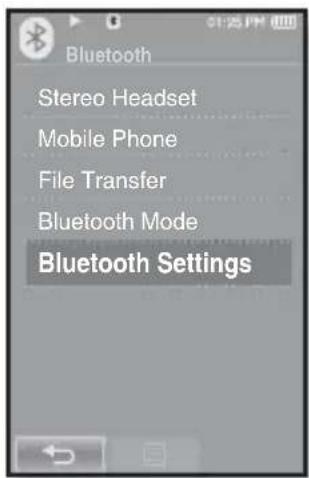
text_image
Bluetooth Stereo Headset Mobile Phone File Transfer Bluetooth Mode Bluetooth SettingsBluetooth Settings Options
- Discover Option: You can set the Bluetooth device to detect this player.
sets it to detect and turns off detection. - Search Timeout: You can select the search time period for a new device. After setting a time, a new device will be searched for the time limit you set. Select one from <10sec>, <20sec>, <30sec>, <45sec> and <60sec>.
- Delete Device : You can delete a registered device in the player. Tap the [T] icon to delete all of the registered devices. See page 129.
- My Device Info. : You can check the name and address of your player.
BLUETOOTH SETTINGS (Continued)
To delete a Bluetooth device
- Select
and tap on it.
- You will see the list of the registered devices.
- Select a device to remove and tap the [icon].
- Tap the icon to delete all of the registered devices.
- Tap
.
- The selected device will be removed.
To rename a Bluetooth device
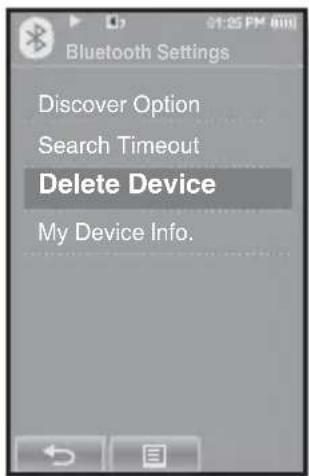
text_image
Bluetooth Settings Discover Option Search Timeout Delete Device My Device Info.- Select
and tap on it.
■ The My Device Info screen appears.
- Tap the [ ] icon.
■ The Edit Device Name window appears.
-
Rename the device by tapping on the number or character icon.
-
[1Aa] : The input mode switches from number to uppercase English and to lowercase English.
- [←]: You can delete the characters one at a time.
- [-]: You can add space between characters.
You can insert ‘-’.
■ [OK] : Confirm your change.
E.g. To enter "YPS5"
-Move to the corresponding key icon and tap on it.

flowchart
graph LR
    A["1Aa (once)"] --> B["WXY (3 times)"]
    B --> C["PRS (once)"]
    C --> D["PRS (3 times)"]
    D --> E["1Aa (twice)"]
    F["5 (once)"] --> G
    style A fill:#f9f,stroke:#333
    style F fill:#f9f,stroke:#333
    style B fill:#ccf,stroke:#333
    style C fill:#ccf,stroke:#333
    style D fill:#ccf,stroke:#333
    style E fill:#ccf,stroke:#333
    style G fill:#ccf,stroke:#333
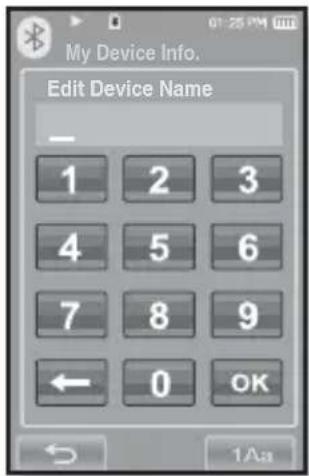
text_image
My Device Info. Edit Device Name - 1 2 3 4 5 6 7 8 9 ← 0 OK 1Aausing bluetooth_129
troubleshooting
If you have a problem with your new mp3 player, check for a solution in this list. If the problem persists, contact Samsung Customer Service Center near you.
| PROBLEM SOLUTION | |
| Power will not turn on. | • Power will not turn on if the battery is completely drained. Recharge the battery and turn the power on again.• Press the Reset hole. |
| Buttons do not work. | • Check if theswitchis in the direction of the arrow position.• Ensure that you press the right button and icon before trying.• Press the Reset hole. |
| The screen will not turn on. | • The screen may not be visible under direct sunlight.• Whenis selected from, the touch screen will be turned off. Tap any button or on the screen and see if it turns on. |
| Power is turning off. | • Check the battery status.• The power is automatically turned off when the battery is completely drained. Recharge the battery.• Ifis selected from, the Power will be turned off when the player is in Pause mode. Turn on the Player. |
| Battery life differs from the manual. | ·The battery life can vary depending on the sound mode and display setting.·Battery life may be shortened when the player is left for extended periods in low or high temperatures. |
| EmoDio Program Malfunction | ·Check if your PC meets the basic system requirements. |
| Connection to your PC is disabled. | ·Check if the USB cable is correctly connected and try again.·Run Windows Update. Select Key Updates and Service Packs, then update all. Reboot your PC and reconnect. |
| The fi le transfer rate is too slow. | ·If you are running multiple programs includingon your PC, the file transfer rate will be slow. Exit unnecessary programs and try transferring again. |
| Player isn’t playing. | ·Check if the available file has been saved in the memory.·Check if the music file is damaged.·Check if there is enough battery power. |
| File upload doesn’t work. | ·Check if the USB cable is securely connected. Reconnect if necessary.·Check if the memory is full.·Press the Reset hole. |
| Files or data are missing. | ·Check if the USB cable has been disconnected during file or data transmission. If this is the case, it may cause serious damage not only to files/data but also to the product. You have to be extra cautious as Samsung is not responsible for data loss. |
| Abnormal play time display during play. | ·Check if the file is in Variable Bit Rate (VBR) format. |
| Abnormal display of fi le name. | ·Go to→→in the Main Menu screen and set an appropriate language. |
| The product is hot. | ·Heat may be generated during recharging. This has no effect on the product life or functions. |
| A message appears while watching a video. | ·Try to download the video clip through EmoDio again. |
| Bluetooth connections could not be made. | ·Check if the stereo headset is Bluetooth-certified. The mono hands-free headset is not supported.·The Bluetooth connection can be set off if you turn the player or stereo headset off and on. In this case, try to connect again.·If you want to talk on your mobile phone, check if you have set off the Bluetooth connections between player and stereo headset.·If you want to talk on your mobile phone, check if you have set the player toin the→.If set to, you can't find the player on your mobile phone. |
appendix
MENU TREE
Here's a quick look at how the menus and functions are organized on your new mp3 player.
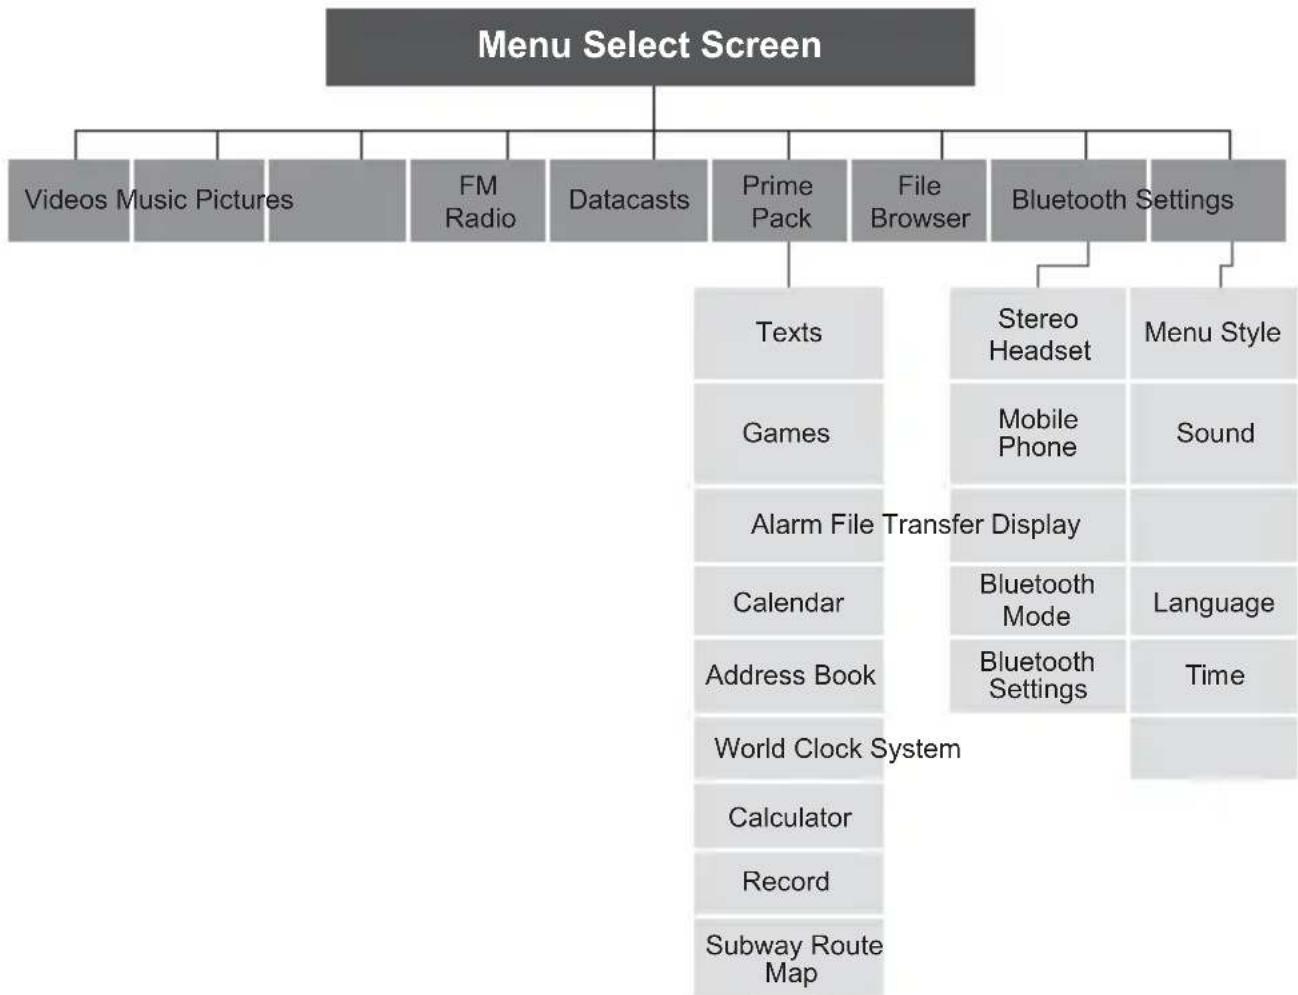
flowchart
graph TD
    A["Menu Select Screen"] --> B["Videos Music Pictures"]
    A --> C["FM Radio"]
    A --> D["Datacasts"]
    A --> E["Prime Pack"]
    A --> F["File Browser"]
    A --> G["Bluetooth Settings"]
    E --> H["Texts"]
    E --> I["Games"]
    E --> J["Alarm File Transfer Display"]
    E --> K["Calendar"]
    E --> L["Address Book"]
    E --> M["World Clock System"]
    E --> N["Calculator"]
    E --> O["Record"]
    E --> P["Subway Route Map"]
    G --> Q["Stereo Headset"]
    G --> R["Mobile Phone"]
    G --> S["Bluetooth Mode"]
    G --> T["Bluetooth Settings"]
    G --> U["Menu Style"]
    G --> V["Sound"]
    G --> W["Language"]
    G --> X["Time"]
PRODUCT SPECIFICATIONS
| Model Name YP-P2 | |
| Rating DC 5.0V / 500mA | |
| Built-in Battery Power 830 mAh / DC 3.7V | |
| File Compatibility | AUDIO: MPEG1/2/2.5 Layer3 (8kbps ~ 320kbps, 8kHz ~ 48kHz) WMA(8kbps~320kbps, 8kHz~48kHz)AAC-LC (16kbps ~ 256kbps, 8kHz ~ 48kHz) AAC-Plus (16kbps ~ 256kbps, 16kHz ~ 44.1kHz)Enhanced-AAC-Plus : (16kbps ~ 56kbps, 32kHz ~ 44.1kHz)VIDEO: SVI (Video: MPEG4, Audio: MP3 (CBR 44.1kHz 16bit Stereo, 128kbps), Resolution: 480x272, Frame Rate: 30fps)WMV9 (Video: WMV9 Simple Profi le, Audio:WMA9 (Max 860kbps), Resolution: 320x240 or 480x272, Frame Rate: 30fps)IMAGE: JPG (Baseline olny) |
| Earphone Output | 20mW/Ch. (France 5mW/Ch.) (based on 16Ω) |
| Output Frequency Range | 20Hz~20KHz |
| Signal to Noise Ratio 89 | dB with 20 KHz LPF(based on 1kHz 0 dB) |
| Play Time | Maximum of 35 hours for music playback (based on: MP3 128kbps, Volume 20, Normal sound mode), Maximum of 5 hours for video playback |
| Temperature Range for Operation | -5~35°C (23~95°F) |
| Case PMMA, Stainless | |
| Weight 86 g | |
| Dimensions (WxHxD) 52 X 100 X 9.95 mm | |
| FM Radio | FM Frequency | 87.5~108.0MHz FM T.H.D 0.8% | ||
| FM Signal to Noise Ratio | 59 dB | FM Useable Sensitivity | 5dBμ | |
Wireless System
| Emission Type F1D | |
| RF Power 2.4mW | |
| Transmit Frequency 2402MHz ~ 2480MHz | |
| Receive Frequency 2402MHz ~ 2480MHz | |
| No. of channels 79 ch | |
| Temperature -10°C~ +50°C (14 ~ 122°F) | |
| Modulation System GFSK | |
| Communication Mode Semi-duplex Operation | |
| Humidity 0~95% | |
| Spec Version Supported | 2.0 |
| Module | BCM2048 |
The contents of this Manual are subject to change without prior notice for further improvement.
LICENSE
The product player accompanying this user manual is licensed under certain intellectual property rights of certain third parties. This license is limited to private non-commercial use by end-user consumers for licensed contents. No rights are granted for commercial use.
The license does not cover any product player other than this product player and the license does not extend to any unlicensed product player or process conforming to ISO/IEC 11172-3 or ISO/IEC 13818-3 used or sold in combination with this product player. The license only covers the use of this product player to encode and/or decode audio files conforming to the ISO/IEC 11172-3 or ISO/IEC 13818-3. No rights are granted under this license for product features or functions that do not conform to the ISO/IEC 11172-3 or ISO/IEC 13818-3.
CORRECT DISPOSAL OF THIS PRODUCT (WASTE ELECTRICAL & ELECTRONIC EQUIPMENT)
(Applicable in the European Union and other European countries with separate collection systems)
This marking shown on the product or its literature, indicates that it should not be disposed with other household wastes at the end of its working life. To prevent possible harm to the environment or human health from uncontrolled waste disposal, please separate this from other types of wastes and recycle it responsibly to promote the sustainable reuse of material resources.
Household users should contact either the retailer where they purchased this product, or their local government office, for details of where and how they can take this item for environmentally safe recycling.
Business users should contact their supplier and check the terms and conditions of the purchase contract. This product should not be mixed with other commercial wastes for disposal.
natural_image
Simple line drawing of a trash bin with crossed lines indicating no waste or discharge (no text or symbols)
CORRECT DISPOSAL OF BATTERIES IN THIS PRODUCT
(Applicable in the European Union and other European countries with separate battery return systems.)
This marking on the battery, manual or packaging indicates that the batteries in this product should not be disposed of with other household waste at the end of their working life. Where marked, the chemical symbols Hg, Cd or Pb indicate that the battery contains mercury, cadmium or lead above the reference levels in EC Directive 2006/66. If batteries are not properly disposed of, these substances can cause harm to human health or the environment.
natural_image
Simple line drawing of a trash bin with two crossed arms and no text or symbolsTo protect natural resources and to promote material reuse, please separate batteries from other types of waste and recycle them through your local, free battery return system.
CONTACT SAMSUNG WORLD WIDE
If you have any questions or comments relating to Samsung products, please contact the SAMSUNG customer care center.
| Country | Customer Care Center | Web Site |
| CANADA 1-800-SAMSUNG(726-7864) www.samsung.com/ca | ||
| MEXICO 01-800-SAMSUNG(726-7864) www.samsung.com/mx | ||
| U.S.A 1-800-SAMSUNG(726-7864) www.samsung.com/us | ||
| ARGENTINE 0800-333-3733 www.samsung.com/ar | ||
| BRAZIL 0800-124-421, 4004-0000 www.samsung.com/br | ||
| CHILE 800-SAMSUNG(726-7864) www.samsung.com/cl | ||
| NICARAGUA 00-1800-5077267 www.samsung.com/latin | ||
| HONDURAS | 800-7919267 | www.sams |
| COSTA RICA 0-800-507-7267 | www.samsung.com/latin | |
| ECUADOR | 1-800-10-7267 | www.samsung.com/latin |
| EL SALVADOR | 800-6225 | www.samsung.com/latin |
| GUATEMALA | 1-800-299-0013 | www.samsung.com/latin |
| JAMAICA 1-800-234-7267 | www.samsung.com/latin | |
| PANAMA 800-7267 | www.samsung.com/latin | |
| PUERTO RICO | 1-800-682-3180 | www.samsung.com/latin |
| REP. DOMINICA | 1-800-751-2676 | www.samsung.com/latin |
| TRINIDAD & TOBAGO | 1-800-SAMSUNG(726-7864) www.samsung.com/latin | |
| VENEZUELA 0-800-100-5303 | www.samsung.com/latin | |
| COLOMBIA | 01-8000112112 | www.samsung.com.co |
| BELGIUM | 02 201 2418 | www.samsung.com/be |
| CZECH REPUBLIC | 800-726-786 (800 - SAMSUNG) | www.samsung.com/cz |
| DENMARK | 70 70 19 70 | www.samsung.com/dk |
| FINLAND | 030-6227 515 | www.samsung.com/fi |
| FRANCE | 3260 SAMSUNG (€ 0,15/Min)08 25 08 65 65 (€ 0,15/Min) | www.samsung.com/fr |
| GERMANY | 01805 - SAMSUNG(726-7864 € 0,14/Min) | www.samsung.de |
| HUNGARY | 06-80-SAMSUNG(726-7864) www.samsung.com/hu | |
| ITALIA 800-SAMSUNG(726-7864) www.samsung.com/it | ||
| LUXEMBURG | 02 261 03 710 | www.samsung.com/lu |
| NETHERLANDS | 0900-SAMSUNG (726-7864 € 0,10/Min) | www.samsung.com/nl |
| NORWAY 815-56 480 | www.samsung.com/no |
ung.com/la
| Country | Customer Care Center | Web Site |
| POLAND 0 801 801 881 | 022-607-93-33 www.samsung.com/pl | |
| PORTUGAL 80820-SAMSUNG(726-7864) www.samsung.com/pt | ||
| SLOVAKIA 0800-SAMSUNG(726-7864) www.samsung.com/sk | ||
| SPAIN 902-1-SAMSUNG(72678) www.samsung.com/es | ||
| SWEDEN 0771-400 200 | www.samsung.com/se | |
| U.K 0845 SAMSUNG (7267864) www.samsung.com/uk | ||
| EIRE 0818 717 100 www.samsung.com/ie | ||
| AUSTRIA 0800-SAMSUNG(726-7864) www.samsung.com/at | ||
| SWITZERLAND | 0800-SAMSUNG(726-7864) www.samsung.com/ch | |
| RUSSIA | 8-800-555-55-55 | www.samsung.ru |
| KAZAKHSTAN | 8-10-800-500-55-500 | www.samsung.com/kz_ru |
| UZBEKISTAN | 8-10-800-500-55-500 | www.samsung.com/kz_ru |
| KYRGYZSTAN | 00-800-500-55-500 | |
| TADJIKISTAN | 8-10-800-500-55-500 | |
| UKRAINE 8-800-502-0000 | www.samsung.ua | |
| LITHUANIA | 8-800-77777 | www.samsung.lt |
| LATVIA | 8000-7267 | www.samsung.com/lv |
| ESTONIA 800-7267 | www.samsung.ee | |
| AUSTRALIA | 1300 362 603 www.samsung.com/au | |
| NEW ZEALAND | 0800 SAMSUNG (0800 726 786) | www.samsung.com/nz |
| CHINA | 800-810-5858, 400-810-5858, 010-6475 1880 | www.samsung.com/cn |
| HONG KONG | 3698-4698 | www.samsung.com/hk |
| INDIA | 3030 8282, 1800 110011, 1-800-3000-8282 | www.samsung.com/in |
| INDONESIA 0800-112-8888 | www.samsung.com/id | |
| MALAYSIA | 1800-88-9999 | www.samsung.com/my |
| PHILIPPINES | 1800-10-SAMSUNG(726-7864) www.samsung.com/ph | |
| SINGAPORE | 1800-SAMSUNG(726-7864) www.samsung.com/sg | |
| THAILAND | 1800-29-3232, 02-689-3232 | www.samsung.com/th |
| TAIWAN | 0800-329-999 | www.samsung.com/tw |
| VIETNAM 1 800 588 889 | www.samsung.com/vn | |
| TURKEY | 444 77 11 | www.samsung.com/tr |
| SOUTH AFRICA | 0860-SAMSUNG(726-7864) | www.samsung.com/za |
| U.A.E | 800-SAMSUNG (726-7864), 8000-4726 | www.samsung.com/ae |

ELECTRONICS
Declaration of Conformity
For the following product:
YP-P2**, YP-P2J** / Digital Audio Player
(The mark “*” means the memory capacity and color of product.)
Manufactured at:
- Samsung Electronics Huizhou Co., Ltd. Industrial Complex, Chenjiang Town, Huizhou City, Guangdong Province, China
- Tianjin Samsung Electronics Company. 300457, TSEC12, 4th Avenue, TEDA, Tianjin, China
- Samsung Electronics Slovakia s.r.o. Hviezdoslavova 807, 924 27 Galanta, Slovakia
- P.T. Samsung Electronics Indonesia Co. Cikarang Industrial Estate JI, Jababeka Raya Blok F 29-33 Cikarang. Bekasi 17530, Indonesia (Factory name, address)
We hereby declare, that the product above is in compliance with the essential requirements of the R&TTE Directive (1995/5/EC) by application of:
EN 60065:2002
EN 55020:2002+A1:2003+A2:2005
EN 55022:1998+A1:2000+A2:2003
EN 55024:1998+A1:2001+A2:2003
EN 61000-3-2:2000
EN 61000-3-3:1995+A1:2001
EN 300 328-1 v1.7.1(2006-10)
EN 301 489-1 v1.6.1(2005-09)
EN 301 489-17 v1.2.1(2002-08)
Technical documentation kept at Samsung Electronics Co., Ltd. in Korea.
Manufacturer Representative in the EU:

Youn Doo Hyun / S. Engineer Samsung Electronics Co., Ltd. 416, Maetan3-Dong, Yeongtong-Gu, Suwon-City, Gyeonggi-Do, Korea

Yong Sang Park / S.Manager Samsung Electronics Euro QA Lab. Blackbushe Business Park, Saxony Way, Yateley, Hampshire, GU46 6GG, United Kingdom
August 20, 2007
August 20, 2007
(Place and date of issue) (Name and signature of authorized person)

REV. 4.0