
HT-TQ22 - Home Theater SAMSUNG - Free user manual and instructions
Find the device manual for free HT-TQ22 SAMSUNG in PDF.


User questions about HT-TQ22 SAMSUNG
0 question about this device. Answer the ones you know or ask your own.
Ask a new question about this device
Download the instructions for your Home Theater in PDF format for free! Find your manual HT-TQ22 - SAMSUNG and take your electronic device back in hand. On this page are published all the documents necessary for the use of your device. HT-TQ22 by SAMSUNG.
USER MANUAL HT-TQ22 SAMSUNG
natural_image
Line drawing of a CD-ROM front panel with control buttons and indicator lights (no text or symbols)





Safety Warnings
CLASS 1 LASER PRODUCT
KLASSE 1 LASER PRODUKT
LUOKAN 1 LASER LAITE
KLASS 1 LASER APPARAT
PRODUCTO LASER CLASE 1
Use of controls, adjustments or performance of procedures other than those specified herein may result in hazardous radiation exposure.
CAUTION-INVISIBLE LASER RADIATION WHEN OPEN AND INTERLOCKS DEFEATED, AVOID EXPOSURE TO BEAM.

CAUTION
RISK OF ELECTRIC SHOCK.
DO NOT OPEN

CAUTION:
TO REDUCE THE RISK OF ELECTRIC SHOCK, DO NOT REMOVE REAR COVER. NO USER SERVICEABLE PARTS INSIDE. REFER SERVICING TO QUALIFIED SERVICE PERSONNEL.

This symbol indicates that dangerous voltage which can cause electric shock is present inside this unit.

This symbol alerts you to important operating and maintenance instructions accompanying the unit.
WARNING: To reduce the risk of fire or electric shock, do not expose this appliance to rain or moisture.
CAUTION: TO PREVENT ELECTRIC SHOCK, MATCH WIDE BLADE OF PLUG TO WIDE SLOT, FULLY INSERT.
CLASS 1 LASER PRODUCT
This Compact Disc player is classified as a CLASS 1 LASER product.
- This apparatus shall always be connected to a AC outlet with a protective grounding connection.
- To disconnect the apparatus from the mains, the plug must be pulled out from the mains socket, therefore the mains plug shall be readily operable.
Wiring the Main Power Supply Plug(UK Only)
IMPORTANT NOTICE
The main lead on this equipment is supplied with a moulded plug incorporating a fuse. The value of the fuse is indicated on the pin face of the plug and if it requires replacing, a fuse approved to BS1362 of the same rating must be used.
Never use the plug with the fuse cover removed. If the cover is detachable and a replacement is required, it must be of the same colour as the fuse fitted in the plug. Replacement covers are available from your dealer.
If the fitted plug is not suitable for the power points in your house or the cable is not long enough to reach a power point, you should obtain a suitable safety approved extension lead or consult your dealer for assistance.
However, if there is no alternative to cutting off the plug, remove the fuse and then safely dispose of the plug. Do not connect the plug to a main socket as there is a risk of shock hazard from the bared flexible cord.
Never attempt to insert bare wires directly into a main socket. A plug and fuse must be used at all times.
IMPORTANT
The wires in the main lead are coloured in accordance with the following code:—
BLUE = NEUTRAL BROWN = LIVE
As these colours may not correspond to the coloured markings identifying the terminals in your plug, proceed as follows:-
The wire coloured BLUE must be connected to the terminal marked with the letter N or coloured BLUE or BLACK.
The wire coloured BROWN must be connected to the terminal marked with the letter L or coloured BROWN or RED.
WARNING: DO NOT CONNECT EITHER WIRE TO THE EARTH TERMINAL WHICH IS MARKED WITH THE LETTER E OR BY THE EARTH SYMBOL ⏚, OR COLOURED GREEN OR GREEN AND YELLOW.
Precautions
GB
text_image
10Cm 7Cm 10Cm 10Cm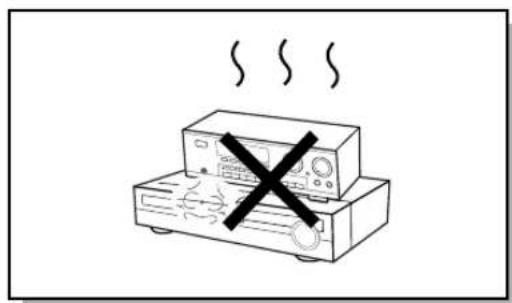
natural_image
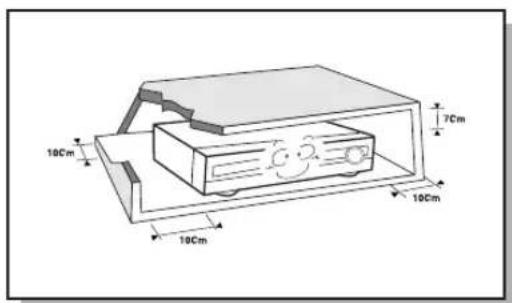
Simple line drawing of a printer with a crossed-out black X mark above it, emitting steam (no text or symbols)Ensure that the AC power supply in your house complies with the identification sticker located on the back of your player. Install your player horizontally, on a suitable base (furniture), with enough space around it for ventilation (3\~4 inches). Make sure the ventilation slots are not covered. Do not stack anything on top of the player. Do not place the player on amplifiers or other equipment which may become hot. Before moving the player, ensure the disc tray is empty. This player is designed for continuous use. Switching off the DVD player to the stand-by mode does not disconnect the electrical supply. In order to disconnect the player completely from the power supply, remove the main plug from the wall outlet, especially when left unused for a long period of time.
natural_image
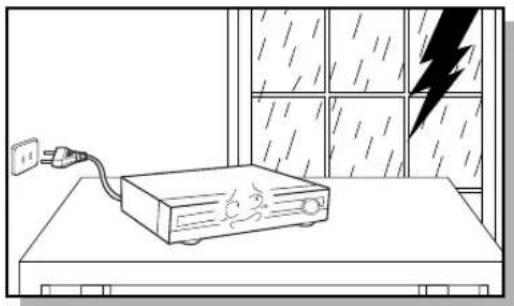
Line drawing of a device on a desk with a lightning bolt and power plug, no text or symbols presentDuring thunderstorms, disconnect AC main plug from the wall outlet.
Voltage peaks due to lightning could damage the unit.
natural_image
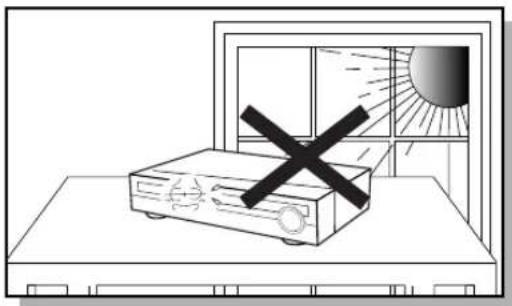
Illustration of a projector with a black X mark on its screen, emitting light from the window (no text or symbols)Do not expose the unit to direct sunlight or other heat sources.
This could lead to overheating and malfunction of the unit.
natural_image
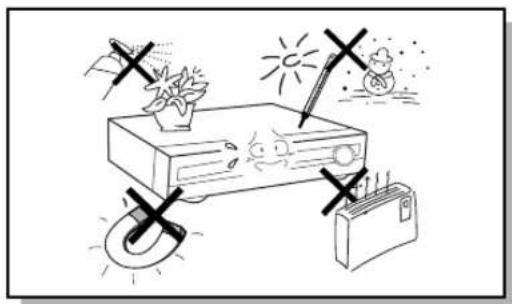
Illustration of a device with warning symbols and icons (no text or labels)Protect the player from moisture(i.e. vases), and excess heat (e.g.fireplace) or equipment creating strong magnetic or electric fields (i.e.speakers...). Disconnect the power cable from the AC supply if the player malfunctions. Your player is not intended for industrial use.
Use of this product is for personal use only.
Condensation may occur if your player or disc has been stored in cold temperatures.
If transporting the player during the winter, wait approximately 2 hours until the unit has reached room temperature before using.
text_image
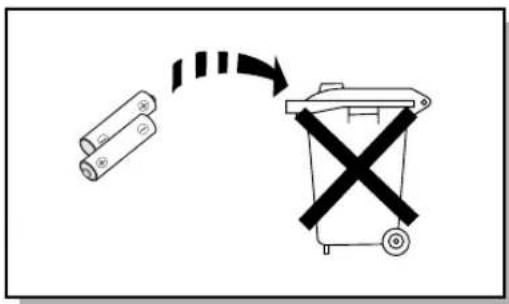
Diagram showing a battery with two batteries and a trash bin marked with a 'X' symbol, indicating a classification or restriction.The batteries used with this product contain chemicals that are harmful to the environment.
Do not dispose of batteries in the general household trash.
Features
Multi-Disc Playback & FM Tuner
The HT-Q20/HT-TQ22/HT-TQ25 combines the convenience of multi-disc playback capability, including DVD-VIDEO, VCD, CD, MP3-CD, WMA-CD, DivX, CD-R/RW, and DVD-R/RW, with a sophisticated FM tuner, all in a single player.
USB HOST Function support
You can connect and play files from external USB storage devices such as MP3 players, USB flash memory, etc. using the Home Theater's USB HOST function.
Dolby Pro Logic II
Dolby Pro Logic II is a new form of multi-channel audio signal decoding technology that improves upon existing Dolby Pro Logic.
DTS (Digital Theater Systems)
DTS is an audio compression format developed by Digital Theater Systems Inc. It delivers full-frequency 5.1 channel sound.
TV Screen Saver Function
The HT-Q20/HT-TQ22/HT-TQ25 automatically brightens and darkens your TV screen after 3 minutes in the stop mode. The HT-Q20/HT-TQ22/HT-TQ25 automatically switches itself into the power saving mode after 20 minutes in the screen saver mode.
Power Saving Function
The HT-Q20/HT-TQ22/HT-TQ25 automatically shuts itself off after 20 minutes in stop mode.
Customized TV Screen Display
The HT-Q20/HT-TQ22/HT-TQ25 allows you to select your favorite image during JPEG, DVD or VCD playback and set it as your background wallpaper.
Optional Wireless receiver amplifier
Samsung's optional rear-channel wireless module does away with cables running between your DVD receiver and rear-channel speakers. Instead, the rear speakers connect to a compact wireless module that communicates with your DVD receiver.
Contents
GB
PREPARATION
Safety Warnings ....1
Precautions 2
Features ....3
Notes on Discs 5
Description 7
CONNECTIONS
Connecting the Speakers .....11
Connecting the optional Wireless Receiving Amplifier 14
Connecting the Video Out to TV .....16
P.SCAN(Progressive Scan) Function .....17
Connecting External Components .....18
Connecting the FM Antenna .....19
OPERATION
Before Using Your Home Theater .....20
Disc Playback 22
MP3/WMA-CD Playback .23
Displaying Disc Information .....24
JPEG File Playback . . . . . . . . . . . . . . . . . . . . . . . . . . . . . . . . . . . . . . . . . . . . . . . . . 25
DivX Playback 27
Checking the Remaining Time .....29
Fast/Slow Playback 30
Skipping Scenes/Songs .30
Repeat Playback ....31
A-B Repeat Playback ....32
Step Function 33
Angle Function 33
Zoom (Screen Enlarge) Function .....34
EZ VIEW Function .....34
Selecting Audio Language .....35
Selecting Subtitle Language .....36
Playing Media Files using the USB HOST feature . .37
Moving Directly to a Scene/Song .....39
Using Disc Menu ....40
Using the Title Menu ....40
SETUP
Setting the Language .....41
Setting TV Screen type . . . . . . . . . . . . . . . . . . . . . . . . . . . . . . . . . . . . . . . . . . . . 43
Setting Parental Controls (Rating Level) .....45
Setting the Password 46
Setting the Wallpaper 47
DivX (R) registration .....49
Setting the Speaker Mode ....50
Setting the Delay Time .....51
Setting the Test Tone ....53
Setting the DRC (Dynamic Range Compression) .54
Setting the Audio Quality .55
AV SYNC Setup ....57
Sound Field (DSP)/EQ Function .....58
Dolby Pro Logic II Mode .....59
Dolby Pro Logic II Effect 60
RADIO OPERATION
Listening to Radio....61
Presetting Stations 62
About RDS broadcasting 63
MISCELLANEOUS
Convenient Functions 65
Operating a TV with the Remote Control .....67
Before Calling for Service .68
Cautions on Handling and Storing Discs .....71
Language Code List 72
USB Host Feature Supported Products .....73
Specifications 74
Notes on Discs

DVD (Digital Versatile Disc) offers fantastic audio and video, thanks to Dolby Digital surround sound and MPEG-2 video compression technology. Now you can enjoy these realistic effects in the home, as if you were in a movie theater or concert hall.


DVD players and the discs are coded by region. These regional codes must match in order for the disc to play. If the codes do not match, the disc will not play.
The Region Number for this player is given on the rear panel of the player. (Your DVD player will only play DVDs that are labeled with identical region codes.)

playable Discs
| Disc Type | DisSize(Lldgα) | PlayingTörsignals | ||
| DVD-VIDEO |  | Video | 12cm | Approx. 240 min. (single-sided) |
| Approx. 480 min. (double-sided) | ||||
| 8cm | Approx. 80 min. (single-sided) | |||
| Approx. 160 min. (double-sided) | ||||
| AUDIO-CDVIDEO-CD |  | AudioAudio + Video | 12cm | 74 min. |
| 8cm | 20 min. | |||
| Divx |  | MPEG4MP3 | 12cm | 74 min. |
| 8cm | 20 min. |

Do not use the following types of disc!
- LD, CD-G, CD-I, CD-ROM and DVD-ROM discs cannot be played on this player. If such discs are played, a "WRONG DISC FORMAT" message appears on the TV screen.
- DVD discs purchased abroad may not play on this player. If such discs are played, a "WRONG REGION CODE" message appears on the TV screen.
Copy Protection
- Many DVD discs are encoded with copy protection. Because of this, you should only connect your DVD player directly to your TV, not to a VCR. Connecting to a VCR results in a distorted picture from copy-protected DVD discs.
- This product incorporates copyright protection technology that is protected by methods claims of certain U.S. patents and other intellectual property rights owned by Macrovision Corporation and other rights owners. Use of this copyright protection technology must be authorized by Macrovision Corporation, and is intended for home and other limited viewing uses only unless otherwise authorized by Macrovision Corporation. Reverse engineering or disassembly is prohibited.
Disc Recording Format
This product does not support Secure (DRM) Media files.
CD-R Discs
- Some CD-R discs may not be playable depending on the disc recording device (CD-Recorder or PC) and the condition of the disc.
- Use a 650MB/74 minute CD-R disc.
Do not use CD-R discs over 700MB/80 minute as they may not be played back. - Some CD-RW (Rewritable) media, may not be playable.
- Only CD-Rs that are properly "closed" can be fully played. If the session is closed but the disc is left open, you may not be able to fully play the disc.
CD-R MP3 Discs
- Only CD-R discs with MP3 files in ISO 9660 or Joliet format can be played.
- MP3 file names should be 8 characters or less in length and contain no blank spaces or special characters (. / = +).
- Use discs recorded with a compression/decompression data rate greater than 128Kbps.
- Only files with the ".mp3" and ".MP3" extensions can be played.
- Only a consecutively written Multisession disc can be played. If there is a blank segment in the Multisession disc, the disc can be played only up to the blank segment.
- If the disc is not closed, it will take longer to begin playback and not all of the recorded files may be played.
- For files encoded in Variable Bit Rate (VBR) format, i.e. files encoded in both low bit rate and high bit rate (e.g., 32Kbps \~ 320Kbps), the sound may skip during playback.
- A maximum of 500 tracks can be played per CD.
- A maximum of 300 folders can be played per CD.
CD-R JPEG Discs
- Only files with the ".jpeg" and ".JPEG" extensions can be played.
- If the disc is not closed, it will take longer to start playing and not all of the recorded files may be played.
- Only CD-R discs with JPEG files in ISO 9660 or Joliet format can be played.
- JPEG file names should be 8 characters or less in length and contain no blank spaces or special characters (. / = +).
- Only a consecutively written multisession disc can be played. If there is a blank segment in the multisession disc, the disc can be played only up to the blank segment.
- A maximum of 9,999 images can be stored on a single CD.
- When playing a Kodak/Fuji Picture CD, only the JPEG files in the picture folder can be played.
- Picture discs other than Kodak/Fuji Picture CDs may take longer to start playing or may not play at all.
CD-R/RW DivX Discs
- Since this product only provides encoding formats authorized by DivX Networks, Inc., a DivX file created by the user might not be played.
- Software update for unsupported formats is not supported.
(Example: QPEL, GMC, resolution higher than 720 x 480 pixels, etc.) - Sections with high frame rate might not be played while playing a DivX file.
- For more information about the formats authorized by DivX Networks, Inc., visit "www.divxnetworks.net".
Description
—Front Panel—
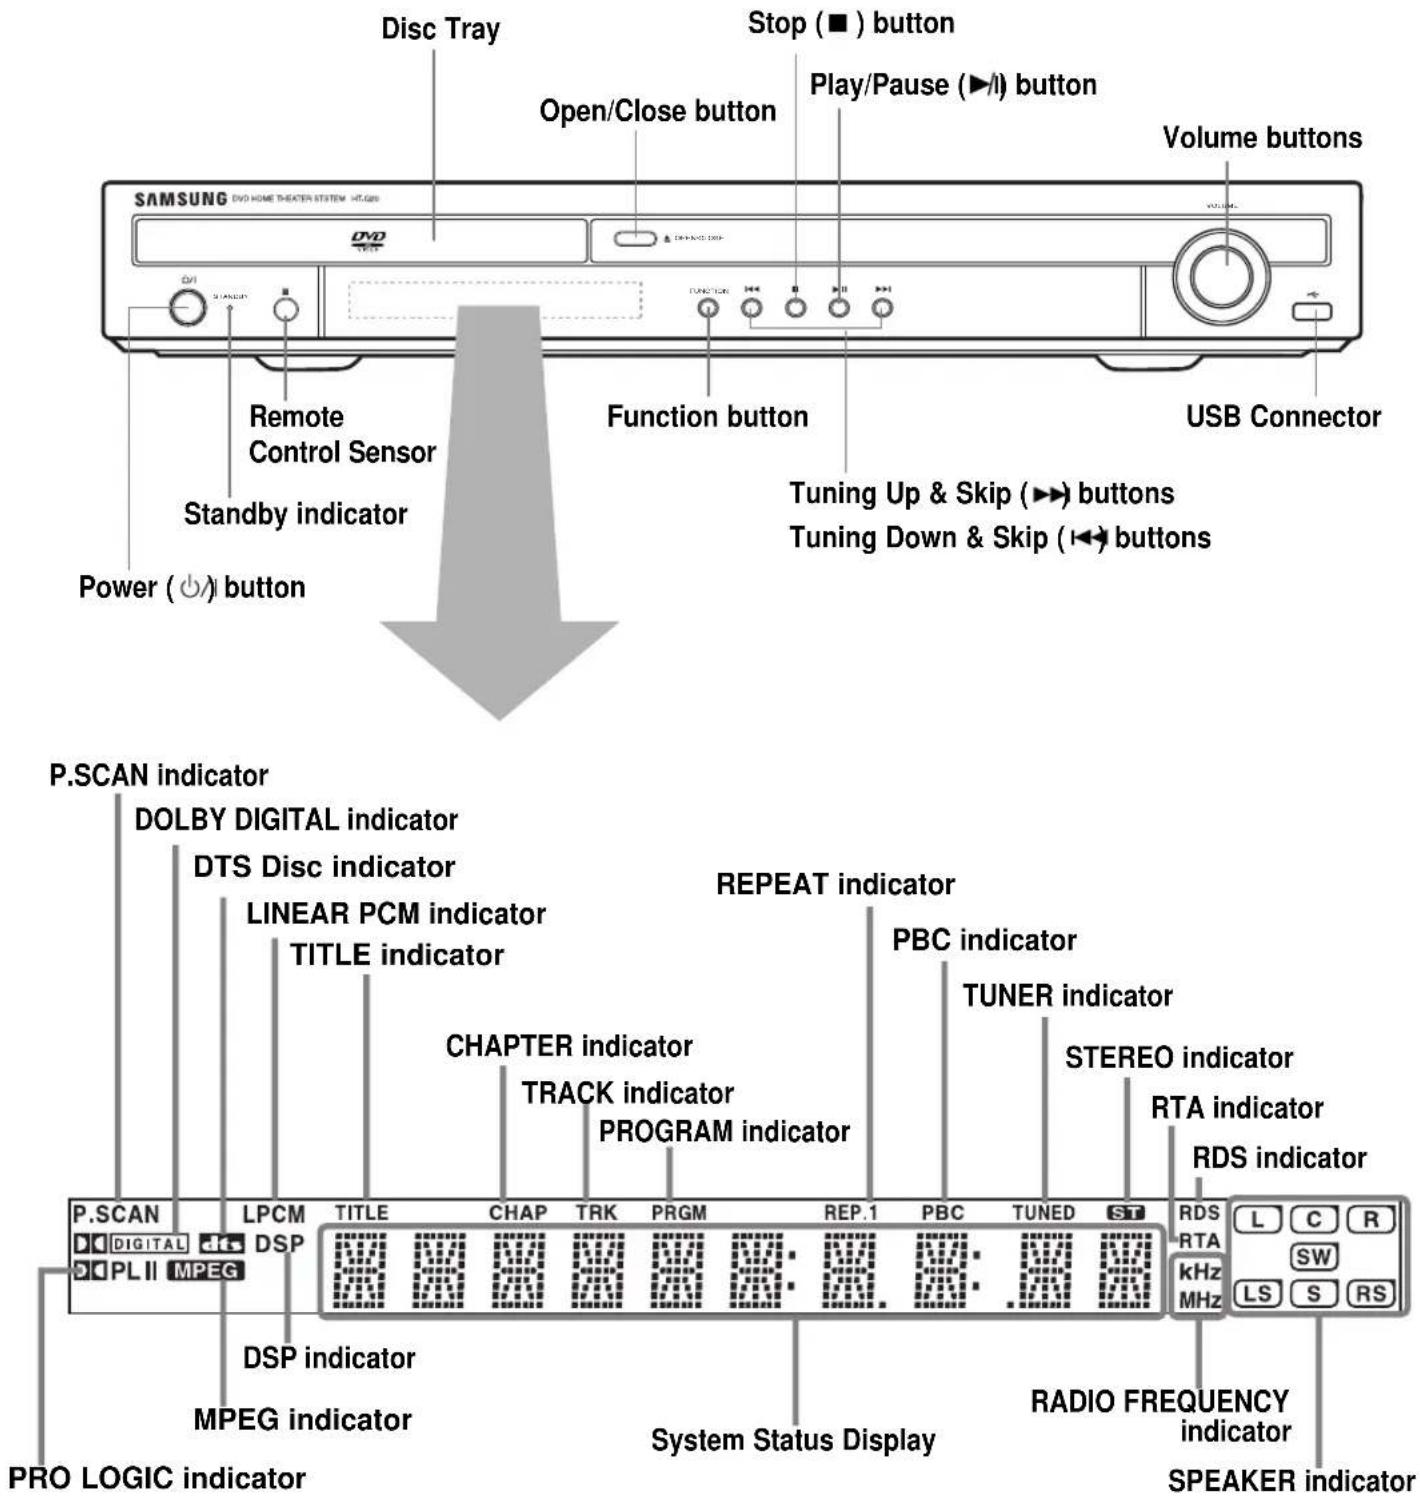
text_image
Disc Tray Stop (■) button Open/Close button Play/Pause (▶/l) button Volume buttons SAMSUNG DVD HOME THEATER SYSTEM - H:\GJ USB Connector Remote Control Sensor Function button Tuning Up & Skip (▶) buttons Tuning Down & Skip (◀) buttons Standby indicator Power (○/○) button P.SCAN indicator DOLBY DIGITAL indicator DTS Disc indicator LINEAR PCM indicator TITLE indicator CHAPTER indicator TRACK indicator PROGRAM indicator REPEAT indicator PBC indicator TUNER indicator STEREO indicator RTA indicator RDS indicator P.SCAN LPCM DSP TITLE CHAP TRK PRGM REP.1 PBC TUNED ST RDS RTA L C R SW kHz LS S RS DSP indicator MPEG indicator System Status Display RADIO FREQUENCY indicator PRO LOGIC indicator SPEAKER indicator—Rear Panel—
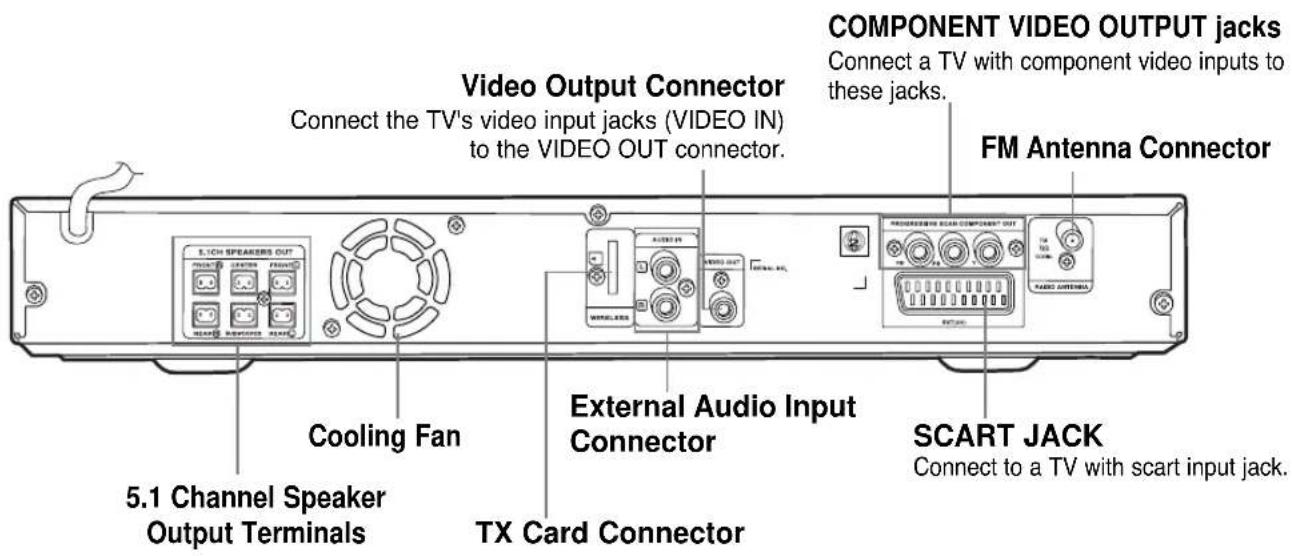
text_image
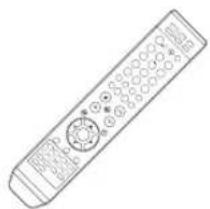
Video Output Connector Connect the TV's video input jacks (VIDEO IN) to the VIDEO OUT connector. COMPONENT VIDEO OUTPUT jacks Connect a TV with component video inputs to these jacks. FM Antenna Connector Cooling Fan External Audio Input Connector SCART JACK Connect to a TV with scart input jack. 5.1 Channel Speaker Output Terminals TX Card ConnectorAccessories
natural_image
Line drawing of a remote control with scroll and keypad (no text or symbols)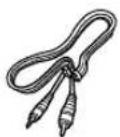
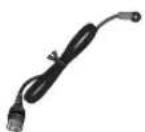
Video CableRemote Control FM Antenna
User's Manual
Description
—Remote Control—
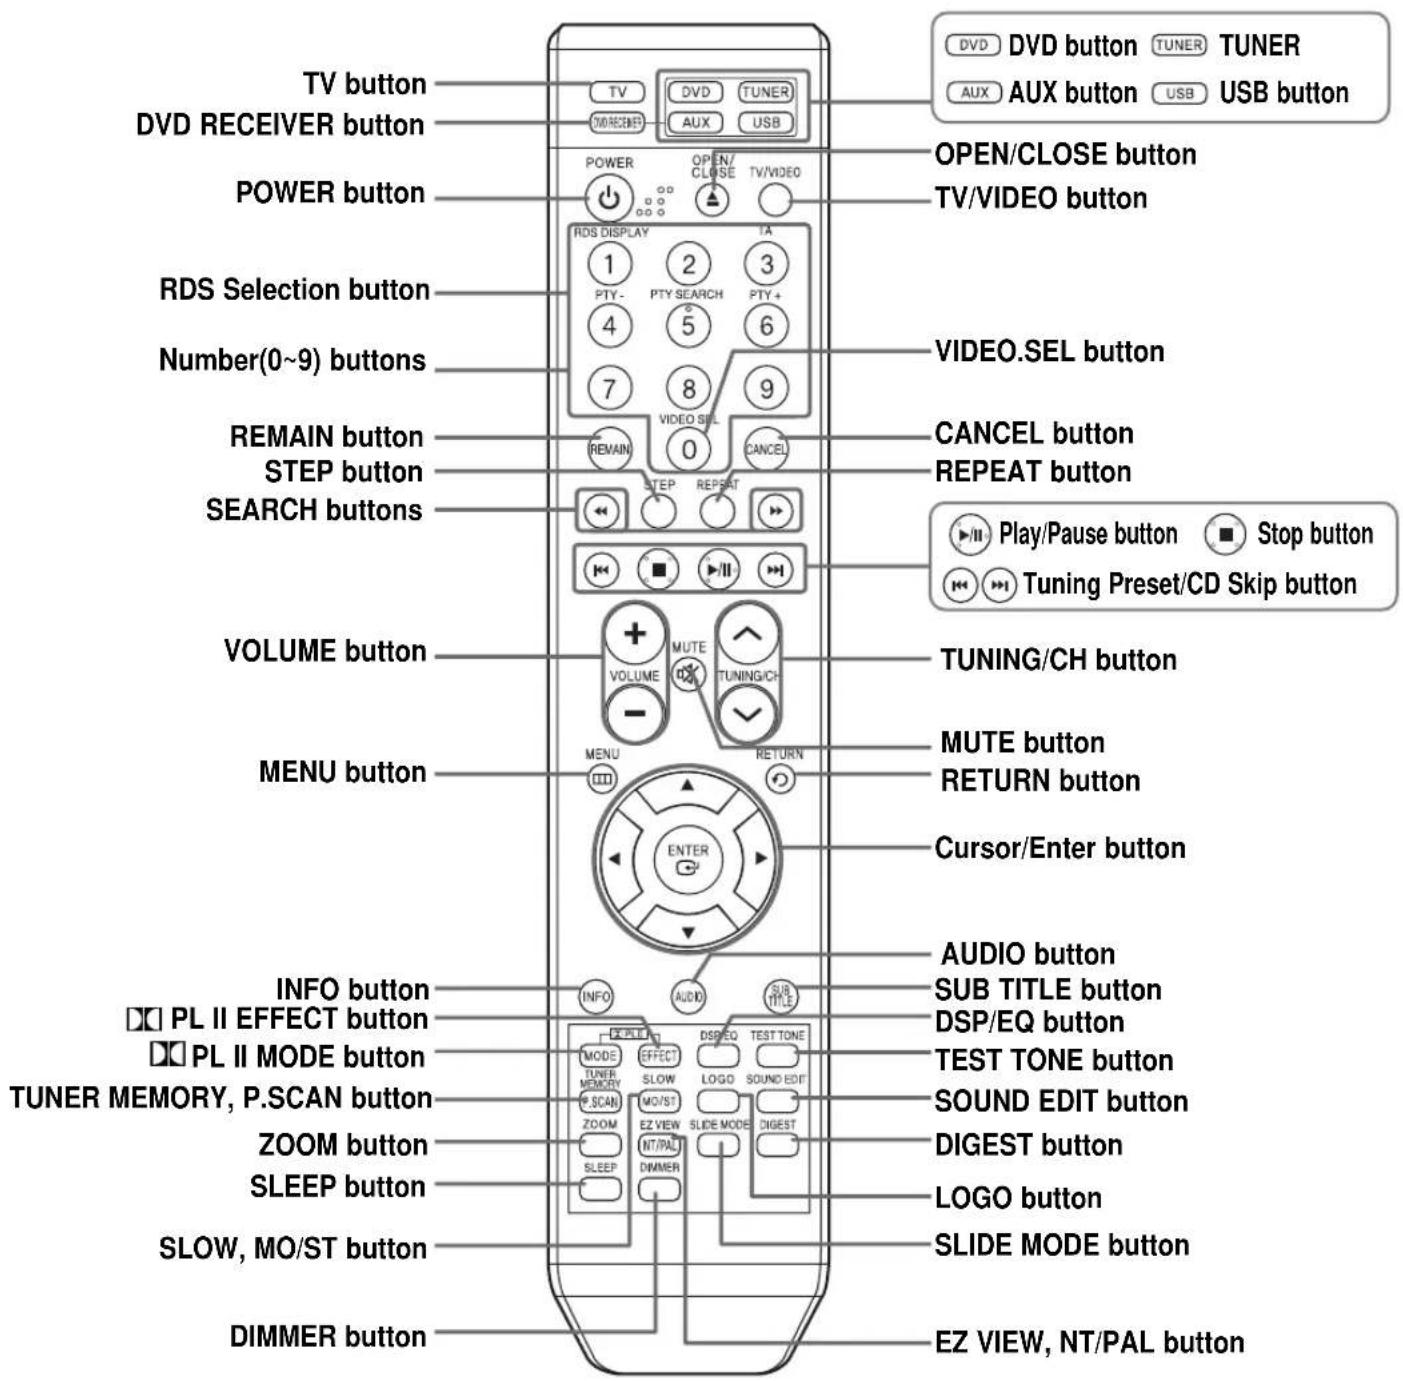
text_image
TV button DVD RECEIVER button POWER button RDS Selection button Number(0~9) buttons REMAIN button STEP button SEARCH buttons VOLUME button MENU button INFO button PL II EFFECT button PL II MODE button TUNER MEMORY, P.SCAN button ZOOM button SLEEP button SLOW, MO/ST button DIMMER button TV DVD TUNER AUX USB POWER OPEN/CLOSE button TV/VIDEO button RDS DISPLAY 1 2 3 4 5 6 7 8 9 VIDEO SEL button REMAIN 0 CANCEL STOP/PUase button Stop button RePEAT button VOLUME MUTE TUNING/CH MUTE button RETURN button Cursors/Enter button ENTER AUDIO button SUB TITLE button DSP/EQ button TEST TONE button SOUND EDIT button DIGEST button LOGO button SLIDE MODE button EZ VIEW, NT/PAL buttonInsert Remote Batteries
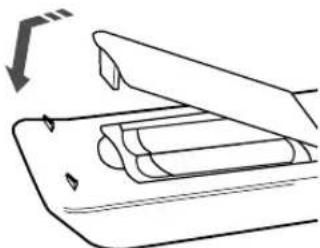
1 Remove the battery cover on the back of the remote by pressing down and sliding the cover in the direction of the arrow.

natural_image
Diagram of a mechanical device with an open lid and internal rollers, showing motion direction (no text or symbols)2 Insert two 1.5V AAA batteries, paying attention to the correct polarities (+ and -).
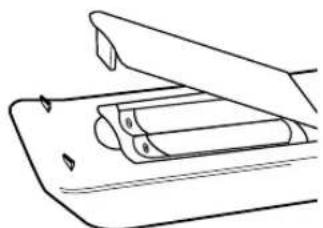
natural_image
Line drawing of a mechanical device with a cylindrical component inserted, no text or symbols present3 Replace the battery cover.
natural_image
Line drawing of a hand pressing down on a cylindrical object (no text or symbols)Caution
Follow these precautions to avoid leaking or cracking cells:
- Place batteries in the remote control so they match the polarity:(+) to (+)and (−)to (−).
- Use the correct type of batteries. Batteries that look similar may differ in voltage.
• Always replace both batteries at the same time. - Do not expose batteries to heat or flame.
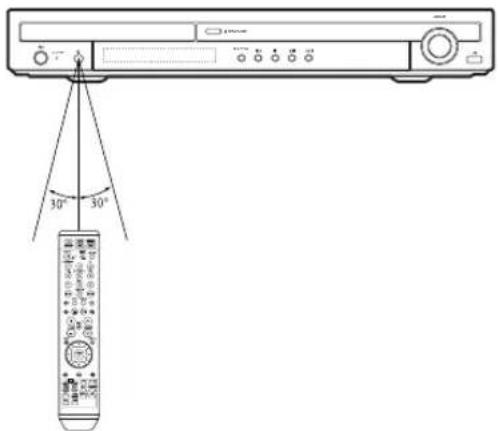
Range of Operation of the Remote Control
The remote control can be used up to approximately 23 feet/7 meters in a straight line. It can also be operated at a horizontal angle of up to 30^ from the remote control sensor.
text_image
Diagram showing a remote control device with 30-degree angle measurement and directional arrows indicating orientation.Connecting the Speakers
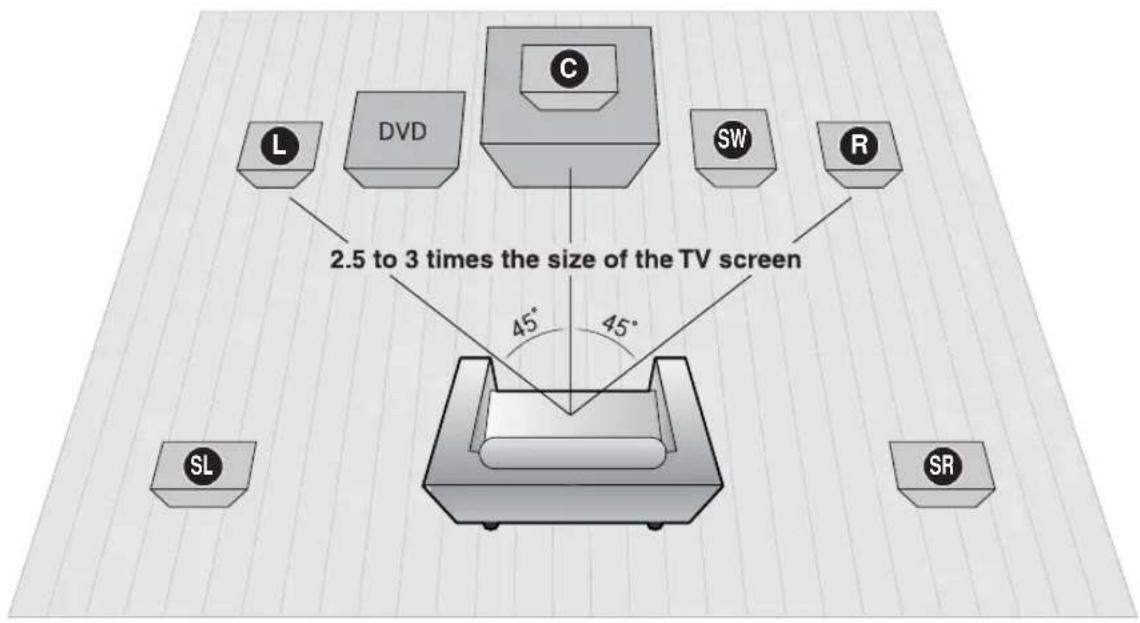
Before moving or installing the product, be sure to turn off the power and disconnect the power cord.
text_image
2.5 to 3 times the size of the TV screen 45° 45°Position of the DVD Player
- Place it on a stand or cabinet shelf, or under the TV stand.
Front Speakers L R
- Place these speakers in front of your listening position, facing inwards (about 45°) toward you.
- Place the speakers so that their tweeters will be at the same height as your ear.
- Align the front face of the front speakers with the front face of the center speaker or place them slightly in front of the center speakers.
Center Speaker ©
- It is best to install it at the same height as the front speakers.
- You can also install it directly over or under the TV.
Selecting the Listening Position
The listening position should be located about 2.5 to 3 times the distance of the TV's screen size away from the TV. Example: For 32" TVs 2\~2.4m (6\~8feet) For 55" TVs 3.5\~4m (11\~13feet)
Rear Speakers SL SR
- Place these speakers behind your listening position.
- If there isn't enough room, place these speakers so they face each other.
- Place them about 60 to 90cm (2 to 3feet) above your ear, facing slightly downward.
★ Unlike the front and center speakers, the rear speakers are used to handle mainly sound effects and sound will not come from them all the time.
Subwoofer SW
- The position of the subwoofer is not so critical. Place it anywhere you like.
HT-Q20
text_image
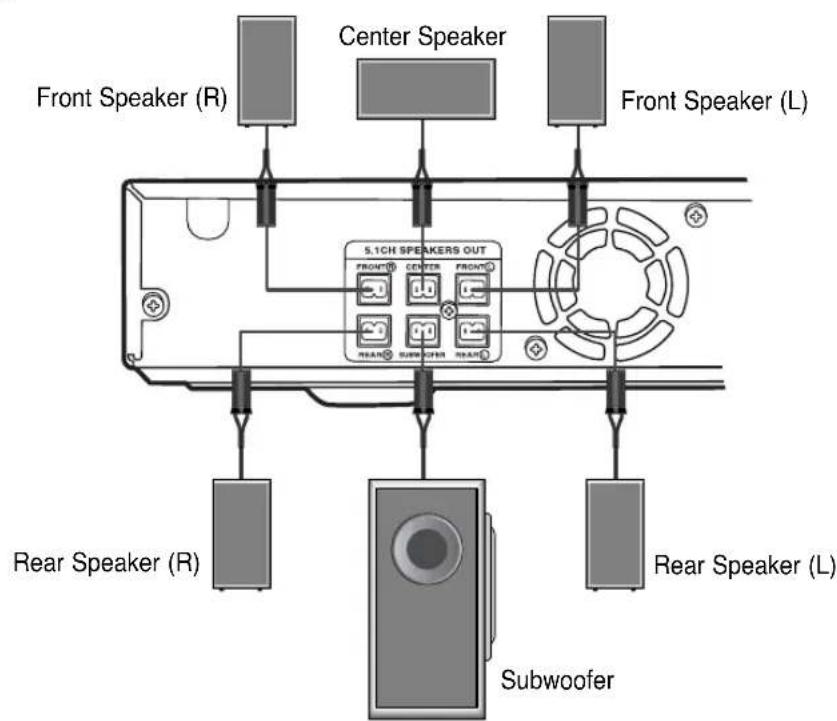
Front Speaker (R) Center Speaker Front Speaker (L) 5.1CH SPEAKERS OUT FRONT® CENTER FRONT® REAR® SUBWOOFER REAR® Rear Speaker (R) Rear Speaker (L) SubwooferConnecting the Speakers
1 Press down the terminal tab on the back of the speaker.
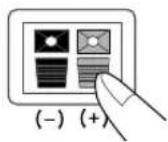
2 Insert the black wire into the black terminal (−) and the red wire into the red (+) terminal, and then release the tab.
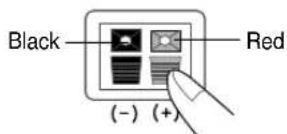
3 Connect the correct color speaker cable to the same color speaker output terminal on the rear of the subwoofer, according to the polarity markings (+/-).
Example: Connect the green center speaker cable to the green center speaker output terminal on the rear of the subwoofer according to the polarity markings (+/-).
Caution
- Do not let children play with or near the speakers. They could get hurt if a speaker falls.
- When connecting the speaker wires to the speakers, make sure that the polarity (+/-) is correct.
Note
- If you place a speaker near your TV set, screen color may be distorted because of the magnetic field generated by the speaker. If this occurs, place the speaker away from your TV set.
Connecting the Speakers
HT-TQ22
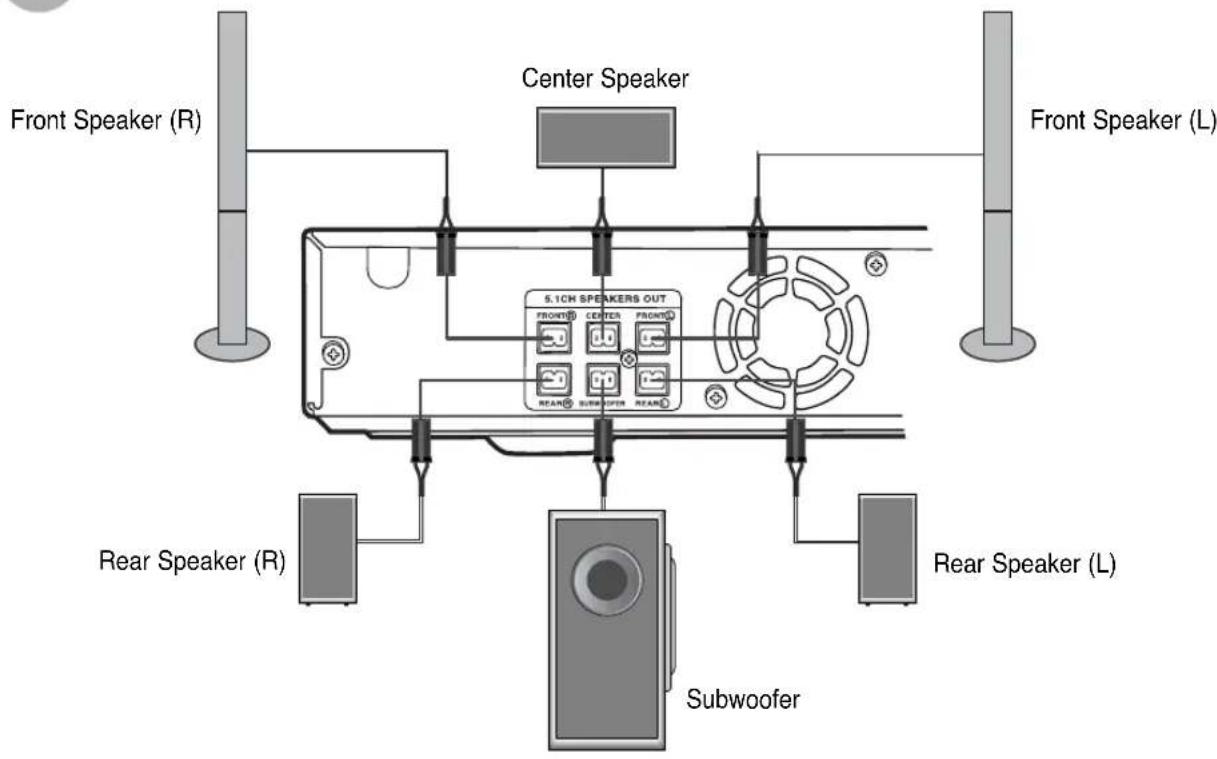
text_image
Front Speaker (R) Center Speaker Front Speaker (L) 5.1CH SPEAKERS OUT FRONTED CENTER FRONTED REAR SUBWOOFER REAR Rear Speaker (R) Rear Speaker (L) SubwooferHT-TQ25
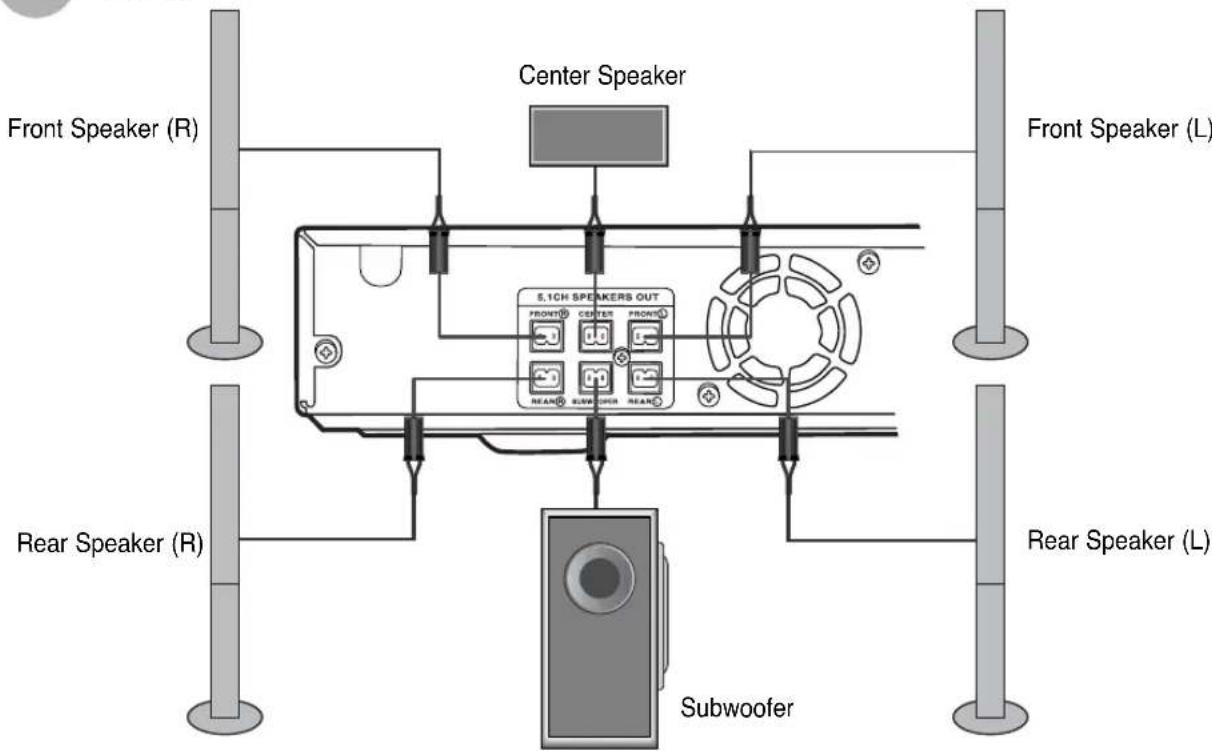
text_image
Front Speaker (R) Center Speaker Front Speaker (L) 5.1CH SPEAKERS OUT FRONT CENTER FRONT REAR SUBWOER REAR Rear Speaker (R) Rear Speaker (L) SubwooferConnecting the optional Wireless Receiving Amplifier
GB
To connect the rear speakers wirelessly, you have to additionally purchase the wireless receiving module and TX card from your Samsung retailer.
When you have purchased the wireless receiving module (SWA-3000)
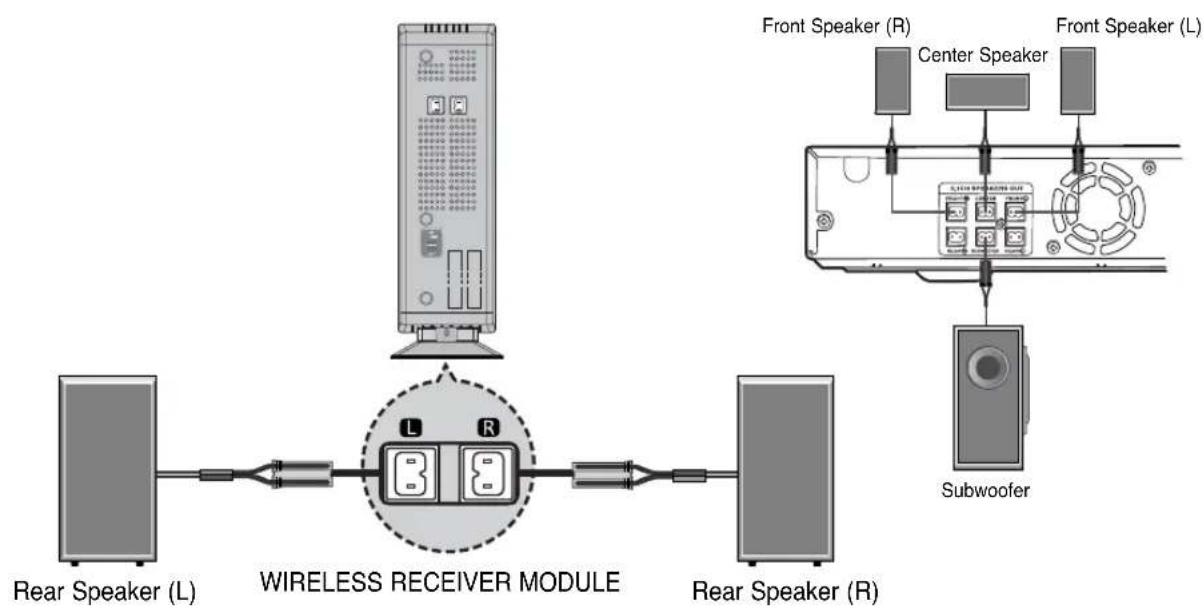
flowchart
graph LR
    A["Rear Speaker (L)"] --> B["Wireless Receiver Module"]
    B --> C["Rear Speaker (R)"]
    D["Front Speaker (R)"] --> E["Center Speaker"]
    E --> F["Subwoofer"]
    G["Front Speaker (L)"] --> H["Central Panel with Display"]
    H --> I["Display"]
    style B fill:#f9f,stroke:#333
    style C fill:#ccf,stroke:#333
    style D fill:#cfc,stroke:#333
    style E fill:#fcc,stroke:#333
    style F fill:#cff,stroke:#333
    style G fill:#ffc,stroke:#333
    style H fill:#cfc,stroke:#333
    style I fill:#fcc,stroke:#333
1 Connect the front, center and subwoofer speakers, referring to page 12.
2 Insert the TX card into the TX card connection port on the back of the main unit.
- Hold the TX card so that the slanted side faces downward and insert the card into the port.
- The TX card enables communication between the main unit and the wireless receiver.
3 Connect the left and right rear speakers to the wireless receiving module.
4 Plug the power cord of the wireless receiving module in the wall outlet and switch the power switch 'ON'.
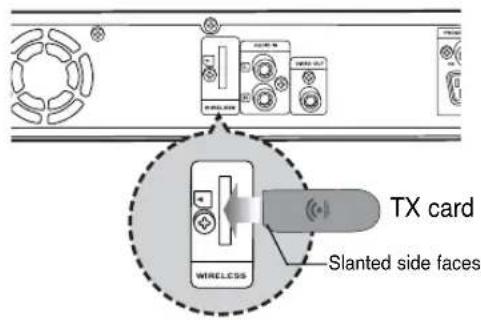
text_image
TX card Slanted side faces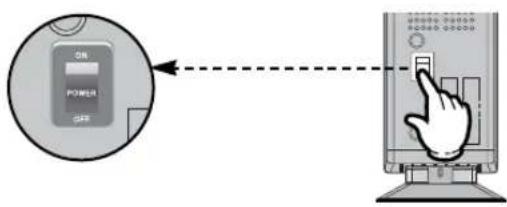
text_image
ON POWER OFFCaution
- Do not insert a card other than the TX card dedicated for the product. The product might be damaged or it may not be removed easily.
- Do not insert the TX card upside down or in reverse direction.
- Insert the TX card when the main unit is turned off. Inserting the card when it is turned on may cause a problem.
- If the TX Card is inserted in the main unit, the rear speakers don't output sounds.
Connecting the optional Wireless Receiving Amplifier
Resetting Wireless Communication
Reset the system if a communication failure occurs, or if the Link indicator (blue LED) on the wireless receiver does not light up and the "REAR CHK" message blinks on the main unit's display.
Reset the system while the main unit and the wireless receiver module (SWA-3000) are in Power Standby mode.
1 With the main unit turned off, press and hold the remote control's REMAIN button for 5 seconds.
- Press the button until the POWER( indicator lights up blue. (The indicator will turn off in 1 second.)
2 With the wireless receiver module turned on, use a ball point pen or a pair of tweezers to press the RESET button on the back of the unit.
- The Standby/On LED on the front panel of the wireless receiver module blinks 2 times.
3 Turn on the main unit.
- The Link LED of the wireless receiver module is lit and the setup is finished.
- If Power Standby mode continues, repeat Steps 1 to 3 above.
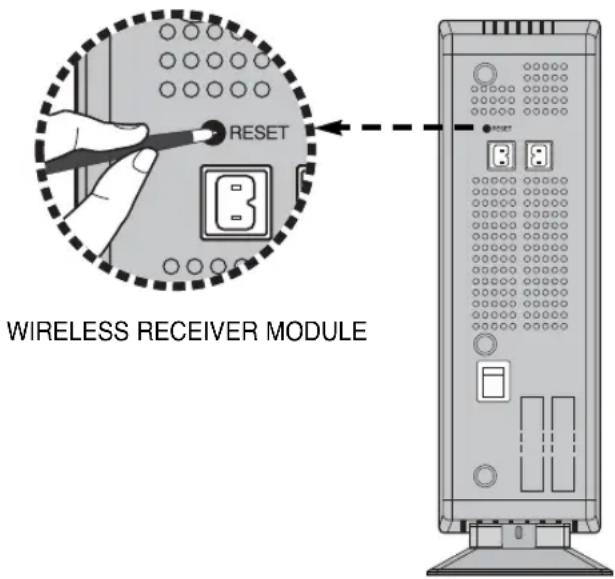
text_image
RESET WIRELESS RECEIVER MODULECaution
- When the wireless receiving module setting is complete, no audio signal is output from the Rear Speaker OUT ports on the back of the main unit.
- The wireless receiving antenna is built into the wireless receiver module. Keep the unit away from water and moisture.
- For optimal listening performance, make sure that the area around the wireless receiver module location is clear of any obstructions.
- Sound will be heard from the wireless rear speakers in DVD 5.1-CH or Dolby Pro Logic II mode only.
- In 2-CH mode, no sound will be heard from the wireless rear speakers.
Note
- Place the wireless receiver module at the rear of the listening position. If the wireless receiver module is too close to the main unit, some sound interruption may be heard due to interference.
- If you use a device such as a microwave oven, wireless LAN Card, Bluetooth equipment, or any other device that uses the same frequency (2.4GHz) near the system, some sound interruption may be heard due to interference.
- The transmission distance of radio wave is about 33 feet, but may vary depending on your operating environment. If a steel-concrete wall or metallic wall is between the main unit and the wireless receiver module, the system may not operate at all, because the radio wave cannot penetrate metal.
Connecting the Video Out to TV
Choose one of the three methods for connecting to a TV.

text_image
METHOD 1 METHOD 3METHOD 2 TV VIDEO IN SCART IN COMPONENT INMETHOD 1 Composite Video ...... Good Quality
Connect the supplied video cable from the VIDEO OUT jack on the back panel of the system to the VIDEO IN jack on your television.
METHOD 2 Scart ...... Better Quality
If you television is equipped with an SCART input, connect an Scart Jack (not supplied) from the AV OUT jack on the back panel of the system to the SCART IN jack on your television.
VIDEO SELECT Function
Press and hold VIDEO SEL. button on the remote control for over 5 seconds.
- "COMPOSITE" or "RGB" will appear in the display.
At this time, press the VIDEO SEL. button shortly to select between "COMPOSITE" and "RGB". - If Scart (RGB Input) is equipped for your TV, press VIDEO SEL. button to select RGB mode. You can get a better picture quality by using Scart setting.
- If Scart (RGB Input) is not equipped for your TV, press VIDEO SEL. button to select COMPOSITE mode.
METHOD 3 Component (Progressive Scan) Video ...... Best Quality
If your television is equipped with Component Video inputs, connect a component video cable (not supplied) from the Pr, Pb and Y jacks on the back panel of the system to the corresponding jacks on your television.
Note
- When the Progressive scan mode is selected, the VIDEO output (Yellow) and SCART output does not output any signal.
P.SCAN(Progressive Scan) Function
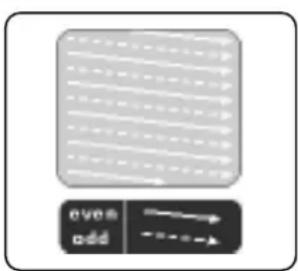
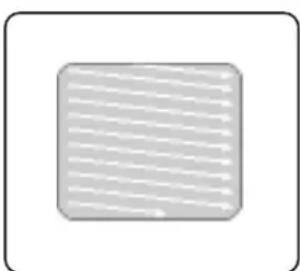
Unlike regular Interlace Scan, in which two fields of picture information alternate to create the entire picture (odd scan lines, then even scan lines), Progressive Scan uses one field of information (all lines displayed in one pass) to create a clear and detailed picture without visible scan lines.
1 Press STOP button.
- If playing a disc, press the STOP button twice so that "STOP", appears on the display.
2 Press and hold P.SCAN button on the remote control for over 5 seconds.
- Pressing and holding the button for over 5 seconds will select "Progressive Scan" and "Interlace Scan" alternately.
- When you select P.SCAN, "P.SCAN" will appear on the display.
- To set P.Scan mode for DivX discs, press the P.SCAN button on the remote control for more than 5 seconds with no disc in the unit ("NO DISC" on the display), then load the DivX disc and play.
What is Progressive (or Non-Interlaced) Scanning?
Interlaced Scan (1 FRAME = 2 FIELDS)
text_image
even addIn interlaced-scan video, a frame consists of two interlaced fields (odd and even), where each field contains every other horizontal line in the frame.
The odd field of alternating lines is displayed first, and then the even field is displayed to fill in the alternating gaps left by the odd field to form a single frame.
One frame, displayed every 1/30th of a second, contains two interfaced fields, thus a total of 60 fields are displayed every 1/60th of a second.
The interlaced scanning method is intended for capturing a still object.
Progressive Scan (FULL FRAME)
natural_image
Simple geometric shape with horizontal lines inside a rounded square (no text or symbols)The progressive scanning method scans one full frame of video consecutively down the screen, line by line.
An entire image is drawn at one time, as opposed to the interlaced scanning process by which a video image is drawn in a series of passes.
The progressive scanning method is desirable for dealing with moving objects.
Note
- This function works only on TVs equipped with component video inputs (Y, Pr, Pb) that support Progressive Video. (It does not work on TVs with conventional component inputs, i.e., non-progressive scan TVs.)
- Depending on the capabilities of your TV, this function may not work.
Connecting External Components
GB
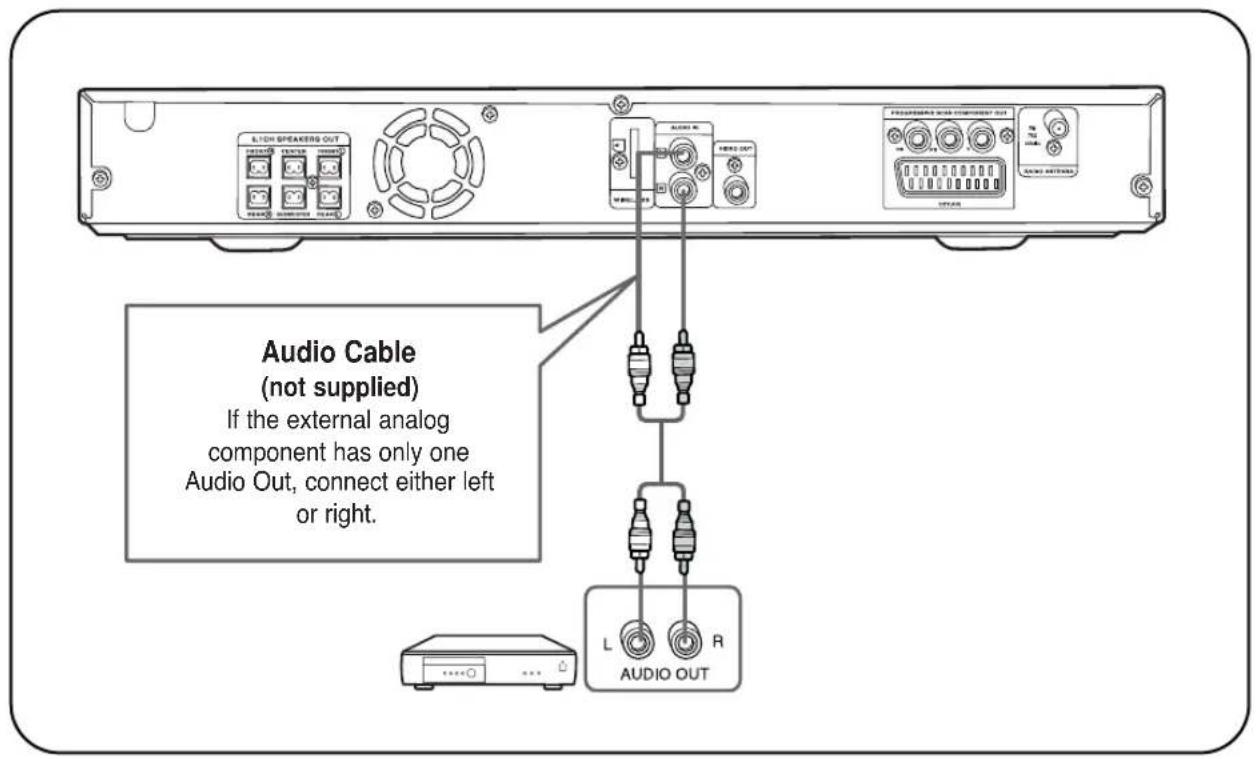
Connecting an External Analog Component
Example: Analog signal components such as a VCR.
text_image
AUDIO CABLE (not supplied) If the external analog component has only one Audio Out, connect either left or right. AUDIO OUT1 Connect AUX (Audio) In on the Home Theater to Audio Out on the external analog component.
- Be sure to match connector colors.
2 Press AUX button on the remote control to select 'AUX' input.
- You can also use the FUNCTION button on the main unit.
The mode switches as follows: DVD/CD → AUX → USB → FM
Note
- You can connect the Video Output jack on your VCR to the TV, and connect the Audio Output jacks on the VCR to this product.
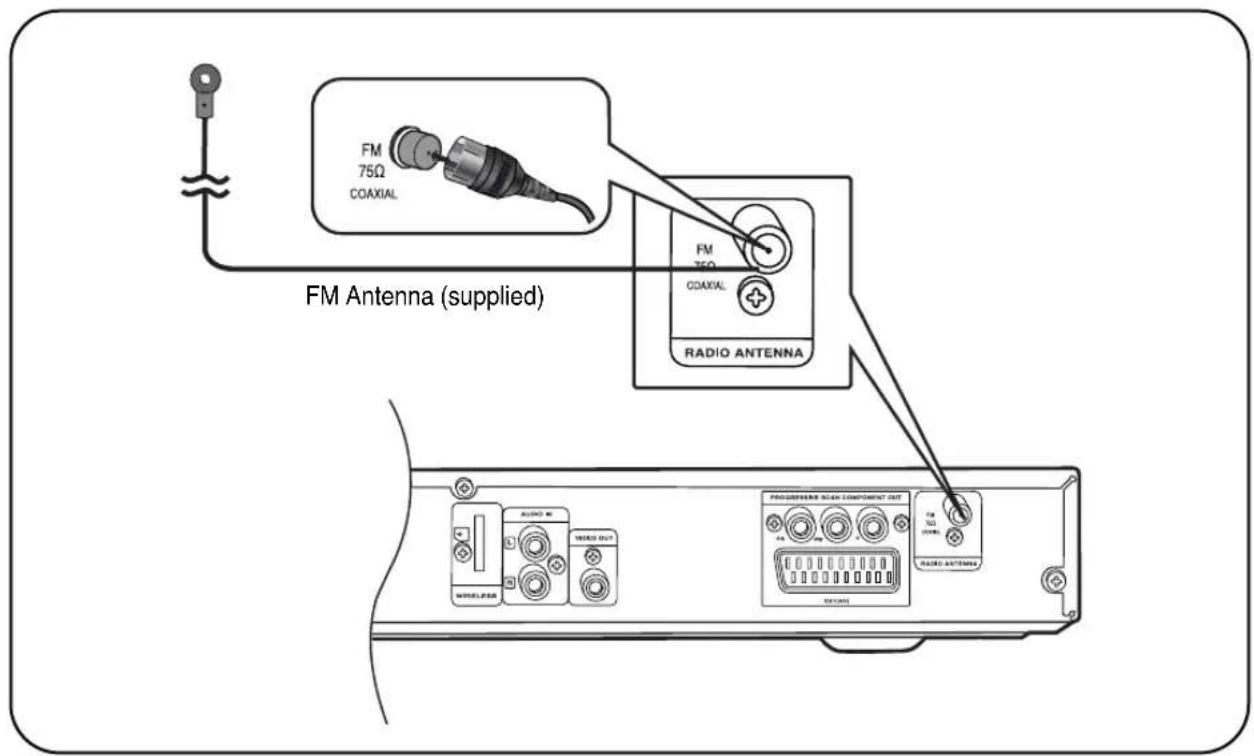
Connecting the FM Antenna
text_image
FM Antenna (supplied) FM 75Ω COAXIAL FM 35Ω COAXIAL RADIO ANTENNA AUDIO VOLUME VIDEO OUT PROG Namibia SCAN COMPONENT OUT DATA1 FND 200A RADIO ANTENNA1 Connect the FM antenna supplied to the FM 75Ω COAXIAL terminal.
2 Slowly move the antenna wire around until you find a location where reception is good, then fasten it to a wall or other rigid surface.
Cooling Fan
text_image
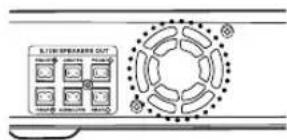
510-Peakers OUT OFF-IN OFF-IN OFF-IN OFF-IN OFF-IN OFF-INThe cooling fan supplies cool air to the unit to prevent overheating.
Please observe the following cautions for your safety.
- Make sure the unit is well-ventilated. If the unit has poor ventilation, the temperature inside the unit could rise and may damage it.
- Do not obstruct the cooling fan or ventilation holes. (If the cooling fan or ventilation holes are covered with a newspaper or cloth, heat may build up inside the unit and fire may result.)
Note
- This unit does not receive AM broadcasts.
Before Using Your Home Theater
GB
Your Home Theater is capable of playing DVD, CD, MP3/WMA and JPEG discs. Depending on the disc you are using, these instructions may vary slightly. Read the instructions carefully before using.
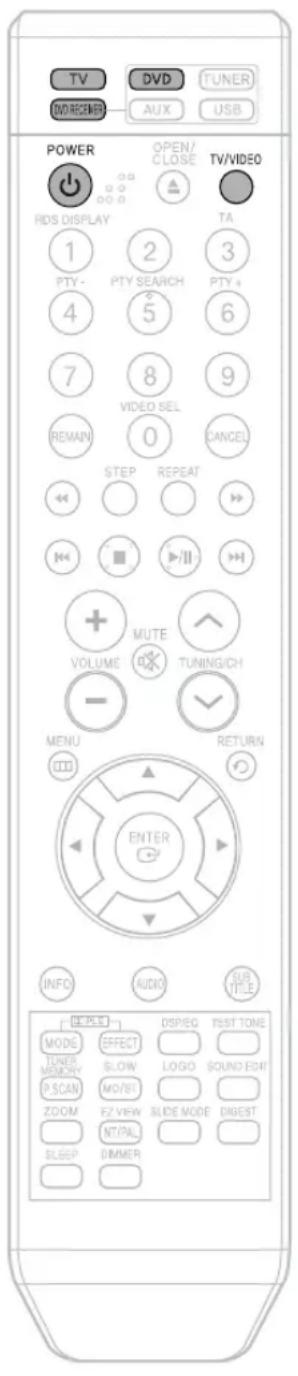
To Operate your Samsung TV and the Home Theater with the HT-Q20/HT-TQ22/HT-TQ25's Remote Control
text_image
TV DVD TUNER DVD/RECEMBER AUX USB POWER OPEN/ CLOSE TV/VIDEO RIDS DISPLAY 1 2 3 PTY- PTY SEARCH PTY+ 4 5 6 7 8 9 VIDEO SEL REMAN 0 CANCEL STEP REPEAT MUTE VOLUME TUNING/CH - MENU RETURN ENTER INFO AUDIO SUB TITLE OK PLET DSP/EO TEST TONE MODE EFFECT TUNER MEMORY SLOW LOGO SOUND EDIT P SCAN MO/ST ZOOM EZ VIEW SLIDE MODE DIGEST MT/PAL SLEEP DIMMER1 Plug the main unit's power cord into the AC power supply.
2 Press TV button to set the remote to TV mode.
3 Press the POWER button to turn on your Samsung TV with this remote.
4 Press TV/VIDEO button to select VIDEO mode on your TV.

natural_image
Hand cursor clicking a button with an 'OK' icon (no text or symbols beyond the icon)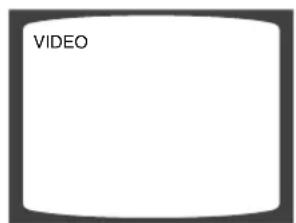
text_image
VIDEO5 Press DVD RECEIVER button to switch to DVD RECEIVER mode.
6 Press FUNCTION button on the main unit or DVD button on the remote to enable DVD/CD playback.
text_image
DVD RECEIVERNote
- Buttons Enabled for TV Operation: POWER, CHANNEL, VOLUME, TV/VIDEO, and Numeric (0-9) buttons.
- By default, the remote control is set to work with Samsung TVs.
Before Using Your Home Theater
Disc terminology
Titles and chapters (DVD-VIDEO)
- DVD-video is divided into several large sections called "titles" and smaller sections called "chapters". Numbers are allotted to these sections. These numbers are called "title numbers" and "chapter numbers".
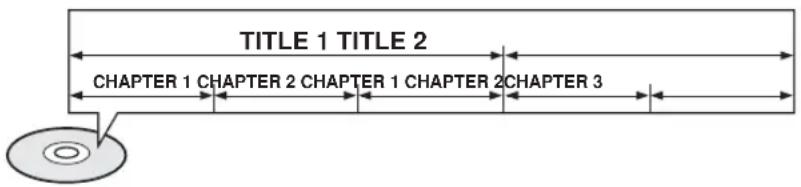
text_image
TITLE 1 TITLE 2 CHAPTER 1 CHAPTER 2 CHAPTER 1 CHAPTER 2 CHAPTER 3Tracks (Video and music CDs)
- Video and music CDs are divided into sections called "tracks". Numbers are allotted to these sections. These numbers are called "track numbers".
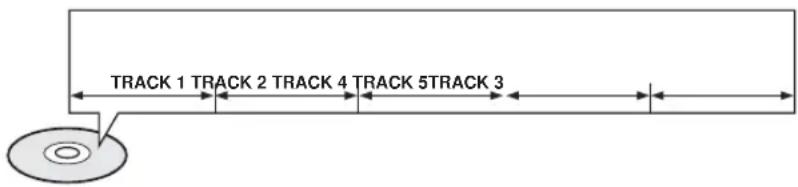
text_image
TRACK 1 TRACK 2 TRACK 4 TRACK 5TRACK 3Files (DivX)
- DivX is divided into sections called "files". Numbers are allotted to these sections. These numbers are called "file numbers".
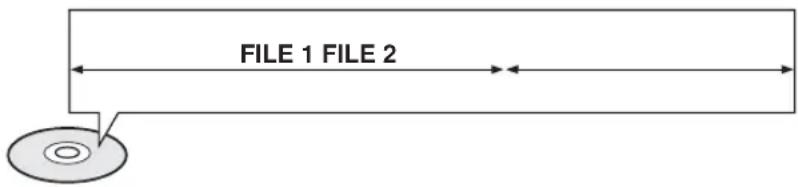
text_image
FILE 1 FILE 2
- In this manual, the instructions marked with "DVD ( DVD )" are applicable to DVD-VIDEO and DVD-R/RW discs.
Where a particular DVD type is mentioned, it is indicated separately. - Depending on the content of the disc, the initial screen may appear different.
Disc Playback
GB
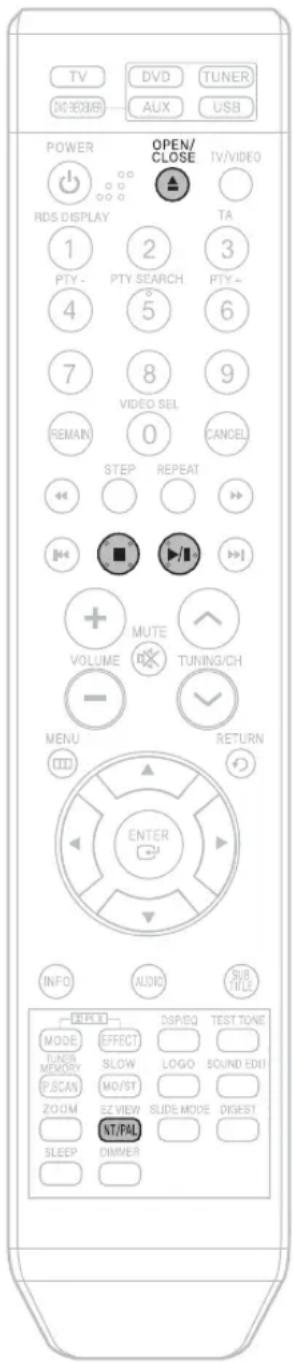
text_image
TV DVD TUNER DIG/REMEM AUX USB POWER OPEN/ CLOSE TV/VIDEO RDS DISPLAY 1 2 3 PTY- PTY SEARCH PTY+ 4 5 6 7 8 9 VIDEO SEL REMAN 0 CANCEL STEP REPEAT MUTE VOLUME TUNING/CH - MENU RETURN ENTER INFO AUDIO SUB TITLE RESET MODE EFFECT TIME/ MEMORY SLOW LOGO SOUND EDITI P.SCAN MO/ST ZOOM EZ VIEW SLIDE MODE DIGEST NT/PAL SLEEP DIMMERNote
- Depending on the content of the disc, the initial screen may appear different.
1 Press OPEN/CLOSE button to open the disc tray.
2 Load a disc. - Place a disc gently into the tray with the disc's label facing up.
3 Close the compartment by pressing the OPEN/CLOSE button again.
DVD V CD CD
- Playback starts automatically.
To stop playback, press STOP during playback.
- If pressed once, "PRESS PLAY" is displayed and the stop position will be stored in memory. If PLAY/PAUSE (▶/II) button or ENTER button is pressed, playback resumes from the stop position. (This function works only with DVDs.)
- If pressed twice, "STOP" is displayed, and if PLAY/PAUSE (▶/II) button is pressed, playback starts from the beginning.
To temporarily pause playback, press PLAY/PAUSE during playback.
- To resume playback, press PLAY/PAUSE (▶/II) button again.
Selecting the Video Format
Press and hold NT/PAL button on the remote controller for over 5 seconds while the power is turned off.
- By default, the video format is set to "PAL".
- "NTSC" or "PAL" will appear in the display. At this time, press the NT/PAL button shortly to select between "NTSC" and "PAL".
• Each country has a different video format standard. - For normal playback, the video format of the disc must be the same as the video format of your TV.
MP3/WMA-CD Playback
Data CDs (CD-ROM, CD-R, CD-RW) encoded in MP3/WMA format can be played.
text_image
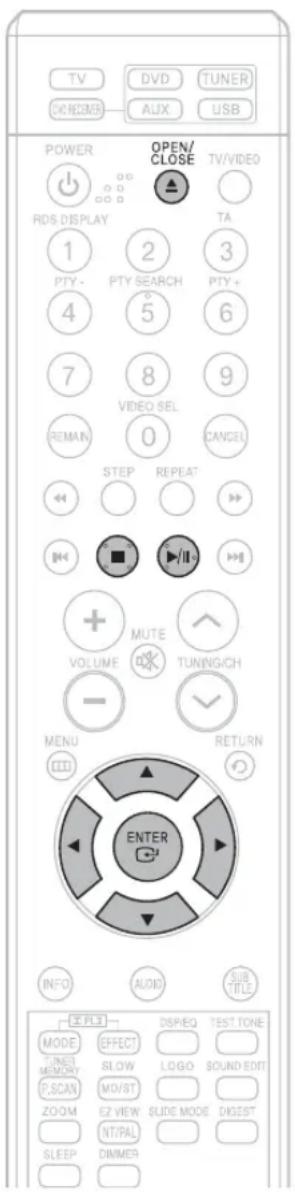
TV DVD TUNER CREMB AUX USB POWER OPEN/ CLOSE TV/VIDEO RDS DISPLAY 1 2 3 PTY- PTY SEARCH PTY+ 4 5 6 7 8 9 VIDEO SEL REMAR 0 CANCEL STEP REPEAT MUTE VOLUME TUNING/CH - MENU RETURN INFO AUDIO SUB-TITLE EX-PLS DISREQ TEST TONE MODE EFFECT TINER MEMORY SLOW LOGO SOUND EDIT P_SCAN MO/ST ZOOM EZ VIEW SLIDE MODE DIGEST NT/PAL SLEEP DIMMER1
Press the OPEN/CLOSE button to open the disc tray, and then load the MP3/WMA disc.
- The MP3/WMA menu screen will appear and playback will start.
- The appearance of the menu depends on the MP3/WMA disc.
- WMA-DRM files cannot be played.
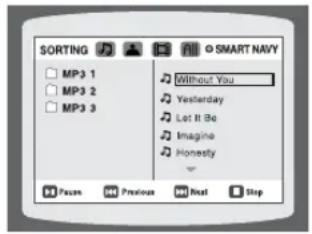
text_image
SORTING MP3 1 MP3 2 MP3 3 Without You Yesterday Let It Be Imagine Honestly Previous Next Stop2
In Stop mode, use ◀ ▶ ▲ ▼ to select the album, and then press the ENTER button.
- Use ▲▼ to select the track.
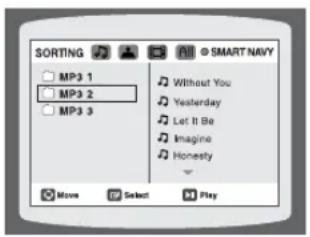
text_image
SORTING MP3 1 MP3 2 MP3 3 © SMART NAVY Without You Yesterday Let It Be Imagine Honesty Move Select Play3
To change the album, use ◀ ▶ ▲ ▼ to select another album in Stop mode, and then press the ENTER button.
- To select another album and track, repeat Steps 2 and 3 above.
4
Press the STOP button to stop playback.
Note
- Depending on the recording mode, some MP3/WMA-CDs may not play.
- Table of contents of a MP3-CD varies depending on the MP3/WMA track format recorded on the disc.
To play a file icon in the screen,
Press the ◀ ▶ ▲ ▼ button when it is in stop status and select a desired icon from the top part of the menu.
- To play music files only, select the 🎯 Icon.
- To view image files only, select the Icon.
- To view movie files only, select the Icon.
- To select all files select the All Icon.
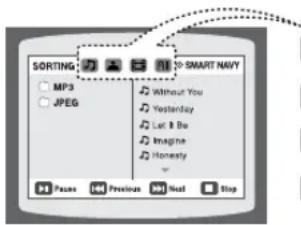
text_image
SORTING MP3 JPEG → SMART NAVY Without You Yesterday Let It Be Imagine Honesty P1 Paune 104 Previous 98 Next Stop
- Music File Icon
- Image File Icon
- Movie File Icon
- All File Icon
Displaying Disc Information
You can view disc playback information on the TV screen.
GB
Press INFO button.
• Each time the button is pressed, the display changes as follows:
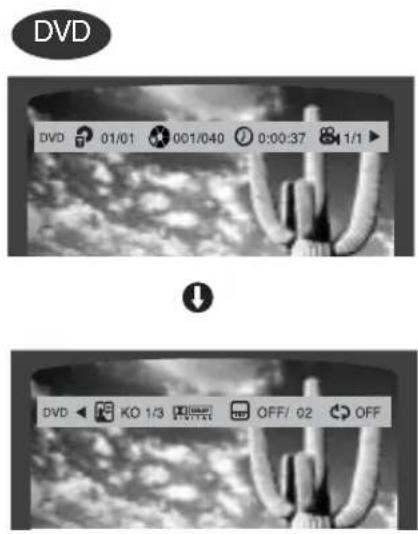
text_image
DVD DVD 01/01 001/040 0:00:37 1/1 DVD KÖ 1/3 OFF/ 02 OFF↓
The information Display disappears from the screen
Note
- Depending on the disc, the disc information display may appear different.
- Depending on the disc, you can also select DTS, DOLBY DIGITAL, or PRO LOGIC.
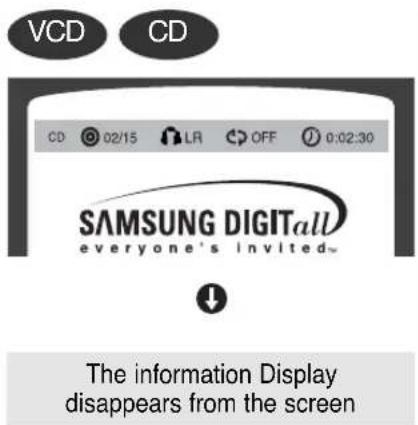
text_image
VCD CD CD 02/15 LR OFF 0:02:30 SAMSUNG DIGITAL everyone's invited~ The information Display disappears from the screen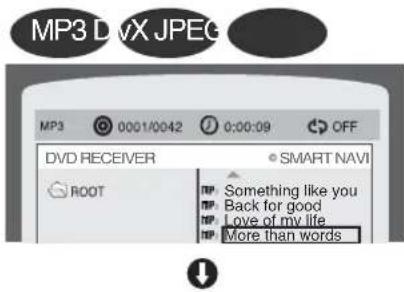
text_image
MP3 DVX JPEG MP3 0001/0042 0:00:09 OFF DVD RECEIVER SMART NAVI ROOT Something like you Back for good Love of my life More than wordsThe information Display disappears from the screen
• 🎋 appears on the TV screen!
If this symbol appears on the TV screen while buttons are being operated, that operation is not possible with the disc currently being played.
• What is a Title?
A movie contained in a DVD-VIDEO disc.
• What is a Chapter?
Each title on a DVD disc is divided into several smaller sections called "chapters".
• What is a Track (File)?
A section of video or a music file recorded on a CD, or MP3-CD.
Screen Display
DVD DVD display
VCD VCD display
CD CD display
TITLE display
CHAPTER display
TRACK (FILE) display
ELAPSED TIME display
REPEAT PLAYBACK display
AUDIO LANGUAGE display
SUBTITLE display
LR STEREO (L/R) display
DOLBY DIGITAL DIGITAL display
ANGLE display
JPEG File Playback
JPEG
Images captured with a digital camera or camcorder, or JPEG files on a PC can be stored on a CD and then played back with this Home Theater.
Slide Mode
1 Place the JPEG disc on the disc tray.
2 Press the OPEN/CLOSE button.
3 Press SLIDE MODE button.
- Playback starts automatically.
• Each time the button is pressed, the image makes the transition as follows:
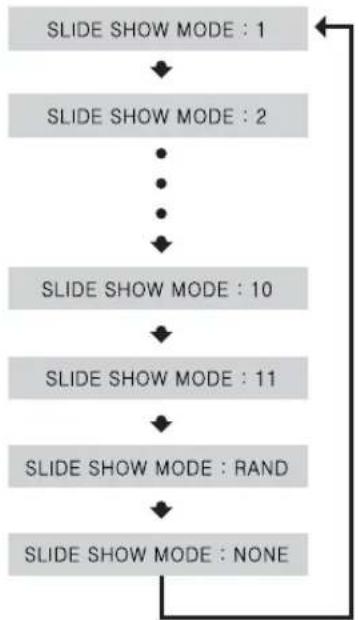
flowchart
graph TD
    A["SLIDE SHOW MODE : 1"] --> B["SLIDE SHOW MODE : 2"]
    B --> C["..."]
    C --> D["SLIDE SHOW MODE : 10"]
    D --> E["SLIDE SHOW MODE : 11"]
    E --> F["SLIDE SHOW MODE : RAND"]
    F --> G["SLIDE SHOW MODE : NONE"]
From top to bottom
From bottom to top
Rectangular shape in the center
Vertical blinds effect
Each time a new image is displayed, slide modes (1\~11) will be applied randomly and automatically.
Cancels the slide mode.
text_image
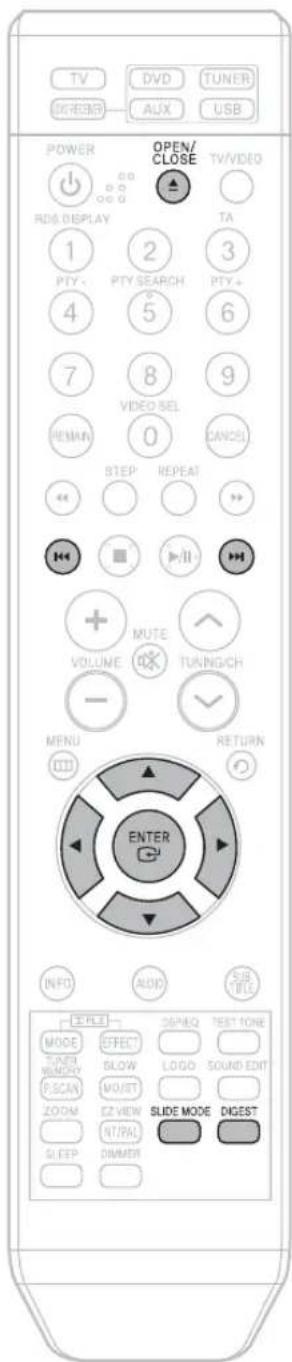
TV DVD TUNER GREEN AUX USB POWER OPEN/ CLOSE TV/VIDEO RDS DISPLAY TA 1 2 3 PTY- PTY SEARCH PTY+ 4 5 6 7 8 9 VIDEO SEL REMARK 0 CANCEL STEP REPEAT MUTE VOLUME TURING/CH - MENU RETURN III ENTER INFO AUDIO SUB WIDE MODE EFFECT TEST FONE TOMEN MEMORY SLOW LOGO SOUND EDIT RSCAN MO/SET ZOOM CZ VIEW SLIDE MODE DIGEST NTPAL SLEEP DIMMERPress I ◀◀◀ ▶▶▶ I to skip to the next slide.
• Each time the button is pressed, the slide moves backward or forward.
Digest Function
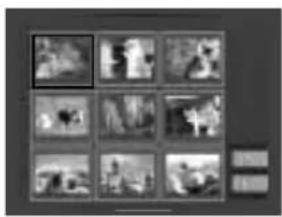
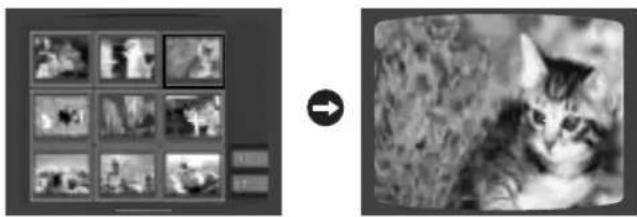
You can view 9 JPEG images on the TV screen.
1 Press DIGEST button during playback.
- JPEG files will be shown in 9 windows.
natural_image
Grid of 12 grayscale photo frames arranged in a 3x3 grid, no visible text or symbols2 Press Cursor ▲, ▼, ◀, ▶ buttons to select the desired image and then press ENTER button.
- The selected image is played for 5 seconds before moving to the next image.
natural_image
Two black-and-white photos: one showing a grid of small images, the other a close-up of a kitten in nature (no text or symbols visible)To view the previous or next image with 9 windows, press ◀◀◀▶▶.
Rotate/Flip Function
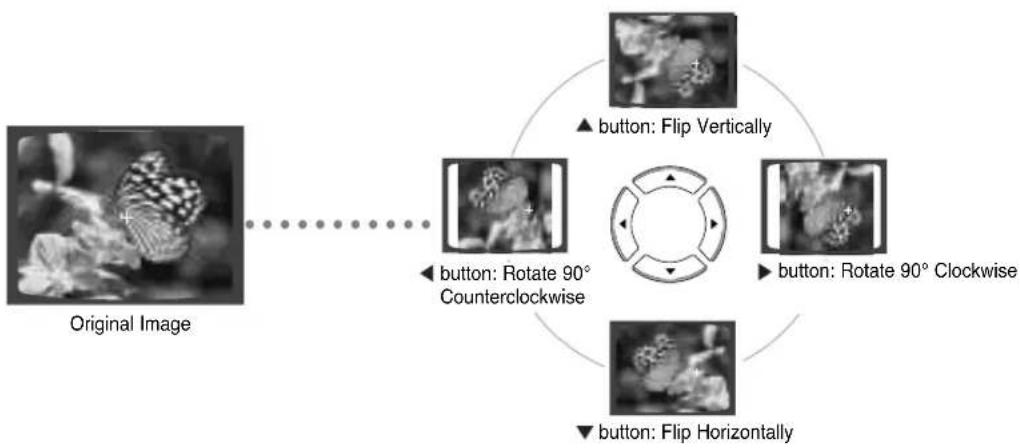
Press Cursor ▲, ▼, ◀, ► buttons during playback.
flowchart
graph TD
    A["Original Image"] --> B["button: Flip Vertically"]
    B --> C["button: Rotate 90° Counterclockwise"]
    C --> D["button: Flip Horizontally"]
    D --> E["button: Rotate 90° Clockwise"]
    E --> F["button: Flip Vertically"]
Note
- The maximum resolutions supported by this product are 5120 x 3480 (or 19.0 MPixel) for standard JPEG files and 2048 x 1536 (or 3.0 MPixel) for progressive image files.
DivX Playback
The functions on this page apply to DIVX disc playback.
Skip Forward/Back
During playback, press the ◀◀◀▶▶ button.
- Goes to the next file whenever you press ▶▶1 button, if there are over 2 files in the disk.
- Goes to the previous file whenever you press ◀◀◀ button, if there are over 2 files in the disk.
Fast playback
To play back the disc at a faster speed, press ◀◀ or ▶▶ during playback.
• Each time you press either button, the playback speed will change as follows:
$$ 2 x \rightarrow 4 x \rightarrow 8 x \rightarrow 3 2 x \rightarrow \text { Normal }. $$
5 Minute Skip function
During playback, press the ◀,▶ button.
- Playback skips 5 minutes forward whenever you press button.
- Playback skips 5 minutes back whenever you press button.
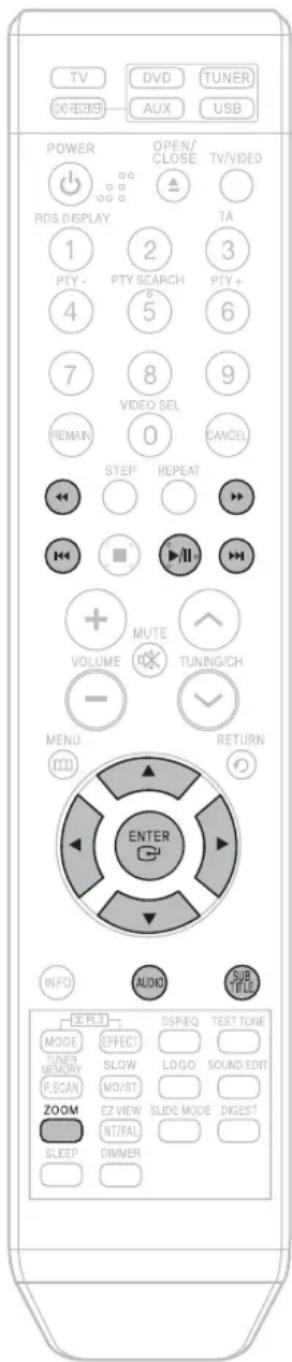
Zoom Function
1 Press ZOOM button.
- Each time you press the button, your selection will toggle between "ZOOM X2" and "ZOOM OFF".
2 Press Cursor ▲,▼,◀,▶ buttons to move to the area you want to enlarge.
Note
- DIVX file can be zoomed only in ZOOM X2 mode.
- DivX files have .Avi file extensions, however, not all .Avi files are DivX and may not be playable in this unit.
text_image
TV D/REBEER DVD TUNER AUX USB POWER OPEN/ CLOSE TV/VIDEO RDS DISPLAY TA 1 2 3 PTY- PTY SCARCH PTY+ 4 5 6 7 8 9 VIDEO SEL REMAR 0 CANCEL STEP REPEAT VOLUME MUTE TUNING/CH - MENU RETURN (III) ENTER INFO AUDIO SUB TITLE EPLI MODE TIME MEMORY F.SCAN SLOW MO/ST LOGO SOUND EDIT ZOOM EZ VIEW SLIDE MODE DIGEST NT/FAL SLEEP DIMMERSubtitle Display
GB
Press the SUBTITLE button.
- Each time you press the button, your selection will toggle between "SUBTITLE (1/1, 1/2 ...) and "SUBTITLE OFF".
- If the disc has only one subtitle file, it will be played automatically.
- See number 2 (Caption Function) below for more details concerning Subtitle usage with DIVX discs.
Audio Display
Press the AUDIO button.
- If there are multiple audio tracks on a disc, you can toggle between them.
- Each time you press the button, your selection will toggle between "AUDIO(1/1, 1/2 ...) and “💡”.
Note
- " [hand icon] " is displayed when there is one supported language in the disc.
DivX(Digital internet video eXpress)
DivX is a video file format developed by Microsoft and is based on MPEG4 compression technology to provide audio and video data over the Internet in real-time.
MPEG4 is used for video encoding and MP3 for audio encoding so that the users can watch a movie at near DVD-quality video and audio.
1. Supported Formats
- This product only supports the following media formats. If both video and audio formats are not supported, the user may experience problems such as broken images or no sound.
• Supported Video Formats
| Format AVI WMV | ||
| Supported Versions | DivX3.11 ~ 5.1 V1/V2 | V3/V7 |
• Supported Audio Formats
| Format MP3 | WMA AC3 DTS | |||
| Bit Rate | 80~384kbps | 56~128kbps | 128~384kbps | 1.5Mbps |
| Sampling Frequency | 44.1khz | 44.1/48khz | 44.1khz | |
- DivX files, including audio and video files, created in the DTS format can only support up to 6Mbps.
- Aspect Ratio: Although default DivX resolution is 640*480 pixels (4:3), this product supports up to 720*480 pixels (16:9). TV screen resolutions higher than 800 will not be supported.
- When you play a disc whose sampling frequency is higher than 48khz or 320kbps, you may experience shaking on the screen during playback.
2. Caption Function
- You must have some experience with video extraction and editing in order to use this feature properly.
- To use the caption function, save the caption file (*.smi) in the same file name as that of the DivX media file (*.avi) within the same folder.
Example. Root Samsung_007CD1.avi
Samsung_007CD1.smi
- Up to 60 alphanumeric characters or 30 East Asian characters (2 byte characters such as Korean and Chinese) for the file name.
Checking the Remaining Time
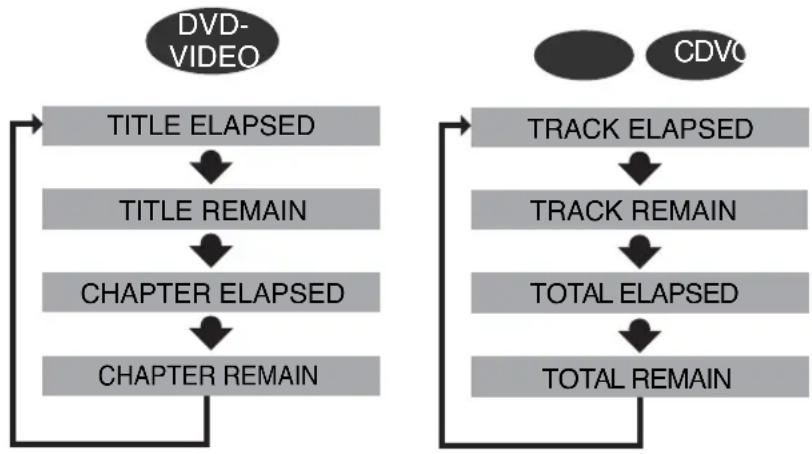
Press the REMAIN button.
- For checking the total and remaining time of a title or chapter being played.
Each time the REMAIN button is pressed
flowchart
graph TD
    A["DVD-VIDEO"] --> B["TITLE ELAPSED"]
    B --> C["TITLE REMAIN"]
    C --> D["CHAPTER ELAPSED"]
    D --> E["CHAPTER REMAIN"]
    F["CDVO"] --> G["TRACK ELAPSED"]
    G --> H["TRACK REMAIN"]
    H --> I["TOTAL ELAPSED"]
    I --> J["TOTAL REMAIN"]
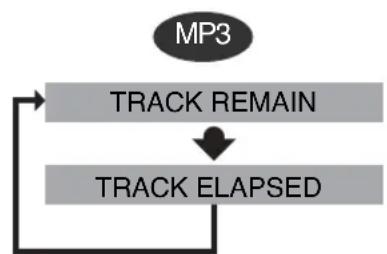
flowchart
graph TD
    A["MP3"] --> B["TRACK REMAIN"]
    B --> C["TRACK ELAPSED"]
    C --> B
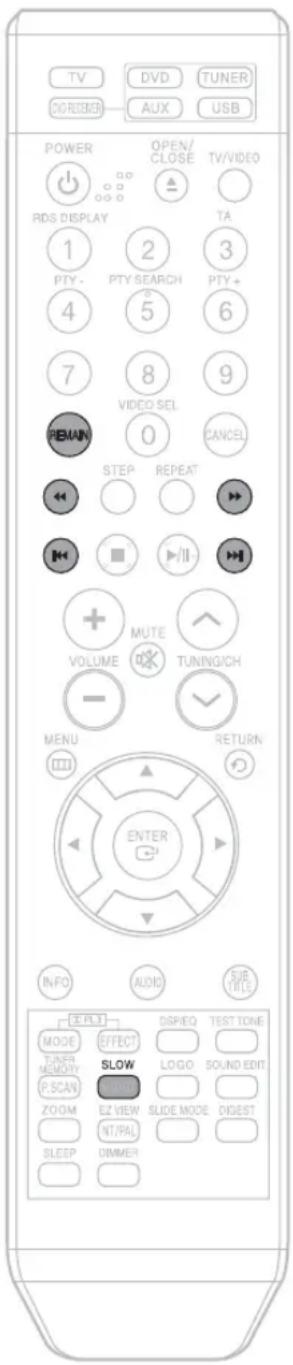
text_image
TV DVD TUNER DIGRENDER AUX USB POWER OPEN/ CLOSE TV/VIDEO RDS DISPLAY 1 2 3 PTY - PTY SEARCH PTY + 4 5 6 7 8 9 VIDEO SEL PEMAN 0 CANCEL STEP REPEAT VOLUME MUTE TUNING/CH - MENU RETURN ENTER INFO AUDIO SUB-TIME E.P.L.T. DGPIEO TEST TONE MODE EFFECT TUNER SLOW LOGO SOUND EDIT MEMORY P.SCAN EZ VIEW SLIDE MODE DIGEST ZOOM INT/PAL SLEEP DIMMERFast/Slow Playback
GB
Fast Playback
DVD V
CD MP3


Press

• Each time the button is pressed during playback, the playback speed changes as follows:
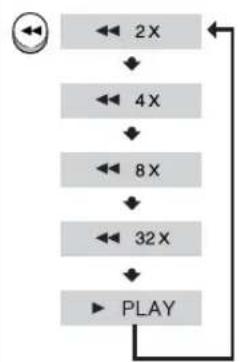
flowchart
graph TD
    A["2X"] --> B["4X"]
    B --> C["8X"]
    C --> D["32X"]
    D --> E["PLAY"]
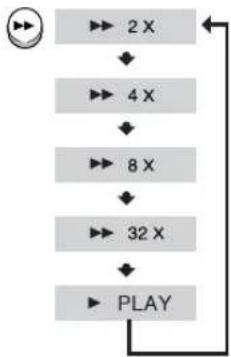
flowchart
graph TD
    A["2X"] --> B["4X"]
    B --> C["8X"]
    C --> D["32X"]
    D --> E["PLAY"]
Note
- During fast playback of a CD or MP3-CD, sound is heard only at 2x speed, and not at 4x, 8x, and 32x speeds.
Slow Playback
Press SLOW button.
• Each time the button is pressed during playback, the playback speed changes as follows:
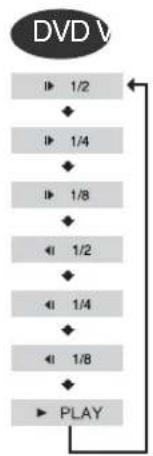
flowchart
graph TD
    A["1/2"] --> B["1/4"]
    B --> C["1/8"]
    C --> D["1/2"]
    D --> E["1/4"]
    E --> F["1/8"]
    F --> G["PLAY"]
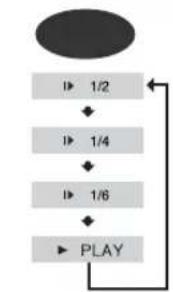
flowchart
graph TD
    A["1/2"] --> B["1/4"]
    B --> C["1/6"]
    C --> D["PLAY"]
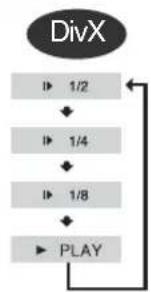
flowchart
graph TD
    A["DivX"] --> B["1/2"]
    B --> C["1/4"]
    C --> D["1/8"]
    D --> E["PLAY"]
Note
• No sound is heard during slow playback and step motion playback.
- Reverse slow playback does not work with VCD and DivX.
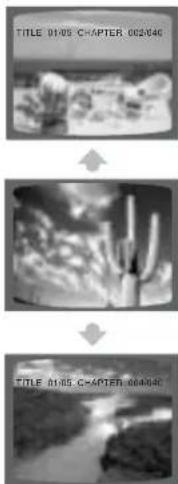
Skipping Scenes/Songs
Press ◀◀◀▶▶.
- Each time the button is pressed during playback, the previous or next chapter, track, or directory (file) will be played.
- You cannot skip chapters consecutively.
DVD
text_image
TITLE 01/05 CHAPTER 002646 TITLE 01/05 CHAPTER 004846VCD M
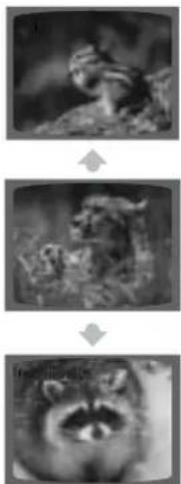
natural_image
Three grayscale images showing animals in natural settings, no text or symbols visible[Non-Text]
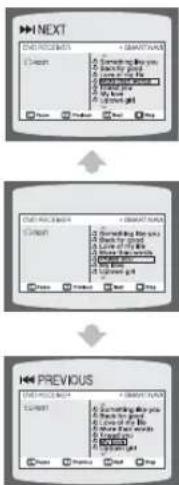
text_image
NEXT NEXT PREVIOUS- When watching a VCD with a track longer than 15 minutes, each time is pressed, playback will skip back or forward 5 minutes.
Repeat Playback
Repeat playback allows you to repeatedly play a chapter, title, track (song), or directory (MP3 file).
DVD COVCD MP3 JPEG

Press REPEAT button.
• Each time the button is pressed during playback, the repeat playback mode changes as follows:
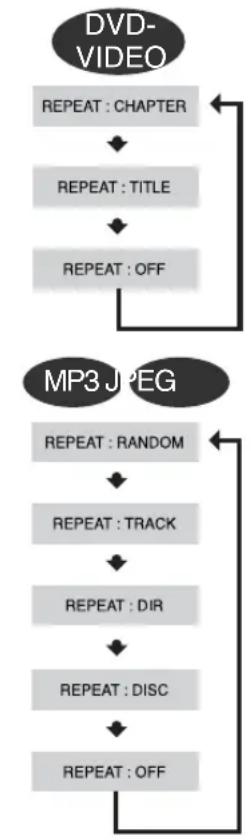
flowchart
graph TD
    A["DVD-VIDEO"] --> B["REPEAT : CHAPTER"]
    B --> C["REPEAT : TITLE"]
    C --> D["REPEAT : OFF"]
    D --> E["MP3 JPEG"]
    E --> F["REPEAT : RANDOM"]
    F --> G["REPEAT : TRACK"]
    G --> H["REPEAT : DIR"]
    H --> I["REPEAT : DISC"]
    I --> J["REPEAT : OFF"]
    J --> E
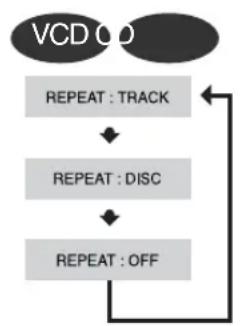
flowchart
graph TD
    A["VCD/DVD"] --> B["REPEAT : TRACK"]
    B --> C["REPEAT : DISC"]
    C --> D["REPEAT : OFF"]
    D --> A
Repeat Playback Options
CHAPTER
Repeatedly plays the selected chapter.
TITLE
Repeatedly plays the selected title.
RANDOM
Plays tracks in random order.
(A track that has already been played may be played again.)
TRACK
Repeatedly plays the selected track.
DIR
Repeatedly plays all tracks in the selected folder.
DISC
Repeatedly plays the entire disc.
OFF
Cancels Repeat Playback.
Note
- Repeat playback operation is not possible with version 2.0 VCD discs if PBC is turned on. To use Repeat Playback on a VCD with PBC, you should set the PBC to OFF in the disc menu. (See page 40.)
To Select a Repeat Playback Mode in the Disc Information Screen
1 Press INFO button twice.
2 Press Cursor ▶ button to move to REPEAT PLAYBACK ( ) display.
3 Press Cursor ▼ button to select the desired Repeat Playback mode.
4 Press ENTER button.
* For MP3 and JPEG discs, you cannot select Repeat Play from the information display screen.
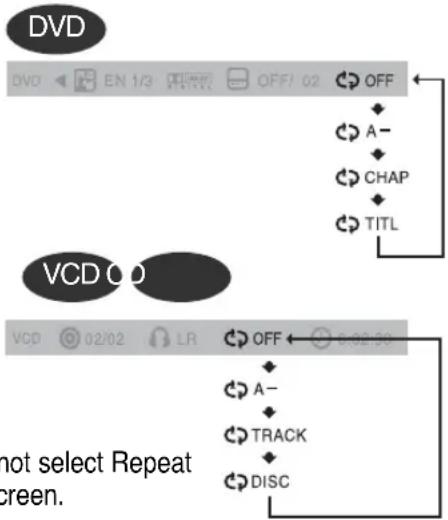
flowchart
graph TD
    A["OFF"] --> B["A-"]
    B --> C["CHAP"]
    C --> D["TITL"]
    D --> E["VCD"]
    E --> F["02/02"]
    F --> G["LR"]
    G --> H["OFF"]
    H --> I["A-"]
    I --> J["TRACK"]
    J --> K["DISC"]
A-B Repeat Playback
You can repeatedly play back a designated section of a DVD.
GB
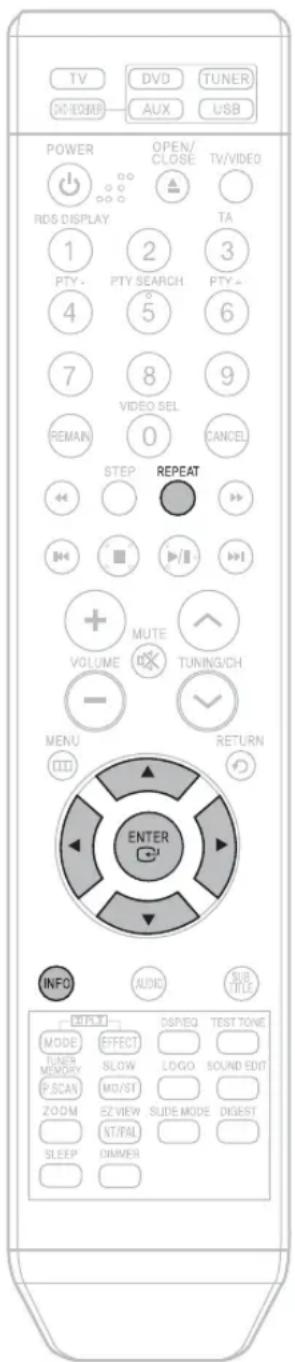
text_image
TV DVD TUNER DNDROMP AUX USB POWER OPEN/ CLOSE TV/VIDEO RDS DISPLAY 1 2 3 PTY- PTY SEARCH PTY- 4 5 6 7 8 9 VIDEO SEL REMAIN 0 CANCEL STEP REPEAT MUTE VOLUME TUNING/CH - MENU RETURN (II) ENTER INFO AUDIO SUB-TITLE REPORT MODE EFFECT TUNER MEMORY SLOW LOGO SOUND EDIT P.SCAN MO/STI ZOOM EZ VIEW SLIDE MODE DIGEST NT/PAL SLEEP DIMMERDVD V CD
1 Press INFO button twice.
- For a VCD, press INFO button once.

2 Press Cursor ▶ button to move to REPEAT PLAYBACK (⇨) display.

3 to select 'A-' and then press ENTER button at the beginning of the desired segment.
- When ENTER button is pressed, the selected position will be stored in memory.



REPEAT : A—
4 Press ENTER button at the end of the desired segment.
- The specified segment will be played repeatedly.

REPEAT: A—B
To return to normal playback, press Cursor ▲,▼ buttons to select ⬇ OFF.
Note
- The A-B Repeat function does not operate with MP3, CD or JPEG discs.
Step Function
Press STEP button.
- The picture moves forward one frame each time the button is pressed during playback.
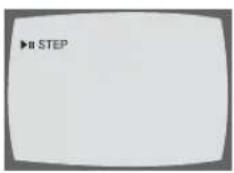
text_image
▶II STEPAngle Function

This function allows you to view the same scene in different angles.
1 Press INFO button.

2 Press Cursor▶ button to move to ANGLE ( Ⓤ ) display.

3 Press Cursor ▲,▼ or numeric buttons to select the desired angle.
• Each time the button is pressed, the angle changes as follows:
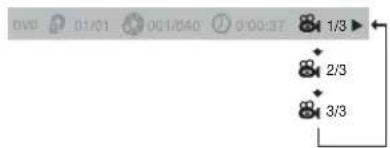
text_image
0:00:37 1/3 2/3 3/3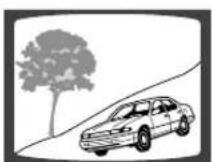
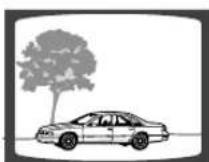
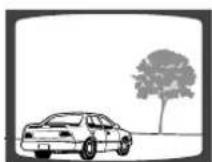
- The Angle function works only with discs on which multiple angles have been recorded.
text_image
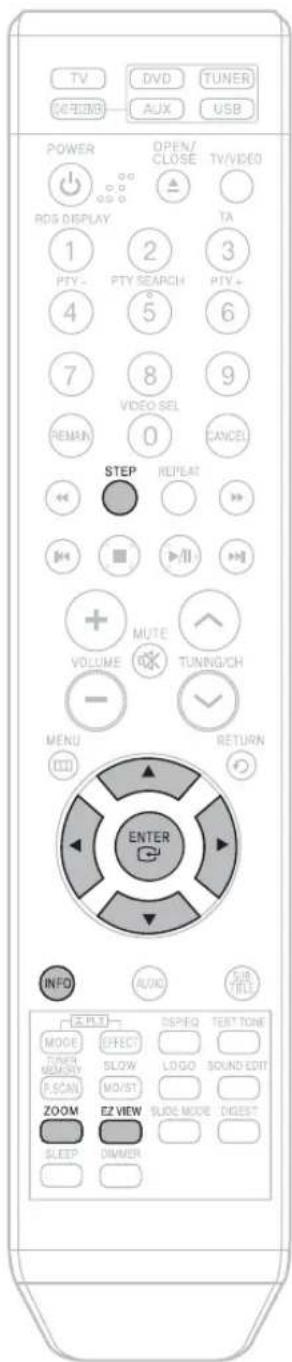
TV DVD TUNER SEEDER AUX USB POWER OPEN/ CLOSE TV/VIDEO ROS DISPLAY TA 1 2 3 PTY- PTY SEARCH PTY+ 4 5 6 7 8 9 VIDEO SEL REMAN 0 CANCEL STEP REPEAT VOLUME MUTE TUNING/CH - MENU RETURN (III) ENTER AUDIO SUB (IV) INFO SELECT > DSEQ TEST TONE MODE EFFECT TYPEN MEMORY SLOW LOGO SOUND EDIT P.SCAN MOVST ZOOM EZ VIEW SLIDE MODE DIGEST SLEEP DIAMERZoom (Screen Enlarge) Function
GB
This function allows you to enlarge a particular area of the displayed image.
DVD V CD
1 Press ZOOM button.
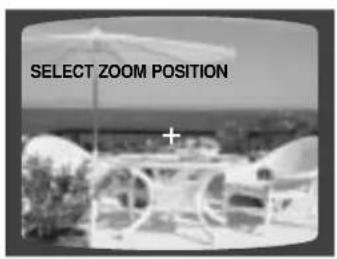
text_image
SELECT ZOOM POSITION2 Press Cursor ▲,▼,◀,▶ buttons to move to the area you want to enlarge.
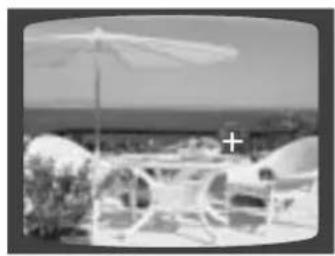
natural_image
Black-and-white photo of a beach with umbrellas and chairs, no visible text or symbols3 Press ENTER button.
• Each time the button is pressed, the zoom level changes as follows:

flowchart
graph TD
    A["ZOOM x 1.5"] --> B["ZOOM x 2"]
    B --> C["ZOOM x 3"]
    C --> D["ZOOM OFF"]
Note
- When a DivX disc is being played, only the 2:1 zoom-in is available.
EZ VIEW Function
DVD
Press EZ VIEW button.
• Each time the button is pressed, the zoom function will switch between On and Off.
- When a movie is played in Widescreen format, black bars at the top and bottom of the TV screen can be removed by pressing the EZ VIEW button.
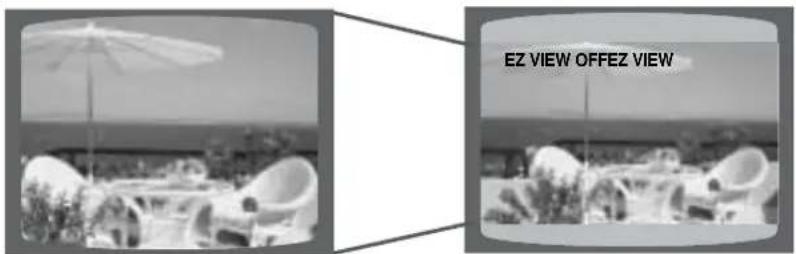
text_image
EZ VIEW OFFEZ VIEWNote
- This function will not work if the DVD is recorded with multi-camera angle format.
- Black bars may not disappear because some DVD discs have a built-in horizontal to vertical ratio.
• This feature is not supported for DivX discs.
Selecting Audio Language
Audio Language Selection Function
DVD
1 Press INFO button twice.
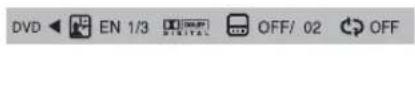
text_image
DVD ← EN 1/3 OFF/ 02 OFF2 Press Cursor ▲,▼ buttons or numeric buttons to select the desired audio language.
- Depending on the number of languages on a DVD disc, a different audio language (ENGLISH, SPANISH, FRENCH, etc.) is selected each time the button is pressed.
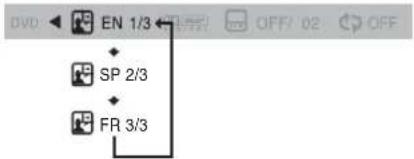
text_image
DVD EN 1/3 OFF/ 02 OFF SP 2/3 FR 3/3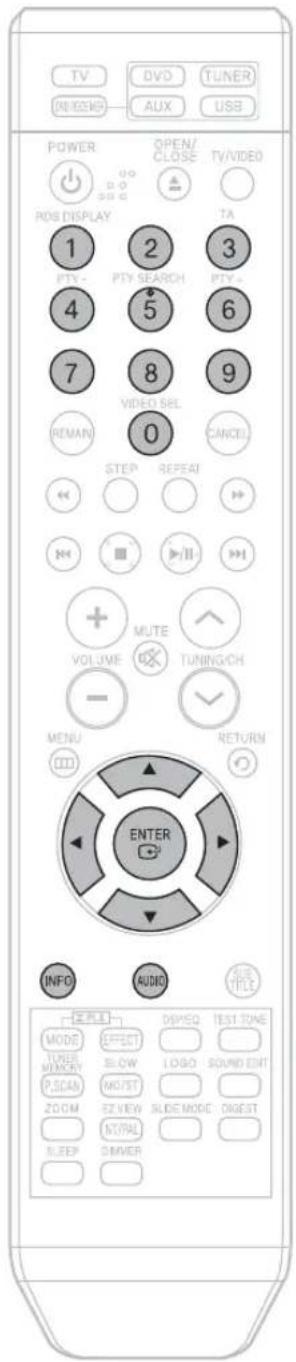
text_image
TV (N/102/9) DVD AUX TUNER USB POWER OPEN/ CLOSE TV/VIDEO UO D O G G G ROS DISPLAY 1 PTV 2 PTY SEARCH 3 PTY 4 5 6 7 8 9 VIDEO SEL REMAN 0 CANCEL STEP REPEAT MUTE VOLUME TUNING/CH - MENU RETURN (III) ENTER AUDIO TIME TITLE MODE EFFECT TUNER MEMORY BLOW LOGO SOUND EDIT P.SCAN MOIST ZOOM EZ VIEW SLIDE MODE DIGEST NTRAL SLEEP DIMMERSelecting Subtitle Language
GB
Subtitle Language Selection Function
DVD
1 Press INFO button twice.

2 Press Cursor ▶ button to move to SUBTITLE (☐) display.

3 Press Cursor ▼ button or numeric buttons to select the desired subtitle.
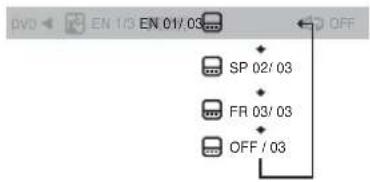
flowchart
graph TD
    A["EN 1/3 EN 01/03"] --> B["SP 02/03"]
    A --> C["FR 03/03"]
    A --> D["OFF /03"]
Note
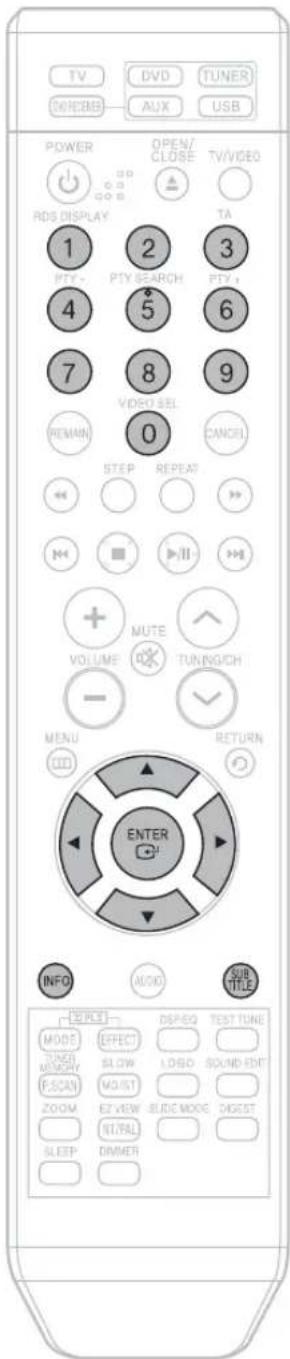
- To operate this function, you can also press the Select AUDIO or Select SUBTITLE buttons on the remote control.
- Depending on the disc, the Subtitle and Audio Language functions may not be available.
text_image
TV (OHCEMB) DVD AUX TUNER USB POWER RDS DISPLAY 1 PTV 2 PTV SEARCH 3 PTV 4 5 6 7 8 VIDEO SEL 9 REMAIN 0 CANCEL STEP REPEAT MUTE VOLUME TUNING/CH - MENU RETURN (II) ENTER INFO AUDIO SUB-TITLE OFFICE MODE EFFECT TIMER BLOW LUSHED SOUND EDIT FSCAN MOIST ZOOM E2 VIEW SLIDE MODE DIGEST NIT/RAL SLEEP DIMMERPlaying Media Files using the USB HOST feature
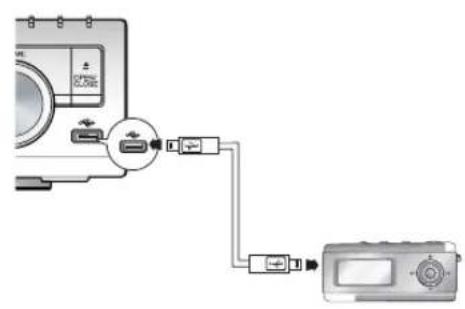
You can enjoy media files such as pictures, movies and music saved in an MP3 player, USB memory or digital camera in high quality video with 5.1 channel home theater sound by connecting the storage device to the USB port of the home theater.
1 Connect the USB device to the USB port on the rear of the unit.
natural_image
Diagram showing connections between a computer monitor, a USB cable, and a digital camera (no text or symbols present)2 Press the FUNCTION button on the main unit or the USB button on the remote control to select the USB mode.
- "USB" appears on the display screen and then disappears.
- USB MENU screen appears on the TV screen and the saved file is played.
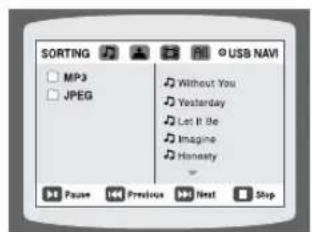
text_image
SORTING MP3 JPEG Without You Yesterday Let It Be Imagine Honesty Pause Previous Next StopTo stop playback, press the STOP (■) button.
Safe USB Removal
To prevent damage to the memory stored in the USB device, perform safe removal before disconnecting the USB cable.
(1) Press the Stop button twice in a row. The display will show REMOVE → USB.
(2) Remove the USB cable.
text_image
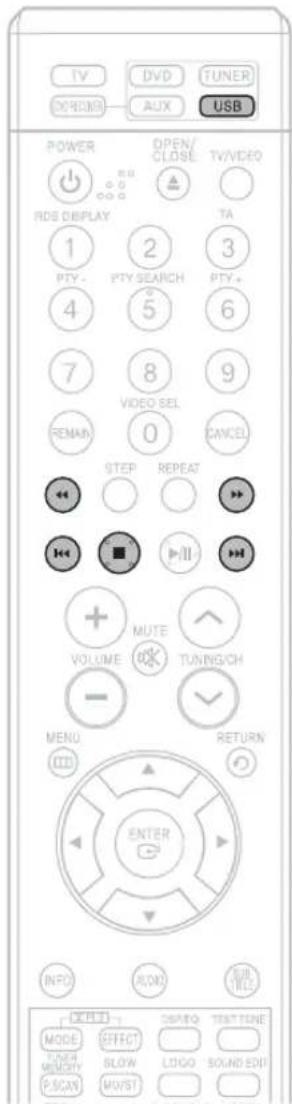
TV DVD TUNER OPEN/ CLOSE TV/VIDEO RDS DISPLAY 1 2 3 PTY- PTY SEARCH PTY+ 4 5 6 7 8 9 VIDEO SEL REMAIN 0 CANCEL STEP REPEAT MUTE VOLUME TUNING/CH - MENU RETURN ENTER INPUT ASIGN RUN TIME ORDER DISPESO TRUST TONE MODE EFFECT POWER MEMORY SLOW LOGO SOUND EDIT P.SCAN MOVSTSkip Forward/Back
During playback, press the ◀◀▶▶ button.
- When there is more than one file, when you press the ▶▶I button, the next file is selected.
- When there is more than one file, when you press the ◀◀◀ button, the previous file is selected.
Fast playback
To play back the disc at a faster speed, press ◀◀ or ▶▶ during playback.
• Each time you press either button, the playback speed will change as follows: 2x 4x 8x 32x Normal .
Compatible Devices
- USB devices that support USB Mass Storage v1.0.
(USB devices that operate as a removable disk in Windows
(2000 or later) without additional driver installation.)
-
MP3 Player: HDD and flash type MP3 players.
-
Digital camera: Cameras that support USB Mass Storage v1.0.
- Cameras that operate as a removable disk in Windows (2000 or later) without additional driver installation.
-
USB HDD and USB Flash Drive: Devices that support USB2.0 or USB1.1.
-
You may experience a difference in playback quality when you connect a USB1.1 device.
-
For a USB HDD, make sure to connect an auxiliary power cord to the USB HDD for proper operation.
-
USB card Reader: One slot USB card reader and Multi slot USB card reader
-
Depending on the manufacturer. the USB card reader may not be supported.
-
If you install multiple memory devices into a multi card reader, you may experience problems.
-
If you use a USB extension cable, the USB device might not be recognized.
-
Supported Formats
| File name | File extension Frequency | Bit rate Version | sion Pixel | Sampling | ||
| Still Picture JPG | JPG.JPG .JPEG | -- 640*480 - | ||||
| Music | MP3 .MP3 | 80~384kbps - | - | 44.1kHz | ||
| WMA | .WMA | 56~128kbps | V8 | - | 44.1kHz | |
| Movie | VCD | MPG.MPEG .DAT | 1.5Mbps | VCD1.1,VCD2.0 | 320*480 | 44.1KHz |
| WMV | .WMV | 4Mbps | V1,V2,V3,V7 | 720*480 | 44.1KHz~48KHz | |
| DivX | .AVI,.ASF | 4Mbps | DivX3.11~DivX5.1,Xvid | 720*480 | 44.1KHz~48KHz |
• CBI (Control/Bulk/Interrupt) is not supported.
- Digital Cameras that use PTP protocol or require additional program installation when connected to a PC are not supported.
- A device using NTFS file system is not supported.
(Only FAT 16/32 (File Allocation Table 16/32) file system is supported.)
- Some MP3 players, when connected to this product, may not operate depending on the sector size of their file system.
- The USB HOST function is not supported if a product that transfers media files by its manufacturer-specific program is connected.
- Does not operate with Janus enabled MTP(Media Transfer Protocol) devices.
- The USB host function of this product does not support all USB devices. For information on the supported devices, see pages 73.
Moving Directly to a Scene/Song
DVD V CD CD
1 Press INFO button.

Moving to a Title/Track
2
Press Cursor ▲ ,▼ buttons or numeric buttons to select the desired title/track and then press ENTER button.

Moving to a Chapter
3
Press Cursor ◀, ▶ buttons to move to Chapter ( Ⓤ ) display.

Moving to a Chapter
4 Press Cursor ▲,▼ buttons or numeric buttons to select the desired chapter and then press ENTER button.

Moving to a Specific Time
5 Press Cursor◀,▶ buttons to move to time display.

Moving to a Specific Time
6 Press the numeric buttons to select the desired time and then press ENTER button.

MP3 JPEG
Press the numeric buttons.
- The selected file will be played.
- When playing an MP3 or JPEG disc, you cannot use ▲,▼ to move to a folder. To move a folder, press ■ (Stop) and then press ▲,▼.
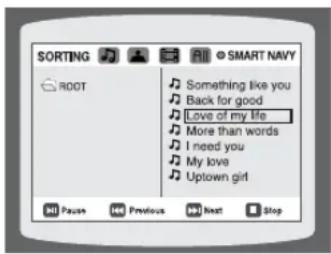
text_image
SORTING ROOT Something like you Back for good Love of my life More than words I need you My love Uptown girl 341 Paes 360 Previous 381 Next 5 StopNote
- You can press ◀◀◀▶▶ on the remote control to move directly to the desired title, chapter, or track.
- Depending on the disc, you may not be able to move to the selected title or time.
Using Disc Menu
DVD
You can use the menus for the audio language, subtitle language, profile, etc.
DVD menu contents differ from disc to disc.
GB
1 In Stop mode, press MENU button.
- When playing a VCD (version 2.), this toggles between PBC ON and OFF.
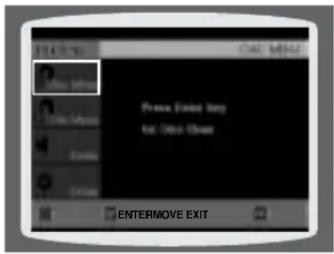
text_image
EnterMOVE EXIT Press Enter Day for One User2 buttons to move to 'DISC MENU' and then press ENTER button.
- When you select Disc Menu and it is not supported by the disc, the "This menu is not supported" message appears on the screen.
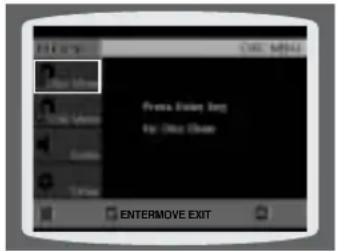
text_image
EnterMove Exit EnterMove Key for Close Close3◀,▶ buttons to select the desired item.
- Press ENTER button.
natural_image
Black and white photo of a dolphin swimming in water (no visible text or symbols)Note
- Disc menu display may be different depending on the disc.
PBC (Playback Control) Function
When playing a VCD (version 2.0), you can select and view various scenes according to the menu screen.
PBC ON: This VCD disc is version 2.0. The disc is played back according to the menu screen. Some functions may be disabled. When some functions are disabled, select "PBC OFF" to enable them.
PBC OFF: This VCD disc is version 1.1. The disc is played back in the same way as with a music CD.
Using the Title Menu
DVD
For DVDs containing multiple titles, you can view the title of each movie.
Depending on the disc, the availability of this feature may vary.
1 In Stop mode, press MENU button.
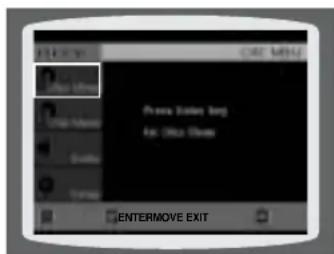
text_image
EnterMOVE EXIT Press Inside 10g for All Us Inside2 Press Cursor ▲,▼ button to move to 'Title Menu'.
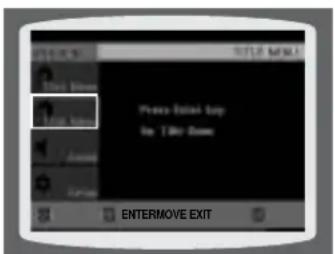
text_image
Please Enter the Buy for Title Room ENTERMOVE EXIT3 Press ENTER button.
- The title menu appears.
natural_image
Black and white photo of a dolphin swimming near water (no visible text or symbols)Press MENU button to exit the setup screen.
Note
- Title menu display may be different depending on the disc.
Setting the Language
OSD (On-Screen Display) language is set to English by default.
text_image
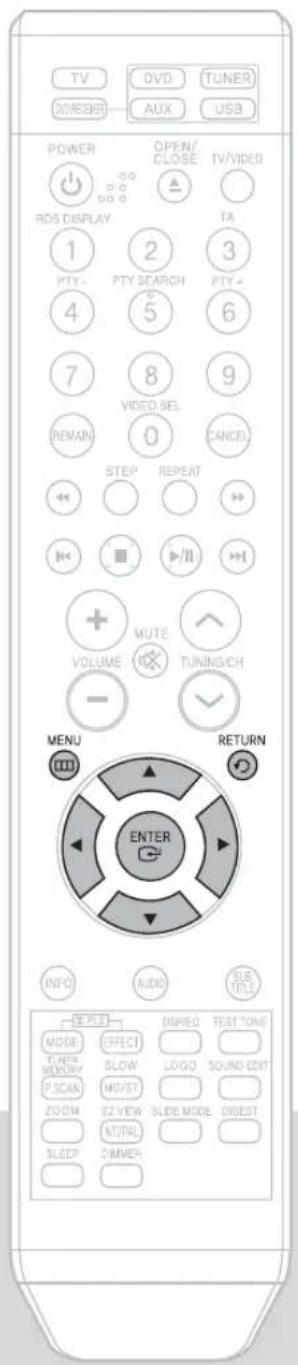
TV DVD TUNER DRESS AUX USB POWER OPEN/ CLOSE TV/VIDEO ROS DISPLAY 1 2 3 PTY- PTY SCARCH PTY+ 4 5 6 7 8 9 VIDEO SEL REMAN 0 CANCEL STEP REPEAT MUTE VOLUME TUNING/CH - MENU RETURN ENTER INFO AUDIO SUB-TITLE CREATE DONEO TEST TONE MODE EFFECT TURPHY SLOW LOGO SOUND EDIT MEMORY P/SCAN MOIST ZOOM EZ VIEW SLIDE MODE DIGEST SLEEP DIMMER1 In Stop mode, press MENU button.
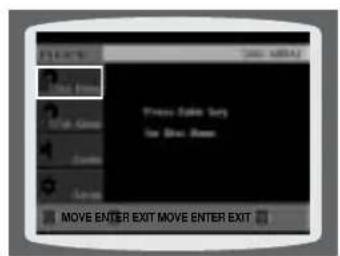
text_image
CREATE 2000 1000 500 400 300 200 100 MOVE ENTER EXIT MOVE ENTER EXIT2 Press Cursor ▼ button to move to 'Setup' and then press ENTER button.
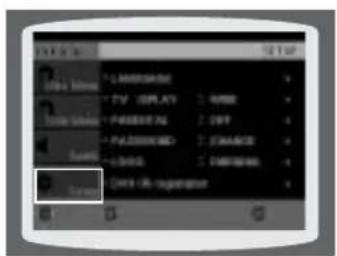
text_image
Search Search Landscape TV DISPLAY PASSIVE PASSIVE PASSIVE PASSIVE Search SearchNote
- To select another language, select OTHER and enter the language code of your country. (See page 72 for language codes) AUDIO, SUB TITLE and DISC MENU language can be selected.
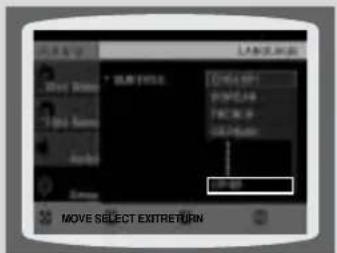
text_image
SUB FIELD C:\041\01\02\03\04\05\06\07\08 SELECT EXTRETURN MOVE SELECT EXTRETURN3
Select 'Language' and then press ENTER button
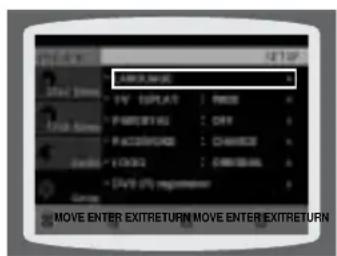
text_image
MOVE ENTER EXITRETURN MOVE ENTER EXITRETURN4
Press Cursor ▲ ,▼ button to select 'OSD Language' and then press ENTER button.
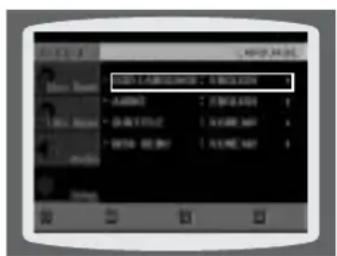
text_image
10:00 - 12:00 • AVERAGE • BVERAGE • CVERAGE • D/B/AVERAGE • E/B/AVERAGE • F/B/AVERAGE • G/B/AVERAGE • H/B/AVERAGE • I/B/AVERAGE • J/B/AVERAGE • K/B/AVERAGE • L/B/AVERAGE • M/B/AVERAGE • N/B/AVERAGE • O/B/AVERAGE • P/B/AVERAGE • Q/B/AVERAGE • R/B/AVERAGE • S/B/AVERAGE • T/B/AVERAGE • U/B/AVERAGE • V/B/AVERAGE • W/B/AVERAGE • X/B/AVERAGE • Y/B/AVERAGE • Z/B/AVERAGE5
Press Cursor ▲,▼ button to select the desired language and then press ENTER button.
- Once the setup is complete, the OSD will be English if English has been selected as language.
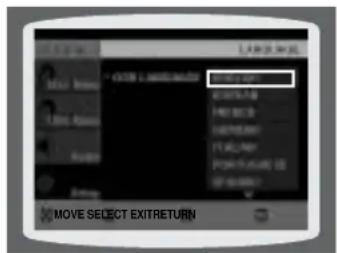
text_image
EXIT L. MINDIA EXIT ONLY EXIT ONLY EXIT ONLY EXIT ONLY EXIT ONLY EXIT ONLY EXIT ONLY MOVE SELECT EXIT RETURNPress RETURN button to return to the previous level.
Press MENU button to exit the setup screen.
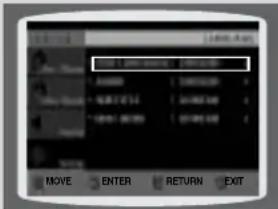
text_image
MOVE ENTER RETURN EXITSelecting the OSD Language
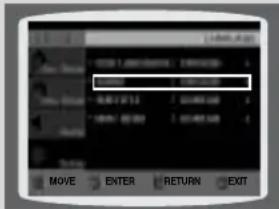
text_image
MOVE ENTER RETURN EXITSelecting the Audio Language (recorded on the disc)
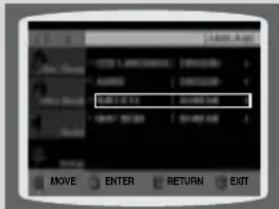
text_image
ENTER ENTER ENTER ENTER ENTER ENTER ENTER ENTER ENTER ENTER ENTER ENTER ENTER ENTER ENTER ENTER ENTER ENTER ENTER ENTER ENTER ENTER ENTER ENTER ENTER ENTER ENTER ENTER ENTER ENTER ENTER ENTER ENTER ENTER ENTER ENTER ENTER ENTER ENTER ENTER ENTER ENTER ENTER ENTER ENTER ENTER ENTER ENTER ENTER ENTER ENTERSelecting the Subtitle Language (recorded on the disc)
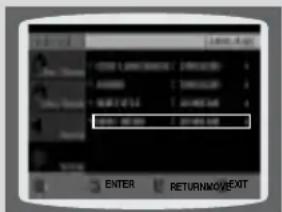
text_image
ENTER RETURNMOVEXITSelecting the Disc Menu Language (recorded on the disc)
* If the language you selected is not recorded on the disc, menu language will not change even if you set it to your desired language.
Setting TV Screen type
Depending on your TV type (Wide Screen or conventional 4:3), you can select the TV's aspect ratio.
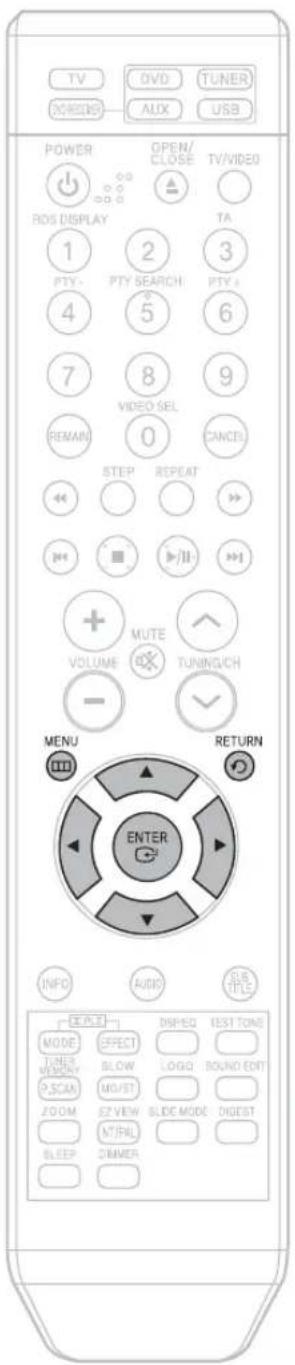
text_image
TV DVD TUNER OXHIBO ALIX USB POWER OPEN/ CLOSE TV/VIDEO ROS DISPLAY 1 2 3 PTY- PTY SEARCH PTY+ 4 5 6 7 8 9 VIDEO SEL REMAIN 0 CANCEL STEP REPEAT MUTE VOLUME TUNING CH - MENU RETURN ENTER INFO AUDIO DRIPED TEST TONG MODE EFFECT LOGO: ROUND ENT TIMER BLOW P.SCAN MODE JOGM NO/ST E2 VIEW SLIDE MODE DIGEST NTRAL SLEEP DIMMER1 In Stop mode, press MENU button.

text_image
EnterMove Exit Press Open Set for Move Close2 press cursor button to move to 'Setup' and then press ENTER button.
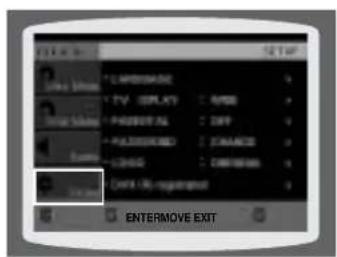
text_image
LPGS/SPG TV 25V/SPG PANETRAL PANETRAL LPGS/SPG LPGS/SPG ENTERMOVE EXIT ENTERMOVE EXIT3 button to move to 'TV DISPLAY' and then press ENTER button.
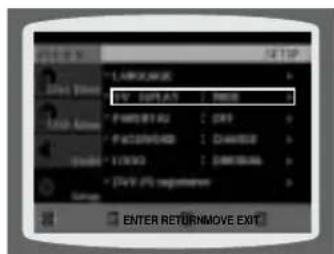
text_image
LARGE TFT DISPLAY : FREE PANETAL : OFF PICKERSHOLD : CHINESE TVS0 : DIRECTUAL TVS1: PS regenzen ENTER RETURNMOVE EXIT4 Press Cursor ▼,▼ button to select the desired item and then press ENTER button.
- Once the setup is complete, you will be taken to the previous screen.
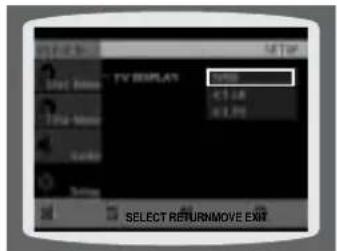
text_image
TV DISPLAY SELECT RETURNMOVE EXITPress RETURN button to return to the previous level.
Press MENU button to exit the setup screen.
Adjusting the TV Aspect Ratio (Screen Size)
The horizontal to vertical screen size ratio of conventional TVs is 4:3, while that of widescreen and high definition TVs is 16:9. This ratio is called the aspect ratio. When playing DVDs recorded in different screen sizes, you should adjust the aspect ratio to fit your TV or monitor.
- For a standard TV, select either "4:3LB" or "4:3PS" option according to personal preference. Select "16:9" if you have a widescreen TV.
WIDE
: Select this to view a 16:9 picture in the full-screen mode on your widescreen TV.
- You can enjoy the widescreen aspect.
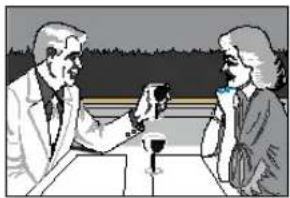
natural_image
Illustration of two people in a meeting, one holding a glass and the other drinking from a cup (no text or symbols present)4:3LB (4:3 Letterbox)
: Select this to play a 16:9 picture in the letter box mode on a conventional TV.
- Black bars will appear at the top and bottom of the screen.
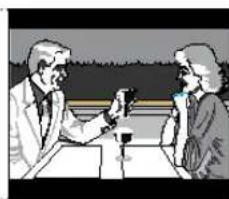
natural_image
Illustration of two people in a meeting, one holding a glass and the other drinking from a cup (no text or symbols visible)4:3PS (4:3 Pan&Scan)
: Select this to play a 16:9 picture in the pan & scan mode on a conventional TV.
- You can see the central portion of the screen only (with the sides of the 16:9 picture cut off).
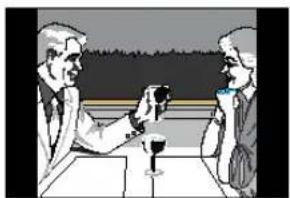
natural_image
Illustration of two men at a table with wine glasses, no visible text or symbolsNote
- If a DVD is in the 4:3 ratio, you cannot view it in widescreen.
- Since DVD discs are recorded in various image formats, they will look different depending on the software, the type of TV, and the TV aspect ratio setting.
Setting Parental Controls (Rating Level)
Use this to restrict playback of adult or violent DVDs you do not want children to view.
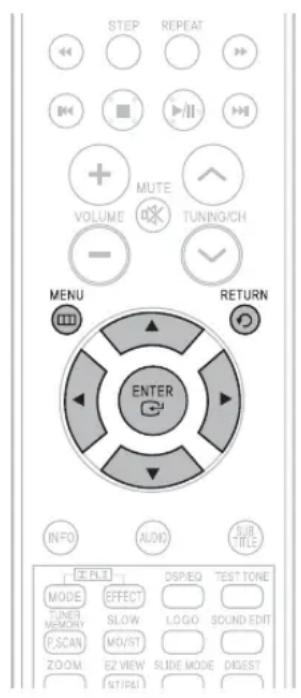
text_image
STEP REPEAT VOLUME MUTE TUNING/CH MENU RETURN ENTER INFO AUDIO SUIT TITLE EX-FLT MODE EFFECT TUNER MEMORY SLOW LOGO SOUND EDIT P.SCAN MOVIST ZOOM EZ VIEW SLIDE MODE DIGEST INT/FLI1 In Stop mode, press MENU button.
2 Press Cursor ▼ button to move to 'Setup' and then press ENTER button.
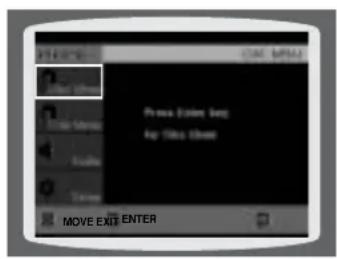
text_image
PRESS OK MAKE Press Color key for this else MOVE EXIT ENTER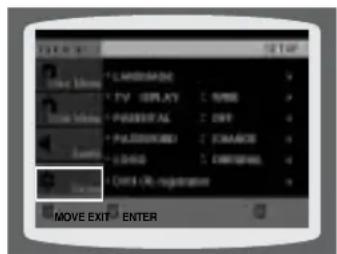
text_image
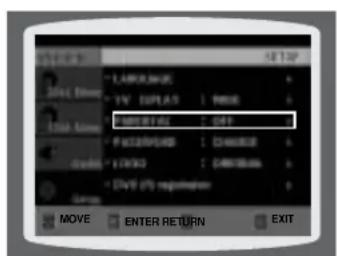
Landscape TV DISPLAY PASSFUL PANSSURSD SHED DAYS OR REGISTRATE MOVE EXIT ENTER3 button to move to 'PARENTAL' and then press ENTER button.
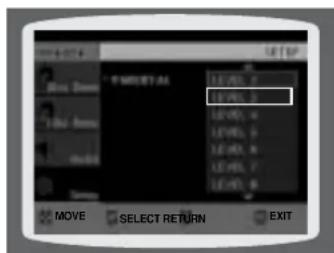
4 button to select the desired rating level and then press ENTER button.
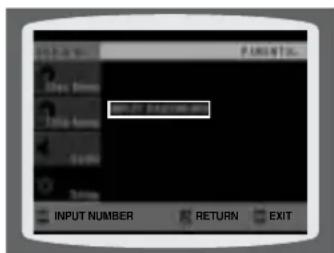
5 Enter the password and then press ENTER button.
text_image
LARGE 1V 3D PLAT: PRINT ENTER AS: ENTER F:\WINDOWS\AD: CHECKLOGS F:\WINDOWS\AD: CHECKLOGS F:\WINDOWS\AD: CHECKLOGS MOVE ENTER RETURN EXIT- If you have selected Level 6, you cannot view DVDs with Level 7 or higher.
- The higher the level, the closer the content is to violent or adult material.
text_image
T MOUNT AS LEVEL 1 LEVEL 2 LEVEL 3 LEVEL 4 LEVEL 5 LEVEL 6 LEVEL 7 LEVEL 8 MOVE SELECT RETURN EXIT- The password is set to "7890" by default.
- Once the setup is complete, you will be taken to the previous screen.
text_image
INPUT NUMBER RETURN EXITNote
- This function works only if a DVD disc contains the rating level information.
Press RETURN button to return to the previous level.
Press MENU button to exit the setup screen.
Setting the Password
You can set the password for the Parental (rating level) setting.
GB
text_image
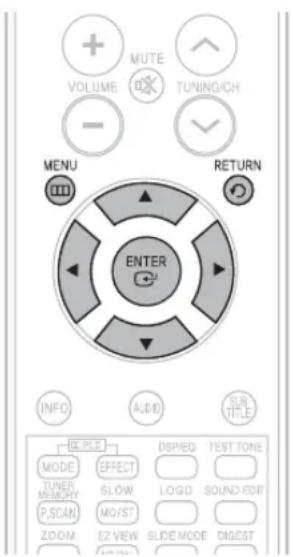
VOLUME MUTE TUNING/CH - MENU RETURN ENTER INFO AUDIO SUB TITLE CREATE MODE EFFECT TUNER MEMORY SLOW LOGO SOUND EDIT P.SCAN MOVST ZOOM E2 VIEW SLIDE MODE DIGEST1 Press MENU button.
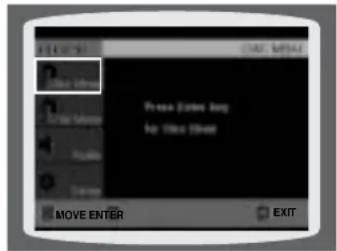
2 Press Cursor ▼ button to move to 'Setup' and then press ENTER button.
text_image
Press Enter Day for Move Inside MOVE ENTER EXIT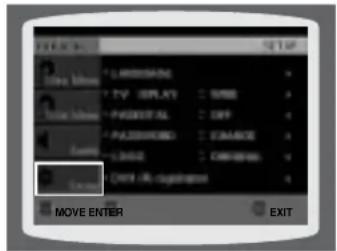
text_image
USE LIMMOM TV 3PLAY PAGOSTAL PUSHROOM DAKE EXIT -IR COLDENUE MOVE ENTER EXIT3 move to 'PASSWORD' and then press ENTER button.
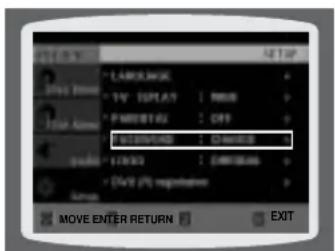
4 Press ENTER button.
5 Enter the password and then press ENTER button.
text_image
LARGE 14" DISPLAY | PROD PARENTS | OFF EXTRUST 14" DISPLAY | EXTRUST 14" EXTRUST OUT (F) response MOVE ENTER RETURN EXIT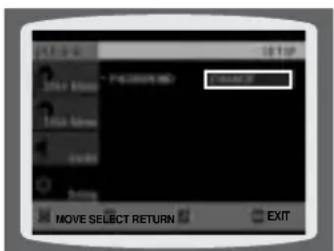
text_image
MOVE SELECT RETURN EXIT- Enter the old password, a new password, and confirm new password.
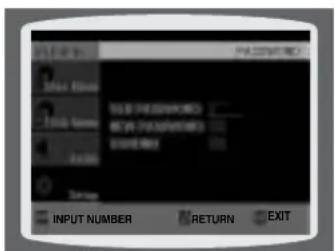
text_image
INPUT NUMBER RETURN EXITNote
- The password is set to "7890" by default.
If you have forgotten the rating level password, do the following:
- While the player is in the no disc mode, hold the main unit's ○ button for longer than 5 seconds. "INITIALIZE" appears on the display and all settings will return to the default values.
- Press the POWER button. Using the RESET function will erase all stored settings. Do not use this unless necessary.
Setting the Wallpaper

While watching a DVD, VCD or JPEG CD, you can set the image you like as background wallpaper.
Setting the Wallpaper
1 During playback, press PLAY/PAUSE button when an image you like appears.
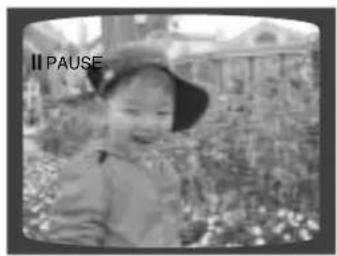
text_image
II PAUSE2 Press LOGO button.
- "COPY LOGO DATA" will be displayed on the TV screen.
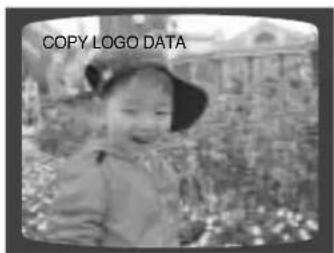
text_image
COPY LOGO DATA3 The power will turn off and then back on.
• The selected wallpaper will be displayed.
- You can select up to 3 wallpaper settings.
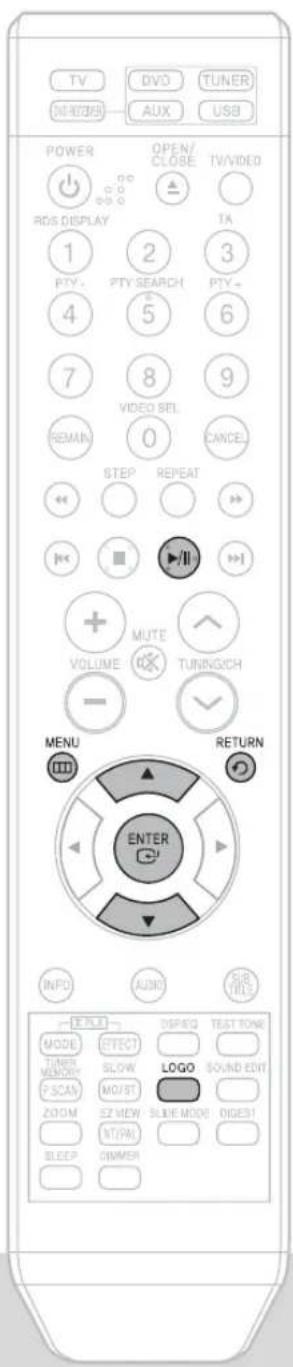
text_image
TV DVD TUNER NEW/RENDER AUX USB POWER OPEN/ CLOSE TV/VIDEO RDS DISPLAY TA 1 2 3 PTY- PTY SEARCH PTY- 4 5 6 7 8 9 VIDEO SET. REMAIN 0 CANCEL STEP REPEAT MUTE VOLUME TUNING/CH - MENU RETURN ENTER INPUT AUDIO SUB-INPUTS TITLE DISPLAY TEST TIME MODE EFFECT TUNER MEMORY SLOW LOGO SOUND EDITI P SCAN MOV/ST ZOOM SZ VIEW SLIDE MODE DIGE31 NT/PAN BLEEP DIMMER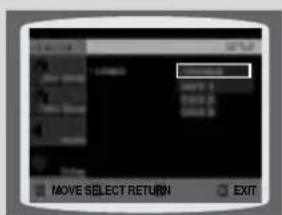
text_image
MOVE SELECT RETURN EXITSelect this to set the Samsung Logo image as your wallpaper.
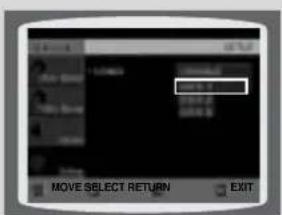
text_image
MOVE SELECT RETURN EXITSelect this to set the desired image as your wallpaper.
To select one of the 3 wallpaper settings you've made
1 In Stop mode, press MENU button.
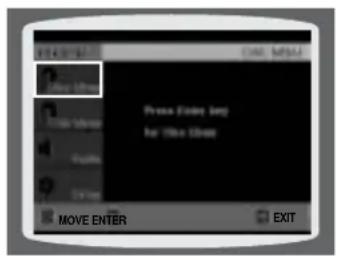
text_image
Press Entry Help for this help MOVE ENTER EXIT2 Press Cursor ▼ button to move to 'Setup' and then press ENTER button.
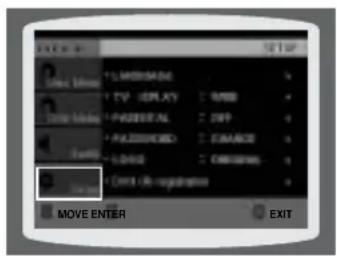
text_image
USE Live Online Live Media Text MOVE ENTER SET TV: DISPLAY PANETRAL PANETRAL ONIONAL ONIONAL OFF EXIT EXIT3 Press Cursor ▼ button to move to 'LOGO' and then press ENTER button.
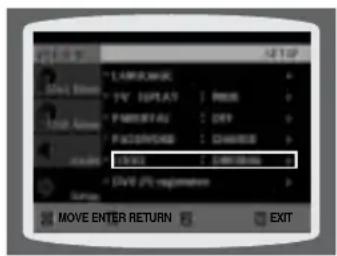
text_image
LAMORANGE 14V 0.01A7 PANERATE PACIFICATE 10.01 DVD 2P regemotion MOVE ENTER RETURN EXIT4 Press ▼ to select the desired 'USER', and then press ENTER.
• This selects one of the 3 wallpaper screens
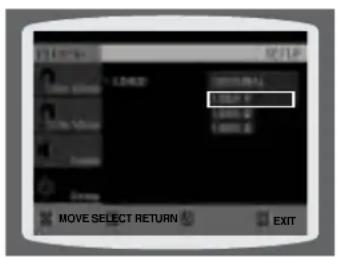
text_image
LOAD 1.000 P 1.000 P 1.000 P MOVE SELECT RETURN EXIT5 Press MENU button to exit the setup
Press RETURN button to return to the previous level.
Press MENU button to exit the setup screen.
DivX (R) registration
Please use the Registration code to register this player with the DivX (R) video on demand format.
To learn more, go to www.divx.com/vod.
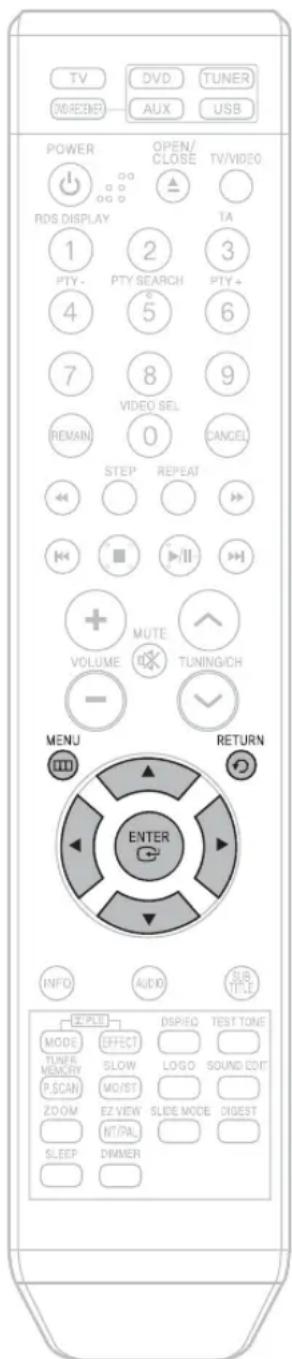
text_image
TV DVD TUNER 00:00:00 AUX USB POWER OPEN/ CLOSE TV/VIDEO RDS DISPLAY TA 1 2 3 PTY- PTY SEARCH PTY+ 4 5 6 7 8 9 VIDEO SEL PEMAIN 0 CANCEL STEP REPEAT VOLUME MUTE TUNING/CH - MENU RETURN ENTER INFO AUDIO SUB-TITLE EFFECT DPIRED TEST TONE MODE TYPE PUNTER MEMORY P.SCAN ZOOM SLEEP TIME SWOW MO/ST EZ VIEW NTPAL DIVENER1 Press the MENU button while the disc tray is open.
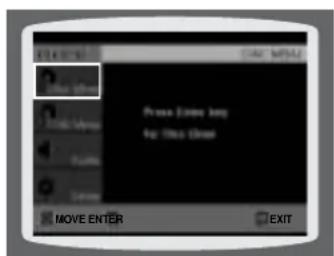
text_image
PRESS ON: 100 MHz Press Entry key Up This close MOVE ENTER EXIT2 Press Cursor ▼ button to move to 'Setup' and then press ENTER button.
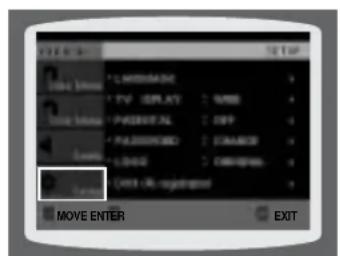
text_image
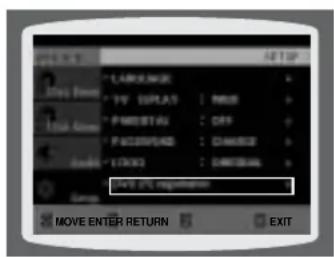
CREATE ENTER LISEMAIN TV1 DRPLY PREFITAL PANSSORD LOAD EXIT OR registration MOVE ENTER EXITPress Cursor ▼ button to move to 'DIVX(R) registration' and then press ENTER button.
text_image
LARGE TV SPLAS | PMS PWEETLOG | DRY PICKSPREAD | CHARGO STOCK | DIRECTUAL NEW PC REGULAR MOVE ENTER RETURN EXITSetting the Speaker Mode
GB
Signal outputs and frequency responses from the speakers will automatically be adjusted according to your speaker configuration and whether certain speakers are used or not.
text_image
TV DVD TUNER OK/REBEER AUX USB POWER OPEN/ CLOSE TV/VIDEO RDS DISPLAY TA 1 2 3 PTY - PTY SEARCH PTY - 4 5 6 7 8 9 VIDEO SEL REMAIN 0 CANCEL STEP REPEAT + MUTE VOLUME TUNING/CH - MENU RETURN ENTER INFO AUDIO SUB-TITLE OFFICE DISPEQ TEST TONE MODE EFFECT SLOW LOGO SOUND EDIT P.SCAN MO/ST ZOOM EZ VIEW SLIDE MODE DIGEST NT/PAL SLEEP DIMMER1 In Stop mode, press MENU button.
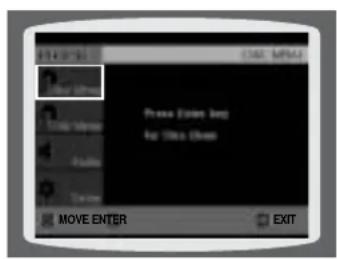
text_image
MOVE ENTER EXIT2 Press Cursor button to move to 'Audio' and then press ENTER button.
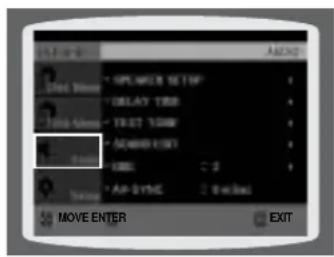
text_image
ON ON ON ON ON ON ON ON ON ON ON ON ON ON ON ON ON ON ON ON ON ON ON ON ON ON ON ON ON ON ON ON ON ON ON ON ON ON ON ON ON ON ON ON ON ON ON ON ON ON ON3 In the Speaker Setup, press the ENTER button
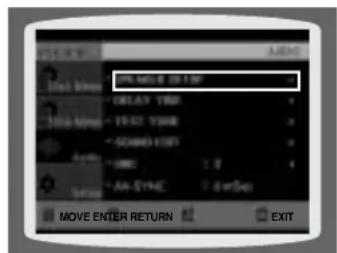
text_image
PRO-MOS 20 TWP RESET TIME TREAST TIME SCAMED TIME GND AA-SYNC 6.8x5s MOVE ENTER RETURN EXIT4 ▶,▶ buttons to move to the desired speaker and then press ENTER button.
- For C, SL, and SR, each time the button is pressed, the mode switches alternately as follows: SMALL → NONE.
- For L and R, the mode is set to SMALL.
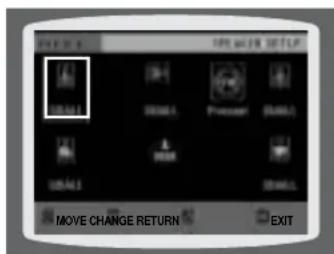
text_image
MOVE CHANGE RETURN EXITSMALL : Select this when using the speakers.
NONE : Select this when no speakers are connected.
Note
- Depending on PRO LOGIC and STEREO settings, the speaker mode may vary (see page
Setting the Delay Time
If the speakers cannot be placed at equal distances from the listening position, you can adjust the delay time of the audio signals from the center and rear speakers.
text_image
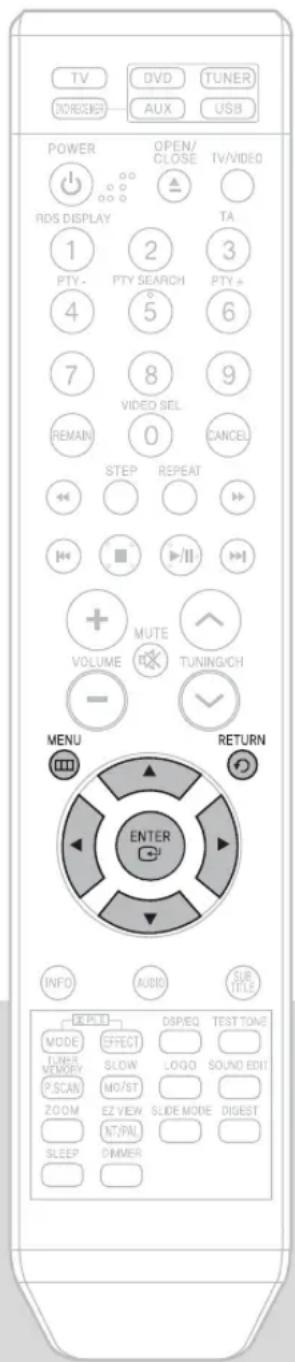
TV DVD TUNER DROGEN AUX USB POWER OPEN/ CLOSE TV/VIDEO RDS DISPLAY TA 1 2 3 PTY- PTY SEARCH PTY+ 4 5 6 7 8 9 VIDEO SEL. REMAIN 0 CANCEL STEP REPEAT MUTE VOLUME TUNING/CH - MENU RETURN ENTER INFO AUDIO SUB-TITLE SELECT MODE EFFECT LIFE MEMORY SLOW LOGO SOUND EDITI P.SCAN MO/ST ZOOM EZ VIEW SLIDE MODE DIGEST AT/PAL SLEEP DIMMER1 In Stop mode, press MENU button.
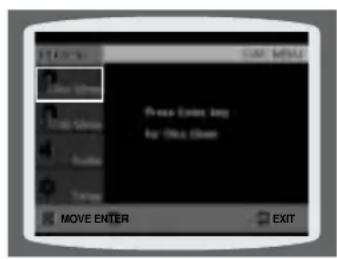
2 Press Cursor ▼ button to move to 'Audio' and then press ENTER button.
text_image
Press Enter Key for You Close MOVE ENTER EXIT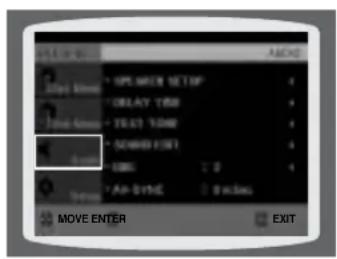
text_image
MOLE ENTER AVOC UP/MIEN SETUP DELAY TIME TREAT TIME SPEED EXIT OK 0 Air-SYNC Switch MOVE ENTER EXITSetting up the Speaker Delay Time
When 5.1CH Surround Sound is played, you can enjoy the best sound if the distance between you and each speaker is the same. Since the sounds arrive at the listening position at different times depending on the placement of speakers, you can adjust this difference by adding a delay effect to the sound of the Center and Surround Speakers.
Note
- With PL II(Dolby Pro Logic II), the delay time may be different for each mode.
- With AC-3 and DTS, the delay time can be set between 00 and 15mSEC.
- The Center channel is only adjustable on 5.1 channel discs.
3
Press Cursor ▼ button to move to 'DELAY TIME' and then press ENTER button.
4
Press Cursor ▲, ▼, ◀, ▶ buttons to move to the desired speaker and then press ENTER button.
5
Press Cursor ◀,▶ to set the Delay time.
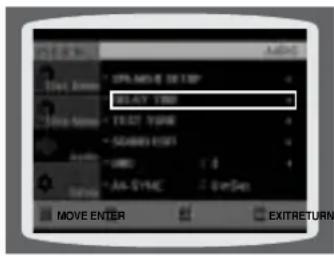
text_image
PLAY TIME TEXT TIME START TIME URO AA-SYNC 2.0kHz MOVE ENTER EXITRETURN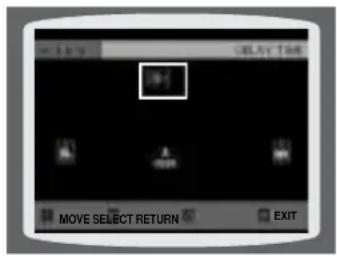
text_image
DELAY TIME MOVE SELECT RETURN EXIT- You can set the delay time for C between 00 and 05mSEC and for SL and SR between 00 and 15mSEC.
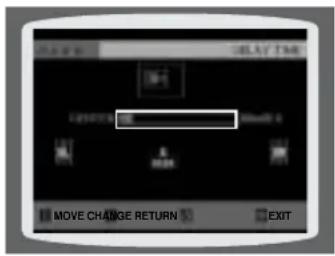
text_image
PLAY TIME CREATE VIEW MOVE CHANGE RETURN EXIT- Setting CENTER SPEAKER
If the distance of Dc is equal to or longer than the distance of Df in the figure, set the mode as 0ms. Otherwise, change the setting according to the table.
| Distance between Df and Dc | Delay Time |
| 0 inch | 0 ms |
| 13.6 inches | 1 ms |
| 27.2 inches | 2 ms |
| 40.8 inches | 3 ms |
| 4.5 feet | 4 ms |
| 5.6 feet | 5 ms |
- Setting REAR (SURROUND) SPEAKERS
If the distance of Df is equal to the distance of Ds in the figure, set the mode as 0ms. Otherwise, change the setting according to the table.
| Distance between Df and Ds | Delay Time |
| 0 inch | 0 ms |
| 40.8 inches | 3 ms |
| 6.7 feet | 6 ms |
| 10.0 feet | 9 ms |
| 13.4 feet | 12 ms |
| 16.7 feet | 15 ms |
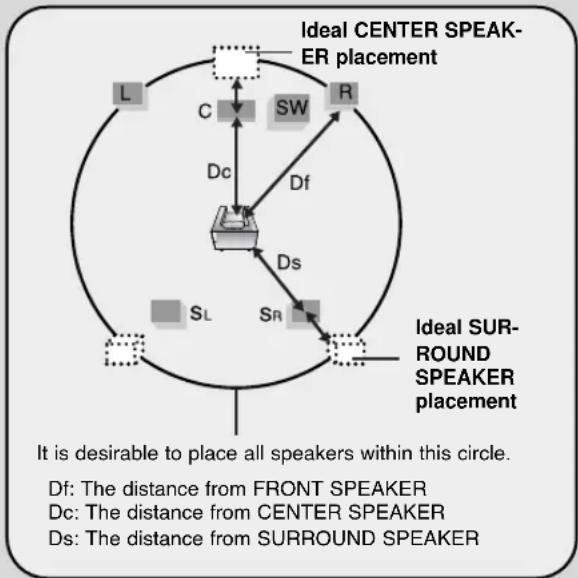
flowchart
graph TD
    A["Ideal CENTER SPEAKER placement"] --> B["C"]
    B --> C["SW"]
    C --> D["R"]
    D --> E["SL"]
    E --> F["SR"]
    F --> G["DS"]
    G --> H["Df"]
    H --> I["Def: The distance from FRONT SPEAKER"]
    I --> J["Def: The distance from CENTER SPEAKER"]
    J --> K["Def: The distance from SURROUND SPEAKER"]
    style A fill:#f9f,stroke:#333
    style B fill:#ccf,stroke:#333
    style C fill:#cfc,stroke:#333
    style D fill:#fcc,stroke:#333
    style E fill:#cff,stroke:#333
    style F fill:#ffc,stroke:#333
    style G fill:#cfc,stroke:#333
    style H fill:#fcc,stroke:#333
    style I fill:#ffc,stroke:#333
    style J fill:#cfc,stroke:#333
    style K fill:#fcc,stroke:#333
Setting the Test Tone
Use the Test Tone feature to check the speaker connections.
1 in Stop of the disc mode, press MENU button.
text_image
PRESS CUC MINDI Press Order Jack for You Donut MOVE ENTER EXIT2 Press Cursor ▼ button to move to 'Audio' and then press ENTER button.
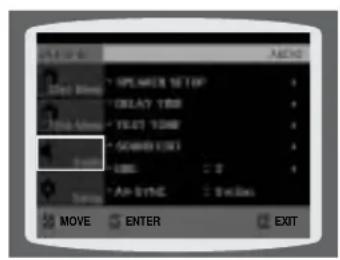
text_image
PLAYER SETUP DELAY TIME TEXT TIME SCREW EXIT ALL Air-SYNC EXIT MOVE ENTER EXIT3 to move to 'TEST TONE' and then press ENTER button.
- The test tone will be sent to L → C → R → SR → SL → SW in order. If the ENTER button is pressed again at this time, the test tone will stop.
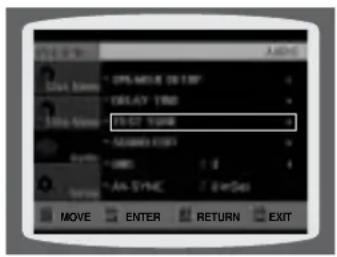
text_image
MUST OFF: MUSE RESET DELAY TIME FAST TURB MANGO CHIP AVS AA SYNC GetSet MOVE ENTER RETURN EXIT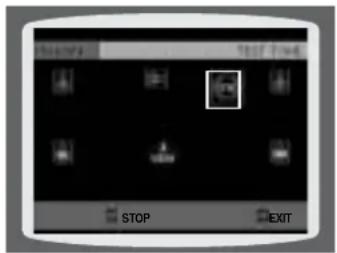
text_image
STOP EXITPress RETURN button to return to the previous level.
Press MENU button to exit the setup screen.
Alternate method: press the TEST TONE button on the remote.
Press TEST TONE button.
- Test tone will be produced as follows: When playing a DVD or CD, this will work only in Stop mode.
- Use this function to check that each speaker is correctly connected and that there is no problem.
To end the test tone, press TEST TONE button again.
L: Front Speaker (L) C: Center Speaker SW: Subwoofer R: Front Speaker (R) SL: Rear Speaker (L) SR: Rear Speaker (R)
Multi-Channel Pro Logic Mode
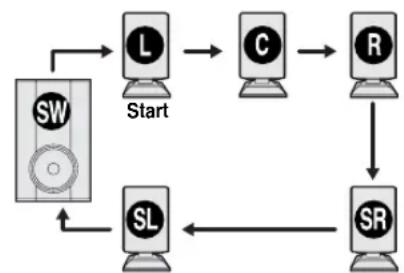
flowchart
graph TD
    SW["SW"] --> Start
    Start --> L["L"]
    Start --> C["C"]
    Start --> R["R"]
    R --> SR["SR"]
    SR --> SL["SL"]
    SL --> Start
Setting the DRC (Dynamic Range Compression)
GB
This feature balances the range between the loudest and quietist sounds.
You can use this function to enjoy Dolby Digital sound when watching movies at low volume at night.

text_image
TV DVD TUNER NOTRENDER AUX USB POWER OPEN/ CLOSE TV/VIDEO HDS DISPLAY 1 2 3 PTY- PTY SEARCH PTY+ 4 5 6 7 8 9 VIDEO SEL 0 REMAIN CANCEL STEP REPEAT VOLUME MUTE TUNING/CH - MENU RETURN ENTER INFO AUDIO SUB-TITLE RESET DSP/EQ TEST TONE MODE EFFECT TUNER MEMORY SLOW LOGO SOUND EDIT P.SCAN NO/S? ZOOM EZ VIEW SLIDE MODE DIGRST NT/PAL SLEEP DIMMER1 In Stop or no disc mode, press MENU button.
text_image
MOVE ENTER EXIT2 Press Cursor ▼ button to move to 'Audio' and then press ENTER button.
text_image
PLAY MEAT SETUP DISPLAY TIME TICK TANK SOUND EDIT URL C 0 An XML 2 KB MOVE ENTER EXIT3 Press Cursor ▼ button to move to 'DRC' and then press ENTER button.
text_image
PLACE STOP DELAY TIME NEXT TIME START TIME OK + 2 An SYNC EXIT MOVE ENTER RETURN EXIT4 Press Cursor ▲,▼ to adjust the 'DRC'.
- When the Cursor ▲ button is pressed, the effect is greater, and when the Cursor ▼ button is pressed, the effect is smaller.
text_image
CHANGE RETURN EXITPress RETURN button to return to the previous level.
Press MENU button to exit the setup screen.
Setting the Audio
You can adjust the balance and level for each speaker.
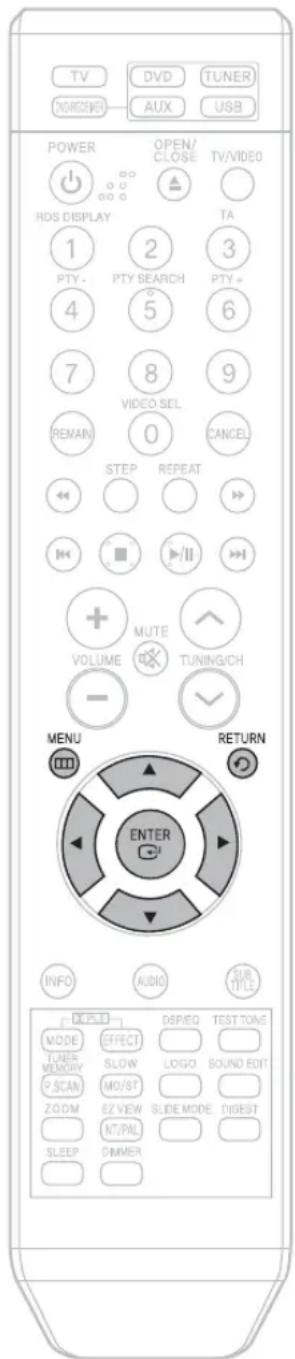
text_image
TV DVD TUNER DND/2NDEN AUX USB POWER OPEN/ CLOSE TV/VIDEO RDS DISPLAY 1 2 3 PTY- PTY SEARCH PTY+ 4 5 6 7 8 9 VIDEO SEL REMAIN 0 CANCEL STEP REPEAT MUTE VOLUME TUNING/CH - MENU RETURN ENTER INFO AUDIO SUB-TITLE DCPLI DSP/EQ TEST TONE MODE EFFECT LUNER SLOW LOGO SOUND EDIT MEMORY M0/S1 P_SCAN MO/S7 ZOOM EZ VIEW SLIDE MODE DIGEST NT/PAL SLEEP DIMMERMethod 1 When adjusting the audio quality using the setup screen
1 In Stop mode, press MENU button.
text_image
Press Escal Jing for this close MOVE ENTER EXIT2 Press Cursor ▼ button to move to 'Audio' and then press ENTER button.
text_image
UP, MER, SET DELAY TIN TRAT TIN SOMATO SET HRC 2.0 AP BYTE 3.0 MOVE ENTER EXIT3 Press Cursor ▼ button to move to 'SOUND EDIT' and then press ENTER button.
text_image
UP-MAKE TEST DELAY TIME TEST TIME GARMS TEST AA-SYNC E+5x MOVE ENTER RETURN EXIT4 Press Cursor ▲,▼ buttons to select and adjust the desired item. Press the ◀,► buttons to adjust the settings.
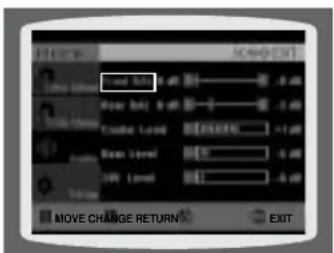
text_image
MOVE CHANGE RETURN EXITPress RETURN button to return to the previous level.
Press MENU button to exit the setup screen.
Method 2 When manually adjusting with the SOUND EDIT button
Adjusting Front Speaker Balance
1 Press SOUND EDIT button and then press Cursor ◀, ►.
00 F 08
usting Rear Speaker Balance
2 Press SOUND EDIT button and then press Cursor
00 R 00
Adjusting Center Speaker Level
3 Press SOUND EDIT button and then press Cursor ◀, ▶.
CENTER+1dB
Adjusting Rear Speaker Level
4 Press SOUND EDIT button and then press Cursor ◀, ►.
REAR -1 dB
Adjusting Subwoofer Speaker Level
5 Press SOUND EDIT button and then press Cursor ◀, ►.
S/W +1dB
Note
Adjusting Front/Rear Speaker Balance
- You can select between 00 and -06 and OFF.
- The volume decreases as you move closer to -6.
Adjusting Center/Rear/Subwoofer Speaker Level
- The volume level can be adjusted in steps from +6dB to -6dB.
- The sound gets louder as you move closer to +6dB and quieter as you get closer to -6dB.
AVSYNC Setup
Video may look slower than the audio if it is connected to a digital TV.
If this occurs, adjust the audio delay time to match the video.
1 Press the MENU button.
- Setup menu appears.
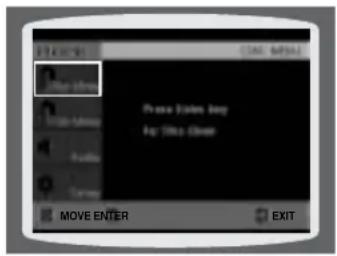
text_image
Press Token Day for This Day MOVE ENTER EXIT2 Press Cursor ▲,▼ buttons to move to 'Audio' and then press ENTER button.
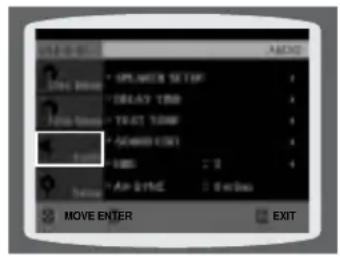
text_image
MOVE ENTER PLAYS SETTLE PLAY TIME PLAY TIME PLAY TIME PLAY TIME PLAY TIME PLAY TIME PLAY TIME PLAY TIME PLAY TIME PLAY TIME PLAY TIME PLAY TIME PLAY TIME PLAY TIME PLAY TIME PLAY TIME PLAY TIME PLAY TIME PLAY TIME PLAY TIME PLAY TIME PLAY TIME PLAY TIME PLAY TIME PLAY TIME PLAY TIME PLAY TIME PLAY TIME PLAY TIME PLAY TIME PLAY TIME PLAY TIME PLAY TIME PLAY TIME3 Press Cursor ▲,▼ buttons to move to 'AV-SYNC' and then press ENTER button.
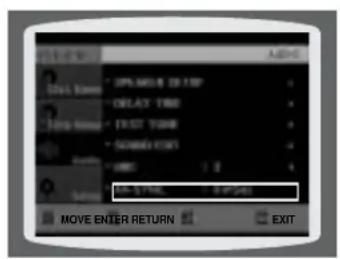
text_image
UP MOLT STOP DELAY TIME TUST TIME SANSY START OK MOVE ENTER RETURN EXIT4 Press Cursor ▲,▼ buttons to select the AV-SYNC Delay Time and then press the ENTER button.
- You can set the audio delay time between 0 ms and 300 ms. Set it to the optimal status.
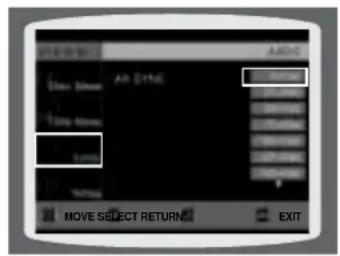
text_image
EXIT DO NOT NULL DO NOT NULL DO NOT NULL DO NOT NULL DO NOT NULL DO NOT NULL DO NOT NULL DO NOT NULL DO NOT NULL DO NOT NULL DO NOT NULL DO NOT NULL DO NOT NULL DO NOT NULL DO NOT NULL DO NOT NULL DO NOT NULL DO NOT NULL DO NOT NULL DO NOT NULL DO NOT NULL DO NOT NULL DO NOT NULL DO NOT NULL DO NOT NULL DO NOT NUT DO NOT NULL DO NOT NULL DO NOT NULL DO NOT NULL DO NOT NULL DO NOT NULL DO NOT NULL DO NOT NULL DO NOT NULL DO NOT NULL DO NOT NULL DO NOT NULL DO NOT NULL DO NOT NULL DO NOT NULL DO NOT NULL DO NOT NULL DO NOT NULL DO NOT NULL DO NOT NULL DO NOT NULL DO NOT NULL DO NOT NULL DO NOT NULL DO NOT COLUMN DO NOT COLUMN DO NOT COLUMN DO NOT COLUMN DO NOT COLUMN DO NOT COLUMN DO NOT COLUMN DO NOT COLUMN DO NOT COLUMN DO NOT COLUMN DO NOT COLUMN DO NOT COLUMN DO NOT COLUMN DO NOT COLUMN DO NOT COLUMN DO NOT COLUMN DO NOT COLUMN DO NOT COLUMN DO NOT COLUMN DO NOT COLUMN DO NOT COLUMN DO NOT COLUMN DO NOT COLUMN DO NOT COLUMN DO NOT COLUMN DO NOT DOWN DO NOT DOWN DO NOT DOWN DO NOT DOWN DO NOT DOWN DO NOT DOWN DO NOT DOWN DO NOT DOWN DO NOT DOWN DO NOT DOWN DO NOT DOWN DO NOT DOWN DO NOT DOWN DO NOT DOWN DO NOT DOWN DO NOT DOWN DO NOT DOWN DO NOT DOWN DO NOT DOWN DO NOT DOWN DO NOT DOWN DO NOT DOWN DO NOT DOWN DO NOT DOWN DO NOT DOWN DO NOT DownPress RETURN button to return to the previous level.
Press MENU button to exit the setup screen.
Sound Field (DSP)/EQ Function
GB
DSP(Digital Signal Processor) DSP modes have been designed to simulate different acoustic environments.
EQ: You can select ROCK, POP, or CLASSIC to optimize the sound for the genre of music you are playing
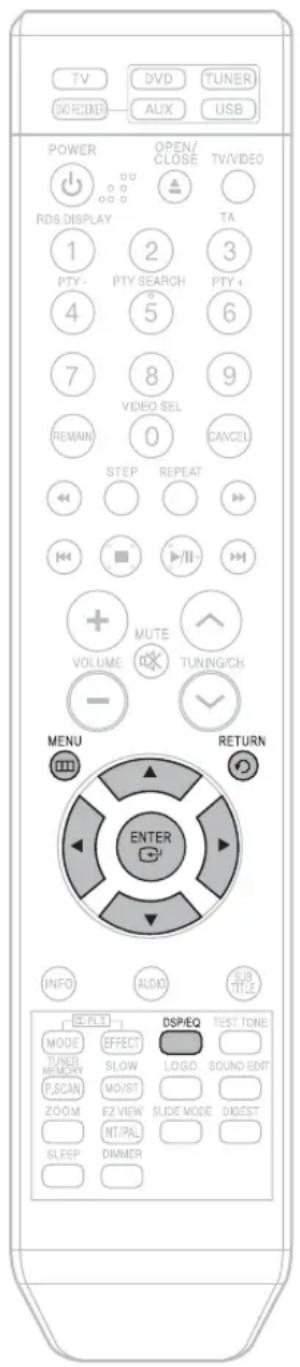
text_image
TV DVD TUNER SCREENB AUX USB POWER OPEN/ CLOSE TV/VIDEO RDS DISPLAY 1 2 3 PTY- PTY SEARCH PTY+ 4 5 6 7 8 9 VIDEO SEL 0 REMAIN CANCEL STEP REPEAT MUTE VOLUME TUNING/CH - MENU RETURN ENTER INFO AUDIO SUB-TITLE CIRCLE DSP/EQ TEST TONE MODE EFFECT TUNER MEMORY SLOW LOGO SOUND EDIT P.SCAN MO/ST ZOOM EZ VIEW SLIDE MODE DIGEST NT.PAL SLEEP DIMMERPress DSP/EQ button.
- "DSP" appears on the display panel.
• Each time the button is pressed, the selection changes as follows:

flowchart
graph TD
    A["LPCM DSP"] --> B["POPS"]
    C["LPCM DSP"] --> D["JAZZ"]
    E["LPCM DSP"] --> F["ROCK"]
    G["LPCM DSP"] --> H["STUDIO"]
    I["LPCM DSP"] --> J["CLUB"]
    K["LPCM DSP"] --> L["HALL"]
    M["LPCM DSP"] --> N["MOVIE"]
    O["LPCM DSP"] --> P["CHURCH"]
    Q["LPCM"] --> R["PASS"]
    B --> S
    D --> T
    F --> U
    H --> V
    J --> W
    L --> X
    N --> Y
    P --> Z
    R --> AA
Note
- DSP/EQ function is only available in STEREO mode.
Press the ☐ PL II mode button to show STEREO on the display. - This feature works with CDs, MP3-CDs, 2 channel DivX and Dolby Digital discs.
- When playing a DVD disc encoded with two or more channels, multi-channel mode will be selected automatically and DSP/EQ function does not work.
POP, JAZZ, ROCK: Depending on the genre of music, you can select POP, JAZZ, and ROCK.
STUDIO : Provides a sense of presence as if in a studio.
CLUB : Simulates the sound of a dance club with a throbbing bass beat.
HALL : Provides a clear vocal as if listening in a concert hall.
MOVIE: Provides the feeling of a movie theater.
CHURCH: Gives the feel of being in a grand church.
PASS: Select this for normal listening.
Dolby Pro Logic II Mode
You can select the desired Dolby Pro Logic II audio mode.
Press ☐ PL II MODE button.
• Each time the button is pressed, the mode changes as follows.
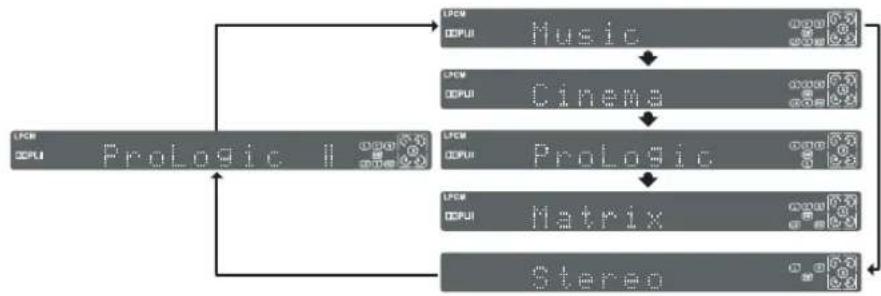
flowchart
graph TD
    A["ProLogic II"] --> B["Music"]
    A --> C["Cinema"]
    A --> D["ProLogic"]
    A --> E["Matrix"]
    A --> F["Stereo"]
    B --> G["OPUI"]
    C --> H["OPUI"]
    D --> I["OPUI"]
    E --> J["OPUI"]
    F --> K["OPUI"]
Note
- When selecting Pro Logic II mode, connect your external device to the AUDIO INPUT jacks (L and R) on the player. If you connect to only one of the inputs (L or R), you cannot listen to surround sound.
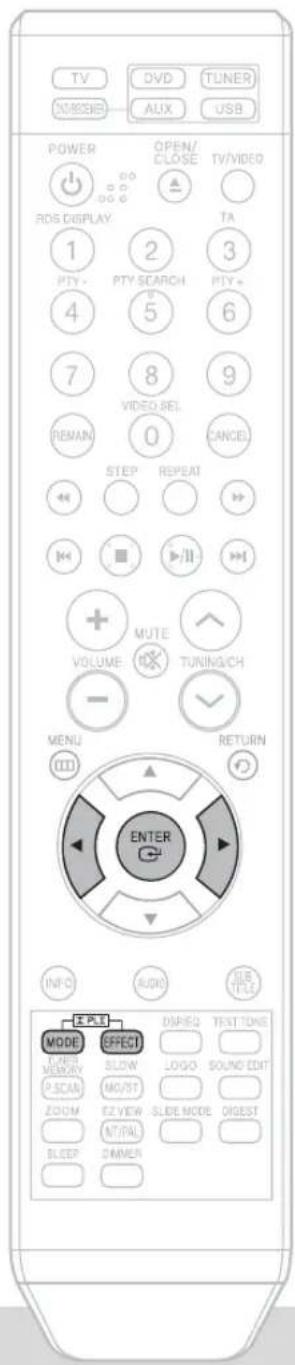
text_image
TV NOSSBER DVD TUNER AUX USB POWER OPEN/ CLOSE TV/VIDEO RDS DISPLAY 1 2 3 PTY- PTY SCARCH PTY+ 4 5 6 7 8 9 VIDEO REL. REMAN 0 CANCEL STEP REPEAT MUTE VOLUME TUNING/CH - MENU RETURN INFO AUDIO SLE TONE EXEPT MODE EFFECT P-MAIN SLOW LOGO SOUND EDIT MEMORY P-SCAN MOVST ZOOM EZ VIEW SLIDE MODE DIGEST NT/PAL SLEEP DIMMERPRO LOGIC II
- MUSIC: When listening to music, you can experience sound effects as if you are listening to the actual performance.
• CINEMA: Adds realism to the movie soundtrack.
• PRO LOGIC: You will experience a realistic multi-channel effect, as if using five speakers, while using just the front left and right speakers.
• MATRIX: You will hear 5.1 channel surround sound.
STEREO: Select this to listen to sound from the front left and right speakers and the subwoofer only.
Dolby Pro Logic II Effect
This function works only in Dolby Pro Logic MUSIC mode.
GB
1 Press ☐ PL II MODE button to select 'MUSIC' mode.

2 Press □□ PL II EFFECT button to select Panorama, then press Cursor ◀, ▶ buttons to select the desired effect setting.
- You can select either 0 or 1.
- This mode extends the front stereo image to include the surround speakers for an exciting "wraparound" effect with side wall imaging.

3 Press □□ PL II EFFECT button to select C-Width, then press Cursor ◀,▶ buttons to select the desired effect setting.
- You can select between 0 and 7.
- This sets the width of the center image. The higher the setting, the less sound comes from the center speaker.

4 Press □□ PL II EFFECT button to select Dimension, then press the Cursor ◀ ,▶ buttons to select the desired setting.
- You can select between 0 and 6.
- Incrementally adjusts the sound field (DSP) from the front or rear.

Note
- When playing a DVD disc encoded with two or more channels, multi-channel mode will be selected automatically and ☐☐PL II (Dolby Pro Logic II) button does not work.
Listening to Radio
Remote Control Unit
1 Press the TUNER button and select the FM band.
2 Tune in to the desired station.
Automatic Tuning 1
When ◀◀▶▶ is pressed, a preset broadcast station is selected.
Automatic Tuning 2
Press and hold TUNING/CH to automatically search for active broadcasting stations.
Manual Tuning
Briefly press TUNING/CH to increase or decrease the frequency incrementally.
Main Unit
1 Press the FUNCTION button to select the FM band.
2 Select a broadcast station.
Automatic Tuning 1
Press the STOP (■) button to select
PRESET and then press ▶▶▶I button to select the preset station.
Automatic Tuning 2
Press the STOP (■) button to select "MANUAL" and hold ◀◀◀▶▶▶▶ natically search the band.
Manual Tuning
Press STOP (■) to select MANUAL and then briefly
press to tune in to a lower or higher frequency.
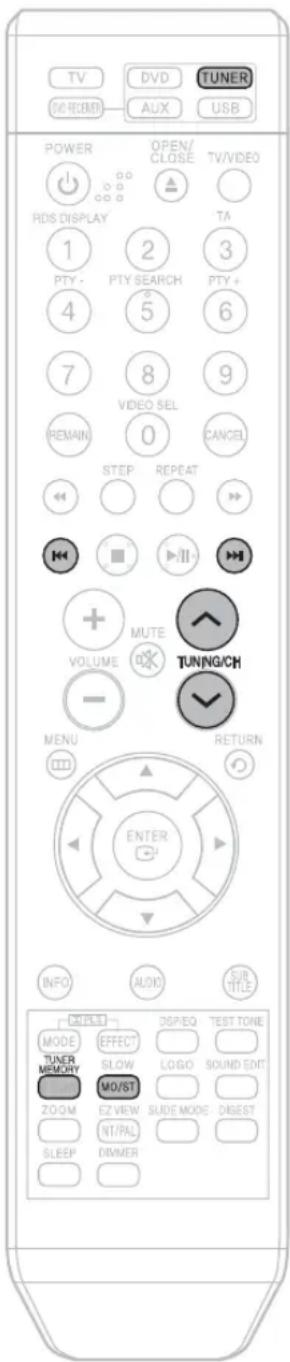
text_image
TV DC/REMEM DVD AUX TUNER USB POWER OPEN/ CLOSE TV/VIDEO RDIS DISPLAY 1 2 3 PTY - PTY SEARCH PTY + 4 5 6 7 8 9 VIDEO SEL REMAIN 0 CANCEL STEP REPEAT + MUTE VOLUME TUNING/CH - MENU RETURN (II) ENTER INFO AUDIO SUIT/TITLE OUTPUT MODE EFFECT TUNER MEMORY SLOW LOGO SOUND EDIT MO/ST ZOOM EZ VIEW SLIDE MODE DIGEST NT/PAL SLEEP DIMMERPress MO/ST button to listen in Mono/Stereo.
(This applies only when listening to an FM station.)
- Each time the button is pressed, the sound switches between "STEREO" and "MONO".
- In a poor reception area, select MONO for a clear, interference-free broadcast.
Presetting Stations
GB
Example: Presetting FM 89.1 in the memory
1 Press the TUNER button and select the FM band.

2 Press TUNING/CH to select "89.10".
- Refer to Step 2 on page 61 to automatically or manually tune in to a station.

3 Press the TUNER MEMORY button.
- "PRGM" flashes in the display.

4 Press ◀◀◀◀◀◀ to select preset number.
- You can select between 1 and 15 presels.

5 Press the TUNER MEMORY button again.
- Press the TUNER MEMORY button before 'PRGM' disappears from the display. - 'PRGM' disappears from the display and the station is stored in memory.

6 To preset another station, repeat steps 2 to 5.
Note
- This unit does not receive AM broadcasts.
To tune in to a preset station, press ◀◀◀▶▶ on the remote control to select a channel.
About RDS broadcasting
Using the RDS (Radio Data System) to receive FM stations
RDS allows FM stations to send an additional signal along with their regular program signals. For example, the stations send their station names, as well as information about what type of program they broadcast, such as sports or music, etc.
When tuned to an FM station which provides the RDS service, the RDS indicator lights up on the display.
• Description on RDS function
- PTY (Program Type) : Displays the type of programme currently being broadcast
- PS NAME (Program Service Name): Indicates the name of broadcasting station and is composed of 8 characters.
- RT (Radio Text) : Decodes the text broadcast by a station (if any) and is composed of maximum 64 characters.
- CT (Clock Time) : Decodes the real time clock from the FM frequency.
- Some stations may not transmit PTY, RT or CT information therefore this may not be displayed in all cases.
- TA (Traffic Announcement): When this symbol flashes it shows that the traffic announcement is in progress.
Note
- RDS may not operate correctly if the station tuned is not transmitting RDS signal properly or if the signal strength is weak.
What information can RDS signals provide?
You can see the RDS signals the station sends on the display.
TO show the RDS signals
Press RDS DISPLAY while listening to an FM station.
Each time you press the button, the display change to show you the following information:

PS (Program Service) :While searching,"PS"appears and then the station names will be displayed."NO PS" appears if no signal is sent.
RT(RadioText) : while searching, "RT" appears and then text messages the station sends will be displayed. "NO RT" appears if no signal is sent.
Frequency : station frequency (non-RDS service)
About characters shown in the display
When the display shows PS, or RT signals, the following characters are used.
- The display window cannot differentiate upper case and lower case letters and always uses upper case letters.
- The display window cannot show accented letters, "A," for instance, may stands for accented "A's" like "À, Â, Ä, Á, Å and Ã."
Note
- If searching finishes at once, "PS", and "RT" will not appear on the display.
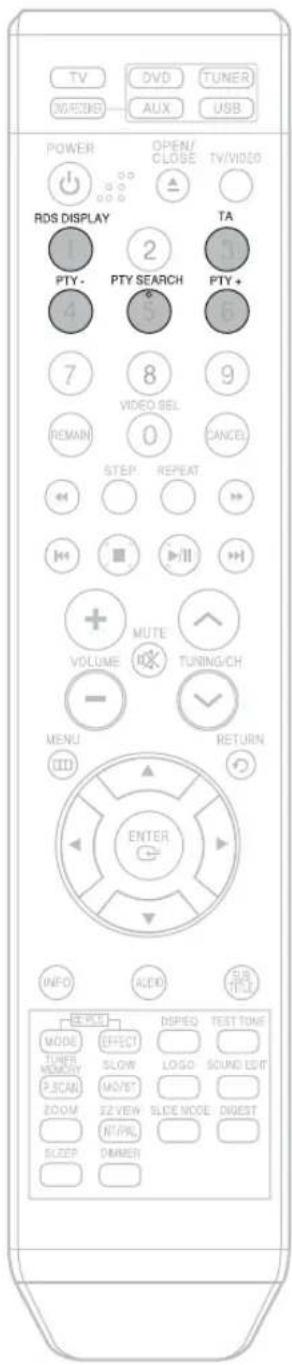
text_image
TV DVD TUNER ONCHED AUX USB POWER OPEN/ CLOSE TV/VIDEO RDS DISPLAY 1 2 TA PTY- PTY SEARCH PTY+ 4 5 6 7 8 9 VIDEO SEL REMAIN 0 CANCEL STEP REPEAT MUTE VOLUME TUNING/CH - MENU RETURN (II) ENTER ADD SUB (III) SERVICE DISPEO TEST TIME MODE EFFECT TUNER MEMORY SLOW LOGO SOUND EDIT P.SCAN MOVIE? ZOOM EZ VIEW SLICE NODE DIGEST NT/PRL SLEEP DIMMERPTY (Program Type) indication and PTY-SEARCH function
One of the advantages of the RDS service is that you can locate a particular kind of program from the preset channels by specifying the PTY codes.
To search for a program using the PTY codes
| Before you start, remember... |
| The PTY Search is only applicable to preset stations.To stop searching any time during the process, press PTY SEARCH while searching.There is a time limit in doing the following steps. If the setting is cancelled before you finish, start from step 1 again.When pressing the buttons on the primary remote control, make sure that you have selected the FM station using the primary remote control. |
1 Press PTY SEARCH while listening to an FM station.
2 Press the PTY-or PTY+until the PTY code you want appears on the display.
- The display gives you the PTY codes described to the right.
3 Press PTY SEARCH again, while the PTY code selected in the previous step is still on the display.
- The center unit searches 15 preset FM stations, stops when it finds the one you have selected, and tunes in that station.
| Display | Program Type |
| NEWS | News including an announced opinion and report |
| AFFAIRS | Several matters including a current incident, documentary, discussion and analysis. |
| INFO | Information including weights and measures, returns and forecast, matters interesting the customer, medical information, etc. |
| SPORT | Sports |
| EDUCATE | Education |
| DRAMA | Drama-Radio serial, etc. |
| CULTURE | Culture-National or local culture including the religious problem, social science, language, theater,etc. |
| SCIENCE | Natural science and technology |
| VARIED | Others-Speech, amusing program (quiz, game), interview, comedy and satirical play, etc. |
| POP M | Pop music |
| ROCK M | Rock music |
| M.O.R.M | Current contemporary music considered to be “easy listening.” |
| LIGHT M | Light classical music- Classical music and instrumental and chorus music |
| CLASSICS | Heavy classical music-Orchestra music, symphony, chamber music and opera |
| OTHER M | Other music - Jazz, R&B country music |
| WEATHER | Weather |
| FINANCE | Finance |
| CHILDREN | Children’s programmes |
| SOCIAL A | Social affairs |
| RELIGION | Religion |
| PHONE IN | Phone in |
| TRAVEL | Travel |
| LEISURE | Leisure |
| JAZZ | Jazz Music |
| COUNTRY | Country Music |
| NATION M | National Music |
| OLDIES | Oldies Music |
| FOLK M | Folk Music |
| DOCUMENT | Documentary |
Convenient Functions
Sleep Timer Function
You can set the time that the Home Theater will shut itself off.
Press SLEEP button.
- "SLEEP" will be displayed. Each time the button is pressed, the preset time changes as follows: 10 20 30 60 90 120 150 OFF.

To confirm the sleep timer setting, press SLEEP button.
• The remaining time before the Home Theater will shut itself off is displayed.
- Pressing the button again changes the sleep time from what you have set earlier.
To cancel the sleep timer, press SLEEP button until OFF appears on the display.
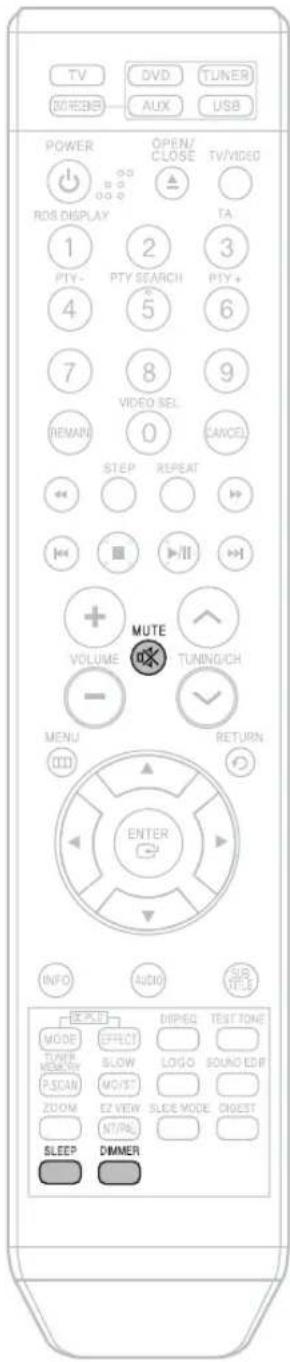
text_image
TV DVD TUNER (O)REBE AUX USB POWER OPEN/ CLOSE TV/VIDEO RDS DISPLAY TA 1 2 3 PTY- PTY SEARCH PTY+ 4 5 6 7 8 9 VIDEO SEL. REMAIN 0 CANCEL STEP REPEAT MUTE VOLUME TUNING/CH - MENU RETURN (II) ENTER INFO AUDIO SUS TICKS DECKT MODE OFFSET TIME MEMORY SLOW LOGO SOUND EDIT P.SCAN MOIST ZOOM EZ VIEW SLICE MODE DIGEST NTRAL SLEEP DIMMERAdjusting Display Brightness
You can adjust the brightness of the display on the main unit so it won't interfere with your movie viewing.
Press DIMMER button.
• Each time the button is pressed, the brightness changes as follows: DARK → BRIGHT.
Mute Function
This is useful when answering a doorbell or telephone call.
Press MUTE button.
- 'MUTE ON' appears in the display.
- To restore the sound, press the button again to select 'MUTE OFF'.
NOTE ON
Operating a TV with the Remote Control
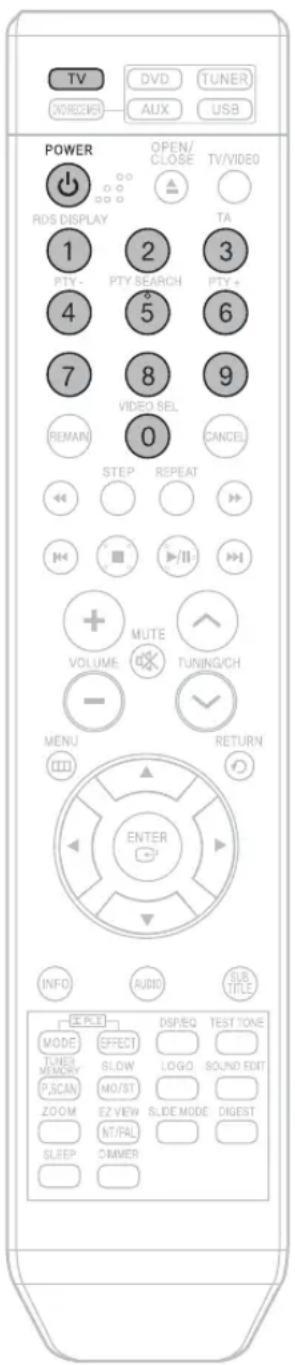
text_image
TV DVD TUNER DND23HD AUX USB POWER OPEN/ CLOSE TV/VIDEO RDS DISPLAY TA 1 2 3 PTV PTY RESEARCH PTV 4 5 6 7 8 9 VIDEO SEL REMAIN CANCEL 0 STEP REPEAT + MUTE VOLUME TUNING/CH - MENU RETURN (III) ENTER INFO AUDIO SUB TITLE DE PLET DSP/EQ TEST TONE MODE EFFECT TUNES MEMORY SLOW LOGO SOUND EDIT P.SCAN MO/ST ZOOM EZ VIEW SLIDE MODE DIGEST NT/PAL SLEEP DIMMERWhen operating a TV with the remote control
1 Press TV button to select TV mode.
2 Press POWER button to turn on the TV.
3 Point the remote control toward the TV.
4 While holding down POWER, enter the code corresponding to your brand of TV.
- If the code matches the TV's code, the TV will be turned off.
- If there is more than one code listed for your TV in the table, enter one at a time to determine which code works.
Example: For a Samsung TV
While holding down POWER, use the number buttons to enter 00, 01, 02, 03, 04, and 05.
5 Point the remote control toward the TV and press POWER. If the TV turns off or on, the setting is complete.
- You can use the TV POWER, VOLUME, CHANNEL, and Numeric buttons (0\~9).
Note
- The remote control may not work on some brands of TVs. Also, some operations may not be possible depending on your brand of TV.
- If you do not set the remote control with the code for your brand of TV, the remote control will work on a Samsung TV by default.
TV Brand Code List
| No. | Brand | Code | No. | Brand | Code |
| 1 | Admiral (M.Wards) | 056, 057, 058 | 44 | MTC | 018 |
| 2 | A Mark | 001, 015 | 45 | NEC | 018, 019, 020, 040, 059, 060 |
| 3 | Anam | 001, 002, 003, 004, 005, 006, 007, 008, 009, 010, 011, 012, 013, 014 | 46 | Nikei | 003 |
| 47 | Onking | 003 | |||
| 4 | AOC | 001, 018, 040, 148 | 48 | Onwa | 003 |
| 5 | Bell & Howell (M.Wards) | 057, 058, 081 | 49 | Panasonic | 006, 007, 008, 009, 054, 066, 067, 073, 074 |
| 6 | Brocsonic | 059, 060 | 50 | Penney | 018 |
| 7 | Candle | 018 | 51 | Philco | 003, 015, 017, 018, 048, 054, 059, 062, 069, 090 |
| 8 | Cetronic | 003 | 52 | Philips | 015, 017, 018, 040, 048, 054, 062, 072 |
| 9 | Citizen | 003, 018, 025 | 53 | Pioneer | 063, 066, 080, 091 |
| 10 | Cinema | 097 | 54 | Portland | 015, 018, 059 |
| 11 | Classic | 003 | 55 | Proton | 040 |
| 12 | Concerto | 018 | 56 | Quasar | 006, 066, 067 |
| 13 | Contec | 046 | 57 | Radio Shack | 017, 048, 056, 060, 061, 075 |
| 14 | Coronado | 015 | 58 | RCA/Proscan | 018, 059, 067, 076, 077, 078, 092, 093, 094 |
| 15 | Craig | 003, 005, 061, 082, 083, 084 | 59 | Realistic | 003, 019 |
| 16 | Croslex | 062 | 60 | Sampo | 040 |
| 17 | Crown | 003 | 61 | Samsung | 000, 015, 016, 017, 040, 043, 046, 047, 048, 049, 059, 060, 098 |
| 18 | Curtis Mates | 059, 061, 063 | |||
| 19 | CXC | 003 | 62 | Sanyo | 019, 061, 065 |
| 20 | Daewoo | 002, 003, 004, 015, 016, 017, 018, 019, 020, 021, 022, 023, 024, 025, 026, 028, 029, 030, 032, 034, 035, 036, 048, 059, 090 | 63 | Scott | 003, 040, 060, 061 |
| 64 | Sears | 015, 018, 019 | |||
| 21 | Daytron | 040 | 65 | Sharp | 015, 057, 064 |
| 22 | Dynasty | 003 | 66 | Signature 2000 (M.Wards) | 057, 058 |
| 23 | Emerson | 003, 015, 040, 046, 059, 061, 064, 082, 083, 084, 085 | 67 | Sony | 050, 051, 052, 053, 055 |
| 24 | Fisher | 019, 065 | 68 | Soundesign | 003, 040 |
| 25 | Funai | 003 | 69 | Spectricon | 001 |
| 26 | Futuretech | 003 | 70 | SSS | 018 |
| 27 | General Electric (GE) | 006, 040, 056, 059, 066, 067, 068 | 71 | Sylvania | 018, 040, 048, 054, 059, 060, 062 |
| 28 | Hall Mark | 040 | 72 | Symphonic | 061, 095, 096 |
| 29 | Hitachi | 015, 018, 050, 059, 069 | 73 | Tatung | 006 |
| 30 | Inkel | 045 | 74 | Techwood | 018 |
| 31 | JC Penny | 056, 059, 067, 086 | 75 | Teknika | 003, 015, 018, 025 |
| 32 | JVC | 070 | 76 | TMK | 018, 040 |
| 33 | KTV | 059, 061, 087, 088 | 77 | Toshiba | 019, 057, 063, 071 |
| 34 | KEC | 003, 015, 040 | 78 | Vidtech | 018 |
| 35 | KMC | 015 | 79 | Videch | 059, 060, 069 |
| 36 | LG (Goldstar) | 001, 015, 016, 017, 037, 038, 039, 040, 041, 042, 043, 044 | 80 | Wards | 015, 017, 018, 040, 048, 054, 060, 064 |
| 37 | Luxman | 018 | 81 | Yamaha | 018 |
| 38 | LXI (Sears) | 019, 054, 056, 059, 060, 062, 063, 065, 071 | 82 | York | 040 |
| 39 | Magnavox | 015, 017, 018, 048, 054, 059, 060, 062, 072, 089 | 83 | Yupiteru | 003 |
| 40 | Marantz | 040, 054 | 84 | Zenith | 058, 079 |
| 41 | Matsui | 054 | 85 | Zonda | 001 |
| 42 | MGA | 018, 040 | 86 | Dongyang | 003, 054 |
| 43 | Mitsubishi/MGA | 018, 040, 059, 060, 075 |
Before Calling for Service
Refer to the chart below when this unit does not function properly. If the problem you are experiencing is not listed below or if the instruction below does not help, turn off the unit, disconnect the power cord, and contact the nearest authorized dealer or Samsung Electronics Service Center.
Symptom Check/Remedy
| Disc tray does not open. | Is the power cord plugged securely into the outlet?Turn off the power and then turn it back on. |
| Playback does not start. | Check the region number of the DVD.DVD discs purchased from abroad may not be playable.CD-ROMs and DVD-ROMs cannot be played on this Home Theater.Make sure that the rating level is correct. |
| Playback does not start immediately when the Play/Pause button is pressed. | Are you using a deformed disc or a disc with scratches on the surface?Wipe the disc clean. |
| Sound is not produced. | No sound is heard during fast playback, slow playback, and step motion playback.Are the speakers connected properly? Is the speaker setup correctly customized?Is the disc severely damaged? |
| Sound can be heard only from a few speakers and not all six. | When listening to a CD or radio, sound is output to the front speakers (L/R) only. Select "PRO LOGIC II" by pressingDIPL II(Dolby Pro Logic II) on the remote control to use all six speakers.Make sure that the DVD disc is 5.1-CH compatible.If you set C, SL, and SR to NONE in the speaker mode in the audio setup of the setup screen, no sound is heard from the center speaker and the front left and right speakers. Set C, SL, and SR to SMALL. |
| Picture does not appear, sound is not produced, or the disc tray opens 2 to 5 seconds later. | Was the Home Theater suddenly moved from a cold place to a warm one? When condensation forms inside the player, remove the disc and let the player stand for 1 or 2 hours with the power on.(You can use the player again after condensation disappears.) |
| Dolby Digital 5.1 CH Surround Sound is not produced. | Is there "Dolby Digital 5.1 CH" mark on the disc? Dolby Digital 5.1 CH Surround Sound is produced only if the disc is recorded with 5.1 channel sound.Is the audio language correctly set to DOLBY DIGITAL 5.1-CH in the information display? |
Symptom Check/Remedy
| Disc is rotating but no picture is produced.Picture quality is poor and picture is shaking. | Is the TV power on?Are the video cables connected properly?Is the disc dirty or damaged?A poorly manufactured disc may not be playable. |
| The remote control does not work. | Is the remote control being operated within its operation range of angle and distance?Are the batteries exhausted?Have you selected the mode(TV/DVD) functions of the remote control (TV or DVD) correctly? |
| Audio language and subtitles do not work. | Audio language and subtitles will not work for DVDs not containing them. And depending on the disc, they may work |
| Menu screen does not appear even when the menu function is selected. | Are you using a disc that does not contain menus? |
| Aspect ratio cannot be changed. | You can play 16:9 DVDs in 16:9 WIDE mode, 4:3 LETTER BOX mode, or 4:3 PAN SCAN mode, but 4:3 DVDs can be seen in 4:3 ratio only. Refer to the DVD disc jacket and then select the appropriate function. |
| The main unit is not working.(Example: The power goes out or strange noise is heard.)The Home Theater is not working normally. | Turn off the power and hold the button on the main unit for longer than 5 seconds.Using the RESET function will erase all stored settings.Do not use this unless necessary. |
| The password for rating level has been forgotten. | While “NO DISC” message appears on the display of main unit, hold the main unit’s button for longer than 5 seconds. “INITIALIZE” appears on the display and all settings will return to the default values.Press the POWER button.Using the RESET function will erase all stored settings.Do not use this unless necessary. |
| Can't receive radio broadcast. | Is the antenna connected properly?If the antenna's input signal is weak, install an external FM antenna in an area with good reception. |
Cautions on Handling and Storing Discs
Small scratches on the disc may reduce sound and picture quality or cause skipping.
Be especially careful not to scratch discs when handling them.

Handling discs
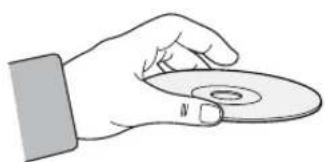
natural_image
Illustration of a hand holding a CD or DVD disc with a compass indicating the magnetic field (no text or symbols present)Do not touch the playback side of the disc. Hold the disc by the edges so that fingerprints will not get on the surface.
Do not stick paper or tape on the disc.

Disc Storage
Do not keep in direct sunlight
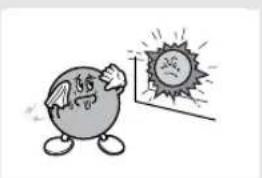
natural_image
Cartoon illustration of a smiling sun with wings and legs, next to a glowing sun (no text or symbols)Keep in a cool ventilated area
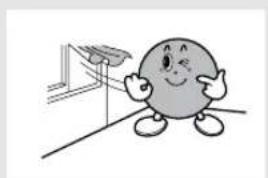
natural_image
Cartoon character standing next to a simple structure with a flag (no text or symbols)Keep in a clean Protection jacket. Store vertically.
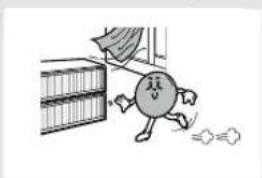
natural_image
Cartoon character running away from a bookshelf, no text or symbols presentCaution
- Do not allow the discs to become contaminated with dirt.
- Do not load cracked or scratched discs.

Handling and Storing Discs
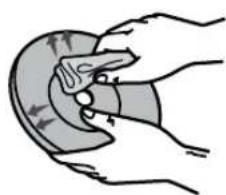
natural_image
Illustration of hands performing a circular motion or maneuver on a curved surface (no text or symbols)When you get fingerprints or dirt on the disc, clean it with a mild detergent diluted in water and wipe with a soft cloth.
- When cleaning, wipe gently from the inside to the outside of the disc.
Note
- Condensation may form if warm air comes into contact with cold parts inside the player. When condensation forms inside the player, the player may not operate correctly. If this occurs, remove the disc and let the player stand for 1 or 2 hours with the power on.
Language Code List
GB
Enter the appropriate code number for the initial settings "Disc Audio", "Disc Subtitle" and/or "Disc Menu" (See page 41).
| Code Language Code Language | Language Code Language Code Language | ||||||
| 1027 Afar 1181 Frisian 1334 | Latvian, Lettish 1506 Slovenian | ||||||
| 1028 | Abkhazian | 1183 | Irish | 1345 | Malagasy | 1507 | Samoan |
| 1032 | Afrikaans | 1186 | Scots Gaelic | 1347 | Maori | 1508 | Shona |
| 1039 | Amharic | 1194 | Galician | 1349 | Macedonian | 1509 | Somali |
| 1044 | Arabic | 1196 | Guarani | 1350 | Malayalam | 1511 | Albanian |
| 1045 | Assamese | 1203 | Gujarati | 1352 | Mongolian | 1512 | Serbian |
| 1051 | Aymara | 1209 | Hausa | 1353 | Moldavian | 1513 | Siswati |
| 1052 | Azerbaijani | 1217 | Hindi | 1356 | Marathi | 1514 | Sesotho |
| 1053 | Bashkir | 1226 | Croatian | 1357 | Malay | 1515 | Sundanese |
| 1057 Byelorussian 1229 Hungarian 1358 Maltese 1516 | Swedish | ||||||
| 1059 | Bulgarian | 1233 | Armenian | 1363 | Burmese | 1517 | Swahili |
| 1060 | Bihari | 1235 | Interlingua | 1365 | Nauru | 1521 | Tamil |
| 1069 | Bislama | 1239 | Interlingue | 1369 | Nepali | 1525 | Tegulu |
| 1066 | Bengali; Bangla | 1245 | Inupiak | 1376 | Dutch | 1527 | Tajik |
| 1067 | Tibetan | 1248 | Indonesian | 1379 | Norwegian | 1528 | Thai |
| 1070 | Breton | 1253 | Icelandic | 1393 | Occitan | 1529 | Tigrinya |
| 1079 | Catalan | 1254 | Italian | 1403 | (Afan) Oromo | 1531 | Turkmen |
| 1093 | Corsican | 1257 | Hebrew | 1408 | Oriya | 1532 | Tagalog |
| 1097 | Czech | 1261 | Japanese | 1417 | Punjabi | 1534 | Setswana |
| 1103 | Welsh | 1269 | Yiddish | 1428 | Polish | 1535 | Tonga |
| 1105 | Danish | 1283 | Javanese | 1435 | Pashto, Pushto | 1538 | Turkish |
| 1109 | German | 1287 | Georgian | 1436 | Portuguese | 1539 | Tsonga |
| 1130 | Bhutani | 1297 | Kazakh | 1463 | Quechua | 1540 | Tatar |
| 1142 | Greek | 1298 | Greenlandic | 1481 | Rhaeto-Romance | 1543 | Twi |
| 1144 | English | 1299 | Cambodian | 1482 | Kirundi | 1557 | Ukrainian |
| 1145 | Esperanto | 1300 | Kannada | 1483 | Romanian | 1564 | Urdu |
| 1149 | Spanish | 1301 | Korean | 1489 | Russian | 1572 | Uzbek |
| 1150 | Estonian | 1305 | Kashmiri | 1491 | Kinyarwanda | 1581 | Vietnamese |
| 1151 | Basque | 1307 | Kurdish | 1495 | Sanskrit | 1587 | Volapuk |
| 1157 | Persian | 1311 | Kirghiz | 1498 | Sindhi | 1613 | Wolof |
| 1165 | Finnish | 1313 | Latin | 1501 | Sangro | 1632 | Xhosa |
| 1166 | Fiji | 1326 | Lingala | 1502 | Serbo-Croatian | 1665 | Yoruba |
| 1171 | Faeroese | 1327 | Laothian | 1503 | Singhalese | 1684 | Chinese |
| 1174 | French | 1332 | Lithuanian | 1505 | Slovak | 1697 | Zulu |
USB Host Feature Supported Products
Digital Camera
| Product | Company | Type |
| Finepix-A340 Fuji Digital Camera | ||
| Finepix-F810 Fuji Digital Camera | ||
| Finepix-F610 Fuji Digital Camera | ||
| Finepix-f450 Fuji Digital Camera | ||
| Finepix S7000 Fuji Digital Camera | ||
| Finepix A310 Fuji Digital Camera | ||
| KD-310Z Konica Digital Camera | ||
| Finecam SL300R Kyocera Digital Camera | ||
| Finecam SL400R Kyocera Digital Camera | ||
| Finecam S5R Kyocera Digital Camera | ||
| Finecam Xt Kyocera Digital Camera | ||
| Dimage-Z1 Minolta Digital Camera | ||
| Dimage Z1 Minolta Digital Camera | ||
| Dimage X21 Minolta Digital Camera | ||
| Coolpix4200 Nikon | Digital Camera | |
| Coolpix4300 Nikon | Digital Camera | |
| Coolpix 2200 Nikon | Digital Camera | |
| Coolpix 3500 Nikon | Digital Camera | |
| Coolpix 3700 Nikon | Digital Camera | |
| Coolpix 4100 Nikon | Digital Camera | |
| Coolpix 5200 Nikon | Digital Camera | |
| Stylus 410 digital Olympus | Digital Camera | |
| 300-digital Olympus | Digital Camera | |
| U300 | Olympus | Digital Camera |
| X-350 | Olympus | Digital Camera |
| C-760 | Olympus | Digital Camera |
| C-5060 | Olympus | Digital Camera |
| X1 | Olympus | Digital Camera |
| U-mini | Olympus | Digital Camera |
| Lumix-FZ20 | Panasonic | Digital Camera |
| DMC-FX7GD Panasonic | Digital Camera | |
| Lumix LC33 | Panasonic | Digital Camera |
| LUMIX DMC-F1 | Panasonic | Digital Camera |
| Optio-S40 | Pentax Digital Camera | |
| Optio-S50 | Pentax Digital Camera | |
| Optio 33LF Pentax Digital Camera | ||
| Optio MX | Pentax Digital Camera | |
| Digimax-420 | Samsung | Digital Camera |
| Digimax-400 | Samsung | Digital Camera |
| Sora PDR-T30 Toshiba | Digital Camera | |
| Coolpix 5900 Nikon | Digital Camera | |
| Coolpix S1 | Nikon | Digital Camera |
| Coolpix 7600 Nikon | Digital Camera | |
| DMC-FX7 | Panasonic | Digital Camera |
| Dimage Xt Minolta Digital Camera | ||
| AZ-1 | Olympus | Digital Camera |
USB Flash Disk
| Product | Company | Type |
| Cruzer Micro | Sandisk | USB 2.0 USB Flash Drive 128M |
| Cruzer Mini Sandisk | USB | 2.0 128M |
| Cruzer Mini Sandisk | USB | 2.0 256M |
| SONY Micro Vault | Sony USB | 2.0 64MB |
| FLEX DRIVE | Serotech | USB 2.0 32MB |
| AnyDrive | A.L tech USB | 2.0 128MB |
| XTICK | LG | USB 2.0 128M |
| Micro Mini | Iomega | USB 2.0 128M |
| iFlash | Imation | USB 2.0 64M |
| LG | XTICK(M) | USB 2.0 64M |
| RiDATA | EZDrive | USB 2.0 64M |
MP3 Player
| Product | Company | Type |
| Creative MuVo NX128M | Creative | 128 MB MP3 Player |
| Iriver H320 Iriver | 20G HDD MP3 Player | |
| YH-920 | Samsung | 20G HDD MP3 Player |
| YP-T7 | Samsung | MP3 Player |
| YP-MT6 | Samsung | MP3 Player |
| YP-T6 | Samsung | MP3 Player |
| YP-53 | Samsung | MP3 Player |
| YP-ST5 | Samsung | MP3 Player |
| YP-T5 | Samsung | MP3 Player |
| YP-60 | Samsung | MP3 Player |
| YP-780 | Samsung | MP3 Player |
| YP-35 | Samsung | MP3 Player |
| YP-55 | Samsung | MP3 Player |
| iAUDIO U2 | Cowon MP3 Player | |
| iAUDIO G3 Cowon MP3 Player | ||
| iAudio M3 Cowon | HDD MP3 Player | |
| SI-M500L | Sharp | 256MB MP3 Player |
| H10 | Iriver MP3 Player | |
| YP-T5 VB Samsung | MP3 Player | |
| YP-53 | Samsung | 256MB MP3 Player |
Multi Card Reader
| Product | Company | Type |
| UNICORN | Unicom | USB 2.0 7 IN 1 CARD READER UC-601R |
| USB 2.0 Card Reader | Billionton(Taiwan) | USB 2.0 Card Reader for SD/MMC/RS-MMC(3-in-1) |
USB External HDD
| Product | Company | Type |
| CUTIE | Serotech | POCKET HARD DISK DRIVE |
| MOMOBAY UX-2 | Dvico USB 2.0 |
Specifications
GB
| GENERAL | Power Consumption | 80W |
| Weight | 3.5Kg | |
| Dimensions (W x H x D) | 430 x 65 x 351.5 mm | |
| Operating Temperature Range | +5°C~+35°C | |
| Operating Humidity Range | 10% ~ 75% | |
| F TUNER | Usable Sensitivity | 10dB |
| S/N Ratio | 60dB | |
| Distortion | 0.5% | |
| V OUTPUT | Composite Video | 1.0Vp-p(75Ωload) |
| Scart Jack | Compositive Video : 1.0Vp-p(75Ωload) | |
| RGB Signal : 0.714Vp-p(75Ωload) | ||
| Component Video | Y:1.0Vp-p(75Ωload) | |
| Pr:0.70Vp-p(75Ωload) | ||
| Pb:0.70Vp-p(75Ωload) | ||
| AMPLIFIER | Front speaker output | 80W x 2(3Ω) |
| Center speaker output | 80W(3Ω) | |
| Rear speaker output | 80W x 2(3Ω) | |
| Subwoofer speaker output | 100W(3Ω) | |
| Frequency range | 20Hz~20KHz | |
| S/N Ratio | 75dB | |
| Channel separation | 60dB | |
| Input sensitivity | (AUX)400mV |
HT-Q20
| SPEAKER | Speaker system | 5.1ch speaker system | |
| Front/Center/Rear speaker | Subwoofer speaker | ||
| Impedance | 3Ωx 5 | 3Ω | |
| Frequency range | 140Hz~20KHz | 35Hz~160Hz | |
| Output sound pressure level | 82dB/W/M | 85dB/W/M | |
| Rated input | 80W | 100W | |
| Maximum input | 160W | 200W | |
| Dimensions (W x H x D) | Front/Rear | 90 x 152x 90 mm | |
| Center | 200 x 90 x 92 mm | ||
| Weights | Front/Rear | 0.5 Kg/0.4 Kg | |
| Center | 0.6 Kg | ||
HT-TQ22
| SPEAKER | Speaker system | 5.1ch speaker system | ||
| Front/Center/Rear speaker | Subwoofer speaker | |||
| Impedance | 3Ωx 5 | 3Ω | ||
| Frequency range | 140Hz~20KHz | 35Hz~160Hz | ||
| Output sound pressure level | 82dB/W/M | 85dB/W/M | ||
| Rated input | 80W | 100W | ||
| Maximum input | 160W | 200W | ||
| Dimensions (W x H x D) | Front | 90 x 1045x 90 mm | 175 x 320 x 381 mm | |
| Rear | 90 x 152x 90 mm | |||
| Center | 200 x 90 x 92 mm | |||
| Weights | Front/Rear | 3 Kg/0.4 Kg | 5.1 kg | |
| Center | 0.6 Kg | |||
HT-TQ25
| SPEAKER | Speaker system | 5.1ch speaker system | ||
| Front/Center/Rear speaker | Subwoofer speaker | |||
| Impedance | 3Ωx 5 | 3Ω | ||
| Frequency range | 140Hz~20KHz | 35Hz~160Hz | ||
| Output sound pressure level | 82dB/W/M | 85dB/W/M | ||
| Rated input | 80W | 100W | ||
| Maximum input | 160W | 200W | ||
| Dimensions (W x H x D) | Front | 90 x 1045x 90 mm | 175 x 320 x 381 mm | |
| Rear | 90 x 1045x 90 mm | |||
| Center | 200 x 90 x 92 mm | |||
| Weights | Front/Rear | 3 Kg/2.8 Kg | 5.1 kg | |
| Center | 0.6 Kg | |||
How to install the speaker and the stand. (Tallboy type)
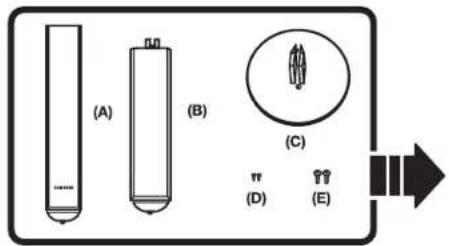
text_image
(A) (B) (C) (D) (E)Components
A: SPEAKER
B: STAND
C: STAND BASE
E: Screw
(1) 本次股东大会的决议
- Composants
A: ENCEINTE
II: PIED D'ENCEINTE
C. BASE DO PIE DIENSEINTE
D-LECCINATE
E - Vis
- Components
A:ALTAVOZ
B:PE
C: BASE ME Dr. Tavelli
- Tomila
● Составные части
А. ГРОМКОГОВОРИТЕЛЬ
В СТОИКА
natural_image
Illustration of a hand holding a magnifying glass over a small object, with an arrow indicating direction (no text or symbols)- Turn the STAND(B) upside-down and connect it to the STAND BASE(Q).
- Retournez le PIED D'ENCEINTE (8) et fixez-le à la BASE DU PIED D'ENCEINTE (C).
- Ponga el PIE (B) boca abajo y únalo a la BASE (C).
● Перевернита СТОЙКУ (В) сварху вниз и соедините во с ОСНДВАНИЕМ СТОЙКИ (С).
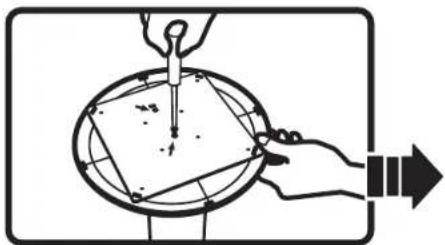
natural_image
Diagram showing a hand using a tool to inspect a circular object with internal grid lines, no text or symbols present.- Turning the screw(D) clockwise, connect it to two holes marked with the arrow using a screwdriver as shown in the illustration.
- En tournant la vis (D) dans le sens horaire, connectez-la aux deux trous marqués d'une flèche à l'aide d'un tournevis, comme le montre l'illustration.
- Girando el tornillo (D) en sentido horario, conectelo a dos orificios marcados con la fiecha con un destornillador como aparece en la ilustración.
● С помощью отвертки (поворанивайте ее по часовой стрелке) завинтите (D) винты в отверстия, отмеченные стрелкой, как показано на рисунке.
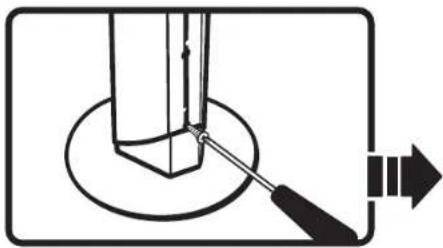
natural_image
Technical diagram showing a tool interacting with a mechanical component, no text or symbols present● Turning the supplied screw (E) clockwise, connect it to a hole on the rear of the Speaker.
- En tournant la vis (E) fournie dans le sens horaire, connectez-la à un trou situé à l'arrière du haut-parleur.
- Girando el tornilio (E) en sentido horario, conéctelo a un orificio de la parte posterior del Altavoz.
- Завинтите(Е)винт в отверстие в задней части громкоговорителя, поворачивая его по часовой стрелке.
natural_image
Illustration of hands using a tool to lift a bottle, with an arrow indicating direction (no text or symbols)- Connect the assembled stand to the SPEAKER(A).
● Fixez l'ENCEINTE (A) sur le pied d'enceinte assemblé, - Conecte el pie ya montado al ALTAVOZ (A).
- Соедините собранную стойку с ГРОМКОГОВОРИТЕЛЕМ(А).
natural_image
Hand holding a tool interacting with a vertical panel, showing a scroll and directional arrow (no text or symbols)● Turning the screw (E)clockwise, connect to a hole on the rear of the speaker using a screwdriver as shown in the illustration.
- En tournant la vis (E) dans le sens horaire, connectez-la à un trou situé à l'arrière du haut-parleur à l'aide d'un tournevis comme le montre l'illustration.
- Girando el tornillo (E) en sentido horario, conectar a un orificio de la parte posterior del altavoz con un destornillador como aparece en la ilustración
● С помощью отвертия (поворочный те ее по часовой стреле) вынетите (E) винт в отверстие в задней части громкогачекрителя, как показано на рисунке.
natural_image
Simple line drawing of a graduated cylinder with a stopper (no text or labels)● This is the successfully assembled speaker.
■ Make sure that the TALLBOY type speaker should be installed on the flat and stable area. Otherwise it may fall down due to external shock.
- Votre enceinte est maintenant installée
Assurez-vous que l'enceinte TALLBOY est installée sur une surface plane et stable. Dans le cas contraire, elle risquerait de tomber à la suite d'un cher externe.
- El altavoz queda correctamente montado.
Asegúrese de colocar el altavoz de tipo TALLBOY sobre una superficie plana y estable
De lo constando podna caerse por golpes externos.
* Устанавливайте громкоговоритель типа TALLBOY на прочной и росной поверхности. Иначе в результате внешнего воздействия он может упасть.
How to install the speaker and the stand. (Half tallboy type)
natural_image
Simple diagram showing a vertical bar with a downward arrow and a circular base, connected to an arrow (no text or symbols)- Connect the SPEAKER(A) with the STAND BASE(C).
● Fixez l'ENCEINTE (A) sur la BASE DU PIED D'ENCEINTE (C). - Conecte el ALTAVOZ (A) a la BASE PIE (C).
● Соедините ГРОМКОГОВОРИТЕЛЬ (А) с ОСНОВАНИЕМ СТОЙКИ (С).
text_image
Diagram showing a hand using a tool to adjust a circular object with internal grid lines, labeled with symbols like 'x2' and 'f'.● Turning the screw (D) clockwise, connect it to two holes marked with the arrow using a screwdriver as shown in the illustration.
- En tournant la vis (D) dans le sens horaire, connectez-la aux deux trous marqués d'une flèche à l'aide d'un tournevis, comme le montre l'illustration.
- Girando el tornillo (D) en sentido horario, conéctelo a dos orificios marcados con la flecha con un destornillador como aparece en la ilustración.
- С помощью отвертки (поворачивайте ее по часовой стрелке) завинтите (D) винты в отверстия, отмеченные стрелкой, как показано на рисунке.
natural_image
Illustration of a hand using a tool to press or adjust a circular component, with no visible text or symbols.● Turning the screw (E)clockwise, connect to a hole on the rear of the speaker using a screwdriver as shown in the illustration.
- En tournant la vis (E) dans le sens horaire, connectez-la à un trou situé à l'arrière e du haut-parleur à l'aide d'un tournevis comme le montre l'illustration.
- Girando el tornillo (E) en sentido horario, conectar a un orificio de la parte posterior del altavoz con un destornillador como aparece en la ilustración
● С помощью отвертки (поворачивай те ее по часовой стрелке) ванитите (E) винт в отверстие в задней части громкоговорителя, как показано на рисунке.
natural_image
Simple line drawing of a vertical cylindrical object with a base, no text or symbols present● This is the successfully assembled SPEAKER(A)
- Votre l'ENCEINTE (A) est maintenant installée.
- El ALTAVOZ (A) queda correctamente montado.
● Так выглядит правильно собранный громкоговоритель.
Memo
THIS APPLIANCE IS MANUFACTURED BY:
SAMSUNG