C43ANSMT - TV Cello - Free user manual and instructions
Find the device manual for free C43ANSMT Cello in PDF.


User questions about C43ANSMT Cello
0 question about this device. Answer the ones you know or ask your own.
Ask a new question about this device
Download the instructions for your TV in PDF format for free! Find your manual C43ANSMT - Cello and take your electronic device back in hand. On this page are published all the documents necessary for the use of your device. C43ANSMT by Cello.
USER MANUAL C43ANSMT Cello
natural_image
Front view of a flat-screen monitor with two side supports (no text or symbols visible)User Guide
Contents
| Unpacking the TV / Accessory's | 1 |
| Installing / Removing the Base Stand | 2 |
| Front / Right Side View and Controls | 3 |
| Rear View and Sockets | 4 |
| Remote Control | 5-6 |
| Installing Batteries in the Remote Control | 7 |
| Remote Control Operation Range | 7 |
| Making Video and Audio Connections | 8 |
| Connecting an AV Device with an HDMI Cable | 8 |
| Connecting a Computer with a VGA Cable | 9 |
| Connecting a Digital Audio Receiver | 9 |
| Connecting Headphones | 10 |
| Turning the TV on for the First Time | 11-12 |
| 21noitarepO cisaB | |
| OSD Menu | 13-22 |
| 1. Picture Setting | 13-14 |
| 2. Sound Setting | 15 |
| 3. Channel Setting | 16-18 |
| 4. Lock Setting | 19-20 |
| 5. Time Setting | 21 |
| 6. Option Setting | 22 |
| Connecting a USB Storage Device | 23 |
| Viewing Photos | 25 |
| Listening to Music | 25 |
| Watching Movies | 26 |
| Viewing Texts | 26 |
| Maintenance | 27 |
| spiT dna stniH | 27-28 |
| 29seMoyalpsiD | |
| snoitacificepS | 30 |
| sgniWaytefaS | 31-32 |
| Waste Electrical Recycling | 33 |
Thank you for purchasing your new 43" FHD LED TV.
Your new TV has many features and incorporates the latest technology to enhance your viewing experience. We recommend that you spend some time reading this instruction manual in order that you fully understand these features. You will also find some hints and tips to help you resolve any issues. Read all the safety instructions carefully before use and keep this instruction manual for future reference.
Unpacking the TV / Accessory's
natural_image
Empty white rectangle with black border (no text or symbols)TV set
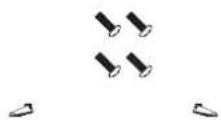
Stand & Screws
(ST4 x 14 4PCS)
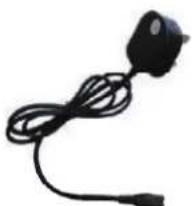
natural_image
Black handheld electronic device with coiled cable and connector (no visible text or symbols)Power Cable
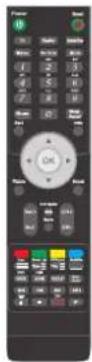
Remote Control
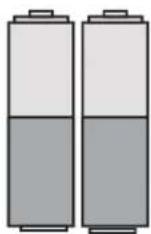
Batteries
text_image
Quick Start GuideQuick Start Guide
text_image
WARRANTY CARDWarranty Card
The parts
natural_image
Empty rectangular frame with black border (no text or symbols)TV set
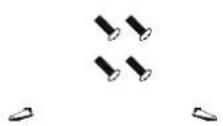
Stand & Screws
(ST4 x 14 4PCS)
Installation
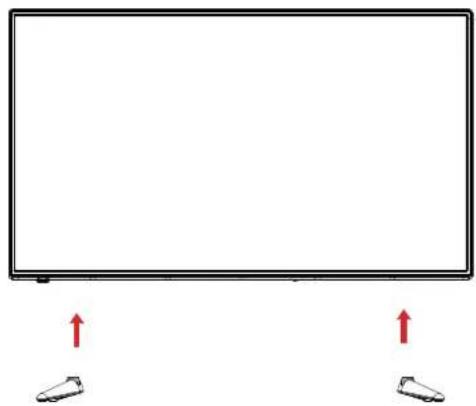
Place the TV face down on a soft and flat surface (blanket, foam, cloth, etc.) to prevent any damage to the TV.
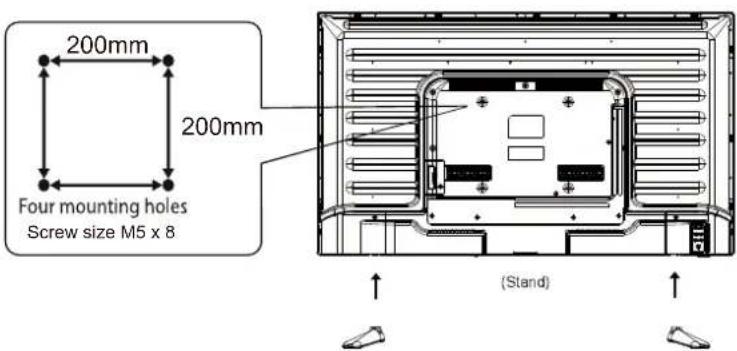
- Attach the stand feet in the positions shown and secure them with supplied screws (ST4 x 14)
natural_image
Simple diagram of a blank rectangular frame with two small shoes at the base, no text or symbols present.This unit is VESA-Compliant and designed to be wall mounted with a VESA-Compliant 200 x 200 mm mounting kit.
Mount this unit according to the instructions of the wall bracket(not supplied)
text_image
200mm Four mounting holes Screw size M5 x 8 200mm (Stand)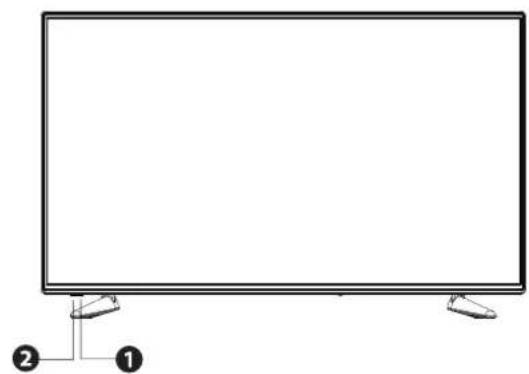
natural_image
Front view of a blank rectangular TV with two labeled connectors at the bottom (no text or symbols on the screen)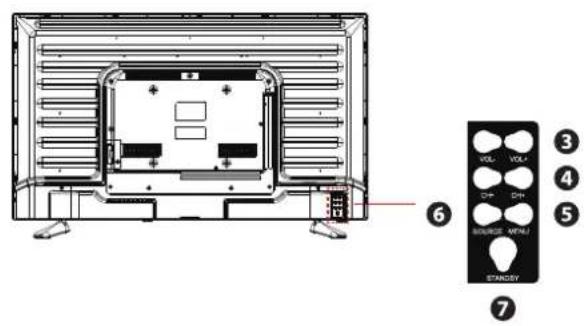
text_image
VOL VOL DR DRY MACHINE MENU STANLEY ⑥ ③ ④ ⑤ ⑦| Item | Description |
| 1 POWER LED | Illuminates green when the TV is turned on. Illuminates red when the TV is in standby mode. The LED will alternate between red and green when the PVR timer programming has started in the standby mode. |
| 2 IR (Infrared Receiver) | Receives IR signals from the remote control.Do not put anything near the sensor, as its function may be affected. |
| 3 VOL + / - | Adjusts the volume.Press to select and adjust a setting in the OSD menu. |
| 4 CH + / - | Press to select a channel or select a sub-menu from the OSD menu. |
| 5 MENU | Displays the OSD (on screen display) menu. |
| 6 SOURCE | Press to select among different input signal sources:SMART/HDMI1/HDMI2/HDMI3/AV/USBConfirmed the selection on OSD menu. |
| 7 STANDBY | Switches the TV on from standby mode.Switches the TV back to standby mode. |
Rear View and Sockets
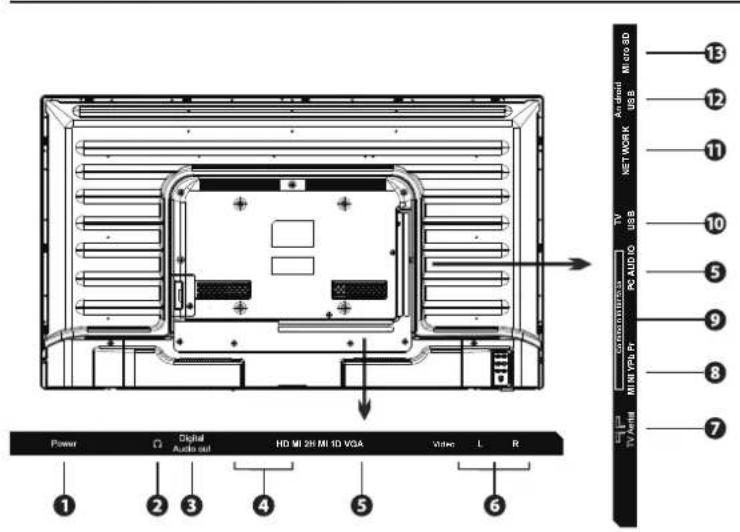
text_image
Power Digital Audio out HD MI 2H MI 1D VGA Video L R 1 2 3 4 5 6 7 8 9 PCI AUDIO TV USB PC AUDIO TV Audio Internet Micro ID 13 12 11 10 5 9 8 7| Socket | Description | |
| 1 | POWER | To connect to power supply. |
| 2 | Headphone out | To connect to the earphones. |
| 3 | DIGITAL AUDIO OUT | To connect to the audio socket on the digital/standard 5.1 audio system. |
| 4 | HDMI IN | To connect to a High-Definition (HD) signal output device, such as a set-top box, blu-ray disc player or AV receiver. |
| 5 | VGA/PC AUDIO IN | To connect to a computer or other devices with a VGA interface. |
| 6 | AV | Connect an external device to the composite VIDEO(Y) and AUDIO (L / R) out jacks found on most video equipment. |
| 7 | TV Aerial | To connect to the aerial socket on the wall with the RF coaxial cable. |
| 8 | MINI YPbPr | To connect to a DVD player, Digital Set-Top-Box, or other AV devices with component (YPbPr) video and audio output sockets. |
| 9 | CI (Common Interface) Slot | Allows the insertion of a Common Access Module. |
| 10 | USB | Allows the insertion of a USB storage device to play video, audio, photo and text files (Media mode) and record DTV programmes on to a USB storage device. |
| 11 | NETWORK | Connect the TV to the Internet |
| 12 | Android USB | Allows the USB storage device to play video, audio, photo and text files in SMART mode, and works with air mouse . |
| 13 | Micro SD | Load external Micro SD memry card |
Dependant on the Model of the TV some keys will have no function

text_image
Power Turn on or standby TV Go to DVBT source Menu Picture Audio Lock Time Setup Exit Exit from any menu Power TV Radio Satellite Menu Re-Tune abc Mute def 1 2 3 ghl jkl mno 4 5 6 pqra tvv wxyz 7 8 9 Mouse O Sleep Recall Exit Info OK Picture Sound Volume +/- Increase and decrease the volume Vol+ EPG CH+ Source Vol- CH- Sound / Nicam key Channel +/- Increase and decrease the channel number Soft Keys. The action is shown on the menu and changes for each menu. Reserved for MHEG in DTV Teletext / MHEG5 (You can not record this) DVD Switch to DVD mode* DVD menu in DVD mode* Prev Track, File, Day.(Media, PVR, EPG) Show the keyboard in android mode* ▲ DVD Eject * Subtitle DVD and DTV mode only* Batt Save Extend battery life ,picture will be dimmer. Next Track, File, Day.(Media, PVR, EPG) Pause / Play PVR & Multimedia*Dependant on Model
To use your sky remote control with this TV follow the instructions given with the sky remote to programme different codes.
■ Functions of remote control buttons
Dependant on the model of the TV some keys will have no function
■ Functions of remote control buttons
Dependant on the model of the TV some keys will have no function
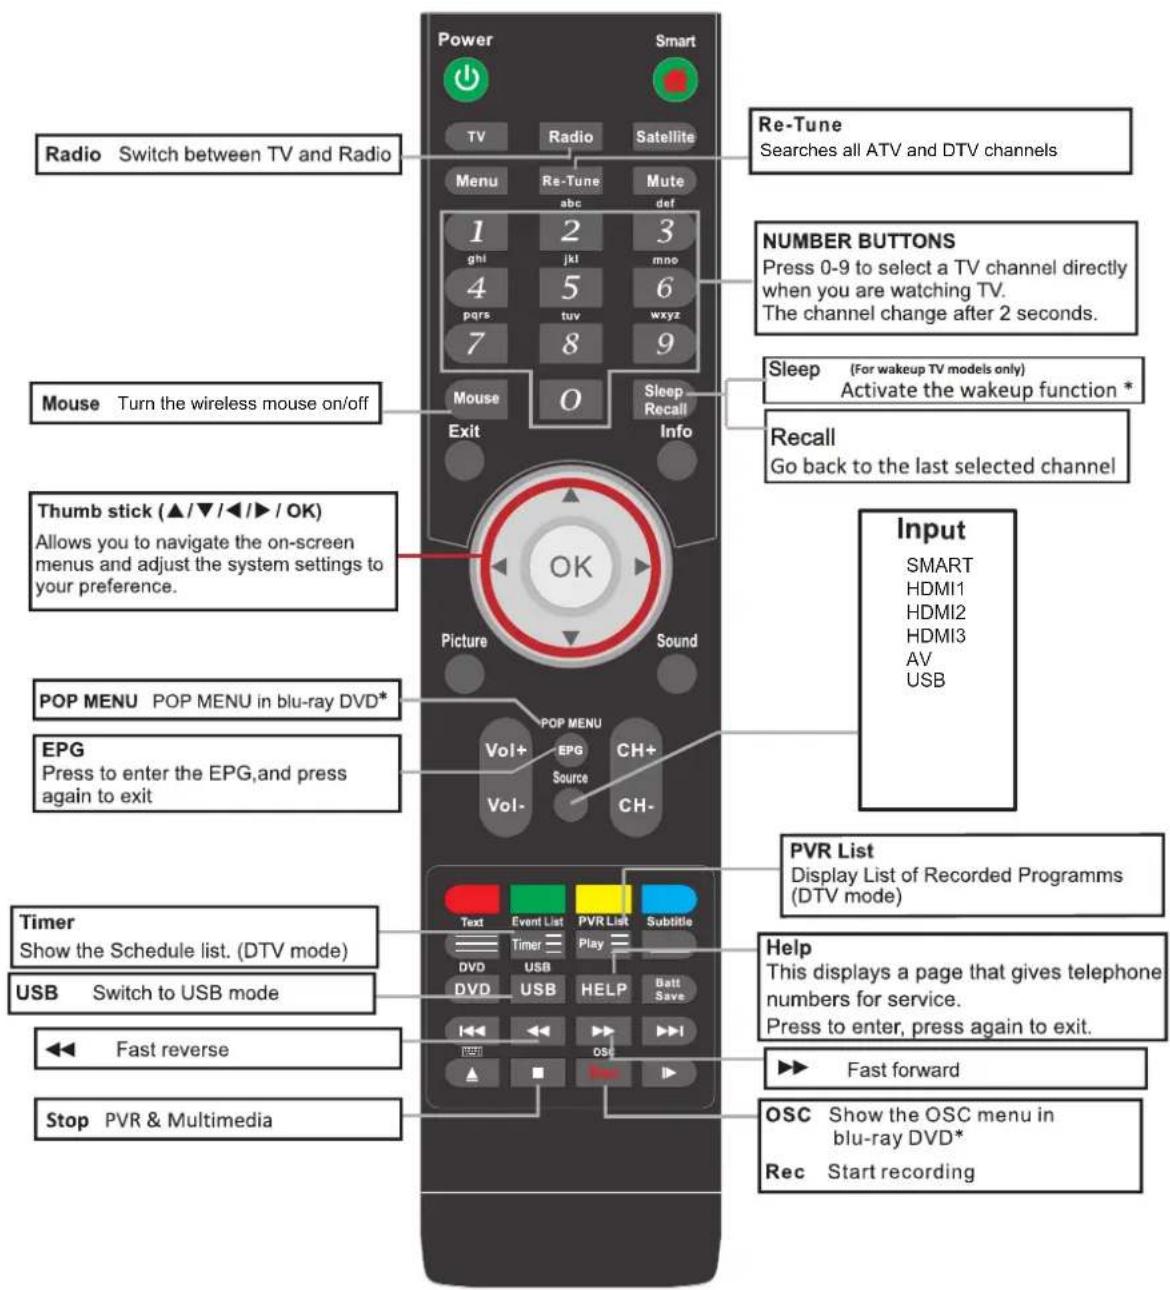
text_image
Radio Switch between TV and Radio Mouse Turn the wireless mouse on/off Thumb stick (▲/▼/◄/►/OK) Allows you to navigate the on-screen menus and adjust the system settings to your preference. POP MENU POP MENU in blu-ray DVD* EPG Press to enter the EPG,and press again to exit Timer Show the Schedule list. (DTV mode) USB Switch to USB mode ◀ Fast reverse Stop PVR & Multimedia Power Smart TV Radio Satellite Menu Re-Tune Mute def 1 2 3 ghi jkl mno 4 5 6 pqs tuv wxyz 7 8 9 Mouse O Sleep Exit Info Picture Sound OK PVP MENU Vol+ EPG CH+ Source CH- Vol- CH- Re-Tune Searches all ATV and DTV channels NUMBER BUTTONS Press 0-9 to select a TV channel directly when you are watching TV. The channel change after 2 seconds. Sleep (For wakeup TV models only) Activate the wakeup function * Recall Go back to the last selected channel Input SMART HDMI1 HDMI2 HDMI3 AV USB PVR List Display List of Recorded Programs (DTV mode) Help This displays a page that gives telephone numbers for service. Press to enter, press again to exit. ◀ Fast forward OSC Show the OSC menu in blu-ray DVD* Rec Start recording*Dependant on Model
- Press and lift the back cover to open the battery compartment of the remote control.
- Insert two 1.5V AAA size batteries. Make sure to match the (+) and (-) ends of the batteries with the (+) and (-) ends indicated in the battery compartment.
- Close the battery compartment cover.
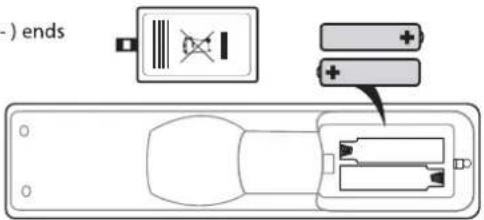
text_image
(-) ends
Handling the Batteries
- Improper or incorrect use of batteries may cause corrosion or battery leakage, which could cause fire, personal injury or damage to property.
- Only use the battery type indicated in this manual.
- When the batteries are exhausted, the remote will not function. Replace both batteries at the same time with new ones.
- Do not install new batteries with used ones and do not mix different types of batteries.
- Do not dispose of used batteries as domestic waste. Dispose of them in accordance with local regulations.

Handling the Remote Control
• Take care of your fingernails when you press and hold the battery release tab.
- Do not drop or cause impact to the remote control.
- Do not spill water or any liquid on the remote control.
- Do not place the remote control on a wet object.
- Do not place the remote control under direct sunlight or near sources of excessive heat.
- Remove the battery from the remote control when not in use for a long period of time, as it could cause corrosion or battery leakage and may result in physical injury and/or property damage including fire.
Remote Control Operation Range
Point the remote control at the TV no more than 5 metres from the remote control sensor on the TV and within 60° in front of the TV. The operating distance may vary depending on the brightness of the room.
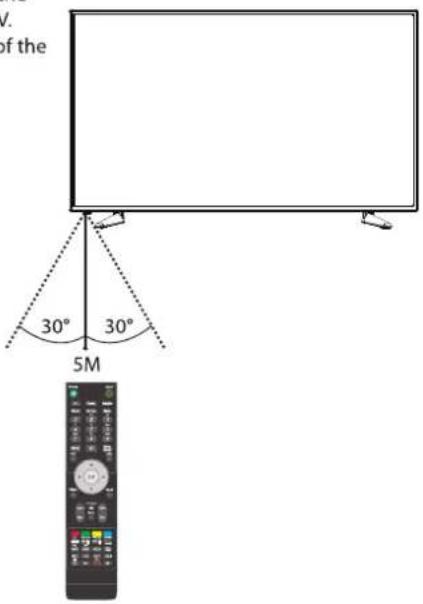
text_image
V. of the 30° 30° 5MTo use your sky remote control with this TV follow the instructions given with the sky remote to programme different codes.
Making Video and Audio Connections
Not all AV devices have the ability to connect to a TV, please refer to the owner's manual of your AV device for compatibility and connection procedures.
When connecting any external AV device, do not connect the mains cable to the mains socket until all other connections are complete.
Best Video Performance

| Signal Type | Separate Audio Connection Required | |
 | HDMI(480i/480p/576i/576p/720p/1080i/1080p) | No |
 | PC | YesPC AUDIO |
 Mi Mi | Component Video(480i/480p/576i/576p/720p/1080i/1080p) | YesMini AV |
 M M | Composite Video | No |
Connecting an AV Device with an HDMI Cable
- This TV can accept High-Definition Multimedia Interface (HDMI) and supports HDCP (High-Bandwidth Digital Content Protection) Protocol.
- The TV has a total of HDMI input sockets, please make sure the correct input source is selected corresponding to your connected HDMI input socket.
- When you connect to the output of an HD ready player (blu-ray disc player, game console, set-top box or computer) switch to the HDMI function and the TV will automatically detect the resolution used by the HDMI source.
-
To get the best picture quality, adjust the blu-ray disc player, game console or set-top box output resolution up to 1920 x 1080p.
-
Use an HDMI cable to connect the TV's HDMI input socket to the external AV device's HDMI output socket.
-
Plug the connected devices into the mains socket
-
Press the STANDBY button on the TV or the ⏻ button on the remote control to turn on your TV.
-
Press the SOURCE button on the TV or the SOURCE button on the remote control to display the Source List. Use the ▲▼ buttons to select HDMI1/2/3 and then press the OK button to confirm.

Although this TV is able to connect to an HDMI device, it is possible that some devices may not operate correctly.
Rear View of TV
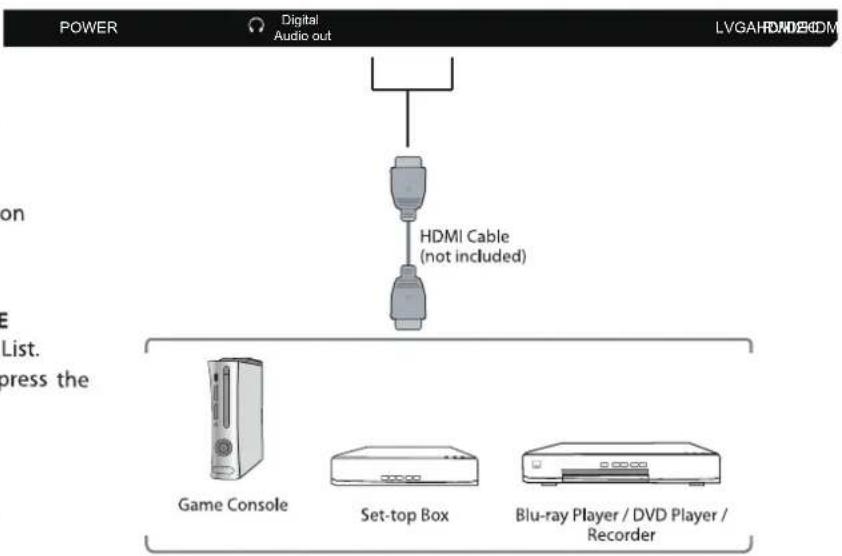
text_image
POWER Digital Audio out LVGAH0ND260DM HDMI Cable (not included) on E List. press the Game Console Set-top Box Blu-ray Player / DVD Player / RecorderConnecting a Computer with a VGA Cable
- Use a VGA cable to connect the TV's PC input socket to a computer's VGA output socket. Use an audio cable to connect the TV's PC AUDIO input socket to the computer's audio output socket.
- Plug the connected devices into the mains socket
- Press the STANDBY button on the TV or the ⏻ button on the remote control
- Press the SOURCE button on the TV or the SOURCE button on the remote control to display the Source List. Use the ▲▼ buttons to select PC and then press the OK button to confirm.

• The best resolution is 1920 x 1080.
- If your computer is set to shut down after a few minutes of idle mode, the TV will also switch to standby due to no signal being received, this is to save energy. Press the STANDBY button at the right side of the TV when viewed from the front or the ⏻ button on the remote control to restart the TV.
If your computer is set to shut down after a few minutes of idle mode, the TV will also switch to standby due to no signal being received, this is to save energy. Press the STANDBY button at the right side of the TV when viewed from the front or the ⏻ button on the remote control to restart the TV.
Rear View of TV
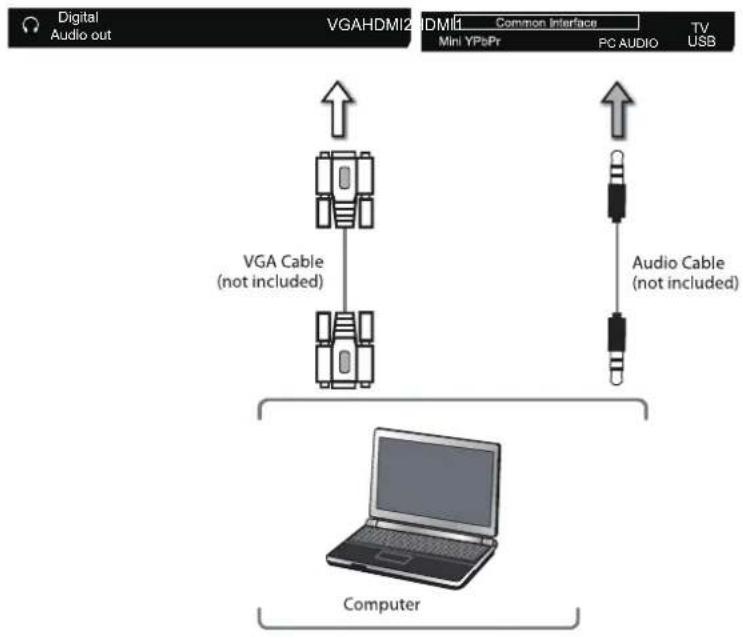
flowchart
graph TD
    A["Computer"] --> B["VGA Cable (not included)"]
    A --> C["Audio Cable (not included)"]
    D["Digital Audio out"] --> E["Top: VGA/HDMI2/HDMI1 Common Interface"]
    D --> F["Bottom: PC AUDIO TV USB"]
Connecting a Digital Audio Receiver
For better sound quality, you may want to play the audio through your multi-channel audio receiver.
- Use an audio cable to connect the TV's Digital Audio out socket to an external audio receiver's audio coaxial input socket.
- Plug the connected devices into the mains socket
- Press the STANDBY button on the TV or the ⏻ button on the remote control
- Press the SOURCE button on the TV or the SOURCE button on the remote control to display the Source List. Use the ▲▼ buttons to select any desired input source and then press the OK button to confirm.

The TV's volume control will have no effect. You may control the audio level via the Audio Receiver.
Rear View of TV
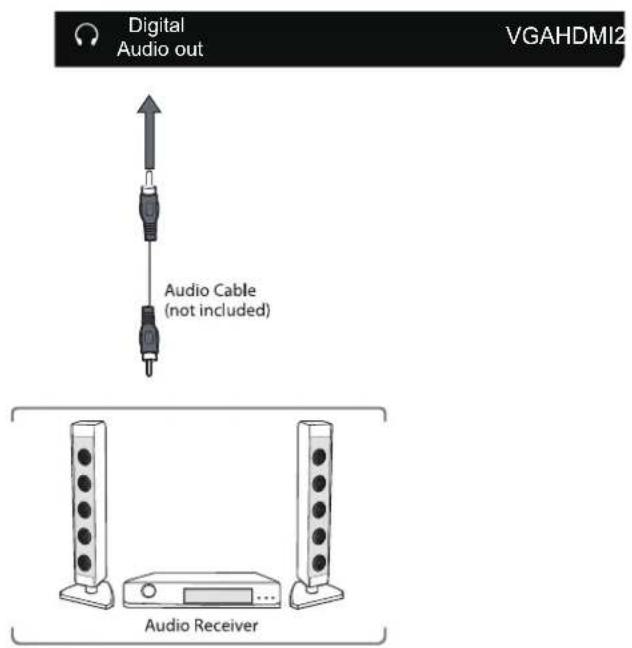
text_image
Digital Audio out VGAHDMI2 Audio Cable (not included) Audio ReceiverConnecting Headphones
Connect your headphones to the TV's Headphone out socket.
Before putting on headphones, turn the volume down then put the headphones on and slowly increase the volume until you reach a comfortable listening level.
Rear View of TV

Long-term exposure to loud music may cause hearing damage. It is best to avoid extreme volume when using earphones, especially for extended periods.

Digital Audio out
LVGAHRXIDHODM
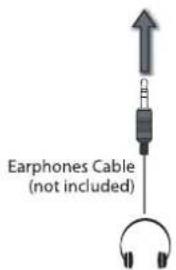
text_image
Earphones Cable (not included)- Connect one end of the RF coaxial cable to the aerial socket on the wall and the other end of the cable to the Aerial socket at the rear bottom of your TV.

Do not connect the TV to the mains supply until you have completed all the connections.
- Connect the mains cable to the mains socket after you have completed all the connections.
- At this stage, the TV switches to standby mode. The red LED indicator will illuminate on the front panel of the TV.
- In standby mode, press the STANDBY button on the TV or the ⏻ button on the remote control to turn the TV on. The LED indicator will change from red to green.

The STANDBY button is located on the rear right side of the TV.

• Always disconnect the TV from the mains socket when not in use for a long period of time.
- The STANDBY button on the rear right side of the TV or the ⏻ button on the remote control is only used for switching the TV into standby, it does not disconnect the TV from the mains power. To completely disconnect the mains power, please remove the mains cable from the mains socket.
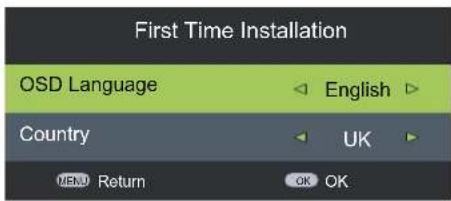
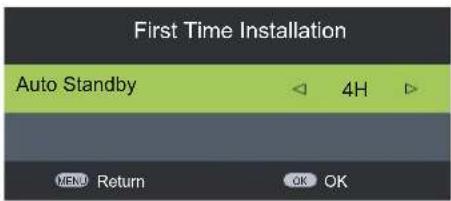
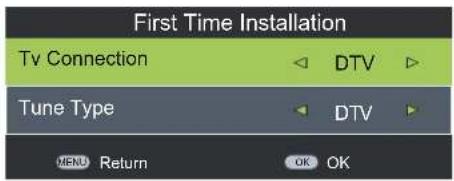
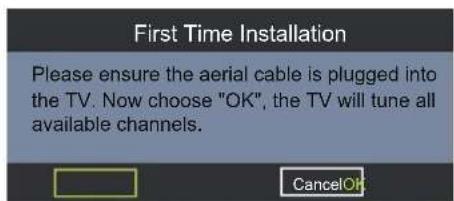
- If this is the first time you are turning on the TV and there are no programs in the TV memory, the Quick Startmenu will appear on the screen. There are 4 setups as follow:
text_image
First Time Installation OSD Language English Country UK MENU Return OK OK1
text_image
First Time Installation Auto Standby 4H MENU Return OK OK2
text_image
First Time Installation Tv Connection DTV Tune Type DTV MENU Return OK OK3
text_image
First Time Installation Please ensure the aerial cable is plugged into the TV. Now choose "OK", the TV will tune all available channels. CancelOK4
Selecting the Input Source
-
Press the Source button on the TV or the Source button on the remote control to display the Input source list.
-
Press the ▲▼ buttons to select the input source that you want: DTV, ATV, AV, SCART, YPBPR, HDMI1, HDMI2, HDMI3, PC, Media.
-
Press the OK button to confirm your selection. If you do not press the OK button to confirm, the TV will automatically confirm the selected input source within 4 seconds.

In DTV mode, press the Radio button to switch to TV / digital radio channels directly.
| Input Source |
| DTV |
| Cable |
| ATV |
| AV |
| YPbPr |
| PC |
| HDMI1 |
| HDMI2 |
| SMART |
| USB |
| OK OK |
Channel Selection
- Press the CH+ / - buttons on the TV or on the remote control repeatedly or the 0-9 buttons on the remote control to select the channel.

Alternative
Press the OK button to enter the Channel List. Then use the ▲▼ buttons to highlight and select the channel. Press the OK button to view the selected channel.
- If a blocked channel is selected, the password screen will be displayed. Press the 0-9 buttons to enter the password, the channel will then be unlocked (refer to page 20 for details on LOCK).
- Press the ⏻ button to return to the previously viewed channel.
Display Channel Information
• Press the i Info button to view the current information.
Volume Adjustment
- Press the VOL+/- button on the TV or on the remote control to adjust the volume.
- If you wish to switch the sound off, press the Mut e Mutton. Press the button again or the VOL+ or - button to resume audio listening.
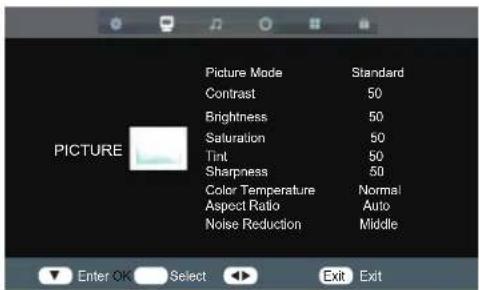
Allows you to set your preferred picture mode.
- Press the Menu button and then press the ◀▶ buttons to select the PICTURE menu.
- Press the OK or ▼ buttons and then press the ▲▼ buttons to select the following picture options and then press the OK button.
text_image
PICTURE Picture Mode Standard Contrast 50 Brightness 50 Saturation 50 Tint 50 Sharpness 50 Color Temperature Normal Aspect Ratio Auto Noise Reduction Middle Enter OK Select Exit ExitPicture Mode
Press the ▲▼ buttons to cycle among picture mode: Dynamic / Standard / Mild / User and then press the OK button to confirm.

Alternative
You may press the Picture button once and then press the ◀▶ buttons to select the picture mode directly.
| Contrast | Press the ◀▶ buttons to adjust the difference between light and dark levels in the picture.(for User mode) |
| Brightness | Press the ◀▶ buttons to increase or decreases the amount of white in the picture.(for User mode) |
| Saturation | Press the ◀▶ buttons to increase or decreases the saturation. |
| Tint (For NTSC format) | Press the ◀▶ buttons to adjust the balance between red and green levels.(Tint is only available for NTSC signal input via the SCART or AV IN.) |
| Sharpness | Press the ◀▶ buttons to adjust the level of crispness in the edges between light and dark areas of the picture.(for User mode) |
| Colour Temperature | Press the ▲▼ buttons to cycle among colour temperature: Standard / Cool / Warm and then press the OK button to confirm.Adjusts the colour components independently to achieve a warm or cool.StandardCool: Increases blue tintWarm: Increases red tint |
| Aspect Ratio | Press the ▲▼ buttons to cycle among aspect ratio: 4:3 / 16:9Auto/ Zoom1 / Zoom2 and then press the OK button to confirm. |

Alternative
You may press the Picture button twice and then press the ◀▶ buttons to select the aspect ratio directly.
| Input Signal 4:3 | Input Signal 16:9 | |||
| 4:3 | This selection will allow you to view a picture with an original 4:3 aspect ratio. Black bars will appear on both the left and right of the screen. | 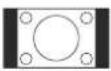 | This selection will allow you to adjust the picture horizontally, in linear proportion. Black bars will appear on both the left and right of the screen. | 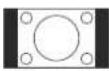 |
| 16:9 | This selection will allow you to adjust the picture horizontally, in linear proportion, to fill the entire screen. | 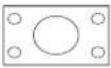 | This selection will allow you to view a picture with an original 16:9 aspect ratio. | 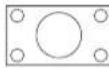 |
| Zoom1 | This selection will allow you to zoom in the picture without any alteration, while filling the entire screen. However, the top and bottom of the picture will be cropped. | 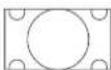 | This selection will allow you to zoom in the picture without any alteration, while the 4 sides of the picture will be cropped. | 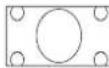 |
| Zoom2 | This selection is similar to 16:9 mode, but the picture slightly stretches vertically and clips off a little from the top and bottom. | 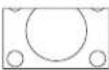 | This selection is similar to 16:9 mode, but the picture slightly stretches vertically and clips off a little from the top and bottom. | 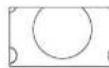 |
| Just scan (in HDMI mode only) | This selection will detect the resolution of the HDMI signal and display an image. with the same number of pixels | 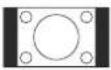 | This selection will detect the resolution of the HDMI signal and display an image. with the same number of pixels | 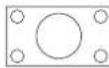 |
Noise Reduction Press the ◀▶ buttons to select to reduce the noise level of the connected device: Off / Low / Middle / High and then press the Menu button to confirm.
- Press the Menu button to return to the previous menu. Press the Exit button to exit the menu.
Allows you to select an audio-enhancement technique.
- Press the Menu button and then press the ◀▶ buttons to select the SOUND menu.
- Press the OK or ▼ buttons and then press the ▲▼ buttons to select the following sound options and then press the OK button.
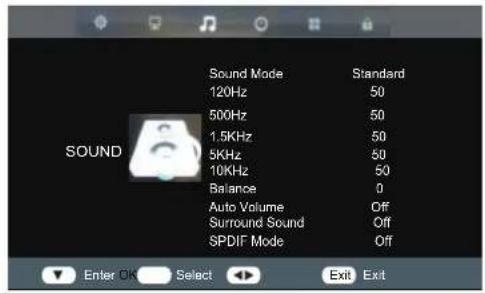
text_image
Sound Mode 120Hz 500Hz 1.5KHz 5KHz 10KHz Balance Auto Volume Surround Sound SPDIF Mode Standard 50 50 50 50 0 Off Off Enter OK Select Exit ExitSound Mode
Press the ▲▼ buttons to select an audio-enhancement technique: Standard / Movie / Music / Sports Meiser and then press the button to confirm.

Alternative
You may press the Sound button once and then press the ◀▶ buttons to select the sound mode.
| Bass | Press the ◀▶ buttons to control the relative intensity of lower-pitched sounds. (for user mode) |
| Treble | Press the ◀▶ buttons to control the relative intensity of higher pitched sounds. (for user mode) |
| Balance | Press the ◀▶ buttons to adjust the relative volume of the speakers in a multiple speaker system. |
| Auto Volume | This feature automatically adjusts the audio level when the TV is turned on. This function is activated by selecting"ON". |
| Surround Sound | Turn on/off the surround sound function by selecting "On" or "Off". |
| SPDIF Mode | Select the spdif mode for the TV from off, PCM and Auto. |
- Press the Menu button to return to the previous menu. Press the Exit button to exit the menu.
Stereo / Dual Sound Reception (ATV Mode)
When a programme is selected, press the Sound button twice and then press the ◀▶ buttons to select Mono / Nicam Stereo for the selected station.
| Broadcast | On Screen Display |
| Mono | MONO |
| Stereo | NICAM STEREO |
Mono sound selection
If the stereo signal is weak in stereo reception, you can switch to mono by pressing the Sound button twice and then press the◀▶ buttons to select Mono / Nicam Stereo. In mono reception, the clarity of sound is improved. To switch back to stereo, press the Sound button twice and then press the◀▶ buttons to select Mono / Nicam Stereo again.
Speaker Sound Output Selection (DTV Mode)
While watching a DTV programme, you can press the Sound button to display the audio language list (only applicable when the TV programme has this feature).
Press the ▲▼ buttons to select an audio language or audio format if available and then press the ◀▶ buttons to select sound track between Left, Right and Stereo. Press the OK button to confirm and exit.
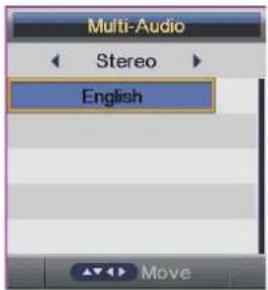
text_image
Multi-Audio Stereo English MoveAllows you to set up a variety of channel options.
- Press the Menu button and then press the ◀▶ buttons to select the CHANNEL menu.
- Press the OK and then press the to▲ed buttons the following channel options and then press the OK button.
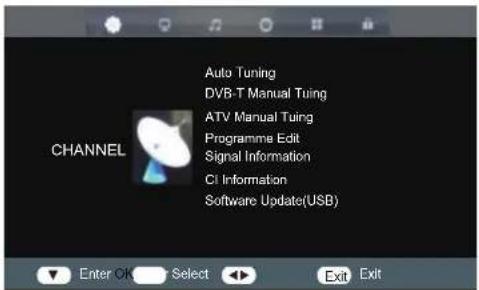
text_image
AUTO Tuning DVB-T Manual Tuing ATV Manual Tuing Programme Edit Signal Information CI Information Software Update(USB) CHANNEL Enter OK Select Exit ExitAuto Tuning
- Press the ▲▼ buttons to Auto Tuning then press the OK button to confirm.
- In the Auto Tuing menu there are 2 options for you to select from: Tune Type and Country.
- Press the Menu button to return back to the main menu.
- Press the Exit button to exit the menu.
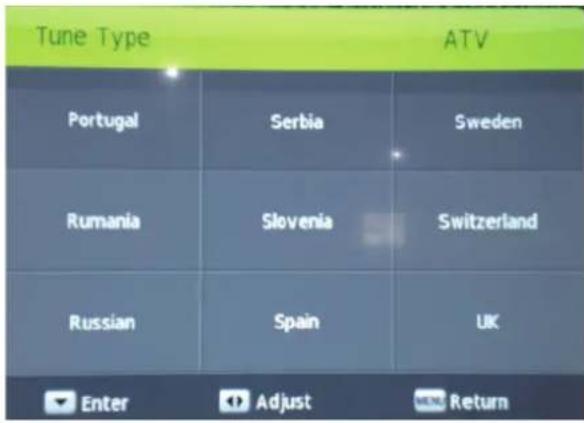
text_image
Tune Type ATV Portugal Serbia Sweden Rumania Slovenia Switzerland Russian Spain UK Enter Adjust ReturnDVB-T Manual Tuning
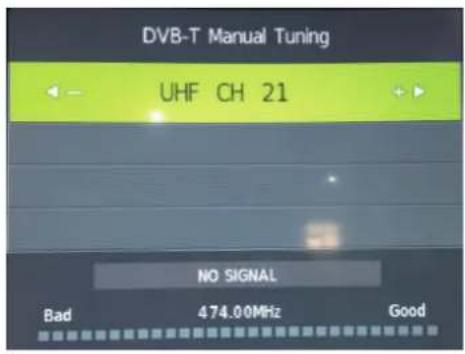
How to search Digital channels manually.
- Select DVB-T Manual Tuning, press the OK button to confirm.
- Select a channel number by pressing the ▶ button or by using the number buttons on the remote control. The Strength and Quality of the signal indication bars are below.
- Select Start to begin the search.
- To exit the tuning menu press EXIT.
text_image
DVB-T Manual Tuning UHF CH 21 NO SIGNAL Bad 474.00MHz GoodATV Manual Tuning
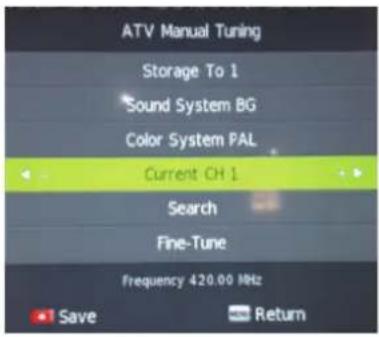
To search analogue channel by entering parameters manually.
- Press the ▲▼ buttons to ATV Manual Tuning then press the OK button to confirm.
- Select ATV manual search item to enter air channel manual search in ATV source and the user operation interface as following.
| Storage Tio 11 | Press the ◀▶ buttons to change the numbered location of the found channel. |
| Sound System | Selects the sound system: BG / DK / I / L / L'. |
| Color System | Selects the color system: Auto / SECAM / PAL. |
| Current Channe | Displays the current channel number. |
| Search | Press the ◀▶ buttons to start the manual tuning. |
| Fine-Tune | Press the ◀▶ buttons to make manual fine tuning adjustments. |
- Press the Menu button to return back to the main menu.
- Press the Exit button to exit the menu.
text_image
ATV Manual Tuning Storage To 1 Sound System BG Color System PAL Current CH 1 Search Fine-Tune Frequency 420.00 MHz Save ReturnProgramme Edit
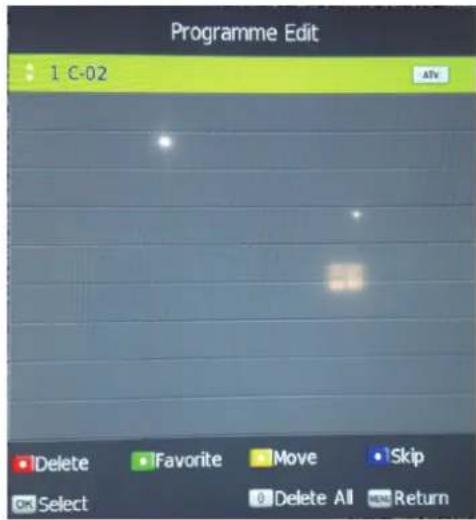
Use up/down keys to select program edit. Press OK or Right button to enter the menu. Use up/down buttons to navigate through the menu.
Delete
Press the RED button to delete the highlighted channel, a red circle will appear next to the cahnnel name.
Press the RED button again to confirm delete.
Press the MENU to return to the main menu.
Move
text_image
Programme Edit 1 C-02 Delete Favorite Move Skip Select Delete All ReturnPress up/down to select the cahnnel, press yellow button to enter the move mode, then press up/down to move the channel location, press yellow button again or press OK to confirm.
Press MENU to return to the main menu.
Skip
Press up/down to select the channel you wish to skip.
press the BLUE button, a logo will appear next to the channel name and the channel will be skipped when you scroll through the channels.
Press the BLUE button again on the highlighted channel to disable the skip function. Press MENU to return to the main menu.
Signal Information
Only available in DTV mode, Signal Information includes: channel/network/modulation/quality/strength.
CI Information
When insert CI Module, display CI Information.
Software Update(USB)
- Download the software to the usb device, then insert the usb device to the unit.
- Press the menu button to select the CHANNEL menu.
- Press the left/right buttons to select Software Update(USB) and then press the OK button to update software.
-
When the updating is completed, the unit will be reset to standby mode.
-
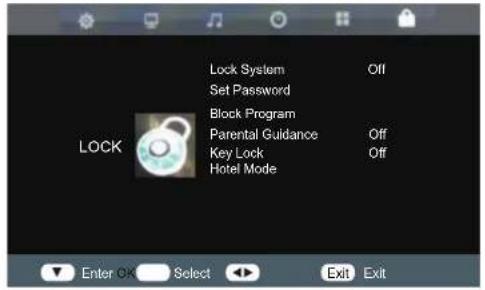
Press the Menu button and then press the ▲▼ buttons to select the Lock menu.
- Press the OK or ▼ buttons and then press the ▲▼ buttons to select the following feature options and then press the OK button.
text_image
Lock System Set Password Block Program Parental Guidance Key Lock Hotel Mode OFF Off OFF Enter OK Select Exit ExitLock System
- Press the ▲▼ buttons to Lock System then press the OK button to confirm.
- Use the 0-9 buttons to input a 4-digit password to enter the LOCK menu and then press the OK button to turn the Lock System On.

• The default password is "0000".
- If you change the password, be sure to remember the new password! If you forget the new password, press the master password"8899".
Set Password: If you had already changed the password, enter the current password.
Block Program: This feature is available only for digital TV and the tuned-in channel must support it.
Parental Guidance: Off: turn off Parental Lock 4-18: turn on Parental Lock and set the age level that are permitted to watch the program.
Key Lock: Press the ▲▼ buttons to select the "Key Lock" option and then press to choose between the options ON or OFF. After selecting ON, the front panel buttons TV/AV/Menu/CH+/CH-/VOL+/VOL- of the device will be locked.
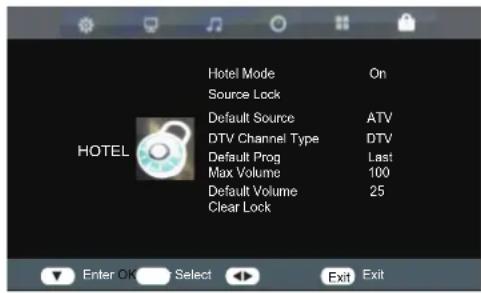
Hotel Mode: Enter the Hotel Setting menu.
- Press the Menu button to return back to the main menu.
- Press the Exit button to exit the menu.
Hotel Mode
Press the up/down buttons to select the "Hotel Mode" option and then press right button to choose between the options ON or OFF.
Source Lock
Press the up/down buttons to select the "Source Lock" option and then press OK to enable the menu.
Press the right button to toggle between ON and OFF. All signal sources labelled ON will not be available any more in the signal source selection menu.
text_image
Hotel Mode On Source Lock Default Source ATV DTV Channel Type DTV Default Prog Last Max Volume 100 Default Volume 25 Clear Lock HOTEL Enter OK Select Exit ExitDefault Source
Press up/down buttons to select the "Default Source" option and then press right button to choose a signal source or OFF. This function lets you set the signal source(DTV/Cable/ATV/AV/SCART/YPbPr/PC/HDMI1/HDMI2/HDMI3/USB) to be used when powering on the unit. It will be used until you select a different signal source or disable this function(OFF).
DTV Channel Type
Default Prog
Press left/right buttons to select Last or 7488.
Max Volume
Press up/down buttons to select the "Max Volume" option and then press right button to set the desired volume. Then the output volume will never exceed the set maximum value.
Default Volume
Press up/down buttons to select the "Default Volume" option and then press right button to set the default volume.
Clear Lock
Press up/down buttons to select the "Clear Lock" option and then press right button to enable it. All hotel settings will remain disabled until you enable the Hotel Lock again.
-
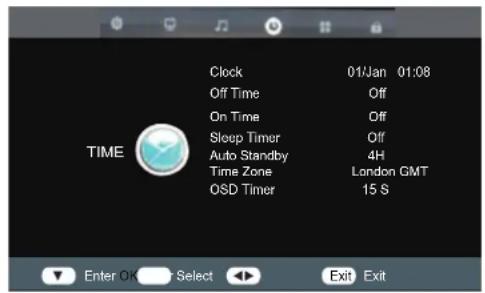
Press the Menu button and then press the ▲▼ buttons to select the Time menu.
-
Press the OK or ▼ buttons and then press the ▲▼ buttons to select the following feature options and then press the OK button.
text_image
Clock 01/Jan 01:08 Off Time Off On Time Off Sleep Timur Off Auto Standby 4H Time Zone London GMT OSD Timer 15 S TIME Enter OK Select Exit ExitClock
Press the OK button to set date and time.
Off Time
Press the OK button to set off time.
On Time
Press the OK button to set on time.
Sleep Timer
The sleep timer automatically switches the TV to standby after the preset time has elapsed. The clock will be set automatically when receiving a digital signal. Time must be set before using Sleep Timer function.
Press up/down buttons to select a period of time after which the TV automatically switches to standby mode: OFF/10/20/.../180/240 min and then press the OK button to confirm. The timer begins to count down from the number of minutes selected.
Auto Standby
The unit will automatically switch to standby mode 4 hours after the last time the remote control was used. A reminder screen will pop up and count down before the unit switches to standby mode. If you want to operate the TV for a long period of time, tun off the auto standby function by selecting Never.
Time Zone
When you select a Time Zone city, the TV time is set by the time offset information based on Time Zone and GMT which is received with the broadcast signal and the time is set automatically by a digital signal. Press the up/down/left/right buttons to select the desired time zone city and then press the OK button to confirm.(DTV mode)
OSD Timer
Press up/down buttons to select the display time of the on-screen menu:5s/10s/15s/20s/25s/30s/Nevel and then press the OK button to confirm.
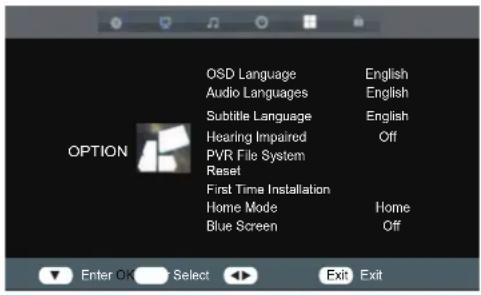
- Press the Menu button and then press the ▲▼ buttons to select the Option menu.
- Press the OK or ▼ buttons and then press the ▲▼ buttons to select the following feature options and then press the OK button.
text_image
OPTION OSD Language English Audio Languages English Subtitle Language English Hearing Impaired Off PVR File System Reset First Time Installation Home Mode Home Blue Screen Off Enter OK Select Exit ExitOSD Language
Allows you to select the on screen display menu language.
Audio Languages
Select the audio languages. The availability of this function depends on the tuned-in channel. (can only be selected in DTV mode)
Subtitle Language
Select the subtitle language. The availability of this function depends on the tuned-in channel. (can only be selected in DTV mode)
Hearing Impaired
Allows you to show more information in subtitles for the hearing-impaired in some programmes(can only be selected in DTV mode)
PVR File System
Reset
Restores all settings to the factory defaults.
First Time Installation
This option allows you to reset the TV to the default factory setting. Once activated the TV will go to standby mode.
Home Mode
Allow you to select among: Max Performance mode Home mode and Max Economy mode.
Blue Screen
Press left/right buttons to select ON or OFF
Rear View of TV
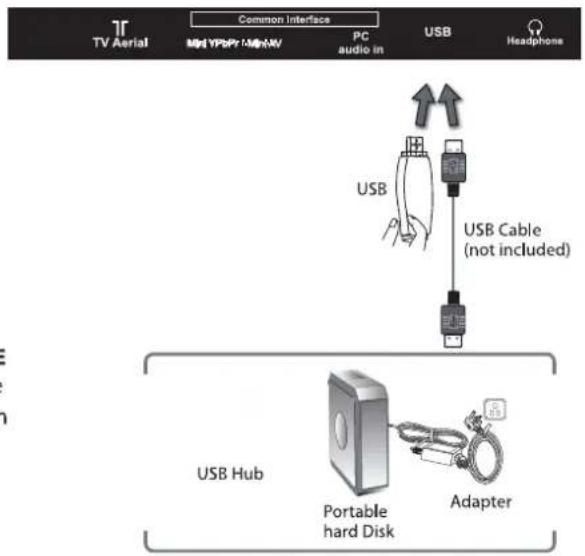
- Switch off the TV before connecting any USB storage device.
- Connect your USB storage device to the USB port of your TV.
- Plug the connected devices into the mains socket
- Press the STANDBY button on of the TV or the ⏻ button on the remote control to turn on your TV.
- Press the SOURCE button on the TV or the SOURCE button on the remote control to display the Source List. Use the ▲▼ buttons to select Media and then press the OK button to confirm.
flowchart
graph TD
    A["TV Aerial"] --> B["Common Interface"]
    B --> C["PC audio in"]
    C --> D["USB Cable (not included)"]
    D --> E["Adapter"]
    E --> F["Portable hard Disk"]
    F --> G["USB Hub"]
    G --> H["Headphone"]

- If a hard disk is used, make sure its mains adapter is connected to the mains supply.
- If a USB hub is used, make sure its mains adapter is connected to the mains supply as the total current consumption may exceed 500mA.
• The maximum supported storage space of the hard disk is 1 TB.
• The file system only supports HiSpeed FS, FAT16, FAT32, NTFS formats (NTFS Compressed files are not supported). - If you want to store the video streaming of a DTV programme, the transfer rate of the USB storage device must not be less than 5MB/s, otherwise the picture and sound of the programme will be affected and a warning statement will be shown on the screen. If this happens, please upgrade your USB storage device.
- The TV screen will be blank temporarily as it will take time to start up and stabilise the connected hard disk. This is normal and the starting time may vary depending on the brand and the memory size of the connected hard disk.
- Disconnect the USB storage device if it is not in use.
• USB output: DC 5V = 500mA
Basic Operation
- Press the SOURCE button on tje remote control to display the input source menu, select the USB source with the up/down buttons and press the OK button to enter the Multimedia menu below.
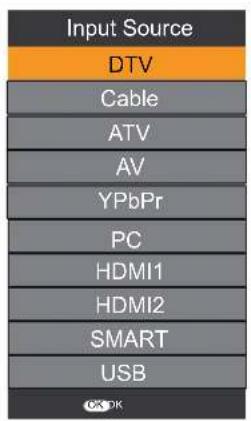
text_image
Input Source DTV Cable ATV AV YPbPr PC HDMI1 HDMI2 SMART USB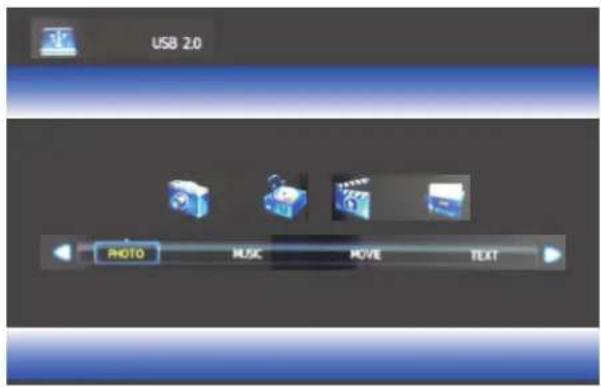
text_image
USB 2.0 PHOTO MUSIC MOVE TEXT- Press left/right buttons to select the files on the USB device(PHOTO,MUSIC,MOVIE,TEXT) to view or play.
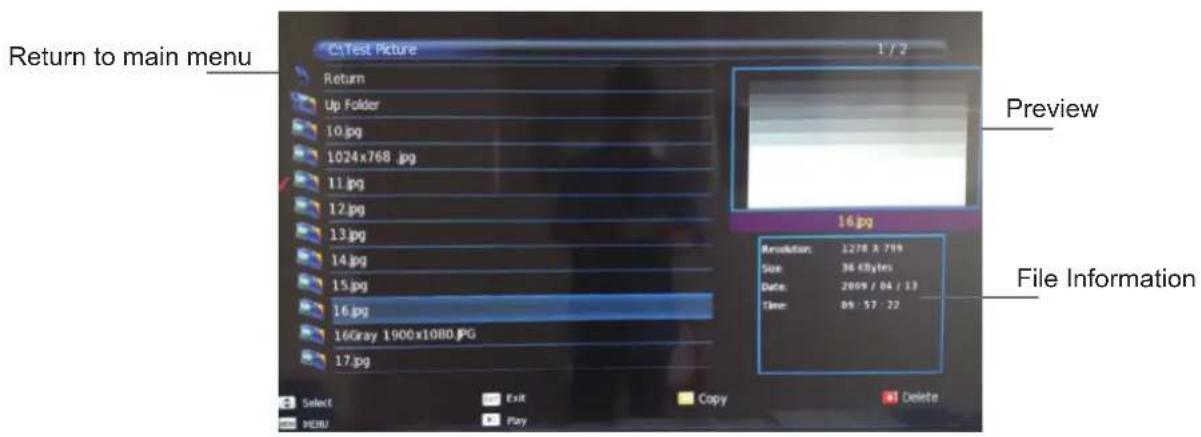
text_image
C:\Test Picture 1 / 2 Return to main menu Up Folder 10.jpg 1024x768.jpg 11.jpg 12.jpg 13.jpg 14.jpg 15.jpg 16.jpg 16Gray 1900x1080.jpg 17.jpg Preview 16.jpg Resolution: 1278 x 799 Size: 36 GB/tes Date: 2009/04/13 Time: 09:57:22 File Information Select Exit Copy Delete MENU PlayPress the up/down/left/right buttons to select and the OK button to activate the file or open folder. Press ▶ button to play the files in full screen mode. When in full screen mode press the OK button to show the navigation option menu on the bottom of the screen or press ■ stop button to return to files.
1. Photo
Photo viewing
Press left/right buttons to select the option on the menu, and press the OK button to activate.
Play: Play the photo.
Prev./Next: Go to on a picture/Go to the next picture.
Stop: Stop auto turning pages.
Repeat: Select the repeat mode from Repeat All, Repeat1, Repeat None.
Music: Play/Pause the background music of your choice.
Playlist: Display the playlist on the screen and select the photo of your choice.
Info: Display the information of the file.
Rotate: Rotate the photo clockwise/counterclockwise.
Zoom In/Out: Zoom In/Out of your photos.
Move view: Move the photo in Zoom out mode.
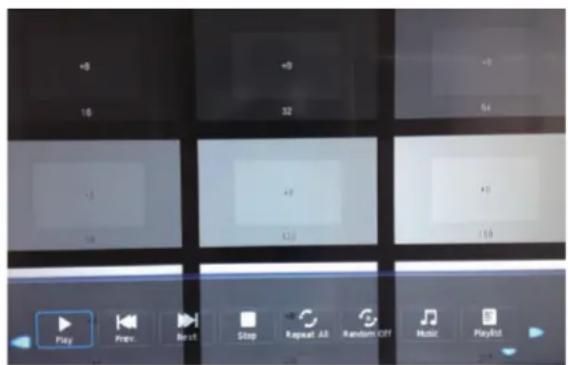
text_image
+0 16 -0 32 +0 64 - - - - - - - - Play Prev. Reset Stop Repeat All Random CRT Music PlayList2. Music
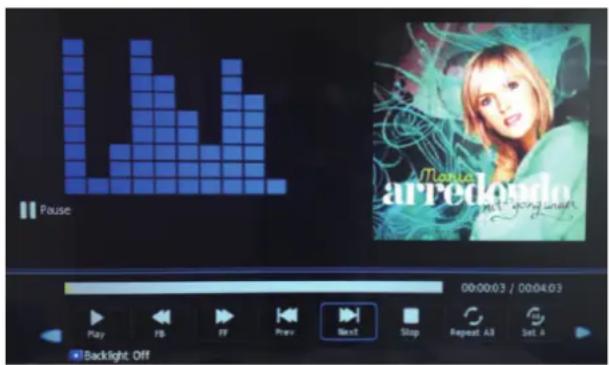
Listen to music
Press left/right buttons to select the option on the menu, and press the OK button to activate.
Play: Play the music.
FB: Retreat quickly.
FF: Fast forward.
Prev./Next: Go to a song/Turn to the next song.
Stop: Stop playing.
Repeat: Select the repeat mode from Repeat All, Repeat1, Repeat None.
Play List: Display the playlist on the screen.
Info.: Display the information of the music file.
text_image
Pause Mantao arredoso 00:00:03 / 00:04:03 Play FB FF Prev Next Stop Repeat All Set A Backlight Off3.Movie
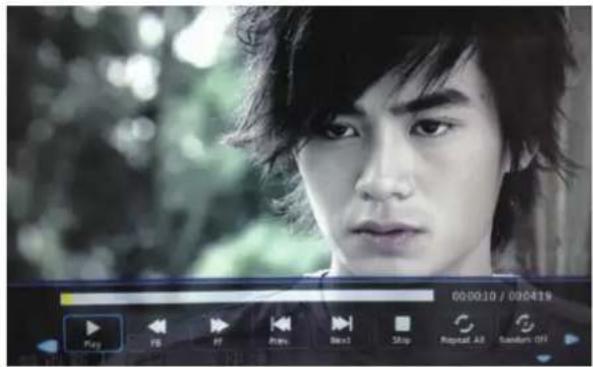
Watch a film
Press left/right buttons to select the option on the menu, and press the OK button to activate.
Play: Play the movie.
FB: Retreat quickly.
FF: Fast forward.
text_image
00:00:10 / 09:04:19 Play FS PF Play Next Stop Repeat All Buttons OffPrev./Next: Go to a video/Turn to the next video.
Stop: Stop playing.
Repeat: Select the repeat mode from Repeat All, Repeat1, Repeat None.
Aspect Ratio: Select the aspect ratio of the on screen display.
Move View: Moves the enlarged picture area.
4.Text
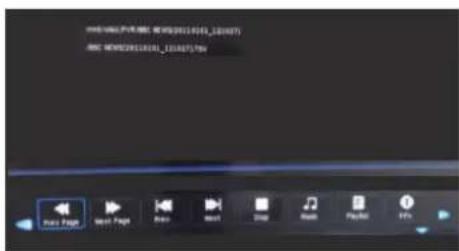
View text files
Press left/right buttons to select the option on the menu, and press the OK button to activate.
Prev/Next page: Turn to previous/next page of the text.
Prev./Next: Turn to previous/next file.
Stop: Stop auto turning pages.
Music: Play/pause the background music of your choice.
Playlist: Display the playlist on the screen.
Info: Display the information of the text file.
text_image
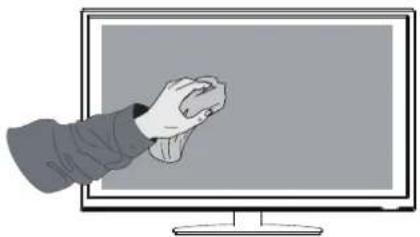
HKEY: 100% (RGB NEW) 2013-12-07 HKEY: 100% (RGB NEW) 2013-12-07/19 Power Page Next Page Auto Next Stop Music Playbox HiCareful and regular cleaning can prolong the life of your TV.

Be sure to Disconnect the mains cable from the mains socket before any cleaning.
- Use a soft dry cloth to wipe away the dust from the screen and surfaces.
- If the surfaces are extremely dirty, clean the TV with a cloth which has been dipped in a weak soapy water. Wring the cloth until it is almost dry, then use it to wipe the TV.
- Ensure there is no excess water on the screen. Allow any water or dampness to evaporate before switching the TV on.

Never use alcohol, benzine, paint-thinner, cleaning fluid or other chemicals. Do not use compressed air to remove dust.
natural_image
Illustration of a hand pointing at a blank screen (no text or symbols)Hints and Tips
The following table contains various hints and tips to get the best performance from your TV. If you require additional assistance please call our UK Call Centre on 0845 6040105.
| The TV does not operate properly. | |
| The TV does not respond when pressing any buttons | · The TV may freeze up during use. Disconnect the mains cable from the mains socket for a few minutes. Reconnect the mains cable and try to operate it again as usual. |
| TV cannot be switched on | · Check that the TV is connected to the mains supply· Make sure all connected AV devices are switched off before switching on your TV. |
| The remote control does not work | · Check to see if there are any objects between the TV and the remote control causing an obstruction. Ensure that you are pointing the remote control directly at the TV.· Ensure that the batteries are installed with the correct polarity (+ to +, - to -).· Install new batteries. |
| Power is suddenly turned off | · Check the power of the TV. The mains supply maybe interrupted.· Check if the sleep timer is set.· Check whether the Auto Standby is activated. |
| The video function does not work. | |
| No Picture & No Sound | · Check whether the TV is switched on.· Try another channel. The problem may be caused by the broadcaster. |
| Picture appears slowly after switching on | · This is normal, the image is muted during the TV startup process. Please contact your service centre, if the picture has not appeared after five minutes. |
| No or poor colour or poor picture | · Adjust the settings in the PICTURE menu.· Try another channel. The problem may be caused by the broadcaster.· Check if the video cables are connected properly. |
| Horizontal / Vertical bar or picture shaking | · Check for local interference such as an electrical appliance or power tool. |
| Poor reception on some channels | · Station or cable channel may be experiencing problems, tune to another station.· Station signal is weak, reposition the aerial for better reception.· Check for sources of possible interference. |
| Lines or streaks in pictures | · Check aerial (Change the position of the aerial.) |
| No pictures when connecting HDMI | · Check if the input source is HDMI. |
| Picture appears in wrong ratio | · Adjust the Aspect Ratio settings in the PICTURE menu. |
| The audio function does not work. | |
| Picture OK but no sound | Press the VOL + / - buttons.Sound muted? Press the Mute button.Try another channel. The problem may be caused by the broadcaster. |
| No output from one of the speakers | Adjust the Balance settings in the SOUND menu. |
| Unusual sound from Inside the TV | A change in ambient humidity or temperature may result in an unusual noise when the TV is switched on or off and does not indicate a fault with the TV. |
| No sound when connecting HDMI | Check if the input source is HDMI. |
| Audio noise | Keep the RF coaxial cable away from the other connected cables. |
| Password | |
| Lost Password | Select the Change Pin Code setting in the FEATURE menu, then enter the following master password "8899". The master password clears your previous password and allows you to enter a new password. |
| There is a problem in PC mode. | |
| The signal is out of range (Invalid format) | Adjust the resolution, horizontal frequency, or vertical frequency. |
| Vertical bar or stripe on background & Horizontal Noise & Incorrect position | Use Auto configure or adjust clock, phase, or H/V position. |
| Screen colour is unstable or single colour | Check the signal cable.Reinstall the PC video card. |
| FAQs (Frequently Asked Questions) | |
| Why have I lost some / all of my channels? | It happens sometimes, if you have a weak signal. Usually it just means you'll need to rescan your digital box or TV. Don't worry, it easy to do. And once you've done it, you should get all the Freeview channels available to you. If problems persist you may need to get your aerial checked. Talk to your retailer or contact your local aerial installer. |
| Why do I get 'blocking' on my digital picture? | In most cases, blocking is caused by a reception problem – either the signal is too weak or there is some kind of interference. Talk to your retailer or contact your local aerial installer.Blocking can also be caused by a digital signal that is too strong. If you are still experiencing blocking and the signal is strong, consult your local aerial installer for advice. |
| Can I watch Freeview using a portable set-top aerial? | Some, but only a few, homes may be able to use a set top aerial. However, for a much better reception, we strongly recommend that you use a rooftop aerial.If you do not have access to a rooftop aerial – for example, if you rent a flat and the aerial is the responsibility of your landlord, or if you're using a second TV in the bedroom and don't want the hassle and expense of using extension cables, a set – top aerial may be your only option. |
| What type of aerial do I need? | If you are installing a new aerial, we recommend a wideband rooftop aerial rather than a loft aerial. Loft aerials generally receive a weaker digital signal and are more likely to get interference from other electrical devices in the home. We suggest you have an aerial survey done before getting an aerial upgrade.Talk to your retailer or contact your local aerial installer. |
The screen resolution has been optimised during production for the display modes listed below.
YPbPr Mode
| Resolution | Vertical Frequency (Hz) | Aspect Ratio |
| 480i: 720 x 480 | 60 | 4:3 / 16:9 / Zoom1 / Zoom2 |
| 480P: 720 x 480 | ||
| 576i: 720 x 576 | 50 | |
| 576P: 720 x 576 | ||
| 720P: 1280 x 720 | 50 | |
| 60 | ||
| 1080i: 1920 x 1080 | 50 | |
| 60 | ||
| 1080P: 1920 x 1080 | 50 | |
| 60 |
PC Mode
Please check the display settings of your computer before connecting to the TV. If the display setting of your computer does not match the TV, there may be no video.
| Resolution | Vertical Frequency (Hz) | Aspect Ratio |
| 640 x 480 | 60 | 4:3 / 16:9 |
| 72 | ||
| 75 | ||
| 800 x 600 | 60 | |
| 72 | ||
| 75 | ||
| 1024 x 768 | 60 | |
| 70 | ||
| 75 | ||
| 1360 x 768 | 60 | |
| 1920 x 1080 | 60 |
HDMI Mode
| Resolution | Vertical Frequency (Hz) | Aspect Ratio |
| 480i: 720 x 480 | 60 | 4:3 / 16:9 / Zoom1 / Zoom2 / Just Scan |
| 480P: 720 x 480 | ||
| 576i: 720 x 576 | 50 | |
| 576P: 720 x 576 | ||
| 720P: 1280 x 720 | 50 | |
| 60 | ||
| 1080i: 1920 x 1080 | 50 | |
| 60 | ||
| 1080P: 1920 x 1080 | 50 | |
| 60 |
| Panel System | 43 inch LED Panel |
| Display Resolution | 1920 pixels (horizontal) x pixels (vertical) |
| Television System | PAL I / BG / DK / SECAM BG / DK |
| Brightness | 200cd/m2 |
| Contrast Ratio | 4000 : 1 |
| Power Source | AC100-240V |
| Energy Efficiency Class | A |
| Operating Power Consumption | 67 W |
| Average Annual Energy Consumption | 98kWh |
| Standby Power Consumption | < 0.5 W |
| Operating Temperature | 0°C-50°C |
| Vesa Wall mounting size / Screw size | 200 x 200 mm / M5 x 8 |
| Speaker Power | 8W + 8W |
| Dimension (W x D x H) without base | 969 x 87 x 564 mm |
| Dimension (W x D x H) with base | 969 x 257 x 612 mm |
| Weight (Net) | 7.1 kg |
Features and specifications are subject to change without prior notice.
This TV has been tested against the European standards for Energy efficiency using the standard signals and conditions specified in the standard. The result is shown on the energy efficiency label. This is the energy that you would expect the TV to consume under normal working conditions when measured over a period of time. At some times the TV will use more power than this and at some times less. The factors that cause this fluctuation are the actual signals being received, and the Volume setting. Generally speaking the mains voltage, brightness / contrast settings and other settings have a very small effect on energy usage and can to all intense and purposes be ignored. The difference between the power consumed when receiving a high bit rate channel with the volume at max and a low bit rate channel with volume at zero is usually less than 3 watts.
- Read all the instructions carefully before using the unit and keep them for future reference.
- Retain the manual. If you pass the unit onto a third party make sure to include this manual.
- Check that the voltage marked on the rating label matches your mains voltage.
Damage
- Please inspect the unit for damage after unpacking.
- Do not continue to operate the unit if you are in any doubt about it working normally, or if it is damaged in any way - switch off, withdraw the mains plug and consult your dealer.
Location of Unit
- The unit must be placed on a flat stable surface and should not be subjected to vibrations.
- Do not place the unit on sloped or unstable surfaces as the unit may fall off or tip over.
- The mains socket must be located near the unit and should be easily accessible.
• This unit is designed for indoor use only.
Temperature
- Avoid extreme degrees of temperature, either hot or cold. Place the unit well away from heat sources such as radiators or gas / electric fires.
- Avoid exposure to direct sunlight and other sources of heat.
Naked Flames
- Never place any type of candle or naked flame on the top of or near the unit.
Moisture
• To reduce the risk of fire, electric shock or product damage, do not expose this unit to rain, moisture, dripping or splashing. No objects filled with liquids, such as vases, should be placed on the unit.
- If you spill any liquid into the unit, it can cause serious damage. Switch it off at the mains immediately. Withdraw the mains plug and consult your dealer.
Ventilation
• To prevent the risk of electric shock or fire hazard due to overheating, ensure that curtains and other materials do not obstruct the ventilation vents.
- Do not install or place this unit in a bookcase, built-in cabinet or in another confined space. Ensure the unit is well ventilated.
• Make sure that there is a gap of at least 10 cm on both sides and a gap of 20 cm at the top.
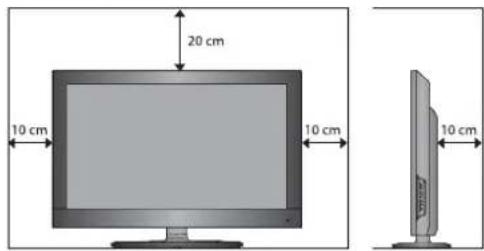
text_image
20 cm 10 cm 10 cm 10 cmSafety
• Always disconnect the unit from the mains supply before connecting / disconnecting other devices or moving the unit.
- Unplug the unit from the mains socket during a lightning storm.
Mains Cable
• Make sure the unit or unit stand is not resting on top of the mains cable, as the weight of the unit may damage the mains cable and create a safety hazard.
- If the mains cable is damaged it must be replaced by the manufacturer, its service agent, or similarly qualified persons in order to avoid a hazard.
Interference
- Do not place the unit on or near appliances which may cause electromagnetic interference. If you do, it may adversely affect the operating performance of the unit, and cause a distorted picture or sound.
Optimum viewing
- View the unit in moderate light to prevent eye strain. It is recommended to watch the unit from a distance 3-7 times that of the screen height.
LED screen
- The LED screen is manufactured using high-precision technology. However, some tiny black points and / or bright points (red, blue or green in colour) may constantly appear on the LED screen. These points are generated in the manufacturing process and are normal.
Screen Burn
- A characteristic of Plasma and LED TV Panels is that displaying the same image for a long time may cause a permanent after-image to remain on the screen. This is called screen burn. Most pictures shown on the unit will be constantly moving and fill the screen. - Examples of images that you need to watch out for are as follows (this is not an all-inclusive list):
-
Black Bars: If black bars appear at the left / right or top / bottom of the screen, it is recommended to change the format so that the picture fills the entire screen.
-
TV Channel Logos: e.g. Shopping channel logos and pricing displays - especially if they are bright and stationary. Moving or low-contrast graphics are less likely to cause ageing of the screen.
3. Time Displays
- Teletext: Do not view a stationary page for long periods of time.
5. TV Menus
- Pause Mode: Do not leave the screen in pause mode for long periods of time, e.g. when watching videos.
- To prevent screen burn if viewing any of the above for long periods of time, reduce contrast and brightness when viewing. Once burn-in occurs it will never disappear completely.
Headphones
- Listening to loud sounds for prolonged periods of time may permanently damage your hearing.
- Before putting on headphones, turn the volume down then put the headphones on and slowly increase the volume until you reach a comfortable listening level.
Standby
- The ⏻ button on the remote control does not switch off the unit completely. The unit will continue to draw electricity from the mains supply while in standby. In the interests of safety and to avoid unnecessary energy consumption, never leave the unit in standby while unattended for long periods of time, e.g. overnight, while on holiday or while out of the house. Switch it off and disconnect the mains plug from the mains socket.
Batteries
- Batteries used in the remote control for this unit are easily swallowed by young children and this is dangerous.
- Keep loose batteries away from young children and make sure that the battery holder tray is secure in the remote control. Seek medical advice if you believe a cell has been swallowed.
- Please dispose of batteries correctly by following the guidance in this manual.
Supervision
• Children should be supervised to ensure that they do not play with the unit and the remote control.
- Never let anyone especially children push anything into the holes, slots or any other openings in the case - this could result in a fatal electric shock.


The lightning flash with arrowhead symbol, within an equilateral triangle, is intended to alert the user to the presence of uninsulated "dangerous voltage" within the unit's enclosure that may be of sufficient magnitude to constitute a risk of electric shock.

The exclamation point within an equilateral triangle is intended to alert the user to the presence of important operating and maintenance (servicing) instructions in the manual accompanying the unit.
Service
• To reduce the risk of electric shock, do not remove screws. The unit does not contain any user-serviceable parts. Please leave all maintenance work to qualified personnel.
- Do not open any fixed covers as this may expose dangerous voltages.
Maintenance
- Ensure to unplug the unit from the mains socket before cleaning.
- Do not use any type of abrasive pad or abrasive cleaning solutions as these may damage the unit's surface.
• Do not use liquids to clean the unit.
Important Note
This TV is fitted with the latest ECO friendly power saving technology. If whilst viewing the TV remote control is not used for a period of 4 hours, the Auto Standby feature will operate and power down the TV. A warning message will be displayed to inform you that the TV is about to power down.

Packaging materials are not toys. Please keep away from children. Plastic bags can cause suffocation when pulled over the head.
Waste Electrical Recycling
Correct disposal of Product
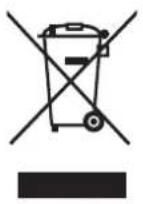
This sign indicates that this product may not be disposed of with your regular household waste. The recycling and separate collection of such products is your responsibility. Please drop off the above mentioned waste at a designated place for recycling waste electrical and electronic equipment. If you do not know where to drop off your waste equipment for recycling, please contact your local city office or household waste collection service.
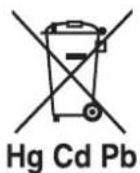
The crossed out wheeled dust bin symbol indicates that batteries and/or accumulators must be collected and disposed of separately from household waste.
If the battery or accumulator contains more than the specified values of lead (Pb), mercury (Hg), and/or cadmium (Cd) defined in the Battery Directive (2006/66/EC), then the chemicals symbols for lead(Pb), mercury (Hg) and/or cadmium (Cd) will appear below the crossed out wheeled dust bin symbol.
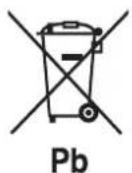
By participating in separate collection of batteries, you will help to assure the proper disposal of products and batteries thus help to prevent potential negative consequences for the environment and human health.
For more detailed information about the collection and recycling programmes available in your country, please contact your local city office or the shop where you purchased this product.

This appliance complies with European Safety and Electrical directives.
It fulfils the following EU regulations:
EN 55022:2006+A1:2007
EN 55013:2001+A1:2003+A2:2006
EN 61000-3-2:2006+A1:2009+A2:2009
EN 61000-3-3:2008
EN 55024:1998+A1:2001+A2:2003
EN 55020:2007