Nepheton - Drum machine D16 - Free user manual and instructions
Find the device manual for free Nepheton D16 in PDF.


User questions about Nepheton D16
0 question about this device. Answer the ones you know or ask your own.
Ask a new question about this device
Download the instructions for your Drum machine in PDF format for free! Find your manual Nepheton - D16 and take your electronic device back in hand. On this page are published all the documents necessary for the use of your device. Nepheton by D16.
USER MANUAL Nepheton D16
natural_image
3D rendering of a black audio mixing console with control knobs and buttons (no visible text or labels)User Manual
Overview
Interface
Nepheton's interface is split into two parts:
- Internal Sequencer – Responsible for editing patterns in Int.Seq. mode.
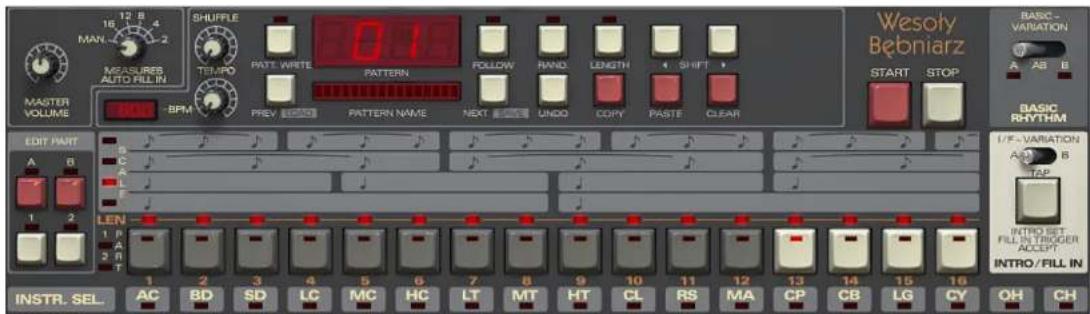
text_image
Wesoź Bębniarz MATERIAL VOLUME SHUFFLE 0.1 PATT. WRITE PATTERN FOLLOW RAND LENGTH SHIFT START STOP BPM PREV 0.050 PATTERN NAME NEXT UNDD COPY PASTE CLEAR EORT PART A B C A L F 1 2 LEN 1 P A 2 R T INSTR. SEL. AC BD SD LC MC HC LT MT HT CL RS MA CP CB LG CY OH CH BASIC RHYTHM I/F-VARIATION A/B TOP INTRO SET FILL IN TROGER ACCEPT INTRO/FILL INInternal sequencer section
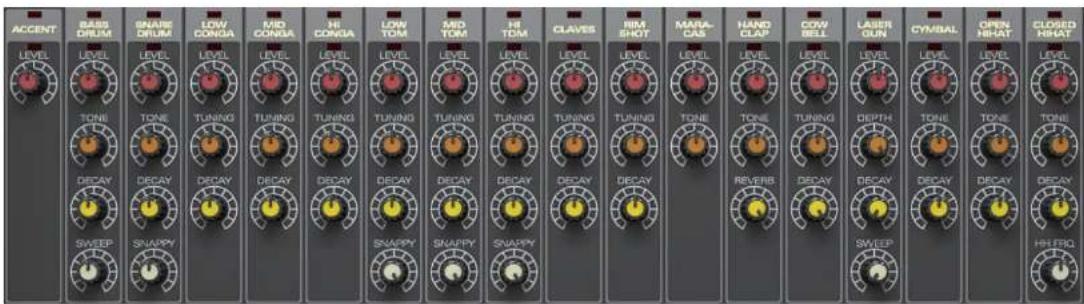
- Synthesis Module – This part is designed for a controlling the sound synthesis.

text_image
ACCENT GASS DRUM OUT OUT OUT OUT OUT OUT OUT OUT OUT OUT OUT OUT OUT OUT OUT OUT OUT OUT OUT OUT OUT OUT OUT OUT OUT OUT OUT OUT OUT OUT OUT OUT OUT OUT OUT OUT OUT OUT OUT OUT OUT OUT OUT OUT OUT OUT OUT OUT OUT OUT MUTE SOLD MUTE SOLD MUTE SOLD MUTE SOLD MUTE SOLD MUTE SOLD MUTE SOLD MUTE SOLD MUTE SOLD MUTE SOLD MUTE SOLD MUTE SOLD MUTE SOLD MUTE SOLD MUTE SOLD MUTE SOLD MUTE SOLD MUTE SOLD MUTE SOLD MUTE SOLD MUTE SOLD MUTE SOLD MUTE SOLD MUTE SOLD MUTE SOLD MUTE SOLID MUTE SOLID MUTE SOLID MUTE SOLID MUTE SOLID MUTE SOLID MUTE SOLID MUTE SOLID MUTE SOLID MUTE SOLID MUTE SOLID MUTE SOLID MUTE SOLID MUTE SOLID MUTE SOLID MUTE SOLID MUTE SOLID MUTE SOLID MUTE SOLID MUTE SOLID MUTE SOLI MUTE SOLI MUTE SOLI MUTE SOLI MUTE SOLI MUTE SOLI MUTE SOLI MUTE SOLI MUTE SOLI MUTE SOLI MUTE SOLI MUTE SOLI MUTE SOLI MUTE SOLI MUTE SOLI MUTE SOLI MUTE SOLI MUTE SOLI MUTE SOLI MUTE SOLI MUTE SOL10000000000000000000000000000000000000000000000000000000000000000000000000000000000000000000000000000Synthesis section
- Control Module – Used for Nepheton presets, patterns and settings management.
Work modes
Nepheton works in two modes:
- Internal – The drum patterns are played using Nepheton's internal sequencer.
- External – Nepheton acts as a sound module playing drum sounds. Patterns are played by sending Midi notes from host sequencer.
Note: Drum sound mapping is compatible with General Midi Standard. However, mapping can be changed by user.
Note: Being able to change the above settings may depend on the host sequencer.
Audio outputs
Nepheton is a multi-output VSTi plug-in. It has 12 stereo (or mono - configurable) outs. Instruments can be freely mapped to each of those available outputs according to their individual volumes setting.
By the default, outputs are set to be stereo. That can be changed in a Options menu (described later).
When Nepheton is loaded, the 17 individual drum sounds (+ 1 extra trigger out sound described later) are mapped to first output. To change the output assignment, just click and drag on the LED above the drum sound settings.

text_image
OUT OUT OUT OUT OUT OUT OUT OUT OUT OUT OUT OUT OUTAudio outputs configuration
Sounds can be mapped to any available output (one of 12). For example, the Open and Closed Hi Hats could be assigned to a single output 2 together or the Clap could appear on output 1 etc. It is fully configurable.
When Nepheton is playing, it is possible to turn on or turn off individual channels (instruments) using the Mute/Solo LED switches:

text_image
WHITE BOLD WHITE BOLD WHITE BOLD WHITE BOLD WHITE BOLD WHITE BOLD WHITE BOLD WHITE BOLD WHITE BOLD WHITE BOLD WHITE BOLD WHITE BOLD WHITE BOLD WHITE BOLD WHITE BOLD WHITE BOLD WHITE BOLD WHITE BOLD WHITE BOLD WHITE BOLD WHITE BOLD WHITE BOLD WHITE BOLD WHITE BOLD WHITE BOLD WHITE BOLDMute, solo switches
These stop the triggering of the instruments but allow the sounds to play until the end of the envelope. This stops a rapid cut in the sound making the transition sound more natural.
Preset management
All the parameter settings (level, tuning, decay etc) for a complete Nepheton drum kit are stored in a Preset. Nepheton can store a total of 128 presets.
text_image
ACCENT BASIS DRUM SNARE DRUM LOW CONGA MIO CONGA HI CONGA LOW TOM MIO TOM HI TOM CLAVES RIM SHOT MANA-CAS HAND CLAP COW BELL LASER GUN CYMBAL OPEN NHAT CLOSED NHAT LEVEL LEVEL LEVEL LEVEL LEVEL LEVEL LEVEL LEVEL LEVEL LEVEL LEVEL LEVEL LEVEL TONE TONE TUNING TUNING TUNING TUNING TUNING TUNING TUNING TUNING TUNING TUNING TUNING TUNING TUNING TUNING TUNING TUNING TUNING TUNING TUNING TUNING TUNING TUNING TUNING TUNING TUNING TUNIN TONE TONE TUNING TUNING TUNING TUNING TUNING TUNING TUNING TUNING TUNING TUNING TUNING TUNING TUNING TUNING TUNING TUNING TUNING TUNING TUNING TUNING TUNING TUNING TUNING THREEK THREEK THREEK THREEK THREEK THREEK THREEK THREEKSound parameters
The Preset browser tool is provided to simplify the organisation and use of Presets. The Preset section on GUI is used for navigation through the preset bank. To read more about preset management go to chapter Preset Management.
Play modes
External sequencer mode
Clicking the Int.Seq. diode in the Sequencer Settings box will switch it off:
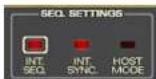
Sequencer settings
Nepheton will now act as a sound module. MIDI Notes corresponding to the Instrument (drum sound) note numbers are sent from the host sequencer to play drum patterns. The mapping follows the General Midi standard – it is possible to change mapping.
Note velocity is used to determine how loud notes are played.
• 48 – Corresponds to the non-accented step.
• 96 - Corresponds to accented step.
• 127 – Corresponds to step with total accent set.
In External mode, only the controls from Synthesis module and Control module functions work.
Note: If a pattern is started using the Nepheton's Start button and the host sequencer has not been started then, playback can only be stopped using the Stop button on Nepheton.
Internal sequencer
Internal Sequencer mode allows Nepheton to act as a fully functioning drum machine within the host sequencer. Pressing Play on the host sequencer, or Start on Nepheton, will start play back of the default internal patterns.
Start, stop buttons
Nepheton can be set to synchronize perfectly to the host tempo (by setting the Int.Sync. led to off) or to play to its own tempo (set by turning the Int.Sync. led on).
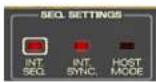
Sequencer settings
With internal synchronization turned on, each of the internal patterns has its own Tempo value, which can be adjusted by tweaking the Tempo knob (Only in the Pattern Write mode, described later):
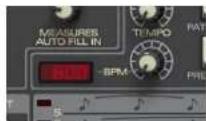
Tempo knob
Internal pattern storage
There are two internal Play modes:
- Native mode - Available when the Host mode LED is turned off:
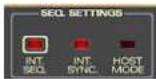
Sequencer settings
- Host mode - When this LED is turned on.
Each of these modes has its own pattern storage system.
Native mode
Nepheton is in this mode when it is first loaded.
There are 16 available patterns. Each pattern is comprised of 4 parts. Each part can be up to 16 steps in length (that is, any size from 0 to 16 steps). The parts have names: A1, A2, B1, B2. Each complete pattern corresponds to one of the Step buttons:

text_image
1 2 3 4 5 6 7 8 9 10 11 12 13 14 15 16Step buttons
Play modes • Internal pattern storage

d16 group
The first 12 patterns are called Regular patterns. The remaining 4 patterns are Fill In patterns. When a Regular pattern is selected, the LED above it will flash. When a Fill in pattern is selected, the LED will stay lit.
Pressing the Start button will cause the chosen Regular pattern to play.
The Measures auto fill in knob:
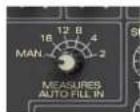
Measures auto fill in knob
The default setting is Man. (Manual). To play the fill-in pattern, the Tap button is used. After pressing the Tap button, the currently playing Regular pattern will play to the end and then chosen Fill in pattern will play. When it finishes, the Regular pattern plays again continuously.
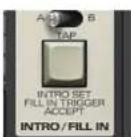
Fill in button
Setting the Measures auto fill in knob to any of the other values will cause the Regular pattern and Fill in pattern to play in a cycle. For example, setting the value to 16 will cause the Regular pattern to repeat 15 times and then play the Fill in pattern. The cycle will then repeat. The Total length of the cycle corresponds to the selected knob value.
Play modes • Internal pattern storage

d16 group
As mentioned earlier, every Regular pattern is comprised of 4 parts. The Basic variation switch determines how the parts are played within the pattern.
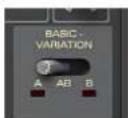
Basic variation switch
There are 3 possible settings:
- Position A – Parts A1 and A2 (if exists – that is if the length of A2 is greater than 0) are played.
- Position B – Parts B1 and B2 (if exists – that is if the length of B2 is greater than 0) are played.
- Position AB – Parts A1, A2, B1 and B2 are played.
Play mode of the Fill in patterns is set by I/F Variation switch:
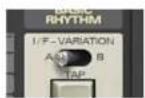
I/F variation switch
Fill in patterns consist of A1, A2, B1, B2 parts. The I/F Variation determine which play.
Example 1: Basic Variation switch = A, I/F Variation switch = B, Measures auto fill in knob = 4. With Length A2 set to 0, the following sequence will be played:
- Regular - A1
- Regular - A1
- Regular - A1
- Fill in - B1
If the length of A2 was greater than zero, then the pattern would be played back as follows:
- Regular - A1+A2
- Regular - A1+A2
- Regular - A1+A2
- Fill in - B1
Note: The cycle is A B A Fill A = a total of 4 parts in cycle. If the
Measures auto fill in knob is set to 12 in the example above, then the following pattern would play: A B
A B A B A B A B
A Fill A = a total
of 12 in cycle.
Note: For the purposes of the cycle and fill in; A
=A1+A2,B=B1
+B2,Fill A=Fill
A1 + Fill A2, Fill B = Fill B1 + Fill B2.
Example 2: Both Regular pattern and Fill in pattern have all 4 parts filled. Basic variation switch = AB, I/F Variation switch = A, Measures auto fill in knob = 4. Following sequence will be played:
- Regular - A1
- Regular - A2
- Regular - B1
- Regular - B2
- Regular - A1
- Regular - A2
- Fill in - A1
- Fill in - A2
Currently playing pattern is shown by the pattern number in the display box with the pattern name below it:
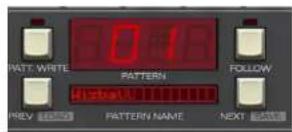
Pattern number and name
Blinking LED on Step buttons mark the pattern position. The Part LED's combined with the Basic variation switch indicate the part.
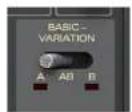
Basic variation switch
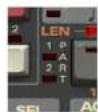
Part indication
States of these LEDs give us all 4 possible pairs: A1, A2, B1 and B2.
When Nepheton is stopped in Native mode, the Tap button allows the selection of Regular patterns or Fill-in patterns (shown by a blinking LED in corresponding section on the chosen step button). If the blinking LED is in the Regular pattern area, then the chosen pattern will start to play when Start is pressed. If the blinking LED is in the Fill-in pattern area, then when play is started the chosen Fill-in pattern will play followed by the regular pattern.
Host mode
In Host mode, patterns are triggered using a MIDI keyboard. A Note on causes the corresponding pattern to play. This mode is recommended for creating drum line arrangement in host application. Releasing the key and sending a Note off will eventually stop the pattern. It depends on whether the Note Off Mode State is set in configurational panel is checked. To change Note Off Mode open configurational window by clicking Options button:
Options button
Go to Sequencer tab and check or uncheck the Note Off Mode State checkbox in Current Settings group.
The pattern will play back at the tempo of the host sequencer (if internal sync turned off - Int.Sync.) or at the tempo which Nepheton's Tempo function is set to (if using internal sync). This happens while a key is pressed and held.
This is a very creative mode which, by recording the notes into the host sequencer, can allow very complex percussion structures to be created using patterns in Nepheton's internal pattern memory.
It should be noted that in Host mode the Start, Stop and Step buttons on Nepheton don't function. Patterns are only played back while a key on a connected midi keyboard is pressed (and held).
Note: In this mode the pattern structure is quite different. They don't consist of parts anymore. They're just Simple patterns with maximum 16 steps. They're mapped to Midi keyboard as notes: C-1 to B-8. That is, 96 patterns.
Play modes • Internal pattern storage

d16 group
In this mode, currently playing pattern is indicated by display unit:
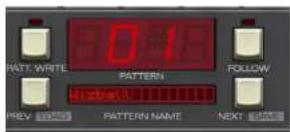
Pattern number and name
in format:
P.[TONE NAME][- or #][OCTAVE NUMBER]
Nepheton has permanently active Midi output, which allows to control external instrument (virtual or hardware) by Nepheton's internal sequencer. It works either in Native or Host mode. Plug-in sends a midi note codes accordingly to the current drum map configuration to its Midi output. Velocity values of Midi notes sent by Nepheton are calculated on a basis of Step attributes (accented or non-accented) and value of Global accent.
When you set the Nepheton into External mode, it just passes Midi notes through itself unchanged. So basically the same notes you redirect into a plug-in you will get on the Midi output.
Sound editing
Synthesis module is for sound editing in Nepheton:

text_image
ACCENT BASS DRUM SNARE DRUM LOW CONGA MID CONGA NI CONGA LOW TOM MID TOM HI TOM MUSO DOG CLAVES REM SHOT MATA-CAS HAND CLAP COW SET LAWR OUN CYMBAL OPEN HCLKT CLOSED HCLKT LEVEL TONE DECAY SWEEP SNAPPY OUT OUT OUT OUT OUT OUT OUT OUT OUT OUT OUT OUT OUT OUT OUT OUT OUT OUT OUT OUT OUT OUT OUT OUT OUT OUT OUT OUT OUT OUT OUT OUT OUT OUT OUT OUT OUT OUT OUT OUT OUT OUT OUT OUT OUT OUT OUT OUT OUT OUT INTE SOD INTE SOD INTE SOD INTE SOD INTE SOD INTE SOD INTE SOD INTE SOD INTE SOD INTE SOD INTE SOD INTE SOD INTE SODSynthesis section
There are various parameter settings for the 17 drum sounds:
- Bass Drum
- Snare Drum
- Low Conga
- Mid Conga
- High Conga
- Low Tom
Sound editing

d16 group
- Mid Tom
- High Tom
- Claves
- Rim Shot
- Maracas
- Hand Clap
Cow Bell - Laser Gun
• Cymbal - Open Hihat
- Closed Hihat
For each instrument there is one common parameter:
• Level – Volume level of each instrument.
And various instrument specific parameters:
- Bass Drum:
- Tone - Volume of the initial click.
- Decay - Amplitude release time.
- Sweep - Release time of frequency envelope.
- Snare Drum:
- Tone - Crossfade between audible one and two oscillators.
- Decay - Noise amplitude release time.
- Snappy - Crossfade between noisy and muddy sound.
Sound editing

d16 group
• Low Conga, Mid Conga, High Conga:
- Tunning - Base frequency.
- Decay - Amplitude release time.
• Low Tom, Mid Tom, High Tom:
- Tunning - Base frequency.
- Decay - Amplitude release time.
- Snappy - Crossfade between dirty and clean sound.
- Claves:
- Tunning - Base frequency.
- Decay - Amplitude release time.
- Rim Shot:
- Tunning - Base frequency.
- Decay - Amplitude release time.
- Maracas:
- Tone - Noise color.
- Hand Clap:
- Tone - Filter's cutoff frequency.
- Reverb - Reverb's decay time.
Cow Bell:
- Tunning - Base frequency.
- Decay - Amplitude release time.
Sound editing • Trigger out • Master volume

d16 group
- Laser Gun:
- Depth - Frequency envelope modulation.
- Decay - Amplitude release time.
- Sweep - Release time of frequency envelope.
• Cymbal:
- Tone - Attack.
- Decay - Amplitude release time.
- Open Hihat, Closed Hihat:
- Tone - Noise colour.
- Decay - Amplitude release time.
- HH Frq - Base frequency for a square oscillators, which are used to generate the noise sound.
Trigger out
There's possible to make audible a trigger sound, which occurs in analogue machines. By default this signal is off. To turn it on you need to decide which track (instrument) will be triggering this sound. Check out further chapters for the details.
Master volume
To change the Master volume just tweak the Master volume knob:
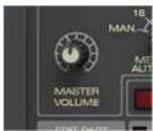
Master volume knob
Drumline editing
Pattern editing
To edit the currently selected pattern, press the Patt.Write button (it's not necessary in Host mode, since Pattern write is the only possible mode there).
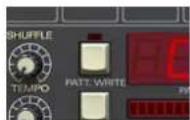
Pattern write button
Note: Make sure the length of a pattern is greater than 0 or it cannot be edited (see later).
To edit another pattern other than the current one playing, use the Prev and Next buttons. The playing pattern won't change but the edited pattern will be the newly selected one.
To choose which pattern part to edit (A1, A2, B1, B2), use the Edit part buttons:
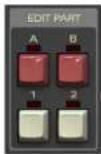
Edit part buttons
Every pattern consists 18 tracks, one for each instrument + accent.

text_image
INSTR. SEL. AC BD SD LC MC HC LT MT HT CL RS MA CP CB LG CY OH CHInstrument selector
The parts are edited using the Step buttons:

text_image
1 2 3 4 5 6 7 8 9 10 11 12 13 14 15 16Step buttons
These keys work in toggle mode and for most instruments have 3 states:
- Accented - LED on, the key lights with a bright red color.
- On - LED on, the key lights with darker red color.
- Off - LED is off
The main difference between a non-accented and accented sound is the volume. However, accent also causes subtle changes to the sound character in other ways.
The Global accent (AC) track have only two possible step values: On or Off.
To select an instrument (track) to edit, use the Instr.Sel. bar below the Step Buttons:

text_image
INSTR. SEL. AC BD SD LC MC HC LT MT HT CL RS MA CP CB LG CY OH CHInstrument selector
Drumline editing • Pattern editing

d16 group
The instrument names on the top of Synthesis module can also be used to select an instrument:

text_image
ACCENT BASR DRUM SNARE DRUM LOW CONGA MID CONGA HI CONGA LOW TOM MID TOM HI TOM CLAVES RIM SHOT MARACAS KAND CLAP COW BELL LASER GUN CYMBAL OPEN HHIAT CLOSED HHIAT LIVE LIVE LIVE LIVE LIVE LIVE LIVE LIVE LIVE LIVE LIVE LIVEInstrument names
We can select a single instrument by clicking on it in the Instr.Sel bar. However, to select more than one instrument, press and hold CTRL on the keyboard whilst clicking.
Tap mode
Tap mode allows patterns to be "tapped" in real time:

text_image
INSTR. SEL. AC BD SD LC MC HC LT MT HT CL RS MA CP CB LG CY OH CHInstrument selector
This is done by selecting an instrument and pressing the Tap button whilst in Patt.Write mode. The notes are automatically quantized to the nearest step.
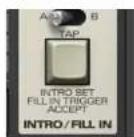
Fill in button
Pressing Tap button enter non-accented notes. Pressing Tap with CTRL key enters accented notes.
Editing functions
Standard editing functions:

Editing functions
Note: Copying can be also performed for the tracks assigned to the different instruments.
- Shift left/right – Shifts steps on the selected tracks left or right. The shifting is cycled. This means if the last step on the right side (during the shifting right) it will appear on the first step on the left side. Similarly it happens while shifting left. Pressed with CTRL key, shifts whole pattern.
- Copy - Copies selected tracks to buffer. After pressing this button, LEDs in Instr.Sel. start to blink to indicate that there is data in the buffer. Pressed with CTRL copies whole pattern to a buffer.
- Paste – Pastes buffer to the selected tracks. If do not change destination tracks, they'll be copied in the same place (in the same or other pattern). But you can change it, by a selecting some other tracks on the Instr.Sel.
- Clear – Clears selected tracks. Pressed with CTRL key, clears whole pattern.
Clear when combined with the CTRL key (on the keyboard) cause operation to be performed for WHOLE pattern.
To select the destination pattern, use the Prev and Next buttons.
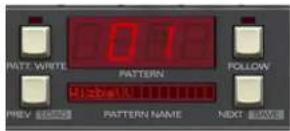
Pattern number and name
Length of the pattern (part)
The length of the pattern's part can be set to a maximum of 16 steps. It can be changed using Length function. Whilst in Patt.Write mode, press the Length button - this will light up the LED's above:
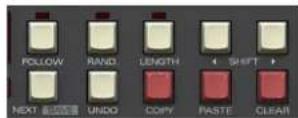
Editing functions
All LED's above Step buttons indicate the number of steps in the pattern:

text_image
1 2 3 4 5 6 7 8 9 10 11 12 13 14 15 16Step buttons
Pressing a Step button will make it the last step in the pattern. To leave this mode, just press the Length button again.
Pressing Clear button when the Length key is active sets the pattern's part length to zero. This is only possible with 2nd parts (A2 and B2). Parts A1 and B1 MUST have the Length set to a value greater than 0.
Global accent
The AC track is used to accent ALL instrumental tracks on a given step.
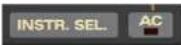
AC Track on instrument selector
The steps to accent are selected the same as any other track using the Step buttons. The value is either On or Off. If an Instrument has an accent on a step and AC is added to that step, the two accents will be combined to give the loudest possible value for that instrument at that step.
The AC knob controls how much extra volume is added to a step. Set to zero, no AC is added.
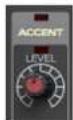
Accent knob
Tempo scale
On the Scale bar bar, the lit LED marks the current Tempo scale (one of four):

text_image
Musical score snippet showing treble and bass clefs with notes and rests in a 4/4 time signatureScale bar
Tempo scale can be described as the number of steps per quarter note. Default value is four steps per quarter note. Successively counting from the bottom there are: 8 steps per quarter note, 4 steps per quarter note, 6 steps and 3 steps per quarter note. Tempo scale is switched by the Scale LED's on Scale bar:
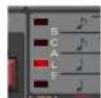
Scale bar LEDs
Drumline editing • Pattern editing • Pattern follow

d16 group
Shuffle
Shuffle is also called Syncopation or Swing, It is added by turning the Shuffle knob when in Patt. Write mode.
Shuffle value is stored per "letter" part (A, B) independently in Native mode. For Host mode it is stored per Simple pattern.

Shuffle knob
Pattern follow
Follow button works only when the Patt.Write mode is active.

Pattern number and name
With Follow button turned off, to choose a pattern to edit we need to navigate through all the available patterns using the Prev and Next buttons.
With Follow turned on, currently playing pattern becomes the edited one immediately. With Follow turned on switching between patterns using keys Prev and Next is disabled.
Additionally currently played part becomes edited one. The Edit part buttons are switched automatically.
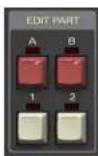
Edit part buttons
Drumline editing • Loading and saving patterns

d16 group
Loading and saving patterns
It is possible to save or load a single pattern or a complete bank of patterns.
Saving patterns
- Before saving, the pattern should be named (click on Pattern name display):
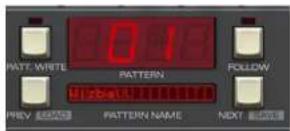
Pattern number and name
Note: On MacOS use Apple CMD key instead of CTRL key.
Just click on it and enter the name for the newly created pattern. Pressing enter ends the editing process.
- To save pattern just click Next button with CTRL key pressed on keyboard. The menu should appear:
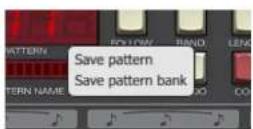
Saving patterns
Choose the Save pattern option to show file save dialog. To save all patterns currently stored in Nepheton, choose Save pattern bank option.
Drumline editing • Loading and saving patterns

d16 group
Loading patterns
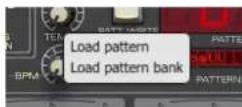
To load pattern click Prev button with CTRL key pressed on keyboard. The menu should appear:
Loading patterns
4
Choose the Load pattern option to show file dialog. To load whole bank of patterns to Nepheton's memory, choose Load pattern bank option.
Note: Files saved by Nepheton are in standard XML format and can be easily edited within any text editor.
Following file types are saved and loaded by Nepheton:
- Native mode
-.npptrbN - Bank consisting all 16 patterns.
-.npptrN - Single pattern. - Host mode
-.npptrbH - Bank consisting all 96 patterns.
-.npptrH - Single pattern.
Randomizing drumlines
Randomize
To randomize a pattern, we need to select Rand. mode while in Patt.Write mode. In Rand mode, the GUI functionality changes slightly:
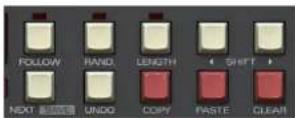
Editing functions
The Instr.Sel. LEDs select which instrument will be included in the randomization. Clicking will turn them on or off. The same principles apply as during instrument selection (using CTRL key on keyboard).

text_image
INSTR. SEL AC BD SD LC MC HC LT MT HT CL RS MA CP CB LG CY OH CHInstrument selector
To randomize the pattern, press the Next button. Prev will function when we have randomized a few patterns and wish to go back to a previous randomization.
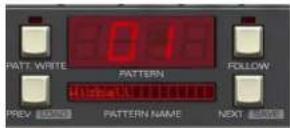
Pattern number and name
Randomizing drumlines • Randomize

d16 group
The LEDs above the Level knob for each selected instrument will flash. This indicates that they are now assigned to Rand.Mode. They are used to determine the intensity of the randomization for that instrument. That is, how much randomization will occur across the selected steps.

text_image
ACCENT BASS DRUM SNARE DRUM LOW CONGA MID CONGA HI CONGA LOW TOM MID TOM HI TOM CLAVES RIM SHOT MARA-CAS HAND CLAP COW BELL LASER GUN CYMBOL OPEN HHAT CLOSED HHAT LEVEL LEVEL LEVEL LEVEL LEVEL LEVEL LEVEL LEVEL LEVEL LEVEL LEVEL LEVEL LEVEL LEVEL LEVELInstrument level knobs
To accept the current randomized pattern, just press Tap button.
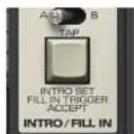
Fill in button
The Undo key will remove the randomization.
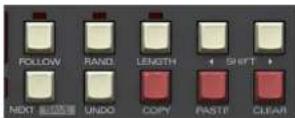
Editing functions
Preset Management
Browsing presets
Presets in the plug-in are hierarchically organized in groups and, contrary to the linear structure, this setting is not compatible with the native methods used within the host application. The user can see the presets assigned to particular groups in the Preset Browser. Groups can be also defined by the user.

text_image
MIDI LEARN / PRESET NAME DIPY PRESET PASTE STORE PREV NEXT BROWSEPreset management section
Controls available in the preset selection section:
- Preset name – Displays the name of the selected preset. Allows editing of the preset name before saving the preset. Clicking on the control causes a shift into edit mode. After applying changes through the keyboard, confirm the new name with the Enter button.
- Prev/Next – Buttons used to navigate through the preset bank. Next button moves the browser to the next preset. If the current preset is the last preset in a group, pressing Next moves the browser to the first preset in the subsequent group. Prev button moves the browser to the previous preset. If the current preset is the first preset in a group, pressing Prev moves the browser to the last preset in the preceding group.
- Prev + CTRL - Prev button pressed while holding CTRL copies the edited preset to the buffer.
- Next + CTRL - Next button pressed while holding CTRL pastes the buffer to the current preset with postfix " _copy" added to its name.
- Browse – Opens a Preset Browser menu.
Note: On MacOS use Apple CMD key instead of CTRL key.
Preset Management • Browsing presets • Preset Browser

d16 group
Changes in the preset bank are not permanent. After removing and reloading the plug-in, the default preset bank will be loaded. However, saving the project within the host application will also save the status of the plug-in including changes in the preset bank. After reloading the project, all changes in the current parameter settings and in the preset bank will be restored.
Preset Browser
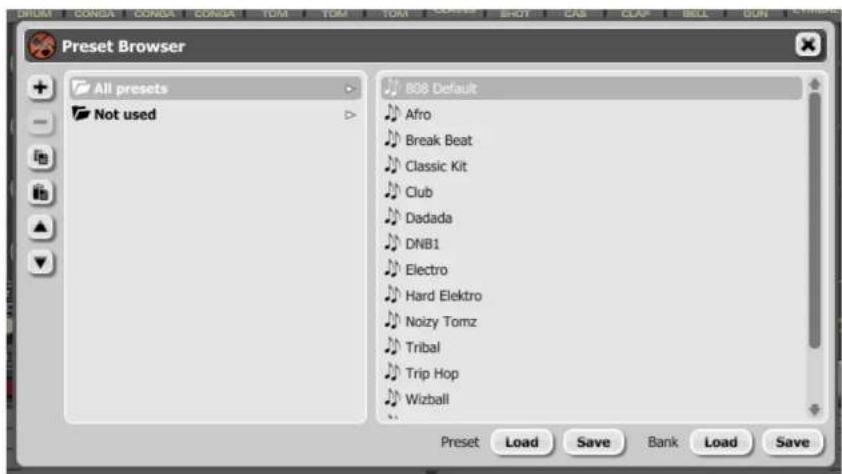
As it was mentioned, the preset bank in the plug-in has a hierarchical structure i.e. presets are organized in groups. Presets can be selected by Next/Prev buttons, which navigate through the structure in a linear way or by using the Preset Browser. The Preset Browser is a tool which allows to easily manage the preset structure. To open it, click Browse in the preset selection section:

text_image
MIDI LEARN / PRESET NAME Default PRESET COPY PASTE STORE PREY NEXT BROWSEPreset management section
The Preset Browser will be displayed on the GUI:
text_image
Preset Browser All presets Not used 808 Default Afro Break Beat Classic Kit Club Dadada DNB1 Electro Hard Elektro Noizy Tomz Tribal Trip Hop Wizball Preset Load Save Bank Load SavePreset browser
Preset Management • Preset Browser

d16 group
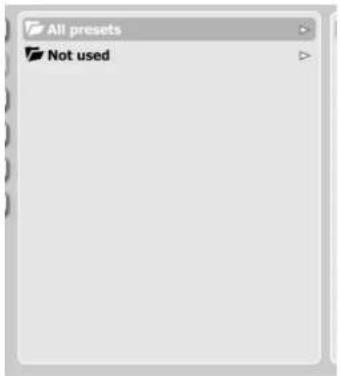
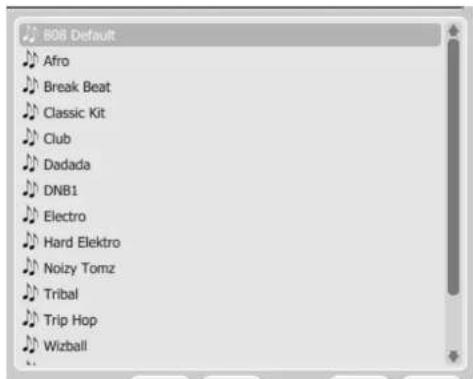
The left side shows the list of groups in the preset bank: The right side shows the list of presets in the selected group:
text_image
All presets Not usedList of groups in the preset bank
text_image
80B Default Afro Break Beat Classic Kit Club Dadada DNB1 Electro Hard Elektro Noizy Tomz Tribal Trip Hop WizballList of presets in the selected group
Actions available in the Preset Browser:
- Clicking on a slot in the preset list loads the selected preset.
- Clicking on a slot in the group list selects a group of presets.
- Both presets and groups can be renamed. Double clicking on a slot toggles edit mode. After entering the new name, press enter to finish.
- The bank of presets has exactly 128 items. The number of presets cannot be changed. This means that there is no possibility of adding or removing presets. Only relocating them between groups or changing their order is possible.
Note: Changing the order of presets in a group is possible for a selected single preset. Changing the order by dragging several presets in a group is inactive.
By dragging the preset you may:
- Change its position in the group by dropping it in a different slot in the list of presets in a selected group.
- Move the preset to a different group by dragging and dropping it in the chosen slot in the group list.
Holding CTRL or SHIFT and using the mouse button allows to select more presets:
- Holding CTRL and clicking on presets selects single items.
- Using SHIFT allows to select a range of presets. The first click marks the beginning of the range and the second click marks the end.
When more than one presets are selected, it is possible to drag them to a different group.
On the left side of the Preset Browser there are function buttons located:

Function buttons of the Preset Browser
- Adds a new empty group to the preset bank.
- Removes a group from the preset bank, but only if the selected group is empty. Before removing a group, remaining presets should be relocated to different groups. An empty group can be recognized by the lack of bold font and the lack of a pointer on the right from its name.

Empty group in the Preset Browser
- Pastes the edited preset to the buffer; works exactly like the combination of Prev and CTRL.
- Overwrites the selected preset with the buffer content; works exactly like the combination of Next and CTRL. The postfix “_copy” is added to the name of the preset pasted from the buffer.
- Works exactly like Prev on GUI; allows to move backwards on the hierarchical structure of presets.
- Works exactly like Next on GUI; allows to move forward on the hierarchical structure of presets.
Loading and Saving presets
At the bottom of the Preset Browser there are function buttons which allow to save/load presets on/from the hard drive.

Loading and Saving presets from the hard drive function
Four buttons are available:
Note: Before saving the preset to a file, save it in Nepheton using CTRL + Browse when On demand function is selected in the plug-in configuration.
Note: Files saved by Nepheton are compatible with XML format, which enables their edition in any text editor.
- Preset Load – loads a single preset from a file (file .npprs – Nepheton preset).
- Preset Save – saves the current preset to a file.
- Bank Load - loads the entire bank of presets from a file (file .npprb - Nepheton bank).
• Bank Save – saves the entire bank of presets to a file.
Configuration
Options button
After clicking on Options in the upper-left corner of GUI, a configuration panel unfolds. The panel has several tabs:

Configuration panel tabs
- Outputs – configures audio outputs.
- Sequencer - configures sequencer's work mode.
- Presets – indicates personal resources loaded instead of default presets.
- Patterns – indicates personal pattern banks loaded with every new instance of the plug-in in the host application.
- Drum map – configures the drum map for External mode.
- Midi control – configures MIDI communications with the plug-in.
Clicking on Options while holding CTRL opens a window with information about the version and the license owner.
Outputs tab
Configures audio outputs from the plug-in.
Default output assigns
Setting the default internal audio outputs mapping.

text_image
Default outputs assigns BD SD LC MC HC LT MT HT CL RS MA CP CB LG CY OH_CH 1▼ 1▼ 1▼ 1▼ 1▼ 1▼ 1▼ 1▼ 1▼ 1▼ 1▼ 1▼ 1▼ 1▼ 1▼ 1▼ 1▼ 1▼ Set from current assignationsDefault output assigns
If you have your favorite audio output configuration:

text_image
OUT OUT OUT OUT OUT OUT OUT OUT OUT OUT OUT OUT OUT OUT OUT OUT OUT OUT OUT OUT OUT OUT OUT OUT OUT OUT OUT OUT OUT OUT OUT OUT OUT OUT OUT OUT OUT OUT OUT OUT OUT OUT OUT OUT OUT OUT OUT OUT OUT OUT OUT OUT OUT OUT OUT OUT OUT OUT OUT OUT OUT OUT OUT OUT OUT OUT OUT OUT OUT OUT OUT OUT OUT OUT OUT OUT OUT OUT OUT OUT OUT OUT OUT OUT OUT OUT OUT OUT OUT OUT OUT OUT OUT OUT OUT OUT OUT OUT OUT OUT OUT UUT UUT UUT UUT UUT UUT UUT UUT UUT UUT UUT UUT UUT UUT UUT UUT UUT UUT UUT UUT UUT UUT UUT UUT UUT UUT UUT UUT UUT UUT UUT UUT UUT UUT UUT UUT UUT UUT UUT UUT UUT UUT UUT UUT UUT UUT UUT UUT UUT UUT UGT UGT UGT UGT UGT UGT UGT UGT UGT UGT UGT UGT UGT UGT UGT UGT UGT UGT UGT UGT UGT UGT UGT UGT UGT UGT UGT UGT UGT UGT UGT UGT UGT UGT UGT UGT UGT UGT UGT UGT UGT UGT UGT UGT UGT UGT UGT UGT UGT UGT Ugt Ugt Ugt Ugt Ugt Ugt Ugt Ugt Ugt Ugt Ugt Ugt Ugt Ugt Ugt Ugt Ugt Ugt Ugt Ugt Ugt Ugt Ugt Ugt Ugt Ugt Ugt Ugt Ugt Ugt Ugt Ugt Ugt Ugt Ugt Ugt Ugt Ugt A OUT OUT OUT OUT OUT OUT OUT OUT OUT OUT OUT OUT OUT OUT OUT OUT OUT OUT OUT OUT OUT OUT OUT OUT OUT OUT OUT OUT OUT OUT OUT OUT OUT OUT OUT OUT OUT OUT OUT OUT OUT OUT OUT OUT OUT OUTAudio outputs configuration
You may set it to be the default one, recalled after each time when you load the plug-in into host application.
You may set a default audio output configuration using combo boxes under instruments' abbreviations by choosing one of twelve available audio outputs for every instrument.

text_image
BD SD LC MC HC LT MT HT CL RS MA CP CB LG CY OH_CH 1▼ 1▼ 1▼ 1▼ 1▼ 1▼ 1▼ 1▼ 1▼ 1▼ 1▼ 1▼ 1▼ 1▼ 1▼ 1▼ 1▼ 1▼ 1▼Default output assigns -selecting outputs
Or map the output using the GUI accordingly to your preferences and then use Set from current assignations option. Then your map becomes the default one.
The content of the Default outputs assigns group is saved in the Nepheton configuration file and applies to all new instances of the plug-in. When removing any instance of the plug-in from the host application the configuration file is saved.
Default outputs type
This is responsible for choosing the type of outputs.

text_image
Default outputs type ● Stereo ○ MonoDefault output type
Note: The plug-in in the AU version allows only Stereo outputs.
We're allowed to choose one of the two available types: Stereo or Mono.
The content of the group is saved in the Nepheton configuration file and applies to all new instances of the plug-in. When removing any instance of the plug-in from the host application the configuration file is saved.
Trigger output
There's possible to make audible a trigger sound, which occurs in analogue machines. By default this signal is off (Source combo box set to - None -). To turn it on you need to decide which track (instrument) will be triggering this sound, by selecting it from Source combo box:

Trigger output
Chosen track (instrument) apart from regular role will also be responsible for controlling trigger out sound.
Trigger out will be mixed into the selected output (one of twelve available). Use the Output combo box to select the audio output for Trigger out.
Sequencer tab
Current Settings
Current Settings checkboxes:
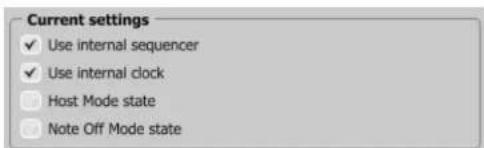
text_image
Current settings ✓ Use internal sequencer ✓ Use internal clock Host Mode state Note Off Mode stateCurrent settings
reflect the state of controls from the Seq.Settings section on GUI.
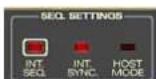
Sequencer settings
The Note Off Mode state checkbox is an exception and it is not available on GUI. It is only available in this tab (Host mode - description available in earlier chapters).
Default Settings
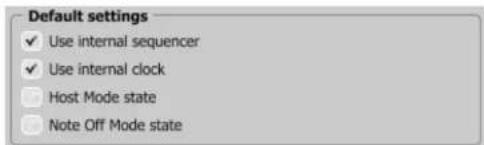
text_image
Default settings ✓ Use internal sequencer ✓ Use internal clock □ Host Mode state □ Note Off Mode stateDefault settings
Default Settings group contains checkboxes with default flag values for the Current Settings group. In every new instance of the plug-in, in the host application, the Default Settings flags are overwritten on the Current Settings flags. Default Settings values are saved in the Nepheton configuration file and applies to all new instances of the plug-in. When removing any instance of the plug-in from the host application the configuration file is saved.
Host play detection
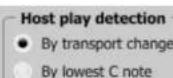
Host play detection flag
This solves sync problems with some hosts. It mainly concerns Native mode. The properly written host should send a Transport Change code to the plug-in after pressing the Play button in the host application.
When the By Transport Change option is selected, then don't need to add an extra Midi track to force the plug-in to start to play. It should start to play automatically. In some cases it doesn't work. If this happens, choose the By The lowest C Note option. Then, add a Midi track with output set to Nepheton and place the Midi note (lowest C note) in the Midi clip. As soon as the Midi Note On is sent to the plug-in, Nepheton will start playing.
Presets tab
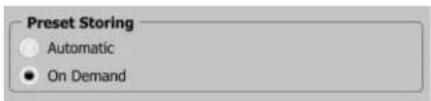
Preset Storing
Using Prev, Next buttons or the Preset Browser navigates through the preset bank. Any change in the current preset can be stored automatically or on demand. Depending on the selection one of the two options is active:
text_image
Preset Storing Automatic On DemandPreset Storing flag
• Automatic – Any change of a parameter in the current preset is automatically stored.
- On Demand – If any parameter is changed, the change is not saved in the current preset until the Store option is used (CTRL + Browse). Selecting a different preset from the bank causes irreversible loss to changes applied to the parameters, unless the Store option is used.
The Preset Storing flag is saved in the Nepheton configuration file and applies to all new instances of the plug-in. When removing any instance of the plug-in from the host application the configuration file is saved.
Default Presets
D16 provides a set of default presets with Nepheton. They are applied to every new instance of the plug-in. If a bank of presets is created which should be applied every time instead of factory presets, it is possible to select such an option Default Presets section:

text_image
Default Presets ● Factory Presets ○ Clear Presets ○ User Defined BrowseDefault Presets selection
Options available in the Default Presets section:
- Factory Presets – Default value after installing Nepheton. Choosing this option loads the factory presets with every new instance of the plug-in.
- Clear Preset – Zeroed parameters with every new instance of the plug-in.
- User Defined – Preset bank selected by the user. When choosing User Defined option, the Browse button on the right side is activated. Using this button opens a dialog box in order to select a path to the user's preset bank. Confirming the path saves it in the Nepheton configuration file. The selected preset bank will be loaded as default. The text box on the left from the Browse button shows the path to the user's preset bank.
Patterns tab
There're included some default patterns and drum kits with Nepheton. These are loaded every time it is started. This can be changed to point to user default patterns and kits.
If a bank of patterns is created which should be applied every time instead of factory pattern bank, it is possible to select such an option Default Pattern section. It is best to keep in mind that depending on the sequencer's work
mode there are two independent patterns banks available separate for Native mode and for Host mode. Therefore it is possible to indicate default resources independently for Native mode and for Host mode.

text_image
Default host patterns ● Factory patterns ○ Clear patterns ○ User defined BrowseDefault patterns

text_image
Default native patterns ● Factory patterns ○ Clear patterns ○ User defined BrowseDefault native patterns
Options available in the Default Patterns section both for Native and Host mode:
- Factory Patterns – Default value after installing Nepheton. Choosing this option loads the factory patterns with every new instance of the plug-in.
- Clear Patterns – With every new instance of the plug-in an empty preset bank is loaded.
- User Defined – Patterns bank selected by the user. When choosing User Defined option, the Browse button on the right side is activated. Using this button opens a dialog box in order to select a path to the user's patterns bank. Confirming the path saves it in the Nepheton configuration file. The selected patterns bank will be loaded as default.
The text box on the left from the Browse button shows the path to the user's preset bank.
Drum map tab
In External mode, Nepheton by default works with General Midi drum mapping, but it's possible to load your own drum map using an options in this tab.
Current Drum map
In order to load or save the current drum map, use the Load/Save buttons from this group:

text_image
Current drum map Load SaveCurrent drum map
Note: There's no way to re-edit drum map using a Nepheton's UI. You need to save default drum map to a file first, and re-edit it within any text editor. Files saved by Nepheton are XML compatible.
- Load – Loads a custom drum map from a file (.npdrmap – Nepheton drum map).
- Save - Saves a current drum map to a file.
Default Drum map
To set Default Drum map, choose options available in this group.
We can choose one of following options:
- Factory map – It means the default factory mapping (General midi compatible) is applied to the External mode available after loading Nepheton into the host application.
- User defined – This option is used to set the new default Drum Map, which will be loaded every time we load Nepheton in the host application. When choosing User Defined option, the Browse button on the right side is activated. Using this button opens a dialog box in order to select a path to the user's drum map. Confirming the path saves it in the Nepheton configuration file. The selected drum map will be loaded as default.
The text box on the left from the Browse button shows the path to the user's preset bank.
Midi control tab
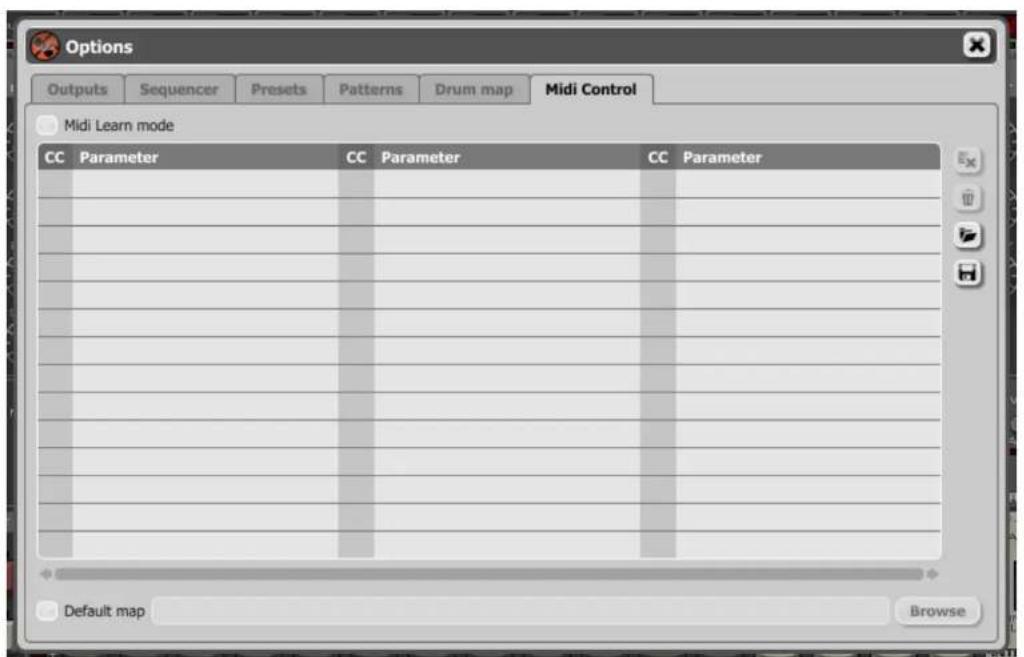
Nepheton can assign its controls (on GUI) to any MIDI CC (Midi Control Change), allowing the control of the plug-in using external hardware or software.
text_image
Options Outputs Sequencer Presets Patterns Drum map Midi Control Midi Learn mode CC Parameter CC Parameter CC Parameter Default map BrowseMidi control tab
Controls included in the tab:
- Midi learn mode – Checkbox which activates Midi learn mode.
• A list of active MIDI CC links containing pairs comprising of a CC code and the name of the plug-in parameter. - Default Map - Checkbox which activates a default MIDI CC map. When the map is activated it will be loaded with creating a new instance of the plug-in.
Midi learn
Assigning a Nepheton control to the MIDI controller requires:
- Checking Midi Learn Mode checkbox in the Midi Control tab:
Midi Learn Mode selection checkbox
or press the Midi Learn button in the Midi section on GUI:
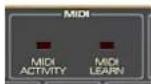
Midi section on GUI
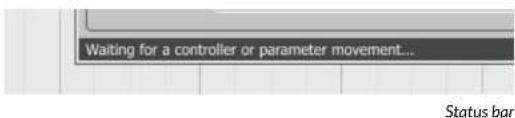
- In the status bar in the bottom section of GUI a message should appear "waiting for a controller or parameter movement...":
text_image
Waiting for a controller or parameter movement... Status barIn this mode the plug-in waits for any change in the parameter value (movement of any control on GUI) and for the movement of any MIDI CC control from the external MIDI controller, which operates on an active MIDI input channel directed to Nepheton. The order of these actions is irrelevant.
During the above-mentioned actions, the status bar informs about the currently changing values of controls and provides their names.
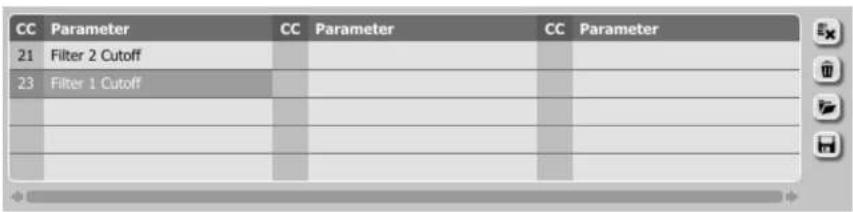
When a MIDI control <-> GUI control link is established, a line is added to the MIDI CC link list:
text_image
CC Parameter CC Parameter CC Parameter 21 Filter 2 Cutoff 23 Filter 1 CutoffMIDI CC link list and function buttons
When a link is established for a controller, it is possible to repeat the operation for the next MIDI CC and parameter pairs. Subsequent links will be created and added to the list.
- When all the needed links are created, uncheck the Midi Learn Mode checkbox or press the Midi Learn button in the Midi section on GUI again.
In order to create new links, it is possible to reactivate the Midi Learn Mode at any time.
The links are always sorted in an ascending manner in relation to the CC column according to the MIDI CC code.
Unlinking and midi link management
On the right side of the link list there are 4 function buttons located:
| CC | Parameter | CC | Parameter | CC | Parameter |
| 21 | Filter 2 Cutoff | ||||
| 23 | Filter 1 Cutoff | ||||
MIDI CC link list and function buttons
Note: MIDI map files are saved in XML format, which enables their edition in any text editor.
- Removes a selected link; choosing any link from the list and clicking on it highlights the selected link. Using this button removes the selected link.
- Removes all MIDI CC links.
- Loads link lists/MIDI maps from file (.npccmap - Nepheton MIDI CC Map).
- Saves link lists/MIDI maps to file.
Default MIDI Map
Selecting a default MIDI Map:
- Check the Default Map checkbox, which activates the Browse button on the right.
- Click Browse and select a file with a saved MIDI Map.
After selecting the MIDI map the text box on the left from the Browse button shows the path to the active map file. A default MIDI map is loaded each time when the plug-in is loaded.

text_image
Default Map BrowseDefault MIDI Map selection
Contents
1 Overview 1
Interface 1
Work modes 2
Audio outputs 3
Preset management 4
2 Play modes 5
External sequencer mode 5
Internal sequencer 6
Internal pattern storage 7
Native mode 7
Host mode 12
3 Sound editing 14
Trigger out 17
Master volume 17
4 Drumline editing 18
Pattern editing 18
Editing functions 21
Length of the pattern (part) 22
Global accent 23
Tempo scale 23
Shuffle 24
Pattern follow 24
Loading and saving patterns 25
Saving patterns 25
Loading patterns 26
5 Randomizing drumlines 27
Randomize 27
6 Preset Management 29
Browsing presets 29
Preset Browser 30

d16 group
Loading and Saving presets 35
7 Configuration 36
Outputs tab 37
Default output assigns 37
Default outputs type 38
Trigger output 39
Sequencer tab 40
Current Settings 40
Default Settings 41
Host play detection 41
Presets tab 42
Preset Storing 42
Default Presets 43
Patterns tab 43
Drum map tab 45
Current Drum map 45
Default Drum map 45
Midi control tab 46
Midi learn 47
Unlinking and midi link management 49
Default MIDI Map 50
8 Contents 51