
PowerShot S300 - Camcorder CANON - Free user manual and instructions
Find the device manual for free PowerShot S300 CANON in PDF.


User questions about PowerShot S300 CANON
0 question about this device. Answer the ones you know or ask your own.
Ask a new question about this device
Download the instructions for your Camcorder in PDF format for free! Find your manual PowerShot S300 - CANON and take your electronic device back in hand. On this page are published all the documents necessary for the use of your device. PowerShot S300 by CANON.
USER MANUAL PowerShot S300 CANON
natural_image
Illustration of a Canon 700M digital camera with lens and aperture (no text or symbols on body)Flowchart and Reference Guide
This Guide
Shooting with the Camera
Software Starter Guide
Installing the Software
This Guide
Connecting the Camera to a Computer
Software Starter Guide
Downloading Images to a Computer


- Please start by reading the Precaution on the reverse side of this cover.
- Please see the user's guide for the printer for operating instructions for Card Photo Printer CP-10.
Precautions
Camera Body Temperature
If your camera is used for prolonged periods, the camera body may become warm. Please be aware of this and take care when operating the camera for an extended period.
About the LCD monitor
The LCD monitor is produced with extremely high-precision manufacturing techniques. With more than 99.99% of the pixels operating to specifications, less than 0.01% of the pixels may occasionally misfire or appear as black, red or green dots. This has no effect on the recorded image and does not constitute a malfunction.
Notice: Please ensure that you read and follow the handling and safety precautions on pages 5 to 9 of this guide before attempting to use the camera.
Video Format
Please set the camera's video signal format to the one used in your region before using it with a TV monitor (p. 77).
Charging the Date/Time Battery
- The camera has a built-in rechargeable lithium battery that maintains the date, time and other camera settings. This battery recharges when the main battery pack is inserted into the camera. When you first purchase the camera, place a charged battery pack in it or use the AC adapter kit (sold separately) for at least 4 hours to charge the date/time battery. It will charge even when the camera power is set to Off.
- If the Set Date/Time menu appears when the camera power is turned on, it means that the date/time battery charge is depleted. Recharge it as described above.
Table of Contents
Read This First
Please Read....5
Safety Precautions ....5
Warnings 6
Cautions....8
Preventing Malfunctions....9
Preparing the Camera
Guide to Components ......10
Front View 10
Back View 11
Operation Panel....12
Mode Dial ....13
Charging the Battery Pack 14
Installing the Battery Pack 16
Using the Household Power Source ....18
Installing a CF Card ....19
Setting the Date and Time 21
Attaching the Wrist Strap 22
Quick Start
Shooting 23
Replaying 24
Erasing Shortcut 24
Basic Functions
Turning the Power On/Off 25
Using the Viewfinder 27
Using the LCD Monitor ....28
Shooting Mode 28
Replay Mode 29
Information Displayed on the LCD Monitor....29
Shooting Mode 29
Replay Mode (Standard Display) 30
Replay Mode (Detailed Display) 30
Pressing the Shutter Button 31
Reviewing an Image Immediately after Recording It .....31
Changing the Default Review Setting ....32
Adjusting the Zoom (Depth of Field) 33
Telephoto/Wide Angle 33
Digital Zoom 33
Shooting
Selecting a Shooting Mode....34
Changing Resolution/Compression Settings....34
Using the Flash 37
Shooting Close-Ups/Infinity Shots 39
Using the Self-Timer 40
Shooting Continuously ....40
Adjusting the Exposure Compensation ....41
Setting the White Balance 42
Shooting in Stitch Assist Mode 43
Framing a Subject 43
Shooting 44
Shooting a Movie 46
Functions Available in Each Shooting Mode 48
Replaying
Displaying Images Singly (Single Image Replay) .... 49 Zooming an Image .... 49
Displaying Images in Sets of Nine (Index Replay) ....50 Switching between Sets of Nine Images ....51
Replaying a Movie....52 Rotating Images in the Display ....53
Automating Playback (Auto Play) 54
Protecting Images ....56
Erasing Images
Erasing Images Singly ....57
Erasing All Images 58
Print Settings (DPOF Settings)
Displaying the Print Settings Menu ....59
Setting the Print Style 60
Selecting Images for Printing.... 61
Resetting Print Settings....64
Printing with Card Photo Printer CP-10
Connecting Card Photo Printer CP-10 65
Printing 66
Printing the Displayed Image 66
Printing with DPOF Print Settings.... 67
Setting the Print Style 70
Camera Settings
Displaying the Rec. Menu 72
Resetting the File Number 73
Setting the Beep On/Off 74
Formatting CF Cards....75
Changing Other Settings 76
Switching the Auto Power Down Function On/Off .....76
Setting the Video Signal Format 77
Setting the Language....78
Shooting/Replaying with a TV Monitor
Shooting/Replaying with a TV Monitor.... 79
Downloading Images to a Computer
Downloading Directly from a CF Card.... 80
Inserting the CF Card 80
Downloading Images 81
Connecting the Camera to a Computer with a USB Cable 82
Connecting to a USB Port 83
Appendices
Care and Maintenance of the Camera 85
Troubleshooting 86
List of Messages....90
Specifications....93
Index 96
Canon Customer Support Help Desk 98
Read This First
Please Read
Test Shots
Before you shoot images of subjects of importance to you, we strongly recommend that you shoot several trial images to confirm that you are operating the camera correctly. Please note that Canon Inc., its subsidiaries and affiliates, and distributors of its digital cameras are not liable for any consequential damages arising from any malfunction of the Canon digital camera or CompactFlash™ card (CF card) resulting in the failure of an image to be recorded or to be recorded in a format that is machine sensible.
Warning Against Copyright Infringement
Please note that Canon digital cameras are intended for personal use and must be used in a manner that respects international and domestic copyright laws and regulations. Please be advised that in certain cases the copying of images from performances, exhibitions, or commercial properties by means of a camera or other device may contravene copyright or other legal rights even if the image was recorded for personal use.
Warranty Limitations
This camera's warranty is only effective in the country of sale. If a problem arises while the camera is in use abroad, please convey it back to the country of sale before proceeding with a warranty claim to a Canon Customer Support Help Desk.
Safety Precautions
- Before using the camera, please ensure that you have read and understood the safety precautions described below. Always ensure that the camera is operated correctly.
- The safety precautions noted on the following pages are intended to instruct you in the safe and correct operation of the camera and its accessories to prevent injuries or damage to yourself, other persons and equipment.
- In the next few pages, the term “equipment” refers primarily to the camera, battery charger and optional compact power adapter.

WARNINGS
- Do not aim the camera directly into the sun or at other intense light sources which could damage your eyesight.
- Do not trigger the flash in close proximity to human or animal eyes. Exposure to the intense light produced by the flash may damage eyesight. In particular, remain at least one meter (39 inches) away from infants when using the flash.
- Store this equipment out of the reach of children and infants. Accidental damage to the camera or batteries by a child could result in serious injury. In addition, placement of the wrist strap around the child's neck could result in asphyxiation.
- Do not attempt to disassemble or alter any part of the equipment that is not expressly described in this guide. Disassembly or alteration may result in high-voltage electrical shock. Internal inspections, alterations and repairs should be conducted by qualified service personnel authorized by your camera distributor or a Canon Customer Support Help Desk.
- To avoid the risk of high-voltage electrical shock, do not touch the flash portion of the camera if it has been damaged. Similarly, never touch internal portions of the equipment which become exposed as a result of damage. There is a risk of high-voltage electrical shock. Please take the first opportunity to consult your camera distributor or a Canon Customer Support Help Desk.
- Stop operating the equipment immediately in the event that it emits smoke or noxious fumes. Failure to do so may result in fire or electrical shock. Immediately turn the camera's power off and remove the camera battery or unplug the power cord from the electrical outlet. Confirm that smoke or fume emissions have ceased. Please consult your camera distributor or the closest Canon Customer Support Help Desk.
-
Stop operating the equipment if it is dropped or the casing is damaged. Failure to do so may result in fire or electrical shock. Immediately turn the camera's power off and remove the camera battery or unplug the power cord from the electrical outlet. Please consult your camera distributor or the closest Canon Customer Support Help Desk.
-
Do not allow the equipment to come into contact with, or become immersed in, water or other liquids. Do not allow liquids to enter the interior. The camera has not been waterproofed. If the exterior comes into contact with liquids or salt air, wipe it dry with a soft, absorbent cloth. In the event that water or other foreign substances enter the interior, immediately turn the camera's power off and remove the camera battery or unplug the power cord from the electrical outlet. Continued use of the equipment may result in fire or electrical shock. Please consult your camera distributor or the closest Canon Customer Support Help Desk.
- Do not use substances containing alcohol, benzene, thinners or other flammable substances to clean or maintain the equipment. The use of these substances may lead to fire.
- Do not cut, damage, alter or place heavy items on the power adapter cord. Any of these actions may cause an electrical short circuit, which may lead to fire or electrical shock. Replace a broken or damaged power adapter cord.
- Do not handle the power cord if your hands are wet. Handling it with wet hands may lead to electrical shock. When unplugging the cord, ensure that you hold the solid portion of the plug. Pulling on the flexible portion of the cord may damage or expose the wire and insulation, creating the potential for fires or electrical shocks.
- Use of power sources not expressly recommended for this equipment may lead to overheating, distortion of the equipment, fire, electrical shock or other hazards. Use only the recommended power accessories.
- Do not place the batteries near a heat source or expose them to direct flame or heat. Neither should you immerse them in water. Such exposure may damage the batteries and lead to the leakage of corrosive liquids, fire, electrical shock, explosion or serious injury.
- Do not attempt to disassemble, alter or apply heat to the batteries. There is serious risk of injury due to an explosion. Immediately flush with water any area of the body, including the eyes and mouth, or clothing, that comes into contact with the inner contents of a battery. If the eyes or mouth contact these substances, immediately flush with water and seek medical assistance.
- Avoid dropping or subjecting the batteries to severe impacts that could damage the casings. It could lead to leakage and injury.
-
Do not short-circuit the battery terminals with metallic objects, such as key holders. It could lead to overheating, burns and other injuries. Use the supplied battery case to transport or store the battery pack.
-
Before you discard a battery, cover the terminals with tape or other insulators to prevent direct contact with other objects. Contact with the metallic components of other materials in waste containers may lead to fire or explosions. Discard the batteries in specialized waste facilities if available in your area.
- Use of batteries not expressly recommended for this equipment may cause explosions or leaks, resulting in fire, injury and damage to the surroundings. Use only recommended batteries and accessories.
- Use only the recommended battery charger to charge the Battery Pack NB-1L rechargeable batteries. Use of chargers not expressly recommended may result in overheating, distortion, fire or electrical shock.
- Disconnect the battery charger or the compact power adapter from both the camera and electrical outlet after recharging and when the camera is not in use to avoid fires and other hazards.
- The camera terminal of the battery charger cord and the compact power cord is designed for exclusive use with your camera. Do not use it with other products or batteries. There is a risk of fire and other hazards.
CAUTIONS
- Avoid using, placing or storing the equipment in places subject to strong sunlight or high temperatures, such as the dashboard or trunk (boot) of a car. Exposure to intense sunlight and heat may cause the batteries to leak, overheat or explode, resulting in fire, burns or other injuries. High temperatures may also cause deformation of the casing. Ensure that there is good ventilation when using the compact power adapter to charge the battery pack or power the camera.
- Do not store the equipment in humid or dusty areas. Storage in such areas could lead to fire, electrical shock or other damage.
- Be careful not to bang the camera or subject it to strong impacts or shocks that could lead to injury or damage the equipment when wearing or holding it by the wrist strap.
- Be careful not to cover the flash with your fingers when shooting. In addition, do not touch the surface of the flash after taking several pictures in rapid succession. Either action could result in burns.
- If your camera is used for prolonged periods, the camera body may become warm. Please take care when operating the camera for an extended period as your hands may experience a burning sensation.
Preventing Malfunctions
Avoid Strong Magnetic Fields
Never place the camera in close proximity to electric motors or other equipment generating strong electromagnetic fields. Exposure to strong magnetic fields may cause malfunctions or corrupt image data.
Avoid Condensation Related Problems
Moving the equipment rapidly between hot and cold temperatures may cause condensation (water droplets) to form on its external and internal surfaces. You can avoid this by placing the equipment in an airtight, resealable plastic bag and letting it adjust to temperature changes slowly before removing it from the bag.
If Condensation Forms Inside the Camera
Stop using the camera immediately if you detect condensation.
Continued use may damage the equipment. Remove the CF card and battery or power cord (if connected) from the camera and wait until the moisture evaporates completely before resuming use.
Extended Storage
When not using the camera for extended periods of time, remove the battery pack and store the equipment in a safe place. Storing the camera for extended periods with a battery pack installed will run down the battery pack and may damage the camera. Please note, however, that the date, time and other camera settings may reset to the default settings if the battery pack has been removed for more than three weeks. Follow the instructions in this guide to reset the desired settings.
Preparing the Camera
Guide to Components
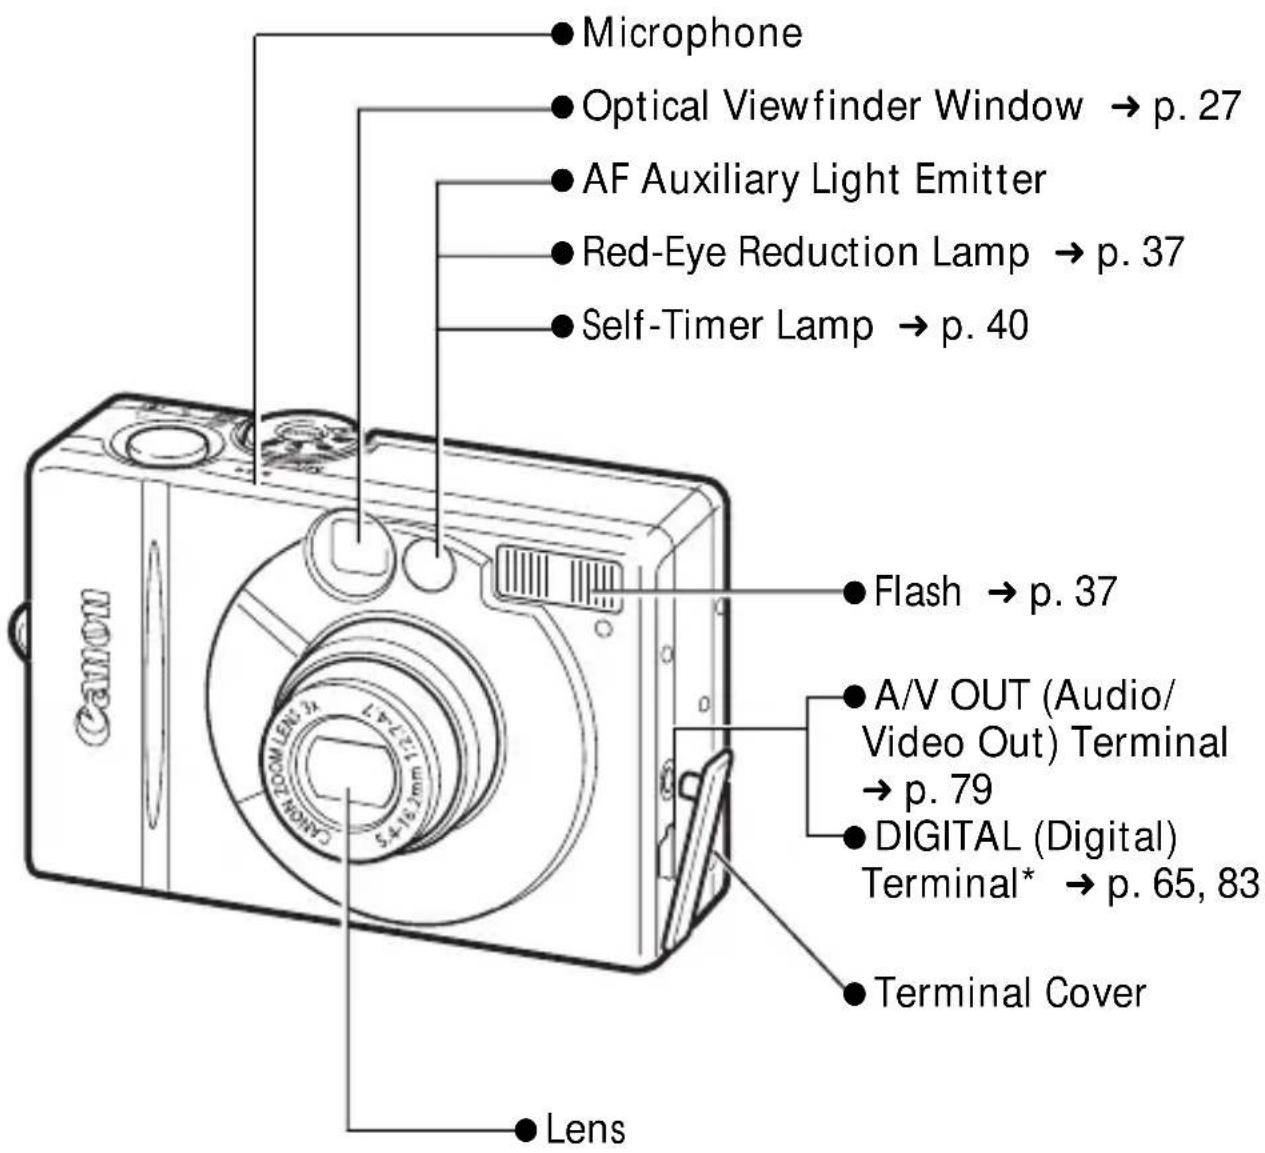
Front View
text_image
Microphone Optical Viewfinder Window → p. 27 AF Auxiliary Light Emitter Red-Eye Reduction Lamp → p. 37 Self-Timer Lamp → p. 40 Flash → p. 37 A/V OUT (Audio/Video Out) Terminal → p. 79 DIGITAL (Digital) Terminal* → p. 65, 83 Terminal Cover Lens* To connect Card Photo Printer CP-10 (Optional), use the direct interface cable provided with the printer. To connect a computer, use the USB interface cable supplied with the camera.
Back View

text_image
Viewfinder → p. 27 Lock for the CF Card Slot Cover → p. 19 CF Card Slot Cover → p. 19 Strap Eyelet → p. 22 Battery Cover → p. 16 DC Coupler Terminal Cover → p. 18 LCD Monitor → p. 28 Tripod SocketOperation Panel
text_image
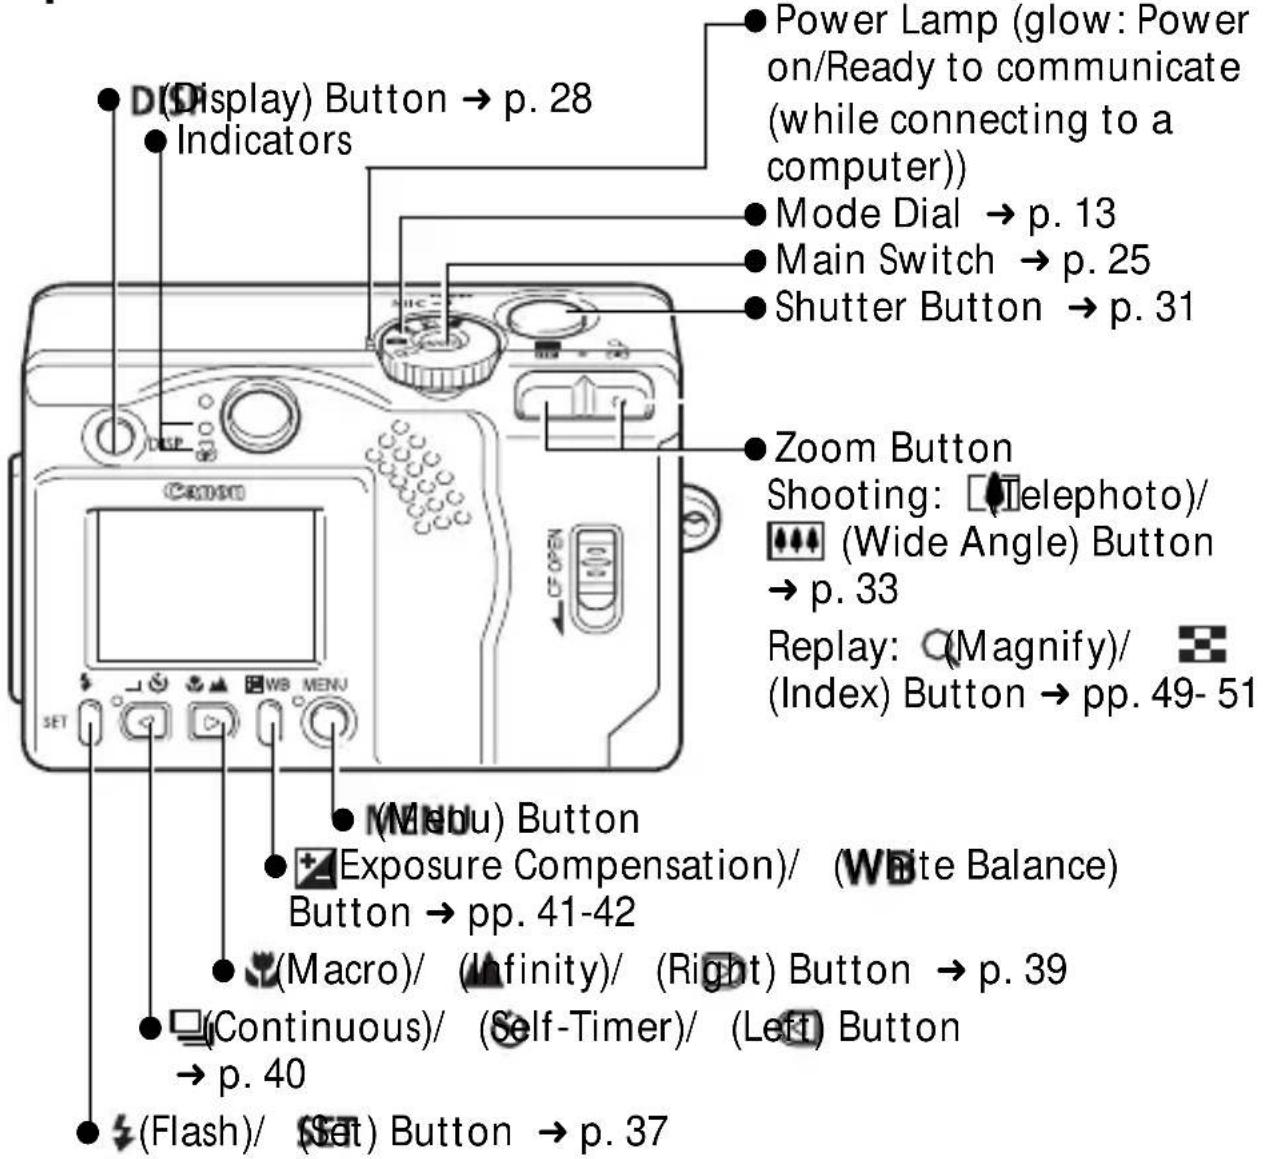
D(Display) Button → p. 28 Indicators Power Lamp (glow: Power on/Ready to communicate (while connecting to a computer)) Mode Dial → p. 13 Main Switch → p. 25 Shutter Button → p. 31 Zoom Button Shooting: □ Telephoto)/ (Wide Angle) Button → p. 33 Replay: ○ Magnify)/ (Index) Button → pp. 49- 51 (Menu) Button ● Exposure Compensation)/ (White Balance) Button → pp. 41-42 (Macro)/ (Infinity)/ (Right) Button → p. 39 □(Continuous)/ (Self-Timer)/ (Left) Button → p. 40 □(Flash)/ (Set) Button → p. 37Indicators
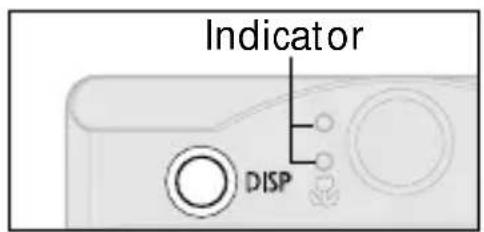
- The indicators will glow or flash at various stages when the main switch or shutter button is pressed.
Upper Indicator
Green: Ready to record
Flashing Green: During camera warm-up/Recording to CF card/Reading CF card/Deleting CF card images/Transmitting images to or from a CF card (while connecting to a computer)
Orange: Ready to record with flash
Flashing Orange: Ready to record but the camera blur warning is flashing
Lower Indicator
Yellow: Macro mode
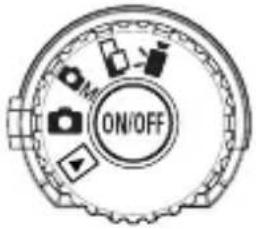
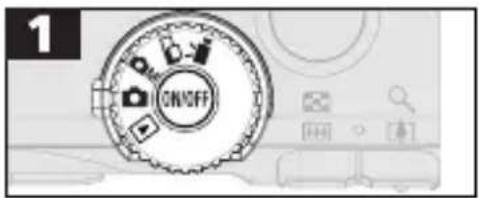
Mode Dial
The mode dial is used to select shooting or replay modes.
text_image
ON/OFFShooting Modes
(Auto)
The camera selects most settings automatically (p. 23).
M (Manual)
You can set the exposure compensation, white balance and other settings manually.
(Stitch Assist)
Shoot images in overlapping series to create panoramas (p. 43).
(Movie)
Shoot movie clips (p. 46).
Replay Mode
(Replay)
- Images recorded onto the CF card can be replayed or erased (pp. 49-58).
- Images can be printed with a Card Photo Printer CP-10 (sold separately) connected (pp. 65-71).
- Images can be downloaded to and viewed on a computer when it is connected (pp. 80-84).
- The icon displays on the LCD monitor while the Card Photo Printer CP-10 is connected.
- The LCD monitor shuts off while a computer is connected.
Charging the Battery Pack
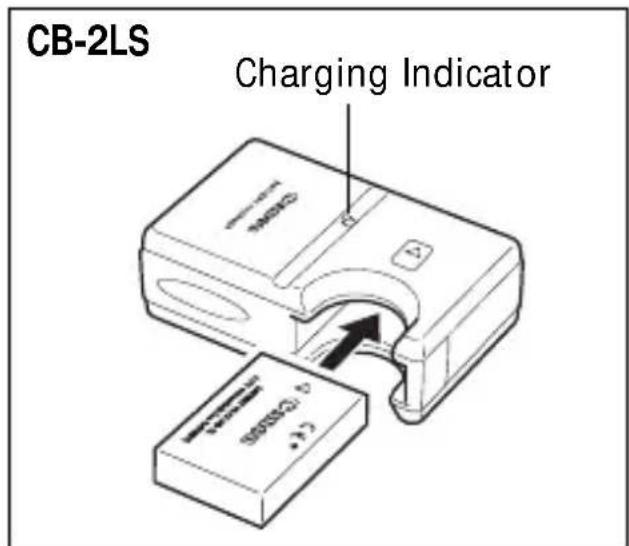
Recharge the battery pack with battery charger CB-2LS or CB-2LSE the first time you use the camera or when the “Change the battery pack” message is displayed.
Battery charger model names and types vary by region.
text_image
CB-2LS Charging Indicator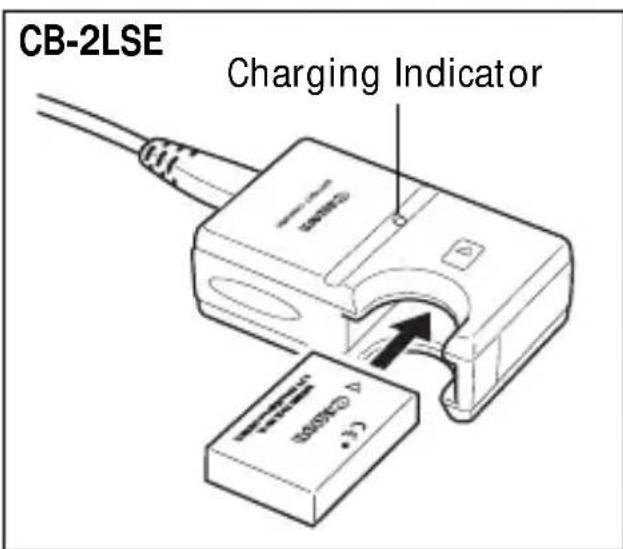
text_image
CB-2LSE Charging Indicator- Insert the battery pack all the way into the battery charger and plug the charger into an electrical outlet.
-
The charging indicator will glow orange while the battery pack is charging. It will change to a steady green when the charge is complete.
• After charging, unplug the battery charger and remove the battery pack from it. -
Since this is a lithium ion battery pack, you need not completely use or discharge it before recharging.
- It takes approximately 130 minutes to fully charge the battery pack from a fully discharged state (based on standard Canon testing conditions). Please charge it at an ambient temperate ranging between 5 and 40 °C (41 and 104 °F).
- Charge times may vary according to the ambient temperature and the charge state of the battery pack.
• To protect and prolong the life of the battery pack, do not charge it for longer than 24 hours at a time.
Handling Precautions
- Do not rapidly overturn or wave the battery charger around when the battery pack is in it. There is a danger of the battery pack flying out.
- At low temperatures, the battery pack performance may be reduced and the low battery icon may appear earlier than usual. Under these conditions, resuscitate the battery pack by warming it in a pocket immediately before use. However, ensure that there are no metallic items in the pocket that could cause the battery pack to short circuit, such as key holders, etc.
- Do not place anything, such as tablecloths, carpets, bedding or cushions, on top of the battery charger while it is charging. Heat will build up and could result in a fire.
- Do not charge batteries other than Battery Pack NB-1L in this charger.
- The battery pack continues to discharge a minimal portion of its power while installed in the camera, even with the camera power off or inserted into the battery charger. This will shorten battery life. To conserve the battery pack, store it in its case in a cool, dry place. Recharge it fully before using it again.
- If the performance of the battery pack diminishes substantially even when it is fully charged, the battery pack should be replaced.
Installing the Battery Pack
Install Battery Pack NB-1L (supplied) as shown below.
- Please recharge the battery pack (p. 14) before you use it for the first time.

natural_image
Diagram of a device being inserted into a slot, showing a circular arrow indicating rotation (no text or symbols present)- Slide the battery cover in the direction of the arrows.
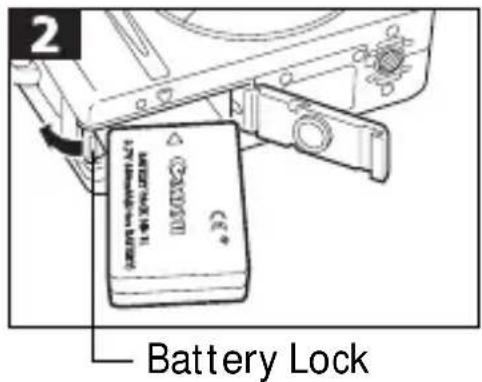
text_image
Battery Lock- Press the battery lock while inserting the battery pack all the way in until the lock clicks.
• To remove the battery pack, press the battery lock and pull the battery pack out.
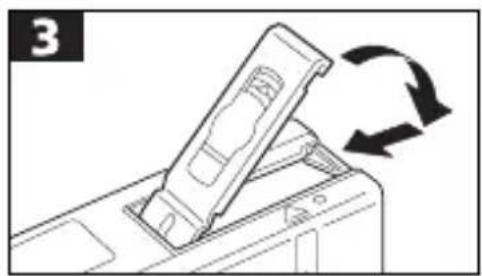
natural_image
Diagram of a device being inserted into a rack with a circular arrow indicating rotation (no text or symbols present)- Slide the battery cover closed.
- When the camera's indicator flashes green, do not turn off the power or open the battery cover. The camera is writing, reading, erasing or transmitting an image to or from the CF card.
- Remove the battery pack from the camera when the camera is not in use. Please note, however, that the date, time and other camera settings may reset to the default settings if the battery pack has been removed for more than three weeks.
- Please use a household power source for extended use of the camera (p. 18).
Battery Performance
| Recordable Images | Replay Time | ||
| LCD Monitor On L | LCD Monitor Off | ||
| Battery Pack NB-1L(fully charged) | Approx. 120 shots | Approx. 270 shots | Approx. 85 min. |
- The actual performance may vary from the above data according to the shooting conditions and the shooting mode.
- Excludes movie data.
- At low operating temperatures, the battery performance may drop and the low battery icon may appear sooner than at high temperatures. To improve performance at these temperatures, warm the battery in your pocket just before using it in the camera.
Shooting: Room temperature (23°C, 73°F), alternating between wide angle and telephoto every 20 seconds, flash used one in four shots, power turned off and on again after every eighth shot
Replay: Room temperature (23°C, 73°F), continuous replay at 3 seconds per image
Battery Pack Charge
The following icons and messages will display when the charge of the battery pack is low.
 | Battery pack charge is low. Recharge it as soon as possible before it is required for an extended period.When the LCD monitor is off, this icon will display when you press the   |
| Change the battery pack | Battery charge is insufficient to operate the camera. Replace the battery pack immediately. |
Using the Household Power Source
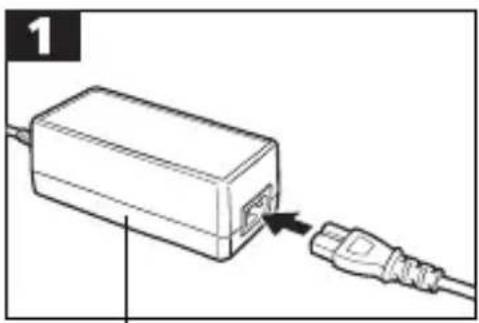
It is best to power the camera with AC Adapter Kit ACK500 (sold separately) when you are using it for long periods of time or connecting it to a computer.
- Turn the camera power off before connecting or disconnecting the AC adapter.
natural_image
Line drawing of a device with an attached plug, showing a cable and connector (no text or symbols)Compact Power Adapter CA-PS500
- Connect the power cord to the compact power adapter first and then plug the other end into the electrical outlet.
Battery
Lock
DC Coupler
DR-500
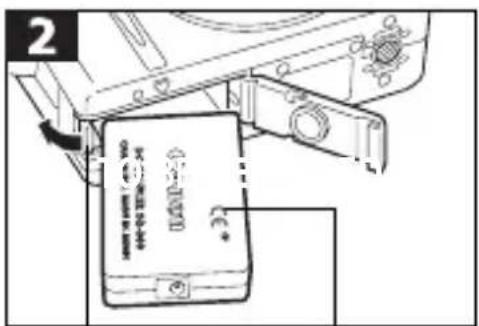
- Open the battery cover and press the battery lock in the direction shown while inserting DC Coupler DR-500. Insert the DC coupler all the way in until the battery lock clicks. Slide the battery cover closed.
text_image
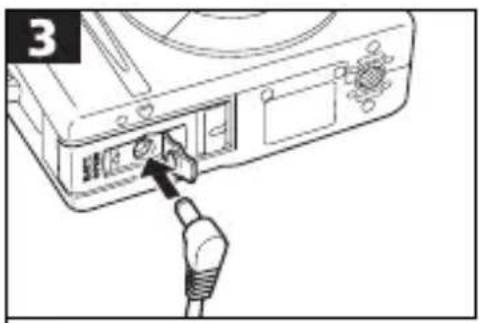
3- Open the DC coupler terminal cover and attach the cord to the DC terminal.
• After you have finished using the camera, unplug the AC adapter from the electrical outlet.
- Use of an AC adapter kit other than ACK500 may cause a malfunction in the camera or kit.
Installing a CF Card
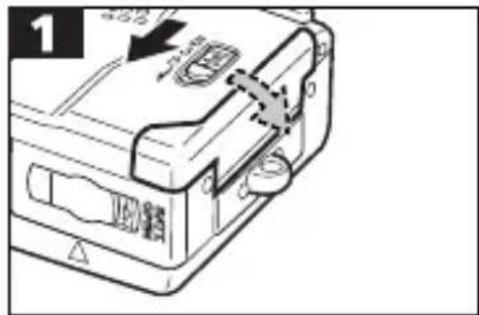
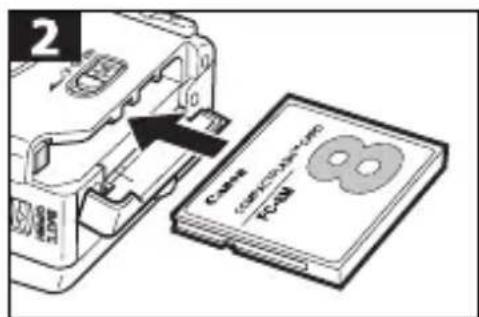
Turn the camera power off and insert the CF card with the following procedures.
text_image
1- Slide the lock down and open the CF card slot cover.
text_image
2 CD-ROM 800V/CD-ROM-100 CD-ROM- Insert the CF card until the slot's eject button fully extends. Close the CF card slot cover.
natural_image
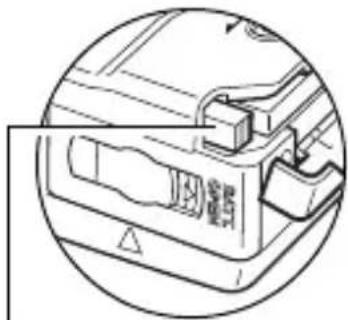
Close-up of a mechanical component with no visible text or symbols• To remove the CF card, push the eject button and pull the CF card out.
CF Card Eject Button
- When the camera's indicator flashes green, do not turn off the power or remove the CF card. The camera is writing, reading, erasing or transmitting an image to or from the CF card.
- Please note that CF cards from other manufacturers, or CF cards which have been edited with application software using other formats, may not operate correctly in the camera.
Handling Precautions for CF Cards
- CF cards are high-precision electronic devices. Do not bend them, apply force to them, or subject them to shocks or vibration.
- Do not attempt to disassemble or alter a CF card.
- Moving a CF card rapidly between temperature extremes will cause condensation to form in the card and lead to a malfunction. To avoid condensation, place the CF card in a sealed plastic bag before moving it into a different temperature zone and allow it to adjust slowly to the new temperature. If condensation forms on the CF card, store it at room temperature until the water droplets have evaporated naturally.
- Place the CF card in the supplied case for storage.
- Do not use or store CF cards in the following types of location.
- Location subject to dust or sand
- Locations subject to high humidity and high temperatures
CF Cards and Estimated Capacities (Recordable Images)
| FC-8M | FC-16M | FC-32M | FC-64M | FC-128M | |||
| L (1600 x 1200 pixels) | s | 7 | 1 | 5 | 3 | 1 | |
| ☐ | 11 24 49 100 200 | ||||||
| ☐ | 24 48 99 200 401 | ||||||
| M (1024 x 768 pixels) | s | 16 32 67 135 271 | |||||
| ☐ | 24 49 102 205 412 | ||||||
| ☐ | 46 92 189 379 760 | ||||||
| S (640 x 480 pixels) | s | 35 70 143 288 577 | |||||
| ☐ | 50 99 206 415 831 | ||||||
| ☐ | 87 | 172 353 707 | 1417 | ||||
| MOVIE | 640 (640 x 480 pixels) | 6 sec. | 13 sec. | 27 sec. | 56 sec. | 113 sec. | |
| 320 (320 x 240 pixels) | 18 sec. | 36 sec. | 75 sec. | 152 sec. | 305 sec. | ||
| 160 (160 x 120 pixels) | 48 sec. | 97 sec. | 198 sec. | 399 sec. | 799 sec. | ||
- These figures reflect standard shooting conditions established by Canon. Actual totals may vary according to the subject, shooting conditions and shooting mode.
- The maximum length of a movie clip recording is approximately: 4 seconds (540), 10 seconds (320) or 30 seconds (160). The times shown are the maximum continuous recording times.
- L (Large), M (Medium), S (Small), 640, 820 and 160 indicate the recording resolution.
- (Superfine), □ (Fine) and □ (Normal) indicate the compression setting.
Setting the Date and Time
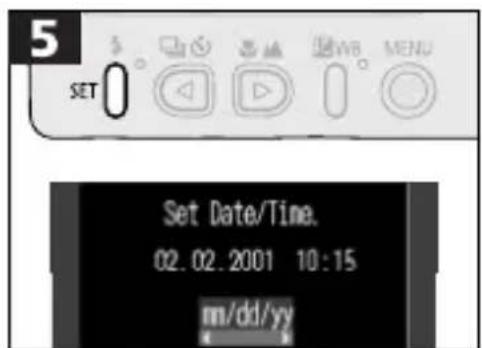
- The Set Date/Time menu will appear the first time the camera power is turned on or whenever the built-in rechargeable lithium battery charge is low. Start from Step 5 to set the date and time.
text_image
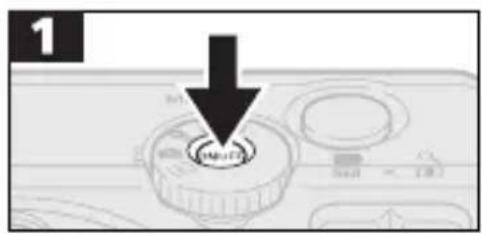
1 Mn123- Press the main switch until the power lamp lights.
text_image
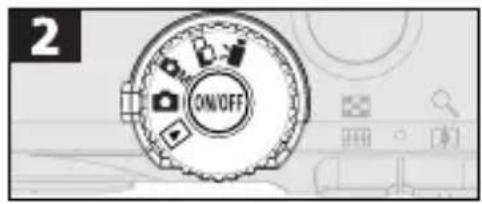
2 ON/OFF- Turn the mode dial to the , , , M or position.
text_image
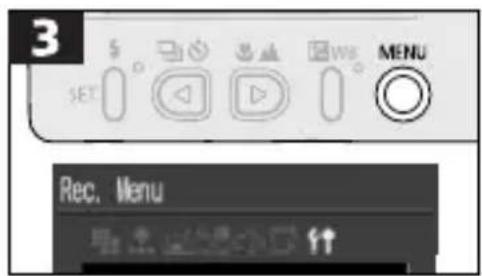
3 SET REC. Menu- Use the or button to select the icon.
text_image
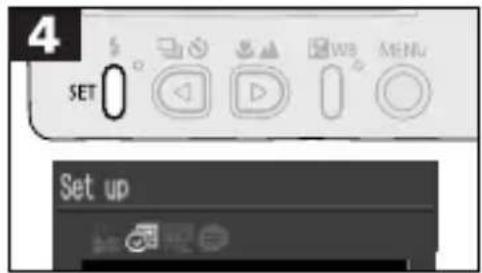
4 SET Set up- Use the ◀ or button to select the icon.
text_image
5 SET Set Date/Time. 02.02.2001 10:15 mm/dd/yy- Select a field (year, month, day, hour, minutes and date format) with the SET button.
- The factory default for the date format in some regions may differ from that shown.
text_image
6 SET ← → WB MENU- Use the or button to change the value in a field.
text_image
7 SET- Press the button.
text_image
8 SET MENU- The LCD monitor will return to the shooting mode.
- Please note that the date and time settings may reset to the default settings if the camera battery has been removed for more than three weeks. Reset them when this occurs.
Attaching the Wrist Strap
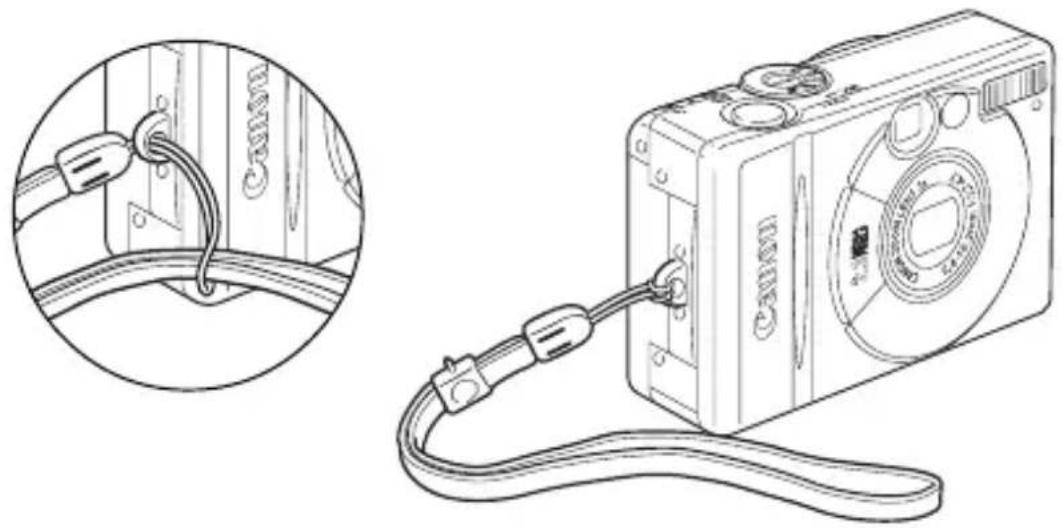
Thread the small loop of the wrist strap through the strap holder on the camera and pull the large loop through the small loop until the small loop fits snugly against the strap holder.
natural_image
Line drawing of a camera with attached cable and connector, shown in two views: one showing cable being inserted into a wall, the other showing cable being connected to a camera.- Be careful not to wave the camera about or catch it on other items when dangling it from the wrist strap.
Quick Start
Shooting (Auto)
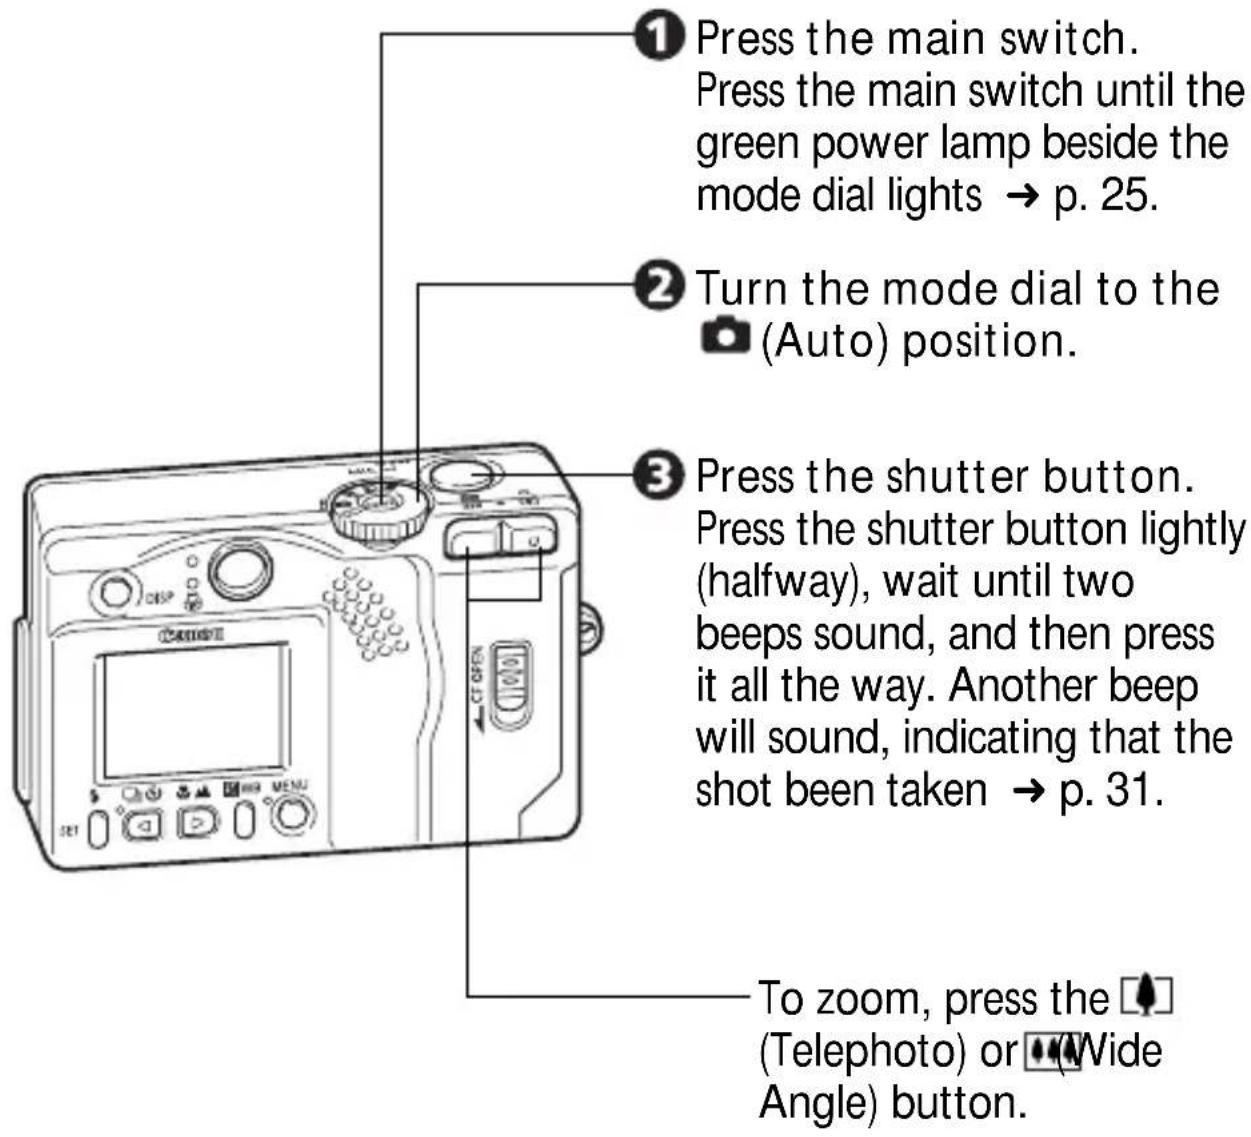
text_image
① Press the main switch. Press the main switch until the green power lamp beside the mode dial lights → p. 25. ② Turn the mode dial to the (Auto) position. ③ Press the shutter button. Press the shutter button lightly (halfway), wait until two beeps sound, and then press it all the way. Another beep will sound, indicating that the shot been taken → p. 31. To zoom, press the (Telephoto) or (Wide Angle) button.- If the Set Date/Time menu appears, set the date and time (p. 21).
▶ Replaying (Single Image Replay)
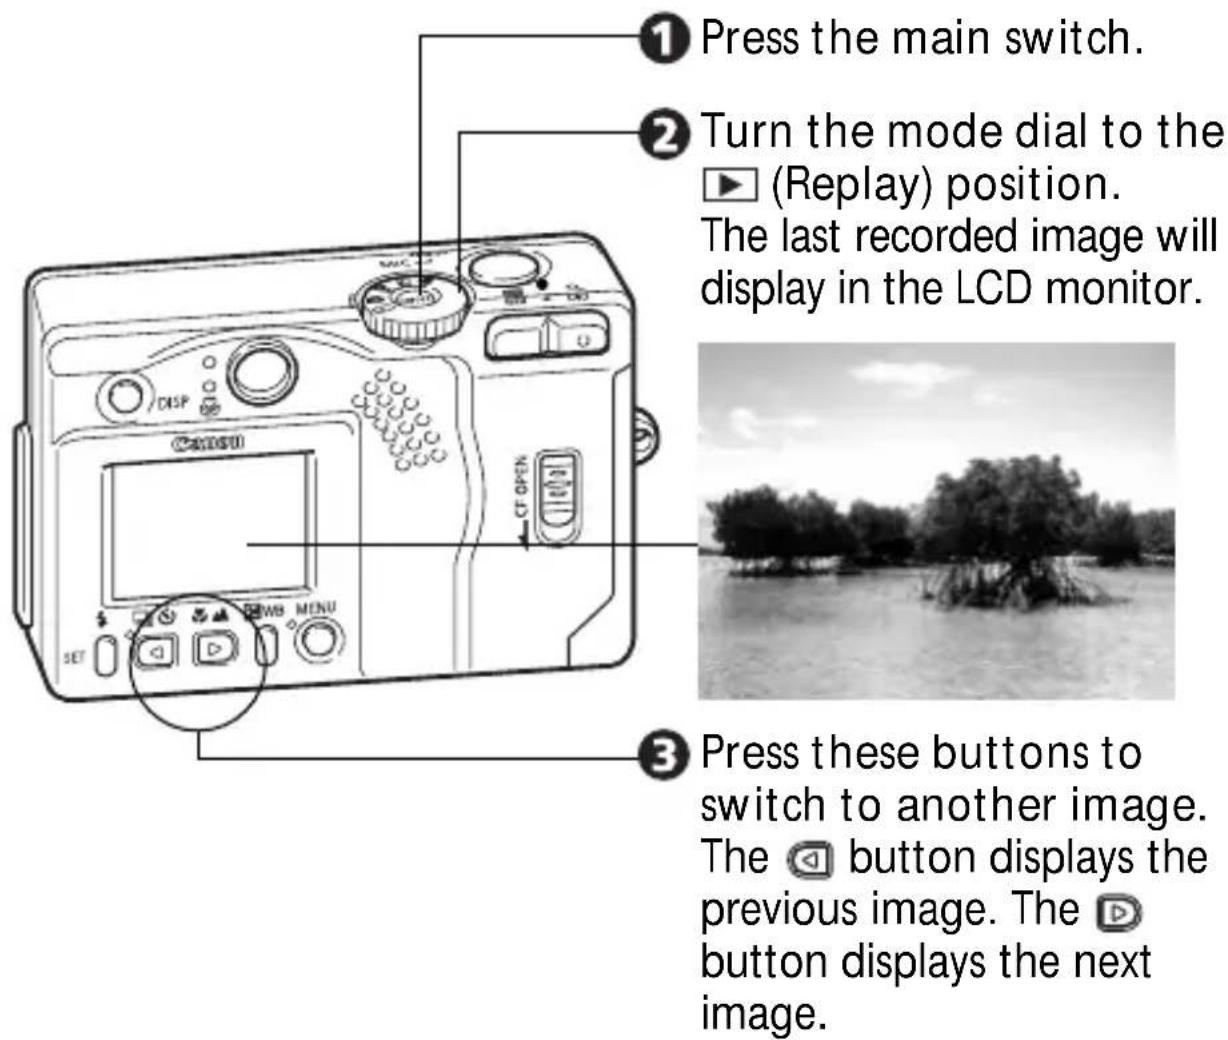
text_image
① Press the main switch. ② Turn the mode dial to the (Replay) position. The last recorded image will display in the LCD monitor. SET DISP CF OPEN SET MENU Press these buttons to switch to another image. The button displays the previous image. The button displays the next image.Erasing Shortcut
① Press the button while the image is displayed.
② Use the E button to select [OK] and press the SET button.
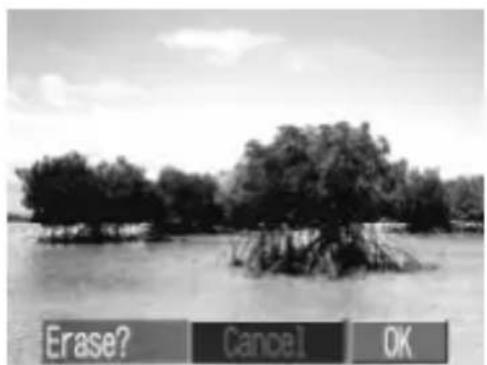
text_image
Erase? Cancel OK- When you have finished viewing or erasing, press the main switch to turn off the power.
Basic Functions
Turning the Power On/Off
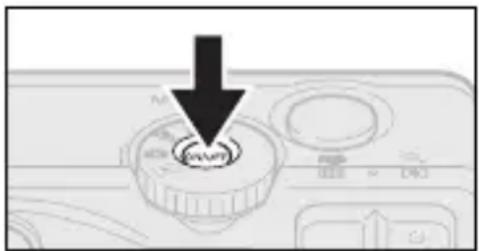
natural_image
Close-up of a camera control panel with a black arrow pointing to the center button (no text or symbols visible)Press the main switch until the green power lamp lights.
- The upper indicator beside the viewfinder eyepiece will flash green.
- The lens will extend when the mode dial is turned to the 📄, 📅 or 📋 position.
- The lens will retract approximately 1 minute after the mode dial is turned to ▶ from any other mode.
- When the mode dial is set to the ▶, □ or ▶ position, the LCD monitor will turn on regardless of its On/Off status.
Press the main switch again to turn off the power.
- The Set Date/Time menu will appear the first time the camera is turned on. Please set the date and time (p. 21).
- If the auto power down function activates, press the main switch again to restore power.
Auto Power Down Function
Shooting Mode
The power will automatically shut off approximately 3 minutes after the last function is accessed.
Replay Mode
The power will automatically shut off approximately 5 minutes after the last function is accessed.
Connected to Card Photo Printer CP-10
The power will automatically shut off approximately 5 minutes after the last camera function is accessed or Card Photo Printer CP-10 (sold separately) ceases to print an image.
While Connected to a Computer (Auto power down function always active) A warning message will appear on the computer screen approximately 5 minutes after the last function is accessed. The power will automatically shut off approximately 1 minute later if no functions are accessed. (Except when the camera is powered by a household power source)
- The auto power down function will not activate while the camera is in auto play mode.
- The camera's settings can be changed to turn off the auto power down function. (p. 76)
Using the Viewfinder
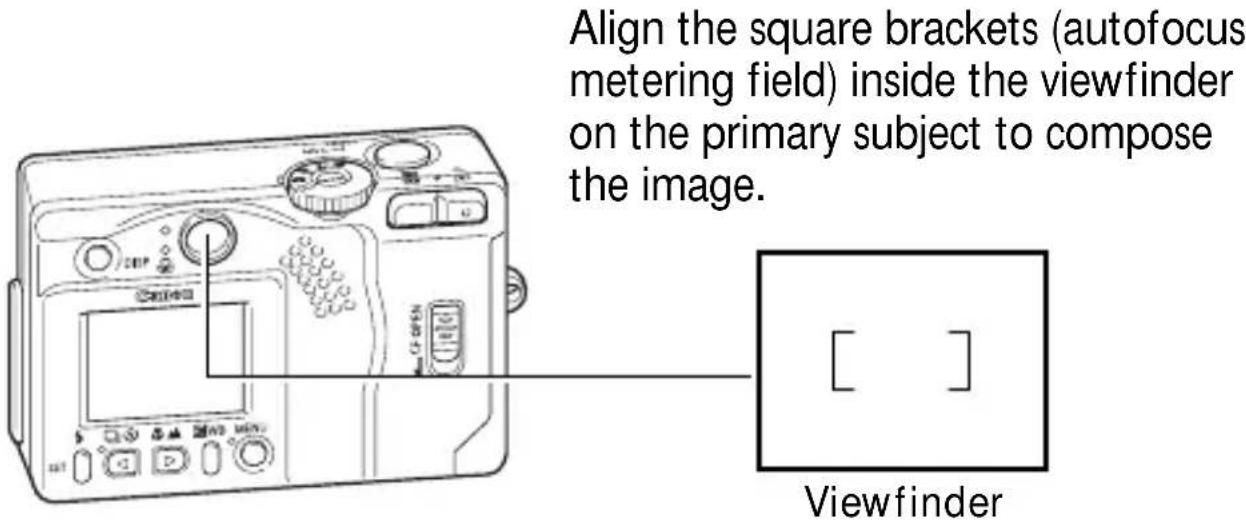
This camera is equipped with an optical viewfinder.
text_image
Align the square brackets (autofocus metering field) inside the viewfinder on the primary subject to compose the image. ViewfinderAbout the Autofocus Function
This camera employs AiAF (artificial intelligence autofocus) technology which uses a broad metering field to calculate the focal distance with high precision. It delivers a crisp focus even when the photographic subject is slightly off-center.
Using the Focus Lock
The following types of subject may not be suited to autofocus photography. Use the focus lock in these situations.
- Subjects with extremely low contrast to the surroundings
- Subjects with extremely bright objects at the center of the composition
- Subjects that are moving quickly
- Subjects through glass
Try to shoot as close to the glass as possible to reduce the chances of light reflecting back off the glass.
How to Use the Focus Lock
- Aim the camera so that a subject at the same focal distance as the main subject is centered in the brackets in the optical viewfinder.
- Press the shutter button halfway and wait until two beeps sound.
- Re-aim the camera to compose the shot as desired and press the shutter button all the way.
Using the LCD Monitor
text_image
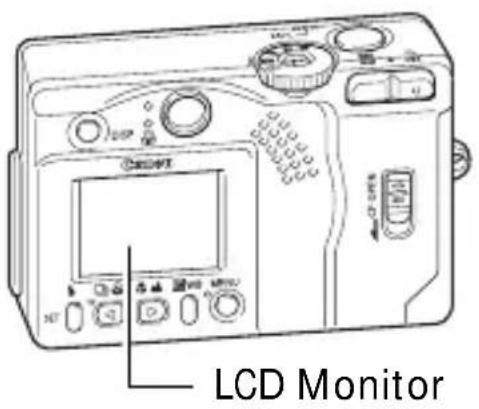
LCD MonitorThe LCD monitor can be used to compose images while shooting, adjust settings menus and replay images.
- The image in the LCD monitor will darken in strong sunlight or bright light. This does not constitute a malfunction.
Shooting Mode
( , mand on the mode dial)
text_image
Indicator DISP- Pressing the DSBtton turns the LCD monitor on or off.
- The LCD monitor setting (On or Off) is saved by the camera when the power is turned off so that the same setting is automatically available when the power is turned on again. However, the setting may be lost when the power has been turned off after the “Change the battery pack” message has displayed, while the LCD monitor was on in shooting mode.
- In macro mode, the parallax phenomenon may cause images composed with the viewfinder to be off-center. Use the LCD monitor to compose close-ups in macro mode (p. 39).
- Set the flash to On or affix the camera to a tripod when the upper indicator flashes orange and the camera blur warning icon (9) appears in the LCD monitor after the metering preparations are complete.
Replay Mode (on the mode dial)
text_image
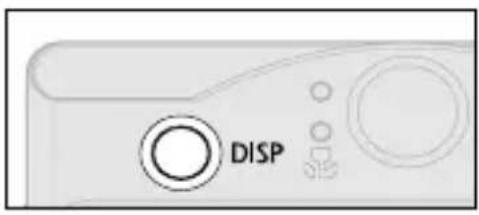
DISP- The LCD monitor will turn on when the mode dial is set to the position.
- In replay mode, pressing the DISP button cycles between display modes.
Single Image Replay ...... Standard → Detailed → No Display Index Image Replay (9 Images) ...... Standard → No Display
Information Displayed on the LCD Monitor
Shooting Mode
In shooting mode, information about the current settings and remaining image capacity will display on the LCD monitor for approximately six seconds when the actions below are taken, regardless of whether the LCD monitor is set to On or Off.
While this information is displayed, you may set the flash, continuous mode, self-timer, macro and infinity settings.
• The power is turned on.
- The DISP, ☐/ button is pressed.
• The camera settings are changed.
• The Rec. menu is closed.
- The shutter button has been pressed and a shot has been taken. (LCD monitor must be on)
The resolution, but not compression, shows in movie mode.
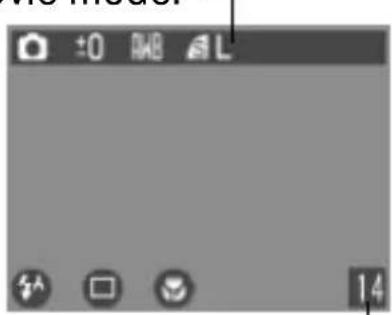
text_image
±0 RAB L 14Remaining Image Capacity (Recordable seconds remaining for movies)
Information Displayed
| Shooting Mode | p. 34 | |
| Exposure Compensation | -2 ... ±0 ... +2 | p. 41 |
| White Balance | p. 42 | |
| Compression | p. 34 | |
| Resolution | p. 34 | |
| Flash | p. 37 | |
| Shooting Method | p. 40 | |
| Macro/ Infinity | p. 39 | |
| Zoom Setting* | X3.8/X4.7/X6.0/X7.5 | p. 33 |
| Camera Blur Warning | p. 28 |
* The displayed zoom setting is the combined effect of the optical and digital zooms. It displays when the digital zoom is activated.
Replay Mode (Standard Display)
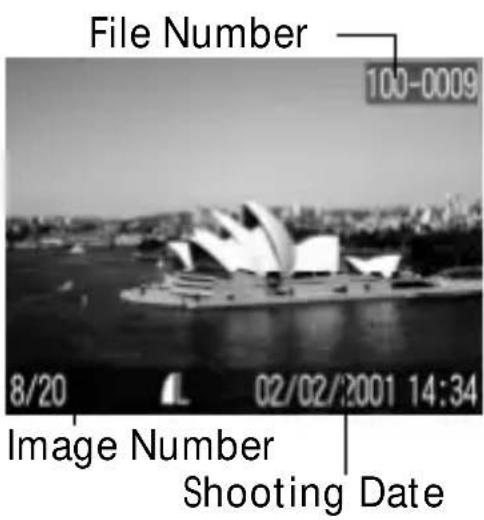
text_image
File Number 100-0009 8/20 02/02/2001 14:34 Image Number Shooting DateIn standard display mode, the following information is displayed.
- File Number
• Image Number (Image Number/Total Number of Images) - Shooting Date
- Compression (s, +)
- Resolution (L, M, S, F40) 320 160
- Movie (AVI)
- Protection Status ( )
Replay Mode (Detailed Display)
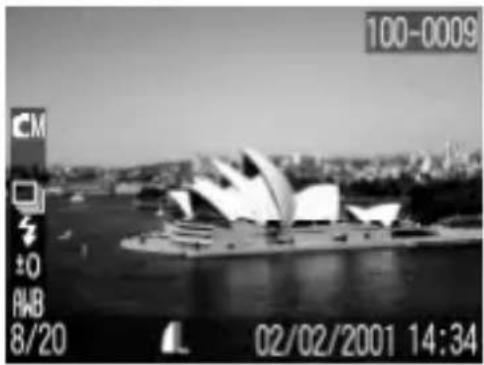
natural_image
Black-and-white cityscape photo of the Sydney Opera House with visible architectural details and a digital camera interface (no readable text or symbols in the scene)In detailed mode, the following supplementary information is displayed.
| Shooting Mode | p. 34 | |
| Macro/Infinity | p. 39 | |
| Shooting Method | p. 40 | |
| Flash | p. 37 | |
| Exposure Compensation | -2 ... ±0 ... +2 | p. 41 |
| White Balance | p. 42 |
The following information may also be displayed with some images.
| A sound file (WAV file) is attached. | |
| A sound file in a format other than the WAV format is attached or the file format is not recognized. | |
| JPEG file with format not conforming to Design rule for Camera File system standards | |
| RAW format file | |
| File with unrecognized format |
- The image information may not display correctly if images shot with this camera are replayed on other cameras or images from other cameras are replayed on this camera.
Pressing the Shutter Button
The shutter button features a two-stage action.
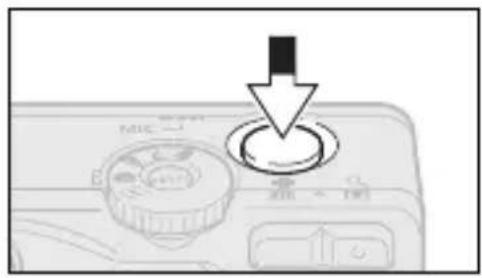
text_image
M10 超大闸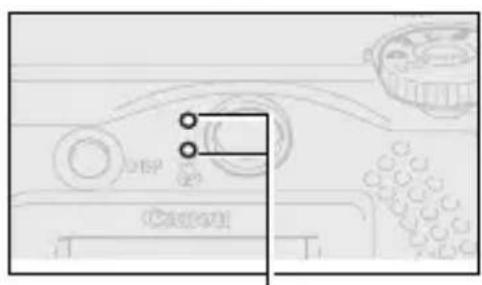
natural_image
Technical line drawing of a mechanical component with no visible text or symbolsIndicator
Pressing Halfway
The camera uses the first stage to automatically set the exposure, autofocus and white balance. When it has finished metering, two beeps sound and the upper indicator glows green. When the flash is used, the indicator glows orange when the flash is ready to fire. A flashing orange indicator warns of insufficient light and the risk of camera blur.
In macro mode, the lower indicator glows yellow.
text_image
MIC-1 端口Pressing Fully
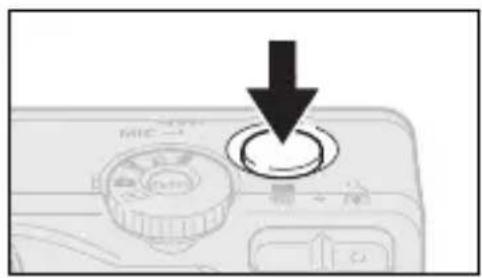
Pressing the shutter button down fully activates the shutter and causes one beep to sound. While the image is being recorded to the CF card, the indicator flashes green.
- Recorded images are temporarily stored in the camera's built-in memory and then written to the CF card. The next image can be recorded immediately after the first as long as sufficient built-in memory is available.
Reviewing an Image Immediately after Recording It
Images display in the LCD monitor (regardless of its On/Off status) for 2 seconds immediately after recording even if you release the shutter button. Images can also be reviewed with the following procedures.
Continuing to Press the Shutter Button Fully
If you continue to press the shutter button fully after shooting, the image will display until the button is released.
Pressing the SET Button
If you press the, SET button while continuing to press the shutter button fully, it will continue to display even when you release the shutter button. To cancel the review, press the shutter button halfway.
- You can erase an image right away while it is displayed (p. 24).
Changing the Default Review Setting
The default review time is approximately 2 seconds. This can either be turned off or set to approximately 10 seconds.
text_image
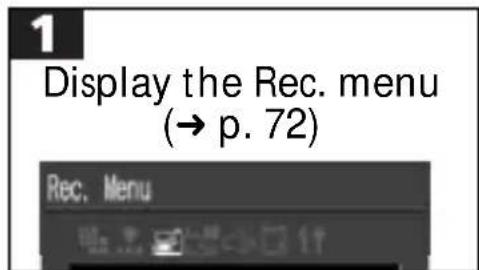
1 Display the Rec. menu (→ p. 72) Rec. Menu• is not available in the modes.
- Use the or button to select the icon.
text_image
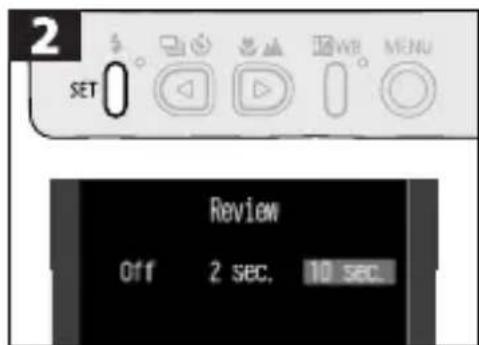
2 SET Review Off 2 sec. 10 sec.- Use the or button to select Off, 2 sec. or 10 sec.
- No image will display when the review function is set to Off unless you continue to press the shutter button fully after shooting.
- With the 2- or 10-second options, the image will display for the specified time even if the shutter button is released right after shooting.
- With the 2- or 10-second options, you can display the image for longer than the specified time as long as the shutter button is held down continuously.
- You can shoot another image even while an image is displayed.
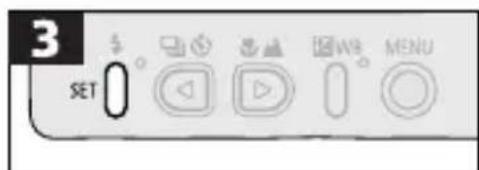
text_image
3 SETAdjusting the Zoom (Depth of Field)
The zoom can be adjusted to any setting in the 35 to 105 mm range in 35 mm film equivalent terms.
Telephoto/Wide Angle
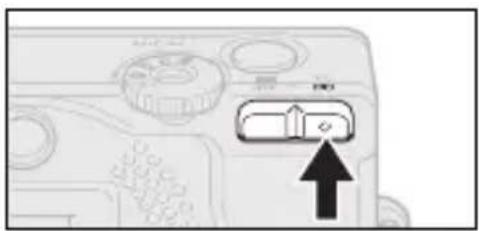
natural_image
Diagram of a device control panel with an arrow pointing to a button (no text or symbols present)Pressing the 📄 button zooms in, making the subject appear larger in the composition.
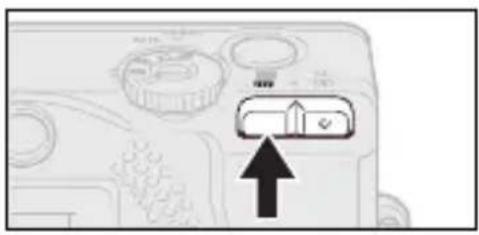
text_image
Diagram showing a device control panel with an arrow pointing to a labeled box containing a checkmark and a house icon.Pressing the 🎯 button zooms out, making the subject appear smaller in the composition.
Digital Zoom
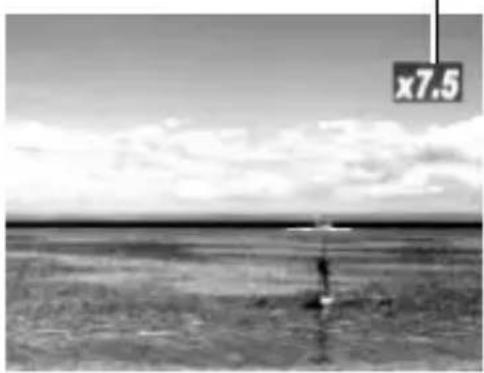
When the LCD monitor is on, you can digitally zoom in on a subject with the zoom button once it is at the maximum optical telephoto setting. Images can be zoomed up to 7.5 times, which combines the effect of the optical zoom.
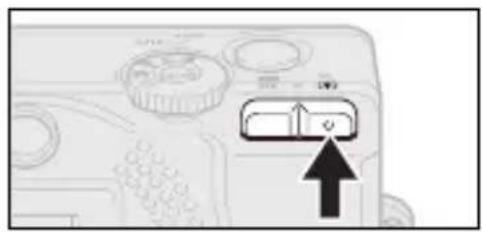
natural_image
Close-up of a camera module interface with a button labeled 'OK' and an arrow pointing to it (no readable text or symbols)The displayed zoom setting is the combined effect of the optical and digital zooms.
natural_image
Black-and-white landscape photo showing a flat horizon with a small structure in the foreground and a scale marker at top (x7.5), no visible text or symbols.Press the ▲ button until the image is fully zoomed and then release the button.
Press the 🔊 button again to further zoom the image.
Pressing the 🖱️ button zooms the image out again.
- Please note that the image appears grainier, the more the image is digitally zoomed.
- The digital zoom is not available in the and modes.
Shooting
Selecting a Shooting Mode
The camera features the following shooting modes.
| Auto Mode | Most settings are automatically selected by the camera. | |
| Manual Mode | The exposure compensation, white balance and other settings can be manually selected. | |
| Stitch Assist Mode | Images are shot in overlapping series to create single panoramic images. | |
| Movie Mode Shoots | movie clips. |
- The settings selected in each shooting mode are saved when switching between shooting modes. Some settings are also saved when the power is turned off (p. 48).
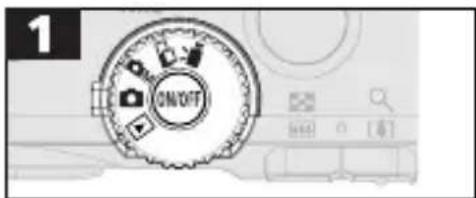
text_image
1 ON/OFF- Select a shooting mode.
Changing Resolution/Compression Settings
Still image resolution and compression settings and movie resolution settings can be adjusted to suit your requirements. Resolution settings get progressively higher ranging from the S (Small) and M(Medium) to the (Large) settings. Use a high resolution setting to obtain the best quality for printing an image at a large size, but select a lower one to print on small labels, to send images by email or to fit more images on a CF card. Compression settings yield progressively higher image quality as one switches from the □ (Normal) and □(Fine) to the (Superfine) setting.
| Still Image Resolution | |
| L | (Large) 1600 x 1200 pixels |
| M | (Medium) 1024 x 768 pixels |
| S | (Small) 640 x 480 pixels |
| Compression | |
| Superfine | |
| Fine | |
| Normal | |
The following resolutions are available for movies.
| Movies Resolution | |
| 640 | 640 x 480 pixels |
| 320 | 320 x 240 pixels |
| 160 | 160 x 120 pixels |

text_image
1 ON/OFF- Turn the mode dial to the , , M or position.
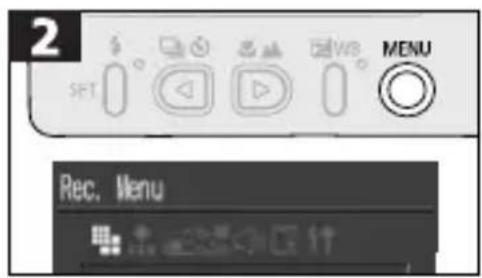
text_image
2 SFT REC. Menucannot be adjusted in mode.
- Use the or button to select or for still images or for movies.
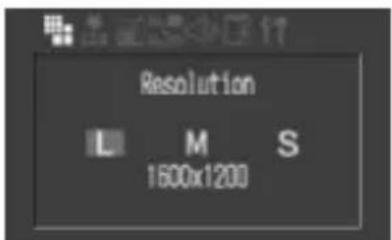
text_image
Resolution L M S 1600x1200Resolution (Still Images)
Select Large, Medium or Small.
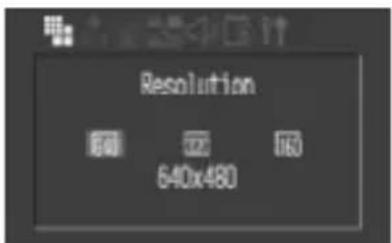
text_image
Resolution 640 22 160 640x480Resolution (Movies)
Select [640 x 480], [320 x 240] or [160 x 120].
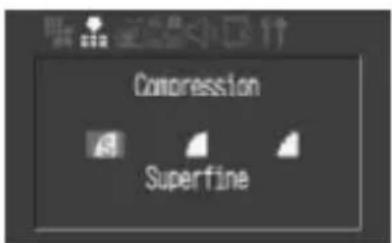
text_image
Compression SuperfineCompression
Select Superfine, Fine or Normal.
text_image
3 SET
text_image
4 SET
text_image
5 SET MENU- Use the or button to select a setting.
- The LCD monitor will return to the shooting mode.
Approximate Image Sizes
| Resolution | Compression | |||
| L | (1600 x 1200 pixels) 957 KB 611 KB 302 KB | |||
| M | (1024 x 768 pixels) 450 KB 294 KB 155 KB | |||
| S | (640 x 480 pixels) 208 KB 141 KB 79 KB | |||
| Movies | (640 x 480 pixels) 900 KB/s | |||
| (320 x 240 pixels) 380 KB/s | ||||
| (160 x 120 pixels) 130 KB/s | ||||
• These figures reflect standard shooting conditions established by Canon. Actual totals may vary according to the subject and shooting conditions.
- The settings can only be adjusted for the first frame in mode.
- Please see page 20 for the available CF cards and their capacities.

Using the Flash
| Red-Eye Reduction Auto | The main flash may fire automatically as required by the light level. The red-eye reduction lamp fires with each shot. | |
| Auto The flash | fires automatically as required by the light level. | |
| On The flash f | res with every shot. | |
| Off The flash will not fire. | ||
| Slow-Synchro | The flash timing is adjusted to slow shutter speeds. This reduces the chance that the background will be dark when shots are taken at night or in rooms with artificial lighting. Use of a tripod is recommended. The red-eye reduction lamp fires with each shot. | |
text_image
1 ON/OFF- Turn the mode dial to the ,orM position.
- Setting available.
▲ Can be selected for first image only.
- Press the button to cycle through the flash settings.
text_image
2 SET- The flash can be fired when the upper indicator glows a steady orange.
- The flash takes approximately 10 seconds to charge. Recharging time may vary with the state of the battery charge.
Please note that a slow shutter speed will be selected in dark places when the flash is set to off or slow-synchro. Be careful to avoid camera blur under these conditions.
- Shooting in Mode
Be careful to hold the camera still to avoid camera blur. - Shooting in 0M Mode
Fix the camera to a tripod to shoot in the ☐M mode since the shutter speed will be slower than in the mode. If an image is dark in mode, reshooting it in mode will make it brighter.
- The flash fires twice. A preparatory pre-flash is followed by the main flash. The exposure readings obtained from the subject with the pre-flash are used to set the optimal flash intensity for the main flash, which is used to shoot the image.
Red-Eye Reduction
- Light reflecting back from eyes can make them appear red when the flash is used in dark areas. Under these conditions, use the red-eye reduction mode. For this mode to be effective, the subject must be looking right at the red-eye reduction lamp. Try asking them to look directly at the lamp. Even better results can be obtained by shooting with the lens set to the wide angle, increasing the lighting in indoor settings or approaching closer to the subject.
- The shutter will not activate for approximately 1 second after the red-eye reduction lamp fires in order to improve the effect. If you wish a more immediate shutter response, set the flash setting to any setting other than the red-eye reduction auto setting.
/▲Shooting Close-Ups/Infinity Shots
 | Macro Mode | Use this mode to record subjects in the range of 16 to 76 cm (6.3 in. to 2.5 ft.) from the lens tip when at maximum wide angle and in the range of 26 to 76 cm (10.2 in. to 2.5 ft.) when at the maximum telephoto setting. |
 | Infinity Mode | Use this mode to record landscapes and distant objects. It can also be used for compositions combining both near and distant objects. |

text_image
1 ON/OFF- Turn the mode dial to the or position.


| ● | ● | ▲ | ● | |
| - | ● | ▲ | ● |
- Setting available.
▲ Selectable for first image only.
text_image
2 SET Media Play WB MENU- Display or .
- Use the LCD monitor to compose close-ups in macro mode since the parallax phenomenon may cause images composed with the optical viewfinder to be off-center.
- The exposure may not be optimal when the flash is used in macro mode in the range of 16 to 26 ~cm (6.3 to 10.2 in).

Using the Self-Timer
text_image
1 ON/OFF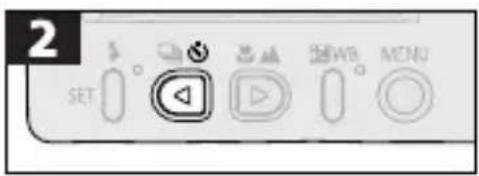
text_image
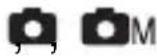
2 SET- Turn the mode dial to the or position.
- Display
- When the shutter button is pressed, the self-timer indicator will flash and the shutter will activate after 10 seconds. The flashing will accelerate two seconds before the picture is taken.
• To cancel partway through, press the ⚙button.
- The settings can only be adjusted for the first frame in mode.
- Please see Step 3 on page 46 to learn how to stop shooting a movie clip.
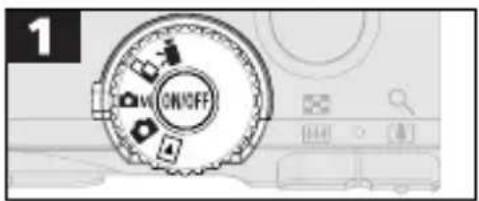
Shooting Continuously
text_image
1 ON/OFF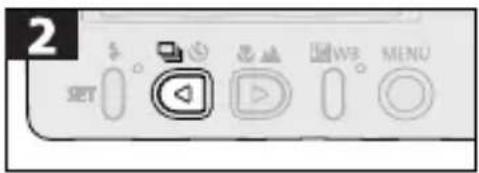
text_image
2 SET Media Player Play Web MENU- Turn the mode dial to the position.

- Display
- The camera will shoot continuously at approximately 2.5 images per second* (Large and Fine settings with the LCD monitor off) while the shutter button is held down. Recording ceases when the shutter button is released.
* This figure reflects standard shooting conditions established by Canon. Actual figures may vary according to the subject and shooting conditions.
- Images may be recorded consecutively in continuous mode until the CF card is full.
- The interval between shots may lengthen slightly when the camera's built-in memory becomes full.
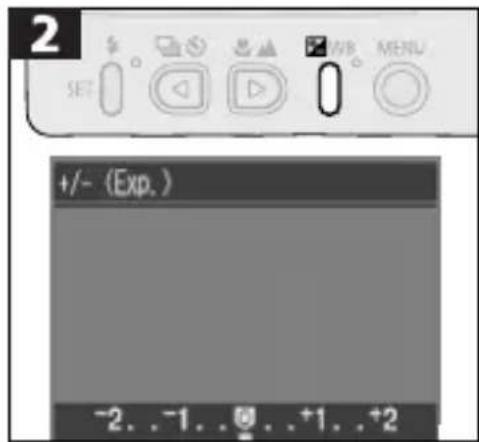
Adjusting the Exposure Compensation
An image can be under-exposed if the subject is backlit or positioned in a bright location. Lights in night shots may also appear too bright. To avoid under-exposing the image, use the exposure compensation function.
text_image
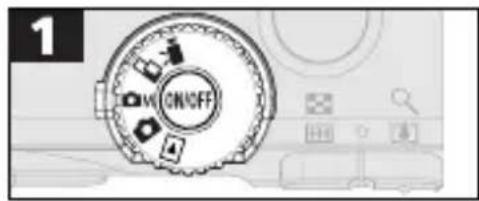
1 ON/OFF- Turn the mode dial to the M, or position.
text_image
2 SET +/- (Exp.) -2..-1..+1..+2- Use the 🔔 or 📁 button to select a setting.
- You can confirm the effect of the exposure compensation setting in the LCD monitor image when the LCD monitor is on.
- A shot can be taken immediately after. The menu will reappear after the shot, allowing you to adjust the setting.
text_image
3 SET- The exposure compensation can only be adjusted for the first frame in mode.
WB Setting the White Balance
Setting the white balance to match the dominant light source when shooting will adjust the coloring of the image (excluding images) to the correct settings for the prevailing light conditions.
| Auto The camera | sets the white balance automatically. | |
| Daylight Use this setting for recording outdoors on a bright day. | ||
| Cloudy Use this setting to record in shade or under overcast or twilight. | ||
| Tungsten Use this setting for recording under tungsten lighting. | ||
| Fluorescent Use this setting to record under fluorescent lighting. | ||
| Black and White Use this setting to record black and white images. | ||
text_image
1 ON/OFF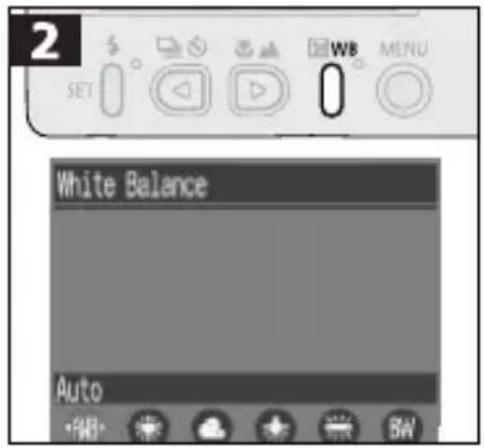
text_image
2 SET WB MENU White Balance Auto +SB-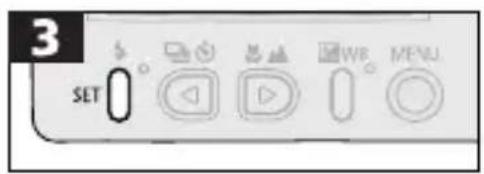
text_image
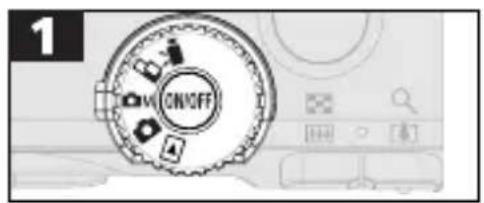
3 SET- Turn the mode dial to the or position.
- Press the WB button twice.
- Use the 🔔 or 🔒 button to select a setting.
- You can confirm the effect of the setting adjustment in the LCD monitor image when the LCD monitor is on.
- A shot can be taken immediately after. The menu will reappear after the shot, allowing you to adjust the setting.
- The white balance can only be adjusted for the first frame in mode.

Shooting in Stitch Assist Mode
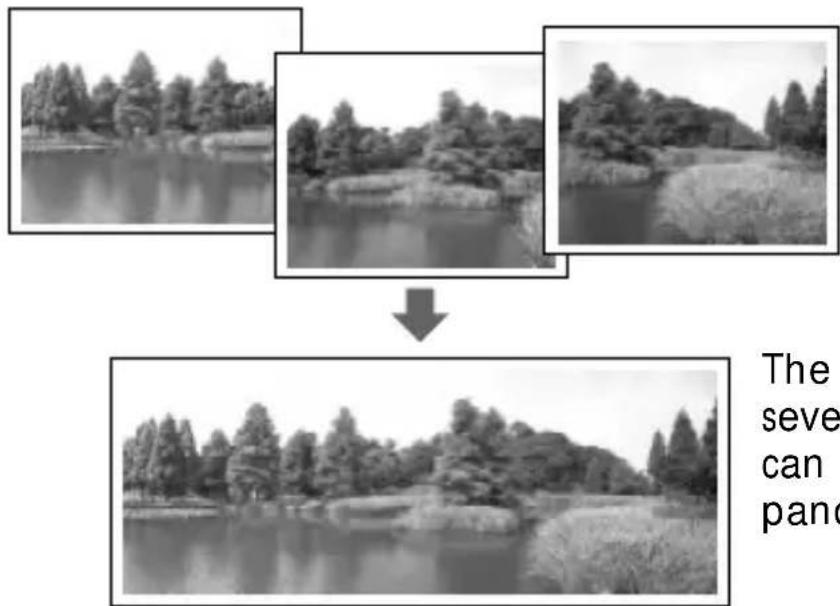
Stitch Assist mode can be used to shoot images, which overlap, and which can later be merged to create one panoramic image on a computer.
text_image
The seven can be panThe overlapping seams of several adjacent images can be joined into a single panoramic image.
- To merge the images on the computer, use PhotoStitch, one of the supplied programs.
Framing a Subject
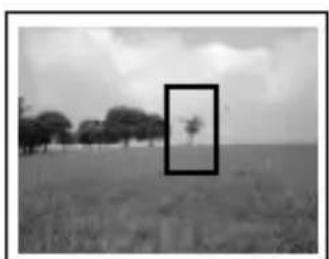
The PhotoStitch program detects the overlapping portions of adjoining images and merges them. When shooting, try to include a distinctive item (landmark) in the overlapping portions.
natural_image
Black-and-white landscape photo showing a field with trees and a small tree, framed by a black rectangle (no text or symbols)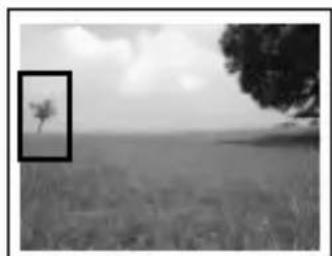
natural_image
Black-and-white landscape photo showing a lone tree in the distance between two trees, with no visible text or symbols.- Compose each frame so that it overlaps 30 - 50% of the adjoining image. Try to keep the vertical misalignment to less than 10% of the image height.
- Do not include moving items in the overlap.
- Do not try to stitch images that include both distant and close items. Objects may appear warped or doubled up.
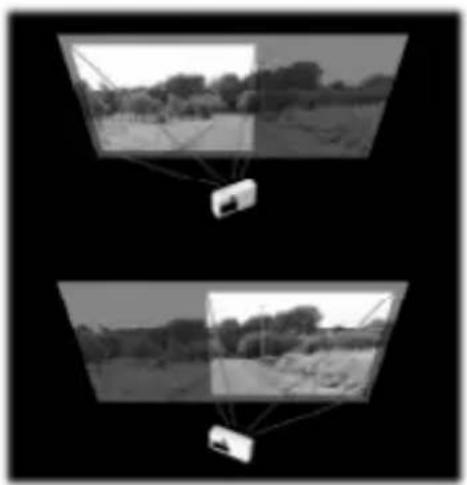
- Make the brightness in each image consistent. The final image will appear unnatural if the difference in brightness is too great.
natural_image
Two identical black-and-white photos showing outdoor scenes with a small object suspended from them, no visible text or symbols.For good results, pan (swivel) the camera to take successive shots.
To shoot close-ups, slide the camera over the subject, keeping it parallel as you move.
Shooting
Images can be shot in two sequences.
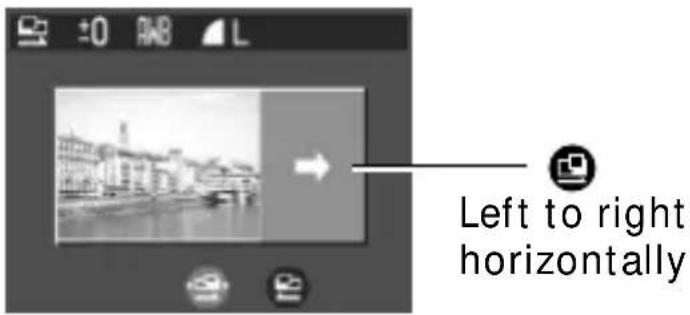
| Left to right horizontally | |
| Right to left horizontally |
text_image
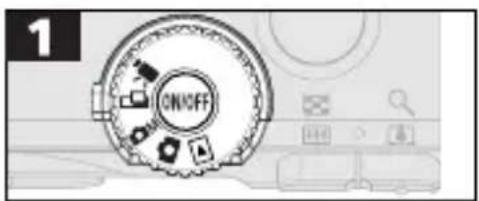
1 ON/OFF- Turn the mode dial to the mode.
• The LCD monitor will turn on.
text_image
Left to right horizontally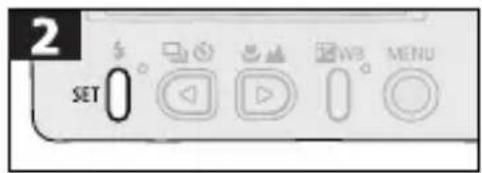
text_image
2 SET- Use the 🔔 or button to select the sequence direction.
text_image
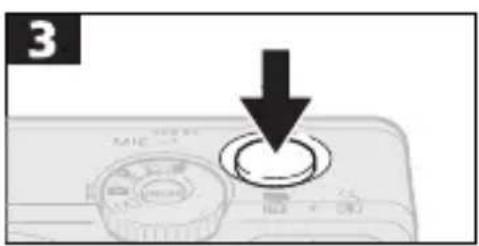
3 MIC 100% 75% 25%- Shoot the first frame in the series.
- The exposure and white balance settings are set and locked with the first image. Successive images use the same settings.
text_image
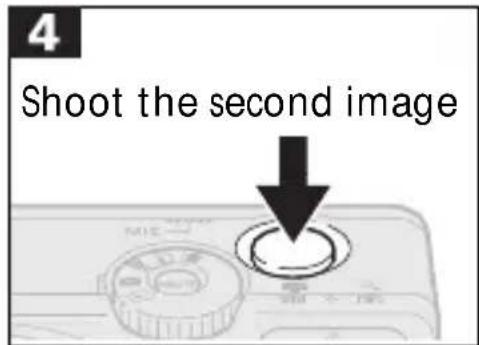
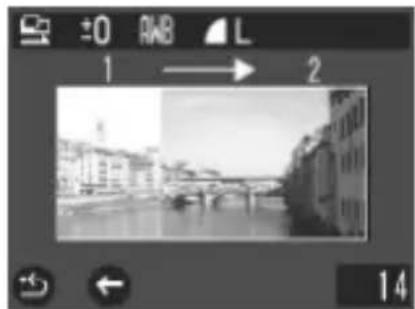
4 Shoot the second image- Compose the second image so that it overlaps a portion of the first and shoot.
natural_image
Black-and-white photo of a river with buildings and bridges, no visible text or symbols- Pressing the 📄 or 📝 button allows you to check the images that have been recorded.
- Minor discrepancies in the overlapping portions can be corrected when the images are stitched together.
text_image
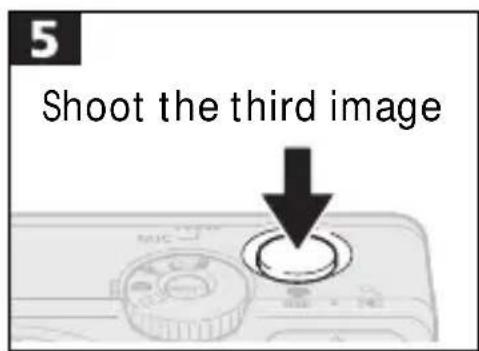
5 Shoot the third image- Repeat the procedure for additional images. A sequence may contain up to 26 images.
text_image
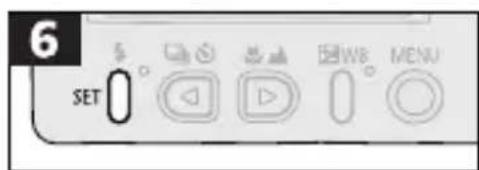
6 SET- Press the SET button to close Stitch Assist mode.
- The zoom, flash (⚡) resolution, compression, exposure compensation, white balance and macro/infinity mode (💡) settings can only be adjusted for the first image. The remaining images use the same settings. Additional images use the same settings.
- The digital zoom, certain flash settings (A) and continuous shooting mode cannot be used with the Stitch Assist mode. - A TV monitor cannot be used when shooting in Stitch Assist mode.

Shooting a Movie
Use the movie mode to shoot movie clips.
text_image
1 ON/OFF
text_image
2 MJC-1 Stop - 100%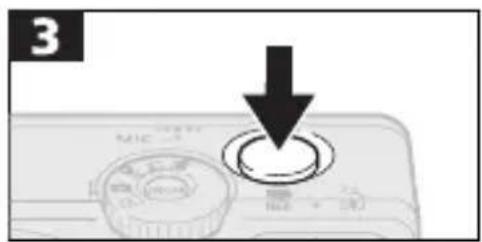
text_image
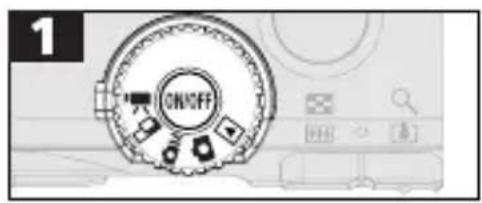
3 MIC 100% 100%- Turn the mode dial to the position. - The LCD monitor will turn on and display the recordable seconds remaining.
- Press the shutter button fully to start recording images and sounds. - A red dot and recorded time (in seconds) will appear on the LCD monitor while recording is in process
- The maximum length of a movie clip (at approximately 20 frames/second) is approximately 4 seconds (640), 10 seconds, (320) or 30 seconds (950) (according to standard Canon testing conditions). These times may vary with the subject and shooting conditions. Recording will automatically stop when the maximum time is reached or when the CF card runs out of free capacity.
- Recording will stop when the shutter button is pressed again while a movie is recording.
- Be careful not to touch the microphone while recording.
- The exposure compensation, focus, white balance and zoom settings remained fixed at the values selected for the first frame.
- After a clip is shot, the upper indicator will flash green while the clip is being written to the CF card. You cannot shoot until the flashing stops.
-
The digital zoom, flash, continuous shooting mode and compression settings cannot be selected for movies.
-
Three resolution settings (640 x 480 pixels, 320 x 240 pixels, 160 x 120 pixels) are available for movies (p. 35).
- Sound is recorded monophonically.
- The beep will not sound in the middle of a movie clip recording.
- QuickTime 3.0 or a later version of this software is required to replay movie files (AVI file format, Motion JPEG compression format) on a computer.
Functions Available in Each Shooting Mode
The chart below is a reference for the settings available for various shooting conditions. The settings selected in each shooting mode are saved when switching between shooting modes.
| Function | Auto Manual Stitch Assist Movie | Reference Page | ||||
| Digital Zoom | ● | ● | - | - | p.33 | |
| Flash | Red-Eye Reduction Auto | ●* | ●* | - | - | p.37 |
| Auto | ● | ● | - | - | ||
| On | - | ● | ▲ | - | ||
| Off | ● | ● | ▲* | ● | ||
| Slow-Synchro | - | ● | ▲ | - | ||
| Resolution | Large | ●* | ●* | ▲* | ● | p.34 |
| Medium | ● | ● | ▲ | ●* | ||
| Small | ● | ● | ▲ | ● | ||
| Compression | Superfine | ● | ● | ▲ | - | p.34 |
| Fine | ●* | ●* | ▲* | - | ||
| Normal | ● | ● | ▲ | - | ||
| Shooting Method | Single | ●* | ●* | ▲* | ●* | - |
| Continuous | - | ● | - | - | p.40 | |
| Self-Timer | ● | ● | ▲ | ● | p.40 | |
| Macro Mode | ● | ● | ▲ | ● | p.39 | |
| Infinity Mode | - | ● | ▲ | ● | p.39 | |
| Exposure Compensation | - | ● | ▲ | ● | p.41 | |
| White Balance | - | ● | ▲ | ● | p.42 | |
* Default value.
- Setting available.
▲ Selectable for first frame only.
: The settings are saved when the power is turned off.
Replaying
Displaying Images Singly (Single Image Replay)
text_image
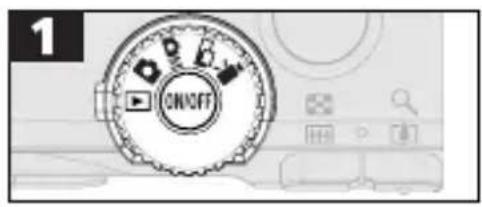
1 ON/OFF- Turn the mode dial to the position.
- The last recorded image will appear in the display (single image replay).
natural_image
Black-and-white photo of a large steel arch bridge spanning a river, with no visible text or symbols.
text_image
2 SET ◀ ▼ ▼ ▼ ▼ MENU- Press the ◀ button to switch the display to the previous image. The ▶ button switches to the next image. Hold down the button to advance through the images more rapidly. Images will appear coarser at the faster speed.
Q Zooming an Image
text_image
1 MHC- An image can be magnified approximately 2.5 times in the single image replay mode.

natural_image
Black and white photo of a steel truss bridge over water, with no visible text or symbols.Approximate Location of the Magnified Area
text_image
2 SET ← → WR MENU- Press the 📊 or button to move the selection area left or right and hold the SET button while pressing the 🔔 or button to move the selection area up or down.
- Press the 🎯 button to reset the zoom setting to normal.
- The button can be pressed as a shortcut for erasing the displayed image (p. 24).
- A TV monitor can be used to replay images (p. 79).
- Movie clips cannot be magnified.
Displaying Images in Sets of Nine (Index Replay)
text_image
1 ON/OFF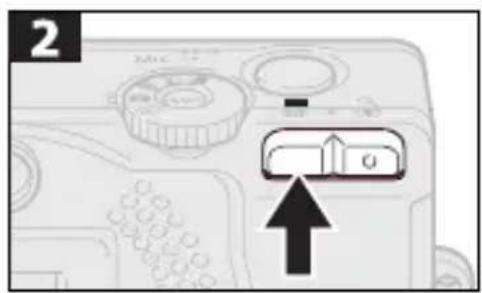
text_image
2 OK- Turn the mode dial to the position.
- The last recorded image will appear in the display (single image replay).
- A set of nine images will appear in the display (index replay).
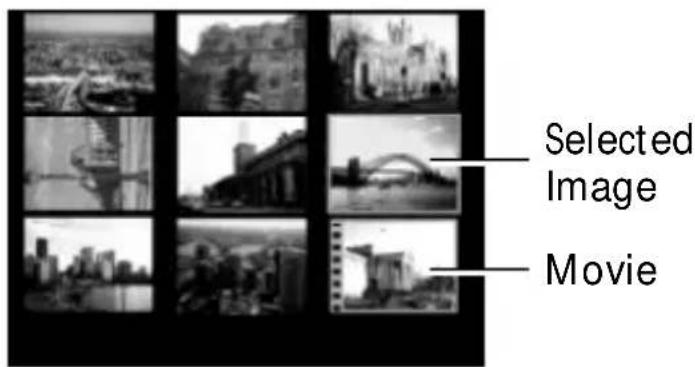
text_image
Selected Image Movie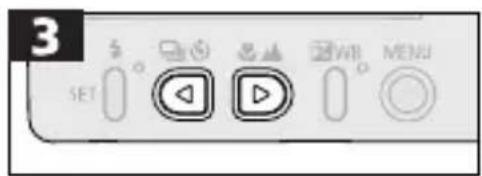
text_image
3 SET ← → WB MENU- You can change the image selection with the 🔔 or 📁 button. Pressing the 🔊 button displays the selected image in single image replay mode.
- The ☐ button can be pressed as a shortcut for erasing the selected image (p. 24).
Switching between Sets of Nine Images
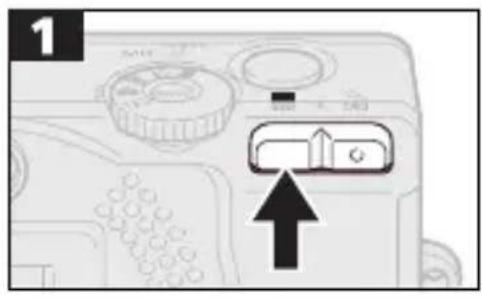
text_image
1 G- Successive sets of nine images can be shown in the display.
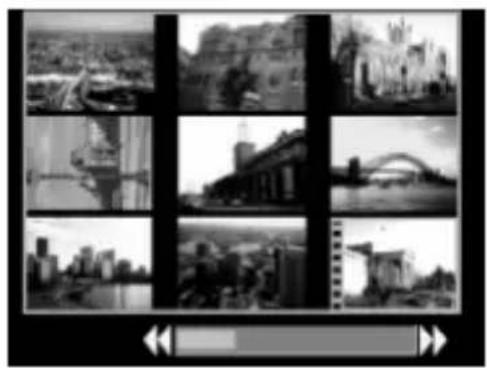
natural_image
Grid of black-and-white photos showing urban landscapes including a city skyline, bridge, and river (no text or symbols)
text_image
2 SET Media Player WB MENU- Press the button to display the previous set of nine images. The button displays the next set of nine. - Pressing the [▲] button restores the index replay mode.
Replaying Movies
Movie clips can be replayed with the following procedures.
text_image
1 ON/OFF- Turn the mode dial to the ▶ position.
- Use the 🔔 or button to select a movie.
• Movies cannot be played in the index replay mode.
text_image
2 SET• The movie images will play.
- Pressing the or button during replay stops it and displays the previous or next image.
- When the movie finishes, the last frame shows in the display.
Pausing/Resuming
text_image
1 SET- Pressing the SET button pauses the replay. Pressing the SET button again resumes it.
- Frames may be dropped or the audio may break up if there are insufficient memory resources when movies are replayed on a computer.
• Movies can also be replayed on a TV. Both audio and visual recordings can be replayed when connected to a TV (p. 79).
• Movies and other clips shot with other cameras may not replay on this camera (List of Messages, p. 90).
Rotating Images in the Display
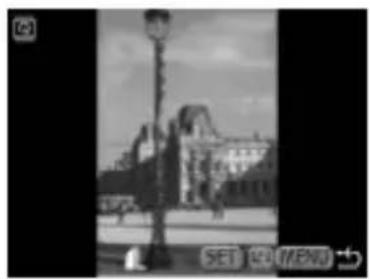
Images can be rotated 90^ or 270^ clockwise in the display.
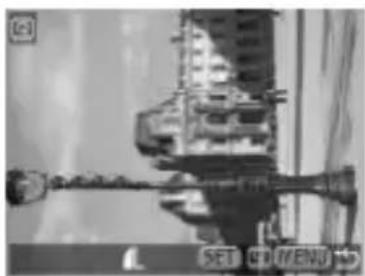
natural_image
Black-and-white photo of a mechanical assembly with no visible text or symbols0° (Original) 90° 270°
natural_image
Black-and-white exterior view of a historic building with a lit street lamp and pedestrians (no visible text or symbols)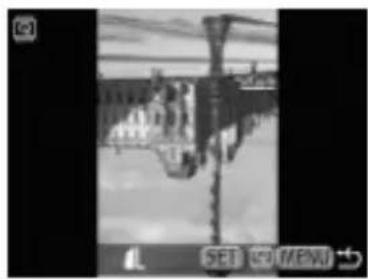
natural_image
Black and white photo of a waterfront scene with reflections, no visible text or symbols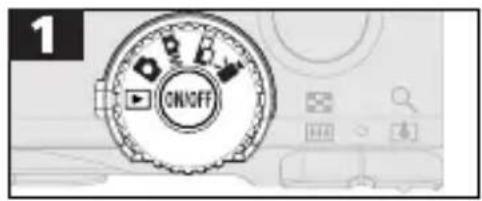
text_image
1 ON/OFF- Turn the mode dial to the position.
text_image
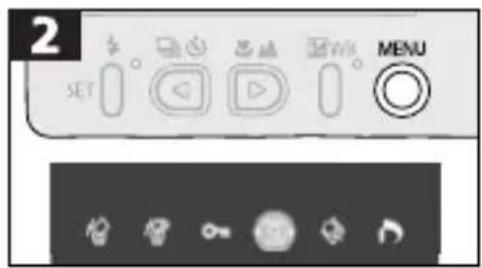
2 SET MENU- Use the or button to select .
text_image
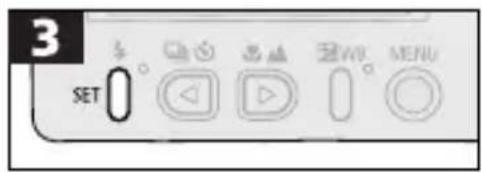
3 SET- Cycle between the 90^ / 270^ / 0^ orientation each time you press the SET button.
text_image
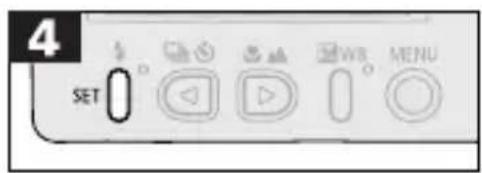
4 SET- Press the button several times until the replay screen reappears.
text_image
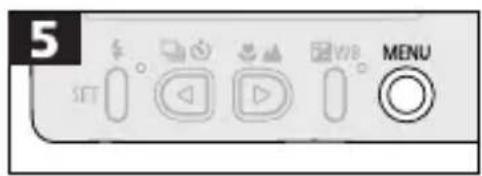
5 SET MENU- If an image has been rotated in the camera before being loaded onto a computer, the particular software in use will determine whether or not the rotation settings are retained.
- Movie clips cannot be rotated.
- Zooming rotated images reverses the rotation and displays the original orientation.
Automating Playback (Auto Play)
All of the images on a CF card can be displayed one-by-one automatically with the auto play function. Each image is displayed for approximately 3 seconds.
text_image
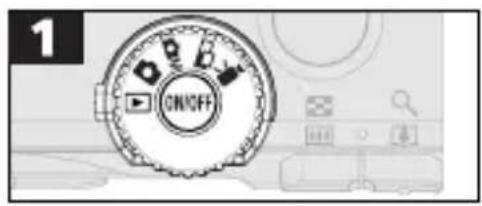
1 ON/OFF- Turn the mode dial to the position.
text_image
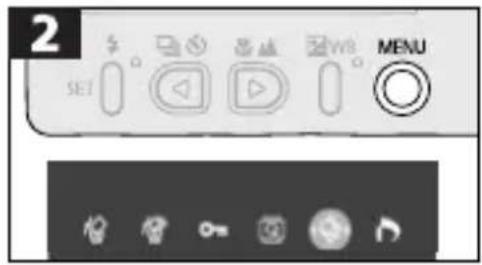
2 SET Media Player Play Window MENU- Use the 📄 or 📋 button to select .
text_image
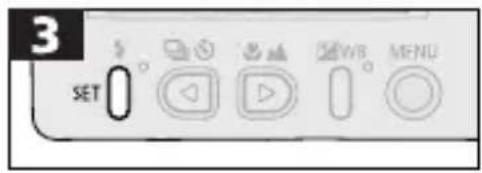
3 SET- The camera will read the images on the CF card and start auto play.
- As with the single image display mode, pressing the 📊 or 🏠 button during auto play will advance through the images more rapidly (p. 49).
- The display interval may vary for some images.
• Movies play for the entire recorded interval.
Pausing and Resuming Auto Play
text_image
1 SET- Pressing the SET button temporarily pauses auto play. Press the SET button again to resume auto play.
- If the 🔔 or 📊 button is pressed while auto play is paused, the display can be switched to the previous or next image, respectively. Hold down the 🔔 or 📊 button to advance through the images more rapidly.
Stopping Auto Play
text_image
1 SET MENU- Stop the auto play by pressing the MENU button several times until the LCD monitor returns to the standard replay mode.
Protecting Images
You can protect important images to prevent their accidental erasure.
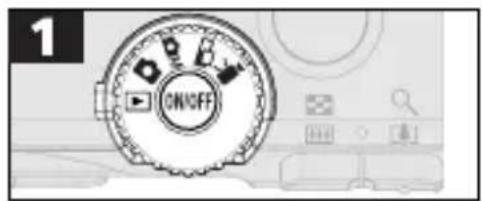
text_image
1 ON/OFF- Turn the mode dial to the position.
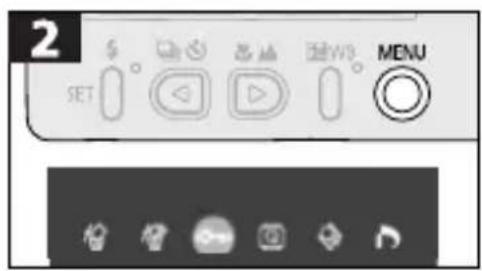
text_image
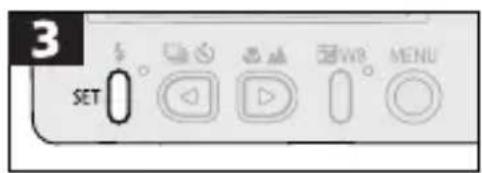
2 SET MENU- Use the 📄 or 📋 button to select .
text_image
3 SET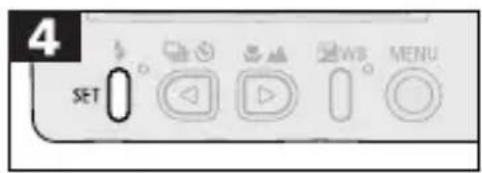
text_image
4 SET- Use the or button to select an image. Press the SET button to protect it.
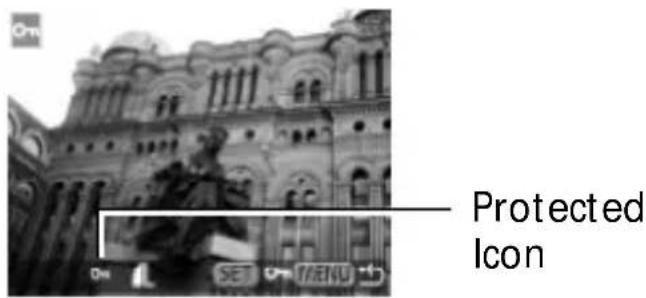
- Pressing the SET button protects the image. If the SET button is pressed a second time, the protection is removed.
text_image
Protected Icon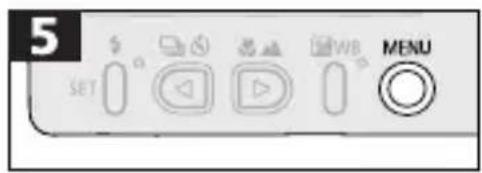
text_image
5 SET MENU- Press the motion several times until the replay screen reappears.
- Please note that even protected images are erased when a CF card is reformatted.
Erasing Images
Erasing Images Singly
text_image
1 ON/OFF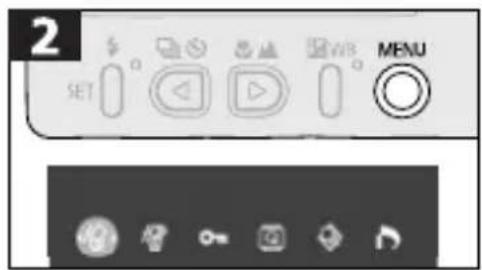
text_image
2 SET MENU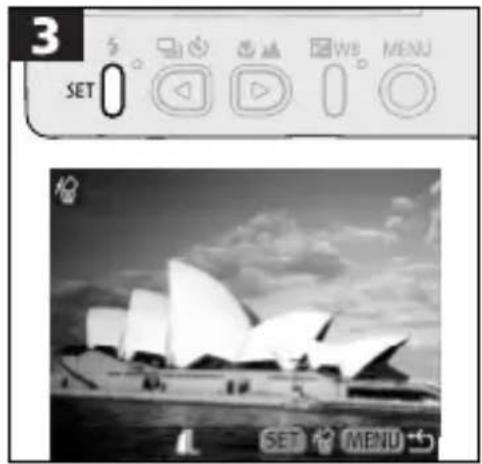
text_image
3 SET 0 WB MENU SET MENU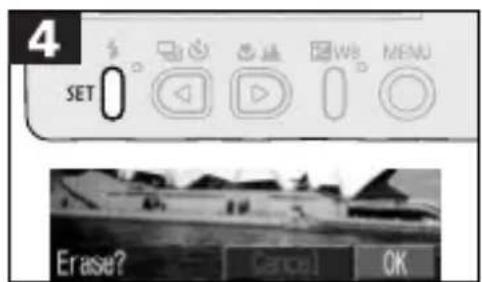
text_image
4 SET 0 WB MENU Erase? Cancel OK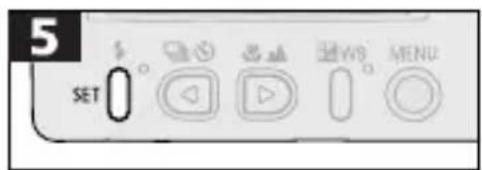
text_image
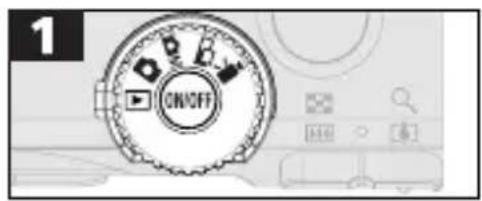
5 SET- Turn the mode dial to the position.
- Please note that erased images cannot be recovered. Exercise adequate caution before erasing a file.
- Protected images cannot be erased with this function.
- Use the or button to select .

- Use the 🔔 or button to select the image you wish to erase.
- Use the ◀ or □ button to select [OK].
- To cancel instead of erasing, select [Cancel].
- Images can also be erased using a shortcut (p. 24). However, images cannot be erased while Card Photo Printer CP-10 (sold separately) is connected.
Erasing All Images
text_image
1 ON/OFF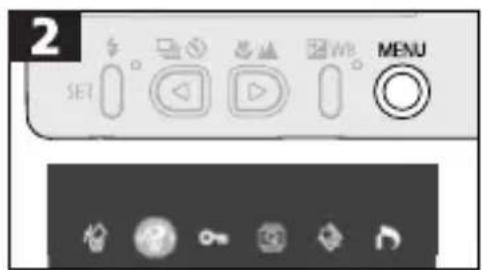
text_image
2 SET MENU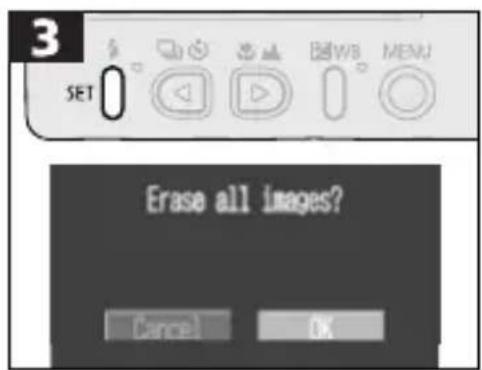
text_image
3 SET 0 Erase all images? Cancel OK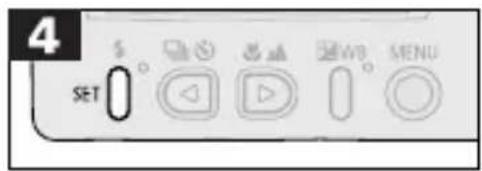
text_image
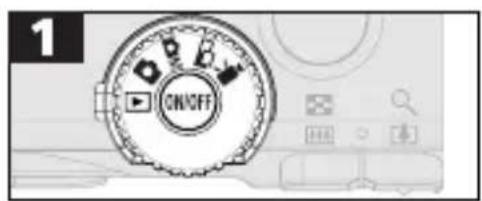
4 SET- Turn the mode dial to the position.
- Please note that erased images cannot be recovered. Exercise adequate caution before erasing a file. - Protected images cannot be erased with this function.
- Use the or button to select .

- Use the 🔔 or button to select [OK].
- To cancel the command, select [Cancel].
Print Settings (DPOF Settings)
Images on a CF card can be individually selected for printing in a specified number of copies. The print type and date or file number printing options can also be selected. These settings are compatible with Digital Print Order Format (DPOF) standards so that images can be printed conveniently on DPOF compliant digital printers or at participating photo labs.
• After you set the DPOF settings, you can connect Card Photo Printer CP-10 (sold separately) and print images directly from the camera (p. 65). Please note that images with the print type set to [Index] cannot be printed on Card Photo Printer CP-10.
Displaying the Print Settings Menu
text_image
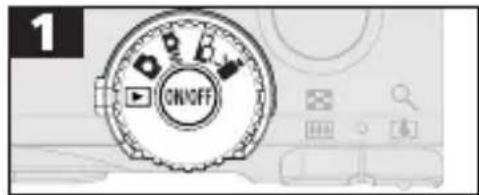
1 ON/OFF- Turn the mode dial to the position.
text_image
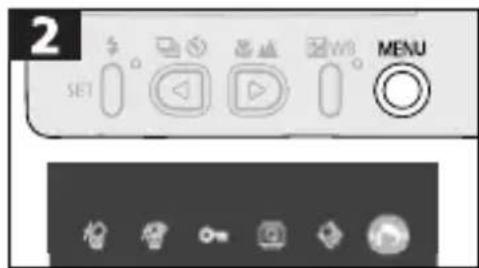
2 SET MENU- Use the or button to select .

text_image
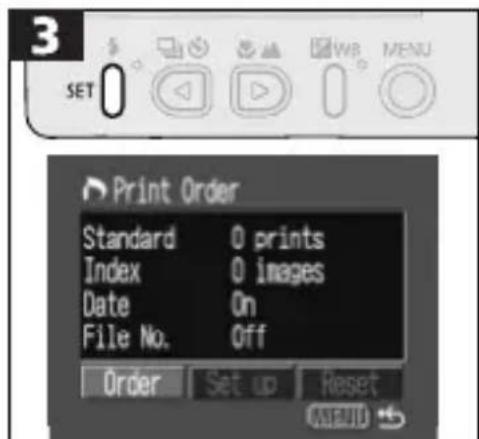
3 SET 0 WB MENU Print Order Standard 0 prints Index 0 images Date On File No. Off Order Set up Reset AMENDAdjust the settings in the Print Settings menu in the following order.
- Set the Print Style (p. 60).
-
Select Images for Printing (p. 61) Select Reset if you wish to reset all settings (p. 64).
-
Print settings cannot be set for movies.
- The mark will display on images that have had print marks set by another DPOF-compliant camera. These settings will be overwritten by any settings set by your camera.
- The output of some printers or developing labs may not reflect the specified print settings.
Setting the Print Style
The following settings can be selected.
| Print Type | Standard | Prints one image per page. |
| Index | Prints selected images at reduced size on a single sheet in an index format. | |
| Both | Prints the images in both standard and index formats. | |
| Date Adds the date to the print. | ||
| File No. Adds the file number to the print. | ||
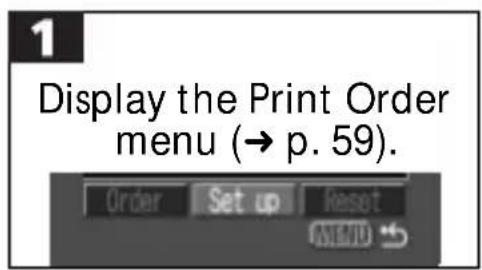
text_image
1 Display the Print Order menu (→ p. 59).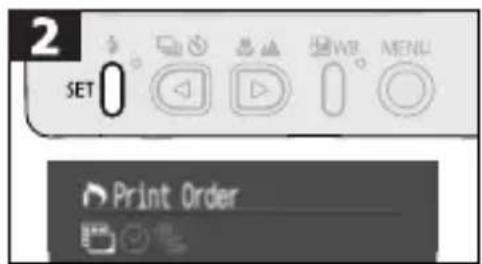
text_image
2 SET 0 WR MENU Print Order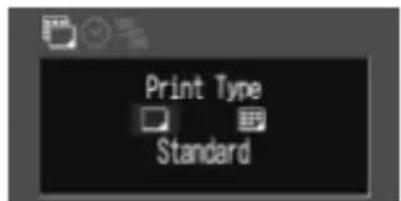
text_image
Print Type Standard- Use the or button to select [Set up].
- Use the 📄 or 📋 button to select , 📋 or 📋 200
(Print Type)
You may select [Standard], [Index] or [Both] options.
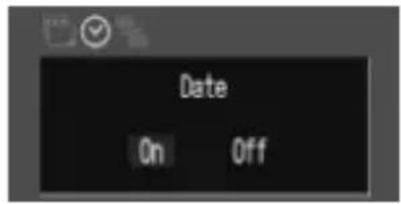
text_image
Date On Off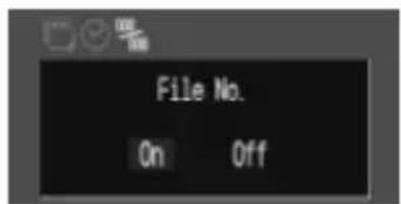
text_image
File No. On Off(Date)
You may select either [On] or [Off].
100.000 (File No.)
You may select either [On] or [Off].
text_image
3 SET
text_image
4 SET
text_image
5 SET MENU- Use the 🔒 or 📁 button to select a setting. Press the SET button.
- Press the NORTON several times until the replay screen reappears.
- The date is printed in the format selected in the date format field of the Set Date/Time menu (p. 21).
- The date and file number options cannot both be set to On when [Index] is selected as the print type.
Selecting Images for Printing
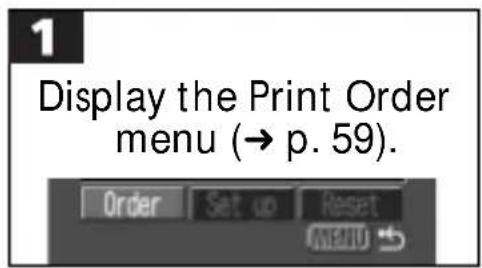
text_image
Display the Print Order menu (→ p. 59).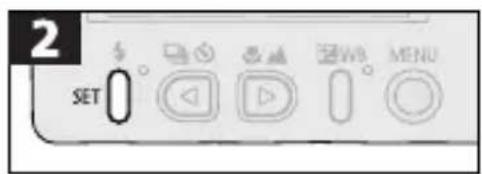
text_image
2 SET- Use the 🔔 or button to select [Order].
The selection method will vary according to the print type ( ) (p. 60).
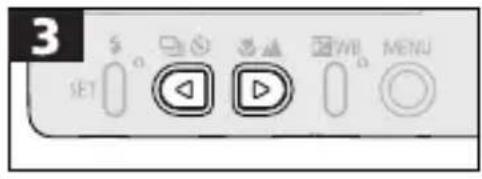
Standard/Both
- Use the or button to select an image.
- The zoom buttons can be used to switch between the single and index replay (3 images) modes for image selection.
- Pressing the button displays the ◀ ▶ icon so that the number of print copies can be specified. Pressing the button a second time causes the ◀ ▶ icon to disappear and restores the image selection mode.
- Use the or button to select the number of copies. The maximum is 99 copies.
Number of Print Copies
- Press the button several times until the replay screen reappears.
Index
text_image
3 SET OK Cancel Preview Action View MENU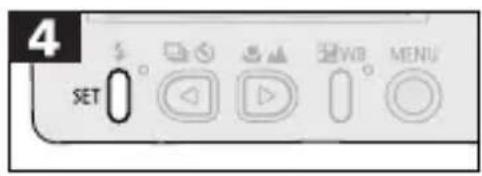
text_image
4 SET- Use the or button to select an image.
- Pressing the SET button causes a check mark icon to appear. Pressing the SET button a second time deselects the image.
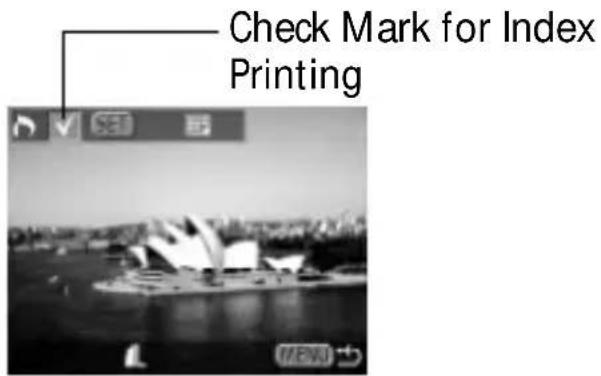
text_image
Check Mark for Index Printing
text_image
5 SET VIB MENU- Press the Mutton several times until the replay screen reappears.
- Images are printed in the order of the oldest image to the newest.
- When the print type is set to [Both] and both the date and file number are set to [On], only the file number will print on the index sheet.
Resetting Print Settings
Resetting the print settings removes them from all the selected images and resets the print type to [Standard], the date setting to [Off] and the file number setting to [Off].
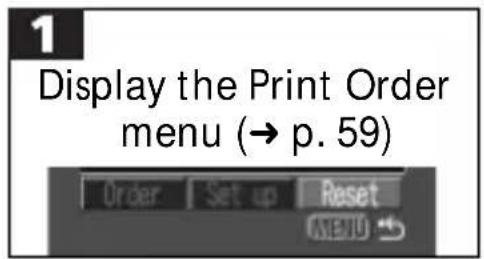
text_image
1 Display the Print Order menu (→ p. 59)- Use the or button to select [Reset].
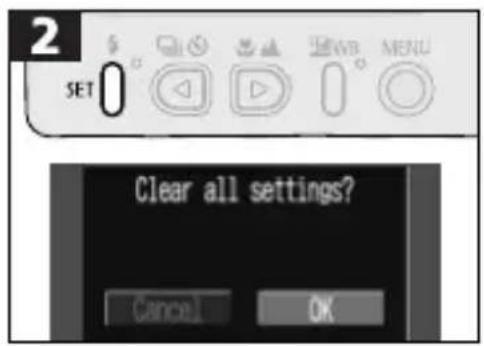
text_image
2 SET Clear all settings? Cancel OK- Use the 🔔 or 📊 button to select [OK].
- To cancel instead of resetting, select [Cancel].
text_image
3 SETPrinting with Card Photo Printer CP-10
The optional Card Photo Printer CP-10 can be used to print images directly and effortlessly from the camera. It can also print images marked with DPOF print settings.
Connecting Card Photo Printer CP-10
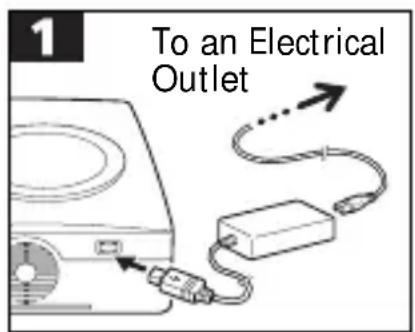
Connect the printer to the camera using Direct Interface Cable DIF-100, which is supplied with the printer.
- You are recommended to use a household power source (AC adapter sold separately) to power the camera when connecting it to a printer. When using a battery, ensure that it is fully charged. Monitor the battery charge closely when printing.
text_image
To an Electrical Outlet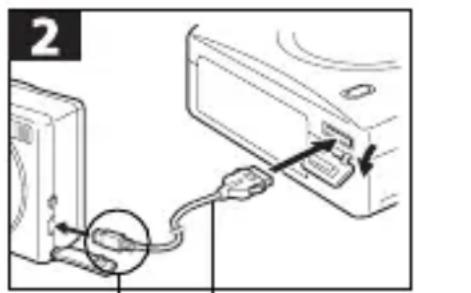
text_image
2Direct Interface Cable DIF-100
← mark appears on the connector.
- Plug the power cord into the printer and then into an electrical outlet.
- Connect the direct interface cable to the printer.
- Open the terminal cover on the camera and attach the direct interface cable to the Digital terminal.
- Position the cable's connector so the mark faces the camera's rear panel.
- When detaching the cable, from the camera's Digital Terminal, always grip the sides of the cable's plug.
- After the printer is connected, turn the camera power on and turn the mode dial to the ▶ position.
- Please refer to the Card Photo Printer CP-10 manual for instructions on feeding paper or installing the ink cassette.
-
The lens retracts right away if the mode dial is turned from a photo, or mode to the position when the printer is connected.
-
All of the replay functions are available when the printer is connected, except for the following: replaying a movie, erasing an image with the ☐ button and setting a language using the SETD button.
- The direct printer) icon will disappear from the upper left of the LCD monitor and the normal replay mode will be restored when the connection with the printer is canceled.
Printing
Printing the Displayed Image
A single copy of an image can be printed while it is displayed in single image replay or index replay.
natural_image
Black and white photo of a city skyline with boats and buildings in the background (no visible text or symbols)- The 📋 icon will display when the printer is connected correctly.
- Select an image for printing.
text_image
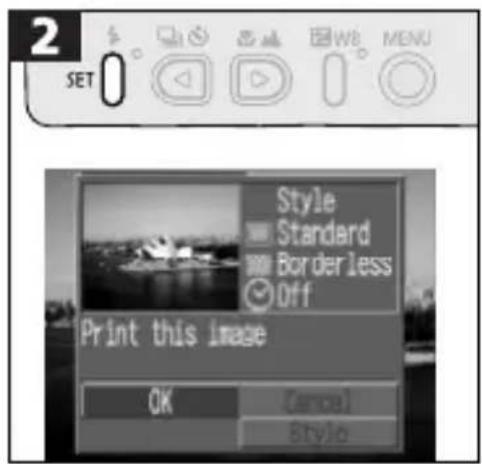
2 SET 0 Style Standard Border less Off Print this image OK Cancel Style- Use the 🔔 or button to [select OK].
- Select [Style] if you wish to change the print style (p. 70).
- Select [Cancel] if you wish to stop printing.
text_image
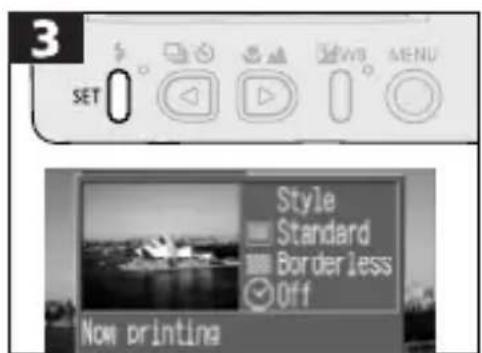
3 SET Style Standard Border less Off Now printing- Press the SET button to start printing.
-
The LCD monitor returns to the replay mode when the print concludes successfully.
-
Printing cannot be stopped in mid process.
• Movie clips cannot be printed.
Printing Errors
text_image
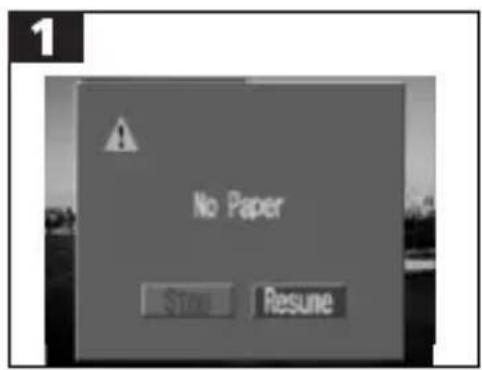
1 No Paper Stop Resume- Use the 🔔 or button to select [Stop] or [Resume].
- The [Resume] option does not display with some types of error. In that case, select [Stop].
text_image
2 SET• The print will cancel or resume.
Printing with DPOF Print Settings
Card Photo Printer CP-10 can print images marked with DPOF print settings, excluding those with the print type set to [Index].
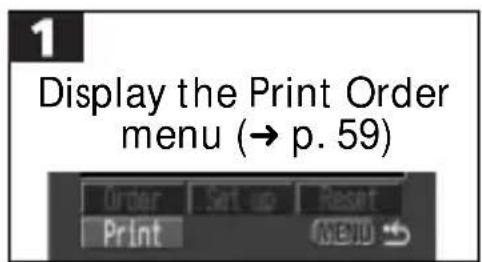
text_image
1 Display the Print Order menu (→ p. 59)- Use the or button to select [Print].
text_image
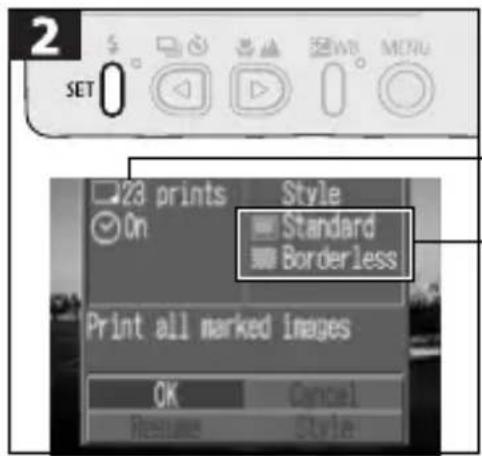
2 SET 0 23 prints On Style Standard Borderless Print all marked images OK Cancel Resume StyleDPOF Print Setting
Current Print Style
- Use the 🔔 or 🔒 button to select [OK].
- Select [Style] if you wish to change the print style (p. 70).
- Select [Cancel] if you wish to stop printing.
text_image
3 SET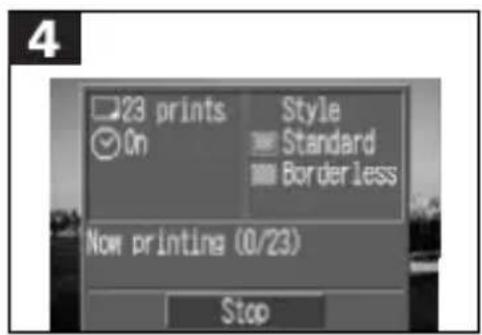
text_image
4 23 prints On Style Standard Borderless Now printing (0/23) Stop- Press the S button to start printing.
- The LCD monitor returns to the replay mode when the print concludes successfully.
Stopping Printing
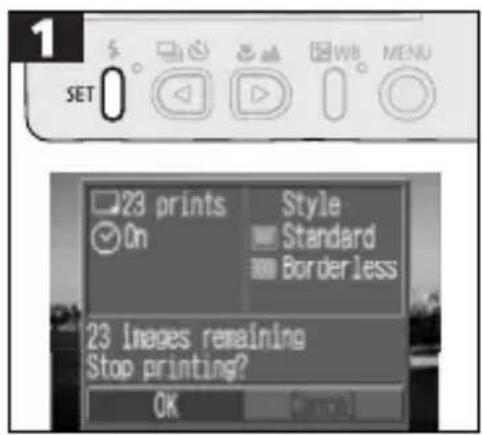
text_image
1 SET 0 23 prints On Style Standard Borderless 23 Images remaining Stop printing? OK
text_image
2 SET- If the SET button is pressed while printing is underway, a confirmation message will appear.
- Use the 📄 or 📋 button to select [OK].
- Pressing the SET button stops the print queue after the image currently printing is finished. The LCD monitor returns to the replay mode.
Resuming Printing
If printing is stopped with images left in the print queue, the remaining images can be printed with the following procedures.
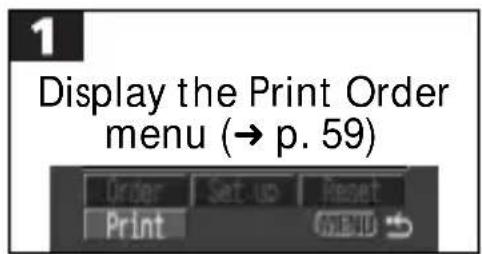
text_image
1 Display the Print Order menu (→ p. 59)- Use the or button to select [Print].
text_image
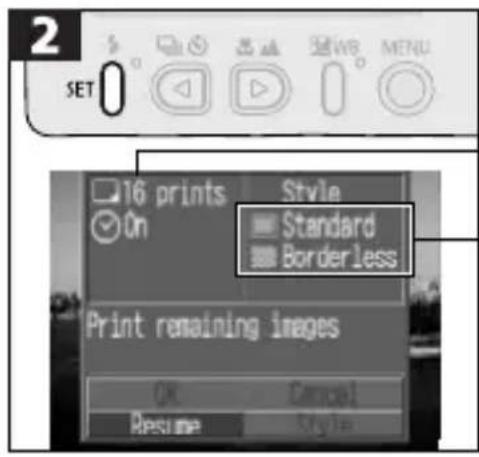
2 SET 0° 16 prints On Style Standard Borderless Print remaining images OK Cancel Resume StyleNumber of Images Left to Print Current Print Style
- Use the or button to select [Resume].
- Select [Style] if you wish to change the print style (p. 70).
- Select [Cancel] if you wish to stop printing.
text_image
3 SET- Press the button to resume printing.
- The LCD monitor returns to the replay mode when the print concludes successfully.
Printing cannot be resumed, however, under the following circumstances.
- When print setting are changed before printing is resumed.
- When images marked for printing are deleted before printing is resumed.
- When there is limited free capacity on the CF card when printing is stopped.
Printing resumes from the first image if [Ok] is selected in the Print menu. You are recommended to use a household power source (AC adapter sold separately) if the battery pack charge is depleted and the camera shuts down. If you intend to use a battery pack, ensure that you charge it fully before use. Then turn the camera on again.
Printing Errors
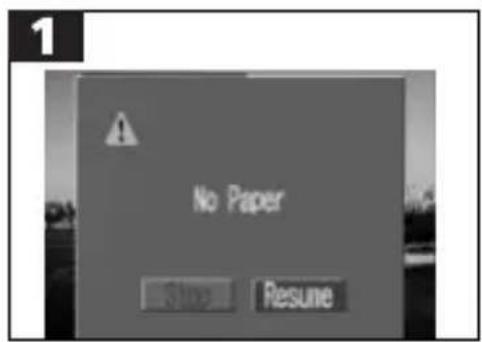
text_image
1 No Paper Stop Resume- Use the 🔔 or button to select [Stop] or [Resume].
- The [Resume] option does not display with some types of error. In that case, select [Stop].
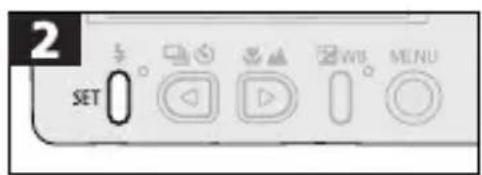
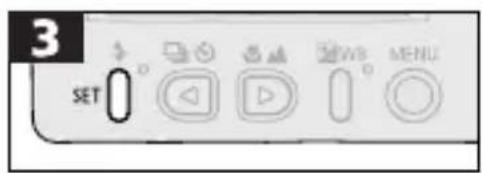
text_image
2 SET• The print will cancel or resume.
Setting the Print Style
The following settings can be selected.
 | Image |  | Standard Prints one copy of one image per page. |
 | Multiple | ||
 | Borders |  | Borderless Prints the image to the edges of the page. |
 | Bordered Prints the image with borders. | ||
 | Date Prints the date with the image. | ||
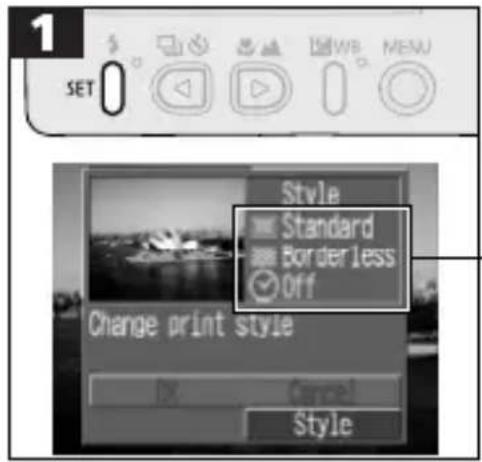
text_image
1 SET 0 Style Standard Border less Off Change print style OK Cancel StyleCurrent Print Style
- Use the or button to select [Style].
- Select [Cancel] if you wish to cancel the setting.

text_image
2 SET Style- Use the ◀ or □ button to select
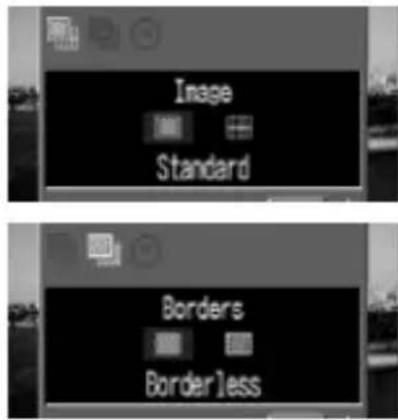
text_image
Image Standard Borders Border lessImage
Select [Standard] or [Multiple].
Borders
Select [Borderless] or [Bordered].
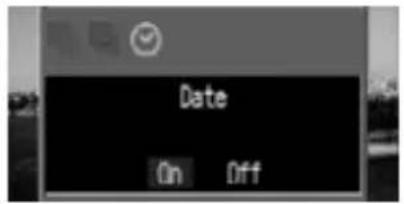
text_image
Date On Off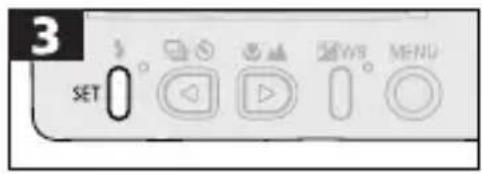
text_image
3 SET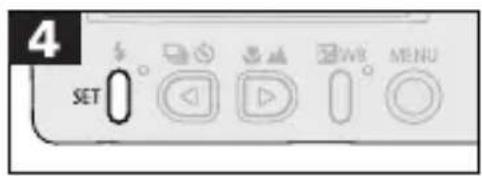
text_image
4 SET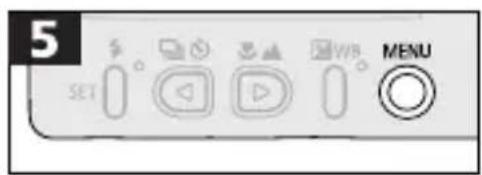
text_image
5 SET MENUDate
Select [On] or [Off].
- Use the 🔔 or 📁 button to select the desired option and press the SET button.
- Press the Mouton to complete the procedure.
- The date and border settings cannot be selected for images set to [Multiple] in the [Style] menu (they will print without dates or borders).
- The date cannot be selected for images marked with DPOF print settings. The date is printed according to the DPOF settings (p. 60).
- Printing with the [Bordered] setting prints virtually all of the image shown in the LCD monitor.
- Printing with the [Borderless] setting or the [Multiple] setting will result in the image being slightly cropped on all four sides because the aspect ratio of the image and paper is different.
Camera Settings
Displaying the Rec. Menu
Camera settings are adjusted with the Rec. menu according to the following procedures. For instructions on changing the resolution and compression please see page 34. Please see page 32 to learn how to change the review time for images.
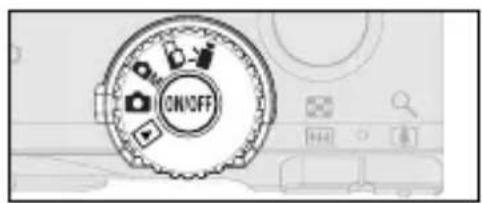
text_image
ON/OFF- Turn the mode dial to the , , M or position.
- The Rec. menu can not be shown in mode.
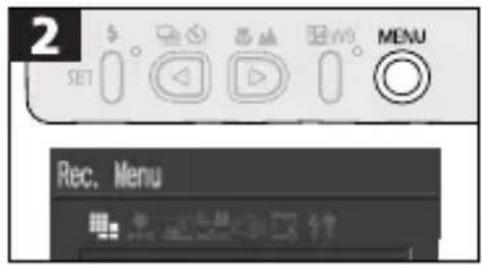
text_image
2 SET MENU Rec. Menu
text_image
3 SET WB MENU- Complete the procedure.
Resetting the File Number
You can select the method which the camera uses to assign file numbers with the File No. Reset function.
| On | The starting file number is reset to 100-0001 each time a new CF card is inserted. New images recorded on previously recorded CF cards with existing files are assigned the next available number. |
| Off | The file number of the last recorded image is saved so that the next image recorded on any CF card, including a new one, is assigned the next available number. |
text_image
1 Display the Rec. Menu (→ p. 72) Rec. Menu- Use the or button to select .
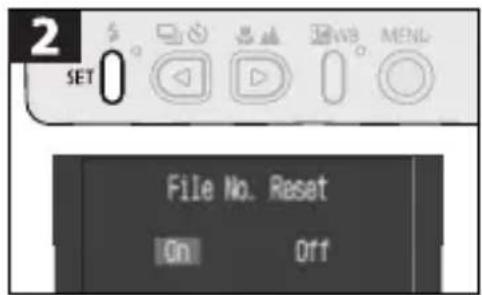
text_image
2 SET 0 File No. Reset On Off- Use the or button to select [On] or [Off].
text_image
3 SET- Shooting with the File No. Reset set to [Off] is useful for avoiding file name duplication when the images are uploaded to a computer and organized in a single directory or album.
About File Numbers
- Images are assigned individual frame numbers ranging from 0001 to 9900 and organized in folders containing up to 100 images. The folders are assigned names from 100 to 998. (Folder numbers cannot contain 99 in the last two digits.)
- Since images shot in or mode are always saved together in the same folder, some folders may contain 101 or more images.
Setting the Beep On/Off
A beep sounds for confirmation purposes when the shutter button is pressed or a camera setting is changed. The beep can be turned off.

text_image
1 Display the Rec. Menu (→ p. 72) Rec. Menu 2 SET 0 Beep On Off 3 SET 0- Use the or button to select .
- Use the 🔊 or button to select [On] or [Off].
- The warning beep is not controlled by this setting and will still sound.
Formatting CF Cards
New CF cards must be formatted in accordance with the following procedures before use.
- Please note that formatting a CF card erases all its data, including protected images and other types of data.
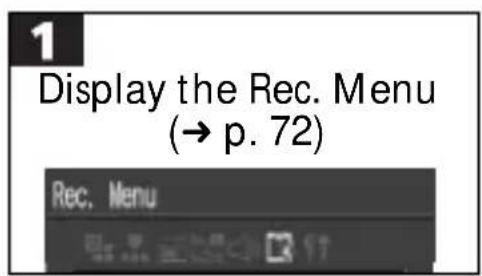
text_image
1 Display the Rec. Menu (→ p. 72) Rec. Menu- Use the or button to select .
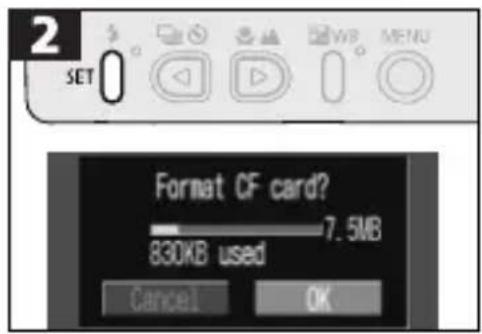
text_image
2 SET Format CF card? 7.5MB 830KB used Cancel OK- Use the 🔔 or button to select [OK]. - To cancel formatting, select [Cancel].
text_image
3 SET- When the camera is not operating as expected, reformatting the CF card may solve the problem.
- When a non-Canon brand CF card is malfunctioning, reformatting it may solve the problem.
- CF cards formatted in other cameras, or by computers or peripheral devices, may not operate correctly in the camera. Reformat the card in your camera.
Changing Other Settings
Switching the Auto Power Down Function On/Off
The auto power down function can be set to automatically turn the camera power off after a set period of time passes without the camera being used.
| On | The camera shuts off after approximately 3 minutes in shooting mode or approximately 5 minutes in replay mode if the camera is not used. Press the main switch to restore power. |
| Off | If it is on, the LCD monitor shuts off after approximately 3 minutes in the shooting mode if the camera is not used. Pressing any button other than the main switch will turn the LCD monitor on again. |
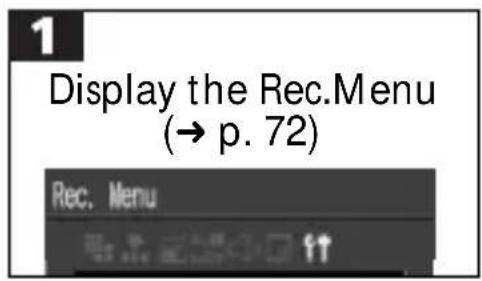
text_image
1 Display the Rec.Menu (→ p. 72) Rec. Menu- Use the or button to select .
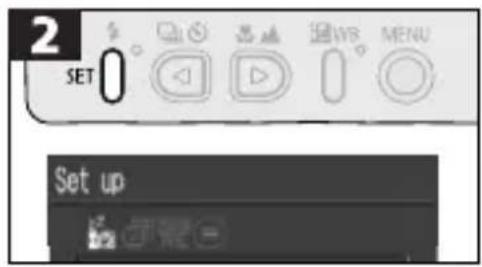
text_image
2 SET 0 Set up- Use the ◀ or □ button to select .
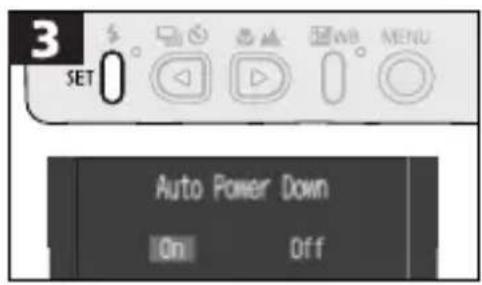
text_image
3 SET 0 Auto Power Down On Off- Use the 🔔 or 📊 button to select [On] or [Off].
text_image
4 SET- The auto power down function will not activate under the following circumstances: during auto play or when a connection is open to a computer (while using a household power source).
Setting the Video Signal Format
To use a TV monitor to shoot or replay images, the video signal format can be switched to suit regional standards.
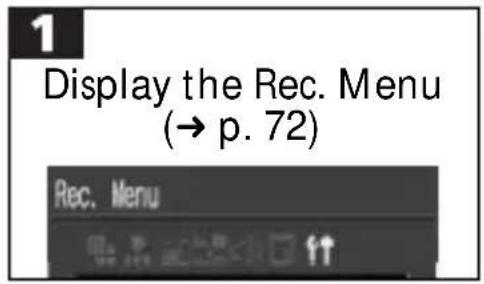
text_image
1 Display the Rec. Menu (→ p. 72) Rec. Menu- Use the or button to select .
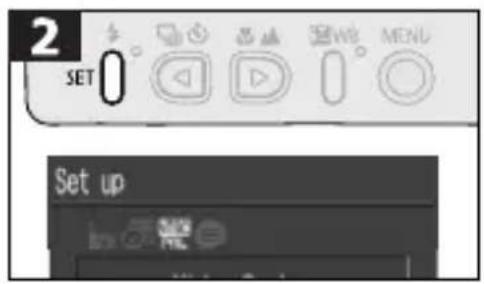
text_image
2 SET 0 Set up- Use the or button to select .
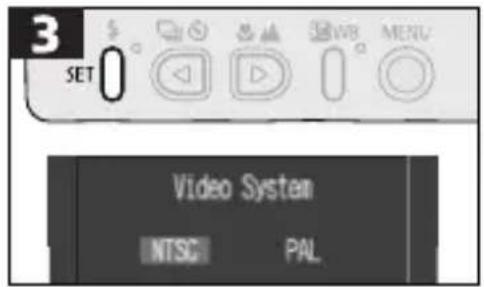
text_image
3 SET Video System NTSC PAL- Use the 📄 or 📋 button to select NTSC or PAL.
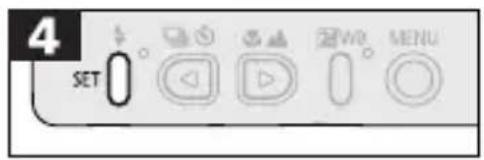
text_image
4 SETSetting the Language
The language in which menus and messages are displayed can be selected with this function.
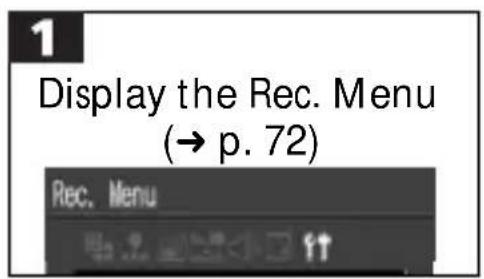
text_image
1 Display the Rec. Menu (→ p. 72) Rec. Menu- Use the or button to select .
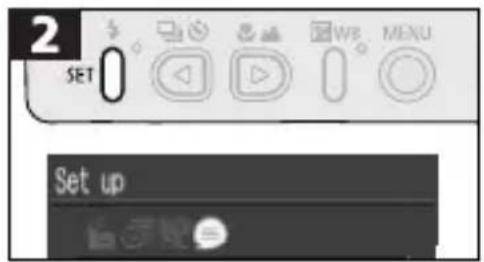
text_image
2 SET WE MENU Set up- Use the ◀ or □ button to select .
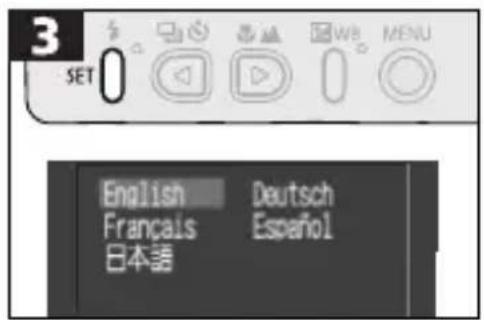
text_image
3 SET 0 English Deutsch Français Español 日本語- Use the 📄 or 🏠 button to select a language.
text_image
4 SET- The Language menu can also be displayed in replay mode by holding down the SETtton and pressing the bMENU
However, language settings cannot be adjusted while Card Photo Printer CP-10 (sold separately) is connected. - The Language menu may appear differently on cameras in some regions.
Shooting/Replaying with a TV Monitor
A TV monitor can be used to view images as they are shot or replayed when it is connected to the camera via the supplied AV cable (AVC-DC100). Always turn the camera and TV power off before attaching or detaching the AV cable.
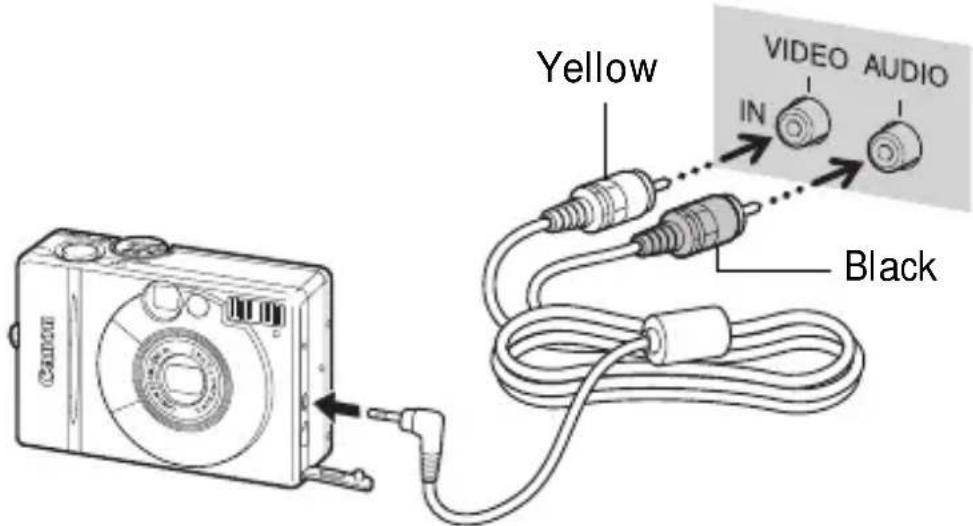
text_image
Yellow IN VIDEO AUDIO Black• After the cable has been attached, turn on the TV and switch it to the Video mode.
- Turn the mode dial to the desired mode and turn the camera power on. You can use the normal procedures to shoot or replay.
- If the image does not appear on the TV when shooting, press the DISP button.
• TV monitors cannot be used with the mode.
- Images will not appear in the camera's LCD monitor when the TV is used as the monitor.
- The video output signal can be switched (NTSC or PAL) to accommodate different regional standards (p.77). The default setting will vary between regions.
NTSC: Japan, U.S.A., Canada, Taiwan, etc
PAL: Europe, Asia (excluding Taiwan), Oceania, etc.
- Connect the AV cable to either the left or right Audio In jack on the TV. Please check your TV's manual for the correct configuration.
Downloading Images to a Computer
Downloading Directly from a CF Card
Images can be loaded directly from a CF card to a computer if you are using a notebook computer, a PC card reader or a CF card reader.
Inserting the CF Card PC Card Reader
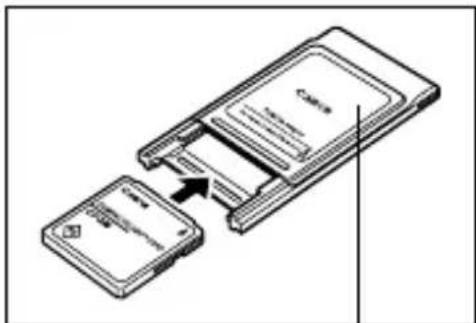
text_image
Diagram showing two devices connected by a file transfer or storage system, with one device labeled 'Cable' and an arrow indicating data flow.PC Card Adapter
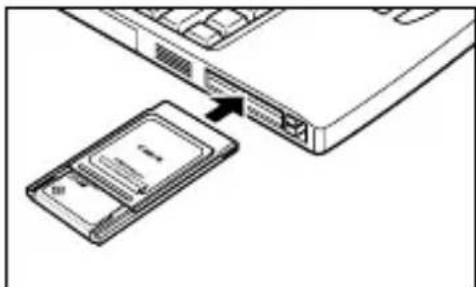
natural_image
Diagram showing a device with an arrow pointing to a server rack (no text or symbols present)- A PC card adapter (PCMCIA adapter), sold separately, is required to use a PC card reader.
-
Eject the CF card from the camera and insert it into the PC card adapter.
-
Insert the PC card adapter into the computer's PC card slot or PC card reader.
- Some computers or PC card readers require the power to be off when the PC card adapter is inserted into the PC card slot. Since this requirement varies between models, please consult the manual for your equipment.
CF Card Reader
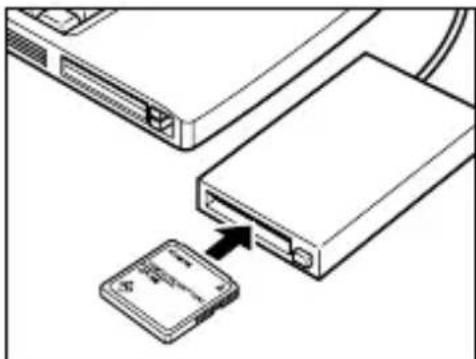
natural_image
Diagram showing a device being inserted into a physical storage unit (no text or symbols visible)- Eject the CF card from the camera and insert it into directly into a CF card reader connected to the computer.
- Some computers or CF card readers require the power to be off when the CF card is inserted. Since this requirement varies between models, please consult the manual for your equipment.
Downloading Images
1 Double-click the icon of the drive with the CF card.
2 Copy the photographed images to the desired folder on the hard disk.
The images are contained in the [XXXCANON] folder inside the [DCIM] folder on the CF card. The XXX represents a number from 100 to 998.
Image Folder Organization and File Names
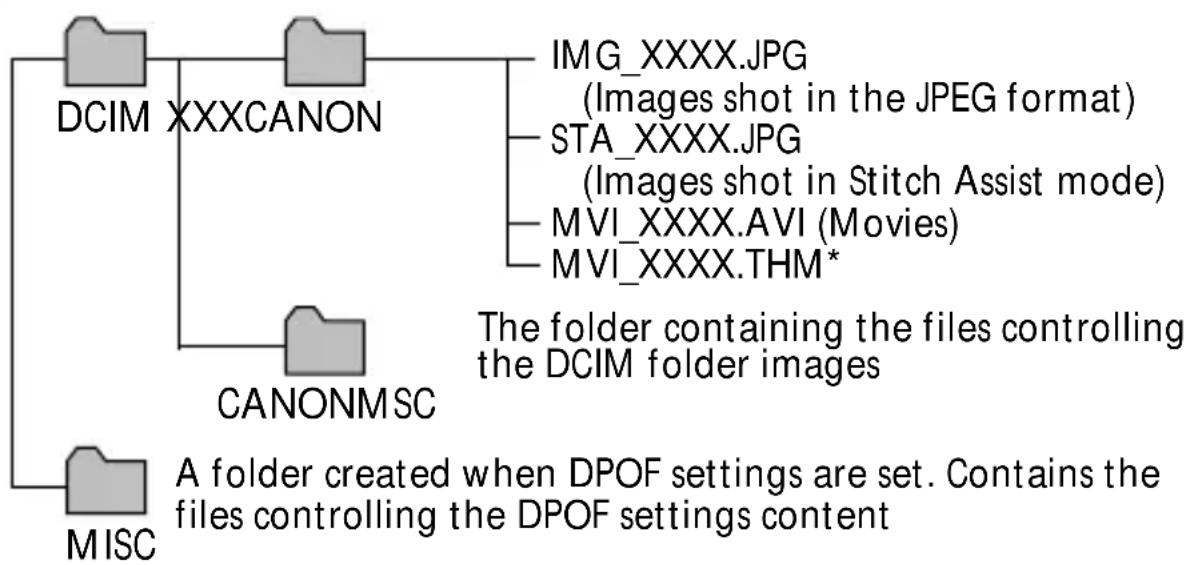
flowchart
graph TD
    A["DCIM XXXCANON"] --> B["CANONMSC"]
    A --> C["MISC"]
    B --> D["IMG_XXXX.JPG (Images shot in the JPEG format)"]
    B --> E["STA_XXXX.JPG (Images shot in Stitch Assist mode)"]
    B --> F["MVI_XXXX.AVI (Movies)"]
    B --> G["MVI_XXXX.THM*"]
    H["A folder created when DPOF settings are set. Contains the files controlling the DPOF settings content"] --> B
- * These files contain thumbnail images for the index display.
- A number will appear in place of each "X" in the file names.
- Do not open or delete files in folders other than [XXXCANON]. Those files are required for image management.
Viewing Downloaded Movies
If you try to view a movie by double-clicking its file name (AVI extension) in Windows Explorer, Windows Media Player may start without being able to replay it. To replay a movie, start the bundled software program that supports movies and open the movie file from within it.
Please refer to the Software Starter Guide for the remaining procedures.
Connecting the Camera to a Computer with a USB Cable
Supported Operating Systems
| Windows | Windows 98 (Including the Second Edition)Windows Millennium Edition (Windows Me)Windows 2000* Only systems pre-installed with Windows 98/Me/2000 or upgraded to Windows Me from pre-installed Windows 98 systems are supported. |
| Macintosh Computers | Mac OS 8.1 or laterQuickTime 3.0 or later (not supported on Mac OS X)* Only genuine Apple Computer systems with built-in USB interfaces are supported. |
- Images can be downloaded to the computer using the bundled software and USB Interface Cable IFC-300PCU. The software must be installed first before the images can be downloaded. Ensure that you use USB Interface Cable IFC-300PCU, the USB cable supplied with the camera.
- Please see the Software Starter Guide to learn how to install the software and download images.
- Please use a CF card reader or PC card reader to download images to a system running Windows 95 or Windows NT.
- Please power the camera with an AC adapter (sold separately) connected to a household power source.
Connection Precautions
- The USB ports may not operate correctly on systems that have been upgraded to Windows 98 /Me/2000 from Windows 3.1/95 or to Windows 2000 from a pre-installed Windows 98 system.
- With Macintosh computers, the USB interface only works with Power Macintosh NEW G3/G4, PowerBook G3, iMac and iBook models with built-in USB connectors.
-
Connect the camera directly to a USB port on the computer. The interface may not operate correctly when connected through a USB hub.
-
Operating the camera simultaneously with other USB devices, excluding USB mice and keyboards, may not work correctly. If this occurs, disconnect the other devices and then reconnect the camera.
- Do not have more than two cameras connected to a computer with the USB interface at any time. The cameras may not operate correctly.
- Do not put the computer into standby (sleep) mode when a camera is connected via a USB port. If the computer should go into standby mode while a camera is connected to a USB port, leave the camera connected (never disconnect it) and try to take the computer out of standby mode. Some computers may not recover properly from the standby mode if the cable is disconnected. Please refer to the computer's manual for information regarding the standby mode.
Connecting to a USB Port
1 Connect the supplied USB interface cable to the computer's USB port and the camera's Digital terminal.
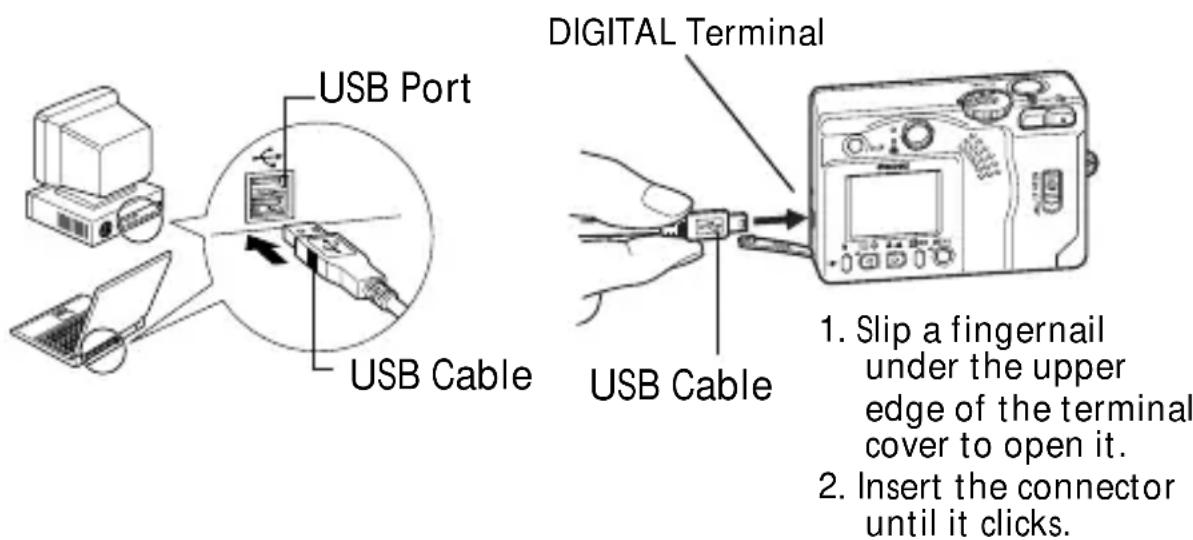
text_image
USB Port USB Cable DIGITAL Terminal USB Cable 1. Slip a fingernail under the upper edge of the terminal cover to open it. 2. Insert the connector until it clicks.- You do not need to turn the camera or computer power off to connect or disconnect USB interface cables.
- Please refer to your computer's manual for information regarding the location of the USB ports.
2 Turn the camera's mode dial to the position.
- The LCD monitor will display in replay mode and then blank out when the connection to the computer is complete.
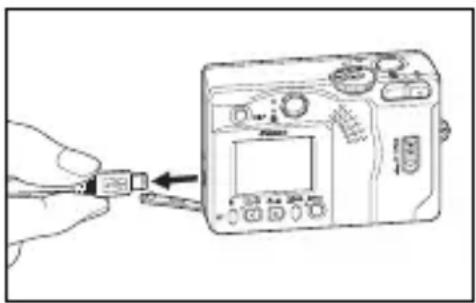
text_image
Diagram showing a hand inserting a small component into a digital camera module, with an arrow indicating the process.- When detaching the cable, from the camera's Digital Terminal, always grip the sides of the cable's plug.
- If the USB cable is detached while the camera power is on, the camera will power down.
- When the camera is connected to a computer, a warning displays on the computer display after 5 minutes if the camera is not used. The camera shuts down if a further minute passes without a button being pressed. To restore power, press the main switch again. (Except when the camera is powered by a household power source)
- Please refer to the Software Starter Guide for the subsequent procedures.
Appendices
Care and Maintenance of the Camera
Use the following procedures to clean the camera body, lens, viewfinder and LCD monitor.
- Never use thinners, benzene, synthetic cleansers or water to clean the camera. These substances may distort or damage the equipment.
Camera Body
Gently wipe dirt off the camera body with a soft cloth or eyeglass lens wiper.
Lens
First use a lens blower brush to remove dust and dirt, then remove any remaining dirt by wiping the lens lightly with a soft cloth.
- Never use synthetic cleansers on the camera body or lens.
- If dirt remains, contact the closest Canon Customer Support Help Desk (see the back of this guide).
Viewfinder and LCD Monitor
Use a lens blower brush to remove dust and dirt. If necessary, gently wipe the viewfinder with a soft cloth or an eyeglass lens wiper to remove stubborn dirt.
- Never rub or press strongly on the LCD monitor. These actions may damage it or lead to other problems.
Troubleshooting

Camera will not operate
| Cause Solution | |
| Power is not on | Press the main switch for a few moments. |
| Battery cover or CF card cover opened | Close the battery cover or CF card cover and then press the main switch again to turn the camera off. |
| Insufficient battery voltage | Insert a fully charged battery pack.Use a household power source. |
| Poor contact between battery pack and camera terminals | Wipe the battery terminals with a clean, dry cloth. |

Camera will not record
| Cause Solution | |
| Mode dial is set to ▶ (Replay) | Turn the mode dial to the , or position. |
| Flash is charging | Wait until the flash charges. You can press the shutter button when the indicator glows a steady orange. |
| CF card full | Replace the CF card.If necessary, download the images to a computer and then erase all or some of the card's images to create space. |
| CF card not formatted correctly | Format CF card. See Formatting a CF Card (p. 75).If reformatting does not work, the CF card logic circuits may be faulty or damaged. Contact the nearest Canon Customer Support Help Desk. |
Lens will not retract
| Cause Solution | |
| Battery cover or CF card cover was opened with power on | • First close the battery cover or CF card cover and then turn the power off. |
| Battery cover or CF card cover was opened while recording to the CF card (warning signal sounds) | • First close the battery cover or CF card cover and then turn the power off. |
Battery pack consumed quickly
| Cause Solution | |
| At room temperature (23°C or 73.4°F), fast discharge indicates the battery pack's service life is over | • Replace the battery pack with a fresh one. |
Battery pack will not charge
| Cause Solution | |
| Battery pack life exceeded | Replace battery pack with a new one. |
| Poor connection between battery pack and battery charger | Seat the battery pack more firmly in the charger.Plug the battery charger all the way into the electrical outlet. |
Image is blurred, out of focus, or not as expected
| Cause Solution | |
| Camera moved | ·Be careful not to move the camera when pressing the shutter button. |
| Subject is out of focal range | ·Ensure that there is at least 76 cm (2.5 ft.) between the camera lens and subject.·Use the macro mode to shoot close-ups between 16 and 76 cm (6.3 in. and 2.5 ft.) from the lens when set to wide angle and between 26 and 76 cm (10.2 in. and 2.5 ft.) when set to telephoto.·Use the infinity mode to shoot distant subjects. |
| Autofocus function is hampered by something obstructing the AF auxiliary light emitter | ·Be careful not to block the AF auxiliary light emitter with your fingers or other items. |
Subject is too dark in image
| Cause Solution | |
| Insufficient light for shooting | • Set the flash to On. |
| Subject is much darker than its surroundings | • Set the exposure compensation to a positive (+) setting. |
| Subject is too far away for flash to reach | • When using the flash, ensure that the camera is no farther from the subject than 3.5 m (11.5 ft.) at the maximum wide angle, or 2 m (6.6 ft.) at the maximum telephoto setting. |
Subject is too bright
| Cause Solution | |
| Subject is too close and the illumination from the flash is too bright. | * When using the flash, ensure that the camera is no closer to the subject than 26 cm (10.2 in.). |
| Subject is much brighter than its surroundings | • Adjust the exposure compensation to a negative (-) setting. |
| Light is shining directly on subject or reflected off subject onto camera | • Change the shooting angle. |
| Flash is set to On | • Set the flash to any setting other than On. |
Flash will not fire
| Cause Solution | |
| Flash is set to Off | • Set the flash to any setting other than Off. |
Zoom does not work
| Cause Solution | |
| Zoom button pressed during movie recording | • Adjust the zoom before shooting a movie. |
List of Messages
The following messages may appear in the LCD monitor.
| Busy...: Image is being recorded to, or read from, CF card |
| No CF card: You attempted to shoot or replay images without a CF card installed. |
| Cannot record!: You attempted to shoot an image without a CF card installed. |
| CF card error: CF card has experienced an anomaly. |
| CF card full: CF card is too full to accommodate more images or print settings. |
| Naming error!: The file could not be created because there is a file with the same name as the directory that the camera is attempting to create, or the highest possible file number has already been reached. In the Rec. Menu, set the File Reset option to On. Save all the images you wish to retain onto a computer, then reformat the CF card. Please note that formatting will erase all the existing images and other data. |
| Change the battery pack: Battery charge is insufficient to operate the camera. Replace it at once with a charged one or recharge the battery pack. |
| No image: No images recorded on CF card. |
| Image too large: You attempted to replay an image larger than 3200 x 2400 pixels or a movie clip recorded by another camera. |
| Incompatible JPEG format: You attempted to replay an incompatible JPEG file. |
| Corrupted Data: You attempted to replay an image with corrupted data. |
| RAW: You attempted to replay a RAW image. |
| Unidentified Image: You attempted to replay an image that was recorded in a special format (proprietary format used by the camera of another manufacturer, etc.) or a movie clip recorded by another camera. |
| Cannot magnify!: You attempted to magnify an image which was photographed with another camera, recorded in a different format, or edited on a computer. |
| Cannot rotate: You attempted to rotate an image which was photographed with another camera, recorded in a different format, or edited on a computer. |
| Protected!: You attempted to erase a protected image. |
| Too many marks: Too many images have been marked for printing. Cannot process any more. |
Exx: (xx: number) Camera malfunction.
Turn the power off and then back on, then shoot or replay. Problem exists if error code reappears. Note the number and contact Canon Customer Support Help Desk. If an error code displays directly after taking a picture, the shot may not have been recorded. Check image in replay mode.
The following messages may appear on the camera's LCD monitor while a Card Photo Printer CP-10 (optional) is connected.
No Paper: Paper cassette is empty or
incorrectly installed. The paper may also be misfeeding.
No Ink: The ink cassette is empty or
removed.
Ink Cassette Error: There is a problem with the ink
cassette.
Paper Jam: Paper jammed while printing.
Communication Error: A communication error has occurred.
Cannot print!: You attempted to print an image
shot by a different camera, or in an incompatible format, or downloaded to and edited on a computer.
Could not print XX images: You attempted to print XX number
of images with DPOF settings that were shot by a different camera, or in an incompatible format, or downloaded to and edited on a computer.
Specifications
PowerShot S300 DIGITAL ELPH / DIGITAL IXUS 300
| Image Sensor: Approx. 2.11 million-pixel 1/2.7 in. charge-coupled device (effective pixels: approx. 2.02 million) | |
| Lens: 5.4 (W)- 16.2 (T) mm | (35 mm film equivalent: 35-105 mm)F2.7 (W)- 4.7 (T) |
| Digital Zoom: Maximum 2.5 x (7.5 x with optical zoom) | |
| Optical Viewfinder: Primary imaging real-image optical zoom viewfinder | |
| LCD Monitor: Approx. 120,000-pixel, 1.5 in. low-temperature polycrystalline silicon TFT LCD | |
| Autofocus: Through the lens (TTL), 3-point artificial intelligence autofocus (AiAF) | |
| Focusing Range: Normal Mode: 76 cm (2.5 ft.) -∞Macro Mode: 16-76 cm (6.3 in. -2.5 ft.) (W)26-76 cm (10.2 in. -2.5 ft.) (T) | |
| Shutter: Mechanical + electronic | |
| Shutter Speed: 1 - 1/1500 sec. | 1 sec. in manual mode with the flash off or in slow synchro modeNoise reduction processing on speeds slower than 1/6 sec. |
| Light Metering Method: | Evaluative metering (linked to focusing point) |
| Exposure Control: | Program AE |
| Exposure Compensation: | ± 2 EV (1/3 steps) |
| Sensitivity: | ISO 100 equivalent (automatically raised to ISO 150 in low light) |
| White Balance: | TTL auto/preset (daylight, cloudy, tungsten, fluorescent) |
| Flash: | Red-eye reduction auto/auto/on/off/slow-synchro |
| Flash Range: | Normal Mode: 76 cm -3.5 m (2.5 -11.5 ft.) (W)/76 cm -2.0 m (2.5 -6.6 ft.) (T)Macro Mode: 26-76 cm (10.2 in.-2.5 ft.) (W/T) |
(W) = wide angle, (T) = telephoto
| Shooting Modes: Auto/manual/stitch assist/movie | |
| Continuous Shooting: Approx. 2.5 images / sec. (Large / Fine mode, LCD monitor off) | |
| Self-Timer: Shoots after approx. 10 sec. | |
| PC Connected Shooting: Available (USB connection only. Exclusive software program “RemoteCapture” is included in the Camera Kit.) | |
| Recording Media: CompactFlash card (Type I) | |
| File Format: Design rule for Camera File system, DPOF compliant | |
| Image Recording Format: Stills: JPEGMovies: AVI (Images: Motion JPEG/Audio: WAVE (monophonic)) | |
| Compression: Superfine/fine/normal | |
| Resolution: Stills: large (1600 x 1200 pixels)/ medium (1024 x 768 pixels)/small (640 x 480 pixels)Movies: 640 x 480 pixels (approx. 4 sec.) /320 x 240 pixels (approx. 10 sec.) /160 x 120 pixels (approx. 30 sec.)Approx. 20 frames/sec., Figures in brackets () represent max. recording time for one movie clip. | |
| Replay Modes: Single image replay/index replay (9 thumbnails)/zoomed view (LCD monitor zooms images up to 2.5 times)/auto play/printing with Card Photo Printer CP-10 (print images directly) | |
| Interface: | USB (mini-B)AV OUT (NTSC or PAL switchable, monophonic sound) |
| Power Source: | Battery Pack NB-1L (lithium ion), exclusive to the PowerShot S300 DIGITAL ELPH/DIGITAL IXUS 300 and PowerShot S100 DIGITAL ELPH/DIGITAL IXUS Compact Power Adapter CA-PS500, exclusive to the PowerShot S300 DIGITAL ELPH/DIGITAL IXUS 300 and PowerShot S100 DIGITAL ELPH/DIGITAL IXUS |
| Operating Temperatures: | 0 - 40 °C (32 - 104 °F) |
| Operating Humidity: | 10%-90% |
| Dimensions (w x h x d): | 94.8 x 62.5 x 29.9 mm (3.7 x 2.5 x 1.2 in.) (excluding lens projection) |
| Weight: | Approx. 240 g (8.5 oz.) excluding batteries and CF Card |
Accessories
Battery Pack NB-1L
| Type: Rechargeable Lithium Ion Cell |
| Rated Voltage: 3.7 V |
| Rated Amperage: 680 mAh |
| Life-span: Approx. 300 charge cycles |
| Operating Temperatures: 0-40°C (32-104°F) |
| Dimensions: 32.3 x 49.8 x 10.6 mm (1.3 x 1.9 x 0.4 in.) |
| Weight: Approx. 29 g (1.0 oz.) |
Battery Charger CB-2LS/ CB-2LSE
| Rated Input: 100-240 V AC (50/60 Hz)0.075 A (100 V) - 0.045 A (240 V) |
| Rated Output: 4.2 V DC /0.5 A |
| Charging Time: Approx. 130 minutes |
| Operating Temperatures: 0-40°C (32-104°F) |
| Dimensions: 90.4 x 56.0 x 28.0 mm (3.6 x 2.2 x 1.1 in.) |
| Weight: CB-2LS: Approx. 78 g (2.8 oz.)CB-2LSE: Approx. 75 g (2.6 oz.) |
CompactFlash™ Card
| Card Slot Type: | Type I |
| Dimensions: 36.4 x 42.8 x 3.3 mm (1.4 x 1.7 x 0.1 in.) | |
| Weight: Approx. 10 g (0.4 oz.) | |
Compact Power Adapter CA-PS500 (Optional)
| Rated Input: 100-240 V AC (50/60 Hz)0.17 A |
| Rated Output: 4.3 V DC /1.5 A |
| Operating Temperatures: 0 - 40 °C (32 - 104 °F) |
| Dimensions: 42.6 x 104.4 x 31.4 mm (1.7 x 4.1 x 1.2 in.) |
| Weight: Approx. 180 g (6.3 oz.) |
* All data is based on Canon's standard testing methods. Subject to change without notice.
Index
A
AC Adapter Kit 16
Autofocus 27
Auto Mode 34
Auto Play 54
Auto Power Down 26
On/Off 76
AV Cable AVC-DC100 79
B
Battery
AC Adapter 18
Handling 15
Household Power Source 18
Installing 16
Performance 17
Recharging 14
Battery Pack 14
Beep 74
Black and White Mode 42
C
Camera Settings 72
Care and Maintenance 85
CF Card
Capacity 20
Formatting 75
Handling 20
Installing 19
Continuous Shooting 38
D
Date and Time 21
Digital Zoom 33,49
Displaying Information 29
DPOF 59
E
Erasing 57
Erasing All Images 58
Erasing Images Singly 57
Erasing the Displayed Image 24
Exposure 41
F
File Number 73
Flash 37
Focus Lock 27
I
Image Sizes 36
Index Replay 50
Indicator 12
Infinity Mode 39
Information Display 29
L
Language Settings 78
LCD Monitor 11
Using 28
M
Macro Mode 39
Main Switch 12, 23
Magnifying Images 49
Manual Mode 34
Mode Dial 12
0
Optical Viewfinder 27
P
Power On/Off 25
Pressing Fully 31
Pressing Halfway 31
Print Settings 59
Selecting 61
Print Style 60
Resetting Print Settings 64
Protecting Images 56
R
Rec. Menu 72
Red-Eye Reduction 38
Replay 24,49
TV Monitor 79
Rotate 53
S
Self-Timer 40
Shooting 23,34
TV Monitor 79
Functions Available in each
Shooting Mode 48
List of Modes 34
Shutter Button 12,31
Pressing Fully 31
Pressing Halfway 31
Single Image Replay 49
Stitch Assist Mode 43
T
Telephoto 33
V
Video Signal Format 77
Viewfinder 27
W
White Balance 42
Wide Angle 33
Wrist Strap 22
Z
Zoom 33
Zooming Images 49
Zoom Button 12,33
Disclaimer
- While every effort has been made to ensure that the information contained in this guide is accurate and complete, no liability can be accepted for any errors or omissions. Canon reserves the right to change the specifications of the hardware and software described herein at any time without prior notice.
- No part of this guide may be reproduced, transmitted, transcribed, stored in a retrieval system, or translated into any language in any form, by any means, without the prior written permission of Canon.
- Canon makes no warranties for damages resulting from corrupted or lost data due to a mistaken operation or malfunction of the camera, the software, the CompactFlash™ cards (CF cards), personal computers, peripheral devices, or use of non-Canon CF cards.
Trademark Acknowledgments
- Canon is a trademark of Canon Inc.
- CompactFlash is a trademark of SanDisk Corporation.
- iBook and iMac are trademarks of Apple Computer, Inc.
• Macintosh, PowerBook and Power Macintosh are trademarks of Apple Computer, Inc., registered in the United States and other countries. - Microsoft, Windows and Windows NT are either registered trademarks or trademarks of Microsoft Corporation in the United States and / or other countries.
- Other names and products not mentioned above may be registered trademarks or trademarks of their respective companies.
Canon Customer Support
Canon Inc.
30-2 Shimomaruko 3-chome, Ohta-ku, Tokyo
146-8501, Japan
NORTH AMERICA
Canon U.S.A., Inc.
Canon Customer Care Center
Phone (US): 1-800-828-4040
(Available Mon. - Fri., 9 AM to 8 PM Eastern Time)
Canon Canada Inc.
Phone (Canada): 1-800-OK-CANON (1-800-652-2666)
(24 hours/day, 7 days/week)
EUROPE
Europe, Africa & Middle East
Canon Europa N.V.
PO Box 2262, 1180 EG Amstelveen, The Netherlands
Canon (UK) Ltd.
Helpdesk
Tel.: 08705 143 723 (Calls may be recorded.) Fax.: 08705 143 340
Canon France S.A.
Hotline : 01.41.99.70.70
Customer Support: (02151) 349-555
Info Desk: (02151) 349-566 Fax: (02151) 349-588
Canon Australia Pty. Ltd.
Info-Line: (02) 9805 2864
Canon New Zealand Ltd.
Info-Line: 0900-522666
ASIA
Canon Singapore Pte. Ltd.
79 Anson Road, #09-01 / 06, Singapore 079906
Phone: (65) 532 4400 Fax: (65) 221 7577
Canon Hongkong Co., Ltd.
9/F, The Hong Kong Club Building, 3A Chater Road, Central, Hong Kong
Phone: 852-2739-0802 Fax: 852-2369-7701
Canon Marketing Services
No.1 Jalan Kilang Timor, #09-00, Pacific Tech Centre,
Singapore 159303
Phone: (65) 799 8888 Fax: (65) 273 3317
Canon Marketing (Malaysia) Sdn. Bhd.
Wisma General Lumber, Block D, Peremba Square,
Saujana Resort, Section U2, 40150,
Shah Alam, Selangor Darul Ehsan, Malaysia
Phone: (60) 3 744 6000, (60) 3 745 0055
Fax: (60) 3 745 0505
Canon Marketing (Thailand) Co., Ltd.
10th Floor, Bangkok City Tower,
179/34-45 South Sathorn Road,
Bangkok 10120, Thailand
Phone: (662) 344 9999 Fax: (662) 344 9910
Canon Marketing (Hongkong) Co., Ltd.
10/F, Mirror Tower, 61 Mody Road, Tsimshatsui East
Kowloon HongKong
Phone: 852-2170-2828 Fax: 852-2723-9684
FCC Notice
(Digital Camera, Model PC1008)

Tested To Comply
With FCC Standards
FOR HOME OR OFFICE USE
This device complies with Part 15 of the FCC Rules. Operation is subject to the following two conditions;
(1) this device may not cause harmful interference, and
(2) this device must accept any interference received, including interference that may cause undesired operation.
Note: This equipment has been tested and found to comply with the limits for Class B digital devices, pursuant to Part 15 of the FCC rules. These limits are designed to provide reasonable protection against harmful interference in a residential installation. This equipment generates, uses and can radiate radio frequency energy and, if not installed and used in accordance with the instructions, may cause harmful interference to radio communications. However, there is no guarantee that interference will not occur in a particular installation. If this equipment does cause harmful interference to radio or television reception, which can be determined by turning the equipment off and on, the user is encouraged to try to correct the interference by one or more of the following measures:
- Reorient or relocate the receiving antenna.
- Increase the separation between the equipment and receiver.
- Connect the equipment into an outlet on a circuit different from that to which the receiver is connected.
- Consult the dealer or an experienced radio/TV technician for help.
The cables with the ferrite core provided with the digital camera must be used with this equipment in order to comply with Class B limits in Subpart B of Part 15 of the FCC rules.
Do not make any changes or modifications to the equipment unless otherwise specified in the manual. If such changes or modifications should be made, you could be required to stop operation of the equipment.
Canon U.S.A. Inc.
One Canon Plaza, Lake Success, NY 11042, U.S.A.
Tel No. (516) 328-5600
Canadian Radio Interference Regulations
THIS CLASS B DIGITAL APPARATUS MEETS ALL REQUIREMENTS OF THE CANADIAN INTERFERENCE CAUSING EQUIPMENT REGULATIONS.