
PowerShot SD970 IS - Camcorder CANON - Free user manual and instructions
Find the device manual for free PowerShot SD970 IS CANON in PDF.


| Product Type | Digital Camcorder |
| Brand | Canon |
| Model | PowerShot SD970 IS |
| Dimensions (W x H x D) | Approx. 97.4 x 57.8 x 22.3 mm |
| Weight (without battery) | Approx. 135 g |
| Power Supply | Rechargeable Li-ion Battery NB-5L |
| Charging Method | AC adapter or USB charging via computer |
| Recording Media | SD/SDHC/SDXC memory card |
| Video Resolution | HD 720p (1280 x 720) at 30 fps |
| Max Video Bitrate | Approx. 12 Mbps |
| Image Stabilization | Optical Image Stabilizer |
| Optical Zoom | 4x |
| Digital Zoom | 4x (combined up to 16x) |
| Display | 2.7-inch PureColor LCD with 230,000 dots |
| Lens Aperture | f/3.2 - f/5.8 |
| ISO Sensitivity | Auto, 80, 100, 200, 400, 800, 1600 |
| File Formats | JPEG (still), MOV (video) |
| Connectivity | USB 2.0, AV out, HDMI mini |
| Battery Life (approx.) | 300 shots (CIPA standard) |
| Main Features | Face Detection, Motion Detection, Smart Auto, Intelligent IS |
| Maintenance & Cleaning | Use a soft dry cloth; avoid harsh chemicals |
| Safety | Do not disassemble; keep away from water and extreme temperatures |
| Spare Parts & Repairability | Battery, charger, cables available; service by authorized centers |
| General Information | User manual included; compatible with Windows and Mac |
Frequently Asked Questions - PowerShot SD970 IS CANON
User questions about PowerShot SD970 IS CANON
0 question about this device. Answer the ones you know or ask your own.
Ask a new question about this device
Download the instructions for your Camcorder in PDF format for free! Find your manual PowerShot SD970 IS - CANON and take your electronic device back in hand. On this page are published all the documents necessary for the use of your device. PowerShot SD970 IS by CANON.
USER MANUAL PowerShot SD970 IS CANON
PowerShot SD970 IS DIGITAL ELPH
DIGITAL IXUS 990 IS
Camera User Guide
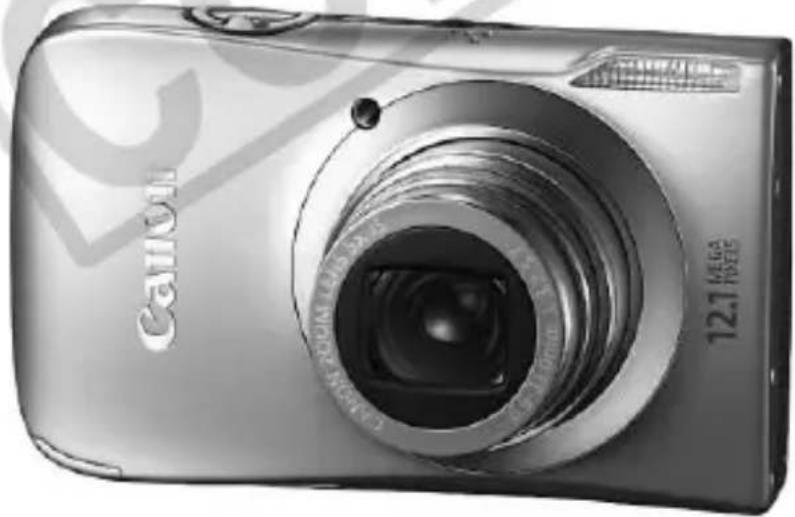
natural_image
Exterior view of a Canon 12.1 Hybrid digital camera (no text or symbols on body)ENGLISH
text_image
CDI.E395• Make sure you read this guide before using the camera.
- Store this guide safely so that you can use it in the future.
Checking the Package Contents
Check if the following items are included in your camera package. If anything is missing, contact the retailer from which you purchased the camera.
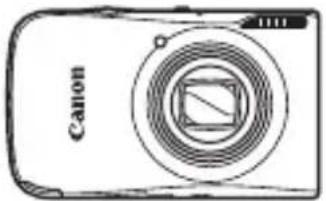
natural_image
Illustration of a Canon digital camera with no visible text or symbols on the device bodyCamera
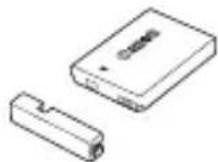
Battery Pack NB-5L (with Terminal Cover)
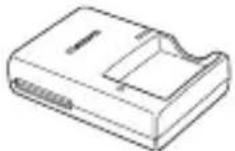
Battery Charger
CB-2LX/CB-2LXE

Interface Cable
IFC-400PCU
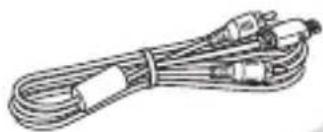
natural_image
Coiled cable with connectors and connectors (no text or symbols visible)AV Cable AVC-DC400
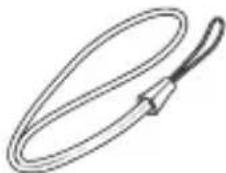
natural_image
Simple line drawing of a coiled cable or rope with a loop (no text or symbols)Wrist Strap WS-DC7

Camera User Guide
(This Guide)

DIGITAL CAMERA
Solution Disk
Warranty Card
"Canon Customer Support" Leaflet

Also refer to the PDF manuals on the CD-ROM. After installation, shortcut icons appear on the desktop. If the software installation fails, you can find the manuals in the Readme folder on the CD-ROM.
• Personal Printing Guide
Read when you want to connect the camera to a printer and print.
• Software Starter Guide
Read when you want to connect the camera to a computer.
- Detailed user guides (PDF format) for the included ZoomBrowser EX and ImageBrowser programs are available on the Canon website (English only): http://web.canon.jp/imaging/information-e.html

• A memory card is not included.
- Adobe Reader is required to view the PDF manuals.
Read This First
Test Shots
Take some initial test shots and play them back to make sure the images were recorded correctly. Please note that Canon Inc., its subsidiaries and affiliates, and its distributors are not liable for any consequential damages arising from any malfunction of a camera or accessory, including memory cards, that results in the failure of an image to be recorded or to be recorded in a way that is machine readable.
Warning Against Copyright Infringement
The images recorded with this camera are intended for personal use. Do not record images that infringe upon copyright laws without the prior permission of the copyright holder. Please be advised that in certain cases the copying of images from performances, exhibitions, or commercial properties by means of a camera or other device may contravene copyright or other legal rights even if the image was shot for personal use.
Warranty Limitations
This camera's warranty is only effective in the country of sale. If there is a problem with the camera while abroad, please return it to the country of sale before proceeding with a warranty claim to a Canon Customer Support Help Desk. For Canon Customer Support contacts, please see the customer support list supplied with your camera.
LCD Monitor
The LCD monitor is produced with extremely high-precision manufacturing techniques. More than 99.99% of the pixels operate to specification, but occasionally non-performing pixels may appear as bright or dark dots. This is not a malfunction and has no effect on the recorded image.
Camera Body Temperature
Please take care when operating the camera for an extended period as the camera body may become warm. This is not a malfunction.
Memory Cards
The various types of memory cards that can be used in this camera are collectively referred to as memory cards in this guide.
For CA, USA only
Included lithium battery contains Perchlorate Material - special handling may apply.
See www.dtsc.ca.gov/hazardouswaste/perchlorate/ for details.
What Do You Want to Do?
Shoot
● Shoot, leaving it to the camera to make settings ..... 24
● Shoot to match special conditions. 56 – 58
Take good people shots
Portraits (p. 56)
With nightscapes (p. 56)
Kids and pets (p. 56)
At the beach (p. 57)
With snowscapes (p. 58)
Take good landscapes
Sunsets (p. 57)
Foliage (p. 58)
Shoot various other scenes
Indoors (p. 57)
Fireworks (p. 57)
Aquarium (p. 57)
Low light (p. 58)
- Focus on faces 24, 64, 82
● Shoot in places where I cannot use the flash (turn off the flash) 59
● Shoot pictures with me in them too (self-timer). . . . . . . . . . 63, 64
Insert the date and time into my shots 62
Take close-up pictures of subjects (macro shooting) ..... 70
Take close-up pictures of subjects using the zoom (digital macro shooting). 71
Take sepia toned or black and white pictures ..... 77 - Add special effects when shooting (Creative Light Effect, Zoom Blur). 65, 85
Change the size of picture I want to take (recording pixels) . . . . 72
Take pictures continuously....76
● Shoot without the effects of camera shake (image stabilization) 139
● Shoot without the effects of camera shake even in low light conditions (High ISO Auto)....58, 74
- Maintain the focus on moving subjects (Servo AF). 84
Make dark subjects appear brighter (i-Contrast). 89
View
- Look at my pictures....27
● Automatically play back pictures (slideshow) ..... 107
Look at my pictures on a TV 111, 112 - Quickly search pictures.... 104, 106
- Erase pictures.... 29, 112
- Protect pictures from accidental erasure. 116
Shoot/View Movies
- Shoot movies .... 32
View movies 34
- Easily print pictures.... 30
Save
- Save images to a computer 35
Other
Turn off sounds 49
Use the camera abroad. 15, 133
Table of Contents
Chapters 1 – 3 explain the basic operations and frequently used functions of this camera. Chapters 4 onward explain the advanced functions, letting you learn more as you read each chapter.
Checking the Package Contents .....2
Read This First ....3
What Do You Want to Do? .....4
Conventions Used in this Guide ......8
Safety Precautions....9
1 Getting Started ....13
Charging the Battery....14
Inserting the Battery and Memory Card ....16
Setting the Date and Time .....19
Setting the Display Language......21
Formatting Memory Cards ......22
Pressing the Shutter Button....23
AUTO Taking Pictures....24
▶ Viewing Images ......27
Erasing Images 29
Printing Images....30
Shooting Movies....32
▶ Viewing Movies ......34
Transferring Images to a Computer.35
Accessories ......38
Separately Sold Accessories ....40
2 Learning More......41
Components Guide......42
Information Displayed on the Screen....44
Indicator 46
FUNC. Menu – Basic Operations ....47
MENU Menu – Basic Operations ....48
Changing the Sound Settings ..... 49
Changing the Screen Brightness .... 50
Returning the Camera to Default Settings 51
Low Level Memory Card Formatting .... 52
Power Saving Function (Auto Power Down) 53
Clock Functions.... 53
3 Shooting in Special Conditions and Commonly Used Functions.... 55
Shooting in Various Conditions ..... 56
Turning the Flash Off.... 59
Zooming in More Closely on Subjects (Digital Zoom) ...... 60
Inserting the Date and Time...... 62
Using the Self-Timer.... 63
Using the Face Self-Timer...... 64
Special Effects for Night Backgrounds (Creative Light Effect).... 65
4 Selecting Settings Yourself .... 67
P Shooting in Program AE ...... 68
Turning the Flash On.... 69
▲ Shooting Far Away Subjects (Infinity).... 69
Shooting Close-ups (Macro)...... 70
Zooming In on Close Subjects (Digital Macro) 71
Changing the Recording Pixels..... 72
Changing the Compression Ratio (Image Quality) 72
Changing the ISO Speed...... 74
Adjusting the White Balance 75
Adjusting the Brightness (Exposure Compensation) ...... 76
Continuous Shooting 76
Changing the Tone of an Image (My Colors) 77
Shooting Using the Two Second Self-Timer 78
Customizing the Self-Timer...... 79
Shooting Using a TV Monitor 80
Changing the Composition with the Focus Lock.... 80
5 Getting More Out of Your Camera 81
Changing the AF Frame Mode...... 82
Magnifying the Focal Point...... 83
AFL Shooting with the AF Lock ..... 84
Shooting with Servo AF 84
Taking Shots With Impact (Zoom Blur) 85
Selecting the Person to Focus On (Face Select).... 86
Changing the Metering Mode...... 87
AEL Shooting with the AE Lock...... 87
FEL Shooting with the FE Lock ...... 88
Shooting with Slow Synchro ..... 88
Ci Making Dark Subjects Appear Brighter (i-Contrast) 89
◎ Red-Eye Correction 90
Checking for Shut Eyes 91
★ Shooting Long Exposures ..... 92
Changing the Color and Shooting... 93
Shooting Stitch Assist Images . 96
6 Using Various Functions for Shooting Movies ...... 97
Changing the Movie Mode 98
Changing the Image Quality...... 98
AE Lock/Exposure Shift...... 99
Other Shooting Functions...... 100
Playback Functions 100
% Editing 101
7 Using Playback and Other Functions.... 103
Quickly Searching Images...... 104
Viewing Images in Filtered Playback 106
Viewing Slideshows 107
Checking the Focus...... 109
Q Magnifying Images 110
Changing Image Transitions.....110
Viewing Images on a TV ......111
Viewing Images on a High-Definition TV 112
Erasing All Images....112
Protecting Images.... 116
Organizing Images by Category (My Category) ..... 118
Rotating Images.... 120
Resizing Images 121
Trimming 122
Adding Effects with the My Colors Function.... 123
Ci Making Dark Subjects Appear Brighter (i-Contrast) 124
Correcting the Red-Eye Effect .. 125
Printing from the Print List (DPOF) 126
Selecting Images for Printing (DPOF) 127
8 Customizing the Camera .. 131
Changing Functions....132
Changing Shooting Functions......136
Changing Playback Functions .....140
Changing the Start-up Image or Sound....141
9 Useful Information...... 143
Using Household Power...... 144
Troubleshooting 145
List of Messages that Appear on the Screen 148
Functions Available in Each Shooting Mode 150
Menus 152
Handling Precautions 156
Specifications 157
Index 160
Conventions Used in this Guide
- Icons are used in the text to represent the camera buttons and switches.
- Language that displays on the screen appears inside [ ] (square brackets).
- The directional buttons, control dial, and FUNC./SET button are represented by the following icons.
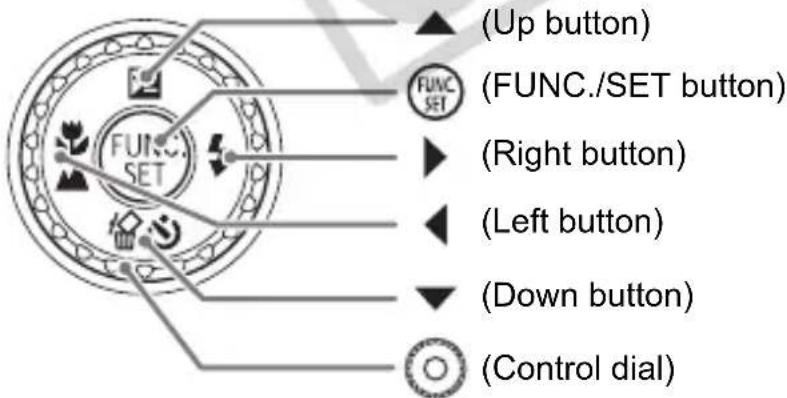
text_image
(Up button) FUNC./SET button) (Right button) (Left button) (Down button) (Control dial)- : Troubleshooting tips.
• : Hints for getting more out of your camera.
• : Things you should be careful about.
• : Supplemental information.
• (p. xx): Reference pages. "xx" stands for page number.
• This chapter assumes all functions are at their default settings.
Safety Precautions
- Before using the camera, please ensure that you read the safety precautions described below. Always ensure that the camera is operated correctly.
- The safety precautions noted on the following pages are intended to prevent injuries to yourself and other persons, or damage to the equipment.
- Be sure to also check the guides included with any separately sold accessories you use.

Warning Denotes the possibility of serious injury or death.

Caution Denotes the possibility of injury.
Caution Denotes the possibility of damage to the equipment.

Warning
Camera
- Do not trigger the flash in close proximity to human eyes.
Exposure to the intense light produced by the flash may damage eyesight. In particular, remain at least one meter (39 inches) away from infants when using the flash.
- Store this equipment out of the reach of children and infants.
Strap: Putting the strap around a child's neck could result in asphyxiation. Memory card, day/date battery: Dangerous if accidentally swallowed. If this occurs, contact a doctor immediately.
- Do not attempt to disassemble or alter any part of the equipment that is not expressly described in this guide.
- To avoid the risk of injury, do not touch the interior of the camera if it has been dropped or otherwise damaged.
- Stop operating the camera immediately if it emits smoke, a strange smell, or otherwise behaves abnormally.
- Do not use organic solvents such as alcohol, benzine, or thinner to clean the equipment.
- Do not allow liquids or foreign objects to enter the camera.
This could result in electrical shock or fire. If liquid or foreign objects come into contact with the camera interior, immediately turn the camera power off and remove the battery.
- Use only recommended power sources.
Using other power sources could result in fire or electrical shock.
Battery, Battery Charger
- Use only recommended batteries.
- Do not place the battery near or in direct flame.
- Do not let the battery come into contact with water (e.g. sea water) or other liquids.
- Do not attempt to disassemble, alter or apply heat to the battery.
- Avoid dropping or subjecting the battery to severe impacts.
This may cause explosions or leaks, resulting in fire, injury and damage to the surroundings. In the event that a battery leaks and the eyes, mouth, skin or clothing contacts these substances, immediately flush with water and seek medical assistance. If the battery charger becomes wet, unplug it from the outlet and consult your camera distributor or the closest Canon Customer Support Help Desk.
- Use only the specified battery charger to charge the battery.
- Do not cut, damage, alter or place heavy items on the power cord.
- Unplug the power cord periodically and wipe away any dust and dirt that has collected on the plug, the exterior of the power outlet, and the surrounding area.
- Do not handle the power cord with wet hands.
This could result in electrical shock or fire.
Other Warnings
- Do not play the supplied CD-ROM(s) in any CD player that does not support data CD-ROMs.
Playing the CD-ROM(s) in an audio CD player (music player) could damage the speakers. It is also possible to suffer hearing loss from listening with headphones to the loud sounds of a CD-ROM played on a music CD player.

Caution
- Be careful not to bang the camera or subject it to strong impacts or shocks when hanging it by the strap.
- Be careful not to bump or push strongly on the lens.
This could lead to injury or damage the camera. - Do not use the equipment in a manner that exceeds the rated capacity of the electrical outlet or wiring accessories. Do not use if the power cord or plug are damaged, or not fully plugged into the outlet.
This could result in electrical shock or fire.
- Avoid using, placing or storing the camera in the following places.
- Places subject to strong sunlight.
- Places subject to temperatures above 40 °C (104 °F).
- Humid or dusty areas.
These could cause leakage, overheating or an explosion, resulting in fire, burns or other injuries. High temperatures may also cause deformation of the casing.
- Do not allow dirt or metal objects (such as pins or keys) to contact the charger terminals or plug.
This could result in electrical shock, fire or other damage.
- Playing back for a long time may cause feelings of discomfort.
Caution
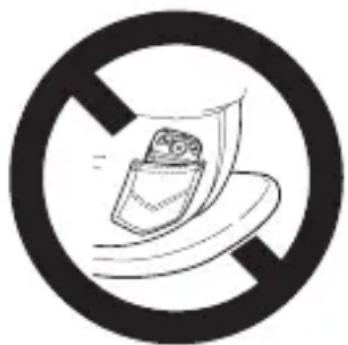
- Do not aim the camera at bright light sources (the sun, etc.). Doing so may cause malfunctions or damage the image sensor (CCD).
- When using the camera on a beach or at a windy location, be careful not to allow dust or sand to enter the camera.
- Do not use the flash with dirt, dust or other items stuck to the surface, or if it is covered by your fingers or clothing. This may cause the camera to malfunction.
- Unplug the battery charger from the power outlet after recharging is complete, or when you are not using it.
- Do not place anything, such as cloth, on top of the battery charger while it is charging. Leaving the unit plugged in for a long period of time may cause it to overheat and distort, resulting in fire.
- Remove and store the battery when you are not using the camera. If the battery is left inside the camera, damage caused by leakage may occur.
- Before you discard batteries, cover the terminals with tape or other insulators. Contacting other metal materials in waste containers may lead to fire or explosions.
- Keep the battery out of the reach of pets. If the battery is bitten, this could cause leakage, overheating or an explosion, resulting in fire, burns or other injuries.
- Do not sit in a chair with the camera in your pocket. Doing so may cause malfunctions or damage the LCD monitor.
- When putting the camera in your bag, ensure that hard objects do not come into contact with the LCD monitor.
- Do not attach accessories to the strap. If this occurs, it may cause malfunctions or damage the LCD monitor.
natural_image
Black and white pictogram showing a food item inside a circle with a diagonal line (no text or symbols)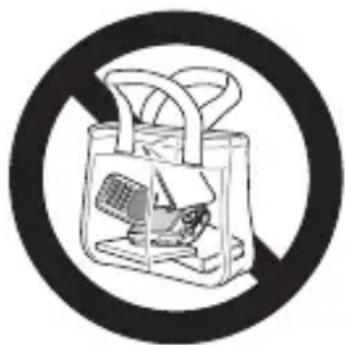
natural_image
Black and white icon of a shopping bag with a computer inside, enclosed in a circle (no text or symbols)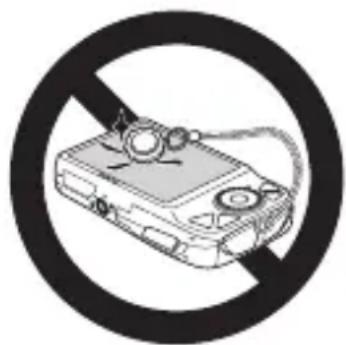
natural_image
Black and white prohibition symbol on a device (no text or numbers present)
text_image
COPYGetting Started
This chapter explains preparations before shooting, how to shoot in AUTO mode, and then how to view, erase and print the images you take. The latter part of this chapter explains how to shoot and view movies and transfer images to a computer.
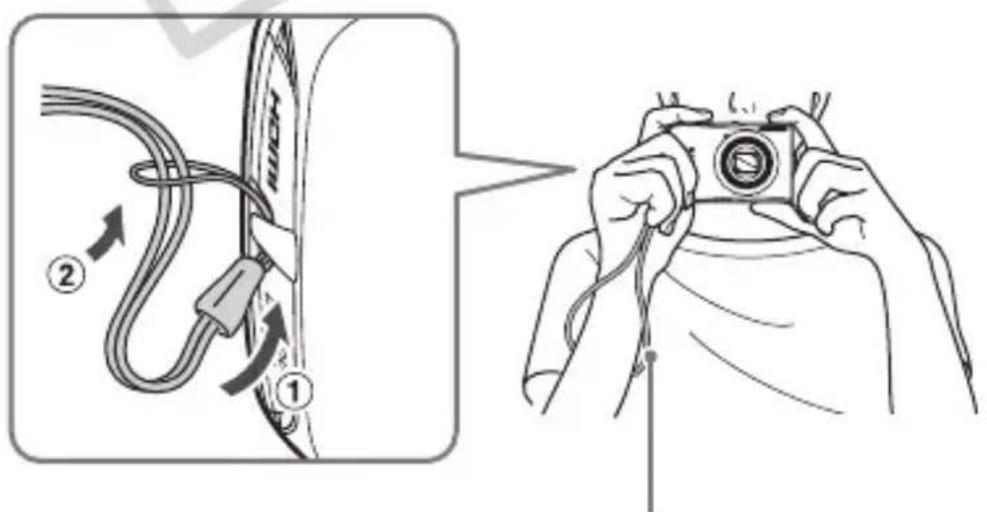
Attaching the Strap/Holding the Camera
- Attach the included strap and place it around your wrist to avoid dropping the camera during use.
- Keep your arms tight against your body while holding the camera firmly by the sides. Be sure that your fingers do not block the flash.
text_image
Diagram illustrating cable installation steps with labeled parts and a close-up of hands holding a camera.Strap
Charging the Battery
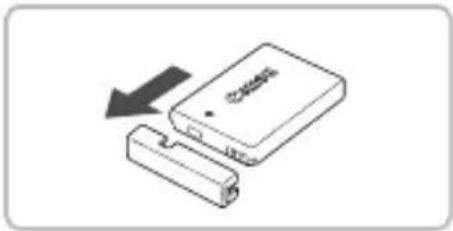
Use the included charger to charge the battery.
natural_image
Diagram showing a battery and two batteries with an arrow indicating direction (no text or symbols)Remove the cover.
text_image
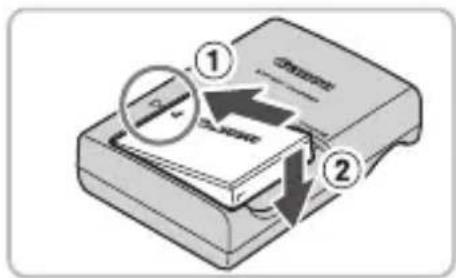
Diagram showing a printer with labeled parts and arrows indicating process flow, including 'Onshore' and 'Airplane' labels.Insert the battery.
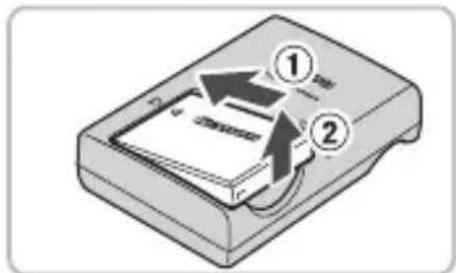
- Align the ▲ marks on the battery and charger, then insert the battery by sliding it in ② and down .
text_image
Diagram showing a refrigerator with labeled parts and directional arrows indicating movement or change.Charge the battery.
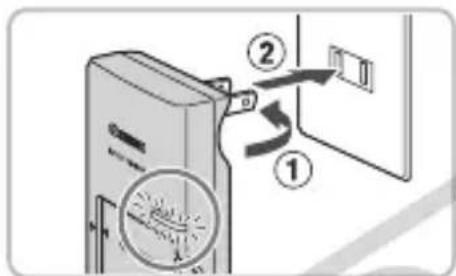
For CB-2LX: Flip out the plug and plug the charger into a power outlet ②
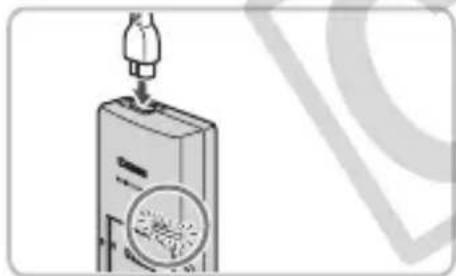
For CB-2LXE: Plug the power cord into the charger, then plug the other end into a power outlet.
natural_image
Illustration of a medical or laboratory device with a pipette inserted into a container (no text or symbols visible)The charge lamp lights red and charging starts.
The charge lamp will light green when charging has finished. Charging takes approx. 2 hours and 5 minutes.
text_image
Diagram of a printer with labeled parts showing paper feeding into a printer, marked with arrows and numbered annotations.Remove the battery.
● Unplug the battery charger from the power outlet, then remove the battery by sliding it in ① and up . ②

To protect the battery and prolong its life, do not charge it for longer than 24 hours continuously.
Approximate Number of Shots That Can Be Taken
| Number of shots | 270 |
| Playback Time (Hours) | 6 hours |
- The number of shots that can be taken is based on the Camera & Imaging Products Association (CIPA) measurement standard.
• Under some shooting conditions, fewer shots can be taken.
Battery Charge Indicator
An icon or message will appear on the screen indicating the battery's charge state.
| Display Summary | |
| Good. | |
| Slightly depleted, but sufficient. | |
| (Blinking red) Nearly depleted. |
"Change the battery pack." Depleted. Recharge the battery.

Using the battery and charger effectively
- Charge the battery on the day, or the day before, it will be used. Charged batteries continue to discharge naturally even if they are not used.
text_image
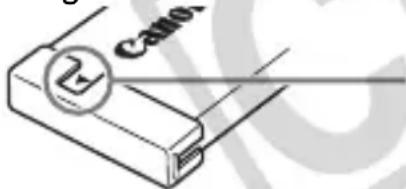
CableAttach the cover to a charged battery so that the ▲ mark is visible.
- How to store the battery for long periods. Deplete and remove the battery from the camera. Attach the terminal cover and store the battery. Storing a battery for long periods of time (about a year) without depleting it may shorten its life span or affect its performance.
- The battery charger can also be used when abroad. The charger can be used in regions that have 100 – 240 V (50/60 Hz) AC power. If the plug does not fit the outlet, use a commercially available plug adapter. Do not use devices, such as electrical transformers for foreign travel, because they will cause malfunctions.
- The battery may develop a bulge. This is a normal characteristic of the battery and does not indicate a problem. However, if the battery bulges to the point where it will no longer fit into the camera, please contact a Canon Customer Support Help Desk.
- If the battery is quickly depleted even after charging, it has reached the end of its life span. Purchase a new battery.
Inserting the Battery and Memory Card
Insert the included battery and a memory card into the camera.
text_image
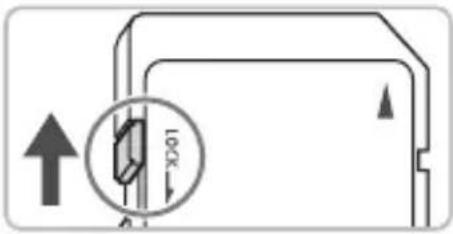
Diagram showing a lock mechanism with directional arrows and a magnified circular detail labeled 'LOCK'Check the card's write-protect tab.
- If the memory card has a write-protect tab, you will not be able to record images if the tab is in the locked position. Slide the tab up until you hear a click.
text_image
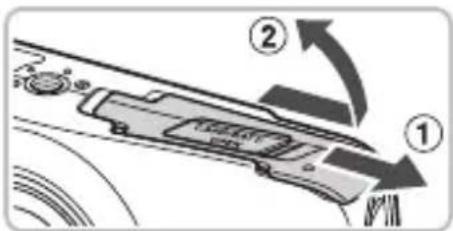
Diagram showing a car's side panel with labeled components and directional arrows indicating movement or flow.Open the cover.
- Slide the cover, and open it. ②

text_image
CanonInsert the battery.
- Insert the battery as shown until it locks into place with a click. - Be sure to insert the battery in the correct direction or it will not properly lock into place.
Terminals
natural_image
Diagram of a car interior showing a monitor mounted on the backrest with a directional arrow indicating movement (no text or symbols present)Terminals
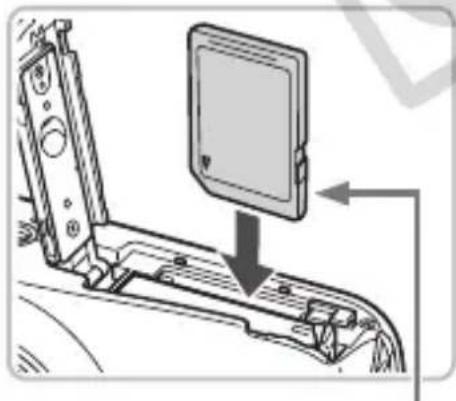
Insert the memory card.
- Insert the memory card as shown until it locks into place with a click. - Be sure the memory card is oriented correctly. Inserting the memory card in the wrong direction could damage the camera.
text_image
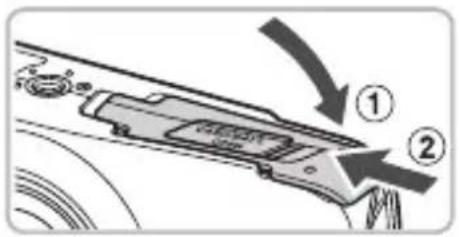
Diagram showing a mechanical component with numbered parts and directional arrows indicating motion or assembly.Close the cover.
- Close the cover, and slide it until it locks into place with a click.
Removing the Battery and Memory Card
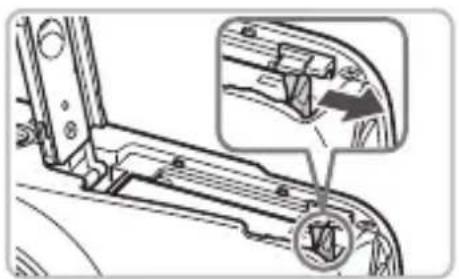
natural_image
Mechanical assembly diagram showing a bracket with a close-up inset of a component (no text or symbols)Remove the battery.
- Open the cover and press the battery lock in the direction of the arrow.
The battery will pop up.
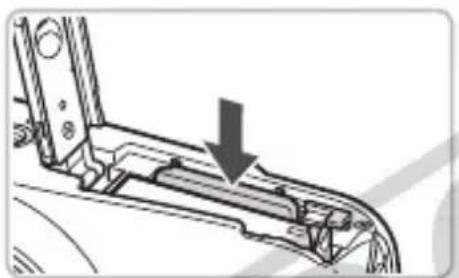
natural_image
Mechanical assembly diagram showing a bracket with a downward arrow indicating a component (no text or symbols present)Remove the memory card.
Push the memory card in until you hear a click, then slowly release it.
The memory card will pop up.
Approximate Number of Shots per Memory Card
| Memory Card | 2 GB 8 GB | |
| Number of shots | 626 2505 |
• Values are based on the default settings.
- The number of shots that can be taken will vary depending on camera settings, the subject and the memory card used.

Can you check the number of shots that can be taken?
You can check the number of shots that can be taken when the camera is in a Shooting Mode (p. 24).
Number of shots that can be taken
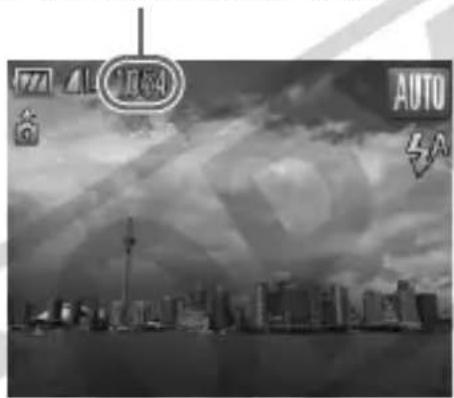
text_image
10.64 AUTO 3ACompatible Memory Cards
- SD memory cards
- SDHC memory cards
• MultiMediaCards - MMCplus memory cards
• HC MMCplus memory cards

What is the write-protect tab?
SD and SDHC memory cards have a write-protect tab. If this tab is in the locked position, [Card locked!] will appear on the screen and you will not be able to take or erase images.
Setting the Date and Time
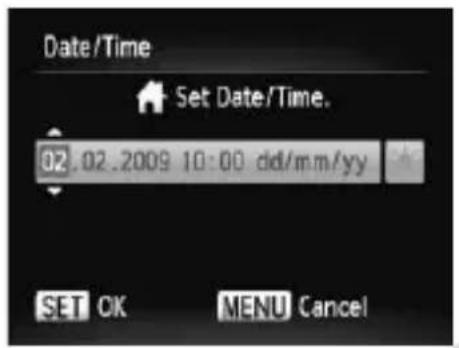
The Date/Time settings screen will appear the first time the camera is turned on. Since the dates and times recorded into your images are based on these settings, be sure to set them.
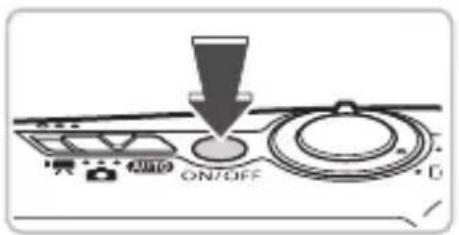
text_image
ON/OFFTurn on the camera.
- Press the power button.
The Date/Time screen will appear.
Set the date and time.
text_image
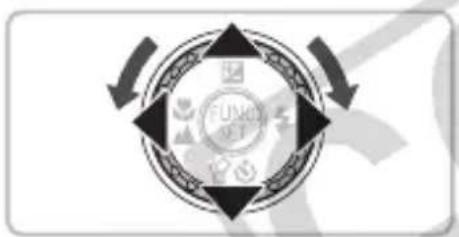
Date/Time Set Date/Time. 02.02.2009 10:00 did/m.m/yy SET OK MENU Cancel- Press the ◀▶ buttons to select an option. - Press the ▲▼ buttons or turn the Ⓞ dial to set a value.
flowchart
graph TD
    A["Start"] --> B["Process Step"]
    B --> C["FUNION OF TET"]
    C --> D["End"]
text_image
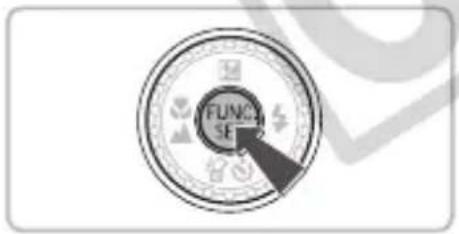
FUNCTION SEMake the setting.
- Press the Ⓗ function. SET button.
Once the date and time have been set, the Date/Time screen will close. - Pressing the power button will turn off the camera.

Reappearing Date/Time screen
Set the correct date and time. If you have not set the date and time, the Date/Time screen will appear each time you turn on the camera.

Daylight saving time settings
If you select 🙏 in Step 2 and press the ▲▼ buttons or turn the Ⓞ dial and select 🚗, you will set the time to daylight savings (1 hour ahead).
Changing the Date and Time
You can change the current date and time settings.
text_image
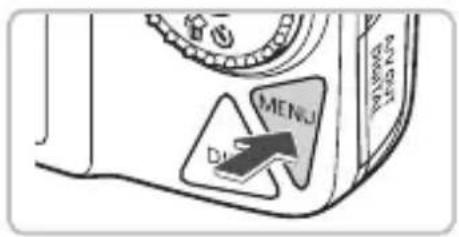
MENU DIDisplay the menus.
- Press the MENU button.
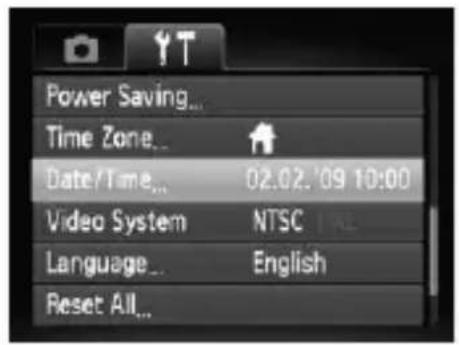
text_image
Power Saving... Time Zone... Date/Time... 02.02.09 10:00 Video System NTSC Language... English Reset All...Select [Date/Time] in the Ġ tab.
- Press the ◀▶ buttons to select the ⌘ tab.
- Press the ▲▼ buttons or turn the Ⓞ dial to select [Date/Time], then press the button.
![CANON PowerShot SD970 IS - Select [Date/Time] in the Ġ tab. - 1](/content/2026/05/790000/images/7aa238bec81f91ea15c2ed71cfd394d85b4e72a8ac5a171701560d5a8c5bc60b.jpg)
flowchart
graph TD
    A["Start"] --> B{Decision}
    B -->|Yes| C["Process"]
    B -->|No| D["End"]
    C --> E["Final Process"]
    D --> E
    E --> F["Feedback Loop"]
    F --> G["Loop Back"]
![CANON PowerShot SD970 IS - Select [Date/Time] in the Ġ tab. - 2](/content/2026/05/790000/images/4bd620e9fd8c2e2373fae5242a666f4d80f59b1b3f7273d348b8a40f959c7e84.jpg)
text_image
MENU DvChange the date and time.
Follow Steps 2 and 3 on p. 19 to adjust the setting.
- To close the menus, press the MENU button.

Date/Time battery
- The camera has a built-in date/time battery (backup battery) that allows the date/time settings to be retained about three weeks after the battery pack has been removed.
- By inserting a charged battery or connecting an AC adapter kit (sold separately, p. 40) the date/time battery can be charged in about 4 hours even if the camera is not turned on.
- If the date/time battery is depleted, the Date/Time menu will appear when you turn the camera on. Follow the steps on p. 19 to set the date and time.
Setting the Display Language
You can change the language displayed in the LCD monitor menus and messages.
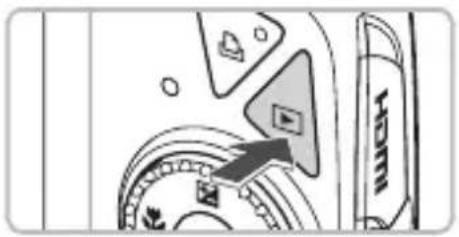
text_image
Diagram showing a device with labeled components and an arrow pointing to a component, possibly indicating a process or location.Set the playback mode.
- Press the ▶ button.
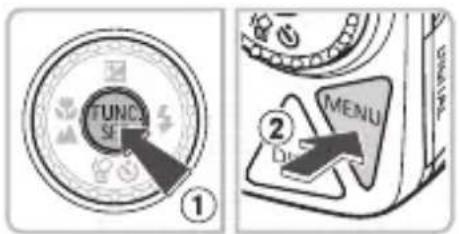
text_image
TUNCA SF ① ② MENU DDisplay the settings screen.
- Press and hold the FUNC SET button ①, then immediately press the MENU button ②
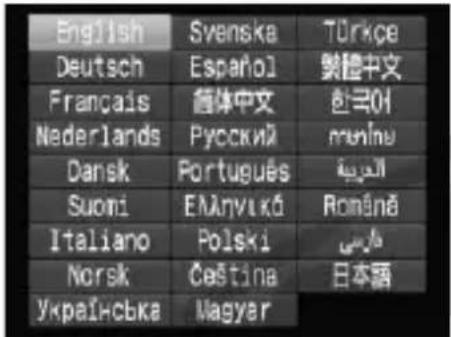
text_image
English Deutsch Français Nederlands Dansk Suoni Italiano Norsk Українська Svenska Español 苗体中文 Русский Portugues Емляnuко Polski Čeština Магyar Türkçe 装體中文 한국어 منلну العربية Romané Japan語Set the display language.
Press the ▲▼◀▶ buttons or turn the Ⓞ dial to select a language, then press the ⏚ function button.
Once the display language has been set, the language menu will close.
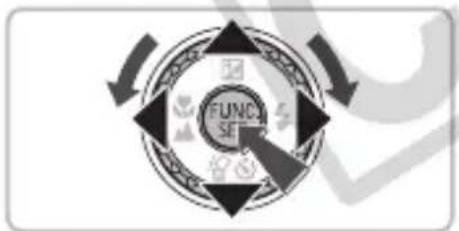
flowchart
graph TD
    A["FUNC SE"] --> B["Outer Ring"]
    B --> C["Inner Ring"]
    C --> D["Outer Ring"]
    D --> E["Inner Ring"]
    E --> F["Outer Ring"]
    F --> G["Inner Ring"]
    G --> H["Outer Ring"]
    H --> I["Inner Ring"]
    I --> J["Outer Ring"]

What if the clock appears when the FUNC. SET button is pressed?
The clock will display if too much time passes between pressing the Ⓗ️ button and the MENU button in Step 2. If the clock appears, press the Ⓗ️ button to remove the clock and repeat Step 2.

You can also change the display language by pressing the MENU button, selecting the 丫丫 tab, and selecting the [Language] menu item.
Formatting Memory Cards
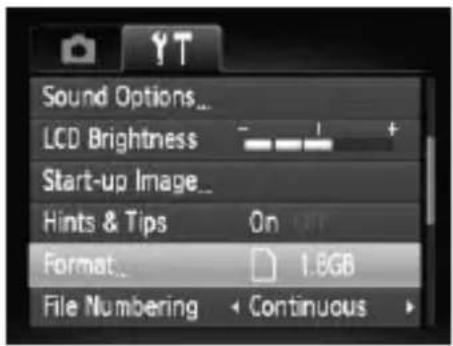
Before you use a new memory card or one that has been used in other devices, you should format the card with this camera. Formatting (initializing) a memory card erases all data on the memory card. As you cannot retrieve the erased data, exercise adequate caution before formatting the memory card.
text_image
Sound Options... LCD Brightness Start-up Image... Hints & Tips On Format... 1.8GB File Numbering Continuous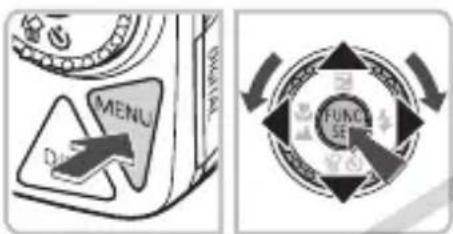
text_image
MENU Date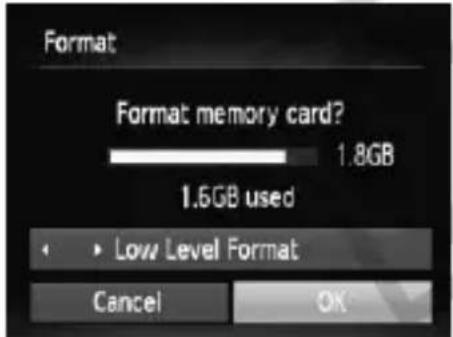
text_image
Format Format memory card? 1.8GB 1.6GB used • Low Level Format Cancel OKDisplay the menus.
- Press the MENU button.
Select [Format].
- Press the ◀▶ buttons to select the ⌘ tab.
- Press the ▲▼ buttons or turn the dial to select [Format], then press the button.
Format the memory card.
Press the ◀▶ buttons or turn the Ⓞ dial to select [OK], then press the Ⓗ function SET button.
The memory card will be formatted.
When formatting has finished, the menu screen will reappear.

Formatting or erasing data on a memory card merely changes the file management information on the card and does not ensure its contents are completely erased. Be careful when transferring or disposing of a memory card. When disposing of a memory card, take precautions such as physically destroying the card to prevent personal information leaks.

The total capacity of the memory card displayed in the formatting screen may be less than indicated on the memory card.
Pressing the Shutter Button
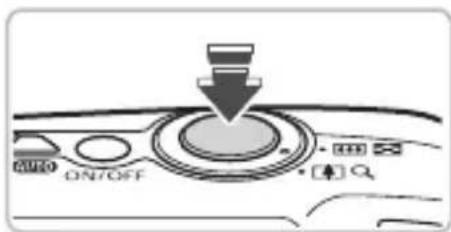
The shutter button has two stops. To take images that are in focus, be sure to first press the shutter button lightly (halfway) to focus, then take the shot.
text_image
AUTO ON/OFFPress halfway (lightly to the first stop).
The camera focuses and automatically selects the necessary settings for shooting, such as the brightness.
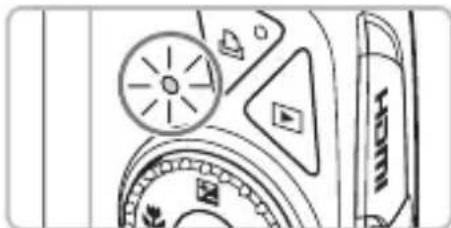
When the camera focuses, it will beep twice and the indicator will light green.
natural_image
Technical line drawing of a mechanical device with no visible text or symbols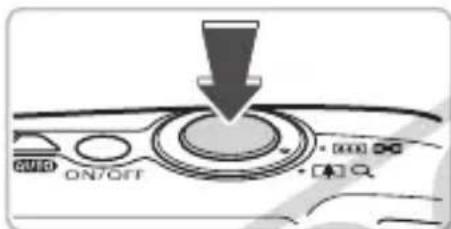
text_image
ON/OFF • [100] ☑ • [4] ☒Press fully (to the second stop).
The camera plays the hutter sound and takes the shot.
Since the shot is being taken while the shutter sound plays, be careful not to move the camera.

Does the length of the shutter sound change?
- Since the time required to shoot differs according to the scene you want to take, the length of the shutter sound may change.
- If the camera or subject moves while the shutter sound is playing, the recorded image may be blurry.

If you just press the shutter button fully without pausing halfway, the image may not be in focus.
AUTO Taking Pictures
Since the camera can determine the subject and shooting conditions, you can let it automatically select the best settings for the scene and just shoot. The camera can also detect and focus on faces, setting the color and brightness to optimal levels.
text_image
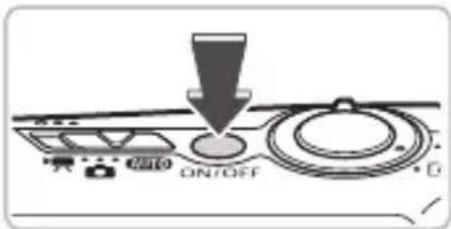
ON/OFFTurn on the camera.
- Press the power button.
The start-up sound will play, and the startup screen will appear.
- Pressing the power button again will turn the camera off.
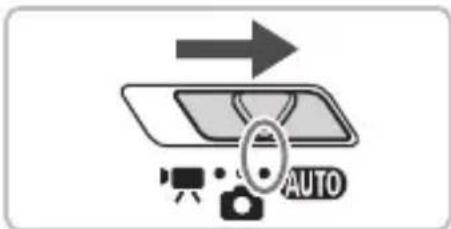
natural_image
Diagram showing a car interior with an arrow pointing upward and a camera icon labeled 'AUTO' (no text or symbols beyond icons)Select the AUTO mode.
Set the mode switch to AUTO.
When you point the camera toward the subject, the camera will make a slight noise as it determines the scene.
The camera focuses on the subject it judges to be the main subject, and displays the icon for the determined scene in the upper right of the screen.
When faces are detected, a white frame appears on the face of the main subject, while gray frames appear on other detected faces.
Even if the detected faces move, the camera will follow the faces within a certain range.
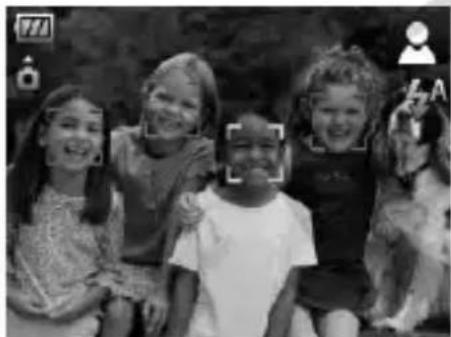
natural_image
Black-and-white photo of four smiling children posing together with a dog, no visible text or symbolsCompose the shot.
- Moving the zoom lever toward [▲] will zoom in on your subject, making it appear larger. Moving the lever toward [▲▲] will zoom out from your subject, making it appear smaller.
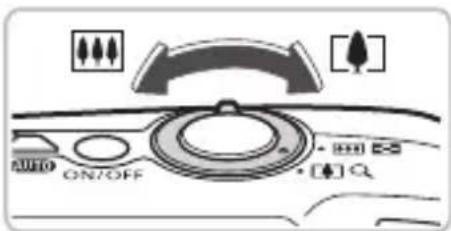
text_image
ON/OFF AUTO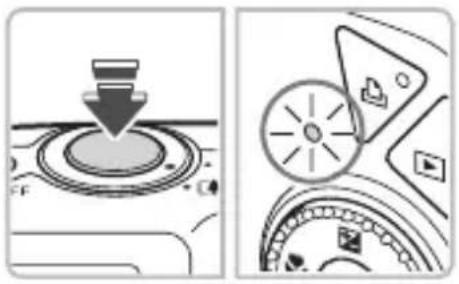
natural_image
Diagram showing a circular dial indicator with a downward arrow and a close-up of the dial (no text or symbols present)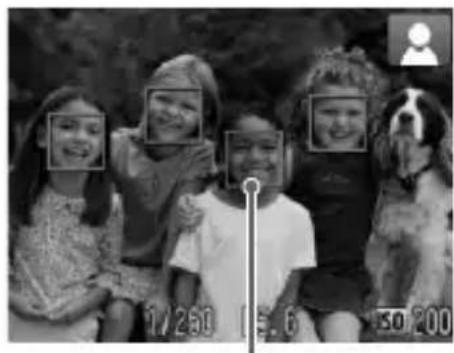
natural_image
Black-and-white photo of four children and a dog, each with facial bounding boxes, against a blurred outdoor background (no text or symbols visible)AF Frames
text_image
ON/OFFFocus.
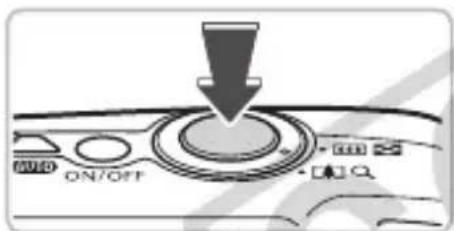
- Press the shutter button halfway to focus.
When the camera focuses, it will beep twice and the indicator will light green (orange when the flash will fire).
Green AF frames appear where the subject is in focus.
Several AF frames will appear when the camera focuses on more than one point.
Shoot.
Press the shutter button fully.
The camera will play the shutter sound and shoot. The flash will automatically fire in low light conditions.
The indicator will blink green while the image is recorded to the memory card.
The image will appear on the screen for about two seconds.
- You can take a second picture even while an image is displayed by pressing the shutter button.

What if...
• The camera does not play any sounds?
Pressing the DISP. button while turning on the camera power will turn off all sounds except for warning sounds. To turn the sounds on, press the MENU button, select the 🎩 tab, and then select [Mute]. Use the ◀ buttons to select [Off].
- The image comes out dark even if the flash fired when shooting?
The subject is too far away for the flash to reach. Shoot within the effective flash range of approximately 30 cm – 3.5 m (1.0 – 11 ft.) at maximum wide angle, and approximately 30 cm – 2.0 m (1.0 – 6.6 ft.) at maximum telephoto.
- The camera beeps once when the shutter button is pressed halfway?
Your subject is too close. When the camera is at maximum wide angle, move about 2 cm (0.79 in.) or more away from your subject and shoot. Move about 50 cm (1.6 ft.) or more away when the camera is at maximum telephoto.
- The lamp lights when the shutter button is pressed halfway.
To reduce red-eye and to assist in focusing, the lamp may light when shooting in dark areas.
- The ↕ icon blinks when you try to take an image?
The flash is charging. You can shoot when recharging ends.
Scene Icons
The camera displays an icon for the scene it has determined and then automatically focuses and selects the optimum settings for subject brightness and color.
| Background Subject | Bright | Including Blue Skies | Sunsets | Dark | |||
| Backlit Backlit | When Using Tripod | ||||||
| People – |  |  |  |  |  |  | |
| Subjects Other Than People Landscapes |  |  |  |  |  |  |  |
| Close Subjects – |  |  |  |  |  | ||
| Icon Background Color | Gray Light Blue Orange Dark Blue | ||||||
* Displays when the camera is attached to a tripod.

Under certain conditions, the icon that displays may not match the actual scene. Especially when there is an orange or blue colored background (a wall for example), or the “Blue Skies” icons may appear and it may not be possible to shoot with the appropriate color. If this happens, try shooting in the P mode (p. 68).
You can view your images on the screen.
text_image
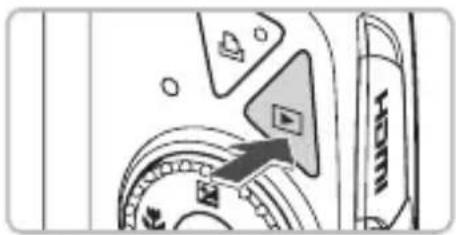
Diagram showing a device with labeled components and an arrow pointing to a component labeled 'Fitch'Select the playback mode.
- Press the ▶ button.
The last image you took will appear.
flowchart
graph TD
    A["FUND SEI"] --> B["Loop Back"]
    B --> C["Loop Back"]
    C --> D["Loop Back"]
    D --> E["Loop Back"]
    E --> F["Loop Back"]
    F --> G["Loop Back"]
    G --> H["Loop Back"]
    H --> I["Loop Back"]
    I --> J["Loop Back"]
    J --> K["Loop Back"]
    K --> L["Loop Back"]
    L --> M["Loop Back"]
    M --> N["Loop Back"]
    N --> O["Loop Back"]
    O --> P["Loop Back"]
    P --> Q["Loop Back"]
    Q --> R["Loop Back"]
    R --> S["Loop Back"]
    S --> T["Loop Back"]
    T --> U["Loop Back"]
    U --> V["Loop Back"]
    V --> W["Loop Back"]
    W --> X["Loop Back"]
    X --> Y["Loop Back"]
    Y --> Z["Loop Back"]
Select an image.
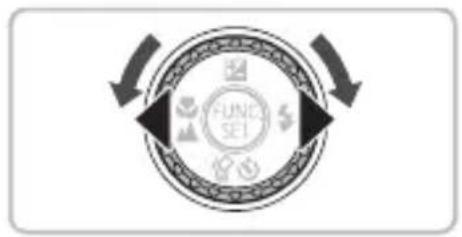
- Pressing the ◀ button will cycle through the images in reverse order.
- Pressing the ▶ button will cycle through the images in the order they were taken.
If you hold the ◀▶ buttons pressed, the images advance continuously.
Turning counter-clockwise displays images in the reverse order they were taken, while turning it clockwise displays images in the order they were taken. - Pressing the ▶ button while the lens is extended will cause the shooting screen to reappear.
The lens will retract after approximately 1 minute elapses. If you press the ▶ button with the lens retracted, the power will turn off.

Switching images quickly
natural_image
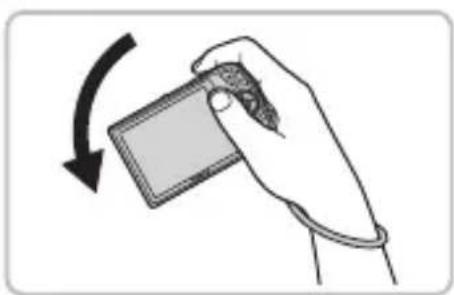
Illustration of a hand holding a card with a scroll, showing a curved arrow indicating rotation (no text or symbols)If you hold the ◀ button pressed and tilt the camera as shown in the illustration, the images advance quickly. However, the images appear coarse. When you hold the ▶ button pressed tilt the camera to the opposite direction.
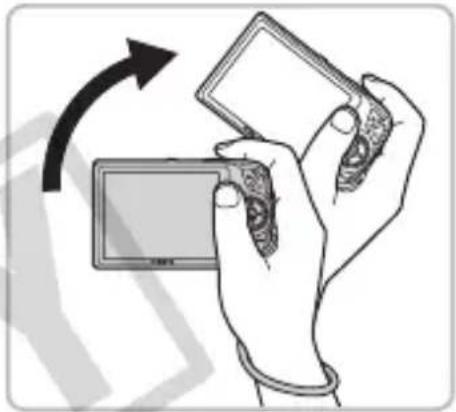
Active Display
If you tilt the camera gently from your wrist as shown in the illustration below, you can switch the images you are viewing.

- Depending on how you tilt the camera, images may not switch.
- Be careful not to accidentally bang people.
- Be sure to hold the camera with the strap around your wrist to avoid dropping it.

text_image
Hold the camera without touching the shutter button.Switch to the next image
natural_image
Illustration of hands holding a card and a smartphone, with an arrow indicating rotation (no text or symbols)Switch to the previous image
Erasing Images
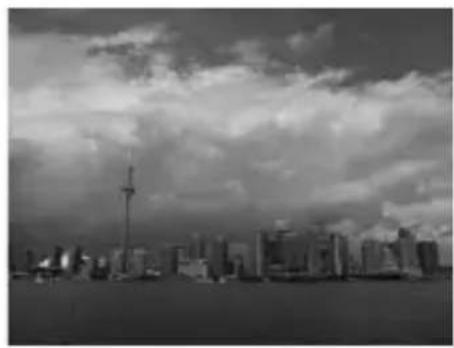
You can select and erase images one at a time. Please note that erased images cannot be recovered. Exercise adequate caution before erasing an image.
text_image
Diagram showing a device with labeled components and an arrow pointing to a component labeled 'Fisher'Select the playback mode.
- Press the ▶ button.
The last image you took will appear.
Select an image to erase.
- Press the ◀▶ buttons or turn the Ⓞ dial to display an image to erase.
natural_image
Black-and-white cityscape featuring a prominent tower and modern skyscrapers under a cloudy sky (no visible text or signage)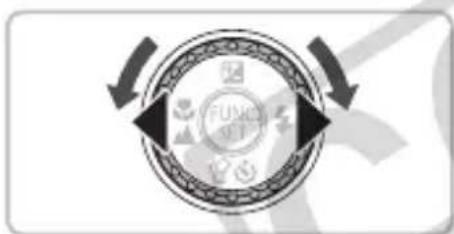
flowchart
graph TD
    A["FUND"] --> B["Process"]
    B --> C["Feedback Loop"]
    C --> A
text_image
Erase? Cancel Erase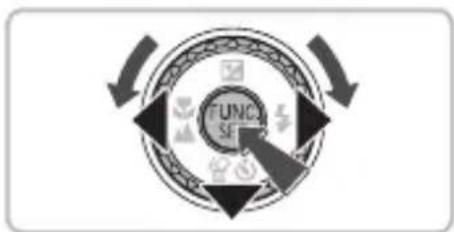
flowchart
graph TD
    A["FUNC SE"] --> B["Outer Ring"]
    B --> C["Inner Ring"]
    C --> D["Outer Ring"]
    D --> E["Inner Ring"]
    E --> F["Outer Ring"]
    F --> G["Inner Ring"]
    G --> H["Outer Ring"]
    H --> I["Inner Ring"]
    I --> J["Outer Ring"]
    J --> K["Inner Ring"]
    K --> L["Outer Ring"]
    L --> M["Inner Ring"]
    M --> N["Outer Ring"]
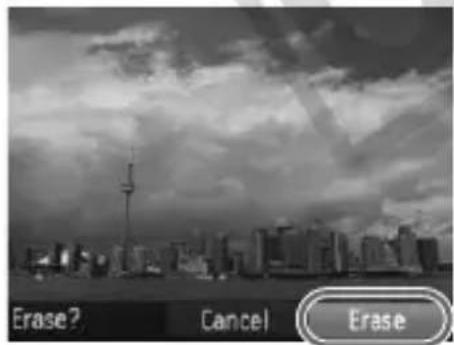
Erase the image.
- Press the ▼ button.
[Erase?] appears on the screen.
- Press the ◀▶ buttons or turn the ⏱ dial to select [Erase], then press the Ⓗ function SET button.
The displayed image will be erased.
To exit instead of erasing, press the buttons or turn the dial to select [Cancel], then press the FUNC SET button.

Printing Images
You can easily print the images you have taken if you connect the camera to a PictBridge compliant printer (sold separately).
Items to Prepare
- Camera and PictBridge compliant printer (sold separately)
• Interface cable supplied with the camera (p. 2)
text_image
MENU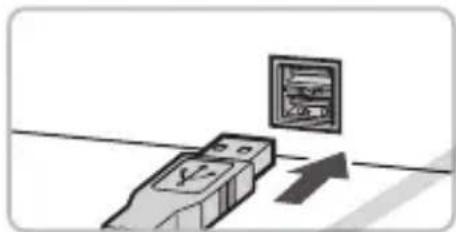
natural_image
Illustration of a USB flash unit with an icon and directional arrow, no text or symbols present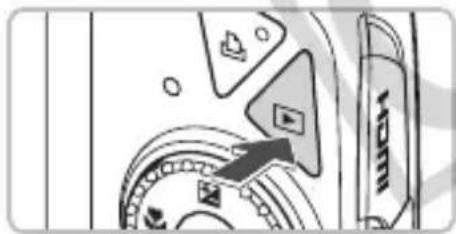
natural_image
Close-up of a mechanical component with a labeled arrow pointing to a component (no readable text or symbols)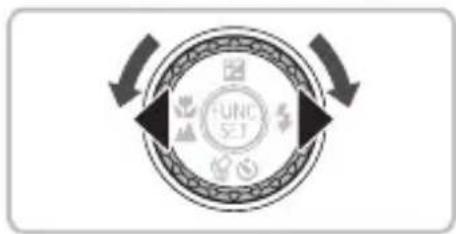
flowchart
graph TD
    A["UNIC SET"] --> B["Data Input"]
    A --> C["Processing"]
    A --> D["Output"]
Turn off the camera and printer.
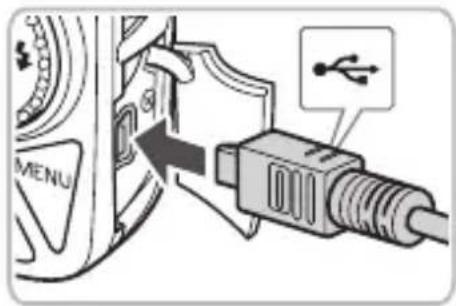
Connect the camera to the printer.
Open the cover, and insert the small end of the plug firmly into the camera terminal in the direction shown.
Insert the cable's larger plug into the printer. For connection details, refer to the user guide provided with the printer.
Turn on the printer.
Turn on the camera.
Press the ▶ button to turn on the camera.
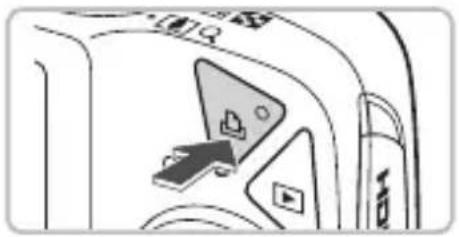
The 📄 button will light blue.
Select an image to print.
- Press the ◀▶ buttons or turn the Ⓞ dial to select an image.
text_image
Diagram showing a device with labeled buttons and a lock mechanism, likely for instructions or instructions in Chinese.Print images.
- Press the 📁 button.
▶ Printing will start and the 📁 button will blink blue. - If you want to print additional images, repeat Steps 5 and 6 after printing has completed.
● After printing has completed, turn off the camera and printer, and unplug the interface cable.

Refer to the Personal Printing Guide for details on the best ways to print.
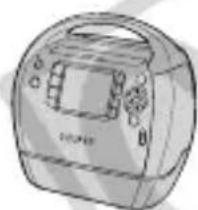
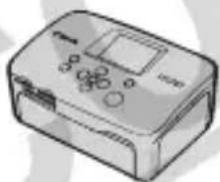
Canon-Brand PictBridge Compliant Printers (Sold Separately)
By connecting your camera to one of the Canon-brand PictBridge compliant printers below, you can print your images without having to use a computer.
natural_image
Line drawing of a portable electronic device with handle and control panel (no text or symbols)Compact Photo Printers (SELPHY Series)
natural_image
Illustration of a rectangular electronic device with buttons and a display (no text or symbols visible)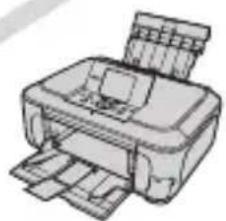
natural_image
Illustration of a printer with paper sheets and a stack of papers (no text or symbols visible)Inkjet Printers (PIXMA series)
For more information, visit your nearest Canon retailer.

Shooting Movies
The camera can automatically select all settings so that you can shoot movies just by pressing the shutter button. If you continue shooting for a long time, the camera may become warm. This is not a malfunction.
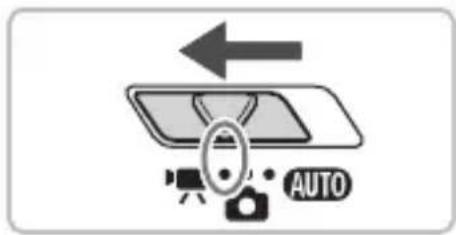
text_image
AUTO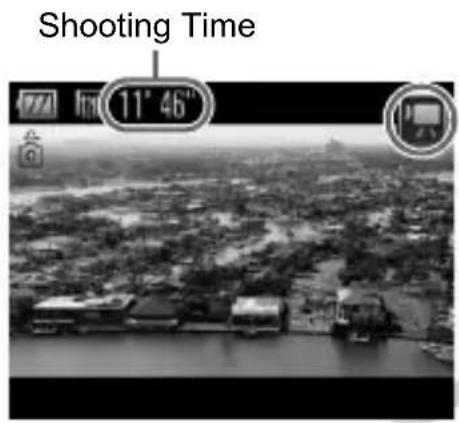
text_image
Shooting Time 11° 46"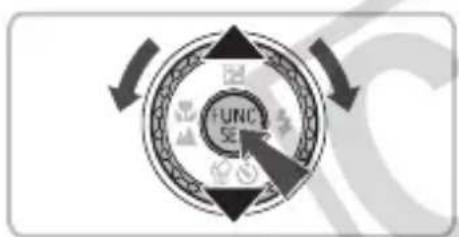
flowchart
graph TD
    A["FUNC"] --> B["Process Step"]
    B --> C["End"]
text_image
AUTO ON/OFF • [100] + ?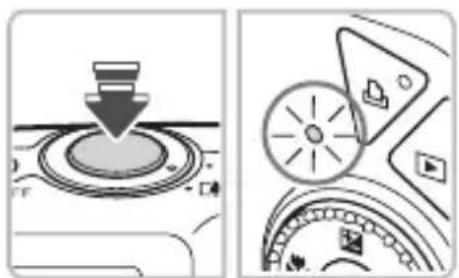
natural_image
Two-panel diagram showing a device with a downward arrow and a circular dial, no text or symbols present.Set the mode switch to 🔊.
Select the ▶ mode.
- Press the Ⓗ button, and press the ▲▼ buttons or turn the Ⓞ dial to select ▶, then press the Ⓗ button again.
- Press the ▲▼ buttons or turn the Ⓞ dial to select ▶, then press the Ⓗ️ button.
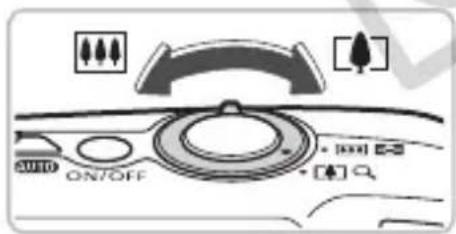
Compose the shot.
- Moving the zoom lever toward [♠] will zoom in on your subject, making it appear larger. Moving the lever toward [◀◀◀] will zoom out from your subject, making it appear smaller.
Focus.
- Press the shutter button halfway to focus.
When the camera focuses, it will beep twice and the indicator will light green.
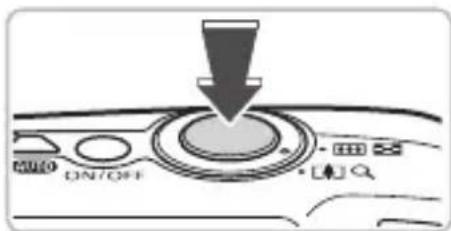
text_image
ON/OFF + - + -Elapsed Time
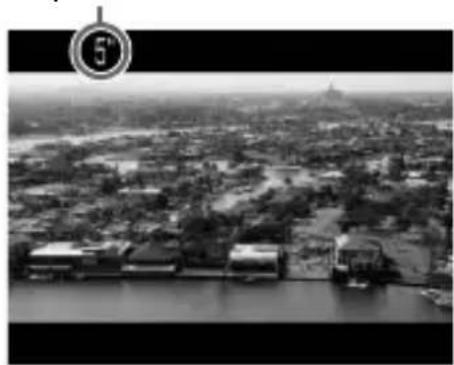
natural_image
Aerial black-and-white view of a densely built urban area with waterfront, buildings, and greenery (no visible text or symbols)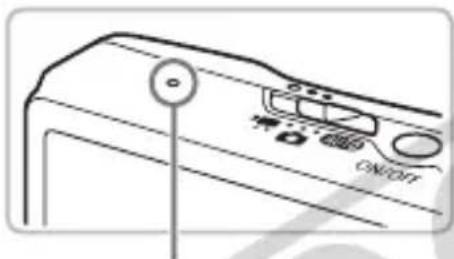
text_image
ON/OFFMicrophone
text_image
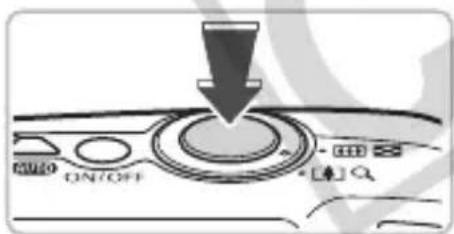
ON/OFF LQShoot.
- Press the shutter button fully.
The camera will start shooting the movie, and [●Rec] and the elapsed time will appear on the screen.
Once shooting begins, take your finger off the shutter button.
If you change the composition of your shot during shooting, the focus will stay the same, but the brightness and tone will automatically adjust.
- Do not touch the microphone while shooting.
- Do not press any buttons other than the shutter button. Otherwise, the sound the buttons make will be recorded in the movie.
Stop shooting.
Press the shutter button fully again.
The camera will beep once and stop shooting the movie.
The indicator will blink green, and the movie will record to the memory card.
Shooting will automatically stop when the memory card fills.
Estimated Shooting Times
| Memory Card | 2 GB 8 GB | |
| Shooting Time | 10 min. 53 sec. 43 min. 32 sec. | |
- Shooting times are based on default settings.
- Shooting time can be checked on the screen in Step 2.
- Recording will automatically stop when either the clip file size reaches 4 GB or the recording time reaches approximately 29 minutes and 59 seconds.
You can view your movies on the screen.
text_image
Diagram showing a mechanical or electronic component with labeled parts and an arrow pointing to a specific area.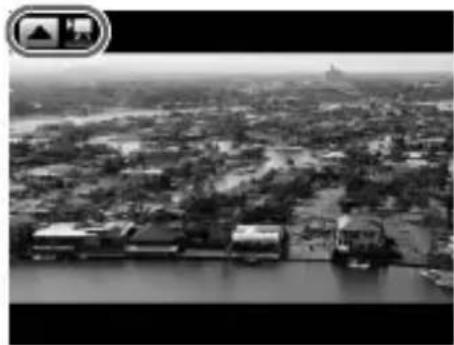
natural_image
Aerial black-and-white view of a flooded urban area with buildings and waterways (no visible text or symbols)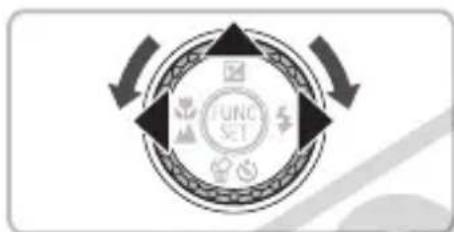
flowchart
graph TD
    A["UNC SET"] --> B["Arrow 1"]
    A --> C["Arrow 2"]
    A --> D["Arrow 3"]
    A --> E["Arrow 4"]
    A --> F["Arrow 5"]
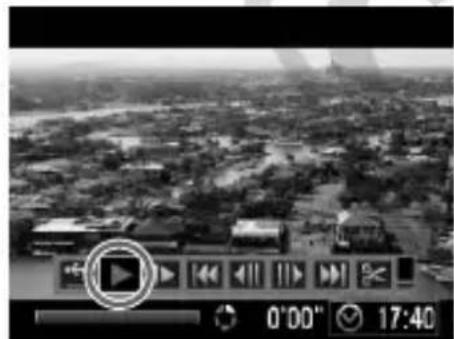
natural_image
Aerial view of a cityscape with buildings and greenery, overlaid with a play button icon and playback controls (no readable text or symbols)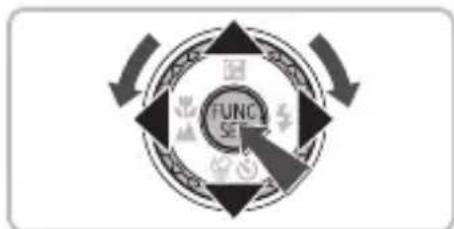
flowchart
graph TD
    A["FUNC SE"] --> B["Arrow Left"]
    B --> C["Arrow Right"]
    C --> D["Arrow Down"]
    D --> E["Arrow Up"]
    E --> F["Arrow Left"]
    F --> G["Arrow Right"]
    G --> H["Arrow Down"]
    H --> I["Arrow Up"]
    I --> J["Arrow Left"]
    J --> K["Arrow Right"]
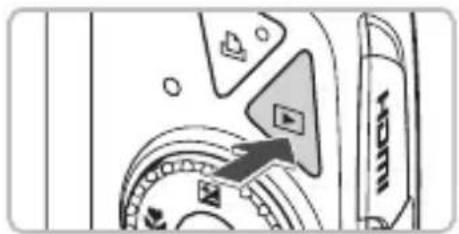
Select the playback mode.
- Press the ▶ button.
The last image you shot will appear.
appears on movies.
Select a movie.
- Press the ◀▶ buttons or turn the Ⓞ dial to select a movie, then press the ▲ button.
The movie control panel will appear on the screen.
Play the movie.
- Press the ◀▶ buttons or turn the Ⓞ dial to select ▶ then press the Ⓗ function SET button.
The movie will play. - You can pause/resume the movie by pressing the Ⓗ function SET button again.
- Press the ▲▼ buttons to adjust the volume.
After the movie finishes, 📄 appears.

When watching a movie on a computer, frames may drop, it may not play smoothly, and the audio may stop suddenly depending on the computer's capabilities. If you use the supplied software to copy the movie back onto the memory card, you can play back the movie smoothly. For enhanced playback you can also connect the camera to a TV.
Transferring Images to a Computer
You can use the included software to transfer your camera images to a computer.
System Requirements
Even though these are recommended system requirements, not all computer functions can be guaranteed.
Windows
| OS | Windows Vista (including Service Pack 1) Windows XP Service Pack 2, Service Pack 3 | |
| Computer model The | above OS should be pre-installed on computers with built-in USB ports. | |
| CPU | Viewing images | Pentium 1.3 GHz or higher |
| Viewing movies | Core2 Duo 1.66 GHz or higher | |
| RAM | Viewing images | Windows Vista: 1 GB or more Windows XP: 512 MB or more |
| Viewing movies 1 | GB or more | |
| Interface | USB | |
| Free Hard Disk Space | Canon Utilities | ZoomBrowser EX: 200 MB or more PhotoStitch: 40 MB or more |
| Display | 1,024 × 768 pixels or higher | |
Macintosh
| OS | Mac OS X v10.4 – v10.5 | |
| Computer model The | above OS should be pre-installed on computers with built-in USB ports. | |
| CPU | Viewing images | PowerPC G4/G5 or Intel Processor |
| Viewing movies | Core Duo 1.66 GHz or higher | |
| RAM | Viewing images | 512 MB or more |
| Viewing movies | 1 GB or more | |
| Interface | USB | |
| Free Hard Disk Space | Canon Utilities | ImageBrowser: 300 MB or morePhotoStitch: 50 MB or more |
| Display 1,024 × 768 pixels or higher | ||
Items to Prepare
- Camera and computer
• DIGITAL CAMERA Solution Disk supplied with the camera (p. 2)
• Interface cable supplied with the camera (p. 2)
Preparations
Windows XP and Mac OS X (v10.4) are used for these explanations.
Install the software.
Windows
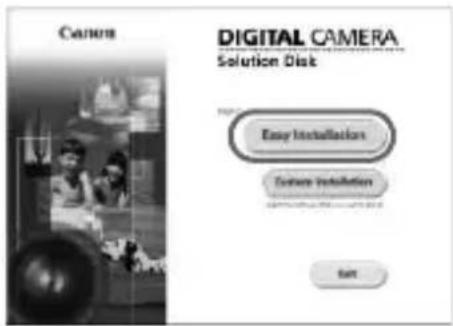
text_image
Canon DIGITAL CAMERA Solution Disk Easy Installation Custom Installation OKPlace the DIGITAL CAMERA Solution Disk in the computer's CD-ROM drive.
Begin installation.
- Click [Easy Installation] and follow the onscreen instructions to proceed with the installation.
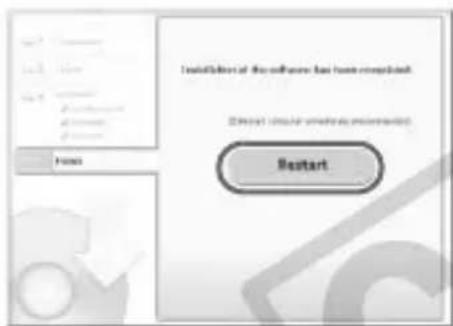
text_image
Installation of the software has been replaced [ ] [ ] [ ] [ ] [ ] [ ] [ ] [ ] [ ] [ ] [ ] [ ] [ ] [ ] [ ] [ ] [ ] [ ] [ ] [ ] [ ] [ ] [ ] [ ] [ ] [ ] [ ] [ ] [ ] [ ] [ ] [ ] [ ] [ ] [ ] [ ] [ ] [ ] [ ] [ ] [ ] [ ] [ ] [ ] [ ] [ ] [ ] [ ] [ ] [ ] [ ] [ ] [ ] [ ] [ ] [ ] Diluted: 100% (100%) [ ] [ ] [ ] [ ] [ ] [ ] [ ] [ ] [ ] [ ] [ ] [ ] [ ] [ ] [ ] [ ] [ ] [ ] [ ] [ ] [ ] [ ] [ ] [ ] [ ] [ ] [ ] [ ] [ ] [ ] [ ] [ ] [ ] [ ] [ ] [ ] [ ] [ ] [ ] [ ] [ ] [ ] [ ] [ ] [ ] [ ] [ ] [ ] [ ] [ ] [ ] [ ] [ ] [ ] [ ] [ ] [ ] [ ] [ ] [ ] [ ] [ ] [ ] [ ] [ ] [ ] [ ] [ ] [ ] [ ] [ ] [ ] [ ] [ ] [ ] [ ] [ ] [ ] [ ] [ ] [ ] [ ] [ ] [ ] [ ] [ ] [ ] [ ] [ ] [ ] [ ] [ ] [ ] [ ] [ ] [ ] ( )When the install finishes, click [Restart] or [Finish].
Remove the CD-ROM.
- Remove the CD-ROM when your desktop screen appears.
Macintosh
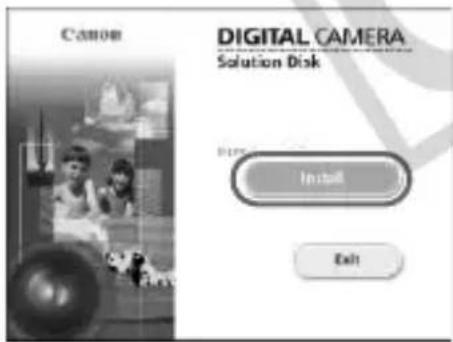
text_image
Canon DIGITAL CAMERA Solution Disk Install Exit- Place the CD-ROM in the computer's CD-ROM drive and double-click the icon.
- Click [Install], and follow the onscreen instructions to proceed with the installation.
text_image
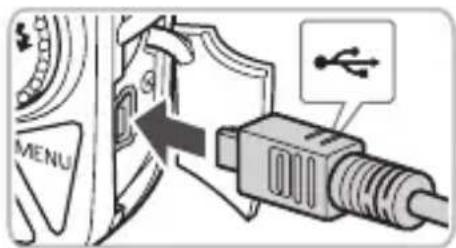
MENUConnect the camera to the computer.
Turn off the camera.
Open the cover, and insert the cable's small plug into the camera terminal in the direction as shown.
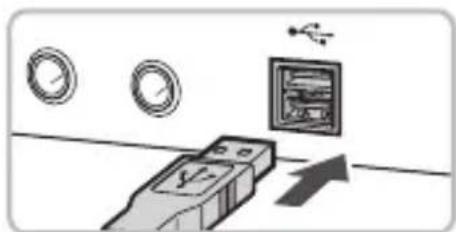
Insert the cable's larger plug into the computer's USB port. For connection details, refer to the user guide provided with the computer.
natural_image
Illustration of a device with a battery and two circular gauges above it, showing an upward arrow (no text or symbols)Turn on the camera.
- Press the ▶ button to turn on the camera.
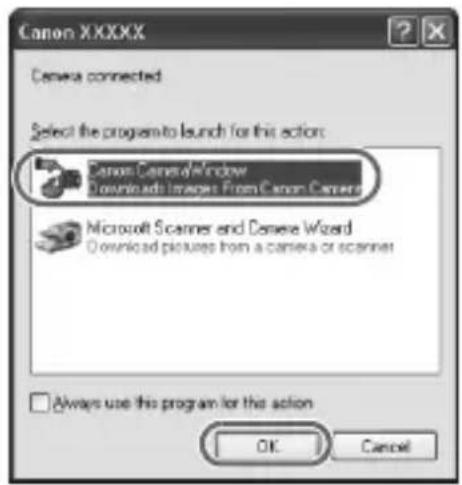
Open CameraWindow.
Windows
text_image
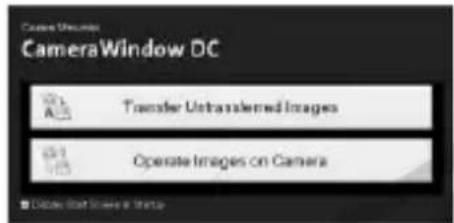
Canon XXXXX Camera connected Select the program to launch for this action: Canon CameraWindow Downloads Images From Canon Camera Microsoft Scanner and Camera Wizard Download pictures from a camera or scanner Always use this program for this action OK Cancel- Select [Canon CameraWindow] and click [OK].
CameraWindow will appear. - If CameraWindow does not appear, click the [Start] menu and select [All Programs] or [Programs], followed by
[Canon Utilities] ▶ [CameraWindow] ▶
[CameraWindow] ▶ [CameraWindow].
text_image
Camera Window DC Transfer Untranslated Images Operate Images on Camera ■ Continue Start Stove in Start
text_image
CameraWindow DC Transfer Untreated Images Operato Images on CameraMacintosh
CameraWindow will appear when you establish a connection between the camera and computer.
- If CameraWindow does not appear, click the [CameraWindow] icon on the Dock (the bar which appears at the bottom of the desktop).
Transferring Images to a Computer
text_image
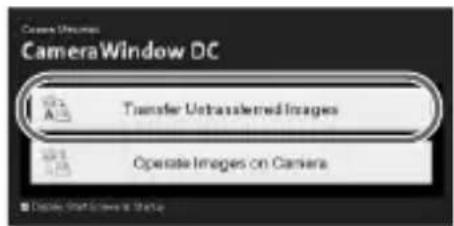
CameraWindow DC Transfer Unreastered Images Operate Images on Camera ■ Display Short Screens & Status- Click [Transfer Untransferred Images].
All images not previously transferred will transfer to the computer.
● After the transfer finishes, turn off the camera and unplug the cable.
For further operations, refer to the Software Starter Guide.

Images transferred to the computer will be sorted by date and saved in separate folders in the "My Pictures" folder for Windows or the "Pictures" folder for Macintosh.
Accessories
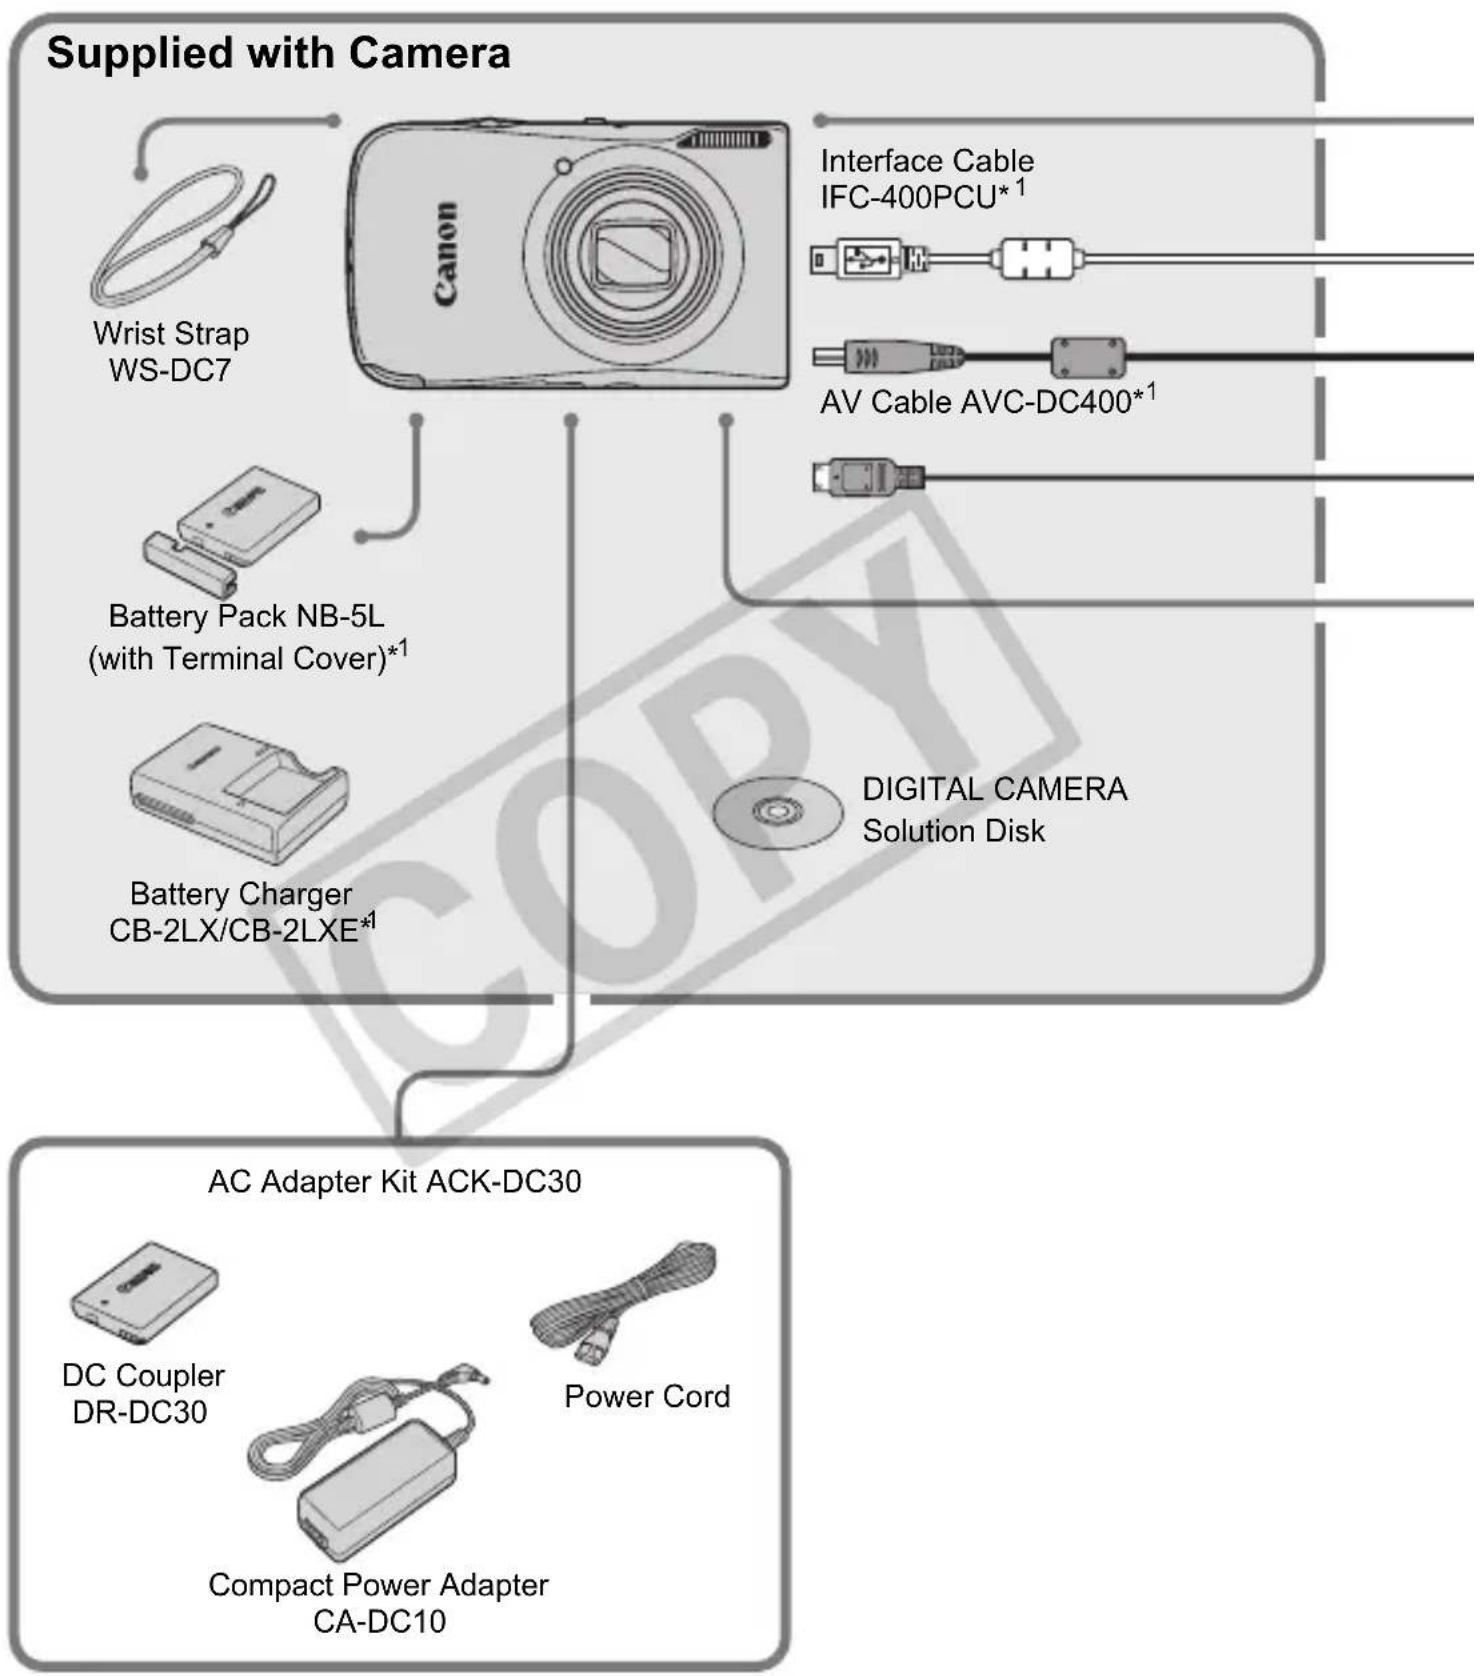
flowchart
graph TD
    A["Canon"] --> B["Wrist Strap WS-DC7"]
    A --> C["Battery Pack NB-5L (with Terminal Cover)*1"]
    A --> D["Battery Charger CB-2LX/CB-2LXE*1"]
    A --> E["Interface Cable IFC-400PCU*1"]
    A --> F["AV Cable AVC-DC400*1"]
    A --> G["DIGITAL CAMERA Solution Disk"]
    H["AC Adapter Kit ACK-DC30"] --> I["DC Coupler DR-DC30"]
    H --> J["Power Cord"]
    H --> K["Compact Power Adapter CA-DC10"]
*1 Also available for purchase separately.
*2 See the user guide supplied with the printer for more information on the printer and interface cables.
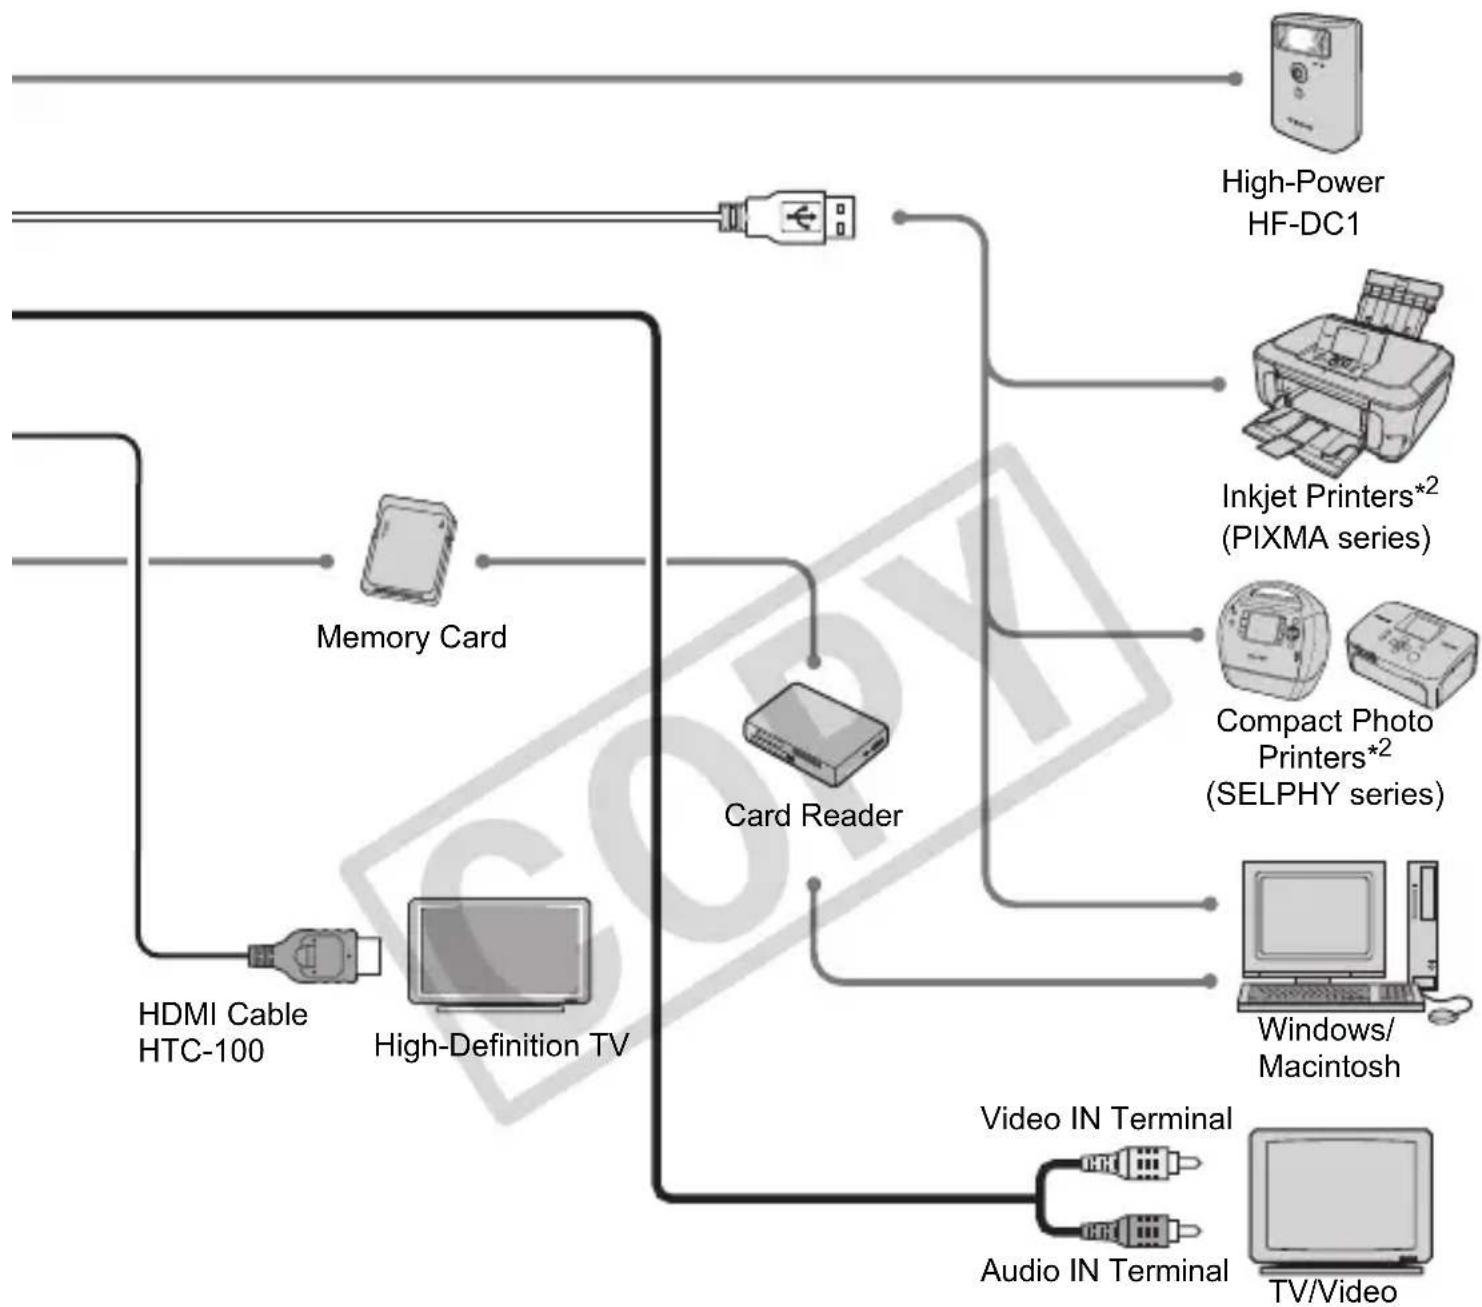
flowchart
graph TD
    A["Memory Card"] --> B["High-Definition TV"]
    C["HDMI Cable HTC-100"] --> B
    D["Card Reader"] --> B
    E["Video IN Terminal"] --> F["TV/Video"]
    G["Audio IN Terminal"] --> F
    H["High-Power HF-DC1"] --> I["Inkjet Printers*2 (PIXMA series)"]
    I --> J["Compact Photo Printers*2 (SELPHY series)"]
    J --> K["Windows/Macintosh"]
Use of genuine Canon accessories is recommended.
This product is designed to achieve excellent performance when used with genuine Canon accessories. Canon shall not be liable for any damage to this product and/or accidents such as fire, etc., caused by the malfunction of non-genuine Canon accessories (e.g., a leakage and/or explosion of a battery pack). Please note that this warranty does not apply to repairs arising out of the malfunction of non-genuine Canon accessories, although you may request such repairs on a chargeable basis.
CAUTION
RISK OF EXPLOSION IF BATTERY IS REPLACED BY AN INCORRECT TYPE.
DISPOSE OF USED BATTERIES ACCORDING TO LOCAL REGULATION.
Separately Sold Accessories
The following camera accessories are sold separately.
Some accessories are not sold in some regions, or may no longer be available.
Power Supplies
• AC Adapter Kit ACK-DC30
This kit lets you power the camera using household power. Recommended for powering the camera for an extended period of time or when connecting to a computer. Cannot be used to charge the battery inside the camera.
• Battery Charger CB-2LX/CB-2LXE
An adapter for charging Battery Pack NB-5L.
- Battery Pack NB-5L
Rechargeable lithium-ion battery.

The battery charger can also be used when abroad.
The charger can be used in regions that have 100 – 240 V (50/60 Hz) AC power. If the plug does not fit the outlet, use a commercially available plug adapter. Do not use devices such as electrical transformers for foreign travel because they will cause malfunctions.
Other Accessories
• HDMI Cable HTC-100
Use this cable to connect the camera to the HDMI ^™ terminal on a high-definition TV set.
• High-Power Flash HF-DC1
This attachable supplementary flash can illuminate subjects that are too distant for the light from the built-in flash to reach.
2
Learning More
This chapter explains the parts of the camera and what displays on the screen, as well as the basic operating instructions.
Components Guide
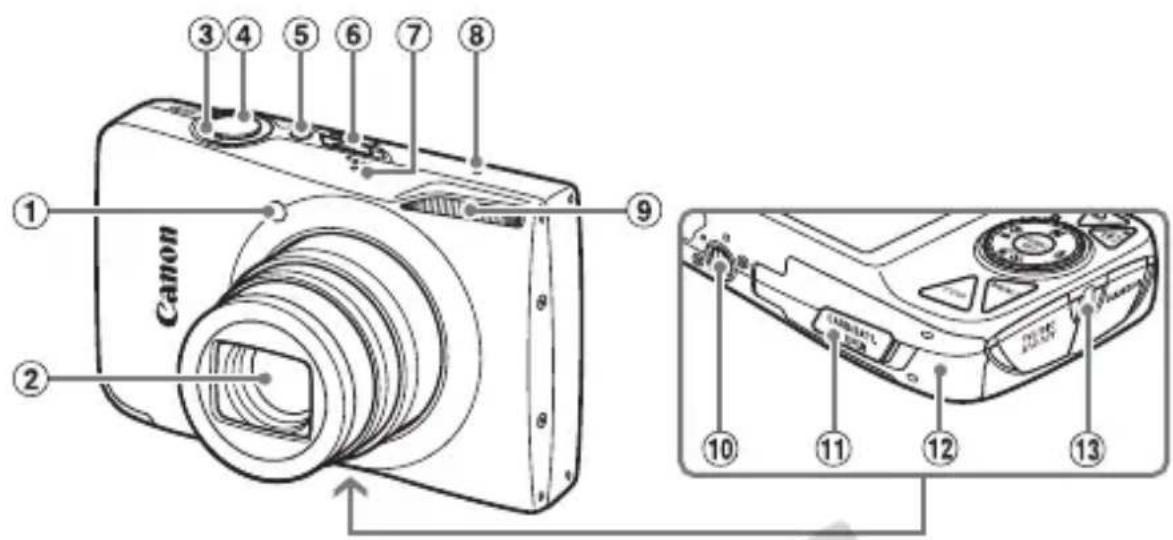
text_image
Canon ① ② ③ ④ ⑤ ⑥ ⑦ ⑧ ⑨ ⑩ ⑪ ⑫ ⑬ ⑭ ⑮ ⑯① Lamp (Red-Eye Reduction Lamp (p. 136)/ AF Assist Beam (p. 137)/ Self-Timer Lamp (p. 64))
② Lens
③ Zoom Lever
Shooting: □ (Telephoto)/ 📁 (Wide Angle) (p. 24)
Playback: Q (Magnify)/ 🕒 (Index) (p. 104)
④ Shutter Button (p. 23)
⑤ Power Button
⑥ Mode Switch
⑦ Speaker
⑧ Microphone (p. 33)
⑨ Flash (pp. 59, 69)
⑩ Tripod Socket
⑪ DC Coupler Terminal Cover (p. 144)
⑫ Memory Card / Battery Cover (p. 16)
⑬ Strap Mount (p. 13)
Mode Switch
Use the mode switch to change shooting modes.
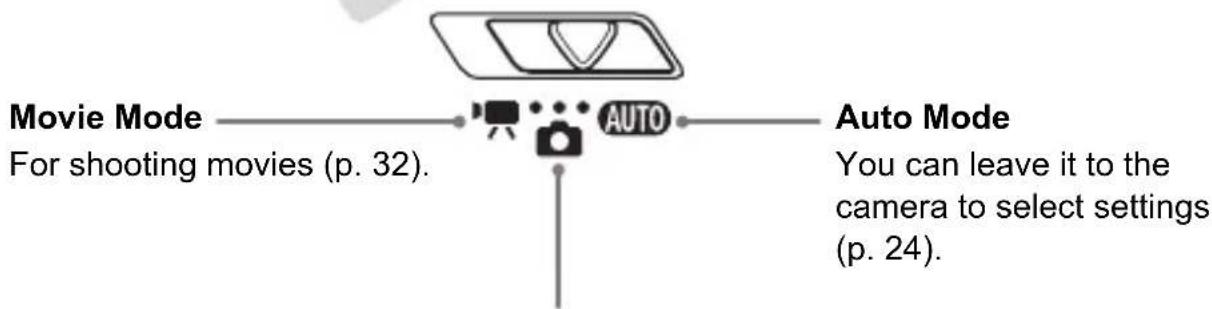
text_image
Movie Mode For shooting movies (p. 32). AUTO Auto Mode You can leave it to the camera to select settings (p. 24).Shooting Mode
You can leave it to the camera to select the best settings for the scene (p. 56) or select settings yourself to take various types of pictures (pp. 55, 67, 81).
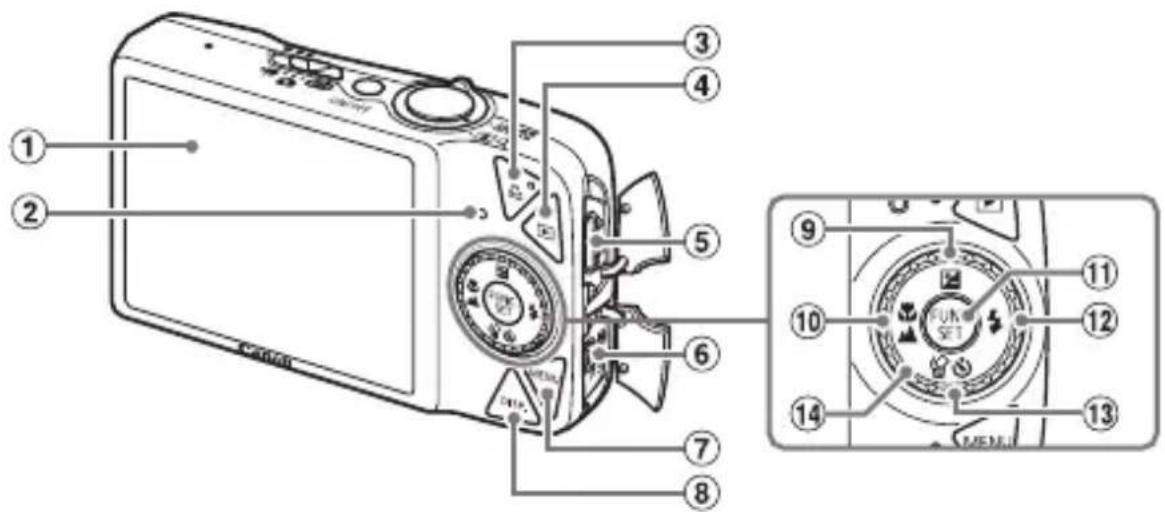
text_image
Diagram of a Canon digital camera with numbered parts and labeled interior view① Screen (LCD Monitor) (p. 44)
② Indicator (p. 46)
③ (Direct Print) Button (pp. 30, 126, 139)
④ ▶ (Playback) Button (pp. 27, 103)
⑤ HDMI OUT Mini Terminal (p. 112)
⑥ A/V OUT (Audio/Video Output) and DIGITAL Terminal (pp. 30, 36, 111)
⑦ MENU Button (p. 48)
⑧ DISP. (Display) Button (pp. 44, 45)
⑨ ☑ (Exposure Compensation) (p. 76)/
▲ Button
10 (Macro) (p. 70)/▲ (Infinity) (p. 69)/Button
⑪ FUNC./SET (Function/Set) Button (p. 47)
⑫ ↓ (Flash) (pp. 59, 69)/ ▶ Button
13 (Self-Timer) (pp. 63, 64, 78, 79)/
(Single Image Erase) (p. 29)/
Button
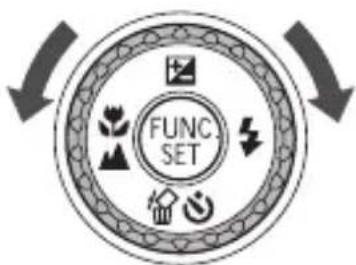
⑭ Control Dial (p. 43)
Control Dial
Turning the control dial allows you to perform operations such as selecting items or switching images.
flowchart
graph TD
    A["FUNC SET"] --> B["Process Icon"]
    B --> C["Feedback Loop"]
    C --> D["Processing Icon"]
    D --> E["Feedback Loop"]
    E --> F["Output Icon"]
Button
When the lens is extended, you can use the ▶ button to switch between the shooting and playback modes. When the lens is retracted, you can use it to turn the camera on and off in playback mode.

flowchart
graph LR
    A["Shooting mode"] <-->|Lens extended| B["Playback mode"]
    B <-->|Lens retracted| C["Turning the Camera Off"]
Information Displayed on the Screen
Shooting (Information Display)
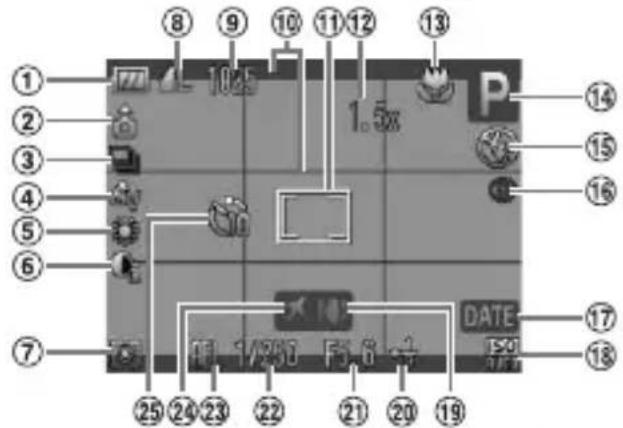
text_image
① ② ③ ④ ⑤ ⑥ ⑦ ⑧ ⑨ ⑩ ⑪ ⑫ ⑬ 1.5% P 14 15 16 DATE 17 18 20 21 22 23 24 25 26 27 28 29 30 31 32 33 34 35 36 37 38 39 40 41 42 43 44 45 46 47 48 49 50① Battery Charge Indicator (p. 15)
② Camera Orientation*
③ Drive Mode (pp. 63, 64, 76, 78, 79)
④ My Colors (p. 77)
⑤ White Balance (p. 75)
⑥ i-Contrast (p. 89)
⑦ Metering Modes (p. 87)
⑧ Compression (Image Quality) (p. 72)/ Recording Pixels (p. 72)
⑨ Still Images: Recordable shots (p. 18)
Movies: Remaining Time (p. 33)
⑩ Disp. Overlay (p. 138)
⑪ AF Frame (p. 25), AE Point Frame (p. 87)
⑫ Digital Zoom Magnification (p. 60), Digital Tele-Converter (p. 61)
⑬ Macro (p. 70), Infinity (p. 69), AF Lock (p. 84)
⑭ Shooting Mode
⑮ Flash Mode (pp. 59, 69)
⑯ Red-Eye Correction (p. 90)
⑰ Date Taken/Recorded (p. 62)
⑱ ISO Speed (p. 74)
⑲ Image Stabilizer (p. 139)
⑳ Exposure Compensation (p. 76)
② Aperture Value
⑳ Shutter Speed
②3 AE Lock (pp. 87, 99), FE Lock (p. 88)
⑳ Time Zone (p. 133)
25 Self-Timer (pp. 63, 64, 78, 79)
When shooting, the camera detects if it is held vertically or horizontally, and adjusts settings accordingly for the best shot. It also detects orientation during playback, so you can hold the camera in either orientation and it will automatically rotate images for correct viewing.
This function may not operate correctly when the camera is pointed straight up or down.
Switching the Display
You can change the display using the DISP. button.
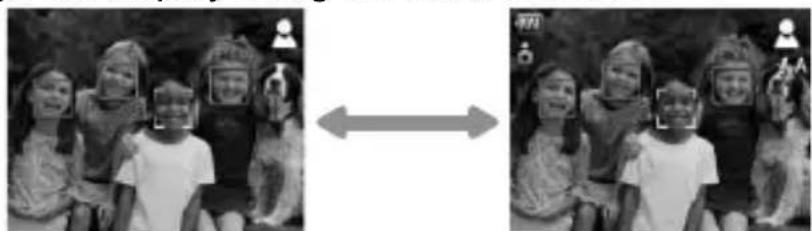
No Information Display Information Display
Playback (Detailed Information Display)
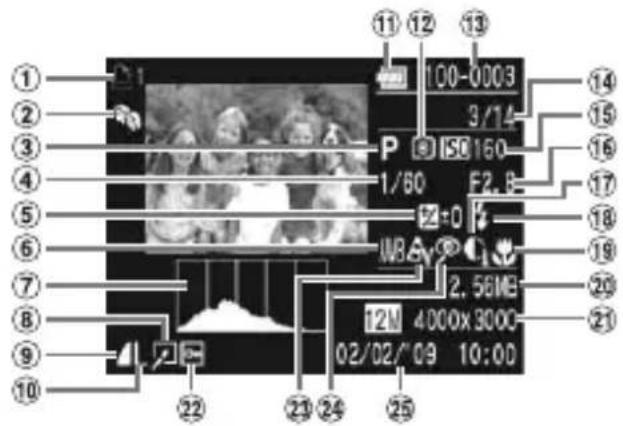
text_image
100-0003 3/14 ISO 160 F2.B +0 MBAv 2.56MB 12M 4000x9000 02/02/09 10:00① Print List (p. 126)
② My Category (p. 118)
③ Shooting Mode
④ Shutter Speed
⑤ Exposure Compensation (p. 76)
⑥ White Balance (p. 75)
⑦ Histogram (p. 46)
⑧ Image Editing (pp. 122 – 125)
⑨ Compression (Image Quality) (p. 72), MOV (Movies) (p. 98)
⑩ Recording Pixels (p. 72)
⑪ Battery Charge Indicator (p. 15)
⑫ Metering Modes (p. 87)
⑬ Folder Number - File Number (p. 134)
⑭ Displayed Image Number /Total Number of Images
⑮ ISO Speed (p. 74)
⑯ Aperture Value, Image Quality (Movies) (p. 98)
⑰ i-Contrast (pp. 89, 124)
⑱ Flash (p. 69)
⑲ Macro (p. 70), Infinity (p. 69)
⑳ File Size (pp. 72, 98)
② Still Images: Recording Pixels (p. 72)
Movies: Movie Length (p. 99)
22 Protect (p. 116)
②3 My Colors (pp. 77, 123)
②4 Red-Eye Correction (pp. 90, 125)
②5 Shooting Date and Time (p. 62)
Switching the Display
You can change the display using the DISP. button.
natural_image
Group photo of four people posing together, including a dog (no visible text or symbols)No Information Display

natural_image
Group photo of four children outdoors (no visible text or symbols)Simple Information Display

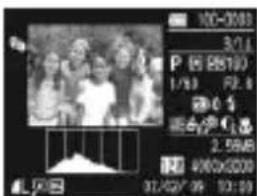
text_image
100-3000 3/14 P 65.85100 1/13 F2.8 2.5% 2.5%8 400X3000 31/27/28 10:19Detailed Information Display

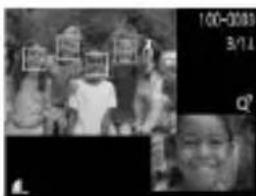
text_image
100-2003 3/14 Q°Focus Check Display (p. 109)

You can also switch the display by pressing the DISP. button while the image displays shortly after shooting. However, the Simple Information will not display. You can set the display that displays first. Press the MENU button to select the 📷 tab. Then set [Review Info].
Display in Dark Conditions during Shooting
The display automatically brightens when shooting in dark conditions, allowing you to check the composition (Night Display function). However, the brightness of the image on the screen, and the brightness of the actual image recorded may be different. Screen noise may appear and the movement of the subject may appear somewhat jagged on the screen. This has no effect on the recorded image.
Overexposure Warning during Playback
In “Detailed Information Display” (p. 45), overexposed areas of the image flash on the screen.
Histogram during Playback
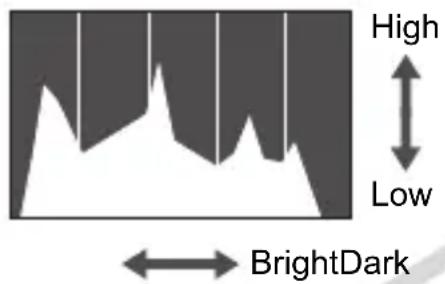
text_image
High Low BrightDarkThe graph that appears in “Detailed Information Display” (p. 45) is called the histogram. The histogram shows the distribution and amount of brightness of an image. When the graph approaches the right side, the image is bright, but when it approaches the left side, the image is dark, and in this way you can judge the exposure.
Indicator
The indicator on the back of the camera (p. 43) will light or blink under the following conditions.
Colors Status Operation Status
| Green | Lights Shooting preparation complete (p. 24)/Display Off (p. 132) |
| Blinks Recording/reading/transmitting image data (p. 24) | |
| Orange | Lights Shooting preparation complete (flash on) (p. 24) |
| Blinks Camera shake warning (p. 59) |

When the indicator blinks green, data is being recorded to/read from the memory card or various information is being transmitted. Do not turn off the power, open the memory card slot/battery cover, shake or jolt the camera. These actions may corrupt the image data or cause the camera or memory card to malfunction.
Commonly used shooting functions can be set with the FUNC. menu. The menu and menu items differ depending on the shooting mode (p. 150). You can also use the FUNC. menu in the playback mode.

text_image
FUNC SEDisplay the FUNC. menu.
Press the FUNC. SET button.
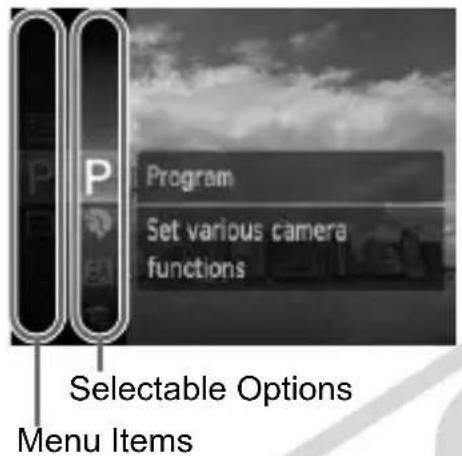
text_image
Program Set various camera functions Selectable Options Menu ItemsSelect a menu item.
- Press the ▲▼ buttons or turn the Ⓞ dial to select a menu item, then press the Ⓗ. FUNC. SET button.
Depending on the menu, the screen may switch. Select a menu item and make the setting.
Select an option.
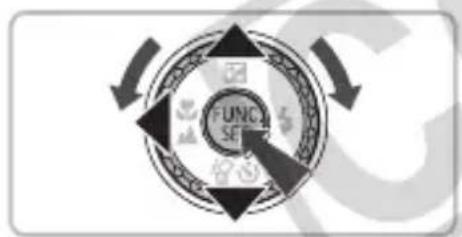
flowchart
graph TD
    A["FUNC SE"] --> B["Arrow Left"]
    B --> C["Arrow Right"]
    C --> D["Arrow Down"]
    D --> E["Arrow Up"]
    E --> F["Arrow Left"]
    F --> G["Arrow Right"]
    G --> H["Arrow Down"]
    H --> I["Arrow Up"]
    I --> J["Arrow Left"]
    J --> K["Arrow Right"]
- Press the ▲▼ buttons or turn the Ⓞ dial to select an option. - To return to the menu, press the ◀ button.

text_image
FUNCTION SEMake the setting.
- Press the Ⓕ FUNC. SET button.
The shooting screen will reappear and the setting you selected will display on the screen.
MENU Menu - Basic Operations
Various functions can be set from the menus. The menu items are organized under tabs, such as for shooting (☐) and playback (▶). The menu items differ depending on the mode (pp. 152 – 155).
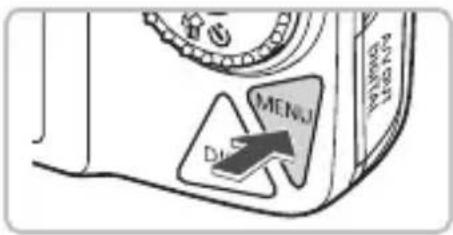
text_image
MENU DIADisplay the menu.
- Press the MENU button.
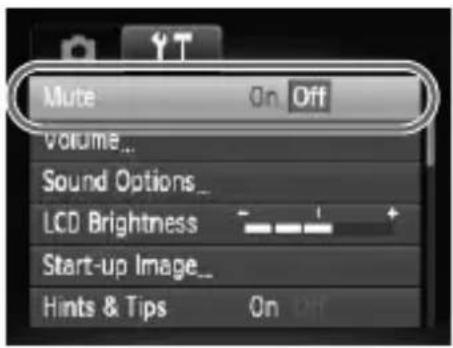
text_image
Mute On Off Volume... Sound Options... LCD Brightness Start-up Image... Hints & Tips On OffSelect a tab.
- Press the ◀▶ buttons, or move the zoom lever (p. 42) left or right to select a tab (category).
Select a menu item.
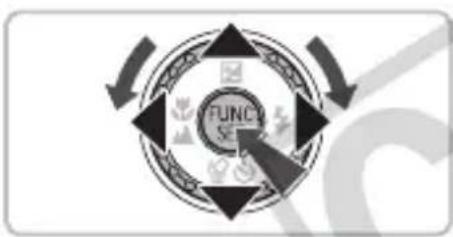
flowchart
graph TD
    A["FUNC SE"] --> B["Arrow Left"]
    B --> C["Arrow Right"]
    C --> D["Arrow Down"]
    D --> E["Arrow Up"]
    E --> F["Arrow Left"]
    F --> G["Arrow Right"]
    G --> H["Arrow Down"]
    H --> I["Arrow Up"]
    I --> J["Arrow Left"]
    J --> K["Arrow Right"]
Press the ▲▼ buttons or turn the Ⓞ dial to select a menu item.
Some items require you to press the button to display a submenu in which you change the setting.
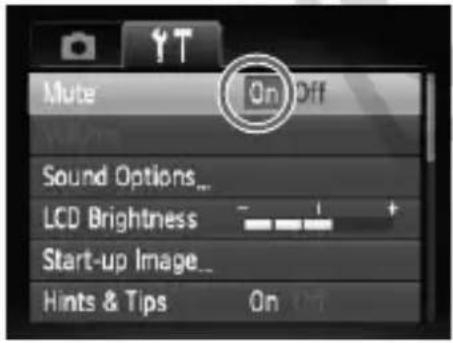
text_image
Mute On Off Sound Options... LCD Brightness Start-up Image... Hints & Tips On OffSelect an option.
- Press the ◀▶ buttons to select an option.
Make the setting.
- Press the MENU button.
● The standard screen will reappear.

text_image
HUBE SU MENU DChanging the Sound Settings
You can silence or adjust the volume of camera sounds.
Muting Sounds
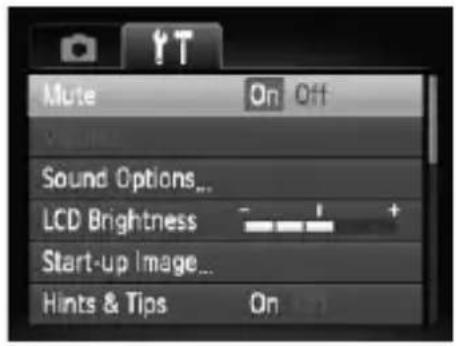
text_image
Mute On Off Sound Options... LCD Brightness Start-up Image... Hints & Tips On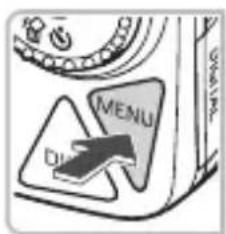
text_image
MENU DAR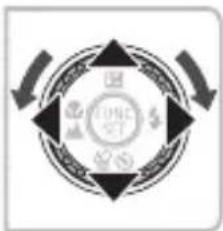
flowchart
graph TD
    A["Start"] --> B["TUNG ST"]
    B --> C["Process"]
    C --> D["Feedback Loop"]
    D --> E["End"]
Display the menu.
- Press the MENU button.
Select [Mute].
- Press the ◀▶ buttons to select the ⌘† tab.
- Press the ▲▼ buttons or turn the Ⓞ dial to select [Mute], then use the ◀▶ buttons to select [On].
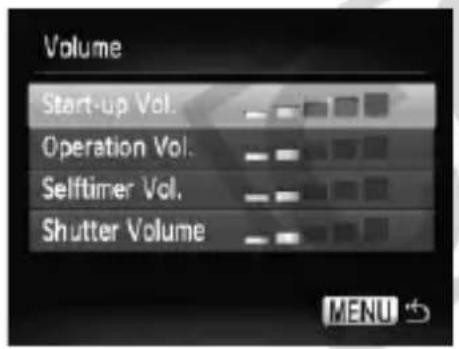
Adjusting the Volume
text_image
Volume Start-up Vol. Operation Vol. Selftimer Vol. Shutter Volume MENU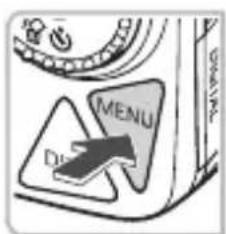
text_image
MENU Di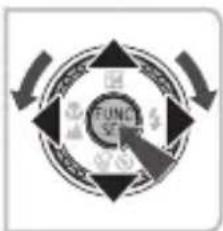
flowchart
graph TD
    A["Start"] --> B["Process Step 1"]
    B --> C["Process Step 2"]
    C --> D["End"]
    style A fill:#f9f,stroke:#333
    style B fill:#ccf,stroke:#333
    style C fill:#cfc,stroke:#333
    style D fill:#fcc,stroke:#333
Display the menu.
- Press the MENU button.
Select [Volume].
Press the ◀▶ buttons to select the 🎨 tab.
- Press the ▲▼ buttons or turn the Ⓞ dial to select [Volume], then press the Ⓗ FUNC. SET button.
Change the volume.
- Press the ▲▼ buttons or turn the Ⓞ dial to select an item, then use the ◀▶ buttons to adjust the volume.
Changing the Screen Brightness
The screen brightness can be changed in two ways.
With the MENU Button
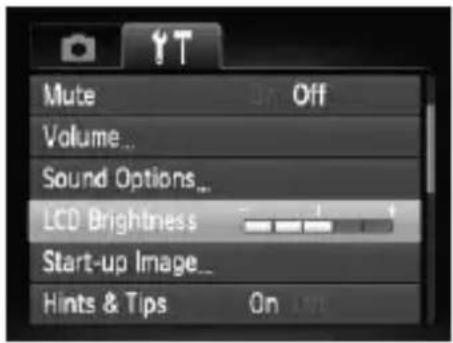
text_image
Mute Volume... Sound Options... LCD Brightness Start-up Image... Hints & Tips On Off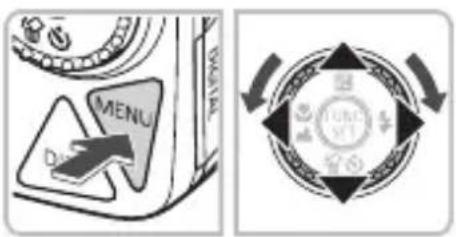
text_image
MENU Data TURCU SETDisplay the menu.
- Press the MENU button.
Select [LCD Brightness].
- Press the ◀▶ buttons to select the ⌘ tab.
- Press the ▲▼ buttons or turn the Ⓞ dial to select [LCD Brightness].
Change the brightness.
- Press the ◀▶ buttons to change the brightness.
- Press the MENU button again to complete the setting.
With the DISP. Button
text_image
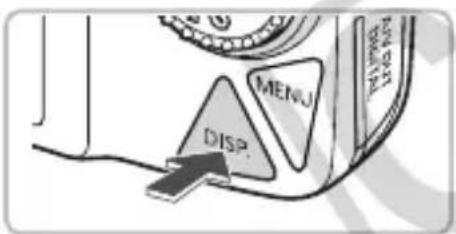
MENU DISP.- Press the DISP. button for more than one second.
The screen increases to maximum brightness regardless of the setting in the tab. - Pressing the DISP. button again for more than one second will return the screen to the original brightness.

- The next time you turn on the camera, the screen will be at the brightness setting selected in the 🎩 tab.
- When you have set the brightness to its highest setting in the 9 tab, you cannot change the brightness with the DISP. button.
Returning the Camera to Default Settings
When you have mistakenly changed a setting, you can reset the camera to the default settings.
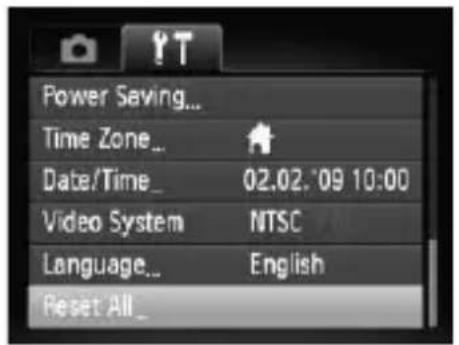
text_image
Power Saving... Time Zone... Date/Time_ 02.02.09 10:00 Video System NTSC Language... English Reset All_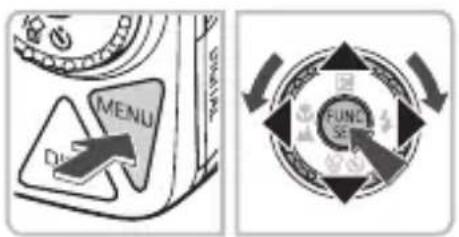
text_image
MENU FUNC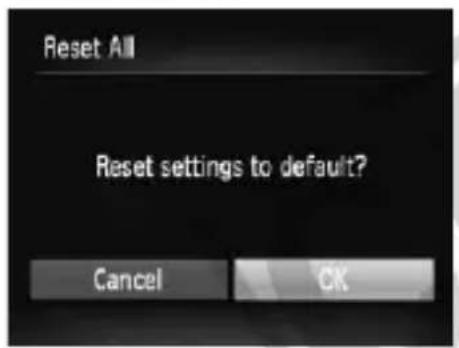
text_image
Reset All Reset settings to default? Cancel CKDisplay the menu.
- Press the MENU button.
Select [Reset All].
- Press the ◀▶ buttons to select the 📊† tab. - Press the ▲▼ buttons or turn the ⏻ dial to select [Reset All], then press the Ⓗ FUNC SET button.
Reset the settings.
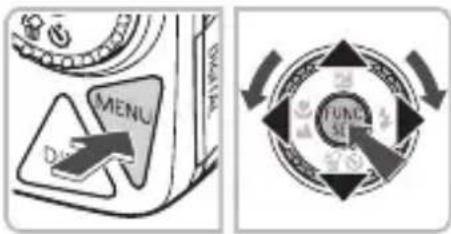
Press the ◀▶ buttons or turn the Ⓞ dial to select [OK], then press the Ⓗ function SET button. The camera will reset to the default settings.

Are there functions that cannot be reset?
- The [Date/Time] (p. 19) in the 🎨 tab, [Language] (p. 21), [Video System] (p. 111), [Time Zone] (p. 133), the image registered as [Start-up Image] (p. 141).
• The saved data for custom white balance (p. 75). - Colors that were selected in Color Accent (p. 93) or Color Swap (p. 94).
Low Level Memory Card Formatting
Perform low level formatting when you think that the recording/reading speed of a memory card has dropped. Low level formatting a memory card completely erases all data on the memory card. As you cannot retrieve the erased data, exercise adequate caution before low level formatting the memory card.
text_image
MENU Date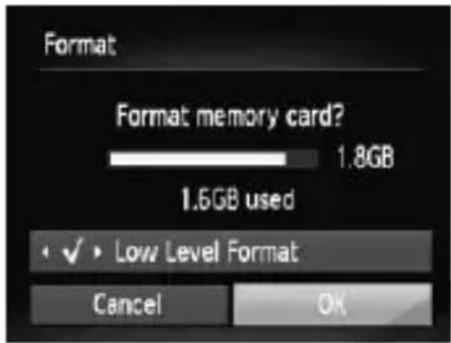
text_image
Format Format memory card? 1.8GB 1.6GB used • ✓ • Low Level Format Cancel OKDisplay the menu.
- Press the MENU button.
Select [Format].
- Press the ◀▶ buttons to select the ⌘ tab.
- Press the ▲▼ buttons or turn the dial to select [Format], then press the button.
Perform the low level format.
- Press the ▲▼ buttons or turn the Ⓞ dial to select [Low Level Format], then use the ◀▶ buttons to display .✓ - Press the ▲▼◀▶ buttons or turn the Ⓞ button to select [OK], then press the Ⓗ.
Low level formatting starts.

About low level formatting
When the [Memory card error] message appears, or when the camera does not work correctly, low level formatting the memory card may solve the problem. Copy the images from the memory card to a computer or other device before low level formatting.

- Low level formatting may take longer than standard formatting (p. 22), since all recorded data are erased.
- You can stop a low level format of a memory card by selecting [Stop]. When stopping low level formatting, the data will be erased but the memory card can be used without problem.
Power Saving Function (Auto Power Down)
To save battery power, the camera shuts down automatically when it is not operated for a certain time.
Power Saving during Shooting
The monitor will turn off approximately 1 minute after the camera is last operated. After about 2 more minutes, the lens will retract and the power will turn off. When the monitor has turned off but the lens has not retracted yet, pressing the shutter button halfway (p. 23) turns on the monitor and shooting can continue.
Power Saving during Playback
The power will turn off approximately 5 minutes after the camera is last operated.

- You can turn off the Power Saving Function (p. 132).
- You can adjust the time before the monitor turns off (p. 132).
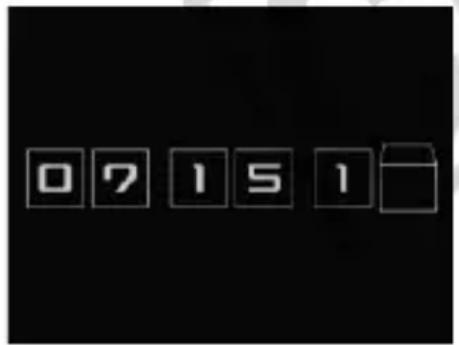
Clock Functions
You can check the current time.
text_image
07151Hold the FUNC. SET button pressed.
A screen like that on the left appears showing the current time.
- You can change the display color by changing the camera's orientation and pressing the ◀▶ buttons or turning the ○ dial.
- Press the FUNC SET button to cancel the clock display.

Press and hold the FUNC. SET button, then press the power button to display the clock.

text_image
COPY3
Shooting in Special Conditions and Commonly Used Functions
This chapter explains how to shoot in different conditions, as well as how to use other common functions, such as the flash and self-timer.
natural_image
Diagram of a car dashboard with a camera and 'AUTO' button, no readable text or symbols beyond the icon elements.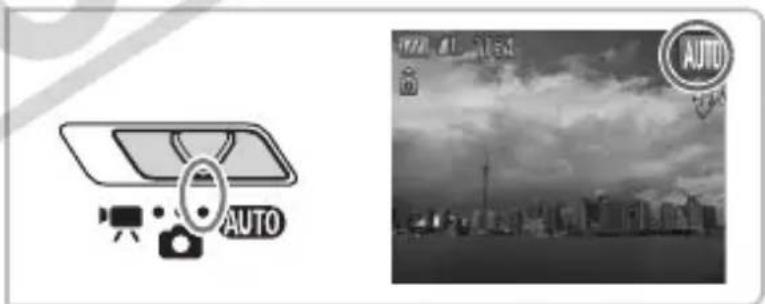
text_image
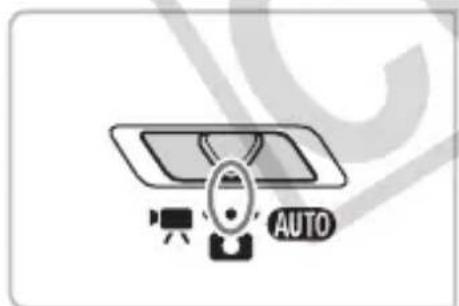
AUTO AUTO- When you select a mode that matches a particular set of conditions, the camera will automatically select any necessary settings. All you need do is press the shutter button to take an optimized picture.
• This chapter assumes the mode switch is set to 📷 or AUTO.
Shooting in Various Conditions
The camera will select the necessary settings for the conditions in which you wish to shoot when you select the matching mode.
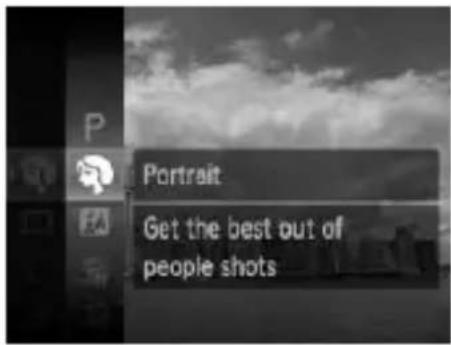
text_image
Portrait Get the best out of people shotsSet the mode switch to 📄 (p. 42).
Select the desired shooting mode.
After pressing the Ⓗ button, press the ▲▼ buttons or turn the Ⓞ dial to select P, then press the Ⓗ button.
- Press the ▲▼ buttons or turn the Ⓞ dial to select the desired mode, then press the FUNC SET button.
Shoot.
natural_image
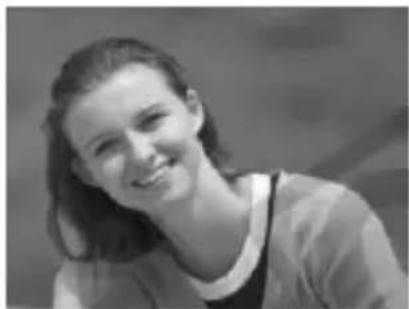
Black-and-white portrait of a smiling woman with shoulder-length hair (no text or symbols visible)Take portraits (Portrait)
Produces a soft effect when photographing people.
natural_image
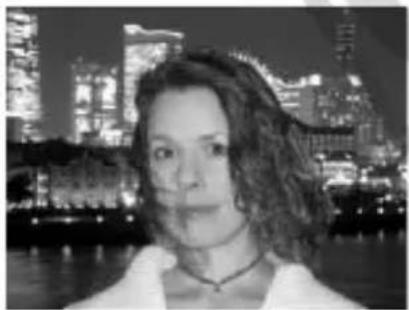
Black-and-white portrait of a woman with curly hair, standing by a river at night with illuminated city skyline in background (no text or symbols visible)Take snapshots at night (Night Snapshot)
Lets you take beautiful snapshots of people against city nightscapes or night backgrounds.
If you hold the camera firmly, you can take pictures with reduced camera shake, even without a tripod.
natural_image
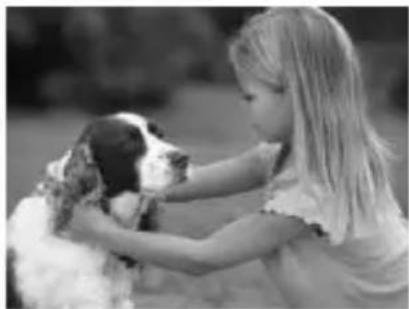
Black-and-white photo of a young girl gently touching a dog (no text or symbols visible)Take shots of kids and pets (Kids&Pets)
Lets you capture subjects that move around, such as children and pets, without missing photo opportunities.
natural_image
Interior view of a restaurant with round tables, chairs, and decorative wall decor (no visible text or signage)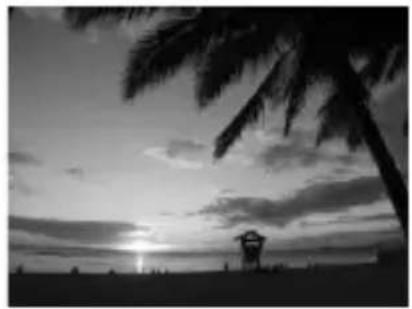
natural_image
Black-and-white beach scene with palm trees and a small pavilion at sunset (no text or symbols visible)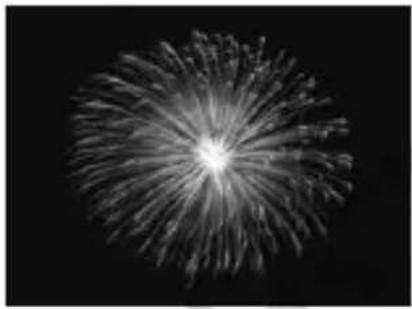
natural_image
Black and white photo of a bright, spiky fireworks burst against a dark background (no text or symbols)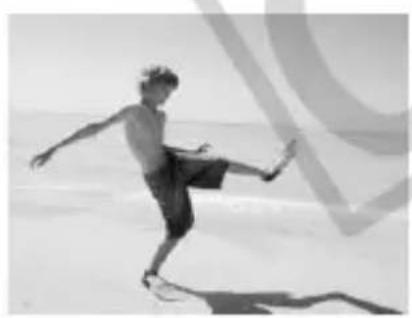
natural_image
Person performing a high kick on a sandy beach, captured in black and white (no text or symbols visible)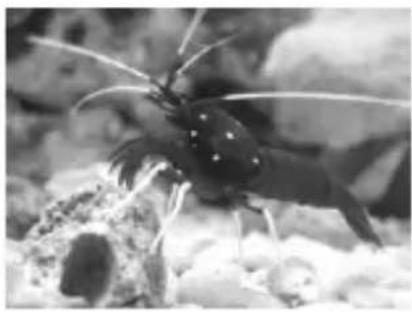
natural_image
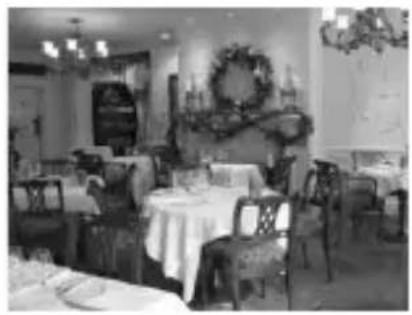
Close-up of a small insect with long antennae and white spots, resting on textured ground (no text or symbols visible)Take indoor shots (Indoor)
Lets you shoot indoors with natural colors.
Shoot sunsets (Sunset)
Lets you take shots of sunsets in vivid colors.
Take shots of fireworks (Fireworks)
Lets you take shots of fireworks in vivid colors.
Take shots of people at the beach (Beach)
Lets you take bright shots of people on sandy beaches where the reflected sunlight is strong.
Take shots of aquatic life in an aquarium (Aquarium)
Lets you take natural-colored shots of aquatic life in indoor aquariums.
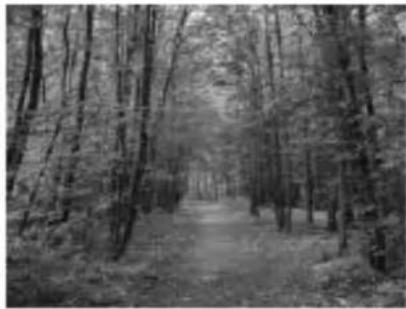
natural_image
Black-and-white photo of a forest path winding through dense trees (no visible text or symbols)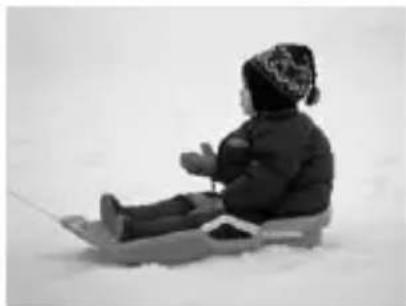
natural_image
Person sitting on a sled in snowy conditions (no text or symbols visible)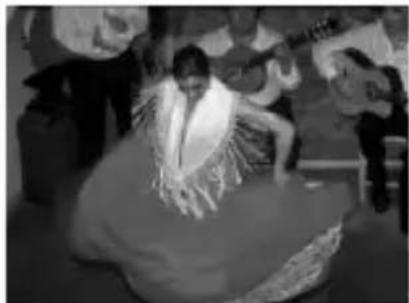
natural_image
Black-and-white photo of a dancer in flowing dress performing on stage, surrounded by other dancers (no visible text or symbols)Take shots of foliage (Foliage)
Lets you shoot trees and leaves, such as new growth, autumn leaves or blossoms, in vivid colors.
Take shots of people in snow (Snow)
Lets you take bright, natural-colored shots of people against snowy backgrounds.
ISO 3200 Shoot using high ISO speed (ISO3200)
Sets the ISO speed to 3200, and lets you shoot without camera shake or subject blurring even in low light conditions.
Recording pixels are set to (1600 × 1200 pixels, p. 72).

- In 📄, 🔒, 🔔 or 🔔 mode, images may appear coarse because the ISO speed (p. 74) is increased to match the shooting conditions.
- In mode, attach the camera to a tripod to prevent the camera from moving and blurring the image. Additionally, you are recommended to set [IS Mode] to [Off] (p. 139).
• In ISO 3200 mode, images may appear coarse.
You can shoot with the flash turned off.
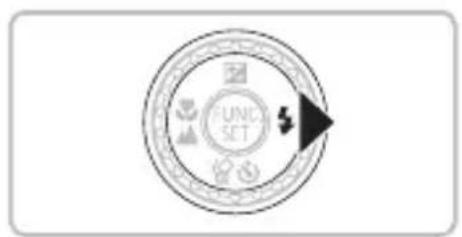
text_image
UNIC SETPress the ▶ button.
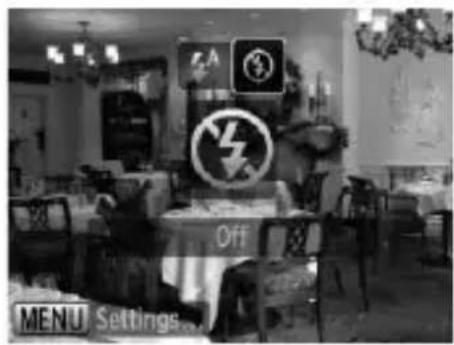
text_image
OFF MENU Settings...Select ④.
- Press the ◀▶ buttons or turn the Ⓞ dial to select ⏻, then press the Ⓗ️ button.
will appear on the screen. - Follow the steps above to return the setting to ⬆ ^A
flowchart
graph TD
    A["FUNC SE"] --> B["Arrow Left"]
    B --> C["Arrow Right"]
    C --> D["Arrow Down"]
    D --> E["Arrow Up"]
    E --> F["Arrow Left"]
    style A fill:#f9f,stroke:#333
    style B fill:#ccf,stroke:#333
    style C fill:#cfc,stroke:#333
    style D fill:#fcc,stroke:#333
    style E fill:#ffc,stroke:#333
    style F fill:#cff,stroke:#333

What if the indicator blinks orange and a flashing appears?

When you press the shutter button halfway in low light conditions where camera shake is likely, the indicator will blink orange and a flashing will appear on the screen. Attach the camera to a tripod to prevent it from moving.
Zooming in More Closely on Subjects (Digital Zoom)
You can use the digital zoom to zoom up to a maximum of 20x and capture subjects that are too far away for the optical zoom (p. 24) to enlarge. The images may appear coarse, however, depending on the recording pixel setting (p. 72) and the zoom factor used.

text_image
ON/OFFMove the zoom lever toward [♠].
Hold the lever until zooming stops.
When you release the zoom lever, the largest possible zoom factor without image deterioration will appear.
![CANON PowerShot SD970 IS - Move the zoom lever toward [♠]. - 1](/content/2026/05/790000/images/16de90c2b5e924ebc804484a8234635fcbf5f7e56603362ae7e1878133ac24bc.jpg)
natural_image
Black-and-white photo of a bird perched on a branch with flowers, no text or symbols visibleMove it toward [▲] again.
The digital zoom will further zoom in on the subject.
Zoom Factors at which Images Deteriorate
| Recording Pixels | Optical Zoom Digital Zoom | |
| L | 5.0x → | |
| M1 | 6.1x → | |
| M2 | 7.7x → | |
| M3 | 13x → | |
| S | 20x → |

: No image deterioration (zoom factor appears white)

: Image deterioration (zoom factor appears blue)

: Maximum zoom factor without deterioration (Safety Zoom)

Turning off the digital zoom
To turn off the digital zoom, press the MENU button, select the ☐ tab, and select [Digital Zoom] and the [Off] option.

The focal length when using digital zoom is 185 – 740 mm (35mm film equivalent).
Digital Tele-Converter
The focal length of the lens can be increased by an equivalent of 1.5x or 2.0x. This enables a faster shutter speed and less chance of camera shake than the zoom (including digital zoom) used by itself at the same zoom factor.
The images may appear coarse, however, depending on the combination of recording pixel (p. 72) and digital tele-converter settings used.
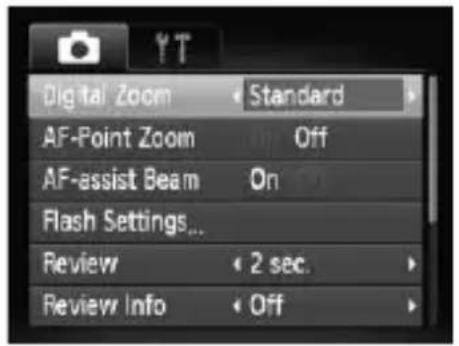
text_image
Digital Zoom Standard AF-Point Zoom Off AF-assist Beam On Flash Settings... Review 2 sec. Review Info Off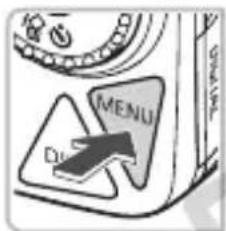
text_image
MENU Du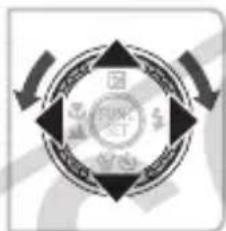
flowchart
graph TD
    A["Start"] --> B{Process Step}
    B --> C["Loop Back"]
    C --> D["End"]
Select [Digital Zoom].
- Press the MENU button.
- Select the 📄 tab, then press the ▲▼ buttons or turn the ⏻ dial to select [Digital Zoom].
Accept the setting.
- Press the ◀▶ buttons to select [1.5x] or [2.0x].
- Pressing the MENU button will restore the shooting screen.
The view will be enlarged, and the zoom factor will display on the screen.
To return to standard digital zoom, select [Digital Zoom] and the [Standard] option.
Combinations that Cause Image Deterioration
• Using [1.5x] at a recording pixel setting of dr will cause image deterioration (the zoom factor will display in blue).
• Using [2.0x] at a recording pixel setting of ,L or M1 will cause image deterioration (the zoom factor will display in blue).

- The respective focal lengths when using [1.5x] and [2.0x] are 55.5 – 277.5 mm and 74 – 370 mm (35mm film equivalent).
- The digital tele-converter cannot be used together with the digital zoom.
Inserting the Date and Time
You can insert the shooting date and time in the lower right corner of an image. Once inserted, however, they cannot be deleted. Be sure to check beforehand that the date and time are correctly set (p. 19).
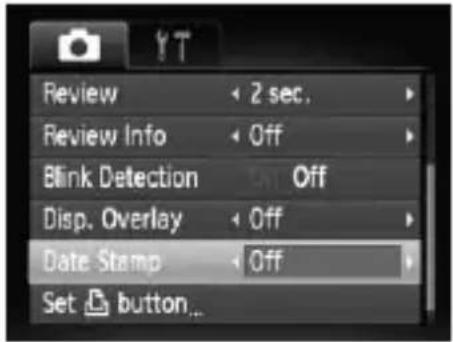
text_image
Review 2 sec. Review Info Off Blink Detection Off Disp. Overlay Off Date Stamp Off Set button...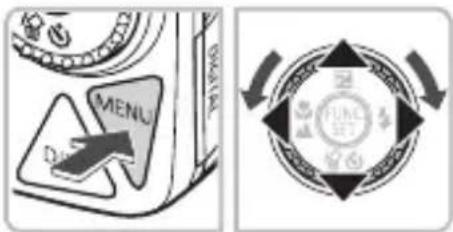
text_image
MENU Dias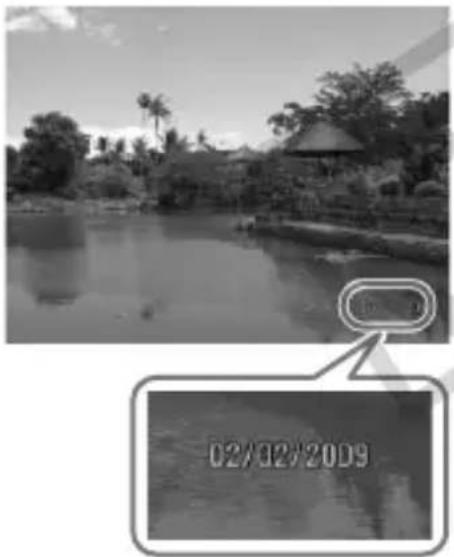
natural_image
Black-and-white photo of a lakeside park with trees and a small building, featuring a timestamp overlay (no readable text or symbols)Select [Date Stamp].
- Press the MENU button and select the tab, then select [Date Stamp] and use the ◀ buttons to select [Date] or [Date & Time].
- Press the MENU button again to accept the setting.
[DATE] will appear on the screen.
Shoot.
You can insert the shooting date and time in the image's lower right corner.
To restore to the original setting, select [Off] in Step 1.

Inserting and printing the date and time in images which do not have an embedded date and time
• Use the DPOF print settings (p. 127) to print.
• Use the included software to print.
Refer to the Software Starter Guide for details.
- Connect the camera to a printer to print.
Refer to the Personal Printing Guide for details.
Using the Self-Timer
The self-timer can be used to shoot a group photo that includes the camera operator. The camera will activate approximately 10 seconds after the shutter button is pressed.
flowchart
graph TD
    A["FUNC SET"] --> B["Top Circular Marker"]
    B --> C["Bottom Circular Marker"]
    C --> D["Arrow Down"]
    style A fill:#f9f,stroke:#333
    style B fill:#ccf,stroke:#333
    style C fill:#cfc,stroke:#333
Press the ▼ button.
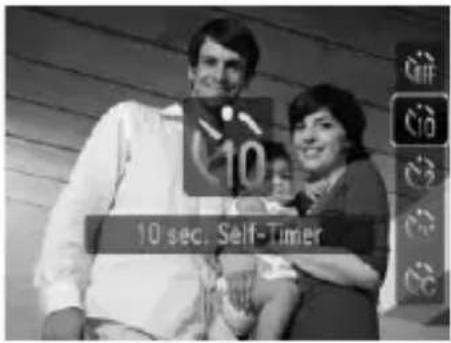
text_image
10 10 sec. Self-TimerSelect 10.
- Press the ▲▼ buttons or turn the Ⓞ dial to select ⬆, then press the Ⓗ function SET button.
Once set, ① will appear.
flowchart
graph TD
    A["FUNCE SE"] --> B["Arrow 1"]
    A --> C["Arrow 2"]
    A --> D["Arrow 3"]
    A --> E["Arrow 4"]
    A --> F["Arrow 5"]
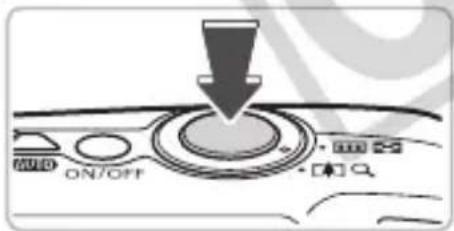
text_image
ON/OFF
natural_image
Diagram of a wheel with radiating lines and a vehicle in the background (no text or symbols)Shoot.
- Press the shutter button halfway to focus on the subject, then press it fully.
When the self-timer starts, the lamp blinks and the self-timer sound plays.
Two seconds before the shutter releases, the lamp and sound speed up (the lamp remains lit when the flash will fire).
- To restore the original setting, select in Step 2.


You can change the delay time and number of shots (p. 79).
Using the Face Self-Timer
Once you compose the shot, such as for a group photo, and press the shutter button, the camera will take three shots in a row two seconds after it detects your face (p. 82) when you enter the composition.
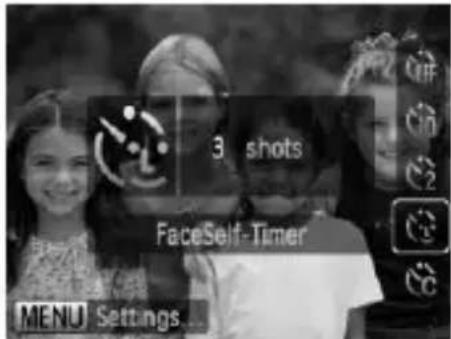
text_image
3 shots FaceSelf-Timer MENU Settings...Select
- Follow Step 2 on p. 63 and select 🔒.
Compose the shot and press the shutter button halfway.
Make sure a green frame appears on the face of the focused subject and white frames appear on other faces.
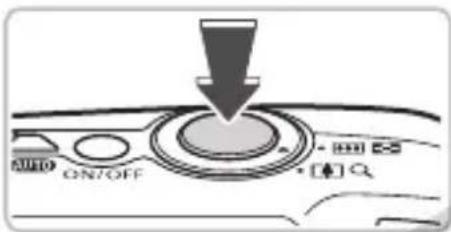
text_image
ON/OFFPress the shutter button fully.
The camera will enter shooting stand-by, and [Look straight at camera to start count down] will appear on the screen.
The lamp will blink and the self-timer sound will play.
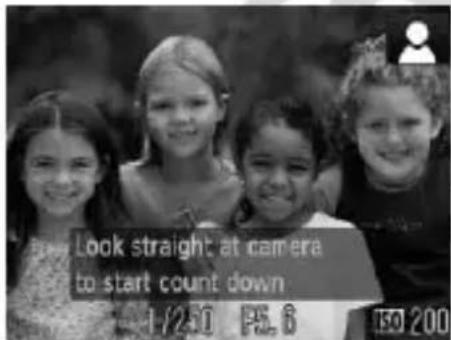
text_image
Look straight at camera to start count down 1/2:50 PS. 6 150 200Join the subjects and look at the camera.
When the camera detects a new face, the lamp and sound will speed up (the lamp remains lit when the flash will fire), and two seconds later the shutter will release.
The second and third shots will continue in succession.
To restore the original setting, select in Step 2 on p. 63.


What if a face is not detected?
Even if your face is not detected after joining the subjects, the shutter will release approximately 30 seconds later.

Changing the number of shots
For the screen in Step 1, press the MENU button, then press the ◀▶ buttons to change the number of shots. Press the FUNC SET button to accept the setting.

Special Effects for Night ckgrounds (Creative Light Effect)
Light displays and other points of light in the night backgrounds behind your subject can be changed into any of six predetermined shapes. Be sure to use the flash when shooting.
Select

- Select in Steps 1 – 3 on page 47 and press the FUNC.SET button.
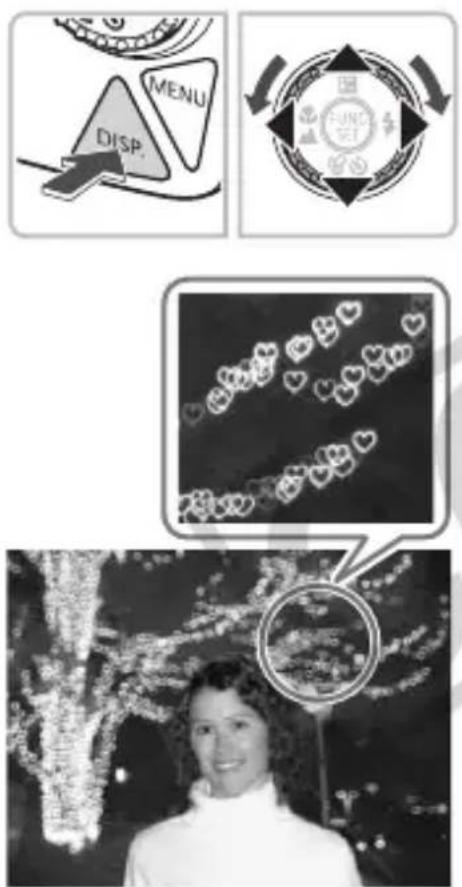
Select a shape.
- Press the DISP. button, then press the ◀▶ buttons or turn the Ⓞ dial to select a shape.
- Press the ▲▼ buttons to change the size of the shape.
- Press the DISP. button to accept the setting.

Shooting tips
- Hold the camera firmly and shoot nonmoving points of light in as dark a location as possible.
- Be sure to shoot with your subject within the range of the flash (p. 69). Also make sure your subject is not illuminated by any other light source.

Depending on the shooting conditions, you may not get the selected shape or the expected scene brightness when shooting moving points of light.

text_image
COPYSelecting Settings Yourself
In this chapter you will learn how to use the various functions in P mode to progressively advance your shooting skills.
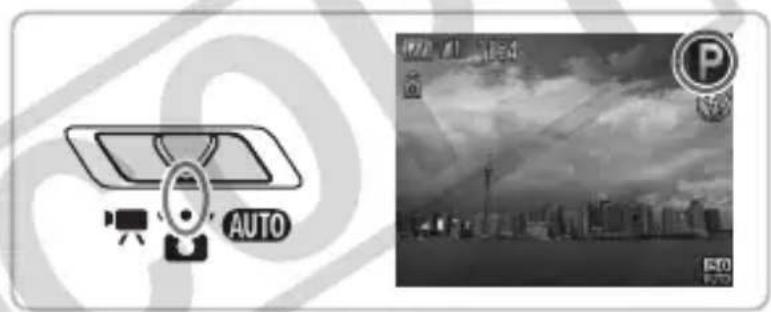
text_image
AUTO P P20- This chapter assumes that the mode switch is set to 📄 and the camera is in P mode.
• P stands for Program AE. - Before attempting to shoot using a function explained in this chapter in modes other than P mode, check if the function is available in those modes (pp. 150 – 153).
P Shooting in Program AE
You can select the settings for various functions to suit your preferences. AE stands for Auto Exposure.
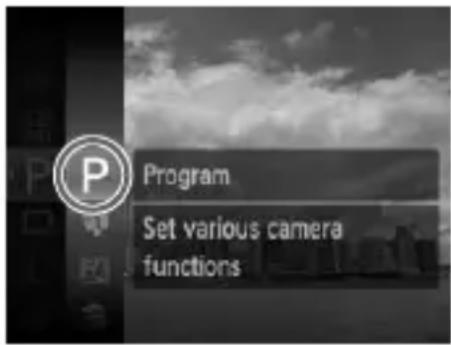
text_image
Program Set various camera functionsSet the mode switch to 📄 (p. 42).
Select P.
- Select P in Steps 1 – 2 on page 47 and press the FUNC.SET button.
Adjust the settings according to your purposes (pp. 69 - 79).
Shoot.

What if the shutter speed and aperture value are displayed in red?
If a correct exposure cannot be obtained when pressing the shutter button halfway, the shutter speed and aperture value display in red. Try the following settings to obtain the correct exposure.
• Turn on the flash (p. 69)
- Select a higher ISO speed (p. 74)

Turning the Flash On
You can make the flash fire every time you shoot. At maximum wide angle, the flash range is approximately 30 cm – 3.5 m (1.0 – 11 ft.), and at maximum telephoto, it is 30 cm – 2.0 m (1.0 – 6.6 ft.).
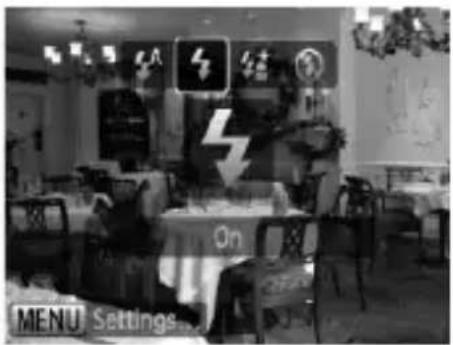
text_image
ON MENU Settings...Select ↘.
After pressing the ▶ button, press the ◀▶ buttons or turn the ⏱ dial to select ↗, then press the Ⓗ function SET button.
Once set, ↓ will appear.

Shooting Far Away Subjects (Infinity)
You can shoot landscapes and far away subjects. The focusing range is 3 m (9.8 ft.) and greater from the camera.
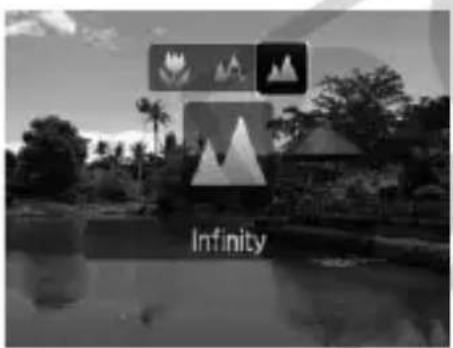
text_image
InfinitySelect ▲.
After pressing the ◀ button, press the ◀▶ buttons or turn the ⏻ dial to select ▲, then press the Ⓗ️ button.
Once set, ▲ will appear.

Shooting Close-ups (Macro)
You can shoot an object at a close distance or even shoot extreme close-ups of it. The possible shooting range is approximately 2 – 50 cm (0.79 in. – 1.6 ft.) from the end of the lens when the zoom lever is moved to the maximum wide angle.

text_image
FUNC SETPress the ◀ button.
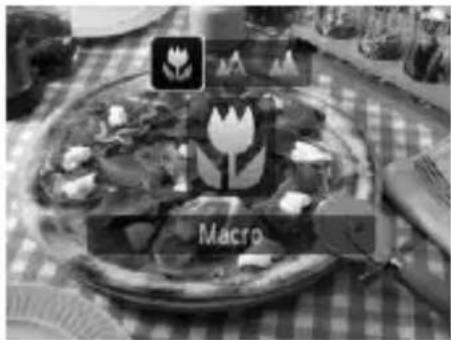
text_image
MacroSelect 🎨.
- Press the ◀▶ buttons or turn the Ⓞ dial to select 🔊, then press the Ⓗ function button. - will appear on the screen.
To restore to the original setting, select A.
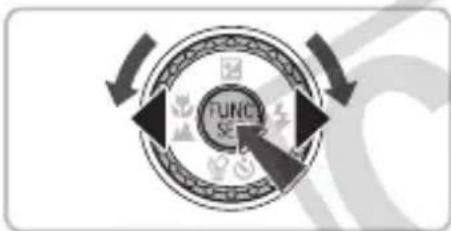
flowchart
graph TD
    A["Start"] --> B{PUNCE SE}
    B --> C["End"]
    style B fill:#f9f,stroke:#333,stroke-width:2px

Using ⓣ2
You are recommended to attach the camera to a tripod and shoot in Ⓞ2, to prevent the camera from moving and blurring the image (p. 78).

The edges of the image may darken if the flash fires.

Zooming In on Close Subjects (Digital Macro)
You can zoom in on close subjects. The possible shooting range is approximately 2 – 10 cm (0.79 – 3.9 in.) from the end of the lens. However, you can zoom in even closer on the subject using the digital zoom. The digital zoom may cause images to appear coarse at some recording pixel settings (p. 72).
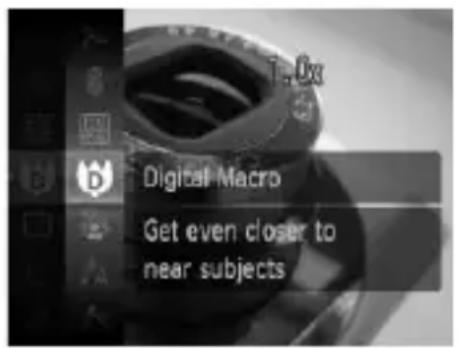
text_image
Digital Macro Get even closer to near subjectsSet the mode switch to 📄 (p. 42).
Select D.
- Select 📋 in Steps 1 – 3 on page 47 and press the FUNC.SET button.
The optical zoom will lock at the maximum wide angle.
Use the zoom lever to compose the shot.
The camera will zoom in and the zoom factor will appear.
Zoom Factors at which Images Deteriorate
- No image deterioration (zoom factor appears white)
• Image deterioration (zoom factor appears blue)

Using

You are recommended to attach the camera to a tripod and shoot in Ⓗ2, to prevent the camera from moving and blurring the image (p. 78).
Changing the Recording Pixels
You can select the recording pixels (image size) from six settings.
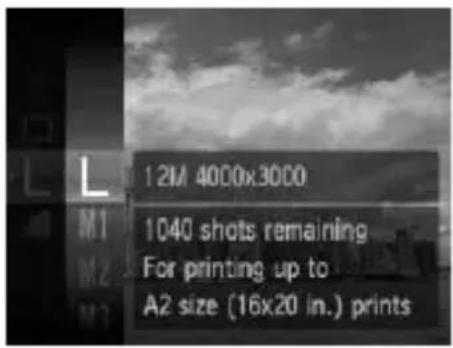
text_image
L 12M 4000x3000 M1 1040 shots remaining For printing up to A2 size (16x20 in.) printsSelect the recording pixels.
- Press the FUNC.SET button and select L, then press the FUNC.SET button.
Select an option.
- Press the ▲▼ buttons or turn the ⏻ dial to select an option, then press the button.
The setting you selected will display on the screen.

If you select You cannot use the Digital Zoom (p. 60) or Digital Tele-Converter (p. 61).
Changing the Compression Ratio (Image Quality)
You can select from the following two levels of image quality: (Fine), (Normal).
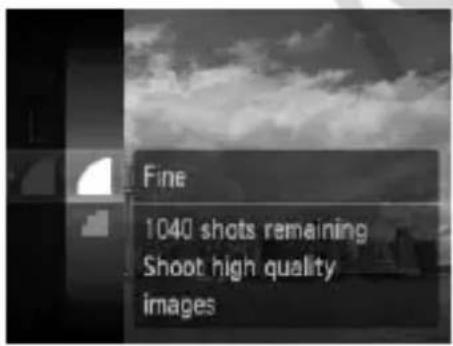
text_image
Fine 1040 shots remaining Shoot high quality imagesSelect the compression ratio.
- Press the FUNC SET button and select, then press the FUNC SET button.
Select an option.
- Press the ▲▼ buttons or turn the Ⓞ dial to select an option, then press the button.
The setting you selected will display on the screen.
Approximate Values for Recording Pixels and Image Quality
| Recording Pixels | Compression Ratio | Single Image Data Size (Approx. KB) | Number of Recordable Images | |
| 2 GB 8 GB | ||||
| L (Large)12 M/4000 × 3000 | 3084 626 | 2505 | ||
| 1474 1280 | 5116 | |||
| M1 (Medium 1)8 M/3264 × 2448 | 2060 930 | 3721 | ||
| 980 1920 | 7675 | |||
| M2 (Medium 2)5 M/2592 × 1944 | 1395 1365 | 5457 | ||
| 695 2672 | 10679 | |||
| M3 (Medium 3)2 M/1600 × 1200 | 558 3235 | 12927 | ||
| 278 6146 | 24562 | |||
| S (Small)0.3 M/640 × 480 | 150 10245 | 40937 | ||
| 84 15368 | 61406 | |||
| W (Widescreen)4000 × 2248 | 2311 830 | 3318 | ||
| 1105 1707 | 6822 | |||
- The values in the table are measured according to Canon standards and may change depending on the subject, memory card and camera settings.
Approximate Values for Paper Size
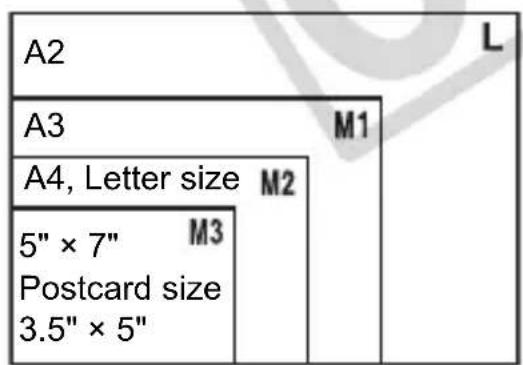
text_image
A2 A3 M1 A4, Letter size M2 5" × 7" M3 Postcard size 3.5" × 5"Suitable for sending images as e-mail attachments.
For printing on wide size paper.
Changing the ISO Speed
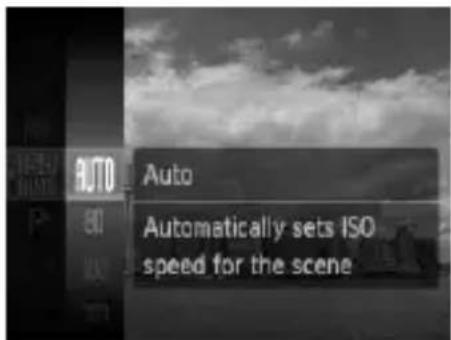
text_image
AUTO Auto Automatically sets ISO speed for the sceneSelect the ISO speed.
- Press the Ⓗ function. button and select ISO AUTO, then press the Ⓗ function. button.
- Press the ▲▼ buttons or turn the dial to select an option, then press the button.
Once set, the ISO speed will appear on the screen.
Approximate Values for ISO Speed
| ISO AUTO | Automatically adjusts the ISO speed to the shooting mode and shooting conditions. | |
| ISO 80 ISO 100 ISO 200 | Low | Fine weather conditions, outdoor shooting. |
| ISO 400 ISO 800 | Cloudy, Twilight | |
| ISO 1600 | High | Nightscapes, Dark interiors |

Changing the ISO speed
- Lowering the ISO speed results in sharper images, but there may be an increased chance of image blurring in certain shooting conditions.
- Raising the ISO speed results in a faster shutter speed, reducing camera shake and letting the flash reach greater distances to the subject. The images, however, will appear coarse.

- When the camera is set to ISO AUTO, you can press the shutter button halfway to display the automatically set ISO speed.
- With ISO3200 you can set an even faster speed (p. 58).
Adjusting the White Balance
The white balance (WB) function sets the optimal white balance for natural looking colors.
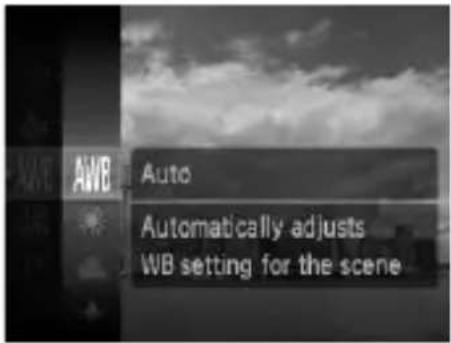
text_image
AVB Auto Automatically adjusts WB setting for the sceneSelect the white balance.
- Press the FUNC. SET button and select AWB, then press the FUNC. SET button.
Select an option.
- Press the ▲▼ buttons or turn the dial to select an option, then press the button.
The setting you selected will display on the screen.
| AWB | Auto | Automatically sets the optimal white balance for the shooting conditions. |
| Day Light Fine weather conditions, outdoor shooting | ||
| Cloudy Cloudy, shady, twilight conditions | ||
| Tungsten Tungsten, bulb-type (3-wavelength) fluorescent lighting | ||
| Fluorescent | Warm-white fluorescent, cool-white fluorescent, warm-white-type (3-wavelength) fluorescent lighting | |
| Fluorescent H | Daylight fluorescent, daylight-type (3-wavelength) fluorescent lighting | |
| Custom Manually sets a custom white balance. | ||

Custom White Balance
You can adjust the white balance to the light source at the shooting location. Make sure that you set the white balance under the lighting conditions of the shooting scene.
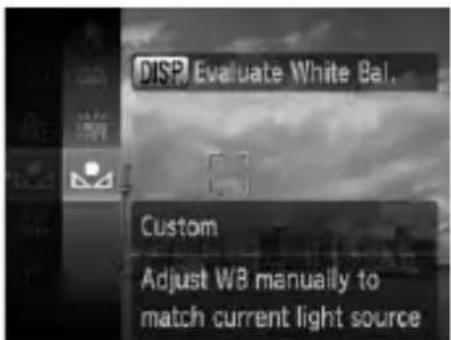
text_image
DISR Evaluate White Bal. Custom Adjust WB manually to match current light sourceIn Step 2 above, select
● Make sure the entire screen is filled with the white subject, then press the DISP. button.
The tint on the screen will change when a white balance data is set.

Adjusting the Brightness (Exposure Compensation)
You can adjust the standard exposure set by the camera in 1/3-stop increments in the range of -2 to +2.
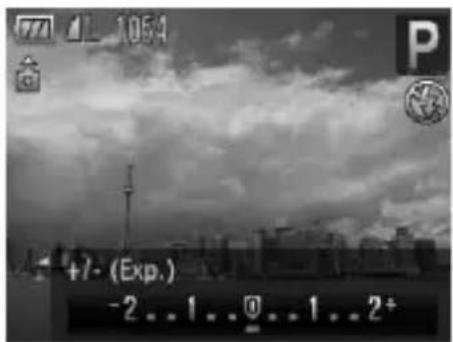
text_image
7L 1054 +/- (Exp.) -2..1..0..1..2+Select the exposure compensation.
- Press the ▲ button.
Adjust the brightness.
While watching the screen, press the ◀▶ buttons or turn the ⏱ dial to adjust the brightness and press the FUNC SET button.

Continuous Shooting
You can shoot continuously at about 1.0 images/second.
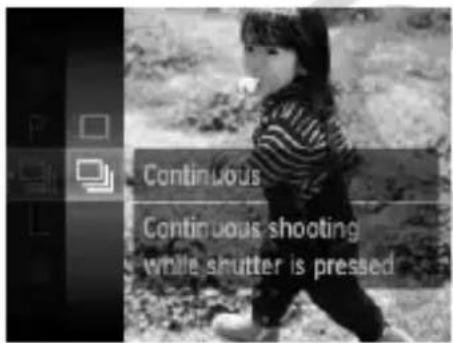
text_image
Continuous Continuous shooting while shutter is pressedSelect the drive mode.
Press the Ⓗ button to select □, then press the ▶ button.
Press the ▲▼ buttons to select □, then press the Ⓗ️ button.
Shoot.
As long as you hold the shutter button down, the camera will shoot successive images.

- Cannot be used with the self-timer (pp. 63, 64, 78, 79).
- For continuous shooting, the focus and exposure are locked when the shutter button is pressed halfway.
- As the number of images increases, the shooting intervals may take longer.
- If the flash fires, shooting intervals may take longer.
Changing the Tone of an Image (My Colors)
You can change the tone of an image to sepia or black and white when shooting.
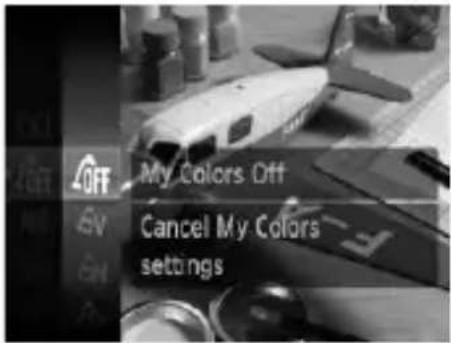
text_image
My Colors Off Cancel My Colors settingsSelect My Colors.
- Press the Ⓗ button and select ⚙ then press the Ⓗ button.
Select an option.
- Press the ▲▼ buttons or turn the ⏻ dial to select an option, then press the Ⓗ FUNC. SET button.
The setting you selected will display on the screen.
After shooting, return the setting to

| My Colors Off – | ||
| Vivid | Emphasizes the contrast and color saturation for a vivid impression. | |
| Neutral | Tones down the contrast and color saturation for neutral hues. | |
| Sepia Sepia tones. | ||
| B/W Black and white. | ||
| Positive Film | Like the Vivid Red, Vivid Green or Vivid Blue effects, produces intense natural appearing colors like those obtained with positive film. | |
| Lighter Skin Tone Makes skin tones lighter. | ||
| Darker Skin Tone Makes skin tones darker. | ||
| Vivid Blue | Emphasizes blue tints. Makes the sky, ocean and other blue subjects more vivid. | |
| Vivid Green | Emphasizes green tints. Makes mountains, foliage and other green subjects more vivid. | |
| Vivid Red Emphasizes red tints. Makes red subjects more vivid. | ||
| Custom Color | You can adjust contrast, sharpness, and color saturation etc. to your preference. |

- The white balance cannot be set in the e and W modes (p. 75).
- In the _L and _D modes, colors other than people's skin color may change. You may not obtain the expected results with some skin colors.

Custom Color
The contrast, sharpness, color saturation, red, green, blue, and skin tones in an image can be selected and set from 5 different levels.
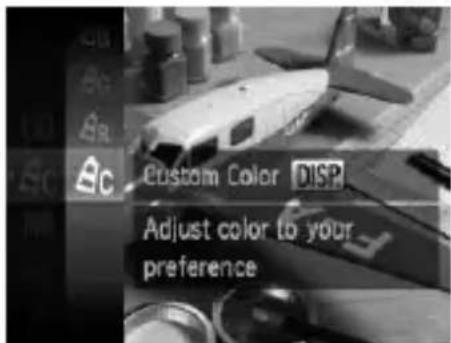
text_image
Custom Color DISP Adjust color to your preference- Follow Step 2 on page 77 and select then press the DISP. button.
- Press the ▲▼ buttons to select an option, then use the ◀▶ buttons or turn the dial to select a value.
The more to the right, the stronger/deeper the effect gets, the more to the left, the weaker/lighter the effect gets. - Press the DISP. button to accept the setting.


Shooting Using the Two Second Self-Timer
You can set the self-timer to a delay of approximately two seconds.
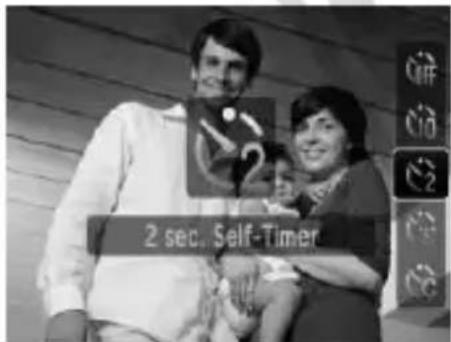
text_image
2 sec. Self-TimerSelect 2.
After pressing the ▼ button, press the ▲▼ buttons or turn the Ⓞ dial to select ⏻2, then press the Ⓗ function SET button.
Once set, Ⓤ2 will appear.
- Follow Step 3 on page 63 to shoot.
Customizing the Self-Timer
You can set the time delay (0 – 30 seconds) and the number of shots taken (1 – 10 shots).
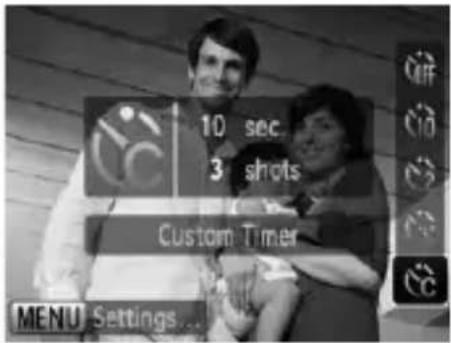
text_image
10 sec 3 shots Custom Timer MENU Settings...Select ©.
After pressing the ▼ button, press the ▲▼ buttons or turn the Ⓞ dial to select ⚙, then immediately the press the MENU button.
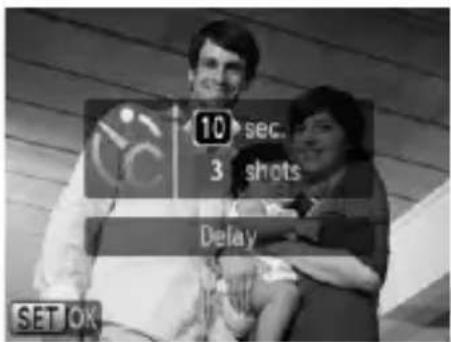
text_image
10 sec. 3 shots Delay SET OKSelect the settings.
- Press the ▲▼ buttons to select [Delay] or [Shots]. - Press the ◀▶ buttons or turn the Ⓞ dial to select a value, then press the FUNC.SET button.
Follow Step 3 on page 63 to shoot.

What if the number of shots is set to two or more shots?
- Exposure and white balance settings are set with the first shot.
- When you set the time delay for more than 2 seconds, the self-timer lamp and sound speed up 2 seconds before the shutter releases (when the flash will fire, the lamp lights).

- If the flash fires, the shooting interval may be longer.
- If you set a high number of shots, the shooting interval may be longer.
- If the memory card becomes full, shooting stops automatically.
Shooting Using a TV Monitor
You can use a TV to display the camera screen content.
- Connect the camera to a TV as described in “Viewing Images on a TV” (p. 111).
- Shooting procedures are the same as when using the camera's monitor.

TV display is not available when using the HDMI Cable HTC-100 (sold separately) to connect the camera to a high-definition TV.
Changing the Composition with the Focus Lock
While you press and hold the shutter button halfway, the focus and exposure are fixed. You can now recompose and shoot. This is called Focus Lock.
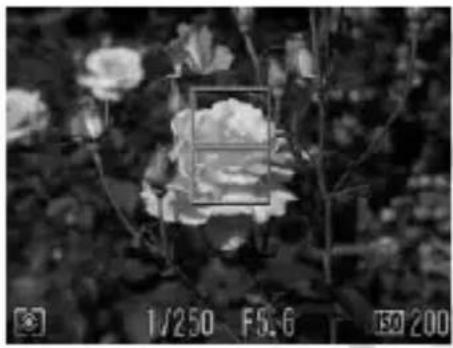
natural_image
Black-and-white photo of a blooming flower with visible petals and surrounding foliage (no text or symbols)Focus.
- Center the subject you want in focus, and press the shutter button halfway. - Confirm that the AF Frame on the subject is green.
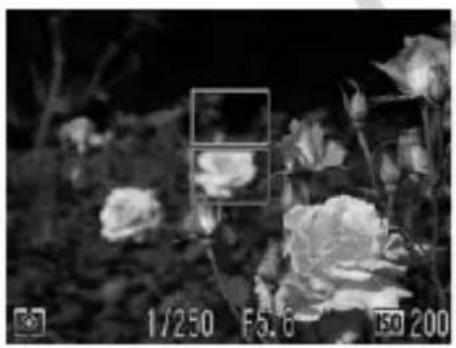
natural_image
Black-and-white photo of a flower cluster with visible petals and buds, no text or symbols present.Recompose.
Hold the shutter button pressed halfway and recompose the scene.
Shoot.
- Press the shutter button fully.
5
Getting More Out of Your Camera
This chapter serves as the advanced version of Chapter 4 and explains how to take pictures using various functions.
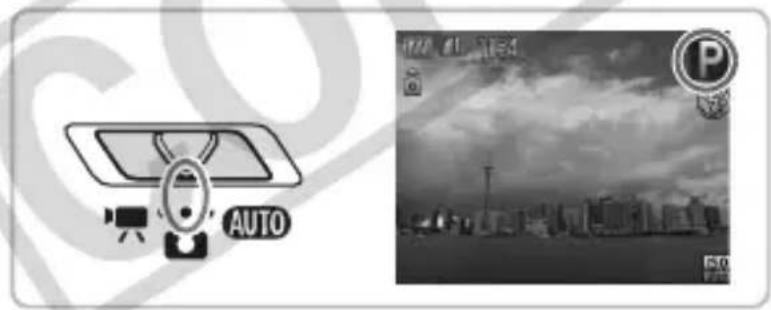
text_image
AUTO P- This chapter assumes that the mode switch is set to 📄 and the camera is in P mode.
- “Taking Shots With Impact (Zoom Blur)” (p. 85), “Shooting Long Exposures” (p. 92), “Changing the Color and Shooting” (p. 93) and “Shooting Stitch Assist Images” (p. 96) assume you have set the mode switch to and selected the corresponding mode.
- Before attempting to shoot using a function explained in this chapter in modes other than P mode, check if the function is available in those modes (pp. 150 – 153).
Changing the AF Frame Mode
You can change the AF (Auto Focus) frame mode to match the conditions you want to shoot.
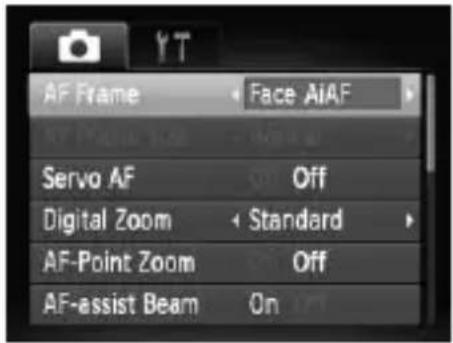
text_image
AF Frame Face AIAF Servo AF Off Digital Zoom Standard AF-Point Zoom Off AF-assist Beam OnSelect [AF Frame].
- Press the MENU button, select the tab, select [AF Frame], then press the buttons to select an option.
Face AiAF
- Detects people's faces and sets the focus, exposure (evaluative metering only) and white balance (AVWD only).
- When the camera is pointed at subjects, a white frame appears on the face the camera judges to be the main subject, and gray frames (max. 2) will appear on other faces. When the shutter button is pressed halfway, up to 9 green frames will appear on faces on which the camera focuses.

-
If a face is not detected and only gray frames (no white frame) appear, up to 9 green frames will appear on the areas the camera focuses on when the shutter button is pressed halfway.
• Examples of faces that cannot be detected: -
Subjects that are far away or extremely close.
- Subjects that are dark or light.
- Faces turned to the side or at a diagonal, or faces with a portion hidden.
• The camera may mistakenly identify non-human subjects as a face.
- If the camera cannot focus when you press the shutter button halfway, the AF frame will not appear.
Center
The AF frame is fixed at the center. This is effective for focusing on a specific point.

You can reduce the AF frame size
- Press the MENU button, select the 📄 tab, then select the [AF Frame Size] menu item and [Small] option.
- The setting is configured to [Normal] when the Digital Zoom or Digital Tele-converter is used.

If the camera cannot focus when you press the shutter button halfway, the AF frame will turn yellow.
Magnifying the Focal Point
If you press the shutter button halfway, the AF frame will magnify and you can check the focus.
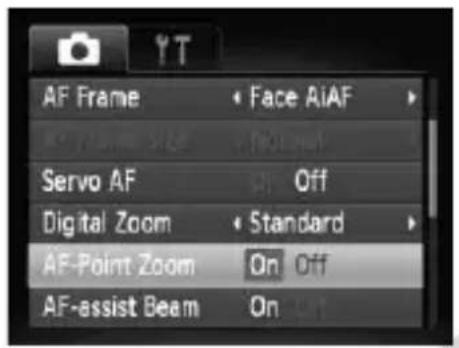
text_image
AF Frame Face AiAF Servo AF Off Digital Zoom Standard AF-Point Zoom On Off AF-assist Beam OnSelect [AF-Point Zoom].
- Press the MENU button and select [AF-Point Zoom] on the 📄 tab. Use the ◀▶ buttons to select [On].
![CANON PowerShot SD970 IS - Select [AF-Point Zoom]. - 1](/content/2026/05/790000/images/f4f6927dac9420daabc66cad70eba59b77e38c3edf71ca4ef7283037415330b7.jpg)
natural_image
Black-and-white photo of four smiling children (no text or symbols visible)Check the focus.
Press the shutter button halfway.
In [Face AiAF], the face selected as the main subject will appear magnified.
In [Center], the contents of the center AF frame will appear magnified.

What if the display does not magnify?
The display will not appear magnified in [Face AiAF] mode if a face cannot be detected (p. 82) or is too big in relation to the screen. In [Center] mode, it will not appear magnified if the camera cannot focus.

The magnified display will not appear when using the Digital Zoom (p. 60), Digital Tele-Converter (p. 61) or Servo AF (p. 84), or when connected to a TV (p. 80).
AFL Shooting with the AF Lock
The focus can be locked. After locking the focus, the focal distance will not change even when you release your finger from the shutter button.
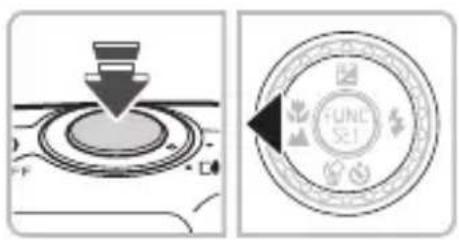
text_image
Diagram showing a mechanical component with downward force and a circular emblem labeled 'UNIC SE1' with icons for safety and maintenance.Lock the focus.
- Keep the shutter button pressed halfway and press the ◀ button.
● The focus locks and AFL is displayed on the screen. - If you release your finger from the shutter button, and press the ◀ button once more, AFL will disappear and the focus will unlock.
Compose the scene and shoot.
Shooting with Servo AF
Since focus will be maintained on a subject while you press the shutter button halfway, you can shoot moving subjects without missing photo opportunities.
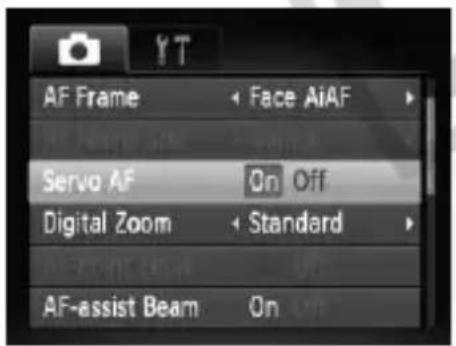
text_image
AF Frame Face AiAF Servo AF On Off Digital Zoom Standard AF-assist Beam OnSelect [Servo AF].
- Press the MENU button and select [Servo AF] on the 📄 tab, and use the ◀▶ buttons to select [On].
Focus.
While the shutter button is pressed halfway, the focus will continue to adjust on the spot where the blue frame appears.

- The camera may not be able to focus in some conditions.
- You cannot shoot with the AF lock in this mode.
- You cannot set the Servo AF mode if you have set the [AF-Point Zoom] option in the 📷 tab to [On].
• Not available in FaceSelf-Timer (p. 64).
The optical zoom operates automatically during shooting, creating an image where the subject appears closed into the center of the screen.
natural_image
Black-and-white photo of a display case with various camera models and accessories (no visible text or labels)Select

- Select in Steps 1 – 3 on page 47 and press the FUNC SET button.
After the shutter sound plays, the camera will zoom.

- The focal length is fixed. The zoom function is not available.
• Results will vary depending on the lighting conditions of the scene.

Selecting the Person to Focus On ace Select)
You can select a specific person's face to focus on and then shoot.

text_image
Frame 1/250 P5.6 30:200Register 📁 to the 🔔 button (p. 139).
Set the Face Select mode.
- Point the camera toward the face and press the 📄 button.
After [Face Select : On] displays, a face frame will appear around the face detected as the main subject.
Even if the subject moves, the frame will follow the subject within a certain range. If a face is not detected, will not appear.
Select the face on which to focus.
If you press the 📁 button, the frame will move to another face detected by the camera.
When the frame has made a full circuit of all detected faces, the AF frame mode screen will reappear.
Shoot.
- Press the shutter button halfway. The face frame of the focused face will change into a green ☐
- Press the shutter button fully to shoot.

Confirming the number of detected faces
Keeping the ☐ button pressed will display the number of faces detected by the camera (35 at the most) (green: main subject's face, white: detected face).

Not available in Zoom Blur, Stitch Assist or movie modes.
Changing the Metering Mode
You can change the metering mode (brightness measuring function) to match the shooting conditions.
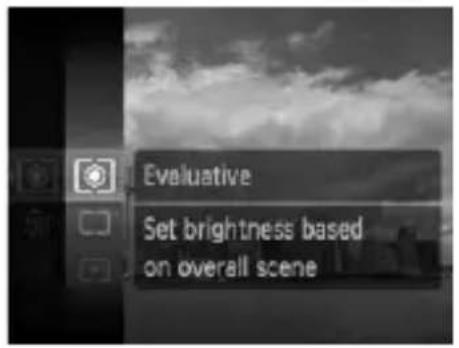
text_image
Evaluative Set brightness based on overall sceneSelect the metering mode.
- Press the Ⓗ button and select , then press the Ⓗ button.
Select an option.
- Press the ▲▼ buttons or turn the Ⓞ dial to select an option, then press the Ⓗ FUNC. SET button.
The setting will display on the screen.
| Evaluative | Suitable for standard shooting conditions, including back lit shots. Automatically adjusts the exposure to match the shooting conditions. |
| Center Weighted Avg. | Averages the light metered from the entire frame, but gives greater weight to the center. |
| Spot | Only meters within the [(Spot AE Point frame) that appears at the center of the screen. |
AEL Shooting with the AE Lock
When you wish to take several shots with the same exposure, you can set the exposure and focus separately using the AE lock. AE stands for "Auto Exposure".
text_image
Diagram showing a mechanical component with a downward arrow and a circular emblem labeled 'TUNC SET' with icons.Lock the exposure.
- Point the camera toward the subject and press the ▲ button while pressing the shutter button halfway.
When AEL appears, the exposure will be set.
- If you release your finger from the shutter button and press the ▲ button again, AEL will disappear and the AE will unlock.
Compose the scene and shoot.
FEL Shooting with the FE Lock
Just as with the AE lock (p. 87), you can lock the exposure for shooting with the flash. FE stands for “Flash Exposure”.
Select ↘ (p. 69).
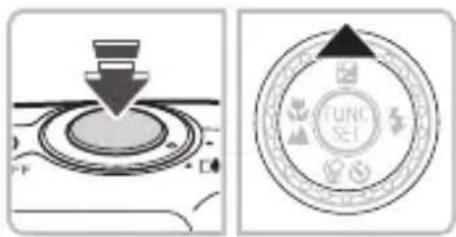
text_image
Diagram showing a mechanical component with downward force and a circular dial labeled 'UNIC SET' with icons.Lock the exposure.
- Point the camera toward the subject and press the ▲ button while pressing the shutter button halfway.
The flash will fire and when FEL appears, the flash output will be retained.
If you release your finger from the shutter button and press the ▲ button again, FEL will disappear and the FE will unlock.
Compose the scene and shoot.
Shooting with Slow Synchro
You can make the main subject, such as people, appear bright by having the camera provide the appropriate illumination with the flash. At the same time, you can use a slow shutter speed to brighten the background that the light from the flash cannot reach.
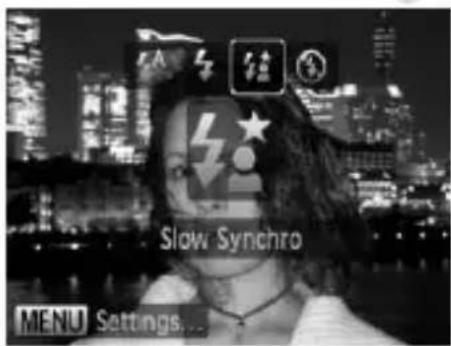
text_image
Slow Synchro MENU Settings...Select ♣.
After pressing the ▶ button, press the ◀▶ buttons or turn the Ⓞ dial to select ♣, then press the Ⓗ️ button.
Once set, ⬆ will appear on the screen.
Shoot.
Even if the flash fires, ensure that the subject does not move until the shutter sound ends.

Attach the camera to a tripod to prevent the camera from moving and blurring the image. It is recommended to set the [IS Mode] to [Off] when shooting with a tripod (p. 139).
Ci Making Dark Subjects Appear Brighter (i-Contrast)
The camera can automatically detect and compensate for faces or subjects that appear dark in certain shooting conditions.
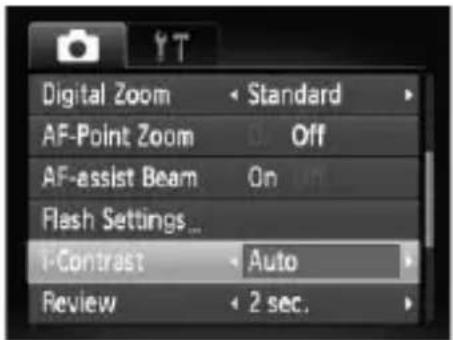
text_image
Digital Zoom AF-Point Zoom AF-assist Beam Flash Settings... i-Contrast Review Standard Off On Auto 2 sec.Select [i-Contrast].
- Press the MENU button, select [i-Contrast] from the 📷 tab, and use the
◀▶ buttons to select [Auto].
▶ Ci will appear on the screen.
![CANON PowerShot SD970 IS - Select [i-Contrast]. - 1](/content/2026/05/790000/images/784e54eb2075aa6668b51248c138c7e66c394336c1f6a11ca48a48980e395572.jpg)
natural_image
Black-and-white photo of a person holding a pole with visible weights and a coin, no text or symbols present.![CANON PowerShot SD970 IS - Select [i-Contrast]. - 2](/content/2026/05/790000/images/dc8ffd19ce2afe3cd8f9a8733bda4a43c5ce0ae506389f1f40d80e55103757e0.jpg)
Under some conditions, the image may appear coarse or the exposure setting may not be suitable.
![CANON PowerShot SD970 IS - Select [i-Contrast]. - 3](/content/2026/05/790000/images/766c24de9a492ab6e976890fda99271d3c32f4b4888a57059c788e41f8da3bf5.jpg)
You can correct recorded images (p. 124).
You can automatically correct red eyes in images taken with the flash.
![CANON PowerShot SD970 IS - Select [i-Contrast]. - 4](/content/2026/05/790000/images/167b89f36fde582112acc1dc194aa57aa21e369d515758d24d91132ba3aa875e.jpg)
text_image
Servo AF Off Digital Zoom Standard AF-Point Zoom Off AF-assist Beam On Flash Settings... i-Contrast OffSelect [Flash Settings].
- Press the MENU button, select [Flash Settings] from the 📄 tab and press the FUNC.SET button.
![CANON PowerShot SD970 IS - Select [Flash Settings]. - 1](/content/2026/05/790000/images/51cdd27eb93d6e24bb52b209a56449fa50f106ebaced2c9eb49633caf25d1db9.jpg)
text_image
Flash Settings Red-Eye Conn. On Off Red-Eye Lamp OnAdjust the setting.
- Press the ▲▼ buttons or turn the Ⓞ dial to select [Red-Eye Corr.] and press the ◀▶ buttons to select [On]. - Ⓞ will appear on the screen.

Red-eye correction may be applied to other red parts than red eyes. For example, when red make-up has been used around eyes.

- You can correct recorded images (p. 125). - If you press the ▶ button as shown on the screen in Step 2 and then press the MENU button, the Flash Settings screen will display.
Checking for Shut Eyes
When the camera detects that there is a possibility that people have their eyes shut, appears.
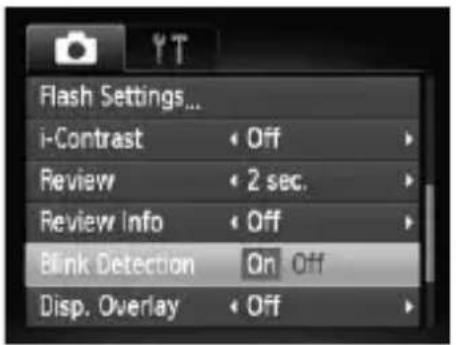
text_image
Flash Settings... i-Contrast Review Review Info Blink Detection Disp. Overlay Off 2 sec. Off On Off OffSelect [Blink Detection].
- Press the MENU button, select the 📄 tab, and then select [Blink Detection]. Use the ◀▶ buttons to select [On].
Shoot.
- When a person with shut eyes is detected, a frame and appear for a few seconds.

In ☐, ⚙ and ⚙ mode, the function is only available for the last image shot.

Shooting Long Exposures
You can set the shutter speed to a range between 1 and 15 seconds to shoot long exposures. However, you should attach the camera to a tripod to prevent the camera from moving and blurring the image.
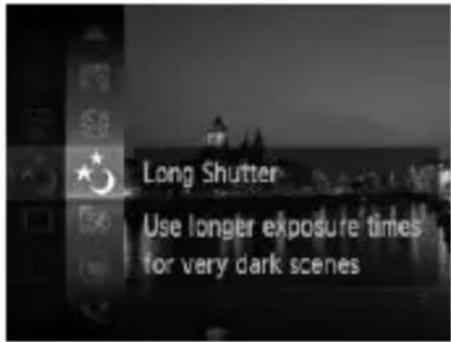
text_image
Long Shutter Use longer exposure times for very dark scenesSelect ★.
- Set the mode switch to 📄, then select ⭐ in Steps 1 – 3 on page 47 and press the Ⓗ️ button.
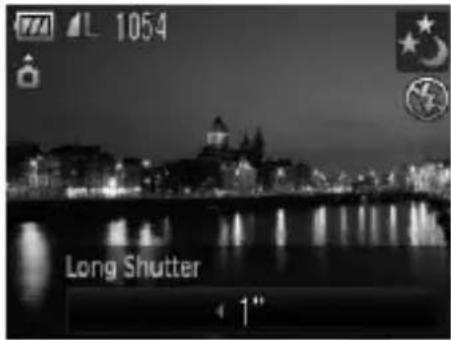
text_image
1054 Long ShutterSelect the shutter speed.
- Press the ▲ button. - Press the ◀▶ buttons or turn the Ⓞ dial to select shutter speed, then press the Ⓗ FUNC. SET button.
Confirm the exposure.
When you press the shutter button halfway, the exposure for the selected shutter speed will appear.

- The brightness of the image may differ from the brightness of the screen in Step 3 when the shutter button was pressed halfway.
- When shutter speeds of 1.3 seconds or slower are used, images are processed to eliminate noise after being taken. A certain amount of processing time may be needed before you can take the next shot.
- It is recommended to set the [IS Mode] to [Off] when shooting with a tripod (p. 139).

If the flash fires, the image may be overexposed. If this happens, set the flash to Ⓧ and shoot.
Changing the Color and Shooting
You can change the look of an image when shooting. However, the shooting conditions may cause the image to become coarse, or the colors may not come out as expected.

Color Accent
You can select to retain a single color and change the rest to black and white in a composition.
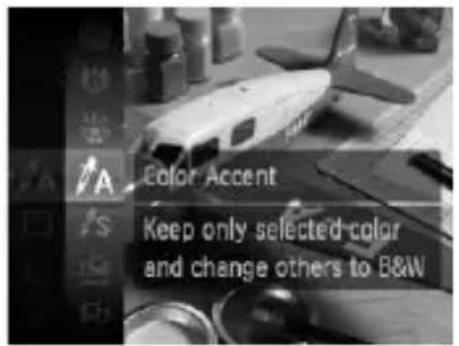
text_image
Color Accent Keep only selected-color and change others to B&W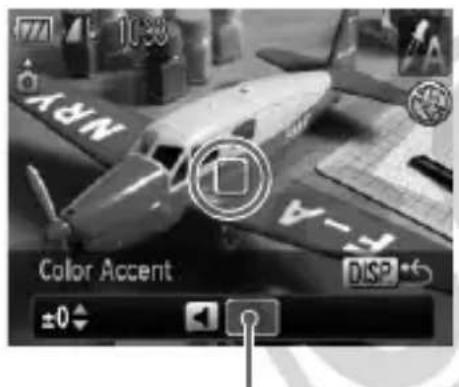
text_image
NRV Color Accent ±0° +1° -2° +3° -4°Recorded color
Select /A.
- Follow Step 2 on page 56 to select ⚠A.
Press the DISP. button.
The unchanged image and the Color Accent image will both display.
The color for default settings is green.
Specify the color.
Position the center frame so it is filled with the color you want and press the ◀ button.
The specified color will be recorded.
Specify the range of colors.
Press the ▲▼ buttons or turn the Ⓞ dial to change the range of colors to be retained.
- Select a negative value to limit the range of colors. Select a positive value to extend the range of colors to similar colors.
- Pressing the DISP. button accepts the setting and restores the shooting screen.

• Using the flash may cause unexpected results in this mode.
- The recorded color will be saved even if you turn off the power.
s Color Swap
You can swap one color in an image for another when recording it. You can only swap one color.
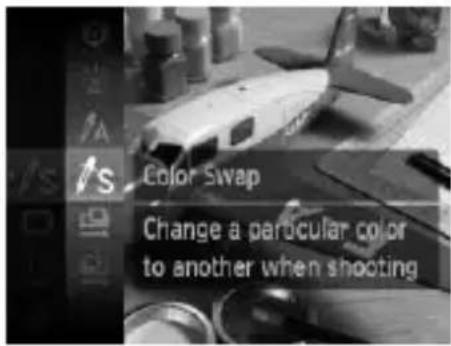
text_image
Color Swap Change a particular color to another when shootingSelect /s.
- Follow Step 2 on page 56 to select /s.
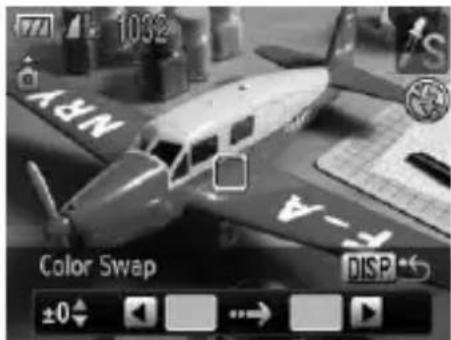
text_image
1032 NRY Color Swap DISP ±0Press the DISP. button.
- The unchanged image and the Color Swap image will both display. - The default setting is to change green to gray.
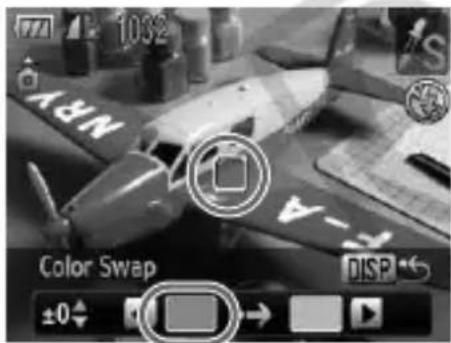
text_image
1032 N&Y - A Color Swap ±0 →Specify the color to be swapped.
Position the center frame so it is filled with the color you want and press the ◀ button. The specified color will be recorded.
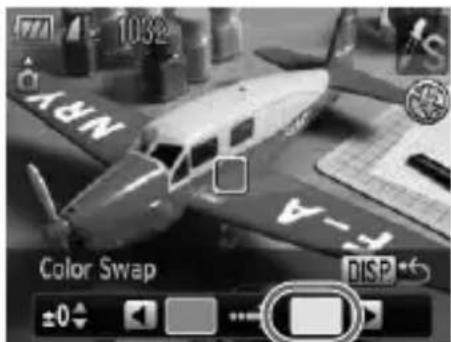
text_image
NEW F-A Color Swap ±0 1032 DISPSpecify the target color.
- Position the center frame so it is filled with the color you want and press the ▶ button. - The specified color will be recorded.
Specify the range of colors to be swapped.
- Press the ▲▼ buttons or turn the Ⓞ dial to adjust the range of colors affected.
- Select a negative value to limit the range of colors. Select a positive value to extend the range of colors to similar colors.
- Pressing the DISP. button accepts the setting and restores the shooting screen.

- Using the flash may cause unexpected results in this mode.
- The recorded color and range of colors will be saved even if you turn off the power.
- Under some conditions, the image may appear coarse.
Shooting Stitch Assist Images
Large subjects can be split into several shots that can later be merged together using the included software on a computer to create a panoramic image.
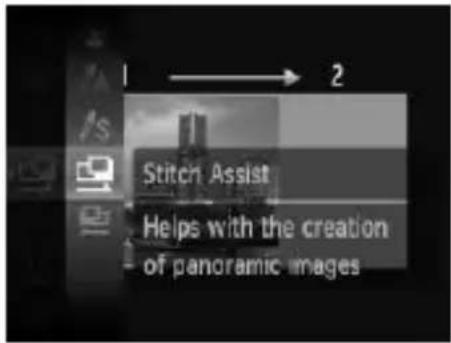
text_image
1 → 2 Stitch Assist Helps with the creation of panoramic images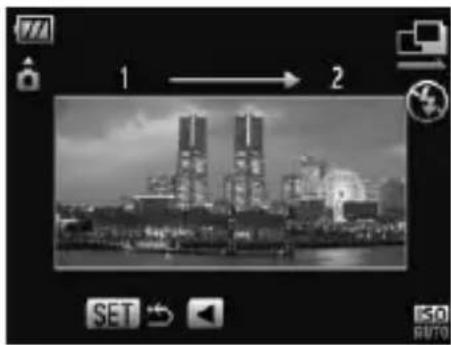
natural_image
Black-and-white cityscape photo showing two tall buildings on a waterfront, with no visible text or symbols.
natural_image
Black-and-white panoramic view of an industrial complex with towers and structures along a riverbank, under cloudy skies (no visible text or symbols)Select or.
- Follow Step 2 on page 56 to select □ or □.
Take the first shot.
The exposure and white balance will be set with the first shot.
Take subsequent shots.
Overlap part of the first shot when taking the second shot.
Minor discrepancies in the overlapping portions will be corrected when the images are merged.
You can repeat the procedure for the second shot to take up to 26 shots.
When you have finished taking shots, proceed to Step 4.
Finish shooting.
Press the FUNC. SET button.
Merge the images on a computer.
For details on how to merge the images, refer to the Software Starter Guide.

This function is not available when a TV is used as the monitor (p. 80).
Using Various Functions for Shooting Movies
This chapter provides more advanced information than the
"■ Shooting Movies" and "▶ Viewing Movies" sections of Chapter 1.
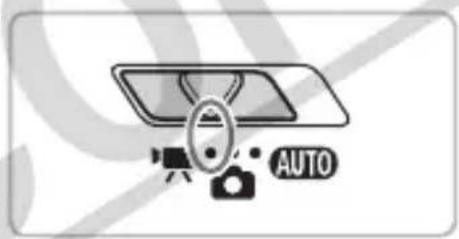
natural_image
Diagram showing a camera and an 'AUTO' button with no readable text or symbolsThis chapter assumes that the mode switch is set to 🖱️.
Changing the Movie Mode
You can select between three movie modes.
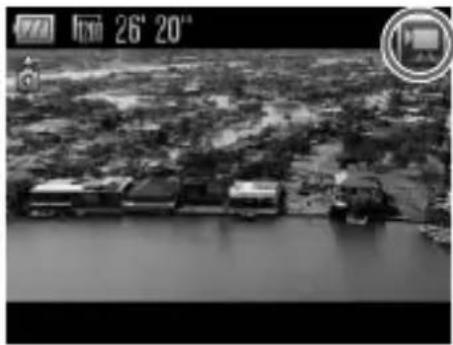
natural_image
Aerial view of a flooded landscape with houses and water, no visible text or symbols.Set the mode switch to 🖱️.
Select a movie mode.
After pressing the Ⓑ️ button, press the ▲▼ buttons or turn the Ⓞ dial to select ▶, then press the Ⓑ️ button.
- Press the ▲▼ buttons or turn the ○ dial to select a mode, then press the Ⓗ FUNC SET button.
Standard For shooting standard quality movies.
| Color Accent | These shooting modes let you change all colors except the selected color to black and white, or exchange the selected color for another color, when shooting. See “Changing the Color and Shooting” (p. 93) for details. |
| Color Swap |

Under some conditions, colors may not turn out as expected in the A and S mode.
Changing the Image Quality
You can select between three image quality settings.
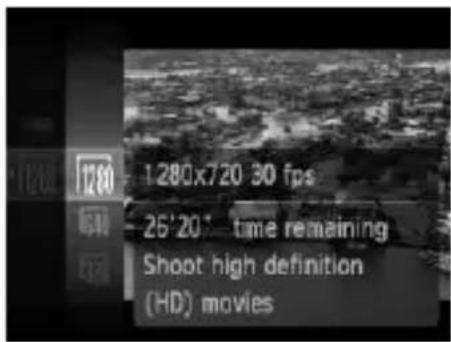
text_image
1280 x 720 30 fps 26'20" time remaining Shoot high definition (HD) moviesSelect the image quality.
After pressing the Ⓗ button, press the ▲▼ buttons or turn the Ⓞ dial to select 1280, then press the Ⓗ button.
Select an option.
- Press the ◀▶ buttons or turn the Ⓞ dial to select an option, and press the button.
The setting will display on the screen.
Image Quality Table
| Image Quality(Recording Pixels/Frame Rate) | Content |
| 1280 × 720 pixels, 30 frames/sec. | For shooting high-definition movies. |
| 640 × 480 pixels, 30 frames/sec. | For shooting standard quality movies. |
| 320 × 240 pixels, 30 frames/sec. | Since the number of the recording pixels is smaller, the image quality will be lower than with 640 , but you can record three times the length. |
Estimated Shooting Times
| Image Quality (Frame Rate) | Shooting Time | |
| 2 GB 8 GB | ||
| 1280 | 10 min. 53 sec. 43 min. 32 sec. | |
| 1640 | 23 min. 49 sec. 1 hr. 35 min. 11 sec. | |
| 320 | 1 hr. 13 min. 10 sec. 4 hrs. 52 min. 24 sec. | |
- Based on Canon's testing standards.
- Recording will automatically stop when either the clip file size reaches 4 GB or the recording time reaches approximately 29 minutes and 59 seconds in 120 hour in 640 and 320
- Recording may stop even if the maximum clip length has not been reached on some memory cards. SD Speed Class 4 or higher memory cards are recommended.
AE Lock/Exposure Shift
You can set the exposure or change it in 1/3 steps within a range of ±2 .
Focus.
Lock the exposure.
- Press the ▲ button to lock the exposure. The exposure shift bar appears.
- Press the ▲ button again to release the lock.
Change the exposure.
● While watching the screen, turn the dial to adjust the brightness.

Shoot.
natural_image
Aerial view of a flooded urban area with boats and buildings, captured in grayscale (no visible text or symbols)Other Shooting Functions
The following functions can be used in the same way as for still images. For i_A^■ and i_S^■ modes, the functions with an * attached can be used in the same way as for still images.
- Zooming in More Closely on Subjects (Digital Zoom) (p. 60)
You can use the digital zoom, but the optical zoom cannot be used. If you want to shoot at the maximum zoom factor, you should adjust the optical zoom to the maximum before shooting.
The sound of the zoom will be recorded.
• 10 Using the Self-Timer (p. 63)*
• Shooting Close-ups (Macro) (p. 70)*
• ▲ Shooting Far Away Subjects (Infinity) (p. 69)*
• Adjusting the White Balance (p. 75)
• Changing the Tone of an Image (My Colors) (p. 77)
- Shooting Using the Two Second Self-Timer (p. 78)*
• Shooting Using a TV Monitor (p. 80)*
• AFL Shooting with the AF Lock (p. 84)
• Turning off the AF Assist Beam (p. 137)*
• Displaying the Overlay (p. 138)*
[3:2 Guide] is not available.
- Changing the IS-Mode Settings (p. 139)*
You can switch between [Continuous] and [Off].
- Registering Functions to the Button (p. 139)
Playback Functions
The following functions can be used in the same way as for still images.
• Erasing Images (p. 29)
• Quickly Searching Images (p. 104)
• Viewing Images in Filtered Playback (p. 106)
• Viewing Slideshows (p. 107)
- Changing Image Transitions (p. 110)
• Viewing Images on a TV (p. 111)
• Erasing All Images (p. 112)
• On Protecting Images (p. 116)
- Organizing Images by Category (My Category) (p. 118)
• Rotating Images (p. 120)
Summary for “Viewing Movies” (p. 34)
| Exit | |
| Playback | |
| Slow Motion Playback (you can use the ◀▶ buttons to adjust the speed. Sound will not play back.) | |
| Display the first frame | |
| Previous frame (Rewind if you hold down the FUNC.SET button.) | |
| Next frame (Fast forward if you hold down the FUNC.SET button.) | |
| Display the last frame | |
| Edit (p. 101) | |
| Displays when connected to a PictBridge compliant printer (p. 30). Refer to the Personal Printing Guide for details. |

Editing
You can trim the beginnings and ends of recorded movies in one-second increments.
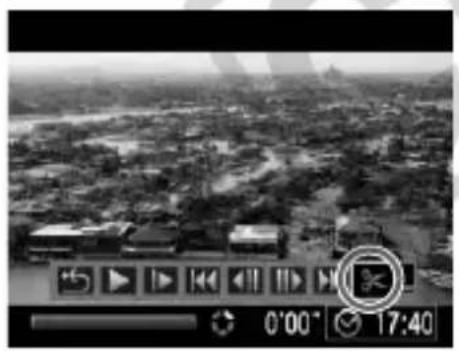
natural_image
Aerial view of a coastal town with buildings and river, captured in an aerial view (no visible text or symbols)Movie Editing Panel
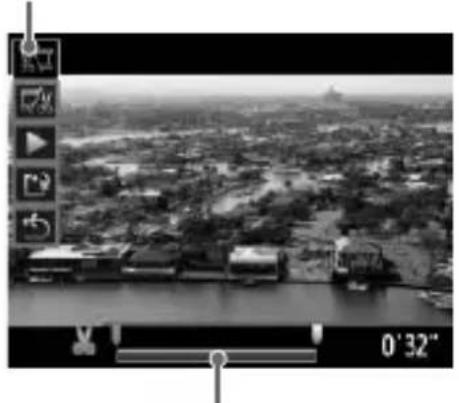
natural_image
Aerial black-and-white view of a coastal cityscape with boats and buildings, no visible text or symbols.Movie Editing Bar
Select%.
Follow Steps 1 to 3 on p. 34, select % and press the FUNC SET button.
The movie editing panel and the movie editing bar will display.
Set the editing range.
- Press the ▲▼ buttons and select


- Press the ◀▶ buttons or turn the Ⓞ dial to move ↓ will display at each one-second interval. If you select, you can trim the beginning of the movie from. If you select, you can trim the end of the movie from
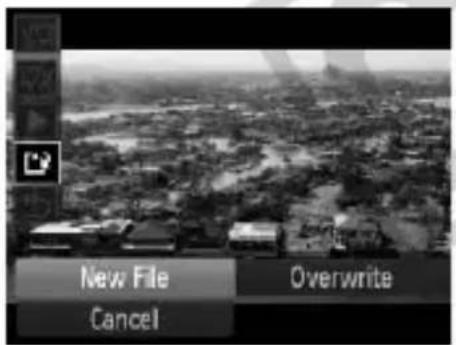
text_image
New File Overwrite CancelEven if you move to a point other than a ✗ point, only the portion from the nearest ✗ to the left will be trimmed when ✗ is selected. Only the portion from the nearest ✗ to the right will be trimmed when ✗ is selected.
The section selected with will be the section of the movie that remains after editing.
Check the edited movie.
- Press the ▲▼ buttons to select ▶, then press the FUNC SET button. The edited movie will play.
To edit the movie again, repeat Step 2.
To cancel editing, press the ▲▼ buttons, and select : After pressing the FUNC SET
button, press the ◀▶ buttons or turn the Ⓞ dial to select [OK], and press the Ⓗ function SET button.
Save the edited movie.
- Press the ▲▼ buttons to select [ ], then press the Ⓗ️ button.
- Press the ◀▶ buttons or turn the Ⓞ dial to select [New File], then press the ⏚ button.
The movie will be saved as a new file.

- When [Overwrite] in Step 4 is selected, the unedited movie is overwritten with the edited movie, erasing the original movie.
- When there is not enough space left on the memory card, only [Overwrite] can be selected.
- If the battery is depleted partway through editing, the edited movie clips may not be saved. When editing movies, you should use a fully charged battery or the separately sold AC adapter kit (p. 40).
Using Playback and Other Functions
The first part of this chapter explains various ways to play back and edit images. The latter part explains how to specify images for printing.
- Press the ▶ button to select the Playback mode before operating the camera.

- It may not be possible to play back or edit images that have been edited on a computer, had their file name changed, or have been taken on a different camera.
- The edit function (pp. 121 – 125) cannot be used if the memory card does not have free space available.
Quickly Searching Images
Searching Images Using Index Display
Displaying multiple images at a time lets you quickly find the image you want.
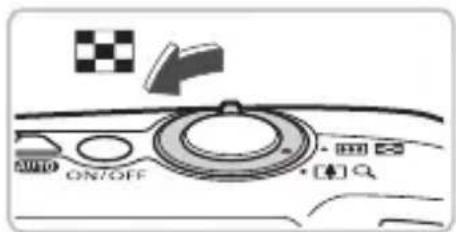
text_image
AUTO ON/OFFMove the zoom lever toward

Images will display in an index.
- Move the zoom lever toward ☐ to increase the number of images. The number of images increases each time you move the lever.
- Move the zoom lever toward 🔒 to reduce the number of images. The number of images will reduce each time you move the lever.
Change the displayed images.
Turn the Ⓞ dial to switch to the next set of images set in Step 1.
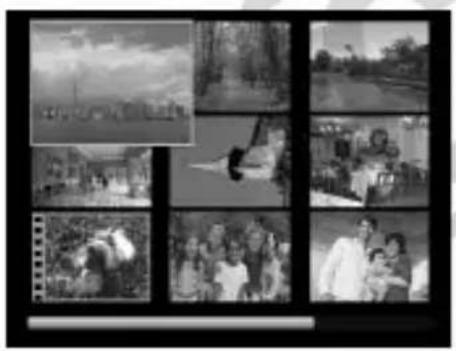
natural_image
Collage of black-and-white photos showing scenes including a rural landscape, a street scene, a person jumping over water, and a group of people (no visible text or symbols)Select an image.
- Press the ▲▼◀▶ buttons to select an image.
An orange frame appears on the selected image. - Press the Ⓗ button to display the selected image by itself.
Searching Images Using the Control Dial
Turn the control dial to quickly search images. You can also jump by the shooting date.
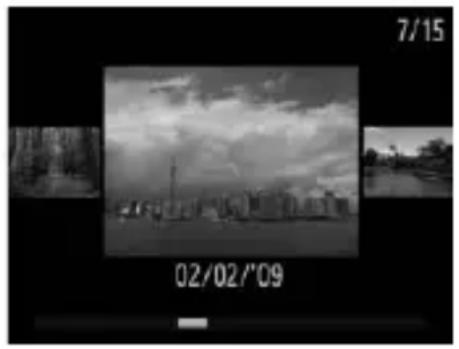
natural_image
Black-and-white cityscape photo with cloudy sky and water, no visible text or symbolsSelect an image.
- If you set the single image playback and turn the Ⓞ dial quickly, the images will display as shown on the left.
- If you press the ▲▼ buttons, you can search images by the shooting date.
- Pressing the FUNC. SET button restores the single image playback.
Viewing Images in Filtered Playback
When there are many images on the memory card, you can filter and display them by a specified condition. You can also delete (p. 112) or protect (p. 116) all images at once in the filtered condition.
Setting the Conditions
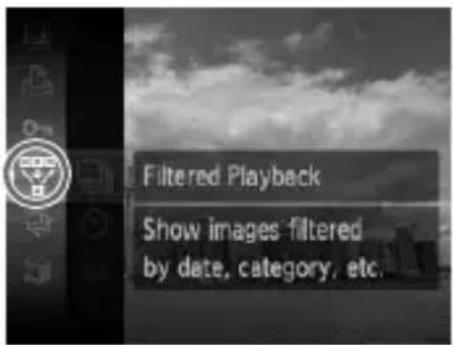
text_image
Filtered Playback Show images filtered by date, category, etc.Select
- Press the Ⓗ button to select then press the Ⓗ button.
Select a condition.
- Press the ▲▼ buttons or turn the Ⓞ dial to select a condition, then press the FUNC. SET button.
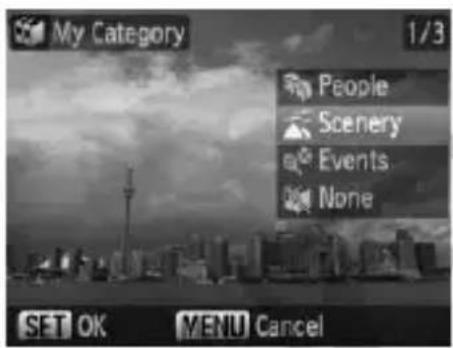
text_image
My Category 1/3 People Scenery Events None SET OK MENU CancelView the filtered images.
- Press the ▲▼ buttons or turn the Ⓞ dial to select a condition for playback, then press the Ⓗ function SET button.
Filtered playback starts and a yellow frame displays. - If you press the ◀▶ buttons, only the images selected in Step 1 will display. - If you select [All Images] in Step 2, filtered playback will be canceled.
Search by 📊, and 🏠
√ Date Displays the images shot on the specified date
My Category Displays the images of the specified category
Folder Displays the images in a specified folder
File Format Displays only still images or movies

What if you can't select a target?
Conditions containing no images cannot be selected.

Filtered Playback
You can use the following functions in filtered playback for processing the filtered images at once.
- “Erasing Images” (p. 29), “Viewing Slideshows” (p. 107), “Protecting Images” (p. 116), “Selecting Images for Printing (DPOF)” (p. 127)

Viewing Slideshows
You can automatically play back images recorded to a memory card. Each image displays for approximately 3 seconds.
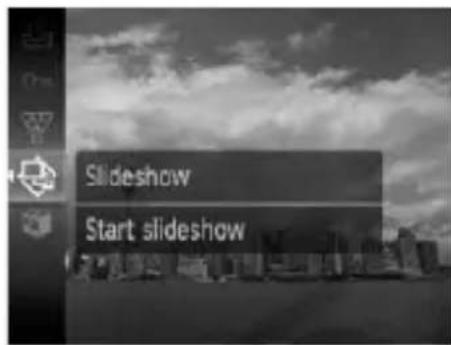
text_image
Slideshow Start slideshowSelect
- Press the ⬤️ button to select 🔊, then press the ⬤️ button.
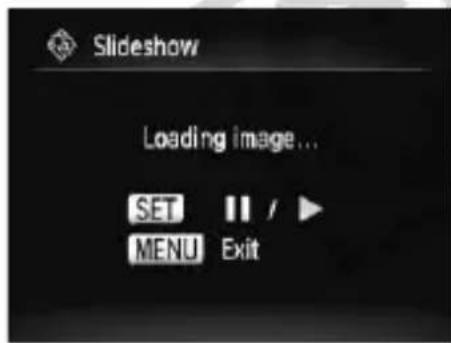
text_image
Slideshow Loading image... SET // / MENU ExitThe slideshow will start a few seconds after [Loading image...] displays.
In filtered playback (p. 106), only images in a filtered condition play back.
- You can pause/restart a slideshow by pressing the FUNC SET button again.
- Press the MENU button to stop the slideshow.

- If you press the ◀▶ buttons or turn the Ⓞ dial during playback, the image will switch. If you press and hold down the ◀▶ buttons you can fast-forward through images.
- The power saving function does not work during slideshows (p. 53).
Changing Settings
You can change the time that slideshow images are displayed, transition effects and set the slideshow to repeat. You can select from seven transition effects when switching between images.
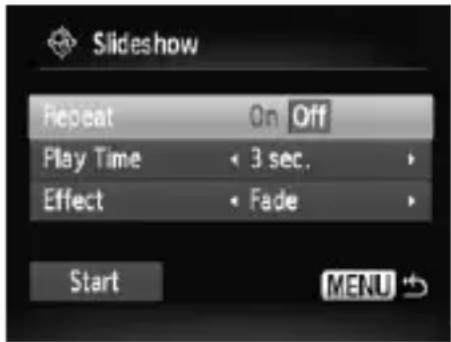
text_image
Slideshow Repeat On Off Play Time 3 sec. Effect Fade Start MENU ↕Select [Slideshow].
- Press the MENU button and select the ▶ tab, then select [Slideshow] and press the FUNC SET button.
Make the setting.
- Press the ▲▼ buttons or turn the Ⓞ dial to select an item, then press the ◀▶ buttons to adjust the setting.
If you select [Start] and press the Ⓗ button, the slideshow starts with your settings. - Pressing the MENU button restores the slideshow screen.
Checking the Focus
You can magnify the area of a recorded image that was inside the AF frame or the area of a face that was detected to check the focus.
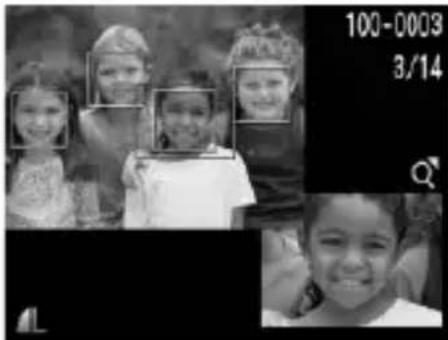
text_image
100-0003 3/14Press the DISP. button, and switch to the focus check display (p. 45).
A white frame will appear where the AF frame or face was when the focus was set.
A gray frame will appear on a face detected during playback.
The area within the orange frame appears magnified.
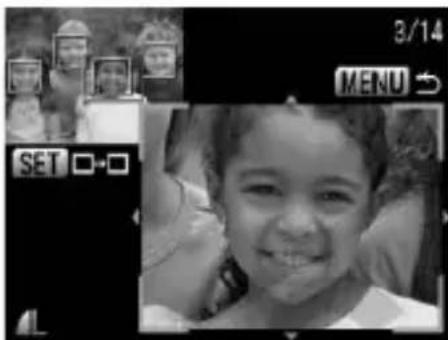
text_image
3/14 MENU SET □-□ 4Change the magnification level or location.
- Move the zoom lever toward once. - Use the zoom lever to change the display size, and the ▲▼◀▶ buttons to change the display position while checking the focus.
Switch frames.
- Pressing the FUNC. SET button will switch to a different frame.
- Pressing the MENU button resets the display to Step 1.

Magnifying Images
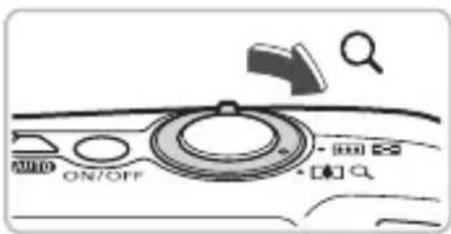
text_image
AUTO ON/OFF - [ ]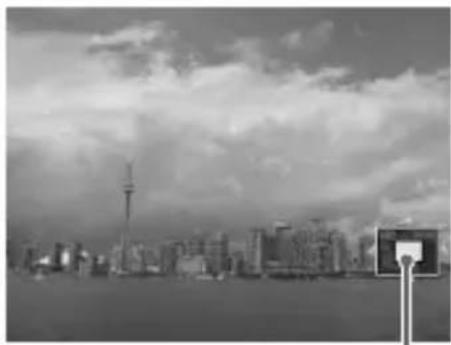
natural_image
Black-and-white cityscape featuring a prominent tower and waterfront, with cloudy sky and no visible text or symbols.Approximate Location of Displayed Area
Move the zoom lever toward 🔒.
● The display will zoom in on the image and, if you continue to hold the zoom lever, it will continue to zoom in up to a factor of 10x.
- If you press the ▲▼◀▶ buttons, you can move the location of the displayed area.
- Move the zoom lever toward ☐ to zoom out or return to Single Image Playback.
- If you turn the Ⓞ dial, you can switch images in the zoomed state.

Changing Image Transitions
You can select from three transition effects when switching between images in single image playback.
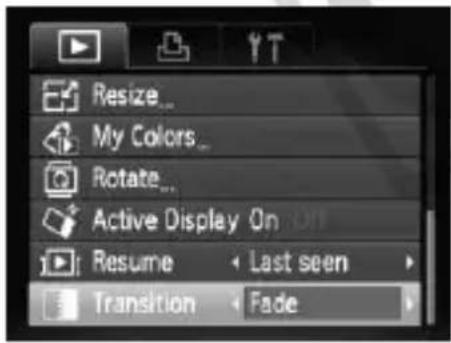
text_image
Resize... My Colors... Rotate... Active Display On Resume Last seen Transition FadeSelect [Transition].
Press the MENU button and select the ▶ tab, then select [Transition] and use the ◀ buttons to select a transition effect.
- Press the MENU button to accept the setting.
Viewing Images on a TV
Using the supplied AV cable, you can connect the camera to a TV to view images you have shot.
Items to Prepare
- Camera and TV
• AV cable supplied with the camera (p. 2)
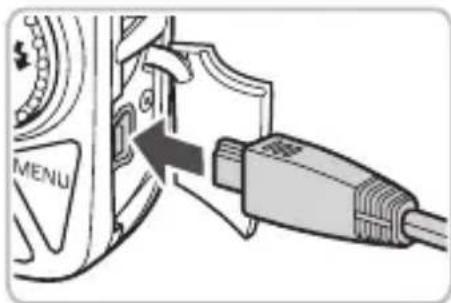
natural_image
Diagram of a connector with an attached USB cable, showing a switch and label 'MENU' (no text or symbols beyond the label)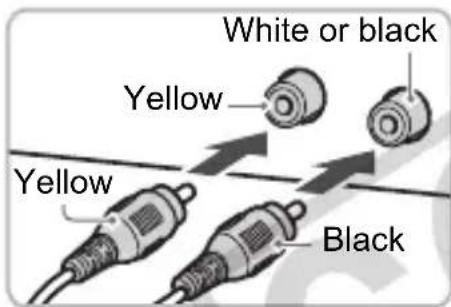
text_image
White or black Yellow Yellow Black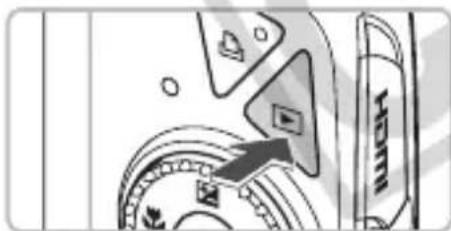
natural_image
Close-up of a mechanical component with a labeled arrow pointing to a circular feature (no readable text or symbols)Turn off the camera and TV.
Connect the camera to the TV.
Open the camera's terminal cover and fully insert the plug of the supplied AV cable into the camera's A/V OUT terminal.
Insert the cable plug fully into the video input terminals as shown in the illustration.
Turn on the TV and switch it to the input to which the cable is connected.
Turn on the camera.
Press the ▶ button to turn on the camera.
The image will appear on the TV (nothing will appear on the monitor of the camera).
After you finish viewing, turn off the camera and TV, and unplug the AV cable.

What if the images don't properly display on the TV?
Images will not display correctly if the camera's video output setting (NTSC/PAL) does not match the TV system. Press the MENU button, select the 🎨 tab and [Video System] to switch to the correct video system.
Viewing Images on a High-Definition TV
Use the separately sold HDMI cable HTC-100 to connect the camera with a high-definition TV for enhanced viewing experience.
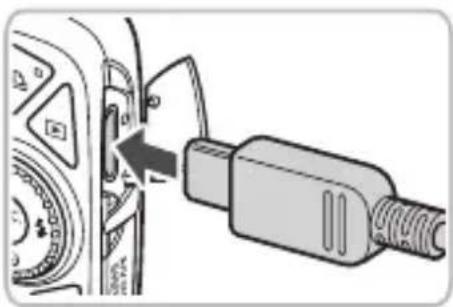
natural_image
Diagram of a device with a plug inserted into a control panel, showing no text or symbols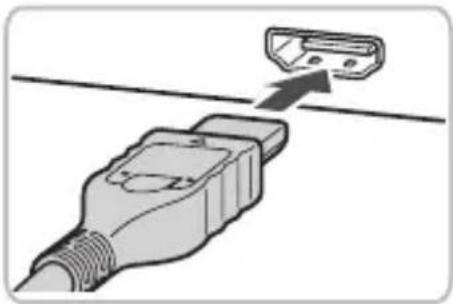
natural_image
Diagram of a plug connector with an arrow pointing to a terminal block (no text or symbols present)Turn off the camera and TV.
Connect the camera to the TV.
Open the camera's terminal cover and fully insert the plug of the supplied AV cable into the camera's HDMI OUT mini terminal.
Insert the cable plug fully into the TV's HDMI terminal as shown in the illustration.
- Follow Steps 3 – 4 on p. 111 to display the images.

Erasing All Images
You can select images and erase them in groups. Since erased images cannot be recovered, exercise adequate caution before erasing. Protected images (p. 116) cannot be erased.
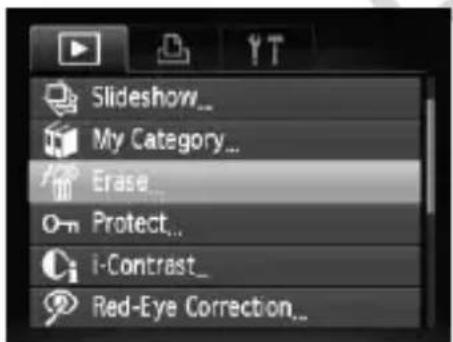
text_image
Slideshow... My Category... Erase... Protect... i-Contrast_ Red-Eye Correction...Select [Erase].
- Press the MENU button, select the ▶ tab and [Erase], and press the FUNC.SET button.
![CANON PowerShot SD970 IS - Select [Erase]. - 1](/content/2026/05/790000/images/4e64b7c619ee7e106989fe1b6510071cad9a8ad9d224159dc53e1195d4d279ea.jpg)
text_image
Erase Select... Select Range... All Images...Select a selection method.
- Press the ▲▼ buttons or turn the Ⓞ dial, select a selection method, and press the Ⓗ function SET button.
- Press the MENU button to return to the menu screen.
Selecting Images Individually
Select [Select].
- Follow Step 2 above to select [Select] and press the Ⓗ function. SET button.
![CANON PowerShot SD970 IS - Select [Select]. - 1](/content/2026/05/790000/images/682e2d183289428784631a3a35e3ddb2845b24f09e929d99758e481ae8b89788.jpg)
natural_image
Black-and-white cityscape photo with skyline, tower, and cloudy sky (no visible text or symbols)Select images.
- Press the ◀▶ buttons or turn the Ⓞ dial, select the image and press the Ⓗ function SET button.
Once set, will appear on the screen. - Pressing the Ⓗ button once more will cancel the selection, and √will disappear.
To select multiple images, repeat the above operation.
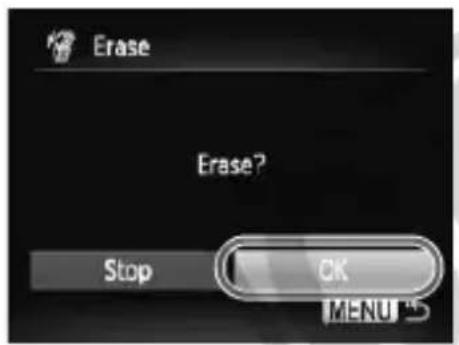
text_image
Erase Erase? Stop OK MENUPress the MENU button.
Erase.
- Press the ◀▶ buttons or turn the ⏻ dial, select [OK] and press the Ⓗ function SET button.
Select Range
text_image
Select Range SET First image MENU
natural_image
Black-and-white cityscape with a prominent tower and cloudy sky, no visible text or symbols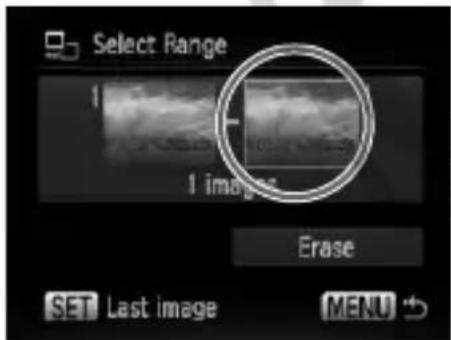
text_image
Select Range 1 images Erase SET Last image MENU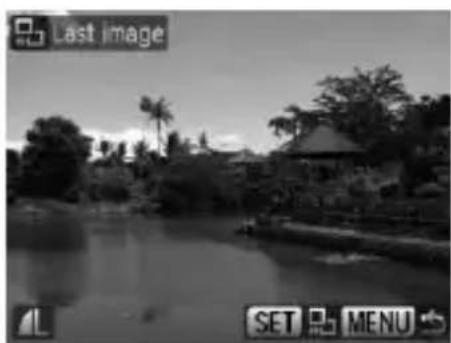
natural_image
Black-and-white landscape photo showing a pond with palm trees and a small house, no visible text or symbols.Select [Select Range].
● Follow Step 2 on p. 112 to select [Select Range] and press the FUNC.SET button.
Select the starting image.
- Press the FUNC. SET button.
- Press the ◆▶ buttons or turn the Ⓞ dial, select the image and press the Ⓗ function SET button.
Select the ending image.
- Press the ▶ button, select [Last image] and press the Ⓗ function SET button.
- You cannot select images before the first image.
- Press the ◀▶ buttons or turn the ⏱ dial to select an image, and press the Ⓗ button.
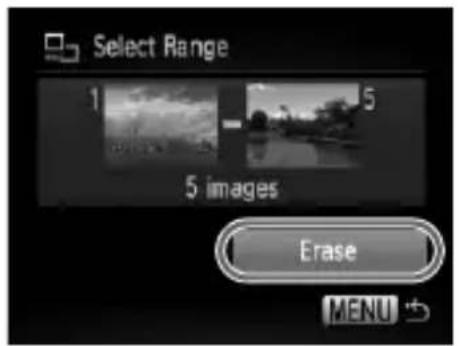
text_image
Select Range 1 5 5 images Erase MENUErase.
- Press the ▼ button to select [Erase], then press the Ⓗ button.

Select images with the Ⓞ dial
You can also select the first or last image by turning the Ⓞ dial when the upper screen in Steps 2 and 3 is displayed.
Select All Images
Select [All Images].
Follow Step 2 on p. 112 to select [All Images] and press the FUNC.SET button.
Erase.
- Press the ◀▶ buttons or turn the Ⓞ dial, select [OK] and press the Ⓗ function SET button.
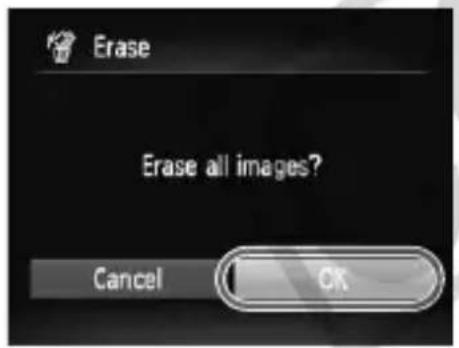
text_image
Erase Erase all images? Cancel OKOn Protecting Images
You can protect important images so that they cannot be erased by the camera (pp. 29, 112).
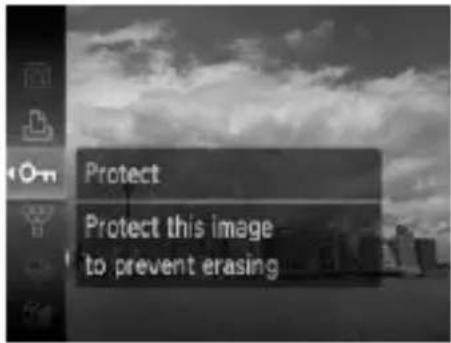
text_image
Protect Protect this image to prevent erasingSelect ON.
- Press the ⓕ FUNC. SET button to select ⏰, then press the ⓕ FUNC. SET button.
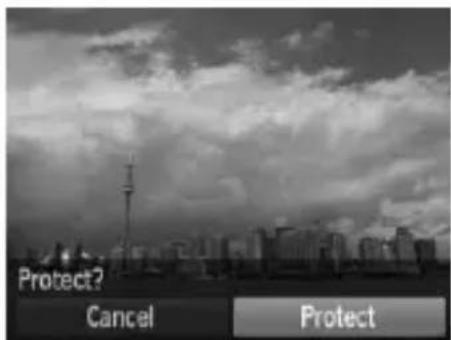
text_image
Protect? Cancel ProtectMake the setting.
- Press the ◀▶ buttons or turn the Ⓞ dial, select [Protect], and press the Ⓗ function button. Once set, will appear on the screen.

If you format the memory card (pp. 22, 52), protected images will also be erased.

- Protected images cannot be erased with the camera's erase function. To erase an image, cancel protection first.
- You can also protect images using the following method. Press the MENU button, select the ▶ tab, select [Protect]. Press the ⬤ function SET button to select [Select] and press the ⬤ function SET button, then press the ◀ buttons to select an image and press the ⬤ function SET button.
Select Range
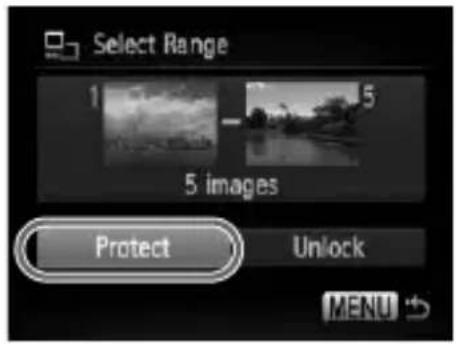
text_image
Select Range 1 5 5 images Protect Unlock MENUSelect [Protect].
- Press the MENU button, select the ▶ tab and [Protect], and then press the FUNC.SET button.
Select [Select Range].
- Press the ▲▼ buttons or turn the Ⓞ dial, select [Select Range], and press the FUNC. SET button.
- Follow Steps 2 and 3 on p. 114 to select the range.
Protect images.
Press the ▼ button, select [Protect] and press the Ⓗ button.
Select All Images
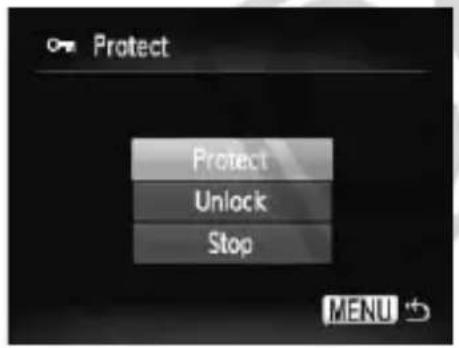
text_image
Protect Protect Unlock Stop MENUSelect [All Images].
Follow Step 2 above to select [All Images] and press the FUNC. SET button.
Protect images.
- Press the ▲▼ buttons or turn the dial, select [Protect] and press the button.

You can unlock groups of protected images if you select [Unlock] in Step 2, while in [Select Range] or [All Images].

Organizing Images by Category (y Category)
You can categorize images. You can also use the categorized images in the following functions.
• Viewing Images in Filtered Playback (p. 106), Slideshow (p. 107), Erase All (p. 112), Protect (p. 116), Print Settings (DPOF) (p. 127)
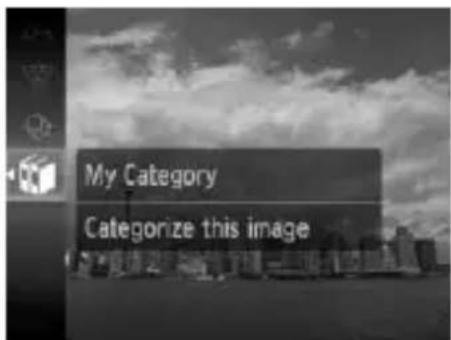
text_image
My Category Categorize this imageSelect
- Press the Ⓗ button to select ☐, then press the Ⓗ button.
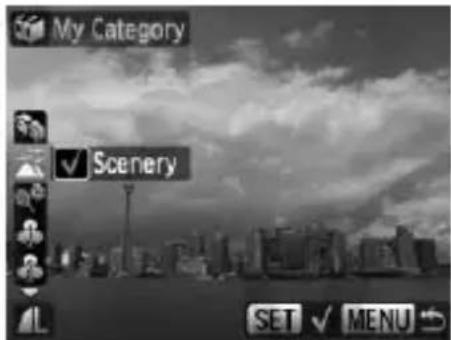
text_image
My Category ✓ Scenery SET ✓ MENU ↙Make the setting.
Press the ▲▼ buttons, select a category and press the Ⓗ️ button.
Once set, will appear on the screen.
To select multiple images, press the ◀▶ buttons or turn the Ⓞ dial to select an image, then repeat the above operation.

Images are automatically categorized by shooting condition as they are shot.
: Images shot in ♂, ♂, ♂ modes or images with faces detected when the [AF Frame] is set to [Face AiAF] will be categorized to ♂
: Images shot in AUTO and detected as or or images shot in 🙏, 🚫, will be categorized to .
: Images shot in ⚙️, ⚠️, ⚣️, ⚙️ will be categorized to ⚙️.
Selecting Images Individually
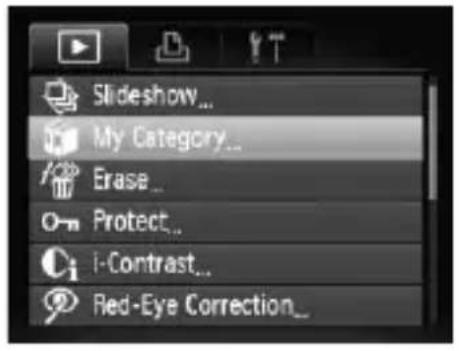
text_image
Slideshow... My Category... Erase... Protect... i-Contrast... Red-Eye Correction_Select [My Category].
- Press the MENU button, select the ▶ tab and [My Category], and press the Ⓗ FUNC. SET button.
![CANON PowerShot SD970 IS - Select [My Category]. - 1](/content/2026/05/790000/images/cb75f45cabd179e6eae56060e1a49908312263a15e3ed66f42edc408d4ba0270.jpg)
text_image
My Category Select... Select Range...Select [Select].
- Press the ▲▼ buttons or turn the dial, select [Select], and press the button.
Make the setting.
- Follow Step 2 to set the category. - Press the MENU button to return to the menu screen.
Select Range
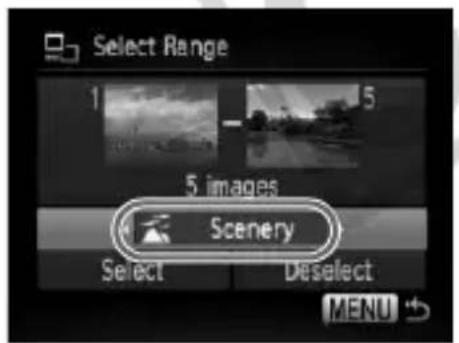
text_image
Select Range 1 5 5 images Scenery Select Deselect MENUSelect [Select Range].
Follow Step 2 above to select [Select Range] and press the FUNC. SET button.
- Follow Steps 2 and 3 on page 114 to select images.
- Press the ▼ button to select an item, then press the ◀ buttons or turn the Ⓞ dial, and select a type.
Select the setting.
- Press the ▼ button to select [Select] and press the Ⓗ function SET button.

If you select [Deselect] in Step 2, you can deselect all of the images in the [Select Range] category.

Rotating Images
You can change the orientation of an image and save it. Movies with a resolution of 1200 cannot be rotated.
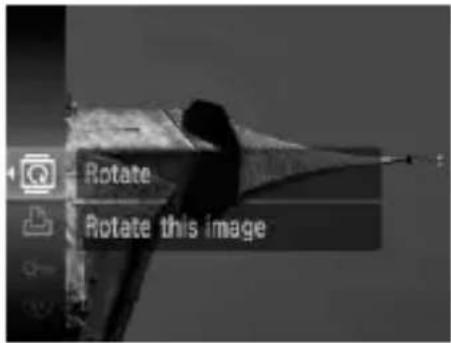
text_image
Rotate Rotate this imageSelect ☐.
- Press the Ⓗ button to select 🔒, then press the Ⓗ button.
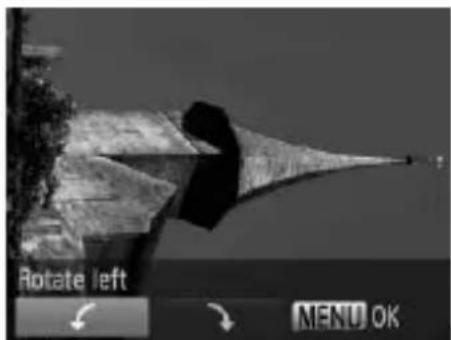
text_image
Rotate left MENU OKMake the setting.
- Press the ◀▶ buttons to select the rotation direction and press the FUNC SET button.
The image will rotate 90^ in the selected direction. - Press the MENU button to return to the menu screen.
Select All Images
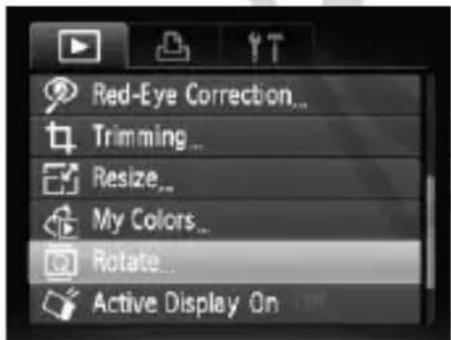
text_image
Red-Eye Correction... Trimming... Resize... My Colors... Rotate... Active Display OnSelect [Rotate].
Press the MENU button and select the ▶ tab, then select [Rotate] and press the ⏚ button.
![CANON PowerShot SD970 IS - Select [Rotate]. - 1](/content/2026/05/790000/images/0d4bed155cd8ecfbafe97face44f4b986947527710efca78925c52824322c66d.jpg)
natural_image
Black-and-white photo of a pointed structure with a tree on top, viewed from above (no visible text or symbols)Rotate the image.
- Press the ◀▶ buttons or turn the Ⓞ dial to select an image to rotate.
The image will rotate 90° with each press of the FUNC. SET button.
If you want to rotate multiple images, press the ◀▶ buttons or turn the Ⓞ dial, select an image and repeat the operations above. - Press the MENU button to return to the menu screen.

Resizing Images
You can resize images to a lower pixel setting and save the resized image as a separate file.
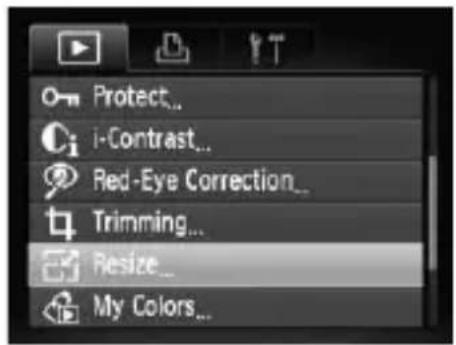
text_image
Protect.. i-Contrast.. Red-Eye Correction.. Trimming.. Resize.. My Colors..Select [Resize].
- Press the MENU button and select the tab, then select [Resize] and press the button.
Select an image.
- Press the ◀▶ buttons or turn the Ⓞ dial, select the image and press the Ⓗ function SET button.
Select an image size.
- Press the ◀▶ buttons or turn the Ⓞ dial to select an option, then press the button.
The [Save new image?] screen will appear.
Save the new image.
Press the ◀▶ buttons or turn the Ⓞ dial to select [OK] and press the Ⓗ function SET button. The image will be saved as a new file.
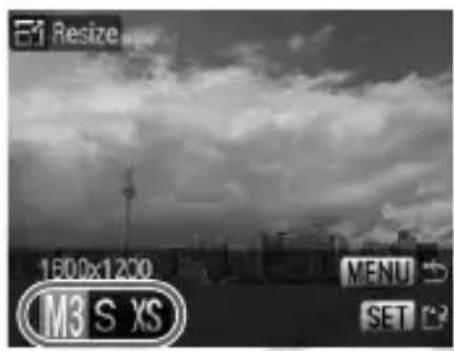
text_image
81 Resize 1600x1200 M3 S XS MENU SET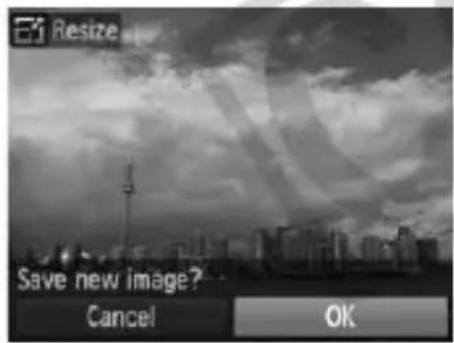
text_image
Resize Save new image? Cancel OKDisplay the new image.
- When you press the MENU button, the [Display new image?] screen will appear. If you press the ◀▶ buttons or turn the ○ dial to select [Yes] and press the ⏚ function SET button, the saved image will display.
text_image
Display new image? Yes No
- You cannot resize an image to a larger size.
- You cannot resize images taken with the W and XS settings.
4 Trimming
You can cut out a portion of a recorded image and save it as a new image file.
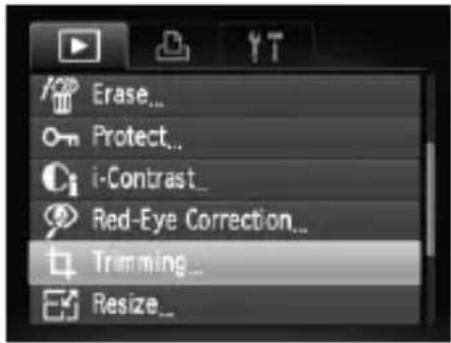
text_image
Erase... Protect... i-Contrast_ Red-Eye Correction... Trimming... Resize...Trimming Area
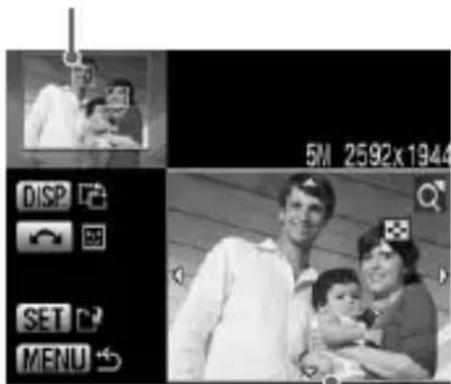
text_image
5M 2592x1944 DISP SET MENUTrimming Area Display
Recorded pixels
after trimming

text_image
0.3M 640x48Ω DISP SET MENUSelect [Trimming].
- Press the MENU button, select the ▶ tab and [Trimming], then press the Ⓗ function SET button.
Select an image.
- Press the ◀▶ buttons or turn the Ⓞ dial, select the image and press the FUNC. SET button.
Adjust the trimming area.
A frame will appear around the portion of the image to be trimmed.
The original image will display in the upper left and the trimmed image will display in the lower right.
If you move the zoom lever to the left or right, you can change the frame size.
If you press the ▲▼◀▶ buttons, you can move the frame.
If you press the DISP. button, you can change the vertical/horizontal orientation of the frame.
In an image with a detected face, a gray frame will appear around faces located in the upper left of the frame, and the frame can be used for trimming. You can switch between frames by turning the ☐ dial.
After pressing the Ⓗ️ button, press the ◀️ buttons or turn the ⏱️ dial to select [OK], and press the Ⓗ️ button.
Save as a new image and display.
● Perform Steps 4 and 5 on p. 121.

• W and images cannot be trimmed.
- Trimming is only possible for images shot at aspect ratio 4:3 (vertical 3:4).
- The number of recorded pixels in a trimmed image will be smaller than before trimming.

Adding Effects with the My Colors nction
You can change the color of an image and save it as a separate image. Refer to p. 77 for details on each menu item.
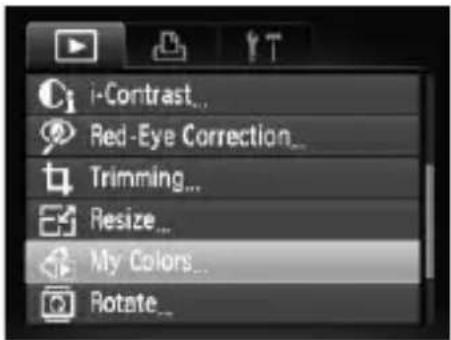
text_image
i-Contrast... Red-Eye Correction... Trimming... Resize... My Colors... Rotate...Select [My Colors].
- Press the MENU button, select the ▶ tab and [My Colors], and press the Ⓗ function SET button.
Select an image.
- Press the ◀▶ buttons or turn the dial to select the image and press the button.
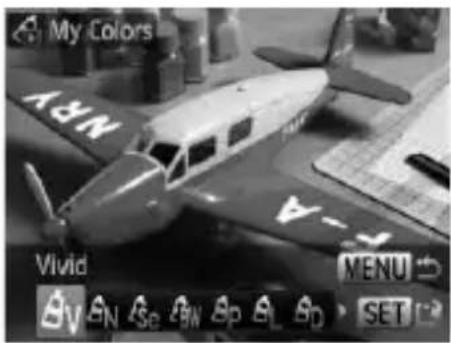
text_image
My Colors NRY Vivid MENU SETSelect a menu option.
Press the ◀▶ buttons or turn the Ⓞ dial to select an option, then press the button.
After selecting the menu option, you can zoom the image by following the operations in “Q Magnifying Images” (p. 110).
If you press the Ⓗ button during magnified display, you can switch to the original image. Pressing the MENU button restores the menu screen.
Save as a new image and display.
● Perform Steps 4 and 5 on p. 121.

- If you repeatedly change the color of an image, the quality will gradually deteriorate and you may not achieve the expected color.
- The coloration of images changed with this function may vary from those recorded with the My Colors function (p. 77).
Ci Making Dark Subjects Appear Brighter (i-Contrast)
Detects and compensates for dark sections of subjects or people's faces and saves the image as a separate file. You can select 4 levels of correction: [Auto], [Low], [Medium] or [High].
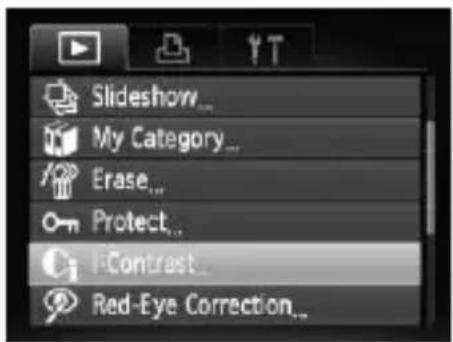
text_image
Slideshow... My Category... Erase... Protect... Contrast... Red-Eye Correction...Select [i-Contrast].
- Press the MENU button, select the ▶ tab and [i-Contrast], then press the Ⓗ function SET button.
Select an image.
- Press the ◀▶ buttons or turn the 🔧 dial to select the image and press the button.
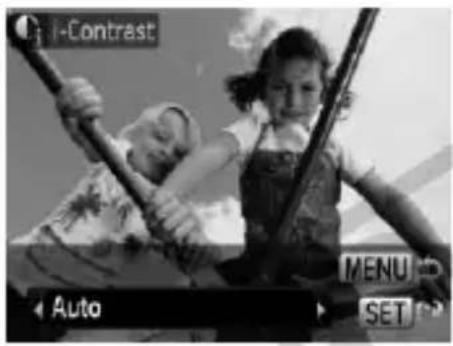
text_image
i-Contrast Auto MENU SETSelect an option.
Press the ◀▶ buttons or turn the Ⓞ dial to select an option, then press the button.
Save as a new image and display.
Perform Steps 4 and 5 on p. 121.

What if the image wasn't corrected by the [Auto] option as well as you would like?
Select [Low], [Medium] or [High] and adjust the image.
![CANON PowerShot SD970 IS - What if the image wasn't corrected by the [Auto] option as well as you would like? - 1](/content/2026/05/790000/images/681ec7a95a9e148c9a8b879876f8e34a945fdd9bcad13e7cab2289e4096e850f.jpg)
- Under some conditions, the image may appear coarse or the exposure setting may not be suitable.
• Repeatedly adjusting the same image may cause the quality to deteriorate.
![CANON PowerShot SD970 IS - What if the image wasn't corrected by the [Auto] option as well as you would like? - 2](/content/2026/05/790000/images/d71e9ff9e40d6e30e778a4c7555b26fd8abcfc503d0fd7813ee7abbb0415f494.jpg)
Correcting the Red-Eye Effect
You can automatically correct red eyes in images and save them as new files.
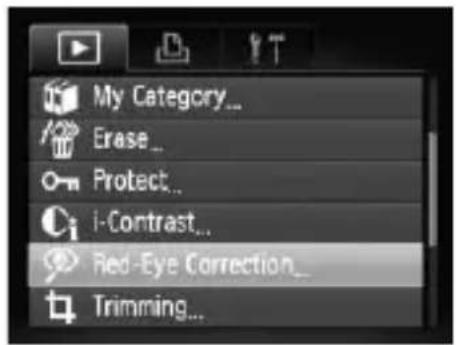
text_image
My Category... Erase... Protect... i-Contrast... Red-Eye Correction_ Trimming...Select [Red-Eye Correction].
- Press the MENU button, select the ▶ tab and [Red-Eye Correction], then press the Ⓗ function button.
The [Red-Eye Correction] screen will appear.
Select an image.
- Press the ◀▶ buttons or turn the Ⓞ dial, select the image.
- You can zoom the image using the procedures in “Q Magnifying Images” (p. 110).
Correct the image.
Press the FUNC. SET button.
Frames appear at the corrected areas. You can zoom the image using the procedures in "Q Magnifying Images" (p. 110).
Save as a new image and display.
- Press the ▲▼◀▶ buttons or turn the dial to select [New File], and press the button.

The image will be saved as a new file.
- Display the new image using the operation in Step 5 on p. 121.

• Some images may not be properly corrected.
- When [Overwrite] in Step 4 is selected, the uncorrected image is overwritten with the corrected data, erasing the original image.
- Protected images cannot be overwritten.
Printing from the Print List (DPOF)
You can add images to the print list (DPOF) directly after shooting or while in playback by pressing the 📁 button. You can print from a print list simply by connecting your camera and printer. These selection methods comply with the DPOF (Digital Print Order Format) standards.
Easily Add Images to the Print List
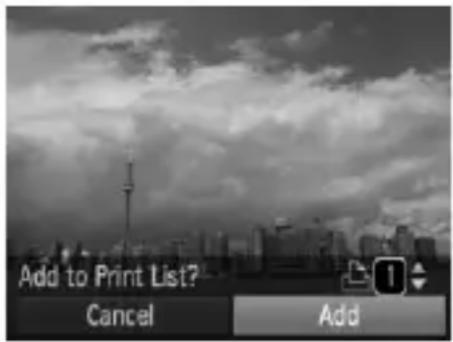
text_image
Add to Print List? Cancel AddSelect an image.
- Press the ◀▶ buttons or turn the Ⓞ dial to select the image.
Press the 📁 button (videos will be excluded).
Print list.
- Press the ▲▼ buttons and select the number of prints, press the ◀▶ buttons or turn the ⏻ dial to select [Add] and press the Ⓗ️ button.
To remove an image from the print list, select the added image and press the button, then press the ◀▶ buttons or turn the dial to select [Remove] and press the FUNC SET button.
Print Added Images
The following examples use the Canon SELPHY series printers. Please also refer to the Personal Printing Guide.
Number of copies to print
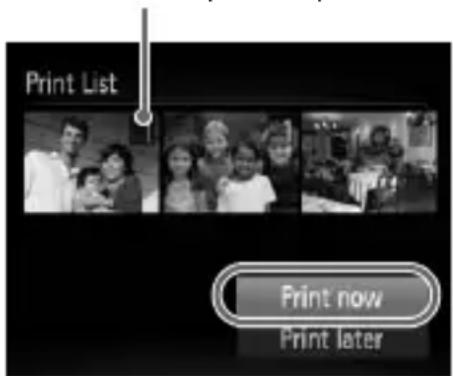
text_image
Print List Print now Print laterConnect the camera to the printer (p. 30).
Print.
- Press the ▲▼ buttons, select [Print now] and press the Ⓗ️ button.
Printing will start. - If you stop the printer during printing and start again, it will start from the next print.
Selecting Images for Printing (DPOF)
You can select certain images on a memory card for printing (up to 998 images) and specify the number of print copies so they can be printed together or processed at a photo developer service. You can then print all the selected images at once or take the memory card to a photo developer to order prints. These selection methods comply with the DPOF (Digital Print Order Format) standards.
Print Settings
You can set the print type, date and file number. These settings apply to all images selected for printing.
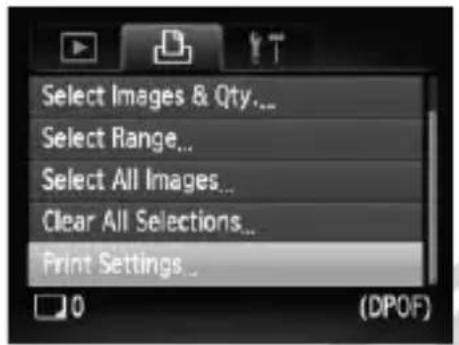
text_image
Select Images & Qty... Select Range... Select All Images... Clear All Selections... Print Settings...Select [Print Settings].
- Press the MENU button and select the tab, then select [Print Settings] and press the FUNC.SET button.
Adjust the settings.
Press the ▲▼ buttons or turn the Ⓞ dial to select a menu item, then press the ◀▶ buttons to select an option.
Pressing the MENU button accepts the settings and restores the menu screen.
| Print Type | Standard | Prints one image per page. |
| Index | Prints several reduced size images per page. | |
| Both | Prints both standard and index formats. | |
| Date | On Prints | the date from the shooting information. |
| Off – | ||
| File No. | On Prints | the file number. |
| Off – | ||
| Clear DPOF data | On Removes all print settings after printing. | |
| Off – | ||

- Some printers or photo developer services may not be able to reflect all of the print settings in the output.
- may display when using a memory card with print settings set by a different camera. These settings will be overwritten by those set by your camera.
- Images with the date embedded always print with the date, regardless of the [Date] setting. As a result, some printers may print the date twice on these images if [Date] is also set to [On].

- With [Index] selected, the [Date] and [File No.] options cannot be set to [On] at the same time.
- The date will be printed in the style set in the [Date/Time] function in the tab (p. 19).
Selecting the Number of Copies
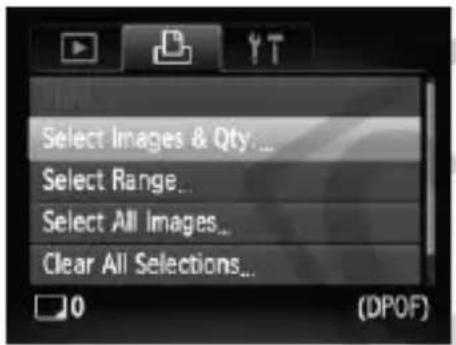
text_image
Select Images & Qty... Select Range... Select All Images... Clear All Selections... 0 (DPOF)Select [Select Images & Qty.].
- Press the MENU button and select the tab, then select [Select Images & Qty.] and press the FUNC.SET button.
Select an image.
Press the ◀▶ buttons or turn the Ⓞ dial to select an image, then press the button.
You will be able to set the number of print copies.
- If you select [Index], appears on the screen.
- Press the FUNC. SET button again to deselect the images. will disappear.
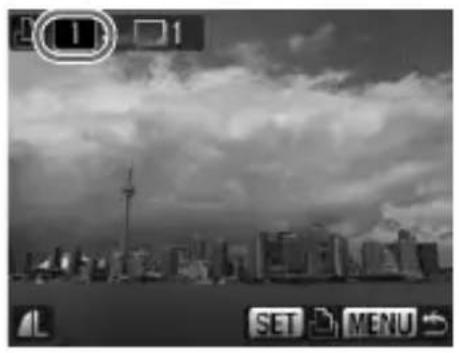
natural_image
Black-and-white cityscape photo with a prominent tower and skyline under cloudy sky (no visible text or symbols)Set the number of prints.
- Press the ▲▼ buttons or turn the Ⓞ dial to set the number of prints (maximum 99).
- Repeat Steps 2 and 3 to select other images and the number of prints for each.
- You cannot set the number of print copies for Index prints. You can only select which images to print in Step 2.
Pressing the MENU button accepts the settings and restores the menu screen.
Select Range
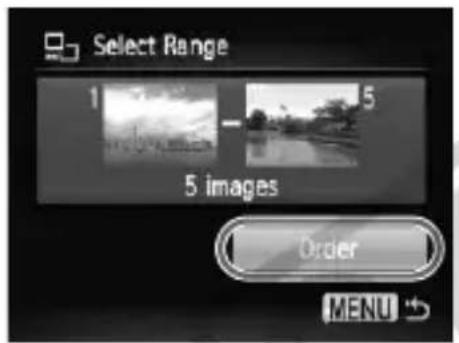
text_image
Select Range 1 5 - 5 images Order MENUSelect [Select Range].
Select [Select Range] in Step 1 on p. 128 and press the FUNC.SET button.
Select images according to Steps 2 and 3 on p. 114.
Make print settings.
Press the ▲▼ buttons, select [Order] and press the Ⓗ️ button.
Set All Images to Print Once
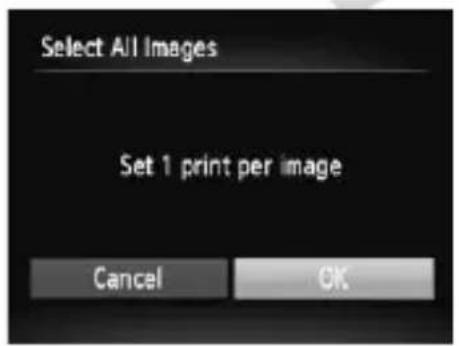
text_image
Select All Images Set 1 print per image Cancel OKSelect [Select All Images].
- Select [Select All Images] from the screen in Step 1 on p. 128 and press the FUNC.SET button.
Make print settings.
- Press the ◀▶ buttons or turn the Ⓞ dial, select [OK] and press the Ⓗ function SET button.
Clearing All Selections
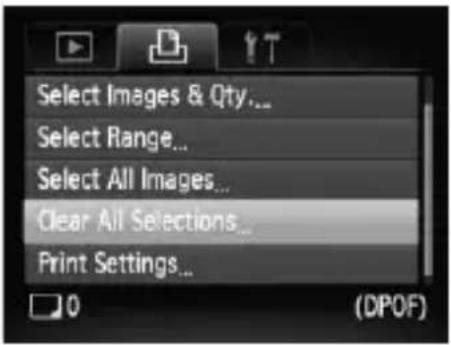
text_image
Select Images & Qty... Select Range... Select All Images... Clear All Selections... Print Settings... 0 (DPOF)Select [Clear All Selections].
- Select [Clear All Selections] in Step 1 on p. 128, and press the FUNC.SET button.
- Press the ◀▶ buttons or turn the ⏻ dial to select [OK], then press the Ⓗ function button.
All selections will be cleared.
Customizing the Camera
You can customize various functions to suit your shooting preferences. The first part of this chapter explains convenient and commonly used functions. The latter part explains how to change shooting and playback settings to suit your purposes.
text_image
COChanging Functions
You can customize convenient and commonly used functions from the tab (p. 48).
Turning off the Power Saving Function
You can set the power saving function (p. 53) to [Off]. Setting it to [On] is recommended to save battery power.
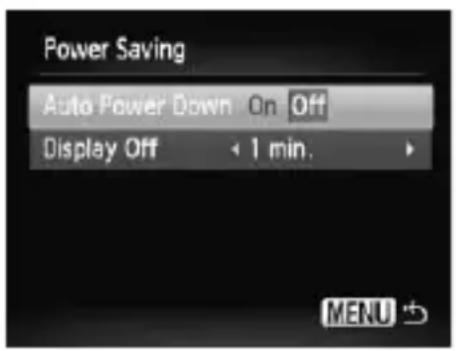
text_image
Power Saving Auto Power Down On Off Display Off 1 min. MENU- Select [Power Saving], then press the button.
- Press the ▲▼ buttons or turn the Ⓞ dial to select [Auto Power Down], then use the ◀▶ buttons to select [Off].
- If you set the Power Saving function to [Off], be careful not to forget to turn off the camera after use.

Setting the Screen Shut-Off Time
You can adjust the time the screen takes to shut off automatically (p. 53). This also works when [Auto Power Down] is set to [Off].
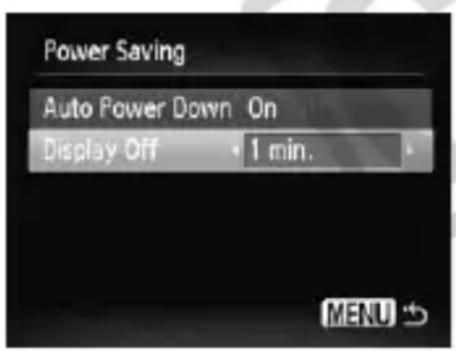
text_image
Power Saving Auto Power Down On Display Off 1 min.Select [Power Saving], then press the Ⓗ button.
- Press the ▲▼ buttons or turn the Ⓞ dial to select [Display Off], then use the ◀▶ buttons to select a time.
In order to save battery power, it is recommended to select less than [1 min.].
Using the World Clock
When traveling abroad, you can record images with local dates and times simply by switching the time zone setting if you pre-register the destination time zones. You can enjoy the convenience of not having to switch the Date/Time settings.
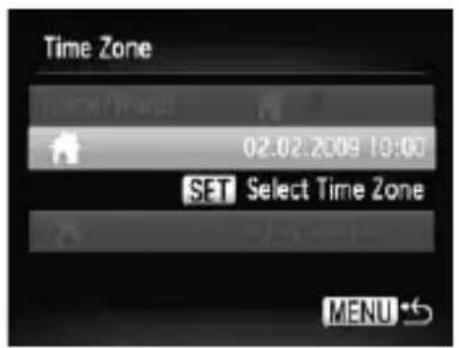
text_image
Time Zone 02.02.2009 10:00 SET Select Time Zone MENU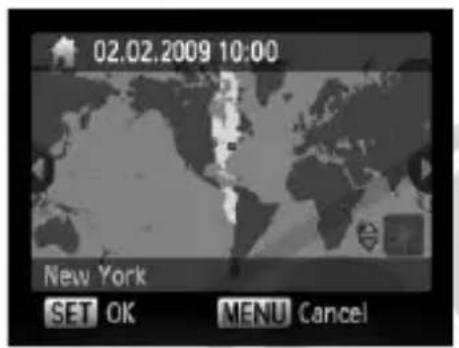
text_image
02.02.2009 10:00 New York SET OK MENU Cancel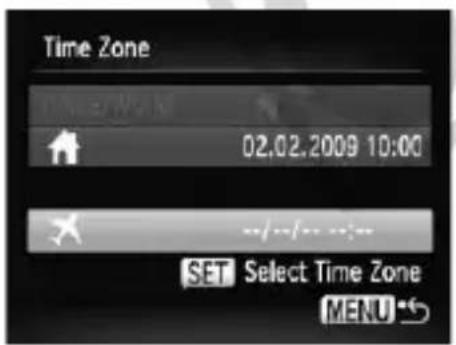
text_image
Time Zone 02.02.2009 10:00 SET Select Time Zone MENU *5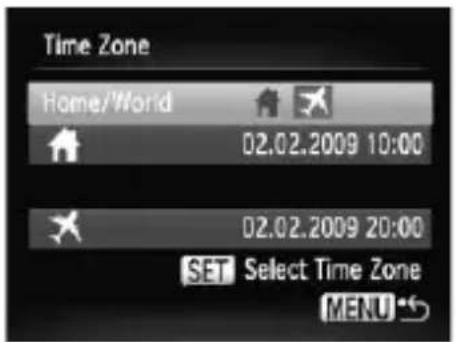
text_image
Time Zone Home/World 02.02.2009 10:00 02.02.2009 20:00 SET Select Time Zone MENU*5Set the home time zone.
- Select [Time Zone] and press the button.
- When setting this for the first time, confirm the information that displays on the screen at the left, and press the FUNC.SET button.
- Press the ◀▶ buttons or turn the ⏻ dial to select the home time zone, then press the Ⓗ function button. To set daylight saving time (adds 1 hour), press the ▲▼ buttons to select ✿.
Set the world time zone.
- Press the ▲▼ buttons or turn the Ⓞ dial to select → then press the Ⓗ function SET button.
- Press the ◀▶ buttons or turn the Ⓞ dial to select the destination time zone, then press the Ⓗ function SET button.
- You can also set the daylight saving time as in Step 1.
Select the world time zone.
- Press the ▲▼ buttons or turn the Ⓞ dial and select [Home/World].
- Press the ◀▶ buttons to select ✗, then press the MENU button.
will appear in the [Time Zone] or shooting screen (p. 44).

If you change the date or time in the and date will automatically change.

setting, (p. 19), your time
Turning off Hints & Tips
When you select an item in the FUNC. menu or when using the ▲▼◀▶ buttons, hints and tips display. You can turn off this function.
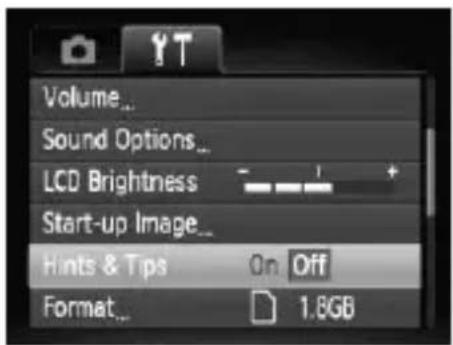
text_image
Volume... Sound Options... LCD Brightness Start-up Image... Hints & Tips On Off Format... 1.8GB- Select [Hints & Tips] and press the ◀▶ buttons to select [Off].
Changing the File Number Assignment
Images you shoot are automatically assigned file numbers in the order they were taken, from 0001 – 9999, and saved to folders of up to 2,000 images. You can change the file number assignment.
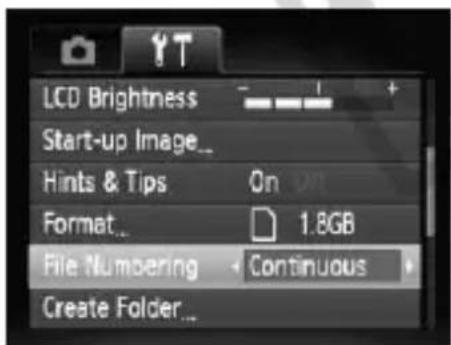
text_image
LCD Brightness Start-up Image... Hints & Tips On Format... 1.8GB File Numbering Continuous Create Folder...- Select [File Numbering], then press the ◀▶ buttons to select an option.
| Continuous | Even if you shoot using a new memory card, the file numbers are assigned consecutively until an image with the number 9999 is taken/saved. |
| Auto Reset | If you replace the memory card with a new one, file numbering begins with 0001 again. |

- If you use a memory card already containing images, the newly assigned file numbers may continue the existing numbering for both the [Continuous] and [Auto Reset] settings. If you want to start over with file number 0001, format the memory card before use (pp. 22, 52).
- Refer to the Software Starter Guide for information regarding folder structure or image types.
Creating a Folder
You can create new folders in which to save images.
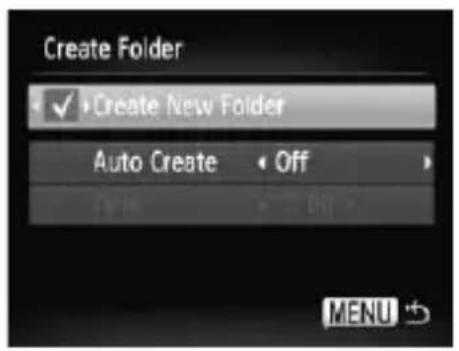
text_image
Create Folder ✓ Create New Folder Auto Create Off MENU- Select [Create Folder], then press the button.
- Select [Create New Folder], then press the ◀▶ buttons to select √
● Shots will be recorded into the new folder.
Creating Folders by Day and Time
You can set a day and time for folder creation.
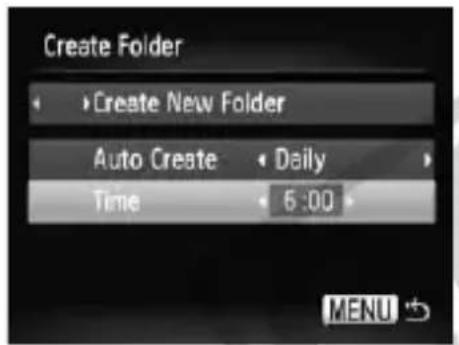
text_image
Create Folder ► Create New Folder Auto Create · Daily Time · 6:00 MENU- Select [Create Folder], then press the button.
- Select [Auto Create], then press the ◀▶ buttons to select an interval.
Select [Time], then press the ◀▶ buttons to set a time.
The new folder will be created on the set day and time. Images shot after the creation date are saved to the new folder.
Turning off Auto Rotate
When you play back images on the camera, images shot in vertical orientation automatically rotate and display vertically. You can turn off this function.
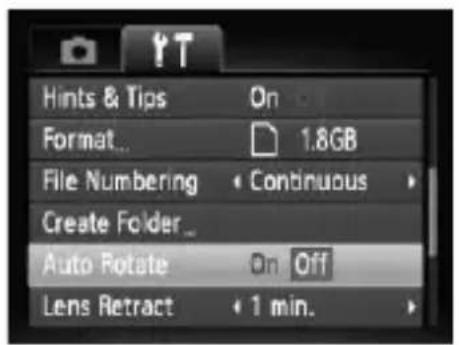
text_image
Hints & Tips On Format... 1.8GB File Numbering Continuous Create Folder_ Auto Rotate On Off Lens Retract 1 min.- Select [Auto Rotate], then press the ◀▶ buttons to select [Off].
Changing the Lens Retract Time
For safety reasons, the lens retracts about 1 minute after pressing the ▶ button when in a shooting mode (p. 27). You can set the retraction time to [0 sec.].
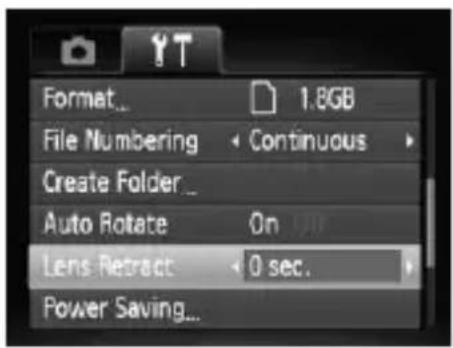
text_image
Format... 1.8GB File Numbering Continuous Create Folder Auto Rotate On Lens Retract 0 sec. Power Saving...- Select [Lens Retract], then press the ◀▶ buttons to select [0 sec.].
Changing Shooting Functions
If you set the mode switch to ☐, and the mode to P, you can change the settings in the ☐ tab (p. 48).

Before attempting to shoot using a function explained in this chapter in modes other than P mode, check if the function is available in those modes (pp. 150 – 153).
Turning off the Red-Eye Reduction Function
The red-eye reduction lamp lights in order to reduce the red-eye effect that occurs when shooting in dark conditions with the flash. You can turn off this function.
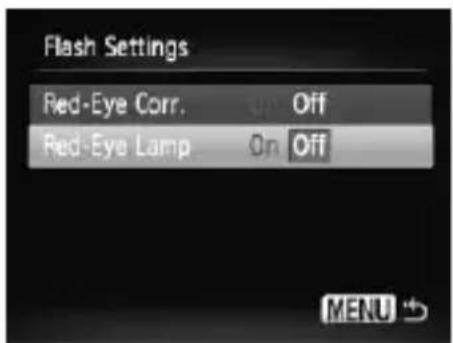
text_image
Flash Settings Red-Eye Corr. Off Red-Eye Lamp On Off MENU- Select [Flash Settings], then press the button.
- Press the ▲▼ buttons or turn the Ⓞ dial to select [Red-Eye Lamp], then press the ◀▶ buttons to select [Off].

Turning off the AF Assist Beam
The lamp will automatically light to assist focusing in low light conditions when you press the shutter button halfway. You can turn off the lamp.
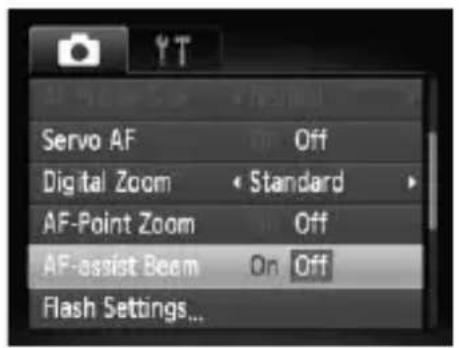
text_image
Servo AF Off Digital Zoom Standard AF-Point Zoom Off AF-assist Beem On Off Flash Settings...- Select [AF-assist Beam], then press the
◀▶ buttons to select [Off].
Changing the Image Display Time
You can change the length of time the images display directly after shooting.
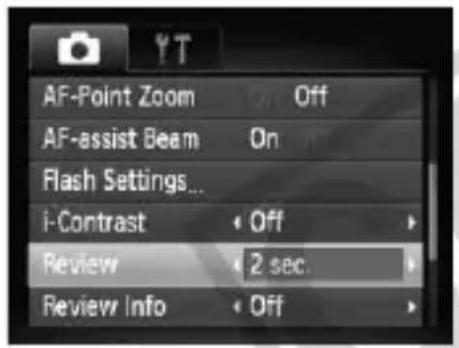
text_image
AF-Point Zoom Off AF-assist Beam On Flash Settings... i-Contrast Off Review 2 sec. Review Info OffSelect [Review], then press the ◀▶ buttons to select an option.
If you select [Off], the image will not display.
- If you select [Hold], the image displays until you press the shutter button halfway.
Changing the Image Display Right After Shooting
You can change the image display that appears after shooting.
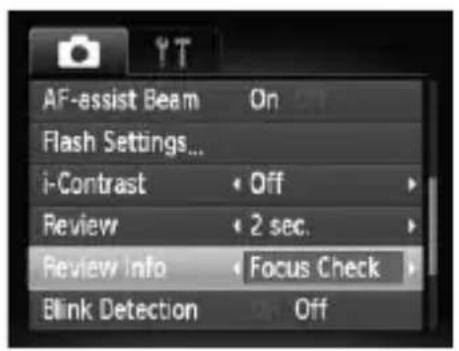
text_image
AF-assist Beam On Flash Settings... i-Contrast Off Review 2 sec. Review Info Focus Check Blink Detection Off- Select [Review Info], then press the ◀▶ buttons to select an option.
Detailed Displays detailed information (p. 45).
Focus Check The area inside the AF frame is magnified, allowing you to check the focus. The procedure is the same as in “Checking the Focus” (p. 109).
Displaying the Overlay
You can display gridlines for vertical and horizontal guidance, or a 3:2 guide to confirm the printable area for L size or postcard size prints.
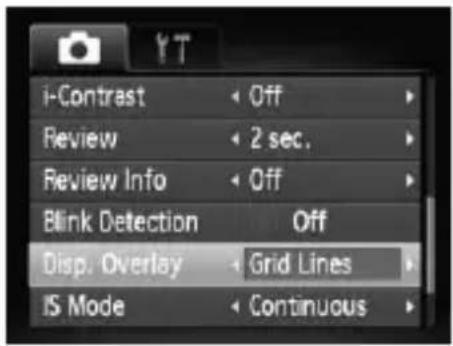
text_image
i-Contrast Review Review Info Blink Detection Disp. Overlay IS Mode Off 2 sec. Off Grid Lines Continuous- Select [Disp. Overlay], then press the ◀▶ buttons to select an option.
| Grid Lines A grid overlays the display. | |
| 3:2 Guide | The areas outside the 3:2 range are grayed out. This area will not print when printing on paper with a 3:2 aspect ratio. |
| Both | Both grid lines, and the 3:2 guide will display. |

- In mode, you cannot set [3:2 Guide] or [Both].
- Grid Lines will not be recorded on the image.
- The gray areas displayed with [3:2 Guide] are the areas that will not be printed. The actual image recorded will include the portion in the gray areas.
Changing the IS-Mode Settings
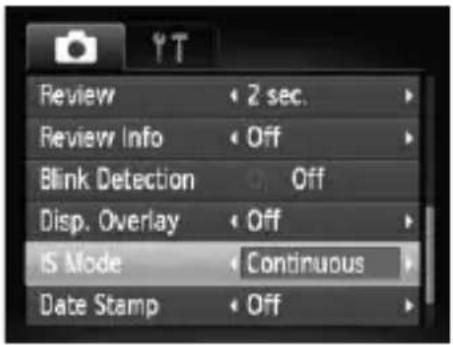
text_image
Review 2 sec. Review Info Off Blink Detection Off Disp. Overlay Off IS Mode Continuous Date Stamp Off- Select [IS Mode], then press the ◀▶ buttons to select an option.
| Continuous | Image stabilization is always on. You can confirm the result directly on the display, which makes it easier to check the composition or focus. |
| Shoot Only | Image stabilization is only active at the moment of shooting. |
| Panning | Image stabilization only counters up and down motion. This option is recommended for shooting objects moving horizontally. |

- If camera shake is too strong, attach the camera to a tripod. It is recommended to set the IS Mode to [Off] when the camera is fixed to a tripod.
- When using [Panning], hold the camera horizontally. Image stabilization does not work when the camera is held vertically.
Registering Functions to the Button
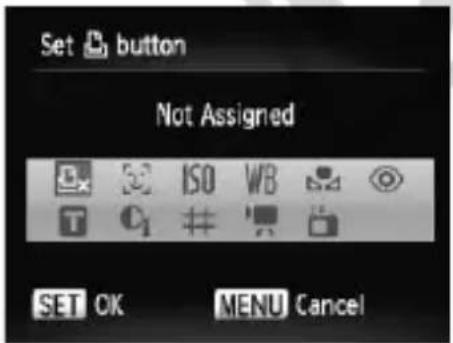
text_image
Set button Not Assigned SET OK MENU CancelSelect [Set button], then press the button.
- Press the ▲▼◀▶ buttons or turn the ○
dial to select the functions to register, then press the Ⓗ️ button.
- Pressing the 📁 button will call up the registered function.

- Select if you want to cancel a function.
- When this symbol is shown on the bottom right of an icon, the function cannot be used in the current shooting mode or function setting.
- In ☐, each press of the ☐ button records white balance data (p. 75), and the white balance settings also change to ☐
Changing Playback Functions
You can adjust the settings in the ▶ tab by pressing the ▶ button (p. 48).
Turning off Active Display
When you shake or tilt the camera gently you can display the next image or you can change the speed at which images switch. You can turn off this function.
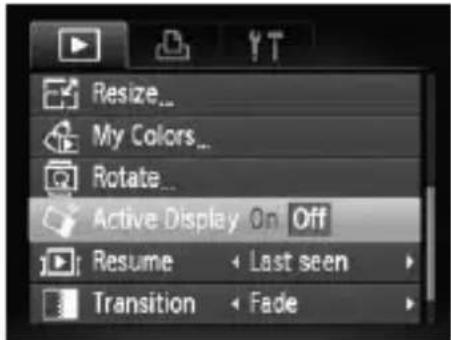
text_image
Resize... My Colors... Rotate... Active Display On Off Resume Last seen Transition Fade- Select [Active Display], then press the ◀▶ buttons to select [Off].
Selecting the Image that First Displays in Playback
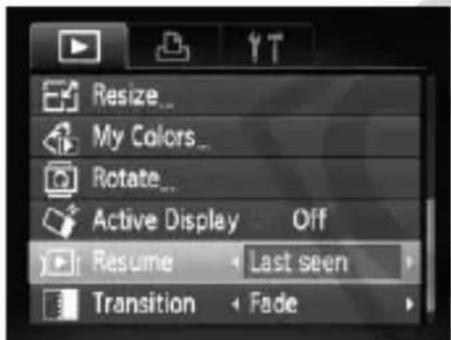
text_image
Resize... My Colors... Rotate... Active Display Off Resume Last seen Transition Fade- Select [Resume], then press the ◀▶ buttons to select an option.
| Last shot | Resumes with the most recently shot image. |
| Last seen | Resumes with the image last viewed. |
Changing the Start-up Image or Sound
In the 📋 tab, you can set one of your recorded images as the start-up image when the camera power is turned on, or change the sounds played for each camera operation with your recorded sounds.
Change Sounds
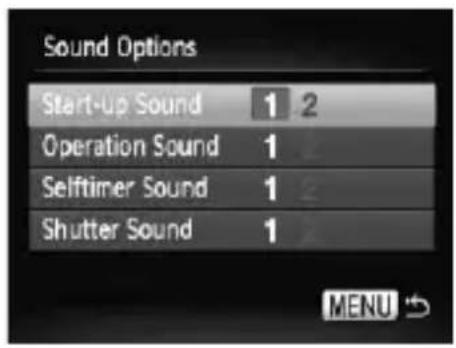
text_image
Sound Options Start-up Sound 1 2 Operation Sound 1 Selftimer Sound 1 Shutter Sound 1 MENU- Select [Sound Options], then press the button.
- Press the ▲▼ buttons or turn the Ⓞ dial to select an option.
- Press the ◀▶ buttons to change the sound.
1 Preset sound.
2 You can register your sounds using the supplied software (ZoomBrowser EX/ImageBrowser) (p. 142).
Changing the Start-up Screen
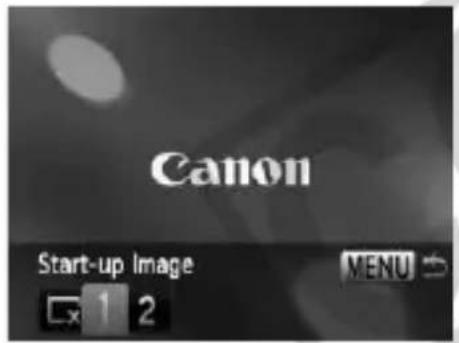
text_image
Canon Start-up Image MENU- Select [Start-up Image], then press the Ⓗ
button.
Press the ◀▶ buttons to change the image.
X No start-up image.
1 Preset image.
2 You can register images that you have taken.
Register the Start-up Screen
When you press the ▶ button and set the camera to playback mode, you can register sounds and images.
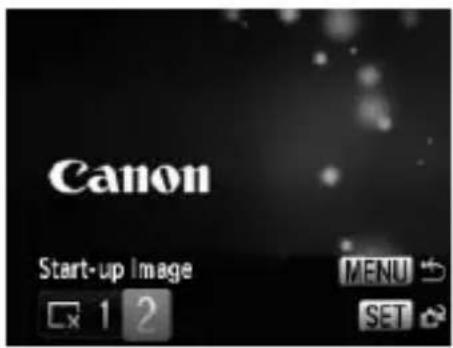
text_image
Canon Start-up Image MENU 1 2 SET- Select [Start-up Image], then press the Ⓗ button.
- Press the ◀▶ buttons to select [2], then press the ⬤️ button.
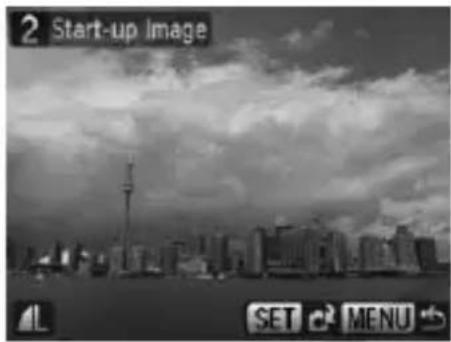
text_image
2 Start-up Image SET MENU- Press the ◀▶ buttons or turn the Ⓞ dial to select an image, then press the ⏚ button.
- Press the ◀▶ buttons or turn the ⏻ dial to select [OK], then press the Ⓗ function SET button to complete registration.

Register images or sounds saved on a computer
You can register images or sounds to the camera using the included software (ZoomBrowser EX / ImageBrowser). Refer to the Software Starter Guide for details.

Any previously registered start-up image will be overwritten when registering a new start-up image.
Useful Information
This chapter introduces how to use the AC adapter kit (sold separately), troubleshooting tips and contains lists of functions. The index also appears at the end.
natural_image
Black-and-white photo of two children sitting on a decorative bench, one in wedding attire and the other in a dress with flowers (no text or symbols visible)Using Household Power
If you use AC Adapter Kit ACK-DC30 (sold separately), you can use the camera without worrying about how much charge is left in the battery.
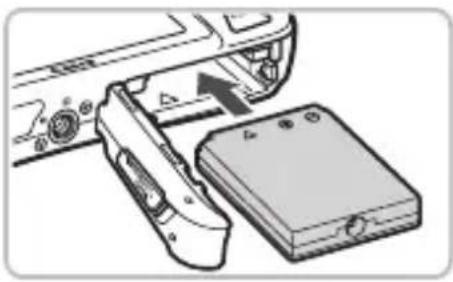
natural_image
Diagram of a device's internal components, showing a switch and battery with no visible text or symbolsInsert the coupler.
- Open the cover (p. 16) and insert the coupler as shown until it locks into place with a click.
- Close the cover (p. 16).
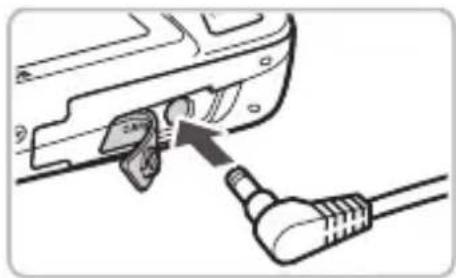
natural_image
Diagram showing a cable connector inserted into a device, with an arrow pointing to the connector (no text or symbols present)Plug the cord into the coupler.
Open the cover and fully insert the plug into the coupler.
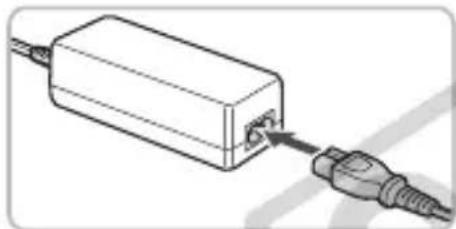
natural_image
Simple line drawing of a rectangular device connected to a cable, no text or symbols presentConnect the power cord.
Connect the power cord to the compact power adapter, then plug the other end into a power outlet.
You can turn the camera on to use it.
After you finish, turn off the camera and unplug the power cord from the power outlet.

Do not unplug the plug or power cord with the camera turned on. This could erase images you have taken or damage the camera.
Troubleshooting
If you think there is a problem with the camera, first check the following. If the items below do not solve your problem, contact a Canon Customer Support Help Desk as listed on the included customer support list.
Power
You pressed the power button, but nothing happened.
- Confirm that the battery is properly inserted (p. 16).
- Confirm that the memory card/battery cover is securely closed (p. 16).
- If the battery terminals are dirty, battery performance will decrease. Clean the terminals with a cotton swab and re-insert the battery several times.
Battery is consumed quickly.
- Battery performance decreases at low temperatures. Warm the battery by such methods as placing them in your pocket with the terminal cover on.
Lens will not retract.
- Do not open the memory card/battery cover while the power is on. After closing the memory card/battery cover, turn the power on then back off (p. 17).
TV output
Image is distorted or not showing on TV (p. 111).
Shooting
Cannot shoot.
- Set the mode switch to 📄 (p. 42).
- When in playback (p. 27), press the shutter button halfway (p. 23).
Screen does not display properly in dark places (p. 46).
Screen does not display properly while shooting.
Please note, the following will not be recorded in still images, but will be recorded in movies.
- When the camera is subjected to powerful light sources, the display may darken.
• Under fluorescent lighting, the screen may flicker. - When shooting bright light sources, a bar of light (purplish red) may appear on the screen.
The ↩ icon blinks when you try to shoot (p. 26).

appears when the shutter button was pressed halfway (p. 59).
- Set [IS Mode] to [Continuous] (p. 139).
- Set the flash to ↓ (p. 69).
- Increase the ISO speed (p. 74).
- Attach the camera to a tripod.
Image is blurred.
- Press the shutter button halfway to focus, then shoot (p. 23).
- Shoot the subject within the focusing distance (p. 157).
- Set the [AF-assist Beam] to [On] (p. 137).
- Confirm that functions which you do not intend to use (macro, etc.) are not set.
- Shoot using the focus lock or AF lock (pp. 80, 84).
Even when you press the shutter button halfway, the frame does not appear, and the camera does not focus.
- If you center on the light and dark contrasting area of the subject and press the shutter button halfway, or repeatedly press the shutter button halfway, the frame will appear and the camera will focus.
Subject is too dark.
- Set the flash to ↓ (p. 69).
- Adjust the brightness with exposure compensation (p. 76).
- Adjust the brightness with the i-Contrast function (pp. 89, 124).
- Use the AE lock, or spot metering to shoot (p. 87).
Subject is too bright (overexposed).
- Set the flash to Ⓧ (p. 59).
- Adjust the brightness with exposure compensation (p. 76).
- Use the AE lock, or spot metering to shoot (p. 87).
- The subject is too bright due to ambient lighting.
Image is dark even though the flash fired (p. 26).
- Increase the ISO speed (p. 74).
- Shoot within an appropriate distance for flash photography (p. 69).
Image taken using the flash is too bright (overexposed).
- Shoot within an appropriate distance for flash photography (p. 69).
- Set the flash to ⬆ (p. 59).
White dots appear on the image when shooting with the flash.
• Light from the flash has reflected off dust particles or other objects in the air.
Image appears rough or grainy.
- Shoot with the ISO speed on a lower setting (p. 74).
- Depending on the shooting mode, when shooting in a high ISO speed the image may appear rough or grainy (p. 58).
Eyes appear red (p. 90).
- Set the [Red-Eye Lamp] to [On] (p. 136). When shooting with the flash, the lamp (on the front of the camera) lights (p. 42), and for approximately 1 second while the camera is reducing red-eye, it is not possible to shoot. It is more effective if the subject is looking directly at the lamp. Even better results can be obtained by increasing the lighting in indoor settings or approaching closer to the subject.
Recording images to the memory card takes a long time, or continuous shooting slows down.
- Perform a low-level format of the memory card in the camera (p. 52).
When you can't make settings for shooting functions or FUNC. menu.
- The items in which settings can be made differ depending on the shooting mode. Refer to “Functions Available in Each Shooting Mode” (pp. 150 – 151).
Shooting movies
Correct shooting time does not display, or stops.
- Format the memory card in the camera, or use a memory card capable of recording at high speeds. Even when the shooting time does not display properly, the video recorded will be the length that it was actually shot (p. 33).
! displayed on the LCD monitor, and shooting ended automatically.
Camera's internal memory was insufficient. Try one of the following.
- Perform a low-level format of the memory card in the camera (p. 52).
• Lower the recorded pixels (p. 98). - Use a memory card capable of recording at high speeds.
Zoom does not operate.
- You can use the digital zoom while recording, but not the optical zoom (p. 100).
Playback
Cannot play back images or movies.
- If the file name or folder structure is changed on a computer, you may not be able to play back images or movies. Refer to the Personal Printing Guide for information regarding folder structure or file names.
Playback stops, or audio cuts out.
- Use a card that has been formatted on this camera (p. 22).
- If you copy a movie to a memory card that reads slowly, playback may interrupt momentarily.
- You may experience frame dropping and audio breakup when playing back a movie on a computer with insufficient system resources.
List of Messages that Appear on the Screen
If error messages appear on the LCD monitor, try one of the following solutions.
No memory card
- The memory card is not installed in the correct direction. Install the memory card in the correct direction (p. 16).
Card locked!
- The SD memory card or SDHC memory card's write protect tab is set to "Lock". Unlock the write protect tab (p. 18).
Cannot record!
- You attempted to shoot an image without the a memory card, or with a memory card installed incorrectly. Install the memory card in the correct direction when shooting (p. 16).
Memory card error (p. 52)
- Contact your Canon Customer Support Help Desk as there may be a problem with the camera.
Memory card full
- There is not enough free space on the memory card to shoot (pp. 24, 55, 67, 81) or edit images (pp. 121 – 125). Erase the images (pp. 29, 112) to open space for new images, or insert an empty memory card (p. 16).
Change the battery pack (p. 16)
No image.
- There are no images recorded on the memory card that can be displayed.
Protected! (p. 116)
Unidentified Image/Incompatible JPEG/Image too large./RAW
- Unsupported images or data, or corrupted image data cannot be displayed.
- Images manipulated on a computer, that have had their file name changed, or have been taken with a different camera may not display.
Cannot magnify!/Cannot rotate/Cannot modify image/Cannot register this image!/Cannot modify/Cannot assign to category
- Incompatible images cannot be magnified (p. 110), rotated (p. 120), edited (pp. 121 – 125), registered to the start-up screen (p. 142), categorized (p. 118), or added to a print list (p. 127).
- Images manipulated on a computer, that have had their file name changed, or have been taken with a different camera may not be magnified, rotated, edited, registered to the start-up screen, categorized, or added to a print list.
- Movies cannot be magnified (p. 110), edited (pp. 121 – 125), or registered to the start-up screen (p. 142).
Cannot select!
- When selecting the selection range (pp. 114, 117, 119), you tried to select a starting image that was after the last image or you tried to select an ending image that was before the starting image.
- You tried to select more than 501 images (pp. 114, 117, 119).
Too many marks.
- You selected more than 998 images to print settings. Select less than 998 images (p. 127).
Cannot complete!
- Print settings could not be saved correctly. Reduce the number of settings and try again (p. 127).
Naming error!
- The file name could not be created because there is an image with the same name as the folder that the camera is attempting to create, or the highest possible file number has already been reached (p. 134). In the ⚡† menu, change [File Numbering] to [Auto Reset] (p. 134) or format the memory card (pp. 22, 52).
Communication error
- Images could not be transferred to the computer or printed due to the large amount of images (approx. 1000) stored on the memory card. Use a commercially available USB card reader to transfer the images. Insert the memory card into the printer's card slot to print.
Lens error, restart camera
- A lens error was detected. Press the power button to turn the camera off and back on (p. 42). If this error message continues to display, contact your Canon Customer Support Help Desk as there may be a problem with the lens.
- This error can occur if you hold the lens while it is in motion or when using it in a location with excessive dust or sand in the air.
Exx (xx: number)
- A camera error was detected. Press the power button to turn the camera off and back on (p. 42).
- If an error code displays directly after taking a picture, the shot may not have been recorded. Check image in playback mode.
- If this error code reappears, note the number and contact your Canon Customer Support Help Desk as there may be a problem with the camera.
Please tilt camera gently!
- The camera was moved with too much force so that the images could not advance. Tilt the camera gently (p. 27).
Functions Available in Each Shooting Mode
*1 Possible settings: 0 – 30 seconds in [Delay], and 1 – 10 shots in [Shots].
*2 Not selectable. However always set to [On] when the flash fires.
*3 FE lock is not available. *4 ISO3200 (p. 58) is set by default. *5 MS set by default.
*6 W is not selectable.
*1 Always [On]. *2 Available when ↓ is selected. *3 AiAF only.
*4 [Panning] is not available.
| Item Options/Summary Ref. Page | ||
| Mute On/Off* p. 49 | ||
| Volume Set all operation sounds (5 levels). p. 49 | ||
| Sound Options | Set the sounds played for each camera operation. | p. 141 |
| LCD Brightness Set within a range of ±2. p. 50 | ||
| Start-up Image Add an image as start-up image. | pp. 141, 142 | |
| Hints & Tips On*/Off p. 134 | ||
| Format Formats card, erasing all data. pp. 22, 52 | ||
| File Numbering Continuous*/Auto Reset p. 134 | ||
| Create Folder Create New Folder/Auto Create | p. 135 | |
| Auto Rotate | On*/Off p. 135 | |
| Lens Retract | 1 min.*/0 sec. | p. 136 |
| Power Saving | Auto Power Down: On*/OffDisplay Off: 10, 20 or 30 sec./1*, 2 or 3 min. | pp. 53, 132 |
| Time Zone | Home/World | p. 133 |
| Date/Time | Date and time settings. | p. 20 |
| Video System | NTSC/PAL | p. 111 |
| Language | Select displayed language. | p. 21 |
| Reset All | Returns camera to default settings. | p. 51 |
* Default setting

Playback Menu
| Item Options/Summary Ref. Page | ||
| Slideshow Plays back images automatically. p. 107 | ||
| My Category Categorizes images. p. 118 | ||
| Erase Erases images. p. 112 | ||
| Protect Protects images. p. 116 | ||
| i-Contrast Corrects dark portions of images. p. 124 | ||
| Red-Eye Correction Corrects red eyes in images. p. 125 | ||
| Trimming Trims portions of images. p. 122 | ||
| Resize Resizes and saves images. | p. 121 | |
| My Colors | Adjusts colors in images. | p. 123 |
| Rotate | Rotates images. | p. 120 |
| Active Display | On*/Off | p. 140 |
| Resume | Last seen*/Last shot | p. 140 |
| Transition | Scroll/ Slide/Fade/Off | p. 110 |
* Default setting

Print Menu
| Item Options/Summary Ref. Page | ||
| Displays printing screen. | p. 30 | |
| Select Images & Qty. | Selects individual images for printing. | p. 128 |
| Select Range | Selects starting and ending images for printing. | p. 129 |
| Select All Images | Selects all images for printing. | p. 129 |
| Clear All Selections | Cancels all settings for printing. | p. 130 |
| Print Settings | Sets the printing style. | p. 127 |
Handling Precautions
Equipment
- This camera is a high-precision electronic device. Do not drop it or subject it to strong impacts.
- Never place the camera close to magnets or motors that generate strong electromagnetic fields. Exposure to strong magnetic fields may cause malfunctions or corrupt image data.
- If water droplets have fallen or dirt is stuck on the camera or LCD monitor, wipe with a dry soft cloth or eyeglass wiper. Do not rub or apply force.
- Never use cleaners containing organic solvents to wipe the camera or LCD monitor.
- Use a commercially available blower brush to remove dust from the lens. For stubborn dirt contact the closest Canon Customer Support Help Desk as listed on the customer support leaflet supplied with your camera.
- When you move the camera rapidly from cold to hot temperatures, condensation may form on the internal or external surfaces of the camera. To avoid condensation, put the camera in an airtight, resealable plastic bag and let it adjust to temperature changes slowly before removing it from the bag.
- If condensation has formed, stop using the camera immediately. Continued use may damage the camera. Remove the battery and memory card, and wait until the moisture has completely evaporated before resuming use.
Memory Cards
- A memory card is a high-precision electronic device. Do not bend, apply force or subject it to strong impacts. Doing so may corrupt image data recorded on the memory card.
- Do not spill liquids on the memory card. Do not touch the memory card's terminals with your hands or metallic objects.
- Do not store memory cards near a TV, speakers or other devices that generate magnetic fields or static electricity. Doing so may corrupt image data recorded on the memory card.
- Do not store memory cards in hot, humid or dusty locations.
Specifications
Camera Effective Pixels. . . . . . . . . Approx. 12.1 million
Image Sensor 1/2.3-inch type CCD (Total number of pixels:
Approx. 12.4 million)
Lens 6.6 (W) - 33.0 (T) mm
35mm film equivalent: 37 (W) - 185 (T) mm
with the optical zoom)
LCD Monitor. 3.0-inch type TFT LCD color monitor with wide
viewing angle
Approx. 461,000 dots, Picture coverage 100%
AF Frame Mode.....Face AiAF/Center
Servo AF ...... On / Off
Focusing Range (from end of lens) .. Normal: 50 cm (1.6 ft.) – infinity
Macro: 2 - 50 cm (W) (0.79 in. - 1.6 ft.)
Infinity: 3 m (9.8 ft.) – infinity
Digital Macro: 2 – 10 cm (0.79 – 3.9 in.) (W)
Kids&Pets: 1 m (3.3 ft.) – infinity
Shutter . . . . . . . . . . . . . . . . Mechanical shutter and electronic shutter
Shutter Speed 1 - 1/1600 sec.
15 - 1/1600 sec. (Total shutter speed range)
Image Stabilization .... Lens-shift type
Metering Type . . . . . . . . . . . . . . . . . . . . . . . . . . . . . . . . . . . . . . . . . . . . . . . . . . . . . . . . . . . . . . . . . . . . . . . . . . . . . . . . . . . . . . . . . Evaluative, Center-weighted average or Spot
Exposure Compensation . . . . . . . ±2 stops in 1/3-stop increments
ISO speed
(Standard Output Sensitivity,
Recommended Exposure Index) . . . .Auto, ISO 80 / 100 / 200 / 400 / 800 / 1600
White Balance . . . . . . . . . . . . . . . . . . . . . . . . . . . . . . . . . . . . . . . . . . . . . . . . . . . . . . . . . . . . . . . . . . . . . . . . . . . . . . . . . . . . . . . . . . . Auto, Day Light, Cloudy, Tungsten, Fluorescent,
Fluorescent H, Custom
Built-in Flash .... Auto, On, Slow Synchro, Off
- Red-eye reduction/Red-eye correction settings available
Built-in Flash Range 30 cm - 3.5 m (1.0 - 11 ft.) (W)/
30 cm - 2.0 m (1.0 - 6.6 ft.) (T)
Shooting Modes. . . . . . . . . . . . . . . . . . . . . . . . . . . . . . . . . . . . . . . . . . . . . . . . . . . . . . . . . . . . . . . . . . . . . . . . . . . . . . . . . . . . . . . . . . . . . . . . . . . . . Auto, Program AE, Portrait, Night Snapshot,
Kids&Pets, Indoor, Sunset, Creative Light Effect,
Fireworks, Long Shutter, Beach, Aquarium,
Foliage, Snow, ISO3200, Digital Macro, Zoom
Blur, Color Accent, Color Swap, Stitch Assist, Movie
Continuous Shooting ....Approx. 1.0 images/sec.
Self-timer ....Approx. 10 sec./Approx. 2-sec. delay, Custom
Timer, FaceSelf-Timer
i-Contrast ..... Off/Auto
Specifications
| Recording Media | SD memory card, SDHC memory card, MultiMediaCard, MMCplus memory card, HC MMCplus memory card |
| File Format. | Design rule for camera file system and DPOF compliant |
| Data Type | Still images: Exif 2.2 (JPEG)Movies: MOV (Image data: H.264, Audio data: Linear PCM) (Monaural) |
| Compression | Fine, Normal |
| Number of Recording Pixels | |
| (Still images) | Large: 4000 × 3000 pixelsMedium 1: 3264 × 2448 pixelsMedium 2: 2592 × 1944 pixelsMedium 3: 1600 × 1200 pixelsSmall: 640 × 480 pixelsWidescreen: 4000 × 2248 pixels |
| (Movies) | 1280 × 720 pixels (30 frames/sec.)640 × 480 pixels (30 frames/sec.)320 × 240 pixels (30 frames/sec.) |
| Number of Possible Shots | Approx. 270 images (Based on CIPA standardized measurement) |
| Playback Function | Single Image, Movie, Magnified Focus, Index, Magnified, Filtered, Slideshow, Active Display |
| Editing Function | Erase, Protect, My Category, Resize, My Colors, i-Contrast, Trimming, Rotate, Red-Eye Correction |
| Direct Print Type | PictBridge |
| Interface | Hi-Speed USB (Dedicated connector with unified type of digital, audio and video*)HDMI (HDMI Mini Connector)* mini-B compatibleVideo/Audio output: NTSC and PAL capable, monaural |
| Communication Settings | MTP, PTP |
| Power | Battery Pack NB-5L (rechargeable lithium-ion battery)AC adapter kit ACK-DC30 |
| Operating Temperatures | 0 – 40 °C (32 – 104 °F) |
| Operating Humidity | 10 – 90% |
| Dimensions (excluding protrusions) | .94.8 × 56.8 × 26.3 mm (3.73 × 2.24 × 1.04 in.) |
| Weight (camera body only) | Approx. 160 g (5.64 oz.) |
Battery Pack NB-5L
Type. Rechargeable lithium-ion battery
Voltage.... 3.7 V DC
Capacity....1120 mAh
Charging cycles .... Approx. 300 times
Operating temperature. . . . . . . . . . 0 - 40 °C (32 - 104 °F)
Dimensions 32.0 × 44.9 × 7.9 mm (1.26 × 1.77 × 0.31 in.)
Weight ..... Approx. 25 g (0.88 oz.)
Battery Charger CB-2LX/CB-2LXE
Rated input ....100 – 240 V AC (50/60 Hz), 0.085 A (100 V) – 0.05 A (240 V)
Rated output 4.2 V DC, 0.7 A
Charge time ....Approx. 2 hours 5 min.
Operating temperature....0 - 40 °C (32 - 104 °F)
Dimensions 57.5 × 81.6 × 21.0 mm (2.26 × 3.21 × 0.83 in.)
Weight ..... Approx. 65 g (2.29 oz) (CB-2LX)
Approx. 59 g (2.08 oz.) (CB-2LXE, excluding power cord)
- All data is based on tests by Canon.
- The finished product, or exterior may differ from this report.
About MPEG-4 Licensing
This product is licensed under AT&T patents for the MPEG-4 standard and may be used for encoding MPEG-4 compliant video and/or decoding MPEG-4 compliant video that was encoded only (1) for a personal and non-commercial purpose or (2) by a video provider licensed under the AT&T patents to provide MPEG-4 compliant video.
No license is granted or implied for any other use for MPEG-4 standard.
* Notice displayed in English as required.

text_image
RECYCLE RBRC Li-ion 1.800.822.8837USA and Canada only:
The Lithium ion/polymer battery that powers the product is recyclable.
Please call 1-800-8-BATTERY for information on how to recycle this battery.
When connecting to and using a household power outlet, use only AC Adapter Kit ACK-DC30 (rated input: 100 – 240 V AC 50/60 Hz, rated output: 4.3 V DC). Using anything else can cause fire, overheating, or electrical shock.
Numerics
3:2 Guide 138
A
AC Adapter Kit 40, 144
Accessories 38
AE Lock 87
AF Assist Beam 137
AF Frame 25
AF → Focus
AF Lock 84
Aquarium 57
AV Cable 2,111
B
Battery
Battery Charger 2, 14, 40
Charge Indicator 15
Charging 14
Date/Time Battery 20
Power Saving 53
Beach 57
Black and White Images 77
C
Camera
Default Settings 51
Holding 13
Camera Shake 59,139
Clock Functions 53
Color Accent 93, 98
Color Swap 94, 98
Components Guide 42
Compression Ratio
→ Image Quality (Compression Ratio)
Continuous Shooting 76
Control Dial 43
Creative Light Effect 65
D
Date and Time
Adding to Image 62
Changing 20
Date/Time Battery 20
Setting 19
Date/Time → Date and Time
Default Settings 51
DIGITAL CAMERA Solution Disk ..... 2, 35
Digital Macro 71
Digital Tele-Converter 61
Digital Zoom 60
Direct Print Button 30,139
Disp. Overlay 138
Display Language 21
DPOF 126, 127
E
Editing
i-Contrast 124
My Colors 123
Red-Eye Correction 125
Resizing (Making Images Smaller) ..... 121
Trimming 122
Enlarged Display 110
Erasing 29,112
Erasing All Images 112
Error Messages 148
Estimated Shooting Times 33,99
Exposure
AE Lock 87
Compensation 76
FE Lock 88
F
Face AiAF 82
Face Selection 86
Face Self-Timer 64
FE Lock 88
File Number 134
Fireworks 57
Flash
Off 59
On 69
Slow Synchro 88
Supplementary Flash 40
Focus
AF Frame 25
AF Frame Mode 82
AF Lock 84
AF-Point Zoom 83
Face Selection 86
Servo AF 84
Focus Check 109
Focus Lock 80
Foliage 58
Format (Formatting Memory Cards) ......22
FUNC. Menu
Basic Operations ......47
List 150
G
Grid Lines 138
H
High ISO Speed ....58, 74
High-Power Flash 40
Histogram 46
Household Power 144
|
i-Contrast 89, 124
Image
Editing → Editing
Erasing Images 29
Playback → Viewing
Protect 116
Image Quality (Compression Ratio) .....72
Indicator 43, 46
Indoor 57
Infinity 69
Interface Cable 2,30,35
ISO Speed 74
ISO3200 58
K
Kids&Pets 56
L
Lamp 42,137
Language Settings ......21
LCD Monitor → Screen
Long Shutter 92
M
Memory Card 16
Available Shots 18, 73, 99
Formatting 22, 52
Number of Recordable Images 73
Menu
Basic Operations ....48
List 152
Metering Mode 87
MMCplus/HC MMCplus Memory Card → Memory Card
Mode Switch 42
Movie
Editing 101
Estimated Shooting Times .....99
Image Quality (Frame Rate) .....98
Mode 98
Recording Pixels 99
Shooting Time ....33
Viewing (Playback) 34
MultiMedia Card → Memory Card
My Category 118
My Colors 77,123
N
Night Snapshot 56
Number of Shots 15, 73
P
Panoramic Image 96
PictBridge 30
Playback Button 27
Playback → Viewing
Portrait 56
Postcard Size 73
Power Button 42
Power → Battery
Power Saving 53
Print List (DPOF) 126
Printer 30, 31
Printing 30, 127
Program AE 68
R
Recording Pixels (Image Size) .....72
Index
Red-Eye
Correction 125
Red-Eye Correction 90
Reduction 136
Red-Eye Reduction Lamp 136
Resizing (Making Images Smaller) ..... 121
Rotating Images 120
s
Screen
Display Language 21
Information Displayed 44
Menu Operations 47
Screen 48
Switching the Display 44, 45
SD/SDHC Card → Memory Card
Self-Timer
10 second Self-Timer 63
Changing Delay and
Number of Shots 79
Face Self-Timer 64
Two Second Self-Timer 78
Sepia Tones 77
Servo AF 84
Shooting Date and Time → Date and Time
Shooting Using a TV Monitor 80
Shooting With Macro 70
Shutter Button 23
Slideshow 107
Snow 58
Software
DIGITAL CAMERA Solution Disk ..... 2, 35
Transferring Images to a Computer ..... 35
Sound 49
Stitch Assist 96
Strap 2,13
Sunset 57
Supplementary Flash 40
T
Terminal 30, 36, 111
Transferring Images to a Computer 35
Transition 110
Trimming 122
Troubleshooting 145
U
Using When Abroad 15
V
Video → Movie
Viewing (Playback)
Enlarged Display 110
Index Display 104
Single Image Playback 27
Slideshow 107
Viewing Images on a TV 111, 112
Viewing Images on a TV 111, 112
W
White Balance 75
Widescreen (Recording Pixels) ..... 72, 73
World Clock 133
Wrist Strap → Strap
Z
Zoom 24,32,60
Zoom Blur 85
FCC Notice
(Digital Camera, Model PC1357 systems)
This device complies with Part 15 of the FCC Rules. Operation is subject to the following two conditions;
(1) this device may not cause harmful interference, and
(2) this device must accept any interference received, including interference that may cause undesired operation.
Note: This equipment has been tested and found to comply with the limits for Class B digital devices, pursuant to Part 15 of the FCC rules. These limits are designed to provide reasonable protection against harmful interference in a residential installation. This equipment generates, uses and can radiate radio frequency energy and, if not installed and used in accordance with the instructions, may cause harmful interference to radio communications. However, there is no guarantee that interference will not occur in a particular installation. If this equipment does cause harmful interference to radio or television reception, which can be determined by turning the equipment off and on, the user is encouraged to try to correct the interference by one or more of the following measures:
- Reorient or relocate the receiving antenna.
- Increase the separation between the equipment and receiver.
- Connect the equipment into an outlet on a circuit different from that to which the receiver is connected.
- Consult the dealer or an experienced radio/TV technician for help.
The cable with the ferrite core provided with the digital camera must be used with this equipment in order to comply with Class B limits in Subpart B of Part 15 of the FCC rules.
Do not make any changes or modifications to the equipment unless otherwise specified in the manual. If such changes or modifications should be made, you could be required to stop operation of the equipment.
Canon U.S.A., Inc.
One Canon Plaza, Lake Success, NY 11042, U.S.A.
Tel No. (516) 328-5600
Canadian Radio Interference Regulations
This Class B digital apparatus complies with Canadian ICES-003.
Battery Charger CB-2LX
This product is not intended to be serviced. Should the product cease to function in its intended manner, it should be returned to the manufacturer or be discarded.
This power unit is intended to be correctly orientated in a vertical or floor mount position.
IMPORTANT SAFETY INSTRUCTIONS-SAVE THESE INSTRUCTIONS.
DANGER-TO REDUCE THE RISK OF FIRE OR ELECTRIC SHOCK, CAREFULLY FOLLOW THESE INSTRUCTIONS.
For connection to a supply not in the U.S.A., use an attachment plug adapter of the proper configuration for the power outlet.
This battery charger is for exclusive use with Battery Pack NB-5L (1.12 Ah). There is a danger of explosion if other battery packs are used.
Trademark Acknowledgments
• The SDHC logo is a trademark.
- HDMI, the HDMI logo and High-Definition Multimedia Interface are trademarks or registered trademarks of HDMI Licensing LLC.
Disclaimer
- Reprinting, transmitting, or storing in a retrieval system any part of this guide without the permission of Canon is prohibited.
- Canon reserves the right to change the contents of this guide at any time without prior notice.
- Illustrations and screenshots in this guide may differ slightly from the actual equipment.
- Every effort has been made to ensure that the information contained in this guide is accurate and complete. However, if you notice any errors or omissions, please contact the Canon customer service center indicated on the customer support list included with the product.
- The above items notwithstanding, Canon accepts no liability for damages due to mistaken operation of the products.