
NV Passenger (2017) - Automobile NISSAN - Free user manual and instructions
Find the device manual for free NV Passenger (2017) NISSAN in PDF.


| Product Type | Full-size passenger van |
| Model Year | 2017 |
| Manufacturer | Nissan |
| Seating Capacity | 12 passengers (4 rows) |
| Engine Options | VQ40DE 4.0L V6 or VK56VD 5.6L V8 |
| Fuel Type | Unleaded regular gasoline (87 AKI min) |
| Transmission | 5-speed automatic or 7-speed automatic |
| Drive | Rear-wheel drive |
| Dimensions (L x W x H) | Approx. 240 x 80 x 82 in (6096 x 2032 x 2083 mm) |
| Wheelbase | Approx. 146 in (3708 mm) |
| Curb Weight | Approx. 5500-6000 lbs (2495-2722 kg) |
| Fuel Tank Capacity | 28 gal (106 L) |
| Safety Systems | ABS, VDC, TPMS, front/side airbags, curtain airbags |
| Child Restraint System | LATCH anchors (2nd, 3rd, 4th rows) |
| Seat Configuration | Flexible seating: removable and interchangeable seats |
| Audio System | AM/FM radio, CD player, USB/AUX, Bluetooth® |
| Climate Control | Front and rear air conditioning |
| Power Windows | Available |
| Maintenance Interval | Oil change every 5,000-7,500 miles (8,000-12,000 km) |
| Warranty | 3 years/36,000 miles basic; 5 years/60,000 miles powertrain |
Frequently Asked Questions - NV Passenger (2017) NISSAN
User questions about NV Passenger (2017) NISSAN
0 question about this device. Answer the ones you know or ask your own.
Ask a new question about this device
Download the instructions for your Automobile in PDF format for free! Find your manual NV Passenger (2017) - NISSAN and take your electronic device back in hand. On this page are published all the documents necessary for the use of your device. NV Passenger (2017) by NISSAN.
USER MANUAL NV Passenger (2017) NISSAN
For your safety, read carefully and keep in this vehicle.
FOREWORDREADFIRST—THENDRIVESAFELY
WelcometothegrowingfamilyofnewNISSAN owners. This vehicle is delivered to you with confidence. It was produced using the latest techniques and strict quality control.
This manual was prepared to help you understand the operation and maintenance of your vehicles that you may enjoy my miles (kilometers) of driving pleasure. Pleasereadthrough this manual before operating your vehicle.
AseparateWarrantyInformationBooklet explainsdetailsaboutthewarrantiescoveringyourvehicle.The"Maintenance and schedules"sectionofthismanualexplains detailsaboutmaintainingandservicing yourvehicle.Additionally,aseparateCustomerCare/LemonLawBooklet(U.S.only) willexplainhowtoresolveanyconcerns youmayhavewithyourvehicle,aswellas clarifyyourrightsundryyourstate'slemon law.
ANISSANdealershipknowsyourvehiclebest. Whenyourequireanyserviceorhaveanyquestions,theywillbegladtoassistyouwiththe extensiveresourcesavailabletothem.
Inadditiontofactory-installedoptions,yourvehiclemayalsobeequippedwithadditionalaccessoriesinstalledpriortodelivery.ItisrecommendedthatyouvisitaNISSANdealerfordetailsconcerningtheparticularaccessorieswithwhichyourvehicleisequipped.Itisimportantthatyoufamiliarizeyourselfwithalldisclosures,warnings,cautionsandinstructionsconcerningproperuseofsuchaccessoriespriortooperatingthevehicleand/oraccessory.ItisrecommendedthatyouvisitaNISSANdealerfordetailsconcerningtheparticularaccessorieswithwhichyourvehicleisequipped.
Beforedrivingyourvehicle, pleasereadthis Owner's Manualcarefully. This will ensure familiarity with controls and maintenance requirements assisting you in the safe operation of your vehicle.
WARNING
IMPORTANT SAFETY INFORMATION REMINDERS!
Followtheseimportantdrivingrulesto helpensureasafeandcomfortabletrip foryouandyourpassengers!
- NEVERdriveundertheinfluenceofalcoholordrugs.
- ALWAYSObservepostedspeedlimits andneverdrivetoofastforconditions.
- ALWAYSgiveyourfullattentiontodriving andavoidusingvehiclefeaturesortaking otheractionsthatcoulddistractyou.
- ALWAYSuseyourseatbeltsandappropriatechildrestraintsystems.Preteen childrenshouldbeseatedintherearseat.
- ALWAYSprovideinformationaboutthe properuseofvehiclesafetyfeaturesto allooccupantsofthevehicle.
- ALWAYSreviewthisOwner'sManual forimportantsafetyinformation.
DRIVING
Thisvehiclewillhandleandmaneuverdifferentlyfromanordinarypassengervehiclebecauseithasahighercenterofgravity.Aswith othervehicleswithfeaturesofthistype,failure tooperatethisvehiclecorrectlymayresultin lossofcontroloranaccident. Besuretoread"Drivingprecautions"and "Avoidingcollisionandrollover"inthe"Starting anddriving"sectionofthismanual.
MODIFICATIONOFYOURVEHICLE
WARNING
Anymodificationsoralterationsofthis vehiclethatdonotcomplywiththe NISSANNV1500/2500/3500BodyBuildersGuidemayaffectthesafetyofthe vehiclewhichmayresultinacollision, seriouspersonalinjuryordeath.AnelectroniccopyoftheNISSANbodybuilders guideisavailableat www.nissancommercialvehicles.com.
Modificationsmadetothisvehicleby conversioncompaniesordealersmayaffectthefinalcertificationoftheengine, vehicleorequipment.Theconversion companyordealerhastheresponsibility tocertifythatthealteredvehicleand equipmentcompliesorcontinuestocomply with all applicable motor vehicle safety standards and emissions regulations.Theconversioncompanyor dealerisresponsibleformakingsurethe modifications or installed equipment doesnotaffectthesafetyofthevehicle.
NISSANdoesnotassumetheresponsibilityasthefinalstagemanufacturerfor modifiedoralteredvehicles.NISSANis notresponsibleforthefinalcertification, product liability claims, or warranty claims,resultingfromanycomponent, assembly, or system being altered. NISSANisnotresponsibleformodificationswhichcausethevehicletobecome non-compliantwithanyofthemotorvehicle safety standards, emissions regulations,ormodificationsthatcause thevehicletobeorbecomedefectiveor unsafe.
Yourvehicle'swarrantymaynotcover damage resulting from alterations, modifications, installation of non-approvedaccessories,orimproperinstallation of accessories. For additional information,refertoyour2017NV1500/2500/3500WarrantyInformationBooklet forcompletedetails.
WARNING
InstallinganaftermarketOn-BoardDiagnostic(OBD)plug-indevicethatusesthe portduringnormaldriving,for example remoteinsurancecompanymonitoring, remotevehiclediagnostics,telematicsor enginereprogramming,maycauseinterferenceordamagetovehiclesystems.We donotrecommendorendorsetheuseof anyaftermarketOBDplug-indevices,unlessspecificallyapprovedbyNISSAN.The vehicle warranty may not cover damage causedbyanyaftermarketplug-indevice.
WHENREADINGTHEMANUAL
This manual includes information for all features and equipment available on this model. Features and equipment in your vehicle may vary depending on model, trim level, options selected, order, date of production, region or availability. Therefore, you may find information about features or equipment that are not included or installed on your vehicle.
Allinformation, specifications and illustrations in this manual are those effective at the time of printing. NISSAN reserves their right to change specifications, performance, design or components suppliers without notice and without obligation. From timetotime, NISSAN may update or revise this manual to provide Owners with the most accurate information currently available. Please carefully read and retain with this manual all revision updates sent to you by NISSAN to ensure you have access to accurate and up-to-date information regarding your vehicle. Current version of vehicle Owner's Manuals and any updates can also be found in the Owner section of the NISSAN website at
https://owners.nissanusa.com/nowners/navigation/manualsGuide.IfyouhavequestionsconcerninganyinformationinyourOwner's Manual,contactNISSANConsumerAffairs.For contactinformation,refertotheNISSANCUSTOMERCAREPROGRAMpageinthisOwner's Manual.
IMPORTANTINFORMATIONABOUT THISMANUAL
Youwillseevarioussymbolsinthismanual.They areusedinthefollowingways:

WARNING
Thisisusedtoindicatethepresenceofa hazardthatcouldcausedeathorserious personalinjury.Toavoidorreducethe risk,theproceduresmustbefollowed precisely.

CAUTION
Thisisusedtoindicatethepresenceofa hazardthatcouldcauseminorormoderatepersonalinjuryordamagetoyourvehicle.Toavoidorreducetherisk,theproceduresmustbefollowedcarefully.

Ifyouseethissymbol, itmeans "Donotdothis" or "Donotletthishappen."

If you see easy symbols similar to these in an illustration, it mean the arrow point to the front of the vehicle.


Arrowsinanillustrationthataresimilartothese indicatemovementoration.


Arrowsinanillustrationthataresimilartothese callattentiontoanitemintheillustration.
CALIFORNIAPROPOSITION65 WARNING
WARNING
Engineexhaust, some of its constituents, and certain vehicle components contain or emit chemicals known to the State of Californiatocausecancer and birth defects or other reproductive harm. In addition, certain fluids contained in vehicles and certain product of component wear contain or remit chemicals known to the State of Californiatocausecancer and birth defects or other reproductive harm.
CALIFORNIAPERCHLORATE ADVISORY
Somevehicleparts,suchaslithiumbatteries,maycontainperchloratematerial.The followingadvisoryisprovided:"PerchlorateMaterial-specialhandlingmayapply. Foradditionalinformation,referto www.dtsc.ca.gov/hazardouswaste/perchlorate/".
Bluetooth®
((SiriusXM))
BLUETOOTH®isa trademarkownedby BluetoothSIG,Inc. andlicensedto VisteonandBosch.
SiriusXM® services requireasubscription aftertrialperiodand aresoldseparatelyor asapackage. The satelliteserviceis availableonlyinthe 48contiguousUSA andDC.SiriusXM® satelliteserviceis alsoavailablein Canada;see www.siriusxm.ca.
©2016NISSANNORTHAMERICA,INC.
Allrightsreserved.NopartofthisOwner's Manualmaybereproducedorstoredinaretrieval system,ortransmittedinanyform,orbyany means,electronic,mechanical,photocopying, recordingorotherwise,withoutthepriorwritten permissionofNissanNorthAmerica,Inc.
NISSANCUSTOMERCAREPROGRAM
NISSANCARES ...
Both NISSAN and your NISSAN dealer are dedicated to serving all your automotive needs. Your satisfaction with your vehicle and your NISSAN dealer are our primary concerns. Your NISSAN dealer is always available to assist you with all your automobile sales and service needs.
However, if there is something that your NISSAN dealer cannot assist you with or you would like to provide NISSAN directly with comments or questions, please contact the NISSAN Consumer Affairs Department usingourtoll-free number:
ForU.S.customers
877-NIS-NCV1
(877-647-6281)
ForCanadiancustomers
1-800-387-0122
The Consumer Affairs Department will ask for the following information:
-Yourname,address,andtelephonenumber
-Vehicleidentificationnumber(attachedtothe topoftheinstrumentpanelonthedriver's side)
-Dateofpurchase
-Currentodometerreading
-YourNISSANdealer'sname
-Yourcommentsorquestions
OR
YoucanwritetoNISSANwiththeinformationat:
ForU.S.customers
NissanNorthAmerica, Inc.
ConsumerAffairsDepartment
P.O.Box685003
Franklin,TN37068-5003
orviae-mailat:
nnaconsumeraffairs@nissan-usa.com
ForCanadiancustomers
NissanCanadaInc.
5290OrbitorDrive
Mississauga,OntarioL4W4Z5
orviae-mailat:
information.centre@nissancanada.com
If you prefer, visit us at:
www.nissanusa.com(forU.S.customers)or
www.nissan.ca(forCanadiancustomers)
WeappreciateyourinterestinNISSANandthankyouforbuyingaqualityNISSANvehicle.
Tableof Contents
| Illustratedtableofcontents | 0 |
| Safety—Seats,seatbeltsandsupplementalrestraintsystem | 1 |
| Instrumentsandcontrols | 2 |
| Pre-drivingchecksandadjustments | 3 |
| Monitor,climate,audio,phoneandvoicerecognitionsystems | 4 |
| Startinganddriving | 5 |
| Incaseofemergency | 6 |
| Appearanceandcare | 7 |
| Do-it-yourself | 8 |
| Maintenanceandschedules | 9 |
| Technicalandconsumerinformation | 10 |
| Index | 11 |
0Illustratedtableofcontents
Airbags, seatbeltsandchildrestraints. 0 - 2
Exteriorfront. 0 - 3
Exteriorrear....0 - 4
Passengercompartment....0 - 5
Instrumentpanel....0 - 6
Enginecompartmentchecklocations....0 - 8
Warningandindicatorlights....0-10
AIRBAGS,SEATBELTSANDCHILD RESTRAINTS

0-2 Illustratedtableofcontents
- Headrestraints/headrests(2nd,3rd and 4throws)(P.1-15)
2.LATCH(LowerAnchorsandTethersfor CHildren)system(secondrowshown; 3rdand4throwssimilar)(P.1-32)
3.Headrestraints/headrests(frontrow) (P.1-15)
4.Frontseatbelts(P.1-21,1-53)
5.Roof-mountedcurtainside-impact and rolloversupplementalairbag(P.1-53)
6.Supplementalairbags(P.1-53)
7.Frontseats(P.1-2) - Frontseat-mountedside-impact supplementalairbag(P.1-53)
- Toptetherstrapanchorpoints(2nd, 3rd, and 4throws—foundonbottom ofseatback)(2ndrowshown; other rowssimilar)(P.1-32)
- Rearseatconfigurations(P.1-2)
Refertothepagenumberindicatedinparenthesesforoperatingdetails.
EXTERIORFRONT
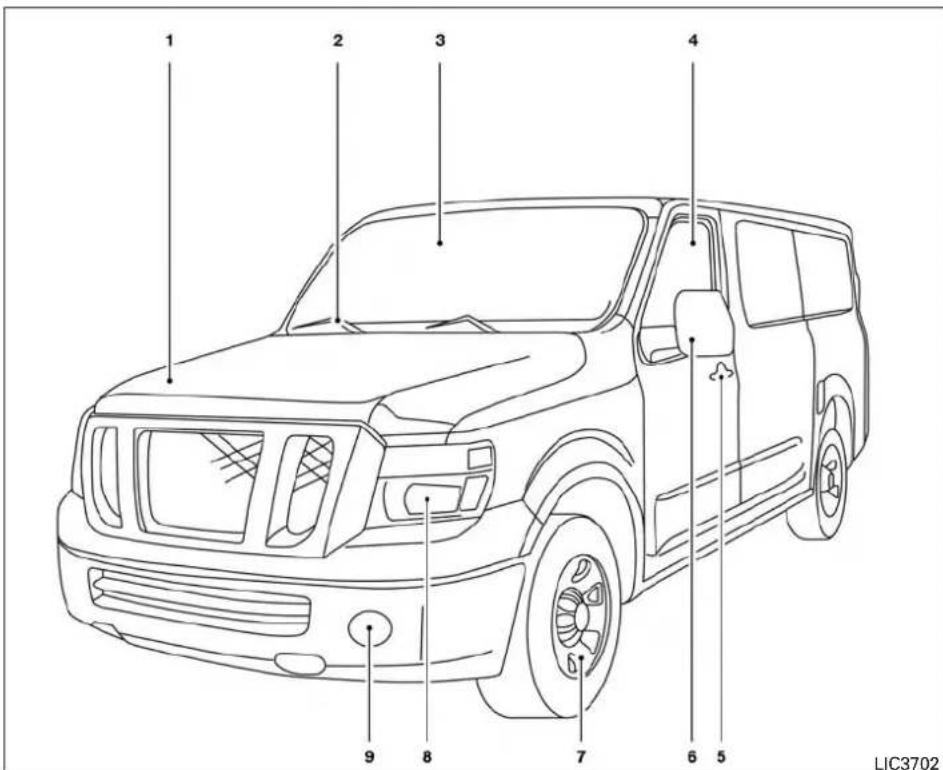
- Enginehood(P.3-12)
2.Wiperandwasherswitch(P.2-24)
3.Windshield(P.8-18)
4.Powerwindows(ifsoequipped) (P.2-44)
- Doorlocks(P.3-3)
Keyfob(ifsoequipped)(P.3-8) Keys(P.3-2)
6.Mirrors(P.3-17)
7.Tirepressure(P.8-30)
Flattire(P.6-2)
Tirechains(P.8-30)
8.Headlightandturnsignalswitch (P.2-26)
DaytimeRunningLights(DRL)(P.2-26) Replacingbulbs(P.8-26)
- Foglightswitch(ifsoequipped) (P.2-28)
Refertothepagenumberindicatedinparenthesesforoperatingdetails.
Illustratedtableofcontents0-3
EXTERIORREAR

0-4 Illustratedtableofcontents
- Rearwindowandoutsidemirror(ifso equipped)defrosterswitch(P.2-25)
2.Trailerhitch/towing(P.10-17)
3.Replacingbulbs(P.8-26)
-
Fuel-fillercap(P.3-13) Fuelrecommendation(P.10-2) Fuel-fillerdoor(P.3-13)
-
Vehicleloading(P.10-14)
Refertothepagenumberindicatedinparenthesesforoperatingdetails.
PASSENGERCOMPARTMENT

- Maplights(P.2-46)
2.Sunvisors(P.3-16)
3.Insidemirror(P.3-17)
4.Steeringwheel(P.3-15)
5.Glovebox(P.2-36)
6.Consolebox(ifsoequipped)(P.2-36) - Cupholders(mountedtolowerseat frame)(2ndrowshown;3rdand4th rowssimilar)(P.2-36)
8.Rearseatconfigurations(P.1-2)
Refertothepagenumberindicatedinparenthesesforoperatingdetails.
Illustratedtableofcontents0-5
INSTRUMENTPANEL

0-6 Illustratedtableofcontents
- Headlightswitch(P.2-26)
2.Vents(P.4-16) - Frontfoglightswitch(ifsoequipped) (P.2-26)
4.Wiperandwasherswitch(P.2-24) Turnsignalswitch(P.2-28) - Steeringwheelswitchforaudiocontrol (ifsoequipped)(P.4-60) Bluetooth®Hands-FreePhoneSystem (ifsoequipped)(P.4-62,4-76)
- Drivers supplemental airbag(P.1-53)
Horn(P.2-29)
7.Metersandgauges(P.2-3) Warningandindicatorlights(P.2-14) - Cruisecontrolmain/setswitches (ifsoequipped)(P.5-18)
9.Shiftlever(P.5-13)
10.Storagetray(P.2-37) - Audiosystemcontrols(P.4-29)
Navigationsystem*(ifsoequipped)
(P.4-4)
12.Storagetray(P.2-37)
13.Supplementalairbag(P.1-53)
14.Glovebox(P.2-38)
15.Hazardwarningflasherswitch(P.6-2) -
Climatecontrols(P.4-17)
-
RearSonarSystem(RSS)OFFswitch (ifsoequipped)(P.2-31) FrontandrearsonarsystemOFF switch(ifsoequipped)(P.2-32) Powerinverterswitch(ifsoequipped) (P.2-31) Heatedseatswitch(ifsoequipped) (P.2-29) Towmodeswitch(ifsoequipped) (P.2-33) USB/AUXinput(ifsoequipped) (P.4-29)
18.12vpoweroutlet(P.2-33) 19.Ignitionswitch(P.5-8) 20.Tiltsteeringwheelcontrol(P.3-15) 21.Hoodreleaseswitch(P.3-12) 22.Fusebox(P.8-20) 23.Outsidepowermirrorswitch(P.3-17) VehicleDynamicControl(VDC)OFF switch(P.2-30) *:RefertotheseparateNavigationSystemOwner'sManual(ifsoequipped).
Refertothepagenumberindicatedinparenthesesforoperatingdetails.
ENGINECOMPARTMENTCHECK LOCATIONS

0-8Illustratedtableofcontents
VQ40DEengine
1.Fuse/Fusiblelinkbox(P.8-20)
-
Engineoilfillercap(P.8-7)
-
Engineoildipstick(P.8-7)
4.Brakefluidreservoir(P.8-12)
5.Aircleaner(P.8-17)
-
Windshield-washerfluidreservoir (P.8-12)
-
Enginecoolantreservoir(P.8-5)
8.Drivebeltlocation(P.8-15)
9.Powersteeringfluidreservoir(P.8-11)
10.Radiatorcap(P.8-5)
11.Battery(P.8-13)
Refertothepagenumberindicatedinparenthesesforoperatingdetails.

VK56VDengine
- Radiatorcap(P.8-5)
2.Fuse/Fusiblelinkbox(P.8-20)
3.Engineoidipstick(P.8-7) - Engineoilfillercap(P.8-7)
5.Brakefluidreservoir(P.8-12)
6.Aircleaner(P.8-17) - Windshield-washerfluidreservoir (P.8-12)
- Enginecoolantreservoir(P.8-5)
9.Drivebeltlocation(P.8-15) - Powersteeringfluidreservoir(P.8-11)
11.Battery(P.8-13)
12.Fuse/Relaybox(P.8-20)
NOTE:
Enginecoverremovedforclarity.
Refertothepagenumberindicatedinparenthesesforoperatingdetails.
Illustratedtableofcontents0-9
WARNINGANDINDICATORLIGHTS
| Warning light | NamePage | |
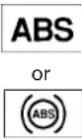 | Anti-lockBraking System(ABS)warninglight | 2-15 |
| AT CHECK | AutomaticTransmissioncheckwarning light | 2-15 |
| AutomaticTransmissionoiltemperature warninglight | 2-15 | |
| BRAKE or ( ! ) | Brakewarninglight2-15 | |
| Chargewarning light | 2-16 | |
| Dooropenwarning light | 2-16 |
| Warning light | NamePage | |
 | Driver'sseatbelt warninglightand chime | 2-16 |
 | Engineoilpressure warninglight | 2-16 |
 | Lowfuelwarning lightandchime | 2-16 |
 | Lowtirepressure warninglight | 2-17 |
 | Lowwindshield-washerfluidwarning light(ifsoequipped) | 2-18 |
 | Masterwarninglight2-18 | |
 | Passenger'sseat beltwarninglight | 2-18 |
 | Supplementalair bagwarninglight | 2-19 |
| Indicator light | NamePage | |
 | AutomaticTransmissionpositionindicatorlight | 2-19 |
 | Cruisemainswitch indicatorlight(ifso equipped) | 2-19 |
 | Cruisesetswitch indicatorlight(ifso equipped) | 2-19 |
 | Highbeamindicator light(blue) | 2-19 |
 | MalfunctionIndicatorLight(MIL) | 2-19 |
 | Securityindicator light(ifsoequipped) | 2-20 |
 | Slipindicatorlight2-20 |
0-10 Illustratedtableofcontents
| Indicator light | NamePage | |
 | TOWmodeONindicatorlight(ifso equipped) | 2-21 |
 | Turnsignal/hazard indicatorlights | 2-21 |
 | VehicleDynamic Control(VDC)OFF indicatorlight | 2-21 |
MEMO
0-12 Illustratedtableofcontents
1 Safety—Seats,seatbeltsand supplementalrestraintsystem
Seats....1 - 2
Frontmanualseatadjustment
(forpassenger'sseatandifsoequippedfor
driver'sseat). 1 - 3
Frontpowerseatadjustment
(ifsoequippedfordriver'sseat)....1 - 4
Armrests(ifsoequipped)....1 - 5
Flexibleseating....1 - 6
Removingthe2nd,3rdand4throwseats.....1-7
Installingthe2nd,3rdand4throwseats.....1-9
Seatrailcovers....1-11
Seatconfigurations....1-14
Headrestraints/headrests....1-15
Adjustableheadrestraint/headrest
components....1-16
Non-adjustableheadrestraint/headrest
components....1-16
Remove....1-17
Install....1-18
Adjust. 1-18
Seatbelts....1-21
Precautionsonseatbeltusage....1-21
Seatbeltwarninglight. 1-24
Pregnantwomen....1-24
Injuredpersons....1-24
Three-pointtypeseatbeltwithretractor.....1-24
Seatbeltextenders....1-28
Seatbeltmaintenance....1-29
Childsafety....1-29
Infants. 1-30
Smallchildren....1-30
Largerchildren....1-30
Childrestraints....1-32
Precautionsonchildrestraints....1-32
LATCH(LowerAnchorsandTethersfor
CHILDREN)system....1-34
Rear-facingchildrestraintinstallationusing
LATCH....1-38
Rear-facingchildrestraintinstallationusing
theseatbelts....1-39
Forward-facingchildrestraintinstallation
usingLATCH....1-42
Forward-facingchildrestraintinstallation
usingtheseatbelts....1-46
Boosterseats....1-51
SupplementalRestraintSystem(SRS)....1-53
PrecautionsonSRS. 1-53
Supplemental airbagwarninglabels....1-64
Supplementalairbagwarninglight. 1-64
SEATS


ARS1152
WARNING
- Donotrideinamovingvehiclewhen theseatbackisreclined.Thiscanbe dangerous.Theshoulderbeltwillnot beagainstyourbody.Inanaccident, youcouldbethrownintoitandreceive neckorotherseriousinjuries.You couldalsoslideunderthelapbeltand receiveseriousinternalinjuries.
- Forthemosteeffectiveprotectionwhen thevehicleisinmotion,theseatshould beupright.Alwayssitwellbackand uprightintheseatwithbothfeetonthe floorandadjusttheseatproperly.For additionalinformation,referto"Precautionsonseatbeltusage"inthis section.
●Afteradjustment, gentlyrockintheseat tomake sureitissecure lylocked.
- Donotleavechildrenunattendedinside thevehicle.Theycouldunknowinglyactivateswitchesorcontrolsormakethe vehiclemove.Unattendedchildren couldbecomeinvolvedinserious accidents.
●Tohelpavoidriskofinjuryordeath throughunintendedoperationofthe vehicleand/oritssystems,donotleave children,peoplewhorequiretheassistanceofothersorpetsunattendedin yourvehicle.Additionally,thetemperatureinsideaclosedvehicleonawarm daycanquicklybecomehighenoughto causeasignificantriskofinjuryor deathtopeopleandpets.
- Donotadjustthedriver'sseatwhile drivingsofullattentionmaybegivento vehicleoperation. Theseatmaymove suddenlyandcouldcauselossofcontrolofthevehicle.
- Theseatbackshouldnotbereclined anymorethanneededforcomfort.Seat beltsaremosteffectivewhenthepassengersitswellbackandstraightupin theseat.Iftheseatbackisreclined,the riskofslidingunderthelapbeltand beinginjuredisincreased.
1-2 Safety—Seats, seat belts and supplemental restraintsystem
CAUTION
When adjusting theseatpositions, be surenottocontactanymovingpartsto avoid possible injuries and ordamage.
FRONTMANUALSEAT ADJUSTMENT(forpassenger'sseat andifsoequippedfordriver'sseat)
Yourvehicleseatscanbeadjustedmanually. For additional information about adjusting theseats, refertothestepsoutlined in this section.

Forwardandbackward
Pulltheleverupandholditwhileyouslidethe seatforwardorbackwardtothedesiredposition. Releasethelevertolocktheseatinposition.

Reclining
Toreclinetheseatback,pulltheleverupandlean back.Tobringtheseatbackforward,pullthelever upandleanyourbodyforward.Releasethelever tolocktheseatbackinposition.
Therecliningfeatureallowsadjustmentofthe seatbackforoccupantsofdifferentsizesfor addedcomfortandtohelpobtainproperseat beltfit.Foradditionalinformation,referto"Precautionsonseatbeltusage"inthissection.Also, theseatbackcanbereclinedtoallowoccupants torestwhenthevehicleisstoppedandtheshift leverisintheP(Park)position.

theseatbackcanbereclinedtoallowoccupants torestwhenthevehicleisstoppedandtheshift leverisinP(Park).
FRONTPOWERSEATADJUSTMENT (ifsoequippedfordriver'sseat)
Operatingtips
- Thepowerseatmotorhasanauto-reset overloadprotectioncircuit.Ifthemotor stopsduringoperation,wait30seconds thenreactivatetheswitch.
- Donotoperatethepowerseatswitchfora longperiodoftimewhentheengineisoff. Thiswilldischargethebattery.
Forwardandbackward
Movingtheswitchasshownwillslidetheseat forwardorbackwardtothedesiredposition.
Reclining
Movethereclineswitchasshownuntilthedesiredangleisobtained.
Therecliningfeatureallowsadjustmentofthe seatbackforoccupantsofdifferentsizesfor addedcomfortandtohelpobtainproperseat beltfit.Foradditionalinformation,referto"Precautionsonseatbeltusage"inthissection.Also,
1-4 Safety—Seats, seatbeltsandsupplementalrestraintsystem
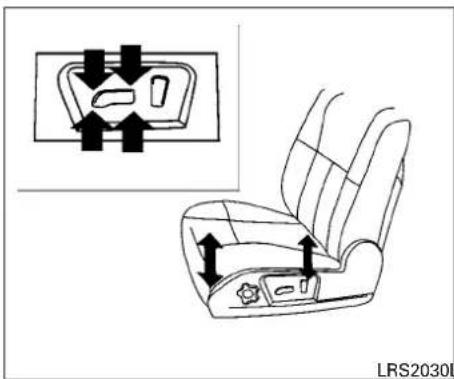
Seatlifter
Movetheswitchasshowntoadjusttheangle andheightoftheseatcushion.

Lumbarsupport
Thelumbarsupportfeatureprovidesadjustable lowerbacksupporttothedriver.Turntheknob forwardorbackwardtoadjusttheseatlumbar area.
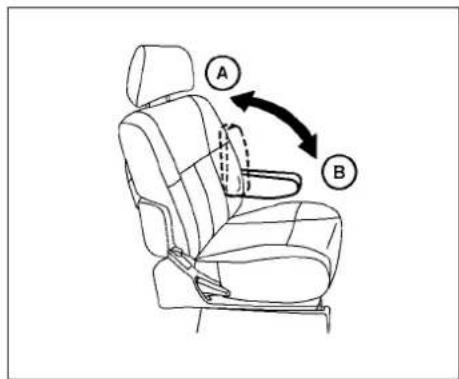
ARMRESTS(ifsoequipped)
Tousethearmrests, pull them downtotheresting position.
Ⓐ Stowedposition
B Restingposition
FLEXIBLESEATING
WARNING
- Donotallowpeoplelorideinanyarea ofyourvehiclethatisnotequippedwith seatsandseatbelts.Besureeveryone inyourvehicleisinaseatandusinga seatbeltproperly.
- Headrestraints/headrestsshouldbe adjustedproperlyastheymayprovide significantprotectionagainstinjuryin anaccident.Alwaysreplacethemproperlyiftheyhavebeenremovedforany reason.
- If the headrestraints/headrestsarere moved for any reason, they should be securely stored to prevent them from causing injury top passengers or damage to the vehicle in case of sudden braking or an accident.
- When returning these seat back to the upright position, be certain they are completely secured in the latched position. If they are not completely secured, passengers maybe injured in an accidentors sudden stop.
●Properlysecureallcargotohelppreventitfromslidingorshifting.Donot placecargohigherthantheseatbacks. Inasuddenstoporcollision,unsecured cargocouldcausepersonalinjury.
- Donotdrivethevehicleunlessallofthe seatsareinstalledandlockedinposition. Looseseatscanbecomeprojectilesinasuddenstoporcollisionand causeseriouspersonalinjuryordeath.

LRS2042
Foldingthefrontpassenger'sseatback
Tofoldthefrontpassenger'sseatbackflatfor extrastoragelengthwhentransportinglong items:
1.Slidetheseattotherearmostposition.Lift uponthereclinelever,locatedontheoutsideedgeoftheseat,andallowtheseatbacktofoldforwardasfarasitwillgo.
1-6 Safety—Seats, seat belts and supplemental restraintsystem

- Oncetheseatbackisreleased, it will enable youtofoldthefrontpassengerseatbackflat overtheseatcushion.
- Toreturnthefrontpassenger'sseattoa seatingposition, liftupontheseatback and pushituptoanuprightposition. Then pullup on therecline leverandleantheseatback to a properseatingposition. Releasethelever to locktheseatbackinposition.
WARNING
- If you fold the front passenger's seat-back flat forward to carry longer objects, besure this cargo is properly secured and not near an air bag. In a crash, an inflating air bag might forc that object toward a person. This could cause severe injury overvendence. Secure objects away from the areain which an air bag would inflate. For additional information, refer to "Precautions on SRS" in this section.
●Neverallowanyonetorideinthecargo areaoronthefrontpassenger'sseat whenitisinthefold-downposition.Use oftheseareasbypassengerscouldresultinseriousinjuryordeathinanaccidentorsuddenstop.
CAUTION
Donotapplyloadtothebackofthe tableifitisnotfullyhorizontal.Doingso maycausedformation/malfunction.
NOTE:
Thebeltbucklemustbeintheforwardmost positionfortheseattobefoldedtoavoid prematureaging.
REMOVINGTHE2ND,3RDAND 4THROWSEATS
WARNING
- Donotremoveorinstalltheseatswhile thevehicleismoving.
- Donotdrivethevehicleunlessallofthe seatsareinstalledandlockedinposition. Looseseatscanbecomeprojectilesinasuddenstoporcollisionand causeseriouspersonalinjuryordeath.
- Donotsitintheseatsthathavebeen removedfromthevehicle.Theseats maytipoverandcausepersonalinjury.
- Whenadjustingormovingtheseatsin yourvehicle,donotuseanyoftheseat beltbuckles,tonguesorwebbingto carryormovetheseats.Liftingthe seatsbyanyoftheseatbeltscandamagetheseatbelts.Damagedseatbelts shouldbereplaced.Itisrecommended thatyouvisitaNISSANdealerforthis service.Failureuretofollowtheseinstructionscouldincreasethechanceorseverityofaninjuryinacollisionorsuddenstop.
A CAUTION
- Donotdragtheseatsonthecarpetto preventdamagetothecarpet.
- Theseatsareheavy.Topreventpersonalinjury,twopeopleshouldremove orinstalltheseat.
NOTE:
- When removing the 4 throw seats, the driver's sideseat should be removed before removing the passenger's sideseat.
- Remove all necessary rail covers before moving or adjusting these seat.

- Removethepullstrapfromthestowedposition.
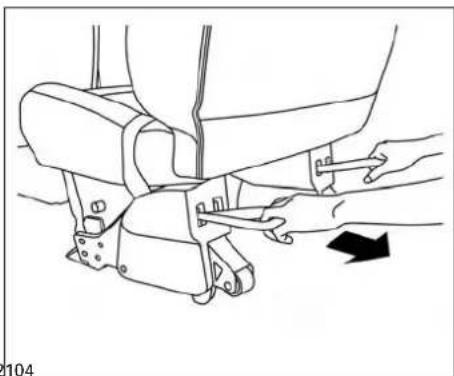
- Standdirectlybehindtheseatandpullup andrearwardonthestrapstodisengagethe seat.
1-8 Safety—Seats, seat belts and supplemental restraintsystem
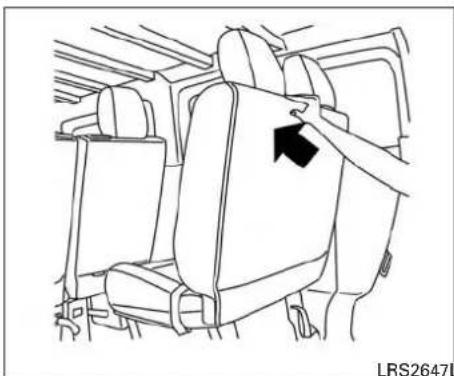
3.Pushupandforwardtoremovetheseats fromthewells.
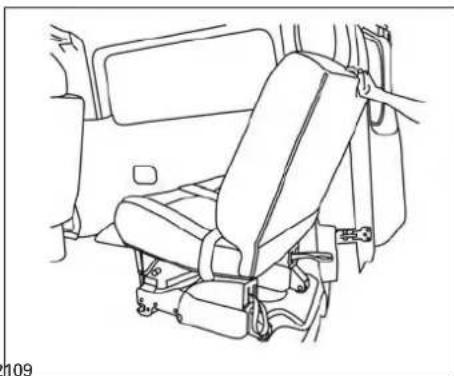
- Resttheseatonthevehiclefloorandwith twopeople,removetheseatfromthevehicle.Storetheseatinasafelocation.
NOTE:
The4throwseathasrollersontheseat frametomaketheseateasiertomovetoa securelocation.
INSTALLINGTHE2ND,3RDAND 4THROWSEATS
NOTE:
- Removenecessary rail covers before removing or adjusting these seat.
●Thelargerailcovershouldbeinstalledin frontofthesmallrailcover. - Makesuretheseatmountinglocationsare freefromobjects.
- Checklatchestomakesurethattheyarein theopenposition.Pullthepullstrapifthe latchisclosed.
- Using two people, bring these at to the appropriatemounting position.
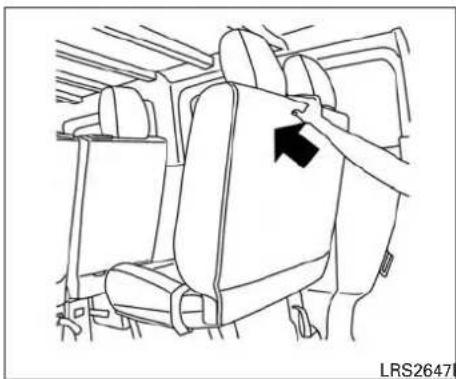

4.Pushupontherearoftheseat.5.Lineuptheseatwiththemountinglocations. Tilttheseatslightlyforwardsothefront hooksengageintothefrontmountingloca- tions.
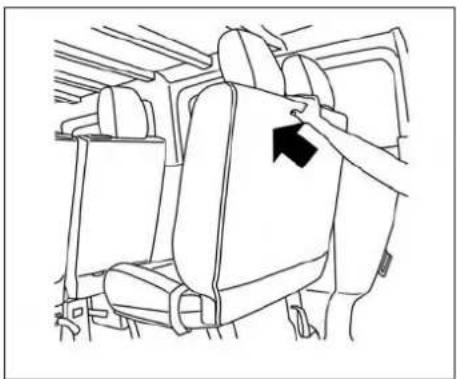
6.Pushupontherearoftheseatsotherear latchesare4inches(100mm)abovethe floor.Makesurethattheareabeneath theseatisclear.Releasetheseatsotherearlatchesdropintothemountinglocation andlock.
7. Checkfronthookandrearlatchtomakesure thelatchesarelockedintothemounting location.
1-10 Safety—Seats, seat belts and supplemental restraintsystem
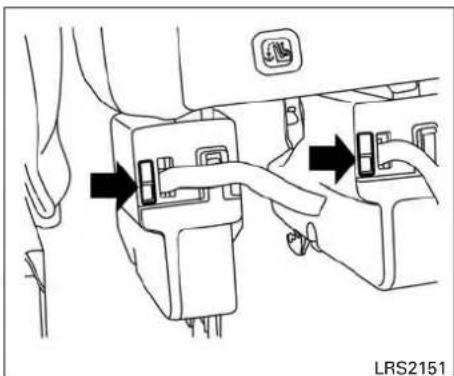
Latchindicator
8.Pushandpulleachseattomakesurethe seatisproperlyengaged.Makesurethat thelatchindicatordoesnotshowmore than50%red.Pullthestrapsandrelatch theseatsasnecessary.

LRS2102LRS2123
9. Stowthepullstrapsbehindthestorageclip.
WARNING
Failuretostowthepullstrapscorrectly mayallowthestrapstobeaccidentally pulled(byapersonorcargo)releasingthe latchandpotentiallyresultingininjuryina crash.
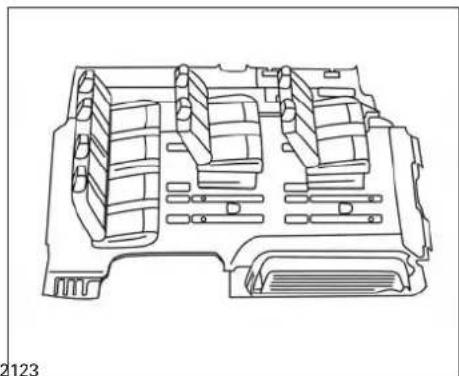
SEATRAILCOVERS
Yourvehiclehaseightfactoryinstalledsmallrail covers.ItalsocomeswithaLargeSeatRail Coverkit.Thekitcontainsfourlargerailcovers thatcanbeusedtocovertheseattrackswhen thesingleseatsinthe2ndand/or3rdrowshave beenremoved.Ifadditionalseatsareremoved andyouwishtocovertheseattracks,contactthe PartsDepartmentataNISSANdealerforthe latestpartsinformation.
Boththesmallandlargeseatrailcoverscanbe removedandinstalledthesameway.
WARNING
Properlystowtherailcoverswhennotin use. They should be securely stored to prevent them from causing injury top passengers or damage to the vehicle in case of sudden braking or an accident.

![graph LR A["Step 1"] --> B["Step 2"] B --> C["Step 3"]](/content/2026/05/789802/images/7fa612e44bdeb99f8c9719c9b2c74f5963fe04950f4c972d12ecfaba028a4c27.jpg)
Installationofrailcovers
Wheninstallingtherailcoversintotherailopening,makesurethattheOwner'sManualsymbolis placedinthecorrectdirection.
●2ndrowtowardsfrontofthevehicle
●3rdrowtowardssrearofthevehicle
Toinstalltherailcovers:
- Removethelockingcapfromthecoverusingasuitabletool,suchasasmallscrewdriverorkey,beforeinstallingthecoverinthe railopening.
1-12 Safety—Seats, seat belts and supplemental restraintsystem

●Rearheatervent(1)
●Largerailcover(2)
- Smallrailcover(3)
- Clipthelargecoverintotherailopening. MakesurethattheOwner'sManualsymbol isplacedinthecorrectdirection.Seepreviousillustration.
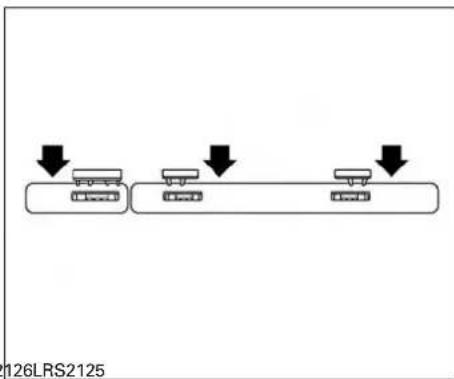
- Slidelockingcapbackintocoverafterclippingintotherail.
![graph LR A["Step 1"] --> B["Step 2"] B --> C["Step 3"]](/content/2026/05/789802/images/40ee670a119676de6028fd44fd190bbbd788259e565e122c41118f64df77bbd9.jpg)
Removalofrailcovers
Toremovetherailcovers,removethelocking capsfromthecoverusingasuitabletoolsuchas asmallscrewdriverorkey.Thenliftthecoverfromtherailopening.
WARNING
Properlystowtherailcoverswhennotin use. They should be securely stored to prevent them from causing injury top as-sengers or damage to the vehicle in case of sudden braking or an accident.

Seatscanbeinterchangedwithseatsofthe sameletter
SEATCONFIGURATIONS
Theseatingsystemallowsgreatflexibilitybyallowingthe2nd,3rdand4throwseatstobe rearrangedinmultipleconfigurations.Properusageisimportanttoyoursafety.Thereareatotalof sixindependentseatsintherearrowsandallof themcanberemovedandrearranged.Theillustrationaboveshowsswhichseatsarecommon andinterchangeable.
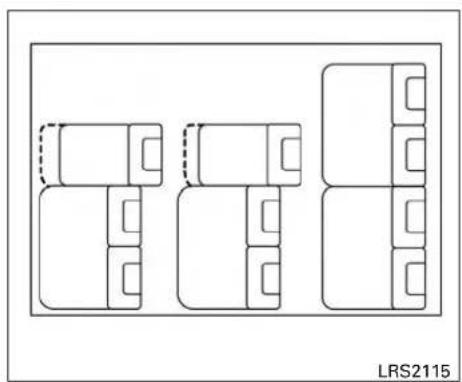
2ndand3rdrowpassengersideseats movedtorearpositions

2ndand3rdrowseatsmovedtotherear positionsand4throwremoved
The2ndand3rdrowseatshavetwofore/aft mountinglocations. Therowsareidenticaland canbeinterchangedforconvenience. Thepassengersideseatscanbemovedtotherear positionindependentlyofthedriver'ssideseats.
1-14 Safety—Seats, seat belts and supplemental restraint system
HEADRESTRAINTS/HEADRESTS

WARNING
Headrestraints/headrestssupplement theothervehiclesafetysystems.Theymay provideadditionalprotectionagainstinjuryincertainrearendcollisions.Adjustableheadrestraints/headrestsmustbe adjustedproperly,asspecifiedinthissection.Checkheadjustmentaftersomeone elseusestheseat.Donotattachanything totheheadrestraint/headreststalksor removetheheadrestraint/headrest.Do notusetheseatifthehead restraint/headresthasbeenremoved.If theheadrestraint/headrestwasremoved, reinstallandproperlyadjustthehead restraint/headrestbeforeanoccupant usestheseatingposition.Failureretofollowtheseinstructionscanreducetheeffectivenessofthehead restraints/headrests.Thismayincrease theriskofseriousinjuryordeathina collision.

The illustration shows the seating positions equipped with headrestraints/headrests.
▲Indicatetheseatingpositionisequippedwith aheadrestraint.
■Indicate theseating position is equipped with aheadrest.
+Indicate theseating position is not equipped with a head restraint or head rest (if applicable).
- Your vehicle is equipped with a head restraint/headrestthatmaybeintegrated, adjustableornon-adjustable.
- Adjustableheadrestraints/headrestshave multiplenotchesalongthestalk(s)tolock theminadesiredadjustmentposition.
●The non-adjustable head restraints/headrestshaveasinglelocking notchtosecurethemtotheseatframe.
●ProperAdjustment: - Fortheadjustabletype, alignthehead restraint/headrestsothecenterofyour earsapproximatelylevelwiththecenter oftheheadrestraint/headrest.
- If you rear position is still higher than the recommended alignment, placethe head restraint/head rest at the highest position.
- If the head restraint/head rest has been removed, ensure that it is reinstalled and locked in place before reiding in that designated seating position.

TypeA(ifsoequipped) ADJUSTABLEHEADRESTRAINT/ HEADRESTCOMPONENTS
- Removableheadrestraint/headrest
2.Multiplenotches
3.Lockknob(s)
4.Stalks
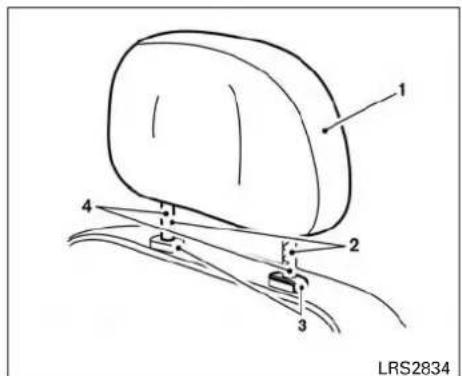
TypeB(ifsoequipped)

TypeA(ifsoequipped)
NON-ADJUSTABLEHEAD
RESTRAINT/HEADREST
COMPONENTS
- Removableheadrestraint/headrest
2.Singlenotch
3.Lockknob(s)
4.Stalks
1-16 Safety—Seats, seat belts and supplemental restraintsystem

TypeB(ifsoequipped)

TypeA(ifsoequipped)
REMOVE
Use the following procedure to remove the head restraint/headrest:
- Pulltheheadrestraint/headrestuptothe highestposition.
- Pushandholdthelockknob(s).
- Removetheheadrestraint/headrestfrom theseat.
- Storetheheadrestraint/headrestproperly in asecureplacesoitisnotlooseinthe vehicle.
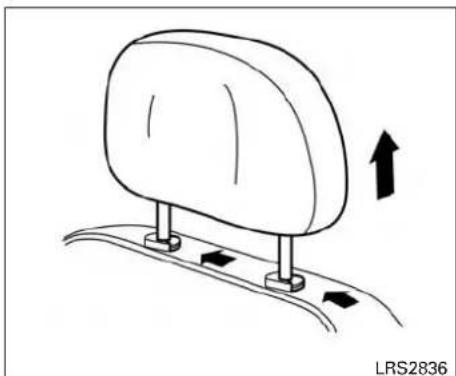
TypeB(ifsoequipped)
- Reinstallandproperlyadjustthehead restraint/headrestbeforeanoccupantuses theseatingposition.
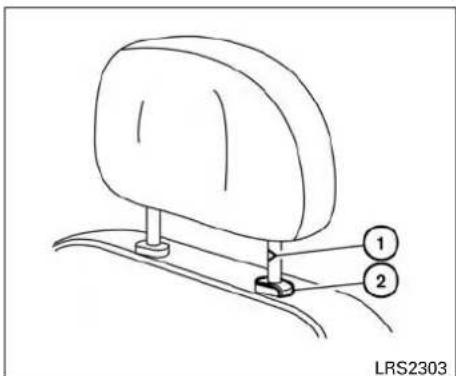
TypeA(ifsoequipped)
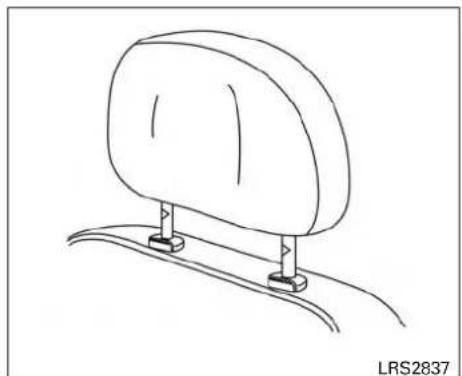
TypeB(ifsoequipped)

ADJUST
Foradjustableheadrestraint/headrest
Adjusttheheadrestraint/headrestsothecenter islevelwiththecenterofyourears.Ifyourear positionisstillhigherthantherecommended alignment,placetheheadrestraint/headrestat thehighestposition.
INSTALL
- Aligntheheadrestraint/headreststalkswith theholesintheseat.Makesurethatthe headrestraint/headrestisfacingthecorrect direction.ForvehicleswithTypeA,thestalk withthenotch(notches) ① mustbeinstalledintheholewiththelockknob ②.
- Pushandholdthelockknob(s) and push the headrestraint/headrestdown.
- Properly adjust the head restraint/headrest before an occupant use these seating position.
1-18 Safety—Seats, seat belts and supplemental restraintsystem
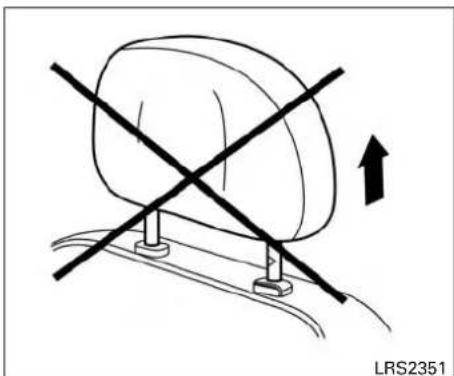
TypeA(ifsoequipped)
Fornon-adjustableheadrestraint/headrest
Makesuretheheadrestraint/headrestispositionedsothelockknob(s)isengagedinthe notch(notches)beforeridinginthatdesignated seatingposition.

TypeB(ifsoequipped)

TypeA(ifsoequipped)
Raise
Toraisetheheadrestraint/headrest, pullitup.
Makesuretheheadrestraint/headrestispositionedsothelockknob(s)isengagedinthe notch(notches)beforeridinginthatdesignated seatingposition.
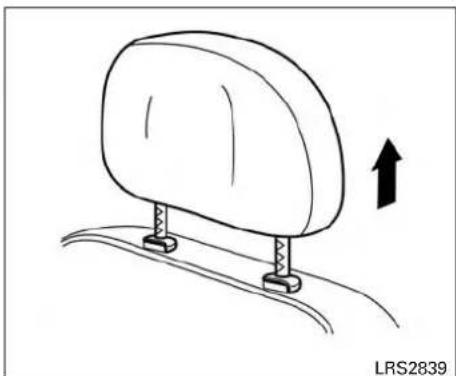
TypeB(ifsoequipped)

TypeA(ifsoequipped)

TypeB(ifsoequipped)
Lower
Tolower, pushandholdthelockknob(s) and pushtheheadrestraint/headrestdown.
Makesuretheheadrestraint/headrestispositionedsothelockknob(s)isengagedinthe notch(notches)beforeridinginthatdesignated seatingposition.
1-20 Safety—Seats, seat belts and supplemental restraintsystem
SEATBELTS

PRECAUTIONSONSEATBELT USAGE
If you are wearing your seat belt properly adjusted and you are sitting upright and well back in your seat with both feet on the floor, your chances of being injured or killed in a collision and/or the severity of injury may begreatly reduced.
NISSANstronglyencouragesyouandallofyour passengerstobuckleupeverytimeyoudrive, evenifyourseatingpositionincludesasupplementalairbag.
MostU.S. states and Canadian provinces or territories specify that seat belts beworn at all times when vehicle is being driven.
Safety—Seats, seatbeltsandsupplementalrestraintsystem 1-21


WARNING
- Everypersonwhodrivesorridesinthis vehicleshoulduseaseatbeltatall times.Childrenshouldbeintherear seatsandinanappropriaterestraint.
WARNING
- Theseatbeltshouldbeproperlyadjustedtoasnugfit.Failureretodosomay reducetheeffectivenessoftheentire restraintsystemandincreasethe chanceorseverityofinjuryinanaccident.Seriousinjuryordeathcanoccurif theseatbeltisnotwornproperly.
1-22 Safety—Seats, seat belts and supplemental restraint system


WARNING
●Alwaysroutetheshoulderbeltover yourshoulderandacrossyourchest. Neverputthebeltbehindyourback, underyourarmoracrossyourneck. The beltshouldbeawayfromyourface and neck, butnotfallingoffyourshoulder.
- Positionthelapbeltaslowandsnugas possibleAROUNDTHEHIPS,NOTTHE WAIST.Alapbeltworntoohighcould increasetheriskofinternalinjuriesin anaccident.
- Besuretheseatbelttongueissecurely fastenedtotheproperbuckle.
- Donotweartheseatbeltinsideoutortwisted.Doingsomayreduceitseffectiveness.
- Donotallowmorethanonepersonto usethesameseatbelt.
●Nevercarrymorepeopleinthevehicle thanthereareseatbelts. - If theseatbeltwarninglightglowscontinuouslywhiletheignitionisturned ONwithalldoorsclosedandallseat beltsfastened, it may indicate amal-functioninthesystem. Havethesystem checked. It is recommended that you visitaNISSANdealer.
-
Nochangesshouldbemadetotheseat beltsystem. Forexample, donotmodify theseatbelt, addmaterial, or install devices that may change theseatbelt routingortension. Doingsomay affect the operation of theseat beltsystem. Modifying ortampering with theseat beltsystem may result in serious personal injury.
-
Onceseatbeltpretensioner(s)haveactivated,theycannotbereusedandmust bereplacedtogetherwiththeretractor. Itisrecommendedthatyouvisita NISSANdealerforthisservice.
- Allseatbeltassemblies,includingretractorsandattachinghardware,should beinspectedafteranycollision.Itis recommendedthatyouvisitaNISSAN dealerforthisservice.NISSANrecommendsthatallseatbeltassembliesin useduringacollisionbereplacedunlessthecollisionwasminorandthe beltsshownodamageandcontinueto operateproperly.Seatbeltassemblies notinuseduringacollisionshouldalso beinspectedandreplacedifeither damageorimproperoperationisnoted.
- Allchildrestraintsandattachinghard-wareshouldbeinspectedafteranycollision.Alwaysfollowtherestraint manufacturer'sinspectioninstructions and replacement recommendations. Thechildrestraintsshouldbereplaced iftheyaredamaged.

LRS0786
SEATBELTWARNINGLIGHT
Boththedriver'sandpassenger'sfrontseatsare equippedwithaseatbeltwarninglight.The warninglight,locatedontheinstrumentpanel, willshowthestatusofthedriverandpassenger seatbelt.
NOTE:
Thefrontpassengerseatbeltwarninglight willilluminateforaperiodoftime.Ifthe seatisoccupiedandseatbeltislatched withinthatperiodoftime,thelightwillgo out.
For additional information, refer to "Warning lights, indicator lights and audibler reminders" in the "Instruments and controls" section of this manual.
PREGNANTWOMEN
NISSANrecommendsthatpregnantwomenuse seatbelts.Theseatbeltshouldbewornsnugand alwayspositionthelapbeltaslowaspossible aroundthehips,notthewaist.Placetheshoulder beltoveryourshoulderandacrossyourchest. Neverrunthelap/shoulderbeltoveryourabdominalarea.Contactyourdoctorforspecific recommendations.
INJUREDPERSONS
NISSANrecommendsthatinjuredpersonsuse seatbelts.Checkwithyourdoctorforspecific recommendations.
THREE-POINTTYPESEATBELT WITHRETRACTOR
WARNING
- Everypersonwhodrivesorridesinthis vehicleshoulduseaseatbeltatall times.Childrenshouldbeintherear seatsandinanappropriaterestraint.
- Donotrideinamovingvehiclewhen theseatbackisreclined. This can be dangerous. Theshoulderbeltwillnot beagainstyourbody.Inanaccident, you could bethrown into it and receive neckorotherserious injuries. You could also slide under the lap belt and receives serious internal injuries.
- Forthemosteeffectiveprotectionwhen thevehicleisinmotion,theseatshould beupright.Alwayssitwellbackand uprightintheseatwithbothfeetonthe floorandadjusttheseatbeltproperly.
- Donotallowchildrentoplaywiththe seatbelts.Mostseatingpositionsare equippedwithAutomaticLockingRetractor(ALR)modeseatbelts.Iftheseat beltbecomeswrappedarounddachild's neckwiththeALRmodeactivated,the childcanbeseriouslyinjuredorkilledif theseatbeltretractsandbecomes tight.Thiscanoccurevenifthevehicle isparked.Unbuckletheseatbeltto releasethechild.Iftheseatbeltcannot beunbuckledorisalreadyunbuckled, releasethechildbycuttingtheseatbelt withasuitabletool(suchasaknifeor scissors)toreleasetheseatbelt.
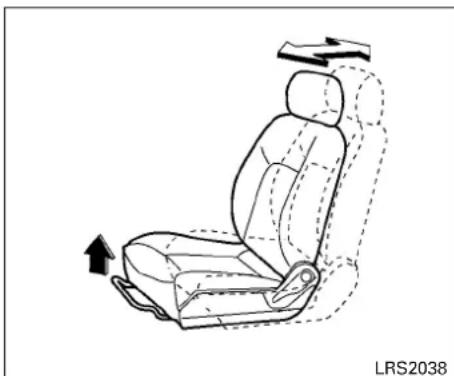
Manualfrontseatshown(ifsoequipped)

Powerfrontseatshown(ifsoequipped)
Fasteningtheseatbelts
- Adjusttheseat. For additional information, refer to "Seats" in this section.

- Slowlypulltheseatbeltoutoftheretractor andinsertthetongueintothebuckleuntil youhearandfeelthelatchengage.
●Theretractorisdesignedtolockduringasuddenstoporonimpact.A slowpullingmotionpermitstheseat belttomove,andallowsyousome freedomofmovementintheseat.
- If theseatbelt cannot be pulled from its fully retracted position, firmly pull the belt and release it. Then smoothly pull the belt out of the retractor.
1-26 Safety—Seats, seat belts and supplemental restraint system

- Positionthelapbeltporitionlowandsnug onthehipsasshown.
- Pulltheshoulderbeltportiontowardthe retractortotakeupextraslack. Besurethe shoulderbeltisroutedoveryourshoulder andacrossyourchest.
Thefrontpassengerseatandtherearseating positionsthree-pointseatbelthavetwomodesof operation:
●EmergencyLockingRetractor(ELR)
●AutomaticLockingRetractor(ALR)
TheELRmodeallowstheseatbelttoextendand retracttoallowthedriverandpassengerssome freedomofmovementintheseat.TheELRlocks theseatbeltwhenthevehicleslowsdownrapidly orduringcertainimpacts.
The ALRmode(childrestraintmode)locksthe seatbeltforchildrestraintinstallation.
WhentheALRmodeisactivated,theseatbelt cannotbeextendedagainuntiltheseatbelt tongueisdetachedfromthebuckleandfully retracted.TheseatbeltreturnstotheELRmode aftertheseatbeltfullyretracts.Foradditional information,referto"Childrestraints"inthissec-
The ALRmodes should be used only for child restraint installation. During normal seatbelt use by a passenger, the ALRmode should not be activated. If it is activated, may cause uncomfortable seat beltension.
WARNING
When fastening these seat belts, be certain that these seat backs are completely secured in the latched position. If they are not completely secured, passengers maybe injured in an accidentors sudden stop.

Unfasteningtheseatbelts
Tounfastentheseatbelt, pressthebuttononthe buckle ①. Theseatbeltautomaticallyretracts.
Checkingseatbeltoperation
Seatbeltretractorsaredesignedtolockseatbelt movementbytwoseparatemethods:
- When these seat belt is pulled quickly from the retractor
- Whenthevehicleslowsdownrapidly
To increase your confidence in these seat belts, check the operation as follows:
- Grasptheshoulderbeltandpullforward quickly. Theretractorshouldlockandrestrictfurtherbeltmovement.
Iftheretractordoesnotlockduringthischeck, getthesystemchecked.Itisrecommendedthat youvisitaNISSANdealerforthisserviceorto learnmoreaboutseatbeltoperation.

LRS0242
Shoulderbeltheightadjustment(front seats)
Theshoulderbeltanchorheightshouldbeadjustedtothepositionbestforyou.Foradditional information,referto"Precautionsonseatbelt usage"inthissection.Toadjust,pulloutthe adjustmentbutton ① andmovetheshoulderbelt anchorothedesiredposition ② ,sothebelt passesoverthecenteroftheshoulder.Thebelt shouldbeawayfromyourfaceandneck,butnot fallingoffyourshoulder.Releasetheadjustment buttonolocktheshoulderbeltanchorintoposition.
WARNING
- Afteradjustment,releasetheadjustmentbuttonandtrytomovetheshoulderbeltanchorupanddowntomake sureitissecurelyfixedinposition.
- Theshoulderbeltanchorheightshould beadjustedtothepositionbestforyou. Failuretodosomayreducetheeffectivenessoftheentirerestrainsystem andincreasethechanceorseverity of injuryinanaccident.
SEATBELTEXTENDERS
If, because of body size or driving position, it is not possible to properly fit the lap/shoulder belt and fastenit, an extender that is compatible with the installed seat belts available for purchase. The extender adds approximately 8 in (200 mm) of length and maybe used for either the driver or front passenger seating position. It is recommended that you visit a NISSAN dealer for assistance with purchasing an extender if an extender is required.
CHILDSAFETY
WARNING
- OnlyNISSANseatbeltextenders, made bythesamecompanywhichmadethe originalequipmentseatbelts, should beusedwithNISSANseatbelts.
- Adultsandchildrenwhocanusethe standardseatbeltshouldnotusean extender.Suchunnecessaryusecould resultinseriouspersonalinjuryinthe eventofanaccident.
- Neveruseseatbeltextenderstoinstall childrestraints.Ifthechildrestraintis notsecuredproperly,thechildcouldbe seriouslyinjuredorkilledinacollision orasuddenstop.
SEATBELTMAINTENANCE
- Tocleantheseatbeltwebbing,applya mildsoapsolutionoranysolutionrecommendedforcleaningupholsteryorcarpet. Thenwipewithaclothandallowtheseat beltstodryintheshade.Donotallowthe seatbeltstoretractuntiltheyarecompletely dry.
- Ifdirtbuildsupintheshoulderbelt guideoftheseatbeltanchors, theseat beltsmayretractslowly. Wipetheshoulder beltguidewithaclean, drycloth.
- Periodicallychecktoseethattheseat beltandthemetalcomponents,suchas buckles,tongues,retractors,flexiblewires andanchors,workproperly.Iflooseparts, deterioration,cutsorotherdamageonthe webbingisfound,theentireseatbeltassemblyshouldbereplaced.
WARNING
Donotallowchildrentoplaywiththeseat belts.Mostseatingpositionsare equippedwithAutomaticLockingRetractor(ALR)modeseatbelts.Iftheseatbelt becomeswrappedarounddachild'sneck withtheALRmodeactivated,thechildcan beseriouslyinjuredorkillediftheseat beltretractsandbecomestight.Thiscan occurevenifthevehicleisparked.Un-buckletheseatbeltoreleasethechild.If theseatbeltcannotbeunbuckledoris alreadyunbuckled,releasethechildby cuttingtheseatbeltwithasuitabletool (suchasaknifeorscissors)toreleasethe seatbelt.
Childrenneedadultstohelpprotectthem. Theyneedtobeproperlyrestrained.
In addition to the general information in this manual, child safety information is available from many other sources, including doctors, teachers, government traffic safety offices, and community organizations. Every child is different, sobesure to learn the best way to transport your child.
There are three basic types of child restraint systems:
●Rear-facingchildrestraints
●Forward-facingchildrestraints
- Boosterseats
The proper restraint depends on the child's size. Generally, infants up to about 1 year and less than 20 lbs (9 kg) should be placed in rear-facing child restraints. Forward-facing child restraints are available for children who out grow rear-facing child restraints and are at least 1 year old. Booster seats are used to help position vehicle lap/shoulder beltonachild whocannolonger use forward-facing child restraint.
WARNING
Infantsandchildrenneedspecialprotection.Thevehicle'sseatbeltsmaynotfit themproperly.Theshoulderbeltmay cometooclosetothefaceorneck.Thelap beltmaynotfitovertheismallhipbones. Inanaccident,animproperlyfittingseat beltcouldcauseseriosorfatalinjury. Alwaysuseappropriatechildrestraints.
AllU.S.statesandCanadianprovincesorterritoriesrequiretheuseofapprovedchildrestraints forinfantsandsmallchildren.Foradditionalinformation,referto"Childrestraints"inthissection.
Achildrestraintmaybesecuredinthevehicleby usingeithertheLATCH(LowerAnchorsand TethersforCHildren)systemorwiththevehicle seatbelt.Foradditionalinformation,referto "Childrestraints"inthissection.
NISSANrecommendsthatallpre-teens andchildrenberestrainedintherearseat. Studiesshowthatchildrenaresaferwhen properlyrestrainedintherearseatthanin thefrontseat.
Thisisespeciallyimportantbecauseyour vehiclehasasupplementalrestraintsystem(airbagsystem)forthefrontpassenger.Foradditionalinformation,referto "SupplementalRestraintSystem(SRS)"in thissection.
INFANTS
Infantsuptoatleast1yearoldshouldbeplaced inarear-facingchildrestraint.NISSANrecommendsthatinfantsbeplacedinchildrestraints thatcomplywithFederalMotorVehicleSafety StandardsorCanadianMotorVehicleSafety Standards. Youshouldchooseachildrestraint thatfitsyourvehicleandalwaysfollowthemanufacturer'sinstructionsforinstallationanduse.
SMALLCHILDREN
Childrenthatareover1yearoldandweighat least20lbs(9kg)shouldremaininarear-facing child restraint as long as possible up to the height orweightlimitofthechildrestraint.Childrenwho outgrowtheheightorweightlimitoftherear-facingchildrestraintandareatleast1yearold shouldbesecuredinaforward-facingchildrestraintwithaharness.Refertothemanufacturer'sinstructions forminimum andmaximum weightandheightrecommendations.NISSAN recommendsthatsmallchildrenbeplacedin childrestraintsthatcomplywithFederalMotor VehicleSafetyStandardsorCanadianMotorVehicleSafetyStandards.Youshouldchoosea childrestraintthatfitsyourvehicleandalways followthemanufacturer'sinstructionsforinstallationanduse.
LARGERCHILDREN
Childrenshouldremaininaforward-facingchild restraintwithaharnessuntiltheyreachthemaxi-mumheightorweightlimitallowedbythechild restraintmanufacturer.
Onceachildoutgrowstheheightorweightlimit oftheharness-equippedforward-facingchildrestraint,NISSANrecommendsthatthechildbe placed in a commercially available booster seat to obtainproperseatbeltfit.Foraseatbelttofit
properly,theboosterseatshouldraisethechild sothattheshoulderbeltisproperlypositioned acrossthechestandthetop,middleportionof theshoulder.Theshoulderbeltshouldnotcross theneckorfaceandshouldnotfallofftheshoulder.Thelapbeltshouldliesnuglyacrossthe lowerhipsorupperthighs,nottheabdomen.A boosterseatcanonlybeusedinseatingpositionsthathaveathree-pointtypeseatbelt.The boosterseatshouldfitthevehicleseatandhave alabelcertifyingthatitcomplieswithFederal MotorVehicleSafetyStandardsorCanadianMotorVehicleSafetyStandards.
Aboosterseatshouldbeuseduntilthechildcan passtheseatbeltfittestbelow:
- Arethechild'sbackandhipsagainstthe vehicleseatback?
●Isthechildabletositwithoutslouching? - Dothechild'skneesbendeasilyoverthe frontedgeoftheseatwithfeetflatonthe floor?
- Canthechildsafelyweartheseatbelt(lap beltlowandsnugacrossthehipsandshoulderbeltacrossmid-chestandshoulder)?
●Isthechildabletousetheproperlyadjusted headrestraint/headrest?
- Will the child be able to stay in position for the entire ride?
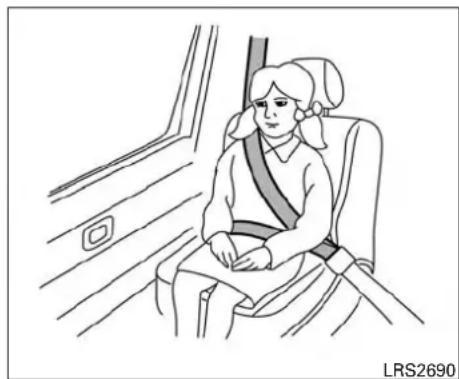
If you answered not to any of these questions, the child should remain in a booster seat using a three-point type seat belt.
NOTE:
Lawsinsomecommunitiesmayfollowdifferentguidelines.Checklocalandstate regulationstoconfirmyourchildisusing thecorrectrestraintsystembeforetraveling.
CHILDRESTRAINTS
WARNING
Neverletachildstandorkneelonanyseat anddonotallowachildinthecargoarea. Thechildcouldbeseriouslyinjuredor killedinasuddenstoporcollision.

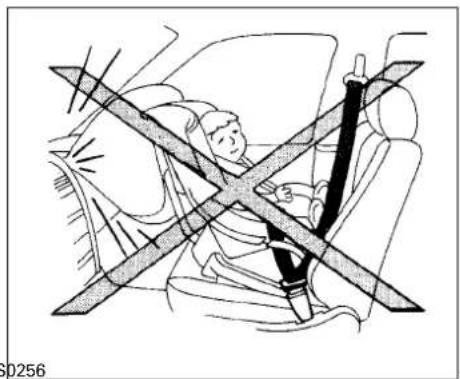
ARS1098WRS0256
PRECAUTIONSONCHILD RESTRAINTS
WARNING
- Failuretofollowthewarningsandinstructionsforproperuseandinstallationofchildrestraintscouldresultin seriousinjuryordeathofachildor otherpassengersinasuddenstopor collision:
-Thechildrestraintmustbeusedand installedproperly.Alwaysfollowall ofthechildrestraintmanufacturer's instructionsforinstallationanduse.
1-32 Safety—Seats, seat belts and supplemental restraint system
-Infantsandchildrenshouldneverbe heldonanyone'slap.Eventhestrongestadultcannotresisttheforcesof acollision.
-Donotputaseatbeltaroundbothachildandanotherpassenger.
-NISSANrecommendsthatallchild restraintsbeinstalledintherear seat.Studiesshowthatchildrenare saferwhenproperlyrestrainedinthe rearseatthaninthefrontseat.Ifyou mustinstallaforward-facingchild restraintinthefrontseat,referto "Forward-facingchildrestraintin- stallationusingtheseatbelts"inthis section.
—Neverinstallarear-facingchildre-
straintinthefrontseat.Aninflating
supplementalairbagcouldseriously
injureorkillyourchild.
-Besuretopurchaseachildrestraint thatwillfitthechildandvehicle. Somechildrestraintsmaynotfit properlyinyourvehicle.
-Childrestraintanchoragesaredesignedtowithstandonlythoseloads imposedbycorrectlyfittedchildrestraints.Undernocircumstancesare theytobeusedtoattachadultseat belts,orotheritemsorequipmentto thevehicle.Doingsocoulddamage thechildrestraintanchorages.The childrestraintanchorages.Thechild restraintwillnotbeproperlyinstalledusingthedamagedanchorage,andachildcouldbeseriously injuredorkilledinacollision.
- Neverusetheanchorpointsforadult seatbeltsorharnesses.
-Achildrestraintwithatoptether strapshouldnotbeusedinthefront passengerseat.
-Keepseatbacksasuprightaspossibleafterfittingthechildrestraint.
-Infantsandchildrenshouldalways beplacedinanappropriatechildrestraintwhileinthevehicle.
- Whenthechildrestraintisnotinuse, keepitsecuredwithaseatbelt.Ina suddenstoporcollision,looseobjects caninjureoccupantsordamagethe vehicle.
CAUTION
Achildrestraintinaclosedvehiclecan becomeveryhot.Checktheseatingsurfaceandbucklesbeforeplacingachildin thechildrestraint.
Thisvehicleisequippedwithauniversalchild restraintanchorsystem,referredtoastheLATCH (LowerAnchorsandTethersforCHildren)system.Somechildrestraintsincluderigidor webbing-mountedattachmentsthatcanbeconnectedtotheseanchors.Foradditionalinformation, refer to "LATCH (Lower Anchors and TethersforCHildren)system"inthissection.
If you donothavea LATCH compatible child restraint, the vehicle seat belt scan be used.
Several manufacturers offer childrestraints for infants and children of various sizes. Whense-lecting any child restraint, keep the following points in mind:
- Chooseonlya restraintwithalabelcertifying thatitcomplieswithFederalMotorVehicle SafetyStandard213orCanadianMotor VehicleSafetyStandard213.
-
Checkthechildrestraintinyourvehicletobe sureitiscompatiblewiththevehicle'sseat andseatbeltsystem.
-
If the child restraint is compatible with your vehicle, place your child in the child restraint and check the various adjustments to be sure the child restraint is compatible with your child. Choose each child restraint that is designed for your child's height and weight. Always follow all recommended procedures.
- If the combined weight of the child and child restraint is less than 65 lbs (29.5 kg), you may see either the LATCH anchors or the seat belt to install the child restraint (not both at the same time).
- If the combined weight of the child and child restraint is greater than 65 lbs (29.5 kg), use the vehicle's seat belt (not the lower anchors) to install the child restraint.
- Besuretofollowthechildrestraintmanufacturer'sinstructionsforinstallation.
AllU.S. states and Canadian provinces or territories require that infants and small children are restrained in an approved child restraint at all times while the vehicle is being operated. Canadian law requires the toptether strapon forward-facing children-straints besecured to the designated anchor point on the vehicle.

LATCHsystemloweranchorlocations-2nd,3rdand4throws
LATCH(LowerAnchorsandTethers forCHildren)SYSTEM
Yourvehicleisequippedwithspecialanchor pointsthatareusedwithLATCHsystemcompatiblechildrestraints. Thissystemmayalsobe referredtoastheISOFIXorISOFIXcompatible system. With this system, you donothavetouse vehicle seatbelt to secure the child restraint unless the combined weight of the child and child restraint exceeds 65 lbs (29.5 kg). If the combined weight of the child and child restraint is greater than 65 lbs (29.5 kg), us the vehicle's seat belt (not the lower anchors) to install the
childrestraint.Besuretofollowthechildrestraint manufacturer'sinstructionsforinstallation.
The LATCHloweranchorpoints are provided to install child restraints in the following positions only:
●2ndand3rdrowcenterpositiononly
- 4throwdriver'ssideinboardseatingpositiononly
LATCHloweranchor

WARNING
Failuretofollowthewarningsandinstructionsforproperuseandinstallationof childrestraintscouldresultinseriousinjuryordeathofachildorotherpassengersinasuddenstoporcollision:
-AttachLATCHsystemcompatible childrestraintsonlyatthelocations shownintheillustration.
-Inspecttheloweranchorsbyinsertingyourfingersintotheloweranchor area.Feeltomakesurethereareno obstructionsovertheanchorssuch asseatbeltwebbingorseatcushion material.Thechildrestraintwillnot besecuredproperlyiftheloweranchorsareobstructed.
1-34 Safety—Seats, seat belts and supplemental restraintsystem
-Childrestraintanchoragesaredesignedtowithstandonlythoseloads imposedbycorrectlyfittedchildrestraints.Undernocircumstancesare theytobeusedtoattachadultseat beltsorotheritemsorequipmentto thevehicle.Doingsocoulddamage thechildrestraintanchorages.The childrestraintwillnotbeproperly installedusingthedamagedanchorage,andachildcouldbeseriously injuredorkilledinacollision.
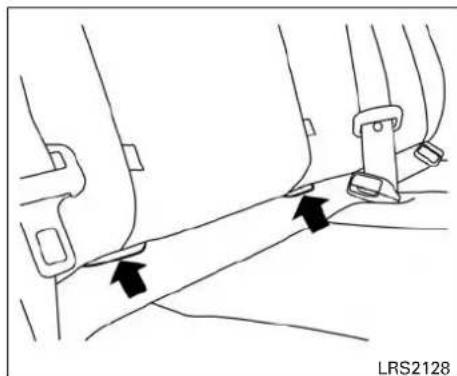
LATCHloweranchorlocation
LATCHloweranchorlocation
TheLATCHloweranchorsarelocatedasshown. Alabelisattachedtotheseatbacktohelpyou locatetheLATCHloweranchors.

LATCHlabellocations2ndand3rdrows
WARNING
Childrestraintanchoragesaredesigned towithstandonlythoseloadsimposedby correctlyfittedchildrestraints.Underno circumstancesaretheytobeusedtoattachadultseatbeltsorotheritemsor equipmenttothevehicle.Doingsocould damagethechildrestraintanchorages. Thechildrestraintwillnotbeproperly installedusingthedamagedanchorage, andachildcouldbeseriouslyinjuredor killedinacollision

LATCHlabellocations4throw

LATCHwebbing-mountedattachment InstallingchildrestraintLATCHlower anchorattachments
LATCHcompatiblechildrestraintsincludetwo rigidorwebbing-mountedattachmentsthatcan beconnectedtotwoanchorslocatedatcertain seatingpositionsinyourvehicle.Withthissystem,youdonothavetouseavehicleseatbeltto securethechildrestraint.Checkyourchildrestraintforalabelstatingthatitiscompatiblewith LATCH.Thisinformationmayalsobeintheinstructionsprovidedbythechildrestraintmanufacturer.

LATCHrigid-mountedattachment
Wheninstallingachildrestraint, carefullyread and followtheinstructionsinthismanualand thoseuppliedwiththechildrestraint.
1-36 Safety—Seats, seat belts and supplemental restraint system
Toptetheranchor
WARNING
- Donotallowcargotocontactthetop tetherstrapwhenitisattachedtothe toptetheranchor.Properlysecurethe cargosoitdoesnotcontactthetop tetherstrap.Cargothatisproperly securedorcargothatcontactsthetop tetherstrapmaydamageitduringa collision.Achildcouldbeseriouslyinjuredorkilledinacollisionifthetop tetherstrapisdamaged.
- Childrestraintanchoragesaredesignedtowithstandonlythoseloads imposedbycorrectlyfittedchildrestraints.Undernocircumstancesare theytobeusedtoattachadultseat belts,orotheritemsorequipment to thevehicle.Doingsocoulddamagethe childrestraintanchorages.Thechildrestraintwillnotbeproperlyinstalledusingthedamagedanchorages,anda childcouldbeseriouslyinjuredorkilled inacollision.

2ndand3rdrowseats
Ⓐ Toptetherstrap
B Anchorpoint
Toptetheranchorpointlocation
Theanchorpointsarelocatedinthefollowing locations:
-2ndrowand3rdrowseats-ontheseat-backasshown.
- 4throwseats-ontheseatbackasshown.
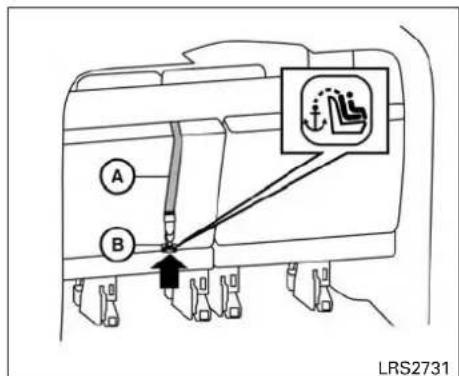
4throwseat
REAR-FACINGCHILDRESTRAINT INSTALLATIONUSINGLATCH
Foradditionalinformation,refertoallWarnings andCautionsinthe"Childsafety"and"Child restraints"sectionsofthismanualbeforeinstall-ingachildrestraint.
Donotusetheloweranchorsifthecombined weightofthechildandthechildrestraintexceeds 65lbs(29.5kg).Ifthecombinedweightofthe childandthechildrestraintisgreaterthan65lbs (29.5kg),usethevehicle'sseatbelt(notthe loweranchors)toinstallthechildrestraint.Be suretofollowthechildrestraintmanufacturer's instructionsforinstallation.
Followthesestepstoinstallarear-facingchild restraintinthe2nd,3rdand4throwseatsusing theLATCHsystem:
- Position the child restraint on these seat. Always follow the child restraint manufacturer's instructions.

Rear-facingwebbing-mounted-step2
- Secure the child restraint anchor attachment to the LATCH lower anchors. Check to make sure the LATCH attachment is properly attached to the lower anchors.
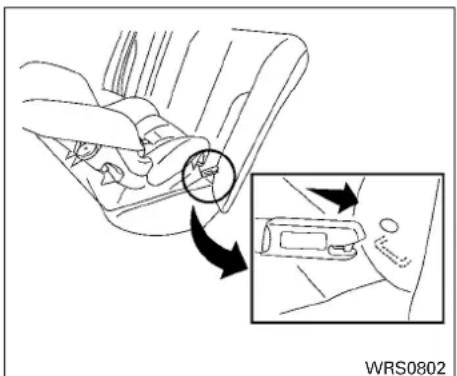
Rear-facingrigid-mounted-step2
1-38 Safety—Seats, seat belts and supplemental restraintsystem

Rear-facing-step3
3. For child restraint that are equipped with webbing-mounted attachments, remove any addition of slack from the anchor attachments. Press downward and rearward firmly in the center of the child restraint with your hand to compress the vehicle seat cushion and seat back while tightening the webbing of the anchor attachments.

Rear-facing-step4
4. After attaching the child restraint, test it before you place the childinit. Pushit from side to side while holding the child restraint near the LATCH attachment path. The child restraint should not move more than 1 inch (25mm), from sidetoside. Try to get forward and check to see if the LATCH attachment holds therestraint in place. If the restraint is not secure, tighten the LATCH attachment necessary, or put therestraint in another seat and test it again. You may need to try different child restraint or try installing by using the vehicle seat belt (if applicable). Not all child restraints fit in all types of vehicles.
5. Checktomakesurethechildrestraintis properlysecuredpriortoeachuse.Ifthe childrestraintisloose,repeatsteps2 through4.
REAR-FACINGCHILDRESTRAINT INSTALLATIONUSINGTHESEAT BELTS
WARNING
Thethree-pointseatbeltwithAutomatic LockingRetractor(ALR)mustbeused wheninstallingachildrestraint.Failureto usetheALRmodewillresultinthechild restraintnotbeingproperlysecured.The restraintcouldtipoverorbelooseand causeinjurytoachildinasuddenstopor collision.
For additional information, refertoallWarnings and Cautions in the "Childsafety" and "Child restraints" section so this manual before installing a child restraint.
Donotusetheloweranchorsifthecombined weightofthechildandthechildrestraintexceeds 65lbs(29.5kg).Ifthecombinedweightofthe childandthechildrestraintisgreaterthan65lbs (29.5kg),usethevehicle'sseatbelt(notthe loweranchors)toinstallthechildrestraint.Be
suretofollowthechildrestraintmanufacturer's instructionsforinstallation.
Followthesestepstoinstallarear-facingchild restraintusingthevehicleseatbeltsintherear seats:

Rear-facing-step1
- Childrestraintsforinfantsmustbe usedintherear-facingdirectionand thereforemustnotbeusedinthefront seat.Positionthechildrestraintontheseat. Alwaysfollowthechildrestraintmanufacturer'sinstructions.

Rear-facing-step2
- Routetheseatbelttonguethroughthechild restraintandinsertitintothebuckleuntilyou hearandfeelthelatchengage.Besureto followthechildrestraintmanufacturer's instructionsforbeltrouting.
1-40 Safety—Seats, seat belts and supplemental restraintsystem

Rear-facing-step3
3. Pulltheshoulderbeltuntilthebeltisfully extended. At thistime, theseatbeltretractor isintheALRmode(childrestraintmode). It revertstotheELRmodewhentheseatbelt isfullyretracted.
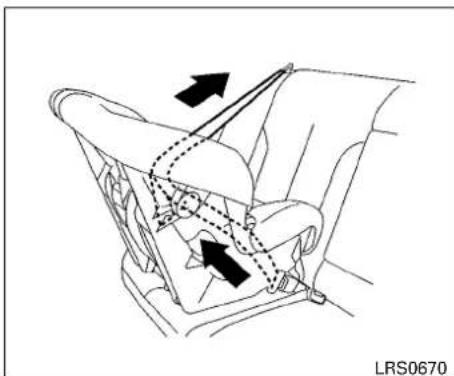
Rear-facing-step4
4. Allow these seat belt to retract. Pull upon the shoulder belt to remove anyslack in the belt.

Rear-facing-step5
5. Remove any additional slack from these seat belt; press downward and rear forward firmly in the center of the child restraint to compress the vehicle seat cushion and seat back while pulling up on these seat belt.

WRS0763
Rear-facing-step6
-
After attaching the child restraint, testit before you placethe childinit. Pushit from side to sidewhile holding the child restraint near these at beltpath. The child restraint should not movemorethan 1 inch (25mm), from sidetoside. Try to get forward and check to see if the belthold stherestraint in place. If therestraint is not secure, tightentheseat beltas necessary, or put therestraint in another seat and testit again. You may need to try different child restraint. Not all child restraints fit in all types of vehicles.
-
Checktomakesurethatthechildrestraintis properlysecuredpriortoeachuse.Ifthe seatbeltisnotlocked,repeatsteps1 through6.
Afterthechildrestraintisremovedandtheseat beltfullyretracted,theALRmode(childrestraint mode)iscanceled.
FORWARD-FACINGCHILD RESTRAINTINSTALLATIONUSING LATCH
For additional information, refertoallWarnings and Cautions in the "Childsafety" and "Child restraints" section so this manual before installing a child restraint.
Donotusetheloweranchorsifthecombined weightofthechildandthechildrestraintexceeds 65lbs(29.5kg).Ifthecombinedweightofthe childandthechildrestraintisgreaterthan65lbs (29.5kg), usethevehicle'sseatbelt(notthe loweranchors)toinstallthechildrestraint.Be suretofollowthechildrestraintmanufacturer's instructionsforinstallation.
Followthesestepstoinstallaforward-facing childrestraintinthe2nd,3rdand4throwseats usingtheLATCHsystem:
- Position the child restraint on these seat. Always follow the child restraint manufacturer's instructions.
1-42 Safety—Seats, seat belts and supplemental restraintsystem

Forward-facingwebbing-mounted-step2
- Secure the child restraint anchor attachment to the LATCH lower anchors. Check to make sure the LATCH attachment is properly attached to the lower anchors.
If the child restraint is equipped with atop tether strap, routethetoptether strap and secure the ether strap to the ether anchor point. For additional information, refer to "Installing to optether strap" in this section.
Donotinstallchildrestraintsthatrequirethe useofatoptetherstrapinseatingpositions thatdonothaveatoptetheranchor.
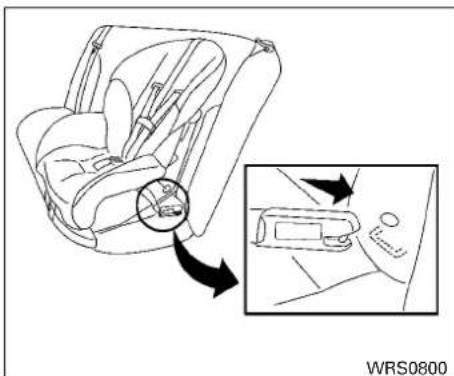
Forward-facingrigid-mounted-step2
- The back of the child restraint should be secured against the vehicle seat back.
Ifnecessary,adjustorremovethehead restraint/headresttobtainthecorrectchild restraintfit.Iftheheadrestraint/headrestis removed,storeitinasecureplace.Besure toreinstalltheheadrestraint/headrest whenthechildrestraintisremoved.For additionalinformationabouthead restraint/headrestadjustment,referto "Headrestraints/headrests"inthissection.
If theseatingpositiondoesnothavean adjustableheadrestraint/headrestanditis interferingwiththeproperchildrestraintfit, tryanotherseatingpositionoradifferent childrestraint.

Forward-facing-step4
- For child restraint sthat are equipped with webbing-mounted attachments, remove any addition of slack from the anchor attachments. Press downward and rearward firmly in the center of the child restraint with your kneetocompress the vehicle seat cushion and seat back while tightening the webbing of the anchor attachments.
- Tightenthetherstrapaccordingtothe manufacturer'sinstructionstoremoveany slack.
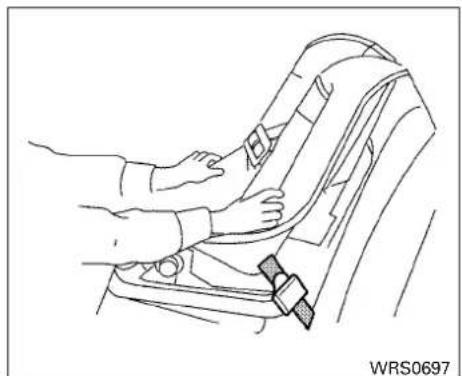
Forward-facing-step6
-
After attaching the child restraint, test it before you placethe childinit. Pushit from side to sidewhile holding the child restraint near the LATCH attachment path. The child restraint should not move more than 1 inch (25mm), from sidetoside. Try to get forward and check to see if the LATCH attachment hold sther restraint place. If the restraint is not secure, tighten the LATCH attachment as necessary, or put her restraint in another seat and test it again. You may need to try different child restraint. Not all child restraints fit in all types of vehicles.
-
Checktomakesurethechildrestraintis properlysecuredpriortoeachuse.Ifthe childrestraintisloose,repeatsteps3 through6.
1-44 Safety—Seats, seat belts and supplemental restraintsystem

2ndand3rdrowbenchseat
Ⓐ Toptetherstrap
⑧ Anchorpoint
Installingtoptetherstrap
Thechildrestrainttoptetherstrapmustbeused wheninstallingthechildrestraintwiththeLATCH loweranchorattachments.
First, secure the child restraint with the LATCH lower anchors (2nd and 3rd row bench seating positions only).
2ndand3rdrowbenchseat
- Removetheheadrestraint/headrestand storeitinasecureplace. Besuretoreinstall theheadrestraint/headrestwhenthechild restraintisremoved. For additional information about headrestraint/headrestadjustment, removalandinstallation, refer to "Headrestraints/headrests" in this section.
- Positionthetoptetherstrap seatback. Ⓐ overthe
- Securethetetherstraptothetetheranchor point Ⓑ asshown.
- Tightenthetherstrapaccordingtothe manufacturer'sinstructionstoremoveany slack.
WARNING
Childrestraintanchoragesaredesigned towithstandonlythoseloadsimposedby correctlyfittedchildrestraints.Underno circumstancesaretheytobeusedtoattachadultseatbelts,orotheritemsorequipmenttothevehicle.Doingsocould damagethechildrestraintanchorages. Thechildrestraintwillnotbeproperly installedusingthedamagedanchorage, andachildcouldbeseriouslyinjuredor killedinacollision.

4throwbenchseat
Ⓐ Toptetherstrap
⑧ Anchorpoint
4throwbenchseat
WARNING
Inthe4throwbenchseat,achildrestraint withatoptetherstrapcanonlybeusedon themiddle-driver'ssideseatingposition. Donotplaceintheotherseatingposition andattempttoanglethetetherstrapto themiddle-driver'ssideseatingposition.
Themiddle-driver'ssideofthe4throwbench seatistheseatingpositionthatcanuseatop tetherstrap.First,securethechildrestraintwith theseatbelt,asapplicable.
- Positionthetoptetherstrap
Ⓐ asshown. - Securethetetherstraptothetetheranchor point Ⓑ asshown.
- Tightenthetherstrap according to the manufacturer's instruction store move any slack. Makesuretheheadrestraint/headrest does not contact the top ether strap.
If you have any questions when installing a toptether strap, it is recommended that you visit a NISSAN dealer for details.
WARNING
Childrestraintanchoragesaredesigned towithstandonlythoseloadsimposed by correctlyfittedchildrestraints.Underno circumstancesaretheytobeusedtoattachadultseatbelts,orotheritemsor equipmenttothevehicle.Doingsocould damagethechildrestraintanchorages. Thechildrestraintwillnotbeproperly installedusingthedamagedanchorage, andachildcouldbeseriouslyinjuredor killedinacollision.
FORWARD-FACINGCHILD RESTRAINTINSTALLATIONUSING THESEATBELTS
A WARNING
Thethree-pointseatbeltwithAutomatic LockingRetractor(ALR)mustbeused wheninstallingachildrestraint.Failureto usetheALRmodewillresultinthechild restraintnotbeingproperlysecured.The restraintcouldtipoverorbelooseand causeinjurytoachildinasuddenstopor collision.

Forward-facing(frontpassengerseat)-step1
For additional information, refertoallWarnings and Cautionsinthe "Childsafety" and "Child restraints" sectionsof this manual before installing a child restraint.
Donotusetheloweranchorsifthecombined weightofthechildandthechildrestraintexceeds 65lbs(29.5kg).Ifthecombinedweightofthe childandthechildrestraintisgreaterthan65lbs (29.5kg),usethevehicle'sseatbelt(notthe loweranchors)toinstallthechildrestraint.Be suretofollowthechildrestraintmanufacturer's instructionsforinstallation.
Followthesestepstoinstallaforward-facing childrestraintusingthevehicleseatbeltinthe rearseatsorinthefrontpassengerseat:
-
If you must install a child restraint in the front seat, it should be placed in forward-facing direction only. Move these at to there are most position. Child restraints for infants must be used in therear-facing direction and therefore must not be used in the front seat.
-
Position the child restraint on these seat. Always follow the child restraint manufacturer's instructions.
The back of the child restraint should be secured against the vehicle seat back.
Ifnecessary, adjustorremovethehead restraint/headrestttoobtainthecorrectchild restraintfit. Iftheheadrestraint/headrestis removed, storeitinasecureplace. Besure toreinstalltheheadrestraint/headrest whenthechildrestraintisremoved. For additionalinformationabouthead restraint/headrestadjustment, removaland installation, referto "Head restraints/headrests" inthissection.
If theseating position does not have an adjustable head restraint/head restanditis interfering with the proper child restraint fit, try another seating position or a different child restraint.

Forward-facing-step3
- Routetheseatbelttonguethroughthechild restraintandinsertitintothebuckleuntilyou hearandfeelthelatchengage.Besureto followthechildrestraintmanufacturer's instructionsforbeltrouting.
If the child restraint is equipped with atop tether strap, routethetoptether strap and secure the ether strap to the ether anchor point. For additional information, refer to "Installing toptether strap" in this section.
Donotinstallchildrestraintsthatrequirethe useofatoptetherstrapinseatingpositions thatdonothaveatoptetheranchor.

Forward-facing-step4
4. Pulltheshoulderbeltuntilthebeltisfully extended.Atthistime,theseatbeltretractor isintheALRmode(childrestraintmode).It revertstoELRmodewhentheseatbeltis fullyretracted.
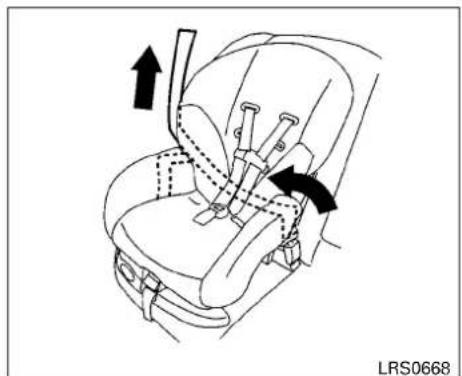
Forward-facing-step5
5. Allow these seat belt to retract. Pull upon the shoulder belt to remove anyslack in the belt.

Forward-facing-step6
6. Remove any additional slack from these seat belt; press downward and rearward firmly in the center of the child restraint with your kneetocompress the vehicle seat cushion and seat back while pulling up on these seat belt.
7. Tightenthetherstrapaccordingtothe manufacturer'sinstructionstoremoveany slack.
1-48 Safety—Seats, seatbeltsandsupplementalrestraintsystem

Forward-facing-step8
-
After attaching the child restraint, testit before you placethe childinit. Pushit from side to sidewhile holding the child restraint near these at beltpath. The child restraint should not movemorethan 1 inch (25mm), from sidetoside. Trytotugitforward and check to see if these at belthold stherestraint in place. If therestraint is not secure, tighten these at beltas necessary and testit again. You may need to try a different child restraint. Not all child restraints fitinall types of vehicles.
-
Checktomakesurethechildrestraintis properlysecuredpriortoeachuse.Ifthe seatbeltisnotlocked,repeatsteps3 through8.
Afterthechildrestraintisremovedandtheseat beltisfullyretracted,theALRmode(childre-straintmode)iscanceled.

2ndand3rdrowbenchseat
Ⓐ Toptetherstrap
B Anchorpoint
Installingtoptetherstrap
Thechildrestrainttoptetherstrapmustbeused wheninstallingthechildrestraintwithseatbelts.
First, secure the child restraint with these at belt.
2ndand3rdrowbenchseat
- Removetheheadrestraint/headrestand storeitinasecureplace.Besuretoreinstall theheadrestraint/headrestwhenthechild restraintisremoved.Foradditionalinforma-
tionaboutheadrestraint/headrestadjustment,removalandinstallation,referto "Headrestraints/headrests"inthissection.
- Positionthetoptetherstrap seatback.
Ⓐ overthe - Securethetetherstraptothetetheranchor point Ⓑ asshown.
- Tightenthetherstrapaccordingtothe manufacturer'sinstructionstoremoveany slack.
WARNING
Childrestraintanchoragesaredesigned towithstandonlythoseloadsimposed by correctlyfittedchildrestraints. Underno circumstancesaretheytobeusedtoattachadultseatbelts, orotheritemsor equipmenttothevehicle. Doingsocould damagethechildrestraintanchorages. Thechildrestraintwillnotbeproperly installedusingthedamagedanchorage, andachildcouldbeseriouslyinjuredor killedinacollision.

LRS2731
4throwbenchseat
Ⓐ Toptetherstrap
⑧ Anchorpoint
4throwbenchseat
WARNING
Inthe4throwbenchseat,achildrestraint withatoptetherstrapcanonlybeusedon themiddle-driver'ssideseatingposition. Donotplaceintheotherseatingposition andattempttoanglethetetherstrapto themiddle-driver'ssideseatingposition.
Themiddle-driver'ssideofthe4throwbench seatistheseatingpositionthatcanuseatop tetherstrap.First,securethechildrestraintwith theseatbelt,asapplicable.
- Positionthetoptetherstrap
Ⓐ asshown. - Securethetetherstraptothetetheranchor point Ⓑ asshown.
- Tightenthetetherstrapaccordingtothe manufacturer'sinstructionstoremoveany slack. Makesuretheheadrestraint/headrest doesnotcontactthetoptetherstrap.
If you have any questions when installing a toptether strap, it is recommended that you visit a NISSAN dealer for details.
WARNING
Childrestraintanchoragesaredesigned towithstandonlythoseloadsimposedby correctlyfittedchildrestraints.Underno circumstancesaretheytobeusedtoattachadultseatbelts,orotheritemsor equipmenttothevehicle.Doingsocould damagethechildrestraintanchorages. Thechildrestraintwillnotbeproperly installedusingthedamagedanchorage, andachildcouldbeseriouslyinjuredor killedinacollision.
BOOSTERSEATS
For additional information on installing a booster seat in your vehicle, follow the instructions outlined in this section.
Precautionsonboosterseats
WARNING
Ifaboosterseatandseatbeltarenotused properly,theriskofachildbeinginjured orkilledinasuddenstoporcollision greatlyincreases:
-Makesuretheshoulderportionof thebeltisawayfromthechild'sface andneckandthelapportionofthe beltdoesnotcrossthestomach.
-Makesuretheshoulderbeltisnot behindthechildorunderthechild's arm.
-Aboosterseatmustonlybeinstalled inaseatingpositionthathasa lap/shoulderbelt.

A.Lowbackboosterseat
B.Highbackboosterseat

Boosterseatsofvarioussizesareofferedby severalmanufacturers.Whenselectingany boosterseat,keepthefollowingpointsinmind:
- Chooseonlyaboosterseatwithalabel certifyingthatitcomplieswithFederalMotor VehicleSafetyStandard213orCanadian MotorVehicleSafetyStandard213.
- Checktheboosterseatinyourvehicletobe sureitiscompatiblewiththevehicle'sseat andseatbeltsystem.

LRS0464WRS
AllU.S. states and Canadian provinces or territories require that infants and small children were restrained in an approved child restraint at all times while the vehicle is being operated.
The instructions in this section apply to booster seat installation in there are seats or the front passenger seat.
Boosterseatinstallation
WARNING
Toavoidinjurytochild, donotusethe lap/shoulderbeltintheAutomaticLockingRetractor(ALR)modewhenusinga boosterseatwiththeseatbelts.
- Makesurethechild'sheadwillbeproperly supportedbytheboosterseatorvehicle seat.Theseatbackmustbeatorabovethe centerofthechild'sears.Forexample,ifa lowbackboosterseatischosen,thevehicle seatbackmustbeatorabovethecenterof thechild'sears.Iftheseatbackislowerthan thecenterofthechild'sears,ahighback boosterseatshouldbeused.
- If the booster seatis compatible with your vehicle, placethe child in the booster seat and check the various adjustments to be sure the booster seatis compatible with the child. Always follow all recommended procedures.
For additional information, refertoallWarnings and Cautionsinthe "Childsafety", "Childrestraints" and "Boosterseats" sectionsof this manual before installing a child restraint.
Followthesestepstoinstallaboosterseatinthe rearseatorinthefrontpassengerseat:
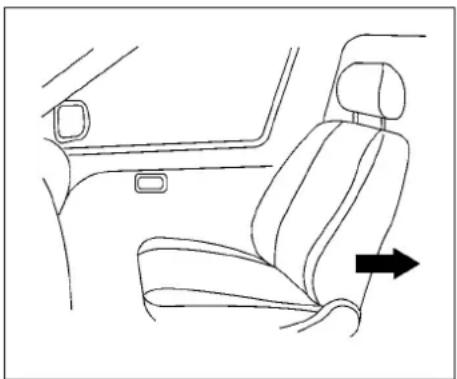
- If you must install a booster seat in the front seat, mov these at to there are most position.
- Positiontheboosterseatontheseat. Only placeitinafront-facingdirection. Always followtheboosterseatmanufacturer's instructions.
1-52 Safety—Seats, seat belts and supplemental restraintsystem

LRS0454
Frontpassengerposition
- The booster seat should be positioned on the vehicle seat so that it is stable.
Ifnecessary, adjustorremovethehead restraint/headresttobtainthecorrect boosterseatfit.Ifthehead restraint/headrestisremoved,storeitina secureplace.Besuretoreinstallthe headrestraint/headrestwhenthe boosterseatisremoved.Foradditional informationaboutheadrestraint/headrest adjustment,removalandinstallation,referto "Headrestraints/headrests"inthissection.
If theseating position does not have an adjustable head restraint/head restanditis interfering with the proper booster seat fit, try another seating position or different booster seat.
-
Positionthelapportionoftheseatbeltlow andsnugonthechild'ships.Besureto followtheboosterseatmanufacturer's instructionsforadjustingtheseatbeltrouting.
-
Pulltheshoulderbelt portion of these seat belt toward theretractor to take up extraslack. Besuretheshoulder belt is positioned across the top, middle portion of the child's shoulder. Besuret of follow the booster seat manufacturer's instructions for adjusting the seat belt routing.
-
Followthewarnings, cautions and instructions for properly fastening a seat belt shownin"Three-pointtypeatbeltwith retractor"inthissection.
SUPPLEMENTALRESTRAINT SYSTEM(SRS)
PRECAUTIONSONSRS
This SRS section contains important information concerning the following systems:
- Driverandfrontpassengersupplemental front-impactairbag
- Front seat-mounted side-impact supplementalairbag
- Roof-mountedcurtainside-impactandroll-oversupplementalairbag
- Seatbeltwithpretensioner(s)(frontseats)
Supplementalfront-impactairbagsystem
This system can help cushion the impact force to the head and chest of the driver and front passenger in certain frontal collisions.
Frontseat-mountedside-impactsupplementalairbagsystem
This system can help cushion the impact for ceto the chest and pelvic area of the driver and front passenger incertainside impact collisions. The side air bags are designed to inflate on the side where the vehicle is impacted.
Roof-mountedcurtainside-impact and rolloversupplementalairbagsystem
This system can help cushion the impact for ceto the head of occupants in front and rear out board seating positions incertainside - impact roll over collisions. In aside impact, the curtain air bags are designed to inflate on the side where the vehicle is impacted. In a rollover, both curtain and air bags are designed to inflate and remain inflated for a short time.
This supplemental restraintsystem is designed to supplement the crash protection provided by the driver and front passenger seat belts and not as substitute forthem. Seat belt should always be correctly worn and the occupant seated as suitable distance away from the steering wheel, instrument panel and door finishers. For additional information about instructions and precaution on seat belt usage, refer to "Seat belts" in this section.
Thesupplementalairbagsoperateonly whentheignitionswitchisplacedintheON orSTARTposition.
AfterplacingtheignitionswitchintheON position,thesupplementalairbagwarning lightilluminates.Thesupplementalairbag warninglightwillturnoffafterabout7secondsifthesystemisoperational.


WRS0031
WARNING
●Thefrontairbagsordinarilywillnot inflateintheeventofasideimpact,rear impact,rollover,orlowerseverityfrontalcollision.Alwayswearyourseat beltstohelpreducetheriskorseverity ofinjuryinvariouskindsofaccidents.
- Theseatbeltsandthefrontairbagsare mosteffectivewhenyouaresittingwell backanduprightintheseat.Thefront airbagsinflatewithgreatforce.Ifyou areunrestrained,leaningforward,sittingsidewaysoroutofpositioninany way,youareatgrecaterriskofinjuryor deathinacrash.Youmayalsoreceive seriousorfatalinjuriesfromthefront airbagifyouareupagainstitwhenit inflates.Alwayssitbackagainstthe seatbackandasfarawayaspractical fromthesteeringwheelorinstrument panel.Alwaysproperlyusetheseat belts.
- Keephandsontheoutsideofthesteeringwheel.Placingtheminsidethe steeringwheelrimcouldincreasethe riskthattheyareinjuredwhenthefront airbaginflates.
- Thedriverandfrontpassengerseatbelt bucklesareequippedwithsensorsthat detectiftheseatbeltsarefastened.The airbagsystemmonitortheseverityof acollisionandtheninflatestheairbags asneededbasedonbeltusage.Failure toproperlywearseatbeltscanincrease theriskorseverityofinjuryinan accident.


ARS1133


WARNING
●Neverletchildrenrideunrestrainedor extendtheirhandsorfaceoutofthe window.Donotattempttoholdthemin yourlaporarms.Someexamplesof dangerousridingpositionsareshown intheillustrations.
1-56 Safety—Seats, seat belts and supplemental restraintsystem
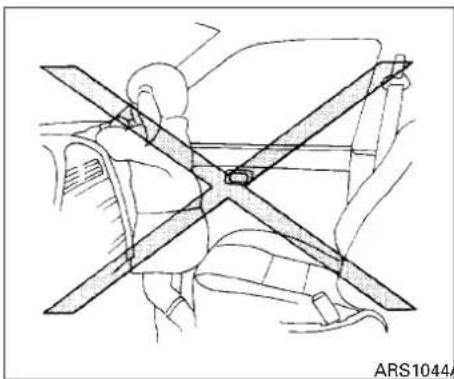
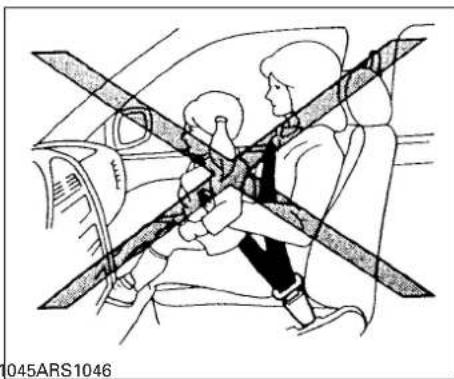

WARNING
- Childrenmaybeseverelyinjuredor killedwhenthefrontairbags,sideair bagsorcurtainside-impactrolloverair bagsinflateiftheyarenotproperlyrestrained.Pre-teensandchildrenshould beproperlyrestrainedintherearseat,if possible.
●Neverinstallarear-facingchildre- straintinthefrontseat.Aninflating frontairbagcouldseriouslyinjureor killyourchild.Foradditionalinformation,referto"Childrestraints"inthis section.

Donotleanagainstdoorsorwindows.
WARNING
Frontseat-mountedside-impactsupplementalairbagsandroof-mountedcurtain side-impactrolloversupplementalair bags:
- Thesideairbagsandcurtainairbags ordinarilywillnotinflateintheeventof afrontalimpact,rearimpact,rolloveror lowerseveritysidecollision.Always wearyourseatbeltstohelpreducethe riskorseverityofinjuryinvariouskinds ofaccidents.
- Theseatbelts,thesideairbagsand curtainandairbagsaremosteffective whenyouaresittingwellbackandup-rightintheseatwithbothfeetonthe floor.Thesideairbagandcurtainand airbaginflatewithgreatforce.Donot allowanyonetoplacetheirhand,legor facenearthesideairbagonthesideof theseatbackofthefrontseatornear thesideroofrails.Donotallowanyone sittinginthefrontseatstoextendtheir handoutofthewindoworleanagainst thedoor.Someexamplesofdangerous ridingpositionsareshowninthepreviousillustrations.
- Donotuseseatcoversonthefront seatbacks. They may interferewithside airbaginflation.

1-58 Safety—Seats, seat belts and supplemental restraintsystem
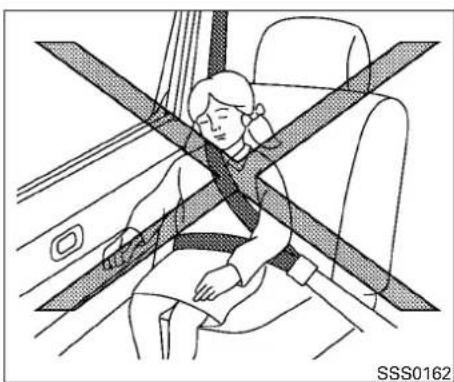
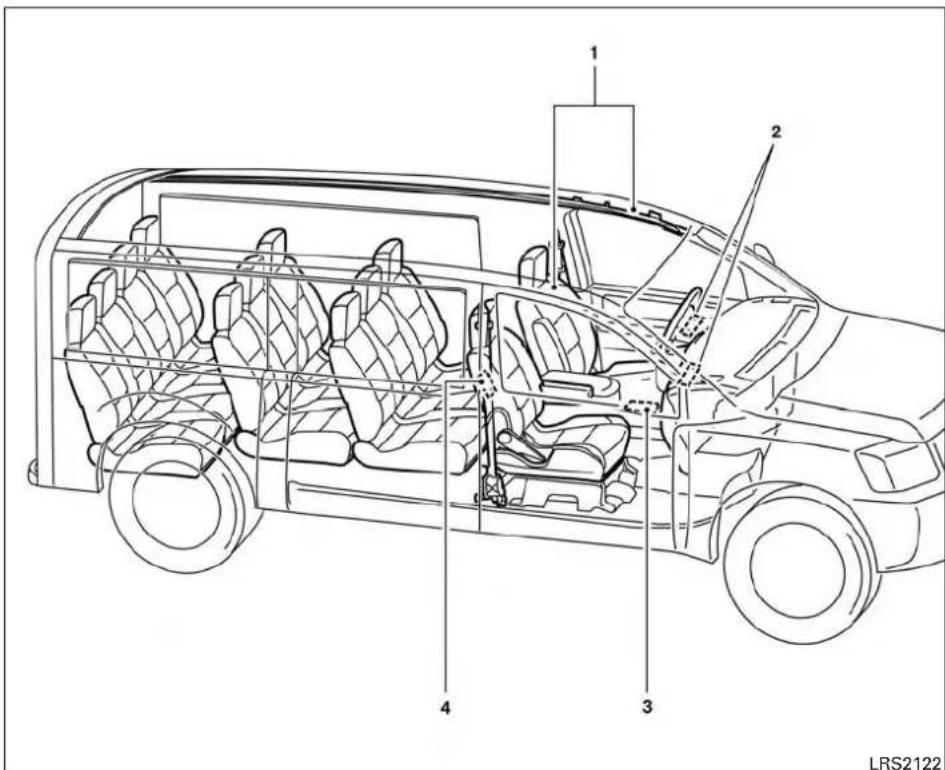
Safety—Seats, seatbeltsandsupplementalrestraintsystem 1-59
Supplementalairbagsystem
- Roof-mounted curtainside-impact and roll-oversupplemental airbags
- Supplementalfront-impactairbagmodules
- AirbagControlUnit(ACU)
- Frontseat-mountedside-impactsupplementalairbagmodules
The drivers supplemental front-impact air bag is located in the center of the steering wheel. The passengers supplemental front-impact air bag is mounted in the dashboard above the glove box. The frontair bags are designed to inflate in higher severity frontal collisions, although they may inflate if the forces in another type of collision are similar to those of higher severity frontal impact. They may not inflate in certain frontal collisions. Vehicle damage (or lack of it) is not always an indication of proper frontair bags system operation.
If you have any questions about your airbag system, it is recommended that you contact NISSANoraNISSANdealer. If you are considering modification of your vehicle duetoadisability, you may also contact NISSAN. Contact information is contained in the front of this Owner's Manual.
Whenafrontairbaginflates,afairlyloudnoise maybeheard,followedbythereleaseofsmoke. Thissmokeisnotharmfulanddoesnotindicatea fire.Careshouldbetakennottoinhaleit,asitmay causeirritationandchoking.Thosewithahistory ofabreathingconditionshouldgetfreshair promptly.
Frontairbags, alongwiththeuseofseatbelts, helptocushiontheimpactforceonthefaceand chestofthefrontoccupants. Theycanhelpsave livesandreduceseriousinjuries. However, an inflatingfrontairbagmaycausefacialabrasions orotherinjuries. Frontairbagsdonotprovide restrainttothelowerbody.
Seatbeltsshouldbecorrectlywornandthe driverandpassengerseateduprightasfaras practicalawayfromthesteeringwheelorinstrumentpanel.Thefrontairbagsinflatequicklyin ordertohelpprotectthefrontoccupants.Becauseofthis,theforceofthefrontairbaginflating canincreasetheriskofinjuryiftheoccupantis toocloseto,orisagainst,thefrontairbagmodule duringinflation.
Thefrontairbagsdeflatequicklyafteracollision.
Thefrontairbagsoperateonlywhenthe ignitionswitchisplacedintheONorSTART position.
AfterplacingtheignitionswitchintheON position,thesupplementalairbagwarning lightilluminates.Thesupplementalairbag warninglightwillturnoffafterabout7secondsifthesystemisoperational.
Othersupplementalairbagprecautions
WARNING
- Donotplaceanyobjectsonthesteering wheelpadorontheinstrumentpanel. Also, donotplaceanyobjectsbetween anyoccupantandthesteeringwheelor instrumentpanel. Such objects maybe comed dangerousprojectilesandcause injuryifthefrontairbagsinflate.
- Immediatelyafterinflation,several frontairbagsystemcomponentswillbe hot.Donottouchthem;youmayseverelyburnyourself.
-
Donotmakeunauthorizedchangesto yourvehicle'selectricalsystemorsuspensionsystemthiscouldaffectproper operationoftheairbagsystem.
-
Tamperingwiththefrontairbagsystem mayresultinseriouspersonalinjury. Tamperingincludeschangestothe steeringwheelandtheinstrument panelassemblybyplacingmaterial overthesteeringwheelpadandabove theinstrumentpanelorbyinstalling additionaltrimmaterialaroundtheair bagsystem.
- Itisrecommendedthatyouvisita NISSANdealerforworkonandaround thefrontairbagsystem.ItisalsorecommendedthatyouvisitaNISSAN dealerforinstallationofelectrical equipment.TheSupplementalRestraint System(SRS)wiringshouldnotbe modifiedordisconnected.Unauthorizedelectricaltestequipmentandprob-ingdevicesshouldnotbeusedonthe airbagsystem.
- Acrackedwindshieldshouldbere-placedimmediatelybyaqualifiedrepair facility.Acrackedwindshieldcouldaf-fectthefunctionofthesupplementalair bagsystem.
*The SRSwiringharnessconnectorsare yellowandorangeforeasyidentification.

Frontseat-mountedside-impact supplementalairbagandroof-mountedcurtainside-impact and rolloversupplementalairbagsystems
Thesideairbagsarelocatedintheoutsideofthe seatbackofthefrontseats.Thecurtainairbags arelocatedinthesideroofrailsinallfourrows.
Alloftheinformation,cautionsandwarningsinthismanualmustbefollowed.The sideairbagsandcurtainairbagsaredesignedto inflateinhigherseveritydecollisions,although theymayinflateiftheforcesinanothertypeof collisionaresimilartothoseofahigherseverity impact.Theyaredesignedtoinflateontheside where the vehicle is impacted. They may not inflate incertainside collisions.
Curtainairbagsarealsodesignedtoinflatein certaintyesof rollovercollisionsor nearroll-overs.Asaresult,certainvehiclemovements(for example,duringsevereoff-roading)maycause thecurtainairbagstoinflate.
Vehicledamage(orlackofit)isnotalwaysan indicationofpropersideairbagandcurtainair bagoperation.
Whentheside airbagsandcurtainairbags inflate,afairlyloudnoisemaybeheard,followed byreleaseofsmoke.Thissmokeisnotharmful and does not indicate a fire. Care should be taken not to inhale it, as it may cause irritation and choking.Thosewithahistoryofabreathingconditionsshouldgetfreshhairpromptly.
Sideairbags, alongwiththeuseofseatbelts, helptocushiontheimpactforceonthechestof thefrontoccupants. Curtainairbagshelpto cushiontheimpactforcetotheheadofoccupantsinthefrontandrearoutboardseatingpositionsinallrows. Theycanhelpsavelivesand reduceseriousinjuries. However, aninflating sideairbagorcurtainairbagmaycauseabrasionsorotherinjuries. Sideairbagsandcurtain air bags donotproviderestrainttothelower body.
Theseatbeltsshouldbecorrectlywornandthe driverandpassengerseateduprightasfaras practicalawayfromthesideairbag.Rearseat passengersshouldbeseatedasfarawayas practicalfromthedoorfinishersandsideroof rails.Thesideairbagsandcurtainairbagsinflate quicklyinordertohelpprotecttheoccupants. Becauseofthis,theforceofthesideairbagsand curtainairbagsinflatingcanincreasetheriskof injuryiftheoccupantistoocloseto,orisagainst, theseairbagmodulesduringinflation.Theside airbagwilldeflatequicklyafterthecollisionis over.
Thecurtainairbagwillremaininflatedforashort time.
Thesideairbagsandcurtainairbagsoperateonlywhentheignitionswitchis placedintheONorSTARTposition.
AfterplacingtheignitionswitchintheON position,thesupplementalairbagwarning lightilluminates.Thesupplementalairbag warninglightwillturnoffafterabout7secondsifthesystemisoperational.
WARNING
- Donotplaceanyobjectsneartheseat-backofthefrontseats. Also, donot placeanyobjects(anumbrella, bag, etc.) betweenthefrontdoorfinisher andthefrontseat. Suchobjectsmay becomedangerousprojectilesand causeinjuryifasideairbaginflates.
- Rightafterinflation,severalsideairbag andcurtainairbagsystemcomponents willbehot.Donottouchthem;youmay severelyburnyourself.
- No unauthorized changes should be madetoanycomponentsorwiringofthesideairbagandcurtainairbag systems. Thisistopreventdamagetoor accidentalinflationofthesideairbag andcurtainairbagsystems.
-
Donotmakeunauthorizedchangesto yourvehicle's electrical system, suspensionsystem orside panel. This could affect proper operation of the curtainairbagsystems.
-
Tamperingwiththesideairbagsystem mayresultinseriouspersonalinjury. Forexample,donotchangethefront seatsbyplacingmaterialneartheseat-backsorbyinstallingadditionaltrim material,suchasseatcovers,around thesideairbag.
- Itisrecommendedthatyou visita NISSANdealerforworkaroundandon thesideairbagandcurtainairbag systems.Itisalsorecommendedthat youvisitaNISSANdealerforinstallationofelectricalequipment.TheSRS wiringharnesses*shouldnotbemodified or disconnected. Unauthorized electricaltestequipmentandprobing devicesshouldnotbeusedontheside airbagorcurtainairbagsystems.
*The SRSwiringharnessorconnectorsare yellowororangeforeasyidentification.
Whensellingyourvehicle, werequestthatyou informthebuyeraboutthesideairbagsand curtainairbagsystemandguidethebuyertothe appropriatesectionsinthisOwner'sManual.
Seatbeltwithpretensioner(s)(front seats)
WARNING
- Thepretensioner(s) cannotbereused afteractivation. They must bereplaced together with theretractor and buckle as a unit.
- If the vehicle becomes involved a collision but pretensioner(s) are not activated, besureto havethe pretensionersystem checked and, if necessary, replaced. It is recommended that you visit a NISSAN dealer for this service.
-
Nounauthorizedchangesshouldbe madetoanycomponentsorwiringof thepretensionersystem. Thisistopreventdamagetooraccidentalactivation of thepretensioner(s).Tamperingwith thepretensionersystemmayresult in seriouspersonalinjury.
-
It is recommended that you visit a NISSAN dealer for work on and around the pretensionersystem. It is also recommended that you visit a NISSAN dealer for installation of electrical equipment. Unauthorized electrical test equipment and probing device should not be used on the pretensionersystem.
- If you need to dispose of the pretensioner(s) or scrap the vehicle, it is recommended that you visit a NISSAN dealer for this service. Incorrect disposal procedures could cause personal injury.
Thepretensionersystemmayactivatewiththe supplementalairbagsystemin certaintypesof collisions. Working withtheseatbeltretractor, thepretensioner(s)helptightentheseat belt when the vehicle becomes involved in certain typesofcollisions,helpingtorestrainfrontseat occupants.
Thepretensioner(s)areencasedwithintheseat beltretractorandtotheseatbeltanchoraffixed to the floor of the vehicle. These seat belts are usedthesamewayasconventionalseatbelts.
Whenpretensioner(s)activate, smokeisreleased and a loud noise may be heard. This smokeisnotharmfulanddoesnotindicateafire. Care should be taken not to inhale it, as it may causeirritationandchoking. Thosewithahistory of a breathing condition should get fresh air promptly.
Afterthepretensioner(s')activation,loadlimiters allowtheseatbelttoreleasewebbing(ifnecessary)toreduceforcesagainstthechest.
Thesupplementalairbagwarninglight is used to indicate themalfunctions in the pretensioner system. For additional information, refer to "Supplementalairbagwarninglight" in this section. If the operation of these supplemental airbag warning light indicates there is a malfunction, have the system checked. It is recommended that you visit a NISSAN dealer forth this service. When selling your vehicle, we request that you inform the buyer about the pretensioner system and guide the buyer to the appropriate sections in this Owner's Manual.

1.SRSAirbagwarninglabels
Thewarninglabelsarelocatedonthesurfaceofthesunvisor.
SUPPLEMENTALAIRBAG WARNINGLABELS
Warninglabelsaboutthesupplementalfront-impactairbagsystemareplacedinthevehicleas shownintheillustration.
WARNING
Donotusearear-facingchildrestrainton aseatprotectedbyanairbaginfrontofit. Iftheairbagdeploys,itmaycauseserious injuryordeath.

SUPPLEMENTALAIRBAG WARNINGLIGHT
Thesupplementalairbagwarninglight, displaying intheinstrumentpanel,monitorsthecircuitsfortheairbagsystems,pretensioner(s)andallrelatedwiring. WhentheignitionswitchisplacedintheONor STARTposition,thesupplementalairbagwarninglightilluminatesforabout7secondsandthen turnsoff.Thismeansthesystemisoperational.
1-64 Safety—Seats, seat belts and supplemental restraint system
Ifanyofthefollowingconditionsoccur, thefront airbag, sideairbag, curtainairbag and pretensionersystemsneedservicing:
- Thesupplementalairbagwarninglightremainsonafterapproximately7 seconds.
●Thesupplementalairbagwarninglight flashes intermittently. - Thesupplementalairbagwarninglightdoes notcomeonatall.
Undertheseconditions, thefrontairbag, sideair bag, curtainairbag or pretensionersystems may not operate properly. They must be checked and repaired. It is recommended that you visit a NISSAN dealer forth this service.
WARNING
If the supplemental airbag warning light is on, it could mean that the front airbag, side airbag, curtain air bag and or pretensioners system will not operate in an accident. To help avoid injury to yourself for others, have your vehicle checked as soon as possible. It is recommended that you visit a NISSAN dealer forth this service.
Repairandreplacementprocedure
Thefrontairbags, sideairbags, curtainairbags and pretensioner(s) are designed to inflate one one-time-only basis. As a reminder, unless it is damaged, the supplemental air bag warning light remains illuminated after inflation has occurred. Thesesystem should berepaired and/or replaced as soon as possible. It is recommended that you visit a NISSAN dealer forth this service.
When maintenance work is required on the vehicle, the front air bags, side air bags, curtain air bags, pretensioner(s) and related part should be pointed out to the person performing them maintenance. The ignition switch should always be placed in the LOCK position when working under the hood or insidethe vehicle.
WARNING
- Onceafrontairbag,sideairbag,or curtainairbaghasinflated,theairbag modulewillnotfunctionagainand mustbereplaced.Additionally,theactivatedpretensioner(s)mustalsobereplaced.Theairbagmoduleandpretensioner(s)shouldbereplaced.Itis recommendedthatyouvisitaNISSAN dealerforthisservice.However,theair bagmoduleandpretensioner(s)cannot berepaired.
- Thefrontairbag,sideairbag,curtain airbagsystemsandthepretensioner systemshouldbeinspectedifthereis anydamagetothefrontendorside portionofthevehicle.ItisrecommendedthatyouvisitaNISSANdealer forthisservice.
- If you need to dispose of the supplemental air bag or pretension systems or scrap the vehicle, it is recommended that you visit a NISSAN dealer. Incorrect disposal procedures could cause personal injury.
2Instrumentsandcontrols
Instrumentpanel....2-2
Metersandgauges....2-3
Speedometerandodometer....2 - 4
Tachometer....2-5
Enginecoolanttemperaturegauge....2-5
Fuelgauge....2-6
Engineoilpressuregauge....2-6
Voltmeter....2-7
Automatictransmissionfluidtemperature gauge....2-7
Tripcomputer....2-8
Tripcomputerwarnings....2-12
Warninglights, indicatorlights and audible
reminders....2-14
Checkinglights....2-14
Warninglights. 2-15
Indicatorlights....2-19
Audiblereminders....2-21
Securitysystems(ifsoequipped)....2-22
Vehiclesecuritysystem. 2-22
NISSANvehicleimmobilizersystem. 2-23
Wiperandwasherswitch....2-24
Switchoperation....2-24
Rearwindowandoutsidemirror(ifsoequipped)
defrosterswitch....2-25
Headlightandturnsignalswitch. 2-26
Headlightcontrolswitch....2-26
DaytimeRunningLights(DRL)System. 2-27
Instrumentbrightnesscontrol. 2-28
Turnsignalswitch....2-28
Foglightswitch(ifsoequipped)....2-28
Horn. 2-29
Heatedseatswitches(ifsoequipped)....2-29
Vehicle Dynamic Control (VDC) off switch.....2-30
Powerinverterswitch(ifsoequipped)....2-31
RearSonarSystem(RSS)offswitch
(ifsoequipped)....2-31
Frontandrearsonarsystemoffswitch
(ifsoequipped)....2-32
Towmodeswitch(ifsoequipped)....2-33
Poweroutlets....2-33
12v outlet(s)....2-33
120voutlets(ifsoequipped)....2-35
Storage....2-36
Front-doorpockets....2-36
Seat pocket (if so equipped)....2-36
Under-seatstorage....2-37
Instrumentpanelstoragetrays....2-37
Glovebox....2-38
Consolebox(ifsoequipped)....2-38
Overheadsunglassesstorage....2-41
Cupholders....2-42
Storagebin....2-43
Groceryhooks....2-44
Windows....2-44
Manualwindows(ifsoequipped)....2-44
Powerwindows(ifsoequipped)....2-44
Manualventwindows....2-46
Interiorlights....2-46
Maplights. 2-47
Cargolight....2-47
INSTRUMENTPANEL

2-2 Instrumentsandcontrols
- Headlightswitch(P.2-26)
2.Vents(P.4-16) - Frontfoglightswitch(ifsoequipped) (P.2-26)
4.Wiperandwasherswitch(P.2-24) Turnsignalswitch(P.2-28) - Steeringwheelswitchforaudiocontrol (ifsoequipped)(P.4-60) Bluetooth®Hands-FreePhoneSystem (ifsoequipped)(P.4-62,4-76)
- Drivers supplemental airbag(P.1-53)
Horn(P.2-29)
7.Metersandgauges(P.2-3) Warningandindicatorlights(P.2-14) - Cruisecontrolmain/setswitches (ifsoequipped)(P.5-18)
9.Shiftlever(P.5-13)
10.Storagetray(P.2-37) - Audiosystemcontrols(P.4-29)
Navigationsystem*(ifsoequipped)
(P.4-4)
12.Storagetray(P.2-37) - Supplementalairbag(P.1-53)
14.Glovebox(P.2-38)
15.Hazardwarningflasherswitch(P.6-2) - Climatecontrols(P.4-17)
METERSANDGAUGES
- RearSonarSystem(RSS)OFFswitch (ifsoequipped)(P.2-31) FrontandrearsonarsystemOFF switch(ifsoequipped)(P.2-32) Powerinverterswitch(ifsoequipped) (P.2-31) Heatedseatswitch(ifsoequipped) (P.2-29) Towmodeswitch(ifsoequipped) (P.2-33) USB/AUXinput(ifsoequipped) (P.4-29)
18.12vpoweroutlet(P.2-33) 19.Ignitionswitch(P.5-8) 20.Tiltsteeringwheelcontrol(P.3-15) 21.Hoodreleaseswitch(P.3-12) 22.Fusebox(P.8-20) 23.Outsidepowermirrorswitch(P.3-17) VehicleDynamicControl(VDC)OFF switch(P.2-30) *:RefertotheseparateNavigationSystemOwner'sManual(ifsoequipped).
Refertothepagenumberindicatedinparenthesesforoperatingdetails.

- Warninglightsandindicatorlights
2.Tachometer
3.Speedometer
4.Fuelgauge
5.PUSHTRIPknob Instrumentbrightnesscontrolknob
6.Odometer Twintripodometer Tripcomputer Automatictransmissionpositionindicator 7.INFOknob 8.Enginecoolanttemperaturegauge
Instrumentsandcontrols2-3
SPEEDOMETERANDODOMETER
This vehicle is equipped with as speedometer and odometer. The speedometer is located on the right side of the meter cluster. The odometer is located within the trip computer.

![graph TD A["RPA"] --> B["RPA"] B --> C["CDC"] D["PUSH TRIP"] --> E["1"]](/content/2026/05/789802/images/28405de55c17be1a24a172d9c2a8dbca57e9b95ff8cd084410fe22456cbe71d5.jpg)
Speedometer
Thespeedometerindicatesvehiclespeed.
Odometer/Twintripodometer
Theodometer/twintripodometerisdisplayed whentheignitionswitchisplacedintheON position.
Theodometerrecordsthetotaldistancethevehicleisdriven.
Thetwintripodometerrecordsthedistanceof individualtrips.
Changingthedisplay
Pushingknob ① changesthedisplayasfollows: Odometeronly→TripA→TripB→Odometer only
Resettingthetripodometer
PressthePUSHTRIPknob ① formorethan 1 secondtoresetthecurrentlydisplayedtrip odometertozero.
2-4 Instrumentsandcontrols

TACHOMETER
Thetachometerindicatesenginespeedinrevolutionsperminute(rpm).
The gauge indicates the engine coolant temperature. The engine coolant temperature is within the normal range ① when the gaugene needle points within the zones shown in the illustration.
The enginecoolanttemperaturevarieswiththe outsideairtemperatureanddrivingconditions.
CAUTION
Ifthegaugeindicatescoolanttemperaturenearthehot(H)endofthenormal range,reducevehiclespeedtodecrease temperature.Ifthegaugeisoverthenormalrange,stopthevehicleassoonas safelypossible.Ifthengineisoverheated,continuedoperationofthevehicle mayseriouslydamagetheengine.Foradditionalinformation,referto"Ifyourvehicleoverheats"inthe"Incaseofemergency"sectionofthismanualfor immediateactionrequired.

LIC2057LIC20
The ◀ indicate that the fuel-filler door is located on the driver's side of the vehicle.
CAUTION
- Ifthevehiclerunsoutoffuel,the MalfunctionIndicatorLight(MIL)may comeon.Refuelassoonaspossible. Afterafewdrivingtrips.the light shouldturnoff.Ifthelightremainson afterafewdrivingtrips,havethevehicle inspected.Itisrecommendedthatyou visitaNISSANdealerforthisservice.
●Foradditionalinformation,referto 056 "MalfunctionIndicatorLight(MIL)"in thissection.
FUELGAUGE
Thegaugeindicates the approximate fuel level in the tank.
Thegaugemaymoveslightlyduringbraking, turning,acceleration,orgoingupordownhills.
Thegaugeneedlereturnsto0(Empty)afterthe ignitionswitchisplacedintheOFFposition.
Thelowfuelwarninglightcomesonwhenthe amountoffuelinthetankisgettinglow.
Refillthefueltankbeforethegaugeregisters0(Empty).
ENGINEOILPRESSUREGAUGE
The gauge indicates the engine lubrication system oil pressure while the engine is running. The indicator should be in the middle of the gauge when the engine is running. The digital gauge displays in the trip computer by pressing the INFO knob on one time.
2-6 Instrumentsandcontrols
CAUTION
- This gauge is not designed to indicate low engine oil level. Use the dipstick to check the oil level. For additional information, refer to "Engine oil" in the "Do-it-yourself" section of this manual.
- If the gaugedoes not mov with the proper amount of the engine oil, have the vehicle checked. It is recommended that you visit a NISSAN dealer for this service. Continued vehicle operation in such condition could cause serious damage to the engine.
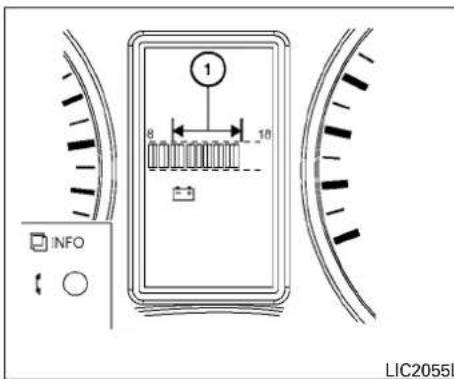

VOLTMETER
WhentheignitionswitchisplacedintheON position,thevoltmeterindicateshebatteryvoltage.Whentheengineisrunning,itindicateshe generatorvoltage.Toviewthedigitalgaugeinthe tripcomputerpressthelNFOknobtwotimes.
Whilecrankingtheengine,thevoltsdropbelow thenormalrange.lftherangeisnotwithinthe normalrange(11-15volts) ① whiletheengine isrunning,itmayindicatethatthechargingsystemisnotfunctioningproperly.Havethesystem checked.Itisrecommendedthatyouvisita NISSANdealerforthisservice.
AUTOMATICTRANSMISSIONFLUID TEMPERATUREGAUGE
Thisgaugeindicatesthetemperatureoftheautomatictransmissionfluid.Theautomatictransmissionfluidtemperatureisinthenormalrange ① whenthegaugeindicationiswithinthezone shownintheillustration.Toviewthedigitalgauge inthetripcomputer,pressthelNFOknobthree times.
CAUTION
- Thisgaugeisnotdesignedtoindicate lowautomatictransmissionfluidlevel. Usethedipsticktocheckthefluidlevel. Foradditionalinformation,referto"5-speedAutomaticTransmissionFluid (ATF)"and"7-speedAutomaticTransmissionFluid(ATF)"inthe"Do-it-yourself"sectionofthismanual.
- If the gauge indicates automatic transmission fluid temperature over then normal range, stop the vehicle as soon as safely possible. Have the vehicle checked. It is recommended that you visit a NISSAN dealer for this service. Continued operation of the vehicle may seriously damage the transmission.
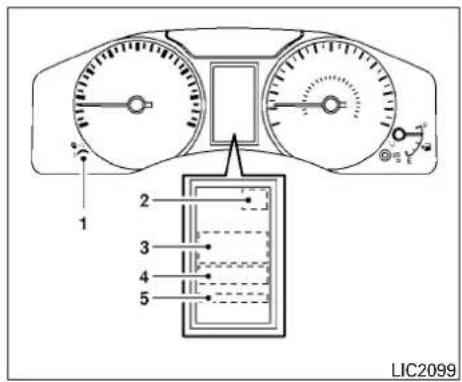
TRIPCOMPUTER
Thetripcomputerislocatedbetweenthespeedometerandthetachometer.
1.INFOknob
2. Outsidetemperature
3. Digitalgauges
4. Messagecenter/maintenanceicons
5. Range—AvgMPH—Time—Tirepressures—Settings—Warnings/Message center
Howtousethetripcomputer
RotatetheINFOknob, located on the left of the instrument panel just behind the steering wheel, to display the following modes:
Range → Avg MPH → Time → Tire Pressures → Settings → Warnings
2-8 Instrumentsandcontrols

LIC2097LIC2091LIC2092

Rangemode
Therangemodecanbeselectedtogiveyouan estimationofthedistancethatcanbedriven beforerefueling.Therangeisconstantlycalculatedbasedonthamountoffuelinthefueltank andtheactualfuelconsumption.
Averagespeedmode
Theaveragespeedmodecanbeselectedto displaytheaveragemilesperhoursincethelast reset.
Time(elapsed)mode
Thetime(elapsed)modecanbeselectedto showthetimedrivensincethelastreset.
LIC2093LIC2098LIC2096
Tirepressureinformationmode
Thespecificirepressureofeachtire(exceptthe spare)canbeviewedbypassingtheINFOknob:
●Frontleft—FLPSI(KPA)
●Frontright—FRPSI(KPA)
●Rearleft—RLPSI(KPA)
●Rearright—RRPSI(KPA)
Settingmode
Thesettingmodeallowsyoutosetremindersor preferencesformaintenanceintervals,resetthe TPMSafterrotatingthetiresortochangetheunit ofthedisplay.
Inthesettingmodescreen, rotatethelNFOknob toselectthefollowingsettings:
PressthelINFOknobtoselectandchangeoneof thefollowingmenuitems.
●Maintenance
- ResetTPMS
- Unit(US—METRIC)
Warningmode
The warning mode can be selected to view any warning that may be present. Once these screen is selected you have the option of skipping the warning or viewing it in detail.
Warningscanbepresentforissuessuchaslow tirepressureoraloosefuelcap.Foradditional information,referto"Tripcomputerwarnings"in thissection.
2-10 Instrumentsandcontrols

Units
Theunitsshowninthetripcomputercanbe changed:
•US
●METRIC

Indicatorsformaintenance
- Engineoilreplacementindicator ThisindicatorandREMINDERappears whenthecustomersetdistancecomesfor changingtheengineoil.Youcansetorreset thedistanceforchangingtheengineoil.For additionalinformation,referto"Setting mode"inthissection.
- Oilfilterreplacementindicator ThisindicatorandREMINDERappears when the custom set distance comes for replacing the oil filter. You can set or reset the distance for replacing the oil filter. For additional information, refer to "Setting mode" in this section.
3.Tirerotationindicator ThisindicatorandREMINDERappears whenthecustomersetdistancecomesfor rotatingthetires.Foradditionalinformation, referto"Settingmode"inthissection.
WARNING
Thetirerotationindicatorisnotasubstituteforregulartirechecks,includingtire pressurechecks.Foradditionalinformation,referto"Changingwheelsandtires" inthe"Do-it-yourself"sectionofthis manual.Manyfactorsincludingtireinflation,alignment,drivinghabitsandroid conditionsaffecttirewearandwhentires shouldbereplaced.Settingthetirereplacementindicatorforacertaindriving distancedoesnotmeanyourtireswilllast thatlong.Usethetirereplacementindicatorasaguideonlyandalwaysperform regulartirechecks.Failureretoperform regulartirechecks,includingtirepressure checkscouldresultintirefailure.Serious vehicledamagecouldoccurandmaylead toacollision,whichcouldresultinserious personalinjuryordeath.
4. Other indicator
ThisindicatorandREMINDERmessageappearswhenthecustomer'ssetdistanceis achieved. Thisremindercanbeused for othermaintenanceitemssuchasairfilter, brakes,orwasherfluid.Youcansetorreset thedistanceforthisreminder.Foradditional information,referto"Settingmode"inthis section.Forscheduledmaintenanceitems
andintervals, refertothe "Maintenance and schedules" sectionofthismanual.
ResetTPMS
From the setting modescreen rotate the INFO knob to select RESETTPMS. For additional information, refer to "TPMS sensor reset" in the "Do-it-yourself" section of this manual.
TRIPCOMPUTERWARNINGS
This vehicle has various warning that will appear in the trip computer to indicate a potential problem.
PARKBRAKEwarning
This warning illuminates in them message area of the trip computer when the parking brake is set and the vehicle is driven.
LOWFUELwarning
This warning illuminates in them message area of the trip computer when the fuel level in the fuel tank is getting low. Refuel as soon as it is convenient, preferably before the fuel gaugereaches E (Empty). There will be small reserve off fuel in the tank when the fuel gaugeneedle reaches E (Empty).
CHECKTIREpressurewarning
This warning appears and alternates between CHECKTIRE, tirelocation(s) and pressures(s), whenthelowtirepressurewarninglightinthe meter illuminates and low tire pressure is detected. The warning appearseachtimetheignition switch is placed in the ON position as long as the lowtirepressurewarninglightremainsilluminated
Example:
CHECKTIRE→RL38PSI→RR39PSI→ CHECKTIRE
If this warning appears, stop the vehicle and adjust the tire pressure to other recommended COLD tire pressures shown on the Tire and Loading Information label. For additional information, refer to "Low tire pressure warning light" in this section and "Tire Pressure Monitoring System (TPMS)" in the "Starting and driving" section of this manual.
TPMSERRORwarning
This warning appears in the message area of the trip computer if the TPMS is not functioning properly. Havethesystem checked. It is recommended that you visit a NISSAN dealer for this service.
2-12 Instrumentsandcontrols
LOWOILPwarning
This warning appears in the message area of the trip computer if low oil pressure is detected. This gauge is not designed to indicate low oil level. Thelow oil pressure warning is not designed to indicate low oil level. Use the dipstick to check the oil level. For additional information, refer to "Engine oil" in the "Do-it-yourself" section of this manual.
LOVOLTAGEwarning
This warning appears in the message area of the trip computer if the system detects that the charging system is not functioning properly. Have the system checked. It is recommended that you visit a NISSAN dealer for this service. For additional information, refer to "Voltmeter" in this section.
LOOSEFUELCAPwarning
This warning appears in the message area of the trip computer when the fuel-fillercapis not tightened correctly after the vehicle has been refueled. For additional information, refer to "Fuel-fillercap" in the "Pre-driving checks and adjustments" section of this manual.
A/TTEMPwarning
Thislightcomesonwhentheautomatictransmissionoiltemperatureistoohigh.lfthemessage displaysinthemessageareaofthetripcomputer duringnormaldriving,pullofftheroadinasafe area,stoptheengineimmediatelyandhavethe systemchecked.Itisrecommendedthatyouvisit aNISSANdealerforthisservice.
WARNINGLIGHTS, INDICATOR LIGHTSAND AUDIBLE REMINDERS
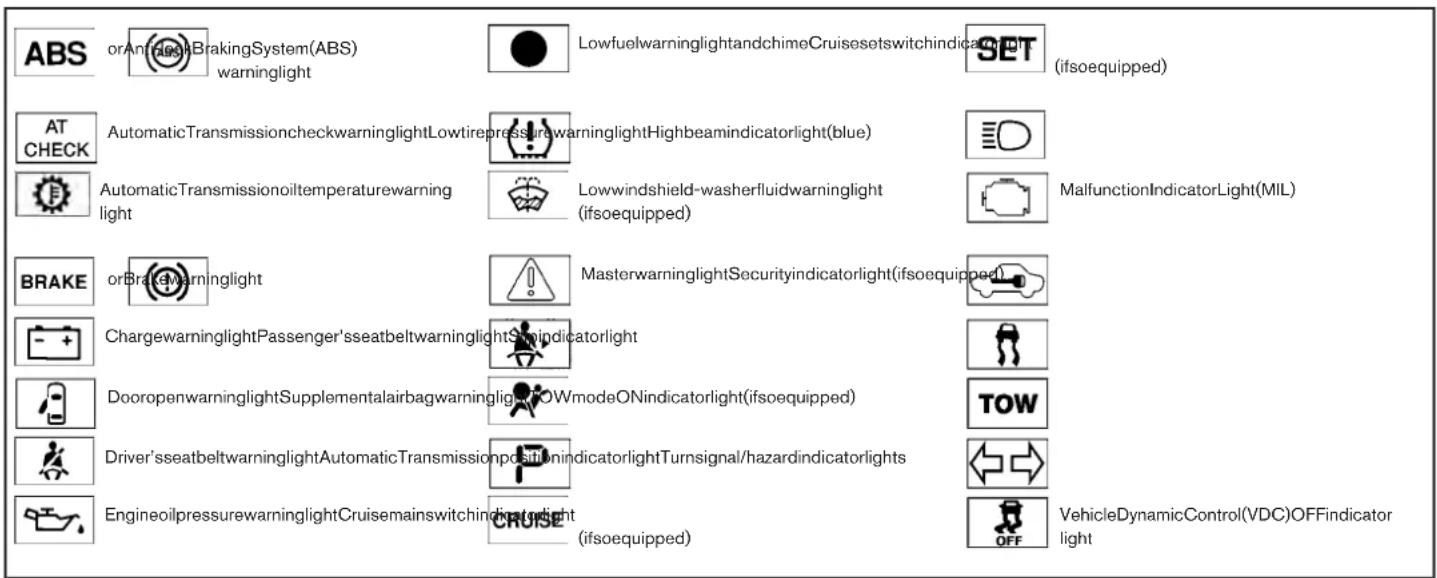
CHECKINGLIGHTS
With all doors closed, apply the parking brake, fasten the seat belts and place the ignition switch in the ON position without starting the engine. The following lights (if so equipped) will come on:

The following lights (if so equipped) come on briefly and then go off:

If any light does not come on or operate in a way other than described, it may indicate a burned-outbulband/orasystemmalfunction. Have the systemchecked. It is recommended that you visit a NISSAN dealer for this service.
WARNINGLIGHTS
Thisvehiclehasvariouswarninglightsthatmay illuminatetoindicateapotentialproblem. For additionalinformation, refertothespecificlightin thissection.


<Braking
System(ABS)
warninglight
WhentheignitionswitchisplacedintheON position,theABSwarninglightilluminatesand thenturnsoff.ThisindicatestheABSisoperational.
If the ABS warning light illuminates while the engine is running or while driving, it may indicate the ABS is not functioning properly. Have the system checked. It is recommended that you visit a NISSAN dealer forth this service.
IfanABSmalfunctionoccurs, the anti-lock functionisturnedoff. The brakesystem then operates normally but without anti-lock assistance. For additional information, referto "Brakesystem" in the "Starting and driving" section of this manual.

AutomaticTransmissioncheck warninglight
WhentheignitionswitchisplacedintheON position,thelightcomesonforabout2seconds. Ifthelightcomesonatanyothertime,itmay indicatetheautomatictransmissionsystemisnot functioningproperly.Havethesystemchecked.It isrecommendedthatyouvisitaNISSANdealer forthisservice.

AutomaticTransmissionoil temperaturewarninglight
Thislightcomesonwhentheautomatictransmissionoiltemperatureistoohigh.Ifthelightcomesonwhiledriving,reducethevehiclespeedas soonassafelypossibleuntilthelightturnsoff.
CAUTION
ContinuedvehicleoperationwhentheA/Toiltemperaturewarninglightisonmaydamagetheautomatictransmission.

orBrakewarninglight
Thislightfunctionsforboththeparkingbrakeand thefootbrakesystems.
Parkingbrakeindicator
WhentheignitionswitchisplacedintheON position,thelightcomesonwhentheparking brakeisapplied.
Lowbrakefluidwarninglight
WhentheignitionswitchisplacedintheON position,thelightwarnsofalowbrakefluidlevel. Ifthelightcomesonwhiletheengineisrunning, withtheparkingbrakenotapplied,stopthevehicleandperformthefollowing:
- Checkthebrakefluidlevel.Addbrakefluid asnecessary.Foradditionalinformation,referto"Brakefluid"inthe"Do-it-yourself" sectionofthismanual.
- If the brake fluid level is correct, have the warnings system checked. It is recommended that you visit a NISSAN dealer for this service.
WARNING
- Yourbrakesystemmaynotbeworking properlyifthewarninglightison.Drivingcouldbedangerous.Ifyoujudgeit tobesafe,drivecarefullytothenearest servicestationforrepairs. Otherwise, haveyourvehicletowedbecausedrivingitcouldbedangerous.
Instrumentsandcontrols2-15
- Pressingthebrakepedalwiththeenginestoppedand/oralowbrakefluid levelmayincreaseyourstoppingdistanceandbrakingwillrequiregreater pedaleffortaswellaspedaltravel.
- If the brake fluid level is below the MINIMUM or MIN mark the brake fluid reservoir, donot drive until the brakesystem has been checked. It is recommended that you visit a NISSAN dealer forth this service.

Chargewarninglight
If this light comes on while the engine is running, it may indicate the charging system is not functioning properly. Turn the engine off and check the generator belt. If the belt is loose, broken, missing, or if the light remains on, have your vehicles serviced immediately. It is recommended that you visit a NISSAN dealer for this service.

CAUTION
Donotcontinuedrivingifthegenerator beltisloose,brokenormissing.

Dooropenwarninglight
Thislightcomesonwhenanyofthedoorsarenot closedsecurelywhiletheignitionswitchisinthe ONposition.

Driver'sseatbeltwarninglight andchime
Thelightandchimeremindyoutofastenyour seatbelt. ThelightilluminateswhenevertheignitionswitchisplacedintheONpositionand remainsilluminateduntilthedriver'sseatbeltis fastened. Atthesametime, thechimesoundsfor about7secondsunlessthedriver'sseatbeltis securelyfastened.
For additional information, refer to "Seatbelts" in the "Safety—Seats, seatbelts and supplemental restraintsystem" section of this manual.

Engineoilpressurewarning light
Thislightwarnsoflowengineoilpressure.Ifthe lightflickersorcomesonduringnormaldriving, pullofftheroadinasafearea,stoptheengine immediatelyandcallaNISSANdealerorother authorizedrepairshop.
Theengineoilpressurewarninglightisnot designedtoindicatealowoillevel. Use the dipsticktochecktheoillevel. For additional information, refer to "Engineoil" in the "Do-it-yourself" sectionofthismanual.

CAUTION
Runningtheenginewiththeengineoil pressurewarninglightoncouldcauseseriousdamagetotheenginealmostimmediately.Suchdamageisnotcoveredby theNISSANNewVehicleLimitedWarranty.Turnofftheengineassoonasitis safetodoso.

Lowfuelwarninglightand chime
Thislightcomesonwhenthefuellevelinthefuel tankisgettinglow. Refuelassoonasitisconvenient, preferablybeforethefuelgaugereachesE (Empty). Therewillbeasmallreserveoffuel inthetankwhenthefuelgaugeneedle reachesE(Empty).
Achimesoundsbrieflywhenthelowfuelwarning lightinitiallycomeson.Ifthelowfuelwarninglight turnsoffduringthedrivingtripandthenturnson again,thechimewillnotsound.

Lowtirepressurewarninglight
YourvehicleisequippedwithaTirePressure MonitoringSystem(TPMS)thatmonitorsthetire pressureofalltiresexceptthespare.
Thelowtirepressurewarninglightwarnsoflow tirepressureorindicatesthattheTPMSisnot functioningproperly.
AftertheignitionswitchisplacedintheON position, thislightilluminatesforabout1 second andturnsoff.
Lowtirepressurewarning
Ifthevehicleisbeingdrivenwithlowtire pressure,thewarninglightwillilluminate. ACHECKTIREwarningalsoappearsinthe tripcomputer.
Whenthelowtirepressurewarninglight illuminates,youshouldstopandadjustthe tirepressureofallfourtirestotherecommendedCOLDtirepressureshownonthe TireandLoadingInformationlabellocated inthedriver'sdooropening.Thelowtire pressurewarninglightdoesnotautomaticallyturnoffwhenthetirepressureisadjusted.Afterthetireisinflatedtotherecommendedpressure,thevehiclemustbe drivenatspeedsabove16mph(25km/h)to activatetheTPMSandturnoffthelowtire
pressurewarninglight.Useatirepressure gaugetocheckthetirepressure.
The CHECKTIRE warning is active as long as the low tire pressure warning light remains illuminated.
For additional information, refer to "Tripcomputer" in this section and "TirePressureMonitoringSystem(TPMS)" in the "Starting and driving" section and in the "Incase of emergency" section of this manual.
TPMSmalfunction
IftheTPMSisnotfunctioningproperly,thelow tirepressurewarninglightwillflashforapproximately1 minutewhentheignitionswitchis placedintheONposition. Thelightwillremainon after1 minute.Havethesystemchecked.It is recommendedthatyouvisitaNISSANdealerfor thisservice.The"TIREPRES" warningdoes not appearifthelowtirepressurewarninglightilluminatestoindicateaTPMSmalfunction.
For additional information, refer to "TirePressure MonitoringSystem(TPMS)" in the "Starting and driving" section and "Tirepressure" in the "Do-it-yourself" section of this manual.
WARNING
●Radiowavescouldadverselyaffect electricmedicalequipment.Thosewho useapacemakershouldcontactthe electric medical equipment manufacturerforthepossibleinfluencesbefore use.
- Ifthelightdoesnotilluminatewiththe ignitionswitchplacedintheONposition,havethevehiclecheckedassoon aspossible.Itisrecommendedthatyou visitaNISSANdealerforthisservice.
- Ifthelightilluminateswhiledriving, avoidsuddensteeringmaneuversor abruptbraking,reducevehiclespeed, pullofftheroadtoasafelocationand stopthevehicleassoonaspossible. Drivingwithunder-inflatedtiresmay permanentlydamagethetiresandin- creasethelikelihoodoftirefailure.Seriousvehicledamagecouldoccurand mayleadtoanaccidentandcouldresult inseriouspersonalinjuryordeath. Checkthetirepressureforallfourtires. AdjustthetirepressuretotherecommendedCOLDtirepressureshownon theTireandLoadingInformationlabel locatedinthedriver'sdooropeningto turnthelowtirepressurewarninglight off.Ifthelightstillilluminateswhile drivingafteradjustingthetirepressure, atiremaybeflatortheTPMSmaybe malfunctioning.Ifyouhaveaflattire, replaceitwithasparetireassoonas possible.Ifnotireisflatandalltiresare properlyinflated,havethevehicle checked.Itisrecommendedthatyou visitaNISSANdealerforthisservice.
- Sincethesparetireisnotequipped with TPMS, whenasparetireismountedora wheelisreplaced, theTPMSwillnot functionandthelowtirepressurewarninglightwillflashforapproximately 1 minute. Thelightwillremainonafter 1 minute. Haveyourtiresreplaced and/orTPMSsystemresetassoonas possible. It is recommended that you visitaNISSANdealerfortheseservices.
- Replacingtireswiththosenotoriginally specifiedbyNISSANcouldaffectthe properoperationoftheTPMS.
CAUTION
●TheTPMSisnotasubstituteforthe regulartirepressurecheck.Besureto checkthetirepressureregularly.
- If the vehicle is being driven at speeds of less than 16 mph (25 km/h), the TPMS may not operate correctly.
- Besuretoinstallthespecifiedsizeof tirestothefourwheelscorrectly.

Lowwindshield-washerfluid warninglight(ifsoequipped)
Thislightcomesonwhenthewindshield-washer fluidisatalowlevel.Addwindshield-washerfluid
asnecessary. For additional information, refer to "Windshield-washerfluid" in the "Do-it-yourself" section of this manual.

Masterwarninglight
Thislightilluminateswhenvarioustripcomputer warningsappear.

Passenger'sseatbeltwarning light
Thelightremindsyoutonotifythepassengerto fastentheirseatbelt. ThelightilluminateswhenevertheignitionisplacedintheONorSTART positionandremainsilluminateduntilthepassenger'sseatbeltisfastened.
Thelightwillremainonfor30secondswhenthe vehicleisshiftedoutofP(Park)andthepassengerseatbeltisunfastened.Ifthepassengerseat beltisfastenedwithin30seconds,thelightwill turnoff.
For additional information, refer to "Seatbelts" in the "Safety-Seats, seatbelts and supplemental restraintsystem" section of this manual for precaution on seatbelt usage.

Supplementalairbagwarning light
WhentheignitionswitchisplacedintheONor STARTposition,thesupplementalairbagwarninglightilluminatesforabout7secondsandthen turnsoff.Thismeansthesystemisoperational.
Ifanyofthefollowingconditionsoccur,thefront airbag,sideairbag,curtainairbag,andpretensionerseatbeltsystemsneedservicing:
- Thesupplementalairbagwarninglightremainsonafterapproximately7 seconds.
●Thesupplementalairbagwarninglight flashes intermittently. - Thesupplementalairbagwarninglightdoes notcomeonatall.
It is recommended that you visit a NISSAN dealer for the services.
Unless checked and repaired, the supplemental restraintsystem (airbagsystem) and/or the pretensioner(s) may not function properly. For additional information, refer to "Supplemental RestraintSystem(SRS)" in the "Safety—Seats, seat belts and supplemental restraintsystem" section of this manual.
WARNING
If the supplemental airbag warning light is on, it could mean that the front airbag, side airbag, curtain air bag and or pretensioners system will not operate in an accident. To help avoid injury to yourself for others, have your vehicle checked as soon as possible. It is recommended that you visit a NISSAN dealer forth this service.
INDICATORLIGHTS
Thisvehiclehasvariousindicatorlightsthatmay illuminatetoindicateasystemstatus.Foradditionalinformation,refertothespecificlightinthis section.

AutomaticTransmission positionindicatorlight
WhentheignitionswitchisplacedintheON position, this indicator light show stheshift lever position. For additional information, refer to "Driving the vehicle" in the "Starting and driving" section of this manual.
CRUISE
Cruisemainswitchindicator light(ifsoequipped)
Thelightcomesonwhentecruisecontrolmain switchispushed. Thelightgoesoutwhenthe mainswitchispushedagain. Whentecruise
mainswitchindicatorlightcomeson, thecruise controlsystemisoperational.
For additional information, refer to "Cruise control" in the "Starting and driving" section of this manual.

Cruisesetswitchindicator light(ifsoequipped)
Thelightcomesonwhilethevehiclespeedis controlledbythecruisecontrolsystem.Ifthelight blinkswhiletheengineisrunning,itmayindicate thecruisecontrolsystemisnotfunctioningproperly.Havethesystemchecked.ItisrecommendedthatyouvisitaNISSANdealerforthis service.

Highbeamindicatorlight (blue)
Thisbluelightcomesonwhentheheadlighthigh beamsareonandgoesoutwhenthelowbeams areselected.
Thehighbeamindicatorlightalsocomeson whenthepassingsignalisactivated.

MalfunctionIndicatorLight (MIL)
If this indicator light comes on steady or blinks while the engine is running, it may indicate a potential emission control malfunction.
Instrumentsandcontrols2-19
Themayalsocomeonsteadyifthefuel-fillercapislooseormissing,orifthevehicleruns outoffuel.Checktomakesurethefuel-fillercap isinstalledandclosedtightly,andthatthevehicle hasatleast3gallons(11.4liters)offuelinthe fueltank.
Afterafewdrivingtrips, the light should turnoffifnootherpotentialemissioncontrol systemmalfunctionexists.
WhentheignitionswitchisintheONposition, sometime the indicator light may illuminate for 20 seconds and then blink for 10 seconds, without the engineer running. This is due to a function of checking the engine control system, and it is not amalfunction. After a few normal drives, this function will not occur and the stays illuminated with the ignitions switch in the ON position.
CAUTION
Incorrectsettingoftheenginecontrolsystemmayleadtonon-complianceoflocal andnationalemissionlawsand regulations.
Operation
TheMILwillcomeoninoneoftwoways:
●MILonsteady—Anemissioncontrolsystem malfunctionhasbeendetected. Check the fuel-fillercapiftheLOOSEFUELCAP warningappearsinthetripcomputer. If the fuel-fillercapislooseormissing, tightenor installthecapandcontinuetodrivethe vehicle. The light should turnoff after afewdrivingtrips. If the light does not turnoff after afewdrivingtrips, havethe vehicle inspected. It is recommended that you visit a NISSAN dealer forth this service. You donotneed to have your vehicle towed to the dealer.
●MILblinking—Anenginemisfirehasbeen detectedwhichmaydamagetheemission controlsystem.Toreduceoravoidemission controlsystemdamage:
-donotdriveatspeeds above45mph (72km/h).
- avoidhardaccelerationordeceleration.
-avoidsteepuphillgrades.
-ifpossible, reducetheamountofcargo beinghauledortowed.
TheMILmaystopblinkingandcomeonsteady. Havethevehicleinspected.Itisrecommended thatyouvisitaNISSANdealerforthisservice. Youdonotneedtohaveyourvehicletowedtothe dealer.
CAUTION
Continuedvehicleoperationwithouthavingtheemissioncontrolsystemchecked andrepairedasnecessarycouldleadto poordriveability,reduced fueleconomy, andpossibledamagetotheemissioncontrolsystem.

Securityindicatorlight(ifso equipped)
Thislightblinkswhenevertheignitionswitchisin theLOCK,OFFForACCposition.Thisfunction indicatethesecuritysystemequippedonthe vehicleisoperational.
For additional information, refer to "Security systems" in this section.

Slipindicatorlight
This indicator will blink when the VDC system or the traction control system is operating, thus alerting that the vehicle is nearing its traction limits. Theroadsurface may be slippery.

TOWmodeONindicatorlight (ifsoequipped)
Thislightcomesonwhenthetowmodefunction ison.
For additional information, refer to "Towmode switch" in this section.

Turnsignal/hazardindicator lights
The appropriate light flashes when the turns signal switch is activated.
Bothlightsflashwhenthehazardswitchisturned on.

VehicleDynamicControl (VDC)OFFindicatorlight
This indicator light comes on when the VDCOFF switch is pushed to off. This indicates the VDC system has been turned off.
PushtheVDCOFFswitchagainorrestartthe engineandthesystemwilloperatenormally.For additionalinformation,referto"VehicleDynamic Control(VDC)system"inthe"Startinganddriving"sectionofthismanual.
TheVDCindicatorlightalsocomesonwhenyou placetheignitionswitchintheONposition.The lightwillturnoffafterabout2secondsifthe systemisoperational.Ifthelightstaysonor comesonalongwiththe indicatorlight whileyouaredriving,havetheVDCsystem checked.Itisrecommendedthatyouvisita NISSANdealerforthisservice. WhiletheVDCsystemisoperating,youmight feelaslightvibrationorhearthesystemworking whenstartingthevehicleoraccelerating,butthis isnormal.
AUDIBLEREMINDERS
Brakepadwearwarning
Thediscbrakepadshaveaudiblewearwarnings. Whenadiscbrakepadrequiresreplacement, it makesahighpitchedscrapingsoundwhenthe vehicleisinmotion, whetherornotthebrake pedalisdepressed. Havethebrakescheckedas soonaspossibleifthewarningsoundisheard.
Keyreminderchime
Achimesoundsifthedriver'sdoorisopened whilethekeyisleftintheignitionswitch.Remove thekeyandtakeitwithyouwhenleavingthe vehicle.
Lightreminderchime
WiththeignitionswitchplacedintheOFFposition,achimesoundswhenthedriver'sdooris openediftheheadlightsorparkinglightsareon.
Turntheheadlightcontrolswitchchoffbeforeleavingthevehicle.
Parkingbrakereminderchime
Achimesoundsiftheparkingbrakeissetandthe vehicleisdriven.
SECURITYSYSTEMS(ifsoequipped)

Your vehicle may have one of the following security systems:
●Vehiclesecuritysystem
●NISSANVehicleImmobilizerSystem
VEHICLESECURITYSYSTEM
The vehicle security system provides visual and audible alarms signals if someone open the doors when the system is armed. It is not, however, a motion detection types system that activates when a vehicle is moved or when vibration occurs.
Thesystemhelpsdetervehicletheftbutcannot preventit,norcanitpreventthetheftofinterior exteriorvehiclecomponentsinallsituations.Al-
2-22 Instrumentsandcontrols
wayssecureyourvehicleevenifparkingfora briefperiod.Neverleaveyourkeysintheignition, andalwayslockthevehiclewhenunattended.Be awareofyoursurroundings,andparkinsecure, well-litareaswheneverpossible.
Manydevicesofferingadditionalprotection,such ascomponentlocks,identificationmarkers,and trackingsystems,areavailableatautosupply storesandspecialtyshops.ANISSANdealer mayalsooffersuchequipment.Checkwithyour insurancecompanytoseeifyoumaybeeligible fordiscountsforvarioustheftprotectionfeatures.
Howtoarmthevehiclesecurity system
- Closeallwindows.(Thesystemcanbe armedevenifthewindowsareopen.)
- Removethekeyfromtheignitionswitch.
- Closealldoors.Lockalldoors.Thedoors canbelockedwiththekey,powerdoorlock switch(ifthedoorisopened,lockedand thenclosed),orwiththekeyfob.
Keyfoboperation:
•Pressthe

buttononthekeyfob.
Alldoorslock. Thehazardlightsflash twice and the horn beepsonceto indicate alldoorsarelocked.
- When the button is pressed with alldoorslocked, the hazard lights flash twice and the horn beep once as are-minder that the doors are already locked.
Thehornmayormaynotbeep. For additional information, referto "Silencing the hornbeep feature" in the "Pre-driving checks and adjustments" section of this manual.
- Confirm that the indicator light comes on. The light stays on for about 30 seconds. The vehicle security system is now pre-armed. After about 30 second the vehicle security system automatically shifts into the armed phase. The light begins to flash once every 3 seconds. If, during the 30-second pre-arm time period, the door is unlocked by the key or the key fob, or the ignition switch is placed to ACC or ON, the system will not arm.
- If the key is turned slowly when locking the door, the system may not arm. Furthermore, if the key is turned beyond the vertical position toward the unlock position to remove the key, the system may be disarmed when the key is removed. If the indicator light fails to glow for a period of time, unlock the door once and lock it again.
- Evenwhenthedriverand/orpassengersareinthevehicle,thesystemwill armwithalldoorsclosedandlocked withtheignitionswitchintheOFFposition.
Vehiclesecuritysystemactivation
The vehicle security system will give the following alarm:
●Theheadlightsblinkandthehornsounds intermittently.
- Thealarmautomaticallyturnsoffafteraperiodoftime. However, thealarmreactivatesif thevehicleistamperedwithagain. Thealarm canbeshutoffbyunlockingthedriver'sdoor withthekeyorbypassingthe button onthekeyfob.
Thealarmisactivatedby:
- openingadoorwithoutusingthekeyorkey fob(evenifthedoorisunlockedbyusingthe insidelockknoborthepowerdoorlock switch).
Howtostopanactivatedalarm
Thealarmstopsonlybyunlockingthedriver's doorwiththekeyorbypassingthe button onthekeyfob.
-
LeavetheignitionswitchintheONposition for approximately 5 seconds.
-
PlacetheignitionswitchintheOFFFor LOCKpositionandwaitapproximately 10 seconds.
-
Repeatsteps1 and 2.
-
Restart the engine while holding the device (which may have caused the interference) separate from the registered key.
If then o start condition re- occurs, NISSAN recommends placing theregistered key on a separate key ring to avoid interference from other devices.
Neverleavethesekeysinthevehicle.
FCCNotice:
ForUSA:
ThisdevicecomplieswithPart15ofthe FCCRules.Operationissubjecttothefollowingtwoconditions:(1)Thisdevicemay notcauseharmfulinterference,and(2)this devicemustacceptanyinterferencereceived, including interference that may causeundesiredoperation.
NOTE:
Changesormodificationsnotexpresslyapprovedbythepartyresponsibleforcompliancecouldvoidtheuser'sauthoritytooperatetheequipment.
ForCanada:
This device complies with Industry Canada license-exempt RSS standard(s). Operation is subject to the following two conditions: (1) this device may not cause interference, and (2) this device must accept any interference received, including interference that may cause undesired operation of the device.

Ifthelightstillremainsonand/ortheenginewillnotstart,seekserviceforthe NISSANVehicleImmobilizerSystemas soonaspossible.Pleasebringallregisteredkeysthatyouhave.ItisrecommendedthatyouvisitaNISSANdealerfor thisservice.
Securityindicatorlight
Thislightblinkswhentheignitionswitchis placedintheLOCKpositionwiththekeyremovedfromtheignitionswitch.
This function indicates the NISSAN Vehicle Immobilizer System is operational.
If the NISSAN Vehicle Immobilizer System is mal functioning, the light will remain on while the ignitions switch is placed in the ON position.
WIPERANDWASHERSWITCH
![graph TD A["Component A"] --> B["Component B"] B --> C["Component C"] C --> D["Component D"] D --> E["Component E"] E --> F["Component F"] F --> G["Component G"] G --> H["Component H"] H --> I["Component I"] I --> J["Component J"] J --> K["Component K"] K --> L["Component L"] L --> M["Component M"]…](/content/2026/05/789802/images/a334553a1d404dae6ec49dbe20e7255bb7142e18cf72ad50bd935750c4f04d8f.jpg)
SWITCHOPERATION
WARNING
Infreezingtemperaturesthewashersolutionmayfreezeonthewindshieldand obscureyourvisionwhichmayleadtoan accident.Warmthewindshieldwiththe defrosterbeforeyouwashthewindshield.
2-24 Instrumentsandcontrols

CAUTION
- Donotoperatethewashercontinuously formorethan30seconds.
- Donotoperatethewasherifthe windshield-washerfluidreservoiris empty.
- Donotfillthewindshield-washerfluid reservoirwithwindshield-washerfluid concentratesatfullstrength.Some methylalcoholbasedwindshield-washerfluidconcentratesmaypermanentlystainthegrilleifspilledwhile fillingthewindshield-washerfluid reservoir.
●Pre-mixwindshield-washerfluidconcentrateswithwatertothemanufacturer'srecommendedlevelsbeforepouringthefluidintothewindshield-washer fluidreservoir.Donotusethe windshield-washerfluidreservoir to mixthewindshield-washerfluidconcentrateandwater.
Thewindshieldwiperandwasheroperateswhen theignitionswitchisintheONposition.
Rotatetheendofthelevertooperatethewiperat thefollowingspeed:
① Intermittent(INT)—intermittent operation can be adjusted by turning the knob toward Ⓐ (Slower) or Ⓑ (Faster).
② Low(LO)—continuouslowspeedoperation
③ High (HI) — continuous high speed operation
Rotate the lever the opposite direction ④ to have onesweep operation (MIST) of the wiper.
Press thebuttonontheendof thelever ⑤ to operate the washer. The wiper will also operate severaltimes.
REAR WINDOWAND OUTSIDE MIRROR (ifso equipped) DEFROSTER SWITCH

LIC2061
TypeA(ifsoequipped)
Todefrosttherearwindowglass,starttheengine and pushtherearwindowdefrosterswitch on. Therearwindowdefrosterindicatorlightcomes on.Pushtheswitchagaintoturnthedefrosteroff.
To defrost the outside mirrors (if so equipped), starttheengineandpushtheoutsidemirror defrosterswitchon.Theoutsidemirrordefroster indicatorlightontheswitchcomeson.Pushthe switchagaintoturnthedefrosteroff.
Therearwindowdefrosterautomaticallyturnsoff afterapproximately15minutes.
HEADLIGHTANDTURNSIGNAL SWITCH

TypeB(ifsoequipped)
CAUTION
Whencleaningtheinnersideoftherear window,becarefulnottoscratchordamagetherearwindowdefroster.
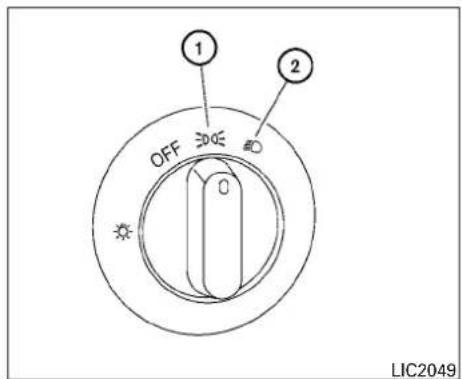
HEADLIGHTCONTROL SWITCH
Lighting
① Rotatetheswitchtotheposition, and thefrontparking, tail, licenseplate, and instrumentpanellightswillcomeon.
② Rotatetheswitchtotheposition, and theheadlightswillcomeonandalltheother lightsremainon.
CAUTION
Usetheheadlightswiththeengineerunningtoavoiddischargingthevehicle battery.
2-26Instrumentsandcontrols

Headlightbeamselect
① Toselectthehighbeamfunction,engagethe lowbeams,andpushtheleverforwarduntil latches.Thehighbeamlightscomeonand theblue indicatorlightilluminates.
② Pulltheleverbacktoreturntothelowbeam. Foradditionalinformation,referto"Headlightcontrolswitch"inthissection.
③ Pullingandreleasingtheleverflashesthe headlighthighbeamsonandoff. Thelow beamsneednotbeonforthistofunction.
Batterysaversystem
IftheignitionswitchisplacedintheOFFposition whiletheheadlightswitchisinthe ORposition,theheadlightswillturnoffafter aperiodoftime.
Aftertheheadlightsautomaticallyturnoffwiththe headlightswitchinthe EDDE orposition, theheadlightswillilluminateagainiftheheadlight switchismovedtotheOFFpositionandthen turnedtothe EDDE orposition.
CAUTION
Even though the battery saver feature automatically turn soff the headlights after a period of time, you should turn the headlights switch to the OFF position when the engine is not running to avoid discharging the vehicle battery.
Theheadlightsautomaticallyilluminateatareducedintensitywhentheengineisstartedwith theparkingbrakereleased.TheDaytimeRunning Lights(DRL)operatewiththeheadlightswitchin theOFFposition.Turntheheadlightswitchto the EDDE or positionforfullillumination whendrivingatnight.
If the parking brake is applied before the engine is started, the DRL donotilluminate. The DRL illuminate when the parking brake is released. The DRL will remain on until the ignition switch is placed in the OFF position.
WARNING
WhentheDRLsystemisactive,taillights onyourvehiclearenonoton.Itisnecessary atdusktoturnonyourheadlights.Failure todosocouldcauseanaccidentinjuring yourselfandothers.


The instrument brightness control operates when the headlight control switch is in the EDDE or position.
Turntheknob ① toadjustthebrightnessofthe instrumentpanellights.
TURNSIGNALSWITCH
Turnsignal
① Movetheleverupordownuntillatchesto signaltheturningdirection.Whentheturnis completed, theturnsignalcancelsautomatically.
Lanechangesignal
② Tosignalalanechange, movetheleverupor downtothepointwheretheindicatorlight beginstoflash, buttheleverdoesnotlatch.
Holdtheleveruntilthelanechangeiscompleted.

FOGLIGHT SWITCH(ifsoequipped)
Toturnthefrontfoglightson,turntheheadlight switchtothe 10 position,thenpushthefog lightswitch ①.
Toturnthemoff, pushthefoglightswitch again. ①
Thefoglightswillturnoffiftheheadlightsare turnedoff.
2-28Instrumentsandcontrols
HORN
HEATEDSEATSWITCHES(ifso equipped)

Tosoundthehorn, push the center pad area of the steering wheel.
WARNING
Donotdisassemblethehorn.Doingso could affect proper operation of the supplemental frontairbagsystem.Tampering with the supplemental frontairbag system may result in serious personal injury.
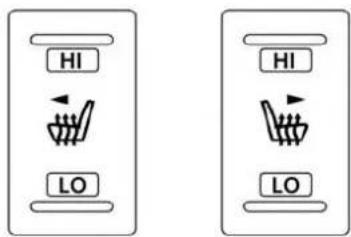
WARNING
Donotuseorallowoccupantstousethe seatheaterifyouortheoccupantscannot monitorelevatedseattemperaturesor haveaninabilitytofeelpaininbodyparts thatcontacttheseat.Useoftheseat heaterbysuchpeoplecouldresultinseriousinjury.
CAUTION
- The battery could rundown if these at heater is operated while the engine is not running.
- Donotusetheseatheaterforextended periodsorwhennooneisusingthe seat.
- Donotputanythingontheseatwhich insulatesheat,suchasablanket,cushion,seatcover,etc. Otherwise,theseat maybecomeoverheated.
- Donotplaceanythinghardorheavyon theseatorpierceitwithapinorsimilar object. This may result in damagetothe heater.
- Anyliquidspilledontheheatedseat shouldberemovedimmediatelywitha drycloth.
- Whencleaningtheseat,neveruse gasoline,benzine,thinner,oranysimilarmaterials.
- Ifanymalfunctionsarefoundorthe heatedseatdoesnotoperate,turnthe switchoffandhavethesystemchecked. Itisrecommendedthatyouvisita NISSANdealerforthisservice.
Thefrontseatsarewarmedbybuilt-inheaters.
Instrumentsandcontrols
VEHICLEDYNAMICCONTROL(VDC) OFFSWITCH
- Starttheengine.
- Push the LO or HI position of the switch, as desired. The indicator light in the switch will illuminate.
Theheateriscontrolledbyathermostat, automaticallyturningtheheateronandoff. Theindicatorlightwillremainonaslongas theswitchison.
- Whentheseatiswarmedorbeforeyou leavethevehicle, besuretopushtheswitch toturnitoff.

LIC1548
The vehicles should be driven with the VDC system on most driving conditions.
Ifthevehicleisstuckinmudorsnow,theVDC systemreducetheengineoutputtoreduce wheelspin.Theenginespeedwillbereduced eveniftheacceleratorisdepressedtothefloor.If maximumenginepowerisneededtofreeastuck vehicle,turntheVDCsystemoff.
ToturnofftheVDCsystem, pushtheVDCOFF
switch.The indicatorwillcomeon.
PushtheVDCOFFswitchagainorrestarthe enginetoturnonthesystem.Foradditionalinformation,referto"VehicleDynamicControl(VDC) system"inthe"Startinganddriving"sectionof thismanual.
2-30 Instrumentsandcontrols
POWERINVERTERSWITCH(ifso equipped)
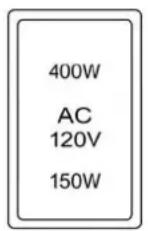
LIC2075LIC2074
Tousetheoutletsfordevicesthatrequire120v power, placetheignitionswitchintheONpositionandpushthepowerinverterswitch.
The400Wor150Wontheswitchwillilluminate accordingtothemodeselected.Onlythe150W isavailablewhentheignitionswitchisplacedin theONpositionandthevehicleisbeingdriven. Foradditionalinformation,referto"120voutlets" inthissectionregardingusingdevicesthatrequirethepowerinverterswitchactivated.
CAUTION
- Usepoweroutletswiththeengineerunningtoavoiddischargingthevehicle battery.
- Donotattempttousethiswhiledriving.
- Donotuseddoubleadaptersormore thanoneelectricalaccessory,doingso couldsignificantlydrainthebatteryof yourvehicle.
REARSONARSYSTEM(RSS)OFF SWITCH(ifsoequipped)

WARNING
TheRSSisaconveniencebutitisnota substituteforproperbacking.Alwaysturn andcheckthatitissafetodosobefore backingup.Alwaysbackupslowly.
TheRSSisactivewhentheignitionswitchis placedtotheONpositionandtheshiftleverisin R(Reverse).
Whensensorsdetectobstacleswithin5.9ft (1.8m)oftherearbumper,abeepingtoneis emitted.
FRONTANDREARSONARSYSTEM OFFSWITCH(ifsoequipped)
TheRSSScanbedisabledbypushingtheOFF switch. Whenthesystemmisdisabled, theindicatorlightontheswitchwillilluminate. Pushthe switchagaintoenablethesystem. Theindicator lightwillgooff.
Thesystemwillautomaticallyresetthenexttime theignitionswitchisturnedon.
For additional information, refer to "Rearsonar system(RSS)" in the "Starting and driving" section of this manual.
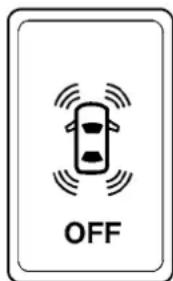
LIC1182
WARNING
- Thefrontsonarsystemisaconvenience butitisnotasubstituteforproper driving.
- Therearsonarsystemisaconvenience butitisnotasubstituteforproperbacking.Alwaysturnandcheckthatitissafe todosobeforebackingup.Always backupslowly.
Thefrontsonarsystem:
- IsactivewhentheignitionisintheON positionandtheshiftleverisinaforward gearposition.
- Abeepingtoneisemittedwhenthesensors detectobstacleswithin3ft(1.0m)ofthe frontbumper.
Therearsonarsystem:
- IsactivewhentheignitionisintheON positionandtheshiftleverisinR(Reverse).
- Abeepingtoneisemittedwhenthesensors detectobstacleswithin5.9ft(1.8m)ofthe rearbumper.
Thefrontandrearsonarsystemcanbedisabled bypushingtheOFFswitch.Whenthesystemis disabled,theindicatorlightontheswitchwill illuminate.Pushtheswitchagaintoenable the system.Theindicatorlightwillgooff.
Thesystemwillautomaticallyresetthenexttime theignitionswitchisplacedintheONposition.
For additional information, refer to "Frontandrear sonarsystem" in the "Starting and driving" section of this manual.
TOWMODESWITCH(ifsoequipped)POWEROUTLETS

Towmodeshouldbeusedwhenpullingaheavy trailerorhaulingaheavyload.Drivingthevehicle inthetowmodewithnotrailer/loadorlight trailer/lightloadwillnotcauseanydamage.However,fueleconomymaybereducedandthe transmission/enginedrivingcharacteristicsmay feelunusual.
Pressthetowmodeswitchtoactivatetowmode. The TOW indicator will come on whentow mode is selected. Pressthetow modeswitchagainto turnthetowmodeoff.
Towmodeisautomatically canceled when the keyisturnedoff.
For additional information, referto "Towmode" in the "Technical and consumer information" section of this manual.

12vInstrumentPanel
12VOUTLET(s)
The power outlets are for power ing electrical accessories such as cellular telephones. They are rated at 12 volt, 120W(10A) maximum.
Openthecaptouseapoweroutlet.
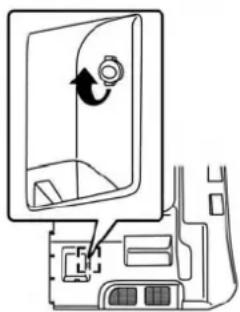
LIC2199
12v3rdRow(ifsoequipped)
The power outlet on the instrument panel and the 3rd row (if so equipped) are powered only when the ignition switch is in the ACC or ON position.
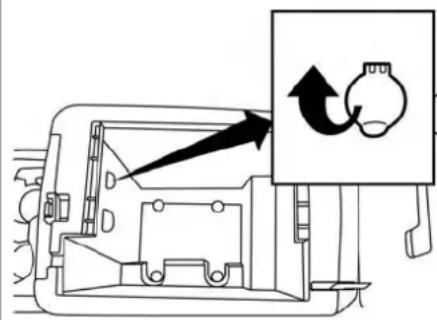
LIC2077
12vCenterconsole(ifsoequipped)
The power outlet inside the console (if so equipped) is powered directly by the vehicle's battery.
CAUTION
●Theoutletandplugmaybehotduring orimmediatelyafteruse.
- Only certain power outlets are designed for use with a cigarette lighter unit. Do not use any other power outlet for an accessory lighter. It is recommended that you visit a NISSAN dealer for additional information.
- Donotusewithaccessoriesthatexceed a12volt,120W(10A)powerdraw.
- Donotusedoubleadaptersormore thanoneelectricalaccessory.
- Usepoweroutletswiththeengineerunningtoavoiddischargingthevehicle battery.
- Avoidusingpoweroutletswhentheair conditioner,headlightsorrearwindow defrosterison.
- Beforeinsertingordisconnectinga plug, besuretheelectricalaccessory beingusedisturnedOFF.
- Pushthepluginasfarasitwillgo. If goodcontactisnotmade, theplugmay overheatortheinternaltemperature fuse may open.
- When not in use, besuretoclosethe cap. Donotallowwateroranyother liquid to contact the outlet.
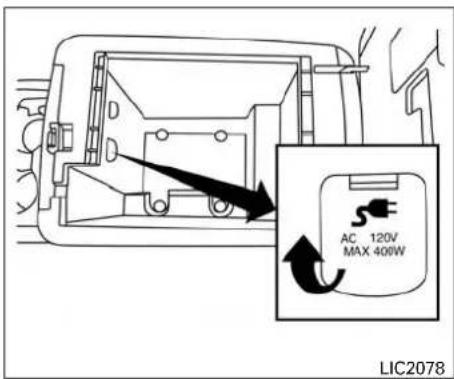
120v Center console (if so equipped)
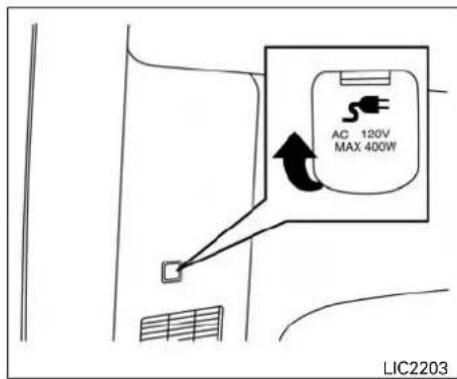
120v Rear luggage area (if so equipped)
120VOUTLETS(ifsoequipped)
| BeforeDrive(idling)(Park)WhenshiftingoutofParkWhenshiftingbackto(idling)(Park) | SwitchReset | ||||||||
| OptionsW | whatispluggedINIndicatorInverter | Status | IndicatorInverter Status | IndicatorInverter Status | IndicatorInverter Status | IndicatorInverter Status | IndicatorInverter Status | IndicatorInverter Status | |
| Nothingpluggedbutswitchison150and400ON150ON150and400ONNOT | NECESSARY | NOT NECESSARY | |||||||
| Device<150W150and400ON150ON150and400ONNOT | NECESSARY | NOT NECESSARY | |||||||
| 150W>device<400W150and400ONOFFON | ON150and400 | ON | |||||||
| Device>400W | 150 and 400 | OFF | OFF | OFF | OFF | OFF | OFF** | OFF** | |
** OFF means that the inverter system cannot be reset until a device that is within the specified range of operation is plugged in. Therefore, the switch indicators and inverter would remain OFF. There may be a very short period of time where the switch indicators are on, but once the inverter reaches its peak saturation point (temp and power level), it will shut off both the inverter and the switch indicators.
STORAGE
CAUTION
- Theoutletandplugmaybehotduring orimmediatelyafteruse.
- Usepoweroutletswiththeengineerunningtoavoiddischargingthevehicle battery.
- Donotuseddoubleadaptorsormore thanoneelectricalaccessory.
- Avoidusingpoweroutletswhentheair conditioner,headlightsorrearwindow defrosterison.
- Beforeinsertingordisconnectinga plug, besuretheelectricalaccessory beingusedisturnedoff.
- Pushthepluginasfarasitwillgo.If goodcontactisnotmade,theplugmay overheatortheinternaltemperature fuse may open.
- When not in use, besuretoclosethe cap. Donotallowwateroranyother liquidtocontacttheoutlet.
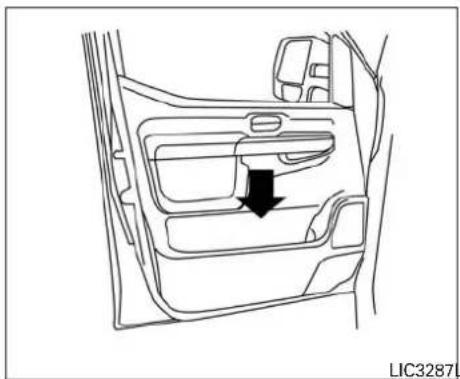

FRONT-DOORPOCKETSSEATPOCKET(ifsoequipped)
Theseatpocketislocatedonthefrontcornerof thedriver'sseat.Thepocketcanbeusedtostore smallitems.
WARNING
Donotstoreangular, sharp, heavy objects or objectsthatcannotfullyfitinsidethe pouchbecausetheymightincreasethe likelihoodofaninjuryinacrash.
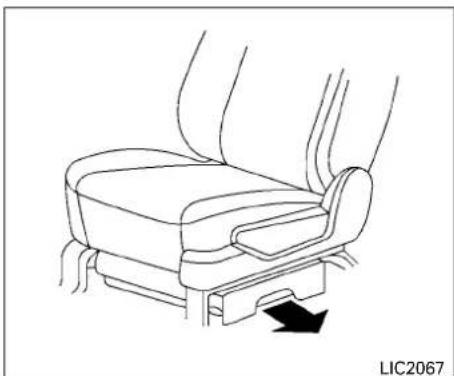
Driversideonly
UNDER-SEATSTORAGE
Toopenthedrawer,liftupslightlyandpullto open.Toremovethedrawer,pulltothepointof resistanceandliftupandpull.

CAUTION
To avoid damaging the tray under these at, cargoin the tray should not exceed 20 pounds (9.08 kg).

Instrumentpanel
INSTRUMENTPANELSTORAGE TRAYS
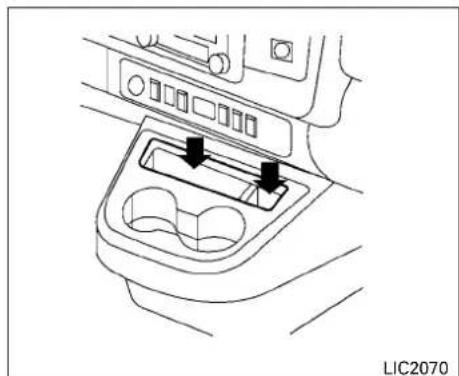
Lowercenterconsole
Thelongstoragetraycanbeusedtostorebusinesscards.

WARNING
Donotplacesharpobjectsinthetraysto helppreventinjuryinanaccidentorsuddenstop.

WIC0255LIC2086

GLOVEBOX
Openthegloveboxbypullingthehandle.
WARNING
Keepgloveboxlidclosedwhiledrivingto helppreventinjuryinanaccidentora suddenstop.
CONSOLEBOX(ifsoequipped)
Thefrontoftheconsoleboxlid ① hasaplacefor securingitemswithmetalclips.
2-38 Instrumentsandcontrols

Binderstoragetray
Thetraylocatedinthefrontoftheconsoleboxis forstoringbinders.
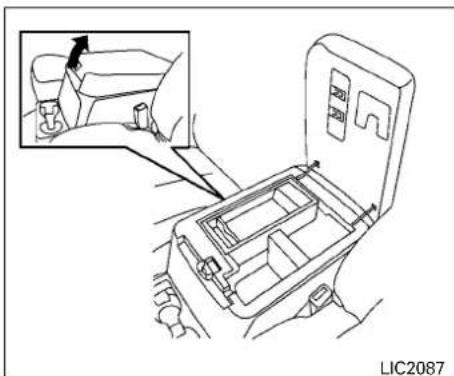
Lowerhalf
Removablecenterconsole
Toremovethecenterconsole:
- Stop the vehicle and placethe ignition switch in the OFF position.
2.Liftouttray. - Unplugallaccessoriesfromtheoutlets.

- Remove four bolts located inside the console and two in the front storage tray.

5.Disconnectthepowersupply.Theconnectormayneedtobeaccessedfromthedriver'sdoorsideoftheseatbyreachingunderneatheseat.
- The harnesscap(ifsoequipped)istaped to the harnessunderneaththeinsideofthe centerconsole.Removethetapetoremove thecap.
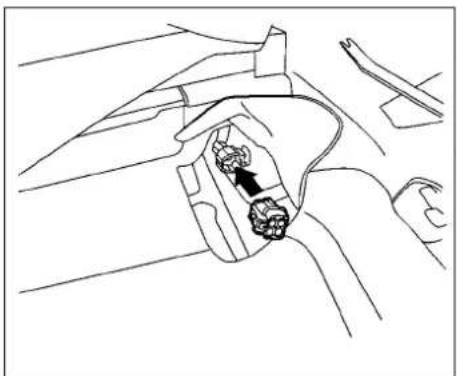
Forcustomerswithout120Vproceedtostep8.
- Install the cap to the harness connector located at the bottom corner of the driver's seat.
- Securelytightentheboltstothevehicleafter theconsoleisremoved.
WARNING
Reinstallboltsinthefloormountingholes topreventwaterintrusionandreducethe chanceforcarbonmonoxidetogetinto theoccupantcompartment.
2-40Instrumentsandcontrols
CAUTION
Properlystowandsecuretheconsoleifit isnotstoredoutsidethevehicle.
Toinstallthecenterconsole:
- Stop the vehicle and placethe ignition switch in the OFF position.
- Removethesixboltsfromthefloormounting holes.
Forcustomerswithout120Vproceedtostep5.
- Removethecapfromtheharnessconnector locatedatthebottomcornerofthedriver's seatandplacethecapinthegloveboxfor futureuse.
- Connect the harness from the console to the connector at the bottom of the driver's seat. This may need to be accessed from the driver's doorside of these at by reaching underneath the seat.
- Securelytightensixbolts, fourboltslocated insidetheconsoleandthetwointhefront storagetray.

OVERHEADSUNGLASSES STORAGE
Toopenthesunglassesholder, pushandrelease.
Onlystoreonepairofsunglassesintheholder.
WARNING
Keepthesunglassesholderclosedwhile drivingtoavoidobstructingthedriver's viewandtohelppreventanaccident.
CAUTION
- Donotuseforanythingotherthan sunglasses.
- Donotleavesunglassesinthesunglassesholderwhileparkingindirect sunlight.Theheatmaydamagethe sunglasses.

Instrumentpanel
CUPHOLDERS

Centerconsole(ifsoequipped)
CAUTION
- Avoid abrupt starting and braking when the cupholder is being used to prevent spilling the drink. If the liquid is shot, it cans cald you or your passenger.

Underseatcupholders
Eachrowisequippedwithtwomoveableunder seatmountedcupholders.Touse,pulloutfrom belowtheseat.
CAUTION
- Useonlysoftcupsinthecupholder. Hardobjectscaninjureyouinan accident.
2-42 Instrumentsandcontrols

Frontrow—bottleholder

3rdrow-bottleholder

Mappocket-passengerarea
STORAGEBIN
CAUTION
- Donotusebottleholderforanyother objectsthatcouldbethrownaboutin thevehicleandpossiblyinjurepeople duringsuddenbrakingoranaccident.
- Donotusebottleholderforopenliquid containers.
WINDOWS
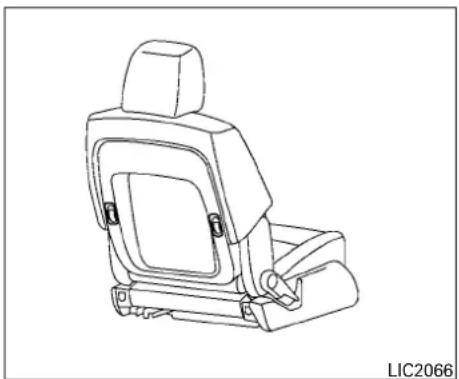
GROCERYHOOKS
The grocery hooks are located on the back of the passenger's seat. The grocery hooks allow for standardsize plastic grocery bag to hang side by side.
CAUTION
To avoid damaging the hooks donot apply at total load of more than 18 lbs (8 kg) to a single grocery hook.

LIC3352
MANUALWINDOWS(ifsoequipped)
Thesidewindowscanbeopenedorclosedby turningthehandcrankoneachdoor.
POWERWINDOWS(ifsoequipped)
WARNING
- Makesurethatallpassengershave theirhands,etc.insidethevehiclewhile itisinmotionandbeforeclosingthe windows.Usethewindowlockswitchto preventunexpectedduseofthepower windows.
●Tohelpavoidriskofinjuryordeath throughunintendedoperationofthe vehicleand/oritssystems,including entrapmentinwindowsorinadvertent doorlockactivation,donotleavechildren,peoplewhorequiretheassistance ofothersorpetsunattendedinyour vehicle.Additionally,thetemperature insideaclosedvehicleonawarmday canquicklybecomehighenoughto causeasignificantriskofinjuryor deathtopeopleandpets.
The power windows operate when the ignition switch is placed in the ON position, or for a period of time after the ignition switch is placed in the OFF position. If the driver's or passenger's door is opened during this period of time, the power to the window is canceled.


1.Powerdoorlockswitch
2.Frontpassengerside
3.Windowlockbutton
4.Driversideautomaticswitch
Driver'ssidepowerwindowswitch
Thedriver'ssidecontrolpanelisequippedwith switchestoopenorclosebothfrontwindows.
Toopenawindow, pushtheswitchandholdit down. Tocloseawindow, pulltheswitchand holditup. Tostoptheopeningorclosingfunction atanytime, simplyreleasetheswitch.
Frontpassenger'spowerwindow switch
Thepassenger'swindowswitchoperatesonly thecorrespondingpassenger'swindow.Toopen thewindow,pushtheswitchandholditdown ①. Toclosethewindow,pulltheswitchup ②.
Lockingpassengers'windows
Whenthewindowlockswitchispushed, only the driver'ssidewindowcanbeopenedorclosed. Pushitagaintocancelthewindowlockfunction.
Automaticoperation
Tofullyopenawindowequippedwithautomatic operation,pushthewindowswitchdowntothe seconddetentandreleaseit;itneednotbeheld. Thewindowautomaticallyopensalltheway.To stopthewindow,lifttheswitchupwhilethe windowisopening.
INTERIORLIGHTS


MANUALVENTWINDOWS
Toopenamanualventwindow, pulleachofthe latchhandlesupuntilreleased.
Tolockthewindowintheopenposition, push the latch handlesdownuntillockedinplace.
Tocloseamanualventwindow,pullthelatch handlesupandtotheinsideofthevehicle,then pushthelatchesdownuntiltheylock.
The interior light shave three-position switch and operateregardless of ignitions switch position.
WhentheswitchisintheONposition ①,the interiorlightsilluminate,regardlessofdoorposition.Thelightswillgooffafteraperiodoftime unlesstheignitionswitchisintheONposition.
WhentheswitchisintheON,DOORornormal position ②,theinteriorlightswillstayonfora periodoftimewhen:
- Thedoorsare unlocked by the key fob, a key, orthepower door lock switch while all doors are closed and the ignition switch in the OFF position.
- Thedriver's doorisopened and then enclosed while the key is removed from the ignition switch.
●Thekeyisremovedfromtheignitionswitch whilealldoorsareclosed.
Thelightswillturnoffwhilethetimerisactivated when:
- Thedriver'sdoorislockedbythekeyfob(if soequipped),akey,orthepowerdoorlock switch(ifsoequipped).
●TheignitionswitchisplacedintheONposition.
Thelightswillturnoffautomaticallyafteraperiod oftimewhiledoorsareopentopreventthebatteryfrombecomingdischarged.
WhentheswitchisintheOFFposition ③, the interiorlightsdonotilluminate, regardless of door position.

CAUTION
Donotuseforextendedperiodsoftime withtheenginestopped.Thiscouldresult inadischargedbattery.
2-46 Instrumentsandcontrols


MAPLIGHTS
Toturnthemaplightson, pushtheswitches. To turnthemoff, pushtheswitches again.
CAUTION
Donotuseforextendedperiodsoftime withtheenginestopped.Thiscouldresult inadischargedbattery.
CARGOLIGHT
Thecargolightontheoverheadtrimhasathree-positionswitch. Tooperate, pushtheswitch to thedesiredposition.
ON:Thelightisilluminated.
Normal(center)position:Thelightilluminates whenanydoorisopenedorunlockedbythekey fob.Thelightturnsoffafteraperiodoftimewhen alldoorsareclosed.
OFF: Thelight does not illuminateregardless of door position or lock status.
MEMO
2-48 Instrumentsandcontrols
3Pre-drivingchecksandadjustments
Keys....3-2
NISSANVehicleImmobilizerSystemkeys (ifsoequipped)....3 - 2
Doors. 3 - 3
Lockingwithkey....3-3
Lockingwithinsidelockknob. 3 - 4
Lockingwithpowerdoorlockswitch (ifsoequipped)....3 - 5
Operatingtheslidingdoor....3-6
Backdoors....3-7
Automaticdoorlocks(ifsoequipped).... 3 - 8
Childsafetyslidingdoorlock. 3 - 8
Remotekeylessentrysystem(ifsoequipped)....3-8
Howtouseremotekeylessentrysystem....3-9
Hood....3-12
Fuel-fillerdoor....3-13
Openingthefuel-fillerdoor. 3-13
Fuel-fillercap. 3-13
Steeringwheel....3-15
Tiltoperation. 3-15
Sunvisors....3-16
StorageClip....3-16
Mirrors....3-17
Manualanti-glarerearviewmirror (ifsoequipped)....3-17
Automaticanti-glarearviewmirror (ifsoequipped)....3-17
Outsidemirrors....3-18
KEYS


LPD0348
-
Twomasterkeys(black)withtransponderchip(ifsoequipped)
-
Transponderchip(ifsoequipped)
3.Keynumberplate
Akeynumberplateissuppliedwithyourkeys. Recordthekeynumberandkeepitinasafeplace (suchasyourwallet),notinthevehicle.Ifyoulose yourkeys,itisrecommendedthatyouvisita NISSANdealerforduplicatesbyusingthekey number.NISSANdoesnotrecordkeynumbers soitisveryimportanttokeeptrackofyourkey numberplate.
Akeynumberisonlynecessarywhenyouhave lostallkeysanddonothaveonetomakea
3-2 Pre-drivingchecksandadjustments
duplicate.Ifyoustillhaveakey,itcanbeduplicatedwithoutknowingthekeynumber.
Youcanonlydriveyourvehicleusingthekeys whichareregisteredtotheNISSANVehicleImmobilizerSystemcomponentsinyourvehicle.
Amechanicalkeycanbeusedforallthelocks.
Neverleavethekeysinthevehicle.
Additionalorreplacementkeys:
If you still have a key, the key number is not necessary when you need extra NISSAN Vehicle Immobilizer System keys. You existing key can be duplicated without knowing the key number. As many as four NISSAN Vehicle Immobilizer System key scan be used with one vehicle. You should bring all NISSAN Vehicle Immobilizer System key that you haveto a NISSAN dealer for registration. This because theregistration process will erasethememory of all key codes previously registered into the NISSAN Vehicle Immobilizer System. After theregistration process, these components will only recognize keys coded into the NISSAN Vehicle Immobilizer System during registration. Any key that is not given to the dealer at the time of registration will no longer be able to start your vehicle.

CAUTION
Donotallowtheimmobilizersystemkey, which contains an electrical transponder, to come into contact with water or salt water. This could affect system function.
DOORS
Whenthedoorsarelockedusingoneofthe followingmethods,thedoorscannotbeopened usingtheinsideoroutsidedoorhandles.The doorsmustbeunlockedtoopenthedoors.
WARNING
●Alwayshavethedoorslockedwhile driving. Alongwiththeuseofseatbelts, thisprovidesgreatersafetyintheevent ofanaccidentbyhelpingtoprevent personsfrombeingthrownfromthe vehicle. Thisalsohelpskeepchildren andothersfromunintentionallyopeningthedoors, andwillhelpkeepout intruders.
- Beforeopeninganydoor,alwayslook forandavoidoncomingtraffic.
●Tohelpavoidriskofinjuryordeath throughunintendedoperationofthe vehicleandoritssystems,including entrapmentinwindowsorinadvertent doorlockactivation,donotleavechildren,peoplewhorequiretheassistance ofotherorpetsunattendedinyourvehicle.Additionally,thetemperatureinsideaclosedvehicleonawarmdaycan quicklybecomehighenoughtocausea significantriskofinjuryordeathor peopleandpets.

Driver'sside
LOCKINGWITHKEY
Tolockorunlockthevehicle,turnthekeyas shown.
ManualorPower(withoutvehicle securitysystem)(ifsoequipped)
Tolockadoor,turnthekeytowardthefrontofthe vehicle ①.Tounlock,turnthekeytowardtherear ②.
Frontandslidingdoors
Tolockadoor,turnthekeytowardthefront thevehicle.Tounlock,turnthekeytowardthe rear ① of
Reardoor
Turningthekeytowardtheleft locksthereardoors.
Turningthekeytotheright unlocksthereardoors.
① ofthevehicle
② ofthevehicle
![graph TD A["1"] --> B["Central Component"] C["2"] --> B D["3"] --> B E["4"] --> B B --> F["LPD0483"]](/content/2026/05/789802/images/610d106620cc7c1342b86271764c41f169884d17206d10cdfd24d3b93bcb36b8.jpg)
Power(withvehiclesecuritysystem)(if soequipped)
The powerdoor locks system with vehicle security system allows you to lock all doors at the same time.
Frontandslidingdoors
Turningthekeytowardthefront ① ofthevehicle locksallthedoors.
Turningthekeyonetimetowardtherear ② ofthe vehicleunlocksthatdoor.Fromthatposition, returningthekeytoneutral ③ (wherethekeycan
onlyberemovedandinserted)andturningit towardtherearagainwithin5secondsunlocks alldoors ④.
Reardoor
Turningthekeytowardtheleft ① ofthevehicle locksallthedoors.
Turningthekeyonetimetowardtheright ② of thevehicleunlocksthatdoor.Fromthatposition, returningthekeytoneutral ③ (wherethekeycan onlyberemovedandinserted)andturningit towardtherightagainwithin5secondsunlocks alldoors ④.
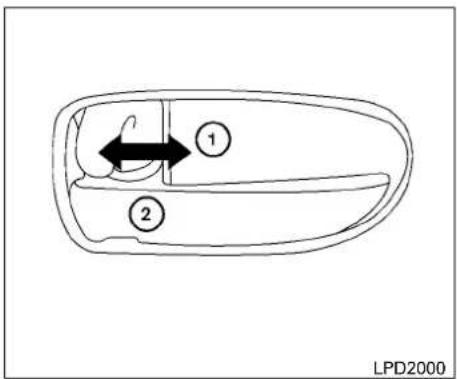
Insidelock-frontdriverandpassenger LOCKINGWITHINSIDELOCK KNOB
Tolockthedoorwithoutthekey,movetheinside lockknobtothelockposition ①,thenclosethe door.
Tounlockthedoorwithoutthekey,movethe insidelockknobtotheunlockposition ②.
3-4 Pre-driving checks and adjustments
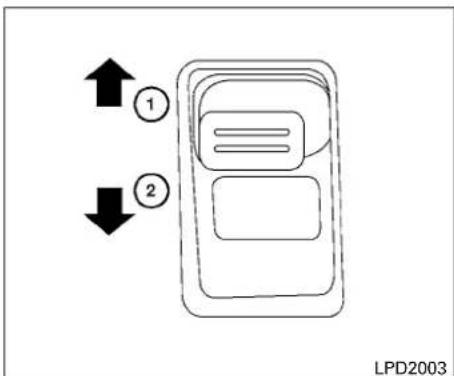
Insidelock-slidingdoor
Tolockthedoorwithoutthekey,movetheinside lockknobtothelockposition ②,thenclosethe door.
Tounlockthedoorwithoutthekey,movethe insidelockknobtotheunlockposition ①.
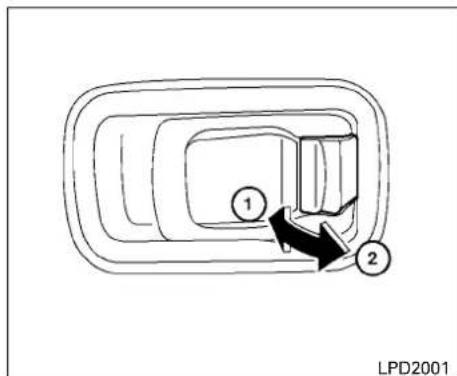
Insidelock-backdoor
Tolockthedoorwithoutthekey,movetheinside lockknobtothelockposition ①,thenclosethe door.
Tounlockthedoorwithoutthekey,movethe insidelockknobtotheunlockposition ②.
Toopenthedorfromtheinside,pulltheinside doorhandletowardyou.

LOCKINGWITHPOWERDOOR LOCKSWITCH(ifsoequipped)
Tolockallthedoorswithouttakey,pushthedoor lockswitch(driver'sorfrontpassenger'sside)to thelockposition ①.Whenlockingthedoorthis way,becertainnottoleavethekeyinsidethe vehicle.
Tounlockallthedoorswithouttakey,pushthe doorlockswitch(driver'sorfrontpassenger's side)totheunlockposition ②.
Lockoutprotection
Whenthepowerdoorlockswitch(driver'sor frontpassenger'sside)ismovedtothelock positionwiththekeyintheignitionswitchchandany dooropens,alldoorswilllockandthenunlock automatically.Thishelpstopreventthekeysfrom beingaccidentallylockedinsidethevehicle.

Theslidingdoorcanbeopenedfromtheinsideor theoutside.
Toopentheslidingdoorfromtheinside,pullthe releaselever ① downandpullthehandle towardtherearofthevehicleuntilthedoorclicks. Thiswilllockthedoorintoanopenposition.
Toclosetheslidingdoorfromtheinsidepullthe releaselever ① down. Thedoorwillreleasefrom theopenposition.Slidethedorforwardto close.
Toopenaslidingdoorfromtheoutside,pullout theoutsidehandleandslidethedoortowardthe rearofthevehicleuntilthedoorclicks. Thedoor willockintoanopenposition.
Toclosetheslidingdoorfromtheoutside,pullthe outsidehandleagain.Thedoorwillreleasefrom theopenpositionandslideclosed.
3-6 Pre-driving checks and adjustments

LPD2051LPD2009
Openthebackdoorsbyperformingthefollowing:
- From the outside of the vehicle, pull the door handle on therights sided to forward you and opendoor until stops.
- Liftthelever Ⓐ onthesideoftheleftback doorandpullthedoortoopenuntilthedoor stops ①.
BACKDOORS
CAUTION
Donotoperatethe243°releaseleveruntil thedoorhasbeenfullyopened.Doingso canresultindamagetothevehicleand/or malfunctionofthemechanism.

The backdoors open approximately 243° to allow access to the rear of the vehicle.
- Toopeneitherdoortothewideopenposition ② pullthereleaselever ⑧ towardthe backdoorandreleasethechecklinkarm ⑨.
- Openthedoorslowlyuntilthemagnetic doorstopperconnectstothestoppadon theoutsideofthevehicle.Donotusethe stopperasastep.
Pre-drivingchecksandadjustments3-7
AUTOMATICDOORLOCKS(ifso equipped)
●Alldoorslockautomaticallywhenthevehicle speedreaches15mph(24km/h).
- AlldoorsunlockautomaticallywhentheignitionisplacedintheOFFpositionorwhen thekeyisremovedfromtheignitionswitch.

LPD2050
CHILDSAFETYSLIDINGDOOR LOCK
Thechildsafetylockhelpspreventthesliding doorfrombeingopenedaccidentally,especially whensmallchildrenareinthevehicle.
Thechildsafetylockleverislocatedontheedge oftheslidingdoor.
Whentheleverisintheunlockposition, thedoor canbeopenedfromtheoutsideortheinside.
WhentheleverisintheLOCKposition,the doorcanbeopenedonlyfromtheoutside.
REMOTEKEYLESSENTRYSYSTEM (ifsoequipped)
WARNING
●Radiowavescouldadverselyaffect electricmedicalequipment.Thosewho useapacemakershouldcontactthe electricmedicalequipmentmanufacturerforthepossibleinfluencesbefore use.
- Theremotekeylessentrykeyfobtransmitsradiowaveswhenthebuttonsare pushed.TheFAAadvisesradiowaves mayaffectaircraftnavigationandcommunicationsystems.Donotoperatethe remotekeylessentrykeyfobwhileon anairplane.Makesurethebuttonsare notoperatedunintentionallywhenthe unitisstoredforaflight.
Itispossibletolock/unlockalldoors,turnonthe interiorlightsandactivathepanicalarmby usingthekeyfobfromoutsidethevehicle.
Somesettingsforthekeyfob,suchashornbeep, canbeadjusted.Foradditionalinformation,refer to"Silencingthehornbeepfeature"inthissection.
Besuretoremovethekeyfromthevehicle beforelockingthedoors.
The key fobcan operate at a maximum distance of approximately 33 ft (10 m) from the vehicle.
3-8 Pre-driving checks and adjustments
The effective distance depends upon the conditions around the vehicle.
Asmanyasfivekeyfobscanbeusedwithone vehicle.Forinformationconcerningthepurchase anduseofadditionalkeyfobs,itisrecommended thatyouvisitaNISSANdealer.
Thekeyfobwillnotfunctionwhen:
●Thebatteryisdischarged.
●Thedistancebetweenthevehicleandthe keyfobisover33ft(10m).
Thepanicalarmwillnotactivatewhenthe keyisintheignitionswitch.
CAUTION
Listedbelowareconditionsoroccurrenceswhichwilldamagethekeyfob:
- Donotallowthekeyfob, which contains electrical components, to come into contact with water or saltwater. This could affect the system function.
- Donotdropthekeyfob.
- Donotstrikethekeyfobsharply againstanotherobject.
-
Donotchangeormodifythekeyfob.
-
Wettingmaydamagethekeyfob.Ifthe keyfobgetswet,immediatelywipeuntil itiscompletelydry.
- Donotplacethekeyfobforanextendedperiodinanareawheretemperaturesexceed140°F(60°C).
- Donotattachthekeyfobwithakey holderthatcontainsamagnet.
- Donotplacethekeyfobnearequipmentthatproducesamagneticfield, suchasaTV, audioequipmentandpersonalcomputers.
Ifakeyfobislostorstolen,NISSANrecommendserasingthelDcodeofthatkey fob.Thiswillpreventthekeyfobfrom unauthorizedusetounlockthevehicle. Forinformationregardingtheerasing procedure,itisrecommendedthatyou visitaNISSANdealer.
LPD0209
HOWTOUSEREMOTEKEYLESS ENTRYSYSTEM
Lockingdoors
1.Closeallwindows.
2. Removethekeyfromtheignitionswitch.
3. Closethehoodandalldoors.
4.Pressthe

buttononthekeyfob.All
thedoorslock. Thehazardwarninglights flashtwiceandthehornbeepsonceto indicatealldoorsarelocked.
- When the button is pressed with all doors locked, the hazard warning lights flash twice and the horn beep once as are - minder that the doors are already locked.
- Ifadoorisopenandyoupressthe button,thedoorswilllockbutthehornwill notbeepandthehazardwarninglightswill notflash.
Thehornmayormaynotbeep. For additional information, referto "Silencingthehornbeep feature" in this section.

Unlockingdoors
Pressthebuttononthekeyfobonce.
- Onlythedriver'sdoorunlocks.
- Thehazardwarninglightsflashonceifall doorsarecompletelyclosedwiththeignition switchinanypositionexcepttheONposition.
●Theinteriorlightsturnonandthelighttimer activatesforaperiodoftimewhentheinteriorlightswitchisintheDOORpositionwith theignitionswitchinanypositionexceptthe ONposition.
Pressthe 🔒 buttononthekeyfobagain within5seconds.
●Alldoorsunlock.
●Thehazardwarninglightsflashonceifall doorsarecompletelyclosed.
The interiorlightscan be turned off without waiting by inserting the key into the ignition switch and placing it in the ON or START position, locking the doors with the key for or pushing the interior lights switch to the OFF position.
Autorelock(ifsoequipped)
When the buttononthekeyfobis pressed, alldoorswilllockautomatically within 1 minute unless one of the following operations is performed:
- Anydoorisopened.
- Akeyisinsertedintotheignitionswitchand theswitchiscycledfromOFFtoON.
Usingtheinteriorlights
Pressthebuttononthekeyfobonceto turnontheinteriorlights. Foradditionalinformation,referto"Interiorlights" inthe"Instrumentsandcontrols"sectionofthis manual.
Usingthepanicalarm
If you are necessary your vehicle and feel threatened, you may activate the anical alarm to call attention by pressing and holding the button on the key for longer than 0.5 seconds.
Thepanicalarmandheadlightswillstayonfora periodoftime.
Thepanicalarmstopswhen:
- Ithasrunforaperiodoftime.
●Anybuttonispressedonthekeyfob.
![graph TD A["Lock Icon"] --> B["Lock Icon"] B --> C["Lock Icon"] C --> D["Unlabeled Box"] style A fill:#f9f,stroke:#333 style B fill:#ccf,stroke:#333 style C fill:#cfc,stroke:#333 style D fill:#fcc,stroke:#333](/content/2026/05/789802/images/cd044e70bb46be7eab3f9b387725a8bef312aa18bcb0e479ed2b5c1c871416ca.jpg)
Silencingthehornbeepfeature
Ifdesired, the horn beep feature can be deactivated using the keyfob.
Todeactivate:Pressandholdthe andbuttonsforatleast2seconds. Thehazardwarninglightswillflashthreetimesto confirmthatthehornbeepfeaturehasbeen deactivated.
Toactivate:Pressandholdthe andbuttonsforatleast2secondsonce more.
[NO TEXT]
[NO TEXT]
Pre-drivingchecksandadjustments3-11
HOOD
Thehazardwarninglightswillflashonceandthe hornwillsoundoncetoconfirmthatthehorn beepfeaturehasbeenreactivated.
Deactivatingthehornbeepfeaturedoesnotsilencethehornifthealarmistriggered.


LPD2006
-
Pullthehoodlockreleasehandle ① located belowthedriversideinstrumentpanel.The hoodwillspringupslightly.
-
Pushthelever ② atthefrontofthehood to thesideasillustratedwithyourfingertips andraisethehood.
When closing the hood, lower its slowly and make sure it locks into place.
WARNING
- Makesurethehoodiscompletely closedandlatchedbeforedriving.Failure-todosocouldcausethehoodtofly openandresultinanaccident.
- Ifyouseesteamorsmokecomingfrom theenginecompartment,toavoidinjury donotopenthehood.
3-12 Pre-driving checks and adjustments
FUEL-FILLERDOOR
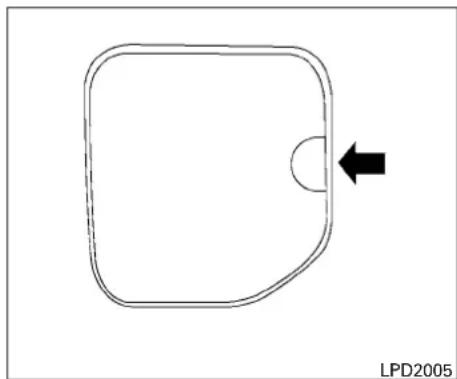
OPENINGTHEFUEL-FILLERDOOR
Pullonthefingertabtoopen.

FUEL-FILLERCAP
WARNING
●Gasolineisextremelyflammable and highlyexplosiveundercertainconditions. You could be burned or seriously injured if it is misused from is handled. Always stop the engine and donot smoke or allow open flames or sparks near the vehicle when refueling.
- Donotattempttotopoffthefueltank afterthefuelpumpnozzleshutsoff automatically. Continuedrefuelingmay causefueloverflow, resultinginfuel sprayandpossiblyafire.
- Useonlyanoriginalequipmenttype fuel-fillercapasareplacement.lthasa built-insafetyvalveneededforproper operationofthefuelsystemandemissioncontrolsystem.Anincorrectcap canresultinaseriousmalfunctionand possibleinjury.Itcouldalsocause the MalfunctionIndicatorLight (MIL)tocomeon.
- Neverpourfuelintothethrottlebodyto attempttostartyourvehicle.
- Donotfillaportablefuelcontainerin thevehicleortrailer.Staticelectricity cancauseanexplosionofflammable liquid,vapororgasinanyvehicleor trailer.Toreducetheriskofserious injury or death when filling portable fuel containers:
-Alwaysplacethecontaineronthe groundwhenfilling.
-Donotuseelectronicdeviceswhen filling.
-Keepthepumpnozzleincontact withthecontainerwhileyouarefillingit.
-Useonlyapprovedportablefuelcontainersforflammableliquid.
CAUTION
- DonotuseE-15orE-85fuelinyour vehicle. For additional information, refer to "Fuel recommendation" in the "Technical and consumer information" section of this manual.
●TheLOOSEFUELCAPwarningwillappearifthefuel-fillercapisnotproperly tightened.Itmaytakeafewdrivingtrips forthemessagetobedisplayed.Failure totightenthefuel-fillercapproperly aftertheLOOSEFUELCAPwarningappearsmaycausethe Malfunction IndicatorLight(MIL)toilluminate.
●Failuretotightenthefuel-fillercap
properlymaycausethe Malfunc-
tionIndicatorLight(MIL)toilluminate.
Ifthe lightilluminatesbecause
thefuel-fillercapislooseormissing,
tightenorinstallthecapandcontinue
todrivethevehicle. The light
shouldturnoffafterafewdrivingtrips.
Ifthe lightdoesnotturnoffaftera
fewdrivingtrips,havethevehiclein-
spected.Itisrecommendedthatyou
visitaNISSANdealerforthisservice.
- Foradditionalinformation,referto "MalfunctionIndicatorLight(MIL)"in the"Instrumentsandcontrols"section of thismanual.
- Iffuelisspilledonthe vehiclebody, flushitawaywithwatertoavoidpaint damage.
NOTE:
Changingignitionswitchstatusduringthe refuelingprocessmaycauseadelayinfuel gaugeresponse.

Toremovethefuel-fillercap:
- Turnthefuel-fillercapcounterclockwiseto remove.
- Loopthetetherstraparoundthehook whilerefueling. ①
Toinstallthefuel-fillercap:
- Insert the fuel-fillercap straight into the fuel-fillertube.
- Turnthefuel-fillercapclockwiseuntila singleclickisheard.
STEERINGWHEEL
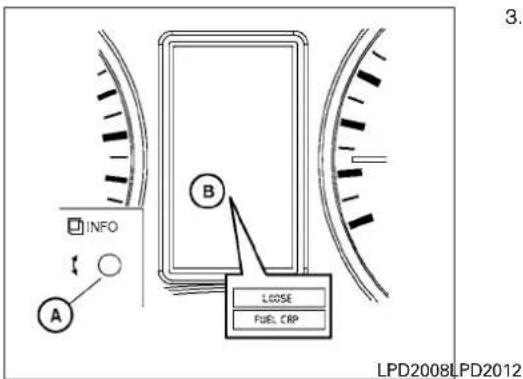
3.PresstheINFOknob Ⓐ ontheinstrument panellocatedbehindthesteeringwheelfor aboutonesecondtoturnofftheLOOSE FUELCAPwarning Ⓑ aftertighteningthe fuel-fillercap.

LOOSEFUELCAPwarning
TheLOOSEFUELCAPwarningappearsinthe tripcomputerwhenthefuel-fillercapisnottightenedcorrectlyafterthevehiclehasbeenrefueled.Itmaytakeafewdrivingtripsforthemes-sagetobedisplayed.Toturnoffthewarning, performthefollowing:
- Remove and install the fuel-fillercapassoon as possible.
- Tightenthefuel-fillercapuntilitclicks.
TILTOPERATION
WARNING
- Donotadjustthesteeringwheelwhile driving. You could lose control of your vehicle and cause an accident.
Pre-drivingchecksandadjustments3-15
SUNVISORS
- Donotadjustthesteeringwheelany closertoyouthanisnecessaryfor propersteeringoperationandcomfort. Thedriver'sairbaginflateswithgreat force.Ifyouareunrestrained,leaning forward,sittingsidewaysoroutofpositioninanyway,youareatgreaterriskof injuryordeathinacrash.Youmayalso receiveseriousorfatalinjuriesfromthe airbagifyouareupagainstitwhenit inflates.Alwayssitbackagainstthe seatbackandasfarawayaspractical fromthesteeringwheel.Alwaysusethe seatbelts.
Pullthelocklevertowardthedriverandholditto adjustthesteeringwheelupordowntothe desiredposition.
Releasethelocklevertolockthesteeringwheel inplace.

- Toblockoutglarefromthefront, swing downthesunvisor ①.
- Toblockglarefromtheside, disconnect the sunvisorfromthecentermountandswingit totheside ②.
STORAGECLIP
Toaccessthestorageclip,pullthesunvisor down.Insertitemssuchasbusinesscards,direc tions,etc.undertheclip.Donotviewinformation whileoperatingthevehicle.
3-16 Pre-driving checks and adjustments
MIRRORS
WPD0126L
AUTOMATICANTI-GLARE REARVIEWMIRROR(ifsoequipped)
Theinsidemirrorisdesignedsothatitautomaticallydimsduringnighttimeconditionsandaccordingtotheintensityoftheheadlightsofthevehiclefollowingyou.Theautomaticanti-glarefeatureisactivatedwhentheignitionswitchisplacedintheONposition.
NOTE:
Donothanganyobjectsoverthesensors ① orapplyglasscleanertothesensors. Doingsowillreducethesensitivityofthe sensors,resultinginimproperoperation.
MANUALANTI-GLAREREARVIEW MIRROR(ifsoequipped)
Usethenightposition
① toreduceglarefrom behindyouatnight.
theheadlightsofvehiclesbehindyouatnight.
Usethedayposition hours.
② whendrivingindaylight

WARNING
Usethenightpositiononlywhennecessary, because it reduces rearview clarity.

Theindicatorlight ② willilluminatewhenthe automaticanti-glarefeatureisoperating.
WiththeignitionswitchplacedintheONposition,pressthe ⏻ buttonasdescribed:
- Toturnofftheanti-glarefeature,pressand holdthe buttonfor8seconds.The indicatorlightwillturnoff.
- Toturnontheanti-glarefeature, pressand holdthe ⏻ buttonagainfor8seconds. Theindicatorlightwillturnon.
Forinformationonthecompassdisplay ③ (ifso equipped),referto"Compassdisplay"inthe "Instrumentsandcontrols"sectionofthismanual.
Pre-drivingchecksandadjustments3-17

TypeA(ifsoequipped)
OUTSIDEMIRRORS
WARNING
Objectsviewedintheconvexportionof themirrorarecloserthantheyappear.Be carefulwhenchanginglanesorturning. Usingonlytheconvexmirrorcouldcause anaccident. Usetheothermirrororsor glanceoveryourshouldertoproperly judgedistancestootherobjects.
Usetheoutsidemirrorremotecontroltoadjust thetopportionofthemirror.

TypeB(Trailertow)(ifsoequipped)
Thelowerportionofthemirrorcanbemoved manuallyinanydirectionforabetterrearview.

Trailertow
Pullthetrailertowmirroroutwardtoextenditto thedesiredpositionforbettervisibilitywhiletowingatraler.
WARNING
Donotextendorretractmirrorswhiledriving.Youmaylosecontrolofyourvehicle andcauseanaccident.
CAUTION
Drivingintightspaceswithmirrorsex-tendedmaycausedamagetothevehicle.
3-18Pre-drivingchecksandadjustments
![graph TD A["Car Icon"] --> B["Arrow 1"] B --> C["Arrow 2"] C --> D["Arrow 2"] D --> E["Arrow 2"] style A fill:#f9f,stroke:#333 style B fill:#ccf,stroke:#333 style C fill:#cfc,stroke:#333 style D fill:#fcc,stroke:#333 style E fill:#cff,stroke:#333](/content/2026/05/789802/images/043d5274f98c260105f8bccace9b7a576a1613c9a57e121fbf4051379eaeed9d.jpg)
Electriccontroltype
Theoutsidemirrorremotecontrolwilloperate onlywhentheignitionswitchisplacedinthe ACCorONposition.
Movethesmallswitch ① toselecttherightorleft mirror.Adjusteachmirrortothedesiredposition usingthelargeswitch ②.
Manualfoldingoutsidemirrors
Pulltheoutsidemirrortowardthedoortofoldit.
Heatedmirrors(ifsoequipped)
Someoutsidemirrorscanbeheatedtodefrost, defog, orde-iceforimprovedvisibility. For additional information, refer to "Rearwindow and outsidemirror(ifsoequipped)defrosterswitch" in the "Instrumentsandcontrols" section of this manual.
MEMO
3-20Pre-drivingchecksandadjustments
4Monitor,climate,audio,phoneandvoice recognitionsystems
Controlpanelbuttons—colorscreenwith
NavigationSystem(ifsoequipped)....4-4
Howtousethetouch-screen....4-5
HowtousetheBACKbutton....4-7
Howtousethe APPS-1 button....4 - 7
☀/☐ button....4 - 9
HowtousetheON-OFFbutton/VOL
(volume)controlknob. 4 - 9
HowtousetheCAMERAbutton....4-9
RearViewMonitor(ifsoequipped)....4-10
RearViewMonitorsystemoperation. 4-11
Howtoreadthedisplayedlines....4-11
Differencebetweenpredictedandactual
distances. 4-12
Adjustingthescreen. 4-14
RearViewMonitorsystemlimitations....4-14
Systemmaintenance....4-15
Vents. 4-16
HeaterandAirConditioner(manual)
(ifsoequipped)....4-17
Controls....4-18
Heateroperation....4-19
Airconditioneroperation. 4-20
Airflowcharts. 4-21
Heaterandairconditioner(automatic)
(ifsoequipped)....4-25
Controls. 4-26
Automaticoperation....4-26
Manualoperation. 4-27
Operatingtips. 4-27
Rearseatairconditioner....4-28
Controls. 4-28
Servicingairconditioner....4-29
Audiosystem(ifsoequipped)....4-29
Radio....4-29
FMradioreception....4-29
AMradioreception. 4-30
Satelliteradioreception(ifsoequipped)....4-30
Audiooperationprecautions. 4-30
FM/AMradiowithcompactdisc(CD)player
(TypeA)(ifsoequipped)....4-38
FM/AMradiowithcompactdisc(CD)player
(TypeB)(ifsoequipped). 4-42
FM/AM/SATradiowithcompactdisc(CD)
player(ifsoequipped)....4-46
USB(UniversalSerialBus)ConnectionPort
(modelswithNavigationSystem)
(ifsoequipped)....4-52
iPod®*playeroperationwithNavigation
System(ifsoequipped)....4-54
Bluetooth®streamingaudiowithNavigation
System(ifsoequipped)....4-58
CDcareandcleaning....4-59
Steeringwheelswitchforaudiocontrol
(ifsoequipped)....4-60
Antenna. 4-60
NissanConnect SM MobileApps(ifsoequipped). . . . 4-61
RegisteringwithNissanConnect SM Mobile
Apps. 4-61
ConnectPhone....4-61
ApplicationDownload....4-61
CarphoneorCBradio....4-62
Bluetooth®Hands-FreePhoneSystemwithout
NavigationSystem(ifsoequipped)....4-62
RegulatoryInformation....4-64
Usingthesystem....4-64
Listofvoicecommands....4-68
VoiceAdaptation(VA)mode. 4-73
RegulatoryInformation....4-77
Voicecommands....4-78
ConnectingProcedure....4-78
Vehiclephonebook....4-79
Makingacall....4-79
Receivingacall....4-79
Duringacall....4-79
Endingacall....4-79
Textmessaging(ifsoequipped)....4-80
Bluetooth®settings....4-82
Phonesettings....4-83
Troubleshootingguide....4-84
NISSANVoiceRecognitionSystem
(ifsoequipped)....4-85
Usingthesystem....4-85
Systemfeatures....4-86
Bluetooth®Hands-FreePhoneSystem voicecommands....4-87
NavigationSystemvoicecommands....4-87
Audiosystemvoicecommands....4-88
Informationvoicecommands....4-88
MyAppsVoiceCommands....4-88
Helpvoicecommands....4-88
Troubleshootingguide....4-89
WARNING
- Positioningoftheheatingorairconditioningcontrolsanddisplaycontrols shouldnotbedonewhiledrivinginorderthatfullattentionmaybegivento thedrivingoperation.
- Donotdisassembleormodifythissystem.Ifyoudo,itmayresultinaccidents, fire,orelectricalshock.
- Donotusethissystemifyounoticeany abnormality,suchasafrozenscreenor lackofsound.Continueduseofthe systemmayresultinaccident,fireor electricshock.
- Incaseyounoticeanyforeignobjectin thesystemhardware,spillliquidonit,ornoticsmokeorsmellcomingfromit,stopusingthesystemimmediately.Ignoringsuchconditionsmayleadtoaccidents,fireorelectricalshock.ItisrecommendedthatyouvisitaNISSAN dealerforservicing.
CONTROLPANELBUTTONS—
COLORSCREENWITHNAVIGATION
SYSTEM(ifsoequipped)
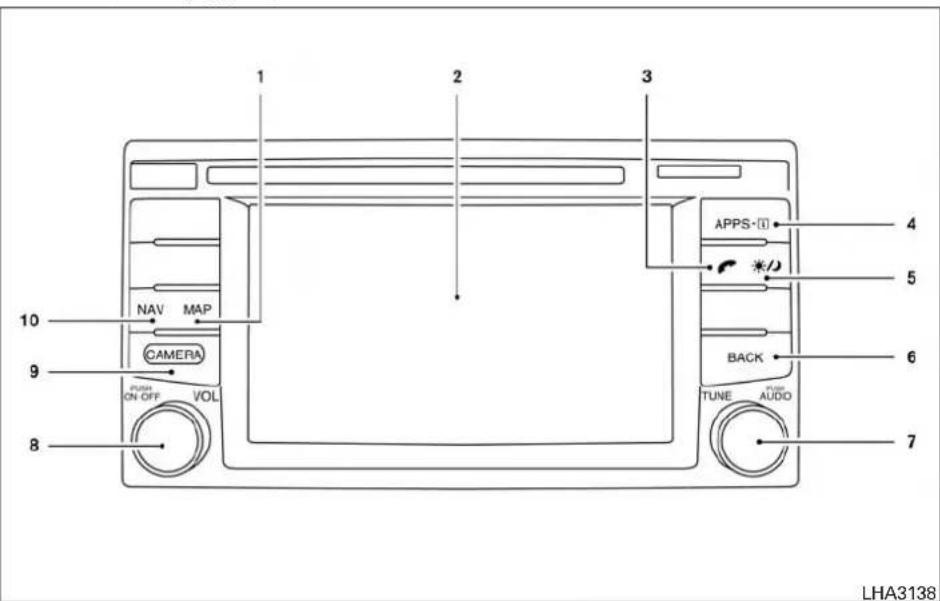
1.MAPbutton*
2.Displayscreen
3. button**
4. APPS button
- ⚙/∅ (brightnesscontrol)button
6.BACKbutton - ENTER/AUDIObutton/TUNEknob
8.ON-OFFbutton/VOL(volume)controlknob
4-4 Monitor, climate, audio, phone and voicerecognitionsystems
9.CAMERAbutton
10.NAVbutton*
*Foradditionalinformation, refertotheseparate NavigationSystemOwner'sManualregarding the Navigationsystemcontrolbuttons.
**Foradditionalinformation,refertothe "Bluetooth®Hands-FreePhoneSystemwith navigationsystem"or"Bluetooth®Hands-Free PhoneSystemwithoutnavigationsystem"inthis section.
Whenyouusethissystem, makesuretheengine isrunning.
If you us the system with the engine not running (ignition ON or ACC) for along time, it will discharge the battery, and the engine will not start.
Referencesymbols:
"Example"—Wordsmarkedinquotesrefertoa keyshownonlyonthedisplay. Thesekeyscanbe selectedbytouchingthescreen.
To help ensures a fed driving, some functions cannot be operated while driving.
Theon-screenfunctionsthatarenotavailable whiledrivingwillbegrayedoutormuted.
Parkthevehicleinasafelocationandthenoperatethenavigationsystem.
WARNING
- ALWAYSgiveyourfullattentionto driving.
- Avoid using vehicle feature that could distract you. If distracted, you could lose control of your vehicle and cause an accident.

Touch-screenoperation
| MenultemResult | ||
| Selecting the item | Touch an item to select . To select the "Audio" key, touch the "Audio" key on the screen. Press the BACK button to return to the previousscreen. | |
| Adjusting the item | Touch the "+" key or the "-" key to adjust the settings of an item. Touch the up arrow to scroll up the page one item at a time, or touch the double up arrow to scroll up an entire page. Touch the down arrow to scroll down the page one item at a time, or touchthedoubledownarrowtoscolldownanentirepage. | |
| InputtingcharactersTouchtheletterornumberkey.Therearesomeoptionsavailablewheninputtingcharacters. | ||
| 123/ABCChangestheavailablecharactersettonumbers. | ||
| Spacelinsertsaspace. | ||
| Delete | Deletes the last inputted character with one touch. Touch and hold the "Delete" key to delete all of the characters. | |
| OKCompletesthecharacterinput. | ||
4-6 Monitor, climate, audio, phone and voicerecognitionsystems
Touch-screenmaintenance
If you clean the display screen, use dry, soft cloth. If additional cleaning is necessary, use a small amount of neutral detergent with a soft cloth. Neverspray the screen with water or detergent. Dampenthe cloth first stand then wipe the screen.
HOWTOUSETHEBUTTON
Foradditionalinformation,refertotheseparate NavigationSystemOwner'sManualregarding the"SiriusXMTravelLink"and"SiriusXMTraffic" features.
Foradditionalinformation,referto"NissanConnect SM MobileApps"inthissection.
Foradditionalinformation,referto"NISSAN VoiceRecognitionSystem"inthissection.
Toselectand/oradjustseveralfunctions,featuresandmodesthatareavailableforyourvehicle:
1.Pressthe[ APPS-i ]button.
2. Touchthe"Settings"key.
3. Touchthedesireditem.
| MenuitemResult | |||
| AudioForadditionalinformation,referto"Audiosystem" | inthissection. | ||
| NavigationForadditionalinformation,refertotheseparateNavigationSystemOwner'sManual. | |||
| Phone & Bluetooth | For additional information, refer to "Bluetooth® Hands-Free Phone System with Navigation System" in this section. | ||
| System | Touch this key to select and/or adjust various functions of this system. A screen with additional options will appear. | ||
| DisplayTouchthiskeytoadjusttheappearancenceofthedisplay. | |||
| BrightnessAdjuststhebrightnessofthedisplay. | |||
| Display Mode | Adjusts to fit the level of lighting in the vehicle. Touch key to cycle through options. "Day" and "Night" modes are suited for the respective timesofdaywhile"Auto"controlsthedisplayautomatically. | ||
| ScrollDirectionAdjuststhedirectionofthemenuscroll.Choosetoeithermoveupordown. | |||
| ClockTouchthiskeytoadjustthetime. | |||
| TimeFormatTheclockcanbesetto12hoursor24hours. | |||
| DateFormatSelectfromfivepossibleformatsforddisplayingtheday.month,andyear. | |||
| Clock Mode | Adjust the mode for the clock. "Auto" uses the system's GPS to automatically maintain the time. "Manual" allows you to set the clockusingthe"SetClockManually"key. | ||
| Set Clock Manually | Adjust the clock manually, Touch the "+" or "-" keys to adjust the hours, minutes, day, month and year up or down. "Clock Mode" mustbesettomanualforthisoptiontobeavailable. | ||
| DaylightSavingsTime | Adjuststhedaylightsavingstimeonoroff. | ||
| TimeZone | Choosetheapplicabletimezonefromthelist. | ||
| Language | Touchthiskeytochangethelanguageonthedisplay. | ||
| CameraSettings | Touchthiskeytochangethecamerasettings. | ||
| Display Mode | Touch this key to select the touch-screen display mode (day, night, or automatic). | ||
| BrightnessAdjusttouch-screenbrightness. | |||
| Contrast | Adjusttouch-screencontrast. | ||
| Color | Adjusttouch-screencolor. | ||
| MenuitemResult | ||
| TemperatureUnitTouchthiskeytochangethetemperatureunitbeingdisplayed(FahrenheitCelsius). | ||
| Touchscreen click | Toggles the touch-screen click feature on or off. When activated a click sound will be heard every time a key on the screen is touched. | |
| System Beeps | Toggle the system beep tones feature on or off. When activated, a beep sound will be heard when a pop-up message appears on thescreenorabuttonontheunit(suchasthe 📋/ Dj button)ispressedandheldfor2seconds. | |
| ReturntoFactorySettings/Clear Memory | Touchthiskeytoreturnallsettingstodefaultandtoclearthememory. | |
| SoftwareLicensesTouchthiskeytodisplaysoftwarelicensinginformation. | ||
| Traffic | Touch this key to display traffic settings. For additional information, refer to the separate Navigation System Owner's Manual. | |
| SXM | Touch this key to display SXM status information. For additional information, refer to "Audio System" in this section. | |
◎/▶ BUTTON
Tochangethedisplaybrightness,press the 📋/Button.Pressingthebuttonagainwill changethedisplaytodayornightdisplaymode. Ifnooperationisperformedwithin5seconds,the displaywillreturntothepreviousdisplay.
Press and hold the 📋/ respiratory button for more than 2secondstoturnthedisplayoff.Pressthebutton againtoturnthedisplayon.
HOWTO USETHE ON-OFF BUTTON/VOL(volume) CONTROL KNOB
PresstheON-OFFbuttontoturnaudiofunction onandoff.Turnthevolumecontrolknobtoadjust audiovolume.
HOWTO USETHE CAMERA BUTTON
For additional information, refer to "RearView Monitor" in this section.
REARVIEWMONITOR(ifso equipped)

1.CAMERAbutton
WARNING
FailuretofollowthewarningsandinstructionsforproperuseoftheRearView Monitorsystemcouldresultinseriousinjuryordeath.
- RearViewMonitorisaconveniencefeatureandisnotasubstituteforproper backing.Alwaysturnandlookoutthe windowsandcheckmirrorstobesure thatitissafetomovebeforeoperating thevehicle.Alwaysbackupslowly.
4-10 Monitor, climate, audio, phone and voicerecognitionsystems
- Thesystemisdesignedasanaidtothe driverinshowinglargestationaryobjectsdirectlybehindthevehicle,tohelp avoiddamagingthevehicle.
- Thedistanceguidelineandthevehicle widthlineshouldbeusedasareference onlywhenthevehicleisonalevel paved surface. Thedistanceviewedon themonitorisforreferenceonly and maybedifferentthantheactualdistancebetweenthevehicleanddisplayedobjects.
CAUTION
Donotscratchthecameralenswhen cleaningDIRtorsnowfromthefrontofthe camera.
TheRearViewMonitorsystemautomatically showsarearviewofthevehiclewhentheshift leverisshiftedintotheR(Reverse)position. WhileinR(Reverse),pressingtheCAMERA buttonwillcyclethroughguidelineoptions.The radiocanstillbeheardwhiletheRearViewMonitorisactive.

Todisplaytherearview,theRearViewMonitor systemusesacameralocatedjustabovethe vehicle'slicenseplate ①.
Guidinglineswhichindicatethevehiclewidth and distances to objects with reference to the vehiclebodyline Ⓐ aredisplayedonthe monitor.
Distanceguidelines
Indicated distances from the vehicle body.
• Redline ①: approx.1.5ft(0.5m)
- Yellowline ②:approx.3ft(1m)
- Greenline ③:approx.7ft(2m)
- Greenline ④:approx.10ft(3m)
Monitor, climate, audio, phone and voice recognition systems
Vehiclewidthguidelines ⑤
Indicatethevehiclewidthwhenbackingup.
DIFFERENCE BETWEEN PREDICTED AND ACTUAL DISTANCES
Thedisplayedguidelinesandtheirlocationson thegroundareforapproximatereferenceonly. Objectsonuphillordownhillsurfacesorprojectingobjectswillbeactuallylocatedatdistances differentfromthosedisplayedinthemonitorrelativetotheguidelines(refertoillustrations).When indoubt,turnaroundandviewtheobjectsasyou arebackingup,orparkandexitthevehicletoviewthepositioningofobjectsbehindthevehicle.
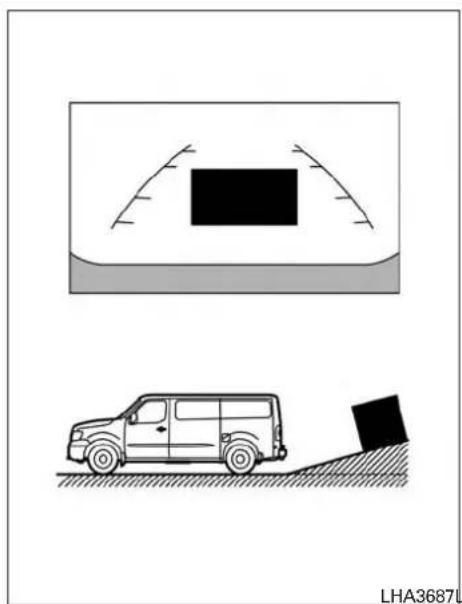
Backinguponasteepuphill
Whenbackingupthevehicleupahill,thedistanceguidelinesandthevehiclewidthguide linesareshowncloserthantheactualdistance. Notethatanyobjectonthehillisfurtherthanit appearsonthemonitor.
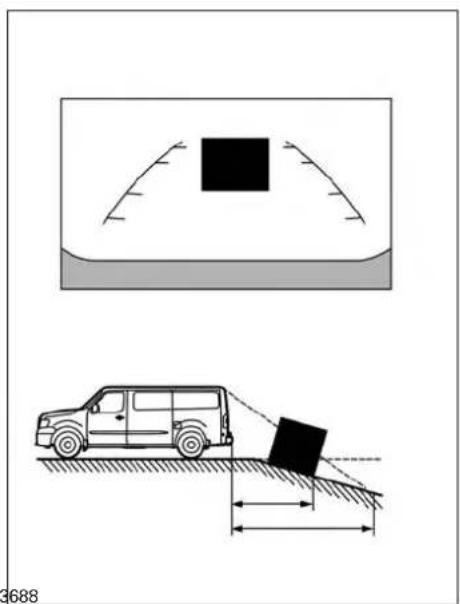
Backinguponasteepdownhill
Whenbackingupthevehicledownahill,the distanceguidelinesandthevehiclewidthguide linesareshownfartherthantheactualdistance. Notethatanyobjectonthehilliscloserthanit appearsonthemonitor.
4-12Monitor,climate,audio,phoneandvoicerecognitionsystems
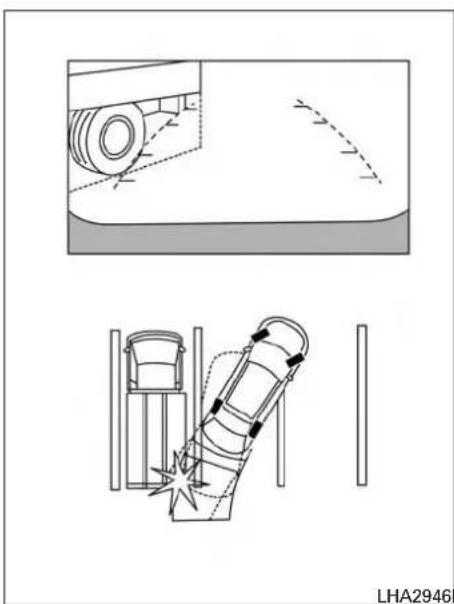
Backingupnearaprojectingobject
Thevehiclemayseemtonearlycleartheobjectin thedisplay.However,thevehiclemayhitthe objectifitprojectsovertheactualbackingup course.
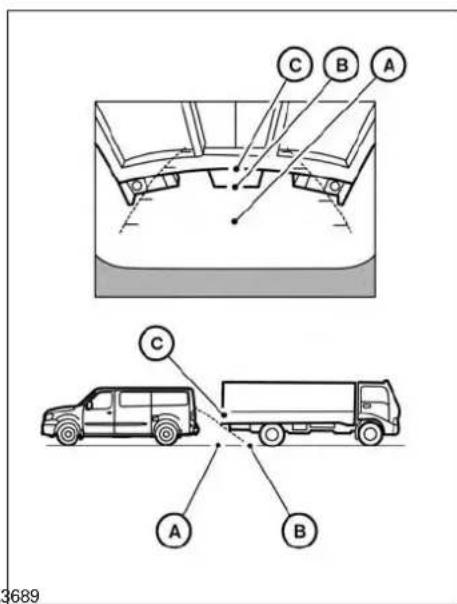
Backingupbehindaprojectingobject
Theposition © is shown farther than the position
⑧ in the display. However, the position © is actually at the same distance at the position
The vehicle may hit the object when backing up to
theposition Ⓐ iftheobjectprojectsoverthe actualbackingupcourse.

ADJUSTINGTHESCREEN
- Firmlyapplythebrakeandplacetheshift leverinR(reverse)
2.Pressthe 📋/ Dj buttononthecontrolpanel. - ThescreenwilldisplaytheNightsettings.
- Turn the TUNE knob to adjust these setting up or down.
5.Pressthe 📋/ Dj buttonagaintoaccessthe Autosettings. - TurntheTUNEknobtoadjustthesettingup ordown.
- Donotadjustthedisplaysettingsofthe RearViewMonitorwhilethevehicleismoving.
REARVIEWMONITORSYSTEM LIMITATIONS
A WARNING
Listedbelowarethesystemlimitationsfor RearViewMonitor.Failuretooperatethe vehicleinaccordancewiththesesystem limitationscouldresultinseriousinjuryor death.
- Thesystemcannotcompletelyeliminateblindspotsandmaynotshoweveryobject.
- Underneaththebumperandthecorner areasofthebumpercannotbeviewed ontheRearViewMonitorbecauseofits monitoringrangelimitation.Thesystem willnotshowsmalobjectsbelowthe bumper,andmaynotshowobjects closetothebumperorontheground.
-
ObjectsviewedintheRearViewMonitordifferfromactualdistancebecauseawide-anglelensisused.
-
ObjectsintheRearViewMonitorwill appearvisuallyoppositecomparedto whenviewedintherearviewandout-sidemirrors.
- Usethedisplayedlinesasareference. Thelinesarehighlyaffectedbythe numberofoccupants,fuellevel,vehicle position, road conditions and road grade.
- Makesurethatthereardoorsaresecurelyclosedwhenbackingup.
- Donotputanythingontherearview camera. The rearviewcamera isinstalledabovethelicenseplate.
- When washing the vehicle with high pressure water, besurenottospray it around the camera. Otherwise, water may enter the camera unit causing water condensation on the helens, amal-function, fire or an electric shock.
- Donotstrikethecamera.Itisaprecisioninstrument. Otherwise,itmaymal-functionorcausedamageresultingina fireoranelectricshock.
4-14 Monitor, climate, audio, phone and voice recognition systems
The following are operating limitations and donot representasystemmalfunction:
- Whenthetemperatureisextremelyhighor low,thescreenmaynotclearlydisplayobjects.
- When strong light directly shines on the camera, objects may not be displayed clearly.
- Verticallinesmaybeseeninobjectsonthe screen. Thisisduetostrongreflectedlight fromthebumper.
● Thescreenmayflickerunderfluorescent light. - ThecolorsofobjectsontheRearViewMonitormaydiffersomewhatfromtheactual colorofobjects.
- Objectsonthemonitormaynotbeclearina darkenvironment.
●Theremaybeadelaywhenswitchingbetweenviews. - Ifdirt, rainorsnowaccumulate on the camera, the Rear View Monitor may not display objects clearly. Clean the camera.
- Donotusewaxonthecameralens.Wipeoff anywaxwithacleanclothdampenedwitha dilutedmildcleaningagent,thenwipewitha drycloth.

SYSTEMMAINTENANCE
CAUTION
- Donotusealcohol, benzineorthinner tocleanthecamera. This will cause discoloration.
- Donotdamagethecameraasthemonitorscreenmaybeadverselyaffected.
Ifdirt,rainorsnowaccumulatesonthecamera ①,theRearViewMonitormaynotdisplayobjectsclearly.Cleanthecamerabywipingitwitha clothdampenedwithadilutedmildcleaning agentandthenwipingitwithadrycloth.
VENTS

Front(sideandcenter)
Adjustairflowdirectionbymovingthevent slides.
Openorclosetheventsbyusingthedial.Move thedialtowardthe ≡ toopentheventsor towardthe ☒ toclosethem.

Rear(ceiling)
Adjust the airflow direction of the events by opening, closing or rotating.
Theseventsareonlyoperationalwhentherear fanspeedcontroldialisatasettingotherthan0 andthereartemperaturecontroldialisata settingotherthanhot.
Foradditionalinformation,referto"Rearseatair conditioner"inthissection.

Floor(beneathdriver'sandfrontpassenger'sseats)
The airflow from the floor vents located beneath the driver's sand front passenger's seat cannot be adjusted or closed. These events are only operational when the airflow control button is selected.
Foradditionalinformation,referto"Airflowcontrolbuttons"inthissection.
4-16 Monitor, climate, audio, phone and voicerecognition systems

Floor(beneath2ndand3rdrows)
The airflow from the floor vents located beneath these second and third row passenger's seat cannot be adjusted or closed. These events are only operational when there are fans speed control dial is atasetting other than 0 and there are temperature control dial is atasetting other than cold.
Foradditionalinformation,referto"Rearseatair conditioner"inthissection.
HEATERANDAIRCONDITIONER (manual)(ifsoequipped)
WARNING
●Theairconditionercoolingfunctionoperatesonlywhentheengineisrunning.
- Donotleavechildrenoradultswho wouldnormallyrequiretheassistance ofothersaloneinyourvehicle.Pets shouldalsonotbeleftalone.They couldaccidentallyinjurethemselvesor othersthroughinadvertentoperationof thevehicle.Also,onhot,sunnydays, temperaturesinaclosedvehiclecould quicklybecomehighenoughtocause severeorpossiblyfatalinjuriesto peopleoranimals.
- Donotusethere circulation mode for longperiodsasitmaycausetheinterior airtobecomestaleandthewindowsto fogup.
NOTE:
- Odorsfrominsideandoutsidethevehicle canbuildupintheairconditionerunit.Odor canenterthepassengercompartment throughthevents.
- Whenparking, settheheaterandairconditionercontrolstoturnoffairrecirculationto allowfreshairintothepassengercompartment. This should help reduce odors inside the vehicle.
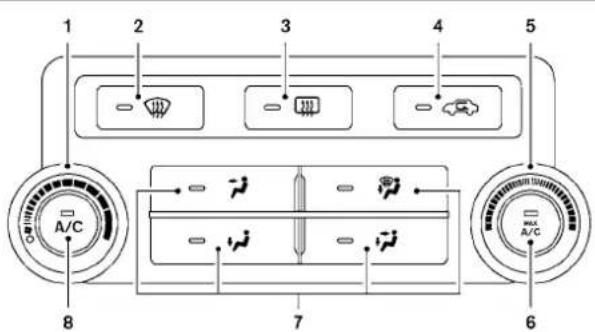
LHA2037
CONTROLS
1.Famspeedcontroldial
2. Frontwindowdefrosterbutton
3. Rearwindowandoutsidemirror(ifso equipped)defrosterswitch
4. Airrecirculationbutton
5.Temperaturecontroldial
6.MAXA/Cbutton
7. Airflowcontrolbuttons
8.A/C(airconditioner)button
Fancontroldial
The fan controldialturnsthefanonandoff, andcontrolsfanspeed.
Airflowcontrolbuttons
The airflow control buttons allowy out to select the airflow outlets.
MAXA/C—Airflowsfromcenterandside ventswithmaximumcooling (airconditioning).

—Airflowsfromcenterandside vents.
4-18 Monitor, climate, audio, phone and voicerecognition systems
—Airflowsfromcenterandside ventsandthefrontfloor outlets.
—Airflowsmainlyfromthefront flooroutletsandthevents locatedbeneaththedriver's andfrontpassenger'sseat.
—Airflowsfromdefrosteroutletsandthefrontflooroutlets.
Foradditionalinformation,referto"Rearseatair conditioner"inthissection.
Temperaturecontroldial
Thetemperaturecontroldialallowsyoutoadjust thetemperatureoftheoutletair.Tolowerthe temperature,turnthedialtotheleft.Toincrease thetemperature,turnthedialtotheright.

Airrecirculationbutton
Pressthebutterorecirculateairinside thevehicle.
Pressthe 📄 buttontotheONpositionwhen:
●drivingonadustyroad.
- topreventtrafficfumesfromenteringthe passengercompartment.
- formaximumcoolingwhenusingtheairconditioner.
Theairrecirculationmodeisonlyfunctionalwhen theairflowcontrolmodeisinthefollowing
positions:


Pressthe buttonoturnairrecirculation off. Outsideairisdrawnintothepassengercompartmentanddistributedthroughtheselected outlet.
The G mode is not necessary for normal heater or air conditioner operation.

Airconditionerbutton
Starttheengine,turnthefancontroldialto thedesiredposition.The A/C buttonwillilluminate.Toturnofftheairconditioner,press the A/C buttonorturnthefancontrol dialallthewaytotheleft.
The airconditioner cooling function operates only when the engine is running.
Rearwindowandoutsidemirror(ifso equipped)defrosterswitch
Foradditionalinformation,referto"Rearwindow andoutsidemirror(ifsoequipped)defroster switch"inthe"Instrumentsandcontrols"section of thismanual.
HEATEROPERATION
Heating
Thismodeisusedtodirectheatedairtothefoot outlets. Someairalsoflowsfromthedefrost outlets.
- Pressthe button to the OFF position for normal heating. The indicator light on the button will go off.
2.Pressthe airflowcontrolbutton.
3.Turnthe ✿ fancontroldialtothedesired position.
- Turnthetemperaturecontroldialtothedesiredpositionbetweenthemiddleandthe hotposition.
Ventilation
Thismodedirectsoutsideairtothesideand centervents.
- Pressthe buttontotheOFFposition. Theindicatorlightonthe buttonwill gooff.
2.Pressthe ↗ airflowcontrolbutton.
3.Turnthe ✿ fancontroldialtothedesired position.
- Turnthetemperaturecontroldialtothedesiredposition.
Defrostingordefogging
Thismodedirectstheairtothedefrostoutletsto defrost/defogthewindows.
1.Pressthe frontdefrosterbutton.
-
Turnthe ✿ fancontroldialtothedesired position.
-
Turnthetemperaturecontroldialtothedesiredpositionbetweenthemiddleandthe hotposition.
- Toquicklyremoveiceorfogfromthewindows,turnthe ✿ fancontroldialtothe highestsettingandthetemperaturecontrol tothefullHOTposition.
- Whenthe positionisselected, the air conditionerautomaticallyturnsoniftheoutsidetemperatureismorethan36°F(2°C). Thisdehumidifiesthearwhichhelpsdefog thewindshield. The modeautomaticallyturnsoff, allowingoutsideairtobe drawnintothepassengercompartmentto furtherimprovethedefoggingperformance. Therecirculationmodecannotbeactivated inthe position.
Bi-levelheating
Thebi-levelmodedirectswarmedairtotheside andcenterventsandtothefrontandrearfloor outlets.
- Pressthe buttontotheOFFposition.
Theindicatorlightonthe buttonwill gooff.
2.Pressthe airflowcontrolbutton.
3.Turnthe ✿ fancontroldialtothedesired position. - Turnthetemperaturecontroldialtothedesiredposition.
Heatinganddefogging
Thismodeheatstheinterioranddefogsthewindshield.
- Pressthe airflowcontrolbutton.
2.Turnthe ✿ fancontroldialtothedesired position. - Turnthetemperaturecontroldialtothedesiredpositionbetweenthemiddleandthe hotposition.
airflowcontrolbutton.
fancontroldialtothedesired
广力云智慧零售收银系统 - Turnthetemperaturecontroldialtothedesiredpositionbetweenthemiddleandthe hotposition.
- When the positionisselected, the air conditionerautomaticallyturnsoniftheoutsidetemperatureismorethan36°F(2°C). Thisdehumidifiestheairwhichhelpsdefog thewindshield. The modeautomaticallyturnsoff, allowingoutsideairtobe drawnintothepassengercompartento furtherimprovethedefoggingperformance.
Operatingtips
Clearsnowandicefromthewiperblades andairinletinfrontofthewindshield.This improvesheateroperation.
The airconditioner cooling function operates only when the engine is running.
Cooling
Thismodeisusedtocoolanddehumidifytheair.
1.Pressthe 📄 buttontotheOFFposition.
2.Pressthe ↗ airflowcontrolbutton.
buttontotheOFFposition.
airflowcontrolbutton.


3.Turnthe ✿ fancontroldialtothedesired position.Theindicatorlightonthe A/C buttonwillcomeon.
4. Turnthetemperaturecontroldialtothedesiredposition.
-Forquickcoolingwhentheoutsidetemperatureishigh,pressthe buttonto theONposition.Theindicatorlighton the buttonwillcomeon.Besureto returnthe buttontotheOFFposition fornormalcooling.Theindicatorlighton the buttonwillgooff.Youmayalso selectMAXA/Cforquickcooling.
Dehumidifiedheating
Thismodeisusedtoheatanddehumidifytheair.
- Pressthe buttontotheOFFposition.
Theindicatorlightonthe buttonwill gooff.
2.Pressthe ↗ airflowcontrolbutton.
3.Turnthe fancontroldialtothedesired position.Theindicatorlightonthe A/C buttonwillcomeon. - Turnthetemperaturecontroldialtothede-siredposition.
4-20Monitor, climate, audio, phone and voicerecognitionsystems
Dehumidifieddefogging
Thismodeisusedtodefogthewindowsand dehumidifytheair.
1.Pressthe

airflowcontrolbutton.
2.Turnthe position.

fancontroldialtothedesired
-Whenthe

orareselected,the
airconditionerautomaticallyturnsonifthe outsidetemperatureismorethan36°F (2°C).Thisdehumidifiestheairwhichhelps defogthewindshield.The modeau- tomaticallyturnsoff,allowingoutsideairto bedrawnintothepassengercompartment tofurtherimprovethedefoggingperfor- mance.
•Theaircon

erisalwaysonin essofwhethertheindicator
mode, regardless of whether the indicator lightisonoroff.
- Turnthetemperaturecontroldialtothede-siredposition.
Operatingtips
- Keepthewindowsclosedwhiletheairconditionerisinoperation.
●Afterparkinginthesun,drivefor2or3minuteswiththewindowsopentoventhotair fromthepassengercompartment. Then, closetewindows.Thisallowstheairconditionertocooltheinteriormorequickly.
●Theairconditioningsystemshouldbe operatedforapproximately10minutes atleastonceamonth. Thishelpspreventdamagetothesystemduetolack oflubrication.
- Avisiblemistmaybeseencomingfromthe ventilatorsinhot,humidconditionsastheair iscooledrapidly.Thisdoesnotindicatea malfunction.
- If the engine coolant temperature gauge indicates engine coolant temperatureover thenormalrange, turn theairconditioneroff.Foradditional information, refer to "If your vehicle overheats" in the"Incaseofemergency"sectionofthismanual.
AIRFLOWCHARTS
The following chart show the button and dial positions for MAXIMUM AND QUICK heating, cooling or defrosting. For additional information on heating and cooling, refer to "Heater and air conditioner" in this section. The air recirculation ( ) modes should always be OFF for heating and defrosting.


4-22Monitor, climate, audio, phone and voicerecognitionsystems
HEATING

| A/C Button | Air flow control | Temp control | Fan control | Air recirculation button |
| OFF | HOT (RIGHT) | HI (RIGHT) | OFF |

Air passed through heater core
Air passed through heater core
HEATING &
DEFROSTING/DEFOGGING


Air passed through heater core
| A/C Button | Air flow control | Temp control | Fan control | Air recirculation button |
| OFF | HOT (RIGHT) | HI (RIGHT) | OFF |
LHA2041LHA2042

4-24Monitor,climate,audio,phoneandvoicerecognitionsystems
HEATERANDAIRCONDITIONER (automatic)(ifsoequipped)
WARNING
- The airconditioner cooling function operates only when the engine is running.
- Donotleavechildrenoradultswho wouldnormallyrequiretheassistance ofothersaloneinyourvehicle.Pets shouldalsonotbeleftalone.They couldaccidentallyinjurethemselvesor othersthroughinadvertoperationof thevehicle.Also,onhot,sunnydays, temperaturesinaclosedvehiclecould quicklybecomehighenoughtocause severeorpossiblyfatalinjuriesto peopleoranimals.
- Donotusethere circulation mode for long periods as it may cause the interior air to be most stable and the window to fogup.
Starttheengineandoperatethecontrolsto activatetheairconditioner.
NOTE:
- Odorsfrominsideandoutsidethevehicle canbuildupintheairconditionerunit.Odor canenterthepassengercompartment throughthevents.
- Whenparking, settheheaterandairconditionercontrolstoturnoffairrecirculationto allowfreshairintothepassengercompartment. This should help reduce odors inside the vehicle.

LHA2468
CONTROLS
- Drivertemperaturecontroldial
2.A/C(ON/OFF)button - Frontwindowdefrosterbutton
- Fanspeedcontroldial
- ⏻ (SystemOFF)button
- Rearwindowandoutsidemirrordefrosterswitch
- Airrecirculationbutton
8.Passengertemperaturecontroldial
9.DUALbutton
10.Airflowcontrolbuttons
11.AUTObutton
AUTOMATICOPERATION
Coolingorheating(auto)
Thismodemaybeusedallyearroundasthe systemautomaticallyworkstokeepaconstant temperature.Airflowdistributionandfanspeed arealsocontrolledautomatically.
1.PresstheAUTObuttonon.
2. Turnthetemperaturedialtotheleftorright tosetthedesiredtemperature.Driverand
passengertemperaturescanbesetindependently.PressDUALtoactivatedualclimatecontrolfunctions.Turnthepassenger's sidetemperaturecontroldialtothelettor righttosetthedesiredpassenger's temperature.
- Adjust the temperature dial to about 75°F (24°C) for normal operation.
●Thetemperatureofthefrontpassenger compartmentwillbemaintainedautomatically.Airflowdistribution,fanspeedandA/Con/offarealsocontrolledautomatically.
●Avisiblemistmaybeseencomingfromthe ventsinhot, humidconditionsastheairis cooledrapidly. Thisdoesnotindicateamal-function.
Dehumidifieddefrostingordefogging
- PressthefrontWindowdefrosterbuttertontoturnthesystemon. The indicatorlight inthebuttonwillilluminate.
- Turnthetemperaturedialtotheleftorright tosetthedesiredtemperature.
- To quickly remove ice from the outside of the windows, turn the manual fan control to the maximum position.
4-26Monitor,climate,audio,phoneandvoicerecognitionsystems
- As soon as possible after the windshield is clean, pressthe AUTO button to return to the automode.
- When the controlisactivated, the air conditioner will automatically be turned on at outside temperatures above 36°F(2°C) . If in defrostmodeform more than 1 minute, the air conditionings system will continue to operate until the fan controlist turned OFF, the vehicle is shutoff for the A/C button is used to turn off the compressore even if an airflow button other than is selected. This dehumidifies the air which helps defog the windshield. The air recirculation mode automatically turn soff, allowing outside airtobe drawn into the passenger compartment to further improvethedefogging performance.

Airconditionerbutton
Starttheengineandpressthebuttonto turnontheairconditioner.Toturnofftheair conditioner,pressthe A/C buttonagain. Theairconditionercoolingfunctionoper- atesonlywhentheengineisrunning.
Rearwindowandoutsidemirror defrosterswitch
Foradditionalinformation,referto"Rearwindow andoutsidemirror(ifsoequipped)defroster switch"inthe"Instrumentsandcontrols"section of this manual.
MANUALOPERATION
Fanspeedcontroldial
Turnthefanspeedcontroldialleftorright tomanuallycontrolthefanspeedorturnthe systemonoroff.
PresstheAUTObuttontoreturntoautomatic controlofthefanspeed.
Airrecirculation
Pressthe airrecirculationbuttontorecirculateinteriorairinsidethevehicle.Pressthe AUTObuttontoreturntoautomaticmode.
Theairrecirculationbuttonwillnotbeactivated when the airconditioner isinDEF, floor, or floor/defrostmode.
Airflowcontrol
Presstheairflowcontrolbuttonstomanually controlairflowandselecttheairoutlet:
—Airflowsfromcenterandside vents.
—Airflowsfromcenterandside ventsandfrontflooroutlets.
—Airflowsmainlyfromthefront flooroutletsandtheventslocated beneaththedriver'sandfront passenger'sseat.
—Airflowsfromdefrosterandfloor outlets.
—Airflowsfromdefrosteroutlets. Foradditionalinformation,referto"Rearseatair conditioner"inthissection.
Toturnsystemoff
Pressthe(systemOFF)button.
OPERATINGTIPS
- When the engine coolant temperature and outside air temperature are low, the airflow from the foot outlets may not operate for a maximum of 150 seconds. However, this is not amalfunction. After the coolant temperature warmsup, airflow from the foot outlets will operate normally.

Thesunloadsensor, locatedonthetopofthe instrumentpanelonthedriver'sside ①, helps thesystemmaintainaconstanttemperature.Do notputanythingonoraroundthissensor.
REARSEATAIRCONDITIONER
Tooperatetherearairconditioner, the engine must berunning.
Iftherearseatfancontroldialissetto(0),theair conditioneristurnedoff.Ifitissettoanyofthefan speedpositions,airisdischargedfromtherear ventsatthecorrespondingspeed.
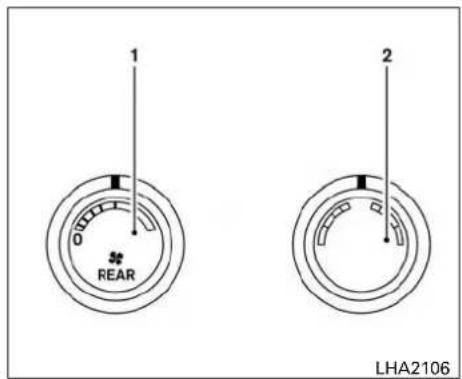
Rearseatrearclimatecontrols
- Rearfanspeedcontroldial
- Reartemperaturecontroldial CONTROLS
Fancontroldial
Thefancontroldialturnstherearventfanonand offandcontrolsfanspeed.
Temperaturecontroldial
Thetemperaturecontroldialadjuststhetemperatureandairflowoftheoutletair.
Turnthedialtotheleftforcoolerairortotheright forwarmerair.
Whenthetemperaturecontroldialisturnedall thewaytothecoldsetting,theairflowsonlyfrom theceilingvents.Whenthetemperaturecontrol dialisturnedallthewaytothehotsetting,theair flowsonlyfromthefloorventsbeneaththesecondandthirdrowofseats.Whenthetempera-turecontroldialisturnedtoapointbetweenthe coldestandhottestsettings,theairflowsfrom boththefloorandceilingvents.
4-28Monitor, climate, audio, phone and voicerecognition systems
SERVICINGAIRCONDITIONER
The air conditionersysteminyourNISSANvehicle is discharged with arefrigerant designed with the environment in mind.
Thisrefrigerantdoesnotharmtheearth's ozonelayer.
SpecialchargingequipmentandlubricantisrequiredwhenservicingyourNISSANairconditioner.Usingimproperrefrigerantsorlubricants willcauseseveredamagetoyourairconditioner system.Foradditionalinformation,referto"Air conditionersystemrefrigerantandoilrecommendations"inthe"Technicalandconsumerinformation"sectionofthismanual.
It is recommended that you visit a NISSAN dealer to service your "environmentally friendly" air conditionersystem.
WARNING
The airconditionersystem contains refrigerant under high pressure. To avoid personal injury, any air conditionerservice should be done only by an experienced technician with properequipment.
AUDIOSYSTEM(ifsoequipped)
RADIO
PlacetheignitionswitchintheACCorON positionandpressthePWR(power)orON-OFF buttontoturntheradioon.Ifyoulistentothe radiowiththeenginenotrunning,theignition switchshouldbeplacedintheACCposition.
Radioreceptionisaffectedbystationsignal strength, distancefromradiotransmitter, buildings, bridges, mountainsandotherexternalinfluences. Intermittentchangesinreceptionquality normallyarecausedbytheseexternalinfluences.
Usingacellularphoneinornearthevehicle may influenceradioreceptionquality.
Radioreception
YourNISSANradiosystemisequipped with state-of-the-artelectroniccircuitstoenhanceradioreception. These circuits are designed to extend reception range, and to enhance the quality of that reception.
However, there are some general characteristics of both FM and AM radiosignal that can affect radioreception quality in an moving vehicle, even when the finest equipment is used. These characteristics are completely normal in a given reception area and do not indicate anymalfunction in your NISSAN radiosystem.
Receptionconditionswillconstantlychangebecauseofvehiclemovement.Buildings,terrain, signaldistanceandinterferencefromothervehiclescanworkagainstidealreception.Describedbelowaresomeofthefactorsthatcan affectyourradioreception.
Somecellularphonesorotherdevicesmay causeinterferenceorabuzzingnoisetocome fromtheaudiosystemspeakers.Storingthede-viceinadifferentlocationmayreduceoreliminatethenoise.
FMRADIORECEPTION
Range: FMrangeisnormallylimitedto25–30mi (40–48km), withmonaural(singlechannel)FM havingslightlymorerangethanstereoFM. ExternalinfluencesmaysometimesinterferewithFM stationreceptioneveniftheFMstationiswithin 25mi(40km). ThestrengthoftheFMsignalis directlyrelatedtothedistancebetween the transmitterandreceiver.FMsignalsfollowaline-of-sightpath, exhibitingmanyofthesamecharacteristicsaslight. Forexample, theywillreflect offobjects.
Fadeanddrift: As your vehicle moves away from astation transmitter, the signals will tend to fade and ordrift.
Staticandflutter: Duringsignalinterference from buildings, largehillsorduetoantennaposition (usually in conjunction within increased distance from the station transmitter), staticorflutter can be heard. This can be reduced by adjusting the treble controltoreducetrebler response.
Multipathreception: Because of the reflective characteristics of FM signals, direct and reflected signals reach there to receive at the same time. The signals may cancel each other, resulting in momentary flutter or loss of sound.
AMRADIORECEPTION
AMsignals, because of their low frequency, can bendaround objects and skip along the ground. In addition, the signals can be bounced off the ionosphere and bent back to earth. Because of these characteristics, AMsignals are also subject to interference as they travel from transmitter to receiver.
Fading: Occurswhilethevehicleispassing throughfreewayunderpassesorinareaswith manytallbuildings.Itcanalsooccurforseveral secondsduringionosphericturbulenceevenin areaswherenoobstaclesexist.
Static: Caused by thunderstorms, electrical powerlines, electricsignsandeventrafficlights.
SATELLITERADIORECEPTION(ifso equipped)
Whenthesatelliteradioisusedforthefirsttime orthebatteryhasbeenreplaced,thesatellite radiomaynotworkproperly.Thisisnotamal-function.Waitmorethan10minuteswithsatellite radioonandthevehicleoutsideofanymetalor largebuildingforsatelliteradiotoreceiveallof thenecessarydata.
Nosatelliteradioreceptionisavailableunless thereisanactiveSiriusXM®SatelliteRadioservicesubscription.Satelliteradioisnotavailablein Alaska,HawaiiandGuam.Ifsatelliteradioisnot operationalthenpressingtheRADIObuttonwill switchbetweenFMandAMbands.
Satelliteradioperformancemaybeaffectedif cargocarriedontheroofblocksthesatelliteradio signal.
If possible, donotput cargo over the satellite antenna.
Abuildupoficeonthesatelliteradioantennacan affectsatelliteradioperformance.Removethe icetorestosatelliteradioreception.
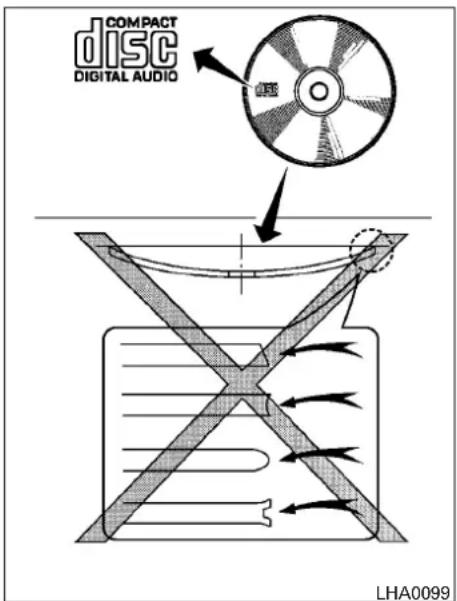
AUDIOOPERATIONPRECAUTIONS
Compactdisc(CD)player
CAUTION
- DonotforceacompactdiscintotheCD insertslot.ThiscoulddamagetheCD and/orCDplayer.
- TryingtoloadaCDwiththeCDdoor closedcoulddamagetheCDand/orCD player.
-OnlyoneCDcanbeloadedintotheCD playeratatime. - Onlyusehighquality4.7in(12cm) rounddiscsthathavethe"COMPACT discDIGITALAUDIO"logoonthedisc orpackaging.
- Duringcoldweatherorrainydays,the playermaymalfunctionduetothehumidity.Ifthisoccurs,removetheCD anddehumidifyorventilatetheplayer completely.
●Theplayermayskipwhiledrivingon roughroads. -
TheCDplayersometimes cannot function when the compartment temperature is extremely high or low. Decrease/increase the temperature before use.
-
DonotexposetheCDtodirectsun-light.
- CDsthatareinpoorconditionorare dirty, scratchedorcoveredwithfingerprintsmaynotworkproperly.
- The following CDsmaynotworkprop- erly:
●Copycontrolcompactdiscs(CCCD)
●Recordablecompactdiscs(CD-R)
●Rewritablecompactdiscs(CD-RW)
- DonotusethefollowingCDsasthey maycausetheCDplayertomalfunc- tion:
●3.1in(8cm)discswithanadapter
- CDsthatarenotround
- CDswithapaperlabel
- CDsthatarewarped,scratched,or haveabnormaledges
- This audiosystemcanonlyplaypre-recorded CDs. Ithasnocapability to recordorburn CDs.
-
If the CD cannot be played, one of the following messages will be displayed. CHECKDISC
-
Confirm that the CD is inserted correctly (thelabelsideisfacingup, etc.).
- Confirm that the CD is not bentor warped and it is free of scratches.
PRESSEJECT
Thisisanerrorduetoexcessivetemperatureinsidetheplayer.RemovetheCDbypassingtheEJECTbutton.Afterashorttime,reinserttheCD.TheCDcanbeplayedwhenthetemperatureoftheplayerreturnstonormal.
UNPLAYABLE
Thefileisunplayableinthisaudiosystem(onlyMP3orWMA(ifsoequipped)CD).
CompactdiscwithMP3orWMA(if soequipped)
Terms
- MP3—MP3isshortforMovingPictures ExpertsGroupAudioLayer3.MP3isthe mostwell-knowncompresseddigitalaudio fileformat.This format allows for near "CD quality" sound, but a fraction of the sizeof normal audio files. MP3 conversion of an audiotrack from CD-ROM can reduce the filesize by approximately 10:1 ratio with virtually no perceptible loss in quality. MP3 compression removes the redundant and irrelevant part of as soundsign that the humane doesn't hear.
- WMA—WindowsMediaAudio(WMA)*isa compressedaudioformatcreatedbyMicrosoftasanalternativetoMP3.TheWMA codecoffersgreaterfilecompressionthan theMP3codec,enablingstorageofmore digitalaudiotracksinthesameamountof spacewhencomparedtoMP3satthesame levelofquality.
- Bitrate—Bitratedenotesthenumberof bitspersecondusedbyadigitalmusicfile. Thesizeandqualityofacompresseddigital audiofileisdeterminedbythebitrateused whenencodingthefile.
4-32Monitor, climate, audio, phone and voicerecognitionsystems
- Samplingfrequency—Samplingfrequency istherateatwhichthesamplesofasignal areconvertedfromanalogtodigital(A/D conversion)persecond.
- Multisession—Multisessionisoneofthe methodsforwritingdatatomedia.Writing dataoncetothemediaiscaledasing session,andwritingmorethanonceiscalled amultisession.
- ID3/WMATag—TheID3/WMAtagisthe partoftheencodedMP3orWMAfilethat containsinformationaboutthedigitalmusic filesuchassongtitle,artist,encodingbit rate,tracktimeduration,etc.ID3taginformationisdisplayontheArtist/songtitle lineonthedisplay.
*Windows® and Windows Media® areregistered trademarksandtrademarksintheUnited StatesofAmericaandothercountriesofMicrosoftCorporationoftheUSA.
![graph TD A["ROOT FOLDER"] --> B["1"] A --> C["2"] A --> D["3"] A --> E["4"] A --> F["5"] A --> G["6"] A --> H["7"] style A fill:#f9f,stroke:#333 style B fill:#ccf,stroke:#333 style C fill:#cfc,stroke:#333 style D fill:#fcc,stroke:#333 style E fill:#cff,stroke:#333 style F fill:#ffc,stroke:#333 style…](/content/2026/05/789802/images/87ccbc8c0f004b9fcae695f9e4786e8a209b2fb146336fef6cb0f1e3da2ccd9e.jpg)
Playbackorderchart
Playbackorder
Music playbackorderofaCDwithMP3orWMA filesisasillustrated.
- ThenamesoffoldersnotcontainingMP3or WMAfilesarenotshowninthedisplay.
- Ifthereisafileinthetoplevelofthedisc, "RootFolder" is displayed.
- The playbackorderistheorderinwhichthe fileswerewrittenbythewritingsoftware. Therefore, thefilesmightnotplayinthe desiredorder.
Specificationchart
| SupportedmediaCD,CD-R,CD-RW | |||
| Supported file systems | ISO9660 LEVEL1, ISO9660 LEVEL2, Apple ISO, Romeo, Joliet * ISO9660 Level 3 (packet writing) is not supported. | ||
| Supported versions*1 | MP3 | VersionMPEG1,MPEG2,MPEG2.5 | |
| Samplingfrequency8kHz-48kHz | |||
| Bitrate8kbps-320kbps | VBR | ||
| WMAVersionWMA7,WMA8,WMA9 | |||
| Samplingfrequency32kHz-48kHz | |||
| Bitrate48kbps-192kbps,VBR | |||
| TaginformationID3tagVER1.0,VER1.1,VER2.2,VER2.3(MP3only) | |||
| FolderlevelsFolderlevels:8,Maxfolders:255(including rootfolder),Files:512(Max.255filesforonefolder) | |||
| Textcharacternumberlimitation128characters | |||
| Displayablecharactercodes*2 | 01: ASCII, 02: ISO-8859-1, 03: UNICODE (UTF-16 BOM Big Endian), 04: UNICODE (UTF-16 Non-BOM Big Endian), 05: UNICODE(UTF-8),06:UNICODE(Non-UTF-16BOMLittleEndian) | ||
*1 Filescreatedwithacombinationof48kHzsamplingfrequencyand64kbpsbitratecannotbeplayed.
*2Availablecodesdependonwhatkindofmedia,versionsandinformationaregoingtobedisplayed.
Troubleshootingguide
| SymptomCauseandCountermeasure | |
| Cannotplay | Checkifthediscwasinsertedcorrectly. |
| Checkifthediscisscratchedordirty. | |
| Check if there is condensation inside the player. If there is, wait until the condensation is gone (about 1 hour) before using the player. | |
| Ifthereisatemperatureincreaseerror,theCDplayerwillplaycorrectlyafteritreturnstothenormaltemperature. | |
| If there is a mixture of music CD files (CD-DA data) and MP3/WMA files on a CD, only the music CD files (CD-DA data) will be played. | |
| Files with extensions other than ".MP3",".WMA",".mp3" or ".wma" cannot be played. In addition, the character codes and number of characters for foldernamesandfilenamesshouldbeincompliancewiththespecifications. | |
| Checkifthefinalizationprocess,suchassessioncloseanddiscclose,isdoneforthedisc. | |
| Checkifthediscisprotectedbycopyright. | |
| Poorsoundquality | Checkifthediscisscratchedordirty. |
| Bitratemaybetoolow. | |
| Ittakesarelativelylongtime beforethemusicstarts playing. | If there are many folders or file levels on the MP3/WMA disc, or if it is a multisession disc, some time may be required before the music starts playing. |
| Musiccutsofforskips | The writing software and hardware combination might not match, or the writing speed, writing depth, writing width, etc., might not match the specifications.Tryusingtheslowestwritingspeed. |
| Skippingwithhighbitrate files | Skippingmayoccurwithlargequantitiesofdata,suchasforhighbitratedata. |
| Movesimmediatelytothe nextsongwhenplaying | When a non-MP3/WMA file has been given an extension of ".MP3",".WMA",".mp3"or ".wma", or when play is prohibited by copyright protection, there willbeapproximately5secondsofnosoundandthentheplayerwillskiptothenextsong. |
| Songsdonotplaybackin thedesiredorder | The playback order is the order in which the files were written by the writing software. Therefore, the files might not play in the desired order. |
4-34Monitor, climate, audio, phone and voicerecognition systems
USB(UniversalSerialBus) ConnectionPort(ifsoequipped)
WARNING
Donotconnect, disconnectoroperatethe USB device while driving. Doingsocanbe adistraction. If distracted you could lose controfo your vehicle and cause an accidentor serious injury.
CAUTION
- DonotforcetheUSBdeviceintothe USBport.InsertingtheUSBdevice tiltedorup-side-downintotheportmay damagetheport.Makesurethatthe USBdeviceisconnectedcorrectlyinto theUSBport.
- DonotgrabtheUSBportcover(ifso equipped)whenpullingtheUSBdevice outoftheport.Thiscoulddamagethe portandthecover.
- DonotleavetheUSBcableinaplace whereitcanbepulledunintentionally. Pullingthecablemaydamagetheport.
The vehicle is not equipped with a USB device. USB devices should be purchased separately as necessary.
This system cannot be used to format USB devices. To form a USB device, use a personal computer.
Insomejurisdictions, the USB device for the front seats play only sound without images for regulatory reasons, even when the vehicle is parked.
This systems supports various USB memory devices, USB hard drives and Pod® players. Some USB devices may not be supported by this system.
- PartitionedUSBdevicesmaynotplaycor-rectly.
- Somecharactersusedinotherlanguages (Chinese, Japanese, etc.) may not appear properly in the display. Using English language characters with a USB device is recommended.
GeneralNotesforUSBuse:
- Foradditionalinformation,refertoyourdevicemanufacturer'sownerinformationregardingtheproperuseandcareofthedevice.
NotesforiPod®use:
iPod®isatrademarkofAppleInc., registered in the U.S. and other countries.
- ImproperlypluggingintheiPod®maycause acheckmarktobedisplayedonandoff (flickering).Alwaysmakesurethatthe iPod®isconnectedproperly.
- AniPod® nano(1stGeneration) may remain infastforwardorrewindmodeifitisconnected duringaseekoperation. In this case, pleasemanuallyresettheiPod®.
- AniPod® nano(2ndGeneration) will continuetofast-forwardorrewindifitisdisconnectedduringaseekoperation.
- Anincorrectsongtitlemayappearwhenthe PlayModeischangedwhileusinganiPod® nano(2ndGeneration).
- Audiobooksmaynotplayinthesameorder astheyappearonaniPod®.
- Largevideofilescauseslowresponsesinan iPod®. Thevehiclecenterdisplaymaymomentarilyblackout, but will soon recover.
- IfaniPod® automaticallyselectslargevideo fileswhileintheshufflemode,thevehicle centerdisplaymaymomentarilyblackout, butwillsoonrecover.
iPod®*player(ifsoequipped)
- Somecharactersusedinotherlanguages (Chinese, Japanese, etc.) are not displayed properly on the vehicle centers screen. We recommend using English language characters with an iPod®.
- LargevideopodcastfilescauseslowresponsesintheiPod®.Thevehiclecenter displaymaymomentarilyblackout,butitwill soonrecover.
- IftheiPod® automaticallyselectslarge videopodcastfileswhileintheshufflemode, thevehiclecenterdisplaymaymomentarily blackout,butitwillsoonrecover.
- ImproperlypluggingintheiPod®maycause acheckmarktobedisplayedonandoff (flickering).Alwaysmakesurethatthe iPod®isconnectedproperly.
- TheiPod®nano(2ndGeneration)willcontinuetofastforwardorrewindifitisdisconnectedduringaseekoperation.
- Anincorrectsongtitlemayappearwhenthe PlayModeischangedwhileusingtheiPod® nano(2ndGeneration).
-
Audiobooksmaynotplayinthesameorder astheyappearontheiPod®.
-
TheiPod® nano(1stGeneration) may remain infast forward or rewind mode if it is connected during a seek operation. In this case, pleasemanually reset theiPod®.
- If you are using an iPod® (3rd Generation with Dockconnector), donot use every long names forth the song title, album name or artist nametoprevent the iPod® from resetting itself.
- Becarefulnottodothefollowing,orthe cablecouldbedamagedandalossoffunc-
tionmayoccur:
●Bendthecable excessively(1.6in (40mm)radiusmaximum).
●Twistthecableexcessively(morethan 180degrees).
●Pullordropthecable. - DonotforcetheiPod® cableconnector intothedeviceport.
- Closethecenterconsolelidonthecable orconnectors.
- Storeobjectswithsharpedgesinthe storagewherethecableisstored.
-
Spillliquidsonthecableandconnectors.
-
DonotconnectthecabletotheiPod®ifthe cableand/orconnectorsarewet.Itmay damagetheiPod®.
- If the cable and connectors are exposed to water, allow the cable and/or connector to dry completely before connecting the cable to the iPod® (wait 24 hours for it today).
- If the connector is exposed to fluid so other than water, evaporatoreresiduemaycause a short between the connector pins. In this case, replacothecable, other wised damage to the iPod® and also so function may occur.
- If the cable is damaged (insulation cut, connectors cracked, contaminations such as liquids, dust, dirt, etc. in the connectors), do not use the cable and contact a NISSAN dealer to replace the cable with anewone.
- When not in use forextended period sof time, store the cable in a clean, dust free environment at room temperature and without direct sun exposure.
- Donotusethecableforanyotherpurposes otherthanitsintendeduseinthevehicle.
*iPod®isattrademarkofAppleInc.,registered in the U.S. and other countries.
Bluetooth®streamingaudio(ifso equipped)
- SomeBluetooth® audiodevicesmaynotbe recognizedbythein-vehicleaudiosystem.
- It is necessary to setup the wireless connection between incompatible Bluetooth® audiodevice and their vehicle Bluetooth® module before using the Bluetooth® audio.
- Operating procedure of the Bluetooth® audiowillvary depending on the devices. Make sure how to operate your audiodevice before using it with this system.
- TheBluetooth®audiomaybestoppedunderthefollowingconditions:
●ReceivingacallontheHands-Free PhoneSystem.
- Checkingtheconnectiontothehands-freephone.
- DonotplacetheBluetooth®audiodevicein anareasurroundedbymetalorfarawayfrom their-vehicleBluetooth®moduletoprevent tonequalitydegradationandwirelessconnectiondisruption.
- Whileanaudiodeviceisconnectedthrough theBluetooth®wirelessconnection,the batterypowerofthedevicemaydischarge quickerthanusual.
- This system supports the Bluetooth® Audio Distribution Profile (A2DP, AVRCP).
Bluetooth®
BLUETOOTH®isa
trademarkownedby
BluetoothSIG, Inc.
andlicensedto
Bosch.
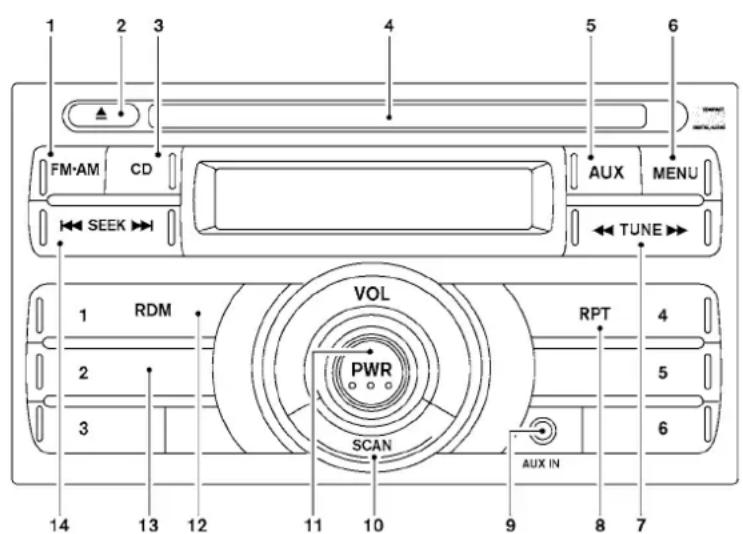
LHA2057
FM/AMRADIOWITHCOMPACT DISC(CD)PLAYER(TypeA)(ifso equipped)
1.FM·AMbutton
3.CDbutton
4.CDinsertslot
5.AUX(auxiliary)button
6.MENUbutton
-
▲ CDejectbutton
-
◀◀ TUNEButton
4-38Monitor, climate, audio, phone and voicerecognition systems
8.RPT(repeat)button
9.AUX(auxiliary)INjack
10.SCANbutton
11.PWR(power)button/VOL(volume)control knob
12.RDM(random)button
13.Stationselect(1-6)buttons
- SEEKbutton
For additional information, refer to "Audiooperation precautions" in this section.
Audiomainoperation
PWR(power)buttonandVOL(volume) controlknob
PlacetheignitionswitchintheACCorON position, thenpressthePWR(power)button. If youlistentotheradiowiththeenginenotrunning, placetheignitionswitchintheACCposition. The mode(radioorCD)thatwasplayingimmediately beforethesystemwasturnedoffresumesplaying.
WhennoCDisloaded,theradiocomeson.
PressingthePWRbuttonagainturnsthesystem off.
TurntheVOLcontrolknobtotherighttoincrease volumeortothelefttodecreasevolume.
MENUbutton(BASS,TREBLE,FADE, BALANCEandCLOCK)
PresstheMENUbuttontochangethemodeas follows:
BAS → TRE → FAD → BAL → CLOCK → BAS
ToadjustBass, Treble, FadeandBalance, press the MENUbuttonuntilthedesiredmodeappears inthedisplay.Pressthe SEEKbntontoadjustBassandTrebletothedesiredlevel.
Youcanalsousethe SEEKbeton toadjustFadeandBalancemodes.Balanceadjuststhesoundbetweentherightandleftspeakers.Sincethisvehicleisnotequippedwithrear speakers,adjustingthefadetotherearofthe vehiclewillreducethevolumeuntilnosoundis played.
Once you have adjusted the sound quality to the desired level, press the MENU button repeatedly until the radioor CD display reappears. Otherwise, ther radioor CD display will automatically reappear after about 10 seconds.
NOTE:
If the clock is enabled, pressing the MENU button will change them mode as follows: BAS → TRE → FAD → BAL → CLOCK → Hour adjustment → Minute adjustment → BAS
For additional information, refer to "Clockset" in this section.
Clockoperation
PresstheMENUbuttonuntilCLOCKisdisplayed;usetheSEEKbuttontoturntheclock displayon(CLKON)oroff(CLKOFF).
Clockset
If the clock is not displayed with the ignition switch in the ACC or ON position, you need to select the CLKON mode. Press the MENU button repeatedly until CLOCK is displayed. Use the SEEK button to enable CLKON mode.
- PresstheMENUbuttonrepeatedlyuntil CLOCKmodeappears; presstheSEEK buttonuntilCLKONappears.
- PresstheMENUbuttonagain; thehourswill startflashing.
3.PresstheSEEKbutton adjustthehour.
-
PresstheMENUbuttonagain; the display will switch to the minute adjustment mode.
-
Theminuteswillstartflashing.PressSEEK button ◀◀ or ▶▶ toadjust the minutes.
-
PresstheMENUbuttonagaintoexitthe clocksetmode.
Thedisplaywillreturntotheregularclockdisplay after 10 seconds, or press the MENU button againtoreturntotheregularclock display.
Resettingthetime
HoldtheMENUbuttondownandthenpress
the ◀◀ TUNE ▶▶ or ◀◀ SEEK ▶▶ button;thetimewillresetasfollows:
- Ifthedisplayedminutesbeforetheresetare intherangeof:00-:29,thehourdisplayed beforetheresetwillstaythesameandthe minuteswillberesetto:00.
- Ifthedisplayedminutesbeforetheresetare intherangeof:30-:59,thehourdisplayed beforetheresetwilladvancebyonehour andtheminuteswillberesetto:00.
Forexample, if the MENU button and the
◀◀
TUNE ▶ or ◀ SEEK ▶ buttonare pressedwhilethetimedisplayedisbetween 8:00and8:29,thedisplaywill beresetto8:00.If thebuttonswerepressedwhilethetimewas between8:30and8:59,thedisplaywillbereset to9:00. Atthesametimethedisplaywillreturnto theaudio.
FM/AMradiooperation
FM-AMbutton
PresstheFM-AMbuttontochangethebandas follows:
FM1→FM2→AM→FM1
TheFMstereoindicator,ST(STEREO),illuminatesduringFMstereoreception.Whenthe stereobroadcastsignalisweak,theradioautomaticallychangesfromstereotomonauralreception.

TUNEbuttons
Manualtuning
PresstheTUNE

orbuttonforless
than0.5secondsformanualtuning.
Tomovequicklythroughthechannels,pressand
holdeitherTUNE

orbuttondown
formorethan1.5seconds.

SEEKbuttons
SEEKtuning
PresstheSEEK

orbuttontoseek
throughthefrequencies.Seektuningbegins
fromlowtohighfrequencies,orhightolow
frequencies,dependingonwhichbuttonis
pressed, and stops at then east broadcasting station. Oncethe highest broadcasting station is reached, theradio continues in these seek mode at the lowest broadcasting station.
SCANtuning
PresstheSCANbuttontostopateachbroadcastingstationfor5seconds.Pressingthebuttonagainduringthis5secondperiodwillstop SCANtuningandtheradiowillremaintunedto thatstation.IftheSCANbuttonisnotpressed within 5 seconds, SCAN tuning moves to the next station.
Stationmemoryoperations
TwelvestationscanbesetfortheFMband(6for FM1 and 6for FM2)and6stationscanbesetfor theAMbandtothepresetbuttons.
- PresstheFM-AMbuttontochangetothe desiredband.
- Tunethedesiredstationusingmanual TUNE or SEEK tuning. Press and hold any of thedesiredstationmemorybuttons(1-6) until a beep sound is heard. (The radio mutes whentheselectbuttonispressed.)
-
The channel indicator will then come on and the sound will resume. Programming is now complete.
-
Otherbuttonscanbesetinthesamemanner.
If the batterycable is disconnected, or if the fuse opens, theradiomemory will be canceled. In that case, reset the desired stations.
Compactdisc(CD)playeroperation
Iftheradioisalreadyoperating, it automatically turnsoffandthecompactdiscbeginstoplay.
CDbutton
When the CD button is pressed with a compact discarded and theradioplaying, theradioturns off and the last used compact disc start to play.

TUNE(rewindandfast forward)buttons
When the TUNE ◀◀ or ▶ button is pressedwhilethecompactdiscisplaying,the compactdiscplaysatanincreasedspeedwhile rewindingorfastforwarding.Whenthebuttonis released,the compact disc returns to normal play speed.

SEEKbuttons
When ▶▶ ispressedwhilethecompactdisc isplaying,thenexttrackfollowingthepresent one starts to play from the beginning.
Press ▶▶▶ severaltimestoskipseveraltracks.
4-40 Monitor, climate, audio, phone and voice recognition systems
Eachtimethebuttonispressed,theCDadvances1additionaltrack.Thetracknumberappearsinthedisplaywindow.(Whenthelasttrackonthecompactdiscisskipped,thefirsttrackisplayed.)
When ispressed, the track being played return to the beginning. Press several timestepskipback several tracks. Each time the button is pressed, the CD moves back on track.
RPT(repeat)button
When the RPT button is pressed while connected media is being played, the song playing will berepeated until the RPT button is pressed again.
RDM(random)button
When the RDM button is pressed while the compact discis being played, the play pattern can be changed as follows:
RDM Normal
RDM: Tracks from the dischatis currently playing will be played randomly.
AUX(Auxiliary)button
TheAUXINjackislocatedonthefrontofthe radio.TheAUXINaudioinputjackacceptsany standardanalogaudioinputsuchasfromaportablecassettetape/CDplayer,MP3playerora laptopcomputer.
PresstheAUXbuttontoplayacompatibledevice whenitispluggedintotheAUXINjack.

CDEJECTbutton
When the ▲ CDejectbuttonispressedwith acompactdiscloaded, the compactdiscwill be ejected.
Whenthe ▲ CDejectbuttonispressed whilethecompactdiscisbeingplayed,thecompactdiscwillejectandthesystemwillturnoff.
CDINindicator
CDINindicatorappearsonthedisplaywhenthe CDisloadedwiththesystemon.
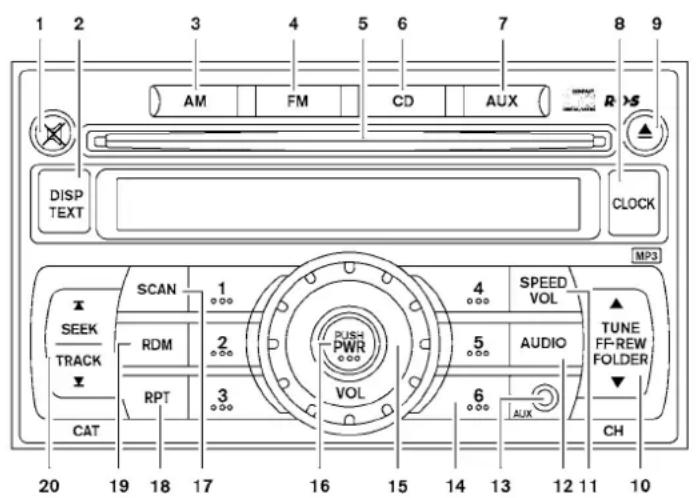
LHA2050
FM/AMRADIOWITHCOMPACT
DISC(CD)PLAYER(TypeB)(ifso equipped)
- ✗ (mute)button
3.AMbutton
4.FMbutton
5.CDinsertslot
6.CDbutton
- DISP(display)/TEXTbutton
4-42Monitor,climate,audio,phoneandvoicerecognitionsystems
7.AUXbutton
8.CLOCKbutton
-
▲ (eject)button
-
TUNE/FF-REW/FOLDERbutton
11.SPEEDVOL(volume)button
- AUDIObutton
13.AUXINjack
14.Stationselect(1-6)buttons
15.VOLUMEcontrolknob
16.PWR(power)button
17.SCANbutton
18.RPT(repeat)button
19.RDM(random)button
- ▲ ▼ SEEK/TRACKbutton
For additional information on alloperation precautions, refer to "Audiooperation precautions" in this section.
Audiomainoperation
POWER/VOLUMEcontrol
PlacetheignitionswitchintheACCorON position.PressthePWR(power)buttonwhile thesystemisofftocallupthemode(radio,CDor
AUX)thatwasplayingimmediatelybeforethe systemwasturnedoff. Whilethesystemison, pressingthePWRbuttonturnsthesystemoff. TurntheVOL(volume)controlknobtoadjustthe volume.

MUTEbutton
Pressthe ✗ buttonomutetheaudiosound.
Pressthe ✗ buttonagaintoresumeplaying theaudioatitspreviousvolume.
AUDIObutton(Bass, Treble, Fade, Balance, SSV, Beep)
PresstheAUDIObuttontochangethemodeas follows:
Bass → Treble → Fade → Balance → Beep ON/OFF→BAS
ToadjustBass, Treble, FadeandBalance, press theAUDIObuttonuntilthedesiredmodeappearsinthedisplay.PresstheTUNE
ororSEEKorbuttontoad-justtheselectedmodetothedesiredlevel.Balanceadjuststhesoundbetweentherightandlext speakers.Sincethisvehicleisnotequippedwith rearspeakers,adjustingthefadetotherearofthe vehiclewillreducethevolumeuntilnosoundis played.
TochangetheBeeptoONorOFF, press the TUNEbuttonupordownuntilthedesiredmode isdisplayed. This will enable or disable the beep soundheard during menuselection.
SPEEDVOLbutton
TochangetheSpeedSensitiveVolume(SSV) modetoOff, Low, MidorHigh, presstheSPEED VOLbuttonandthenusetheTUNEFF-REW/
FOLDERbutton ▲ ortochangebe-tweensettings.
Once you have adjusted the sound quality to the desired level, press the AUDIO button repeatedly until the radioor CD display reappears. If no actionistaken, ther radioor CD display will automatically reappear after approximately 5 seconds.
Clockset
If the clock is not displayed with the ignition switchintheACCorONposition, press the CLOCKbuttontoresumethedisplay. Pressing the CLOCKbutton togglestheclockdisplay on andoff.
-
PressandholdtheCLOCKbuttonuntilthe clockdisplaystartstoflash.
-
Press the SEEK/TRACK button or ▼ toadjustthehours.
-
Press the TUNE/FF-REW/FOLDER button ▲ or ▼ toadjusttheminutes.
-
PresstheCLOCKbuttonagaintoexitthe clocksetmode.
Ifnoactionistaken, the display will return to the regular clock display after 10 seconds.
DISP(display)/TEXTbutton
ThisbuttonworksduringFMandCDoperation.
FM/AMradiooperation
AMbutton
PresstheAMbuttontochangethebandtoAM.
IfanotheraudiosourceisplayingwhentheAM buttonispressed,theaudiosourceplayingwill automaticallybeturnedoffandthelastradio stationplayedwillbeginplaying.
FMbutton
Press the FM button to change the band as follows:
FM1→FM2→FM1
IfanotheraudiosourceisplayingwhentheFM buttonispressed,theaudiosourceplayingwill automaticallybeturnedoffandthelastradio stationplayedwillbeginplaying.
TheFMstereoindicator(ST)illuminatesduring FMstereoreception.Whenthestereobroadcast signalisweak,theradioautomaticallychanges fromstereotomonauralreception.

TUNEButton(Tuning)
PresstheTUNE/FF-REW/FOLDER
button

orformanualtuning.


SEEKtuning
PresstheSEEK/TRACKbutton


totunefromlowtohighorhightolowfrequenciesandtostopatthenextbroadcastingstation.
SCANtuning
PresstheSCANbuttontostopateachbroad-castingstationfor5seconds.Pressingthebuttonagainduringthis5secondperiodwillstopSCANtuningandtheradiowillremaintunedto thatstation.IftheSCANbuttonisnotpressed within5seconds,SCANtuningmovestothenext station.
1to6Stationmemoryoperations
TwelvestationscanbesetfortheFMband(6for FM1,6forFM2)andsixstationscanbesetfor theAMband.
-
ChoosetheradiobandAM, FM1 or FM2 using the AMorFMbutton.
-
Tunetothedesiredstationusingmanual, SEEKorSCANtuning. Pressandholdany ofthedesiredstationmemorybuttons(1–6) untilabeepsoundisheard.
-
The channel indicator will then come on and the sound will resume. Programming is now complete.
-
Other button scan beset in the samemanner.
If the batterycable is disconnected or if the fuse opens, theradiomemory will be canceled. In that case, reset the desired stations.
Compactdisc(CD)playeroperation
Iftheradioisalreadyoperating, it automatically turnsoffandthecompactdiscbeginstoplay.
CDbutton
When the CD button is pressed with the system off and the compact discarded, the system will turn on and the compact disc will start to play.
When the CD button is pressed with a compact discarded and theradioplaying, theradiow will automatically be turned off and the compact disc will start to play.
DISP/TEXTbutton
WhentheDISP/TEXTbuttonispressedwhilea CDisplaying,thedisplaywillchangeasfollows:
CD:
Track number → Disc title → Song title → Track number
CDwithMP3orWMA:
Tracknumber→Foldertitle→Albumtitle→Artist→Songtitle→Tracknumber

TUNE/FF-REW/FOLDER (ReverseorFastForward) button
CD:
WhentheTUNE/FF-REW/FOLDERbutton (fastforward)or(reverse)ispressedwhile thecompactdiscisplaying,thecompactdisc playsatanincreasedspeedwhilereversingorfast forwarding.Whenthebuttonisreleased,thecompactdisreturnstonormalplayspeed. CDwithMP3orWMA:
WhentheTUNE/FF-REW/FOLDERbutton ▲ (fastforward)or ▼ (reverse)ispressedforless than1.5secondswhilethecompactdiscisplaying,thefoldersintheCDwillchange.
4-44Monitor, climate, audio, phone and voicerecognitionsystems
When the TUNE/FF-REW/FOLDER button (fastforward) or (reverse) is pressed for more than 1.5 seconds while the compact disc is playing, the compact disc plays at an increased speed while reversing for fast forwarding. When the button is released, the compact discrete return to normal plays speed.


SEEK/TRACKbutton
WhentheSEEK/TRACKbutton pressedwhilethecompactdiscisplaying, the nexttrackfollowingthepresentonestartstoplay fromthebeginning.PresstheSEEK/TRACK button ▲ severaltimestoskipseveraltracks. Eachtimethebuttonispressed,theCDadvancesoneadditionaltrack.Thetracknumber appearsinthedisplaywindow.(Whenthelast trackonthecompactdiscisskipped,thefirst trackisplayed.)
WhentheSEEK/TRACKbutton pressed, the track being played return to the beginning. PresstheSEEK/TRACK button several timestepskipback several tracks. Each timethebutton is pressed the CD moves back on track.
RPTbutton
When the RPT button is pressed while a compact discisplaying, the play pattern can be changed as follows:
CD:
TRACKREPEAT→DISCREPEAT
CDwithMP3orWMA:
TRACKREPEAT: the current track will be repeated.
DISCREPEAT: playpatternreturnstonormal.
FOLDERREPEAT: the current folder will be re- peated.
RDMbutton
is WhentheRDMbuttonispressedwhileacompactdiscisplaying,theplaypatterncanbe changedasfollows:
CD:
DISCRANDOM→DISCREPEAT
CDwithMP3orWMA:
DISCRANDOM→FOLDERRANDOM→DISCREPEAT
DISCRANDOM: all tracksonthediscwillbe playedrandomly.
FOLDERRANDOM:alltracksinthecurrent folderwillbeplayedrandomly.
DISCREPEAT: playpatternreturnstonormal.
AUX(Auxiliary)button
The AUXINjackislocatedonthefrontofthe radio. The AUXINaudioinputjackacceptsany standardanalogaudioinputsuchasfromaportablecassettetape/CDplayer, MP3playerora laptopcomputer.
PresstheAUXbuttontoplayacompatibledevice whenitispluggedintotheAUXINjack.

EJECTbutton
When the ▲ button is pressed with a compact discarded, the compact disc willeject and the last source will be played.
Whenthe ▲ buttonispressedtwicewitha compactdiscloaded, thecompactdiscwillbe ejectedfurtherforeasierCDremoval. Ifthedisc isnotremovedwithin15seconds, thediscwill reload.

FM/AM/SATRADIOWITH COMPACTDISC(CD)PLAYER(ifso equipped)
- ▲ CDejectbutton
2.FM-AMbutton
3.AUX(auxiliary)button
4.CDinsertslot
- Backwardseekbutton and Forwardseekbutton
6.BACKbutton

4-46Monitor,climate,audio,phoneandvoicerecognitionsystems
- AUDIObutton/TUNEknob
8.Displayscreen
9.ON-OFFbutton/VOL(volume)control knob
10.CDbutton
11.SXMbutton*
*Nosatelliteradioreceptionisavailablewhenthe SXMbuttonispressedtoaccesssatelliteradio stationsunlessoptionalsatellitereceiverandantennaareinstalledandaSiriusXM®Satellite Radioservicesubscriptionisactive.SatelliteradioisnotavailableinAlaska,HawaiiandGuam.
For additional information, refer to "Audiooperation precautions" in this section.
Audiomainoperation
ON-OFFbutton/VOL(volume)control knob
PlacetheignitionswitchintheACCorON positionandpresstheON-OFFbuttonwhilethe systemisofftocallupthemode(radio,CD,AUX,Bluetooth®audio,USBoriPod®)thatwasplayingimmediatelybeforethesystemwasturnedoff.
Toturnthesystemoff, presstheON-OFFbutton.
TurntheVOL(volume)controlknobtoadjustthe volume.
This vehicle may be equipped with Speed Sensitive Volume. When this feature is active, the audio volume changes asthedrivingspeed changes.
AUDIObutton
PresstheAUDIObuttontoshowtheSettings screenonthedisplay.TurntheTUNEknobto
navigatetheoptionsandthenpresstheAUDIO buttonomakeaselection.
| Audio | ||
| BassAdjuststhebasstothedesiredlevel. | ||
| TrebleAdjuststhetrebletothedesiredlevel. | ||
| BalanceAdjuststhebalancetothedesiredlevel.Balanceadjuststhesoundlevelbetweentheleftandrightspeakers. | ||
| FadeAdjuststhefadetothedesiredlevel.Fadeadjuststhesoundlevelbetweenthefrontandrearspeakers. | ||
| Speed Sens Vol. (Speed Sensitive Volume) | Adjusts the Speed Sensitive Volume function, which increases the volume of the audio system as the speed of thevehicleincreases.Setto"OFF"todisablethefeature.Thehigherthesetting,themorethevolumeincreasesinrelationtovehiclespeed. | |
| AUX Volume Level | Choose a setting from 0 to +3 to control the boost of incoming auxiliary device volume. A setting of 0 provides noadditionalboostinvolume.Asettingof+3providesthegreatestboostinvolume. | |
Bass, treble, balance and fade can also be adjusted by pressing the AUDIO button and turning the TUNE knob to select the item to adjust. When the desired item is shown on the display, turn the tuning to adjust and then press the AUDIO button until the display returns to the main audio screen. If the button is not pressed for approximately 10 seconds, theradioorCDdisplaywillautomatically reappear.
SXMsettings
ToviewtheSXMsettings:
-
Pressthe[ APPS-i] button.
-
Touchthe"Settings"key.
-
Touch the "SXM" key.
Thesignalstrength, activationstatusandother informationaredisplayedonthescreen.
FM/AM/SATradiooperation
FM-AMbutton
PresstheFM·AMbuttontochangethebandas follows:
AM→FM1→FM2→AM
Ifanotheraudiosourceisplayingwhenthe FM-AMbuttonispressed,theaudiosourceplayingwillautomaticallybeturnedoffandthelast radiostationplayedwillbeginplaying.
TheFMstereoindicator(ST)isshownonthe screenduringFMstereoreception. Whenthestereobroadcastsignalisweak,theradioautomaticallychangesfromstereotomonauralreception.
SXMbandselect
PressingtheSXMbuttonwillchangethebandas follows:
SXM1*→SXM2*→SXM3*→SXM1*(satellite, ifsoequipped)
WhentheSXMbuttonispressedwhiletheignitionswitchisintheACCorONposition,the radiowillcomeonatthelaststationplayed.
Thelaststationplayedwillalsocomeonwhen theON-OFFbuttonispressedtoturntheradio on.
*WhentheSXMbuttonispressed,thesatellite radiomodewillbeskippedunlessanoptional satellitereceiverandantennaareinstalledanda SiriusXM®SatelliteRadioservicesubscriptionis active.SatelliteradioisnotavailableinAlaska, HawaiiandGuam.
If a compact disc is playing when the SXM button is pressed, the compact disc will automatically be turned off and the lastradiostation played will come on.
WhiletheradioisinSXMmode, the operation can be controlled through the touch screen. Touch the "Channels" keytodisplayalist of channels. Touchachanneldisplayedonthelist to changetothatchanel. Touch the "Categories" keytodisplayalist of categories. Touchacate- gorydisplayedonthelist to display options within that category.
Tuningwiththetouch-screen
WheninAMorFMmode,theradiocanbetuned usingthetouch-screen.Tobringupthevisual tuner,touchthe"Tune"keyonthelowerright cornerofthescreen.Ascreenappearswithabar runningfromlowfrequenciesonthelefttohigh frequenciesontheright.Touchthescreenatthe locationofthefrequencyyouwishtotuneandthe stationwillchangetothatfrequency.Toreturnto theregularradiodisplayscreen,touchthe"OK" key.
TuningwiththeTUNEknob
Theradiocanalabsobemanuallytunedusingthe TUNEknob.WheninFMorAMmode,turnthe TUNEknobtotheleftforlowerfrequenciesorto therightforhigherfrequencies.WheninSXM mode,turntheTUNEknobtochangethechannel.

SEEKtuning
WheninFMorAMmode, presstheseek buttons ◀◀ ortotlhefromlowtohigh orhightolowfrequenciesandtostopatthenext broadcastingstation.
WheninSXMmode, presstheseek buttons ◀◀ orto▶▶langethecategory.
4-48 Monitor, climate, audio, phone and voice recognition systems

-
The channel indicator will then come on and the sound will resume. Programming is now complete.
-
Other button scan beset in the samemanner.
If the batterycable is disconnected or if the fuse opens, theradiomemory will be canceled. In that case, reset the desired stations.
Presetscanalsobeselectedbytouchingthe desiredpresetnumberonthescreen.
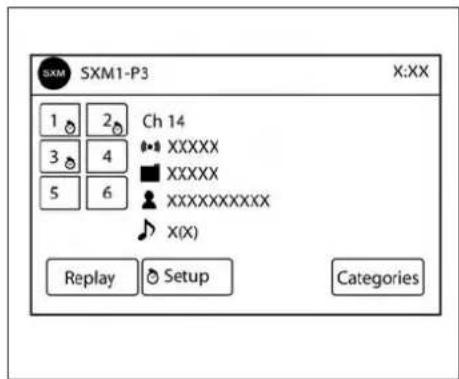
1to6Stationmemoryoperations
TwelvestationscanbesetfortheFMband(6for FM1,6forFM2)and6stationscanbesetforthe AMband.Eighteenstationscanbesetforthe SXMband(6forSXM1,6forSXM2,6for SXM3).
-
ChoosetheradiobandAM, FM1 or FM2 using the FM-AM button or choosetheradio band SXM1, SXM2, SXM3 using the SXM button.
-
Tunetothedesiredstationusingmanualor seektuning. Pressandholdanyofthedesiredstationmemory(1-6)untilabeep soundisheard.
SmartFavoritesPresetSetup(ifso equipped)
TheSmartFavoritesfeatureallowstheuserto designatepresets,withintheSXM1,SXM2and SXM3bands,astheirSmartFavorites.Whenany oftheSmartFavoritepresetsareselected,the currenttrackonthatstationwillplayfromthe beginningofthesong.
ToprogramaSmartFavoritepreset:
- PresstheSXMbutton.
- Touch the "Setup" key.
- Touch the "TuneStart" keytoactivate(ON) or deactivate(OFF) Smart Favorites.
- Touchthe "AddPreset" keytoselectan availablepreset.
For additional information regarding preset memory options, refer to "1 to 6 station memory operations" in this section.
NOTE:
-SmartFavoriteswillstartfunctioningonly aftertheaudiounitisturnedonforafew minutes.
•TuneStartissupportedformusicchannelsonly.

ReplayScreen
TheReplayScreengivestheusertheabilityto replay,skip,pauseorrewindthecurrentlyaired track.
Whenthe"Replay"keyistouched,theReplay Screenisprompted.
REPLAYToreplayatrackfromthe
beginning, press the seekbutton. The user can continuetopressthe seekbuttontoreplayprevious songs, butcanonlygo backasfarasthesystem permits. Thesystemwill warntheuserwhenthey cannotskipanyfurtherback bydisplaying "AttheEnd" in thebottomleftcornerofthe screen.
SKIPToskipatrack, press
the ▶ trackbutton. "Live" will appear in the bottom left corner of the screen indicating the difference from play timetolive audio.
4-50Monitor, climate, audio, phone and voicerecognitionsystems
PAUSETopauseatrack, press the "pausebutton.
Compactdisc(CD)playeroperation Iftheradioisalreadyoperating, it automatically turnsoffandthecompactdiscbeginstoplay.
CDbutton
When the CD button is pressed with the system off and the compact discarded, the system will turn on and the compact disc will start to play.
REWIND/ Torewind/fastforwarda FAST track, holdthe or ▶▶ FORWARD seek/trackbutton.
When the CD button is pressed with a compact discarded and theradioplaying, theradiow will automatically be turned off and the compact disc will start to play.
CD/MP3displaymode
| Menuitem | ||
| CD/MP3 | WhilelisteningtoaCDoranMP3/WMACD,certaintextmaybedisplayed(whenaCDencodedwithtextis beingused).DependingonhowtheCDorMP3/WMACDisencoded,thetextisdisplayedlistingtheartist,albumandsongtitle.ThereareotherkeysdisplayedonthescreenwhenaCDisplaying. | |
| Random | Touchthe"Random"keytoapplyarandomplaypatterntotheCD.IfanMP3CDisplaying,touching"Random"oralternatesbetweenRandomFolder,andRandomAll.Thistextwillappearonthedisplay.Tocancel Randommode,touchthe"Random"keyuntilthekeyisnolongerhighlighted. | |
| RepeatTouchthe"Repeat"keytoapplyarepeatplaypatterntotheCD.IfanMP3CDisplaying,touching"Repeat"alternatesbetweenrepeatingthecurrentsongandrepeatingthecurrentfolder.Thistextwillappearonthedisplay.TocancelRepeatmode,touchthe"Repeat"keyuntilthekeyisnolongerhighlighted | ||
| Browse | Touch the "Browse" key to display the titles on the CD in list format. Touch the title of a song in the list to begin playingthatsong.IfanMP3CDisplaying,touchingthe"Browse"keywillalsolistthefoldersonthedisc.Followtheprocedureforselectingasongwiththetouch-screentochooseafolder. | |


SEEK(ReverseorFast Forward)buttons
PressandholdtheSEEKbuttons

orfor▶15secondswhilethecompactdisc isplayingtoreverseorfastforwardthetrack beingplayed.Thecompactdiscplaysatanincreasedspeedwhilereversingorfastforwarding. Whenthebuttonisreleased,thecompactdisc returnstonormalplayspeed.


SEEKbuttons
PresstheSEEKbutton ← whileaCDor MP3/WMACDisplaytoreturntothebegin- ningofthecurrenttrack.PresstheSEEK button ← severaltimestoskipbackwardse- eraltracks.
PresstheSEEKbutton

whileaCDor
MP3/WMACDisplayingtoadvanceonetrack. PresstheSEEKbutton ▶▶ severaltimesto skipforwardseveraltracks.lfthelasttrackona CDisskipped, thefirsttrackonthediscisplayed. lfthelasttrackinafolderofanMP3/WMACDis skipped, thefirsttrackofthenextfolderisplayed.
AUXbutton
TheAUXINaudioinputjackacceptsanystandardanalogaudioinputsuchasfromaportablecassettetape/CDplayer,MP3playeroralaptopcomputer.PresstheAUXbuttontoplayacompatibledevicepluggedintotheAUXINjack.

CDEJECTbutton
When the ▲ CDEJECTbuttonispressed withacompactdiscloaded,thecompactdisc willejectandthelastsourcewillbeplayed. Ifthediscisnotremovedwithin10seconds,the discwillreload.
Additionalfeatures
For additional information, refer to "iPod® player operation with Navigation System" in this section.
For additional information, refer to "USB(Universal Serial Bus) Connection Port (model with Navigation System)" in this section.
For additional information, refer to "Bluetooth® streamingaudiowithNavigationSystem" in this section.

USB(UniversalSerialBus) CONNECTIONPORT(modelswith NavigationSystem)(ifsoequipped)
ConnectingadevicetotheUSB ConnectionPort

WARNING
Donotconnect, disconnect, or operate the USB device while driving. Doingsocan be adistraction. If distracted you could lose controlof your vehicle and cause an accidentor serious injury.
4-52Monitor, climate, audio, phone and voicerecognitionsystems
CAUTION
- To avoid damage and lossoff function when using a USB device, not the following precautions.
- DonotforcetheUSBdeviceintothe USBport.InsertingtheUSBdevice tiltedorup-side-downintotheportmay damagetheport.Makesurethatthe USBdeviceisconnectedcorrectlyinto theUSBport.
- DonotgrabtheUSBportcover(ifso equipped)whenpullingtheUSBdevice outoftheport.Thiscoulddamagethe portandthecover.
- DonotleavetheUSBcableinaplace whereitcanbepulledunintentionally. Pullingthecablemaydamagetheport.
For additional information, refertoyour device manufacturer's owner information regarding the proper use and care of the device.
TheUSBportislocatedontheinstrumentpanel ①. InserttheUSBdeviceintotheconnection port.
When incompatible storage device is plugged into the connection port, compatible audio files on the storage device can be played through the vehicle's audiosystem.
Audiofileoperation
AUXbutton
PlacetheignitionswitchintheONorACC positionandpresstheAUXbuttontoswitchto theUSBinputmode.Ifanotheraudiosources playingandaUSBmemorydeviceisinserted, presstheAUXbuttonuntilthecenterdisplay changestotheUSBmemorymode.
If the system has been turned off while the USB memory was playing, press the ON-OFF button to restart the USB memory.
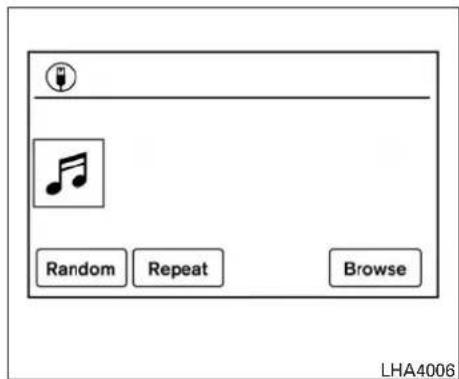
Playinformation
Informationabouttheaudiofilesbeingplayedis shownonthedisplayscreenofthevehicle's audiosystem.Touch"Browse"todisplaythelist of foldersandfilesontheUSBdevice.Touchthe nameofasongonthescreentobeginplaying thatsong.

SEEK(ReverseorFast Forward)buttons
Pressandholdthe orseekbuttons for1.5secondswhileanaudiofileontheUSB deviceisplayingtoreverseorfastforwardthe trackbeingplayed.Thetrackplaysatanin-
Monitor, climate, audio, phone and voicerecognitionsystems 4-53
creasedspeedwhilereversingorfastforwarding. Whenthebuttonisreleased, theaudiofilere-turnstonormalplayspeed.

SEEKbuttons
Pressthe ◀ buttonwhileanaudiofileonthe USBdeviceisplayingtoreturntothebeginning ofthecurrenttrack.Pressthe ◀ buttonseveraltimestoskipbackwardseveraltracks.
Pressthe ▶ buttonwhileanaudiofileonthe USBdeviceisplayingtoadvanceonetrack.
Pressthe ▶ buttonseveraltimestoskipforwardseveraltracks.lfthelasttrackinafolderon theUSBdeviceisskipped,thefirsttrackofthe nextfolderisplayed.
Randomandrepeatplaymode
WhilefilesonaUSBdeviceareplaying, the play patterncanbealteredsothatsongsarerepeated orplayedrandomly.
Random
Touchthe"Random"keytoapplyarandomplay patterntotheUSBdevice.WhentheRandom modeisactive,thetext"Random"onthekeywill illuminate.Bytouchingthe"Random"keyagain, thetext"RandomFolder"appears. Bytouching the"Random"keyoncemore,thetext"Random All"appears. TocancelRandommode,touchthe "Random"keyuntilnotextisilluminated.
Repeat
Touchthe"Repeat"keytoapplyarepeatplay patterntotheUSBdevice.WhentheRepeat modeisactive,thetextonthe"Repeat"keywill illuminate.Bytouchingthe"Repeat"keyagain, thetext"RepeatTrack"appears.Bytouchingthe "Repeat"keyoncemore,thetext"RepeatFolder" appears.TocancelRepeatmode,touchthe"Repeat"keyuntilnotextisilluminated.

iPod®*PLAYEROPERATIONWITH NAVIGATIONSYSTEM(ifso equipped)
ConnectingiPod®
WARNING
Donotconnect, disconnectoroperatethe USB device while driving. Doingsocanbe adistraction. If distracted you could lose controlof your vehicle and cause an accidentor serious injury.
4-54Monitor, climate, audio, phone and voicerecognitionsystems
CAUTION
- DonotforcetheUSBdeviceintothe USBport.InsertingtheUSBdevice tiltedorup-side-downintotheportmay damagetheport.Makesurethatthe USBdeviceisconnectedcorrectlyinto theUSBport.
- DonotgrabtheUSBportcover(ifso equipped)whenpullingtheUSBdevice outoftheport.Thiscoulddamagethe portandthecover.
- DonotleavetheUSBcableinaplace whereitcanbepulledunintentionally. Pullingthecablemaydamagetheport.
For additional information, referto your device manufacturer's owner information regarding the proper use and care of the device.
ToconnectaniPod®tothevehiclesothatthe iPod®canbecontrolledwiththeaudiosystem controlsanddisplayscreen,usetheUSBport locatedontheinstrumentpanel ①. Connectthe iPod®-specificendofthecabletotheiPod® andtheUSBendofthecabletotheUSBporton thevehicle.IfyouriPod®supportschargingviaa USBconnection,itsbatterywillbechargedwhile connectedtothevehiclewiththeignitionswitch intheACCorONposition.
While connected to the vehicle, the iPod® can only be operated by the vehicle audio controls.
TodisconnecttheiPod® from the vehicle, remove the USB bend of the cable from the USB port on the vehicle, then remove the cable from the iPod®.
*iPod®isattrademarkofAppleInc.,registered in the U.S. and other countries.
Compatibility
The following models are compatible:
- iPod®5thGeneration(firmwareversion 1.2.3orlater)
- iPod®Classic(firmwareversion1.1.1or later)
- iPod®Touch(firmwareversion 2.0.0 or later)*
- iPod® nano-1 stgeneration(firmwareversion1.3.1 or later)
- iPod® nano-2ndgeneration(firmwareversion1.1.3orlater)
- iPod® nano-3rdgeneration(firmwareversion1.1.3orlater)
- iPod®nano-4thgeneration(firmwareversion1.0.4orlater)
- iPod®nano-5thgeneration(firmwareversion1.0.1 orlater)
*SomefeaturesofthisiPod®maynotbefully functional.
Make sure that your iPod® firmware is updated to theversionindicatedabove.

AUXbutton
WhentheAUXbuttonispressedwiththesystemoffandtheiPod®connected,thesystemwillturnon.IfanotheraudiosourceisplayingandtheiPod®isconnected,presstheAUXbuttonrepeatedlyuntilthecenterdisplaychangestotheiPod®mode.
iPod®mainoperation
PlacetheignitionswitchintheACCorON position.PresstheAUXbuttonrepeatedlyto switchtotheiPod®mode.
If the system has been turned off while the iPod® was playing, pressing the ON-OFF button will start the iPod®.

Interface
TheinterfaceforiPod® operationshownonthe vehicle'saudiosystemdisplayscreenissimilarto theiPod®interface.Usethetouch-screen, BACKbuttonorthescrollingknobtonavigate themenusonthescreen.
WhentheiPod®isplaying,touchthe"Menu"key tobringuptheiPod®interface.
DependingontheiPod®model,thefollowing itemsmaybeavailableonthemenulistscreen. Foradditionalinformationabouteachitem,refer totheiPod®Owner'sManual.
●Playlists
4-56Monitor, climate, audio, phone and voicerecognition systems
●Artists
●Albums
-Genres
●Songs
•Composers
●Audiobooks
- Podcasts
Shuffleandrepeatplaymode
While theiPod®isplaying, the play pattern can be altered so that songs are repeated or played randomly.
Shuffle
Touchthe"Shuffle"keytoapplyarandomplay patterntotheiPod®. WhentheShufflemodeis active, the text is illuminated. Touching the "Shuffle" key on cemore will display the "Shuffle songs" key. Tocancel Shuffle mode, touch the "Shuffle" key again until the text is no longer illuminated.
Repeat
Touchthe"Repeat"keytoapplyrepeatplay patterntotheiPod®. Whentherepeatmodeis active, the text is illuminated. Touching the "Repeat" key oncemore will display the "Repeat song" key. Tocancel Repeat mode, touch the "Repeat" key again until the text is no longer illuminated.


SEEKbuttons
Pressthe orSEEKbuttonstoskip backwardorforwardonetrack.
Pressandholdthe orSBKbuttonsfor1.5secondswhileatrackisplayingto reverseorfastforwardthetrackbeingplayed. Thetrackplaysatanincreasedspeedwhile reversingorfastforwarding. Whenthebuttonis released, the trackreturnstonormalplayspeed.
![graph TD A[" "] --> B[" "] B --> C[" "] C --> D[" "] D --> E[" "] E --> F[" "] F --> G[" "] G --> H[" "] H --> I[" "] I --> J[" "] J --> K[" "] K --> L[" "] L --> M[" "] M --> N[" "] N --> O[" "] O --> P[" "] P --> Q[" "] Q --> R[" "] R --> S[" "] S --> T[" "] T --> U[" "] U --> V[" "] V --> W[" "]…](/content/2026/05/789802/images/d5d81c78723345381befb3de74e05a165d680212c7430e3c01414b915dfab27a.jpg)
Scrollingmenus
Whilenavigatinglonglistsofartists,albumsor songsinthemusicmenu,itispossibletoscroll thelistbythefirstcharacterinthename.To activatecharacterindexing,touchandholdthe "A-Z"keyintheupperrightcornerofthescreen. TurntheTUNEknobtochoosethenumberor lettertojumptointhelistandthenpressthe AUDIObutton.
Ifnocharacterisselectedafter2seconds,the displayreturnstonormal.
BLUETOOTH®STREAMINGAUDIO WITHNAVIGATIONSYSTEM(ifso equipped)
If you have incompatible Bluetooth® audiode- vicethatiscapableofplayingaudiofiles, the device can be connected to the vehicle's audio system so that the audio files on the device play through the vehicle's speakers.

ConnectingBluetooth®audio
ToconnectyourBluetooth®audiodevicetothe vehicle, follow the procedure below:
1.Pressthe[ APPS-1]button.
2. Touchthe"Settings"key.
3. Touch the "Phone & Bluetooth" key.
- Touchthe "ConnectNewDevice" key.
- Thesystemacknowledgesthecommand andasksyoutoinitiateconnectingfromthe phonehandset.
4-58Monitor, climate, audio, phone and voicerecognitionsystems
NOTE:
Theconnectingprocedureofthecellular phonevariesaccordingtoeachcellular phonemodel.Foradditionalinformation, refertothecellularphoneOwner'sManual. Youcanalsovisit
www.nissanusa.com/bluetoothor www.nissan.ca/bluetoothforinstructions onconnectingNISSANrecommendedcellularphones.
Audiomainoperation
ToswitchtotheBluetooth®audiomode,press theAUXbuttonrepeatedlyuntiltheBluetooth® audiomodeisdisplayedonthescreen.
The controls for the Bluetooth® audio are displayed on the screen.
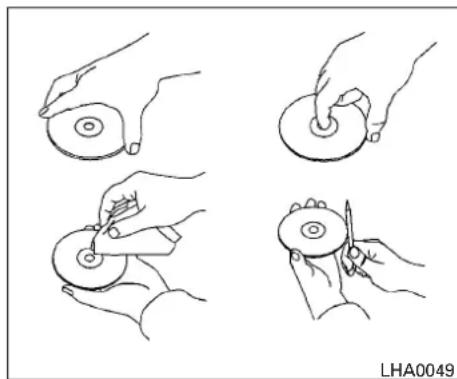
CDCAREANDCLEANING
- HandleaCDbyitsedges.Donotbendthe disc.Nevertouchthesurfaceofthedisc.
●Alwaysplacethediscsinthestoragecase whentheyarenotbeingused. - Tocleanadisc, wipethesurface from the centertotheouteredge using a clean, soft cloth. Donotwipethediscusing a circular motion.
- Donotuseaconventionalrecordcleaneror alcoholintendedforindustrialuse.
- Anewdiscmayberoughontheinnerandouteredges.Removetheroughedgesby rubbingtheinnerandouteredgeswiththe sideofapenorpencilasillustrated.

STEERINGWHEELSWITCHFOR AUDIOCONTROL(ifsoequipped)
The audiosystem can be operated using the control on the steering wheel.
1.SOURCEswitch
2.Tuningswitch
3. Volumecontrolswitch
SOURCEswitch
PushtheSOURCEswitchtochangethemodein thefollowingsequence:
AM → FM* → XM** (if so equipped) → CD*** → USB/iPod*** (ifsoequipped) → Bluetooth® StreamingAudio*** (ifsoequipped) → AUX*** → AM
*WhenusingtheSOURCEswitch,theaudio modeswitchestothefMpresetbank(FM1 or FM2)thatwaslastactive.Toswitchbetween the FM1 and FM2presetbanks,usethecontrolson theaudiosystem.
**WhenusingtheSOURCEswitch,theaudio modeswitchestotheXMpresetbank(XM1 or XM2)thatwaslastactive.Toswitchbetweenthe XM1 and XM2presetbanks,usethecontrolson theaudiosystem.
***Thesemodesareonlyavailablewhencompatiblemediaisconnectedtothesystem.
Volumecontrolswitch
Pushthevolumecontrolswitchupordownto increaseordecreasethevolume.

Tuningswitch
Memorychange(radio)
Pushthetuningswitch(▼ or)for less than 1.5 secondstochangepresets.
Seektuning(radio)
Pushthetuningswitch(▼ or)for more than 1.5secondstoseekthenextorprevious radiostation.
Next/Previoustrack(CD)
Pushthetuningswitch ▼ orforless than1.5secondstoreturntothebeginningofthe presenttrackorskiptothenexttrack.Push severaltimestoskipbackorskipthroughtracks.
ANTENNA
Theantennacannotbeshortened, but can be removed. When you need to remove the antenna, turn the antennarod counterclockwise.
Toinstalltheantennarod,turntheantennaclockwise.Tightentheantennarodtospecification usingasuitabletoolsuchasanopen-end wrench.Theantennarodtighteningspecification is3.4–3.6N·m(30–32in-lb).Donotusepliers totightentheantennaastheycanleavemarkson theantennasurface. Theantennarod cannotbe handtightenedtotheproperspecification.
CAUTION
Alwaysproperlytightentheantennarod duringinstallationortheantennarodmay breakduring vehicle operation.
NISSANCONNECT SM MOBILEAPPS (ifsoequipped)
This vehicle is equipped with Smartphone integration technology. This allows many compatible smartphone application to be displayed and easily controlled through the vehicle's touchscreen.
NOTE:
Acompatiblesmartphoneandregistration isrequiredtousemobileapplicationsorto accessconnectedfeaturesofcertainvehicleapplications.
REGISTERINGWITH NISSANCONNECT SM MOBILEAPPS
TousetheSmartphoneIntegrationfeature,itis necessaryfortheusertoregister.Inorderto register,visittheNissanConnect SM MobileApp website,www.nissanusa.com/connect/or www.nissan.ca/nissanconnect(ForCanada)and signuporcreateanaccountthroughtheprompts ontheNissanConnectMobileApp.Onceregistered,downloadtheNissanConnectAppfrom yourcompatiblephone'sapplicationdownload sourceandthenlogintotheapplication.Ifyou alreadyhaveanaccountcreatedthroughthe App,please login.
CONNECTPHONE
Tousethisfeature, acompatiblesmartphone mustbeconnectedviaBluetooth®orUSBtothe vehicle. For additional information, refer to "Bluetooth®Hands-FreePhoneSystemwithNavigationSystem" in this section.
NOTE:
AppleiPhones® must be repaired via USB for Nissan ConnectMobile Appstofunction.
NOTE:
ForAndroidphones, Nissan Connect MobileApps REQUIRES the phonetobe paired via Bluetooth®.
APPLICATIONDOWNLOAD
Onceconnected,theNissanConnectMobileApps willsearchyourphonetodeterminewhichcompatibleapplicationsarecurrentlyinstalled.Thevehicle willthendownloadthein-vehicleinterfaceforeach ofthesecompatibleapplications.Oncedown-loaded,theusercanaccessmanysmartphone ApplicationsthroughthevehicledisplaybypressingtheINFObuttonfollowedbytouchingthe"My Apps"keyorpressingtheAPPSbuttononthe audiounit.Foradditionalinformationonapplication availability refer to the NissanConnect website www.nissan.ca/nissanconnect or
www.nissanusa.com/connect/orcontactNISSAN CustomerService.
CARPHONEORCBRADIOBUETOOTH®HANDS-FREEPHONE
WheninstallingaCB,hamradioorcarphonein yourvehicle,besuretoobservethefollowing precautions;otherwise,thenewequipmentmay adverselyaffecttheenginecontrolsystemand otherelectronicparts.
WARNING
- Acellularphoneshouldnotbeusedfor anypurposewhiledrivingsofullattentionmaybegiventovehicleoperation. Somejurisdictionsprohibittheuseof cellularphoneswhiledriving.
- If you must make a call while your vehicle is in motion, the hands free cellular phone operational mode (if so equipped) is highly recommended. Exercise extremecution at all times to full attention may begin to vehicle operation.
- If you are unable to devote full attention to vehicle operation while talking on the phone, pullofftheroadtoasafe location and stop your vehicle.
CAUTION
- Keeptheantennaasfarawayaspossiblefromtheelectroniccontrol modules.
- Keeptheantennawiremorethan8in (20cm)awayfromtheeelectroniccontrol systemharnesses.Donotroutetheantennawirenexttoanyharness.
- Adjusttheantennastanding-waveratio asrecommendedbythemanufacturer.
- ConnectthegroundwirefromtheCB radiochassistothebody.
- Foradditionalinformation,itisrecommendedthatyouvisitaNISSANdealer forthisservice.
SYSTEMWITHOUTNAVIGATION SYSTEM(ifsoequipped)
A WARNING
- Useaphoneafterstoppingyourvehicle inasafelocation.Ifyouhavetousea phonewhiledriving,exerciseextreme cautionataalltimessofullattentionmay begiventovehicleoperation.
- If you are unable to devote full attention to vehicle operation while talking on the phone, pullofftheroadto as safe location and stop your vehicle.
A CAUTION
Toavoiddischargingthevehiclebattery, useaphoneafterstartingtheengine.

YourNISSANisequippedwiththeBluetooth® Hands-FreePhoneSystem.IfyouhaveacompatibleBluetooth®enabledcellularphone,you cansetupthewirelessconnectionbetweenyour cellularphoneandthein-vehiclephonemodule. WithBluetooth®wirelesstechnology,youcan
makeorreceiveahands-freetelephonecallwith yourcellularphoneinthevehicle.
Onceyourcellularphoneisconnectedtothe in-vehiclephonemodule,nootherphoneconnectingprocedureisrequired.Yourphoneis automaticallyconnectedwiththein-vehicle
phonemodulewhentheignitionswitchisplaced intheONpositionwiththepreviouslyconnected cellularphoneturnedonandcarriedinthevehicle.
YoucanconnectuptofivedifferentBluetooth® cellularphonestothein-vehiclephonemodule. However, you cantalkononlyonecellularphone atatime.
BeforeusingtheBluetooth®Hands-FreePhone System, refertothefollowingnotes.
- Setupthewirelessconnectionbetweena cellularphoneandthein-vehiclephone modulebeforeusingthehands-freephone system.
- SomeBluetooth® enabledcellularphones may not be recognized by their vehicle phonemodule. Please visit www.nissanusa.com/bluetoothor www.nissan.ca/bluetoothforarecommendedphonelistandconnectinginstructions.
- You will not be a beletouse ahands-free phone under the following conditions:
- Your vehicle is outside of the cellular service area.
-Yourvehicleisinanareawhereitis difficulttoreceiveacellularsignal;such asinatunnel,inanundergroundparking garage,nearatallbuildingorinamountainousarea.
-Yourcellularphoneislockedtopreventit frombeingdialed.
- Whentheradiowaveconditionisnotideal orambientsoundistooloud,itmaybe difficulttoheartheotherperson'svoiceduringacall.
- Donotplacethecellularphoneinanarea surroundedbymetalorfarawayfromthe in-vehiclephonemoduletopreventtone qualitydegradationandwirelessconnection disruption.
●Whileacellularphoneisconnectedthrough theBluetooth®wirelessconnection,the batterypowerofthecellularphonemaydischargequickerthanusual.TheBluetooth®Hands-FreePhoneSystemcannotcharge cellularphones. -
Foradditionalinformation,referto"Troubleshootingguide"inthissection.
-
Somecellularphonesorotherdevicesmay causeinterferenceorabuzzingnoiseto comefromtheaudiosystemspeakers.Storingthedeviceinadifferentlocationmay reduceoreliminatethenoise.
- Foradditionalinformation.refertothecellularphoneOwner'sManualregardingthe telephonecharges,cellularphoneantenna andbody,etc.
REGULATORYINFORMATION
FCCRegulatoryinformation
-CAUTION: Tomaintaincompliance with FCC's RFexposureguidelines, use only the supplied antenna. Unauthorizedantenna, modification, or attachments could damage the transmitter and may violate FCC regulations.
-Operationissubjecttothefollowingtwoconditions:
- This device may not cause interference and
- this device must accept any interference, including interference that may cause undesired operation of the device.
ICRegulatoryinformation
-Operationissubjecttothefollowingtwoconditions:(1)thisdevicemaynotcauseinterfer-
ence, and(2) this device must accept any interference, including interference that may cause undesired operation of the device.
-ThisClassBdigitalapparatusmeetsallrequirements of the Canadian Interference-CausingEquipmentRegulations.
Bluetooth®
BLUETOOTH®isa trademarkowned by BluetoothSIG, Inc. and licensed to Visteon.
USINGTHESYSTEM
TheNISSANVoiceRecognitionsystemallows hands-freeoperationoftheBluetooth®Hands-FreePhoneSystem.
If the vehicle is in motion, some commands may not be available so full attention may begin to vehicle operation.
Initialization
WhentheignitionswitchisplacedintheON position,NISSANVoiceRecognitionisinitialized, whichtakesafewseconds.Ifthe button is pressedbeforetheinitializationcompletes,the systemwillannounce"Hands-freephonesystem notready"andwillnotreacttovoicecommands.
4-64 Monitor, climate, audio, phone and voice recognition systems
Operatingtips
TogetthebestperformanceoutoftheNISSAN VoiceRecognitionsystem,observethefollowing:
- Keeptheinteriorofthevehicleasquietas possible. Closethewindowstoeliminate surroundingnoises(trafficnoises, vibration sounds, etc.), which may prevent the system from recognizing voice commands correctly.
- Waituntilthetonesoundsbeforespeakinga command. Otherwise, the command will not bereceived properly.
-Startspeakingacommandwithin5seconds afterthetonesounds. - Speakinanaturalvoicewithoutpausing betweenwords.
Givingvoicecommands
TooperateNISSANVoiceRecognitionSystem, pressandreleasethe buttonlocatedon thesteeringwheel. Afterthetonesounds, speak a command.
The command given is picked up by the microphone, and voice feedback is given when the command is accepted.
- If you need to hear the available commands for the current menu again, say "Help" and the system will repeat them.
- Ifacommandisnotrecognized, thesystem announces, "Commandnotrecognized. Pleasetryagain." Makesurethecommandis saidexactlyaspromptedbythesystemand repeatthecommandinaclearvoice.
- If you want to go back to the previous command, you can say "Goback" or "Correction" any times system is waiting for a response.
- Youcancancelacommandwhenthesystemiswaitingforaresponsebysaying, "Cancel"or"Quit."Thesystemannounces "Cancel"andendstheNISSANVoiceRecognitionSystemsession.Youcanalsopress andholdthe buttononthesteering wheelfor5secondsatanytimetoendthe NISSANVoiceRecognitionSystemsession. WhenevertheNISSANVoiceRecognition Systemsessioniscanceled,adoublebeep isplayedtoindicateyouhaveexited the system.
-
If you want to adjust the volume of the voice feedback, press the volume control switches (+ or - ) on the steering wheel while being provided with feedback. You can also use the radio volume control knob.
-
Inmostcasesyoucaninterruptthevoice feedbacktospeakthenextcommandby pressingthe buttononthesteering wheel.
- Tousethesystemfaster,youmayspeakthe secondlevelcommandswiththemainmenu commandonthemainmenu.Forexample, pressthe buttonandafterthetone say,"CallRedial."
Howtosaynumbers
NISSANVoiceRecognitionrequiresacertain waytospeaknumbersinvoicecommands.Refer tothefollowingrulesandexamples.
- Either"zero"or"oh"canbeusedfor"0".
Example:1-800-662-6200
-“Oneeightohohsixsixtwosixtwooh oh”,or
-“Oneeightzerozerosixsixtwosixtwooh oh” - Wordscanbeusedforthefirst4digits placesonly.
Example:1-800-662-6200 - "Oneeighthundredsixsixtwosixtwooh oh",
-NOT"Oneeighthundredsixsixtwosixty twohundred,"and
-NOT"Oneeightohohsixsixtwosixtytwo hundred"
- Numberscanbespokeninsmallgroups. Thesystemwillpromptyoutocontinueenteringdigits,ifdesired.
Example:1-800-662-6200
- "Oneeightzerozero"
Thesystemrepeatsthenumbersand promptsyoutoentermore.
-“Sixsixtwo”
Thesystemrepeatsthenumbersand promptsyoutoentermore.
-“Sixtwozerozero”
- Say"pound"for"#".Say"star"for"*"(availablewhenusingthe"SpecialNumber"commandandthe"Send"commandduringa call).
For additional information, refer to "List of voice commands" and "Special number" in this section.
Example:1-555-1212*123
- "Onefivefivefiveonetwoonetwostar onetwothree"
- Say"plus"for"+"(availableonlywhenusing the"SpecialNumber"command).
- Say"pause"fora2-secondpause(available onlywhenstoringaphonebooknumber).
NOTE:
Forbestresults, sayphonenumbersas singledigits.
The voice command "Help" is available at any time. Please us the "Help" command to get information on how to set the system.
VoicePromptInterrupt
Inmostcasesyoucaninterruptthevoicefeedbacktospeakthenextcommandbypassing the buttononthesteeringwheel. After interruptingthesystem, waitforabeepbefore speakingyourcommand.
OneShotCall
Tousethesystemfaster,youmayspeakthe secondlevelcommandswiththemainmenu commandonthemainmenu. Forexample,press the buttonandafterthetonesay,"Call Redial".
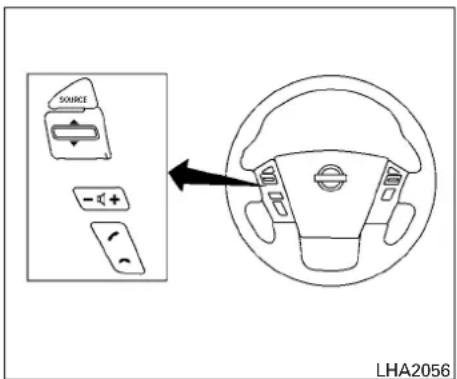
CONTROLBUTTONS
The control buttons for the Bluetooth® Hands-Free Phone System are located on the steering wheel.
PHONE/SEND
Pressthe buttonontinitiatea NISSANVoiceRecognitionSystem sessionoransweranincomingcall.
Youcanalsousethe buttonointerruptthesystemfeedbackandgivea commandatonce.Foradditional information,referto"Listofvoicecommands"and"Duringacall"inthissection.
4-66 Monitor, climate, audio, phone and voice recognition systems

PHONE/END
While the NISSAN Voice Recognition System session is active, press and hold the button for 5 second stop quitthe voicerecognition system at anytime.

TUNINGSWITCH
While using the NISSAN Voice Recognition System session, tilt the tuning switchupordowntomanually control the phones system.
GETTINGSTARTED
The following procedures will help you get started using the Bluetooth® Hands-Free Phone System with NISSAN Voice Recognition. For additional information, refer to "List of voice commands" in this section.
Choosingalanguage
Youcan interact with the Bluetooth® Hands-Free Phone System using English, Spanish or French.
Tochangethelanguage, perform the following.
- Pressandholdthe than5seconds.

buttonformore
- Thesystemannounces: "Pressthe PHONE/SEND( )buttonforthe hands-freephonesystemtoenterthevoice adaptationmodeorpresssthePHONE/END ( )buttontoselectadifferentlanguage."
3.Pressthe button.
Foradditionalinformation,referto"Voice Adaptation(VA)mode"inthissection.
- Thesystemannouncesthecurrentlanguage andgivesyoutheoptiontochangethelanguagetoSpanish(inSpanish)orFrench(in French).Toselectthecurrentlanguage, pressthePHONE/SEND( )button.To selectadifferentlanguage,tiltthetuning switch( ^ or ▼ )upordown.
NOTE:
You must press the button within 5secondstochangethelanguage.
- If you decide not to change the language, do not press either button. After 5 seconds, the NISSAN Voice Recognition System session will be changed.
Connectingprocedure
NOTE:
Theconnecting procedure must be performed when the vehicle is stationary. If the vehicle starts moving during the procedure, the procedure will be canceled.
MainMenu
"Connectphone" Ⓐ
"Addphone" Ⓑ
Initiatefromhandset ©
Namephone D
- Pressthe buttonon thesteering wheel. Thesystemannouncestheavailable commands.
2.Say:"Connectphone" Ⓐ.Thesystemacknowledgesthecommandandannounces thenextsetofavailablecommands.
3.Say: "Addphone" Ⓑ. Thesystemacknowledgesthecommandandasksyoutoinitiate connectingfromthephonehandset Ⓓ.
Theconnectingprocedureofthecellular phone varies according to each cellular phonemodel.Foradditionalinformation,refertothecellularphoneOwner'sManualfor details. You can also visit
www.nissanusa.com/bluetoothor www.nissan.ca/bluetoothforinstructionson connectingNISSANrecommendedcellular phones.
When prompted fora Passkeycode, enter "1234" from the handset. The Passkeycode "1234" has been assigned by NISSAN and cannot be changed.
- Thesystemasksyoutosayanameforthe phone Ⓓ.
If thenameistoolongortooshort, the systemtellsyou, then promptsyoufora nameagain.
Also, if more than one phone is connected and then names soundstoom much like an name already used, the system tells you, then prompts you for an name again.
Makingacallbyenteringaphone number
MainMenu
"Call" Ⓐ
"PhoneNumber" Ⓑ
Speakthedigits ©
"Dial" D
-
Pressthebuttononthesteering wheel. Atonewillsound.
-
Say: "Call" Ⓐ. Thesystemacknowledges the command and announce the next set of available commands.
3.Say"PhoneNumber" Ⓑ. Thesystemacknowledgesthecommandandannounces thenextsetofavailablecommands.
-
Saythenumberyouwishtocallstartingwith theareacodeinsingledigitformat ©. If the systemhastroublerecognizingthecorrect phonenumber, tryenteringthenumberin thefollowing groups:3-digit areacode, 3-digitprefixandthelast4-digits. Forex-ample,555-121-3354canbesaidas"five fivefive"asthe1stgroup, then "onetwo one"asthe2ndgroup, and "threethreefive four"asthe3rdgroup. Fordialingmorethan 10digitsoranyspecialcharacters, say "SpecialNumber". For additional information, refer to "Howtosaynumbers" in this section.
-
When you have finished speaking the phone number, the system repeats it back and announce the available commands.
6.Say:"Dial" D. Thesystemacknowledges the command and make the call.
For additional command options, refer to "List of voice commands" in this section.
Receivingacall
Whenyouheartheringtone, press the button on the steering wheel.
Oncethecallhasended, pressthe onthesteeringwheel.

button
NOTE:
If you donotwishtotakethe call when you heartheringtone, press the button on the steering wheel.
Foradditionalcommandoptions,referto"Listof voicecommands"inthissection.
LISTOFVOICECOMMANDS
MainMenu
"Call"
"Phonebook"
"RecentCalls"
"ConnectPhone"
Whenyoupressandreleasethe buttonon thesteeringwheel,youcanchoosefromthe commandsontheMainMenu.Thefollowing pagesdescribethesecommandsandthecommandsineachsub-menu.
Remembertowaitforthetonebefore speaking.
Afterthemainmenu,youcansay"Help"tohear thelistofcommandscurrentlyavailableanytime thesystemiswaitingforaresponse.
If you want to end an action without completing it, you can say "Cancel" or "Quit" at any time the system is waiting for a response. The system will end the NISSAN Voice Recognition session. Whenever the NISSAN Voice Recognition session is canceled, double beep is played to indicate you have exited the system.
If you want to go back to the previous command, you can say "Goback" or "Correction" anytime the system is waiting for a response.
"Call"
MainMenu
"Call"
(Speakname) Ⓐ
"PhoneNumber"
(SpeakDigits) Ⓑ
"SpecialNumber" ©
"Redial" D
"CallBack" E
(Speakname) Ⓐ
If you have stored entries in the phonebook, you can be a number associated with an name.
For additional information, refer to "Phonebook" in this section.
When prompted by the system, say the name of the phone book entry you wish to call. The system acknowledges the name.
If there are multiplenumbers associated with the name, the system masky outochoosethecorrect number.
Once you have confirmed the name and location, the system begins the call.
(SpeakDigits) Ⓑ
When prompted by the system, say then number you wish to call. For additional information, refer to "How to say numbers" and "Making a call by enteringaphon number" in this section.
"SpecialNumber" ©
Fordialingmorethan10digitsoranyspecial characters, say "SpecialNumber". When the systemacknowledgesthecommand, thesystem willpromptyoutspeakthenumber.
"Redial" D
Use the Redial command to call the last number that was dialed.
Thesystemacknowledgesthecommand, repeatsthenumberandbeginsdialing.
Ifaredialnumberdoesnotexist, thesystem announces, "Thereisnonumbertoredial" and ends the NISSANVoiceRecognitionSystem session.
"CallBack" E
Use the Call Back command to dial then number of the last incoming call within the vehicle.
Thesystemacknowledgesthecommand, repeatsthenumberandbeginsdialing.
Ifacallbacknumberdoesnotexist, thesystem announces, "Thereisnonumbertocallback" and endstheNISSANVoiceRecognitionSystem session.
Duringacall
During acallthereareseveralcommandoptions available.Pressthe buttononthesteering wheeltomutethereceivingvoiceandentercommands.
- "Help"—Thesystemannouncestheavailablecommands.
- "Cancel/Quit"—Thesystemannounces "Cancel," endstheNISSANVoiceRecognitionSystemsessionandreturnstothecall.
- "Send"—UsetheSendcommandtoenter numbers,"*or"#"duringacall.Forexample,ifyouweredirectedtodialanextensionbyanautomatedsystem:
Say:"Sendonetwothreefour."
Thesystemacknowledgesthecommand andsendsthetonesassociatedwiththe numbers.Thesystemthenends the NISSANVoiceRecognitionSystemsession andreturnstothecall.Say"star"for"*",Say "pound"for"#".
- "Transfercall"—UsetheTransferCallcommandtotransferthecallfromtheBluetooth®Hands-FreePhoneSystemto thecellularphonewhenprivacyisdesired.
Thesystemannounces, "Transfercall.Call transferredtoprivacymode." Thesystem thenendstheNISSANVoiceRecognition Systemsession.
Toreconnectthecallfromthecellularphone totheBluetooth®Hands-FreeSystem, pressthe button.
- "Mute"—UsetheMutecommandtomute yourvoicesotheotherpartycannothearit. Usethemutecommandagaintounmute yourvoice.
NOTE:
Ifacallisendedorthecellularphone networkconnectionislostwhiletheMute featureison,theMutefeaturewillbereset to"off"forthenextcallsotheotherparty canhearyourvoice.
"Phonebook"(phoneswithout automaticphonebookdownload function)
NOTE:
The "TransferEntry" command is not available when the vehicle is moving.
MainMenu
"Phonebook"
"TransferEntry" Ⓐ
"DeleteEntry" Ⓑ
"ListNames" ©
Forphonesthatdonotsupportautomaticdownloadofthephonebook(PBAPBluetooth®profile),the "Phonebook" commandisusedtomanuallyaddentriestothevehiclephonebook.
The phonebookstoresupto40namesforeach phoneconnectedtothesystem.
NOTE:
Eachphonehasitsownseparatephone-book. You cannot access PhoneA's phonebook if you are currently connected with PhoneB.
"TransferEntry" A
UsetheTransferEntrycommandtostoreanew nameinthesystem.
When prompted by the system, say then a name you would like to give them new entry.
Forexample, say: "Mary."
If thenameistoolongortooshort, thesystem tells you, then prompts you for an name again.
Also,ifthenamesoundstoomuchlikeaname alreadystored,thesystemtellsyou,thenprompts youforanameagain.
Thesystemwillaskyoutotransferaphone numberstoredinthecellularphone'smemory.
Enteraphonenumberbyvoicecommand:
Forexample, say: "fivefivefiveonetwoonetwo." For additional information, referto "Howtosay numbers" in this section.
Totransferaphonenumberstoredinthecellular phone'smemory:
Say "Transferentry." Thesystemacknowledges the command and ask soy out to initiate the transfer from the phone handset. Thenew contact phone number will be transferred from the cellular phone via the Bluetooth® communication link.
The transfer procedure varies according to each cellular phone. For additional information, refer to the cellular phone Owner's Manual.
Thesystemrepeatsthenumberandpromptsyou forthenextcommand.Whenyouhavefinished enteringnumbersortransferringanentry,choose "Store."
Thesystemconfirmsthename, location and number.
"DeleteEntry" Ⓑ
UsetheDeleteEntrycommandtoeraseone entryfromthephonebook.Afterthesystemrecognizesthecommand,speakthenametodelete orsay"ListNames"tochooseanentry.
"ListNames" ©
UsetheListNamescommandtohearallthe namesinthephonebook.
Thesystemrecitesthephonebookentriesbut doesnotincludetheactualphonenumbers. Whentheplaybackofthelistiscomplete, the systemgoesbacktothemainmenu.
Youcanstoptheplaybackofthelistatanytime bypassingthe buttononthesteering wheel. ThesystemendstheNISSANVoiceRecognitionSystemsession.
"Phonebook"(phoneswithautomatic phonebookdownloadfunction)
NOTE:
The "TransferEntry" command is not available when the vehicle is moving.
| MainMenu |
| "Phonebook" |
| S a y a N a m e |
| "ListNames" A |
| "RecordName" B |
Forphonesthatsupportautomaticdownloadof thephonebook(PBAPBluetooth®profile),the "Phonebook" commandisusedtomanageen-
triesinthevehiclephonebook.Youcansaythe nameofanentryatthismenutoinitiatedialingof thatentry.
The phonebookstoresupto 1,000 names for each phone connected to the system.
Whenaphoneisconnectedtothesystem,the phonebookisautomaticallydownloadtothe vehicle.Thisfeatureallowsyoutoaccessyour phonebookfromtheBluetooth®systemandcall contactsbyname.Youcanrecordacustom voicetagforcontactnamesthatthesystemhas difficultyrecognizing.Foradditionalinformation, refer to"Recordname"inthissection.
NOTE:
Eachphonehasitsownseparatephone-book.YoucannotaccessPhoneA'sphone-bookifyouarecurrentlyconnectedwith PhoneB.
"ListNames" Ⓐ
UsetheListNamescommandtohearallthe namesandlocationsinthephonebook.
Thesystemrecitesthephonebookentriesbut doesnotincludetheactualphonenumbers. Whentheplaybackofthelistiscomplete, the systemgoesbacktothemainmenu.
Youcanstoptheplaybackofthelistatanytime bypassingthe buttononthesteering wheel.ThesystemendstheNISSANVoiceRecognitionSystemsession.Foradditionalinformation,refertothe"Recordname"inthissection.
"RecordName" B
Thesystemallowsyoutorecordcustomvoice tagsforcontactnamesinthephonebookthatthe vehiclehasdifficultyrecognizing. Thisfeaturecan alsobeusedtorecordvoicetagstodirectlydial anentrywithmultiplenumbers.Upto40voice tagscanberecordedtothesystem.
"RecentCalls"
| MainMenu |
| “RecentCalls” |
| “Outgoing” Ⓐ |
| “Incoming” Ⓑ |
| “Missed” Ⓒ |
Use the Recent Calls command to access outgoing, incoming or missed calls.
"Outgoing" Ⓐ
UsetheOutgoingcommandtolisttheoutgoing callsmadefromthevehicle.
"Incoming" Ⓑ
Usethelncomingcommandtolisttheincoming callsmadetothevehicle.
"Missed" ©
Use the Missed command to list the calls made to the vehicle that were not answered.
"ConnectPhone"
NOTE:
TheAddPhonecommandisnotavailable whenthevehicleismoving.
| MainMenu |
| "ConnectPhone" |
| "AddPhone" A |
| "SelectPhone" B |
| "ReplacePhone" C |
| "DeletePhone" D |
| "TurnBluetoothOFF" E |
UsetheConnectPhonecommandstomanage thephonesconnectingtothevehicleortoenable theBluetooth®functiononthevehicle.
"AddPhone" Ⓐ
Use the Add Phone command to add daphoneto the vehicle. For additional information, referto "Connecting procedure" in this section.
"SelectPhone" Ⓑ
Use the Select Phone command to select from a list of phones connected to the vehicle. Thesystem will list then names assigned to each phone and then promptly you for the honey you wish to select. Only one phone can be active at time.
"ReplacePhone" ©
Use the Replace Phone command to replace an existing phone pairing with anewphone. The system will keep all voice tags assigned to your phonebook.
"DeletePhone" D
Use the Delete Phone command to delete a phonethatisconnected to the vehicle. Thesystemwillist then names assigned to each phone and then promptly you for the honey you wish to delete. Deleting a phone from the vehicle will also delet that phone book forth that phone.
"TurnBluetoothOFF" E
Use the Turn Bluetooth OFF command to prevent wireless connection to your phone.
4-72Monitor, climate, audio, phone and voicerecognition systems
The procedure for training avoice is as follows.
-
Position the vehicle in areasonably quiet outdoor location.
-
Sitinthedriver'sseatwiththeengineerunning, theparkingbrakeon, and thetransmission in P(Park).
-
Pressandholdthe buttonformore than5seconds.
-
Thesystemannounces: "Pressthe PHONE/SEND( )buttonforthe hands-freephonesystemtoenterthevoice adaptationmodeorpresssthePHONE/END ( )buttontoselectadifferentlanguage."
5.Pressthe button.
Foradditionalinformation, refer to "Choos-ingalanguage" in this section.
-
VoicememoryAormemoryBisselected automatically. If both memory locations are already in use, the system will promptly out to overwrite one. Follow the instructions provided by the system.
-
When preparation is complete and you are ready to begin, press the button.
-
The VAmodewillbeexplained.Follow the instructionsprovidedbythesystem.
-
Whentrainingisfinished, thesystemwilltell youanadequatenumberofphraseshave beenrecorded.
-
Thesystemwillannouncethatvoiceadaptationhasbeencompletedandthesystemis ready.
TheVAmodewillstopif:
- The buttonispressedformorethan 5secondsinVAmode.
●ThevehiclebeginsmovingduringVAmode.
●TheignitionswitchisplacedintheOFFor LOCKposition.
Trainingphrases
DuringtheVoiceAdaptationmode, thesystem instructsthetrainertosaythefollowingphrases. Thesystemwillpromptyouforeachphrase.
- phonebooktransferentry
- dialthreeohfourtwonine
- deletecallbacknumber
- incoming
●transferentry
●eightpauseninethreetwopauseseven
- deleteallentries
- callseventwofourzeronine
- phonebookdeleteentry
- nextentry
- dialstartwoonesevenoh
•yes
no
- select
•missed
- dialeightfivesixninetwo
- Bluetooth
•outgoing
- callthreeonenineohtwo
●ninesevenpausepausethreeoheight
- cancel
- callbacknumber
- callstartwozeroninefive
- deletephone
- dialeightthreezerofiveone
- recordname
●fourthreepausetwoninepausezero
- deleteredialnumber
- phonebooklistnames
- calleightohfivefourone
- correction
- connectphone
- dialsevenfourohoneeight
- previousentry
- delete
•dialnineseventwosixsix
- callsevensixthreeophone
•goback
- callfivesixtwoeightzero
- dialsixsixfourthreeseven
MANUALCONTROL
Whileusingthevoicerecognitionsystem,itis possibletoselectmenuoptionsbyusingthe steeringwheelcontrolsinsteadofspeakingvoice commands.Thiscanbeespeciallyhelpfulifthe noiseofdrivingmakesitdifficultforthevoice recognitionsystemtouaccuratelyinterpretcommands.Themanualcontrolmodedoesnotallow dialingaphonenumberbydigits.Theusermay selectanentryfromthePhonebookorRecent Callslists.Tore-activatevoicerecognition,exit themanualcontrolmodebypressingandholding thePHONE/END( )button.Atthattime, pressingthePHONE/SEND( )buttonwill starttheHandsFreePhoneSystem.
Operatingtips
- Toentermanualcontrolmode, start the voicerecognitionsystemandtilthetuning (▲) switchupordown. Thesystemwill speak "ShowingManualOptions" when manualcontrols are initially activated.
- Tobrowsethemenuoptions,tiltthetuning (▲) switchupordown. Thesystemwill always speak the current menuoption. Depending on the audiodisplay, it will also show the current menuoption.
- Toselectthecurrentmenuoption, press the PHONE/SEND( ) button.
- Togobacktothepreviousmenu, pressthe PHONE/END( )button.Ifthecurrent menuistheMainMenu, pressingthe PHONE/END( )buttonwillexitthe Phonesystem.
- Toexitthemanualcontrolmode, press and holdthePHONE/END( ) button for 5 seconds.
4-74 Monitor, climate, audio, phone and voice recognition systems
TROUBLESHOOTINGGUIDE
Thesystemshouldrespondcorrectlytoallvoice commandswithoutdifficulty.Ifproblemsareencountered,trythefollowingsolutions.
Wherethesolutionsarelistedbynumber,try eachsolutioninturn,startingwithnumber1,until theproblemisresolved.
| SymptomSolution | |
| Systemfailstointerpretthecommandcorrectly. | 1.Ensurethatthecommandisvalid.Foradditionalinformation,referto"Listofvoicecommands"inthissection. |
| 2.Ensurethatthecommandisspokenafterthetone. | |
| 3.Speakclearlywithoutpausingbetweenwordsandatalevelappropriatetotheambientnoiselevelinthevehicle. | |
| 4.Ensurethattheambientnoiselevelisnotexcessive(forexample,windowsopenordefrosteron).NOTE:Ifitistoo noisytousethephone,itislikelythatthevoicecommandswillnotberecognized. | |
| 5.Ifmorethanonecommandwassaidatatime,trysayingthecommandsseparately. | |
| 6.Ifthesystemconsistentlyfailstorecognizecommands,thevoicetrainingprocedureshoubecarriedouttoim-provetherecognitionresponseforthespeaker.Foradditionalinformation,referto"VoiceAdaptation(VA)mode"in thissection. | |
| Thesystemconsistentlyselectsthewrongentryfromthe phonebook. | 1.Ensurethatthephonebookentrynamerequestedmatcheswhatwasoriginallystored.Thiscanbeconfirmedby usingthe"ListNames"command.Foradditionalinformation,referto"Phonebook"inthissection. |
| 2.Replaceoneofthenamesbeingconfusedwithanewname. |
BLUETOOTH® HANDS-FREEPHONE SYSTEMWITHNAVIGATIONSYSTEM (ifsoequipped)
WARNING
- Useaphoneafterstoppingyourvehicle inasafelocation.Ifyouhavetousea phonewhiledriving,exerciseextreme cautionatalltimessofullattentionmay begiventovehicleoperation.
- If you are unable to devote full attention to vehicle operation while talking on the phone, pullofftheroadtoasafe location and stop your vehicle.
CAUTION
Toavoid discharging the vehicle battery, use a phone after starting the engine.
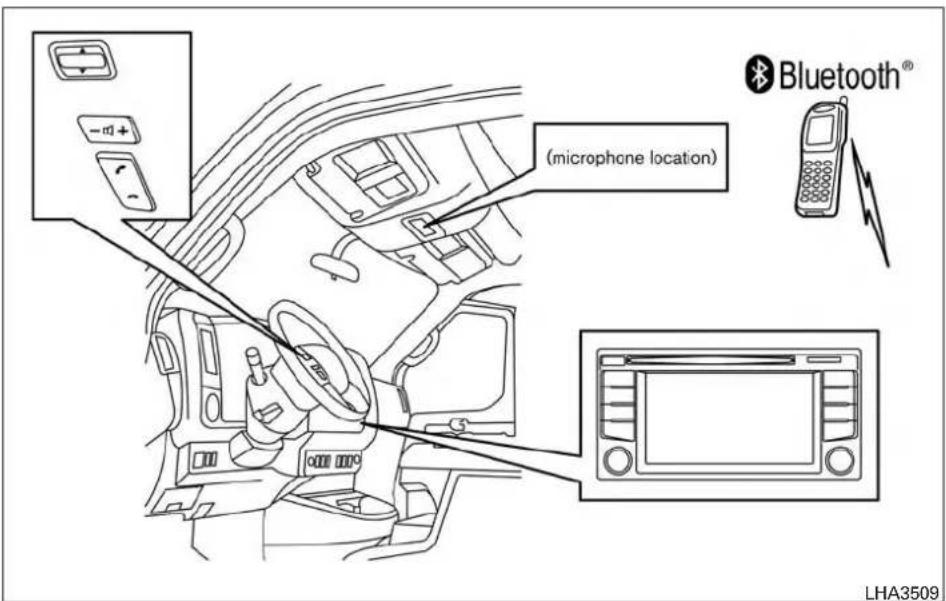
YourNISSANisequippedwiththeBluetooth® Hands-FreePhoneSystem.IfyouhaveacompatibleBluetooth®enabledcellularphone,you cansetupthewirelessconnectionbetweenyour cellularphoneandthein-vehiclephonemodule. WithBluetooth®wirelesstechnology,youcan
makeorreceiveahands-freetelephonecallwith yourcellularphoneinthevehicle.
Onceyourcellularphoneisconnectedtothe in-vehiclephonemodule,nootherphoneconnectingprocedureisrequired.Yourphoneis automaticallyconnectedwiththein-vehicle
4-76Monitor, climate, audio, phone and voicerecognitionsystems
phonemodulewhentheignitionswitchisplaced intheONpositionwiththeconnectedcellular phoneturnedonandcarriedinthevehicle.
YoucanregisteruptofivedifferentBluetooth® cellularphonestothein-vehiclephonemodule. However, you cantalkononlyonecellularphone atatime.
NISSANVoiceRecognitionsystemsupportthe phonecommands,sodialingaphonenumber usingyourvoiceispossible.Foradditionalinformation,referto"NISSANVoiceRecognitionSystem"inthissection.
BeforeusingtheBluetooth®Hands-FreePhone System, refertothefollowingnotes.
- Setupthewirelessconnectionbetweena cellularphoneandthein-vehiclephone modulebeforeusingthehands-freephone system.
- SomeBluetooth® enabledcellularphones may not be recognized by their vehicle phonemodule. Please visit www.nissanusa.com/bluetoothor www.nissan.ca/bluetoothforarecommendedphonelistandconnectinginstructions.
-
You will not be a beletouse ahands-free phone under the following conditions:
-
Yourvehicleisoutsideofthecellularservicearea.
- Yourvehicleisinanareawhereitis difficulttoreceivecellularsignal;suchas inatunnel,inanundergroundparking garage,nearatallbuildingorinamountainousarea.
- Yourcellularphoneislockedtopreventit frombeingdialed.
- Whentheradiowaveconditionisnotideal orambientsoundistooloud, itmaybe difficulttoheartheotherperson'svoiceduringacall.
- Immediately after the ignition switch is placed in the ON position, it maybe impossible to receive a call for a short period of time.
-
Donotplacethecellularphoneinanarea surroundedbymetalorfarawayfromthe in-vehiclephonemoduletoprevent tone qualitydegradationandwirelessconnection disruption.
●Whileacellularphoneisconnectedthrough the Bluetooth®wireless connection, the batterypowerofthecellularphonemaydischargequickerthanusual.TheBluetooth®Hands-FreePhoneSystemcannotcharge cellularphones. -
Foradditionalinformation,referto"Troubleshootingguide"inthissectionifthehandsfreephonesystemseemstobemalfunctioning.
- Somecellularphonesorotherdevicesmay causeinterferenceora buzzing noiseto comefromtheaudiosystemspeakers.Storingthedeviceinadifferentlocationmay reduceoreliminatethenoise.
- Foradditionalinformation,refertothecellularphoneowner's manual regardingthetelephonecharges,cellularphoneantennaand body,etc.
- Thesignalstrengthdisplayonthemonitor will not coincide with the signal strength displayofsomecellularphones.
REGULATORYINFORMATION
FCCRegulatoryinformation
- CAUTION: To maintain compliance with FCC's RFexposureguidelines, use only the supplied antenna. Unauthorized antenna, modification, or attachments could damage the transmitter and may violate FCC regulations.
-
Operationissubjecttothefollowingtwoconditions:
-
Thisdevicemaynotcauseinterference and
-
this device must accept any interference, including interference that may cause undesired operation of the device.
ICRegulatoryinformation
-Operationissubjecttothefollowingtwoconditions:(1)thisdevicemaynotcauseinterference,and(2)thisdevicemustacceptany interference,includinginterferencethatmay causeundesiredoperationofthedevice.
-ThisClassBdigitalapparatusmeetsallrequirementsoftheCanadianInterference-CausingEquipmentRegulations.
Bluetooth®
BLUETOOTH®isa trademarkownedby BluetoothSIG,Inc. andlicensedto Bosch.
VOICECOMMANDS
Youcanusevoicecommandstooperatevarious Bluetooth®Hands-FreePhoneSystemfeatures usingtheNISSANVoiceRecognitionsystem.For additionalinformation,referto"NISSANVoice RecognitionSystem"inthissection.
VoicePromptInterrupt
Whileusingthevoicerecognitionsystem,the systemvoicecanbeinterruptedtoallowtheuser tospeakcommands.Whilethesystemisspeaking,pressthe buttononthesteering wheel.Thesystemvoicewillstopandatonewill beheard.Afterthetone,speakdesiredcommand (displayedonthetouch-screen).
OneShotCall
Tousethesystemfaster,youmayspeakthe secondlevelcommandswiththemainmenu commandonthemainmenu. Forexample,press the buttonandafterthetonesay,"Call Redial".

CONNECTINGPROCEDURE
NOTE:
Theconnectingproceduremustbeperformedwhenthevehicleisstationary.Ifthe vehiclestartsmovingduringtheprocedure, theprocedurewillbecanceled.
- Pressthe[ APPS-1]buttononthecontrol panel.
- Touchthe"Settings"key.
- Touch the "Phone&Bluetooth" key.
- Touchthe "ConnectNewDevice" key.
4-78Monitor,climate,audio,phoneandvoicerecognitionsystems
- Initiatetheconnecting process from the handset. Thesystemwilldisplaytheme- sage: "IsPINXXXXXXdisplayedonyour Bluetooth device?". If the PIN is displayed on your Bluetooth® device, select "Yes" to completethepairing process.
Foradditionalinformation,refertothe Bluetooth®device'sOwner'sManual.
VEHICLEPHONEBOOK
Toaccessthevehiclephonebook:
- Pressthe buttononthecontrolpanel.
- Touch the "Phonebook" key.
- Choosethedesiredentryfromthedisplayed list.
- Thenumberoftheentrywillbedisplayedon thescreen.Touchthenumbertoinitiatedialing.
NOTE:
Toscrollquicklythroughthelist,touchthe "A-Z"keyintheupperrightcornerofthe screen.TurntheTUNEknobtochoosea letterornumberandthenpressthe ENTER/AUDIObutton.Thelistwillmoveto thefirstentrythatbeginswiththatnumber orletter.
MAKINGACALL
Tomakeacall, follow the procedure below:
- Pressthe buttononthecontrolpanel. The "Phone" screenwillappearonthedisplay.
- Selectoneofthefollowingoptionstomakea call:
- "Phonebook": Selectthenamefromanentry storedinthevehiclephonebook.
- "CallLists": Selectthenamefromtheincoming,outgoingormissed.
- "Redial": Dialthelastoutgoingcallfromthe vehicle.
- "":Inputthephonenumbermanually usingakeypaddisplayedonthescreen.For additionalinformation,referto"Howtouse thetouch-screen"inthissection.
RECEIVINGACALL
Whenacallisplacedtotheconnectedphone, thedisplaywillchangetophonemode.
Toaccepttheincomingcall,either:
- Pressthe wheel,or buttononthesteering
- Touchthe 📊 icononthescreen.
Torejecttheincomingcall, either:
- Pressthe buttononthesteering wheel,or
- Touchthephoneicononthescreen.
DURINGACALL
While acallisactive, the following options are available on the screen:
- "Handset" Selectthisoptiontoswitchcontrolofthe phonecallovertothehandset.
- "MuteMic." Selectthisoptiontomutethemicrophone. Selectagaintounmutethemicrophone.
- Phone icon Selecttoendthephonecall.
ENDINGACALL
Toendaphonecall, select the phone icon on the screen or press the button on the steering wheel.
TEXTMESSAGING(ifsoequipped)
WARNING
- Lawsinsomejurisdictionsmayrestrict theuseof"Text-to-Speech." Checklocalregulationsbeforeusingthe feature.
●Lawsinsomejurisdictionsmayrestrict theuseofsomeoftheapplicationsand features,suchassocialnetworkingand texting.Checklocalregulationsforany requirements. - Usethetextmessagingfeatureafter stoppingyourvehicleinasafelocation. Ifyouhavetousethefeaturewhile driving,exerciseextremec cautionatall timesofullattentionmaybegivento vehicleoperation.
- If you are unable to devote full attention to vehicle operation while using the text messaging feature, pullofftheroadtoa safelocation and stop your vehicle.
NOTE:
Manyphonesmayrequirespecialpermissiontoenabletextmessaging.Checkthe phone'sscreenduringBluetooth® pairing. Forsomephones,youmayneedtoenable 'Notifications'inthephone'sBluetooth® menufortextmessagestoappearonthe headunit.Foradditionalinformation,refer tothephone'sOwner'sManual. Textmessageintegrationrequiresthatthe phonesupportMAP(MessageAccessProfile)forbothreceivingandsendingtext messages.Somephonesmaynotsupport alltextmessagingfeatures.Pleasereferto www.nissanusa.com/bluetoothor www.nissan.ca/bluetoothforcompatibility information.Foradditionalinformation,refertothephone'sOwner'sManual. Thesystemallowsforthesendingandreceiving oftextmessagesthroughthevehicleinterface.
Sendingatextmessage:
- Pressthe wheel.

buttononthesteering
- Say "Phone" afterthetone.
-
Say "SendText" afterthetone.
-
Thesystemwillprovidealistofavailable commandsinordertodeterminetherecipientofthetextmessage.Choosefromthe following:
-
To(aname)
- EnterNumber
- MissedCalls
- IncomingCalls
-OutgoingCalls
For additional information, refer to "Voice commands" in this section.
- Once are recipientischosen, the system prompts for which message to send. Nine predefined messages are available as well as three custom messages. To choose one of the predefined messages, speak one of the following after the tone:
●“Driving,can'ttext”
- "Callme"
- "Onmyway"
- "Runninglate"
•“Okay”
●“Yes”
•“No”
- "Whereareyou?"
●“When?”
Tosendoneofthecustommessages, say "CustomMessages". If more than one custom message is stored, the system will prompt for the number of the desired custom message. For additional information, referto "Bluetooth® settings" in this section.
Readingareceivedtextmessage:
- Pressthe wheel.

buttononthesteering
2.Say"Phone"afterthetone.
3.Say"ReadText"afterthetone.
Thetextmessage, sender and delivery time are shown on the screen. Usethetuning switch to scroll through all text messages if more than one are available. Press the button to exit the text messages screen. Press the button to access the following options for replying to the text message:
- CallBack
Speakthiscommandtocallthesenderof thetextmessageusingtheBluetooth® Hands-FreePhoneSystem.
- SendText
Speakthiscommandtosendatextmessage responsetothesenderofthetextmessage.
- ReadText
Speakthiscommandtoreadthetextmessageagain.
●PreviousText
Speakthiscommandtomovetotheprevioustextmessage(ifavailable).
- NextText
Speakthiscommandtomovetothenexttext message(ifavailable).
NOTE:
Textmessagesareonlydisplayedifthe vehiclespeedislessthan5mph(8km/h).
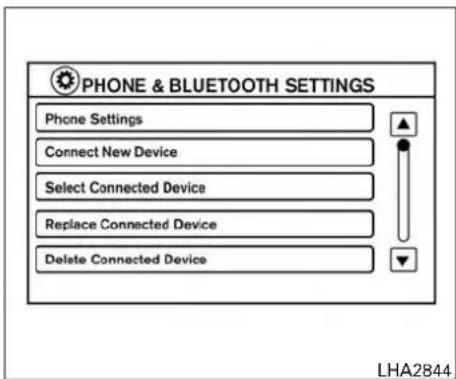
BLUETOOTH® SETTINGS
Toaccessthephonesettings:
1.Pressthe[ APPS-i ]button.
2. Touchthe"Settings"key.
3. Touch the "Phone&Bluetooth" key.
| MenultemResult | |
| PhoneSettingsForadditionalinformation,referto"Phonesettings"inthissection. | |
| ConnectNewDeviceSelecttoconnectanew | Bluetooth®devicetotheBluetooth®Hands-FreePhoneSystem. |
| Select Connected Device | Select to choose a Bluetooth® device from a list of those devices connected to the Bluetooth® Hands-Free Phone System. |
| Replace Connected Device | Select to replace a Bluetooth® device from a list of those devices connected to the Bluetooth® Hands-Free Phone System. |
| Delete Connected Device | Select to delete a Bluetooth® device from a list of those devices connected to the Bluetooth® Hands-Free Phone System. |
| BluetoothSelecttotoggleBluetooth®onandoff. | |
4-82Monitor, climate, audio, phone and voicerecognitionsystems
PHONE SETTINGS
Toaccessthephonesettings:
1.Pressthe[ APPS-i ]button.
2. Touchthe"Settings"key.
3. Touch the "Phone&Bluetooth" key.
4. Touch the "Phone Settings" key and adjust the following settings as desired:
- SortPhonebookBy: Select"FirstName"or"LastName"to choosehowphonebookentriesarealphabeticallydisplayonthescreen.
- UsePhonebookFrom: Select"Handset"tousethephone'sphone-book.Select"SIM"tousethephonebookon theSIMcard.Select"Both"touseboth sources.
- DownloadPhonebookNow: Selecttodownloadthephonebooktothe vehiclefromthechosensource.
- RecordNameforPhonebookEntry: Selecttorecordanameforaphonebook entryforusewiththeNISSANVoiceRecognitionSystem.
- TextMessaging: Selecttotogglethetextmessagefunctionalityonoroff.
●ShowIncomingText: Selecttotoggletextnotificationonoroff.
●AutoReply: Selecttotoggleautoreplyfunctionalityonor off.
●AutoReplyMessage: Selecttochooseamessagethatissent whentheautoreplyfunctionisactivated. - UseVehicle'sSignature: Selecttotoggleonorofftheadditionofthe vehiclesignaturetooutgoingmessages.
- CustomTextMessages: Selectthepredefinedmessagesthatare usedbythesystem.
TROUBLESHOOTINGGUIDE
Thesystemshouldrespondcorrectlytoallvoice commandswithoutdifficulty.Ifproblemsareencountered,trythefollowingsolutions.
Where the solutions are listed by number, try each solution in turn, starting with number 1, until the problem is resolved.
| SymptomSolution | |
| Systemfailstointerpretthecommandcorrectly. | 1.Ensurethatthecommandisvalid.Foradditionalinformation,referto"NISSANVoiceRecognition". |
| 2.Ensurethatthecommandisspokenafterthetone. | |
| 3.Speakclearlywithoutpausingbetweenwordsandatalevelappropriatetotheambientnoiselevelinthevehicle. | |
| 4.Ensurethattheambientnoiselevelisnotexcessive(forexample,windowsopenordefrosteron).NOTE:Ifitistoo noisytousethephone,itislikelythatthevoicecommandswillnotberecognized. | |
| 5.Ifmorethanonecommandwassaidatatime,trysayingthecommandsseparately. | |
| Thesystemconsistentlyselectsthewrongentryfromthe phonebook. | 1.Ensurethatthephonebookentrynamerequestedmatcheswhatwasoriginallystored.Foradditionalinformation, referto"Vehiclephonebook"inthissection. |
| 2.Replaceoneofthenamesbeingconfusedwithanewname. | |
| 3.Pleasespeakbothfirstandlastnameofcontacttoimproverecognitionaccuracy. |
4-84Monitor, climate, audio, phone and voicerecognition systems
NISSANVOICERECOGNITION SYSTEM(ifsoequipped)
The NISSAN Voice Recognition system allows hands-free operation of the system sequipped on this vehicle, such as the phone and navigation systems.
TooperateNISSANVoiceRecognition,press the buttonlocatedonthesteeringwheel. Whenprompted,speakthecommandforthe systemyouwishtoactivate.Thecommandgiven ispickedupbythemicrophoneandperformed whenitisproperlyrecognized.NISSANVoice Recognitionwillprovideavoiceresponseaswell asamessageinthecenterdisplaytoinformyou ofthecommandresults.
USINGTHESYSTEM
Initialization
WhentheignitionswitchisintheONposition, NISSANVoiceRecognitionisinitialized, which takesafewseconds. Whencompleted, thesystemisreadytoacceptvoicecommands. If the buttonispressedbeforetheinitializationcompletes, thesystemwillannounce: "Voice RecognitionSystemnotready.Pleaseawait."
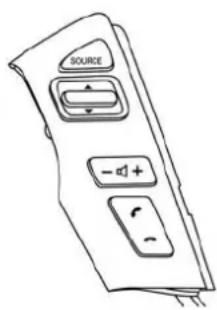
LHA3511
Givingvoicecommands
- Pressthebutton.
- Thesystemannounces: "Pleasesayacate-gorylikephoneoracommandlikepointsof interestfollowedbyabrandname". Alistof availablecommandsisthenspokenbythe system.
-
Afterthetonesoundsandthefaceiconon thedisplaychanges,speakacommand. Availablecommandsarediscussedinthis section.
-
Voiceanddisplayfeedbackareprovided whenthecommandisaccepted.
- If the command is not recognized, the system announces: "Command not recognized". Repeat the command in a clear voice.
- If you want to cancel the command or go back to the previous menu of commands, press the button. The system will announce: "Cancelling Voice Recognition" or "Goback" depending on the current menu level.
- Pressthe buttonto move back throughthemenusdisplayonthescreen.
- If you want to adjust the volume of the voice feedback, use the volume control switches on the steering wheel or the volume knob on the control panel.
●Thevoicecommandscreencanalsobe accessedusingthecontrolpaneldisplay:
1.Pressthe[ APPS-[]button.
2. Touch the "Voice Commands" key.
Operatingtips
TogetthebestperformanceoutofNISSAN VoiceRecognition,observethefollowing:
- Keeptheinteriorofthevehicleasquietas possible.Closethewindowstoeliminate the surroundingnoises(trafficnoises,vibration sounds,etc.),whichmaypreventthesystem fromrecognizingthevoicecommandscorrectly.
- Waituntilatonesoundsbeforespeakinga command. Otherwise, the command will not bereceived properly.
- Startspeakingacommandwithin3.5secondsafterthetonesounds.
- Speakinanaturalvoicewithoutpausing betweenwords.

SYSTEMFEATURES
NISSANVoiceRecognitioncanactivatethefollowingsystems:
- Bluetooth®Hands-FreePhoneSystem
●Navigation
●Audio
Information
MyApps
For additional information, referto these separate Navigation System Owner's Manual.
Howtosaynumbers
NISSANVoiceRecognitionrequiresacertain waytospeaknumbersinvoicecommands.Refer tothefollowingexamples.
Generalrule: Either "zero" or "oh" can be used for "0".
Phonenumbers
Speakphonenumbersaccordingtothefollowing example.For1-800-662-6200,saydialnumber andthenspeakthephonenumberinanyofthe followingformats:
●“oneeightohohsixsixtwosixtwoohoh”
●"oneeighthundredsixsixtwosixtwoohoh"
●“oneeightzerozerosixsixtwosixtwoohoh”
Forthebestvoicerecognitionphonedialingresults,sayphonenumbersassingledigits.Also,fullnumberscanonlybespokenfor"800".For example,youcannotsay555-6000as"fivefive fivesixthousand".
BLUETOOTH®HANDS-FREE PHONESYSTEMVOICE COMMANDS
ToaccesstheBluetooth®Hands-FreePhone Systemvoicecommands:
- Pressthe

button.
- Say "Call" and then an name in the vehicle phonebook to call that entry. Otherwise, say "Phone" to access various phone commands.
IftheBluetooth®hasbeensetto"Off",the systemannounces:"Bluetooth®isoff.Would youliketoturnBluetooth®on?"
Ifnophoneisconnectedtothesystemandthe vehicleisstationary,thesystemannounces: "Thereisnophoneconnected.Wouldyouliketo connectaphonenow?"Say"Yes"toconnecta phone.AllfurtherBluetooth®Hands-FreePhone Systemvoicecommandsareonlyavailableifa phoneisconnected.
IfaphoneisconnectedandBluetooth®issetto "On", the following voice commands are available:
- Call(aname)
Speakthenameofthecontactinwhichyou aretryingtocall.Systemwillconfirmcorrect contact.Say"Dial"toinitiatedialing.
- DialNumber
Allowsforupto24digitstobedialed. After thenumberisentered, say "Dial" toinitiate dialing. Say "Correction" tocorrectthenumberentered. Say "GoBack" toreturntothe mainmenu.
●ListPhonebook
Startingwiththefirstalphabeticalentryin thevehiclephonebook,thesystemprompts foranadditionalcommand.Say"Dial"tocall thenumberofthephonebookentry.Say "SendText"tosendatextmessagetothe numberofthephonebookentry.Say"Next Entry"toskiptothenextalphabeticalentryin thevehiclephonebook,wherethesameoptionswillthenbeavailable.
-RecentCalls
Thesystem prompts for an additional command. Say "Missed Calls", "Incoming Calls" or "Outgoing Calls" to display a list of such calls on the screen.
Speakthenumberoftheentrydisplayedon thescreentodialthatnumberorsay"Next Page"toviewentriesonthenextpage(if available).
•Redial
Redialsthelastcallednumber.
- ReadText
Readsanincomingtextmessage.Foradditional information, refer to "Bluetooth® Hands-Free Phone System with Navigation System" in this section.
- SendText
Sendsatextmessage.Foradditionalinformation,referto"Bluetooth®Hands-Free PhoneSystemwithNavigationSystem"in thissection.
- SelectPhone
Thesystemreplies"Pleaseusemanualcontrolstocontinue".Usemanualcontrolstochangetheactivephonefromamongthe listedphonesconnectedtothevehicle.
Foradditionalinformation,referto"Bluetooth® Hands-FreePhoneSystemwithNavigationSystem"inthissection.
NAVIGATIONSYSTEMVOICE COMMANDS
The following voice commands are available for the Navigation System:
- StreetAddress(address)
- PointsofInterest(name)
- POIbyCategory
Home
- AddressBook
●PreviousDestinations
- EnterAddressinSteps
- CancelRoute
Foradditionalinformation, refertotheseparate NavigationSystemOwner'sManual.
AUDIOSYSTEMVOICE COMMANDS
Toaccesstheaudiosystemvoicecommands:
- Pressthe

button.
2.Say"Audio"
3. Speakacommandfromthefollowingavailablecommands:
●Play(AM,FM,etc.)
Allowsusertoselectradioband
●TuneAM(number)
AllowsusertotunedirectlytoadesiredAM frequency
●TuneFM(number)
AllowsusertotunedirectlytoadesiredFM frequency
●SXMchannel(number)
Allowsusertotunedirectlytoadesired SXMstation(ifsoequipped)
- CDTrack(number)
Allowsusertoselecttracktobeplayed
●PlaySong(name)
Allowsusertoselectsongnametobe played
●PlayArtist(name)
Allowsusertoselectartisttobeplayed
●PlayAlbum(name)
Allowsusertoselectalbumnametobe played
Foradditionalinformation,referto"Audiosystem"inthissection.
INFORMATIONVOICECOMMANDS
The following voice commands are available for the information functions of the Navigation System:
●Traffic
●FuelPrices
- Stocks
●MovieListings
- CurrentWeather
●WeatherMap
●5—dayForecast
-6-hourForecast
For additional information, referto these separate Navigation System Owner's Manual.
MYAPPSVOICECOMMANDS
ManyAppscanbeaccessedusingthisvoice command.Foradditionalinformation,referto "NissanConnect SM MobileApps"inthissection.
HELPVOICECOMMANDS
The following voice commands can be spoken to have the system provide instructions and tips for using the NISSAN Voice Recognition System.
- ListCommands
- WhatCanlSay?
- GeneralHelp
•Quit - Exit
4-88Monitor, climate, audio, phone and voicerecognition systems
TROUBLESHOOTINGGUIDE
Thesystemshouldrespondcorrectlytoallvoice commandswithoutdifficulty.lfproblemsareencountered,followthesolutionsgiveninthisguide fortheappropriateerror.Wherethesolutionsare listedbynumber,tryeachsolutioninturn,starting withnumberone,untiltheproblemisresolved.
| Symptom/errormessageSolution | |
| Thesystemresponds“CommandNot Recognized”orthesystemfailstorecognizethecommandcorrectly. | 1.Ensurethatthecommandformatisvalid.Usethe“ListCommands”or“WhatCanISay?”commandunderthe“Help”menu. |
| 2.Speakclearlywithoutpausingbetweenwordsandatalevelappropriatetotheambientnoiselevel. | |
| 3.Ensurethattheambientnoiselevelisnotexcessive(forexample,withthewindowsopenorthedefrosteron).NOTE:Ifitistoonoisytousethephone,itislikelythatvoicecommandswillnotberecognized. | |
| 4.Ifoptionalwordsofthecommandhavebeenomitted,thenthecommandshouldbetriedwiththeseinplace. |
MEMO
4-90Monitor, climate, audio, phone and voicerecognitionsystems
5Startinganddriving
Precautionswhenstartinganddriving....5-2
Exhaustgas(carbonmonoxide)....5-2
Three-waycatalyst. 5 - 2
Driving precautions. 5 - 3
TirePressureMonitoringSystem(TPMS)....5-4
Avoidingcollisionandrollover....5-6
Off-roadrecovery....5-7
Rapidairpressureloss....5-7
Drinkingalcohol/drugsanddriving. 5-8
Ignitionswitch....5-8
Automatictransmission. 5 - 8
Ignitionswitchpositions. 5 - 9
NISSANVehicleImmobilizerSystem
(ifsoequipped)....5-9
Beforestartingtheengine....5-10
Startingtheengine....5-10
Drivingthevehicle. 5-11
Engineprotectionmode....5-11
Automatictransmission. 5-12
Parkingbrake....5-17
Cruisecontrol(ifsoequipped)....5-18
Precautionsoncruisecontrol.... 5-18
Cruisecontroloperations....5-19
Break-inschedule....5-20
Fuelefficientdrivingtips....5-20
Increasingfueleconomy....5-21
Parking/parkingonhills. 5-22
Powersteering. 5-23
Brakesystem....5-23
Brakeprecautions....5-23
Anti-lockBrakingSystem(ABS)....5-24
Brakeassist. 5-25
Activebrakelimitedslip(ABLS)system....5-25
VehicleDynamicControl(VDC)system. 5-26
Brakeforcedistribution....5-27
Rearsonarsystem(RSS)(ifsoequipped)....5-28
FrontandRearSonarSystem(ifsoequipped)....5-29
Coldweatherdriving. 5-31
Freeingafrozendoorlock. 5-31
Antifreeze. 5-31
Battery....5-31
Draining ofcoolantwater. 5-31
Tireequipment. 5-31
Specialwinterequipment. 5-31
Drivingonsnoworice....5-31
Engineblockheater(ifsoequipped)....5-32
PRECAUTIONSWHENSTARTING ANDDRIVING
WARNING
- Donotleavechildrenoradultswho wouldnormallyrequiretheassistance ofothersaloneinyourvehicle.Pets shouldalsonotbeleftalone.They couldaccidentallyinjurethemselvesor othersthroughinadvertentoperationof thevehicle.Also,onhot,sunnydays, temperaturesinaclosedvehiclecould quicklybecomehighenoughtocause severeorpossiblyfatalinjuriesto peopleoranimals.
●Properlysecureallcargowithropesor strapstohelppreventitfromslidingor shifting.Donotplacecargohigherthan theseatbacks.Inasuddenstoporcollision,unsecuredcargocouldcause personalinjury.
EXHAUSTGAS(carbonmonoxide)
WARNING
- Donotbreatheexhaustgases;they containcolorlessandodorlesscarbon monoxide. Carbonmonoxide is dangerous. It can cause unconsciousness or death.
●Alwayskeepthedoorsclosedwhen drivingthevehicle.Donotdrivewiththe doorsopenanddonotattempttotransportlongcargobydrivingwiththe doorsopen.Doingsocandamagethe doorsanddoorhinges.Cargomayalso falloutofthevehiclewhichmaycause seriouspersonalinjuryordeath.
- Ifyoususpectthatexhaustfumesare enteringthevehicle,drivewithallwindowsfullyopen,andhavethevehicle inspectedimmediately.
- Donotruntheengineinclosedspaces suchasagarage.
- Donotparkthevehiclewiththeengine runningforanyextendedlengthoftime.
- Keepthedoorsclosedwhiledriving, otherwiseexhaustgasescouldbe drawnintothepassengercompartment. Ifyoumustdrivewiththisopen,follow theseprecautions:
1.Openallthewindows.
- Setthe airrecirculationbuttontooffandthefancontroldialto hightocirculatetheair.
- If electrical wiring or other cable connections must pass to a trailer through these on the body, follow them manufacturer's recommendation to prevent carbon monoxide entry into the vehicle.
●Theexhaustsystemandbodyshouldbe inspectedbyaqualifiedmechanic whenever:
a.Thevehicleisraisedforservice.
b. Yoususpectthatexhaustfumesare entering into the passenger compartment.
c. You notice a change in the sound of the exhaust system.
d.Youhavehadanaccident involving damageto the exhaustsystem, underbody,orrearofthevehicle.
THREE-WAYCATALYST
Thethree-waycatalystisanemissioncontrol device installed in the exhaust system. Exhaust gasesinthethree-waycatalystareburnedat hightemperaturestohelpreducepollutants.
WARNING
- Theexhaustgasandtheexhaustsystemareveryhot.Keeppeople,animals orflammablematerialsawayfromthe exhaustsystemcomponents.
- Donotstoporparkthevehicleover flammablematerialssuchasdrygrass, wastepaperorrags. They may ignite and cause a fire.
CAUTION
- Donotuseleadedgasoline.Deposits fromleadedgasolinewillseriouslyreducethethree-waycatalyst'sability to helpreduceexhaustpollutants.
- Keepyourenginetunedup.Malfunctionsintheignition,fuelinjection,or electricalsystemscancauseoverrich fuelflowintothethree-waycatalyst, causingittooverheat.Donotkeepdrivingiftheenginemisfires,orifnotice-ablelossofperformanceorotherun-usualoperatingconditionsare detected.Havethevehicleinspected promptly.Itisrecommendedthatyou visitaNISSANdealerforthisservice.
- Avoiddrivingwithanextremelylowfuel level.Runningoutoffuelcouldcause theenginetomisfire,damagingthe three-waycatalyst.
- Donotracetheenginewhilewarmingit up.
- Donotpushortowyourvehicletostart theengine.
DRIVINGPRECAUTIONS
Utilityvehicleshaveasignificantlyhigher rolloverratethanothertypesofvehicles.
Theyhavelargertiresandhighergroundclear-ancethanpassengercarstomakethemcapable ofperforminginavarietyofapplications.This givesthemahighercenterofgravitythanordinary cars.Anadvantageofhighgroundclearanceis abetterviewoftheroad,allowingyoutoanticipateproblems.However,theyarenotdesigned forcorneringatthesamespeedsasconventional 2-wheeldrivevehiclesanymorethanlow-slung sportscarsaredesignedtoperformsatisfactorily underoff-roadconditions.lfatalllpossible,avoid sharpturnsathighspeeds.Aswithothervehicles ofthistype,failuretooperatethisvehiclecorrectlymayresultinlossofcontrolorvehicle rollover.Inarollovercrash,anunbeltedpersonis significantlymorelikelytodiethanapersonwearingaseatbelt.
Aloadedvehiclewithahighercenterofgravity mayhandledifferentlythananunloadedvehicle. Theriskoflossofcontrolorvehiclerollover increasesasmorecargoisloadedinthevehicle. Theriskincreasesbecausethecargoplacedin thevehicleraisesthevehicle'scenterofgravity. Asaresult,thevanhandlesdifferentlyfromother ordinarypassengervehiclesandithaslessresis-tancetorolloverwhichcanmakeitmoredifficult tocontrolinanemergencysituation.Placingany loadontheroofalsoraisesthecenterofgravity andincreasesthepotentialforrollover.Donot overloadyourvehicleandmakesuretheloadis evenlydistributed.
Toreducetheriskoflossofcontrolorvehicle rolloverdriveatslowerspeed, avoid abrupt steering changes and increase your following distance and allow for increased stopping distance.
Besuretoreadthedrivingsafetyprecautionsin thissection.
TIREPRESSUREMONITORING SYSTEM(TPMS)
Eachtire, including the spare (if provided), should be checked monthly when cold and inflated to the inflation pressurerecommended by the vehicle manufacturer on the vehicle placard or tire inflation pressure label. (If your vehicle has tires of different size than the size indicated on the vehicle placard or tire inflation pressure label, you should determin the property inflation pressure forthosetires.)
Asanadded safety feature, your vehicle has been equipped with a Tire Pressure Monitoring System (TPMS) that illuminates alowtire pressure telltale when one or more of your tires is significantly under-inflated. Accordingly, when the low tire pressure telltale illuminates, you should stop and check all four tires as soon as possible, and inflate them to the proper pressure. Driving on a significantly under-inflated tire cause the tire to overheat and can lead to tire failure. Under-inflation also reduces fuel efficiency and tire tread life, and may affect the vehicle's handling and stopping ability.
PleasenotethattheTPMSisnotasubstitutefor propertiremaintenance,anditisthedriver's responsibilitytomaintaincorrecttirepressure, evenifunder-inflationhasnotreachedthelevelto triggerilluminationoftheTPMSlowtirepressure telltale.
Yourvehiclehasalsobenequippedwitha TPMSmalfunctionindicatortoindicatewhenthe systemisnotoperatingproperly.TheTPMSmalfunctionindicatoriscombinedwiththelowtire pressuretelltale.Whenthesystemdetectsa malfunction,thetelltalewillflashforapproximately 1 minuteandthenremaincontinuously illuminated. Thissequencewillcontinueupon subsequentvehiclestart-upsaslongasthemal-functionexists.Whenthemalfunctionindicatoris illuminated,thesystemmaynotbeabletodetect orsignallowtirepressureasintended.TPMS malfunctionsmayoccurforavarietyofreasons, includingtheinstallationofreplacementoralternatetiresorwheelsonthevehiclethatprevent theTPMSfromfunctioningproperly.Always checktheTPMSmalfunctiontelltaleafterreplacingoneormoretiresorwheelsonyourvehicleto ensurethatthereplacementoralternatetiresand wheelsallowtheTPMStocontinuetofunction properly.
Additional information
- Sincethesparetire is not equipped with the TPMS, the TPMS does not monitor the tire pressure of the spare tire.
- The TPMS will activate only when the vehicle is driven at speeds above 16 mph (25 km/h). Also, this system may not detect as sudden drop tire pressure (fore example, aflattire while driving).
●Thelowtirepressurewarninglightdoesnot automaticallyturnoffwhenthetirepressure isadjusted. Afterallyourtiresareinflatedto therecommended pressure, the vehicle mustbedrivenatspeedsabove16mph (25km/h)toactivatetheTPMSandturnoff thelowtirepressurewarninglight.Useatire pressuregaugetocheckthetirepressure.
●TheCHECKTIRE pressurewarningappearsinthetripcomputerwhenthelowtire pressurewarninglightisilluminatedandlow tirepressureisdetected.TheCHECKTIRE pressurewarningturnsoffwhenthelowtire pressurewarninglightturnsoff.
●TheCHECKTIREpressurewarningdoes notappearifthelowtirepressurewarning lightilluminatestoindicateaTPMSmalfunction.
●Tirepressurerisesandfallsdependingon theheatcausedbythevehicle'soperation andtheoutsidetemperature.Donotreduce thetirepressureafterdrivingbecausethe tirepressurerisesafterdriving.Lowoutside temperaturecanlowerthetemperatureof theairinsidethetirewhichcancausea lowertireinflationpressure.Thismaycause thelowtirepressurewarninglighttoilluminate.Ifthewarninglightilluminates,check thetirepressureforallfourtires.
- The Tire and Loading Information label (also referred to asthe vehicle placardortire inflation pressure label) is located in the driver's door opening.
Foradditionalinformation,referto"Lowtirepressurewarninglight"inthe"Instrumentsandcontrols"sectionand"TirePressureMonitoringSystem(TPMS)"inthe"Incaseofemergency" sectionofthismanual.
WARNING
●Radiowavescouldadverselyaffect electricmedicalequipment.Thosewho useapacemakershouldcontactthe electricmedicalequipmentmanufacturerforthepossibleinfluencesbefore use.
- Ifthelowtirepressurewarninglight illuminateswhiledriving,avoidsudden steeringmaneuversorabruptbraking, reducevehiclespeed,pullofftheroad toasafelocationandstopthevehicle assoonaspossible.Drivingwithunderinflatedtiresmaypermanentlydamage thetiresandincreasethelikelihood of tirefailure.Seriousvehicledamage couldoccurandmayleadtoanaccident andcouldresultinseriouspersonalinjury.Checkthetirepressureforallfour tires.Adjustthetirepressuretothe recommendedCOLDtirepressure shownontheTireandLoadingInformationlabeltoturnthelowtirepressure warninglightOFF.Ifyouhaveaflattire, replaceitwithasparetireassoonas possible.(Foradditionalinformation, referto"Flattire"inthe"Incaseof emergency"sectionofthismanual.)
- Sincethesparetireisnotequipped with theTPMS, whenasparetireismounted orawheelisreplaced, tirepressurewill notbeindicated, theTPMSwillnot functionandthelowtirepressurewarninglightwillflashforapproximately 1 minute. Thelightwillremainonafter 1 minute. Have your tires replaced and/or TPMSsystemresetassoonas possible. It is recommended that you visitaNISSANdealerforthisservice.
- Replacingtireswiththosenotoriginally specifiedbyNISSANcouldaffectthe properoperationoftheTPMS.
- Donotinjectanytireliquidoraerosol tiresealantintothetires,asthismay causeamalfunctionofthetirepressure sensors.
CAUTION
Donotplacemetalizedfilmoranymetal parts(antenna,etc.)onthewindows.This maycausepoorreceptionofthesignals fromthetirepressuresensors,andthe TPMSwillnotfunctionproperly.
Somedevicesandtransmittersmaytemporarily interferewiththeoperationoftheTPMSand causethelowtirepressurewarninglighttoilluminate.
Someexamplesare:
●Facilitiesorelectricdevicesusingsimilar radiofrequenciesarenearthevehicle.
- Ifatransmittersettosimilarfrequenciesis beingusedinornearthevehicle.
- Ifacomputer(orsimilarequipment)ora DC/ACconverterisbeingusedinornear thevehicle.
Lowtirepressurewarninglightmayilluminatein the following cases.
- If the vehicle is equipped with a wheeland tire without TPMS.
- If the TPMShasbeenreplacedandtheID hasnotbeenregistered.
- If the wheel is not originally specified by NISSAN.
FCCNotice:
ForUSA:
ThisdevicecomplieswithPart15ofthe FCCRules.Operationissubjecttothefollowingtwoconditions:(1)Thisdevicemay
5-6 Startinganddriving
notcauseharmfulinterference,and(2)this devicemustacceptanyinterferencere- ceived,includinginterferencethatmay causeundesiredoperation.
NOTE:
Changesormodificationnotexpresslyapprovedbythepartyresponsibleforcompliancecouldvoidtheuser'sauthoritytooperatetheequipment.
ForCanada:
This device complies with Industry Canada licence-exempt RSS standard(s). Operation is subject to the following two conditions: (1) this device may not cause interference, and (2) this device must accept any interference, including interference that may cause undesired operation of the device.
AVOIDINGCOLLISIONAND ROLLOVER
WARNING
Failuretooperatethisvehicleinasafe andprudentmannermayresultinlossof controloranaccident.
Bealertanddrivedefensivelyatallltimes. Obey alltrafficregulations. Avoidexcessivespeed, highspeedcornering, orsuddensteeringmaneuvers, because the driving practices could causeyoutolosecontrol of your vehicle.
Aswithanyvehicle,lossofcontrolcould resultinacollisionwithothervehiclesor objectsorcausethevehicletorollover, particularlyifthelossofcontrolcausesthe vehicletoslidesideways.
Beattentiveatalltimes, and avoiddrivingwhen tired. Never drivewhen under the influence of alcohol or drugs (including prescription over-the-counter drugs which may cause drowsiness). Always weary our seat belt as outlined in the "Safety-Seats, seat belts and supplemental restraintsystem" section of this manual, and also instruct your passenger stodoso.
Seatbeltshelpreducetheriskofinjuryincollisionsandrollovers.Inarollovercrash,an unbeltedorimproperlybeltedpersonis significantlymorelikelytobeinjuredor killedthanapersonproperlywearinga seatbelt.
OFF-ROADRECOVERY
While driving, therightside or leftsidewheels may unintentionally leavetheroad surface. If this occurs, maintain in control of the vehicle by following the procedure below. Pleased not that this procedure is only a general guide. The vehicle must be driven as appropriate based on the condition of the vehicle, road and traffic.
-
Remaincalmanddonotoverreact.
-
Donotapplythebrakes.
-
Maintainafirmgriponthesteeringwheelwith bothhandsandtrytoholdastraightcourse.
-
When appropriate, slowly releasethe acceleratorpedaltogradually slow the vehicle.
-
If there is nothing in the way, steer the vehicle to follow the road while vehicles speed is reduced. Donot attempt to drivethe vehicle back to other roads surface until vehicle speed is reduced.
-
When it is a fast food, gradually turns the steering wheel until both tires return to the roads surface. When all tires are on the road surface, steer the vehicle to stay in the appropriate driving lane.
- If you decide that it is not safet to return the vehicle to other roads surface based on vehicle, road traffic conditions, gradually slow the vehicle to as topinasafe place off the road.
RAPIDAIRPRESSURELOSS
Rapidairpressurelossora"blow-out"canoccur ifthetireispuncturedorisdamageddueto hittingacurborpothole.Rapidairpressureloss canalsobecausedbydrivingonunder-inflated tires.
Rapidairpressurelosscanaffectthehandling andstabilityofthevehicle,especiallyathighway speeds.
Helppreventrapidairpressurelossbymaintainingthecorrectairpressureandvisuallyinspect thetiresforwearanddamage.Foradditional information,referto"Wheelsandtires"inthe "Do-it-yourself"sectionofthismanual.Ifatire rapidlylosesairpressureor"blows-out"while driving,maintaincontrolofthevehiclebyfollowingtheprocedurebelow.Plesenotethatthis procedureisonlyageneralguide.Thevehicle mustbedrivenasappropriatebasedontheconditionsofthevehicle,roadandtraffic.
WARNING
The following actions can increase the chance of losing control of the vehicle if there is as sudden loss of air pressure. Losing control of the vehicle may cause a collision and result in personal injury.
●Thevehiclegenerallymovesorpullsin thedirectionoftheflattire.
- Donotrapidlyapplythebrakes.
- Donotrapidlyreleasetheaccelerator pedal.
- Donotrapidlyturnthesteeringwheel.
- Remaincalmanddonotoverreact.
- Maintain a firm grip on the steering wheel with both hands and try to hold a straight course.
- When appropriate, slowly releasethe acceleratorpedaltogradually slow the vehicle.
- Graduallysteerthevehicletoasafelocation offtheroadandawayfromtrafficifpossible.
- Lightly apply the brake pedalt gradually stop the vehicle.
- Turnon the hazard warning flashers and contactaroadside emergency serviceto changethetire. For additional information, refer to "Changing a flattire" in the "Incase of emergency" section of this manual.
Startinganddriving5-7
IGNITIONSWITCH
DRINKINGALCOHOL/DRUGSAND DRIVING
WARNING
Neverdriveundertheinfluenceofalcohol ordrugs. Alcoholinthebloodstreamreducescoordination, delaysreactiontime and impairsjudgement. Drivingafter drinkingalcoholincreasesethelikelihood of beinginvolvedinanaccidentinjuring yourselfandothers. Additionally, if you are injuredinanaccident, alcoholcan increasetheseverityoftheinjury.
NISSANiscommittedtosafedriving. However, youmustchoosenottodriveundertheinfluence ofalcohol. Everyearthousandsofpeople are injuredorkilledinalcohol-relatedcollisions. Althoughelocallawsvaryonwhatisconsidered tobelegallyintoxicated, thefactisthatalcohol affectsallpeopledifferentlyandmostpeople underestimatetheeffectsofalcohol.
Remember, drinking and driving don't mix! That is true for drugs (over-the-counter, prescription) and illegal drugs, too. Don't drive your ability to operate your vehicle is impaired by alcohol, drugs, or some other physical condition.
WARNING
- Neverremovetheignitionkeyorplace theignitionswitchintheLOCKposition whiledriving.Thesteeringwheelwill lock.Thismaycausethedrivertolose controlofthevehicleandcouldresult in seriousvehicledamageorpersonal injury.

WSD0041
AUTOMATICTRANSMISSION
Theignitionlockisdesignedsotheignition switchcannotbeplacedintheLOCKposition and the key cannot be removed until the shift leverismovedtotheP(Park)position.
When removing the key from the ignitions switch, makes sure the shift lever is in the P(Park) position.
If the shift lever is not returned to the Park position, the ignition switch cannot be placed in the LOCK position.
If the shift lever is shifted to the Park position after the ignition switch is placed in the OFF position or when the ignition switch cannot be placed in the LOCK position, proceeds as follows to removethe key.
- MovetheshiftleverintotheP(Park)position.
- Placetheignitionswitchslightlytowardthe ONposition.
- PlacetheignitionswitchintheLOCKposition.
- Removethekey.
Theshiftleverisdesignedsoitcannotmoveout ofP(Park)andintoanyoftheothergearpositionsiftheignitionswitchisplacedintheOFF positionorifthekeyisremovedfromtheswitch.
Theshiftlevercanbemovediftheignition switchisintheONpositionandthefoot brakepedalisdepressed.
ThereisanOFFpositionbetweenthe LOCKandONpositions.TheOFFposition isindicatedbya"1"ontheignitionswitch. FormodelswithoutNISSANVehicleImmobilizerSystem:whentheignitionswitchis intheOFFposition,thesteeringwheelis notlocked.
Inorderforthesteeringwheeltobelocked, it must be turned about 1/8 of a turn clockwise from the straightup position.
Tolockthesteeringwheel,turntheignition totheLOCKposition.Removethekey.To unlockthesteeringwheel,insertthekey andturnitgentlywhilerotatingthesteeringwheelslightlyrightandleft.
IfthekeywillnotturnfromtheLOCKposition,turnthesteeringwheeltotheleftor rightwhileturningthekeytounlockthekey cylinder.
IGNITIONSWITCHPOSITIONS
LOCK: Normalparkingposition(0)
OFF:(1)
The engine can be turned off without locking the steering wheel.
ACC:(Accessories)(2)
Thispositionactivateselectricalaccessories suchastheradiowhentheengineisnotrunning.
ON: Normaloperatingposition(3)
This position turns on the ignition system and the electrical accessories.
START:(4)
Thispositionstartstheengine.Assoonasthe enginehasstarted,releasethekey.ItautomaticallyreturnstotheONposition.
NISSANVEHICLEIMMOBILIZER SYSTEM(ifsoequipped)
TheNISSANVehicleImmobilizerSystemwillnot allowtheenginetostartwithouttheuseoftheregisteredkey.
If the engine failstostart using a registered key (forexample, when interference is caused by another registered key, an automated toll road device or automatic payment device on the key ring), restart the engine using the following procedures:
- LeavetheignitionswitchintheONposition for approximately 5 seconds.
- TurntheignitionswitchtotheOFFForLOCK position, and wait approximately 10 seconds.
Startinganddriving
BEFORE STARTING THE ENGINE
STARTING THE ENGINE
3.Repeatsteps1 and2.
4. Restart the engine while holding the device (which may have caused the interference) separate from the registered key.
If thenostartconditionre-occurs,NISSANrecommendsplacingtheregisteredkeyonaseparatekeyringtoavoidinterferencefromother devices.
●Makesuretheareaaroundthevehicleis clear.
- Checkfluidlevelssuchasengineoil,coolant,brakefluid,andwindshield-washerfluid asfrequentlyaspossible,oratleastwhen-everyourefuel.
- Checkthatallwindowsandlightsareclean.
- Visuallyinspecttiresfortheirappearance andcondition.Alsochecktiresforproper inflation.
- Checkthatalldoorsareclosed.
- Positionseatandadjusthead restraints/headrests.
- Adjustinsideandoutsidemirrors.
- Fastenseatbeltsandaskallpassengersto dolikewise.
- Checktheoperationofwarninglightswhen theignitionswitchisplacedintheONposition.Foradditionalinformation,referto "Warninglights,indicatorlightsandaudible reminders"inthe"Instrumentsandcontrols" sectionofthismanual.
- Apply the parking brake.
- MovetheshiftlevertoP(Park)orN(Neutral).P(Park)isrecommended.
Theshiftlevercannotbemovedoutof P(Park)andintoanyoftheothergear positionsiftheignitionswitchis turnedtotheOFFpositionorifthekey isremovedfromtheignitionswitch.
Thestarterisdesignednottooperateif theshiftleverisinanyofthedriving positions. - Cranktheengine with your footoff the accelerator pedal by placing the ignition switch in the START position. Releasethe key when the engine starts. If the engine starts, but fails to run, repeat the above procedure.
- If the engine is very hard to start in extremely cold weather or when restarting, depress the accelerator pedal at little (approximately 1/3 to the floor) and hold it and then crank the engine. Reasesthe key and the accelerator pedal when the engine starts.
- If the engine is very hard to start because it is flooded, depress the accelerator pedal all the way to the floor and hold it. Crank the engine for 5–6 seconds. After cranking the engine, releaset the accelerator pedal. Crank the engine with your foot off the accelerator pedal by turning the ignition key to START. Reasest the key when the engine starts. If the engine starts, but fails to run, repeat the above procedure.
CAUTION
Donotoperatethestarterformorethan 15secondsatatime.Iftheenginedoes notstart,turnthekeyoffandwait10secondsbeforecrankingagain,otherwisethe startercouldbedamaged.
- Allow the engine to idle for at least 30 seconds after starting. Donotracethe engine while warming it up. Drive at moderate speed for short distance first, especially in cold weather.
Incoldweather, keep the engineer running for a minimum of 2–3 minutes before shutting it off. Starting and stopping the engine over a short period to timemay make the vehicle more difficult to start.
DRIVINGTHEVEHICLE
NOTE:
Careshouldbetakentoavoidsituations thatcanleadtopotentialbatterydischarge andpotentialno-startconditionssuchas:
-
Installationorextendeduseofelectronic accessoriesisthatconsumebatterypower whentheengineisnotrunning(phonechargers,GPS,DVDplayers,etc.)
-
Vehicle is not driven regularly and/or only drivenshort distances. In these cases, the battery may need to be charged to maintain battery health.
ENGINEPROTECTIONMODE
Theenginehasanengineprotectionmodeto reducethechanceofdamageifthecoolanttem- peraturebecomestohigh(forexample,when climbingsteepgradesinhightemperaturewith heavyloads,suchaswhentowingatraler). Whentheenginetemperaturereachesacertain level:
●Theenginecoolanttemperaturegaugewill movetowardtheHposition.
●Enginepowermaybereduced.
●Theairconditioningcoolingfunctionmaybe automaticallyturnedofforashorttime(the blowerwillcontinuetooperate).
Enginepowerand, undersomeconditions, vehiclespeedwilldecrease. Vehiclespeedcanbe controlledwiththeacceleratorpedal, but the vehiclemaynotaccelerateatthedesiredspeed. The transmissionwilldownshiftorupshiftasit reaches prescribed shift points. You can also shiftmanually.
Asdrivingconditionschangeandenginecoolant temperatureisreduced,vehiclespeedcanbe increasedusingtheacceleratorpedal,andair conditioningcoolingfunctionwillautomatically beturnedbackon.
Amalfunctionmayhaveoccurredif:
●Theenginecoolanttemperatureisnotreduced,
●Theairconditioningcoolingfunctiondoes notturnbackon,or
●Theengineoilpressurelowwarninglight illuminatesortheenginecoolanttemperaturegaugeindicatesanoverheatingcondition.
Movethevehicleofftheroadinasafearea andallowtheenginetocool.Ifthecondition isstillpresentaftercheckingtheoiland coolant,donotcontinuetodrive.ItisrecommendedthatyoucontactaNISSANdealer.
TheMalfunctionIndicatorLight(MIL)may also comeon.Ifonlyitremainson,youdonotneedto haveyourvehicletowed,buthaveitinspected soon.ItisrecommendedthatyouvisitaNISSAN dealerforthisservice.Foradditionalinformation, refer to"MalfunctionIndicatorLight(MIL)"inthe "Instrumentsandcontrols"sectionofthis manual.
WARNING
Overheatingcanresultinreducedengine powerandvehiclespeed.Thereduced speedmaybelowerthanothertraffic, whichcouldincreasethechanceofacollision.Beespeciallycarefulwhendriving. Ifthevehiclecannotmaintainasafedrivingspeed,pulltothesideoftheroadina safearea.Allowtheenginetocooland returntonormaloperation.Foradditional information,referto"Ifyourvehicleoverheats"inthe"Incaseofemergency"sectionofthismanual.
CAUTION
Runningtheenginewiththeengineoil pressurewarninglightoncouldcauseseriousdamagetotheenginealmostimmediately.Suchdamageisnotcoveredby warranty.Turnofftheengineassoonasit issafetodoso.
AUTOMATICTRANSMISSION
WARNING
- Donotdepresstheacceleratorpedal whileshiftingfromP(Park)orN(Neutral)toR(Reverse)orD(Drive).Always depressthebrakepedaluntilshiftingis completed.Failureretodosocouldcause you to lose control and have an accident.
- Coldengineidlespeedishigh, souse cautionwhenshiftingintoaforwardor reversegearbeforetheenginehas warmedup.
- Donotdownshiftabruptlyonslippery roads. This may cause all of control.
- NevershifttoeithertheP(Park)orR (Reverse)positionwhilethevehicleis movingforwardand P(Park)or D (Drive)positionwhilethevehicleisreversing. Thiscouldcauseanaccidentor damagethetransmission.
- Exceptinanemergency, donotshift to the N(Neutral) positionwhile driving. Coasting with the transmission in the N (Neutral) position may cause serious damage to the transmission.
CAUTION
- To avoid possible damage to your vehicle, when stopping the vehicle on an uphill grade, donothold the vehicle by depressing the accelerator pedal. The footbrakes should be used for this purpose.
The automatic transmission in your vehicle is electronically controlled to produce maximum power and smooth operation.
Therecommendedoperatingproceduresforth this transmissionareshownonthefollowingpages. Followtheseproceduresformaximumvehicle performanceanddrivingenjoyment.
Startingthevehicle
- After starting the engine, fully depress the footbrakepedal before removing the shift lever out of the P(Park) position.
- Keep the foot brake pedal depressed and movetheshift lever into a driving gear.
- Releasethefootbrake, thengraduallystart thevehicleinmotion.
The automatic transmission is designed so the footbrakepedal MUST bedepressed beofreshifting from P(Park) to any drive position while the ignition switch is in the ON position.
Theshiftlevercannotbemovedoutofthe P(Park)positionandintoanyoftheother gearpositionsiftheignitionswitchis placedintheLOCKorOFFposition.
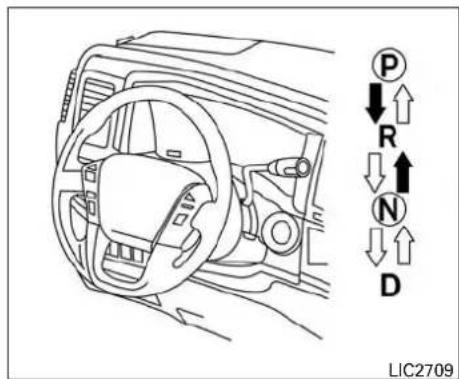
Tomovetheshiftlever:

:Shiftwhiledepressingthebrakepedal
:Shiftwithoutdepressingbrakepedal
Shifting
Afterstartingtheengine,fullydepressthebrake pedalandmovetheshiftleveroutoftheP(Park) position.
WARNING
Apply the parking brake if the shift lever is in any position while the engine is not running. Failure to dos could cause the vehicle to move unexpectedly or roll away and result in serious personal injury or property damage.
If theignitionswitchisplacedintheOFFForACC position for any reason while the vehicle is in N (Neutral), or any D(Drive) position, the ignition switch cannot be turned to the LOCK position. MovetheshiftlevertotheP(Park) position, then theignitionswitch can be turned to LOCK.
P(Park)
CAUTION
Topreventtransmissiondamage, usethe P(Park)positiononlywhenthevehicleis completelystopped.
UsetheP(Park)shiftleverpositionwhenthe vehicleisparkedorwhenstartingtheengine. Makesurethevehicleiscompletelystopped.
Thebrakepedalshouldbedepressedto movetheshiftleverfromN(Neutral)orany drivepositiontoP(Park).
Apply the parking brake. When parking on a hill, apply the parking brake first, then movetheshift lever into the P(Park) position.
R(Reverse)
CAUTION
Topreventtransmissiondamage, usethe R(Reverse)positiononlywhenthevehicle iscompletelystopped.
UsetheR(Reverse)positiontobackup.Make surethevehicleiscompletelystoppedbefore selectingtheR(Reverse)position.Thebrake pedalmustbedepressedtomovetheshift leverfromP(Park),N(Neutral)oranydrive positiontoR(Reverse).
N(Neutral)
Neitherforwardnorreversegearisengaged. The enginecanbestartedinthisposition. You may shifttoN(Neutral)andrestartastalledengine whilethevehicleismoving.
D(Drive)
Use this position for all normal forward driving.

Manualshiftmode
Whenthemanualshiftmodebutton
A
is
pressedwhiledriving, the transmissionentersthe manualshiftmode.Shiftrangescanbeselected manually.
Toleavemanualmodefromanypositionpress themanualshiftmodebutton ① again.Manual shiftmodeisalsocanceledwhenthevehicleis restarted.
Inthemanualshiftmode, the shift range is displayed on the position indicator in the meter. After pressing the manual shift mode button, the position indicator first displays M4 (Fourth) (5-speed automatic transmission) or M1 (First) through M6
5-14 Startinganddriving
(Sixth), depending on the current gear position as indicated in the following table (7-speed automatic transmission):
| Currentgearposition: | Positionindicatorfirstdisplays: |
| FirstM1 | |
| SecondM2 | |
| ThirdM3 | |
| FourthM4 | |
| FifthM5 | |
| SixthM5 | |
| SeventhM6 |
Shiftrangesupordownonebyoneasfollows:
M1←→M2←→M3←→
M4←→M5←→M6*←→M7*
*Ifsoequipped
M7(Seventh)(ifsoequipped)
Use this position for all normal forward driving at highways speeds.
M1 M2 M3 M4 M5 M6 M7
M7willbedisplayedonthepositionindicatorin themeter.
M6(Sixth)(Ifsoequipped)
Use this position for all normal forward driving at highways speeds.
M1 M2 M3 M4 M5 M6
M6willbedisplayedonthepositionindicatorin themeter
M5(Fifth)
Allowsthevehicletoshifttothehighestgear (5-speedautomatictransmission).
Shiftrangesupordownonebyoneasfollows:
M1 M2 M3 M4 M5
M5willbedisplayedonthepositionindicatorin themeter.
M4(Fourth)
Fordrivingupordownlongslopeswhereengine brakingwouldbeadvantageous.
Shiftrangesupordownonebyoneasfollows:
M1←→M2←→M3←→M4
M4willbedisplayedonthepositionindicatorin themeter.
M3(Third)
Useforhillclimbingorenginebrakingondownhill grades.
Shiftrangesupordownonebyoneasfollows:
M1←→M2←→M3
M3willbedisplayedonthepositionindicatorin themeter.
M2(Second)
Useforhillclimbingorenginebrakingondownhill grades.
Shiftrangesupordownonebyoneasfollows:
M1←→M2
M2willbedisplayedonthepositionindicatorin themeter.
M1(First)
Usethispositionwhenclimbingsteephillsslowly ordrivingslowlythroughdeepsnow,sandor mud, or for maximum engine braking on steep downhillgrades.
M1 will bed displayed on the position indicator on themeter.
- Remember not to drive at high speeds for extended period soft time in lower than M4 range. This reduces fueleconomy.
Whenshiftingup
Pushtheshiftswitchtothe+(up)side.(Shiftsto higherrange.)
Startinganddriving
Whenshiftingdown
Pushtheshiftswitchtothe-(down)side.(Shifts tolowerrange.)
- Thetransmissionwillautomaticallydownshiftthegears.(Forexample,ifyouselectthe3rdrange,thetransmissionwillshiftdownbetweenthe3rdand1stgears.)
- Pushingtheshiftswitchrapidlywillshiftthe rangesinsuccession.
Whencancelingthemanualshiftmode
Pressandholdthe+(UP)buttontoreturnthe transmissiontothenormaldrivingmode.
- In the manual shift mode, the transmission may not shift to these selected gear immediately because of vehicles speed. The transmission will up on shift when vehicles speed match the programmed transmissions shift points. This helps maintain driving performance and reduce the chance of vehicle damage or loss of control.
- Inthemanualshiftmode, the transmission will not up shift to a higher gear than is manually selected. When the vehicles speed decreases, the transmission automatically shifts down and shift to 1st gear before the vehicle comestoastop.
Shiftlockrelease
If the battery is discharged, the shift lever may not be moved from the P(Park) position even with the brake pedal depressed.
Tomovetheshiftlever,releasetheshiftlock.The shiftlevercanbemovedtoN(Neutral).However, formodelswithouttheNISSANVehicleImmobilizerSystem,thesteeringwheelwillbelocked unlesstheignitionswitchisturnedtotheON position.Thisallowsthevehicletobemovedif thebatteryisdischarged.
PARKINGBRAKE
IftheshiftlevercannotbemovedoutofP(Park), havetheautomatictransmissionsystemchecked as soonaspossible.Itisrecommendedthatyou visitaNISSANdealerforthisservice.
WARNING
If the shift lever cannot be removed from the P(Park) position while the engine is running and the brake pedal is depressed, the stoplights may not work. Malfunctioning stoplights could cause an accident in injury yourself and others.
Acceleratordownshift —inD(Drive)position—
Forpassingorhillclimbing, depress the accelerator pedal to the floor. This shift sthetransmissiondown into a lower gear, depending on the vehiclespeed.
Fail-safe
Whenthefail-safeoperationoccurs,pleasenote thatthetransmissionwillbelockedinanyofthe forwardgearsaccordingtothecondition.
Ifthevehicleisdrivenunderextremeconditions,suchasexcessivewheelspinning andsubsequenthardbraking,thefail-safe systemmaybeactivated.Thiswilloccur evenifallelectricalcircuitsarefunctioning properly.Inthiscase,turntheignition switchOFFandwaitfor3seconds.Then turntheignitionswitchbacktotheON position.Thevehicleshouldreturntoits normaloperatingcondition.Ifitdoesnot returntoitsnormaloperatingcondition,havethetransmissioncheckedandre-paired,ifnecessary.Itisrecommendedthat youvisitaNISSANdealerforthisservice.
WARNING
- Besuretheparkingbrakeisfullyreleasedbeforedriving.Failureretodoso cancausebrakefailureandleadtoan accident.
- Donotreleasetheparkingbrakefrom outsidethevehicle.
- Donotusetheshiftleverinplaceofthe parkingbrake.Whenparking,besure theparkingbrakeisfullyengaged.
- To help avoid risk of injury or death through unintended operation of the vehicle and/or it systems, don't leave children, people who require the assistance of others or pets unattended in your vehicle. Additionally, the temperature inside a closed vehicle on a warm day can quickly become high enough to cause significant risk of injury or death to people and pets.
CRUISECONTROL(ifsoequipped)
Toengage: Firmlydepresstheparkingbrake.
Torelease:
- Firmly apply the footbrake.
2.MovetheshiftlevertotheP(Park)position. - Firmly depress the parking brake pedalandit will release.
- Before driving, besure the brakewarning light goes out.
![graph TD A["CANCEL"] --> B["ACCEL/RES"] B --> C["COAST/SET"] C --> D["ON/OFF"] style A fill:#f9f,stroke:#333 style B fill:#ccf,stroke:#333 style C fill:#cfc,stroke:#333 style D fill:#fcc,stroke:#333](/content/2026/05/789802/images/7f97b501da15f5296591f40a9cb33623763853e5cfc9f7968dd7a2260b043003.jpg)
PRECAUTIONSONCRUISE CONTROL
1.ACCEL/RESswitch
2.COAST/SETswitch
3.CANCELswitch
4.ON/OFFswitch
- If the cruise controlsystem malfunctions, it cancels automatically. The SET indicator light illuminates in the trip computer then blink stow arn the driver. For additional information, referto "Cruiseset indicator light" in the "Instruments and controls" section of this manual.
- If the SET indicator light blinks, push the cruise control ON/OFF switch off and have the system checked. It is recommended that you visit a NISSAN dealer forth this service.
●The SET indicator light may blink when the cruise control ON/OFF switch is pushed on while pushing the ACCEL/RES, COAST/SET, or CANCEL switch. Top properly set the cruise control system, use the following procedures.
WARNING
Donotusethecruisecontrolwhendriving underthefollowingconditions:
- Whenitisnotpossibletokeepthe vehicleatasetspeed.
- Inheavytrafficorintrafficthatvariesin speed.
●Onwindingorhillyroads.
●Onslipperyroads(rain,snow,ice,etc.).
●Inverywindyareas.
Doingsocouldcausealossofvehicle controlandresultinanaccident.
CRUISECONTROLOPERATIONS
Thecruisecontrolallowsdrivingataspeedbetween25-89mph(40-144km/h)without keepingyourfootontheacceleratorpedal.
Toturnonthecruisecontrol, push the ON/OFFswitchon. The CRUISE indicator light in the trip computer will illuminate.
Tosetcruisingspeed,acceleratethevehicleto thedesiredspeed,pushtheCOAST/SETswitch andreleaseit.TheSETindicatorlightinthetrip computerwillilluminate.Takeyourfootoffthe acceleratorpedal.Yourvehiclemaintainstheset speed.
- Topassanothervehicle, depress the accelerator pedal. When you are a set of the vehicle return to the previously sets speed.
●Thevehiclemaynotmaintainthesetspeed whengoingupordownsteephills.Ifthis happens,drivewithoutthecruisecontrol.
Tocancelthepresetspeed, useoneofthe followingthreemethods:
- PushtheCANCELswitch;theSETindicator lightinthetripcomputergoesout.
- Tapthebrakepedal; the SETindicatorlight goesout.
- PushtheON/OFFswitchoff.Boththe CRUISEindicatorlightandSETindicator lightinthetripcomputergout.
Thecruisecontrolisautomatically canceled and the SETlightinthetripcomputergoesoutif:
- Youdepressthebrakepedalwhilepushing theACCEL/RESorSET/COASTswitch. Thepresetspeedisdeletedfrommemory.
●The vehicleslowsdownmorethan8mph (13km/h)belowthesetspeed. - YoumovetheshiftlevertoN(Neutral).
Toresetatafastercruisingspeed, use one of the following three methods:
- Depresstheacceleratorpedal. When the vehicleattainsthedesiredspeed, pushand releasetheCOAST/SETswitch.
- Pushandholdthe ACCEL/RES switch. Whenthevehicleattainsthespeedyoudesire,releasetheswitch.
- PushandreleasetheACCEL/RESswitch. Eachtimeyoudothis,thesetspeedincreasesbyabout1mph(1.6km/h).
Toresetataslowercruisingspeed,useone ofthefollowingthreemethods:
●Lightlytapthebrakepedal. Whenthevehicleattainsthedesiredspeed, push the COAST/SETswitchandreleaseit.
- PushandholdtheCOAST/SETswitch.Releasetheswitchwhenthevehicleslowsto thedesiredspeed.
- PushandreleasetheCOAST/SETswitch. Eachtimeyoudothis,thesetspeeddecreasesbyabout1mph(1.6km/h).
Toresumethepresetspeed, pushandre-lease the ACCEL/RES switch. The vehiclere-turnstothelastsetcruisingspeed when the vehiclespeed is over 25 mph (40 km/h).
BREAK-INSCHEDULE
CAUTION
During the first 1,200 miles (2,000 km), follow the recommendation to obtain maximum engine performance and ensure the futurer reliability and economy of your new vehicle. Failure to follow the recommendations may result in shortened engine life and reduced engine performance.
- Avoiddrivingforlongperiodsatconstant speed, eitherfastorslow, anddonotrunthe engineover4,000RPM.
- Donotaccelerateatfullthrottleinanygear.
- Avoidquickstarts.
●Avoidhardbrakingasmuchaspossible. - Donottowatrailerforthefirst500miles (805kilometers).Youreengine,axleorother partscouldbedamaged.
FUELEFFICIENTDRIVINGTIPS
Followtheseeasy-to-useFuelEfficientDriving Tipstohelpyouachievethemostfueleconomy fromyourvehicle.
1. Use Smooth Accelerator and Brake Pedal Application
- Avoidrapidstartsandstops.
- Usesmooth, gentleaccelerator and brakeapplicationwheneverpossible.
- Maintainconstantspeedwhilecommut-ingandcoastwheneverpossible.
2. MaintainConstantSpeed
- Lookaheadtotryandanticipateandminimizestops.
- Synchronizingyourspeedwithtraffic lightsallowsyoutoreduceyournumber ofstops.
- Maintainingasteadyspeedcanminimize redlight stopsand improvefuel efficiency.
3. Use Air Conditioning (A/C) at Higher Vehicle Speeds
- Below40mph(64km/h), it is more efficient to open window stocool the vehicle duetoreduced engine load.
- Above 40 mph (64 km/h), it is more efficienttouseA/Ctocoolthevehicledueto increasedaerodynamicdrag.
●Recirculatingthe coolairin thecabin whentheA/Cisonreducescoolingload.
4. DriveatEconomicalSpeedsandDistances
- Observing the speed limit and not exceeding60mph(97km/h)(wherelegally allowed) can improve fuel efficiency due to reduced aerodynamic drag.
- Maintaining as safe following distance behind other vehicles reduces unnecessary braking.
- Safely monitoring traffic to anticipate changesinspeedpermitsreducedbrakingandsmoothaccelerationchanges.
- Selectagearrangesuitabletoroadconditions.
5. Use Cruise Control
- Usingcruise controlduringhighwaydrivinghelpsmaintainasteadyspeed.
●Cruisecontrolisparticularlyeffectivein providingfuelsavingswhendrivingonflat terrains.
INCREASINGFUELECONOMY
6. PlanfortheShortestRoute
- Utilizeamapornavigationsystemtodeterminethebestroutetosavetime.
7. Avoidldling
- Shuttingoffyourenginewhensafefor stopsexceeding30–60secondssaves fuelandreducesemissions.
8. BuyanAutomatedPassforTollRoads
●Automatedpassespermitdriverstouse speciallanestomaintaincruisingspeed throughthetollandavoidstoppingand starting.
9. WinterWarmUp
- Limitidlingtimetominimizeimpacttofuel economy.
●Vehiclestypicallyneednomorethan 30secondsofidlingatstart-uptoeffectivelycirculatetheengineoilbeforedriving. - Yourvehiclewillreachitsidealoperating temperaturemorequicklywhiledriving versusidling.
10. Keeping your Vehicle Cool
●Parkyourvehicleinacoveredparking areaorintheshadewheneverpossible.
- Whenenteringahotvehicle, opening the windowswillhelptoreducetheinside temperaturefaster, resultinginreduced demandonyourA/Csystem.
- Keepyourenginetunedup.
- Followtherecommended scheduled maintenance.
- Keepthetiresinflatedtothecorrectpressure.Lowtirepressureincreasestirewear andlowersfueleconomy.
- Keepthefrontwheelsincorrectalignment. Improperalignmentincreasestirewearand lowersfueleconomy.
- Usetherecommendedviscosityengineoil. Foradditionalinformation,referto"Engine oilandoilfilterrecommendations"inthe "Technicalandconsumerinformation"sectionofthismanual.
PARKING/PARKINGONHILLS
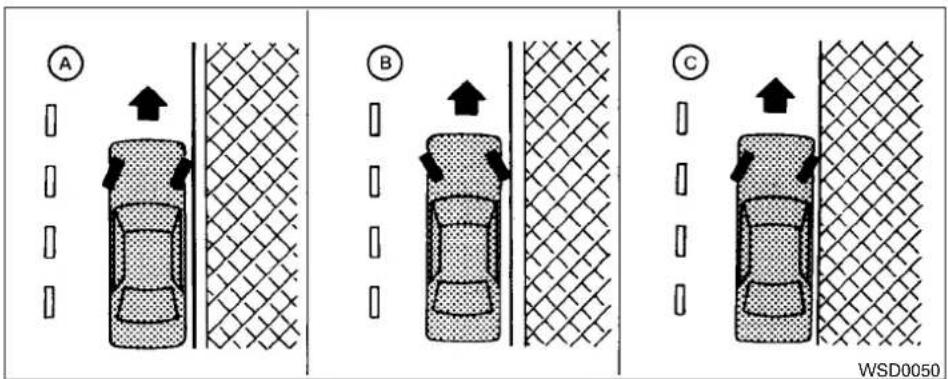
WARNING
- Donotstoporparkthevehicleover flammablematerialssuchasdrygrass, wastepaperorrags. They may ignite and cause a fire.
- Safeparkingproceduresrequirethat boththeparkingbrakebesetandthe transmissionplacedintoP(Park).Failuretodosocouldcausethevehicletomoveunexpectedlyorrollawayandresultinanaccident.Makesuretheshift leverhasbeenpushedasfarforwardas itcangoandcannotbemovedwithout depressingthefootbrakepedal.
●Neverleavetheengine runningwhile the vehicle is unattended.
- To help avoid risk of injury or death through unintended operation of the vehicle and/or it systems, don't leave children, people who require the assistance of others or pets unattended in your vehicle. Additionally, the temperature inside a closed vehicle on a warm day can quickly become high enough to cause significant risk of injury or death to people and pets.
5-22 Startinganddriving
- Firmly apply the parking brake.
2.MovetheshiftlevertotheP(Park)position. - To help prevent the vehicle from rolling into traffic when parked on an incline, it is good practicetoturn the wheels as illustrated.
●HEADEDDOWNHILLWITHCURB
A:
Turnthewheelsintothecurbandmovethe vehicleforwarduntilthecurbsidewheel gentlytouchesthecurb.
●HEADEDUPHILLWITHCURB
B:
Turnthewheelsawayfromthecurband movethevehiclebackuntilthecurbside wheelgentlytouchesthecurb.
●HEADEDUPHILLORDOWNHILL,NO CURB ©:
Turnthewheelstowardthesideoftheroad sothevehiclewillmoveawayfromthecenteroftheroadifitmoves.
- PlacetheignitionswitchintheLOCKposition.
POWERSTEERING
The power assisted steering uses a hydraulic pump, driven by the engine, to assist steering.
Iftheenginestopsorthedrivebeltbreaks,you willstillhavecontrolofthevehicle.However, muchgreatersteeringeffortisneeded,especially insharpturnsandatlowspeeds.
WARNING
If the engine is not running oristurned off while driving, the power assist for the steering will not work. Steering will be hard to operate.
BRAKESYSTEM
Thebrakesystemhastwoseparatehydraulic circuits. Ifonecircuitmalfunctions, you will still have braking attwowheels.
BRAKEPRECAUTIONS
Usingthebrakes
Avoidrestingyourfootonthebrakepedalwhile driving. Thiswilloverheatthebrakes, wearoutthe brakepadsfaster, and reducegasmileage.
To help reduce brakewear and to prevent the brakes from overheating, reduces speed and downshift to a lower gear before going down a slope or long grade. Overheated brakes may reduce braking performance and could result in loss of vehicle control.
WARNING
- While driving on aslippery surface, be careful when braking, accelerating or downshifting. Abrupt braking or accelerating could cause the wheelstoskid and result in an accident.
- If the engine is not running oristurned off while driving, the power assist for the brakes will not work. Braking will be harder.
Wetbrakes
Whenthevehicleiswashedordriventhrough water,thebrakesmaygetwet.Asaresult,your brakingdistancewillbelongerandthevehicle maypulltoonesideduringbraking.
Todrythebrakes, drivethevehicleatasafe speedwhilelightlypressingthebrakepedalto heatupthebrakes. Do this until the brakes return tonormal. Avoid driving the vehicle at high speeds until the brakes function correctly.
Parkingbrakebreak-in
Breakintheparkingbrakeshoeswheneverthe stoppingeffectoftheparkingbrakeisweakened orwhenevertheparkingbrakeshoesand/or drums/rotorsarereplaced,inordertoassurethe bestbrakingperformance.
Thisprocedureisdescribedinthevehicleservice manual.Itisrecommended that youvisita NISSANdealerforthisservice.
ANTI-LOCKBRAKINGSYSTEM (ABS)
WARNING
- TheABSisasophisticateddevice, but it cannot prevent accidents resulting from careless or dangerous driving techniques. It can help maintain vehicle control during braking on slippery surfaces. Remember that stopping distances on slippery surfaces will be longer than on normals surfaces even with ABS. Stopping distances may also be longer on rough, gravelors now covered roads, or if you are using tire chains. Always maintain as a safe distance from the vehicle in front of you. Ultimately, the driver is responsible for safety.
- Tiretypeandconditionmayalsoaffect brakingeffectiveness.
-Whenreplacingtires,installthe specifiedsizeoftiresonallfour wheels.
-Wheninstallingasparetire,make surethatitisthepropersizeandtype asspecifiedontheTireandLoading Informationlabel.Foradditionalinformation,referto"TireandLoading Informationlabel"inthe"Technical andconsumerinformation"section ofthismanual.
-Foradditionalinformation,referto "Wheelsandtires"inthe"Do-it-yourself"sectionofthismanual.
TheABScontrolsthebrakessothewheelsdo notlockduringhardbrakingorwhenbrakingon slipperysurfaces.Thesystemdetectstherotationspeedateachwheelandvariesthebrake fluidpressuretopreventeachwheelfromlocking andsliding.Bypreventingeachwheelfromlocking,thesystemhelpsthedrivermaintainsteering controlandhelpstominimizeswervingandspinningonslipperysurfaces.
Usingthesystem
Depressthebrakepedalandholditdown. Depressthebrakepedalwithfirmsteadypressure, butdonotpump thebrakes. TheABS willoperatetopreventthe wheelsfromlockingup. Steer thevehicletoavoidobstacles.
WARNING
Donotpumpthebrakepedal.Doingso may result in increased stopping distances.
Self-testfeature
TheABSincludeselectronicsensors,electric pumps,hydraulicsolenoidsandacomputer. The computerhasabuilt-indiagnosticfeaturethat tests the system each time you start the engine andmovethevehicleatalowspeedinforwardor reverse. Whentheself-testoccurs,youmayhear a"clunk" noiseand/orfeelapulsationinthebrake pedal. Thisisnormalanddoesnotindicate a malfunction. If thecomputersensesamalfunction, it switches the ABS off and illuminates the ABS warninglightonthe instrumentpanel. The brakesystemthenoperatesnormally,butwithout anti-lockassistance.
If the ABS warning light illuminates during the self-test or while driving, have the vehicle checked. It is recommended that you visit a NISSAN dealer for this service.
Normaloperation
The ABS operates at speeds above 3 - 6 mph (5 - 10 km/h). The speed varies according to road conditions.
ACTIVEBRAKELIMITEDSLIP(ABLS) SYSTEM
WhentheABSsensesthatoneormorewheels areclosetolockingup,theactuatorrapidlyappliesandreleaseshydraulicpressure.Thisaction issimilartopumpingthebrakesveryquickly.You mayfeelapulsationinthebrakepedalandheara noisefromunderthehoodorfeelavibrationfrom theactuatorwhenitisoperating.Thisisnormal andindicatesthattheABSisoperatingproperly. However,thepulsationmayindicatethatroad conditionsarehazardousandextracareisrequiredwhiledriving.
BRAKEASSIST
Whentheforceappliedtothebrakepedalexceedsacertainlevel,thebrakeassistisactivated generatinggreaterbrakingforcethanaconventionalbrakeboosterevenwithlightpedalforce.
WARNING
Thebrakeassistisonlyanaidtoassist brakingoperationandisnotacollision warningoravoidancedevice.Itisthedriver'sresponsibilitytostayalert,drive safelyandbeincontrolofthevehicleatall times.
●ABLSsystemusesautomaticbrakingto transferpowerfromaslippingdrivewheelto thewheelonthesameaxlewithmoretraction.TheABLSsystemappliesbrakingto theslippingwheel,whichhelpsredirect powertotheotherwheel.
●TheABLSsystemisalwayson.Insome conditions,thesystemmayautomatically turntheABLSsystemoff.Ifthesystemis automaticallyturnedoff,normalbrakefunctionwillcontinue.ABLSwillfunctioneven whentheVDCsystemisturnedoff.
●TheABLSdoesnotoperateifbothwheels onadriveaxleareslipping.
WARNING
- TheABLSsystem helps provide increasedtraction, but will not prevent accidents due to abrupt steering operation or by care less driving or dangerous driving practices. Reduce vehicles speed and bees especially careful when driving and cornering on slippery surfaces. Always drive carefully.
- Donotmodifythevehicle'ssuspension. Ifsuspensionpartssuchasshockabsorbers,struts,springs,stabilizerbars,bushingsandwheelsarenotNISSAN approvedforyourvehicleorareextremelydeteriorated,theABLSsystem maynotoperateproperly.Thiscould adverselyaffectvehiclehandlingperformance,andtheslipindicatorlight mayilluminate.
- Ifbrakerelatedpartssuchasbrake pads, rotors and calipers are not NISSANrecommendedareextremely deteriorated,theABLSsystemmaynot operateproperlyandtheslipindicator lightmayilluminate.
- IfwheelsortiresotherthantheNISSAN recommendedonesareused,theABLS systemmaynotoperateproperly and theslipindicatorlightmayilluminate.
VEHICLEDYNAMICCONTROL(VDC) SYSTEM
The VDC system uses various sensorstomonitor driver inputs and vehicle motion. Under certain driving conditions, the VDC system helps to perform the following functions:
- Controlsbrakepressuretoreducewheel slipononeslippingdrivewheelsopoweris transferredtoanonslippingdrivewheelon thesameaxle.
- Controlsbrakepressureandengineoutput toreducedrivewheelslipbasedonvehicle speed(tractioncontrolfunction).
- Controlsbrakepressureatindividualwheels andengineoutputtohelpthedrivermaintain controlofthevehicleinthefollowingconditions:
-understeer(vehicletendstonotfollow thesteeredpathdespiteincreasedsteeringinput)
-oversteer(vehicletendstospindueto certainroadordrivingconditions)
The VDC system can help the driver to maintain control of the vehicle, but it cannot prevent loss of vehicle control in all drivings situations.
WhentheVDCsystemoperates,the indicatorintheinstrumentpanelflashestonotethe following:
- Theroadmaybelipperyorthesystemmay determinesomeactionisrequiredtohelp keepthevehicleonthesteeredpath.
- Youmayfeelapulsationinthebrakepedal andhearanoiseorvibrationfromunderthe hood. Thisisnormalandindicatesthatthe VDCsystemisworkingproperly.
- Adjustyourspeedanddrivingtotheroad conditions.
For additional information, refer to "Slipindicator light" and "VehicleDynamicControl(VDC)OFF indicatorlight" in the "Instrumentsandcontrols" section of this manual.
Ifamalfunctionoccursinthesystem,the indicatorlightcomesontheinstrumentpanel. TheVDCsystemautomaticallyturnsoffwhenthe indicatorlightison.
The VDCOFF switch is used to turn off the VDC system. The indicator illuminates to indicate the VDC system is off.
WhentheVDCswitchisusedtoturnoffthe system,theVDCsystemstilloperatestoprevent onedrivewheelfromslippingbytransferring powertoanonslippingdrivewheel.The
indicatorflashesifthisoccurs. AllotherVDC functionsareoffandthe indicatorwillnot flash.
TheVDCsystemisautomaticallyresettoON whentheignitionswitchisplacedintheOFF positionthenbacktotheONposition.
Thecomputerhasabuiltindiagnosticfeature thatteststhesystemeachtimeyoustartthe engineandmovethevehicleforwardorinreverse ataslowspeed.Whentheself-testoccurs,you mayhearaclocknoiseand/orfeelapulsationin thebrakepedal.Thisisnormalandisnotan indicationofamalfunction.
WARNING
- The VDC system is designed to help the driver maintain stability but does not prevent accidents due to abrupt steering operation at high speeds or by care less or dangerous driving techniques. Reduce vehicles speed and bees especially careful when driving and cornering on slippery surfaces and always drive carefully.
5-26 Startinganddriving
- Donotmodifythevehicle'ssuspension. If suspension part such as shock absorbers, struts, springs, stabilizer bars, bushings and wheels are not NISSAN recommended for your vehicle or are extremely deteriorated, the VDC system may not operate properly. This could adversely affect vehicle handling performance, and the indicator may flash the indicator light may illuminate.
-
Ifbrakerelatedpartssuchasbrake pads, rotorsandcalipersarenot NISSANrecommendedorareextremely deteriorated, the VDCsystemmay not operate properly and both the and indicatorlightmay illuminate.
-Ifenginecontrolrelatedpartsarenot NISSANrecommendedorareextremely deteriorated,boththe and the indicatorlightmayilluminate. -
When driving on extremely inclined surfaces such as higher banked corners, the VDC system may not operate properly and the indicator may flash or the indicator light may illuminate. Donot drive on these types of roads.
- When driving an unstable surface such as a turntable, ferry, elevator ramp, the indicator may flash or the indicator light may illuminate. This is not a malfunction. Restart the engine after driving onto a stable surface.
- If wheels sortires other than the NISSAN recommended ones are used, the VDC system may not operate properly and the indicator may flash or the indicator light may illuminate.
●TheVDCsystem isnota substitute for wintertiresortirechainsonasnow coveredroad.
BRAKEFORCEDISTRIBUTION
During braking while driving through turns, the system optimizes the distribution of forcetoeach of the four wheels depending on the radius of the turn.
WARNING
- TheVDCsystemisdesignedtohelpthe drivermaintainstabilitybutdoesnot prevent accidents due to abrupt steeringoperationathighspeedsorbycarelessordangerousdrivingtechniques. Reducevehiclespeedandbeespecially carefulwhendrivingandcorneringon slippery surfaces and always drive carefully.
- Donotmodifythevehicle'ssuspension. If suspension part such as shock absorbers, struts, springs, stabilizer bars, bushings and wheels are not NISSAN recommended for your vehicle or are extremely deteriorated, the VDC system may not operate properly. This could adversely affect vehicle handling performance, and the indicator may flash the indicator light may illuminate.
- Ifbrakerelatedpartssuchasbrake pads, rotorsandcalipersarenot NISSANrecommendedorarextremely deteriorated, the VDCsystemmay not operateproperly and both the and indicatorlightmay illuminate.
REARSONARSYSTEM(RSS)(ifso equipped)
-Ifenginecontrolrelatedpartsarenot NISSANrecommendedorareextremely deteriorated,boththe and the indicatorlightmayilluminate.
- When driving on extremely inclined surfaces such as higher banked corners, the VDC system may not operate properly and the indicator may flash or the indicator light may illuminate. Donot drive on these types of roads.
- Whendrivingonanunstablesurface suchasaturntable,ferry,elevatoror ramp,the indicatormayflashor the indicatorlightmayilluminate. Thisisnotamalfunction.Restartthe engineafterdrivingontoastable surface.
- If wheels sortires other than the NISSAN recommended ones are used, the VDC system may not operate properly and the indicator may flash or the indicator light may illuminate.
- TheVDCsystemisnotasubstitutefor wintertiresortirechainsonasnow coveredroad.

LSD0088
WARNING
- Alwaysturnandlookbackbeforebackingup.TheRSSisnotasubstituteforproperbackingprocedures.
- Readandunderstandthelimitations of therearsonarsystemascontained in thissection. Inclementweathermay affect the function of the RSS; this may include reduced performance or false activation.
- This system is not designed to prevent contact with small or more moving objects.
- Thesystemisdesignedasanaidtothe driverindetectinglargestationaryobjectstohelpavoiddamagingthevehicle. Thesystemwillnotdetectsmall objectsbelowthebumper, and may not detectobjectsclosetothebumperor ontheground.
- If your vehicles sustain damage to the rear bumper fascia, leaving it mis-alignedorbent, the sensing zone may be altered causing inaccurate measurement of obstacles or false alarms.
TheRSSsoundsatonetowaranthedriverof obstaclesneartherearbumperwhentheshift leverisinR(Reverse).Thesystemmaynot detectobjectsatspeedsabove3mph(5km/h) andmaynotdetectcertainangularormoving objects.
TheRSSdetectsobstaclesupto5.9feet(1.8m) fromtherearbumperwithadecreasedcoverage areaattheoutercornersofthebumper,(referto theillustrationforapproximatezonecoverage areas).Asyoumoveclosertotheobstacle,the rateofthetoneincreases.Whentheobstacleis lessthan10inches(25.0cm)away,thetonewill soundcontinuously.IftheRSSdetectsastationaryorrecedingobjectfurtherthan10inches (25.0cm)fromthesideofthevehicle,thetone
FRONTANDREARSONARSYSTEM (ifsoequipped)
willsoundforonly3seconds.Oncethesystem detectsanobjectapproaching,thetonewill soundagain.
TheRSSautomaticallyturnsonwhentheshift leverisplacedinR(Reverse)andtheignitionis on.TheRSSOFFswitchontheinstrumentpanel allowsthedrivertoturntheRSSonandoff.To turntheRSSoff,theignitionmustbeon,andthe shiftleverinR(Reverse).Anindicatorlightonthe switchwillilluminatewhenthesystemisturned off.IftheindicatorlightilluminateswhentheRSS isnottenedoff,itmayindicateamalfunctionin theRSS.
KeeptheRSSsensors(locatedontherearbumperfascia)freefromsnow,iceandlargeaccumulationsofdirt(donotcleanthesensorswithsharp objects).Ifthesensorsarecovered,itwillaffect theaccuracyoftheRSS.

RearSensor
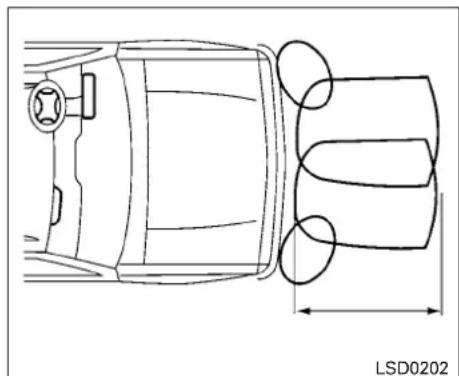
FrontSensor
WARNING
-
Alwaysturnandlookbackbeforebackingup.Therearsonarsystemisnota substituteforproperbacking procedures.
●Alwayslookaroundbeforeproceeding. Thefrontsonarsystemisnotasubstituteforproperdrivingprocedures. -
Readandunderstandthelimitations of thefrontandrearsonarsystemascontainedinthissection.Inclement weathermayaffectthefunctionofthe sonarsystem;thismayincludereduced performanceorafalseactivation.
-
This system is not designed to prevent contact with small or moving objects.
-
Thesystemisdesignedasanaidtothe driverindetectinglargestationaryobjectstohelpavoiddamagingthevehicle.Thesystemwillnotdetectsmall objectsbelowthebumper,andmaynot detectobjectsclosetothebumperor ontheground.
- If your vehicles sustain damage to the front bumper fascia or there are bumper fascia, leaving it misaligned by the sensing zone may be altered causing inaccurate measurement of obstacles or false alarms.
Therearsonarsystemsoundsatonetowarnthe driverofobstaclesneartherearbumper.Therear sonarsystemautomaticallyturnsonwhenthe shiftleverisplacedinR(Reverse)andtheignitionisON.Thesystemmaynotdetectobjectsat speedsabove3mph(5km/h)andmaynotdetect certainangularormovingobjects.
Therearsonarsystemdetectsobstaclesupto 5.9ft(1.8m)fromtherearbumperwithadecreasedcoverageareaattheoutercornersofthe bumper.Asyoumoveclosertotheobstacle,the rateofthetoneincreases.Whentheobstacleis lessthan10in(25cm)away,thetonewillsound continuously.liftdetectsastationaryorreceding objectfurtherthan10in(25cm)fromthesideof thevehicle,thetonewillsoundforonly3sec-
5-30 Startinganddriving
onds. Oncethesystemdetectsanobjectapproaching, the tonewillsoundagain.
Thefrontsonarsystemsoundsatonetowarnthe driverofobstaclesnearthefrontbumper. The frontsonarsystemautomaticallyturnsonwhen theshiftleverisplacedinaforwardgearandthe ignitionswitchisintheONposition. Thesystem maynotdetectobjectsatspeedsabove3mph (5km/h) and maynotdetectcertainangular or movingobjects.
Thefrontsonarsystemdetectsobstaclesupto 3ft(1m)fromthefrontbumperwithadecreased coverageareaattheoutercornersofthebumper. Asyoumoveclosertotheobstacle,therateofthe toneincreases.Whentheobstacleislessthan 10in(25cm)away,thetonewillsoundcontinuously.lfitdetectsastationaryorrecedingobject furtherthan 10in(25cm)fromthesideofthe vehicle,thetonewillsoundforonly3seconds. Oncethesystemdetectsanobjectapproaching, thetonewillsoundagain.
ThefrontandrearsonarsystemOFFswitchon theinstrumentpanelallowsthedrivertoturnthe sonarsystemonandoff.Toturnthesystemoff, theignitionmustbeONandtheshiftleverinR (Reverse)orD(Drive).Anindicatorlightonthe switchwillilluminatewhenthesystemisturned
off. If the indicator light illuminates when the system is not turned off, it may indicate a failure in the sonarsystem.
Keepthefrontandrearsonarsensors(locatedon thebumperfascia)freefromsnow,iceandlarge accumulationsofdirt(donotcleanthesensors withsharpobjects).Ifthesensorsarecovered,it willaffecttheaccuracyofthesonarsystem.
COLDWEATHERDRIVING
FREEINGAFROZENDOORLOCK
Topreventadoorlockfromfreezing,applyde-icerthroughthekeyhole.Ifthelockbecomes frozen,heatthekeybeforeinsertingitintothekey holeorusetheremotekeylessentrykeyfob(ifso equipped).
ANTIFREEZE
Inthewinterwhenitisanticipatedthatthetemperaturewilldropbelow32°F(0°C),checkthe antifreezetoassureproperwinterprotection.For additionalinformation,referto"Enginecooling system"inthe"Do-it-yourself"sectionofthis manual.
BATTERY
If the battery is not fully charged during extremely cold weather conditions, the battery fluid may freeze and damage the battery. To maintain maximum efficiency, the battery should be checked regularly. For additional information, refer to "Battery" in the "Do-it-yourself" section of this manual.
DRAININGOFCOOLANTWATER
If the vehicle is the oldest outside without anti-freeze, drain the coolingsystem, including the engine block. Refill before operating the vehicle.
For additional information, refer to "Changing engine coolant" in the "Do-it-yourself" section of this manual.
TIREEQUIPMENT
-
SUMMERtireshaveatreaddesignedto providesuperiorperformanceondrypavement. However, the performance of these tires will be substantially reduced in snowy and icy conditions. If you operate your vehicle on snowy or icy roads, NISSAN recommend the use of MUD & SNOW or ALL SEASON TIRES on all four wheels. It is recommended that you visit a NISSAN dealer for the tire type, size, speed rating and availability information.
-
For additional traction on icy roads, studded tires maybe used. However, some U.S. states and Canadian provinces prohibit their use. Check local, state and provincial laws before installing studded tires.
Skidandtractioncapabilitiesofstudded snowtiresonwetordrysurfacesmaybe poorerthanthatofnon-studdedsnowtires.
- Tirechainsmaybeused. For additional information, referto "Tirechains" in the "Do-it-yourself" section of this manual.
SPECIALWINTEREQUIPMENT
It is recommended that the following items be carried in the vehicle during winter:
- Ascraper and stiff-bristled brusht remove ice and snow from the windows and wiper blades.
- Asturdy, flatboardtobeplaced under the jacktogiveitfirmsupport.
●Ashoveltodigthevehicleoutofsnowdrifts. - Extrawasherfluidtorefillthewindshield-washerfluidreservoir.
DRIVINGONSNOWORICE
WARNING
- Wetice(32°F,0°Candfreezingrain), very cold snoworice can beslick and very hard to drive on. The vehicle will havemuchlesstraction or "grip" under these conditions. Try to avoid driving on wet ice until the road is salted or sanded.
- Whateverthecondition,drivewithcaution.Accelerate andslow downwith care.Ifacceleratingordownshiftingtoo fast,the drivewheels will loseeven moretraction.
Startinganddriving
- Allowmorestoppingdistanceunder theseconditions.Brakingshouldbe startedsoonerthanondrypavement.
- Allowgreaterfollowingdistanceson slipperyroads.
- Watchforslipperyspots(glareice). These may appear on otherwise clear road in shaded areas. If a patch of ice is seen ahead, brake before reaching. Try nottobrakewhile on the ice, and avoid any sudden steering maneuvers.
- Donotusethecruise control on slippery roads.
- Snowcantrapdangerousexhaust gasesunderyourvehicle. Keepsnow clearoftheexhaustpipeandfrom aroundyourvehicle.
ENGINEBLOCKHEATER(ifso equipped)
Engine block heaters are used to assist with cold temperature starting.
The engine block heater should be used when the outside temperature is 20° F(-7°C) or lower.
WARNING
- Do not use your engine block heater with an ungrounded electrical system or a 2-pronged adapter. You can be seriously injured by an electrical shock if you use an ungrounded connection.
- Disconnectandproperlystore theengine block heater cord before starting the engine. Damage tothe cordcould result inanelectrical shockandcan causeseriousinjury.
- Useaheavy-duty3-wire,3-prongedextension cord rated for at least 10 A. Plug theextensioncordintoaGroundFault Interrupt (GFI) protected, grounded 110-VAC outlet. Failure to use the proper extension cord or a grounded outletcanresultin afire orelectrical shockand causeseriouspersonal injury.
Tousetheengineblockheater:
- Turntheengineoff.
- Open the hood and unwrap the engine block heatercord.
3.Plugtheengineblockheatercordintoa grounded 3-wire, 3-pronged extension cord.
4.PlugtheextensioncordintoaGroundFault Interrupt(GFI) protected, grounded110-voltAC(VAC)outlet. - The engine block heater must be plugged in for at least 2–4 hours, depending on outside temperatures, to properly warm the engine coolant. Use an appropriate timer to turn the engine blockheateron.
- Before starting the engine, unplug and properly store the cord to keep it away from movingparts.
5-32 Startinganddriving
6Incaseofemergency
Hazardwarningflasherswitch....6-2
Flattire. 6 - 2
TirePressureMonitoringSystem(TPMS)....6-2
Changingaflattire. 6 - 3
Jumpstarting. 6-10
Pushstarting....6-12
If your vehicle overheats. 6-12
Towingyourvehicle....6-13
TowingrecommendedbyNISSAN....6-13
Vehiclerecovery(freeingastuckvehicle). 6-14
LIC0394
Pushtheswitchontowarnotherdriverswhen youmuststoporparkunderemergencyconditions.Allturnsignallightsflash.
WARNING
- Ifstoppingforanemergency,besureto movethevehiclewellofftheroad.
- Donotusethehazardwarningflashers whilemovingonthehighwayunless unusualcircumstancesforceyouto drivesoslowlythatyourvehiclemight becomeahazardtoothertraffic.
-Turnsignalsdonotworkwhenthehazardwarningflasherlightsareon.
6-2 Incaseofemergency
Theflasherswilloperatewiththeignitionswitch placedinanyposition.
Somejurisdictionsmayprohibittheuseof thehazardwarningflasherswitchwhile driving.
FLATTIRE
TIREPRESSUREMONITORING SYSTEM(TPMS)
ThisvehicleisequippedwithTPMS.Itmonitors tirepressureofalltiresexceptthespare.When thelowtirepressurewarninglightislit,andthe CHECKTIREpressurewarningappearsinthe tripcomputer,oneormoreofyourtiresissignificantlyunder-inflated.Ifthevehicleisbeingdriven withlowtirepressure,TPMSwillactivateand warnyouofitbythelowtirepressurewarning light.Thissystemwillactivateonlywhenthe vehicleisdrivenatspeedsabove16mph (25km/h).Foradditionalinformation,referto "Warninglights,indicatorlightsandaudiblereminders"inthe"Instrumentsandcontrols"section,and"TirePressureMonitoringSystem (TPMS)"inthe"Startinganddriving"sectionof thismanual.
WARNING
●Radiowavescouldadverselyaffect electricmedicalequipment.Thosewho useapacemakershouldcontactthe electricmedicalequipmentmanufacturerforthepossibleinfluencesbefore use.
- Ifthelowtirepressurewarninglight illuminateswhiledriving,avoidsudden steeringmaneuversorabruptbraking, reducevehiclespeed,pullofftheroad toasafelocationandstopthevehicle assoonaspossible.Drivingwithunderinflatedtiresmaypermanentlydamage thetiresandincreasethelikelihood of tirefailure.Seriousvehicledamage couldoccurandmayleadtoanaccident andcouldresultinseriouspersonalinjury.Checkthetirepressureforallfour tires.Adjustthetirepressuretothe recommendedCOLDtirepressure shownontheTireandLoadingInformationlabeltoturnthelowtirepressure warninglightOFF.Ifyouhaveaflattire, replaceitwithasparetireassoonas possible.
-
Sincethesparetireisnotequipped with theTPMS, whenasparetireismounted orawheelisreplaced, theTPMSwill notfunctionandthelowtirepressure warninglightwillflashforapproximately1minute. Thelightwillremain onafter1minute. Haveyourtiresreplaced and/orTPMSsystemresetas soonaspossible. It is recommended that youvisitaNISSANdealerforthese services.
-
Replacingtireswiththosenotoriginally specifiedbyNISSANcouldaffectthe properoperationoftheTPMS.
- Donotinjectanytireliquidoraerosol tiresealantintothetires,asthismay causeamalfunctionofthetirepressure sensors.
CHANGINGAFLATTIRE
If you have a flattire, follow the instructions below:
Stoppingthevehicle
- Safelymovethevehicleofftheroadand awayfromtraffic.
- Turnonthehazardwarningflashers.
- Parkonalevelsurfaceandapplytheparking brake.MovetheshiftlevertoP(Park).
- Turnofftheengine.
- Raisethehoodtowarnothertrafficandto signalprofessionalroadassistancepersonnelthatyouneedassistance.
- Have all passengers get out of the vehicle and standinasafe place, away from traffic and clear of the vehicle.
WARNING
- Makesuretheparkingbrakeissecurely appliedandtheshiftleverisshiftedinto P(Park).
- Neverchangetireswhenthevehicleis onaslope,iceorslipperyareas.This is hazardous.
- Neverchangetiresifoncomingtrafficis closetoyourvehicle.Waitforprofessionalroadassistance.
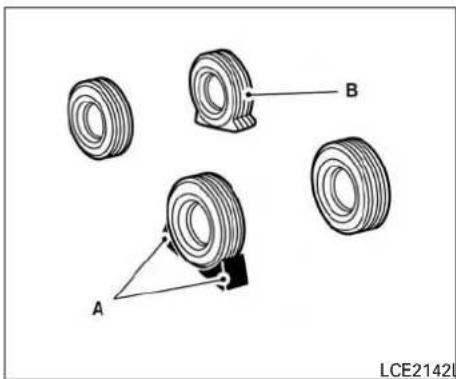
A.Tirestoppers
B.FlatTire
Blockingwheels
Placetirestoppers, supplied into toolkit, at both the front and back of the wheeldiagonally opposite the flattire to prevent the vehicle from moving when it is jacked up.

Gettingthesparetireandtools
Thejackandtoolkitarelocatedbehindtherear passengersideaccesscover.Toremovethejack andtoolkitperformthefollowing:
- Removetheaccesscover ①.

-
Toeasilyaccessremovingthejack,firstremovethetoolkitbyunscrewingtheretainer ② counterclockwise.
-
Removethetoolbag.
WARNING
Besuretoblockthewheelasthevehicle maymoveandresultinpersonalinjury.
6-4 Incaseofemergency
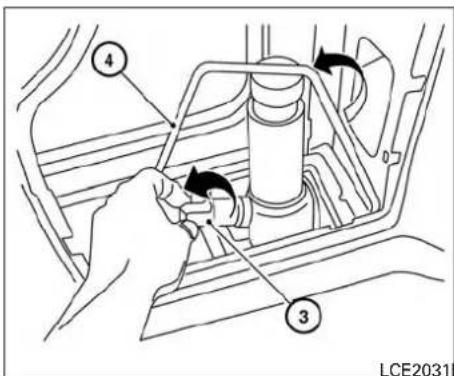
- Toreleasethejack, lowerthejackbyturning thejacklever ③ counterclockwiseuntilthe lockrod ④ canbelowered.
5.Liftthejacktoremove.

- AssembletheextensionandtheJ-shaped endtooltogetherbeforeinsertingtheminto theoval-shapedopeningabovethemiddle oftherearstepbumper.PasstheJ-shaped endofthejackrodthroughtheopeningand directittowardthesparetirewinch,located directlyabovethesparetire.
CAUTION
Donotinsertthejackrodstraightasitis designedtobeinsertedatanangleas shown.

- Fitthesquareendofthejackrodintothe squareholeofthewheelnutwrenchtoform ahandle.
- SeattheJ-shapedendofthejackrodinto theopeningofthetirewinch.Applypressure tokeepthejackrodengagedinthespare tirewinchandturnthejackrodcounter-clockwisetolowerthesparetire.
- Oncethesparetireiscompletelylowered, reachunderthevehicle, removetheretainer chain, and carefully slidethetirefrom under therearofthevehicle. Donotremovethe rubberspacer.
Incaseofemergency6-5
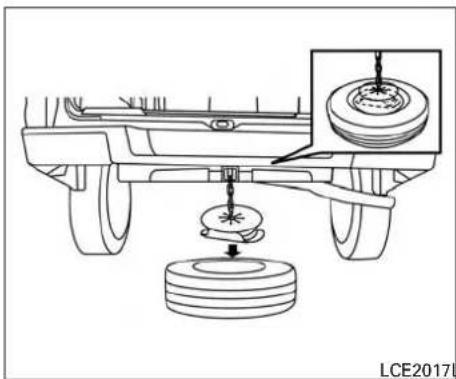
NOTE:
Inspectthespacereverysixyearsandreplaceasnecessary.ContactaNISSAN dealerforreplacementpartsifnecessary.
CAUTION
- Besuretocenterthesparetiresuspendingplateonthewheelandthenlift thesparetire.
●Failuretousethespacermayallowthe chaintogetstuckonthewheelnut holes.
LCE2017LCE2297
- Toreinstallthewheel, insert the tire chain through the wheel. Besuretherubber spacer is centered on the wheel before lifting. Use the assembled jack rod and slowly rotate the winch clock with a set of the wheel to the vehicle.
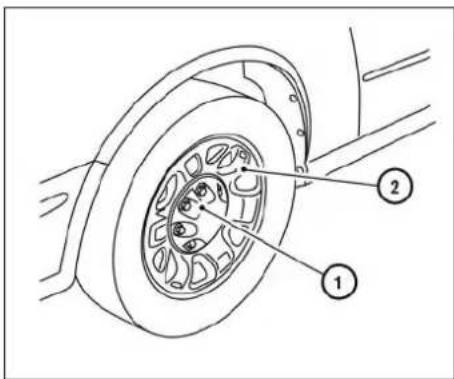
Removingwheelcover(ifso equipped)
CAUTION
Donotuseyourhandstopryoffwheel capsorwheelcovers.Doingsocouldresultinpersonalinjury.
Thewheelcover ① isonlyattachedwiththelug nutsandisseparatefromthewheel ②.
Toremovethewheelcover,removethelugnuts afterthejackissecurelysupportingthevehicle andthetireclearstheground.
6-6 Incaseofemergency
For additional information about removing the lug nuts, referto "Jackingupvehicle and removing the damaged tire" in this section.
Usecautionnottoscratchthewheelcoveror wheelsurface.
Jackingupvehicleandremovingthe damagedtire
WARNING
- Nevergetunderthevehiclewhileitis supportedonlybythejack.Ifitisnecessarytoworkunderthevehicle,supportitwithsafetystands.
- Useonlythejackprovidedwithyour vehicletoliftthevehicle.Donotusethe jackprovidedwithyourvehicleonother vehicles.Thejackisdesignedforlifting onlyyourvehicleduringatirechange.
-
Usethecorrectjack-uppoints.Never useanyotherpartofthevehicleforjack support.
●Neverjackupthevehiclemorethan necessary.
●Neveruseblocksonorunderthejack. -
Donotstartorruntheenginewhilethe vehicleisonthejack.Itmaycausethe vehicletomove.
- Donotallowpassengerstostayinthe vehiclewhileitisonthejack.
- Neverruntheenginewithawheel(s)off theground.Itmaycausethevehicletomove.
Alwaysrefertotheillustrationforthecorrect placementandjack-uppointsforyourspecific vehiclemodelandjacktype.
Carefullyreadthecautionlabelattachedto thejackbodyandthefollowinginstruc- tions.
- Looseneachwheelnutoneortwoturnsby turningcounterclockwisewiththewheelnut wrench. Donotremovethewheelnuts untilthetireisofftheground.
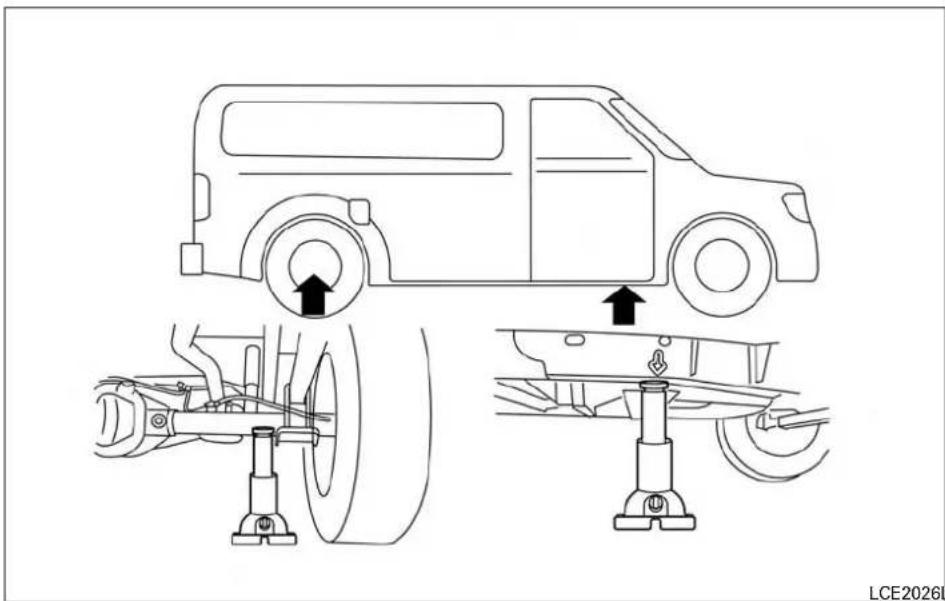
- Placethejack directly under the jack-up point as illustrated so the top of the jack contact the vehicle at the jack-up point. The jack-up points are indicated by stamped arrows on the side of the frame or therearas shown.

Thejackshouldbeusedonfirmand levelground.
- Install the assembled jack rod into the jack as shown.
- Toliftthevehicle, securelyholdthejacklever androd. Carefullyraisethevehicleuntilthe tireclearstheground.
- Removethewheelnutsandthenremovethetire.
6-8 Incaseofemergency

Installingthesparetire
Thesparetireisdesignedforemergency use. For additional information, referto "Wheelsandtires" in the "Do-it-yourself" section of this manual.
- Cleananymudordirtfromthesurfacebetweenthewheelandhub.
- Carefullyputthesparetireonandtighten thewheelnutsfingertight.
-
With the wheel nut wrench, tighten wheel nuts alternately and evenly in the sequence illustrated (①, ②, ③, ④, ⑤, ⑥, ⑦, ⑧) until they are tight.
-
Lowerthevehicleslowlyuntilthetire touchestheground. Then, with the wheel nutwrench, tightenthewheel nuts securely in the sequence illustrated ( ①, ②, ③, ④, ⑤, ⑥, ⑦, ⑧). Lowerthevehicle completely.
WARNING
- Incorrectwheelnutsorimproperly tightenedwheelnutscancausethe wheeltobecomelooseorcomeoff. This could cause an accident.
- Donotuseoilorgreaseonthewheel studsornuts. This could cause them nuts tobecome loose.
- Retightenthewheelnutshwhenthevehiclehasbeen driven for600miles (1,000km)(alsoincasesofaflattire, etc.).
As soon as possible, tighten the wheel nuts tothespecified torquewitha torque wrench.
Wheelnuttighteningtorque:
131ft-lb(177N·m)
The wheelnuts must be kept tightened to specification at all times. It is recommended that wheel nuts be tightened to specifications at each lubrication interval.
AdjusttirepressuretotheCOLDpressure.
COLDpressure:After vehiclehasbeen parkedfor3hoursormoreordrivenless than1mile(1.6km).
COLDtirepressuresareshownontheTire andLoadingInformationlabelaffixedto theriversidecenterpillar.
AfteradjustingtirepressuretotheCOLD tirepressure,thedisplay(ifsoequipped)of thetire pressureinformationmay show higherpressurethantheCOLDtirepressure after the vehicle has been driven more than 1 mile (1.6 km). This is because the tire pressureincreasesasthetiretemperature rises.Thisdoesnotindicateasystemmal-function.
- Securely store the flat tire and jacking equipmentinthevehicle.
JUMPSTARTING
WARNING
●Alwaysmakesurethatthesparetire andjackingequipmentareproperlysecuredafteruse.Suchitemscanbecome dangerousprojectilesinanaccidentor suddenstop.
- Thesparetireisdesignedforemergencyuse.Foradditionalinformation, refer to"Wheelsandtires"inthe"Do-it-yourself"sectionofthismanual.
Tostartyourenginewithaboosterbattery,the instructionsandprecautionsbelowmustbefol- lowed.
WARNING
- If done incorrectly, jump starting can lead to a battery explosion, resulting in severe injury or death. It could also damage your vehicle.
- Explosivehydrogengasisalwayspresentinthevicinityofthebattery.Keepall sparksandflamesawayfromthe battery.
- Donotallowbatteryfluidtocomeinto contactwitheyes,skin,clothingor paintedsurfaces.Batteryfluidisacorrosivesulfuricacidsolutionwhichcan causesevereburns.Ifthefluidshould comeintocontactwithanything,immediatelyflushthecontactedareawith water.
-
Keepbatteryoutofthereachof children.
●Theboosterbatterymustberatedat 12volts.Useofanimproperlyrated batterycandamageyourvehicle. -
Whenever working on near a battery, always wears suitable eyeprotectors (for example, goggles or industrials safety spectacles) and removerings, metal bands, or any other jewelry. Donotlean over the battery when jump starting.
- Donotattempttojumpstartafrozen battery.Itcouldexplodeandcauseseriousinjury.
●Theautomaticenginecoolingfan(ifso equipped)maycomeonatanytime withoutwarning,eveniftheignition switchisintheOFFpositionandthe engineisnotrunning.Toavoidinjury, keep hands and other objects away fromit.
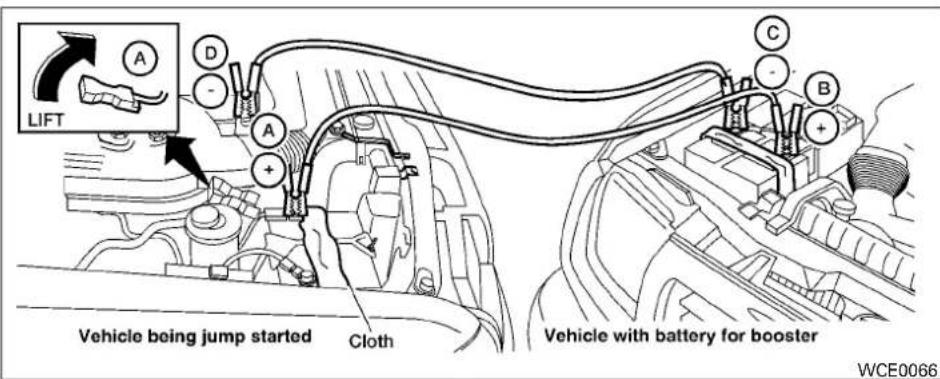
WARNING
Alwaysfollowtheinstructionsbelow.Failure-todosocouldresultindamagetothe chargingsystemandcausepersonal injury.
- If the booster battery is in another vehicle, position the two vehicle to bring their batteries are each other.
Donotallowthetwovehiclestotouch.
-
Apply the parking brake. Movetheshift lever to P (Park). Switch off all unnecessary electrical systems (lights, heater, air conditioner, etc.).
-
Removetheventcapsonthebattery(ifso equipped). Coverthebatterywithanold clothtoreduceexplosionhazard.
-
Connect the jumpercables in the sequence illustrated (A, B, C, D).
CAUTION
●Alwaysconnectpositive(+)topositive(+)andnegative(-)tobodyground(for example,strutmountingbolt,engine liftbracket,etc.)—nottothebattery.
- Makesurethejumpercablesdonot touchmovingpartsintheenginecompartmentandthatthecableclampsdo notcontactanyothermetal.
5.Starttheengineoftheboostervehicleand letitrunforafewminutes.
- Keep the engines speed of the booster vehicle a 2,000 rpmand start the engine of the vehicle being jump started.
CAUTION
Donotkeepthestartermotorengagedfor morethan10seconds.Iftheengineodes notstartrightaway, placetheignition switchintheOFFpositionandwait3to 4secondsbeforetryingagain.
-
After starting the engine, carefully disconnect then negative cable and then the positive cable.
-
Replacetheventcaps(ifsoequipped). Be suretodisposeoftheclothusedtocover theventholesasitmaybecontaminated withcorrosiveacid.
PUSHSTARTING
WARNING
Donotpushstartthisvehicle.Thethreewaycatalystmaybedamaged.
CAUTION
Automatictransmissionmodelscannotbe push-startedortow-started.Attempting todosomaycausetransmissiondamage.
IFYOURVEHICLEOVERHEATS
WARNING
- Donotcontinuetodriveifyourvehicle overheats.Doingsocouldcauseengine damageoravehiclefire.
- To avoid the danger of being scalded, never movether radiator or coolant reservoir cap while the engine is still hot. When the radiator or coolant reservoir cap is removed, pressurized hot water will spurt out, possibly causing serious injury.
- Donotopenthehoodifsteamiscomingout.
●Overheatingcanresultinreducedenginepowerandvehiclespeed.Thereducdspeedmaybelowerthanother traffic,whichcouldincreasethechance ofacollision.Beespeciallycareful whendriving.Ifthevehiclecannot maintainasafedrivingspeed,pullto thesideoftheroadinasafearea.Allow theenginetocoolandreturntonormal operation.
If your vehicle is overheating (indicated by an extremely high temperature gaugereading) or if you feel alack of engine power, detect abnormal noise, etc., tak the following steps.
- Movethevehiclesafelyofftheroad, apply theparkingbrakeandmovetheshiftleverto P(Park).
- Turnoff the air conditioner. Open all the windows, mov the heater or air conditioner temperature control to maximum hot and fan control to high speed.
3.Getoutofthevehicle.Lookandlistenfor steamorcoolantescapingfromtheradiator beforeopeningthehood.Ifsteamorcoolant isescaping,turnofftheengine.Donotopen thehoodfurtheruntilnosteamorcoolant canbeseen. - Opentheenginehood.
Donotstoptheengine.
WARNING
Ifsteamorwateriscomingfromtheengine, stand clear to prevent getting burned.
- Visuallycheckdrivebeltsfordamageor looseness. Also check if the cooling fan is running. Theradiator hoses and radiator should not leak water. If coolant is leaking, the water pump belt is missing or loose, or the cooling fand does not run, stop the engine.
TOWINGYOURVEHICLE
WARNING
Becarefulnottoallowyourhands,hair, jewelryorclothingtocomeintocontact with,orgetcaughtin,enginebeltsorthe enginecoolingfan.Theenginecoolingfan canstartatanytime.
- Aftertheenginecoolsdown, check thecoolantlevelintheenginecoolantreservortank with the engineer running. Add coolant to the enginecoolantreservortank if necessary. It is recommended that you visit a NISSAN dealer forth this service.
Incorrecttowingequipmentcoulddamageyour vehicle.Towinginstructionsareavailablefroma NISSANdealer.Localserviceoperatorsaregenerallyfamiliarwiththeapplicablelawsandproceduresfortowing.Toassurepropertowingandto preventaccidentaldamagetoyourvehicle, NISSANrecommendshavingaserviceoperator towyourvehicle.Itisadvisabletohavetheserviceoperatorcarefullyreadthefollowingprecautions:
WARNING
●Neverrideinavehiclethatisbeing towed.
- Nevergetunderyourvehicleafterithas beenliftedbyatowtruck.
CAUTION
- Whentowing, makesure that the transmission, axles, steeringsystem and powertrain are in working condition. If any of these conditions apply, dollies or a flatbedtow truck must be used.
●Alwaysattachsafetychainsbefore towing.

TOWINGRECOMMENDED BY NISSAN
NISSANrecommendsthatyourvehiclebetowed withthedriving(rear)wheelsoffthegroundor placethevehicleonaflatbedtruckasillustrated.
Incaseofemergency6-13
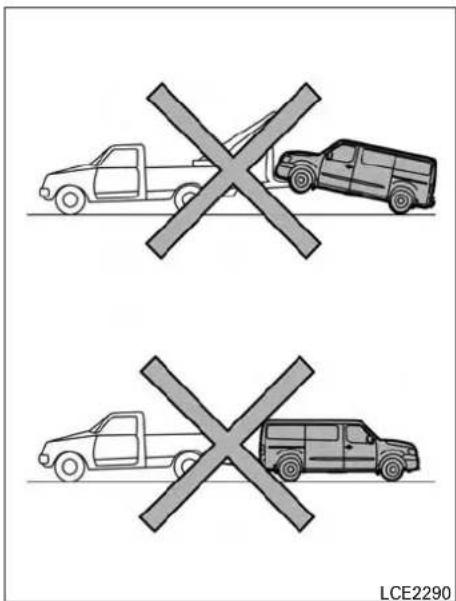
CAUTION
- Nevertowautomatictransmission modelswiththerearwheelsonthe groundorfourwheelsontheground (forwardorbackward),asthismay causeseriousandexpensivedamageto thetransmission.Ifitisnecessaryto towthevehiclewiththefrontwheels raisedalwaysusetowingdolliesunder therearwheels.
- Whentowingautomatictransmission modelswiththefrontwheelsonthe groundorontowingdollies:
-PlacetheignitionswitchintheOFF positionandsecurethesteering wheelinastraight-aheadposition witharopeorsimilardevice.Never securethesteeringwheelbyplacing theignitionswitchintheLOCKposition.Thismaycauseddamagetothe lockmechanism.
VEHICLERECOVERY(freeingastuck vehicle)
There are two option store recover a stuck vehicle: pulling and rocking. For additional information regarding these options, pleasereferto the following sections.
Pullingastuckvehicle
WARNING
Toavoidvehicledamage,seriouspersonal injuryordeathwhenrecoveringastuck vehicle:
- Contactaprofessionaltowingserviceto recoverthevehicleifyouhaveanyquestionsregardingtherecoveryprocedure.
- Attachrecoverydevicesonlytomain structuralmembersofthevehicleorthe recoveryhooks.
- Donotusethevehicletie-downstotow orfreeastuckvehicle.
- Onlyusedevicessspecificallydesigned forvehiclerecoveryandfollow the manufacturer'sinstructions.
●Alwayspulltherecoverydevice straight outfromthefrontofthevehicle.Never pullatanangle. - Routerecoverydevicessotheydonot touchanypartofthevehicle exceptthe attachmentpoint.
If your vehicle is stuck in sand, snow, mud, etc., use atowstraporotherdevicedesignedspecificallyfor vehiclerecovery.Alwaysfollowthemanufacturer's instructionsfortherecoverydevice.
Rockingastuckvehicle
WARNING
- Standclearofastuckvehicle.
- Donotspinyourtiresathighspeed. This could cause them to explode and result in serious injury. Part of your vehicle could also overheat and be damaged.
If your vehicle is stuckins and snow, mud, etc., use the following procedure:
- Turnoff the Vehicle Dynamic Control (VDC) System.
- Makesuretheareainfrontandbehindthe vehicleisclearofobstructions.
- Turnthesteeringwheelrightandlefttoclear anareaaroundthefronttires.
- Slowlyrockthevehicleforwardandbackward.
- ShiftbackandforthbetweenR(Reverse) andD(Drive).
- Applytheacceleratoraslittleaspossible tomaintaintherockingmotion.
●Releasetheacceleratorpedalbefore shiftingbetweenR(Reverse)andD(Drive).
- Donotspinthetiresabove34mph (55km/h).
- If the vehicle cannot be freed after a few tries, contact a professional towingservice to remove the vehicle.
MEMO
6-16 Incaseofemergency
7Appearanceandcare
Cleaningexterior....7-2
Washing....7-2
Waxing....7-2
Removingspots. 7 - 3
Underbody. 7 - 3
Glass. 7-3
Chromeparts. 7 - 3
Tiredressings. 7 - 3
Cleaninginterior. 7 - 4
Airfresheners....7-4
Floormats(ifsoequipped)....7-4
Seatbelts....7-5
Cleaningtheseatlatchmountinglocations. . . . . . . 7 - 6
Corrosionprotection....7-6
Mostcommonfactorscontributingtovehicle corrosion....7-6
Environmentalfactorsinfluencetherateof corrosion....7-6
Protectyourvehiclefromcorrosion 7 - 6
CLEANINGEXTERIOR
Inordertomaintaintheappearanceofyourvehicle,itisimportanttotakepropercareofit.
Toprotectthepaintsurfaces,pleasewashyour vehicleassoonasyoucan:
●Afterarainfalltopreventpossibledamage fromacidrain.
●Afterdrivingoncoastalroads.
- Whencontaminantssuchassoot,birddroppings,treesap,metalparticlesorbugsget onthepaintsurface.
- Whendustormudbuildsuponthesurface.
Whenever possible, store or park your vehicle inside agarage or in covered area.
Whenitisnecessarytoparkoutside,parkina shadyareaorprotectthevehiclewithabody cover.
Becarefulnottoscratchthepaintsurface whenputtingonorremovingthebody cover.
WASHING
Washdirtoffwithawetspongeandplentyof water.Cleanthevehiclethoroughlyusingamild soap,aspecialvehiclesoaporgeneralpurpose dishwashingliquidmixedwithclean,lukewarm (neverhot)water.
7-2 Appearanceandcare
CAUTION
- Donotusecarwashesthatuseacidin thedetergent. Some car washes, especially brushless ones, usesome acid for cleaning. The acid may react with some plastic vehicle components, causing them to crack. This could affect their appearance, and also could cause them not to function properly. Always check with your car was to confirm that acid is not used.
- Donotwashthevehiclewithstrong householdsoap,strongchemicaldetergents,gasolineorsolvents.
- Donotwashthevehicleindirectsun-lightorwhilethevehiclebodyishot,as thesurfacemaybecomewater-spotted.
- Avoidusingtight-nappedorrough cloths,suchaswashingmitts.Care mustbetakenwhenremoving caked-on dirt or other foreign substancesothepaintsurfaceisnot scratchedordamaged.
Rinsethevehiclethoroughlywithplentyofclean water.
Insideedges, seamsandfoldsonthedoors, hatchesandhoodareparticularlyvulnerableto
theeffectsofroadsalt.Therefore,theseareas mustbecleanedregularly.Takecarethatthe drainholesinthe loweredgeofthe doorare open.Spray water under the body and in the wheelwellstoloosenthedirtandwashaway roadsalt.
Adampchamoiscanbeusedtodrythevehicleto avoidwaterspots.
WAXING
Regularwaxingprotectsthepaintsurfaceand helpsretainnewvehicleappearance.Polishingis recommended to remove built-up wax residue and toavoidawatheredappearancebefore re-applyingwax.
ANISSANdealercanassistyouinchoosingthe properproduct.
- Waxyourvehicleonlyafterathoroughwashing.Followtheinstructionssuppliedwiththe wax.
- Donotuseawaxcontaininganyabrasives, cuttingcompoundsorcleanersthatmay damagethevehiclefinish.
Machine compounding or aggressive polishing on abasecoat/clearcoat paint finish may dull the finish or leaves whirl marks.
REMOVINGSPOTS
Removetarandoilspots,industrialdust,insects, andtreesapasquicklyaspossiblefromthe surfaceofthepainttoavoidlastingdamageor staining.Specialcleaningproductsareavailable ataNISSANdealeroranyautomotiveaccessory store.ItisrecommendedthatyouvisitaNISSAN dealerfortheseproducts.
UNDERBODY
Inareaswhereroadsaltisusedinwinter,itis necessarytocleantheunderbodyregularlyin ordertopreventdirtandsaltfrombuildingupand causingtheaccelerationofcorrosionontheunderbodyandsuspension.Beforethewinterperiodandagaininthespring,theundersealmust becheckedand,ifnecessary,re-treated.
GLASS
Useglasscleanertoremovesmokeanddustfilm fromtheglassurfaces.Itisnormalforglassto becomecoatedwithafilmafterthevehicleis parkedinthehotsun.Glasscleanerandasoft clothwilleasilyremovethisfilm.
CAUTION
Whencleaningtheinsideofthewindows, donotusesharp-edgedtools, abrasive cleanersorchlorine-baseddisinfectant cleaners. They could damage the electrical conductors, radioantennaelements or rearwindowdefrosterelements.
CHROMEPARTS
Cleanallchromepartsregularlywithanon-abrasivechromepolishtomaintainthefinish.
TIREDRESSINGS
NISSANdoesnotrecommendtheuseoftire dressings. Tiremanufacturersapplyacoatingto thetirestohelpreducediscolorationoftherubber. Ifatiredressingisappliedtothetires, itmay reactwiththecoatingandformacompound. This compoundmaycomeoffthetirewhiledriving and stainthevehiclepaint.
If you choose a seat of dressed dressing, take the following precautions:
- Useawater-basedtiredressing. The coatingonthetiredissolvesmoreeasilythan withanoil-basedtiredressing.
- Applyalightcoatoftiredressingtohelp preventitfromenteringthetire tread/grooves(whereitwouldbedifficultto remove).
●Wipeoffexcesstiredressingusingadry towel.Makesurethetiredressingiscompletelyremovedfromthetiretread/grooves.
- Allowthetiredressingtodryasrecommendedbythetiredressingmanufacturer.
CLEANINGINTERIOR
Occasionallyremoveloosedustfromtheinterior trim,plasticpartsandseatsusingavacuum cleanerorsoftbristledbrush.Wipethevinyl and leathersurfaces(ifsoequipped)withaclean, softclothdampenedinmildsoapsolution,then wipecleanwithadry,softcloth.
Regularcareandcleaningisrequiredinorderto maintaintheappearanceoftheleather(ifso equipped).
Before using any fabric protector, read the manufacturer's recommendations. Some fabric protectors contain chemical that may stain or bleach these at material.
Useaclothdampenedonlywithwatertoclean themeterandgaugelens.
CAUTION
- Neverusebenzine, thinneroranysimilarmaterial.
- Smalldirtparticlescanbeabrasiveand damagingtoleathersurfacesand shouldberemovedpromptly.Donot usesaddlesoap,carwaxes,polishes, oils,cleaningfluids,solvents,deter-gentsorammonia-basedcleanersas theymaydamagetheleather'snatural finish.
7-4 Appearance and care
- Neverusefabricprotectorsunlessrecommendedbythemanufacturer.
- Donotuseglassorplasticcleaneron meterorgaugelenscovers.Itmaydamagethelenscover.
AIRFRESHENERS
Most air fresheners use a solvent that could affect the vehicle interior. If you use an air freshener, takethe following precautions:
- Hanging-typeairfreshenerscancausepermanentdiscolorationwhentheycontactvehicleinteriorsurfaces. Placetheairfreshenerinalocationthatallowsittohangfree andnotcontactaninteriorsurface.
- Liquid-typeairfreshenerstypicallyclipon thevents. Theseproductscancauseimmediate damage and discoloration when spilledoninteriorsurfaces.
Carefullyreadandfollowthemanufacturer's instructionsbeforeusingtheairfresheners.
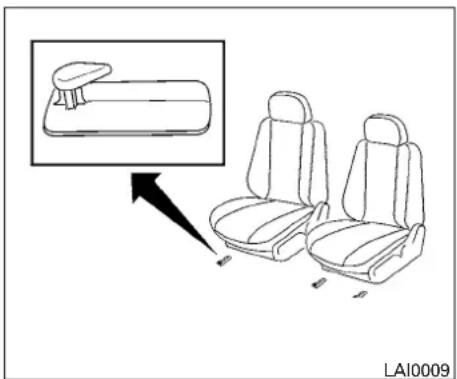
FLOORMATS(ifsoequipped)
WARNING
To avoid potential pedal interference that may result in a collision, injury or death:
- NEVERplaceafloormatontopofan-otherfloormatinthedriverfrontposition or install them upside down or backwards.
- UseonlyGenuineNISSANfloormats,or equivalentfloormats,thatarespecificallydesignedforuseinyourvehicle modelandmodelyear.
-Properlypositionthematsinthefloor-wellusingthefloormatpositioning hook.Foradditionalinformation,refer to"Floormatinstallation"inthis section.
- Makesurethefloormatdoesnotinterferewithpedaloperation.
- Periodicallycheckthefloormatsto makesuretheyareproperlyinstalled.
●Aftercleaningthevehicleinterior, checkthefloormatstomakesurethey areproperlyinstalled.
TheuseofGenuineNISSANfloormatscan extendthelifeofyourvehiclecarpetandmakeit easiertocleantheinterior.Matsshouldbemaintainedwithregularcleaningandreplacedifthey becomeexcessivelyworn.
Floormatinstallation
Yourvehicleisequippedwithfloormatpositioninghook(s). Thenumberandshapeofthefloor matpositioninghooksforeachseatingposition variesdependingonthevehicle.
WheninstallingGenuineNISSANfloormats, followtheinstallationinstructionsprovidedwith thematandthefollowing:
- Position the floormatin the floor well so that the floormat grommetholes are aligned with the hook(s).
- Secure the grommetholes into the hook(s) and ensure that the floormatis properly positioned.
- Makesurethefloormatdoesnotinterfere withpedaloperation.Withtheignitioninthe OFFposition,theselectorleverintheP (Park)position(AutomaticTransmission models)ortheshiftleverintheN(Neutral) position(ManualTransmissionmodels)fully applyandreleaseallpedals.Thefloormat must not interfere with pedal operation or preventthepedalfromreturningtoitsnormalposition.
It is recommended that you visitaNISSANdealer for details about installing the floormats in your vehicle.
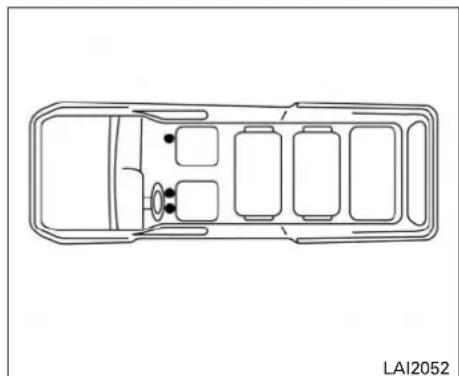
Positioninghooks
The illustration shows the location of the floor mat positioninghooks.
SEATBELTS
Theseatbelts canbecleanedbywiping them withaspongedampenedinamildsoapsolution. Allow the belts to dry completely in the shade beforeusingthem.Foradditionalinformation, refereto"Seatbeltmaintenance"inthe"Safety-Seats,seatbeltsandsupplementalrestraint system"sectionofthismanual.
CORROSIONPROTECTION
WARNING
Donotallowwetseatbeltstorollupinthe retractor.NEVERusebleach,dyeor chemicalsolventstocleantheseatbelts, sincethesematerialsmayseverely weakentheseatbeltwebbing.
CLEANINGTHESEATLATCH MOUNTINGLOCATIONS
CAUTION
Periodically clean these at latch mounting location to prevent reduction of flatching ability of these at.
Themountinglocationsfortheseatsshouldbe cleanedperiodicallywithahigh-powered vacuumcleaner.Dirtanddebrismayreducethe latchingabilityoftheseat.Awetcleansingagent maybeusedifnecessary,butthemountinglocationsmustbethoroughlydried.
Useaclothwrappedaroundascrewdriver(or similarobject)tocleanthemountinglocations,if needed.
Donotapplyanytypeoflubricanttothemounting locations.
MOSTCOMMONFACTORS CONTRIBUTING TO VEHICLE CORROSION
Mostvehiclecorrosioniscausedby:
- The accumulation of moisture-retaining dirt and debris in body panel sections, cavities, and other areas.
- Damagetopaintandotherprotectivecoatingscausedbygravelandstonechipsor minortrafficcollisions.
ENVIRONMENTALFACTORS INFLUENCETHERATEOF CORROSION
Moisture
Accumulation of sand, dirt and water on the vehicle body underside can accelerate corrosion. Wet floor coverings will not dry completely inside the vehicle and should be removed for drying to avoid floor panel corrosion.
Relativehumidity
Corrosionwillbeacceleratedinareasofhigh relativehumidity,especiallythoseareaswhere thetemperaturesstayabovefreezingandwhere atmosphericpollutionexistssandroadsaltis used.
Temperature
Hightemperaturesacceleratetherateofcorrosiontothosepartswhicharenotwellventilated.
Airpollution
Industrial pollution, the presence of salt in the air in coastal areas, or heavy roads salt use accelerate the corrosion process. Roads salt also accelerate the integration of paints surfaces.
PROTECT YOUR VEHICLE FROM CORROSION
- Washandwaxyourvehicleoftentokeepthe vehicleclean.
●Alwayscheckforminordamagetothepaint andrepairitassoonaspossible. - Keepdrainholesatthebottomofthedoors opentoavoidwateraccumulation.
- Checktheunderbodyforaccumulationof sand,dirtorsalt.Ifpresent,washwithwater assoonaspossible.
CAUTION
- NEVERremovedirt,sandorotherdebrisfromthepassengercompartment bywashingitoutwithahose.Remove dirtwithavacuumcleanerorbroom.
●Neverallowwaterorotherliquidsto comeincontactwithelectroniccomponentsinsidethevehicleasthismay damagethem.
Chemicalsusedforroadsurfacede-icingare extremelycorrosive. Theyacceleratecorrosion anddeteriorationofunderbodycomponents suchastheexhaustsystem,fuelandbrakelines, brakecables,floorpanandfenders.
Inwinter, the underbody must be cleaned periodically.
For additional protection against trust and corrosion, which may be required in some areas, it is recommended that you consult a NISSAN dealer.
Appearanceandcare7-7
MEMO
7-8 Appearance and care
8Do-it-yourself
Maintenance precautions....8 - 2
Enginecompartmentchecklocations....8-3
Enginecoolingsystem....8-5
Checkingenginecoolantlevel....8-6
Changingenginecoolant....8-6
Engineoil....8-7
Checkingengineoillevel....8-7
Changingengineoil....8-8
Changingengineoilfilter....8-9
5-speedautomatictransmissionfluid(ATF)....8-11
7-speedautomatictransmissionfluid(ATF)....8-11
Powersteeringfluid....8-11
Brakefluid....8-12
Windshield-washerfluid....8-12
Windshield-washerfluidreservoir....8-12
Battery....8-13
Jumpstarting....8-15
Drivebelt....8-15
Sparkplugs....8-16
Replacingsparkplugs....8-16
Aircleaner....8-17
In-cabinmicrofilter(ifsoequipped)....8-18
Windshieldwiperblades....8-18
Cleaning. 8-18
Replacing....8-19
Brakes....8-20
Fuses....8-20
Enginecompartment....8-21
Passengercompartment....8-22
Batteryreplacement....8-24
Keyfob(ifsoequipped)....8-25
Lights....8-26
Headlights....8-26
Foglights(ifsoequipped)....8-27
Exteriorandinteriorlights....8-28
Wheelsandtires....8-30
Tirepressure....8-30
Tire labeling....8-33
Typesoftires. 8-36
Tirechains....8-37
Changingwheelsandtires. 8-37
MAINTENANCEPRECAUTIONS
When performing any inspection or maintenance work on your vehicle, always take care to prevent serious accident in injury to yourself for damage to the vehicle. The following are general precautions which should be closely observed.
WARNING
- Parkthevehicleonalevelsurface,applytheparkingbrakesecurelyand blockthewheelstoppreventthevehicle frommoving.MovetheshiftlevertoP (Park).
- BesuretheignitionkeyisintheOFFFor LOCKpositionwhenperformingany partsreplacementorrepairs.
- If you must work with the engineer running, keep your hands, clothing, hair and tools away from moving fans, belts and any other moving parts.
-
Itisadvisabletosecureorremoveany looseclothingandremoveanyjewelry, suchasrings,watches,etc.before workingonyourvehicle.
●Alwaysweareyeprotectionwhenever youworkonyourvehicle. -
The automatic engine cooling fan (if so equipped) may come on at any time without warning, even if the ignition switch is in the OFF position and the engine is not running. To avoid injury, always disconnect then negative battery cable before working near the fan.
- Ifyoumustruntheengineinanenclosedspacesuchasagarage,besure thereisproperventilationforexhaust gasestoescape.
- Nevergetunderthevehiclewhileitis supportedonlybyajack.Ifitisnecessarytoworkunderthevehicle,support itwithsafetystands.
- Keepsmokingmaterials, flameandsparks awayfromthefueltankandbattery.
- Ongasolineenginemodels, the fuel filter or fuelliness should be serviced. It is recommended that you visit a NISSAN dealer for servicing because the fuel lines are under high pressure even when the engine is off.
CAUTION
- Donotworkunderthehoodwhilethe engineishot.Turntheengineoffand waituntilcoolsdown.
- Avoidcontactwithusedengineoiland coolant.Improperly disposed engine oil,enginecoolantand/orothervehicle fluidscandamagetheenvironment.Alwaysconformtolocalregulationsfor disposalofvehiclefluid.
●Neverleavetheengineorthetransmissionrelatedcomponentharnessconnectordisconnectedwhiletheignition switchisintheONposition. - Neverconnectordisconnectthebattery oranytransistorizedcomponentwhile theignitionswitchisintheONposition.
This "Do-it-yourself" sectiongivesinstructions regardingonlythoseitemswhicharerelatively easyforanownertoperform.
AGenuineNISSANservicemanualisalsoavailable.Foradditionalinformation,referto"Owner's Manual/ServiceManualorderinformation"inthe "Technicalandconsumerinformation"sectionof thismanual.
Youshouldbeawarethatincompleteorimproper servicingmayresultinoperatingdifficultiesor excessiveemissions,andcouldaffectwarranty coverage.Ifindoubtaboutanyservicing,it isrecommendedthatyouvisitaNISSAN dealerforthisservice.
ENGINECOMPARTMENTCHECK LOCATIONS
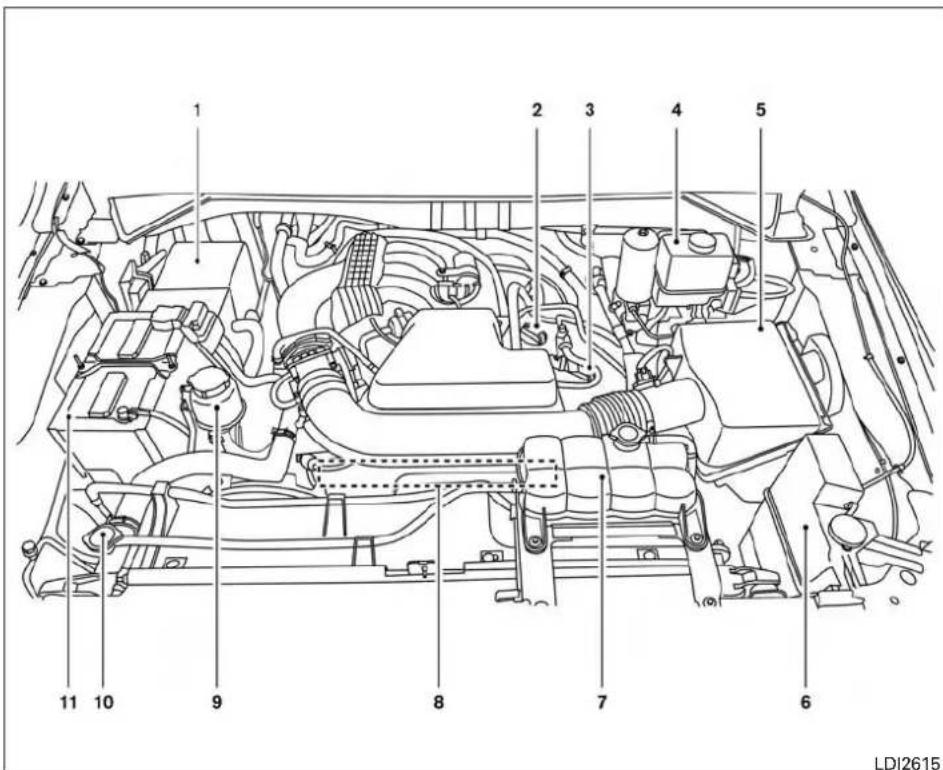
VQ40DEengine
1.Fuse/Fusiblelinkbox
2.Engineoilfillercap
3.Engineoidipstick
4.Brakefluidreservoir
5.Aircleaner
6.Windshield-washerfluidreservoir
7. Enginecoolantreservoir
8.Drivebeltlocation
9.Powersteeringfluidreservoir
10.Radiatorcap
11.Battery
Do-it-yourself8-3
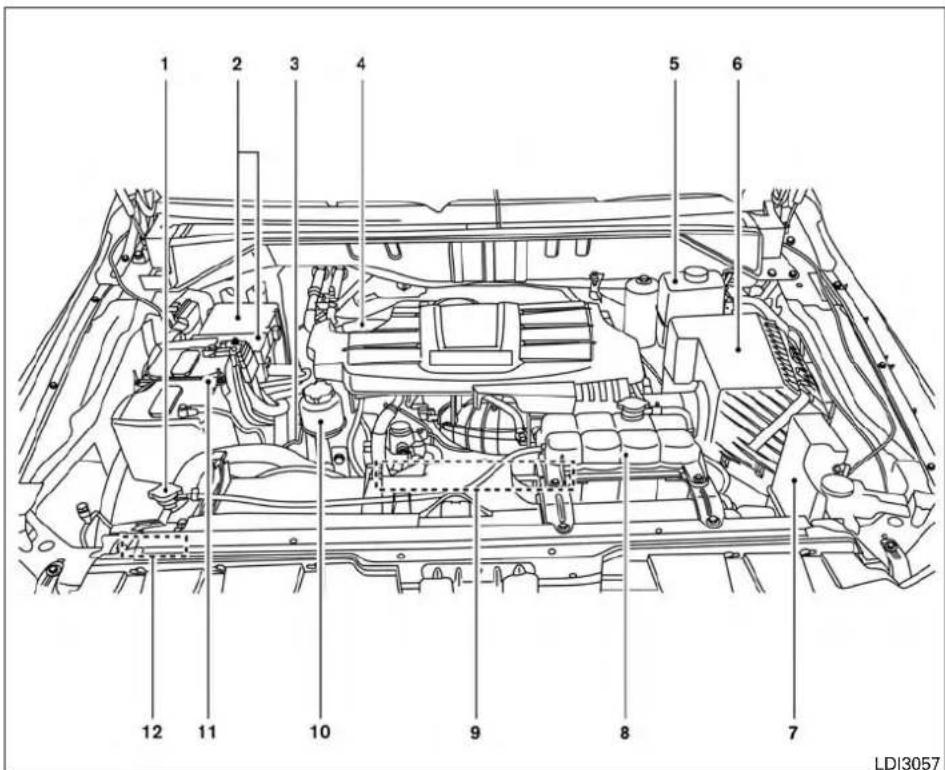
8-4 Do-it-yourself
VK56VDengine
- Radiatorcap
2.Fuse/Fusiblelinkbox - Engineoildipstick
- Engineoilfillercap
5.Brakefluidreservoir
6.Aircleaner - Windshield-washerfluidreservoir
- Enginecoolantreservoir
9.Drivebeltlocation - Powersteeringfluidreservoir
11.Battery
12.Fuse/Relaybox
ENGINECOOLINGSYSTEM
Theenginecoolingsystemisfilledatthefactory withapre-dilutedmixtureof50%Genuine NISSANLongLifeAntifreeze/Coolant(blue)and 50%watertoprovideyear-roundantifreeze and coolantprotection.Theantifreezesolutioncontainsrustandcorrosioninhibitors.Additionalenginecoolingsystemadditivesarenotnecessary.
WARNING
- Neverremovetheradiatororcoolant reservoircapwhentheengineishot. Waituntiltheengineandradiatorcool down.Seriousburnscouldbecaused byhighpressurefluidescapingfrom theradiator.Foradditionalinformation onprecautions,referto"Ifyourvehicle overheats"inthe"Incaseofemergency"sectionofthismanual.
- Theradiatorisequippedwithapressuretyperadiatorcap.Topreventenginedamage,useonlyaGenuine NISSANradiatorcap.
CAUTION
- Neveruseanycoolingsystemadditives suchasradiatorsealer.Additivesmay clogthecoolingsystemandcausedamagetotheengine,transmissionand/or coolingsystem.
- Whenaddingorreplacingcoolant, be suretouseonlyGenuineNISSANLong LifeAntifreeze/Coolant(blue)orequivalent.GenuineNISSANLongLife Antifreeze/Coolant(blue)ispre-diluted toprovideantifreezeprotectionto-34°F(-37°C).Ifadditionalfreezeprotection isneededduetoweatherwhereyou operate your vehicle, add Genuine NISSANLongLifeAntifreeze/Coolant (blue)concentratefollowingthedirectionsonthecontainer.Ifanequivalent coolantotherthanGenuineNISSAN LongLifeAntifreeze/Coolant(blue)is used,followthecoolantmanufacturer's instructionstomaintainminimumanti-freezeprotectionto-34°F(-37°C).The useofothertypesofcoolantsolutions otherthanGenuineNISSANLongLife Antifreeze/Coolant(blue)orequivalent may damage the engine cooling system.
●Thelifeexpectancyofthefactory-fill coolantis105,000miles(168,000km)or 7years.MixinganyothertypeofcoolantotherthanGenuineNISSANLong LifeAntifreeze/Coolant(blue),includingGenuine NISSAN LongLife Antifreeze/Coolant(green),ortheuse ofnon-distilledwaterwillreducethe lifeexpectancyofthefactory-fillcoolant.Foradditionalinformation,referto the"Maintenanceandschedules"sectionofthismanual.

This vehicle contains Genuine NISSAN Long Life Antifreeze/Coolant (blue). Thelife expectancy of the factory-fill coolant is 105,000 miles (168,000 km) or 7 years. Mixing any other type of coolant or the use of non-distilled water will reduce the life expectancy of the factory-fill coolant. For additional information, referto the "Maintenance and schedules" section of this manual.
If the cooling system frequently requires coolant, it is recommended that you visit a NISSAN dealer forth this service.
For additional information on the location of the engine coolant reservoir, refer to "Engine compartment check locations" in this section.
CHANGINGENGINECOOLANT
ANISSANdealercanchangetheenginecoolant. Theserviceprocedurecanbefoundinthe NISSANServiceManual.
Improperservicingcanresultinreduced heaterperformanceandengineoverheating.
WARNING
- To avoid the danger of being scalded, never changethe coolant when the engine is shot.
- Neverremovetheradiatororengine coolantreservoircapwhentheengine ishot.Seriousburnscouldbecausedby highpressurefluidescapingfromthe radiator.
- Avoiddirectskin contact withused coolant.Ifskincontactismade,wash thoroughlywithsoaporhandcleaneras soonaspossible.
- Keepcoolantoutofthereachofchildrenandpets.
Enginecoolantmustbedisposedofproperly.
Checkyourlocalregulations.
ENGINEOIL

VQ40DEengine
CHECKINGENGINEOILLEVEL
- Parkthevehicleonalevelsurfaceandapply theparkingbrake.
- Start the engine and let it idle until it reaches operating temperature.
- Turnofftheengine. Waitmorethan 10 minutes for the oil to drain back into the oil pan.
- Removethedipstickandwipeitclean.Re-insertitalltheway.

VK56VDengine

- Removethedipstickagainandchecktheoil level.ItshouldbebetweentheH(High)and L(Low)marks B. Thisisthenormaloperatingoillevelrange.Iftheoillevelisbelow theL(Low)mark A, removetheoilfillercap andpourrecommendedoilthroughthe opening.Donotoverfill C.
- Recheckoillevelwiththedipstick.
Itisnormaltoaddsomeoilbetweenoil maintenanceintervalsorduringthe break-inperiod,dependingontheseverity ofoperatingconditions.
Do-it-yourself8-7
CAUTION
Oillevelshouldbecheckedregularly. Operating the engine with an insufficient amount of oil and damage the engine, and such damage is not covered by warranty.

VQ40DEengine
CHANGINGENGINEOIL
- Parkthevehicleonalevelsurfaceandapply theparkingbrake.

VK56VDengine
2.Starttheengineandletitidleuntilitreaches operatingtemperature,thenturnitoff.
- Removetheoilfillercap counterclockwise.
Ⓐ byturningit
-
Placealargedrainpanunderthedrainplug Ⓑ.
-
Removethedrainplug Ⓑ withawrenchby turningitcounterclockwiseandcompletely draintheoil.
If the oil filterist be changed, remove and replace it at this time. For additional information, refer to "Changing engine oil filter" in this section.
- Wasteoilmustbedisposedofproperly.
- Checkyourlocalregulations.
WARNING
●Prolongedandrepeatedcontactwith usedengineoilmaycauseskincancer.
- Trytoavoiddirectskincontactwith usedoil.Ifskincontactismade,wash thoroughlywithsoaporhandcleaneras soonaspossible.
- Keepusedengineoiloutofreachof children.
CAUTION
Becarefulnottoburnyourself.Theengine oilmaybehot.
- Cleanandreinstallthedrainplugandanew washer. Securelytightenthedrainplugwith awrench. Donotuseexcessiveforce.
Drainplugtighteningtorque: 25ft-lb(34N·m)
- Refillenginewithrecommendedoilthrough theoilfilleropening, then install the oilfiller capsecurely.
For additional information, refer to "Recommended fluids/lubricants and capacities" in the "Technical and consumer information" section of this manual for drain and refill capacity.
Thedrainandrefillcapacitydependsonthe oiltemperatureanddraintime.Usethese specificationsforreferenceonly.Alwaysuse thedipsticktodeterminewhentheproper amountofoilisintheengine.
8.Starttheengine.Checkforleakagearound thedrainplugandoilfilter.Correctasrequired.
- Turntheengineoffandwaitmorethan 10minutes. Checktheoillevelwiththe dipstick.Addengineoilifnecessary.
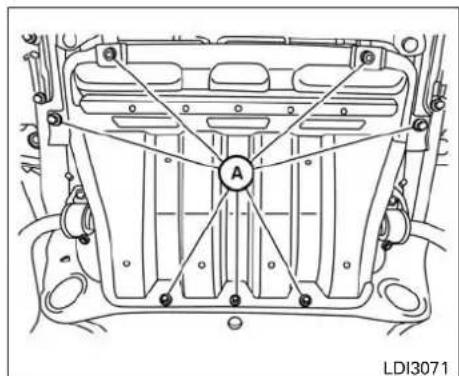
Skidplate
CHANGINGENGINEOILFILTER
- Parkthevehicleonalevelsurfaceandapply theparkingbrake.
2.Turntheengineoff.
- Remove bolts Ⓐ and skid plate.
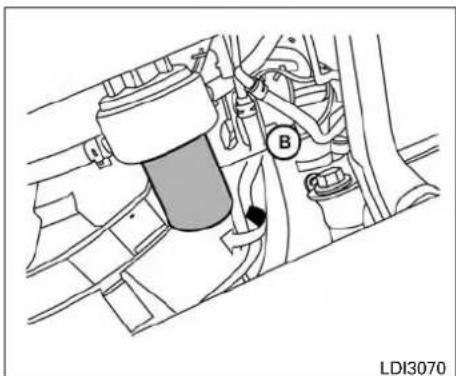
VQ40DE
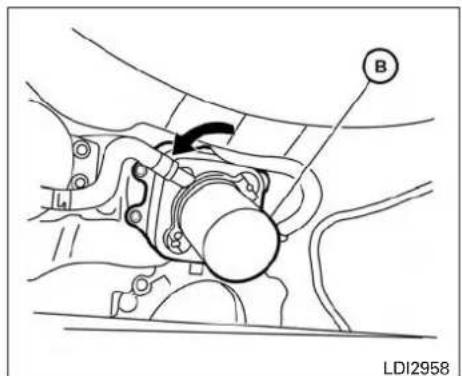
VK56VD
- Placealargedrainpanundertheoilfilter.
- Unscrew the plate covering the oil filter exposing the filter.
- Loosentheoilfilter Ⓑ withanoilfilter wrenchbyturningitcounterclockwise. Then removetheoilfilterbyturningitbyhand.
CAUTION
Becarefulnottoburnyourself.Theengine oilmaybehot.
- Wipetheengineoilfiltersealingsurface with acleanrag.
CAUTION
Besuretoremoveanyoldgasketmaterial remainingonthesealingsurfaceofthe engine.Failureretodosocouldleadto enginedamage.
- Coatthegasketonthenewfilterwithclean engineoil.
- Screwontheoilfilteruntilaslightresistance isfelt, thentightenanadditional2/3turn.
10.Starttheengineandcheckforleakage aroundtheoilfilter.Correctasrequired. - Turntheengineoffandwaitmorethan 10minutes. Checktheoillevel.Addengine oilifnecessary.
Whencheckingorreplacementisrequired,itis recommendthatyouvisitaNISSANdealerfor thisservice.
CAUTION
- UseGenuineNISSANMaticSATF.If GenuineNISSANMaticSATFisnot available,GenuineNISSANMaticJATF mayalsobeused.
- Usingautomatictransmissionfluid otherthanGenuineNISSANMaticSATForMaticJATFwillcausedeteriorationindriveabilityandautomatictransmissiondurability,andmaydamagethe automatictransmission,whichisnot coveredbytheNISSANNewVehicle LimitedWarranty.
Thespecified automatic transmission fluid is also described on caution labels located in the engine compartment.
Whencheckingorreplacementisrequired,itis recommendthatyouvisitaNISSANdealerfor thisservice.
CAUTION
- NISSAN recommends using Genuine NISSANMaticSATF. Donotmix with other fluids.
- DonotuseCVTfluidormanualtransmissionfluidinthistransmission.Damagecausedbytheuseoffluidsother thanasrecommendedisnotcovered underNISSAN'sNewVehicleLimited Warranty.
- Usingfluidsthatarenotequivalentto GenuineNISSANMaticSATFmayalso damagethetransmission.Damage causedbytheuseoffluidsotherthanas recommendedisnotcoveredunder NISSAN'sNewVehicleLimited Warranty.
Thespecified automatic transmission fluid is also described on caution labels located in the engine compartment.
POWERSTEERINGFLUID

LDI2597
ThefluidlevelshouldbecheckedusingtheHOT MAXrangeonthepowersteeringfluidreservoir atfluidtemperaturesof122°-176°F(50°-80°C)orusingtheCOLDMAXrange onthe powersteeringfluidreservoiratfluidtemperaturesof32°-86°F(0°-30°C). IfthefluidisatorbelowtheMINline,addGenuineNISSANPSFtoHOTMAXorCOLDMAX dependingonsystemfluidtemperature.Remove thecapandfillthroughtheopening.
CAUTION
•DONOTOVERFILL.
- Recommended fluid is Genuine NISSANPSForequivalent.
Do-it-yourself8-11
Donotspillthefluidonanypaintedsurfaces. This will damage the paint. If fluid is spilled, immediately wash the surface with water.
Checkthefluidlevelinthereservoir.Ifthebrake fluidisbelowtheMINline ⑧,thebrakewarning lightwillilluminate.AddbrakefluiduptotheMAX line A.Foradditionalinformationonbrakefluid type,referto"Recommendedfluids/lubricants andcapacities"inthe"Technicalandconsumer information"sectionofthismanual.
thebrakefluidmustbeaddedfrequently,the brakesystemshouldbethoroughlychecked.Itis recommendedthatyouvisitaNISSANdealerfor thisservice.

WINDSHIELD-WASHERFLUID RESERVOIR
Fillthewindshield-washerfluidreservoirperiodically.
Tofillthewindshield-washerfluidreservoir, lift thecapoffthereservoirandpourthewindshield-washerfluidintothereservoiropening.
Addawashersolventtothewasherforbetter cleaning. In the winter season, addawindshield-washerantifreeze. Follow the manufacturer's instructions for themixtureratio.
BATTERY
Refillthereservoirmorefrequentlywhendriving conditionsrequireanincreasedamountof windshield-washerfluid.
RecommendedfluidisGenuineNISSANWindshieldWasherConcentrateCleaner&Antifreezeorequivalent.
CAUTION
- Donotsubstituteengineantifreeze coolantforwindshield-washerfluid. Thismayresultindamagetothepaint.
- Donotfillthewindshield-washerfluid reservoirwithwasherfluidconcentratesatfullstrength.Somemethylalcoholbasedwasherfluidconcentrates maypermanentlystainthegrilleif spilledwhilefillingthewindshield-washerfluidreservoir.
-
Pre-mixwasherfluidconcentrateswith watertothemanufacturer'srecommendedlevelsbeforepouringthefluid intothewindshield-washerfluidreservoir.Donotusethewindshield-washer fluidreservoirtomixthewasherfluid concentrateandwater.
-
Keepthebatterysurfacecleananddry. Cleanthebatterywithasolutionofbaking sodaandwater.
●Make certaintytheterminalconnections are cleanandsecurelytightened. - If the vehicle is not to be used for 30 days or longer, disconnect then negative (-) battery terminal cable to prevent discharge.
NOTE:
Careshouldbetakentoavoidsituations thatcanleadtopotentialbatterydischarge andpotentialno-startconditionssuchas:
- Installationorextendeduseofelec- tronicaccessoriesthatconsumebat- terypowerwhentheengineisnotrun- ning(Phonechargers,GPS,DVD players,etc.).
- Vehicle is not driven regularly and/or only drivenshort distances.
In these cases, the battery may need to be charged to maintain battery health.
WARNING
- Donotexposethebatterytoflames,an electrical spark or a cigarette. Hydrogen gasgeneratedbythebatteryisexplosive.Explosivegasescancauseblindnessorinjury.Donotallowbatteryfluid tocontactyourskin,eyes,fabricsor painted surfaces. Sulfuric acid can causeblindnessorinjury.Aftertouchingabatteryorbatterycap,donot touchor rub youreyes. Thoroughly washyourhands.Iftheacidcontacts youreyes,skinorclothing,immediately flushwithwaterforatleast15minutes andseekmedicalattention.
- Donotoperatethevehicleifthefluidin thebatteryislow.Lowbatteryfluidcan cause a higher load on the battery which can generate heat, reduce battery life, and in some cases lead to an explosion.
- Whenworkingonornearabattery,alwayswearsuitableeyeprotectionandremovealljewelry.
-
Batteryposts,terminalsandrelatedaccessoriescontainleadandleadcompounds.Washhandsafterhandling.
-
Keepbatteryoutofthereachof children.
- Donottipthebattery.Keepthevent capstightandthebatterylevel.

- Removetheventcapswithascrewdriveras shown. Useaclothtoprotectthebattery case.

- Check the fluid level each cell. If it is necessary to add fluid, add only distilled water to bring the level up to the bottom of the filler opening. Donotoverfill. Reinstall the vent caps.
8-14 Do-it-yourself
DRIVEBELT
Vehiclesoperatedinhightemperaturesorunder severeconditionsrequirefrequentchecksofthe batteryfluidlevel.
JUMPSTARTING
Ifjumpstartingisnecessary,referto"Jumpstart- ing"inthe"Incaseofemergency"sectionofthis manual.Iftheengineedsnotstartbyjump starting,thebatterymayhavetobereplaced.Itis recommendedthatyouvisitaNISSANdealerfor thisservice.

VQ40DE
- Powersteeringfluidpumppulley
- Automatic drive belt tensioner pulley
3.Idlerpulley
4.Coolingfanpulley - Airconditionercompressorpulley
6.Crankshaftpulley - Generatorpulley

VK56VD
- Powersteeringfluidpumppulley
- Automatic drive belt tensioner pulley
- Waterpumppulley
- Coolingfanpulley
- Airconditionercompressorpulley
6.Crankshaftpulley - Generatorpulley
WARNING
BesuretheignitionswitchisintheOFFFor LOCKpositionbeforeservicingdrivebelt. Theenginecouldrotateunexpectedly.
SPARKPLUGS
- Visually inspect the belt for sign of unusual wear, cuts, fraying or looseness. If the belt is in poor condition or is loose, have it replaced or adjusted. It is recommended that you visit a NISSAN dealer forth this service.
- Havethebelt checked regularly for condition and tension in accordance with the maintenances schedule found in the "Maintenance and schedules" section of this manual.

REPLACINGSPARKPLUGS
Iridium-tippedsparkplugs
Itisnotnecessarytoreplaceiridium-tipped sparkplugsasfrequentlyasconventionaltype sparkplugsbecausetheylastmuchlonger.Followthemaintenancelogshowninthe"Maintenanceandschedules"sectionofthismanual.Do notserviceiridium-tippedsparkplugsbycleaningorregapping.
●Alwaysreplacesparkplugswithrecommendedorequivalentones.
WARNING
Besuretheengineandignitionswitchare offandthattheparkingbrakeisengaged securely.
CAUTION
Besuretousethecorrectsocketto- movethesparkplugs.Anincorrectsocket candamagethesparkplugs.
Ifreplacementisrequired,itisrecommendedthat youvisitaNISSANdealerforthisservice.
AIRCLEANER
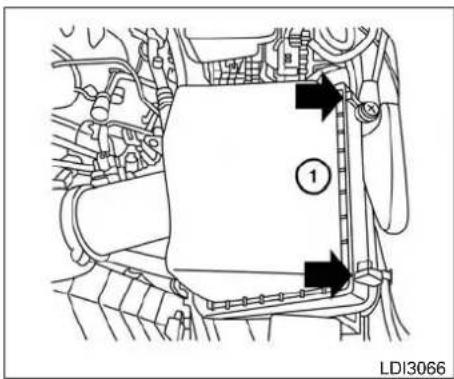
VQ40DE
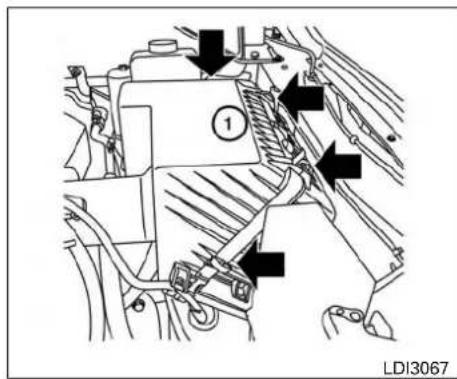
VK56VD
The aircleanerfilters should not be cleaned and reused. Replace it according to them maintenance log shown in the "Maintenance and schedules" section of this manual.
Toremovetheaircleanerfilter:
① Unlatchtheclipsandmovetheaircleaner coverupward.
- Removetheaircleanerfilter.
- Wipetheinsideoftheaircleanerfilterhousingandthecoverwithadampcloth.
NOTE:
Afterinstallinganewaircleanerfilter, makesuretheaircleanercoverisseated in thehousingandlatchtheclips.

WARNING
- Operatingtheenginewiththeair cleanerremovedcancauseyouorotherstobeburned.Theaircleanernot onlycleanstheair,itstopstheflameif theenginebackfires.Ifitisn'tthere,and theenginebackfires,youcouldbe burned.Donotdrivewiththeaircleaner removed,andbecarefulwhenworking ontheenginewiththeaircleaner removed.
- Neverpourfuelintothethrottlebodyor attempttostarttheenginewiththeair cleanerremoved.Doingsocouldresult inseriousinjury.
WINDSHIELDWIPERBLADES

LDI2080LDI2618

IN-CABINMICROFILTER(ifso equipped)
Thein-cabinmicrofilterrestrictstheentryofairbornedustandpollenparticlesandreduces someobjectionableoutsideodors. Thefilteris locatedbehindtheglovebox. Foradditionalinformation, refertothe"Maintenanceandschedules" sectionforchangeintervals.
Toreplacethefilter, perform the following procedure:
- Opentheglovebox.
-
Removethesevenscrewsindicatedabove.
-
Gently releasethetwotabstoremovethe filtercover.
- Removetheoldfilter.
- Insert thenewfilter into the housing.
- Replacethefiltercover.
- Reinstallthescrewsandclosetheglovebox door.
CLEANING
If your windshield is not clear after using the windshield-washer or if a wiper bladechatters when running, wax or other material may be on the blade or windshield.
Cleantheoutsideofthewindshieldwithawasher solutionoramildetergent.Yourwindshieldis cleanifbeadsdonotformwhenrinsingwithclear water.
Cleaneachbladebywipingitwithaclothsoaked inawashersolutionoramilddetergent.Then rinsethebladeswithclearwater.Ifyourwind-shieldisstillnotclearaftercleaningtheblades andusingthewiper,replacetheblades.

CAUTION
Wornwindshieldwiperbladescandam- agethewindshieldandimpairdriver vision.
8-18Do-it-yourself

REPLACING
Replacethewiperbladesiftheyareworn.
- Liftthewiperarmawayfromthewindshield.
② Pushthereleasetab, thenmovethewiper bladedownthewiperarmtoremove.
③ Removethewiperblade. - Insertthenewwiperbladeontothewiper armuntilclicksintoplace.
-
Rotatewiperbladesothedimpleisinthe groove.
-
Return the wiperto its original position and release until lithasmade contact with the windshield.
CAUTION
- Afterwiperbladereplacement, return thewiperarmtoitsoriginalposition; otherwiseitmaybedamagedwhenthe hoodisopened.
- Makesurethewiperbladescontactthe glass;otherwisethearmsmaybedamagedfromwindpressure.

Becarefulnottoletanythinggetintothewasher nozzle Ⓐ. This may cause clogging or improper windshield washer operation. If something gets into the nozzle, remove it with needleorsmall pin Ⓑ.
BRAKESFUSES
Ifthebrakesdonotoperateproperly,havethe brakeschecked.Itisrecommendedthatyouvisit aNISSANdealerforthisservice.
Self-adjustingbrakes
Your vehicle is equipped with self-adjusting brakes.
Thefrontandreardisc-typebrakesself-adjust everytimethebrakepedalisapplied.
A WARNING
Haveyourbrakesystemcheckedifthe brakepedalheightdoesnotreturntonormal.Itisrecommendedthatyouvisita NISSANdealerforthisservice.
Brakepadwearindicators
Thediscbrakepadsonyourvehiclehaveaudible wearindicators.Whenabrakepadrequiresreplacement,ahighpitchedscrapingorscreechingsoundwillbeheardwhenthevehicleisin motion.Thenoisewillbeheardwhetherornotthe brakepedalisdepressed.Havethebrakes checkedassoonaspossibleifthewearindicator soundisheard.
Undersomedrivingorclimateconditions,occasionalbrakesqueak,squealorothernoisemay beheard.Occasionalbrakenoiseduringlightto moderatestopsisnormalanddoesnotaffectthe functionorperformanceofthebrakesystem.
Properbrakeinspectionintervalsshould befollowed.Foradditionalinformationregardingbrakeinspections,refertotheappropriatemaintenancescheduleinformationinthe"MaintenanceandSchedules"sectionofthismanual.

LDI0455
Twotypesoffusesareused.Type ① isusedin thefuseboxesintheenginecompartment.Type ② isusedinthepassengercompartmentfuse box.
Type Ⓐ fusesareprovidedassparefuses.They arestoredinthepassengercompartmentfuse box.
Type Ⓐ fusescanbeinstalledintheengine compartmentandpassengercompartmentfuse boxes.
8-20Do-it-yourself

LDI0457
Ifatype Ⓐ fuseisusedtoreplaceatype Ⓑ fuse, thetype Ⓐ fusewillnotbelevelwiththefuse pocketasshownintheillustration.Thiswillnot affecttheperformanceofthefuse.Makesurethe fuseisinstalledinthefuseboxsecurely.
Type Ⓑ fusescannotbeinstalledintheunderhoodfuseboxes.Onlyusetype Ⓐ fusesinthe underhoodfuseboxes.

VQ40DEengine ENGINECOMPARTMENT
WARNING
Neveruseafuseofhigherorloweramperageratingthanthatsspecifiedonthefuse boxcover. This could damage the electrical system more electronic control units or cause a fire.
Ifanyelectricalequipmentdoesnotcomeon, checkforanopenfuse.
- Besuretheignitionswitchandtheheadlight switchareOFF.

VK56VDengine
-
Opentheenginehood.
-
Removethefuseboxcoverbypushingthe tabandliftingthecoverup.
-
Removethefusewiththefusepuller. The fusepullerislocatedinthecenterofthefuse blockinthepassengercompartment.
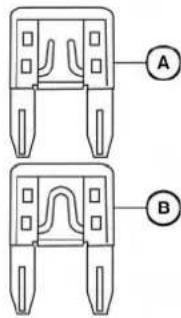
LDI2826LDI0456LDI2828
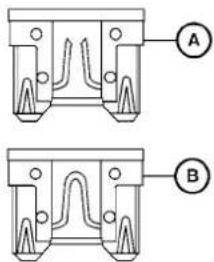
- If the fuse is open fuse Ⓑ.
Ⓐ,replaceitwithanew
- Ifanewfusealsoopens, havetheelectrical systemcheckedandrepaired. It is recommended that you visit a NISSAN dealer for this service.
Fusiblelinks
If the electricalequipment does not operate and fuses are good condition, check the fusible links. If any of these fusible links are melted, replace with only Genuine NISSAN parts.
8-22Do-it-yourself
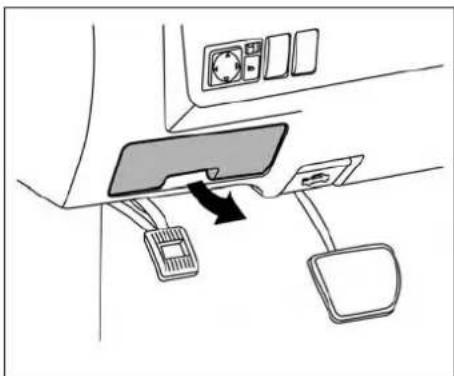
PASSENGERCOMPARTMENT
WARNING
Neveruseafuseofahigherorlower amperageratingthanspecifiedonthe fuseboxcover.Thiscoulddamagethe electricalsystemorelectroniccontrol unitsorcauseafire.
Ifanyelectricalequipmentdoesnotoperate, checkforanopenfuse.
- Besuretheignitionswitchandtheheadlight switchareintheOFFposition.
- Pullthefuseboxcovertoremove.
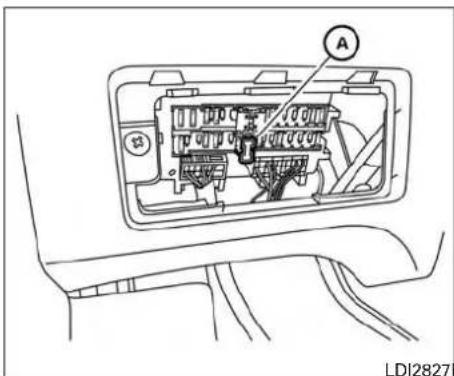
3.Removethefusewiththefusepuller

LDI2827LDI2760LDI2736
A.4.Ifthefuseisopen
⑧,replaceitwithan
equivalentgoodfuse
©.
5.Pushthefuseboxcovertoinstall.
- Ifanewfusealsoopens, havethelectrical systemcheckedandrepaired. It is recommended that you visit a NISSAN dealer for this service.

Extendedstorageswitch
Ifanyelectricalequipmentdoesnotoperate, removetheextendedstorageswitchandcheck foranopenfuse.
NOTE:
Theextendedstorageswitchisused for longtermvehiclestorage.Eveniftheextendedstorageswitchisbrokenitis not necessary to replace it.Replace only the openfuse in the switch with anew fuse.
BATTERYREPLACEMENT
Howtoreplacetheextendedstorageswitch:
- Toremovetheextendedstorageswitch, be suretheignitionswitchisintheOFFFor LOCKposition.
- BesuretheheadlightswitchisintheOFF position.
- Removethefuseboxcover.
4.Pinchthelockingtabs Ⓐ foundoneach sideofthestorageswitch. - Pullthestorageswitchstraightoutfromthe fusebox Ⓑ.
CAUTION
Becarefulnottoallowchildrentoswallow thebatteryorremovedparts.
8-24Do-it-yourself
![graph TD A["Contact Contact"] --> B["Switch"] B --> C{Switch Loop} C -->|Yes| D["Disassembly"] C -->|No| E["Adjustment"] E --> F["Close Outer Ring"] F --> G["Close Inner Ring"] G --> H["End"]](/content/2026/05/789802/images/038f711ed484454fe29fe53590c510659d30e166b4f1fb7f27d8573a47171cc7.jpg)
KEYFOB(ifsoequipped)
Replacethebatteryinthekeyfobasfollows:
① Openthelidusingacoin Ⓐ.
② Removethebattery Ⓑ.
③ Installanewbattery ⓒ withthe“+”facing down.
●Holdthebatterybytheedges.Holdingthe batteryacrossthecontactpointswillseriouslydepletethestoragecapacity.
- Donottouchtheinternalcircuitandelectric terminalsasitcouldcauseamalfunction.
- Whenchangingthebattery, donotletdust oroilgetonthekeyfob.
- Thereisdangerofexplosionifalithiumbatteryisincorrectlyreplaced.Replaceonly withthesameorequivalenttype.
Recommendedbattery:CR2025orequivalent.
④ Closethelidsecurely.
5.Pressthe button,thenthe buttontwoorthreetimestocheckthekey foboperation.
If the battery is removed for any reason other than replacement, perform step 5.
- Animproperly disposed battery can hurt the environment. Always confirm local regulations for battery disposal.
- Thekeyfobiswater-resistant;however,ifitdoesgetwet,immediately wipecompletelydry.
●Theoperationalrangeofthekeyfob extendstoapproximately33ft(10m) fromthevehicle.Thisrangemayvary withconditions.
LIGHTS
FCCNotice:
ForUSA:
This device complies with Part 15 of the FCC Rules. Operation is subject to the following two conditions: (1) This devicem may not cause harmful interference, and (2) this devicem must accept any interferencereceived, including interference that may cause undesired operation.
Note:
Changesormodificationsnotexpresslyapprovedbythepartyresponsibleforcompliancecouldvoidtheuser'sauthoritytooperatetheequipment.
ForCanada:
ThisdevisecomplieswithIndustryCanada licence-exemptRSSstandard(s).Operationissubjecttothefollowingtwoconditions:(1)thisdevicemaynotcauseinterference,and(2)thisdevicemustacceptany interference,includinginterferencethat maycauseundesiredoperationofthedevice.
HEADLIGHTS
For additional information on headlightbulbreplacement, refertothe instructions outlined in this section.
Replacingthehalogenheadlightbulb
Theheadlightisasemi-sealedbeamtypewhich usesareplaceableheadlight(halogen)bulb.Itis recommendedthatyouvisitaNISSANdealerfor thisservice.
Ifthevehicleisequippedwithaftermarketaccessories,itmaybenecessarytore-aimthehead lamps.Foradditionalinformation,referto NISSANNV2500/3500BodyBuildersGuidefor aiminginstructions.Anelectroniccopyofthe NISSANNV2500/3500BodyBuildersGuideis availableatwww.nissancommercialvehicles.com oritisrecommendedthatyouvisitaNISSAN dealerforthisservice.
CAUTION
●Highpressurehalogengasissealed insidethehalogenbulb.Thebulbmay breakiftheglassenvelopeisscratched orthebulbisdropped.
- Whenhandlingthebulb, donottouch theglassenvelope.
•DONOTTOUCHTHEBULBWITHBARE HANDS.
- Donotleavethebulboutoftheheadlightreflectorforalongperiodoftime asdust,moistureandsmokemayenter theheadlightbodyandaffecttheperformanceoftheheadlight.
- Aimingisnotnecessaryafterreplacing thebulb.Whenaimingisnecessary,itis recommendedthatyouvisitaNISSAN dealerforthisservice.
NOTE:
Usethesamenumberandwattageas showninthechart.
Fogmaytemporarilyforminsidethelensofthe exteriorlightsintherainorinacarwash.A temperaturedifferencebetweentheinsideand theoutsideofthelenscausesthefog.Thisisnot amalfunction.Iflargedropsofwatercollect insidethelens,Itisrecommendedthatyouvisita NISSANdealerforthisservice.
FOGLIGHTS(ifsoequipped)
For additional information on foglightbulbreplacement, refertothe instructions outlined in this section.
Replacingthefoglightbulb
CAUTION
●Highpressurehalogengasissealed insidethehalogenbulb.Thebulbmay breakiftheglassenvelopeisscratched orthebulbisdropped.
- When handling the bulb, donottouch the glass envelope.
- Usethesamenumberandwattageas originallyinstalledasshowninthe chart.
- Donotleavethebulboutofthefoglight foralongperiodoftimeasdust,moistureandsmokemayenterthefoglight bodyandaffecttheperformanceofthe foglight.
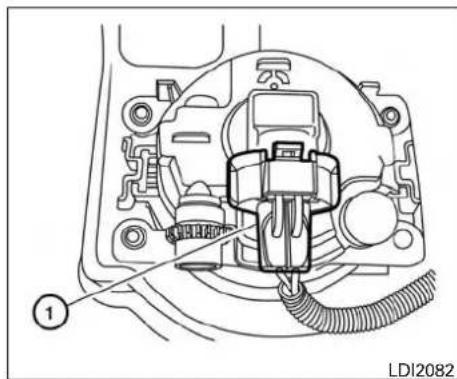
- Disconnectthenegative(-)batterycable.
- The foglight is accessible in front of the front tire and behind the bumper.
3.Disconnectthebulbconnector ①. - Rotatethebulbcounterclockwiseandre- move.
- Remove by pulling it straight out of the fog light assembly. Donot shake or rot at the bulb when removing it. Donottouch the glass envelope.
6.Installinthereverseorderofremoval.
EXTERIORANDINTERIORLIGHTS
| ItemWattage(W)BulbNo. | ||
| Headlightassembly*High/Low/Daytimerunninglight65/55H13Park/Turn8/273157AKSidemarker3.8194Foglights(ifsoequipped)55H11Maplights*8—Interiorlights(rear)(ifsoequipped)*8—CargoLight(ifsoequipped)*Steplights(ifsoequipped)High-mountedstoplight*RearcombinationlightTail/StopBackup(reversing)TurnLicenseplatelight* | 103.8194168/273157KX18275W5W | ——9219213156AK |
* It is recommended that you visit a NISSAN dealer for replacement.
Always check with the Parts Department at a NISSAN dealer for the latest parts information.
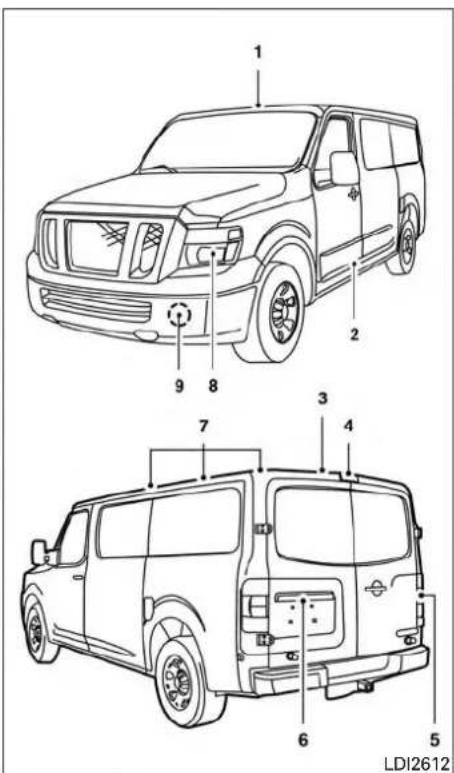
- Maplights
- Steplight(ifsoequipped)
3.Cargolight - High-mounted stoplight
5.Rearcombinationlight - Licenseplatelight
- Interiorlights(rear)(ifsoequipped)
8.Headlightassembly
9.Foglights(ifsoequipped)

Indicatesbulbremoval Indicatesbulbinstallation
Replacementprocedures
AllotherlightsareeithertypeA,B,CorD.When replacingabulb,firstremovethelens,lamp and/orcover.

Steplights(ifsoequipped)
Useacloth ① toprotectthehousing.

Rearcombinationlight
WHEELSANDTIRES
If you have a flattire, referto "Flattire" in the "Incase of emergency" section of this manual.
TIREPRESSURE
TirePressureMonitoringSystem (TPMS)
ThisvehicleisequippedwiththeTire PressureMonitoringSystem(TPMS).It monitorstirepressureofallfourtiresex- ceptthespare.Whenthelowtirepres- surewarninglightislitandtheCHECK TIREwarningappearsinthetripcomputer,oneormoreofyourtiresissignifi- cantlyunder-inflated.
The TPMS will activate only when the vehicle is driven at speeds above 16 mph (25 km/h). Also, this system may not detect as a sudden drop in tire pressure (for example a flattire while driving).
For additional information, refer to "Low tirepressure warning light" in the "Instruments and controls" section, "TirePressure Monitoring System (TPMS)" in the
"Startinganddriving"sectionand"Flat tire"inthe"Incaseofemergency"section of this manual.
Tireinflationpressure
Checkthetirepressures(includingthe spare)oftenandalwayspriortolongdistancetrips.Therecommendedtirepressurespecificationsareshownonthe F.M.V.S.S./C.M.V.S.S.certificationlabel ortheTireandLoadingInformationlabel underthe"ColdTirePressure"heading. The TireandLoadingInformationlabelis affixedtothedriversidecenterpillar.Tire pressuresshouldbecheckedregularly because:
●Mosttiresnaturallyloseairovertime.
- Tirescanloseairsuddenlywhen drivenoverpotholesorotherobjects orifthevehiclestrikesacurbwhile parking.
Thetirepressureshouldbechecked whenthetiresarecold. Thetiresare consideredCOLDafterthevehiclehas
beenparkedfor3ormorehours,ordriven lessthan1 mile(1.6km)atmoderate speeds.
Incorrect tire pressure, including un-derinflation, may adversely affect tire life and vehicle handling.
WARNING
-
Improperlyinflatedtirescanfail suddenlyandcauseanaccident.
●TheGrossVehicleWeightRating (GVWR) is located on the F.M.V.S.S./C.M.V.S.S. certificationlabel.ThevehicleweightcapacityisindicatedontheTireand LoadingInformationlabel.Do notloadyourvehiclebeyondthis capacity. Overloading your vehiclemayresultinreducedtire life, unsafe operating conditions duetoprematuretirefailure,or unfavorablehandlingcharacteristicsandcouldalsoleadtoa seriousaccident.Loadingbeyond thespecifiedcapacitymayalso resultinfailureofothervehicle components. -
Before takingalongtrip, or whenever you heavily load your vehicle, use tire pressure gauge to ensure that the tire pressures are at the specified level.
- For additional information regardingtires,referto"Important TireSafetyInformation" (US)or "Tire Safety Information" (Canada)intheWarrantyInformationBooklet.

TireandLoadingInformationlabel
① Seatingcapacity: Themaximumnumberofoccupantsthatcanbeseated inthevehicle.
② Vehicleloadlimit: Refertoloading information in the "Technical and consumer information" section of this manual.
③ Originaltiresize: Thesizeofthetires originally installed on the vehicle at the factory.
④ Coldtirepressure:Inflatethetiresto thispressurewhenthetiresarecold. TiresareconsideredCOLDafterthe vehiclehasbeenparkedfor3ormore hours,ordrivenlessthan1 mile (1.6km)atmoderatespeeds.The recommendedcoldtireinflationisset bythemanufacturertoprovidethe bestbalanceoftirewear,vehicle handling,driveability,tirenoise,etc., uptothevehicle'sGVWR.
⑤ Tiresize-referto "Tirelabeling" in thissection.
⑥ Sparetiresize.
8-32Do-it-yourself

Checkingtirepressure
- Removethevalvestemcapfromthe tire.
-
Pressthepressuregaugesquarely ontothevalvestem.Donotpresstoo hardorforcethevalvestemsideways, orairwillescape. If the hissing soundofairescaping from the tire is heard while checking the pressure, reposition the gaugetoeliminate this leakage.
3.Removethegauge. -
Read the tire pressure on the gauge stemand compare to these specifications shown on the Tire and Loading Information label.
- Addairtothetireasneeded. If too muchairisadded, pressthecore of thevalvestembriefly with thetip of thegaugestemtoreleasepressure. Recheckthepressure and addor releaseairasneeded.
- Install the valvestem cap.
- Check the pressure of all other tires, including the spare.
| SizeColdTireInflation | Pressure |
| FrontOriginalTire: LT245/70R17 | 350kPa,50PSI |
| RearOriginalTire: LT245/70R17 | 550kPa,80PSI |
| SpareTire: LT245/70R17 | 550kPa,80PSI |
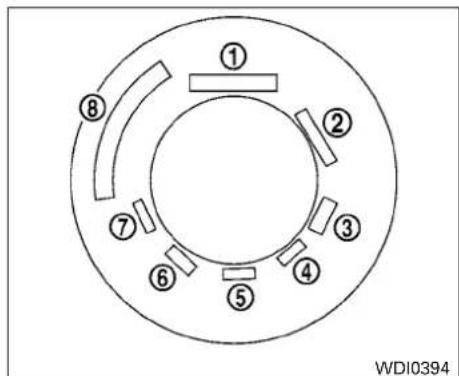
Example
TIRELABELING
Federallawrequirestiremanufacturer to placestandardizedinformationonthe sidewallofalltires.Thisinformationidentifiesanddescribesthefundamental characteristicsofthetireandalsopro- providesthetireidentificationnumber(TIN) forsafetystandardcertification.TheTIN canbeusedtoidentifythetireincaseofa recall.
P215/65R15 95H
P

1
215

2
65

3
R

4
15

5
95

6
H

7
WDI0395
7.H:Tirespeedrating.Youshouldnot drivethevehiclefasterthanthetire speedrating.
Example
① Tiresize(example:P215/65R1595H)
1.P:The "P"indicatesthetireisdesignedforpassengervehicles(notall tireshavethisinformation).
2. Three-digitnumber(215): This number gives the width in millimeters of the tire from sidewalled getoside-walledge.
3. Two-digitnumber(65): This number, knownastheaspectratio, gives the tire's ratio of height to width.
8-34Do-it-yourself
4.R:The“R”standsforradial.
5. Two-digit number(15): This number isthewheelorrimdiameterin inches.
6. Two-orthree-digitnumber(95): This numberisthetire'sloadindex.Itisa measurementofhowmuchweight eachtirecansupport.Youmaynot findthisinformationonalltiresbecauseitisnotrequiredbylaw.

- DOT: Abbreviation for the "Department Of Transportation". Thesymbol can be placed above, below to the left or right of the Tire Identification Number.
- Two-digitcode: Manufacturer's identificationmark.
-
Two-digitcode: Tiresize.
-
Three-digitcode: Tiretypecode (Optional).
- Four numbers represent the week and year the tre was built. Forex-ample, then numbers 3103 mean the 31st week of 2003. If these numbers are missing then look on the other sidewallof the tire.
③ Tireplycompositionandmaterial Thenumberoflayersorpliesofrubber-coatedfabricinthetire.Tiremanufactur-
ersalsomustindicatethematerialsinthe tire,whichincludesteel,nylon,polyester andothers.
④ Maximumpermissibleinflationpressure
Thisnumberisthegreatestamountofair pressurethatshouldbeputinthetire.Do notexceedthemaximumpermissibleinflationpressure.
⑤ Maximumloadrating
Thisnumberindicatethemaximumload inkilogramsandpoundsthatcanbecarriedbythetire.Whenreplacingthetires onthevehicle,alwaysuseatirethathas thesameloadrating asthefactoryinstalledtire.
⑥ Termof"tubeless"or"tubetype"
Indicateswhetherthetirerequiresanin-nertube("tubetype")ornot("tubeless").
⑦ Theword"radial"
Theword"radial"isshownifthetirehas radialstructure.
⑧ Manufacturerorbrandname
Manufacturerorbrandnameisshown.
Do-it-yourself
OtherTire-relatedTerminology
Inadditiontothemanytermsthatare definedthroughoutthissection,Intended OutboardSidewallis(1)thesidewallthat containsawhitewall,bearswhitelettering orbearsmanufacturer,brand,and/or modelnamemoldingthatishigheror deeperthanthesamemoldingonthe othersidewallofthetire,or(2)theoutwardfacingsidewallofanasymmetrical tirethathasaparticularsidethatmust alwaysfaceoutwardwhenmountedona vehicle.
TYPESOFTIRES
WARNING
- Whenchangingorreplacingtires, be sureallfourtiresareofthesametype (i.e.,Summer,AllSeasonorSnow)and construction.ANISSANdealermaybe abletohelpyouwithininformationabout tiretype,size,speedratingand availability.
- Replacementtiresmayhavealower speedratingthanthefactoryequipped tires,andmaynotmatchthepotential maximumvehiclespeed.Neverexceed themaximumspeedratingofthetire.
- Replacing tires with those not originally specified by NISSAN could affect the proper operation of the low tire pressure warnings system.
- For additional information regarding tires, refer to "Important Tire Safety Information" (US) or "Tire Safety Information" (Canada) in the Warranty Information Booklet.
Allseasontires
NISSAN specifies All Season tires on some modelstoprovidegoodperformanceallyear,includingsnowyandicyroadconditions.AllSeason tiresareidentifiedbyALLSEASONand/orM&S onthetiresidewall.Snowtireshavebettersnow tractionthanAllSeasontiresandmaybemore appropriateinsomeareas.
Summertires
NISSANspecifiessummertiresonsomemodels toprovidesuperiorperformanceondryroads. Summertireperformanceissubstantiallyre-
duced insnowandice. Summertiresdonothave thetiretractionrating"M&S" onthetiresidewall.
If you planto operate your vehicle in snowy oricy conditions, NISSAN recommend the use of SNOW tires or ALL SEASON tires on all four wheels.
Snowtires
Ifsnowtiresareneeded,itisnecessarytoselect tiresequivalentinsizeandloadratingtothe originalequipmenttires.Ifyoudonot,itcan adverselyaffectthesafetyandhandlingofyour vehicle.
Generally, snowtireshavelowerspeedratings thanfactoryequippedtiresandmaynotmatch thepotentialmaximumvehiclespeed.Neverexceedthemaximumspeedratingofthetire.
If you install snowtires, they must be the same size, brand, construction and tread pattern on all four wheels.
For additional traction on icy roads, studded tires maybe used. However, some U.S. states and Canadian provinces prohibit their use. Check local, state and provincial laws before installing studded tires. Skidand traction capabilities of studded snow tires on wet or dry surfaces may be poorer than that of non-studded snow tires.
TIRECHAINS
Useoftirechainsmaybeprohibitedaccordingto location.Checkthelocallawsbeforeinstalling tirechains.Wheninstallingtirechains,makesure theyarethepropersizeforthetiresonyour vehicleandareinstalledaccordingtothechain manufacturer's suggestions.UseonlySAE class"S"chains.Class"S"chainsareusedon vehicleswithrestrictedtiretovehicleclearance. VehiclesthatcanuseClass"S"chainsaredesignedtomeetthemminimumclearancesbetween thetireandtheclosestvehiclesuspensionor bodycomponentrequiredtoaccommodatethe useofawintertractiondevice(tirechainsor cables).Theminimumclearancesaredetermined usingthefactoryequippedtiresize.Othertypes maydamageyourvehicle.Usechaintensioners whenrecommendedbythetirechainmanufacturertoensureatightfit.Looseendlinksofthe tirechainmustbesecuredorremovedtoprevent thepossibilityofwhippingactiondamagetothe fendersorunderbody.Ifpossible,avoidfullyloadingyourvehiclewhenusingtirechains.Inaddition,driveatareducedspeed.Otherwise,your vehiclemaybedamagedand/orvehiclehandling andperformancemaybeadverselyaffected.
Tirechainsmustbeinstalledonlyonthe rearwheelsandnotonthefrontwheels.
Donotusetirechainsondryroads. Driving with chainsinsuchconditionscancausedamageto thevariousmechanismsofthevehicledueto someoverstress.
![graph TD A["Stage 1"] --> B["Stage 2"] B --> C["Stage 3"] C --> D["Stage 4"] D --> A style A fill:#f9f,stroke:#333 style B fill:#f9f,stroke:#333 style C fill:#f9f,stroke:#333 style D fill:#f9f,stroke:#333](/content/2026/05/789802/images/005144c8ced8df3a698f31a483b13073dc73ed908e57c284593f4d42573fd46d.jpg)
WDI0258
CHANGINGWHEELSANDTIRES
Tirerotation
NISSAN recommends rotating the tires every 5,000 miles (8,000 km).
For additional information on the their replacing procedures, refer to "Flattire" in the "Incase of emergency" section of this manual.
Assoonaspossible,tightenthe wheelnutstothespecifiedtorque withatorquewrench.
Do-it-yourself8-37
Wheelnuttighteningtorque:
131ft-lb(177N·m)
The wheelnuts must be kept tightened to specifications at all times. It is recommended that wheel nuts be tightened to specification at each tirerotation interval.
Because the tire pressures are different between the front and rear tires, the Tire Pressure Monitoring System (TPMS) must be resetafter tirerotation. For additional information, refer to "TPMS sensor reset" in this section.
WARNING
●Afterrotatingthetires,checkand adjustthetirepressure.
- Retightenthewheelnutswhen thevehiclehasbeendrivenfor 600miles(1,000km)(alsoin casesofaflattire,etc.).
- Donotincludethesparetirein thetirerotation.
- For additional information regarding tires, refer to "Important Tire Safety Information" (US) or "Tire Safety Information" (Canada) in the Warranty Information Booklet.

TPMSsensorreset
After rotating the tires, the TPMS sensor position needs to be relearned. Contact the closest NISSANdealerorfollowthestepsbelow.
- Afterrotating the tietires, adjust the tire pressure as shown above. Decrease air pressure for at least 30 seconds continuously for each tire (more than 10 psi (69 kPa) within 30 seconds) to placethe TPMS system into relearn mode for 30 minutes.
- On the meter, start there learn procedure using the INFO □ knob as follows: SETTINGS → TPMS Menu → RE-LEARN → CONFIRM
The TPMS warning light flashes continuously when the system is mislearning the tire positions.
- Whentherelearnprocedureissuccessfully completed:
-TheTPMSlight 3seconds

illuminatesfor
-Achimesoundsthreetimes
- Adjust the tire pressure to the cold tire pressures specifications shown without tire and loading information label. For additional information, refer to "Checking tire pressure" in this section and "Tire and Loading Information label" in the "Technical and consumer information" section of this manual.
-Ifthetirespressuresarecorrect,the TPMSlightturnsoff.
- If the tires are not inflated to the correct cold tire pressure, the TPMS warning light illuminates. Recheck the tire pressures and adjust as necessary.
If therelearnproceduredoesnotwork, checkthefollowingandretrytheprocess:
- If therelearnprocedureisstoppedbefore completion,thenewtirepositionsarenot learned.Redothecompleterelearnproceduretoresetthetirepositions.
- Youmustselect"RESETTPMS→RE-LEARN"fromthe"SETTINGS"menuto completetherlearnprocedure.Redothe completerelearnproceduretoresetthetire positions.SelecttheTPMSresettingmenu, thencontinuetheremainingregistrationprocedure.
- Adjust the tire pressure to the earl pressures before selecting the TPMS resetting menu on the display. Red the complete relearn procedure to reset the tire positions.
- If the tire pressure cannot be reduced at least 10 psi (69 kPa) to adjust them to the relearn pressures, inflate the tire to least 10 psi (69 kPa) above the specified pressures. Redothecompleter elearn procedure starting with step 1.
●Deviceswhichemitelectronicinterference shouldbe turnedoff before starting there-learn procedure. The interference may prevent the system from learning then new tire positions. Turnofforremovesources of electrical interference. If necessary, move the vehicle to another location, then red the completerelearn procedure to reset the tire positions.
- If you have tried the procedure several times and there learn procedure is not successfully completed, it is recommended that you visit a NISSAN dealer forth this service.
- Useanairpumpthatiscapableofinflating thetirestotherequiredpressurespecifications.Theairpumpmustbecapableofinflatingatireatleast10psi(69kPa)in 30seconds.
- IftheresetTPMSfunctionisunintentionally selected, placetheignitionswitchinthe OFFpositionthentotheONpositiontoend therelearnprocedure.
- If the vehicle is not recognizing then new tire pressure levels, move the vehicle forward 40in(1m). Placetheignitionswitchinthe OFFpositionthentotheONposition.Redo therelearnprocedurebeginningatstep1. Make sure that the tire pressures are increased or decreased at least 10 psi (69kPa).
- When vehicle is in the relearn mode, the TPMSwillnotwarnoflowtirepressuresor detectmalfunctions.
- Iftirepressureisnotsettothecorrectpressure,restarttheprocedureagain.

WDI0259
Tirewearanddamage
- Wearindicator
2.Locationmark
WARNING
- Tiressshouldbeperiodicallyin-spectedforwear,cracking,bulgingorobjectscacgthinthetread. Ifexcessivewear,cracks,bulging ordeepcutsarefound,thetire(s) shouldbereplaced.
- Theoriginaltireshavebuilt-in treadwearindicators.Whenthe wearindicatorsarevisible,the tire(s)shouldbereplaced.
- Tiresdegradewithageanduse. Havetires,includingthespare, over6yearsoldcheckedbya qualifiedtechnicianbecause sometiredamagemaynotbeobvious.Replacethetiresasnecessarytopreventtirefailureand possiblepersonalinjury.
- Improperserviceofthesparetire mayresultinseriouspersonalinjury.Ifitisnecessarytorepairthe sparetire,itisrecommendedthat youvisitaNISSANdealerforthis service.
- For additional information regarding tires, refer to "Important Tire Safety Information" (US) or "Tire Safety Information" (Canada) in the Warranty Information Booklet.
Replacingwheelsandtires
When replacing atire, usethesamesize, tread design, speed rating and load carrying capacity as originally equipped. For additional information, refer to "Wheelsandtires" in the "Technical and consumer information" section of this manual.
WARNING
- The use of tires other than those recommendedorthemixeduseoftiresof different brands, construction (bias, bias-beltedorradial),ortreadpatterns canadverselyaffecttheride,braking, handling, Vehicle Dynamic Control (VDC)system,groundclearance,body-to-tireclearance,tirechainclearance, speedometercalibration,headlightaim andbumperheight.Someoftheseeffectsmayleadtoaccidentsandcould resultinseriouspersonalinjury.
- If your vehicle was originally equipped with four tires that were the same size and you are only replacing two of the four tires, install thenew tires on the rear axle. Placing new tires on the front axle may cause loss of vehicle control in some driving conditions and cause an accident and personal injury
- If the wheels are changed for any reason, always replace with wheels which havethesameoff-set dimension. Wheelsof different off-set could cause premature tire wear, degrade vehicle handling characteristics, affect the VDC system and/or interference with the braked discs. Such interference can lead to decreased braking efficiency and/or early brake pad wear. For additional information on wheel off-set dimensions, refer to "Wheels and tires" in the "Technical and consumer information" section of this manual.
- Sincethesparetireisnotequipped with theTPMS, whenasparetireismounted orawheelisreplaced, tirepressurewill notbeindicated, theTPMSwillnot functionandthelowtirepressurewarninglightwillflashforapproximately 1minute. Thelightwillremainonafter 1minute. Haveyour tiresreplaced and/orTPMSsystemresetassoonas possible. It is recommended that you visitaNISSANdealerforthisservice.
- Replacingtireswiththosenotoriginally specified by NISSANcould affectthe properoperationoftheTPMS.
- TheTPMSsensormaybedamagedifit is not handled correctly. Be careful whenhandlingtheTPMSsensor.
- When replacing the TPMS sensor, the ID registration may be required. It is recommended that you visit a NISSAN dealer for ID registration.
- Donotuseavalvestemcapthatisnot specified byNISSAN.Thevalve stem capmaybecomestuck.
- Be sure that the valve stem caps are correctlyfitted. Otherwisethevalvemay becloggedupwithdirtandcausea malfunctionorlossofpressure.
- Donotinstalladamagedordeformed wheelortireevenifithasbeenrepaired.Suchwheelsortirescouldhave structuraldamageandcouldfailwithoutwarning.
- The use of retread tires is not recommended.
- For additional information regarding tires, referto "Important Tire Safety Information" (US) or "Tire Safety Information" (Canada) in the Warranty Information Booklet.
Wheelbalance
Unbalanced wheels may affect vehicle handling and tire life. Even with regular use, wheels can get out of balance. Therefore, they should be balanced as required.
Wheelbalance services should be performed with the wheel soff the vehicle. Spin balancing the wheels on the vehicle could lead to mechanical damage.
- For additional information regarding tires, refer to "Important Tire Safety Information" (US) or "Tire Safety Information" (Canada) in the Warranty Information Booklet.
Careofwheels
- Washthewheelswhenwashingthevehicle tomaintaintheirappearance.
- Cleantheinnersideofthewheelswhenthe wheelischangedortheundersideofthe vehicleiswashed.
- Donotuseabrasivecleanerswhenwashing thewheels.
- Inspectwheelrimsregularlyfordentsor corrosion. Suchdamagemaycauselossof pressureorpoorsealatthetirebead.
- NISSANrecommendswaxingtheroad wheelstoprotectagainstroadsaltinareas whereitisusedduringwinter.
8-42Do-it-yourself
9Maintenanceandschedules
Maintenancerequirements....9 - 2
Generalmaintenance....9-2
Scheduledmaintenance....9-2
Wheretogoforservice....9-2
Generalmaintenance....9-2
Explanationofgeneralmaintenanceitems. . . . . . . . 9 - 2
Explanation of scheduled maintenance items. 9 - 5
EmissionControlSystemMaintenance:....9-5
ChassisandBodyMaintenance:....9-6
Maintenanceschedules....9 - 6
AdditionalMaintenanceltemsforsevere operatingconditions. 9 - 6
Standardmaintenance....9-7
Emissioncontrolsystemmaintenance....9-8
Chassis&bodymaintenance....9-10
Maintenanceundersevereoperatingconditions.....9-12
Severedrivingconditions....9-12
Maintenancelog. 9-13
MAINTENANCEREQUIREMENTS
Someday-to-day and regular maintenance is essential to maintain your vehicle good mechanical condition, as well as it semissions and engine performance.
Itistheowner's responsibility to make sure that the scheduled maintenance, as well as general maintenance, is performed.
Asthevehicleowner,youaretheonlyonewho canensurethatyourvehiclereceivesproper maintenance.Youareavitallinkinthemaintenancechain.
GENERALMAINTENANCE
Generalmaintenanceincludesthoseitemswhich shouldbecheckedduringnormalday-to-dayoperation. They are essential for proper vehicle operation. It is your responsibility to perform these procedures regularly as prescribed.
Performinggeneralmaintenancechecksrequires minimalmechanicalskillandonlyafewgeneralautomotivetools.
These checks or inspections can be done by yourself, a qualified technician, if you prefer, a NISSAN dealer.
Themaintenanceitemslistedinthissectionare requiredtobeservicedatregularintervals.Howeverunderseveredrivingconditions,additional ormorefrequentmaintenancewillberequired.
WHERETOGOFORSERVICE
Ifmaintenanceserviceisrequiredoryourvehicle appearstomalfunction,havethesystems checkedandserviced.Itisrecommendedthat youvisitaNISSANdealerforthisservice.
NISSANtechniciansarewell-trainedspecialists andarekeptup-to-datewiththelatestservice informationthroughtechnicalbulletins,service tipsandtrainingprograms.Theyarecompletely qualifiedtoworkonNISSANvehiclesbefore workbegins.
YoucanbeconfidentthataNISSANdealer's servicedepartmentcanperformtheservice neededtomeetthemaintenancerequirements onyourvehicle.
GENERALMAINTENANCE
During thenormalday-to-day operation of the vehicle, general maintenances should be performed regularly as prescribed in this section. If you detect any unusual sounds, vibrations or smells, besure to check for the cause or have a NISSAN dealer do it promptly. In addition, it is recommended that you visit a NISSAN dealer if youth think that repairs are required.
When performing any checks or maintenance work, closely observ the "Maintenance precautions" in the "Do-it-yourself" section of this manual.
EXPLANATIONOFGENERAL MAINTENANCEITEMS
Additional information onthe following itemswith “ * ” is foundinthe“Do-it-yourself”sectionofthismanual.
Outsidethevehicle
Themaintenanceitemslistedhereshouldbe performedfromtimetotime,unlessotherwise specified.
Doorsandenginehood:Checkthatthedoors andenginehoodoperateproperly. Also ensure that all latcheslocksecurely. Lubricate hinges, latches, latchpins, rollersandlinksifnecessary.
9-2 Maintenanceandschedules
Makesurethatthesecondarylatchkeepthe hoodfromopeningwhentheprimarylatchis released.
Whendrivinginareasusingroadsaltorother corrosivematerials, checklubricationfrequently.
Lights*:Cleantheheadlightsonaregularbasis. Makesurethattheheadlights,stoplights,tail lights,turnsignallights,andotherlightsareall operatingproperlyandinstalledsecurely.Also checkheadlightaim.
Roadwheelnuts(lugnuts)*:Whenchecking thetires,makesurenowheelnutsaremissing, andcheckforanyloosewheelnuts.Tightenif necessary.
Tirerotation*:Tiresshouldberotatedevery 5,000miles(8,000km).
Tires*:Checkthepressurewithagaugeoften andalwayspriortolongdistancetrips.Ifnecessary,adjustthepressureinalltires,includingthe spare,tothepressurespecified.Checkcarefully fordamage,cutsorexcessivewear.
TirePressureMonitoringSystem(TPMS) transmittercomponents:ReplacetheTPMS transmittergrommetseal,valvecoreandcap whenthetiresarereplacedduetowearorage.
Wheelalignmentandbalance:Ifthevehicle shouldpulltoeithersidewhiledrivingona straightandlevelroad,orifyoudetectunevenor abnormaltirewear,theremaybeaneedforwheel alignment.Ifthesteeringwheelorseatvibratesat normalhighwayspeeds,wheelbalancingmaybe needed.
For additional information regarding tires, refer to "Important Tire Safety Information" (US) or "Tire Safety Information" (Canada) in the Warranty Information Booklet.
Windshield: Cleanthewindshieldonaregular basis. Checkthewindshieldatleasteverysix monthsforcracksorotherdamage. HaveAdamagedwindshieldrepairedbyaqualifiedrepair facility.
Windshieldwiperblades*:Checkforcracks orweariftheydonotwipeproperly.
Insidethevehicle
Themaintenanceitemslistedhereshouldbe checkedonaregularbasis,suchaswhenperformingscheduledmaintenance,cleaningthevehicle,etc.
Acceleratorpedal: Checkthepedalforsmooth operation and makesurethepedaldoesnot catchorrequireuneveneffort. Keepthefloormat awayfromthepedal.
AutomatictransmissionP(Park)mechanism:Onafairlysteephillcheckthatthevehicle isheldsecurelywiththeshiftleverintheP(Park) positionwithoutapplyinganybrakes.
Brakepedal:Checkthepedalforsmoothoperation.Ifthebrakepedalsuddenlygoesdown furtherthannormal,thepedalfeelsspongyorthe vehicleseemstotakelongertostop,haveyour vehiclecheckedimmediately.Itisrecommended thatyouvisitaNISSANdealerforthisservice. Keepthefloormatawayfromthepedal.
Brakes: Check that the brakes donot pull the vehicle to onesidewhen applied.
Parkingbrake: Check the parking brake operation regularly. The vehicles should be securely held on a fairly steep hill with only the parking brake applied. If the parking brakeneeds adjustment, it is recommended that you visit a NISSAN dealer for this service.
Seats: Checkseatpositioncontrolssuchas seatadjusters, seatbackrecliner, etc., toensure theyoperates smoothlyandalllatcheslocksecurelyineveryposition. Checkthatthehead restraints/headrestsmoveupanddown smoothlyandthelocks(ifsoequipped)hold securelyinalllatchedpositions.
Seatbelts: Check that all part of these seat belt system (forexample, buckles, anchors, adjusters and retractors) operate properly and smoothly, and are installed securely. Check the belt webbing for cuts, fraying, wearordamage.
Steeringwheel: Checkforchangesinthe steeringsystem, such as excessivefreeplay, hardsteeringorstrangenoises.
Warninglightsandchimes: Makesureall warninglightsandchimesareoperatingproperly.
Windshielddefroster:Checkthattheair comesoutofthedefrosteroutletsproperlyandin sufficientquantitywhenoperatingtheheateror airconditioner.
Windshieldwiperandwasher*:Checkthat thewipersandwasheroperateproperlyandthat thewipersdonotstreak.
Underthehoodandvehicle
Themaintenanceitemslistedhereshouldbe checkedperiodically(forexample,eachtimeyou checktheengineoilorrefuel).
Battery*:Checkthefluidlevelineachcell.The fluidshouldbeatthebottomofthefilleropening. Vehiclesoperatedinhightemperaturesorunder severeconditionsrequirefrequentchecksofthe batteryfluidlevel.
9-4 Maintenanceandschedules
NOTE:
Careshouldbetakentoavoidsituations thatcanleadtopotentialbatterydischarge andpotentialno-startconditionssuchas:
-
Installationorextendeduseofelec- tronicaccessoriesthatconsumebat- terypowerwhentheengineisnotrun- ning(Phonechargers,GPS,DVD players,etc.).
-
Vehicle is not driven regularly and/or only drivenshort distances.
In these cases, the battery may need to be charged to maintain battery health.
Brakefluidlevel*: Makesurethatthebrake fluidlevelisbetweentheMAXandMINlineson thereservoir.
Enginecoolantlevel*:Checkthecoolantlevel whentheengineiscold.
Enginedrivebelts*: Makesurethedrivebelts are not frayed, worn, cracked or oily.
Engineoillevel*: Checkthelevelafterparking thevehicleonalevelspotandturningoffthe engine. Waitmorethan15minutesfortheoilto drainbackintotheoilpan.
Exhaustsystem: Makesuretherearenoloose supports, cracksorholes. If the sound of the exhaust seems unusual or there is a mell of exhaust fumes, immediately have the exhaust system inspected. It is recommended that you visit a NISSAN dealer for this service. For additional information, refer to "Exhaust gas (carbon monoxide)" in the "Starting and driving" section of this manual.
Fluidleaks: Checkunderthevehicleforfuel, oil, waterorotherfluidleaksafterthevehiclehas beenparkedforawhile. Water drippingfromthe airconditionerafteruseisnormal.Ifyoushould noticeanyleaksoriffuelfumesareevident, checkforthecauseandhaveitcorrectedimmediately.
Power steering fluid level* and lines: Check the level when the fluid is cold, with the engine off. Check the lines for proper attachment, leaks, cracks, etc.
Radiatorandhoses: Checkthefrontofthe radiatorandcleanoffanydirt, insects, leaves, etc., that may have accumulated. Makesurethe hoseshavenocracks, deformation, rotorloose connections.
EXPLANATIONOFSCHEDULED MAINTENANCEITEMS
Underbody:Theunderbodyisfrequentlyexposedtocorrosivesubstancesuchasthose usedonicyroadsortocontroldust.Itisvery importanttoremovethesesubstances,otherwiserustmayformonthefloorpan,frame,fuel linesandaroundtheexhaustsystem.Attheend ofwinter,theunderbodyshouldbethoroughly flushedwithplainwater,beingcarefultoclean thoseareaswheremudanddirtmayaccumulate. Foradditionalinformation,refertothe"Appearanceandcare"sectionofthismanual.
Windshield-washerfluid*:Checkthatthereis adequatefluidinthereservoir.
The following descriptions are provided to give you better understanding of the scheduled maintenance item that should be regularly checked or replaced. Themaintenances schedule indicates at which mileage/time interval each item requires service.
In addition to scheduled maintenance, your vehicle requires that some items be checked during normal day-to-day operation. For additional information, refer to "General maintenance" in this section.
Itemsmarkedwith“*”arerecommendedby NISSANforreliablevehicleoperation.Youare notrequiredtoperformmaintenanceonthese itemsinordertomaintainthewarrantieswhich comewithyourNISSAN.Othermaintenance itemsandintervalsarerequired.
When applicable, additional information can be found in the "Do-it-yourself" section of this manual.
NOTE:
NISSANdoesnotadvocatetheuseofnon-OEMapprovedaftermarketflushingsystemsandstronglyadvisesagainstperformingtheseservicesonaNISSANproduct. Manyoftheaftermarketflushingsystemsusenon-OEMapprovedchemicalsorsolvents,theuseofwhichhasnotbeenvalidatedbyNISSAN.
Forrecommendedfuel,lubricants,fluids, grease,andrefrigerant,referto"Recommendedfluids/lubricantsandcapacities" inthe"Technicalandconsumerinformation"sectionofthismanual.
EMISSIONCONTROLSYSTEM MAINTENANCE:
Drivebelts*: Checkenginedrivebeltsforwear, frayingorcrackingandforpropertension. Replaceanydamageddrivebelts.
Engineairfilter:Replaceatspecifiedintervals. Whendrivingforprolongedperiodsindustyconditions,check/replacethefiltermorerefrequently.
Enginecoolant*:Replacecoolantatthespecifiedinterval.Whenaddingorreplacingcoolant, besuretouseonlyGenuineNISSANLongLife Antifreeze/Coolant(blue)orequivalentwiththe propermixture.(Foradditionalinformationonthe propermixtureforyourarea,referto"Engine coolingsystem"inthe"Do-it-yourself"sectionof thismanual.)
NOTE: Mixinganyothertypeofcoolantor theuseofnon-distilledwatermayreduce therecommendedserviceintervalofthe coolant.
MAINTENANCESCHEDULES
Engineoilandoilfilter:Replaceengineoil andoilfilteratthespecifiedintervals.Forrecommendedoilgradeandviscosityrefereto"Recommendedfluids/lubricantsandcapacities"inthe "Technicalandconsumerinformation"sectionof thismanual.
Evaporativeemissionscontrolvaporlines*: Checkvaporlinesforleaksorlooseness.Tighten connectionsorreplacepartsasnecessary.
Fuellines*: Check the fuel hoses, piping and connections for leaks, looseness, deterioration. Tighten connections or replace parts as necessary.
Sparkplugs:Replaceatspecifiedintervals.Installnewplugsofthesametypeasoriginally equipped.
CHASSISANDBODY MAINTENANCE:
Brakelinesandcables: Visuallyinspectfor properinstallation.Checkforchafing,cracks, deterioration,andsignsofleaking.Replaceany deterioratedordamagedpartsimmediately.
Brakepadsandrotors: Checkforwear, deterioration and fluidleaks. Replace any deteriorated ordamaged parts immediately.
Exhaustsystem: Visually inspect the exhaust pipes, muffler and hangers for leaks, cracks, deterioration, and damage. Tighten connections or replace parts as necessary.
Steeringgearandlinkage,axleandsuspensionparts,driveshaftboots:Checkfor damage,looseness,andleakageofoilgrease. Underseveredrivingconditions,inspectmore frequently.
Tirerotation: Tiresshouldberotated every 5,000 miles (8,000 km) according to the instructions under "Explanation of general maintenance items" in this section. When rotating tires, check for damage and uneven wear. Replace if necessary.
Transmissionfluid/oil,differentialoil:Visuallyinspectforsignsofleakageatspecifiedintervals.
Tohelpensuresmooth,safeandeconomical driving,NISSANprovidestwomaintenance schedulesthatmaybeused,dependinguponthe conditionsinwhichyouusuallydrive.These schedulescontainbothdistanceandtimeintervals,upto120,000miles (192,000km)/144months.Formostpeople,the odometerreadingwillindicatewhenserviceis needed.However,ifyoudriveverylittle,your vehicleshoubeservicedattheregulartime intervalsshownintheschedule.
After120,000miles(192,000km)/144months,continuemaintenanceatthe samemileage/timeintervals.
ADDITIONALMAINTENANCEITEMS FORSEVEREOPERATING CONDITIONS
Additional maintenance items for severe operating conditions should be performed on vehicle that are driven under especially demanding conditions. Additional maintenance item should be performed by primarily operate your vehicle under the following conditions:
- Repeatedshorttripsoflessthan5miles (8km).
STANDARDMAINTENANCE
●Repeatedshorttripsoflessthan10miles (16km)withoutsidetemperaturesremainingbelowfreezing.
- Operatinginhotweatherinstop-an-go "rushhour"traffic.
- Extensiveidlingand/orlowspeeddrivingfor longdistances,suchaspolice,taxiordoor-to-doordeliveryuse.
- Drivingindustyconditions.
●Drivingonrough, muddyorsaltspread roads.
●Towingatraler, using acamperorusinga car-topcarrier.
The following table show the standard maintenance schedule. Depending upon weather and atmospheric conditions, varying roads surfaces, individual driving habits and vehicle usage, additional or more frequent maintenance may be required. After 120,000 miles (192,000 km) / 144 months, continue maintenance at the same mileage / time interval.
NOTE:
ForvehiclesoperatedinCanada, both standardandseveremaintenanceitems shouldbeperformedateveryinterval.
Maintenanceandschedules9-7
EMISSIONCONTROLSYSTEM
MAINTENANCE
Abbreviations: I=Inspectandcorrectorreplaceasnecessary, R=Replace
| MAINTENANCEOPERATIONPerformatnumberofmiles,kilometersormonths,whichevercomesfirst. | milesx1,000(kmx1,000)Months | MAINTENANCEINTERVAL | |||||||||||
| 5(8)6 | 10(16)12 | 15(24)18 | 20(32)24 | 25(40)30 | 30(48)36 | 35(56)42 | 40(64)48 | 45(72)54 | 50(80)60 | 55(88)66 | 60(96)72 | ||
| DrivebeltsSeeNOTE(1)|*|*|* | |||||||||||||
| AircleanerfilterSeeNOTE(2)RR | |||||||||||||
| EVAPvaporlines|*|*|* | |||||||||||||
| Fuellines|*|*|* | |||||||||||||
| Fuelfilter | SeeNOTE(3) | ||||||||||||
| Enginecoolant* | SeeNOTE(4)(5) | ||||||||||||
| Engineoil | RRRR | RRRRRRRR | |||||||||||
| Engineoilfilter | RRRR | RRRRRRRR | |||||||||||
| Sparkplugs | SeeNOTE(6) | Replaceevery105,000miles(168,000km) | |||||||||||
| Intakeandexhaustvalveclearances* | SeeNOTE(7) | ||||||||||||
| MAINTENANCEOPERATIONPerformatnumberofmiles,kilometersormonths,whichevercomesfirst. | milesx1,000(kmx1,000)Months | MAINTENANCEINTERVAL | ||||||||||||
| 65(104)78 | 70(112)84 | 75(120)90 | 80(128)96 | 85(136)102 | 90(144)108 | 95(152)114 | 100(160)120 | 105(168)126 | 110(176)132 | 115(184)138 | 120(192)144 | |||
| DrivebeltsSeeNOTE(1)|*|*|*|*|*|* | ||||||||||||||
| AircleanerfilterSeeNOTE(2)RR | ||||||||||||||
| EVAPvaporlines|*|*|* | ||||||||||||||
| Fuellines|*|*|* | ||||||||||||||
| FuelfilterSeeNOTE(3) | ||||||||||||||
| Enginecoolant*SeeNOTE(4)(5) | ||||||||||||||
| Engineoil | RRRR | RRRRRR | RR | |||||||||||
| Engineoilfilter | RRRR | RRRRRR | RR | |||||||||||
| Sparkplugs | SeeNOTE(6)Replace every 105,000miles(168,000km) | |||||||||||||
| Intakeandexhaustvalveclearances* | SeeNOTE(7) | |||||||||||||
NOTE:
(1) After 40,000 miles (64,000 km) or 48 months, inspect every 10,000 miles (16,000 km) or 12 months. Replace the drive belts if found damaged.
(2) If operating mainly in dusty conditions, more frequent maintenance may be required.
(3) Periodic maintenance is not required.
(4) First replacement interval is 105,000 miles (168,000 km) or 84 months. After first replacement, replace every 75,000 miles (120,000 km) or 60 months.
(5) Use only Genuine NISSAN Long Life Antifreeze/Coolant (blue) or equivalent with proper mixture ration of 50% antifreeze and 50% demineralized or distilled water. Mixing any other type of coolant or the use of non-distilled water may reduce the life expectancy of the factory fill coolant.
(6) Replace spark plug when the plug gap exceeds 0.049 in (1.25 mm) even if within specified periodic replacement mileage.
(7) Periodic maintenance is not required. However, if valve noise increased, inspect valve clearance.
* Maintenance items and intervals with “*” are recommended by NISSAN for reliable vehicle operation. The owner need not perform such maintenance in order to maintain the emission warranty or manufacturer recall liability. Other maintenance items and intervals are required.
Maintenance and schedules
Abbreviations: I=Inspectandcorrectorreplaceasnecessary, R=Replace,
| MAINTENANCEOPERATIONPerformatnumberofmiles,kilometersormonths,whichever comesfirst. | milesx1,000(kmx1,000)Months | MAINTENANCEINTERVAL | |||||||||||
| 5(8)6 | 10(16)12 | 15(24)18 | 20(32)24 | 25(40)30 | 30(48)36 | 35(56)42 | 40(64)48 | 45(72)54 | 50(80)60 | 55(88)66 | 60(96)72 | ||
| Brakelines&cablesl | I | I | |||||||||||
| Brakepads&rotors★I | I | I | I | I | |||||||||
| Brakefluid★RRR | |||||||||||||
| AutomatictransmissionfluidSeeNOTE(1) | |||||||||||||
| DifferentialgearoilSeeNOTE(2)IIIIII | I | ||||||||||||
| Steeringgearandlinkage,axleandsuspensionparts★ | III | ||||||||||||
| Propellershaft★ | I | I | I | I | |||||||||
| Tirerotation | SeeNOTE(3) | ||||||||||||
| Exhaustsystem★ | III | ||||||||||||
9-10 Maintenanceandschedules
| MAINTENANCEOPERATIONPerformatnumberofmiles,kilometersormonths,which-evercomesfirst. | milesx1,000(kmx1,000)Months | MAINTENANCEINTERVAL | ||||||||||||
| 65(104)78 | 70(112)84 | 75(120)90 | 80(128)96 | 85(136)102 | 90(144)108 | 95(152)114 | 100(160)120 | 105(168)126 | 110(176)132 | 115(184)138 | 120(192)144 | |||
| Brakelines&cablesllllll | ||||||||||||||
| Brakepads&rotors★I I | I | I | I | I | ||||||||||
| Brakefluid★RRR | ||||||||||||||
| AutomatictransmissionfluidSeeNOTE(1) | ||||||||||||||
| DifferentialgearoilSeeNOTE(2)llllll | ||||||||||||||
| Steeringgearandlinkage,axleandsuspensionparts★III | ||||||||||||||
| Propellershaft★I I | I | I | I | I | ||||||||||
| TirerotationSeeNOTE(3) | ||||||||||||||
| Exhaustsystem★ | III | |||||||||||||
NOTE:
Maintenance items with “★” should be performed more frequently according to “Maintenance under severe driving conditions”.
(1) Periodic maintenance is not required.
(2) If towing a trailer, using a camper or a car-top, or driving on rough or muddy roads, change (not just inspect) oil at every 20,000 miles (32,000 km) or 24 months.
(3) For additional information on tire rotation, refer to "General maintenance" in this section.
MAINTENANCEUNDERSEVERE OPERATINGCONDITIONS
The maintenance intervals shown on the preceding pages are for normal operating conditions. If the vehicle is mainly operated under severe driving conditionsasshownbelow, more frequent maintainancemustbeperformedonthefollowingitemsasshowninthetable.
SEVEREDRIVINGCONDITIONS
●Repeatedshorttripsoflessthan5miles (8km).
- Repeatedshorttripsoflessthan 10miles (16km) withoutsidetemperaturesremainingbelowfreezing.
- Operatinginhotweatherinstop-and-go "rushhour"traffic.
- Extensiveidlingand/orlowspeeddrivingfor longdistance,suchaspolice,taxiordoor-to-doordeliveryuse.
●Drivingindustyconditions.
- Drivingonrough, muddyorsaltspread roads.
- Towingatraler, usingacamperoracar-top carrier.
Maintenanceoperation:Inspect=Inspectandcorrectorreplaceasnecessary.
| MaintenanceitemMaintenanceoperation | Maintenanceinterval | |
| BrakefluidReplaceEvery10,000miles(16,000km)or12months | ||
| Brakepads&rotorsInspect Every5,000miles(8,000km)or6months | ||
| Steering gear & linkage, axle & suspension parts | Inspect | Every 5,000 miles (8,000 km) or 6 months |
| Propollershaft | Inspect | Every5,000miles(8,000km)or6months |
| Exhaustsystem | Inspect | Every5,000miles(8,000km)or6months |
9-12 Maintenanceandschedules
MAINTENANCELOG
| 5,000Miles(8,000km)or6MonthsDealerName:Date:Mileage:DealerStamp: | 10,000Miles(16,000km)or12MonthsDealerName:Date:Mileage:DealerStamp: | 15,000Miles(24,000km)or18MonthsDealerName:Date:Mileage:DealerStamp: |
| 20,000Miles(32,000km)or24MonthsDealerName:Date:Mileage:DealerStamp: | 25,000Miles(40,000km)or30MonthsDealerName:Date:Mileage:DealerStamp: | 30,000Miles(48,000km)or36MonthsDealerName:Date:Mileage:DealerStamp: |
| 35,000Miles(56,000km)or42MonthsDealerName:Date:Mileage:DealerStamp: | 40,000Miles(64,000km)or48MonthsDealerName:Date:Mileage:DealerStamp: | 45,000Miles(72,000km)or54MonthsDealerName:Date:Mileage:DealerStamp: |
Maintenanceandschedules9-13
| 50,000Miles(80,000km)or60MonthsDealerName:Date:Mileage:DealerStamp: | 55,000Miles(88,000km)or66MonthsDealerName:Date:Mileage:DealerStamp: | 60,000Miles(96,000km)or72MonthsDealerName:Date:Mileage:DealerStamp: |
| 65,000Miles(104,000km)or78MonthsDealerName:Date:Mileage:DealerStamp: | 70,000Miles(112,000km)or84MonthsDealerName:Date:Mileage:DealerStamp: | 75,000Miles(120,000km)or90MonthsDealerName:Date:Mileage:DealerStamp: |
| 80,000Miles(128,000km)or96MonthsDealerName:Date:Mileage:DealerStamp: | 85,000Miles(136,000km)or102MonthsDealerName:Date:Mileage:DealerStamp: | 90,000Miles(144,000km)or108MonthsDealerName:Date:Mileage:DealerStamp: |
| 95,000Miles(152,000km)or114MonthsDealerName:Date:Mileage:DealerStamp: | 100,000Miles(160,000km)or120MonthsDealerName:Date:Mileage:DealerStamp: | 105,000Miles(168,000km)or126MonthsDealerName:Date:Mileage:DealerStamp: |
| 110,000Miles(176,000km)or132MonthsDealerName:Date:Mileage:DealerStamp: | 115,000Miles(184,000km)or138MonthsDealerName:Date:Mileage:DealerStamp: | 120,000Miles(192,000km)or144MonthsDealerName:Date:Mileage:DealerStamp: |
MEMO
9-16 Maintenanceandschedules
10Technicalandconsumerinformation
Recommendedfluids/lubricantsandcapacities.....10-2
Fuelrecommendation....10-4
Engineoilandoilfilterrecommendations.....10-7
Airconditionersystemrefrigerantandoil recommendations....10-8
Specifications....10-9
Engine....10-9
Wheelsandtires....10-10
Dimensionsandweights....10-10
Whentravelingorregisteringinanothercountry.....10-11
Vehicleidentification....10-11
Vehicleidentificationnumber(VIN)plate. . . . . . . 10-11
Engineserialnumber....10-11
F.M.V.S.S./C.M.V.S.S.certificationlabel.....10-12
Emissioncontrolinformationlabel....10-12
TireandLoadingInformationlabel....10-13
Airconditionerspecificationlabel....10-13
Installingfrontlicenseplate....10-13
Vehicleloadinginformation. 10-14
Terms. 10-14
Vehicleloadcapacity....10-15
Loadingtips....10-16
Measurementofweights. 10-17
Towing a trailer....10-17
Maximumloadlimits....10-17
Towingload/specification....10-20
Towingsafety....10-21
Flattowingforrearwheeldrivevehicle....10-28
Uniformtirequalitygrading....10-29
Emissioncontrolsystemwarranty....10-30
Reportingsafetydefects. 10-30
Readinessforinspection/maintenance(I/M)test....10-31
EventDataRecorders(EDR)....10-32
Owner's Manual/ServiceManualorderinformation..10-32
RECOMMENDEDFLUIDS/ LUBRICANTSANDCAPACITIES
The following are approximate capacities. The actual refill capacities may be slightly different. When refilling, follow the procedure described in the "Do-it-yourself" section to determinethe proper refill capacity.
| FluidtypeCapacity(approximate) | RecommendedFluids/Lubricants | |||||
| Metric Measure | US Measure | Imperial Measure | ||||
| Fuel105.8L28gal23-1/4gal | •Foradditionalinformationreferto“Fuelrecommendation”inthis section. | |||||
| Engineoil*1Drainandrefill *1:Foradditional information, refer to“Engineoil”in the“Do-it-your-self”section of thismanual. | VQ40DE | Withoilfilter change | 5.1L5-3/8qt4-1/2qt | •Genuine“NissanMotorOilEster5W-30SN”isrecommended.•Iftheabovemotoroilisnotavailable,useanequivalentmotoroilthat matchestheabovegradeandviscosity.Foradditionalinformation, refer to“Engineoilandoilfilterrecommendation”inthissection. | ||
| Withoutoil filterchange | 4.8L5-1/8qt4-1/4qt | |||||
| VK56VD | Withoilfilter change | 6.5L6-7/8qt5-3/4qt | •Genuine“NissanMotorOil0W-20SN”isrecommended.•Iftheabovemotoroilisnotavailable,useanequivalentmotoroilthat matchestheabovegradeandviscosity.Foradditionalinformation, refer to“Engineoilandoilfilterrecommendation”inthissection. | |||
| Withoutoil filterchange | 6.2L6-1/2qt5-1/2qt | |||||
| Enginecoolant withreservoir | 12.7L3-1/4gal2-3/4gal | •Pre-dilutedGenuineNISSANLongLifeAntifreeze/Coolant(blue)or equivalent. | ||||
10-2 Technical and consumer information
| FluidtypeCapacity(approximate) | RecommendedFluids/Lubricants | ||||
| Metric Measure | US Measure | Imperial Measure | |||
| AutomaticTransmissionFluid(ATF) | 5 | A | T | — | •GenuineNISSANMaticSATF•NISSANrecommendusingGenuineNISSANMaticSATFinNISSAN automatictransmissions.IfGenuineNISSANMaticSATFisnot available,GenuineNISSANMaticJATFmayalsobeused.Donotmix withetherfluids.UsingfluidsthatarenotequivalenttoGenuineNISSAN MaticSATForGenuineNISSANMaticJATFmaydamagetheautomatic transmission.Damagecausedbytheuseoffluidsotherthanasrecom- mendedisnotcoveredundertheNISSAN'SNewVehicleLimited Warranty. |
| 7 | A | T | — | •GenuineNISSANMaticSATF•NISSANrecommendusingGenuineNISSANMaticSATFONLYin NISSANautomatictransmissions.Donotmixwithotherfluids.Usingflu- idsthatarenotequivalenttoGenuineNISSANMaticSAFTmaydamage theautomatictransmission.Damagecausedbytheuseoffluidsother thanasrecommendedisnotcoveredundertheNISSAN'SNewVehicle LimitedWarranty. | |
| Differentialgearoil2.6L5-1/2pt4-5/8pt•APIGL-5syntheticg | caroil,ViscosityS | AE75W-90 | |||
| PowerSteeringFluid(PSF)——— | •GenuineNISSANPSForequivalent •DEXRON"VltypeATFmayalsobeused. | ||||
| Brakefluid——— | •GenuineNISSANSuperHeavyDutyBrakeFluid*2orequivalentDOT3 *2:AvailableinmainlandU.S.A.throughaNISSANdealer. | ||||
| Multi-purposegrease | ———•NL | GINo.2(LithiumSoapbase) | |||
| Airconditioningsystemrefrigerant——— | •HFC-134a(R-134a) •Foradditionalinformation,referto"Airconditionerspecificationlabel"in thissection. | ||||
| Airconditioningsystemoil——— | •GenuineNISSANA/CSystemOilTypeS(KLH00-PAGS0)orequivalent•Foradditionalinformation,referto“Airconditionersystemrefrigerant andoilrecommendations”inthissection. | ||||
| Windshield-washerfluid4.5L1-1/4gal1gal | •GenuineNISSANWindshieldWasherConcentrateCleaner&Anti-freezeorequivalent | ||||
FUELRECOMMENDATION
Useunleadedregulargasolinewithanoctane ratingofatleast87AKI(Anti-KnockIndex)number(Researchoctanenumber91).

CAUTION
- Usingafuelother thanthatspecified could adversely affect the emission controlsystem, and may also affect the warranty coverage.
- Under no circumstances should a leaded gasoline be used, because this willdamagethethree-waycatalyst.
- Do not use E-15 or E-85 fuel in your vehicle. Your vehicle is not designed to run on E-15 or E-85 fuel. Using E-15 or E-85 fuel in a vehicle not specifically designed for E-15 or E-85 fuel can adversely affect the emission control devices and system so the vehicle. Damage caused by such fuel is not covered by the NISSAN New Vehicle Limited Warranty.
- Donotusefuelthatcontainstheoctane booster methylcyclopentadienyl manganese tricarbonyl(MMT). Usingfuel containing MMT may adversely affect vehicle performance and vehicle emissions. Not all fuel dispensers are labeled to indicateMMT content, soyou may have to consult your gasoline retailer formoredetails. Notethat FederalandCalifornialawsprohibittheuse ofMMT inreformulated gasoline. - U.S. government regulations require ethanoldispensingpumpstobeidentified by a small, square, orange and black label with the common abbreviation or the appropriate percentage for thatregion.
Gasolinespecifications
NISSAN recommends using gasolinethat meets the World-Wide Fuel Charter (WWFC) specifications where it is available. Many of the automobile manufacturers developed this specification to improve emission control system and vehicle performance. Ask your service station manager if the gasolinemeet the WWFC specifications.
Reformulated gasoline
Somefuelsuppliersarenowproducingreformulatedgasolines.Thesegasolinesarespecially designedtoreducevehicleemissions.NISSAN supportseffortstowardscleanerairandsuggeststhatyouusereformulatedgasolinewhen available.
Gasolinecontainingoxygenates
Somefuelsuppliersellgasolinecontainingoxygenatessuchasethanol,MethylTert-butylEther (MTBE)andmethanolwithorwithoutadvertising theirpresence.NISSANdoesnotrecommend theuseoffuelsofwhichtheoxygenatecontent andthefuelcompatibilityforyourNISSANcannotbereadilydetermined.Ifindoubt,askyour servicestationmanager.
If you use oxygenate - blend gasoline, please take the following precautions as the usage of such fuelsmay cause vehicle performance problems and/or fuel system damage.
- Thefuelshouldbeunleadedandhave anoctaneratingnolowerthanthat recommendedforunleadedgasoline.
- Ifanoxygenate-blendotherthan methanolblendisused, it should contain nomorethan 10% oxygenate. (MTBEmay, however, beadded upto 15%).
- E-15fuelcontainsmorethan 10% oxygenate.E-15fuelwilladverselyaffect theemissioncontroldevicesandsystemsofthevehicleandshouldnotbe used.Damagecausedbysuchfuelis notcoveredbytheNISSANNewVehicleLimitedWarranty.
- Ifamethanolblendisused, it should containnomorethan5% methanol (methylalcohol, woodalcohol). It should also contain as suitable amount of appropriate cosolvents and corrosion inhibitors. If not properly formulated with appropriate cosolvents and corrosion inhibitors, such methanol blends may cause fuel system damage and/or vehicle performance problems. Atthistime, sufficient data is not available to ensure that all methanol blends are suitable for use in NISSAN vehicles.
Ifanydriveabilityproblemssuchasenginestalling and difficult hot-starting are experienced after using oxygenate-blend fuels, immediately changetoanon-oxygenatefuelorafuelwitha lowblendofMTBE.
Takecarenottospillgasolineduringrefueling.Gasolinecontainingoxygenatescan causepaintdamage.
E-15fuel
E-15 fuelisamixture of approximately 15% fuel ethanol and 85% unleaded gasoline. E-15 can only be used in vehicles designed for unon E-15 fuel. Donotuse E-15 in your vehicle. U.S. government regulations require fuel ethanol dispensing pumpstobe identified with small, square, orange and black label with the common abbreviation or the appropriate percentage for that region.
E-85fuel
E-85fuelisamixtureofapproximately 85% fuel ethanoland 15% unleadedgasoline.E-85can onlybeusedinaFlexibleFuelVehicle(FFV).Do notuseE-85inyourvehicle.U.S.government regulationsrequirefuelethanoldispensing pumpstobeidentifiedbyasmal,square,orange andblacklabelwiththecommonabbreviationor theappropriatepercentageforthatregion.
FuelcontainingMMT
MMT,ormethylcyclopentadienylmanganesetricarbonyl,isanoctaneboostingadditive.NISSAN doesnotrecommendtheuseoffuelcontaining MMT.Suchfuelmayadverselyaffectivevehicleperformance,includingtheemissionscontrolsystem.NotethatwhilesomefuelpumpslabelMMT content,notalldo,soyoumayhavetoconsult yourgasolineretailerformoredetails.
Aftermarketfueladditives
NISSAN does not recommend the use of any aftermarket fuel additives (forexample, fuel injector cleaner, octanebooster, intake valvede deposit removers, etc.) which are sold commercially. Many of these additives intended for gum, varnish or deposit removal may contain active solventors similar ingredient that can be harmful to the fuel system and engine.
Octaneratingtips
Usingunleadedgasolinewithanoctane ratinglowerthanrecommendedcancause persistent,heavy"sparkknock."("Spark knock"isametallicrappingnoise.)Ifsevere,thiscanleadtoengamedamage.Ifyou detectapersistenttheavysparkknockeven whenusinggasolineofthestatedoctane rating,orifyouhearsteadysparkknock whileholdingasteadyspeedonlevel roads,itisrecommendedthatyouhavea NISSANdealercorrectthecondition.Failuretocorrecttheconditionmisuseofthe vehicle,forwhichNISSANisnotresponsible.
Incorrect ignition timing may result in spark knock, after-run and/or overheating, which may cause excessive fuel consumption engine damage. If any of the above symptoms are encountered, have your vehicle checked. It is recommended that you visit a NISSAN dealer for servicing.
However, now and then you may notice light sparkknock for a short time while accelerating or driving up hills. This is not a cause for concern, because you get the greatest fuel benefit when there is light sparkknock for a short time under heavy engine load.
10-6 Technicalandconsumerinformation
API certification mark

API service symbol

API service symbol

LTI2303
ENGINEOILANDOILFILTER RECOMMENDATIONS
Selectingthecorrectoil
It is essential to choose the correct grade, quality and viscosity engine oil to ensure satisfactory engine life and performance. For additional information, refer to "Recommended fluids/lubricants and capacities" in this section. NISSAN recommend the use of an energy conserving oil in orderto improve fuel economy.
SelectonlyengineoilsthatmeettheAmerican PetroleumInstitute(API)certificationorInternationalLubricantStandardizationandApproval
Committee(ILSAC)certificationandSAEviscositystandard.TheseoilshavetheAPlcertificationmarkonthefrontofthecontainer.Oilswhich donothavethespecifiedqualitylabelshouldnot beusedastheycouldcauseengine damage.
Oiladditives
NISSANdoesnotrecommendtheuseofoil additives. Theuseofanoiladditiveisnotnecessarywhentheproperoiltypeisusedandmaintenanceintervalsarefollowed.
Oilwhichmaycontainforeignmatterorhasbeen previouslyusedshouldnotbeused.
Oilviscosity
Theengineoilviscosityorthicknesschanges withtemperature.Becauseofthis,itisimportant toselecttheengineoilviscositybasedonthe temperaturesatwhichthevehiclewillbeoperatedbeforethenextoilchange.Choosinganoil viscosityotherthanthatrecommendedcould causeseriousenginedamage.
Selectingthecorrectoilfilter
YournewNISSANvehicleisequippedwith a high-quality GenuineNISSANoilfilter.When replacing,usea GenuineNISSANoilfilterorits equivalentforthereasondescribedin"Change intervals."
Changeintervals
Theoilandoilfilterchangeintervalsforyour enginearebasedontheuseofthespecified qualityoilsandfilters.Usingengineoilandfilters thatarenotofthespecifiedquality,orexceeding recommendedoilandfilterchangeintervals couldreduceenginelife.Damagetotheengine causedbyimpropermaintenanceoruseofincorrectoilandfilterqualityand/orviscosityisnot coveredbytheNISSANNewVehicleLimited Warranty.
Technical and consumer information 10-7
Yourenginewasfilledwithahigh-qualityengine oilwhenitwasbuilt.Youdonothavetochange theoilbeforethefirstrecommendedchange interval.Oilandfilterchangeintervalsdepend uponhowyouuseyourvehicle.
Operationunderthefollowingconditionsmay require more frequent oil and filter changes:
- repeatedshortdistancedrivingatcoldoutsidetemperatures
●drivingindustyconditions - extensiveidling
- towingatraler
- stopandgocommuting
For additional information, refertothe "Maintenanceandschedules" section of this manual.
AIRCONDITIONERSYSTEM REFRIGERANTANDOIL RECOMMENDATIONS
The air conditionersysteminyourNISSAN vehicle must be charged with therefrigerantHFC-134a(R-134a) and NISSANA/C systemoilTypeS(KLH00-PAGSO) or the exact equivalents.
CAUTION
The useofanyotherrefrigerantoroilwill causeseveredamagetotheairconditioningsystemandwillrequirethereplacementofallairconditionersystem components.
TherefrigerantHFC-134a(R-134a)inyour NISSANvehicledoesnotharmtheearth'sozone layer.Althoughthisrefrigerantdoesnotaffectthe earth'satmosphere,certaingovernmentregulationsrequiretherecoveryandrecyclingofany refrigerantduringautomotiveairconditionersystemservice.ANISSANdealerhasthetrained techniciansandequipmentneededtorecover andrecycleyourairconditionersystemrefrigerant.
It is recommended that you visit a NISSAN dealer when servicing your air conditionersystem.
SPECIFICATIONS
ENGINE
| ModelVQ40DEVK56VD | ||
| TypeGasoline,4-cycle,DOHCGasoline,4-cycle,DOHC | ||
| Cylinderarrangement6-cylinder,V-block,Slantedat60°8-cylinder,V-block,Slantedat90° | ||
| BorexStrokein(mm)3.76x3.622(95.5x92)in(mm)3.858x3.622(98x92) | ||
| Displacementcuin(cm | 3) 241.3(3,954)cuin(cm | 3) 338.8(5,553) |
| Firingorder1-2-3-4-5-61-8-7-3-6-5-4-2 | ||
| Idlespeed | ||
| A/T(in“N”position) | Noadjustmentisnecessary.Noadjustmentisnecessary. | |
| Ignitiontiming(degreeB.T.D.C.atidlespeed) | ||
| CO % at i d l e | ||
| Sparkplug | DILFR5A-11 | DIKAR7B11 |
| Sparkpluggap(Nominal) | in(mm)0.043(1.1) | in(mm)0.043(1.1) |
| Camshaftoperation | Timingchain | Timingchain |
This spark ignition system complies with the Canadian standard ICES-002.
WHEELSANDTIRES
| WheelTypeOffsetin(mm)Size |
| Steel1.57(40)17x7.5J |
| TiresSize |
| AllSeasonLT245/70R17 |
| SparetireSize |
| AllSeasonFullsize |
DIMENSIONSANDWEIGHTS
| Unit:in(mm) | ||
| Overalllength240.6(6,112) | ||
| Overallwidthwithoutmirrors79.9(2,030) | ||
| withnon-extendedtow mirrors | 102.8(2,610) | |
| withextendedtowmirrors108.6(2,758) | ||
| Overallheight84.0(2,133) | ||
| FrontTrack | 68.7(1,745) | |
| RearTrack | 68.9(1,750) | |
| Wheelbase | 146.1(3,710) | |
| Grossvehicleweightrating | lb(kg) | Refertothe"F.M. V.S.S./C.M.V.S.S. certificationlabel" onthedriver's sidecenterpillar. |
| Grossaxleweightrating | ||
| Front | lb(kg) | |
| Rear | lb(kg) | |
WHENTRAVELINGORREGISTERING INANOTHERCOUNTRY
WhenplanningtodriveyourNISSANvehicleinanothercountry,youshouldfirstfind outifthefuelavailableissuitableforyourvehicle'sengine.
Using fuel with an octanerating that istoolow may cause engaged damage. All gasoline vehicles must be operated with unleaded gasoline. Therefore, avoid taking your vehicle to areas where appropriate fuel is not available.
Whentransferringtheregistrationofyour vehicletoanothercountry,state,province ordistrict,itmaybenecessarytomodifythe vehicletomeetlocalawsandregulations.
Thelawsandregulationsformotorvehicleemissioncontrolandsafetystandardsvaryaccording tothecountry,state,provinceordistrict;therefore,vehiclespecificationsmaydiffer.
Whenanyvehicleistobetakenintoanothercountry,state,provinceordistrictand registered,itsmodifications,transportationandregistrationaretheresponsibility oftheuser.NISSANisnotresponsiblefor anyinconveniencethatmayresult.
VEHICLEIDENTIFICATION

VEHICLEIDENTIFICATIONNUMBER (VIN)PLATE
Thevehicleidentificationnumber(VIN)plateis attachedasshown. Thisnumberistheidentificationforyourvehicleandisusedinthevehicle registration.

VQ40DEengine ENGINESERIALNUMBER
Thenumberisstampedontheengineasshown.

VK56VDengine

WTI0172LTI2003

F.M.V.S.S./C.M.V.S.S. CERTIFICATIONLABEL
The Federal/Canadian Motor Vehicle Safety Standard (F.M.V.S.S./C.M.V.S.S.) certification label is affixed as shown. This label contains valuable vehicle information, such as: (GVWR), (GAWR), month and year of manufacture, (VIN), etc. Review it carefully.
EMISSIONCONTROL INFORMATIONLABEL
The emission control information label is attached to the underside of the hood as shown.
INSTALLINGFRONTLICENSEPLATE


TIREANDLOADINGINFORMATION LABEL
ThecoldtirepressureisshownontheTireand LoadingInformationLabel.Thelabelislocatedas shown.
AIRCONDITIONERSPECIFICATION LABEL
Theairconditionerspecificationlabelisaffixedto theundersideofthehoodasshown.
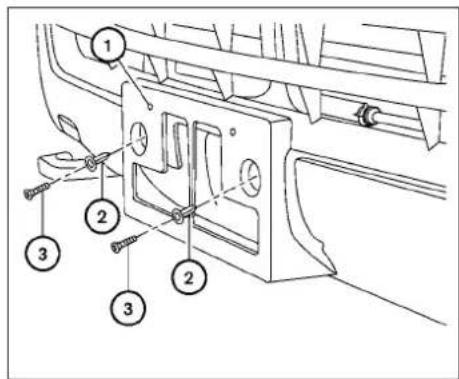
Usethefollowingstepstomountthefrontlicense plate:
- Holdlicenseplateholder ① againstbumper.
2.Lineupholesinbumperwithlicenseplate holderholesandinserttheplasticclips ②.
- Securethelicenseplateholder using two M6-14mmbolts ③.
Licenseplatebolttighteningtorque: 4-5ft-lb(5.10-6.37N·m)
Technical and consumer information 10-13
VEHICLELOADINGINFORMATION
WARNING
- Itisextremelydangeroustoride inacargoareainsideavehicle.In acollision,peopleridinginthese areasaremorelikelytobeseriouslyinjuredorkilled.
- Donotallowpeopletorideinany areaofyourvehiclethatisnot equippedwithseatsandseat belts.
- Besureeveryoneinyourvehicle isinaseatandusingaseatbelt properly.
TERMS
It is important to familiarize yourself with the following terms before loading your vehicle:
- CurbWeight(actualweightofyour vehicle)-vehicleweightincluding: standardandoptionalequipment,fluids,emergencytools,andsparetire assembly.Thisweightdoesnotincludepassengersandcargo.
- GVW(GrossVehicleWeight)-curb weightplusthecombinedweightof passengersandcargo.
- GVWR(GrossVehicleWeightRating)-maximumtotalcombined weightoftheunloadedvehicle,passengers,luggage,hitch,trailer tongueloadandanyotheroptional equipment. This information is locatedontheF.M.V.S.S./C.M.V.S.S. certificationlabel.
●GAWR(GrossAxleWeightRating)-maximumweight(load)limitspecified forthefrontorrearaxle. This information is located on the F.M.V.S.S./C.M.V.S.S. certification label. - GCWR (Gross Combined Weight rating)-Themaximumtotalweight rating of the vehicle, passengers, cargo,andtrailer.
●VehicleCapacityWeight,Loadlimit, Totalloadcapacity-maximumtotal weight limit specified of the load (passengersandcargo)forthevehicle. This isthemaximumcombined weightofoccupantsandcargothat canbeloadedintothevehicle. If the vehicle is used to towatrailer, the trailer tongue weight must be included as part of the cargoload. This information is located on the Tire and Loading Information label.
●Cargocapacity-permissibleweight of cargo, the subtracted weight of occupants from the load limit.
VEHICLELOADCAPACITY
Beforedrivingloadedvehicle, confirm that yououdonotexceedtheGrossVehicle WeightRating(GVWR)ortheGrossAxle WeightRating(GAWR)foryourvehicle. BoththeGVWRandGAWRarelocated ontheF.M.V.S.S./C.M.V.S.S.certification label.Foradditionalinformation,referto "Measurementofweights"inthissection.
Donotexceedtheloadlimitofyourvehicleshownas"Thecombinedweightofoccupantsandcargo"ontheTireandLoadingInformationlabel.Donotexceedthenumberofoccupantsshownas"SeatingCapacity"ontheTireandLoadingInformationlabel.
Toget "the combined weight of occupants and cargo", add the weight of all occupants, then add the total luggage weight. Examples are shown in the following illustration.
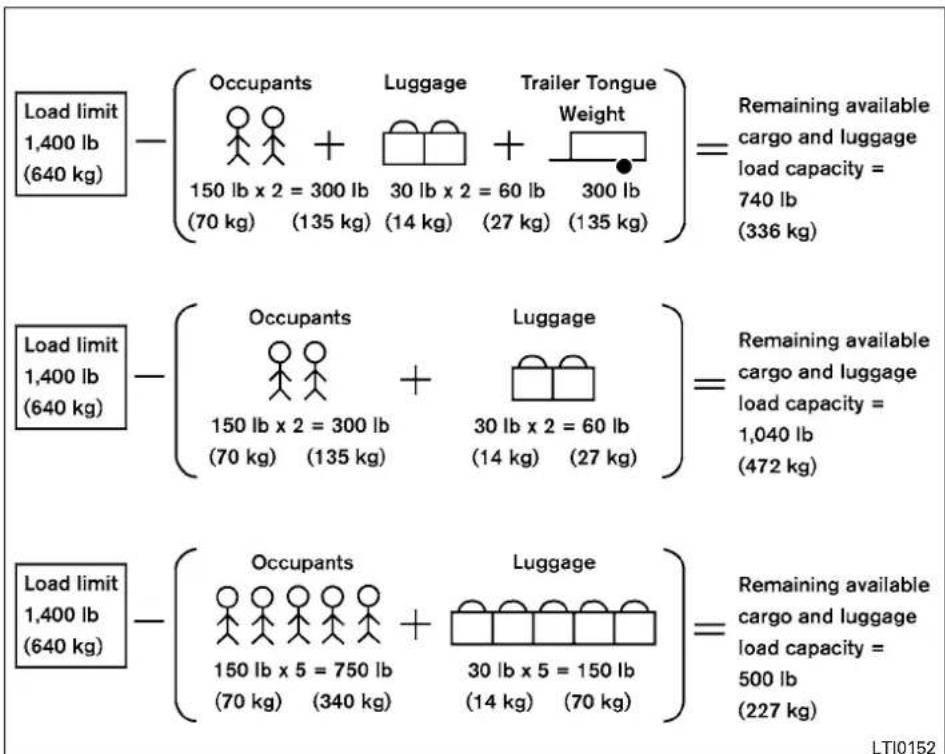
Example
Technical and consumer information 10-15
Stepsfordeterminingcorrectload limit
- Locatethestatement "Thecombined weightofoccupantsandcargo shouldneverexceedXXXlbsorXXX kg" on your vehicle's Tire and Loading Information label.
- Determinethecombinedweight of the driver and passenger that will be riding in your vehicle.
- Subtract the combined weight of the driver and passengers from XXXlbs or XXXkg.
-
Theresultingfigureequalstheavailableamountofcargoandluggage loadcapacity. Forexample, if the XXXamountequals1,400lbs.and therewillbefive150lb.passengers inyourvehicle, theamountofavailablecargoandluggageloadcapacityis650lbs.(1,400-750(5X150) = 650lbs) or (640-340(5X70) = 300kg.)
-
Determinethecombinedweightof luggageandcargobeingloadedon thevehicle.Thatweightmaynot safelyexceedtheavailablecargoand luggageloadcapacitycalculatedin step4.
- If your vehicle will betowing a trailer, load from your trailer will be transferred to your vehicle. Consult this manual to determine how this reduces the available cargo and luggageload capacity of your vehicle.
Beforedrivingloadedvehicle, confirm that you donot exceed the GVWRorthe GAWRforyourvehicle. For additional information, refer to "Measurement of weights" in this section.
Also check tires for proper inflation pressures. For additional information, refer to "Tire and Loading Information label" in the "Do-it-yourself" section of this manual.
LOADINGTIPS
●TheGVWmustnotexceedGVWR or GAWR as specified on the F.M.V.S.S./C.M.V.S.S. certification label.
- Donotloadthefrontandrearaxleto the GAWR.Doingsowillexceedthe GVWR.
WARNING
- Properly secure all cargo with ropesorstrapstohelppreventit fromsliding or shifting.Do not placecargohigherthantheseat-backs.Inasuddenstoporcollision, unsecured cargo could causepersonalinjury.
- Do not load your vehicle any heavierthantheGVWRorthe maximumfrontandrearGAWRs. Ifyoudo, partsofyourvehiclecan break, tire damagecould occur, oritcanchangethewayyour vehiclehandles. Thiscouldresult inlossofcontrolandcausepersonalinjury.
TOWINGATRAILER
Overloadingandimproperloadingnotonlycanshortenthelife ofyourvehicleandthetire,but canalsocauseunsafevehicle handlingandlongerbrakingdistances.Thismaycauseaprematuretirefailurewhichcouldresult inaseriousaccidentandpersonalinjury.Failurerescausedby overloadingarenotcoveredby thevehicle'swarranty.
MEASUREMENTOFWEIGHTS
Securelooseitemstoppreventweight shiftsthatcouldaffectthebalanceofyour vehicle.Whenthevehicleisloaded,drive toascaleandweighthefrontandtherear wheelsseparatelytodetermineaxle loads.IndividualaxleloadsshouldnotexceedeitheroftheGrossAxleWeight Ratings(GAWR).Thetotaloftheaxle loadsshouldnotexceedtheGrossVehicleWeightRating(GVWR).Theseratingsaregivenonthevehiclecertification label. If weight ratings are exceeded, moveorremoveitemstobringallweights belowtheratings.
WARNING
Overloadingorimproperloadingofa trailer and its cargo can adversely affect vehicle handling, braking and performanceandmayleadtoaccidents.
A CAUTION
- Donottowatrailerorhaulaheavyload forthefirst500miles(805km).Your engine, axle or other parts could be damaged.
- Forthefirst500miles(805km)thatyou towatrailer,donotdriveover50mph (80km/h)andonotmakestartsatfull throttle.Thishelpstheengineandother parts ofyourvehicle wearin atthe heavierloads.
Yournewvehiclewasdesignedtobeusedprimarilytocarrypassengersand cargo. Remember that towing a trailer places additional loads on yourvehicle'sengine,drivetrain,steering,brakingandothersystems.
ANISSANTowingGuide(U.S.only)isavailable onthewebsiteatwww.nissanusa.com.This guideincludesinformationontrailertowingcapability and the special equipment required for propertowing.
MAXIMUMLOADLIMITS
Maximum trailer loads
Never allow the total trailer load to exceed the value specified in the "Towing Load/Specification" chart found in this section. Thetotaltrailerloadequalstrailerweightplusits cargoweight.
- Whentowingatrailerloadof3,500lbs. (1,587kg)ormore,trailerswithabrake systemMUSTbeused.
ThemaximumGCWRshouldnotexceedthe value specified in the following "Towing Load/Specification"chart.
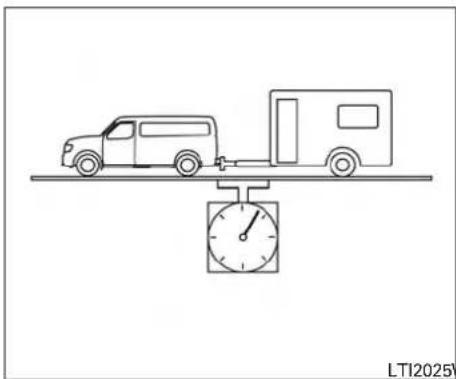
TheGCWRequalsthecombinedweightofthe towingvehicle(includingpassengersandcargo) plusthetotaltrailerload.Towingloadsgreater thantheseorusingimpropertowingequipment couldadverselyaffectivevehiclehandling,braking andperformance.
Theability of your vehicle to to water trailer is not only related to the maximum trailer loads, but also the places you plant to tow. Tow weights appropriate for level highway driving may have to be reduced for low tractions situations (fore example, on slippery boat ramps).
Temperatureconditionscanalsoaffecttowing. Forexample, towingaheavytrailerinhighoutside
10-18 Technical and consumer information
temperaturesongradedroadscanaffectengine performanceandcauseoverheating.Theengine protectionmode,whichhelpsreducethechance ofenginedamage,couldactivateandautomaticallydecreaseenginepower.Vehiclespeedmay decreaseunderhighload.Planyourtripcarefully toaccountfortrailerandvehicleload,weather androadconditions.
WARNING
Overheatingcanresultinreducedengine powerandvehiclespeed.Thereduced speedmaybelowerthanothertraffic, whichcouldincreasethechanceofacol-160. Beespeciallycarefulwhendriving. Ifthevehiclecannotmaintainasafedriv-ingspeed,pulltothesideoftheroadina safearea.Allowtheenginetocooland returntonormaloperation.Foradditional information,referto"Ifyourvehicleover-heats"inthe"Incaseofemergency"sectionofthismanual.
CAUTION
Vehicledamageresultingfromimproper towingproceduresisnotcoveredby NISSANwarranties.

Tongueload
When using a weightcarrying or a weight distribution hitch, keep the tongue load between 10-15% of the total trailer load or a set of the trailer tongue loads specified by the trailer manufacturer. The tongue load must be within the maximum tongue load limit shown in the following "Towing Load/Specification" chart. If the tongue load becomes excessive, rearrangecargoto allow for proper tongue load.

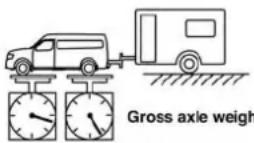
LTI2026
MaximumGrossVehicleWeight (GVW)/maximumGrossAxleWeight (GAW)
TheGVWofthetowingvehiclemustnotexceed theGrossVehicleWeightRating(GVWR) shownontheF.M.V.S.S./C.M.V.S.S.certification label. TheGVWequalsthecombinedweight of theunloaded vehicle, passengers, luggage, hitch, trailertongueloadandanyotheroptional equipment. In addition, frontorrear GAW must notexceed the Gross Axle Weight Rating (GAWR) shownontheF.M.V.S.S./C.M.V.S.S. certification label.
Towing capacities are calculated assuming a base vehicle with driver and any options required to achieve etherating. Additional passengers, cargo and/or optionale equipment, such as the trailer hitch, will add weight to the vehicle and reduce your vehicle's maximum towing capacity and trailertongueload.
The vehicle and trailer need to be weighed to confirm the vehicle is within the GVWR, Front GAWR, Rear GAWR, Gross Combined Weight Rating (GCWR) and Towing capacity.
Allvehicleandtrailerweightscanbemeasured usingplatformtypescalescommonlyfoundat truckstops,highwayweighstations,building supplycentersorsalvageyards.
Todeterminetheavailablepayloadcapacityfor tongue/kingpinload, usethefollowingprocedure.
- LocatetheGVWRonthe F.M.V.S.S./C.M.V.S.S.certificationlabel.
- Weighyourvehicleonthescalewithallof thepassengersandcargothatarenormally inthevehiclewhentowingatrailer.
- Subtract the actual vehicle weight from the GVWR. Theremaining amount is available maximum tongue/kingpin load.
Todeterminetheavailabletowingcapacity, use the following procedure.
- Find the GCWR for your vehicle on the "Towing Load/Specification" chart found in this section.
- Subtract the actual vehicle weight from the GCWR. Theremaining amount is the available maximum towing capacity.
TodeterminetheGrossTrailerWeight,weigh yourtraileronascalewith allequipment and cargo,thatarenormallyinthetrailerwhenitis towed.MakesuretheGrosstrailerweightisnot more than the Gross Trailer Weight Rating shown onthetrailerandisnotmorethanthecalculated availablemaximumtowingcapacity.
Also weigh the front and rear axles on the scale to make sure the Front Gross Axle Weight and Rear Gross Axle Weight are not more than Front Gross Axle Weight and Rear Gross Axle Weight on the F.M.V.S.S./C.M.V.S.S. certification label. The cargoin the trailer and vehicle may need to be moved or removed to meet the specified ratings.
Example:
●GrossVehicleWeight(GVW)asweighed on a scale - including passengers, cargo and hitch-6,200lb.(2,812kg).
Technical and consumer information
●GrossVehicleWeightRating(GVWR)from F.M.V.S.S./C.M.V.S.S.certificationlabel-7,100lb.(3,220kg).
●GrossCombinedWeightRating(GCWR) from "TowingLoad/Specification"chart-15,100lb.(6,848kg).
●Maximum Trailertowing capacity from "TowingLoad/Specification" chart-9,200lb. (4,173kg).
7,100lb.(3,220kg)GVWR
-6,200lb.(2,812kg)GVW
=900lb.(408kg)Availablefortongue/kingpinweight
15,100lb.(6,848kg)GCWR
-6,200lb.(2,812kg)GVW
=8,900lb.(4,036kg)Capacityavailablefor towing
900lb.(408kg)Availabletongueweight
/8,900lb.(4,036kg) Availablecapacity
= 10%tongueweight
The available towing capacity may be less than themaximumtowingcapacityduetothepassengerandcargoloadinthevehicle.
Remembertokeeptrailertongueweightbetween10-15%ofthetrailerweightorwithinthe trailer tongue load specification recommended by the trailer manufacturer. If the tongue load becomes excessive, rearrange the cargo to obtain the proper tongue load. Do not exceed the maximum tongue weight specification shown in the "Towing load/specification" chart even if the calculatedavailabletongueweightisgreater than15%.Ifthecalculatedtongueweightisless than10%,reduce the totaltrailerweightto matchtheavailabletongueweight.
Always verify that available capacities are within therequiredratings.
TOWING LOAD/SPECIFICATION
WARNING
Thetowingcapacities provided in this manual are for general reference only. The safe towing capacity of your truck is affected by dealer and factory installed options and passenger and cargoloads. You must weigh the vehicle and trailer as described in this manual to determine the actual vehicletowing capacity. Donot exceed the published maximum towing capacity or the GCWR or the GVWR shown on the FMVSS/CMVSSlabel.Doingso can result in an accident causing serious personal injury or property damage.
NOTE:
The towing specifications are based on S grademodels. VQ40DE-Bumpertowing
| Axletype | 2WD |
| MaximumPayload | 2,701lbs.(1,225kg) |
| MaximumTowingCapacity *1,*2 | 2,000lbs.(907kg) |
| MaximumTongueload*2 | 200lbs.(90.7kg) |
| MaximumGrossCombinedWeightRating | 13,400lbs.(6,078kg) |
VK56VD-Bumpertowing
| Axletype2WD | |
| MaximumPayload2,646 | bs.(1,200kg) |
| MaximumTowingCapacity *1,*2 | 2,000lbs.(907kg) |
| MaximumTongueload*2200 | lbs.(90.7kg) |
| MaximumGrossCombinedWeightRating | 16,000lbs.(7,257kg) |
VK56VD-ClassIVhitchtowing
| Axletype2WD | |
| MaximumPayload2,535 | bs.(1,150kg) |
| MaximumTowingCapacity *1,*2 | 8,700lbs.(3,946kg) |
| MaximumTongueload*2870 | lbs.(395kg) |
| MaximumGrossCombinedWeightRating | 16,000lbs.(7,257kg) |
*1: Thetowingcapacityvaluesarecalculated assumingabasevehiclewithdriverandany optionsrequiredtoachievetherating.Additional passengers,cargoand/oroptionalequipment willaddweighttothevehicleandreduceyour vehicle'smaximumtowingcapacity.
*2:Useofaweight-distributinghitchsystemis recommendedwhentowingover5,000lbs. (2,268kg).
TOWINGSAFETY
Trailerhitch
Yourvehiclemaybeequippedwithanoptional trailertowpackage.Thetrailertowpackagein-cludesareceiver-typeframemountedhitch.This hitchisratedforthemaximumtowingcapacityof thisvehiclewhenthepropertowingequipmentis used.Chooseaproperballmountandhitchball thatisratedforthetrailertobetowed.Genuine NISSANballmountsandhitchballsareavailable fromaNISSANdealer.
If your vehicle is not equipped with the optional trail to top package, check the towing capacity of your bumper hitch or receiver-type frame mounted hitch. Choose proper hitch for your vehicle and trailer. AGenuine NISSAN trailer hitch available from a NISSAN dealer. Make sure the trailer hitch securely attached to the vehicle to help avoid personal injury or property damaged duetos way caused by cross winds, rough roads surfaces or passing trucks.
WARNING
Trailerhitch componentshave specific weightratings.Yourvehiclemaybecapableoftowingatrailerheavierthanthe weightratingofthehitchcomponents. Never exceed the weight rating of the hitchcomponents.Doing socancause serious personal injury or property damage.
Hitchball
Chooseahitchballofthepropersizeandweight ratingforyourtrailer:
- Therequiredhitchballsizeisstampedon mosttrailercouplers.Mosthitchballsalso havethesizeprintedonthetopoftheball.
- Choosetheproperclasshitchballbasedon thetrailerweight.
- Thediameterofthethreadedshankofthe hitchballmustbematchedtotheballmount holediameter.Thehitchballshankshould benomorethan1/16"smallerthanthehole intheballmount.
- Thethreadedshankofthehitchballmustbe longenoughtobeproperlysecuredtothe ballmount. Thereshouldbeatleast2 threadsshowingbeyondthelockwasher andnut.
Ballmount
Thehitchballisattachedtotheballmountand theballmountisinsertedintothehitchreceiver. Chooseaproperclassballmountbasedonthe trailerweight.Additionally,theballmountshould bechosentokeepthetrailertonguelevelwiththe ground.

Bumpertowing
The GenuineNISSANstepbumperhasprovisionstoinstallatrailerhitchballandisdesigned totowtrailersofamaximumweightof2,000lb (907kg).
Toinstallatralerhitchballcutoutthecircleinthe centerofthestepbumper Ⓐ,thenremoveitto installthetralerhitchball.
Weightcarryinghitches
Aweightcarryingor"deadweight"ballmountis onethatisdesignedtocarrythewholeamountof tongueweightandgrossweightdirectlyonthe ballmountandonthereceiver.
Weightdistributionhitch
This type of hitch is alsocalled a "load-leveling" or "equalizing" hitch. A set of bars attach to the ball mount and to the trail to distribut the tongue weight (hitchweight) of your trailer. Many vehicles can't carry the full tongue weight to give a trailer, and needs some of the tongue weight transferred through the frame and pushing down on the front wheels. This gives stability to the tow vehicle.
Aweight-distributinghitchsystem(ClassIV)is recommendedifyouplantotowtrailerswitha maximumweightover5,000lbs(2,268kg). Checkwiththetrailerandtowing equipment manufacturerstodetermineiftheyrecommend theuseofaweight-distributinghitchsystem.
NOTE:
Aweight-distributinghitchsystemmayaffecttheoperationoftrailersurgebrakes. If you are considering use of a weight-distributing hitch system with a surge brake-equipped trailer, checkwith the surgebrake,hitchortrailermanufacturer todetermineifandhowthiscanbedone.
Followtheinstructionsprovidedbythemanufac-turer for installing and using the weight-distributinghitchsystem.
Generalset-upinstructionsareasfollows:
- Parkunloaded vehicleonalevel surface. With the ignition on and the doors closed, allow the vehicle to stand for several minutes so that it can level.
- Measure the height of a reference point on the front and rear bumpers at the center of the vehicle.
- Attach the trail to the vehicle and adjust the height is within 0 - .5 inches (0-13mm) of the reference height measured in step 2. The rear bumpers should be no higher than the reference height measured in step 2.
WARNING
Properlyadjusttheweightdistributing hitchsotherearofthebumperisno higherthanthemeasuredreference heightwhenthetrailerisattached.Ifthe rearbumperishigherthanthemeasured referenceheightwhenloaded,thevehicle mayhandleunpredictablywhichcould causealossofvehiclecontrolandcause seriouspersonalinjuryorproperty damage.
Swaycontroldevice
Suddenmaneuvers, windgusts, and buffeting caused by other vehicle, can affect trailer handling. Sway control devices may be used to help control these affects. If you choose to use one, contact are put a trailer hitch supplier to make sure the way control device will work with the vehicle, hitch, trailer and the trailer's brakes system. Follow the instructions provided by the manufacturer for installing and using the way control device.
Classlhitch
Classltrailerhitchequipment(receiver, ball mountandhitchball) can be used to tow trailers of a maximum weight of 2,000 lb (907 kg).
Classllhitch
Class II trailer hitch equipment (receiver, ball mountandhitchball) can be used to tow trailers of a maximum weight of 3,500 lb (1,587 kg).
Classllhitch
Class III trailer hitch equipment (receiver, ball mountandhitchball) can be used to tow trailers of a maximum weight of 5,000 lb (2,268 kg).
ClassIVhitch
ClassIVtrailerhitchequipment (receiver, ball mountandhitchball) can be used to tow trailers of a maximum weight of 10,000 lb (4,535 kg). A weight distribution hitch should be used to tow trailer that weigh over 5,000 lb (2,268 kg).
Your vehicle may be equipped with Class IV trailer hitch equipment that has a 10,000 lb (4,535kg) maximumweight rating, but your vehicle is only capable of towing the maximum trailer weights shown in the "Towing Load/Specification" chart in this section.
Tirepressures
- Whentowingatraler,inflatethevehicletirestorecommendedcold tirepressureindicatedontheTire andLoadingInformationlabel.
- Trailer tire condition, size, load rating and proper inflation pressures should be in accordance with the trailer and tire manufacturer's specifications.
Safetychains
Alwaysusesuitablesafetychainsbetweenyour vehicleandthetrailer.Thesafetychainsshould becrossedandshouldbeattachedtothehitch, nottothevehiclebumperoraxle.Thesafety chainscanbeattachedtothebumperifthehitch ballismountedtothebumper.Besuretoleave enoughslackinthechainstopermitturning corners.
Trailerlights
CAUTION
Whensplicingintothevehicleelectrical system,acommerciallyavailablepower- typemodule/convertermustbeusedto providepowerforalltrailerlighting.This unitusesthevehiclebatteryasadirect powersourceforalltrailerlightswhile usingthevehicletaillight,stoplightand turnsignalcircuitsasasignalsource.The module/convertermustdrawnomorethat 15milliampsfromthestopandtaillamp circuits.Usingamodule/converterthat exceedsthesepowerrequirementsmay damagethevehicle'selectricalsystem. Seeareputabletrailerretailertoobtain theproperequipmentandtohaveit installed.
Trailerlightsshouldcomplywithfederaland/or localregulations.Forassistanceinhookingup trailerlights,itisrecommendedthatyoucontacta NISSANdealerorreputabletrailerretailer.Vehiclesequippedwiththeoptionaltrailertow packageareequippedwitha7-pintrailerharnessconnector.Ifyourtrailerisequippedwitha flat4-pinconnector,anadapterwillbeneededto connectthetrailerlightstothevehicle.Adapters areavailableatautopartsstoresandhitchretailers.
Trailerbrakes
Whentowingatrailerloadof3,500lbs. (1,587kg)ormore,trailerswithabrake systemMUSTbeused.However,moststates requireaseparatebrakingsystemontrailerswith aloadedweightaboveaspecificamount.Make surethetrailermeetsthelocalregulationsand theregulationswhereyouplantotow.
Several types of brakingsystems are available.
SurgeBrakes-Thesurgebrakeactuatoris mountedonthetrailetonguewithahydraulicline runningtoeachtrailerwheel.Surgebrakesare activatedbythetrailerpushingagainstthehitch ballwhenthetowvehicleisbraking.Hydraulic surgebrakesarecommononrentaltrailersand someboattrailers.Inthistypeofsystem,thereis nohydraulicorelectricconnectionforbrakeoperationbetweenthetowvehicleandthetrailer.
ElectricTrailerBrakes-Electricbrakingsystemsareactivatedbyanelectronicsignalsent fromatrailerbrakecontroller(specialbrakesensingmodule).Foradditionalinformation,refer to"Electrictrailerbrakecontroller"inthissection.
Haveaprofessionalsupplieroftowingequipmentmakesurethetrailerbrakesareproperly installedanddemonstrateproperbrakefunction testing.
WARNING
Neverconnectatralerbrakesystemdirectlytothevehiclebrakesystem.
10-24 Technical and consumer information

example
Electrictrailerbrakecontroller(ifso equipped)
Trailersequippedwithelectricbrakesmayrequiretheinstallationofanaftermarkettrailer brakecontroller.
Yourvehicleisequippedwithaconnctorand jumperharness(ifsoequipped)thatisspecificallydesignedtobeusedwheninstallingan aftermarketbrakecontroller.
Toinstalltheelectrictrailerbrakecontroller jumperharness, perform the following procedure:
- Openthedriverdoor.Movetheseattothe rearmostposition.

-
Locatethejumperharnessconnector underthelowerportionoftheinstrument panelbehindtheparkingbrake.Theconnectoristapedtothewiringharness.
-
Peeloffthetapeandconnectthejumper harnessstothecconnector ①.
Wirecolordesignationforelectrictrailerbrake controllerjumperharness.
| WIRECOLORNOTE | |
| RED/GREENVehiclestoplamp | pswitch |
| totrailerbrakecontroller. | |
| BLACKBrakecontrollerground | (-). |
| BROWN/WHITETrailerbrake | controller |
| switchedoutput. | |
| RED/BLUETrailerbrakecontroller | illumination(notused). |
| REDFusedtrailerbrakecon- | trollerbatteryfeed(B+). |
- Install the aftermarket electric trailer brake controller according to the manufacturer's instructions.
Pre-towingtips
-
Becertainyourvehiclemaintainsalevel positionwhenloadedand/orunloaded trailerishitched.Donotdrivethevehicleifith hasanabnormalnose-upornose-down condition;checkforimpropertongueload, overload, worn suspension or other possible causesofeithercondition.
●Alwayssecureitemsinthetrailertoprevent loadshiftwhiledriving. -
Keepthecargoloadaslowaspossiblein thetrailerto keepthetrailercenterofgravity low.
- Loadthetrailersoapproximately 60% of the trailer load is in the front half and 40% is in the backhalf. Alsomakesuretheloadis balancedsidetoside.
- Checkyourhitch,trailertirepressure,vehicle tire pressure, trailer light operation, and trailerwheellugnutseverytimeyouattach a trailertothevehicle.
- Be certain your rearview mirrors conform to allfederal,stateorlocalregulations.Ifnot, installanymirrorsrequiredfor towingbefore drivingthevehicle.
- Determinetheoverallheightofthevehicle and trailer so the required clearance is known.
Trailertowingtips
Inordertogainskillandanunderstandingofthe vehicle'sbehavior,youshouldpracticeturning, stoppingandbackingupinanareawhichisfree fromtraffic.Steeringstabilityandbrakingperformance will be somewhat different than under normaldrivingconditions.
●Alwayssecureitemsinthetrailertoprevent loadshiftwhiledriving.
- Lockthetrailerhitchcouplerwithapinor lock to prevent the coupler from inadvertently becoming unlatched.
- Avoid abruptstarts, accelerationorstops.
- Avoidsharpturnsorlanechanges.
●Alwaysdriveyourvehicleatamoderate speed. - Whenbackingup, hold the bottom of the steering wheel with one hand. Move your hand in the direction in which you want the trailer to go. Make small corrections and backups slowly. If possible, has someone guide you when you are back ing up.
Always block the wheels on both vehicle and trailerwhenparking.Parkingonaslopeisnot recommended;however,ifyoumustdoso:
CAUTION
If you move the shift lever to the P (Park) positionbeforeblockingthewheelsand applyingtheparkingbrake,transmission damagecould occur.
- Apply and hold the brake pedal.
2.Havesomeoneplaceblocksonthedownhill sideofthevehicleandtrailerwheels. - After the wheel blocks are in place, slowly releasethe brake pedal until the blocks absorb the vehicle load.
- Apply the parking brake.
5.ShiftthetransmissionintoP(Park).
6.Turnofftheengine.
1.Startthevehicle. - Apply and hold the brake pedal.
3.Shiftthetransmissionintogear. - Releasetheparkingbrake.
- Driveslowlyuntilthevehicleandtrailerare clearfromtheblocks.
- Apply and hold the brake pedal.
- Havesomeoneretrieveandstoretheblocks.
Todriveaway:
●Whilegoingdownhill, the weight of the trailer pushing on the tow vehicle may decrease overall stability. Therefore, to maintain adequate control, reduce your speed and shift to lower gear. Avoid longor repeated use of the brakes when descending a hill, ast his reduce their effectiveness and could cause over heating. Shifting to a lower gear instead provides "engine braking" and reduce the need to brake as frequently.
- If the engine coolant temperature is a high temperature, refer to "If your vehicle overheats" in the "Incase of emergency" section of this owner's manual.
●Trailertowingrequiresmorefuelthannormal circumstances.
- Avoidtowingatrailerforyourvehicle'sfirst 500miles(805km).
- Forthefirst500miles(805km)thatyoudotow,donotdriveover50mph(80km/h).
●Haveyourvehicleservicedmoreoftenthan atintervalsspecifiedintherecommended MaintenanceScheduleinthe“Maintenance and schedules”sectionofthismanual.
- Whenmakingaturn,yourtrailerwheelswill beclosertotheinsideoftheturnthanyour vehiclewheels.Tocompensateforthis, makealargerthannormalturningradius duringtheturn.
- Crosswindsandroughroadswilladversely affectvehicle/trailerhandling,possiblycausingvehiclesway.Whenbeingpassedby largervehicles,bepreparedforpossible changesincrosswindsthatcouldaffectivehandling.
Dothefollowingifthetrailerbeginstosway:
- Take your footoff the accelerator pedal to allow the vehicle to coast and steers straight ahead, astheroad conditions allow. This combination will help stabilize the vehicle.
-Donotcorrecttrailerswaybysteeringor applyingthebrakes.
-
Whenthetrailerswaystops, gently apply the brakes and pull to the side of the herodina safe area.
-
Trytorearrangethetrailerloadsoitisbalanced. For additional information, referto "Pre-towingtips" in this section.
-
Becarefulwhenpassingothervehicles. Passingwhiletowingatrailerrequiresconsiderablymoredistancethannormalpassing.Remember,thelengthofthetrailermustalsopasstheothervehiclebeforeyoucan safelychangelanes.
- Downshift the transmission to alower gear forengine braking when driving downsteep or long hills. This will help the vehicle without applying the brakes.
- Avoidholdingthebrakepedaldowntoolong ortoofrequently.Thiscouldcausethe brakestooverheat,resultinginreduced brakingefficiency.
- Increase your following distance to allow for greater stopping distances while towing a trailer. Anticipate stops and brake gradually.
- NISSANrecommendsthatthecruise controlnotbeusedwhiletowingatraler.
- Somestatesorprovinceshavespecific regulationsandspeedlimitsforvehiclesthat aretowingtrailers. Obeythelocalspeed limits.
-
Checkyourhitch, trailerwiringharnessconnections, and trailerwheellignuts after 50 miles (80 km) of travel and date every break.
-
When launching aboat, don't allow the water level to go over the exhaust tail pipe or rear bumper.
- Makesureyoudisconnectthetrailerlights beforebackingthetrailerintothewateror thetrailerlightsmayburnout.
Whentowingatrailer, finaldrivegearoil shouldbereplacedandtransmission oil/fluidshouldbechangedmorefrequently. For additional information, refer to the "Do-it-yourself" sectioninthismanual.
Towmode(ifsoequipped)
Usingtowmodeisrecommendedwhenpullinga heavytrailerorhaulingaheavyload.Pressthe TOWMODEswitchtoactivatetowmode.The indicatorlightontheTOWMODEswitchilluminateswhentowmodeisselected.Pressthe TOWMODEswitchagaintoturntowmodeoff. Towmodeisautomaticallycancelledwhenthe ignitionswitchisturnedOFF.
Towmodeincludesthefollowingfeatures:
- Gradelogic—Adjuststransmissionshifts whenpullingatrailerorhaulingaloadupa grade.
- DownhillSpeedControl(DSC)—automaticallydownshiftswhendrivingdownagrade withatralerorheavyloadtohelpcontrol vehiclespeed.
Driving the vehicle in the tow mode with no trailer/loadorlighttrailer/lightloadwillnotcause anydamage. However, fueleconomymaybe reduced and the transmission/engine driving characteristics may feel unusual.
Whentowingatrailer, finaldrivegearoil shouldbereplaced and transmission oil/fluidshouldbechangedmorefrequently. For additional information, refer to the "Maintenanceandschedules" section of this manual.
Towingyourvehiclewithallfourwheelsonthe ground issometimescalledflat towing.This methodissometimesusedwhentowingavehicle behindarecreationalvehicle,suchasamotor home.
UNIFORMTIREQUALITYGRADING
CAUTION
●Failuretofollowtheseguidelinescan resultinseveretransmissiondamage.
- Whenever flattowing your vehicle, al-
waystowforward, never backward.
- Nevertowyourrearwheeldrivevehicle withthefronttiresontheground.Doing somaycauseseriousandexpensive damagetothepowertrain.
- DONOTtowyourrearwheeldrivevehiclewithallfourwheelsontheground (flattowing).DoingsoWILLDAMAGE internaltransmissionpartsduetolack oftransmissionlubrication.
- Foremergencytowingproceduresrefer to"TowingrecommendedbyNISSAN" inthe"Incaseofemergency"sectionof thismanual.
AutomaticTransmission
Totowavehiclee equipped with an automatic transmission, an appropriate vehicledolly MUST be placed under the towed vehicle's drive wheels. Always follow the dolly manufacturer's recommendations when using their product.
DOT(DepartmentofTransportation)Quality Grades:Allpassengercartiresmustconformto federalsafetyrequirementsinadditiontothese grades.
Qualitygradescanbefoundwhereapplicableon thetiresidewallbetweenreadshoulderand maximumsectionwidth. Forexample:
Treadwear200TractionAATemperatureA
Treadwear
Thetreadweargradeisacomparativerating basedonthewearrateofthetirewhentested undercontrolledconditionsonaspecifiedgovernmenttestcourse. Forexample, atiregraded 150wouldwearoneandone-half(11/2)times aswellonthegovernmentcourseasatiregraded 100. Thereativeperformanceoftiresdepends upontheactualconditionsoftheiruse, however, andmaydepartsignificantlyfromthenormdueto variationsindrivinghabits, servicepracticesand differencesinroadcharacteristicsandclimate.
TractionAA,A,BandC
Thetractiongrades, from highest to lowest, are AA, A, B, and C. Those grades represent the tire's ability to stop on wet pavement as measured under controlled conditions specified government tests surfaces of asphalt and concrete. Atiremarked C may have poor traction performance.
WARNING
Thetractiongradeassignedtothistireis basedonstraight-aheadbrakingtraction tests, and does not include acceleration, cornering, hydroplaning, or peaktraction characteristics.
TemperatureA,BandC
ThetemperaturegradesareA(thehighest),B, andC,representingthetire'sresistancetothe generationofheat,anditsabilitytodissipateheat whentestedundercontrolledconditionsa specifiedindoorlaboratorytestwheel.Sustained hightemperaturecancausethematerialofthe tiretodegenerateandreducetirelife,andexcessivetemperaturecanleadtosuddentirefailure. ThegradeCcorrespondstoalevelofperformancewhichallpassengercartiresmustmeet undertheFederalMotorSafetyStandardNo. 109.GradesBandArepresenthigherlevelsof performanceonthelaboratorytestwheelthan theminimumrequiredbylaw.
Technical and consumer information 10-29
WARNING
Thetemperaturegradeforthistireisestablishedforatirethatisproperlyinflated andnotoverloaded.Excessivespeed, under-inflation,orexcessiveloading,eitherseparatelyorincombination,can causeheatbuild-upandpossibletire failure.
EMISSIONCONTROLSYSTEM WARRANTY
YourNISSANvehicleiscoveredbythefollowing emissionwarranties:
ForUSA
- EmissionDefectsWarranty
- Emissions Performance Warranty
Detailsofthiswarrantymaybefoundwithother vehiclewarrantiesinyourWarrantyInformation BookletwhichcomeswithyourNISSANvehicle. IfyoudidnotreceiveaWarrantyInformation Booklet,oritislost,youmayobtainareplacementbywritingto:
●NissanNorthAmerica,Inc. ConsumerAffairsDepartment P.O.Box685003 Franklin,TN37068-5003
ForCanada
EmissionControlSystemWarranty
Detailsofthiswarrantymaybefoundwithother vehiclewarrantiesinyourWarrantyInformation BookletwhichcomeswithyourNISSANvehicle. IfyoudidnotreceiveaWarrantyInformation Booklet,oritislost,youmayobtainareplacementbywritingto:
●NissanCanadaInc. 5290OrbitorDrive Mississauga,Ontario,L4W4Z5
REPORTINGSAFETYDEFECTS
ForUSA
If you believe that your vehicle has a defect which could cause an accident or cause injury or death, you should immediately inform the National Highway Traffic Safety Administration (NHTSA) in addition to notifying NISSAN.
IfNHTSAReceivessimilarcomplaints, it may open an investigation, and if it finds that as safety defect exists in a group of vehicles, it may order are call and remedy campaign. However, NHTSA cannot become involved in individual problems between you, your dealer, or NISSAN.
TocontactNHTSA,youmaycalltheVehicleSafetyHotlinetoll-freeat1-888-327-4236(TTY:1-800-424-9153);go tohttp://www.safercar.gov;orwriteto:Administrator, NHTSA, 400 Seventh Street,SW.,Washington,D.C.20590.Youcanalsoobtainotherinformation about motor vehicle safety from http://www.safercar.gov.
READINESSFORINSPECTION/MAINTENANCE(I/M)TEST
YoumaynotifyNISSANbycontactingour ConsumerAffairsDepartment,toll-free,at 1-800-NISSAN-1.
ForCanada
If you believethat your vehicle has a defect which could cause a collision or could cause injury or death, you should immediately inform Transport Canada in addition to notifying NISSAN.
If Transport Canadareceives complaints, it may open an investigation, and if it finds that as safety defect exists in a group of vehicles, it may request that NISSAN conduct are call campaign. However, Transport Canadac cannot become involved in individual problems between you, your dealer, or NISSAN.
YoumaycontactTransportCanada'sDefectInvestigationsandRecallsDivision tollfreeat1-800-333-0510.Youmay alsoreportsafetydefectsonlineat: https://wwwapps.tc.gc.ca/Saf-Sec-Sur/7/PCDB-BDPP/fc-cp.aspx?lang=eng (Englishspeakers)or
https://wwwapps.tc.gc.ca/Saf-Sec-Sur/7/PCDB-BDPP/fc-cp.aspx?lang=fra(Frenchspeakers)
Additional information concerning motor vehicles safety maybe obtained from Transport Canada's Road Safety Information Centre at 1-800-333-0371 or online at www.tc.gc.ca/roadsafety(Englishspeakers)orwww.tc.gc.ca/securiteroutiere (Frenchspeakers).
TonotifyNISSANofanysafetyconcerns pleasecontactourConsumerInformation Centretoll-freeat1-800-387-0122.
Duetolegalrequirementsinsomestates and Canadian Provinces, your vehicle may be requiredtobeinwhatiscalledthe"readycondition"foranInspection/Maintenance(I/M)testof theemissioncontrolsystem.
Thevehicleissettothe"readycondition" whenit isdriven throughcertaindrivingpatterns.Usually, thereadyconditioncanbeobtainedbyordinary usageofthevehicle.
If a powertrain system component is repaired for the battery is disconnected, the vehicle may be reset to a "not ready" condition. Before taking the I/M test, check the vehicle's inspection/maintenancetestreadiness condition. Placetheignitions switch in the ON position without starting the engine. If the Malfunction Indicator Light (MIL) comes on steady for 20 seconds and then blinks for 10 seconds, the I/M test condition is "not ready". If the MIL does not blink after 20 seconds, the Mtest condition is "ready". It is recommended that you visit a NISSAN deal to set the "ready condition" or to prepare the vehicle for testing.
EVENTDATARECORDERS(EDR)OWNER'SMANUAL/SERVICE
ThisvehicleisequippedwithanEventDataRecorder(EDR).ThemainpurposeofanEDRisto record,incertaincrashornearcrash-likesituations,suchasanairbagdeploymentorhittinga roadobstacle,datathatwillassistinunderstandinghowavehicle'ssystemsperformed.TheEDR isdesignedtorecorddatarelatedtovehicle dynamicsandsafetysystemsforashortperiodof time,typically30secondsorless.TheEDRinthis vehicleisdesignedtorecordsuchdataas:
- Howvariousystemsinyourvehiclewere operating;
●Whetherornotthedriverandpassenger safetybeltswerebuckled/fastened;
●Howfar(ifatall)thedriverwasdepressing theacceleratorand/orbrakepedal;and,
●Howfastthevehiclewastraveling.
●Soundsarenotrecorded.
Thesedatacanhelpprovideabetterunderstandingofthecircumstancesinwhichcrashesand injuriesoccur.NOTE:EDRdataarerecordedby yourvehicleonlyifanontrivialcrashsituation occurs;nodataarerecordedbytheEDRunder normaldrivingconditionsandnopersonaldata (e.g.name,gender,ageandcrashlocation)are recorded.However,otherparties,suchaslaw enforcement,couldcombinetheEDRdatawith
thetypeofpersonallyidentifyingdataroutinely acquiredduringacrashinvestigation.
ToreaddatarecordedbyanEDR,specialequipmentisrequiredandaccesstothehvicleortheEDRisneeded.InadditiontothevehiclemanufacturerandNISSANdealer,otherparties,such aslawenforcement,thathavethespecialequipment,canreadtheinformationiftheyhaveaccesstothehvicleortheEDR.EDRdatawillonly beaccessedwiththeconsentofthevehicle ownerorlesseeorasotherwiserequiredorpermittedbylaw.
10-32 Technicalandconsumerinformation
MANUALORDERINFORMATION
GenuineNISSANServiceManualsforthismodel yearandpriorcanbepurchased.A Genuine NISSANServiceManualisthebestsource of serviceandrepairinformationforyourvehicle. Thismanualisthesameoneusedbythefactory-trainedtechniciansworkingatNISSANdealerships.GenuineNISSANOwner'sManualscan alsobepurchased.
ForUSA
ForcurrentpricingandavailabilityofGenuine NISSANServiceManuals,contact:
www.nissan-techinfo.com
ForcurrentpricingandavailabilityofGenuine NISSANOwner'sManuals,contact:
1-800-247-5321
ForCanada
TopurchaseacopyofaGenuineNISSANServiceManualorOwner'sManual,forthismodel yearandprior,pleasecontactyournearest NISSANdealer.ForthephonenumberandlocationofaNISSANdealerinyourarea,callthe NISSANInformationCenterat1-800-387-0122 andabilingualNISSANrepresentativewillassist you.
11Index
| 5-Speedautomatictransmissionfluid(ATF)(gasolineengineonly). | Antenna. | Automatictransmissionfluidtemperature |
| Antifreeze. | 1 gauge. 2 - 7 | |
| 7-speedautomatictransmissionfluid(ATF) | Anti-lockbrakewarninglight. | AUXjack. 4-41,4-45,4-52 |
| Anti-lockBrakingSystem(ABS). | 5 - 2 4 | |
| Apps. | 4 - 6 1 | |
| Audiblereminders. | 2 - 2 1 | |
| Audiosystem. | 4 - 2 9 | |
| A | B | |
| AM-FMradiowithcompactdisc(CD) | Backbutton. 4 - 7 | |
| Activebrakelimitedslip(ABLS)system...5-25 | player. | 4 - 3 Backdoor 2. 3 - 7 |
| Airbag(Seesupplementalrestraint system) | AMradioreception | Battery..4 - 3,0 .5-31,8-13 |
| Bluetooth®streamingaudio. | 4 - 5 8 Charge warninglight 2 - 1 6 | |
| Airbagsystem | Compactdisc(CD)player..4-40,4-44,4-51 | Batteryreplacement 8 - 2 4 |
| Front(Seesupplementalfrontimpact airbagsystem). | FM/AMradiowithcompactdisc(CD) | Key fob. 8 - 2 4 , 8 |
| Airbag warning labels | player. | Beforestartingtheengine 5 - 1 0 |
| Airbag warning light | FM/AMSATradiowithcompactdisc(CD) | Belt(See drivebelt) 8 - 1 5 |
| Airbagwarninglight,supplemental..1-64,2-19 | player. | Blockheater |
| Aircleaner | BMradioreception | 4 - 4 Engine. 5 - 3 2 |
| Aircleanerhousingfilter. | iPod®Player. | Bluetooth®audio 4 - 5 8 |
| Airconditioner | iPod®playeroperation. | Bluetooth®Hands-FreePhoneSystemwith NavigationSystem 4 - 7 6 |
| Airconditioneroperation. | Radio. | Bluetooth®Hands-FreePhoneSystemwithout |
| Airconditionerspecificationlabel. | Steeringwheelaudiocontrolswitch..4-60 | NavigationSystem 4 - 6 2 |
| Airconditionersystemrefrigerantand oilrecommendations. | USBinterface. | Bluetooth®streamingaudiowithNavigation System. 4 - 5 8 |
| Airconditionersystemrefrigerant recommendations. | USB(UniversalSerialBus)Connection Port. | Bosterseats. |
| Heaterandairconditioner controls. | Automaticpowerwindowswitch 2 - 4 5 | Brake Anti-lockBrakingSystem(ABS). 5 - 2 4 |
| Rearseatairconditioner. | Light. | Brakefluid. 8 - 1 2 |
| Servicingairconditioner. | Drivingwithautomatictransmission. 5 - 1 2 | Brakelight (Seestoplight) Brakesystem. 5 - 2 |
| Alarmsystem | Automaticanti-glareinsidemirror. | Brakewarninglight. |
| (Seevehiclesecurityystem). | Automaticdoorlocks. | Brakewear indicators. |
| Anchorpointlocations. | 1 - 3 7 | Parkingbrakeoperation 5 - 1 7 |
| Self-adjustingbrakes. | 8 - 2 0 | Clocksetting | Defrosterswitch |
| Brakeassist. | 5 - 2 5 | (modelswithNavigationSystem) | 4 - 7 |
| Brakefluid. | 8 - 1 2 | Clocksetting(modelswithoutNavigation System). | 4 - 3 9 , 4 - 1 2 |
| Brakes. | 8 - 2 0 | Dimmerswitchforinstrumentpanel. | |
| Brakesystem. | 5 - 2 3 | C.M.V.S.S.certificationlabel. | 1 0 - 1 2 |
| Break-inschedule. | 5 - 2 0 | Coldweatherdriving. | 5 - 3 1 |
| Brightnesscontrol Instrumentpanel. | 2 - 2 8 | Compactdisc(CD)player. | 4 - 6 1 |
| Bulbreplacement. | 8 - 2 8 | Connectphone | 2 - 3 8 |
| Consolebox. | 4 - 4 | ||
| Controlpanelbuttons. | 4 - 7 | ||
| Backbutton. | 4 - 9 | ||
| Brightness/contrastbutton. | 4 - 7 | ||
| Enter button | 4 - 7 | ||
| Settingbutton | 4 - 7 | ||
| Withnavigationsystem. | 4 - 4 , 4 - 5 | ||
| Capacitiesandrecommended fuel/lubricants. | 1 0 - 2 | Controls | Drivingthevehicle. |
| Cargolight. | Audiopontrols(steeringwheel). | 4 - 6 0 | |
| Cargo(Seevehicleloadinginformation)...10-14 | Heaterandairconditioner controls | 4 - 1 7 , 4 - 2 6 | |
| CarphoneorCBradio. | 4 - 6 2 | ||
| CDcareandcleaning. | 4 - 5 9 | Rearseatairconditioner. | 4 - 2 8 |
| CDplayer(Seeaudiosystem)..4-40,4-44,4-51 | Coolant | Economy - fuel. | |
| Checkengineindicatorlight (Seemalfunction indicator Iamp) | Emissioncontrolinformationlabel. | ||
| Checkingbulbs. | 2 - 1 2 | Changing enginecoolant level. | 8 - 6 |
| Checktirepressure. | Enginecoolanttemperaturegauge | 2 - 5 | |
| Childrestraints. | 1 - 2 9 , 1 - 3 0 , 1 - 3 2 , 1 - 3 4 | Corrosionprotection. | 7 - 6 |
| LATCH(LowerAnchorsandTethersfor Children)System. | 1 - 3 4 | Cruise control | 5 - 1 8 |
| Precautionsonchild restraints. | 1 - 3 2 , 1 | Cup holders | 2 - 5 |
| Toptetherstrapanchorpointlocations..1-37 | Cug t a inside impact and rollo | Changengineoil. | |
| Childrestraintwithtoptetherstrap. | 1 - 3 7 | D | Changengineoil level. |
| Childsafetyslidingdoorlock. | 3 - 8 | 8 - 7 | |
| Chimes,audiblereminders. | 2 - 2 1 | Daytimelightsystem | 8 - 3 |
| Cleaning exterior and interior | 7 - 2 , 7 - 4 | 2 - 5 | |
| Clockset/adjustment. | 4 - 7 , 4 - 3 9 | 8 - 5 | |
| Engineoilandoilfilterrecommendation..10-7 | Frontpowerseata adjustment. 1 - 4 | H |
| Engineoilpressuregauge. 2 - 6 | Front seats. | 1 - 2 |
| Engineoilpressurewarninglight. 2 - 1 6 | Fuel | Hazardwarningflasherswitch. 6 - 2 |
| Engineoilviscosity. 1 0 - 7 | Capacitiesandrecommended | Headlightandturnsignalswi |
| Engineserialnumber. 1 0 - 1 1 | fuel/lubricants. 1 0 - 2 | Headlightcontrolswitch. |
| Enginespecifications. 1 0 - 9 | Fueleconomy. 5 - 2 1 | Headlights. |
| Startingtheengine. 5 - 1 0 | Fuel-filleroorandcap. 3 - 1 3 | Headrestraints. 1 - 1 5 |
| Enginecoolanttemperaturegauge. 2 - 5 | Fuelgauge. 2 - 6 | Heatedseats. 2 - 2 9 |
| Engineoilpressuregauge. | Fueloctanerating. 1 0 - 6 | Heater |
| Enterbutton. | Fuelrecommendation. 1 0 - 4 | Heaterandairconditioner |
| EventDataecorders. 1 0 - 3 2 | Loosefuelcapwarning. 2 - 1 3 | controls. 4 - 1 7 , 4 - 2 |
| Exhaustgas(Carbonmonoxide). 5 - 2 | Fuelefficientdrivingtips. 5 - 2 0 | Heateroperation. 4 - 1 9 , 4 - 2 |
| Explanationofmaintenanceitems. 9 - 2 | Fuel-filleroor. 3 - 1 3 | Reaseatairconditioner . 4 - 2 8 |
| Explanationofscheduledmaintenanceitems..9-5 | Fuel gauge. | H20d . 3 - 1 |
| Extendedstorageswitch. | Fuses . 8 - 2 3 | Hogn . 2 - 2 |
| Eyeglasscase. 2 - 4 1 | Fusibfelinks | |
| F | G | I |
| Flashers(Seehazardwarningflasherswitch)..6-2 | Gas cap | Ignitionswitch. 5 - 8 |
| Flattire. 6 - 2 , 6 - 3 | Gauge | Immobilizersystem. 2 - 2 3 , 5 - |
| Floormatpositioningaid. 7 - 5 | Automatictransmissionfluidtemperature | Importantvehicleinformationlabel. 1 0 - 1 2 |
| Fluid | gauge | In-cabinmicrofilter. 8 - 1 8 |
| Enginecoolanttemperaturegauge. 2 - 5 | Increasingfueleconomy. 5 - 2 1 | |
| Brakefluid. 8 - 1 2 | Engineoilpressuregauge. 2 - 6 | Indicatorlightsandaudiblereminders |
| Capacitiesandrecommended fuel/lubricants. 1 0 - 2 | Fuelgauge. 2 - 6 | (Seewarning/indicatorlightsandaudible |
| Enginecoolant. 8 - 5 | Odometer. 2 - 4 | reminders) |
| Engineoil. 8 - 7 | Speedometer. 2 - 4 | Insideautomaticanti-glaremirror. 3 - 1 7 |
| Powersteeringfluid. 8 - 1 1 | Tachometer. 2 - 5 | Instrumentbrightnesscontrol. 2 - 2 8 |
| Windshield-washerfluid. | Tripodometer. 8 - 1 2 | Instrumentpanel. |
| F.M.V.S.S.certificationlabel. 1 0 - 1 2 | Vo'lt'me'ter. | Instrumentpaneldimmerswitch. 2 - 2 8 |
| Fog lightswitch. | Generalmaintenance. 9 - 2 | Interiorlight. 2-46 |
| Frontairbagsystem (Seesupplementalrestraintsystem). 1 - 6 0 | Glovebox. | iPod®Player. |
| Frontandrearsonarsystem. 5 - 2 9 | Groceryhooks. 2 - 4 4 | ISOFIXchildrestraints. 1 - 3 4 |
J
Jumpstarting. 6 - 1 0 , 8 - 1
K
K e y 3 - 2
Keyfobbatteryreplacement. . . . . . 8 - 2 4 , 8 - 2
Keylessentry
Without Intelligent Keysystem
(Seeremotekeylessentrysystem)...3-8,3-9
Keys
NISSANVehicleImmobilizerSystemkeys..3-2
L
Labels
Airconditionerspecificationlabel. . . . 1 0 - 1 3
C.M.V.S.S.certificationlabel. . . . . . 1 0 - 1 2
Emissioncontrolinformat
Engineserialnumber. 10 - 1
F.M.V.S.S.certificationlabel. . . . . . . 1 0 - 1
TireandLoadingInformationlabel. . . . 1 0 - 1 3
Vehicleidentificationnumber(VIN). . . . 1 0 - 1 1
Vehicleidentificationnumber(VIN)plate.10-11
Warninglabels(forSRS). 1 - 6 4
LATCH(LowerAnchorsandTethersforCHildren)
System. 1 - 3 4
Licenseplate
Installingthelicenseplate. . . . . . . . 1 0 - 1 3
Light
Airbagwarninglight.....
Brakelight(Seestoplight). . . . . . . . . 8 - 2 8
Bulbreplacement 8 - 2 8
Chargewarninglight 2 - 1 6
ExteriorandInteriorlights. 8 - 2 8
Foglights.
Foglightswitch....
Headlightandturnsignalswitch. . . . . 2 - 2 6
Headlightcontrolswitch 2 - 2
Headlights....
Interiorlight.
Lightbulbs....
Lowtirepressurewarninglight. . . . . . 2 - 1 7
Lowwindshield-washerfluidwarning
l i g h t . . . . . . . . . . . . . . . . . . . . . . . . . . . . . . 2
Securityindicatorlight. 2 - 2
Warning/indicatorlightsandaudible
reminders. 2 - 1
Lights....
Maplights....
Lock
Childsafetyslidingdoorlock. . . . . . . . 3 - 8
Doorlocks. 3 - 3
|Low fuel warning light.....
Lowtirepressurewarninglight. 2 - 1 7
Lowwindshield-washerfluidwarninglight...2-18
Luggage(Seevehicleloadinginformation)..10-14
M
Maintenance
General maintenance.....
Insidethevehicle.....
Maintenance precautions. 8 - 2
Outsidethevehicle. 9 - 2
Seatbeltmaintenance....
Underthehoodandvehicle. 9 - 4
Maintenancelog....
Mainteancerequirements. 9 - 2
MainteBances8hedules. 9 - 6
Maintenanceundersevereoperation
conditions. 9 - 1 2
Malunc20indicatorlamp(MIL)....2-19
Manualfrenls@adjustment....1-3
Manual2entwindows. 2 - 4 6
Manualwindows. 2 - 4 4
Maplights....2
M1a8p o c k e t....2
Metersandgauges. 2 - 3
Instrumentbrightnesscontrol. . . . . . . 2 - 2 8
Mirror
- Automaticanti-glareinsidemirror. . . . . . 3 - 1 7
2 Outsidermirrors 3 - 1 8
Rearview. 3 - 1 7
Mirrors 3-17
Mobileapps....4
2 - 1 2 , 2 - 1 6 , 2N - 1 8
NissanConnectSM 4-61
NISSANVehicleImmobilizerSystem...2-23,5-9
NISSANVoiceRecognitionSystem. . . . . 4 - 8 5
0
Octanerating(Seef2eloctanerating). . . . 1 0 - 6
Odometer 9. - 3. . . . . . . . . . . . . . . . . . . . . . . . . . 2 - 4
Oil
Capacitiesandrecommended
f.u.e.l./1l u29 i c a n t s . . . . . . . . . . . .
Changingengineoil. 8 - 8
Changingengineoilfilter. 8 - 9
Checkingengineoillevel. 8 - 7
Engineoil. 8 - 7
Engineoilandoilfilterrecommendation..10-7
Engineoilviscosity. 10 - 7
Oneshotcall....4
Outsidemirrors. 3 - 1 8
Overheadsunglassesholder. . . . . . . . . 2 - 4 1
Overheat
If your vehicle overheats
Owner'smanualorderform. 10-32
Owner'smanual/servicemanualorder
information. 10-3
P
Parking
Parkingbrakeoperation. 5 - 1 7
Parking/parkingonhills. 5 - 2 3
Parkingbrake. 5 - 1 7
Power
Powerwindows. 2 - 4 4
Powerinverterswitch. 2 - 3 1
Poweroutlet. 2 - 3 3, 2
Powersteering. 5 - 2
Powersteeringfluid. 8 - 1 1
Precautions
Maintenance precautions. 8 - 2
Precautionsonbooster
s e a t s. . . . . . . . . . . 1 - 3 2 , 1 - 3 9
Precautionsonchild
restraints. . . . . . . . 1 - 3 2 , 1 - 3 9 , 1
Precautionsonseatbeltusage. . . . . . 1 - 2 1
Precautionsonsupplementalrestraint
system. 1 - 5 3
Precautionswhenstartingand
driving. - 7 .8. . . . . . . . . . . . . . . . . . . . . . . . . . . . . . . . . . . . . . . . . . . . . . . . . . . . . . . . . . 5 - 2 , 5
Programmablefeatures.....
Pushstarting. 6 - 1 2
2
R
Radio
AM-FMradiowithcompactdisc(CD)
player 4 - 3 8 , 4
CarphoneorCBradio. 4 - 6 2
FM/AMradiowithcompactdisc(CD)
player 4 - 3 8 , 4
FM/AM/SATradiowithcompactdisc(CD)
player. 4 - 4 6
Steeringwheelaudiocontrolswitch. . . . 4 - 6 0
Readinessforinspectionmaintenance(I/M)
test 10
-ReaSeatairconditioner. 4 - 2 8
Rearsonarsystem. 5 - 2 8
Rearsonarsystemoffswitch. 2 - 3 1
Rearviewmirror. 3 - 1 7
RearViewMonitor. 4 - 1
-Rea5windowandoutsidemirrordefroster
switch. 2 - 2 5
RecommendedFluids. 10 - 2
Recorders
Event Data....
Refrigerantrecommendation. 10 - 8
Registrar vehicle in another country...10-11
Remotekeylessentrysystem. . . . . . . 3 - 8 , 3 - 9
Reportingsafetydefects(USonly)....10-30
ResetTPMS. 2 - 1 2 , 8 - ;
S
Safety 4 - 7
Childsafetyslidingdoorlock. . . . . . . . .3-8
Child seatbelts. . . . 1 - 3 2 , 1 - 3 9 , 1 - 4
Reportingsafetydefects(USonly). . . . 1 0 - 3 0
Seatadjustment
Frontmanualseatadjustment ..... 1 - 3
Frontpowerseatadjustment. . . . . . . . 1 - 4
Seatbelt
- 4Childsafety. 1 - 2 9
Infantsandsmallchildren. . . . . . . . . 1 - 3 0
InjuredPerson. 1 - 2 4
L2argerchildren....
Precautionsonseatbeltusage. . . . . . 1 - 2 1
Pregnantwomen. 1 - 2 4
Seatbeltextenders.....
Seatbeltmaintenance.....
3e at be lt s....1-2
Shoulderbeltheightadjustment. . . . . 1 - 2 8
Three-pointtypewithretractor. . . . . . 1 - 2 4
Seatbeltextenders. 1 - 2 8
Seatbeltwarninglight.....
Seats
Adjustment. 1 - 2
Frontseats....
Heated seats....
Manualfrontseatadjustmen
SecuritIndicatorlight. 2 - 2 0
Securitysystem(NISSANVehicleImmobilizer
System),enginestart. 2 - 2 3 , 5 - 9
| Securitysystems | Steeringwheel | Veheledynamiccontrol(VDC)off |
| Vehiclesecuritysystem. 2 - 2 2 , 2 -Stearingwheelaudiocontrolswitch. 4 - 6 0 | switch. 2 - 3 0 | |
| Self-adjustingbrakes. 8 - 2 0 Stoplight. 8 - 2 8 | ||
| Servicemanualorderform. 1 0 - 3 2 Storage. 2 - 3 6 | ||
| Servicingairconditioner. 4 - 2 1 , 4 - Storageb in. 2 - 4 3 T | ||
| Settingbutton. 4 - 7 Storagetray. 2 - 3 7 | ||
| Shifting | Sunglasscase. Tachometer 4.1. 2 - 5 | |
| Automatictransmission. 5 - 1 3 Sunglasssholder. Temperaturegauge | ||
| Shoulderbeltheightadjustment. 1 - 2 8 Sunvisors. 3 - 1 6 Enginecoolanttemperaturegauge. .2-5 | ||
| Slidingdoor | Supplementalairbagwarninglabels. 1 - 6 4 Theft(NISSANVehicleImmobilizerSystem),enginestart. 2 - 2 3 , 5 - 9 | |
| Manualslidingdoor. 3 - 6 Supplementalairbagwarninglight ...1-64,2-19 | ||
| Slidingdoorlocks | Supplementalfrontimpactairbagsystem...1-60 Three-waycatalyst. 5 - 2 | |
| Childsafetyslidingdoorlocks. 3 - 8 Supplementalrestraintsystem | Tiltingsteeringwheel. 3 - 1 5 | |
| Smartphoneconnectivity. 4 - 6 1 Informationandwarninglabels. 1 - 6 4 Tire | ||
| Sonar | Precautionsupplementalrestraints system. 1 - 5 3 Flattire. 6 - 2 , 6 - 3 | |
| Rearsystem. 5 - 2 8 System. | 1 - 5 3 Sparetire. 6 - 4 | |
| Sparkplugreplacement. 8 - 1 6 Supplementalrestraintsystem | TireandLoadingInformationlabel. 1 0 - 1 3 | |
| Sparkplugs. 8 - 1 6 (Supplementalairbagsystem) | 1 - 5 3 Tirechains. 8 - 3 7 | |
| Specifications. 1 0 - 9 Switch | Tirepressure. 8 - 3 0 | |
| Speedometer. 2 - 4 Automaticpowerwindowswitch. 2 - 4 5 Tirerotation. 8 - 3 7 | ||
| Speedometerandodometer. 2 - 4 Fog lightswitch. Typesoftres. 8 - 3 6 | ||
| SRSwarninglabel. 1 - 6 4 Hazardwarningflasherswitch. 6 - 2 Uniformtirequalitygrading. 1 0 - 2 9 | ||
| Stabilitycontrol. 5 - 2 6 Headlightandturnsignalswitch. 2 - 2 6 Wheelsandtires .8-30,10-10 | ||
| Standard maintenance. Headlightcontrol switch. 2 - 2 6 Wheel/tiresize. 1 0 - 1 0 | ||
| Starting Ignitionswitch. 5 - 8 Tirepressure | ||
| Beforestartingtheengine. 5 - 1 0 Instrumentbrightnesscontrol. 2 - 2 8 Lowtirepressurewarninglight. 2 - 1 7 Jumpstarting. 6 - 1 0 , 8 - 1 Powerdoorlockswitch. 3 - 5 TirePressureMonitoringSystem | ||
| Precautionswhenstartingand Powerinverterswitch. 2 - 3 1 (TPMS). 5 - 4 , 6 - 2 driving. 5 - 2 , 5 - 3 Rearsonarsystemoffswitch. 2 - 3 1 Toptetherstrapchildrestraint. 1 - 3 7 Pushstarting. 6 - 1 2 Rearwindowandoutsidemirrordefroster Towing | ||
| Startingtheengine. 5 - 1 0 switch. 2 - 2 $attowing. 1 | ||
| Startingtheengine. 5 - 1 0 Steeringwheelswitchforaudio control/Bluetooth®Hands-FreePhone | Towingload/specification. 1 0 - 2 0 Trailertowing. 1 0 - 1 7 | |
| Steering System. 4 - 6 Towingatrailer. 1 0 - 1 7 Powersteeringsystem. Towmodeswitch. 2 - 3 3 Towing your vehicle. | ||
| Powersteeringfluid. 8 - 1 1 Towmodeswitch. 2 - 3 3 Towmodeswitch. 2 - 3 3 | ||
| Powersteeringsystem. 5 - 2 3 Turnsignalswitch. 2 - 28 Towmodeswitch. 2 - 3 3 | ||
| Tiltingsteeringwheel. 3 - 1 5 Turnsignalswitch. 2 - 28 Towmodeswitch. 2 - 3 3 |
TMPS
ResetTPMS. 2 - 1 2 , 8
Transmission
Drivingwithautomatictransmission. . . . 5 - 1 2
Travel(Seeregisteringvehicleinanother
country). 1 0 - 1
Tripodometer. 2 - 4
Troubleshootingguide
(NISSANvoicerecognitionsystem)....4-89
Turnsignalswitch. 2 - 2 8
U
Uniformtirequalitygrading. 10 - 29
USBinterface. 4 - 5 2
Audiofileoperation. 4 - 5 3
v
V h icledimensionsandweig
Vehicledynamiccontrol(VDC)offswitch...2-30
Vehicledynamiccontrol(VDC)system. . . . 5 - 2 6
VehicleDynamicControl(VDC)system. . . . 5 - 2 6
Vehicleidentification....10-11
Vehicleidentificationnumber(VIN). . . . . 1 0 - 1 1
Vehicleidentificationnumber(VIN)plate...10-11
Vehicleimmobilizersystem. . . . . . . 2 - 2 3 , 5 -
Vehicle loading informationWarning/indicatorlightsandaudible
Vehiclerecovery. 6 - 1 4 reminders. 2 - 1 9
Vehiclesecuritysystem. . . . . . . . . 2 - 2 2 , 2 - 2 Audiblereminders. . . . . . . . . . . . . 2 - 1 9
Vehiclesecuritysystem(NISSANVehicle
ImmobilizerSystem),enginestart. . . . 2 - 2 3 , 5 - 9 l nd ic at o r l i g h t s. . . . . . . . . . . . . . . . . . . . . . . . . . . . . . . . . . . . . . . . . . . . . . . 2 - 1 9
Vents....4-1Varninglights....2-19
Visors....3W a 6ning lights....2-19
VoicePromptInterrupt. . . . . . . . . 4 - 6 6 , 4 - Warninglights,indicatorlightsandaudible
-V3081 meter....r.e2m-i7n d e r s....
Weights(Seedimensionsandweights)...10-10
Wheelsandtires 8 - 3 0 , 1 0 -
W Wheel/tiresize. 10 - 10
Whentravelingorregisteringinanother
turning country. 10 - 11
Airbagwarninglight....Windpws6.4;2--1.9....2-44
Anti-lockbrakewarninglight 2 - 1 5 Lockingpassengers'windows. . . . . . . 2 - 4 5
Batterychargewarninglight 2 - 1 6 Manualventwindows 2 - 4 6
Brakewarninglight 2 - 1 5 Manualwindows. 2 - 4 4
Dooropenwarninglight 2 - 1 6 Powerwindows. 2 - 4 4
Engineoilpressurewarninglight 2-16 Windshield-washerfluid....
Hazardwarningflasherswitch 6 - 2 Windshieldwiperblades....
Loosefuelcanwarning 2 - 1.3 Wiper
Low fuel warning light, 2-W 2p 2r b 16a d2e s 8.
Lowtirepressurewarninglight 2 - 1 7 Wiperandwasherswitch. . . . . . . . . . . . . 2 - 2 4
Lowwindshield-washerfluidwarning
l i g h t . . . . . . . . . . . . . . . . . . . . . . . . . . . . . 2 - 1 8
Passenger'sseatbeltwarninglightand
chime....2-18
\$ seat b.elt w ar m Ong light . . . . . . . 1 - 2 4 , 2 - 1 6
Supplementalairbagwarning
l i g h t . . . . . . . . . . . . . . . . . . . . 1 - 6 4 , 2 - 1 9
TPMS. 2 - 4
Vehiclesecuritysystem. . . . . . . 2 - 2 2 , 2 - 2 2
Warning/indicatorlightsandaudible
reminders....2-19
Warninglabels(forSRS). . . . . . . . . . 1 - 6 4
urning/indicatorlight sandaudible
minder s....2-19
Audiblereminders. 2 - 1 9
Checkingbulbs 2 - 1 4
Indicator lights....2 - 1 9
Warning lights....2-19
a 6n i n g l i g h t s....2 - 1 9
GASSTATIONINFORMATION
FUELRECOMMENDATION:
Useunleadedregulargasolinewithanoctane ratingofatleast87AKI(Anti-KnockIndex)number(Researchoctanenumber91).

CAUTION
- Usingafuelotherthanthatspecified couldadverselyaffecttheemission controlsystem,andmayalsoaffectthe warrantycoverage.
- Undernocircumstanceshoulda leadedgasolinebeused,becausethis willdamagethethree-waycatalyst.
-
DonotuseE-15orE-85fuelinyour vehicle. Your vehicle is not designed to runonE-15orE-85fuel. Using E-15or E-85fuelinavehiclenotspecifically designed for E-15orE-85fuelcanadversely affect the emission control devices and system of the vehicle. Damage caused by such fuel is not covered by the NISSANNew Vehicle Limited Warranty.
-
Donotusefuelthatcontainstheoctane boostermethylcyclopentadienylmanganesetricarbonyl(MMT).Usingfuel containingMMTmayadverselyaffect vehicleperformanceandvehicleemissions.NotallfueldispensersarelabeledtoindicateMMTcontent,soyou mayhavetoconsultyourgasolinere-tailerformoredetails.NotethatFederalandCalifornialawsprohibittheuse ofMMTinreformulatedgasoline.
•U.S. government regulations require ethanoldispensingpumpstobeidentified byasmall, square, orange and blacklabel with the common abbreviation or the appropriate percentage for that region.
For additional information, refer to "Recommended fluids/lubricants and capacities" in the "Technical and consumer information" section of this manual.
ENGINEOILRECOMMENDATION:
VQ40DE
•Genuine“NissanMotorOilEster5W-30SN”
VK56VD
-Genuine“NissanMotorOil0W-20SN”
For additional information, refer to "Engineoil and oilfilter recommendations" in the "Technical and consumer information" section of this manual.
COLDTIREPRESSURE:
For additional information, refer to "Tire and Loading Information label" in the "Technical and consumer information" section of this manual.
Thelabelistypicallylocatedonthedriverside centerpillaroronthedriver'sdoor.Foradditional information,referto"Wheelsandtires"inthe "Do-it-yourself"sectionofthismanual.
RECOMMENDEDNEWVEHICLE BREAK-INPROCEDURE:
During the first 1,200 miles (2,000 km) of vehicle use, follow the break-in-procedure recommendations for the future reliability and economy of your new vehicle. For additional information, refer to "Break-inschedule" in the "Starting and driving" section of this manual. Failure to follow these recommendations may result in vehicled damage or shortened engine life.

Printing : December 2016 (09)
Publication No.: OM17EA PF80UO
Printed in U.S.A.
PF80-D

- FOREWORDREADFIRST—THENDRIVESAFELY
- WARNING
- IMPORTANT SAFETY INFORMATION REMINDERS
- DRIVING
- MODIFICATIONOFYOURVEHICLE
- WHENREADINGTHEMANUAL
- IMPORTANTINFORMATIONABOUT THISMANUAL
- CAUTION
- CALIFORNIAPROPOSITION65 WARNING
- CALIFORNIAPERCHLORATE ADVISORY
- BLUETOOTH®
- ((SIRIUSXM))
- NISSANCUSTOMERCAREPROGRAM
- NISSANCARES
- 0ILLUSTRATEDTABLEOFCONTENTS
- AIRBAGS,SEATBELTSANDCHILD RESTRAINTS
- EXTERIORFRONT
- EXTERIORREAR
- PASSENGERCOMPARTMENT
- INSTRUMENTPANEL
- ENGINECOMPARTMENTCHECK LOCATIONS
- VQ40DEENGINE
- VK56VDENGINE
- NOTE
- 1 SAFETY—SEATS,SEATBELTSAND SUPPLEMENTALRESTRAINTSYSTEM
- SEATS
- FRONTPOWERSEATADJUSTMENT (IFSOEQUIPPEDFORDRIVER'SSEAT)
- OPERATINGTIPS
- FORWARDANDBACKWARD
- RECLINING
- SAFETY—SEATS, SEATBELTSANDSUPPLEMENTALRESTRAINTSYSTEM
- SEATLIFTER
- LUMBARSUPPORT
- ARMRESTS(IFSOEQUIPPED)
- FLEXIBLESEATING
- FOLDINGTHEFRONTPASSENGER'SSEATBACK
- A CAUTION
- SAFETY—SEATS, SEAT BELTS AND SUPPLEMENTAL RESTRAINTSYSTEM
- INSTALLINGTHE2ND,3RDAND 4THROWSEATS
- SEATRAILCOVERS
- INSTALLATIONOFRAILCOVERS
- TOINSTALLTHERAILCOVERS
- REMOVALOFRAILCOVERS
- SEATCONFIGURATIONS
- HEADRESTRAINTS/HEADRESTS
- REMOVE
- ADJUST
- INSTALL
- RAISE
- SEATBELTS
- PRECAUTIONSONSEATBELT USAGE
- SEATBELTWARNINGLIGHT
- PREGNANTWOMEN
- INJUREDPERSONS
- THREE-POINTTYPESEATBELT WITHRETRACTOR
- FASTENINGTHESEATBELTS
- UNFASTENINGTHESEATBELTS
- CHECKINGSEATBELTOPERATION
- SEATBELTEXTENDERS
- CHILDSAFETY
- SEATBELTMAINTENANCE
- CHILDRENNEEDADULTSTOHELPPROTECTTHEM. THEYNEEDTOBEPROPERLYRESTRAINED
- INFANTS
- SMALLCHILDREN
- LARGERCHILDREN
- CHILDRESTRAINTS
- PRECAUTIONSONCHILD RESTRAINTS
- ACHILDRESTRAINTINACLOSEDVEHICLECAN BECOMEVERYHOT.CHECKTHESEATINGSURFACEANDBUCKLESBEFOREPLACINGACHILDIN THECHILDRESTRAINT
- LATCHSYSTEMLOWERANCHORLOCATIONS-2ND,3RDAND4THROWS
- TOPTETHERANCHOR
- REAR-FACINGCHILDRESTRAINT INSTALLATIONUSINGLATCH
- REAR-FACING-STEP6
- FORWARD-FACINGCHILD RESTRAINTINSTALLATIONUSING LATCH
- INSTALLINGTOPTETHERSTRAP
- 2NDAND3RDROWBENCHSEAT
- 4THROWBENCHSEAT
- FORWARD-FACINGCHILD RESTRAINTINSTALLATIONUSING THESEATBELTS
- A WARNING
- BOOSTERSEATS
- FRONTPASSENGERPOSITION
- SUPPLEMENTALRESTRAINT SYSTEM(SRS)
- PRECAUTIONSONSRS
- SUPPLEMENTALFRONT-IMPACTAIRBAGSYSTEM
- FRONTSEAT-MOUNTEDSIDE-IMPACTSUPPLEMENTALAIRBAGSYSTEM
- ROOF-MOUNTEDCURTAINSIDE-IMPACT AND ROLLOVERSUPPLEMENTALAIRBAGSYSTEM
- SUPPLEMENTALAIRBAGSYSTEM
- THESIDEAIRBAGSANDCURTAINAIRBAGSOPERATEONLYWHENTHEIGNITIONSWITCHIS PLACEDINTHEONORSTARTPOSITION
- SUPPLEMENTALAIRBAG WARNINGLABELS
- SUPPLEMENTALAIRBAG WARNINGLIGHT
- REPAIRANDREPLACEMENTPROCEDURE
- 2INSTRUMENTSANDCONTROLS
- METERSANDGAUGES
- SPEEDOMETERANDODOMETER
- SPEEDOMETER
- ODOMETER/TWINTRIPODOMETER
- CHANGINGTHEDISPLAY
- RESETTINGTHETRIPODOMETER
- TACHOMETER
- FUELGAUGE
- ENGINEOILPRESSUREGAUGE
- INSTRUMENTSANDCONTROLS
- VOLTMETER
- AUTOMATICTRANSMISSIONFLUID TEMPERATUREGAUGE
- TRIPCOMPUTER
- HOWTOUSETHETRIPCOMPUTER
- RANGEMODE
- AVERAGESPEEDMODE
- TIME(ELAPSED)MODE
- TIREPRESSUREINFORMATIONMODE
- SETTINGMODE
- WARNINGMODE
- INDICATORSFORMAINTENANCE
- OTHER INDICATOR
- RESETTPMS
- TRIPCOMPUTERWARNINGS
- PARKBRAKEWARNING
- LOWFUELWARNING
- CHECKTIREPRESSUREWARNING
- EXAMPLE
- TPMSERRORWARNING
- LOWOILPWARNING
- LOVOLTAGEWARNING
- LOOSEFUELCAPWARNING
- A/TTEMPWARNING
- WARNINGLIGHTS, INDICATOR LIGHTSAND AUDIBLE REMINDERS
- CHECKINGLIGHTS
- WARNINGLIGHTS
- PARKINGBRAKEINDICATOR
- LOWBRAKEFLUIDWARNINGLIGHT
- CHARGEWARNINGLIGHT
- DOOROPENWARNINGLIGHT
- DRIVER'SSEATBELTWARNINGLIGHT ANDCHIME
- ENGINEOILPRESSUREWARNING LIGHT
- LOWFUELWARNINGLIGHTAND CHIME
- LOWTIREPRESSUREWARNINGLIGHT
- LOWTIREPRESSUREWARNING
- PRESSUREWARNINGLIGHT.USEATIREPRESSURE GAUGETOCHECKTHETIREPRESSURE
- TPMSMALFUNCTION
- SUPPLEMENTALAIRBAGWARNING LIGHT
- INDICATORLIGHTS
- AUTOMATICTRANSMISSION POSITIONINDICATORLIGHT
- CRUISE
- CRUISEMAINSWITCHINDICATOR LIGHT(IFSOEQUIPPED)
- CRUISESETSWITCHINDICATOR LIGHT(IFSOEQUIPPED)
- HIGHBEAMINDICATORLIGHT (BLUE)
- MALFUNCTIONINDICATORLIGHT (MIL)
- OPERATION
- TOWMODEONINDICATORLIGHT (IFSOEQUIPPED)
- TURNSIGNAL/HAZARDINDICATOR LIGHTS
- VEHICLEDYNAMICCONTROL (VDC)OFFINDICATORLIGHT
- AUDIBLEREMINDERS
- BRAKEPADWEARWARNING
- KEYREMINDERCHIME
- LIGHTREMINDERCHIME
- PARKINGBRAKEREMINDERCHIME
- SECURITYSYSTEMS(IFSOEQUIPPED)
- VEHICLESECURITYSYSTEM
- HOWTOARMTHEVEHICLESECURITY SYSTEM
- SECURITYINDICATORLIGHT
- WIPERANDWASHERSWITCH
- SWITCHOPERATION
- TYPEA(IFSOEQUIPPED)
- HEADLIGHTANDTURNSIGNAL SWITCH
- HEADLIGHTCONTROL SWITCH
- HEADLIGHTBEAMSELECT
- BATTERYSAVERSYSTEM
- TURNSIGNALSWITCH
- TURNSIGNAL
- LANECHANGESIGNAL
- FOGLIGHT SWITCH(IFSOEQUIPPED)
- 2-28INSTRUMENTSANDCONTROLS
- HORN
- HEATEDSEATSWITCHES(IFSO EQUIPPED)
- VEHICLEDYNAMICCONTROL(VDC) OFFSWITCH
- POWERINVERTERSWITCH(IFSO EQUIPPED)
- REARSONARSYSTEM(RSS)OFF SWITCH(IFSOEQUIPPED)
- FRONTANDREARSONARSYSTEM OFFSWITCH(IFSOEQUIPPED)
- TOWMODESWITCH(IFSOEQUIPPED)POWEROUTLETS
- 12VOUTLET(S)
- 12V3RDROW(IFSOEQUIPPED)
- 12VCENTERCONSOLE(IFSOEQUIPPED)
- STORAGE
- UNDER-SEATSTORAGE
- GLOVEBOX
- CONSOLEBOX(IFSOEQUIPPED)
- REMOVABLECENTERCONSOLE
- PROPERLYSTOWANDSECURETHECONSOLEIFIT ISNOTSTOREDOUTSIDETHEVEHICLE
- OVERHEADSUNGLASSES STORAGE
- WINDOWS
- GROCERYHOOKS
- MANUALWINDOWS(IFSOEQUIPPED)
- DRIVER'SSIDEPOWERWINDOWSWITCH
- FRONTPASSENGER'SPOWERWINDOW SWITCH
- LOCKINGPASSENGERS'WINDOWS
- AUTOMATICOPERATION
- INTERIORLIGHTS
- MANUALVENTWINDOWS
- MAPLIGHTS
- CARGOLIGHT
- 3PRE-DRIVINGCHECKSANDADJUSTMENTS
- KEYS
- PRE-DRIVINGCHECKSANDADJUSTMENTS
- NEVERLEAVETHEKEYSINTHEVEHICLE
- DOORS
- LOCKINGWITHKEY
- FRONTANDSLIDINGDOORS
- REARDOOR
- PRE-DRIVING CHECKS AND ADJUSTMENTS
- LOCKOUTPROTECTION
- BACKDOORS
- AUTOMATICDOORLOCKS(IFSO EQUIPPED)
- CHILDSAFETYSLIDINGDOOR LOCK
- REMOTEKEYLESSENTRYSYSTEM (IFSOEQUIPPED)
- BESURETOREMOVETHEKEYFROMTHEVEHICLE BEFORELOCKINGTHEDOORS
- HOWTOUSEREMOTEKEYLESS ENTRYSYSTEM
- UNLOCKINGDOORS
- AUTORELOCK(IFSOEQUIPPED)
- USINGTHEINTERIORLIGHTS
- USINGTHEPANICALARM
- SILENCINGTHEHORNBEEPFEATURE
- HOOD
- FUEL-FILLERDOOR
- STEERINGWHEEL
- TILTOPERATION
- SUNVISORS
- STORAGECLIP
- MIRRORS
- AUTOMATICANTI-GLARE REARVIEWMIRROR(IFSOEQUIPPED)
- MANUALANTI-GLAREREARVIEW MIRROR(IFSOEQUIPPED)
- OUTSIDEMIRRORS
- 3-18PRE-DRIVINGCHECKSANDADJUSTMENTS
- ELECTRICCONTROLTYPE
- MANUALFOLDINGOUTSIDEMIRRORS
- HEATEDMIRRORS(IFSOEQUIPPED)
- 4MONITOR,CLIMATE,AUDIO,PHONEANDVOICE RECOGNITIONSYSTEMS
- 9.CAMERABUTTON
- IF YOU US THE SYSTEM WITH THE ENGINE NOT RUNNING (IGNITION ON OR ACC) FOR ALONG TIME, IT WILL DISCHARGE THE BATTERY, AND THE ENGINE WILL NOT START
- TOUCH-SCREENMAINTENANCE
- HOWTOUSETHEBUTTON
- ◎/▶ BUTTON
- HOWTO USETHE ON-OFF BUTTON/VOL(VOLUME) CONTROL KNOB
- HOWTO USETHE CAMERA BUTTON
- REARVIEWMONITOR(IFSO EQUIPPED)
- DONOTSCRATCHTHECAMERALENSWHEN CLEANINGDIRTORSNOWFROMTHEFRONTOFTHE CAMERA
- DISTANCEGUIDELINES
- VEHICLEWIDTHGUIDELINES ⑤
- DIFFERENCE BETWEEN PREDICTED AND ACTUAL DISTANCES
- BACKINGUPONASTEEPUPHILL
- BACKINGUPONASTEEPDOWNHILL
- BACKINGUPNEARAPROJECTINGOBJECT
- BACKINGUPBEHINDAPROJECTINGOBJECT
- ADJUSTINGTHESCREEN
- REARVIEWMONITORSYSTEM LIMITATIONS
- MONITOR, CLIMATE, AUDIO, PHONE AND VOICE RECOGNITION SYSTEMS
- VENTS
- FLOOR(BENEATH2NDAND3RDROWS)
- HEATERANDAIRCONDITIONER (MANUAL)(IFSOEQUIPPED)
- CONTROLS
- FANCONTROLDIAL
- AIRFLOWCONTROLBUTTONS
- MONITOR, CLIMATE, AUDIO, PHONE AND VOICERECOGNITION SYSTEMS
- TEMPERATURECONTROLDIAL
- AIRRECIRCULATIONBUTTON
- AIRCONDITIONERBUTTON
- THE AIRCONDITIONER COOLING FUNCTION OPERATES ONLY WHEN THE ENGINE IS RUNNING
- REARWINDOWANDOUTSIDEMIRROR(IFSO EQUIPPED)DEFROSTERSWITCH
- HEATEROPERATION
- HEATING
- VENTILATION
- DEFROSTINGORDEFOGGING
- BI-LEVELHEATING
- HEATINGANDDEFOGGING
- CLEARSNOWANDICEFROMTHEWIPERBLADES ANDAIRINLETINFRONTOFTHEWINDSHIELD.THIS IMPROVESHEATEROPERATION
- COOLING
- DEHUMIDIFIEDHEATING
- DEHUMIDIFIEDDEFOGGING
- AIRFLOWCHARTS
- HEATERANDAIRCONDITIONER (AUTOMATIC)(IFSOEQUIPPED)
- COOLINGORHEATING(AUTO)
- DEHUMIDIFIEDDEFROSTINGORDEFOGGING
- REARWINDOWANDOUTSIDEMIRROR DEFROSTERSWITCH
- MANUALOPERATION
- FANSPEEDCONTROLDIAL
- AIRRECIRCULATION
- AIRFLOWCONTROL
- TOTURNSYSTEMOFF
- REARSEATAIRCONDITIONER
- SERVICINGAIRCONDITIONER
- THISREFRIGERANTDOESNOTHARMTHEEARTH'S OZONELAYER
- AUDIOSYSTEM(IFSOEQUIPPED)
- RADIO
- USINGACELLULARPHONEINORNEARTHEVEHICLE MAY INFLUENCERADIORECEPTIONQUALITY
- RADIORECEPTION
- FMRADIORECEPTION
- AMRADIORECEPTION
- SATELLITERADIORECEPTION(IFSO EQUIPPED)
- COMPACTDISC(CD)PLAYER
- PRESSEJECT
- UNPLAYABLE
- COMPACTDISCWITHMP3ORWMA(IF SOEQUIPPED)
- TERMS
- PLAYBACKORDER
- GENERALNOTESFORUSBUSE
- NOTESFORIPOD®USE
- IPOD®*PLAYER(IFSOEQUIPPED)
- BLUETOOTH®STREAMINGAUDIO(IFSO EQUIPPED)
- PWR(POWER)BUTTONANDVOL(VOLUME) CONTROLKNOB
- MENUBUTTON(BASS,TREBLE,FADE, BALANCEANDCLOCK)
- CLOCKOPERATION
- CLOCKSET
- RESETTINGTHETIME
- FM/AMRADIOOPERATION
- FM-AMBUTTON
- TUNEBUTTONS
- MANUALTUNING
- SEEKBUTTONS
- SEEKTUNING
- SCANTUNING
- STATIONMEMORYOPERATIONS
- COMPACTDISC(CD)PLAYEROPERATION
- CDBUTTON
- TUNE(REWINDANDFAST FORWARD)BUTTONS
- RPT(REPEAT)BUTTON
- RDM(RANDOM)BUTTON
- AUX(AUXILIARY)BUTTON
- CDEJECTBUTTON
- CDININDICATOR
- POWER/VOLUMECONTROL
- MUTEBUTTON
- AUDIOBUTTON(BASS, TREBLE, FADE, BALANCE, SSV, BEEP)
- SPEEDVOLBUTTON
- DISP(DISPLAY)/TEXTBUTTON
- AMBUTTON
- FMBUTTON
- TUNEBUTTON(TUNING)
- 1TO6STATIONMEMORYOPERATIONS
- DISP/TEXTBUTTON
- TUNE/FF-REW/FOLDER (REVERSEORFASTFORWARD) BUTTON
- SEEK/TRACKBUTTON
- RPTBUTTON
- RDMBUTTON
- EJECTBUTTON
- AUDIOMAINOPERATION
- ON-OFFBUTTON/VOL(VOLUME)CONTROL KNOB
- AUDIOBUTTON
- SXMSETTINGS
- FM/AM/SATRADIOOPERATION
- SXMBANDSELECT
- TUNINGWITHTHETOUCH-SCREEN
- TUNINGWITHTHETUNEKNOB
- REPLAYSCREEN
- REPLAYTOREPLAYATRACKFROMTHE
- SKIPTOSKIPATRACK, PRESS
- SEEK(REVERSEORFAST FORWARD)BUTTONS
- AUXBUTTON
- ADDITIONALFEATURES
- AUDIOFILEOPERATION
- PLAYINFORMATION
- RANDOMANDREPEATPLAYMODE
- RANDOM
- REPEAT
- COMPATIBILITY
- IPOD®MAINOPERATION
- INTERFACE
- SHUFFLEANDREPEATPLAYMODE
- SHUFFLE
- SCROLLINGMENUS
- BLUETOOTH®STREAMINGAUDIO WITHNAVIGATIONSYSTEM(IFSO EQUIPPED)
- CONNECTINGBLUETOOTH®AUDIO
- CDCAREANDCLEANING
- STEERINGWHEELSWITCHFOR AUDIOCONTROL(IFSOEQUIPPED)
- SOURCESWITCH
- VOLUMECONTROLSWITCH
- MEMORYCHANGE(RADIO)
- SEEKTUNING(RADIO)
- NEXT/PREVIOUSTRACK(CD)
- ANTENNA
- NISSANCONNECT SM MOBILEAPPS (IFSOEQUIPPED)
- CONNECTPHONE
- CARPHONEORCBRADIOBUETOOTH®HANDS-FREEPHONE
- SYSTEMWITHOUTNAVIGATION SYSTEM(IFSOEQUIPPED)
- REGULATORYINFORMATION
- USINGTHESYSTEM
- INITIALIZATION
- GIVINGVOICECOMMANDS
- HOWTOSAYNUMBERS
- FORBESTRESULTS, SAYPHONENUMBERSAS SINGLEDIGITS
- VOICEPROMPTINTERRUPT
- ONESHOTCALL
- CONTROLBUTTONS
- PHONE/SEND
- PHONE/END
- TUNINGSWITCH
- GETTINGSTARTED
- CHOOSINGALANGUAGE
- YOU MUST PRESS THE BUTTON WITHIN 5SECONDSTOCHANGETHELANGUAGE
- CONNECTINGPROCEDURE
- MAKINGACALLBYENTERINGAPHONE NUMBER
- RECEIVINGACALL
- IF YOU DONOTWISHTOTAKETHE CALL WHEN YOU HEARTHERINGTONE, PRESS THE BUTTON ON THE STEERING WHEEL
- LISTOFVOICECOMMANDS
- REMEMBERTOWAITFORTHETONEBEFORE SPEAKING
- (SPEAKNAME) Ⓐ
- (SPEAKDIGITS) Ⓑ
- SPECIALNUMBER" ©
- REDIAL" D
- CALLBACK" E
- DURINGACALL
- DELETEENTRY" Ⓑ
- LISTNAMES" ©
- LISTNAMES" Ⓐ
- RECORDNAME" B
- OUTGOING" Ⓐ
- INCOMING" Ⓑ
- MISSED" ©
- THEADDPHONECOMMANDISNOTAVAILABLE WHENTHEVEHICLEISMOVING
- ADDPHONE" Ⓐ
- SELECTPHONE" Ⓑ
- REPLACEPHONE" ©
- DELETEPHONE" D
- TURNBLUETOOTHOFF" E
- 4-72MONITOR, CLIMATE, AUDIO, PHONE AND VOICERECOGNITION SYSTEMS
- TRAININGPHRASES
- MANUALCONTROL
- TROUBLESHOOTINGGUIDE
- BLUETOOTH® HANDS-FREEPHONE SYSTEMWITHNAVIGATIONSYSTEM (IFSOEQUIPPED)
- FCCREGULATORYINFORMATION
- VOICECOMMANDS
- VEHICLEPHONEBOOK
- MAKINGACALL
- ENDINGACALL
- TEXTMESSAGING(IFSOEQUIPPED)
- SENDINGATEXTMESSAGE
- READINGARECEIVEDTEXTMESSAGE
- BLUETOOTH® SETTINGS
- PHONE SETTINGS
- NISSANVOICERECOGNITION SYSTEM(IFSOEQUIPPED)
- SYSTEMFEATURES
- PHONENUMBERS
- BLUETOOTH®HANDS-FREE PHONESYSTEMVOICE COMMANDS
- NAVIGATIONSYSTEMVOICE COMMANDS
- AUDIOSYSTEMVOICE COMMANDS
- INFORMATIONVOICECOMMANDS
- MYAPPSVOICECOMMANDS
- HELPVOICECOMMANDS
- 5STARTINGANDDRIVING
- PRECAUTIONSWHENSTARTING ANDDRIVING
- EXHAUSTGAS(CARBONMONOXIDE)
- THREE-WAYCATALYST
- DRIVINGPRECAUTIONS
- UTILITYVEHICLESHAVEASIGNIFICANTLYHIGHER ROLLOVERRATETHANOTHERTYPESOFVEHICLES
- TIREPRESSUREMONITORING SYSTEM(TPMS)
- ADDITIONAL INFORMATION
- SOMEEXAMPLESARE
- FCCNOTICE
- FORUSA
- FORCANADA
- OFF-ROADRECOVERY
- RAPIDAIRPRESSURELOSS
- IGNITIONSWITCH
- DRINKINGALCOHOL/DRUGSAND DRIVING
- AUTOMATICTRANSMISSION
- BEFORE STARTING THE ENGINE
- STARTING THE ENGINE
- DONOTOPERATETHESTARTERFORMORETHAN 15SECONDSATATIME.IFTHEENGINEDOES NOTSTART,TURNTHEKEYOFFANDWAIT10SECONDSBEFORECRANKINGAGAIN,OTHERWISETHE STARTERCOULDBEDAMAGED
- DRIVINGTHEVEHICLE
- CARESHOULDBETAKENTOAVOIDSITUATIONS THATCANLEADTOPOTENTIALBATTERYDISCHARGE ANDPOTENTIALNO-STARTCONDITIONSSUCHAS
- ENGINEPROTECTIONMODE
- STARTINGTHEVEHICLE
- SHIFTING
- P(PARK)
- R(REVERSE)
- N(NEUTRAL)
- D(DRIVE)
- MANUALSHIFTMODE
- STARTINGANDDRIVING
- M7(SEVENTH)(IFSOEQUIPPED)
- M6(SIXTH)(IFSOEQUIPPED)
- M5(FIFTH)
- M4(FOURTH)
- M3(THIRD)
- M2(SECOND)
- M1(FIRST)
- WHENSHIFTINGUP
- WHENSHIFTINGDOWN
- WHENCANCELINGTHEMANUALSHIFTMODE
- SHIFTLOCKRELEASE
- PARKINGBRAKE
- CRUISECONTROL(IFSOEQUIPPED)
- TORELEASE
- PRECAUTIONSONCRUISE CONTROL
- ●INVERYWINDYAREAS
- DOINGSOCOULDCAUSEALOSSOFVEHICLE CONTROLANDRESULTINANACCIDENT
- CRUISECONTROLOPERATIONS
- BREAK-INSCHEDULE
- FUELEFFICIENTDRIVINGTIPS
- USE SMOOTH ACCELERATOR AND BRAKE PEDAL APPLICATION
- MAINTAINCONSTANTSPEED
- USE AIR CONDITIONING (A/C) AT HIGHER VEHICLE SPEEDS
- DRIVEATECONOMICALSPEEDSANDDISTANCES
- USE CRUISE CONTROL
- INCREASINGFUELECONOMY
- PLANFORTHESHORTESTROUTE
- AVOIDLDLING
- BUYANAUTOMATEDPASSFORTOLLROADS
- WINTERWARMUP
- KEEPING YOUR VEHICLE COOL
- PARKING/PARKINGONHILLS
- POWERSTEERING
- BRAKESYSTEM
- BRAKEPRECAUTIONS
- USINGTHEBRAKES
- WETBRAKES
- PARKINGBRAKEBREAK-IN
- ANTI-LOCKBRAKINGSYSTEM (ABS)
- SELF-TESTFEATURE
- NORMALOPERATION
- ACTIVEBRAKELIMITEDSLIP(ABLS) SYSTEM
- BRAKEASSIST
- VEHICLEDYNAMICCONTROL(VDC) SYSTEM
- BRAKEFORCEDISTRIBUTION
- REARSONARSYSTEM(RSS)(IFSO EQUIPPED)
- FRONTANDREARSONARSYSTEM (IFSOEQUIPPED)
- COLDWEATHERDRIVING
- FREEINGAFROZENDOORLOCK
- ANTIFREEZE
- BATTERY
- DRAININGOFCOOLANTWATER
- TIREEQUIPMENT
- SKIDANDTRACTIONCAPABILITIESOFSTUDDED SNOWTIRESONWETORDRYSURFACESMAYBE POORERTHANTHATOFNON-STUDDEDSNOWTIRES
- SPECIALWINTEREQUIPMENT
- DRIVINGONSNOWORICE
- ENGINEBLOCKHEATER(IFSO EQUIPPED)
- TOUSETHEENGINEBLOCKHEATER
- 6INCASEOFEMERGENCY
- INCASEOFEMERGENCY
- FLATTIRE
- CHANGINGAFLATTIRE
- STOPPINGTHEVEHICLE
- BLOCKINGWHEELS
- GETTINGTHESPARETIREANDTOOLS
- CAREFULLYREADTHECAUTIONLABELATTACHEDTO THEJACKBODYANDTHEFOLLOWINGINSTRUC- TIONS
- JUMPSTARTING
- PUSHSTARTING
- IFYOURVEHICLEOVERHEATS
- DONOTSTOPTHEENGINE
- TOWINGYOURVEHICLE
- VEHICLERECOVERY(FREEINGASTUCK VEHICLE)
- PULLINGASTUCKVEHICLE
- ROCKINGASTUCKVEHICLE
- 7APPEARANCEANDCARE
- CLEANINGEXTERIOR
- BECAREFULNOTTOSCRATCHTHEPAINTSURFACE WHENPUTTINGONORREMOVINGTHEBODY COVER
- WASHING
- APPEARANCEANDCARE
- WAXING
- REMOVINGSPOTS
- UNDERBODY
- GLASS
- CHROMEPARTS
- TIREDRESSINGS
- CLEANINGINTERIOR
- AIRFRESHENERS
- FLOORMATINSTALLATION
- CORROSIONPROTECTION
- MOSTCOMMONFACTORS CONTRIBUTING TO VEHICLE CORROSION
- ENVIRONMENTALFACTORS INFLUENCETHERATEOF CORROSION
- MOISTURE
- RELATIVEHUMIDITY
- TEMPERATURE
- AIRPOLLUTION
- PROTECT YOUR VEHICLE FROM CORROSION
- INWINTER, THE UNDERBODY MUST BE CLEANED PERIODICALLY
- 8DO-IT-YOURSELF
- MAINTENANCEPRECAUTIONS
- ENGINECOOLINGSYSTEM
- IF THE COOLING SYSTEM FREQUENTLY REQUIRES COOLANT, IT IS RECOMMENDED THAT YOU VISIT A NISSAN DEALER FORTH THIS SERVICE
- CHANGINGENGINECOOLANT
- ENGINEOIL
- CHECKINGENGINEOILLEVEL
- CHANGINGENGINEOIL
- DRAINPLUGTIGHTENINGTORQUE: 25FT-LB(34N·M)
- CHANGINGENGINEOILFILTER
- BECAREFULNOTTOBURNYOURSELF.THEENGINE OILMAYBEHOT
- BESURETOREMOVEANYOLDGASKETMATERIAL REMAININGONTHESEALINGSURFACEOFTHE ENGINE.FAILURERETODOSOCOULDLEADTO ENGINEDAMAGE
- POWERSTEERINGFLUID
- DONOTOVERFILL
- WINDSHIELD-WASHERFLUID RESERVOIR
- DRIVEBELT
- SPARKPLUGS
- REPLACINGSPARKPLUGS
- IRIDIUM-TIPPEDSPARKPLUGS
- AIRCLEANER
- WINDSHIELDWIPERBLADES
- IN-CABINMICROFILTER(IFSO EQUIPPED)
- CLEANING
- 8-18DO-IT-YOURSELF
- REPLACING
- BRAKESFUSES
- SELF-ADJUSTINGBRAKES
- BRAKEPADWEARINDICATORS
- FUSIBLELINKS
- 8-22DO-IT-YOURSELF
- EXTENDEDSTORAGESWITCH
- BATTERYREPLACEMENT
- KEYFOB(IFSOEQUIPPED)
- LIGHTS
- HEADLIGHTS
- REPLACINGTHEHALOGENHEADLIGHTBULB
- DONOTTOUCHTHEBULBWITHBARE HANDS
- USETHESAMENUMBERANDWATTAGEAS SHOWNINTHECHART
- FOGLIGHTS(IFSOEQUIPPED)
- REPLACEMENTPROCEDURES
- WHEELSANDTIRES
- TIREPRESSURE
- TIREINFLATIONPRESSURE
- TIREANDLOADINGINFORMATIONLABEL
- 8-32DO-IT-YOURSELF
- CHECKINGTIREPRESSURE
- TIRELABELING
- P215/65R15 95H
- OTHERTIRE-RELATEDTERMINOLOGY
- TYPESOFTIRES
- ALLSEASONTIRES
- SUMMERTIRES
- SNOWTIRES
- TIRECHAINS
- CHANGINGWHEELSANDTIRES
- WHEELNUTTIGHTENINGTORQUE
- 131FT-LB(177N·M)
- TPMSSENSORRESET
- IF THERELEARNPROCEDUREDOESNOTWORK, CHECKTHEFOLLOWINGANDRETRYTHEPROCESS
- REPLACINGWHEELSANDTIRES
- WHEELBALANCE
- CAREOFWHEELS
- 9MAINTENANCEANDSCHEDULES
- MAINTENANCEREQUIREMENTS
- GENERALMAINTENANCE
- WHERETOGOFORSERVICE
- EXPLANATIONOFGENERAL MAINTENANCEITEMS
- OUTSIDETHEVEHICLE
- MAINTENANCEANDSCHEDULES
- INSIDETHEVEHICLE
- UNDERTHEHOODANDVEHICLE
- EXPLANATIONOFSCHEDULED MAINTENANCEITEMS
- EMISSIONCONTROLSYSTEM MAINTENANCE
- MAINTENANCESCHEDULES
- STANDARDMAINTENANCE
- EMISSIONCONTROLSYSTEM
- MAINTENANCE
- MAINTENANCEUNDERSEVERE OPERATINGCONDITIONS
- SEVEREDRIVINGCONDITIONS
- 10TECHNICALANDCONSUMERINFORMATION
- RECOMMENDEDFLUIDS/ LUBRICANTSANDCAPACITIES
- FUELRECOMMENDATION
- GASOLINESPECIFICATIONS
- REFORMULATED GASOLINE
- GASOLINECONTAININGOXYGENATES
- E-15FUEL
- E-85FUEL
- FUELCONTAININGMMT
- AFTERMARKETFUELADDITIVES
- OCTANERATINGTIPS
- ENGINEOILANDOILFILTER RECOMMENDATIONS
- SELECTINGTHECORRECTOIL
- OILADDITIVES
- OILVISCOSITY
- SELECTINGTHECORRECTOILFILTER
- CHANGEINTERVALS
- AIRCONDITIONERSYSTEM REFRIGERANTANDOIL RECOMMENDATIONS
- SPECIFICATIONS
- ENGINE
- WHENTRAVELINGORREGISTERING INANOTHERCOUNTRY
- VEHICLEIDENTIFICATION
- F.M.V.S.S./C.M.V.S.S. CERTIFICATIONLABEL
- EMISSIONCONTROL INFORMATIONLABEL
- INSTALLINGFRONTLICENSEPLATE
- TIREANDLOADINGINFORMATION LABEL
- AIRCONDITIONERSPECIFICATION LABEL
- VEHICLELOADINGINFORMATION
- VEHICLELOADCAPACITY
- STEPSFORDETERMININGCORRECTLOAD LIMIT
- LOADINGTIPS
- TOWINGATRAILER
- MEASUREMENTOFWEIGHTS
- MAXIMUMLOADLIMITS
- MAXIMUM TRAILER LOADS
- TONGUELOAD
- MAXIMUMGROSSVEHICLEWEIGHT (GVW)/MAXIMUMGROSSAXLEWEIGHT (GAW)
- TOWING LOAD/SPECIFICATION
- TOWINGSAFETY
- TRAILERHITCH
- HITCHBALL
- BALLMOUNT
- BUMPERTOWING
- WEIGHTCARRYINGHITCHES
- WEIGHTDISTRIBUTIONHITCH
- SWAYCONTROLDEVICE
- CLASSLHITCH
- CLASSLLHITCH
- CLASSIVHITCH
- TIREPRESSURES
- SAFETYCHAINS
- TRAILERLIGHTS
- TRAILERBRAKES
- ELECTRICTRAILERBRAKECONTROLLER(IFSO EQUIPPED)
- PRE-TOWINGTIPS
- TRAILERTOWINGTIPS
- TODRIVEAWAY
- DOTHEFOLLOWINGIFTHETRAILERBEGINSTOSWAY
- WHENTOWINGATRAILER, FINALDRIVEGEAROIL SHOULDBEREPLACEDANDTRANSMISSION OIL/FLUIDSHOULDBECHANGEDMOREFREQUENTLY. FOR ADDITIONAL INFORMATION, REFER TO THE "DO-IT-YOURSELF" SECTIONINTHISMANUAL
- TOWMODE(IFSOEQUIPPED)
- WHENTOWINGATRAILER, FINALDRIVEGEAROIL SHOULDBEREPLACED AND TRANSMISSION OIL/FLUIDSHOULDBECHANGEDMOREFREQUENTLY. FOR ADDITIONAL INFORMATION, REFER TO THE "MAINTENANCEANDSCHEDULES" SECTION OF THIS MANUAL
- UNIFORMTIREQUALITYGRADING
- TREADWEAR200TRACTIONAATEMPERATUREA
- TRACTIONAA,A,BANDC
- EMISSIONCONTROLSYSTEM WARRANTY
- REPORTINGSAFETYDEFECTS
- READINESSFORINSPECTION/MAINTENANCE(I/M)TEST
- EVENTDATARECORDERS(EDR)OWNER'SMANUAL/SERVICE
- MANUALORDERINFORMATION
- 11INDEX
- J
- K
- L
- M
- 0
- P
- S
- TMPS
- U
- V
- GASSTATIONINFORMATION
- ENGINEOILRECOMMENDATION
- VQ40DE
- VK56VD
- COLDTIREPRESSURE
- RECOMMENDEDNEWVEHICLE BREAK-INPROCEDURE
Brand : NISSAN
Model : NV Passenger (2017)
Category : Automobile