D5107 - Uncategorized Eonon - Free user manual and instructions
Find the device manual for free D5107 Eonon in PDF.


| Type de produit | Car Multimedia Receiver with GPS Navigation |
| Dimensions | Double DIN (178 x 100 mm) |
| Poids | 1.5 kg |
| Alimentation | 12V DC (vehicle battery) |
| Consommation électrique | ≤ 10A |
| Fonctionnalités principales | GPS navigation, Bluetooth, WiFi, Android Auto, Apple CarPlay, AM/FM radio, USB, SD card, steering wheel control compatible |
| Écran | 7-inch capacitive touchscreen, 1024x600 resolution |
| Système d'exploitation | Android 10.0 |
| Processeur | Quad-core 1.6 GHz |
| Mémoire RAM | 2 GB |
| Stockage interne | 32 GB (expandable via microSD) |
| Connectivité | Bluetooth 5.0, Wi-Fi 802.11 b/g/n, GPS, USB OTG |
| Sortie audio | 4 x 45W RMS (4 channels) |
| Formats audio supportés | MP3, WMA, WAV, FLAC, AAC |
| Formats vidéo supportés | MP4, AVI, MKV, MOV, RMVB |
| Entretien et nettoyage | Wipe screen with a soft dry cloth; do not use harsh chemicals |
| Sécurité | Use only with 12V negative ground systems; disconnect battery before installation |
| Pièces détachées et réparabilité | Replacement parts available through Eonon; device not user-serviceable beyond fuse replacement |
| Informations générales | Compatible with most vehicles with ISO/DIN slots; includes mounting brackets and wiring harness |
Frequently Asked Questions - D5107 Eonon
User questions about D5107 Eonon
0 question about this device. Answer the ones you know or ask your own.
Ask a new question about this device
Download the instructions for your Uncategorized in PDF format for free! Find your manual D5107 - Eonon and take your electronic device back in hand. On this page are published all the documents necessary for the use of your device. D5107 by Eonon.
USER MANUAL D5107 Eonon
Eonon D55063D5507D5508Z installation Guide
This installation guide is written by our great fan Mike, named Nimraynn in our sponsored
AON forum. Thanks a lot for his great
http://www.nimraynn.co.uk/other/eonon-install-guide/
Disclaimer: This is : written for information purpose
responsibility for any damage that may
this guide.
Quoted review from Mike: "Eonon make
with almost every feature you could want
new models to their range made specifically
vehicles. They are designed to fit the c
adapters, and they work perfectly with
compared to most headunits. The first
no assistance from anyone else.
For more information on these headunits,
between the models is the facia colour.
Eonon D5103 (Charcoal Grey)
Eonon D5107 (Matt Chrome/Silver)
Eonon D5108 Z (Piano Black) "
So, onto the fitting!
First up, you need You can use remove a coat the hangepold stereoc
Mike trieds not it You today. much better off buying th
they ' re only a fiver from Halfords. Click
after buying the unit, so obviously he's
the process is identical for the standard
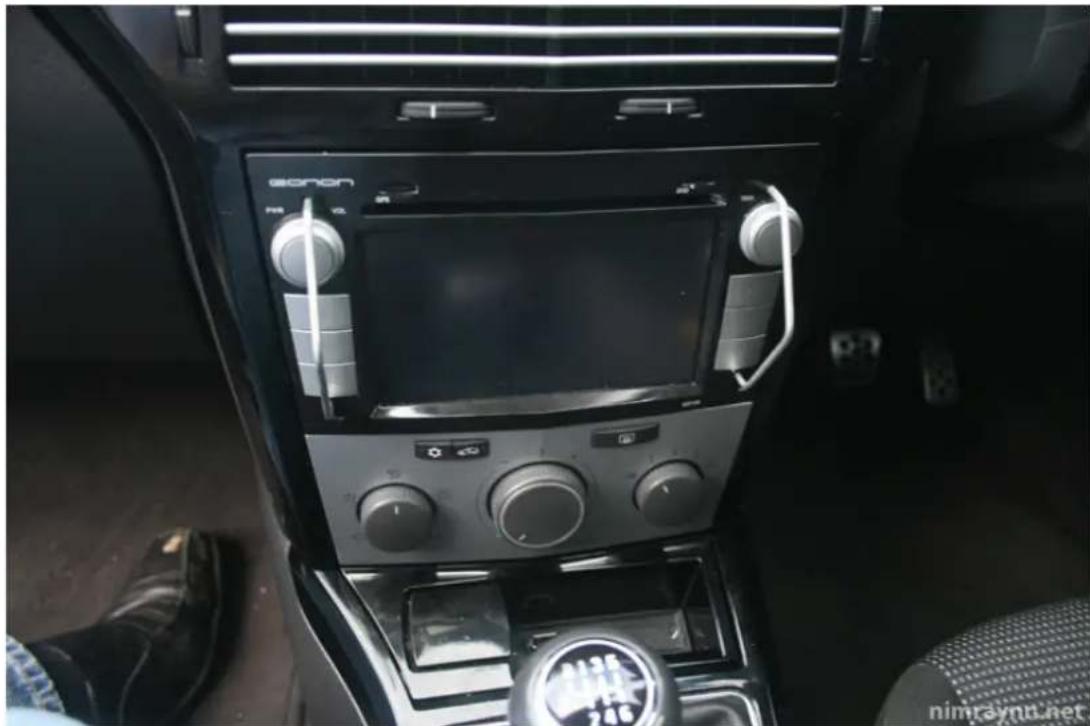
Simply insert the keys into the 4 holes on
and the unit will come out:
natural_image
Interior view of a car infotainment system with digital display and control knobs (no visible text or symbols)| Note: :Be aware that your standard head unit is paired to the display screen in the centre. | |||||||
| This | is a security feature | that means you | |||||
| ever | gets removed | or the battery dies, b | |||||
| car | unless you take | the original screen | |||||
| display | but planning | on selling on the old | |||||
| This | can be done via a Tech2 or VAUXCOM | ||||||
| able | to do this, if not, there are approved | ||||||
| around | the country | 😊 who will be able to ass | |||||
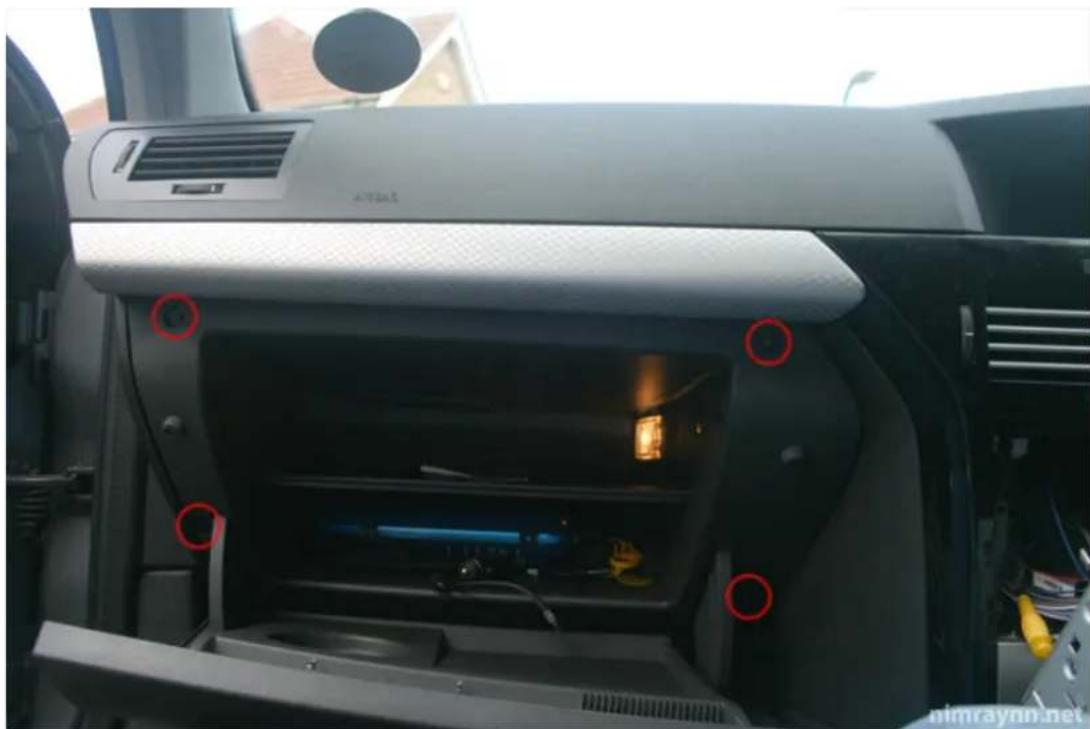
| Now that the stereo is out, you need to r management later on during the 's installation best to Todo it this now. open up the glove box and the below photo. |
natural_image
Interior view of a car showing the backrest door, rear vent, and internal electronics (no visible text or symbols)These screws are a T20 torx size. Undo these 4 screws and put them somewhere safe so you don 't lose them (I've got a habit of lo glovebox a sharp tug and it'll come straight
natural_image
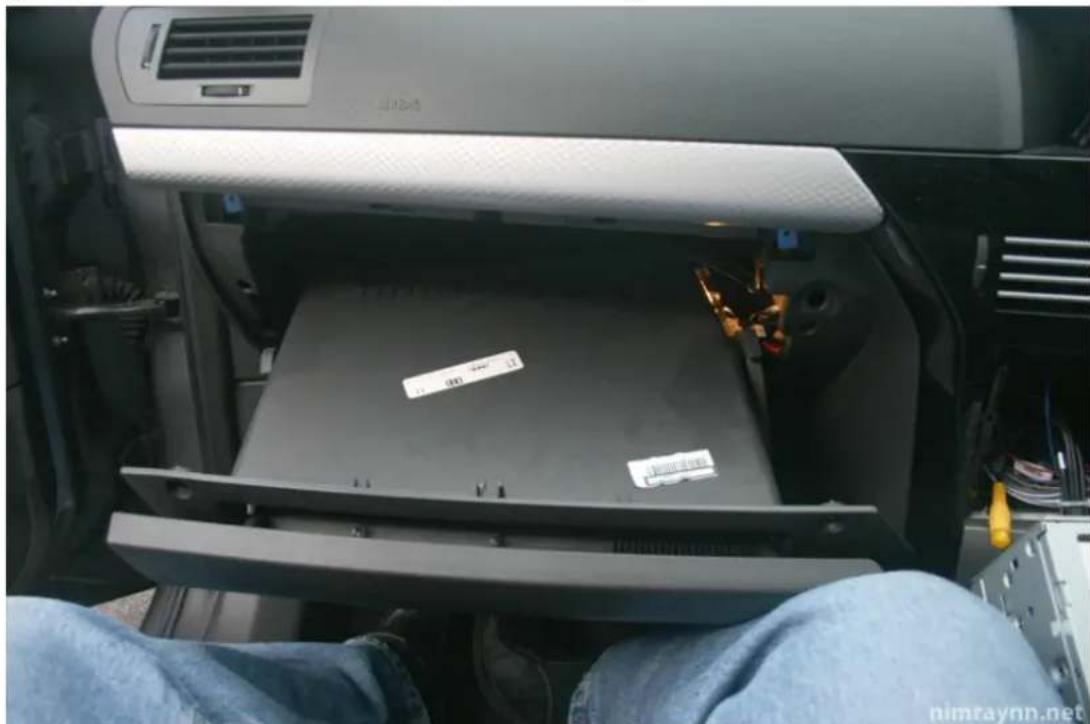
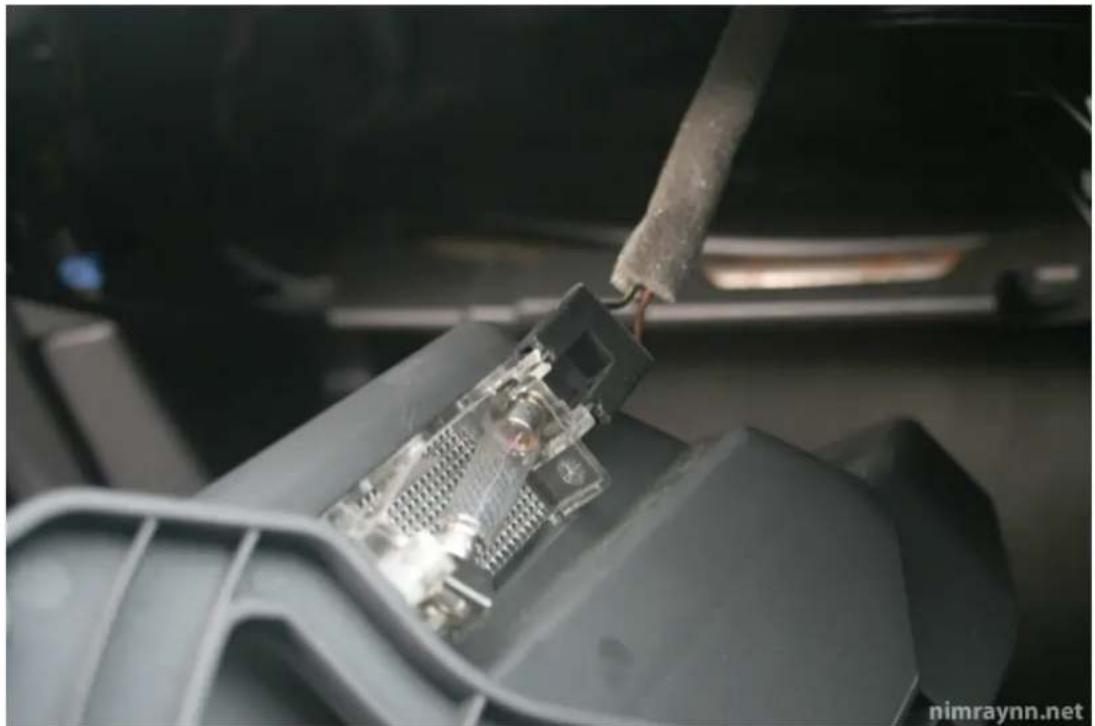
Interior view of a printer's door frame with visible paper and metal components, no text or symbols present.Make sure the glovebox is closed so that from the light. This will completely release you've completed the installation
natural_image
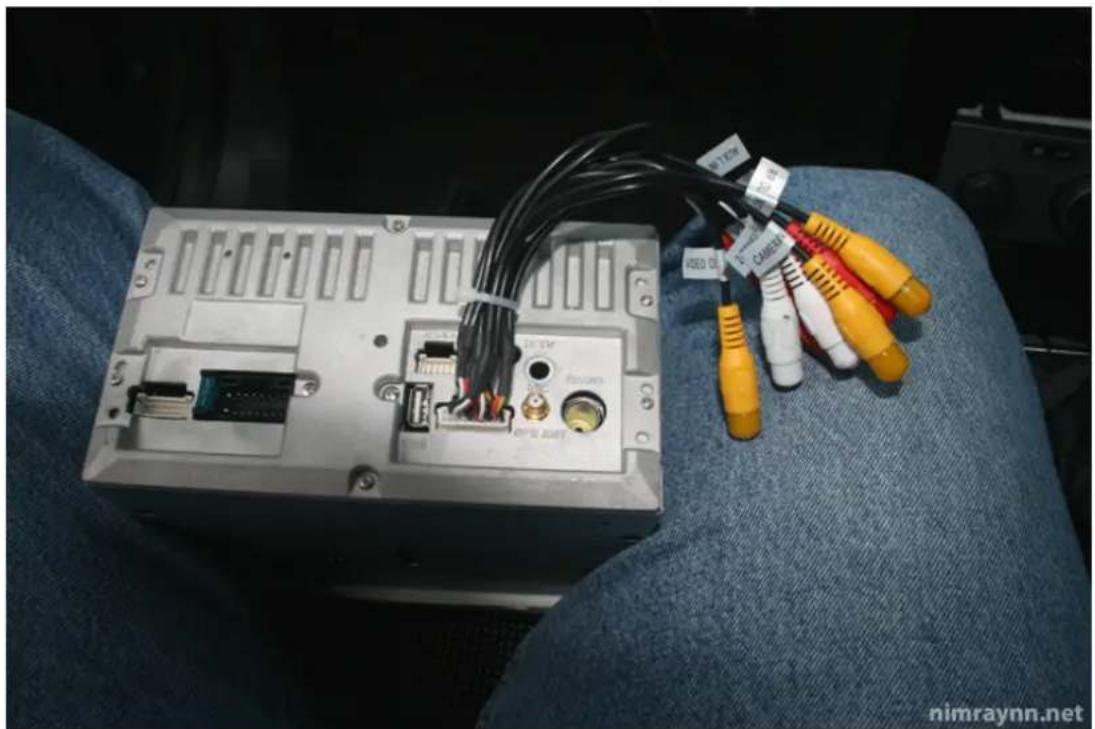
Close-up of a mechanical component with exposed wiring and a metallic tool inserted, no visible text or symbols.| So now, you can grab all the cables that came with the Eonon. The first set of cables he has attached in the picture below deals reversing cameras, aux inputs, 'etc. This not connected, but you obviously To start won, 't he didn 't bother and it made fitting the unit the aux-in feature and will soon be buying here as well ... So if you don 't need it, don |
natural_image
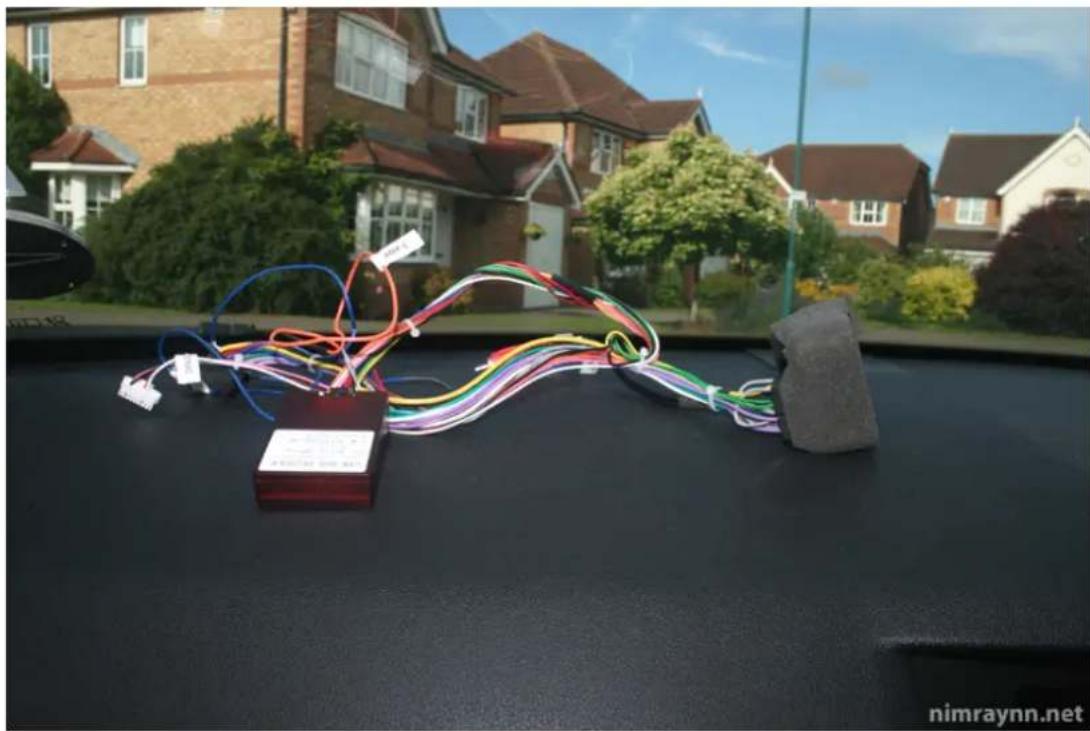
Close-up of an electronic device with attached cables and connectors, placed on a blue fabric surface (no visible text or symbols)The next thing you'll hook up is the main connector block. This is required for the unit to work. It deals with the speakers, all the plastic box is a CANBUS decoder which the steering wheel controls to work, and write text to the centre display, although seems a bit random how it does it ...
natural_image
Exterior view of a car roof with colorful wires and connectors, residential houses in background (no signage)This has one large quadlock on one end, and then it has two smaller blocks and 3 their corresponding sockets on the back they go.
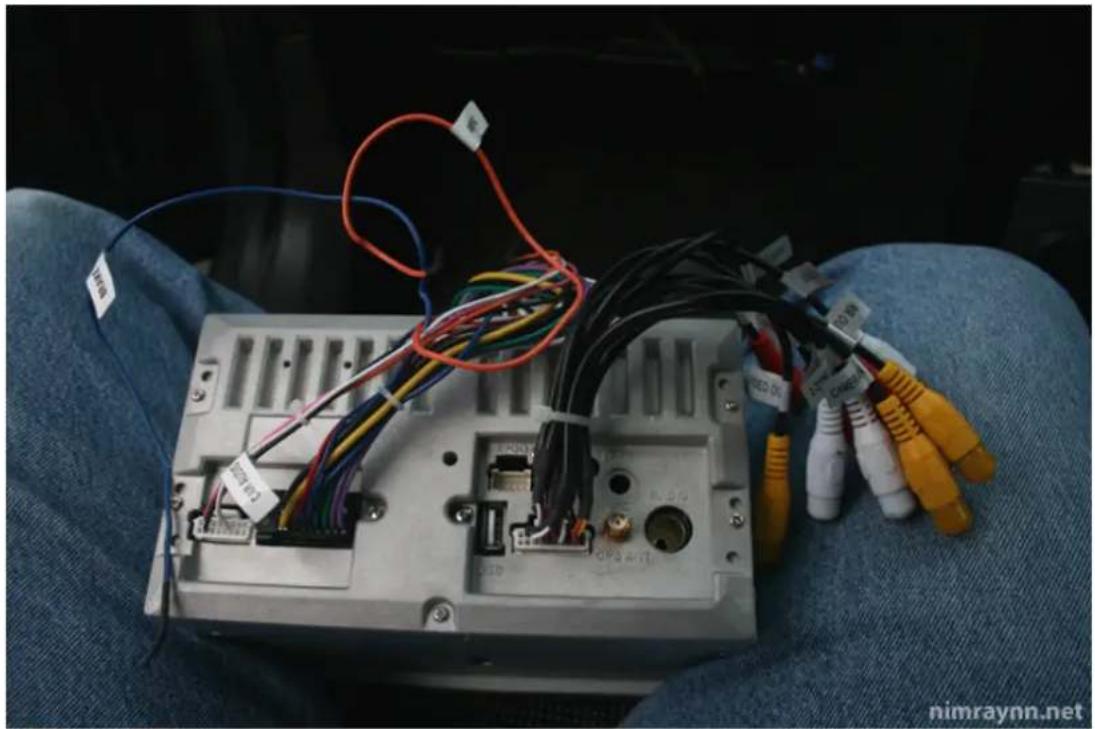
The BRAKE cable should be connected when the handbrake is off while playing be wired up to an earth point to make it better than that, you can just not bother in the head unit settings and it will completely
The AMP cable should be used as a remote don 't have one, then don 't worry about t
The ANT-C cable is a bit of a tricky one. radio signal, discard the aerial _adapter (click me) adapters, then connect it to the
So you should now be looking like this:
natural_image
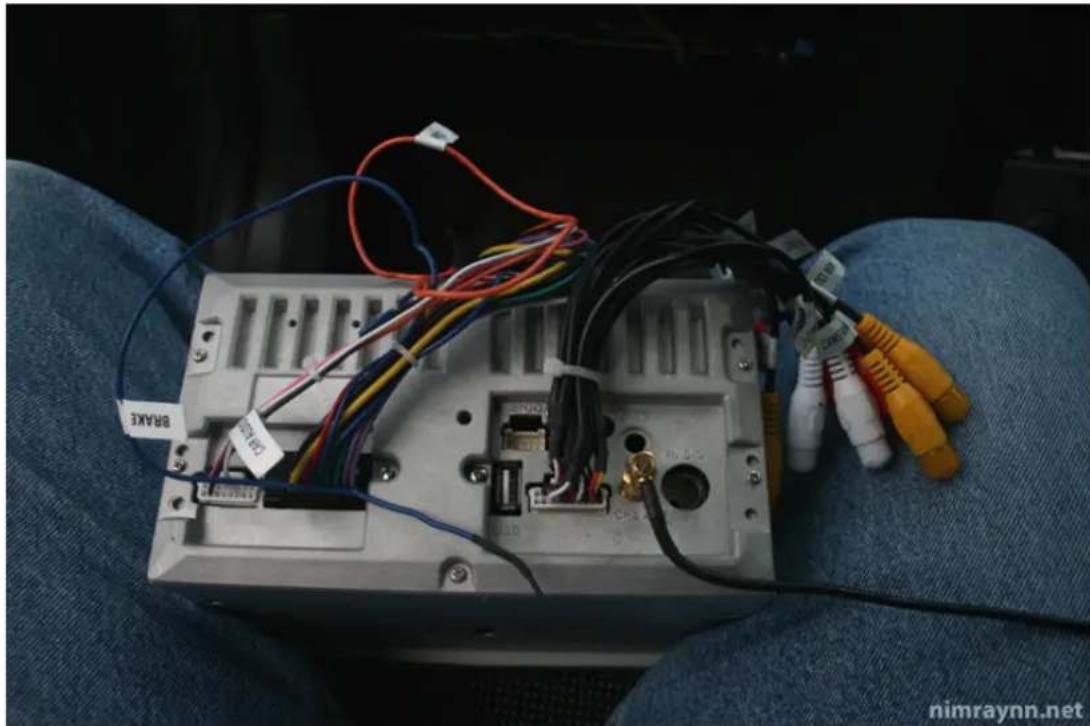
Interior view of an electronic device with visible wiring and connectors, placed on a blue fabric surface (no text or symbols)Next up, you need to connect the GPS antenna. There is a gold and white connector
between the aerial socket and the socket
It's a simple screw on coax connection so
supplied has a magnetic base plate, and
glovebox is a big metal pole. I've stuck
through the side of the centre console ir
unit. Really simply to do:
natural_image
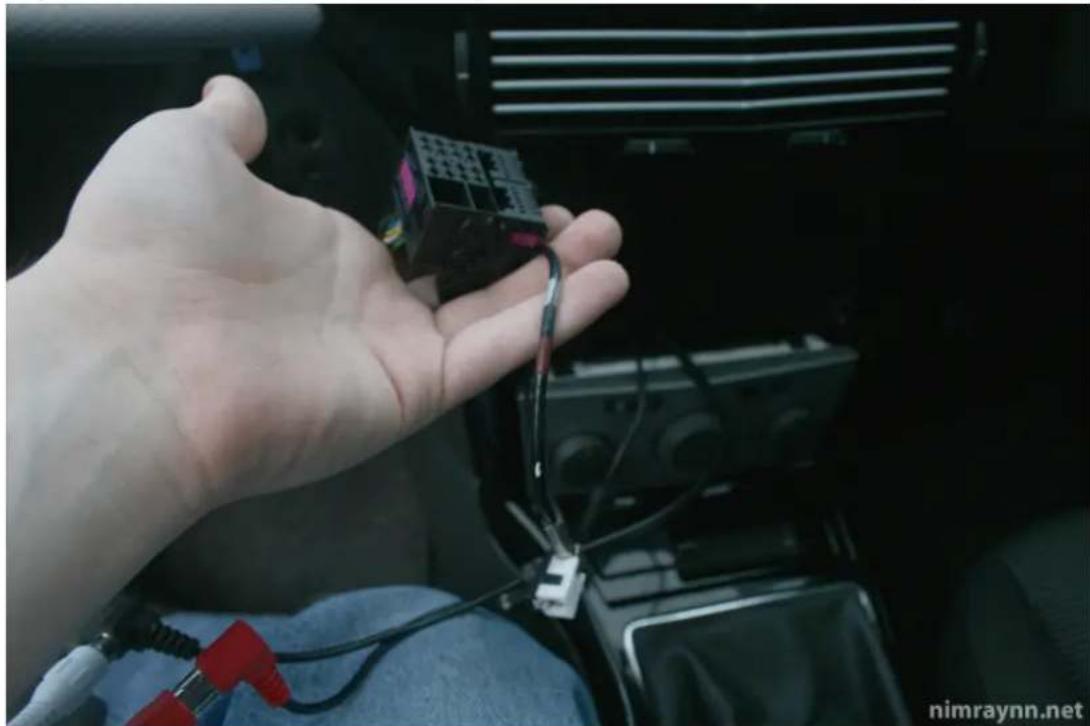
Interior view of an electronic device with visible wiring and connectors, placed on a blue fabric surface (no text or symbols)If you want to use the USB connection or add anything to your aux block, this is probably the time. You can do see now. the USB socket is next Now you're going to connect the stereo as standard on 'sthedesignar. As you suchcan aseey way, so you simply cannot get it wrong.
natural_image
Hand holding a Rubik's cube connected to a car infotainment device (no visible text or symbols)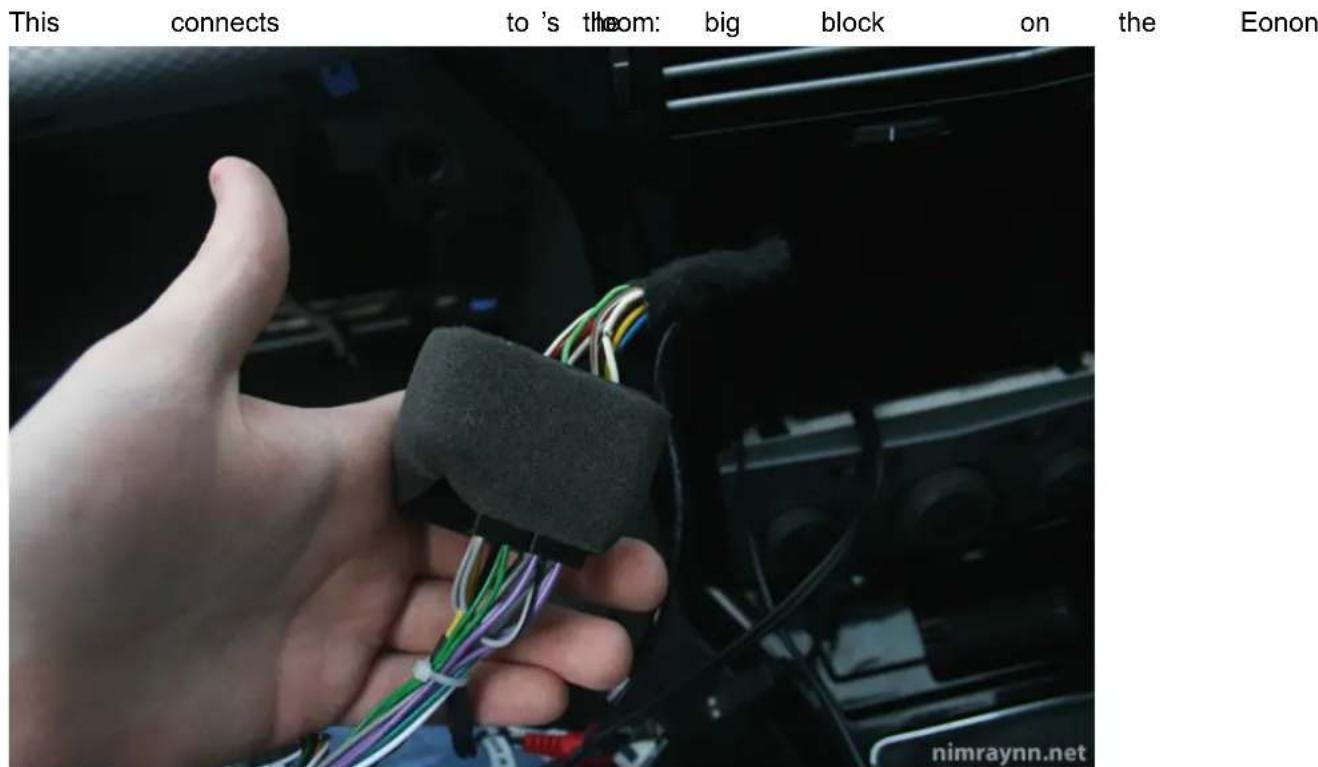
text_image
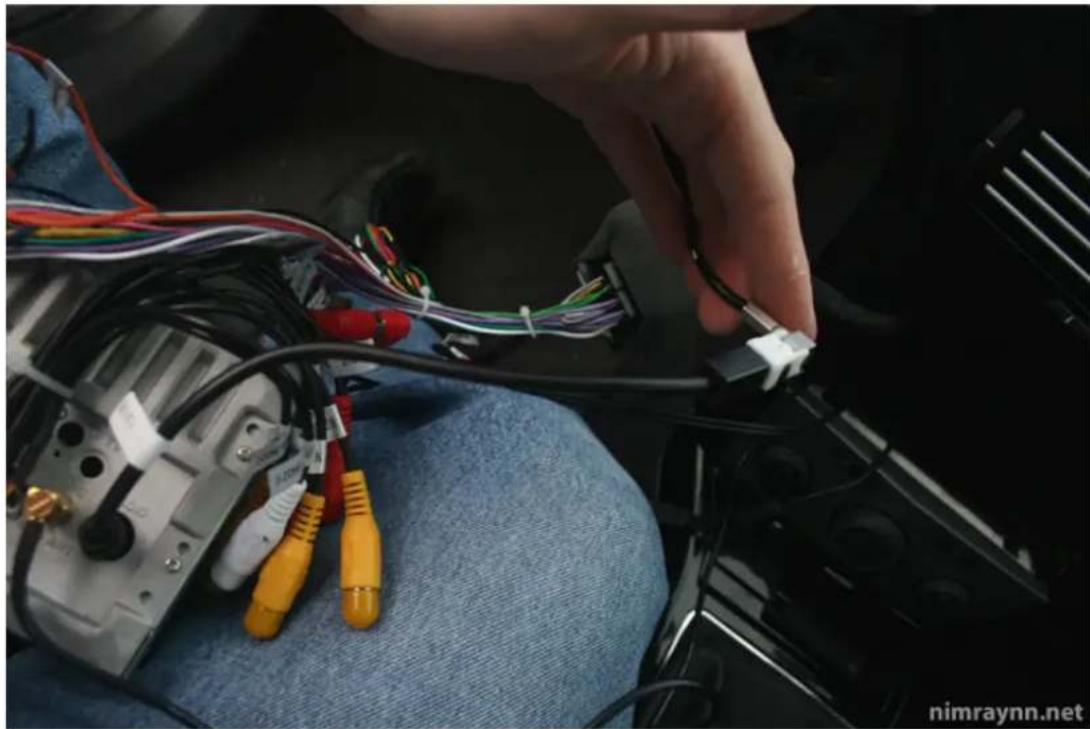
This connects to 's theom: big block on the Eonon nimraynn.netNow you will connect up the aerial. The bigger end of the adapter that comes with the unit goes into the big circular socket next to connects up to the white cable that is attach
natural_image
Close-up of a hand inserting cables into an automotive electronic device, with colored wires and connectors visible (no text or symbols)Now that is everything connected! All dashboard ... which is the hardest part fit all this cable:

natural_image
Interior view of a computer setup with cable spools and a barcode on the front panel (no readable text or symbols)Into this small space:
natural_image
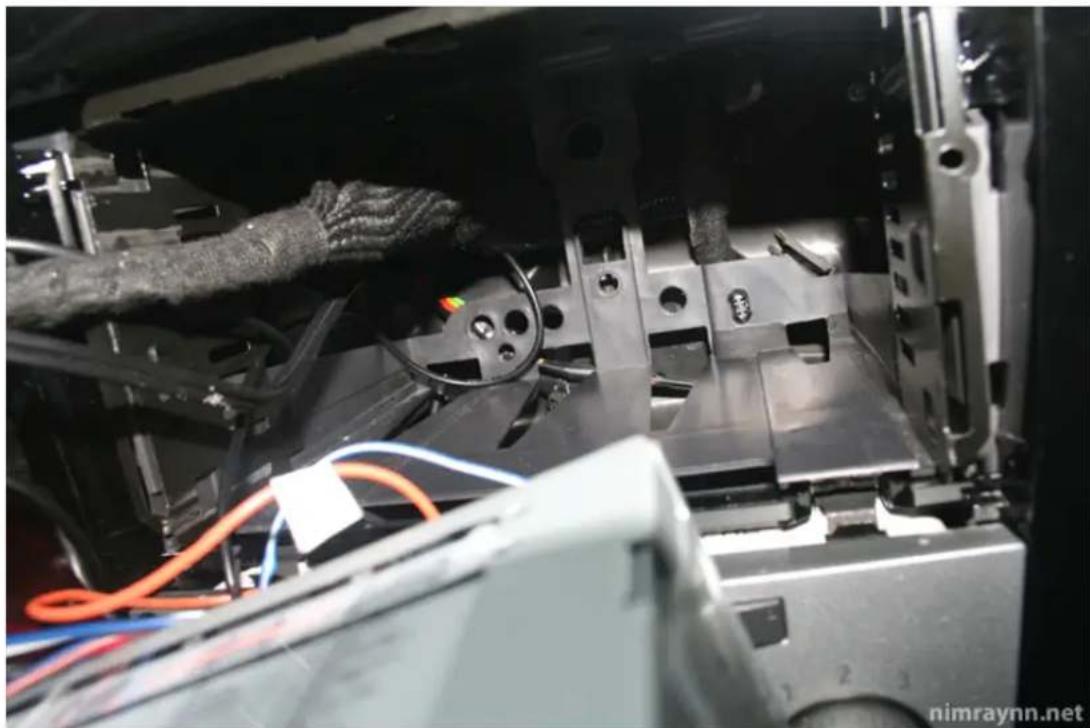
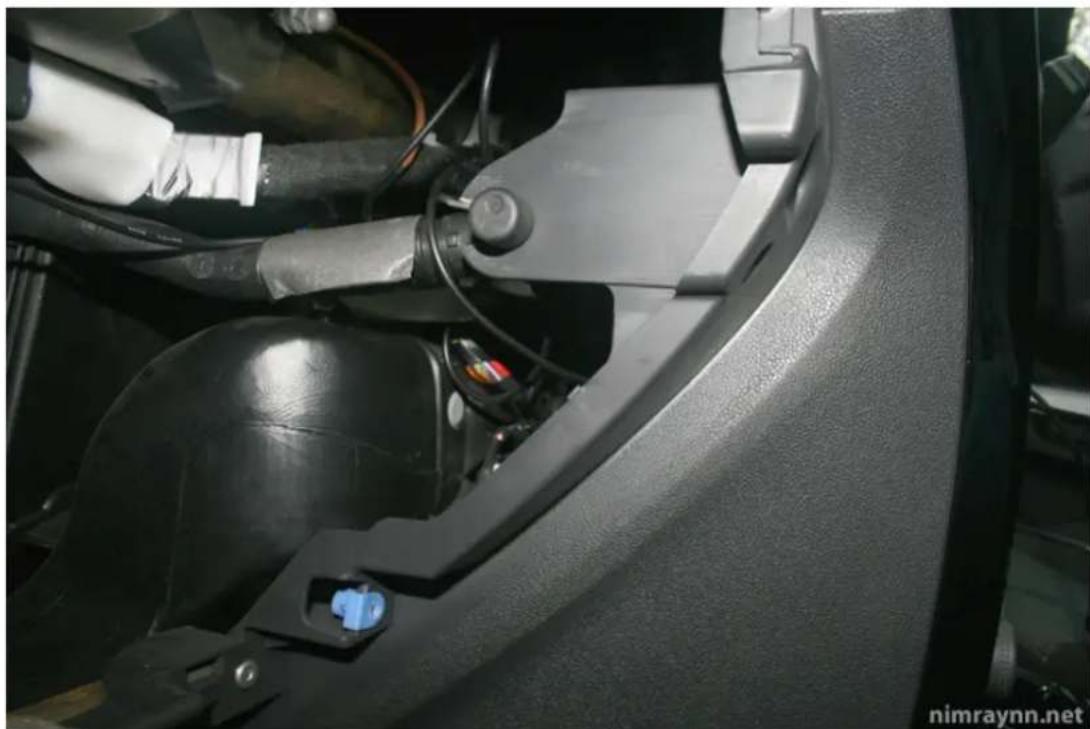
Close-up of a mechanical assembly with visible wiring and components, no readable text or symbols present.This is where having the glovebox out comes in handy, as to the left hand side of the centre console, there is a big gap that you side of the glovebox. This is the perfect possible. This is the gap:
natural_image
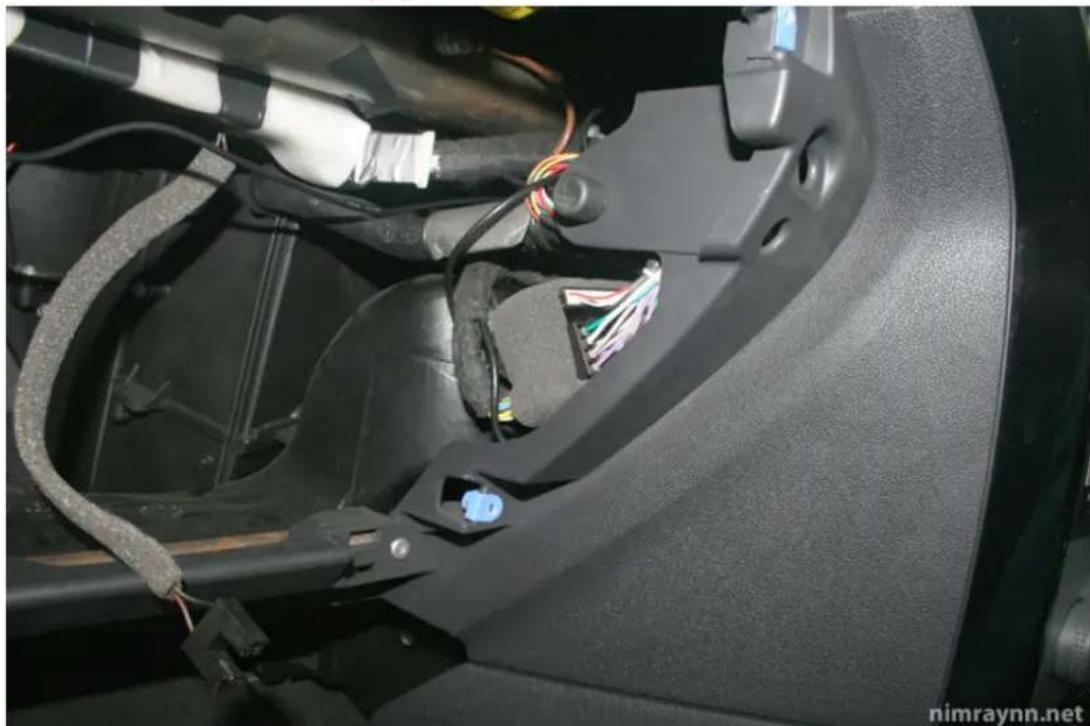
Close-up of a car's front wheel and dashboard assembly, showing mechanical components and wiring (no visible text or symbols)If you're careful enough, you can feed th
keep them nice and neat. This will give you a lot more space behind the unit, so you'll fit much flusher with less effort. If you you're going very hard have time a getting it to sit flush see here though, the cables do fit nice an
natural_image
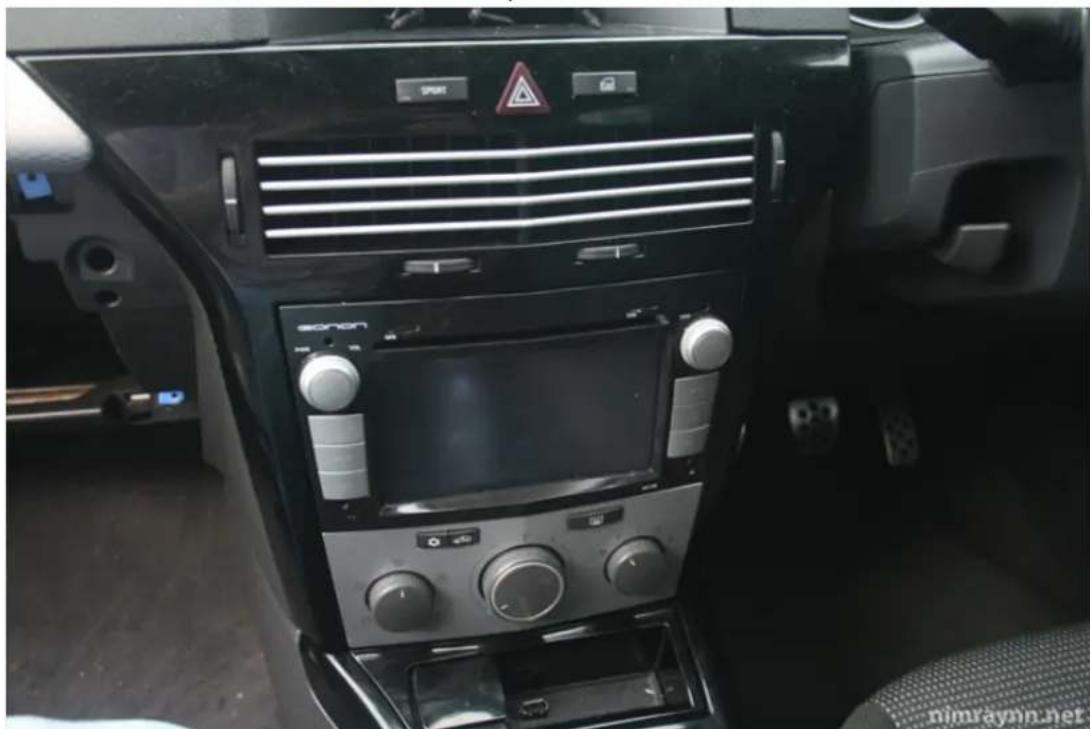
Close-up of a car's interior showing wiring and components, no visible text or symbolsAnd
the finished

product!
natural_image
Interior view of a car dashboard with air filters, control knobs, and a digital display (no visible text or symbols)Hope
it helps!
Good
luck
with
your
installation!