
LMS-320DF - Uncategorized LOWRANCE - Free user manual and instructions
Find the device manual for free LMS-320DF LOWRANCE in PDF.


| Product Type | Fishfinder/Chartplotter |
| Brand | Lowrance |
| Model | LMS-320DF |
| Display Size | 5.0 inches diagonal |
| Display Resolution | 480 x 480 pixels |
| Display Type | Color TFT LCD with LED backlight |
| Sonar Frequency | 50/200 kHz dual frequency |
| Sonar Output Power | RMS 400W, Peak-to-peak 3200W |
| Depth Capability | Up to 2500 ft (762 m) |
| GPS Receiver | Internal WAAS/EGNOS enabled |
| Chartplotting | Built-in US basemap with contours |
| Waypoints | Up to 1000 waypoints |
| Routes | Up to 100 routes (100 waypoints each) |
| Trails | Up to 10 trails (10000 points each) |
| Power Input | 10-17 VDC (negative ground) |
| Power Consumption | Typical 1.5A at 12V |
| Dimensions (WxHxD) | 6.1 x 4.7 x 3.0 inches (155 x 119 x 76 mm) |
| Weight | 1.6 lbs (0.73 kg) |
| Mounting | Bracket or flush mount |
| Protection Rating | IPX7 (waterproof to 1m for 30 min) |
| Operating Temperature | -15°C to 55°C (5°F to 131°F) |
| Cleaning | Use mild soap and water; avoid abrasive materials |
| Maintenance | Check connections and transducer regularly; update software via SD card |
Frequently Asked Questions - LMS-320DF LOWRANCE
User questions about LMS-320DF LOWRANCE
0 question about this device. Answer the ones you know or ask your own.
Ask a new question about this device
Download the instructions for your Uncategorized in PDF format for free! Find your manual LMS-320DF - LOWRANCE and take your electronic device back in hand. On this page are published all the documents necessary for the use of your device. LMS-320DF by LOWRANCE.
USER MANUAL LMS-320DF LOWRANCE
text_image
LOWRANCE Map Sonar Chart 44.5 m 47.9° 23.0 mph PORT AUDANA SIGA 5.57m 800ks 1.00 ZOUT ZIN MOR PAGES WPT MENU EXIT ENT ICONS PWR LIGHT LMS-320LMS-320, LMS-320DF Fish-finding Sonar & Mapping GPS Operation Instructions
Copyright © 2002 Lowrance Electronics, Inc.
All rights reserved.
Lowrance ^® is a registered trademark of Lowrance Electronics, Inc.
MapCreate ^™ is a trademark of Lowrance Electronics, Inc.
Marine-Tex ^™ is a trademark of Illinois Tool Works Inc.
Navionics ^® is a registered trademark of Navionics, Inc.

Points of Interest Data in this unit are by infoUSA, copyright © 2001-2002, All Rights Reserved. infoUSA is a trademark of infoUSA, Inc.

text_image
exit™ SOURCE KNOW THE WAYeXitSource Database, copyright © 2001-2002 Zenrin Co. Ltd. Exit Authority™ and eXitSource™ are trademarks of Zenrin Co. Ltd.
Lowrance Electronics may find it necessary to change or end our policies, regulations and special offers at any time. We reserve the right to do so without notice. All features and specifications subject to change without notice. All screens in this manual are simulated. On the cover: LMS-320 shown. Other models covered in the manual are similar.
For free owner's manuals and other information, visit our web site:
www.lowrance.com
Lowrance Electronics Inc. 12000 E. Skelly Dr. Tulsa, OK USA 74128-2486 Printed in USA.
Table of Contents
Sec. 1: Read Me First! .... 1
Capabilities and Specifications: LMS-320 and LMS-320DF ..... 3
How LMS-320 Sonar Works 5
How LMS-320 GPS Works 6
Introduction to GPS and WAAS....8
How to Use this Manual: Typographical Conventions...... 10
Sec. 2: Installation & Accessories .... 13
Preparations.... 13
Transducer Installation.... 13
Recommended Tools and Supplies 14
Selecting a Transducer Location.... 14
Transom Transducer Assembly and Mounting 16
Trolling Motor Bracket Installation.... 22
Transducer Orientation and Fish Arches 23
Shoot-Thru-Hull Preparation.... 23
Shoot-Thru-Hull Installation 25
Sensor Chart 27
Optional Speed Sensor Installation 28
GPS Antenna/Receiver Module 29
Power Connections....30
NMEA/DGPS Cable Connections 31
Mounting the Unit: Bracket, in-Dash or Portable .... 33
Bracket Installation.... 34
in-Dash Installation.... 36
Portable Installation.... 36
MMC or SDC Memory Card Installation.... 37
Other Accessories....38
Sec. 3: Basic Sonar Operation....41
Keyboard 41
Power/Lights on and Off 42
Main Menu 42
Pages 44
Satellite Status Page 44
Navigation Page 45
Map Page 45
Sonar Page 46
LMS-320 Series Sonar Quick Reference 49
Sonar Operations 50
Fish Symbols vs. Full Sonar Chart 52
Other Free Training Aids 53
Sec. 4: Sonar Options & Other Features ....55
ASP ^TM (Advanced Signal Processing) 55
Alarms 56
Depth Alarms 56
Zone Alarm 57
Fish Alarm....58
Calibrate Speed.... 58
Chart Speed....59
Depth Cursor....60
Depth Range - Automatic 60
Depth Range - Manual.... 61
Depth Range - Upper and Lower Limits ...... 61
FasTrack™ 63
Fish I.D.™ (Fish Symbols & Depths) 63
FishTrack™ 65
FishReveal™ 66
Frequency (Change Transducer Frequency) 68
Grayline ^® 69
HyperScroll™ 71
Log Sonar Chart Data 71
Noise Rejection....71
Overlay Data 71
Ping Speed & HyperScroll™ 74
Reset Options 75
Reset Water Distance 76
Set Keel Offset 76
Sensitivity & Auto Sensitivity...... 77
Sonar Color Mode....79
Sonar Page & Sonar Chart Display Options 79
Full Sonar Chart....79
Split Zoom Sonar Chart....80
Split Frequency Sonar Chart 81
Digital Data/Chart 82
Flasher....83
Map with Sonar Split Screen 84
Sonar Simulator....84
Stop Chart 86
Surface Clarity 87
Upper and Lower Limits 88
Zoom & Zoom Bar 88
Zoom & Zoom Pan 89
Sec. 5: Sonar Troubleshooting....91
Sec. 6: Basic GPS Operations....95
Keyboard 95
Power/Lights (Turn Unit On and Off) 96
Main Menu 96
Pages 98
Sonar Page 98
Satellite Status Page 99
Navigation Page.... 100
Map Page.... 102
LMS-320 GPS Quick Reference.... 107
Find your Current Position 108
Moving around the Map: Zoom & Cursor Arrow Keys...... 108
Selecting any Map Item with the Cursor 109
Searching....109
Set a Waypoint....111
Create Waypoint at Current Position 112
Create Waypoint on Map 113
Create Waypoint by Entering a Position 113
Navigate to a Waypoint....113
Set Man Overboard (MOB) Waypoint.... 114
Navigate Back to MOB Waypoint....114
Navigate to Cursor Position on Map.... 115
Navigate to a Point of Interest.... 117
Creating and Saving a Trail.... 117
Displaying a Saved Trail ...... 119
Navigating Trails.... 119
Visual Trailing 120
Navigate a Trail (Forward).... 120
Navigate a Back Trail (Backtrack, or Reverse)....122
Transfer Custom Maps and GPS Data Files 122
Custom Maps: 122
GPS Data Files: 123
Cancel Navigation.... 125
Sec. 7: Advanced GPS Operations ..... 127
Find Distance from Current Position to Another Location .... 127
Find Distance from Point to Point 127
Icons.... 128
Create Icon on Map.... 128
Create Icon at Current Position....128
Delete an Icon 128
Navigate to an Icon.... 129
Routes.... 130
Create and Save a Route 130
Delete a Route 133
Edit a Route 133
Navigate a Route.... 134
Navigate a Route in Reverse 134
Trails 135
Delete a Trail 135
Edit a Trail Name 135
Edit a Trail Color 136
Edit a Trail Pattern 136
Utilities.... 137
Alarm Clock.... 137
Sun/Moon Rise & Set Calculator.... 137
Trip Calculator.... 137
Trip Down Timer.... 137
Trip Up Timer 137
Waypoints.... 137
Delete a Waypoint.... 137
Edit a Waypoint (Name, Symbol, Position) 137
Selecting a Waypoint 138
Set a Waypoint by Average Position....138
Set a Waypoint by Projecting a Position.... 138
Sec. 8: System & GPS Setup Options....141
Alarms 141
Auto Satellite Search.... 142
Check MMC Files and Storage Space....143
Communications Port Configuration 143
Configure DGPS.... 144
Configure NMEA 145
Coordinate System Selection.... 145
Map Fix.... 146
Customize Page Displays 148
DGPS Status....148
GPS Simulator 148
Hide GPS Features 150
Initialize GPS.... 150
Map Auto Zoom.... 150
Map Data.... 151
Show Map Data.... 151
Pop-Up Map Info.... 151
Map Boundaries 151
Fill Land Gray.... 152
Map Overlays (Range Rings; Lat/Long Grid) ...... 152
Map Datum Selection 152
Map Detail Category Selection.... 153
Map Orientation 154
Navionics ^® Charts.... 155
Display a Navionics Chart:....155
Port Information 156
View Port Services Information: 156
Tidal Current Information 157
to View Tidal Current Information: 158
Tide Information 159
View Tide Information:....159
Pop-Up Help....161
Position Pinning....161
Reset Options....162
Require DGPS....162
Screen Contrast and Brightness 163
Set Language 164
Set Local Time 164
Show WAAS Alarm.... 165
Software Version Information.... 165
Sounds and Alarm Sound Styles....166
Track Smoothing.... 166
Trail Options 167
Delete All Trails.... 167
Flash Trails on Screen Option....167
Update Trail Option.... 167
Delete Trail 168
New Trail....168
Trail Visible/Invisible and Other Trail Options 169
Units of Measure.... 169
Sec. 9: Searching....171
Find Addresses....171
Find any Item Selected by Map Cursor 174
Find Interstate Highway Exits 175
Find Map Places or Points of Interest (POI) 177
Find Streets or Intersections.... 179
Find Waypoints.... 182
Sec. 10: Supplemental Material....185
WARNING! A CAREFUL NAVIGATOR NEVER RELIES ON ONLY ONE METHOD TO OBTAIN POSITION INFORMATION.
CAUTION
When showing navigation data to a position (waypoint), a GPS unit will show the shortest, most direct path to the waypoint. It provides navigation data to the waypoint regardless of obstructions. Therefore, the prudent navigator will not only take advantage of all available navigation tools when traveling to a waypoint, but will also visually check to make sure a clear, safe path to the waypoint is always available.
WARNING!
When a GPS unit is used in a vehicle, the vehicle operator is solely responsible for operating the vehicle in a safe manner. Vehicle operators must maintain full surveillance of all pertinent driving, boating or flying conditions at all times. An accident or collision resulting in damage to property, personal injury or death could occur if the operator of a GPS-equipped vehicle fails to pay full attention to travel conditions and vehicle operation while the vehicle is in motion.
Section 1: Read Me First!
How this manual can get you out on the road, fast!
Welcome to the exciting world of digital sonar and GPS! We know you're anxious to begin navigating and finding fish, but we have a favor to ask. Before you grab the unit and begin installing it, please give us a moment or two to explain how our manual can help you get the best performance from your compact, wide-screen, combination fish finder and mapping GPS receiver.
First, we want to thank you for buying a Lowrance sonar/GPS unit. Whether you're a first time user or a professional fisherman, you'll discover that your unit is easy to use, yet capable of handling demanding navigation and sonar tasks. When you team your unit with our custom mapping software MapCreate™ 6, you have an incredible combination. You won't find another combination GPS and sonar unit with this much power and this many features for this price!
Our goal for this book is to get you on the water fast, with a minimum of fuss. Like you, we'd rather spend more time boating or fishing and less time reading the manual!
So, we designed our book so that you don't have to read the whole thing from front to back for the information you want. At the start (or end) of each segment, we'll tell you what content is coming up next. If it's a concept you're already familiar with, we'll show you how and where to skip ahead for the next important topic. We've also made it easy to look up any tips you may need from time to time. Here's how:
The manual is organized into 10 sections. This first section is an introduction to the LMS-320 or LMS-320DF, sonar and GPS. It tells you the basics you need to know before you can make the unit look around and tell you where you are, or look below the surface to find some fish.
Section 2 will help you install your unit, the transducer and the GPS antenna module. We'll show you how to get the MultiMedia Card (MMC) correctly installed inside the unit. We'll also tell you about some of the available accessories.
Section 3 covers Basic Sonar Operation. It will show you how easy it is to run your LMS-320 series sonar, right out of the box. This section features a one-page Sonar Quick Reference. (If you've already jumped ahead and figured out how to install the unit yourself, and you just can't wait any longer, turn to the Quick Reference on page 49 and head for the water with your LMS-320!)
After you've gained some experience with your sonar, you'll want to check out Section 4, which discusses more advanced Sonar Options and Other Features.
When you come to a sonar menu command on the LMS-320 screen, you can look it up in the manual by skimming over the table of contents, just flipping through Section 3 or scanning through the sonar options in Section 4.
If you're having difficulty with your sonar, you can find an answer to the most common problems in Section 5, Sonar Troubleshooting.
The manual switches from sonar to navigation in Section 6, which introduces you to Basic GPS Operations. This section features a one-page GPS Quick Reference on page 107.
Section 6 contains short, easy-to-scan GPS lessons that follow one another in chronological order. They're all you'll need to know to find your way on the water quickly.
After you've learned the basics (or if you already have some GPS experience), you may want to try out some of LMS-320's many advanced navigation features. That brings us to Section 7, Advanced GPS Operations. This section contains the rest of LMS-320's GPS command functions, organized in alphabetical order.
When you come to a GPS menu command on the LMS-320 screen, you can look it up in the manual by skimming over the table of contents, just flipping through Section 6 or scanning through the command portion of Section 7.
LMS-320 is ready to use right out of the box, but you can fine tune and customize it's operation with dozens of options. Since sonar is the unit's key feature, we put the main sonar options in Section 4. Some options, such as screen brightness settings, affect both sonar and GPS operations. We describe how to use those common options along with GPS options in Section 8, System Setup and GPS Setup Options. Section 8 is organized in alphabetical order.
In Section 9, we go into more detail on one of LMS-320's most remarkable GPS capabilities — Searching. We'll introduce a search example in the Basic GPS Operation section, but there are so many map items you can search for, we had to give this function it's own section in the manual! For example, did you know LMS-320 can look up business phone numbers, functioning as a virtual Yellow Pages? We'll show you how in Section 9.
Finally, in Section 10, we offer Supplemental Material, including a list of the GPS datums used, warranties and customer service information.
Now, if you're into the fine details, glance over the next segment on specifications to see just how much sonar and GPS power your unit contains. It's important to us (and our power users), but, if you don't care how many watts of power the unit has, or how many waypoints LMS-320 can store, skip ahead to important information on how LMS-320 sonar works, on page 5. (Background on GPS begins on page 6.)
Capabilities and Specifications: LMS-320 and LMS-320DF General
| Display:......5.0" (12.7 cm) diagonal high contrast Film SuperTwist LCD; programmable to viewing preference. |
| Resolution:...... 320 pixel x 320 pixel resolution; 102,400 total pixels; 10-level gray scale definition. |
| Backlighting:...... | Incandescent backlit screen with multiple lighting levels; backlit keypad. |
| Input power:...... 10 to 15 volts DC. |
| Current drain: ...... Sonar only: 500 ma lights off; 600 ma lights on. With GPS and lights on: 700 ma. |
| Case size:...... | 5.4" H x 6.9" W x 3.4" D (13.8 x 17.6 x 8.6 cm); sealed and waterproof; suitable for saltwater use. |
| MMC slots:......One with waterproof door (SD card compatible). |
| Back-up memory: ...... Built-in memory stores sonar records and GPS data for decades. User settings are stored when unit is turned off. |
| Languages:...... 10; menu languages selectable by user. |
| Sonar |
| Frequency:......LMS-320DF: 50/200 kHz.LMS-320: 200 kHz. |
| Transducers:......A dual-frequency Skimmer® transducer with built-in temperature sensor is packed with the LMS-320DF. It has 35°/12° cone angles. A single-frequency Skimmer transducer with built-in temperature sensor is packed with the LMS-320. It has a 20° cone angle. Transducers operate at speeds up to 70 mph (61 kts). |
| Transmitter: | 3,000 watts peak-to-peak/375 watts RMS. |
Sonar sounding
depth capability: ....LMS-320DF: 2,500 feet/762 meters.
LMS-320: 1,000 feet/305 meters.
(Actual capability depends on transducer configuration and installation, bottom composition and water conditions. All sonar units typically read deeper in fresh water than in salt water.)
Depth display:...... Continuous display.
Graph recording:..... Up to 256 MB on one MMC (or SD) card
Audible alarms: .... Deep/shallow/fish/zone.
Automatic ranging:..... Yes, with instant screen updates.
Auto bottom track:..... Yes
Zoom bottom track: ..... Yes.
Split-screen zoom:...... Yes.
Surface water temp: ..... Yes, built into transducer.
Speed/distance log:...... Yes, with optional speed sensor (sensor included with LMS-320DF.)
GPS
Receiver/antenna: ...... External; LGC-12w 12 parallel channel GPS/WAAS; DGPS beacon receiver optional.
Recording:......MMC & SD memory cards for recording GPS trip details and displaying charts or custom maps.
Background map:...... Built-in custom, detailed Lowrance map. Contains: enhanced detail of continental U.S. and Hawaii. Includes more than 60,000 nav aids and 10,000 wrecks/obstructions in coastal and Great Lakes waters. Metro areas, selected major streets/highways and interstate exit services details included.
Custom mapping:......MapCreate™ version 6 software optional; Navionics® charts (XL charts or HotMaps™) on MMC cards optional.
Mapping memory: ...... Up to 256 MB on one MMC (or SD) card.
Position updates: ...... Every second.
Position points: ...... 1,000 waypoints; 1,000 event marker icons.
Audible alarms: .... Arrival/off-course/anchor.
Graphic symbols for waypoints or event marker icons: 42.
Routes:....100; up to 100 waypoints per route.
Plot Trails:.... 10 savable; up to 9,999 points per trail.
Zoom range:.... 37 ranges; 0.05 to 4,000 miles.
NOTE:
The above memory capacities refer only to LMS-320's on-board memory. The amount of GPS or sonar data you can record and save for recall later is only limited by the number of MMC cards you have.
NOTICE!
The storage temperature range for your unit is from -4 degrees to +167 degrees Fahrenheit (-20 degrees to +75 degrees Celsius). Extended storage in temperatures higher or lower than specified will damage the liquid crystal display in your unit. This type of damage is not covered by the warranty. For more information, contact the factory's Customer Service Department; phone numbers are listed on the last page.
How LMS-320 Sonar Works
Sonar has been around since the 1940s, so if you already know how it works, skip down to read about the relatively new technology of C. But, if you've never owned a sonar fish finder, this segment will tell you the under water basics.
Sonar is an abbreviation for SOund NAvigation and Ranging, a technology developed during World War II for tracking enemy submarines. (Lowrance developed the world's first transistorized sportfishing sonar in 1957.) A sonar consists of a transmitter, transducer, receiver and display. In simple terms, here's how it finds the bottom, or the fish:
The transmitter emits an electrical impulse, which the transducer converts into a sound wave and sends into the water. (The sound frequency can't be heard by humans or fish.) The sound wave strikes an object (fish, structure, bottom) and bounces back to the transducer, which converts the sound back into an electrical signal.
The receiver amplifies this return signal, or echo, and sends it to the display, where an image of the object appears on the scrolling sonar chart. The sonar's microprocessor calculates the time lapse between the transmitted signal and echo return to determine the distance to the object. The whole process repeats itself several times each second.
Your LMS-320 can record a log of the sonar signals that scroll across the screen and save them to the MMC memory card. (These recordings are also called sonar charts or sonar graphs.) You can replay this sonar log in the unit using the Sonar Simulator function, or play it back on a personal computer using our free Sonar Viewer. The viewer is available for download from the Lowrance web site, www.lowrance.com.
You can save several different sonar log files, erase 'em and record new ones, over and over again. The size of your sonar recordings is only limited by the free space available on your MMC.
How LMS-320 GPS Works
You'll navigate faster and easier if you understand how the LMS-320 scans the sky to tell you where you are on the earth — and, where you're going. (But if you already have a working understanding of GPS receivers and the GPS navigation system, skip on ahead to Section 2, Installation & Accessories on page 13. If you're new to GPS, read on, and you can later impress your friends with your new-found knowledge.)
First, think of your LMS-320 as a small but powerful computer. (But don't worry — we made the LMS-320 series easy to use, so you don't need to be a computer expert to find your way!) The unit includes a keypad and a screen with menus so you can tell LMS-320 what to do. The screen also lets LMS-320 show your location on a moving map, as well as point the way to your destination.
This gimbal-mounted unit uses an external antenna/receiver module, which makes the whole system work something like your car radio. But instead of your favorite dance tunes, this receiver tunes in to a couple of dozen GPS satellites circling the earth. (It will also listen in to the WAAS satellites in orbit, but more about that in the upcoming segment introducing you to GPS and WAAS.)
Your LMS-320 listens to signals from as many satellites as it can "see" above the horizon, eliminates the weakest signals, then computes its location in relation to those satellites. Once LMS-320 figures its latitude and longitude, it plots that position on the moving map shown on the screen. The whole process takes place several times a second!
The performance doesn't stop there. Stored in the permanent memory of each LMS-320 is a basic background map of the entire world. We lock it in here at the factory — you can't change or erase this map.
The background map is suitable for many navigation chores, but for maximum accuracy and much more detail, you need our optional map-making software, MapCreate™ 6. Some unit features — such as
searching for businesses and addresses — won't work without a custom MapCreate map. There is so much detail in our background map (and even more in MapCreate) that we'll describe their contents and differences in Section 6, Basic GPS Operations, on page 95.
Another portion of LMS-320's onboard memory is devoted to recording GPS navigation information, which includes waypoints, event marker icons, trails and routes. This lets you look back the way you came. Think of this data storage like the hard drive memory in a computer or a tape in a cassette tape recorder. You can save several different GPS data files, erase 'em and record new ones, over and over again. Like any computer file, these GPS Data Files (file format *.usr) can be shared between LMS-320s, other Lowrance GPS or sonar/GPS units, even personal computers.
LMS-320 has one more thing in common with a personal computer. Just as computers have a floppy disk drive for storing and exchanging files, the LMS-320 has a slot for an MMC (MultiMedia Card) or SDC (Secure Digital card) flash memory card. These solid-state memory devices are about the size of a postage stamp, but can hold data ranging from 8 MB to 128 MB in size. (Compare that to a floppy disk's 1.44 MB capacity!) LMS-320 uses all that MMC space for two key GPS purposes. (The MMC is also used to record sonar logs...see page 6.)
First, you can backup your onboard GPS Data Files by copying them to the MMC. Since the MMC is removable (like a floppy disk or a cassette tape), you can store these GPS Data Files on a personal computer equipped with an MMC card reader. (Or store them on a pocketful of MMCs, if you don't have a computer.) Our MapCreate mapping software can save, edit or create its own GPS Data Files, which can be copied to the MMC and then loaded from the MMC into LMS-320's memory. (NOTE: No matter where they come from, GPS Data Files must be loaded from the MMC into memory before LMS-320 can use them.)
The other key GPS use for MMCs is storage of special high-detail, custom maps, which you can produce on your computer with our MapCreate software. These MapCreate custom maps contain much greater detail than the basic background map. These Custom Map Files (file format *.lcm) can also be shared between LMS-320s, other Lowrance GPS or sonar/GPS units and personal computers. (For example, the exact same MMC, custom map files and GPS data files can be used interchangeably between your gimbal-mounted LMS-320 and the handheld iFINDER™ GPS receiver.)
LMS-320 automatically reads Custom Map Files directly from the MMC or SDC. To use a custom map, all you need to do is slide an MMC containing a map into the unit.
Introduction to GPS and WAAS
Well, now you know the basics of how LMS-320 does its work. You might be ready to jump ahead to Section 2, Installation & Accessories, on page 13, so you can mount your unit and plug in the power. Or you might want to see how our text formatting makes the manual tutorials easy to skim. If that's the case, move on to "How to Use This Manual" on page 10. But, if you want to understand the current state of satellite navigation, look over this segment describing how GPS and its new companion WAAS work together to get you where you're going.
The Global Positioning System (GPS) was launched July 17, 1995 by the United States Department of Defense. It was designed as a 24-hour-a-day, 365-days-a-year, all weather global navigation system for the armed forces of the U.S. and its allies. Civilian use was also available at first, but it was less accurate because the military scrambled the signal somewhat, using a process called Selective Availability (SA.)
GPS proved so useful for civilian navigation that the federal government discontinued SA on May 2, 2000, after the military developed other methods to deny GPS service to enemy forces. Reliable accuracy for civilian users jumped from 100 meters (330 feet) under SA to the present level of 10 to 20 meters (about 30 to 60 feet.)
Twenty-four satellites orbit 10,900 nautical miles above the Earth, passing overhead twice daily. A series of ground stations (with precisely surveyed locations) controls the satellites and monitors their exact locations in the sky. Each satellite broadcasts a low-power signal that identifies the satellite and its position above the earth. Three of these satellites are spares, unused until needed. The rest virtually guarantee that at least four satellites are in view nearly anywhere on Earth at all times.
natural_image
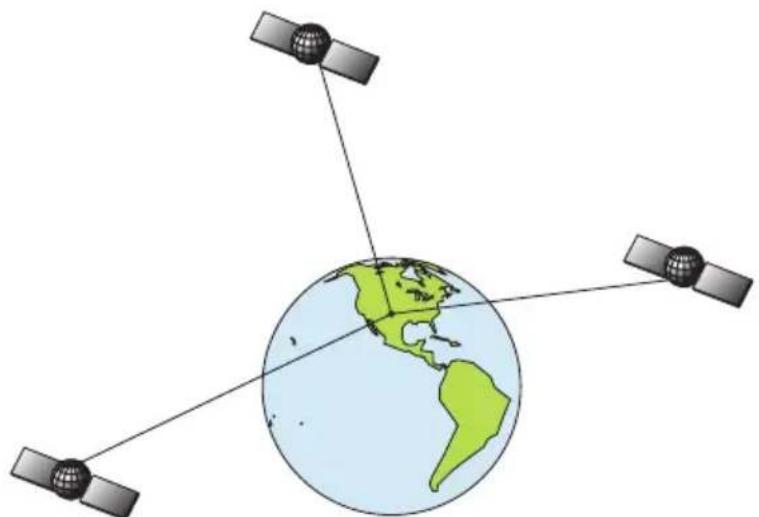
Diagram showing three satellites orbiting Earth with a green globe and connecting lines (no text or labels)A minimum of three satellites are required to determine a 2D fix.
The system requires signal reception from three satellites in order to determine a position. This is called a 2D fix. It takes four satellites to determine both position and elevation (your height above sea level — also called altitude.) This is called a 3D fix.
Remember, the unit must have a clear view of the satellites in order to receive their signals. Unlike radio or television signals, GPS works at very high frequencies. These signals can be easily blocked by trees, buildings, an automobile roof, even your body.
Like most GPS receivers, LMS-320 doesn't have a compass or any other navigation aid built inside. It relies solely on the signals from the satellites to calculate a position. Speed, direction of travel, and distance are all calculated from position information. Therefore, in order for LMS-320 to determine direction of travel, you must be moving and the faster, the better. This is not to say that it won't work at walking or trolling speeds — it will. There will simply be more "wandering" of the data shown on the display.
GPS is plenty accurate for route navigation, but the U.S. Federal Aviation Administration has special needs for aircraft traffic control that go beyond basic GPS. The FAA has a plan under way to boost GPS performance even further with its Wide Area Augmentation System, or WAAS. This GPS add-on will include a time control element that will help airliners fly closer together while avoiding collisions. In addition to carefully spacing airplanes along travel corridors, WAAS will eventually make instrument landings and takeoffs more accurate as it replaces existing aviation navigation systems.
Non aviators can use WAAS signals to make their GPS navigation even more accurate. Your LMS-320 receives both GPS and WAAS signals. However, WAAS has some limits you should know about.
First, the U.S. government has not completed construction of the WAAS system, so it is not yet fully operational. The ground stations are in place, but only a few of the needed WAAS satellites have been launched.
WAAS can boost the accuracy of land GPS navigation, but the system is designed for aircraft. The satellites are in a fixed orbit around the Equator, so they appear very low in the sky to someone on the ground in North America. Aircraft and vessels on open water can get consistently good WAAS reception, but terrain, foliage or even large man-made structures frequently block the WAAS signal from ground receivers.
You'll find that using your GPS receiver is both easy and amazingly accurate. It's easily the most accurate method of electronic navigation available to the general public today. Remember, however, that this receiver is only a tool. Always have another method of navigation available, such as a map or chart and a compass.
Also remember that this unit will always show navigation information in the shortest line from your present position to a waypoint, regardless of terrain! It only calculates position, it can't know what's between you and your destination, for example. It's up to you to safely navigate around obstacles, no matter how you're using this product.
How to use this manual: typographical conventions
Many instructions are listed as numbered steps. The keypad and arrow "keystrokes" appear as boldface type. So, if you're in a real hurry (or just need a reminder), you can skim the instructions and pick out what menu command to use by finding the boldface command text. The following paragraphs explain how to interpret the text formatting for those commands and other instructions:
Arrow Keys
The arrow keys control the movement of dotted cross-hair lines on your mapping screen called the cursor. The arrow keys also control a horizontal line depth cursor on the sonar screen. The arrow keys help you move around the menus so you can execute different commands. They are represented by symbols like these, which denote the down arrow key, the up arrow, the left arrow and the right arrow: ↓↑← →.
Keyboard
The other keys perform a variety of functions. When the text refers to a key to press, the key is shown in bold, sans serif type. For example, the "Enter/Icons" key is shown as ENT and the "Menu" key is shown as MENU.
Menu Commands
A menu command or a menu option will appear in small capital letters, in
a bold sans serif type like this: ROUTE PLANNING. These indicate that you are to select this command or option from a menu or take an action of some kind with the menu item. Text that you may need to enter or file names you need to select are show in italic type, such as trail name.
Instructions = Menu Sequences
Most functions you perform with LMS-320 are described as a sequence of key strokes and selecting menu commands. We've written them in a condensed manner for quick and easy reading.
For example, instructions for navigating a trail would look like this:
- From the Map Page, press MENU | MENU | ↓ to MY TRAILS | ENT.
- Press ↓ to Trail 1 | ENT | → | ↓ to NAVIGATE | ENT.
- You are asked to wait while it converts the trail into a route.
- The wait message disappears and the unit begins showing navigation information along the trail. Now, begin moving and follow your LMS-320.
Translated into complete English, step 1 above would mean: "Start on the Map Page. Press the Menu key twice. Next, repeatedly press (or press and hold) the down arrow key to scroll down the menu and select (highlight) the My Trails menu command. Finally, press the Enter key."
Step 2 would mean: "Press the down arrow key repeatedly to scroll to the trail named Trail 1, and press Enter. Next, press the right arrow key and then the down arrow key to highlight the Navigate command, then press Enter."
Notes
Section 2: Installation & Accessories
Preparations
You can install the sonar and GPS systems in some other order if you prefer, but we recommend this installation sequence:
CAUTION:
You should read over this entire installation section before drilling any holes in your vehicle or vessel!
- Determine the approximate location for the sonar/GPS unit, so you can plan how and where to route the cables for the antenna, transducer and power. This will help you make sure you have enough cable length for the desired configuration.
- Determine the approximate location for the transducer and its cable route.
- Determine the approximate location for the GPS antenna module and its cable route.
- Determine the location of your battery or other power connection, along with the power cable route.
- Install the transducer and route the transducer cable to the sonar/GPS unit.
- Install the GPS antenna and route the antenna cable to the sonar/GPS unit.
- Install the power cable and route it to the sonar/GPS unit.
- Mount the sonar/GPS unit.
Transducer Installation
These instructions will help you install your Skimmer ^® transducer on a transom, on a trolling motor or inside a hull. These instructions cover both single- and dual-frequency Skimmer transducers. Please read all instructions before proceeding with any installation.
The smaller single-frequency Skimmers typically use a one-piece, stainless steel mounting bracket. The larger dual-frequency Skimmers typically use a two-piece, plastic mounting bracket. The trolling motor mount uses a one-piece plastic bracket with an adjustable strap.
These are all "kick-up" mounting brackets. They help prevent damage if the transducer strikes an object while the boat is moving. If the trans-
ducer does "kick-up," the bracket can easily be pushed back into place without tools.
Read these instructions carefully before attempting the installation. Determine which of the mounting positions is right for your boat. Use extreme care if mounting the transducer inside the hull, because once it is epoxied into position, the transducer usually cannot be removed.
Remember, the transducer installation is the most critical part of a sonar installation.
Recommended Tools and supplies
If you prefer the option of routing the cable through the transom, you will need a 1" drill bit. A transom mount requires use of a high quality, marine grade above- or below-waterline caulking compound. The following installation types also call for these recommended tools and required supplies (supplies are not included):
Single-frequency transom installations
Tools include: two adjustable wrenches, drill, #29 (0.136") drill bit, flathead screwdriver. Supplies: none.
Dual-frequency transom installations
Tools: two adjustable wrenches, drill, #20 (0.161") drill bit, flat-head screwdriver. Supplies: four, 1" long, #12 stainless steel slotted wood screws.
Single-frequency trolling motor installations
Tools: two adjustable wrenches, flat-head screwdriver. Supplies: plastic cable ties.
Shoot-through hull installations
Tools: these will vary depending on your hull's composition. Consult your boat dealer or manufacturer. Supplies: 100 grit sandpaper, good quality epoxy adhesive.
Selecting a Transducer Location
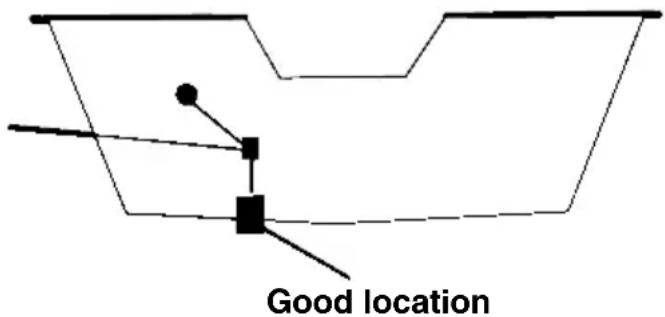
- The transducer must be placed in a location that has a smooth flow of water at all times. If the transducer is to be mounted inside the hull, then the chosen location must be in the water at all times. If the transducer is not placed in a smooth flow of water, interference caused by bubbles and turbulence will show on the sonar's display in the form of random lines or dots whenever the boat is moving.
NOTE:
Some aluminum boats with strakes or ribs on the outside of the hull create large amounts of turbulence at high speed. These boats typically have large outboard motors capable of propelling the boat
at speeds faster than 35 mph. Typically, a good location on aluminum boats is between the ribs closest to the engine.
- The transducer should be installed with its face pointing straight down, if possible.
- If the transducer is mounted on the transom, make sure it doesn't interfere with the trailer or hauling of the boat. Also, don't mount it closer than approximately one foot from the engine's lower unit. This will prevent cavitation (bubble) interference with propeller operation.
- If possible, route the transducer cable away from other wiring on the boat. Electrical noise from engine wiring, bilge pumps and aerators can be displayed on the sonar's screen. Use caution when routing the transducer cable around these wires.
CAUTION: Clamp the transducer cable to transom near the transducer. This will help prevent the transducer from entering the boat if it is knocked off at high speed.
text_image
Good location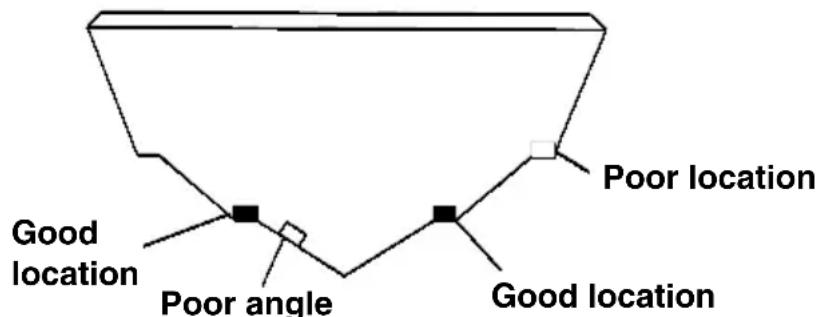
text_image
Good location Poor angle Poor location Good locationGood and poor transducer locations.
How low should you go?
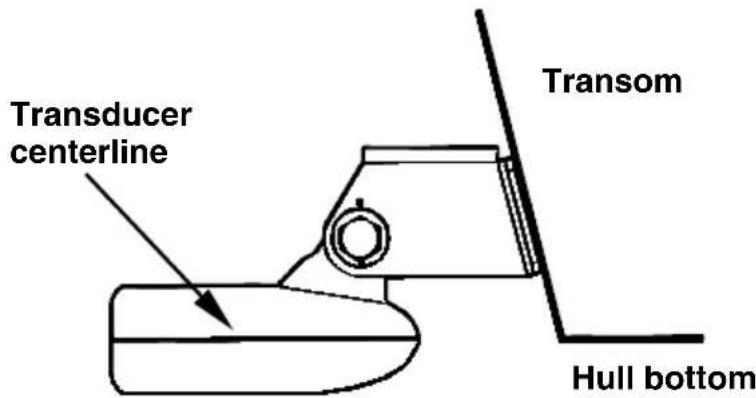
For most situations, you should install your Skimmer transducer so that its centerline is level with the bottom of the boat hull. This will usually give you the best combination of smooth water flow and protection from bangs and bumps.
text_image
Transducer centerline Transom Hull bottomAlign transducer centerline with hull bottom.
However, there are times when you may need to adjust the transducer slightly higher or lower. (The slots in the mounting brackets allow you to loosen the screws and slide the transducer up or down.) If you frequently lose bottom signal lock while running at high speed, the transducer may be coming out of the water as you cross waves or wakes. Move the transducer a little lower to help prevent this.
If you cruise or fish around lots of structure and cover, your transducer may be frequently kicking up from object strikes. If you wish, you may move the transducer a little higher for more protection.
There are two extremes you should avoid. Never let the edge of the mounting bracket extend below the bottom of the hull. Never let the bottom – the face – of the transducer rise above the bottom of the hull.
Shoot-thru-hull vs. Transom Mounting
Typically, shoot-thru-hull installations give excellent high speed operation and good to excellent depth capability. There is no possibility of damage from floating objects. It can't be knocked off when docking or loading on the trailer.
However, the shoot-thru-hull installation does have its drawbacks. First, some loss of sensitivity does occur, even on the best hulls. This varies from hull to hull, even from different installations on the same hull. This is caused by differences in hull lay-up and construction.
Second, the transducer angle cannot be adjusted for the best fish arches. This can be a problem on some hulls that sit with the bow high when at rest or at slow trolling speeds. Follow the procedure listed in the shoot-thru-hull installation section at the end of this lesson to determine if you can satisfactorily shoot through the hull.
TRANSOM TRANSDUCER ASSEMBLY AND MOUNTING
The best way to install these transducers is to loosely assemble all of the parts first, place the transducer's bracket against the transom and see if you can move the transducer so that it's parallel with the ground.
The following instructions sometimes vary depending on the mounting bracket that came with your transducer. Single-frequency Skimmers come with a one-piece stainless steel bracket, while dual-frequency Skimmers come with a two-piece plastic mounting bracket. Use the set of instructions that fits your model.
1. Assembling the bracket.
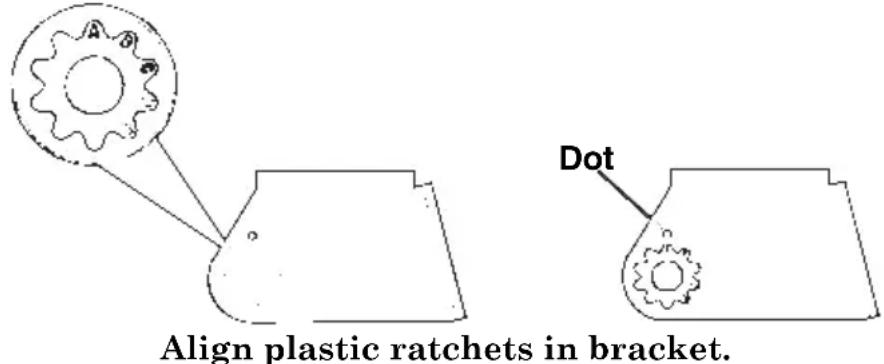
A. One-piece bracket: Press the two small plastic ratchets into the sides of the metal bracket as shown in the following illustration. Notice there are letters molded into each ratchet. Place each ratchet into the bracket with the letter "A" aligned with the dot stamped into the metal bracket. This position sets the transducer's coarse angle adjustment for a 14^ transom. Most outboard and stern-drive transoms have a 14^ angle.
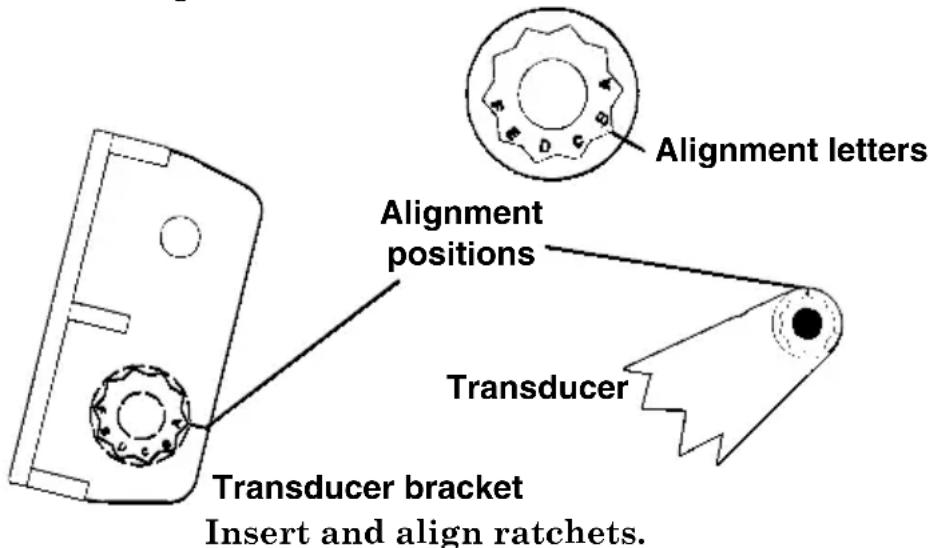
B. Two-piece bracket: Locate the four plastic ratchets in the transducer's hardware package. Press two ratchets into the sides of the plastic bracket and two on either side of the transducer as shown in the following illustrations. Notice there are letters molded into each ratchet.
Place the ratchets into the bracket with the letter "A" aligned with the alignment mark molded into the bracket. Place the ratchets onto the transducer with the letter "A" aligned with the 12 o'clock position on the transducer stem. These positions set the transducer's coarse angle adjustment for a 14^ transom. Most outboard and stern-drive transoms have a 14^ angle.
text_image
Alignment letters Alignment positions Transducer Transducer bracket Insert and align ratchets.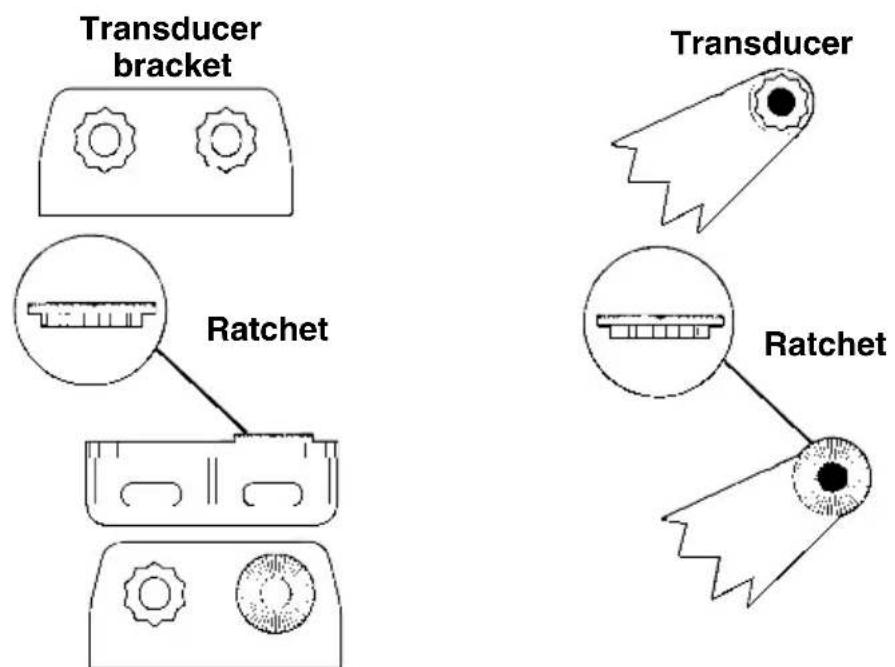
Add ratchets to bracket and transducer.
2. Aligning the transducer on the transom.
A. One-piece bracket: Slide the transducer between the two ratchets. Temporarily slide the bolt though the transducer assembly and hold it against the transom. Looking at the transducer from the side, check to see if it will adjust so that its face is parallel to the ground. If it does, then the "A" position is correct for your hull.
If the transducer's face isn't parallel with the ground, remove the transducer and ratchets from the bracket. Place the ratchets into the holes in the bracket with the letter "B" aligned with the dot stamped in the bracket.
Reassemble the transducer and bracket and place them against the transom. Again, check to see if you can move the transducer so it's parallel with the ground. If you can, then go to step 3A. If it doesn't, repeat step 2A, but use a different alignment letter until you can place the transducer on the transom correctly.
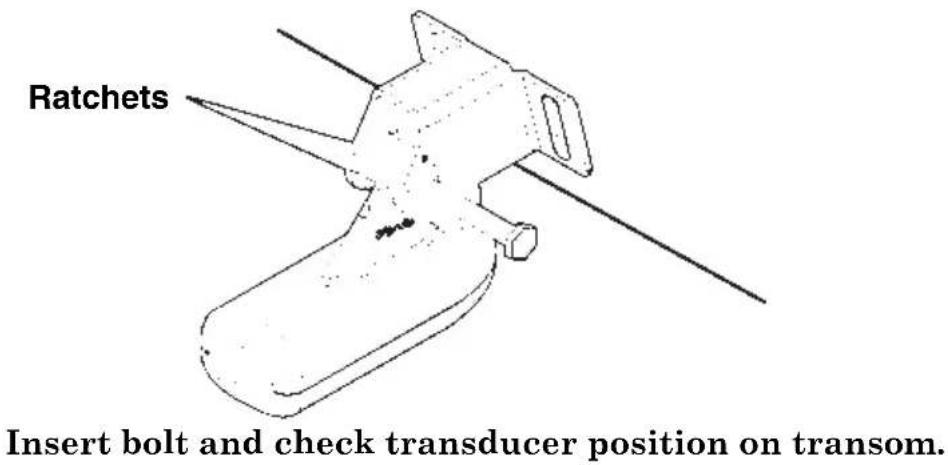
B. Two-piece bracket: Assemble the transducer and bracket as shown in the following figure. Temporarily slide the bolt though the transducer assembly but don't tighten the nut at this time. Hold the assembled transducer and bracket against the transom. Looking at the transducer from the side, check to see if it will adjust so that its face is parallel to the ground. If it does, then the "A" positions are correct for your hull.
If the transducer's face isn't parallel with the ground, remove and disassemble the transducer and ratchets. Place the ratchets into the bracket holes with the letter "B" aligned with the bracket alignment mark. Place them on the transducer aligned with the 12 o'clock position on the transducer stem.
Reassemble the transducer and bracket and place them against the transom. Again, check to see if you can move the transducer so it's parallel with the ground. If you can, then go to step 3B. If it doesn't, repeat step 2B, but use a different alignment letter until you can place the transducer on the transom correctly.
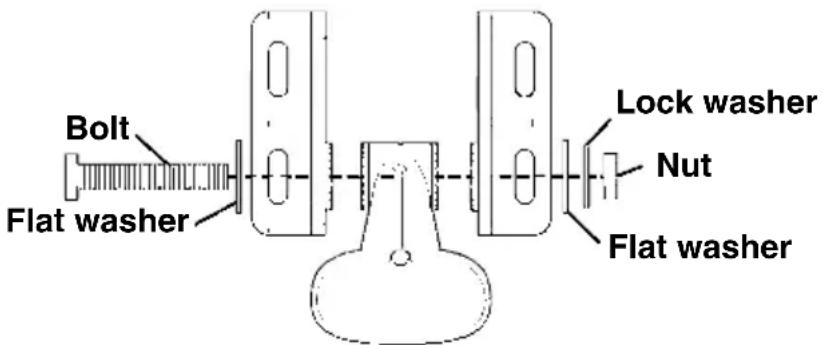
text_image
Bolt Flat washer Lock washer Nut Flat washerAssemble transducer and bracket.
3. Assembling the transducer.
A. One-piece bracket: Once you determine the correct position for the ratchets, assemble the transducer as shown in the following figure. Don't tighten the lock nut at this time.
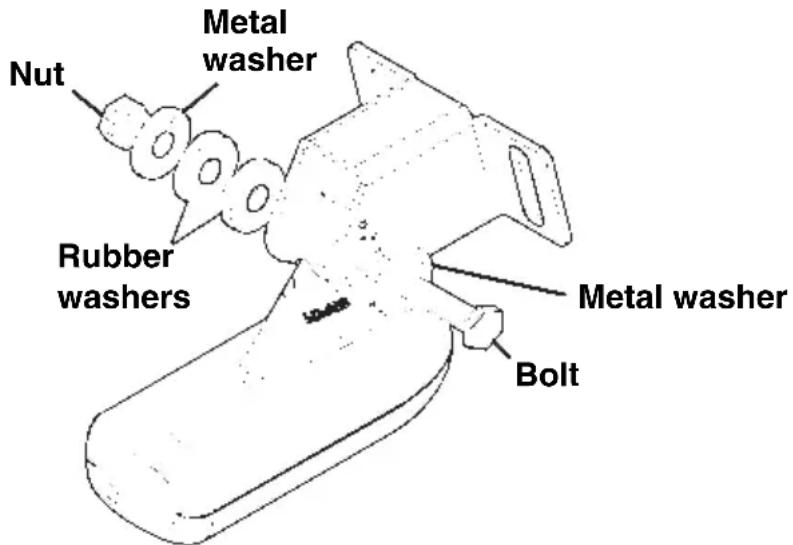
text_image
Nut Metal washer Rubber washers Metal washer BoltAssemble transducer and bracket.
B. Two-piece bracket: Once you determine the correct position for the ratchets, assemble the transducer as shown in the figure in step 2B. Don't tighten the lock nut at this time.
4. Drilling mounting holes.
Hold the transducer and bracket assembly against the transom. The transducer should be roughly parallel to the ground. The transducer's centerline should be in line with the bottom of the hull. Don't let the bracket extend below the hull!
Mark the center of each slot for the mounting screw pilot holes. You will drill one hole in the center of each slot.
Drill the holes. For the one-piece bracket, use the #29 bit (for the #10 screws). For the two-piece bracket, use the #20 bit (for the #12 screws).
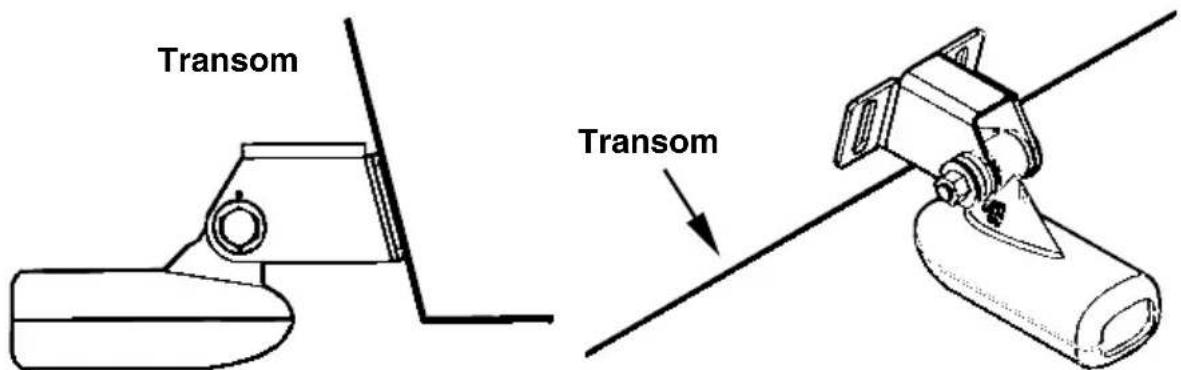
text_image
Transom TransomPosition transducer mount on transom and mark mounting holes. Side view shown at left and seen from above at right.
5. Attaching transducer to transom.
A. One-piece bracket: Remove the transducer from the bracket and re-assemble it with the cable passing through the bracket over the bolt as shown in the following figures.

natural_image
Technical line drawing of two mechanical components with no visible text or symbolsFor single-frequency Skimmer, route cable over bolt and through bracket. Side view shown at left and seen from above at right.
Both bracket types: Attach the transducer to the transom. Slide the transducer up or down until it's aligned properly with the bottom of the hull as shown in the preceding and following figures. Tighten the bracket's mounting screws, sealing them with the caulking compound.
Adjust the transducer so that it's parallel to the ground and tighten the nut until it touches the outer washer, then add 1/4 turn. Don't over tighten the lock nut! If you do, the transducer won't "kick-up" if it strikes an object in the water.
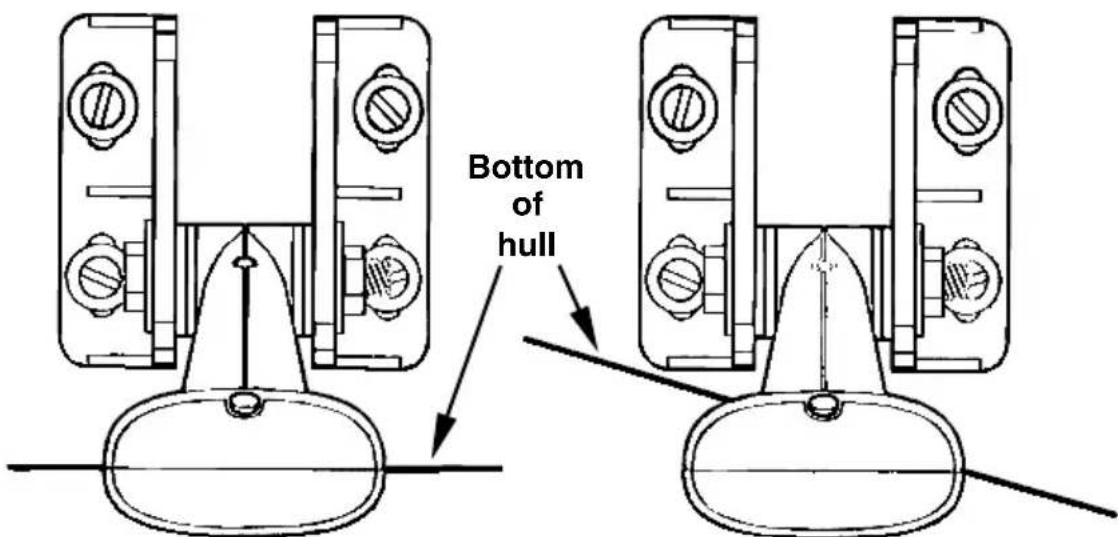
text_image
Bottom of hullFlat-bottom hull Deep-"vee" hull
Align transducer centerline with hull bottom and attach transducer to transom. Rear view of dual-frequency Skimmer shown.
- Route the transducer cable through or over the transom to the sonar unit. Make sure to leave some slack in the cable at the transducer. If possible, route the transducer cable away from other wiring on the boat. Electrical noise from the engine's wiring, bilge pumps, VHF radio wires and cables, and aerators can be picked up by the sonar. Use caution when routing the transducer cable around these wires.
WARNING:
Clamp the transducer cable to the transom close to the transducer. This can prevent the transducer from entering the boat if it is knocked off at high speed.
If you need to drill a hole in the transom to pass the connector through, the required hole size be 1".
CAUTION:
If you drill a hole in the transom for the cable, make sure it is located above the waterline. After installation, be sure to seal the hole with the same marine grade above- or below-waterline sealant used for the mounting screws.
- Make a test run to determine the results. If the bottom is lost at high speed, or if noise appears on the display, try sliding the transducer bracket down. This puts the transducer deeper into the water, hopefully below the turbulence causing the noise. Don't allow the transducer bracket to go below the bottom of the hull!
TROLLING MOTOR BRACKET INSTALLATION
(single-frequency only)
- Attach the optional TMB-S bracket to the transducer as shown in the following figure, using the hardware supplied with the transducer. (Note: The internal tooth washer is supplied with the TMB-S.)
TMB-S bracket
Internal tooth washer
Bolt
Nut
Flat washer
Attach motor mounting bracket to transducer.
- Slide the adjustable strap supplied with the TMB-S through the slot in the transducer bracket and wrap it around the trolling motor. Position the transducer to aim straight down when the motor is in the water. Tighten the strap securely.
- Route the transducer cable alongside the trolling motor shaft. Use plastic ties (not included) to attach the transducer cable to the trolling motor shaft. Make sure there is enough slack in the cable for the motor to turn freely. Route the cable to the sonar unit and the transducer is ready for use.
TRANSDUCER ORIENTATION AND FISH ARCHES
If you do not get good fish arches on your display, it could be because the transducer is not parallel with the ground when the boat is at rest in the water or at slow trolling speeds.
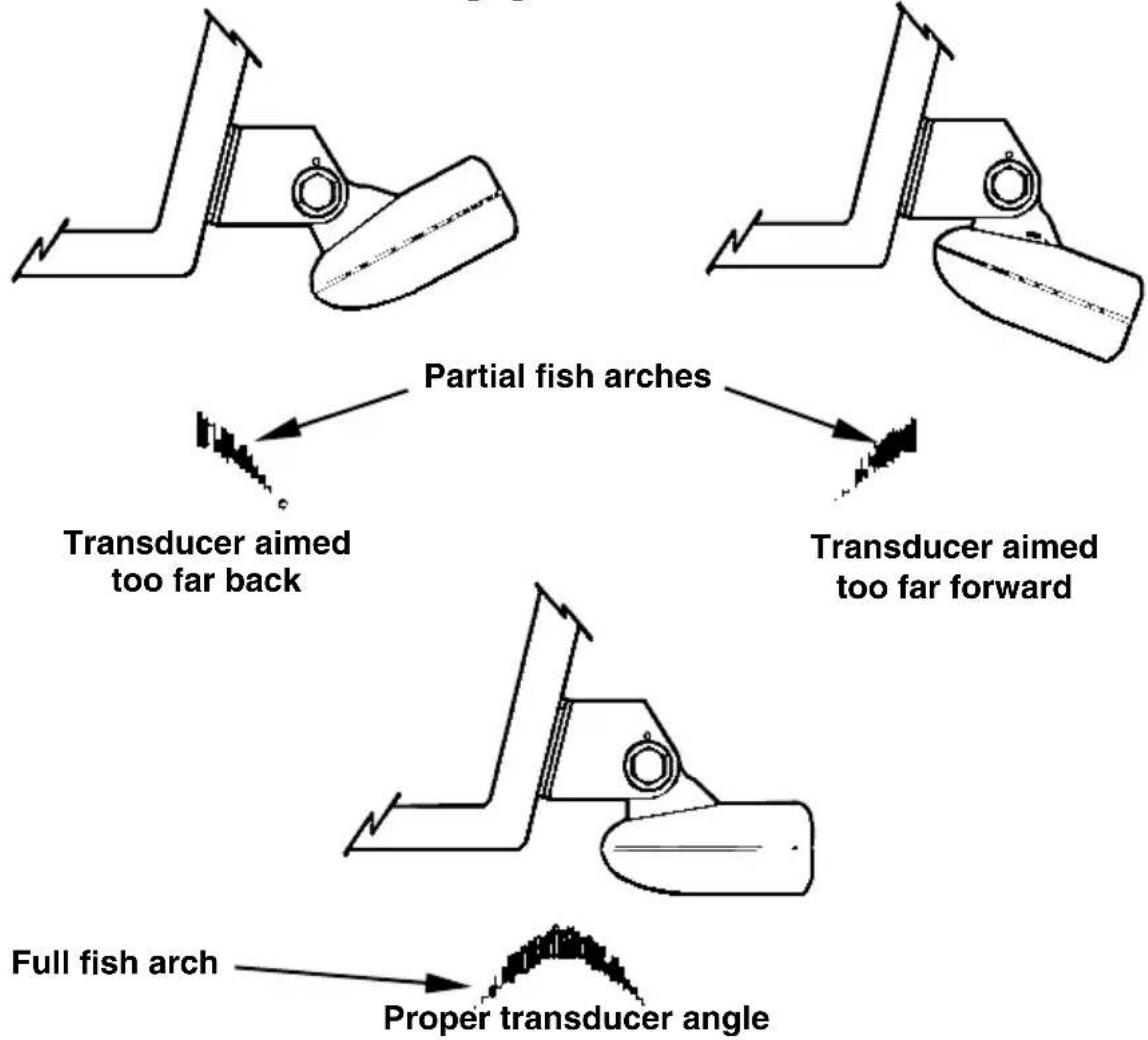
text_image
Partial fish arches Transducer aimed too far back Transducer aimed too far forward Full fish arch Proper transducer angleTransducer angles and their effects on fish arches.
If the arch slopes up – but not back down – then the front of the transducer is too high and needs to be lowered. If only the back half of the arch is printed, then the nose of the transducer is angled too far down and needs to be raised.
NOTE:
Periodically wash the transducer's face with soap and water to remove any oil film. Oil and dirt on the face will reduce the sensitivity or may even prevent operation.
SHOOT-THRU-HULL PREPARATION
The transducer installation inside a fiberglass hull must be in an area that does not have air bubbles in the resin or separated fiberglass layers. The sonar signal must pass through solid fiberglass. A successful
transducer installation can be made on hulls with flotation materials (such as plywood, balsa wood or foam) between layers of fiberglass if the material is removed from the chosen area.
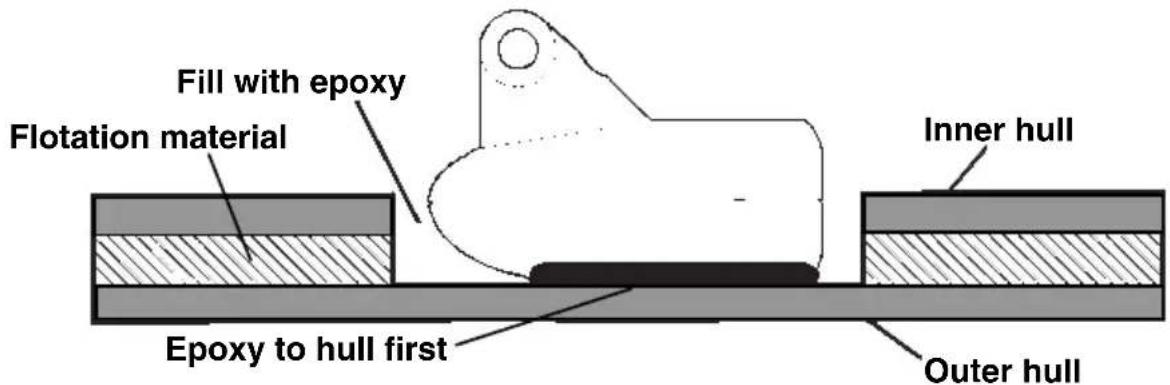
text_image
Fill with epoxy Flotation material Epoxy to hull first Inner hull Outer hullEpoxy the transducer to a solid portion of the hull.
For example, some (but not all) manufacturers use a layer of fiberglass, then a core of balsa wood, finishing with an outer layer of fiberglass. Removing the inner layer of fiberglass and the balsa wood core exposes the outer layer of fiberglass. The transducer can then be epoxied directly to the outer layer of fiberglass. After the epoxy cures, the hull is watertight and structurally sound. Remember, the sonar signal must pass through solid fiberglass. Any air bubbles in the fiberglass or the epoxy will reduce or eliminate the sonar signals.
WARNING:
Do not remove any material from your inner hull unless you know the hull's composition. Careless grinding or cutting on your hull can result in damage that could sink your boat. Contact your boat dealer or manufacturer to confirm your hull specifications.
To choose the proper location for thru-hull mounting, anchor the boat in 60 feet of water. Add a little water to the sump of the boat. Plug the transducer into the sonar unit, turn it on, then hold the transducer over the side of the boat. Adjust the sensitivity and range controls until a second bottom echo is seen on the display. (You will need to turn off both automatic and ASP™.) Don't touch the controls once they've been set.
Next, take the transducer out of the water and place it in the water in the sump of the boat. Observe the sonar signal to see if there is a noticeable decrease in sensitivity. The second bottom signal may disappear and the bottom signal may decrease in intensity.
Move the transducer around to find the best location. If the sensitivity control must be increased greatly to compensate, then the transducer should be mounted on the outside of the hull. If not, then mark the lo-
cation that shot through the hull the best and follow the instructions on the following pages for a shoot-thru-hull mounting.
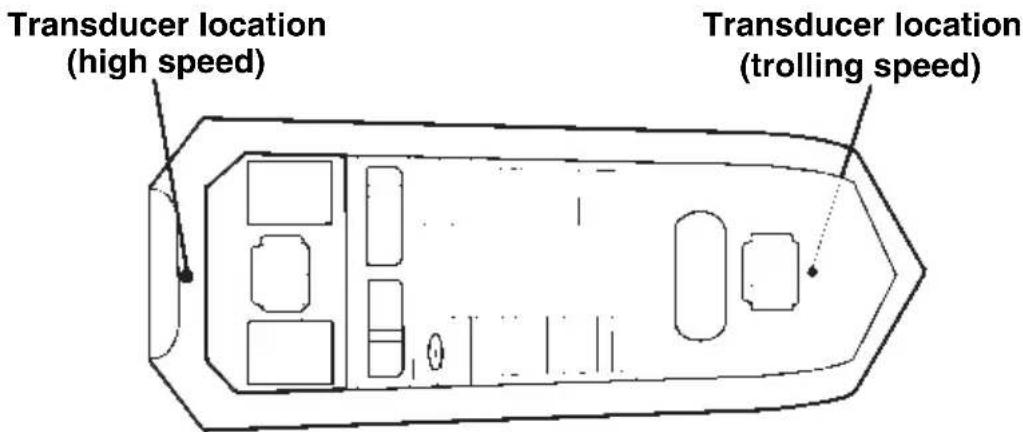
text_image
Transducer location (high speed) Transducer location (trolling speed)Shoot-thru-hull transducer locations for high speed or trolling speed operation.
Shoot-thru-hull Installation
- Make sure the area is clean, dry and free of oil or grease, then sand both the inside surface of the hull and the face of the transducer with 100 grit sandpaper. The surface of the hull must be flat so the entire transducer face is in contact with the hull prior to bonding.
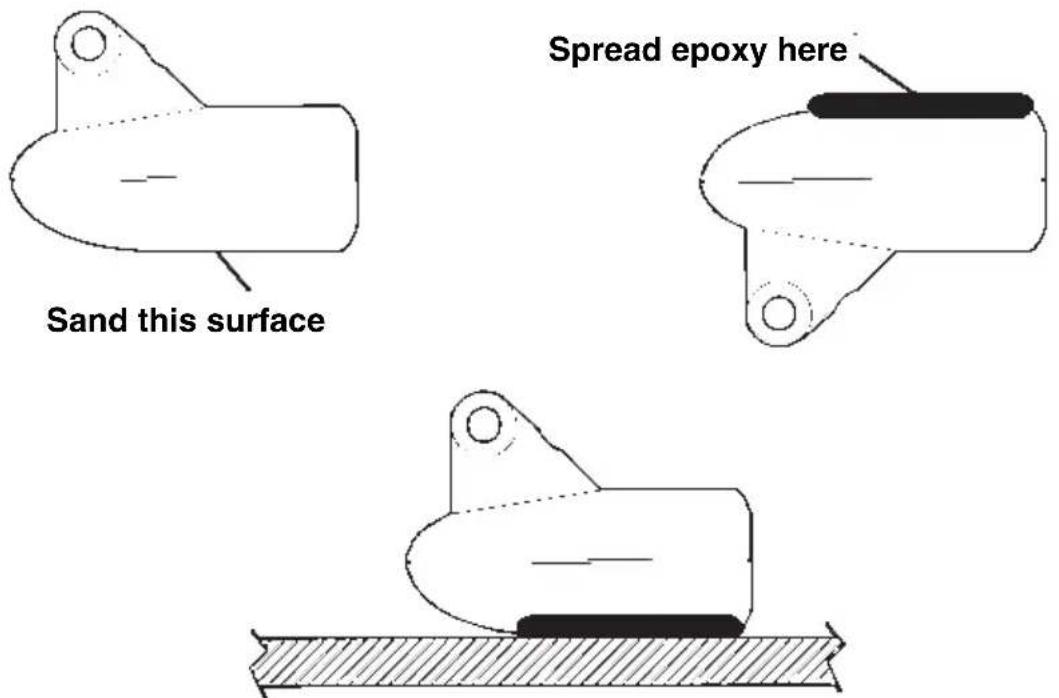
text_image
Sand this surface Spread epoxy hereEpoxy transducer to hull.
- Follow the instructions on the epoxy package and mix it thoroughly. Do not mix it too fast, because it will cause bubbles to form in the epoxy. Apply a small amount on the face of the transducer as shown above, then spread a small amount onto the sanded area on the hull.
Place the transducer into the epoxy, twisting and turning it to force any air bubbles out from under the transducer face. The face of the transducer should be parallel with the hull, with a minimum amount of epoxy between the hull and transducer. After the epoxy dries, route the cable to the sonar unit.
Speed/Temperature Sensors
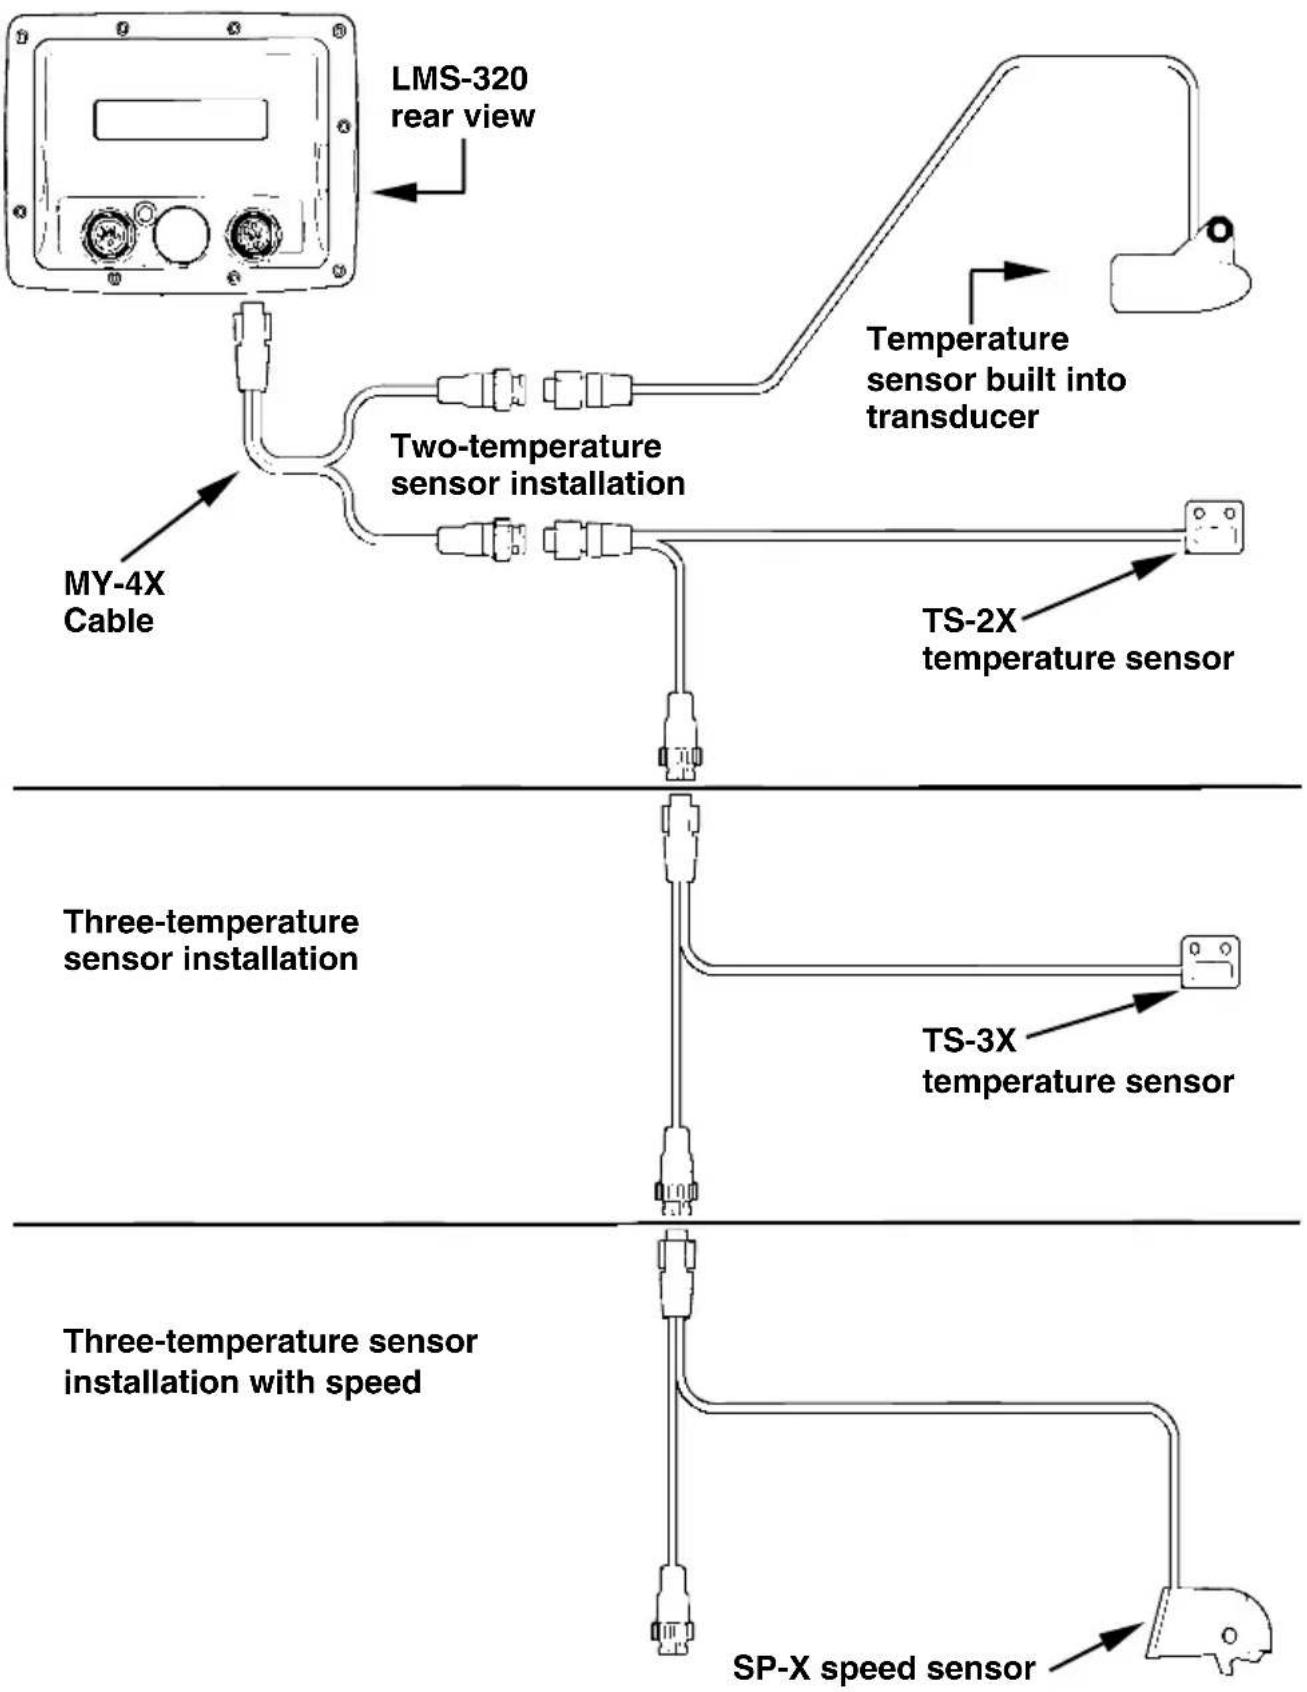
This unit accepts up to three temperature sensors which can monitor surface water, live well, air and virtually any other temperature. If you want to use more than one temperature sensor or a speed sensor, you must purchase the optional MY-4X adapter cable. You also need to be careful when purchasing the temperature sensors, because each temperature sensor has its own fixed electronic "address." The sensors are labeled "Water," "T-2" (or Temp-2) and "T-3" (or Temp-3).
The first "Water" temperature sensor is built into the transducer. This is the sensor that measures surface water temperature. If you want two (or more) temperature readings from other locations, you'll need to use the proper sensors. For example, you can't use two additional T-3 sensors. The sensors that fit this unit are:
- TS-1X This sensor will over-ride the temperature sensor built into the transducer and over-ride the temperature sensor in a ST-TGY combination sensor. (This sensor is not recommended.)
- TS-2X One sensor for "T-2" temperature display.
- TS-3X One sensor for "T-3" temperature display.
- SP-X One speed sensor for "Speed" display.
- ST-TGY This combination sensor will provide speed and temperature readings, but the temperature reading will be displayed as the "Water" temperature because it will over-ride the temperature sensor in the transducer. (This sensor is not recommended.)
See the wiring diagram on the following page for temperature and speed sensor combinations.
Sensor Chart
flowchart
graph TD
    A["LMS-320 rear view"] --> B["Two-temperature sensor installation"]
    B --> C["Three-temperature sensor installation with speed"]
    C --> D["SP-X speed sensor"]
    B --> E["Temperature sensor built into transducer"]
    E --> F["TS-2X temperature sensor"]
    F --> G["Three-temperature sensor installation"]
    G --> H["Three-temperature sensor installation with speed"]
    H --> I["SP-X speed sensor"]
    style A fill:#f9f,stroke:#333
    style B fill:#ccf,stroke:#333
    style C fill:#cfc,stroke:#333
    style D fill:#fcc,stroke:#333
    style E fill:#cff,stroke:#333
    style F fill:#ffc,stroke:#333
    style G fill:#cfc,stroke:#333
    style H fill:#fcc,stroke:#333
Optional Speed Sensor Installation
All the units in this series can display speed and distance traveled, but only the LMS-320DF comes packed with a speed sensor. If you wish to purchase an optional additional sensor for your unit, refer to the accessory ordering information inside the back cover of this manual. The following instructions describe how to install the speed sensor.
Recommended tools for this job include: drill, 7/8" drill bit, 1/8" drill bit for pilot holes, screwdriver. Required supplies for this job include: four #8 stainless steel wood screws (3/4" long), high quality, marine grade above- or below-waterline caulking compound.
First find a location on the boat's transom where the water flow is smoothest. Don't mount the sensor behind strakes or ribs. These will disturb the water flow to the speed sensor. Make sure the sensor will remain in the water when the boat is on plane. Also make sure the location doesn't interfere with the boat's trailer. Typically, the sensor is mounted about one foot to the side of the transom's centerline.
Once you've determined the proper location for the unit, place the sensor on the transom. The bottom of the bracket should be flush with the hull's bottom. Using the sensor as a template, mark the hull for the screws' pilot holes. Drill four 1/8" holes, one in each end of the slots.
Mount the sensor to the hull using #8 stainless steel wood screws (not included). Use a high quality, marine grade above- or below-waterline caulking compound to seal the screws. Make sure the sensor is flush with the bottom of the hull and tighten the screws.
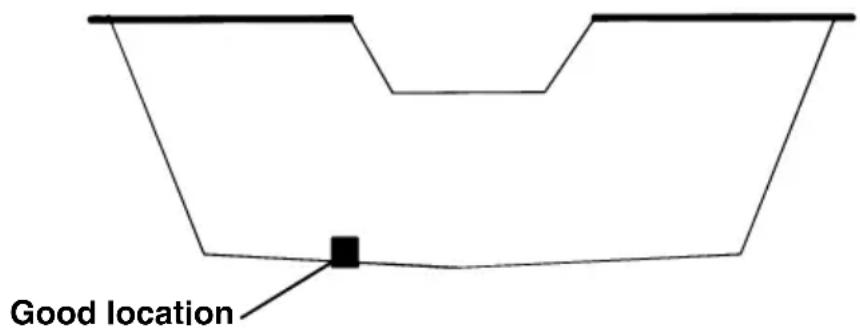
text_image
Good locationStern view showing good location for mounting sensor on transom.
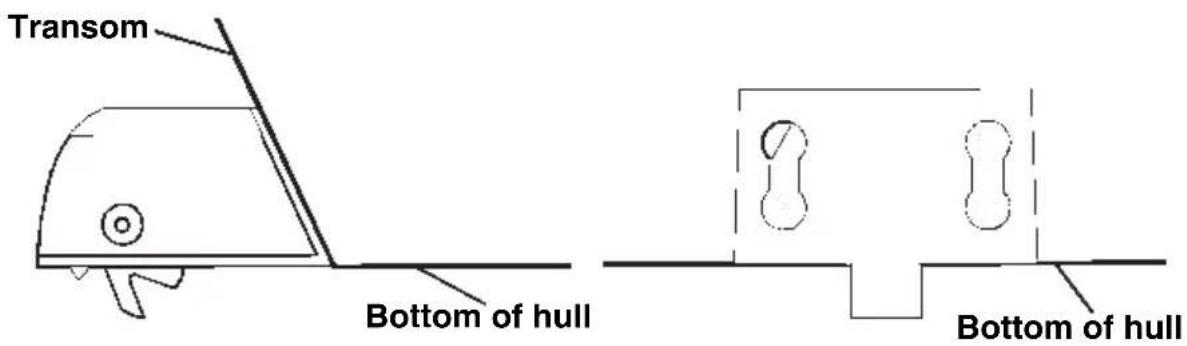
text_image
Transom Bottom of hull Bottom of hullSpeed sensor mounting configuration: side view (left) and rear view (right.)
If the base of the transom has a radius, fill the gap between the transom and the sensor with the caulking compound. This will help ensure a smooth water flow.
Route the sensor's cable through or over the transom to the sonar unit. If you need to drill a hole in the transom to pass the connector through, the required hole size is 7/8".
CAUTION:
If you drill a hole in the transom for the cable, make sure it is located above the waterline. After installation, be sure to seal the hole with the same marine grade above- or below-waterline sealant used for the screws.
The sensor is now ready for use. Connect the sensor to the in-line connector on the MY-4X adapter cable. If you have any questions concerning the installation of the sensor, please contact your local boat dealer.
GPS Antenna/Receiver Module
The LMS-320 series package includes the LGC-12w GPS module. This device contains the unit's external antenna and receiver for GPS and WAAS signals. The antenna/receiver module comes with a 25-foot extension cable. This module can be mounted on a flat surface or pole, or a magnet is included for temporary mounting on any ferrous surface. (The LGC-12s GPS module sold with earlier Lowrance equipment will work with your unit, but it will not receive WAAS signals.)
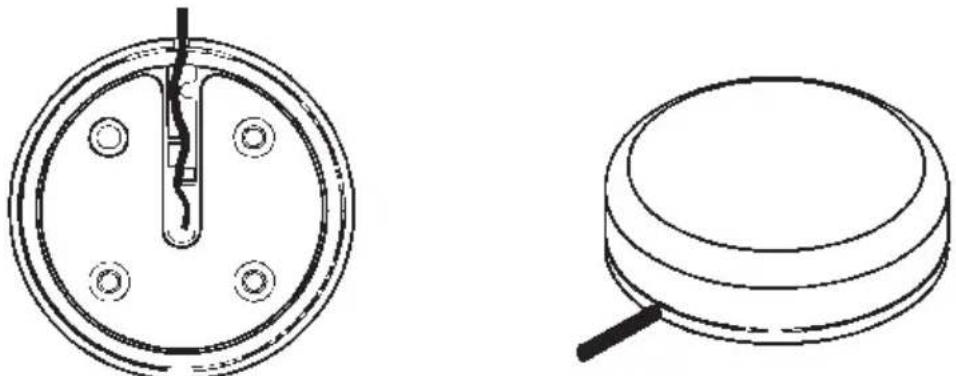
natural_image
Technical line drawings of a circular mechanical component with mounting holes and a magnified view (no text or symbols)LGC-12 Module, bottom view (left) and top view (right).
You need to select an antenna installation location that has a clear, unobstructed view of the sky. After the module is installed, route the cable to the LMS-320, plug it in the center socket on the back and your system is ready to use. See the module's instruction sheet, publication part number 988-0147-39, for complete installation directions.
In an automobile, you may achieve good results by simply placing the external antenna on the top of the dash, at the base of the windshield. A piece of the rubber non-skid shelf liner material available in recreational vehicle supply stores will help hold the antenna in place. This may not work well if you have a cab-over design pickup truck camper or motor home. If dashboard reception is poor, simply relocate the antenna module elsewhere on the vehicle for a clearer view of the sky.
Power Connections
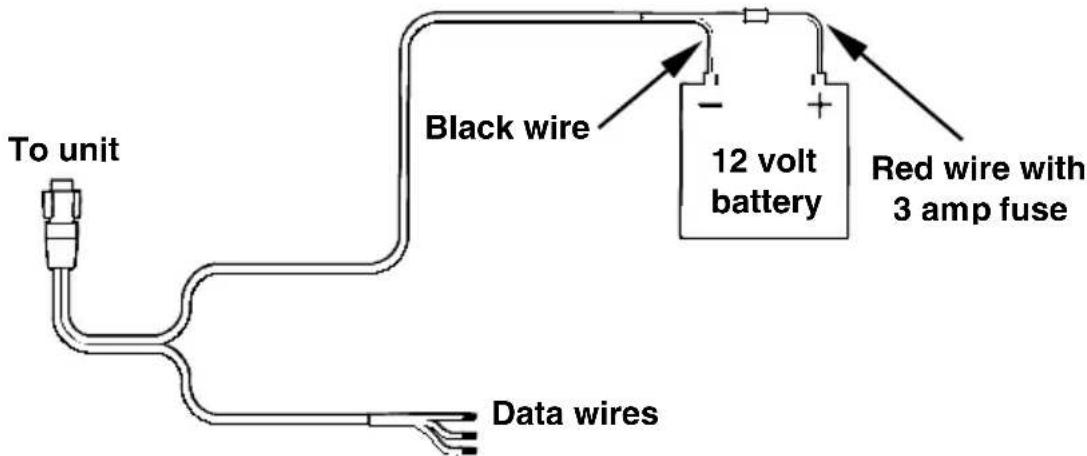
The unit works from a 12-volt battery system. For the best results, attach the power cable directly to the battery. You can attach the power cable to an accessory or power buss, however you may have problems with electrical interference. Therefore, it's safer to go ahead and attach the power cable directly to the battery.
If possible, keep the power cable away from other boat wiring, especially the engine's wires. This will provide the best isolation from electrical noise. If the cable is not long enough, splice #18 gauge wire onto it. The power cable has two wires, red and black. Red is the positive lead, black is negative or ground. Make sure to attach the in-line fuse holder to the red lead as close to the power source as possible.
For example, if you have to extend the power cable to the battery or power buss, attach one end of the fuse holder directly to the battery or power buss. This will protect both the unit and the power cable in the event of a short. It uses a 3-amp fuse.
text_image
To unit Black wire 12 volt battery Red wire with 3 amp fuse Data wiresPower connections for the LMS-320 series sonar/GPS unit.
CAUTION:
Do not use this product without a 3-amp fuse wired into the power cable! Failure to use a 3-amp fuse will void your warranty.
This unit has reverse polarity protection. No damage will occur if the power wires are reversed. However, the unit will not work until the wires are attached correctly.
An optional 8-foot, CA-4 external power cable with a cigarette lighter adapter is available from Lowrance.
NMEA/DGPS Cable Connections
NMEA is a standard communications format for marine electronic equipment. For example, an autopilot can connect to the NMEA interface on the LMS-320 and receive positioning information. The LMS-320 can exchange information with any device that transmits or receives NMEA 0183 data.
DGPS is an acronym for the Differential Global Positioning System. DGPS supplements and boosts the accuracy of basic GPS. DGPS was developed by the U.S. Coast Guard, which is responsible for the system's operation in the United States. Since it's creation, DGPS has become the international maritime standard for marine navigation.
The most popular DGPS system relies on a grid of ground-based transmitters that send correction signals to DGPS receivers. These in turn, connect to the GPS receiver (such as the LMS-320). Lowrance offers an optional DGPS receiver for your unit.
See the diagrams on the following page for general wiring connections. Read your other product's owner's manual for more wiring information.
NMEA/DGPS Wiring
To exchange NMEA or DGPS data, the LMS-320 has one NMEA 0183 version 2.0 communication port. Com port one (Com-1) can be used to receive NMEA format GPS data or DGPS data. The com port can also transmit NMEA format GPS data to another device.
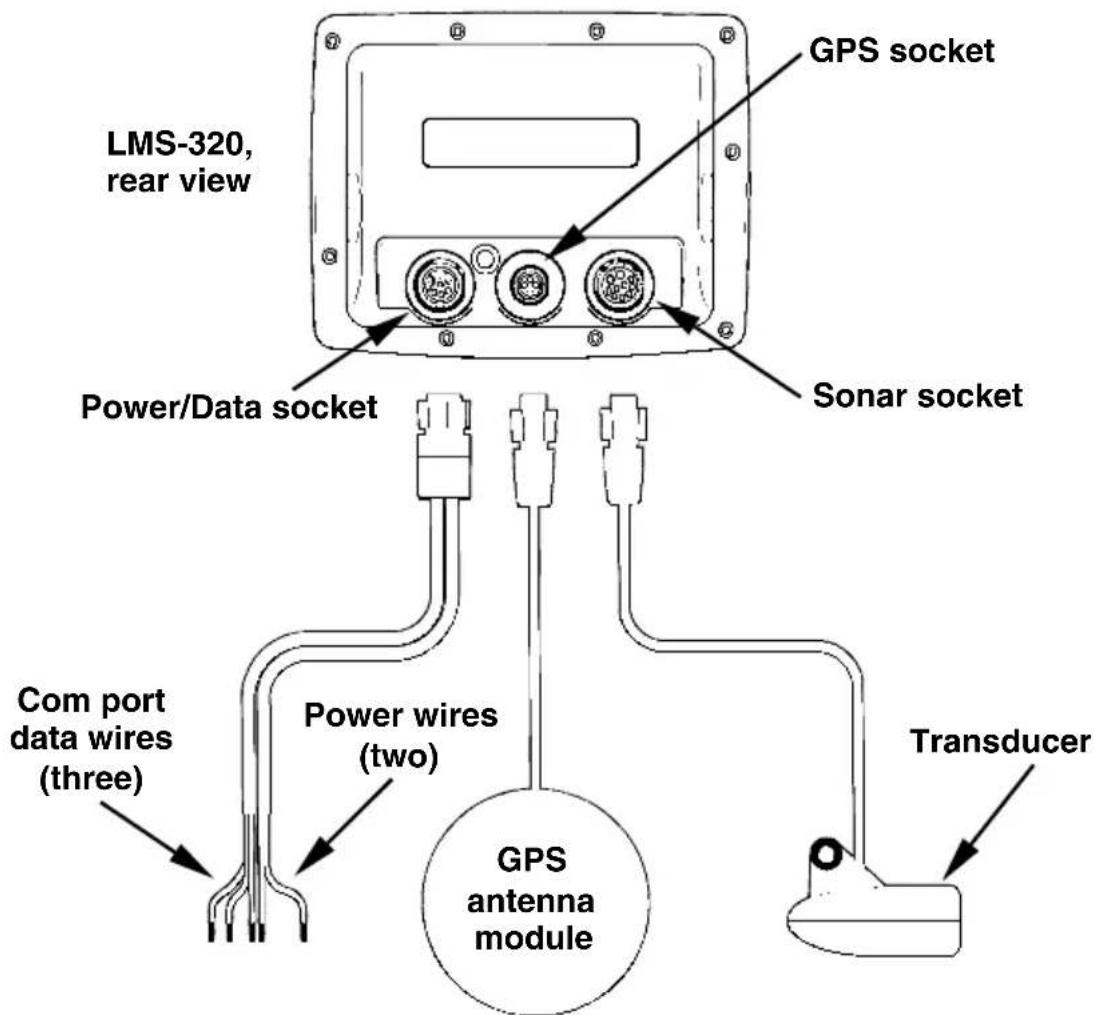
The three wires for the com port are combined with the two power wires to form the power/data cable (see the drawing on page 33). Com-1 uses the yellow wire to transmit, the orange wire to receive and the shield wire for signal ground.

bar_stacked
| Category | Yellow (Transmit) | Orange (Receive) | Shield (Ground) | | -------------------- | ----------------- | ----------------- | --------------- | | Yellow (Transmit) | 1 | 1 | 1 | | Orange (Receive) | 1 | 1 | 1 | | Shield (Ground) | 1 | 1 | 1 | | Transmit | 1 | 1 | 1 | | Ground | 1 | 1 | 1 | | To DGPS Receiver | 0 | 0 | 0 |Com-1 wiring to receive DGPS position information from a DGPS receiver.

text_image
Com-1 To LMS-320 Orange (Receive) NMEA Transmit Shield (Ground) Ground To Other GPS ReceiverCom-1 wiring to receive NMEA position information from some other GPS receiver.

text_image
Yellow (Transmit) NMEA Receive Com-1 To LMS-320 Shield (Ground) Ground To Other DeviceCom-1 wiring to transmit NMEA position information to another NMEA-compatible device.
text_image
GPS socket LMS-320, rear view Power/Data socket Sonar socket Com port data wires (three) Power wires (two) GPS antenna module TransducerLMS-320 cable connections.
Mounting the Unit: Bracket, In-Dash or Portable
You can install the LMS-320 on the top of a dash with the supplied gimbal bracket. It can also be installed in the dash or mounted on a portable power supply.
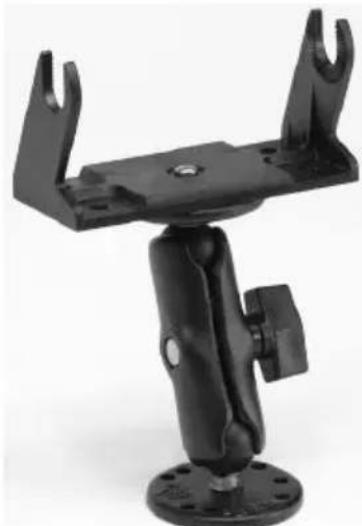
If you use the supplied bracket, you may be interested in the optional R-A-M ^® bracket mounting system. This converts the unit's gimbal bracket to a swivel mount, which can be used on the dash or overhead mounting positions. Installation instructions are supplied with the R-A-M mounting kits.
natural_image
Black offshore crane mount with mounting base and two articulated arms (no text or symbols visible)Optional R-A-M mounting system.
Bracket Installation
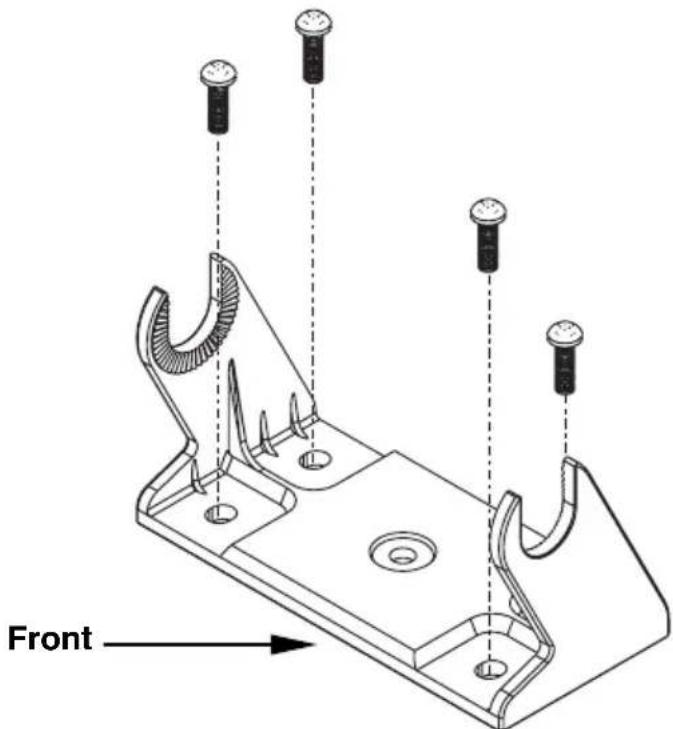
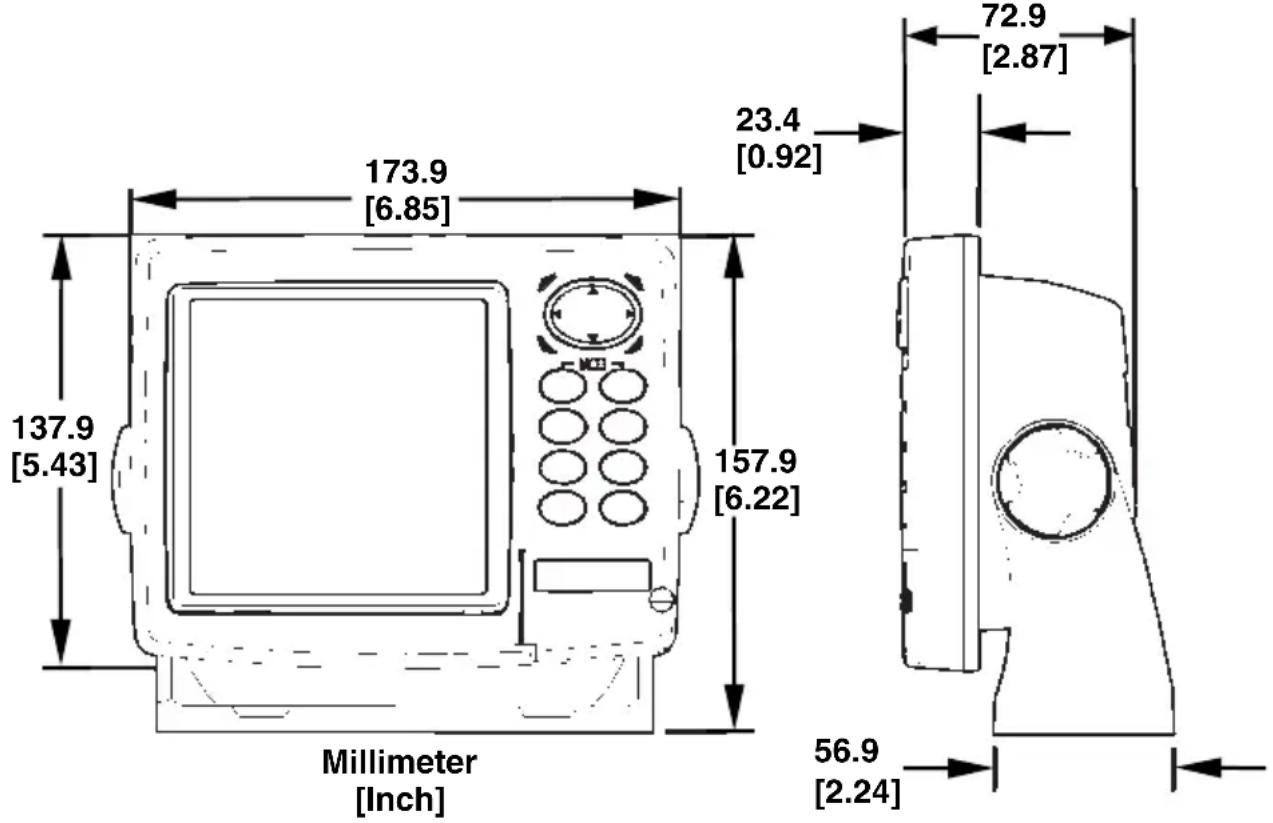
Mount the unit in any convenient location, provided there is clearance behind the unit when it's tilted for the best viewing angle. You should also make sure there is enough room behind the unit to attach the power, transducer and GPS antenna/receiver module cables. (A drawing on the next page shows the dimensions of a gimbal-mounted LMS-320 unit.)
Holes in the bracket's base allow wood screw or through-bolt mounting. You may need to place a piece of plywood on the back side of thin fiberglass panels to reinforce the panel and secure the mounting hardware.
text_image
FrontInstall the gimbal bracket. Orient the bracket so the arms slope toward the front of your unit.
Drill a 1-inch (25.4 mm) hole in the dash for the power, transducer and antenna cables. The best location for this hole is immediately under the gimbal bracket location. This way, the bracket can be installed so that it covers the hole, holds the cables in position and results in a neat installation. Some customers, however, prefer to mount the bracket to the side of the cable hole — it's a matter of personal preference.
text_image
173.9 [6.85] 23.4 [0.92] 137.9 [5.43] 157.9 [6.22] Millimeter [Inch] 72.9 [2.87] 56.9 [2.24]Front view (left) and side view (right) showing dimensions of LMS-320 sonar/GPS unit when mounted on gimbal bracket.
After drilling the hole, pass the transducer connector up through the hole from under the dash, followed by antenna connector. Pass the power cable's bare-wire end down though the hole from the top.
If you wish, you can fill in the hole around the cables with a good marine caulking compound. (Some marine dealers stock cable hole covers to conceal the opening.) No matter what type of installation you prefer, be sure to leave enough slack in the cables to allow tilting or swiveling the unit. If you choose to fill in the hole, be sure to position the cables against the rear edge of the hole as you apply the fill material.
Before positioning the bracket, be sure to hold the cables against the rear edge of the hole. Then, slide the bracket over the hole and butt the rear of the bracket base firmly against the cables, thus pinning them in place against the side of the hole. Finally, fasten the bracket to the dash. Attach the unit to the gimbal bracket using the supplied gimbal knobs and washers.
In-Dash Installation
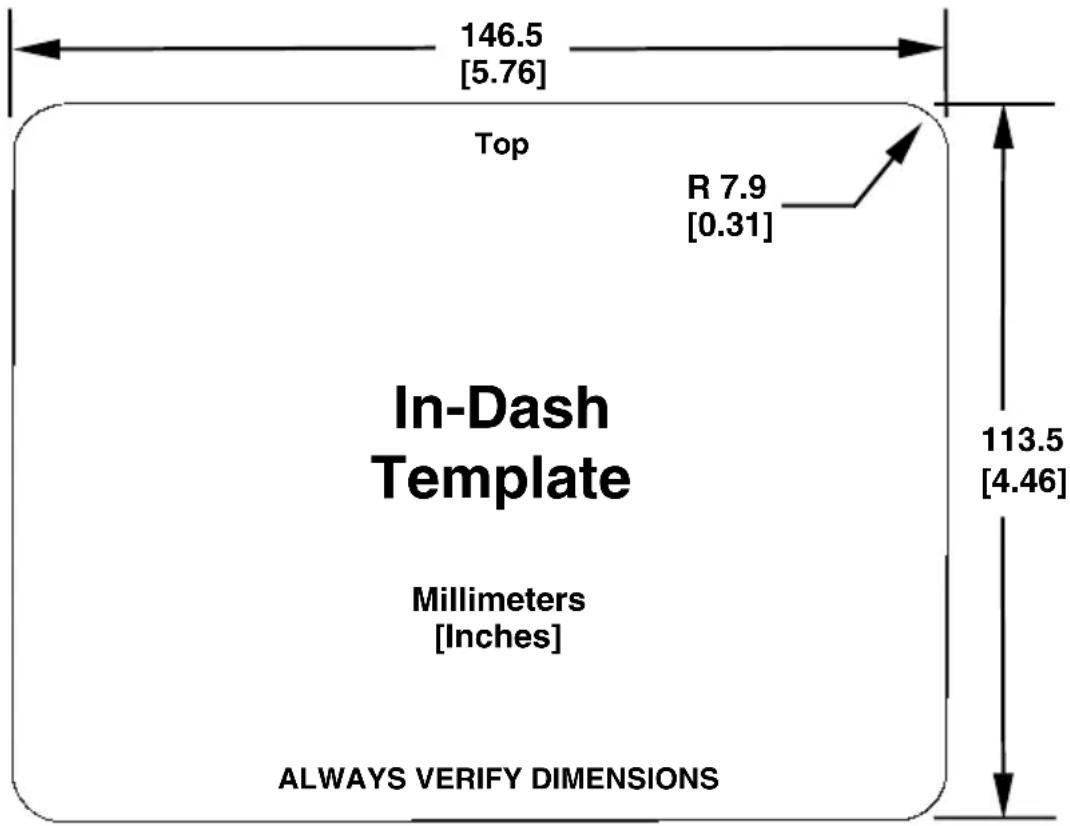
You can mount the unit in the dash with an optional FM-5 In-Dash Adapter Kit. The kit includes mounting hardware, a template for cutting the hole and an instruction sheet, part 988-0147-43.
text_image
146.5 [5.76] Top R 7.9 [0.31] In-Dash Template Millimeters [Inches] 113.5 [4.46] ALWAYS VERIFY DIMENSIONSIn-dash mounting template for LMS-320 sonar/GPS unit, showing dimensions. NOTE: The figure above is not printed to scale. A scaled template (FM-5 In-Dash Adapter Kit instructions) is available for free download from our web site, www.lowrance.com.
Portable Installation
Like many Lowrance products, the LMS-320 is capable of portable operation by using the optional PPP-11 portable power pack. The power pack, the magnet-equipped antenna module and an optional portable transducer expand the uses for your sonar/GPS unit. The PPP-11 makes it easy to transfer your unit from a boat to a car, recreational vehicle, airplane or other vehicle without drilling and mounting a second bracket. You can use your unit in your own car or boat, then take it along when riding in a friend's vehicle that's not equipped with sonar or GPS. (Or use it as a second sonar, one for each fisherman!)
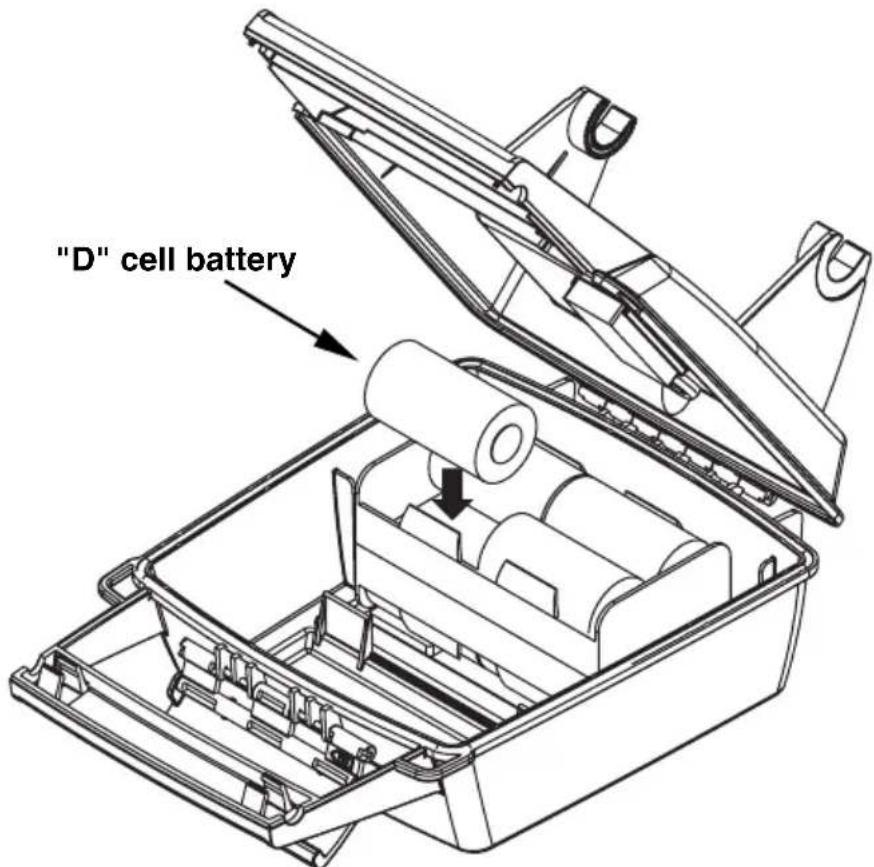
The PPP-11 Portable Power Pack can be used with eight "D" cell alkaline batteries or an optional sealed, rechargeable battery. For set-up directions, refer to the pack's instruction sheet, part 988-0147-46.
text_image
"D" cell batteryInstall batteries in power pack battery adapter.
MMC or SDC Memory Card Installation
Your LMS-320 uses a MultiMedia Card to store information, such as sonar logs, custom maps, waypoints, trails and other GPS data. The unit can also use Secure Digital Cards (SD card or SDC) to store data.
NOTE:
Throughout this manual, we will use the term MMC, but just remember that your unit can use an MMC or SDC to store data.
Both of these solid-state flash memory devices are about the size of a postage stamp. An SD card is slightly thicker than an MMC. As the manual went to press, MMCs were available in storage capacities of 8 MB, 16 MB, 32 MB and 64 MB. SD cards were available in capacities of 8 MB, 16 MB, 32 MB, 64 MB, 128 and 256 MB.
Additional MMC cards are available from LEI Extras; see ordering information inside the back cover of this manual. MMCs and SD cards are also available at many camera and consumer electronics stores.
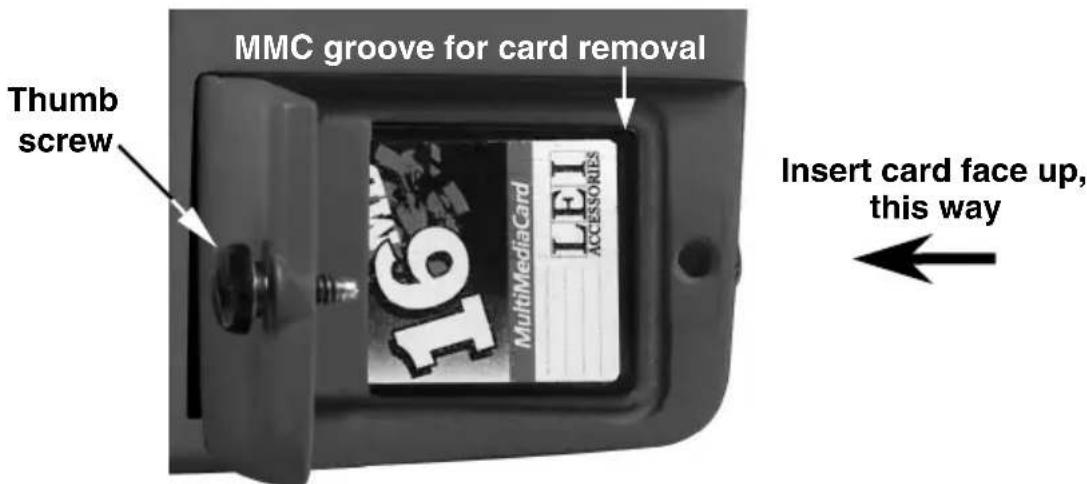
The MMC slot is located in a compartment on the front of the case. The compartment door is located at the lower right corner. The following figure shows a close-up with the door opened.
text_image
MMC groove for card removal Thumb screw 16 MultiMediaCard LEI ACCESSORIES Insert card face up, this wayMemory card compartment with a 16 MB MMC card installed.
To remove an MMC
- Open the card compartment door by unscrewing the thumb screw. The screw should only be finger tight. If it was over-tightened, use a thumbnail, a coin or a screwdriver to open the door.
- Use a thumbnail or fingernail to grab the groove in the bottom of the MMC. See the figure above for the groove location.
- Drag the MMC from the slot.
- Open the card compartment door.
- Grasp the bottom of the MMC and push the top of the card into the slot. Once the card is started, use your fingernails to slide it the rest of the way to the left, until it is firmly seated in the slot.
- Close the compartment door and fasten the thumb screw finger tight.
Other Accessories
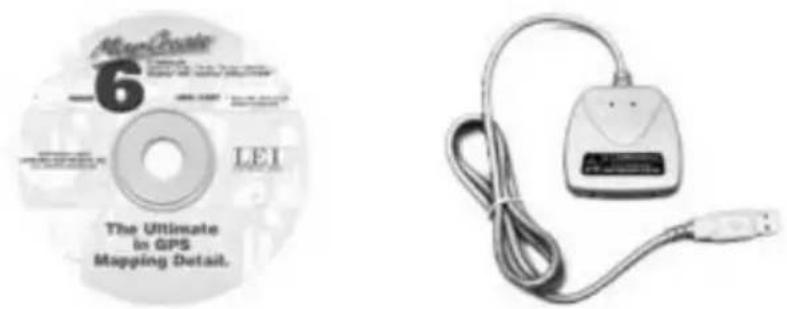
Other LMS-320 accessories include MMC cards, MMC card readers and MapCreate™ 6 custom mapping software for your computer. MMC card readers are available in USB and parallel port versions.
Two switch boxes are available for this unit. The SB-7X transducer switch box switches two transducers to one sonar unit. The SB-8X transducer switch box switches two sonar units to one transducer.
If these accessories are not available from your dealer, see the accessory ordering information on the inside back cover of this manual. Visit our web site for a complete listing of all the available accessories for your unit.
text_image
6 LEI The Ultimate in GPS Mapping Detail.MapCreate™ 6 CD-ROM, left; MMC card reader for USB ports, right.
Now that you have your unit installed, move on to Section 3, Basic Sonar Operations. There, we'll present a series of step-by-step tutorials to teach you the basics of LMS-320 sonar operation.
NOTE:
When you first turn the unit on, the Map Page appears. If you'd rather start learning about GPS operation first, turn over to Section 6, Basic GPS Operations. (Remember, you don't need to read this manual from cover-to-cover to get going. We designed it so you can skip around to the section you want to read.)
Face Cover
Your LMS-320 comes with a white protective cover that snaps on and off the front of the unit. This cover is intended for use when your unit and the vehicle it's mounted in are idle.
WARNING:
When the unit is mounted in an unprotected area, such as an open boat cockpit, the protective face cover must be removed when the vehicle is moving at high speed. This includes towing a boat on a trailer at highway speeds. Otherwise, wind blast can pop off the cover.
Notes
Section 3: Basic Sonar Operation
This section addresses the unit's most basic sonar operations. The instructions presented in Sec. 3 follow a chronological order. Sec. 4, Sonar Options & Other Features, will discuss other more advanced functions and utilities. Material in Sec. 4 is arranged in alphabetical order.
Before you turn on the LMS-320, it's a good idea to learn about the different keys, the Main Menu, the four Page screens and how they all work together. BUT, if you just can't wait to get on the water, turn to the one-page Quick Reference on page 49.
Keyboard
text_image
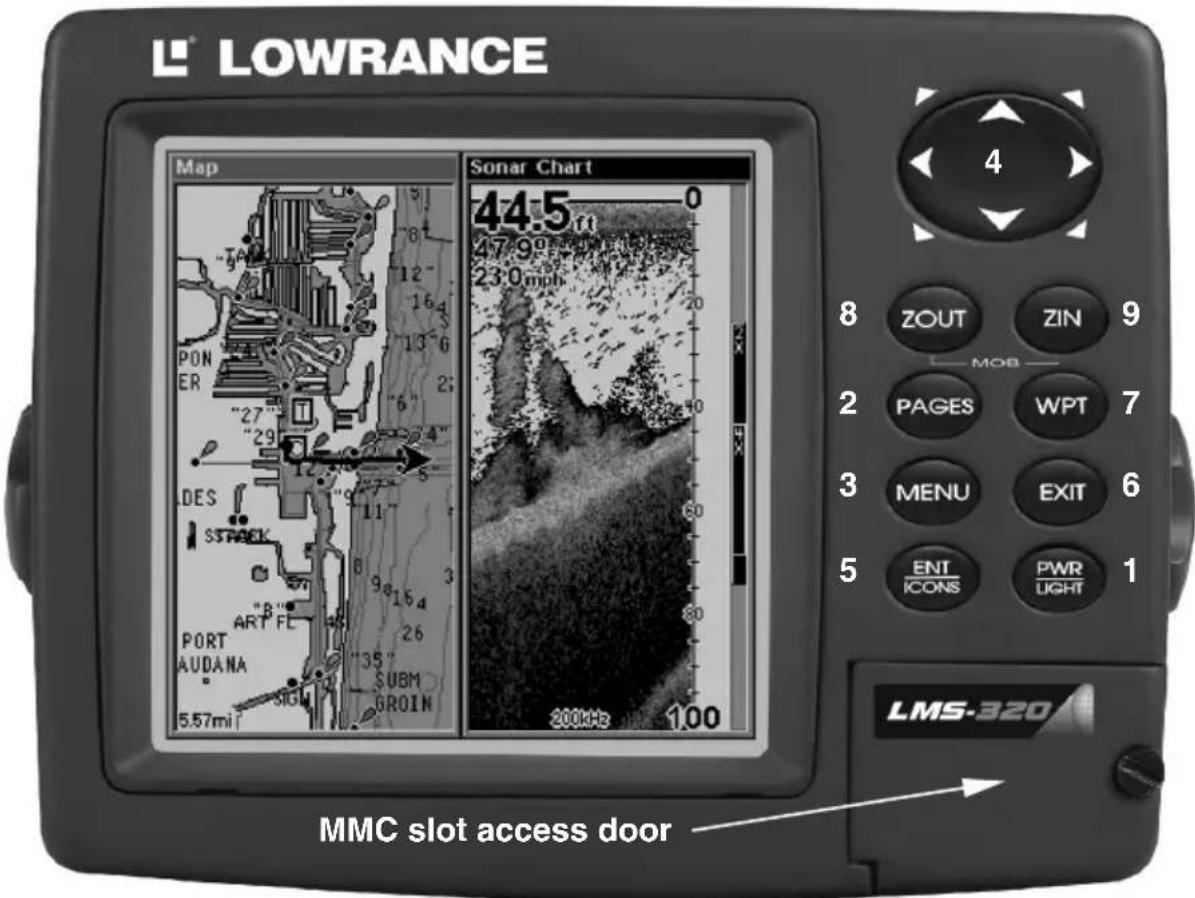
LOWRANCE Map Sonar Chart 44.5 ft 230 mph 4 8 ZOUT ZIN 9 MOB 2 PAGES WPT 7 3 MENU EXIT 6 5 ENT PWR ICONS LIGHT 1 LMS-320 MMC slot access doorLMS-320 series sonar/GPS unit, front view, showing map with sonar split screen, keyboard and access door for the MMC slot.
-
PWR/LIGHT (Power & Light) – The PWR key turns the unit on and off and activates the backlight.
-
PAGES – Pressing this and the arrow keys switches the unit between the four different page screens. (Satellite Status Page, Navigation Page, Map Page and Sonar Page.) Each page represents one of the unit's major operation modes.
-
MENU – Press this key to show the menus and submenus, which allow you to select a command or adjust a feature. This also accesses search functions for streets, intersections, addresses and highway exits.
-
ARROW KEYS – These keys are used to navigate through the menus, make menu selections, move the map and sonar chart cursors and enter data.
-
ENT/ICONS (Enter & Icons) – This key allows you to save data, accept values or execute menu commands. It is also used to create event marker icons.
-
EXIT – The Exit key lets you return to the previous screen, clear data or erase a menu.
-
WPT – (Waypoint) The Waypoint key is used to save and recall waypoints, search for waypoints and access the waypoint list. It also launches the Point-of-Interest (POI) search menus and is involved in some navigation functions.
-
ZOUT – (Zoom Out) – This key lets you zoom the screen out. On the Sonar Page, this key returns you to a full sonar chart display, showing the entire water column from surface to bottom. On the Map Page, this lets you see a larger geographic area on the map. Less detail is seen as you zoom out.
-
ZIN – (Zoom In) – This key lets you zoom the screen in. On the Sonar Page, this key enlarges fish signals and bottom detail. On the Map Page, zooming in lets you see greater detail in a smaller geographic area on the map.
Power/lights on and off
To turn on the unit, press PWR. As the unit powers up, the Map Page is displayed first. To switch to the Sonar Page, press PAGES | → | EXIT.
To turn on the backlight, press PWR again. The unit has three backlight levels to select from. Repeatedly pressing PWR will cycle through the backlight settings and turn off the backlight.
Turn off the unit by pressing and holding the PWR key for 3 seconds.
Main Menu
The LMS-320 has a Main Menu, which contains some function commands and some setup option commands. The instructions in this section will deal only with sonar functions, the basic commands that make LMS-320 show sonar signals on your screen. LMS-320 will work fine right out of the box with the factory default settings. But, if you want to
learn about the various sonar options, see Sec. 4, Sonar Options & Other Features. (For general system setup and GPS options, see Sec. 8, System Setup and GPS Setup Options.)
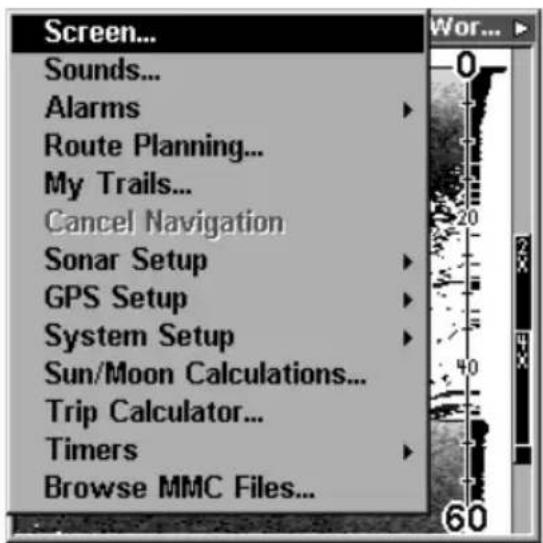
You can access the Main Menu from any of the four Page screens by pressing MENU | MENU. To clear the menu screen and return to the page display, press EXIT. (Remember, our text style for "MENU | MENU" means "press the Menu key twice." See a full explanation of our instruction text formatting on page 10, Instructions = Menu Sequences.)
text_image
Screen... Sounds... Alarms Route Planning... My Trails... Cancel Navigation Sonar Setup GPS Setup System Setup Sun/Moon Calculations... Trip Calculator... Timers Browse MMC Files... Wor... 0 20 40 60Main Menu.
The Main Menu commands and their functions are:
Screen command: changes the contrast or brightness of the display screen.
Sounds command: enables or disables the sounds for key strokes and alarms and sets the alarm style.
Alarms command: turns GPS alarms on or off and changes alarm thresholds.
Route Planning command: used to plan, view or navigate a route.
My Trails command: shows, creates and deletes plot trails. Also used to navigate or backtrack a trail.
Cancel Navigation command: turns off the various navigation commands. Used to stop navigating after you have reached your destination waypoint, Point of Interest or map cursor location; or after you reach the end of a route or trail.
Sonar Setup command: sets various sonar options.
GPS Setup command: sets various GPS receiver options.
System Setup command: sets general configuration options.
Sun/Moon Calculations command: finds the rising and setting time of the sun and the moon.
Trip Calculator command: shows trip status and statistics.
Timers command: controls the up timer, down timer and alarm clock settings.
Browse MMC Files command: this allows you to view the installed MMC card and the files it contains.
Pages
The unit has four Page displays that represent the four major operating modes. They are the Satellite Status Page, the Navigation Page, the Map Page and Sonar Page. They are accessed by pressing the PAGES key, then using → or ← to select a Page. (Clear the Pages Menu by pressing EXIT.)
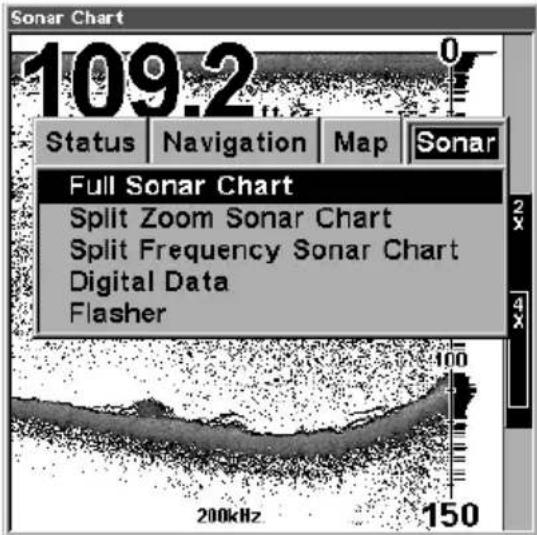
text_image
109.2 Status Navigation Map Sonar Full Sonar Chart Split Zoom Sonar Chart Split Frequency Sonar Chart Digital Data Flasher 200kHz 150Pages Menu, showing some Sonar display options.
Satellite Status Page
The Satellite Status Page provides detailed information on the status of LMS-320's satellite lock-on and position acquisition. To get to the Satellite Status Page: Press the PAGES key, then use → or ← to select STATUS. (Clear the Pages Menu by pressing EXIT.)
This page represents a GPS function, so it is discussed in much greater detail in Sec. 6.
No matter what Page you are on, a flashing current position indicator/question mark symbol and flashing GPS data displays indicate that satellite lock has been lost and there is no position confirmed.
WARNING:
Do not begin navigating with this unit until the numbers have stopped flashing!
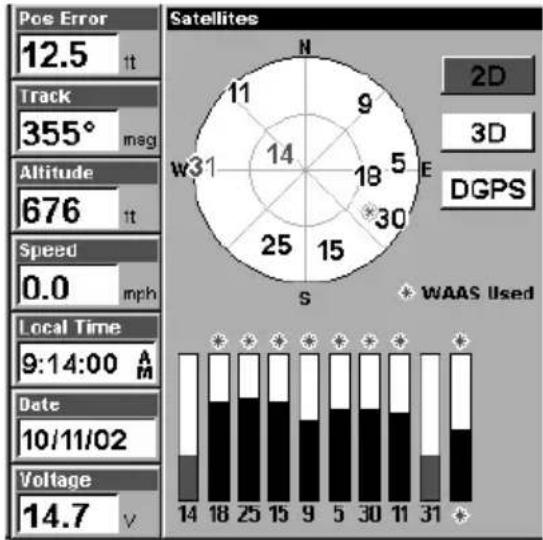
radar
| Time (s) | Value | | :--- | :--- | | 0 | 14.7 | | 1 | 18 | | 2 | 25 | | 3 | 15 | | 4 | 9 | | 5 | 5 | | 6 | 18 | | 7 | 30 | | 8 | 30 | | 9 | 15 | | 10 | 18 | | 11 | 25 | | 12 | 15 | | 13 | 18 | | 14 | 14 | | 15 | 18 | | 16 | 25 | | 17 | 15 | | 18 | 18 | | 19 | 25 | | 20 | 15 | | 21 | 18 | | 22 | 25 | | 23 | 15 | | 24 | 18 | | 25 | 25 | | 26 | 15 | | 27 | 18 | | 28 | 25 | | 29 | 15 | | 30 | 18 | | 31 | 25 | | 32 | 15 | | 33 | 18 | | 34 | 25 | | 35 | 15 | | 36 | 18 | | 37 | 25 | | 38 | 15 | | 39 | 18 | | 40 | 25 | | 41 | 15 | | 42 | 18 | | 43 | 25 | | 44 | 15 | | 45 | 18 | | 46 | 25 | | 47 | 15 | | 48 | 18 | | 49 | 25 | | 50 | 15 | | 51 | 18 | | 52 | 25 | | 53 | 15 | | 54 | 18 | | 55 | 25 | | 56 | 15 | | 57 | 18 | | 58 | 25 | | 59 | 15 | | 60 | 18 | | 61 | 25 | | 62 | 15 | | 63 | 18 | | 64 | 25 | | 65 | 15 | | 66 | 18 | | 67 | 25 | | 68 | 15 | | 69 | 18 | | 70 | 25 | | 71 | 15 | | 72 | 18 | | 73 | 25 | | 74 | 15 | | 75 | 18 | | 76 | 25 | | 77 | 15 | | 78 | 18 | | 79 | 25 | | 80 | 15 | | 81 | 18 | | 82 | 25 | | 83 | 15 | | 84 | 18 | | 85 | 25 | | 86 | 15 | | 87 | 18 | | 88 | 25 | | 89 | 15 | | 90 | 18 | | 91 | 25 | | 92 | 15 | | 93 | 18 | | 94 | 25 | | 95 | 15 | | 96 | 18 | | 97 | 25 | | 98 | 15 | | 99 | 18 | |100 |Satellite Status Page showing satellite lock-on with a 3D position acquired (latitude, longitude and altitude), including WAAS reception.
Navigation Page
This screen has a compass rose that not only shows your direction of travel, but also the direction to a recalled waypoint. To get to the Navigation Page: Press PAGES | → or ← to NAVIGATION | EXIT.
This page represents a GPS function, so it is discussed in much greater detail in Sec. 6.
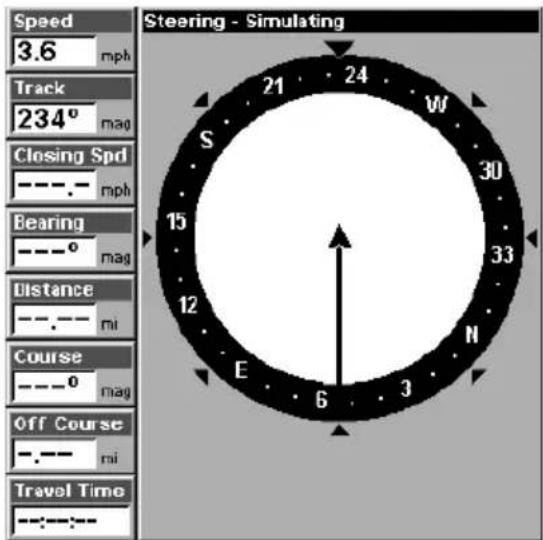
text_image
Speed 3.6 mph Track 234° mag Closing Spd ----- mph Bearing -----° mag Distance ----- mi Course -----° mag Off Course ----- mi Travel Time ------Navigation Page, recording a trail, traveling southwest.
Map Page
The Map Page screens show your course and track from a "bird's-eye" view, on a moving map. By default, this unit shows the map with north always at the top of the screen. The arrow in the center of the screen is your present position. It points in the direction you're traveling.
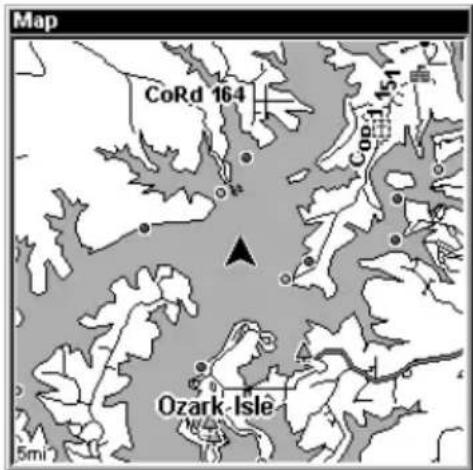
text_image
Map CoRd 164 CoRd 154 Ozark Isle 5mi²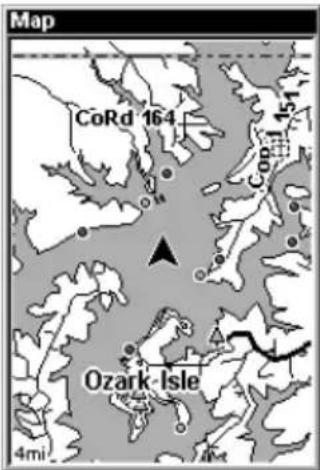
text_image
Map CoRd 164 Conn 151 Ozark Isle 4mi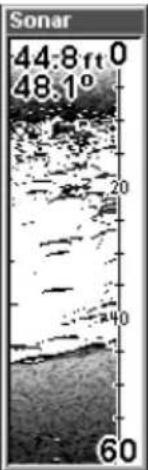
text_image
Sonar 44.8 ft 0 48.1° 20 40 60Map Page, showing position on Bull Shoals Lake, Arkansas. At left is the full map option. At right, map with sonar option.
Map Page is also the default screen that appears when you turn on the unit. To get to the Map Page from another page: Press PAGES | → or ← to MAP | EXIT.
You can display a split screen showing both the Map and Sonar pages at the same time. This feature is discussed in Sec. 4, Sonar Options & Other Features.
The Map Page represents a GPS function, so it is discussed in much greater detail in Sec. 6.
Sonar Page
The Sonar Page displays the sonar chart. This is a "cross-section" view of the water column beneath the boat. The chart moves across the screen, displaying sonar signal echoes that represent fish, structure and the bottom.
To get to the Sonar Page: Press the PAGES key, then use → or ← to select SONAR. (Clear the Pages Menu by pressing EXIT.) The Pages Menu also offers five chart display options under the Sonar Page category. To access them, press PAGES|← or→ to SONAR|↓ to Option Name|EXIT.
The Sonar Page also has its own menu, which is used for some advanced functions and for setting various options. (Sonar Options and other features are discussed in Sec. 4.) To Access the Sonar Page menu, from the Sonar Page press MENU.
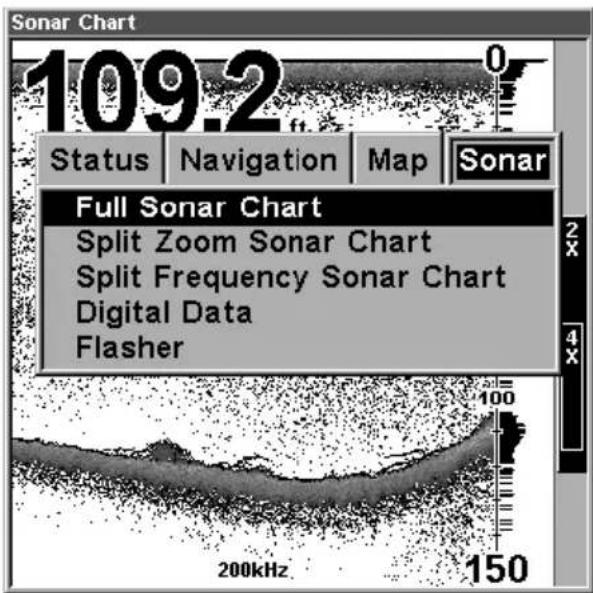
text_image
Sonar Chart 109.2 ft Status Navigation Map Sonar Full Sonar Chart Split Zoom Sonar Chart Split Frequency Sonar Chart Digital Data Flasher 200kHz 150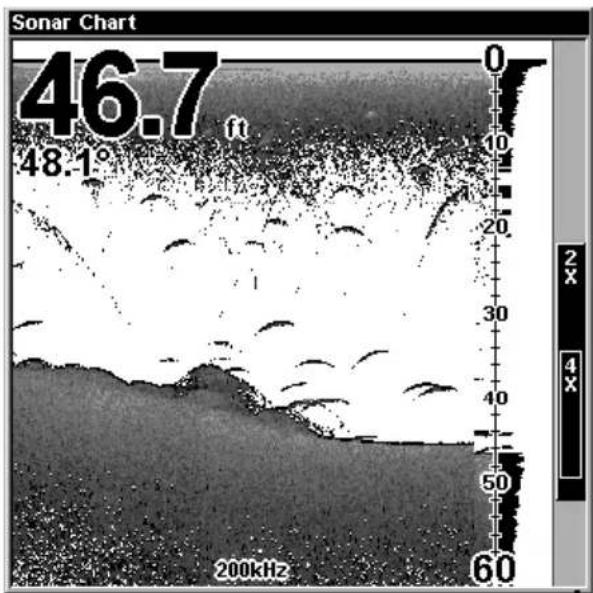
text_image
Sonar Chart 46.7 ft 48.1° 200kHz 60 0 10 20 30 40 50 60 2 X 4 XAt left, Pages Menu, showing sonar chart display option commands.
At right, Sonar Page in full sonar chart display mode.
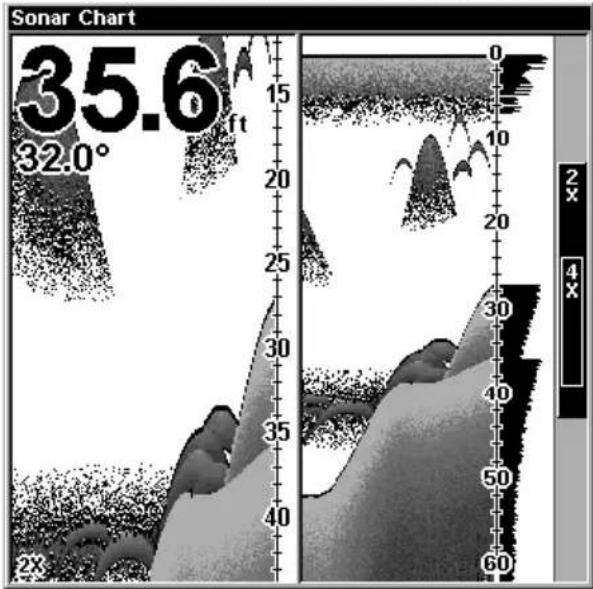
text_image
Sonar Chart 35.6 32.0° ft 15 20 25 30 35 40 0 10 20 30 40 50 60 2x 4x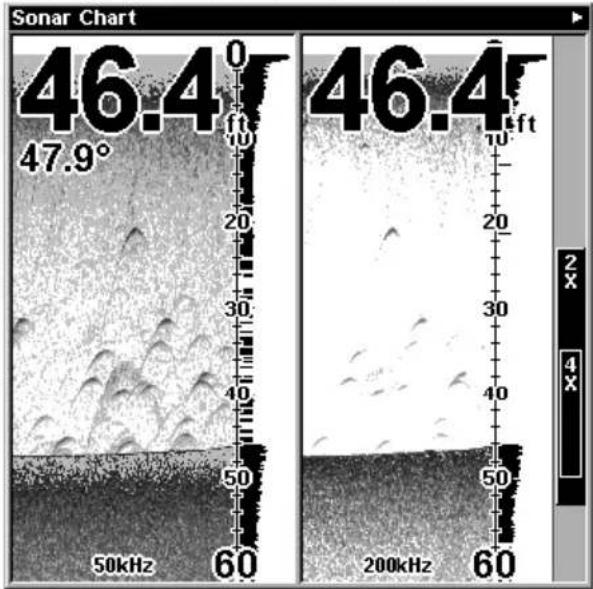
other
| Frequency | Value | | --------- | ----- | | 50kHz | 46.4ft | | 200kHz | 46.4ft |Sonar chart display options (from left) split zoom and split frequency.
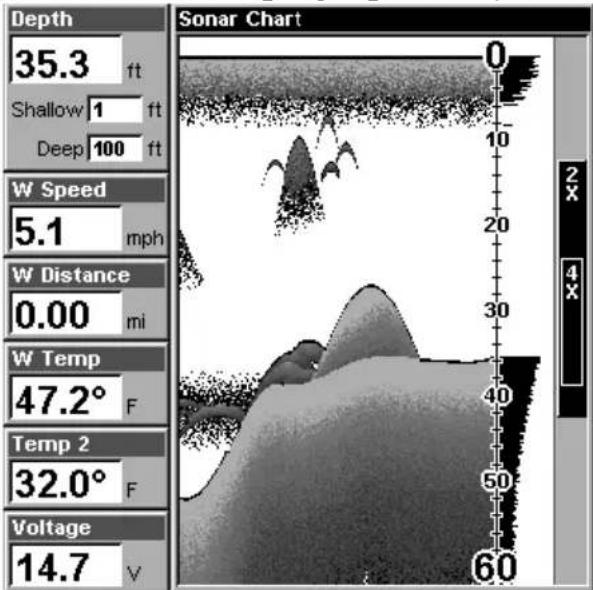
other
| Depth | W Speed (mph) | W Distance (mi) | W Temp (F) | Temp 2 (F) | Voltage (V) | |-------|---------------|-----------------|------------|------------|-------------| | 35.3 | 5.1 | 0.00 | 47.2 | 32.0 | 14.7 |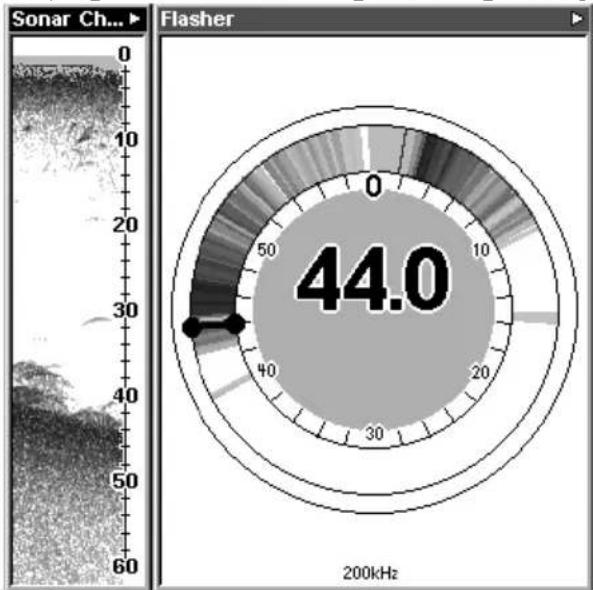
radar
| Value | |-------| | 44.0 |Sonar chart display options (from left) digital data and flasher.
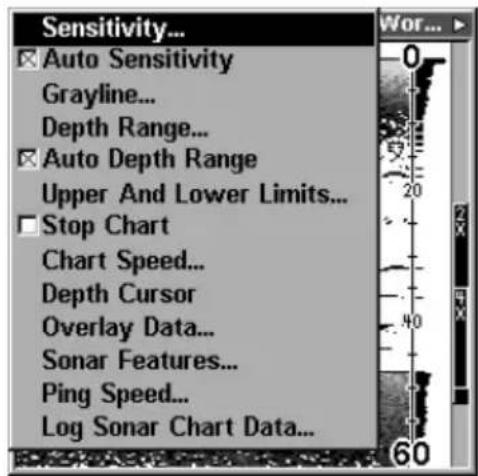
text_image
Sensitivity... Auto Sensitivity Grayline... Depth Range... Auto Depth Range Upper And Lower Limits... Stop Chart Chart Speed... Depth Cursor Overlay Data... Sonar Features... Ping Speed... Log Sonar Chart Data...Sonar Page Menu. Most of these functions are discussed in Sec. 4.
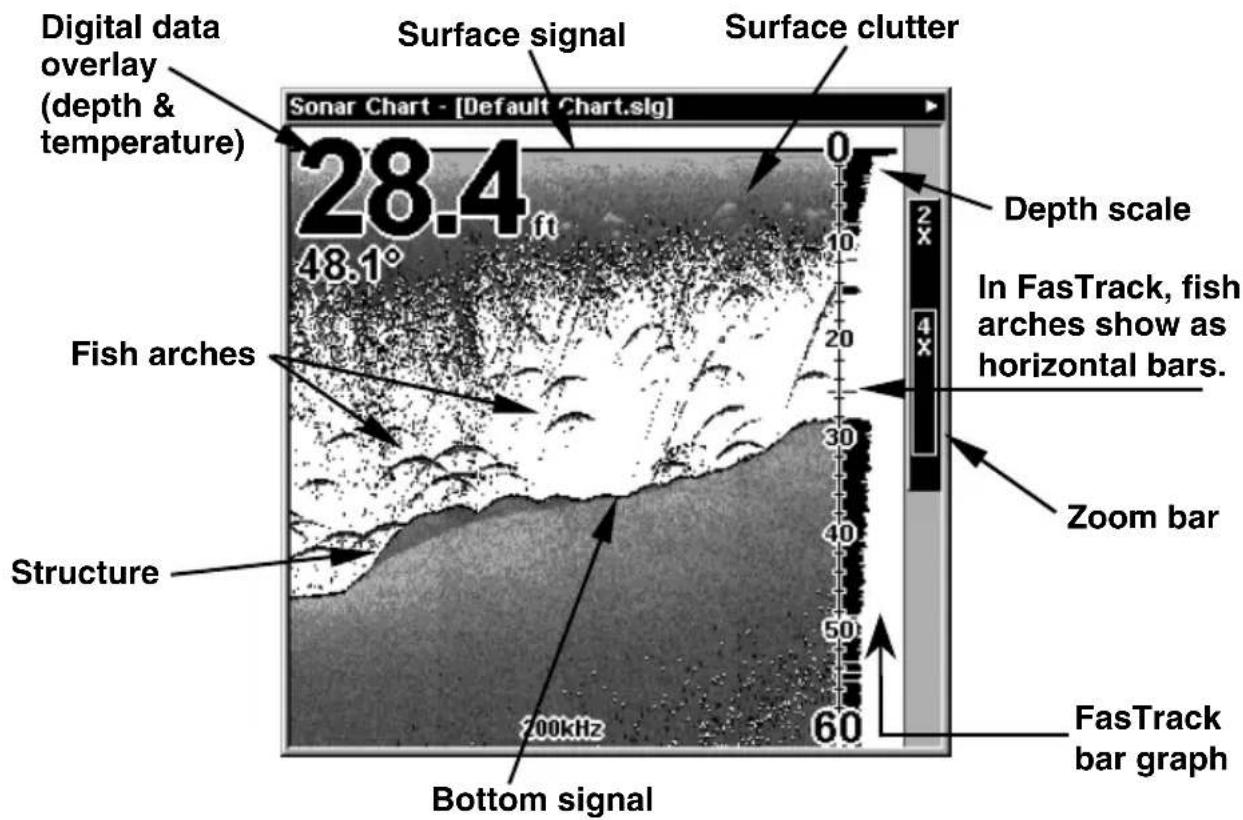
text_image
Digital data overlay (depth & temperature) Surface signal Surface clutter 28.4 ft 48.1° Fish arches Structure Bottom signal 200kHz 60 Depth scale In FasTrack, fish arches show as horizontal bars. Zoom bar FasTrack bar graphSonar Page, showing full sonar chart mode.
You can customize how the Sonar Page displays its pictures and other data in many ways. Your unit also includes several special sonar features and options that can help you better interpret the underwater scene.
We'll discuss all of those features and options in Sec. 4, but to show you how easy the LMS-320 is to operate, the following page contains a simplified, 10-step quick reference that will cover most fish finding situations. The quick reference describes how your unit will operate with all the sonar features in their automatic modes, which are set at the factory.
LMS-320 Series Sonar Quick Reference
- Mount the transducer, antenna and unit. Connect the unit to electric power and the transducer. (If GPS operation is desired, connect GPS antenna, too.) Make sure the MMC is in. (See complete installation details beginning on page 13.)
- Launch your boat.
- To turn on LMS-320, press and release PWR key.
- Opening screen displays Map Page. Rotate through the four main Page screens (Map Page, Satellite Status Page, Navigation Page, Sonar Page) by pressing PAGES|← or → to select Page Name|EXIT. Switch Pages to display Sonar Page.
- If GPS data is desired, wait while unit locates satellites and calculates current position. When the unit acquires position, a tone sounds and a position acquired message appears.
- With position acquired (if desired), head for your fishing grounds. Your unit will automatically display digital depth and surface water temperature in the top left corner of the screen.
The auto settings will track the bottom, displaying it in the lower portion of the screen. The full sonar chart will scroll from right to left, showing you what's under the boat as you cruise across the water. You can change the display by:
Zoom in to enlarge the chart for more detail: press ZIN.
Zoom out to return to full chart mode: press ZOUT.
- Watch the display for the appearance of fish arches. When you see arches, you've found fish! Stop the boat and get your lure or bait into the water at the depth indicated on the sonar chart.
- Gauge the fish depth by visually comparing the fish arches with the depth scale on the right side of the screen, or get a more accurate measure with the Depth Cursor. Press MENU|↓ to DEPTH CURSOR|ENT. Press ↓ to align the cursor line with the fish arch. The exact depth appears in a box at the right end of the cursor line. To clear the cursor, press EXIT.
- If you are drifting at a very low speed or anchored, you are not moving fast enough for a fish to return the tell-tale fish arch signal. As you drift over a fish, or as a fish swims through the transducer's signal cone, the fish echo will appear as a straight line suspended between the surface and the bottom.
- To turn off LMS-320, press and hold PWR key for three seconds.
Sonar Operations
As you can see from the quick reference on the previous page, basic operation is pretty easy, right out of the box. If you are a sonar novice, try operating the unit with the factory defaults until you get a feel for how it's working.
As you're learning the basics, there is one setting you might want to tinker with from time to time — Sensitivity.
Sensitivity controls the unit's ability to pick up echoes. If you want to see more detail, try increasing the sensitivity, a little at a time. There are situations when too much clutter appears on the screen. Decreasing the sensitivity can reduce the clutter and show the strongest fish echoes, if fish are present. As you change the sensitivity setting, you can see the difference on the chart as it scrolls.
Fig. 1
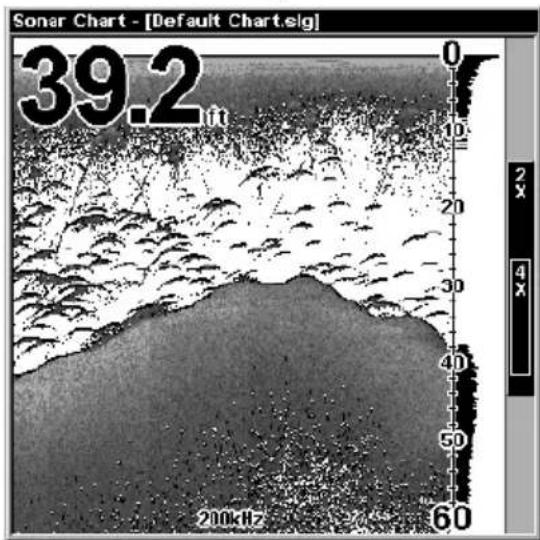
text_image
Sonar Chart - [Default Chart.sg] 39.2 in 0 10 20 30 40 50 60 200kHzFig. 2
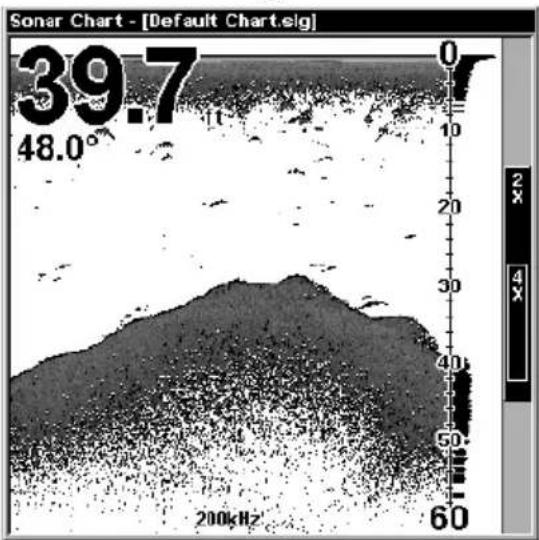
text_image
Sonar Chart - [Default Chart.eig] 39.7 48.0° 0 10 20 30 40 50 60 200kHzFig. 3
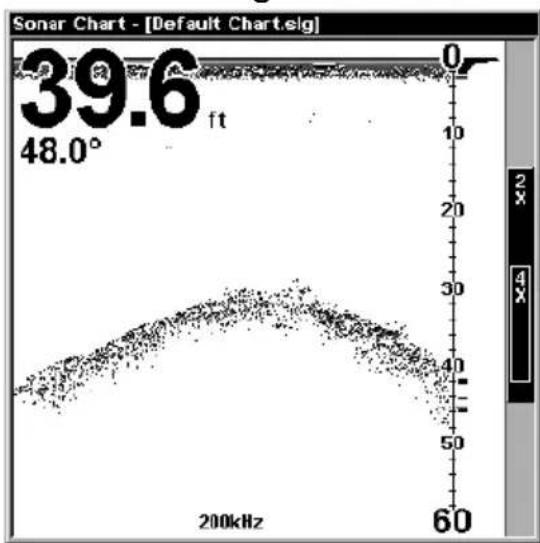
scatter
| Frequency (kHz) | Value | | --------------- | ----- | | 0 | 0 | | 20 | 10 | | 40 | 20 | | 60 | 30 | | 80 | 40 | | 100 | 50 | | 120 | 40 | | 140 | 30 | | 160 | 20 | | 180 | 10 | | 200 | 0 |Fig. 4
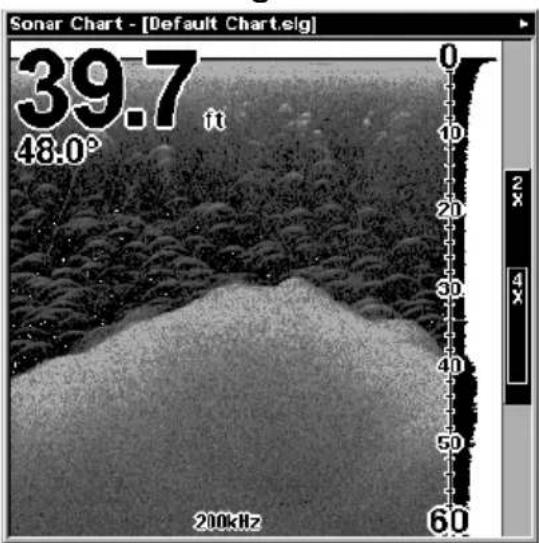
text_image
Sonar Chart - [Default Chart.elg] 39.7 48.0° 0 10 20 30 40 50 60 200kHzThese figures show results of different sensitivity levels on the same location. Fig. 1: Sensitivity at 88 percent, determined by Auto Sensitivity. Typical of full auto mode. Fig. 2: Sensitivity set at 75 percent. Fig. 3: Sensitivity set at 50 percent. Fig. 4: Sensitivity set at 100 percent.
You can change the sensitivity level whether you are in Auto Sensitivity mode or Manual Sensitivity mode. The adjustment method works the same in both modes, but it gives you slightly different results.
Adjusting sensitivity in Auto Sensitivity Mode is similar to manually adjusting a car's speed with the accelerator pedal while cruise control is on. You can tell the car to run faster, but when you let off the gas the cruise control automatically keeps you from running slower than the minimum speed setting. In the LMS-320, auto mode will let you increase sensitivity to 100 percent, but the unit will limit your minimum setting. This prevents you from turning sensitivity down too low to allow automatic bottom tracking. When you change the setting with auto turned on, the unit will continue to track the bottom and make minor adjustments to the sensitivity level, with a bias toward the setting you selected.
Adjusting sensitivity in Manual Sensitivity Mode is similar to driving a car without cruise control — you have complete manual control of the car's speed. In the LMS-320, manual mode allows you to set sensitivity at 100 percent (maximum) or zero percent (minimum.) Depending on water conditions, the bottom signal may completely disappear from the screen when you reduce sensitivity to about 50 percent or less!
Try adjusting sensitivity in both auto and manual modes to see how they work.
To adjust sensitivity:
-
Press MENU | ENT.
-
The Sensitivity Control Bar appears. Press ↓ to decrease sensitivity; press ↑ to increase sensitivity. When it's set at the desired level, press EXIT. (When you reach the maximum or minimum limit, a tone sounds.)
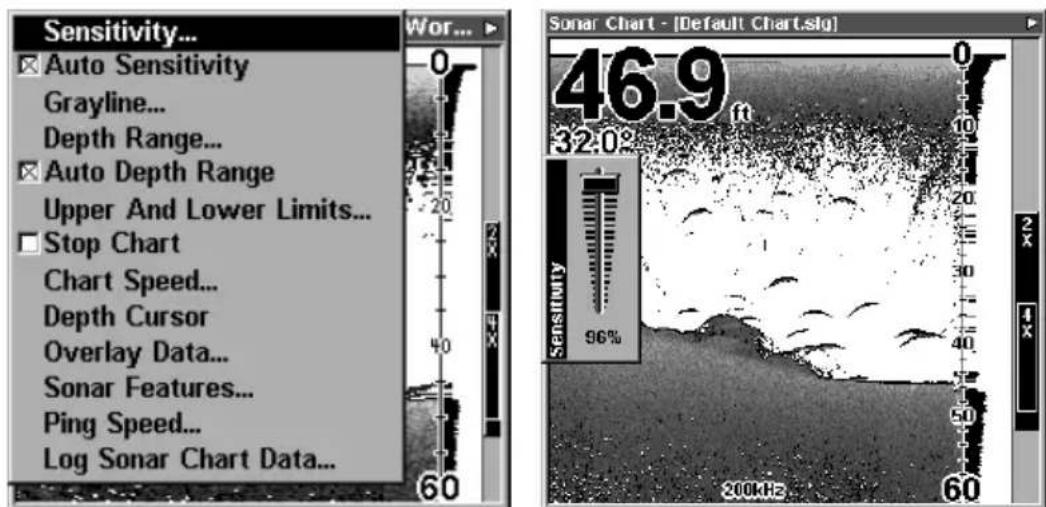
text_image
Sensitivity... Auto Sensitivity Grayline... Depth Range... Auto Depth Range Upper And Lower Limits... Stop Chart Chart Speed... Depth Cursor Overlay Data... Sonar Features... Ping Speed... Log Sonar Chart Data... Wor... 60 Sonar Chart - [Default Chart.slg] 46.9 32.0° 96% 10 20 30 40 50 60 200kHz 60At left, Sonar Menu with Sensitivity command selected. At right, the Sensitivity Control Bar.
NOTE:
If you want to change the sensitivity in Manual Mode, first turn off Auto Sensitivity: from the Sonar Page, press MENU↓ to AUTO SENSITIVITY | ENT | ↑ to SENSITIVITY | ENT. Press ↓ or ↑ to pick a different sensitivity setting. When it's set at the desired level, press EXIT.
Important Tip:
While you are experimenting and learning, it's possible to scramble the settings so that the sonar picture disappears from your screen. If that happens, remember that it's easy to switch back to full automatic operation by simply restoring the factory auto settings. Here's how:
To Restore Factory Settings
-
Press MENU | MENU | ↓ to SYSTEM SETUP | ENT | ↓ to RESET OPTIONS | ENT.
-
The unit asks if you want to reset all the options. Press ← to YES | ENT. All options are reset, and the unit reverts back to the Map Page at the 4000 mile zoom range. (Any recorded sonar logs or GPS data will be unchanged.)
Fish Symbols vs. Full Sonar Chart
You may have noticed in the quick reference that we used fish arches in full sonar chart mode for our example, and not the popular Fish I.D. ^™ fish symbol feature. Here's why.
Fish I.D. is an easier way for a sonar novice to recognize a fishy signal return when he sees it. However, locating fish by symbol only has some limitations.
Your sonar unit's microprocessor is remarkably powerful, but it can be fooled. Some of the echoes calculated to be fish could be tree limbs or turtles! To see what's under your boat in maximum detail, we recommend you turn off Fish I.D. and begin learning to interpret fish arches.
Fish I.D. is most handy when you're in another part of the boat or performing some task that prevents you from watching the sonar screen. Then, you can turn on Fish I.D. and the audible fish alarm. When that lunker swims under your boat, you'll hear it!
Fish I.D. can also be useful when you want to screen out some of the sonar detail gathered by your unit. For example, in one case fisherman in San Francisco Bay saw clouds of clutter in the water but no fish arches. When a down rigger was pulled up, it brought up several small jellyfish. The fisherman switched their Lowrance sonar to Fish I.D., which screened out the schools of jellyfish and clearly showed the game fish there as fish symbols.
Other Free Training Aids
The sonar options section discusses Fish I.D., fish alarms and other features in greater detail. If you or a friend has Internet access, you can also learn more about interpreting what you see on your sonar screen. Visit our web site, WWW.LOWRANCE.COM. Be sure to check out the free Sonar Tutorial, which includes animated illustrations and more pictures of actual sonar returns, all described in detail. There's even a "printer friendly" version of the tutorial available on our web site...it makes a great supplement to this operation manual!
You can also download a free copy of our Sonar Viewer software. This PC-based software application plays back any sonar chart log recorded with a Lowrance sonar product. Features include:
- Adjustable range, zoom, sensitivity, color line, noise rejection, surface clarity, etc. of the recorded file.
• Color interpretation of sonar signals can be user defined. - Operates like a Windows Multimedia Player with forward, reverse, pause, fast forward, fast reverse, and scroll buttons.
- Adjustments update the entire record displayed
- Can print in full color.
- Window can dynamically be sized on your monitor.
- Mouse cursor shows GPS position, depth and sounding number anywhere on the visible record.
For the ultimate training aid, be sure to download the free emulator software for your unit. Aside from being just plain fun, this program can help you learn both basic and advanced operations without burning boat fuel! Lowrance is the first sonar manufacturer to provide this type of training tool for customers.
This PC application simulates the actual sonar/GPS unit on your computer. You can run it from your computer keyboard or use your mouse to press the virtual keys. Easy download and installation instructions are available on our web site.
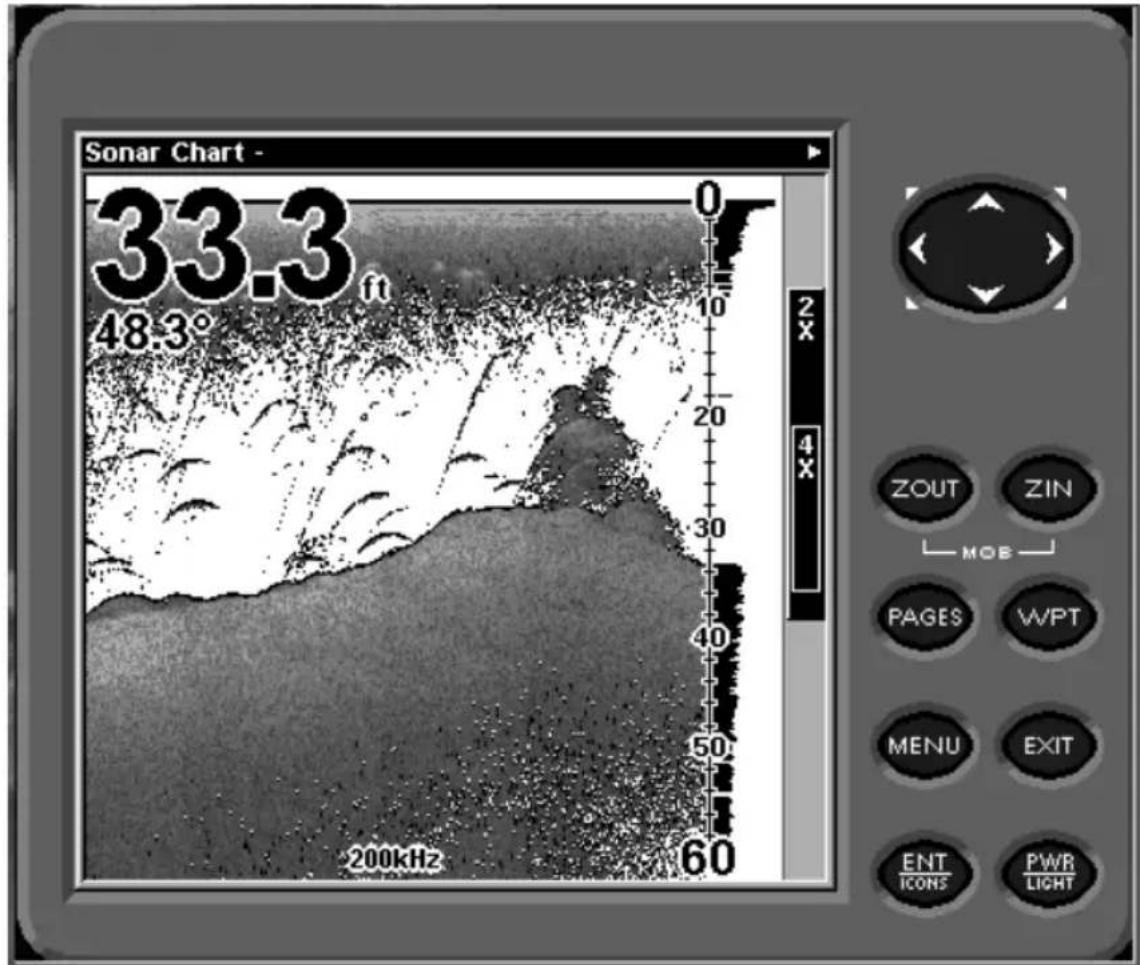
text_image
Sonar Chart - 33.3ft 48.3° 200kHz 60 0 10 20 30 40 50 60 ZOUT ZIN MOB PAGES WPT MENU EXIT ENT PWR ICOMS LIGHTFree training emulator is available for your unit on our web site.
The emulator works exactly like your real sonar/GPS unit. Using the Sonar Simulator and GPS Simulator features, it allows you to play back sonar logs, run GPS routes and trails, even create real waypoints you can use in the field! You can even take snapshots of the Sonar Chart and print them or e-mail them to friends.
Section 4: Sonar Options & Other Features
Material in this section is arranged in alphabetical order.
ASP™ (Advanced Signal Processing)
The ASP ^™ feature is a noise rejection system built into the sonar unit that constantly evaluates the effects of boat speed, water conditions and interference. This automatic feature gives you the best display possible under most conditions.
The ASP feature is an effective tool in combating noise. In sonar terms, noise is any undesired signal. It is caused by electrical and mechanical sources such as bilge pumps, engine ignition systems and wiring, air bubbles passing over the face of the transducer, even vibration from the engine. In all cases, noise can produce unwanted marks on the display.
The ASP feature has four settings — Off, Low, Medium and High. If you have high noise levels, try using the "High" ASP setting. However, if you are having trouble with noise, we suggest that you take steps to find the interference source and fix it, rather than continually using the unit with the high ASP setting.
There are times when you may want to turn the ASP feature off. This allows you to view all incoming echoes before they are processed by the ASP feature.
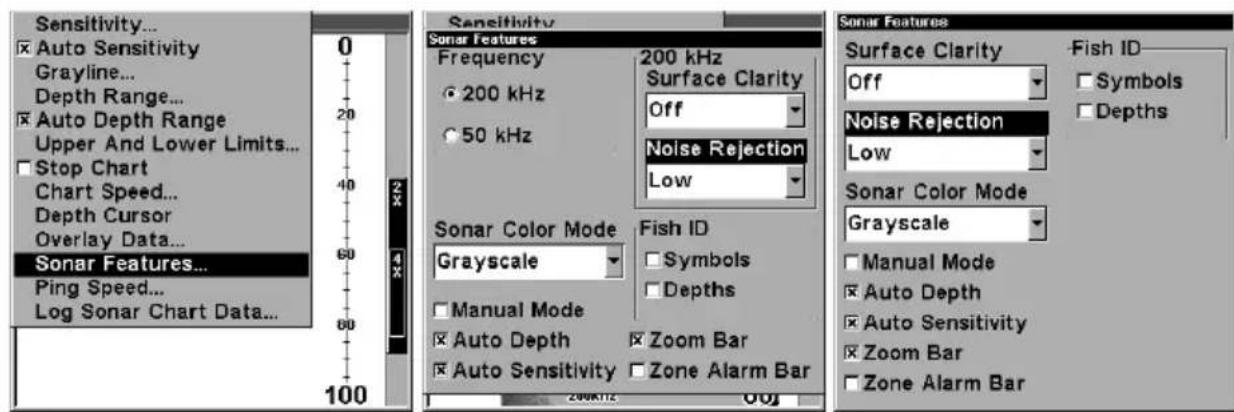
text_image
Sensitivity... Auto Sensitivity Grayline... Depth Range... Auto Depth Range Upper And Lower Limits... Stop Chart Chart Speed... Depth Cursor Overlay Data... Sonar Features... Ping Speed... Log Sonar Chart Data... 100 Sensitivity Sonar Features Frequency 200 kHz Surface Clarity Off 50 kHz Noise Rejection Low Sonar Color Mode Grayscale Fish ID Symbols Depths Manual Mode Auto Depth Zoom Bar Auto Sensitivity Zone Alarm Bar 200KHz 0.0J Sonar Features Surface Clarity Fish ID Off Symbols Depths Noise Rejection Low Sonar Color Mode Grayscale Manual Mode Auto Depth Auto Sensitivity Zoom Bar Zone Alarm BarAt left, Sonar Menu with Sonar Features selected. In the Sonar Features menu, Noise Rejection is selected with ASP in the default low setting (center, dual-frequency menu; at right, single-frequency menu).
To change the ASP level:
- From the Sonar Page, press MENU | ↓ to SONAR FEATURES | ENT.
- Press → ↓ or ↓ to NOISE REJECTION | ENT.
- Press ↓ or ↑ to select a setting, then press ENT.
- To return to the previous page, press EXIT | EXIT.
Alarms
This unit has three different types of sonar alarms. The first is the Fish Alarm. It sounds when the Fish I.D. ^TM feature determines that an echo is a fish.
Another alarm is the Zone Alarm, which consists of a bar on the side of the screen. Any echo on the chart that appears inside this bar triggers this alarm.
The last alarm is the Depth Alarm, which has both a Shallow and a Deep setting. Only the bottom signal will trigger this alarm. This is useful as an anchor watch, a shallow water alert or for navigation.
Depth Alarms
The depth alarms sound a tone when the bottom signal goes shallower than the shallow alarm's setting or deeper than the deep alarm's setting. For example, if you set the shallow alarm to 10 feet, the alarm will sound a tone if the bottom signal is less than 10 feet. It will continue to sound until the bottom goes deeper than 10 feet.
The deep alarm works just the opposite. It sounds a warning tone if the bottom depth goes deeper than the alarm's setting. Both depth alarms work only off the digital bottom depth signals. No other targets will trip these alarms. These alarms can be used at the same time or individually.

text_image
Screen... Sounds... 0 Alarm GPS Alarms... Route Sonar Alarms... My Trails... Cancel Navigation Sonar Setup GPS Setup System Setup Sun/Moon Calculations... Trip Calculator... Timers Browse MMC Files... 60 Sonar Alarms Shallow Alarm Depth Enabled 1 ft Deep Alarm Enabled 100 ft Zone Alarm Enabled Adjust Zone Fish AlarmAt left, Main Menu and Sonar Alarms command. At right, the Sonar Alarms menu.
To adjust and turn on the shallow alarm:
-
Press MENU | MENU | ↓ to ALARMS | ENT | ↓ to SONAR ALARMS | ENT.
-
Press → to SHALLOW ALARM DEPTH | ENT.
-
Press or to change the first number, then press to move the cursor to the next number and repeat until the depth is correct, then press ENT.
-
Press ← to SHALLOW ALARM ENABLED | ENT | EXIT | EXIT | EXIT.
-
To turn off the alarm, press MENU | MENU | ↓ to ALARMS | ENT | ↓ to SONAR ALARMS | ENT | ENT | EXIT | EXIT | EXIT.
To switch to a different depth setting, open the Sonar Alarms menu and repeat the instructions in step 3 above.
To adjust and turn on the deep alarm:
- Press MENU | MENU | ↓ to ALARMS | ENT | ↓ to SONAR ALARMS | ENT.
- Press ↓ to DEEP ALARM ENABLED | → to DEEP ALARM DEPTH | ENT.
- Press or to change the first number, then press to move the cursor to the next number and repeat until the depth is correct, then press ENT.
- Press ← to DEEP ALARM ENABLED | ENT | EXIT | EXIT | EXIT.
- To turn off the alarm, press MENU | MENU | ↓ to ALARMS | ENT | ↓ to SONAR ALARMS | ENT | ↓ to DEEP ALARM ENABLED | ENT | EXIT | EXIT | EXIT.
To switch to a different depth setting, open the Sonar Alarms menu and repeat the instructions in step 3 above.
Zone Alarm
The zone alarm is triggered when any echo passes inside the zone alarm bar, shown on the right side of the screen.
To adjust and turn on the zone alarm:
- Press MENU | MENU | ↓ to ALARMS | ENT | ↓ to SONAR ALARMS | ENT.
- Press ↓ to ZONE ALARM ENABLED | → to ADJUST ZONE | ENT.
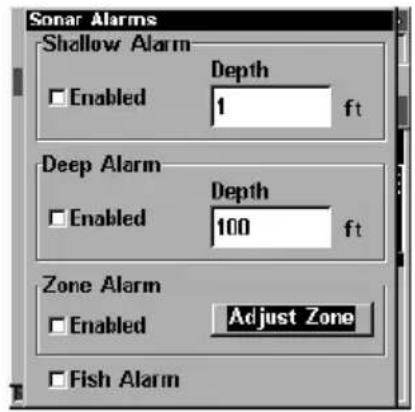
text_image
Sonar Alarms Shallow Alarm Enabled Depth 1 ft Deep Alarm Enabled Depth 100 ft Zone Alarm Enabled Adjust Zone Fish Alarm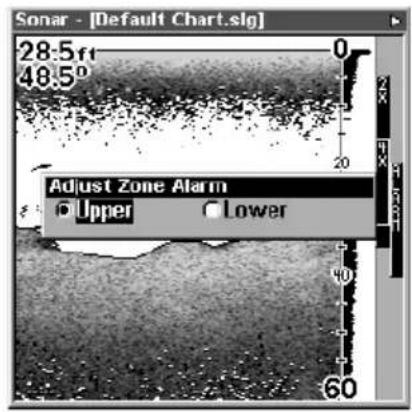
text_image
Sonar - [Default Chart.sg] 28.5 ft 48.5° Adjust Zone Alarm Upper Lower 60At left, Sonar Alarms menu, with Adjust Zone command selected. At right, Adjust Zone Alarm selection box, with Upper selected.
- To set the upper boundary for the Zone Alarm, use or to select UPPER, then press or to move the top of the bar to the desired depth.
- To set the lower boundary for the Zone Alarm, use or to select
LOWER, then press or to move the bottom of the bar to the desired depth.
-
Press EXIT | ← to ZONE ALARM ENABLED | ENT | EXIT | EXIT | EXIT. Now, any echo — fish, bottom, structure — within the zone alarm's depth range will trigger the zone alarm.
-
To turn off the alarm, press MENU | MENU | ↓ to ALARMS | ENT | ↓ to SONAR ALARMS | ENT | ↓ to ZONE ALARM ENABLED | ENT | EXIT | EXIT | EXIT.
To switch to a different depth setting, open the Sonar Alarms menu and repeat the instructions in steps 3 and 4 above.
Fish Alarm
Use the fish alarm for a distinctive audible alarm when fish or other suspended objects are detected by the Fish I.D. ^™ feature (Fish I.D. must be turned on for the Fish Alarm to work). A different tone sounds for each fish symbol size shown on the display.
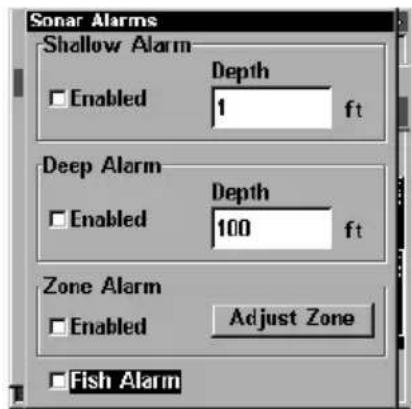
text_image
Sonar Alarms Shallow Alarm Enabled Depth 1 ft Deep Alarm Enabled Depth 100 ft Zone Alarm Enabled Adjust Zone Fish AlarmSonar Alarms menu with Fish Alarm selected. The check box to the left is blank, indicating the alarm is turned off.
To turn the fish alarm on:
-
Press MENU | MENU | ↓ to ALARMS | ENT | ↓ to SONAR ALARMS | ENT.
-
Press ↓ to FISH ALARM | ENT | EXIT | EXIT | EXIT.
-
To turn off the alarm, press MENU | MENU | ↓ to ALARMS | ENT | ↓ to SONAR ALARMS | ENT | ↓ to FISH ALARM | ENT | EXIT | EXIT | EXIT.
Calibrate Speed
The speed sensor can be calibrated to compensate for inaccuracies. Before you change the setting, first calculate the percentage that the speed is off. You will enter this percentage in a moment.
For example, if you figure the sensor is reading 10 percent faster than actual speed, you will enter - 10 in the calibration window. If the sensor is reading 5 percent slower than true speed, you will enter + 5 in the window.
A good way to gauge your speed sensor's performance is to compare its reading with the ground speed measured by your unit's GPS functions. When you make a run to compare GPS ground speed to speed sensor speed, perform your test in relatively calm water free of current, if possible. (Unless, of course, you are taking the current speed into consideration when making your calculation.) After you have a correction figure, here's how to enter it:
-
Press MENU | MENU | ↓ to SONAR SETUP | ENT | ↓ to CALIBRATE WATER SPEED | ENT.
-
Enter the number you calculated earlier: press or to change the first character (+ or -), then press to move the cursor to the next number and repeat until the percentage is correct, then press EXIT.
Chart Speed
The rate that echoes scroll across the screen is called the chart speed. The default is maximum; we recommend that you leave the speed set there for virtually all fishing conditions.
However, you might consider experimenting with chart speed when you are stationary or drifting very slowly. You may sometimes achieve better images as you slow down the chart speed to match how fast you are moving across the bottom.
If you are at anchor, ice fishing or fishing from a dock, experiment with a chart speed around 50 percent. If you are drifting slowly, try a chart speed around 75 percent. When you are stationary and a fish swims through the sonar signal cone, the image appears on the screen as a long line instead of a fish arch. Reducing the chart speed may result in a shorter line that more closely resembles a regular fish return.
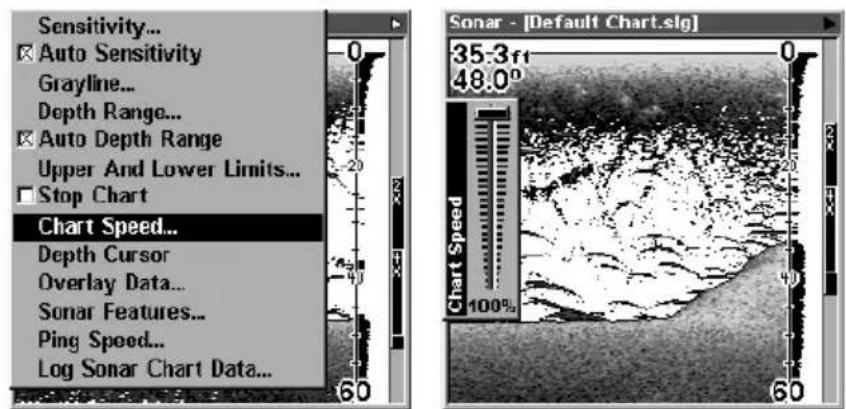
text_image
Sensitivity... Auto Sensitivity Grayline... Depth Range... Auto Depth Range Upper And Lower Limits... Stop Chart Chart Speed... Depth Cursor Overlay Data... Sonar Features... Ping Speed... Log Sonar Chart Data... 60 Sonar - [Default Chart.sg] 35-3 ft 48.0° 100% 60At left, Sonar Page menu with Chart Speed command selected. At right, Chart Speed Control Bar.
If you do experiment with chart speed, remember to reset it to maximum when you resume trolling or moving across the water at higher speed. To change chart speed:
- From the Sonar Page, press MENU | ↓ to CHART SPEED | ENT.
- The Chart Speed Control Bar appears. Press ↓ to decrease chart speed; press ↑ to increase chart speed.
- When it's set at the desired level, press EXIT.
Depth Cursor
The depth cursor consists of a horizontal line with a digital depth box on the right side. The numbers inside the box show the depth of the cursor.
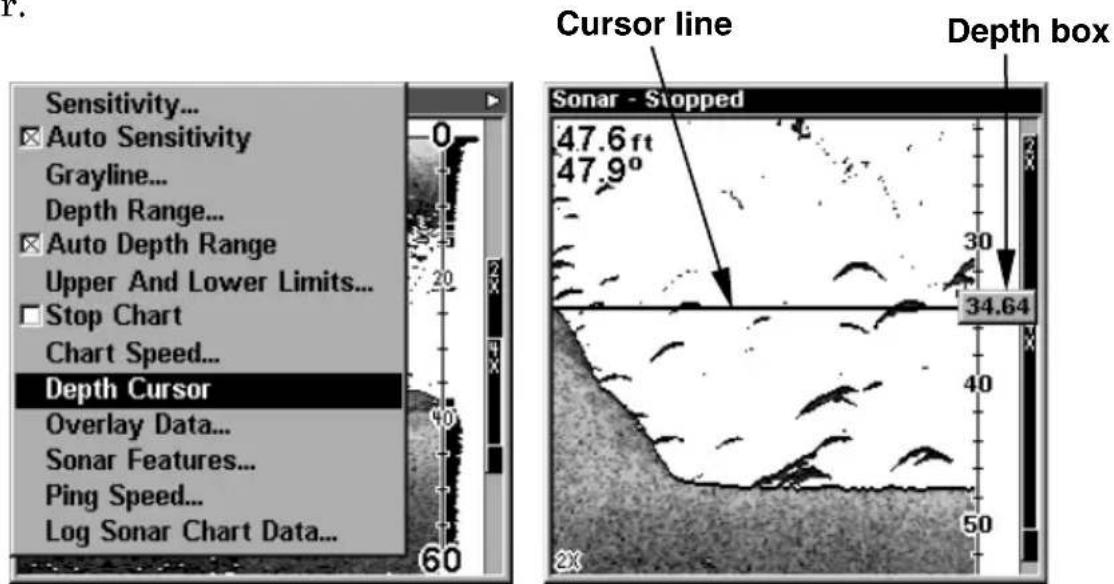
text_image
Sensitivity... Auto Sensitivity Grayline... Depth Range... Auto Depth Range Upper And Lower Limits... Stop Chart Chart Speed... Depth Cursor Overlay Data... Sonar Features... Ping Speed... Log Sonar Chart Data... 60 Cursor line Depth box 47.6 ft 47.9° 30 34.64 50 Sonar - StoppedAt left, Sonar Page menu with Depth Cursor command selected. At right, sonar chart with the depth cursor active. The line indicates the large fish is 34.64 feet deep.
The cursor can be moved to any location on the screen, letting you pinpoint the depth of a target.
- From the Sonar Page, press MENU | ↓ to DEPTH CURSOR | ENT.
- The depth cursor appears. Press ↓ to lower the cursor line; press ↑ to raise the cursor line.
- To clear the depth cursor, press EXIT.
Depth Range - Automatic
When turned on for the first time, the bottom signal is automatically placed in the lower half of the screen. This is called Auto Ranging and is part of the automatic function. However, depending upon the bottom depth and the current range, you can change the range to a different depth. To do this:
- From the Sonar Page, press MENU | ↓ to DEPTH RANGE| ENT.
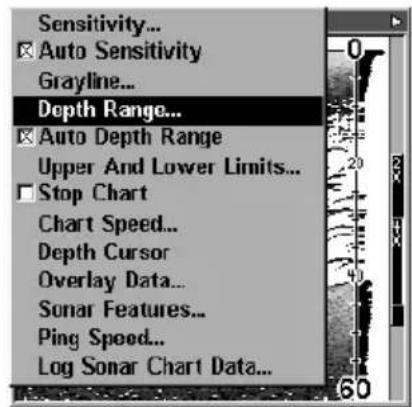
text_image
Sensitivity... Auto Sensitivity Grayline... Depth Range... Auto Depth Range Upper And Lower Limits... Stop Chart Chart Speed... Depth Cursor Overlay Data... Sonar Features... Ping Speed... Log Sonar Chart Data...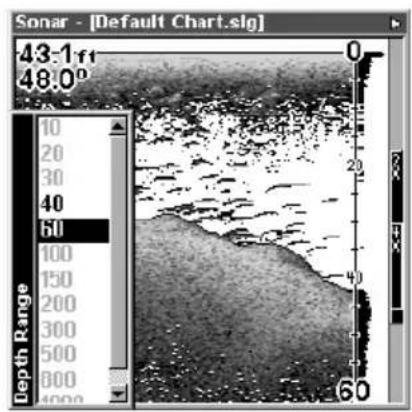
text_image
Sonar - [Default Chart.sg] 43:1 ft 48.0° 10 20 30 40 60 100 150 200 300 500 800 4000 Depth Range 0 20 40 60At left, Sonar Page menu with Depth Range command selected. At right, the Depth Range Control Scale.
- The Depth Range Control Scale appears. Press or to select a different depth range. A black bar highlights the selected range. Range numbers in gray cannot be selected.
- When the new range is selected, press EXIT to clear the menu.
Depth Range - Manual
You have complete control over the range when the unit is in the manual mode. There are 16 depth ranges, from 5 feet to 4,000 feet.
To switch to Manual Depth Range:
- First, turn off automatic depth range. From the Sonar Page, press MENU | ↓ to AUTO DEPTH RANGE | ENT.
- Press to DEPTH RANGE |ENT and the Depth Range Control Scale appears.
- Press ↓ or ↑ to select a different depth range. A horizontal black bar highlights the selected range.
- When the new range is selected, press EXIT to clear the menu.
To turn Auto Depth Range on again:
- From the Sonar Page, press MENU | ↓ to AUTO DEPTH RANGE | ENT | EXIT.
NOTE:
The sonar's depth capability depends on the transducer installation, water and bottom conditions, and other factors.
Depth Range - Upper and Lower Limits
Virtually any segment of the water column can be displayed by using the upper and lower limit feature. This lets you pick the shallow and deep depth range limits that are shown on the screen, provided there is at least 10 feet between the upper and lower limit you select. For example, a range from 12 feet to 34 feet could be used.
Changing the upper and lower limits gives you far greater control over the depth range. This feature lets you "zoom in" the display in almost unlimited combinations. Nearly any segment of the water column, from
the surface to the bottom can be shown. This enlarges the sonar targets to best suit your fishing needs and water conditions.
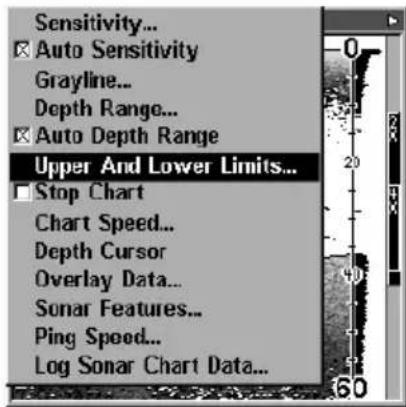
text_image
Sensitivity... Auto Sensitivity Grayline... Depth Range... Auto Depth Range Upper And Lower Limits... Stop Chart Chart Speed... Depth Cursor Overlay Data... Sonar Features... Ping Speed... Log Sonar Chart Data...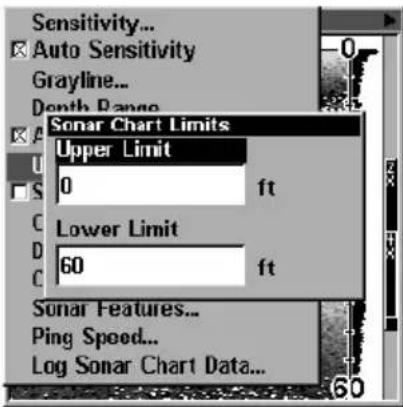
text_image
Sensitivity... Auto Sensitivity Grayline... Depth Range Sonar Chart Limits Upper Limit 0 ft Lower Limit 60 ft Sonar Features... Ping Speed... Log Sonar Chart Data...At left, Sonar Page Menu with Upper and Lower Limits command selected. At right, Sonar Chart Limits menu, with Upper Limit selected.
To change the upper and lower limits:
- From the Sonar Page, press MENU | ↓ to UPPER AND LOWER LIMITS | ENT. The Sonar Chart Limits menu appears, with Upper Limit selected.
- To set the upper limit, press ENT. Press or to change the first number, then press to move the cursor to the next number and repeat until the depth is correct, then press EXIT.
- To set the lower limit, press ↓ to LOWER LIMIT | ENT. Press ↑ or ↓ to change the first number, then press → to move the cursor to the next number and repeat until the depth is correct, then press EXIT | EXIT | EXIT.
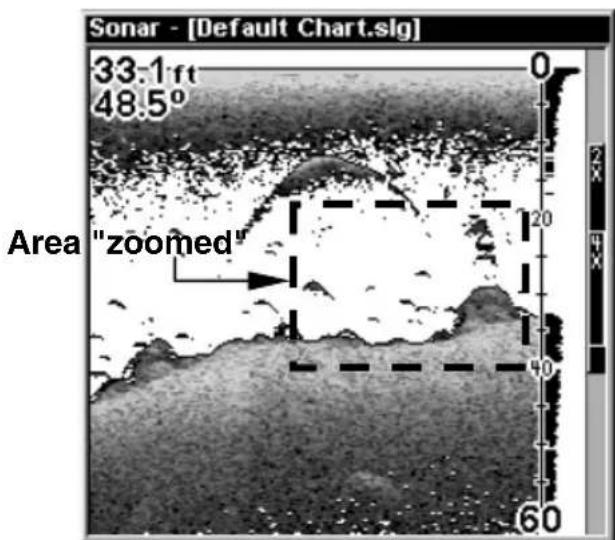
text_image
Sonar - [Default Chart.slg] 33.1 ft 48.5° Area "zoomed" 0 20 40 60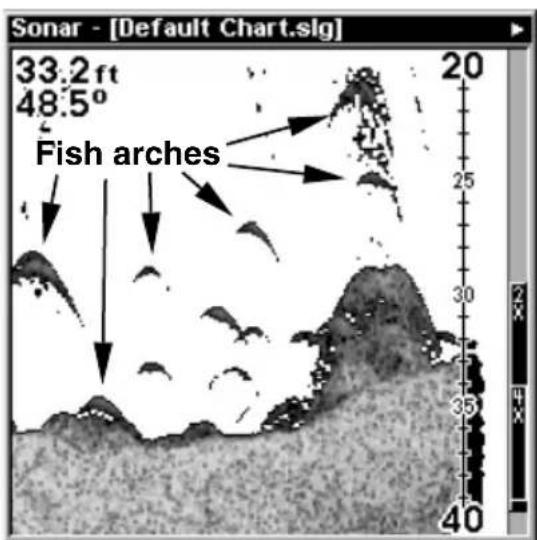
text_image
Sonar - [Default Chart.sg] 33.2 ft 48.5° Fish arches 20 25 30 35 40Normal display, in auto depth range mode, left. At right, display "zoomed" with Upper and Lower Limits focusing on the portion of the water column from 20 feet to 40 feet deep. In the "zoomed" image, note the target definition at lower left, showing a fish holding just above the structure. At top right, two game fish are attacking a school of bait fish.
To turn off upper and lower limits:
From the Sonar Page, press MENU | ↓ to AUTO DEPTH RANGE | ENT | EXIT.
FasTrack™
This feature automatically converts all echoes to short horizontal lines on the display's far right side. The graph on the rest of the screen continues to operate normally. FasTrack gives you a rapid update of conditions directly under the boat. This makes it useful for ice fishing, or when you're fishing at anchor. When the boat is not moving, fish signals are long, drawn out lines on a normal chart display. FasTrack converts the graph to a vertical bar graph that, with practice, makes a useful addition to fishing at a stationary location.
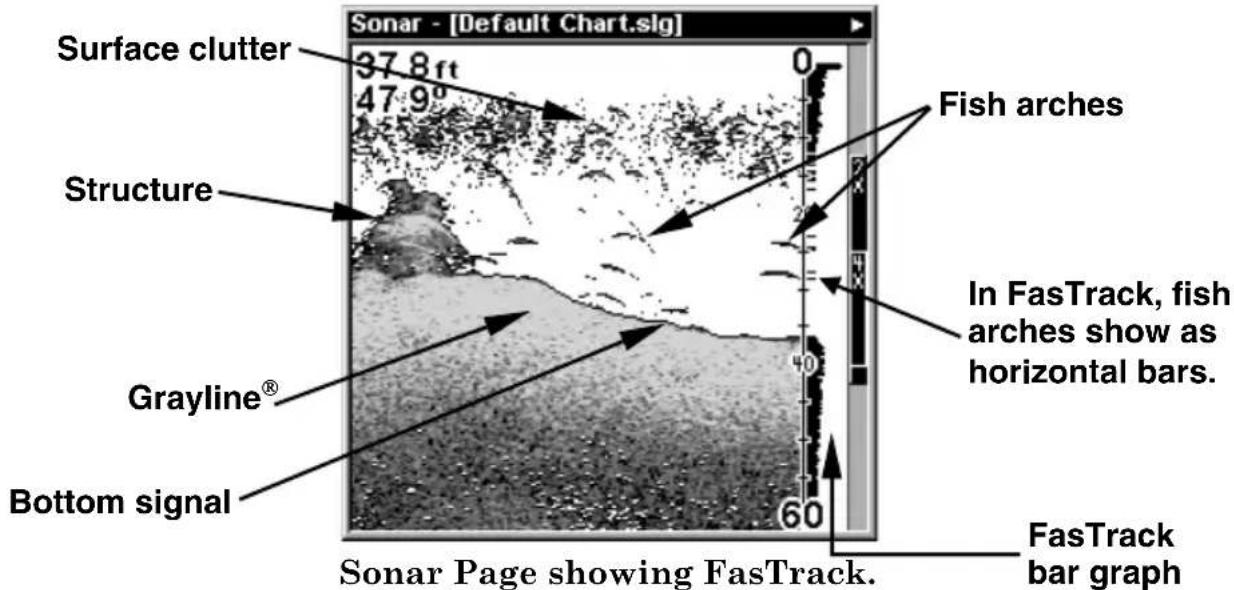
text_image
Sonar - [Default Chart.sg] Surface clutter 37.8 ft 47.9° Fish arches Structure In FasTrack, fish arches show as horizontal bars. Grayline® Bottom signal 60 Sonar Page showing FasTrack. FasTrack bar graphFish I.D. ^TM (Fish Symbols & Depths)
The Fish I.D. feature identifies targets that meet certain conditions as fish. The microcomputer analyzes all echoes and eliminates surface clutter, thermoclines, and other signals that are undesirable. In most instances, remaining targets are fish. The Fish I.D. feature displays fish symbols on the screen in place of the actual fish echoes.
There are several fish symbol sizes. These are used to designate the relative size between targets. In other words, Fish I.D. displays a small fish symbol when it thinks a target is a small fish, a medium fish symbol on a larger target and so on.
The sonar's microcomputer is sophisticated, but it can be fooled. It can't distinguish between fish and other suspended objects such as trotlines, turtles, submerged floats, air bubbles, etc. Individual tree limbs extending outwards from a group of limbs is the hardest object for the Fish I.D. feature to distinguish from fish.
You may see fish symbols on the screen when actually, there are no fish. The reverse is also true. The illustrations on the next page show how Fish I.D. can actually miss fish that are present.
Does that mean Fish I.D. is broken? No — the feature is simply interpreting sonar returns in a specific way to help take some of the work out of reading the screen. Remember: Fish I.D. is one of the many tools we provide so you can analyze your sonar returns for maximum fish finding information. This and other features can help you successfully "see" beneath the boat under varied water and fishing conditions. So, practice with the unit in both the Fish I.D. mode and without to become more familiar with the feature. The default for Fish I.D. is off.
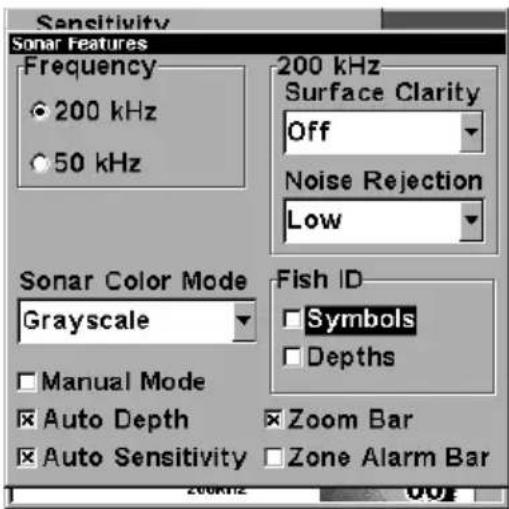
text_image
Sensitivity Sonar Features Frequency 200 kHz 50 kHz 200 kHz Surface Clarity Off Noise Rejection Low Sonar Color Mode Grayscale Fish ID Symbols Depths Manual Mode Auto Depth Zoom Bar Auto Sensitivity Zone Alarm Bar 200kHz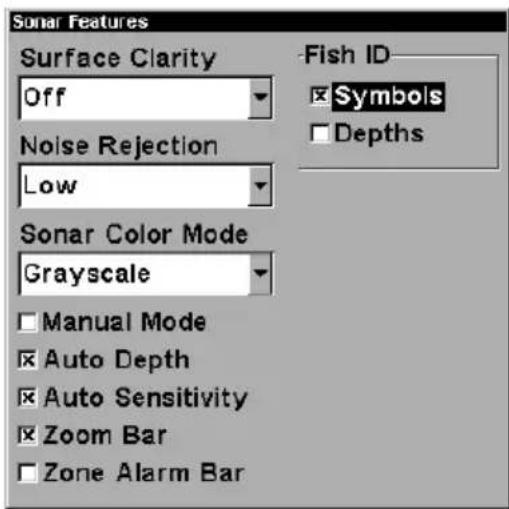
text_image
Sonar Features Surface Clarity Off Noise Rejection Low Sonar Color Mode Grayscale Manual Mode Auto Depth Auto Sensitivity Zoom Bar Zone Alarm Bar Fish ID Symbols DepthsSonar Features menu with Fish I.D. Symbols selected (at left, dual-frequency menu; at right, single-frequency menu). When the check box to the left is checked, the feature is on.
Fig. 1 A
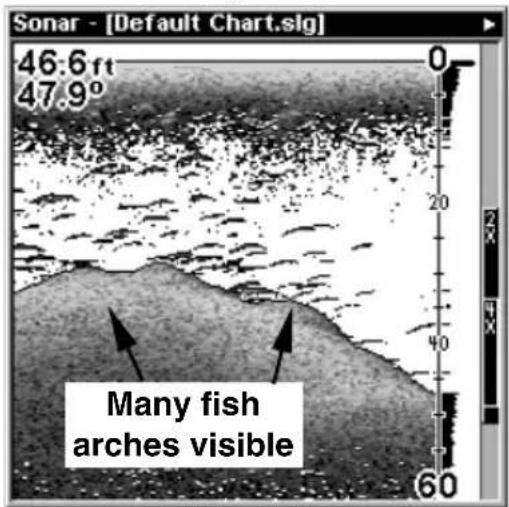
text_image
Sonar - [Default Chart.sg] 46.6 ft 47.9° Many fish arches visibleFig. 2 A
Fig. 1 B
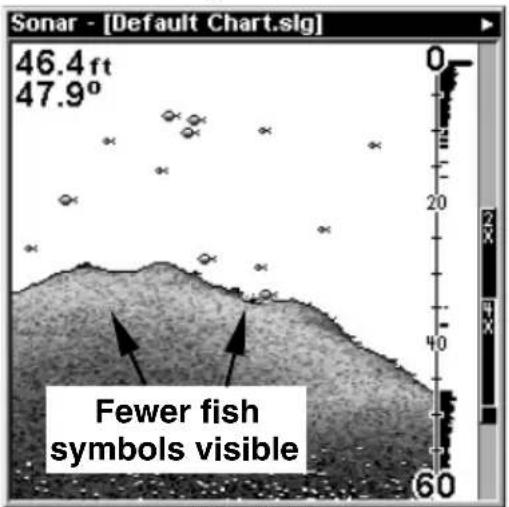
text_image
Sonar - [Default Chart.slg] 46.4 ft 47.9° Fewer fish symbols visibleFig. 2 B
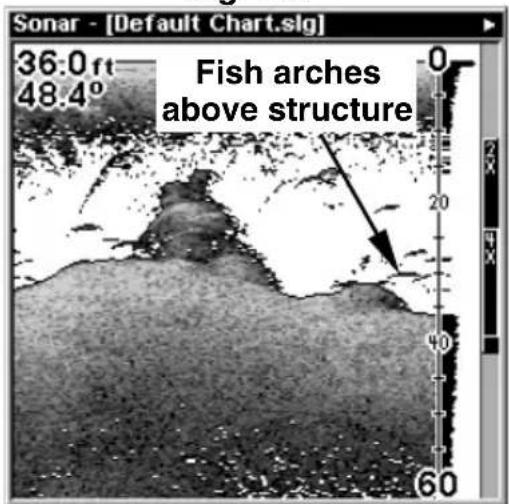
text_image
Sonar - [Default Chart.sg] 36.0 ft 48.4° Fish arches above structure 0 20 40 60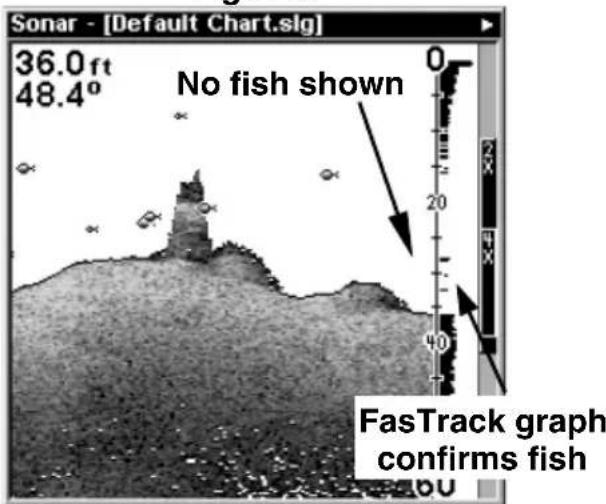
text_image
Sonar - [Default Chart.sg] 36.0 ft 48.4° No fish shown FasTrack graph confirms fishAt left, figures 1A and 2A show Sonar Page in normal chart mode. At right, figures 1B and 2B show the same underwater scene with Fish I.D. turned on. Note how arches are replaced with symbols.
To turn the Fish I.D. feature on:
- From the Sonar Page, press MENU | ↓ to SONAR FEATURES | ENT.
- Press → ↓ or → to Fish ID SYMBOLS | ENT | EXIT | EXIT.
To turn off Fish I.D., repeat the instructions in step 1.
FishTrack™
The FishTrack feature shows the depth of a fish symbol when it appears on the display. This lets you accurately gauge the depth of targets. This feature is available only when the Fish I.D. feature is on. The default setting for FishTrack is off.
To turn on FishTrack:
(Note: These instructions will turn on FishTrack and Fish I.D. at the same time.)
-
From the Sonar Page, press MENU | ↓ to SONAR FEATURES | ENT.
-
Press → ↓ to FISH ID DEPTHS | ENT | EXIT | EXIT.
To turn off FishTrack, repeat the instructions in step 1. Turning off FishTrack in this manner will not turn off Fish I.D. symbols.
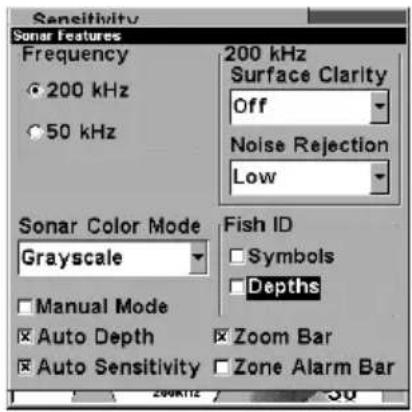
text_image
Sensitivity Sonar Features Frequency 200 kHz 50 kHz 200 kHz Surface Clarity Off Noise Rejection Low Sonar Color Mode Grayscale Fish ID Symbols Depths Manual Mode Auto Depth Zoom Bar Auto Sensitivity Zone Alarm Bar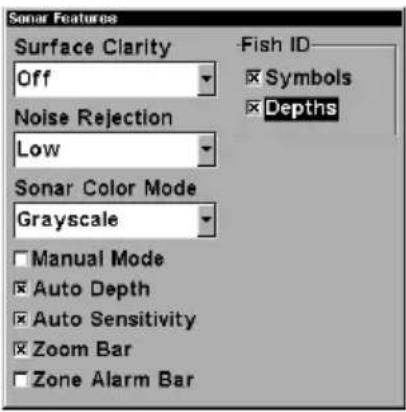
text_image
Sonar Features Surface Clarity Off Noise Rejection Low Sonar Color Mode Grayscale Manual Mode Auto Depth Auto Sensitivity Zoom Bar Zone Alarm Bar Fish ID Symbols Depths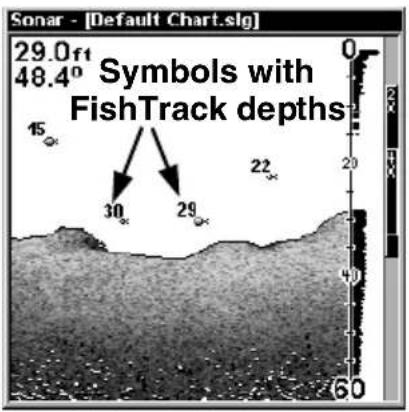
text_image
Sonar - [Default Chart.sg] 29.0f1 48.4° Symbols with FishTrack depths 15 30 29 22 60Sonar Features menu with Fish I.D. Depths selected (at left, dual-frequency menu; center, single-frequency menu). When the check box to the left is checked, the feature is on. At right, Sonar Page showing Fish I.D. symbols and FishTrack depths turned on.
FishReveal™
When displaying actual sonar returns, the FishReveal feature uses 10 levels of gray tones to show fish targets hidden by surface clutter, thermoclines, weed beds and other cover.
The normal mode of operation (with FishReveal turned off) shows the weakest echoes as black and the strongest echoes in light gray. Since all weak echoes are black, fish arches show boldly against the white background. The drawback is that all weak echoes – such as thermoclines – are also emphasized. This can make it hard to distinguish fish signals inside thermoclines or other cover.
In FishReveal mode, the weakest echoes are white and the strongest echoes are black. Echoes in between vary in gray in proportion to their signal strength. The Grayline control determines the range for black to white. Also note that when using FishReveal, we recommend that you turn off Auto Sensitivity and turn up Sensitivity to near maximum.
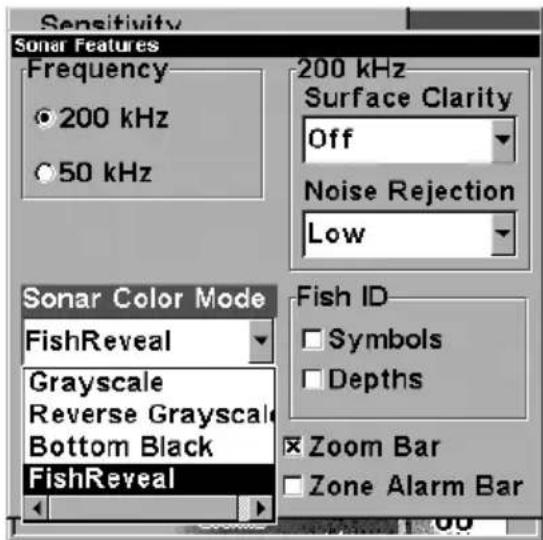
text_image
Sensitivity Sonar Features Frequency 200 kHz 50 kHz 200 kHz Surface Clarity Off Noise Rejection Low Sonar Color Mode FishReveal Grayscale Reverse Grayscale Bottom Black FishReveal Fish ID Symbols Depths Zoom Bar Zone Alarm Bar
text_image
Sonar Features Surface Clarity Off Noise Rejection Low Sonar Color Mode FishReveal Grayscale Reverse Grayscale Bottom Black FishReveal Zoom Bar Zone Alarm Bar Fish ID Symbols DepthsSonar Color Mode command with FishReveal selected (at left, dual-frequency menu; at right, single-frequency menu).
To turn FishReveal on:
- From the Sonar Page, press MENU | ↓ to SONAR FEATURES | ENT.
- Press ↓ to SONAR COLOR MODE | ENT | ↓ to FISHREVEAL | ENT.
- Press EXIT |↑ to AUTO SENSITIVITY | ENT |↑ to SENSITIVITY | ENT.
- Press ↑ until the Sensitivity Control Bar reads 100% (or close to it), then press EXIT. (If you reach the maximum limit, a tone sounds.)
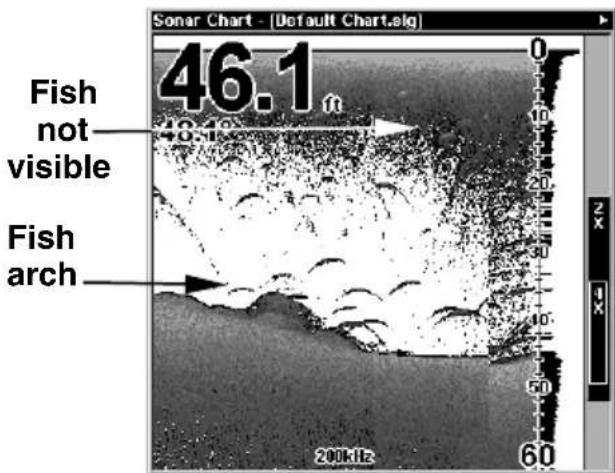
text_image
46.1 Fish not visible Fish arch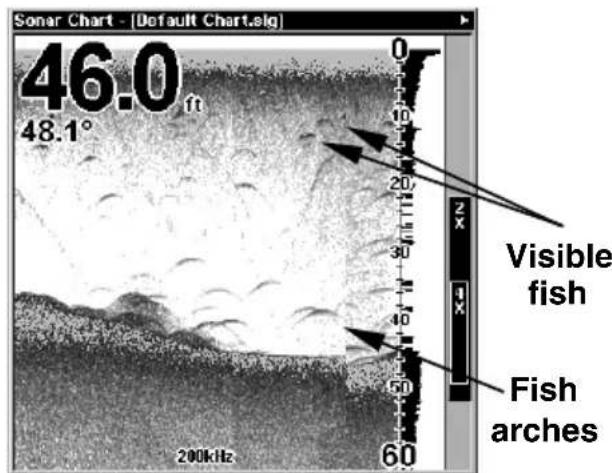
text_image
Sonar Chart - [Default Chart.sg] 46.0 48.1° 0 10 20 30 40 50 60 Visible fish Fish arches 200kHzSonar chart in regular grayscale mode, left, and in FishReveal mode, right. Notice how shallow fish formerly hidden in the surface clutter become visible in FishReveal mode.
NOTE:
Water conditions vary greatly, and that affects sonar performance. Under certain conditions, FishReveal will show you more fish than normal grayscale mode, but the reverse will be true in other circumstances. We suggest you become familiar with both modes so you can best match your sonar's performance to the current water conditions.
Frequency (Change Transducer Frequency) (LMS-320DF only)
The LMS-320DF transducer operates with both 200 kHz and 50 kHz. The 200 kHz frequency has a 12° cone angle and the 50 kHz frequency has a 35° cone angle.
The default frequency is 200 kHz, which is best for use in shallow water (about 300 feet or less). This frequency is the best choice for about 80 percent of the fresh and salt water sport fishing applications. When you get into very deep salt water, 300 to 500 feet or deeper, the 50 kHz frequency is the best choice.
The 200 kHz transducer will give you better detail and definition, but less depth penetration. The 50 kHz transducer will give you greater depth penetration, but a little less detail and less definition. (Remember, all sonar units typically read deeper in fresh water than in salt water.)
There is a common exception to these rules of thumb. Some fishermen on freshwater lakes (or the ocean) using downriggers like to see them on the sonar. In many of those cases, you'll see a 50 kHz transducer frequency in use because the wider cone angle lets them watch the bait.
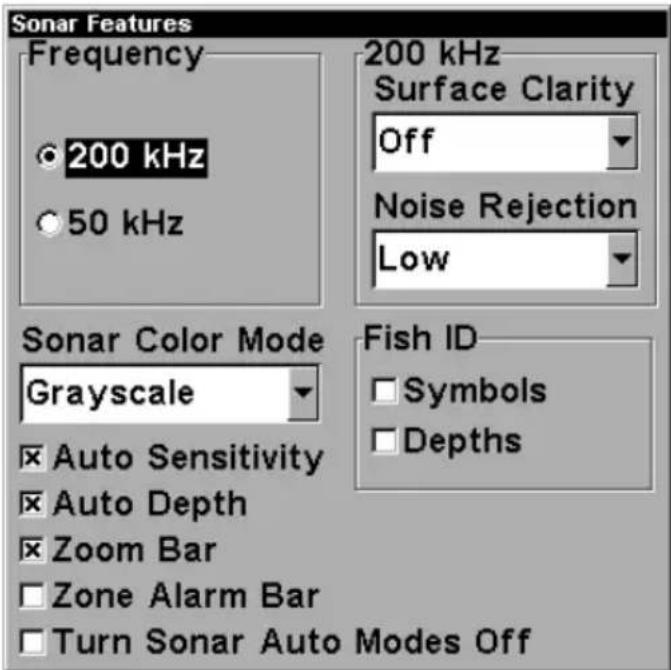
text_image
Sonar Features Frequency 200 kHz 50 kHz 200 kHz Surface Clarity Off Noise Rejection Low Sonar Color Mode Grayscale Fish ID Symbols Depths Auto Sensitivity Auto Depth Zoom Bar Zone Alarm Bar Turn Sonar Auto Modes OffSonar Features menu with a frequency of 200 kHz selected. To change the frequency setting to 50 kHz:
- From the Sonar Page, press MENU | ↓ to SONAR FEATURES | ENT.
- Press ↓ to 50 kHz | ENT.
- Press EXIT | EXIT to clear the menu.
To change the frequency setting to 200 kHz:
-
From the Sonar Page, press MENU | ↓ to SONAR FEATURES | ENT | ENT.
-
Press EXIT | EXIT to clear the menu.
Grayline®
Grayline lets you distinguish between strong and weak echoes. It "paints" gray on targets that are stronger than a preset value. This allows you to tell the difference between a hard and soft bottom. For example, a soft, muddy or weedy bottom returns a weaker signal which is shown with a narrow or no gray line. A hard bottom returns a strong signal which causes a wide gray line.
If you have two signals of equal size, one with gray and the other without, then the target with gray is the stronger signal. This helps distinguish weeds from trees on the bottom, or fish from structure.
Grayline is adjustable. Experiment with your unit to find the Grayline setting that's best for you.
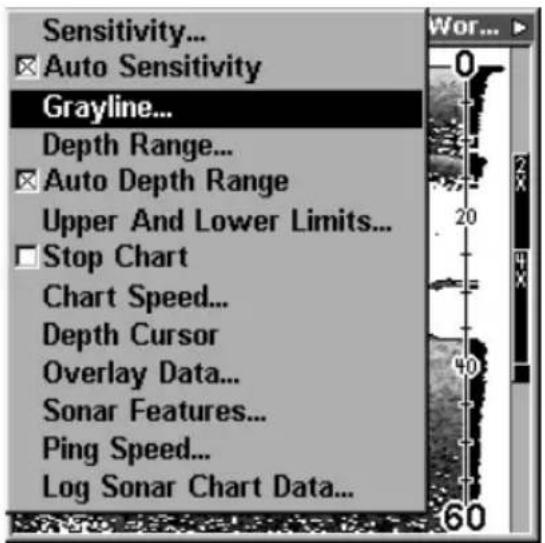
text_image
Sensitivity... Auto Sensitivity Grayline... Depth Range... Auto Depth Range Upper And Lower Limits... Stop Chart Chart Speed... Depth Cursor Overlay Data... Sonar Features... Ping Speed... Log Sonar Chart Data...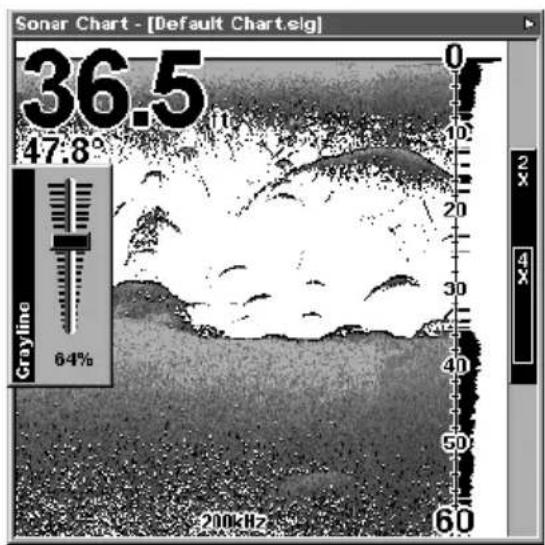
text_image
Sonar Chart - [Default Chart.sig] 36.5 47.8° Grayline 64% 200kHz 60At left, Sonar Page menu with Grayline command selected. At right, the Grayline control bar.
To adjust the Grayline level:
-
From the Sonar Page, press MENU | ↓ to GRAYLINE | ENT.
-
The Grayline Control Bar appears. Press ↓ to decrease Grayline; press ↑ to increase Grayline.
-
When it's set at the desired level, press EXIT.
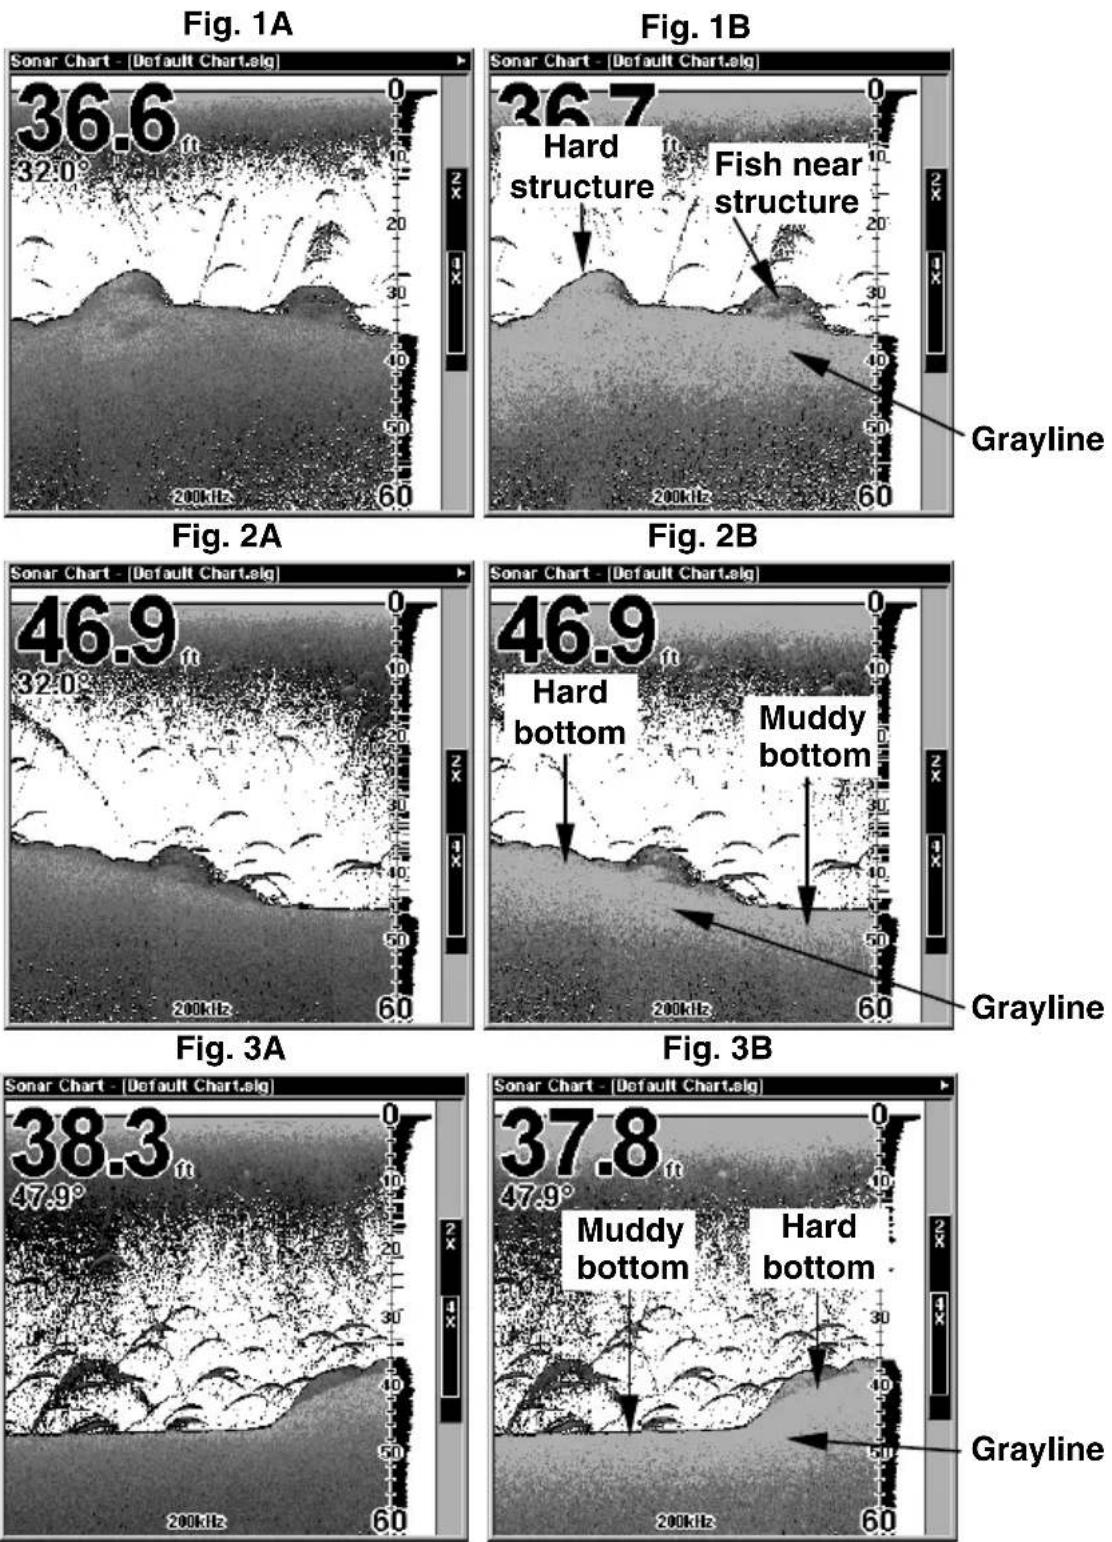
This series of figures shows how different Grayline settings can reveal more information. The "A" figures to the left show locations with Grayline set at the factory level of 64 percent. At right, the "B" figures show the same locations with Grayline increased to 84 percent. In Figure 1B, no fish are near the left structure, but the right structure shows fish holding next to the structure. Notice in figures 2B and 3B how Grayline displays a hard, rocky bottom (the drop-offs) with a wider gray line. The muddier bottom below those drop-offs appears as a narrower gray line.
HyperScroll™
See the entry on Ping Speed, which controls the HyperScroll feature.
Log Sonar Chart Data
If you have an MMC installed in the unit, the sonar data shown on the screen can be saved to the MMC. This can be played back at any time (to play a recorded sonar chart log, see the entry in this section for Sonar Simulator). If you have a personal computer and Internet access, visit our web site, www.lowrance.com, and download the free Sonar Viewer and the emulator for your unit. These programs will allow you to replay sonar logs on your personal computer.
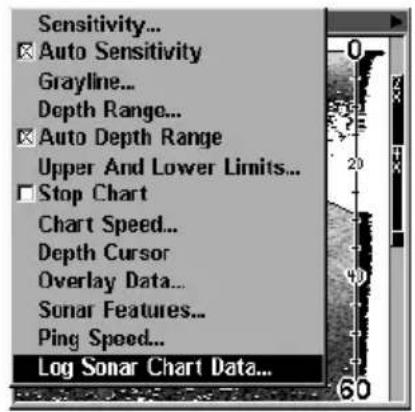
text_image
Sensitivity... Auto Sensitivity Grayline... Depth Range... Auto Depth Range Upper And Lower Limits... Stop Chart Chart Speed... Depth Cursor Overlay Data... Sonar Features... Ping Speed... Log Sonar Chart Data...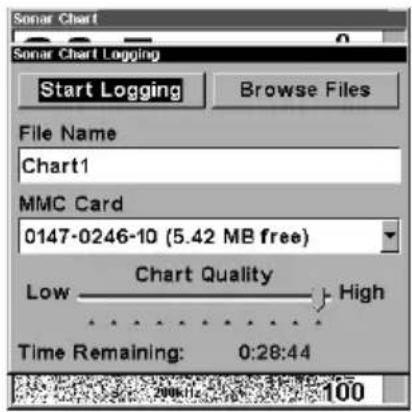
text_image
Sonar Chart Sonar Chart Logging Start Logging Browse Files File Name Chart1 MMC Card 0147-0246-10 (5.42 MB free) Low Chart Quality High Time Remaining: 0:28:44 200KHz 100At left, the Sonar Page menu with the Log Sonar Chart Data command selected. At right, Sonar Chart Logging menu, with the Start Logging command selected. The menu says the MMC has 5.42 MB of free space, which will record the scrolling chart for 28 minutes and 44 seconds.
To record or log chart data:
-
Press MENU | ↓ to LOG SONAR CHART DATA | ENT.
-
To record data using the default settings, press ENT. The menu clears and the Sonar Page title bar shows the name of the file you are recording. Warning messages will appear as recording time begins to run out.
NOTE:
You can change any of the settings by using the cursor arrows to highlight different commands. Select FILE NAME if you want to change the name. Select CHART QUALITY if you want to lower the file quality and record for a longer period of time. After you've changed the settings, select START LOGGING
Noise Rejection
See the entry on Advanced Signal Processing in this section.
Overlay Data
To change the digital data shown on top of the Sonar Page or the Map Page:
First, press PAGES, use → or ← to select a Page Name, then press EXIT.
To select data for display:
- From the Map or Sonar page, press MENU | ↓ to OVERLAY DATA | ENT.
- Press ↓ or ↑ to select Data Type | ENT.
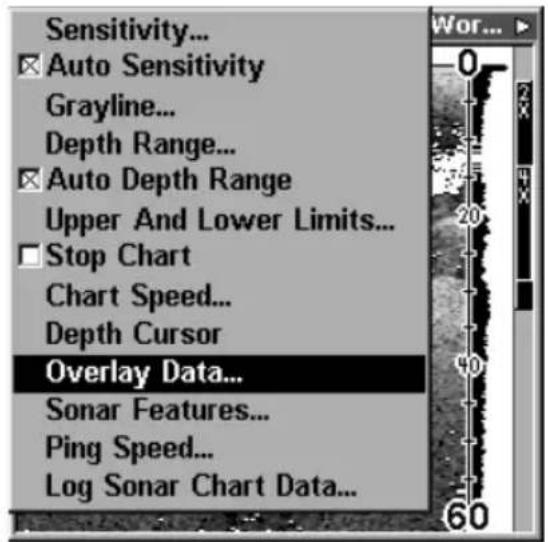
text_image
Sensitivity... Auto Sensitivity Grayline... Depth Range... Auto Depth Range Upper And Lower Limits... Stop Chart Chart Speed... Depth Cursor Overlay Data... Sonar Features... Ping Speed... Log Sonar Chart Data...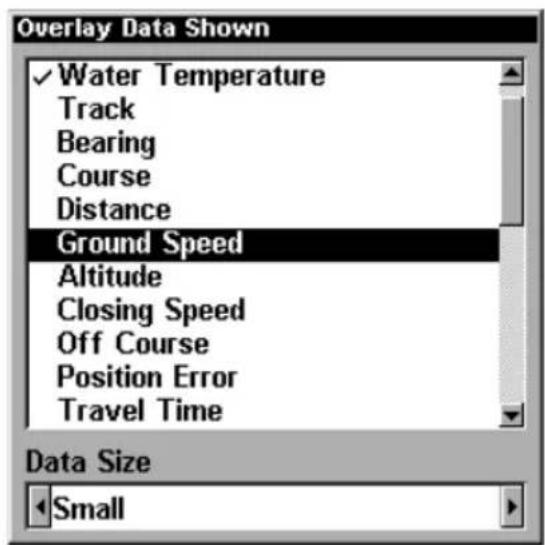
text_image
Overlay Data Shown ✓ Water Temperature Track Bearing Course Distance Ground Speed Altitude Closing Speed Off Course Position Error Travel Time Data Size SmallOverlay Data command on the Sonar Menu, at left. Overlay Data Shown selection menu, right. In this example, we scrolled down the data list to highlight "Ground Speed."
When selected, the data type shifts to the top of the data list and a check mark appears beside the data type. (If you wish, you may now use ↓ or ↑ to select other Data Types for display.)
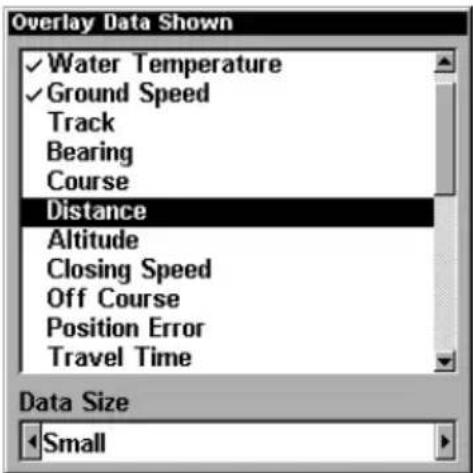
text_image
Overlay Data Shown ✓ Water Temperature ✓ Ground Speed Track Bearing Course Distance Altitude Closing Speed Off Course Position Error Travel Time Data Size SmallData list showing "Ground Speed" selected to display on Sonar Page.
- To return to the previous page, press EXIT|EXIT.
To turn off displayed data:
-
From the Map or Sonar page, press MENU | ↓ to OVERLAY DATA | ENT.
-
Press ↓ or ↑ to select Data Type|ENT. The selected data type disappears from the top of the list and reverts to its previous, unchecked position. (If you wish, you may now use ↓ or ↑ to select other Data Types to turn off.)
-
To return to the previous page, press EXIT | EXIT.
To change displayed data font size:
-
From the Map or Sonar page, press MENU | ↓ to OVERLAY DATA | ENT.
-
Press ↓ or ↑ to select Data Type | press → or ← to Data Size | EXIT.
The selected data type will be displayed in the new size. (To change the font size for another Data Type, press ENT and repeat these steps, beginning with step two above.)
- To return to the previous page, press EXIT.
Tip:
If you wish, you can change the displayed data font size when you select a data type:
- From the Map or Sonar page, press MENU|↓ to OVERLAY DATA|ENT.
- Press ↓ or ↑ to select Data Type | press → or ← to select Data Size | ENT.
The data will be shown in the new font size. To return to the previous page, press EXIT | EXIT.
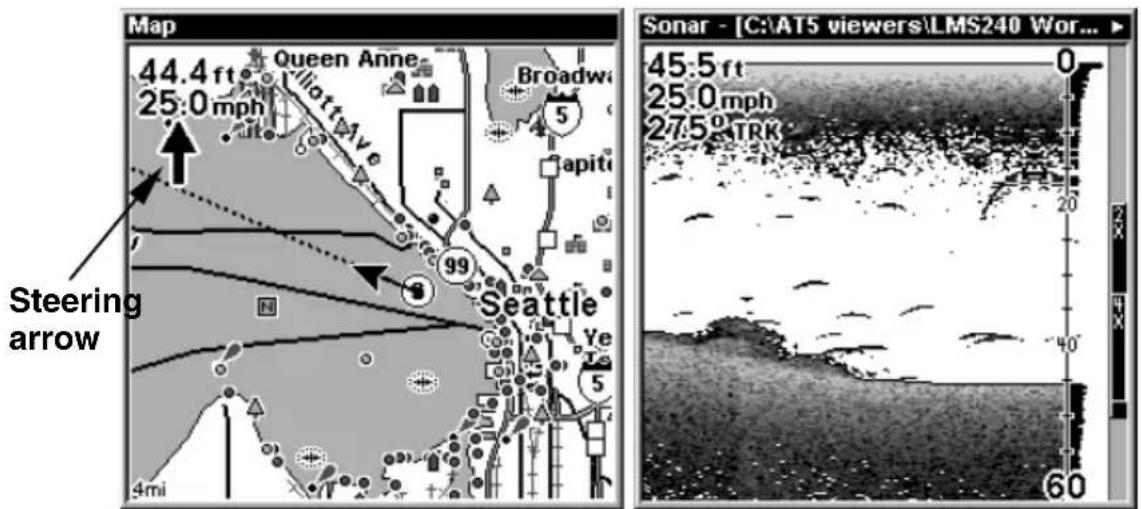
text_image
Map 44.4 ft 25:0 mph Queen Anne Iliott Ave Broadway 5 apiti 99 Steering arrow Seattle Ye 5 4mi Sonar - [C:\AT5 viewers\LMS240 Wor... 45.5 ft 25.0 mph 27.5° TRK 0 20 40° 60At left, Map Page showing boat cruising Puget Sound, Washington, with Overlay Data turned on. This example shows Depth, Ground Speed and the Steering Arrow. Note that the Steering Arrow always points directly to the destination you are navigating toward. In this case, the boater is headed on a northwesterly course of 275^ . Since the helmsman is on course, the Steering Arrow is pointing straight ahead. If the helmsman veered off course, the arrow would show which direction to steer to get back on course toward the destination. At right, Sonar Page with Overlay Data turned on. This example shows Depth, Ground Speed and the Track the boat is following.
Ping Speed & HyperScroll™
Ping Speed controls the rate at which the transmitter and transducer broadcast sonar sound waves — pings — into the water. The unit has a default ping speed of 50 percent. At normal boating speeds, this automatically provides enough return echoes to refresh the screen and scroll the chart at maximum chart speed.
However, when you are running at high speeds, or just want the fastest possible screen update, you may want to use the HyperScroll™ feature. When you change the Ping Speed to any setting greater than 50 percent, the unit automatically enters HyperScroll mode.
These faster ping rates allow you to maintain a high-detail picture on the screen, and the screen refresh rate and chart scroll speed can keep pace with the boat as it moves quickly over the bottom terrain.
When using HyperScroll, you may also need to manually decrease the sensitivity for optimum performance. Depending on water depth and other conditions, HyperScroll may cause a second bottom echo to return to the transducer during the next ping cycle, or sounding. This can result in a large amount of clutter appearing on the screen. If this occurs, just decrease the sensitivity to a level that eliminates the clutter. When you turn HyperScroll off, you can return to your original sensitivity level.
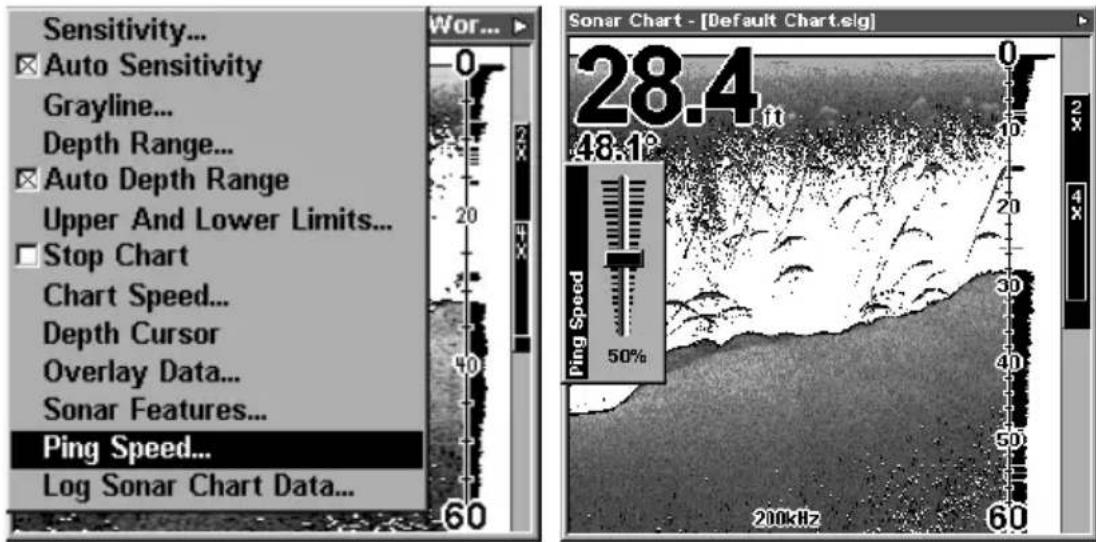
text_image
Sensitivity... Auto Sensitivity Grayline... Depth Range... Auto Depth Range Upper And Lower Limits... Stop Chart Chart Speed... Depth Cursor Overlay Data... Sonar Features... Ping Speed... Log Sonar Chart Data... Wor... 28.4 48.1° 0 10 20 30 40 50 60 Pings Full 50% 200kHz 60 Sonar Chart - [Default Chart.elg]At left, Sonar Menu with Ping Speed command selected. Ping Speed Control Bar, right, at default setting.
To change Ping Speed:
-
From the Sonar Page, press MENU | ↓ to PING SPEED | ENT.
-
The Ping Speed Control Bar appears. Press to increase ping speed; press to decrease ping speed. When it's set at the desired level, press EXIT.
To adjust Sensitivity:
-
From the Sonar Page, press MENU|ENT.
-
The Sensitivity Control Bar appears. Press ↓ to decrease sensitivity; press ↑ to increase sensitivity. When it's set at the desired level, press EXIT. (When you reach the maximum or minimum limit, a tone sounds.)
To turn off HyperScroll:
-
From the Sonar Page, press MENU | ↓ to PING SPEED | ENT.
-
The Ping Speed Control Bar appears. Press↓ to decrease ping speed to 50 percent. When it's set at the desired level, press EXIT.
When you boost ping speed and switch into HyperScroll, the width of the FasTrack bar graph display doubles in width at the right side of the screen. The allows you to better see the virtually instantaneous sonar returns, just as you would on a flasher sonar unit. For more information on FasTrack, see it's entry in this section.
Reset Options
This command is used to reset all features, options and settings to their original factory defaults. This is useful when you have changed several settings and want to return the unit to basic automatic operation.
-
Press MENU | MENU | ↓ to SYSTEM SETUP | ENT | ↓ to RESET OPTIONS | ENT.
-
Press ← to YES | ENT.
-
All the menus are cleared and the unit reverts to the Map Page at the 4000 mile zoom range, just as if you had turned it on for the first time. All options have been returned to the factory settings.
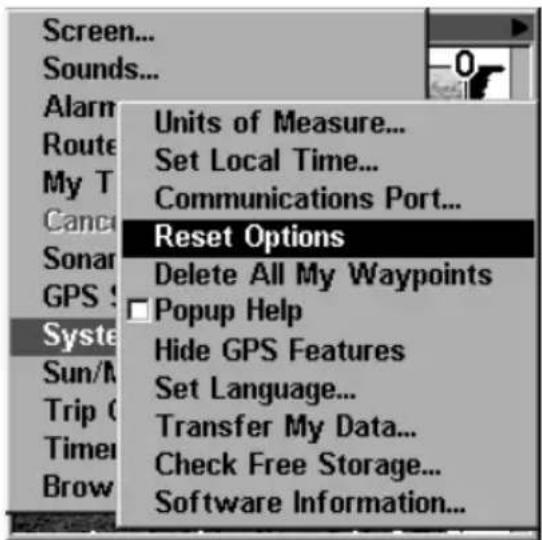
text_image
Screen... Sounds... Alarm Route My T Cancel Sonar GPS Syste Sun/M Trip (C Timer Brow Units of Measure... Set Local Time... Communications Port... Reset Options Delete All My Waypoints □ Popup Help Hide GPS Features Set Language... Transfer My Data... Check Free Storage... Software Information...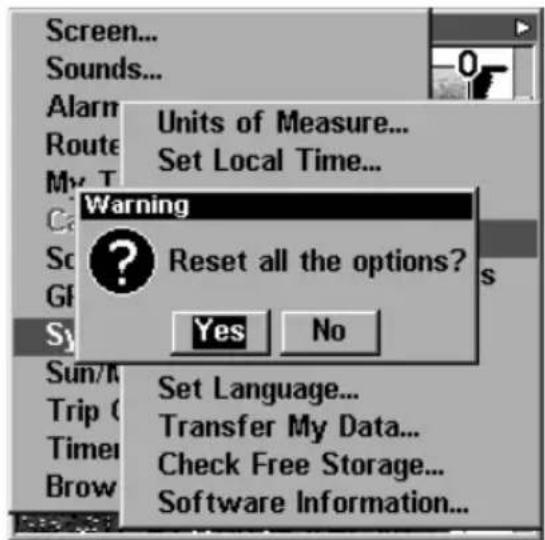
text_image
Screen... Sounds... Alarm Route My T C Sc G Sy Warning Reset all the options? Yes No Sun/M Trip Timer Brow Set Language... Transfer My Data... Check Free Storage... Software Information...At left, System Setup menu with Reset Options command selected. At right, the Reset Options dialog box, with "Yes" selected.
NOTE:
Reset Options does not erase any waypoints, routes, plot trails, or sonar logs.
Reset Water Distance
The sonar chart's Digital Data display option includes a window that shows distance traveled, called Water Distance ("W Distance"). This information is calculated from an optional water speed sensor, not the GPS. The Water Distance window can be reset to zero using the Reset Water Distance command.
Press MENU|MENU|↓ to SONAR SETUP|ENT|↓ to RESET WATER DISTANCE|ENT. The menus are cleared and the water distance is reset to 0.00.
Set Keel Offset
This unit measures water depth from the face of the transducer. Since the transducer is installed below the water surface, the distance displayed by the digital depth, chart depth scale, chart cursor or fish symbols is not the exact water depth. If the transducer is 1 foot below the surface, and the screen shows the water depth as 30 feet, then the actual depth is 31 feet.
On sailboats or other large vessels with deep drafts, the distance between the transducer installation and the keel or lower engine unit can be several feet. In those cases, an inexact depth reading could result in grounding or striking underwater structure. The Keel Offset feature eliminates the need for the navigator to mentally calculate how much water is under his keel.
Keel Offset lets you calibrate the digital depth: chart depth scale, chart cursor depth and fish symbol depth displayed on the screen. To calibrate the depth indicators, first measure the distance from the face of the transducer to the lowest part of the boat. In this example, we will use 3.5 feet. This will entered as a negative 3.5 feet, which makes the depth indicators perform as if the transducer's lower in the water than it really is.
- Press MENU | MENU | ↓ to SET KEEL OFFSET | ENT.
- The Keel Offset dialog box appears. Press ↓ to change the plus (+) sign to a minus (−) sign.
- Press → to the first number, then press ↑ to change the number to 3
- Press to the second number, then press to change the number to 5, then press EXIT. The depth indicators now accurately show the depth of water beneath the keel.
NOTE:
If knowing the exact depth of water beneath the keel is less important, you can calibrate the depth indicators so that they show the actual water depth from surface to bottom. To do this, first measure the distance from the face of the transducer up to the surface (the water line on the boat). In this example, we will use 1.5 feet. This will be entered as a positive 1.5 feet, which makes the depth indicators perform as if the transducer's higher in the water than it really is.
- Press MENU | MENU | ↓ to SET KEEL OFFSET | ENT.
- The Keel Offset dialog box appears with a plus (+) sign at the front of the box.
- Press to the first number, then press to change the number to 1.
- Press to the second number, them press to change the number to 5, then press EXIT. The depth indicators now accurately show the water depth from surface to bottom.
Sensitivity & Auto Sensitivity
The sensitivity controls the ability of the unit to pick up echoes. Sensitivity can be adjusted, because water conditions vary greatly. A low sensitivity level (from zero to 50 percent) excludes much of the bottom information, fish signals, and other target information.
High sensitivity levels let you see this detail, but it can also clutter the screen with many undesired signals. Typically, the best sensitivity level shows a good solid bottom signal with Grayline and some surface clutter.
Automatic Sensitivity
The default sensitivity mode is automatic. The unit bases the sensitivity level on water depth and conditions. When the unit is in the automatic mode, sensitivity is automatically adjusted to keep a solid bottom signal displayed, plus a little more power. This gives it the capability to show fish and other detail.
However, situations occur when it becomes necessary to increase or decrease the sensitivity. This typically happens when you wish to see more detail, so an increase in sensitivity is indicated. Or, wave action and boat wakes can create enough tiny air bubbles to clutter much of the water column. In that case, a decrease in sensitivity is indicated to reduce some of the clutter.
The control bar used to adjust sensitivity up or down is the same whether the unit is in the automatic or manual mode. In automatic you
can adjust sensitivity up to 100 percent but the unit will limit your minimum setting. In auto, the unit will continue to make small adjustments, allowing for the setting you selected.
In manual mode, you have complete control over sensitivity, with the ability to set it anywhere from zero to 100 percent. Once you select a level in manual, the unit will continue to use that exact sensitivity setting until you change it or revert to auto mode.
To adjust sensitivity in auto mode:
-
Press MENU | ENT.
-
The Sensitivity Control Bar appears. Press ↓ to decrease sensitivity; press ↑ to increase sensitivity. When it's set at the desired level, press EXIT. (When you reach the maximum or minimum limit, a tone sounds.)
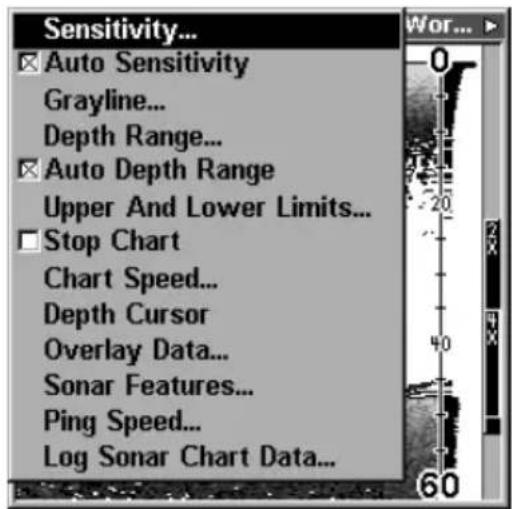
text_image
Sensitivity... Auto Sensitivity Grayline... Depth Range... Auto Depth Range Upper And Lower Limits... Stop Chart Chart Speed... Depth Cursor Overlay Data... Sonar Features... Ping Speed... Log Sonar Chart Data...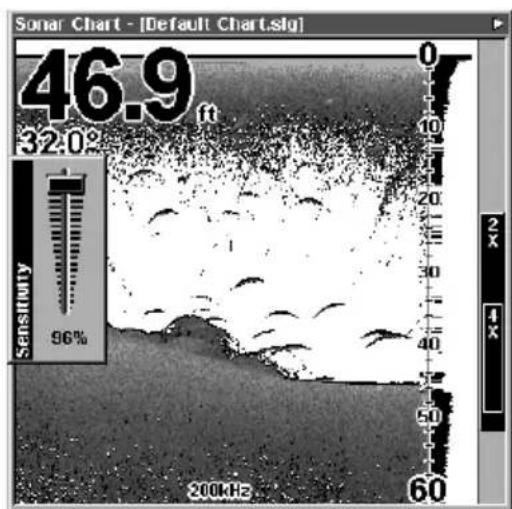
text_image
Sonar Chart - [Default Chart.stg] 46.9 ft 32.0° Sensitivity 96% 200kHz 60 0 10 20 30 40 50 60 2 X 4 XAt left, Sonar Menu with Sensitivity command selected. At right, the Sensitivity Control Bar.
To adjust sensitivity in manual mode:
-
First, turn off Auto Sensitivity: from the Sonar Page, press MENU | ↓ to AUTO SENSITIVITY | ENT.
-
Press ↑ to SENSITIVITY|ENT and the Sensitivity Control Bar appears. Press ↓ or ↑ to pick a different sensitivity setting. When it's set at the desired level, press EXIT.
To turn Auto Sensitivity back on:
From the Sonar Page, press MENU | ↓ to AUTO SENSITIVITY | ENT | EXIT.
NOTE:
To return to the original factory setting for Auto Sensitivity, see the entry in this section on Reset Options. If sensitivity is in manual mode, the Reset Options command will switch back to Auto and reset the factory setting at the same time.
Tip:
For quicker sensitivity adjustments, try leaving the Sensitivity Control Bar on the screen as the chart scrolls. You can see the changes on the screen as you press the up or down arrows. This is handy when there's a lot of clutter in the water, and you are matching the sensitivity to rapidly changing water conditions.
Sonar Color Mode
The default color scheme for the sonar chart is grayscale, but we offer other variations to suit your viewing preferences. You can select the chart to be displayed in reverse grayscale, bottom black or FishReveal mode. (For more information on FishReveal, see the entry on that topic elsewhere in this section.)
To change the chart mode color scheme:
- From the Sonar Page, press MENU | ↓ to SONAR FEATURES | ENT.
- Press ↓ to SONAR COLOR MODE | ENT.
- Press ↓ or ↑ to Mode Name | ENT.
- Press EXIT | EXIT to return to the Sonar Page.
Sonar Page & Sonar Chart Display Options
The Pages Menu offers five chart display options for dual-frequency models and four options for single-frequency models. To access them, press PAGES | ← or → to SONAR | ↓ to Option Name | EXIT.
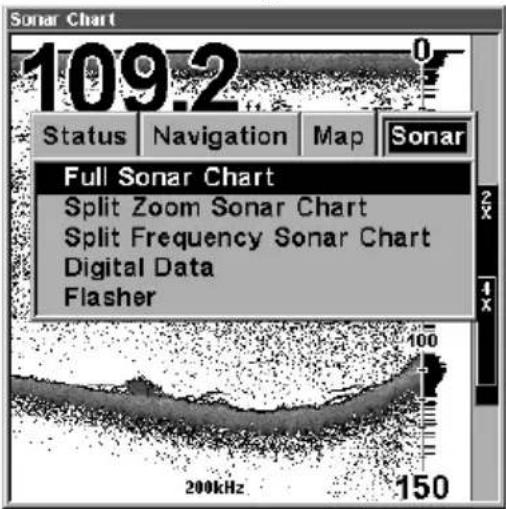
text_image
109.2 Status Navigation Map Sonar Full Sonar Chart Split Zoom Sonar Chart Split Frequency Sonar Chart Digital Data Flasher 200kHz 150Pages Menu, showing sonar chart display options.
Full Sonar Chart
This is the default mode used when the unit is turned on for the first time or when it's reset to the factory defaults.
The bottom signal scrolls across the screen from right to left. Depth scales on the right side of the screen aid in determining the depth of targets. The line at the top of the screen represents the surface. The
bottom depth and surface temperature (if equipped with a temperature sensor or a transducer with a temp sensor built in) show at the top left corner of the screen.
The FasTrack™ display shows just to the right of the scale. This changes all echoes into short horizontal bars, replicating a flasher sonar. The zoom bar on the far right shows the area that's zoomed when the zoom is in use. (See the Zoom section for more information.)
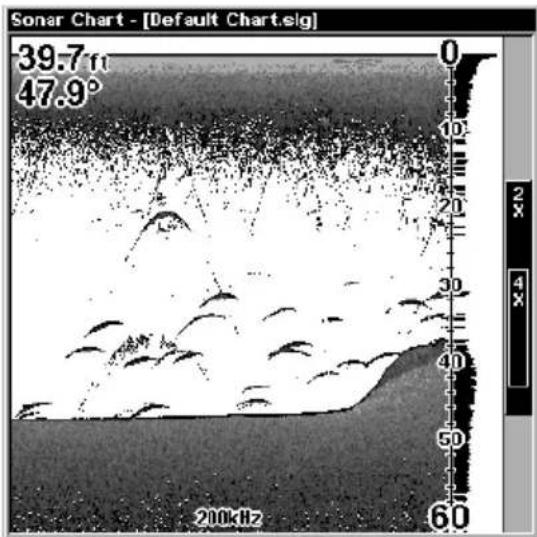
text_image
Sonar Chart - [Default Chart.elg] 39.7 47.9° 200kHzFull Sonar Chart. The Overlay Data (depth and water temperature) are both set to the small text size.
Split Zoom Sonar Chart
A split chart shows the underwater world from the surface to the bottom on the right side of the screen. The left side shows an enlarged version of the right side. The zoom range shows at the bottom left corner of the screen.
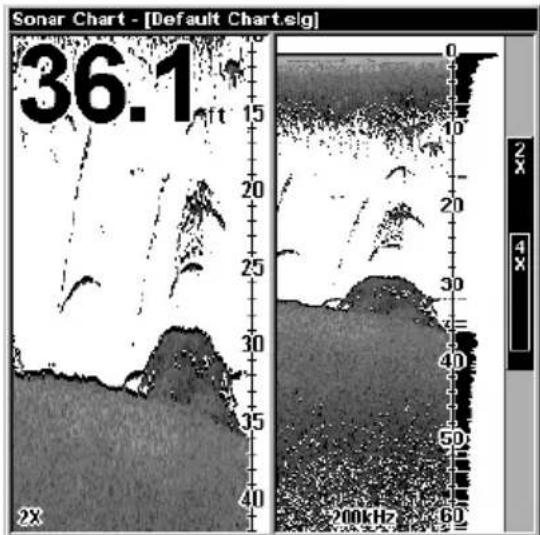
text_image
36.1 ft 15 20 25 30 35 40 2X 200kHz 60 0 10 20 30 40 50 60 Sonar Chart - [Default Chart.elg] 2 X 4 X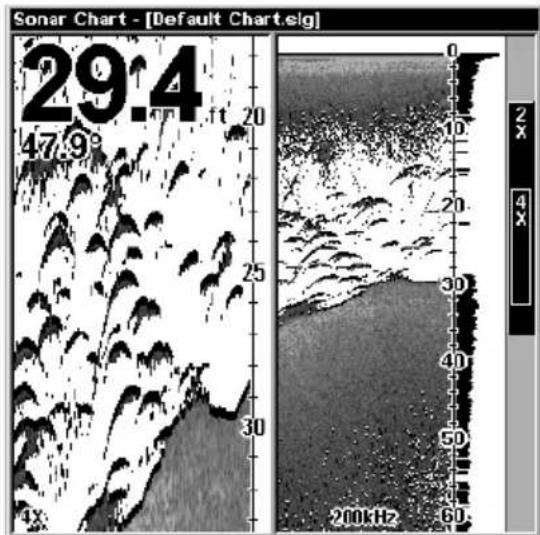
text_image
Sonar Chart - [Default Chart.elg] 29:4 47.9° 11 20 25 30 0 10 20 30 40 50 60 200HzSplit Zoom Sonar Chart. Image at left shows the left window zoomed to 2X. The right image shows the left window zoomed to 4X. The depth overlay data is set to the default large text size; the water temperature is set to the small text size.
Split Frequency Sonar Chart (LMS-320DF only)
This page shows sonar data from the 50 kHz transducer element on the left side of the screen and data from the 200 kHz transducer on the right side. All other functions and features are the same as the Full Chart page.
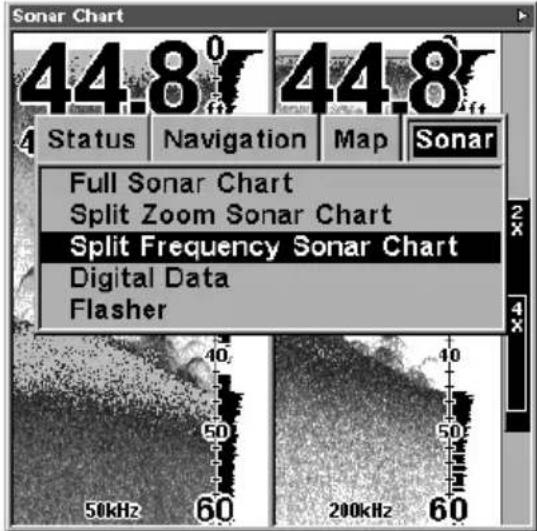
text_image
Sonar Chart 44.80 T 44.8 Status Navigation Map Sonar Full Sonar Chart Split Zoom Sonar Chart Split Frequency Sonar Chart Digital Data Flasher 50kHz 60 200kHz 60Split Frequency Sonar Chart page, with 50 kHz view at left and 200 kHz view at right.
You can adjust the sensitivity in each window.
To adjust sensitivity in auto mode:
- Press MENU | ENT.
- The unit asks which you wish to adjust. Press or to select the one you want | ENT.
- The Sensitivity Control Bar appears. Press ↓ to decrease sensitivity; press ↑ to increase sensitivity. When it's set at the desired level, press EXIT. (When you reach the maximum or minimum limit, a tone sounds.)
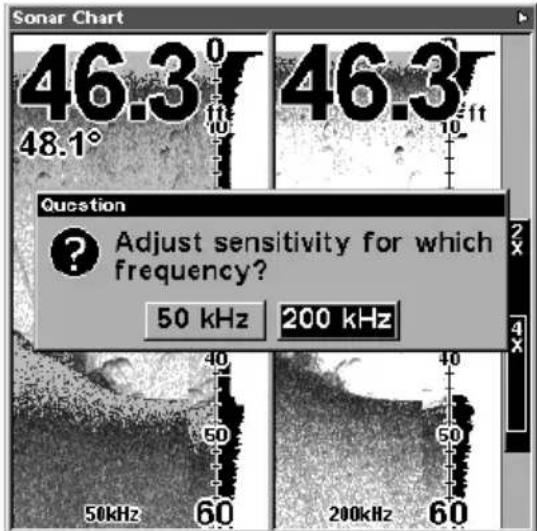
text_image
Sonar Chart 46.3° 48.1° 46.3° Question ? Adjust sensitivity for which frequency? 50 kHz 200 kHz 50kHz 60 200kHz 60The Split Frequency Sonar Chart page allows you to adjust sensitivity separately for each window.
Digital Data/Chart
This mode shows the chart on the right side of the screen. The left side has six large digital boxes or windows containing: Water Depth; Water Speed (from an optional speed sensor); Water Distance (distance traveled or log, it also requires a speed sensor); Surface Water Temperature; Temperature #2 and Temperature #3. (Note: Temperature #2 and #3 require additional optional temperature sensors.)
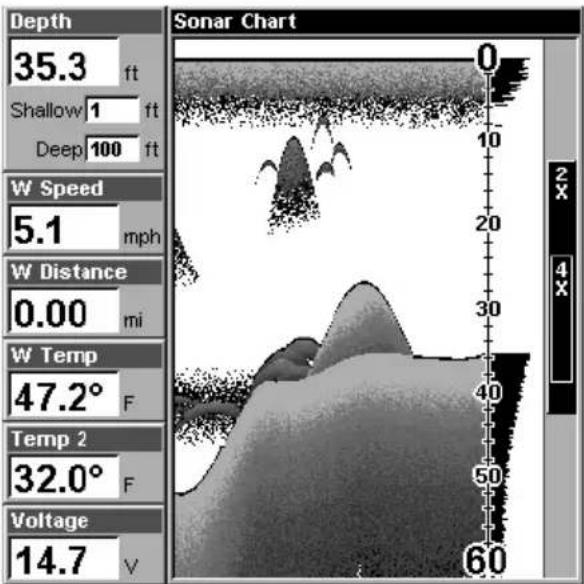
other
| Depth | W Speed (mph) | W Distance (mi) | W Temp (F) | Temp 2 (F) | Voltage (V) | |-------|---------------|-----------------|----------|----------|------------| | 35.3 | 5.1 | 0.00 | 47.2 | 32.0 | 14.7 |Digital Data/Chart
Customizing the Digital Data/Chart Screen
The Digital Data/Chart screen can be customized to show digital data different from the defaults first shown. To customize this screen:
- From the Sonar Page (in Digital Data mode), press MENU|↓ to CUSTOMIZE | ENT. (Keep scrolling down and Customize will appear.)
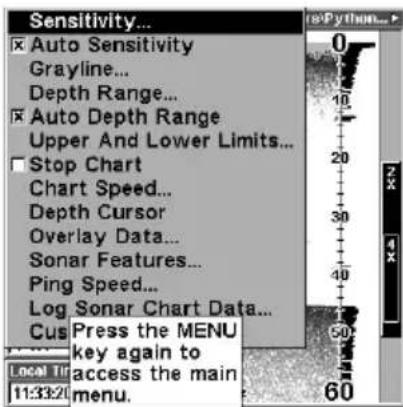
text_image
Sensitivity... Auto Sensitivity Grayline... Depth Range... Auto Depth Range Upper And Lower Limits... Stop Chart Chart Speed... Depth Cursor Overlay Data... Sonar Features... Ping Speed... Log Sonar Chart Data... Cus Press the MENU key again to access the main menu. 60 2x 4x Local Tr 11:33:24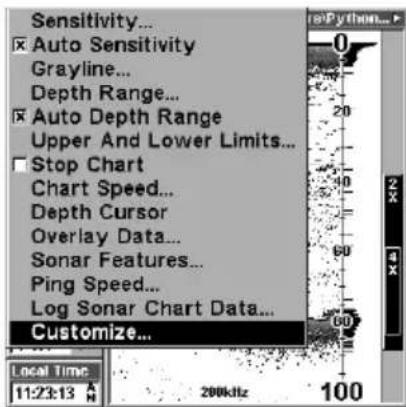
text_image
Sensitivity... Auto Sensitivity Grayline... Depth Range... Auto Depth Range Upper And Lower Limits... Stop Chart Chart Speed... Depth Cursor Overlay Data... Sonar Features... Ping Speed... Log Sonar Chart Data... Customize... Local Time: 11:23:13 200kHz 100 rePython...>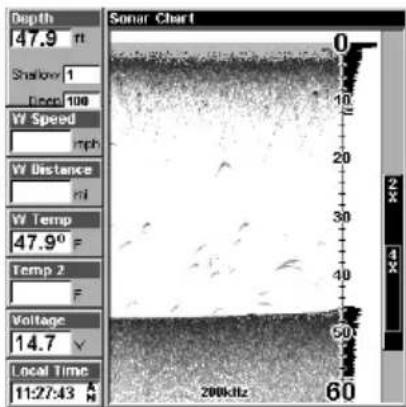
text_image
Depth 47.9 ft Shallow 1 Deep 100 W Speed mph W Distance mi W Temp 47.9° F Temp 2 F Voltage 14.7 V Local Time 11:27:43 A Sonar Chart 0 10 20 30 40 50 60 2 X 4 X 60 200 kHzThe Customize command will not appear until you begin scrolling down the Sonar Page menu. At far left, the pop-up help box conceals part of the menu.
- The W Speed window title bar flashes, indicating the window contents can be changed. Press ENT | ↑ or ↓ to select data type | ENT | EXIT.
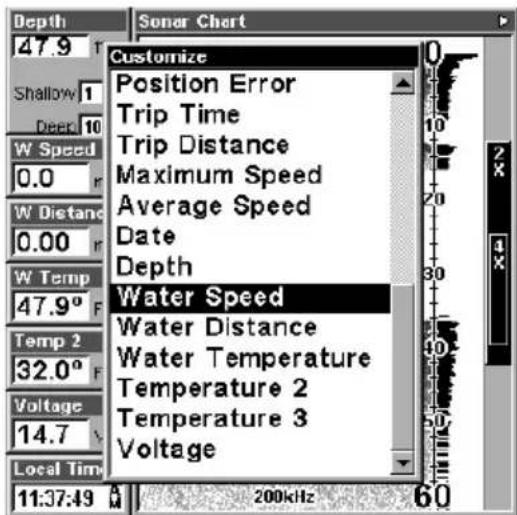
text_image
Depth 47.9 Shallow 1 Deep 10 W Speed 0.0 W Distanc 0.00 W Temp 47.9° F Temp 2 32.0° F Voltage 14.7 Local Tim Customize Position Error Trip Time Trip Distance Maximum Speed Average Speed Date Depth Water Speed Water Distance Water Temperature Temperature 2 Temperature 3 Voltage 200kHz 60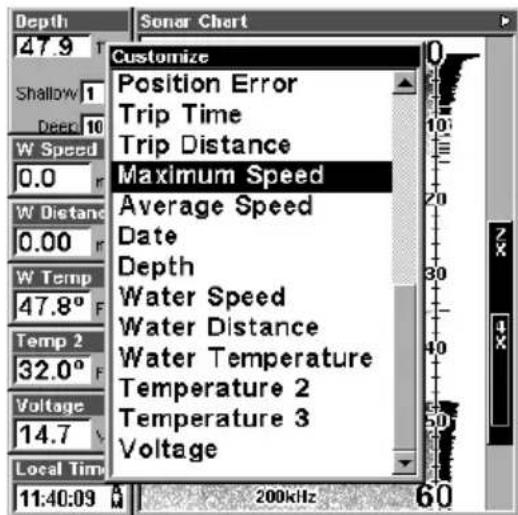
text_image
Depth 47.9 T Shallow 1 Deep 10 W Speed 0.0 r W Distanc 0.00 r W Temp 47.8° F Temp 2 32.0° F Voltage 14.7 V Local Tim 11:40:09 A Customize Position Error Trip Time Trip Distance Maximum Speed Average Speed Date Depth Water Speed Water Distance Water Temperature Temperature 2 Temperature 3 Voltage 200kHz 60Options List for customizing Digital Data windows. At left, the list first appears with Water Speed selected. At right, Maximum Speed has been picked to replace Water Speed in the top digital data window.
Tip:
You can customize other digital data windows before returning to the Sonar Page. After changing the first window by selecting the Data Type and pressing Enter, use the ↓ key to select another window to change. When the selected window title bar flashes, press ENT | ↑ or ↓ to select data type | ENT. Repeat these steps until you're finished customizing, then press EXIT to return to the Sonar Page.
Flasher
The Flasher page represents a flasher style sonar. A circular dial shows all returning echoes at a high screen refresh rate. It uses the Grayline feature to show weaker targets as shades of gray. The bottom depth is also shown as a black bar across the outer circle. There is also a narrow chart display on the left of the screen.
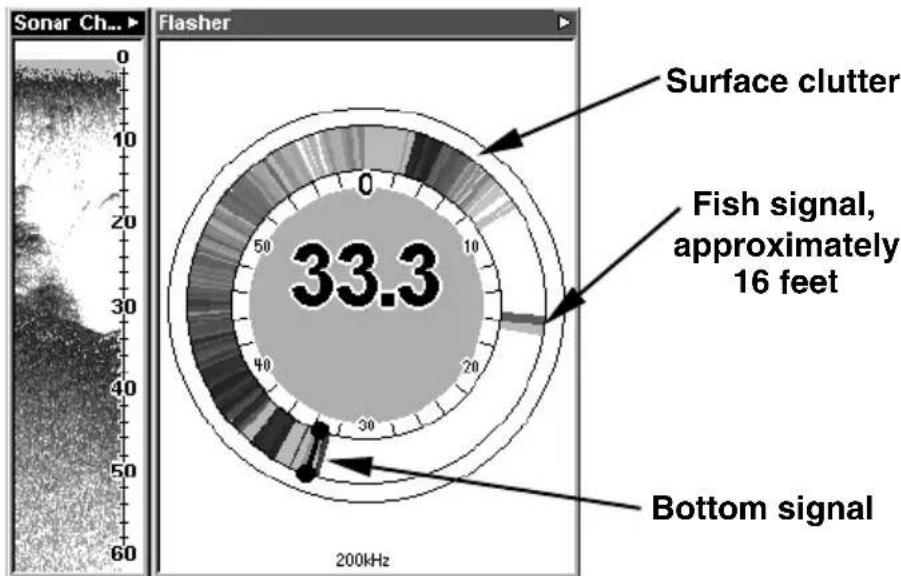
text_image
Sonar Ch... Flasher 0 10 20 30 40 50 60 Surface clutter Fish signal, approximately 16 feet 33.3 Bottom signal 200kHzFlasher page.
Map With Sonar Split Screen
There is a page mode that splits the screen in half, with the map on the left and the sonar on the right. This screen option can be found on the Pages Menu under the Map Page category.
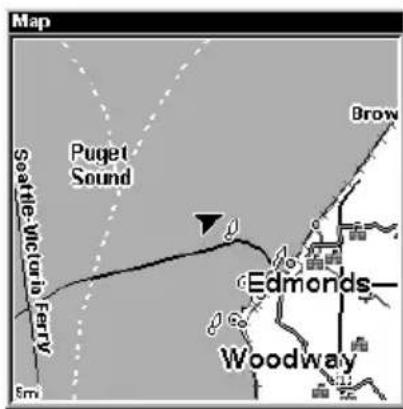
text_image
Map Puget Sound Brow Seattle-Victoria in Ferry Edmonds— Woodway Em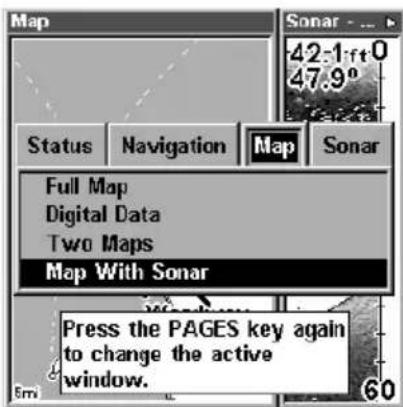
text_image
Map Sonar - ... 42-1:ft 0 47.9° Status Navigation Map Sonar Full Map Digital Data Two Maps Map With Sonar Press the PAGES key again to change the active window.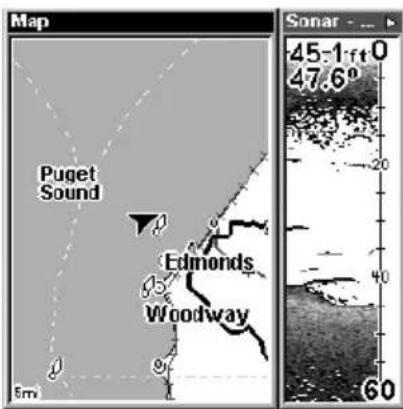
text_image
Map Puget Sound Edmonds Woodway Em Sonar 45-1 ft 0 47.6° 20 40 60Map With Sonar split screen option. At far right, the full Map Page is shown. The Pages Menu with the Map option list is shown in the center. At right, the Map With Sonar split screen is shown.
When this screen is activated, you need to specify which side the Menu, Zoom In and Zoom Out keys correspond to. To do this, press PAGES | PAGES. The window with the black title bar at the top of the screen is the active window. To switch back, just press PAGES | PAGES again.
Sonar Simulator
This unit has a built-in simulator that lets you run it as if you were on the water. All sonar features and functions are useable. When in simulator mode, you will see the chart file name in the Sonar Page title bar and a play symbol will flash on and off at the right end of the title bar. To use the simulator:
- From the Sonar Page, press MENU | MENU | ↓ to SONAR SETUP | ENT | ↓ to SONAR SIMULATOR | ENT.
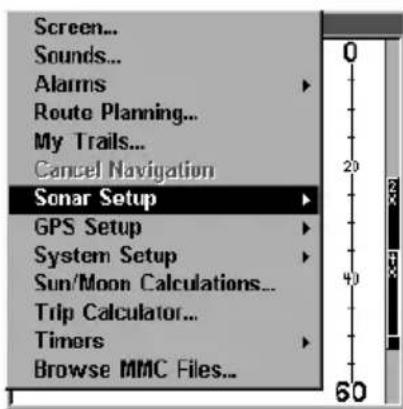
text_image
Screen... Sounds... Alarms Route Planning... My Trails... Cancel Navigation Sonar Setup GPS Setup System Setup Sun/Moon Calculations... Trip Calculator... Timers Browse MMC Files...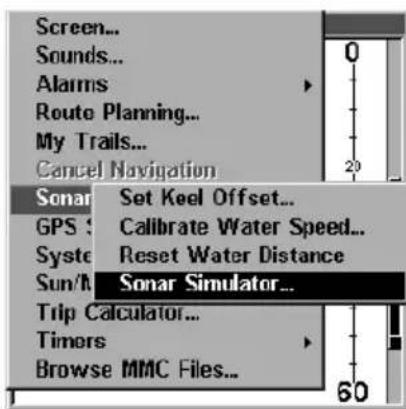
text_image
Screen... Sounds... Alarms Route Planning... My Trails... Cancel Navigation Sonar Set Keel Offset... GPS Calibrate Water Speed... Syste Reset Water Distance Sun/M Sonar Simulator... Trip Calculator... Timers Browse MMC Files...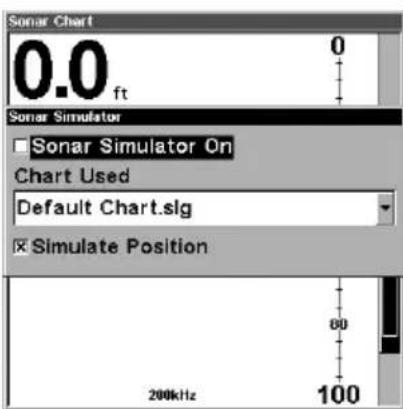
text_image
Sonar Chart 0.0 ft Sonar Simulator Sonar Simulator On Chart Used Default Chart.slg Simulate Position 200kHz 100At left, Main Menu with Sonar Setup command selected. Center, sub-menu with Sonar Simulator command selected. At right, Sonar Simulator menu, with simulator turned off (check box is unchecked).
NOTE:
With Simulate Position checked, the simulator will also automatically run the GPS simulator (if GPS data was recorded with the sonar log).
-
To use the default sonar chart log stored in the unit, press ENT | EXIT. The recorded chart begins scrolling across the screen, just as if you were on the water.
-
Turn off Sonar Simulator by pressing MENU | MENU | ↓ to SONAR SETUP | ENT | ↓ to SONAR SIMULATOR | ENT | ENT | EXIT.
Title bar with chart file name
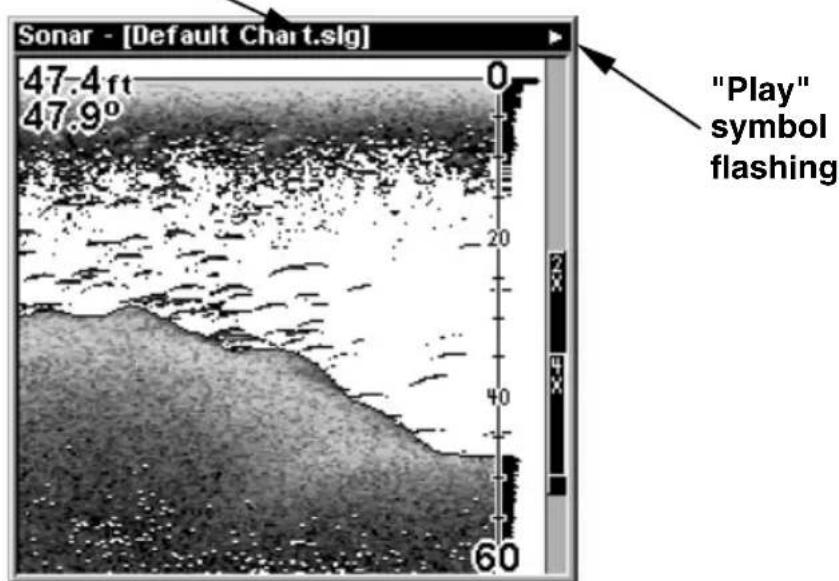
text_image
Sonar - [Default Chart.slg] 47.4 ft 47.9° "Play" symbol flashing 0 20 40 60Sonar Page, playing a recorded sonar chart in Sonar Simulator mode. Tip:
The Sonar Simulator can use sonar charts that you or a friend have recorded (logged) on an MMC card. (To see how, read the entry in this section on Log Sonar Chart Data.) To play back your own sonar chart, make sure the MMC containing the chart is installed, then:
- Press MENU | MENU | ↓ to SONAR SETUP | ENT | ↓ to SONAR SIMULATOR | ENT.
- Press ↓ to CHART USED | ENT.
- Press ↓ or ↑ to select chart name|ENT|↑ to SONAR SIMULATOR ON |ENT| EXIT.
While you're in the Sonar Simulator menu, don't forget to check Simulate Position if you want to run the sonar and GPS simulators simultaneously. As you review sonar logs, you can create waypoints to mark sites you want to return to.
While the simulator is running, you can switch from one chart log to another by opening the Sonar Simulator menu and using the instructions in step 2 to select a different chart.
Tip:
There's more than one way to play a recorded sonar chart. You can also turn on the simulator from the MMC files list. Here's how:
-
Press MENU | MENU | ↓ to BROWSE MMC FILES | ENT | ENT.
-
Press ↓ or ↑ to chart name | ENT | ↓ to PLAY | ENT | EXIT.
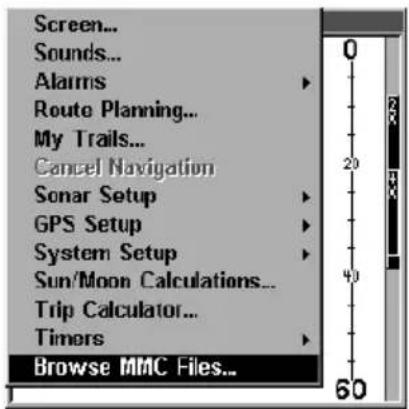
text_image
Screen... Sounds... Alarms Route Planning... My Trails... Cancel Navigation Sonar Setup GPS Setup System Setup Sun/Moon Calculations... Trip Calculator... Timers Browse MMC Files...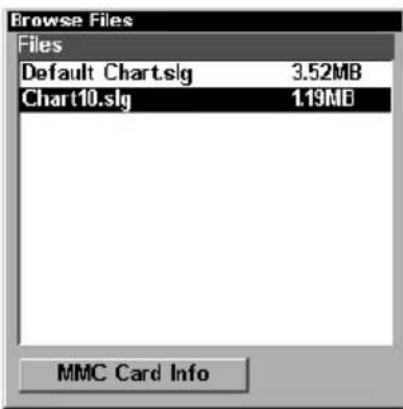
text_image
Browse Files Files Default Chart.sg 3.52MB Chart10.sg 1.19MB MMC Card Info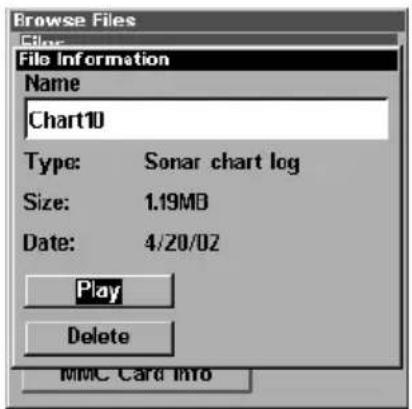
text_image
Browse Files Files File Information Name Chart10 Type: Sonar chart log Size: 1.19MB Date: 4/20/02 Play Delete MMC Card InfoMenu sequence for playing a sonar chart log from the MMC File List.
NOTE:
For some great practice, try running the Sonar Simulator and the GPS Simulator at the same time. This will really give you a feel for how the unit will work in the field.
NOTE:
If you turn on your unit before attaching a transducer, it may enter a demo mode. The words "demo mode" flash on the bottom of the screen and a sonar chart plays much like the simulator. Unlike the simulator, the demo mode is for demonstration only, and will automatically stop as soon as you turn on the unit with a transducer attached. The simulator will continue to function normally.
Stop Chart
If you are running multiple units on a boat or using this unit in a car, there are times when you may want to turn off the sonar. This command turns off the sonar and stops the chart from scrolling. Sonar restarts automatically each time you turn on your unit.
Press MENU | ↓ to STOP CHART | ENT | EXIT.
To turn on sonar and start the chart scrolling again, repeat the above step.
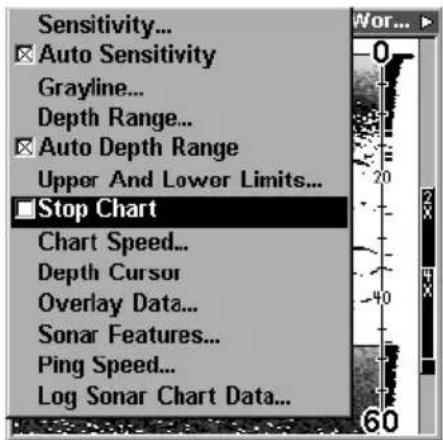
text_image
Sensitivity... Auto Sensitivity Grayline... Depth Range... Auto Depth Range Upper And Lower Limits... Stop Chart Chart Speed... Depth Cursor Overlay Data... Sonar Features... Ping Speed... Log Sonar Chart Data...Sonar Menu with Stop Chart command selected. The box is unchecked, indicating that the chart is scrolling across the screen.
Surface Clarity
The markings extending downward from the zero line on the chart are called "surface clutter." These markings are caused by wave action, boat wakes, temperature inversion and more.
The surface clarity control reduces or eliminates surface clutter signals from the display. It does this by changing the sensitivity of the receiver, decreasing it near the surface and gradually increasing it as the depth increases.
There are three levels of surface clarity available: low, medium, or high. It can also be turned off. The default level is off.
To adjust the Surface Clarity level:
- From the Sonar Page, press MENU | ↓ to SONAR FEATURES | ENT.
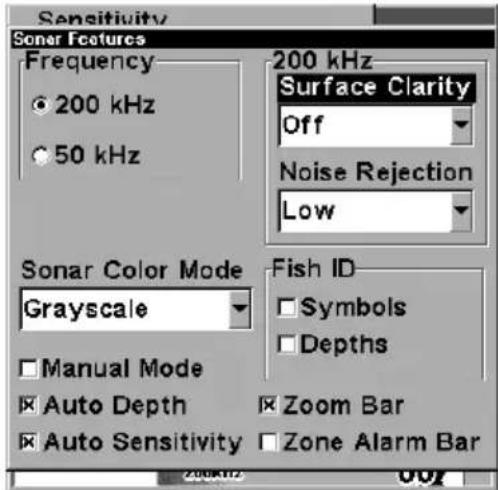
text_image
Sensitivity Sonar Features Frequency 200 kHz 50 kHz 200 kHz Surface Clarity Off Noise Rejection Low Sonar Color Mode Grayscale Fish ID Symbols Depths Manual Mode Auto Depth Zoom Bar Auto Sensitivity Zone Alarm Bar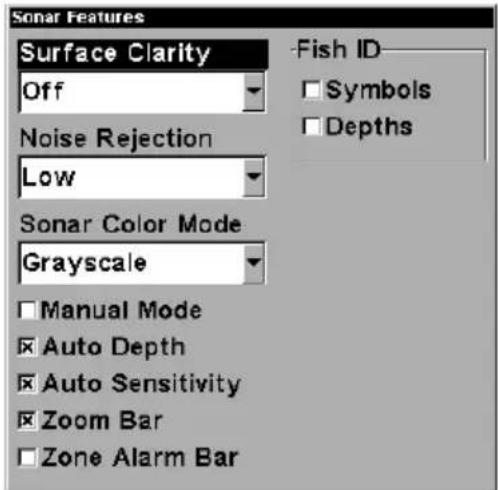
text_image
Sonar Features Surface Clarity Off Noise Rejection Low Sonar Color Mode Grayscale □ Manual Mode ☑ Auto Depth ☑ Auto Sensitivity ☑ Zoom Bar □ Zone Alarm Bar Fish ID □ Symbols □ DepthsSonar Features menu with Surface Clarity selected (at left, dual-frequency menu; at right, single-frequency menu).
-
Press → to SURFACE CLARITY|ENT. (For single-frequency units, just press ENT).
-
Press ↓ or ↑ to select clarity level |EXIT | EXIT | EXIT.
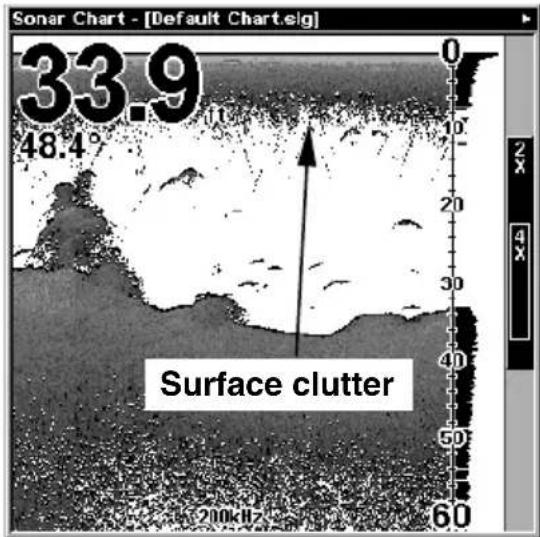
text_image
Sonar Chart - [Default Chart.elg] 33.9 48.4° Surface clutter 200kHz 60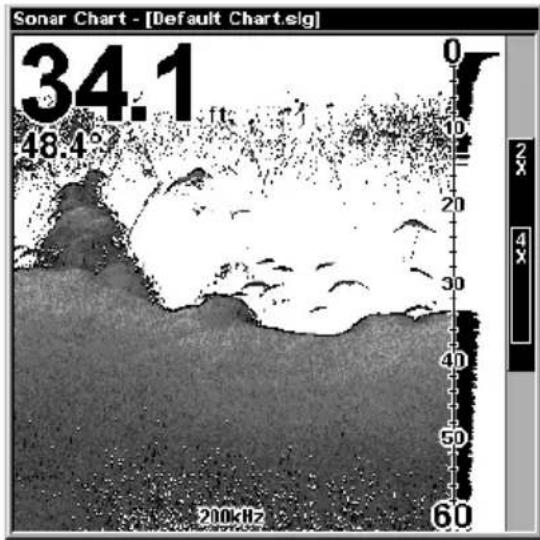
text_image
Sonar Chart - [Default Chart.sg] 34.1 48.4° 0 10 20 30 40 50 60 200kHzIn the illustration at left, Surface Clarity is turned off. The right view shows Surface Clarity set at High.
Upper and Lower Limits
See the entry in this section for Depth Range - Upper and Lower Limits
Zoom & Zoom Bar
"Zooming" the display is a common, fast and easy method used to enlarge small detail, fish signals and the bottom with its associated structure. This unit lets you zoom the display quickly and easily by pressing the Zoom In key, ZIN.
Pressing ZIN once doubles the size (2X) of all echoes on the screen. Pressing it again quadruples the size of the echoes (4X). The zoom bar on the far right side of the screen shows which echoes will be displayed on the screen when the ZIN key is pressed.
For example, pressing the ZIN key once will enable a 2X zoom which will show all echoes that are between the top and bottom of the 2X zoom bar. Pressing the key again will give a 4X zoom and only the echoes between the top and bottom of the 4X bar will show on the screen.
Press the Zoom Out key, ZOUT, to return the display to the normal mode.
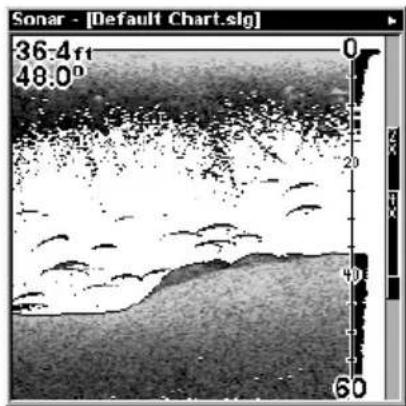
text_image
Sonar - [Default Chart.sg] 36-4 ft 48.0° 0 20 40 60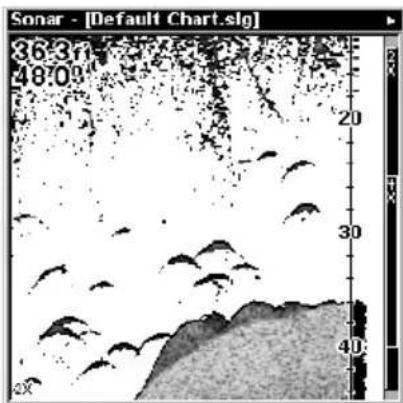
text_image
Sonar - [Default Chart.sg] 36.3 48.0 20 30 40 2X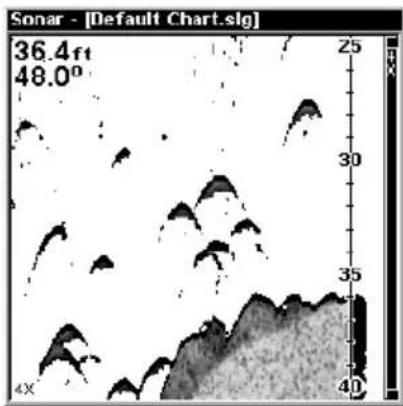
text_image
Sonar - [Default Chart.slg] 36.4ft 48.0° 25 30 35 40 4XAt left, Sonar Page, normal view. Center, same view zoomed to 2X. Right, same view zoomed to 4X
Zoom & Zoom Pan
Your unit has the handy ability to quickly zoom in on any portion of the water column with just the touch of an arrow key. The Zoom Pan feature lets you rapidly move the zoomed area up and down to different depths. By "pointing" your zoom at different portions of the chart as it scrolls, you can get a good, close-up look at structure or cover below you.
To use Zoom Pan, switch to a manual depth Range setting (see page 61) and turn on 2X or 4X Zoom. Then, simply press or to pan up and down the water column.
Notes
Section 5: Sonar Troubleshooting
If your unit is not working, or if you need technical help, please use the following troubleshooting section before contacting the factory customer service department. It may save you the trouble of returning your unit for repair. For contact information, refer to the last page, just inside the back cover of this manual.
Unit won't turn on:
- Check the power cable's connection at the unit. Also check the wiring.
- Make certain the power cable is wired properly. The red wire connects to the positive battery terminal, black to negative or ground.
- Check the fuse.
- Measure the battery voltage at the unit's power connector. It should be at least 11 volts. If it isn't, the wiring to the unit is defective, the battery terminals or wiring on the terminals are corroded, or the battery needs charging.
Unit operates only in demo mode:
The transducer has not yet been connected or has been disconnected. To leave demo mode, make sure the transducer is securely connected before turning the unit on.
Unit freezes, locks up, or operates erratically:
- Electrical noise from the boat's motor, trolling motor, or an accessory may be interfering with the sonar unit. Rerouting the power and transducer cables away from other electrical wiring on the boat may help. Route the sonar unit's power cable directly to the battery instead of through a fuse block or ignition switch
- Inspect the transducer cable for breaks, cuts, or pinched wires.
- Check both the transducer and power connectors. Make certain both are securely plugged in to the unit.
Weak bottom echo, digital readings erratic, or no fish signals:
- Make certain the transducer is pointing straight down. Clean the face of the transducer. Oil, dirt and fuel can cause a film to form on the transducer, reducing its effectiveness. If the transducer is mounted inside the hull, be sure it is shooting through only one layer of fiberglass and that it is securely bonded to the hull. Do NOT use RTV silicone rubber adhesive or Marine-Tex ^™ epoxy.
- Electrical noise from the boat's motor can interfere with the sonar.
This causes the sonar to automatically increase its Discrimination or noise rejection feature. This can cause the unit to eliminate weaker signals such as fish or even structure from the display.
-
The water may be deeper than the sonar's ability to find the bottom. If the sonar can't find the bottom signal while it's in the automatic mode, the digital sonar display will flash continuously. It may change the range to limits far greater than the water you are in. If this happens, place the unit in the manual mode, then change the range to a realistic one, (for example, 0-100 feet) and increase the sensitivity. As you move into shallower water, a bottom signal should appear.
-
Check the battery voltage. If the voltage drops, the unit's transmitter power also drops, reducing its ability to find the bottom or targets.
Bottom echo disappears at high speeds or erratic digital reading or weak bottom echo while boat is moving
-
The transducer may be in turbulent water. It must be mounted in a smooth flow of water in order for the sonar to work at all boat speeds. Air bubbles in the water disrupt the sonar signals, interfering with its ability to find the bottom or other targets. The technical term for this is cavitation.
-
Electrical noise from the boat's motor can interfere with the sonar. This causes the sonar to automatically increase its Discrimination or noise rejection feature. This can cause the unit to eliminate weaker signals such as fish or even structure from the display. Try using resistor spark plugs or routing the sonar unit's power and transducer cables away from other electrical wiring on the boat.
No fish arches when the Fish I.D. feature is off:
-
Make certain the transducer is pointing straight down. This is the most common problem if a partial arch is displayed.
-
The sensitivity may not be high enough. In order for the unit to display a fish arch, it has to be able to receive the fish's echo from the time it enters the cone until it leaves. If the sensitivity is not high enough, the unit shows the fish only when it is in the center of the cone.
-
Use the Zoom feature. It is much easier to display fish arches when zoomed in on a small range of water than a large one. For example, you will have much better luck seeing fish arches with a 30 to 60 foot range than a 0 to 60 foot range. This enlarges the targets, allowing the display to show much more detail.
-
The boat must be moving at a slow trolling speed to see fish arches. If the boat is motionless, fish stay in the cone, showing on the screen as straight horizontal lines.
NOISE
A major cause of sonar problems is electrical noise. This usually appears on the sonar's display as random patterns of dots or lines. In severe cases, it can completely cover the screen with black dots, or cause the unit to operate erratically, or not at all.
To eliminate or minimize the effects of electrical noise, first try to determine the cause. With the boat at rest in the water, the first thing you should do is turn all electrical equipment on the boat off. Make sure the engine is also off. Turn your sonar on, then turn off Noise Reject [also known as the ASP feature (Advanced Signal Processing)]. Sensitivity should be set at 90-95 percent. There should be a steady bottom signal on the display. Now turn on each piece of electrical equipment on the boat and view the effect on the sonar's display. For example, turn on the bilge pump and view the sonar display for noise. If no noise is present, turn the pump off, then turn on the VHF radio and transmit. Keep doing this until all electrical equipment has been turned on, their effect on the sonar display noted, then turned off.
If you find noise interference from an electrical instrument, trolling motor, pump, or radio, try to isolate the problem. You can usually reroute the sonar unit's power cable and transducer cable away from the wiring that is causing the interference. VHF radio antenna cables radiate noise when transmitting, so be certain to keep the sonar's wires away from it. You may need to route the sonar unit's power cable directly to the battery to isolate it from other wiring on the boat.
If no noise displays on the sonar unit from electrical equipment, then make certain everything except the sonar unit is turned off, then start the engine. Increase the RPM with the gearshift in neutral. If noise appears on the display, the problem could be one of three things; spark plugs, alternator, or tachometer wiring. Try using resistor spark plugs, alternator filters, or routing the sonar unit's power cable away from engine wiring. Again, routing the power cable directly to the battery helps eliminate noise problems. Make certain to use the in-line fuse supplied with the unit when wiring the power cable to the battery.
When no noise appears on the sonar unit after all of the above tests, then the noise source is probably cavitation. Many novices or persons with limited experience make hasty sonar installations which function perfectly in shallow water, or when the boat is at rest. In nearly all cases, the cause of the malfunction will be the location and/or angle of the transducer. The face of the transducer must be placed in a location that has a smooth flow of water at all boat speeds. Read your transducer owner's manual for the best mounting position.
Notes
Section 6: Basic GPS Operations
This section addresses the unit's most basic GPS operations. The tutorials presented in Sec. 6 follow a chronological order. Sec. 7, Advanced GPS Operations, will discuss other more advanced functions and utilities. Material in Sec. 7 is arranged in alphabetical order.
Before you turn on LMS-320 and find where you are, it's a good idea to learn about the different keys, the four Page screens and how they all work together. BUT, if you just can't wait to get outside, turn to the one-page Quick Reference on page 107.
Keyboard
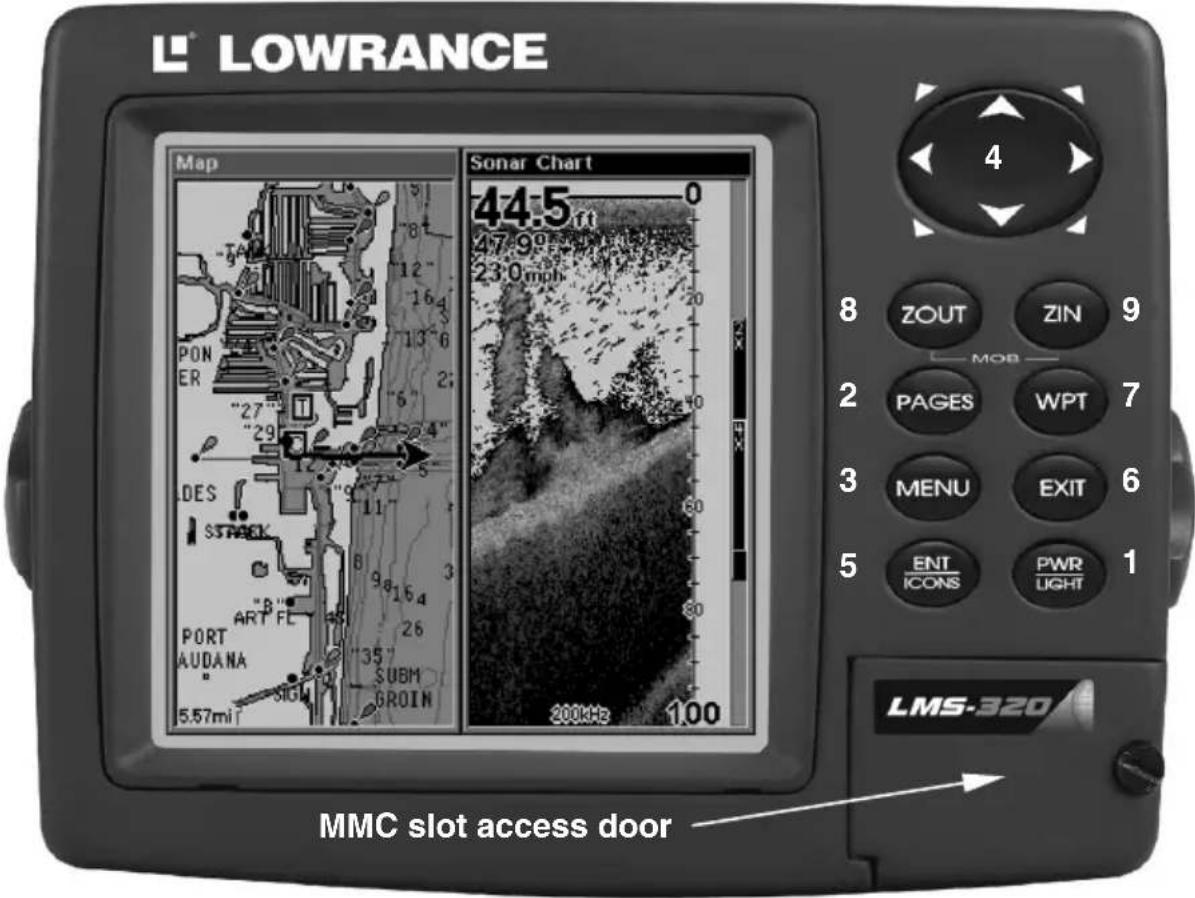
text_image
L® LOWRANCE Map Sonar Chart 44.5 ft 47.9 ft 23.0 mph 200kHz 100 8 ZOUT ZIN 9 MOB 2 PAGES WPT 7 3 MENU EXIT 6 5 ENT PWR ICONS LIGHT 1 LMS-320 MMC slot access doorLMS-320 sonar/GPS unit, front view, showing map with sonar split screen, keyboard and access door for the MMC slot.
- PWR/LIGHT (Power & Light) – The PWR key turns the unit on and off and activates the backlight.
- PAGES - Pressing this and the arrow keys (4) switches the unit between the four different page screens. (Satellite Status Page,
Navigation Page, Map Page and Sonar Page.) Each page represents one of the unit's major operation modes.
-
MENU - Press this key to show the menus and submenus, which allow you to select a command or adjust a feature. This also accesses search functions for streets, intersections, addresses and highway exits.
-
ARROW KEYS – These keys are used to navigate through the menus, make menu selections, move the map cursor and sonar chart cursor and enter data.
-
ENT/ICONS (Enter & Icons) – This key allows you to save data, accept values or execute menu commands. It is also used to create event marker icons.
-
EXIT – The Exit key lets you return to the previous screen, clear data or erase a menu.
-
WPT - (Waypoint) The Waypoint key is used to save and recall waypoints, search for waypoints and access the waypoint list. It also launches the Point-of-Interest (POI) search menus and is involved in some navigation functions.
-
ZOUT – (Zoom Out) – This key lets you zoom the screen out. On the Sonar Page, this key returns you to a full sonar chart display, showing the entire water column from surface to bottom. On the Map Page, this lets you see a larger geographic area on the map. Less detail is seen as you zoom out.
-
ZIN – (Zoom In) – This key lets you zoom the screen in. On the Sonar Page, this key enlarges fish signals and bottom detail. On the Map Page, zooming in lets you see greater detail in a smaller geographic area on the map.
Power/lights on and off
To turn on the unit, press PWR. As the unit powers up, the Map Page is displayed first. (To switch to another page, press PAGES | ← or → to Page Name | EXIT.)
To turn on the backlight, press PWR again. The unit has three backlight levels to select from. Repeatedly pressing PWR will cycle through the backlight settings and turn off the backlight.
Turn off the unit by pressing and holding the PWR key for 3 seconds.
Main Menu
The LMS-320 has a Main Menu, which contains some function commands and some setup option commands. The tutorial lessons in this
section will deal only with functions, the basic commands that make LMS-320 do something. LMS-320 will work fine for these lessons right out of the box with the factory default settings. But, if you want to learn about the various options, see Sec. 8, System Setup and GPS Setup Options.
You can access the Main Menu from any of the four Page screens by pressing MENU | MENU. To clear the menu screen and return to the page display, press EXIT.
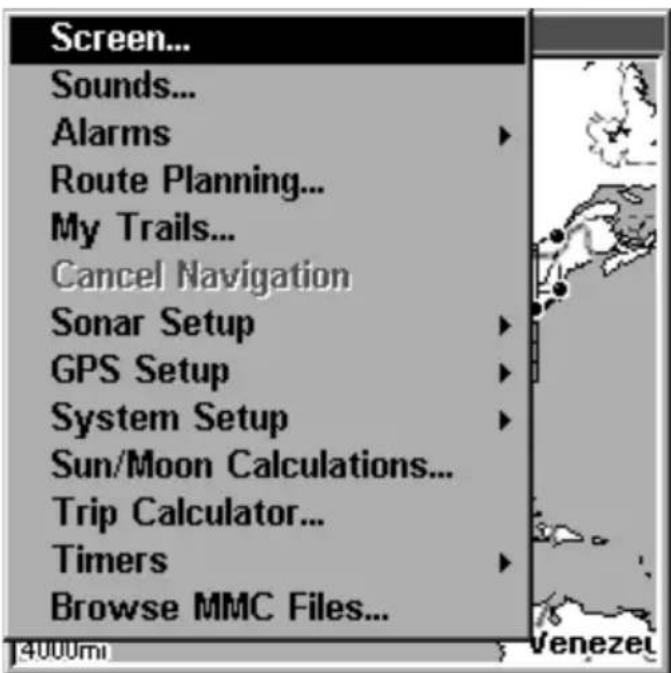
text_image
Screen... Sounds... Alarms Route Planning... My Trails... Cancel Navigation Sonar Setup GPS Setup System Setup Sun/Moon Calculations... Trip Calculator... Timers Browse MMC Files...Main Menu.
The Main Menu commands and their functions are:
Screen command: changes the contrast or brightness of the display screen.
Sounds command: enables or disables the sounds for key strokes and alarms and sets the alarm style.
Alarms command: turns GPS or sonar alarms on or off and changes alarm thresholds.
Route Planning command: used to plan, view or navigate a route.
My Trails command: shows, hides, creates and deletes plot trails. Also used to navigate or backtrack a trail.
Cancel Navigation command: turns off the various navigation commands. Used to stop navigating after you have reached your destination waypoint, Point of Interest or map cursor location; or after you reach the end of a route or trail.
Sonar Setup command: sets various sonar options.
GPS Setup command: sets various GPS receiver options.
System Setup command: sets general configuration options.
Sun/Moon Calculations command: finds the rising and setting time of the sun and the moon.
Trip Calculator command: shows trip status and statistics.
Timers command: controls the up timer, down timer and alarm clock settings.
Browse MMC Files command: this allows you to view the installed MMC card and the files it contains.
Pages
The unit has four Page displays that represent the four major operating modes. They are the Satellite Status Page, the Navigation Page, Map Page and the Sonar Page. They are accessed by pressing the PAGES key, then using or to select a Page. (Clear the Pages Menu by pressing EXIT.)
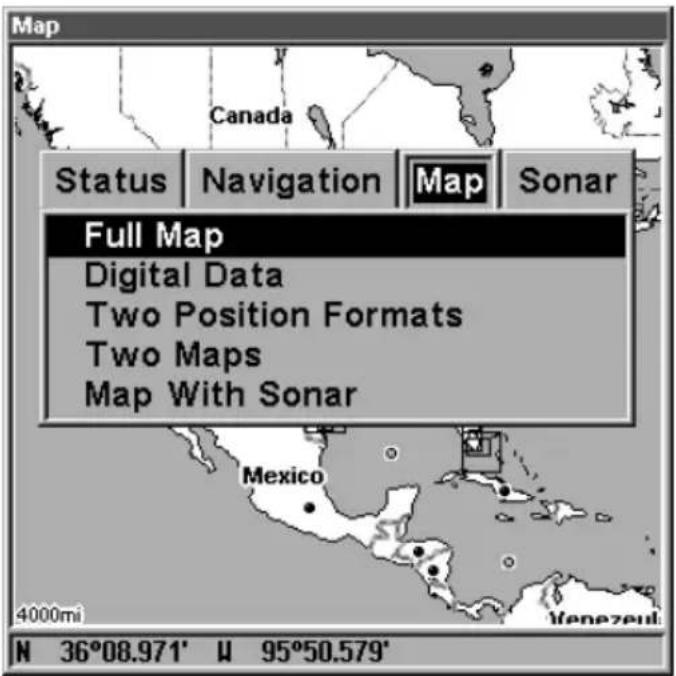
text_image
Map Canada Status Navigation Map Sonar Full Map Digital Data Two Position Formats Two Maps Map With Sonar Mexico 4000mi N 36°08.971' W 95°50.579'Pages Menu, showing some Map display options.
Sonar Page
The Sonar Page displays the sonar chart, a view of the water column from the surface to the bottom. The chart scrolls across the screen from right to left, displaying signal echoes that represent fish, structure and the bottom. The Sonar Page is discussed in detail in Sec. 3. To get to the Sonar Page: Press the PAGES key, then use → or ← to select SONAR. (Clear the Pages Menu by pressing EXIT.)
Satellite Status Page
The Satellite Status Page, shown, provides detailed information on the status of LMS-320's satellite lock-on and position acquisition. To get to the Satellite Status Page: Press the PAGES key, then use → or ← to select STATUS. (Clear the Pages Menu by pressing EXIT.)
No matter what Page you are on, a flashing current position indicator/question mark symbol and flashing GPS data displays indicate that satellite lock has been lost and there is no position confirmed. The Satellite Status Page shows you the quality and accuracy of the current satellite lock-on and position calculation.
WARNING:
Do not begin navigating with this unit until the numbers have stopped flashing!
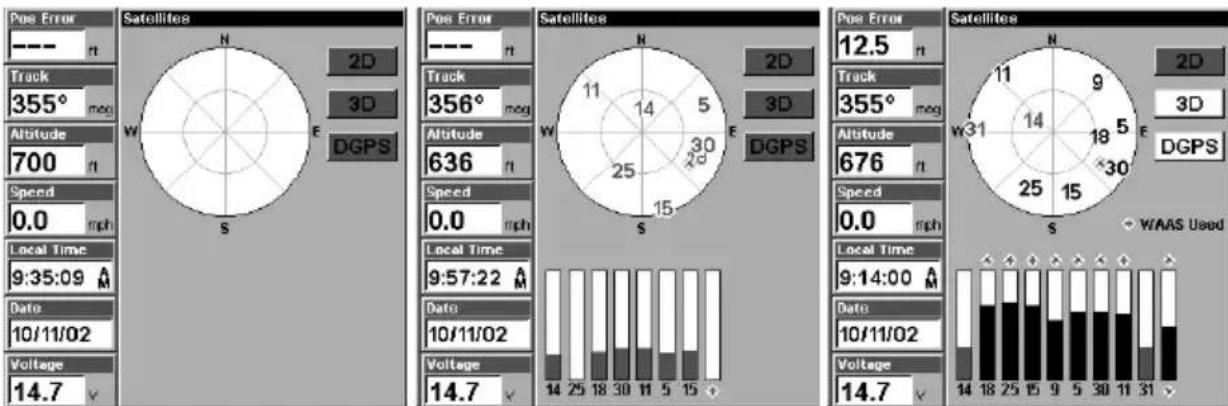
text_image
Pos Error ---- n Track 355° meg Altitude 700 n Speed 0.0 mph Local Time 9:35:09 AM Date 10/11/02 Voltage 14.7 √ Satellites N 2D 3D DGPS Pos Error ---- n Track 356° meg Altitude 636 n Speed 0.0 mph Local Time 9:57:22 AM Date 10/11/02 Voltage 14.7 √ Satellites N 2D 3D DGPS Pos Error 12.5 n Track 355° meg Altitude 676 n Speed 0.0 mph Local Time 9:14:00 AM Date 10/11/02 Voltage 14.7 √ Satellites N 2D 3D DGPS WAAS UsedSatellite Status Page. Left view indicates unit has not locked on to any satellites and does not have a fix on its position. Center view shows satellites being scanned. Right view shows satellite lock-on with a 3D position acquired (latitude, longitude and altitude), and WAAS reception.
This screen shows a graphical view of the satellites that are in view. Each satellite is shown on the circular chart relative to your position. The point in the center of the chart is directly overhead. The small inner ring represents 45^ above the horizon and the large ring represents the horizon. North is at the top of the screen. You can use this to see which satellites are obstructed by obstacles in your immediate area if the unit is facing north.
The GPS receiver is tracking satellites that are in bold type. The receiver hasn't locked onto a satellite if the number is grayed out, therefore it isn't being used to solve the position.
Beneath the circular graph are the bar graphs, one for each satellite in view. Since the unit has twelve channels, it can dedicate one channel per visible satellite. The taller the bar on the graph, the better the unit is receiving the signals from the satellite.
The "Estimated Position Error" (horizontal position error) shown in the
upper left corner of the screen is the expected error from a benchmark location. In other words, if the EPE shows 50 feet, then the position shown by the unit is estimated to be within 50 feet of the actual location. This also gives you an indicator of the fix quality the unit currently has. The smaller the position error number, the better (and more accurate) the fix is. If the position error flashes dashes, then the unit hasn't locked onto the satellites, and the number shown isn't valid.
The Satellite Status Page has its own menu, which is used for setting various options. (Options and setup are discussed in Sec. 8). To access the Satellite Status Page Menu, from the Status Page, press MENU.
Navigation Page
This screen has a compass rose that not only shows your direction of travel, but also the direction to a recalled waypoint. To get to the Navigation Page: Press PAGES | → or ← to NAVIGATION | EXIT.
The navigation screen looks like the one below when you're not navigating to a waypoint or following a route or trail. Your position is shown by an arrow in the center of the screen. Your trail history, or path you've just taken, is depicted by the line extending from the arrow. The arrow pointing down at the top of the compass rose indicates the current track (direction of travel) you are taking.
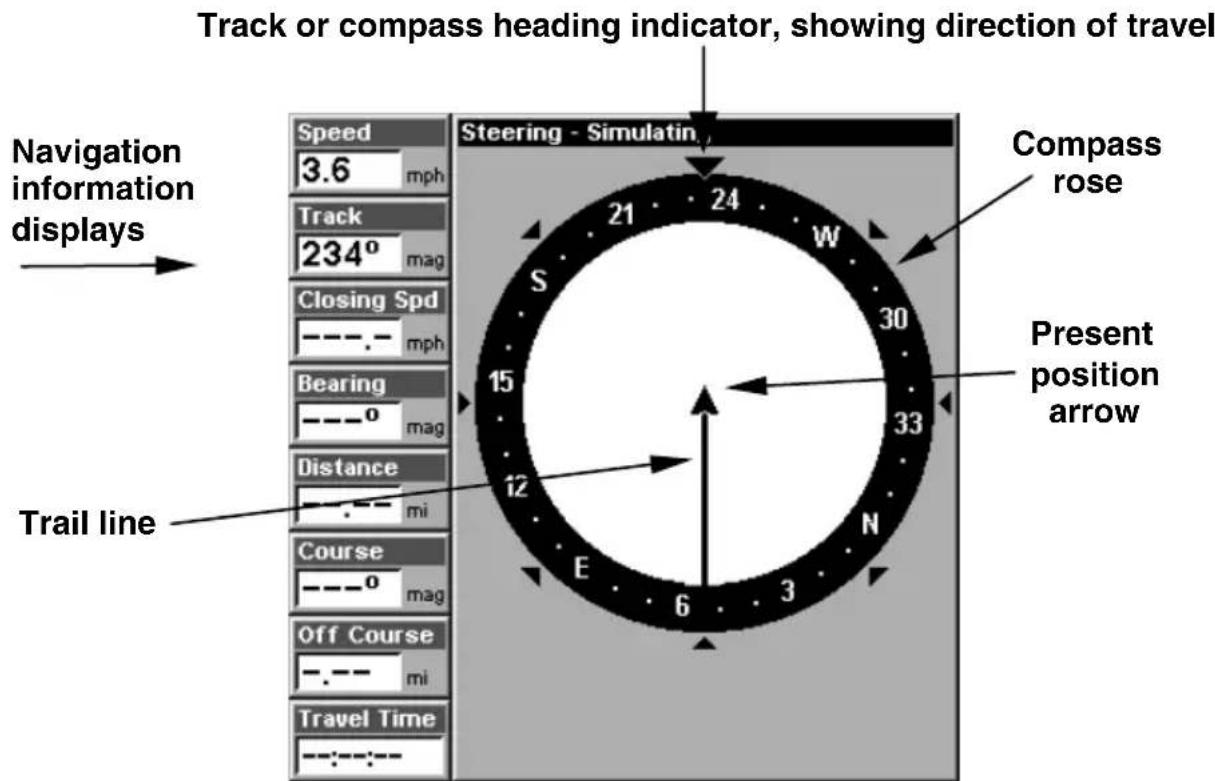
text_image
Track or compass heading indicator, showing direction of travel Navigation information displays Speed 3.6 mph Track 234° mag Closing Spd - - - - mph Bearing - - - 0 mag Distance - - - mi Course - - - 0 mag Off Course - - - mi Travel Time - - - - Steering - Simulating 15 12 E 6 3 30 33 N Present position arrow Compass roseNavigation Page, recording a trail, traveling southwest. Page looks like this when LMS-320 is not navigating to a waypoint, following a route, or backtracking a trail.
When navigating to a waypoint, the Navigation screen looks like the
following figure. Your ground speed, track, distance and bearing to waypoint, and course are all shown digitally on this screen.
NOTE:
Remember, when the Speed, Track and Position information displays are flashing, satellite lock has not been achieved and no position fix has been determined. A question mark will also flash on the present position arrow in the center of the compass rose.
Speed (ground speed) is the velocity you are making over the ground. (If you wish, you can customize the Speed window to display Closing Speed instead. Closing Speed is also known as velocity made good. It's the speed that you're making toward the waypoint. For instructions, see the Customize Page Displays entry in Sec. 8.)
Track is the heading, or the current direction you are actually traveling. Bearing is the direction of a line-of-sight from your present position to the destination. No matter what direction you are steering, the Bearing window shows the compass direction straight to the destination from your location at the moment. Distance shows how far it is to the waypoint you're navigating toward.
The Off Course window shows the current cross track error. This shows the distance you are off-course to the side of the desired course line. The course line is an imaginary line drawn from your position when you started navigating to the destination waypoint. The course line is shown on the Navigation Page screen (and the Map Page screen) as a dotted line.
The cross track error range is shown on the compass rose as a wide, white, corridor enclosing the course line. The outer edges of this white corridor represent lines that show the current cross track error range. The default for the cross track error range is 0.20 miles.
For example, if the present position symbol touches the right cross track error line, then you are .20 miles to the right of the desired course. You need to steer left to return to the desired course. You can use the ZIN or ZOUT keys to change the cross track error range.
A circular symbol depicting your destination (waypoint) appears on the screen as you approach the waypoint, as shown on the screen in the following figure.
Travel Time is the time that it will take to reach your destination at your present closing speed. (You can also customize the time window to show Arrival Time instead. Arrival Time is the local time it will be when you arrive at the destination, based upon your present closing speed and track.)
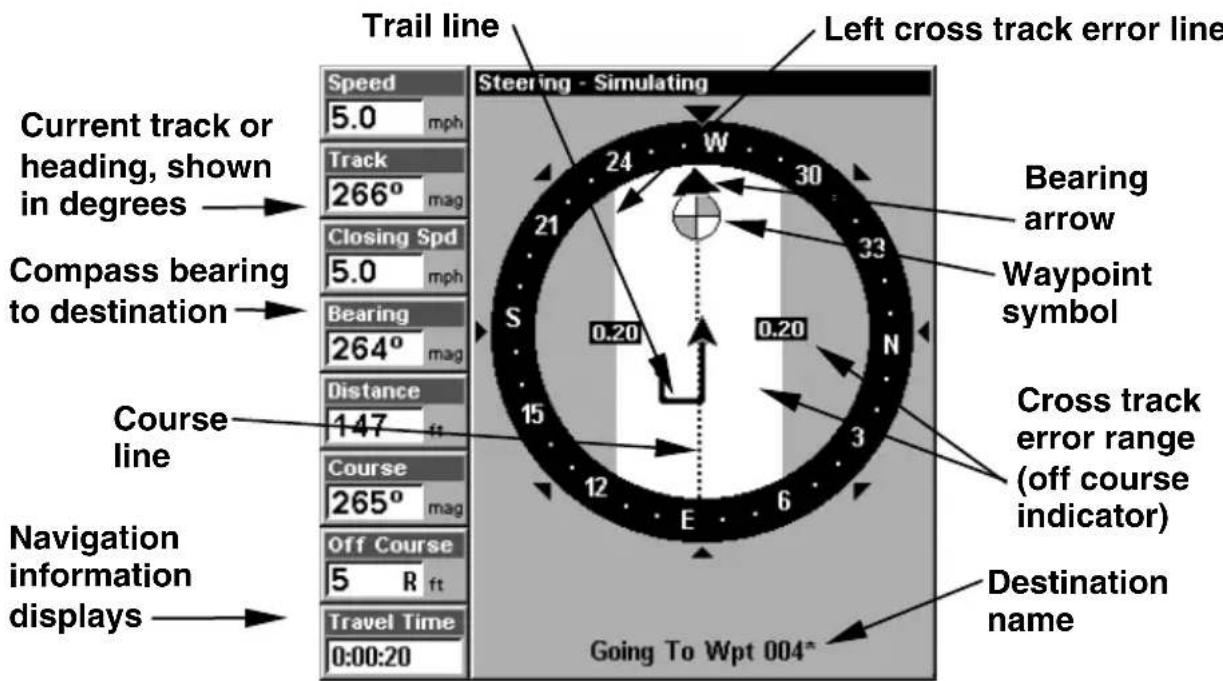
text_image
Trail line Current track or heading, shown in degrees Compass bearing to destination Course line Navigation information displays Speed 5.0 mph Track 266° mag Closing Spd 5.0 mph Bearing 264° mag Distance 147 ft Course 265° mag Off Course 5 R ft Travel Time 0:00:20 Steering - Simulating 24 W 30 21 S 33 N 0.20 0.20 15 E 6 Cross track error range (off course indicator) Destination name Going To Wpt 004* Bearing arrow Waypoint symbol Cross track error rangeNavigation Page, backtracking a trail while creating a new trail.
In the example figure above, the driver is headed west (a 266^ track) toward a waypoint 264^ (bearing) away. The cross track error range (white corridor) is 0.20 miles either side of the course. The driver is headed toward trail waypoint 4, which is 147 feet away. The vehicle is virtually on course (off course 5 feet to the right). Traveling at a speed of 5 mph, the driver will arrive at the waypoint in 20 seconds.
The Navigation Page has its own menu, which is used for some advanced functions and for setting various options. (Options and setup are discussed in Sec. 8). To access the Navigation Page Menu, from the Navigation Page, press MENU.
Map Page
The Map Page screens show your course and track from a "bird's-eye" view. By default, this unit shows the map with north always at the top of the screen. (This can be changed. See the topic Map Orientation, in Sec. 8.) If you're navigating to a waypoint, the map also shows your starting location, present position, course line and destination. You don't have to navigate to a waypoint, however, to use the map.
Map Page is the default screen that appears when you turn on the unit. To get to the Map Page from another page: Press PAGES | → or ← to MAP | EXIT. When the Map Page is displayed, a screen similar to the following figures appears.
The arrow in the center of the screen is your present position. It points in the direction you're traveling. The solid line extending from the back of the arrow is your plot trail, or path you've taken.
The map zoom range is the distance across the screen. This number shows in the lower left corner of the screen. In the first example figure below, the range is 4,000 miles from the left edge of the map to the right edge of the map.
The Zoom In and Zoom Out keys zoom the map to enlarge or reduce its coverage area and the amount of mapping detail shown. There are 37 available map zoom ranges, from 0.05 miles to 4,000 miles.
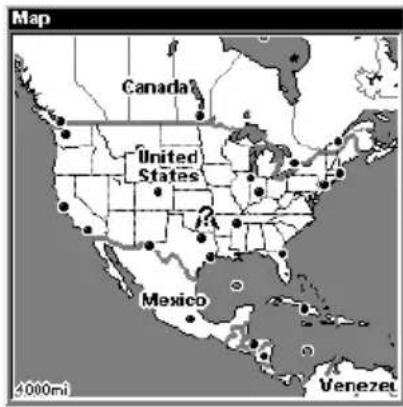
text_image
Map Canada United States Mexico 4000ml Venezuel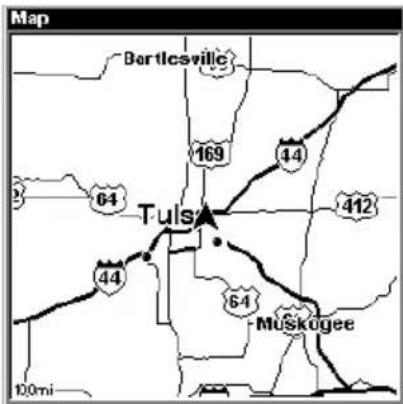
text_image
Map Bortlcsville 169 44 3 64 Tuls 44 64 MUSKOGEE 10mi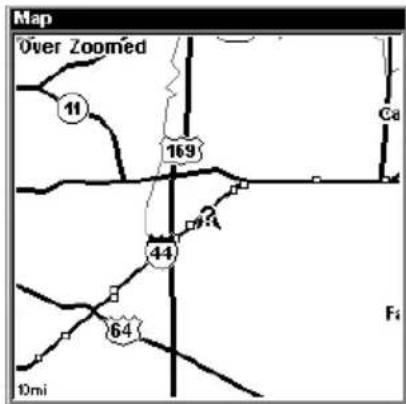
text_image
Map Over Zoomed 11 169 Ca 44 64 10mi FiFar left, Map Page opening screen. Center, zoomed to 100 miles and right, zoomed to 10 miles. Over Zoomed means you have reached the detail limits in an area covered only by the basic background map. Zooming in any closer will reveal no more map details because a high-detail custom map has not been loaded on the MMC for this area.
If you're using only the factory-loaded background map, the maximum zoom range for showing additional map detail is 20 miles. You can continue to zoom in closer, but the map will simply be enlarged without revealing more map content (except for a few major city streets.) Load your own high-detail custom map made with MapCreate, and you can zoom in to 0.05 miles with massive amounts of accurate map detail.
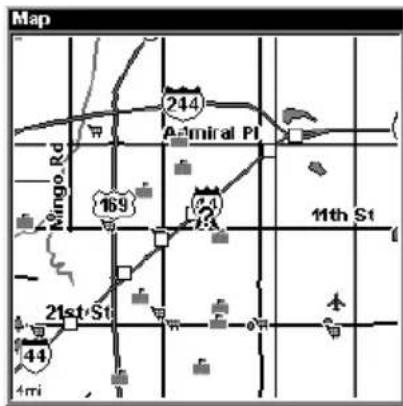
text_image
Map 214 Aimiral PI 169 214 11th St 21st St 44 4mi
text_image
Map Admiral Pl 244 69 St Rd 44 Garn 44 cm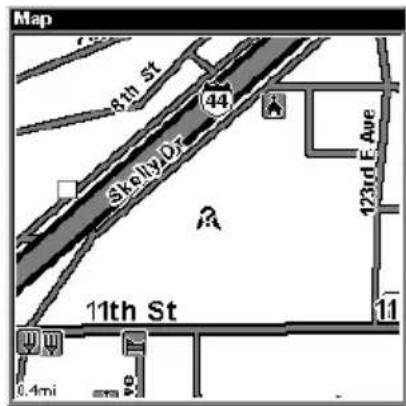
text_image
Map 8th St 44 Skelly Dr 123rd F Ave R 11th St 11 0.4miMap Pages with high-detail MapCreate map of an urban area loaded on the MMC. At left, arterial streets appear at the 4 mile zoom range, with a few Point of Interest icons visible. Center, numerous dots representing Points of Interest become visible at the 2 mile range, along with minor streets. Right, at the 0.4 mile zoom, you can see an interstate highway with an exit, major and minor streets as well as Point of Interest icons.
Background map vs. MapCreate map content
The background map includes: low-detail maps of the whole world (containing cities, major lakes, major rivers, political boundaries); and medium-detail maps of the United States.
The medium-detail U.S. maps contain: all incorporated cities; shaded metropolitan areas; county boundaries; shaded public lands (such as national forests and parks); some major city streets; Interstate, U.S. and state highways; Interstate highway exits and exit services information; large- and medium-sized lakes and streams; and more than 60,000 navigation aids and 10,000 wrecks and obstructions in U.S. coastal and Great Lakes waters
MapCreate custom maps include massive amounts of information not found in the background map. MapCreate contains: the searchable Points of Interest database, all the minor roads and streets, all the landmark features (such as summits, schools, radio towers, etc.); more rivers, streams, smaller lakes and ponds and their names.
What's more important is the large scale map detail that allows your GPS unit to show a higher level of position accuracy. For example, the background map would show you the general outline and approximate shape of a coastline or water body, but the higher detail in MapCreate shows the shoreline completely and accurately (finer detail). Many smaller islands would not be included in the background map, but are, of course, in MapCreate.
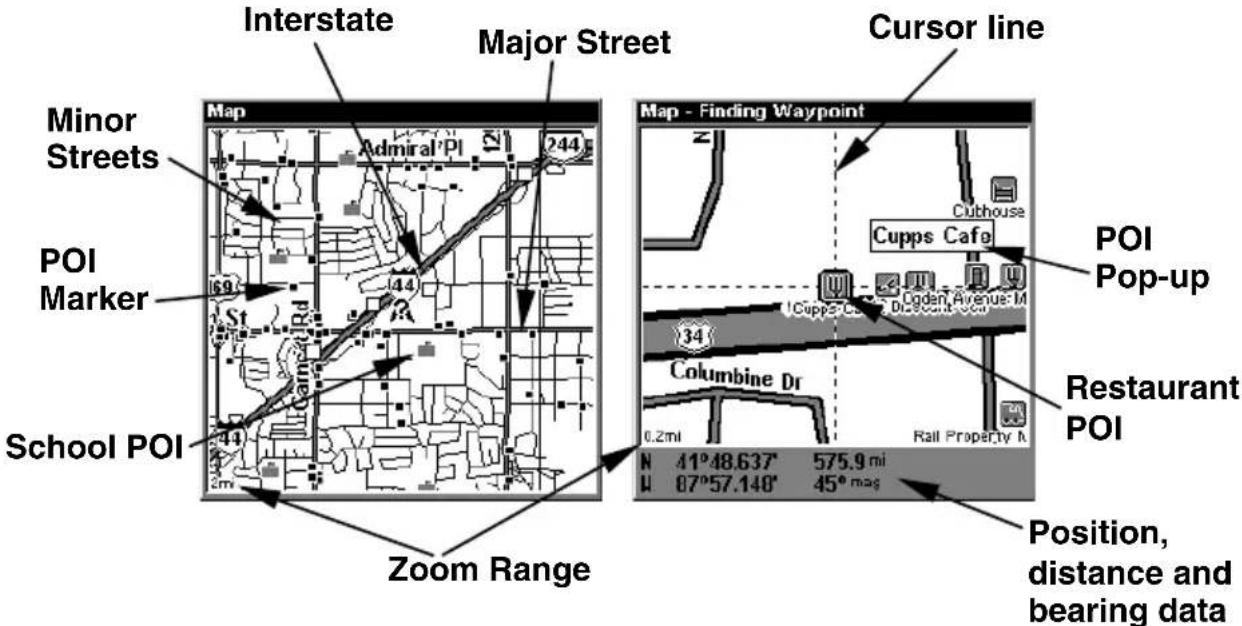
text_image
Interstate Major Street Cursor line Minor Streets Admiral Pl 244 POI Marker St 44 School POI Zoom Range Map - Finding Waypoint Cuthouse Cupps Cafe Doden Avenue M 34 Columbine Dr Rail Property N N 41°48.637° 575.9 mi W 07°57.140° 45° mag Position, distance and bearing data POI Pop-up Restaurant POIWhen the map is zoomed out far enough, most POIs appear as square dots. As you zoom in closer, the symbols become readable icons. In the 0.2 mile zoom example at right, the cursor has selected the Cupps Café POI, which triggers a pop-up box with the POI name. This pop-up box works on POIs at any zoom range.
Tip:
In some urban areas, businesses are so close to one another that their POI icons crowd each other on the screen. In the preceding figure, you can see a jumbled pile of POIs along Highway 34. You can reduce screen clutter and make streets and other map features easier to see by simply turning off the display of POIs you're not watching for. (To see how, check the text on Map Detail Category Selection, page 153. It shows how to use the Map Categories Drawn menu to turn individual POI displays off and on.) Even though their display is turned off, you can still search for POIs and their icons will pop-up when your unit finds them for you.
The Map Page has its own menu, which is used for several functions and for setting various options. To access the Map Page Menu, from the Map Page, press MENU.
The Pages Menu also offers several map display options under the Map Page category. To access them, press PAGES |← or→ to MAP |↓ to Option |EXIT.
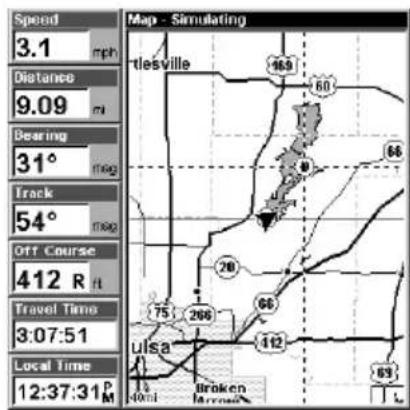
text_image
Speed 3.1 mph Distance 9.09 m Bearing 31° mag Track 54° mag Off Course 412 R ft Travel Time 3:07:51 Local Time 12:37:31 P M Map - Simulating tlesville 469 60 68 20 75 266 66 112 63 Broken Mnrsns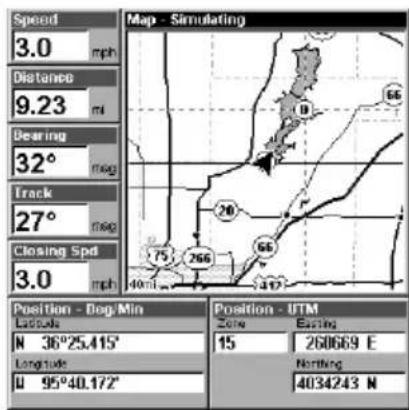
text_image
Speed 3.0 mph Distance 9.23 mi Bearing 32° mag Track 27° mag Closing Spd 3.0 mph Map - Simulating Position - Deg/Min Latitude N 36°25.415' Longitude U 95°40.172' Position - UTM Zone Easting 15 260669 E Northing 4034243 NAt left, Digital Data map page; at right, Two Position Formats page.
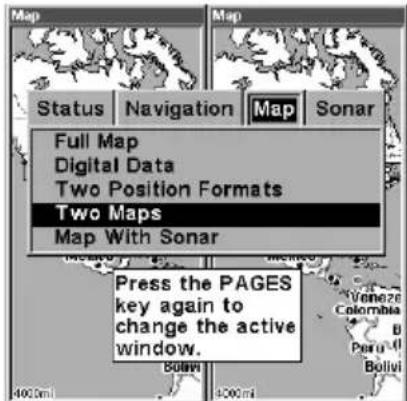
text_image
Map Status Navigation Map Sonar Full Map Digital Data Two Position Formats Two Maps Map With Sonar Press the PAGES key again to change the active window. Venezuela Colombia B Peru 01 Bolivi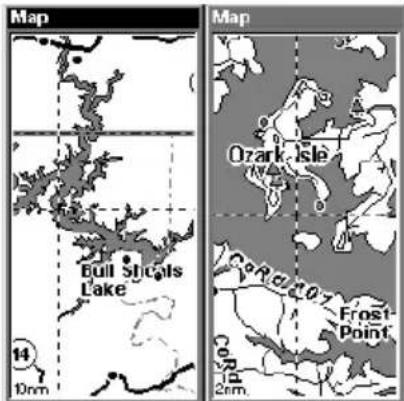
text_image
Map Bull Stools Lake 14 10mm Map Ozark Isle Coro 207 Frost- Point 207 20mmPages Menu with Two Maps option selected, left.
Map Page with two map windows, at right. The left map is active.
In pages that have two major windows (such as two maps) you can toggle back and forth between the two windows by pressing
PAGES | PAGES. This allows you to change which map the cursor, keyboard and menus operate on. A black title bar denotes the active window.
Resize Window is another extremely handy feature for pages that have two major windows. You can change the horizontal size of the windows to suit your viewing preference. Here's how:
- From any two-window display, press MENU | ↓ to RESIZE WINDOW | ENT.
- Two flashing arrows appear along the centerline dividing the two windows. Press or to adjust the window widths. Press EXIT to clear the menu.
- To change the window size again or revert back to the original display, just follow the steps above. (Most dual-window displays use half the screen for each window by default.) You can also use the Reset Options command to revert to the factory default.
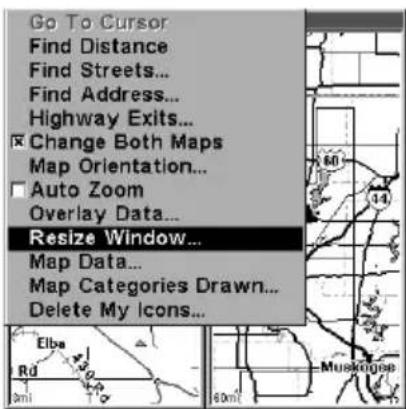
text_image
Go To Cursor Find Distance Find Streets... Find Address... Highway Exits... Change Both Maps Map Orientation... Auto Zoom Overlay Data... Resize Window... Map Data... Map Categories Drawn... Delete My Icons...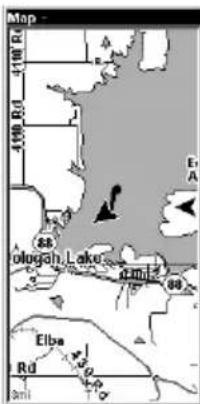
text_image
Map 4100 Rd 4100 Rd Olugah Lake Elba Rd Era A 88 88 88 88 88 88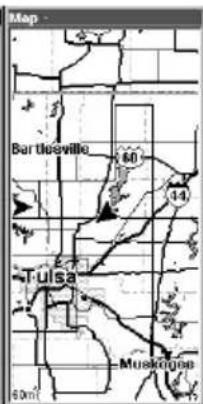
text_image
Map Barville 60 14 Tulsa Musk Ridge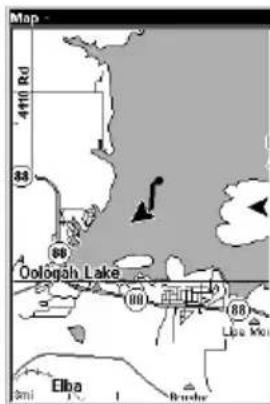
text_image
Map 4410 Rd 88 66 Oologah Lake (00) (88) Liba Mo Elba Brudar
text_image
Map Tulsa 40 50 mAt left, Map Menu with Resize Window command selected. Center, Resize Window command is active. At right, pressing the → key moves the centerline to the right and enlarges the left window.
The following page contains a 12-step quick reference for the most basic GPS operations. If you don't want to carry the manual with you as you practice with LMS-320, you might consider photocopying this quick reference page and tucking it into your pocket.
LMS-320 GPS Quick Reference
Start outdoors, with a clear view of the open sky. As you practice, try navigating to a location at least a few blocks away. While you're learning, navigation in too small an area will constantly trigger arrival alarms.
- Connect the unit to electric power and the antenna module. Make sure the MMC is in. (See complete installation details beginning on page 13.)
- To turn on LMS-320, press and release PWR key.
- Opening screen displays map of North America at the 4,000 mile zoom range. Rotate through the four main Page screens (Map Page, Satellite Status Page, Navigation Page and Sonar Page) by pressing PAGES |← or → to select Page Name |EXIT. Switch Pages to display Satellite Status Page.
- Wait while unit locates satellites and calculates current position. Process is visible on Satellite Page. This takes an average of 1 minute or less under clear sky conditions (unobstructed by terrain or structures.) When the unit acquires position, a tone sounds and a position acquired message appears.
- With position acquired, press PAGES key to display Map Page, which shows a bird's eye view of the earth. You can move around the map by:
Zoom in closer to see greater detail: press ZIN (zoom in key.)
Zoom out to see more area, less detail: press ZOUT (zoom out key.)
Scroll map north, south, east or west using arrow keys . To stop scrolling and return to current position on map, press EXIT key.
- Set a waypoint (Wpt 001) at your current position so you can navigate back here: press WPT | WPT. Waypoint symbol and "001" appears.
- Zoom/scroll map to find a nearby object or location to go to. Use arrow keys to center cursor cross-hair over the map object or location.
- Navigate to the selected destination: press MENU|ENT|EXIT. Follow dotted course line on Map Page or compass bearing arrow on Navigation Page.
-
At destination, Arrival Alarm goes off; to clear it, press EXIT. Cancel navigation: press MENU | MENU | ↓ to CANCEL NAVIGATION | ENT | ← to YES | ENT.
-
Return to Wpt 1 by Navigate To Waypoint or Backtrack Trail. To Waypoint: press WPT | → to SAVED | ENT | ENT | ENT. Use ↑ or ↓ to select Wpt 001, press ENT | ENT; follow navigation displays. Trail: press MENU | MENU | ↓ to MY TRAILS | ENT. Press ↓ to Trail 1 | ENT | → | ↓ to NAVIGATE | ENT | ↓ to NAVIGATE | ENT | → to REVERSE | ENT | ← to NAVIGATE | ENT. (If arrival alarm sounds, press EXIT.) Follow navigation displays.
-
Back home, Arrival Alarm goes off; press EXIT. Cancel navigation: press MENU | MENU | ↓ to CANCEL NAVIGATION | ENT | ← to YES | ENT.
-
To turn off LMS-320, press and hold PWR key for three seconds.
Find Your Current Position
Finding your current position is as simple as turning LMS-320 on. Under clear sky conditions, the unit automatically searches for satellites and calculates its position in approximately one minute or less.
NOTE:
"Clear sky" means open sky, unobstructed by terrain, dense foliage or structures. Clouds do not restrict GPS signal reception.
If for some reason satellite acquisition takes longer, you may be inside a structure or vehicle or in terrain that is blocking signal reception. To correct this, be sure you are positioned so that the unit's antenna module has as clear a view of the sky as possible, then turn the unit off and back on again.
Moving Around the Map: Zoom & Cursor Arrow Keys
The map is presented from a bird's eye view perspective. The current zoom range shows in the lower left corner of the screen.
- Press the ZIN key (zoom in) to move in closer and see greater detail in a smaller geographic area.
- Press the ZOUT key (zoom out) to move farther away and see less map detail, but a larger geographic area.
When you are traveling, the map will automatically move as you move. This keeps your current location roughly centered on the screen.
You can manually pan or scroll the map northward, southward, eastward or westward by using the arrow keys, which launch the cross-hair map cursor. This allows you to look at map places other than your current position. To clear the cursor, press EXIT, which jumps the map back to the current position or the last known position.
Tip:
Use the cursor to determine the distance from your current position (or last known position, when working indoors) to any map object or location. Simply use the arrow keys to position the cursor over the object or place. The distance, measured in a straight line, appears in the data box at the bottom of the map. Press EXIT to clear the cursor.
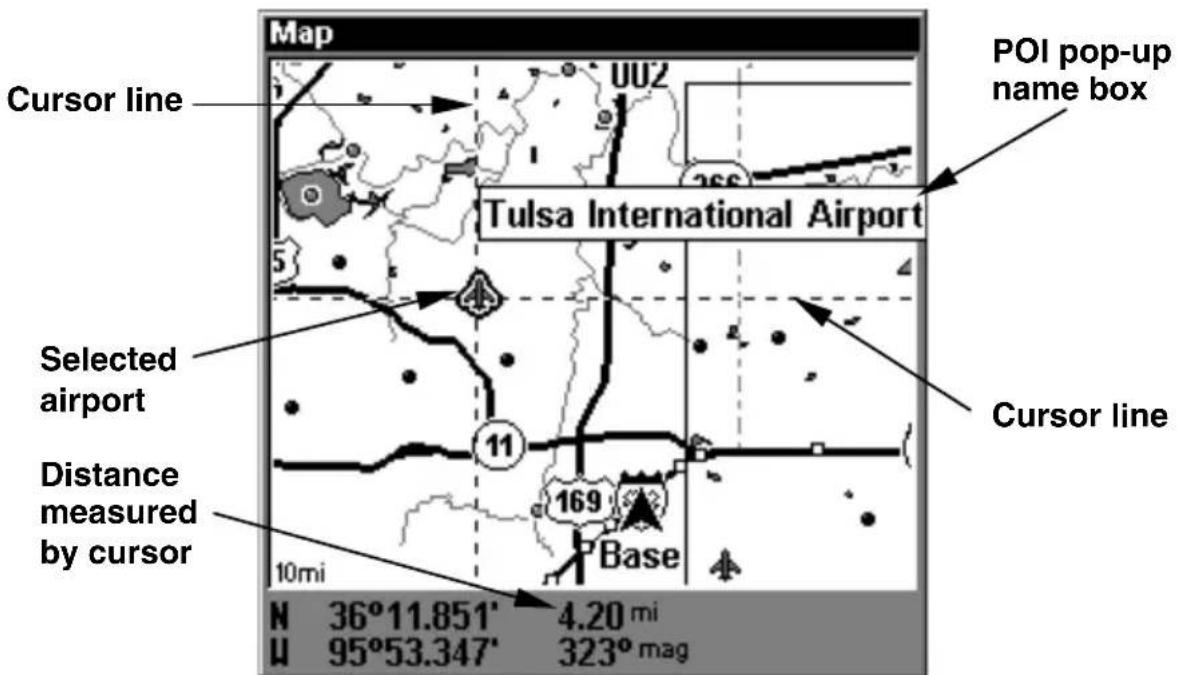
text_image
Map Cursor line U02 266 Tulsa International Airport 5 Selected airport 11 169 Cursor line Distance measured by cursor 10mi N 36°11.851' 4.20 mi U 95°53.347' 323° mag POI pop-up name boxThe selected airport to the northwest is 4.2 miles away.
Selecting Any Map Item With the Cursor
- Use the zoom keys and the arrow keys to move around the map and find the item you wish to select.
- Use the arrow keys and center the cursor cross-hair on the desired object. On most items, a pop-up box will give the name of the selected item.
Searching
Now that you've seen how LMS-320 can find where you are, let's search for something somewhere else. Searching is one of the most powerful features in the Lowrance GPS product line.
In this example, we'll look for the nearest fast-food restaurant. For more information on different types of searches, refer to Sec. 9, Searching.
NOTE:
This example requires the Point of Interest (POI) database included with a high detail MapCreate 6 custom map.
After LMS-320 has acquired a position:
-
Press WPT | ↓ to POI-RESTAURANTS.
-
You could search the entire restaurant category, but in this example we will narrow our search. Press → to SUBCATEGORY column|↓ to FAST FOOD CHAINS | ENT|↓ to NEAREST | ENT.
-
LMS-320 says it is calculating, then a list of restaurants appears, with the closest at the top of the list, and the farthest at the bottom of the list. The nearest is highlighted.
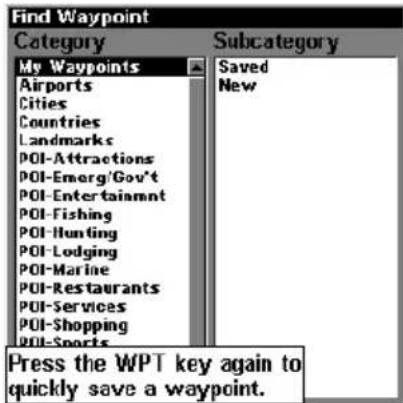
text_image
Find Waypoint Category Subcategory My Waypoints Airports Cities Countries Landmarks POI-Attractions POI-Emerg/Gov't POI-Entertainment POI-Fishing POI-Hunting POI-Lodging POI-Marine POI-Restaurants POI-Services POI-Shopping POI-Sports Press the WPT key again to quickly save a waypoint.
text_image
Find Waypoint Category Subcategory My Waypoints Airports Cities Countries Landmarks POI-Attractions POI-Emerg/Gov't POI-Entertainment POI-Fishing POI-Hunting POI-Lodging POI-Marine POI-Restaurants POI-Services POI-Shopping POI-Sports POI-Transport'n Public Lands Asian Banquet Rooms Barbecue Coffee Shops Dalic Fast Food Chains Ice Cream Italian Mexican Miscellaneous Pizza Sandwiches Seafood Steak Houses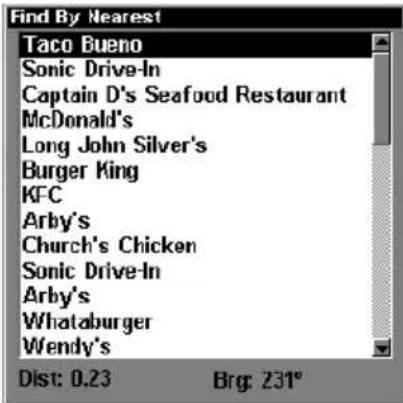
text_image
Find By Nearest Taco Bueno Sonic Drive-In Captain D's Seafood Restaurant McDonald's Long John Silver's Burger King KFC Arby's Church's Chicken Sonic Drive-In Arby's Whataburger Wendy's Dist: 0.23 Brg: 231°Find Waypoint Menu, left; Category Selection menu, center; and list of the nearest restaurants, right.
- If you wish, you could scroll or here to select another restaurant, but for now we will just accept the nearest one. Press ENT.
- The POI information screen appears. (This is how you can use LMS-320 as a business phone directory!) If you wanted to navigate there, you could press Enter, since the Go To command is highlighted. But we just want to see it on the map, so press ↓ to FIND|ENT.
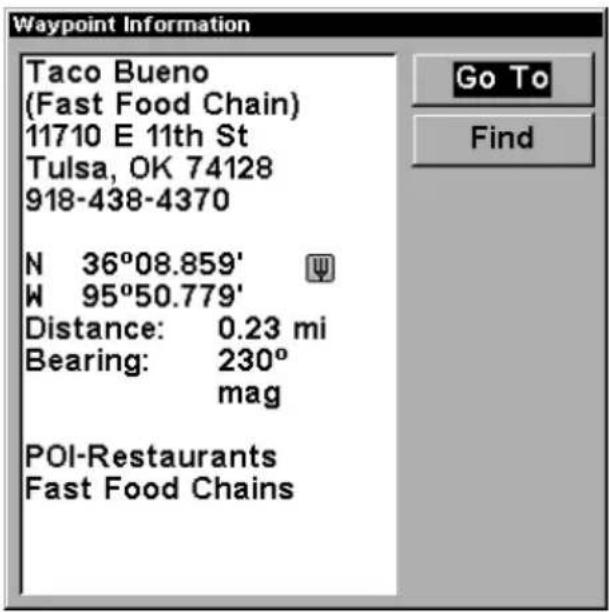
text_image
Waypoint Information Taco Bueno (Fast Food Chain) 11710 E 11th St Tulsa, OK 74128 918-438-4370 N 36°08.859' W 95°50.779' Distance: 0.23 mi Bearing: 230° mag POI-Restaurants Fast Food Chains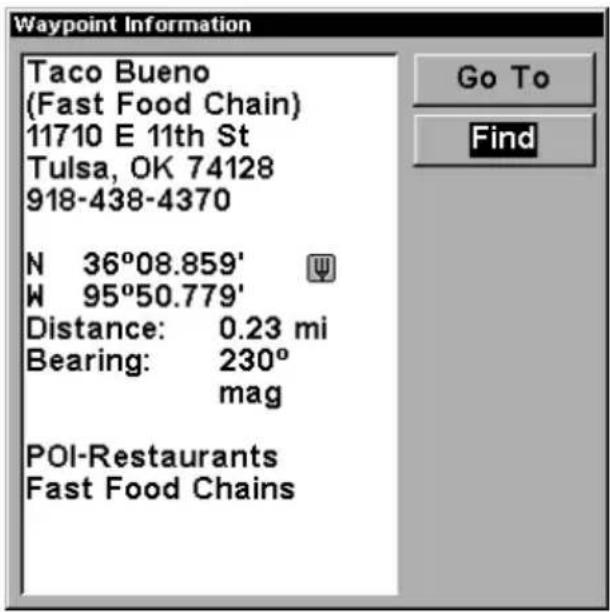
text_image
Waypoint Information Taco Bueno (Fast Food Chain) 11710 E 11th St Tulsa, OK 74128 918-438-4370 N 36°08.859' W 95°50.779' Distance: 0.23 mi Bearing: 230° mag POI-Restaurants Fast Food Chains Go To FindPOI information screen on fast food restaurant nearest this position. Screen shows name, street address, phone number, latitude/longitude, distance to restaurant and its compass bearing. Figure at left shows Go To command; right figure shows Find (on map) command.
- LMS-320's map appears, with the cross-hair cursor highlighting the restaurant's POI symbol. A pop-up name box identifies the POI. A data box at the bottom of the screen continues to display the location's latitude and longitude, distance and bearing.
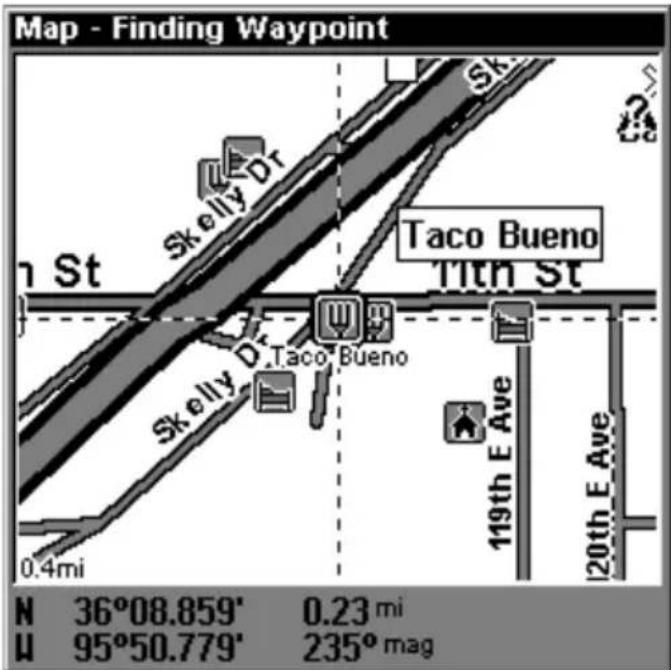
text_image
Map - Finding Waypoint 1 St Skelly Dr Taco Bueno Tith St Skelly Dr Taco Bueno 119th E Ave 120th E Ave 0.4mi N 36°08.859' 0.23 mi H 95°50.779' 235° magMap screen showing Finding Waypoint, the result of a restaurant search.
- To clear the search and return to the last page displayed, press EXIT | EXIT | EXIT | EXIT. (Before you completely exited out of the Search menus, you could have gone looking for another place.)
NOTE:
Search works from mapping and POI data loaded in LMS-320. If you do not have a high-detailed custom map (containing POI data) for the area you are searching loaded on the MMC, you may not find anything.
Set a Waypoint
A waypoint is simply an electronic "address," based on the latitude and longitude of a position on the earth. A waypoint represents a location, spot, or destination that can be stored in memory, then be recalled and used later on for navigation purposes.
You can create a waypoint at the cursor position on the map, or at your current position while you are navigating. You can create a waypoint at any location by manually entering the position's latitude and longitude. You can copy waypoints from your unit to your personal computer with MapCreate software. When you want to repeat a trip, these archived waypoints can be reloaded into your GPS unit.
To create and save a Waypoint:
These first two techniques use the Quick Save method, the fastest and easiest way to create a waypoint.
Create Waypoint at Current Position
While you are traveling, press WPT|WPT. The waypoint is saved and automatically given a name with a sequential number, such as "waypoint 003." The waypoint symbol and number appear on the map.
Step 1. Step 2.
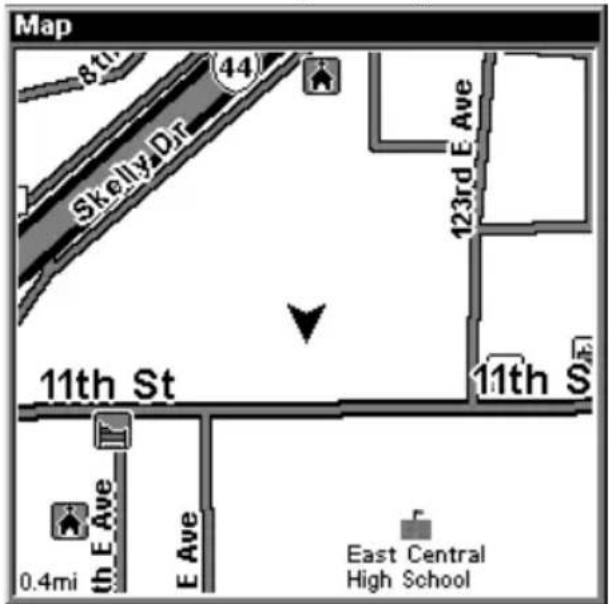
text_image
Map 811 44 Skelly Dr 123rd E Ave 11th St 11th S 0.4mi E Ave East Central High SchoolStep 3.
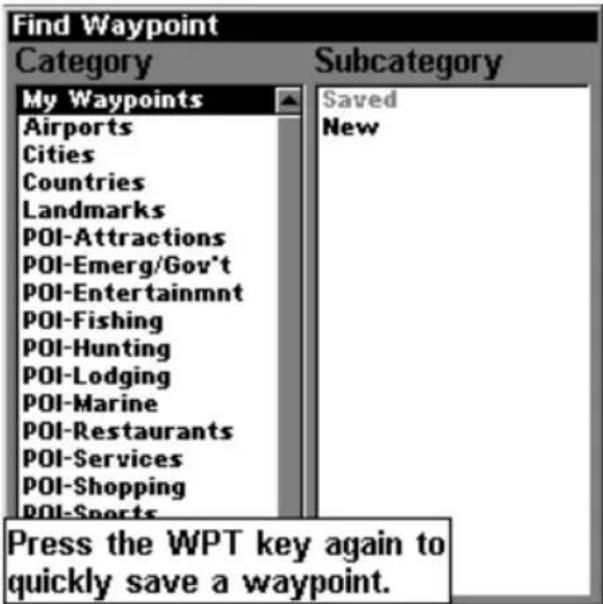
text_image
Find Waypoint Category Subcategory My Waypoints Airports Cities Countries Landmarks POI-Attractions POI-Emerg/Gov't POI-Entertainmnt POI-Fishing POI-Hunting POI-Lodging POI-Marine POI-Restaurants POI-Services POI-Shopping POI-Sports Press the WPT key again to quickly save a waypoint.Step 4.
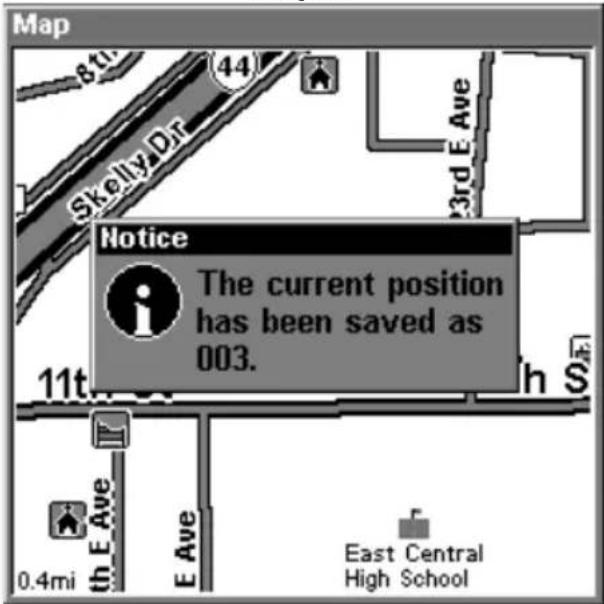
text_image
Map 8th 44 Skelly Dr. 3rd E Ave Notice The current position has been saved as 003. 11th S 0.4mi E Ave East Central High School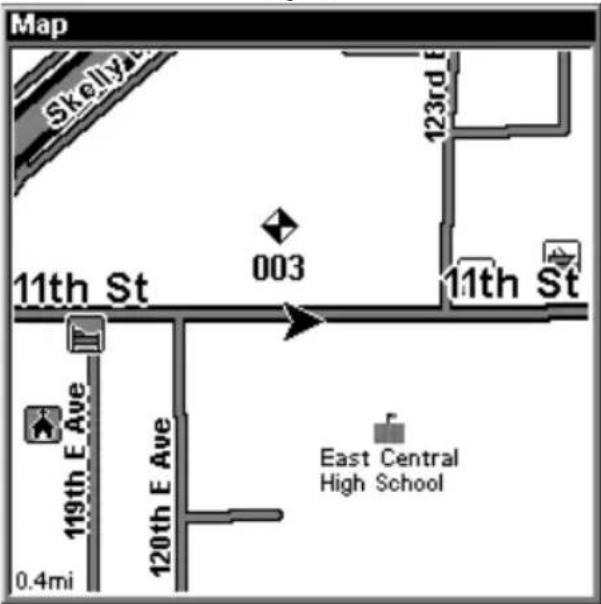
text_image
Map Skelly Street 123rd St 003 11th St 11th St 119th E Ave East Central High School 120th E Ave 0.4miSequence for setting a waypoint. Step 1: while traveling, quickly press WPT twice to call up Find Waypoint screen (seen in Step 2) and set a point. Step 3: a message says the waypoint has been saved. Step 4: vehicle continues on its way; number waypoint symbol is visible on map.
NOTE:
The Quick Save method uses the default waypoint symbol until you edit an existing waypoint and change its symbol. (Edit Waypoint Symbol is described in Sec. 7.) After you have changed a waypoint symbol, the unit will remember the one you chose and use it the next time you "quick save" a waypoint. To revert back to the default symbol, edit a waypoint and choose it, or use the Reset Options command (described in Sec. 8).
Create Waypoint on Map
- Use the arrow keys to move the cursor to the place where you want to make a waypoint.
- Press WPT|WPT. The waypoint is saved and automatically given a name with a sequential number, such as "waypoint 001." The waypoint symbol and number appear on the map.
Create Waypoint by Entering a Position
- Press WPT | → to SUBCATEGORY column | ↓ to NEW | ENT.
- Press ↓ to ENTERED POSITION | ENT | → to CREATE | ENT.
- Press → to LATITUDE | ENT. Enter the latitude by pressing ↑ or ↓ to change the first character, then press → to the next character and repeat until the latitude is correct. Press ENT.
- Press ↓ to LONGITUDE | ENT. Enter the longitude by pressing ↑ or ↓ to change the first character, then press → to the next character and repeat until the longitude is correct. Press ENT, then EXIT | EXIT to return to the previous page display. The waypoint is saved and automatically given a name with a sequential number, such as "waypoint 001." The waypoint symbol and number appear on the map and in the waypoint list.
Navigate To a Waypoint
You can select any waypoint visible on the Map Page with the cursor, then use the Navigate to Cursor command (we'll describe how later in this section.) However, you can avoid scrolling the map to pick your waypoint if you use the Find Waypoint commands:
- Press WPT | → to SAVED | ENT. To look up the nearest waypoint, press ↓ to NEAREST | ENT; or, to look by name (and scroll through the entire waypoint list), press ENT. For this example, look by name.
- If your waypoint list is a long one, you can spell out the waypoint name in the FIND BY NAME box to search for it. (Press ↑ or ↓ to change the first character, then press → to move the cursor to the next character
and repeat until the name is correct, then press ENT to jump to the list below.)
-
If the list is short, you can jump directly to the FIND IN LIST box by pressing ENT. Use ↑ or ↓ to select the waypoint name, press ENT and the waypoint information screen appears with the Go To command selected.
-
To begin navigating to the waypoint, press ENT.
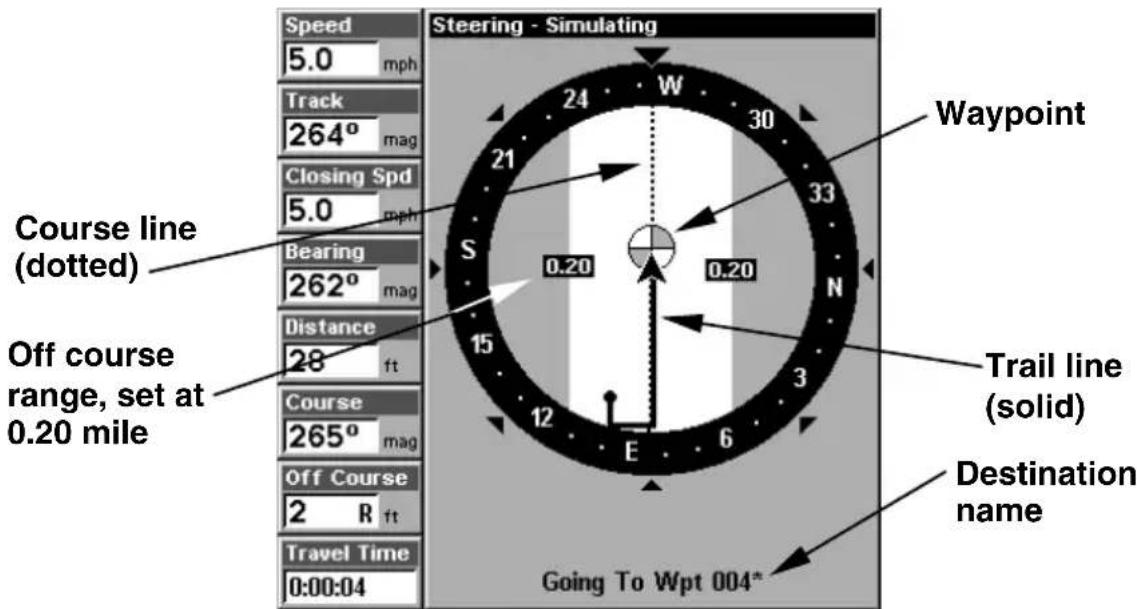
text_image
Speed 5.0 mph Track 264° mag Closing Spd 5.0 mph Course line (dotted) Bearing 262° mag Distance 28 ft Course 265° mag Off course range, set at 0.20 mile Travel Time 0:00:04 Steering - Simulating 24 W 30 21 S 0.20 15 12 E 6 33 N 0.20 Waypoint Trail line (solid) Destination name Going To Wpt 004*Navigation Page, navigating toward waypoint 004 and leaving a trail.
Set Man Overboard (MOB) Waypoint
One of boating's most terrifying events is having a friend or family member fall overboard. This situation can be deadly on any body of water — fresh or salt. It's particularly dangerous at night or if you're out of sight of land. Of course, the first thing to do is remain calm and then use all standard safety procedures to rescue the person.
This unit has a man overboard feature that shows navigation data to the location where the feature was activated. To activate it, press the ZOUT and ZIN keys at the same time. Your position at the time these keys are pressed is used as the man overboard position.
Caution:
Saving a new "Man Overboard" waypoint will overwrite and erase the previous "Man Overboard" waypoint.
Navigate Back to MOB Waypoint
Find your way back to the accident position with the Navigation Page or Map Page. When MOB is activated, the Navigation Page automatically shows the compass rose with its bearing arrow pointing toward
the man overboard position, and the destination name says "Going To Man Overboard." The Map Page displays a Man Overboard waypoint, represented by a human figure, and the steering arrow points where to steer to reach that position.
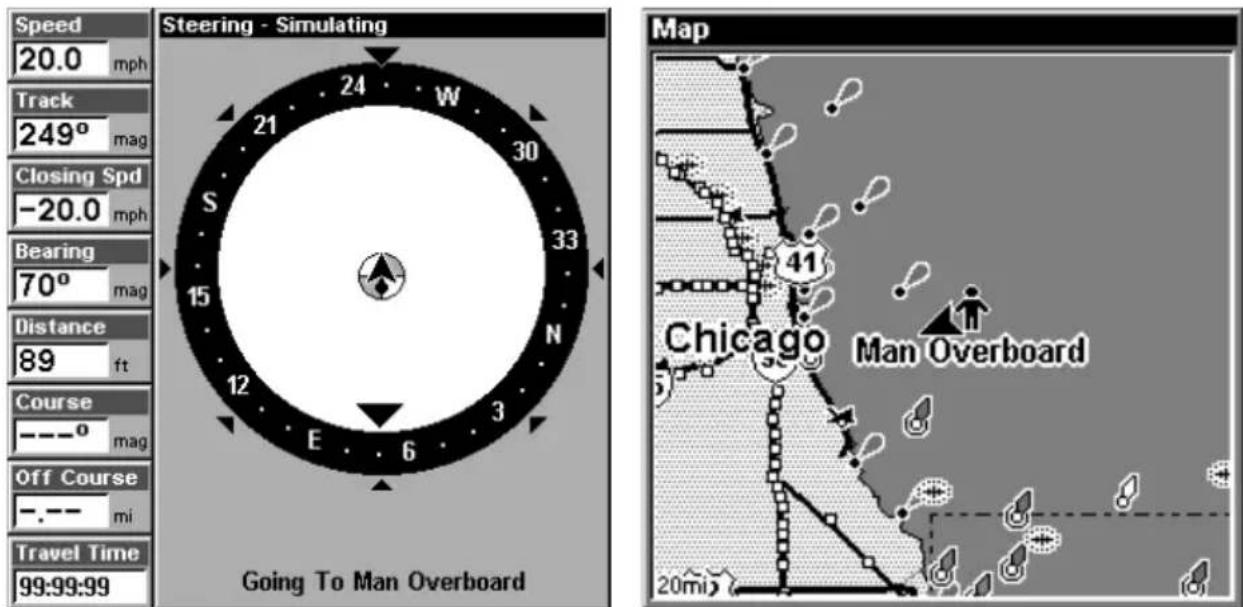
text_image
Speed 20.0 mph Track 249° mag Closing Spd -20.0 mph Bearing 70° mag Distance 89 ft Course ----° mag Off Course --- mi Travel Time 99:99:99 Steering - Simulating 21 24 W 30 33 15 12 E 6 3 Going To Man Overboard Map 41 Chicago Man Overboard 20miNavigating to Man Overboard: Navigation Page, left, and Map Page, right. The victim is astern of the vessel; the GPS shows which direction to steer to for the rescue.
The man overboard position is also stored in the waypoint list for future reference. It can be edited the same as any other waypoint in Advanced Mode. This prevents the inadvertent loss of the current Man Overboard position.
To cancel navigation to MENU, | MENUS\$ ↓ to CANCEL NAVIGATION | ENT | ← to YES | ENT. LMS-320 stops showing navigation information.
Navigate to Cursor Position on Map
The Go To Cursor command: navigates to the current cursor position on the map. It's a quick and handy way to navigate to anything you can see on the map display.
- Use the cursor (controlled by the arrow keys) with the zoom in and zoom out keys to maneuver around the map until you find a location you want to go to.
- Center the cursor over the location to select it. See the example in the following figure. (Many map items such as waypoints, Points of Interest, towns, etc. can be "selected," and appear "highlighted" with a pop-up box. Other features, such as a river or a street intersection will not appear "highlighted," but the cursor will take you to those locations just the same.)
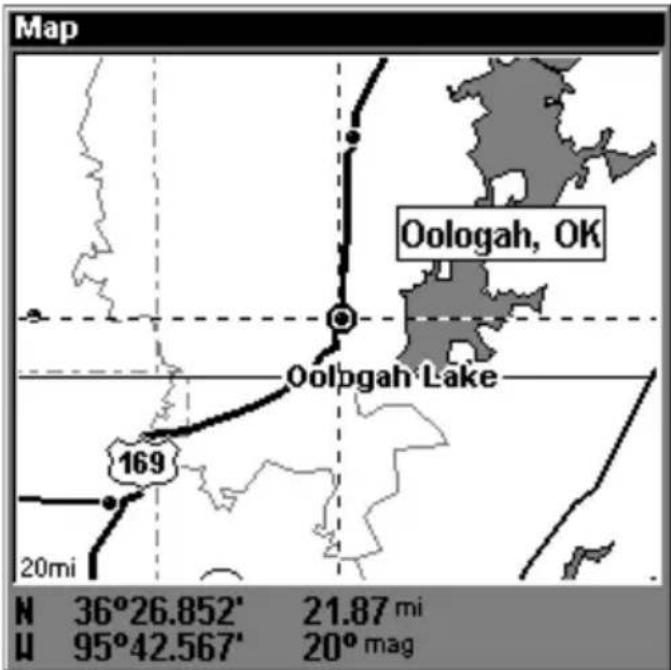
text_image
Map Oologah, OK Oolpgah Lake 169 20mi N 36°26.852' 21.87 mi U 95°42.567' 20° magNavigate to cursor. In this example, the cursor has selected the town of Oologah, Oklahoma.
- Press MENU|ENT and LMS-320 will begin navigating to the cursor location.
The Map Page will display a dotted line from your current position to the cursor position. The Navigation Page displays a compass rose showing navigation information to your destination. See the following examples.

text_image
Map Tai'ala Oologah, OK Oologah Oologah Lake 169 Tamilie N 36°26.852' 21.87 mi M 95°42.567' 20° mag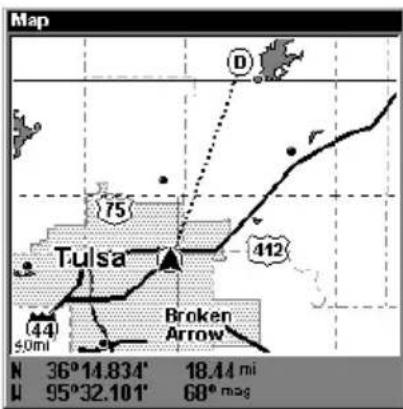
text_image
Map Tulsa 412 Broken Arrow N 36°14.834' 18.44 mi M 95°32.101' 60° mag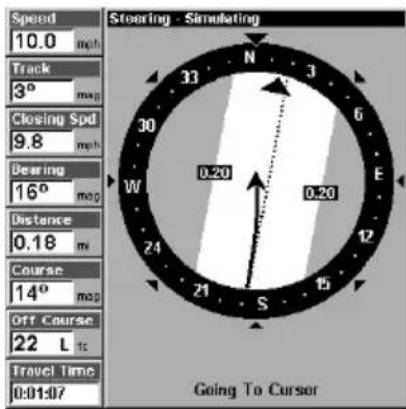
text_image
Speed 10.0 mph Track 3° mag Closing Spd 9.8 mph Dearing 16° mag Distance 0.18 m Course 14° mag Off Course 22 L ts Travel Time 0:01:07 Steering - Simulating N 33 3 6 30 W 0.20 0.20 E 12 24 21 S 15 Going To CursorThe 15-mile zoom figure at left clearly shows the dotted course line connecting your current position to your destination. The 40-mile zoom, center, shows both current position and destination on screen. The Navigation Page, right, will also show navigation information.
To stop navigating to the cursor, use the Cancel Navigation command: press MENU | MENU | ↓ to CANCEL NAVIGATION | ENT | ← to YES | ENT. LMS-320 stops showing navigation information.
Navigate to a Point of Interest
For POIs that are in view on the map, you can easily use the Navigate to Cursor command above; just use the cursor to select the POI.
The other method involves searching for POIs with the Find Waypoint command, launched with the WPT key. (See the searching example earlier in this section, or turn to Sec. 9, Searching, for detailed instructions on POI searches.)
After you have looked up an item with the Find Waypoint command, use the to make sure the Go To command is highlighted at the top of the screen, then press ENT. LMS-320 begins showing navigation information to the item.
To cancel navigation, press MENU | MENU | ↓ to CANCEL NAVIGATION | ENT | ← to YES | ENT. LMS-320 stops showing navigation information.
Creating and Saving a Trail
A trail, or plot trail, is a string of position points plotted by LMS-320 as you travel. It's a travel history, a record of the path you have taken. Trails are useful for repeating a journey along the same track. They are particularly handy when you are trying to retrace your trip and go back the way you came. On the screen, trails are represented by a solid line extending from the back of the current position arrow.
LMS-320 is set at the factory to automatically create and record a trail while the unit is turned on. The unit will continue recording the trail until the length reaches the maximum trail point setting (default is 2,000, but the unit can record trails 9,999 points long). When the point limit is reached, LMS-320 begins recording the trail over itself.
By default, the trail flashes once a second, making it easier to see against the background map. With the default auto setting, LMS-320 creates a trail by placing a dot (trail point) on the screen every time you change directions. (The methods used for creating a trail and the trail update rate can both be adjusted or even turned off. See Sec. 8 for Trail Options.)
To preserve a trail from point A to point B, you must "turn off" the trail by making it inactive before heading to point C or even back to point A. When the current trail is set inactive, LMS-320 automatically creates and begins recording a new trail.
To Save a Trail
- Press MENU | MENU | ↓ to MY TRAILS | ENT.
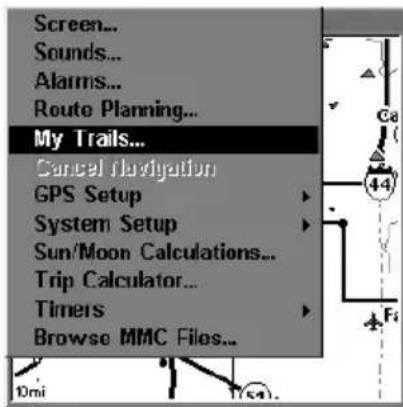
text_image
Screen... Sounds... Alarms... Route Planning... My Trails... Cancel Navigation GPS Setup System Setup Sun/Moon Calculations... Trip Calculator... Timers Browse MMC Files...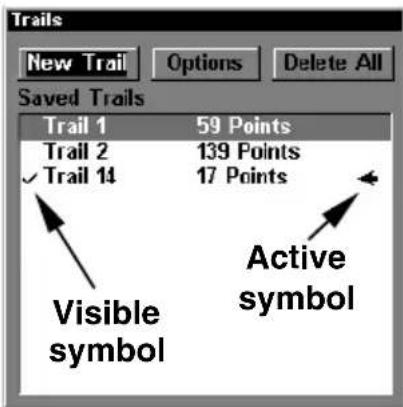
text_image
Trails New Trail Options Delete All Saved Trails Trail 1 59 Points Trail 2 139 Points ✓ Trail 14 17 Points Visible symbol Active symbol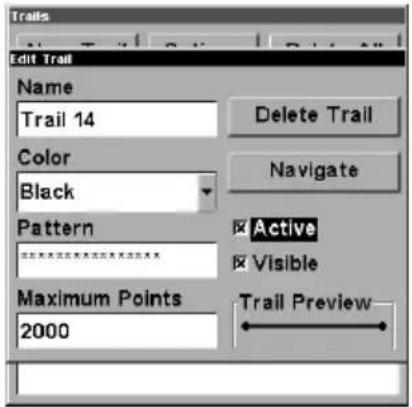
text_image
Trails Edit Trail Name Trail 14 Delete Trail Color Black Navigate Pattern Active Visible Maximum Points 2000 Trail PreviewSequence for saving a trail and beginning a new one. At left, My Trails command. Center, the Trails Menu. The arrow to the right of Trail 14 indicates the trail is "active," and the check to the left indicates the trail is visible on the map display. The right figure shows the Edit Trail menu, with the Active command selected.
- Press ↓ to the Active Trail Name | ENT.
- Press ↓ to ACTIVE|ENT. This unchecks the Active option.
- To return to the previous page, press EXIT|EXIT|EXIT|EXIT. As you left the Edit Trail menu, you will notice that a new trail was started with a new sequential number. In the example figure below, the new trail is number 15, showing zero points. Note that Trail 14 is inactive, but it is still visible on the map.
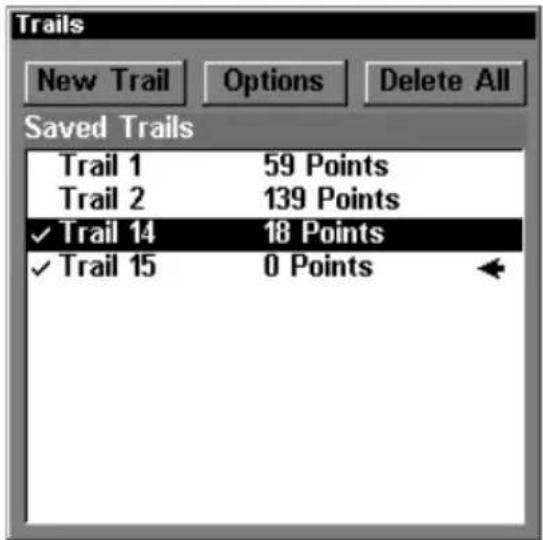
text_image
Trails New Trail Options Delete All Saved Trails Trail 1 59 Points Trail 2 139 Points ✓ Trail 14 18 Points ✓ Trail 15 0 PointsNew trail, named "Trail 15," is created when Trail 14 is made inactive. Any new travel will be recorded in this trail, which is active and visible. Trails do not need to be visible in order to be active.
You can save and recall up to 10 different plot trails, which can also be copied to your MMC for archiving or for transfer to your MapCreate software.
Tip:
Another quick way to stop recording one trail and begin a new one is to use the New Trail command: Press MENU | MENU | ↓ to My TRAILS | ENT | ENT.
Caution:
You also have the option of completely turning off trail recording, under the trail Options command. However, if the Update Active Trail option is left turned off, it will cancel the automatic trail creation feature.
Displaying a Saved Trail
The active trail is automatically displayed on the map (the "Visible" option) with the factory default settings. You can selectively turn trail display off and on for any saved or active trail. In the Saved Trails List, visible trails have a check mark in front of the trail name.
To turn off trail display:
- Press MENU | MENU | ↓ to MY TRAILS | ENT.
- Press ↓|↓ to enter the Saved Trail list, then use ↑ or ↓ to select the desired Trail Name | ENT.
- Press ↓ to ACTIVE|→ to VISIBLE | ENT. To return to the previous page, press EXIT |EXIT |EXIT |EXIT.
To turn on trail display:
- Press MENU | MENU | ↓ to MY TRAILS | ENT.
- Press ↓|↓ to enter the Saved Trail list, then use ↑ or ↓ to select the desired Trail Name | ENT.
- Press ↓ to ACTIVE|→ to VISIBLE | ENT. To return to the previous page, press EXIT |EXIT |EXIT |EXIT.
Navigating Trails
There are three methods for following a trail: visual trailing, navigating a trail (forward) and backtracking a trail (backward). Try each method to see which you prefer.
Visual trailing is the simplest method. It uses only the Map Page and requires no menu commands at all. The technique works the same if you are running a trail forward (from start to end) or backward (from end to start.) However, visual trailing provides no navigation information during the trip, such as the time to your destination.
The other two methods provide a full range of navigation data and work with both the Map Page and Navigation Page. The only difference between them is "navigating a trail" follows a trail forward (from start to end) while "backtracking" follows a trail in reverse (from end to start.)
When hiking at walking speed with a hand-held GPS, we often just use visual back trailing because it is a bit better at following each little turn on a foot path. At faster speeds, such as the highway or on the water, the Navigate Trail and Backtrack Trail commands are handy.
Visual Trailing
-
On the Map Page, zoom (ZIN or ZOUT) so your flashing trail is visible.
-
Begin moving and watch the Map Page. Simply walk or steer so that your current position arrow traces along the trail you have just made.
Tip:
Generally, when using this method, the smaller the zoom range, the more accurately you will be able to steer along the trail.
Navigate a Trail (forward)
The following figures illustrate the menu sequence for navigating a trail.
-
Press MENU | MENU | ↓ to MY TRAILS | ENT.
-
Press ↓|↓ to enter the Saved Trail list, then use ↑ or ↓ to select the desired Trail Name | ENT.
-
Press → to DELETE TRAIL | ↓ to NAVIGATE | ENT.
-
Press ↓ to NAVIGATE|ENT. The unit begins showing navigation information along the trail.
NOTE:
If you are already located at or near the beginning of your trail, the arrival alarm will go off as soon as you hit Enter. Just press EXIT to clear the alarm and proceed.
-
Now, begin moving and follow your LMS-320.
-
When you reach your destination, be sure to cancel your navigation: press MENU | MENU|↓ to CANCEL NAVIGATION|ENT. LMS-320 asks if you're sure; press ← | ENT.
Figure 1.
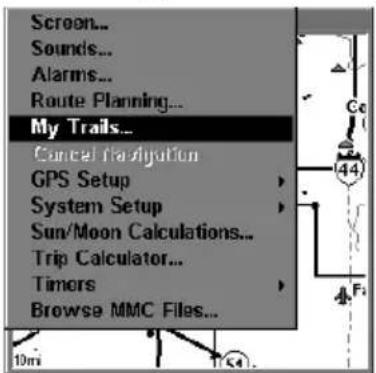
text_image
Screen... Sounds... Alarms... Route Planning... My Trails... Cancel Navigation GPS Setup System Setup Sun/Moon Calculations... Trip Calculator... Timors Browse MMC Files...Figure 2.
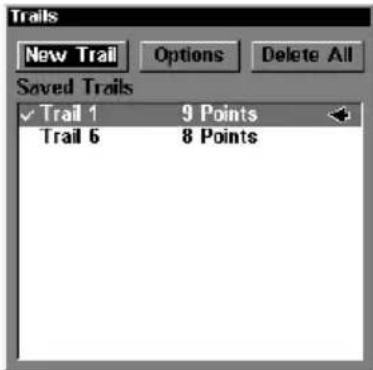
text_image
Trails New Trail Options Delete All Saved Trails ✓ Trail 1 9 Points Trail 6 8 PointsFigure 3.
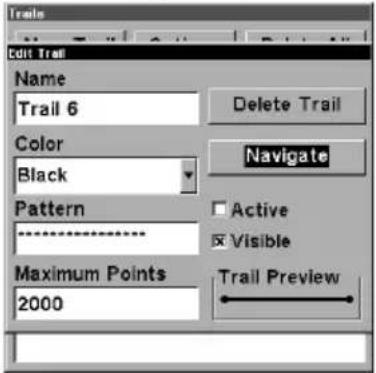
text_image
Trails Edit Trail Name Trail 6 Delete Trail Color Black Navigate Pattern ****** Active Visible Maximum Points 2000 Trail PreviewFigure 4.
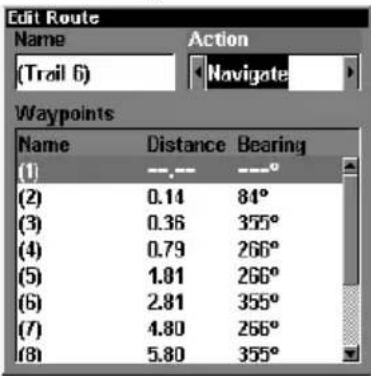
text_image
Edit Route Name Action (Trail 6) Navigate Waypoints Name Distance Bearing (1) -.- -° (2) 0.14 84° (3) 0.36 355° (4) 0.79 266° (5) 1.01 266° (6) 2.81 355° (7) 4.80 256° (8) 5.80 355°Navigate a trail menu sequence: Fig. 1, My Trails command. Fig. 2, Trails Menu. Fig. 3, Edit Trail Menu. Fig. 4, Edit Route Menu with Navigate command highlighted for Trail 6. A trail is always converted to a "route" when you navigate the trail.
On the Map Page, the trail you are navigating is represented by a dotted line that alternates with a flashing solid line. The Navigation Page will also show the navigated trail as a dotted line. The bearing arrow on the compass rose points to the next waypoint on the trail.
As you travel, the arrival alarm will go off when you near a trail waypoint, and the bearing arrow on the compass rose will swing around and point to the next trail waypoint. Press EXIT to clear the alarm.
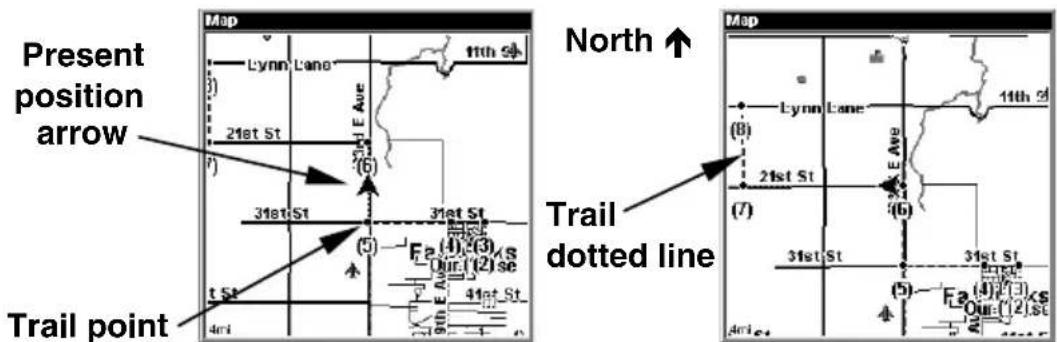
text_image
Present position arrow Trail point Map Lynn Lane 11th St 21st St (6) 31st St 31st St (5) Fa(4)(3)S Our.(12)se 41st St 4nd St North ↑ Trail dotted line Map Lynn Lane 11th St 21st St (7) 31st St 31st St (5) Fa(4)(3)S Our.(12)se 41st StNavigate trail, map views: at left driver is northbound heading straight toward trail point 6. At right, northbound driver has reached point 6 and has turned west to follow trail.
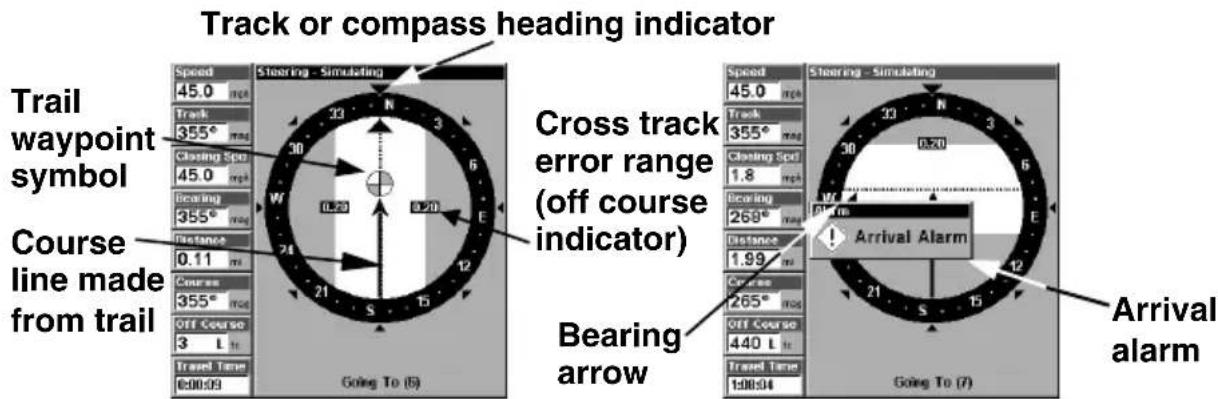
text_image
Track or compass heading indicator Speed 45.0 rps Track 355° rps Closing Spot 45.0 rps Bearing 355° rps Distance 0.11 m Course line made from trail Going To (5) Cross track error range (off course indicator) Bearing arrow Speed 45.0 rps Track 355° rps Closing Spot 1.8 rps Bearing 268° rps Distance 1.99 m Course 265° rps Off Course 440 L rps Travel Time 1:00:04 Going To (7) Arrival Alarm Arrival alarmNavigate trail, navigation page (compass rose) views: at left, driver is northbound heading straight toward trail point 6; bearing arrow shows the trail point is due north (straight ahead.) At right, driver has reached trail point 6 and must turn west to follow the trail. Arrival alarm goes off and bearing arrow swings around to say turn left (west), toward the next waypoint, trail point 7. LMS-320 now shows navigation information to point 7, which is 1.99 miles away.
Navigate a Back Trail (backtrack, or reverse)
- Press MENU | MENU | ↓ to MY TRAILS | ENT.
- Press ↓|↓ to enter the Saved Trail list, then use ↑ or ↓ to select the desired Trail Name | ENT.
- Press → to DELETE TRAIL | ↓ to NAVIGATE | ENT.
- Press ↓ to NAVIGATE| → to REVERSE | ENT| ← to NAVIGATE | ENT. The unit begins showing navigation information along the trail, in reverse.
NOTE:
If you are already located at or near the end of your trail, the arrival alarm will go off as soon as you hit Enter. Just press EXIT to clear the alarm and proceed.
-
Now, begin moving and follow your LMS-320.
-
When you reach your destination, be sure to cancel your navigation: press MENU | MENU | ↓ to CANCEL NAVIGATION | ENT. LMS-320 asks if you're sure; press ← | ENT.
Transfer Custom Maps and GPS Data Files Custom Maps:
Custom maps work only from the MMC card or SDC card. When a card containing a Custom Map File is loaded into the unit, LMS-320 automatically loads the map into memory when the unit is turned on.
Instructions for copying Custom Map Files to an MMC are contained in the instruction manual for your MMC card reader and MapCreate 6
software. For instructions on inserting an MMC into LMS-320, see Sec. 2, Installation/Accessories.
NOTE:
To load a Navionics ^® chart, see Sec. 8 for the entry Navionics Charts.
GPS Data files:
GPS Data Files contain waypoints, routes, trails and event marker icons. Instructions for copying GPS Data Files between your computer and an MMC are contained in the instruction manual for your MMC card reader and MapCreate 6 software.
GPS data automatically recorded in the unit's internal memory must be saved to the MMC (as a GPS Data File) in order to store it on your personal computer. GPS Data Files stored on an MMC must be copied from the card to LMS-320's internal memory before the unit can read them. Here's how:
- Insert the MMC into your unit. Press MENU | MENU | ↓ to SYSTEM SETUP | ENT | ↓ to TRANSFER MY DATA | ENT and the screen below appears.
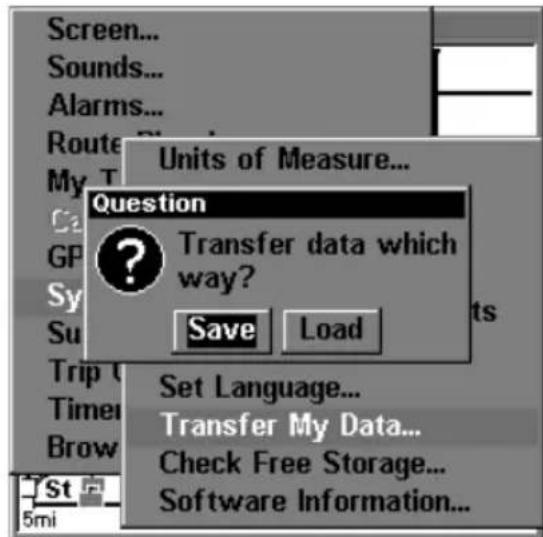
text_image
Screen... Sounds... Alarms... Route My T C GP Sy Su Trip U Timer Brow St 5mi Units of Measure... Question Transfer data which way? Save Load Set Language... Transfer My Data... Check Free Storage... Software Information...The Transfer My Data submenu asks if you want to save data to the MMC or load data from the MMC into LMS-320's memory.
- The Transfer My Data menu includes a message which tells you if an MMC is present or not. If no MMC is present, you must first insert a card into LMS-320 in order to activate the Load or Save commands.
To transfer data from LMS-320 to the MMC: press ENT (for SAVE.)
To transfer data from the MMC to LMS-320: press → to LOAD | ENT.
- Saving to MMC: To accept the default name "Data" for the GPS Data File, press ↓ to SAVE DATA | ENT. If you wish to rename the file (as shown in the following figures), press ENT to activate the selection box.
Press ↑ or ↓ to change the first character, then press → to the next character and repeat until the name is correct. Then, press ENT | ↓ to SAVE DATA | ENT.
The unit will display first a progress then a completion message when the data transfer is finished. To return to the Page view, repeatedly press EXIT.
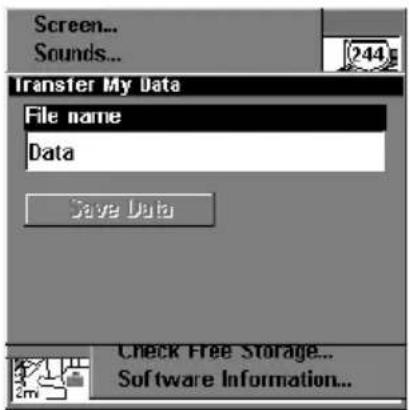
text_image
Screen... Sounds... Transfer My Data File name Data Save Data Check Free Storage... Software Information...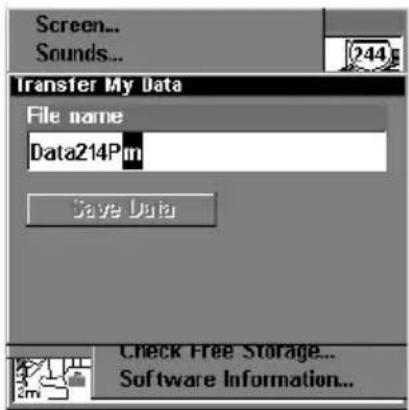
text_image
Screen... Sounds... Transfer My Data File name Data214Pin Save Data Check Free Storage... Software Information...
text_image
Screen... Sounds... Transfer My Data File name Data214Pm Save Data Check Free Storage... Software Information...From left to right, these figures show the menu sequence for naming and saving a GPS Data File from LMS-320's memory to an MMC.
- Loading to unit memory: There may be more than one GPS Data File (*.USR) on the card. To select a file, press ENT to activate the selection box, use ↓ or ↑ to highlight the file, then press ENT to accept the selection. Next, press ↓ to LOAD|ENT. The unit will display a completion message when the data transfer is finished. To return to the Page view, press EXIT | EXIT | EXIT | EXIT.
Figure 1.
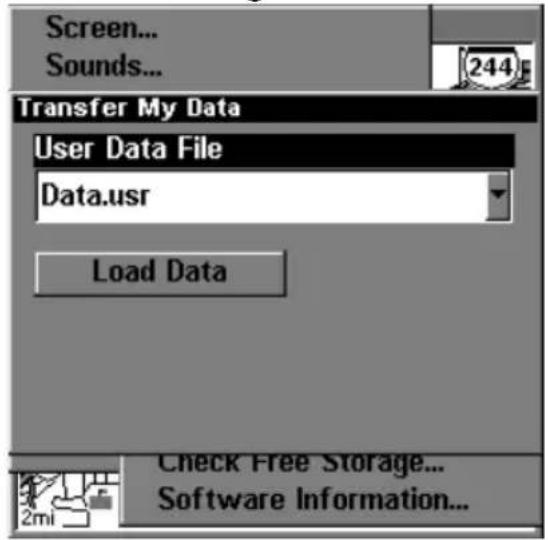
text_image
Screen... Sounds... 244 Transfer My Data User Data File Data.usr Load Data Check Free Storage... Software Information...Figure 2.
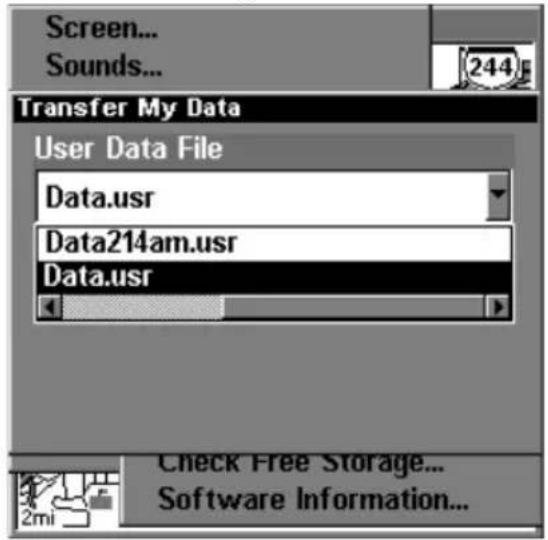
text_image
Screen... Sounds... Transfer My Data User Data File Data.usr Data214am.usr Data.usr Check Free Storage... Software Information...Figure 3.
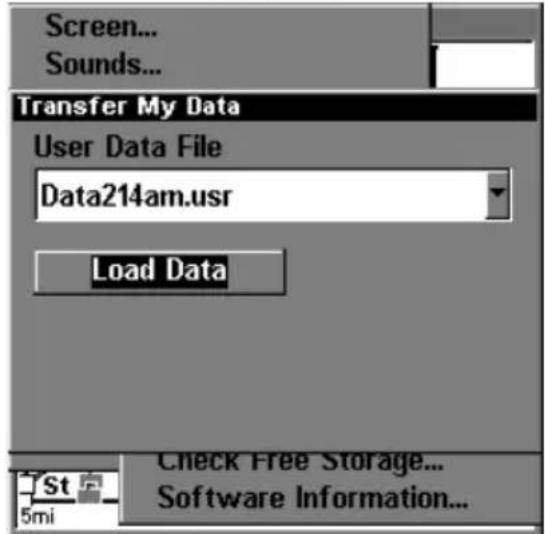
text_image
Screen... Sounds... Transfer My Data User Data File Data214am.usr Load Data Check Free Storage... Software Information...Figure 4.
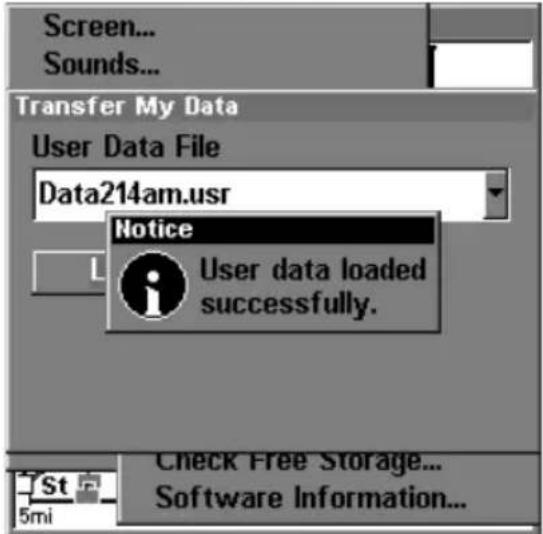
text_image
Screen... Sounds... Transfer My Data User Data File Data214am.usr Notice User data loaded successfully. Check Free Storage... Software Information...These figures show the menu sequence for loading a GPS Data File from an MMC into LMS-320's memory.
Cancel Navigation
You can turn off any of the navigation commands after you reach your destination or at any other time by using the Cancel Navigation command. Press MENU | MENU | ↓ to CANCEL NAVIGATION | ENT | ← to YES | ENT.
Notes
Section 7: Advanced GPS Operations
Find Distance From Current Position To Another Location
-
While on the Map Page press: MENU | ↓ to FIND DISTANCE | ENT.
-
Center your cursor over the position you want to find the distance to. A rubber band line appears, connecting your current position to the cursor's location. The distance along that line will appear in a pop-up box. The box also shows the bearing to the point you're measuring to.
-
Press EXIT to return to regular operation.
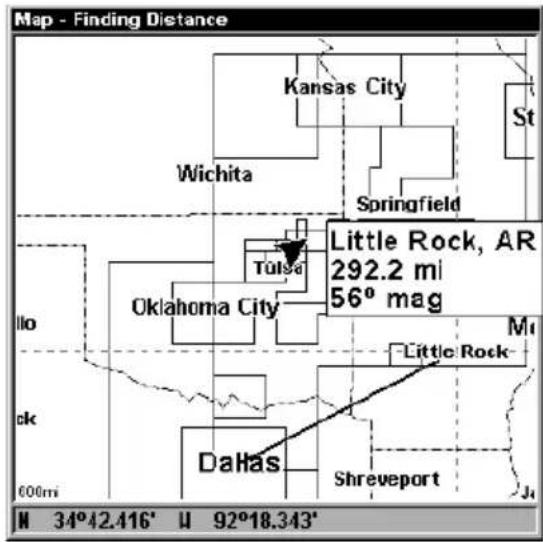
text_image
Map - Finding Distance Kansas City St Wichita Springfield Tulsa Little Rock, AR 292.2 mi 56° mag Oklahoma City Little Rock Dakhs Shreveport J1 M 34°42.416' M 92°18.343'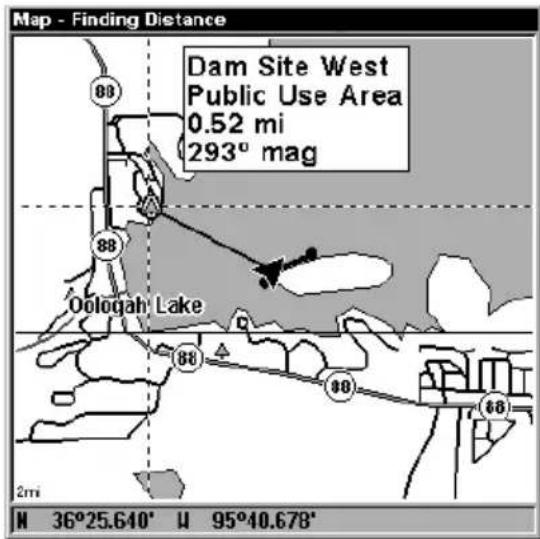
text_image
Map - Finding Distance Dam Site West Public Use Area 0.52 mi 293° mag Oologah Lake 88 88 88 88 2mi M 36°25.640' M 95°40.678'At left, the distance from Dallas to Little Rock is 292.2 miles. At right, the distance from the boat's current position to the boat ramp is 0.52 miles.
Find Distance From Point to Point
You can also measure distance between two other points on the map.
- While on the Map Page press: MENU | ↓ to FIND DISTANCE | ENT.
- Center your cursor over the first position. (A rubber band line appears, connecting your current position to the cursor's location.) Press ENT to set the first point, and the rubber band line disappears.
- Move the cursor to the second position. The rubber band line reappears, connecting the first point you set to the cursor. The distance along that line will appear in the lower portion of the screen.
- Press EXIT to clear the command and return to the page screen.
Icons
Icons are graphic symbols used to mark some location, personal point of interest or event. They can be placed on the map screen, saved and recalled later for navigation purposes. These are sometimes referred to as event marker icons. LMS-320 has 42 different symbols you can pick from when creating an icon.
Icons are similar to waypoints, but they do not store as much information (like names) as waypoints do. You can't use a menu to navigate to icons as you can with waypoints. (But, you can use the map cursor and navigate to any icon on the map.)
You can create an icon at the cursor position on the map, or at your current position while you are navigating.
Create Icon on Map
-
Use the arrow keys to move the cursor to the place where you want to make an icon.
-
Press ENT and the screen shows a "Select Icon Symbol" menu.
-
Press or or or to select your icon symbol, then press ENT. The icon appears on the map.
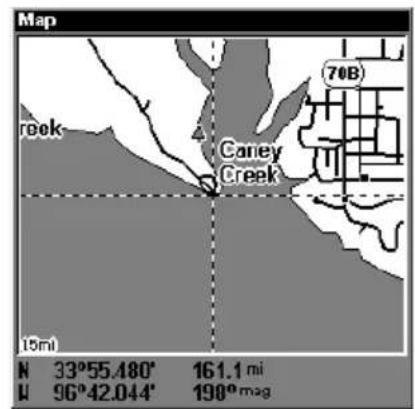
text_image
Map 70B reek Caney Creek 15mi N 33°55.480° 161.1 mi M 96°42.044° 198° mag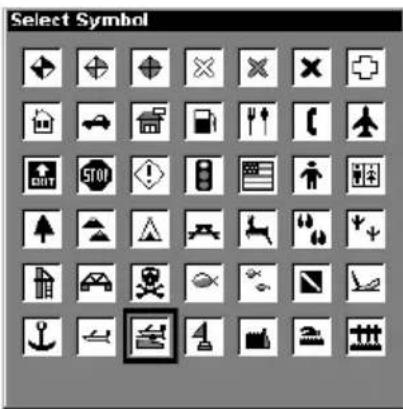
text_image
Select Symbol ✓ ✓ ✓ ✕ ✗ + - + - + → → → + - - - - STO! + - - - - A A A A A A A A A A A A A A A A A A A A A A A A A A A A A A A A A A A A A A A A A A A A A A A A A A A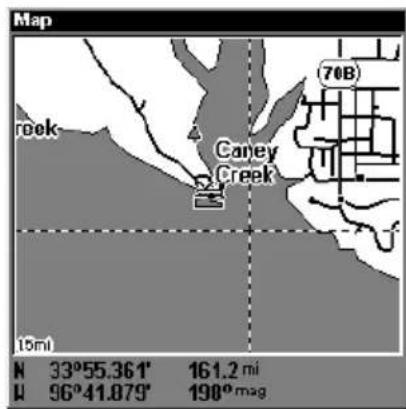
text_image
Map 70B reek Caney Creek 15m N 33°55.361' 161.2 mi M 96°41.879' 190°magCursor selects icon location, left; Select Icon Symbol menu, center; Boat Ramp icon on map, right. (Cursor has been moved for clarity.)
Create Icon at Current Position
-
While you are traveling, press ENT and the screen shows a "Select Icon Symbol" menu.
-
Press or or or to select your icon symbol, then press ENT. The icon appears on the map.
Delete an Icon
You can delete all the icons at one time, you can delete all icons represented by a particular symbol, or you can use the cursor to delete a selected icon from the map.
-
Press MENU | ↓ to DELETE MY ICONS | ENT.
-
Press ↓ to DELETE ALL ICONS, DELETE BY SYMBOL, or DELETE FROM MAP and press ENT.
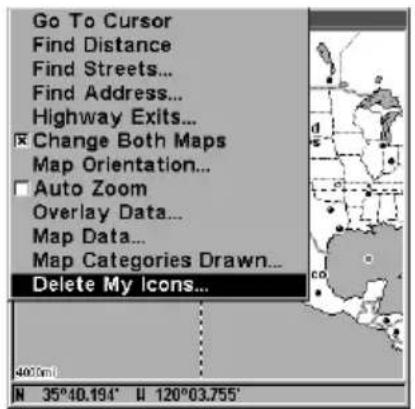
text_image
Go To Cursor Find Distance Find Streets... Find Address... Highway Exits... Change Both Maps Map Orientation... Auto Zoom Overlay Data... Map Data... Map Categories Drawn... Delete My Icons... 400.0ml N 35°40.194' W 120°03.755'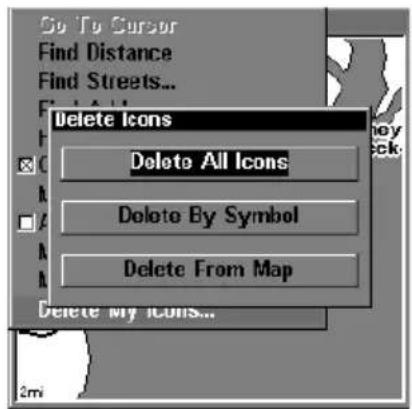
text_image
Go To Cursor Find Distance Find Streets... Delete Icons Delete All Icons Delete By Symbol Delete From Map Delete my Icons...Delete icons menu.
The Delete All Icons command will ask if you are sure. Press ← to YES | ENT. All icons will be deleted from the map.
The Delete by Symbol command will launch the Select Symbol menu. Press ← or ↑ or → or ↓ to select the icon symbol to delete, then press ENT. A message appears saying all icons with the selected symbol have been deleted.
The Delete From Map command will prompt you to move the cursor over an icon to select it. After selecting the icon, press ENT and it disappears from the map.
Navigate to an Icon
Use the Navigate to Cursor command, and use the cursor to select the desired icon on the map.
-
Use arrow keys to center cursor cross-hair over the icon.
-
To navigate to the selected icon location: press MENU|ENT|EXIT. Follow course line on the Map Page or the compass bearing arrow on the Navigation Page.
Routes
A route is a series of waypoints, linked together in an ordered sequence, that's used to mark a course of travel. You can visualize a route as a string of beads: The beads represent waypoints and the string represents the course of travel connecting waypoint to waypoint.
The course from one waypoint to the next is a leg; routes are composed of one or more legs. The legs of all GPS routes are based on straight lines between waypoints.
A route provides the automatic capability to navigate through several waypoints without having to reprogram the unit after arriving at each waypoint. Once programmed into the GPS unit, a route provides the option of navigating forward through the route waypoints or in reverse order (you can even begin navigating in the middle of a route!)
Create and Save a Route
You have the option of creating and editing a route in the unit, or you can make a route on your computer with our MapCreate 6 software.
PC-created Routes
MapCreate is the easiest method for preparing a route, simply because your PC's larger screen, keyboard and mouse are easier to manipulate than the gimbal-mounted LMS-320.
To load a MapCreate route into LMS-320, follow instructions in Map-Create's manual for creating a route and saving it as part of a GData File (file format *.usr). Copy the GPS Data File to an MMC and insert the MMC in LMS-320. (See Sec. 2 for instructions on installing MMCs. To load the GPS Data File into LMS-320 memory, see the entry on Transfer Custom Maps & GPS Data Files in Sec. 6, Basic GPS Operations.)
Routes Created in LMS-320
You can create a route by selecting existing waypoints from the waypoint list or you can set a series of route waypoints on the map with cursor arrows and the Enter key. In this example, we'll create a route from the map.
- From the NAVIGATION PAGE, press MENU | ENT or from the MAP PAGE, press MENU | MENU | ↓ to ROUTE PLANNING | ENT.
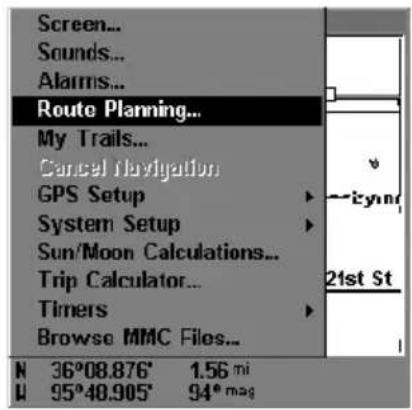
text_image
Screen... Sounds... Alarms... Route Planning... My Trails... Cancel Navigation GPS Setup System Setup Sun/Moon Calculations... Trip Calculator... Timers Browse MMC Files... N 36°08.876' 1.56 mi U 95°48.905' 94° mag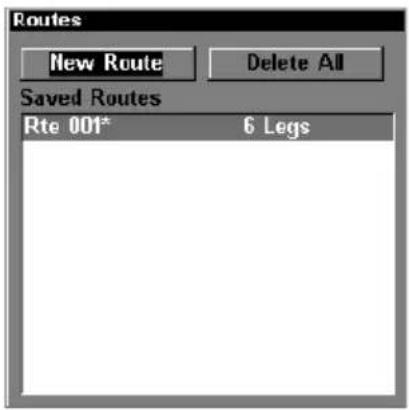
text_image
Routes New Route Delete All Saved Routes Rte 001* 6 LegssRoute Planning command on Main Menu, left, will open the Route List screen, right.
- Press ↓ | ↓ | ↑ or ↓ to route name | ENT | ↓ to (ROUTE END) | ENT | ↓ to ADD FROM MAP | ENT. The Map Page appears with the cursor showing.

text_image
Edit Route Name Display Data Route 2 Total Distance/Bearing Navigate Preview Reverse Delete Waypoints Name Distance Bearing (Route end)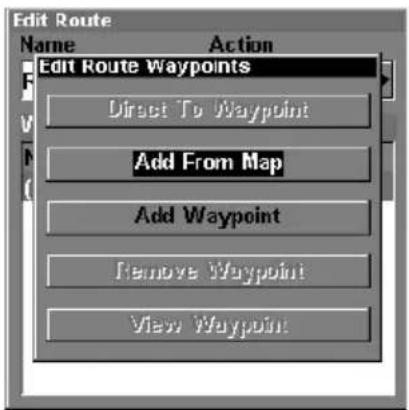
text_image
Edit Route Name Action Edit Route Waypoints Direct To Waypoint Add From Map Add Waypoint Remove Waypoint View WaypointEdit Route menu, left. Edit Route Waypoints menu, right, with Add From Map command selected.
-
Use the Zoom keys and arrow keys to move the map and cursor until the cursor is centered on the spot where you want your route to begin. (If you are starting at your current position or the current cursor position, you are already at the starting spot.)
-
Set the first route waypoint: press ENT. In this example, we moved to the intersection of 11th Street and 145th E. Ave. to start our route to a public hunting area next to a river. (Creating this example route is illustrated in the following figures.)
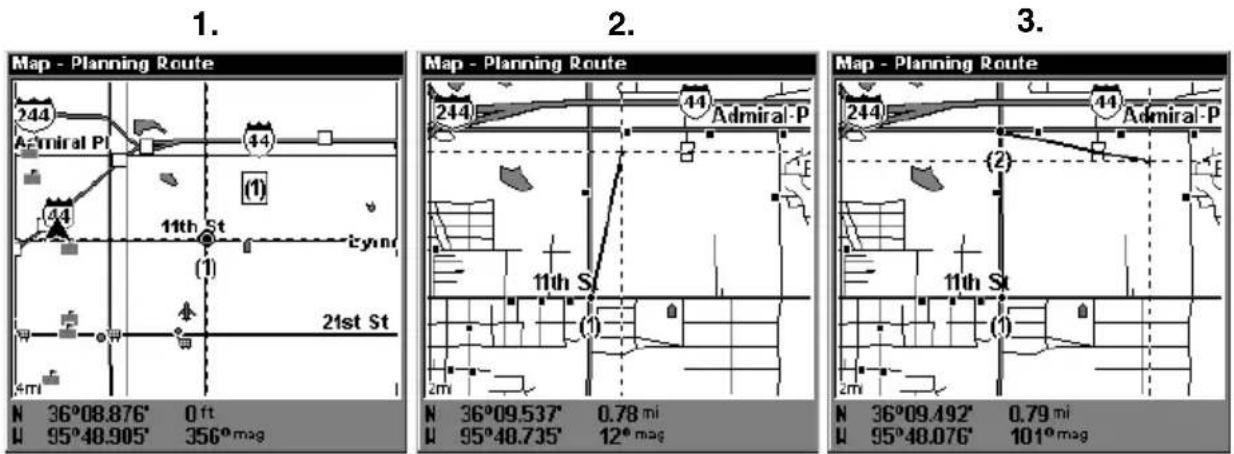
Route creation sequence, from left: Fig. 1. Set route waypoint (1) at 11th St. & 145th Ave. Fig. 2. Zoom in; move cursor north to set point (2) at 145th & Admiral. Fig. 3. With point (2) set, move cursor east to mark interstate on-ramp with waypoint (3). In figures 2 and 3, notice the rubber band line extending from the previously set waypoint to the cursor. This line will become the course for the route.
5.6.4.
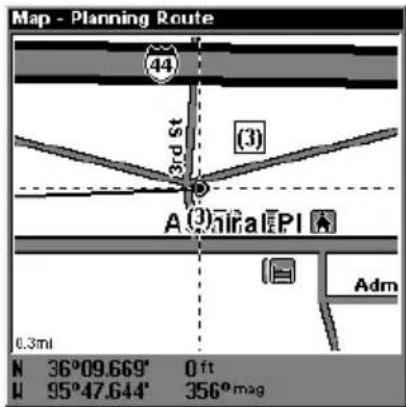
text_image
Map - Planning Route 44 3rd St (3) A (3) 0.3mil Adm 0.3mil N 36°09.669' 0 ft M 95°47.644' 356°mag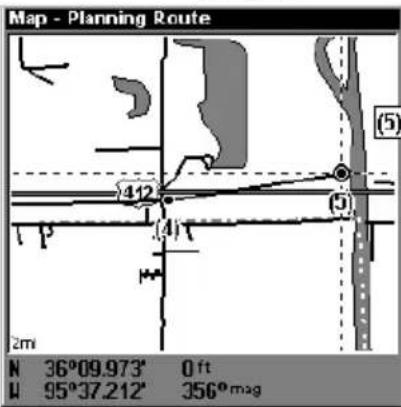
text_image
Map - Planning Route (5) 412 (4) N 36°09.973" 0 ft W 95°37.212" 356°mag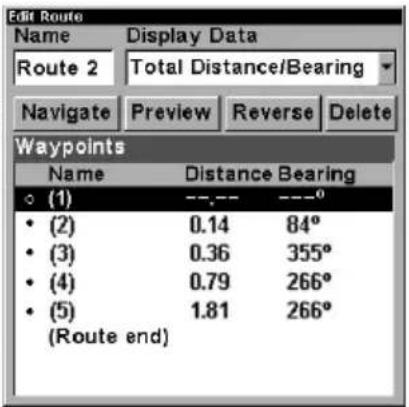
text_image
Edit Route Name Display Data Route 2 Total Distance/Bearing Navigate Preview Reverse Delete Waypoints Name Distance Bearing ○ (1) ---.--- ---° • (2) 0.14 84° • (3) 0.36 355° • (4) 0.79 266° • (5) 1.81 266° (Route end)Route creation sequence, continued: Fig. 4. Point (3) set at on-ramp turn. Fig. 5. Waypoint (4) set at highway exit to frontage road leading to river. Waypoint (5) ends the route at a tree stand in the hunting area. Fig. 6. Press EXIT to save the route and you return to this screen.
- Move the cursor to the next point in the route, a spot where you need to turn or change direction, and press ENT to set the next waypoint.
- Repeat step five until the route reaches your destination.
- To save your route, pEXIT.sLMS-320 reverts to the Edit Route screen, with the route automatically named "Route 1" and stored in LMS-320's internal memory. (In our example, Route 1 already existed, so the unit automatically made "Route 2.")
You can edit the route and run other commands, but if you are finished with the route for now, return to the last page displayed by pressing EXIT | EXIT | EXIT | EXIT | EXIT.
Delete a Route
-
From the NAVIGATION PAGE, press MENU|ENT or from the MAP PAGE press MENU|MENU|↓ to ROUTE PLANNING|ENT.
-
Press ↓ to route name | ENT.
-
Press ↓ to NAVIGATE | ENT | → to DELETE | ENT | ← to YES | ENT.
Tip:
You can also delete all routes at once:
-
From the NAVIGATION PAGE, press MENU | ENT or from the MAPPAGE press MENU | MENU | ↓ to ROUTE PLANNING | ENT.
-
Press → to DELETE ALL | ENT| ← to YES | ENT.
Edit a Route
You can edit the route name if you wish.
-
From the NAVIGATION PAGE, press MENU|ENT or from the MAP PAGE press MENU|MENU|↓ to ROUTE PLANNING|ENT.
-
Press ↓ to route name | ENT | ENT.
-
Press ↑ or ↓ to change the first character, then press → to move the cursor to the next character and repeat until the name is correct, then press ENT. Return to the previous page by pressing EXIT | EXIT | EXIT | EXIT.
You can edit the route by adding and removing waypoints.
-
From the NAVIGATION PAGE, press MENU|ENT or from the MAP PAGE press MENU|MENU|↓ to ROUTE PLANNING|ENT.
-
Press ↓ to route name | ENT | ↓ to ROUTE WAYPOINTS LIST. Use ↓ and ↑ to select a waypoint, then press ENT.
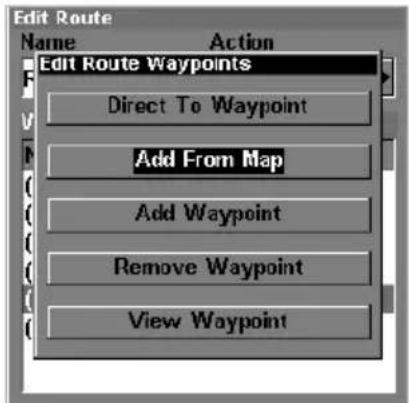
text_image
Edit Route Name Action Edit Route Waypoints Direct To Waypoint Add From Map Add Waypoint Remove Waypoint View WaypointEdit Route Waypoints menu.
- Use ↓ and ↑ to select a command from the Edit Route Waypoints menu and press ENT . Add From Map lets you insert a waypoint in the
route by clicking on a map location with the cursor. Add Waypoint calls up the Waypoint List so you can insert a waypoint from the list. Remove Waypoint will delete the waypoint from the route. View Waypoint will show you where the selected waypoint is on the map.
Navigate a Route
- From the NAVIGATION PAGE, press MENU | ENT or from the MAP PAGE, press MENU | MENU | ↓ to ROUTE PLANNING | ENT.
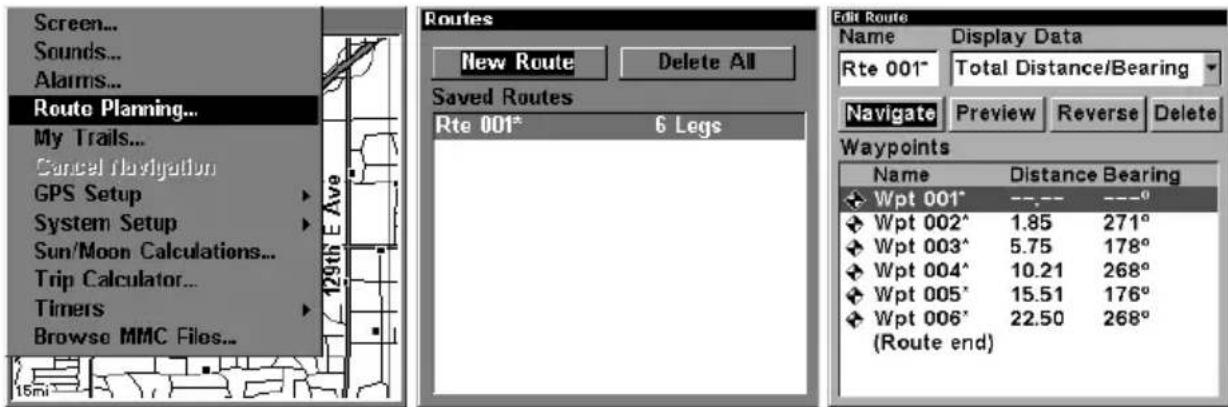
text_image
Screen... Sounds... Alarms... Route Planning... My Trails... Cancel Navigation GPS Setup System Setup Sun/Moon Calculations... Trip Calculator... Timers Browse MMC Files... 129th E Ave Routes New Route Delete All Saved Routes Rte 001* 6 Legss Edit Route Name Display Data Rte 001* Total Distance/Bearing Navigate Preview Reverse Delete Waypoints Name Distance Bearing Wpt 001* --- --- ---° Wpt 002^ 1.85 271° Wpt 003^ 5.75 178° Wpt 004^ 10.21 268° Wpt 005^ 15.51 176° Wpt 006^ 22.50 268° (Route end)Route Planning command on Main Menu, left; Routes menu, center; Edit Route menu, right. Navigate command is selected in the Action box.
-
Press ↓ to select route name | ENT | ↓ to NAVIGATE | ENT | ENT.
-
Upon arrival at your destination, cancel navigation: press MENU | MENU | ↓ to CANCEL NAVIGATION | ENT | ← to YES | ENT.
The following figures show what the Navigation Page and Map Page look like while navigating a route.
Navigate a Route in Reverse
Here's how you run a route backward, from the end waypoint to the beginning waypoint:
- From the NAVIGATION PAGE, press MENU | ENT or from the MAP PAGE, press MENU | MENU | ↓ to ROUTE PLANNING | ENT.
- Press ↓ to select route name | ENT | ↓ to NAVIGATE | → to REVERSE | ENT | ← to NAVIGATE | ENT.
- Upon arrival at your destination, cancel navigation: press MENU | MENU | ↓ to CANCEL NAVIGATION | ENT | ← to YES | ENT.
Figure 1.
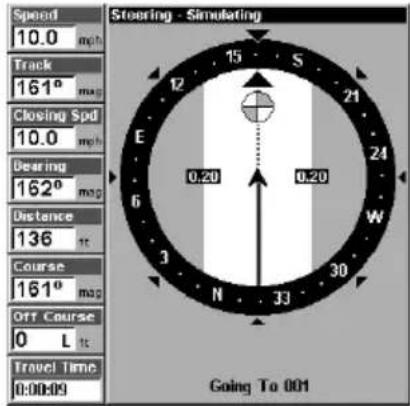
text_image
Speed 10.0 mph Track 161° mag Closing Spd 10.0 mph Dearing 162° mag Distance 136 ft Course 161° mag Off Course 0 L ft Travel Time 0:00:09 Stoaring - Simulating 15 S 12 21 E 0.20 0.20 W 6 3 30 N 33 Going To 001Figure 2.
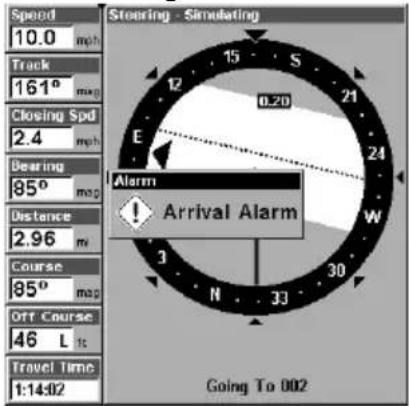
text_image
Speed 10.0 mph Track 161° mag Closing Spd 2.4 mph Bearing 95° mag Distance 2.96 m Course 85° mag Off Course 46 L Travel Time 1:14:02 Stoering - Simulating 12 S 15 21 0.20 E 24 Alarm ! Arrival Alarm 3 N 33 30 Going To 002Figure 3.
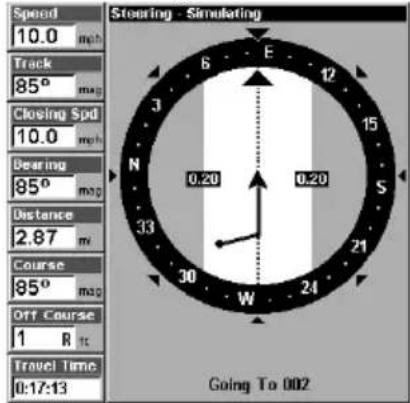
text_image
Speed 10.0 mb Track 85° mag Closing Spd 10.0 mb Bearing 85° mag Distance 2.87 m Course 85° mag Off Course 1 R t Travel Time 0:17:13 Stearing - Simulating 6 E 12 3 15 N 0.20 0.20 33 30 24 21 W Going To 002Figure 4.
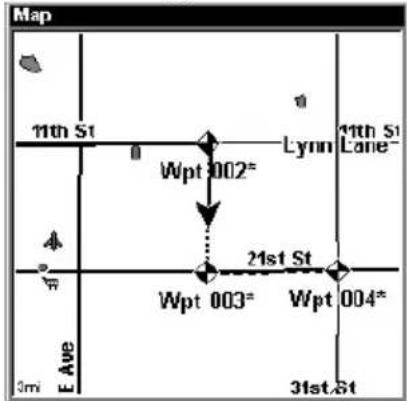
text_image
Map 11th St Wpt 002* Lynn 11th St Lane* 4 21st St Wpt 003* Wpt 004* 31st St E Ave 3mNavigating along a route: Fig. 1 shows the Navigation Page at the start of a route, heading straight for the first waypoint (Wpt 1). In Fig. 2, the traveler has arrived at Wpt 1; the arrival alarm has been triggered and the bearing arrow on the compass rose has turned to point toward Wpt 2, off to the east. In Fig. 3 the traveler has turned east on his new course and is heading straight for Wpt 2, which is 2.87 miles away. Fig. 4 shows route navigation on the Map Page. In this figure, the traveler has reached Wpt 2 and is half-way along the leg between Wpts 2 and 3.
Trails
Delete a Trail
This is the command used to erase or delete a trail: Press MENU|MENU|↓ to MY TRAILS|ENT|↓ to trail name|ENT|→ to DELETE TRAIL|ENT|← to YES|ENT.
Tip:
You can also delete all trails at once:
- Press MENU | MENU | ↓ to MY TRAILS | ENT.
- Press → to DELETE ALL | ENT | ← to YES | ENT.
Edit a Trail Name
To edit a trail name: press MENU|MENU|↓ to MY TRAILS|ENT|↓ to trail name|ENT|ENT. Press ↑ or↓ to change the first character, then press
→ to the next character and repeat until the name is correct. Press ENT then EXIT | EXIT | EXIT | EXIT to return to the previous page display.
Tip:
You can quickly call up the Edit Trail menu by selecting a trail on the map with the cursor. Simply move the cursor over a trail and a pop-up box appears. Press WPT and the Edit Trail menu opens.
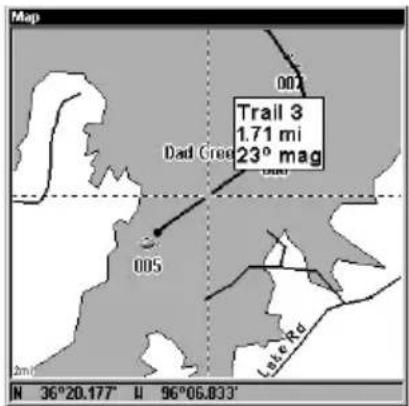
text_image
Map 001 Trail 3 1.71 mi 23° mag Dad Creek 005 Late Rd N 36°20.177' W 96°06.833'
text_image
Map Edit Trail Enter a name for the trail. Name Trail 3 Delete Trail Color Black Navigate Pattern Active Visible Maximum Points 2000 Trail Preview 2m N 36°20.177' H 96°06.833'At left, trail selected with map cursor. The pop-up box shows distance and bearing from current position to the selected point on the trail. At right, the Edit Trail menu.
Edit a Trail Color
To edit a trail color: press MENU | MENU | ↓ to MY TRAILS | ENT | ↓ to trail name | ENT | ↓ to COLOR | ENT. Press ↑ or ↓ to select a color style, then press ENT. Press EXIT | EXIT | EXIT | EXIT to return to the previous page display.
Edit a Trail Pattern
To edit a trail pattern: press MENU | MENU | ↓ to MY TRAILS | ENT | ↓ to trail name | ENT | ↓ to PATTERN | ENT. Press ↑ or ↓ to change the first character, then press → to the next character and repeat until the pattern is correct. Press ENT, then EXIT | EXIT | EXIT | EXIT to return to the previous page display.
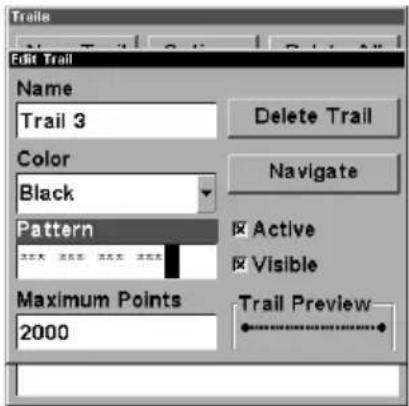
text_image
Trails Edit Trail Name Trail 3 Delete Trail Color Black Navigate Pattern Active Visible Maximum Points 2000 Trail Preview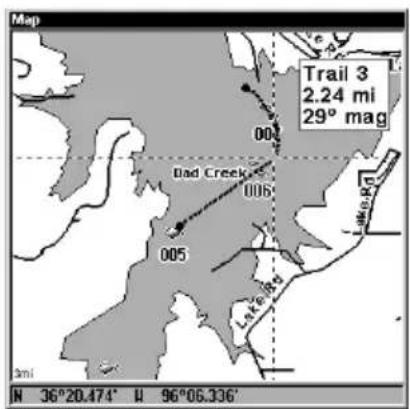
text_image
Map Trail 3 2.24 mi 29° mag 004 Dad Creek 006 005 Lake Rd 0mi N 36°20.474' W 96°06.336'At left, Edit Trail Menu with Pattern option selected. At right, edited trail with dotted line pattern.
Utilities
Utilities are useful tools for traveling or for outdoor activities.
Alarm Clock
To get to the alarm clock menu: press MENU | MENU | ↓ to TIMERS | ENT | ↓ to ALARM CLOCK | ENT.
Sun/Moon Rise & Set Calculator
To get to the Sun/Moon menu: press MENU | MENU | ↓ to SUN/MOON CALCULATIONS | ENT.
Trip Calculator
To get to the Calculator menu: press MENU | MENU|↓ to TRIP CALCULATOR | ENT.
Trip Down Timer
To get to the Down Timer menu: press MENU | MENU | ↓ to TIMERS | ENT | ↓ to DOWN TIMER | ENT.
Trip Up Timer
To get to the Up Timer menu: press MENU | MENU | ↓ to TIMERS | ENT | ENT.
Waypoints
Delete a Waypoint
To delete a waypoint from the waypoint list: press WPT | ENT | ENT | ENT | ↓ to waypoint name | ENT | ↓ to DELETE WAYPOINT | ENT | ← to YES | ENT. To return to the previous page, press EXIT | EXIT.
To delete a waypoint from the map:
-
Use the arrow keys to select the waypoint with the cursor.
-
Press WPT | → to DELETE WAYPOINT | ENT | ← to YES | ENT. To return to the previous page and clear the cursor, press EXIT.
To delete all waypoints at one time: press MENU|MENU|↓ to SYSTEM SETUP|ENT|↓ to DELETE ALL MY WAYPOINTS|ENT|← to YES|ENT. To return to the previous page, press EXIT|EXIT.
Edit a Waypoint
Waypoint Name
To edit waypoint name: 1. Press WPT|ENT|ENT|ENT|↓ to waypoint name|ENT|↓ to EDIT WAYPOINT|ENT|ENT.
- Press or to change the first character, then press to the next character and repeat until the name is correct. Press ENT then EXIT | EXIT | EXIT |EXIT to return to the previous page display.
Waypoint Symbol
To edit waypoint symbol: 1. Press WPT|ENT|ENT|ENT|↓ to waypoint name|ENT|↓ to EDIT WAYPOINT|ENT|↓ to CHOOSE SYMBOL|ENT.
- Use arrow keys to select desired symbol and press ENT. To return to the previous page, press EXIT | EXIT | EXIT | EXIT.
Waypoint Position
To edit waypoint position: 1. Press WPT | ENT | ENT | ENT | ↓ to waypoint name | ENT | ↓ to EDIT WAYPOINT | ENT.
- Latitude: press → to LATITUDE|ENT. Press ↑ or ↓ to change the first character, then press → to the next character and repeat until the latitude is correct. Press EXIT.
- Longitude: press ↓ to LONGITUDE|ENT. Press ↑ or ↓ to change the first character, then press → to the next character and repeat until the longitude is correct. Press EXIT.
- When latitude and longitude are correct, return to the previous page: press EXIT | EXIT | EXIT | EXIT.
Selecting a Waypoint
To select a waypoint on the map (for navigating to, for editing, etc.,) use the arrow keys and center the cursor over the waypoint. A highlighted halo will appear around the waypoint.
Set a Waypoint by Average Position
This feature sets a waypoint at the current position after taking several position readings and averaging them. This boosts waypoint position accuracy by helping to eliminate errors caused by atmospheric conditions and other factors.
- Press WPT | → to SUBCATEGORY column | ↓ to NEW | ENT.
- Press ↓ or ↑ to AVERAGE POSITION | ENT | press → to CREATE | ENT.
- Wait while the unit takes points to average for the position. (The greater the number of points, the greater the accuracy.) When the desired number of points accumulates, press ENT to create and save the waypoint.
- The Edit Waypoint menu appears. You can simply save the waypoint by pressing EXIT | EXIT or you can edit the waypoint.
Set a Waypoint by Projecting a Position
This feature sets a waypoint at a point located a specific distance and bearing from a reference position. The reference position can be selected from your waypoint list, a map feature or from the Points of Interest list.
- Press WPT | → to SUBCATEGORY column | ↓ to NEW | ENT.
- Press ↓ to PROJECTED POSITION | ENT | → to CREATE | ENT.
- Press → to CHOOSE REFERENCE |ENT. Use ↑ and ↓ to select a waypoint, map feature or Point of Interest. When the point has been selected, press ENT and the point's position appears as the reference position.
- Press ↓ to DISTANCE|ENT. Press ↑ or ↓ to change the first character, then press → to the next character and repeat until the distance is correct. Press ENT.
- Press ↓ to BEARING | ENT. Press ↑ or ↓ to change the first character, then press → to the next character and repeat until the bearing is correct. Press ENT.
- Press ↑ to PROJECTION | ENT. The Edit Waypoint menu appears. You can simply save the new projected waypoint by pressing EXIT | EXIT or you can edit the waypoint. (Press EXIT | ENT if you want to immediately begin navigating to the new waypoint.)
Notes
Section 8: System & GPS Setup Options
Alarms
This unit has several GPS alarms. The factory default setting has all the alarms turned on. You can turn the alarms off and on and change their distance settings.
You can set an arrival alarm to flash a warning message and sound a tone when you cross a preset distance from a waypoint. For example, if you have the arrival alarm set to .1 mile, then the alarm will flash a message when you come within .1 mile of the recalled waypoint.
The off course alarm warns you when your track drifts too far to the right or left of the course line to the waypoint. For example, if the alarm is set to .1 mile, then the alarm flashes a message if you drift .1 of a mile or more to the right or left of the line to the waypoint.
The anchor alarm is triggered when you drift outside of a preset radius. Again, using the .1 mile as an example, if you're anchored and your boat moves more than .1 of a mile, the alarm will flash a message and sound a tone.
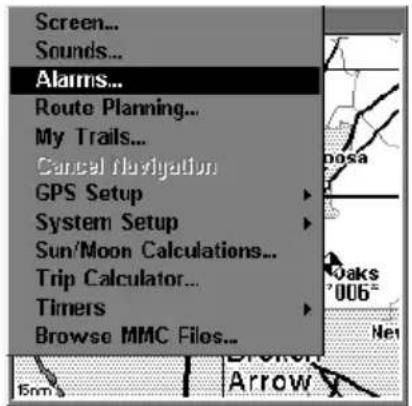
text_image
Screen... Sounds... Alarms... Route Planning... My Trails... Cancel Navigation GPS Setup System Setup Sun/Moon Calculations... Trip Calculator... Timers Browse MMC Files... 6m Arrow nosa Oaks 006° Net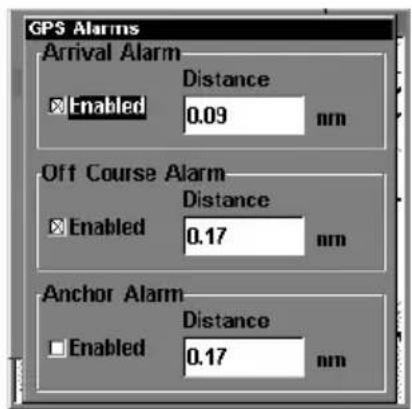
text_image
GPS Alarms Arrival Alarm Distance Enabled 0.09 nm Off Course Alarm Distance Enabled 0.17 nm Anchor Alarm Distance Enabled 0.17 nmAlarms command, left; Alarm menu, right.
To change alarm settings:
-
Press MENU | MENU | ↓ to ALARMS | ENT.
-
Scroll ↓ or ↑ to select the desired category, then press ENT to check or clear the Enabled box. This turns the alarm on (checked) or off (unchecked.)
-
To change distance settings, scroll ↓ or ↑ to select the desired category, then press → | ENT to activate the distance dialog box. Press ↑ or ↓ to change the first character, then press → to the next character and repeat until the name is correct.
-
When your adjustments are finished, return to the last page displayed by repeatedly pressing EXIT.
IMPORTANT ALARM NOTES:
Anchor Alarm - The anchor alarm may be triggered even when you're sitting still. This typically happens when using small (less than .05 mile) anchor alarm ranges.
Arrival Alarm - If you set the arrival alarm's distance to a small number and you run a route (see the Navigate Routes segment), this unit may not show navigation data to the next waypoint, once you arrive at the first one, since you may not be able to come close enough to the first waypoint to trip the arrival alarm.
Auto Satellite Search
To lock onto the satellites, the GPS receiver needs to know it's current position, UTC time and date. (Elevation (altitude) is also used in the equation, but it's rarely required to determine a position.) It needs this data so that it can calculate which satellites should be in view. It then searches for only those satellites.
When your GPS receiver is turned on for the first time, it doesn't know what your position or elevation (altitude) is. It does know the current UTC time and date since these were programmed into it at the factory and an internal clock keeps the time while the unit is turned off. (If the time and/or date are incorrect, you can set it using the "Set Local Time" menu.)
The unit begins searching for the satellites using the above data that it acquired the last time it was turned on. This probably was at the factory. Since it's almost certain that you're not at our factory, it's probably looking for the wrong satellites.
If it doesn't find the satellites it's looking for after approximately one minute, it switches to Auto Search. The receiver looks for any satellite in the sky. Due to advanced technology, the auto search time has shrunk significantly from the early days of GPS.
Once the unit locks onto the satellites, it should take less than a minute to find your position the next time it's turned on, provided you haven't moved more than approximately 100 miles from the last location it was used.
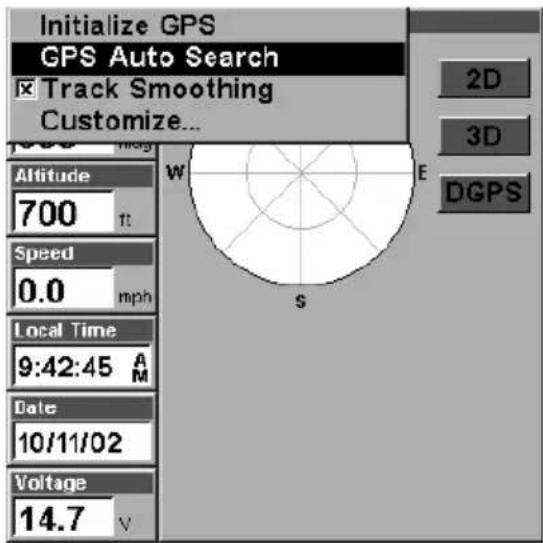
text_image
Initialize GPS GPS Auto Search Track Smoothing Customize... Altitude 700 ft Speed 0.0 mph Local Time 9:42:45 A Date 10/11/02 Voltage 14.7 V 2D 3D DGPS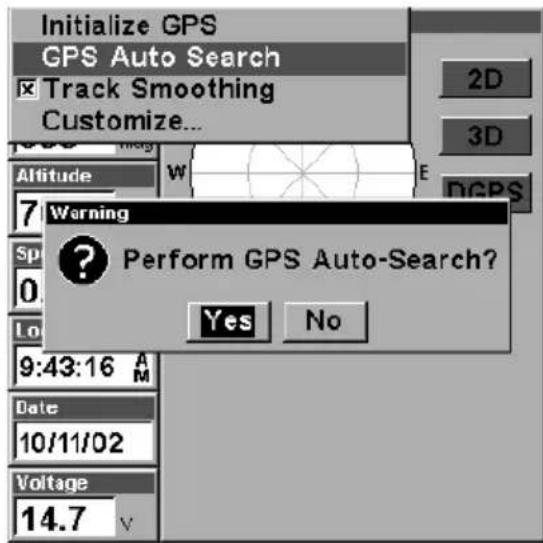
text_image
Initialize GPS GPS Auto Search Track Smoothing Customize... Altitude Warning Perform GPS Auto-Search? Yes No 9:43:16 A Date 10/11/02 Voltage 14.7GPS Auto Search on the Satellite Status Menu.
You can force the unit to immediately kick into auto search mode.
Here's how:
- Press PAGES until you are on the Satellite Status screen.
- Press MENU | ENT | ← to YES | ENT.
Check MMC Files and Storage Space
To check MMC Files:
Press MENU | MENU | ↓ to BROWSE MMC FILES | ENT.

text_image
Screen... Sounds... Alarms... Route Planning... My Trails... Cancel Navigation GPS Setup System Setup Sun/Moon Calculations... Trip Calculator... Timers Browse MMC Files... 14.7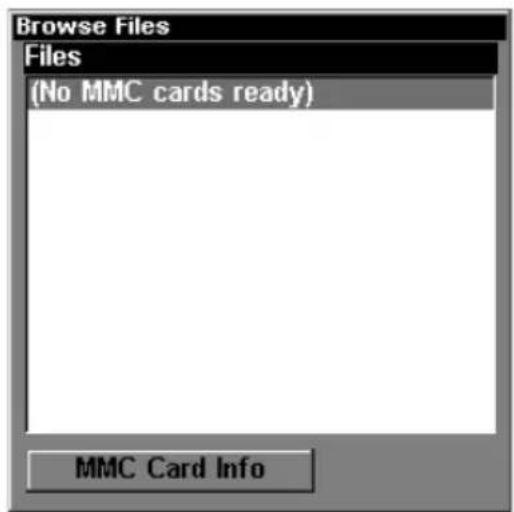
text_image
Browse Files Files (No MMC cards ready) MMC Card InfoMain Menu, left, MMC File Browser, right.
Communications Port Configuration
LMS-320 has one NMEA 0183 version 2.0 compatible communication port, or com port for short. The Com Port Menu, which is accessed from the System Setup Menu, allows you to configure the communications port to send or receive data to another electronic device, such as an autopilot. The com port can be used for either NMEA or DGPS Binary data transfer.
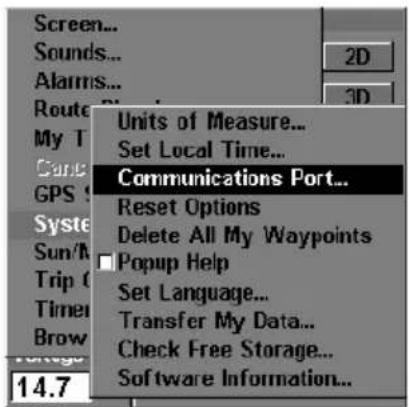
text_image
Screen... Sounds... Alarms... Route My T Cang GPS Syste Sun/M Trip C Timer Brow 14.7 2D 3D Units of Measure... Set Local Time... Communications Port... Reset Options Delete All My Waypoints Popup Help Set Language... Transfer My Data... Check Free Storage... Software Information...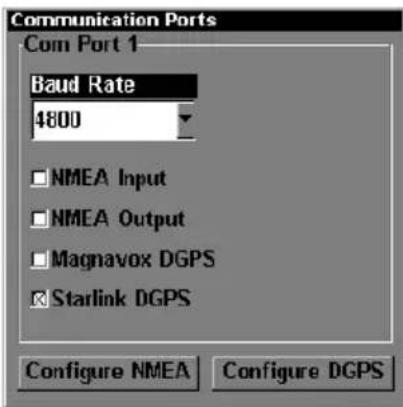
text_image
Communication Ports Com Port 1 Baud Rate 4800 NMEA Input NMEA Output Magnavox DGPS Starlink DGPS Configure NMEA Configure DGPS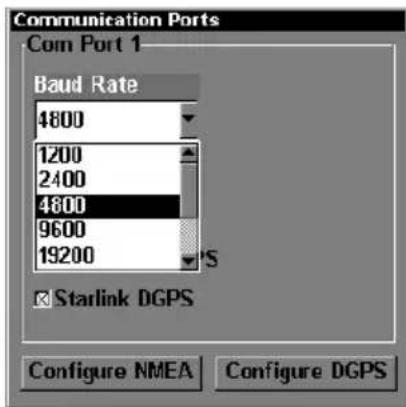
text_image
Communication Ports Com Port 1 Baud Rate 4800 1200 2400 4800 9600 19200 Starlink DGPS Configure NMEA Configure DGPSMenus for changing Com Port settings.
For connectors and wiring information for another device, see page 31. For assistance in configuring the unit to communicate with another device, consult the factory; customer service phone numbers are in the back of this manual. Also see the entries below for Configure DGPS and Configure NMEA. To set Com Port Configuration:
- Press MENU | MENU | ↓ to SYSTEM SETUP | ENT.
- Press ↓ to COMMUNICATIONS PORT | ENT.
Configure DGPS
This unit will recognize Starlink ^® , Magnavox ^® and Lowrance DGPS receivers.
- Press MENU | MENU | ↓ to SYSTEM SETUP | ENT.
- Press ↓ to COMMUNICATIONS PORT | ENT.
A. If you have a Magnavox receiver, press ↓ to MAGNAVOX | ENT.
B. If you have a Lowrance or Starlink receiver, press ↓ to STARLINK | ENT.
C. If you have a Magnavox or Starlink, press EXIT | EXIT | EXIT. This is the only setup necessary. If you have a Lowrance receiver or another Magnavox- or Starlink- compatible brand, continue with these steps:
-
Press ↓ to CONFIGURE NMEA | → to CONFIGURE DGPS | ENT.
-
Press ENT, then use to enter the station frequency, then press ENT.
-
Press → to BIT RATE | ENT then use ↑ ↓ to select the station bit rate, then press ENT.
-
A. If you are not using a Starlink DGPS receiver, press EXIT | EXIT | EXIT | EXIT to return to the previous page.
B. If you are using a Starlink DGPS receiver, press ↓ to STARLINK AUTO TUNING MODE | press ENT | press EXIT | EXIT | EXIT | EXIT to return to the previous page.
Configure NMEA
You can configure the unit to use specific NMEA sentences.
- Press MENU | MENU | ↓ to SYSTEM SETUP | ENT.
- Press ↓ to COMMUNICATIONS PORT | ENT | ↓ to CONFIGURE NMEA | ENT.
-
A menu appears showing the prefixes of the available NMEA sentences. A check mark next to a prefix means the prefix is in use. Use to select a prefix, then press ENT to turn off the prefix. (Press ENT again to check the box and turn a prefix on.)
-
When the desired prefixes are checked or unchecked, press EXIT | EXIT | EXIT | EXIT to return to the previous page.
Coordinate System Selection
The Coordinate System Menu lets you select the coordinate system to use when displaying and entering position coordinates.
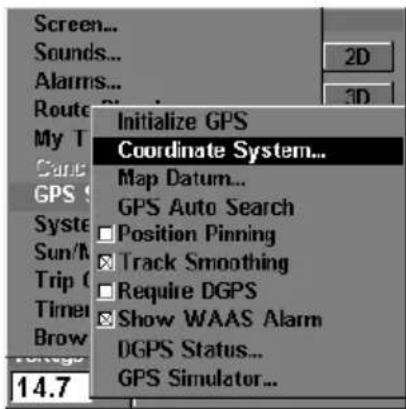
text_image
Screen... Sounds... Alarms... Route My T Cane GPS S Syste Sun/M Trip C Timer Brow 14.7 Initialize GPS Coordinate System... Map Datum... GPS Auto Search Position Pinning Track Smoothing Require DGPS Show WAAS Alarm DGPS Status... GPS Simulator...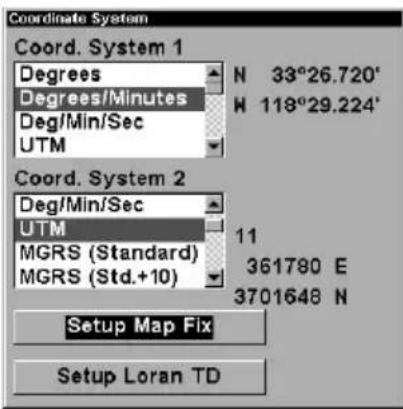
text_image
Coordinate System Coord. System 1 Degrees N 33°26.720' Degrees/Minutes W 118°29.224' Deg/Min/Sec UTM Coord. System 2 Deg/Min/Sec UTM 11 MGRS (Standard) 361780 E MGRS (Std.+10) 3701648 N Setup Map Fix Setup Loran TD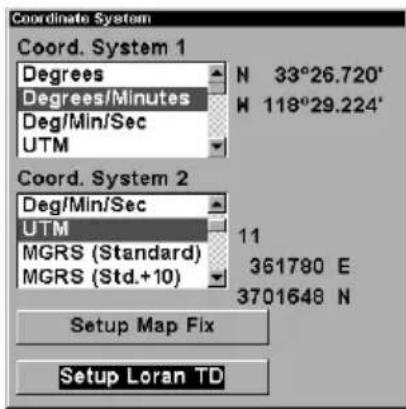
text_image
Coordinate System Coord. System 1 Degrees N 33°26.720' Degrees/Minutes H 118°29.224' Deg/Min/Sec UTM Coord. System 2 Deg/Min/Sec UTM 11 MGRS (Standard) 361780 E MGRS (Std.+10) 3701648 N Setup Map Fix Setup Loran TDMenus for changing coordinate system used to display positions.
To get to Coordinate System Selection:
-
Press MENU | MENU | ↓ to GPS SETUP | ENT.
-
Press ↓ to COORDINATE SYSTEM | ENT.
This unit can show a position in degrees (36.14952°); degrees, minutes and thousandths of a minute (36° 28.700'); or degrees, minutes, seconds and tenths of a second (36° 28' 40.9"). It can also show position in: UTM (Universal Transverse Mercator) projection; MGRS (Standard); MGRS (Standard + 10); Map Fix; Loran TD; British, Irish, Finnish, German, New Zealand, Swedish, Swiss, Taiwan, Greek and Military grids.
UTM's are marked on USGS topographic charts. This system divides the Earth into 60 zones, each 6 degrees wide in longitude.
British, Irish, Finnish, German, New Zealand, Swedish, Swiss, Taiwan, and Greek grid systems are the national coordinate system used only in
their respective countries. In order to use these grid systems, you must be in the respective country. This unit will pick the matching datum for you when you select the grid. See the entry on Map Datum Selection for more information.
The military grid reference system (MGRS) uses two grid lettering schemes, which are referred to as standard and standard + 10 MGRS on this unit. Your position and datum in use determines which one to use. If you use standard, and your position is off significantly, then try the alternate.
NOTE: When the position format is changed, it affects the way all positions are shown on all screens. This includes waypoints.
To change the coordinate system, press ENT while COORDINATE SYSTEM is highlighted. Press the ↑ or ↓ arrow keys to highlight the desired format. Press ENT to select it. Press EXIT to erase the menus.
To setup Loran TD:
NOTE:
If the Loran TD conversion is chosen, you must enter the local Loran chain identification for the master and slaves. Do this by selecting "Setup Loran TD" at the bottom of the "Coordinate System" menu and select the ID. Press EXIT to erase this menu.
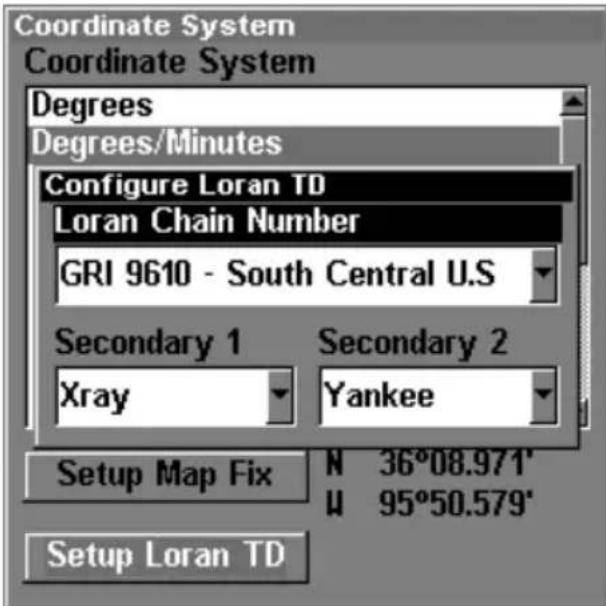
text_image
Coordinate System Coordinate System Degrees Degrees/Minutes Configure Loran TD Loran Chain Number GRI 9610 - South Central U.S Secondary 1 Secondary 2 Xray Yankee Setup Map Fix N 36°08.971' U 95°50.579' Setup Loran TDConfigure Loran TD menu.
Map Fix
Map Fix is used with charts or maps. This system asks for a reference position in latitude/longitude, which you take from a marked location on the map. It then shows the present position as distance on the map from that reference point.
For example, if it shows a distance of UP 4.00" and LEFT 0.50", you then measure up four inches and to the left a half-inch from the reference point on the map to find your location.
To configure a map fix:
To use this format, you need to follow these steps in order. First, take your map of the area and determine a reference latitude/longitude. (Please note that in order for this system to work, the latitude/longitude lines must be parallel with the edge of the map. USGS maps are parallel, others may not be. Also, this works better with smaller scale maps.) The reference position can be anywhere on the map, but the closer it is to your location, the smaller the numbers will be that you'll have to deal with.
Once you've decided on a reference position, you can save it as a waypoint. See the waypoint section for information on saving a waypoint. Save the reference position as a waypoint. Exit from the waypoint screens.
- Press MENU | MENU | ↓ to GPS SETUP | ENT.
- Press ↓ to COORDINATE SYSTEM | ENT.
- Press ↓ to SETUP MAP Rx | ENT.
The screen below appears, and MAP SCALE is highlighted. Press ENT and enter the map's scale. This is generally at the bottom of the paper map. It's shown as a ratio, for example 1:24000. Press EXIT and the unit returns to the Configure Map Fix screen.
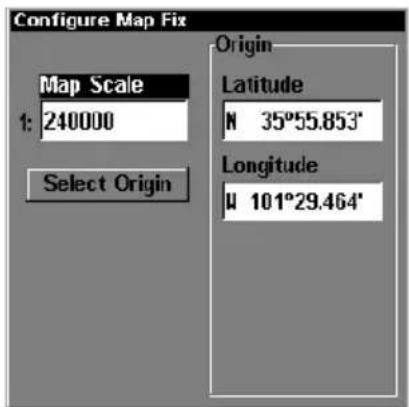
text_image
Configure Map Fix Map Scale 1: 240000 Select Origin Origin Latitude N 35°55.853' Longitude W 101°29.464'Configure a map fix so LMS-320 can find your position on a printed chart or topographical map.
Press ↓ to SELECT ORIGIN|ENT|ENT|ENT to bring up the waypoint list. Select the waypoint that you saved the reference point under and press ENT. The unit displays a waypoint information screen with the command SET AS ORIGIN selected; press ENT and the unit returns to the Configure Map Fix menu. Finally, press EXIT to erase this menu. Now press
↑ to COORD SYSTEM | ENT, select MAP FIX from the list and press ENT | EXIT. All position information now shows as a distance from the reference point you chose.
Customize Page Displays
The Position, Navigation, and Map pages all have customizable options. These options decide which information is viewable on each page.
Customize Satellite Status Page
While on the Satellite Status Page, press MENU | ↓ to CUSTOMIZE | ENT. Press ↓ or ↑ to select a display option window. With the display window highlighted and flashing, press ENT to open a list of options. Scroll ↑ and ↓ to select a different display option, then press ENT. After all options are set, press EXIT to return to the page display.
Customize Navigation Page
While on the Navigation Page, press MENU | ↓ to CUSTOMIZE | ENT. Press ↓ or ↑ to select a display option window. With the display window highlighted and flashing, press ENT to open a list of options. Scroll ↑ and ↓ to select a different display option, then press ENT. After all options are set, press EXIT to return to the page display.
Customize Map Page
While on the Map Page, press PAGES|↓ or ↑ to select Option Name|ENT.
DGPS Status
The DGPS Status screen shows whether DGPS is off or on, and it describes the quality of the DGPS signal. This screen is useful if you have to diagnose a DGPS problem.
-
Press MENU |MENU | ↓ to GPS SETUP | ENT | ↓ to DGPS STATUS | ENT.
-
The DGPS Status screen is displayed. To return to the previous page, press EXIT | EXIT | EXIT.
GPS Simulator
The GPS simulator lets you use the unit as if you were outdoors navigating somewhere. It's a great way to practice using your unit. You can set the starting location by entering latitude/longitude (Starting Position) or from a stored waypoint, map place or POI location (CHOOSE START command). You can steer your position and change speed on the map by using the arrow keys (STEER WITH ARROWS command) or by setting the track and speed in the dialog boxes provided on the simulator menu screen.
To get to the GPS Simulator:
- Press MENU | MENU | ↓ to GPS SETUP | ENT.
- Press ↓ to GPS SIMULATOR | ENT. The GPS Simulator Menu appears.
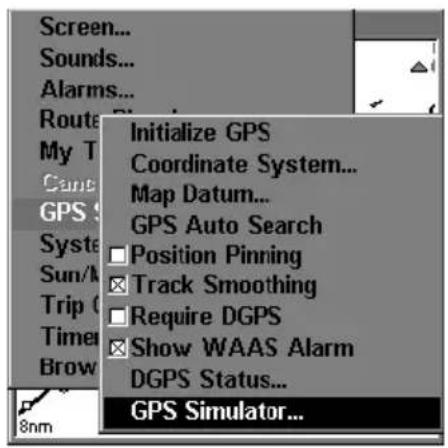
text_image
Screen... Sounds... Alarms... Route My T Camp GPS Syste Sun/M Trip Timer Brow 8nm Initialize GPS Coordinate System... Map Datum... GPS Auto Search Position Pinning Track Smoothing Require DGPS Show WAAS Alarm DGPS Status... GPS Simulator...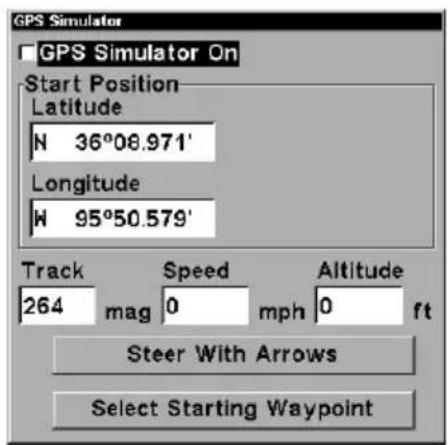
text_image
GPS Simulator GPS Simulator On Start Position Latitude N 36°08.971' Longitude W 95°50.579' Track Speed Altitude 264 mag 0 mph 0 ft Steer With Arrows Select Starting WaypointGPS Setup Menu, left; GPS Simulator menu, right.
Make the desired settings, then turn the simulator on by highlighting the GPS SIMULATOR ON box and pressing ENT key. Press EXIT|EXIT|EXIT to erase this menu. A message and tone appears periodically, warning you that the simulator is on. To turn the simulator off, repeat the above steps or turn the unit off.
While in simulator mode, you can press EXIT to clear the steering and speed boxes from the screen while continuing the simulation. This will allow you to use the map cursor during a simulation. To turn steering and speed boxes back on again, return to the GPS Simulator menu, select the STEER WITH ARROWS command, press ENT, then Press EXIT | EXIT | EXIT to return to the previous page.
Simulating Trail or Route Navigation
In Simulator mode, your unit can automatically follow a trail or route without manual steering if you use these steps:
- From the Map Page, go to the simulator menu. Pick a STARTING POSITION at or near the beginning of your trail/route. Enter an approximate TRACK (shown in compass degrees) that will point you toward the start of the trail/route.
- Set SPEED to zero. Select STEER WITH ARROWS command and press ENT, which turns on the simulator and returns you to the Map Page.
-
Begin navigating along the trail/route. (If you are close enough to the first waypoint, the arrival alarm will usually go off as soon as navigation begins. Press EXIT to clear the alarm.) When navigation starts, press ↑ to increase speed to the desired setting.
-
Press EXIT to turn off the steering and speed boxes. The unit will now automatically "steer" along the trail or route. When you arrive at your "destination," cancel navigation as you normally do.
Tip:
You can pick any spot on the map to begin your simulation session by using the Initialize GPS command. This makes your unit think it's located at the position you select. See it's entry following the entry for Hide GPS Features.
Hide GPS Features
If there is no GPS antenna/receiver module attached to this unit, the GPS menus and features can be hidden from view with this command. The default setting is off, allowing you to rotate between the Sonar Page and the GPS pages and features. To hide GPS features:
Press MENU | MENU | ↓ to SYSTEM SETUP | ENT | ↓ to HIDE GPS FEATURES | ENT. The GPS menus and pages are now hidden.
To restore GPS Features, press MENU | MENU | ↓ to SHOW GPS FEATURES | ENT. The GPS menus and pages are available once again.
Initialize GPS
This command is handy when you are practicing in simulator mode. (See the entry in this section for GPS Simulator.) In simulator mode, this command makes the unit operate as if it sitting someplace other than its actual location. So, you and your unit could be located in Kansas City, but easily practice navigating in the ocean off Islamorada, Florida.
-
Press MENU | MENU | ↓ to GPS SETUP | ENT | ENT.
-
A message appears, telling you to move the cursor near the desired location and press ENT. When the message automatically clears, follow the message instructions.
-
In a moment, your present position marker arrow appears on the map in the location you selected with the cursor. The unit will consider that spot as it's last known position until changed by either a live satellite lock-on or a new simulator location.
Map Auto Zoom
This receiver has an auto zoom feature that eliminates much of the button pushing that other brands of GPS receivers force you to make. It works in conjunction with the navigation features.
First, start navigation to a waypoint. (See the waypoint section for more information on navigating to a waypoint.) Then, with the auto zoom mode on, the unit zooms out until the entire course shows, from the present position to the destination waypoint. As you travel toward the destination, the unit automatically begins zooming in — one zoom range at a time — always keeping the destination on the screen.
To turn this feature on, from the MAP PAGE, press MENU | ↓ to AUTO Zoom | ENT | EXIT. Repeat these steps to turn it off.
Map Data
This menu lets you turn the map off, if desired (which turns the map screen into a GPS plotter); turn off or on the pop-up map info boxes; draw the map boundaries or boxes around the areas of high detail; or fill land areas with gray. You can also turn on or off Map Overlays, which display latitude and longitude grid lines or range rings on the map. This menu lets you select Navionics Maps; for instructions, see the Navionics Charts entry in this section.
To get to Map Data:
From the Map Page, press MENU | ↓ to MAP DATA | ENT.
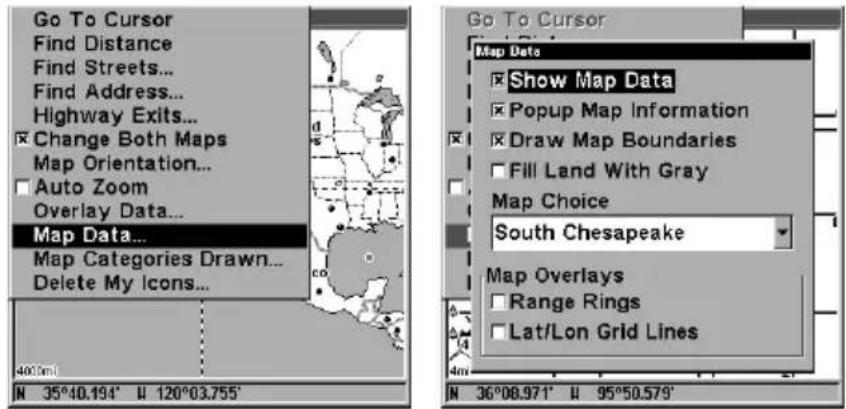
text_image
Go To Cursor Find Distance Find Streets... Find Address... Highway Exits... Change Both Maps Map Orientation... Auto Zoom Overlay Data... Map Data... Map Categories Drawn... Delete My Icons... 400.0m N 35°40.194' U 120°03.755' Go To Cursor Map Data Show Map Data Popup Map Information Draw Map Boundaries Fill Land With Gray Map Choice South Chesapeake Map Overlays Range Rings Lat/Lon Grid Lines N 36°08.971' U 95°50.579'Map Menu, left, Map Data Menu, right.
Show Map Data
From the Map Page, press MENU | ↓ to MAP DATA | ENT. Press ENT to check SHOW MAP DATA (turn on) and uncheck it (turn off.) After the option is set, press EXIT | EXIT to return to the page display.
Pop-up Map Info
From the Map Page, press MENU | ↓ to MAP DATA | ENT. Press ↓ to POPUP MAP INFO. With the option highlighted, press ENT to check it (turn on) and uncheck it (turn off.) After the option is set, press EXIT | EXIT to return to the page display.
Map Boundaries
From the Map Page, press MENU|↓ to MAP DATA|ENT. Press ↓ to MAP BOUNDARIES. With the option highlighted, press ENT to check it (turn on) and uncheck it (turn off.) After the option is set, press EXIT|EXIT to return to the page display.
Fill Land Gray
From the Map Page, press MENU|↓ to MAP DATA|ENT. Press ↓ to FILL LAND GRAY. With the option highlighted, press ENT to check it (turn on) and uncheck it (turn off.) After the option is set, press EXIT|EXIT to return to the page display.
Map Overlays (Range Rings; Lat/Long Grid)
The map screen can be customized with four range rings and/or grids that divide the plotter into equal segments of latitude and longitude.
Range rings are handy for visually estimating distances on the map. The ring diameters are based on the current zoom range. For example: at the 100 mile zoom, the screen will show two rings with your current position in the center. The large ring touching the left and right sides of the screen is 100 miles in diameter (same as the zoom range). The second smaller ring is 50 miles in diameter (always 1/2 the zoom range).
The distance from your current position to the smaller ring (the ring's radius) is 25 miles (always 1/4 the zoom range). With the arrow keys and map cursor, you can scroll the map to see the third and fourth rings. In this example, the distance to the third ring is 75 miles and distance to the fourth ring is 100 miles from your current position.
To set range rings: From the Map Page, press MENU | ↓ to MAP DATA|ENT. Press ↓ to RANGE RINGS. With the option highlighted, press ENT to check it (turn on) and uncheck it (turn off.) After the option is set, press EXIT | EXIT to return to the page display.
To set Lat/Long Grid: From the Map Page, press MENU|↓ to MAP DATA|ENT. Press ↓ to LAT/LON GRID LINES. With the option highlighted, press ENT to check it (turn on) and uncheck it (turn off.) After the option is set, press EXIT | EXIT to return to the page display.
Map Datum Selection
Maps and charts are based on a survey of the area that's covered by the map or chart. These surveys are called "Datums." Maps that are created using different datums will show the same latitude/longitude in slightly different locations.
All datums are named. The GPS system is based on the WGS-84 datum, which covers the entire world. Other datums may also cover the entire world, or just a small portion of it. By default, your position shows using the WGS-84 datum. However, it can show your position using one of 191 different datums. Different datums can be selected; to change the datum:
- Press MENU | MENU | ↓ to GPS SETUP | ENT | ↓ to MAP DATUM | ENT.
- Scroll ↓ or ↑ to select the desired datum, then press ENT.
- To return to the last page displayed, press EXIT | EXIT.
A list of the datums used by this unit is in the back of this manual.
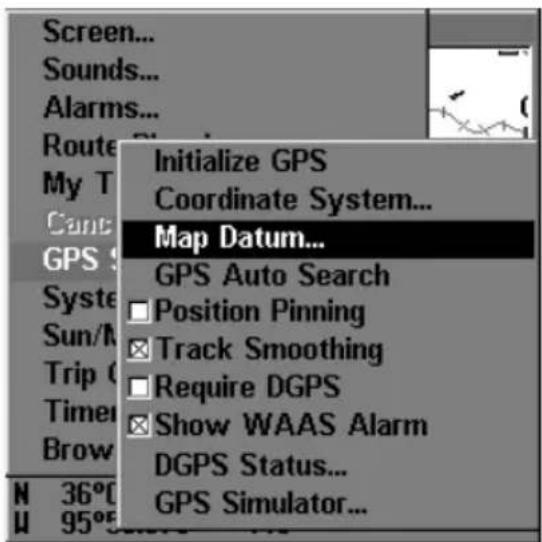
text_image
Screen... Sounds... Alarms... Route My T Can: GPS S Syste Sun/M Trip C Timer Brow N 36°0 U 95°0 Initialize GPS Coordinate System... Map Datum... GPS Auto Search Position Pinning Track Smoothing Require DGPS Show WAAS Alarm DGPS Status... GPS Simulator...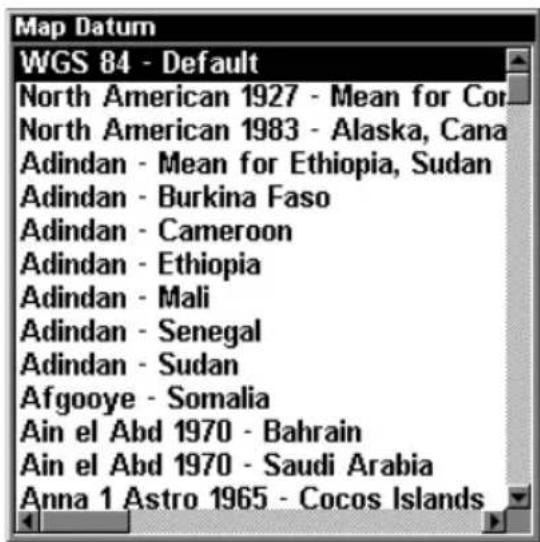
text_image
Map Datum WGS 84 - Default North American 1927 - Mean for Cor North American 1983 - Alaska, Cana Adindan - Mean for Ethiopia, Sudan Adindan - Burkina Faso Adindan - Cameroon Adindan - Ethiopia Adindan - Mali Adindan - Senegal Adindan - Sudan Afgooye - Somalia Ain el Abd 1970 - Bahrain Ain el Abd 1970 - Saudi Arabia Anna 1 Astro 1965 - Cocos IslandsGPS Setup Menu, left, Map Datum Menu, right.
Map Detail Category Selection
This menu determines which of the mapping features are shown on the screen. This includes, waypoints, trails, icons, cities, highways, etc. You can selectively turn on or off any of these items, customizing the map to your needs.
To get to Map Categories:
- From the Map Page, press MENU | ↓ to MAP CATEGORIES DRAWN | ENT.
- Press ↑ or ↓ to select a category or press → then press ↑ or ↓ to select a subcategory. Press ENT to turn it off (no check) or on (checked.)
- To return to the last page displayed, press EXIT | EXIT.
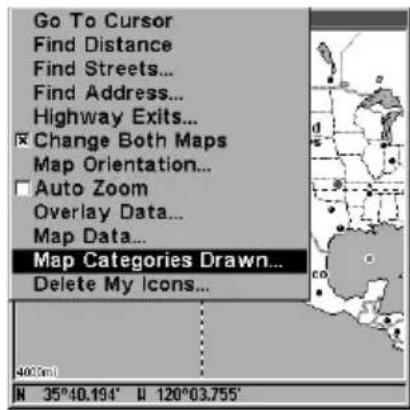
text_image
Go To Cursor Find Distance Find Streets... Find Address... Highway Exits... Change Both Maps Map Orientation... Auto Zoom Overlay Data... Map Data... Map Categories Drawn... Delete My Icons... 400ml N 35°40.194' II 120°03.755'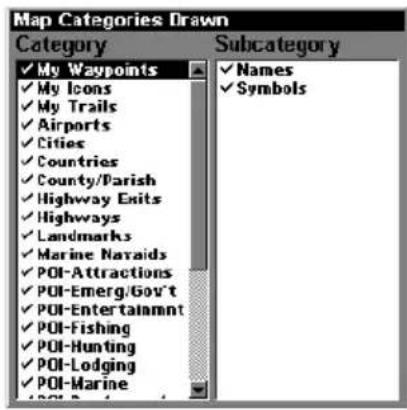
text_image
Map Categories Drawn Category ✓ My Waypoints ✓ My Icons ✓ My Trails ✓ Airports ✓ Cities ✓ Countries ✓ County/Parish ✓ Highway Exits ✓ Highways ✓ Landmarks ✓ Marine Navaids ✓ POI-Attractions ✓ POI-Emerg/Gov't ✓ POI-Entertainment ✓ POI-Fishing ✓ POI-Hunting ✓ POI-Lodging ✓ POI-Marine Subcategory ✓ Names ✓ SymbolsMap Menu, left, Map Categories Drawn Menu, right.
Map Orientation
By default, this receiver shows the map with north always at the top of the screen. This is the way most maps and charts are printed on paper.
In Track Up mode, map shows "N" and arrow to indicate north.
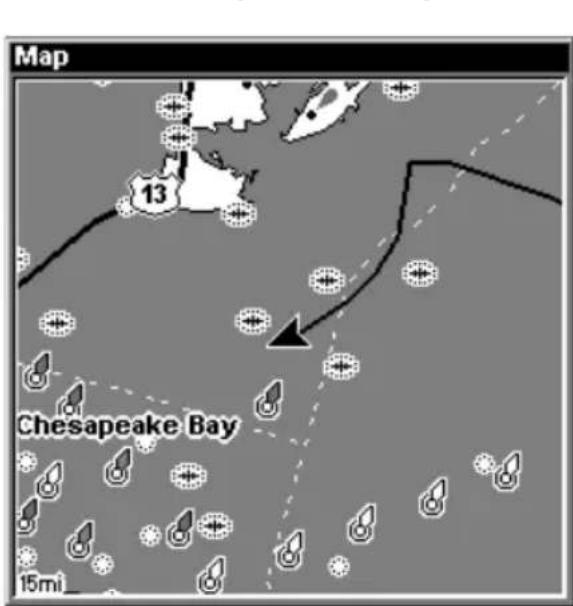
text_image
Map 13 Chesapeake Bay 15mi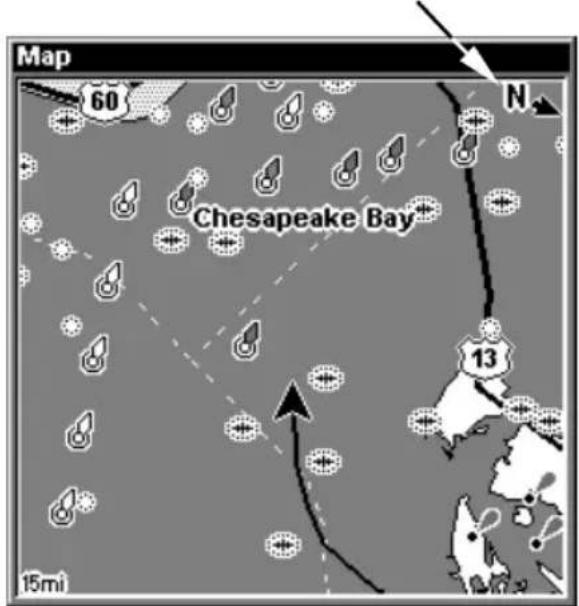
text_image
Map 60 N Chesapeake Bay 13 15miMap orientation at left is shown in north up and at right, track up.
This is fine if you're always traveling due north. What you see to your left corresponds to the left side of the map, to your right is shown on the right side of the map, and so on. However, if you travel any other direction, the map doesn't line up with your view of the world.
To correct this problem, a track-up mode rotates the map as you turn. Thus, what you see on the left side of the screen should always be to your left, and so on.
Another option is course-up mode, which keeps the map at the same orientation as the initial bearing to the waypoint. When either the track-up or course-up mode is on, an "N" shows on the map screen to help you see which direction is north.
To change map orientation: from the Map Page, press MENU | ↓ to MAP ORIENTATION | ENT. Use ↑ or ↓ to select the desired mode, then press ENT. Press EXIT | EXIT to return to the page display.
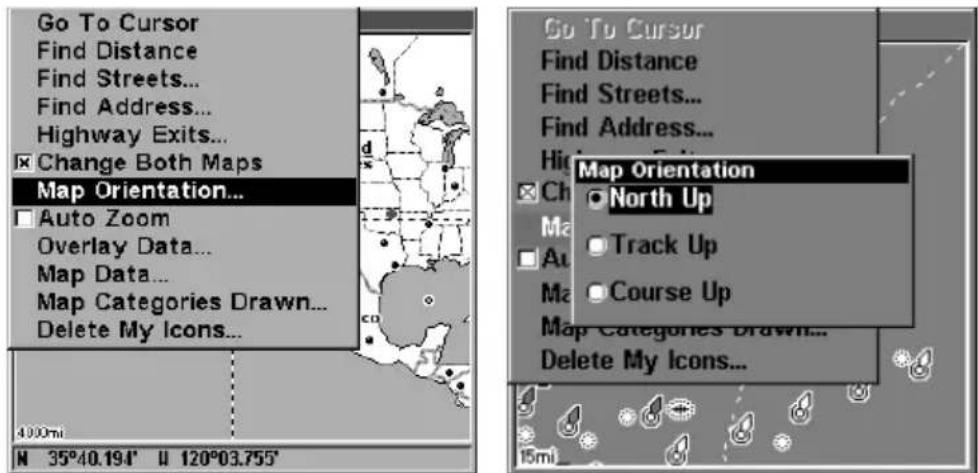
text_image
Go To Cursor Find Distance Find Streets... Find Address... Highway Exits... Change Both Maps Map Orientation... Auto Zoom Overlay Data... Map Data... Map Categories Drawn... Delete My Icons... 400ml N 35°40.194' U 120°03.755' Go To Cursor Find Distance Find Streets... Find Address... High Map Orientation North Up Track Up Course Up Map Categories Drawn... Delete My Icons...Map Menu, left; Map Orientation menu with the North Up map orientation option selected, right.
Navionics® Charts
Your LMS-320 can display Navionics® electronic charts on MMCs. They work just like a MapCreate custom map on an MMC.
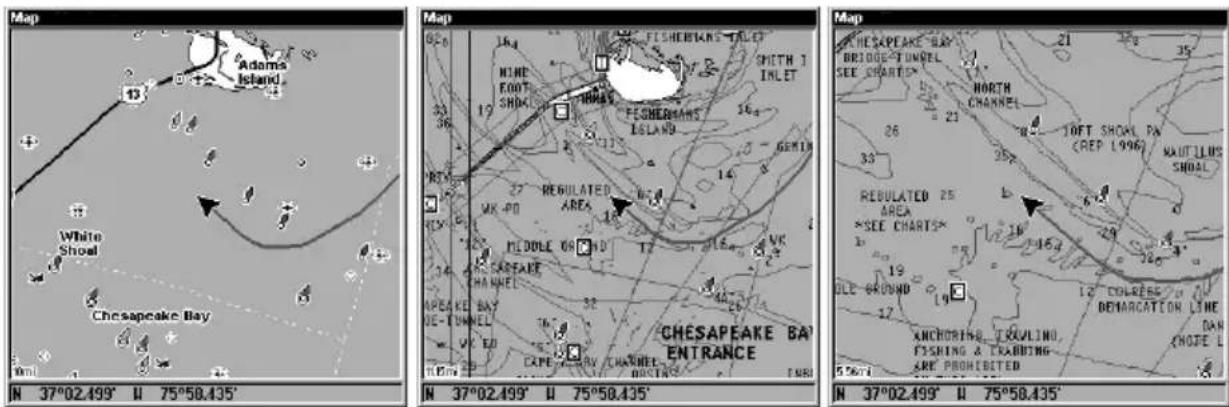
text_image
Map Adoma Island. White Shoal Chesapeake Bay N 37°02.499' II 75°50.435' Map FISHERMANS-TILET MINE FOOT SHOD 16.4 17 18 19 20 21 22 23 24 25 26 27 28 29 30 31 32 33 34 35 36 37 38 39 40 41 42 43 44 45 46 47 48 49 50 51 52 53 54 55 56 57 58 59 60 61 62 63 64 65 66 67 68 69 70 71 72 73 74 75 76 77 78 79 80 81 82 83 84 85 86 87 88 89 90 91 92 93 94 95 96 97 98 99 100 101 102 103 104 105 106 107 108 109 110 111 112 113 114 115 116 117 118 119 120 121 122 123 124 125 126 127 128 129 130 131 132 133 134 135 136 137 138 139 140 141 142 143 144 145 146 147 148 149 150 151 152 153 154 155 156 157 158 159 160 161 162 163 164 165 166 167 168 169 170 171 172 173 174 175 176 177 178 179 180 181 182 183 184 185 186 187 188 189 190 191 192 193 194 195 196 197 198 199 200Left, entrance to Chesapeake Bay in a MapCreate 6 custom map, 10 mile zoom. Center, same position on Navionics chart at 11.15 mile zoom and right, 5.56 mile zoom.
To display a Navionics chart:
- Install the Navionics MMC in the memory card compartment and turn on the unit. (For full card install instructions, see Sec. 2.)
WARNING:
You should never format the MMC containing your Navionics chart. Formatting the MMC will permanently erase the chart from the card.
- From the Map Page, press MENU|↓ to MAP DATA|ENT|↓ to MAP CHOICE|ENT. Use ↑ or ↓ to select the Map Name, then press ENT|EXIT|EXIT.
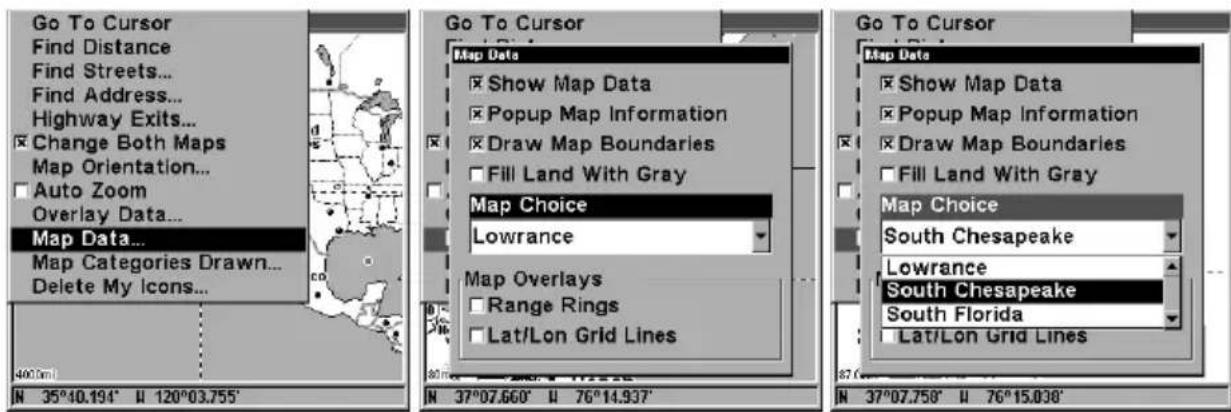
text_image
Go To Cursor Find Distance Find Streets... Find Address... Highway Exits... Change Both Maps Map Orientation... Auto Zoom Overlay Data... Map Data... Map Categories Drawn... Delete My Icons... 400.0m N 35°40.194' U 120°03.755' Go To Cursor Map Data Show Map Data Popup Map Information Draw Map Boundaries Fill Land With Gray Map Choice Lowrance Map Overlays Range Rings Lat/Lon Grid Lines Go To Cursor Map Data Show Map Data Popup Map Information Draw Map Boundaries Fill Land With Gray Map Choice South Chesapeake Lowrance South Chesapeake South Florida Lat/Lon Grid Lines N 37°07.660' U 76°14.937' N 37°07.758' U 76°15.038'These figures show menu sequence (from left to right) for selecting a Navionics chart for the South Chesapeake Bay area.
- To turn off a Navionics chart, From the Map Page, press MENU | ↓ to MAP DATA | ENT | ↓ to MAP CHOICE | ENT. Use ↑ or ↓ to select LOWRANCE, then press ENT | EXIT | EXIT.
Port Information
Navionics charts contain Port Services information, represented by anchor icons on the map display. An example is displayed in the following figure.
To view Port Services information:
-
Use the arrow keys to move the cursor over a Port Services icon. When selected, a pop-up name box appears.
-
Press WPT to display the Port Services Information screen.
The Port Services information screen has two windows. The top window lists the various service categories. The lower window lists the detailed services available in each basic category.
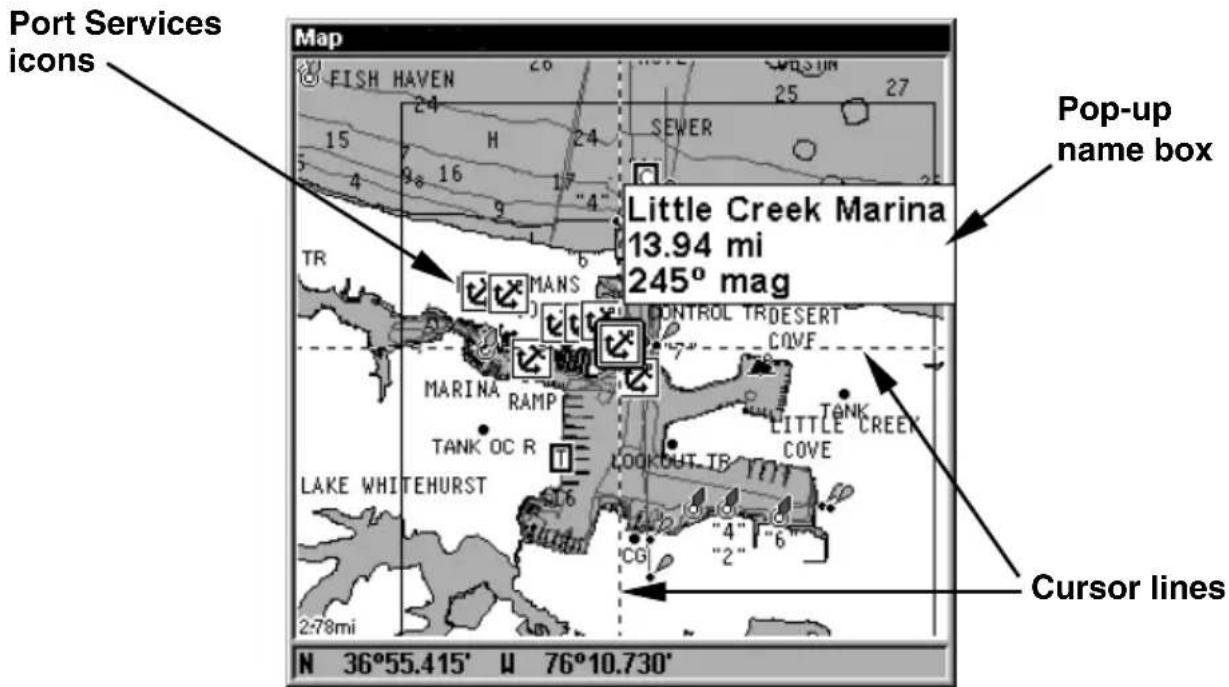
text_image
Port Services icons Map FISH HAVEN 24 15 9 4 5 24 H 16 17 "4" SEWER Little Creek Marina 13.94 mi 245° mag TR MANS CONTROL TRDESERT COVE MARINA RAMP TANK OC R LOOKOUT TR LITTLE CREEK COVE LAKE WHITEHURST "4" "2" 278mi N 36°55.415' U 76°10.730' Pop-up name box Cursor linesNavionics chart showing Port Services icon selected by cursor.
- To scroll through the Service Categories window: press ENT then use ↑ or ↓ to see the types of services available. As you highlight a different category, the list in the lower window changes. To return to the Map Page, press EXIT | EXIT.
- The General Services category includes a long list of items in the Detailed Services window. To scroll through the Detailed Services window: from SERVICE CATEGORIES, press ↓ to DETAILED SERVICES | ENT, then use ↑ or ↓ to read the list of available services. To return to the Map Page, press EXIT | EXIT. To return to the top service category window, press ENT | ↑.
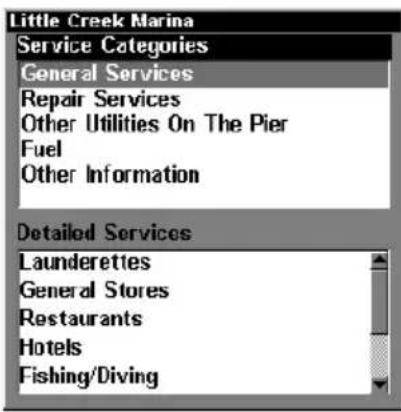
text_image
Little Creek Marina Service Categories General Services Repair Services Other Utilities On The Pier Fuel Other Information Detailed Services Launderettes General Stores Restaurants Hotels Fishing/Diving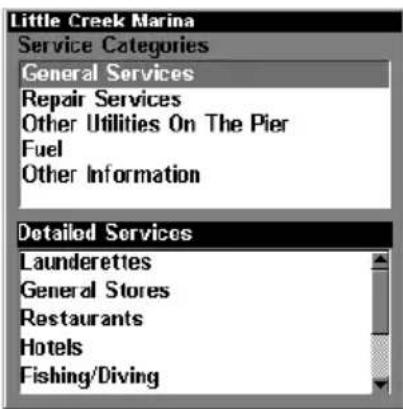
text_image
Little Creek Marina Service Categories General Services Repair Services Other Utilities On The Pier Fuel Other Information Detailed Services Launderettes General Stores Restaurants Hotels Fishing/Diving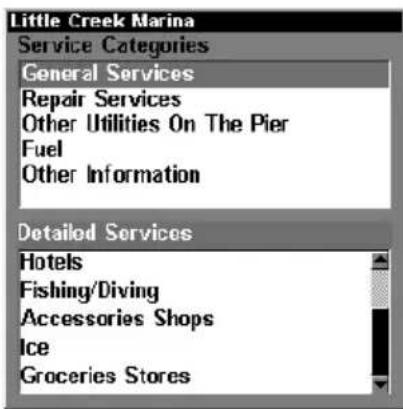
text_image
Little Creek Marina Service Categories General Services Repair Services Other Utilities On The Pier Fuel Other Information Detailed Services Hotels Fishing/Diving Accessories Shops Ice Groceries StoresPort Services information screens.
Tidal Current Information
Navionics charts contain Tidal Current information, represented at large zoom ranges by a box icon with the letter "C." The icon stands for a Tidal Current Station location. An example is displayed at right.
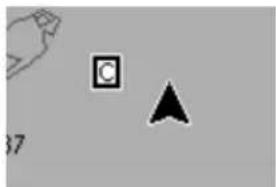
natural_image
Simple geometric shapes including a house, a square, and a triangle on a gray background (no text or symbols)When you zoom in to a sufficiently small zoom range, the icon itself becomes an animated arrow showing tidal current velocity and direction for the selected tidal station at the present time. At larger zoom ranges, you can select the boxed "C" icon and it becomes an animated arrow with a pop-up name box. An example is displayed in the following figure.
To view Tidal Current information:
- Use the arrow keys to move the cursor over a Tidal Current Station icon. When selected, a pop-up name box appears.
- Press WPT to display the Tidal Current Information screen.
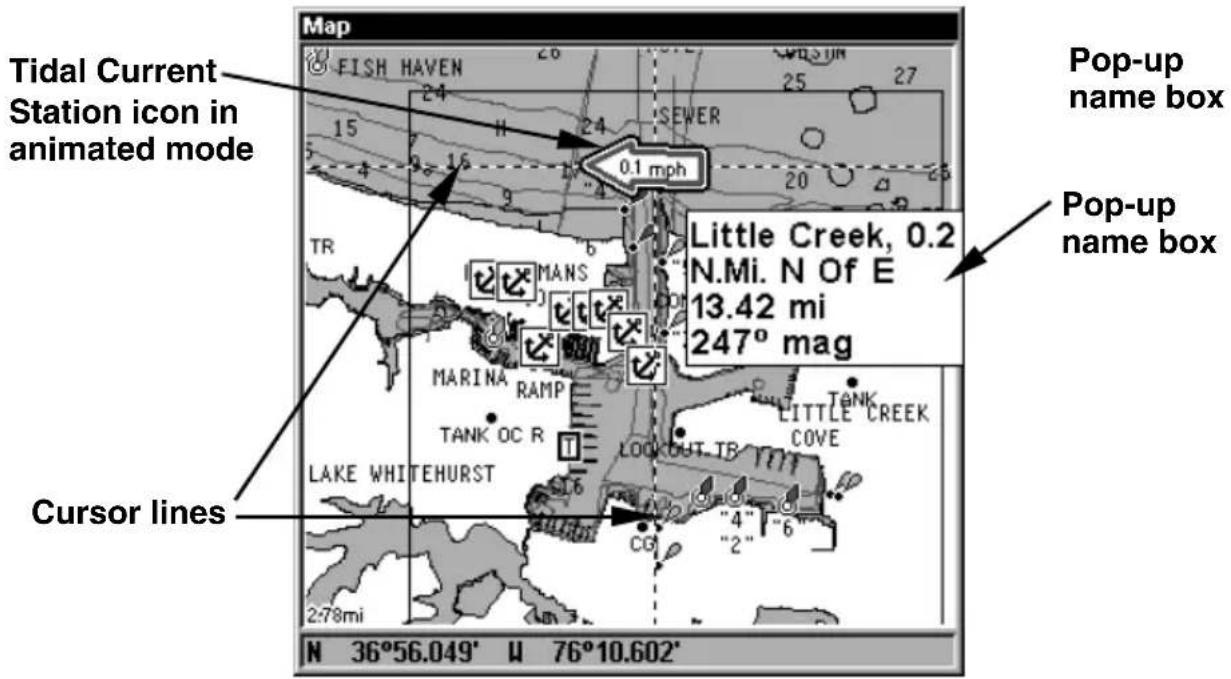
text_image
Map Tidal Current Station icon in animated mode FISH HAVEN 24 15 24 27 SEWER 0.1 mph 20 TR MANS Little Creek, 0.2 N.Mi. N Of E 13.42 mi 247° mag MARINA RAMP TANK OC R LOOKOUT TR LITTLE CREEK COVE LAKE WHITEHURST CORSOR LINES 2:78mi N 36°56.049' U 76°10.602' Pop-up name box Pop-up name boxNavionics chart showing Tidal Current Station icon selected by cursor. In this example, the tidal current is in flood but it's about to enter the slack water stage. The current is flowing to the west at 0.1 mph.
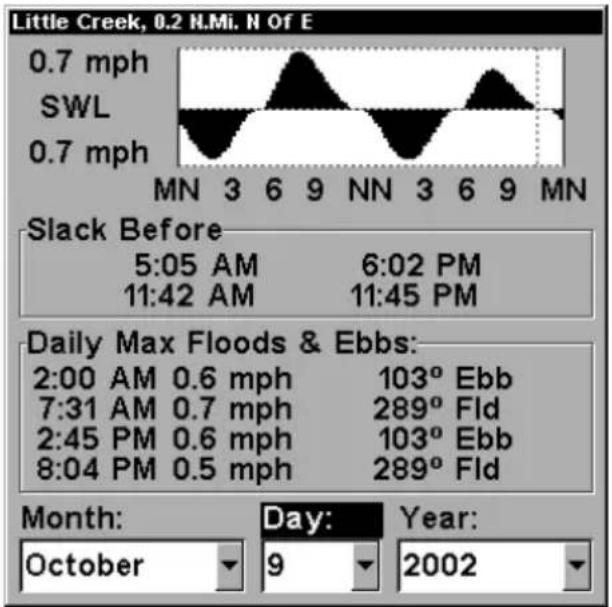
text_image
Little Creek, 0.2 N.Mi. N Of E 0.7 mph SWL 0.7 mph MN 3 6 9 NN 3 6 9 MN Slack Before 5:05 AM 6:02 PM 11:42 AM 11:45 PM Daily Max Floods & Ebbs: 2:00 AM 0.6 mph 103° Ebb 7:31 AM 0.7 mph 289° Fld 2:45 PM 0.6 mph 103° Ebb 8:04 PM 0.5 mph 289° Fld Month: October Day: 9 Year: 2002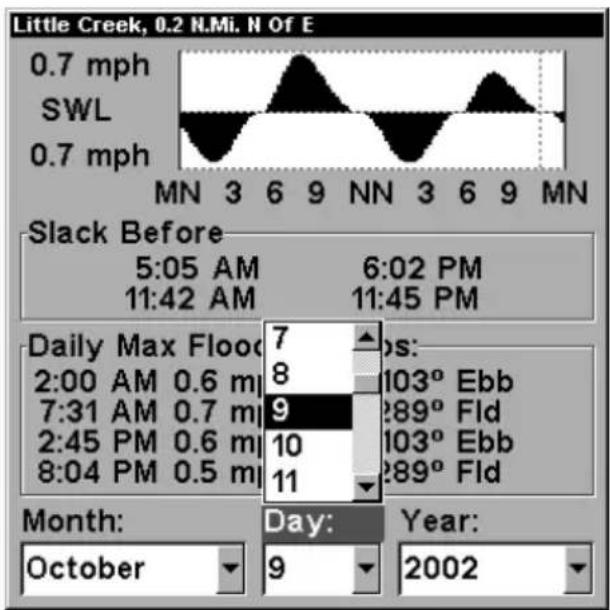
text_image
Little Creek, 0.2 N.Mi. N Of E 0.7 mph SWL 0.7 mph MN 3 6 9 NN 3 6 9 MN Slack Before 5:05 AM 6:02 PM 11:42 AM 11:45 PM Daily Max Floods: 2:00 AM 0.6 m 8 7:31 AM 0.7 m 9 2:45 PM 0.6 m 10 8:04 PM 0.5 m 11 Month: October Day: 9 Year: 2002The Tidal Current Information screen displays daily tidal current data for this station on this date at the present time. The graph at the top of the screen is an approximate view of the flood and ebb pattern for the day, from midnight (MN), to noon (NN) to midnight (MN). The velocity scale at the top left side of the graph changes dynamically based upon the maximum velocity of the current for that day.
Slack water, the period of little or no current, is represented by the Slack Water Line (SWL). The flood appears above the SWL and the ebb appears below the SWL.
You can look up tidal current data for other dates by changing the month, day and year selection boxes. To select another date:
- Use → and ← to highlight month, day or year, then press ENT.
- Use and to select the desired month, day or year, then press ENT.
To clear the information screen, press EXIT.
Tide Information
Navionics charts contain Tidal Information, represented at large zoom ranges by a box icon with the letter "T." The icon stands for a Tidal Station location. An example is displayed at right.
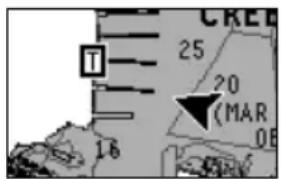
text_image
CRED 25 20 (MAR) 16 OBWhen you zoom in to a sufficiently small zoom range, the icon itself becomes an animated gauge showing a rising or falling tidal height for the selected station at the present time. At larger zoom ranges, you can select the boxed "T" icon and it becomes an animated gauge with a pop-up name box. An example is displayed in the following figure.
To view tide information:
- Select a Tide Station icon: use the arrow keys to move the cursor over an icon. When it is selected, a pop-up name box appears.
- After selecting the Tide Station icon, press WPT to display the Tide Information screen.
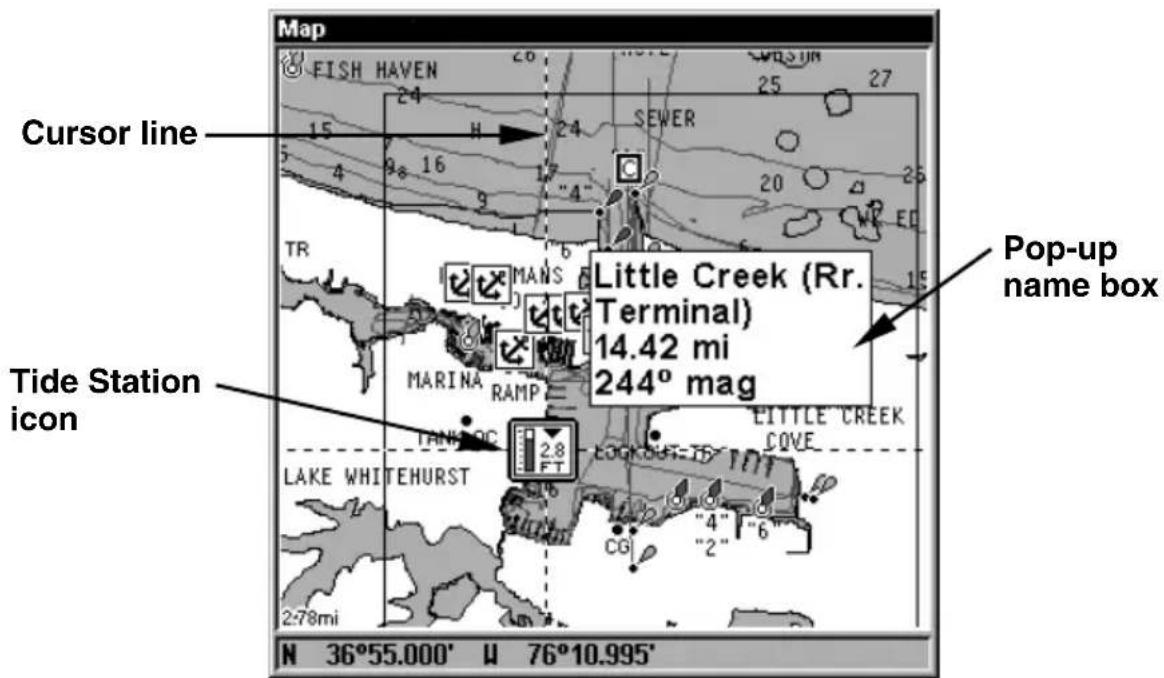
text_image
Map FISH HAVEN 24 H 24 SEWER 25 27 Cursor line 15 98 16 9 "4" 20 26 TR MANS Little Creek (Rr. Terminal) 14.42 mi 244° mag Tide Station icon MARINA RAMP EITTLE CREEK COVE 2.8 FT LAKE WHITEHURST "4" "2" 2-78mi N 36°55.000' U 76°10.995' Pop-up name boxNavionics chart showing Tide Station icon selected by cursor. In the example above, the tide is at 2.8 feet and falling, as shown by the down arrow at the top of the icon.
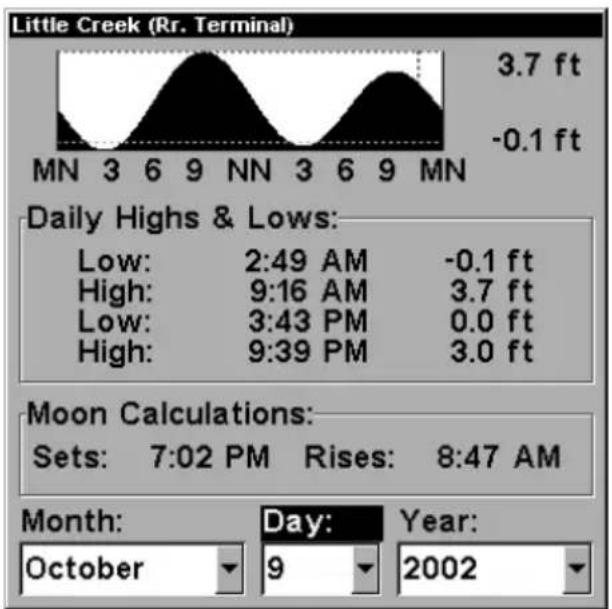
line
| Metric | Value | | ---------------- | --------- | | Daily Highs & Lows | Low: 2:49 AM | | Daily Highs & Lows | High: 9:16 AM | | Daily Highs & Lows | Low: 3:43 PM | | Daily Highs & Lows | High: 9:39 PM | | Moon Calculations | Sets: 7:02 PM | | Moon Calculations | Rises: 8:47 AM | | Month | October | | Day | 9 | | Year | 2002 |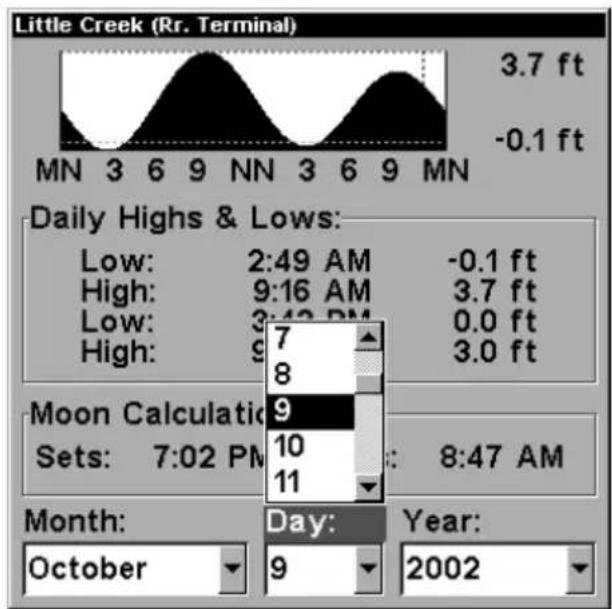
text_image
Little Creek (Rr. Terminal) 3.7 ft -0.1 ft MN 3 6 9 NN 3 6 9 MN Daily Highs & Lows: Low: 2:49 AM -0.1 ft High: 9:16 AM 3.7 ft Low: 3:42 PM 0.0 ft High: 9 3.0 ft Moon Calculatio Sets: 7:02 PM 10 : 8:47 AM Month: Day: Year: October 9 2002Tide Information screen.
The Tide Information screen displays daily tidal data for this station on this date at the present time. The graph at the top of the screen is an approximate view of the tidal range pattern for the day, from midnight (MN), to noon (NN) to midnight (MN). The dotted line across the graph is the Mean Lower Low Water line (MLLW).
The height scale on the top right side of the graph changes, based upon the maximum range of the tide for that day. The MLLW line also adjusts its position as the height scale changes.
You can look up tidal data for other dates by changing the month, day and year selection boxes. To select another date:
- Use → and ← to highlight month, day or year, then press ENT.
- Use and to select the desired month, day or year, then press ENT.
To clear the information screen, press EXIT.
Pop-up Help
Help is available for virtually all of the menu labels on this unit. By highlighting a menu item and leaving it highlighted for a few seconds, a "pop-up" message appears that describes the function of the menu item. This feature is on by default.
To set up Popup Help: Press MENU | MENU | ↓ to SYSTEM SETUP | ENT | ↓ to POPUP HELP. With the option highlighted, press ENT to check it (turn on) and uncheck it (turn off.) After the option is set, press EXIT | EXIT to return to the page display.
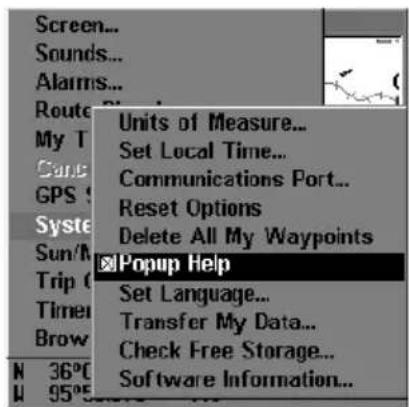
text_image
Screen... Sounds... Alarms... Route My T Cans GPS Syste Sun/M Trip C Timer Brow N 36°E W 95°E Units of Measure... Set Local Time... Communications Port... Reset Options Delete All My Waypoints □Popup Help Set Language... Transfer My Data... Check Free Storage... Software Information...
text_image
Go To Cursor Find Distance Find Streets... Find Address... Highway Exits... Change Both Maps Map Orientation... Auto Zoom Overlay Data... Map Data... Map Categories Drawn... Delete My Icons... 4000mil Navigate to the current cursor position. N 35°40.194" N 120°03.755'System Setup menu, left, with Pop-up Help command highlighted. At right, this example shows the Pop-up Help message for the Go To Cursor command, located on the Map Menu.
Position Pinning
When you are standing still or moving at extremely slow speed, a GPS receiver can have trouble determining the direction you are traveling. In the past, this resulted in a "wandering" plot trail that moved around the map, even if you were standing still.
The Position Pinning feature was developed so that when you stopped, the unit locked the present position on the GPS plotter until you moved a short distance or exceeded a very slow speed.
The command remains available in the unit's software, but we recommend that you leave it in the default off (unchecked) mode. The "wandering" plot trail issue has now been corrected by the Track Smoothing feature. Turning on Position Pinning could actually result in an inaccu-
rate plot trail if you are moving around in a relatively small area. If you want to experiment with Position Pinning, the same instructions are used to turn the feature on (checked) and off (unchecked.)
-
Press MENU | MENU | ↓ to GPS SETUP | ENT | ↓ to POSITION PINNING | ENT.
-
Press EXIT | EXIT to return to the previous page.
Reset Options
To reset all features to their factory defaults:
- Press MENU | MENU | ↓ to SYSTEM SETUP | ENT | ↓ to RESET OPTIONS | ENT | ← to YES | ENT.
NOTE:
Reset Options does not erase any waypoints, routes, icons, plot trails or sonar logs.
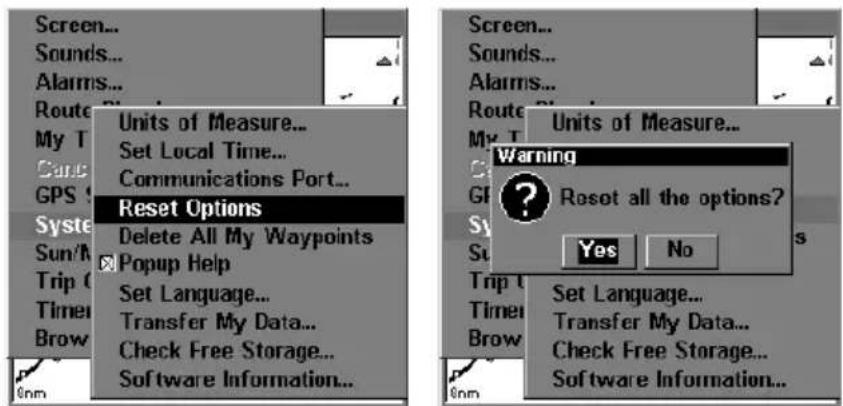
text_image
Screen... Sounds... Alarms... Route My T Curt GPS System Sun/N Trip Timer Brow Units of Measure... Set Local Time... Communications Port... Reset Options Delete All My Waypoints Popup Help Set Language... Transfer My Data... Check Free Storage... Software Information... Screen... Sounds... Alarms... Route My T Curt GPS Systems Trip Timer Brow Units of Measure... Warning Reset all the options? Yes No Set Language... Transfer My Data... Check Free Storage... Software Information...Reset Options command, left, and the Reset Options Menu, right.
Require DGPS
You can force LMS-320 to require DGPS for reporting a valid position. (The default setting, off, uses DGPS automatically when an optional DGPS beacon receiver is connected. However, this auto mode doesn't require DGPS reception to yield a position.) Here's how to turn mandatory DGPS on and off.
-
Press MENU | MENU | ↓ to GPS SETUP | ENT | ↓ to REQUIRE DGPS | ENT.
-
To return to the last page displayed, press EXIT | EXIT.
-
You can return to this command and press ENT again to turn the feature off.
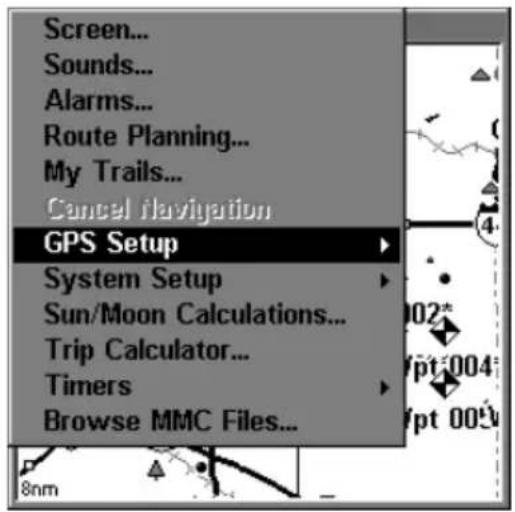
text_image
Screen... Sounds... Alarms... Route Planning... My Trails... Cancel navigation GPS Setup System Setup Sun/Moon Calculations... Trip Calculator... Timers Browse MMC Files...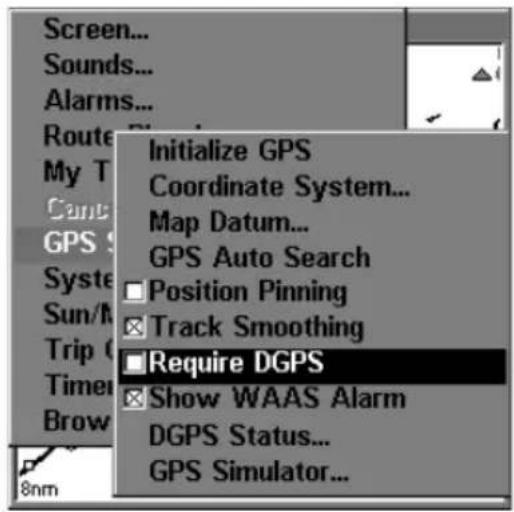
text_image
Screen... Sounds... Alarms... Route My T Can GPS S Syste Sun/M Trip C Timer Brow 8nm Initialize GPS Coordinate System... Map Datum... GPS Auto Search Position Pinning Track Smoothing Require DGPS Show WAAS Alarm DGPS Status... GPS Simulator...GPS Setup command, left; Require DGPS command on the GPS Setup Menu, right.
Screen Contrast and Brightness
To access the Screen menu, press MENU | MENU | ENT.
Once in the Screen menu:
To adjust the display's contrast:
The CONTRAST slider bar is already selected. Press → or ← to move the bar. The left end of the scale is minimum contrast; the right end is maximum contrast.
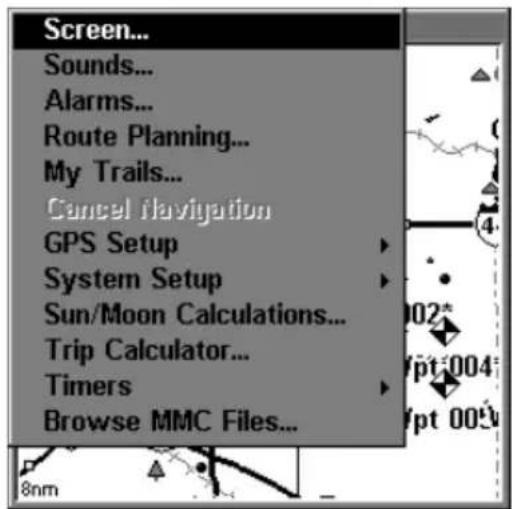
text_image
Screen... Sounds... Alarms... Route Planning... My Trails... Cancel Navigation GPS Setup System Setup Sun/Moon Calculations... Trip Calculator... Timers Browse MMC Files...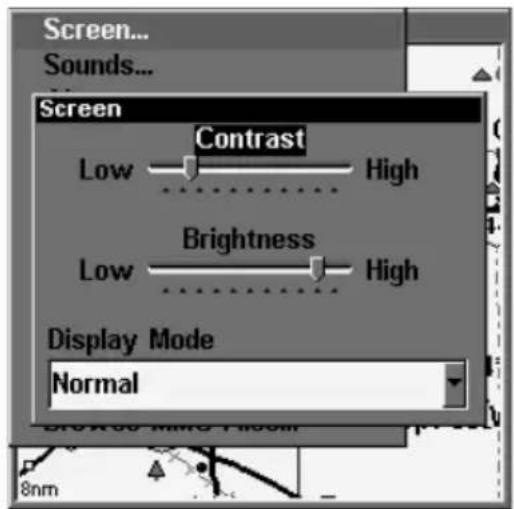
text_image
Screen... Sounds... Screen Contrast Low High Brightness Low High Display Mode NormalScreen Command, left, and Screen Menu with Contrast bar selected, right.
To adjust the display's brightness:
Press ↓ to BRIGHTNESS. Press → or ← to move the bar. The left end of the scale is minimum contrast; the right end is maximum contrast.
To adjust the screen's display mode:
Press ↓ to DISPLAY MODE | ENT | press ↑ or ↓ to select mode | EXIT.
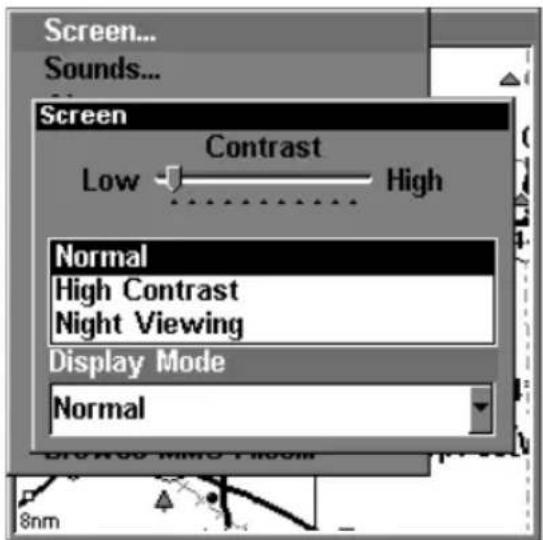
text_image
Screen... Sounds... Screen Contrast Low High Normal High Contrast Night Viewing Display Mode NormalDisplay Mode menu.
Set Language
This unit's menus are available in 10 languages: English, French, German, Spanish, Italian, Danish, Swedish, Russian, Dutch and Finnish. To select a different language:
- Press MENU | MENU | ↓ to SYSTEM SETUP | ENT.
- Press ↓ to SET LANGUAGE... | ENT.
- Use ↓ or ↑ to select a different language and press ENT. All menus now appear in the language you selected.
Set Local Time
Using the correct local time setting is handy when estimating local arrival time while navigating. Also, the time and date are saved when a waypoint is created.
To access the Set Local Time menu, you must first acquire your position. Once that is done: press MENU | MENU | ↓ to SYSTEM SETUP | ENT | ↓ to SET LOCAL TIME | ENT.
Once in the Time Settings menu:
To set Local Time: Press ENT. Press ↑ or ↓ to change the first character, then press → to move the cursor to the next character. Repeat until the time is correct, then press ENT.
To set the Month: Press ↓ to MONTH | ENT. Press ↑ or ↓ to select the month, then press ENT.
To set the Day: Press → to DAY|ENT. Press ↑ or ↓ to select the day, then press ENT.
To set the Year: Press → to YEAR | ENT. Press ↑ or ↓ to select the year, then press ENT.
The last field in this menu is CONFIG DST. This feature allows your unit to automatically adjust with the time change caused by Daylight Saving Time (you should only have to set it once). You may select which set of rules matches DST in your region, or simply accept the default.
Once you have each field set the way you want, press EXIT repeatedly until you return to the previous page.
Show WAAS Alarm
When the signal is available, your unit will automatically use WAAS to boost the accuracy of the position fix. When the WAAS signal is lost or acquired, a alarm message appears. Since the U.S. government is still developing the WAAS system, it's not unusual for a GPS/WAAS receiver to frequently lose and reacquire its lock on a WAAS satellite. That can result in the alarm repeatedly going on and off. If you want, you have the option of turning off the WAAS Acquired/Lost alarm without affecting how the unit uses WAAS. Here's how:
- Press MENU | MENU | ↓ to GPS SETUP | ENT | ↓ to SHOW WAAS ALARM.
- With the option highlighted, press ENT to uncheck it (turn off) and check it (turn on.) After the option is set, press EXIT|EXIT to return to the page display.
- You can return to this command and press ENT again to turn the feature on.
Software Version Information
From time to time, Lowrance updates the operating system software in some of its products. These software upgrades are usually offered to customers as free downloads from our web site, www.lowrance.com. These upgrades make the unit perform better or introduce a new feature or function. You can find out what software version is running in your LMS-320 by using the Software Information command.

text_image
Screen... Sounds... Alarms... Route Planning... My Trails... Cancel navigation GPS Setup System Setup Sun/Moon Calculations... Trip Calculator... Timers Browse MMC Files...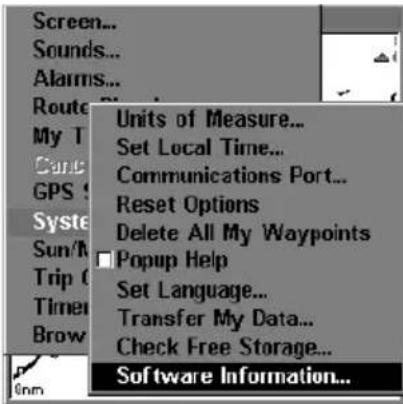
text_image
Screen... Sounds... Alarms... Route My T Canc GPS System Sun/M Trip C Timer Brow Units of Measure... Set Local Time... Communications Port... Reset Options Delete All My Waypoints □ Popup Help Set Language... Transfer My Data... Check Free Storage... Software Information...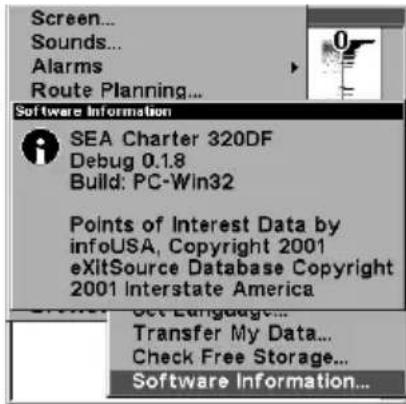
text_image
Screen... Sounds... Alarms Route Planning... Software Information SEA Charter 320DF Debug 0.1.8 Build: PC-Win32 Points of Interest Data by infoUSA, Copyright 2001 eXltSource Database Copyright 2001 Interstate America Transfer My Data... Check Free Storage... Software Information...System Setup command left; Software Information command, center. At right, the Software Information screen.
- Press MENU | MENU | ↓ to SYSTEM SETUP | ENT | ↓ to SOFTWARE INFO | ENT.
- Read the information displayed on the screen.
- To return to the last page displayed, press EXIT | EXIT | EXIT.
Sounds and Alarm Sound Styles
Sounds triggered by key strokes and alarms can be adjusted:
You first press MENU | MENU | ↓ to SOUNDS | ENT.
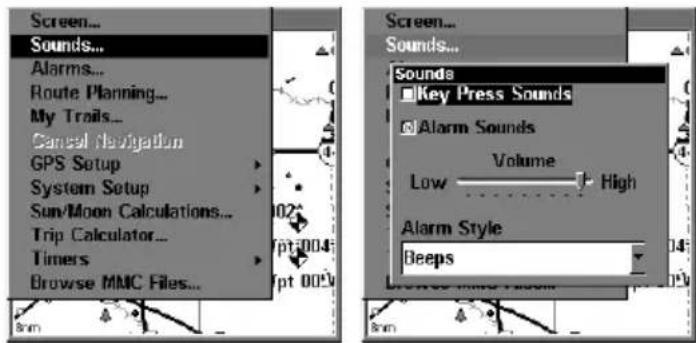
text_image
Screen... Sounds... Alarms... Route Planning... My Trails... Cancel navigation GPS Setup System Setup Sun/Moon Calculations... Trip Calculator... Timers Browse MMC Files... Screen... Sounds... Key Press Sounds Alarm Sounds Volume Low High Alarm Style BeepsSounds command, left. At right, the Sounds menu.
Once in the Sounds menu:
To set Key Press Sounds: With the option highlighted, press ENT to check it (turn on) and uncheck it (turn off.) After the option is set, press EXIT | EXIT to return to the page display.
To set Alarm Sounds: Press ↓ to ALARM SOUNDS. With the option highlighted, press ENT to check it (turn on) and uncheck it (turn off.) After the option is set, press EXIT | EXIT to return to the page display.
To set Alarm Volume: Press ↓ to VOLUME. Press → or ← to move the bar. The left end of the scale is low volume; the right end is high volume. After the option is set, press EXIT | EXIT to return to the page display.
To set Alarm Style: Press ↓ to ALARM STYLE | ENT. Press ↑ or ↓ to change the style, then press ENT. After the option is set, press EXIT | EXIT to return to the page display.
Track Smoothing
This is a factory setting on the GPS Setup menu that should always be left on. When stopped or traveling at slow speeds (such as walking or trolling), Track Smoothing prevents wandering of trails, the steering arrow, compass rose and a map in track-up mode.
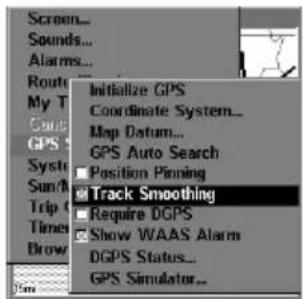
text_image
Initialize GPS Coordinate System... Map Datum... GPS Auto Search Position Pinning Track Smoothing Require DGPS Show WAAS Alarm DGPS Status... GPS Simulator...Track Smoothing option, turned on.
Trail Options
There are several options you can use with trails. Some affect all trails, other options can be applied to a particular trail. You can change the way trails are updated, you can display or hide trails, make them flash on the screen or not flash, create a new trail, delete a trail, etc.
General Trail Options
To access the Trails Menu:
- Press MENU | MENU | ↓ to MY TRAILS | ENT.
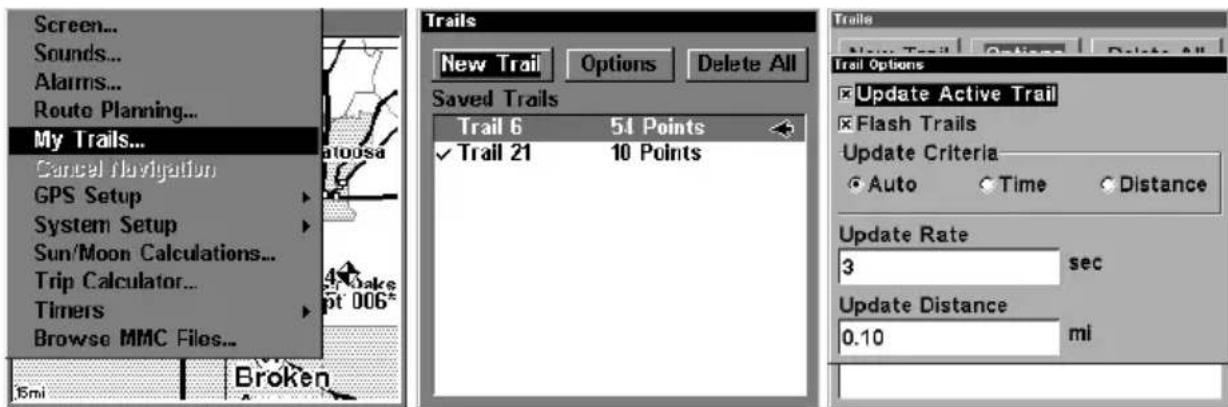
text_image
Screen... Sounds... Alarms... Route Planning... My Trails... Cancel Navigation GPS Setup System Setup Sun/Moon Calculations... Trip Calculator... Timers Browse MMC Files... 50ml Broken Trails New Trail Options Delete All Saved Trails Trail 6 51 Points ✓ Trail 21 10 Points Trails New Trail Options Delete All Trail Options Update Active Trail Flash Trails Update Criteria Auto Time Distance Update Rate 3 sec Update Distance 0.10 miMain Menu, left, Trails Menu, center, Trail Options, right.
Delete All Trails
To remove all of the trails from memory: from the Trails Menu, press → to DELETE ALL | ENT | ← to YES | ENT.
Flash Trails on Screen Option
From the Trails Menu, press → to OPTIONS | ENT | ↓ to FLASH TRAILS. With the option highlighted, press ENT to check it (turn on) and uncheck it (turn off.)
Update Trail Option
This menu lets you change the way the trail updates occur.
WARNING:
If you uncheck the Update Trail option, automatic trail creation and recording will be turned off. You must turn it back on to record trails. The default setting is on.
From the Trails Menu, press → to OPTIONS | ENT. With UPDATE ACTIVE TRAIL highlighted, press ENT to check it (turn on) and uncheck it (turn off.)
Update Trail Criteria (Auto, Time, Distance)
The options are automatic, time, or distance. When it's in the default automatic mode, the unit doesn't update the plot trail while you're traveling in a straight line. Once you deviate from a straight line, the unit "drops" a plot point (trail waypoint) onto the trail. This conserves plot trail points. If a plot trail uses all of the available points allotted to
it, the beginning points are taken away and placed at the end of the trail.
From the Trails Menu, press → to OPTIONS|ENT|↓ to UPDATE CRITERIA. Press → or ← to select criteria type|ENT.
Trail Update Rate (Time, Distance)
You can update a trail by time, with a range from 1 second to 9999 seconds; the default is 3 seconds. You can update by distance, with a range from 0.01 mile/nm/km to 9.99 mile/nm/km; the default is 0.10 mi.
With one of the Update Criteria selected, use the cursor arrows to highlight either the UPDATE RATE or UPDATE DISTANCE data entry boxes and press ENT. Press ↑ or ↓ to change the first character, then press → to the next character and repeat until the entry is correct. Press EXIT to return to the Trail Options Menu.
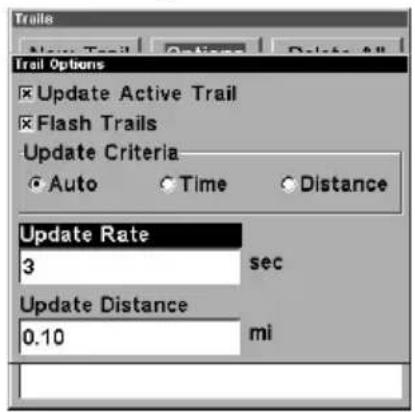
text_image
Trails New Trail Options Delete All Trail Options Update Active Trail Flash Trails Update Criteria Auto Time Distance Update Rate 3 sec Update Distance 0.10 mi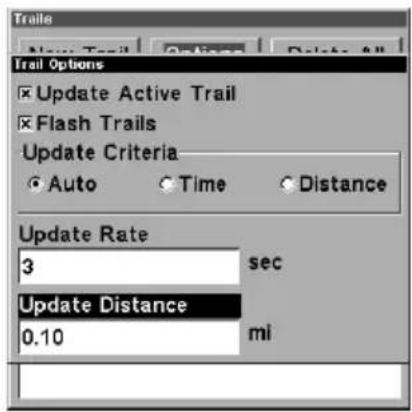
text_image
Trail Options Update Active Trail Flash Trails Update Criteria Auto Time Distance Update Rate 3 sec Update Distance 0.10 miTrail Options menu: Update Time Rate setting, left, and Update Distance setting, right.
Specific Trail Options Delete Trail
To delete a specific trail: From the Trails Menu, press ↓ to Trail Name | ENT. The Edit Trail menu appears as seen in the following figure. Press → to DELETE TRAIL | ENT | ← to YES | ENT.
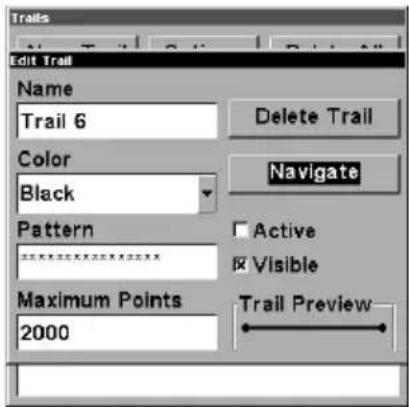
text_image
Traits Edit Trail Name Trail 6 Delete Trail Color Black Navigate Pattern ****** Active Visible Maximum Points 2000 Trail PreviewEdit Trail menu.
New Trail
To manually start a new trail, in the Trails Menu, make sure NEW TRAIL is highlighted and press ENT.
Trail Visible/Invisible and Other Trail Options
The name, maximum number of points in the trail, activity, and visibility are all changed on the Edit Trail menu screen. The Active setting determines whether or not LMS-320 is recording new points for a particular trail.
On the Edit Trail menu, press ↓ or ↑ to highlight the section you wish to change, then press ENT. Make your changes, then press EXIT to erase this menu.
Units of Measure
This menu sets the speed and distance (statute or nautical miles, meters), depth (feet, fathoms, or meters), temperature (degrees Fahrenheit or Celsius) and heading (true or magnetic) units. To change the units:
Press MENU | MENU | ↓ to SYSTEM SETUP | ENT | ENT.
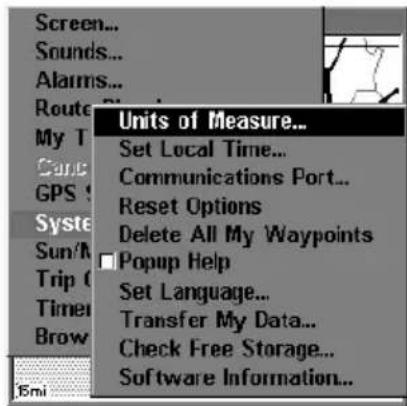
text_image
Screen... Sounds... Alarms... Route My T Canc GPS! System Sun/M Trip C Timer Brow Emi Units of Measure... Set Local Time... Communications Port... Reset Options Delete All My Waypoints ■ Popup Help Set Language... Transfer My Data... Check Free Storage... Software Information...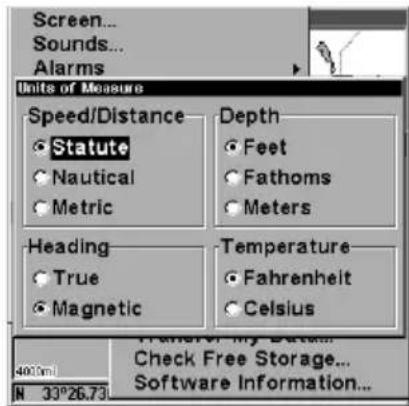
text_image
Screen... Sounds... Alarms Units of Measure Speed/Distance Statute Nautical Metric Depth Feet Fathoms Meters Heading True Magnetic Temperature Fahrenheit Celsius 400nm N 33°26.73 Check Free Storage... Software Information...System Setup Menu, left, Units of Measure Menu, right.
To set Speed/Distance Unit of Measure: Press ↑ or ↓ to change the Speed/Distance, then press ENT. After the option is set, press EXIT | EXIT | EXIT to return to the page display.
To set Heading: Press ↑ or ↓ to change the heading type, then press ENT. After the option is set, press EXIT | EXIT | EXIT to return to the page display.
Notes
Section 9: Searching
NOTE:
The background map loaded in your unit lets you to search for U.S. Interstate Highway exits and exit services, as well as some land features, including cities and lakes. For a full set of searchable land features, including landmarks, streets, addresses and Points of Interest, you must load your own high-detail custom map produced with our MapCreate 6 software. For a complete description of what detail is found in the background map and custom MapCreate maps, see page 102.
LMS-320's varied search functions all begin with either the Find Waypoint menu or the Map Page menu. Press WPT and the Find Waypoint menu appears for waypoints and Points of Interest (POI). From the Map Page, press MENU and the Map Page menu appears for streets, addresses and highway exits.
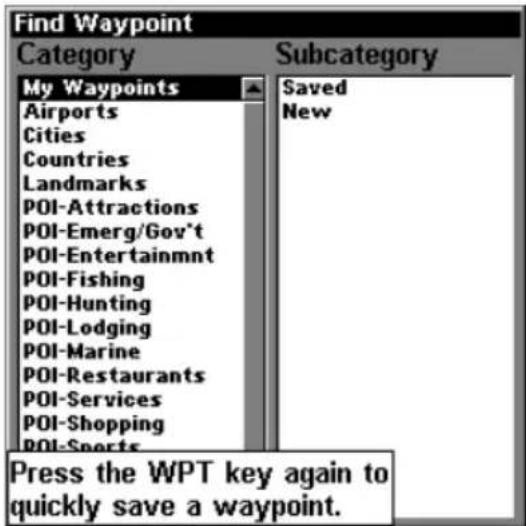
text_image
Find Waypoint Category Subcategory My Waypoints Airports Cities Countries Landmarks POI-Attractions POI-Emerg/Gov't POI-Entertainmnt POI-Fishing POI-Hunting POI-Lodging POI-Marine POI-Restaurants POI-Services POI-Shopping POI-Sports Press the WPT key again to quickly save a waypoint.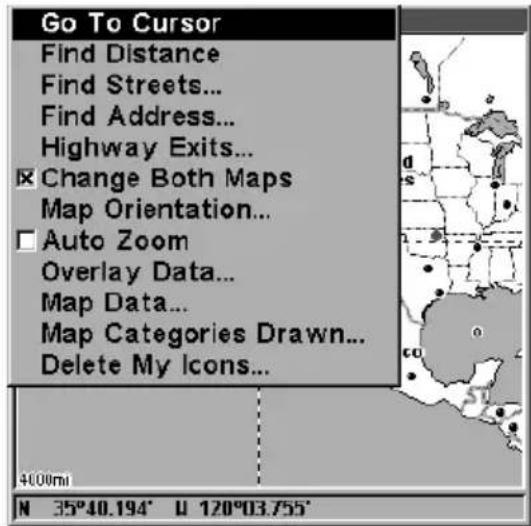
text_image
Go To Cursor Find Distance Find Streets... Find Address... Highway Exits... Change Both Maps Map Orientation... Auto Zoom Overlay Data... Map Data... Map Categories Drawn... Delete My Icons... 4000mi N 35°40.194' U 120°03.755'Find Waypoint menu, left and Map Page menu, right.
NOTE:
You can search for items after LMS-320 has acquired a position, or while using LMS-320 in the "indoor" simulator mode. Distance and bearing to the selected item will be calculated from LMS-320's current position, or the last known position if operating indoors (without a position determined). You can look up items by name, or search for the item nearest to you.
Find Addresses
-
From the Map Page, press MENU | ↓ to FIND ADDRESS | ENT.
-
Press ENT to search in the Address field.
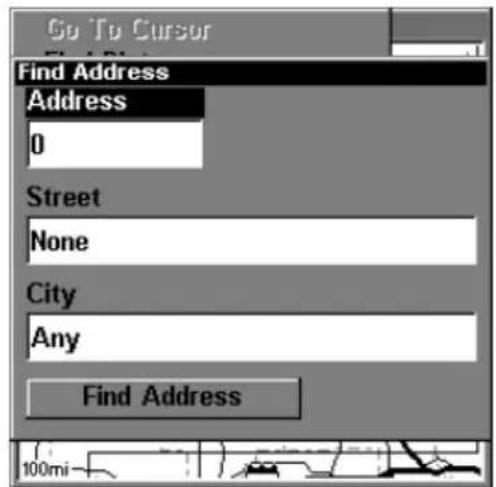
text_image
Go To Cursor Find Address Address 0 Street None City Any Find AddressFind Address Menu.
- To enter an address number, press or to change the first number, then press to move the cursor to the next number and repeat until the number is correct, then press ENT.
- To enter a street name, press ↓ to STREET|ENT. There are two options: A. You can spell out the name in the top selection box. Press ↑ or ↓ to change the first letter, then press → to move the cursor to the next letter and repeat until the name is correct, then press ENT|ENT. B. Jump down to the lower selection list by pressing ENT, then press ↓ or ↑ to select a street name from the list, then press ENT. The street name you selected is now in the street field.
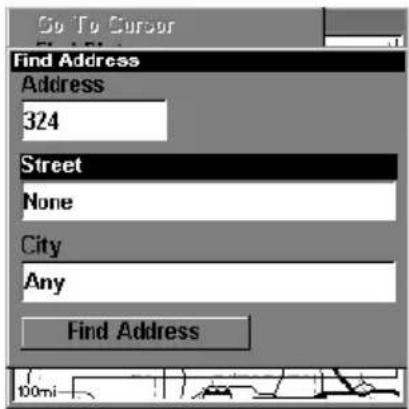
text_image
Go To Cursor Find Address Address 324 Street None City Any Find Address
text_image
Find By Name Find By Name 9th Find In List 80 (Interstate) 9th 9 B (State Highway) 9 (Access Rd) 9 (Be) 9 (County Highway) 9 (County I-) 9 (County Road BB-) 9 (County Road 00-) 9 (County Road)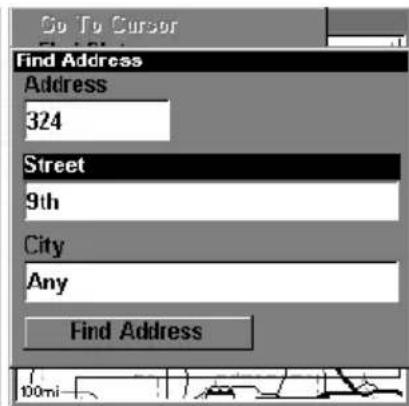
text_image
Go To Cursor Find Address Address 324 Street 9th City Any Find AddressFind Address menu, left; Find Street menu, center, with Find By Name field active; street name entry complete, right.
- To enter a city name, press ↓ to CITY | ENT. You will be asked if you want to find addresses only within a particular city. This option is designed so you can limit an address search to a single city if necessary (see the note below.)
If you select yes, there are two options: A. You can spell out the city name in the top selection box. Press or to change the first letter, then press to move the cursor to the next letter and repeat until the name is correct, then press ENT|ENT. B. Jump down to the lower selection list
by pressing ENT, then press ↓ or ↑ to select a city name from the list, then press ENT. The city name you selected is now in the city field.
NOTE:
We recommend that you do not enter a city name unless the list you are given is too large when searching without it. LMS-320 can actually search quicker without a city and you save time by not entering a city name.
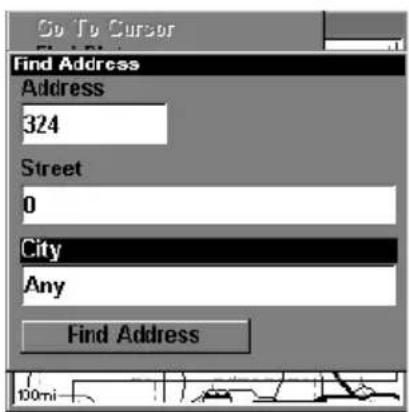
text_image
Go To Cursor Find Address Address 324 Street 0 City Any Find Address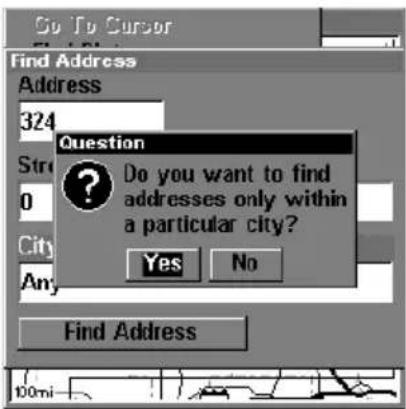
text_image
Go To Cursor Find Address Address 324 Str 0 City Any Question Do you want to find addresses only within a particular city? Yes No Find Address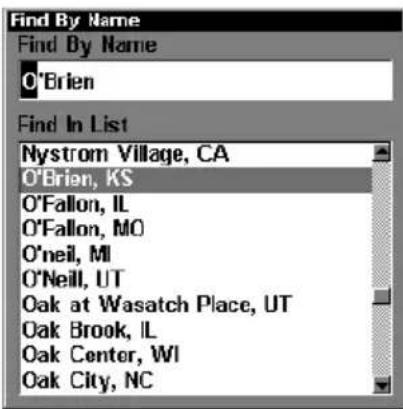
text_image
Find By Name Find By Name O'Brien Find In List Nystrom Village, CA O'Brien, KS O'Fallon, IL O'Fallon, MO O'neil, MI O'Neill, UT Oak at Wasatch Place, UT Oak Brook, IL Oak Center, WI Oak City, NCFind city field, left, Search in particular city only option, center; Find City by name, right.
- When the necessary search fields are filled in, press ↓ to FIND ADDRESS | ENT. You unit asks you to wait while it searches for the address. (If an address is not in the database, a message appears saying the address could not be found.)
- The unit will display a list of addresses. If the address you are looking for is highlighted at the top of the list, press ENT. If not, use ↓ and ↑ to select the correct address from the list, then press ENT. The Map Page will then appear with the location selected by the cursor. (In the example below, we are looking for 12303 East 11th Street in Tulsa, not 11th Court, so we had to scroll down the list to select the right one.)
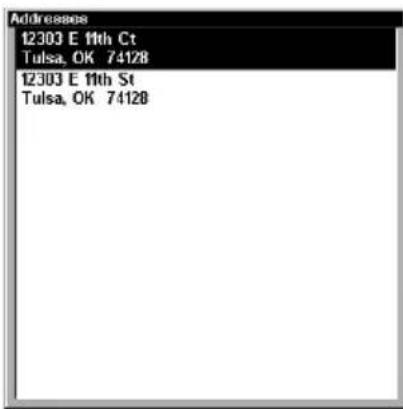
text_image
Addresses 12303 E 11th Ct Tulsa, OK 74128 12303 E 11th St Tulsa, OK 74128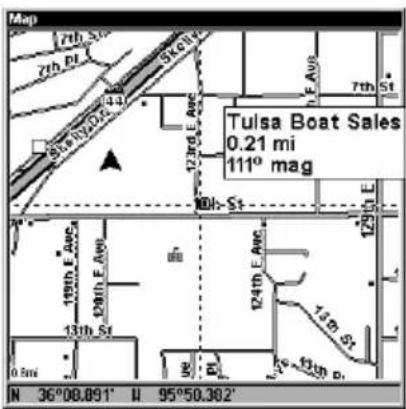
text_image
Map 7th St 7th Pl Skol 12nd St Ave 7th St Skol Tulsa Boat Sales 0.21 mi 111° mag 10th St 124th St Ave 129th St 13th St 13th Ave 0.5 mi N 36°08.091' W 95°50.382'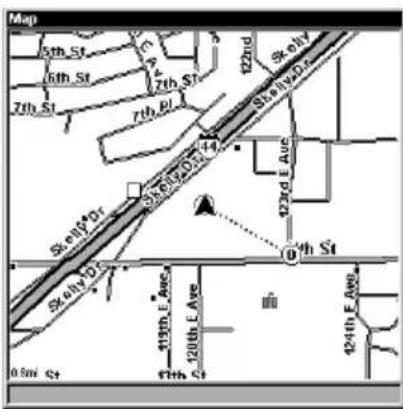
text_image
Map 5th St 6th St 7th St 7th Pl 12nd St-ohyDr. St-ohyDr. 123rd E.Aue 423rd E.Aue 4th St St-ohyDr. 113th E.Aue 120th E.Aue 424th E.Aue 0.5m St 11th StAddress search result list, left. At center, Map Page showing location of the address on the map, highlighted by cursor. At right, after the address is located, you can navigate to it ("D" symbol for destination).
- To navigate to the address, press MENU|ENT|EXIT and LMS-320 will begin showing navigation information to the address pointed out by the cursor. If you are only looking up an address (not navigating), just press EXIT to return to the previous page.
Tip:
If the address also happens to be an item in the Point of Interest database, you can look up the item's phone number in the Waypoint Information list. With the address location selected by the cursor on the map, press WPT. The POI's Waypoint Information window appears, with the Go To Waypoint command highlighted. If you want to go ahead and navigate to the POI address, just press ENT | EXIT.
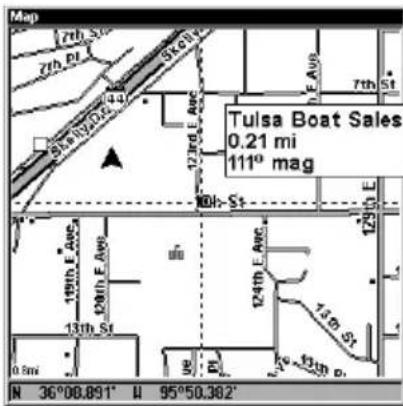
text_image
Map 7th St. 7th Pl. 43 Sto#e 12nd St. 7th St. Tulsa Boat Sales 0.21 mi 111° mag 19th E.Awc. 08th E.Awc. 13th St. 124th E.Awc. 14th St. 129 0.8mi N 36°00.891' W 95°50.362'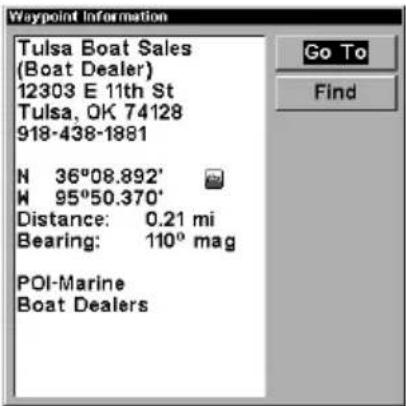
text_image
Waypoint Information Tulsa Boat Sales (Boat Dealer) 12303 E 11th St Tulsa, OK 74128 918-438-1881 N 36°08.892' W 95°50.370' Distance: 0.21 mi Bearing: 110° mag POI-Marine Boat Dealers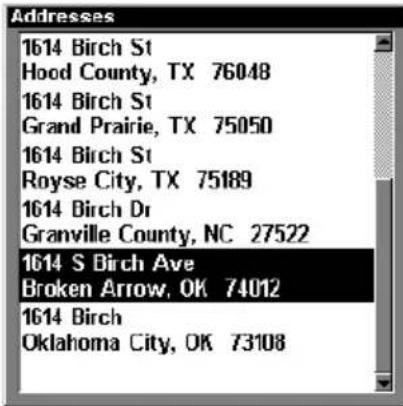
text_image
Addresses 1614 Birch St Hood County, TX 76048 1614 Birch St Grand Prairie, TX 75050 1614 Birch St Royse City, TX 75189 1614 Birch Dr Granville County, NC 27522 1614 S Birch Ave Broken Arrow, OK 74012 1614 Birch Oklahoma City, OK 73108Left, Map Page showing location of the address on the map, highlighted by cursor. Center, this address is a business in the POI database, so you can display the POI information window, then navigate to it. At right, this address is not in the POI database, so the Waypoint key will not display any information for this address.
Find Any Item Selected by Map Cursor
On the Map Page: with a POI or map feature selected by the cursor press WPT. To return to the previous page, press EXIT.
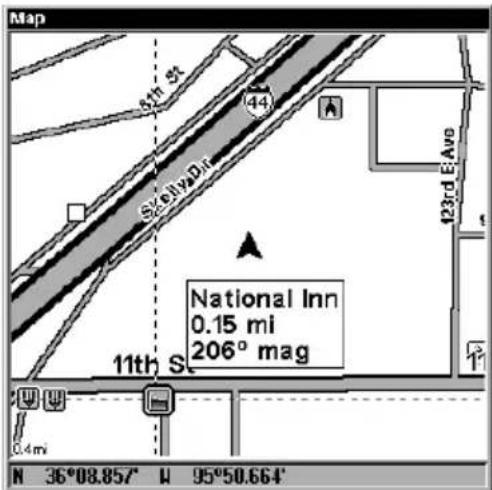
text_image
Map 6th St. 44 S2.SilvaDr. 123rd Ave National Inn 0.15 mi 206° mag 11th St. 0.4 mi N 36°08.85' W 95°50.664'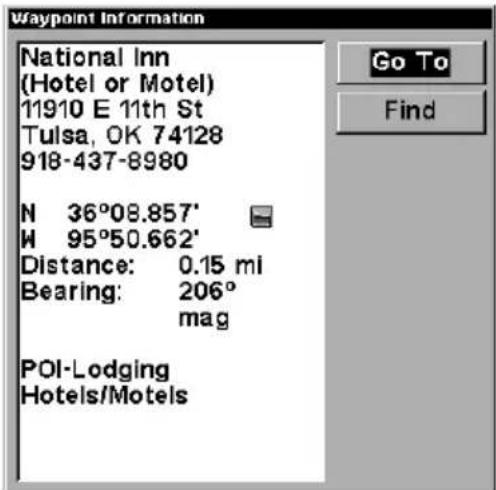
text_image
Waypoint Information National Inn (Hotel or Motel) 11910 E 11th St Tulsa, OK 74128 918-437-8980 N 36°08.857' W 95°50.662' Distance: 0.15 mi Bearing: 206° mag POI-Lodging Hotels/MotelsA POI selected by the cursor, left, POI information screen, right.
NOTE:
Since the Go To Waypoint command is highlighted, you can navigate to the selected POI by pressing ENT|EXIT while in the POI Waypoint Information screen.
Find Interstate Highway Exits
- From the Map Page, press MENU | ↓ to HIGHWAY EXITS | ENT, which calls up the Find Exit menu.
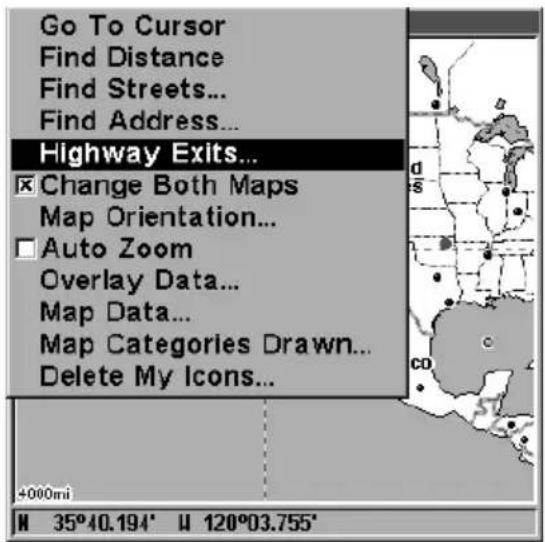
text_image
Go To Cursor Find Distance Find Streets... Find Address... Highway Exits... Change Both Maps Map Orientation... Auto Zoom Overlay Data... Map Data... Map Categories Drawn... Delete My Icons... 4000mi M 35°40.194' U 120°03.755'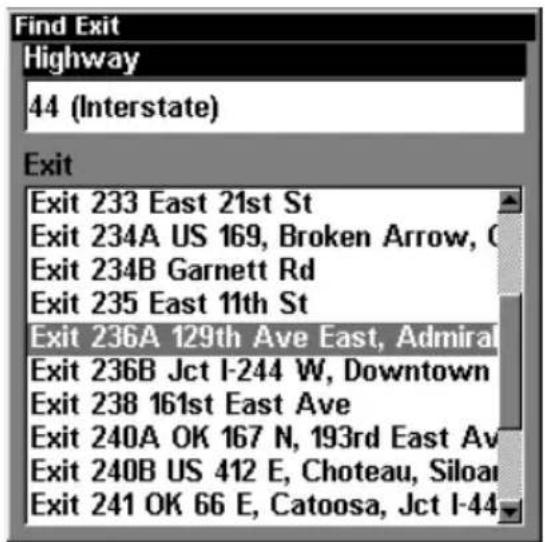
text_image
Find Exit Highway 44 (Interstate) Exit Exit 233 East 21st St Exit 234A US 169, Broken Arrow, Exit 234B Garnett Rd Exit 235 East 11th St Exit 236A 129th Ave East, Admiral Exit 236B Jct I-244 W, Downtown Exit 238 161st East Ave Exit 240A OK 167 N, 193rd East Av Exit 240B US 412 E, Choteau, Siloar Exit 241 OK 66 E, Catoosa, Jct I-44Find Highway Exits command, left, and Find Exit menu, right.
- First, select a highway name by pressing ENT, which calls up the Find By Name menu. There are two highway search options: A. You can spell out the highway name in the top selection box. Press ↑ or ↓ to change the first letter, then press → to move the cursor to the next letter and repeat until the name is correct, then press ENT|ENT. B. Jump down to the lower selection list by pressing ENT, then press ↓ or ↑ to select a highway from the list, then press ENT.
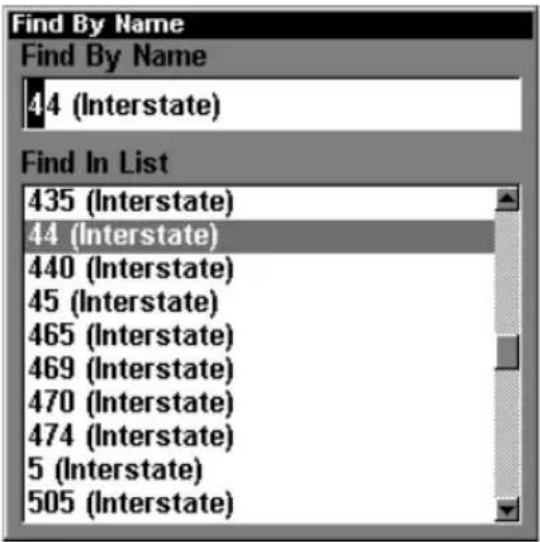
text_image
Find By Name Find By Name 44 (Interstate) Find In List 435 (Interstate) 44 (Interstate) 440 (Interstate) 45 (Interstate) 465 (Interstate) 469 (Interstate) 470 (Interstate) 474 (Interstate) 5 (Interstate) 505 (Interstate)Find By Name menu, right.
- Once you have selected a highway name you can then select an exit. Press ↓ to switch to the Exit List, then press ↓ or ↑ until you highlight the exit, then press ENT.
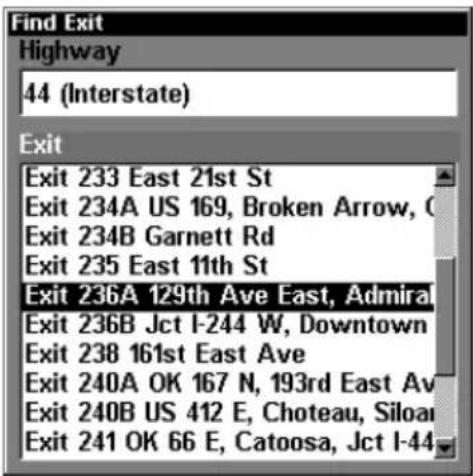
text_image
Find Exit Highway 44 (Interstate) Exit Exit 233 East 21st St Exit 234A US 169, Broken Arrow, Exit 234B Garnett Rd Exit 235 East 11th St Exit 236A 129th Ave East, Admiral Exit 236B Jct I-244 W, Downtown Exit 238 161st East Ave Exit 240A OK 167 N, 193rd East Av Exit 240B US 412 E, Choteau, Siloai Exit 241 OK 66 E, Catoosa, Jct I-44Find Exit menu, with an exit selected in the Exit List.
- In the Exit Information screen you have two choices. A. Press ENT to navigate or "go to" the exit. B. Press → | ENT to find the exit on the map.
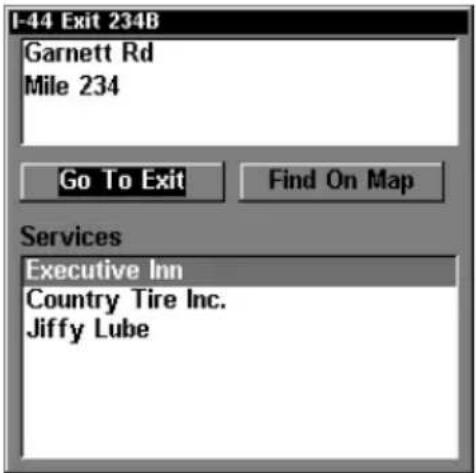
text_image
I-44 Exit 234B Garnett Rd Mile 234 Go To Exit Find On Map Services Executive Inn Country Tire Inc. Jiffy Lube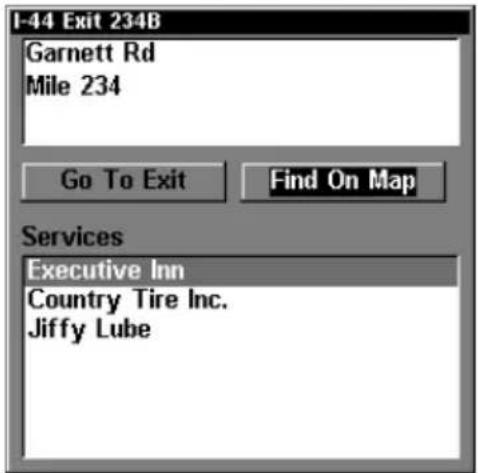
text_image
I-44 Exit 234B Garnett Rd Mile 234 Go To Exit Find On Map Services Executive Inn Country Tire Inc. Jiffy Lube"Go To Exit" option, left, "Find On Map" option, right.
Tip:
You can also look up some additional information on the Exit Services located near this exit. Press ↓ to SERVICES | press ↓ or ↑ to select Service Name | ENT.
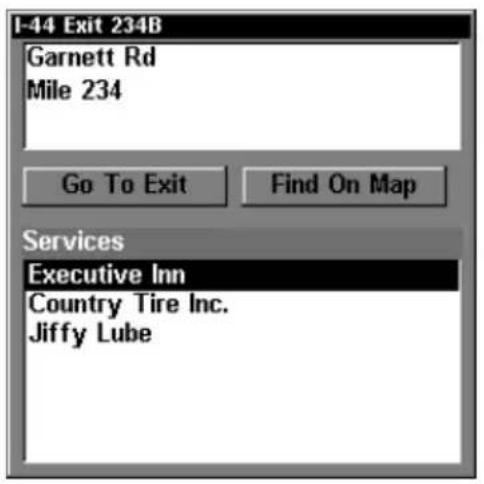
text_image
I-44 Exit 234B Garnett Rd Mile 234 Go To Exit Find On Map Services Executive Inn Country Tire Inc. Jiffy Lube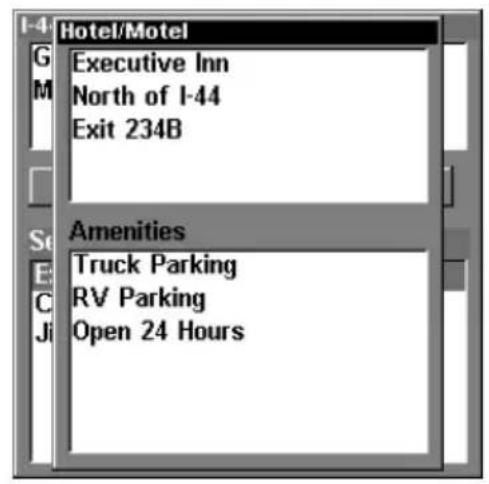
text_image
Hotel/Motel Executive Inn North of 1-44 Exit 234B Amenities Truck Parking RV Parking Open 24 HoursExit Information screen, left; general location and amenities information, at right.
Find Map Places or Points of Interest (POI)
- Press WPT, press ↓ or ↑ to select a map place or POI category, then press ENT. (To narrow your search, press → then press ↓ or ↑ to select a subcategory before pressing ENT.) You will be given two options; Search By Name or By Nearest.
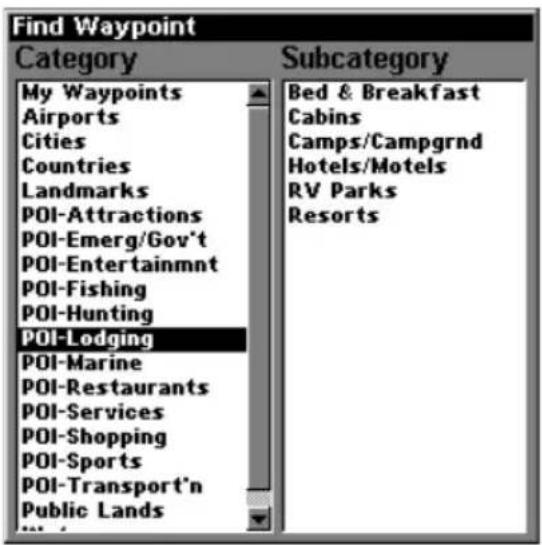
text_image
Find Waypoint Category My Waypoints Airports Cities Countries Landmarks POI-Attractions POI-Emerg/Gov't POI-Entertainmnt POI-Fishing POI-Hunting POI-Lodging POI-Marine POI-Restaurants POI-Services POI-Shopping POI-Sports POI-Transport'n Public Lands Subcategory Bed & Breakfast Cabins Camps/Campgrnd Hotels/Motels RV Parks Resorts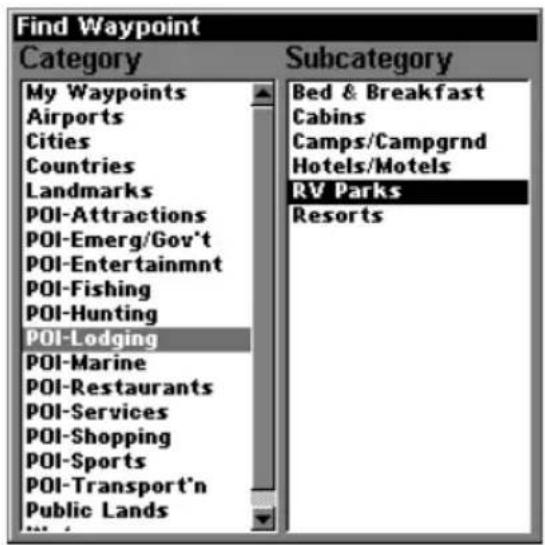
text_image
Find Waypoint Category Subcategory My Waypoints Airports Cities Countries Landmarks POI-Attractions POI-Emerg/Gov't POI-Entertainmnt POI-Fishing POI-Hunting POI-Lodging POI-Marine POI-Restaurants POI-Services POI-Shopping POI-Sports POI-Transport'n Public LandsFind Waypoint menu with Lodging POI category selected, left, and with the RV Parks subcategory selected, right.
- Search by nearest POI. Press ↓| ENT. The "find by nearest" menu will show a "calculating" screen, then a list of the nearest POI's will appear. Press ↓ or ↑ to the selected POI and press ENT to call up the POI's Waypoint Information screen.
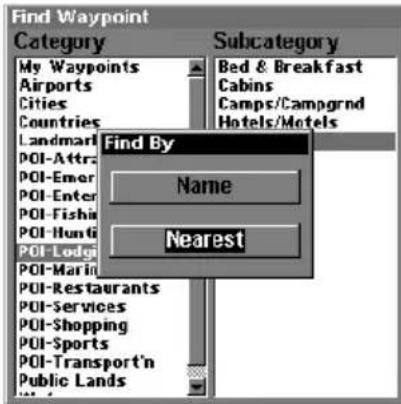
text_image
Find Waypoint Category Subcategory My Waypoints Airports Cities Countries Bed & Breakfast Cabins Camps/Campgrnd Hotels/Motels Landmark POI-Attr POI-Emer POI-Enter POI-Fishi POI-Hunti POI-Lodgi POI-Marin POI-Restaurants POI-Services POI-Shopping POI-Sports POI-Transport'n Public Lands Find By Name Nearest
text_image
Find By Nearest (Calculating nearest)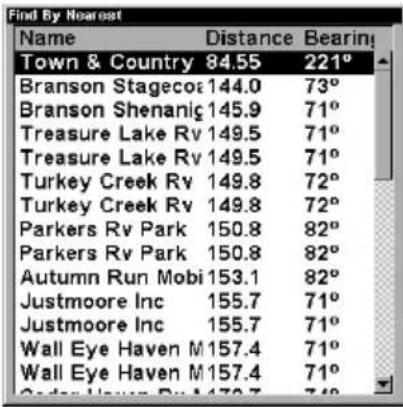
text_image
Find By Nearest Name Distance Bearing Town & Country 84.55 221° Branson Stagecoa 144.0 73° Branson Shenaniq 145.9 71° Treasure Lake Rv 149.5 71° Treasure Lake Rv 149.5 71° Turkey Creek Rv 149.8 72° Turkey Creek Rv 149.8 72° Parkers Rv Park 150.8 82° Parkers Rv Park 150.8 82° Autumn Run Mobi 153.1 82° Justmoore Inc 155.7 71° Justmoore Inc 155.7 71° Wall Eye Haven M 157.4 71° Wall Eye Haven M 157.4 71° Cedar House Rv 170.7 71°Find by nearest option, left, Calculating screen, center, POI list, right.
- Search by name of POI. Press ENT. There are two options: A. You can spell out the POI in the top selection box. Press ↑ or ↓ to change the first letter, then press → to move the cursor to the next letter and repeat until the name is correct, then press ENT | ENT. B. Jump down to the lower selection list by pressing ENT, then press ↓ or ↑ to select a POI from the list, then press ENT to call up the POI's Waypoint Information screen.
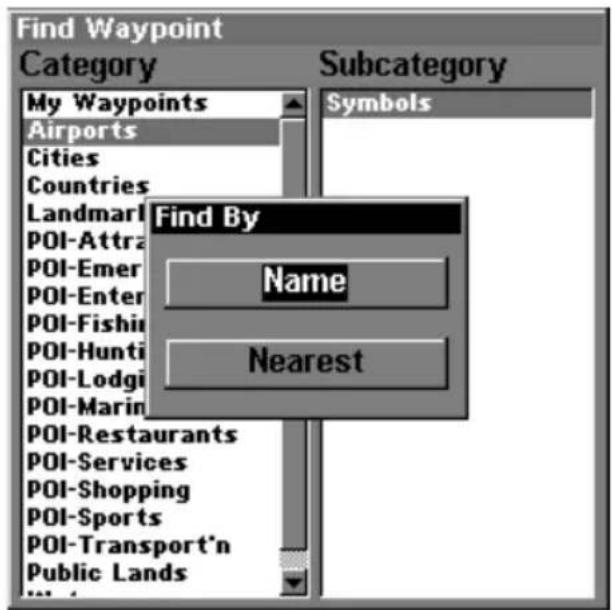
text_image
Find Waypoint Category My Waypoints Airports Cities Countries Landmarl POI-Attra POI-Emer POI-Enter POI-Fishing POI-Hunti POI-Lodgi POI-Marin POI-Restaurants POI-Services POI-Shopping POI-Sports POI-Transport'n Public Lands Subcategory Symbols Find By Name Nearest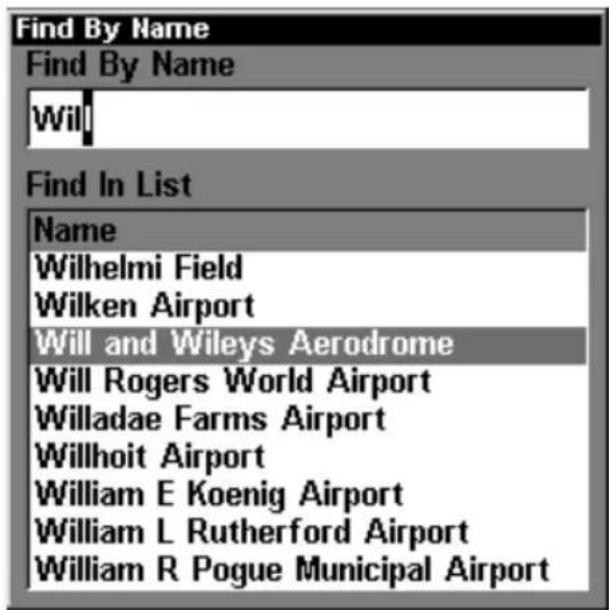
text_image
Find By Name Find By Name Will Find In List Name Wilhelmi Field Wilken Airport Will and Wiley's Aerodrome Will Rogers World Airport Willadae Farms Airport Willhoit Airport William E Koenig Airport William L Rutherford Airport William R Pogue Municipal AirportFind by name option, left, Find by name menu, right.
- When the POI's Waypoint Information screen is displayed, you can choose to "Go To" the POI waypoint by pressing ENT or find it on the map by pressing→|ENT.
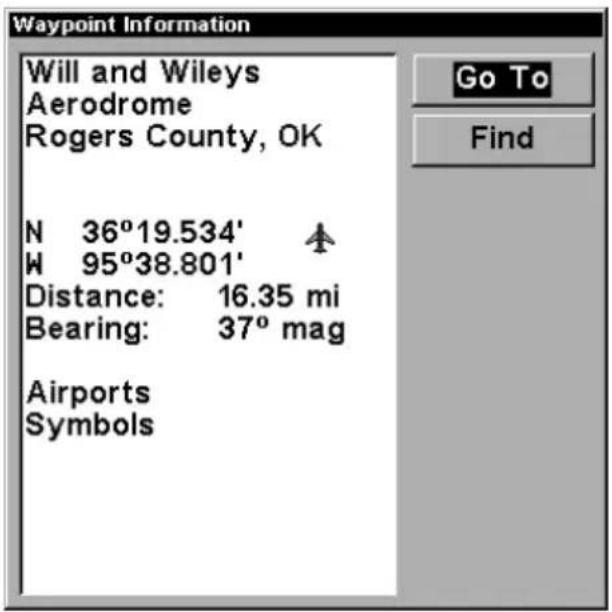
text_image
Waypoint Information Will and Wiley's Aerodrome Rogers County, OK N 36°19.534' W 95°38.801' Distance: 16.35 mi Bearing: 37° mag Airports Symbols Go To Find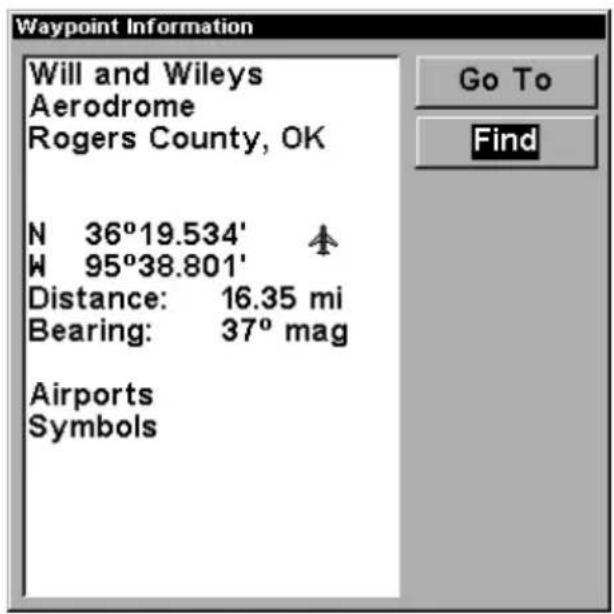
text_image
Waypoint Information Will and Wiley's Aerodrome Rogers County, OK N 36°19.534' W 95°38.801' Distance: 16.35 mi Bearing: 37° mag Airports Symbols Go To Find"Go To" POI option, left, "Find on Map" POI option, right.
Find Streets or Intersections
Find a Street
- From the Map Page, press MENU | ↓ to FIND STREETS | ENT and the Find Streets Menu appears.
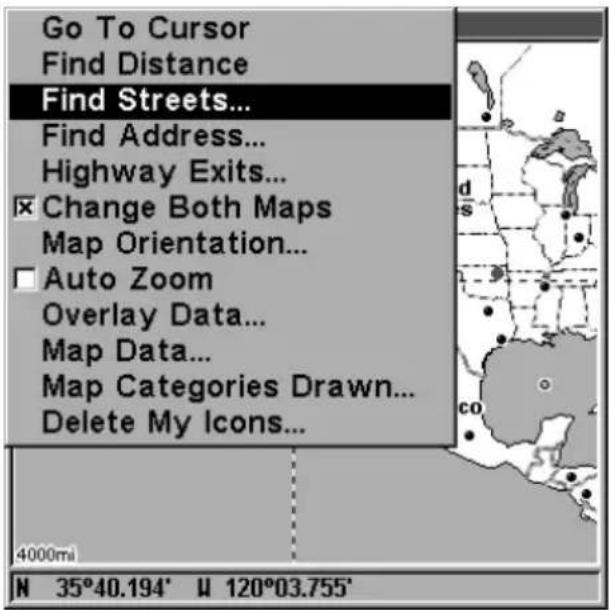
text_image
Go To Cursor Find Distance Find Streets... Find Address... Highway Exits... Change Both Maps Map Orientation... Auto Zoom Overlay Data... Map Data... Map Categories Drawn... Delete My Icons... 4000mi N 35°40.194' U 120°03.755'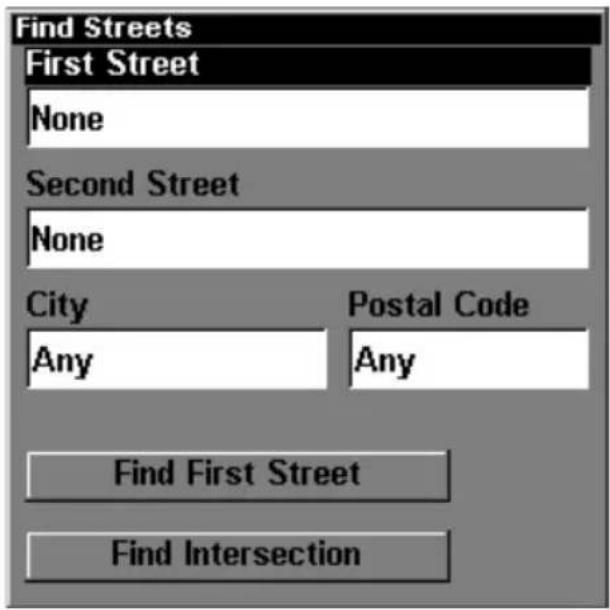
text_image
Find Streets First Street None Second Street None City Postal Code Any Any Find First Street Find IntersectionFind Streets command, left, Find Streets menu, right.
- You must first fill in a street name in the First Street dialog box. Press ENT to display the Find By Name menu. There are two options: A. You can spell out the street in the top selection box. Press ↑ or ↓ to change the first letter, then press → to move the cursor to the next letter and repeat until the name is correct, then press ENT | ENT. B. Or you can jump down to the lower box and pick a street from the selection list. Press ENT, then press ↓ or ↑ to select a street from the list and press ENT.
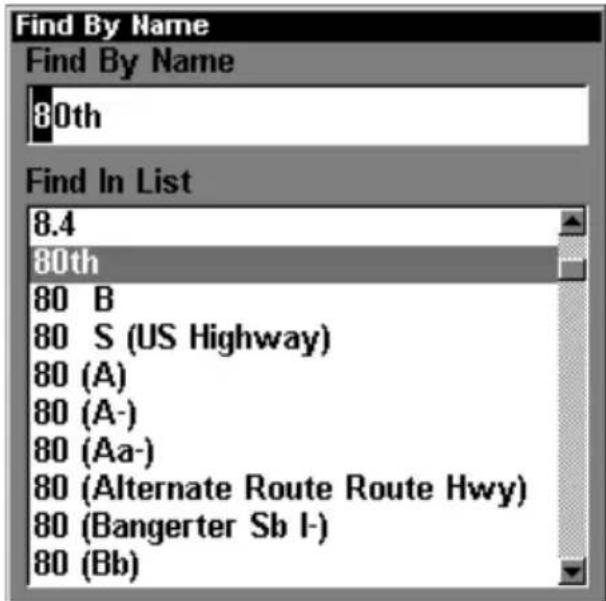
text_image
Find By Name Find By Name 80th Find In List 8.4 80th 80 B 80 S (US Highway) 80 (A) 80 (A-) 80 (Aa-) 80 (Alternate Route Route Hwy) 80 (Bangerter Sb I-) 80 (Bb)Find Street By Name menu. Spell out name in the top box, or select from the list in the lower box.
- The Find Streets menu reappears with the street you're searching for in the First Street box. (In this example, it's 80th Street.) To search for that street, press ↓ to FIND FIRST STREET | ENT. A message appears asking you to wait while the unit finds the street. When the Streets Found list appears, press ↑ or ↓ to select the street you are searching for and press ENT.
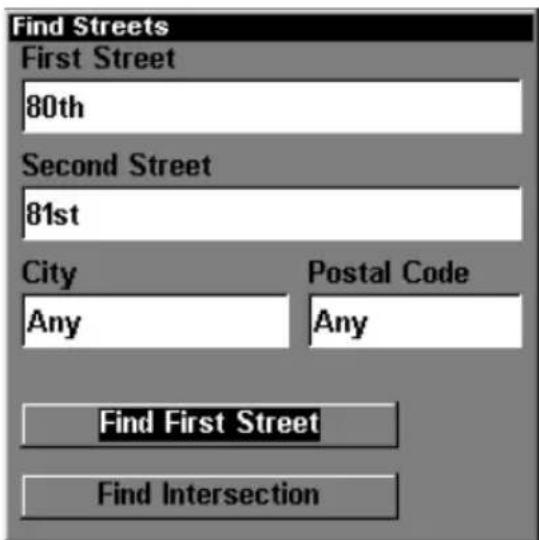
text_image
Find Streets First Street 80th Second Street 81st City Postal Code Any Any Find First Street Find Intersection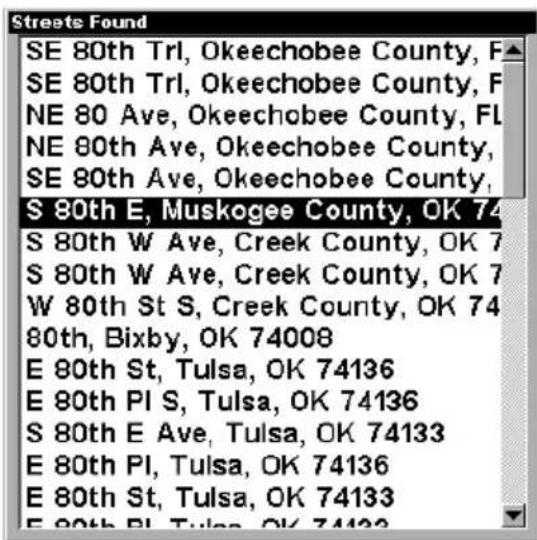
text_image
Streets Found SE 80th Trl, Okeechobee County, F SE 80th Trl, Okeechobee County, F NE 80 Ave, Okeechobee County, FL NE 80th Ave, Okeechobee County, SE 80th Ave, Okeechobee County, S 80th E, Muskogee County, OK 74 S 80th W Ave, Creek County, OK 7 S 80th W Ave, Creek County, OK 7 W 80th St S, Creek County, OK 74 80th, Bixby, OK 74008 E 80th St, Tulsa, OK 74136 E 80th PI S, Tulsa, OK 74136 S 80th E Ave, Tulsa, OK 74133 E 80th PI, Tulsa, OK 74136 E 80th St, Tulsa, OK 74133 E 80th PI, Tulsa, OK 74132At left, the Find Streets menu with the Find First Street command highlighted. At right, Streets Found list.
- The Map Page appears, with the cursor pointing to the found street.
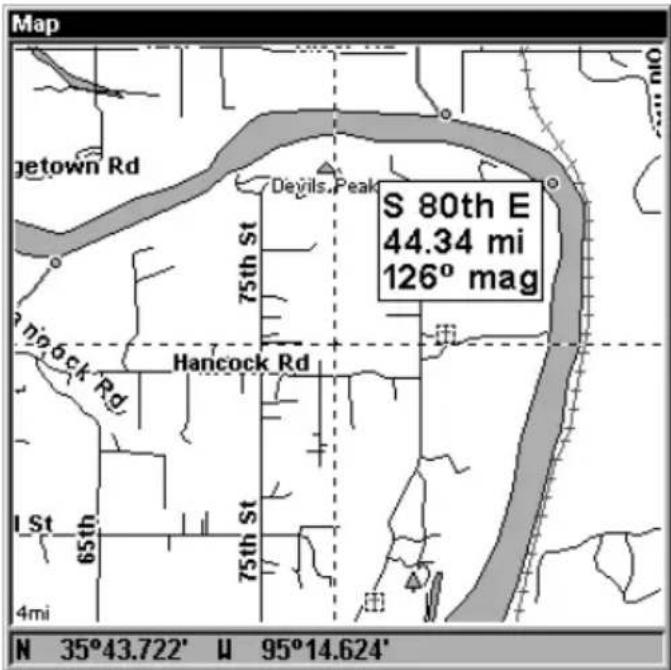
text_image
Map S 80th E 44.34 mi 126° mag getown Rd Devils Peak 75th St Hancock Rd 65th 75th St I St 4mi N 35°43.722' U 95°14.624'Map Page showing results of a street search. The cursor points to the located street.
If you want to navigate to the found street at the cursor location, just press MENU|ENT|EXIT.
Find an Intersection
You must enter one street in the First Street dialog box and enter the next street in the Second Street dialog box.
-
From the Map Page, press MENU | ↓ to FIND STREETS | ENT and the Find Streets Menu appears.
-
You must fill in a street name in the First Street dialog box. Press ENT to display the Find By Name menu. There are two options: A. You can spell out the street in the top selection box. Press ↑ or ↓ to change the first letter, then press → to move the cursor to the next letter and repeat until the name is correct, then press ENT|ENT. B. Or you can jump down to the lower box and pick a street from the selection list. Press ENT, then press ↓ or ↑ to select a street from the list and press ENT.
-
The Find Streets menu reappears with the street you're searching for in the First Street box. (In this example, it's 80th Street.)
-
Now fill in the second street. Press ↓ to SECOND STREET | ENT and the Find By Name menu appears again. Just like before, there are two options: A. You can spell out the second street in the top selection box. Press ↑ or ↓ to change the first letter, then press → to move the cursor to the next letter and repeat until the name is correct, then press ENT | ENT. B. Or you can jump down to the lower box and pick the sec-
ond street from the selection list. Press ENT, then press ↓ or ↑ to select a street from the list and press ENT.
- The Find Streets menu reappears with the first and second street dialog boxes filled in. In this example, we selected 71st Street as our second street. You could now use similar techniques to select a city or Zip code, but your search will probably be faster if you leave those boxes blank. (You can specify a city and/or Zip code later on to narrow the search, if the resulting list is too long.)
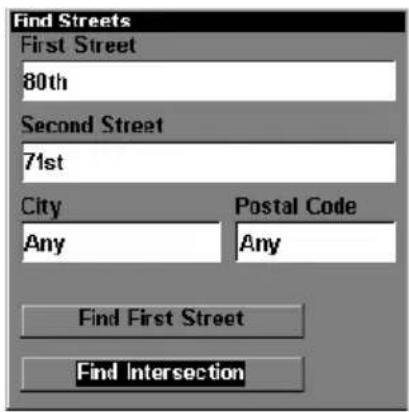
text_image
Find Streets First Street 80th Second Street 71st City Postal Code Any Any Find First Street Find Intersection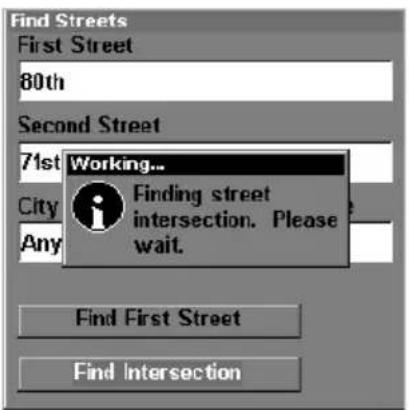
text_image
Find Streets First Street 80th Second Street 71st Working... City Finding street intersection. Please wait. Any Find First Street Find Intersection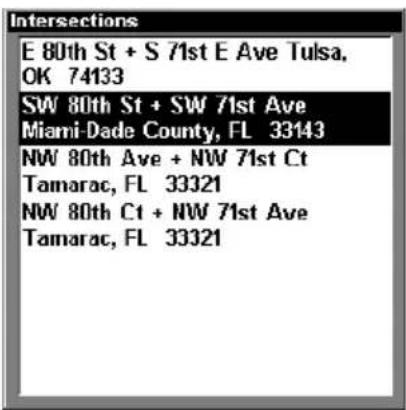
text_image
Intersections E 80th St + S 71st E Ave Tulsa, OK 74133 SW 80th St + SW 71st Ave Miami-Dade County, FL 33143 NW 80th Ave + NW 71st Ct Tamarac, FL 33321 NW 80th Ct + NW 71st Ave Tamarac, FL 33321Find Intersection command highlighted, left, and "Working" message, center. At right is the Intersections Found list.
-
To search for the intersection of the two streets, press ↓ to FIND INTERSECTION | ENT. A message appears asking you to wait while the unit finds the intersection. When the Intersections Found list appears, press ↑ or ↓ to select the intersection you are searching for and press ENT. (In the example on the previous page, we selected the intersection of SW 80th Street and SW 71st Avenue in Miami, Fla.)
-
The Map Page appears, with the cursor pointing to the found intersection. The intersection in our example is shown below.
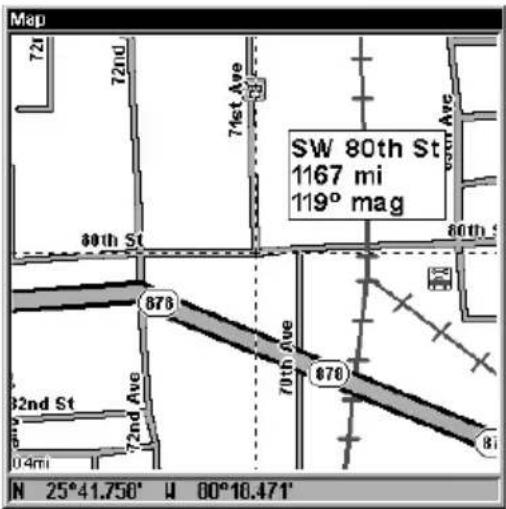
text_image
Map 72f 72nd 7Net Ave 40th St SW 80th St 1167 mi 119° mag 80th St 876 70th Ave 876 82nd St 72nd Ave 0.4mi N 25°41.750' W 00°10.471'Map Page showing results of an intersection search. The cursor points to the located intersection.
If you want to navigate to the found intersection, just press MENU | ENT | EXIT.
Find Waypoints
- Press WPT | ENT.
- If searching for the waypoint By Name, press ENT. If searching for the Nearest waypoint, press ↓ to NEAREST|ENT. (To search by name, jump to step 5 below.)
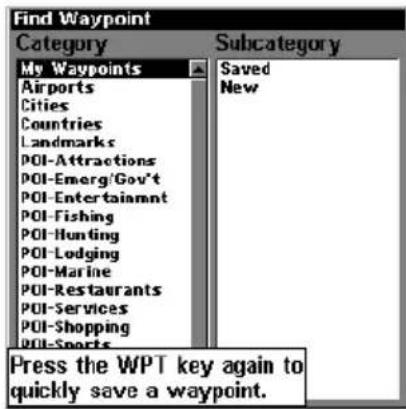
text_image
Find Waypoint Category My Waypoints Airports Cities Countries Landmarks POI-Attractions POI-Emerg/Gov't POI-Entertainment POI-Fishing POI-Hunting POI-Lodging POI-Marine POI-Restaurants POI-Services POI-Shopping POI-Sports Subcategory Saved New Press the WPT key again to quickly save a waypoint.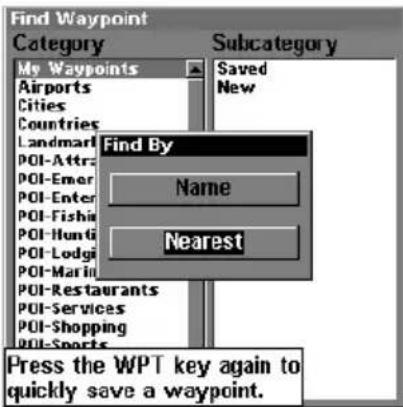
text_image
Find Waypoint Category Subcategory My Waypoints Airports Cities Countries Landmark POI-Attr POI-Emer POI-Enter POI-Fishin POI-Hunti POI-Lodgi POI-Marin POI-Restaurants POI-Services POI-Shopping POI-Sports Find By Name Nearest Press the WPT key again to quickly save a waypoint.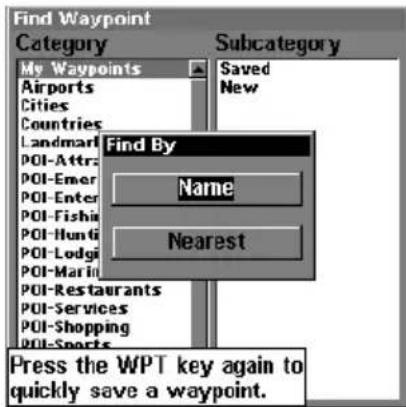
text_image
Find Waypoint Category Subcategory My Waypoints Airports Cities Countries Landmark POI-Attrz POI-Emer POI-Enter POI-Fishia POI-Hunti POI-Lodgi POI-Marin POI-Restaurants POI-Services POI-Shopping POI-Sports Find By Name Nearest Press the WPT key again to quickly save a waypoint.Find Waypoint menu, left; Find By Nearest command, center, Find by Name command, right.
- If you're looking for nearest, LMS-320 says it is calculating, then a list of waypoints appears. The closest is highlighted at the top of the list and the farthest at the bottom of the list.
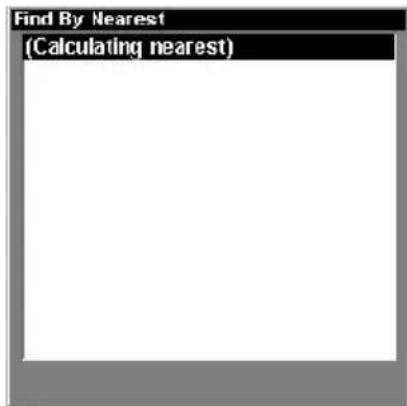
text_image
Find By Nearest (Calculating nearest)| Find By Nearest | ||
| Name | Distance | Bearing |
| Wpt 001° | 0.14 | 179° |
| Wpt 002° | 1.13 | 91° |
| Wpt 003° | 1.18 | 105° |
| Wpt 004° | 1.49 | 100° |
| Wpt 005° | 1.83 | 118° |
| Wpt 006° | 2.70 | 105° |
| 004 | 99.21 | 241° |
| 010 | 102.8 | 112° |
| 010 | 136.4 | 208° |
| 003 | 244.7 | 196° |
| 014 | 415.6 | 227° |
| Carlsbad Nm | 539.6 | 240° |
| 005 | 564.2 | 239° |
Calculating message, left, and list of the nearest waypoints, right.
- To see location information on the closest (highlighted) waypoint, press ENT and the Waypoint Information screen appears. (If you wanted to, you could select another waypoint from the list with the ↑ or ↓ keys.)
A. To navigate to the waypoint, press ENT. (The Go To Waypoint command is already highlighted.) The unit will show navigation information to the waypoint.
B. To find the waypoint, press ↓ to FIND|ENT. The Map Page ap-
pears with the cursor highlighting the found waypoint.
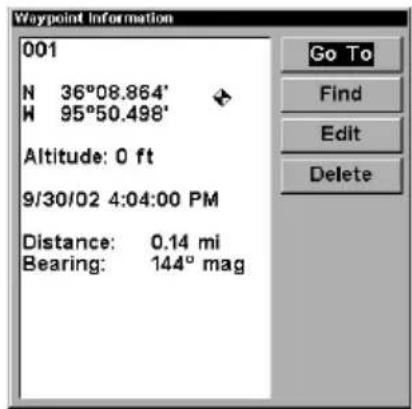
text_image
Waypoint Information 001 N 36°08.864' W 95°50.498' Altitude: 0 ft 9/30/02 4:04:00 PM Distance: 0.14 mi Bearing: 144° mag Go To Find Edit Delete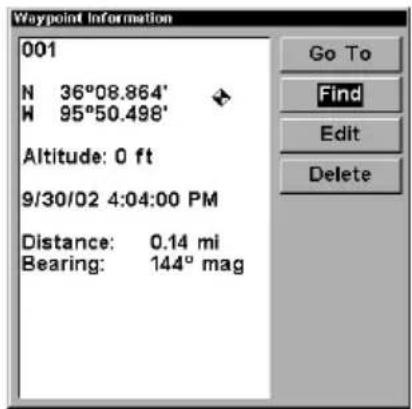
text_image
Waypoint Information 001 N 36°08.864' W 95°50.498' Altitude: 0 ft 9/30/02 4:04:00 PM Distance: 0.14 mi Bearing: 144° mag Go To Find Edit DeleteWaypoint Information screens with the Go To Waypoint command selected, left, and the Find on Map command selected, right.
To clear these menus and return to the previous page, press EXIT repeatedly.
- If you're looking by name, there are two options: A. You can spell out the name in the top selection box. Press ↑ or ↓ to change the first letter, then press → to move the cursor to the next letter and repeat until the name is correct, then press ENT|ENT. B. Or you can jump down to the lower selection list by pressing ENT, then press ↓ or ↑ to select a waypoint from the list, then press ENT. The waypoint information screen appears.
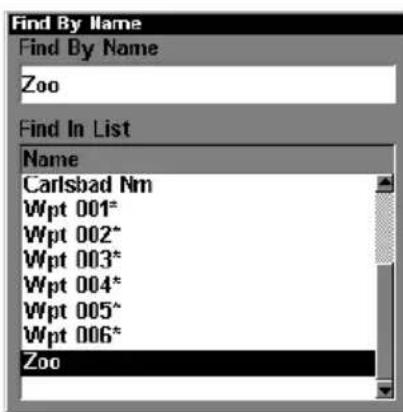
text_image
Find By Name Find By Name Zoo Find In List Name Carlsbad Nm Wpt 001* Wpt 002* Wpt 003* Wpt 004* Wpt 005* Wpt 006* Zoo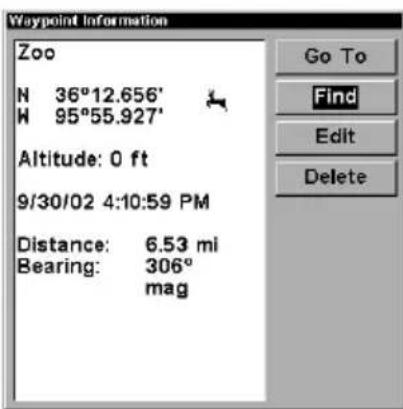
text_image
Waypoint Information Zoo N 36°12.656' W 95°55.927' Altitude: 0 ft 9/30/02 4:10:59 PM Distance: 6.53 mi Bearing: 306° mag Go To Find Edit Delete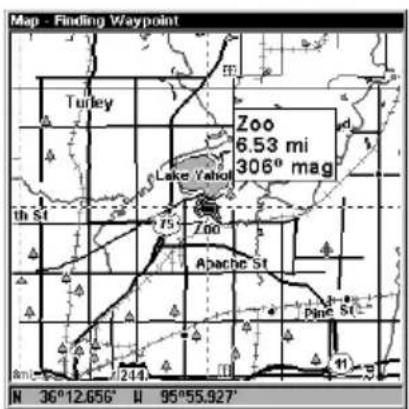
text_image
Map - Finding Waypoint Turkey Lake Yahoo Lake 306° mag Zoo 6.53 mi 175 Zoo Apache St Pine St 244 N 36°12.656' W 95°55.927'Find By Name menu, left. Waypoint Information screen, center. At right, the found waypoint is highlighted by the cursor on the Map Page.
A. To navigate to the waypoint, press ENT. (Go To Waypoint command is already highlighted.) The unit will show navigation information to the waypoint.
B. To find the waypoint, press ↓ to FIND|ENT. The Map Page appears with the cursor highlighting the found waypoint.
To clear these menus and return to the previous page, press EXIT repeatedly.
Section 10: Supplemental Material Datums Used by This Unit
| WGS 1984Default | Arc 1950 - Botswana | Bermuda 1957 - Bermuda |
| Arc 1950 - Burundi | ||
| AdindanMean for Ethiopia, Sudan | Arc 1950 - Lesotho | Bissau - Guinea-BissauBogota Observatory -Colombia |
| AdindanBurkina Faso | Arc 1950 - Malawi | Bukit Rimpah - Indonesia(Bangka & BelitungIslands) |
| Arc 1950 - Swaziland | ||
| AdindanCameroon | Arc 1950 - Zaire | Camp Area Astro -Antarctica (McMurdoCamp Area) |
| AdindanEthiopia | Arc 1950 - Zambia | Campo Inchauspe -Argentina |
| Arc 1950 - Zimbabwe | ||
| AdindanMali | Arc 1960 - Mean forKenya, Tanzania | Canton Astro 1966 -Phoenix Islands |
| AdindanSenegal | Ascension Island 1958 -Ascension Island | Cape - South Africa |
| AdindanSudan | Astro Beacon E 1945 -Iwo Jima | Cape Canaveral -Bahamas, Florida |
| AfgooyeSomalia | Astro DOS 71/4 - St.Helena Island | Carthage - Tunisia |
| Ain el Abd 1970Bahrain | Astro Tern Island (FRIG)1961 - Tern Island | Switzerland |
| Ain el Abd 1970Saudi Arabia | Astronomical Station1952 - Marcus Island | Chatham Island Astro1971; New Zealand(Chatham Island) |
| Anna 1 Astro 1965Cocos Islands | Australian Geodetic 1966- Australia & Tasmania | Chua AstroParaguay |
| Antigua Island Astro1943; Antigua (LeewardIslands) | Australian Geodetic 1984- Australia & Tasmania | Corrego AlegreBrazil |
| Arc 1950; Mean forBotswana, Lesotho,Malawi, Swaziland, Zaire,Zambia and Zimbabwe | Ayabelle Lighthouse -Djibouti | DabolaGuinea |
| Bellevue (IGN) - Efate &Erromango Islands | Djakarta (Batavia)Indonesia (Sumatra) | |
| DOS 1968 | European 1950Italy (Sardinia) | Mahe Island |
| New Georgia Islands(Gizo Island) | European 1950(Sicily) | MassawaEthiopia (Eritrea) |
| Easter Island 1967 | European 1950 | Merchich |
| Easter Island | Malta | Morocco |
| European 1950 | Ireland 1965 | Midway Astro 1961 |
| Mean for Austria,Belgium, Denmark,Finland, France, WestGermany, Gibraltar,Greece, Italy,Luxembourg,Netherlands, Norway,Portugal, Spain, Sweden,Switzerland | Ireland | Midway Islands |
| ISTS 061 Astro 1968 | Minna | |
| South Georgia Islands | Cameroon | |
| ISTS 073 Astro 1969 | Minna | |
| Diego Garcia | Nigeria | |
| Johnston Island 1961 | Montserrat Island Astro | |
| Johnston Island | 1958; Montserrat(Leeward Islands) | |
| European 1950 | ||
| Mean for Austria,Denmark, France, WestGermany, Netherlands,Switzerland | KandawalaSri Lanka | M'PoralokoGabon, Nahrwan, Oman(Masirah Island) |
| Kerguelen Island 1949Kerguelen Island | ||
| European 1950 | Nahrwan | |
| Mean for Iraq, Israel,Jordan, Lebanon, Kuwait,Saudi Arabia, Syria | Kertau 1948West Malaysia &Singapore | Saudi Arabia |
| NahrwanUnited Arab Emirates | ||
| European 1950 | Kusaie Astro 1951 | |
| Cyprus | Caroline Islands | Naparima BWITrinidad & Tobago |
| European 1950 | L.C. 5 Astro 1961 | |
| Egypt | Cayman Brac Island | North American 1927Mean for Antigua, |
| European 1950 | Leigon | Barbados, Barbuda,Caicos Islands, Cuba,Dominican Republic, |
| England, ChannelIslands, Ireland, Scotland,Shetland Islands | Ghana | Grand Cayman, Jamaica,Turks Islands |
| Liberia 1964 | ||
| Liberia | ||
| European 1950 | ||
| Finland, Norway | LuzonPhilippines (ExcludingMindanao) | North American 1927Mean for Belize, CostaRica, El Salvador,Guatemala, Honduras,Nicaragua |
| European 1950 | ||
| Greece | LuzonPhilippines (Mindanao) | North American 1927 |
| European 1950 | ||
| Iran | Mahe 1971 | Mean for Canada |
| North American 1927Mean for CONUS(Continental United States)North American 1927Mean for CONUS (East of Mississippi River)including Louisiana, Missouri, Minnesota | North American 1927Cuba | Great Britain 1936 -England |
| North American 1927Greenland (Hayes Peninsula) | Ordinance SurveyGreat Britain 1936 -England, Isle of Man, Wales | |
| North American 1927Mexico | Ordinance SurveyGreat Britain 1936 -Scotland, Shetland Islands | |
| North American 1927Mean for CONUS(West of Mississippi River) | North American 1983Alaska, Canada, CONUS | Ordinance SurveyGreat Britain 1936 -Wales |
| North American 1983Central America, Mexico | ||
| North American 1927Alaska | Observaorio Metereo1939; Azores (Corvo & Flores Islands) | Pico de las NievesCanary Islands |
| North American 1927Bahamas (Except San Salvador Island) | Old Egyptian 1907Egypt | Pitcairn Astro 1967Pitcairn Island |
| North American 1927Bahamas (San Salvador Island) | Old HawaiianMean for Hawaii, Kauai, Maui, Oahu | Point 58 |
| North American 1927Canada (Alberta, British Columbia) | Old HawaiianHawaii | SwedenSanto (DOS)1965 Espirito Santo Island |
| North American 1927Canada (Manitoba, Ontario) | Old HawaiianKauai | Sao BrazAzores (Sao Miguel, Santa Maria Islands) |
| Old HawaiianMaui | Sapper Hill 1943East Falkland Island | |
| North American 1927Canada (New Brunswick, Newfoundland, Nova Scotia, Quebec) | Old HawaiianOahu | SchwarzeckNambia |
| North American 1927Canada (Northwest Territories, Saskatchewan) | OmanOman | Selvagem Grande Salvage Islands |
| Ordinance SurveyGreat Britain 1936 - Mean for England, Isle of Man, Scotland, Shetland Islands, Wales | SGS 85Soviet Geodetic System 1985 | |
| North American 1927Canada (Yukon) | ||
| North American 1927Canal Zone | Ordinance Survey | South American 1969Mean for Argentina, |
| Bolivia, Brazil, Chile,Colombia, Ecuador,Guyana, Paraguay, Peru,Trinidad & Tobago, andVenezuela | South American 1969ParaguaySouth American 1969Peru | TokyoKoreaTokyo |
| Okinawa | ||
| South American 1969Argentina | South American 1969Trinidad & Tobago | Tristan Astro 1968Tristan da Cunha |
| South American 1969Bolivia | South American 1969Venezuela | Viti Levu 1916Fiji (Viti Levu Island) |
| South American 1969Brazil | South AsiaSingapore | Wake |
| South American 1969Chile | Tananarive Observatory1925; Madagascar | Eniwetok 1960Marshall Islands |
| South American 1969Colombia | Timbalai 1948Brunei, East Malaysia(Sabah, Sarawak) | Wake Island Astro 1952Wake Atoll |
| South American 1969Ecuador | TokyoMean for Japan, Korea,Okinawa | WGS 1972Global Definition |
| South American 1969Ecuador (Baltra,Galapagos) | TokyoJapan | YacareUruguay |
| South American 1969Guyana | ZanderijSuriname |
FCC Compliance
This device complies with Part 15 of the U.S. Federal Communications Commission (FCC) Rules. Operation is subject to the following two conditions: (1) this device may not cause harmful interference, and (2) this device must accept any interference received, including interference that may cause undesired operation.
Changes or modifications not expressly approved by the manufacturer could void the user's authority to operate the equipment.
Note:
This equipment has been tested and found to comply with the limits for a Class B digital device, pursuant to Part 15 of the FCC Rules. These limits are designed to provide reasonable protection against harmful interference in a residential installation. This equipment generates, uses and can radiate radio frequency energy and, if not installed and used in accordance with the instructions, may cause harmful interference to radio communications. However, there is no guarantee that interference will not occur in a particular installation. If this equipment does cause harmful interference to radio or television reception, which can be determined by turning the equipment off and on, the user is encouraged to try to correct the interference by one or more of the following measures:
- Reorient or relocate the receiving antenna.
- Increase the separation between the equipment and receiver.
- Connect the equipment into an outlet on a circuit different from that to which the receiver is connected.
- Consult the factory customer service department for help.
Notes
LOWRANCE DATABASES LICENSE AGREEMENT
THIS IS A LEGAL AGREEMENT BETWEEN THE END-USER WHO FIRST PURCHASES THIS PRODUCT AS A CONSUMER ITEM FOR PERSONAL, FAMILY, OR HOUSEHOLD USE ("YOU") AND LOWRANCE ELECTRONICS, INC., THE MANUFACTURER OF THIS PRODUCT ("WE", "OUR", OR "US"). USING THE PRODUCT ACCOMPANIED BY THIS LICENSE AGREEMENT CONSTITUTES ACCEPTANCE OF THESE TERMS AND CONDITIONS. IF YOU DO NOT ACCEPT ALL TERMS AND CONDITIONS, PROMPTLY RETURN THE PRODUCT WITHIN 30 DAYS OF PURCHASE. PLEASE RETURN USING THE ENCLOSED UPS SHIPPING LABEL AND INCLUDE: PROOF OF PURCHASE, NAME, ADDRESS, AND PHONE NUMBER. YOUR PURCHASE PRICE AND ANY APPLICABLE TAXES WILL BE REFUNDED. PLEASE ALLOW 4-6 WEEKS TO PROCESS YOUR REFUND.
- This License Agreement applies to the one or more databases that your product may contain. We refer to these singly as a "Database" and together as the "Databases." Your product may thus include the "WBS Database" which contains worldwide background surface mapping data, the "SmartMap Database" which contains inland mapping data, or other Databases.
- The Databases that your product may contain are licensed, not sold. We grant to you the nonexclusive, nonassignable right to use these Databases for supplemental navigation reference purposes, but only as long as you comply with the terms and conditions of this License Agreement. We reserve the right to terminate this license if you violate any aspect of this License Agreement. You are responsible for using official government charts and prudent navigation for safe travel.
- The Databases housed in your product are protected by the copyright notices appearing on the product or its screen(s). You may NOT modify, adapt, translate, reverse engineer, decompile, disassemble, rent, lease, or resell any Database, and you may NOT create derivative works based upon any Database or its contents. Any unauthorized reproduction, use, or transfer of a Database may be a crime and may subject you to damages and attorney fees.
- This License Agreement will terminate immediately without prior notice from us if you fail to comply with or violate any of the provisions of this Agreement. Upon termination, you will promptly return all products containing one or more Databases to us.
- Prices and programs are subject to change without notice.
- This License Agreement shall be governed by the laws of the State of Oklahoma and comprises the complete and exclusive understanding between you and us concerning the above subject matter.
DATABASES LIMITED WARRANTY
"We", "our", or "us" refers to Lowrance Electronics, Inc., the manufacturer of this product. "You" or "your" refers to the first person who purchases the product as a consumer item for personal, family, or household use. The Databases Limited Warranty applies to the one or more databases that your product may contain. We refer to each of these as a "Database" or together as the "Databases." Your product may thus include the "WBS Database" which contains worldwide background surface mapping data, the "SmartMap Database" which contains inland mapping data, or other Databases.
We warrant to you that we have accurately compiled, processed, and reproduced the portions of the source material on which the Databases are based. However, we are under no obligation to provide updates to the Databases, and the data contained in the Databases may be incomplete when compared to the source material. WE MAKE NO EXPRESS OR IMPLIED WARRANTY OF ANY KIND ABOUT THE ACCURACY OF THE SOURCE MATERIAL ITSELF, INCLUDING BUT NOT LIMITED TO IMPLIED WARRANTIES OF MERCHANTABILITY OR FITNESS FOR A PARTICULAR PURPOSE.
If there is a defect in any Database, your exclusive remedy shall be, at our option, either a refund of the price you paid for the product containing the defective Database or a replacement of such product. WE WILL NOT UNDER ANY CIRCUMSTANCES BE LIABLE TO ANYONE FOR ANY SPECIAL, CONSEQUENTIAL, INCIDENTAL, OR OTHER INDIRECT DAMAGE OF ANY KIND.
Some states do not allow the exclusion or limitation of incidental or consequential damages, so the above limitations or exclusions may not apply to you.
This warranty does NOT apply in the following circumstances: (1) when the product has been serviced or repaired by anyone other than us; (2) when the product has been connected, installed, combined, altered, adjusted, or handled in a manner other than according to the instructions furnished with the product; (3) when any serial number has been effaced, altered, or removed; or (4) when any defect, problem, loss, or damage has resulted from any accident, misuse, negligence, or carelessness, or from any failure to provide reasonable and necessary maintenance in accordance with the instructions of the owner's manual for the product.
We reserve the right to make changes or improvements in our products from time to time without incurring the obligation to install such improvements or changes on equipment or items previously manufactured.
This warranty gives you specific legal rights and you may also have other rights which may vary from state to state.
Your remedies under this warranty will be available so long as you can show in a reasonable manner that the defect occurred within one (1) year from the date of your original purchase, and we must receive your warranty claim no later than 30 days after such 1-year period expires. Your claim must be substantiated by a dated sales receipt or sales slip.
LOWRANCE ELECTRONICS FULL ONE-YEAR WARRANTY
"We," "our," or "us" refers to LOWRANCE ELECTRONICS, INC., the manufacturer of this product. "You" or "your" refers to the first person who purchases this product as a consumer item for personal, family or household use.
We warrant this product against defects or malfunctions in materials and workmanship, and against failure to conform to this product's written specifications, all for one (1) year from the date of original purchase by you. WE MAKE NO OTHER EXPRESS WARRANTY OR REPRESENTATION OF ANY KIND WHATSOEVER CONCERNING THIS PRODUCT. Your remedies under this warranty will be available so long as you can show in a reasonable manner that any defect or malfunction in materials or workmanship, or any non-conformity with the product's written specifications, occurred within one year from the date of your original purchase, which must be substantiated by a dated sales receipt or sales slip. Any such defect, malfunction, or non-conformity which occurs within one year from your original purchase date will either be repaired without charge or be replaced with a new product identical or reasonably equivalent to this product, at our option, within a reasonable time after our receipt of the product. If such defect, malfunction, or non-conformity remains after a reasonable number of attempts to repair by us, you may elect to obtain without charge a replacement of the product or a refund for the product. THIS REPAIR, OR REPLACEMENT OR REFUND (AS JUST DESCRIBED) IS THE EXCLUSIVE REMEDY AVAILABLE TO YOU AGAINST US FOR ANY DEFECT, MALFUNCTION, OR NON-CONFORMITY CONCERNING THE PRODUCT OR FOR ANY LOSS OR DAMAGE RESULTING FROM ANY OTHER CAUSE WHATSOEVER. WE WILL NOT UNDER ANY CIRCUMSTANCES BE LIABLE TO ANYONE FOR ANY SPECIAL, CONSEQUENTIAL, INCIDENTAL, OR OTHER INDIRECT DAMAGE OF ANY KIND.
Some states do not allow the exclusion or limitation of incidental or consequential damages, so the above limitations or exclusions may not apply to you.
This warranty does NOT apply in the following circumstances: (1) when the product has been serviced or repaired by anyone other than us; (2) when the product has been connected, installed, combined, altered, adjusted, or handled in a manner other than according to the instructions furnished with the product; (3) when any serial number has been effaced, altered, or removed; or (4) when any defect, problem, loss, or damage has resulted from any accident, misuse, negligence, or carelessness, or from any failure to provide reasonable and necessary maintenance in accordance with the instructions of the owner's manual for the product.
We reserve the right to make changes or improvements in our products from time to time without incurring the obligation to install such improvements or changes on equipment or items previously manufactured.
This warranty gives you specific legal rights and you may also have other rights which may vary from state to state.
REMINDER: You must retain the sales slip or sales receipt proving the date of your original purchase in case warranty service is ever required.
LOWRANCE ELECTRONICS 12000 E. SKELLY DRIVE, TULSA, OK 74128 (800) 324-1356
How to Obtain Service...
...in the USA:
We back your investment in quality products with quick, expert service and genuine Lowrance parts. If you're in the United States and you have technical, return or repair questions, please contact the Factory Customer Service Department. Before any product can be returned, you must call customer service to determine if a return is necessary. Many times, customer service can resolve your problem over the phone without sending your product to the factory. To call us, use the following toll-free number:
800-324-1356
8 a.m. to 5 p.m. Central Standard Time, M-F
Lowrance Electronics may find it necessary to change or end our shipping policies, regulations, and special offers at any time. We reserve the right to do so without notice.
...in Canada:
If you're in Canada and you have technical, return or repair questions, please contact the Factory Customer Service Department. Before any product can be returned, you must call customer service to determine if a return is necessary. Many times, customer service can resolve your problem over the phone without sending your product to the factory. To call us, use the following toll-free number:
800-661-3983
905-629-1614 (not toll-free)
8 a.m. to 5 p.m. Eastern Standard Time, M-F
...outside Canada and the USA:
If you have technical, return or repair questions, contact the dealer in the country where you purchased your unit. To locate a dealer near you, visit our web site, www.lowrance.com and look for the Dealer Locator.
Accessory Ordering Information for all countries
To order Lowrance GPS accessories such as computer cables or MMC cards, please contact:
1) Your local marine dealer or consumer electronics store. Most quality dealers that handle marine electronic equipment or other consumer electronics should be able to assist you with these items.
To locate a Lowrance dealer near you, visit our web site, www.lowrance.com and look for the Dealer Locator. Or, you can consult your telephone directory for listings.
2) U.S. customers: LEI Extras Inc., PO Box 129, Catoosa, OK 74015-0129 Call 1-800-324-0045 or visit our web site www.lei-extras.com.
3) Canadian customers can write: Lowrance/Eagle Canada, 919 Matheson Blvd. E. Mississauga, Ontario L4W2R7 or fax 905-629-3118.
Shipping Information
If it becomes necessary to send a product for repair or replacement, you must first receive a return authorization number from Customer Service. Products shipped without a return authorization will not be accepted. When shipping, we recommend you do the following:
-
Always use the original shipping container and filler material the product was packed in.
-
Always insure the parcel against damage or loss during shipment. Lowrance does not assume responsibility for goods lost or damaged in transit.
-
For proper testing, include a brief note with the product describing the problem. Be sure to include your name, return shipping address and a daytime telephone number.
Visit our web site:

text_image
lowrance.comL® LOWRANCE
We Lead, We Find, You Win. ^TM
Lowrance Pub. 988-0105-971
© Copyright 2002
All Rights Reserved
Printed in USA 102502 Lowrance Electronics, Inc.