3G SOHO - Uncategorized Digicom - Free user manual and instructions
Find the device manual for free 3G SOHO Digicom in PDF.


| Product Type | 3G Gateway / Router |
| Model | 3G SOHO |
| Brand | Digicom |
| UMTS Technology | HSDPA/HSUPA; Downlink up to 7.2 Mbps, Uplink up to 2 Mbps |
| ADSL Support | Optional (ADSL2/2+ router function) |
| WiFi | 802.11b/g (2.4 GHz) |
| LAN Port | 1 x RJ45 10/100 Mbps |
| Phone Ports (FXS) | 2 x RJ11 (TEL1, TEL2) |
| LINE Port (FXO) | Not available on 3G SOHO (present on PLUS model) |
| ADSL Port | Not available on 3G SOHO (present on PLUS/BackUP/Corporate) |
| SIM Slot | 1 x SIM holder |
| Display | 65,000 color display |
| LED Indicators | Power, 3G, WiFi, LAN, TEL (on models without display) |
| Backup Battery | Optional (Li-ion 7.4V 1700mAh) |
| Antenna Connectors | GSM antenna and WiFi antenna (included) |
| Power Supply | External power adapter (included) |
| Operating Temperature | 0°C to +40°C |
| Relative Humidity | 20% to 80% (non-condensing) |
| Cleaning | Use a soft dry cloth; avoid solvents or abrasive materials |
| Safety | Do not disassemble, avoid contact with water, keep away from pacemakers, switch off in aircraft/hospitals |
| Spare Parts | Backup battery (Digicom approved only) |
| Package Contents | 3G Gateway, power adapter, Quick Guide, Wi-Fi antenna, GSM antenna, Ethernet cable RJ45-RJ45 |
| Dimensions | Not specified in manual |
| Weight | Not specified in manual |
Frequently Asked Questions - 3G SOHO Digicom
User questions about 3G SOHO Digicom
0 question about this device. Answer the ones you know or ask your own.
Ask a new question about this device
Download the instructions for your Uncategorized in PDF format for free! Find your manual 3G SOHO - Digicom and take your electronic device back in hand. On this page are published all the documents necessary for the use of your device. 3G SOHO by Digicom.
USER MANUAL 3G SOHO Digicom
● Fast Internet with 7.2 Mbps UMTS Technology
● Simultaneous Internet and Voice call
- Send and Receive SMS
● Built-in ADSL 2/2+ Router function (optional)
natural_image
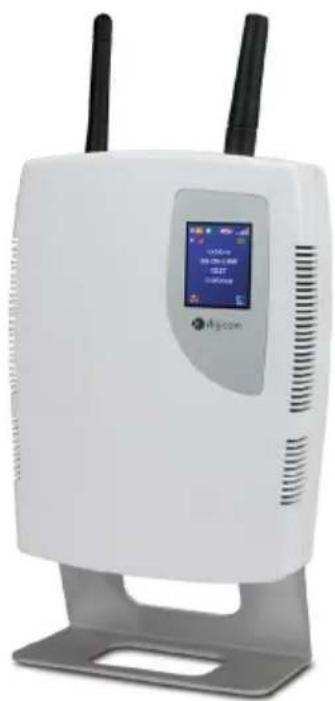
White wireless router with two black antennas and a digital display screen (no visible text or symbols on the device body)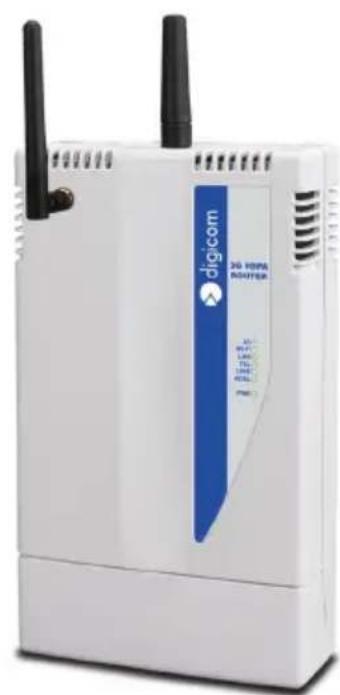
natural_image
White 3G Home Router device with two antennas and ventilation slots (no visible text or symbols on body)3G Gateway Series
Quick Guide
7D1668 rev. 2.0 09/2009
2 Mbps Upload transmission
INDEX
PREFACE......II
DECLARATION CE OF CONFORMITY ...... II
ASSISTANCE AND CONTACTS ......II
Restriction of use of Wireless Radio Equipment using the 2.4GHz ISM frequency band .... III
SAFETY WARNINGS IV
- INTRODUCTION....1.1
1.1.DESCRIPTION....1.1
1.2. CONNECTORS PANEL....1.2
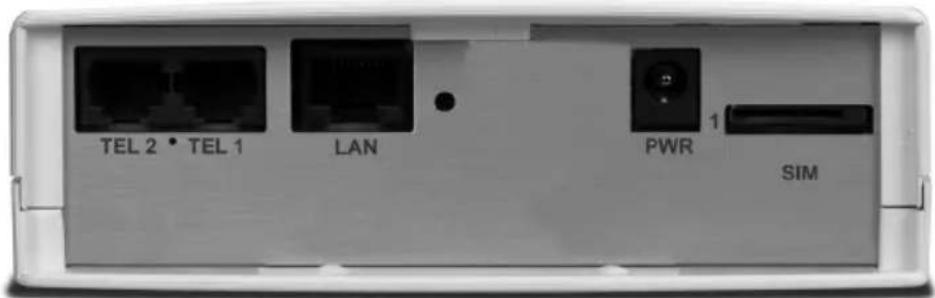
1.2.1. 3G SOHO CONNECTORS....1.2
1.2.2. 3G SOHO PLUS CONNECTORS....1.2
1.2.3. 3G BACKUP CONNECTORS....1.3
1.2.4. 3G CORPORATE CONNECTORS ....1.3
1.2.5. 3G WLL CONNECTORS....1.3
1.3. DISPLAY 1.4
1.4. LED....1.5
1.5. PARTS CHECK 1.5
- HARDWARE INSTALLATION 2.1
2.1. BATTERY BACKUP 2.3
2.1.1. REPLACEMENT OF BATTERY 2.3
2.2. PIN AND PUK MANAGEMENT 2.4
- WEB CONFIGURATION....3.1
3.1. QUICK CONFIGURATION 3.2
3.1.1. PHONE CALL 3.2
3.1.2. 3G DATA CALL....3.2
-
HOME......4.1
-
CONFIGURATION....5.1
INFORMATION FOR USERS
According to the 2002/95/CE, 2002/96/CE and 2003/108/CE Directives, relative to reduction in the use of hazardous substances in electrical and electronic apparatus, as well as to disposal of waste materials.
The symbol of a crossed box applied on the apparatus or on its package indicates that at the end of its useful life the product must be collected separately from other waste materials.
The user must therefore take the apparatus which has reached the end of its useful life to appropriate separate collection centres for electronic and electro-technical waste materials, or deliver it back to the reseller when purchasing new apparatus of an equivalent type, giving one piece in for one piece out.
Suitable separate waste collection for then sending the cast-off apparatus for recycling, treatment and environmentally
friendly disposal, contributes towards preventing any possible negative effects on the environment and on health and encourages recycling of the materials the apparatus is made up of.
Unauthorised disposal of the product by the user will lead to payment of the administrative sanctions in force in the country where it is put on the market.
All rights reserved; no part of this publication may be reproduced, stored in a retrieval system, or transmitted in any form or by any means, electronic, otherwise, without the prior written permission of Digicom S.p.A. The contents of this booklet may be modified without notice. Every possible care has been taken in testing and putting together all the documentation contained in this booklet, however Digicom can not take any responsibility brought by the use of this booklet.
PREFACE
In order to guarantee your safety and a correct functioning, be sure to follow these safety warnings. The whole set (with cables included) must be installed in a place lacking of or distant from:
• Dust, humidity, high temperatures and direct exposure to sunlight.
- Heat irradiating objects, which may damage your device or cause any other problem.
- Objects producing a high electromagnetic field (Hi-Fi speakers, etc.).
• Corrosive liquids or chemical substances.
ENVIRONMENTAL CONDITIONS
Environment temperature: from 0 °C to +40 °C Relative humidity: from 20 to 80 % n.c.
Any sudden change in temperature and humidity must be avoided.
CLEANING INFORMATION
Use a soft dry cloth and avoid any solvents or abrasive materials.
SHOCKS OR VIBRATIONS
Caution against shocks or vibrations.
BACKUP BATTERY (OPTIONAL)
WARNING: this device can be supplied with a backup battery.
This battery may get burnt, explode or cause serious burnings. DO NOT disassemble, weld, burn or throw the battery into water. Keep out of children. Replace only with a same model battery and reserve the operation only to qualified staff. The use of a different battery may cause fire hazard or explosions. Italian laws consider batteries as dangerous urban waste that must be disposed according to the law provisions in force (Italian DPR 915/82 and local provisions).
The backup battery is excluded from warranty.
DECLARATION OF CONFORMITY
We, Digicom S.p.A., with registered office at Cardano al Campo (VA - Italy) - Via Volta 39, declare under our sole responsibility, that the products named 3G SoHo, 3G SoHo PLUS, 3G BackUP, 3G Corporare, 3G WLL, to which this declaration refers to, satisfy the essential requirements of following Directive:
- 1999/5/CE 9th March 1999, R&TTE (concerning radio equipment and telecommunication terminal equipment and the acknowledgment of their conformity) Law Decree 9th May 2001, n.269, (G.U. n. 156 of 7-7-2001).
As indicated in conformity with the requirements of following Reference Standards or of other regulations documents:
EN 300 328
EN 301 489-1
EN 301 489-7
EN 301 489-24
EN 301-908-1
EN 301-908-2
EN 60950-1
This device can be used in the following countries: IT, DE, ES, PT, BE, NL, GB, IE, DK, GR, CH
ASSISTANCE AND CONTACTS
Most of questions can be answered by looking up in the Support > F.A.Q. section of our website at www.digicom.it. If you can't find the answer you're looking for, please contact our Technical Support at support@digicom.it
REstRIctION OF UsE OF WIREIEss RaDIO EQUIpMENT UsINg thE 2.4ghZ IsM FREQUENcy baND
This equipment complies with european standards in matter of electromagnetic compatibility, interference and safety. This equipment operates in the 2.4GHz Wireless radio bandwidth, regulated by the European 1999/5/CE Directive. It can be freely used in those countries which are not specifically applying restrictions.
Restrictions of use in France
Indoor
● The maximum transmit power (EIRP) is limited to 100mW (20 dBm) within the 2400-2483,5MHz frequency range
Outdoor
● The maximum transmit power (EIRP) is limited to 100mW (20 dBm) within the 2400-2454MHz frequency range
● The maximum transmit power (EIRP) is limited to 10mW (10 dBm) within the 2454-2483,5MHz frequency range
Please check www.art-telecom.fr for updates and further informations.
Restrictions of use in France
This equipment can be used freely within private areas.
Should the equipment being used in public areas or outside private areas, the user must apply a general authorization and inform the national telecommunication organization. Please refer to www.comunicazioni.it for updates and further informations.
If the equipment allows to modify the transmit power level or change of the antenna type, the user must ensure not to exceed the 100mW (20 dBm) limit in any case or final setup.

SAFETY WARNINGS
Read these instructions and norms carefully before powering the 3G Gateway. Violation of such norms may be illegal and cause hazard situations.
For any of the described situations please refer to the specific instructions and norms.
The 3G Gateway is a low power radio transmitter and receiver. When it is ON, it sends and receives radio frequency (RF) signals.
The 3G Gateway produces magnetic fields. Do not place it next to magnetic supports such as floppy disks, tapes, etc.
Operating your 3G Gateway close to other electrical and electronic equipment - such as a television, phone, radio or a personal computer - may cause interferences.
INTERFERENCES

The 3G Gateway, like all other wireless devices, is subject to interferences that may reduce its performances.

ROAD SAFETY
Do not use your 3G Gateway while driving. In case of use on cars, you must check that the electronic equipment is shielded against RF signals. Do not place the 3G Gateway in the air bag deployment area.

AIRCRAFT SAFETY
Switch off your 3G Gateway when on board aircrafts by disconnecting the power supply and deactivating the internal backup battery. Using GSM devices on aircrafts is illegal.

HOSPITAL SAFETY
Do not use the 3G Gateway near health equipment, especially pacemakers and hearing aids, in order to avoid potential interferences. Take care when utilizing the 3G Gateway inside hospitals and medical centres, which make use of equipment that could be sensitive to external RF signals. Switch it off when use is expressly forbidden.

EXPLOSIVE MATERIALS
Do not use the 3G Gateway in refuelling points, near fuel or chemicals. Do not use the 3G Gateway where blasting is in progress. Observe restrictions and follow any specific regulation or instruction.

INSTRUCTIONS FOR USE
Do not use the 3G Gateway in direct contact with the human body and do not touch the antenna if not strictly necessary. Use approved accessories only. Consult documentation regarding any possible device connected to the 3G Gateway. Do not connect incompatible products.
1. INTRODUCTION
1
Dear Customer,
thanks for puchasing 3G Gateway.
You will now be able to access the Internet using 3G connection or ADSL connection (optional).
This User's Guide will show you how to connect your 3G Gateway and to customize its configuration to get the most out of your new product.
1.1. DESCRIPTION
3G Gateway identifies a range of Digicom 3G routers: 3G SoHo, 3G SoHo PLUS, 3G BackUP, 3G Corporate and 3G WLL.
This user manual describes all the functionalities of 3G Gateway.
natural_image
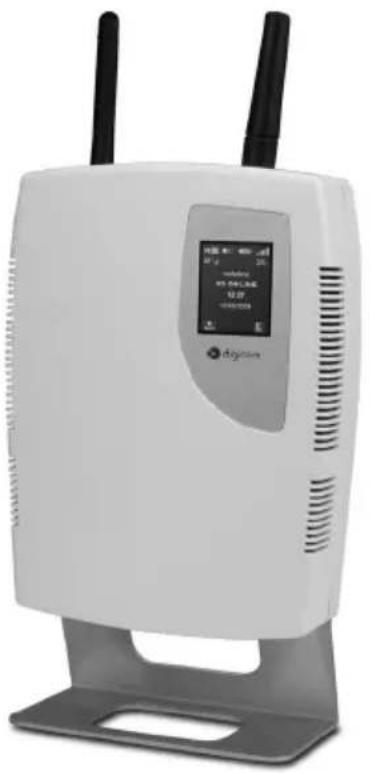
White wireless router with two black antennas and a digital display showing network ports (no visible text or symbols on the device body)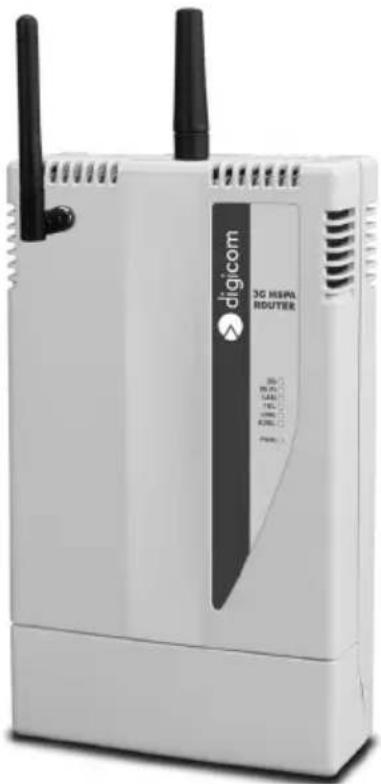
natural_image
White 3G HSPA ROUTER device with two antennas and ventilation slots (no visible text or symbols on body)The table shows the main differences among 3G Gateway versions:
Functionality 3G SoHo 3G SoHo PLUS 3G BackUP 3G Corporare 3G WLL
| UMTS (HSUPA) | Yes | Yes | Yes | Yes | Yes |
| ADSL (2/2+) | No | Yes | Yes | Yes | No |
| 1 LAN 10/100 | Yes | Yes | Yes | Yes | Yes |
| Tel FXS | Yes | Yes | No | Yes | Yes |
| Line FXO | No | Yes | No | Yes | No |
| 1 SIM Holder | Yes | Yes | Yes | Yes | Yes |
| 2 SIM Holder | No | No | Optional | Optional | No |
| In/Out | No | No | No | Optional | No |
| Display | Yes Yes No No | No | |||
| WiFi | Yes | Yes | Yes | Yes | Yes |
| Battery Backup | Optional | Optional | Optional | Optional | Yes |
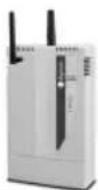
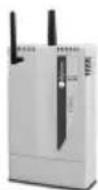
Housing
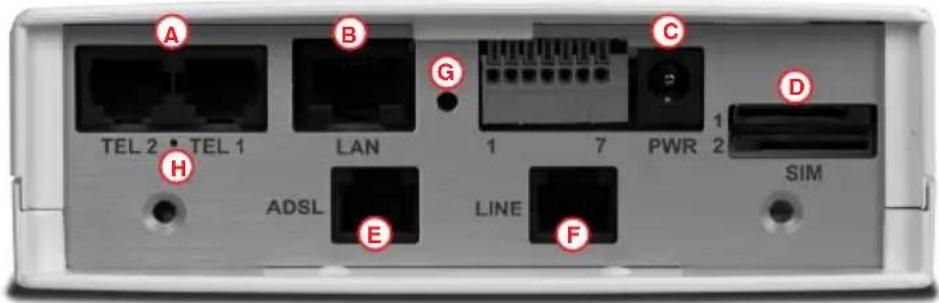
1.2. CONNECTORS PANEL
CONNECTOR DESCRIPTION
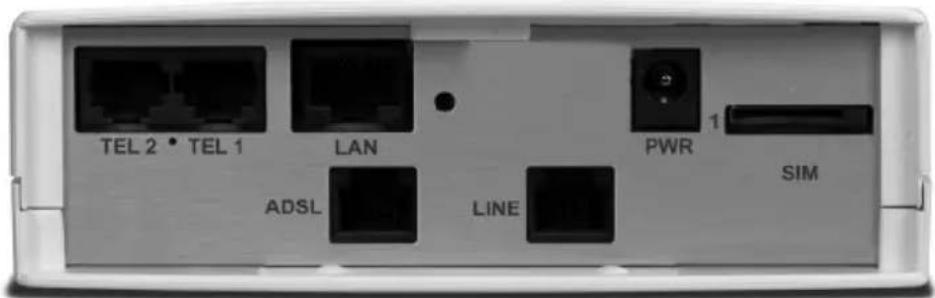
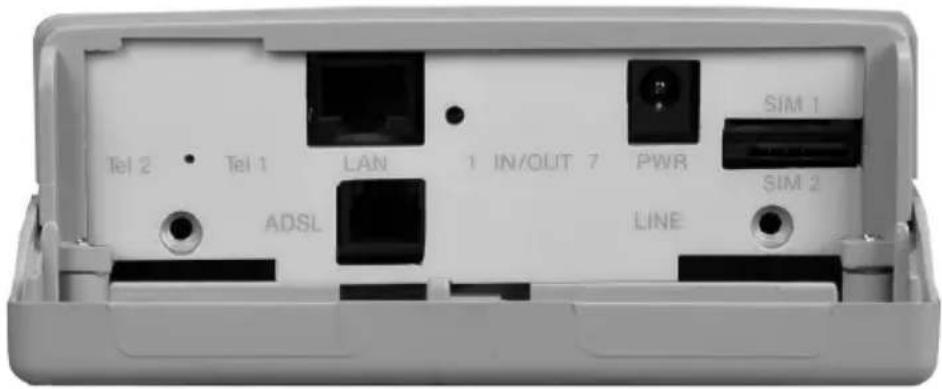
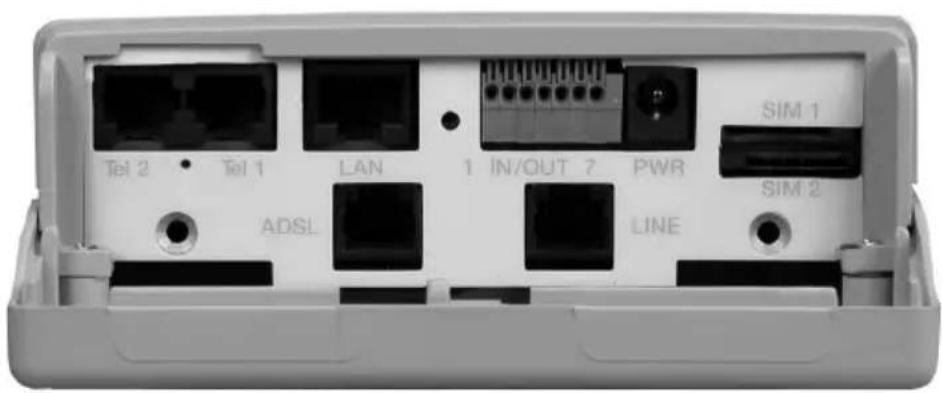
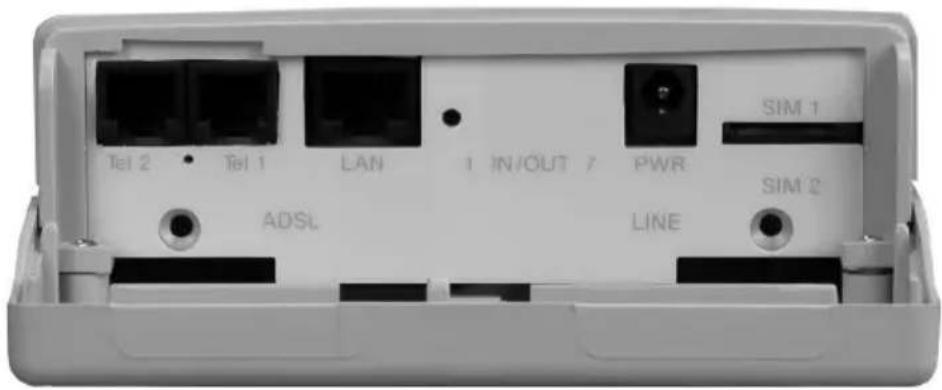
A TEL (1,2) RJ11 FXS connectors for analog phones or PABX trunks (parallel)
B LAN RJ45 connector for ethernet cable
C PWR Power supply connector
D SIM SIM connector. The models supporting double SIM will have 2 SLOTS
E ADSL RJ11 connector for ADSL line (available on models with ADSL router only)
F LINE RJ11 FXO connectors for PABX extensions
G RESET Reset (Power OFF/ON). For Backup battery models, power the device OFF and press it for 10 sec
H FACTORY Reset to factory default
text_image
A TEL 2 TEL 1 B LAN G C 1 7 PWR 1 2 D H ADSL E LINE F SIM1.2.1. 3G SoHo Connectors
text_image
TEL 2 • TEL 1 LAN PWR 1 SIM1.2.2. 3G SoHo PLUS Connectors
text_image
TEL 2 • TEL 1 LAN PWR 1 SIM ADSL LINE1.2.3. 3G Backup Connectors
text_image
Tel 2 Tel 1 LAN 1 IN/OUT 7 PWR SIM 1 SIM 2 ADSL LINE1.2.4. 3G Corporate Connectors
text_image
Tel 2 Tel 1 LAN 1 IN/OUT 7 PWR SIM 1 SIM 2 ADSL LINE1.2.5. 3G WLL Connectors
text_image
Tel 2 Tel 1 LAN 1 IN/OUT 7 PWR SIM 1 SIM 2 ADSL LINE1.3. DISPLAY
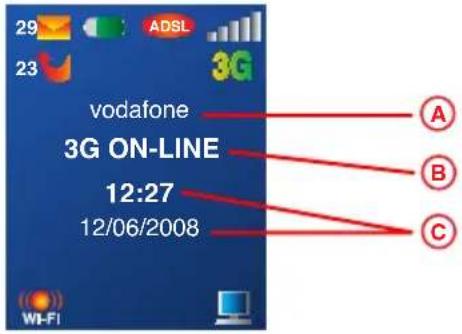
3G Gateway (SoHo models) is equipped with a 65.000 colors display where you can see the information on the gateway operation status.
text_image
29 ADSL 23 3G vodafone 3G ON-LINE 12:27 12/06/2008 A B C Wi-FiSYMBOL DESCRIPTION


SMS It indicates the presence and the numbers of unread SMS in the SIM
Missed calls It indicates the presence and the number of missed calls
Battery Backup It indicates the Backup battery status (optional)
ADSL ADSL connected
ADSL ADSL disconnected
Signal It indicates the status of GSM signal
GSM Mode 3G indicates the roaming range of 3G network
Operator Operator where the SIM is registered
Connession It indicates the status of data connection
Time & Date It indicates the time and date
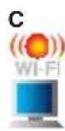
WiFi WiFi enabled
LAN A computer, switch or other network device is correctly connected to the LAN port
1.4. LED
3G gateway version with no display, will supply the information about the device status through 7 leds.
LED STATUS DESCRIPTION
| Power Off Device offOn Device correctly powered | |
| 3G Off SIM not ready | |
| Flashing Green SIM ready and no 3G data connection on | |
| On Green SIM ready and 3G data connection on | |
| Flashing Red SIM ready and no 2G data connection on | |
| On Red SIM ready and 2G data connection on | |
| Fast Flashing Red Insert PIN/PUK | |
| WiFi Off WiFi disabled | |
| On WiFi enabled | |
| LAN Off No device connected on the Ethernet port | |
| On Computer, switch or other network device correctly connected to the LAN port | |
| TEL Off Line not engaged | |
| Flashing Line engaged | |
| LINE Off Line not engaged | |
| Flashing Line engaged | |
| ADSL Flashing ADSL line (physical level) not available | |
| On ADSL line (physical level) available |
1.5. PARTS CHECK
The package will contain the following items:
- 3G Gateway
- Power adapter
- Quick Guide
- Wi-Fi antenna
- GSM antenna
- Ethernet cable RJ45-RJ45

Just three steps to operate with 3G Gateway:
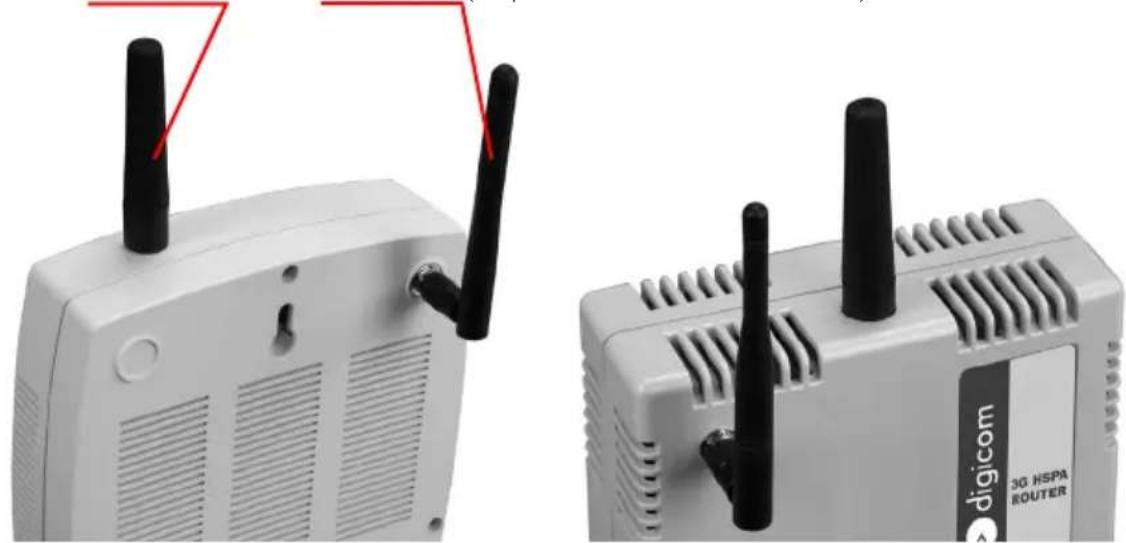
- Connect the GSM antenna and the WiFi antenna (the pictures show two different models).
natural_image
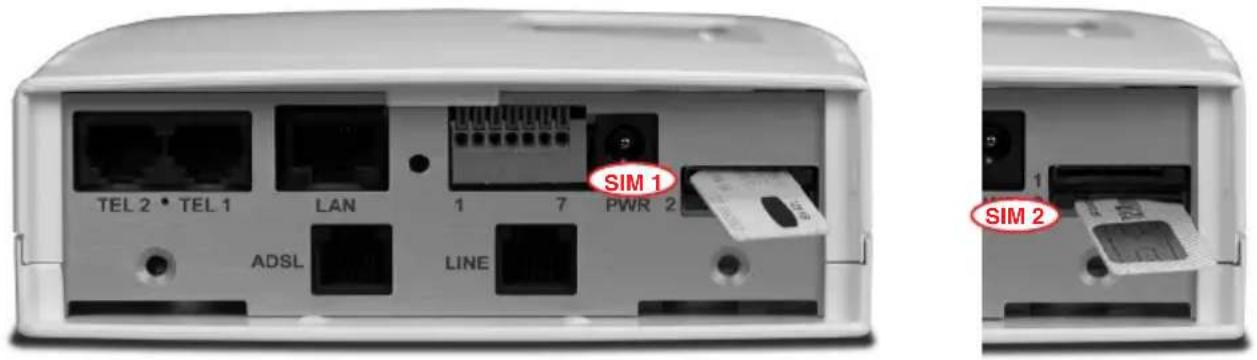
Two white wireless devices with black antennas and red connectors, one labeled '3G HSPA ROUTER' (no additional text or symbols visible)- Insert the SIM (we recommend to disable the PIN). For a correct operation turn 3G Gateway off.
text_image
TEL 2 • TEL 1 LAN 1 7 PWR 2 ADSL LINE SIM 1 SIM 2- Connect the power supply and turn 3G Gateway on.
Now you can connect a phone to the connector Tel 1 and you will be able to make and receive calls. (Function not supported by 3G BackUP).
The next image shows the other connection types:
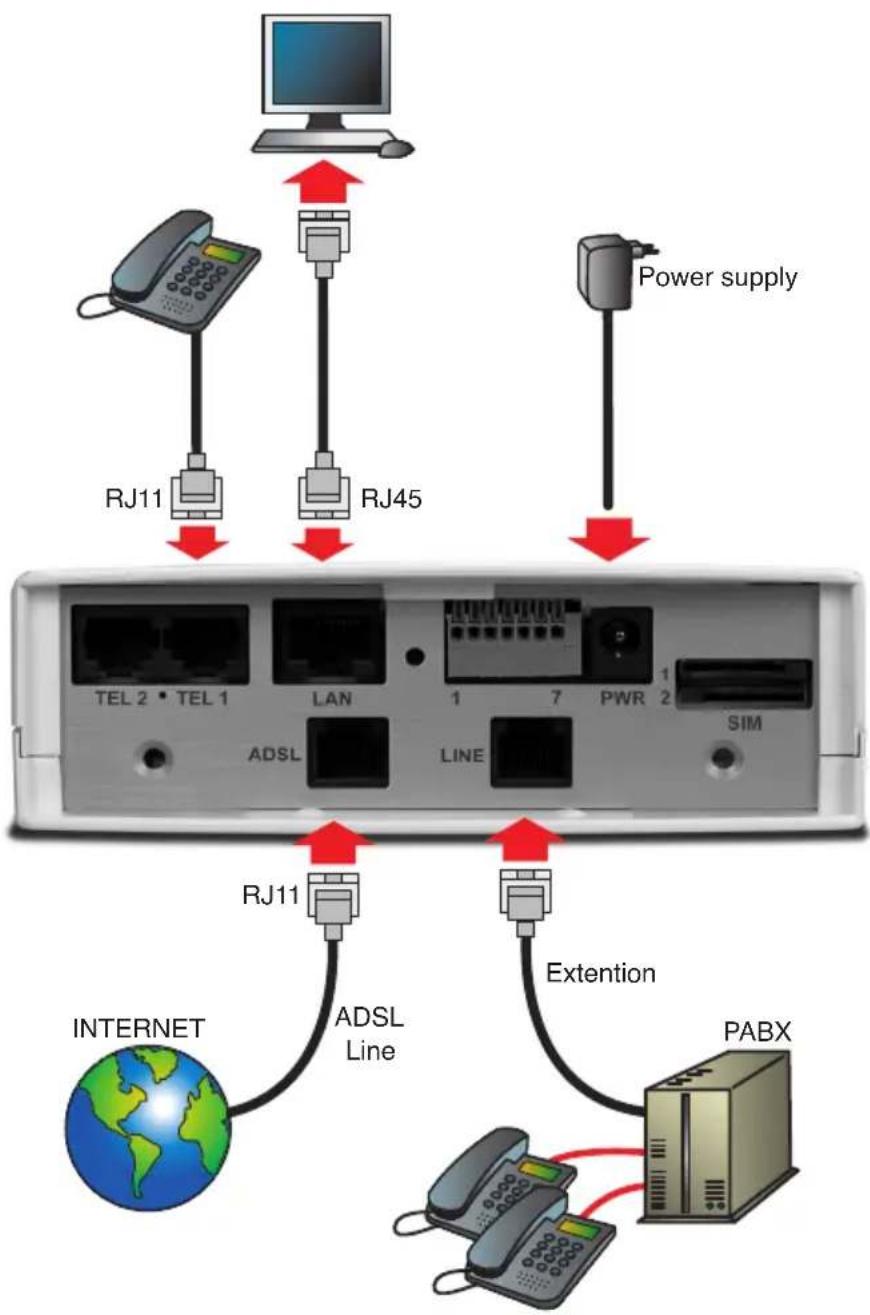
flowchart
graph TD
    A["Computer"] -->|Data Bus| B["RJ11"]
    A -->|Data Bus| C["RJ45"]
    A -->|Data Bus| D["Power supply"]
    B --> E["TEL 2 • TEL 1"]
    C --> F["LAN"]
    D --> G["PWR 2"]
    E --> H["ADSL"]
    F --> I["LINE"]
    G --> J["SIM"]
    H --> K["INTERNET"]
    I --> L["ADSL Line"]
    J --> M["Extention"]
    K --> N["PABX"]
    L --> M
    M --> O["Internet"]
LAN
To configure 3G Gateway and/or surf the internet, connect the computer through the LAN port. If more than one device must be connected, use an external switch. To use the WiFi, simply enable this option in the configuration web pages.
ADSL
If your 3G Gateway supports the ADSL router, connect the line to the ADSL port.
LINE
If your 3G Gateway supports the FXO interface, connect the PABX extension or public line to the LINE port.
Display & LED
Through the dispaly or the leds it is possible to check 3G Gateway status.
2.1. BATTERY BACKUP
The battery backup is placed into the product. The connection of the battery is at the installer or at the end user's care. Battery backup features: Li-ion 7,4V 1700mAh
To connect the battery backup:
• Power off the device and remove the plastic cover by turning the screws
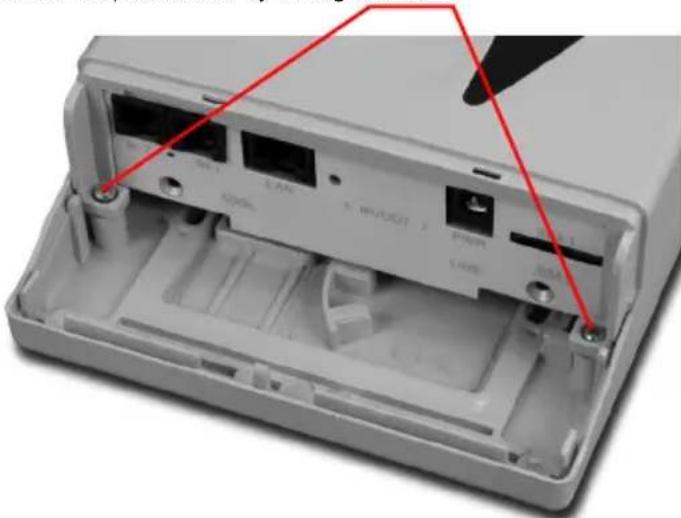
natural_image
Interior view of a white electronic device casing showing internal components and mounting holes (no text or symbols visible)- Insert the connector into the card as shown in picture
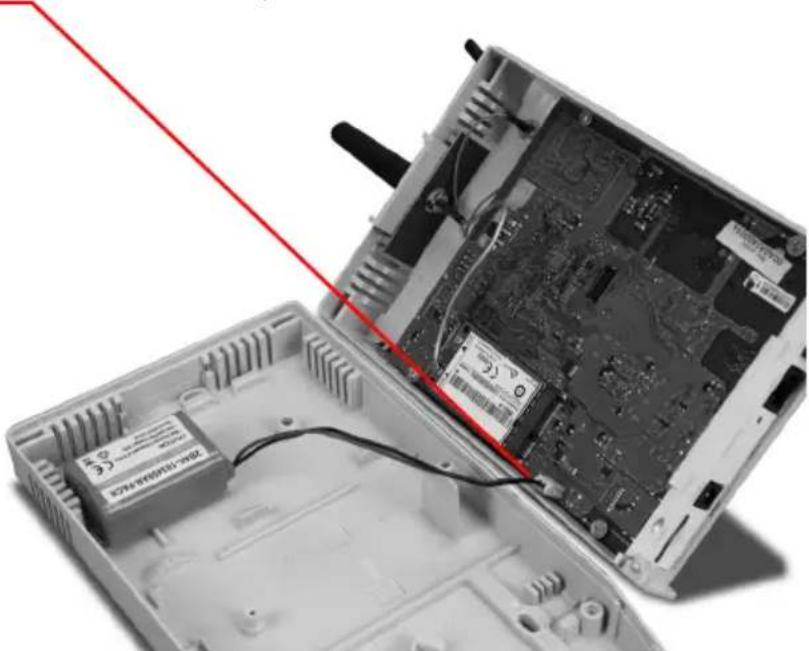
natural_image
Interior view of an electronic device showing exposed circuit board and battery casing with a red diagonal line indicating a cable or connection (no text or symbols visible)- Close the upper plastic cover and secure it by using the two screws.
2.1.1. Replacement of battery
The battery is sticked on the device.
To replace it, disconnect the connector from the card and gently remove the battery.

Note: You are advised to use battery supplied by Digicom only.
2.2. PIN AND PUK MANAGEMENT
The PIN request is always enabled on the SIMs; to use them inside 3G Gateway you can:
- Disable the PIN request on the SIM (through a cellular phone).
- Insert the PIN in the 3G Gateway configuration. At power on, the device will send the PIN to the SIM.
3G Gateway will show the PIN request from the SIM on the display (Insert PIN) or through the fast blinking of 3G led (red) in the versions without display.
You can setup 3G gateway in two ways:
A. WEB based configuration (3G Umts menu). Click Save&Reboot to enable the configuration.
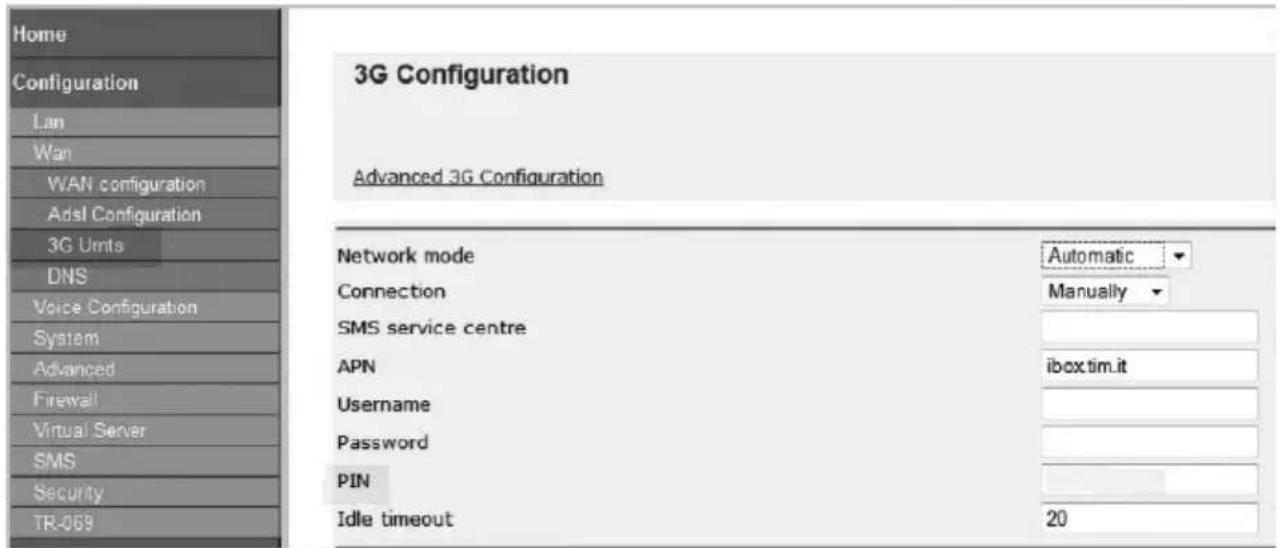
text_image
Home Configuration Lan Wan WAN configuration Adsl Configuration 3G Units DNS Voice Configuration System Advanced Firewall Virtual Server SMS Security TR-069 3G Configuration Advanced 3G Configuration Network mode Automatic Connection Manually SMS service centre APN ibox tim.it Username Password PIN Idle timeout 20B. Through the phone keyboard (set the DTMF selection) connected to TEL1 or TEL2 connector (available in the version with TEL-FXS port only).
Lift the receiver, you will hear the tone of PIN code request (two close beeps repeated with a pause).
- Digit the PIN code using the phone keyboard and confirm by pressing “#” (set on the phone the DTMF selection) PIN# code (i.e.0123#)
- To cancel the PIN code insertion, hang up before you confirm the PIN code with “#”.
- If the PIN code is correct, you will hear the correct configuration tone (two tones repeated), or the tone for wrong PIN (three tones repeated).
- Hang up to complete the procedure. Now 3G Gateway will automatically save the PIN in the configuration and it will make a Reset.
- At 3G Gateway start up, the PIN is no more asked for and the SIM will register to the network.
PUK management
The PUK code can be inserted with the same procedure as for the PIN insertion, through the phone keyboard (available in the version with TEL-FXS port only) or by inserting the SIM inside a mobile phone.

ATTENTION: the PIN and PUK codes are indicated on the PIN-PUK card supplied by the Telecom Operator when you buy the SIM card. If a wrong PIN number is inserted for 3 times, it will be necessary to insert the PUK code followed by a new PIN code. After 10 wrong PUK codes, the SIM card will be blocked permanently and you have to substitute it.
Getting Started with the Web pages
3G Gateway includes a series of Web pages that provide an interface to the software installed on the device. It allows you to configure the device settings to meet the needs of your network. You can access it through a web browser on a PC connected to the device.
Accessing the Web pages
To access the web pages, you need the following:
• A laptop or PC connected to the LAN port on the device.
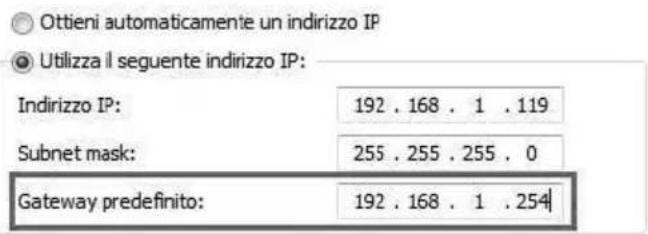
To enter the configuration menu you must set on the computer an IP address of the same LAN of 3G Gateway; you can set the address statically or using the assignment through the DHCP Server.
Windows® XP
• From the Start menu select -> Control Panel -> Network connections.
- Select LAN Connection, display the Properties, select Internet Protocol (TCP/IP) and press on Properties button.
text_image
Ottieni automaticamente un indirizzo IP Utilizza il seguente indirizzo IP: Indirizzo IP: 192 . 168 . 1 . 119 Subnet mask: 255 . 255 . 255 . 0 Gateway predefinito: 192 . 168 . 1 . 254- If using a DHCP Server, set Obtain automatically an IP Address, 3G Gateway will appropriately configure the IP addresses.
- A web browser installed on the PC. For the best display quality, use latest version of Internet Explorer, Netscape or Mozilla Firefox. from any of the LAN computers, launch your web browser, type the following URL in the web address (or location) box, and press Enter on your keyboard:
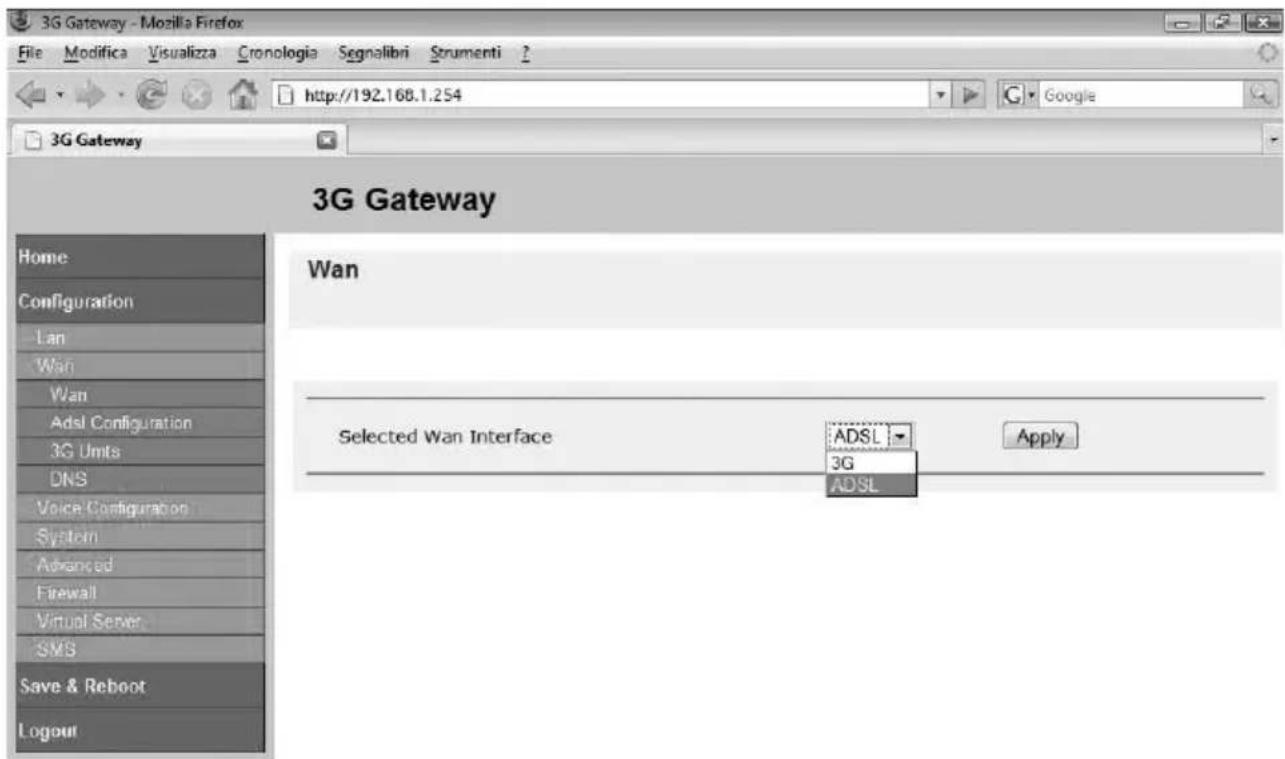
http://192.168.1.254 (user: admin, pwd: admin)
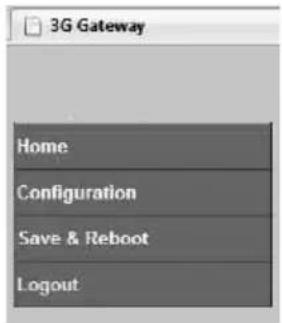
The web pages for the configuration have a column on the left, where you find the configuration menus, and a central part where you can see the settings and modify them.
The main menus are the following: Home, Configuration, Save & Reboot and Logout.
text_image
3G Gateway Home Configuration Save & Reboot LogoutThis paragraph describes the main parameters to be set to make and receive calls (if the FXS "TEL" interface is supported) and to start the Internet surfing in 3G mode.
3.1.1. Phone Call

For FxS interface versions only.
To start making/receiving calls you must have followed the instructions of the Hardware Installation chapter:
- Connect the GSM antenna
• Insert the SIM (we recommend to disable the PIN) - Connect a phone to the connector Tel 1
- Connect the power supply and turn 3G Gateway on
• As soon as the display (or 3G led) will show the operator name, you will be able to make and receive calls.
3.1.2. 3G Data Call
To make a call in 3G mode, check that the WAN is set to 3G (Configuration menu, WAN, WAN configuration).
text_image
3G Gateway - Mozilla Firefox File Modifica Visualizza Cronologia Segnalibri Strumenti ? http://192.168.1.254 Google 3G Gateway 3G Gateway Home Configuration Ian Wan Wan Adsl Configuration 3G Units DNS Voice Configuration System Advanced Firewall Virtual Server SMS Save & Reboot Logout Wan Selected Wan Interface ADSL 3G ADSL Apply- In the 3G UMTS menu insert the information (depending on the GSM operator you are using) for APN, Username and Password (for some operators the APN is sufficient).
- Define the connection mode:
Always on: 3G Gateway will enable 3G connection at power on. If some disconnections should occur, the Gateway will try to restore them automatically.
Manually: In this mode the user manually decides when the connection must be enabled and for how long. To enable (connect) and disable (disconnect) 3G connection, use the push buttons in the Home page.

Note: Verify with your telecom operator the profile of the SIM you are using for the Internet connection.
3G Configuration
Advanced 3G Configuration
Connection
SMS service centre
Apn
Username
Password
Pin
Idle timeout
Obtain DNS automatically
Manually
ibox.tim.it
20
V
Apply
- Save the configuration and reboot the gateway (menu Save & Reboot).
Commit & Reboot
Save Configuration & Reboot Page
This page allows you to save configuration to flash to retain configuration across reboots. You can also use this page to reboot modem with the configuration file you wanted, simply select the configuration file and press reboot
Commit Configuration
Use to save current Router's configuration to flash
Commit
Reboot Router
Use to Reboot Router with the listed configuration files
Reboot From
Last
Reboot
- If the ethernet card of the computer connected to 3G Gateway is set to DHCP mode, 3G Gateway will appropriately configure the IP addresses and you will be able to start surfing.
- If the ethernet card is configured with static IP addresses, check that the preset Gateway address is the one of 3G Gateway.
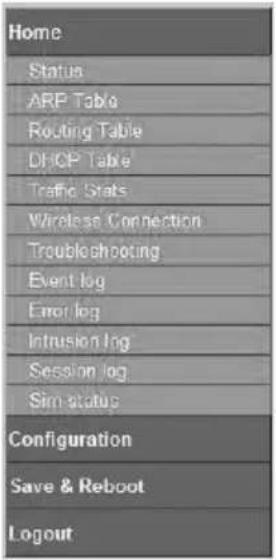
• The Home menu has various options that allow to verify the device status.
text_image
Home Status ARP Table Routing Table DHCP Table Traffic Stats Wireless Connection Troubleshooting Event log Error log Intrusion log Session log Sim status Configuration Save & Reboot Logout• The Home and Status pages display the device overview:
Home
Connection 3G
Manually
Status
OFFLINE
Connect
Disconnect
SMS
SMS Read
SMS Send
DSL Connected?
false
Downstream Data Rate
0
Upstream Data Rate
0
Status
Device Information
Model Name
3G Gateway
Host Name
MyModem
System Up-Time
00:17:246
Current Time
Synchronize Client with NTP Server now! Synchronize
Hardware Version
Solos 4615 RD / Solos 461x CSP v1.0
Software Version
10.0.3.23
MAC Address
00:A0:A2:55:55:05
Home URL
digicom s.p.a
LAN
IP Address
192.168.2.1
Subnet Mask
255.255.255.0
DHCP Server
On
WAN