Miami J - Attelle Ossur - Free user manual and instructions
Find the device manual for free Miami J Ossur in PDF.


User questions about Miami J Ossur
0 question about this device. Answer the ones you know or ask your own.
Ask a new question about this device
Download the instructions for your Attelle in PDF format for free! Find your manual Miami J - Ossur and take your electronic device back in hand. On this page are published all the documents necessary for the use of your device. Miami J by Ossur.
USER MANUAL Miami J Ossur
natural_image
Side profile of a woman wearing a white and black medical headcage (no text or symbols visible)MIAMI J®
PATIENT CARE HANDBOOK

INTRODUCTION:

text_image
Your Miami Jdoctor has determined that wearing a
Miami J ^® collar will aid in your rehabilitation. The collar will maintain your neck in the proper position while it is healing. Not being able to turn or shake your head “yes” or
“no” may seem unusual, but limiting the motion of your neck is an important part of your treatment.
This pamphlet will explain the things you should do to properly use and care for your Miami J® Cervical Collar. You can help the healing process by following your doctor's instructions and the guidelines in this pamphlet.
A Latex-Free Product
C-SPINE PRECAUTIONS:
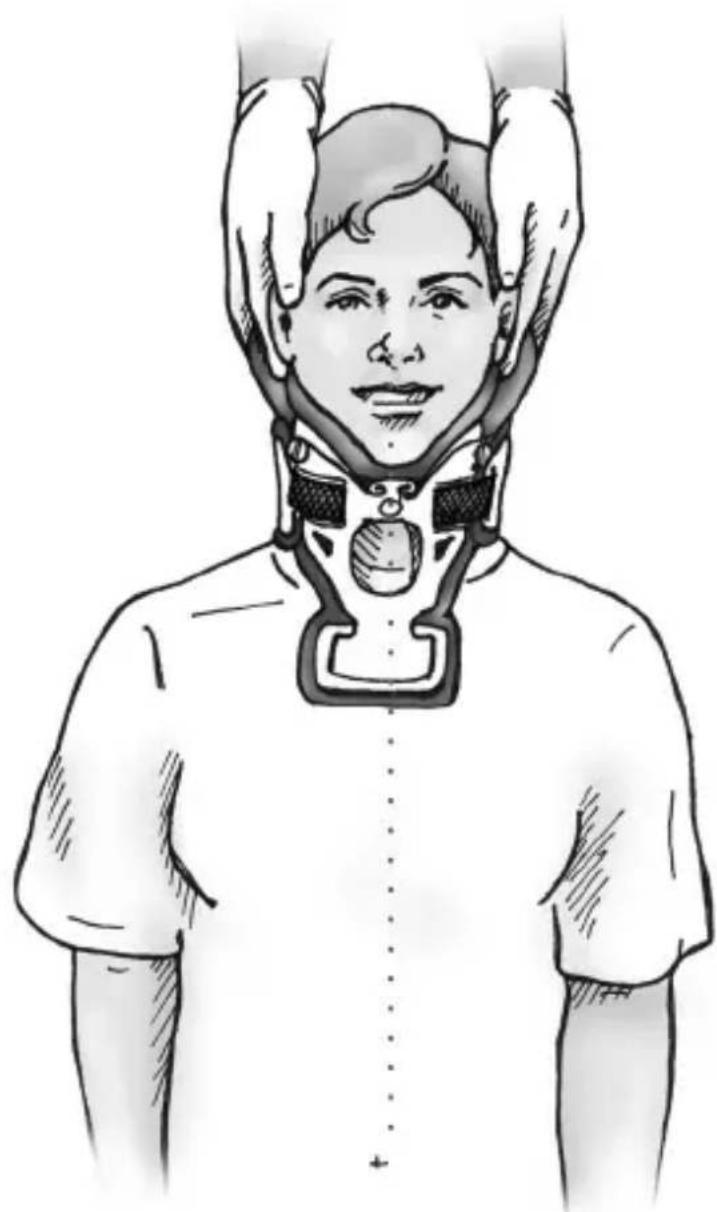
You must be lying flat to remove the collar unless your doctor gives you permission to do this in a sitting position. You will need a second person to help you in order to maintain the proper head, neck, and airway alignment.
Position patient with arms to the side, shoulders down and head aligned centrally.
natural_image
Illustration of a person wearing a medical headgear with straps, no text or symbols presentUnless otherwise specified by your doctor: Do not remove the collar except to wash under it and change the pads.
COLLAR REMOVAL & SKIN CARE
Keeping your Miami J® and the skin beneath clean is an important part of your treatment. Daily cleaning will help to prevent skin irritation. Cleaning the collar will require at least one set of replacement pads.
When you are at home you should shower or bathe with the collar on. After you wash you will need to take the collar off to wash your neck and change the pads.
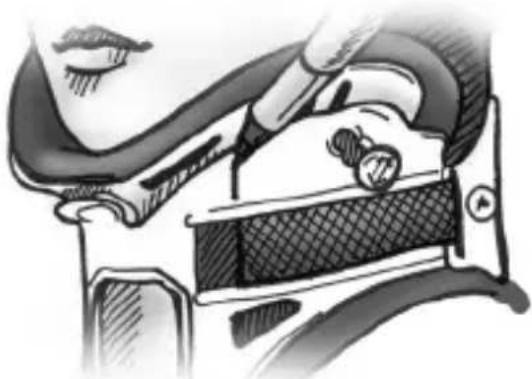
Before removing the collar, note where the ends of the velcro straps are. When you put the collar back on, the straps should be in the same position. You may use a pen to mark the positions on the white plastic shell.
natural_image
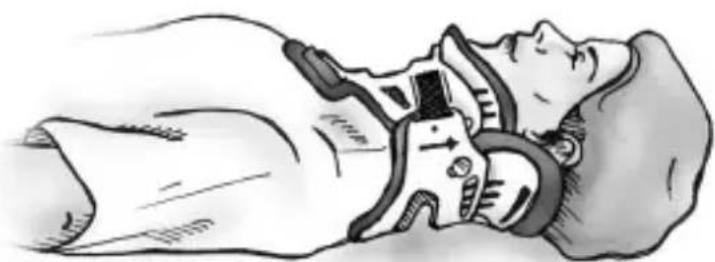
Illustration of a person using a tool on a car intake manifold (no text or symbols visible)To wash under collar and change pads while lying down:
Lie flat in bed without a pillow. Keep your head in a neutral position.

Do not bend your neck forward, backward or from side to side.
natural_image
Illustration of a person lying down with medical equipment (no text or symbols visible)COLLAR REMOVAL (cont'd):
ALTERNATIVE POSITION
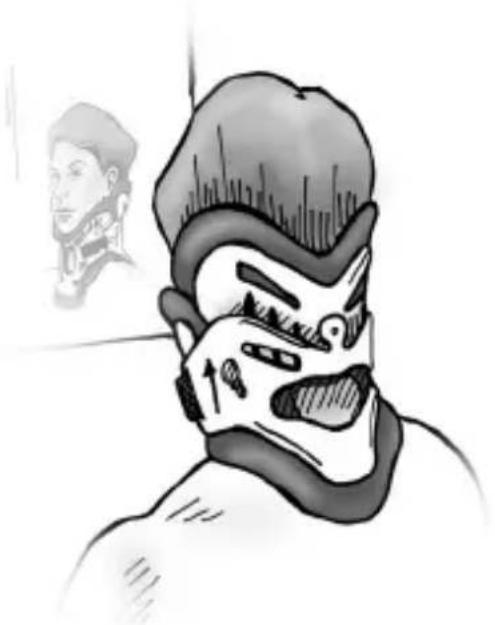
To wash under collar and change pads while sitting:

You must have permission from your doctor to do this.
Sit up straigt in a firm chair in front of a mirror.
Keep your head and neck in a neutral position (nose in line with belly button, chin level). Do not bend you neck forward, backward or side ways.
natural_image
Illustration of a person wearing a hooded face with a stylized face, looking downward (no text or symbols present)
Be very careful not to move your neck while this is done.
1
Undo the Velcro straps. Remove the Back of the collar, sliding out from under neck if necessary.
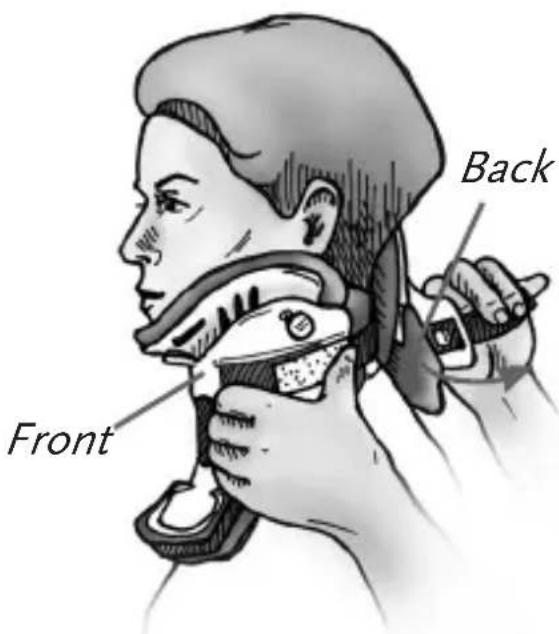
text_image
Back Front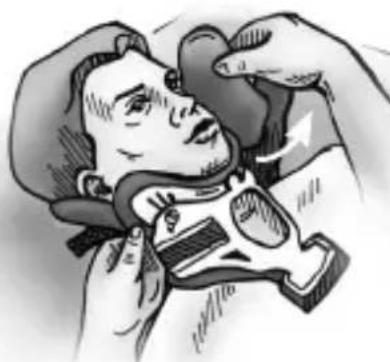
natural_image
Illustration of a person receiving a medical procedure with hands and tools (no text or symbols)2
Remove the Front. If present, unfasten the elastic Assist Strap that goes around the back of the neck.

natural_image
Illustration of a person wearing a neck and head covering the neck area, with an arrow indicating direction (no text or symbols present)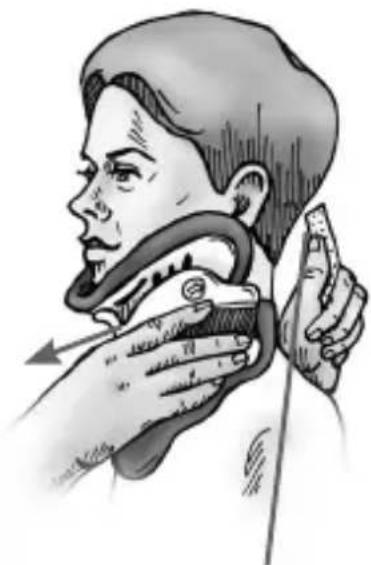
natural_image
Illustration of a person using a handheld device to interact with another person (no text or symbols present)Assist Strap
3
Wash front and back of neck with mild facial soap and water and completely dry the skin. Observe for any redness or irritation under the collar, especially over bony areas like the chin, clavivles, or back of the head.
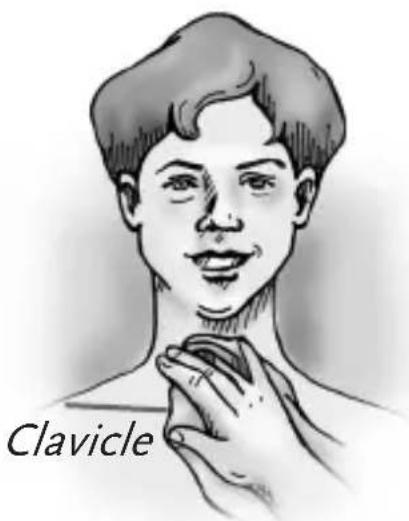
text_image
ClaviclePatient laying down: Back of the head will be checked and cleaned at a later step.

Wearing a beard may cause skin irritation in men.
Redness on chin may indicate improper use of a pillow. If permitted, pillows must always be placed behind the head and shoulders.
4 Clean the Front and Back of collar and replace the soiled pads with clean ones as directed below.
CLEANING & SKIN CARE:
Call Össur Customer Service (1 800 257 8440) to purchase extra pads.
5
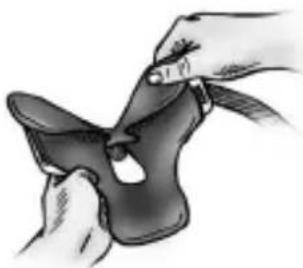
natural_image
Illustration of hands holding a black shoe with a zipper, no text or symbols presentPeel the soiled, blue pads off. Look carefully at the shape as you remove them so that you can reposition the clean pads properly. The pads attach with velcro.
6
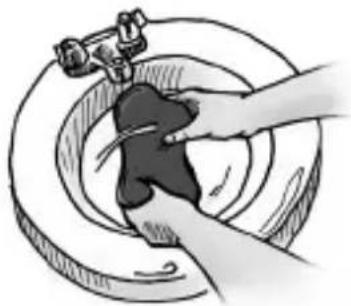
natural_image
Illustration of hands cleaning a circular object with a cloth (no text or symbols)Wash the pads with mild facial soap and water. DO NOT use bleach or harsh detergents. Thoroughly rinse the pads with clean water. Wring out the excess water and squeeze in a towel.



Lay the pads out flat to air dry. It should take less than 60 minutes for them to dry.
7
Wipe the white plastic collar shell clean with mild soap and water.
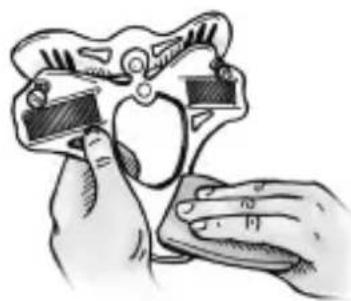
natural_image
Illustration of hands using a computer and a device to interact (no text or symbols visible)8
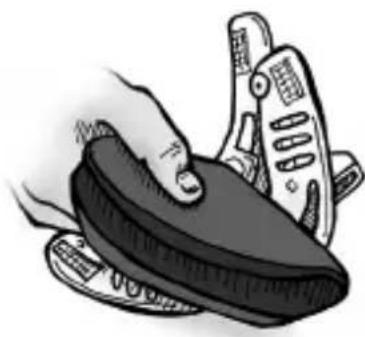
natural_image
Illustration of a hand holding a computer monitor with keyboard, next to a remote control device (no text or symbols visible)Attach the replacement pads. Fold the pads in half with the dull side out next to the velcro (the shiny side goes against the skin); then center the pad in the white shell.
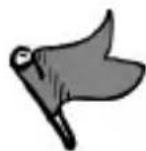
Adjust pads as needed to make sure no plastic touches the skin.
REPLACE COLLAR:
9A
Patient laying down:
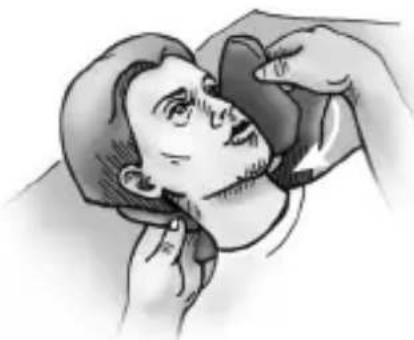
Slide the Back carefully behind the patient's neck. Make sure it is centered evenly.

natural_image
Illustration of a person receiving a medical or therapeutic procedure, no text or symbols presentLong hair should be placed outside the collar.
natural_image
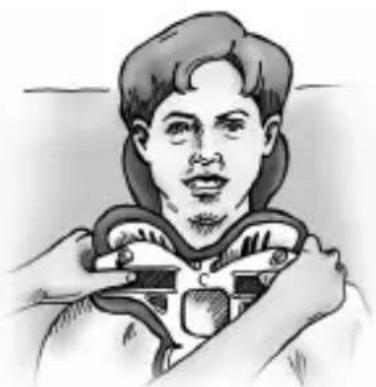
Illustration of a person receiving medical or surgical pressure from a device (no text or symbols visible)9B
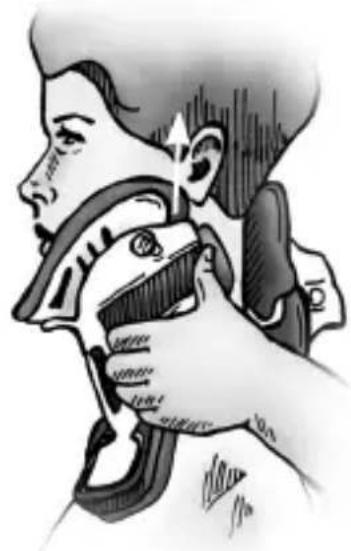
Flare the sides of the Front out, slide it up the chest wall and scoop it up! under the chin.
REPLACE COLLAR (cont'd):
10A
Sides of the collar Front should be directed up toward the patient's ears.
natural_image
Illustration of a person using a medical device to interact with another person (no text or symbols present)10B
Patient sitting:
Bring the Assist Strap around the back of the neck and attach the white section loosely to the opposite side of the collar.
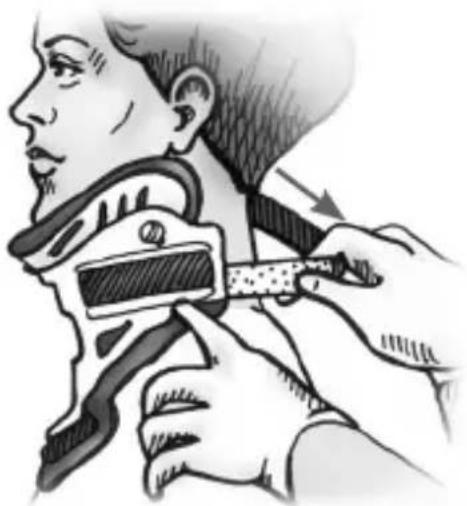
natural_image
Illustration of a person using a hairpin to cut the neck area (no text or symbols present)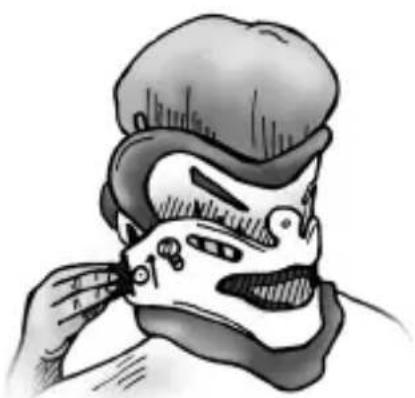
natural_image
Illustration of a person applying makeup to a face mask (no text or symbols present)Place the Back behind the patient's neck. Make sure it is centered evenly. Attach the Back straps loosely to the Front.
Snug it up!
11
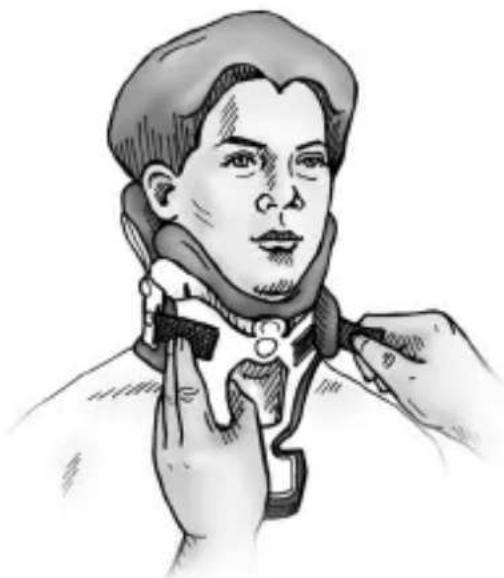
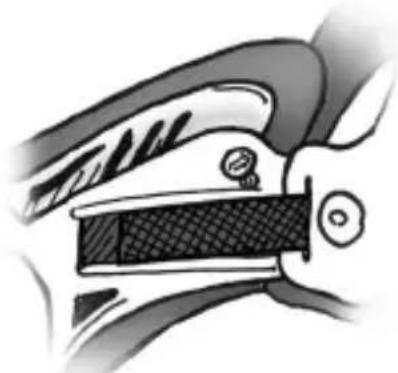
While holding the Front securely, curl the ends snugly against the patient's neck. Fasten the velcro strap, then secure the other side in the same way. Alternately tighten the straps, one at a time, until they are in the original position.
natural_image
Illustration of a person adjusting a neckal brace, no text or symbols present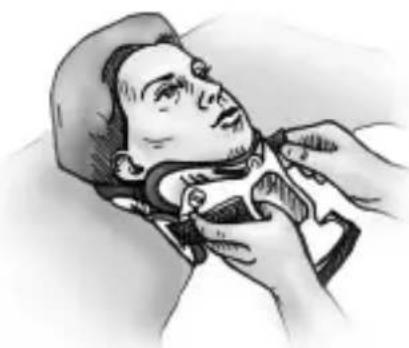
natural_image
Illustration of a person receiving medical or surgical treatment from a handheld device (no text or symbols visible)The velcro straps must be aligned symmetrically and oriented "blue-on-blue" to the velcro on the Front.
natural_image
Diagram of a mechanical clamp or bracket assembly (no text or symbols visible)
If the patient can slip his/her chin inside the collar, it is a clear indication collar is not snug enough.
REPLACE COLLAR (cont'd):
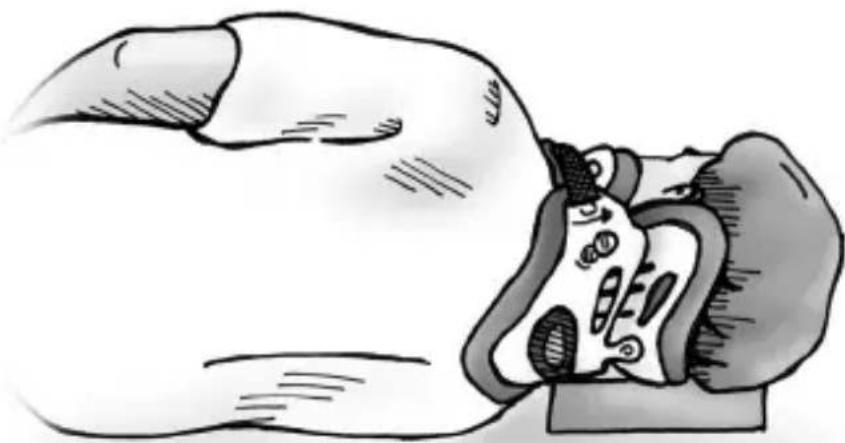
12 Patient laying down:
After the collar is in place, gently roll the patient onto his/her side. (Place a small pillow or folded towel under his/her cheek to prevent the head from tilting sideways.)
natural_image
Illustration of a person lying down with a large object partially visible, no text or symbols present.13
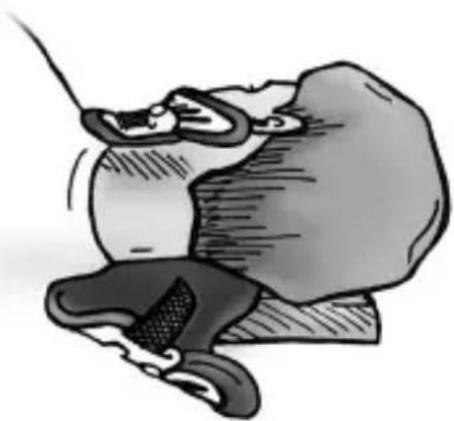
Undo the velcro strap on the top side of the collar and fold the Back down to clean and check the back of the patient's head for redness or irritation.
natural_image
Cartoon illustration of a person wearing glasses and a large rock, no text or symbols present
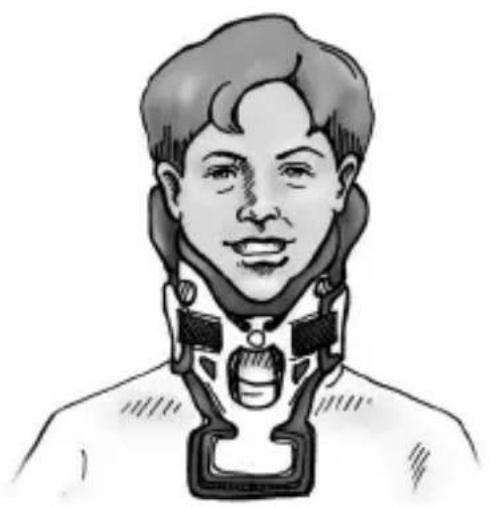
Make sure the Back collar is replaced and securely re-fastened after skin check.
natural_image
Illustration of a person wearing a medical headgear (no text or symbols)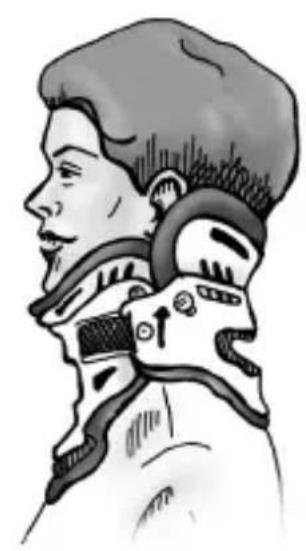
natural_image
Side profile illustration of a person wearing a high-collared head and neck (no text or symbols)FINAL CHECKLIST:
A properly applied Miami J® will look like the above illustrations:
√ Chin is centered comfortably in the chin piece.
√ Collar velcro straps oriented blue-on-blue, both tabs the same length.
√ Front of collar angled up toward ears. The lower plastic edge should not be resting on clavicles or digging into shoulder.
√ Sides of the Back overlap the sides of the Front.
√ No plastic touching the skin. Blue SorbatexTM pads extend beyond all plastic edges.
√ No slack or gaps in any of the straps (except Assist Strap).
The large front and back openings are centered on the
√ neck.
ADDITIONAL INSTRUCTIONS
If you experience sudden neck or back pain, numbness or tingling, contact your doctor.
Doctor's Name/Number: ____
If you have any problems or questions about the use and care of your brace, contact your doctor or orthotic professional.
Orthotist Name/Number:
These instructions do not supercede the specific orders of your physician.
FOLLOW-UP
Time: ____ Location: ____
Össur Americas
27051 Towne Centre Drive
Foothill Ranch, CA 92610
USA
Tel: +1 (949) 382 3883
Tel: +1 800 233 6263