6.8 - Browser AutoMapa - Free user manual and instructions
Find the device manual for free 6.8 AutoMapa in PDF.


User questions about 6.8 AutoMapa
0 question about this device. Answer the ones you know or ask your own.
Ask a new question about this device
Download the instructions for your Browser in PDF format for free! Find your manual 6.8 - AutoMapa and take your electronic device back in hand. On this page are published all the documents necessary for the use of your device. 6.8 by AutoMapa.
USER MANUAL 6.8 AutoMapa
1 Installation and registration
1.1 Software preinstalled on an SD card
1.2 Installer file downloaded from the Internet
1.4 Follow-up installation for the Installer and CD/DVD
1.4.1 Start installation
1.4.2 Selection of device
1.4.3 Selection of installation location
1.4.4 Selection of program components
1.4.5 Selecting the map for installation
1.4.6 Map registration
1.4.7 Selecting map area for installation
1.4.8 Copying files
1.5 Connecting the portable device to the PC
1.6 Possible installation problems
1.7 Maps and program update
1.8 Uninstallation
1.9 Structure of the program and map installation
1.9.1 TPC/PC
1.9.2 PPC2003/WM5/WCE devices
1.9.3 Other directories
2 Basic functions of the system
2.1 Program start-up
2.2 Simplified and Expert menu
2.3 Main menu and map buttons
2.3.1 Map buttons
2.3.2 Main menu
2.4 Map
2.5 Selecting a point on the map
2.6 Context menu
2.7 Options menu
2.8 "Go to" menu and selecting destinations - searching for addresses and objects...
2.8.1 Search address
2.8.2 Search POI
2.8.3 Search by postal codes
2.8.4 Searching by geographic coordinates
2.9 Map points
2.9.2 Home/Work
2.9.3 POI (Points of Interest)
2.10 Show position
2.10.1 System layout and operation in the show position mode
2.10.2 "Your menu" pop-up menu
2.10.3 On-board computer
2.10.4 POI Warnings
2.11 Navigation
2.11.1 Mapping the route
2.11.2 System layout and operation in navigation mode
2.11.3 "Your menu" pop-up menu in navigation mode
2.12 Block roads
2.12.1 Temporary section blocks
2.12.2 Blocked roads and route mapping
2.13 AM'Traffic menu
2.14 Accident menu
2.15 Help and info menu
3 Advanced features and system settings
3.1 Route menu
3.1.1 Modify
3.1.2 Blocked sections and areas
3.2 GPS menu
3.2.1 GPS tracks
3.2.2 Other GPS functions
3.3 Settings menu
3.3.1 Interface - Settings
3.3.2 Route - Settings
3.3.3 GPS - Settings
3.3.4 Voice messages - Settings
3.3.5 Buttons - settings
3.3.6 Others - Settings
3.3.7 Settings: AM'Traffic
3.4 POI menu
3.5 Miplo.pl website and POIs
4 GPS system
4.1 Introduction to GPS
4.2 Fixing GPS position
4.3 GPS receiver connection
5 Index
1 Installation and registration

The icon on the left shows installation stages specific for a portable device. Paragraphs which are not marked by this symbol concern installation on both a PC/TPC (PC Tablet) and a portable device of PocketPC/Windows Mobile/Windows CE type.
The process of AutoMapa installation and registration is subject to the type of carrier on which the program was supplied. The program can be installed from the DVD supplied with AutoMapa or installer files downloaded from www.AutoMapa.pl. The version published on the DVD may be older than the one available on the website, therefore we recommend that users download and the install the newest version of the program from website at www.AutoMapa.pl.
1.1 Software preinstalled on an SD card

If your version of this software comes preinstalled on an SD/miniSD memory card, any further installation is unnecessary; just put the SD/miniSD card in the PND and start navigating!
When an SD card (or its mini or micro version) is inserted in the portable device, the program and the maps are installed automatically. When the installation is complete, program starts and the start screen is displayed.
Note: the above applies only to devices with the Windows Mobile system. For devices with the CE.NET system, an additional application integrating the system with software has to be installed. These applications can be downloaded from our website or obtained from the hardware supplier.
If you want to update the software on the card which was included with the purchased PDA, put the card in the PC card reader. Do not connect the PDA. On the computer, launch the installer downloaded from the Internet or from the DVD. In the installer, choose the option "PocketPC/WinMobile/WinCE". Note: on the card there must be a fully operational software version along with the map.
The same actions are necessary when installing on a clean memory card. It is required if the PDA cannot establish connection using ActiveSync.
1.2 Installer file downloaded from the Internet
The installation program immediately starts automatically, without extracting the files.
Note: In case of Vista/7 operating systems it can take several minutes due to the file archive being scanned by the Windows firewall.
If the installer comprises several archive files, they have to be first unzipped into a selected directory on your PC. Then find the program setup.exe file and run it.
The rest of the installation process is identical to that performed from an installation CD/DVD.
Installation CD/DVD
The installation process for Software and the maps should start automatically when the installation disc is inserted into the PC's disc drive. If this is not the case, find the Setup.exe file on the installation disc and run it.
1.4 Follow-up installation for the Installer and CD/DVD

When installing AutoMapa on a Pocket PC device, first connect the device to your PC and use the Microsoft ActiveSync connection tool (version 4.5 or Sync Center in Vista/7). Your PC should be connected to the Internet (at least during the registration process).
Run the installer downloaded from http://www.automapa.pl/ or place the AutoMapa CD/DVD in your computer's DVD drive. The installer will start automatically. (Otherwise, double click the "My computer" icon, then select the DVD drive icon and choose Setup.exe).
If the device cannot establish connection using ActiveSync, it is possible to install and register on a clean memory card. For this option, use the card reader in the PC.
We recommend that the entire program is installed on an SD card in the following configuration: portable device connected to the PC with a USB cable, the SD card inserted into the card reader in the PC.
Note: Many SD card readers available on the market do not support SDHC cards (in particular built-in readers, e.g. in laptops). Make sure that the card is compatible with the reader. Most cheap external USB readers support 2 and 4 GB SDHC cards.
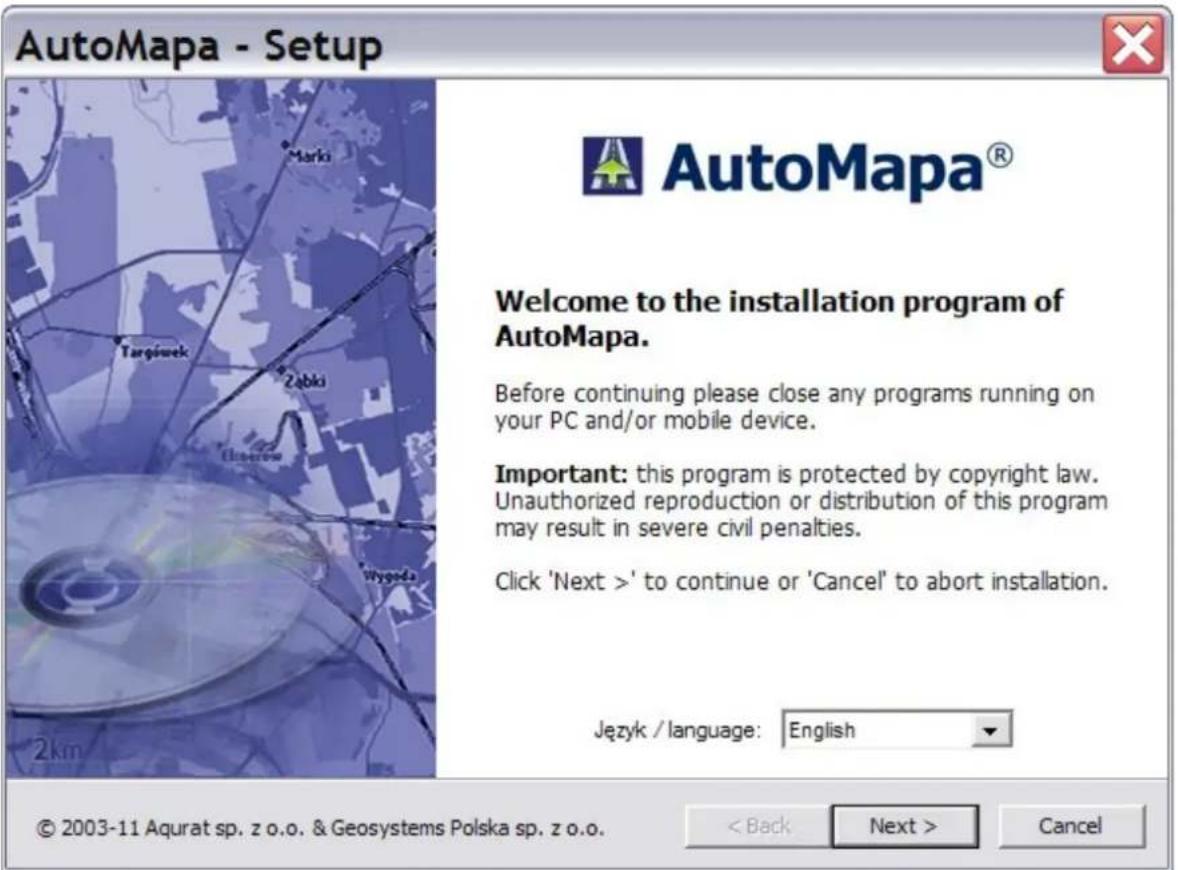
1.4.1 Start installation
text_image
AutoMapa - Setup Marki Targimek Zabki Glasnera Wygoda 2km AutoMapa® Welcome to the installation program of AutoMapa. Before continuing please close any programs running on your PC and/or mobile device. Important: this program is protected by copyright law. Unauthorized reproduction or distribution of this program may result in severe civil penalties. Click 'Next >' to continue or 'Cancel' to abort installation. Język / language: English © 2003-11 Aqurat sp. z o.o. & Geosystems Polska sp. z o.o. < Back Next > CancelThe first installer message window allows the user to select the installation language. This choice will also determine other language components and messages, which will be suggested by the installer by default.
text_image
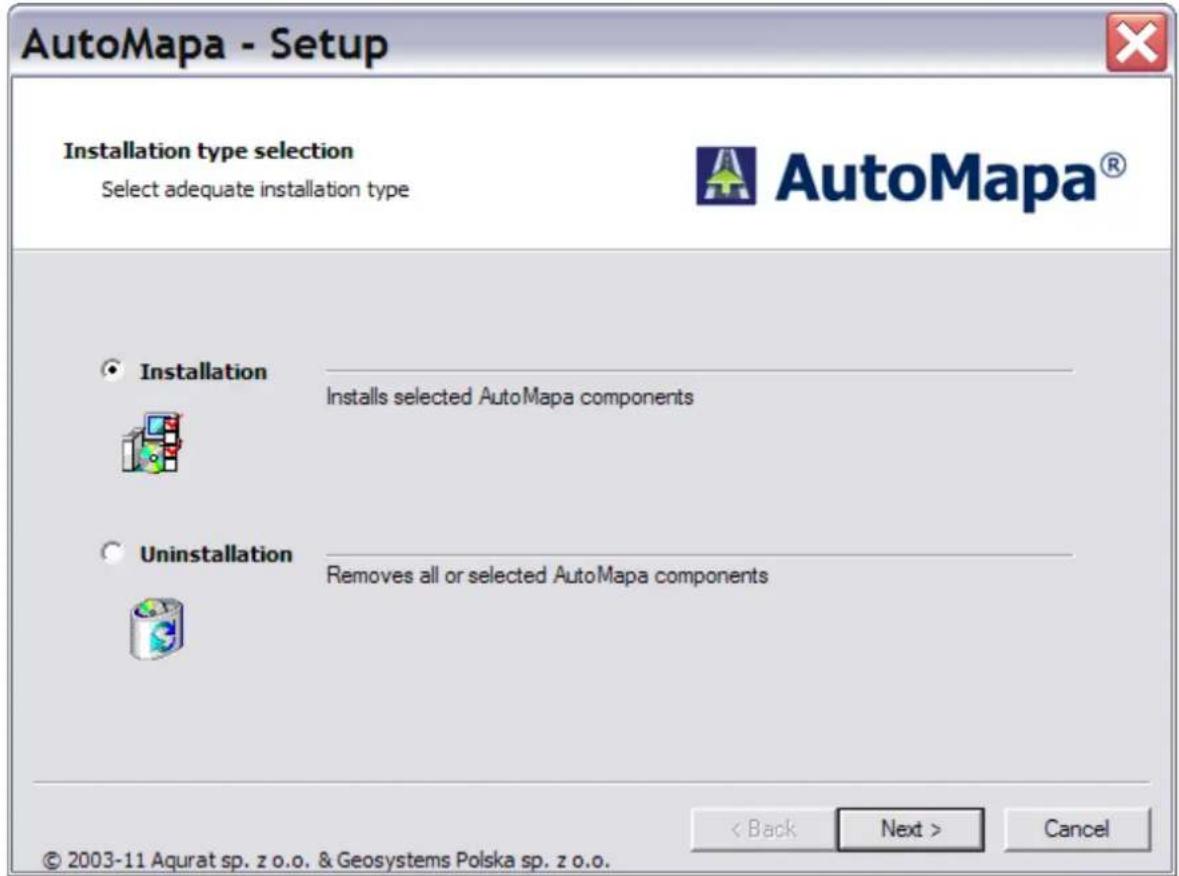
AutoMapa - Setup Installation type selection Select adequate installation type AutoMapa® Installation Installs selected AutoMapa components Uninstallation Removes all or selected AutoMapa components < Back Next > Cancel © 2003-11 Agurat sp. z o.o. & Geosystems Polska sp. z o.o.In the next window, choose installation and continue the process.
text_image
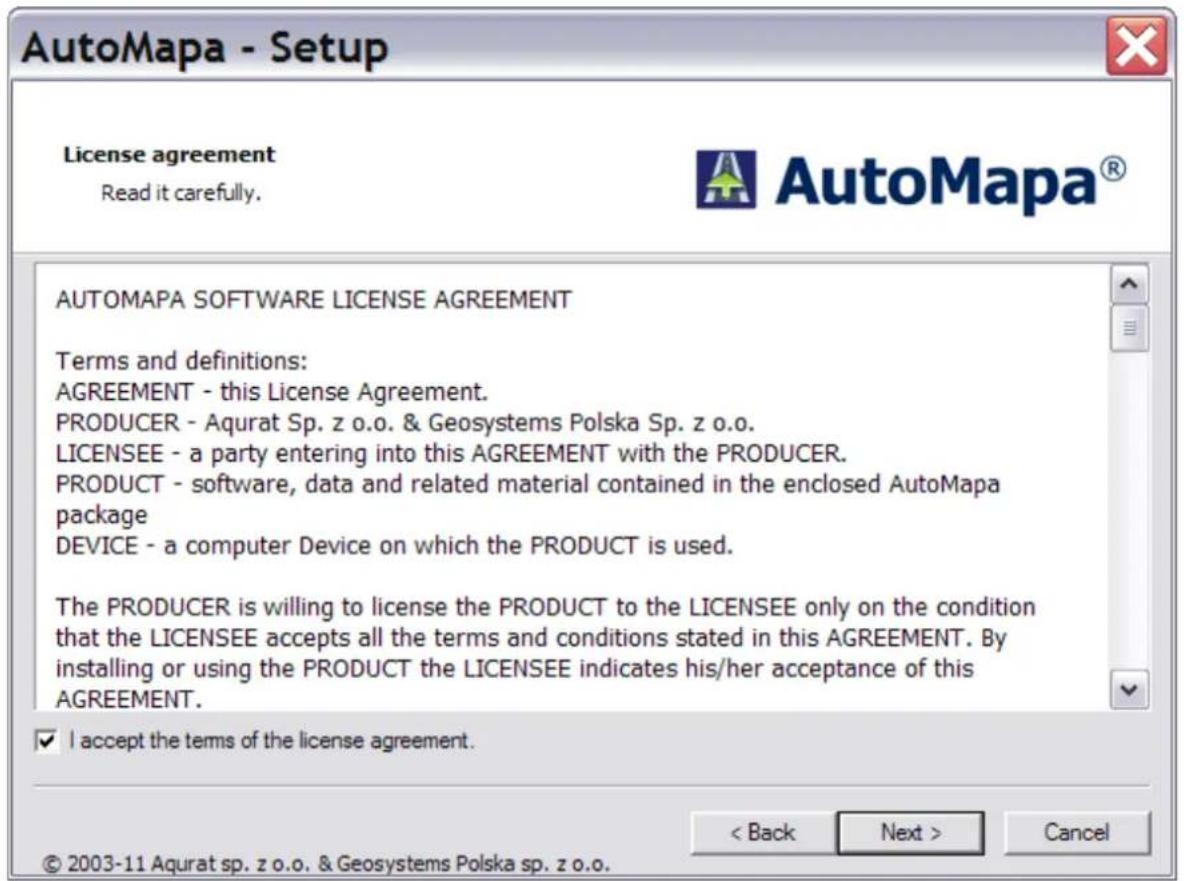
AutoMapa - Setup License agreement Read it carefully. AutoMapa® AUTOMAPA SOFTWARE LICENSE AGREEMENT Terms and definitions: AGREEMENT - this License Agreement. PRODUCER - Aqurat Sp. z o.o. & Geosystems Polska Sp. z o.o. LICENSEE - a party entering into this AGREEMENT with the PRODUCER. PRODUCT - software, data and related material contained in the enclosed AutoMapa package DEVICE - a computer Device on which the PRODUCT is used. The PRODUCER is willing to license the PRODUCT to the LICENSEE only on the condition that the LICENSEE accepts all the terms and conditions stated in this AGREEMENT. By installing or using the PRODUCT the LICENSEE indicates his/her acceptance of this AGREEMENT. ✓ I accept the terms of the license agreement. < Back Next > Cancel © 2003-11 Aqurat sp. z o.o. & Geosystems Polska sp. z o.o.Read the license agreement displayed on the screen and accept the terms of the agreement.
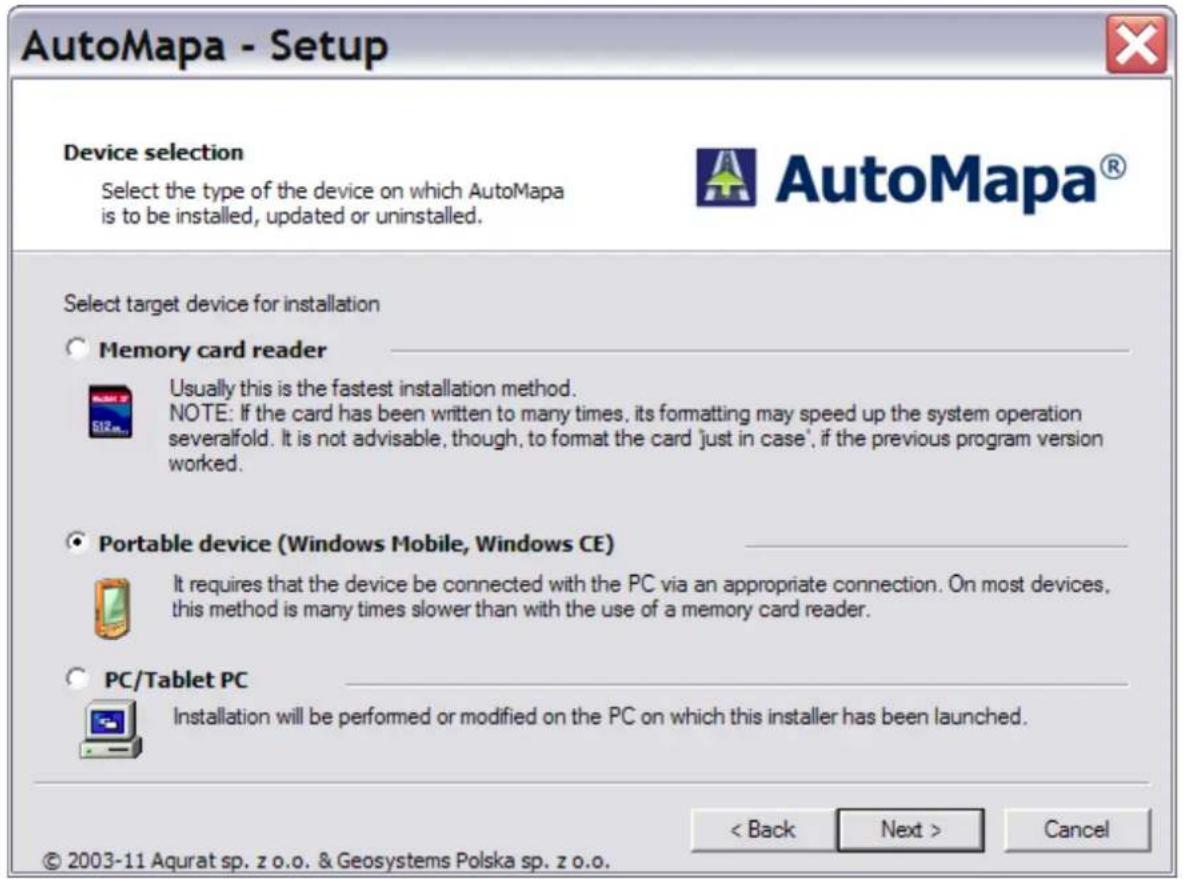
1.4.2 Selection of device
text_image
AutoMapa - Setup Device selection Select the type of the device on which AutoMapa is to be installed, updated or uninstalled. Select target device for installation ○ Memory card reader ● Usually this is the fastest installation method. NOTE: If the card has been written to many times, its formatting may speed up the system operation severalfold. It is not advisable, though, to format the card 'just in case', if the previous program version worked. ○ Portable device (Windows Mobile, Windows CE) ● It requires that the device be connected with the PC via an appropriate connection. On most devices, this method is many times slower than with the use of a memory card reader. ○ PC/Tablet PC ● Installation will be performed or modified on the PC on which this installer has been launched. < Back Next > Cancel © 2003-11 Aqurat sp. z o.o. & Geosystems Polska sp. z o.o.Choose the installation method for Software (choose the device where the program will be installed).
Choose the type of device where the Software program will be installed.
The Memory card reader option will update the version of Software installed on the card placed in the reader.
The Portable device (Windows Mobile, Windows CE) option should be selected if the system is to be installed directly on the device synchronised with your PC. The memory card may be placed in the device (slow installation mode) or in an external card reader (installation time will be identical to that in the "Memory card reader" option).
The PC/Tablet PC option should be selected if you want to install Software on the computer where the installation process has been initiated.
Note: Under the license, the program may be installed on one computer only. After the maps have been registered on a PC, you will be unable to activate them again on a portable device – and vice versa.
text_image
AutoMapa - Setup A program will be started on the mobile device, which may require user attention Press 'Next >' to continue. Next >
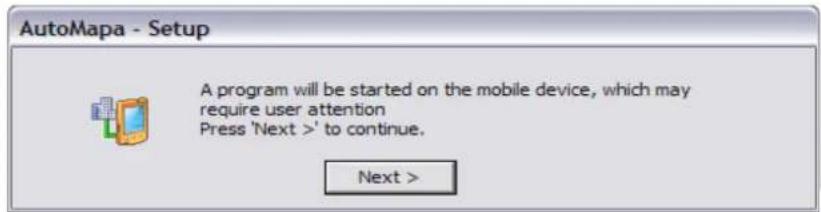
When a portable device has been selected (depending on the system version), you may receive a warning message prompting the user to check the connection with the portable device. After pressing the "Next>" button, pay attention to any messages which require the user's acceptance (they usually inform the user of attempts to start the program).

text_image
Start środa 25 kwietnia 2007 Tap here to set owner information No unread messages No tasks No upcoming appointments Device unlocked ...PPCInterface.dll Starting this program requires a component from an unknown publisher. You should start the program only if you trust the component's publisher. Do you want to continue? Name: ...PPCInterface.dll Publisher: Unknown Location: Yes No1.4.3 Selection of installation location
text_image
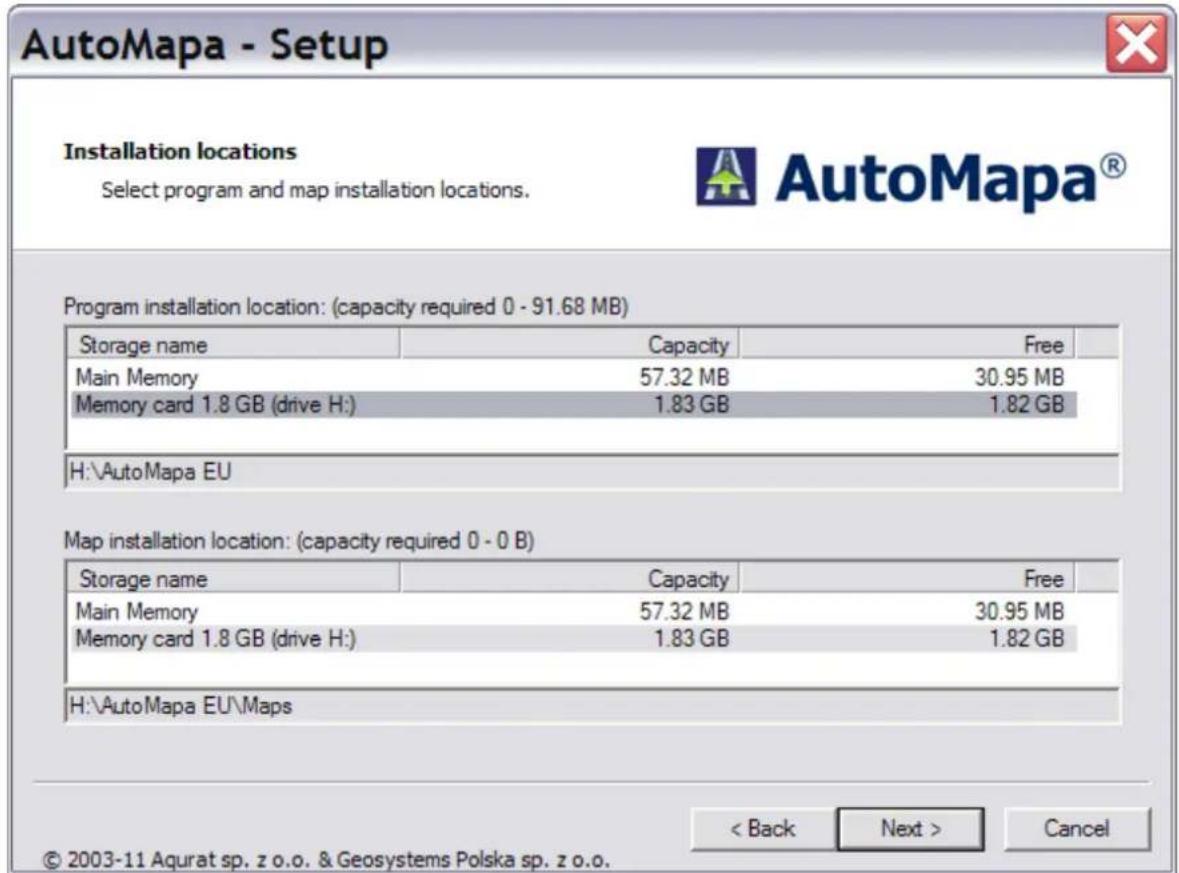
AutoMapa - Setup Installation locations Select program and map installation locations. Program installation location: (capacity required 0 - 91.68 MB) Storage name Capacity Free Main Memory 57.32 MB 30.95 MB Memory card 1.8 GB (drive H:) 1.83 GB 1.82 GB H:\AutoMapa EU Map installation location: (capacity required 0 - 0 B) Storage name Capacity Free Main Memory 57.32 MB 30.95 MB Memory card 1.8 GB (drive H:) 1.83 GB 1.82 GB H:\AutoMapa EU\Maps < Back Next > Cancel © 2003-11 Aqurat sp. z o.o. & Geosystems Polska sp. z o.o.In the next screen, the user is asked to select the location for installing the program and the maps. To install the program and the map on a PC/TPC platform, select the drive and the directory to which those components will be installed.

If the program is installed on a portable device, this step involves the selection of portable device memory where the program and the maps will be installed. By default, all components will be installed on the memory card. If the memory card is inserted into the card reader of a PC, it will be suggested as the location for program installation (during the installation process, the user will be asked to move the card to the portable device). If there are several cards in the reader/readers of a PC, select one by clicking on the appropriate name displayed on the installer screen.
Note: In case of the portable computer setup, we recommend installation on a memory card. By placing the memory card in a card reader connected directly to a PC, you can speed up the installation process several-fold.
Note: PenDrive devices and USB memory keys may be recognized as memory cards, so make sure that the right device is selected.
Note: Before installing Software, it is recommended that the memory card be formatted, after first backing up any important files it holds in a secure location. By formatting the card before the installation, you may significantly speed up the operation of the program.
Note: In case of devices which are not connected to a PC via ActiveSync (e.g. Nokia 500), the memory card should NOT be formatted because it would erase the files necessary for the update and the reinstallation would require contact with the device manufacturer's service.
1.4.4 Selection of program components
text_image
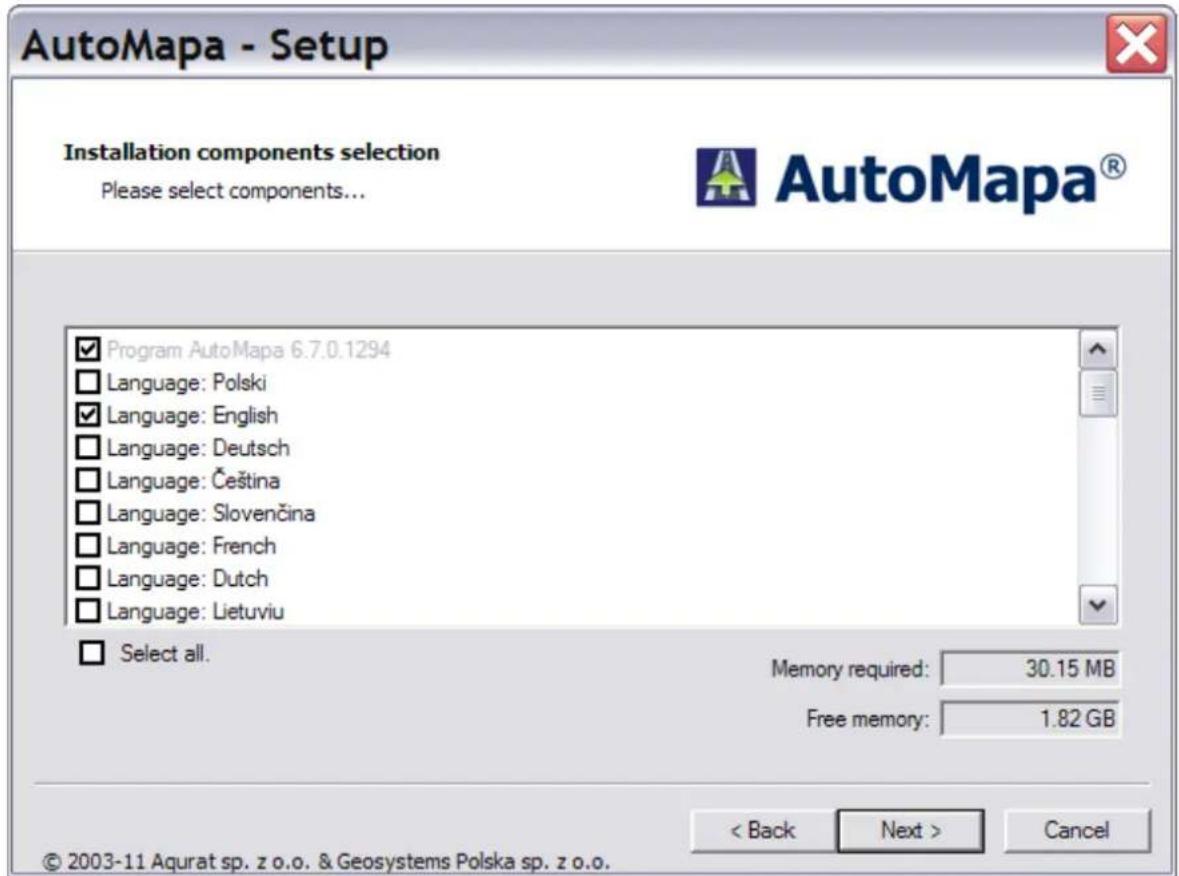
AutoMapa - Setup Installation components selection Please select components... ✓ Program AutoMapa 6.7.0.1294 Language: Polski ✓ Language: English Language: Deutsch Language: Čeština Language: Slovenčina Language: French Language: Dutch Language: Lietuviu Select all. Memory required: 30.15 MB Free memory: 1.82 GB < Back Next > Cancel © 2003-11 Agurat sp. z o.o. & Geosystems Polska sp. z o.o.On the next screen, the user can select components to be installed or updated. Additional program languages, skins and colours of program windows, message voices, additional icons and POI (Points of Interest) warning sounds can also be selected at this stage.

The plugin on the "Today" screen installs a convenient desktop shortcut to Software.
The wake-up control plugin supports the process of waking up the device from stand-by mode when Software is active. It should be installed every time.
SD AutoStart installs in the memory card a special directory, which recovers the Software system after the loss of data from the device (e.g. after a hard reset).
Note: the system can be recovered only if the program is installed on the memory card and only in devices operating with the Windows Mobile system.
NavRoad Autostart installs the application required to start Software on NavRoad devices.
Nokia330 Autostart installs the application required to start Software on Nokia 330 devices.
1.4.5 Selecting the map for installation
text_image
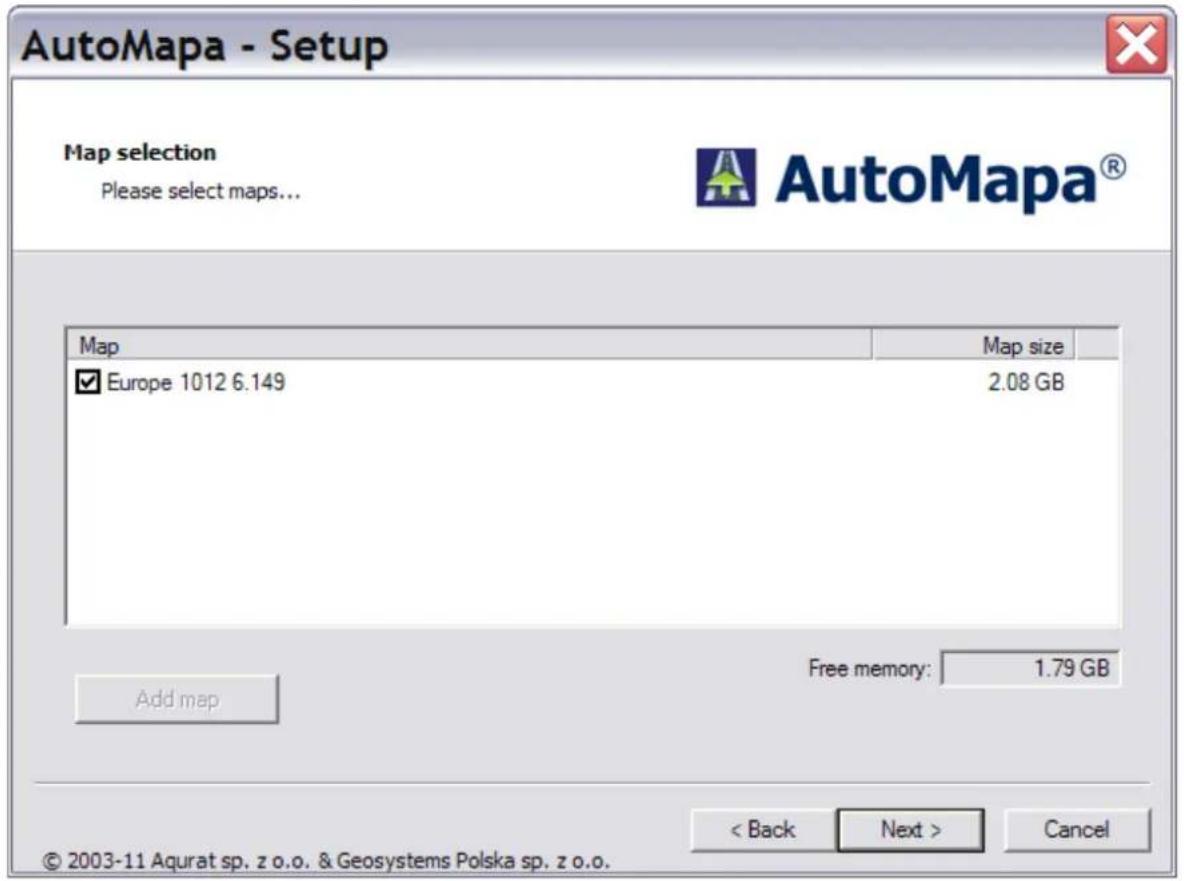
AutoMapa - Setup Map selection Please select maps... Map Europe 1012 6.149 Map size 2.08 GB Free memory: 1.79 GB Add map < Back Next > Cancel © 2003-11 Agurat sp. z o.o. & Geosystems Polska sp. z o.o.On the next screen, select the map for installation. The indicated map size means total size. At subsequent stages, you will have the option of installing selected fragments of the map, which will substantially reduce the memory requirement.
1.4.6 Map registration
text_image
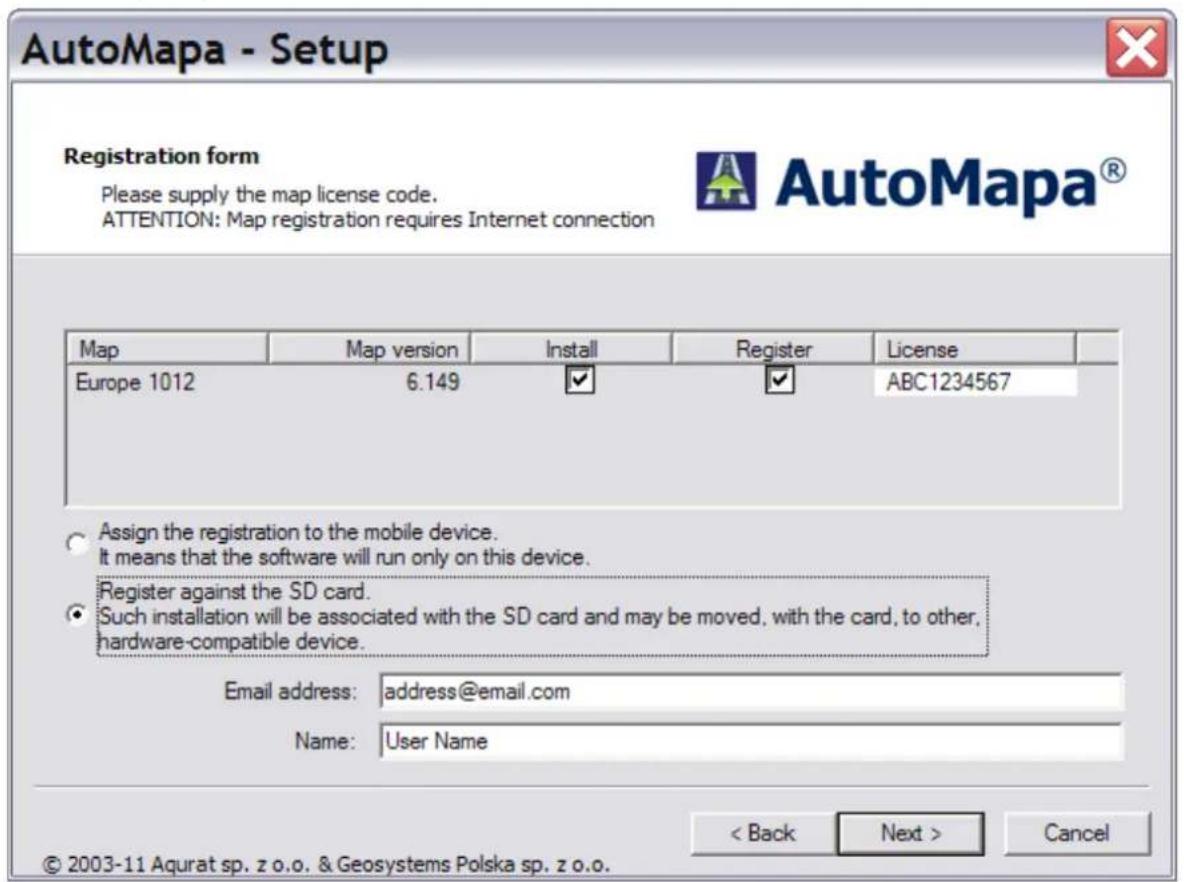
AutoMapa - Setup Registration form Please supply the map license code. ATTENTION: Map registration requires Internet connection Map Map version Install Register License Europe 1012 6.149 ✓ ✓ ABC1234567 Assign the registration to the mobile device. It means that the software will run only on this device. Register against the SD card. Such installation will be associated with the SD card and may be moved, with the card, to other, hardware-compatible device. Email address: address@email.com Name: User Name < Back Next > Cancel © 2003-11 Agurat sp. z o.o. & Geosystems Polska sp. z o.o.On the next screen, you can register the map. Enter the license number, which is found on the license card, your e-mail
address and full name. If possible, you are advised to always use the same e-mail address, which will facilitate access to registration data in the Software licensing system. Registration data is saved on the carrier with the map after the first installation. If the map is re-installed (e.g. a larger map section) on the same carrier, you will not be asked to re-enter the same data.
Note: the license card or the memory card on which Software was purchased constitutes a proof of software license. Make sure that it is stored in a safe place.

The "Assign registration to SD card" option enables the user to assign the registered maps to an SD card, and not the portable device. This means that the program installed on the card will also work on other devices (with the same operating system, unless you reinstall only the software for the second device).
Note: if you are performing the installation on a card in the PC card reader, the installer will ask you to move the card to the portable device, and after completing the registration process you will be asked to return the card to the PC card reader.
At a subsequent stage of the installation process, you may be asked to pay attention to the portable device to accept the displayed messages.
1.4.7 Selecting map area for installation
text_image
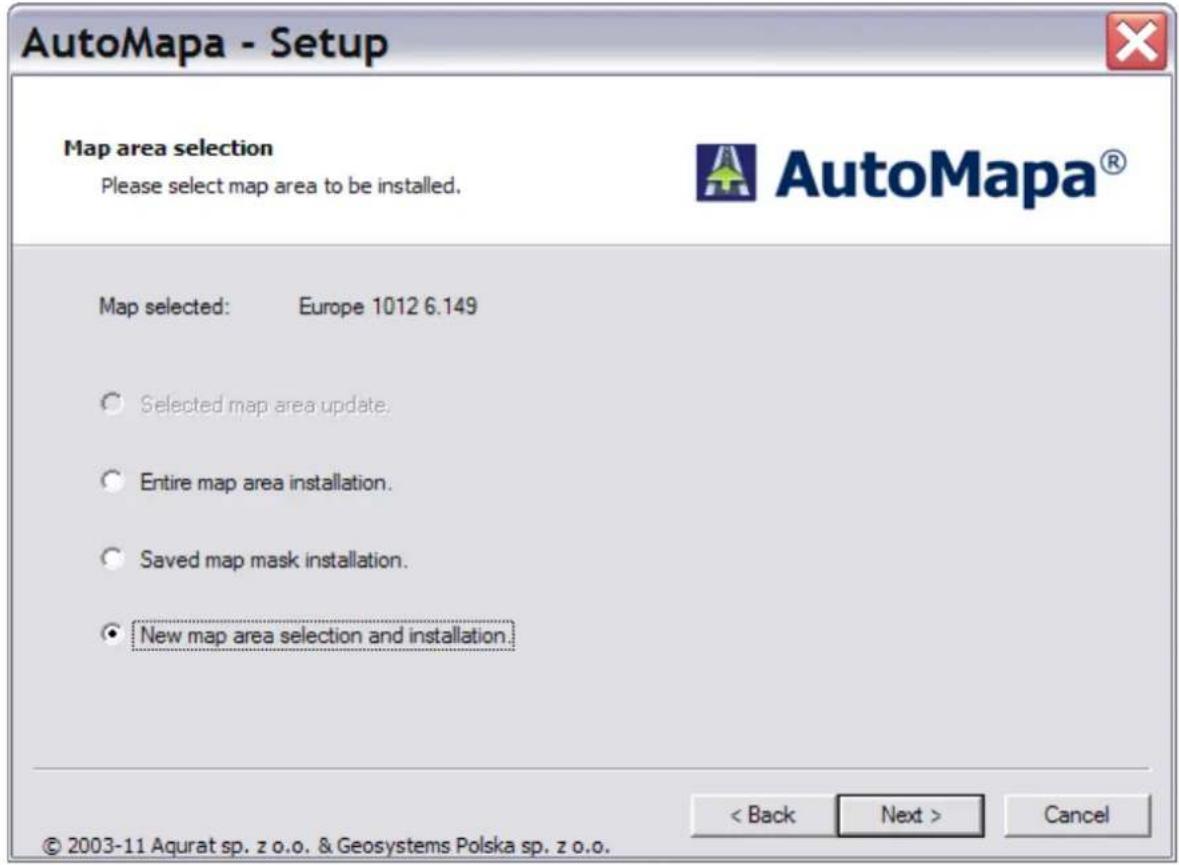
AutoMapa - Setup Map area selection Please select map area to be installed. Map selected: Europe 1012 6.149 Selected map area update. Entire map area installation. Saved map mask installation. New map area selection and installation. < Back Next > Cancel © 2003-11 Agurat sp. z o.o. & Geosystems Polska sp. z o.o.When the map registration has been completed, the user can decide to install the entire map area or only a section. With the area editor you can select a given map section and perform one of the actions below:
- Updating the selected area.
If the map has already been installed, this option enables the user to install the same fragment of the map, e.g. for upgrading.
•Installing the entire selected area.
This option installs the entire available map.
- Installing a previously defined map fragment.
This option enables the user to read in a previously saved mask (definition of a map fragment) and use the area editor to modify the saved area.
- Selecting and installing a new map fragment.
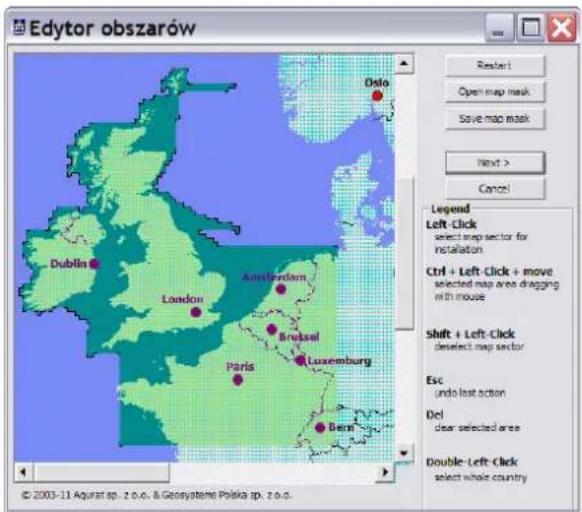
This function activates the area editor, which enables the user to select the map fragment for installation with the use of a mouse. The defined section can be saved as a
text_image
Edytor obszarów Reset: Open map mask Save map mask Next > Cancel Legend Left-Click select map sector for installation Ctrl + Left-Click + move selected map area dragging with mouse Shift + Left-Click deselect map sector Esc undo last action Del clear selected area Double-Left-Click select whole country © 2003-11 Agurat sp. z o.o. & Geosystems Polska sp. z o.o.mask for future use. Map sections are selected as rectangular areas on the map.
1.4.8 Copying files
text_image
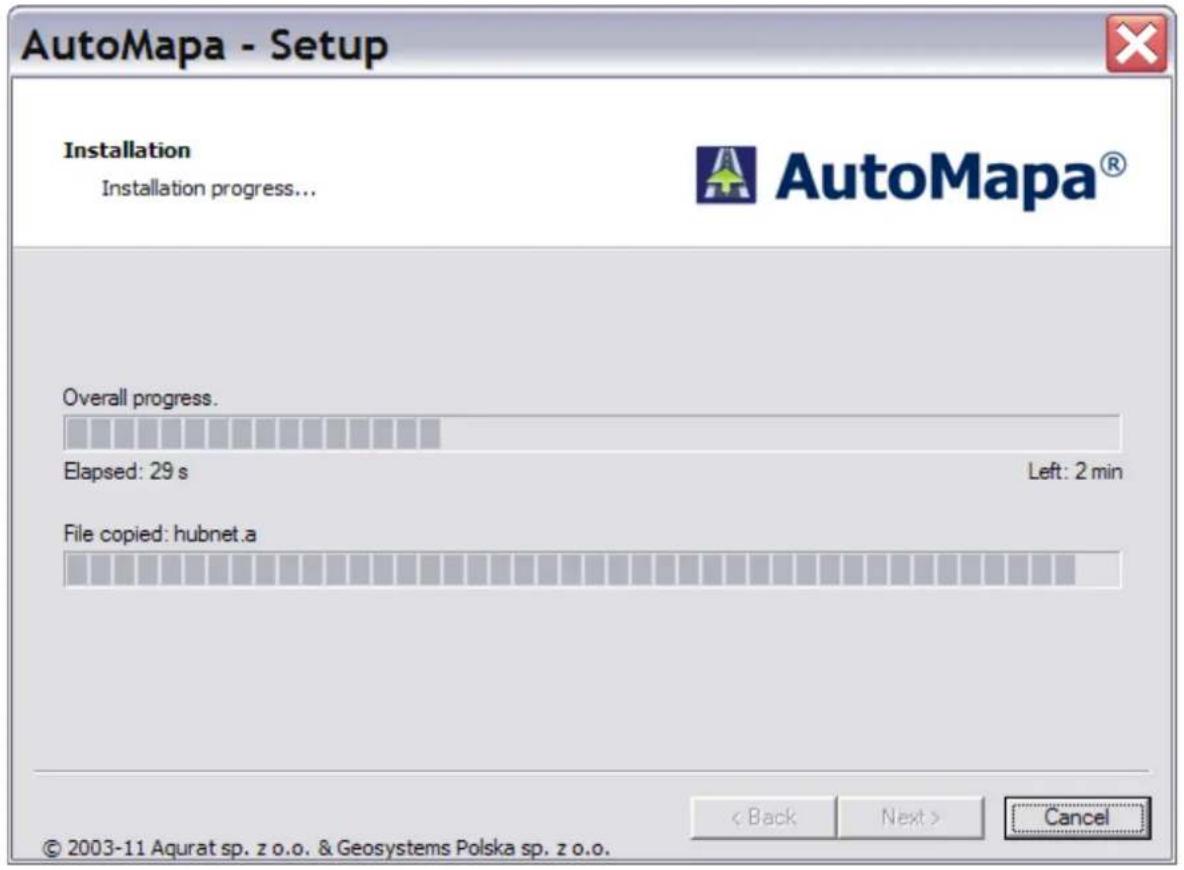
AutoMapa - Setup Installation Installation progress... AutoMapa® Overall progress. Elapsed: 29 s Left: 2 min File copied: hubnet.a < Back Next > Cancel © 2003-11 Agurat sp. z o.o. & Geosystems Polska sp. z o.o.After the map areas have been selected, the file copying process is initiated.

The user may be asked to pay attention to the portable device to accept the displayed messages.
If the program is installed on a memory card in the PC reader, the user will be asked to move the card to the reader in the portable device.
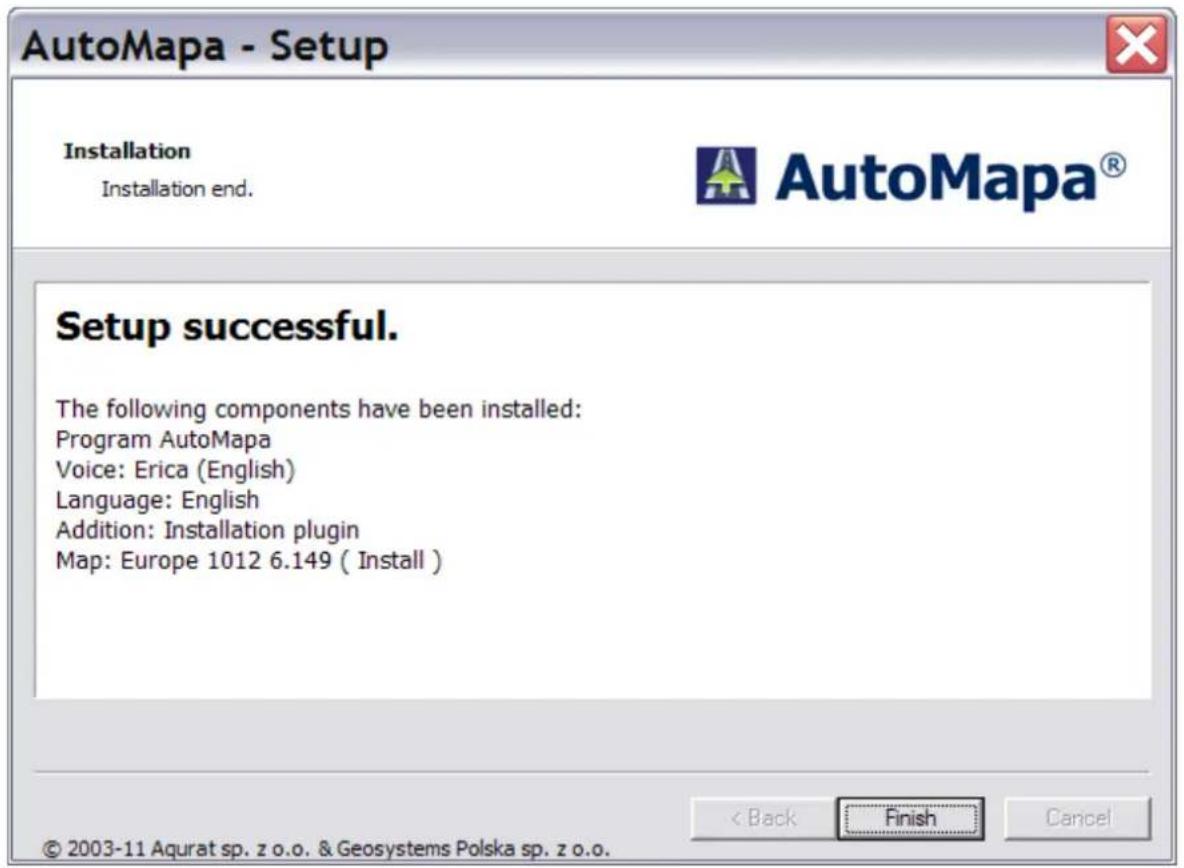
text_image
AutoMapa - Setup Installation Installation end. AutoMapa® Setup successful. The following components have been installed: Program AutoMapa Voice: Erica (English) Language: English Addition: Installation plugin Map: Europe 1012 6.149 ( Install ) < Back Finish Cancel © 2003-11 Agurat sp. z o.o. & Geosystems Polska sp. z o.o.The final screen displays a list of installed program components and maps.
1.5 Connecting the portable device to the PC
To establish a working connection between the portable device and the PC, install Microsoft ActiveSync software. This application can be downloaded from the Microsoft website.
After installing ActiveSync, connect the portable device to the PC with a USB cable and make sure that the connection has been established by monitoring the ActiveSync application window.
In case of devices which are not connected to a PC via ActiveSync, install Software on a clean memory card using the card reader in the PC.
1.6 Possible installation problems

If the installation process ends with an error message, first perform the following:
- check the connection between the portable device and the PC
- reset the portable device
- format the memory card
1.7 Maps and program update
The update is performed in the same way as the installation. The installer automatically detects whether previous program versions have been installed. On the screens with components and maps selection, the installer will display the versions of the installed files and - if they are older than the files that are being installed - will offer to update them.
1.8 Uninstallation
You can remove the program installation from your computer by selecting the appropriate option on the second installer screen. You will be asked to select the components and maps to be removed.
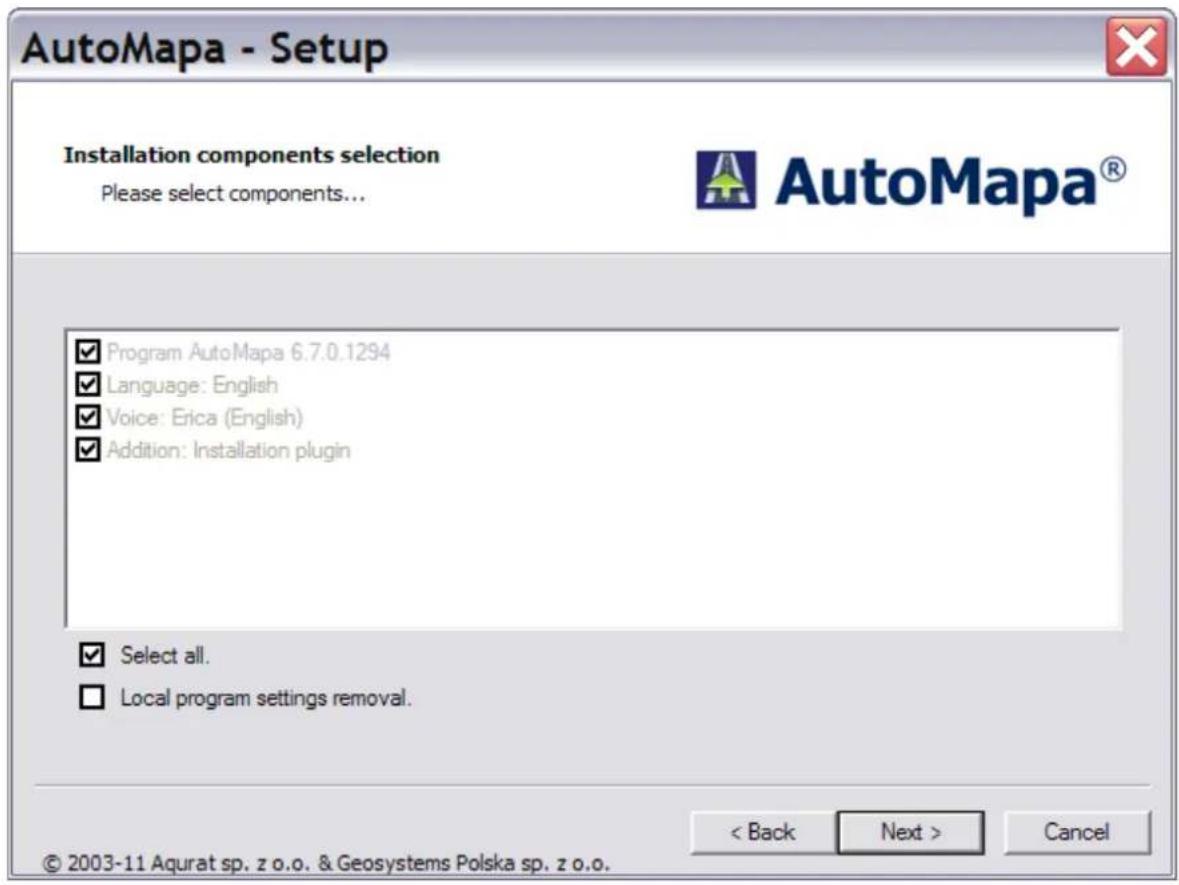
text_image
AutoMapa - Setup Installation components selection Please select components... ✓ Program AutoMapa 6.7.0.1294 ✓ Language: English ✓ Voice: Erica (English) ✓ Addition: Installation plugin ✓ Select all. □ Local program settings removal. < Back Next > Cancel © 2003-11 Agurat sp. z o.o. & Geosystems Polska sp. z o.o.1.9 Structure of the program and map installation
1.9.1 TPC/PC
On computers with Windows 2000/XP/Vista/7 operating system, AutoMapa is installed by default in the C:\ProgramFiles\AutoMapa EU directory, and maps are installed in the C:\ProgramFiles\AutoMapa EU\Maps directory.
The installer creates a shortcut to the program in the "AutoMapa EU" group, which can be accessed by choosing Start|All Programs.
1.9.2 PPC2003/WM5/WCE devices

On portable devices (with Windows Mobile 2003/Windows Mobile 5/Windows CE.NET 5.0 operating system), AutoMapa is installed by default in the [Memory card]AutoMapa EU directory, and maps are installed in the [Memory card]AutoMapa EUMaps directory.
The installation directory always contains two EXE files: AutoMapa EU.exe (responsible for preparing AutoMapa for start) and the actual executable program file (its name is subject to the selected platform type). To optimise program operation, the executable program file is copied from the card to the main memory of the portable device, where it is saved in the "AutoMapa EU" directory (only if the program is installed on the memory card).
The program which supports the process of waking up the device from stand-by mode and the components of shortcuts on the Today screen are installed in the Windows directory (only for PPC/WM5 platforms).
The program shortcut is also installed in the Start|Programs menu.
Recovering the installation after a hard reset of the device
If AutoMapa has been installed on the memory card (refer to the point below), and the device was reset to factory default settings, the user will lose only the shortcut for activating the program in the "Start" menu, the shortcut on the Today screen and the program which supports the process of waking up the device with active AutoMapa.
To recover the above components, run the installation program and reinstall those components. You do not need to reinstall the program or the maps.
Note: The "SD AutoStart" component safeguards the user against the above loss, but only if the program has been installed on a memory card.
Locating the program and the maps
The system prefers full program and map installation on a memory card. Alternatively, the program can be installed in device memory, and maps – on the memory card. If the map fragment selected for installation is sufficiently small, and the portable device memory is sufficiently large, the map can also be installed directly in device memory.
The following guidelines should be observed:
- In devices with Windows Mobile 2003 operating system, device memory is reset after a hard reset and when the battery is completely discharged (a highly unpractical solution). If the program is installed in device memory, the user will lose all system settings, including favourite points, POI, etc., after a reset (even though such files can be moved manually from the memory card by copying the "Data Files" directory to the card and by reading in the respective files to screens which describe the settings). Nevertheless, device memory is a much faster memory carrier than memory cards.
- In devices with Windows Mobile 5 operating system, the device memory is a built-in flash card. The memory is not formatted after battery discharge, but it is formatted after a hard reset. In some devices, built-in memory may have lower read-out parameters than fast SD cards.
- In devices with Windows CE.NET operating system, device memory may be formatted after the device is disconnected from the supply source. For this reason, the installer prevents AutoMapa from being installed in the main memory of such a device.
- The only situation which justifies the installation of the program in the main memory of the device is the installation of map fragments on many memory cards (if the user does not have a single card capable of accommodating the given map set or fragment).
1.9.3 Other directories
After the first start of the program, the following folders: Profiles | Personal | Data Files and | Settings Files, containing, respectively, user data (location of Home and Work points, POI, favourites, last visited, POI categories with warning messages, assigning system functions to keys, etc.) and system settings (GPS, interface, route settings, etc.) will be created in the installation folder.
"Icons" and "Voices" folders, which contain files whose names correspond to POI categories, can also be created in the installation folder (if not created by the installer):
- .BMP bitmaps (16x16 pixels with 8-bit colour palette) used as icons for the given POI category (on the map and in selection lists)
- .WAV files (preferably 22 kHz/8-bit/mono) used as warning messages for the given POI category.
The user can also change the default look of the GPS cursor by creating a subfolder named Images (similar to Icons and Voices folders) in the program folder and copying there the respective prepared bitmaps with the following names:
for 2D mode -> car2D.bmp
for 3D mode -> car3D.bmp
Additionally, the user can select separate versions for night mode skins:
car2D_night.bmp
car3D_night.bmp
The optimal format is 256 colours without RLE compression. The bitmap size is not limited, and the file is displayed in the original size, without any scaling.
White pixels (RGB - 255,255,255) are not displayed and remain transparent. This default "transparent" colour setting can be changed by creating the following file(s) in the Images folder:
car2D.bmp.settings car3D.bmp.settings
with entry:
crTrans=R G B
where R, G, B means colour codes, from '0 0 0', i.e. black, to '255 255 255', i.e. white.
The bitmap location on the map can be adjusted vertically by the following entry:
iAltGPSMarkerBottomMargin=X (in the same file),
where X means the vertical shift of the bitmap centre in respect of the bottom margin (0 - on the margin). Default shift value (no entry) is 24 pixels.
2 Basic functions of the system
This section describes the basic functions of the system and provides information on how to start using and efficiently navigating the main program options.
2.1 Program start-up
Following the successful installation and registration of the program and the maps, the program is ready to use. Its start-up method depends on the type of the navigation device. On a typical PocketPC portable device, you can run the program by selecting it from the "Start" menu or directly from the start screen. If the map has not been registered, the program will display the relevant request upon start.
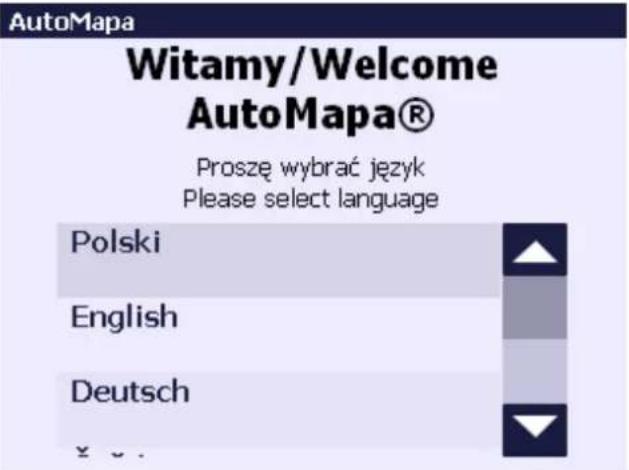
After the first start-up, the display will show a language selection screen for the program interface (the screen is displayed only if more languages have been installed).
Then, after the first start-up, a window will be displayed asking the user to choose a profile. Profiles store settings and they enable the user to quickly switch between groups of settings (e.g. for driving a company truck and a private car). When the "Use as default profile" option is selected, the settings from the chosen profile will be loaded automatically every time the program starts, and the user will not be prompted to select a profile.
You can save personal settings in profiles

Passenger

Truck

Off road

Use as default profile
(do not ask on startup anymore)
The "AutoMapa - Warning" screen
Then the "AutoMapa - Warning" screen will be displayed, containing information and instructions regarding safety of use when driving. After reading its contents, tap the OK button located at the bottom left corner of the screen to continue. To disable the display of the message at the next start-up, check the "Do not show this again" box at the bottom corner of the screen.
? AutoMapa - Warning
IMPORTANT
When using your AutoMapa GPS in a vehicle, it is your sole responsibility to place, secure, and use the device in a manner that will not cause accidents, personal injury or property damage, or in any manner obstruct your view.
The user of this product is solely responsible for observing safe driving practices, road signs and driving regulations. Do not change AutoMapa settings while driving - park the vehicle first.
OK
Do not show this window
Configuring AutoMapa Traffic
The AutoMapa Traffic system enables users to avoid traffic jams by processing real data on the anticipated driving speeds on the roads. The system relies on both statistical information (collected over longer periods of time) and online data, which are collected and sent regularly.
The basic parameters of AM'Traffic can be configured in the configuration window displayed upon the first start-up.
When the SmartRoutes (tm) option is selected, the traffic jam avoidance mechanism is activated, and routes are mapped by relying on traffic and jams statistics.
By choosing the LiveDrive! (tm) option, the user activates a mechanism that avoids traffic jams by mapping routes based on online data (3G/HSDPA). The LiveDrive! (tm) option may imply additional data transmission charges quoted by the telecommunications operator.
In devices without the Internet access, SmartRoutes (tm) data can be synchronised with the use of the Amcenter application, which can be downloaded at http://www.AutoMapa.pl/, the "Support" - "Current release" section, and http://www.miplo.pl/.
Detailed information can be accessed by tapping the "Details" button.
AutoMapa Traffic setup

Enable SmartRoutes™
When determining routes, it takes into account places where the traffic jams occur, and how often.
Enable LiveDrive!™
Avoid traffic jams and obstacles with information downloaded online (3G/HSDPA)
Remind me in a couple of days
Details

AutoMapa - Question

Connections with the server, required for LiveDrive!™ service operation, may cause charges for data transfer being imposed by the ISP.
Are you sure you want to enable LiveDrive!™?

Welcome screens
The display will show a welcome screen with fast access to selected program options, allowing the user to start navigation, start map browsing or specify the connection parameters of a GPS receiver.
Go to - opens a destination selection menu that allows you to immediately start navigation (upon correct configuration of GPS device).
Usually, the device is detected automatically. If that is not the case, manually configure the relevant parameters (port number and baud rate) and, for an external GPS device, make the relevant connections (applies also to Bluetooth connection). The method and the correct parameters of the connection should be described in the device's documentation.
Map - map browsing mode. This option offers the best introduction to the application, and as such is recommended for new users.
Welcome to AutoMapa

Go to
Select your destination and find the route based on current GPS position

Conf. GPS
Properly connected and configured GPS receiver is needed for the navigation. Set it up manually if GPS is not detected automatically. (COM4, off)

Map
Go to map browsing. You can use it like a traditional paper map.
Do not show this again
To disable the display of the welcome screen at each start-up, check the "Do not show this again" box.
2.2 Simplified and Expert menu
By default, program runs in simplified interface mode with access only to the most important system options. To enable/disable simplified mode, select "Simplified menu" from the main menu of the application.
The differences between the two modes consist in the number of options available in the route menu, POI menu and "Go to" menu.
2.3 Main menu and map buttons
2.3.1 Map buttons
The screen shows 4 buttons at the bottom of the displayed map, of which two main buttons are:

in the bottom left corner of the screen, which opens the main menu.

in the bottom right corner of the screen, which opens the context menu of the selected point on the map and is equivalent to tapping and holding the pen on the screen.
Moreover, the map features also the following buttons:

Telephone support option (for select devices only).
Sound enable/disable. Hold the button to display the volume slider instead of the scale slide rule.
This switch shows the distance to the nearest route point/destination. It is displayed only after adding THROUGH points.
Sequential switch between the following modes: 2D and 3D. Hold the 3D button to display the slider controlling the 3D buildings blocks height instead of the scale slider.

On-screen button switch – Enables/disables semi-transparent on-screen buttons. Hold it to switch the map move/zoom mode.

Fast change of scale in the navigation mode. Available option: town (zoom-in), outside town (zoom-out), overview (region).

Enabling of disabled navigation mode, e.g. by map scrolling or GPS shut-down.
Jeżyce, Poznań, PL
Information on the current position (in accordance with the GPS localization), or description of the point selected on the map.

Opens the AM'Traffic system statistics window. No data to send.

Opens the AM'Traffic system statistics window. Communicating with the server - sending or receiving data.

Opens the AM'Traffic system statistics window. The system is active, data are collected for the next transfer session.

Opens the AM'Traffic system statistics window. The previous attempt to receive or send data failed.
Information on current position
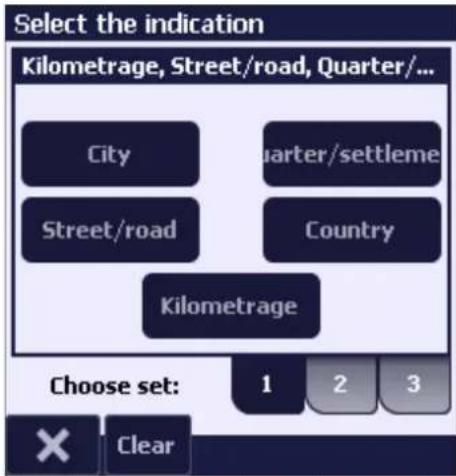
The information panel indicates the location and the current position (GPS-based) or describes a point selected on the map.
By tapping on the panel, the user opens a window where the type of displayed information can be selected (by clicking on a button representing a given type of data).
The button representing a given type of data is deselected by clicking on the "Clear" button.
The program enables the user to save three defined sets of data displayed in the panel (the user can navigate between the sets by clicking on the number of the set).
2.3.2 Main menu
The main menu features the key options for operating the AutoMapa system.
Some options are marked by a small rectangle on the left, which resembles a diode light. When greyed out, the rectangle indicates that the given option is not active at the moment. When the rectangle is lit blue, the given option is active.
The menu features two screens – you can move between them with the use of < and > buttons on the bar at the bottom of the screen. Press the X button to exit the menu.
Other main menu options:

Options – enables/disables the onboard computer, night mode, sounds, pilot and screen pivot.

Turn off GPS - Turn on/off GPS (in Expert mode, this menu is replaced with "GPS" option, which opens the GPS menu).
POI – opens the POI menu with configuration of POI warnings, parameters of POI display or POI management.

Settings - opens the settings menu. Refer to the "Settings" chapter.

Opens the "Go to/Search" menu, as discussed in the "»Go to« menu and searching destinations - searching for addresses and points' section.

Opens the "Route" menu, where the user can perform operations on the mapped route, change the route type and set up roadblocks.

Simplified menu - enables/disables the simplified menu.

AM'Traffic - Opens the AM'Traffic menu.

Accident - Opens the Accident menu.
text_image
Select the indication Kilometrage, Street/road, Quarter/... City Quarter/settleme Street/road Country Kilometrage Choose set: 1 2 3 × Clear
Full content of help and program operating instructions, as well as information about program version and manufacturers, license agreement text, information about the loaded map, system license owner's data.
Context menu is available on most of the screens by clicking the icon.

Minimize - hides the program. The application will operate in the background; to re-open the program on portable devices, select the AutoMapa shortcut on the screen or in the "Start" menu. This function can be assigned to a hardware button (refer to "Settings: Buttons").

End - closes the program. This function can be assigned to a hardware button (refer to "Settings: Buttons").
2.4 Map
Program can be operated in three modes:
• the map view mode – with the GPS receiver off,
- the show position/tracking mode – with the GPS receiver on but without a mapped route,
- the navigation mode – with the GPS receiver on and a mapped route.
Map view
This is the simplest way of working with Software and it does not require a connection with the GPS receiver. In this mode, the user can view the map, find address points or POI. The user can also map a route between selected points and view the route on the map.
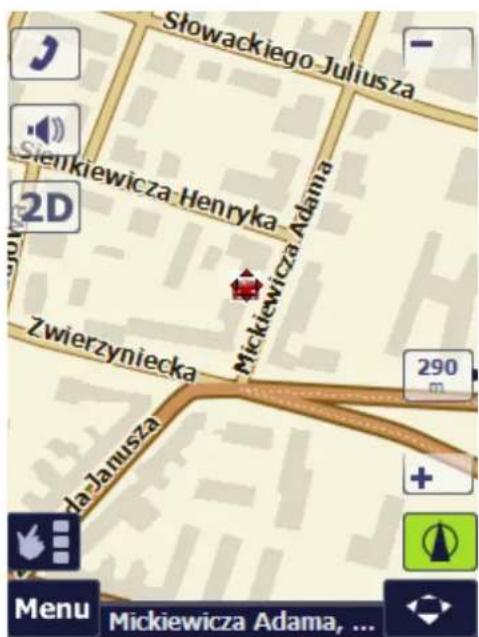
When the user taps on any point on the map or an icon of an object displayed on the map, a "balloon" with a description of the given location will be displayed: the name of the street and town, building address, description of POI or a favourite point. The description is also displayed on the bar located at the bottom of the screen.
Map view 2
The software enables the user to find the searched location in several ways.
One of them involves the use of pen/fingers for scrolling the map and the use of tools for changing the scale in which the map is displayed. This is a good viewing method if the user knows in which area of the map the searched point is located, and place names do not have to be entered in the search window.
Another useful function is the option of magnifying a rectangular section of the map, which can be assigned to hardware buttons. (Refer to: Advanced features and system settings/ Settings menu/Settings: Buttons.
Map scrolling and zooming
Map scrolling allows the user to change the currently displayed section of the map. Each movement of the pen/finger on the screen moves the map in the indicated direction. The scale in which the map is displayed is not changed.
If the user wants to see an interesting map section in greater detail, he/she can grab a rectangular area to zoom in.
By default, the Switch to map scrolling/zooming function is assigned to the screen button, which hides the screen buttons and slider. To toggle between the enlarging and map zooming mode, press and hold this button. The mode and button icon will change.


During map zooming it is possible to change the scale of the map to suit the user's individual requirements. The scale can also be changed with the scale slider.
Scale Slide Rule
The scale Slide Rule is found on the right of the program screen. It is used to smoothly zoom in and out on the screen. If the Slide Rule is moved down, the map will be enlarged to a more detailed view. When the Slide Rule is moved up, it produces the opposite effect – the user zooms out and details disappear.
On the Slide Rule there is a scale, referring to the map width visible on the screen.
The Slide Rule zooms in or out on the map in reference to the navigation point/position cursor, which is marked on the map with the "view finder" symbol. The location of the navigation point/position cursor can be changed by tapping on a selected point on the map.
Note: the 3D mode is automatically deactivated at higher scale values.
A semi-transparent Scale Slide Rule can be hidden/displayed with the on-screen button switch, located in the bottom left corner of the screen.
Compass
The compass is displayed in the upper left corner of the screen as an arrow with the letter "N", pointing to the north.
By tapping on the compass, you will align the top of the map to the north.
By default, this option is turned off.
Directional arrow to route point
The arrow is displayed in the top right corner of the screen and it shows the direction to the next point on the route (this feature is hidden by default).
The above feature can be hidden/displayed in the interface settings in the Settings menu.
2.5 Selecting a point on the map
A point on the map can be selected in a number of ways:
- by holding your finger or the pan tool down on a selected map point,
- by tapping on the "map cursor" icon on the tool bar under the map (unless a different function has been assigned to this option; refer to "Settings: Buttons"),
• by tapping on the "Map point" option in the "Go to" menu, - by pressing the respective hardware key – if this function has previously been assigned to the key (refer to "Settings: Buttons").
By selecting a point on the map, you will open the context menu. You can assign a function to the selected point. The same menu opens up when an object is selected in the options for searching the address, POI, etc. in the "Go to" menu.
2.6 Context menu
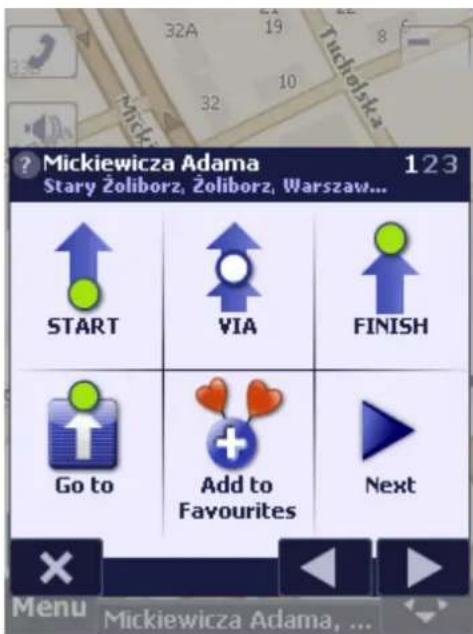
The context menu may cover several pages and the user can move between the pages with the use of arrows located at the bottom of the screen. Its content varies subject to the context, i.e. the type of object for which the context menu opens.
The first page contains route mapping options. The user can activate navigation to a given point and map the route between the user's present GPS position and the selected point ("Go to" option) or can define a given location as one of the route points (start point - "START", end point - "FINISH", or a route point - "STOP").
If the "Go to" option is selected when the GPS receiver is off, the GPS receiver will be activated and it will make an attempt to determine the user's present position.
Context menu 2
The second page of the context menu enables the user to define a selected location as Home, Work or POI. For detailed information, refer to the "Map points" chapter.
The "Show co-ordinates" option will display in detail the GPS co-ordinates of the selected point on the map, and the "Centre on screen" option places the selected point in the centre of the screen.


text_image
Mickiewicza Adama Stary Żoliborz, Żoliborz, Warszaw... 123 START VIA FINISH Go to Add to Favourites Next Menu Mickiewicza Adama, ...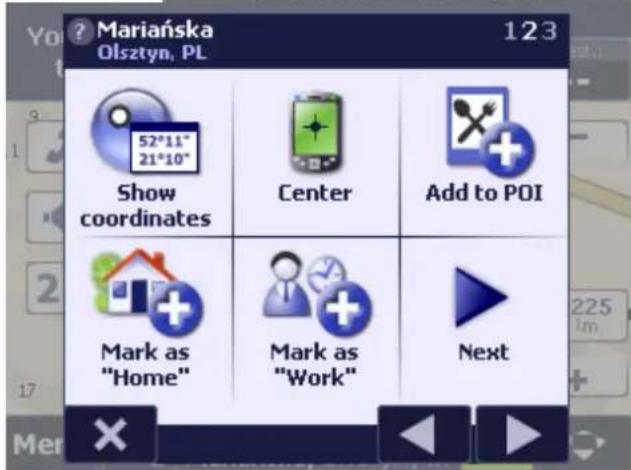
text_image
Mariańska Olsztyn, PL 123 52°11" 21°10" Show coordinates Center Add to POI Mark as "Home" Mark as "Work" NextContext menu 3
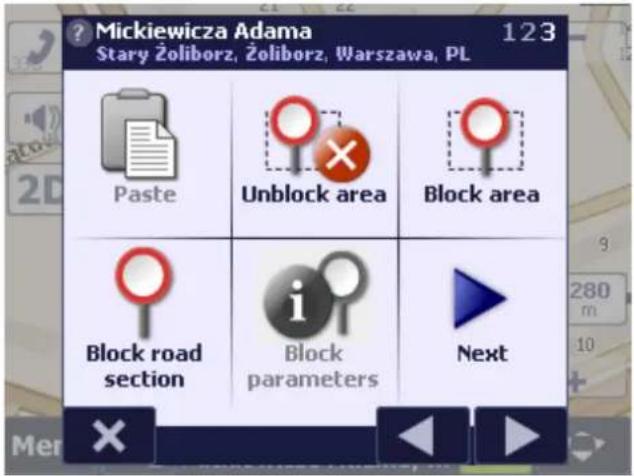
If a road section is selected on the map, the "Block section" option will ban traffic along that route, and that section will be avoided when the route is mapped. If the section was already blocked, it can be unblocked.
Similarly to the section blocking procedure, select the "Block area" option from the context menu. The system will go into map display mode. By marking a rectangular area on the map, the user chooses the blocked area where all sections will be blocked (in line with the principle of blocking sections from junction to junction). A blocked area may be unblocked by choosing the "Unblock area" option from the context menu.
For more information, refer to the "Road blocks" chapter.
Context menu 4
If a favourite point or a POI defined by the user is selected, the point can be moved on the map, deleted or copied with the use of "Copy/Cut/Delete/Paste" options.
text_image
Mickiewicza Adama Stary Żoliborz, Żoliborz, Warszawa, PL 123 Paste Unblock area Block area Block road section Block parameters Next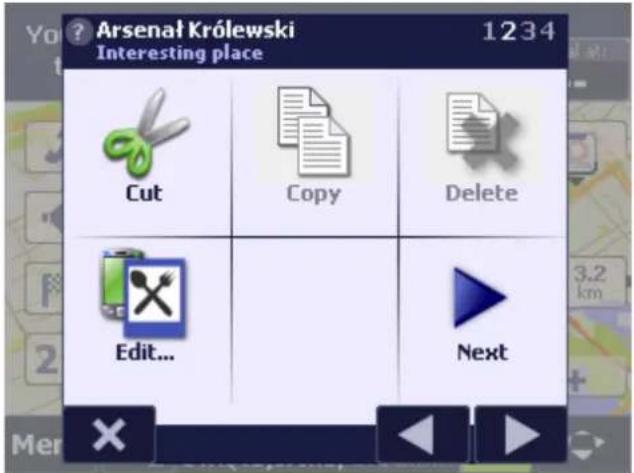
text_image
Arsenal Królewski Interesting place 1234 Cut Copy Delete Edit... Next2.7 Options menu
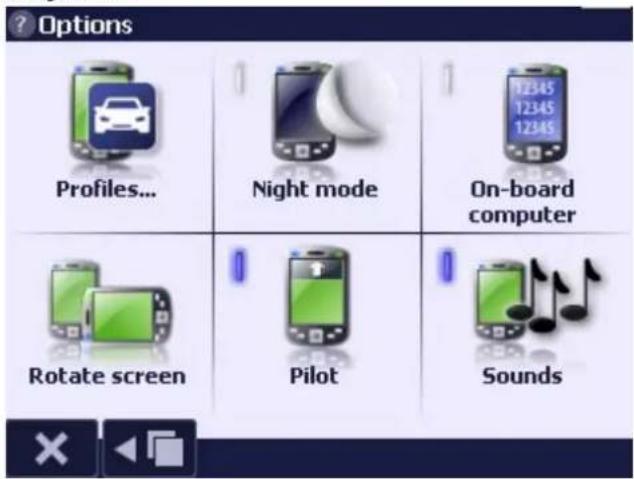
The menu is available from the main menu. It features the following items:
Profiles: opens the profile manager menu. Profiles enable the user to save device settings. The profile manager helps the user to quickly switch between the saved setting groups.
Night mode: select this mode to change the colours of the map to colours more suitable to night-time navigation that do not wear out the eyes and do not dazzle when the car interior is dark. By default, the night mode is activated automatically with enabled GPS navigation, in accordance with the time, time of the year and position on the map.
On-board computer: opens the on-board computer panel on the screen, presenting information on speed, distance covered, length of stops and drive, etc. For more information, refer to section "Showing position".
Rotate screen: enables the screen to pivot from vertical orientation to horizontal. Option available only on devices with Windows Mobile 2003SE and Windows Mobile 5 operating systems. This function can be assigned to hardware button (refer to "Hardware Buttons") and can be used instead
text_image
Options Profiles... Night mode On-board computer Rotate screen Pilot SoundsPilot: enables and disables the pilot panel (turn and route information) during the navigation. By default, it is enabled automatically when the navigation mode is on, and is disabled in the same way after completing the navigation. Refer to section "Navigation".
Sounds: enables and disables all the sounds generated by AutoMapa, including tapping sounds, navigational messages, etc. Always on upon application start. For message settings, refer to section "Settings".
Profiles...
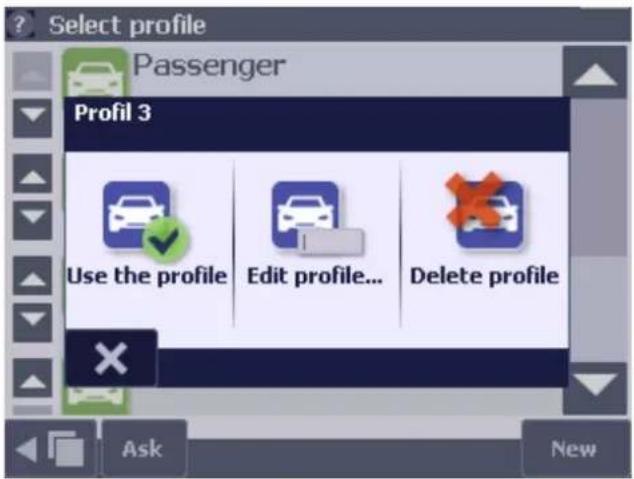
Profiles enable the user to save device settings. The profile manager helps the user to quickly switch between the saved setting groups.
There are three default profiles: truck, passenger, 4WD.
The profile creator menu is opened by clicking on the "New" button. After entering the name, selecting the template and the icon to represent the given profile, and eventually clicking the "OK" button, the profile will be created.
The decision menu is activated by clicking on the "Ask" button. In this menu, the user decides whether to display or block the display of the profile creator when AutoMapa starts.
By pressing on a button representing a given profile, the user opens a menu, in which the profile can be activated ("Use profile" button), deleted ("Delete profile" button), edited ("Edit profile" button), renamed or assigned a different icon.
text_image
Select profile Passenger Profil 3 Use the profile Edit profile... Delete profile Ask New2.8 "Go to" menu and selecting destinations - searching for addresses and objects...
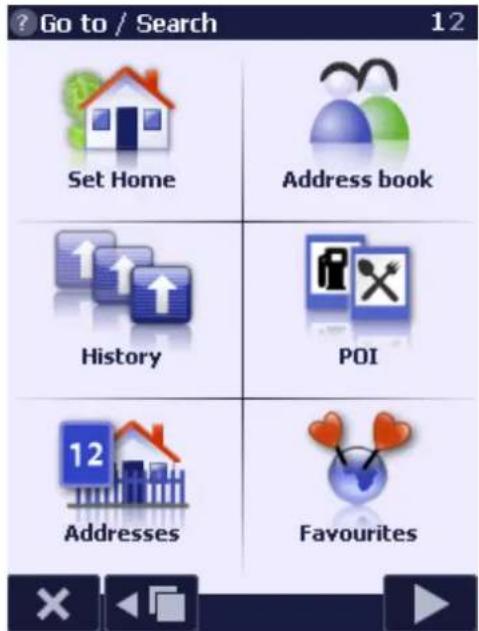
The quickest way of finding a given object on the map (e.g. street, restaurant) is by entering its name in the corresponding search window.

The search window can be opened by selecting "Go to/Search" from the welcome screen or the main menu.
You can search for town, street and addresses ("Addresses" option), points of interest ("POI" option), favourites (specified by the user), last visited ("History"), addresses in the address book of the portable device ("Contacts"), as well as towns and cities by entering the postal code.
Software also enables the user to search for selected points on the map based on GPS coordinates.
"Go to" menu and selecting destinations - searching for addresses and objects... 2
When entering the name of the searched object, it is enough to enter only its short fragment. Do not use capitals or diacritics. To end particular search stages, tap the relevant object with a finger or pen. Previously selected countries, cities or POI categories are remembered and proposed first in the
text_image
Go to / Search 12 Set Home Address book History POI 12 Addresses Favourites
text_image
Go to / Search 12 Set Home Address book History POI 12 Addresses Favourites"Go to" menu and selecting destinations - searching for addresses and objects... 3
After selecting an object of interest you can decide what to use it for. By choosing "Go to", you start navigation, and the program calculates and navigates you on a route to a selected destination. The selected object can also be displayed on the map, added to the Favourites list or stored as "Home" or "Work". The above-mentioned options are selected Favourites with their own positions in the "Go to" menu. Their selection allows for immediate route selection and the start of the navigation.
If you select "Go to/Search", the program, after specifying your GPS position, will automatically enter the navigation mode and will automatically switch and rotate the map in accordance with the direction of the route.
2.8.1 Search address
By default, the search takes place in the country of the user's present position (GPS position or cursor position on the map). In unclear situations (e.g. when the cursor was placed outside the territory of any country), the program will ask the user to select the country first, provided that maps of several countries have been installed in the device.
The search process begins with the screen containing information about the recently selected address - "Country", "City or code", "Street", "Number" or "Junctions".
When the user clicks the chosen field (e.g. "City"), the system displays the screen for searching the particular location.
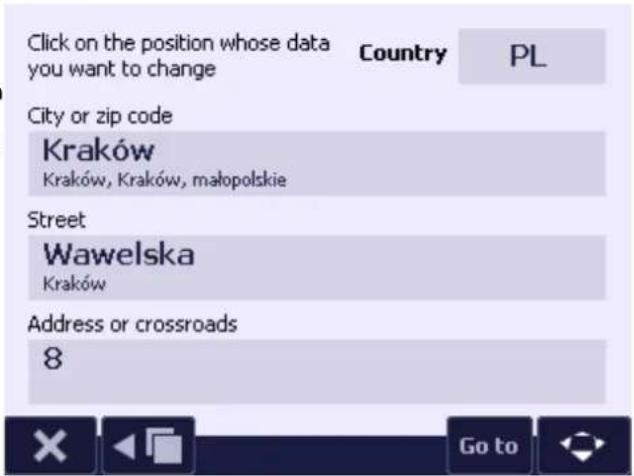
text_image
Click on the position whose data you want to change Country PL City or zip code Kraków Kraków, Kraków, małopolskie Street Wawelska Kraków Address or crossroads 8Search address 2
The search process begins with entering the name of the town/city. The user has to enter the first letters of the town/city name in the "City:" field at the top of the screen. The code of the country where the address is searched is displayed in the top right corner of the screen. To change the country, use the "Country" option on the bar at the bottom of the screen. AutoMapa allows searching exact point addresses, among others in the Czech Republic, Slovakia and Russia.
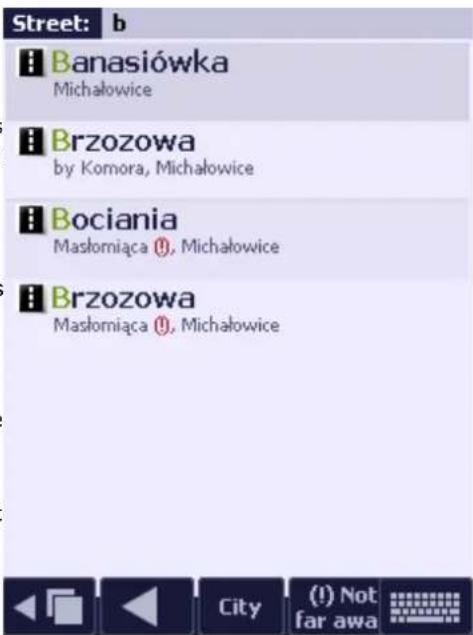
When the user taps on one of the locations found by AutoMapa, the program will display the street search window in the given town/city.
Searching and automatic suggesting of the list of found cities and streets begins after the second character is entered. There is also an additional delay, enabling the user to quickly enter several characters.
The list of found streets can be additionally sorted. First, the results for the given city will be shown. By selecting "(!)Nearby", redundant streets will be shown, which were found in cities neighbouring the selected city. They have been marked with the exclamation mark in addition.
In addition, after the first few characters have been entered, redundant keyboard keys will be disabled to prevent accidental use.
If the search results fit a single screen, the keyboard will be automatically collapsed to facilitate the address selection.
text_image
Street: b Banasiówka Michałowice Brzozowa by Komora, Michałowice Bociania Mastomiąca ①, Michałowice Brzozowa Mastomiąca ②, Michałowice City (!) Not far awaSearch address 3
Note: the program memorises the previously selected locations, which will be suggested during subsequent search inquires. In this situation, the keyboard does not open automatically. To find an address in a new location, open the keyboard with the icon in the bottom right corner of the screen or tap on the field where the place name is entered.
After finding the location, the user can select it as an object of interest (by tapping on its name again) or – to find a given street – enter the first letters of the street name in the "Street" field.
After selecting the street, the user can: select the street in its entirety ("Entire street" option), find the address assigned to the street (by entering the address in the "Address:" field or by scrolling the list), or select a junction with other streets ("Show junctions" option).
If the streets have no house numbers, or if there are no streets in the place, the address searching will finish at the earlier stage.
In case of small locations without street names, but with house numbers on the map, address searching should be done by entering the location name in the "Street" field, i.e. as Roszyce, Roszyce. In this way, it is possible to select the required house number.
By tapping on a selected address point (or junction, the "Entire street" option, or the name of the town/city on the previous screen), the user will open the context menu window where the given location can be set as the destination point, a route point, "Home", "Work", POI, favourite point, or can be displayed on the map.
2.8.2 Search POI
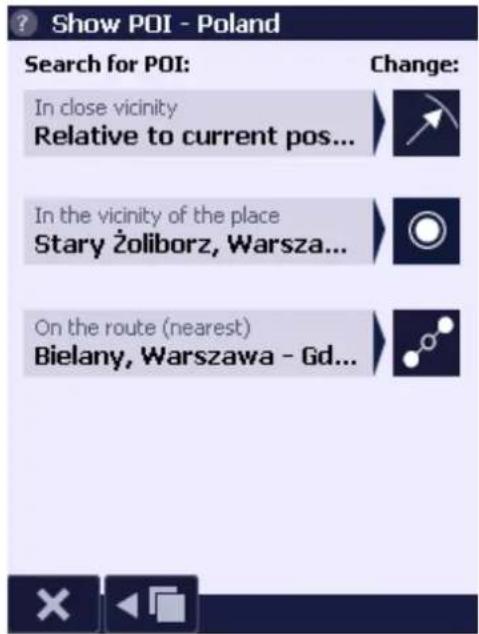
On the "Search for POI" screen one can quickly select the place where to search POIs. Functions available on the screen:
- Change the search radius (options: "In close vicinity" and "In further vicinity"). The search radius is determined by the number of POI found in the area. The more POI the system finds in the area, the more restricted the search radius.
- "In locality" - searches POIs after selecting a locality, junction or address.
- If a route has been mapped, the search can be limited to points in the „route vicinity” – with options "On the route (nearest)" and "On the route (whole)". Icons which appear by such points indicate the distance: 1 up to 50 m, 100 m, 150 m from the route. The grey dark icon signifies a point on the side of the road opposite to the travelled direction (i.e. on the left side in Continental Europe and on the right in Great Britain). An additional option "In the destination vicinity" searches POIs at the route end point.
text_image
Show POI - Poland Search for POI: In close vicinity Relative to current pos... In the vicinity of the place Stary Żoliborz, Warsza... On the route (nearest) Bielany, Warszawa - Gd...Search POI 2
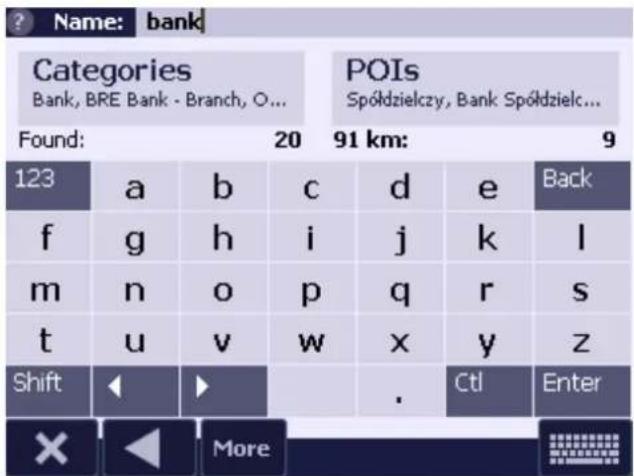
POIs are searched by typing in a string of characters in the "Name" field.
The number of found categories and POIs containing the entered string of characters is displayed. The listed results will be displayed when one result is selected.
The objects found in the given category are displayed in the search window. The results are listed in the order of the nearest to the most distant objects. After tapping on the description or the icon of the object in the results list, the user will have access to the context menu where the given point can be viewed on the map and can be added to, for example, the list of favourite points.
To find a POI in another place on the map, go back to "Search for POI" screen and change the search location or go back to the map and move it to the place where you want to start searching (by placing the cursor on the map).
To find a more distant POI, select using the "More" option on the bar at the bottom of the screen.
text_image
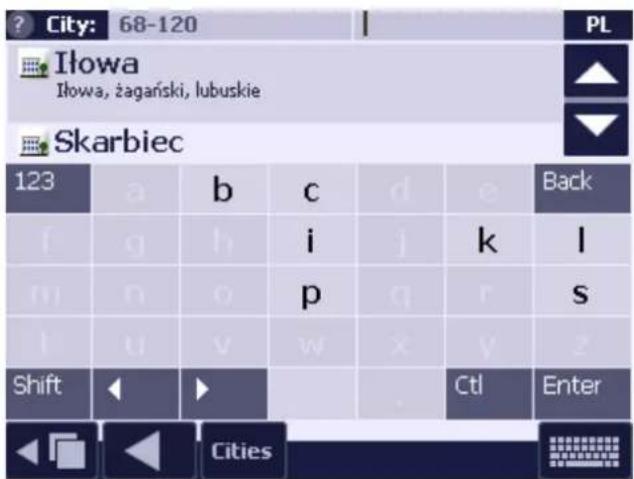
? Name: bank Categories Bank, BRE Bank - Branch, O... POIs Spółdzielczy, Bank Spółdzielc... Found: 20 91 km: 9 123 a b c d e Back f g h i j k l m n o p q r s t u v w x y z Shift ◀ ▶ . Ctl Enter × ▶ More2.8.3 Search by postal codes
Program supports the search of an address with the use of a postal code. Select the "Postal codes" option from the "Go to/Search" menu (this option is not available in the simplified menu mode). Enter the postal code and a list of corresponding locations will be displayed.
The town, district or street can be selected from the list of results displayed for the entered postal code in the field on the right hand side.
The user can select the location (by tapping on its name) or, to find a specific street, enter a fragment of its name in the "Street" field.
By tapping on a selected address point, the user will open the shortcut menu window where the given location can be marked as the destination, a route point, "Home", "Work", POI or favourite. The location can also be displayed on the map.
2.8.4 Searching by geographic coordinates
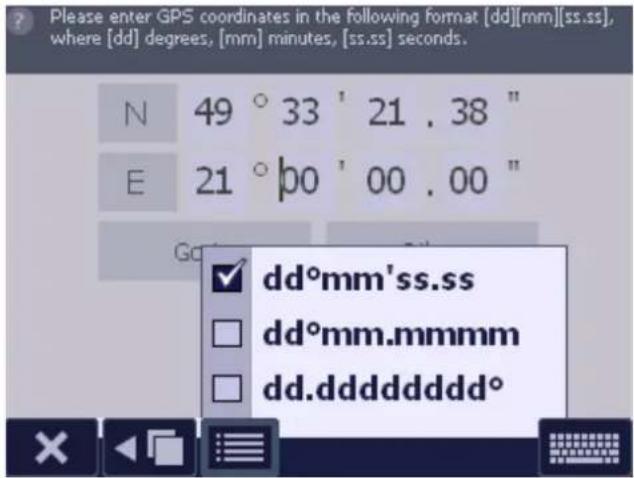
Program supports the search for locations using GPS geographic coordinates. Select the "GPS point" option from the Go to/Search menu (this option is not available in the simplified menu). Enter the geographic coordinates of the searched point and click on the "Go to" button to activate the route mapping manager, and map the route from the present point to the entered point.
The entered point is regarded as an ordinary map point, for which a variety of options are available (the menu can be accessed by clicking on the "Other options" button); it can be added to the POI database, the favourite points list, it can be displayed on the map, set as the "start" or "end" point.
The format of coordinates can be changed using the "Options" button on the bottom bar of the screen.
text_image
Please enter GPS coordinates in the following format [dd][mm][ss.ss], where [dd] degrees, [mm] minutes, [ss.ss] seconds. N 49 ° 33 ' 21 . 38 " E 21 ° 00 ' 00 . 00 " G ✓ dd°mm'ss.ss □ dd°mm.mmmm □ dd.ddddddddd°2.9 Map points
Favourite points
Favourite points are a reference set of user-defined points. They can be used to register the addresses of family members, favourite restaurants or any other frequently visited locations.
The program automatically creates a "Car" favourite point, which remembers the last GPS position upon the shut-down of external power supply or program exit (helping you find a car at a parking lot, etc.).
Favourite points are set on the map by opening the context menu in any location on the map or found object (address, POI, etc.) and by choosing the "Add to favourites" option. First, one has to enter the "Name", and then the "Description" of the favourite point.
The function of adding a favourite point can also be assigned to a hardware key (refer to the section "Settings: Buttons").
Favourite points are displayed on the map by a flag icon:
Favourite points can be moved on the map, deleted or copied with the use of "Copy/Cut/Delete/Paste" options from the context menu.
The favourite points editing screen is found in the POI menu.
2.9.2 Home/Work
Home/Work are special favourite points, which are assigned own options in the "Go to" menu. When the "Home" or "Work" option is selected, navigation is activated directly – you do not have to go through the context menu.
Similarly to favourite points, "Home" and "Work" points can be defined by opening the context menu in any location on the map or found object (address, POI, etc.) and by choosing the "Mark as Home" or "Mark as Work" option. Another method of adding points is direct selection of the "Set home" or "Set work" keys in menu "Go to".
The points have their own icons on the map: land

The points are displayed on the list of favourite points ("Go to|Favourite points").
2.9.3 POI (Points of Interest)
The map contains a built-in POI base for every country. The POI base includes objects such as pharmacies, restaurants, ATMs, hotels, etc. They are marked on the map with icons corresponding to the given category.
The POI categories are grouped in a hierarchical tree synchronised with the AutoMapa users' service http://www.miplo.pl.
If under the given category there is the 📄 icon, it means it is a master category - it contains POIs or other categories. If the user wants to browse the master category contents, they must click the 📄 icon. To close an open category, the 📄 icon must be clicked.
POIs display on the map
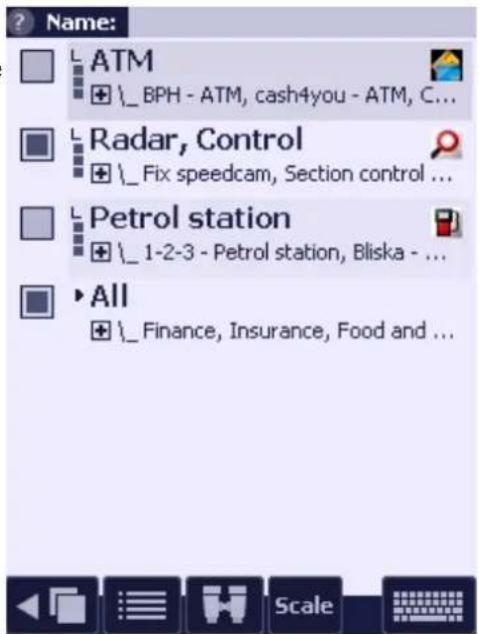
The category of points to be viewed by the user on the map is defined with the use of the "Display" option in the POI menu. Interesting POI categories are selected with a square to the left of their names. The square means that POIs in a given category, both the ones built into the map and the user-defined ones, are shown.
An important display parameter is the scale, below which the points are displayed on the map. The scale is set with the use of the "Scale" button on the tool bar at the bottom of the screen. The scale threshold and the number of displayed categories should be selected carefully to make sure that POI icons do not obstruct the map view.

POI categories can be selected and deselected with the use of the "Options" button to display or remove them from the map. The "Add category" option enables the user to define a new category with a customised name (when icon density is high at higher map scale values, the system automatically filters the icons and does not display all of them). By selecting "Display all", the user can choose to display only categories on the pre-filtered list. The "Organise context menu" option enables the user to change the sequence in which the selected context menu categories are displayed.

The "View" button enables the user to restrict the list of categories to point categories, which are displayed on the map, hidden or user-defined.
When a fragment of the POI name is entered in the "Name" field, the system will find POIs and categories that fulfill search criteria regardless of whether and which category is displayed during the search.
POI display on the map 2
When the POIs are displayed on the map, the user can obtain additional information on the selected POI, e.g. a tourist destination, restaurant or pharmacy, and see photos related to the given POI thanks to the MiploPics function.
After tapping the pen on the selected point, a balloon with short information will be displayed above the POI. To obtain more detailed information, click the balloon or open the context menu and select the Info option. The program will display a screen containing the most important information regarding the POI, such as the name, short description or telephone number.
If the description of the POI features the telephone number, then you can directly call that number. To do so, select Call button, which is located at the bottom of the displayed window, then confirm your decision by pressing the displayed small window with the telephone number.
text_image
Name: ATM +_BPH - ATM, cash4you - ATM, C... Radar, Control +_Fix speedcam, Section control ... Petrol station +_1-2-3 - Petrol station, Bliska - ... All +_Finance, Insurance, Food and ...Tarot
Restaurant
Tarot
Tel: (48) 618484881

POI display on the map 3

If there are photos related to the given POI, after clicking the button with the camera symbol the user can launch the photo browsing screen.

The user can zoom in/out the photo by clicking the "+/-" button. If there are more photos, the "Left" and "Right" buttons are used for navigation.
Information - Interesting place
Members of the AutoMapa users' portal Members of the AutoMapa users' portal www.miplo.pl can download photos for particular POI using MiploSync.
The "Options" button located on the information screen offers options identical to those available from the context menu.
Interesting place

natural_image
Aerial view of a historic cathedral with a tall spire and surrounding urban buildings under a clear blue sky.


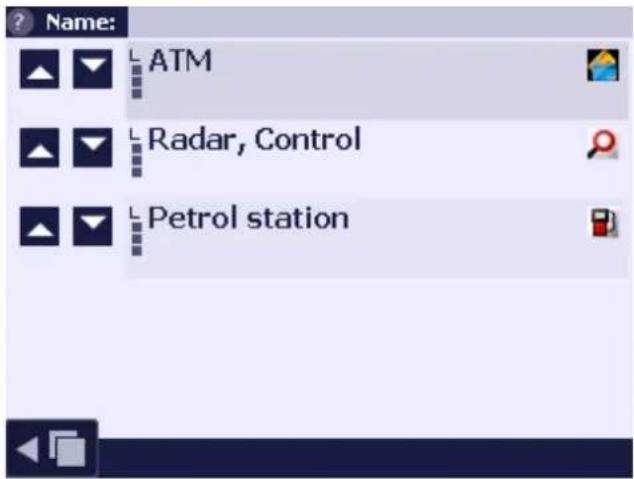
Organise pop-up menu
This function changes the sequence in which pop-up menu categories are displayed in display, warning and POI search windows. The arrows move the selected category up or down accordingly.
To delete a pop-up menu category, click it and select "delete pop-up menu category".
Adding POI
POI are set on the map by opening the context menu in any place on the map or found object (address, POI, etc.) and by choosing the "Add to POI" option. This function can also be assigned to a hardware key (refer to the section "Settings: Buttons").
To add POI, first select the respective category and name the POI. You can also add a short description. The new POI will
be identified on the map with the same icon, which is used to mark other points from the given category.
text_image
Name: ATM Radar, Control Petrol stationPOI edit screen
The user can also edit and delete POI or import them in file format from other AutoMapa users or Internet servers (e.g. miplo.pl). This can be done with the use of the "Management" screen in the POI menu.
User icons
Points from user-defined categories are marked on the map with the following icon.
To assign a user icon or modify the icons of the existing points (including built-in points), you will need a 16 x 16 pixel bitmap in BMP format with an 8-bit colour palette. The name of the file has to be identical to the name of the given point category. Copy the file to the "Icons" folder in the program installation directory.
2.10 Show position
This program mode is activated automatically, when the GPS receiver is turned on and when the position is set by the system.
2.10.1 System layout and operation in the show position mode
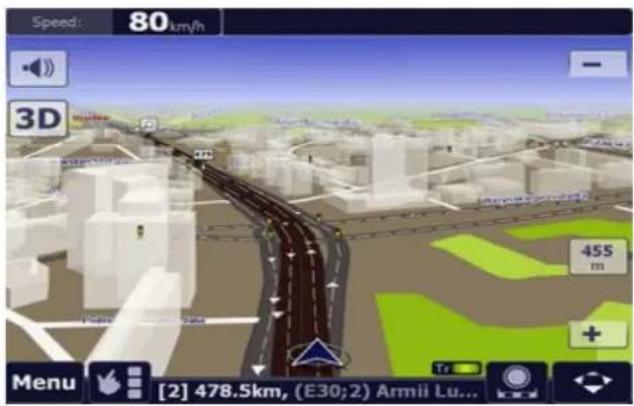
When the GPS position has been set, program automatically switches to the show GPS position mode – the present position is continuously displayed on the map as a pulsating arrow in a circle. The map revolves automatically to show the largest possible area in the travelled direction, and the user's present position is shown at the bottom of the screen. By default, the 3D map view mode is activated. After a short while, the night mode may be automatically activated if the received GPS signal indicates time past sundown.
text_image
Speed: 80km/h 3D 455 m Menu [2] 478.5km, (E30;2) Armii Lu...By moving a finger across the screen, the user interrupts the show position mode, and this mode will be restored automatically a few seconds after the last movement of the finger across the map.
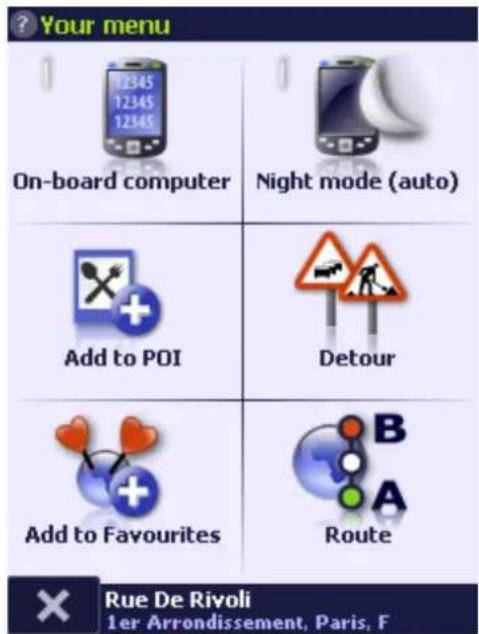
A single tap on the screen opens the "Your menu" pop-up menu.
2.10.2 "Your menu" pop-up menu
When the software operates in the show GPS position mode, the user can open the "Your menu" pop-up by touching the screen. If no operations are performed by the user in the course of several seconds, the menu will be closed automatically to protect the screen against accidental touching.
By default, this menu offers 6 features, which can be changed or extended to max. 12 by using Menu | Settings | Buttons.
On-board computer - allows the user to open the screen of the software on-board computer.
Night mode - Enables/disables the night mode on AutoMapa.
Add to POI - by clicking this option, you can add your current location to the list of points of interest - the GPS location or the point to its left or right.
Detour - enables a detour around a section of the route over specified distance.
Add to Favourites – as above; adds the selected point to Favourites.
Route - opens the relevant menu screen.
text_image
Your menu 12345 12345 12345 On-board computer Night mode (auto) Add to POI Detour Add to Favourites Route Rue De Rivoli 1er Arrondissement, Paris, F2.10.3 On-board computer
text_image
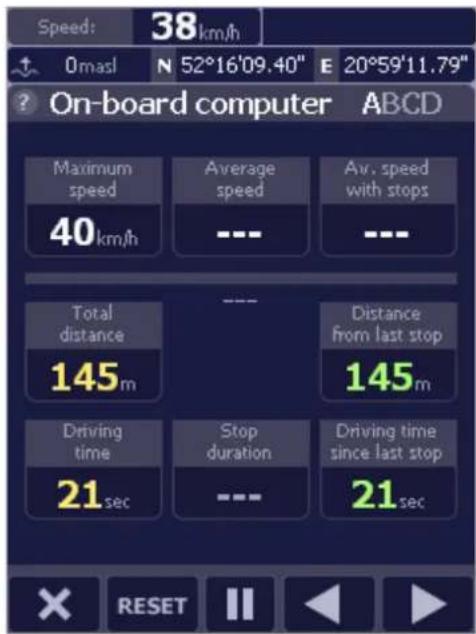
Speed: 38km/h Omasl N 52°16'09.40" E 20°59'11.79" ? On-board computer ABCD Maximum speed 40km/h Average speed --- Av, speed with stops --- Total distance 145m --- Distance from last stop 145m Driving time 21sec Stop duration Driving time since last stop 21sec RESETThe "Computer" option is found in the "Your menu" and "Options" menu. This option opens the panel of AutoMapa system's on-board computer.
The panel is shown to the left, while its contents have been explained below:
The meter section shows the presently selected set of meters. The meters comprise 4 independent sets of parameters displayed by the on-board computer. They can be independently reset and selected for display. Each set is located on a separate screen, which can be switched by selecting the arrow keys. To reset the meters, select "Reset", from the bar at the bottom of the screen. To start/pause the calculations performed by the "Computer", use the "Pause" option. Meter sets A, B and C, are reset every time AutoMapa is started and GPS is activated, while set D is a "permanent" meter – it continues to run until manual reset.
On-board computer 2
The speed section displays the following data on the given meter, from the left: maximum speed, average speed, and average speed including stopping time.
The distance section displays the following data, from the left: the entire distance travelled since system activation (or meter reset) and the distance from the last stop. The route progress bar is displayed above, showing the percentage of the route travelled so far (only if the route has been previously mapped).
The time section displays the following data, from the left: total driving time, total stopping time and driving time since the last stop.
2.10.4 POI Warnings
POI warnings is a function which informs the user about approaching a point of a given category. It can be used to warn the user of dangerous points or traffic radars on the route. This function also notifies the user of points of interest in the area by displaying the relevant information, e.g. restaurants or ATMs. The POI warnings function is active in the show position mode and during navigation. When the warning function is activated, the system changes the scale of the displayed map to ensure the maximum visibility of the given POI.
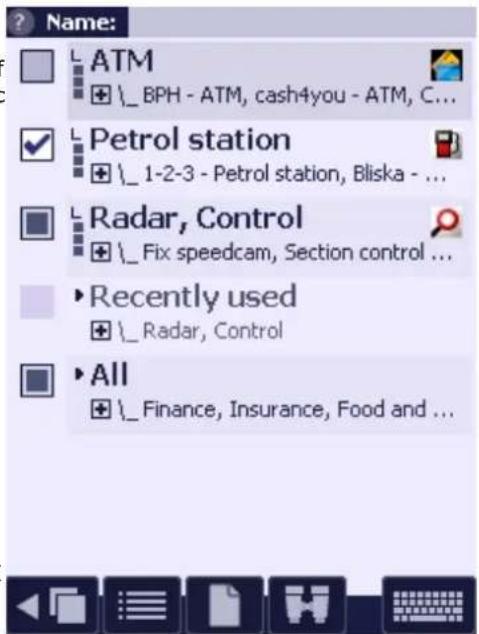
The "Warnings" window in the POI menu can be used to select POI categories and set the nature of the "warning" message.
POI Warnings 2
A number of POI warning categories from "Traffic Information" are active by default.
Interesting POI categories are selected with a square to the left of their names. The square enables POI warnings for a given category, both for the POIs built into the map and the user-defined ones.
The "Options" and "View" buttons have identical functions to those on the "POI Display" screen.
text_image
Name: ATM +\_BPH - ATM, cash4you - ATM, C... Petrol station +\_1-2-3 - Petrol station, Bliska - ... Radar, Control +\_Fix speedcam, Section control ... Recently used +\_Radar, Control All +\_Finance, Insurance, Food and ...
The "File" button enables the user to perform basic operations in the file where the settings for POI warning categories are stored (.war file). The functions are described in the POI Menu: Management 2.
The number of POI warnings categories should be selected carefully to ensure that the main system functions are not disrupted during navigation.
POI Warnings 3
After selecting point categories, warning parameters can be modified separately for every category. Tap on the category name to open the parameters screen.
In the first screen, the user can define the speed above which the warnings will be displayed.
The "Repeat" option defines the minimal interval between subsequent warnings for the same POI.
The options below enable the user to select effects related to the warning, displayed on the map screen:
- Voice message – the warning message will be accompanied by a sound. For POI warning, the distance is provided only if it is big enough.
- Inform about distance to point - specifies the distance on the map from the displayed POI icon, and generates a voice message about the distance to POI.
- Display info – a "balloon" is displayed above the point with the following information: name and description.
•Show until passed – the warning message for the given point category will continue to be displayed until the user passes the point.
- Do not warn of POI on the left on two-way roads - if this option is selected, the system will warn only of POI located on the right side of two-way road.
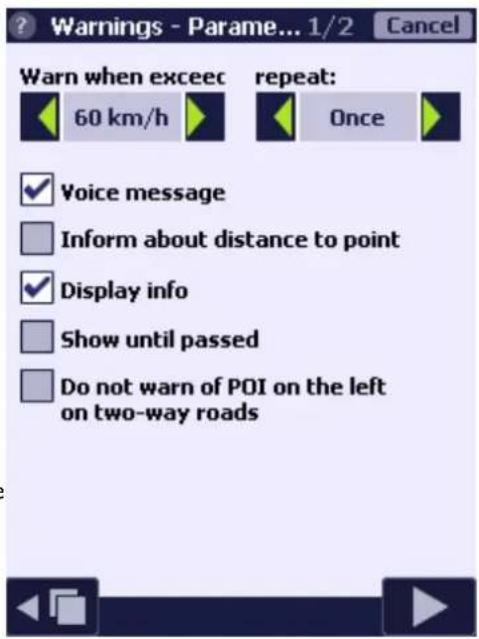
text_image
Warnings - Parame... 1/2 Cancel Warn when exceed 60 km/h repeat: Once ✓ Voice message Inform about distance to point ✓ Display info Show until passed Do not warn of POI on the left on two-way roadsPOI Warnings 4
In the second screen of warning settings you can specify whether software will warn of POI located near the route (specifying the maximum distance in which POIs are detected by the route), whether they are located in the direction of driving (specifying the angle and radius of POI detection in the direction of driving, where the bigger the angle and radius, the more POIs will activate the warning system).
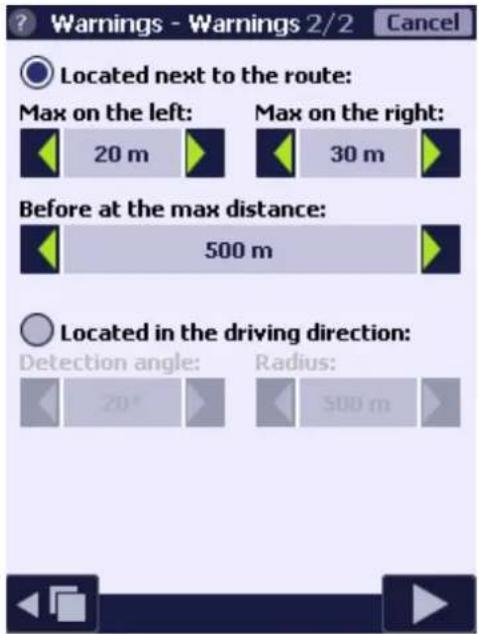
text_image
Warnings - Warnings 2/2 Cancel Located next to the route: Max on the left: 20 m Max on the right: 30 m Before at the max distance: 500 m Located in the driving direction: Detection angle: 20° Radius: 500 mSample selection of warning message parameters Warning about speed cameras on the road:
Warn about POIs:
When exceeding: 40km/h
Repeat warning every: Once
Sound message: Yes
Inform about distance to point: Yes
Show information: No
Show until passed No
Do not warn about POI on the left side of two-directional roads: No
Located along the route: Yes
Max. to the left: 20 m
Max. to the right: 30 m
Forward up to: 500 m
Inform about interesting places in the vicinity:
Warn about POIs:
When exceeding: 30km/h
Repeat wraning every: 8sec
Sound message: Yes
Inform about distance to point: No
Show information: Yes
Show until passed No
Do not warn about POI on the left side of two-directional roads: No
Located in the driving direction: Yes
Searching angle: 60°
Radius: 500 m
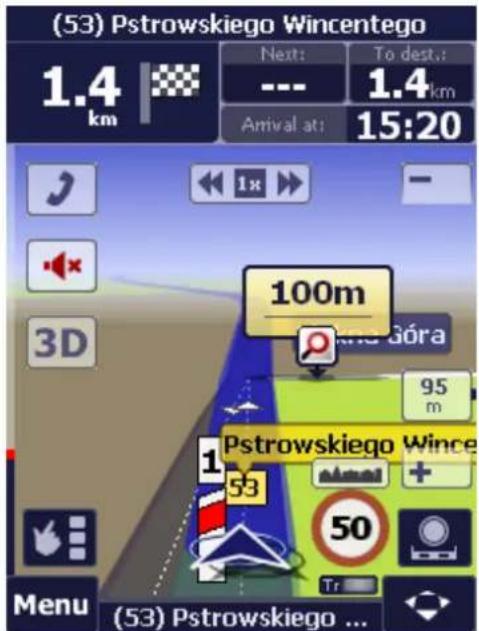
The screen shows a sample effect of warning about a POI belonging to the category "Radar, speed measurement" and "Interesting places" during the
text_image
(53) Pstrowskiego Wincentego 1.4 km Next: To dest. --- 1.4 km Arrival at: 15:20 100m 3D 95 m Pstrowskiego Wince 1 53 50 Tr Menu (53) Pstrowskiego ...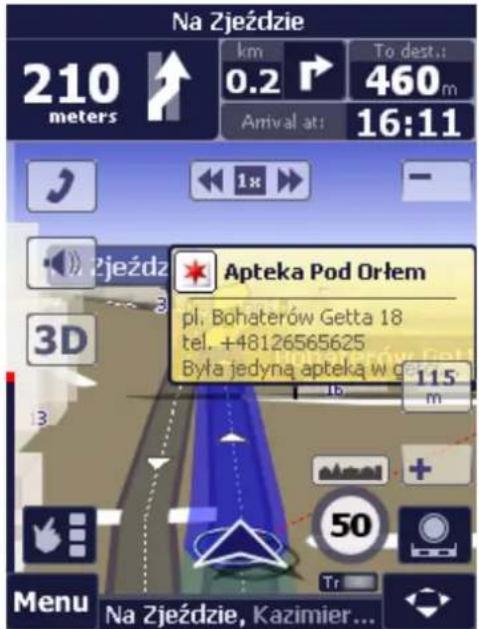
drive. The system generates a sound message, shows the distance to the first point. The points have a bold frame around, and the map zoom changes in order to display them clearly. The system generates a voice message for the second point and displays information about that point.
User warning sounds
The user can customise warning sounds for the given POI category. To do this, copy your .WAV file (preferably 22 kHz/8 bit/mono) with a name identical to the name of the POI category to the "Voices" folder in the program installation directory.
The navigation system also enables you to customise sounds for a selected POI. To activate this option:
- Move the .WAV file (e.g. my.wav) to the "Voices" folder.
- Insert the "@@my" line n the POI description.
- Activate the warning sound option for a given POI category, and select the "Display information" option in the first bookmark.
2.11 Navigation
Navigation is an operating mode of the program, in which the system indicates the user's position on the map (if GPS is on) and the mapped route. In the navigation mode, the program guides the user to the point of destination by displaying the mapped route and the vehicle's position on the map, and displays the pilot panel, which notifies the user about the upcoming manoeuvres, accompanied by voice messages.
There are two ways of starting navigation:
- by selecting the point of destination with the use of the "Go to/Search" option: the system maps the route, displays the entire route on the screen, generates a voice message on the length of the route and the time required to reach the destination, and activates navigation after a few seconds, or
- by mapping the route with START and END points, activating GPS or navigation (if GPS is already on) in the "GPS" menu.
2.11.1 Mapping the route
To map the route, the user has to define at least two points – the beginning and the end of the route. They can be set on the map or with the use of the "Go to/Search" menu option, by selecting the START or END option in the context menu. The system will ask the user whether the route should be mapped and will do it after receiving an affirmative answer.
If the user chooses the "Go to" option in the context menu for any point on the map or another object, the route is mapped between the user's present position and the selected point, and navigation is activated automatically.
Mapping the route 2
The course of the mapped route can be modified with the use of "THROUGH" points (which can also be set in the context menu). "THROUGH" points force the route to intersect a given location.
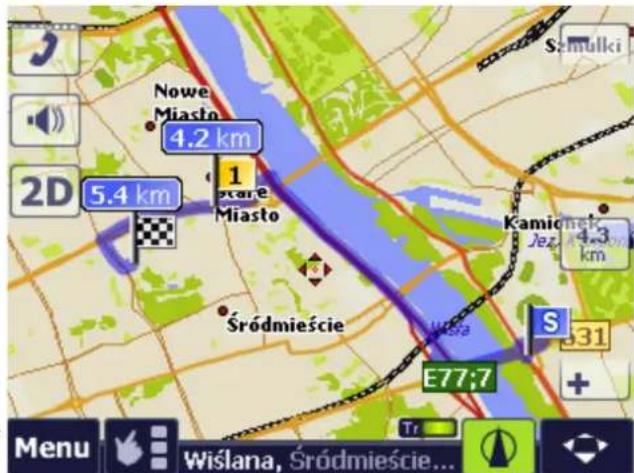
The type of the THROUGH point can be selected:
- THROUGH area - an Intelligent THROUGH Point is created. The location of this point is not detailed upon route mapping, but only adjusted to the course of the route. The point is used for specifying the initial course of the route which is then adjusted to obtain a set, optimal distance to that point (depending on the size of the city/town where the point is located).
- THROUGH point - forces the route to pass exactly through the indicated point. If a city/town is selected without specifying the street, the route will run through the centre.
Before the route to the new destination is confirmed, the system may ask whether to remove the unnumbered THROUGH points from the previous route.
Mapping the route 3
The sequence of points on the route can be modified in the "Route" menu, by selecting the "Information" option in the "Route points" window. The option contains valuable information on the mapped route: a list of manoeuvres, a comparison of travelling distance and time along various road categories, etc.
The route start time can be set by clicking the "start date" button. The system will select the route using data from the AM'Traffic system, taking into account the time limits and road throughput at the moment when the route reaches it. The return route - to the START point - can be mapped with the use of the "Reverse" option in the "Route" menu.
The route type can be changed when this option is selected in the first screen of the "Route" menu. The system supports the following route types:
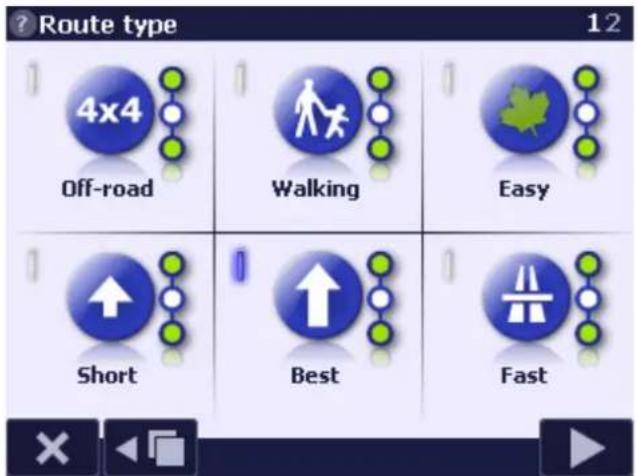
text_image
Route type 4x4 Off-road Walking Easy Short Best FastFast
The route will be mapped along roads with the shortest time to drive.
Best
The route will account for the parameters of the Fast and the Short route, i.e. both the throughput of the travelled roads and total route length. The "Settings/Route" option in the main menu can be used to define which route parameter (Distance/Speed) has priority.
Short
The system will map the shortest possible route, avoiding roads of the lowest category (e.g. dirt roads).
Off-road
The system will map the shortest possible route without taking into account the road category. The shortest possible route could lead through sections of lower category roads, including dirt roads.
This route type is not available in "simplified mode".
Walking
The route will not account for the direction of traffic, Do Not Enter signs or road categories. This is a useful option for users travelling on foot or by bike. The route is not mapped along international roads or motorways.
Easy
The Easy route is meant for less experienced drivers. It enables them to plan the route so that the journey is possibly the easiest. When calculating, the program tries to avoid left turns and U-turns. Where possible, the program operating in the Easy route tries to avoid roundabouts. When selecting the roads, those of the highest possible category have priority over SmartRoutes and LiveDrive! data.
Cross-country
This route leads directly to the destination, along a straight line, disregarding the lay of the land. Such a route does not utilize the road network. (This option is not available in the "simplified mode").
2.11.2 System layout and operation in navigation mode
If your GPS receiver has been connected and correctly configured, and the route has been mapped, AutoMapa will automatically switch to navigation mode. In this mode, map operation is identical to that in the Show GPS Position mode. During navigation, depending on the time given by the GPS system and the season of the year, AutoMapa may dim the colours of the map and other screen features displayed, making sure that light screen is not too dazzling at night.
In addition, the route (the travelled distance is shown in a different colour), the chainage poles (showing the subsequent road kilometres) and the arrows of the upcoming manoeuvres are displayed on the map.
The pilot panel, notifying the user about the upcoming manoeuvre (moreover, each such manoeuvre will be preceded by a voice message including similar information) and the name of the street where the manoeuvre will take place is displayed on the screen. The street name is
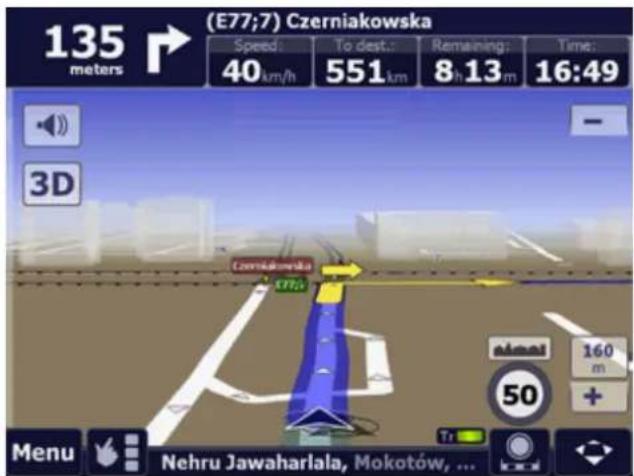
text_image
(E77;7) Czerniakowska Speed: 40 km/h To dest.: 551 km Remaining: 8.13 m Time: 16:49 3D Czerniakowska 160 m 50 + Menu Nehru Jawaharlala, Mokotów, ...additionally preceded by the road number and mileage, i.e. the successive kilometre travelled on the route. The pilot panel information displayed on the right side of the screen should be read as follows: after 120 metres the user must turn right into Czerniakowska street, there is 551 km to the destination, which will take 8 hours and 13 minutes. Current speed is 40 km/h.
Inside each map (for a large number of Polish cities), there are embedded data on REAL speed limits for each road section. The system compares the current vehicle speed with the speed limit valid for the section the vehicle is on at the moment, and when the limit is exceeded, the warning sign is displayed with the information on the maximum allowed speed. The current speed is highlighted with the red colour of the "Speed" section. Click the sign to turn off displaying the speed exceeding warning.
The following icon will be displayed when driving through a built-up area:
Tapping the individual panel sections enables sequential switching between the following values: current time (GPS), remaining time to destination, estimated time of arrival, current speed, distance to destination, the following manoeuvre (after the upcoming manoeuvre). After clicking the distance to the next manoeuvre, its symbol or name of the street for that manoeuvre, first the route fragment is shown from a distance, and then the whole route. The third tap returns to the position d
If you need to leave the route calculated by AutoMapa, just keep on driving and do not worry: the program will automatically map an alternative route in view of the situation on the road.
The route auto-correction function supports automatic navigation when the GPS receiver signals that the user is off the route. There can be many reasons for going off the route: traffic jam, road works, accident, driver's error, map error, inaccurate GPS reading, etc. In practice, this happens quite often. Thanks to auto-correction, the driver does not have to make independent attempts to return to the mapped route or manually set a new route from the present position – this will be done by AutoMapa. When the driver goes off the mapped route, AutoMapa will wait for a few seconds (to make sure that it is not a planned manoeuvre, e.g. an attempt to bypass a road obstruction) and will automatically map a new route in line with the previously set points, beginning from the user's current position.
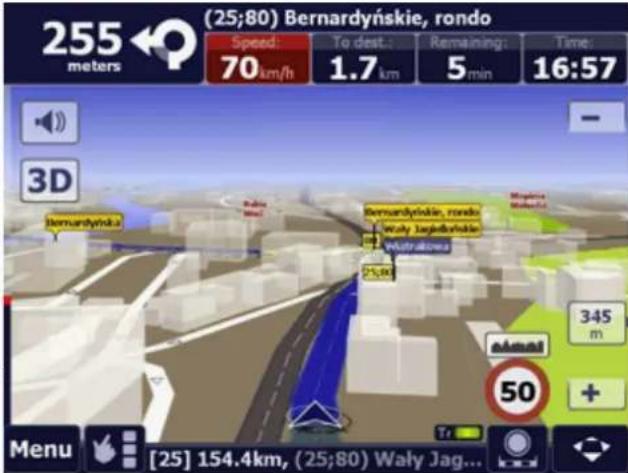
text_image
(25;80) Bernardyńskie, rondo Speed: 70 km/h To dest.: 1.7 km Remaining: 5 min Time: 16:57 3D Bernardynska Bernardynska, rondo: Waly Jagdaryśkie Wiatrakowa 25km 345 m 50 Menu [25] 154.4km, (25;80) Wały Jag...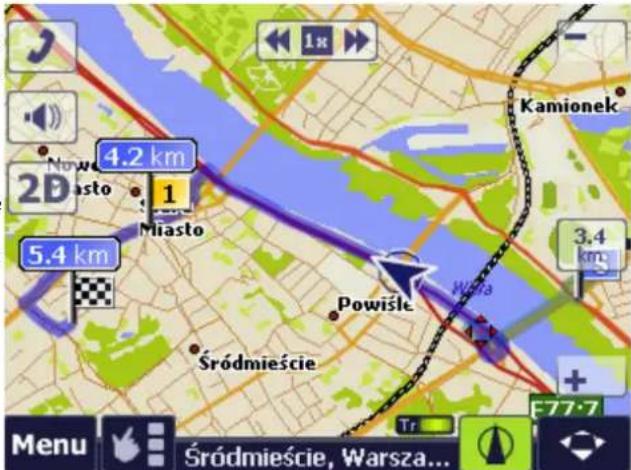
Traffic Lane Assistant
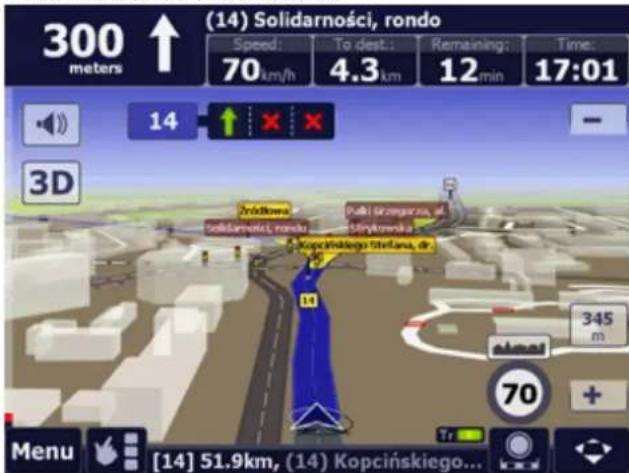
The Traffic Lane Assistant helps the driver to cross complex road junctions. AutoMapa indicates which lanes should be chosen to smoothly drive through European junctions. The Assistant activates automatically whenever the map offers the required lane data. It is not possible to manually turn it on or off.
The Traffic Lane Assistance system was first introduced for European countries. The Traffic Lane Assistant for Poland was introduced in 6.6.0 version.
2.11.3 "Your menu" pop-up menu in navigation mode
Similarly to the show position mode, by touching the screen during navigation, the user will open the "Your menu" pop-up window. It differs from the main menu in the following respects:
- Add to POI - by clicking this option, you can add your current location to the list of points of interest - the GPS location or the point to its left or right.
- Add to Favourites – as above; adds the selected point to Favourites.
•Night mode - Enables/disables the night mode on software. - On-board computer - allows the user to open the screen of the software on-board computer.
- Detour – enables a detour around a section of the route over specified distance.
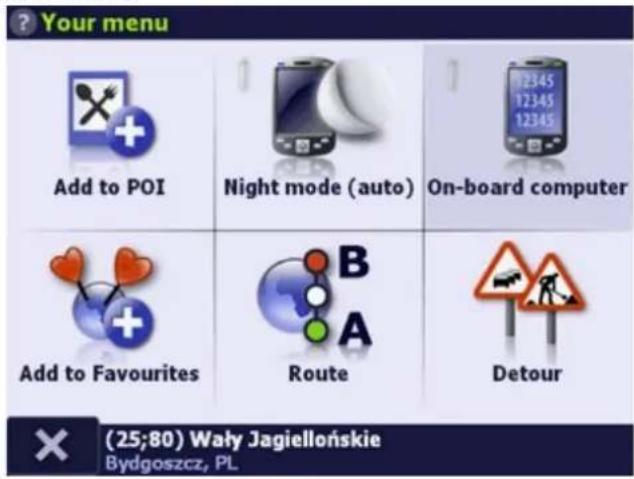
text_image
Your menu Add to POI Night mode (auto) On-board computer Add to Favourites Route Detour (25;80) Wały Jagiellońskie Bydgoszcz, PL2.12 Block roads
Road sections on the map can be freely blocked and they will be omitted in the route mapping algorithm. The selected sections will be regarded as impassable and will be avoided. Road sections can be blocked over a specific period of time by indicating the beginning and end dates.
Road sections with a traffic ban can also be unblocked for the route: the unblocked road section will be used in navigation. The sections which the user unblocked are shown on the map in a different colour.
To block a segment (option unavailable in the simplified mode), open the context menu in the given road segment (refer to the section "Context menu") and select the "Block section" option. The system will ask whether an expiry date should be assigned to the blocked section. If the answer is "yes", indicate the date. Follow the same steps to unblock a road section which is marked as impassable on the map by using the "Unblock section" option. Then the user can enter the beginning and/or ending date of the blocks.
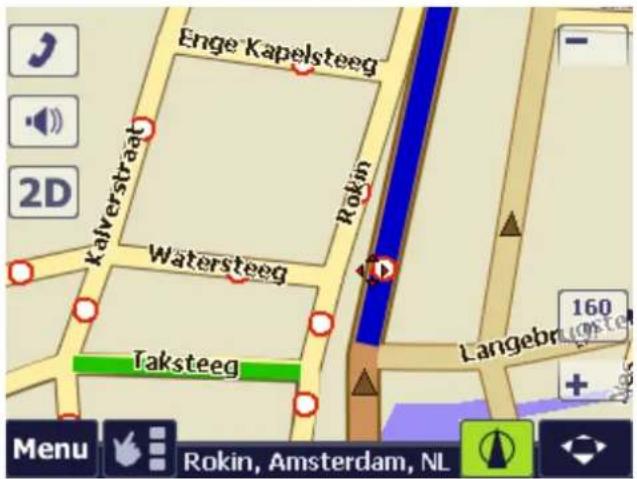
The section is usually blocked between the two closest crossroads. Of course, there is the possibility of blocking only one traffic direction in case of a multilane road.
A section is usually blocked between two nearest junctions. The user can obviously block a one-way traffic lane in a multi-lane road.
Software also enables the user to block entire areas. Similarly to the section blocking procedure, select the "Block area" option from the context menu. The system will go into map display mode. By marking a rectangular area on the map, the user chooses the blocked area where all sections will be blocked (in line with the principle of blocking sections from junction to junction). A blocked area may be unblocked by choosing the "Unblock area" option from the context menu.
Follow the same steps (without being inquired about the expiry date) to unblock a previously blocked section ("Unblock section"). The expiry date can also be modified ("Section block parameters").
Block roads 2
Blocked sections can also be handled with the use of the "Blocked sections" option in the "Route" menu. The list of all blocked sections is displayed: blocked sections are marked with a red circle (traffic ban), and unblocked sections – with a grey circle. This option enables the user to: view the blocked section on the map, unblock the section or modify its beginning and/or expiry date, remove all blocked sections. Blocked sections can be saved to file, read in, added from a file or imported from previous system versions.
The same procedure can be used to view blocked areas. A list of blocked areas will be displayed by tapping on the "Areas" button.
Blocked areas are shown in the screens above.
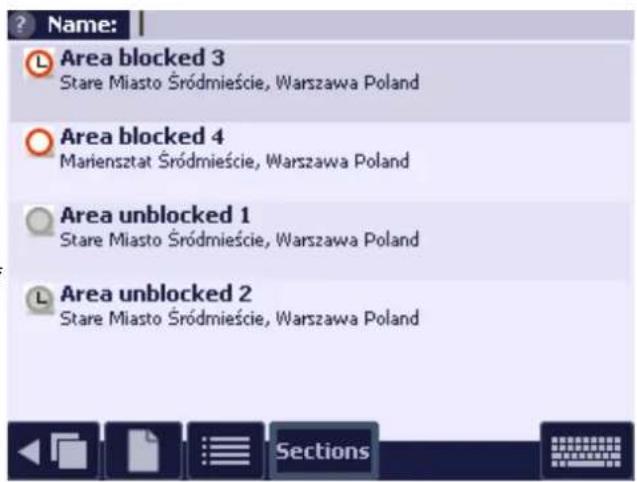
text_image
Name: Area blocked 3 Stare Miasto Śródmieście, Warszawa Poland Area blocked 4 Mariensztat Śródmieście, Warszawa Poland Area unblocked 1 Stare Miasto Śródmieście, Warszawa Poland Area unblocked 2 Stare Miasto Śródmieście, Warszawa Poland2.12.1 Temporary section blocks
The "Detour" option has a similar function but it applies to a section of the route with a preset length. This is a useful function when, for example, the driver sees a traffic jam ahead with the estimated length of 500 m. When the user taps on "Detour" and then "Next 500 m", the system will block all sections from the nearest junction along the distance of 500 m on the preset route. Detour blocks can be removed with the use of the "Detour|Remove detours" option.
Detour blocks are automatically deleted when the user exits the program.
2.12.2 Blocked roads and route mapping
The system can use a blocked section to map the route in the following situations:
- when a route point is situated in a blocked road section,
- if the detour enforced by the road block is too long in comparison with the route leading through the blocked section,
•during route mapping, when a route point is set at home/work/car.
2.13 AM'Traffic menu
The AM'Traffic menu enables the user to view system statistics by selecting the "AM'Traffic statistics" button, and to view the system - by tapping on the "View AM'Traffic" button. The "AM'Traffic events" - downloads the current traffic events for the whole country.
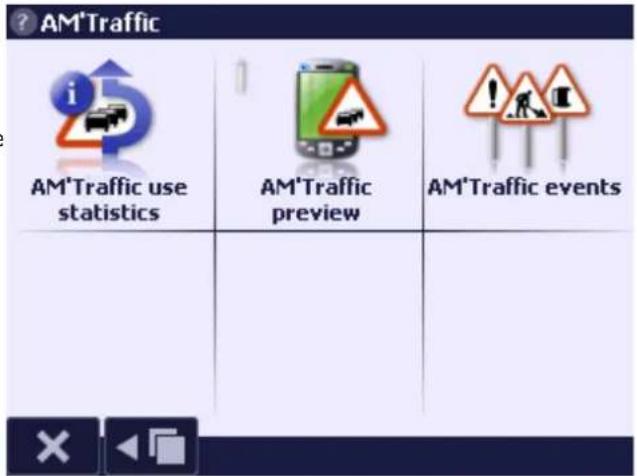
text_image
AM'Traffic i AM'Traffic use statistics AM'Traffic preview AM'Traffic eventsAM'Traffic usage statistics
Detailed data on AM'Traffic system statistics are presented here. One can read the following data:
- Last connection status,
•Amount of current data to be sent,
•LiveDrive! communications frequency,
•Information about the particular map,
- List of data sent/received in the given month,
- Connection times from the start/in the month,
•Information about the last data sending/receiving/sending trial/receiving trial and the last data transmission,
- Error messages.
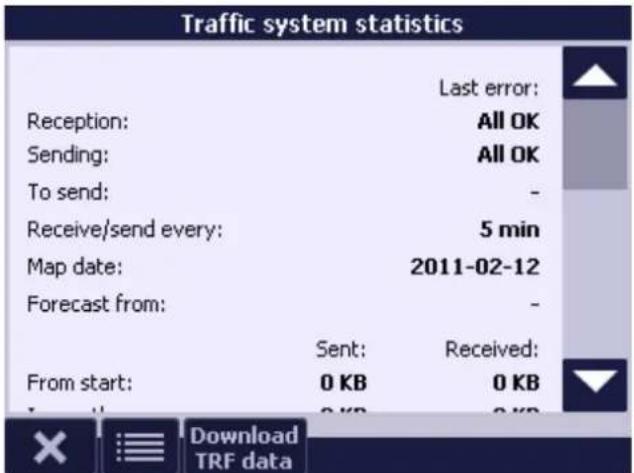
text_image
Traffic system statistics Last error: Reception: All OK Sending: All OK To send: - Receive/send every: 5 min Map date: 2011-02-12 Forecast from: - Sent: Received: From start: 0 KB 0 KB Download TRF dataThe "Download TRF data" function allows to manually download LiveDrive! data for the given map area (point on the map/GPS position) or for the mapped route. Data downloading finishes with a confirming message. The function operates only in Poland. To download data, active Internet connection is necessary.
AM'Traffic events
This function enables downloading and displaying traffic events for the whole country. They are presented on the map as icons for POIs and can affect route calculation.
The downloading is performed in the AM'Traffic Events window with the "Download" or "Get" button (a function for a hardware key is available). The downloaded events are displayed in relation to the distance from the current point on the map. They can be additionally filtered with "Show only current" and "Show only on the route" options.
List of traffic events:
| Beginning of events | Description of events | End of events |
 | Block |  |
 | Other obstructions |  |
 | Catastrophe |  |
 | Road works |  |
 | Accident |  |
2.14 Accident menu
The "Accident" function enables fast access to emergency information.
An emergency text message can be forwarded to the ICE number by tapping on the "SMS for help" button. The driver's current position can be determined directly by tapping on the "Where am I" button, list of contact phones to the most popular insurance companies - "Reporting damages". By selecting the "Driver's must-have" option, developed in shared effort with Gazeta Wyborcza, the driver will have access to first aid instructions, procedures to be observed in a road emergency, a list of traffic fines, the rights and obligations of the driver and the police officer.
Driver's must-have
Driver's must-have is a set of information concerning:
•delivering first aid,
•information about actions to be taken in case of an accident or crash,
•table of fines,
•table of penalty points for traffic regulations violations,
- driver's and police officer's rights and duties,
•current list of traffic signs.
Each section above has the table of contents. It can be extended and one can navigate between the sections.


enlarge/reduce the font size, revert to defaults.
go back to the must-have main menu.
SMS for help
The function is only active in devices equipped with the GSM module. When selected, an emergency message is automatically sent to the ICE number saved in the contacts. If the number is not found, AutoMapa will ask to enter it manually or select one from the contact list.
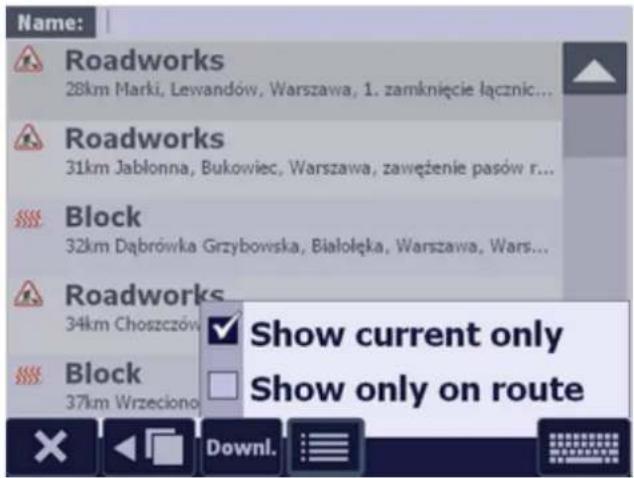
text_image
Accident Driver's must- have SMS for help Where am I Drive for help Reporting damagesSample message content:
AutoMapa user: John Doe is asking you for help.
Current position unknown (GPS off).
GPS position at 09.23 a.m. is:
N 52°19'53.32" E 20°56'04.09"
Address: Odkryta 29B (distance 30 m)
Białołęka, PL
Where am I
The function allows to quickly determine the current position on the map.
Go for help
The "Go for help" function provides the driver with fast access to information about the nearest hospitals, doctor's offices, police stations and pharmacies. The system will map a walking or a driving route to the requested location.
When a given emergency service button is tapped, software will display a list of outlets closest to the driver's current location.
When the driver taps on a given emergency service button, software will automatically map the route from the driver's current location to the requested service outlet.
By tapping on the "Back" and "Forward" buttons, the driver can scroll to other screens containing a list of the nearest emergency service outlets.
Report a loss
Here one will find the list of insurance companies along with current contact phone numbers.
AutoMapa
Current position unknown (GPS off).
GPS position at 19:17 (10-10-15) is:
N 51°44'01.24" E 19°28'26.00"
Address: Rzgowska 64 (distance 40m)
Górna, PL


Enable GPS
Direct (route) to the nearest
(click the selected field)
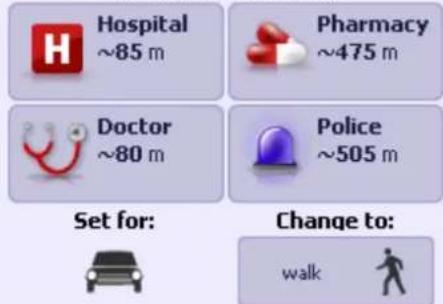
text_image
Hospital ~85 m Pharmacy ~475 m Doctor ~80 m Police ~505 m Set for: Change to: walk
Contact with insurance service providers
| Allianz | 801 10 20 30 |
| +48 22 567 67 00 | |
| Aviva | 801 28 28 28 |
| +48 22 563 28 28 | |
| Axa | 1 95 22 |
| +48 22 599 95 22 | |
| Benefia14.pl | 801 080 300 |
| +48 22 544 14 14 | |
| Grupa Concordia | +48 61 858 48 08 |
| Mon-Fri 7:00 | +48 61 858 48 65 |
2.15 Help and info menu
It is available in the main menu, on the second tab. It contains the following options:
Help - opens the user manual.
About... - contains data of the licence owner, program and map version, information about AutoMapa creators and the licence contents.
Country information - contains important information for drivers: basic information, speed limits, fares for toll roads.
Help and information
 Help Help |  About... About... |  Country information Country information |
3 Advanced features and system settings
This section describes advanced system features omitted above, as well as all the available settings selectable in various application screens.
3.1 Route menu
Route menu includes many options useful for calculating and handling the program routes. The menu is divided into two screens, selectable by pressing arrow buttons. To exit to the main window, tap X. Most menu options are only available for route calculation.
In simplified mode, the "Route" menu is composed only of key route-related options. The section below describes the full version of the menu screen.
Demo
Select Demo to show a demonstration of the calculated route. The operation is identical to the playback of the stored GPS track. After reaching the destination, the demonstration starts once again.
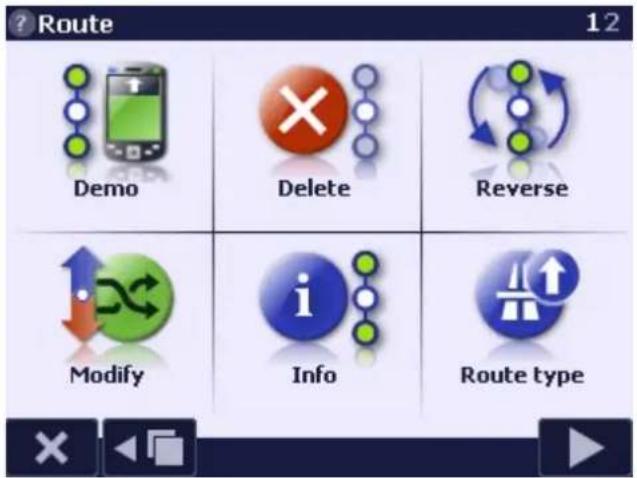
text_image
Route Demo Delete Reverse Modify Info Route typeShow all
The application scales the map to fit the complete route on the screen.
Reverse
Reverses the order of route points to create a return route that connects the same points, but in the order reverse to the previously calculated one.
Info
Multi-screen dialog box featuring information related to the calculated route:
Route points window includes a POI reordering option (using arrow buttons by the name of route point) and a simple optimization of THROUGH points that consists in finding the THROUGH point closest (as the crow flies) to the START point. Then the second closest point is found, etc., until all the THROUGH points have been reordered. Another function available in this window is the "Swap" the route points and the "Return the original" - it reverts to the original route settings if the user selects this option prior to accepting the changes.
NOTE: In the description of each route point, two distances from the Start point are given. The first denotes the distance considering the calculated route, the second - as the crow flies.
The General route info window informs about the length of the calculated route and the ETA. This window also displays information about the Start and End points time zones.
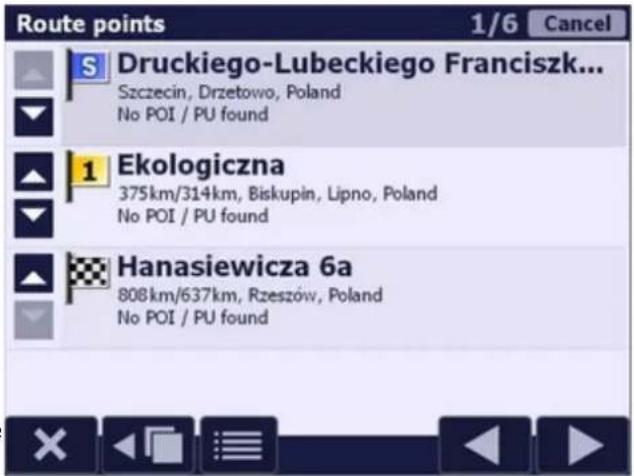
text_image
Route points 1/6 Cancel S Druckiego-Lubeckiego Franciszk... Szczecin, Drzetowo, Poland No POI / PU found 1 Ekologiczna 375km/314km, Biskupin, Lipno, Poland No POI / PU found Hanasiewicza 6a 808km/637km, Rzeszów, Poland No POI / PU foundThe Lengths and times window shows the division of the route into road types, length and driving time.
The Manoeuvres window - a list of route manoeuvres. Possibility of counting them from the START point or from the previous manoeuvre. By clicking the manoeuvre directly, the user may display it on the map or block it.
The Unwanted manoeuvres window - if the route goes via blocked sections, the program will take account of them in this window. Clicking the manoeuvre directly allows to show it on the map or unlock it.
The Route parameters window allows to change the basic route parameters.
Delete
Deletes the route points set on the map.
Route type
Option for selecting one of six route types (not all available in simplified mode). The available route types are described in Chapter 2/Navigation/Route mapping.
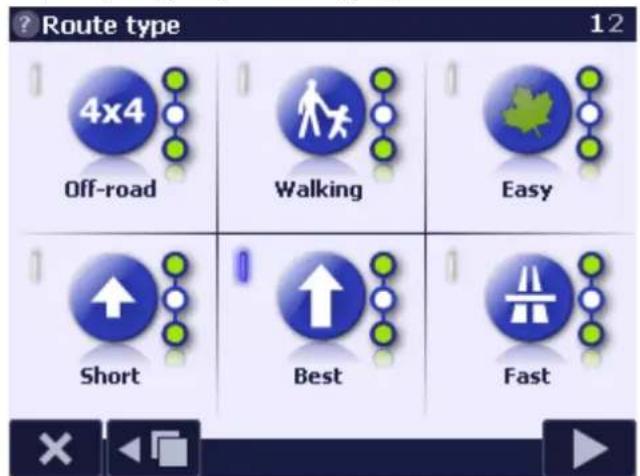
text_image
Route type 4x4 Off-road Walking Easy Short Best FastFast
Calculates a fast route. If route points have been set, it recalculates the current route in accordance with the fast route algorithm, and if no points have been set, it changes the type of route to be calculated. For more information on routes, see section "Route calculation".
Best
Calculates the best route, i.e. the average between the fast route (where throughput is the priority) and the short one. You can change the relation between the two types in the settings.
Short
Calculates a short route.
Off-road
Calculates an off-road route.
Walking
Calculates a walking route.
Easy
Calculates an easy route.
Cross-country
Calculates a cross-country route.
3.1.1 Modify
This item offers the following options:
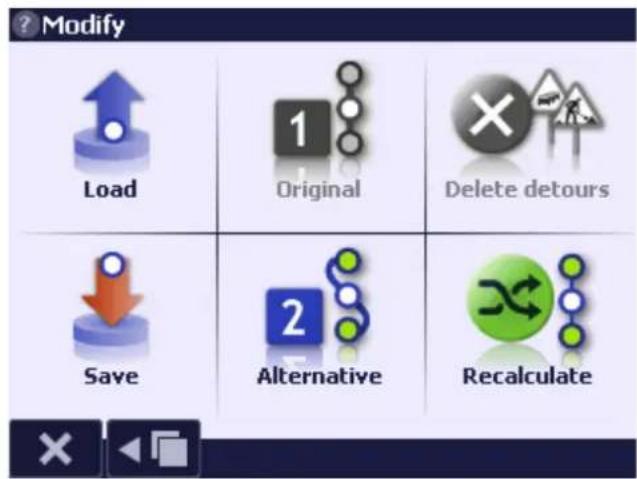
text_image
Modify Load Original Delete detours Save Alternative RecalculateLoad
Loads route points saved in an atm file. The file's location should be selected on the device.
Save
Saves route points to an atm file. The file can be saved in any location on the device.
Original
Calculates the original route.
Alternative
Other from START, END and VIA points, this option attempts to use alternative roads throughout the entire course of this route.
Delete detours
Deletes temporary detour roadblocks created with the "Detour" function available from the Show position pop-up menu in the navigation mode.
Recalculate
Recalculates the determined route; function available only after specifying the route points and refusal to calculate it. In navigation mode, it is replaced with option "Calculate from the current position".
3.1.2 Blocked sections and areas
The list of all blocked sections is displayed: blocked sections are displayed first, and they are marked with a red circle (traffic ban), while unblocked sections - with a grey circle. In the list of blocked areas (accessible by tapping on the "Areas" button), blocked areas are marked with a red circle (traffic ban), and unblocked areas - with a grey circle. This option enables the user to: view the blocked section or area on the map, unblock the section or area, modify its beginning and/or expiry date, remove all blocked sections or areas.
Blocked sections or areas can be saved to a file, loaded, added from a file or imported from previous system versions.
3.2 GPS menu
GPS menu groups functions required for GPS device operation in the program.
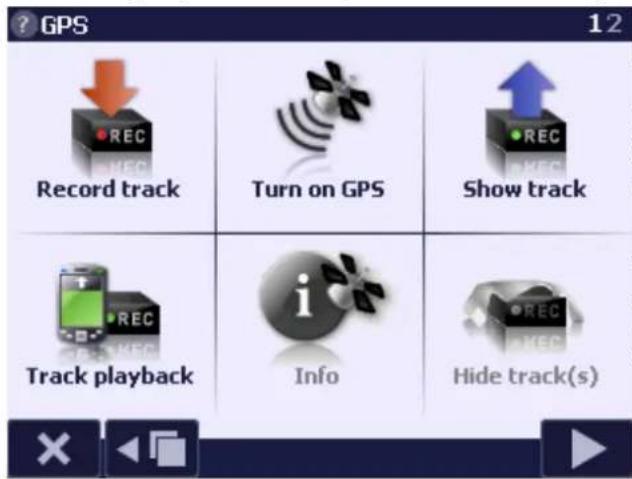
text_image
GPS 12 Record track Turn on GPS Show track Track playback Info Hide track(s)3.2.1 GPS tracks
A GPS track is information stored on the PC, obtained from the GPS antenna, which can be saved to the program when the GPS receiver is enabled. The track is saved to two files with user-defined names and the following extensions: .gps and gps.bin.
Show track
Shows the saved track as a green line on the map. The map is scaled to fit the complete track on the screen. The display can also show several tracks simultaneously.
Hide track(s)
Hide track(s) displayed on the map.
Track playback
Shows the GPS position based on a previously saved track. The operation is similar to driving with the GPS receiver enabled, also the navigation feature is available.
During track playback, the top of the screen shows keys that speed down, stop or speed up track playback. The number to the right of the keys shows the playback speed as a multiple of the driving speed.
Enable track storage
After you provide the file name and location, the information from the GPS receiver will be saved. This is symbolized by a red square in the bottom left corner of the screen. REC

text_image
85 meters Jagiellonów, rondo Speed: 40 km/h To dest.: 910 m Remaining: 4 min 2D 1x 50 455 m Menu 3 Maja, Bydgoszcz, B...Save route as a track
Converts the route calculated on the map and saves it as a GPS track. The resulting file may be used as a standard GPS track from live recording.
Using the "Convert track" button, the user can convert the route to the KML format, so that the GPS track can be viewed with Google Earth.
Convert track
By default, the route track is saved in ".gps" format. AutoMapa enables conversion of the route track from ".gps" to ".kml" format. KML stands for Keyhole Markup Language, it is the language for saving geographical data, thanks to which the route track saved by AutoMapa can be read by travel route visualisation applications, like Google Earth.
Click the "Convert track" button to open the route track format converter screen.
The "GPS track details" option, when selected, allows storing all data related to the route track in the ".kml" format - it is checked by default.
To convert the track format, first select the ".gps" file in the device memory: click the "GPS track (.gps)" field and select the target location for the ".kml" track file. By default, for the ".kml" file, the ".gps" location and file name will be selected. Click the "Google Earth track (.kml)" field to change the location and the file name.
Start the conversion by clicking the "Convert" button. You can stop the process at any time by clicking the "Stop" button.
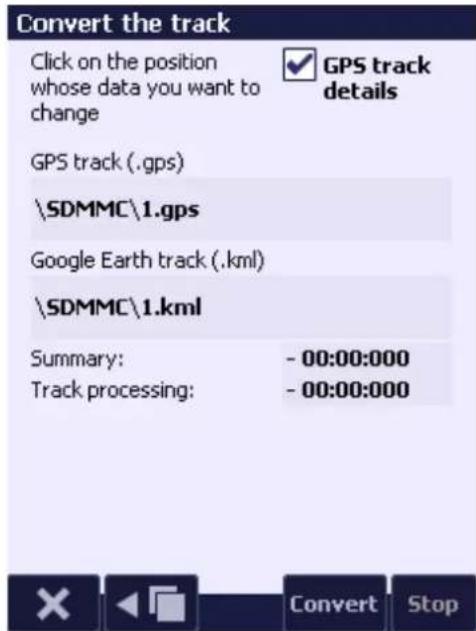
text_image
Convert the track Click on the position whose data you want to change GPS track (.gps) \SDMMC\1.gps Google Earth track (.kml) \SDMMC\1.kml Summary: Track processing: - 00:00:000 - 00:00:000 Convert Stop3.2.2 Other GPS functions
Info
This dialog box shows 3 screens of information on the current GPS signal:
- satellite signal level - green bars show the relative strength of the GPS signal of satellites used by the antenna, yellow bars - of other detected satellites,
- your current position, speed, altitude, and direction,
- current raw GPS data dump in text form.
GPS mini status
GPS mini status appears in the GPS signal searching message. The green bars show the relative strength of the GPS signal from the satellites that the antenna uses, yellow - other detected satellites, grey - undetected satellites.
Enable/Disable/Detect
Depending on the current operation, this option will enable or disable GPS. If the GPS port has not been detected automatically, the operation can be repeated when this option is called "Detect."
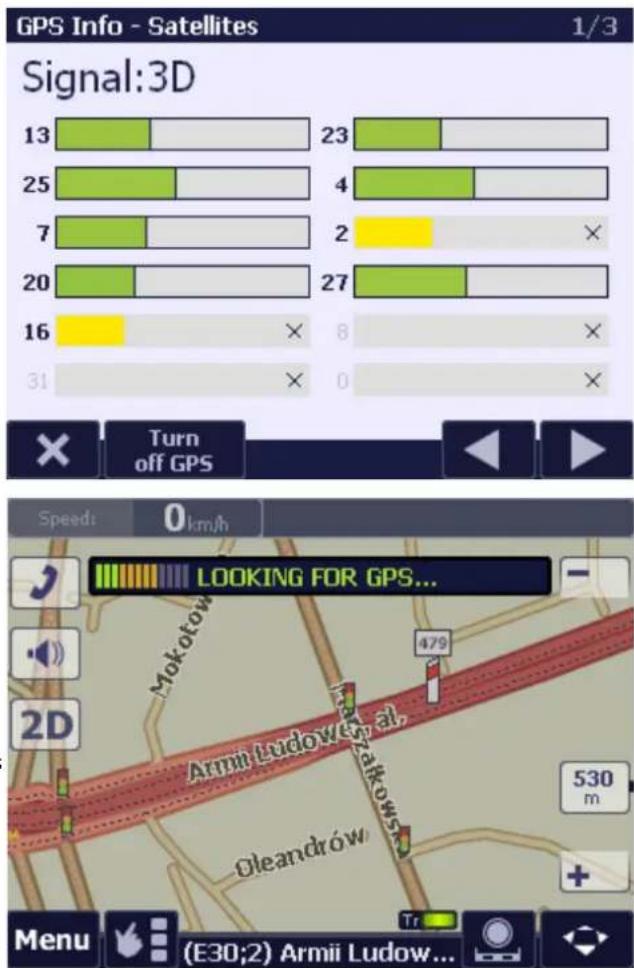
text_image
GPS Info - Satellites 1/3 Signal:3D 13 23 25 4 7 2 20 27 16 8 31 × × 0 Turn off GPS Speed: 0 km/h LOOKING FOR GPS... Mokotów 479 Armii Ludow, Poland, Oleandrów 530 m 2D Menu (E30;2) Armii Ludow...3.3 Settings menu
In the settings menu (select "Settings" from the main menu) you can change many useful parameters of software to fit your preferences and requirements of your device.
3.3.1 Interface - Settings
With interface settings you can change the appearance of the screen in accordance with your preferences.
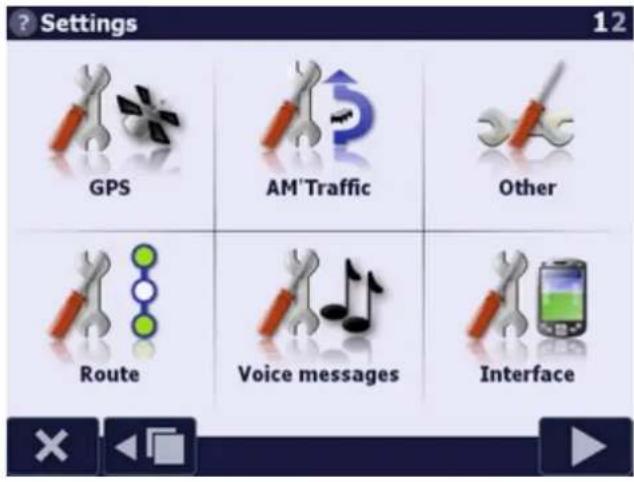
text_image
Settings 12 GPS AM'Traffic Other Route Voice messages InterfaceMap
In this box you can change the way the map is displayed on the device screen.
Show road outlines – you can configure drawing the outlines of road sections on the map, speeding up the program operation.
Small / large label fonts on the map - specifies the size of fonts displayed on the map.
Hide local roads at the distance - specifies the scale for hiding lower grade roads.
Show widened roads - enables/disables the widened road sections on the map
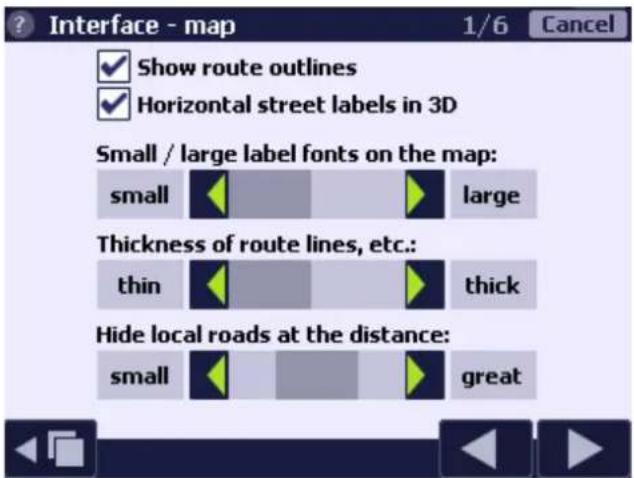
text_image
Interface - map 1/6 Cancel ✓ Show route outlines ✓ Horizontal street labels in 3D Small / large label fonts on the map: small large Thickness of route lines, etc.: thin thick Hide local roads at the distance: small greatView
With these options you can adjust the colours of the map to reflect your preferences, and change the manner of its display in 3D mode.
Map colours in day mode – specifies the map colour set, selected separately for day mode.
Map colours in night mode – specifies the map colour set, selected separately for night mode.
Horizon (in 3D view) - specifies the method for displaying the horizon in 3D mode.
Inclination (in 3D view) - specifies the method for displaying the map slope, depending on the scale ("Auto") or at a set value.
Preferences
In this screen you can enable/disable the following options used during navigation:
Automatically run - Enables/disables automatic running of the following options:
- switching to 3D mode – the map will be automatically switched to the 3D mode
- switching to night mode - if this option is activated, the program will automatically (based on the GPS reading, including the position, time of day and year) switch to night mode, i.e. it will change the colours of the map and of other components of the screen to a setting more suited to night-time navigation, which does not tire the eyesight and does not dazzle during the drive, when the car interior is dark.
•turning the map in the driving direction – in
showing position and navigation mode, the map is
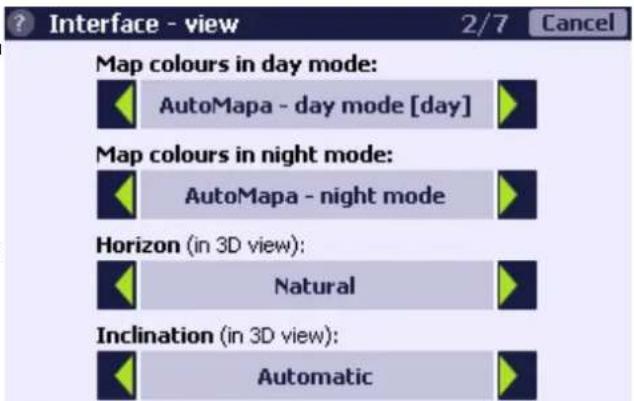
text_image
Interface - view 2/7 Cancel Map colours in day mode: AutoMapa - day mode [day] Map colours in night mode: AutoMapa - night mode Horizon (in 3D view): Natural Inclination (in 3D view): Automatic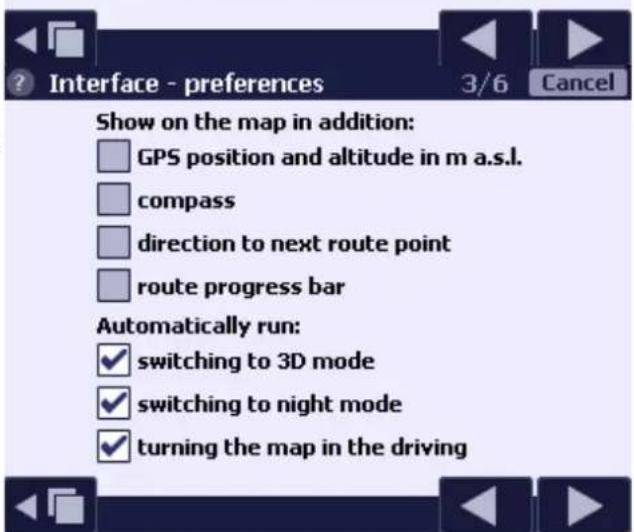
text_image
Interface - preferences 3/6 Cancel Show on the map in addition: □ GPS position and altitude in m a.s.l. □ compass □ direction to next route point □ route progress bar Automatically run: ✓ switching to 3D mode ✓ switching to night mode ✓ turning the map in the drivingrotated in the direction of user rotation. If disabled, the map will always be oriented to the north, and the cursor
of GPS position will be located at the middle of the screen. Note: this option does not apply to map rotation in 3D mode, i.e. map auto-rotation may be disabled only in 2D display mode.
- hardware screen rotation - activates screen rotation triggered by the sensor.
Show on the map in addition – in this section, you can select additional horizontal street labels in 3D, display of GPS position and altitude, the compass indicating the direction of travel and the direction to the next route point (displays an additional arrow on the map screen, indicating the direction to the next route point), as well as the route progress bar.
Preferences part 2
In this window, you can enable/disable:
•built-up area icon,
•speed limit sign,
- chainage,
•additional vertical arrows,
•lane assistant,
•direction indicator to the next route point,
- route progress bar,
- menu animations.
Scale
The two first screens enable the users to adjust the scale used automatically with the following modes: city scale in 2D mode, city scale in 3D mode, intermediary scale 2D, intermediary scale 3D, overview scale 2D, overview scale 3D.
On the last screen you can enable/disable automatic zooming in/out of the map upon turning or POI warnings: the application will change the scale at the turn or in the proximity of the POI, to ensure their improved visibility on the screen. AutoMapa also offers the adjustment of the scale for map zooming in/out.
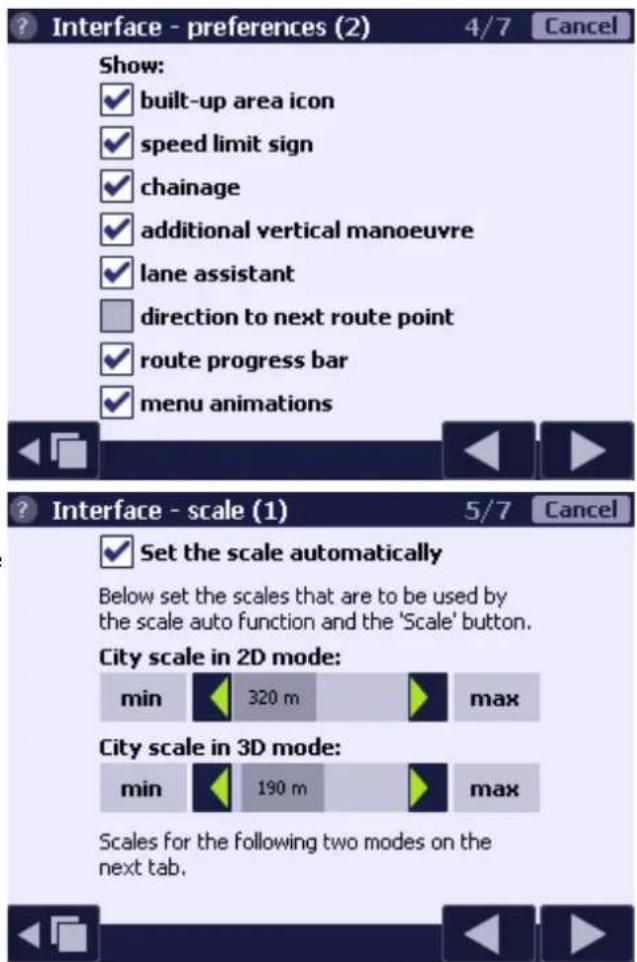
text_image
Interface - preferences (2) 4/7 Cancel Show: ✓ built-up area icon ✓ speed limit sign ✓ chainage ✓ additional vertical manoeuvre ✓ lane assistant □ direction to next route point ✓ route progress bar ✓ menu animations Interface - scale (1) 5/7 Cancel ✓ Set the scale automatically Below set the scales that are to be used by the scale auto function and the 'Scale' button. City scale in 2D mode: min 320 m max City scale in 3D mode: min 190 m max Scales for the following two modes on the next tab.3.3.2 Route - Settings
In this dialog box you can specify additional parameters for the program route calculation function.
Car details
In this box you can include the speed profile when calculating the route and set the average speeds for particular road grades, and the related estimated fuel consumption.
The above data influence the estimated time of arrival (ETA), including the values displayed in the route info ("Route|Info" menu), and the traffic speed during route demonstration ("Route|Demo" menu).
The "All" road type is the obligatory maximum speed limit for all road categories.
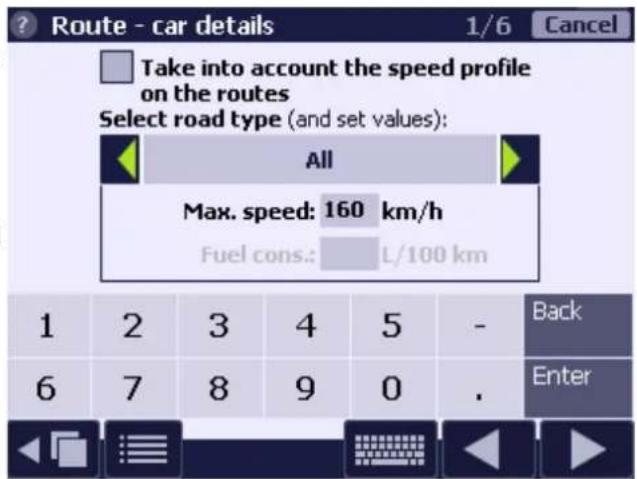
text_image
Route - car details 1/6 Cancel Take into account the speed profile on the routes Select road type (and set values): All Max. speed: 160 km/h Fuel cons.: L/100 km 1 2 3 4 5 - Back 6 7 8 9 0 . EnterCar details 2
On this screen the user can choose to include the restrictions for truck vehicles. Select the Truck vehicle option to determine the vehicle's total weight, axle load and dimensions. Additional options are displayed after the above parameters have been specified:
"Privileged" transit. The user can disregard regulatory or periodic "tonnage" limits.
Non-standard heights. The user can choose whether the displayed restrictions account for traffic sign information or the actual dimensions (for non-standard vehicles that require a transit permit).
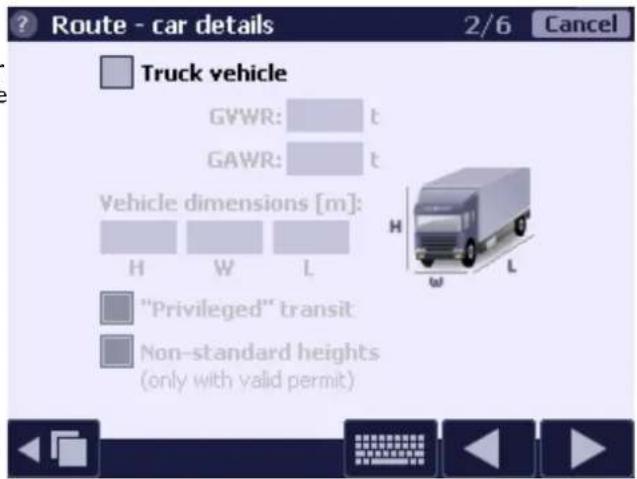
text_image
Route - car details 2/6 Cancel Truck vehicle GVWR: t GAWR: t Vehicle dimensions [m]: H W L "H "L "Privileged" transit Non-standard heights (only with valid permit)Preferences
In this screen, the following preferences can be set:
Route mapping:
- automatic during Start and End – if this option is selected, the route will be calculated after START and END points have been determined; when this option is not activated, the system will remember route points, but the route will not be mapped. The "Calculate route" option in the Route menu, "Modify" option, can be selected to map the route based on the above points.
- ask for parameters before mapping - when this option is chosen, the driver will be able to set selected route parameters before the route is mapped.
The user can also set preferences regarding toll roads, ferry crossings and highways. The driver may be prompted to select a given option, the program may accept the chosen options unconditionally ("OK") or skip them.
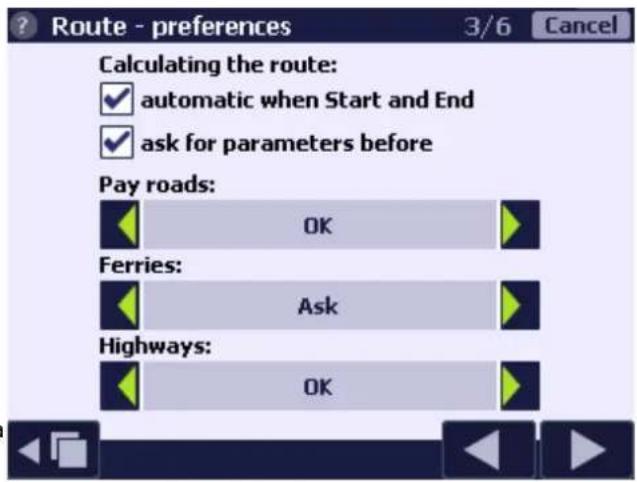
text_image
Route - preferences 3/6 Cancel Calculating the route: ✓ automatic when Start and End ✓ ask for parameters before Pay roads: OK Ferries: Ask Highways: OKCalculation
Skip roads of class (and worse) – skips road sections of class equal or worse than specified. This option does not apply to off-road or walking routes.
...detour no more than - sets the maximum detouring distance when the driver chooses to skip roads selected in the Skip roads of class (and worse) option.
Cost of U-turn - sets the number of kilometres that can be added to the route in order to avoid a U-turn upon leaving the selected route. If one wants the system to calculate a new route upon ignoring a manoeuvre, one should set this option for the maximum value.
Do not cross borders when detouring - sets the maximum distance after which the mechanism preventing border crossing will be activated for calculating the route.
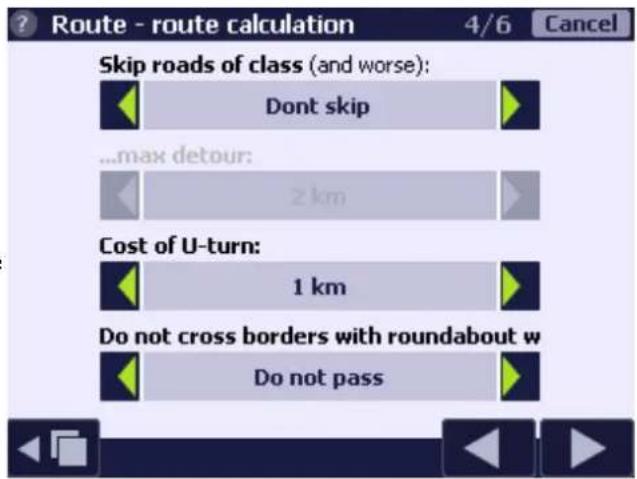
text_image
Route - route calculation 4/6 Cancel Skip roads of class (and worse): Dont skip ...max detour: 2 km Cost of U-turn: 1 km Do not cross borders with roundabout w Do not passOther
Delete route after reaching destination - deletes the route after reaching the END point.
Sort THROUGH points - the function automatically activates a simple THROUGH points optimization: it finds the THROUGH point next (as the crow flies) to the START point. Then the following point is found next to the one found previously. It goes on until all THROUGH points become reorganized.
After mapping - chooses which view is to be displayed directly after the route is mapped. This option may display the entire route, route information or the first manoeuvre on the given route (with the pilot panel), alternatively, the map view may remain unmodified.
Optimal route - parameterises the optimal route mapping algorithm to ensure that the mapping process relies more on road throughput (fast route) or road length (short route).
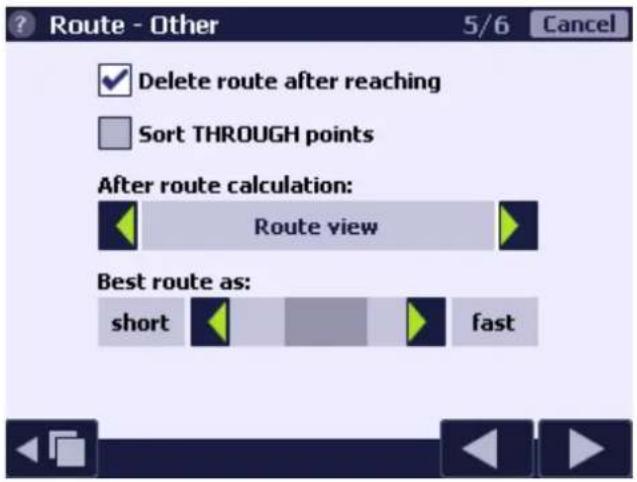
text_image
Route - Other 5/6 Cancel Delete route after reaching Sort THROUGH points After route calculation: Route view Best route as: short fastETA
In the last window, you can set the length and frequency of the planned stops in the route, as well as the ETA (Estimated Time of Arrival).
This window allows to determine the method in which the system will estimate time needed to reach the destination. For this purpose, the system may use declared average speeds (the vehicle data settings screen), the AutoMapa Traffic system and/or the average current speed. By default, the first two parameters are used. The km/h value at the top of the screen is the current average vehicle speed calculated by the program.
If you enable the use only av option, determining the ETA will only show in the pilot when the navigation has been in operation for at least the period set by the 'Calculate av. Speed from last' parameter.

text_image
Route - ETA 6/6 Cancel Calc. stop 30 min every 180 min For ETA calculation: ✓ don't use av. speed use only av. (55 km/h) Calculate av. Speed from last: 15 min Do not include stops longer than: 2 min3.3.3 GPS - Settings
General
In this window you can select the general settings for GPS operation.
Option Start GPS at program start is automatically enabled by default.
Synchronize clock with GPS time - the computer's system time is synchronised with the time of the GPS signal.
GPS connected to port and Reading speed from port - selection of GPS port and its speed is made automatically in the COM1-9 range for speeds 4800 and 9600 bps. If the GPS device uses a different COM port or different port speed, manually select the correct parameters in accordance with the data provided by the manufacturer.
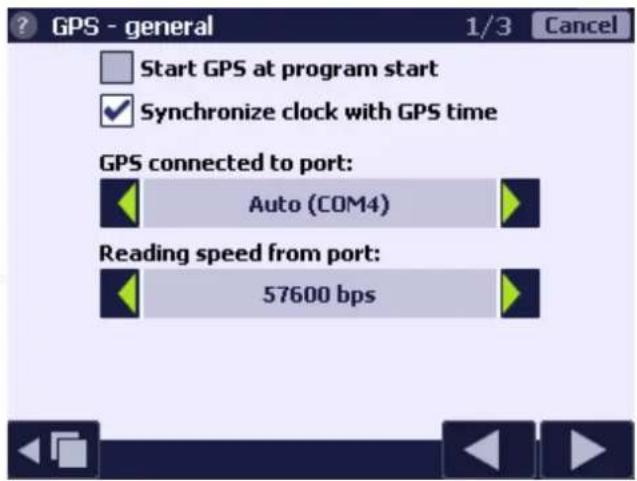
text_image
GPS - general 1/3 Cancel Start GPS at program start Synchronize clock with GPS time GPS connected to port: Auto (COM4) Reading speed from port: 57600 bpsAdvanced
Advanced GPS settings are available on two subsequent screens, that is:
Use Bluetooth GPS receiver - allows to activate the BT module in the computer if it is off. It also helps if there occur problems with the renewal of the BT connection with the GPS device after leaving the sleep mode.
Hide Bluetooth Browser - on older devices with Windows Mobile, it helps to hide the BT device selection window.
Compensate signal delay - adjusts the position forecasting "strength".
Ignore GPS Deviations - specifies the value of deviation of your GPS position from the road network on the map to be ignored, with the position still drawn at a section of the closest road.
Advanced 2
For options Open port only when in use and Read COM port in separate thread it is not recommended to change the default settings, unless you are experiencing problems with the connection to the GPS device. The default settings are specified by program.
Reading frequency of GPS port - enables the setting of time delay between subsequent readings of the GPS port. The higher the frequency, the better the accuracy (but, potentially, lower efficiency).
Save track automatically - enables the user to save the GPS track during every journey while reducing the size of the saved file to that selected in the "to files with max. total size:" option.
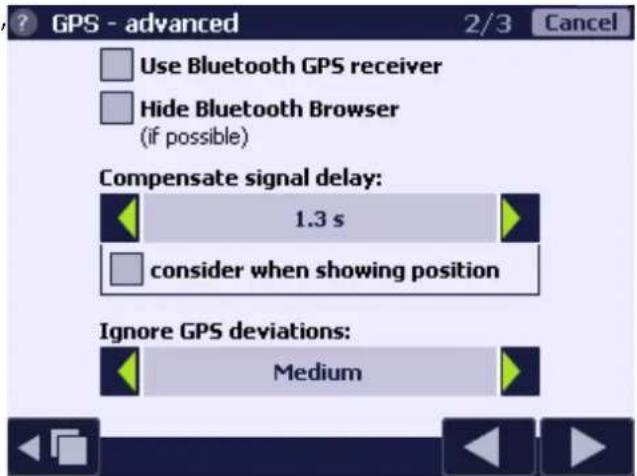
text_image
GPS - advanced 2/3 Cancel Use Bluetooth GPS receiver Hide Bluetooth Browser (if possible) Compensate signal delay: 1.3 s consider when showing position Ignore GPS deviations: Medium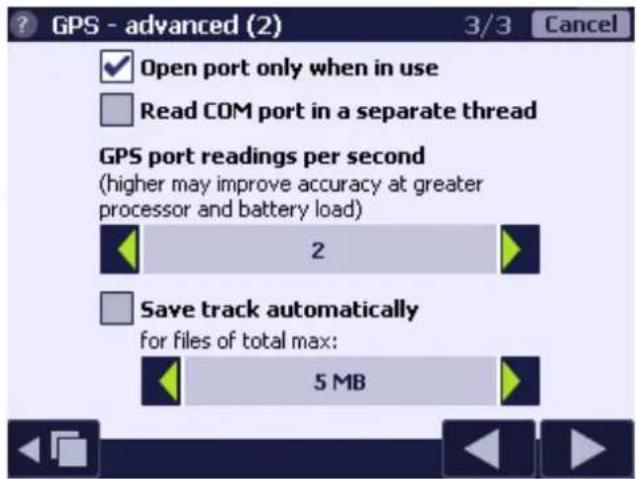
text_image
GPS - advanced (2) 3/3 Cancel Open port only when in use Read COM port in a separate thread GPS port readings per second (higher may improve accuracy at greater processor and battery load) 2 Save track automatically for files of total max: 5 MB3.3.4 Voice messages - Settings
Volume
AutoMapa handles volume – device volume is specified by the application.
Note: volume adjustment is made only for the time of system playing the voice messages.
Constant message volume - volume slider allows you to increase or decrease the volume of messages, which will not be adjusted in accordance with the speed of your car.
Volume adjustment can also be executed automatically, based on the vehicle speed. During fast drive, the interior of the car is noisier than during slow drive. The settings shown at the right-side of the screen should be interpreted as follows: with the speed below 40 km/h, the volume remains at the level of 50% and increases on a straight-line basis once the speed exceeds 40 km/h, only to achieve the maximum setting of 90% if the speed reaches 120 km/h. At speeds greater than 120 km/h, volume remains at the level of 90%.
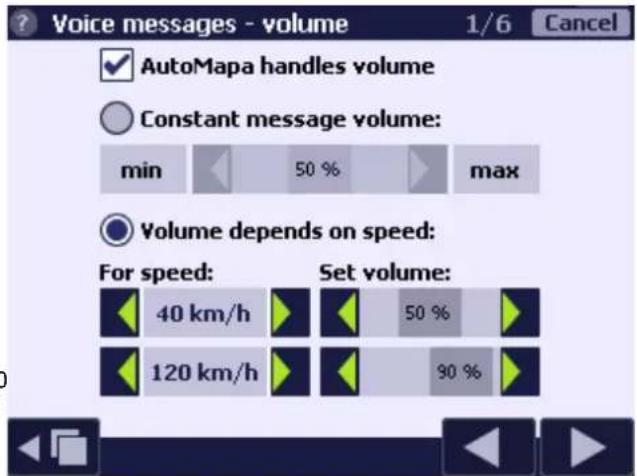
text_image
Voice messages - volume 1/6 Cancel ✓ AutoMapa handles volume ○ Constant message volume: min 50 % max Volume depends on speed: For speed: 40 km/h Set volume: 120 km/h 50 % 90 %Preferences
In this window you can select the language of voice instructions and voice messages. The "Test" button can be used to check the current language and voice selection.
Notify about searching GPS signal - the message is
"Searching for GPS signal". You can change the frequency of the message or turn it off.
Inform about distance to destination - regards voice message with information on the distance to destination and estimated time of arrival; this message can sound after route calculation and every specified number of minutes.
Options
Specifies which message groups are turned on, and which are off (navigational, warning about POI, about turning off the route, welcome message).
Selecting the option Alternative form of messages means changed reversed order of messages. Instead of "In 600 metres, right", the message will be "Right, in 600 metres".
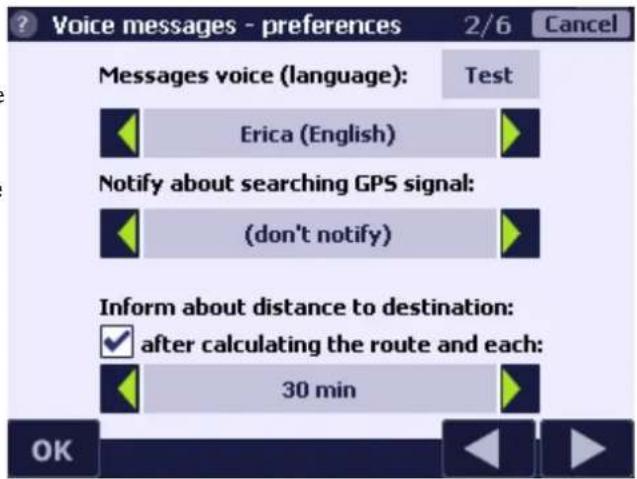
text_image
Voice messages - preferences 2/6 Cancel Messages voice (language): Test Erica (English) Notify about searching GPS signal: (don't notify) Inform about distance to destination: ✓ after calculating the route and each: 30 min OK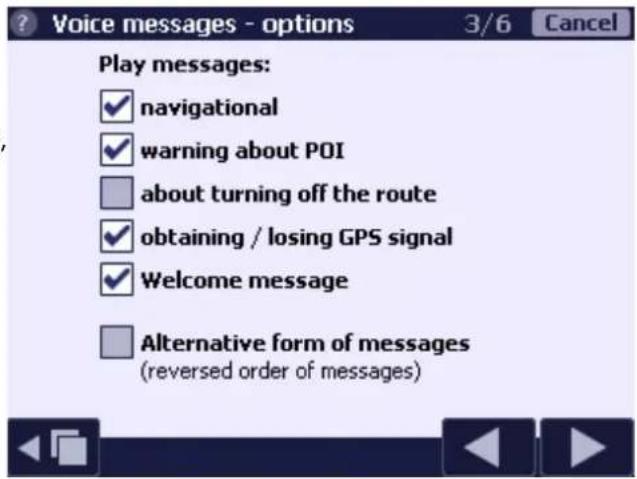
text_image
Voice messages - options 3/6 Cancel Play messages: ✓ navigational ✓ warning about POI □ about turning off the route ✓ obtaining / losing GPS signal ✓ Welcome message □ Alternative form of messages (reversed order of messages)Frequency
This window groups navigation mode settings (driving along the set route, with a GPS receiver enabled). You can specify when the next voice message for the subsequent manoeuvre will sound, where the distance to the manoeuvre does not depend on the physical distance the car has to travel but on the estimated time of covering the distance.
The first message will be played well before the manoeuvre to give you time to prepare (e.g. change the lane before a turn). The manoeuvre warning will be played at the set number of seconds before the manoeuvre, provided that the vehicle's speed exceeds the amount specified in option "Above".
The second message will be played at the set number of seconds before the manoeuvre.
AutoMapa also offers the option of playing an additional message at a defined time before the manoeuvre, but only in a situation where the car travels with speed higher than specified in option only above.
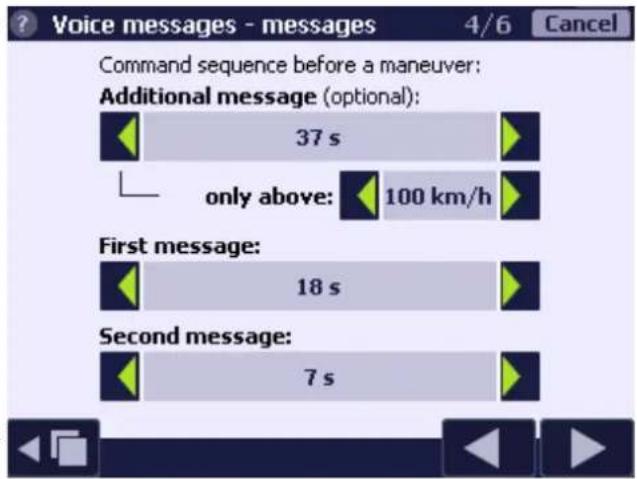
text_image
Voice messages - messages 4/6 Cancel Command sequence before a maneuver: Additional message (optional): 37 s only above: 100 km/h First message: 18 s Second message: 7 sTurns/straight
Inform about slight turns - limits the "slightly left/right" messages displayed on the route to the minimum.
Inform about turns - Disables the option of informing about turns.
Show "Straight" when - defines the distance to a manoeuvre, above which program shows "straight".
Signal "Straight" manoeuvres - limits the "straight" messages displayed on the route to the minimum.
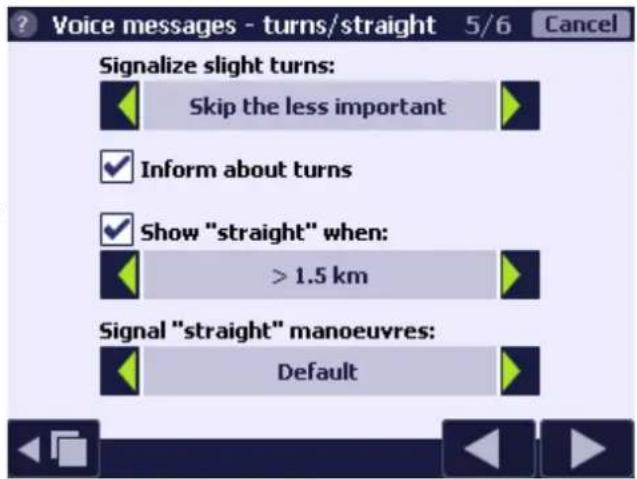
text_image
Voice messages - turns/straight 5/6 Cancel Signalize slight turns: Skip the less important Inform about turns Show "straight" when: > 1.5 km Signal "straight" manoeuvres: DefaultSpeed
If you want to receive warnings about exceeding the safe speed limit, you can specify its value and enable a relevant warning. The safe speed is the limits and multiplication of 10 km/h. The limits are speeds for the given road grade, determined in the map. (If there is no limit in the map, the speed profile specified at the Settings | Route | Car details screen is taken into account).
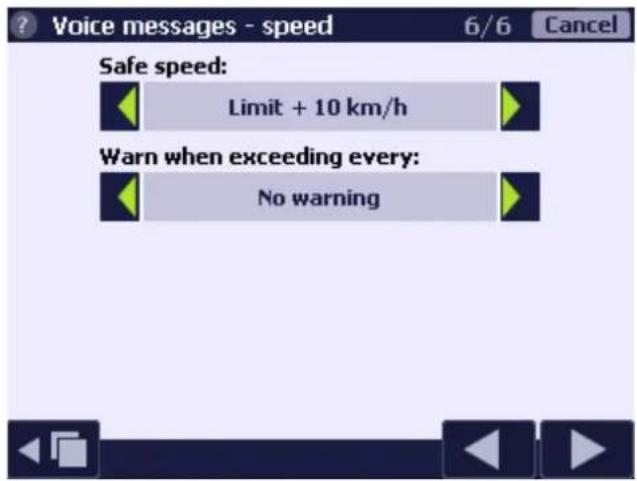
text_image
Voice messages - speed 6/6 Cancel Safe speed: Limit + 10 km/h Warn when exceeding every: No warning3.3.5 Buttons - settings
The program enables assigning of many of its functions to hardware buttons of the user's device.
To assign/change function assignation, select menu "Settings" from the main menu, then select "Buttons". Tap on one of the options listed to open a hardkey selection window. Select a button from the list to assign it to a chosen function. The application will try to detect the device's buttons, but sometimes it is unable to recognize the function buttons. If you want to assign a function to a button that is not listed, exit the list. The selected function will be highlighted in blue. Then press a hardkey to assign it to the chosen function. Follow the instructions above to assign functions e.g. to palmphone context buttons.
The same applies to system operation on a PC: select a keyboard button/button combination to assign it to a selected function.
Abbreviation NQ before function name means "No question", e.g. "(NQ) Start/stop track storage" means that you can start track recording without being asked to enter a file name, while "(NQ) Add the current position to POI" will create a POI with the
"Other") and a name taken from the POI's description on the map.
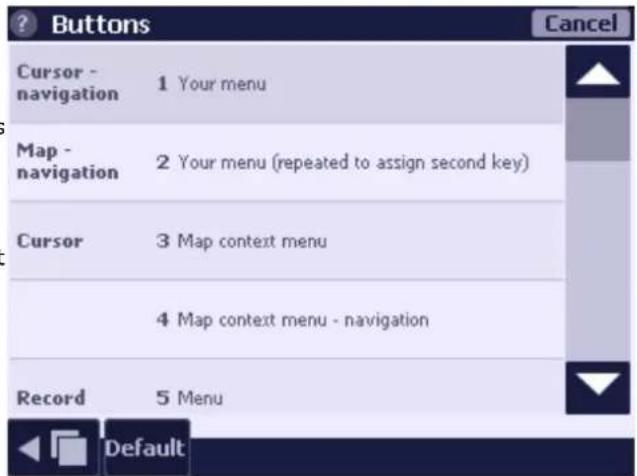
text_image
Buttons Cancel Cursor - navigation 1 Your menu Map - navigation 2 Your menu (repeated to assign second key) Cursor 3 Map context menu 4 Map context menu - navigation Record 5 Menu Defaultcategory of the most recently created point (default:
p.
Error reporting
"Report error" is an important feature that is available only by assigning it to buttons. This function helps you to send map errors to the AutoMapa support centre. By default, the function is assigned to the Enter/OK device button. It generates the following files in the map installation folder (default: "Memory card/AutoMapa EU/Maps/map name/Errors/YYYY-MM-DD")
- print screen (bitmap in .bmp format)
•GPS track (.gps and .gps.bin files)
•current route (.atm file)
• program settings at "error reporting"
The file names have the following structure:
[subsequent number].[file format]
The function will add a POI (category: "Map errors") on the map, at the place of its use.
Examples of use:
- you notice that the route calculated by AutoMapa is not the best one: run the "Error reporting" option, use the form available on AutoMapa website to describe the problem and attach the print screen and the route file.
- when driving, you notice that AutoMapa has played an incorrect manoeuvre voice message: run the "Error reporting" option, use the form available on AutoMapa website to describe the problem and attach the print screen, GPS track and the route file.
3.3.6 Others - Settings
Options
Interface language – change of the interface language selected upon the first start of the program.
Distance units - selection of units of speed and distance to be used in the program. Available options: kilometres and miles.
Keyboard layout - selection of keyboard type appearing at, e.g., municipality search; available options are: ABC - comfortable when tap-writing, QWERTY - standard PC keyboard, AZERTY - francophone keyboard layout, and Mobile - designed after mobile keyboards, enabling tap-writing even on devices with very small screens.
For devices with a built-in or a connected external keyboard, it is recommended that the Automatically show keyboard option is disabled.
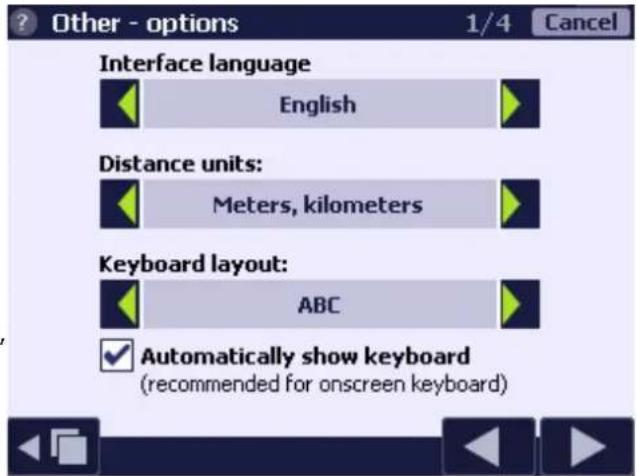
text_image
Other - options 1/4 Cancel Interface language English Distance units: Meters, kilometers Keyboard layout: ABC ✓ Automatically show keyboard (recommended for onscreen keyboard)Preferences
Interface layout("skin") – changing the interface layout by selecting one of the available skins: AutoMapa or AutoMapa Panorama.
Delete last selected - deletes last selected points (points from the list in the "History" option of the "Go to" menu"), as well as addresses (cities / towns and streets selected in the "Address" option of the "Go to" menu).
AutoMapa also offers the Restore default settings option, which resets all of the user's settings.
NOTE: The option also restores default profiles, in case of their removal from the "Delete profile" function.
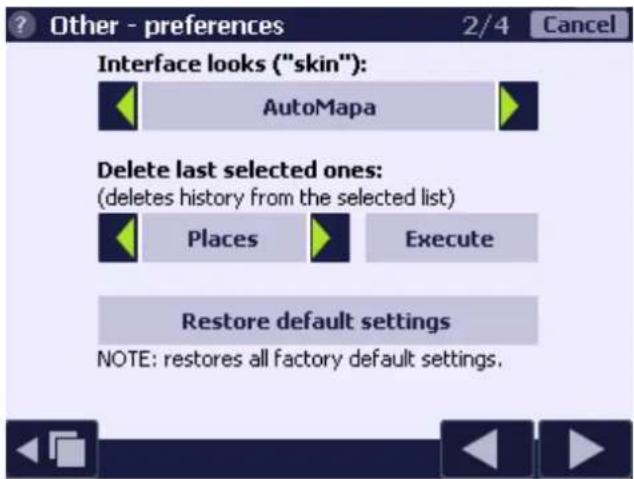
text_image
Other - preferences 2/4 Cancel Interface looks ("skin"): AutoMapa Delete last selected ones: (deletes history from the selected list) Places Execute Restore default settings NOTE: restores all factory default settings.System
Manage screen and power - prevents software from blanking the screen or entering the sleep mode when in navigation or tracking mode. If the battery runs low, the program will exit automatically (with the user's consent).
The memory options allow users to change the settings related to default device memory to be utilized by software for its maps and user POIs.
IMPORTANT! Software settings may only be changed when the car is stopped, and NEVER when driving!
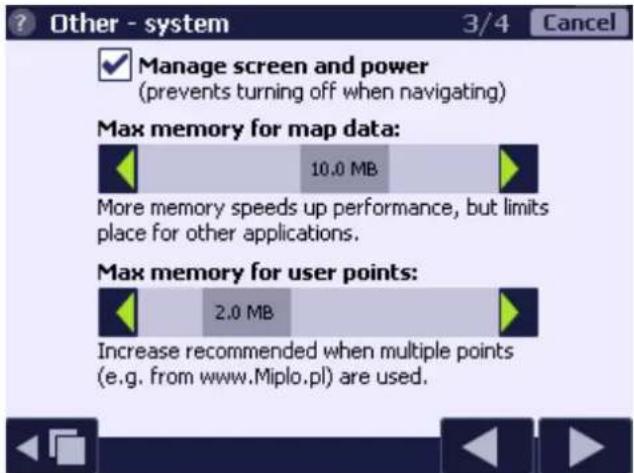
text_image
Other - system 3/4 Cancel ✓ Manage screen and power (prevents turning off when navigating) Max memory for map data: 10.0 MB More memory speeds up performance, but limits place for other applications. Max memory for user points: 2.0 MB Increase recommended when multiple points (e.g. from www.Miplo.pl) are used.Load map
Load map - loads additional maps into the system.
3.3.7 Settings: AM'Traffic
The AM'Traffic service can be activated in this screen. The program can be set to collect anonymous traffic information which speeds up map upgrades and enables the driver to skip problem areas.
AM'Traffic relies on two mechanisms: SmartRoutes (tm) and LiveDrive! (tm).
By activating the "Use SmartRoutes (tm)" option, the user initiates a mechanism for bypassing traffic jams - the route is mapped based on statistical traffic data.
By activating the "Send LiveDrive! (tm) data" option, the user initiates a mechanism which forwards anonymous traffic data at regular time intervals.
By activating the "Download and use LiveDrive! (tm) data" option, the user initiates a mechanism which receives traffic data for a given area at regular time intervals as well as a mechanism for bypassing traffic jams - the route is mapped based on the received data (3G/HSDPA). The LiveDrive! (tm) op quoted by the telecommunications operator.
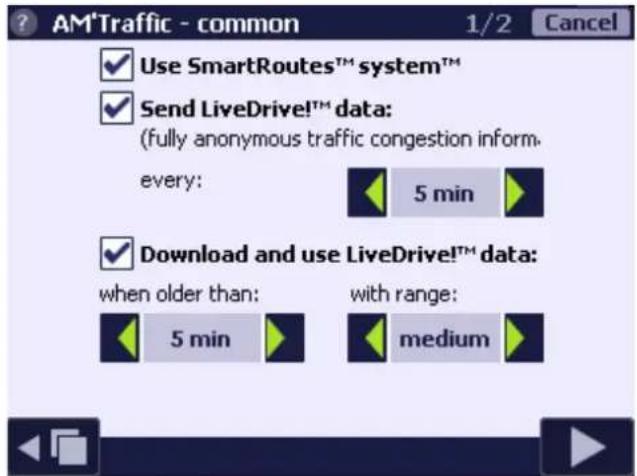
text_image
AM*Traffic - common 1/2 Cancel ✓ Use SmartRoutes™ system™ ✓ Send LiveDrive!™ data: (fully anonymous traffic congestion inform- every: 5 min ✓ Download and use LiveDrive!™ data: when older than: 5 min with range: mediumParameters
Disconnect after sending data - the connection is terminated after every data transfer.
Disconnect on program exit - the connection is terminated only after the program has been closed.
Only exchange data via a PC - the device will exchange data during synchronisation with the PC when the user's device has access to a GPS signal. Use the AMCENTER application for exchanging data without a GPS signal. The application downloads the latest data and transmits it to devices or memory cards connected to a PC.
To ensure data for SmartRoutes technology are always up-to-date in devices without the Internet access, we recommend using the AM'Center application. Using this program, devices with AutoMapa 6.5 and its future versions can be fed with current statistical data about road traffic density.
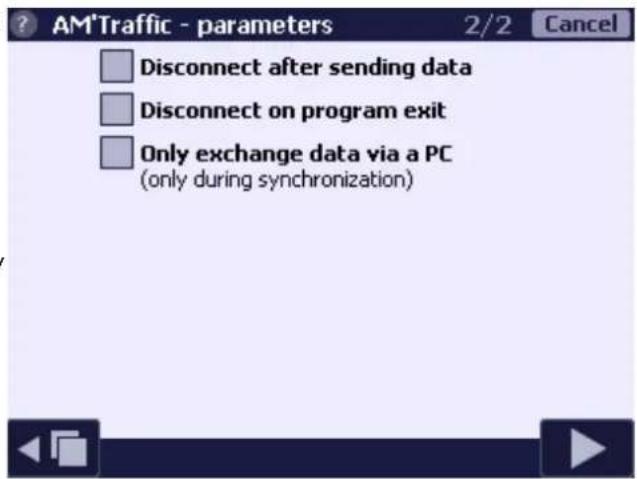
text_image
AM'Traffic - parameters 2/2 Cancel Disconnect after sending data Disconnect on program exit Only exchange data via a PC (only during synchronization)3.4 POI menu
In the POI menu ("POI" option in the main menu), you can change all the settings related to points of interest (POI).
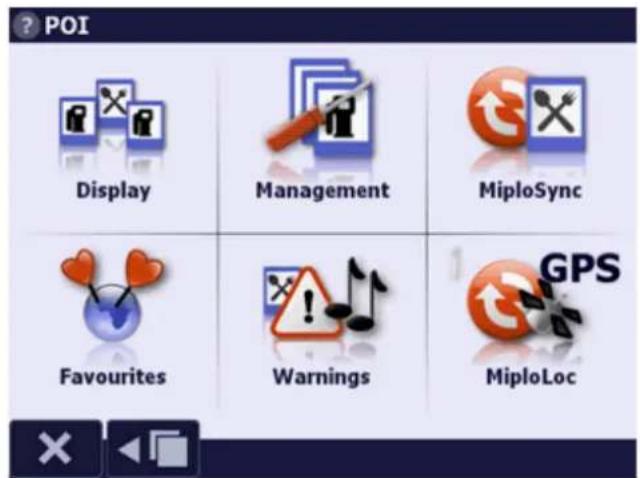
text_image
POI Display Management MiploSync Favourites Warnings MiploLocDisplay
In this option you can specify the categories of POIs displayed on the map; refer to section "POI on the map". For more details, refer to section "Displaying POIs on the map".
Favourites
Displays and edits the user's favourite POIs.
Pop-up category
Pop-up - in this category, groups of frequently used POIs can be created for easy access.
Last used
Last used - this category contains the most recently used POIs.
Notebook category
This special POI "Notebook" category, coupled with the "(BP) Add to POI" function in the MENU | Settings | Buttons, enables the user to save a new POI with a single tap of a hardware button or a screen button.
Management
In this option, you can manage the POIs you have defined or added to the system.
The POI are displayed in the form of a list, composed of a category icon, as well as the name and description of the POI. A map square to the left means that the POI will be displayed on the map. POI can be filtered by name (by entering part of that name or description in the "Name" field) or by category (by selecting one category of POI after tapping the option "Any").
After selecting a category, you can easily delete selected POIs, as the category icon disappears, only to be replaced with a recycle bin. After clicking the icon, you can select any point to be deleted. After selecting POIs for deleting, click the Delete button and Delete selected. (You can also select all points in the chosen category, by selecting Delete, then Select All.)
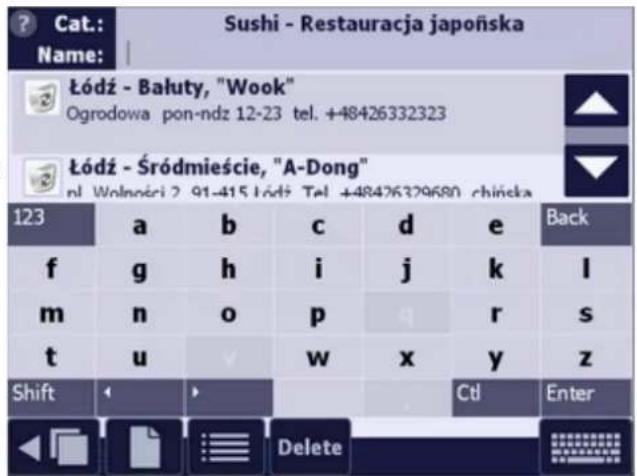
Use the File button to make the basic operations on the file containing POI (or actually on a set of files with extensions .amp, .ampdata and .ampdesc).

Menu header contains information on the currently loaded file.
Load default file loads the default file (i.e. default.amp, default.ampdesc and default.ampdata files from the "Data Files" folder of the profile currently in use).
New – creates a new empty POI file by providing its name and localization. Note! For devices running Windows CE, we suggest creating files on the memory card.
Open - loads a different existing POI file.
Save As- makes a copy of the currently loaded file and saves it under a new name and/or in a new file folder.
Add From – loads POI from a selected file to the currently loaded one, simultaneously turning on the map display of POI contained in the file.
Import - loads POI from files in formats supported by older AutoMapa versions (version 3 - .uam, version 4 - .poi, .piopts) or from a text file (.csv format). During the POI import, the system will ask the user whether it should create a separate file for imported POI. Selecting "No" causes the points to be added to the currently loaded POI file, while selecting "Yes" results in the creation of a new POI file in the same folder as the imported file.
Tapping any point on the lists opens the pop-up menu which apart from the commands detailed above, also contains an "Edit..." option. By editing a point, you can change its category, name and description.
The user can edit and delete POI or import them as files obtained from other AutoMapa users or websites (such as miplo.pl).
Warnings
The screen is used for selecting POI categories that are interesting to the user and for selecting the nature of "warning" of such a POI. For details about this option, refer to section POI Warnings.
MiploSync
Option available only in "Expert" mode. Access to this menu requires registration in the Miplo.pl service. MiploSync allows for additional updating of a POI file that is independent of the synchronization cycle specified during the configuration of the MiploSync application.
MiploLoc
Enabling/disabling the MiploLoc service. The LED located on the left side informs whether the option is currently active.
3.5 Miplo.pl website and POIs
Miplo.pl is a website devoted to points of interest (POIs). The users can easily share their own POIs and download others' POIs. There are tens of thousands of useful points. The most popular are the ones delivering information about the locations of speed cameras and traffic obstructions.
The users can also share their routes, application skins, icons or sounds used when navigating.
MiploSync application
MiploSync application, available on the website, is used for automatic, self-acting downloading and updating of POIs. MiploSync enables the data on new speed cameras and tens of thousands other POIs to be updated both when navigating and at home.
MiploLoc service
MiploLoc enables the AutoMapa users to register their location during the journey and presenting it along with the trace "live" on Miplo website. The vehicle location is shown on the map using a car icon, which also symbolizes the direction. When viewing the data, the following information is available: date and time of measurement and driving speed (if not reserved).
For details on the website usage, as well as MiploSync and MiploLoc applications, see www.miplo.pl.
Use of downloaded POIs in AutoMapa
To use a downloaded POI in navigation, you need first to load that file to the program. It is a one-off process, and any future POI updates will be loaded automatically to AutoMapa.
When you want to use the downloaded POI file for navigating, have the application load the file. It is a one-time action. Future POI updates will be automatically loaded to AutoMapa.
To load the POI file to Automapa, choose the Settings - User's POIs in the application. In the window that appears, select File at the bottom, and then Load file. Next, point to the file with downloaded POIs.
The downloaded points will be available in the application as Users' POIs. You will be able not only to easily choose and navigate to the selected points, but along with the download you will also receive a lot of additional POI data, like phone number, opening hours or range of rendered services.
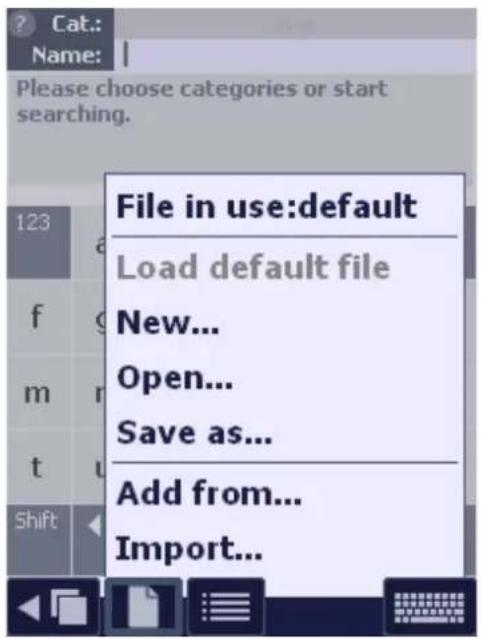
text_image
Cat.: Name: Please choose categories or start searching. File in use:default Load default file New... Open... Save as... Add from... Import...Software uses the GPS navigation system to accurately determine your position and display it on the digital map.
4.1 Introduction to GPS
Automatic navigation in Software utilizes the Global Positioning System, made available for civilian use by the U.S. Department of Defense. A GPS receiver calculates its position by measuring the distance between itself and several (out of 24 operating) visible satellites of the Navstar network.
The more satellites the receiver can detect, the more accurate the calculations will be. Usually, as much as 4 to 6 satellites are visible (the maximum number is 12). The minimal number of satellites required to determine the receiver's position is three.
Conditions for GPS reception
In ideal conditions, a typical GPS receiver used with Software can calculate its position exact to a few metres. However, the GPS signal may be absorbed by building walls, thick tree crowns, metal shieldings, or metalized and heated car windows. Covering the receiver with a hand or a newspaper may also, to a lesser extent, weaken the signal. The quality of GPS signal depends on the state of atmosphere, both its upper
text_image
NAVSTAR GPS(e.g. ionosphere) and the lower layer that influences the weather conditions. Sometimes, on cloudy and humid days the GPS receiver may have problems with calculating its position. Another frequent problem related to problems with GPS reading is incorrect cabling or close proximity to electronic devices that generate interference, and in particular to devices used to monitor vehicle movement.
The accuracy of calculating the GPS position is greater, if the GPS receiver antenna is not covered, preferably in the open, where the signal is not absorbed by buildings or thick foliage.
Extrapolate position
Software is adapted for city navigation and as such is equipped with solutions improving GPS reading by extrapolating the vehicle's position based on the analysis of its direction and speed. However, the map can show a position outside the route, e.g. when taking a fast turn. The "Extrapolate position" function can be turned on/off by selecting the setting you want in "GPS - Settings" in the main menu. In this option you can also manually specify the time when Software extrapolates/overtakes the GPS position obtained from the GPS receiver. This time depends on CPU speed, display rate and palmtop memory.
4.2 Fixing GPS position
If, after turning on the GPS receiver, the "Searching for GPS signal" is played, and after a dozen or so minutes the correct position is not found, that means the following:
- receiver has been detected by Software, but it relays information in non-supported protocol (other than NMEA 0183), or
• automatic COM port detection failed, or
• GPS signal is interfered with resulting in a failure of the GPS receiver to calculate the current position (e.g. user remains indoors).
It should be noted that the so-called cold start (i.e. start after long non-use) or the first start of the GPS receiver may, in case of certain models, take as much as dozen minutes or more. Before starting the troubleshooting, you should wait a while longer.
After calculating the GPS position, Software automatically switches to the GPS tracking mode where the current position is always displayed on the map.
The current position is indicated on the map as a pulsating circle with a direction arrow inside.
4.3 GPS receiver connection
GPS receiver - requirements
Software is supported by GPS receivers with COM interface (i.e. serial port for connecting to PCs), which relay their position in the GPS NMEA 0183 protocol.
Connection types
The GPS receiver can be connected to a handheld computer in several ways, depending on the computer and receiver equipment and accessories, e.g. with a cable, through a Compact Flash terminal or through a Bluetooth radio modem.
Some receivers require no additional software, they can cooperate with the navigation system out of the box. In other cases, one must install the software included with the receiver.
The program is equipped with a COM port scanner, which checks the port that the GPS receiver uses to transfer the location data.
2
2D and 3D mode
Automatic off
Scale Slide Rule
System layout and operation in the
show position mode
Preferences
Scale
Scale
Switch
Main menu and map buttons
A
ActiveSync
AutoMapa preinstalled on an SD card
Follow-up installation for the Installer and CD/DVD
Selection of installation location
Connecting the portable device to the PC
Addresses
Last search
"Go to" menu and selecting destinations
- searching for addresses and objects...
Preferences
Search
"Go to" menu and selecting destinations
- searching for addresses and objects...
Search address
Select a country
Search address
AutoMapa program
Activate
AutoMapa start-up
End
Main menu
Information
Main menu
Install
Installation and registration
Location
PPC2003/WM5/WCE devices
Minimize
Main menu
Shortcut
TPC/PC
Selection of program components
PPC2003/WM5/WCE devices
Uninstall
Uninstallation
Upgrade
Upgrading the program and the maps
AutoMapa preinstalled on an SD card
Selection of device
Version
M
Manoeuvres
Information
System layout and operation in
navigation mode
Route menu
Messages
System layout and operation in
navigation mode
Voice messages - Settings
Turns/straight
Speed
Navigation
Map
Assign to SD card
Map registration
Buttons
Main menu and map buttons
Change scale
Scale
Map scrolling and zooming
Scale Slide Rule
Choose for installation
Selecting map area for installation
Delete
Uninstallation
Read in
Main menu
Selecting map area for installation
Registration
Map registration
Installation and registration
Restart
Selection of device
Scroll
Map view
Map scrolling and zooming
View
Map view
AutoMapa start-up
Zoom box
Map view
Map scrolling and zooming
Map area
Area editor
Selecting map area for installation
Install
Selecting map area for installation
Upgrade
Selecting map area for installation
Upgrading the program and the maps
Map buttons, switch
Main menu and map buttons
Map cursor
Selecting a point on the map
Search address
Main menu
B
Blocks
Block, unblock a section Main menu Context menu Block roads Blocked sections
List of blocks Blocked sections Viewing blocks Blocked sections
Buildings, display
Main menu and map buttons
C
Compass
Compass Preferences
Components
Delete
Uninstallation
Install
Selection of program components
Installed list
Copying files
Upgrade
Upgrading the program and the maps
Contacts, address search
"Go to" menu and selecting destinations - searching for addresses and objects...
Current position
System layout and operation in the show position mode Fixing GPS position Main menu and map buttons
D
Destination, setting
Main menu
"Go to" menu and selecting destinations - searching for addresses and objects... Search address AutoMapa start-up
Detour
Delete
Temporary section blocks Delete detours
Set
Temporary section blocks
Map points
Add to favourites
Map points
Delete, Copy, Move
Context menu
Display coordinates
Context menu
Display on map
Search address
POI display on the map
"Go to" menu and selecting destinations - searching for addresses and objects...
Mark as Home or Work
Context menu
Select
Selecting a point on the map
Menu
Expert
Simplified and Expert menu
GPS
GPS menu Main menu
Main
Main menu and map buttons Main menu
Options
Options menu
POI
POI menu Main menu
Popup
"Your menu" pop-up menu "Your menu" pop-up menu in navigation mode
Route
Route menu
Settings
Settings menu
Shortcut
Main menu and map buttons Context menu
Simple
Simplified and Expert menu
Messages
About manoeuvres
Frequency
Turns/straight
Speed
Navigation
System layout and operation in navigation mode
Options
Options
Preferences
Preferences
Settings
Voice messages - Settings
Voice selection
Selection of program components Preferences
Volume
Volume
Meters
On-board computer
"Your menu" pop-up menu in navigation mode
Direction arrow to route point Selection of program components
Directories
Icons
Other directories User icons
Images
Other directories
Installation
Other directories Error reporting
Voices
Other directories User warning sounds
Driving, information
Distance travelled
Options menu On-board computer
Driving time
Options menu On-board computer
Stopping time
Options menu On-board computer
Driving safety
AutoMapa start-up
POI Warnings
Sample selection of warning message parameters
Speed
E
Errors, reports
Error reporting
ETA (estimated time of arrival)
Car details ETA
F
Favourite
Add
"Your menu" pop-up menu "Go to" menu and selecting destinations - searching for addresses and objects... Context menu
Car
Map points
Delete, copy, move
Map points Context menu
Display
POI menu
Editing screen
Miplo
Download POI
MiploSync application Miplo.pl website and POIs Use of downloaded POIs in AutoMapa
MiploLoc
MiploLoc MiploLoc service
MiploSync
MiploSync MiploSync application
Share POI
Miplo.pl website and POIs
Upgrade POI
MiploSync MiploSync application Use of downloaded POIs in AutoMapa
Use downloaded points in AutoMapa
Use of downloaded POIs in AutoMapa
N
Navigation, start Navigation
Night mode
Automatic Preferences
On/Off
Options menu "Your menu" pop-up menu
0
On-board computer, display On-board computer
P
Pilot, On/Off
Options menu
Navigation
System layout and operation in navigation mode
Plug-ins
Selection of program components
POI (Points Of Interest)
Add
Adding POI
"Your menu" pop-up menu
"Your menu" pop-up menu in navigation mode
Management
Built-in, User
Search POI
POI display on the map POI Warnings
Call the number in the description
Map points
G
Go to
"Go to" menu and selecting destinations - searching for addresses and objects... AutoMapa start-up Main menu
GPS
Change indicator
Other directories
Determine position
Fixing GPS position
Information
Info
Menu
GPS menu
On/Off
Main menu
Enable/Disable/Detect
Settings
GPS - Settings
GPS, receiver
Detect device
AutoMapa start-up
Receiver connection parameters
AutoMapa start-up
Requirements
GPS receiver - requirements
Signal reception
Conditions for GPS reception
Types of connection
Connection methods
GPS, system
GPS system
Introduction to GPS
H
Hardware keys, assigning functions
Buttons - settings
History
Delete
Others - Settings
Display
"Go to" menu and selecting destinations
- searching for addresses and objects...
Home and Work points
Context menu
"Go to" menu and selecting destinations - searching for addresses and objects...
POI display on the map
Categories
POI display on the map
POI Warnings
Delete, Move, Copy
Context menu
Display
POI display on the map
Icon categories
User icons
Management
Information
POI display on the map
Use of downloaded POIs in AutoMapa
In the city/town
Search POI
Manage
Management
Menu
POI menu
Main menu
Warning
POI Warnings
Warnings
POI categories
Add
POI display on the map
Change icon
User icons
Display
POI display on the map
POI, Manage
Editing screen
POI edit screen
Filter list
Management
Search POI
Import
POI edit screen
Management
POI warning
Parameters
POI Warnings
Sample selection of warning message
parameters
Points on the route/in the driving direction
POI Warnings
Radars, dangerous spots
POI Warnings
Sample selection of warning message
parameters
User points/built-in
POI Warnings
Warning box
POI Warnings
Sample selection of warning message
parameters
Warning sounds
User warning sounds
Program mode
Navigation
Navigation
System layout and operation in
I
Install
Language
Start installation
Problems
Possible installation problems
Recovery
Selection of program components
Recovery after a hard reset
PPC2003/WM5/WCE devices
Select a device
Selection of device
Uninstall
Uninstallation
Installation, place
From CD/DVD
Installation and registration Follow-up installation for the Installer and CD/DVD
From installation files
Installation and registration Follow-up installation for the Installer and CD/DVD
In main memory
PPC2003/WM5/WCE devices
On a blank memory card
Follow-up installation for the Installer and CD/DVD AutoMapa preinstalled on an SD card
On a PC/TPC
Installation and registration Selection of device Selection of installation location Follow-up installation for the Installer and CD/DVD
On a portable computer
Selection of installation location
On a portable device
Installation and registration Selection of device Selection of installation location Follow-up installation for the Installer and CD/DVD
Installer
Downloaded from the Internet
Installer file downloaded from the Internet
From CD/DVD
Follow-up installation for the Installer and CD/DVD
Interface
Appearance
Interface - Settings
Language
Options
Settings
Interface - Settings
navigation mode
Show position
Show position
System layout and operation in the show position mode
View map
Map view
R
Route
Automatic adjustment
Other
Blocks
Block roads
Context menu
Temporary section blocks
Blocked roads and route mapping
Delete detours
Change point sequence
Info
Reverse
Information
Info
Menu
Info
Modification
Modify
Mapping the route
Preferences
Preferences
Progress bar
Preferences
On-board computer
Return
Mapping the route
Reverse
Setting
Mapping the route
Preferences
Calculation
Settings
Route - Settings
Type
Mapping the route
Route type
Route points (START, END, THROUGH)
Context menu
Mapping the route
Info
Route type
Mapping the route
Route type
S
Scale
Maps
Map view
Map scrolling and zooming
Slider
Scale Slide Rule
Switch
K
Keyboard
Automatic scroll
Search address
Display
Search address
Layout
Options
L
Language
Install
Start installation
Interface
AutoMapa start-up
Options
Software
Selection of program components
License
Map registration
License agreement
Start installation
Main menu and map buttons
While driving
Scale
Screen, pivot
Main menu
Options menu
SD card
Card reader
AutoMapa preinstalled on an SD card
Selection of device
Copying files
Connecting the portable device to the PC
Follow-up installation for the Installer
and CD/DVD
Formatting
Selection of installation location
Install
AutoMapa preinstalled on an SD card
Search
Address
Search address
"Go to" menu and selecting destinations
- searching for addresses and objects...
Contact book address
"Go to" menu and selecting destinations
- searching for addresses and objects...
Favourite
"Go to" menu and selecting destinations
- searching for addresses and objects...
POI
Search POI
"Go to" menu and selecting destinations
- searching for addresses and objects...
Previously selected
"Go to" menu and selecting destinations
- searching for addresses and objects...
Settings, menu
Settings menu
Main menu
Skins
Preferences
View
Selection of program components
Software
Language
Selection of program components
Upgrade
AutoMapa preinstalled on an SD card
Sounds
On/Off
Main menu and map buttons
Volume slider
Main menu and map buttons
Warning messages
Selection of program components
User warning sounds
Speed
Average
On-board computer
Car details
Information
On-board computer
Options menu
Settings
Car details
Warning
Turns/straight
Speed
System
Energy management
System
Settings
Settings menu
T
Telephone, call function
Main menu and map buttons
Traces
GPS tracks
V
Vehicle data
Average speeds
On-board computer
ETA
Car details
Fuel consumption
Car details
Stops
On-board computer
Car details
Y
'Your menu'
"Your menu" pop-up menu
"Your menu" pop-up menu in navigation
mode