
132030A0 - Thermostat EQ-3 - Free user manual and instructions
Find the device manual for free 132030A0 EQ-3 in PDF.


| Product Type | Wireless Room Thermostat (HM-TC-IT-WM-W-EU) |
| Dimensions (without frame) | 55 x 55 x 20 mm |
| Dimensions (with frame) | 86 x 86 x 21.5 mm |
| Weight (without batteries) | 74 g |
| Power Supply | 2 x 1.5 V LR03/micro/AAA batteries |
| Battery Life | Approximately 1 year |
| Radio Frequency | 868.3 MHz |
| Typical Range (open area) | 300 m |
| Protection Degree | IP20 |
| Protection Class | III |
| Ambient Temperature Range | 0 to 50 °C |
| Operating Modes | Auto (week program), Manual (permanent temperature), Holiday (timed temperature) |
| Comfort/Eco Temperature | Customizable (factory: 21.0 °C comfort, 17.0 °C eco) |
| Boost Function | 5-minute rapid heating (80% valve opening, adjustable via CCU) |
| Week Program | Up to 6 heating phases per day (13 change points) |
| Holiday Function | Set temperature for a defined period with start/end date/time |
| Child-Proof / Operating Lock | Local lock via button combination; global and mode locks via CCU |
| Mounting | Wall mounting with adhesive strips or screws; compatible with various manufacturer frames (Berker, GIRA, Jung, etc.) |
| Teach-In Capabilities | Up to 8 radiator thermostats, 8 window contacts, 8 remote control button pairs, 8 switching actuator channels, 1 CCU |
| Maintenance | Replace batteries when battery symbol appears; do not open device; clean with dry cloth |
| Safety Notices | Indoor use only; avoid damp, dust, heat; do not use rechargeable batteries; disposal via electronic waste collection |
| Spare Parts / Accessories | Mounting plate, frame, screws, plugs, batteries (LR03/AAA) |
Frequently Asked Questions - 132030A0 EQ-3
User questions about 132030A0 EQ-3
0 question about this device. Answer the ones you know or ask your own.
Ask a new question about this device
Download the instructions for your Thermostat in PDF format for free! Find your manual 132030A0 - EQ-3 and take your electronic device back in hand. On this page are published all the documents necessary for the use of your device. 132030A0 by EQ-3.
USER MANUAL 132030A0 EQ-3
Installation and operating manual (p. 43)
Funk-Wandthermostat Wireless Room Thermostat
HM-TC-IT-WM-W-EU
Printed in Hong Kong.
natural_image
Top-down schematic of a two-cell battery pack with labeled terminals (no text or symbols beyond basic labels)

Documentation © 2013 eQ-3 AG, Germany
All rights reserved. This manual may not be reproduced in any format, either in whole or in part, nor may it be duplicated or edited by electronic, mechanical or chemical means, without the written consent of the publisher.
Typographical and printing errors cannot be excluded. However, the information contained in this manual is reviewed on a regular basis and any necessary corrections will be implemented in the next edition. We accept no liability for technical or typographical errors or the consequences thereof.
All trademarks and industrial property rights are acknowledged.
Printed in Hong Kong.
Changes may be made without prior notice as a result of technical advances.
Translation from the original version in German.
132033
V 1.5 (11/2016)
Table of Contents
1 Information about this manual 45
2 Hazard information. 45
3 Scope of supply 46
4 Operation and display 47
5 Function 49
6 General information about the Homematic system 49
7 General information about radio operation. . . . . . . 50
8 Start-up. 50
9 Teach-in: 57
10 Teach-out/Restore factory settings. 62
11 Operating modes (auto/manu/holiday)....62
12 Comfort and eco temperature 63
13 Setting the holiday function 64
14 Boost function....65
15 Configuration menu 66
16 Child-proof lock/operating lock. 74
17 Additional functions in connection with Homematic Central Control Unit. 75
18 Troubleshooting and maintenance. 76
19 Components that can be taught-in. 78
20 Technical specifications 79
1 Information about this manual
Read this manual carefully before beginning operation with your Homematic components. Keep the manual handy for later consultation!
If you hand over the device to other persons for use, please hand over the operating manual as well.
Symbols used:

Attention! This indicates a hazard.

Note. This section contains important additional information.

Note. This section contains additional important information about using the device in connection with the Homematic Central Control Unit.

Note. This section contains additional important information about using the device in connection with the QIVICON Home Base.
2 Hazard information

The device may only be operated indoors and must be protected from the effects of damp and dust, as well as solar or heat radiation.

Using the room thermostat for any purpose other than that described in this operating manual does not fall within the scope of intended use and shall
invalidate any warranty or liability. This also applies to any conversion or modification work. This device is intended for private use only.

The device is not a toy; do not allow children to play with it. Do not leave packaging material lying around, as it can be dangerous in the hands of a child.

Do not open the device: it does not contain any components that need to be serviced by the user. In the event of an error, please return the device to our service department.

The system is only suitable for control of heaters (radiators, convection heaters, heater bars) heated by heat carriers. Any other use, e.g. on cooling systems, in-floor heating, etc., is not permitted and can lead to severe damages.
3 Scope of supply
1 x Homematic Room Thermostat (HM-TC-IT-WM-W-EU)
2 x plugs
2 x adhesive strips
2 x screws 3.0 x 30 mm
2 x LR03/micro/AAA batteries
1 x operating manual
4 Operation and display

Display symbols and device buttons have the following meaning and functions:
A Auto mode ( ) manu mode ( ), holiday mode ( ), date/time (8888)
B Boost function ( )Boost
C Comfort / eco temperature ( )
D Open window function (☐)
E Bar chart of programmed heating phases of current day
F Auto / manu button ( ) Switch between auto, manu and holiday mode
G Boost button (Activate the boost function; confirm, start teach-in procedure Handwheel: Temperature settings; select and set menu items
H Comfort / eco button ( ) Switch between comfort and eco temperature
I Operating lock (🔒), antenna symbol (radio synchronicity) (💡), empty battery symbol (☐)
J Display of setpoint or actual temperature and humidity
Controls:

(K) Mounting plate
(L) Clip-on frame
(M) Electronic unit
5 Function
In connection with Homematic Wireless Radiator Thermostats (HM-CC-RT-DN), the Homematic Wireless Room Thermostat can conveniently regulate the room temperature according to individually tailored heating phases. The room thermostat measures the temperature and humidity and cyclically transmits the data to the radiator thermostat to regulate the room temperature.
With the boost function, radiators can be heated up quickly and briefly. There will be a pleasant room temperature right away because of the radiated heat.
6 General information about the Homematic system
This device is part of the Homematic home control system and works with the bidirectional Homematic wireless protocol. All devices are delivered in a standard configuration. The functionality of the device can also be configured with a programming device and software. The additional functions that can be made available in this way and the supplementary functions provided by the Homematic system when it is combined with other components are described in the Homematic WebUI Manual.
You can find the latest versions of all technical documents and the latest updates at: www.homematic.com
7 General information about radio operation
Radio transmission is performed on a non-exclusive transmission path, which means that there is a possibility of interference occurring. Interference can be caused by e.g. switching operations, electrical motors or defective electrical devices.

The range of transmission within buildings can differ greatly from that available in the open air. Besides the transmitting power and the reception characteristics of the receiver, environmental factors such as humidity in the vicinity have an important role to play, as do on-site structural/screening conditions.
Hereby, eQ-3 AG declares that this device conforms with the essential requirements and other relevant regulations of Directive 1999/5/EC.
The full declaration of conformity is provided under www.homematic.com.
8 Start-up
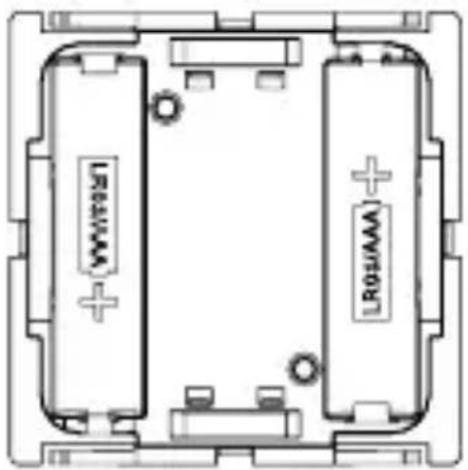
8.1 Inserting (replacing) batteries
To insert or replace the batteries, proceed as follows:
- Once mounted, the electronic unit (M) can easily be pulled out of the frame (L) and removed from the mounting plate (K). To remove the electronic unit from the frame, take hold of the sides of the electronic unit and
pull it out. You do not need to open the device.
- Turn the electronic unit (M) over to remove or insert the batteries.
• After removing the batteries you should wait approx. 10 seconds. - Insert 2 LR03 (micro/AAA) batteries in the battery compartments (making sure that you insert them the right way round).
natural_image
Top-down schematic of a dual-chamber battery pack with two 100A batteries and one 200A battery, no text or symbols present.- Put the electronic unit (M) back into the frame (L).

A battery symbol ( ) indicates that the batteries need to be replaced.

The service life of new alkaline batteries is approximately 1 year.

This device does not support operation with rechargeable batteries.

Never recharge standard batteries. Do not throw the batteries into a fire. Doing so will present a risk of explosion. Do not short-circuit batteries.

Caution! There is a risk of explosion if the battery is not replaced correctly.


Used batteries should not be disposed of with regular domestic waste! Instead, take them to your local battery disposal point.
8.2 Set date and time
After inserting or replacing batteries the firmware version number will be shown briefly. Accordingly, date and time will be requested automatically.
- Set the year, month, day, hour and minute with the handwheel and confirm with the boost button (###).

If the device has already been taught-in to a central control unit or to another thermostat, the room thermostat will be receiving date and time from one of there devices. In this case, entering date and time will not be requested.
8.3 Mounting
You can either use screws or adhesive strips to mount the Homematic Room Thermostat to a wall. It can be mounted in the frame (L) supplied or be integrated into an existing switch (see sec. 8.4 for suitable switches).
8.3.1 Adhesive strip mounting
- Choose a site for installation. The surface on which you
are mounting the room thermostat must be clean, dry and free of grease.
- For mounting of the assembled room thermostat, attach the adhesive strips to the back side of the mounting plate (K). You should be able to read the letters on the back side (according to figure).

- Remove the protective film from the adhesive strips.
- Press the assembled room thermostat with the back side to the wall in the position where it should subsequently be attached.
8.3.2 Screw mounting
- Choose a site for installation.
- Make sure that electrical lines in the wall will not be damaged.
- Position the mounting plate (K) on the desired site on the wall. Make sure that the arrow on the mounting plate is pointing upwards.
- Use a pen to mark the positions of 2 bore holes 1 (diagonally opposite) in the mounting plate (K) on the wall. The bore holes 2 can be used for installation with a flush-mounting box.

flowchart
graph TD
    A["1"] --> B["2"]
    B --> C["2"]
    C --> D["2"]
    D --> E["1"]
    style A fill:#f9f,stroke:#333
    style B fill:#ccf,stroke:#333
    style C fill:#cfc,stroke:#333
    style D fill:#fcc,stroke:#333
    style E fill:#ffc,stroke:#333
- Now drill the bore holes. If you are working with a stone wall, drill the marked two 5 mm holes and insert the plugs supplied. If you are working with a wooden wall, you can pre-drill 1.5 mm holes to make screws easier to insert.
- Use the screws and plugs supplied to fasten the mounting plate (K) to the wall.
- Next, attach the frame (L) to the mounting plate (K) and attach the electronic unit (M).
- Make sure that the arrows on the back side of the electronic unit (M) point upwards and that the clips on the mounting plate (K) latch into the openings on the electronic unit (M).
8.4 Installation in multiple combinations
You can mount the room thermostat with the attachment frame (L) provided or use it with frames of other manufacturers as well as integrate the electronic unit (M) into a
multi-gang frame. In both cases, mounting with adhesive strips and screws is possible. For mounting with multiple combinations, make sure that the mounting plate (K) of the room thermostat is seamlessly aligned to the already fixed mounting plate/retaining ring.
The Homematic Room Thermostat is designed to fit into frames supplied by the following manufacturers:
| Manufacturer | Frame |
| Berker S.1, B.1 | B.3, B.7 glass |
| ELSO Joy | |
| GIRA System | 55, Standard 55, E2, E22, Event, Esprit |
| merten 1-M, Atelier-M, M-Smart, M-Arc, M-Star, M-Plan | |
| JUNG A 500, AS 500, A plus, A creation |

If changes or works have to be made on the house installation (e.g. extension, bypass of switch- or socket inserts) or the low-voltage distribution for mounting or installing the device, the following safety instruction must be considered:

Only to be installed by persons with the relevant electro-technical knowledge and experience! (*1)
Incorrect installation can put
- your own life at risk;
• and the lives of other users of the electrical system.
Incorrect installation also means that you are running the risk of serious damage to property, e.g. because of a fire.
You may be personally liable in the event of injuries or damage to property.
Contact an electrical installer!
(\*1) Specialist knowledge required for installation:
The following specialist knowledge is particularly important during installation:
- The ,5 safety rules' to be used: Disconnect from mains; Safeguard from switching on again; Check that system is deenergised; Earth and short circuit; Cover or cordon off neighbouring live parts;
- Select suitable tool, measuring equipment and, if necessary, personal safety equipment;
- Evaluation of measuring results;
- Selection of electrical installation material for safeguarding shut-off conditions;
- IP protection types;
• Installation of electrical installation material; - Type of supply network (TN system, IT system, TT system) and the resulting connecting conditions (classical zero balancing, protective earthing, required additional measures etc.).
9 Teach-in:

Please read this entire section before starting the teach-in procedure.

Before being able to use your device with QIVICON, it has to be taught-in to your QIVICON Home Base. Therefore, please log-in to „My QIVICON“ at www.qivicon.com/login. There, please select „Add device“ and follow the instructions.
To integrate the room thermostat into your Homematic system and enable it to communicate with other Homematic devices (e.g. Homematic Radiator Thermostat), you must teach-in the room thermostat first. You can teach-in the room thermostat directly to other Homematic devices or to the Homematic Central Control Unit.
9.1 Teaching-in to Homematic devices
If you would like to teach-in the room thermostat to one or more Homematic devices, you must put the devices to be connected into teach-in mode and select the required teach-in channel. To do this, proceed as follows:

During teach-in, please make sure you maintain a distance of at least 50 cm between the devices.
- Activate the teach-in mode of your room thermostat. Therefore, press and hold the boost button (infor at least 3 seconds until the display switches back to teach-in mode.


- The antenna symbol ( ) is displayed, along with the teach-in time remaining in seconds. The teach-in time is 30 seconds.
- Now put the device you wish to teach-in to the room thermostat (e.g. Homematic Radiator Thermostat, see the following fig.) into teach-in mode. Please follow the relevant operating manual instructions of the corresponding device.

- After teaching-in has been successful, “AC” appears and the display returns back to normal display.

If you have already configured a Homematic Radiator Thermostat and would like to teach-in the device to the room thermostat, please put the radiator thermostat into teach-in mode first. All your settings will be saved and transmitted to the room thermostat.

The teach-in mode can be interrupted at any time by pressing the boost button (ir again shortly.

If “nAC” appears in the display, the teach-in procedure has not been successful. In this case, please try again.

Please repeat the teach-in procedure for all devices that communicate with each other.
9.2 Teaching-in to a Homematic Central Control Unit
Your device can be conveniently
• controlled and configured,
- connected directly to other devices or
- used in central control unit programs using a software-based method.
For this purpose, it needs to be taught-in to the Home-matic Central Control Unit first. New devices are taught-in to the central control unit using the Homematic "WebUI" user interface.

A soon as a component has been taught-in to a central control unit, it can only be connected to other components via this unit.

Each component can only be taught-in to one CCU.

During teach-in, please make sure you maintain a distance of at least 50 cm between the Homematic devices and the central control unit.
To teach-in your device to the central control unit, proceed as follows:
- Open the “WebUI” user interface in your browser. Click the “Teach in devices” button on the right-hand side of the screen.

- To activate teach-in mode, click “Teach-in HM device”.
- Teach-in mode remains activated for 60 seconds. An information box shows how much teach-in time remains.
- Meanwhile, please activate the teach-in mode of the Homematic Room Thermostat to teach-in as well.
- Therefore, press and hold the boost button (if for at least 3 seconds until the display switches back to teach-in mode.


- The antenna symbol ( ) is displayed, along with the teach-in time remaining in seconds. The teach-in time is 30 seconds.
- After a short time, the newly taught-in device will appear in the inbox of your software interface. The button „Inbox (x new devices)“ indicates how many new devices have been taught-in successfully.
- If required, you can teach-in additional devices by repeating the steps described above for each device.
- Now configure the newly taught-in devices in the inbox as described in the next section „Configuring newly taught-in devices“.
Configuring newly taught-in devices
Once you have taught-in your room thermostat to the Homematic Central Control Unit, it will be moved to the inbox. Here, you must configure the device and its associated channels in order to make them available for operating and configuration tasks. Give the device a name and assign it to a room. You can also make individual param-
eter settings.
Now you can use the „WebUI“ user interface to control your device, configure it, connect it directly to other devices, or use it in central control unit programs. Please refer to the „WebUI“ manual for more details (you can find this in the „Downloads“ area of the website www.homematic.com).
10 Teach-out/Restore factory settings
The factory settings of the room thermostat can be restored manually. Restoring the factory settings deletes all settings and information about taught-in devices.
- First remove the batteries from the battery compartment.
- Press the three buttons (clock icon) and re-insert the batteries at the same time. Once “rES” is displayed, you can release the buttons and the factory settings will be restored.

Alternatively, you can restore the factory settings via the configuration menu (see sec. „15.9 Restore factory settings (rES)“ auf Seite 74).
11 Operating modes (auto/manu/holiday)
By pressing the auto/manu button ( ) shortly you can switch between the following operating modes:
• Auto: Week programme - automatic temperature regu-
lation in accordance with the time profile saved (heat/reduce).
- Manu: Manual operation - the temperature set manually using the handwheel is maintained permanently.
- Holiday (☐): In holiday mode, the set temperature is maintained up to an end time, at which point the device switches to auto mode automatically.
12 Comfort and eco temperature
The comfort and eco temperature button (✗) makes switching between comfort and eco temperature simple and user friendly. The factory setting for the comfort temperature is 21.0 °C and the eco temperature 17.0 °C. The comfort and eco temperature can be changed individually.

If the room thermostat is used in connection with a Homematic Central Control Unit, settings can also be made via the user interface WebUI.
- Press down the comfort/eco button (©) for a few seconds (> 3s).
- The display shows the symbol (*) and the comfort temperature as defined.
- Change the temperature with the handwheel and confirm with the boost button ( ).
- The display shows the symbol (C) and the eco temperature as defined.
- Change the temperature with the handwheel and confirm with the boost button (###).

In auto mode, the comfort and eco temperature remain activated until the next point at which the week programme changes.
13 Setting the holiday function
If you want to maintain a fixed temperature for a certain period, e.g. during your holidays or a party, the holiday function can be used.

If the room thermostat is used in connection with a Homematic Central Control Unit, settings can also be made via the user interface WebUI.
- Briefly press the auto/manu button (💡) repeatedly, until the suitcase symbol (💡) appears in the display.
- Change the time for starting the temperature with the handwheel and confirm with the boost button (###).
- Change the date for starting the temperature with the handwheel and confirm with the boost button (###).
- Change the time and date until which the temperature is supposed to remain with the handwheel and confirm with the boost button (10).
- Change the temperature with the handwheel and confirm with the boost button (###). The display will flash to confirm.
The set temperature will remain for the defined period of the holiday function.
Otherwise, the room thermostat will change to auto mode. Radio control commands like those from a window contact or the weekly de-scaling run of a radiator thermostat will still be performed.
14 Boost function
With the boost function, cool rooms can be heated within short at the touch of a button. When the function is activated, the heating valves of the taught-in radiator thermostats open immediately for 5 minutes at 80 % (factory setting). There will be a pleasant room temperature right away because of the radiated heat. By the end of the 5 minute boost phase, the radiator thermostat automatically changes back to the prior operating mode.
Activate Boost function:
- Press the boost button (shortly to activate the boost function.
- The remaining time for the function is counted down in seconds (“300” to “000”). Whilst the function is active, Boost is displayed.
- Once the set time has elapsed, the room thermostat switches back to the mode that was active previously (auto/manu), with the temperature that was set previously.
- The function can be deactivated prematurely at any time by pressing the boost button again.

If the room thermostat is used in connection with a Homematic Central Control Unit, the duration of the Boost function and the valve opening can also be configured via the user interface WebUI.

The radiant heat will not have an immediate effect if the radiator is covered or concealed (e.g. by a sofa).

If the duration of the boost function is set so that the display exceeds 999 seconds, the display value switches from seconds to minutes.
15 Configuration menu
Settings of the room thermostat can be changed in the configuration menu of your device. The menu can be accessed by pressing the auto/mode button (按时) for more than 3 seconds.


Menu items can be selected with the handwheel and confirmed with the boost button ( ). By pressing the auto/ menu button ( ) again, you can return to the previous level. After successfully changing a menu item the display switches back to normal. The menu automatically closes without applying changes if there is no operation for more than 1 minute.
The following settings can be made:
14.1 Pro: Set week programme
14.2 dAt: Change time and date
14.3 SFA Recall error messages of single devices
14.4 dSt: (De-)Activate automatic switching between summer and winter time
14.5 tOF: Set temperature offset
14.6 S-A Display of setpoint and actual temperature
14.7 t-H Change between actual temperature and humidity
14.8 dEL Delete taught-in devices
14.9 rES Restoring the factory settings
15.1 Setting the week programme (Pro)
In the week programme, for each weekday up to 6 heating phases (13 change settings) can be set separately. The programming is carried out for the days chosen, whereby temperature settings have to be set for the entire period between 00:00 and 23:59.
- Press the auto/manu button (💡) longer than 3 seconds. The display will show “Pro”. Confirm the setting with the boost button (💡).
- “dAy” appears on the display. You can use the hand-wheel to select a single day of the week, all weekdays, the weekend, or the entire week. Confirm the setting with the boost button (###) (example: Monday).

- The display will show the start date (00:00 h). First set the desired temperature (example: 17.0°) for your start date. Confirm the setting with the boost button (###).

- Now the start time 6:00 h will appear in the display. You can change the start time with the handwheel. Confirm the setting with the boost button ( )

- Set the desired temperature with the handwheel for the next phase. Confirm the setting with the boost button (###).
- Repeat this procedure until temperatures are stored for the entire period between 0:00 and 23:59 h.
Week programme: Example
For each day of the week up to 6 heating phases (13 change settings) with individual temperature settings can be saved with the room thermostat.
The factory settings of the week programme are as follows:
Monday - Friday:
| from 00:00 to 06:00 | 17.0 °C |
| from 06:00 to 09:00 | 21.0 °C |
| from 09:00 to 17:00 | 17.0 °C |
| from 17:00 to 23:00 | 21.0 °C |
| from 23:00 to 23:59 | 17.0 °C |
Saturday - Sunday:
| from 00:00 to 06:00 | 17.0 °C |
| from 06:00 to 22:00 | 21.0 °C |
| from 22:00 to 23:59 | 17.0 °C |
The configured heating phases for one day are displayed by the bars. The displayed bars refer to the change settings. E.g. there are no bars displayed until the first change setting, this is followed by bars displayed until the second change setting, etc.

bar
| Time (s) | Temperature (°C) | | :--- | :--- | | 0 | 17.0 | | 6 | 21.0 | | 12 | 17.0 | | 18 | 21.0 | | 24 | 17.0 |15.2 Changing date and time (dAt)
In the configuration menu, date and time can be adjusted.
- Press the auto/manu button (clock) longer than 3 seconds.
- Choose the menu item „dAT“ with the handwheel.
- Confirm the setting with the boost button (###).
- Set the year, month, day, hour and minute with the handwheel and confirm with the boost button (###).
15.3 Recall error messages of single devices (SFA)
In the menu item “SFA” you can recall the status of taught-in devices to assign error messages directly to the devices (e.g. empty battery symbol of a taught-in window contact).
- Press the auto/manu button (①) longer than 3 seconds.
- Choose the menu item "SFA" with the handwheel.
- Confirm the setting with the boost button (###).
If there are no error messages, “---” appears in the display. The error messages have the following meanings:
 |  | |
| rt communication error of taught-in radiator thermostat | - | |
| Sc | - | battery of taught-in window contact almost empty |
| rc | - | battery of taught-in remote control almost empty |
| CCU communication error of taught-in central control unit | - | |
| Ac communication error of taught-in switching actuator | - | |
15.4 Switching between summer and winter time (dSt)
An automatic switching between summer and winter time can be activated and deactivated. The automatic switching is activated in the factory settings.
- Press the auto/manu button (clock) longer than 3 seconds.
- Choose the menu item „dSt“ with the handwheel.
- Confirm your setting using the boost button (###).
- Set the option „On“ to activate automatic switching or set the option „OFF“ to deactivate automatic switching with the handwheel.
- Confirm with the boost button (###).
15.5 Setting offset temperature (tOF)
As the temperature is measured on the room thermostat, the temperature distribution can vary throughout a room. To adjust this, a temperature offset of ±3.5\ °C can be set. If a nominal temperature of e.g. 20\ °C is set but the room presents with only 18\ °C , an offset of -2.0\ °C needs to be set. The offset temperature can be adjusted individually. An offset temperature of 0.0° is set in the factory settings.
- Press the auto/manu button (💡) longer than 3 seconds.
- Select the menu item „tOF“ with the handwheel and confirm with the boost button (###).
- Turn the handwheel and set the desired offset temperature (max. ±3.5 °C).
- Confirm the setting with the boost button (###).
15.6 Display of setpoint and actual temperature (S-A)
In the configuration menu under “S-A” the permanent display of the setpoint or actual temperature can be adjusted.
- Press the auto/manu button (L) longer than 3 seconds.
- Select the menu item „S-A“ with the handwheel and confirm with the boost button (###).
- Select “ACt” to display the actual temperature and “SEt” to display the setpoint temperature.
- Confirm with the boost button (###).
15.7 Change between actual temperature and humidity (t-H)
In the configuration menu under "t-H" the automatic switch
between the actual temperature and humidity can be activated or deactivated. If the automatic switch is deactivated (“OFF”), only the actual temperature will be displayed.
- Press the auto/manu button (clock) longer than 3 seconds.
- Select the menu item „t-H“ with the handwheel and confirm with the boost button (1).
- Set the option „On“ to activate automatic switching or set the option „OFF“ to deactivate automatic switching with the handwheel.
- Confirm with the boost button (###).

Switch between the actual temperature and humidity is only possible if the actual temperature has been selected under “S-A”.
15.8 Teach-out devices (dEL)
Devices that are taught-in to the room thermostat can be taught-out with the function “dEL”. All taught-in devices are deleted simultaneously.
- Press the auto/manu button (clock) longer than 3 seconds.
- Use the handwheel to select the menu item "dEL" and confirm this with the boost button.
- The display will show “no”. Select “YES” with the handwheel. Confirm with the boost button (☐) to delete all taught-in devices.

The menu item “dEL” will only be displayed as long as the devices are not taught-in to the central control unit.
15.9 Restore factory settings (rES)
The factory settings of the room thermostat can be restored manually. If you do this, you will lose all your settings.
- Press the auto/manu button (clock) longer than 3 seconds.
- Choose the menu item „rES“ with the handwheel and confirm with the boost button (###).
- The display will show “no”. Select “YES” with the handwheel. Confirm with the boost button (☐) to reset the device.
16 Child-proof lock/operating lock
Operation of the device can be locked to avoid settings being changed unintended (e.g. through involuntary touch).
- To activate and deactivate the local operating lock briefly press the auto/manu (💡) and the comfort/eco button (💡) simultaneously for at least 3 seconds.
- Once activated, the operating lock symbol (🔒) is shown on the display permanently. Operation of the device is now locked.
- To deactivate the operating lock, press both buttons once again for at least 3 seconds.

In connection with the Homematic Central Control Unit you can set two additional lock functions via the WebUI user interface: the global and the mode operating lock. Both advanced lock functions can only be activated/deactivated via the WebUI (not via the device itself).
17 Additional functions in connection with Homematic Central Control Unit
17.1 Switching time/date display
The factory setting will show the time on the display. The display of date and time can be switched via the WebUI.
17.2 Maximum setpoint temperature
A maximum setpoint temperature of 30.5\ °C is set in the factory settings. The maximum setpoint temperature (15.0 to 30.5\ °C ) can be adjusted via the WebUI.
17.3 Minumum setpoint temperature
A minimum setpoint temperature of 4.5 °C is set in the factory settings. The minimum setpoint temperature (4.5 to 14.5 °C) can be adjusted via the WebUI.
17.4 Global operating lock
Operation of the device can be locked to avoid settings being changed unintended (e.g. through involuntary touch). The global operating lock will lock the operation on the device and can only be activated/deactivated via the WebUI (not via the device itself).
17.5 Mode operating lock
If the mode operating lock is activated the device can be operated only in the mode that is currently set. The operating mode (auto, manu, holiday or boost) can not be changed. The mode operating lock can only be activated/deactivated via the WebUI (not on the device).

You will find further information about operation and configuration of your Homematic Room Thermostat in connection with the WebUI user interface in the WebUI manual (available for download at www.homematic.com)
18 Troubleshooting and maintenance
| Error codes | Problem Solution | |
| F4 Conflict during teaching-in: CCU has already been taught-in | Delete room thermostat from CCU; perform teach-out function; teach-in new connection partner via CCU | |
| F6 Conflict during teaching-in: there have already been 8 radiator thermostats taught-in; perform teach-out function | perform teach-out function | |
| F7 | Conflict during teaching-in: there have already been 8 window sensors taught-in; | perform teach-out function |
| F8 Conflict during teaching-in, no more connection partners possible | perform teach-out function | |
Battery symbol | Battery voltage low Re | Replace batteries of room thermostat |
Battery symbol + F10  | Battery voltage much too low | Replace batteries of room thermostat |
Battery symbol + C symbol | Battery voltage of one or more con- nection partners too low | Replace batteries of con- nection partner |
| Antenna symbol flash-ing | Connection to one of more taught-in devices is lost | / |
| nAC Teach-in pro | procedure failed | Restart teach-in mode |
| Lock symbol[AT00] | Local operating lock active | Deactivate the operat-ing lock |
Lock symbol + G  | Global operating lock active | Deactivate global operat-ing lock via CCU |
| Lock symbol + M [WTDH] | Mode operating lock active | Deactivate global operat-ing lock via CCU |
| Lock symbol + rES [HACT] | Local reset deac- tivated | Activate local reset via CCU |
| dCE Duty cycle | exceeded The device | will communi-cate again after one hour, no action required |
| Syn Attempts to | synchro- nize with known HM device | / |
| CRC CRC error | after firm- ware update | Please perform firmware update again |
| FUP Firmware up | update is in progress | / |
| tSd Temperature | sensor value defect or out of range | replace device or operate device in current tempera-ture range |
| trd Transceiver | module defect | Replace device |
19 Components that can be taught-in
The following Homematic devices can be taught-in the the room thermostat:
- max, 1 Homematic Central Control Unit (CCU or configuration adapter)
• max. 8 Homematic Radiator Thermostats - max. 8 Homematic Door/Window Contact / Window Rotary Handle Sensors
- max. 8 button pairs of Homematic Remote Controls or Push-Buttons
- max. 8 Homematic Switching Actuators (8 channels)

If you have taught-in the Homematic Room Thermostat to a radiator thermostat, the open-window detection will be deactivated automatically via the temperature fall detection of the radiator thermostat.
20 Technical specifications
Device short description: HM-TC-IT-WM-W-EU
Supply voltage: 2 x 1.5 V LR03/micro/AAA
Battery lifetime: approx. 1 year
Current consumption: 40 mA (max.)
Degree of protection: IP20
Protection class: III
Ambient temperature: 0 to 50 °C
Dimensions (W x H x D)
without frame 55 x 55 x 20 mm
incl. frame: 86 x 86 x 21.5 mm
Weight: 74 g (not incl. batteries)
Radio frequency: 868.3 MHz
Receiver class: SRD Class 2
Typ. open area RF range: 300 m
Duty cycle: < 1 % per h
Method of operation: Type 1
Subject to technical changes.
Instructions for disposal:

Do not dispose of the device with regular domestic waste. Electronic equipment must be disposed of at local collection points for waste electronic equipment in compliance with the Waste Electrical and Electronic Equipment Directive.

The CE sign is a free trading sign addressed exclusively to the authorities and does not include any warranty of any properties.
Bevollmächtigter des Herstellers: Manufacturer's authorised representative:

eQ-3 AG Maiburger Straße 29 26789 Leer / GERMANY www.eQ-3.de


- Table of Contents
- Information about this manual
- Symbols used:
- Hazard information
- Scope of supply
- Operation and display
- Controls:
- Function
- General information about the Homematic system
- General information about radio operation
- Start-up
- Inserting (replacing) batteries
- Set date and time
- Mounting
- Adhesive strip mounting
- Screw mounting
- Installation in multiple combinations
- Contact an electrical installer!
- (\*1) Specialist knowledge required for installation:
- Teach-in:
- Please read this entire section before starting the teach-in procedure.
- Teaching-in to Homematic devices
- Teaching-in to a Homematic Central Control Unit
- Configuring newly taught-in devices
- Teach-out/Restore factory settings
- Operating modes (auto/manu/holiday)
- Comfort and eco temperature
- Setting the holiday function
- Boost function
- Activate Boost function:
- Configuration menu
- Setting the week programme (Pro)
- Week programme: Example
- Changing date and time (dAt)
- Recall error messages of single devices (SFA)
- Switching between summer and winter time (dSt)
- Setting offset temperature (tOF)
- Display of setpoint and actual temperature (S-A)
- Change between actual temperature and humidity (t-H)
- Teach-out devices (dEL)
- Restore factory settings (rES)
- Child-proof lock/operating lock
- Additional functions in connection with Homematic Central Control Unit
- Switching time/date display
- Maximum setpoint temperature
- Minumum setpoint temperature
- Global operating lock
- Mode operating lock
- Troubleshooting and maintenance
- Components that can be taught-in
- Technical specifications
- Subject to technical changes.
- Instructions for disposal:
Brand : EQ-3
Model : 132030A0
Category : Thermostat