Rollick - Graphic tablet Hanvon - Free user manual and instructions
Find the device manual for free Rollick Hanvon in PDF.


User questions about Rollick Hanvon
0 question about this device. Answer the ones you know or ask your own.
Ask a new question about this device
Download the instructions for your Graphic tablet in PDF format for free! Find your manual Rollick - Hanvon and take your electronic device back in hand. On this page are published all the documents necessary for the use of your device. Rollick by Hanvon.
USER MANUAL Rollick Hanvon
Hanwang Technology Co., Ltd.
Copyright © Hanwang Technology Co., Ltd, 2009
All rights reserved. No part of this manual may be reproduced except for your express personal usage. Hanwang Technology Co., Ltd reserves the rights to revise this publication without obligation to provide notification of such changes. Hanwang Technology Co., Ltd does its best to provide current and accurate information in this manual. However, Hanwang Technology Co., Ltd reserves the right to change any specifications and product configurations at its discretion, without prior notice and without obligation to include such changes in this manual.
Art Master, Graphicpal, Rollick and Hanvon are registered trademarks of Hanwang Technology Co., Ltd.
Microsoft, Windows, and Vista are either registered trademarks or trademarks of Microsoft Corporation in the United States and/or other countries. Apple, the Apple logo, and Macintosh are registered trademarks of Apple Computer, Inc., registered in the U.S. and other countries. Any additional company and product names mentioned in this documentation may be trademarked and /or registered as trademarks. Mention of third-party products is for information purposes only and constitutes neither an endorsement nor a recommendation.
Hanwang Technology Co., Ltd assumes no responsibility with regard to the performance or use of these products.
Contents
CHAPTER 1 GRAPHICS TABLET INTRODUCTION ...... 1
1.1 GENERAL INTRODUCTION.... 1
1.2 FEATURES .... 1
1.3 QUICK-START TUTORIAL 2
1.4 PEN HOLDER 7
CHAPTER 2 INSTRUCTION FOR WINDOWS SYSTEMS ..... 8
2.1 SYSTEM REQUIREMENTS......8
2.2 INSTALLATION 8
2.3 UNINSTALLING....9
2.4 CONFIGURATION 10
CHAPTER 3 INSTRUCTION FOR MAC SYSTEMS...... 23
3.1 SYSTEM REQUIREMENTS.... 23
3.2 INSTALLATION 23
3.3 UNINSTALLING....26
3.4 CONFIGURATION 27
CHAPTER 4 BUNDLED SOFTWARE .... 33
4.1 HANVON SHELL 33
4.2 PENWRITE 38
4.3 PENSIGN 43
4.4 PENMAIL.... 45
4.5 PENMARK 47
4.6 WHITEBOARD 49
APPENDIX....52
WARRANTY 52
This User's Manual does not contain detailed information of any software from third party.
◆ Due to our continuous updates on the product, all figures in this manual are only for reference, the actual item is the standard.
Chapter 1 Graphics Tablet Introduction
1.1 General Introduction
The Hanvon Graphics Tablet allows you to create graphics on a computer using a cordless and battery-free pen. It is very easy to use. You don't need to be an experienced graphic artist to use it. This USB graphics tablet supports a variety of professional painting and photo editing software including Painter, Photoshop, Ulead Photolmpact, Flash, Dabbler, Maya, PaintShop and more.
1.2 Features
- Express Touch keys & Touch Wheel
- Cordless and Battery-Free pen
● Pressure Sensitive technology
● Windows & Mac compatible - Software Supported: Painter / Photoshop / Ulead PhotoImpact / Flash / CorelDraw / Dabbler / Maya and a variety of graphic processing software
1.3 Quick-Start Tutorial
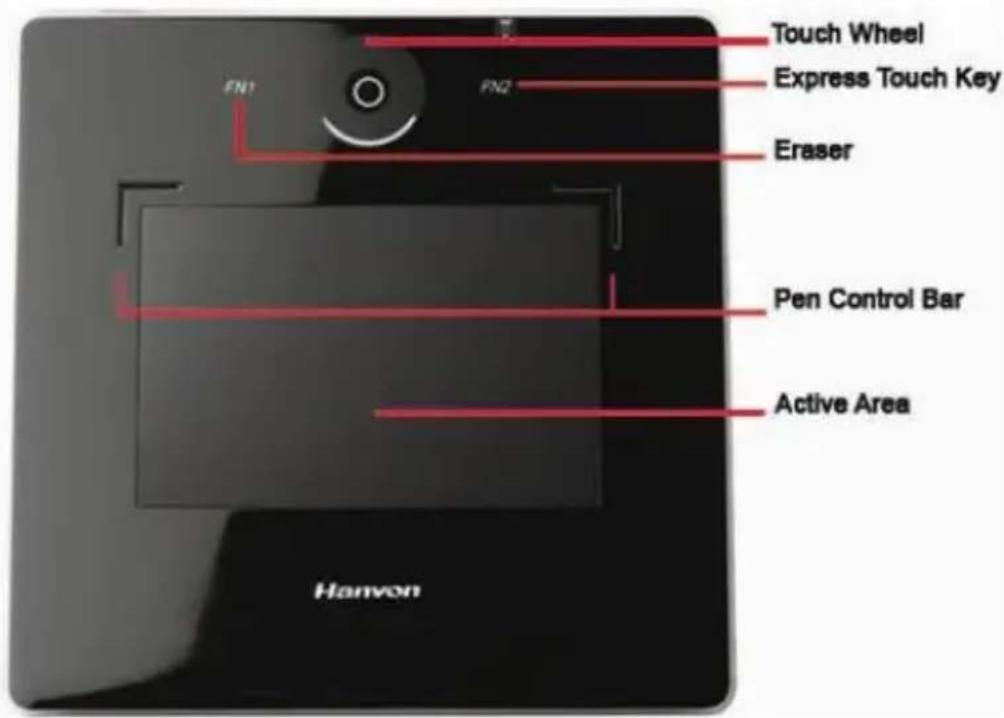
text_image
FN1 FN2 Touch Wheel Express Touch Key Eraser Pen Control Bar Active Area Hanyon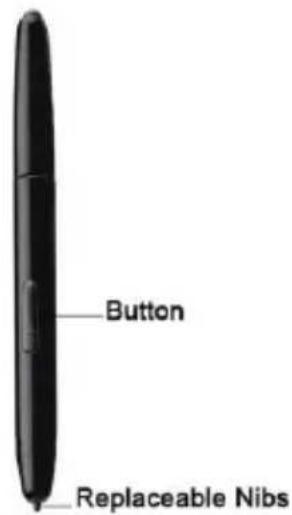
text_image
Button Replaceable Nibs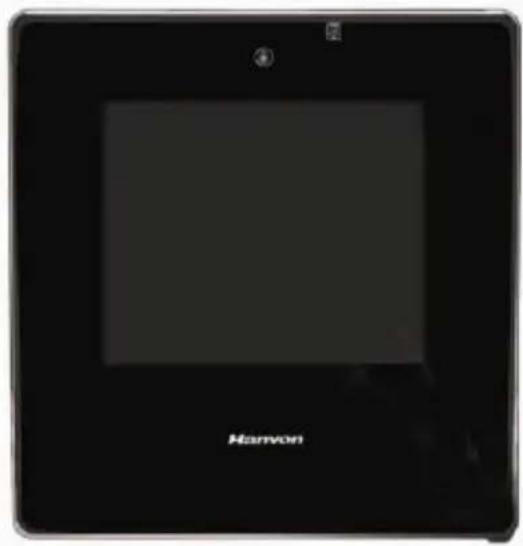
text_image
HanvonHolding the pen
Hold the pen as usual.
- The pen will take effect when it comes within 7mm above the tablet.(As follow picture:)
- While using the pen, be sure that your thumb or index finger can easily control the button on the pen, which acts as the right-click key of a mouse.
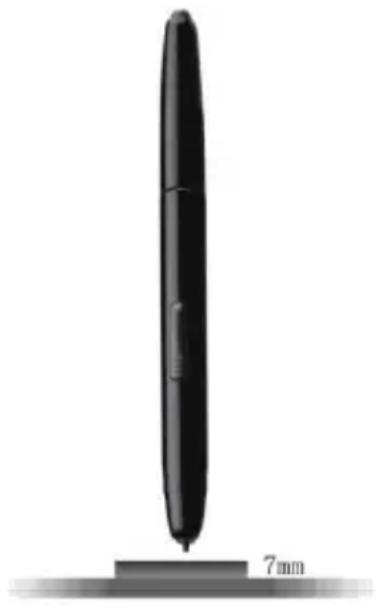
natural_image
Black cylindrical object with a 7mm base, shown against a plain background (no text or symbols)Positioning
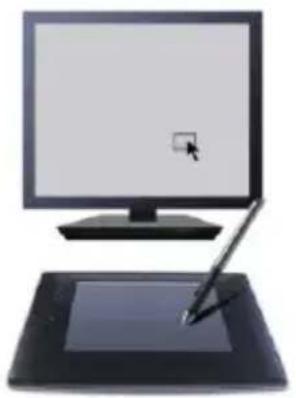
Moving the pen in the active area of the tablet will control the cursor's position on the computer screen. As bellow:
natural_image
Illustration of a desktop computer with a screen and a stylus, no text or symbols present.The pen and tablet use the Absolute Coordination method. This means the active area of the tablet represents the entire computer screen. Moving the pen on the tablet creates a corresponding movement of the cursor on the screen.
Single Click
One slight touch of the pen on the tablet has the same effect as a single left-click of the mouse.
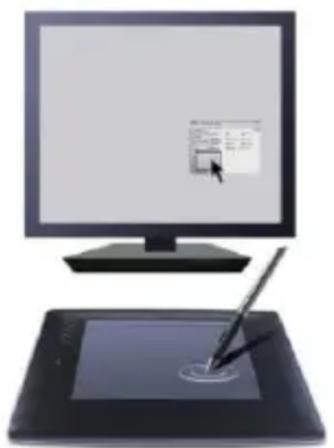
Double Click
Two immediate clicks on the tablet have the same effect as a double left-click of the mouse.
natural_image
Illustration of a computer monitor and a digital drawing tablet with a stylus, no text or symbols present.Double Click Technique
When the cursor is positioned, press the tablet twice immediately with the pen tip, making sure that you do not move the pen tip. The response for the double click can be slow for beginners. You can solve this problem by adjusting the double click speed from the normal setting of the tablet.
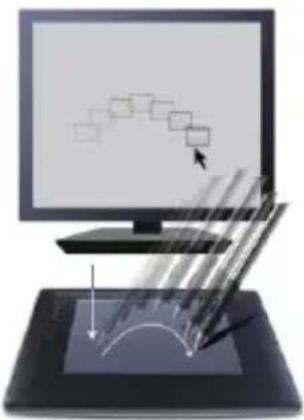
Dragging
Select a target by pressing the pen down on it, and do not release the pen till you have moved the target to the new position you want. As bellow:
natural_image
Illustration of a computer monitor with a stylus and abstract graphics overlay (no text or symbols)Pressure Sensitive Painting
In applicable software, you can use the pressure sensitivity of the pen to control the painting brushwork for different effects such as direction, stroke width, color and thickness.
The software that supports pressure sensitivity includes Adobe Photoshop, Painter, Flash, Ulead PhotoImpact, Art Dabbler etc.
Touch key and Touch Strip
Touch keys are programmable for modifier keys, keyboard shortcuts, mouse clicks, and open/run applications. The default of FN1 is Rubber. The touch strip is used for quick scrolling, zooming, controlling brush size, and other functionality by user configuration.
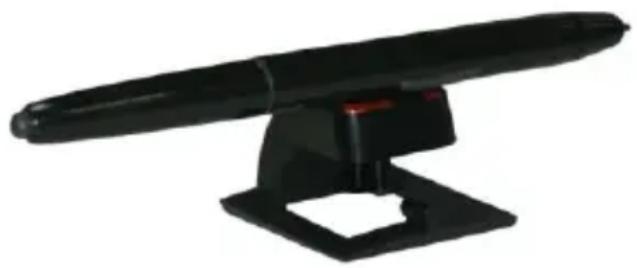
1.4 Pen Holder
Front view with pen placed in horizontal slot
natural_image
Black handheld device with a cylindrical handle and mounting base (no visible text or symbols)Front view with pen placed in vertical slot
natural_image
Black plastic object resembling a stylus or tool, possibly a pen or stylus, with no visible text or symbols.Exchange Pen Nib
Please using tweezers grasp the nib and draw it out. Once removed, a new nib may be inserted into the pen.
Cautions
Do not put the tablet on a metal surface, such as iron or aluminum alloys.
Due to a CRT monitor's electromagnetic radiation, do not use the drawing tablet too close to a CRT monitor.
Chapter 2 Instruction for
Windows Systems
2.1 System Requirements
| CPU | Pentium III 1GHz or later |
| RAM | 256MB |
| Hard-disk | 200MB |
| OS | WINDOWS 2000/XP/Vista X86/Vista X64 |
| Port | USB1.1 or 2.0 |
2.2 Installation
Connect the drawing tablet's USB cable to the computer's USB port.
Step 1
Insert the driver CD into the CD-ROM drive. The Installation Menu should pop-up automatically. If the menu does not appear, double-click the My Computer icon on the Desktop, find the AutoRun.exe file under the CD-ROM's root directory, and double-click it.
Step 2
Click on Install Driver for Graphic Tablet button to install the driver and click on Install Hanvon Soft to install the bundled software.
Step 3
After installing the driver and the bundled software, read this manual for detailed information on using and customizing your graphics tablet.
Note: If the tablet cannot be used after driver installation, please restart your computer.
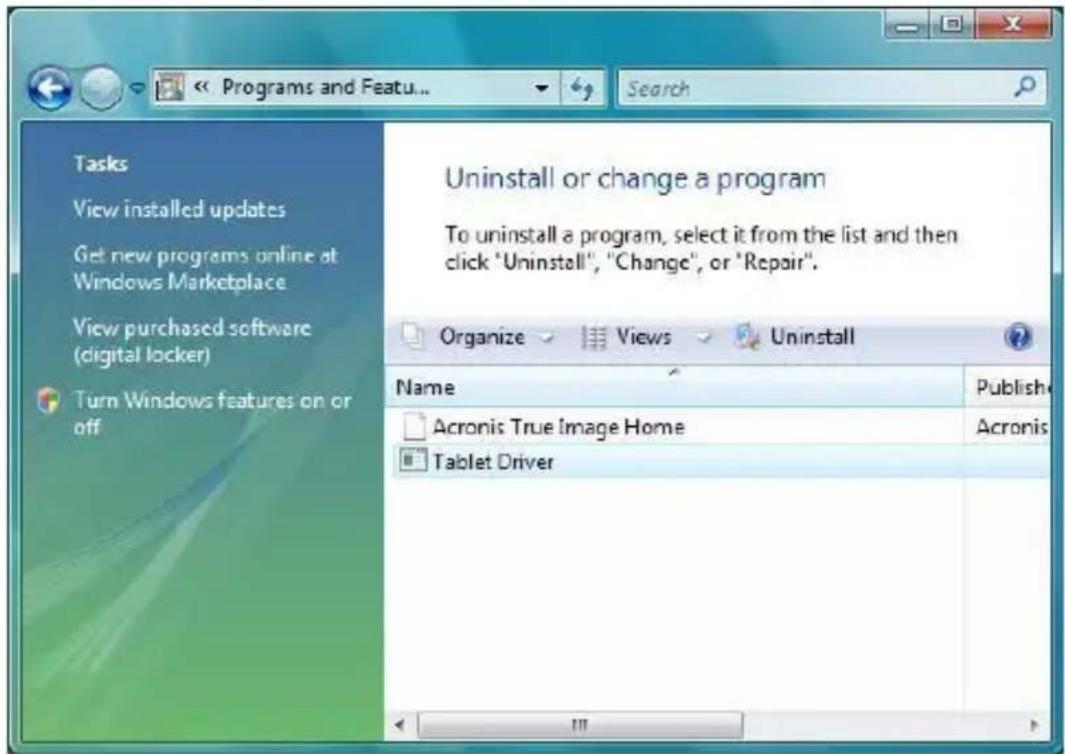
2.3 Uninstalling
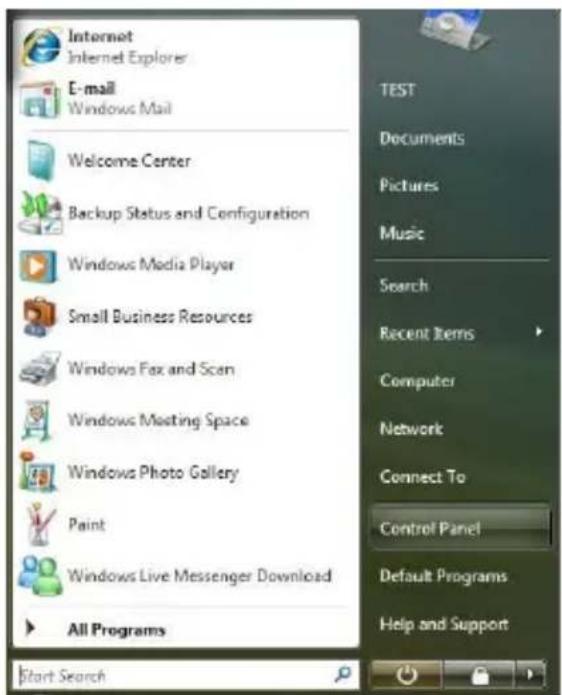
Step 1
Click the Windows Start button and then select Control panel.
Step 2
Double click Add/remove program in the control panel window and find Tablet Driver.
text_image
Tasks View installed updates Get new programs online at Windows Marketplace View purchased software (digital locker) Turn Windows features on or off Uninstall or change a program To uninstall a program, select it from the list and then click "Uninstall", "Change", or "Repair". Organize Views Uninstall Name Acronis True Image Home Tablet Driver Publish AcronisStep 3
Click Uninstall and follow the prompts to remove the tablet driver.
2.4 Configuration
Hanvon tablet driver provides a configuration window to set pen pressure, working area, dual-monitors, double-click speed, express touch keys, etc.
Before Configuration
- Connect the graphics tablet to the USB port on your computer.
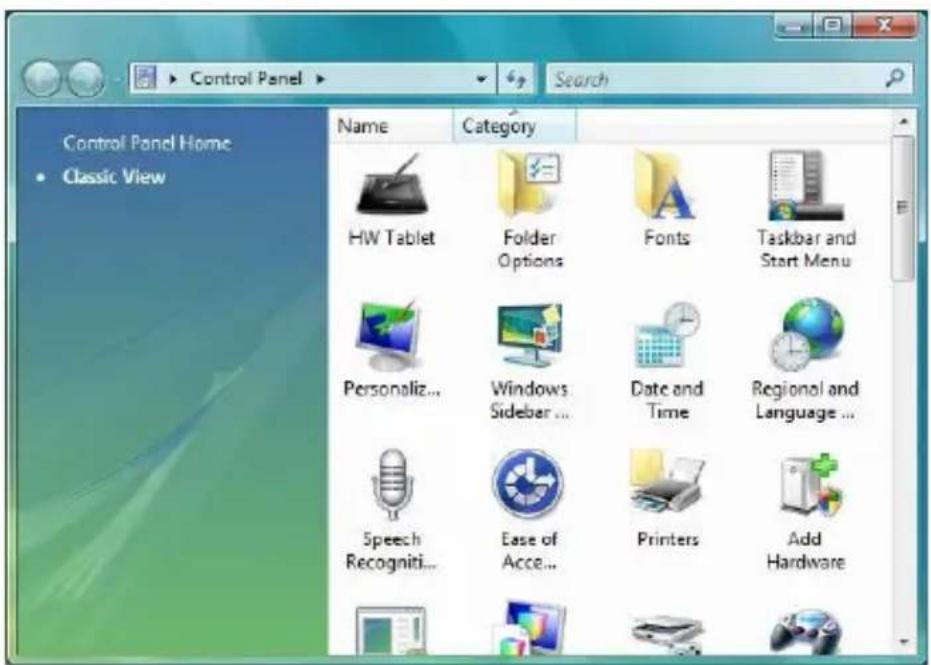
- Go to control panel.
text_image
Internet Internet Explorer E-mail Windows Mail Welcome Center Backup Status and Configuration Windows Media Player Small Business Resources Windows Fax and Scan Windows Meeting Space Windows Photo Gallery Paint Windows Live Messenger Download All Programs Start Search TEST Documents Pictures Music Search Recent Items Computer Network Connect To Control Panel Default Programs Help and Support- Double-click the HW Tablet icon to open the configuration interface.
text_image
Control Panel Home Classic View Name Category HW Tablet Folder Options Fonts assetbar and Start Menu Personaliz... Windows Sideber ... Data and Time Regional and Language ... Speech Recogniti... Ease of Acc... Printers Add Hardware2.4.1 General Configuration
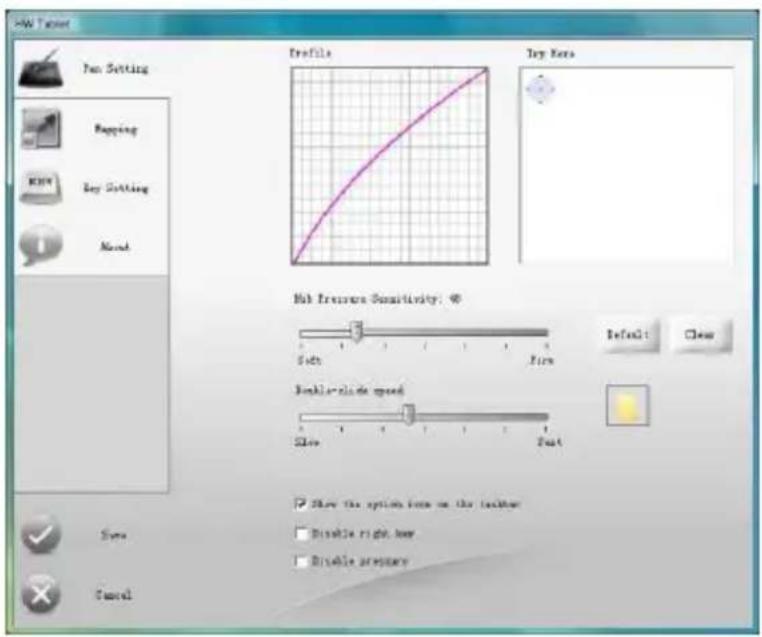
text_image
AutoCAD Fan Setting Mapping Key Setting Mesh Profile Top Bars Hub Feature Sensitivity: ⑥ Sub Turn Book or slide speed Size Foot Show the option from the toolbar Disable right key Disable preprint Save Cancela. Adjusting Pressure Sensitivity
Pen pressure sensitivity can be adjusted by dragging the slider between soft and hard. To create broad strokes, use a soft tip. To draw thin lines, use a hard tip. The factory setting can be restored by clicking the Default button. Adjustments can be saved by clicking the Save button or can be canceled by clicking the Cancel button.
b. Pressure Curve Graph
Pen pressure sensitivity changes are displayed on the Pressure Curve Graph. The images below show the graphs for light and heavy pen pressure respectively.
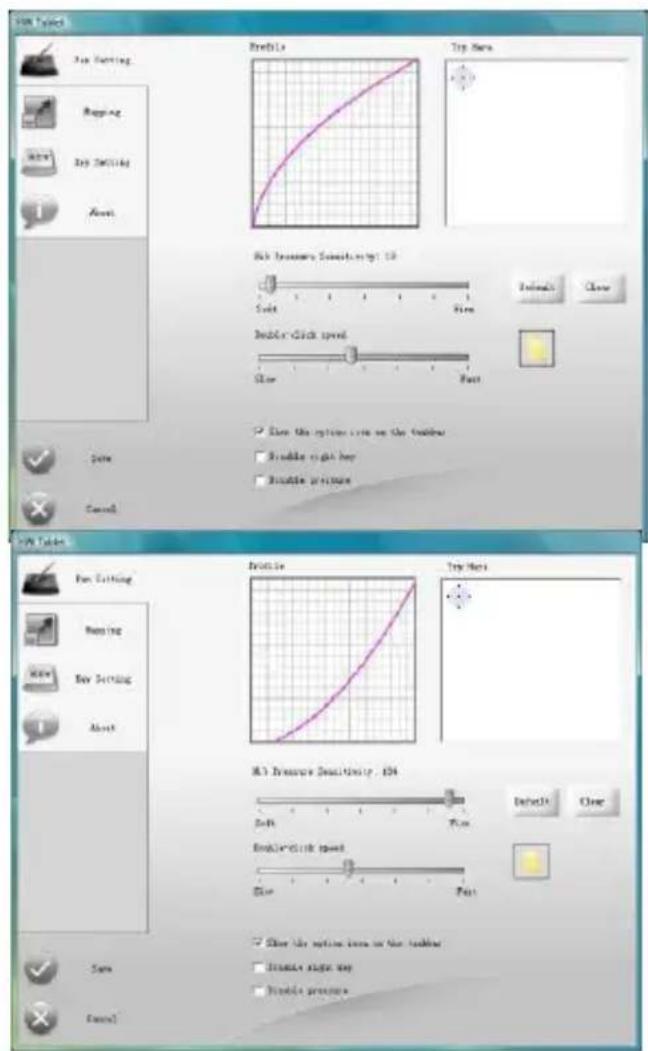
text_image
3M Types File Setting Mapping View Top Smiling About Profile Top Area Profile Text Size Close Back Treasure Scanting: 10 Text Size Close Double-Dock Speed Slow Fast Save the option line on the bottom Double right key Double pressure Back Treasure Scanting: 104 Text Size Close Back-Dock Speed Slow Fast Save the option line on the bottom Double right key Double pressurec. Pressure Testing Area
The right area is the pressure test area which is use to test the pen tip feel. The round circle at the upper left corner represents the tile angle between the drawing pen and the tablet surface. All the writing and drawing in the test area can be cleared by clicking the Clear button.
Note: Only Windows 2000/XP/Vista X86/Vista X64 support tilt angle.
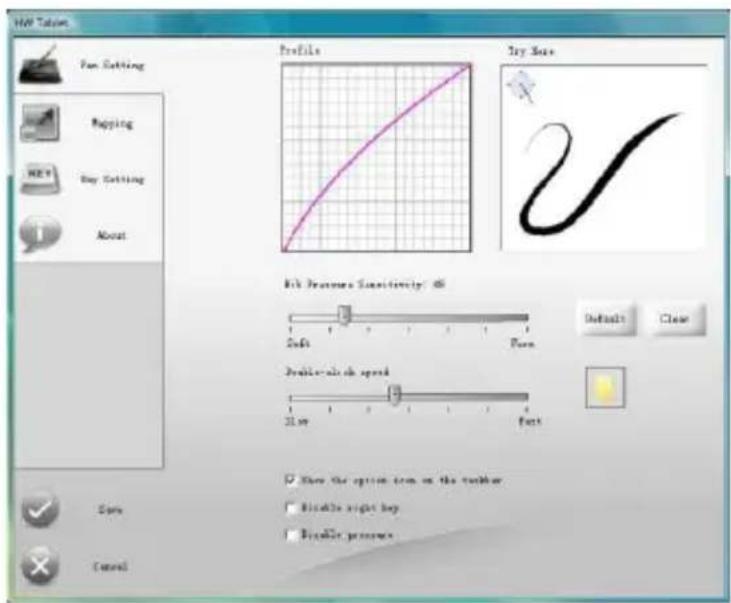
text_image
HIV Tabes Pan Setting Mapping Buy Setting About Profile Dry Size Rik Features Sensitivity: 45 Size Form Brush-size speed 2.00 Fast Show the option item on the number Binds right boy Binds presses Save the option item on the number Binds right boy Binds pressesd. Double-Click Speed
Dragging the slider to adjust the double-click speed and then you can test the double click speed on the folder icon.
e. Other settings
- When you select the option to display the icon on taskbar, the user can configure the tablet by right-clicking on the icon. Uncheck option not to show HW Tablet icon on the taskbar.
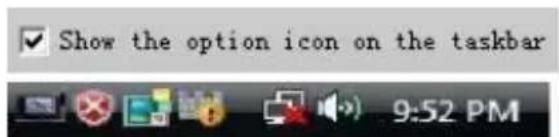
text_image
Show the option icon on the taskbar 9:52 PM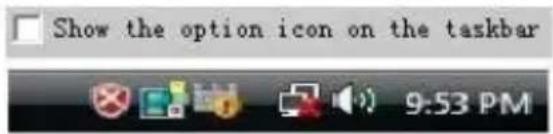
text_image
Show the option icon on the taskbar 9:53 PM- Check the option Disable right key, the pen button acting as right-click of mouse button will not be functional.
2.4.2 Mapping
text_image
HW Tablet Pen Setting Mapping KEY Key Setting About Resolution: 1500 + 1024 Tablet scale: 4 x 3 Select Monitor Part of Monitor Manual Setting Auto Setting All Toilet Save Cancela. Single Monitor Mode
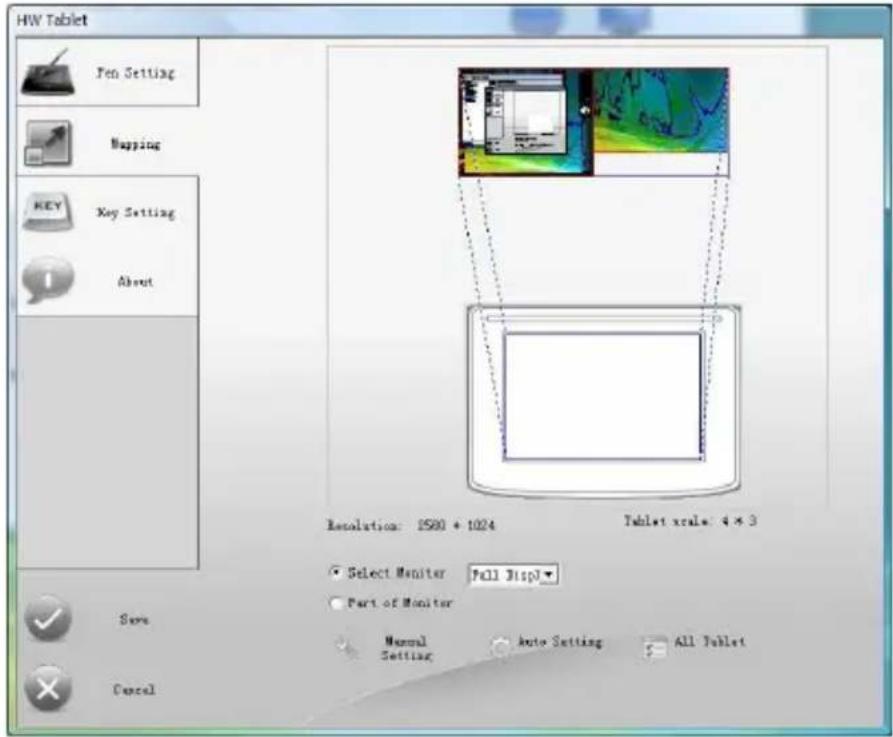
The entire active area of the tablet maps to the entire monitor by default. If your computer has more than one monitor, see Multi-Monitor Mode.
b. Multi-Monitor Mode
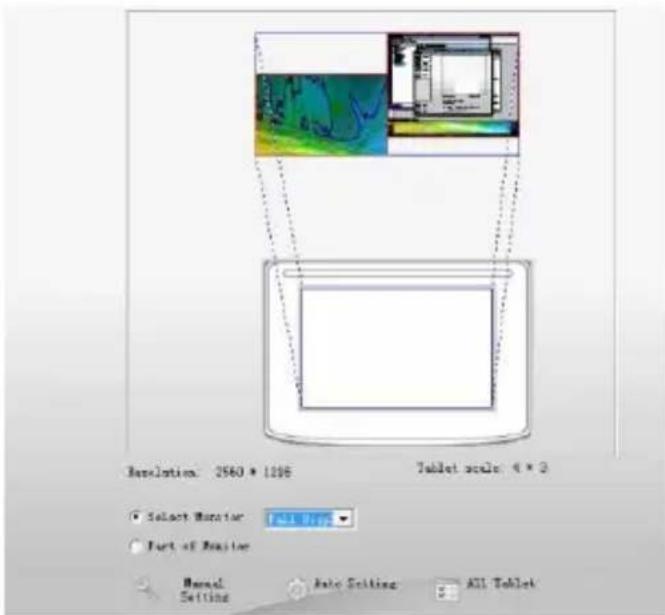
a) Full Screen
Choose Select Monitor and then select Full Display from the drop-down menu. You will see the screen area corresponding to the active area of the tablet is mapped.
text_image
Resolution: 2560 x 1296 Tablet scale: 4 x 3 Select Number: 738.777 Part of Recliter Named Setting Auto Setting All Tabletb) Screen #1
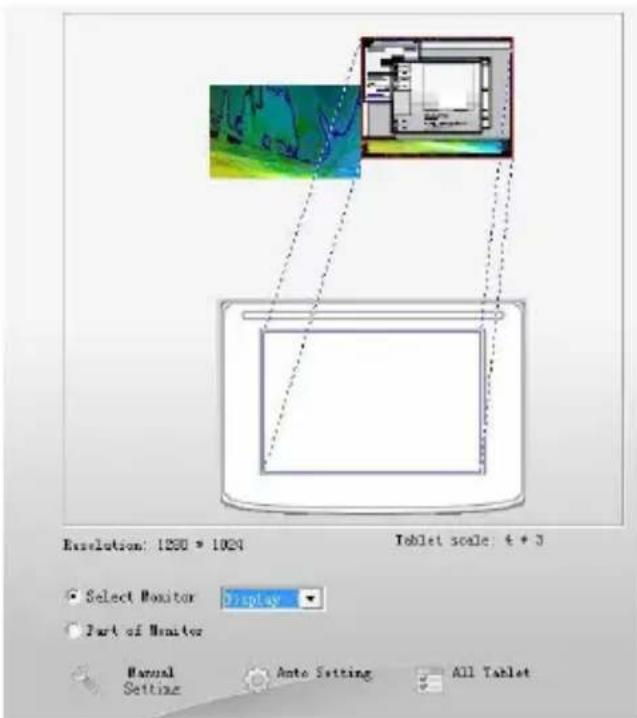
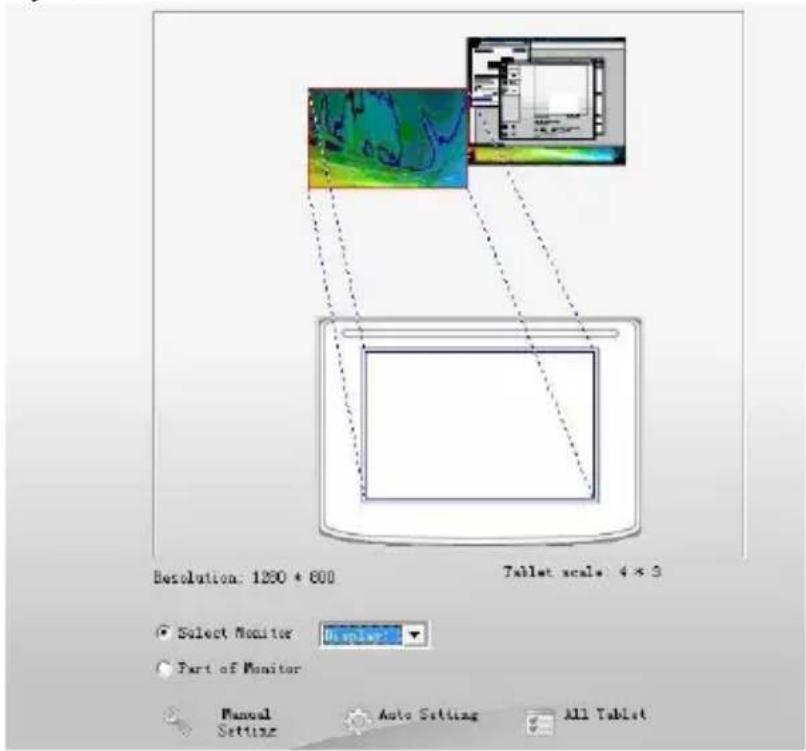
Choose Select Monitor and select Display 1 from the drop-down menu to set the area only Display 1 can be controlled by the tablet.
text_image
Resolution: 1250 * 1024 Tablet scale: t + 3 Select Monitor Display Part of Monitor Manual Setting Auto Setting All Tabletc) Screen #2
Choose Select Monitor and select Display 2 from the drop-down menu to set the area only Display 2 can be controlled by the tablet.
text_image
Resolution: 1200 * 600 Tablet scale: 4 * 3 Select Monitor Part of Monitor Manual Setting Auto Setting All Tabletc. Portion of Screen
Choose Part of Monitor, and then click the upper left corner and lower right corner for the expected area of screen which will be mapped to the full tablet.

text_image
Resolution: 1250 * 800 Tablet scale: 4 * 3 Select Monitor Display: Part of Monitor Vennal Setting Auto Setting All Tabletd. Portion of Tablet
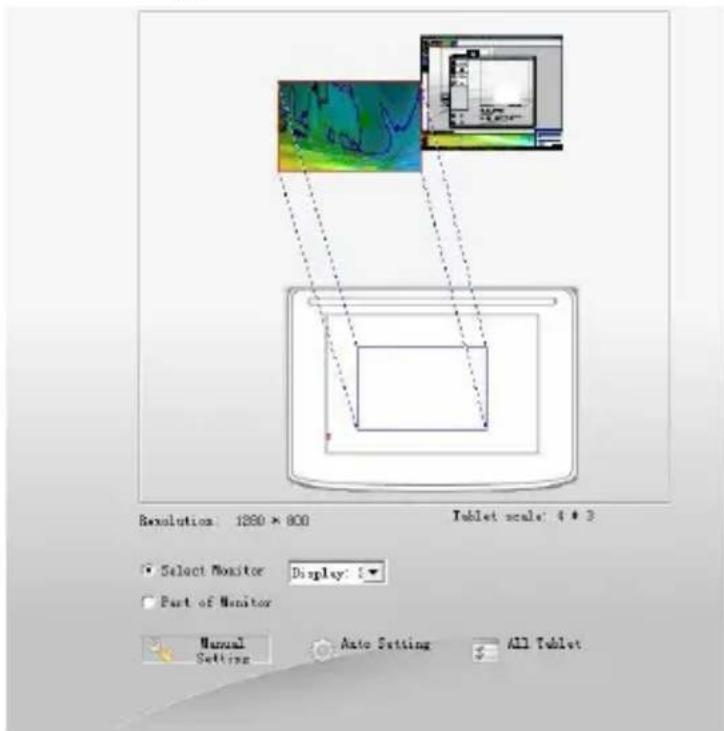
Manual Setting enables you to select part of the active area of the tablet mapped to the full screen.
text_image
Resolution: 1280 × 800 Tablet scale: 4 * 3 Select Monitor Display: Part of Monitor Manual Setting Auto Setting All Tablete. Auto Setting
The tablet active area can be automatically set by clicking the Auto Setting button. The active area can be set when the user have single monitor, multi-monitor or wide screen monitor (16:9).
2.4.3 Express Touch Key Setting
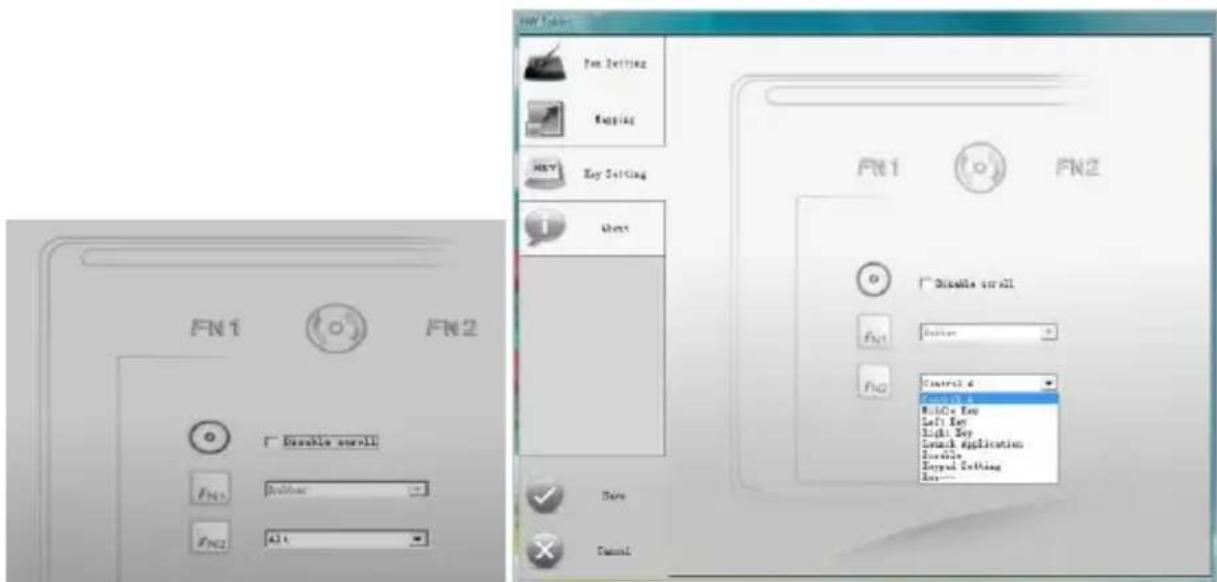
Express Touch Keys can be used for modifier keys, keyboard shortcuts, mouse clicks, to open/run applications. The Touch Scroll is for quick scrolling, zooming, controlling brush size, and more.
As follow:
text_image
FXT Panel FXT Setting Helping Key Setting Next FX1 FX2 Double scroll FX1 Button Control x Control x Middle Key Left Key Right Key Contact Application Enable Target Setting OKa. Define the function of express touch keys
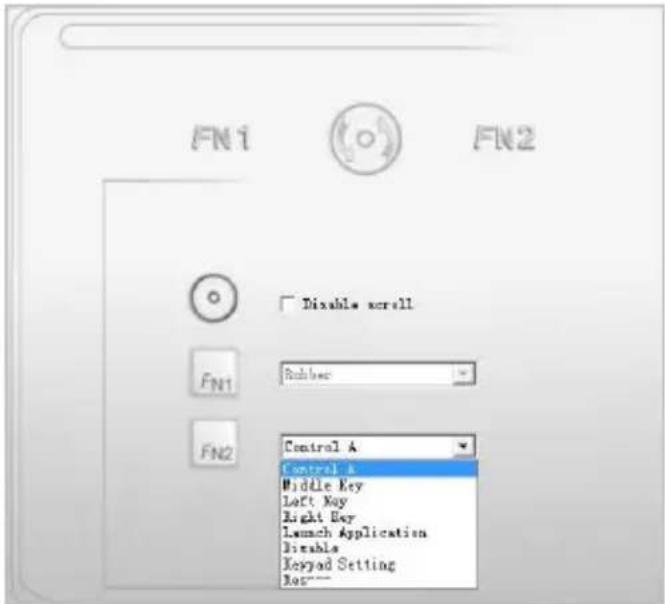
There are two express touch keys on the tablet. When you configure the key function, there are two ways to define it. One is to choose the options from the drop-down menu for each key and another way is defined by pressing the keyboard of your computer. After assignment, click Save to
save the setting or click Cancel to discard the changes.
Example 1
If you want to assign CTRL+A to one of the express touch keys, select the key you want to set, then press CTRL and A simultaneously on the computer keyboard. As bellow:
text_image
FN1 FN2 Disable scroll FN1 Double FN2 Control A Control A Middle Key Left Key Right Key Launch Application Disable Keyboard Setting NotExample 2
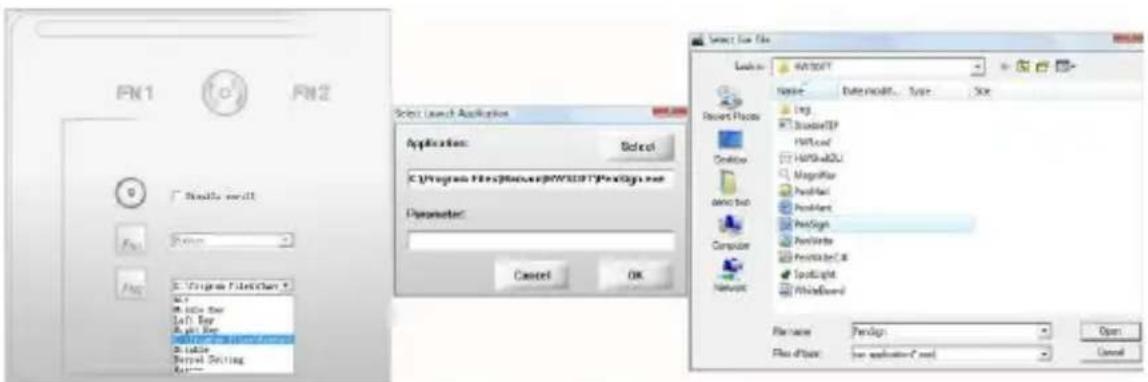
Select Launch Application from the drop-down menu then Select Launch Application will pop up automatically. Click Select button and choose one application program you want to run then click OK.
text_image
FN1 FN2 Select Launch Application Application: Select C:\Program Files\Microsoft\WINST\FoxSign.exe Parameter: Cancel OK Select Fox File Location: C:\WINDOWS\ Name: Entermodif... Size... Size Reset Places Boxing BrowseIP FNTcat HKEYSLDL Magellan PostNet PostMent PostSign PostVisits PostMatsC.R Footlight Ghostword File name: PendSign File type: for application* .com Open Cancelb. Disable the Touch Scroll
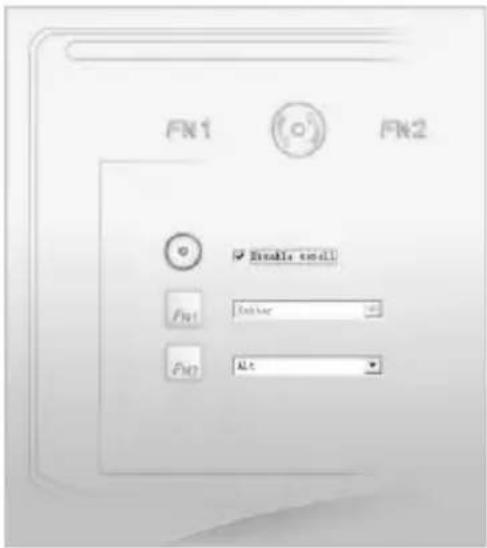
Choose Disable Scroll to disable the touch wheel on the tablet.
text_image
FN1 FN2 Double smell FN1 Deliver Altc. Pen Control Bar
Pen Control Bar provides scrolling function through the graphic pen.
Note: You will see the information as following figure shown when the tablet you purchased does not support the express touch keys.
Your product do not have function with keypad, Please visit follow URL to get more information
http://www.hanvon.com
Chapter 3 Instruction for Mac Systems
3.1 System Requirements
| RAM | Minimum is 128MB (256MB is recommended) |
| Hard-disk | 200MB |
| OS | MAC-OS 10.4 or later |
| Port | USB1.1or 2.0 |
3.2 Installation
Connect the graphic tablet's USB cable to the computer's USB port.
Step 1
Insert the driver CD into the CD-ROM drive then find the install file in MacOS X/Mac104/Install.dmg (Note: For MacOS 10.4 or later) or MacOS X/Mac103/Hwinstall.dmg (Note: For MacOS 10.3.X and it does not support express touch keys of graphics tablet), click on the Install.dmg or Hwinstall.dmg icon to run the file.
natural_image
Generic document icon with no visible text or symbolsNote: If you installed driver for Mac OS 10.3.X, you need to uninstall it before driver installation for Mac OS 10.4.X or later. For removing the driver, please open "System-Library-Extensions" and delete "HYTabletDriver.kext" file.
Step 2
Double-click the Install icon.
Step 3
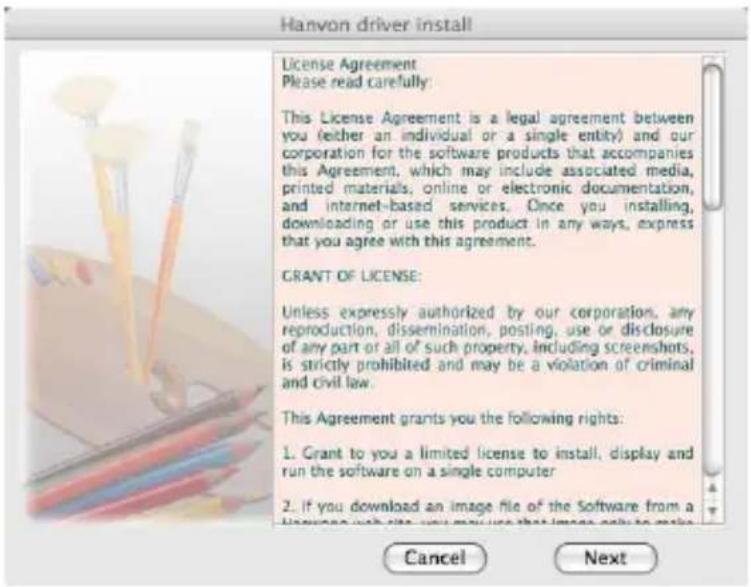
Please read the license agreement carefully then click Next.
text_image
Havon driver install License Agreement Please read carefully: This License Agreement is a legal agreement between you (either an individual or a single entity) and our corporation for the software products that accompanies this Agreement, which may include associated media, printed materials, online or electronic documentation, and internet-based services. Once you installing, downloading or use this product in any ways, express that you agree with this agreement. GRANT OF LICENSE: Unless expressly authorized by our corporation, any reproduction, dissemination, posting, use or disclosure of any part or all of such property, including screenshots, is strictly prohibited and may be a violation of criminal and civil law. This Agreement grants you the following rights: 1. Grant to you a limited license to install, display and run the software on a single computer 2. If you download an image file of the Software from a license file, you may use that image files to make Cancel NextStep 4
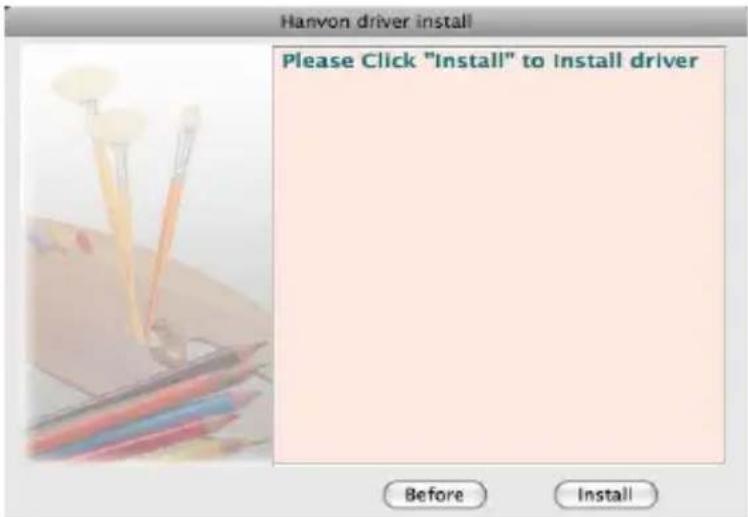
Click Install to install the tablet driver.
text_image
Hanyon driver install Please Click "Install" to install driver Before InstallStep 5
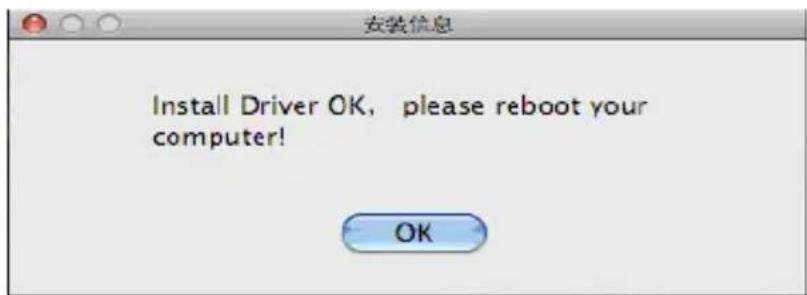
Click OK and reboot your computer when the install process is finished.
text_image
安装信息 Install Driver OK, please reboot your computer! OK3.3 Uninstalling
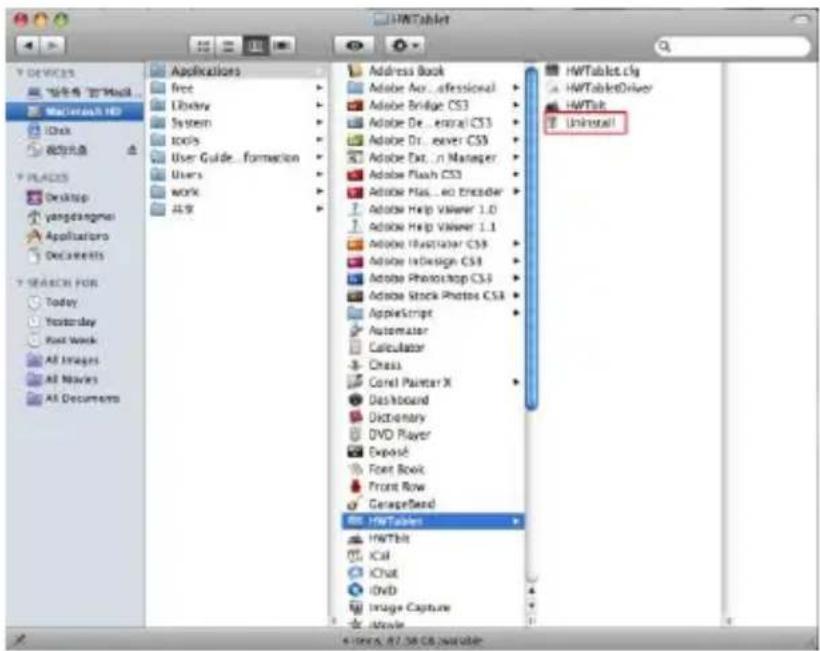
Open HWTablet in Applications.
text_image
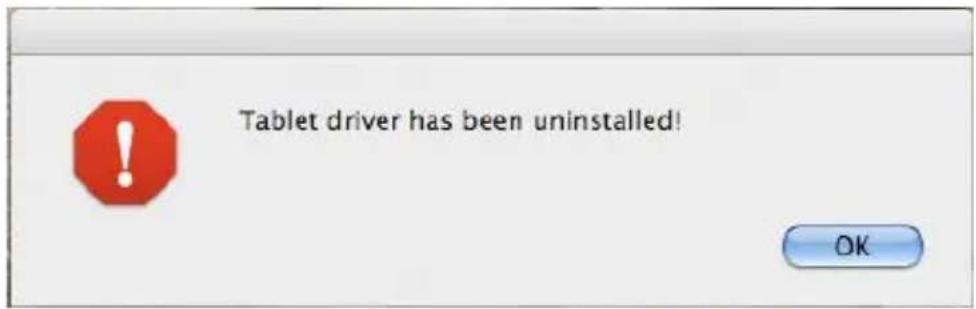
HWT Tablet HWT Tablet.cfg HWTTableDriver HWTsk Uninstall Applications free Library System tools User Guide...formation Users work 共享 Address Book Adobe Aca...affessional Adobe Bridge CS3 Adobe De...enral CS3 Adobe Dr...ever CS3 Adobe Ext...n Manager Adobe Flash CS3 Adobe Mac...o Encoder Adobe Help Viewer 1.0 Adobe Help Viewer 1.1 Adobe Photoshop CS3 Adobe InDesign CS3 Adobe Photoshop CS3 Adobe Stock Photos CS3 ApplicScript Automater Calculator Chess Corel Painter X Dashboard Dictionary DVD Player Expost Font Book Front Row GarageSeed HWTables HWTbit Cal Chat DVD Image Capture Movie 6 times, 87.56 GB availableChoose Uninstall to remove the tablet driver. Please click OK when the driver has been removed. (Suggestion: Reboot the computer).
text_image
Tablet driver has been uninstalled! OK3.4 Configuration
Connect the tablet to your computer by USB cable and port.
The HWTblt icon has been added in the applications. Double-click the HWTblt icon to open the tablet control panel.

text_image
Applications Time Machine UI Linkes Adobe Photoshop CS3 Adobe Acrobat 8 Professional Br Adobe Bridge CS3 Adobe Device Central CS3 Dw Adobe Dreamweaver CS3 Adobe Extension Manager F1 Adobe Flash CS3 Adobe Flash CS3 Video Encoder Adobe Help Viewer 1.0 Adobe Help Viewer 1.1 Adobe Illustrator CS3 Adobe InDesign CS3 Adobe Stock Photos CS3 HWTable Carel Painter X HW IBE Microsoft Office 2008 1 of 42 selected. 87,47 GB available3.4.1 General Configuration
text_image
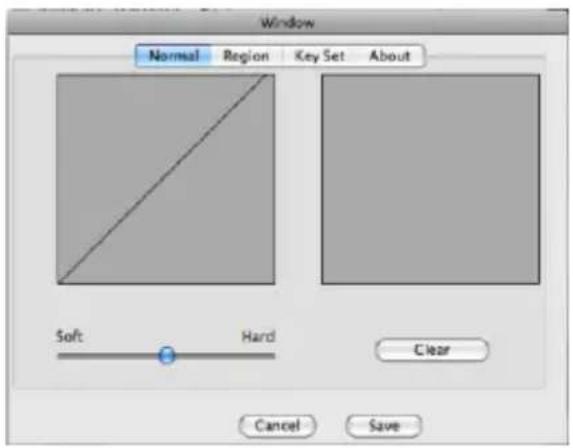
Window Normal Region Key Set About Soft Hard Clear Cancel Savea. Adjusting Pressure Sensitivity
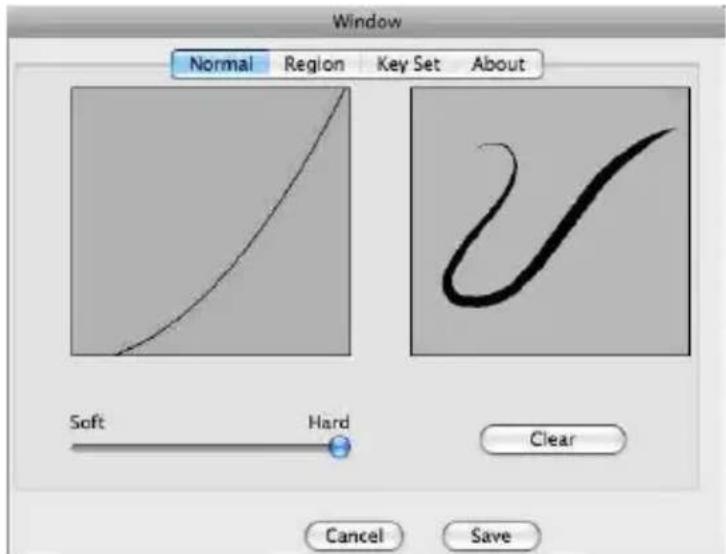
Pen pressure sensitivity can be adjusted by dragging the slider between soft and hard. The right area is the pressure test area. Adjustment can be saved by clicking the Save button, or can be canceled by clicking the Cancel button.
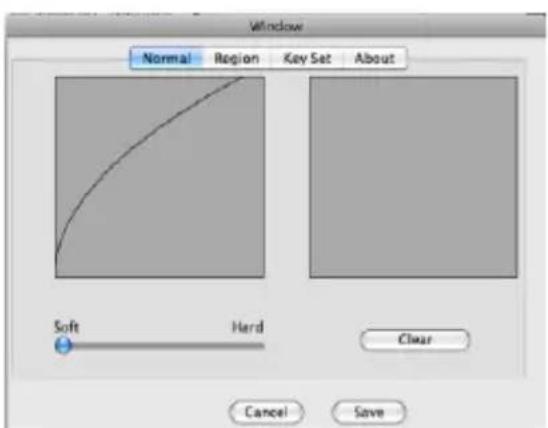
b. Pressure Curve Graph
Pen pressure sensitivity changes are displayed on the Pressure curve graph. The images below show the graphs for light and heavy pen pressure respectively.
text_image
Window Normal Region Key Set About Soft Herd Clear Cancel Save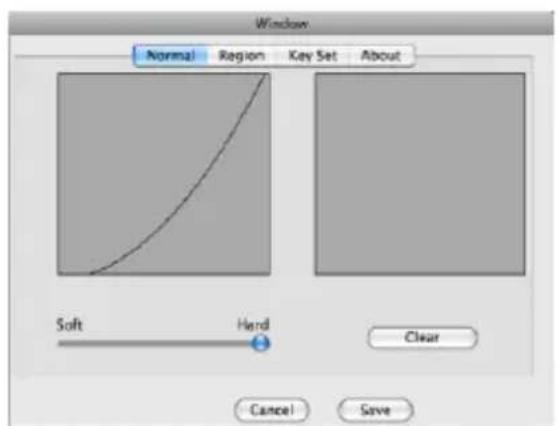
text_image
Window Normal Region Key Set About Soft Herd Clear Cancel Savec. Pressure Test Area
All the writing and drawing in the test area can be cleared by clicking Clear button.
text_image
Window Normal Region Key Set About Soft Hard Clear Cancel Save3.4.2 Mapping
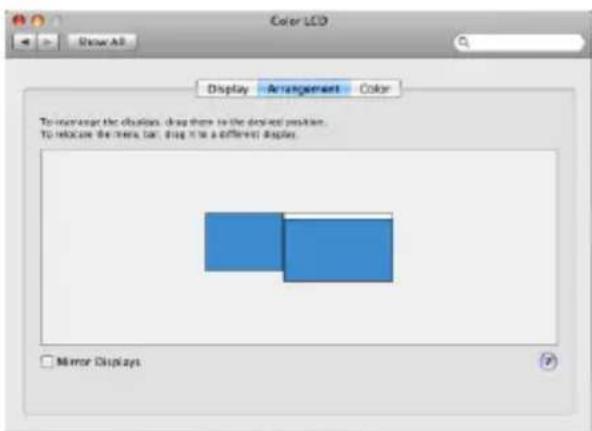
a. Multi-Monitor Mode
You can drag the displays to the desired order if you computer has more than one monitor.
text_image
Color LCD Show All Display Arrangement Color To increase the situation, drag there to the desired position. To enable the menu bar, drag it to a different display. Mirror Displays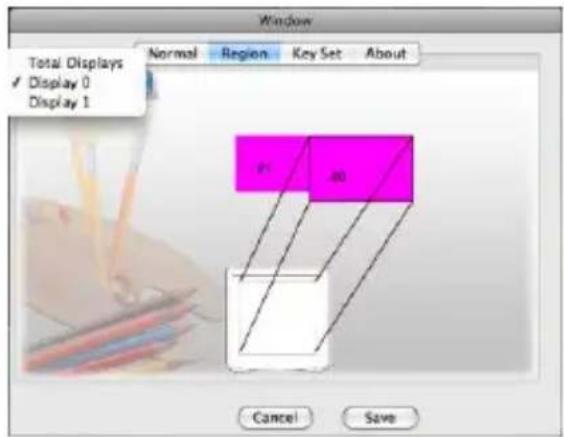
text_image
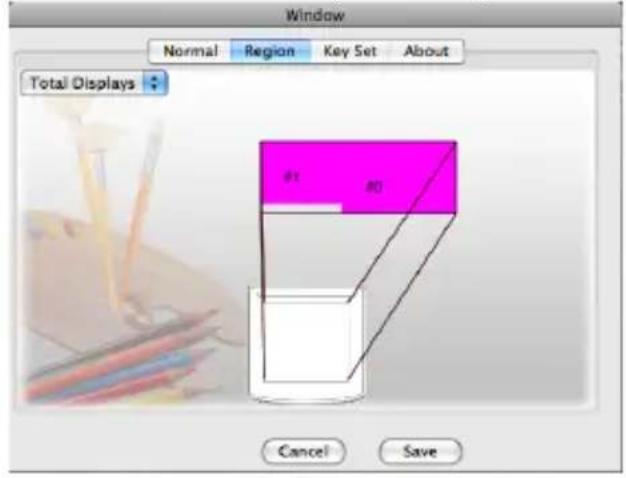
Window Total Displays ✓ Display 0 Display 1 Normal Region Key Set About P1 P2 Cancel Savea) Full screen
Choose Region and select Total Displays from the drop-down menu. You will see the active area of the monitors corresponding to the area in table is mapped.
text_image
Window Normal Region Key Set About Total Displays #1 #0 Cancel Save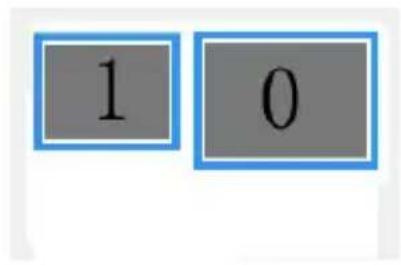
text_image
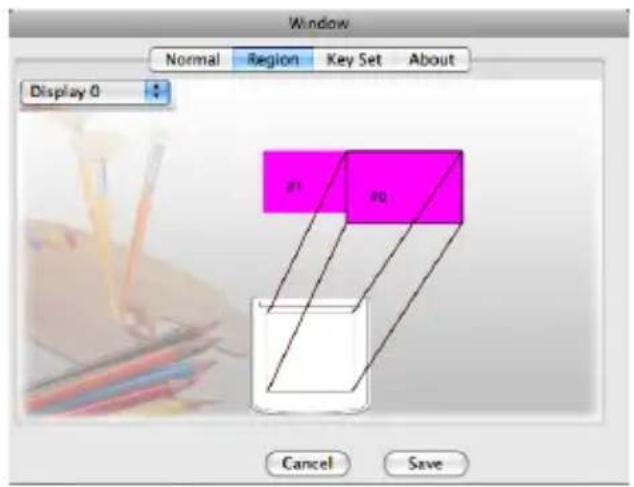
1 0b) Display #0
Select Display 0 from the drop-down menu to set the area in tablet to control Display 0.
text_image
Window Normal Region Key Set About Display 0 #1 #2 Cancel Save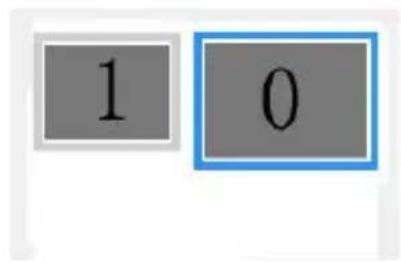
text_image
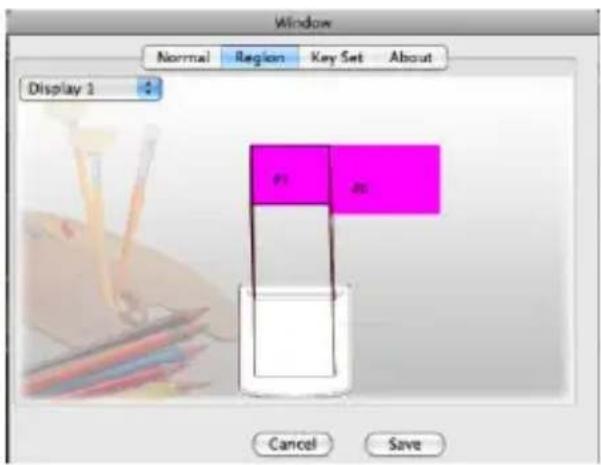
1 0c) Display #1
Select Display 1 from the drop-down menu to set the area in tablet to control Display 1.
text_image
Window Normal Region Key Set About Display 1 P1 P2 Cancel Save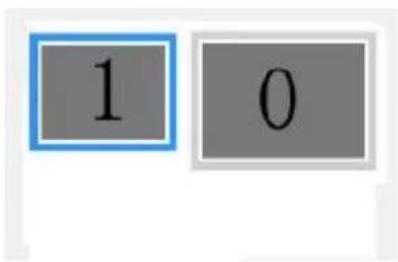
text_image
1 03.4.3 Express Touch Key
a. Express Touch key
There are two express touch keys on the tablet. The first key is defaulted as eraser .You can set the functions for the other key from each drop-down menu in Key Set. Click Save to save the setting or click Cancel to quit. As bellow:
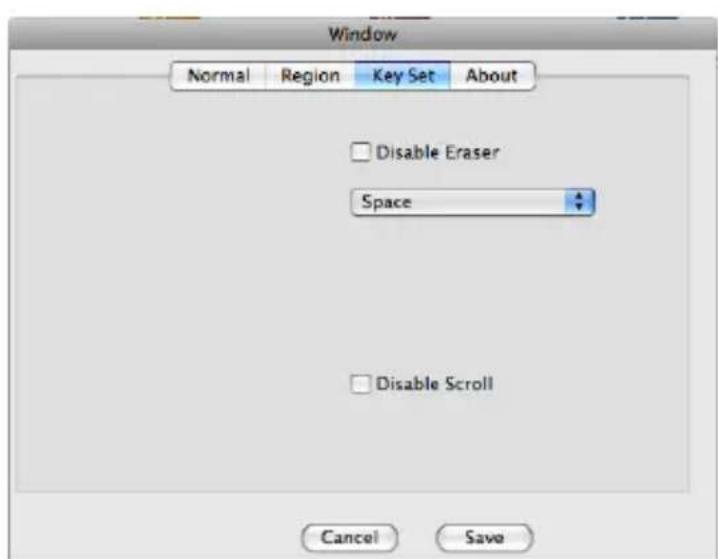
text_image
Window Normal Region Key Set About Disable Eraser Space Disable Scroll Cancel Save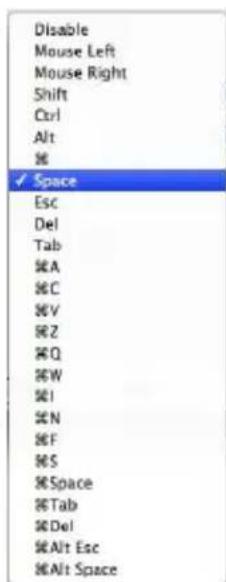
text_image
Disable Mouse Left Mouse Right Shift Ctrl Alt # ✓ Space Esc Del Tab A C V Z Q W I N F S Space Tab Del Alt Esc Alt Spaceb. Disable the Touch Scroll
Choose Disable Scroll to disable the touch strip on the tablet.
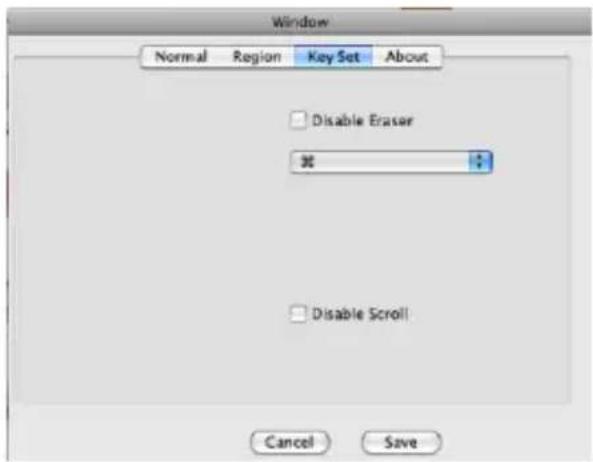
text_image
Window Normal Region Key Set About Disable Eraser Disable Scroll Cancel Savec. Pen Control Bar
Pen Control Bar provides scrolling function through the graphic pen.
Note: You will see the information as following figure shown when the tablet you purchased does not support the express touch keys.
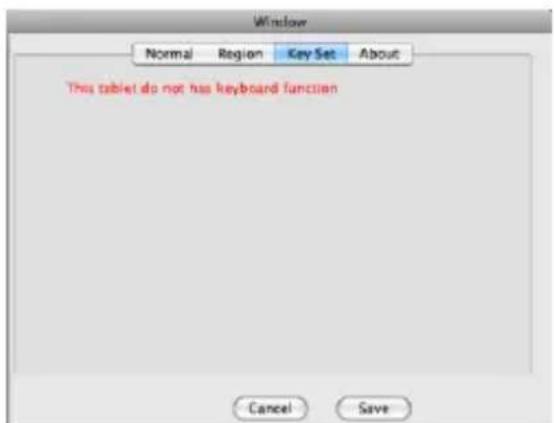
text_image
Window Normal Region Key Set About This tablet do not has keyboard function Cancel SaveChapter 4 Bundled Software
4.1 Hanvon Shell
4.1.1 Shell Summary
Hanvon Shell is a shortcut startup application for starting bundled Hanvon Software or other software.
Default startup style:
it will be operated automatically when you startup your computer; if user exits shell from the application, it will switch to the manual startup style; double click the shortcut icon on
the desktop to startup the Shell toolbar.
Main interface will be shown as following:

text_image
1 2 3 4 5 6 7 8 9 Hanvon T ASIA TIcons explanations as following:
1. Area for Dragging Shell
After opening shell toolbar, you can drag the icon to adjust the positions at up, down, left and right locations on computer's screen;
When cursor have been left the toolbar for 5 seconds or later,
Shell toolbar will be hided, Single-click it to display the main interface;
2. PenWrite
Editing Microsoft Office documents formatted as: Word、Txt、Excel and PPT by handwriting directly;
PenWrite Provides English、German、French、Italian、Dutch、Spanish、Swedish、Portuguese (Portugal)、Portuguese (Brazil) multi-languages recognition
3. PenWrite Asia
Editing Microsoft Office documents formatted as: word、Txt、Excel and PPT by handwriting directly;
PenWrite Asia Provides Simplified Chinese 、 Traditional Chinese (Hong Kong) 、 Traditional Chinese (Taiwan) 、 Japanese and Korean languages recognition
4. PenSign
This program enables you to add your handwriting signature in a document such as Microsoft Office word /PPT;
5. PenMail
Providing handwritten email in Outlook Express or Windows Mail.
6. PenMark
Providing handwritten mark on desktop or pictures;
7. WhiteBoard
A software application simulates Electronic Whiteboard. The monitor is like a marker board in front of users and become a simplified Electronic Whiteboard through a projector.
8. System Menu
Configure shell setting
9. Tablet Setting
Configure tablet setting
4.1.2 System Menu Shell
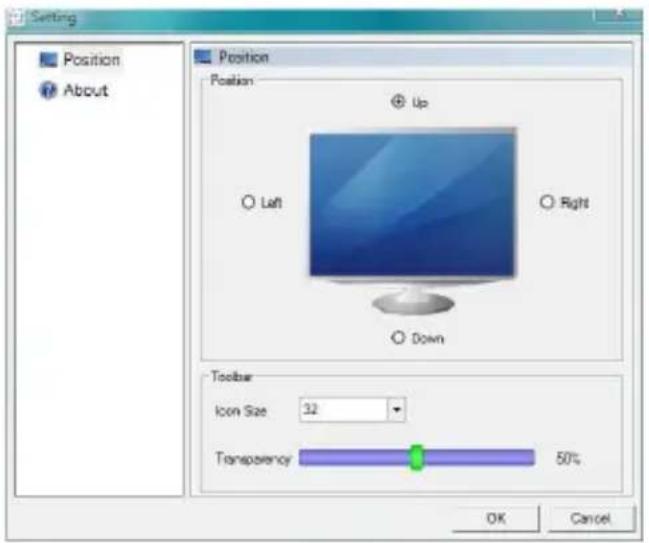
Click to enter Shell configuration interface shown as following figure:
text_image
Setting Position About Position Position Up Left Right Down Toolbar Icon Size 32 Transparency 50% OK CancelPosition: Set the position for Hanvon Shell on the screen;
Icon Size: Set the icon size shown in the Hanvon startup toolbar;
Transparency: Set the transparency for Hanvon startup toolbar.
4.1.3 Tablet Setting

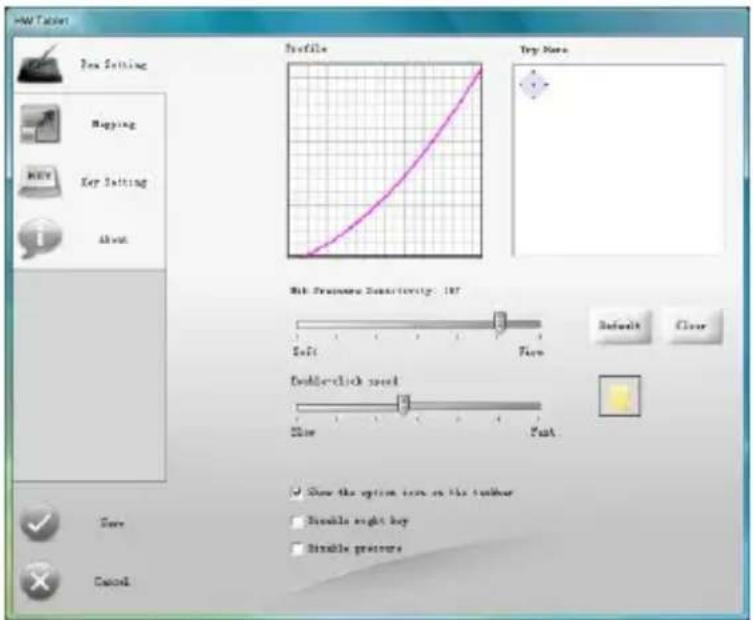
Click to enter tablet setting interface shown as following figure:
text_image
New Settings Mapping Key Setting About Profile Try More Mtl. Preference Sensitivity: 107 Salt Turn Double-click speed Size Fast Show the option times on the toolbar Double right key Double pressure Save Cancel4.1.4 Shell right key menu
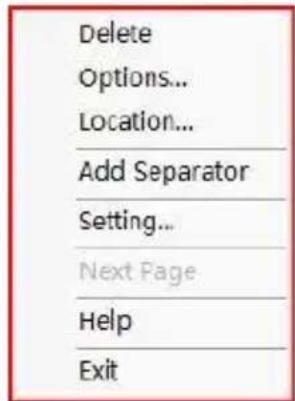
text_image
Delete Options... Location... Add Separator Setting... Next Page Help ExitDelete: Delete the current icon or separator;
Options: Change name and icon of the current software
Location: Find the target file position which the software is saved
Add Separator: Add the separator in the location where the cursor is placed.
Setting: (the function is the same as System Menu)
Next Page: Turn to next page
4.2 PenWrite
4.2.1 .PenWrite
Click on the shell to open PenWrite application.
Open WORD application for editing, Then users may handwriting input words, sentences, punctuation&symbol and numbers in English、German、French、Italian、Dutch、Spanish、Swedish、Portuguese (Portugal)、Portuguese (Brazil). The handwriting characters would be turn to be text automatically to the location where the cursor was placed.
4.2.2 PenWrite Asia
Click on the shell to open PenWrite Asia application.
Open WORD application for editing, Then users may handwriting input characters、punctuation&symbol and numbers in Simplified Chinese、Traditional Chinese (Hong Kong)、Traditional Chinese(Taiwan)、Japanese and Korean.
Note: Please confirm the cursor's location firstly, and then start handwriting.
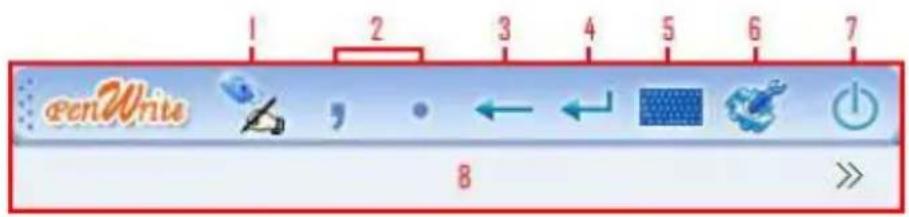
PenWrite and PenWrite Asia have the same main interface. Instruction as following:
4.2.3 Icon explanations
text_image
penWrite 1 2 3 4 5 6 7 8 >>Basic functions
- Pen & Mouse Mode
Switch the status between Pen & Mouse Mode \Pen
Mode Mouse Mode
- Comma & Period
Edit", " or ". " by clicking Comma or Period
- Backspace
Backspace by clicking
- Enter
Enter by clicking
- Keyboard
Click to startup software keyboard
- System Menu
Click to enter an interface shown as following figure:
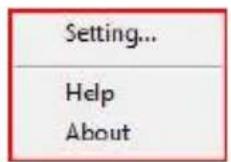
- Exit: Click to exit
- the candidate area for recognized results
4.2.4 Setting
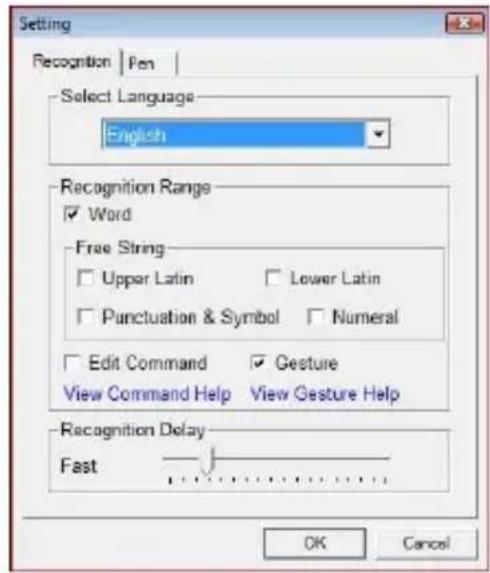
Click "setting..." shown as following figure:
Setting for PenWrite—Recognition
text_image
Setting Recognition | Pen | Select Language English Recognition Range ✓ Word Free String □ Upper Latin □ Lower Latin □ Punctuation & Symbol □ Numeral □ Edit Command ✓ Gesture View Command Help View Gesture Help Recognition Delay Fast OK Cancel[Select Language] Choose recognition language between 9 kinds of languages;
[Recognition Range] Choose the recognition range;
[Recognition Delay] Adjust the recognition interval time.
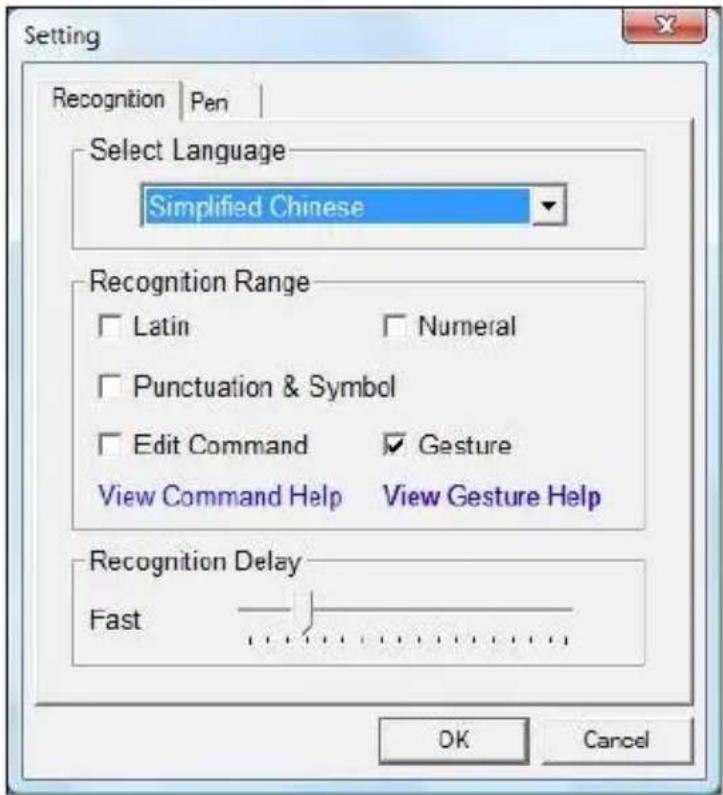
Setting for PenWrite Asia—Recognition
text_image
Setting Recognition | Pen | Select Language Simplified Chinese Recognition Range □ Latin □ Numeral □ Punctuation & Symbol □ Edit Command ✓ Gesture View Command Help View Gesture Help Recognition Delay Fast OK Cancel[Select Language] Choose recognition language between Simplified Chinese、Traditional Chinese (Hong Kong)、Traditional Chinese (Taiwan)、Japanese and Korean. [Recognition Range] Choose the recognition range; [Recognition Delay] Adjust the recognition interval time.
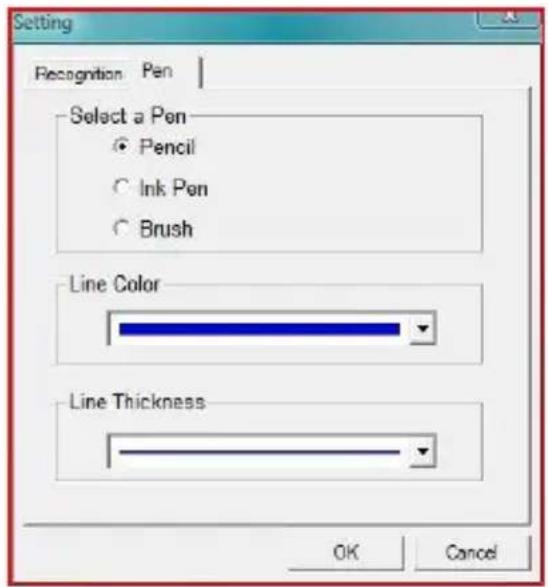
Setting—Pen
text_image
Setting Recognition Pen Select a Pen ● Pencil ○ Ink Pen ○ Brush Line Color Line Thickness OK CancelSelecting the pen type, line colors or line thickness
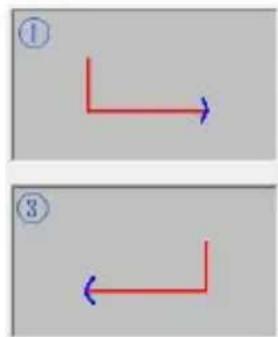
Gesture
① Space、②Backspace、③Enter、④Tab
natural_image
Two identical diagrams showing a red L-shaped arrow with blue directional arrows, labeled ① and ③ (no text or symbols on arrows)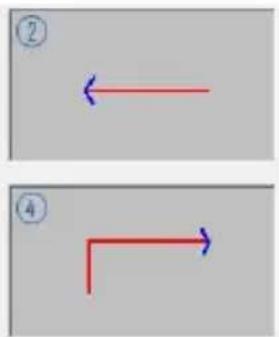
natural_image
Two simple geometric diagrams showing red arrows pointing left and right, labeled ② and ④ (no text or symbols beyond labels)✨ Edit Command:
$$ \Lambda_ {= \mathrm{Ctrl}} $$
For example:
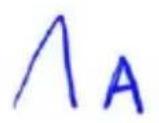
Ctrl+A
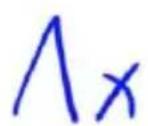
Ctrl+X
Edit Command supported as bellow:
Ctrl + A
Ctrl + C
Ctrl + V
Ctrl +X
Ctrl +Z
4.3 PenSign
Click to open PenSign application
- The program can be used in Microsoft Office 2000 and the version higher, Word、Excel、PowerPoint (Notice: please don’t write directly in Word outline\Excel pagination preview\PowerPoint insert images);
- Support the Word Pad and Windows Draw (when the script will be shown opacity, it wouldn't support "Hide Sign & Show Sign" and "Delete Sign" functions).
● The signature size and position can be adjusted freely.
Icon explanations:

text_image
openSign 1 2 3 4 5 6 7 8 9- Start Sign & End Sign;
Start and end to sign;
- Pen(Brush \ pencil \ Ink Pen)
Select pen type
- Color
Select line color
- Width
Select line thickness
- Clear all
Clear current script
- Hide Sign & Show Sign
Show or hide your signature
- Delete Sign
Delete all script
- System Menu
Help & About
- Exit
4.4 PenMail
Click

to open PenMail application.
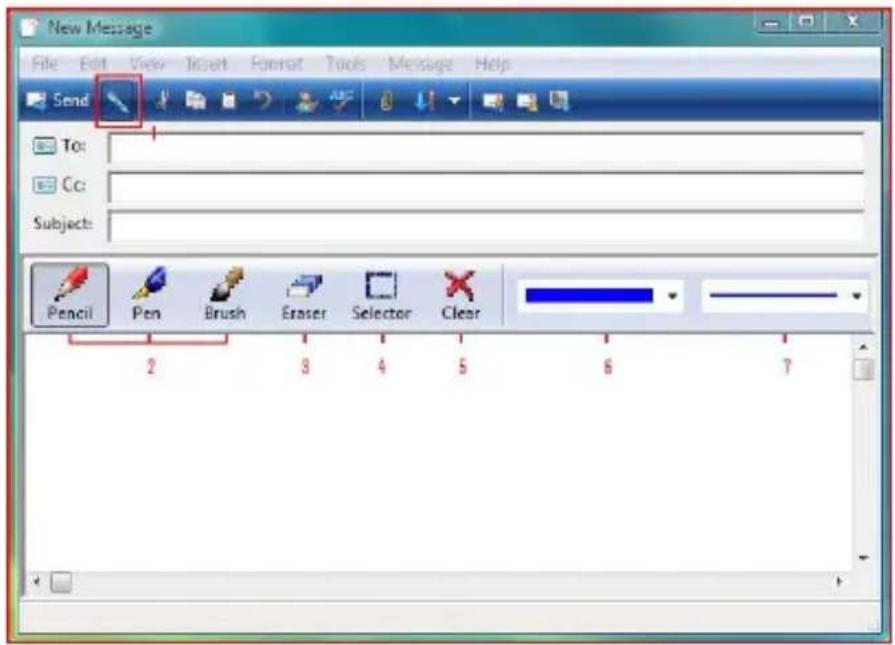
text_image
New Message File Edit View Insert Format Tools Message Help Send To: Cc: Subject: Pencil Pen Brush Eraser Selector Clear 2 3 4 5 6 7Icon explanations:
1. PenMail
When pressing icon down, it will switch to handwriting status; and it will return to text editor status when lifting icon.
2. Pen(Brush \ pencil \ Ink Pen)
Select pen type
3. Eraser
Erase the individual script
- Selector
Select part script
- Clear
Clear all script
- Colors
Select line color
- Width
Select line thickness
The program can be used in Outlook Express 6.0 and the version higher in Windows 2000/XP OS, and Windows Mail in Windows Vista OS. When the system operating is Windows 2000, please install IE6 and Outlook Express 6 or higher version before applying PenMail.
PenMail can also support Vista x32 but not Vista x64;
4.5 PenMark
Click to open PenMark application; you can handwrite marks on the screen or pictures.

text_image
1 2 3 4 5 6 7 8 9 10 11 eenMarkIcon explanations:
- Start\exit screen annotation
- Open picture
-
Save
-
Files can be saved as BMP、JPG、TIF、PNG or GIF format
- Suggest you to select TIF format when the file has several pages.
-
Default saving path: C:\Documents and Settings\Administrator\My Documents\My Pictures.
-
Pen(Brush \ pencil \ Ink Pen \ High Lighter)
Select Pen type
- Color
Select line color
- Width
Select line thickness
7. Eraser
Clear part script
8. Clear all
Clear all script
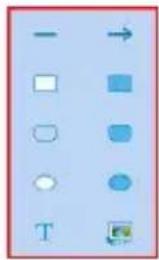
9. Tools
Insert line\figure\text\pictures
text_image
Cropped image showing a row of icons including arrows, squares, circles, and a play button, likely from a software interface.10. System Menu
Setting、Help、About
11. Exit
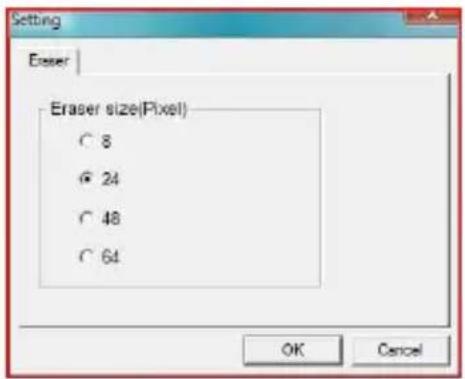
Setting
text_image
Setting Eraser Eraser size(Pixel) ○ 8 ● 24 ○ 48 ○ 64 OK CancelSetting the size of eraser
4.6 WhiteBoard
Click

to open WhiteBoard application.

text_image
1 2 3 4 5 6 7 8 9 10 11 12 13 14 WhiteBoardIcon explanations:
1. Save
- The document can be saved as BMP、JPG、TIF、PNG or GIF format
- Suggest you to select TIF format when the document has multiple pages.
- Default saving path: C:\Documents and Settings\Administrator\My Documents\My Pictures.
2. New Page
Add a new page
3. Pen (Brush \ pencil \ Ink Pen\ High Lighter)
Select pen type
4. Color
Select line color
5. Width
Select line thickness
6. Eraser
Clear part script
7. Clear all
Clear all script
8. Tools
Insert Line\figure\text\pictures
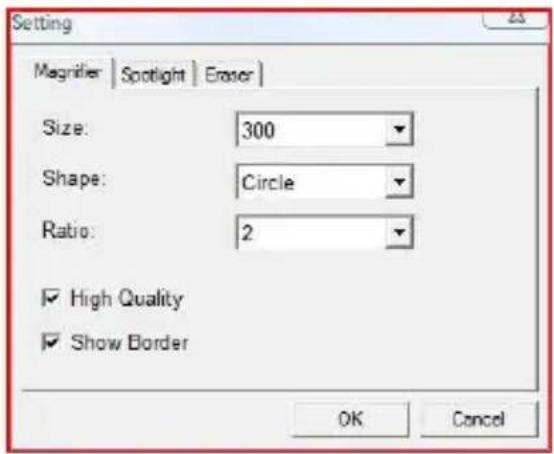
9. Magnifier
- Click the right key, the menu will popup, you can set spotlight size, shape, radio, high quality display, show border and exit
- Exit the application directly by pressing ESC
10. Spotlight
- Click down arrow, the menu will popup, you can set spotlight transparency, shape and exit.
- Exit the application directly by pressing ESC
11. System Menu
Setting、Help、About
12. Previous
Turn to previous page
13. Next
Turn to next page
14. Exit
Setting
Setting--Magnifier
text_image
Setting Magrifier | Spotlight | Eraser | Size: 300 Shape: Circle Ratio: 2 ✓ High Quality ✓ Show Border OK CancelSetting magnifier size, shape, ratio, high quality display and show border
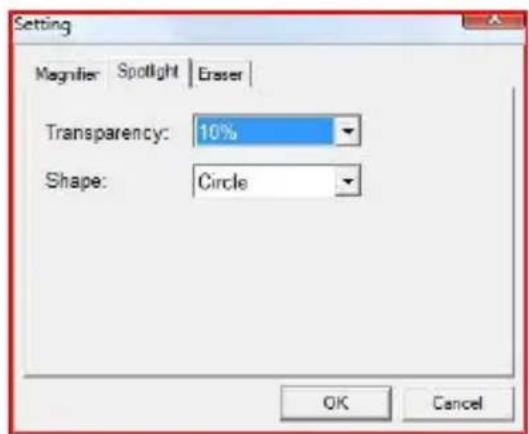
Setting—Spotlight
text_image
Setting Magnifier Spotlight Eraser Transparency: 10% Shape: Circle OK CancelSetting spotlight transparency and shape
Setting—Eraser
Setting the size of eraser
Appendix
Warranty
Limited Warranty
Hanvon Corporation warrants that this product is free from any defects in workmanship or materials under normal use and conditions for a period of two (2) years for Europe and one (1) year for other region from the date of original purchase. If such a defect is discovered within this warrant's limitations, Hanvon agrees, at its sole discretion, to repair or replace the same item with one of equal value, free of charge to the original consumer purchaser.
This warranty shall not apply if this product is modified, misused, tampered with, subject to abnormal working conditions, or transferred to someone other than the original consumer purchaser.
Warranty Redemption for US Market Only
Should this product fail to function in a satisfactory manner, please return it to the store where it was originally purchased. Please be sure to contact us at service@hanvon.com to obtain a Return Merchandise Authorization Number before you return it, and within your email please include your name, address, phone number, a copy of the original receipt, serial number and the reasons for returning the product.
Should this fail to resolve the matter and service is still required by reason of any defect or malfunction during the warranty period, Hanvon Corporation will repair or replace this product without charge (except for a charge for handling, packing, return UPS/postage, and insurance).
Technical Support
Should you have any questions or comments, please contact us via tech@hanvon.com, or visit our website at:
Global website: http://www.hanvon.com
US website: http://usa.hanvon.com
Online Registration for US Market Only
To better serve our customers, please take the time to register online at http://usa.hanvon.com. This information is for internal use only. No information provided will be distributed to soliciting organizations.
The registration also allows you to receive valuable information and enjoy special savings on upgrades for products.
Thank you for choosing Hanvon product.