
Tales of the Abyss (3DS) - Video game NINTENDO - Free user manual and instructions
Find the device manual for free Tales of the Abyss (3DS) NINTENDO in PDF.


| Product Type | Video Game |
| Brand | Nintendo |
| Model | Tales of the Abyss (3DS) |
| Platform | Nintendo 3DS |
| Genre | Action Role-Playing Game (RPG) |
| Release Year | 2012 (Japan), 2013 (North America) |
| ESRB Rating | Teen (T) |
| Number of Players | 1 |
| Game Card Size | 2 GB (approx. 16,000 blocks) |
| Language Support | English |
| Controller | Nintendo 3DS built-in controls |
| Display Support | 3D depth slider, dual screens |
| Manual Format | PDF (33 pages) |
| Manual Language | English |
| Save Support | Yes, save data to game card or SD card |
| Online Features | None (single-player only) |
| Dimensions (cartridge) | 35mm x 25mm x 1.5mm |
| Weight (cartridge) | 0.1 oz (3g) |
| Power Source | Powered by Nintendo 3DS console |
| Maintenance | Keep cartridge clean and dry; avoid dust and moisture |
| Safety Warnings | Follow console safety guidelines; avoid prolonged 3D viewing for children under 6 |
| Repairability | Not applicable; no user-serviceable parts. Contact Nintendo support for hardware issues. |
| Accessories Included | Game cartridge only |
Frequently Asked Questions - Tales of the Abyss (3DS) NINTENDO
User questions about Tales of the Abyss (3DS) NINTENDO
0 question about this device. Answer the ones you know or ask your own.
Ask a new question about this device
Download the instructions for your Video game in PDF format for free! Find your manual Tales of the Abyss (3DS) - NINTENDO and take your electronic device back in hand. On this page are published all the documents necessary for the use of your device. Tales of the Abyss (3DS) by NINTENDO.
USER MANUAL Tales of the Abyss (3DS) NINTENDO
text_image
TALESOF THE ABYSS® INSTRUCTION BOOKLET namco®NINTENDO3DS™
PLEASE CAREFULLY READ THE NINTENDO 3DS™ OPERATIONS MANUAL BEFORE USING YOUR SYSTEM, GAME CARD OR ACCESSORY. THIS MANUAL CONTAINS IMPORTANT HEALTH AND SAFETY INFORMATION.
IMPORTANT SAFETY INFORMATION: READ THE FOLLOWING WARNINGS BEFORE YOU OR YOUR CHILD PLAY VIDEO GAMES.
WARNING - 3D FEATURE ONLY FOR CHILDREN 7 AND OVER
Viewing of 3D images by children 6 and under may cause vision damage.
Use the Parental Control feature to restrict the display of 3D images for children 6 and under. See the Parental Controls section in the Nintendo 3DS Operations Manual for more information.
WARNING - SEIZURES
- Some people (about 1 in 4000) may have seizures or blackouts triggered by light flashes or patterns, and this may occur while they are watching TV or playing video games, even if they have never had a seizure before.
- Anyone who has had a seizure, loss of awareness, or other symptom linked to an epileptic condition should consult a doctor before playing a video game.
- Parents should watch their children play video games. Stop playing and consult a doctor if you or your child has any of the following symptoms:
Convulsions Eye or muscle twitching Loss of awareness
Altered vision Involuntary movements Disorientation
To reduce the likelihood of a seizure when playing video games:
Sit or stand as far from the screen as possible.1.
- Play video games on the smallest available television screen.
-
Do not play if you are tired or need sleep.
-
Play in a well-lit room.
- Take a 10 to 15 minute break every hour.
WARNING - EYESTRAIN AND MOTION SICKNESS
Playing video games can result in eyestrain after a sustained period of time, and perhaps sooner if using the 3D feature. Playing video games can also result in motion sickness in some players. Follow these instructions to help avoid eyestrain, dizziness, or nausea:
- Avoid excessive play. It is recommended that parents monitor their children for appropriate play.
Take a 10 to 15 minute break every hour, or every half hour when using the 3D feature, even if you don't think you need it. Each person is different, so take more frequent and longer breaks if you feel discomfort. - If your eyes become tired or sore while playing, or if you feel dizzy or nauseated, stop and rest for several hours before playing again. If you continue to have any of the above symptoms, stop playing and see a doctor.
WARNING - REPETITIVE MOTION INJURIES
Playing video games can make your muscles, joints, or skin hurt. Follow these instructions to avoid problems such as tendinitis, carpal tunnel syndrome or skin irritation:
Avoid excessive play. Parents should monitor their children for appropriate play.
Take a 10 to 15 minute break every hour, even if you don't think you need it.
- When using the stylus, you do not need to grip it tightly or press it hard against the screen. Doing so may cause fatigue or discomfort.
- If your hands, wrists, or arms become tired or sore while playing, or if you feel symptoms such as tingling, numbness, burning or stiff ness, stop and rest for several hours before playing again.
• If you continue to have any of the above symptoms or other discomfort during or after play, stop playing and see a doctor.
WARNING - BATTERY LEAKAGE
The Nintendo 3DS contains a rechargeable lithium ion battery pack. Leakage of ingredients contained within the battery pack, or the combustion products of the ingredients, can cause personal injury as well as damage to your Nintendo 3DS. If battery leakage occurs, avoid contact with skin. If contact occurs, immediately wash thoroughly with soap and water. If liquid leaking from a battery pack comes into contact with your eyes, immediately flush thoroughly with water and see a doctor.
To avoid battery leakage:
Do not expose battery to excessive physical shock, vibration, or liquids.
Do not disassemble, attempt to repair, or deform the battery.
Do not dispose of battery pack in a fire.
- Do not touch the terminals of the battery or cause a short between the terminals with a metal object.
Do not peel or damage the battery label.*
WARNING - RADIO FREQUENCY INTERFERENCE
The Nintendo 3DS can emit radio waves that can affect the operation of nearby electronics, including cardiac pacemakers.
- Do not operate the Nintendo 3DS within 9 inches of a pacemaker while using the wireless feature.
- If you have a pacemaker or other implanted medical device, do not use the wireless feature of the Nintendo 3DS without first consulting your doctor or the manufacturer of your medical device.
- Observe and follow all regulations and rules regarding use of wireless devices in locations such as hospitals, airports, and on board aircraft. Operation in those locations may interfere with or cause malfunctions of equipment, with resulting injuries to persons or damage to property.

The Offi cial Seal is your assurance that this product is licensed or manufactured by Nintendo. Always look for this seal when buying video game systems, accessories, games and related products.
IMPORTANT LEGAL INFORMATION
This Nintendo game is not designed for use with any unauthorized device. Use of any such device will invalidate your Nintendo product warranty. Copying of any Nintendo game is illegal and is strictly prohibited by domestic and international intellectual property laws. "Back-up" or "archival" copies are not authorized and are not necessary to protect your software. Violators will be prosecuted.
This product uses the LC Font by Sharp Corporation, except some characters. LCFONT, LC Font and the LC logo mark are trademarks of Sharp Corporation.
Fonts used in-game are provided in part by Bitstream Inc. All rights reserved. This software uses fonts produced by Fontworks Inc.
Fontworks, and font names are trademarks or registered trademarks of Fontworks Inc.

Powered by

This product is using Mobiclip™, a software video codec of Actimagine. Mobiclip is a trademark of Actimagine. © 2008 Actimagine. All rights reserved. www.mobiclip.com
LICENSED BY NINTENDO. Trademarks are property of their respective owners. Nintendo 3DS is a trademark of Nintendo.
| Story | 6 | |
| Th e-Characters | 7 | |
| Starting the Game | 13 | |
| Game Screens | 14 | |
| Game Controls | 15 | |
| Map Screens Field Map | 18 | |
| Normal Map | 21 | |
| Menu Screens Main Menu | 25 | |
| Artes | 27 | |
| Equipment | 31 | |
| Items | 32 | |
| Battle Menu | 33 | |
| Cooking | 39 | |
| Status | 41 | |
| Library | 44 | |
| System | 45 | |
| Battle Screens Screen and Rules | 47 | |
| Battle Menu | 50 | |
| Fonons and Conditions | 53 | |
| Battle Actions | 56 | |
5 CONTENTS
THE STORY
Fonons – essential components of all matter on planet Auldrant. Ages ago, a new type of fonon was discovered – the Seventh Fonon. Its discovery threw humanity into chaos, for if one could use the Seventh Fonon, one could learn the future. Wars over the Seven Fonon raged across the lands, ending only when the miasma – a poison from within the planet – covered the entire world. This is when Yulla appeared.
A fonist skilled in prophecy, Yulia saw thousands of years into the future and for-saw a way to seal away the miasma. With the guidance of her prophecies, humanity sealed the masima deep within the planet.
Over two thousand years passed.
The world is ruled by Yulia's prophecy, known as the Score. People believe in the coming "unprecedented prosperity" promised in the Score, never straying from the path set forth in the Score which will lead them to that prosperity. They look to the Score as revealed by the Order of Lorelei, the religion Yulia founded, and hold that the greatest virtue is to follow the Score faithfully.
Yulia's Score tells of a young man who is necessary in order to bring "unprecedented prosperity." His name is Luke fon Fabre. An heir to the throne of the Kingdom of Kimlasca-Larvaldear, he was kidnapped as a child by the kingdom's enemy, the Malkuth Empire. Since his return he has been confined to his family's manor for his own safety. He has no idea of the evil that now draws close.
STORY 6
THE CHARACTERS
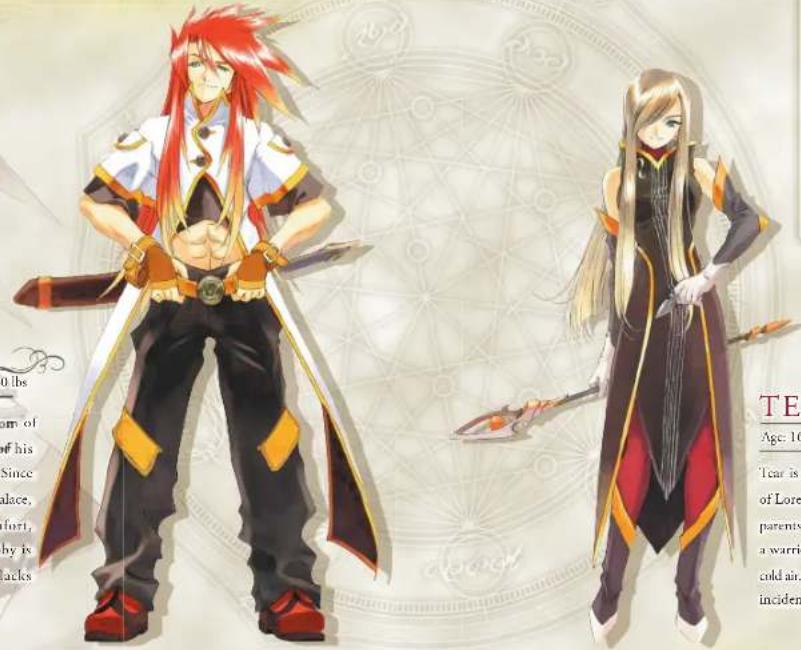
LUKE Luke fon Fabre
Age: 17 Class: Swordsman Height: 5'7" Weight: 150 lbs
Luke is the only son of a Duke of the Kingdom of Kimlasca-Lanvaldear. He lost all memory of his childhood due to the shock of being kidnapped. Since his return he has been a prisoner in his own palace, but his family's wealth has kept him in comfort, leaving him spoiled and naive. His only hobby is practicing with his sword, and, though he lacks refinement; he does possess some skill.
text_image
0 lbs am of of his Since lace, furt, by is acks TE. Age: 16 Tear is of Lorel parents a warrior cold air incidentMIEU
Mieu is a young cheagle. Cheagles, considered holy by the Order of Lorelei, normally live in herds in the forest, but fate will be
him to join Luke and the others on their adventure. The Sorcerer's Ring that he wears around his tummy allows him to use human speech, and he can use the ring's fonic power to breathe fire.

TEAR
Tear Grants
Age: 16 Class: Melodist Height: 5'4" Weight: 110 lbs
Tear is a Seventh Fenist in the military wing of the Order of Lorelei, the religion overseeing the Soror. She lost both parents when she was still an infant, and has been raised as a warrior ever since. She is staid and silent, giving her a cold air, but she has a secret weak spot for cute things. A certain incident leads her to joining with Luke on his adventure.
THE CHARACTERS
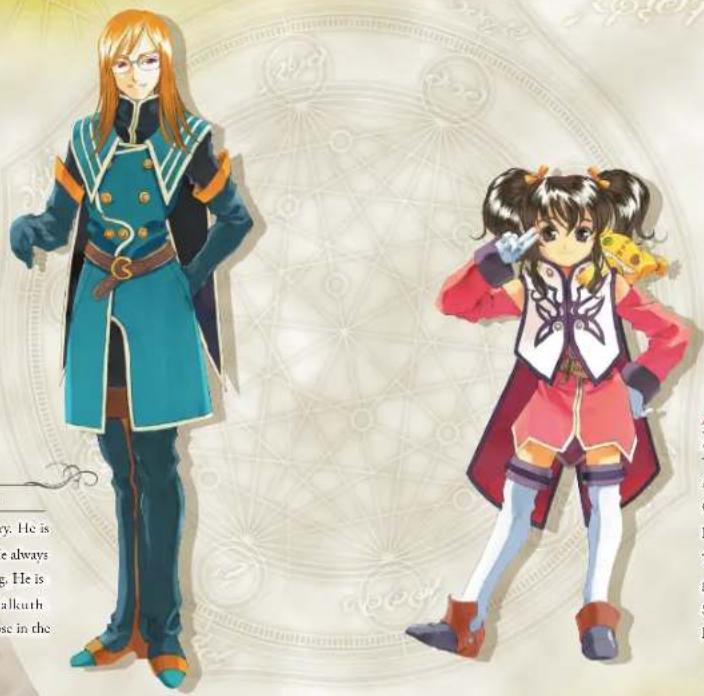
JADE Jade Curtiss
Age: 35 Class: Fonist Height: 6'1" Weight: 163 lbs
Jade is a colonel in the Malkuth Empire's military. He is both a skilled fonist and a master of the spear. He always smiles, so no one knows what he is truly thinking. He is known to be the right-hand man to the Malkuth Emperor, Peony, but he is also known among those in the military as "Jade the Necromancer."
9 THE CHARACTERS
natural_image
Illustration of two anime-style characters in formal costumes, one standing and one in a colorful outfit, with no visible text or symbols.ANISE Anise Tatlin
Age: 13. Class Pupper Master Height: 5'0" Weight: 93 lbs
Always cheerful and happy. Anise is a Fon Master Guardian, charged with personally pictoesting/Iwin-Master Ion, the leader of the Order of Lorelei. The stuffed doll, Tokunaga, that she keeps strapped to her back can grow to gargentum size, and she fights while riding on its back. She hopes to marry rich, and ever since meeting Luke, she has been plotting to become his future ducies.
THE CHARACTERS
THE CHARACTERS
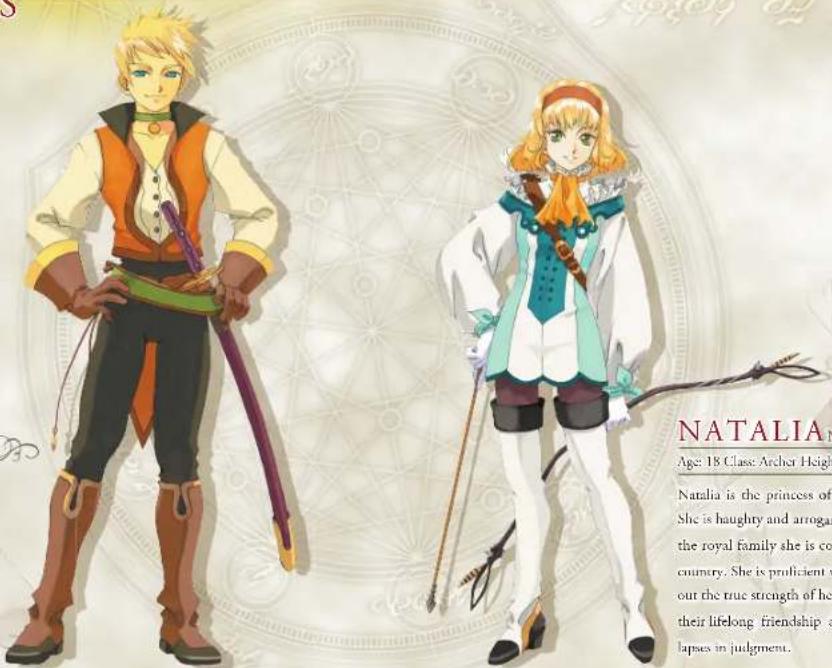
GUY Guy Cecil
Age: 21 Class: Swordsman Height: 6' Weight: 174 lbs
Guy is a servant in the Fabre household. He was first taken on as a babysitter, and ever since then, Guy has been like both a brother and a parent to the palace-bound Luke. He is uncomfortable around women, so his kind words to them often lead to awkward situations.
11 THE CHARACTERS
text_image
NATALIA Age: 18 Class: Archer Height Natalia is the princess of She is haughty and arrogar the royal family she is co country. She is proficient v out the true strength of he their lifelong friendship a lapses in judgment.NATALIA Natalia Luzu Kimlasca Lanvaldear
Age: 18 Class: Archer Height: 5'6" Weight: 117 lbs
Natalia is the princess of the Kingdom of Kimlasca-Lanvaldear. She is haughty and arrogant, but at the same time, as a member of the royal family she is concerned for her subjects and for her country. She is proficient with a bow, and difficult situations bring out the true strength of her will. Natalia is engaged to Lake, and their lifelong friendship allows her to freely criticize him for his lapses in judgment.
THE CHARACTERS
The opening movie plays after the game is started. You may skip the movie by pressing START, or wait until the movie ends and the title screen is displayed.
TITLE SCREEN
The following three menu items will be displayed. Use the +Control Pad or slide up or down on the Circle Pad to choose a menu item, and press the A Button.
NEW GAME Starts a game from the beginning
CONTINUE Continue playing a game from where you last saved. Select a save file to load and press the A Button. Select YES when the prompt message appears
CONFIG This allows you to set various game settings in the same manner as "Config" in the System Menu
SAVING DATA
To save your game progress, open the menu screen while on a Field Map and select System, Save, then a save file. You can also save by pressing the A Button at a Save Point in towns and dungeons.
* If you overwrite existing save data in a file, your previous data will be lost.
* You can have up to four save files at a crime.
13 STARTING THE GAME GAME SCREENS
This section explains the main screens used in Tales of the Abyss and their relationships to one another. You will move through map screens and use the Menu Screen to perform various actions and change settings. The game changes to the Battle Screen when you meet enemies on the field, or when a battle begins during an event.
MAP SCREENS
P 18-24
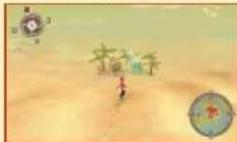
FIELD MAP
You can travel on the Field Map to visit various towns and dungeons.
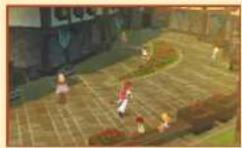
NORMAL MAP
This is the screen shown when you are gathering information in towns or searching through dungeons.
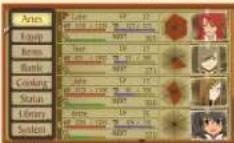
MENU SCREEN
P.25 46
In this menu, you can use items, confirm information, and change game settings.
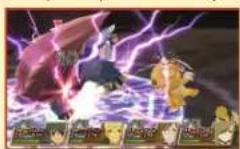
BATTLE SCREEN
P47-63
On this screen, you can control the characters during battles with and earn experience points after enemies, and earn experience points after a victory.
GAME CONTROLS
This section explains basic game controls by screen. Refer to each page's explanation and the key functions table on page 17.
NINTENDO 3DS

text_image
3D Screen (top screen) Circle Pad L Button Touch Screen (bottom screen) iControl Pad X Button 3D depth slider R Button A Button B Button Y Button STARTSELECT HOME ButtonOpen the HOME Menu
* If you close the Nintendo 3DS during play, it will enter Sleep Mode and conserve battery power. Open the Nintendo 3DS to exit Sleep Mode.
15 GAME CONTROLS GAME CONTROLS
Map Screen Controls (P18-24)
| Field Map Normal Map | ||
| +Control Pad | [Up] Open World Map(Down) Toggle current location display(Left/Right) Toggle minimap and compass display | Change character directionToggle Mieu Action (while pressing the R Button) |
| Circle Pad | MoveWalk (while pressing the B Button) | MoveWalk (while pressing the B Button)Toggle Mieu Action (while pressing the R Button) |
| A Button Enter town/dungeon, Search Speak, Search | ||
| X Button Open Menu Screen Open Menu Screen | ||
| Y Button — Perform Mieu Action | ||
| L Button Rotate camera — | ||
| R Button Rotate camera | Toggle Mieu Action (while using +Control Pad/Circle Pad) | |
| START Start Skit | Start Skit | |
| Touch Screen | Select, Confirm | Select, Confirm |
* Depending on how far you slide the Circle Pad, the characters will either run or walk.
Menu Screen Controls (P25-46)
| +Control Pad, Circle Pad | Select items |
| A Button Confirm selection | |
| B Button Cancel, Return to previous screen | |
| L Button, R Button | Change character or item category |
| START Toggle window explanation | |
| Touch Screen | Select, Confirm |
GAME CONTROLS
Battle Screen Controls (P.47-63)
| Circle Pad | Move, Free Run (while pressing the t. Button)Select spell target, move free cursor (while casting spell) |
| A Burton Normal attack | |
| B Button Use Aries (while sliding the Circle Pad) | |
| X Button Open Battle Menu | |
| Y Button Guard | |
| L Button Free Run (while sliding the Circle Pad)* | |
| R Button Select target | |
| +Control Pad (Down) Toggle control mode | |
| +Control Pad (Right) Activate Over Limit* | |
| +Control Pad (Left) Decline item request | |
| START Pause game | |
| Touch Screen Activate shortcut |
* You will be able to use Free Run and Over Limit after your character has gained enough experience.
* You can change in-battle controls by selecting Menu ScreensSystemsConfigurationsBarrle Customize.
KEY HELP
On map screens, help text will be displayed when you are near an object that you can interact with. On menu screens, the buttons that you can use on each screen and what they perform is displayed.

17 GAME CONTROLS
MAP SCREENS (FIELD MAP)
You use the Field Map to travel to the various towns and dungeons that are scattered throughout the world. Be sure to visit all of the places that you can!
FIELD MAP SCREEN
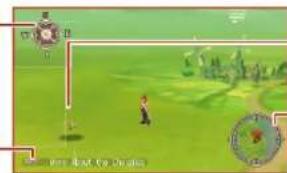
Move using the Circle Pad. Hold down the B Button as you move to walk. You can also rotate the camera using the L Button and R Button, or press left or right on the +Control Pad to show or hide the minimap and compass. Press the X Button or touch "Open menu" on the Touch Screen to open the menu screen.
* Once you progress through the game and acquire the World Map (refer to page 19), your current location will be displayed on the Touch Screen. You can show or hide your current location by pressing down on the +Control Pad.
Compass
The N, S, E, and W indicate the four cardinal directions. The red icon indicates the direction the character is facing.
Skit Title (refer to page 20)
text_image
Game screenshot showing a character playing on a grassy field with game controls and UI elementsEnemy
Touch an enemy to enter battle.
Minimap
Check your current location and direction the camera is facing.
ENTERING TOWNS AND DUNGEONS
When you move close to a town or dungeon on the Field Map, its name will be displayed. Press the A Button to enter.
MAP SCREENS (FIELD MAP)
WORLD MAP
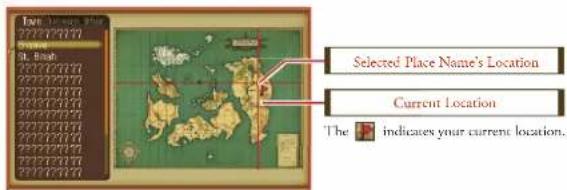
At some point during your journey, you will acquire the World Map. Press up on the +Control Pad to look at the world as a whole. Any locations you have already visited will be listed, and you can toggle between lists of towns, dungeons, and other locations by pressing the I. Button and R Button, and highlight their names to check their locations. When selecting a town's name, press the A Button to view a list of shop items. While viewing the World Map, press the Y Button to zoom in or out. While zoomed in, hold down the X Button and slide the Circle Pad to scroll across the map.
* The World Map can also be opened on Normal Maps. Refer to page 21.
text_image
Selected Place Name's Location Current Location The indicates your current location.USING VEHICLES
As the game progresses, Luke and his companions will acquire vehicles that allow them to travel by sea and by air. You will not encounter enemies while you are using vehicles, and you will be able to visit new places that you could not reach before.
19 MAP SCREENS [FIELD MAP] MAP SCREENS [FIELD MAP]
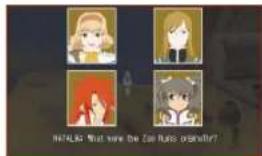
VIEWING SKITS
Press SELECT when a skit title is displayed to view a conversation between each of the characters. These chats may be about anything, from simple conversations to hints about your adventure.
* You may also view Skits on the Normal Map.
text_image
NATALIA: What were the car runs whatever?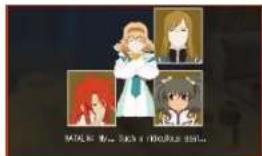
text_image
MILKING MY LEEY HOMES MELLYBEWARE OF SURPRISE ENCOUNTERS!
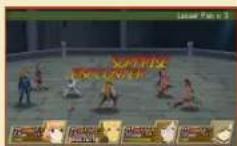
If an enemy comes in contact with you from behind, then a surprise encounter will occur. In surprise encounter battles, characters that take part in the battle are chosen at random, regardless of the established battle order.
MAP SCREENS (NORMAL MAP)
The Normal Map is displayed when you enter a town or a dungeon. This section explains basic controls on that screen and the various services available when you enter a town.
NORMAL MAP
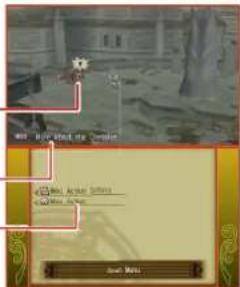
Slide the Circle Pad to move, or pair it with the B Button to walk. Press the X Button or touch "Open Menu" on the Touch Screen to open the menu screen.
Enemy
Touch an enemy to begin a battle.
Skit Title (Refer to page 20 for details.)
Mieu Action (Refer to page 2.2 for details.)
text_image
WILL YOUR HOME COMPRE WILL YOUR HOME COMPRE CORN ROLLING ITEMS CORN ROLLING ITEMS HOT DO NOTSAVE POINTS
You can save the game by pressing the A Button while you are standing on a Save Point in a town or in a dungeon. Choose a file to save your data and press the A Button. Green Memory Circles will also fully restore your HP and TP for all characters standing on them.

21 MAP SCREENS [NORMAL MAP] MAP SCREENS [NORMAL MAP]
SPEAK/LOOK
You can speak to people by facing them and pressing the A Button. You can also read signs or open doors and treasure chests in the same manner.
* You can also perform the same action to open treasure chests on the Field Map.
MOVE OBJECT
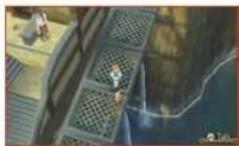
You can move some objects that you find in towns and dungeons. Face the object you want to move and press the A Button while sliding the Circle Pad in any direction. You can both push and pull objects.
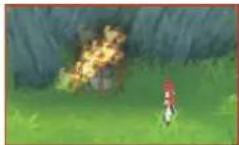
MIEU ACTIONS
After you have added Mieu to your party, you can press the Y Button to have him blow flames. There are many ways to make use of this, such as to burn away vegetation that is blocking your path. You will also learn new actions as your journey progresses. By making appropriate use of Mieu Actions you will be able to enter new dungeons, so try them out in a variety of places!
CHANGING ACTION
After you've learned new Mieu Actions, hold down the R Button to display the current action in the upper right corner of the 3D Screen. You can then press left or right on the iControl Pad or slide left or right on the Circle Pad to change the Mieu Action.

MAP SCREENS (NORMAL MAP)
USING SHOPS
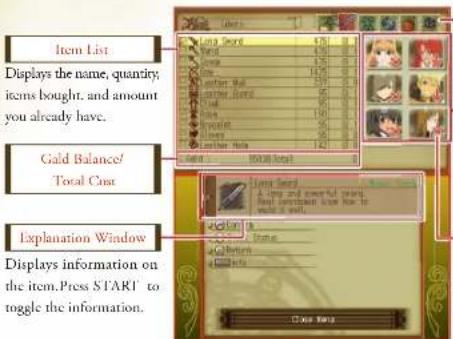
There are several types of shops, including weapon, armor, food, and tool shops. Food shops sell ingredients required for cooking, and tool shops sell healing items and such. Speak to the shopkeeper to purchase and equip items. Refer to page 31 for details. When buying items, press up or down on the +Control Pad or slide up or down on the Circle Pad to select the item you want and then press left or right on the +Control Pad or slide left or right on the Circle Pad to select the quantity. Press the A Button to confirm.
text_image
Item List Displays the name, quantity, items bought, and amount you already have. Gold Balance/ Total Cost Explanation Window Displays information on the item.Press START to toggle the information.Item Category (Refer to page 32) Displays when you are selling items. Press the L Button or R Button to toggle.
Character Information Press the X Button to move here. Select a character and press the A Button to check their status.
Equipment Status Change The following symbols will change depending on the item equipped.
Raises status Lowers status Equipped Cannot be equipped
23 MAP SCREENS [NORMAL MAP] MAP SCREENS [NORMAL MAP]
INNS AND ITEM FORGERS
By paying Gald at an Inn, all characters' HP and TP will be restored to their maximum values, and all Status Effects, such as Poison and KO, are restored to normal. Places called Item Forges give items and various materials, while creating other items for you. Here is where you can get a hold of hard to find items.
TOWN LINK SYSTEM
Many things other than the events occurring in the main story will affect the towns found throughout the game, and as a result the towns will change. The following are some examples of changes that you may see:
CHANGES IN ITEM PRICES
The prices that shops charge for items will change, depending on the status of the town and on your party's actions. For example, if the party has helped someone in the past, that person may sell items to them for a lower price. When war is in the air, causing tensions to rise, prices may rise as well.
CHANGES IN ITEMS SOLD
Just as with prices, the types of items sold may change. This is especially true when war threatens, as shortages will occur, making some items disappear from stores.
OTHER CHANGES
As a result of other events, you may be able to enter previously inaccessible areas, or meet new people. The group's actions may also result in unexpected consequences.
MENU SCREENS (MAIN MENU)
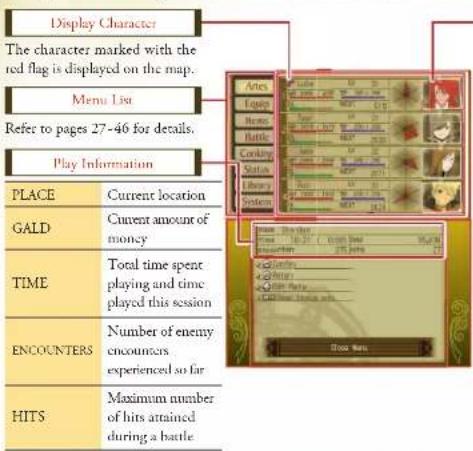
Pressing the X Button or touching "Open Menu" on the Touch Screen opens the Main Menu. From the Main Menu, you can enter various sub-menus.
MAIN MENU
Use the +Control Pad or Circle Pad to move the cursor and highlight a menu item. Press the A Button to select it. Pressing START will change the information shown in the Character Window.
text_image
Display Character The character marked with the red flag is displayed on the map. Menu List Refer to pages 27-46 for details. Play Information PLACE Current location GALD Current amount of money TIME Total time spent playing and time played this session ENCOUNTERS Number of enemy encounters experienced so far HITS Maximum number of hits attained during a battle| Character Window | |
| From left to right, it displays the position of the character, current status, growth trends graph, and a character portrait. | |
| LV | Current level |
| HP | Current and maximum Hit Points |
| TP | Current and maximum Technical Points |
| OWL | Current amount of your Over Limit gauge |
| NEXT | Number of experience points required to reach the next level |
25 MENU SCREENS [MAIN MENU] MENU SCREENS [MAIN MENU]
CAPACITY CORE GROWTH TREND GRAPHS
The graph shown in the character window represents the character's Capacity Core growth trend. Through level-up bonuses, it compares the highest skills as MAX. Use this graph to keep track of how your character's development is progressing.
DISPLAYED CHARACTER
Press the X Button to select a character then select another character and press the A Button to swap them. When collecting items as you progress through the game, you'll be able to change the display character. Select the character you want to set and press the A Button to move the □ and change the character that represents your party as you move on the map screens.
CHANGE BATTLE ORDER
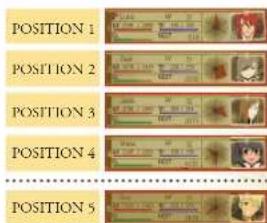
Characters' duties during battles will change according to their positions. Characters in position 1 (the topmost character) will be controlled by the player, and their control mode can be set to "manual" or "semi-auto". Characters in positions 2 through 4 will also take part in battles. Characters in positions 5 and 6 are held in reserve and do not partake in battles. Note that reserve party members still gain standard experience points, but not bonus experience points.
Example: Five-Character Party
In the example below, the player would control Luke who is in position 1. Guy, in position 5, would not take part in barrles.
text_image
POSITION 1 POSITION 2 POSITION 3 POSITION 4 POSITION 5MENU SCREENS (ARTES)
On the Artes Menu, you can adjust settings related to a character's spells (fonic artes) and skills (strike artes), and cast some spells. You can also set the control mode and register shortcuts.
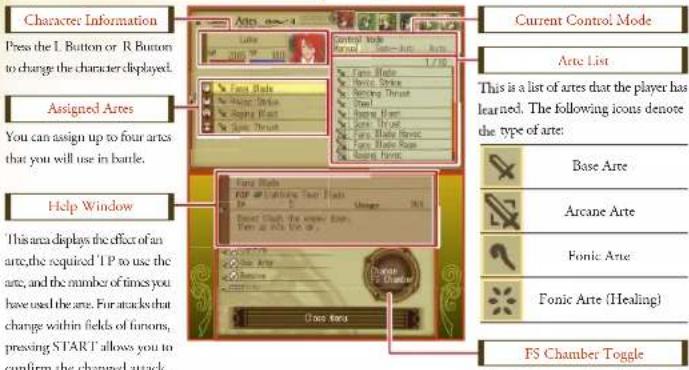
ARTES MENU
Choose "Artes" from the Main Menu and then choose a character. The Artes Menu will be shown. The menu will change slightly depending on the character's control mode.
Control Mode (Manual/Semi-Auto)
text_image
Character Information Press the I. Button or R Button to change the character displayed. Assigned Artes You can assign up to four artes that you will use in battle. Help Window This area displays the effect of an arte, the required 'TP to use the arte, and the number of times you have used the arte. For attacks that change within fields of funons, pressing START allows you to confirm the changed attack. Control Mode Aete List Current Control Mode This is a list of artes that the player has learned. The following icons denote the type of arte: Base Arte Arcane Arte Fonic Arte Fonic Arte (Healing) FS Chamber ToggleArte List This is a list of artes that the player has learned. The following icons denote the type of arte:


FS Chamber Toggle
Touch this to switch with the FS Chamber Screen.
27 MENU SCREENS [ARTES] MENU SCREENS [ARTES]
text_image
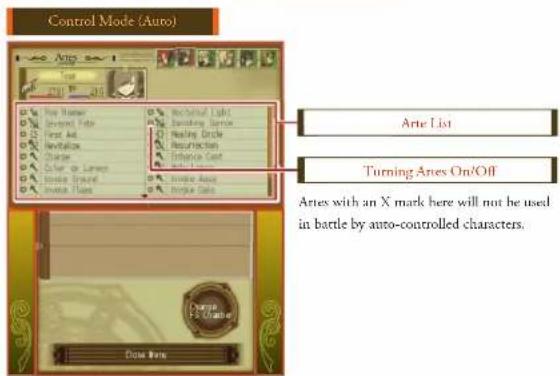
Control Mode (Auto) Top Top Number Overhead Color First Alt Revelation Charge Color or Lines Increase Travel Increase Flats Mechanical Light Mounting Direction Marking Circle Resurrection Enhance Cast Increase Airbus Increase Cache Arte List Turning Artes On/Off Artes with an X mark here will not be used in battle by auto-controlled characters.CONTROL MODE
On the Artes screen, press START over the character in position 1 to change their mode into one of the following three:
| Manual | The player controls all actions. *Th is available after collecting a certain item in the game. |
| Semi-Auto | For the most part, the character is player-controlled, but timing during battles and defense is automatically controlled. |
| Auto The character will fight automatically, using their previously set strategy. | |
MENU SCREENS (ARTES)
ASSIGNING ARTES (MANUAL/SEMI-AUTO MODES)
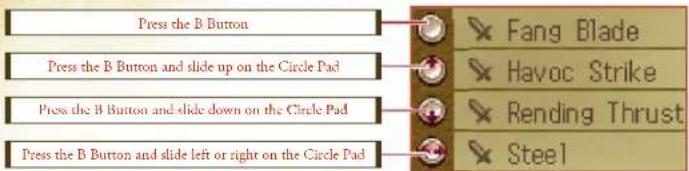
You can assign up to four artes to characters whose control mode is set to Manual or Semi-Auto. Assigned artes can be used during battles by pressing the B Button or a combination of the B Button and the Circle Pad (refer to page 60 for details). Move the cursor using the a Control Pad or Circle Pad to select a slot to register and then press the A Button to select the arte and confirm it.
text_image
Press the B Button Press the B Button and slide up on the Circle Pad Press the B Button and slide down on the Circle Pad Press the B Button and slide left or right on the Circle Pad Fang Blade Havoc Strike Rending Thrust SteelSTRIKE & FONIC ARTES
Ionic artes and strike artes are used in the same manner, but there are a few differences between them:
| Ponic Artes | Ponic artes are performed through the recitation of some spell, and have a variety of effects such as attacking your enemies or healing your allies. Ponic artes can be powerful, but casting them takes some time, during which you must protect yourself. Note that healing fonic artes can be cast both during and outside of battle. |
| Strike Artes | Strike artes are special attacks using weapons or parts of your body, and happen almost immediately, in combination with a normal attack. There are two types of strike artes: base artes and arcane artes, with slightly different combination rules. |
29 MENU SCREENS [ARTES] MENU SCREENS [ARTES]
ASSIGNING SHORTCUTS (MANUAL/SEMI-AUTO)
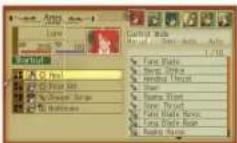
You can assign up to four shortcuts, including shortcuts to artes, for characters other than the one you control. You can trigger the assigned artes by touching it on the Touch Screen during battle. Select the fourth artes registration window and use the tControl Pad or slide down on the Circle Pad to bring up the shortcut. Then select the slot to register and
press the A Button. Next, press left or right on the Control Pad or slide left or right on the Circle Pad to select the character and press the A Button, then select the final artes you want to register and press the A Button to finish. Note that you cannot assign shortcuts to artes for characters that don't take part in battles (i.e., those in positions 5 and 6).
USING HEALING ARTES (MANUAL/SEMI-AUTO/AUTO)
Outside of battle, you can use spells that heal HP and TP or cure Status Effects. Select the spell you wish to use and press the A Button. Next, choose the character you wish to use the spell on and press the A Button to cast the spell with TP.
TURNING OFF ARTES (AUTO)
By choosing an arte and pressing the Y Button, you can toggle the use of that arte. Artes with an X next to them will not be used in battle.
LEARNING NEW ARTS
You can learn new artes when you reach certain experience levels. There are also artes that require you to have used certain artes a specific number of times before learning it. There are also rumors of artes hidden throughout the world.
MENU SCREENS (EQUIPMENT)
Each character is able to equip weapons, armor, and other equipment in four locations: weapon, body, hand, and other.
EQUIP MENU
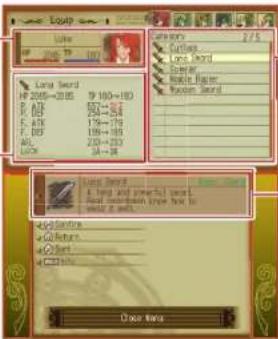
To change a character's equipment, select the part to change and then select the equip item. You can unequiv non- weapons by pressing the Y Button, or swap the order of weapons by pressing the X Button. Press the L Button or R Button to switch characters, or highlight the character information and press left or right on the +Control Pad or slide left or right on the Circle Pad.
Character Information
Moving the cursor here and pressing the X Button will automatically equip the items that are best suited to this character.
Parameter Changes Due to Equipment
Character parameters that increase when an item is equipped are shown in green, and those that decrease are shown in red.
text_image
LIFE 12.00-13.00 19.00-18.00 17.00-16.00 15.00-14.00 13.00-12.00 10.00-9.00 9.00-8.00 8.00-7.00 7.00-6.00 6.00-5.00 5.00-4.00 4.00-3.00 3.00-2.00 2.00-1.00 1.00-0.50 1.50-2.50 2.50-3.50 3.50-4.50 4.50-5.50 5.50-6.50 6.50-7.50 7.50-8.50 8.50-9.50 9.50-10.50 10.50-11.50 11.50-12.50 12.50-13.50 13.50-14.50 14.50-15.50 15.50-16.50 16.50-17.50 17.50-18.50 18.50-19.50 19.50-20.50 20.50-21.50 21.50-22.50 22.50-23.50 23.50-24.50 24.50-25.50 25.50-26.50 26.50-27.50 27.50-28.50 28.50-29.50 29.50-30.50 30.50-31.50 31.50-32.50 32.50-33.50 33.50-34.50 34.50-35.50 35.50-36.50 36.50-37.50 37.50-38.50 38.50-39.50 39.50-40.50 40.50-41.50 41.50-42.50 42.50-43.50 43.50-44.50 44.50-45.50 45.50-46.50 46.50-47.50 47.50-48.50 48.50-49.50 49.50-50.50 50.50-51.50 51.50-52.50 52.50-53.50 53.50-54.50 54.50-55.50 55.50-56.50 56.50-57.50 57.50-58.50 58.50-59.50 59.50-60.50 60.50-61.50 61.50-62.50 62.50-63.50 63.50-64.50 64.50-65.50 65.50-66.50 66.50-67.50 67.50-68.50 68.50-69.50 69.50-70.50 70.50-71.50 71.50-72.50 72.50-73.50 73.50-74.50 74.50-75.50 75.50-76.50 76.50-77.50 77.50-78.50 78.50-79.50 79.50-80.50 80.50-81.50 81.50-82.50 82.50-83.50 83.50-84.50 84.50-85.50 85.50-86.50 86.50-87.50 87.50-88.50 88.50-89.50 89.50-90.50 90.50-91.50 91.50-92.50 92.50-93.50 93.50-94.50 94.50-95.50 95.50-96.50 96.50-97.50 97.50-98.50 98.50-99.5Equipment List
This is the list of items that the character can equip.
Help Window
Information on the selected item. Press START to show the stats.
31 MENU SCREENS [EQUIPMENT] MENU SCREENS [ITEMS]
MENU SCREENS (ITEMS)
The Item Menu allows you to view information about the various items that you have obtained during the game. This menu also allows you to use items such as gels and herbs.
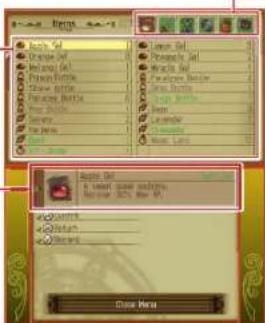
ITEMS MENU
Items are divided into six categories. Press the L Button or R Button to cycle through the categories. You can discard any non-Valuables by highlighting the item and pressing the Y Button.
Item List
Lists the item name as well as the number of this item you have. Green items are new!
Help Window
Displays information about the currently selected item. Highlight an item and press START to see the effect of equipping this item.
text_image
Back Out Back Out Back Out Back Out Back Out Back Out Back Out Back Out Back Out Back Out Back Out Back Out Back Out Back Out Back Out Back Out Back Out Back Out Back Out Back Out Back Out Back Out Back Out Back Out Back Out Back Out Back Out Back Out Back Out Back Out Back Out Back Out Back Out Back Out Close ViewItem Category

Tools (healing items, etc...)

Weapons (equipment used when attacking)

Armor (equipped on your body or hands)

Accessories (other equipped items)

Food (used for cooking)

Valuables (important items)
USING ITEMS
Select the item you want to use. If you choose a weapon, armor, or accessory, then the character will equip that item.
MENU SCREENS (BATTLE MENU)
The Battle Menu lets you adjust various settings related to battles. The Capacity Core (C. Core) and Fon Slot Chamber (FSC) menu items are added as the game progresses.
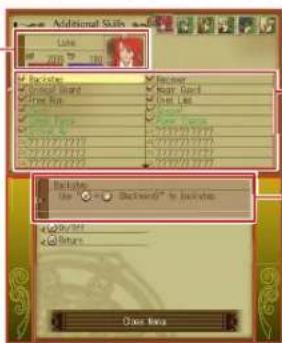
ADDITIONAL SKILLS (AD SKILLS)
AD Skills are skills that allow you to add new abilities in battle like a quick Backstep or the ability to unleash additional basic attacks. You gain AD Skills by advancing in level, or by fighting with a Capacity Core equipped (see next page).
Character Information
Move the cursor here and press the L Button or R Button to change characters. You can also press left and right on the +Control Pad or slide left or right on the Circle Pad.
text_image
Additional Skills Like 200 180 Back Mode Audio Record Free Flow Recovery: Near Back Insert List Back Mode Use: Backwind® to In Belize OK OK Return: Close NowSkill List
This is a list of all of the skills the Character has obtained.
Help Window
This area displays information about the selected skill.
Select a skill and press the Y Button to display or remove a check next to the skill name. Skills without a check will not be used during battles.
33 MENU SCREENS [BATTLE MENU] MENU SCREENS [BATTLE MENU]
CAPACITY CORES
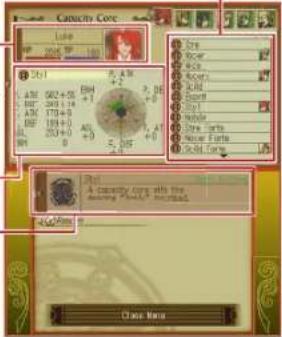
Capacity Cores are special items that you can obtain during your adventure. They allow characters to enhance abilities or acquire new AD Skills as the characters level up.
Equipped Capacity Cores
Displays which capacity cores the character has equipped.
Character Information
Move the cursor here and press the 1. Button or R Button to change characters. You can also press left or right on the +Control Pad or slide left or right on the Circle Pad.
Level Up Bonuses and Their Effects
Help Window
This area shows information related to the selected Capacity Core.
text_image
Capacity Core File HP 2048 TP 160 3x1 A: ATE 502+0.0 B: BPE 173+0 C: CPE 193+0 D: DFE 203+0 E: ETR 0 F: FTR 0 G: GTR 0 H: HTR 0 I: ITR 0 J: JTR 0 K: KTR 0 L: LTR 0 M: MTR 0 N: NTR 0 O: OTR 0 P: PTR 0 Q: QTR 0 R: RTR 0 S: STR 0 T: TTR 0 U: UTR 0 V: VTR 0 W: WTR 0 X: XTR 0 Y: YTR 0 Z: ZTR 0 A Capacity Core adds the awarding Plan/P Awarded. Close NowMENU SCREENS (BATTLE MENU)
OLU PIPING CAPACITY CORES
Pressing the A Button moves the cursor to the list of Capacity Cores. Select the Capacity Core you wish to equip and press the A Button. To remove an equipped Capacity Core, press the Y Button.
text_image
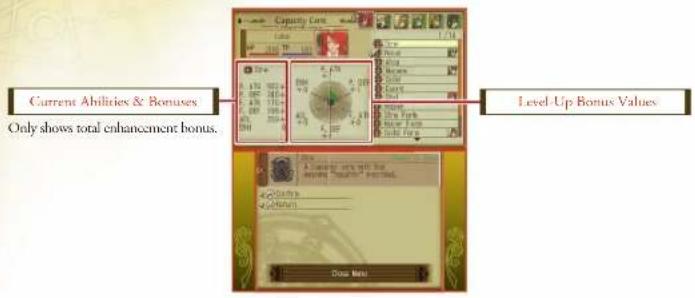
Current Abilities & Bonuses Only shows total enhancement bonus. Level-Up Bonus ValuesLEVEL-UP BONUS VALUES
When you level up and a Capacity Core is equipped, you will also get a Level-Up Bonus to your abilities in addition to your normal parameter bonus. You will also gain AD Skills as you keep leveling up and certain ability bonuses reach certain levels.
35 MENU SCREENS [BATTLE MENU] MENU SCREENS [BATTLE MENU]
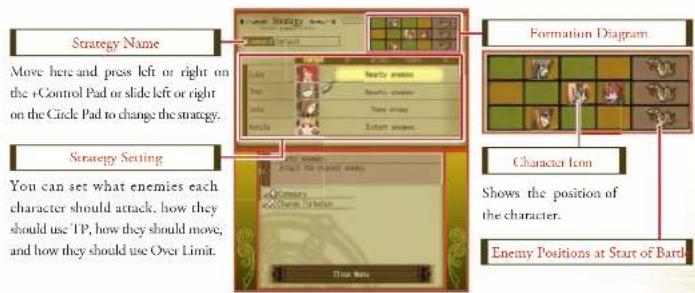
STRATEGY
The Strategy Menu allows you to specify a character's actions in battle for characters whose Control Mode is set to Auto. You can also configure your battle formation (character positions during battle.) Select a strategy name and press left or right on the +Control Pad or slide left or right on the Circle Pad to change strategies. When setting a strategy for each character, select the character and press left or right on the +Control Pad or slide left or right on the Circle Pad to change what enemy they attack, their moves, and Over Limits.
*Press the A Button to display their strategy and select the action you want to take.
text_image
Strategy Name Move here and press left or right on the +Control Pad or slide left or right on the Circle Pad to change the strategy. Strategy Setting You can set what enemies each character should attack, how they should use TP, how they should move, and how they should use Over Limit. Formation Diagram Character Icon Shows the position of the character. Enemy Positions at Start of Batch.SETTING BATTLE FORMATION
First, select the character you want to set a battle formation for. Next press the X Button to move your cursor to the Formation Diagram and move their position before pressing the A Button to confirm. Once you are finished, press the B Button to return to the previous screen.
MENU SCREENS (BATTLE MENU)
FON SLOT CHAMBERS
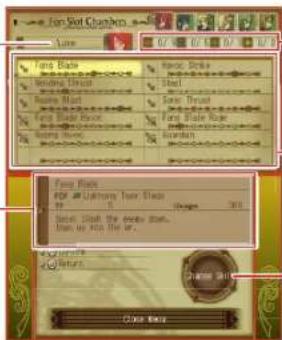
Fon Slot Chambers are special items that you will obtain during your adventure. You can attach them to artes to augment the arte's effect, such as increasing the damage dealt to an enemy, decreasing the recovery time after an arte is used, etc. These special effects will occur during battles with some given probability, and when they do, "TSC Effect" will be displayed. There are four types of Fon Slot Chambers: Carmine, Cubalt, Grass, and Sunlight, and each has a different effect on your artes.
Selected Character
Press the L Button or R Button to change characters.
Help Window
This area displays information about the selected arte.
text_image
Fox Ball Funding Throat Fox Ball Razer Funding Throat Fox Ball Razer Funding Throat Fox Ball Razer Funding Throat Fox Ball Razer Funding Throat Fox Ball Razer Funding Throat Fox Ball Razer Funding Throat Fox Ball Razer Funding Throat Fox Ball Razer Funding Throat Fox Ball Razer Funding Throat Fox Ball Razer Funding Throat Fox Ball Richer Fox Ball Richer Fox Ball Richer Fox Ball Richer Fox Ball Richer Fox Ball Richer Fox Ball Richer Fox Ball Richer Fox Ball Richer Fox Ball Richer Fox Ball Richer Fox Ball Richer Fox Ball Richer Fox Ball Richer Fox Ball Richer Fox Ball Richer Fox Ball Richer Fox Ball Richer Fox Ball Richer Fox Ball Richer Fox Ball Risher Fox Ball Risher Fox Ball Risher Fox Ball Risher Fox Ball Risher Fox Ball Risher Fox Ball Risher Fox Ball Risher Fox Ball Risher Fox Ball Risher Fox Ball Risher Fox Ball Risher Fox Ball Risher Fox Ball Risher Fox Ball Risher Fox Ball Risher Fox Ball Risher Fox Ball Risher Fox Ball Risher Fox Ball Risher Fox Ball Rinder Fox Ball Rinder Fox Ball Rinder Fox Ball Rinder Fox Ball Rinder Fox Ball Rinder Fox Ball Rinder Fox Ball Rinder Fox Ball Rinder Fox Ball Rinder Fox Ball Rinder Fox Ball Rinder Fox Ball Rinder Fox Ball Rinder Fox Ball Rinder Fox Ball Rinder Fox Ball Rinder Fox Ball Rinder Fox Ball Rinder Fox Ball Rinder Fox Ball Riner Fox Ball Riner Fox Ball Riner Fox Ball Riner Fox Ball Riner Fox Ball Riner Fox Ball Riner Fox Ball Riner Fox Ball Riner Fox Ball Riner Fox Ball Riner Fox Ball Riner Fox Ball Riner Fox Ball Riner Fox Ball Riner Fox Ball Riner Fox Ball Riner Fox Ball Riner Fox Ball Riner Fox Ball Riner Fox Ball RinderPon Slot Chamber Inventory
Shows the number available for each of the four, as well as how many you already have.
Arte Development
This is a measure of Fon Slot Chamber development, with development represented by six dots.
Change Arte
Touch here to change arte.
GROWTH GAUGE AND FSC EFFECT TRIGGERS
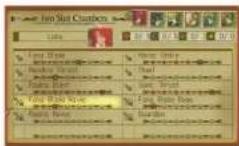
When you use an arte that has a Fon Slot Chamber set, its growth gauge will increase. The higher the level of the gauge, the greater the probability that it will trigger a special effect when the arte is used. When the gauge reaches the right-most dot, the special effect will always trigger.
*Special effects will only occur when the Fon Slot Chamber is equipped. *If you unequip a Fon Slot Chamber when its gauge is partway between dots, its growth will shrink back to the previous dot.
SETTING A FON SLOT CHAMBER
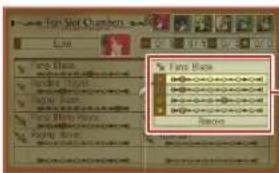
Choose the are that you wish to set a Fon Slot chamber onto, and press the A Button. Select the Fon Slot Chamber that you wish to set, and press the A Button to confirm. If you choose an are that already has a Fon Slot Chamber set, then that Chamber will be replaced with a new one.
text_image
Paste Box RemovePon Slot Chamber Selection Window
Displays the arte name and growth gauge of each of the four types.
37 MENU SCREENS [BATTLE MENU]
MENU SCREENS [BATTLE MENU]
MENU SCREENS (COOKING)
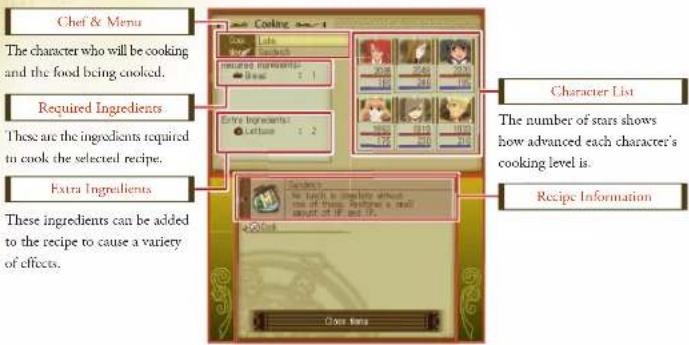
If you have the right recipes, you can use ingredients that you discover along your journey for cooking. Cooking has a variety of effects, such as healing HP and TP, etc.
COOKING
Choose Cooking at the Main Menu to display the Cooking Menu.
text_image
Chef & Menu The character who will be cooking and the food being cooked. Required Ingredients These are the ingredients required to cook the selected recipe. Extra Ingredients These ingredients can be added to the recipe to cause a variety of effects. Cook Table Cook Items Character List The number of stars shows how advanced each character's cooking level is. Recipe InformationCOOKING LEVEL
Your cooking level will increase as you repeatedly cook recipes. Characters with a high cooking level can make better versions of the same recipe. In addition, some recipes have character-specific additional ingredients that can be added if that character's cooking level is high enough.
39 MENU SCREENS [COOKING] MENU SCREENS [COOKING]
HOW TO COOK
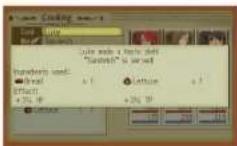
Choose the character that will cook and press the A Button. Next, choose a recipe and press the A Button to display a list of the recipes that character knows. Choose the recipe you want to make and press the X Button. If you have any extra ingredients, they will automatically be used, changing the recipe's effect.
*If you are not successful at making the selected recipe, its effects will be weaker than when the attempt was successful. You cannot cook when the characters are full (immediately after having cooled something).
COOKING SHORTCUTS
If you have cooking shortcuts, you can cook immediately after a battle. At the Battle Results Screen, press down on the +Control Pad or slide down on the Circle Pad to display the Assign Shortcuts Window. Next, choose the position for the shortcut and press the A Button to choose a chef and menu. Touch a recipe with a shortcut on the Battle Results Screen to display the recipe.

FINDING RECIPES
When you obtain a cooking recipe, it is added to your recipe list. There are many ways to obtain recipes, such as having another character reach them to you.
MENU SCREENS (STATUS)
The Status Menu allows you to check the current condition and basic parameters of each character. Here you can also change each character's title.
STATUS
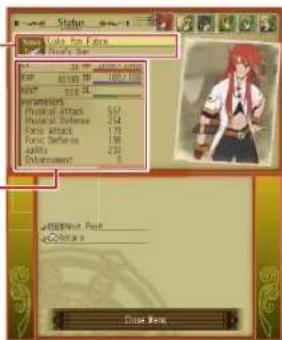
You can display the Status Menu by choosing status from the Main Menu and then choosing the character whose data you wish to view. Press START to switch between status 1 and status 2. You can press the L Button or R Button to change characters.
STATUS SCREEN
Check on each character's name and basic parameters.
Current Title
Select a name and press the A Button to change the character's name.
Parameters
text_image
Status: 10.1.1 Player: 10.1.1 OFF: 32.00 Action: 100.00 RPG: 32.00 Properties Physical Attack: 5.57 Physical Attack: 2.54 Static Attack: 1.78 Static Attack: 1.66 Quality: 2.90 Enhancement: 0 OPEN/Not Open Open to Close Now41 MENU SCREENS [STATUS] MENU SCREENS [STATUS]
BASIC PARAMETERS
Each character's maximum HP and TP, as well as ability levels, increase each time they level up. Equipment, Capacity Cores, and AD Skills also modify these parameters.
Basic Parameters
| LVThis is your current level | |
| HP | Current and maximum Hit Points (HIP) - When a character reaches 0 HIP, he or she is unconscious and cannot take part in battle. |
| TP Current and maximum Technical Points (HP) - TP is used to cast spells or use skills. | |
| OL Current Over Limit gauge | |
| EXP | Experience Points - When this reaches certain levels, your character levels up, causing your basic parameters to increase. You may also learn new spells or skills when you level up. |
| NEXT The number of experience points you need until you level up again | |
| Parameters | These are values that are mostly related to fighting skills. The values shown here are modified by equipment, Capacity Cores, and other effects. |
Parameter Scores
| Physical Attack Your attack power when you attack an enemy with a weapon or a strike arte | |
| Physical Defense Your defense power when attacked by a weapon or a strike arte | |
| Fonic Attack Your attack power when you attack an enemy with a fonic arte | |
| Fonic Defense | Your defense power when attacked by a fonic arte |
| Agility | A high agility rating increases your movement speed and your chance to perform a critical hit. |
| Enhancement | This score will only increase with a Capacity Core level-up bonus. When this score reaches certain levels, you can gain AD Skills. |
MENU SCREENS (STATUS)
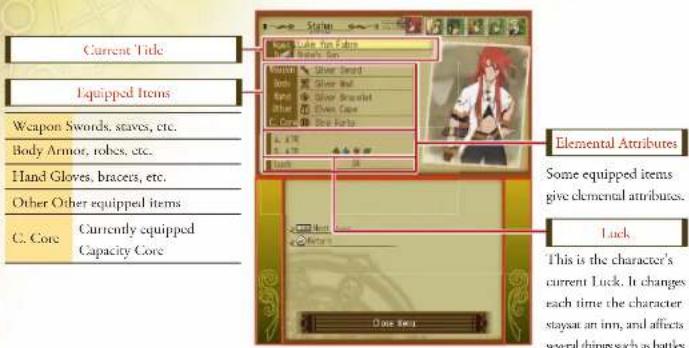
STATUS SCREEN 2
Check equipped items, and character elemental attributes.
text_image
Current Title Equipped Items Weapon Swords, staves, etc. Body Armor, robes, etc. Hand Gloves, braces, etc. Other Other equipped items C. Core Currently equipped Capacity Core Elemental Attributes Some equipped items give elemental attributes. Luck This is the character's current Luck. It changes each time the character staysat an inn, and affects several things such as battles.TITLES
You gain titles after fulfilling certain requirements in game events. Moving the cursor to the available title and pressing the A Button displays a list of available titles. Choose the one you like and press the A Button again. Depending on the title used, the character may be able to use special abilities, or their appearance may change.
43 MENU SCREENS [STATUS] MENU SCREENS [LIBRARY]
MENU SCREENS (LIBRARY)
On this screen, you can view stories, maps, and other such items that you have obtained. Select "Library" and then choose from among the menu items described below.
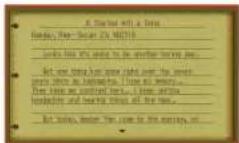
SYNOPSIS
You can read a summary of the story so far by selecting "Synopsis". Press the Y Button to display the list, select the synopsis you wish to read and press the A Burton. You can press up or down on the +Control Pad or slide up or down on the Circle Pad to turn pages. "It is can be very helpful if you are unsure how to proceed."
WORLD MAP
View a map of the world.
COLLECTOR'S BOOK
If you have obtained the Collector's Book, you can see a list of all the items you have obtained so far.
CHARACTER BOOK
Somewhere in this world is the Character Book. If you go there and read the Character Book, you can see who lives in the towns that you have visited, as well as see the characters that you have met during game events.
MENU SCREENS (SYSTEM)
This screen allows you to save and load games, and the Config section allows you to change game settings. You can also use this area to see game-related records
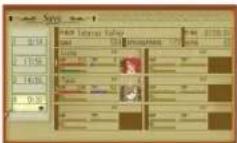
SAVE
You can save your game by choosing "Save" while in the field. Doing so displays a list of save files. Choose the file where you wish to save your game and press the A Button.
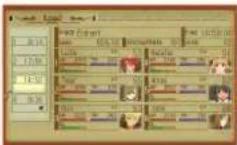
LOAD
This option loads saved data. Select a save file to load and press the A Button.
45 MENU SCREENS [SYSTEM] MENU SCREENS [SYSTEM]
CONFIG
This area allows you to change game-related settings. Press the B Button after you've finished to return to the Main Menu.
Configurable Settings
| Message Speed Sets the speed at which messages are displayed on a scale from 1 to 10 | |
| Battle Difficulty | Sets the battle difficulty to "Normal" or "Hard" "Once you've cleared the game, new battle difficulties become available |
| Button Configuration Allows you to change button controls during battle | |
| Sound | Allows you to change the volume for BGM, sound effects, characters voices and also choose between Stereo and Mono |
| Enemy Check | Causes the camera to temporarily swing to the direction of enemies when a battle starts |
| Dynamic Camera Causes the camera to dynamically change position for characters set to "Auto" mode | |
| Battle Voices Turns voices during battles on or off | |
| Place Names | Approaching an inn, weapons shop, or other place will cause the establishment's name to be displayed |
| Event Voices | Turns voices on or off during events |
RECORDS
This allows you to see various data and records related to your adventure. Press START to turn pages.
BATTLE SCREENS (SCREEN AND RULES)
When a battle event occurs due to touching an enemy icon on the Map Screen, the Battle Screen is displayed. This section explains the parts of the screen and its various rules.
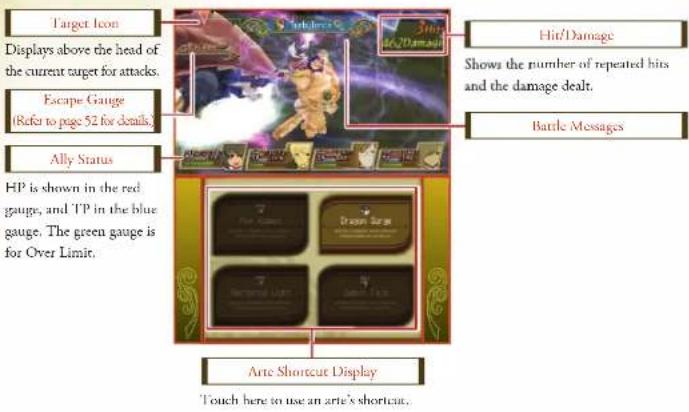
BATTLE SCREEN
Bartles can be paused by pressing START. You can also press the X Button during battles to display the Battle Menu, allowing a variety of actions.
text_image
Target Icon Displays above the head of the current target for attacks. Escape Gauge (Refer to page 52 for details.) Ally Status HP is shown in the red gauge, and TP in the blue gauge. The green gauge is for Over Limit. Hit/Damage Shows the number of repeated hits and the damage dealt. Battle Messages Arte Shortcut Display Touch here to use an arte's shortcut.47 BATTLE SCREENS [SCREEN AND RULES] BATTLE SCREENS [SCREEN AND RULES]
BATTLE RULES
The player controls the character in position 1, and all other characters fight automatically according to the strategies set previously. You are victorious when all enemies are defeated. When you win a battle, the Battle Results Screen appears, and you are rewarded with Gald (money) and experience points, and you will recover some TP. You may also obtain items.
GAME OVER
If all characters taking part in a battle can no longer fight because their IIPs were reduced to zero, or they may have acquired a physical ailment called "Petify" and they are defeated, the game is over. You will have to select "Load Data" and start over from your last save point, or return to the Title Screen.
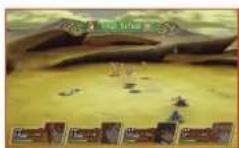
THE FLEX-RANGE LINEAR MOTION BATTLE SYSTEM (FR-LMBS)
During battles, characters and their enemies will be mixed together, but the operated character will follow an invisible line drawn between him and his target. The AD Skill "Free Run" will allow the character to move freely about the battlefield. The Skill "Free Target" allows some magic to have its target set to any point on the field. This is called the Flex-Range Linear Motion Battle System.
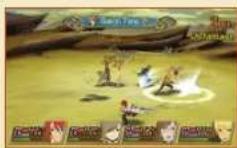
BATTLE SCREENS (SCREEN AND RULES)
THE BATTLE RESULTS SCREEN
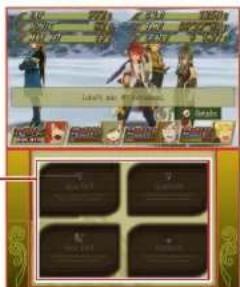
The Battle Results Screen is displayed when you win a battle. Here you are rewarded with items and titles, and level-ups are announced. Press the A Burton to dismiss the screen. If you have shortcuts set for recipes, then you can touch a recipe displayed to start cooking. Press the X Burton on the Battle Results Screen to view details of the battle for each individual character.
text_image
Game interface screenshot showing character selection and game controls with Chinese text labelsDisplays on the Battle Results Screen
EXP Experience gained
BONUS Added experience point bonuses awarded for combination hits
MAX HIT The maximum number of chained hits obtained in the battle
GALD The amount of money received
TIME: The time required for the battle
GRADE Grade Points awarded for the battle - Grade Points can be used in a number of ways, such as spending them at the Grade Shop for special bonuses.
49 BATTLE SCREENS [SCREEN AND RULES] BATTLE SCREENS [BATTLE MENU]
BATTLE SCREENS (BATTLE MENU)
Pressing the X Button displays the Battle Menu. This menu allows you to instruct allies to use items and artes or to change their equipped items.
BATTLE MENU
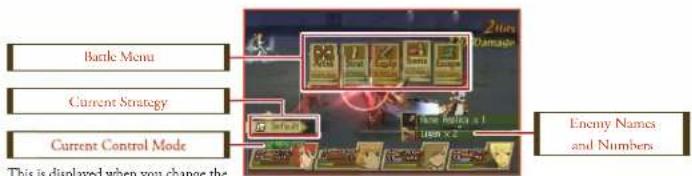
Opening the Battle Menu pauses the battle, and the screen changes to one like below. You can use items, spells, or skills, or tell the party to run away. After doing so, the battle resumes.
text_image
Battle Menu Current Strategy Current Control Mode This is displayed when you change the Enemy Names and NumbersBasic Battle Menu Controls
Down on + Control Pad Switch control mode (in some cases effective only for this battle)
Circle Pad Select a menu item
| A Button | Confirm Selection |
| B Button | Cancel |
| I Button | Change strategy (effective only for this battle) |
| START | Change character order (effective only in this battle)*Available only after acquiring a certain item in the game. |
BATTLE SCREENS (BATTLE MENU)
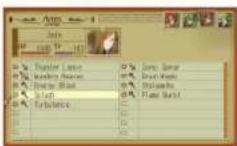
ARTIES
Choosing this item allows you to assign artes and set which artes the characters are able to use. You can also direct characters whose mode is set to "auto" to use a particular arte. Choose the arte you wish the character to use, if required select the location you want the spell to take effect, and then press the A Button.
STRATEGY
This allows you to set tactics and formations.
EQUIP
This allows you to change the selected character's equipped items.
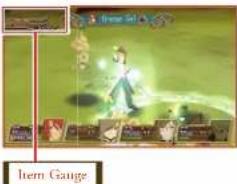
ITEMS
This allows you to use items in the "Tool" category. Choose the character that will use the item, and choose the item to be used at the Item Screen. Next, choose the target for the item. After you have decided which item to use, an Item Gauge appears on the screen and the item will not actually be used until the gauge is empty. Note that gels and medicines can only be used on the character using the item. The AD Skill "Throw Item" will allow characters to use items on other characters.
text_image
Item Gauge51 BATTLE SCREENS [BATTLE MENU] BATTLE SCREENS [BATTLE MENU]
ESCAPE
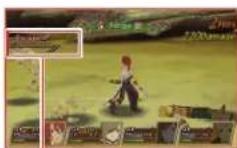
You can choose to escape from battles using this command. When you choose Escape, an Escape gauge appears at the upper left of the 3D Screen, and running away will be successful when this gauge fills up. Press the X Button while the Escape gauge is displayed to cancel the escape attempt and return to battle.
*In some situations, you will be unable to escape.
Escape Gauge
CHANGING THE CHARACTER ORDER AND CONTROL MODE
Pressing START while the Battle Menu is displayed will rotate the character order, changing the controlled character (there are no changes made to which characters take part in battle.) Press down on the +Control Pad while the Battle Menu is displayed to change the control mode.
*Changing the character order becomes possible after finding a certain item during your adventure.
*The control mode changes will remain in effect after the battle ends if that was the only change that was made to the settings.
CHANGING THE STRATEGY TYPE
Pressing the L. Button while the Battle Menu is displayed will change the current strategy. You will need to have set the content of the strategy before the battle begins.
BATTLE SCREENS (FONONS AND CONDITIONS)
This section explains character conditions and the relationships between the six fonons, which play an important role in battles
FONON ELEMENTAL ATTRIBUTES
Some artes and equipment have elemental attributes called "Fonons", such as earth and water. Attacks that have associated fonons will do far more damage to a character that has a weakness for the associated element. Some equipment and some monsters also have resistances to specific fonons, so be careful in your selection of which artes and items to use. You can view fonons associated with certain attacks at the Status Screen, and you can see enemy elemental weaknesses and attributes by using the Magic Lens item.
The six fonons: *Words in parenthesis are the FOL color of that fonon. Refer to the next page for the details.

Wind (green) Fire (red)

m = 311

Earth (yellow)


Light (gold)

Darkness (purple) Water (blue)
LOOKING UP ENEMY STATUS AND ELEMENTAL ATTRIBUTE—
Use the Magic Lens item during battle to check an enemy's status. By knowing its strengths, you can adjust your strategy accordingly.
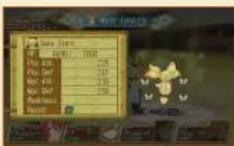
53 BATTLE SCREENS [FONONS AND CONDITIONS] BATTLE SCREENS [FONONS AND CONDITIONS]
FIELDS OF FONONS (FOF)
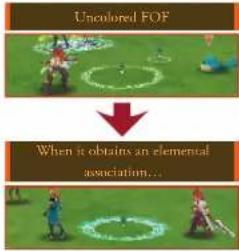
Using an attack that has a fonon association will create a "Field of Fonons" (POP) at the location of the attack for a specific length of time. Fields of Fonons are uncolored at first, but when the same elemental attack is used repeatedly the fonons will build up, causing the field to take on the color of the associated element.
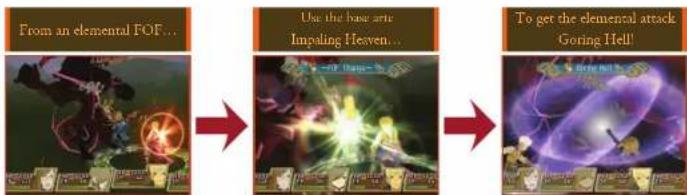
There are also spells that will create fields of fonons of a particular element. Using certain arteries while in a colored field of fonons can transform them into special elemental skills. You should make good use of fields of fonons, such as having one character create one and another character use it to launch a special attack.
flowchart
graph TD
    A["Uncolored FOF"] --> B["When it obtains an elemental association..."]
AN EXAMPLE OF A SPECIAL ELEMENTAL SKILL.
For example, Jade can use leicle Rain, which is created by Splash used within an earth elemental field of fonons. Anise can use Tire Dragon Blast, which is created by Shadow Raid used within a fire elemental field of fonons. Be sure to look for other combinations.
flowchart
graph LR
    A["From an elemental FOF..."] --> B["Use the base art: Impaling Heaven..."]
    B --> C["To get the elemental attack: Goring Hell!"]
BATTLE SCREENS (FONONS AND CONDITIONS)
STATUS EFFECTS
Characters can receive Status Effects as a result of special attacks or the effects of spells or skills. Most Effects are only temporary, ending when the battle is finished, but some Effects can only be corrected with items or by staying at an inn.
| Poison HP is lost as time passes | [720C] | Physical Attack increased | Attack power is increased | |
| Paralysis Various actions are limited |  | Physical Defense increased | Defense power is increased | |
| Petrify No actions are possible | [CX30] | Fonic Defense increased | Defense power against enemy spells is increased | |
| Weak Maximum HP is halved | [07H4] | Casting time improved | Cast spells more quickly | |
| Sick | HP will not be recovered by healing spells or items | [TXV5] | Auto-recover | Automatically recover from KO |
| Sealed Artes | Cannot use artes | [3306] | Heavy Movement speed is halved | |
| KO | HP is at zero, and no actions are possible | |||
DEFENSELESS
Some characters may become defenseless when attacked by enemies in battle. While defenseless, that character is unable to make any actions. You can shorten this time by sliding around the Circle Pad.

55 BATTLE SCREENS [FONONS AND CONDITIONS] BATTLE ACTIONS
BATTLE ACTIONS
This section explains how to control your character when the control mode is set to "Manual" or "Semi-Auto". Note that the same action can differ for different characters.
*The symbols ↑, ↓, → and ← in the explanations below are associated with sliding up, down, right, or left on the Circle Pad. *Command descriptions in the form of "A Button + →" mean to slide right on the Circle Pad while holding down the A Button.
MOVEMENT
The following commands are used to move.
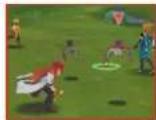
RUN/WALK

Sliding left or right on the Circle Pad will make your character run in that direction.
FREE RUN

If you have obtained the "Free Run" AD Skill, then you can hold down the I. Button while sliding the Circle Pad to move the character freely to any part of the battlefield. You cannot attack or cast any spells while doing this.
BATTLE ACTIONS

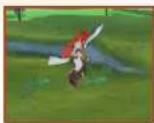
↑ (In Semi-Auto Mode, Y Button + ↑)

When the control mode is set to Manual, you can jump by sliding up on the Circle Pad. Under Semi-Auto mode, you can jump by pressing the Y Button while sliding up on the Circle Pad.
GUARD
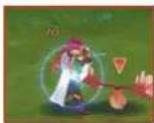
Y Button
This protects your body, lessening damage from physical attacks. Be careful, as Guard Breaks can occur if you guard too often.
GUARD BREAKS AND DEFENSELESS
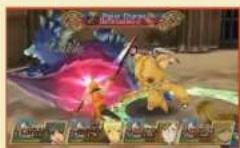
By repeatedly attacking an opponent that is guarding, you can sometimes cause a Guard Break. When this happens, the opponent's defenses are pierced, causing it to collapse and not be able to move for a period of time. Attacking an opponent's weakness, such as towards a certain attack or toward counterattacks, can cause it to become Defenseless. Doing so may cause them to go down with a greater loss of defense than normal.

BATTLE ACTIONS BATTLE ACTIONS
OTHER GUARD ACTIONS
Characters that obtain certain AD Skills can learn how to perform a variety of guard actions. The following lists the basic ones.
| Backstep | Y Button + ← (the opposite direction which you are facing) |
| Avoid enemy attacks by performing a Backstep. | |
| Critical Guard | Y Button + → (the same direction that you are facing) |
| Greatly reduces the damage from enemy physical attacks. | |
| Magic Guard | Y Button + ↓ |
| Reduces damage from enemy magical attacks. | |
| Recover | Y Buttons (while being blown back) |
| When you are blown back from taking damage, land gracefully and avoid being knocked down. |
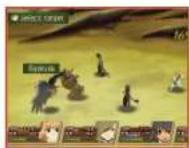
CHANGING TARGETS
R Burton
Briefly pressing the R Button moves the target selection on the enemy that is closest to the character. Holding the R Button down will pause the battle and put the game in target selection mode, allowing you to slide left or right on the Circle Pad to choose an enemy target.
BATTLE ACTIONS
NORMAL ATTACKS
This refers to a standard attack with a weapon. When an attack hits an enemy and is not guarded, the attacking character gains a few TP. Under Semi-Auto mode, a dash attack occurs if the character is separated from the enemy. Below is an explanation of Luke's attacks.
SLASH ATTACK
A Button
This is the most basic attack, performed by swinging the sword down at the enemy in front of you.
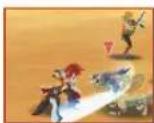
UPPER SLASH ATTACK
←/→A Button
This is an attack from below, swinging the sword up. Hitting the enemy just right will cause it to rise up in the air.
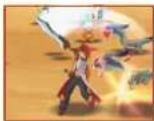
MIDAIR ATTACK
A Button
This is an attack by swinging the sword up while jumping up into the air. This attack is effective against enemies who are flying.
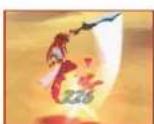

BATTLE ACTIONS BATTLE ACTIONS
SWEEPING ATTACK
↓ + A Button
This is a wide-area attack performed by sweeping the sword horizontally.
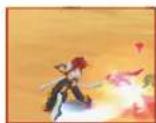
JUMPING SLASH
A Button during a jump
Pressing the A Button while jumping allows you to attack enemies in midair. This attack can be chained from the Midair Attack.
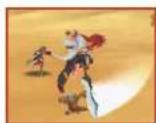
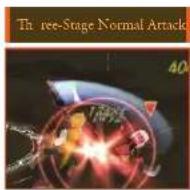
THREE-STAGE NORMAL ATTACK
By continuing to input attacks, you can chain up to three attacks. There are many possible combinations, and some attacks will vary from the standard, starting with the second stage of the attack. Below is one example.
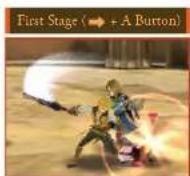
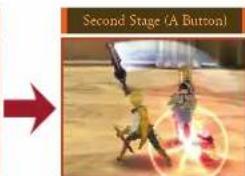
text_image
Second Stage (A Button)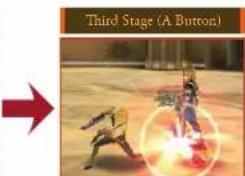
text_image
Third Stage (A Button)BATTLE ACTIONS
USING ARTES
B Button, Circle Pad - B Button
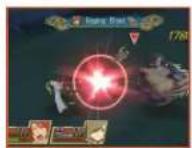
The artes see in the Main Menu are used by expending TP. Slide the Circle Pad while pressing the B Button, or press the B Button alone, to use the arte that is associated with the used direction. Casting of spells begins after this operation is complete, and the spell will trigger when the casting is complete. Be careful, as casting will be interrupted if the caster is attacked before the spell is finished.
● SPELL DELAYS AND CANCELLATIONS ●
If the currently controlled character casts a spell, holding down the B Button will cause the spell to be delayed until the B Button is released. You can also cancel the casting of a spell by pressing the Y Button while it is being cast.
FREE TARGETING
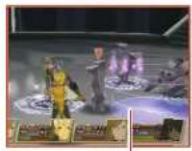
Some spells with areas of effect, like Splash and Healing Circle, allow you to freely set the area of effect by sliding the Circle Pad in a circular motion while the spell is being cast to position a Free Cursor. You can gain an advantage in battle by accurately predicting where the enemy will be moving to and placing your spells accordingly.
Free Cursor
61 BATTLE ACTIONS BATTLE ACTIONS
USING SHORTCUTS
Touch Screen
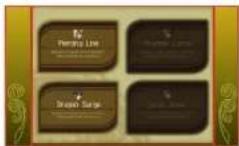
Touch the shortcuts displayed on the Touch Screen to trigger them. You can associate shortcuts with characters other than the one being controlled, with operations associated with other characters becoming a command to the character to use that arte.
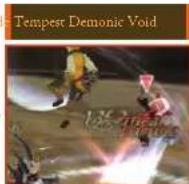
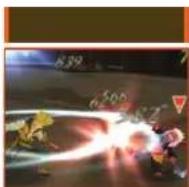
ARTE COMBOS
Arte combos refer to a continuous chaining of normal attacks and artes without being counter-attacked by the enemy. This allows you to follow up a normal attack with a base arte and then an arcane arte or an FOF arte. Below is an example, Be sure to search for more special combos.
Zihul Blac

BATTLE ACTIONS
Right on +Control Pad
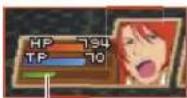
During battles, your Over Limit gauge will slowly fill as you receive damage and cause damage to your enemies. When the gauge becomes full you will be able to press right on the +Control Pad to empty the gauge and trigger Over Limit status once you have learned the AD Skill "Over Limit."
Over Limit Gauge
● EFFECTS OF OVER LIMIT STATUS
Over Limit status continues for a fixed period of time and reduces the damage received from enemies. You also will not be knocked back by enemy attacks. In addition, special conditions and operations can cause you to use very powerful attacks called "Mystic Artes".
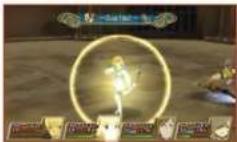
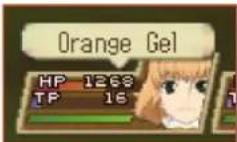
ITEM REQUESTS
Characters in "Auto" control mode will request permission to use items during battles. After a short amount of time, they will automatically use the item. This is called an Item Request. An image like the one to the right will display, where you can press left on the +Control Pad to deny that character permission to use the item.

BATTLE ACTIONS
CREDITS
NAMCO BANDAI Games America
PRESIDENT & CEO Kenji Hisatsune
EXECUTIVE VP & COO Nohubim Kasahara
EXECUTIVE VP & CTO Shuji Nakata
NAMCO LABEL VP, NAMCO LABEL Yoshi Niki
Sr. MANAGER Takashi Akiyama
MANAGER Kyora Toyama
ASSOCIATE PRODUCER Katherine Schilling
SALES VP. SALES Susan Hughes-Taigen
NATIONAL SALES MANAGER Terry Carbon
MARKETING & PR VP, MARKETING Carlson Choi
DIRECTOR OF GLOBAL BRAND MANAGEMENT Nathan Stewart
SENIOR GLOBAL BRAND MANAGER Laii Bosma
ASSOCIATE BRAND MANAGUR Joshua Sepielli
ASSOCIATE MANAGER SOCIAL MEDIA Jenny Park-Chau
DIRECTOR OF INTERACTIVE MARKETING Clinton Wu
INTERACTIVE MARKETING MANAGER Marilo Kato
COMMUNITY MANAGER Richard Banregui
DIRECTOR OF MARKETING COMMUNICATION Kelly Loughlin
PR MANAGER Nick O'Leary
CREATIVE SERVICES MANAGER Michiko Wang
SENIOR VIDEO EDITOR Keisake Kumiji
ASSOCIATE MEDIA MANAGER Nicholas Kinling
SENIOR INTERACTIVE SERVICES MANAGER Ryan Grissom
PRODUCT SERVICES DIRECTOR OF PRODUCTION SERVICES Tad Hirabayashi
SENIOR OPERATIONS MANAGER Jennifer Tersigni
LEGAL. SENIOR COUNSEI Janna Smith
ASSOCIATE ATTORNEY Martin Nguyen
IP TRADEMARKS ADMINISTRATOR Mara Tuma
QUALITY ASSURANCE QA MANAGER Mike Peterson
CQC SUPERVISOR Damon Bernal
PROJECT COORDINATOR Jesse Mejia
DEPARTMENT COORDINATOR Tereza Siegel
CQC LEAD David Moya
QA ANALYST Greg Anderson
LEAD QA TESTER Victor del Rosario
Merwin O. Del Rosario
CQC TESTER Micah Geary
POLE TO WIN AMERICA, INC. TEST LEAD David N. Stevens
QA TESTERS Adrie Mayall Alexis Saravia
Anthony Moura Henry Agyckum
Jacob Harrison
Justin May Robert Hart

text_image
CUSTOMER SUPPORT SUPERVISOR Joans Baragan Sr. CUSTOMER SUPPORT REP. Brian Eilak CUSTOMER SUPPORT REPRESENTATIVE Vilma Valdez SPECIAL TILANKS Moto Aida Yivian Beebe Peter Ganza EVERYONE ON THE TALES FORUMS http://tales.nanco.com/forums/ Fonts used in-game are provided in part by Biostecum Inc. All rights reserved. Special Thanks: Farrowods Inc.Ever get stuck and just need that extra edge to beat the level?
Having problems getting your game to work properly?
Now you can get one-on-one help from NAMCO BANDAI Games America Inc.
using your web browser!
Simply go to livehelp.namco.com for more details.
Live Counselors available from 9am-5pm Monday-Friday Pacific Time.
NAMCO BANDAI Games America Inc.
ATTN: Customer Service
1740 Technology Drive, Suite 600
San Jose, CA 95110
Before returning any defective materials to us, please contact us for a Return Merchandise Authorization (RMA) number. You can reach us at the address above, via e-mail at support@namcobandaigames.com or contact us at (408) 235-2222. Please note that any materials sent to us without an RMA number will be refused and returned. We highly recommend that you use a traceable and / or Insured method of shipping the materials to us.
Namco Bandai Games America Inc. Online:
www.namcobandaigames.com
Visit our Website to get information about our new titles.
LIMITED WARRANTY
NAMCO BANDAI Games America Inc. warrants to the original purchaser that this NAMCO BANDAI Games America Inc. game pack shall be free from defects in material and workmanship for a period of ninety (90) days from the date of purchase. If a defect covered by this limited warranty occurs during this 90-day limited warranty period, NAMCO BANDAI Games America Inc. will repair or replace the defective gamepack or component part, at its option, free of charge.
This limited warranty does not apply if the defects have been caused by negligence, accident, unreasonable use, modification, tampering, or any other cause not related to defective material or workmanship.
LIMITATIONS ON WARRANTY
Any applicable implied warranties of merchantability and fitness for a particular purpose, are hereby limited to ninety (90) days from the date of purchase and are subject to the conditions set forth herein. In no event shall NAMCO BANDAI Games America Inc. be liable for consequential or incidental damages resulting from the possession or use of this product. The provisions of the limited warranty are valid in the United States only. Some states do not allow limitations on how long an implied warranty lasts, or exclusion of consequential or incidental damages, so the above limitation or exclusion may not apply to you. This limited warranty provides you with specific legal rights. You may have other rights which vary from state to state.
To register product online go to WWW.NAMCOREG.COM