Syncros 20 - Bag Osprey - Free user manual and instructions
Find the device manual for free Syncros 20 Osprey in PDF.


User questions about Syncros 20 Osprey
0 question about this device. Answer the ones you know or ask your own.
Ask a new question about this device
Download the instructions for your Bag in PDF format for free! Find your manual Syncros 20 - Osprey and take your electronic device back in hand. On this page are published all the documents necessary for the use of your device. Syncros 20 by Osprey.
USER MANUAL Syncros 20 Osprey
natural_image
Green and white light blue backpack with black straps and a circular logo (no visible text or symbols)SYNCRO 20**
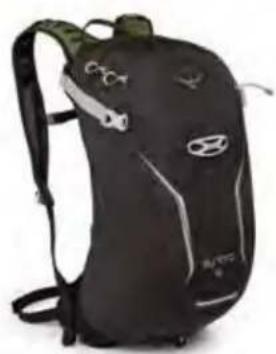
natural_image
Black and white photo of a modern backpack with visible branding and logos (no text or symbols)SYNCRO 15
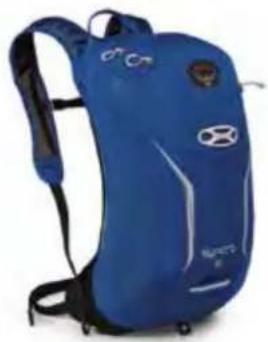
natural_image
Blue and white blue athletic backpack with branding (no visible text or symbols)SYNCRO 10
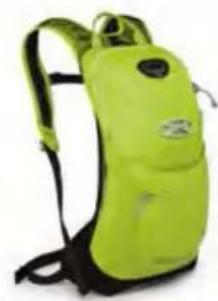
natural_image
Green and black light blue backpack with a small logo on the front (no visible text or symbols)SYNCRO 3
The Syncro Series features Osprey's ventilated AirSpeed ^TM suspension in a small streamlined pack making it ideal for mountain biking adventures. Additional bike-friendly features include a LidLock ^TM helmet attachment, bike tool organization, an integrated raincover and hands-free hydration.
**Available in select markets only.
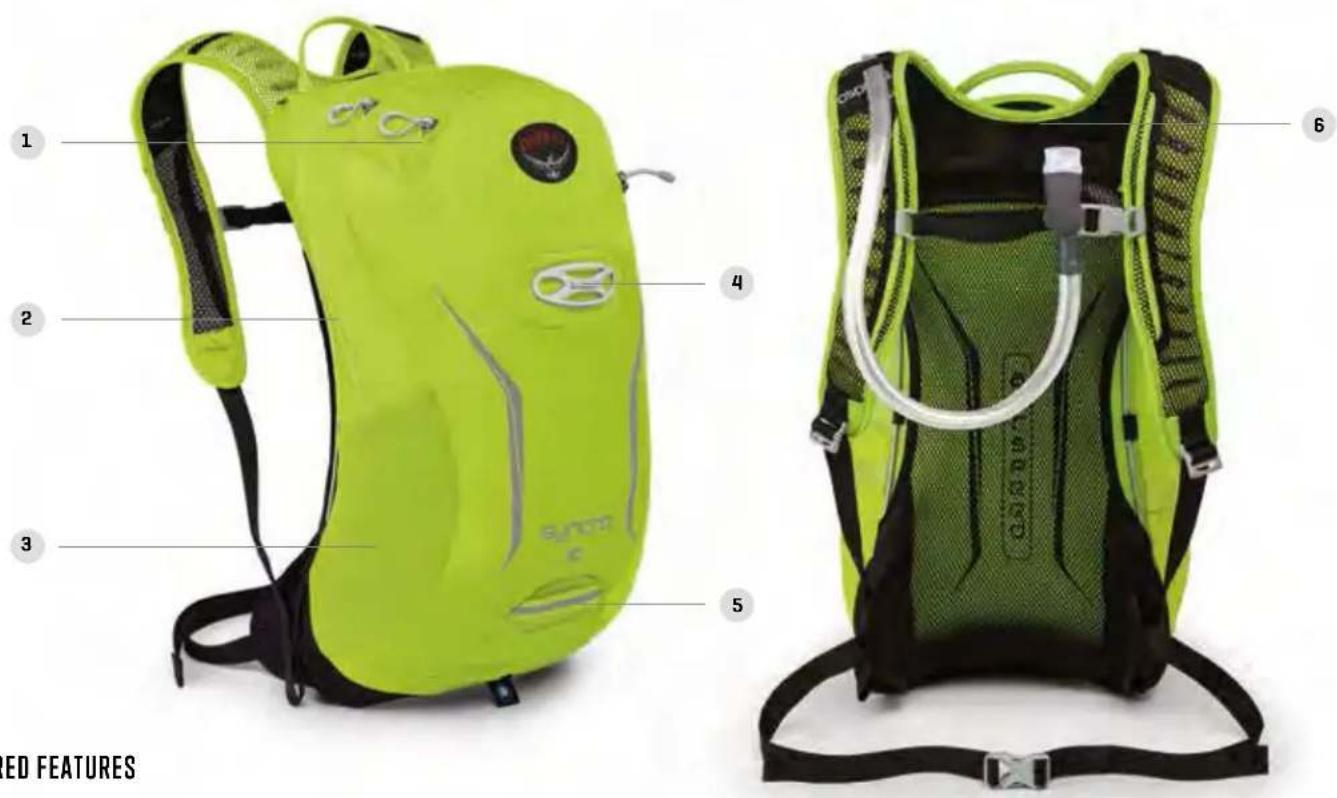
SHARED FEATURES
1 Front organizer pocket
2 Front panel access to main compartment
3 Dual stretch mesh pockets
4 LidLock ^TM helmet attachment
5 Blinker attachment
6 Internal reservoir sleeve
^1 Hydraulics ^TM Reservoir included in U.S. and other select markets
FABRICS
MAIN 1000 Nylon Honeycomb
ACCENT 100D Nylon Honeycomb
BOTTOM 100D Nylon Honeycomb
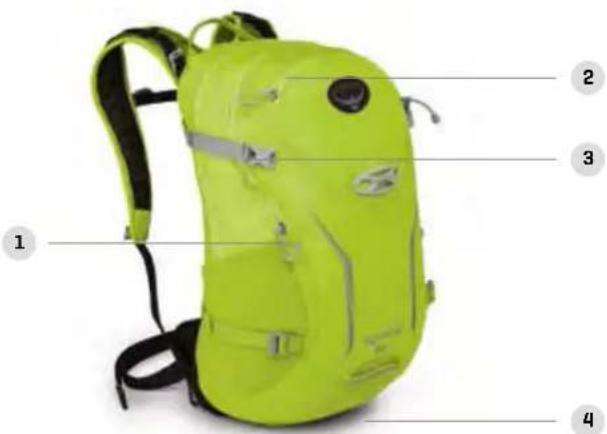
SYNCRO 20\*\*
** Available in select markets only
SPECS S/M M/L
| Cubic Inches 1098 1220 | ||
| Liters | 18 | 20 |
| Lbs/Ounces* | 1/5 | 1/6 |
| Kilograms* | 0.60 | 0.63 |
| Inches 18h x 10w x 11d | ||
| Centlmeters 45h x 26w x 28d | ||
Reservoir Wt 6 oz / 0.17 kg
* Pack weight does not include reservoir
natural_image
Green and black bright backpack with labeled parts (1, 2, 3, 4), no visible text or symbols on the backpack itself.UNIQUE FEATURES
1 J-zip front tool organizer
2 Small zippered external non-scratch pocket
3 Upper and lower side compression straps
4 Integrated raincover
SYNCRO 15
SPECS S/M M/L
| Cubic Inches 793 915 | ||
| Liters | 13 | 15 |
| Lbs/Dunces* | 1/3 | 1/4 |
| Kilograms* | 0.53 | 0.56 |
| Inches 18h x 10w x 9d | ||
| Centimeters 45h x 26w x 23d | ||
Reservoir Wt 6 oz / 0.17 kg
* Pack weight does not include reservoir
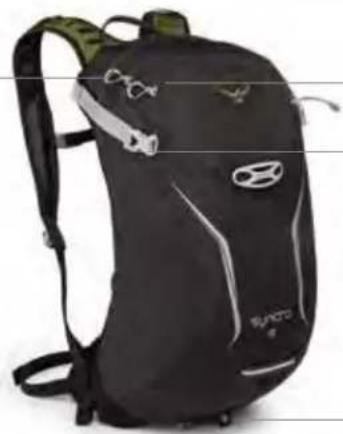
natural_image
Black and white photo of a modern ski backpack with visible branding and lanyards (no text or symbols)2
3
4
UNIQUE FEATURES
1 J-zip front tool organizer
2 Small zippered external non-scratch pocket
3 Upper side compression straps
4 Integrated raincover
SYNCRO 10
SPECS S/M M/L
| Cubic Inches 488 610 | ||
| Liters | 8 | 10 |
| Lbs/Ounces* | 1/1 | 1/2 |
| Kilograms* | 0.47 | 0.50 |
| Inches 18h x 10w x 8d | ||
| Centimeters 45h x 26w x 20d | ||
Reservoir Wt 6 oz / 0.17 kg
• Pack weight does not include reservoir
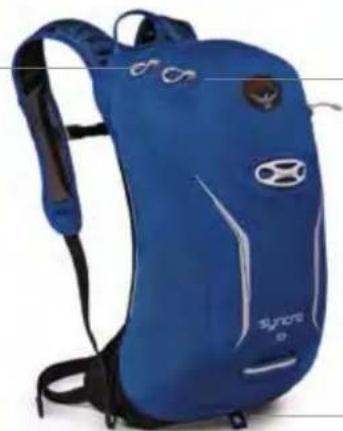
natural_image
Blue athletic backpack with 'synoro' branding and logo, no visible text or symbols on body2
3
UNIQUE FEATURES
1 J-zip front tool organizer
2 Small zippered external non-scratch pocket
3 Integrated raincover
SYNCRO 3
SPECS S/M M/L
| Cubic Inches 122 183 | ||
| Liters | 2 | 3 |
| Lbs/Ounces* | 0/13 | 0/14 |
| Kilograms* | 0.38 | 0.40 |
| Inches 16h x 9w x 4d | ||
| Centimeters 40h x 24w x 10d | ||
Reservoir Wt 6 oz / 0.17 kg
* Pack weight does not include reservoir
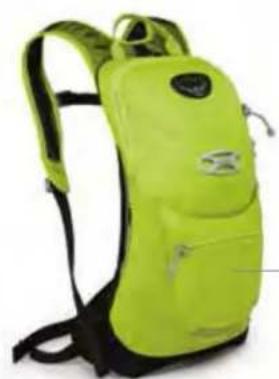
natural_image
Green and black light blue backpack with black straps (no visible text or symbols)1
UNIQUE FEATURE
1 Front shove-it pocket
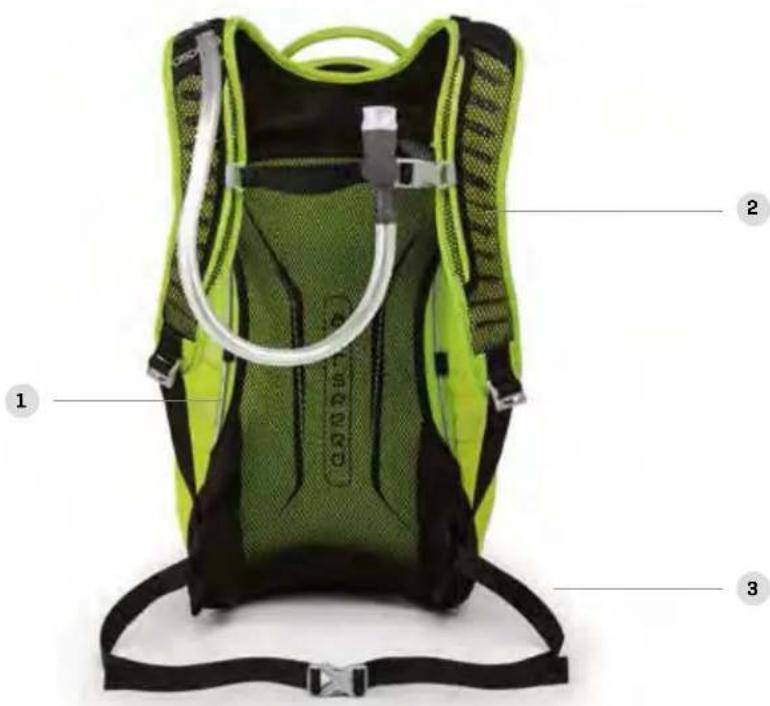
1AIRSPEED™ SUSPENSION
+ Mesh backpanel supported by LightWire™ frame with side vents maintains comfortable fit and keeps your back cool
2 BIOSTRETCH™ VENTILATED HARNESS
+ EVA foam is perforated with large holes for enhanced breathability and comfortable stretch
3 PADDED HIPWING / ERGOPULL™ WAISTSTRAP
+ Nylon waiststrap with padded, spacer mesh hipwings and a modified straight ErgoPull™ provide stable carry
text_image
Labeled diagram of a green and black camping backpack with numbered parts indicating components.SIZING / FIT
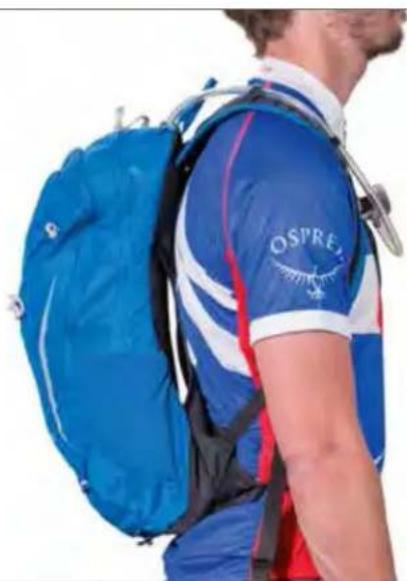
UNISEX TORSO SIZING
S/ M 16-1 9" / 40-48 cm
M/L 18-21" / 46-53 cm
natural_image
Side profile of a person wearing a blue and white sports jacket with a blue backpack (no visible text or symbols)
natural_image
Blue bag with a white spherical object resembling a helmet or gear, no visible text or symbols.LIDLOCK™ HELMET ATTACHMENT
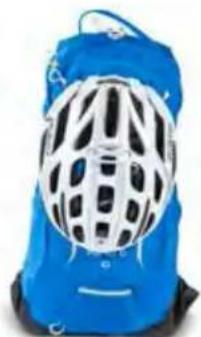
20L/15L/10L/3L
Osprey's LidLock™ easily and securely carries bicycle helmets.
A Pull the LidLock™ attachment away from the pack.
B Twist the LidLock™ and pass it through the bottom of the helmet vent. Turn the LidLock™ back to its horizontal position to lock the helmet in place.
C Adjust the LidLock™ tension with the cord loop on the right outside panel of the pack.
☐ Reverse to remove helmet.
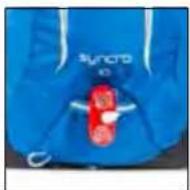
BLINKER LIGHT ATTACHMENT
20L/15L/10L/3L
The blinker light attachment strap found near the base of the front panel of the pack allows for quick light attachment for high visibility in the dark.

SLASH POCKET
20L/15L/10L
A zippered top slash pocket lined with scratch free, heat embossed fabric provides ideal storage for optics and electronic devices.
natural_image
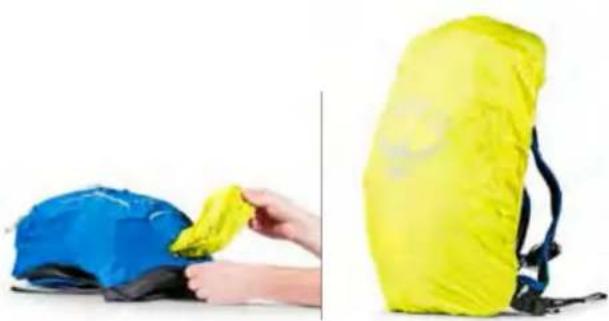
Two-step photo showing a hand holding a yellow bag next to a blue bag, both with black straps and a yellow backpack (no text or symbols visible)INTEGRATED RAINCOVER
20L/15L/10L
The integrated, removable high visibility raincover provides pack protection in adverse conditions.
A Locate the raincover icon and unzip the raincover compartment.
B Pull the raincover from the compartment and slip it over the top and bottom of pack using the peripheral elastic to hold it in place.
C Reverse this process to return raincover to compartment.
☐ To remove the raincover altogether, unfasten the toggle from the cord loop and remove.
Note: To prevent mildew, allow the raincover to dry entirely before storing.
natural_image
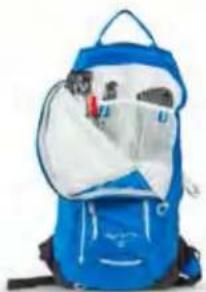
Blue backpack with white cover and accessories, no visible text or symbolsFRONT PANEL ORGANIZATIONAL COMPARTMENT 20L / 15L / 10L
The J-zip gives access to a front panel organizational compartment which features mesh pockets for tubes and tools, a pump holder, key clip and space for additional items.
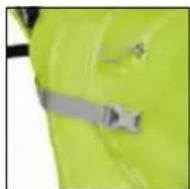
Dual upper side compression/carry straps with a quick release buckle aid in compressing and stabilizing loads for optimal carry.
natural_image
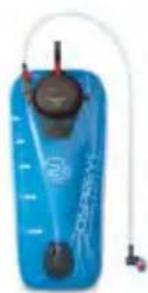
Blue water exchanger device with black tank and red connectors (no visible text or symbols)SPECS
Fluid Ounces 85
Liters 2.5
Ounces 6.17
Kilograms 0.18
Inches 17h x 8w x 2d
Centimeters 42h x 21w x 5d
2.5L HYDRAULICSTM LT RESERVOIR\*
20L/15L/10L/3L
The 2.5L Hydraulics™ LT Reservoir is a streamlined, lightweight hydration system. It has built-in baffles to reduce sloshing and barreling and a detachable hose connection which allows for fast and easy removal of the reservoir from the pack.
*Included in U.S. and other select markets
FOR MORE INFORMATION ON OSPREY'S FULL LINE OF RESERVOIRS VISIT OSPREYPACKS.COM.
natural_image
Two photos showing hands installing or adjusting a blue and lime backpack with a stopwatch (no text or symbols visible)HYDRATION
20L/15L/10L
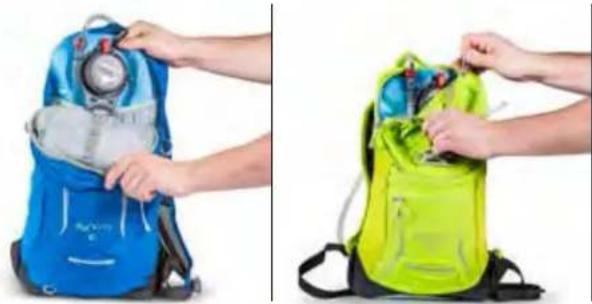
The Syncro 20, 15 and 10 have a sewn-in hydration sleeve located on the inside of the backpanel which can hold up to a 3L reservoir. The backpanel hydration exit port is centered allowing routing to the right or left side of the harness. Elasticized routing straps on the pack's harness hold the reservoir hose in place.
3L
The main compartment of the Syncro 3 is designed to accept up to a 2.5L Hydraulics™ LT Reservoir and features an integrated hydration hanger and hose exit port.
Your Osprey pack is an extremely durable product and is built for years of use.
However, some basic pack maintenance will help ensure your pack lasts a lifetime.
OSPREY PACKS
STANDARD MAINTENANCE
- After each trip be sure to clean out your pack thoroughly.
- Clean the zippers regularly using mild soap, warm water and soft brush. This will help keep them in proper working condition.
- If your pack is wet, hang it to dry out of direct sunlight.
- Loosen all the straps.
- Wash your pack if dirt, sweat, salt and stains have worked their way into fabrics, webbing or mesh.
[Do not immerse travel packs in water with our HighRoad™ Wheeled Chassis.]
WASHING YOUR PACK
A Empty the pack including any food, dirt or spilled contents.
B If your pack has a removable harness and hipbelt, remove them from the pack body.
C Do NOT wash your pack in a washing machine. Clean your pack and components in a bathtub or large sink using a mild detergent and warm water.
☐ Agitate the pack gently. Scrub the inside and outside of all compartments including the pockets with a soft brush.
E Clean the zippers using a mild soap, warm water and a soft brush. Flush water and soap through the buckles. Keeping dirt and debris out of the zippers and buckles will help keep them in proper working condition.
F Drain the dirty water from the bathtub or sink and refill with cool clean non-soapy water. Rinse the pack thoroughly. Repeat this step as necessary.
G Hang your pack to dry outside or in a well ventilated area, out of direct sunlight.
WHEELED TRAVEL LUGGAGE
[Do not immerse travel packs in water with our HighRoad™ Wheeled Chassis.]
A After each trip, empty the pack including any food, dirt or spilled contents.
B Clean the zippers regularly using mild soap, warm water and soft brush. This will help keep them in proper working condition.
C Wipe the exterior of the chassis with a damp cloth or sponge.
☐ Clean the pack fabric by scrubbing stains and dirt with warm water, mild detergent and a soft brush or sponge.
E Use a wet towel with clean non-soapy water to wipe away any soap residue on the pack.
F Hang your pack to dry outside or in a well ventilated area, out of direct sunlight.
RECOMMENDED CLEANING PRODUCTS
Osprey recommends Nikwax® products for pack care. Be sure to read label directions carefully before applying any product to your pack.
Tech Wash® - Use this with warm water for washing and cleaning your packs or luggage.
Tent & Gear Solar Proof® - Use this spray-on product to protect your packs from UV exposure and to improve water repellency.

For complete instructions on cleaning your Osprey pack,
visit: ospreypacks.com/PackTech/PackCare.
OSPREY RESERVOIRS
RESERVOIR STANDARD MAINTENANCE
- Our reservoir's anti-microbial formula prevents most mold and bacteria growth.
- Rinsing out your reservoir after each use should keep your reservoir fresh, especially when using sugary drink mixes.
- Periodically use Osprey's Hydraulics™ Cleaning Tablets to clean your reservoir.
- lodine or other purifying tablets used in your reservoir will not affect the quality of your reservoir. However these tablets may stain the reservoir over time.
- Freezing your reservoir will not effect the quality of the reservoir. However if the reservoir is filled with water, be aware that water expands when it freezes and can damage your reservoir if it is overfilled.
- Do NOT pour boiling water into the reservoir. This can damage the reservoir and will void your warranty.
- Watch "Cleaning an Osprey Hydraulics™ Reservoir" video on Osprey Packs YouTube® page.
CLEANING YOUR RESERVOIR (WITH OSPREY HYDRAULICS™ CLEANING TABLETS)
A Fill reservoir with warm water. Do not use bleach or boiling water.
B Add one cleaning tablet to reservoir and close the cap.
C Let tablet dissolve for 5 minutes with the reservoir laying on its back.
D Shake the reservoir for 30 seconds to mix and spread the solution.
E Pinch the bite valve and squeeze the reservoir to remove air and fill the reservoir hose and bite valve with solution.
F Let the reservoir sit for 15 minutes and then pour out solution.
G Rinse the reservoir and tube with clean cool water.
H Hang your reservoir to dry in a well ventilated area.
DEEP CLEANING YOUR RESERVOIR (WITH OSPREY HYDRAULICS™ CLEANING KIT)
1 Rinse out the reservoir and fill it with warm water and a mild dish detergent. Do not use bleach or boiling water.
2 With the large cleaning brush from Osprey's Hydraulics™ Cleaning Kit scrub the interior of the reservoir.
3 Remove the hose from the reservoir and the bite valve from the hose and use the small brush from Osprey's Hydraulics™ Cleaning Kit to scrub the interior of the hose.
4 Remove the silicone bite valve cover and clean it and the bite valve with warm soapy water.
5 Rinse the interior and exterior of the reservoir, hose and bite valve parts with cool clean water.
6 Let the hose and bite valve dry in a well-ventilated area.
7 Insert Osprey's Hydraulics™ Cleaning Kit drying rack into the reservoir and hang to dry in a well ventilated area.
For complete instructions on cleaning your Osprey reservoir watch,
"Cleaning an Osprey Hydraulics™ Reservoir" at youtube.com/ospreypacks.
OSPREY ACCESSORIES
Customize and protect your pack with Osprey's full line of accessories.
For the full lineup, please visit your local Osprey retailer or visit:
ospreypacks.com.
PACK YOUR PACK
Loading your pack correctly optimizes comfort while
you are carrying it. For complete information visit:
ospreypacks.com/PackTech/HowToPackYourPack
GUARANTEE
At Osprey, sustainability is designed into our packs, which are built to last a lifetime and backed by a superb guarantee, no matter how hard you are on your gear. Visit ospreypacks.com for details.
QUESTIONS?
Contact Osprey Customer Service. Real help from real people.
Scroll over the customer service tab at ospreypacks.com.
OSPREY PACKS, INC.
115 PROGRESS CIRCLE
CORTEZ, CO 81321 USA
866-284-7830
ospreypacks.com/PackTech/OwnersManuals
KR www.ospreypacks.com/PackTech/OwnersManuals
에서 사용자 설명 서류다운로드하세요
OWNER'S MANUAL

ospreypacks.com