AV-1006 Altimeter - Wristwatch Aviador - Free user manual and instructions
Find the device manual for free AV-1006 Altimeter Aviador in PDF.


| Product Type | Analog Quartz Wristwatch |
| Brand | Aviador |
| Model | AV-1006 Altimeter |
| Movement | Quartz (various calibers including Miyota, Seiko, Ronda) |
| Battery Type | Miniature silver oxide battery (e.g., SR621SW) |
| Battery Life | Approximately 2 years under normal use |
| Functions | Time (hours, minutes, seconds), date, day, 24-hour indicator, chronograph (up to 60 minutes), tachymeter, slide rule for calculations |
| Chronograph | Measures elapsed time, split time, accumulated time; 1/1 second increments, max 11h 59m 59s or 30 min depending on movement |
| Slide Rule | Bezel slide rule for multiplication, division, ratios, square roots, flight calculations, fuel consumption, conversions |
| Tachymeter | Measures average speed over a fixed distance (up to 60 seconds) |
| Display | Analog with three subdials (chronograph minutes, seconds, 1/10 seconds or 24-hour) |
| Calendar | Date and day of week (bi-lingual; set via crown) |
| Water Resistance | 3 ATM (splash resistant; not suitable for swimming or diving) |
| Crown Type | Standard push/pull (some models with screw-lock) |
| Case Material | Stainless steel (typical) |
| Strap Material | Leather or metal bracelet (varies by model) |
| Glass | Mineral crystal (scratch-resistant) |
| Care Instructions | Avoid high temperatures (>60°C), perfumes, solvents; rinse after saltwater exposure; check gaskets every 2-3 years |
| Battery Replacement | Recommended at authorized service center to prevent damage |
| Warranty | 24 months against manufacturing defects |
Frequently Asked Questions - AV-1006 Altimeter Aviador
User questions about AV-1006 Altimeter Aviador
0 question about this device. Answer the ones you know or ask your own.
Ask a new question about this device
Download the instructions for your Wristwatch in PDF format for free! Find your manual AV-1006 Altimeter - Aviador and take your electronic device back in hand. On this page are published all the documents necessary for the use of your device. AV-1006 Altimeter by Aviador.
USER MANUAL AV-1006 Altimeter Aviador
MANUAL DE INSTRUCCIONES INSTRUCTION MANUAL
ω alδφrf
AVIADO
adn
RBF
FURIA ROJA
ESPAÑOL
USANDO EL CRONÓGRAFO
(A) → (A) / (A) → … → (A) → (B)
![graph LR A["COMENZAR (inicio del juego)"] --> B["DETENER (tiempo muerto) REINICIAR (reincio del juego)"] B --> C["DETENER (Final del juego)"] C --> D["VOLVER A CERO"] subgraph Timeframe A1["5 minutos, 10 segundos"] A2["20 minutos, 00 segundos"] end subgraph Details A3["60/40/15/30/24/17/19/18/17/19/…](/content/2026/05/786829/images/09f6449cbf09390919f92b8ad6844a675d5f8c776e08c07697a9eed6eca612f1.jpg)
CRONÓGRAFO
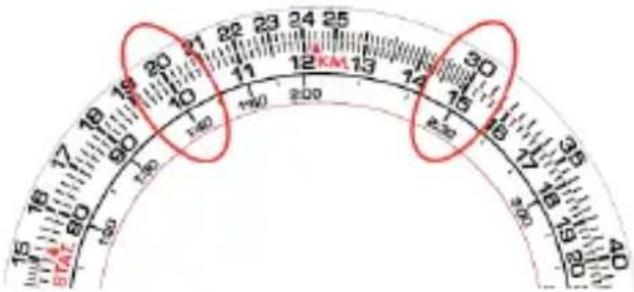
Combustible
[Ejemplo]
INSTRUCTIONS BOOKLET
INDEX
Page
ADVICES & GUARANTEE TERMS.... 48
INSTRUCTIONS FOR WATER RESISTANT WATCHES.... 50
MANUAL MOV. MIYOTA Cal. OS10, OS00, OS20, OS21 & JS50.... 54
MANUAL MOV. MIYOTA Cal. 2115 & 2315 62
MANUAL MOV. Cal. VD53B 64
MANUAL MOV. Cal. VD57B.... 70
MANUAL MOV MIYOTA Cal. 6025/6P75 & 6P00.... 79
MANUAL MOV RONDA Cal. 575.24h 86
BATTERY CHANGE 88
HOW IS THE SLIDE RULE USED? 95
ADVICES
Here there are some useful advices to maintain your watch perfectly for long time.
These watches are manufactured with high quality materials; each watch must pass several controls during every single stage of its advanced technical process of production; the hardest control takes place on each watch before it commercialization.
If your watch is not working properly, or presents some defects, we do suggest to take it immediately to one of your specialized After Sales Service Centre.
For all models with quartz mechanism, the battery life should be on for 12 to 36 moths.
NOTE: A wrong replacement of the battery could damage the mechanism of your watch, so please always apply to one of our authorized Service Centres.
GUARANTEE TERMS
Your watch is guaranteed against manufacturing defects for 24 moths from the date of purchase.
Guarantee terms.
In case of defects of watch movement, any part will be repaired or replaced free of charges except for delivery and insurance.
The guarantee does not cover.
-Battery, glass, bracelet, or strap, case, crown and buttons.
-Any damage due to an unauthorized handling or negligence.
-Repairs made on watches without water resistance indications and that got water (see the instructions for the water resistant watches).
INSTRUCTIONS FOR WATER RESISTANT WATCHES
Important warnings
1 Leave the crown in its normal position. If the watch has a screw crown, block the crown
2 Do not use the crown and do not press buttons when the watch is wet.
3 Do not use the crown and do not press buttons when de water.
4 After being submerged in salt water, the watch should be rinsed with fresh water and dried out.
5 Clouded glass.
A certain degree of the humidity is inside watch. If the temperature outside the watch is lower than the one inside it, the glass might be misted. If this condition persists, the watch should be checked.
6 Do not expose the watch to high temperatures (more than 60oC / 140oF) for a long time.
7 The glass of the watch may have invisible scratches. Make the glass be checked every 2-3 years or whenever you replace the battery.
8 Avoid the contact with perfumes, petrol and solvents
9 Caseback rings, crown rings and buttons rings can be deteriorated by the cause. Make rings be checked every 2-3 years or whenever you replace the battery..
10 If the space between the case and the crown is filled with dirt it becomes difficult to pull out the crown. Periodically turn the crown when it is on normal position.
WARNING
Silf the watch (with guarantee certificate) presents permebeality defects, a water proof test can be requested to one of our Authorized Service Centres. If the watch resists to level of deepness noted on the caseback, the repair wil,be at purchaser charge, because due to his negligence.
NOT SUMERSIBLE
3 ATM (ATMOSPHERES)
The clock may be exposed to splashes of water but not to the pressure of this.
CAUTION: The clock does not support direct water pressure

You can expose to rain and splashes.
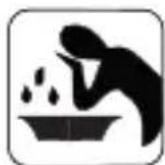
You can wash in a sink, just splashing.

The clock can be used in water at a pressure limited and reasonably low.
CAUTION: Do not use the clock for water sports and diving in apnea ...

You can dip moderately. Not recommended.

You can do chores. You can wash your car or shower.

SUMERSIBLES
10, 15 & 20 ATM
You can use the watch for water sports and diving in apnea.
CAUTION: Do not use the watch for professional diving.

You can swim professionally

You can dive in shallow water.
* 20 ATM or superior:
Watches for expert divers must be checked periodically in order to preserve their original water resistance, so please apply to one of our Service Centre for all kind of repairs and for batteries replacing.
* Pressure in ATM is a test pressure and should not be considered as corresponding to actual diving depth since swimming movements tend to increase the pressure at a certain depth. Also, care must be taken on diving with the watch on the wrist.
MANUAL MOV. MIYOTA Cal. OS10, OS00, OS20, OS21 & JS50

DISPLAYS AND BUTTONS
MIYOTA OS10
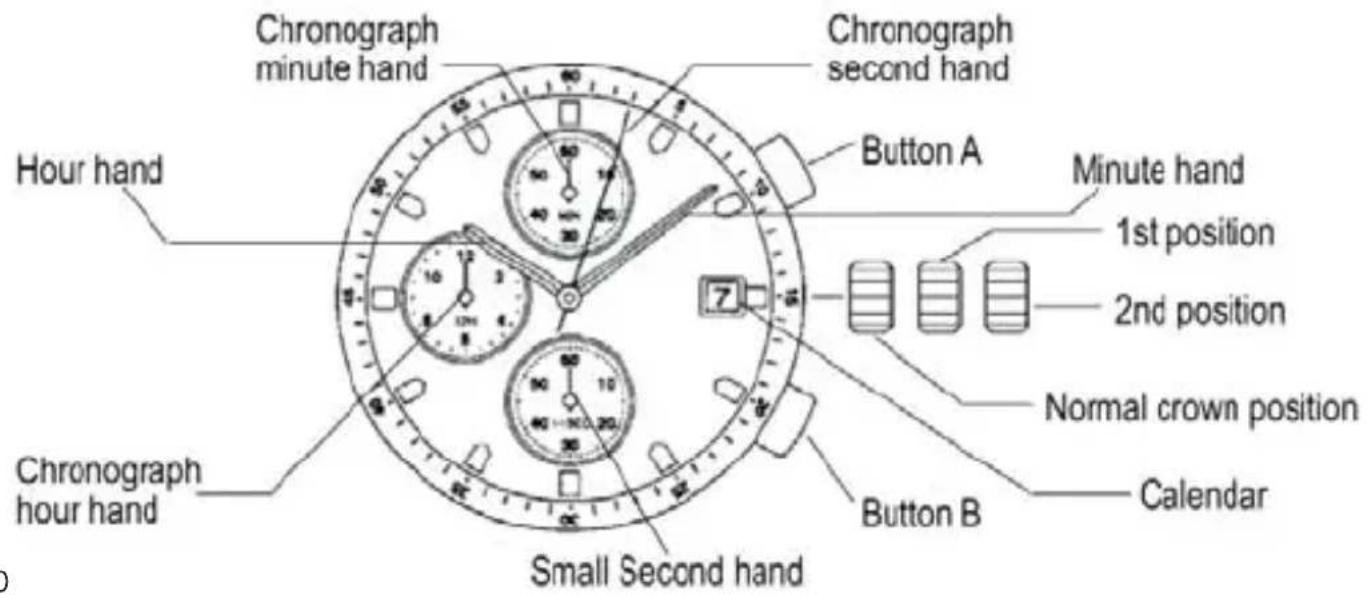
MIYOTA OS00
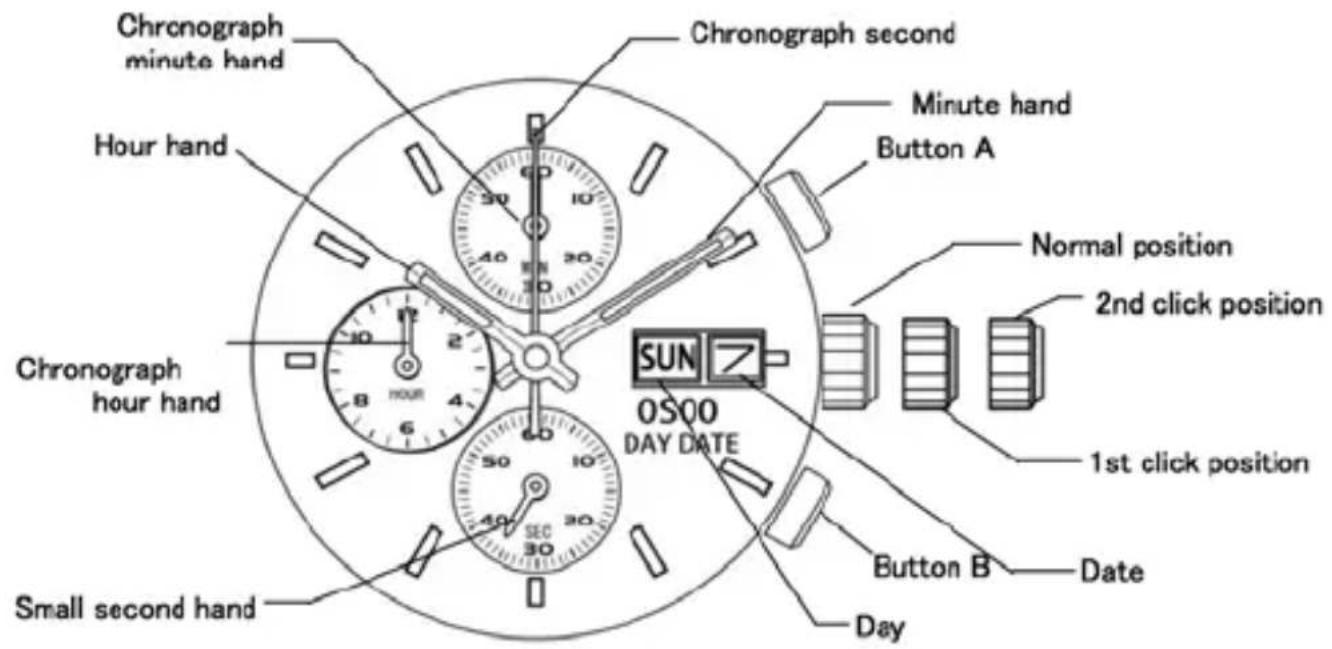
MIYOTA OS20
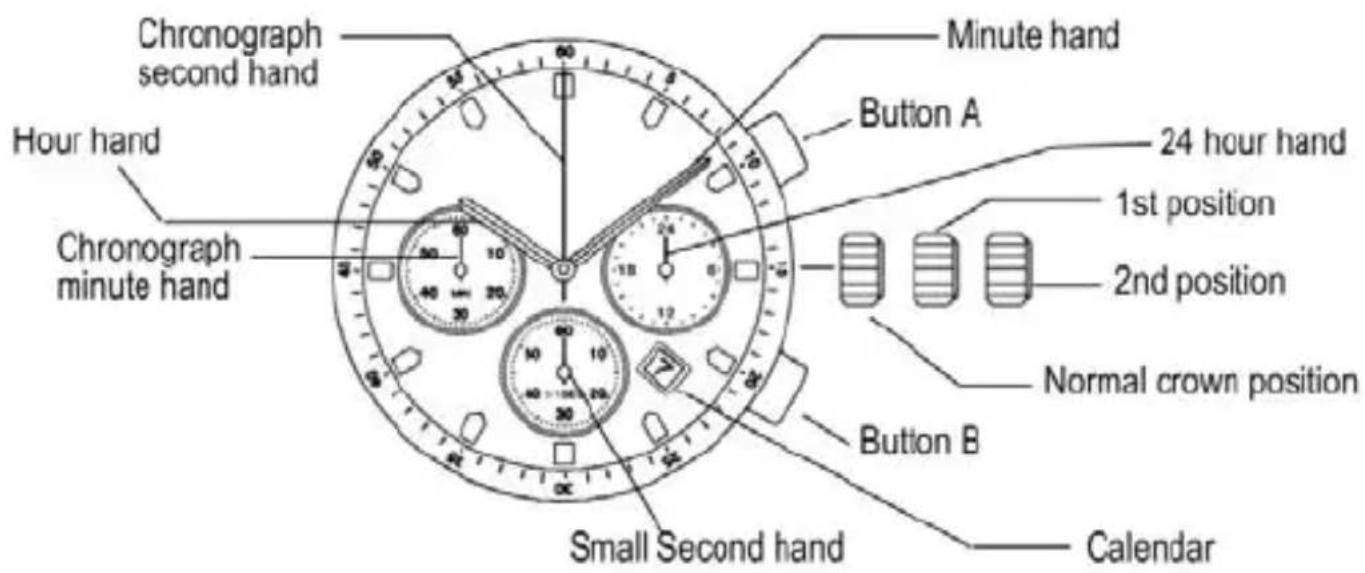
MIYOTA OS21
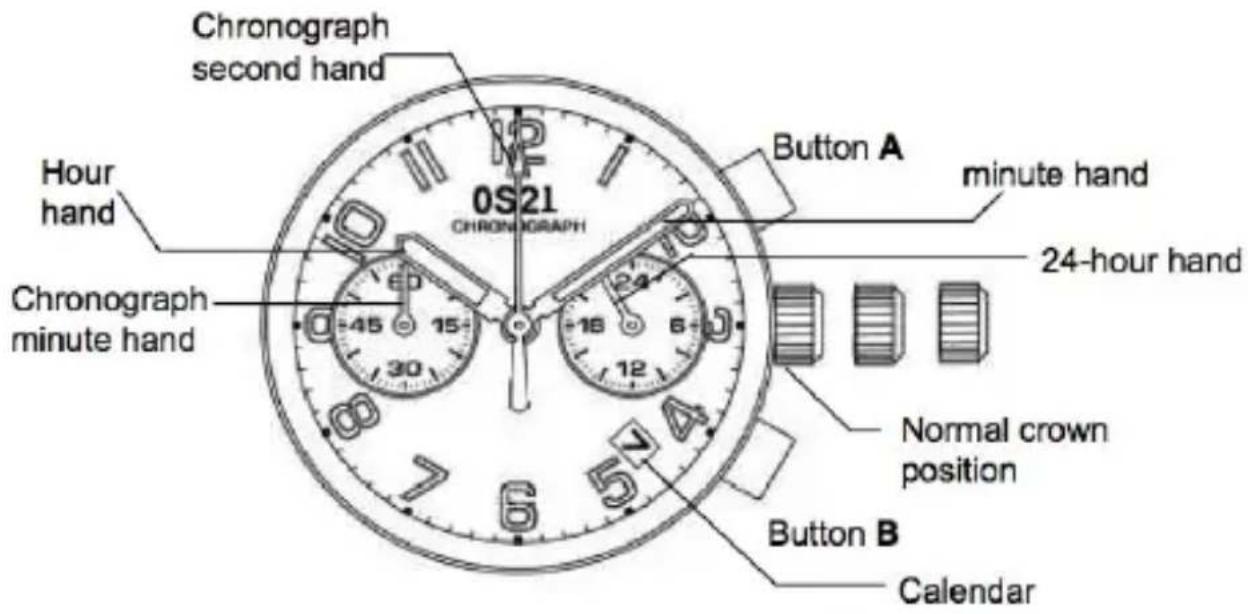
MIYOTA JS50
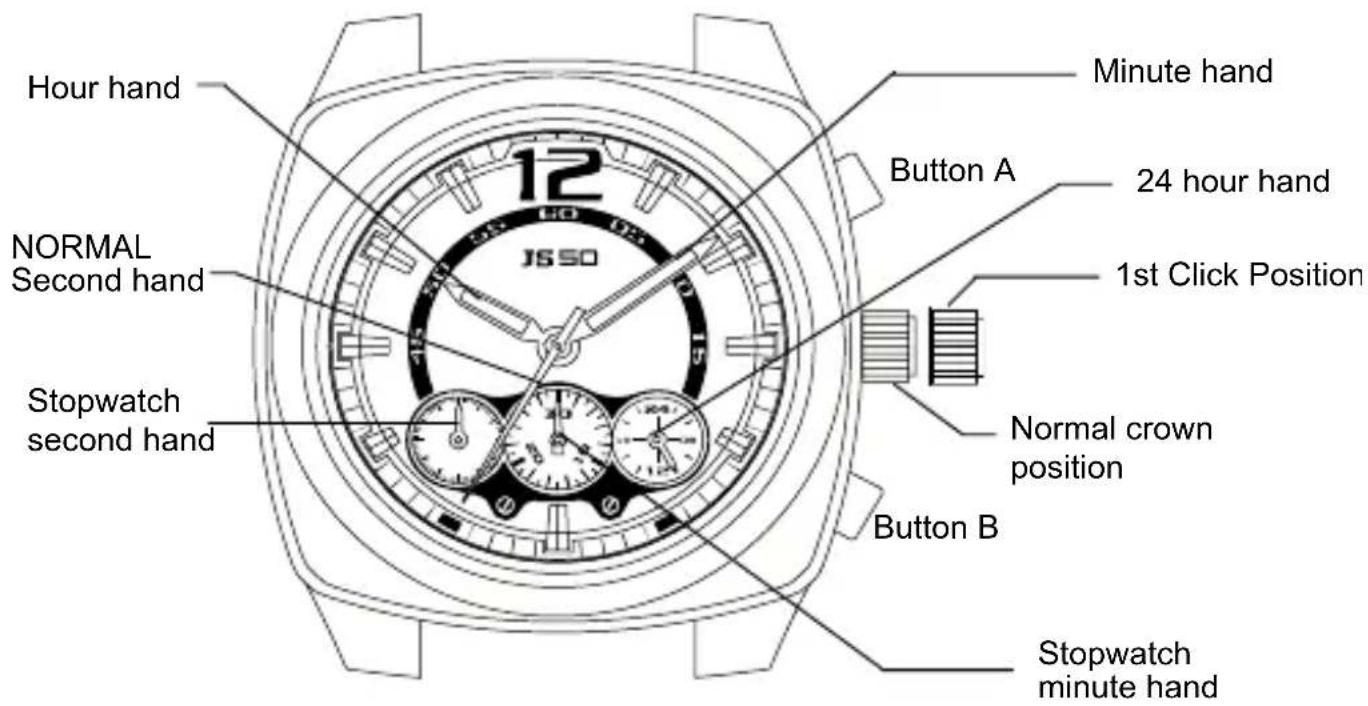

SETTING THE TIME
- Pull the crown out to the second position.
- Turn the crown to set hour and minute hands.
- When the crown is pushed back to the normal position, small second hand begins to run.

SETTING THE DATE
- Pull the crown out to the 1st position.
- Turn the crown counter-clockwise to set the date. Important: If the date is set between the hours of around 9:00 PM and 1:00 AM, the date may not change on the following day.
- After the date has been set, push the crown back to the normal position.

SETTING THE DAY ( OS00 )
- Pull the crown out to the 1st click position.
- Turn the crown clockwise to set the day.
* If the day is set between the hours of around 11:15 PM and 6:00 AM, the day may not change on the following day. - After the day has been set, push the crown back to the normal position.

USING THE CHRONOGRAPH
OS00/OS10/OS20 This chronograph is able to measure and display time in 1/1 second united up to maximum of 11 hours 59 minutes 59 seconds. The chronograph second hand keeps continuously for 11 hours 59 minutes 59 seconds after starting.
OS21 This chronograph is able to measure and display time in 1/1 second united up to maximum of 1 hour.
JS 50 This chronograph can measure and display time in fractions of 1 second to a maximum of 29 minutes 59 seconds. The timer will stop automatically after running continuously for 30 minutes.
Measuring time with the chronograph
- The chronograph can be started and stopped each time button "A" is pressed.
- Pressing button "B" resets the chronograph and the chronograph second hand, chronograph minute hand, and chronograph hour hand return to zero position
![graph TD A["RESET"] -->|“A”| B["TIME MEASUREMENT"] B -->|“A”| C["STOP"] C -->|“B”| A B -->|“B”| A](/content/2026/05/786829/images/0a26983d0b17e06b2b08aa36bbbd29e449afabda932bafda2af85248d5b0c6ba.jpg)

CHRONOGRAPH RESET (INCL. AFTER PLACING BATTERY)
This procedure should be performed when the chronograph second hand does not return to zero position after the chronograph has been reset, and including after the battery has been replaced.
- Pull the crown out to the 2nd position.
- Press button "A" to set the chronograph second hand to the zero position. The chronograph hand can be advanced rapidly by continuously pressing button "A".
- Once the hand have been zeroed, return the crown to the normal position.
* Do not push crown to normal position while the chronograph second hand returns to zero position. It stops on the way when crown are returned to normal position and its position is recognized as zero position.
MANUAL MOV. MIYOTA Cal. 2115 Y 2315

DISPLAYS AND BUTTONS
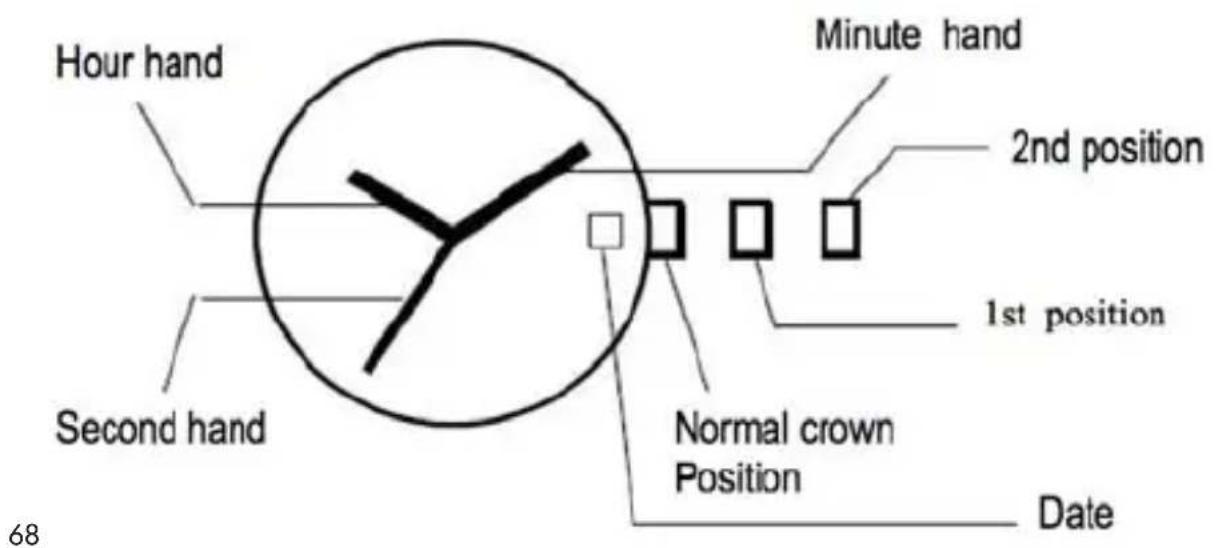

SETTING THE TIME
- Pull the crown out to the second position.
- Turn the crown to set hour and minute hands.
- When the crown is pushed back to the normal position, small second hand begins to run.

SETTING THE DATE
- Pull the crown out to the 1st position.
- Turn the crown counter-clockwise to set the date.
Important: If the date is set between the hours of around 9:00 PM and 1:00 AM, the date may not change on the following day.
- After the date has been set, push the crown back to the normal position.
MANUAL MOV. SEIKO Cal. VD53B
DISPLAY AND CROWN/BUTTON OPERATION
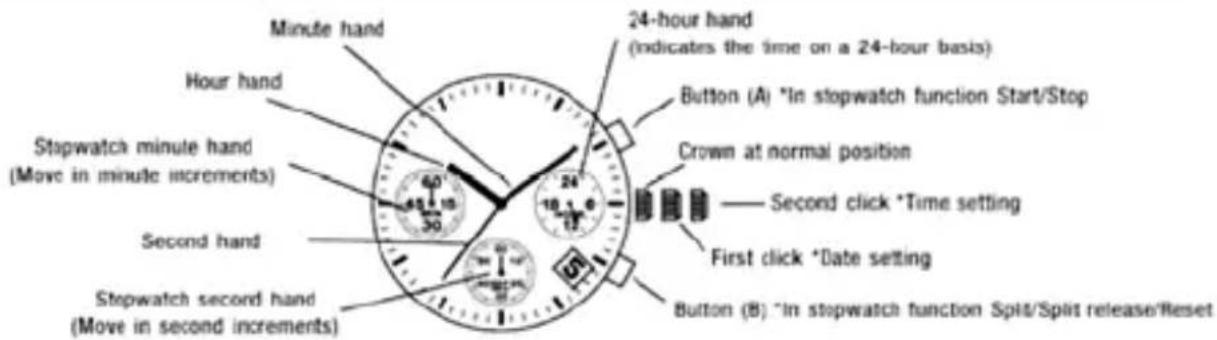
* The measured time is indicated by the stopwatch hands that move independently of the center and 24-hour hands.
ADJUSTING THE STOPWATCH HAND POSITION
Before setting the time, check if the Stopwatch second and minute hands are at the "0"(12 o'clock) position.
If the stopwatch is in use, press the button in the following order to reset it, and then, check if the hands return to "0" position.
(For details, see "HOW TO USE THE STOPWATCH")
If the stopwatch is counting:
(A) → (B)
If the stopwatch is stopped:
(B)
If the split time is displayed:
(B) →
(A) → (B)
* If either of the stopwatch hands are not at the "0" position, reset them following the procedure below:
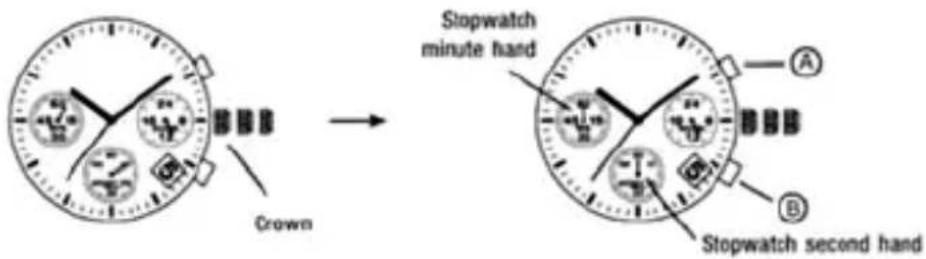
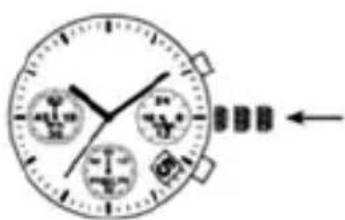
-
Pull out the crown to the second click.
-
Press button (A) or (B) to reset the stopwatch second and minute hands to "0" position.
* By pressing button (A), the hands move counter clockwise.
* By pressing button (B), the hands move clockwise.
- Push the crown back to the normal position.
TIME SETTING
* Before setting the time, check that the chronograph measurement is stopped.
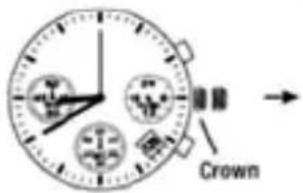
- Pull out the crown to the first click.
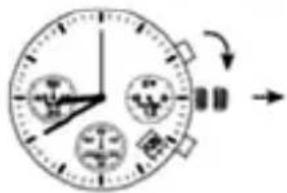
- Turn the crown clockwise until the previous day's date appears.
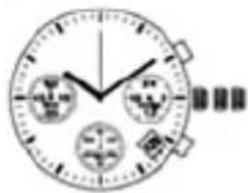
- Pull out the crown to the second click when the second hand is at the 12 o'clock position. It will stop on the spot and advance the hour and minute hands by turning the crown. (Check that 24-hour hand is set correctly.)
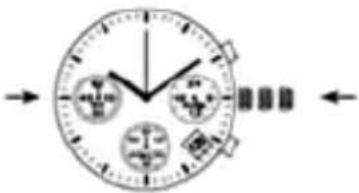
- Push the crown back in to the normal position in accordance with a time signal.
* When the crown is at the second click position. Do not press any button. Otherwise, the chronograph hands will move.
* Do not set the date between 9:00 P.M. and 1:00 A.M.
Otherwise, the day may not change properly. If it is necessary to set the date during that time period, first change the time to any time outside it, set the date and then reset the correct time.
HOW TO USE THE STOPWATCH
* The measured time is indicated by the stopwatch hands that move independently of the center and 24-hour hands.
* The stopwatch can measure up to 60 minutes in seconds.
(Standard measurement)
Ex)100m race (Press the buttons in the following order (A) → (A) → (B))
![graph LR A["START"] --> B["STOP (Finish)"] B --> C["RESET (Reset to '0'00')"] subgraph Hand Start D["Stopwatch minute hand"] E["Stopwatch second hand"] end subgraph Hand End F["10 seconds"] G["10 seconds"] end D --> H["40-15/30"] E --> I["24/12"] F --> J["60/30"] G --> K["24/12"] H --> L["40-15/30"]…](/content/2026/05/786829/images/367b16b0188ec22d9bc6a61c211421f9356f9300e258ee4137a5e41dacaa6a6f.jpg)
(Accumulated elapsed time measurement)
Ex.) Basketball game(Press the buttons in the following order:
(A) → (A) / (A) → (A) → (B)
![graph LR A["START (Start of game)"] --> B["STOP (Time out) RESTART (Restart of game)"] B --> C["STOP (Game over)"] C --> D["RESET"]](/content/2026/05/786829/images/84b7f543b6647b68f6bf4bdbd5f42e7e3ebcab7dc4e558abf000e1615d179eb7.jpg)
* Restart and stop of the stopwatch can be repeated as many times as necessary by pressing button (A).
(Split time measurement)
Ex) 5,000m race (Press the buttons in the following order:

![graph LR A["START"] --> B["SPLIT/SPLIT RELEASE"] B --> C["STOP"] C --> D["RESET"]](/content/2026/05/786829/images/7874f04f77e004f5300bf58faf688b3689fd6dcea1667d163bb07927fb3de60c.jpg)
* Measurement and release of the split time can be repeated as many times as necessary by pressing button (B).
MANUAL MOV. SEIKO Cal. VD57B
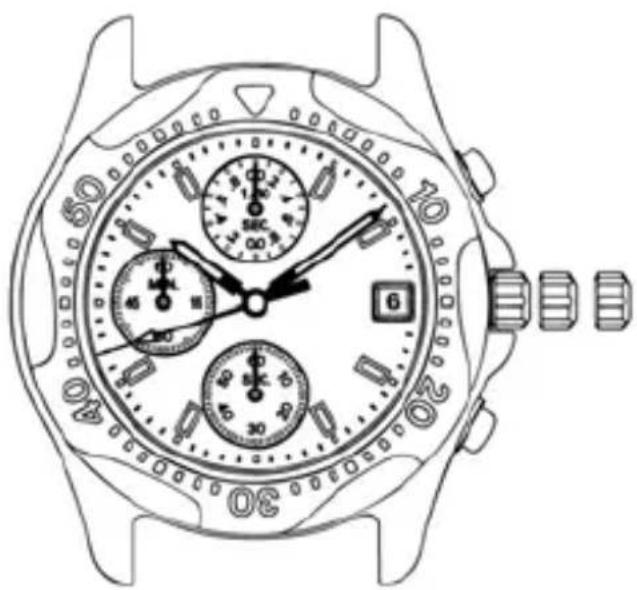
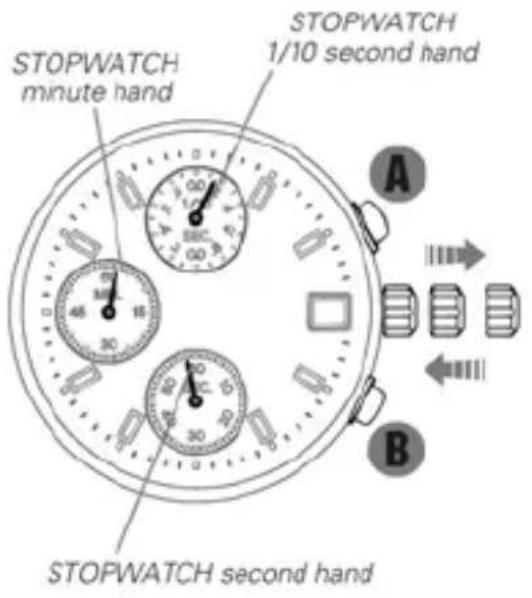
STOPWATCH
● Three small STOPWATCH hands
● Measures up to 60 minutes in 1/10 second increments.
- Split time measurement
● Tachymeter function (for models with tachymeter scale on the dial)
TIME/CALENDAR
● Hour, minute and second hands and date
ADJUSTING THE HAND POSITION
Before setting the time, be sure to check that the STOPWATCH hands are in "0" position when the stopwatch is reset. (For resetting the stopwatch, see "STOPWATCH")
- If any of the STOPWATCH hands does not return to "0" position, follow the procedure below.
![graph TD A["CROWN"] --> B["Pull out to second click."] B --> C["A Press repeatedly to reset STOP-WATCH 1/10 second hand to "0" position."] C --> D["B Press repeatedly to reset STOP-WATCH second and minute hands to "0" position."] D --> E["CROWN Push back in to normal position."]](/content/2026/05/786829/images/ff07d26f25a46edf1c9d66687a9006ea59447341ccac4624fa9d44d26afadbc0.jpg)
* Hands move quickly if the respective buttons are kept pressed.
TIME/CALENDAR SETTING
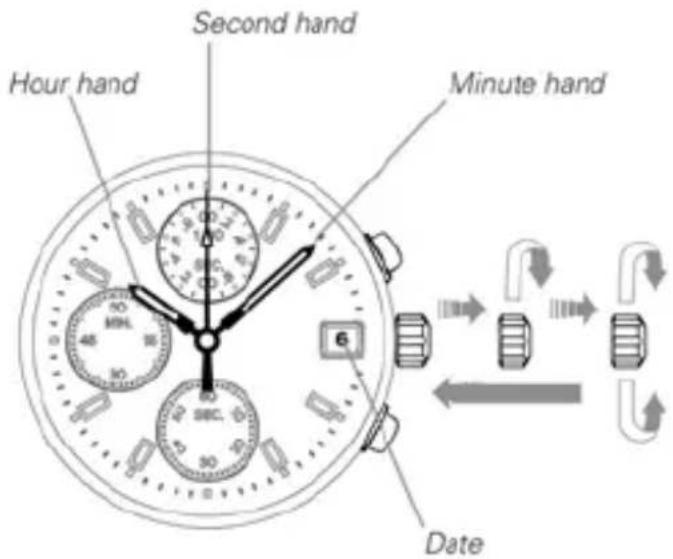
CROWN
Pull out to first click and turn clockwise until the previous day's date appears.

Pull out to second click when Second hand is at the 12 o'clock position.

Turn clockwise until the desired date appears.

Set Hour and Minute hands.

Push back in to normal position in accordance with a time signal.
STOPWATCH
● The measured time is indicated by small STOPWATCH hands that move independently of the center hands.
HOW TO READ THE HANDS
● Ex.: 15 minutes and 10.6 seconds
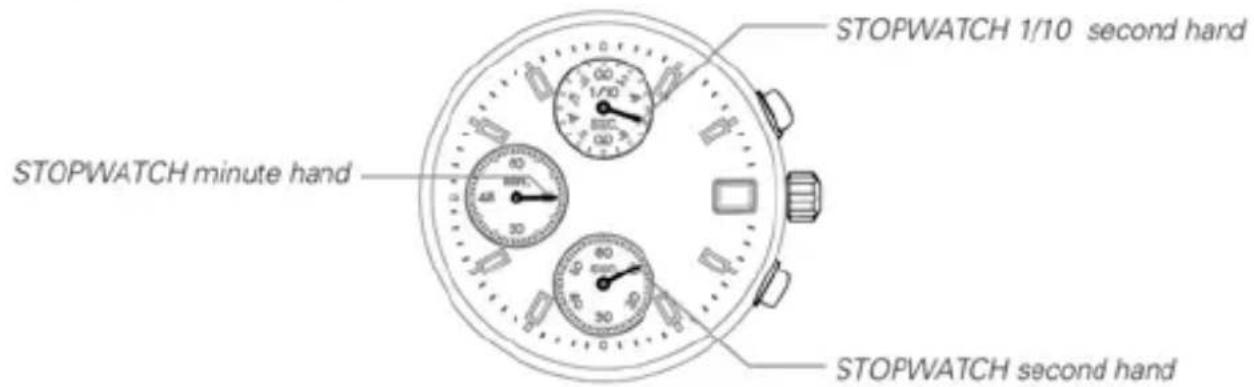
● Movement of STOPWATCH 1/10 second hand
- After the measurement exceeds 1 minute, the STOPWATCH 1/10 second hand stays at the "0" position while the stopwatch is counting.
- When the measurement is stopped or split time is being measured, it indicates the 1/10 seconds measured.
STOPWATCH OPERATION
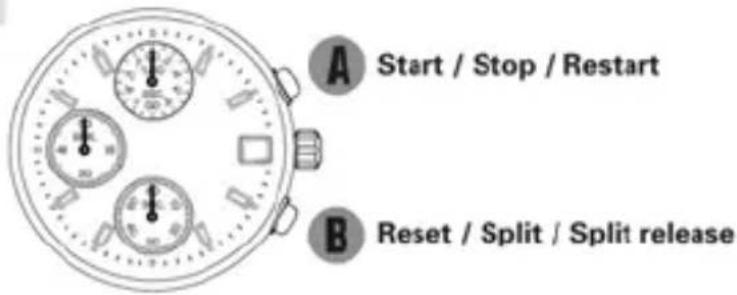
Standard measurement

Accumulated elapsed time measurement
![graph LR A["A"] --> START["START"] A --> STOP["STOP"] A --> RESTART["RESTART"] A --> STOP1["STOP"] A --> STOP2["STOP"] A --> B["B"]](/content/2026/05/786829/images/fe5605e5c50713ae62eb2b063e4319776886c50fda9b1219b8c49c3c99b19cd7.jpg)
Split time measurement
![graph LR A["START"] --> B["SPLIT"] B --> C["SPLIT RELEASE"] C --> D["STOP"] D --> E["RESET"]](/content/2026/05/786829/images/be3a7cf88b682a0eb7d27396eaf3fd970f179f1285e473ade1c40cffd30c7272.jpg)
* Restart and stop of the stopwatch can be repeated by pressing button A.
* Measurement and release of split time can be repeated by pressing button B.
TACHYMETER
[For models with tachymeter scale on the dial]
To measure the hourly average speed of a vehicle:
1 Use the stopwatch to determine how many seconds it takes to go 1 km or 1 mile.
2 Locate the second marker on the main dial which corresponds to the number of seconds measured. The number on the tachymeter scale indicates the average speed per hour.
* For the models with the tachymeter scale around the small dial at the 6 o'clock position, read the tachymeter scale which the STOPWATCH second hand points to.
● Tachymeter scale can only be used to measure average speed when time required is up to 60 seconds.
If the measuring distance is extended to 2 km or miles or shortened to 0.5 km or miles and STOPWATCH second hand indicates "90" on the tachymeter scale:
"90" (tachymeter scale figure) x 2 (km or miles)
= 180 km/h or mph
"90" (tachymeter scale figure) x 0.5 (km or miles)
= 45 km/h or mph
To measure the hourly rate of operation:
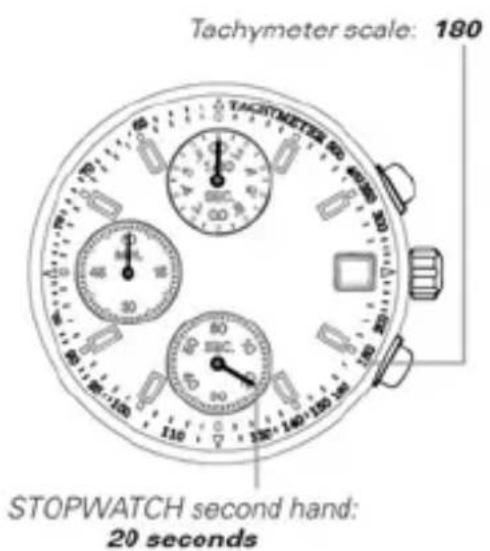
● Ex.: "180" (tachymeter scale figure) x 1 job = 180 jobs/hour
1 Use the stopwatch to measure the time required to complete 1 job.
2 Locate the second marker on the main dial which corresponds to the number of seconds measured. The number on the tachymeter scale indicates the average number of jobs accomplished in one hour.
* For the models with the tachymeter scale around the small dial at the 6 o'clock position, read the tachymeter scale which the STOPWATCH second hand points to.
- If 15 jobs are completed in 20 seconds: "180" (tachymeter scale figure) x 15 jobs = 2700 jobs/hour
NOTES ON USING THE WATCH
ADJUSTING THE HAND POSITION
● The STOPWATCH minute hand moves in correspondence with the STOPWATCH second hand.
TIME/CALENDAR SETTING
● Before setting the time, be sure to stop and reset the stopwatch.
- Do not set the date between 9:00 p.m. and 1:00 a.m. Otherwise, the date may not change properly. If it is necessary to set the date during that time period, first change the time to any time outside it, set the date and then reset the correct time.
- When setting the hour hand, check that AM/PM is correctly set. The watch is so designed that the date changes once in 24 hours.
Turn the hands past the 12 o'clock marker to determine whether the watch is set for the A.M. or P.M. period. If the date changes, the time is set for the A.M. period. If the date does not change, the time is set for the P.M. period.
- When setting the minute hand, advance it 4 to 5 minutes ahead of the desired time and then turn it back to the exact time.
- Do not press any button with the crown at the second click. Otherwise, the STOPWATCH hands move and resetting them is made necessary.
STOPWATCH
● The STOPWATCH 1/10 second scale and hand differ in design and shape depending on the model.
- Do not pull out the crown while the stopwatch is counting. If it is pulled out, the stopwatch operation cannot be made.
- When the stopwatch is reset, it takes up to 40 seconds for the STOPWATCH second and minute hands to return to "0" position.
HOW TO OPERATE THE SCREW LOCK TYPE CROWN (for models with screw lock type crown)
● To unscrew the crown:
Turn the crown counterclockwise. Then, pull it out for time/calendar setting or for adjusting the STOPWATCH hand position.
● To screw in the crown:
With the crown at the normal position, turn it clockwise while pressing it.
MANUAL MIYOTA Cal. 6P25/6P75 & 6P00
A) VISUALIZATION
MIYOTA 6P25/6P75
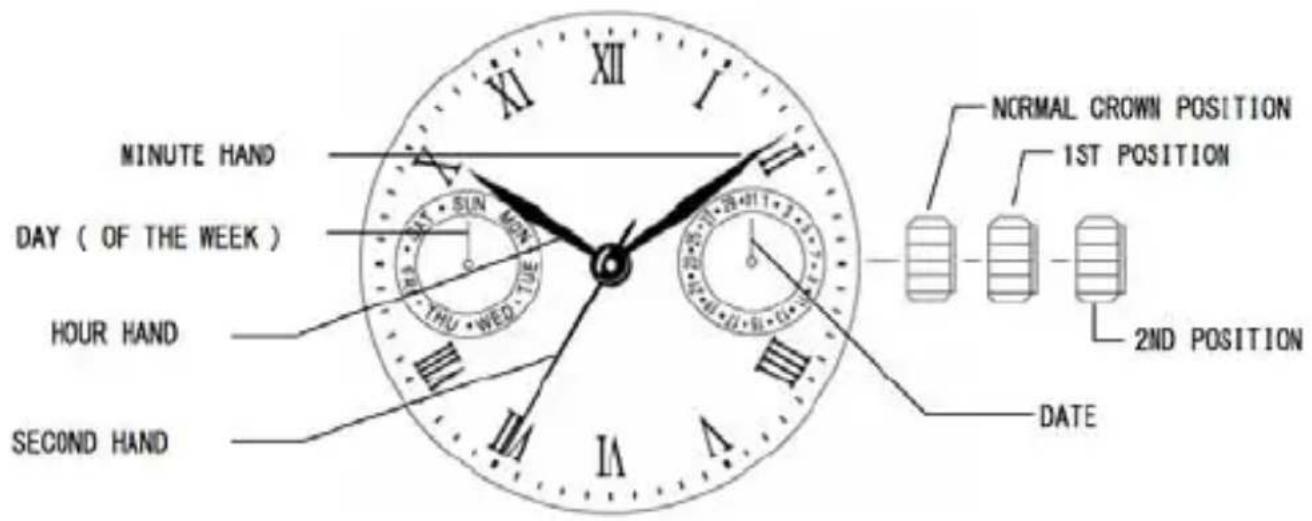
NORMAL CROWN POSITION
1ST POSITION Quick operation - Date ( Counterclockwise)
2ND POSITION Time / Day setting (Clockwise)
MIYOTA 6P00
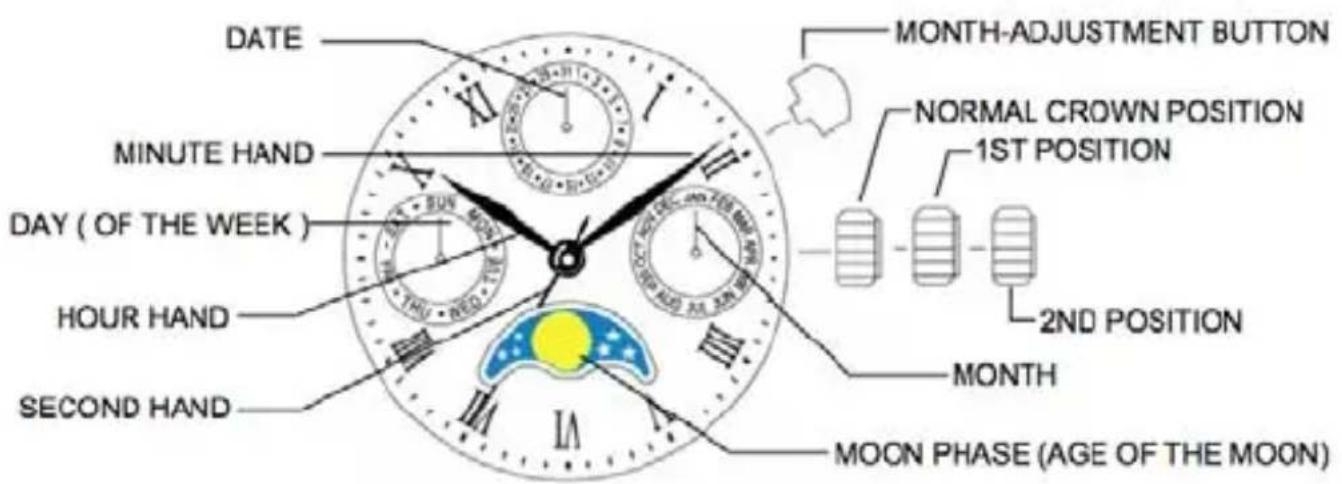
NORMAL CROWN POSITION
1ST POSITION Quick operation - Date ( Counterclockwise) MoonPhase (Clockwise)
2ND POSITION Time / Day setting (Clockwise)
B) SETTING THE DAY AND TIME (HOUR, MINUTE AND SECOND)
The hour, minute, second and day are set by the same operation.
B-1) SETTING THE DAY
Pull the crown out to the 2nd position to stop the second hand at 0 (12 o'clock). Turn the hour/minute hands in a clockwise direction to set a day In order to set the day, you must advance the hour hand by 24 hours per day.
NOTE:
* If the day is set by turning the crown counterclockwise, there is the possibility the date will not change over. Do not set the day by turning the crown in counterclockwise direction.
* The day changes somewhere between 0:00a.m. and 5:30a.m. or a little later.
B-2) SETTING THE TIME
After setting the day, set the hour and minute hands. Turn the hour/minute hands in a clockwise direction to set the time. To ensure time is set accurately, first turn the minute hand 5 minutes ahead of desired time and then turn back (in a counterclockwise) to the desired time. After setting the time, use a time signal to synchronize the watch by pushing crown to the normal position to start the second hand going.
NOTE:
Make sure you have correctly set AM/PM before setting the time.
When the day changes over, it is a.m.. (Day changes over between 0:00a.m. and 5:30a.m. or little later)
Pull the crown out to the 1st position. Turn the crown counterclockwise to set the date quickly.
NOTE:
* Do not set the date between the hours 9:00p.m. and 0:30a.m.. The date may not change correctly the next day.
D) & E) FOR 6P00:
D) SETTING AND READING THE AGE OF THE MOON
* The moon phase represents the age of the moon, the actual shape of the moon during each phase is not represented.
* Use the moon phase only as a guide to the age and phase of the moon when reading and setting watch.
Pull the crown out to the 1st position.
Turn the crown clockwise to advance the moon phase.
D-2) SETTING THE AGE OF THE MOON WITH AGE SCALE
* Check on the age of the moon for the day. Check the newspaper or other source for the age or phase of the moon for today or tomorrow. Subtract one day before a setting is made if the listings for tomorrow are used.
* Setting procedure(Example: age of the moon:4.4)
Pull the crown out to the 1st position.
Turn the moon disc clockwise until the center of the moon is in line with 4.4 on the scale.
D-3) SETTING THE AGE OF THE MOON WITHOUT THE AGE SCALE
* Check the newspaper or other source that lists current age or phase of the moon. Referring to section D) Reading the age of the moon, set the moon phase to the age (0,7,15 or 22) closest to the listed. More accurate setting can be made at the same time of the new moon (0) or full moon(15).
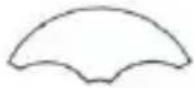
THE AGE OF THE MOON
The age of the moon is indicated in units of days. The average period from a new moon to the next new moon is equivalent to about 29.5 days.
| New moonMoon's age: 0Spring tide | First quarter moonMoon's age: 7Neap tide | Full moonMoon's age: 15Spring tide | Last quarter moonMoon's age: 22Neap tide |
 | 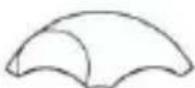 | 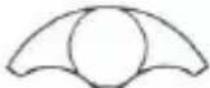 | 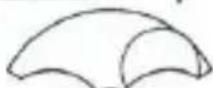 |
* From the phase of the moon in the display, you can tell the size of the tide.
* If you want to set more accurately the phases of the moon, we recommend to set it at the time of a New Moon (The Moon is hidden in the display...New Moon) or a Full Moon (The Moon appears fully in the display...Full Moon).
Pull the crown out to the 1st position. Turn the crown counterclockwise to set the date quickly. NOTE: * Do not set the date between the hours 9:00p.m. and 0:30a.m.. The date may not change correctly 90 the next day.
Each time the month-adjustment button is pushed, the month advances one month at a time. Be sure to press firmly on the button when making month changes.
NOTE:
* Do not set the month when the date hand is between the 26th and 31st. Move the date hand out of this period. After this operation, return the date hand to the proper setting. (When the date hand is between the 26th and 31st, month quick setting can not be made or if a quick setting is attempted, the month may not advance to the next month as normal.)
* The month and date are synchronized such that when adjusting the date at the end of short months (less than 31 days), the month automatically adjusts to the correct month.
The month hand begins changing to the next month around midnight of the 30th day. It completes the change around midnight of the 31st. (On the 31st, the position of the month between the current and next month.)
MANUAL MOV. RONDA Cal 575 24h
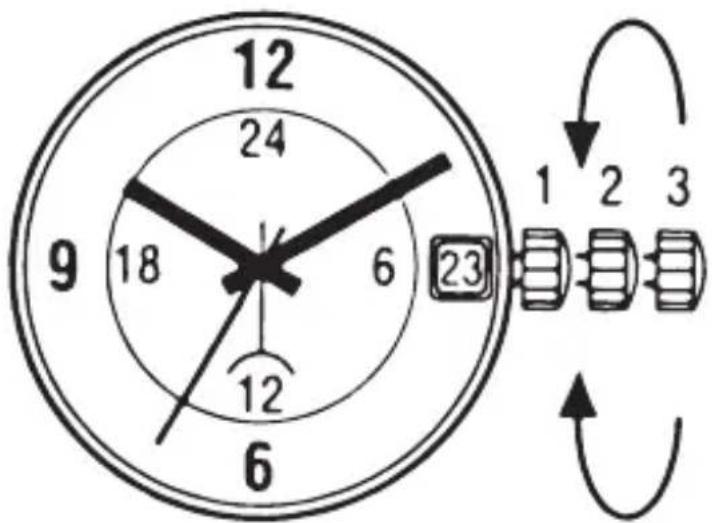
SETTING THE TIME & DATE
INDICATION: During the calendar jump phase between 10.30 pm and 00.00 am the date can be changed. In this case the date of the following day needs to be set as there will be no jump at midnight.
Stem position 1
- Home position, watch runs
Stem position 2
- Quick change of the date ( clockwise), watch runs
- Quick change of 24h indication ( anticlockwise), watch runs
Stem position 3
- Hand-setting, watch stops – when stem pulled out, save up to 70% energ
BATTERY CHANGE
The miniature battery which powers your watch should last approximately 2 years. However, because the battery is inserted at the factory to check teh function and performance of the watch, its actual life once in your possession may be less than the specified period. When the battery expires, be sure to replace it as soon as possible to prevent any malfunction.
* If the stopwatch is used for more than 60 minutes a day, the battery life may be less than 2 years.
WARNING!
* Don not remove the battery from the watch.
* If it is necessary to take out the battery, keep it out of the reach of children. If a child swallows it, consult a doctor immediately.
CAUTION!
* Never short-circuit, heat or otherwise tamper with the battery, and never expose it to fire. The battery may burst, become very hot or catch fire.
* The battery is not rechargeable. Never attempt to recharge it, as this may cause battery leakage or damage to the battery.
HOW IS THE SLIDE RULE USED?
Multiplication
[Example]
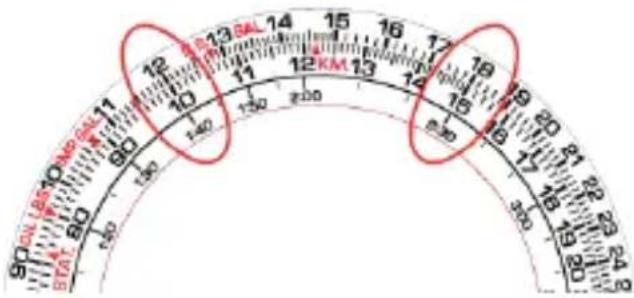
12×15
[Operation]
Align 12 on the outer scale with 10 on the inner scale.
Then, 15 on the inner scale corresponds to 18 on the outer scale.
Take into account the position of the decimal point and add one zero to obtain 180. Note that with the scales of this watch, the position of the decimal point cannot be obtained.
Division
[Example]
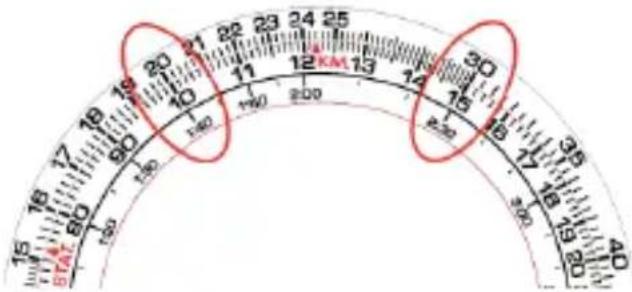
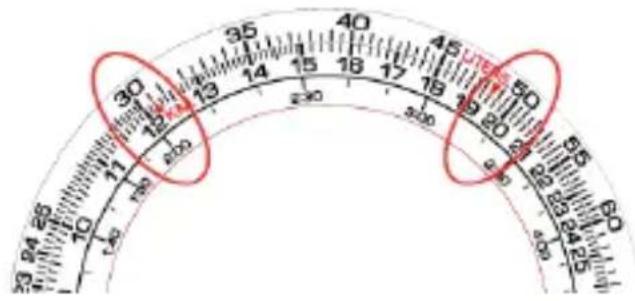
300 / 15
[Operation]
Align 30 on the outer scale with 15 on the inner scale.
Then, 10 on the inner scale corresponds to 20 on the outer scale.
Take into account the position of the decimal point to obtain 20.
Reading Ratios
[Example]
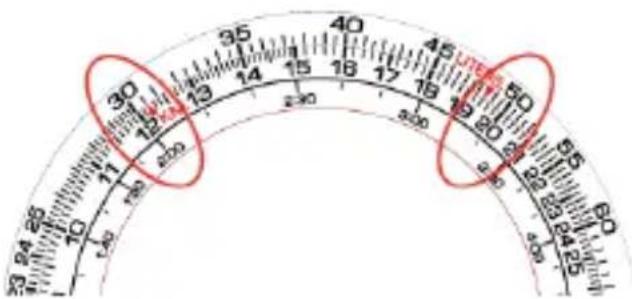
50 / 20 = 30 / ×
[Operation]
Align 50 on the outer scale with 20 on the inner scale.
Then, 30 on the outer scale corresponds to 12 on the inner scale.
At this point, the proportion for every value on the inner and outer scales is "50:20".
Determining Square Root
[Example]
Square root of 169
[Operation]
Turn the outer scale slowly and find a value that corresponds to both
16.9 on the outer scale and 10 on the inner scale.
In this example, 16.9 on the outer scale corresponds to 13 on
the inner scale, and 10 on the inner scale corresponds to 13
on the outer scale. Thus, the answer is 13.
Time required
[Example]
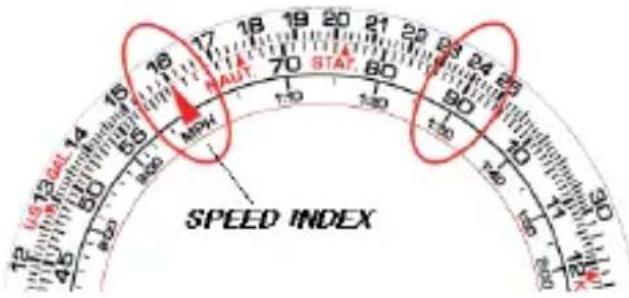
Obtain the time required for the flight of an aircraft at 160 knots for 240 nautical miles.
[Operation]
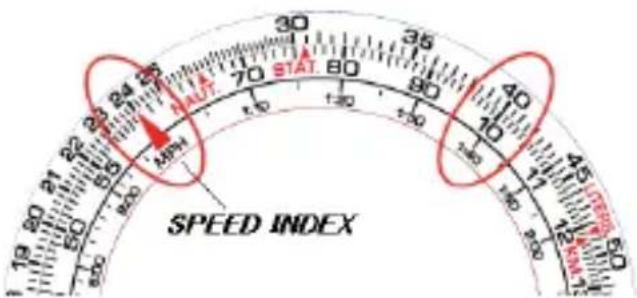
Align 16 on the outer scale with the SPEED INDEX (MPH) on the inner scale.
Then, 24 on the outer scale corresponds to "1:30" on the inner scale (time scale).
Thus, the time required for the flight is 1 hours and 30 minutes.
Speed
[Example]
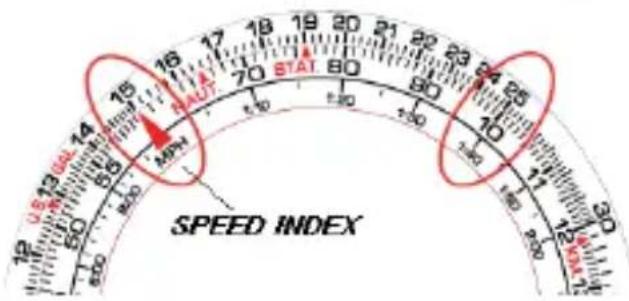
Obtain the knots (air speed) for 250 nautical miles with a flight time of 1 hour and 40 minutes.
[Operation]
Align 25 on the outer scale with "1:40" on the inner scale (time scale).
Then, the SPEED INDEX (MPH) on the inner scale corresponds to 15 on the outer scale. Thus, the air speed for the flight is 150 knots.
Flight distance
[Example]
Obtain the air distance when the air speed is 180 knots and the flight time is 40 minutes.
[Operation]
Align 18 on the outer scale with the SPEED INDEX (MPH) on the inner scale. Then, 40 on the inner scale corresponds to 12 on the outer scale. Thus, the air distance of the flight is 120 nautical miles.
Rate of fuel consumption
[Example]
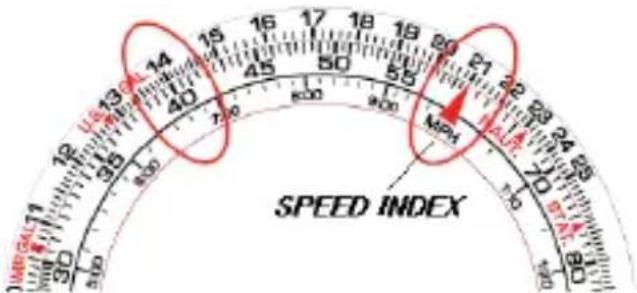
Obtain the rate of fuel consumption (gallons / hour) when the flight time is 40 minutes and the fuel consumption is 140 gallons.
[Operation]
Align 14 on the outer scale with 40 on the inner scale. Then, the SPEED INDEX (MPH) on the inner scale corresponds to 21 on the outer scale. Thus, the fuel consumption is 210 gallons per hour.
Fuel consumption
[Example]
Obtain the fuel consumption required for a flight when the rate of fuel consumption is 240 gallons per hour and the flight time is 1 hours and 40 minutes.
[Operation]
Align 24 on the outer scale with the SPEED INDEX (MPH) on the inner scale. Then, "1:40" on the inner scale (time scale) corresponds to 40 on the outer scale. Thus, the fuel consumption is 400 gallons.

Estimated flight time
[Example]
Obtain the estimated flight time when the rate of fuel consumption is 200 gallons
per hour and the aircraft has 1400 gallons of fuel.
[Operation]
Align 20 on the outer scale with the SPEED INDEX (MPH) on the inner scale. Then, 14 on the outer scale corresponds to "7:00" on the inner scale (time scale). Thus, the estimated flight time is 7 hours.
Distance
[Example]
Convert 45 miles into nautical miles and kilometers.
[Operation]
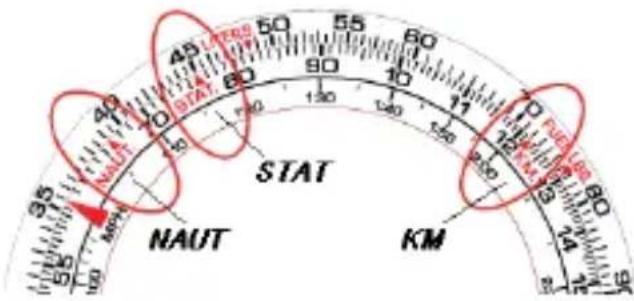
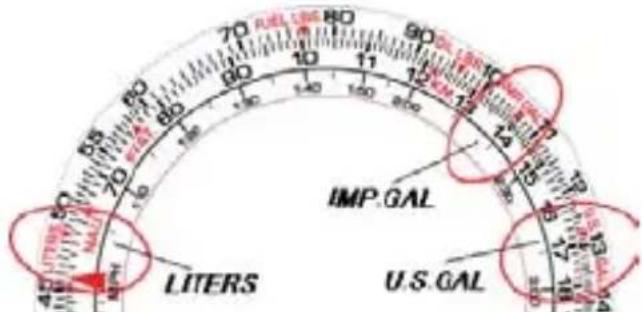
Align 45 on the outer scale with STAT on the inner scale. Then, NAUT on the inner scale corresponds to about 39 nautical miles on the outer scale, and KM on the inner scale corresponds to about 72 km on the outer scale.
Weight
[Example]
Convert 16.4 oil lbs. into U.S. gallons and IMP. gallons and liters.
[Operation]
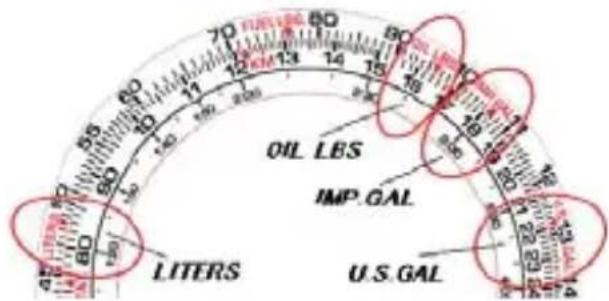
Align 16.4 on the inner scale with OIL LBS on the outer scale. Then, U.S. GAL on the outer scale corresponds to about 2.2 U.S. gallons on the inner scale, and IMP. GAL on the outer scale corresponds to about 1.8 IMP. gallons on the inner scale, and LITERS on the outer scale corresponds to about 8.3 liters on the inner scale.

Volume
[Example]
Convert 13.1 fuel lbs. into U.S. gallons and IMP. gallons and liters.
[Operation]
Align 13.1 on the inner scale with FUEL LBS on the outer scale.
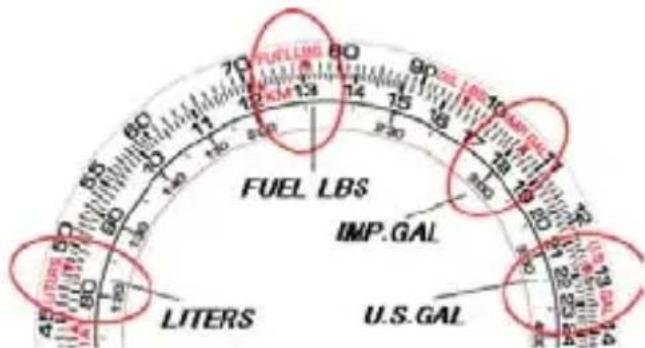
Then, U.S. GAL on the outer scale corresponds to about 2.2 U.S. gallons on the inner scale, and IMP. GAL on the outer scale corresponds to about 1.8 IMP. gallons on the inner scale, and LITERS on the outer scale corresponds to about 8.3 liters on the inner scale.
Fuel
[Example]
Convert 16.8 U.S. gallons into and IMP. gallons and liters.
[Operation]
Align 16.8 on the inner scale with U.S. GAL on the outer scale.
Then, IMP. GAL on the outer scale corresponds to about 14 IMP. gallons on the inner scale, and LITERS on the outer scale corresponds to about 63.5 liters on the inner scale.
ATTENTION
Depending if the watch model has internal time scale, this being optional, they can perform a number of calculations or another.
- MANUAL DE INSTRUCCIONES INSTRUCTION MANUAL
- ESPAÑOL
- USANDO EL CRONÓGRAFO
- CRONÓGRAFO
- COMBUSTIBLE
- INSTRUCTIONS BOOKLET
- INDEX
- ADVICES
- GUARANTEE TERMS
- THE GUARANTEE DOES NOT COVER
- INSTRUCTIONS FOR WATER RESISTANT WATCHES
- IMPORTANT WARNINGS
- WARNING
- NOT SUMERSIBLE
- 3 ATM (ATMOSPHERES)
- SUMERSIBLES
- 10, 15 & 20 ATM
- MANUAL MOV. MIYOTA CAL. OS10, OS00, OS20, OS21 & JS50
- DISPLAYS AND BUTTONS
- MIYOTA OS00
- MIYOTA OS21
- MIYOTA JS50
- SETTING THE TIME
- SETTING THE DATE
- SETTING THE DAY ( OS00 )
- USING THE CHRONOGRAPH
- CHRONOGRAPH RESET (INCL. AFTER PLACING BATTERY)
- MANUAL MOV. MIYOTA CAL. 2115 Y 2315
- MANUAL MOV. SEIKO CAL. VD53B
- ADJUSTING THE STOPWATCH HAND POSITION
- TIME SETTING
- HOW TO USE THE STOPWATCH
- MANUAL MOV. SEIKO CAL. VD57B
- STOPWATCH
- TIME/CALENDAR
- ADJUSTING THE HAND POSITION
- TIME/CALENDAR SETTING
- CROWN
- HOW TO READ THE HANDS
- TACHYMETER
- TO MEASURE THE HOURLY AVERAGE SPEED OF A VEHICLE
- TO MEASURE THE HOURLY RATE OF OPERATION
- NOTES ON USING THE WATCH
- HOW TO OPERATE THE SCREW LOCK TYPE CROWN (FOR MODELS WITH SCREW LOCK TYPE CROWN)
- MANUAL MIYOTA CAL. 6P25/6P75 & 6P00
- VISUALIZATION
- MIYOTA 6P25/6P75
- MIYOTA 6P00
- SETTING THE DAY AND TIME (HOUR, MINUTE AND SECOND)
- B-1) SETTING THE DAY
- NOTE
- B-2) SETTING THE TIME
- E) FOR 6P00
- SETTING AND READING THE AGE OF THE MOON
- D-2) SETTING THE AGE OF THE MOON WITH AGE SCALE
- D-3) SETTING THE AGE OF THE MOON WITHOUT THE AGE SCALE
- THE AGE OF THE MOON
- MANUAL MOV. RONDA CAL 575 24H
- SETTING THE TIME & DATE
- STEM POSITION 1
- STEM POSITION 2
- STEM POSITION 3
- BATTERY CHANGE
- CAUTION
- HOW IS THE SLIDE RULE USED
- MULTIPLICATION
- DIVISION
- READING RATIOS
- DETERMINING SQUARE ROOT
- TIME REQUIRED
- SPEED
- FLIGHT DISTANCE
- RATE OF FUEL CONSUMPTION
- FUEL CONSUMPTION
- ESTIMATED FLIGHT TIME
- DISTANCE
- WEIGHT
- VOLUME
- FUEL
- ATTENTION
Brand : Aviador
Model : AV-1006 Altimeter
Category : Wristwatch