Kepler 2 - Tablet bq - Free user manual and instructions
Find the device manual for free Kepler 2 bq in PDF.


| Product Type | Tablet |
| Brand | bq |
| Model | Kepler 2 |
| Operating System | Android 4.0 (Ice Cream Sandwich) |
| Display | Capacitive touch screen |
| Battery | Rechargeable Li-ion |
| Charging Time | Approximately 6 hours |
| Power Supply Input | 100-240V ~ 50/60 Hz 0.4A max |
| Power Supply Output | 5.0V = 2.0A |
| Connectivity | Wi-Fi, microUSB, miniHDMI, headphone jack |
| Camera | Front camera |
| Storage Expansion | microSD card slot |
| Buttons | Power, Volume, Reset |
| Speakers | Built-in |
| Microphone | Built-in |
| File Transfer | MTP, mass storage, or PTP via microUSB |
| Package Contents | bq Kepler 2, USB cable, charger, earphones, documents |
| Safety Precautions | Do not use damaged cords, avoid water, follow WEEE disposal |
| Cleaning Instructions | Turn off, disconnect power, use soft cloth with mild cleaner |
| Certification | CE, complies with R&TTE, Low Voltage, EMC directives |
Frequently Asked Questions - Kepler 2 bq
User questions about Kepler 2 bq
0 question about this device. Answer the ones you know or ask your own.
Ask a new question about this device
Download the instructions for your Tablet in PDF format for free! Find your manual Kepler 2 - bq and take your electronic device back in hand. On this page are published all the documents necessary for the use of your device. Kepler 2 by bq.
USER MANUAL Kepler 2 bq
natural_image
Close-up of a cable with a right-angle connector attached to a device (no text or symbols visible)
Alberto Méndez Peydró CEO
CE
bq Kepler 2
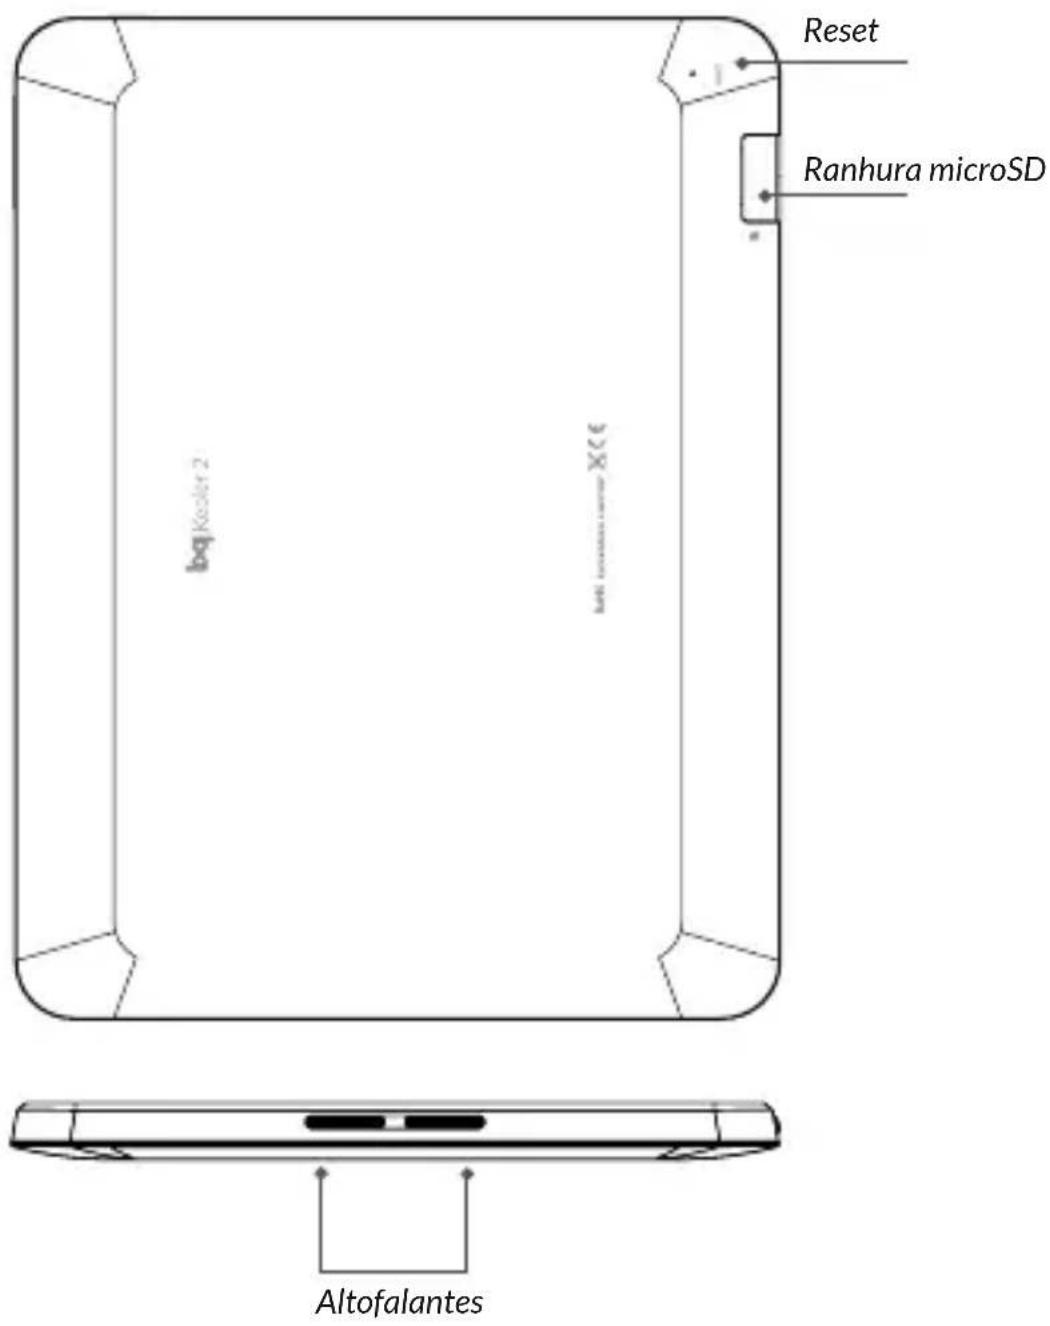
Botãos e portos
natural_image
Close-up of a cable with a 1.5-pin connector inserted into a portion of a device (no text or symbols visible)
Thank you for choosing bq Kepler 2. Before using your tablet, carefully read this quick-start guide.
Content of package
Before using your bq for the first time, please check the content of the package. If any of the following items is not in the package, contact the retailer where you purchased the device.
■ bq Kepler 2
■ Computer connexion wire
■ Mains charger
■ Earphones
- Documents
INSTRUCTIONS
- To properly use the device, carefully read this quick-start guide before using it.
- Instructions are based on factory settings of the device.
- Images and screenshots in this guide may not exactly match those of the final product.
- Parts of the content may not exactly match the operation of the product owing to firmware updates of the device. For the latest version of the user manual, visit www.bqreaders.com.
- bq is not liable for any performance problems or incompatibilities caused by the user's editing of the registry.
- Part of the content and services accessed through this device belong to third parties and are protected by copyright, patent, registered trademark and/or other intellectual property laws. bq does not guarantee the content or the services provided.
Instructional icons

Alert: Important tips and notifications about how to use your new device.
Next: Indicates the next step in a sequence.
All rights reserved
No part of this quick-start guide may be reproduced, distributed, translated or transmitted in any form or by any means –electronic or mechanical, including photocopying or recording– without the prior written permission of bq.
Marcas comerciales
bq's logo is a registered trademark of Mundo Reader, S.L.
Android, Google Search ^TM logos are registered trademarks of Google Inc.
Wi-Fi®, Wi-Fi CERTIFIED and Wi-Fi logos are registered trademarks of Wi-Fi Alliance.
Other trademarks and their copyrights are property of their respective owners.
View of the device

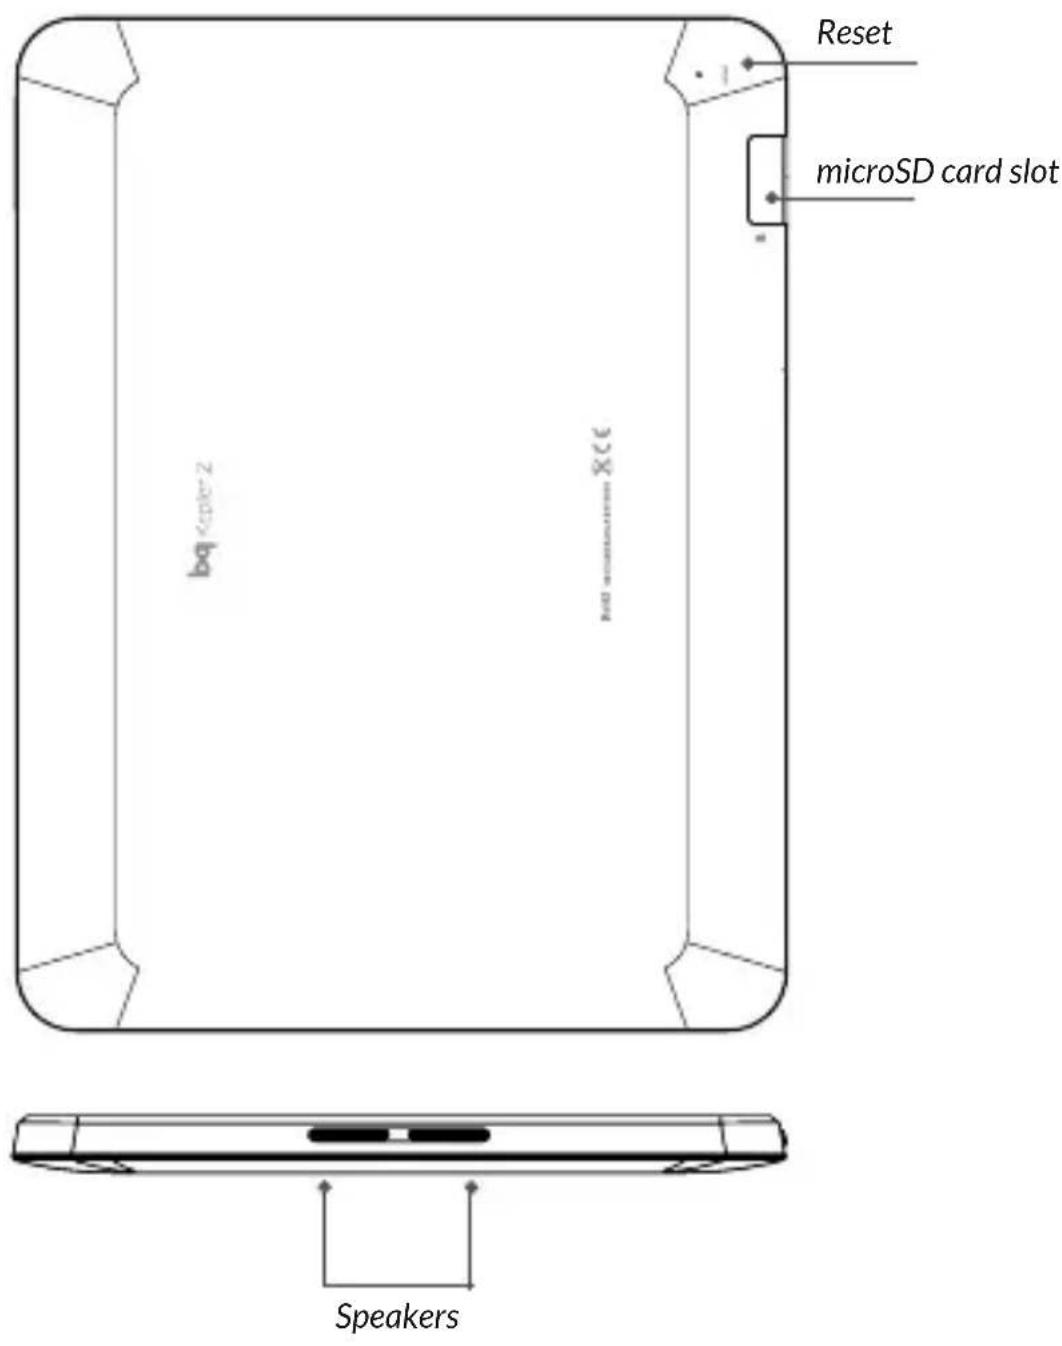
Buttons and ports
Power Long press to switch on the device, short press to turn on the screen when the device is in suspended mode.
Microphone Captures and records sounds and voices.
miniHDMI port Digital-video outlet which enables the device to be connected to an external screen.
Headphone jack Insert your headphone cable here in order to listen to audio played on the device.
Power jack Use provided charger to charge the battery.
microUSB A port which enables your bq Kepler 2 to be connected to a computer via a USB cable, in order to transfer files between the two devices.
Front Camera which can be used to take photographs and record video.
LED When pressing a button, the indicator LED will flash accordingly.
Touch-screen The capacitive touch-screen enables you to perform actions by touching it directly.
Volume buttons Enable the adjustment of multimedia volume on the tablet.
Reset Press this button to reset the device when locked up.
microSD microSD cards can be inserted slot into the device in order to increase its storage capacity.
Speakers Emit the audio when the headphones are not connected.
GETTING STARTED
Battery
This device contains a rechargeable Li-ion battery. To charge your bq's battery, connect the AC adapter to any standard socket and connect the charger cord to the device charging jack.
When the battery is fully charged, the battery icon will be shown as full. Disconnect the device cord and unplug the charger from the socket.

You should fully charge the battery before using the bq for the first time. The charging time is approximately 6 hours.

natural_image
Close-up of a cable with a black connector attached to a device (no visible text or symbols)
Please do not fully insert the AC jack in you tablet. It is normal that a small part of the jack is not inserted. In order to check whether your bq tablet is charging, please check if the LED is on and the battery charging icon is shown.
Power on / off
To power on the device, press the power button for a few seconds. To power it off, press the power button until the popup screen Device options appears. Tap on Power off and confirm by tapping on OK.
Insert / remove the microSD card
To install the microSD card, insert it in the slot and press until it clicks into place. To safely remove the microSD card, press the Menú button and go to Settings > Storage > Unmount SD card. Press the card to remove it from the slot.
Operating system
The operating system in your bq Kepler 2 is Android 4.0 (Ice Cream Sandwich).
Transferring files
To transfer files from your device to a computer or vice-versa, follow these steps:
- Connect the microUSB cable to the corresponding ports on the device and on the computer. The device (and microSD card if inserted) will be detected as a multimedia device (MTP), mass storage or as a camera (PTP): the latter option will only allow you to transfer images. Select the option you desire.
- Select and copy files onto either the tablet or the computer.
- Once the files have been transferred, safely remove the device from your computer. Do not detach the cable while files are being transferred.
To transfer files from your tablet onto a computer which is running Mac OS and vice versa, it is necessary to download and install the free application Android File Transfer onto your computer: http://www.android.com/filetransfer/.

Periodically backup data in your bq to avoid loss of files in case of physical damage, theft or loss.
USING THE SCREEN
Screen lock
The bq screen locks automatically and by default when it is powered on or when the device is not used for a long period of time.
To set the screen timeout interval, press the button and go to Settings > Display > Turn off.
To turn off the screen manually, press the power button.
Adjust screen orientation
The orientation of the display switches automatically from portrait (vertical) to landscape (horizontal) and vice-versa according to the position of the device in all applications that support this function.
To change the display orientation, press the button ⋯ Settings > Display and turn off Auto-rotate screen.
Home screen
The home screen is the main pathway to the tools and applications installed on the bq Pascal 2. On the home screen, you can control the status of the device, open websites, open applications with their icons, open the Menu, etc.
The Toolbar is located in the lower part of the screen, with the Start Menu on the left and the Notifications bar on the right.
Launcher. This is located in the top right-hand corner of the screen, and enables you to access: App, Widgets and Market.
Start Menu. In the Toolbar you will find the following buttons:
← Back. This will take you back to the previous screen within the application.
Home. This will take you back to the start screen.
Open applications. This enables you to return or fully close an application so that it does not continue to execute its function. To close an application, simply click on it and move it over to the right and out of the list.
■ Menu. this displays the options menu (for applications which have this function).
Notification bar. The notification bar displays time, device status, battery level, the intensity of the Wi-Fi signal and other system notifications. Press down and slide to access the Settings.

Wi-Fi. This will appear if your device is connected to a Wi-Fi network, and will also indicate the strength of the signal.

Battery. This indicates how much charge is in the battery.
Extended screens
You can use up to four additional extensions of the Home Screen, that can be personalised with shortcuts, applications and other tools. To move between the Home screen and the extended screens, drag the screen to the left or to the right using your finger.
Personalizing the Home screen
You can personalize the Home screen or the extended screens with your own images, such as backgrounds, icons or shortcuts to your favorite applications, etc.
Change the screen background
To change the screen background, long-press here, a pop-up window will appear in which you can select the origin of the image. Select an image to use as the screen background and tap on Set wallpaper to confirm the selection.
Add shortcuts
To add shortcuts to the Home screen, go to the extended screen where you wish to add an icon. Tap :to open the menu and press and hold the application icon until the screen icon appears. Drag it to the place you wish to put it on the screen.
APPLICATIONS
In the applications Menu you can access all the applications installed on your bq Kepler2. To open the Menu tap on, this button is located in the top right-hand corner of the screen. To access an application, tap on its icon. To go back to the Home screen, tap on.
WI-FI CONNECTION
To connect to the Internet or use and application that requires an Internet connection, you must first connect the device to a Wifi network. To do this, follow these steps:
- You can access it by pressing the Notifications Menu, which is located in the bar at the bottom of the screen, or by pressing and accessing the Settings > Wireless & Networks > Wi-Fi. Turn on Wi-Fi. The device will begin to search for an available network.
- Tap Wi-Fi settings. A list of the names of the Wi-Fi networks (SSID) detected. Scroll down the list of the available networks. Tap on the network detected to check the security level and the intensity of the signal.
- If the connection is secure, enter the password and tap on Connect to start the connection. In the notifications bar, an icon with the signal intensity is shown.
SAFETY PRECAUTIONS
To use the device safely, please observe the following safety precautions:
■ Do not use damaged power cords or connectors or loose sockets.
■ Do not touch the power cord with wet hands or pull on the cord to disconnect the charger.
■ Do not fold or damage the power cord.
■ Do not use the device while charging or touch it with wet hands.
■ Do not strike or drop the charger or battery.
■ Do not charge the battery with chargers that have not been approved by the manufacturer.
■ Do not use the device during a lightning storm.
■ Do not handle damaged or leaky Li-ion batteries.
■ Handle and dispose batteries and chargers with precaution.
■ Do not use the device near a pacemaker: if possible, avoid using the device at a distance
of less than 15 cm from the pacemaker, as the device may interfere with it.
■ Do not use the device in a hospital or near medical equipment which is vulnerable to interference caused by radiofrequency.
■ If you use medical equipment, contact the manufacturer to ensure that the equipment is protected from radiofrequency. If you use a hearing aid, contact the manufacturer for further information on radio interference.
■ In potentially explosive environments, turn off the device instead of removing the battery. Observe all rules, instructions and warning signs in potentially explosive environments.
■ Do not use the device in fuel loading areas (service stations) or near fuels or chemicals in explosive areas.
■ Do not store or carry flammable liquids, gases or explosive materials in the same compartment as the device, its parts or accessories.
■ Turn off the device when on board a plane.
- Electronic devices in a motor vehicle may behave in a wrong way due to the device's radiofrequency.
Warning!
This product has to be used with a power supply that has the following technical specifications:
INPUT: 100-240V \~ 50/60 Hz 0.4A máx
OUTPUT: 5.0V = 2.0A
Polarity has to be the same as described in this picture: ⊙—●—⊕
The use of power sources with different specifications may cause damage to equipment and can compromise the safety of people and goods.
Cleaning
Before cleaning the device, turn it off and disconnect all the system and power cords. Ensure that the device is completely dry before connecting again the cords and turning it on. Do not use any cleaning liquids or sprays directly on the surface of the screen or the case.
Use a soft, clean and lint-free cloth to remove dust and dirt from the screen. For fingerprints and stains, use a cloth with mild cleaning products. Moisten the cloth with clean water, wring it well and clean the case to remove any leftover detergent.
CORRECT DISPOSAL OF THIS PRODUCT
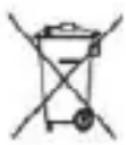
(Electric and electronic device waste) (Applicable in the European Union and in European countries with selective waste collection systems).
This marking on the product, accessories or literature indicates that the product and its electronic accessories (e.g. charger, headset, USB cable) should not be disposed of with other household waste at the end of their working life.
To prevent possible harm to the environment or human health from uncontrolled waste disposal, easy separate these items from other types of waste and recycle them responsibly to promote the sustainable reuse of material resources.
Household users should contact either the retailer where they purchased this product, or their local government office, for details of where and how they can take these items for environmentally safe recycling.
Business users should contact their supplier and check the terms and conditions of the purchase contract. This product and its electronic accessories should not be mixed with other commercial wastes for disposal.
DECLARATION OF CONFORMITY
Mundo Reader S.L.,
Warrants that this product:
bq Kepler 2 complies with the provisions of Directive 1999/5/CE on Radio and Telecommunications Terminal Equipment (R&TTE) of Directive 95/2006/CE on the Electrical Safety of Low Voltage Equipment and Directive 2004/108/CEE on Electromagnetic Compatibility complying with the harmonized standards: EN 60950-1:2006 + A11:2009, EN 62311:2008, EN 301 489-1 V 1.8.1, EN 301 489-17 V2.1.1, EN 300 328 V1.7.1, EN 55022: 2006 + A1: 2007, EN 55013: 2001 + A1: 2003 + A2: 2006, EN 61000-3-2: 2006 + A1: 2009 + A2: 2009, EN 61000-3-3: 2008, EN 55024: 1998 + A1:2001 + A2: 2003, EN 55020: 2007.
Madrid, March 2012.

Alberto Méndez Peydró CEO

bq
- bq Kepler 2
- Botãos e portos
- Content of package
- INSTRUCTIONS
- Instructional icons
- All rights reserved
- Marcas comerciales
- View of the device
- Buttons and ports
- GETTING STARTED
- Battery
- Power on / off
- Insert / remove the microSD card
- Operating system
- Transferring files
- USING THE SCREEN
- Screen lock
- Adjust screen orientation
- Home screen
- Extended screens
- Personalizing the Home screen
- Change the screen background
- Add shortcuts
- APPLICATIONS
- WI-FI CONNECTION
- SAFETY PRECAUTIONS
- Warning!
- Cleaning
- CORRECT DISPOSAL OF THIS PRODUCT
- DECLARATION OF CONFORMITY
Brand : bq
Model : Kepler 2
Category : Tablet