
Les Paul Birdseye - Guitar Gibson - Free user manual and instructions
Find the device manual for free Les Paul Birdseye Gibson in PDF.


User questions about Les Paul Birdseye Gibson
0 question about this device. Answer the ones you know or ask your own.
Ask a new question about this device
Download the instructions for your Guitar in PDF format for free! Find your manual Les Paul Birdseye - Gibson and take your electronic device back in hand. On this page are published all the documents necessary for the use of your device. Les Paul Birdseye by Gibson.
USER MANUAL Les Paul Birdseye Gibson
natural_image
Close-up of hands playing a guitar with strings and tuning pegs (no text or symbols visible)Gibson USA
OWNER'S MANUAL
1550-07 GUS
Gibson USA
© 2007 Gibson Guitar Corp.
To the new Gibson owner:
Congratulations on the purchase of your new Gibson electric guitar—the world's most famous electric guitar from the leader of fretted instruments.
Please take a few minutes to acquaint yourself with the information in this booklet regarding materials, electronics, “how to,” care, maintenance, and more about your guitar.
And then begin enjoying a lifetime of music with your new Gibson.
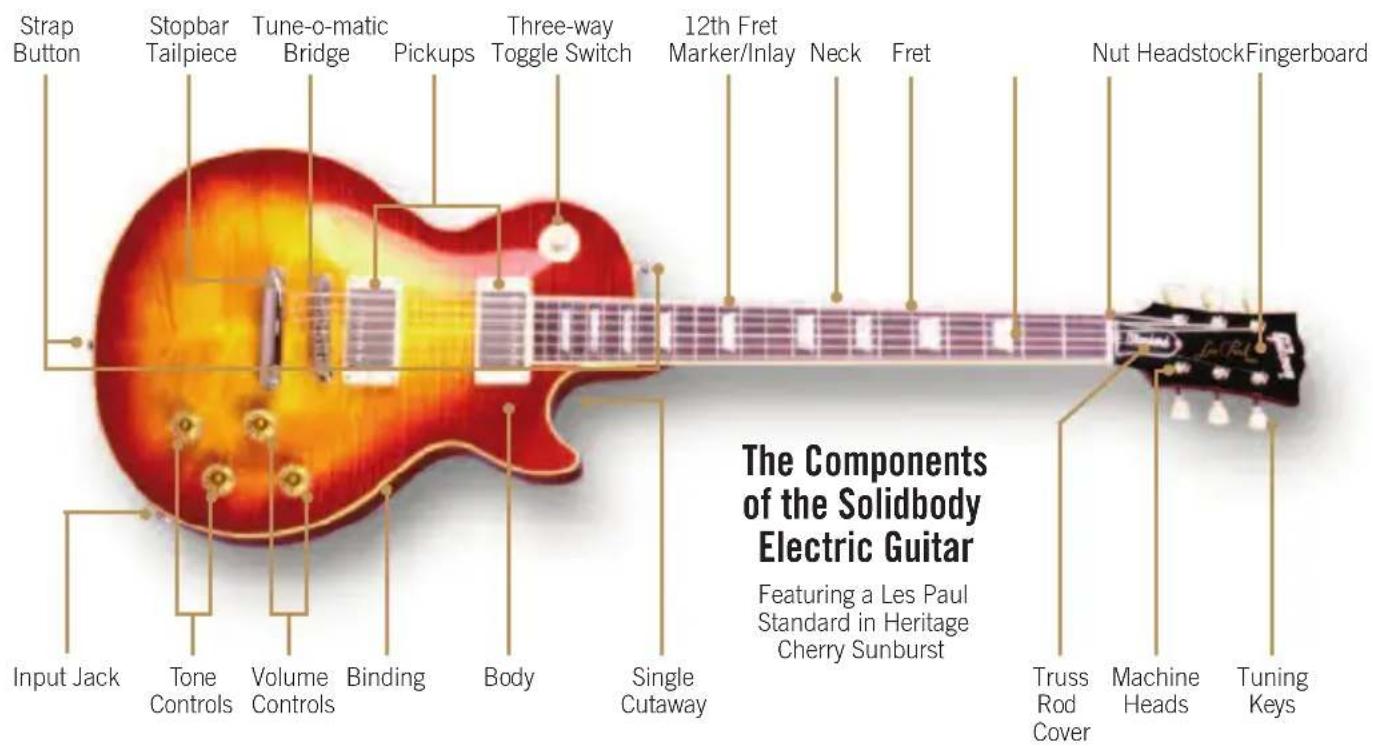
The Components of the Solidbody Electric Guitar 4
Gibson Innovations 6
The History of Gibson Electric Guitars 8
DESIGN AND CONSTRUCTION
Body 13
Neck and Headstock 13
Pickups 14
Controls 15
Bridge 17
Tailpiece 18
CARE AND MAINTENANCE
Finish 19
Your Guitar on the Road 19
Things to Avoid 20
Strings 21
Install Your Strings Correctly 22
String Gauge 23
Brand of Strings 23
NEW TECHNOLOGY
The Gibson Robot Guitar 24
text_image
Strap Button Stopbar Tailpiece Tune-o-matic Bridge Pickups Three-way Toggle Switch 12th Fret Marker/Inlay Neck Fret Nut Headstock Fingerboard The Components of the Solidbody Electric Guitar Featuring a Les Paul Standard in Heritage Cherry Sunburst Input Jack Tone Controls Volume Controls Binding Body Single Cutaway Truss Rod Cover Machine Heads Tuning Keys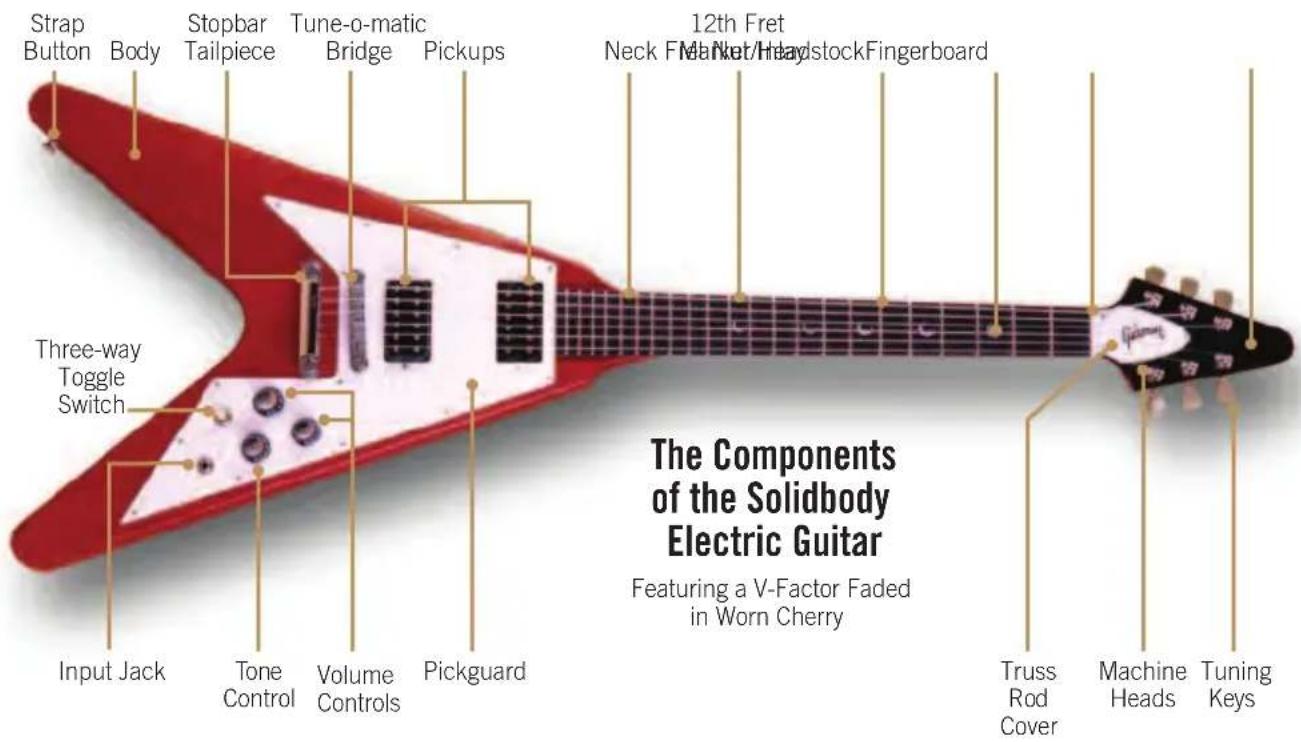
text_image
Strap Button Body Stopbar Tailpiece Tune-o-matic Bridge Pickups 12th Fret Neck F Market/Hardstock Fingerboard Three-way Toggle Switch Input Jack Tone Control Volume Controls Pickguard Truss Rod Cover Machine Heads Tuning Keys The Components of the Solidbody Electric Guitar Featuring a V-Factor Faded in Worn CherryHere are just a few of the Gibson innovations that have reshaped the guitar world:
1894 – First archtop guitar
1922 - First f -hole archtop, the L-5
1936 – First professional quality electric guitar, the ES-150
1947 – P-90 single-coil pickup introduced
1948 – First dual-pickup Gibson, the ES-300
1949 – First three-pickup electric, the ES-5
1949 – First hollowbody electric with pointed cutaway, the ES-175
1952 – First Les Paul guitar
1954 – Les Paul Custom and Les Paul Jr. introduced
1955 – Les Paul Special introduced
1957 – First humbucking pickup
1958 – Flying V and Explorer introduced
1958 – First semi-hollowbody guitar, the ES-335
1961 – SG body style introduced in the Les Paul line
1963 – Firebird guitars and Thunderbird basses introduced
1969 – Les Paul Personal and Professional with low-impedance pickups introduced
1979 - L.P. Artist with active electronics introduced
1982 – First solidbody acoustic, the Chet Atkins CE
1983 – Les Paul Studio introduced
1990 – Les Paul Classic introduced
1996 – Les Paul SmartWood introduced
1998 - Double-Cutaway Les Paul Standard introduced
2002 – Gibson Digital Guitar introduced
A BRIEF HISTORY OF GIBSON ELECTRIC GUITARS
Gibson's legendary acoustic engineer, Lloyd Loar, was experimenting with electric instruments in 1924, at the dawn of electronic amplification. However, Gibson's struggle to dominate the banjo market took precedence through the 1920s, and it wasn't until the mid-1930s that the company once again turned its attention to electric guitars. In 1935 Gibson's Walt Fuller designed a pickup that was introduced on the E-150, an aluminum-body lap steel. Early in 1936, the pickup was put in a midline archtop model and named the ES-150—ES for Electric Spanish, 150 for the retail price of \$150 for the guitar and amplifier set.
The original ES-150 bar pickup with its hexagonal housing is now known as the “Charlie Christian” pickup, because it was installed on the ES-150s and ES-250s that Christian used to establish the new concept of electric jazz guitar.
Gibson made several improvements in pickup design before World War II, although many players still consider the “Christian” pickup to be the best jazz pickup ever made. Immediately after World War II, Gibson introduced the P-90 single-coil, with six adjustable polepieces and a black plastic cover, usually with “dog-ear” mounting extensions. The P-90 is still in production and still sets the industry standard for a single-coil pickup.
The first postwar Gibson electrics followed the prewar concept of an electric guitar as a conventional acoustic archtop with a pickup installed on the top. Gibson added a second pickup to the ES-300 in 1948 and then became the first company to offer a three-pickup model with the introduction of the ES-5 in 1949.
Although the advantages of a solidbody guitar had been known to Hawaiian steel guitarists for almost 20 years, it took the persuasive powers of Les Paul, the world's most famous guitarist in the early 1950s, to convince Gibson to make a “Spanish style” solidbody. Gibson designed the new model with a carved top, not only to give it the look of a traditional archtop—a style invented by Gibson—but also to make it difficult for other makers to copy. Les, who had been playing a homemade solidbody guitar, nicknamed The Log, since 1941, specified a maple top cap to increase sustain, coupled with a mahogany back to lighten the weight. Les also specified the famous “Goldtop” finish.
The Les Paul Model debuted in 1952. The bridge and tailpiece were upgraded when Gibson introduced the patented tune-o-matic bridge in 1954, and the original single-coil pickups were upgraded with the introduction of Gibson's patented humbuckers in 1957. Otherwise, the original Les Paul is essentially the same guitar today as it was when it was introduced.
In 1954 the growing popularity of the Les Paul Model prompted Gibson to expand the line. On the high end, the Les Paul Custom sported an Ebony finish and low frets for fast action, and it immediately gained two nicknames: the Black Beauty and the Fretless Wonder. On the more affordable end, the Les Paul Jr. featured a flat “slab” top and a single pickup, and it became the best-selling Les Paul of the 1950s.
One year after the Les Paul Jr., Gibson offered a two-pickup version of the slab-body model called the Les Paul Special. The Special was further distinguished by its yellow-stained “TV” finish.
The double-coil humbucking pickup, invented by Gibson engineer Seth Lover, debuted in 1957 on the Standard and Custom, introducing the sound that would shape rock 'n' roll music in the 1960s.
In 1958, Gibson introduced more important design innovations than in any other year in the company's history. Gibson president Ted McCarty combined the look of an f-hole archtop with the performance of a solidbody and came up with a completely new type of guitar—the semi-hollowbody ES-335. McCarty also designed two radically modern solidbody shapes: the Flying V and Explorer.
The body of the Les Paul Jr. received a pair of rounded horns to become Gibson's first double-cutaway solidbody. And the finish color on the Les Paul Model was changed to Cherry Sunburst, which let the grain of the maple top show through. The model name was changed to Les Paul Standard, and the sunburst Standards from 1958-60 would become some of the most valuable collectibles in the guitar world. All of this happened in 1958.
The new Les Paul Jr. set in motion a complete redesign of the Les Paul line. In 1959 the Special went to the rounded-horn double-cutaway shape and was renamed the SG Special (SG for Solid Guitar). In 1960, all four models were revamped and given a new “SG” body shape, featuring a thinner, double-cutaway body with pointed horns. The Custom, Standard, and Jr. retained the Les Paul designation through 1962, after which they became SG models.
Gibson's design innovation continued into the 1960s when Ted McCarty hired legendary automotive designer Ray Deitrich to design a Gibson. The result was the Firebird series, and the companion Thunderbird bass series of 1963. The Firebirds “reversed” conventional designs, with their elongated treble-side horn and treble-side tuners. They also introduced neck-through-body construction and smaller “mini-humbucking” pickups to the Gibson line.
In response to the rising demand for 1950s-style Les Pauls, the carved-top models were reintroduced in 1968. A new model, the Les Paul Deluxe, featuring mini-humbucking pickups appeared in 1969. The Special was revived in the 1970s and the Jr. reappeared in the 1980s. The Flying V, Explorer, and Firebird were also brought back into regular production, as musical styles began to catch up with these ahead-of-their-time designs.
While the original four Les Paul models continued as the foundation of the line, Gibson offered new variations, such as the Studio, Classic, and Double-Cut Standard, in order to give musicians all the features they wanted in a Les Paul guitar. In the 50-plus years of the Les Paul, Gibson has offered more than 100 different variations. In 2003 Gibson honored Les Paul for his achievements as a performer, recording innovator, and guitar designer by presenting him with a special Artist for Eternity Award.
As Gibson celebrated the 50th anniversary of the Les Paul in 2002, the company rocked the guitar world once again by introducing the first digital electric guitar. It represents the biggest advance in electric guitar design since the instrument was invented, and moreover, it serves notice that Gibson electric guitars will continue to epitomize the highest levels of Quality, Prestige and Innovation.
DESIGN AND CONSTRUCTION
Body. The solidbody guitar was invented to increase sustain, produce a brilliant tone, and eliminate feedback caused by a vibrating top. These qualities are enhanced by wood with high density, such as maple. Les Paul would have preferred for his model to have had a solid maple body, but density translates to weight, and a solid maple Les Paul Model would have been exceedingly heavy. A compromise was reached, with lighter-weight mahogany used for the main part of the body and maple for the top cap. Most of the carved-top Les Pauls have the combination maple/mahogany body, while the “slab” or flat top models have a solid mahogany body. Flying V’s, Explorers, and Firebirds have a solid mahogany body.
Neck and Headstock Mahogany is a time-proven material for guitar necks, and the necks of most Gibson USA models are constructed of a single piece of mahogany. The Firebird or Thunderbird IV bass neck is made of nine-ply mahogany and walnut (or all mahogany laminates), and it extends completely through the body. Fingerboards are of ebony or rosewood.
Neck Specifications.Gibson designs its guitar necks to complement and enhance the unique characteristics of each model. Neck profiles can be “rounded ’50s” or “slim ’60s” (or a slight V-shape available only on the BluesHawk). Scale length (string length) is 24 3/4" on the Les Paul, X-Factor and SG models, 25 1/2" on the Chet Atkins, Americana, and Hawk models and 34" on basses.
Pickups. Humbucking (double-coil): Most Les Pauls have double-coil humbucking pickups, which were designed to do what their name says: "buck" the hum caused by fluorescent lights, rheostats, and other electrical interference. They accomplish this with two coils of wire, wound in opposite directions so that they cancel out interference. Also, they produce a powerful sound that is the foundation of rock 'n' roll music.
Gibson produces humbuckers in a variety of subtle variations, achieved by the use of different magnets and different combinations of winding turns. In addition, some Les Pauls have humbuckers without the metal cover pieces, which results in a hotter signal. For individual model and pickup specs, please refer to Gibson's website, www.gibson.com.
P-90 (single-coil): Only a few Gibsons—some Les Paul Juniors, Les Paul Specials, and Melody Makers—have single-coil P-90 pickups. Some have the original “dog-eared” covers; those
without the “dog ears” are nicknamed “soapbar” because the original cream-colored plastic covers on the 1952 Les Paul Model resembled bars of soap. When the P-90 was introduced in 1946, it was the most powerful pickup of its kind. And it still is. Among the many examples of the P-90 sound are Carlos Santana’s Les Paul Special on Santana’s classic recordings, Leslie West’s Les Paul Jr. with the group Mountain, and the Who’s Pete Townshend with an SG Special on Live at Leeds and at Woodstock.
Pickup adjustments. Although the pickups on each Les Paul are set to Gibson standards at the factory, they can be adjusted. The height of the pickup can be adjusted by the two screws found at either end of the pickup, in the mounting ring. Individual string volume can be adjusted by turning the polepiece screws. Bringing the pickup or pole screw closer to the strings makes the signal stronger or “hotter.”
Controls. The standard Gibson electronic configuration is two pickups, four knobs, and a pickup selector switch. The four knobs provide individual tone and volume control for each pickup. Models with only three knobs provide individual volume and master tone control. Single pickup models have only two knobs—for volume and tone control—and no pickup selector.
Volume controls: The two knobs closest to the fingerboard control the volume of the pickups. The volume knob nearest the bridge controls the “front” or neck pickup; the knob nearest the edge of the guitar controls the “back” or bridge pickup.
Tone controls: The knob or knobs farthest away from the fingerboard control tone. The tone knob nearest the bridge controls the “front” or neck pickup; the knob nearest the edge of the guitar controls the “back” or bridge pickup.
The tone controls are the “treble roll off” or “cut” variety. The tonal quality of the instrument is darkened by the reduction of treble rather than the addition of bass. The tone control turned all the way counterclockwise results in maximum reduction of treble and produces the “darkest” sound. The tone control turned clockwise to its maximum position allows the pickup’s full harmonic frequencies to pass through, producing the guitar’s brightest sound.
Pickup selector switch: The selector switch has three positions. The up position selects only the “front” or neck pickup. The down position selects only the “back” or bridge pickup. The middle position engages both pickups. The tone and volume controls will only be active when the corresponding pickup is selected. On models with three pickups, the selector switch activates the front pickup (front position), the middle and back pickup together (middle position), and the back pickup (back position).
The Tune-o-matic Bridge. The Tune-o-matic bridge allows for adjustment in overall bridge height and individual string length. Height is adjustable up and down by means of thumb wheels under the bridge at either end. Each string saddle is adjustable forward and back with a small standard screwdriver. Action adjustment (up and down) is set at the factory to the correct height for playing comfort and for buzz-free action. Raising the bridge will result in stiffer action; lowering the bridge will result in faster action but may also result in fret buzz. Climatic or humidity changes, or changes in string gauge, may necessitate a bridge adjustment.
Any change—in bridge height, string gauge, or climate—can affect the intonation and cause a guitar to play out of tune in some fret positions. When this happens, the string length needs to be adjusted, and this is accomplished by moving the individual saddles forward (toward the neck) or backward (toward the tailpiece). The screw heads are on the pickup side of the bridge, although there are many Gibsons that have the screw heads facing the tailpiece. To check intonation, compare the pitch of a string that is fretted at the 12th fret against the harmonic at the 12th fret (accomplished by touching the string lightly with the left hand, without pressing it all the way to the fret). If the fretted note is higher than the harmonic, the string should be lengthened by moving the saddle toward the tailpiece until the two notes are the same. If the fretted note is lower than the harmonic, the string length should be decreased.
The tune-o-matic bridge was designed to adjust for string changes (gauge or type) and other physical changes but not for problems with intonation due to string wear. Should a string lose its intonation due to wear, we strongly recommend changing the string and not the bridge setting.
Adjustable Stopbar Tailpiece. The stopbar tailpiece may be adjusted up or down to change the downward pressure across the bridge. There is usually no need to adjust the stopbar unless the strings are moving out of the saddles, in which case the stopbar should be lowered.
CARE AND MAINTENANCE
Finish. A Gibson instrument always attracts attention, whether it is on a concert stage before thousands or on a guitar stand in a home studio. After the classic body lines of a Gibson, the finish makes the strongest impression.
Perspiration acids, heavy fingerprinting, dust, and grime from on-the-job usage are unavoidable. However, a minute or two spent with Gibson's instrument care products—guitar polish, fretboard conditioners, string cleaner/lubricant, and polishing cloth—will restore a finish to like-new condition.
Gibson's nitrocellulose lacquer finish not only looks great, it is also easily repairable—by a professional. Minor scratches and dings can be fixed without completely refinishing the instrument.
Keeping Your Guitar on the RoadYour Gibson is a durable instrument. It is likely to outlive you—if you take care of it. In determining whether conditions might be harmful to your guitar, the rule of thumb is, if you are comfortable, then your guitar will be comfortable. Here are some conditions to avoid.
Heat and cold: Gibson's nitrocellulose finish can expand or contract to adjust to extreme temperatures and humidities—but not to sudden changes in temperature or humidity. Just as a hot drink will crack a chilled glass, the finish of a Les Paul will crack if a guitar that has been sitting in the trunk of a car in wintertime is suddenly exposed to the warm air of a heated room. In these conditions, let the guitar warm up gradually inside the case before opening the case.
Rain: Water wipes off the instrument's finish easily, but if allowed to remain, it can cause ugly water spots in the lacquer.
Sun: Avoid direct rays of the sun on your Gibson. Direct sunlight can blister or discolor the finish.
More Things to Avoid. When using a shoulder strap for a standing playing position, check that all contact points and strap fasteners are secure.
Guitar stands with rubber supports that contain dye or plasticizers can “eat away” at the lacquer finish or leave a stain on your guitar that goes through the lacquer finish and into the wood. These stains are permanent and this sort of damage is not covered under your warranty. We recommend covering the rubber parts of the stand with a soft cotton cloth (such as a guitar polishing cloth) and using a guitar stand only for temporary “storage” of your instrument.
Avoid sharp blows to any part of your instrument. Be particularly alert to possible blows to the back of the headstock, machine heads (tuners), and in the neck heel area. Many headstock breaks are the result of a guitar being knocked over or dropped while it's still in the case, so do not stand the case on its end.
Should major adjustments become necessary, contact your local authorized Gibson dealer or service center.
Strings. Fresh strings are a vital part of that “new instrument” sound. When strings begin to go dead, a guitar loses its edge, and as the strings undergo further wear and tear they go “dead.” Your Gibson will sound its best with new strings.
How often should you change strings? That depends on how much you play your guitar, how hard you play, and also on your individual body chemistry. Some professional musicians change strings before every show in order to maintain the brightest edge on their sound. More casual players may only need to change strings every month or two. For some players, even light perspiration shortens the life of their strings. The sound of the strings is the only sure way to judge whether or not they need to be changed. And if one string needs to be changed, the others can't be far behind. To maintain tonal balance, change the whole set.
When changing strings, we recommend changing one string at a time in order to maintain tension on the neck and bridge. The pressure of the strings holds the bridge and saddles in place, and removing all the strings could necessitate a new setup.
Use high quality strings. The most obvious action you can take to maximize the life and performance of your strings is to use high quality strings. Your Gibson comes from the factory with a set of strings made by Gibson and designed exclusively for Gibsons. Although the string set from the Gibson factory is suitable for virtually any style of music, Gibson offers a variety of string styles and gauges for specialized purposes.
Install your strings correctly. Improperly installed strings can slip, which will cause your Gibson to constantly go out of tune. To correctly install strings:
-
Be certain the first winding of the string around the machine head stem (tuner post) goes over the exposed tip of the new string. The rest of the winding should then go under the exposed tip of the new string. When pressure is applied by tightening the string to pitch, a clamping action keeps the string from slipping around the machine head stem.
-
Be certain the string is wrapped around the tuner post an adequate number of times. For unwound strings, at least five turns around the machine head stem are necessary. For wound strings, two or three turns are adequate.
What gauge strings should be used? Your Gibson guitar comes strung with “10s”—which means the high-E string is .010 inches in diameter. The low-E is .046 inches in diameter. The set is designed so that all strings are in proportion to one another, ensuring that the action and the volume will be consistent across the entire fingerboard. Gibson offers “9s,” “11s,” and a variety of other gauges and compositions, all of which are balanced for consistent tension.
What brand of strings should be used? Gibson has been offering its own strings since 1907, and Gibson has more experience than any other string maker when it comes to matching strings to Gibson guitars. Gibson strings are manufactured to exacting standards to achieve the highest level of quality and performance.
NEW TECHNOLOGY - THE GIBSON ROBOT GUITAR
The Impossible is Now Possible.
Introducing the Gibson Robot Guitar, the world's first guitar with robot technology.
Gibson's Robot Guitar is the only guitar available with the auto-tuning system described herein as original equipment.
Your Gibson Robot Guitar will be pre-calibrated for a standard .010-.046 set of strings. If you change string gauges, restore factory defaults, or are installing the system yourself, you may first want to calibrate the Robot Tuners individually using the calibration method as described in the Setup Mode section of this guide. However, since each Robot Tuners self-regulated with a Dynamic Runtime Algorithm (DRA) which ensures the change of runtimes according to each string, after several tunings the system will perfect itself automatically.
A special “eFunction” algorithm is provided by the software to assist the tuning process. We recommend using it in the “enabled” mode.
This Owner's Manual is intended to provide a working understanding of the Robot Guitar's features to bring you the greatest benefits as you explore the exciting possibilities it has to offer. For questions or more in-depth technical information, feel free to contact us at 1-800-4GIBSON or www.gibson.com
THE MASTER CONTROL KNOB (MCK)
The Master Control Knob not only serves as the master control for all aspects of this amazing, self-tuning system, but it will communicate with you as you learn its “language.”
The MCK is quite powerful and has many uses, and we believe you will find that MCK functions will become second nature to you once you have tried them a few times.
Caution: Do not attempt to manually turn the Robot Tunersunless they are pulled away from the peghead so they are in the disengaged position! Otherwise the Robot Tüheas be damaged.
BASIC OPERATIONS
The Robot Guitar's Master-Control Knob (MCK) is what is commonly referred to as a “push-pull” knob. When in the normal position, it behaves as a regular volume or tone pot, depending on which series you have. When the MCK is pulled out, the system is activated.
When the system becomes active by pulling out the MCK, it immediately places your instrument in ‘Standard Tuning Mode’ at A440 (unless you have changed tuning defaults, see page 46), but six factory presets have been provided for your use. Each preset can be
changed to your liking, but you can always restore the factory defaults as later described in this Owner's Manual.
The MCK's LED display will show various symbols and colors and these will be explained in the various modes of operation available to you. During the tuning process, they will behave as follows:
String LEDs Display Actions During Tuning Operations:
string not tuned = solid red
measuring frequency = red flashing
Robot Tuners™ turning = yellow flashing
signal clipping = solid blue
string frequency at extreme range = solid purple
individual string in tune = solid green
all strings in tune = all LEDs flash blue 3 times
During the tuning process, the guitar will be nearly 100 percent muted. After the MCK is pushed back in, full volume returns.
PRECAUTIONS:
- Never try to manually turn the tuning pegs on the Robot Tuners unless they are in the disengaged position (pulled out and away from the peghead).
- Do not attempt to open the cover of the peghead electronics, the Robot Tuner or the body CPU as this will void your warranty.
- Do not ‘fret’ a string while attempting to tune the Robot Guitar. Strings must be ‘open’ for the system to function properly unless you are performing the intonation routine.
- It does not require much force to detect pitch and to tune each desired string accurately and quickly. Strumming the strings gently will provide best results.
natural_image
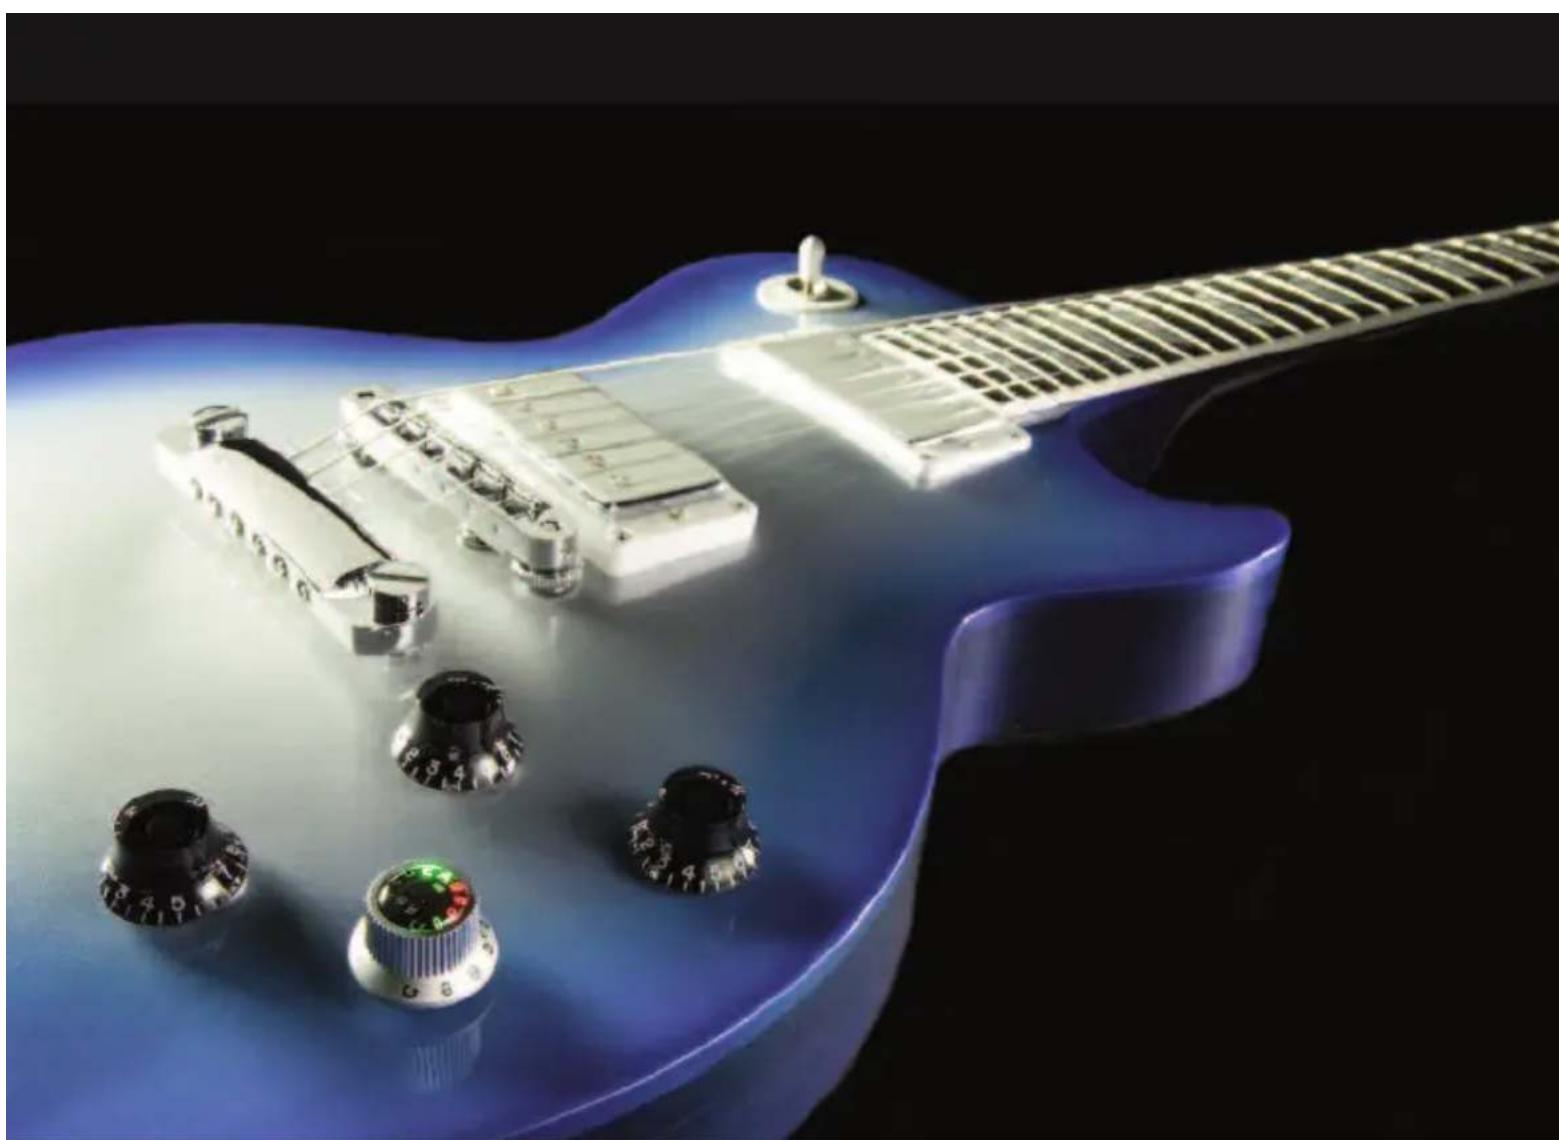
Close-up of a blue electric guitar with visible tuning knobs and a black handle, set against a black background (no text or symbols)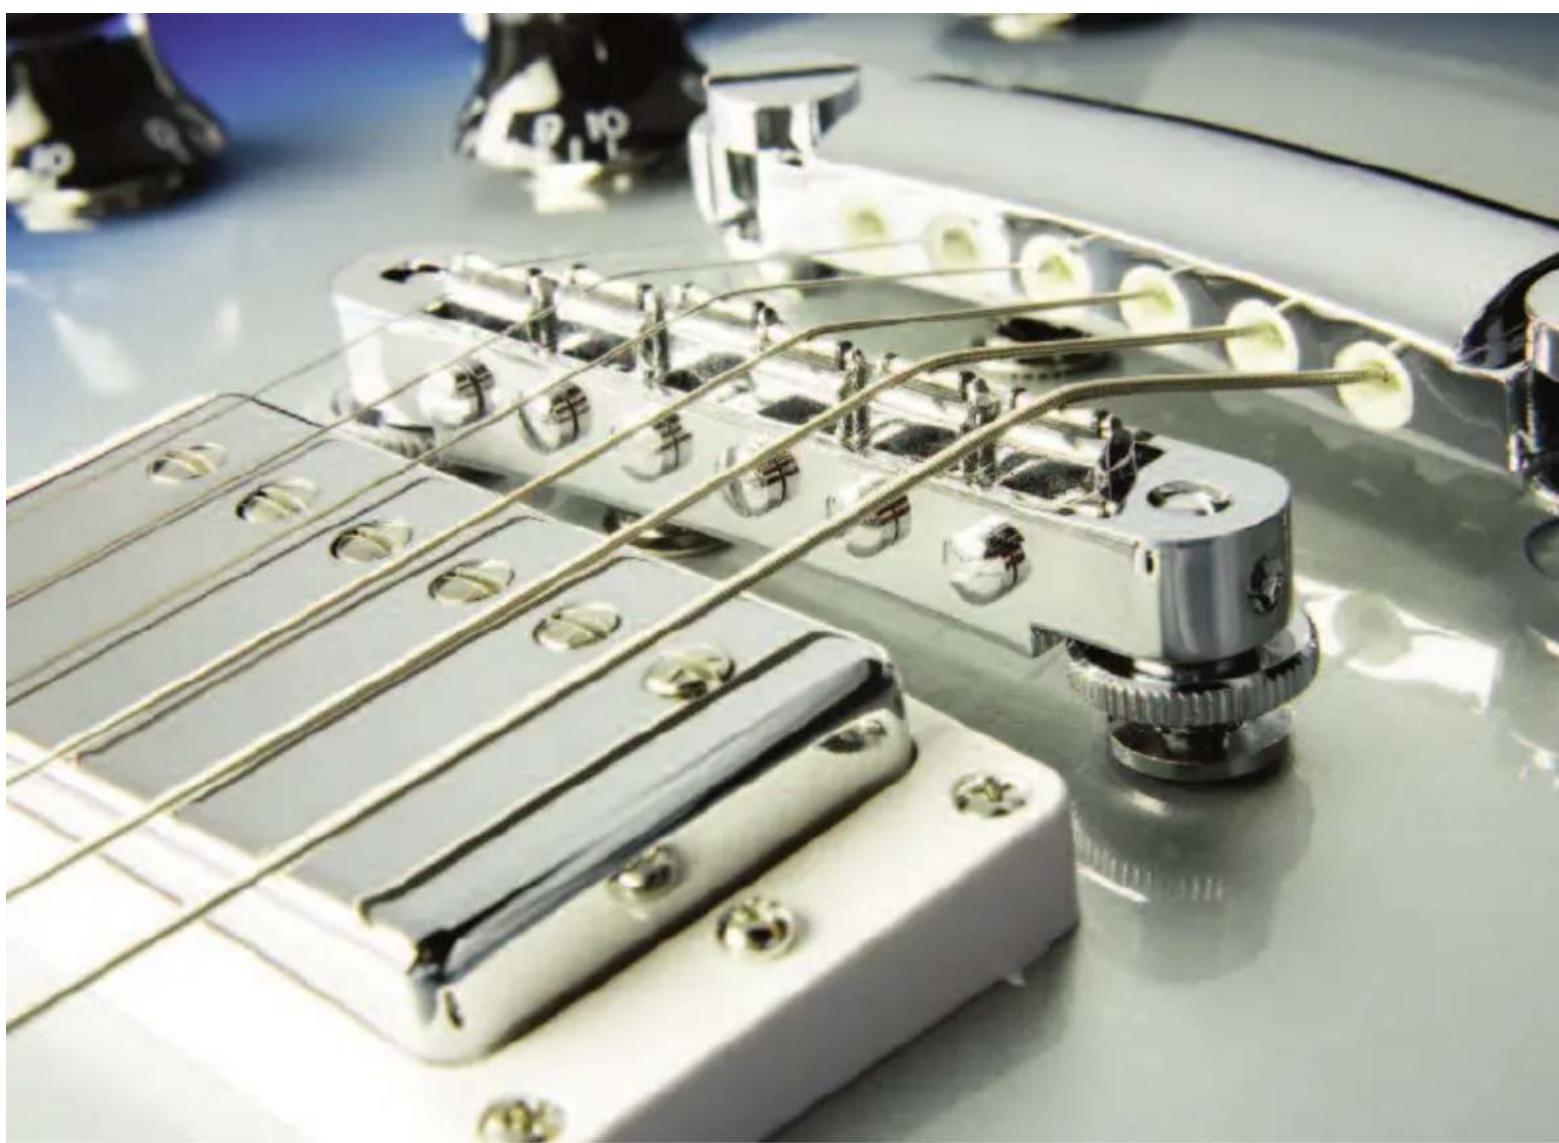
natural_image
Close-up of a white electric guitar fretboard with metal wiring and mounting holes (no visible text or symbols)| Function MCK Position Display LEDs Action Remarks | ||||
| Instantly Activated Tuning (440Hz, EADGBE is factory default) | Pull MCK out | All string LEDs shining red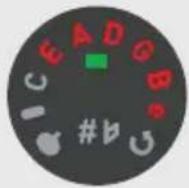 | Strum all strings gently | While you strum, Robot TunersTM start turning, individual strings will shine green when in tune, all LEDs will flash blue 3 times when tuning is complete. After blue lights flash, push MCK back in. |
| Regular Tuning 440Hz, EADGBE | MCK out and turned all the way down to “0” (counter-clockwise) | b and # shining red | Enter by pressing the display once—b, #, and all string LEDs will shine red | See above |
| E major Tuning 440Hz, EBEG#BE | Pull MCK out and turn to E LED | E LED shining blue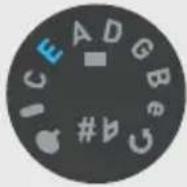 | See above | See above |
| DADGAD Tuning440Hz, DADGAD | Pull MCK out and turn to A LED | A LED shining blue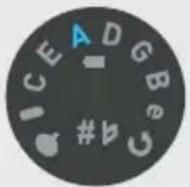 | Enter by pressing the display once—b, #, and all string LEDs will shine red | While you strum, Robot TunersTM start turning, individual strings will shine green when in tune, all LEDs will flash blue 3 times when tuning is complete. After blue lights flash, push MCK back in. |
| Dropped D Tuning440Hz, DADGBE | Pull MCK out and turn to D LED | D LED shining blue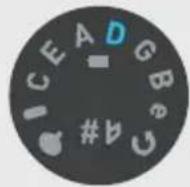 | See above | See above |
| Delta Blues Tuning440Hz, DGDGBD | Pull MCK out and turn to G LED | G LED shining blue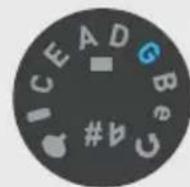 | See above | See above |
| E Flat Tuning440Hz,EbAbDbGbBbeb | Pull MCK out and turn to B LED | B LED shining blue | Enter by pressing the display once—b, #, and all string LEDs will shine red | While you strum, Robot Tuners ^TM start turning, individual strings will shine green when in tune, all LEDs will flash blue 3 times when tuning is complete. After blue lights flash, push MCK back in. |
| Double DroppedD TuningDADGBD | Pull MCK out and turn to e LED | e LED shining blue | See above | See above |
Function Display LEDs Action Remarks
Reference Tuning (Tune to selected reference pitch)
MCK Position
Pull MCK out and turn to I LED
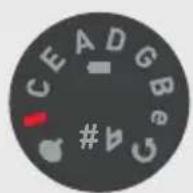
I LED shining red
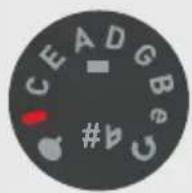
Pull out (disengage) the peg of the Robot Tunel ^™ you choose to tune to a reference pitch. Now tune this string to match your chosen reference. Push peg back into engaged position. Begin tuning your guitar by pressing the display. The letter “I” will shine green and ALL string LEDs will shine red.
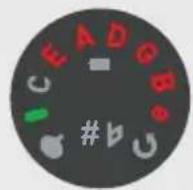
Strum the SAME string you have just tuned to your reference pitch. When this string's LED shines solid green its frequency has been measured and stored. Now strum all strings, and the Robot Tunersystem will tune your guitar to 'normal tuning' based on your chosen reference string. (LEDs will behave the same as during normal tuning.) When the reference tuning is achieved, the "I" will flash on and off in blue.
Should you wish to store your new 'Reference Tuning,' simply turn the MCK to one of the factory preset positions (E, A, D, G, B, or e) and press the display once. The display LEDs will flash blue 3 times to indicate your new Reference Tuning has been stored at that position, and can be recalled in the same manner as any other preset by choosing that position.
(Remember that you don't have to "store" your new Reference Tuning. Simply push the MCK back into normal position and you are ready to go!)
Function Display LEDs Action Remarks
Custom Altered Tuning
MCK Position
Pull MCK out and turn to Peg LED
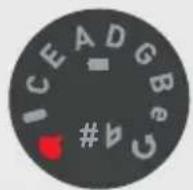
Peg LED shines red
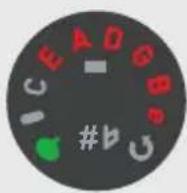
To create your own "Custom Altered Tuning," disengage each Robot TuneM of the string required and tune it manually to the pitch you want. Then press the display once, and the Peg LED will shine green and the string LEDs will shine red. Now strum all strings one by one (do not strum too hard!) and when their frequencies have been measured and stored their corresponding LEDs will shine green.
When all strings of your Custom Altered Tuning have been registered, the string LEDs will flash blue 3 times. You may now store your Custom Altered Tuning to one of the factory preset positions. Select E, A, D, G, B, or e, and press the display once. The display LEDs will flash blue 3 times to indicate your new Custom Reference Tuning has been stored at that position, and can be recalled in the same manner as any other preset.
(Remember that when you store your Custom Altered Tuning, you will override the preset position you have chosen.)
| Function MCK Position Display LEDs Action Remarks | ||||
| String Up Mode | Pull MCK out and turn to Revolving Arrow LED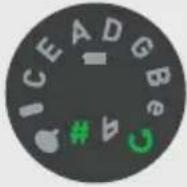 | Revolving Arrow and # LED shine green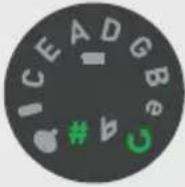 | Activate String Up Mode by pressing the display for 3 seconds. | Robot TunersTM will begin winding strings up close to normal tuning. When they stop turning, activate Normal Tuning mode to finish tuning your instrument. |
| String Down Mode | Pull MCK out and turn to Revolving Arrow LED | Revolving Arrow and # LED shine green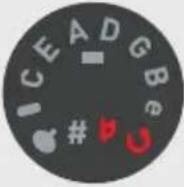 | Press the display once and it will toggle to String Down Mode, indicated by the Revolving Arrow switching from green to red. Now activate String Down Mode by pressing the display for 3 seconds. | Robot Tuners will begin to unwind all strings. When they stop turning, unscrew each post's locking nut so that you are able to remove old strings. |
TO RESTRING YOUR ROBOT GUITAR
First ensure that all Robot Tuners are disengaged by pulling the pegs away from the peghead. This is very important!
Guide each string through your tailpiece, over the center of each saddle (where contact is essential), and through the nut slot. If you are using String Up Mode, allow 1/2 wrap or more around the post on wound (bass side) strings before sending it through the post hole and locking it down tightly. For unwound strings, allow two windings around the post before locking down the nut. Whether you are going to manually tension the strings (with the Robot Tuners™ disengaged) or using String Up Mode, the point is to ultimately have at least a full wrap around the bass keys and at least two full wraps around the treble (unwound) posts when the strings are fully tensioned.
Cut the loose end of each string close to the post so that they will not make contact with other strings, as that would cause the system to function improperly. Also, do not use any strings which have frayed wraps at the ball end, because that could short circuit the tail-piece.
Now you are ready to engage String Up Mode. MCK should be on the green revolving arrow as described on the previous page. After the display is pressed for 3 seconds, all strings will wind themselves close to their correct pitches, whereupon you must fine tune your guitar using Normal Tuning Mode. (When all strings are removed, don't allow the tailpiece to move or it could damage its connector!)
TO ACTIVATE STRING UP MODE FOR A SINGLE STRING
(as in the case of replacing a string broken while playing)
Install the string in the manner described above (remember saddle contact is crucial! Simply select the LED for the string you are replacing, turn to the green revolving arrow and toggle it from green to red and back to green. Press the display for three seconds. The Robot Tuners ^™ of the selected string will begin winding close to normal tuning, and when it stops, you will be ready to fine tune it using Normal Tuning Mode.
INTONATION MODE (ONLY GIBSON MODELS)
Before starting the Intonation Mode we recommend to perform Normal tuning 440Hz
| Function MCK Position Display LEDs Action Remarks | ||||
| Intonation Mode | Pull MCK output and turn to I LED | I LED shining blue | Mode by pressing the display for 3 seconds. | |
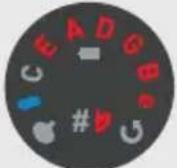 | ||||
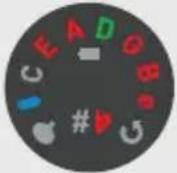 | Strum one of the strings until the according LED shines green. For example, D. | |||
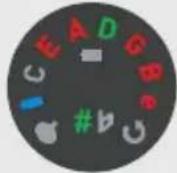 | After 2 seconds b LED turns off and # LED shines green | |||
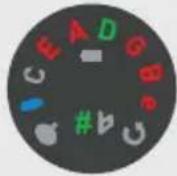 | Pick the same string now in the 12th fret and strum it. | |||
| Intonation Mode | MCK is now in the position of the string you are intonating. | I LED shining blue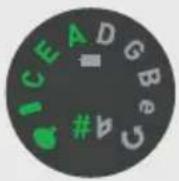 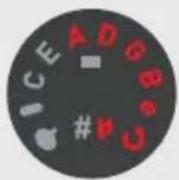 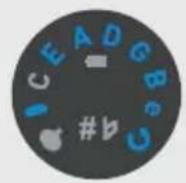 | For each green LED turn the screw half turn clockwiseFor each red LED turn the screw half turn counter-clockwise | Now a colored blink code displays the appropriate correction for the intonation screw.For example:●ICEA= 5 half turns clockwiseFor example:○eBGDA= 6 half turns counter-clockwiseRepeat Intonation Mode for each string.A correctly intonated string is indicated by a blue LED. |
Function Display LEDs Action Remarks
| Calibration Mode | C LED shines red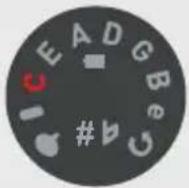 | Access Calibration Mode by pressing the display for 3 seconds. The C LED will shine blue. Now turn the MCK to select your fundamental frequency from the following list.(Note: while selecting your fundamental, pressing the display will toggle the red # LED on and off, and the other displayed LEDs will remain blue.) | 435Hz = C and E LED blue436Hz = C and E LED blue, # LED red437Hz = C and A LED blue438Hz = C and A LED blue, # LED red439Hz = C and D LED blue440Hz = C and D LED blue, # LED red441Hz = C and G LED blue442Hz = C and G LED blue, # LED red443Hz = C and B LED blue444Hz = C and B LED blue, # LED red445Hz = C and e LED blue446Hz = C and e LED blue, # LED red |
| MCK Position | 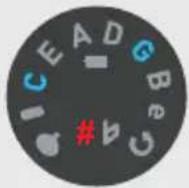 | ||
| Pull MCK out and turn to C LED |
PLEASE NOTE:
Once you have selected your desired fundamental, press the display down for three seconds. Now choose a tuning and strum the strings. The Global Calibration Offset is applied to each selected tuning.
To check the selected Global Calibration Offset, pull MCK out and press LED C for three seconds.
Now a colored blink code displays the fundamental in Hz:
red = hundreds / green = tens / blue = ones / yellow = 0
Example 440Hz: 4 red LEDs, Pause, 4 green LEDs, Pause, 1 yellow LED
Example 436Hz: 4 red LEDs, Pause, 3 green LEDs, Pause, 6 blue LEDs, red LED Spin (lower than 440Hz Concert Pitch)
Example 445Hz: 4 red LEDs, Pause, 4 green LEDs, Pause, 5 blue LEDs, green LED Spin (higher than 440Hz Concert Pitch)
SETUP MODE
The various important functions in Setup Mode can be accessed individually once Setup Mode is activated. We will now describe how to enter and exit Setup Mode, and we'll list the various functions it contains afterward.
| Function MCK Position Display LEDs Action Remarks | ||||
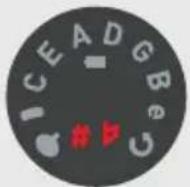
| Enter Setup Mode | Pull MCK out and turn all the way down to “0” (counter-clockwise) | b and # shine red Press | display for 3 seconds. When the display turns blue, release the display button. Now press the display again for 3 seconds. It will flash 3 times and stop. Now the Peg LED will be solid white, # and b will be red. You are now in Setup Mode. | This is the first step to Enter Setup Mode |
 | ||||
 | ||||
 | ||||
| Exit Setup Mode without saving changes | Push MCK back in | Setup Mode switches off | You can exit Setup Mode at any time | |
| Exit Setup Mode; saving changes | Dependent on Setup Mode function last utilized | All outer LEDs will flash blue-green 3 times | Setup Mode function applied | Your Setup Mode function is now stored |
| Function MCK | Position Display LEDs | Action Remarks | ||
| Restore Factory Defaults | Enter Setup Mode and turn to LED D | LED D shining blue, Peg LED shines white | Press display once and Factory Defaults are restored | Restoring Factory Defaults will do the following:• Preset positions set to default tunings• Runtime Correction Data set to default• Dynamic Runtime Correction is switched on• eFunction Correction is switched on• Tuning accuracy is set to 4 out of 6• Calibration Data is restored |
 | ||||
| Display Software Release | Enter Setup Mode and turn to E LED and press Enter | Peg LED flashing sequence indicates software release edition | Press display once. Peg LED will begin flashing | Red=Major Release Number Green=Minor Release Number Blue=Revision Level For Example, Software Release 2.3.5 would be shown as 2 red flashes, followed by 3 green flashes, followed by 5 blue flashes |
| Function MCK Position Display LEDs Action Remarks | ||||
| Global Calibration Offset On / Off | Enter Setup Mode turn to LED C and press display once | LED C shining blue, Peg LED shines white 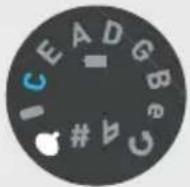 | Turn MCK left (Counterclockwise) to switch off Global Calibration | When a Calibration Mode is in effect, your selected fundamental frequency will now apply to all your presets |
 | red B LED indicates OFF | |||
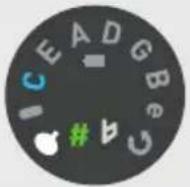 | Turn MCK left (clockwise) to switch on Global Calibration green LED indicates ON | |||
| Press Enter to store | ||||
| Instantly Activated Last Tuning | Enter Setup Mode and turn to LED 🎨 and press Enter |  | Turn MCK to I and press Enter | Last Tuning is activated on startup |
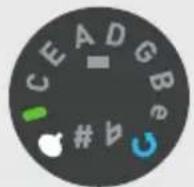 | ||||
| Instantly Activated Preset Tuning | Enter Setup Mode and turn to LED 🎨 and press Enter | Turn MCK to one of the Presets and press Enter | Select Preset Tuning is activated on startup | |
 | ||||
Function Display LEDs Action Remarks
Speed / Accuracy Settings
Pegs shines white, A shines blue

Press display once. Current Speed / Accuracy setting will be indicated by flashing green LEDs (as described below)
The Robot Tune™ system is adjustable to a pitch accuracy of .2 Cent. However, this will cause tuning functions to take slightly longer, and in live applications a relaxed accuracy is advisable. There are 6 levels of setting. The factory preset setting will show 4 green flashing LEDs, indicating that you are using an accuracy setting of approx. 1 Cent, which is practical for most applications. Relaxing this setting will cause the overall tuning process to run at a faster rate, and this can be useful in live applications. In the studio, you would want the maximum accuracy measurable. In this case, range will be changed and adjusted by rotating the MCK. The high end of accuracy (.2 Cent) is indicated by 6 green LEDs. The low end (i.e., fastest speed) is indicated by one green LED. Even at the low end, accuracy of tuning is still 2.5 Cent! To store your chosen setting, press display once. You will leave Setup Mode automatically.
MCK Position
Enter Setup Mode and turn to A LED
| Function MCK Position Display LEDs Action Remarks | ||||
| Dynamic Runtime Control On / Off | Enter Setup Mode turn to G LED and press Enter | # will be shining green or b will be shining red, G LED shines blue, Peg LED shines white | Turn MCK left to switch off DRC, turn MCK right (clockwise) to switch on DRC Press Enter to store | # shines green when DRC is on, b shines red when DRC is off |
 | ||||
| eFunction Correction On / Off | Enter Setup Mode and turn to B LED, press display | # will be shining green or b will be shining red, B LED shines blue, Peg LED shines white | Turn MCK left to switch off eFunction, turn MCK right (clockwise) to switch on eFunction Press Enter to store | # shines green when eFunction is on, b shines red when eFunction is off |
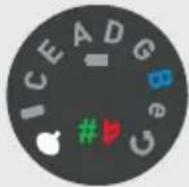 | ||||
CALIBRATING ROBOT TUNERS ^TM
The Robot Guitar will be pre-calibrated for a standard .010-.046 set of strings. If you change string gauges, restore factory defaults, or are installing the system yourself, you may first want to calibrate the Robot Tuners ^™ individually using the Motor Calibration Mode as described below. Remember though, each Robot Tuner ^™ is self-regulated with a Dynamic Runtime Algorithm that ensures the change of runtimes according to each string. After several tunings the system will perfect itself automatically.
MANUAL CALIBRATION OF ROBOT TUNERS
Enter Setup Mode and turn to LED I, press display. The Peg and I LEDs will shine white. Now you are ready to calibrate any or all of your Robot Tumers
First, turn the MCK to the Robot Tuné you want to calibrate (selected strings are indicated by solid blue) and press the display once. Strum the string and it will begin to alternate between flashing red and green. Pause a few seconds and strum it again. Repeat this simple procedure while the Robot Tuné adjusts itself. When the LED for that string changes to the next string in order, you know that the Robot Tuné you selected first is done. It's that simple.
CHARGING AND BATTERY INFORMATION
The Robot Guitar comes with a battery pack containing two rechargeable batteries.
A special charger is also included with the system.
The battery charge level is indicated each time you activate your system, as indicated below. You may expect more than 200 tunings between charges. There is no need to open your guitar to access any of the battery charging functions. When the system is enabled but inactive for more than one minute, the battery will switch off automatically. A special protection mode is built into the charging system, so always begin the charging process by connecting your guitar cord to the charger last. Short patch cords are most effective during charging.
BATTERY LEVEL
Each time the MCK is first activated, it will indicate if charging is needed immediately by showing the battery symbol flashing red.
| Function MCK Position Display LEDs Action Remarks | ||||
| Charge Mode | Pull MCK out, turn to C LED and press display | Your current charge level will be displayed for about 3 seconds. The level of charge will be indicated by how many green LEDs you see (between 1 and 10).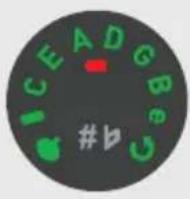 | Now you will see a flashing red battery symbol on the MCK, indicating your system is looking for its charger. Plug in the AC power plug of your charging unit and the charger will flash red, too. Connect the charging unit to the guitar with a standard guitar cord, and when the system begins to charge, the charging unit will flash green, and a running display of green LEDs on the MCK will indicate charge level. The charging unit's LED will flash green, too. | For optimum performance, you will want a charge level of 8-10 green flashing LEDs. A fully charged battery pack will show a solid blue light on the charging unit. Push MCK back to its normal position when charging is complete. A full charge should take no more than 90 minutes. |
EMERGENCY CHARGE MODE
The system has an Emergency Charge Mode (ECM) if its rechargeable battery pack goes completely ‘dead’ or too low in charge to run the normal Charge Function. Pull out MCK and turn it to roughly the middle position. It’s OK if the lights don’t come on, ECM will fix that. Put all the other controls in roughly the middle position, and use a short patch cord (1 foot or less) to lower resistance. Plug your patch cable into the charger, into the guitar, and connect your power supply to the charger and power it up. The charger will soon blink red (seeking a guitar). The charger will recognize the problem and after 30 seconds will blink yellow. It will soon provide enough charge to activate and switch to normal charging mode automatically. The length of time it takes to re-activate the normal charging mode can be from a few seconds to a minute or more.
AUTOMATIC SWITCH OFF MODE
If the MCK is left in the ‘on’ position for more than 120 seconds, the system enters Switch Off Mode, indicated by a flashing green light. After 30 minutes the system turns into Standby Mode, indicated by a very slow flashing yellow light. You can re-activate the system in either status by turning the MCK.
Note: It is recommended not to store the guitar with the MCK out, as this will fully drain the battery eventually and Emergency Charge Mode must be employed.
SHORT CIRCUIT WARNING
In the event of a short circuit from negative to ground (Strings E or A to D or G) the white peg symbol will flash. This can be caused if strings are not trimmed properly at the headstock. If the short circuit runs from B or hi E to D, A or low E, the peg will flash yellow. Check to make sure no strings touch one another.
English
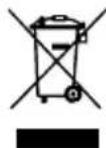
Disposal of Old Electrical & Electronic Equipment (Applicable in the European Union and other European countries with separate collection systems)
This symbol on the product or on its packaging indicates that this product shall not be treated as household waste. Instead it shall be handed over to the applicable collection point for the recycling of electrical and electronic equipment. By ensuring this product is disposed of correctly, you will help prevent potential negative consequences for the environment and human health, which could otherwise be caused by inappropriate waste handling of this product. The recycling of materials will help to conserve natural resources. For more detailed information about recycling of this product, please contact our local city office, your household waste disposal service or the shop where you purchased the product.
Francais