Korall - Aquarium Juwel - Free user manual and instructions
Find the device manual for free Korall Juwel in PDF.


User questions about Korall Juwel
0 question about this device. Answer the ones you know or ask your own.
Ask a new question about this device
Download the instructions for your Aquarium in PDF format for free! Find your manual Korall - Juwel and take your electronic device back in hand. On this page are published all the documents necessary for the use of your device. Korall by Juwel.
USER MANUAL Korall Juwel
natural_image
A fishcater with aquatic plants and fish swimming in a vibrant blue sky (no text or symbols visible)www.juwel-aquarium.com
Introduction
Thank you for choosing a JUWEL Aquarium product.
Our products represent over 40 years experience in the manufacturing of aquariums and their accessories applying most modern production techniques bringing together the JUWEL Aquarium system, which is both easy to use and simple to maintain.

Important:
Please read this instruction manual carefully and completely to make sure you have received all components before setting up the aquarium.
Please observe the safety instructions and maintenance guidelines given in this manual.
This instruction manual has been carefully prepared to provide you with accurate and complete information. All efforts have been made to ensure that the information given is correct. However, we cannot accept responsibility for printing or other errors. Technical details are always approximate and are not warranted characteristics and may be subject to change without notice.
Always unplug all immersed electrical equipment from mains before placing your hands into the water.

Important:
The use of additional air stones or air lines is not necessary with the JUWEL Aquariums. If an air stone is used, this should always be placed in the middle of the aquarium. Capillary leaks resulting from the use of these items will not be accepted as a fault with the aquarium.
Do not transport or move your aquarium while still containing water or sand.
Always take care not to damage the seals while maintaining your aquarium.
Do not use toxic substances to clean your aquarium.

Safety instructions:
This appliance is not intended for use by persons (including children) with reduced physical, sensory or mental capabilities, or lack of experience and knowledge, unless they have been given supervision or instruction concerning use of the appliance by a person responsible for their safety. Children should be supervised to ensure that they do not play with the appliance.

Operation with the RC circuit breaker only, max. 30mA.

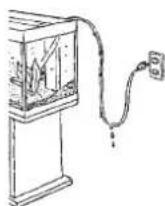
The power plugs of the electrical devices must not become moist. Connect the power plugs to the power supply at such a height that the connection cable forms a loop which would enable the water to drip down.
Setting up the Aquarium
We have produced your JUWEL Aquarium with the utmost care using most advanced production techniques. Extra strong packaging has been used to prevent damage to the aquarium. Please note however, that your aquarium has been transported and handled several times prior to reaching its final destination. We recommend therefore, that you test the aquarium for leaks in a suitable area (e.g. garage), by filling it with water and checking it very carefully.
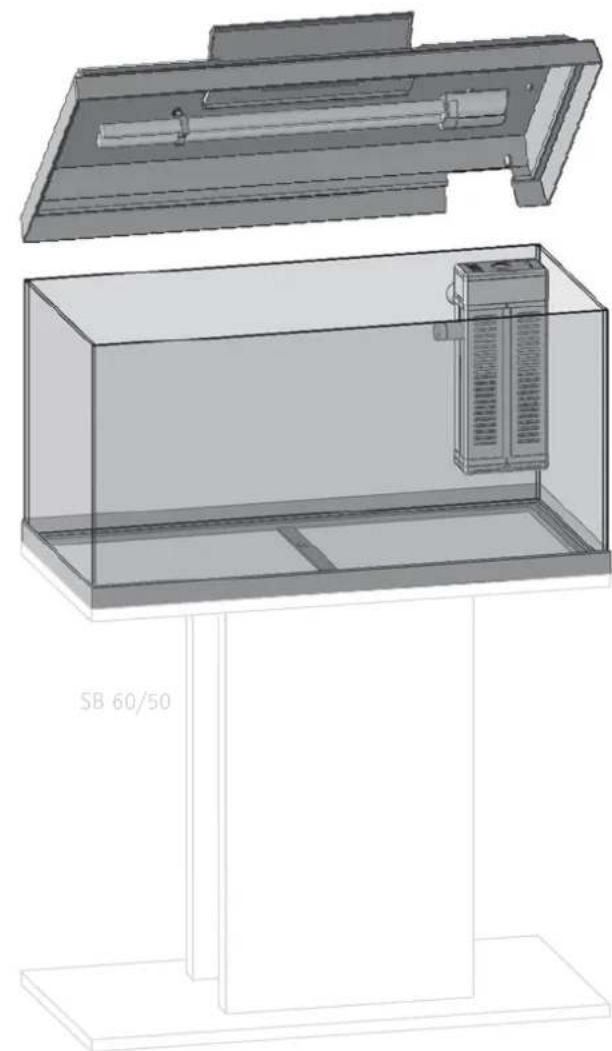
Having made your checks, you should select the most suitable and desirable position for your aquarium. The position selected should have an even and level surface and should be able to support the weight of the filled aquarium. In order to prevent excessive algae growth, we recommend that you select a position that is not exposed to direct daylight.
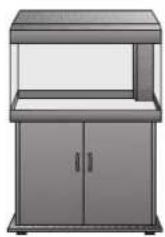
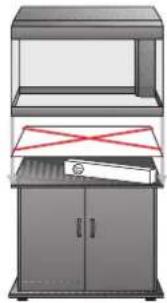
We strongly recommend that the appropriate JUWEL Aquarium cabinet is used. They have a water-repellent surface and they have been made to match the dimensions and to bear the weight of the filled aquarium. The cabinet must be positioned on a level surface. The JUWEL Aquarium is built with a special bottom frame for security. The aquarium should be placed directly onto the cabinet. DO NOT place any additional support, e.g. polystyrene, under the aquarium since this is not necessary with our aquariums.
Weight of the aquarium in kg filled with water: 60
natural_image
Illustration of a laboratory apparatus with two stacked compartments and a central control unit (no text or symbols visible)
The JUWEL filter Bioflow Mini
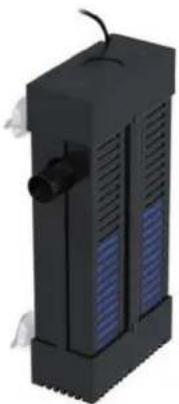
The JUWEL filter Bioflow Mini is a highly effective biological filter system with components that are harmonized among each other in an ideal manner.
Installing the filter in the aquarium makes hose connections unnecessary and prevents leaks. The pump output is not negatively affected by hose couplings, intake tubes etc.
The pump capacity is dimensioned in such a manner that the biological filtering is ensured by a sufficient flow through the filter material in an ideal manner.
The construction of the filter system enables you to quickly access the individual pump and filter medium components, facilitating comfortable operation while cleaning and maintaining the filter system.
natural_image
3D rendering of a black industrial device with blue ventilation slots and a white exhaust pipe (no text or symbols visible)Getting Started - The JUWEL filter Bioflow Mini
We recommend that you prepare the filter system ready for use before you fill the aquarium with sand/gravel, plants and water.
Please observe the following instructions carefully to ensure that the filter system works at its optimum.
The JUWEL filter Bioflow Mini consists of:
- a pump
- a filter housing
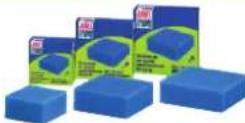
- 1 blue filter sponge
- 4 suction cups
- an outlet
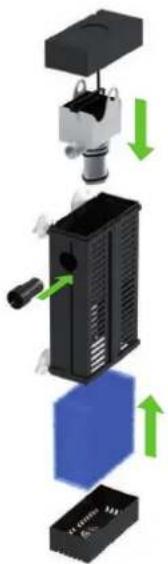
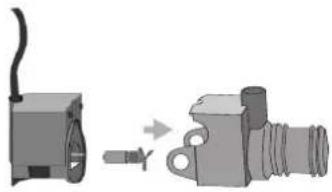
Prior to the first use of the filter, open the lower and upper filter covers and remove the filter sponge as well as the pump in order to rinse all components under running water.
Insert the filter sponge and the pump back into the filter housing and close the filter covers.
Attach the filter by means of suction cups in the rear right corner of the aquarium. The upper edge of the filter housing should be 1 cm below the water surface in order to achieve a good flow through the aquarium.
Carefully attach the outlet from the outside through the opening to the pump outlet and ensure its tight fit.
The JUWEL filter Bioflow Mini is now operational.
The JUWEL Aquarium Filter System is a biological filter system. For it to work effectively, bacteria cultures will need to grow inside the blue sponges. This process can take up 6-8 weeks for the filter to fully mature. Consequently we recommend to decorate and plant the aquarium and add just a few (3-5) hardy fish in order to help the maturation process. Please test the water on a weekly basis to monitor the water conditions and once the water is safe you can begin to add more fish.
Care and Maintenance for the JUWEL filter Bioflow Mini
Replace the blue filter sponge at an interval of approx. 3 months.

Important:
Always use original JUWEL Aquarium filter media to ensure the optimum performance of your system.
Recommendation
JUWEL Air Diffuser
The special JUWEL Aquarium Air Diffuser provides additional oxygen to the aquarium if desired. This can be ordered from your JUWEL Aquarium retailer (Part No. 85145).
Recommendation
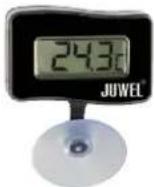
JUWEL Digital Thermometer
To monitor the temperature we recommend the JUWEL Digital Thermometer (Part No. 85701). Available from your JUWEL Aquarium retailer.
Tip:
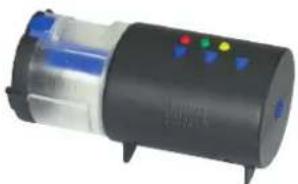
JUWEL automatic feeder
We offer you the JUWEL automatic feeder matching all JUWEL aquariums.
It is available from specialist retailers as original JUWEL Aquarium accessory (item No. 89000).
natural_image
Exploded view diagram of a mechanical device showing internal components and directional arrows (no text or symbols)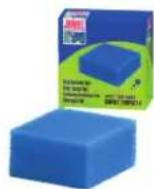
natural_image
3D rendering of a cylindrical electronic device with blue and red indicator lights (no visible text or symbols)
Maintaining the JUWEL Pump Bioflow
The JUWEL aquarium pump requires little maintenance. Regardless, you should confirm the functionality at regular intervals.
Please perform the following steps in order to test and maintain the pump:
- Disconnect the pump and the heater from the power supply.
- Remove the nozzles.
- Remove the pump from the pump holder of the filter.
- Remove the pump housing from the motor and remove the impeller.
- Thoroughly clean all parts and particularly check the impeller for signs of wear at the magnet.
- After that, please reinstall the pump in reverse order in the filter.
Recommendation:
In order to ensure that the power head operates at its optimum and maintains its low noise level, we recommend to check and potentially replace the parts subject to wear and tear, such as the impeller regularly.
All spare parts are available from your local JUWEL Aquarium retailer.
Safety instructions:
Never operate the power head out of water.
Always unplug the power head from the power supply before removing it from the filter.
The power head is intended for indoor use and for use in fluids up to 35°C.
Never repair the electrical cord or plug. In case of damage replace the complete power head.
Installing the heater
We have enclosed suction cups for the installation of the heater. Please start by attaching the suction cups to your new heater.
After that, attach the suction cups to the glass pane of your aquarium while the aquarium is filled and check whether the heater is reliably suspended. Position the heater in such a manner that the heater head is above the water level.
Only UK: Please note that the coldwater version of Korall 60 does not include the heater. All comments and instructions of the heater are irrelevant for the coldwater version.
Recommendation:
The JUWEL automatic heater warms the water of your aquarium up to 28°C depending on a nomal room temperature of 21°C. If you keep your aquarium in rooms below this or your fish need a higher temperature, we recommend to purchase a second heater.
Safety instructions:
Only connect the heater once the aquarium is filled with water at least to the minimum water level of the heater.
Never use the heater outside the aquarium.
Operate the heater indoors only.
natural_image
Diagram showing a device transitioning from a left-side component to a right-side component with a valve (no text or symbols present)

Operating the heater
You may adjust the water temperature by means of the adjustment knob in the heater head.
Depending on your individual needs, you may define the temperature the heater should heat the water to.
Turn the adjustment knob until the desired temperature is displayed in the temperature display. Please note that - depending on the initial water temperature in the aquarium - it may take approx. 12 hours and longer for the heater to complete heating the water to the desired temperature.
After that, the heater will automatically maintain the desired temperature of the water and activate as well as deactivate accordingly. You may determine the operation of the heater by means of the red glow lamp.
In addition, as the temperature display of the heater only displays approximate values, we recommend that you check the water temperature by means of a thermometer at regular intervals. The heater does not require further care or maintenance.

natural_image
3D diagram of a cylindrical device with two wires and a close-up inset showing a pin insertion (no text or symbols)Safety instructions:
Always unplug the heater and allow it to cool before removing it from the filter.
Never attempt to open or repair the heater. Any signs of damage or malfunction and the heater should be replaced with an original JUWEL Aquarium heater.
Never repair the electrical cord or plug. In case of damage replace the complete heater.
Once removed never place on a flammable surface.
This appliance is not intended for use by young children or infirm persons unless they have been adequately supervised by a responsible person to ensure that they can use the appliance safely. Young children should be supervised to ensure that they do not play with the appliance.
The cover lighting system JUWEL Korallux
The cover light by JUWEL Aquarium enables you to achieve optimum lighting for your aquarium while enabling you to access the lit aquarium for general care at the same time.
The light itself is waterproof. Because of that, there is no need for cover panes against splash water that might negatively affect the luminosity.
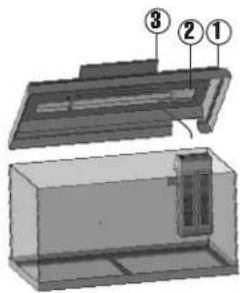
The cover light by JUWEL Aquarium consists of
- aquarium hood (1)
- Compact fluorescent lamp JUWEL Twin-Lite PL5 (20 watts) (2)
- operating flap (3) for supplying feed and water care products etc.
text_image
Technical diagram of a mechanical assembly with numbered components labeled ①, ②, and ③Putting the cover light JUWEL Korallux into operation
Remove the cover light from the packaging.
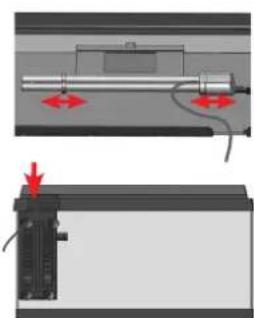
Start by passing the new PL lamp through the holder in the front section and slide the PL lamp with the socket on the right holder until it is securely seated.
Now the cover light may be placed on the glass element of the aquarium and connected to the power grid.
In that context, ensure that the upper edge of the aquarium and the guide rails of the cover hatch are free of foreign objects, e.g. sand or gravel.
natural_image
Two technical diagrams showing a mechanical assembly with red arrows indicating motion or force direction (no text or symbols present)Safety instructions:
Do not operate the light under water.
Do not attempt to open the light or repair it in case of a malfunction! This would endanger the waterproofness.
Install the JUWEL Twin-Lite PL Light unit only in aquarium hoods made by JUWEL Aquarium from polystyren or ABS to fit the safety requirements using the specially constructed holders.
Maintenance and care JUWEL Korallux
The JUWEL Aquarium cover light requires very little maintenance and attention.
However, each fluorescent lamp loses luminosity in the course of time. Of course this affects the growth of the plants in your aquarium. Because of that, we recommend you to replace the compact fluorescent lamp at regular intervals.
As the JUWEL Twin-Lite PL lamp forms a closed unit with a power plug, the replacement may be realised without problems.
Replacement of the compact fluorescent lamp JUWEL Twin-Lite PL5 (20 watts):
- Pull the power plug.
- Remove the cover light from the aquarium in order to gain access to the PL lamp.
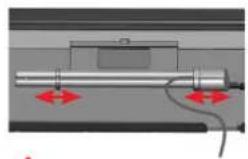
- Pull the PL lamp to the left at the socket in order to remove it from the holder. (Ref. figure)
- Start by passing the new PL lamp through the holder in the front section and slide the PL lamp with the socket on the right holder until it is securely seated.
- Arrange the cover light on the aquarium and reconnect it to the power grid.

Safety instructions:
Pull the power plug for each light replacement.
The connection line may not be repaired. Always replace the entire light in case of damage.
For Replacement use only original JUWEL Twin-Lite PL Light units!
natural_image
Pure mechanical assembly diagram without any text, numbers, or symbols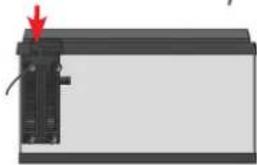
natural_image
Diagram of a device with a red arrow pointing to a component, no visible text or symbolsRecommendation:
JUWEL TWIN-LITE PL4 / PL5
The compact fluorescent lamps JUWEL Twin-Lite PL4 (15 watts) and PL5 (20 watts) are available as original spare part for the cover light systems JUWEL Violux and Korallux. Inquire at your specialist retailer to that end.


Proper disposal (electrical waste)
The labelling on the product or on the accompanying literature declares that it must not be disposed of, at the end of its service life, together with household rubbish. Please dispose of this equipment separately from other waste, to protect the environment or public health from damage by unregulated waste disposal. Recycle the equipment and support the sustained recycling of material resources.
Private users should contact the dealer who sold them the product or the responsible authorities, for a demonstration on how to recycle the equipment in an environmentally friendly way.
Guarantee
We guarantee the performance of the JUWEL-Aquarium product or its accessories to the purchaser for a period of 24 months from the date of purchase according to the following conditions:
§ 1 Extent of the guarantee
(1) This guarantee extends to the JUWEL-Aquarium product and its components excluding items subject to wear and tear such as light tubes and filter media. It is limited to the product as such and does not cover damage to other property and/or individuals. In addition, the provisions of the product liability law apply. These provisions are not limited by the aforementioned arrangement.
(2) It is the prerogative of JUWEL-Aquarium to decide whether the guarantee is performed by means of repair or replacement. If neither repair nor replacement can ensure the performance of the JUWEL-Aquarium product the purchaser is entitled to demand a reduction in price or to return the product against repayment of the purchase price.
§ 2 Guarantee period and settlement procedure
(1) The guarantee period begins on the day of the purchase of the product from the retailer. Claims under this guarantee will not be honoured, if
(a) the damage is caused as a result of improper use or maintenance or non-observance of the instructions given in this manual
(b) the product or its components have been maintained by persons or companies not authorised by the manufacturer to do so
(c) the product or its components have been damaged by mechanical means of whatsoever kind, in particular broken glass
(2) All claims under this guarantee have to be notified to the retailer, from whom the aquarium has been purchased without delay, however, not longer than 2 weeks from the day of first occurrence of defects. Rights under the consumer protection laws will remain unaffected.
(3) Guarantee claims will only be accepted if the validity of the claim is supported by evidence of purchase of the JUWEL-Aquarium product.
This declaration of guarantee is a translation only. In case of doubts the original German language version prevails.
We reserve the right to make technical alterations.
© JUWEL AQUARIUM
© JUWEL, Trigon, Vision, Rekord, Rio, Lido, Vio, Korall, Monolux, Duolux, Multilux, Korallux, Violux, High-Lite, Warm-Lite, Colour-Lite, Day-Lite, Juwel Twin-Lite, Juwel Eccoflow, Bioflow, Cirax, Nitrax.
Aquarien-Pass
KORALL 60 - KORALLUX 60
natural_image
Technical line drawing of a device enclosure with top and side views, labeled SB 60/50 (no text or symbols on the diagram itself)natural_image
Diagram showing a mechanical component being processed into a final assembly (no text or symbols present)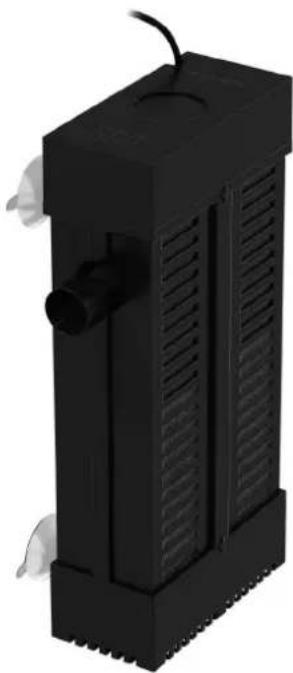
natural_image
Black industrial electrical enclosure with ventilation slots and a cylindrical inlet (no visible text or symbols)
natural_image
Diagram showing a cylindrical device with a handle and a separate view of its lock mechanism (no text or symbols present)ArtikelBestell-Nr.
| 260 400 500 1000 1500 1500 (3eflow) |
Before 250/400/600/1000
85070
85600 85800 only GB 85850 only
85720 85730 only GB 85740 only
88051