
1C.51 - Thermostat Finder - Free user manual and instructions
Find the device manual for free 1C.51 Finder in PDF.


User questions about 1C.51 Finder
0 question about this device. Answer the ones you know or ask your own.
Ask a new question about this device
Download the instructions for your Thermostat in PDF format for free! Find your manual 1C.51 - Finder and take your electronic device back in hand. On this page are published all the documents necessary for the use of your device. 1C.51 by Finder.
USER MANUAL 1C.51 Finder
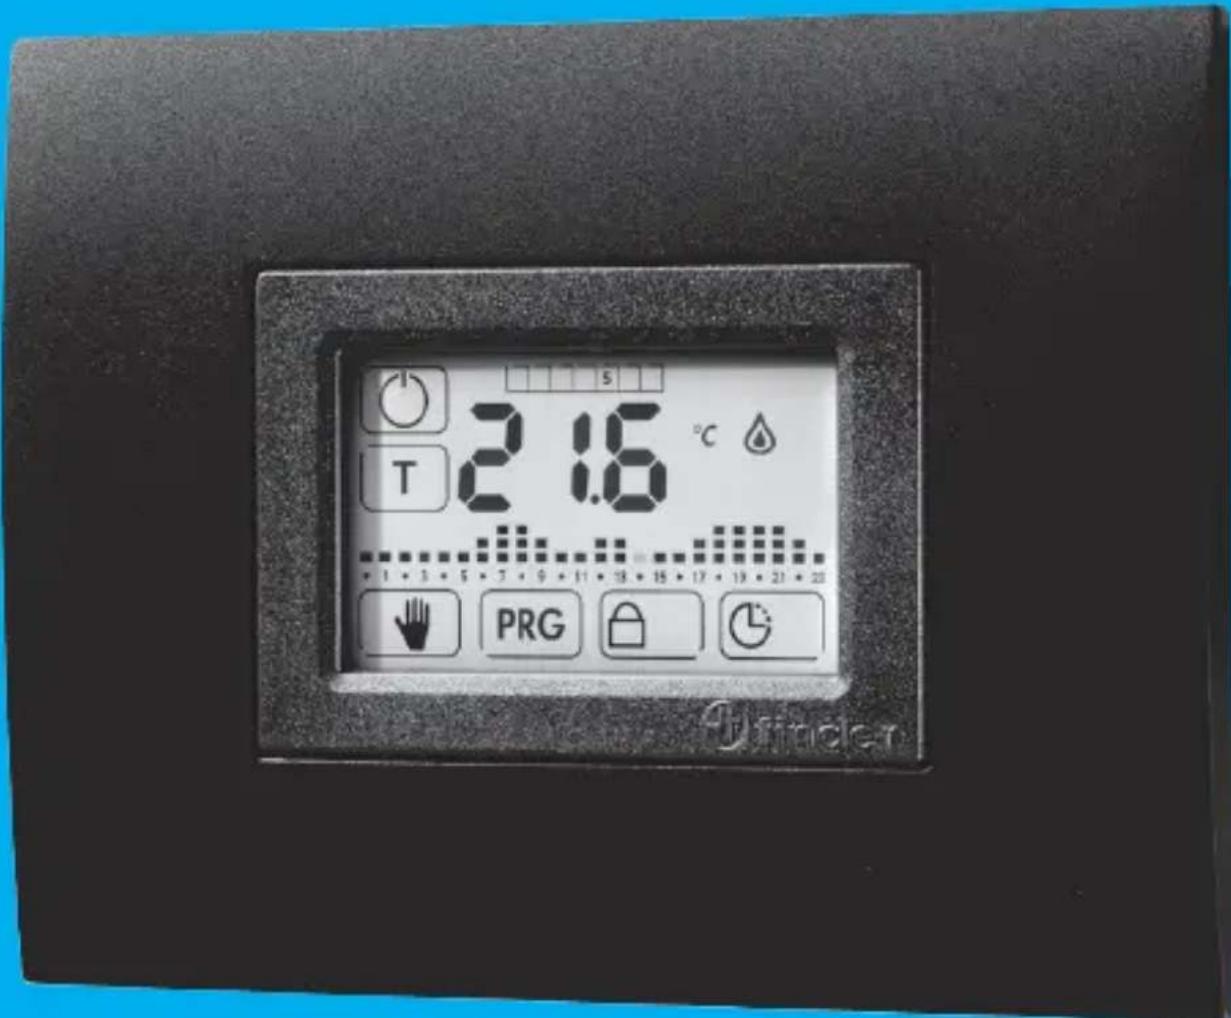
DIGITAL TOUCH CHRONOTHERMOSTAT
text_image
21.6 °C T PRGINDEX
TECHNICAL DATA ...... page 2
DIMENSIONS......page 2
INSTALLATION......page 3
ELECTRICAL CONNECTIONS......page 5
BATTERY......page 6
START UP......page 7
KEYS......page 8
SYMBOLS......page 9
TIME/DATE SETTING......page 10
MANUAL MODE......page 12
DISPLAY LOCK......page 13
FULL THERMOSTAT LOCK MODE (WITH PIN)......page 14
TEMPERATURE SETTING......page 16
PROGRAMMING...... page 17
TIMED MANUAL FUNCTION (VACATION PROGRAM)...... page 20
PARTY FUNCTION......page 21
FROST PROTECTION FUNCTION...... page 22
REMOTE CONTROL...... page 23
ADVANCED MENU......page 24
TECHNICAL DATA
Power supply: 2 Alkaline Batteries 1.5 V AAA
WINTER temperature range: (+5...+37)°C
SUMMER temperature range: (+5...+37)°C
MANUAL temperature range: (+5...+37)°C
FROST protection temperature range: (+2...+8)°C
Temperature differential T : (0.1...0.9) ^ C
Internal sensor accuracy: + /− 0.5°C
Minimum programming interval: 1 hour
Degree protection: IP20
Output: relay 1 CO (volt-free contact)
Contact rating: 5 A 250 VAC
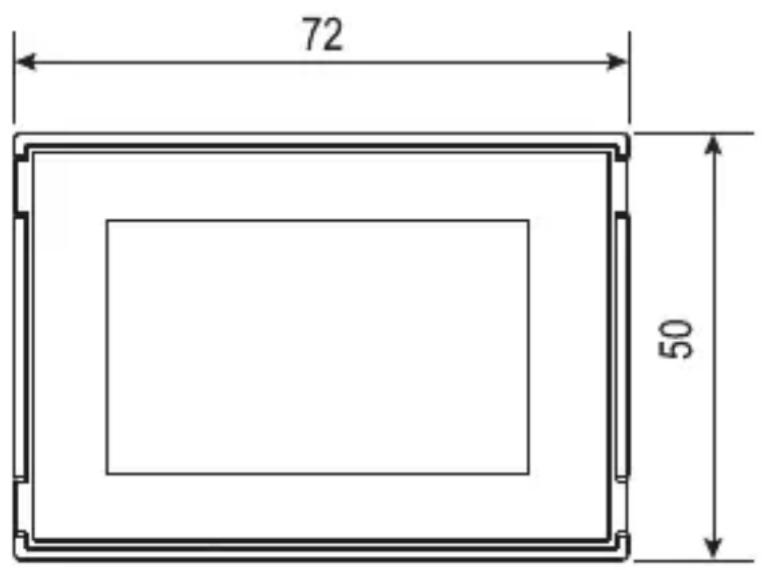
Mounting: recess mount in wall or box
ADDITIONAL NOTES
There are 3 audible alerts:
- SHORT BEEP: confirmation that key is pressed
- 3 LONG BEEPS: confirmation that the information is saved
- TRILL: error
DIMENSIONS
text_image
72 50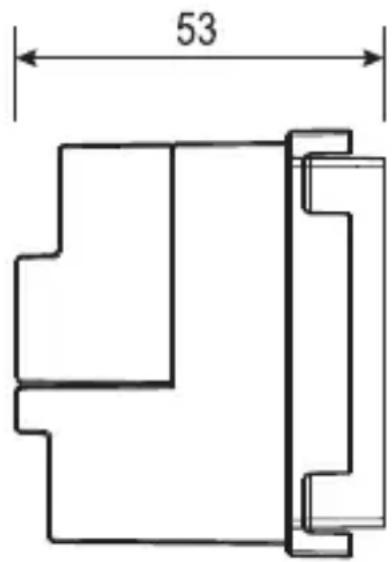
text_image
53SAFETY REQUIREMENTS
Before connecting to this programmable thermostat, make sure that the load (heater, pump, etc.) is not connected to the supply and that the load is within the ratings marked on the thermostat.
POSITIONING
Install the programmable thermostat away from sources of heat (heaters, direct sunlight, kitchens) and from doors/windows, at a height of about 1.5 m above the floor.
CLEANING
For cleaning-use only a damp cloth.
START UP
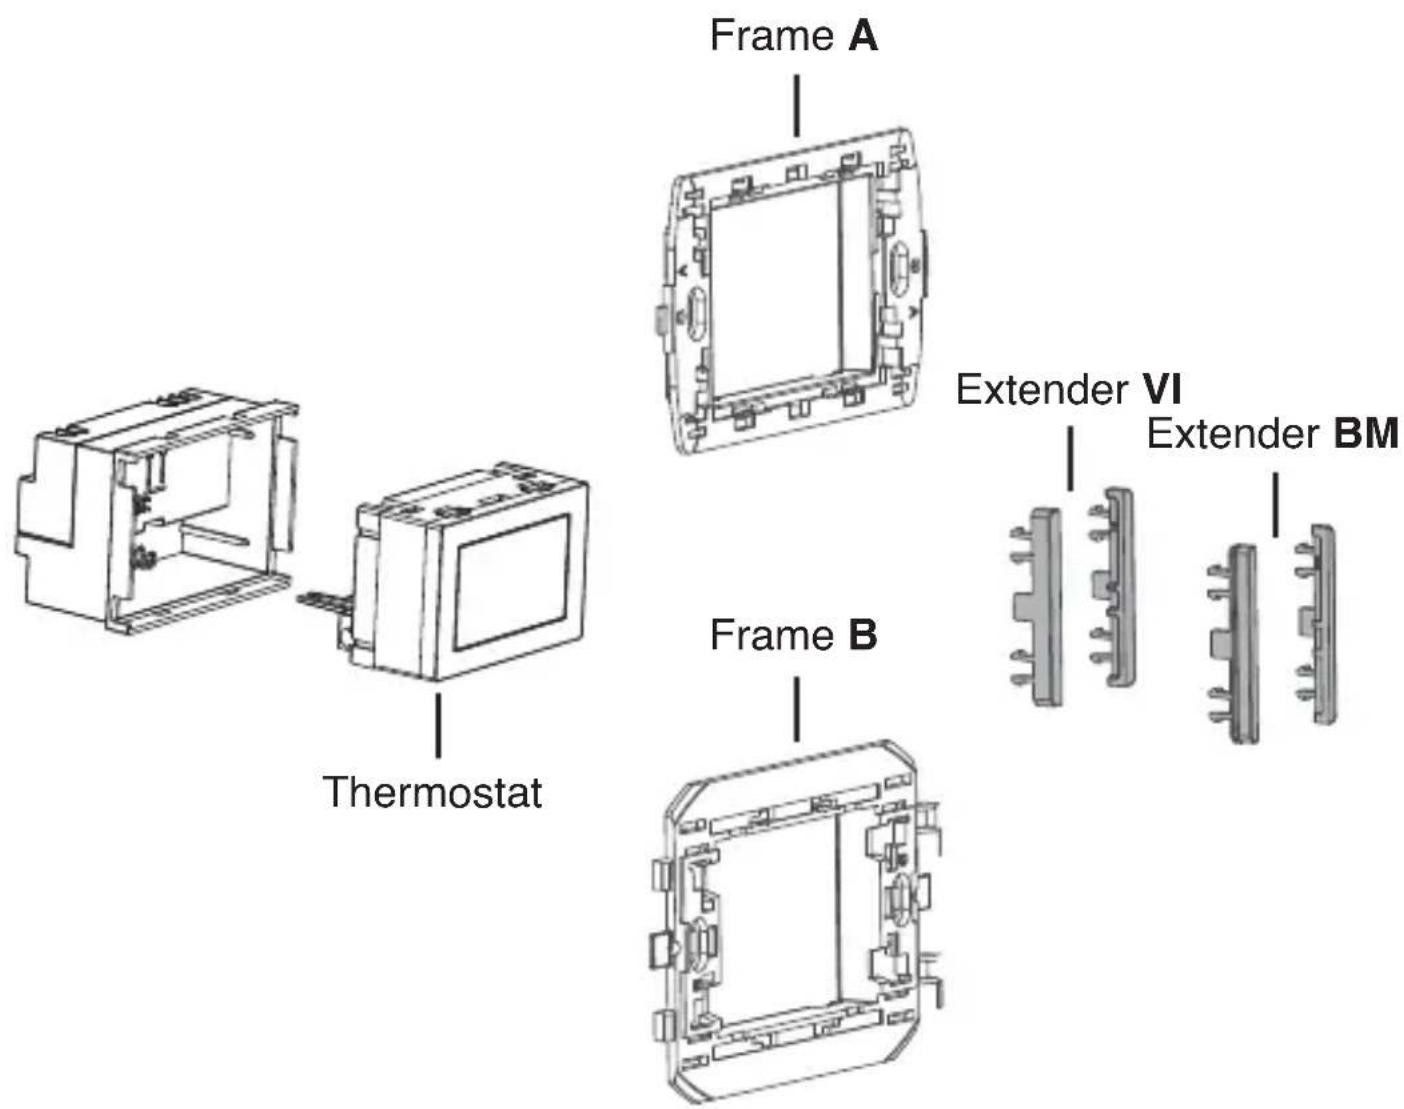
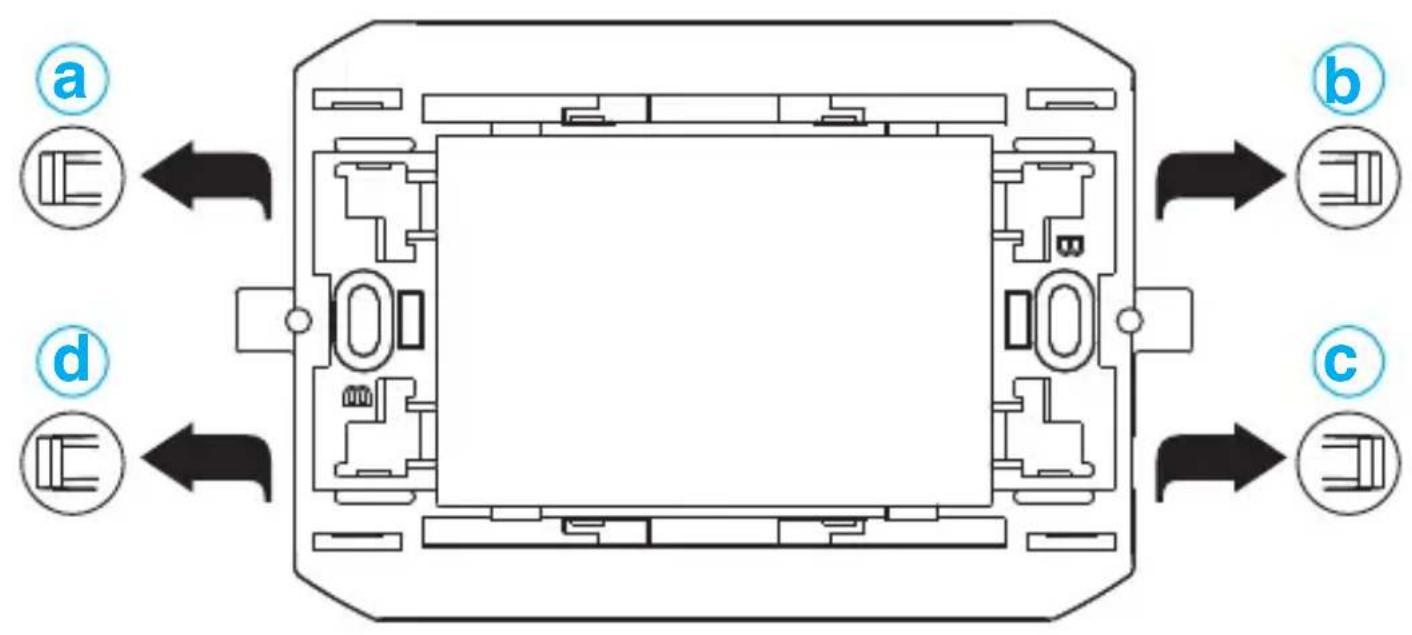
Install the thermostat using the correct accessories (see the table in the following page).
text_image
Frame A Thermostat Frame B Extender VI Extender BM| Frame A | Frame B | Extender VI | Extender BM | |
| ABB: Chiara | ||||
| ABB: Mylos | ||||
| Ave: Serie 44 | ||||
| Bticino: Living, Light, Light Tech, Livinglight, Axolute | ||||
| Bticino: Matix | * | |||
| Gewiss: Chorus | * | |||
| Vimar: Arke | ||||
| Vimar: Eikon, Eikon Evo, Plana | ||||
| Vimar: Idea | ||||
| Bticino: Livinglight Air | with 01C.51 | |||
= remove the side supports (a - b - c - d)
flowchart
graph TD
    A["Top Section"] --> B["Left Component a"]
    A --> C["Right Component b"]
    A --> D["Left Component d"]
    A --> E["Right Component c"]
    style A fill:#f9f,stroke:#333
    style B fill:#ccf,stroke:#333
    style C fill:#ccf,stroke:#333
    style D fill:#ccf,stroke:#333
    style E fill:#ccf,stroke:#333
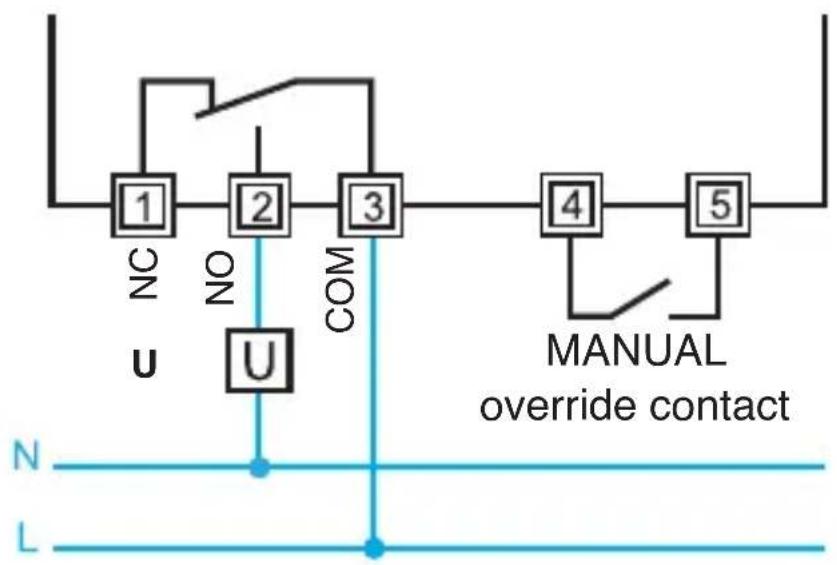
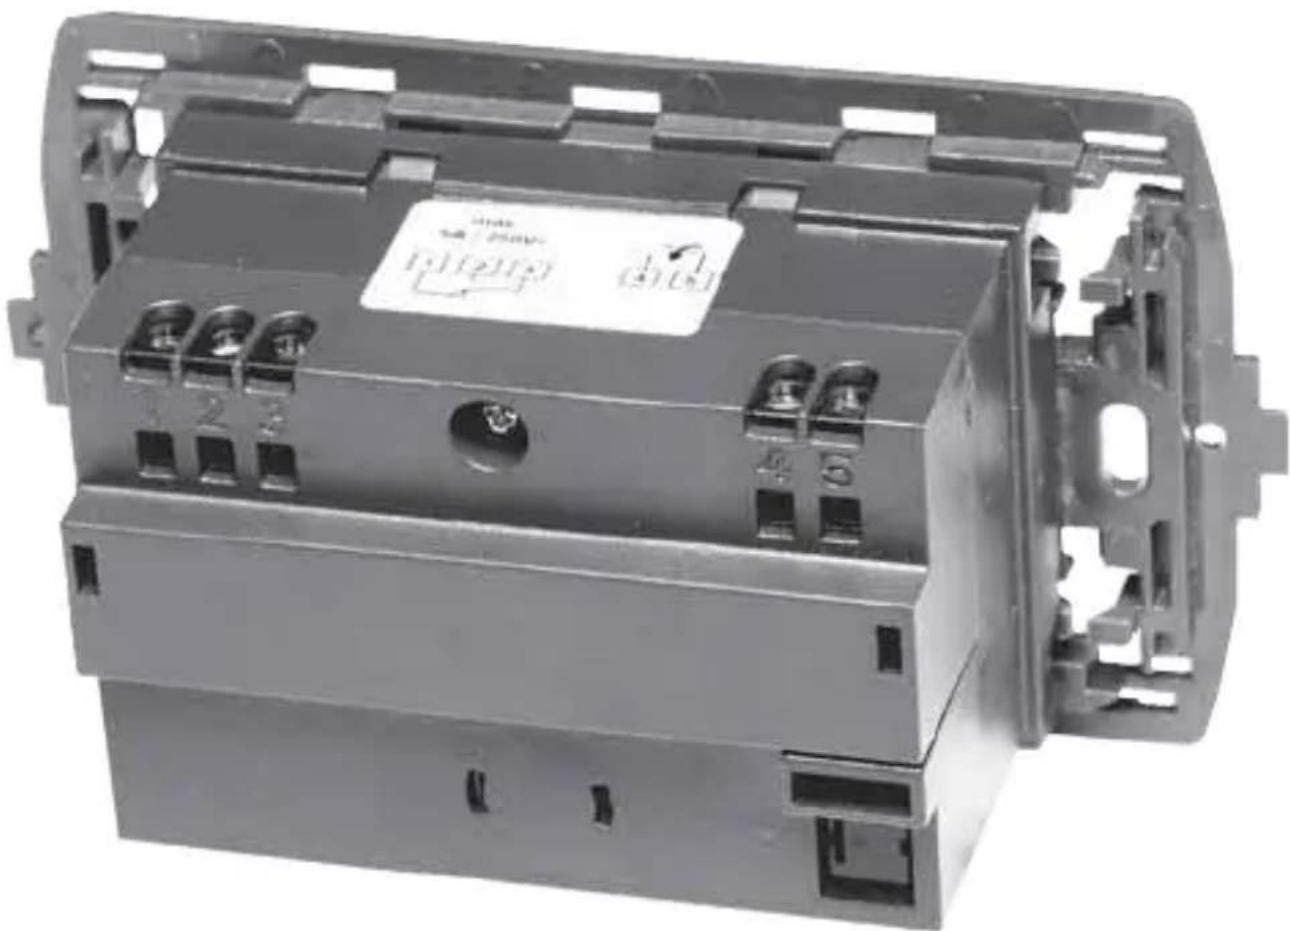
WIRING DIAGRAM
flowchart
graph TD
    A["1"] -->|NC| B["2"]
    B -->|NO| C["3"]
    C --> D["4"]
    D --> E["5"]
    E --> F["MANUAL override contact"]
    G["U"] --> H["N"]
    I["L"] --> J["L"]
natural_image
Exterior view of a black plastic electrical contact box with mounting holes and internal components (no visible text or symbols)BATTERY
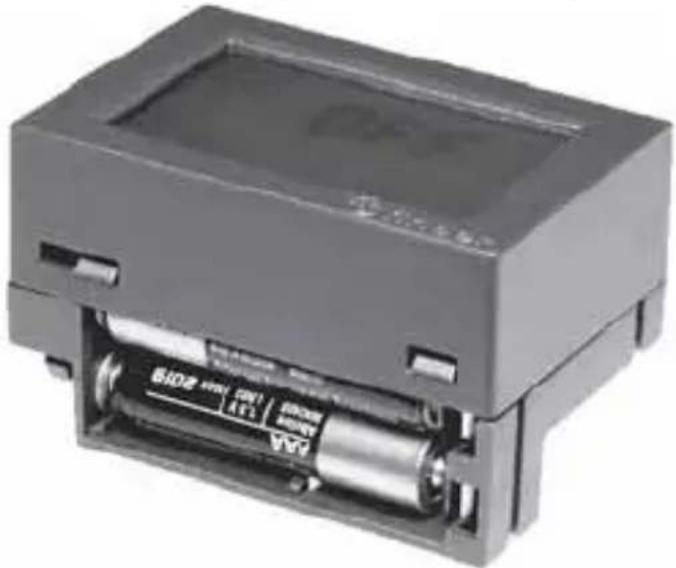
Insert the batteries into the battery compartment, observing the correct polarity.
natural_image
Exterior view of a black rectangular electronic device with a cylindrical battery and labeled ports (no readable text or symbols beyond branding)ATTENTION
- Incorrect placement of the batteries (reverse polarity) may damage the thermostat
- If the battery charge falls below the minimum level, the thermostat is placed in the OFF state and the output relay releases
- If the thermostat remains unused for long periods it is advisable to remove the batteries
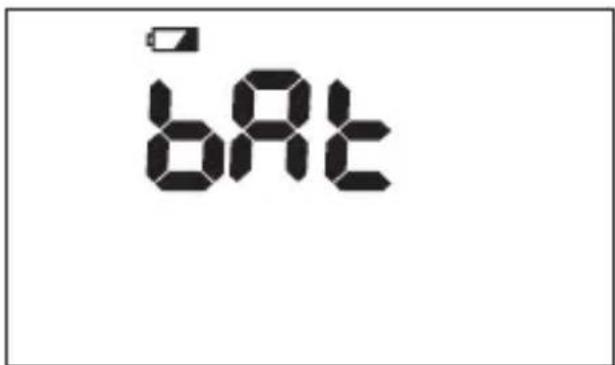
The thermostat provides 3 different reports of battery condition:
text_image
BAT- With the battery ON (STEADY), operation of the thermostat will soon be compromised
- With the battery FLASHING imminent replacement of batteries is necessary
- With the bRt/OFF FLASHING the thermostat is in the OFF state and the output relay releases
NOTE
Replacing the batteries at the initial warning ON (STEADY) and taking no more than 40 seconds, the date and time will not be erased.
START UP
Insert the batteries and for a few seconds the display will show all the symbols, keys and the software version - before entering the time and date routine. Set the latter by using the keys △ ▽ to modify the values and OK to confirm (see pages 10/11).
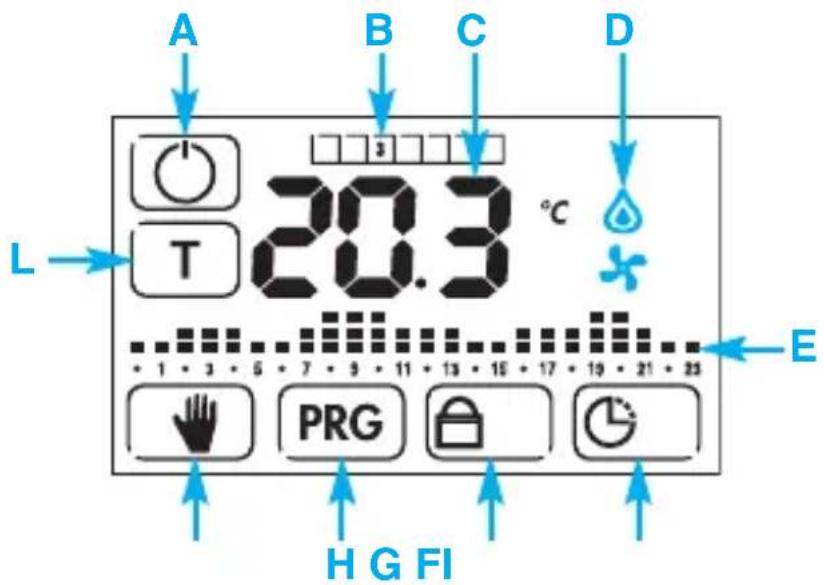
After that, the thermostat will revert to the main screen:
text_image
A B C D L T 20.3 °C E PRG H G FIA Thermostat ON/OFF switch
B Days of the week (indicated numerically from 1 to 7)
C Temperature display in Celsius
D Active icons (eg: fan = Cooling ON, flame = Heating ON)
E Time/temperature profile
(The column corresponding to the current time will flash)
F Allows the TIME and DATE to be set
G Key to activate or de-activate the LOCK mode
H Key to enter programming
I Key to activate MANUAL
L Key to set the 3 levels of temperature
NOTE
A tap to the center of the display will activate the back-light for 4 seconds. A second tap within the 4 seconds will display the current time of day, for 4 seconds.
KEYS
Thermostat ON/OFF switch

Display/setting the three temperature levels

Activates and sets the MANUAL mode. Pressed for 3 seconds it is possible to program the TIMER MANUAL mode

Programming. Pressed for 3 seconds activates the PARTY mode

Pressed for 3 seconds activates or deactivates the LOCK mode
Allows the TIME and DATE to be set
Pressed for 3 seconds, it is possible to access at the advanced menu
Changes the data displayed (increase)

Changes the data displayed (decrease)

Confirms the information displayed on the display

Press once to return to the previous data.
Press for 3 seconds to exit the menu displayed
Returns to the previous data (in the advanced menu)
SYMBOLS

Displayed during the TIME/DATE setup or when time is shown

Heating ON (in WINTER mode)

Cooling ON (in SUMMER mode)

Frost protection ON

Displays Low battery

Unit of measurement

Temperature differential

Indicates the LOCK mode active

24 hour time/temperature profile
1 2 3 4 5 6 7 Displays the days of the week
1 2 3 4 5 6 7 Displays the days of the week selected
To set time and date press 📊.
Data to be set appears in the following order:
HOURS/MINUTES/DAY/MONTH/YEAR
Figures that are flashing, can be changed using the keys △. ▽
Confirm with OK and advance to the next parameter.
To step back or exit from the menu, press
EXAMPLE
Press ⏰.
The HOUR flashes.
Enter the correct time through keys △ ▽

text_image
OK 00:00Pressing OK confirms the hour setting and it is then possible to set the MINUTES, using the same method.
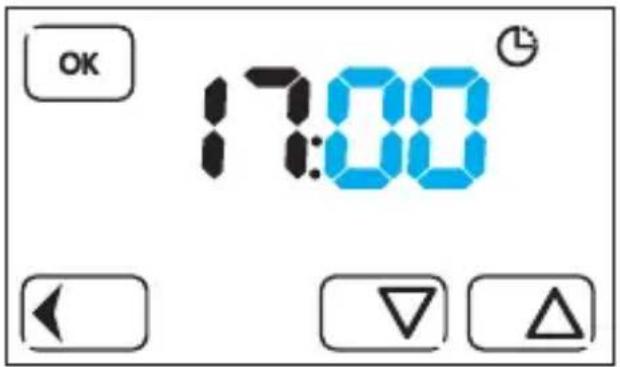
text_image
OK 17:00°Press OK to confirm the minutes setting.
Then proceed to set the DAY
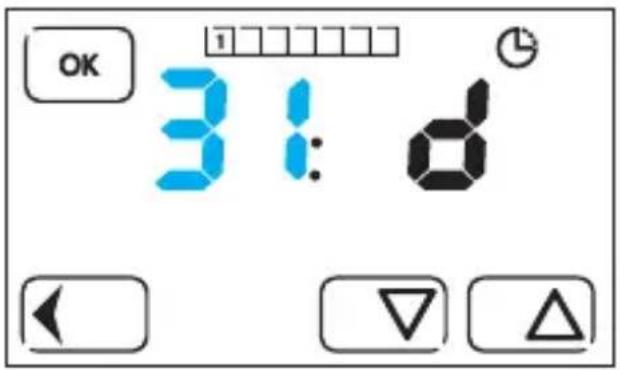
text_image
OK 31: dPress ok to confirm the DAY and proceed to set the MONTH
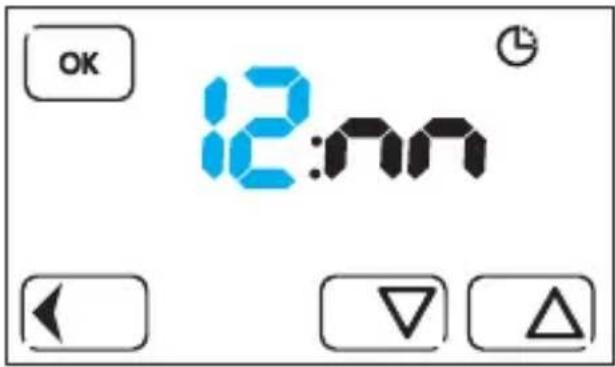
text_image
OK 12:00Press OK to confirm the MONTH and proceed to set the YEAR
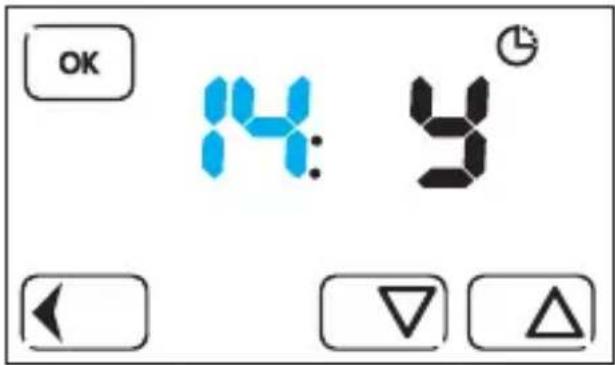
text_image
OK 4: 8°Press OK to confirm and exit the Time/Date setting menu. The display will then show the main screen.

text_image
T 20.3 °C + 1 + 3 + 5 + 7 + 9 + 11 + 13 + 16 + 17 + 18 + 21 + 23 PRGNOTES
- Removing the batteries, the thermostat has a power reserve of 40 seconds, after which, settings, hours, minutes, day, month, year, will be lost
- The day of the week number is automatically set based on the calendar
- Pressing ◀ you can step back to the previous setting
- Pressing ◀ for more than 3 seconds, you will return to the main screen, saving however, all confirmed values up to that point with the key OK
MANUAL MODE
From the main screen press

The display shows the manual temperature, previously set.
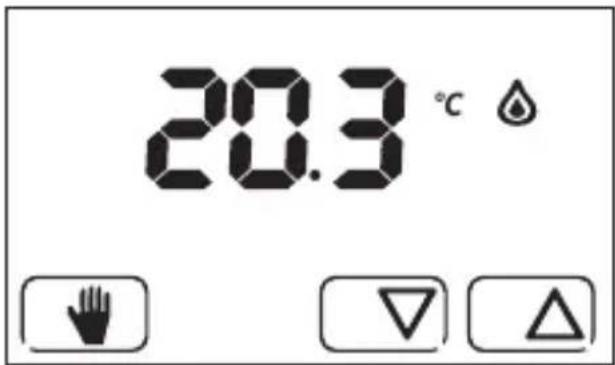
text_image
20.3 °CTo change it, use △ to increase or ▽ to decrease the value. To confirm and exit, press ⏚.
NOTE
If you do not touch the display for 3 seconds, the screen will revert to show the current measured temperature.
To set a new temperature press either △ or ▽. To exit and return to the main screen, press ⏚.
DISPLAY LOCK
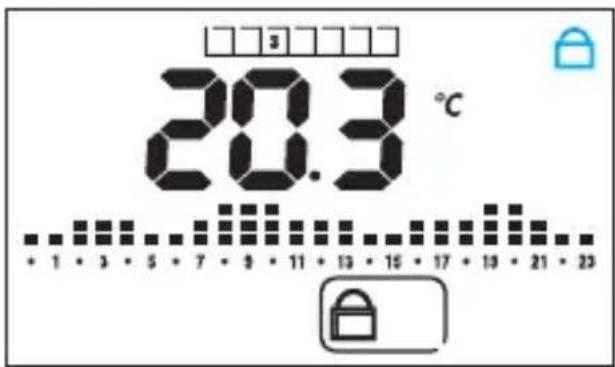
This function protects the thermostat from accidental touch, blocking ONLY the display.
To activate, it is necessary to press 🔒 for 3 seconds.
The symbol ⚙flashes adjacent to the displayed temperature indicating that the lock is activated.
To deactivate, press 🔒 for 3 seconds.
text_image
20.3 °C + 1 + 3 + 5 + 7 + 9 + 11 + 13 + 15 + 17 + 19 + 21 + 23(display locked)
NOTE
To use the DISPLAY LOCK, it is necessary that the PIN set in the FULL THERMOSTAT LOCK mode menu is 800 (see page 28).
FULL THERMOSTAT LOCK MODE (WITH PIN)
This advanced feature, serves to completely lock the thermostat.
To enable it, you must set a 3-digit PIN that will be required every time you want to lock or unlock the thermostat.
To set and register the PIN:
- Turn off the thermostat with the key
- Press SET for 3 seconds to enter into the ADVANCED SETTINGS
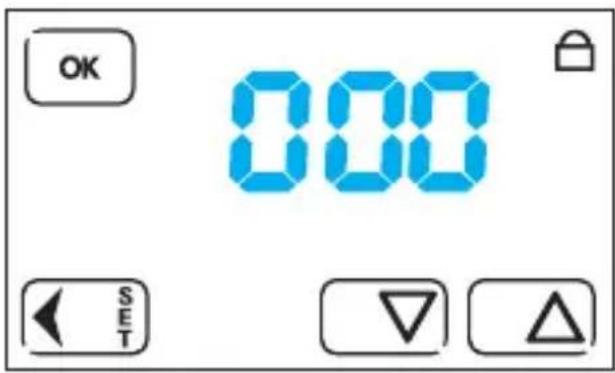
- Press OK until the screen shows 000 which then allows the personal PIN code to be entered
text_image
OK 000 SETPress keys △ or ▽ to attain the PIN number and confirm with OK. It is now possible to exit from the Advanced settings, pressing key OK several times or key ← SET until three beeps confirm that the PIN is successfully registered.
The thermostat remains turned off.
text_image
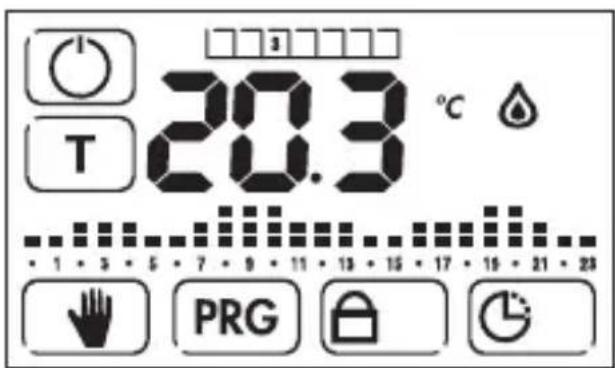
T 20.3 °C 1 3 5 7 9 11 13 15 17 19 21 23 PRGTo activate the thermostat lock function with the PIN, press 🔒 to turn on the device and then press 🔒 for 3 seconds.
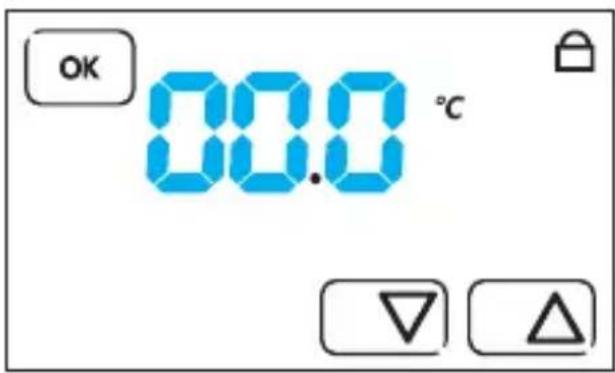
The following screen appears
text_image
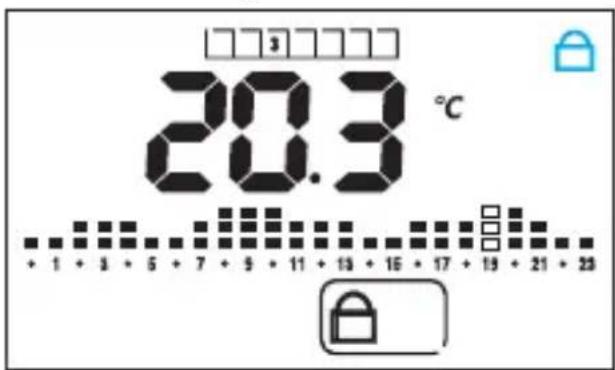
OK 00.0 °CUsing keys △ or ▽ enter the PIN previously set in the advanced settings and press OK. 3 beeps will confirm that the lock is active and the display will show the following screen
text_image
20.3 °C + 1 + 3 + 5 + 7 + 9 + 11 + 13 + 16 + 17 + 19 + 21 + 23To unlock the thermostat, press and hold key 🔒 for 3 seconds.
The display will show 000.
Enter the PIN and confirm with OK.
3 beeps confirm that the lock has been disabled.
ATTENTION
After 3 failed attempts, it will not be able to enter any PIN for 20 seconds. The ERR message will remain fixed on the display.
NOTE
Also, on removing and inserting the batteries, the thermostat will remain with the display locked.
If you forget the PIN it is possible to enter the unlock code 513.
Once unlocked, you may want to return to the advanced settings to check and/or change the PIN, previously entered.
TEMPERATURE SETTING
Press T, and the first level of temperature will flash.
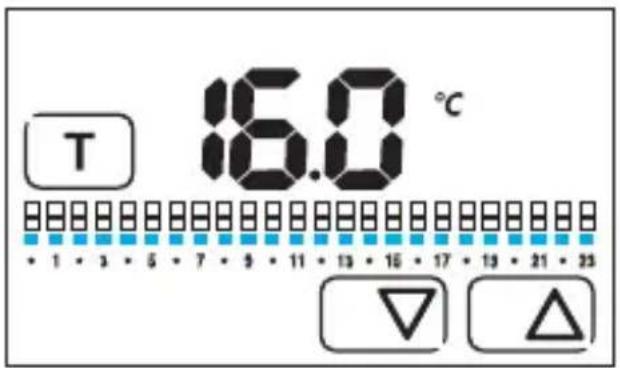
Set the desired temperature using the keys △ or ▽. Press T to confirm and to pass to next temperature level.
text_image
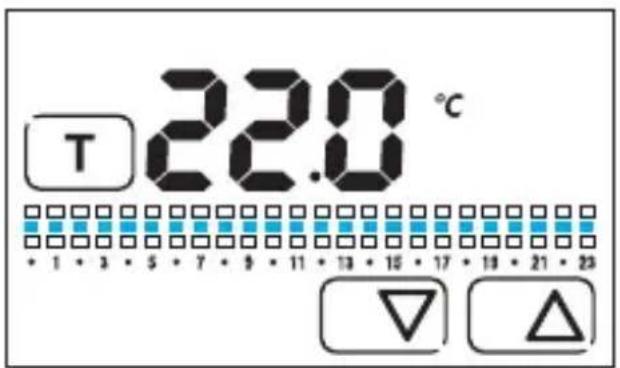
T 22.0 °C + 1 + 3 + 5 + 7 + 9 + 11 + 13 + 15 + 17 + 18 + 21 + 23Set the desired temperature using the keys △ or ▽. Press T to confirm and to pass to next temperature level.
text_image
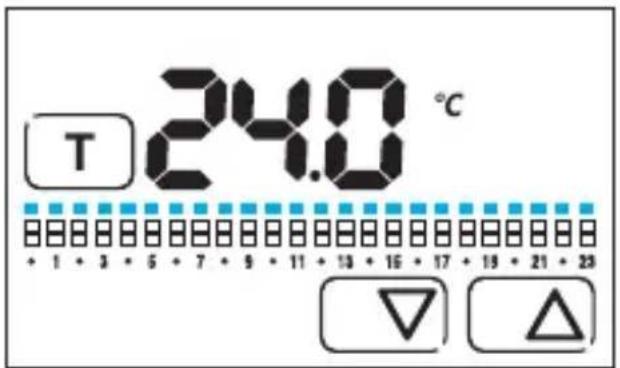
T 24.0 °C + 1 + 3 + 5 + 7 + 9 + 11 + 13 + 15 + 17 + 19 + 21 + 23Set the desired temperature using the keys △ or ▽. Press T finally to return to the main screen.
NOTE
- Level 1 will be the lowest temperature of the 3 levels. Levels 2 and 3 being progressively higher.
- With the SUMMER setting, the association between Level and temperature is reversed (ie. Level 3 represents the lowest temperature).
Press PRG to enter programming menu.
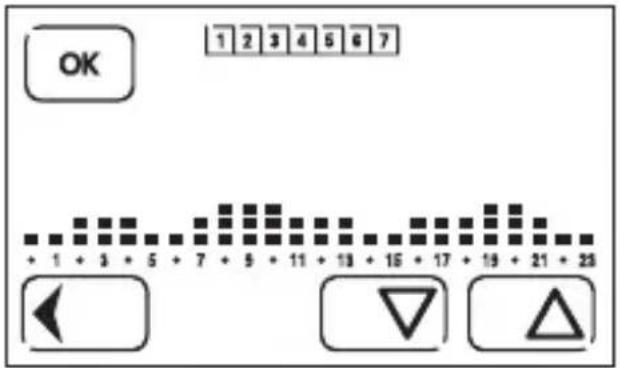
SELECT THE DAY(S) TO BE PROGRAMMED
Starting with day 1 (Monday) blinking, move across each day in turn by pressing △ or ▽.
text_image
OK 1 2 3 4 5 6 7 + 1 + 3 + 5 + 7 + 9 + 11 + 13 + 15 + 17 + 19 + 21 + 23During this process select using the key OK those day(s) required to have the same time/temperature profile. Day(s) so selected will now appear on a black background. Press in the middle of the profile to pass to programming the time/temperature profile.
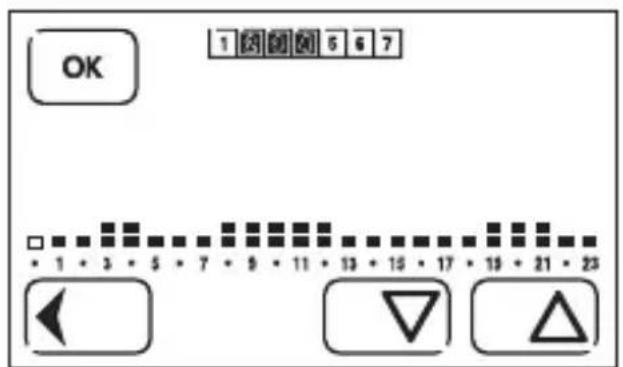
Starting with the zero hour segment of the profile blinking.
With △ or ▽ select the required level of temperature.
Confirm with OK and pass to next hour segment.
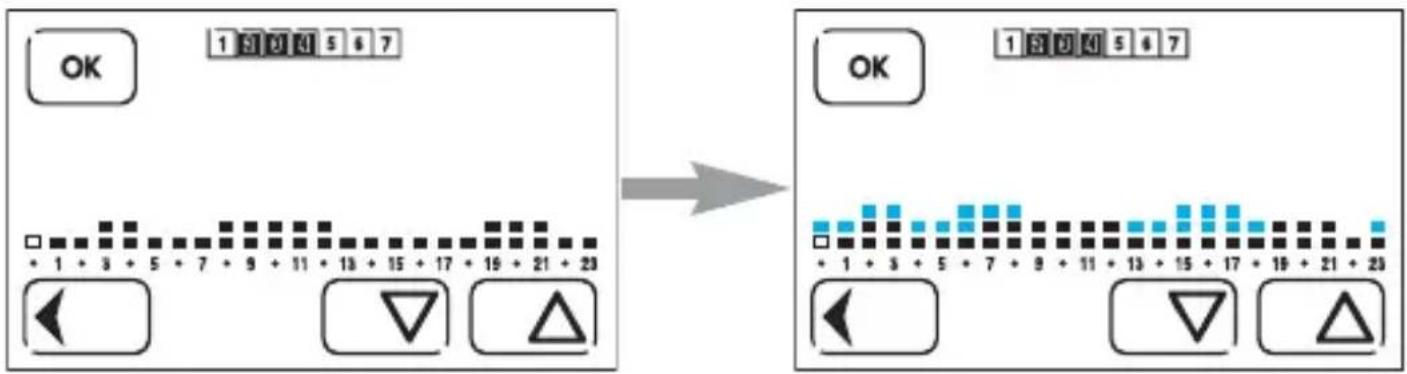
Program in the same way, all the time segments.
flowchart
graph LR
    A["OK"] --> B["1 S D K 5 6 7"]
    B --> C["+ 1 + 3 + 5 + 7 + 9 + 11 + 13 + 15 + 17 + 19 + 21 + 23"]
    C --> D["◀"]
    C --> E["▽"]
    C --> F["△"]
    G["OK"] --> H["1 S D K 5 6 7"]
    H --> I["+ 1 + 3 + 5 + 7 + 9 + 11 + 13 + 15 + 17 + 19 + 21 + 23"]
    I --> J["◀"]
    I --> K["▽"]
    I --> L["△"]
NOTE With it is possible to step back to the previous hour.
Pressed for 2 sec, it is possible to exit from the programming, saving all the changes confirmed until that moment.
After all 24 hours have been programmed, 3 beeps will confirm acceptance of the program and the display will show only the days yet to be programmed (the days that at the beginning were not selected). Now is possible to continue the programming of the remaining day(s), by the same process described above or exit from the menu with the key.
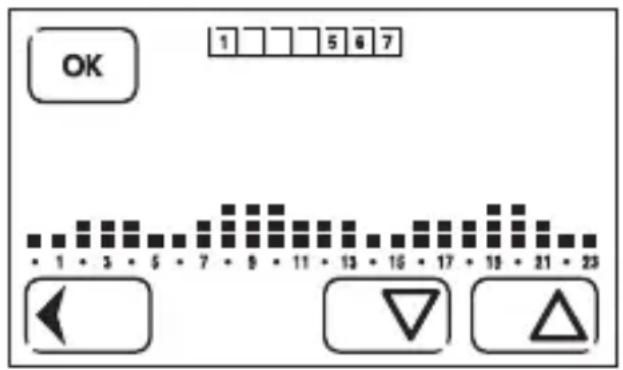
When the programming is finished, press the key ◀ to exit from the advanced menu.
Everything confirmed with the key OK will be saved.
The display will then show the main screen.
NOTE
- At any time it is possible to exit from the programming by pressing for 3 sec, returning to the main screen.
- To review the schedule for each day of the week. From the main screen, press PRG and scroll with the arrows, through the days, numbered 1-7.
- Each day will show the profile programmed.
COPY FUNCTION
Press PRG to enter the programming menu.
Day 1 blinks (Monday).
Navigate between days by pressing △ or ▽
For example, to copy the program of day 2 into days 3 and 4, select (by OK) the day 2 before selecting the days 3 and 4.
These days will be highlighted by a black background
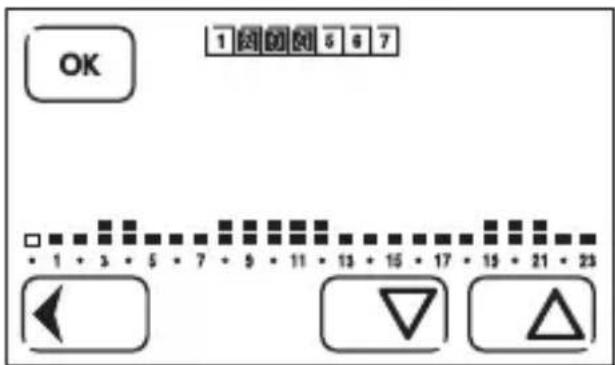
Press the time/temperature profile.
With the first hour of the profile flashing, press key ◀ for 3 seconds.
3 beeps confirm that the copy of the program is registered.
Press ← to exit the copy program.
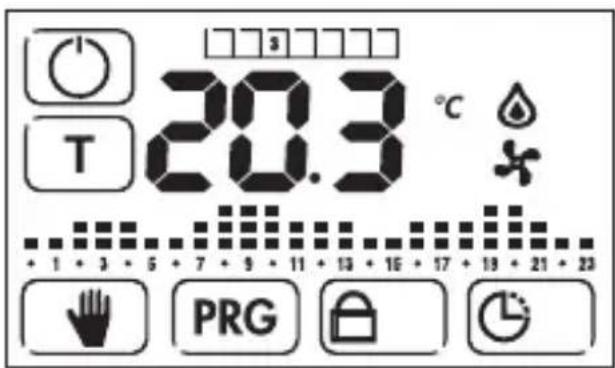
text_image
T 20.3 °C + 1 + 3 + 5 + 7 + 9 + 11 + 13 + 16 + 17 + 18 + 21 + 23 PRGNOTE
To review the schedule for each day of the week, from the main screen, press PRG and scroll with the arrows through the days numbered 1-7.
Each day will show the profile programmed.
TIMED MANUAL FUNCTION (VACATION PROGRAM)
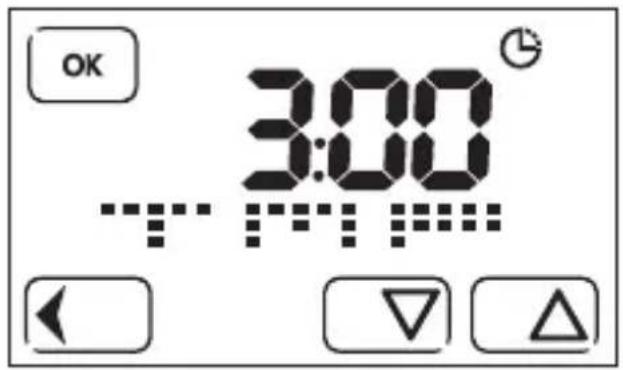
This function serves to maintain a specified temperature for a specific time, set by the user. Starting from the main display press 🎨 for 3 seconds. You will see the following screen. With keys △ or ▽ set the time (hour) after which this function will terminate. The maximum is 9999 hours.
text_image
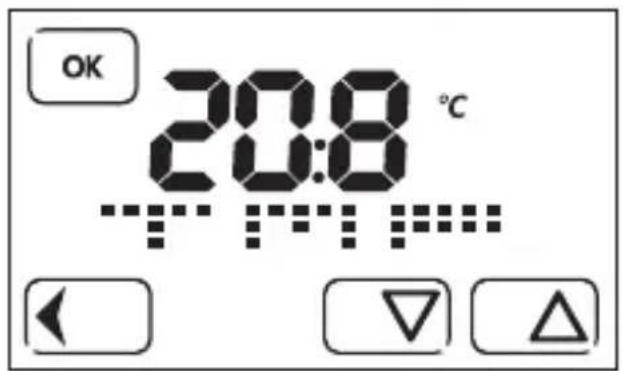
OK 3:00° T F MConfirm with OK and proceed to set the temperature in the same way by the keys △ or ▽. Confirm with OK.
text_image
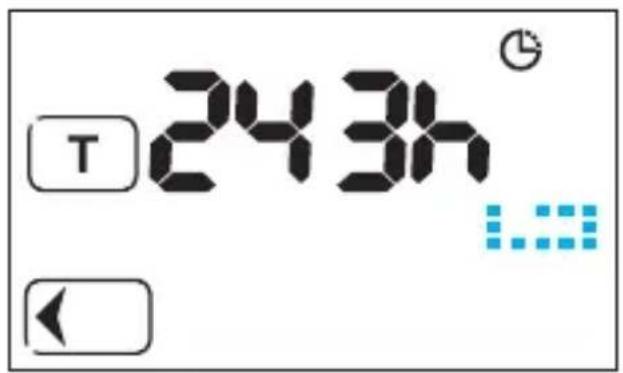
OK 20:8 °C T T T T TFollowing confirmation, a digital countdown plus a circular motion graphic will be displayed.
text_image
T 243h ↓Press T to view the set temperature. To exit from the vacation program, press the key ◀. The display has 3 different resolutions:
- Shows "hours: minutes" until 99 hours and 59 minutes
- Shows only the hours with the "h" symbol, until to 999 hours.
- Shows only the hours without the "h" symbol, from 1000 to 9999 hours
PARTY FUNCTION
With this function, you can temporarily change the values set for the 24 hour profile.
The function will last 24 hours and will not be saved.
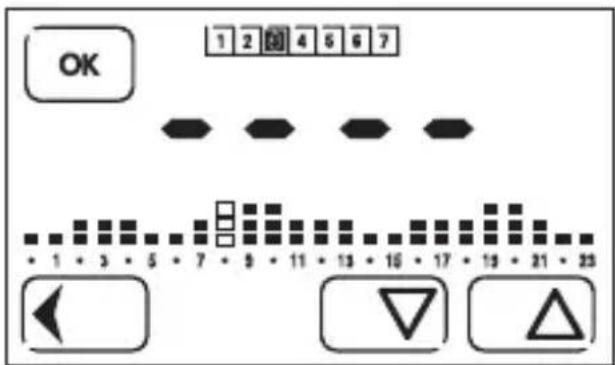
Starting from the Main screen, press PRG for 2 seconds
text_image
OK 1 2 3 4 5 6 7 + 1 + 3 + 5 + 7 + 9 + 11 + 13 + 16 + 17 + 19 + 21 + 23The display shows the profile for the current day, with the current time segment, flashing (eg hour 8).
With △ or ▽ it is possible to change the temperature level.
Confirming with OK move to the right towards the other hours of the day, while using the key it is possible to go back to the previous hour value.
After the change(s) there is no need to press any other keys.
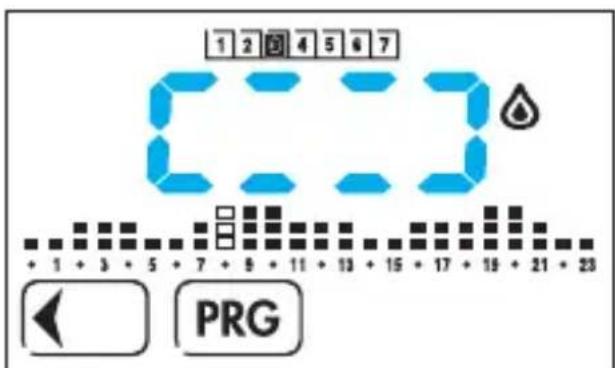
After a few moments, the function starts, indicated on the display by a sequential circular motion.
text_image
1 2 3 4 5 6 7 + 1 + 3 + 5 + 7 + 8 + 11 + 13 + 15 + 17 + 19 + 21 + 23 PRGNOTE
The changes you make will be active for 24 hours, then return back to original programming.
After the operation, the display will show the main screen.
At any time, is possible to end the Party Function with , while to view or edit the profile you will need to press PRG and repeat the process of change.
FROST PROTECTION FUNCTION
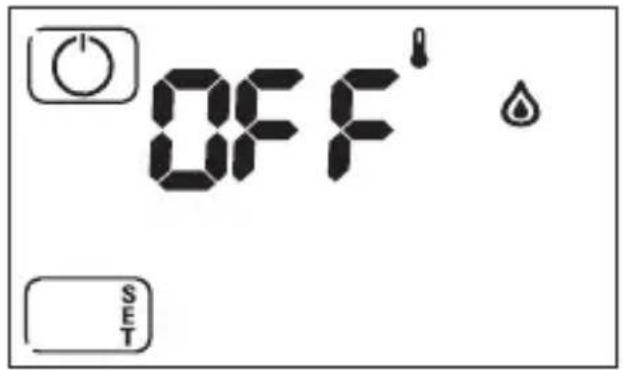
The frost protection function is active only when the thermostat is set to WINTER and is OFF.
It serves to protect the system against very low temperatures.
Upon reaching the set threshold, the function will be activated and the display will show the icons 🔊 🔒.
text_image
OFF SETAt any time, press 🔒 to turn on the thermostat and view the main screen.
REMOTE CONTROL
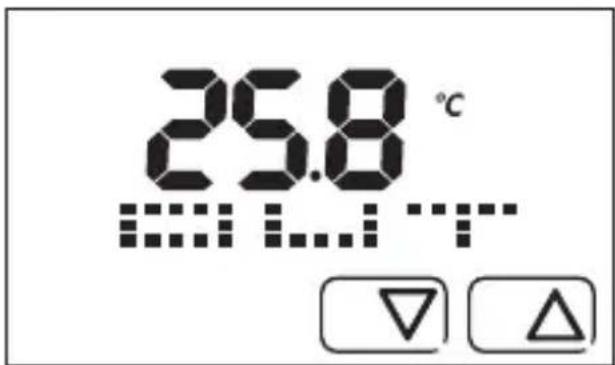
Closing the remote control contact forces the thermostat into the MANUAL mode. In this state, the temperature can be adjusted only by using the △ or ▽ keys.
NOTE
The temperature initially displayed will be the temperature previously set in the Manual mode
text_image
25.8 °C WHT ▽ △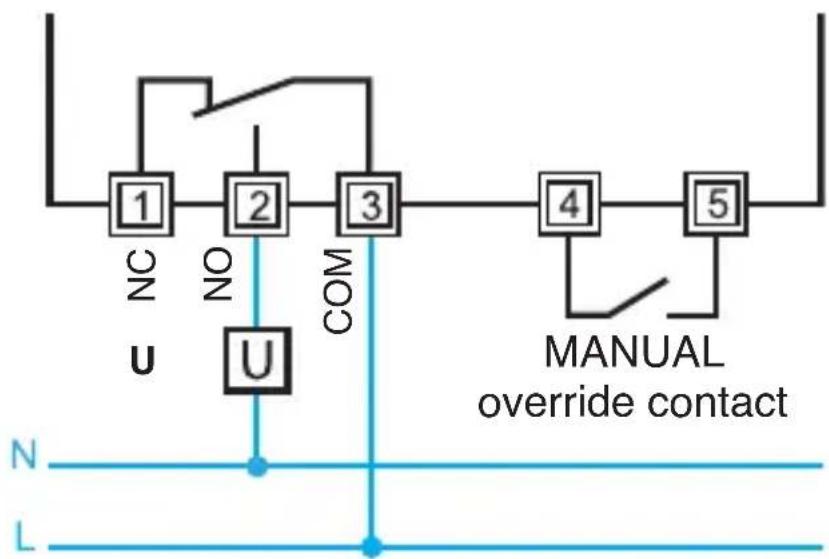
flowchart
graph TD
    A["1"] -->|NC| B["2"]
    C["2"] -->|NO| D["3"]
    E["3"] -->|COM| F["4"]
    G["4"] --> H["5"]
    I["N"] --> J["L"]
    K["U"] --> L["U"]
    M["MANUAL override contact"] --> N["4"]
    O["4"] --> P["5"]
ADVANCED MENU
The advanced settings are useful for customizing the thermostat.
The settings are:
1 - SUMMER-WINTER mode
2 - FROST PROTECTION Function
3 - TEMPERATURE DIFFERENTIAL
4 - ANTI-SEIZE PUMP Function
5 - DAYLIGHT SAVING Function
6 - FULL THERMOSTAT LOCK mode (with PIN)
7 - RESET
To enter to advanced settings, start from the main screen, press 🔒 to turn off the thermostat.
Press the key for 3 second.
1 - SUMMER-WINTER mode
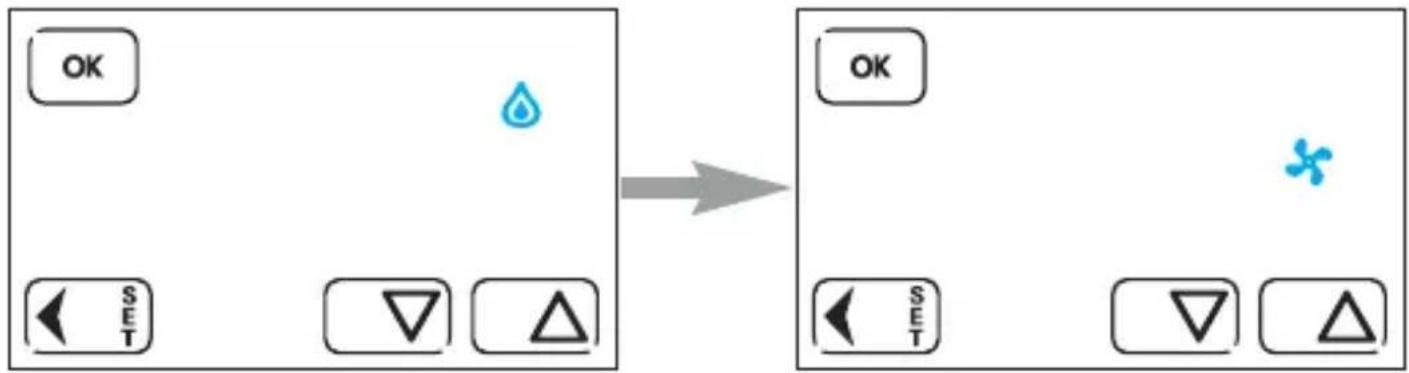
The display shows one of the following screens
flowchart
graph LR
    A["OK"] --> B["SET"]
    B --> C["△"]
    C --> D["Water滴图标"]
    D --> E["OK"]
    E --> F["SET"]
    F --> G["△"]
    G --> H["×"]
    H --> I["OK"]
    I --> J["SET"]
    J --> K["△"]
Choose the desired mode using the key △ or ▽.
Press OK to confirm and proceed to the next menu.
To exit, press or OK until the message OFF appears on the screen. If a change has been made, 3 beeps will confirm it has been accepted.
2 - FROST PROTECTION function
After setting the Summer or Winter mode, pressing OK the display will show the following screen.
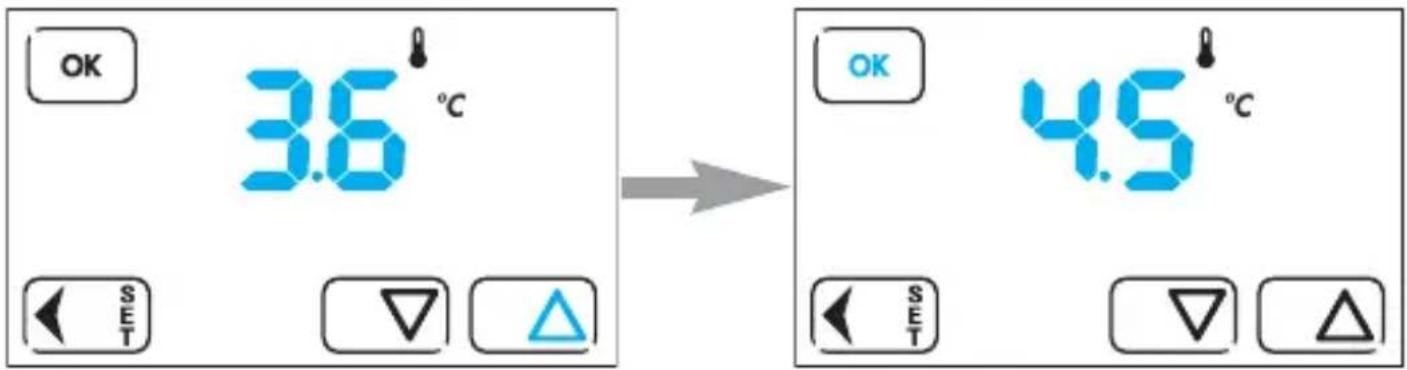
With the keys △ or ▽ it is possible to set the desired value, between 2°C and 8°C. Press OK to confirm and proceed to the next menu.
text_image
OK 3.6 °C ← SET ▽ △ → OK 4.5 °C ← SET ▽ △To step back in the menu press _SET^S , while to exit, press the key _SET^S for 3 seconds or press OK repeatedly until the message OFF appears on the screen. If something has been changed, 3 beeps will confirm the successful change.
3 - THERMAL DIFFERENTIAL
After confirming with the button OK the desired value of the frost protection, the display will show the following screen.
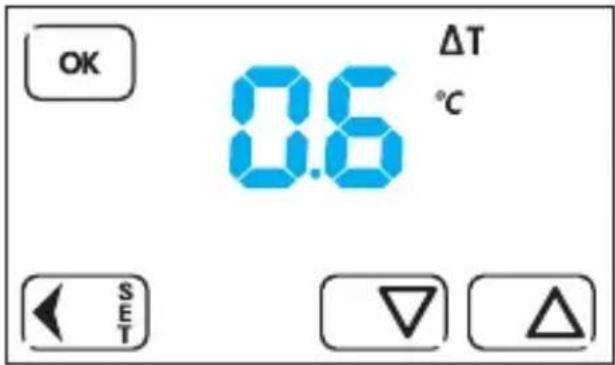
text_image
OK 0.6 ΔT °C ← SETUsing keys △ or ▽ it is possible to set the value of the thermal differential between 0.1 and 0.9.
Confirm with the key OK and proceed to the next menu.
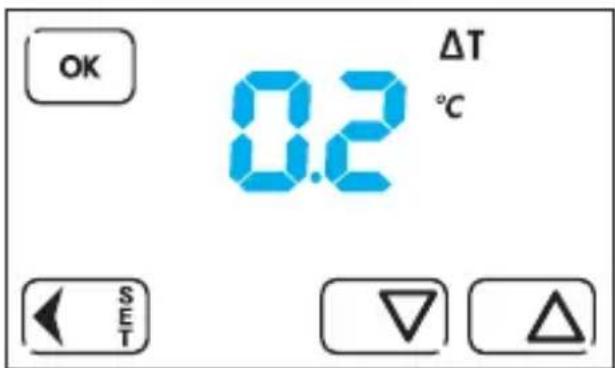
text_image
OK 0.2°C ΔT SETTo step back in the menu press ( SF ), while to exit, press the key ( SF ) for 3 seconds or press OK repeatedly until the message OFF appears on the screen. If something has been changed, 3 beeps will confirm the successful change.
4 - ANTI-SEIZE PUMP function
After programming the thermal differential, press OK to display the following screen
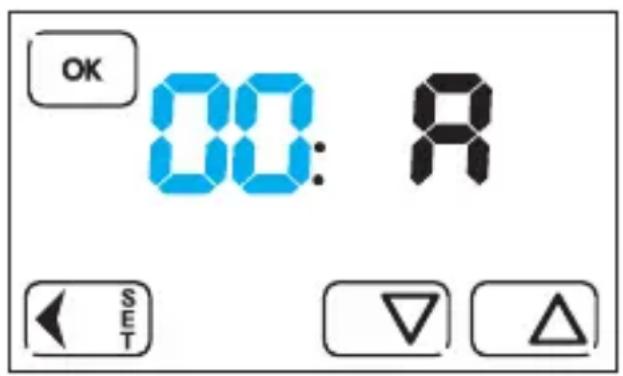
text_image
OK 00: 8 ← SET(Anti-seize function OFF)
The anti-seize pump function is a function that will configure the thermostat as an asymmetrical timer. By setting a value between 1 and 99 hours, the thermostat will close the output contact for 30 seconds, every time the set time value has elapsed.
Example:
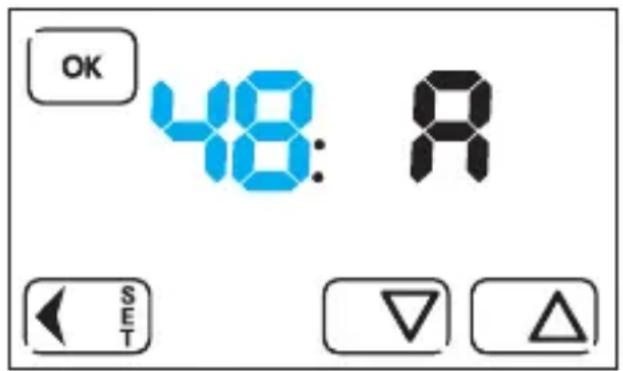
text_image
OK 48:8By setting with keys △ or ▽ the value 48 (48 hours = 2 days) and confirming with OK, the thermostat will close the relay contact for 30 seconds, every 2 days.
After enabling the function in the menu, the count will start after the last switching off of the relay.
To step back in the menu press ← SET while to exit the Advanced Menu, press and hold the ← SET for 3 seconds, or press OK repeatedly, until the screen shows OFF.
If something has been changed, 3 beeps will confirm the successful change.
5 - DAYLIGHT SAVING function
This function allows you to set the thermostat such that:
- Daylight saving time changes automatically
- Daylight saving time does not change automatically
The screens appear as follows:
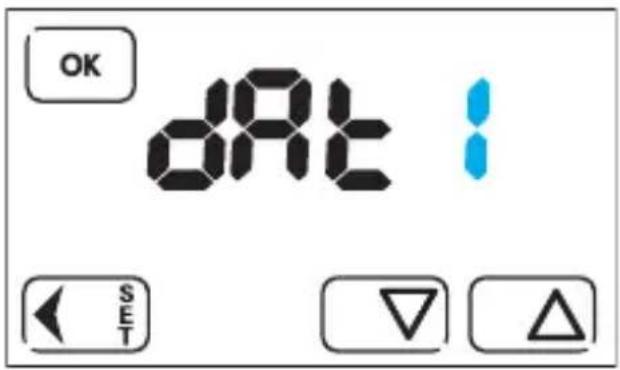
text_image
OK dA12Confirming with OK the thermostat will automatically change to daylight savings time.
With the keys △ or ▽ it is possible to change this value to ∩ ZERO so that the daylight saving changeover does not happen automatically.
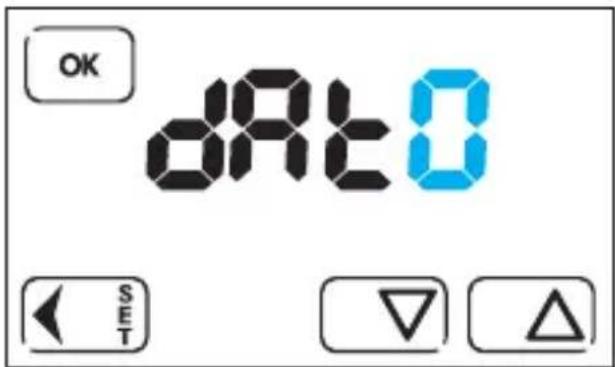
text_image
OK dA10Press OK to confirm and proceed to the next menu.
To step back in the menu press ← SET while to exit from the Advanced Menu, press and hold the ← SET for 3 seconds, or press OK repeatedly, until the screen shows OFF.
If something has been changed, 3 beeps will confirm the change.
6 - FULL THERMOSTAT LOCK MODE (WITH PIN)
Through this menu, you can enable the LOCK function for just the display, or for the entire thermostat, thus avoiding tampering (see p. 13 and 14). On the Advanced Menu, press OK until the following screen is displayed:
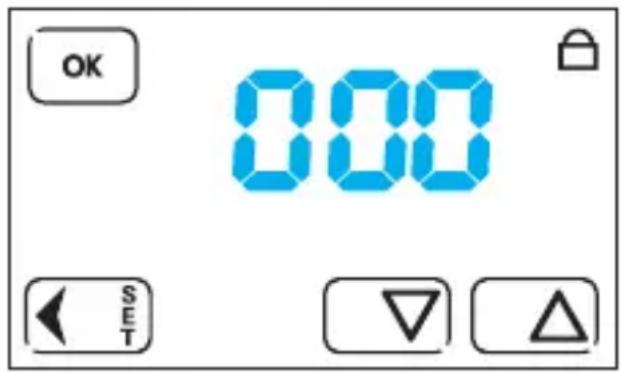
text_image
OK 000 SETTo enable the lock mode for the display only, set the PIN to 000 using the △ or ▽ keys. To enable the lock mode for the entire thermostat set the PIN to a number between 001 and 999.
When in service, if it is required to lock the display just press the key for 3 seconds (see pag. 13). To lock the entire thermostat press for 3 seconds, enter the PIN set previously, and confirm with OK (see p.14). To unlock, repeat the same procedure.
NOTE
If the PIN has been forgotten, enter the unlock code 513.
Once unlocked you may want to return to the advanced menu to verify and/or change the PIN previously entered.
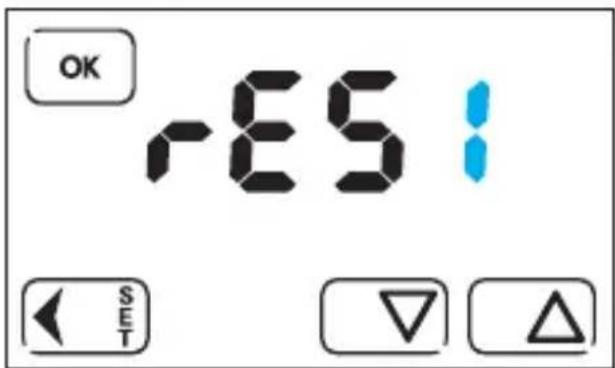
7 - RESET
This will restore all factory settings.
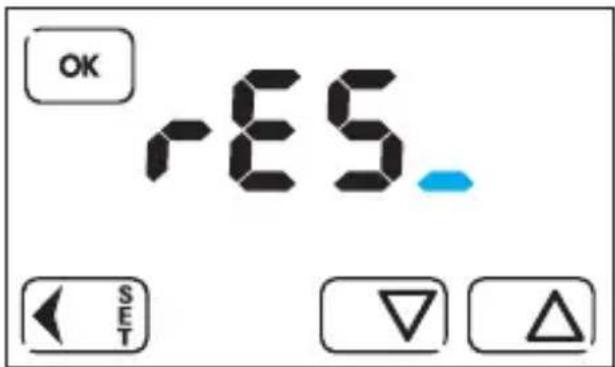
text_image
OK rE5.Using △ or ▽ set -ES :
text_image
OK rE5: ← SET ▽ △Confirming with OK the thermostat will turn off completely and then turn back on showing first the version of the software and then the main screen.
The product will be reset to its factory settings.
NOTE
Time and date will not be cleared/reset.