Rectangular (400x200x99) - Above-ground pool JILONG - Free user manual and instructions
Find the device manual for free Rectangular (400x200x99) JILONG in PDF.


| Product Type | Above-Ground Rectangular Frame Pool |
| Brand | JILONG |
| Model | Rectangular (400x200x99) |
| Dimensions (L x W x H) | 400 cm x 200 cm x 99 cm (13' x 6.5' x 39") |
| Water Capacity | 1854 gallons (7020 liters) |
| Material | PVC liner with steel frame |
| Color | Grey |
| Minimum Ground Area | 4.2 m x 2.2 m (approx.) |
| Recommended Ground Slope | Less than 3° |
| Assembly Time | 45 minutes (excluding site preparation and water filling) |
| Number of Persons Required for Assembly | 2 adults |
| Filter Pump Included | No (sold separately) |
| Drain Valve Included | Yes (with cover and connector) |
| Maintenance Frequency | Clean filter cartridge every 2 weeks; test water chemistry weekly |
| Safety Warnings | No diving or jumping; constant adult supervision required; keep children under 5 at highest risk |
| Warranty | 90-day limited warranty for original owner |
| Storage | Cool, dry place; fold after complete drying |
| Replacement Parts Available | Yes (contact consumer service for replacement parts) |
| User Manual Language | English (PDF downloadable) |
Frequently Asked Questions - Rectangular (400x200x99) JILONG
User questions about Rectangular (400x200x99) JILONG
0 question about this device. Answer the ones you know or ask your own.
Ask a new question about this device
Download the instructions for your Above-ground pool in PDF format for free! Find your manual Rectangular (400x200x99) - JILONG and take your electronic device back in hand. On this page are published all the documents necessary for the use of your device. Rectangular (400x200x99) by JILONG.
USER MANUAL Rectangular (400x200x99) JILONG
READ, UNDERSTAND, AND FOLLOW ALL INSTRUCTIONS CAREFULLY BEFORE INSTALLING AND USING THIS PRODUCT!
RECTANGULAR FRAME POOL
OWNER'S MANUAL
FOR FOLLOWING SIZES:
-4mx2mx99 cm (13'x6,5'x39")
-4mx2.07mx1.22m (13'x6,8'x48")
-5.4mx2.74mx1.22m (18'x9'x48")
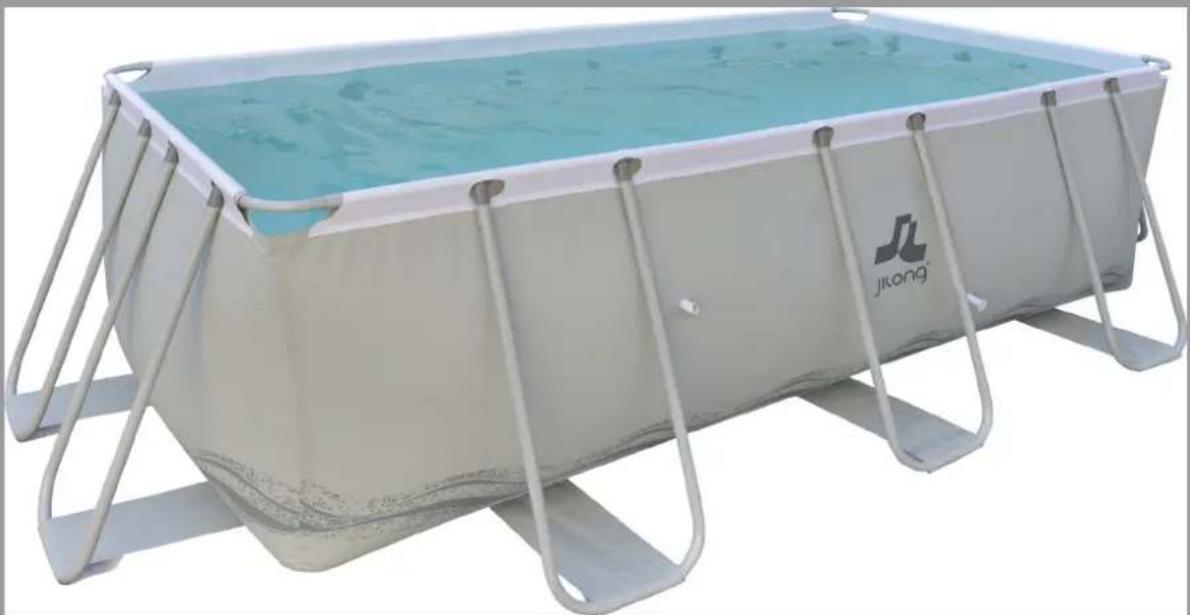
natural_image
Exterior view of a rectangular aquaculture tank with metal frame structure and water-filled interior (no signage or text visible)Drawing for illustration purpose only. Actual product may vary. Not to scale.
STOP!
DO NOT RETURN PRODUCT TO STORE
READ CAREFULLY AND KEEP IT FOR FUTURE REFERENCE!
CONTENTS
IMPORTANT SAFETY RULES----02
PART REFERENCE----04
SITE SELECTION 06
SET UP THE POOL----07
FILL THE POOL WITH WATER----08
DISASSEMBLY AND STORAGE 09
IN-SEASON POOL MAINTENANCE AND WATER CARE----10
TROUBLE SHOOTING 11
LIMITED WARRANTY 12
PART1-IMPORTANT SAFETY RULES

WARNING: To enhance the enjoyment of your pool and protect the safety of those in and around the pool, ALWAYS STRICTLY OBSERVE the following safety and maintenance instructions:
1). It is the responsibility of the pool owner to identify and obey all local and state laws pertaining to above ground swimming pool safety PRIOR to set-up or use of the pool. These include, but are not limited to, laws on: decks, fences, barriers, covers, pool ladders, lighting, and required safety equipment. Please consult your local authorities to ensure compliance.
2). Do not allow unattended Children in the pool. Always make sure that at least one responsible adult is supervising all Children and those who do not know how to swim AT ALL TIMES. Never swim / bathe in the pool alone.
3). NEVER permit diving or jumping into the pool. Never enter the pool from any decks or other raised surfaces. The water level in your pool is extremely shallow and is not suitable for these activities. Failure to heed these instructions can result in serious injury or even death.
4). Do not permit Children or adults to engage in any “rough-housing” or other aggressive sports or activity in or around the pool. Failure to observe this guideline can result in serious injury for those in and around the pool area.
5). Always maintain the proper pool safety equipment in an easily accessible area adjacent to your pool. Clearly post emergency phone numbers as well as safety advisories and rules (such as “No Jumping or Diving” and “Do Not Swim Alone”). Do not allow bathers in the pool unless the area is sufficiently bright or lighted.
6). All filtrations are in agreement with the installation standard NF C 15-100 that specify that all electric appliances located within 3.50 m for the pond and with a free access should have a low voltage supply of 12V. All electrical appliance supplied with 220V must be located at least at 3.50 meter from the edge of the pond. Consult the manufacturer for any change of one or several elements to the filtration system.(For France Market)
7). the safety of your children is up to you! The risk is greatest when children are younger than 5 years old. The accidents do not only happen to others! Be ready to face it!
8). Watch and act:
PART1-IMPORTANT SAFETY RULES
- Supervision of children must be close and constant;
- Designate one responsible for security;
- Strengthen monitoring when there are multiple users in the pool;
- Teach your children to swim as soon as possible;
- Wet neck, arms and legs before entering the water;
- Learn lifesaving, especially those specific to children;
- Forbid diving or jumping in front of young children;
- Forbid running and violent games around the pool;
- Do not allow access to the pool without a shirt or bra for a child not knowing how to swim and not accompanied in the water;
- Do not leave toys near unmonitored pool;
- Keep water clear and healthy;
- Store water treatment products out of reach of children;
9). Plan:
- Phone near the pool accessible to not leave your children unattended when you call;
- Buoy and pole near the pool;
10). Moreover, some devices may contribute to security:
- Barrier whose portal will be constantly kept closed (e g a hedge cannot be regarded as a protective barrier);
- Manual or automatic cover properly positioned and secured protection;
- Electronic sensor to detect or drop in service and operational, but not a substitute for close supervision;
11). Accident:
- Remove the child from the water as quickly as possible;
- Call for help immediately and follow the advice that given to you;
- Replace wet clothes with warm blankets;
12). Store and view pool numbers of first aid:
- Fire: (18 for France);
- EMS: (15 for France);
- Poison Center.
13). Prohibit access to the pool for the deterioration or the system (s) filter;
16). Warning: Never put the empty swimming pool in the open air.
PREVENT DROWNING
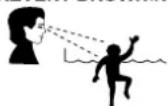
WARNING
Closely watch children who are in or near this pool. Children under 5 are at highest risk for drowning.
Stay away from drains & suction fittings
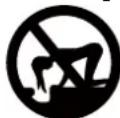
WARNING
Your hair, body & jewelry can get sucked into drain. You could be held under water & drown!
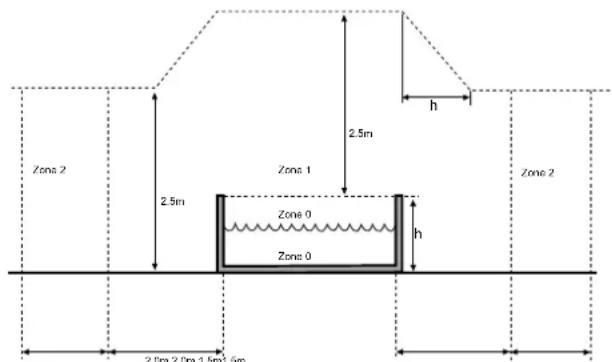
NO DIVING!
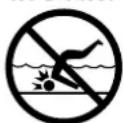
WARNING
You can break your neck and be paralyzed!
PART2-PART REFERENCE
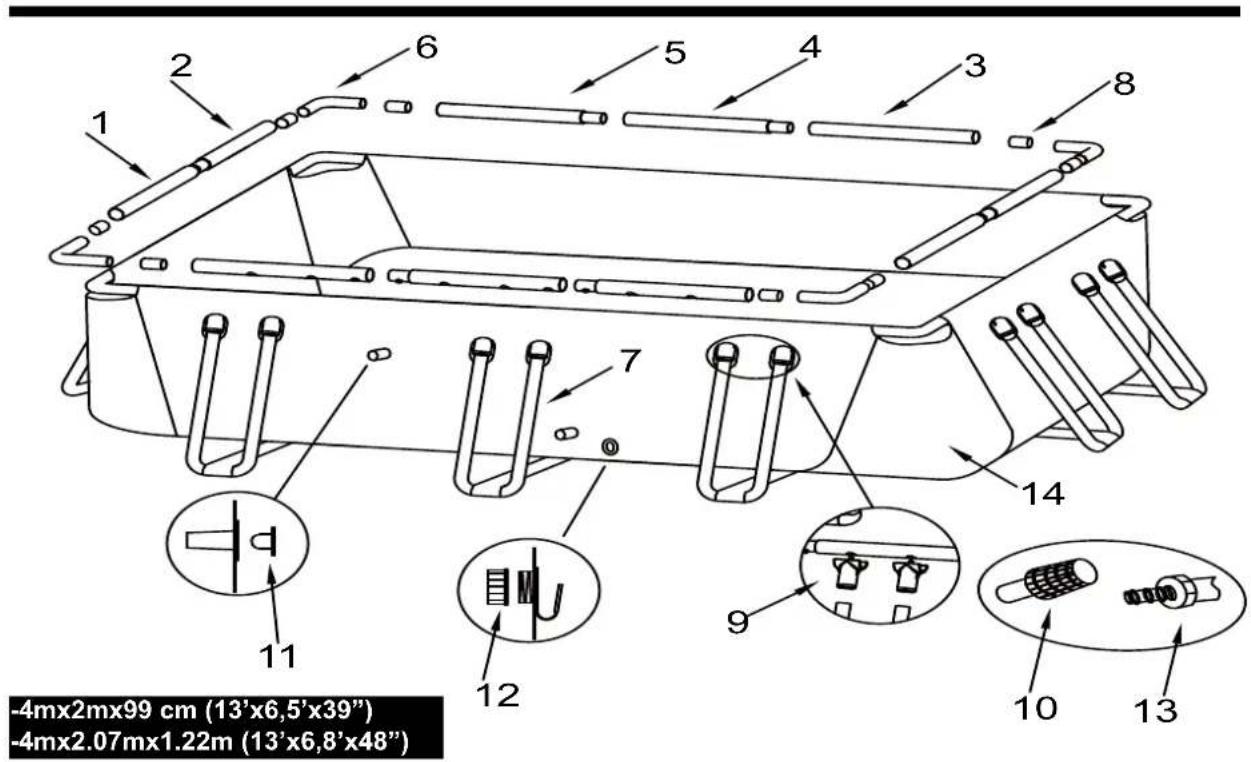
NOTE: Drawing for illustration purpose only. Actual product may vary. Not to scale.
Before assembling your pool, layout and review the contents to become familiar with all the parts you will be using during the assembly:
| 4mx2mx99 cm (13'x6,5'x39") | 4mx2.07mx1.22m(13'x6,8'x48") | 4mx2mx99 cm(13'x6,5'x39") | 4mx2.07mx1.22m(13'x6,8'x48") | |||||||
| NO. | NAME QUANTITY | TERIALNUMBER | QUANTITY | TERIALNUMBER | QUANTITY | TERIALNUMBER | QUANTITY | TERIALNUMBER | QUANTITY | TERIALNUMBER |
| 1 | HorizontalBeam A | 2 | 393037 | 2 | 393045 | 2 | 290428 | 2 | 290436 | |
| 2 | HorizontalBeam B | 2 | 393038 | 2 | 393046 | 2 | 290429 | 2 | 290437 | |
| 3 | HorizontalBeam C | 2 | 393039 | 2 | 393047 | 2 | 290430 | 2 | 290438 | |
| 4 | HorizontalBeam D | 2 | 393040 | 2 | 393048 | 2 | 290431 | 2 | 290439 | |
| 5 | HorizontalBeam E | 2 | 393041 | 2 | 393049 | 2 | 290432 | 2 | 290440 | |
| 6 | L-Tube | 4 | 393042 | 4 | 393050 | 4 | 290434 | 4 | 290442 | |
| 7 U-Tube 10 39 | 3043 10 39 | 3051 10 29 | 0433 10 29 | 0441 | ||||||
| 8 | Sleeve | 8 | 290435 | 8 | 290435 | 8 | 290435 | 8 | 290435 | |
| 9 T Joint 20 39 | 010 20 39 | 010 20 29 | 0177 20 29 | 0177 | ||||||
| 10 | Hole Strainer | 2 | 290312 | 2 | 290312 | 2 | 290312 | 2 | 290312 | |
| 11 | Stopper | 2 | 290311 | 2 | 290311 | 2 | 290311 | 2 | 290311 | |
| 12 | Drainage ValveCover | 1 | 290367 | 1 | 290367 | 1 | 290367 | 1 | 290367 | |
| 13 | Drainage ValveConnector | 1 | 290365 | 1 | 290365 | 1 | 290365 | 1 | 290365 | |
| 14 | Pool Liner | 1 | 393044 | 1 | 393052 | 1 | 011414 | 1 | 011413 | |
| Color | GREY | GREY | BLUE | BLUE | ||||||
PART2-PART REFERENCE
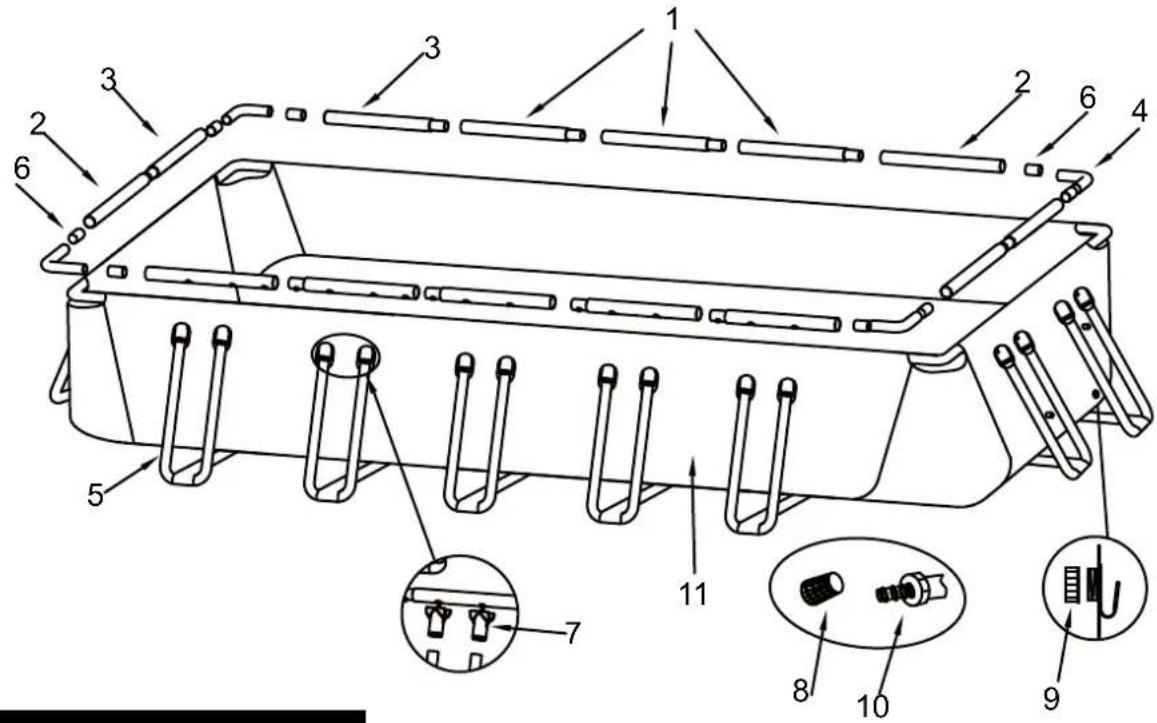
-5.4mx2.74mx1.22m 18'x9'x48")
NOTE: Drawing for illustration purpose only. Actual product may vary. Not to scale.
| 5.4mx2.74mx1.22m (18'x9'x48") | |||||
| NO. | NAME | QUANTITY | SERIAL NUMBER | QUANTITY | SERIAL NUMBER |
| 1 | Horizontal Beam A | 6 290180 6 393053 | |||
| 2 | Horizontal Beam B | 4 290196 4 393054 | |||
| 3 | Horizontal Beam C | 4 290319 4 393055 | |||
| 4 L-Tube 4 290320 4 | 393056 | ||||
| 5 U-Tube 14 290399 | 14 393057 | ||||
| 6 S-eeve 8 290435 8 | 290435 | ||||
| 7 T-Joint 28 290177 | 28 393010 | ||||
| 8 | Hole Strainer | 2 | 290368 | 2 | 290368 |
| 9 | Drainage Valve Cover | 1 290367 1 290367 | |||
| 10 | Drainage Valve connector | 1 290365 1 290365 | |||
| 11 | Pool Liner | 1 | 011228 | 1 | 393058 |
| Pool Cover | 1 | 016114N | 1 | 016114NV01 | |
| Ground Cloth | 1 | 016108N | 1 | 016108NV01 | |
| Color | BLUE | GREY | |||
PART3-SITE SELECTION
WARNING: Pools installed on inadequately level surfaces are subject to leaking, forming irregularities, or collapse, which can result in property damage or serious injury for those in or around the pool area!
WARNING: Do not use sand during setup process. If it appears that there is a need for use of a “leveling agent”, then your set-up site is likely unsuitable. FAILURE TO OBEY THIS WARNING MAY RESULT IN SERIOUS PERSONAL INJURY.
CAUTION: Please choose your set-up area carefully, as lawn and other desirable vegetation underneath the ground cloth(If applicable) will die. Furthermore, try to avoid setting the ground cloth(If applicable)in areas prone to aggressive plant and weed species, as they may grow through the ground cloth(If applicable).
CAUTION: The pool must be accessible to a 110 or 230-volt AC outlet protected by a Ground Fault Circuit Interrupter (GFCI). The pool should be set no closer than 10 ft. to the power source, but no further than the length of the filter pump cord. Under no circumstances should an extension cord be used to extend the range of the connection.
It is absolutely essential to select a suitable site for your pool BEFORE attempting to fill it with any water. Please select a set-up site which strictly conforms to the following guidelines:
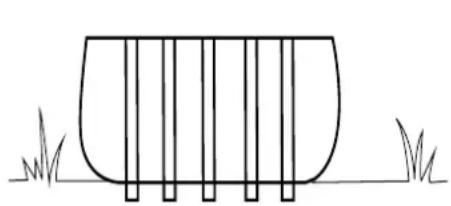
Guide1. Ensure that the area is firm, flat (no bumps or mounds of earth) and extremely level, with a grade not exceeding 3^ of slope at any point in the set-up area.
Guide2. Make sure that the area you have selected to set-up the pool is completely free of sticks, stones, sharp objects or other foreign debris.
Guide3. Select an area that is not directly underneath overhead power lines or trees. Additionally, make sure that the pool set-up area does not contain underground utility pipes, lines, or cables or any kind.
Guide4. If a ground cloth is provided with your pool kit, its use is highly recommended. The ground cloth will help protect the pool liner from damage due to weed growth, sharp objects, and debris.
Guide5. If at all possible, choose an open location on your property that is exposed to direct sunlight. This will help to warm your pool.
Flat,Level Ground-CORRECT
Bumpy, Sloping Ground-INCORRECT
natural_image
Simple line drawing of a container with vertical bars and grass at the base (no text or symbols)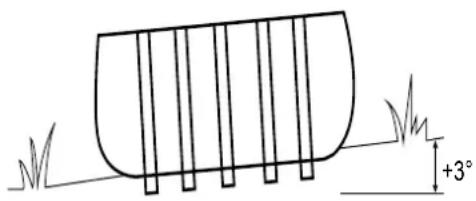
natural_image
Simple line drawing of a grassy container with vertical supports and a +3° angle indicator (no text or symbols)IMPORTANT: Do not start assembly if any pieces are missing. For replacement pieces call the Consumer Service telephone number in your area.
The number of persons required for installation: 2 adult at least.
Total installation time except the time for site preparation and water filling :
45 minutes for size 13'×6.5'×39"/13'×6.8'×48"; 60 minutes for size 18'×9'×48".
Step1. ACCOUNT FOR ALL PARTS.
Remove all the parts from the carton(s) and place them on the ground in the location where they are to be assembled. Check each part according to "PART REFERENCE". Make sure all the pieces to be assembled are accounted for.
Step2. INSTALL DRAIN VALVES COVER AND STOPPER
Make sure that outer drain plug is inserted into the outer drain cap and drain valve cover is screwed on tightly. Plug the connection holes with the stoppers. (The out drain plug changes according to different size of pool.)

natural_image
Four-panel line drawing showing hands performing a mechanical or mechanical assembly, with no visible text or symbols.STOPPER Out Drain Plug A Out Drain Plug BDrain Vavle Cover
Step3. INSTALL THE U-TUBES

natural_image
Line drawings showing a hand holding a tool near a vertical pole, with no text or symbols present.Slide each U-tube through the bottom addition connected belt
T-join
Step4. INSTALL HORIZONTAL BEAM
For the long side sleeve of the pool:

For 4mx2mx99 cm (13'x6,5'x39")/4mx2.07mx1.22m (13'x6,8'x48"), the combination is E-D-C

For 5.4mx2.74mx1.22m (18'x9'x48"), the combination is C-A-A-A-B

natural_image
Simple line drawing of two apple-shaped objects on a horizontal line (no text or symbols)Slide combined beams into sleeve, the hole on the beams should face outwards.
For the short side sleeve of the pool:

For 4mx2mx99 cm (13'x6,5'x39")/4mx2.07mx1.22m (13'x6,8'x48"), the combination is A-B

natural_image
Two identical rectangular shapes with internal dots, no text or symbols presentBEAM B BEAM C
For 5.4mx2.74mx1.22m (18'x9'x48"), the combination is B-C

Slide combined beams into sleeve, the hole on the beams should face outwards.
Step5. INSTALL HORIZONTAL BEAM AND L-TUBE

Use the connection end of the L tube to connect the adjacent horizontal tubes with transparent plastic sleeve.
Step6. INSTALL HORIZONTAL BEAM AND U-TUBES
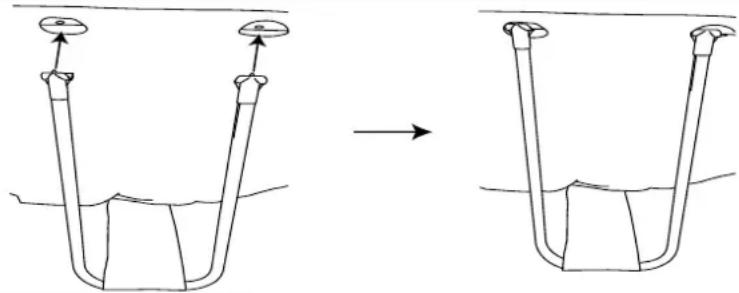
Find the one side holes on the horizontal beam. Place and lock the T-joints into the holes. Ensure they are fully connected
PART5-FILL THE POOL WITH WATER
WARNING: Do not leave pool unattended while filling with water.
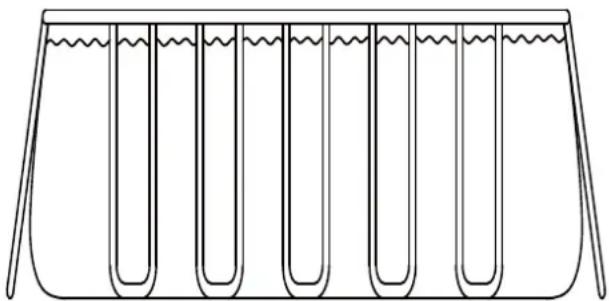
WARNING: If more than 1\~2 inches of water collects on any one side before you start filling in the center. The pool is not level enough, and must be corrected! shall pull out the drain plug, release the water completely, disassemble the pool completely, locate the pool on a plane surface, repeat set up instruction.
WARNING: DO NOT OVERFILL as this could cause the pool to collapse. In times of heavy rainfall you may need to empty some of the water to ensure the level is correct.
natural_image
Line drawing of a test tube setup with multiple U-shaped vials and wavy liquid levels (no text or symbols)- Make sure the drain fitting is plugged securely and the cap is in place. Start filling the pool with water. After about 1-inch of water is on the bottom, stop filling and smooth wrinkles out of the bottom of the pool. Pull the outer wall out from the top edge, all around the bottom of the pool, so that it fills evenly.
- Continueue filling the pool until water level.
PART6-DISASSEMBLY AND STORAGE
WARNING: Do not let your children stand at downfold and face the water outlet during the drainage. The water current may sweep your children.
WARNING: Pool should be stored at places where is cool and dry, with no sharp object surroued, or no heavy objects lying above, which may cause damage to the pool.
Step1. If you have a filter pump, make sure that the electricity source to the filter pump has been disconnected.
Step2. Check to ensure that the out drain plug is firmly inserted on the inside of the pool.
Step3. Attach your garden hose to the drainage valve connector, and placing the other end of the hose in an area where the water can drain safely, such as a storm drain or street gutter. Remember that because water always finds its own level, the end of the hose must be lower in elevation than the pool to ensure complete drainage.
Step4. If you have a filter pump, insert the stopper into the inlet and outlet fixtures, on inside of pool, and then disconnect the filter pump hoses.
Step5. Attach the drainage valve connector to the drain outlet by turning connector in a clockwise direction.
Step6. Open the out drain plug on the inside of the pool and the water will begin to drain immediately.
Step7. Disconnect the hose and drainage valve connector when finished.
Step8. Replace the out drain plug on the inside of the pool.
Step9. Be sure that the pool liner is completely dry before folding the pool for long-term storage. Leaving the pool exposed to sunlight for a few hours will clean and speed the drying process and make it easier to fold the pool for storage. (Never attempt to fold or stow a pool that is not completely dry as this could lead to a proliferation of mold or mildew build-up during the time the pool is in storage.)
Step10. Remember, proper off-season storage is critical to protect your investment in your pool.(especially in winter) Once drained and dry, your pool should be carefully folded and wrapped in a ground cloth (if available) or other similar protective tarp-like material. The pool and all applicable accessories such as the pump, cover, ground cloth, ladder, hoses, clamps, and hardware should be kept together and stored indoors, in a reasonably warm, dry and weatherproof location.
FOLDING INSTRUCTION
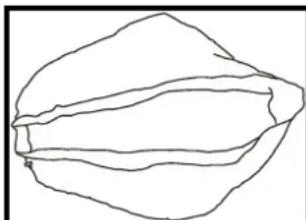
Before folding, it's better to dry all parts and pool completely by lying them in the sun for one hour or so.(PIC.1). And then, spread some talcum powder to prevent the vinyl from sticking together.
Step1. Please fold the protrusion sides inside to gain rectangle shape.(PIC.2).
Step2. Fold each half of the rectangle to gain a smaller rectangle shape.(PIC.3).
Step3. Fold each ends backwards. (PIC.4).
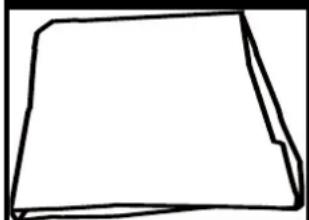
Step4. Fold the rest ends together to create an ultimate rectangle one.(PIC.5).
TIPS1. Please remove air inside to make the folded pool thin and flat during each folding.
TIPS2. The original packing can be used for storage.
natural_image
Simple line drawing of a fruit or vegetable with layered sections (no text or symbols)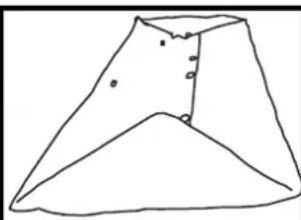
natural_image
Simple line drawing of a symmetrical geometric shape with no text or symbols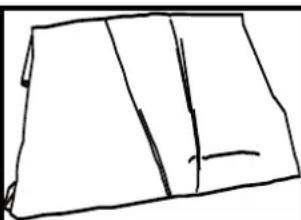
natural_image
Simple line drawing of a folded paper or sheet with vertical lines and a horizontal line (no text or symbols)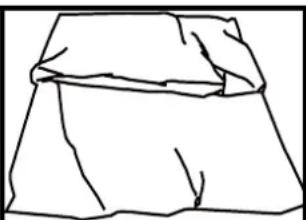
natural_image
Simple line drawing of a folded skirt or blanket (no text or symbols)PIC.1 PIC.3 PIC.4 PIC.2
natural_image
Simple line drawing of a folded paper or sheet (no text or symbols)PIC.5
PART7-IN-SEASON POOL MAINTENANCE AND WATER CARE
WARNING: If applicable, the filter pump included with your pool is designed to remove dirt and other small particles from your pool water. However, to maintain pool water that is perfectly clear, algae free, and safe from harmful bacteria, it is VERY IMPORTANT TO ENGAGE IN A CONSISTENT REGIMEN OF CHEMICAL TREATMENT. Contact your local pool supply retailer for guidance on the safe and effective use of chlorine, shock, algaecide and other such chemicals.
WARNING: To avoid skin and eye irritation or even injury to bathers, never add chemicals to the pool while it is occupied. Never add any chemicals or substances to your pool if you cannot verify the exact quantity or type to add to the water. Consult a pool supply retailer for specific instructions and guidelines concerning the use of chemicals in your pool.
WARNING: It is highly recommended that pool owners frequently test their pool water to ensure that the pH and chlorine concentration in the water is optimal for safe and enjoyable bathing throughout the season. Please consult your pool supply retailer to find a suitable testing kit and instructions on its use.
WARNING: Non-respect of the maintenance rules may result in serious hazards for health and especially for the children.
This product is designed to be storable, seasonal pools. If you live in a temperate area in which the pool will not be in use year-round, it is STRONGLY RECOMMENDED that you drain your pool, clean and dry it thoroughly, and store it in a protected area for the off-season. This will help extend the life of your pool and prevent a safety hazard from developing while the pool is not in use. During the season of use of the pool kit, the filtration system (if applicable) must be put into service each day, long enough to ensure at least a complete renewal of the volum of water.
In order to keep your pool water clean and hygienic all season long please closely adheres to the following guidelines:
- The proper and consistent use of basic pool chemicals are required to maintain the proper pH balance in your pool water. Furthermore, the application of chemicals will help prevent the growth of harmful bacteria or algae in your pool, and assist your filter-pump in keeping your water crystal clear. Chemicals that your pool may require include but are not limited to:
1) Tabular, Granular, or Liquid Chlorine: Disinfects pool water and inhibits algae growth.
2) PH Adjusting Chemicals: These are used to correct PH level and make water more or less acidic.
3) Algaecides: These chemicals are formulated to remove algae.
4) "Shock" (Super chlorinator): Eliminates certain organic and other combination compounds that can affect water clarity. In order to obtain specific details on the use of chemicals, please consult a local pool supply retailer and provide them with the volume of water in your specific pool, and if desired, a sample of your pool water. This will enable them to properly instruct you on: 1) which chemicals to purchase, 2) what quantities of chemicals to purchase, and 3) how to use specific chemicals safely and effectively.
- Never let chlorine come into direct contact with the pool liner until it has completely dissolved. This means that granular or tabulated chlorine is first dissolved in a bucket of water before applying to pool water, and likewise, liquid chlorine is slowly and evenly poured into pool water from various locations around perimeter of pool.
DANGER: NEVER add water to chemicals. INSTEAD, always add chemicals to water. Also, never mix separate chemicals together, rather, add chemicals to the pool separately and allow them to circulate throughout the pool before adding additional types of chemicals.
- We recommend that you purchase a test kit, and frequently test your pool water to make sure that your PH balance and chlorine levels are optimal. Your local pool supply retailer can provide information on purchasing and using a test kit that is most suitable for your needs. NOTE: Excessive chlorine levels or low (acidic) pH levels can damage your pool liner, so please take corrective action as soon as possible if testing reveals either condition.
The tasks of removing larger debris from your pool and keeping the inside of the pool liner clean are simplified by using a Prompt Set Pool Maintenance Kit, which includes a leaf skimmer and garden hose powered vacuum. Maintenance Kits are included as a bonus feature in larger pool systems, and can also be purchased separately as an accessory. Please contact
PART7-IN-SEASON POOL MAINTENANCE AND WATER CARE
your local after sale service center if you want to get advice on any repair during the life of the pool kit.
- If applicable, check your filter-pump cartridge every two weeks (or more frequently during periods of heavy usage) to verify whether it needs to be cleaned or replaced. If your cartridge is no longer white in color, attempt to spray it clean with a strong blast of water from your garden hose. If your cartridge cannot be cleaned in this manner, the cartridge must be replaced. Failure to frequently clean and/or replace your cartridges will affect the effectiveness of your filter pump and could shorten its useful life.
- If your pool system included a cover, try to keep your pool covered at all times when not in use. This will help keep the wind and other elements from depositing dirt and debris in your pool, and will also prevent excess rainwater from overfilling your pool.
- Remind your family and friends to always hose or rinse off any dirt or tanning oil from their hands, feet, and body prior to entering the pool.
- It's necessary to monitor the bolts and hardware of the pool (eg. rust stain) when possible.
- Once your pool has been filled with water for the season, take note if your pool becomes overfilled due to rainwater or accidental overfill. If this should occur, it is important to drain or bale out the excess water as soon as possible. If it is an inflatable ring pool, the water level should never be higher than the bottom edge of the inflatable ring.
PART8-TROUBLE SHOOTING
| PROBLEM | ESCRIPION CAUSE REMEDY | ||
| COLORED WATER | ·Water turns blue, brown, or black when first treated with chlorine. | ·The chlorine is oxidizing minerals in your water. This commonly occurs with water from different sources. | ·Adjust pH to recommended level.·Run filter until water is clear.·Regularly clean cartridge. |
| PARTICALS SUSPENDED IN WATER | ·Water looks “milky” or cloudy. ·“Hard Water” caused by an elevated pH.·Chlorination is inadequate.·Foreign debris in water.·Bathers are not cleaning their feet prior to entering pool. | ·Adjust pH. Check with a swimming pool supply retailer for correct water treatment.·Ensure proper chlorine level.·Clean or replace your filter.·Spray off dirt with a high-pressure hose before entry. | |
| PERSISTENT LOW WATER LEVEL | ·Pool appears to be losing water on a daily basis. | ·Tear or hole in pool liner.·Tear or hole in a filter pump hose.·Hose clamps are too loose.·Evaporation from high summer temperatures. | ·Locate damage and repair with the included patch kit.·Repair or replace hoses.·Tighten all hose clamps.·Keep pool covered when not in use. |
| ALGAE | ·Water has greenish tint.·Green, brown or black spots appear on pool liner.·Pool bottom is slippery and/or an unpleasant odor is present. | ·Algae is present. ·Apply “shock” treatment (super-chlorinator). Check pH and adjust to an appropriate level per your local pool supply retailer.·Vacuum or lightly scrub pool liner.·Test water often to maintain proper chlorine levels. | |
| POOL WATER IS COOL | ·Water is not warming to a comfortable swimming temperature. | ·Pool was set up in an excessively shady or tree lined area.·Heat is escaping from pool water. | ·Relocate pool to a more open location where it can get maximum exposure to sunlight during peak daylight hours.·Keep your pool covered whenever it is not in use. |
PART9-LIMITED WARRANTY
We warrant all components contained in this Prompt Set™ Pool/SPA Pool (excluding the filter pump unit) against defects in materials and workmanship under normal use and service, for a period of 90 days from the date of purchase for the original owner only.
If any of the components have been consumer-replaced, damaged, or misused, the corresponding warranty on those components is invalidated. In this situation, you will be advised of the cost of replacement parts and processing instructions.
If a verifiable manufacturing defect is found during the relevant time period, we agree to repair or replace at its option any product under warranty provided proper proof of purchase is presented.
This limited warranty is not valid if the product is used for commercial purposes, or if the damage is caused by an accident, an act of God, consumer misuse, neglect or abuse, vandalism, improper use of chemicals, exposure to extreme weather conditions or negligence during product set up or disassembly.
We cannot be held responsible for the cost of installation, labor, or transportation expenses incurred due to the replacement of defective parts. This limited warranty, furthermore, does not cover any unauthorized alterations to the product.
| Model | Capacity Pump Ladder | |||
| JL017233NG/NN/ND | 4mx2mx99 cm (13'x6,5'x39") 1854Gal(7020L) | × | ||
| JL017233N | 4mx2mx99 cm (13'x6,5'x39") 1854Gal(7020L) | × | × | |
| JL017233NF | 4mx2mx99 cm (13'x6,5'x39") 1854Gal(7020L) | |||
| JL017445NG/NN/ND/NC/NF | 4mx2mx99 cm (13'x6,5'x39") 1854Gal(7020L) | |||
| JL017445N | 4mx2mx99 cm (13'x6,5'x39") 1854Gal(7020L) | × | × | |
| JL017445-1NG/NN/ND/NC/NF | 4mx2mx99 cm (13'x6,5'x39") 1854Gal(7020L) | |||
| JL017234NG/NN/ND/NF | 4mx2.07mx1.22m (13'x6,8'x48") 2343Gal(8870L) | |||
| JL017234N | 4mx2.07mx1.22m (13'x6,8'x48") 2343Gal(8870L) | × | × | |
| JL017451NG/NN/ND/NC/NF | 4mx2.07mx1.22m (13'x6,8'x48") 2343Gal(8870L) | |||
| JL017451N | 4mx2.07mx1.22m (13'x6,8'x48") 2343Gal(8870L) | × | × | |
| JL017451-1NG/NN/ND/NC/NF | 4mx2.07mx1.22m (13'x6,8'x48") 2343Gal(8870L) | |||
| JL016110NG/NN/ND/NF | 5.4mx2.74mx1.22m (18'x9'x48") 4171Gal(15787L) | |||
| JL016110N | 5.4mx2.74mx1.22m (18'x9'x48") 4171Gal(15787L) | × | × | |
| JL017443NG/NN/ND/NC/NF | 5.4mx2.74mx1.22m (18'x9'x48") 4171Gal(15787L) | |||
| JL017443-1NG/NF | 5.4mx2.74mx1.22m (18'x9'x48") 4171Gal(15787L) |
- RECTANGULAR FRAME POOL
- CONTENTS
- PART1-IMPORTANT SAFETY RULES
- WARNING: To enhance the enjoyment of your pool and protect the safety of those in and around the pool, ALWAYS STRICTLY OBSERVE the following safety and maintenance instructions:
- 9). Plan:
- 11). Accident:
- WARNING
- PART3-SITE SELECTION
- Step1. ACCOUNT FOR ALL PARTS.
- Step2. INSTALL DRAIN VALVES COVER AND STOPPER
- Step4. INSTALL HORIZONTAL BEAM
- PART5-FILL THE POOL WITH WATER
- PART6-DISASSEMBLY AND STORAGE
- FOLDING INSTRUCTION
- PART7-IN-SEASON POOL MAINTENANCE AND WATER CARE
- PART9-LIMITED WARRANTY
Brand : JILONG
Model : Rectangular (400x200x99)
Category : Above-ground pool