
3555i - Printer Utax - Free user manual and instructions
Find the device manual for free 3555i Utax in PDF.


User questions about 3555i Utax
0 question about this device. Answer the ones you know or ask your own.
Ask a new question about this device
Download the instructions for your Printer in PDF format for free! Find your manual 3555i - Utax and take your electronic device back in hand. On this page are published all the documents necessary for the use of your device. 3555i by Utax.
USER MANUAL 3555i Utax
natural_image
Line drawing of a multi-chamber printer with internal components and mounting brackets (no text or symbols)Preface
Thank you for purchasing the 3555i/4555i/5555i.
This Operation Guide is intended to help you operate the machine correctly, perform routine maintenance, and take simple troubleshooting measures as needed so that the machine can always be used in the optimum condition.
Please read this Operation Guide before using the machine.
We recommend the use of our own brand supplies.
Please use our genuine toner containers, which have passed rigorous quality control testing.
The use of non-genuine toner containers may cause failure.
We will not be liable for any damages caused by the use of third party supplies in this machine.
Overview
This machine is equipped standard with copy and print functions, and a scanned image can be sent to an E-mail recipient as an attachment or to a computer on the same network. A fax function is available as an option.
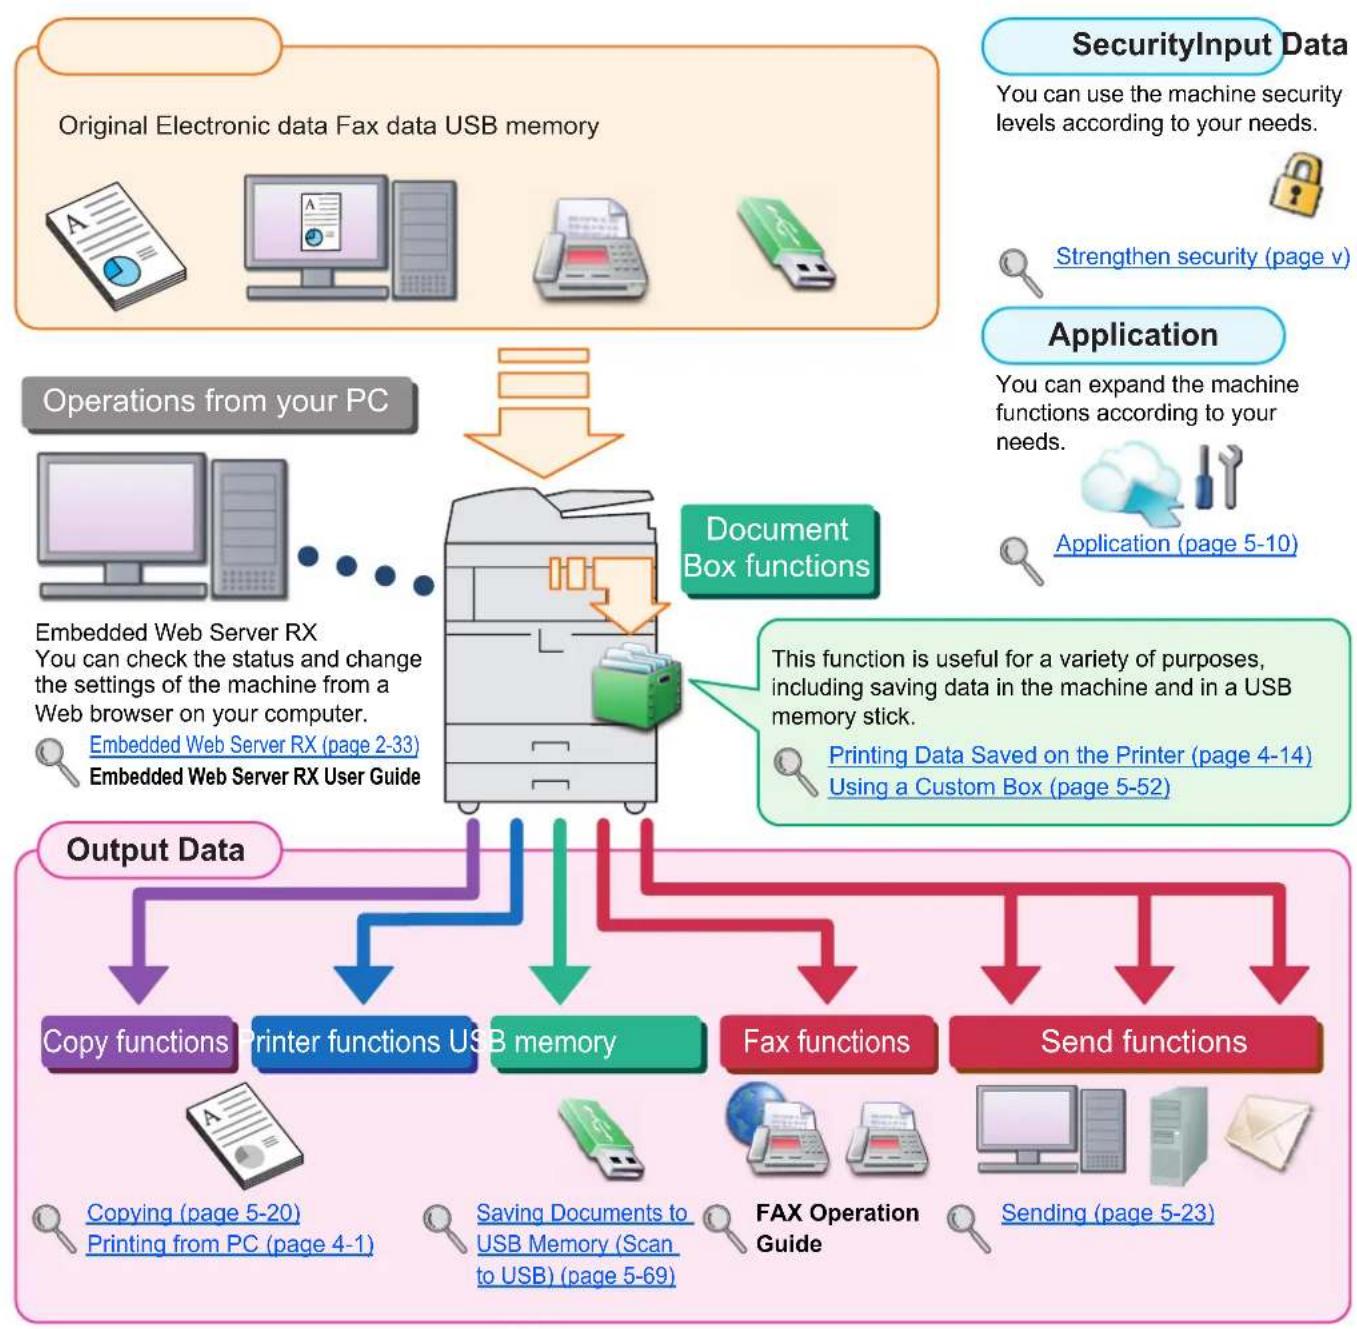
flowchart
graph TD
    A["Original Electronic data Fax data USB memory"] --> B["Document Box functions"]
    C["Operations from your PC"] --> B
    D["Embedded Web Server RX"] --> B
    E["Embedded Web Server RX (page 2-33)"] --> B
    F["Embedded Web Server RX User Guide"] --> B
    G["Copy functions"] --> H["Printer functions USB memory"]
    I["Fax functions"] --> J["Send functions"]
    K["Copying (page 5-20) Printing from PC (page 4-1)"] --> H
    L["Saving Documents to USB Memory (Scan to USB) (page 5-69)"] --> H
    M["FAX Operation Guide"] --> J
    N["Sending (page 5-23)"] --> J
    O["Application"] --> P["You can expand the machine functions according to your needs. Application (page 5-10)"]
    Q["SecurityInput Data"] --> R["You can use the machine security levels according to your needs. Strengthen security (page v)"]
    S["This function is useful for a variety of purposes, including saving data in the machine and in a USB memory stick. Printing Data Saved on the Printer (page 4-14) Using a Custom Box (page 5-52)"]

NOTE
- Before using the machine, be sure to read Legal and Safety Information on page 1-1.
- For preparations for use of the machine such as cable connections and software installation, refer to Installing and Setting up the Machine on page 2-1.
- To learn how to load paper, place originals, set up shared folders, and add addresses to the address book, refer to Preparation before Use on page 3-1.
Machine Features
The machine is equipped with many useful functions. Here are some examples. For details, refer to Using Various Functions (page 6-1).
| Optimize your office workflow | ||
Access to frequently used functions with just one touch (Program) You can preset frequently used functions.Once you set the functions as a preset program, all you need to do is press the program number to call up the functions.Using this program brings the same results even if operated by another person.Program (page 5-6) You can preset frequently used functions.Once you set the functions as a preset program, all you need to do is press the program number to call up the functions.Using this program brings the same results even if operated by another person.Program (page 5-6) | Scan originals of different sizes at a time (Mixed Size Originals) 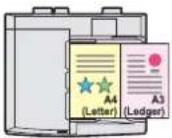 It is useful when preparing conference materials.You can set the different sized originals at one time so you don't need to reset the originals regardless of size.Mixed Size Originals (page 6-14) It is useful when preparing conference materials.You can set the different sized originals at one time so you don't need to reset the originals regardless of size.Mixed Size Originals (page 6-14) | Scan a large number of originals in separate batches and produce as one job (Continuous Scan)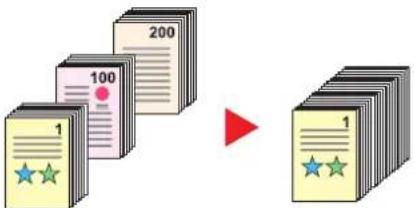 It is useful when preparing many-page handouts.When a large number of originals cannot be placed in the document processor at one time, the originals can be scanned in separate batches and then copied or sent as one job.Continuous Scan (page 6-52) It is useful when preparing many-page handouts.When a large number of originals cannot be placed in the document processor at one time, the originals can be scanned in separate batches and then copied or sent as one job.Continuous Scan (page 6-52) |
| Optimize your office workflow Save energy and cost | ||
Send one time with multiple sending options (Multi Sending)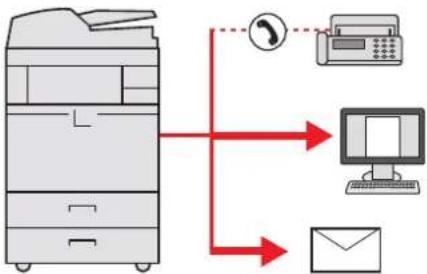 You can send a same document to the multiple destinations using a different method.You can specify multiple destinations of different send methods such as E-mail, SMB, and Fax.You can reduce your workflow by sending a job at once. You can send a same document to the multiple destinations using a different method.You can specify multiple destinations of different send methods such as E-mail, SMB, and Fax.You can reduce your workflow by sending a job at once. Sending to Different Types of Destinations (Multi Sending) (page 5-36) Sending to Different Types of Destinations (Multi Sending) (page 5-36) | Save frequently used documents in the machine (Custom Box) You can share frequently used documents with the others.You can save the frequently used document in the machine and print or send it when needed.A document can be shared among multiple users. You can share frequently used documents with the others.You can save the frequently used document in the machine and print or send it when needed.A document can be shared among multiple users. Using a Custom Box (page 5-52) Using a Custom Box (page 5-52) | Save energy as needed(Energy Saver function / Energy Saver Recovery Level)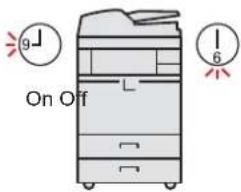 The machine is equipped with Energy Saver function that automatically switched into Low Power Mode or Sleep Mode. You can set appropriate Energy Saver Recovery Level depending on the operation.In addition, the machine can automatically be switched into Sleep and recovered at a specified time for each day of the week.[IMAGE]Energy Saver function (page 3-14)Weekly Timer Settings (page 8-56) The machine is equipped with Energy Saver function that automatically switched into Low Power Mode or Sleep Mode. You can set appropriate Energy Saver Recovery Level depending on the operation.In addition, the machine can automatically be switched into Sleep and recovered at a specified time for each day of the week.[IMAGE]Energy Saver function (page 3-14)Weekly Timer Settings (page 8-56) |
| Save energy and cost Create attractive documents | ||
| Print multiple originals onto one sheet (Duplex / Combine) | Skip blank pages when printing (Skip Blank Page) | Prevent image bleed-through (Prevent Bleed-through) |
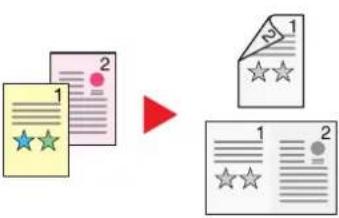 | 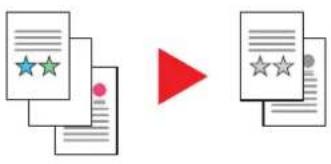 | 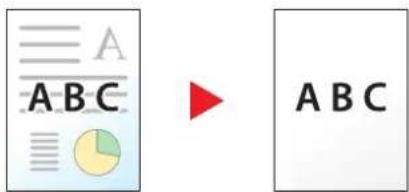 |
| You can print originals on both sides of the paper. You can also print multiple originals onto one sheet. | When there are blank pages in a scanned document, this function skips the blank pages and prints only pages that are not blank. | You can prevent image bleed-through from the reverse side when scanning thin originals. |
| Combine (page 6-31)Duplex (page 6-39) | Skip Blank Page (page 6-56) | Prevent Bleed-thru (page 6-26) |
| Create attractive documents Strengthen security | ||
Create a booklet(Booklet)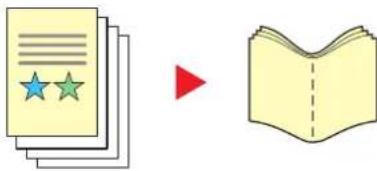 It is useful when preparing handout.You can create a magazine, pamphlet, or other booklet from sheet originals.Facing-page, two-sided copies of originals can be folded down the center to create a booklet.The cover page can be printed onto colored paper or heavy paper. It is useful when preparing handout.You can create a magazine, pamphlet, or other booklet from sheet originals.Facing-page, two-sided copies of originals can be folded down the center to create a booklet.The cover page can be printed onto colored paper or heavy paper. Booklet (page 6-36) Booklet (page 6-36) | Print a stamp on copies(Text Stamp / Bates Stamp)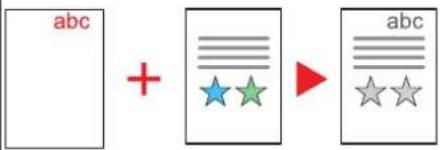 It is useful when adding text or date that is not included in originals.You can print desired text and date as a stamp onto the first page or all pages.Text Stamp (page 6-48)Bates Stamp (page 6-50) It is useful when adding text or date that is not included in originals.You can print desired text and date as a stamp onto the first page or all pages.Text Stamp (page 6-48)Bates Stamp (page 6-50) | Password-protect a PDF file(PDF Encryption Functions)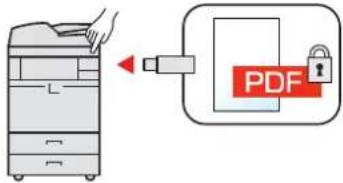 Use the PDF format's password security options to restrict document viewing, printing and editing.Encrypted PDF Password (page 6-65) Use the PDF format's password security options to restrict document viewing, printing and editing.Encrypted PDF Password (page 6-65) |
| Strengthen security | ||
| Protect data on the hard disk (Encryption / Overwrite) | Prevent loss of finished documents (Private Print) | Log in by ID card (Card Authentication) |
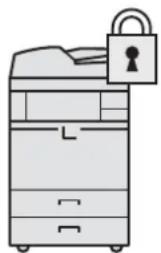 | 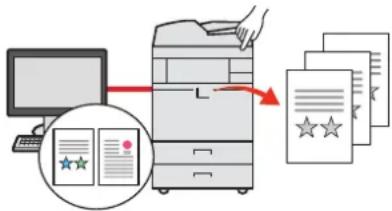 | 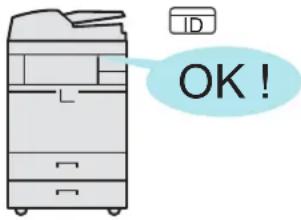 |
| You can overwrite the unnecessary data that remains on the hard disk automatically.To prevent an external leakage, the machine encrypts data before writing it to the hard disk.Data Security (page 8-50) | You can temporarily save a printer document in the machine. By printing the document from the machine prevents someone takes your document.Private Print/Stored Job (page 4-14) | You can log in simply by touching an ID card. You don't need to enter your user name and password.Card Authentication Kit(B) "Card Authentication Kit" (page 11-6) |
| Strengthen security Use functions more efficiently | ||
Strengthen security(for administrator use) Various functions are available for administrators to strengthen security.To Strengthen the Security (page 2-31) Various functions are available for administrators to strengthen security.To Strengthen the Security (page 2-31) | Expand functions as necessary(Application)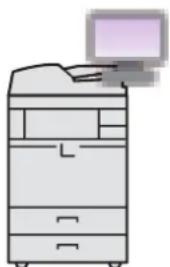 The functionality of the machine can be expanded by installing applications. Applications that help you perform your daily more efficiently such as a scan feature and an authentication feature are available.Application (page 5-10) The functionality of the machine can be expanded by installing applications. Applications that help you perform your daily more efficiently such as a scan feature and an authentication feature are available.Application (page 5-10) | Display file size before sending / storing a job (File Size Confirmation)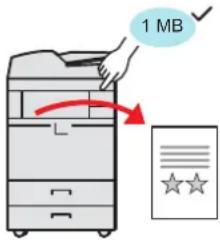 You can check the file size before sending/storing the document.If your server specifies an e-mail size limit, you can check the size in advance.File Size Confirmation (page 6-64) You can check the file size before sending/storing the document.If your server specifies an e-mail size limit, you can check the size in advance.File Size Confirmation (page 6-64) |
| Use functions more efficiently | ||
Install the machine without concerning the network cables (Wireless Network)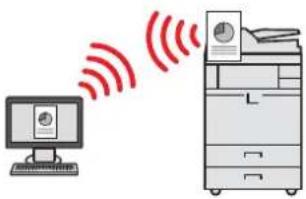 In an environment where the wireless LAN is used, you can install the machine without concerning the network cables.Wireless Network (page 8-48) In an environment where the wireless LAN is used, you can install the machine without concerning the network cables.Wireless Network (page 8-48) | Use USB memory(USB Memory)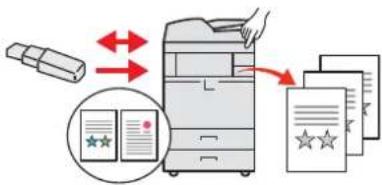 It is useful when you need to print document outside your office or you cannot print document from your PC.You can print the document from the USB memory by plugging it directly into the machine.Original scanned at the machine can be saved in the USB memory also.Printing Documents Stored inRemovable USB Memory (page 5-67)Saving Documents to USB Memory(Scan to USB) (page 5-69) It is useful when you need to print document outside your office or you cannot print document from your PC.You can print the document from the USB memory by plugging it directly into the machine.Original scanned at the machine can be saved in the USB memory also.Printing Documents Stored inRemovable USB Memory (page 5-67)Saving Documents to USB Memory(Scan to USB) (page 5-69) | Specify image file format(Scan Format)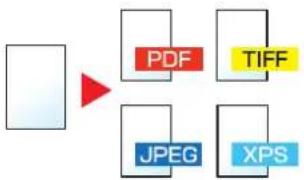 You can select the various file formats when sending/storing images.File Format (page 6-59) You can select the various file formats when sending/storing images.File Format (page 6-59) |
| Use functions more efficiently | |
Skip the error job(Job Skip Functions)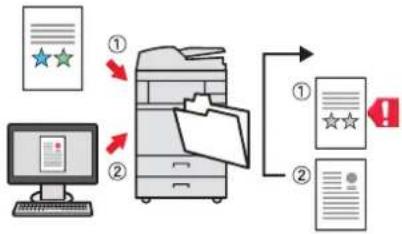 When paper empty error occurs at the cassette by specifying the special paper size or type, the machine skips the error job and perform the next job.Error Job Skip (page 8-55) When paper empty error occurs at the cassette by specifying the special paper size or type, the machine skips the error job and perform the next job.Error Job Skip (page 8-55) | Perform remote operation(Embedded Web Server RX)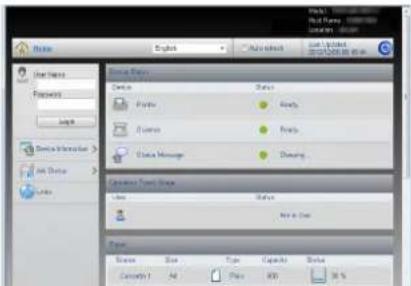 You can access to the machine remotely to print, send or download data.Administrators can configure the machine behavior or management settings.Embedded Web Server RX (page 2-33) You can access to the machine remotely to print, send or download data.Administrators can configure the machine behavior or management settings.Embedded Web Server RX (page 2-33) |
Color and Image Quality Functions
The machine is equipped with various color and image quality functions. You can adjust the scanned image as desired.
Basic Color Modes
The basic color modes are as follows. For details, refer to Color Selection (page 6-24).
| Color mode Description | Reference image | ||
| Before After | |||
| Color/Gray Color/B & W | Automatically recognizes whether a document being scanned is color or black & white. |  |  |
| Full Color Scans a document in full color. |  | ||
| Grayscale Scans a document in grayscale. |  | ||
| Black & White Scans a document in black & white. |  | ||
Adjusting Image Quality
To adjust the image quality, use the following functions.
| I want to... | Sample image | Function Page | ||
| Before After | ||||
| Easily adjust the image quality to match your own image | ||||
| Remove dark background or bleed-through from the original such as a newspaper. |  |  | Program [Newspaper Copy] | page 5-6 |
| Clearly reproduce fine lines, faint lines, broken lines, and other fine details in a CAD or other drawings. |  | 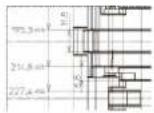 | Program [Drawing Copy] | page 5-6 |
| Adjust the image quality precisely | ||||
| Adjust the density. Density page 6-22 | 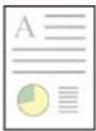 | 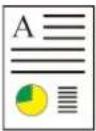 | ||
| Emphasize or blur the image outline. Example: Emphasize the image outlines |  |  | Sharpness page 6-25 | |
| Darken or lighten the background (the area with no texts or images) of a document. Example: Lightening the background |  | 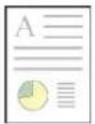 | Background Density page 6-25 | |
| Prevent bleed-through in 2-sided originals. |  |  | Prevent Bleed-through | page 6-26 |
| Adjust the scanned image | ||||
| Decrease the file size and produce the characters clearly. | Copy | Copy | File format [High Comp. PDF] | page 6-59 |
| Convert a paper document to PDF with searchable text. | Glossary Accessibility The machine is designed feature visually impaired. Touch panel c | Glossary Accessibility The machine is designed feature visually impaired. Touch panel c | File format [PDF] or [High Comp. PDF] with [OCR] | page 6-59 |
Guides Provided with the Machine
The following guides are provided with the machine. Refer to each guide as needed.
The contents of the guides are subject to change without notice for the purpose of improvement of machine performance.
Printed guides
| Start using the machine quickly | Quick GuideExplains how to use basic functions of the machine, how to use convenient features, how to perform routine maintenance, and what to do when problems occur. |
| For safe use of the machine | Safety GuideProvides safety and cautionary information for installation and use of the machine. Be sure to read this guide before using the machine.Safety Guide (3555i/4555i/5555i)Indicates the space required for machine installation, and describes the cautionary labels and other safety information. Be sure to read this guide before using the machine. |
Guides (PDF) on the DVD (Product Library)
| Use the machine thoughtfully | Operation Guide (This Guide)Explains how to load paper and perform copy, print and scan operations, and indicates default settings and other information. |
| Use the fax functions | FAX Operation GuideExplains how to use the fax function. |
| Use the ID card | Card Authentication Kit (B) Operation GuideExplains how to perform authentication using the ID card. |
| Strengthen security | Data Security Kit (E) Operation GuideExplains how to introduce and use the Data Security kit (E), and how to initialize the system. |
| Easily register machine information and configure settings | Embedded Web Server RX User GuideExplains how to access the machine from a Web browser on your computer to check and change settings. |
| Print data from a computer | Printing System Driver User GuideExplains how to install the printer driver and use the printer function. |
| Directly print a PDF file | Network Tool for Direct Printing Operation GuideExplains how to print PDF files without launching Adobe Acrobat or Reader. |
| Monitor the machine and printers on the network | NETWORK PRINT MONITOR User GuideExplains how to monitor your network printing system (the machine) with NETWORK PRINT MONITOR. |
| Scan images and save with information | File Management Utility User GuideExplains how to use File Management Utility to set various parameters and send and save scanned documents. |
Install the Adobe Reader (version 8.0 or later) to view the manuals on the DVD.
About the Operation Guide (this Guide)
Structure of the guide
The Operation Guide contains the following chapters.
| Chapter Contents | ||
| 1 | Legal and Safety Information | Provides precautions regarding use of the machine and trademark information. |
| 2 | Installing and Setting up the Machine | Explains part names, cable connections, installation of the software, login, logout, and other matters related to administration of the machine. |
| 3 | Preparation before Use | Explains preparations and settings that are required in order to use the machine, such as how to use the operation panel, load paper, log in and log out, and create an address book. |
| 4 | Printing from PC | Explains functions that are available when the machine is used as a printer. |
| 5 | Operation on the Machine | Explains the basic procedures for using the machine, such as placing originals, making copies, sending documents, and using user boxes. |
| 6 | Using Various Functions | Explains convenient functions that are available on the machine. |
| 7 | Status/Job Cancel | Explains how to check the status of a job and the job history, and how to cancel jobs being printed or waiting to print. Also explains how to check paper and toner levels, how to check the device status, and how to cancel fax transmission. |
| 8 | Setup and Registration (System Menu) | Explains System Menu and how it relates to the operation of the machine. |
| 9 | User Authentication and Accounting (User Login, Job Accounting) | Explains user login and job accounting. |
| 10 | Troubleshooting | Explains what to do when toner runs out, an error is displayed, or a paper jam or other problem occurs. |
| 11 | Appendix | Describes convenient options that are available for the machine. Provides information on media types and paper sizes, and gives a glossary of terms. Explains how to enter characters, and lists the specifications of the machine. |
Conventions Used in This Guide
Adobe Reader X is used as an example in the explanations below.
Click an item in the Table of Contents to jump to the corresponding page.
Click to move from the current page to the previously displayed page. This is convenient when you want to return to the page from which you jumped to the current page.
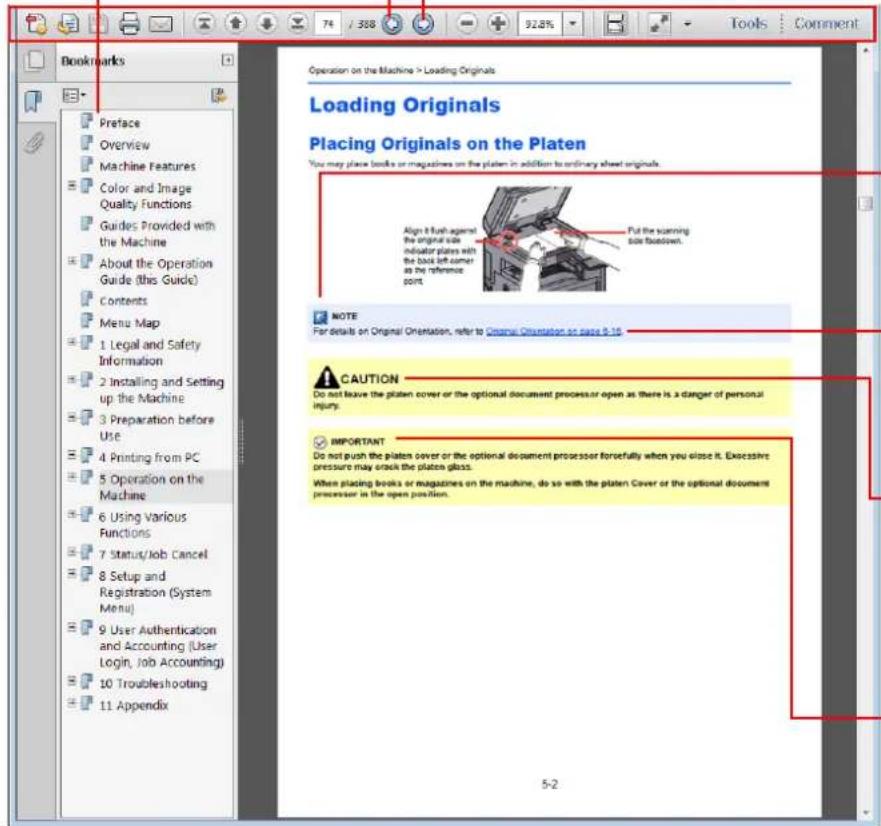
text_image
Bookmarks Preface Overview Machine Features Color and Image Quality Functions Guides Provided with the Machine About the Operation Guide (this Guide) Contents Menu Map 1 Legal and Safety Information 2 Installing and Setting up the Machine 3 Preparation before Use 4 Printing from PC 5 Operation on the Machine 6 Using Various Functions 7 Status/Job Cancel 8 Setup and Registration (System Menu) 9 User Authentication and Accounting (User Login, Job Accounting) 10 Troubleshooting 11 Appendix Operation on the Machine > Loading Originals Loading Originals Placing Originals on the Platen You may place books or magazines on the platen in addition to ordinary sheet originals. Align it flush against the original side indicator plans with the back left corner as the reference point. Put the scanning side lockdown. NOTE For details on Original Orientation, refer to Original Orientation on page 9-16 CAUTION Do not leave the platen cover or the optional document processor open as there is a danger of personal injury. IMPORTANT Do not push the platen cover or the optional document processor forcefully when you close it. Excessive pressure may knock the platen glass. When placing books or magazines on the machine, do so with the platen Cover or the optional document processor in the open position. 5-2
NOTE
Indicates supplemental explanations and reference information for operations.
Refer to
Click the underlined text to jump to the corresponding page.

CAUTION
Indicates that personal injury or mechanical damage may result from insufficient attention to or incorrect compliance with the related points.

IMPORTANT
Indicates operational requirements and restrictions to operate the machine correctly, and avoid damage to the machine or property.

NOTE
The items that appear in Adobe Reader vary depending on how it is used. If the Table of Contents or tools do not appear, refer to Adobe Reader Help.
Certain items are indicated in this guide by the conventions described below.
| Convention Description Example | ||
| [Bold] | Indicates keys on the operation panel and buttons on your computer screen. | Press the [Start] key.Click the [OK] button. |
| [Regular] Indicates keys on the touch panel. Press [OK]. | ||
| "Regular" Indicates a message or setting displayed on the touch panel or computer screen. | "Ready to copy." appears. | |
| You can select from the "Print size" menu. | ||
On pages that explain a convenient function, the modes in which that function can be used are indicated by icons.
Using Various Functions > Functions
Functions
Original Size

flowchart
graph LR
    A["Copy"] --> B["Org./Paper/Finishing"]
    B --> C["Send"]
    C --> D["Org./Sending Data Format"]
    D --> E["Custom Box"]
    E --> F["Functions"]
    F --> G["USB Memory"]
    G --> H["Functions"]
Specify the original size to be scanned.
| Icon Description Icon Description | |||
| Copy | The function can be used when copying a document. | Custom Box | The function can be used when saving to or printing from a user box. |
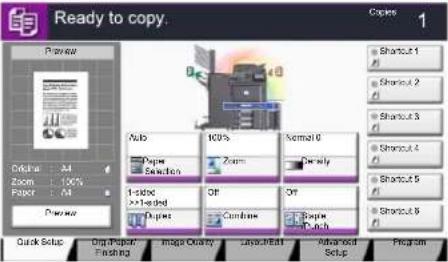 | 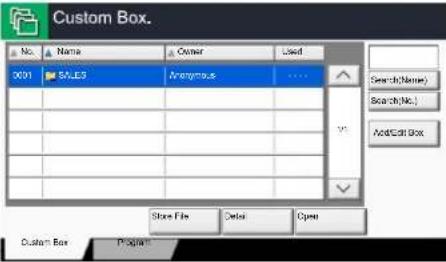 | ||
| Copy screen | User box screen | ||
| Send | The function can be used when sending a document. | USB Memory | The function can be used when saving to or printing from removable memory such as a USB memory stick. |
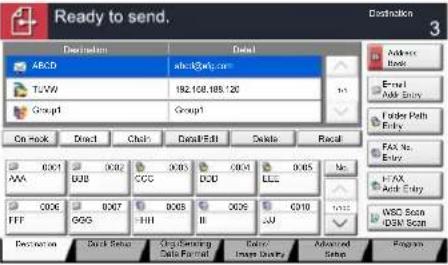 | 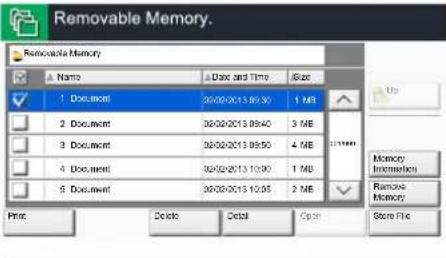 | ||
| Send screen | Removable memory screen | ||
| Icon Description | |
 | Access to the function is indicated by icons.Example: Press the [Org./Paper/Finishing] tab in the Copy screen to use the function. |
Conventions used in procedures for operating the machine
In this Operation Guide, continuous operation of the keys on the touch panel is as follows:
| Actual procedure Procedure indicated in this guide | |
| Press the [System Menu] key▼Press [Common Settings]▼Press [ twice▼Press [Next] in "Message Board Settings" | Press the [System Menu] key, [Common Settings], [ twice), and then [Next] in "Message Board Settings". |
Touch panel keys that are pressed are outlined in red.
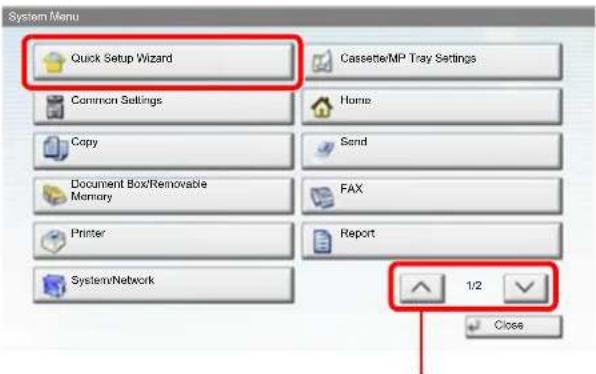
text_image
System Menu Quick Setup Wizard Cassette/MP Tray Settings Common Settings Home Copy Send Document Box/Removable Memory FAX Printer Report SystemNetwork 1/2 ClosePress [ ] or [ ] to scroll up and down.
Procedures consisting of a sequence of operation panel or touch panel operations are numbered as shown below.
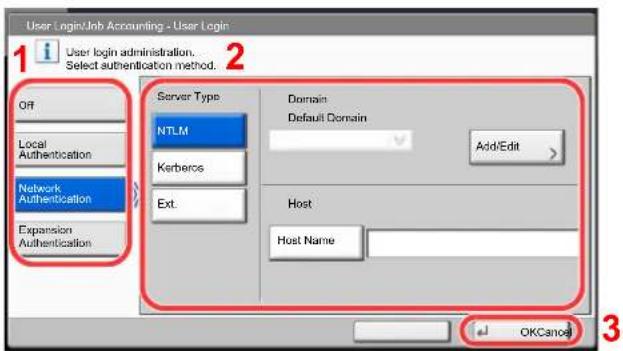
text_image
User Login/Job Accounting - User Login 1 User login administration. Select authentication method. Off Local Authentication Network Authentication Expansion Authentication Server Type NTLM Kerberos Ext. Domain Default Domain Add/Edit > Host Host Name OKCancelOriginals and Paper Sizes
Original sizes and paper sizes such as A4, B5, and Letter can be used in both the horizontal and vertical orientations. To distinguish the orientations when these sizes are used, "R" is added to sizes used in the horizontal orientation.
| Orientation Indicated size | * | ||
Vertical orientation | 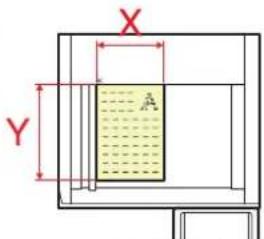 | 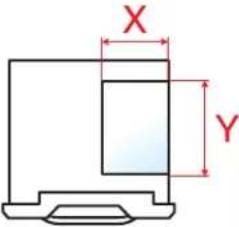 | A4, B5, A5, B6, A6Letter, Statement |
| Original PaperDimension Y of the original/paper is longer than X. | |||
Horizontal orientation (-R) | 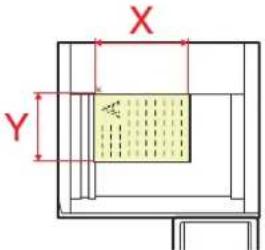 | 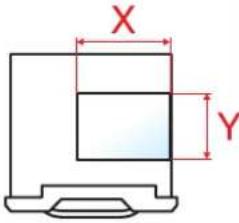 | A4-R, B5-R, A5-R, B6-R, A6-R, Letter-R,Statement-R |
| Original PaperDimension Y of the original is shorter than X. | |||
* Original/paper sizes that can be used vary depending on the function and source tray. For details, refer to Specifications on page 11-22.
Icons on the touch panel
The following icons are used to indicate original and paper placement orientations on the touch panel.
| Orientation Original Paper | ||
| Vertical orientation |  |  |
| Horizontal direction |  |  |
Contents
Preface .... i
Overview ...... ii
Machine Features .... iii
Color and Image Quality Functions.... vii
Basic Color Modes vii
Adjusting Image Quality ...... viii
Guides Provided with the Machine ix
About the Operation Guide (this Guide) ...... x
Structure of the guide....x
Conventions Used in This Guide.... xi
Contents.... XV
Menu Map.... xxii
1 Legal and Safety Information 1-1
Notice 1-2
Safety Conventions in This Guide 1-2
Environment 1-3
Precautions for Use 1-4
Laser Safety (Europe) 1-5
Legal Restriction on Copying/Scanning 1-6
EN ISO 7779 1-6
EK1-ITB 2000 1-6
Legal Information 1-7
Energy Saving Control Function 1-13
Automatic 2-Sided Copy Function 1-13
Resource Saving - Paper 1-13
Environmental benefits of "Power Management" 1-13
Energy Star (ENERGY STAR®) Program 1-14
2 Installing and Setting up the Machine 2-1
Part Names 2-2
Machine Exterior 2-2
Connectors/Interior 2-4
With Optional Equipments Attached 2-5
Determining the Connection Method and Preparing Cables 2-6
Connection Example 2-6
Preparing Necessary Cables 2-7
Connecting Cables 2-8
Connecting LAN Cable 2-8
Connecting USB Cable 2-9
Connecting the Power Cable 2-9
Power On/Off 2-10
Power On 2-10
Power Off 2-11
Installing Software 2-13
Software on DVD (Windows) 2-13
Installing Printer Driver in Windows 2-14
Uninstalling the Software 2-16
Installing Printer Driver in Macintosh 2-17
Setting TWAIN Driver 2-19
Setting WIA Driver 2-20
Login/Logout 2-21
Login 2-21
Logout 2-22
Default Settings of the Machine 2-23
Setting Date and Time 2-23
Network Setup (LAN Cable Connection) 2-25
Quick Setup Wizard 2-28
Checking the Counter 2-30
Additional Preparations for the Administrator 2-31
To Send Documents to a PC 2-31
To E-mail Scanned Images 2-31
To Strengthen the Security 2-31
Embedded Web Server RX 2-33
Accessing Embedded Web Server RX 2-34
Changing Security Settings 2-35
Changing Host Name 2-36
Sending E-mail 2-37
Registering Destinations 2-40
Registering a Custom Box 2-41
Transferring data from our other products 2-42
Migrating the Address Book 2-42
3 Preparation before Use ....3-1
Using the Operation Panel 3-2
Operation Panel Keys 3-2
Adjusting the Operation Panel Angle 3-3
Touch Panel Display 3-4
Home Screen 3-4
Display for Originals and Paper 3-8
Display of keys that cannot be set 3-8
Original Preview 3-9
Enter key and Quick No. Search key 3-11
Help Screen 3-12
Accessibility Functions (Magnifying the View) 3-13
Energy Saver function 3-14
Low Power Mode and Auto Low Power Mode 3-14
Sleep and Auto Sleep 3-15
Loading Paper 3-16
Before Loading Paper 3-17
Loading in the Cassettes 3-18
Loading Paper in the Multi Purpose Tray 3-26
Paper stopper 3-29
Specifying Paper Size and Media 3-30
Preparation for Sending a Document to a PC 3-35
Making a note of the computer name and full computer name 3-35
Making a note of the user name and domain name 3-36
Creating a Shared Folder, Making a Note of a Shared Folder 3-37
Configuring Windows Firewall (for Windows 7) 3-41
Registering Destinations in the Address Book 3-45
Adding a Destination (Address Book) 3-45
Adding a Destination on One Touch Key (One Touch Key) 3-53
4 Printing from PC 4-1
Printing from PC 4-2
Printer driver print settings screen 4-5
Printer Driver Help 4-6
Changing the default printer driver settings (Windows 7) 4-6
Canceling printing from a computer 4-6
Banner printing 4-7
Printing Data Saved on the Printer 4-14
Private Print/Stored Job 4-14
Quick Copy/Proof and Hold 4-16
5 Operation on the Machine 5-1
Loading Originals 5-2
Placing Originals on the Platen 5-2
Loading Originals in the Document Processor 5-3
Checking the Equipment's Serial Number 5-5
Program 5-6
Registering Programs 5-7
Recalling Programs 5-7
Editing and Deleting Programs 5-9
Application 5-10
Installing Applications 5-10
Activating/Deactivating Application 5-11
Deleting Applications 5-13
Registering Shortcuts
(Copy, Send, and Document Box Settings) 5-14
Adding Shortcuts 5-14
Editing and Deleting Shortcuts 5-15
Using the Internet Browser 5-16
Launching and Exiting the Browser 5-16
Using the Browser Screen 5-17
Canceling Jobs 5-18
Canceling Jobs 5-18
Canceling printing from a computer 5-19
Copying 5-20
Basic Operation 5-20
Reserve Next 5-21
Interrupt Copy 5-22
Sending 5-23
Basic Operation 5-24
Specifying Destination 5-26
Checking and Editing Destinations 5-34
Confirmation Screen of Destinations 5-35
Sending to Different Types of Destinations (Multi Sending) 5-36
WSD Scan/DSM Scan 5-37
Scanning using TWAIN 5-41
Scanning a document placed in the machine 5-41
Scanning a document stored in a custom box 5-43
Scanning with FMU Connection 5-45
Using FMU Connection to scan an original 5-45
What is Document Box? 5-46
Basic Operation for Document Box 5-47
Using a Custom Box 5-52
Creating a New Custom Box (Add/Edit Box) 5-52
Editing Custom Box 5-54
Storing Documents (Store File) 5-55
Printing Documents (Print) 5-56
Sending Documents (Send) 5-57
Editing Documents 5-59
Deleting Documents 5-63
Job Box 5-64
Outputting Repeat Copy Jobs 5-64
Form for Form Overlay 5-65
Printing Documents Stored in Removable USB Memory 5-67
Saving Documents to USB Memory (Scan to USB) 5-69
Check the USB memory information 5-70
Removing USB Memory 5-71
Manual Staple 5-72
6 Using Various Functions 6-1
Functions Available on the Machine 6-2
Copy 6-2
Send 6-4
Custom Box (Store File, Printing, Send) 6-6
Removable Memory (Store File, Printing Documents) 6-9
Functions 6-11
Original Size 6-11
Paper Selection 6-12
Mixed Size Originals 6-14
Original Orientation 6-16
Fold 6-17
Collate/Offset 6-18
Staple/Punch 6-19
Paper Output 6-22
Density 6-22
Original Image 6-23
EcoPrint 6-24
Color Selection 6-24
Sharpness 6-25
Background Density Adj. 6-25
Prevent Bleed-thru 6-26
Zoom 6-27
Combine 6-31
Margin/Centering, Margin, Centering 6-33
Border Erase 6-34
Booklet 6-36
Duplex 6-39
Cover 6-42
Form Overlay 6-43
Page # 6-44
Memo Page 6-46
Image Repeat 6-47
Text Stamp 6-48
Bates Stamp 6-50
Continuous Scan 6-52
Auto Image Rotation 6-53
Negative Image 6-53
Mirror Image 6-53
Job Finish Notice 6-54
File Name Entry 6-54
Priority Override 6-55
Repeat Copy 6-55
DP Read Action 6-56
Skip Blank Page 6-56
2-sided/Book Original 6-57
Sending Size 6-58
File Format 6-59
File Separation 6-62
Scan Resolution, Resolution 6-62
E-mail Subject/Body 6-62
Send and Print 6-63
Send and Store 6-63
FTP Encrypted TX 6-64
File Size Confirmation 6-64
Delete after Printed 6-64
Delete after Transmitted 6-64
Storing Size 6-65
Encrypted PDF Password 6-65
JPEG/TIFF Print 6-66
XPS Fit to Page 6-66
Functions Available in the Home Screen 6-67
Send to Me (E-mail) 6-67
Send to Me from Box (E-mail) 6-67
7 Status/Job Cancel 7-1
Checking Job Status 7-2
Details of the Status Screens 7-4
Checking Detailed Information of Jobs 7-9
Checking Job History 7-11
Checking the Detailed Information of Histories 7-13
Sending the Log History 7-13
Pause and Resumption of Jobs 7-14
Canceling of Jobs 7-14
Priority Override for Waiting Jobs 7-15
Reordering Print Jobs 7-16
Device/Communication 7-17
Removing the USB Memory 7-18
Canceling FAX Communication 7-19
Checking the Remaining Amount of Toner and Paper (Paper/Supplies) 7-20
8 Setup and Registration (System Menu) 8-1
System Menu 8-2
Operation Method 8-2
System Menu Settings 8-4
Cassette/MP Tray Settings 8-7
Common Settings 8-9
Home 8-28
Copy 8-28
Send 8-29
Document Box/Removable Memory 8-34
FAX 8-35
Printer 8-35
Report 8-37
System/Network 8-43
Edit Destination 8-53
User Login/Job Accounting 8-53
User Property 8-54
Date/Timer/Energy Saver 8-54
Adjustment/Maintenance 8-57
Internet 8-60
Application 8-60
9 User Authentication and Accounting (User Login, Job Accounting) 9-1
User Login 9-2
First User Login Administration 9-2
User Login Setting 9-2
User Login 9-4
Authentication Security 9-6
Adding a User (Local User List) 9-8
Changing User Properties 9-11
Local Authorization 9-15
Group Authorization Set. 9-15
Guest Authorization Set. 9-18
Obtain NW User Property 9-21
Simple Login Settings 9-23
ID Card Settings 9-26
Job Accounting Setting 9-27
First Job Accounting Setup 9-27
Job Accounting Setting 9-27
Job Accounting 9-29
Login/Logout 9-29
Job Accounting Access 9-30
Job Accounting (Local) 9-31
Accounting List 9-32
Managing Accounts 9-33
Default Setting 9-36
Counting the Number of Pages Printed 9-38
Apply Limit 9-40
Copier/Printer Count 9-40
Unknown ID Job 9-41
10 Troubleshooting 10-1
Regular Maintenance 10-2
Cleaning 10-2
Toner Container Replacement 10-6
Waste Toner Box Replacement 10-9
Replacing Staples 10-12
Disposing of the Punch Waste 10-16
Troubleshooting 10-18
Solving Malfunctions 10-18
Responding to Messages 10-23
Adjustment/Maintenance 10-36
Clearing Paper Jams 10-39
Clearing a Staple Jam 10-63
11 Appendix 11-1
Optional Equipment 11-2
Overview of Optional Equipment 11-2
Optional Applications 11-8
Character Entry Method 11-10
Entry Screens 11-10
Entering Characters 11-12
Paper 11-13
Basic Paper Specifications 11-13
Choosing the Appropriate Paper 11-14
Special Paper 11-17
Specifications 11-22
Common functions 11-22
Copy functions 11-24
Printer functions 11-25
Scanner functions 11-25
Document Processor (Option) 11-26
Paper Feeder (500-sheet x 2) (Option) 11-26
Large Capacity Feeder (1,500-sheet x 2) (Option) 11-27
Side Feeder (3,000-sheet) (Option) 11-27
1,000-sheet Finisher (Option) 11-28
4,000-sheet Finisher (Option) 11-29
Hole Punch Unit (Option) 11-29
Mailbox (Option) 11-30
Center-Folding Unit (Option) 11-30
Inner Job Separator (Option) 11-31
Inner Job Separator (JS-732) (Option) 11-31
Right Job Separator (Option) 11-32
Banner Tray (Option) 11-32
Glossary 11-33
Index ......Index-1
Menu Map
(The names displayed on the touch panel are used here. These may differ from the referenced titles.)

Copy
or

| Org./Paper/Finishing Original Size (page 6-11) | ||
| Paper Selection (page 6-12) | ||
| Mixed Size Originals (page 6-14) | ||
| Original Orientation (page 6-16) | ||
| Fold (page 6-17) | ||
| Collate/Offset (page 6-18) | ||
| Staple/Punch Staple (page 6-19) | ||
| Punch (page 6-20) | ||
| Paper Output (page 6-22) | ||
| Image Quality Density (page 6-22) | ||
| Original Image (page 6-23) | ||
| EcoPrint (page 6-24) | ||
| Sharpness (page 6-25) | ||
| Background Density Adj. (page 6-25) | ||
| Prevent Bleed-thru (page 6-26) | ||
| Layout/Edit Zoom (page 6-27) | ||
| Combine (page 6-31) | ||
| Margin/Centering (page 6-33) | ||
| Border Erase (page 6-34) | ||
| Booklet (page 6-36) | ||
| Duplex (page 6-39) | ||
| Cover (page 6-42) | ||
| Form Overlay (page 6-43) | ||
| Layout/Edit Page # (page 6-44) | ||
| Memo Page (page 6-46) | ||
| Image Repeat (page 6-47) | ||
| Text Stamp (page 6-48) | ||
| Bates Stamp (page 6-50) | ||
| Advanced Setup Continuous Scan (page 6-52) | ||
| Auto Image Rotation (page 6-53) | ||
| Negative Image (page 6-53) | ||
| Mirror Image (page 6-53) | ||
| Job Finish Notice (page 6-54) | ||
| File Name Entry (page 6-54) | ||
| Priority Override (page 6-55) | ||
| Repeat Copy (page 6-55) | ||
| DP Read Action (page 6-56) | ||
| Skip Blank Page (page 6-56) | ||
| Program (page 5-6) | ||

or

| Destination Address Book (page 5-26) | |
| E-mail Addr Entry (page 5-29) | |
| Folder Path Entry (page 5-31) | |
| FAX No. Entry (refer to FAX Operation Guide) | |
| i-FAX Address Entry (refer to FAX Operation Guide) | |
| WSD Scan/DSM Scan (page 5-37) | |
| Org./Sending Data Format Original Size (page 6-11) | |
| Mixed Size Originals (page 6-14) | |
| 2-sided/Book Original (page 6-57) | |
| Original Orientation (page 6-16) | |
| Sending Size (page 6-58) | |
| File Format (page 6-59) | |
| File Separation (page 6-62) | |
| Long Original (refer to FAX Operation Guide) | |
| Color/Image Quality Density (page 6-22) | |
| Original Image (page 6-23) | |
| Scan Resolution (page 6-62) | |
| FAX TX Resolution (refer to FAX Operation Guide) | |
| Color Selection (page 6-24) | |
| Sharpness (page 6-25) | |
| Background Density Adj. (page 6-25) | |
| Prevent Bleed-thru (page 6-26) | |
| Advanced Setup Zoom (page 6-27) | |
| Centering (page 6-33) | |
| Border Erase (page 6-34) | |
| FAX Delayed Transmission (refer to FAX Operation Guide) | |
| Continuous Scan (page 6-52) | |
| Job Finish Notice (page 6-54) | |
| File Name Entry (page 6-54) | |
| E-mail Subject/Body (page 6-62) | |
| i-FAX Subject/Body (refer to FAX Operation Guide) | |
| FAX Direct Transmission (refer to FAX Operation Guide) | |
| FAX Polling RX (refer to FAX Operation Guide) | |
| Send and Print (page 6-63) | |
| Send and Store (page 6-63) | |
| FTP Encrypted TX (page 6-64) | |
| Text Stamp (page 6-48) | |
| Bates Stamp (page 6-50) | |
| File Size Confirmation (page 6-64) | |
| FAX TX Report (refer to FAX Operation Guide) | |
| Program (page 5-6) | |

| Custom Box Store File Functions Original Size (page 6-11) | |||
| Mixed Size Originals (page 6-14) | |||
| 2-sided/Book Original (page 6-57) | |||
| Original Orientation (page 6-16) | |||
| Storing Size (page 6-65) | |||
| Prevent Bleed-thru (page 6-26) | |||
| Density (page 6-22) | |||
| Original Image (page 6-23) | |||
| Scan Resolution (page 6-62) | |||
| Color Selection (page 6-24) | |||
| Sharpness (page 6-25) | |||
| Background Density Adj. (page 6-25) | |||
| Zoom (page 6-27) | |||
| Centering (page 6-33) | |||
| Border Erase (page 6-34) | |||
| Continuous Scan (page 6-52) | |||
| Job Finish Notice (page 6-54) | |||
| File Name Entry (page 6-54) | |||
| Program (page 5-6) | |||
| Detail (page 5-47) | |||
| Custom Box | Open | Functions | Paper Selection (page 6-12) | ||
| Collate/Offset (page 6-18) | |||||
| Staple/Punch (page 6-19) | Staple (page 6-19) | ||||
| Punch (page 6-20) | |||||
| Paper Output (page 6-22) | |||||
| Combine (page 6-31) | |||||
| Margin/Centering (page 6-33) | |||||
| Booklet (page 6-36) | |||||
| Printing (page 6-41) | |||||
| Cover (page 6-42) | |||||
| Form Overlay (page 6-43) | |||||
| Page # (page 6-44) | |||||
| Job Finish Notice (page 6-54) | |||||
| File Name Entry (page 6-54) | |||||
| Delete after Printed (page 6-64) | |||||
| Priority Override (page 6-55) | |||||
| EcoPrint (page 6-24) | |||||
| Zoom (page 6-27) | |||||
| Fold (page 6-17) | |||||
| Text Stamp (page 6-48) | |||||
| Bates Stamp (page 6-50) | |||||
| Image Quality Density (page 6-22) | |||||
| Original Image (page 6-23) | |||||
| Sharpness (page 6-25) | |||||
| Background Density Adj. (page 6-25) | |||||
| Prevent Bleed-thru (page 6-26) | |||||
| Program (page 5-6) | |||||
| Custom Box Open Send | Destination (page 5-26) | ||
| Functions Sending | Size (page 6-58) | ||
| File Format (page 6-59) | |||
| FAX TX Resolution (refer to FAX Operation Guide) | |||
| Centering (page 6-33) | |||
| FAX Delayed Transmission (refer to FAX Operation Guide) | |||
| Job Finish Notice (page 6-54) | |||
| File Name Entry (page 6-54) | |||
| E-mail Subject/Body (page 6-62) | |||
| i-FAX Subject/Body (refer to FAX Operation Guide) | |||
| FTP Encrypted TX (page 6-64) | |||
| Delete after Transmitted (page 6-64) | |||
| Zoom (page 6-27) | |||
| File Separation (page 6-62) | |||
| Text Stamp (page 6-48) | |||
| Bates Stamp (page 6-50) | |||
| File Size Confirmation (page 6-64) | |||
| FAX TX Report (refer to FAX Operation Guide) | |||
| Color/Image Quality | Density (page 6-22) | ||
| Original Image (page 6-23) | |||
| Resolution (page 6-62) | |||
| Color Selection (page 6-24) | |||
| Sharpness (page 6-25) | |||
| Background Density Adj. (page 6-25) | |||
| Prevent Bleed-thru (page 6-26) | |||
| Program (page 5-6) | |||
| Join (page 5-61) | |||
| Move/Copy (page 5-59) | |||
| Delete (page 5-66) | |||
| Store File (page 5-55) | |||
| Search(Name) (page 5-47) | |||
| Page Selection (page 5-47) | |||
| Detail (page 5-47) | |||
| Preview (page 5-50) | |||
| Search(No.) (page 5-47) | |||
| Search(Name) (page 5-47) | |||
| Add/Edit Box (page 5-52) | |||

| Job Box | Private Print/Stored Job (page 4-14) |
| Quick Copy/Proof and Hold (page 4-16) | |
| Repeat Copy (page 6-55) | |
| Form for Form Overlay (page 5-65) |

| Removable Memory | Functions | Paper Selection (page 6-12) | ||
| Collate/Offset (page 6-18) | ||||
| Staple/Punch (page 6-19) | Staple (page 6-19) | |||
| Punch (page 6-20) | ||||
| Paper Output (page 6-22) | ||||
| Margin (page 6-33) | ||||
| Duplex (page 6-39) | ||||
| Job Finish Notice (page 6-54) | ||||
| Priority Override (page 6-55) | ||||
| EcoPrint (page 6-24) | ||||
| Fold (page 6-17) | ||||
| Text Stamp (page 6-48) | ||||
| Bates Stamp (page 6-50) | ||||
| Encrypted PDF Password (page 6-65) | ||||
| JPEG/TIFF Print (page 6-66) | ||||
| XPS Fit to Page (page 6-66) | ||||
| Removable Memory | Store File | Functions | Original Size (page 6-11) | |
| Mixed Size Originals (page 6-14) | ||||
| 2-sided/Book Original (page 6-57) | ||||
| Original Orientation (page 6-16) | ||||
| Storing Size (page 6-65) | ||||
| Prevent Bleed-thru (page 6-26) | ||||
| Density (page 6-22) | ||||
| Original Image (page 6-23) | ||||
| Scan Resolution (page 6-62) | ||||
| Color Selection (page 6-24) | ||||
| Sharpness (page 6-25) | ||||
| Background Density Adj. (page 6-25) | ||||
| Zoom (page 6-27) | ||||
| Centering (page 6-33) | ||||
| Border Erase (page 6-34) | ||||
| Continuous Scan (page 6-52) | ||||
| Job Finish Notice (page 6-54) | ||||
| File Name Entry (page 6-54) | ||||
| File Format (page 6-59) | ||||
| File Separation (page 6-62) | ||||
| Text Stamp (page 6-48) | ||||
| Bates Stamp (page 6-50) | ||||
| Delete (page 5-48) | ||||
| Detail (page 5-47) | ||||
| Memory Information (page 5-70) | ||||
| Remove Memory (page 5-71) | ||||
| FAX Box (refer to FAX Operation Guide) | ||||
Status/
Job Cancel
or


| Printing Jobs (page 7-4) |
| Sending Jobs (page 7-6) |
| Storing Jobs (page 7-7) |
| Device/Communication (page 7-17) |
| Paper/Supplies (page 7-20) |
System Menu

or

| Quick Setup Wizard FAX Setup (page 2-28) | ||
| Cassette/MP Tray Settings Cassette 1 (page 8-7) | ||
| Common Settings Language (page 8-9) | ||
| Common Settings Error Handling | Duplexing Error (page 8-14) | |
| Finishing Error (page 8-14) | ||
| No Staple Error (page 8-14) | ||
| Finished Pages Exceeded (page 8-14) | ||
| Punch Waste Full Error (page 8-15) | ||
| Paper Mismatch Error (page 8-15) | ||
| Inserted Paper Mismatch (page 8-15) | ||
| Paper Jam before Staple (page 8-15) | ||
| Paper Jam before Staple (page 8-15) | ||
| Paper Output (page 8-16) | ||
| Orientation Confirmation (page 8-16) | ||
| Function Defaults Original | Orientation (page 8-17) | |
| Original Image (Copy) (page 8-17) | ||
| Org. Image (Send/Store) (page 8-17) | ||
| Scan Resolution (page 8-17) | ||
| FAX TX Resolution (refer to FAX Operation Guide) | ||
| Color Selection (page 8-17) | ||
| File Format (page 8-17) | ||
| File Separation (page 8-17) | ||
| Backgrnd Density (Copy) (page 8-17) | ||
| BackgrndDens.(Send/Store) (page 8-17) | ||
| Prevent Bleed-thru (Copy) (page 8-17) | ||
| Prevent Bleed(Send/Store) (page 8-17) | ||
| Zoom (page 8-17) | ||
| Border Erase Default (page 8-17) | ||
| Border Erase to Back Page (page 8-17) | ||
| Margin Default (page 8-18) | ||
| Auto Image Rotation (Copy) (page 8-18) | ||
| EcoPrint (page 8-18) | ||
| Toner Save Level (EcoPrint) (page 8-18) | ||
| High Comp. PDF Image (page 8-18) | ||
| Common Settings Function Defaults Color TIFF Compression (page 8-18) | |||
| Copy Paper Selection (page 8-28) | |||
| Auto Image Rotation Action (page 8-28) | |||
| Auto Paper Selection (page 8-28) | |||
| Auto % Priority (page 8-28) | |||
| Paper Size for Small Original (page 8-28) | |||
| Preset Limit (page 8-28) | |||
| Reserve Next Priority (page 8-29) | |||
| Quick Setup Registration (page 8-29) | |||
| Send Quick Setup Registration (page 8-29) | |||
| Printer Emulation (page 8-35) | |||
| EcoPrint (page 8-35) | |||
| Toner Save Level (EcoPrint) (page 8-35) | |||
| Override A4/Letter (page 8-35) | |||
| Duplex (page 8-35) | |||
| Copies (page 8-35) | |||
| Orientation (page 8-36) | |||
| Form Feed Timeout (page 8-36) | |||
| LF Action (page 8-36) | |||
| CR Action (page 8-36) | |||
| Job Name (page 8-36) | |||
| User Name (page 8-36) | |||
| Paper Feed Mode (page 8-36) | |||
| KIR (page 8-36) | |||
| Report Print Report Status Page (page 8-37) | |||
| Font List (page 8-37) | |||
| Network Status (page 8-37) | |||
| Service Status (page 8-38) | |||
| Optional Network Status (page 8-38) | |||
| Admin Report Settings | |||
| Outgoing FAX Report (refer toFAX Operation Guide) | |||
| Incoming FAX Report (refer toFAX Operation Guide) | |||
| Result Report Settings Send Result Report (page 8-38) | |||
| FAX RX Result Report (refer toFAX Operation Guide) | |||
| Job Finish Notice Setting (refer toFAX Operation Guide) | |||
| RX Result Report Type (refer toFAX Operation Guide) | |||
| Sending Log History Auto Sending (page 8-39) | |||
| Sending Log History (page 8-39) | |||
| Destination (page 8-39) | |||
| Job Log Subject (page 8-39) | |||
| Personal Information (page 8-39) | |||
| Report Login History Settings Login History (page 8-40) | |||
| TCP/IP Setting TCP/IP (page 8-43) | |||
| IPv4 (page 8-43) | |||
| IPv6 (page 8-44) | |||
| Bonjour (page 8-44) | |||
| IPSec (page 8-44) | |||
| Protocol Settings SMTP (E-mail TX) (page 8-45) | |||
| POP3 (E-mail RX) (page 8-45) | |||
| FTP Client (Transmission) (page 8-45) | |||
| FTP Server (Reception) (page 8-45) | |||
| SMB Client (Transmission): (page 8-45) | |||
| NetBEUI (page 8-45) | |||
| WSD Scan (page 8-45) | |||
| WSD Print (page 8-45) | |||
| i-FAX (page 8-45) | |||
| DSM Scan (page 8-45) | |||
| ThinPrint (page 8-45) | |||
| LPD (page 8-45) | |||
| Raw (page 8-45) | |||
| IPP (page 8-45) | |||
| IPP over SSL (page 8-45) | |||
| HTTP (page 8-46) | |||
| HTTPS (page 8-46) | |||
| System/Network Network Protocol | Settings LDAP (page 8-46) | ||
| SNMPv1/v2c (page 8-46) | |||
| SNMPv3 (page 8-46) | |||
| Enhanced WSD (page 8-46) | |||
| Enhanced WSD over SSL (page 8-46) | |||
| Security Settings (page 8-46) | |||
| LAN Interface (page 8-46) | |||
| Restart Network (page 8-46) | |||
| Proxy (page 8-47) | |||
| Optional Network Network | interface (Send) (page 8-49) | ||
| Wireless Network (page 8-48) | |||
| Network Interface (Send) (page 8-49) | |||
| Security Level (page 8-49) | |||
| Interface Block Setting USB | Host (page 8-50) | ||
| USB Device (page 8-50) | |||
| USB Storage (page 8-50) | |||
| Optional Interface 1 (page 8-50) | |||
| Optional Interface 2 (page 8-50) | |||
| Data Security (page 8-50) | |||
| Document Guard (page 8-51) | |||
| Optional Function (page 8-52) | |||
| Restart Entire Device (page 8-52) | |||
| Edit Destination Address Book (page 3-45) | |||
| User Login/Job Accounting User Login Setting User Login (page 9-4) | |||
| Date/Timer/Energy Saver Date/Time (page 8-54) | |
| Date Format (page 8-54) | |
| Time Zone (page 8-54) | |
| Auto Panel Reset (page 8-54) | |
| Auto Error Clear (page 8-54) | |
| Low Power Timer (page 8-54) | |
| Panel Reset Timer (page 8-55) | |
| Sleep Timer (page 8-55) | |
| Interrupt Clear Timer (page 8-55) | |
| Error Job Skip (page 8-55) | |
| Error Clear Timer (page 8-55) | |
| Unusable Time (refer to FAX Operation Guide) | |
| Sleep Rules (models for Europe) (page 8-55) | |
| Sleep Level (models except for Europe) (page 8-56) | |
| EnergySaver RecoveryLevel (page 8-56) | |
| Weekly Timer Settings (page 8-56) | |
| Adjustment/Maintenance Density Adjustment Copy (page 8-57) | |
| Send/Box (page 8-57) | |
| FAX (refer to FAX Operation Guide) | |
| Background Density Adj. Copy (Auto) (page 8-57) | |
| Send/Box (Auto) (page 8-57) | |
| Correcting Black Lines (page 8-57) | |
| System Initialization (page 8-57) | |
| Display Brightness (page 8-57) | |
| Silent Mode (page 8-57) | |
| Memory Diagnostics (page 8-57) | |
| Auto Color Correction (page 8-58) | |
| Tone Curve Adjustment (page 8-58) | |
| Drum Refresh 1 (page 8-58) | |
| Drum Refresh 2 (page 8-58) | |
| Developer Refresh (page 8-58) | |
| Color Calibration Cycle (page 8-58) | |
| Calibration (page 8-59) | |
| Correct Paper Curl (page 8-59) | |
| Internet (page 8-60) | |
| Application (page 8-60) | |
1 Legal and Safety Information
Please read this information before using your machine. This chapter provides information on the following topics.
Notice 1-2
Safety Conventions in This Guide 1-2
Environment 1-3
Precautions for Use 1-4
Laser Safety (Europe) 1-5
Legal Restriction on Copying/Scanning 1-6
EN ISO 7779 1-6
EK1-ITB 2000 1-6
Legal Information 1-7
Energy Saving Control Function 1-13
Automatic 2-Sided Copy Function 1-13
Resource Saving - Paper 1-13
Environmental benefits of "Power Management" 1-13
Energy Star (ENERGY STAR®) Program 1-14
Notice
Safety Conventions in This Guide
The sections of this guide and parts of the machine marked with symbols are safety warnings meant to protect the user, other individuals and surrounding objects, and ensure correct and safe usage of the machine. The symbols and their meanings are indicated below.

WARNING: Indicates that serious injury or even death may result from insufficient attention to or incorrect compliance with the related points.

CAUTION: Indicates that personal injury or mechanical damage may result from insufficient attention to or incorrect compliance with the related points.
Symbols
The symbol indicates that the related section includes safety warnings. Specific points of attention are indicated inside the symbol.

... [General warning]

... [Warning of high temperature]
The Ⓧ symbol indicates that the related section includes information on prohibited actions. Specifics of the prohibited action are indicated inside the symbol.

... [Warning of prohibited action]

... [Disassembly prohibited]
The ● symbol indicates that the related section includes information on actions which must be performed. Specifics of the required action are indicated inside the symbol.

... [Alert of required action]

... [Remove the power plug from the outlet]

... [Always connect the machine to an outlet with a ground connection]
Please contact your service representative to order a replacement if the safety warnings in this Operation Guide are illegible or if the guide itself is missing (fee required).

NOTE
An original which resembles a bank note closely may not be copied properly in some rare cases because this machine is equipped with a counterfeiting prevention function.
Environment
The service environmental conditions are as follows:
• Temperature: 50 to 90.5 °F (10 to 32.5 °C)
(But humidity should be 70% or less when temperature is 90.5 °F (32.5 °C).)
• Humidity: 15 to 80%
(But temperature should be 86 °F (30 °C) or less when humidity is 80%.)
Use coated paper at a temperature of 80.6 ^ ( 27^ ) or less and a humidity of 60% or less.
Adverse environmental conditions may affect the image quality. It is recommended to use the machine at a temperature: around 60.8 to 80.6 °F or less (16 to 27 °C), humidity: around 36 to 65%. In addition, avoid the following locations when selecting a site for the machine.
The machine automatically detects and displays the following message when the environmental temperature is too high or too low.
Message: "Warning for high temperature. Adjust the room temperature." or "Warning for low temperature. Adjust the room temperature."
To use the machine under optimum conditions, adjust the temperature and the humidity of your room if the message is displayed.
- Avoid locations near a window or with exposure to direct sunlight.
- Avoid locations with vibrations.
- Avoid locations with drastic temperature fluctuations.
- Avoid locations with direct exposure to hot or cold air.
- Avoid poorly ventilated locations.
If the floor is delicate against casters, when this machine is moved after installation, the floor material may be damaged.
During copying, some ozone is released, but the amount does not cause any ill effect to one's health. If, however, the machine is used over a long period of time in a poorly ventilated room or when making an extremely large number of copies, the smell may become unpleasant. To maintain the appropriate environment for copy work, it is suggested that the room be properly ventilated.
Precautions for Use
Cautions when handling consumables

CAUTION
Do not attempt to incinerate parts which contain toner. Dangerous sparks may cause burns.
Keep parts which contain toner out of the reach of children.
If toner happens to spill from parts which contain toner, avoid inhalation and ingestion, as well as contact with your eyes and skin.
- If you do happen to inhale toner, move to a place with fresh air and gargle thoroughly with a large amount of water. If coughing develops, contact a physician.
- If you do happen to ingest toner, rinse your mouth with water and drink 1 or 2 cups of water to dilute the contents of your stomach. If necessary, contact a physician.
- If you do happen to get toner in your eyes, flush them thoroughly with water. If there is any remaining tenderness, contact a physician.
- If toner does happen to get on your skin, wash with soap and water.
Do not attempt to force open or destroy parts which contain toner.
Other precautions
Return the exhausted toner container and waste toner box to your dealer or service representative. The collected toner container and waste toner box will be recycled or disposed in accordance with the relevant regulations.
Store the machine while avoiding exposure to direct sunlight.
Store the machine in a place where the temperature stays below 40 °C while avoiding sharp changes of temperature and humidity.
If the machine will not be used for an extended period of time, remove the paper from the cassette and the Multi Purpose (MP) Tray, return it to its original package and reseal it.
Laser Safety (Europe)
Laser radiation could be hazardous to the human body. For this reason, laser radiation emitted inside this machine is hermetically sealed within the protective housing and external cover. In the normal operation of the product by user, no radiation can leak from the machine.
This machine is classified as Class 1 laser product under IEC/EN 60825-1:2007.
Caution: Performance of procedures other than those specified in this manual may result in hazardous radiation exposure.
These labels are attached to the laser scanner unit inside the machine and are not in a user access area.
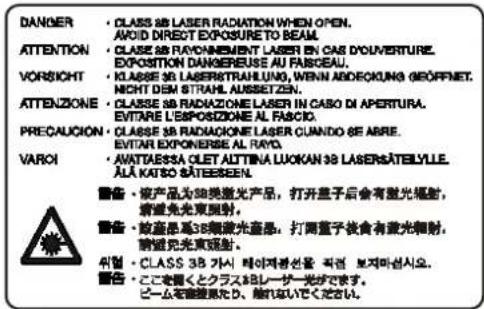
The label shown below is attached on the right side of the machine.

text_image
CLASS 1 LASER PRODUCT KLASSE 1 LASER PRODUKTLegal Restriction on Copying/Scanning
It may be prohibited to copy/scan copyrighted material without permission of the copyright owner.
Copying/Scanning the following items is prohibited and may be penalized by low. It may not be limited to these items. Do not knowingly copy/scan the items that are not to be copied/scanned.
- Paper money
- Bank note
- Securities
- S t a m p
- Passport
- Certificate
Local laws and regulations may prohibit or restrict copying/scanning of other items not mentioned above.
EN ISO 7779
Copying or other reproduction of all or part of this guide without the prior written consent of Copyright owner is prohibited.
Regarding Trade Names
- PRESCRIBE is a registered trademark of Kyocera Corporation.
- KPDL is a trademark of Kyocera Corporation.
- Microsoft, Windows, Windows XP, Windows Server 2003, Windows Vista, Windows Server 2008, Windows 7, Windows Server 2012, Windows 8 and Internet Explorer are registered trademarks or trademarks of Microsoft Corporation in the U.S.A. and/or other countries.
- PCL is a trademark of Hewlett-Packard Company.
- Adobe Acrobat, Adobe Reader and PostScript are trademarks of Adobe Systems, Incorporated.
- Ethernet is a registered trademark of Xerox Corporation.
• IBM and IBM PC/AT are trademarks of International Business Machines Corporation.
• AppleTalk, Bonjour, Macintosh, and Mac OS are trademarks of Apple Inc., registered in the U.S. and other countries. - Helvetica, Palatino and Times are registered trademarks of Linotype GmbH.
- ITC Avant Garde Gothic, ITC Bookman, ITC ZapfChancery and ITC ZapfDingbats are registered trademarks of International Typeface Corporation.
- UFST™ MicroType® fonts by Monotype Imaging Inc. are installed in this machine.
- This machine contains the software having modules developed by Independent JPEG Group.
- ThinPrint is a trademark of Cortado AG in Germany and other countries.
- This product contains NetFront Browser of ACCESS CO., LTD.
- ACCESS, ACCESS logo and NetFront are trademarks or registered trademarks of ACCESS CO., LTD. in the United States, Japan and other countries.
• © 2011 ACCESS CO., LTD. All rights reserved. - Java is a registered trademark of Oracle and/or its affiliates.

text_image
ACCESS™ NetFront™ Browser
All other brands and product names are registered trademarks or trademarks designations ^TM and ^ will not be used in this Operation Guide.
GPL/LGPL
This product contains GPL (http://www.gnu.org/licenses/gpl.html) and/or LGPL (http://www.gnu.org/licenses/lgpl.html) software as part of its firmware. You can get the source code, and you are permitted to copy, redistribute and modify it under the terms of GPL/LGPL.
OpenSSL License
Copyright (c) 1998-2006 The OpenSSL Project. All rights reserved.
Redistribution and use in source and binary forms, with or without modification, are permitted provided that the following conditions are met:
- Redistributions of source code must retain the above copyright notice, this list of conditions and the following disclaimer.
- Redistributions in binary form must reproduce the above copyright notice, this list of conditions and the following disclaimer in the documentation and/or other materials provided with the distribution.
- All advertising materials mentioning features or use of this software must display the following acknowledgment: "This product includes software developed by the OpenSSL Project for use in the OpenSSL Toolkit. (http://www.openssl.org/)"
- The names "OpenSSL Toolkit" and "OpenSSL Project" must not be used to endorse or promote products derived from this software without prior written permission. For written permission, please contact openssl-core@openssl.org.
- Products derived from this software may not be called "OpenSSL" nor may "OpenSSL" appear in their names without prior written permission of the OpenSSL Project.
- Redistributions of any form whatsoever must retain the following acknowledgment: "This product includes software developed by the OpenSSL Project for use in the OpenSSL Toolkit (http://www.openssl.org/)
THIS SOFTWARE IS PROVIDED BY THE OpenSSL PROJECT "AS IS" AND ANY EXPRESSED OR IMPLIED WARRANTIES, INCLUDING, BUT NOT LIMITED TO, THE IMPLIED WARRANTIES OF MERCHANTABILITY AND FITNESS FOR A PARTICULAR PURPOSE ARE DISCLAIMED. IN NO EVENT SHALL THE OpenSSL PROJECT OR ITS CONTRIBUTORS BE LIABLE FOR ANY DIRECT, INDIRECT, INCIDENTAL, SPECIAL, EXEMPLARY, OR CONSEQUENTIAL DAMAGES (INCLUDING, BUT NOT LIMITED TO, PROCUREMENT OF SUBSTITUTE GOODS OR SERVICES; LOSS OF USE, DATA, OR PROFITS; OR BUSINESS INTERRUPTION) HOWEVER CAUSED AND ON ANY THEORY OF LIABILITY, WHETHER IN CONTRACT, STRICT LIABILITY, OR TORT (INCLUDING NEGLIGENCE OR OTHERWISE) ARISING IN ANY WAY OUT OF THE USE OF THIS SOFTWARE, EVEN IF ADVISED OF THE POSSIBILITY OF SUCH DAMAGE.
Original SSLeay License
Copyright (C) 1995-1998 Eric Young (eay@cryptsoft.com) All rights reserved.
This package is an SSL implementation written by Eric Young (eay@cryptsoft.com). The implementation was written so as to conform with Netscapes SSL.
This library is free for commercial and non-commercial use as long as the following conditions are adhered to. The following conditions apply to all code found in this distribution, be it the RC4, RSA, Ihash, DES, etc., code; not just the SSL code. The SSL documentation included with this distribution is covered by the same copyright terms except that the holder is Tim Hudson (tjh@cryptsoft.com).
Copyright remains Eric Young's, and as such any Copyright notices in the code are not to be removed.
If this package is used in a product, Eric Young should be given attribution as the author of the parts of the library used.
This can be in the form of a textual message at program startup or in documentation (online or textual) provided with the package.
Redistribution and use in source and binary forms, with or without modification, are permitted provided that the following conditions are met:
- Redistributions of source code must retain the copyright notice, this list of conditions and the following disclaimer.
- Redistributions in binary form must reproduce the above copyright notice, this list of conditions and the following disclaimer in the documentation and/or other materials provided with the distribution.
- All advertising materials mentioning features or use of this software must display the following acknowledgement: "This product includes cryptographic software written by Eric Young (eay@cryptsoft.com)"
The word 'cryptographic' can be left out if the rouines from the library being used are not cryptographic related :-). - If you include any Windows specific code (or a derivative thereof) from the apps directory (application code) you must include an acknowledgement: "This product includes software written by Tim Hudson (tjh@cryptsoft.com)"
THIS SOFTWARE IS PROVIDED BY ERIC YOUNG "AS IS" AND ANY EXPRESS OR IMPLIED WARRANTIES, INCLUDING, BUT NOT LIMITED TO, THE IMPLIED WARRANTIES OF MERCHANTABILITY AND FITNESS FOR A PARTICULAR PURPOSE ARE DISCLAIMED. IN NO EVENT SHALL THE AUTHOR OR CONTRIBUTORS BE LIABLE FOR ANY DIRECT, INDIRECT, INCIDENTAL, SPECIAL, EXEMPLARY, OR CONSEQUENTIAL DAMAGES (INCLUDING, BUT NOT LIMITED TO, PROCUREMENT OF SUBSTITUTE GOODS OR SERVICES; LOSS OF USE, DATA, OR PROFITS; OR BUSINESS INTERRUPTION) HOWEVER CAUSED AND ON ANY THEORY OF LIABILITY, WHETHER IN CONTRACT, STRICT LIABILITY, OR TORT (INCLUDING NEGLIGENCE OR OTHERWISE) ARISING IN ANY WAY OUT OF THE USE OF THIS SOFTWARE, EVEN IF ADVISED OF THE POSSIBILITY OF SUCH DAMAGE.
The licence and distribution terms for any publicly available version or derivative of this code cannot be changed. i.e. this code cannot simply be copied and put under another distribution licence [including the GNU Public Licence.]
Monotype Imaging License Agreement
1 Software shall mean the digitally encoded, machine readable, scalable outline data as encoded in a special format as well as the UFST Software.
2 You agree to accept a non-exclusive license to use the Software to reproduce and display weights, styles and versions of letters, numerals, characters and symbols (Typefaces) solely for your own customary business or personal purposes at the address stated on the registration card you return to Monotype Imaging. Under the terms of this License Agreement, you have the right to use the Fonts on up to three printers. If you need to have access to the fonts on more than three printers, you need to acquire a multiuser license agreement which can be obtained from Monotype Imaging. Monotype Imaging retains all rights, title and interest to the Software and Typefaces and no rights are granted to you other than a License to use the Software on the terms expressly set forth in this Agreement.
3 To protect proprietary rights of Monotype Imaging, you agree to maintain the Software and other proprietary information concerning the Typefaces in strict confidence and to establish reasonable procedures regulating access to and use of the Software and Typefaces.
4 You agree not to duplicate or copy the Software or Typefaces, except that you may make one backup copy. You agree that any such copy shall contain the same proprietary notices as those appearing on the original.
5 This License shall continue until the last use of the Software and Typefaces, unless sooner terminated. This License may be terminated by Monotype Imaging if you fail to comply with the terms of this License and such failure is not remedied within thirty (30) days after notice from Monotype Imaging. When this License expires or is terminated, you shall either return to Monotype Imaging or destroy all copies of the Software and Typefaces and documentation as requested.
6 You agree that you will not modify, alter, disassemble, decrypt, reverse engineer or decompile the Software.
7 Monotype Imaging warrants that for ninety (90) days after delivery, the Software will perform in accordance with Monotype Imaging-published specifications, and the diskette will be free from defects in material and workmanship. Monotype Imaging does not warrant that the Software is free from all bugs, errors and omissions.
The parties agree that all other warranties, expressed or implied, including warranties of fitness for a particular purpose and merchantability, are excluded.
8 Your exclusive remedy and the sole liability of Monotype Imaging in connection with the Software and Typefaces is repair or replacement of defective parts, upon their return to Monotype Imaging.
In no event will Monotype Imaging be liable for lost profits, lost data, or any other incidental or consequential damages, or any damages caused by abuse or misapplication of the Software and Typefaces.
9 Massachusetts U.S.A. law governs this Agreement.
10 You shall not sublicense, sell, lease, or otherwise transfer the Software and/or Typefaces without the prior written consent of Monotype Imaging.
11 Use, duplication or disclosure by the Government is subject to restrictions as set forth in the Rights in Technical Data and Computer Software clause at FAR 252-227-7013, subdivision (b)(3)(ii) or subparagraph (c)(1)(ii), as appropriate. Further use, duplication or disclosure is subject to restrictions applicable to restricted rights software as set forth in FAR 52.227-19 (c)(2).
12 You acknowledge that you have read this Agreement, understand it, and agree to be bound by its terms and conditions. Neither party shall be bound by any statement or representation not contained in this Agreement. No change in this Agreement is effective unless written and signed by properly authorized representatives of each party. By opening this diskette package, you agree to accept the terms and conditions of this Agreement.
Knopflerfish License
This product includes software developed by the Knopflerfish Project. http://www.knopflerfish.org
Copyright 2003-2010 The Knopflerfish Project. All rights reserved.
Redistribution and use in source and binary forms, with or without modification, are permitted provided that the following conditions are met:
- Redistributions of source code must retain the above copyright notice, this list of conditions and the following disclaimer.
- Redistributions in binary form must reproduce the above copyright notice, this list of conditions and the following disclaimer in the documentation and/or other materials provided with the distribution.
- Neither the name of the KNOPFLERFISH project nor the names of its contributors may be used to endorse or promote products derived from this software without specific prior written permission.
THIS SOFTWARE IS PROVIDED BY THE COPYRIGHT HOLDERS AND CONTRIBUTORS "AS IS" AND ANY EXPRESS OR IMPLIED WARRANTIES, INCLUDING, BUT NOT LIMITED TO, THE IMPLIED WARRANTIES OF MERCHANTABILITY AND FITNESS FOR A PARTICULAR PURPOSE ARE DISCLAIMED. IN NO EVENT SHALL THE COPYRIGHT OWNER OR CONTRIBUTORS BE LIABLE FOR ANY DIRECT, INDIRECT, INCIDENTAL, SPECIAL, EXEMPLARY, OR CONSEQUENTIAL DAMAGES (INCLUDING, BUT NOT LIMITED TO, PROCUREMENT OF SUBSTITUTE GOODS OR SERVICES; LOSS OF USE, DATA, OR PROFITS; OR BUSINESS INTERRUPTION) HOWEVER CAUSED AND ON ANY THEORY OF LIABILITY, WHETHER IN CONTRACT, STRICT LIABILITY, OR TORT (INCLUDING NEGLIGENCE OR OTHERWISE) ARISING IN ANY WAY OUT OF THE USE OF THIS SOFTWARE, EVEN IF ADVISED OF THE POSSIBILITY OF SUCH DAMAGE.
Apache License (Version 2.0)
Apache License
Version 2.0, January 2004
http://www.apache.org/licenses/
TERMS AND CONDITIONS FOR USE, REPRODUCTION, AND DISTRIBUTION
1. Definitions.
"License" shall mean the terms and conditions for use, reproduction, and distribution as defined by Sections 1 through 9 of this document.
"Licensor" shall mean the copyright owner or entity authorized by the copyright owner that is granting the License.
"Legal Entity" shall mean the union of the acting entity and all other entities that control, are controlled by, or are under common control with that entity. For the purposes of this definition, "control" means (i) the power, direct or indirect, to cause the direction or management of such entity, whether by contract or otherwise, or (ii) ownership of fifty percent (50%) or more of the outstanding shares, or (iii) beneficial ownership of such entity.
"You" (or "Your") shall mean an individual or Legal Entity exercising permissions granted by this License.
"Source" form shall mean the preferred form for making modifications, including but not limited to software source code, documentation source, and configuration files.
"Object" form shall mean any form resulting from mechanical transformation or translation of a Source form, including but not limited to compiled object code, generated documentation, and conversions to other media types.
"Work" shall mean the work of authorship, whether in Source or Object form, made available under the License, as indicated by a copyright notice that is included in or attached to the work (an example is provided in the Appendix below).
"Derivative Works" shall mean any work, whether in Source or Object form, that is based on (or derived from) the Work and for which the editorial revisions, annotations, elaborations, or other modifications represent, as a whole, an original work of authorship. For the purposes of this License, Derivative Works shall not include works that remain separable from, or merely link (or bind by name) to the interfaces of, the Work and Derivative Works thereof.
"Contribution" shall mean any work of authorship, including the original version of the Work and any modifications or additions to that Work or Derivative Works thereof, that is intentionally submitted to Licensor for inclusion in the Work by the copyright owner or by an individual or Legal Entity authorized to submit on behalf of the copyright owner. For the purposes of this definition, "submitted" means any form of electronic, verbal, or written communication sent to the Licensor or its representatives, including but not limited to communication on electronic mailing lists, source code control systems, and issue tracking systems that are managed by, or on behalf of, the Licensor for the purpose of discussing and improving the Work, but excluding communication that is conspicuously marked or otherwise designated in writing by the copyright owner as "Not a Contribution."
"Contributor" shall mean Licensor and any individual or Legal Entity on behalf of whom a Contribution has been received by Licensor and subsequently incorporated within the Work.
- Grant of Copyright License. Subject to the terms and conditions of this License, each Contributor hereby grants to You a perpetual, worldwide, non-exclusive, no-charge, royalty-free, irrevocable copyright license to reproduce, prepare Derivative Works of, publicly display, publicly perform, sublicense, and distribute the Work and such Derivative Works in Source or Object form.
- Grant of Patent License. Subject to the terms and conditions of this License, each Contributor hereby grants to You a perpetual, worldwide, non-exclusive, no-charge, royalty-free, irrevocable (except as stated in this section) patent license to make, have made, use, offer to sell, sell, import, and otherwise transfer the Work, where such license applies only to those patent claims licensable by such Contributor that are necessarily infringed by their Contribution(s) alone or by combination of their Contribution(s) with the Work to which such Contribution(s) was submitted. If You institute patent litigation against any entity (including a cross-claim or counterclaim in a lawsuit) alleging that the Work or a Contribution incorporated within the Work constitutes direct or contributory patent infringement, then any patent licenses granted to You under this License for that Work shall terminate as of the date such litigation is filed.
- Redistribution. You may reproduce and distribute copies of the Work or Derivative Works thereof in any medium, with or without modifications, and in Source or Object form, provided that You meet the following conditions:
(a) You must give any other recipients of the Work or Derivative Works a copy of this License; and
(b) You must cause any modified files to carry prominent notices stating that You changed the files; and
(c) You must retain, in the Source form of any Derivative Works that You distribute, all copyright, patent, trademark, and attribution notices from the Source form of the Work, excluding those notices that do not pertain to any part of the Derivative Works; and
(d) If the Work includes a "NOTICE" text file as part of its distribution, then any Derivative Works that You distribute must include a readable copy of the attribution notices contained within such NOTICE file, excluding those notices that do not pertain to any part of the Derivative Works, in at least one of the following places: within a NOTICE text file distributed as part of the Derivative Works; within the Source form or documentation, if provided along with the Derivative Works; or, within a display generated by the Derivative Works, if and wherever such third-party notices normally appear. The contents of the NOTICE file are for informational purposes only and do not modify the License. You may add Your own attribution notices within Derivative Works that You distribute, alongside or as an addendum to the NOTICE text from the Work, provided that such additional attribution notices cannot be construed as modifying the License.
You may add Your own copyright statement to Your modifications and may provide additional or different license terms and conditions for use, reproduction, or distribution of Your modifications, or for any such Derivative Works as a whole, provided Your use, reproduction, and distribution of the Work otherwise complies with the conditions stated in this License.
- Submission of Contributions. Unless You explicitly state otherwise, any Contribution intentionally submitted for inclusion in the Work by You to the Licensor shall be under the terms and conditions of this License, without any additional terms or conditions. Notwithstanding the above, nothing herein shall supersede or modify the terms of any separate license agreement you may have executed with Licensor regarding such Contributions.
- Trademarks. This License does not grant permission to use the trade names, trademarks, service marks, or product names of the Licensor, except as required for reasonable and customary use in describing the origin of the Work and reproducing the content of the NOTICE file.
- Disclaimer of Warranty. Unless required by applicable law or agreed to in writing, Licensor provides the Work (and each Contributor provides its Contributions) on an "AS IS" BASIS, WITHOUT WARRANTIES OR CONDITIONS OF ANY KIND, either express or implied, including, without limitation, any warranties or conditions of TITLE, NON-INFRINGEMENT, MERCHANTABILITY, or FITNESS FOR A PARTICULAR PURPOSE. You are solely responsible for determining the appropriateness of using or redistributing the Work and assume any risks associated with Your exercise of permissions under this License.
- Limitation of Liability. In no event and under no legal theory, whether in tort (including negligence), contract, or otherwise, unless required by applicable law (such as deliberate and grossly negligent acts) or agreed to in writing, shall any Contributor be liable to You for damages, including any direct, indirect, special, incidental, or consequential damages of any character arising as a result of this License or out of the use or inability to use the Work (including but not limited to damages for loss of goodwill, work stoppage, computer failure or malfunction, or any and all other commercial damages or losses), even if such Contributor has been advised of the possibility of such damages.
- Accepting Warranty or Additional Liability. While redistributing the Work or Derivative Works thereof, You may choose to offer, and charge a fee for, acceptance of support, warranty, indemnity, or other liability obligations and/or rights consistent with this License. However, in accepting such obligations, You may act only on Your own behalf and on Your sole responsibility, not on behalf of any other Contributor, and only if You agree to indemnify, defend, and hold each Contributor harmless for any liability incurred by, or claims asserted against, such Contributor by reason of your accepting any such warranty or additional liability.
END OF TERMS AND CONDITIONS
APPENDIX: How to apply the Apache License to your work.
To apply the Apache License to your work, attach the following boilerplate notice, with the fields enclosed by brackets "[]" replaced with your own identifying information. (Don't include the brackets!) The text should be enclosed in the appropriate comment syntax for the file format. We also recommend that a file or class name and description of purpose be included on the same "printed page" as the copyright notice for easier identification within third-party archives.
Copyright [yyyy] [name of copyright owner]
Licensed under the Apache License, Version 2.0 (the "License"); you may not use this file except in compliance with the License. You may obtain a copy of the License at
http://www.apache.org/licenses/LICENSE-2.0
Unless required by applicable law or agreed to in writing, software distributed under the License is distributed on an "AS IS" BASIS, WITHOUT WARRANTIES OR CONDITIONS OF ANY KIND, either express or implied. See the License for the specific language governing permissions and limitations under the License.
Energy Saving Control Function
The device comes equipped with a Low Power Mode where energy consumption is reduced after a certain amount of time elapses since the device was last used, as well as a Sleep where printer and fax functions remain in a waiting state but power consumption is still reduced to a minimum when there is no activity with the device within a set amount of time.
Low Power Mode
The device automatically enters Low Power Mode when 2 minutes have passed since the device was last used. The amount of time of no activity that must pass before Low Power Mode is activated may be lengthened. For more information refer to Low Power Mode and Auto Low Power Mode (page 3-14).
Sleep
The device automatically enters Sleep when 45 minutes (for 3555i), or 60 minutes (for 4555i or 5555i) have passed since the device was last used. The amount of time of no activity that must pass before Sleep is activated may be lengthened. For more information see Sleep and Auto Sleep (page 3-15).
Automatic 2-Sided Copy Function
This device includes 2-sided copying as a standard function. For example, by copying two 1-sided originals onto a single sheet of paper as a 2-sided copy, it is possible to lower the amount of paper used. For more information refer to Duplex (page 6-39).
Printing in duplex mode reduces paper consumption and contributes to the conservation of forest resources. Duplex mode also reduces the amount of paper that must be purchased, and thereby reduces cost. It is recommended that machines capable of duplex printing be set to use duplex mode by default.
Resource Saving - Paper
For the preservation and sustainable use of forest resources, it is recommended that recycled as well as virgin paper certified under environmental stewardship initiatives or carrying recognised ecolabels, which meet EN 12281:2002 ^* or an equivalent quality standard, be used.
This machine also supports printing on 64 g/m^2 paper. Using such paper containing less raw materials can lead to further saving of forest resources.
* : EN12281:2002 "Printing and business paper - Requirements for copy paper for dry toner imaging processes"
Your sales or service representative can provide information about recommended paper types.
Environmental benefits of "Power Management"
To reduce power consumption when idle, this machine is equipped with a power management function that automatically activates energy-saving mode when the machine is idle for a certain period of time.
Although it takes the machine a slight amount of time to return to READY mode when in energy-saving mode, a significant reduction in energy consumption is possible. It is recommended that the machine be used with the activation time for energy-saving mode set to the default setting.
Energy Star (ENERGY STAR®) Program

We have determined as a participating company in the International Energy Star Program that this product is compliant with the standards laid out in the International Energy Star Program.
ENERGY STAR ^® is a voluntary energy efficiency program with the goal of developing and promoting the use of products with high energy efficiency in order to help prevent global warming. By purchasing
ENERGY STAR ^® qualified products, customers can help reduce emissions of greenhouse gases during product use and cut energy-related costs.
2 Installing and Setting up the Machine
This chapter provides information for the administrator of this machine, such as part names, cable connection, and software installation.
Part Names 2-2
Machine Exterior 2-2
Connectors/Interior 2-4
With Optional Equipments Attached 2-5
Determining the Connection Method and Preparing Cables 2-6
Connection Example 2-6
Preparing Necessary Cables 2-7
Connecting Cables 2-8
Connecting LAN Cable 2-8
Connecting USB Cable 2-9
Connecting the Power Cable 2-9
Power On/Off 2-10
Power On 2-10
Power Off 2-11
Installing Software 2-13
Software on DVD (Windows) 2-13
Installing Printer Driver in Windows 2-14
Uninstalling the Software 2-16
Installing Printer Driver in Macintosh 2-17
Setting TWAIN Driver 2-19
Setting WIA Driver 2-20
Login/Logout 2-21
Login 2-21
Logout 2-22
Default Settings of the Machine 2-23
Setting Date and Time 2-23
Network Setup (LAN Cable Connection) 2-25
Quick Setup Wizard 2-28
Checking the Counter 2-30
Additional Preparations for the Administrator 2-31
To Send Documents to a PC 2-31
To E-mail Scanned Images 2-31
To Strengthen the Security 2-31
Embedded Web Server RX 2-33
Accessing Embedded Web Server RX 2-34
Changing Security Settings 2-35
Changing Host Name 2-36
Sending E-mail 2-37
Registering Destinations 2-40
Registering a Custom Box 2-41
Transferring data from our other products 2-42
Migrating the Address Book 2-42
Part Names
Machine Exterior
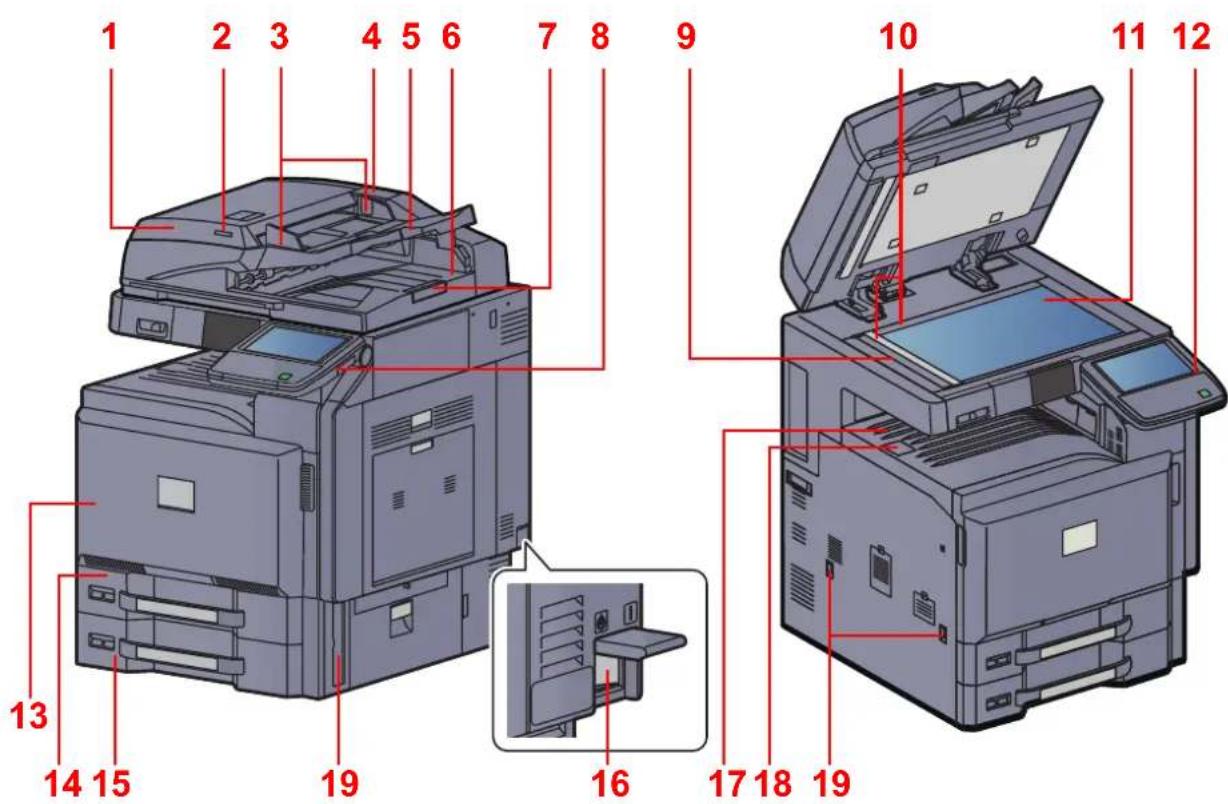
text_image
1 2 3 4 5 6 7 8 9 10 11 12 13 14 15 19 16 17 18 191 Document Processor (Option)
2 Original Loaded Indicator
3 Original Width Guides
4 Cleaning Cloth Compartment
5 Original Table
6 Original eject table
7 Original stopper
8 USB Port (A1)
9 Slit Glass
10 Original Size Indicator Plates
11 Platen
12 Operation Panel
13 Front Cover
14 Cassette 1
15 Cassette 2
16 Main Power Switch
17 Inner Tray
18 Paper stopper
19 Handles

Optional Equipment (page 11-2)
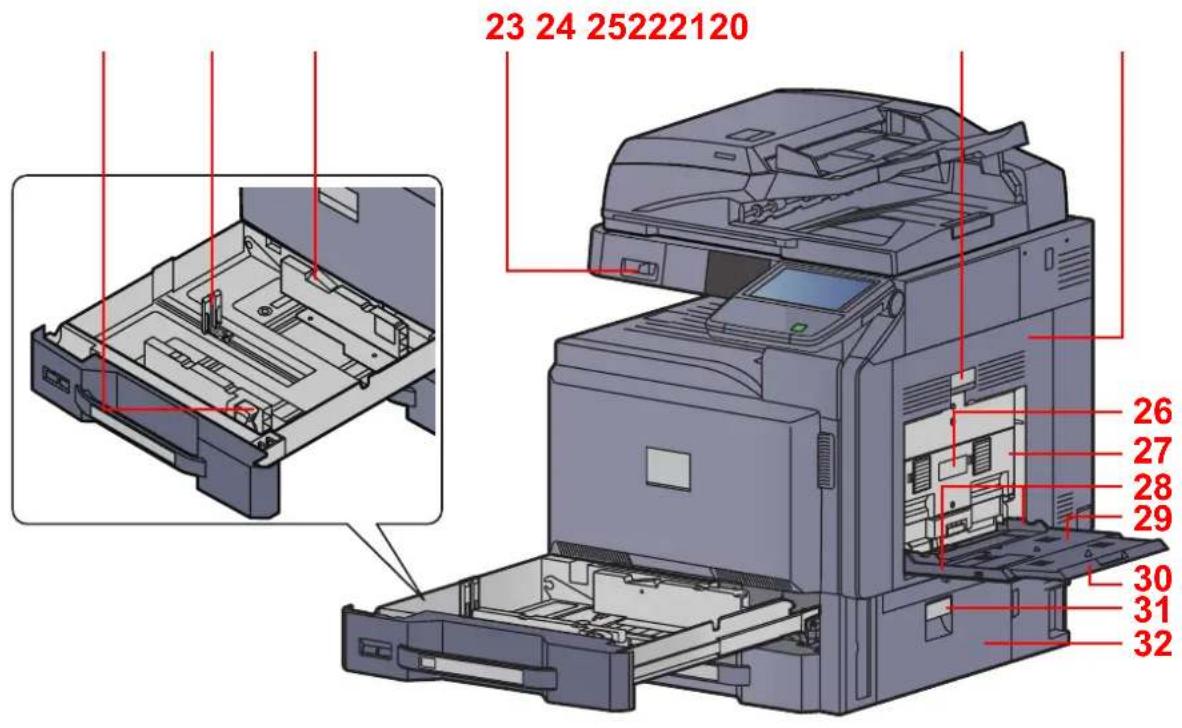
text_image
23 24 25222120 26 27 28 29 30 31 3220 Paper Width Adjusting Tab
21 Paper Length Guide
22 (Paper Width Guide) Lock
23 Clip Holder
24 Right Cover 1 Lever
25 Right Cover 1
26 Right Cover 2 Lever
27 Right Cover 2
28 Paper Width Guide
29 Multi Purpose Tray
30 Support Tray Section of the Multi Purpose Tray
31 Right Cover 3 Lever
32 Right Cover 3
Connectors/Interior
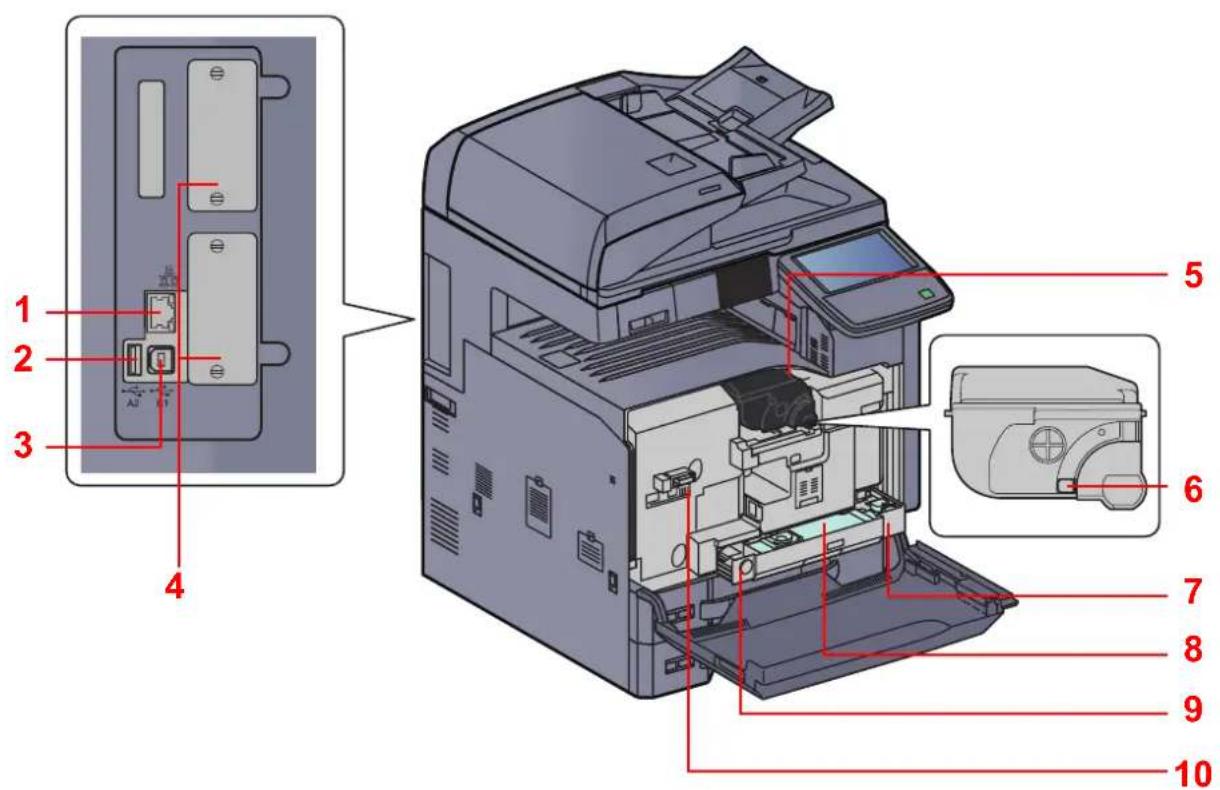
text_image
Diagram of a printer internal structure with numbered parts, showing front and side views with labeled components.1 Network Interface Connector
2 USB Port (A2)
3 USB Interface Connector (B1)
4 Option Interface
5 Toner Container (Black)
6 Toner Container Release Lever
7 Waste Toner Tray
8 Waste Toner Box
9 Release Button
10 Cleaning Brush
With Optional Equipments Attached
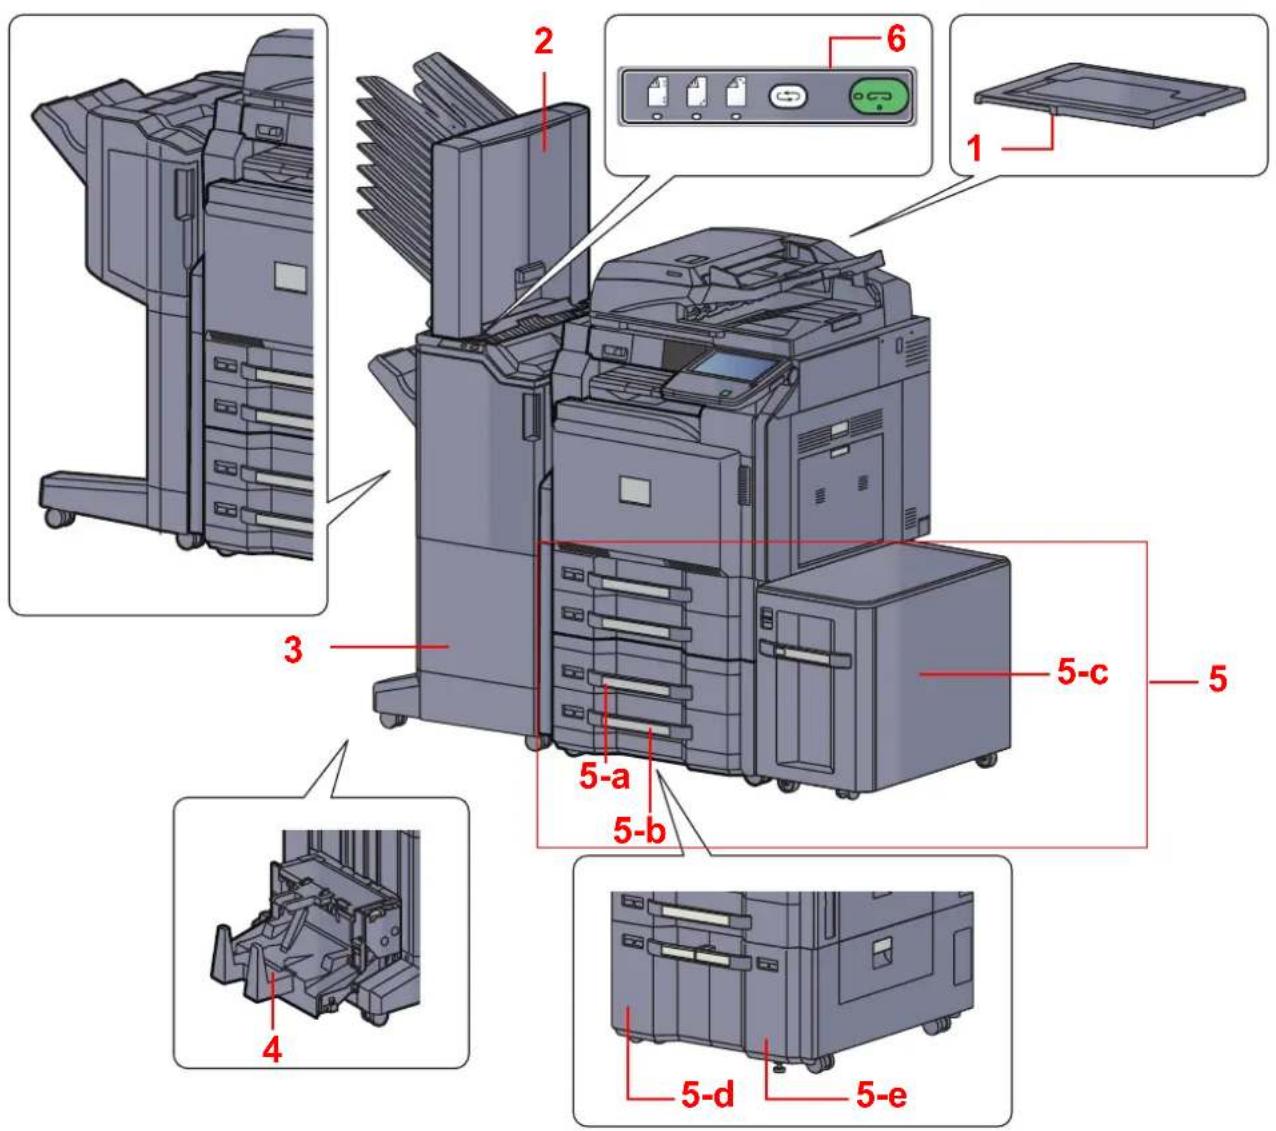
text_image
Technical diagram of an open-plan printer with labeled parts including printer, printer, and internal components1 Platen Cover
2 Mailbox
3 Document Finisher
4 Folding Unit
5 Cassette 3 to 5
• 5-a: Cassette 3 • 5-b: Cassette 4 • 5-c: Cassette 5
• 5-d: Cassette 4 • 5-e: Cassette 3

Optional Equipment (page 11-2)
6 Control Section of the Finisher

Manual Staple (page 5-72)
Determining the Connection Method and Preparing Cables
Check the method to connect the equipment to a PC or network, and prepare the necessary cables for your environment.
Connection Example
Determine the method to connect the equipment to a PC or network by referring to the illustration below.
Connecting a scanner to your PC network with a network cable (1000BASE-T, 100BASE-TX or 10BASE-T)
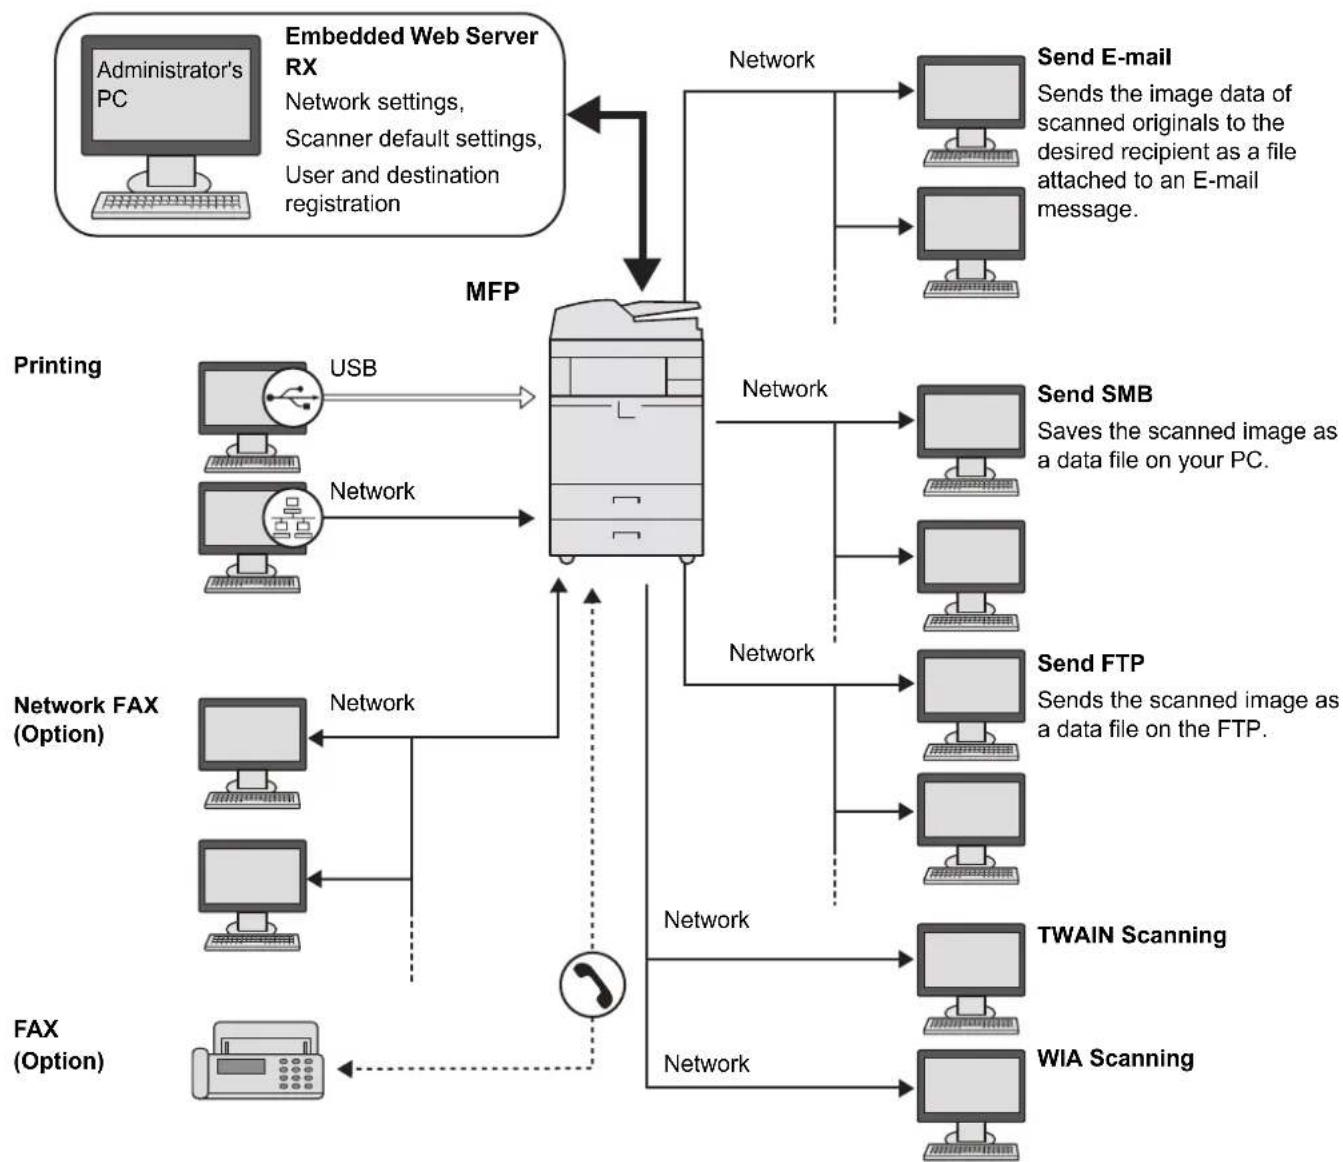
flowchart
graph TD
    A["Administrator's PC"] --> B["Embedded Web Server RX"]
    B --> C["MFP"]
    C --> D["Send E-mail"]
    C --> E["Send SMB"]
    C --> F["Send FTP"]
    C --> G["TWAIN Scanning"]
    C --> H["WIA Scanning"]
    D --> I["Send data from PC"]
    E --> J["Data from your PC"]
    F --> K["Data from FTP"]
    G --> L["Data from WIA"]
    H --> M["Data from WIA"]
    N["Printing"] --> O["USB"]
    O --> P["Network"]
    P --> Q["Network"]
    Q --> R["Network"]
    R --> S["Send E-mail to PC"]
    R --> T["Send SMB to PC"]
    R --> U["Send FTP to PC"]
    V["Network FAX (Option)"] --> W["Network"]
    X["FAX (Option)"] --> Y["Network"]
    Z["Network"] --> AA["Network"]
    AB["Network"] --> AC["Network"]
    AD["Network"] --> AE["Network"]
TWAIN and WIA are standardized interface for communication between software applications and image acquisition devices.

NOTE
If you are using the machine with the optional wireless interface kit attached, you do not need to connect the LAN cable.

Optional Network (page 8-47)
Preparing Necessary Cables
Prepare the necessary cables according to the interface you use.
Available Standard Interfaces
| Connection Environment Function Necessary Cable | ||
| Connect a LAN cable to the machine. | Printer/Scanner /Network FAX* | Network Interface LAN (10BASE-T or 100BASE-TX, 1000BASE-T Shielded) |
| Connect a USB cable to the machine. | Printer USB2.0 compatible cable (Hi-Speed USB compliant, Max. 5.0 m, Shielded) | |
* Function available when using optional fax kit. For more information on using the Network FAX, refer to the FAX Operation Guide.
Connecting Cables
Connecting LAN Cable

IMPORTANT
If the power is on, turn the main power switch off.

Power Off (page 2-11)
1 Connect the machine.
1 Connect the LAN cable to the network interface connector.
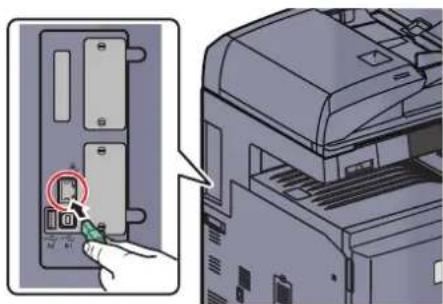
text_image
Diagram showing a hand inserting a device into a printer, with a magnified view highlighting the device's internal structure.2 Connect the other end of the cable to the hub.
2 Set up the machine.
Power on the machine and configure the network.

For details, refer to Network Setup (LAN Cable Connection) on page 2-25.
Connecting USB Cable

IMPORTANT
If the power is on, turn the main power switch off.

Power Off (page 2-11)
1 Connect the machine.
1 Connect the USB cable to the USB interface connector (B1) located on the left side of the body.
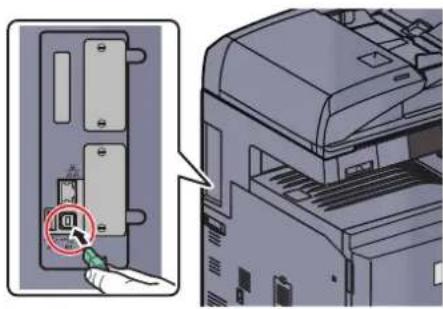
text_image
Diagram showing a printer's internal panel with a highlighted switch and magnified view of the printer's front view.2 Connect the other end of the cable to the PC.
Connecting the Power Cable
Connect one end of the supplied power cable to the machine and the other end to a power outlet.

IMPORTANT
Only use the power cable that comes with the machine.
Power On/Off
Power On
When the main power indicator is lit... (Recovery from sleep)
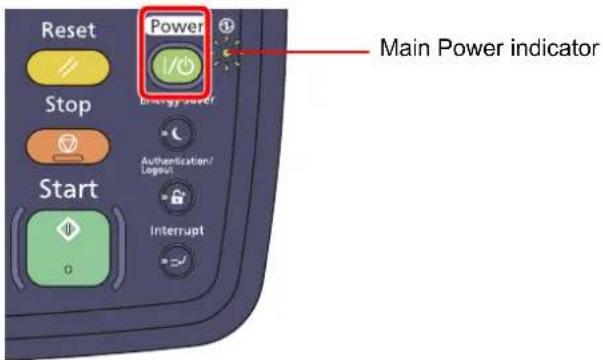
text_image
Reset Power Stop Energy level Authentication/ Logout Start Interrupt Main Power indicatorPress the [Power] key.
When the main power indicator is off...
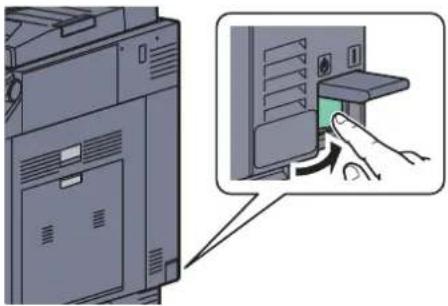
natural_image
Illustration of a computer tower with a hand inserting a green component into the base panel (no text or symbols visible)Turn the main power switch on.

IMPORTANT
When turning off the main power switch, do not turn on the main power switch again immediately. Wait more than 5 seconds, and then turn on the main power switch.

NOTE
If the optional Data Security Kit is activated, a message might display indicating the security function is being activated and time may be taken to start up when the power is turned on.
Power Off
When not turning off the main power switch... (sleep)
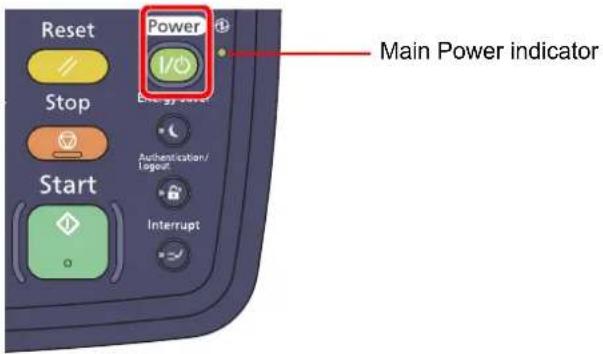
text_image
Reset Stop Start Power I/O Main Power indicator Energy level Authentication/ Togglet InterruptPress the [Power] key. The [Power] key light will go out, and the Main Power indicator will light up.

Low Power Mode and Auto Low Power Mode (page 3-14) Sleep and Auto Sleep (page 3-15)
When turning off the main power switch...
Note that when the main power switch is turned off, the machine will be unable to automatically receive print data from computers or faxes.

IMPORTANT
When the [Processing] indicator or [Memory] indicator is lit up or blinked, the machine is operating. Turning off the main power switch while the machine is operating may cause it to malfunction.
1 Press the [Power] key.
![Utax 3555i - Press the [Power] key. - 1](/content/2026/05/780633/images/9dacfd56ae4207ff58ee9ef33271aa1d0572b2aecf814abe25b11de71aed38c3.jpg)
text_image
Reset Stop Power Authentication/ Logout Start Interrupt Clear Quick No. Search Enter Processing Memory Attention Check that the indicators are off.Verify that the [Power] key light has gone out and that the Main Power indicator is lit up.
2 Turn the main power switch off.
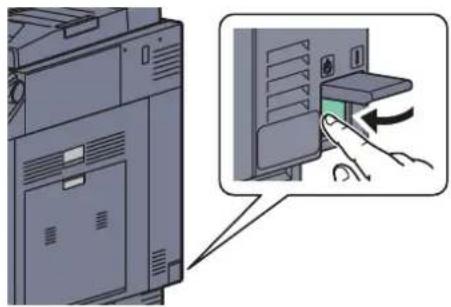
natural_image
Illustration of a computer tower with an open door and a hand inserting a green button (no text or symbols present)In case of not using the machine for an extended period of time...

CAUTION
If this machine will be left unused for an extended period (e.g. overnight), turn it off at the main power switch. If the machine will not be used for an even longer period of time (e.g. vacation), remove the power plug from the outlet as a safety precaution. If the optional Fax kit is installed, note that turning the machine off at the main power switch disables fax transmission and reception.

IMPORTANT
Remove paper from the cassettes and seal it in the paper storage bag to protect it from humidity.
Installing Software
Install appropriate software on your PC from the included DVD (Product Library) if you want to use the printer function of this machine or perform TWAIN / WIA transmission or Network FAX transmission from your PC.
Software on DVD (Windows)
You can use either [Express Install] or [Custom Install] can be selected for the installation method. The software that can be installed and the printer port selection method vary depending on which method is selected.
| Software Function Description | Installation method●: Standard installation○: Allows selection of the components to be installed | |||
| Express Install | Custom Install | |||
| Printing System Driver | Print This driver enables files on a computer to be printed by the machine. Multiple page description languages (PCL XL, KPDL, etc.) are supported by a single driver. This printer driver allows you to take full advantage of the features of the machine. Use this driver to print PDF files. | ● | ○ | |
| Printing System (XPS) Driver | This printer driver supports the XPS (XML Paper Specification) format developed by Microsoft Corporation. | - | ||
| KPDL mini-driver/PCL mini-driver | This is a Microsoft MiniDriver that supports PCL and KPDL. There are some restrictions on the machine features and option features that can be used with this driver. | - | ||
| TWAIN Driver Scan | This driver enables scanning on the machine using a TWAIN-compliant software application.The machine has two types of TWAIN drivers: one for scanning a document placed in the machine, and one for reading document data stored in a user box. | ● | ○ | |
| WIA Driver WIA (Windows Imaging | Acquisition) is a function of Windows that enables reciprocal communication between an imaging device such as a scanner and an image processing software application. An image can be acquired using a WIA-compliant software application, which is convenient when a TWAIN-compliant software application is not installed in the computer. | - | ||
| FAX Driver FAX This makes it possible to send a document created in a computer software application as a fax via the machine. | - | ○ | ||
| File Management Utility | Utility | This makes it possible to send and save a scanned document to a specified network folder. | - | ○ |
| Network Tool for Direct Printing | This makes it possible to print a PDF file without starting Adobe Acrobat/Reader. | - | ○ | |
| NETWORK PRINT MONITOR | This is a utility that enables monitoring of the machine on the network. | - | ○ | |
| FONTS | - | These are display fonts that enable the machine's built-in fonts to be used in a software application. | ● | ○ |

NOTE
Installation on Windows must be done by a user logged on with administrator privileges.
When connected by USB cable, Plug and Play is disabled on this device when in Sleep mode. To continue the installation, press the [Power] key to wake the device from Low Power Mode or Sleep before continuing.
The optional Fax Kit is required in order to make use of fax functionality.
WIA driver and Printing System (XPS) Driver cannot be installed on Windows XP.
Installing Printer Driver in Windows
The following procedure is an example for installing the software in Windows 7 using [Express Install].
You can use either [Express Install] or [Custom Install] can be selected for the installation method. [Express Install] automatically detects connected machines and installs the required software. Use [Custom Install] if you want to specify the printer port and select the software to be installed. For details, refer to Custom Installation in the Printing System Driver User Guide on the DVD.
1 Insert the DVD.

natural_image
Illustration of a hand holding a CD next to a laptop displaying a small screen (no text or symbols visible)
NOTE
Installation on Windows must be done by a user logged on with administrator privileges.
If the "Welcome to the Found New Hardware Wizard" dialog box displays, select [Cancel].
If the autorun screen is displayed, click [Run Setup.exe].
If the user account management window appears, click [Yes] ([Allow]).
2 Display the screen.
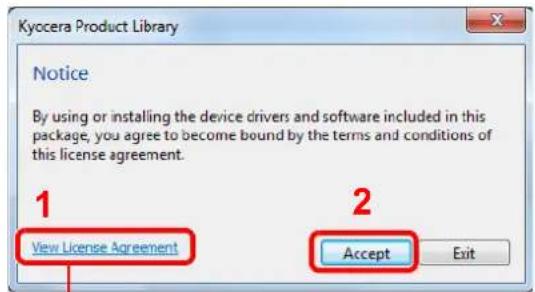
text_image
Kyocera Product Library Notice By using or installing the device drivers and software included in this package, you agree to become bound by the terms and conditions of this license agreement. 1 View License Agreement 2 Accept ExitClick [View License Agreement] and read the License Agreement.
3 Install using [Express Install].
![Utax 3555i - Install using [Express Install]. - 1](/content/2026/05/780633/images/37816b2e72eef6b52abbf9451aef02dd2911602c256e14fa561aa60e7c195443.jpg)
text_image
Express Install Currently add a device and to all Add working devices and packaging tools Maintenance Run ability projects Documents Move areas and import files Delete Remove errors, errors, and allairs Language English Select the device you need to add Use your device or system Use your device or system Driver Package Driver Package Show © 2013 MRS-3.1 Document Library Inc.Packages include the following software:
- Driver Package Printing System Driver, Fonts
- Scan Package TWAIN Driver
You can also select [Use host name for port name] and set to use the host name of the standard TCP/IP port. (A USB connection cannot be used.)
![Utax 3555i - Install using [Express Install]. - 2](/content/2026/05/780633/images/4f34bd80a98a95eaad79e37df659f3ac595f15e78b8a6f475962396268f4e41d.jpg)
NOTE
The machine cannot be detected unless it is on. If the computer fails to detect the machine, verify that it is connected to the computer via a network or USB cable and that it is turned on and click (Reload).
If the Windows security window appears, click [Install this driver software anyway].
4 Finish the installation.
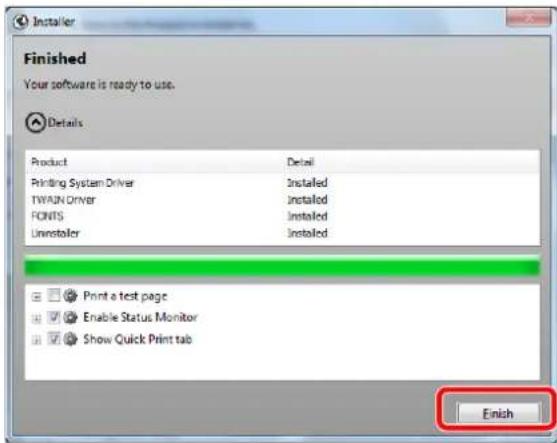
text_image
Finished Your software is ready to use. Details Product Detail Printing System Driver Installed TWAIN Driver Installed FONTS Installed Uninstoller Installed Print a test page Enable Status Monitor Show Quick Print tab Finish
NOTE
When you have selected [Device settings] in Windows XP, the dialog box for device setting will appear after [Finish] is clicked. Configure the settings for options installed on the machine. Device settings can be configured after the installation is completed. For details, refer to the Device Settings in the Printing System Driver User Guide on the DVD.
If a system restart message appears, restart the computer by following the screen prompts. This completes the printer driver installation procedure.
The TWAIN driver can be installed if the machine and computer are connected via a network. If you are installing the TWAIN driver, continue by configuring the Setting TWAIN Driver (page 2-19).
Uninstalling the Software
Perform the following procedure to delete the Software from your computer.

NOTE
Uninstallation on Windows must be done by a user logged on with administrator privileges.
1 Display the screen.
Click [Start] button on the Windows and then select [All Programs], [(name of offer company), [(name of product)], and [Uninstall Printing System Library] to display the Uninstall Wizard.
2 Uninstall the software.
Place a check in the check box of the software to be deleted.

text_image
Uninstaller Welcome to the Software Remove Wizard This wizard helps you remove software for your printing system. Please close all our applications before continuing. Select All Clear All 1 2 Uninstall Cancel3 Finish uninstalling.
If a system restart message appears, restart the computer by following the screen prompts. This completes the software uninstallation procedure.

NOTE
The software can also be uninstalled using the Product Library.
In the Product Library installation screen, click [Uninstall], and follow the on-screen instructions to uninstall the software.
Installing Printer Driver in Macintosh
The machine's printer functionality can be used by a Macintosh computer.

NOTE
Installation on MAC OS must be done by a user logged on with administrator privileges.
When printing from a Macintosh computer, set the machine's emulation to [KPDL] or [KPDL(Auto)].

For details, refer to Printer on page 8-35.
If connecting by Bonjour, enable Bonjour in the machine's network settings.

For details, refer to Bonjour Settings on page 2-27.
In the Authenticate screen, enter the name and password used to log in to the operating system.
1 Insert the DVD.
natural_image
Illustration of a hand holding a CD next to a laptop displaying a simple diagram (no text or symbols present)Double-click the [GEN_LIB] icon.
2 Display the screen.
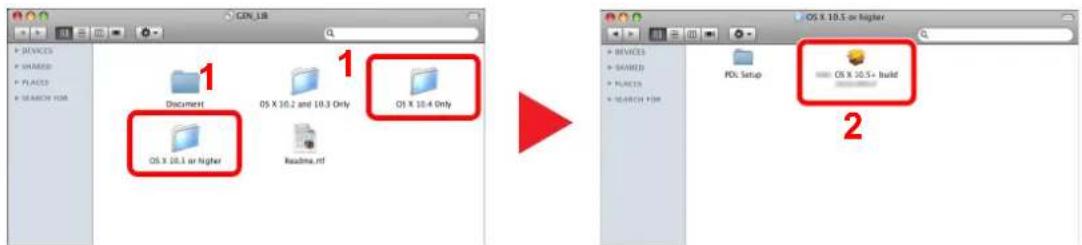
text_image
CDN_18 1 Document OS X 10.2 and 10.3 Only 1 OS X 10.4 Only OS X 10.1 or higher Readme.rtf 2 OS X 10.5 or higher 2 DEVICES SHARED PLACES SEARCH FOR PO: Setup OS X 10.5+ buildDouble-click [(Brand Name) OS X vx.x] depending on your Mac OS version.
3 Install the Printer Driver.
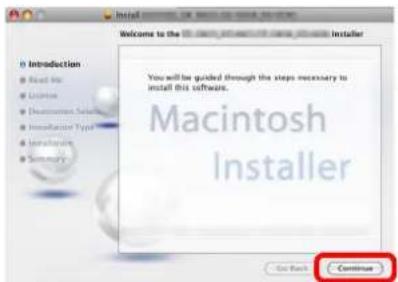
text_image
Welcome to the Web page for this software installed 0 Introduction Read Me License De-harman Solution Installant Type Installants Summary You will be guided through the steps necessary to install this software. Macintosh Installer Go Back ContinueInstall the printer driver as directed by the instructions in the installation software.
This completes the printer driver installation.
If a USB connection is used, the machine is automatically recognized and connected. If an IP connection is used, the settings below are required.
4 Configure the printer.
1 Display the window.
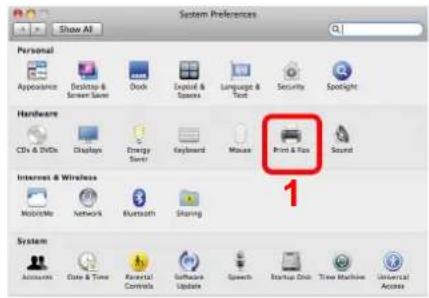
text_image
System Preferences Show All Personal Appearance Desktop & Screen Save Dock Print & Spaces Language & Text Security Spotlight Hardware CDs & DIs Displays Energy Save Keyboard Mouse Print & Box Sound Interest & Wireless Mobile Network Bluetooth Sharing System Access Date & Time Parental Controls Software Update Speech Startup Disk Tree Machine Universal Access
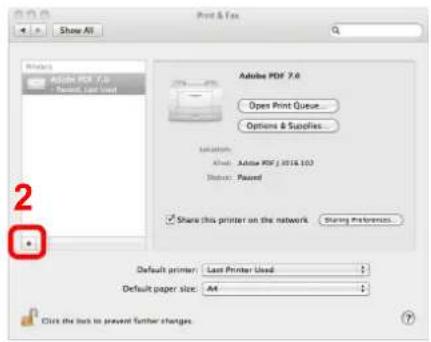
text_image
Print & Fax Adobe PDF 7.0 Open Print Queue... Options & Supplies... Settings: All: Adobe PDF / 2018.103 Status: Paused Share this printer on the network Sharing Preferences... Default primer: Last Printer Used Default paper size: A4 Click the back to prevent further changes.2 Click the IP icon for an IP connection and then enter the IP address and printer name.
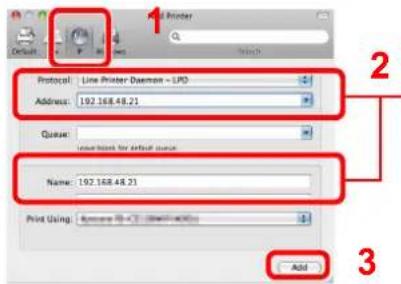
text_image
Protocol: Line Printer Daemon - LPD Address: 192.168.48.21 Queue: New items for default queue Name: 192.168.48.21 Print Using: AddThe number entered in "Address" will automatically appear in "Name". Change if needed.

NOTE
When using a Bonjour connection, select [Default] and click the item that appears in "Printer Name". The driver with the same name as the machine automatically appears in "Driver".
3 Select the options available for the machine and click Continue.
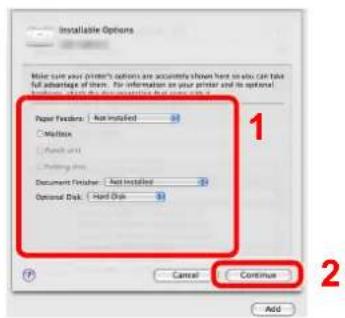
text_image
Installable Options Make sure your printer's options are apparently shown here in this can take full advantage of them. For information on your printer and its optional options, it is recommended that you want to use the paper. Paper Features: Not installed ● Methods ○ Locks and ○ Printing Disk Document Features: Not installed Optional Disk: Hard Disk 1 2 Cancel Continue Add4 The selected machine is added.
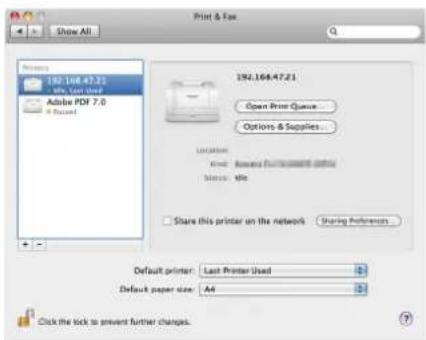
text_image
Print & Fax 192.168.47.21 Open Print Queue... Options & Supplies... Location: Root: Newer Format/Download Status: file Share this printer on the network Sharing References Default printer: Last Printer Used Default paper size: A4 Click the lock to prevent further changes.Setting TWAIN Driver
Register this machine to the TWAIN Driver. Instructions are based on interface elements as they appear in Windows 7.
1 Display the screen.
1 Select [Start] button on the Windows, [All Programs], [(Brand Name)] and then [TWAIN Driver Setting]. TWAIN Driver screen appears.
In Windows 8, select [Search] in charms, [Apps], and then [TWAIN Driver Setting].
2 Click [Add].
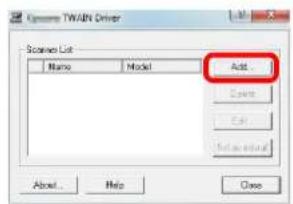
text_image
Scene List Name Model Add... Close Help Close2 Configure TWAIN Driver.
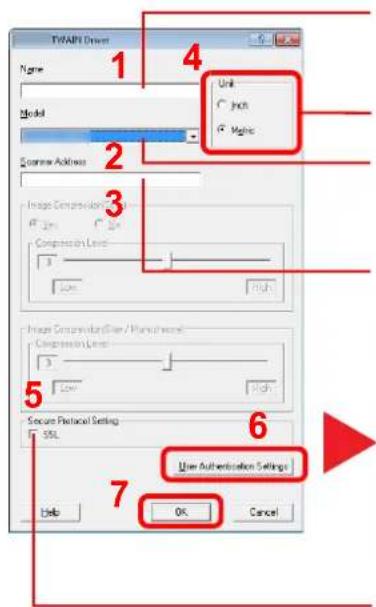
text_image
TWAPI Driver Name Model Source Address Unit Jock Magic Image Compression Compression Level 3 High Image Compression (Sim/Manu) Compression Level 5 Low High Secure Protocol Settings SSL OK Cancel User Authentication Settings HelpEnter the machine name.
When a model name without "(BOX)" is selected, the unit option appears. Set units of measurement.
Select this machine from the list. To scan a document stored in a custom box in this machine, select a model name with (Box) from "Model".
Enter the machine's IP address or host name.
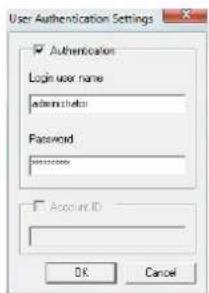
text_image
User Authentication Settings ✓ Authentication Login user name adminstruts Password Account ID OK CancelWhen user login administration is enabled
Select the checkbox beside [Authentication], and enter Login User Name (up to 321 characters) and Password (up to 64 characters).
When job accounting is enabled, select the checkbox beside [Account], and enter the account ID as many as eight digits.
When using SSL, select the checkbox beside SSL.

NOTE
When the machine's IP address is unknown, contact Administrator.
3 Finish registering.
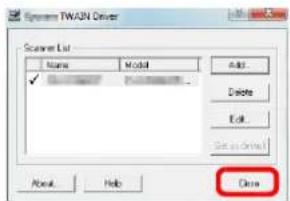
text_image
Scanner List Name Model Add Delete Edit Set as Close About Help Close
NOTE
Click [Delete] to delete the added machine. Click [Edit] to change names.
Setting WIA Driver
Register this machine to the WIA Driver. Instructions are based on interface elements as they appear in Windows 7.
1 Display the screen.
1 Click [Start] button on the Windows and enter [Scanner] in [Program and File Search]. Click [View scanners and cameras] in the search list then the Scanners and Cameras screen appears. In Windows 8, click [Search] in charms, and then [Settings], and enter "Scanner" in the search box. Click [View scanners and cameras] in the search list then the Scanners and Cameras screen appears.
2 Select the same name as this machine from WIA Drivers, and press [Properties].
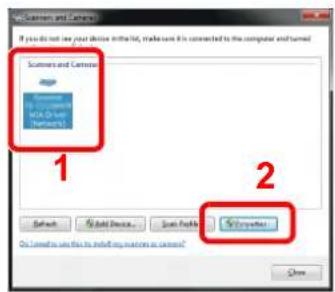
text_image
Sumter and Lenovo 1 2 3 4 5 6 7 8 9 10 11 12 13 14 15 16 17 18 19 20 21 22 23 24 25 26 27 28 29 30 31 32 33 34 35 36 37 38 39 40 41 42 43 44 45 46 47 48 49 50 51 52 53 54 55 56 57 58 59 60 61 62 63 64 65 66 67 68 69 70 71 72 73 74 75 76 77 78 79 80 81 82 83 84 85 86 87 88 89 90 91 92 93 94 95 96 97 98 99 1002 Configure WIA Driver.
Enter the machine IP addresses or host name. When using SSL, select the checkbox beside SSL.
Set units of measurement.
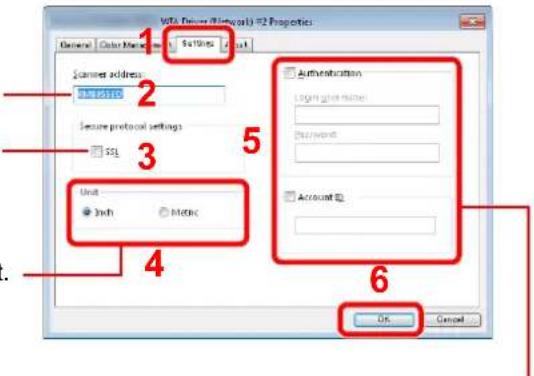
text_image
WTA Device (Network) =2 Properties Description Color Mode: 5x100% 2x1 Current address: Web address Secure protocol settings: SQL Unit Shift Metric Authentication Light image name: Password: Account ID: OK CancelWhen user login administration is enabled
Select the checkbox beside [Authentication], and enter Login User Name (up to 321 characters) and Password (up to 64 characters).
When job accounting is enabled, select the checkbox beside [Account], and enter the account ID as many as eight digits.
Login/Logout
If you are setting a function that requires administrator rights, or if user login administration is enabled, you must enter your login user name and login password.

NOTE
- The factory default login user name and login password are set as shown below.
| Model Name Login User Name Login Password | |
| 3555i 3500 3500 | |
| 4555i 4500 4500 | |
| 5555i 5500 5500 | |
You will be unable to login if you forget your login user name or login password. In this event, login with administrator privileges and change your login user name or login password.
- If the guest authentication setting is enabled, the [Authentication/Logout] key must be pressed when logging in. For details, refer to the Guest Authorization Set. on page 9-18.
Login
Normal login
1 Enter the login user name and login password to login.
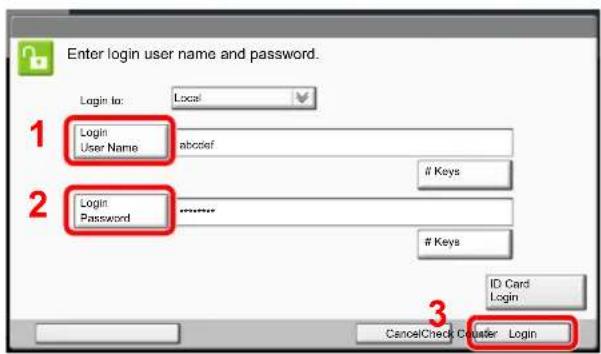
text_image
Enter login user name and password. Login to: Local 1 Login User Name abcdef 2 Login Password ..........Keys
Keys
3 ID Card Login CancelCheck Cluster Login
Character Entry Method (page 11-10)
If this screen is displayed during operations, press [Login User Name] to enter the login user name.
Alternatively, you can login by pressing [Login Password] and entering the login password.

NOTE
[# Keys] can be pressed to enter the number with the numeric keys on the operation panel.
If [Network Authentication] is selected as the user authentication method, either [Local] or [Network] can be selected as the authentication destination.
To authenticate by ID card, press [ID Card Login].
Simple Login
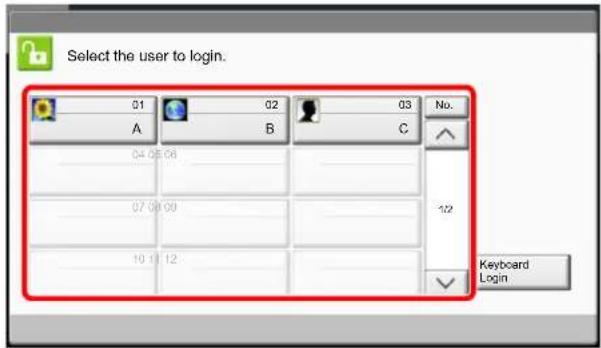
text_image
Select the user to login. 01 02 03 No. A B C 04 05 06 07 08 09 10 11 12 Keyboard LoginIf this screen is displayed during operations, select a user and log in.

NOTE
If a login password is required, an input screen will be displayed.

Simple Login (page 9-23)
Logout
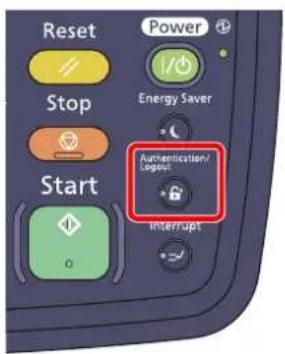
text_image
Reset Power Stop Energy Saver Start Authentication/ Logout InterruptTo logout from the machine, press the [Authentication/Logout] key to return to the login user name/login password entry screen.
Users are automatically logged out in the following circumstances:
- When the machine is put to Sleep by pressing the [Power] key.
- When the Auto Sleep function is activated.
- When the auto panel reset function is activated.
- When Auto Low Power Mode is activated.
- When the machine is placed in Low Power Mode by pressing the [Energy Saver] key.
Default Settings of the Machine
The default settings of the machine can be changed in System Menu. Before using this machine, configure such settings as date and time, network configuration, and energy saving functions as needed.

NOTE
For settings that are configurable from System Menu, refer to Setup and Registration (System Menu) (page 8-1).
Setting Date and Time
Follow the steps below to set the local date and time at the place of installation.
When you send an E-mail using the transmission function, the date and time as set here will be printed in the header of the E-mail message. Set the date, time and time difference from GMT of the region where the machine is used.

NOTE
If user login administration is enabled, you can only change the settings by logging in with administrator privileges. If user login administration is disabled, the user authentication screen appears. Enter a login user name and password, and press [Login].
The factory default login user name and login password are set as shown below.
| Model Name Login User Name Login Password | ||
| 3555i 3500 3500 | ||
| 4555i 4500 4500 | ||
| 5555i 5500 5500 | ||
Be sure to set the time difference before setting the date and time.
If you change the date/time while using the trial version of an application, you will no longer be able to use the application.

Application (page 5-10)
Optional Applications (page 11-8)
1 Display the screen.
Press the [System Menu] key and select [Date/Timer/Energy Saver].
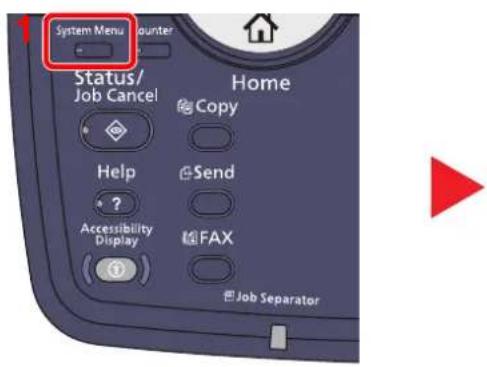
text_image
System Menu Counter Status/ Job Cancel Home Copy Help Send ? Accessibility Display FAX Job Separator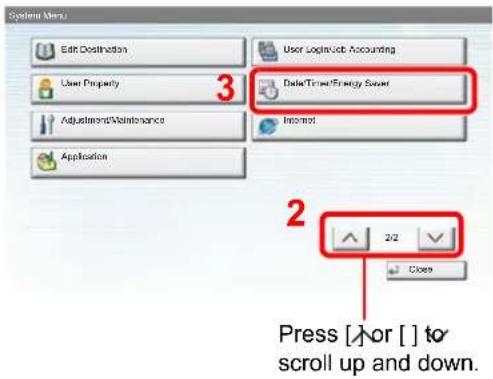
text_image
System Status Edit Destination User Login/Job Accounting User Property 3 Date/Time/Energy Server Adjustment/Waintenance Information Application 2/2 Close Press [ ] or [ ] to scroll up and down.2 Configure the settings.
1 Set the time zone.
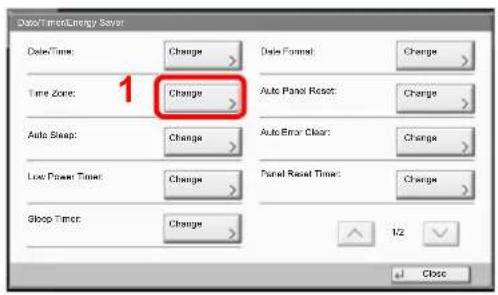
text_image
DeloTimonEnergy Saver DeloTimon: Change Time Zone: 1 Change Auto Swap: Change Auto Error Clear: Change Low Power Timer: Change Panel Reset Timer: Change Gloep Timer: Change 1/2 Close
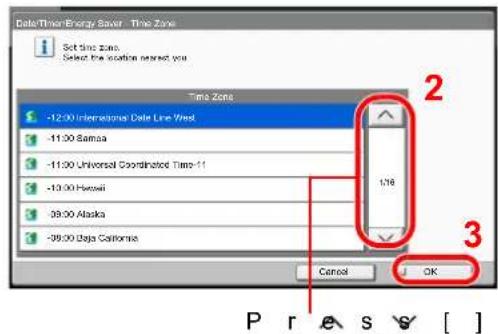
text_image
Date/Time/Energy Saver - Time Zone 1 Set time zone. Select the location near you Time Zone -12:00 International Date Line Wed -11:00 Bamaa -11:00 Universal Coordinated Time-11 -13:00 Hawaii 39:00 Alaska -39:00 Uaja California 178 Cancel OK P r e s y [ ]scroll up and down.
2 Set the summer time.
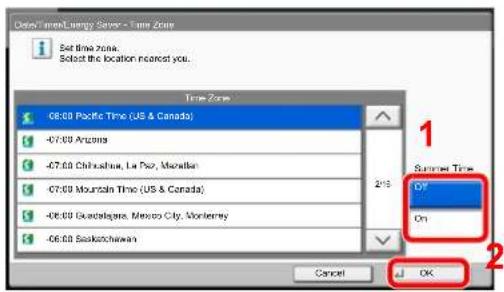
text_image
Del-Zel Energy Server - Time Zone Set time zone. Select the location nearest you... Time Zone 06:00 Pacific Time (US & Canada) -07:00 Argona -07:00 Chihuahua, La Paz, Morillon -07:00 Mountain Time (US & Canada) -06:00 Guadalajara, Mexico City, Worlemy -06:00 Saskatchewan 2/15 Sunset Time On OK Cancel OK
NOTE
If you select a region that does not utilize summer time, the summer time setting screen will not appear.
3 Set the date and time.
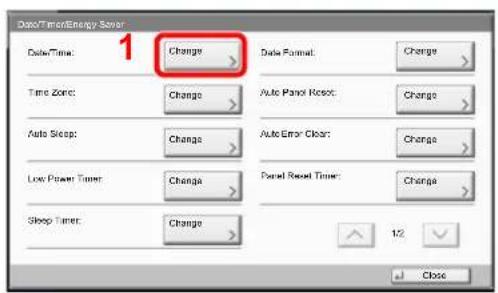
text_image
Data/Timer/Energy Server 1 Date/Time: Change Data Format: Change Time Zone: Change Auto Panel Reset: Change Auto Sleep: Change Auto Error Clear: Change Low Power Timer: Change Panel Reset Timer: Change Sleep Timer: Change 1/2 Close
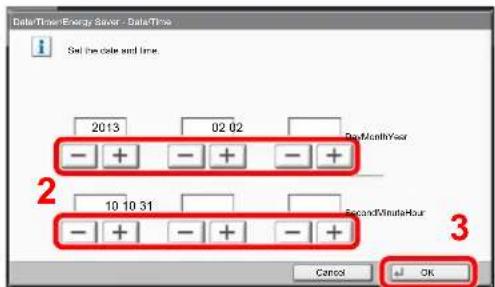
text_image
Date/Time/Energy Server - Data/Time Sell the code and time. 2013 02 02 Day/Month/Year - + - + - + 10 10 31 Second/Minute/Hour - + - + - + Cancel OKPress [+] or [-] in each setting.
Network Setup (LAN Cable Connection)
The machine is equipped with network interface, which is compatible with network protocols such as TCP/IP (IPv4), TCP/IP (IPv6), IPX/SPX, NetBEUI, and IPSec. It enables network printing on the Windows, Macintosh, UNIX, NetWare and other platforms.
This section explains the procedure of IPv4 and Bonjour settings for TCP/IP settings. For other network settings, refer to the Network on page 8-43.

NOTE
If user login administration is enabled, you can only change the settings by logging in with administrator privileges. If user login administration is disabled, the user authentication screen appears. Enter a login user name and password, and press [Login].
The factory default login user name and login password are set as shown below.
| Model Name Login User Name Login Password | |
| 3555i 3500 3500 | |
| 4555i 4500 4500 | |
| 5555i 5500 5500 | |
TCP/IP Settings
IPv4 setting
Set up TCP/IP (IPv4) to connect to the Windows network.
The default settings are "TCP/IP Protocol: On, DHCP: On, Auto-IP: On".

NOTE
- Ask your network administrator for the IP address in advance, and have it ready when you configure this setting. In the following cases, set the IP address of DNS server on the Embedded Web Server RX.
- When using the host name with "DHCP" setting set to "Off"
- When using the DSN server with IP address that is not assigned by DHCP automatically.
Refer to the Embedded Web Server RX User Guide.
1 Display the screen.
1 Press the [System Menu] key and select [System/Network].
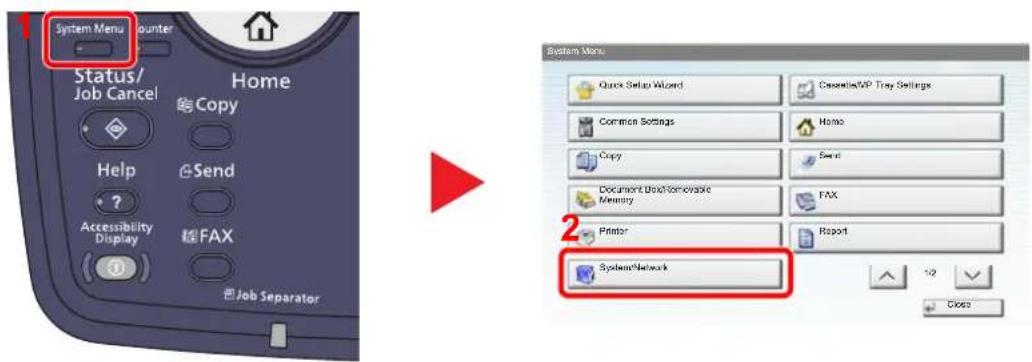
text_image
System Menu Counter Status/ Home Job Cancel Copy Help Send Accessibility FAX Accessibility Display Job Separator System Menu Quick Setup Wizard CaseLineWP Tray Settings Common Settings Home Copy Send Document Box/Interruptible Memory FAX Printer Report SystemNetwork 1/2 Click2 Select "Network" and then "TCP/IP Setting".
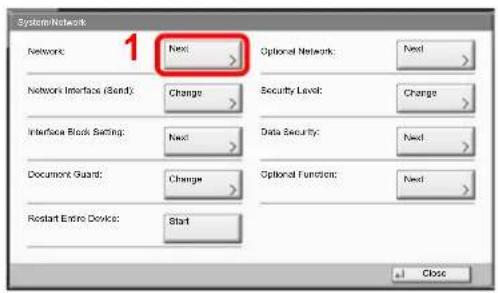
text_image
1 Network: Next Optional Network: Next Network Interface (Send): Change Security Level: Change Interface Block Setting: Next Data Security: Next Document Guard: Change Optional Function: Next Restart Entire Device: Start Close
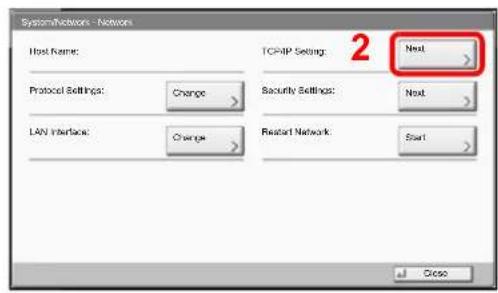
text_image
SystemNetworks - Networks Host Name: TCP/IP Setting: 2 Next Protocol Settings: Change Security Settings: Next LAN Interface: Change Restart Network: Start Close2 Configure the settings.
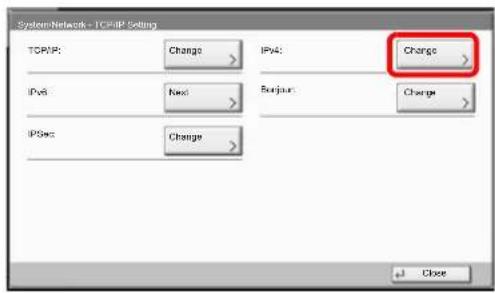
text_image
SystemNetwork + TCP/IP Setting TCP/IP: Change IPv4: Change IPv6 Next Repair: Change IPSec Change + Close
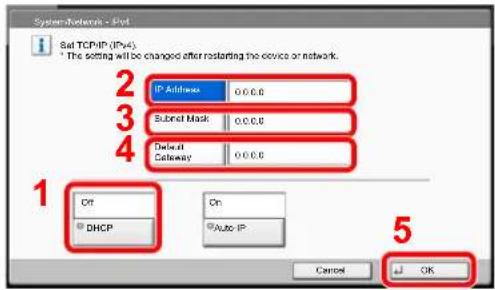
text_image
System-Networks - IPv Set TCP/IP (IPv4): * The setting will be changed after restarting the device or network. IP Address 0.0.0.0 Subnet Mask 0.0.0.0 Deselect Gateway 0.0.0.0 1 Off DHCP On Auto IP 5 Cancel OKWhen using DHCP server
[DHCP]: Set to [On].
When setting the static IP address
[DHCP]: Set to [Off].
[IP Address]: Enter the address.
[Subnet Mask]: Enter the address.
[Default Gateway]: Enter the address.

IMPORTANT
After changing the setting, restart the network from System Menu, or turn the machine OFF and then ON.

Restart Network (page 8-46)
Bonjour Settings
Configure the settings for Bonjour.
1 Display the screen.
1 Press the [System Menu] key and select [System/Network].
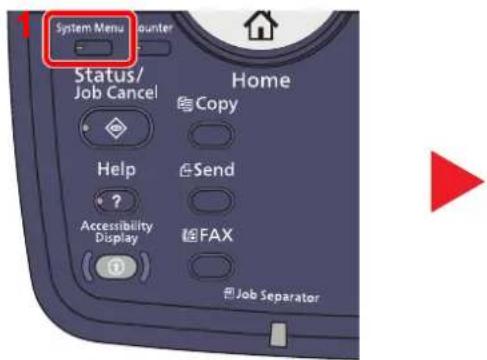
text_image
System Menu Counter Status/ Job Cancel Home Copy Help Send ? Accessibility Display FAX Job Separator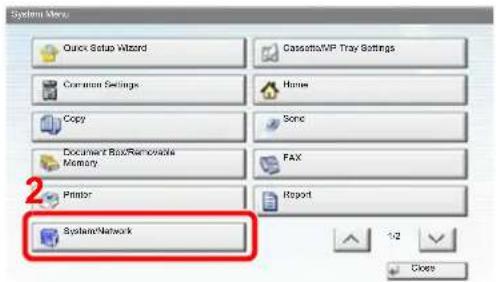
text_image
System Menu Quick Setup Wizard Cassette/VP Tray Settings Common Settings Home Copy Sono Document Box/Removable Memory FAX Printer Report SystemNetwork 1/2 Close2 Select "Network" and then "TCP/IP Setting".
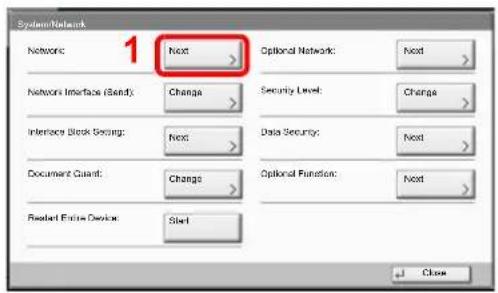
text_image
System/Network 1 Next Network Interface (Band): Change Security Level: Change Interface Block Settings: Next Data Security: Next Document Guard: Change Optional Function: Next Restart Existing Device: Start Close
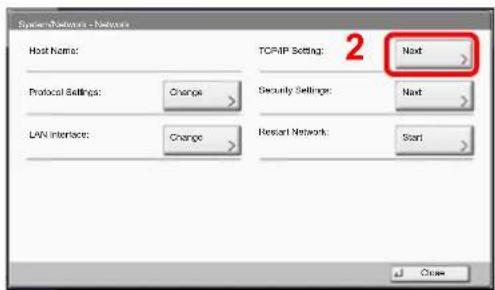
text_image
System/Networks - Network Host Name: TCP/IP Setting: 2 Protocol Settings: Change Security Settings: Next LAV Interface: Change Reset Network: Start Close2 Configure the settings.
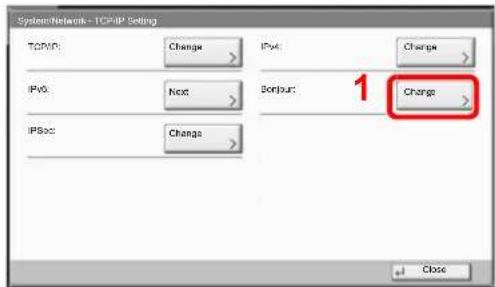
text_image
System/Network - TCP/IP Setting TCP/IP: Change IPv: Change IPv0 Next Bonbur: 1 Change IPSec Change Close
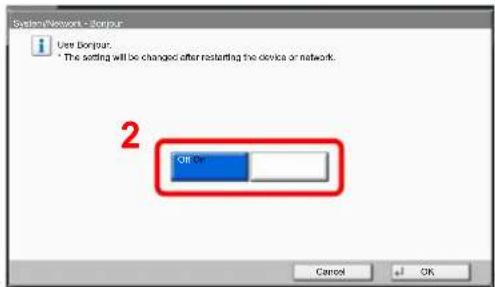
text_image
SystemNetwork - Scriptur Use Bonjus: * The setting will be changed after restarting the device or network. 2 OK On Cancel + OK
IMPORTANT
After changing the setting, restart the network from System Menu, or turn the machine OFF and then ON.

Restart Network (page 8-46)
Quick Setup Wizard
For Energy Saver and FAX functions, the following settings can be configured in a wizard-style screen.
| Energy Saver Setup Configures sleep mode and low-power mode. | ||
| FAX Setup Configures basic | fax settings.This function is displayed when the optional fax is installed.Refer to the FAX Operation Guide. | |

NOTE
If the user authentication screen appears, enter your login user name and login password and press [Login].
The factory default login user name and login password are set as shown below.
| Model Name Login User Name Login Password | |
| 3555i 3500 3500 | |
| 4555i 4500 4500 | |
| 5555i 5500 5500 | |
1 Display the screen.
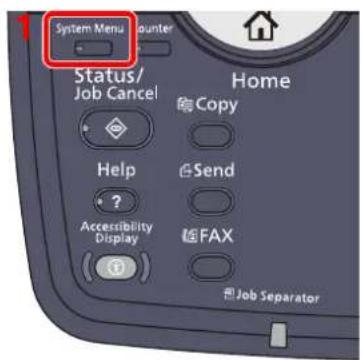
text_image
System Menu Counter Status/ Job Cancel Home Copy Help Send Accessibility Display FAX Job Separator
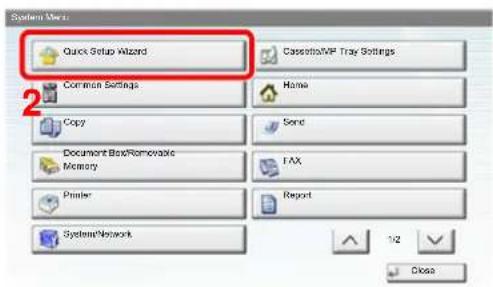
text_image
System Wizard Quick Setup Wizard Cassette/VIF Tray Settings Common Settings Home Copy Send Document Box/Removable Memory FAX Printer Report SystemNetwork 1/2 Close2 Select a function.
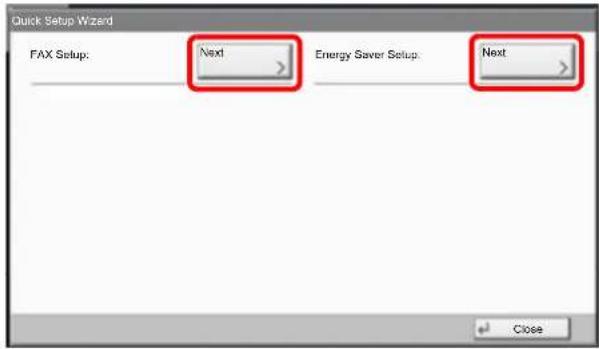
text_image
Quick Setup Wizard FAX Setup: Next Energy Saver Setup: Next Close3 Configure the settings.
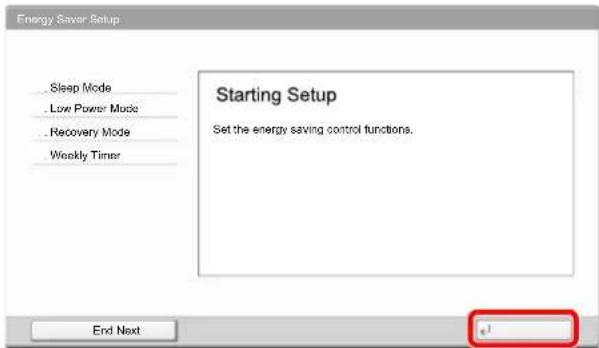
text_image
Energy Saver Setup Sleep Mode Low Power Mode Recovery Mode Weekly Timer Starting Setup Set the energy saving control functions. End NextStart the wizard. Follow the instructions on the screen to configure settings.

NOTE
If you experience difficulty configuring the settings, refer to Help Screen on page 3-12.
| Control Description | |
| End Exits the wizard. Settings configured so far are applied. | |
| Previous Returns to the previous item. | |
| Skip Advances to the next item without setting the current item. | |
| Next Advances to the next screen. | |
| Back Returns to the previous screen. | |
| Complete Register the settings and exit the wizard. | |
Checking the Counter
Press the [Counter] key to check the number of sheets printed and scanned.
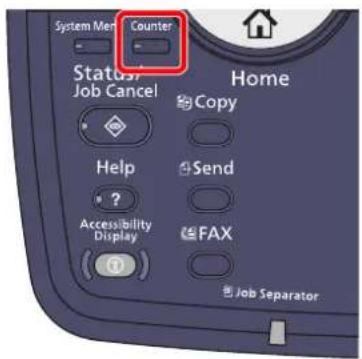
text_image
System Metric Counter Status Job Cancel Home Copy Help Send ? Accessibility Display FAX Job Separator
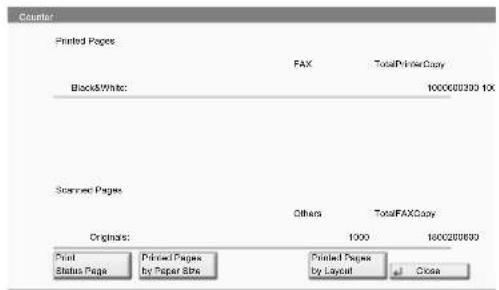
text_image
Counter Printed Pages FAX TotalPrint Copy Block/Write: 1000000000 10x Sorted Pages Others TotalFAXCopy Original: 1000 1600280890 Print Status Page Printed Pages by Paper Bps Printed Pages by Layout CloseYou can check the number of pages printed in each paper size by pressing [Printed Pages by Paper Size].
Additional Preparations for the Administrator
In addition to the information provided in this chapter, the administrator of this machine should check the following, and configure the settings as needed.
To Send Documents to a PC
To send a document that has been loaded, you need to create a folder to receive the document on your computer.
For details, refer to Preparation for Sending a Document to a PC on page 3-35.
To E-mail Scanned Images
When sending documents by E-mail or to FTP, it may be useful to store the destinations in the Address Book. For each registration method, refer to Registering Destinations in the Address Book on page 3-45.
To Strengthen the Security
This machine is shipped with two default users registered ó one with Machine Administrator rights, and another with Administrator rights. Logging in as this user will allow you to configure all settings; therefore, please change the login user name and password.
In addition, this machine is equipped with user authentication function, which can be configured to limit the access to this machine to only those who have a registered login name and password. For each setting procedure, refer to User Authentication and Accounting (User Login, Job Accounting) (page 9-1).
| I want to... Function Reference page | ||
| Restrict the users of the machine. User Login page | 9-2 | |
| Authentication Security page 9-6 | ||
| Auto Panel Reset page 8-54 | ||
| ID Card Settings*1 | page 9-26 | |
| Restrict the basic functions that can be used. Local Authorization page 9-15 | ||
| Prevent another user from handling the documents stored in the machine. | Custom Box page 5-52 | |
| Output the document sent to the machine at the time when the machine is operated. | Remote Printing | page 8-27 |
| Prevent the data stored in the machine from being leaked. | Data Wipe*2 | Refer to the Data Security Kit (E) Operation Guide. |
| Encryption*2 | ||
| PDF Encryption Functions | page 6-61 | |
| Document Guard*3 | page 8-51 | |
| Completely delete the data on the hard disk before disposing of the machine. | Data Sanitization | page 8-50 |
| Record the operation history of users. | Login History Settings | page 8-40 |
| Device Log History Settings | page 8-41 | |
| Secure Comm. Error Log | page 8-42 | |
| Protect the transmission from interception and wiretapping. | IPP over SSL page 8-45 | |
| HTTPS page 8-46 | ||
| LDAP Security Refer to the | Embedded Web Server RX User Guide. | |
| SMTP Security Refer to the | Embedded Web Server RX User Guide. | |
| POP3 Security Refer to the | Embedded Web Server RX User Guide. | |
| FTP Encrypted TX page 6-64 | ||
| Enhanced WSD (SSL) page 8-46 | ||
| IPSec page 8-44 | ||
| SNMPv3 page 8-46 | ||
| Verify the software in the machine. Software Verification page 8-50 | ||
*1 The optional Card Authentication Kit is required.
*2 The optional Data Security Kit is required.
*3 The optional Printed Document Guard Kit is required.
Embedded Web Server RX
If the machine is connected to the network, you can configure various settings using Embedded Web Server RX. The settings that are configurable with Embedded Web Server RX are as follows.
Some configurable settings are restricted according to the access rights of the logged-in user.
| Setting Description | Administ- rator | User | |
| Device Information | The machine's structure can be checked.[Configuration], [Counter], [About Embedded Web Server RX] | ○ | ○ |
| Job Status | Displays all device information, including print and scan jobs, storing jobs,scheduled jobs, and job log history.[Printing Jobs Status], [Printing Job Log], [Sending Job Status],[Scheduled Jobs], [Sending Job Log], [Storing Job Status],[Storing Job Log] | ○ | ○ |
| Document Box | Add or delete document boxes, or delete documents within a document box.[Custom Box], [FAX Box]*, [Polling Box]*, [Job Box Settings] | ○ | ○ |
| Address Book Create | edit, or delete addresses and address groups.[Machine Address Book], [External Address Book Settings],[One Touch Key] | ○ | ○ |
| Device Settings Configure the advanced settings of the machine.[Paper/Feed/Output], [Original Settings], [Energy Saver/Timer], [Date/Time],[System] | ○- | ||
| Function Settings Configure the advanced function settings.[Common/Job Defaults], [Copy], [Printer], [E-mail], [Scan to Folder],[DSM Scan], [FAX / i-FAX]*, [Send and Forward]*, [RX/Forward Rules],[Operation Panel] | ○- | ||
| Network Settings Configure the network advanced settings.[General], [TCP/IP], [Protocol] | ○- | ||
| Security Settings Configure the security advanced settings.[Device Security], [Send Security], [Network Security], [Certificates] | ○- | ||
| Management Settings | Configure the advanced management settings.[Job Accounting], [Authentication], [ID Card], [Notification/Report],[History Settings], [SNMP], [System Stamp], [Message Board], [Reset] | ○- | |
* Displayed only when the optional fax kit is installed.
This section explains how to access Embedded Web Server RX and change security settings and host name. For details on Embedded Web Server RX, refer to the Embedded Web Server RX User Guide.

NOTE
The optional Fax Kit is required in order to make use of fax functionality.
Here, information on the FAX settings has been omitted. For more information on using the FAX, refer to the FAX Operation Guide.
To fully access the features of the Embedded Web Server RX pages, enter the User Name and Password and click Login. Entering the predefined administrator password allows the user to access all pages, including Document Box, Address Book, and Settings on the navigation menu. The factory default setting for the default user with administrator privileges is shown below.
| Login User Name Admin | |
| Login Password | Admin |
* Upper case and lower case letters are distinguished (case sensitive).
Accessing Embedded Web Server RX
1 Display the screen.
1 Launch your Web browser.
2 In the address or location bar, enter the machine's IP address or the host name.
Examples: https://192.168.48.21/ (for IP address)
https://MFP001 (if the host name is "MFP001")
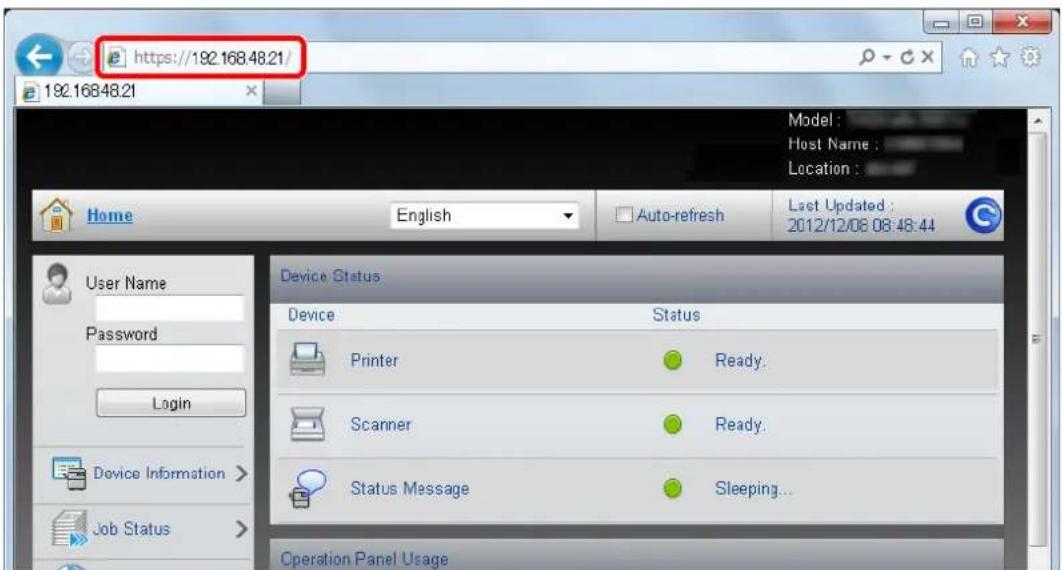
text_image
https://192.168.48.21/ 192.168.48.21 Home English Auto-refresh Last Updated : 2012/12/06 08:48:44 User Name Password Login Device Information > Job Status > Device Status Device Status Printer Ready. Scanner Ready. Status Message Sleeping... Operation Panel UsageThe web page displays basic information about the machine and Embedded Web Server RX as well as their current status.
NOTE
When connecting to Embedded Web Server RX, a message may appear that reads "There is a problem with the security certificate of this website". To prevent this message appearing, install the device certificates of the machine to the Web browser. For details, refer to Embedded Web Server RX User Guide.
2 Configure the function.
Select a category from the navigation bar on the left of the screen. When you log in to the machine as an administrator, you will see [Device Settings], [Function Settings], [Network Settings], [Security Settings], and [Management Settings].
Changing Security Settings
This section explains how to change the security settings.
1 Display the screen.
Access Embedded Web Server RX by referring to Accessing Embedded Web Server RX on page 2-34.
2 Configure the Security Settings.
From the [Security Settings] menu, select the setting you want to configure. The configurable settings are [Device Security], [Send Security], [Network Security], and [Certificates].
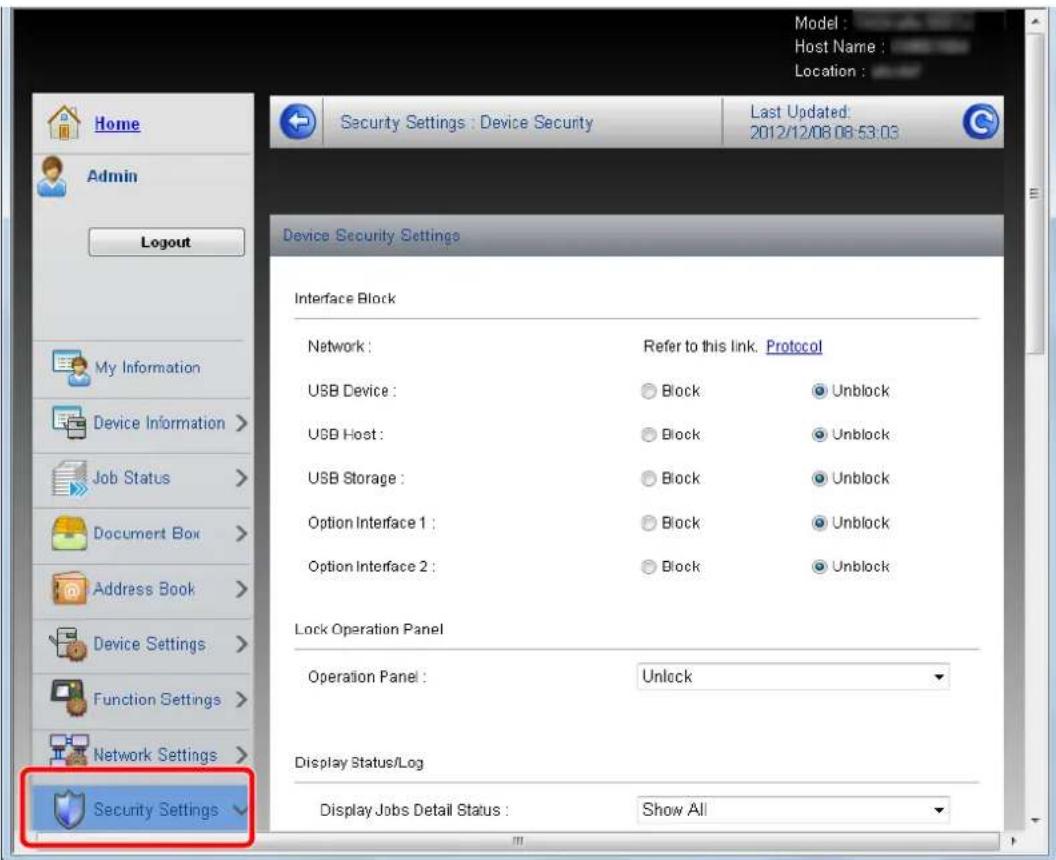
text_image
Model : Host Name : Location : Home Security Settings : Device Security Last Updated: 2012/12/08 08:53:03 Device Security Settings Interface Block Network : Refer to this link. Protocol USB Device : Block Unblock USB Host : Block Unblock USB Storage : Block Unblock Option Interface 1 : Block Unblock Option Interface 2 : Block Unblock Lock Operation Panel Operation Panel : Unlock Display Status/Log Display Jobs Detail Status : Show All My Information Device Information > Job Status > Document Box > Address Book > Device Settings > Function Settings > Network Settings > Security SettingsNOTE
The configurable settings within [Device Security], [Send Security], and [Network Security] can also be configured from the machine's System Menu. For details, see Setup and Registration (System Menu) (page 8-1).
For details on settings related to certificates, refer to the Embedded Web Server RX User Guide.
Changing Host Name
Change the host name of the machine.
1 Display the screen.
1 Access Embedded Web Server RX by referring to Accessing Embedded Web Server RX on page 2-34.
2 From the [Device Settings] menu, press [System].
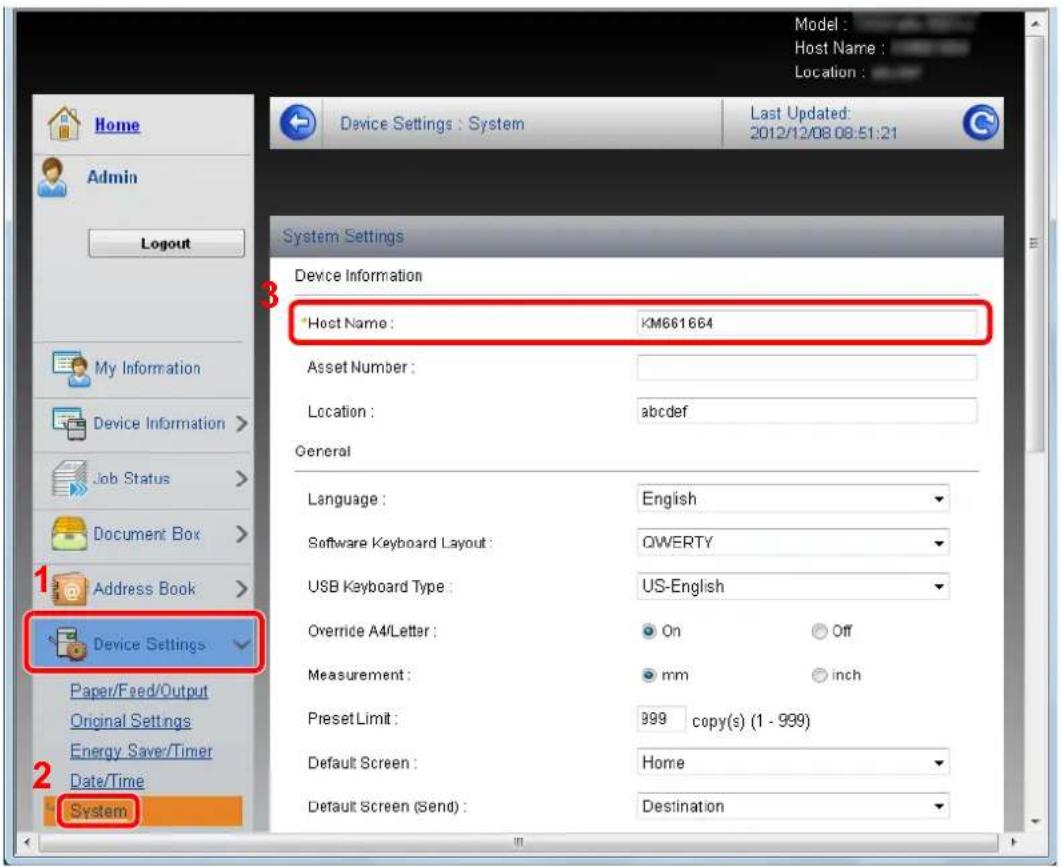
text_image
Model : Host Name : Location : Device Settings : System Last Updated: 2012/12/08 08:51:21 System Settings Device Information Host Name : KM661664 Asset Number : Location : abcdef General Language : English Software Keyboard Layout : QWERTY USB Keyboard Type : US-English Override A4/Letter : On Off Measurement : mm inch Preset Limit : 999 copy(s) (1 - 999) Default Screen : Home Default Screen (Send) : Destination 1 Device Settings Paper/Feed/Output Original Settings Energy Save/Timer Date/Time 2 System2 Specify the host name.
Under "Device Settings", enter the host name in "Host Name", and then click [Submit].

IMPORTANT
After changing the setting, restart the network or turn the machine OFF and then ON.
To restart the network interface card, click [Reset] in the [Management Settings] menu, and then click [Restart Network] in "Restart".
Sending E-mail
By configuring the SMTP settings, you can send E-mail notifications on completed jobs.
To use this function, this machine must be connected to a mail server using the SMTP protocol.
In addition, check the following.
- The network environment used to connect this machine to the mail server. A full-time connection via a LAN is recommended.
- SMTP settings Use Embedded Web Server RX to register the IP address or host name of the SMTP server.
- If limits have been set on the size of E-mail messages, it may not be possible to send very large E-mails. The procedure for specifying the SMTP settings is explained below.
1 Display the screen.
1 Access Embedded Web Server RX by referring to Accessing Embedded Web Server RX on page 2-34.
2 From the [Function Settings] menu, click [E-mail].
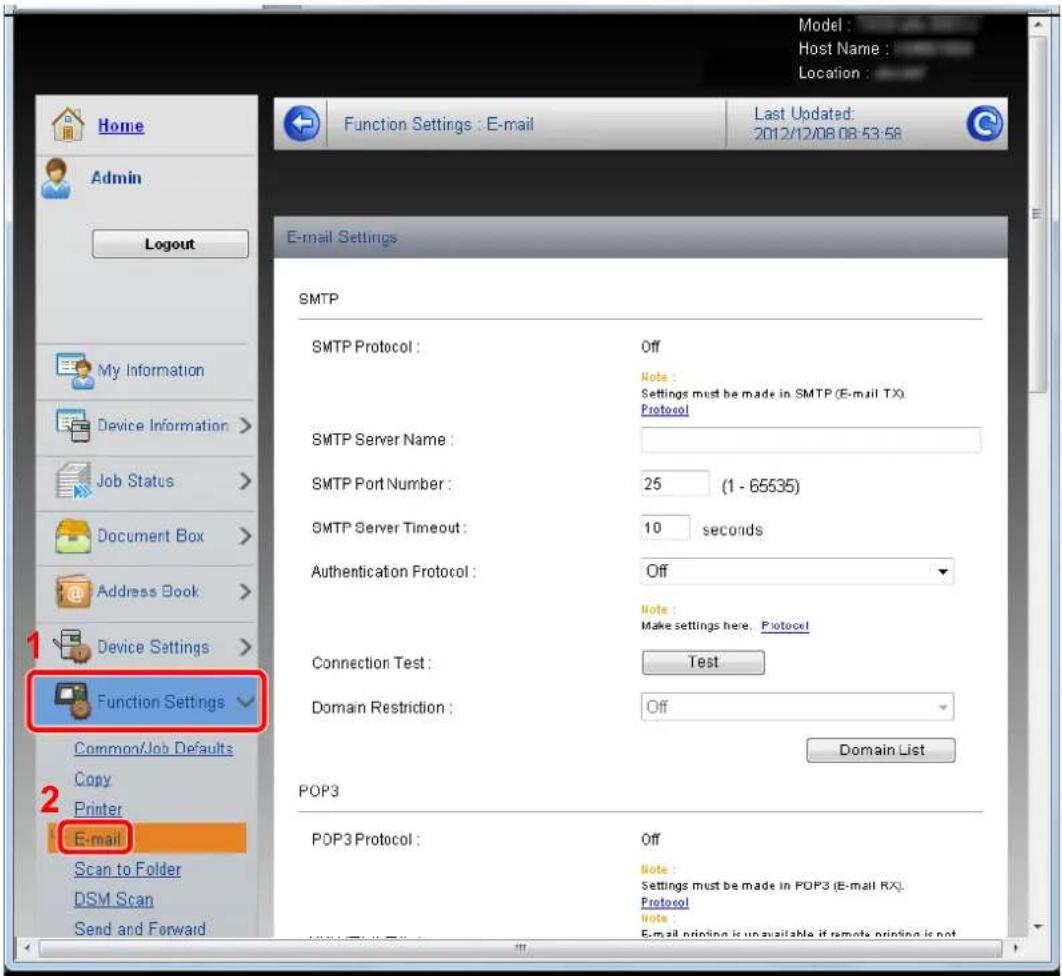
text_image
Home Admin Logout My Information Device Information > Job Status > Document Box > Address Book > Device Settings > Function Settings Common/job Defaults Copy Printer E-mail Scan to Folder DSM Scan Send and Forward Model : Host Name : Location : Last Updated: 2012/12/08 08:53:58 E-mail Settings SMTP SMTP Protocol : Off Note : Settings must be made in SMTP (E-mail TX) Protocol SMTP Server Name : SMTP Port Number : 25 (1 - 65535) SMTP Server Timeout : 10 seconds Authentication Protocol : Off Note : Make settings here. Protocol Connection Test : Test Domain Restriction : Off Domain List POP3 POP3 Protocol : Off Note : Settings must be made in POP3 (E-mail RX). Protocol Note : E-mail printing is unavailable if remote printing is not2 Configure the settings.
Enter the appropriate values to each field.
| Setting Description | ||
| SMTP Set to send e-mail from the | machine. | |
| SMTP Protocol | ||
| SMTP Server Name | ||
| SMTP Port Number | ||
| SMTP Server Timeout | ||
| Authentication Protocol | ||
| SMTP Security Set | ||
| SMTP security.Turn on "SMTP Security" in "SMTP (E-mail TX)" on the [Protocol Settings] page. | ||
| POP before SMTP Timeout | ||
| Connection Test Tests to confirm that the settings are correct. | ||
| Domain Restriction | ||
| POP3 Set to receive e-mail at the machine. | ||
| POP3 Protocol | ||
| Check Interval Specify the interval for checking for incoming e-mail in minutes. | ||
| Run once now | ||
| Domain Restriction | ||
| POP3 User Settings | ||
| Setting Description | ||
| E-mail Send Settings | E-mail Size Limit | Enter the maximum size of E-mail that can be sent in kilobytes. When E-mail size is greater than this value, an error message appears and E-mail sending is cancelled. Use this setting if you have set E-mail Size Limit for SMTP server. If not, enter a value of 0 (zero) to enable E-mail sending regardless of the size limit. |
| Sender Address Enter the E-mail address of the person responsible for the machine, such as the machine administrator, so that a reply or non-delivery report will go to a person rather than to the machine. The sender address must be entered correctly for SMTP authentication. The maximum length of the sender address is 128 characters. | ||
| Signature | Enter the signature. The signature is free form text that will appear at the end of the E-mail body. It is often used for further identification of the machine. The maximum length of the signature is 512 characters. | |
| Function Defaults | Change the function default settings in [Common/Job Default Settings] page. | |
3 Click [Submit].
Registering Destinations
You can register destinations to the machine's Address Book, from Embedded Web Server RX.
1 Display the screen.
1 Access Embedded Web Server RX by referring to Accessing Embedded Web Server RX on page 2-34.
2 From the [Address Book] menu, click [Machine Address Book].
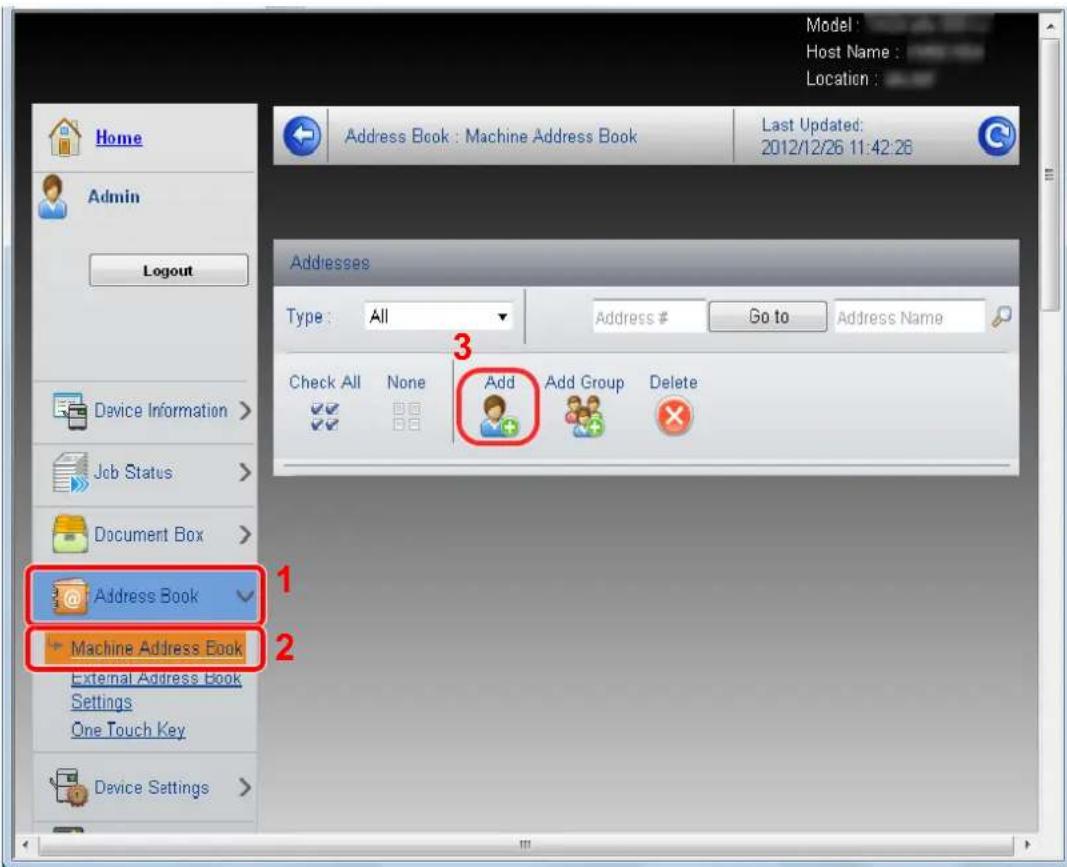
text_image
Model Host Name : Location : Home Admin Logout Device Information > Job Status > Document Box > Address Book Machine Address Book External Address Book Settings One Touch Key Device Settings Last Updated: 2012/12/26 11:42:26 Addresses Type: All Address # Go to Address Name Check All None Add Add Group Delete Add3 Click [Add].
2 Populate the fields.
1 Enter the destination information.
Enter the information for the destination you want to register. The fields to populate are the same as when registering on the machine.

Registering Destinations in the Address Book (page 3-45)
2 Click [Submit].
Registering a Custom Box
You can register a custom box from Embedded Web Server RX.
1 Display the screen.
1 Access Embedded Web Server RX by referring to Accessing Embedded Web Server RX on page 2-34.
2 From the [Document Box] menu, click [Custom Box].
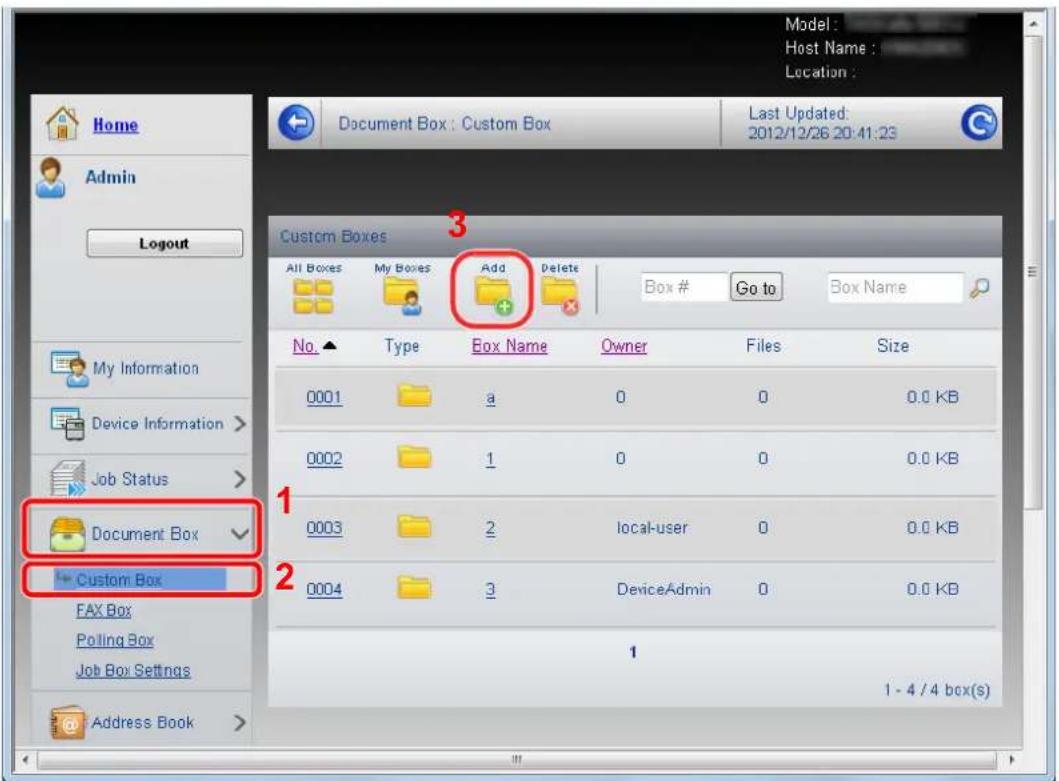
text_image
Model : Host Name : Location : Home Admin Logout My Information Device Information > Job Status > Document Box ✓ + Custom Box FAX Box Polling Box Job Box Settings Address Book > Document Box : Custom Box Last Updated: 2012/12/26 20:41:23 Custom Boxes All Boxes My Boxes Add Delete Box # Go to Box Name No. Type Box Name Owner Files Size 0001 a 0 0 0.0 KB 0002 1 0 0 0.0 KB 0003 2 local-user 0 0.0 KB 0004 3 DeviceAdmin 0 0.0 KB 1 1 - 4 / 4 box(s)3 Click [Add].
2 Configure the Custom Box.
1 Enter the box details.
Enter the information for the custom box you want to register. The fields to populate are the same as when registering on the machine.

Creating a New Custom Box (Add/Edit Box) (page 5-52)
2 Click [Submit].
Transferring data from our other products
By using the machine's utility, you can smoothly migrate address books when the machine is to be replaced.
This section explains how to transfer data between our products.
Migrating the Address Book
The Address Book registered on the machine can be backed up or migrated using the NETWORK PRINT MONITOR on the included DVD.
For details on operating the NETWORK PRINT MONITOR, refer to the NETWORK PRINT MONITOR User Guide.
Backing Up Address Book Data to PC
1 Launch the NETWORK PRINT MONITOR.
2 Create a backup.
1 Right-click on the model name from which you want to back up the Address Book, and select [Advanced] - [Set multiple devices].
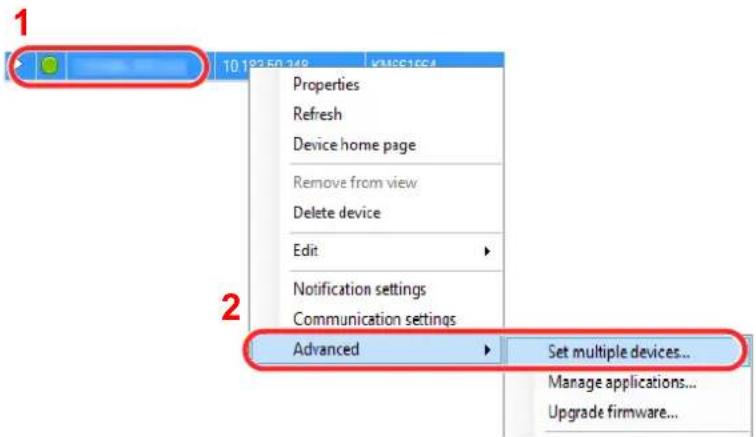
text_image
1 Properties Refresh Device home page Remove from view Delete device Edit Notification settings Communication settings Advanced Set multiple devices... Manage applications... Upgrade firmware...2 Click [Next].
3 Select [Device Address Book] and click [Next].
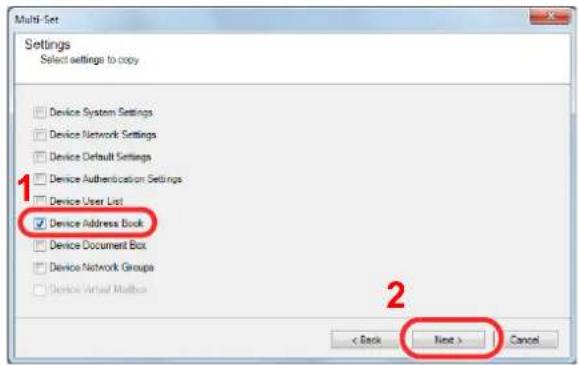
text_image
Multi-Set Settings Select settings to copy Device System Settings Device Network Settings Device Default Settings Device Authentication Settings Device User List Device Address Book Device Document Box Device Network Groups Device Virtual Mailbox < Back Next > Cancel4 Select [Create from device] and remove the checkmark from [Overwrite settings on target device], and then click [Next].
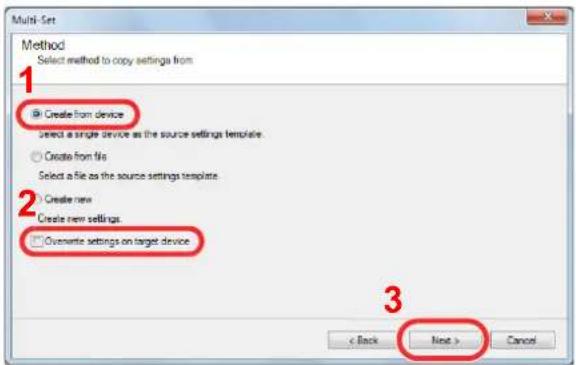
text_image
Multi-Set Method Select method to copy settings from 1 Create from device select a single device as the source settings template. Create from file Select a file as the source settings template. 2 Create new Create new settings. Overwrite settings on target device 3 < Back Next > Cancel5 Select the model you want to back up, and click [Next].
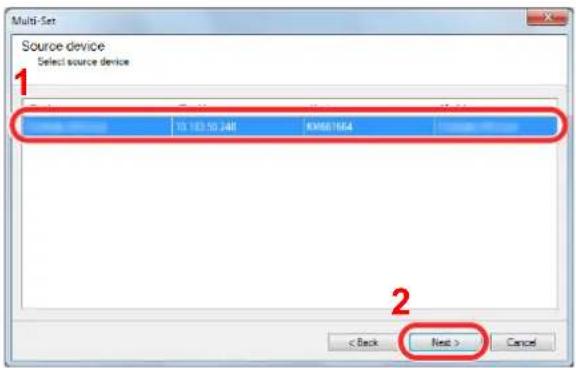
text_image
Multi-Set Source device Select source device 1 10.183.50.248 K9661664 2 < Back Next > CancelNOTE
If the "Admin Login" screen appears, enter the "Admin Login" and "Login Password", and then click [OK]. The default settings are as follows:
| Login User Name Admin |
| Login Password Admin |
* Upper case and lower case letters are distinguished (case sensitive).
6 Click on [Save to file].
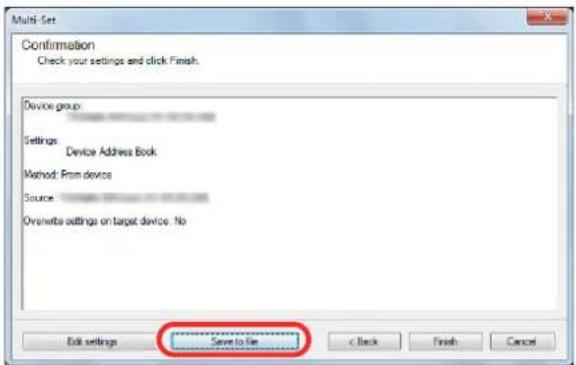
text_image
Multi-Set Confirmation Check your settings and click Finish. Device group Settings Device Address Book Method: From device Source: On-write settings on target device: No Save to file Edit settings C Black Finish Cancel7 Specify the location to save the file, enter the file name, and then click [Save]. For "Save as type", make sure to select "XML File".
8 After saving the file, always click [Cancel] to close the screen.
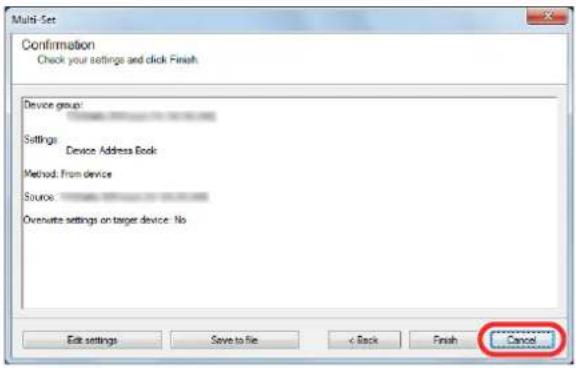
text_image
Multi-Set Confirmation Check your settings and click Finish Device group: Settings Device Address Book Method: From device Source: Overwrite settings on target device: No Edit settings Save to file < Back Finish CancelPlease note that selecting [Finish] will write the data to the machine's Address Book.
Writing Address Book Data to the Machine
1 Launch the NETWORK PRINT MONITOR.
2 Load the Address Book data.
1 Right-click on the model name to which you want to transfer the Address Book, and select [Advanced] - [Set multiple devices].
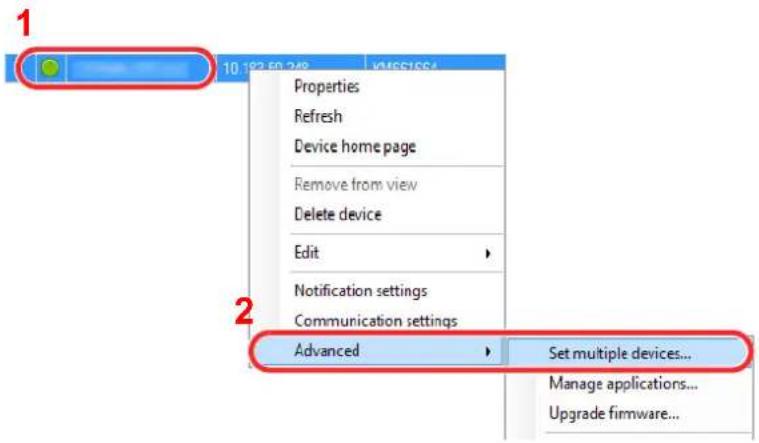
text_image
1 Properties Refresh Device home page Remove from view Delete device Edit Notification settings Communication settings Advanced Set multiple devices... Manage applications... Upgrade firmware...2 Click [Next].
3 Select [Device Address Book] and click [Next].
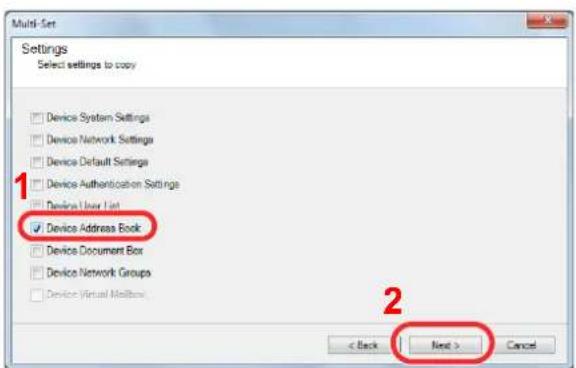
text_image
Multi-Set Settings Select settings to copy Device System Settings Device Network Settings Device Default Settings Device Authentication Settings Device User List Device Address Book Device Document Box Device Network Groups Device Virtual Mailbox < Back Next > Cancel4 Select [Create from file] and remove the checkmark from [Overwrite settings on target device], and then click [Next].
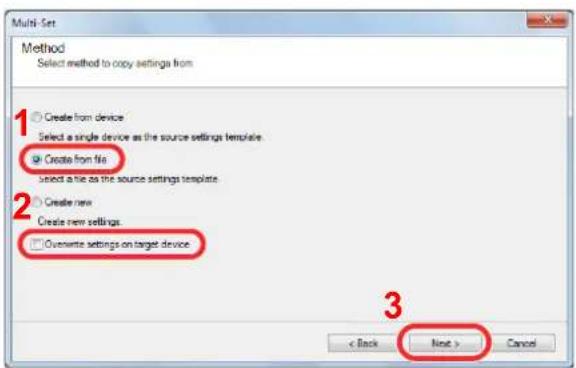
text_image
Multi-Set Method Select method to copy settings from 1 Create from device Select a single device as the source settings template. 2 Create from file Select a file as the source settings template. 3 Create new Create new settings. Overwrite settings on target device < Back Next > CancelSelecting the [Overwrite settings on target device] checkbox will overwrite the machine's Address Book from entry No.1.
5 Click [Browse] and select the backup Address Book file, and then click [Next].
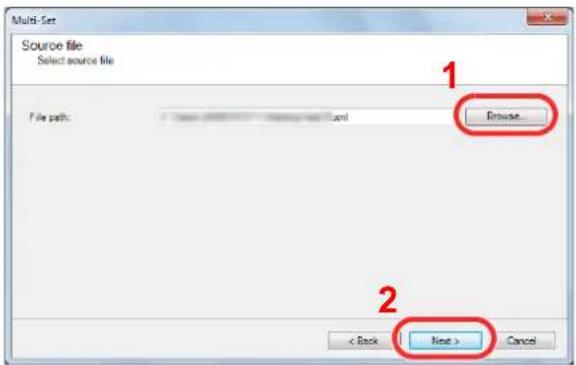
text_image
Multi-Set Source file Select source file File paths: Browse... < Back Next > Cancel6 Click [Finish].
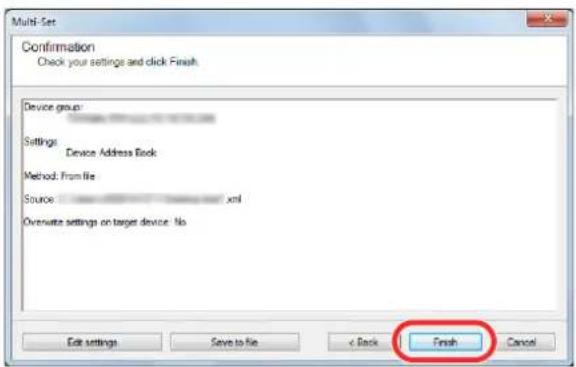
text_image
Multi-Set Confirmation Check your settings and click Finish Device group: Settings Device Address Book Method: From file Source: xml Overwrite settings on target device: No Finish Edit settings Save to file < Back CancelThe write process of the Address Book data starts.
7 Once the write process is complete, click [Close].
3 Preparation before Use
This chapter explains the following operations.
Using the Operation Panel 3-2
Operation Panel Keys 3-2
Adjusting the Operation Panel Angle 3-3
Touch Panel Display 3-4
Home Screen 3-4
Display for Originals and Paper 3-8
Display of keys that cannot be set 3-8
Original Preview 3-9
Enter key and Quick No. Search key 3-11
Help Screen 3-12
Accessibility Functions (Magnifying the View) 3-13
Energy Saver function 3-14
Low Power Mode and Auto Low Power Mode 3-14
Sleep and Auto Sleep 3-15
Loading Paper 3-16
Before Loading Paper 3-17
Loading in the Cassettes 3-18
Loading Paper in the Multi Purpose Tray 3-26
Paper stopper 3-29
Specifying Paper Size and Media 3-30
Preparation for Sending a Document to a PC 3-35
Making a note of the computer name and full computer name 3-35
Making a note of the user name and domain name 3-36
Creating a Shared Folder, Making a Note of a Shared Folder 3-37
Configuring Windows Firewall (for Windows 7) 3-41
Registering Destinations in the Address Book 3-45
Adding a Destination (Address Book) 3-45
Adding a Destination on One Touch Key (One Touch Key) 3-53
Using the Operation Panel
Operation Panel Keys
 | Displays the Home screen. | ||||
| System Menu | Displays the System Menu screen. |  | Displays the Counter screen. | Puts the machine into Sleep Mode. Recovers from Sleep if in Sleep Mode. | |
| Status/Job Cancel | Displays the Status/Job Cancel screen. |  | Displays the Copy screen. | Puts the machine into Low Power Mode. | |
| Help | Displays the help guidance. |  | Screen for sending. You can change it to display the Address Book screen. | Authenticates user switching, and exits the operation for the current user (i.e. log out). | |
| Accessibility Display | Switches the touch panel display on the Copy screen and the Send screen to a magnified view. | FAX | Displays the FAX screen. | Displays the Interrupt Copy screen. | |
| Lit when the machine's main power is on. | |||||
| Numeric keys.Enter numbers and symbols. | Clear | Clears entered numbers and characters. |  | Returns settings to their default states. | |
| Quick No. Search | Specifies registered information such as address numbers, user IDs and program numbers by number. | Stop | Cancels or pauses the job in progress. | ||
| Enter | Finalizes numeric key entry, and finalizes details during setting of functions. Operates linked with the on-screen [OK]. | Start | Starts copying and scanning operations and processing for setting operations. |
Adjusting the Operation Panel Angle
Adjust the angle of the operation panel in two as shown by releasing the operation panel lock lever.
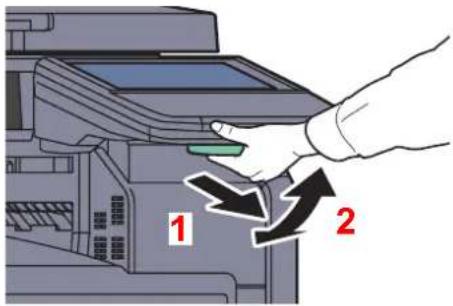
text_image
1 2Touch Panel Display
Home Screen
This screen is displayed by pressing the [Home] key on the operation panel. Touching an icon will display the corresponding screen.
You can change the icons to display on the Home screen as well as its background.

Editing the Home Screen (page 3-5)
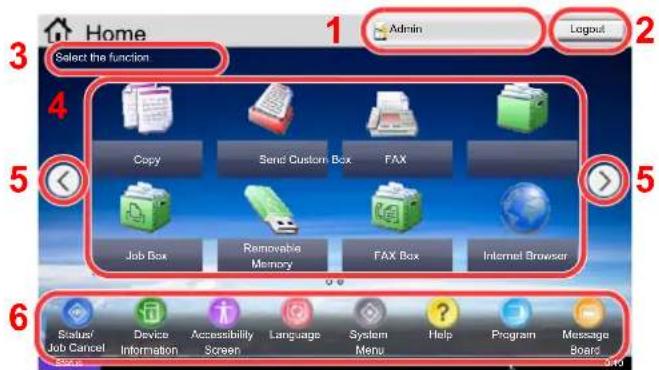
text_image
Home 1 Admin Logout 3 Select the function 4 Copy Send Custom Box FAX 5 Job Box Removable Memory FAX Box Internet Browser 6 Status/ Device Accessibility Language System Help Program Message Board Job Cancel Status/ Device Information Screen Screen System Menu Help Program Board* The appearance may differ from your actual screen, depending on your configuration and option settings.
| No. | Item Description | |
| 1 | Login User Name | Displays the logged-in user name. This is displayed when user login administration is enabled. Pressing "Login User Name" will display the information of the logged-in user. |
| 2 | [Logout] Logs out the current user. This is displayed when user login administration is enabled. | |
| 3 | Message Displays the message depending on the status. | |
| 4 | Desktop | Displays a maximum of 40 function icons* including the functions registered in program. Icons that are not displayed on the first page will appear by changing the page. |
| 5 | Screen-switching keys | Use these buttons to switch between desktop pages.[IMAGE]NOTEYou can also switch views by touching the screen and moving the finger sideways (i.e. swiping).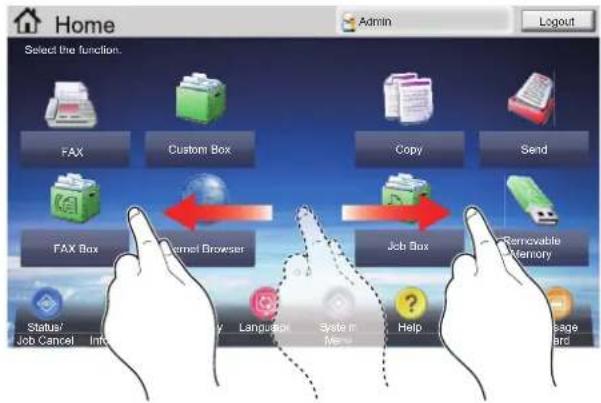 |
| 6 | Taskbar Displays a maximum of 8 task icons. | |
* When the optional fax kit is installed, a maximum of 42 icons can be displayed. A maximum of 5 icons can be displayed for installed applications.
Editing the Home Screen
You can change the background of the Home screen as well as which icons are displayed.
1 Display the screen.
Press the [System Menu] key and select [Home].

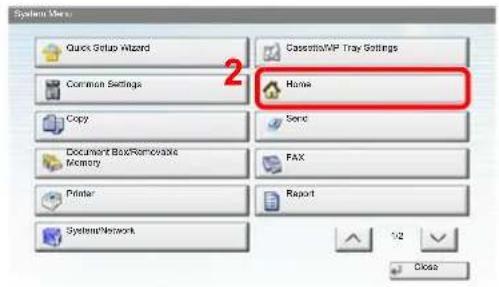
text_image
System Menu Quick Setup Wizard Common Settings Copy Document Box/Removable Memory Printer SystemsNetwork CassetteVIP Tray Settings Home Send FAX Report 1/2 CloseNOTE
You can only change the settings by logging in with administrator privileges.
The factory default login user name and login password are set as shown below.
| Model Name Login User Name Login Password | |
| 3555i 3500 3500 | |
| 4555i 4500 4500 | |
| 5555i 5500 5500 | |
2 Configure the settings.
The available settings are shown below.
| Item Description | |
| Customize Desktop | Specify the function icons to display on the desktop.Press [Add] to display the screen for selecting the function to display. Select the function to display and press [OK].Select an icon and press [Previous] or [After] to change the display position of the selected icon on the Desktop.To delete a icon from desktop, select the desired one and press [Delete].For details, refer toAvailable Functions to Display on Desktop on page 3-6. |
| Customize Taskbar | Specify the task icons to display on the taskbar.For details, refer toAvailable Functions to Display on Taskbar on page 3-7. |
| Wallpaper Configure the | wallpaper of the Home screen.Value: Images 1 to 8 |
Available Functions to Display on Desktop
| Function Icon Description | Reference page | ||
| Copy^*1 |  | Displays the Copy screen. page 5-20 | |
| Send^*1 |  | Displays the Send screen. page 5-23 | |
| FAX^*2 |  | Displays the FAX screen. Refer to the | FAX Operation Guide. |
| Custom Box^*1 |  | Displays the Custom Box screen. page 5-52 | |
| Job Box^*1 |  | Displays the Job Box screen. page 4-14 | page 5-64 |
| Removable Memory^*1 |  | Displays the Removable Memory screen. page 5-67 | |
| FAX Box^*2 |  | Displays the FAX Box screen. Refer to the | FAX Operation Guide. |
| Internet Browser Displays the Internet Browser screen. page 5-16 | |||
| Send to Me (E-mail) |  | Displays the Send screen. The E-mail address of the logged-in user is set as the destination. | page 6-67 |
| Send to Me from Box (E-mail) |  | Displays the Custom Box screen. The E-mail address of the logged-in user is set as the destination. | page 6-67 |
| Program Calls up the registered program. The icon will change according to the function of the program. | page 5-6 | ||
| Application Name^*3 |  | Displays the selected applications. page 5-10 | |
*1 Selected at the time of shipment from factory.
*2 Displayed when the corresponding optional component is attached.
*3 The icon of the application appears.
Available Functions to Display on Taskbar
| Function Icon Description | Reference page | ||
| Status/Job Cancel |  | Displays the Status screen. If an error occurs, the icon will show "!". Once the error clears, the display will return to normal. | - |
| Device Information Displays the Device Information screen.[02CK] | - | ||
| Accessibility/Standard |  | Magnifies the text and icons on the screen. Pressing the Accessibility icon switches the icon to the Standard icon. Press the Standard icon to return to the previous view. | page 3-13 |
Language Displays the Language setting screen in System Menu. | page 8-9 | ||
| System Menu Displays the System Menu screen. page 8-2[COH4] | |||
Help Displays the Help screen. page 3-12 | |||
Program Displays the program list screen. | page 5-6 | ||
| Message Board Displays the Message Board screen.[ZAAS][HZWS]NOTETo use this function, set "Message Board" to [ON] in System Menu.[BYTA]Message Board Settings on page 8-27 | page 8-27 | ||
Display for Originals and Paper
The copy screen displays the selected paper source and output tray.
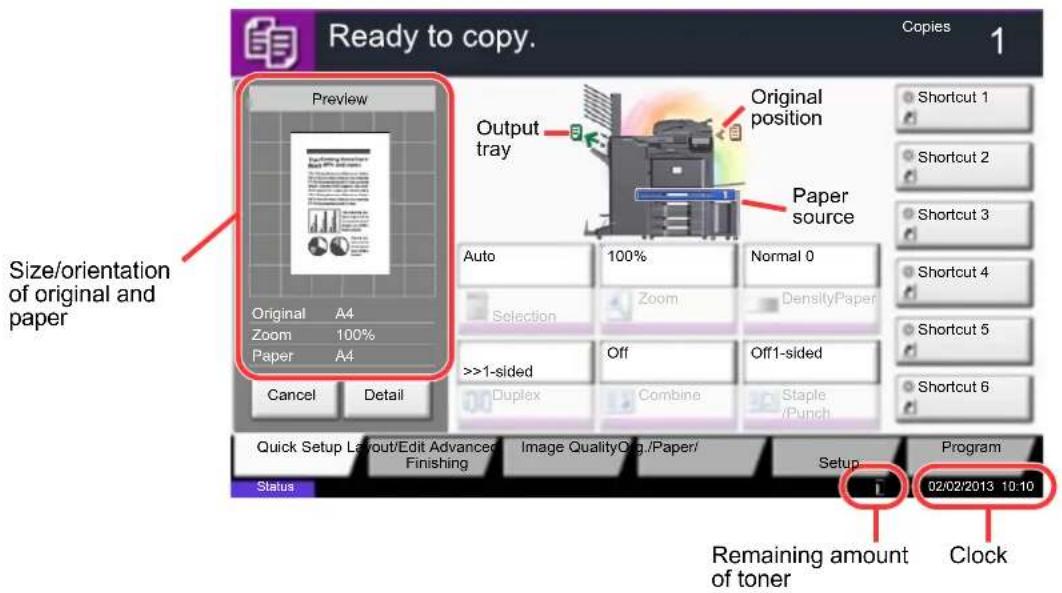
text_image
Ready to copy. Copies 1 Preview Original A4 Zoom 100% Paper A4 Output tray Original position Paper source Auto 100% Normal 0 Selection Zoom DensityPaper >>1-sided Off Off1-sided Duplex Combine Staple /Punch Quick Setup Layout/Edit Advanced Image Quality/Oig./Paper/ Setup Program Finishing Finishing Setup Status 02/02/2013 10:10 Remaining amount of toner ClockDisplay of keys that cannot be set
Keys of features that cannot be used due to feature combination restrictions or non-installation of options are in a non-selectable state.
| Normal Grayed out Hidden | ||
 | In the following cases, the key is grayed out and cannot be selected.Cannot be used in combination with a feature that is already selected.Use prohibited by user control.[Preview] has been pressed.(Refer to Original Preview on page 3-9) |  Cannot be used because an option is not installed.Example: When a finisher is not installed, [Staple/ Punch] does not appear. Cannot be used because an option is not installed.Example: When a finisher is not installed, [Staple/ Punch] does not appear. |

NOTE
If a key that you wish to use is grayed out, the settings of the previous user may still be in effect. In this case, press the [Reset] key and try again.
If the key is still grayed out after the [Reset] key is pressed, it is possible that you are prohibited from using the function by user control. Check with the administrator of the machine.
Original Preview
You can display a preview image of the scanned document on the panel.

NOTE
To view a preview of an image stored in a Custom Box, refer to Previewing Documents/Checking Document Details on page 5-50.
The procedure described here is for copying a single-page original.
1 On the Home screen, press [Copy] or [Send], and then place the original.
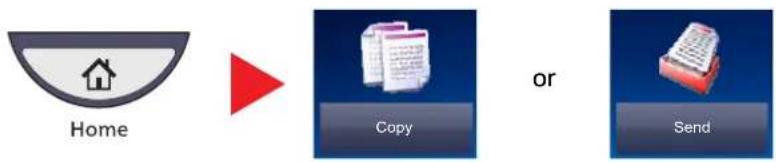
flowchart
graph LR
    A["Home"] --> B["Copy"]
    B --> C["or"]
    C --> D["Send"]
2 Press [Preview].
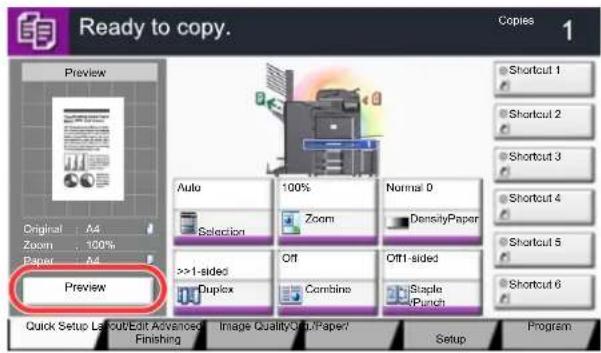
text_image
Ready to copy. Copies 1 Preview Original A4 Zoom 100% Paper A4 Preview Auto 100% Selection Zoom Normal 0 >>1-sided Off DensifyPaper Duplex Combine Staple Quick Setup Layout/Edit Advanced Image Quality/Copy? Finishing Setup Program Shortcut 1 Shortcut 2 Shortcut 3 Shortcut 4 Shortcut 5 Shortcut 6The machine starts scanning the original. When scanning is completed, the preview image appears on the panel.
3 Pressing [Detail] will display the Preview screen so that you can check the finished image in greater detail.
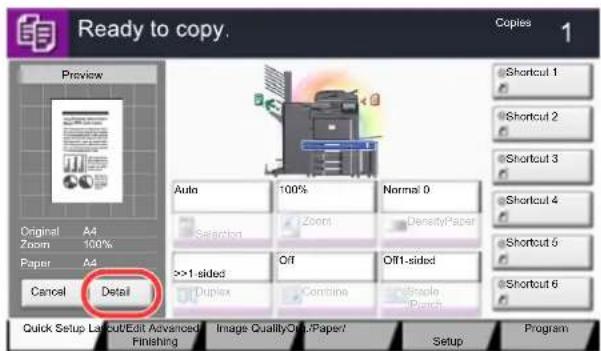
text_image
Ready to copy. Copies 1 Preview Original A4 Zoom 100% Paper A4 Cancel Detail Auto 100% Normal 0 Selection Zoom DensityPaper >>1-sided Off Off1-sided Duplex Combine Single Quick Setup Layout/Edit Advanced Image Quality/Opt/Paper/ Finishing Setup Program Shortcut 1 Shortcut 2 Shortcut 3 Shortcut 4 Shortcut 5 Shortcut 6
NOTE
To change the quality or the layout, press [Cancel] or the [Stop] key.
Change the settings and press [Preview] again to see a preview image with the new settings.
In magnified view, you can move the range of display.
Zoom in Zoom out.
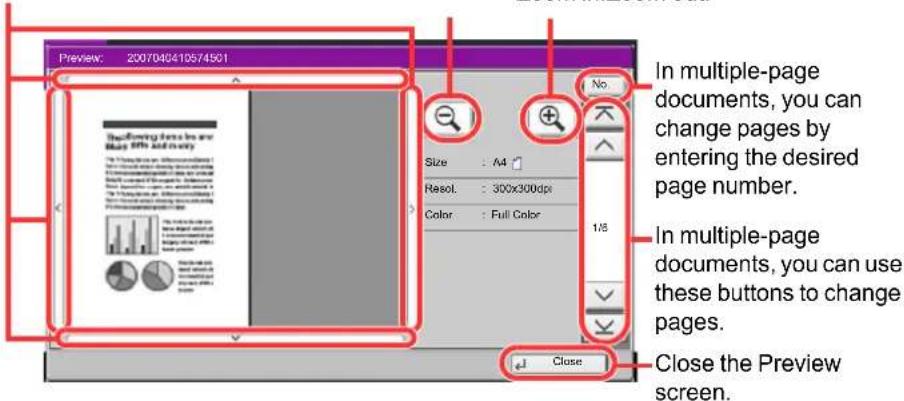
text_image
Preview: 2007040410574501 In multiple-page documents, you can change pages by entering the desired page number. Size : A4 Reset: 300x300dpi Color: Full Color Close Close the Preview screen.
NOTE
Depending on the function you are using, even if you scan a multi-page original, only the first page can be previewed.
4 If there is no problem with the preview image, press the [Start] key.
Copying starts.
Using the Preview Screen
When the Preview screen is displayed, you can do the following by moving the finger that is touching the touch panel.
| Function Description | |
| Drag | With the finger touching the touch panel, slide the finger to move the position of the displayed preview. |
| Pinch in Pinch out | With two fingers touching the touch panel, widen or tighten the space between the two fingers to zoom in and out on the view. |
Enter key and Quick No. Search key
This section explains how to use the [Enter] key and [Quick No. Search] key on the operation panel.
Using the [Enter] key ( )
The [Enter] key has the same function as the key with the Enter mark (←), such as the [← OK] key and the [← Close].
![Utax 3555i - Using the [Enter] key ( ) - 1](/content/2026/05/780633/images/c7277be8a43a06cefb95591aa06c026e2f0f67d565cd7dc604fb0b34dc3e617a.jpg)
text_image
Ready to copy. Copies 1 Paper Selection Auto Cassette A4 Plain Original : A4 Zoom : 100% Paper : A4 Preview A3 Plain A4 Plain A4 Plain A4 Plain MP Tray MP Tray Paper Set > Add Shortcut Cancel OKUsing the [Quick No. Search] key ( )
The [Quick No. Search] key performs the same action as the [No.] displayed on the touch panel. Use the Quick No. Search keys to perform an action by simply entering a number directly using the numeric keys. For example, you can specify the speed dial for a transmission destination or recall a stored program by its program number.
![Utax 3555i - Using the [Quick No. Search] key ( ) - 1](/content/2026/05/780633/images/26ef4afb8a75dcbb0e21fb8582d77e13d81326c25e0eb10eb59cc921c7c6918e.jpg)
For more information on speed dialing, refer to Specifying Destination on page 5-26.
![Utax 3555i - Using the [Quick No. Search] key ( ) - 2](/content/2026/05/780633/images/5379fb58887448df175671e1f788501cf2ac9732e804582d83a9081d26569de7.jpg)
text_image
Ready to send. Place original. Destination 3 Destination Detail a00025g.com Address Book E-mail Addr Entry Folder Path Entry FAX No. Entry i-FAX Addr Entry WSD Scan /DSM Scan Quick No. Search A OFFICE B OFFICE C OFFICE Direct On Hook (0001 - 1000) 0011 0001 AAA BBB 0008 0009-2010 Cancel OK Quick Setup/Det Insign/Berating Data Format Image Quality Advanced Setup ProgramHelp Screen
If you have difficulty operating the machine, you can check how to operate it using the touch panel.
To show the Help screen, press the [Help] key on the operation panel. The Help screen shows explanations of functions and how to use them.

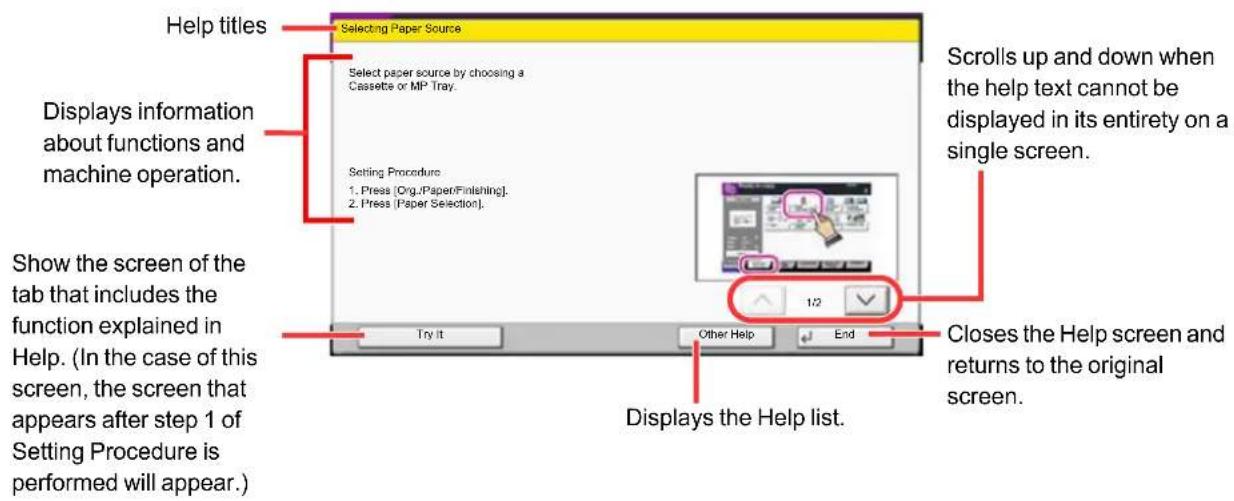
text_image
Help titles Selecting Paper Source Select paper source by choosing a Cassette or MP Tray. Setting Procedure 1. Press [Org./Paper/Finishing]. 2. Press [Paper Selection]. Shows the screen of the tab that includes the function explained in Help. (In the case of this screen, the screen that appears after step 1 of Setting Procedure is performed will appear.) Display information about functions and machine operation. Closes the Help screen and returns to the original screen. Displays the Help list. Try it Other Help End
NOTE
To show the Help list, press the [Help] key on the Home screen.
Accessibility Functions (Magnifying the View)
You can magnify the text and keys displayed on the touch panel. You can also select items and move to the next screen using the numeric keys.

NOTE
This function can be used on the Home screen and on the functions that were registered via Copy/Send Quick Setup.
To configure any functions that are not displayed on the Accessibility screen, you need to return to the original view. Press the [Accessibility Display] key again.
While using the Copy or Send functions, press the [Accessibility Display] key.
Large keys and text appear on the touch panel.
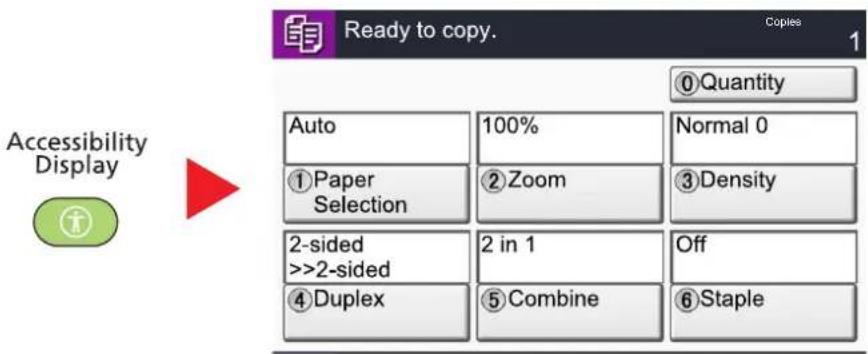
text_image
Accessibility Display Ready to copy. Copies 1 Quantity Auto 100% Normal 0 ①Paper Selection ②Zoom ③Density 2-sided 2 in 1 Off >>2-sided ④Duplex ⑤Combine ⑥StapleYou can also control the screen using the numeric key corresponding to the number in circle. (Example: Press the [2] key on the numeric key pad to zoom.)
Control the functions according to the display on the screen.
Energy Saver function
Low Power Mode and Auto Low Power Mode
Low Power Mode
To activate Low Power Mode, press the [Energy Saver] key. Touch panel and all indicators on the operation panel will go out to save power except the [Energy Saver], [Power], and Main Power indicators. This status is referred to as Low Power Mode.
When the [Power] key is pressed in low power mode, the machine enters the sleep state.
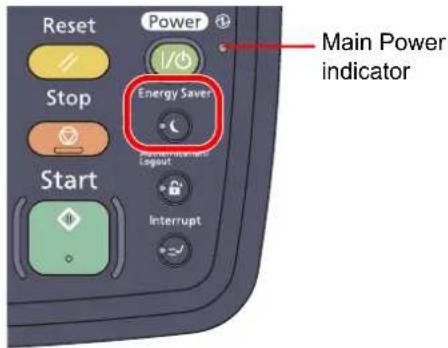
text_image
Reset Power Stop Energy Saver Start Main Power indicator InterruptIf print data is received during Low Power Mode, the machine automatically wakes up and starts printing. Also when fax data arrives while the machine is in Low Power Mode when using the optional fax, the machine automatically wakes up and starts printing.
To resume, perform one of the following actions.
- Press the [ Energy Saver] key. (Full Recovery)
- Press a key other than [ Power] and [Energy Saver] keys. (Power Saving Recovery)
- Open the platen cover or the optional document processor. (Power Saving Recovery)
The machine will be ready to operate within 10 seconds.
Note that ambient environmental conditions, such as ventilation, may cause the machine to respond more slowly.
Auto Low Power Mode
Auto Low Power Mode automatically switches the machine into Low Power Mode if left idle for a preset time.
The default preset time is 2 minutes.
For information on the Low Power Mode settings, refer to Low Power Timer on page 8-54.
Energy Saver Recovery Level
This machine can reduce power consumption when recovering from Energy Saver Mode.
For EnergySaver RecoveryLevel, "Full Recovery", "Normal Recovery" or "Power Saving Recovery" can be selected. The factory default is "Normal Recovery".
For more information on Energy Saver Mode settings, refer to EnergySaver RecoveryLevel on page 8-56.
Sleep and Auto Sleep
Sleep
To enter Sleep, press the [Power] key. Touch panel and all indicators on the operation panel will go out to save a maximum amount of power except the Main Power indicator. This status is referred to as Sleep.
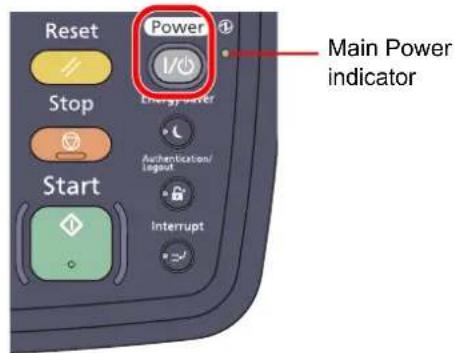
text_image
Reset Power Stop Energy Water Start Authentication/ Input Interrupt Main Power indicatorIf print data is received during Sleep, the print job is performed while the touch panel remains unlit.
When using the optional fax, received fax data is printed out while the operation panel also remains unlit.
- Press the touch panel or any key on the operation panel.
The machine will be ready to operate within 16 seconds.
Note that ambient environmental conditions, such as ventilation, may cause the machine to respond more slowly.
Auto Sleep
Auto Sleep automatically switches the machine into Sleep if left idle for a preset time in the Low Power Mode.
The default preset time are 45 minutes for 3551i, and 60 minutes for 4551i/5551i.
To change the preset sleep time, refer to Sleep Timer on page 8-55.

NOTE
This function cannot be turned on in some regions.
Sleep Rules (models for Europe)
You can set whether sleep mode operates for each function. When the machine enters sleep mode, it cannot perform printing from a computer connected by USB cable. In addition, it takes longer for the machine to wake and return to normal operation. Also, the ID card cannot be recognized.

For more information on Sleep Rules settings, refer to Sleep Rules (models for Europe) on page 8-55.
Sleep Level (Energy Saver) (models except for Europe)
This mode reduces power consumption even more than normal Sleep mode, and allows Sleep Mode to be set separately for each function. Printing from a computer connected with a USB cable is not available while the machine is asleep. The time required for the machine to wake up from power save mode and resume normal operation will be longer than for normal Sleep Mode.

For more information on Energy Saver Mode settings, refer to Sleep Level (models except for Europe) on page 8-56.
Energy Saver Recovery Level
This machine can reduce power consumption when recovering from Energy Saver Mode.
For EnergySaver RecoveryLevel, "Full Recovery", "Normal Recovery" or "Power Saving Recovery" can be selected. The factory default is "Normal Recovery".
For more information on Energy Saver Mode settings, refer to EnergySaver RecoveryLevel on page 8-56.
Loading Paper
Paper can be loaded in the two standard cassettes and the multi purpose tray. A paper feeder is also available as an option. (Refer to Optional Equipment on page 11-2.)
For the paper load methods for each cassette, refer to the page below.
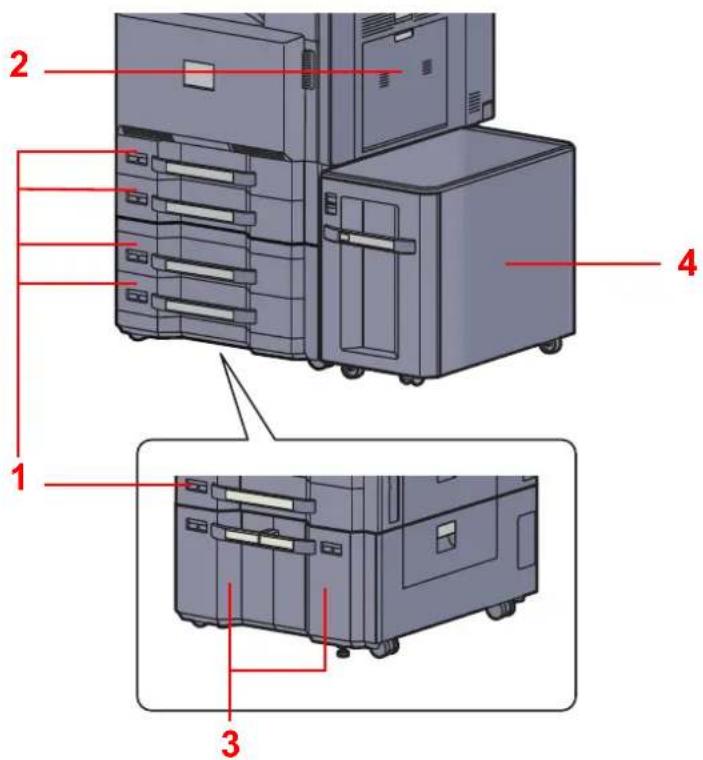
text_image
Technical diagram of a server rack with numbered components and labeled parts in Chinese| Cassettes Name No. Page | ||||
| Standard Cassette 1, Cassette 2 | Standard cassettes 1 page 3-18 | |||
| Multi Purpose Tray | Multi Purpose Tray 2 page 3-26 | |||
| Option Cassette 3, Cassette 4 | Side Feeder (500-sheet x 2)* | 1 page | 3-18 | |
| Large Capacity Feeder (1,500-sheet x 2) 3 page 3-21 | ||||
* The paper feed method is the same as standard cassettes.

NOTE
The number of sheets that can be held varies depending on your environment and paper type. You should not use inkjet printer paper or any paper with a special surface coating. (Such paper may cause paper jams or other faults.)
Before Loading Paper
When you open a new package of paper, fan the sheets to separate them slightly prior to loading in the following steps.
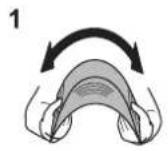
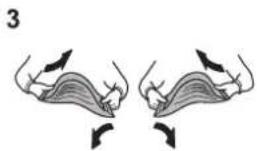
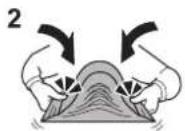
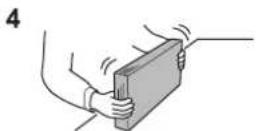
1 Bend the whole set of sheets to swell them in the middle.
2 Hold the stack at both ends and stretch it while keeping the entire stack swelled.
3 Raise the right and left hands alternately to create a gap and feed air between the papers.
4 Finally, align the papers on a level, flat table.
If the paper is curled or folded, straighten it before loading. Paper that is curled or folded may cause a jam.

IMPORTANT
If you copy onto used paper (paper already used for printing), do not use paper that is stapled or clipped together. This may damage the machine or cause poor image quality.

NOTE
Note that some paper types have a tendency to curl and may jam in the paper eject unit. If you use special paper such as letterhead, paper with holes or paper with pre-prints like logo or company name, refer to Paper on page 11-13.
Avoid exposing opened paper to high temperatures and high humidity as dampness can be a cause of problems. Seal any remaining paper after loading in the multi purpose tray or cassettes back in the paper storage bag.
If the machine will not be used for a prolonged period, protect all paper from humidity by removing it from the cassettes and sealing it in the paper storage bag.
Loading in the Cassettes
Standard cassettes
The standard cassettes can hold plain paper, recycled paper or color paper.
Cassette 1 and 2 hold up to 500 sheets of plain paper (80 g/m ^2 ) (or up to 550 sheets of 64 g/m ^2 plain paper).
The following paper sizes are supported: A3, B4, A4, A4-R, B5, B5-R, A5-R, Folio, Ledger, Legal, Oficio II, 12 x 18", Letter, Letter-R, Statement-R, 8K, 16K, 16K-R, and 216 x 340 mm, Custom (140 x 182 mm - 304 x 457 mm).

IMPORTANT
When using media types other than plain paper (such as recycled or colored paper), always specify the media type and paper weight settings.

Specifying Paper Size and Media Type for the Cassettes (page 3-30) Media Type Setting (page 8-13)
The cassettes can hold paper with weight between 60 - 220 g/m ^2 . If you are using a paper weight of 106 g/m ^2 or more, set the media type to Thick and set the weight of the paper you are using.
Do not load thick paper that is heavier than 256 g/m^2 in the cassettes. Use the multi purpose tray for paper that is heavier than 256 g/m^2 .
If you wish to use 330 x 210 mm to 356 x 220 mm paper, contact a service technician.
1 Pull the cassette out toward you until it stops.
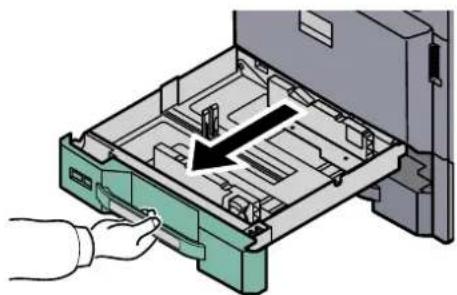
natural_image
Illustration of a hand inserting into a green file organizer with an arrow indicating the process (no text or symbols present)
NOTE
Do not pull out more than one cassette at a time.
2 Adjust the cassette size.
1 Squeeze the ends of the bottom of the paper length guide and move the guide to fit the length of the paper.
Paper sizes are marked on the cassette.
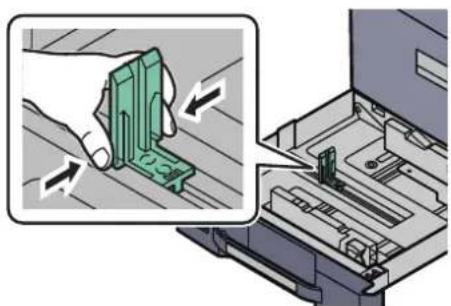
text_image
Diagram showing a hand inserting a green component into an open device, with arrows indicating the process.2 Press the (Paper Width Guide) Lock to release the lock. Grasp the paper width adjusting tab and move the paper width guides to fit the paper.
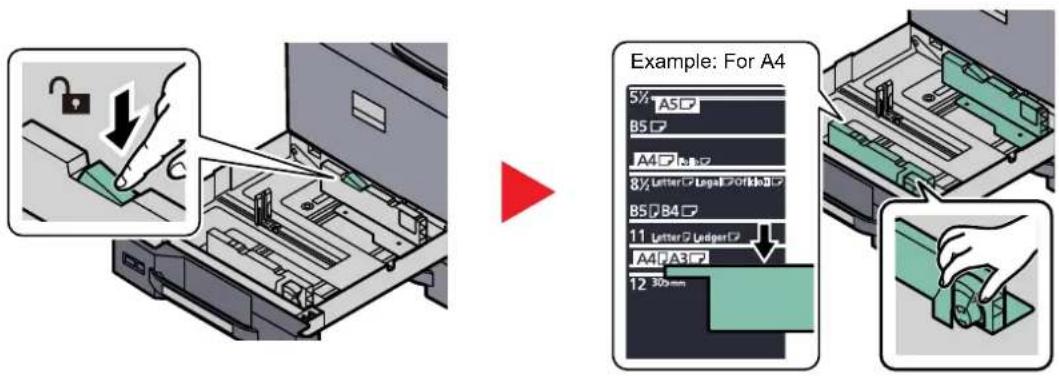
text_image
Example: For A4 5½ ASC B5C7 A4C7 B12 8½ Letter 7 Legal 70/Mo12 B5D84C7 11 Letter 7 Ledger 7 A4A3C7 12 30mm3 Load paper.
1 Align the paper flush against the right side of the cassette.
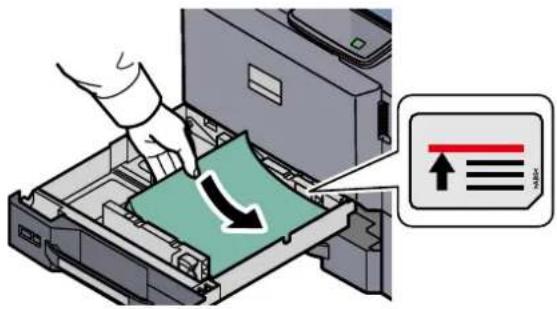
text_image
Diagram showing printer file processing with a green paper being inserted, accompanied by an icon indicating a document with arrows and text.
IMPORTANT
- If paper is loaded without adjusting the paper length guide and paper width guide, the paper may skew or become jammed.
- Load the paper with the print side facing up.
• After removing new paper from its packaging, fan the paper before loading it in the multi-purpose tray. (Refer to Before Loading Paper on page 3-17.) - Before loading the paper, be sure that it is not curled or folded. Paper that is curled or folded may cause paper jams.
- Ensure that the loaded paper does not exceed the level indicator (see illustration below).
2 Be sure that the paper length and width guides rest securely against the paper. If there is a gap, readjust the guides to fit the paper.
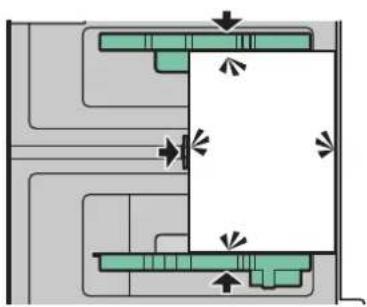
natural_image
Floor plan diagram showing room layouts and directional arrows (no text or labels)3 Press the (Paper Width Guide) Lock to lock.
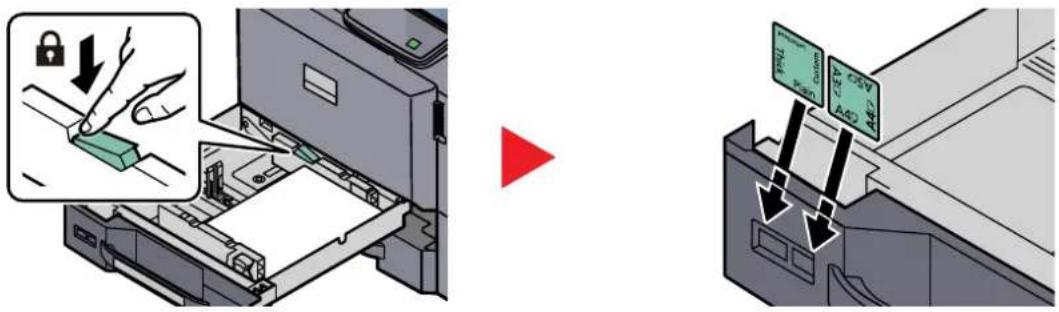
text_image
Diagram illustrating printer lock operation and card slotting process, showing lock mechanism and card slotting steps4 Gently push the cassette back in.

NOTE
- If the machine will not be used for a prolonged period, protect all paper from humidity by removing it from the cassettes and sealing it in the paper storage bag.
- Select the media type (plain, recycled, etc.) loaded in the cassette.

Specifying Paper Size and Media Type for the Cassettes (page 3-30)
The Large Capacity Feeder (1,500-sheet x 2) (Option)
The Optional cassettes will each hold plain paper, recycled paper or color paper.
The Large Capacity Feeder (1,500-sheet x 2) holds up to 3,000 sheets (1,500-sheet x 2) of plain paper (80 g/m ^2 ) (or up to 3,500 sheets (1,750-sheet x 2) of 64 g/m ^2 plain paper).
The following paper sizes are supported: A4, B5 and Letter.

IMPORTANT
When using media types other than plain paper (such as recycled or colored paper), always specify the media type and paper weight settings.

Specifying Paper Size and Media Type for the Cassettes (page 3-30) Media Type Setting (page 8-10)
The cassettes can hold paper with weights up to 256 g/m^2 . If you are using a paper weight of 106 g/m^2 or more, set the media type to Thick and set the weight of the paper you are using.
Do not load thick paper that is heavier than 256 g/m^2 in the cassettes. Use the multi purpose tray for paper that is heavier than 256 g/m^2 .
1 Pull the cassette out toward you until it stops.
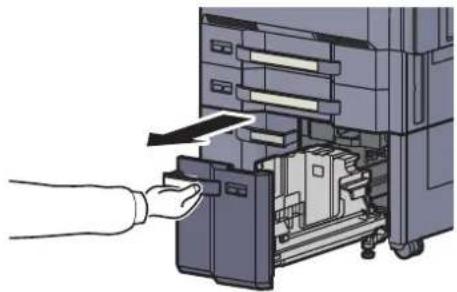
natural_image
Illustration of a hand inserting a card into an open storage machine (no text or symbols visible)2 Adjust the cassette size.
1 Rotate the Paper Size Guide (A) clamp and remove. Pull the Paper Size Guide (A) up and out.
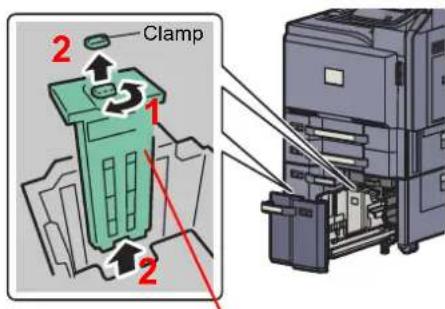
text_image
Clamp 1 2Paper Size Guide (A)
2 Insert the Paper Size Guide (A) into the slot (bottom of cassette) for the paper size to be used.
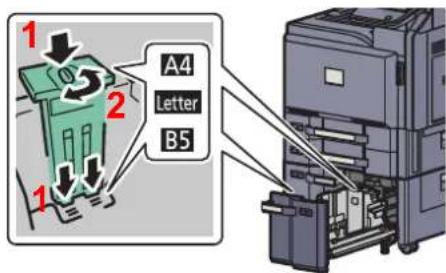
text_image
1 2 A4 Letter B5 1 2Make sure that the top of the paper size guide (A) matches the paper size to be used, attach the clamp, and rotate the clamp to lock it.
Gently try moving the Paper Size Guide (A) to verify that it is fixed.
3 With the bottom of the cassette pressed all the way down, press the hook on the side of the Paper Size Guide (B) to release it and pull out the Paper Size Guide (B).
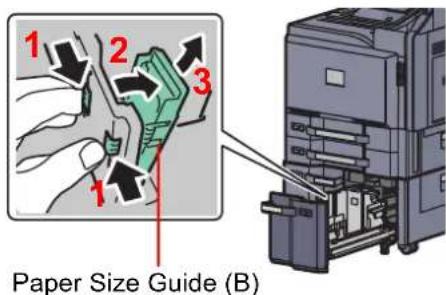
text_image
1 2 3 1 Paper Size Guide (B)4 Adjust the Paper Size Guide (B) to the paper size.
A4
Insert the Paper Size Guide (B) into the slot marked A4 (on the bottom of the cassette), and lock the hook (it will make a "click" sound).
Gently try moving the Paper Size Guide (A) to verify that it is fixed.
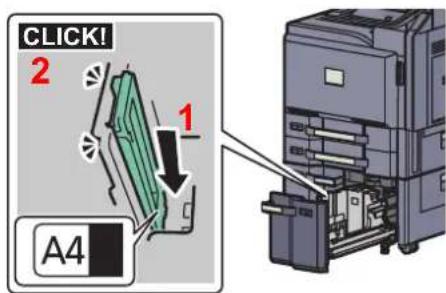
text_image
CLICK! 2 1 A4B5
Open the Paper Size Guide (B) as shown, insert into the slot marked B5 (on the bottom of the cassette), and lock the hook (it will make a "click" sound).
Gently try moving the Paper Size Guide (A) to verify that it is fixed.
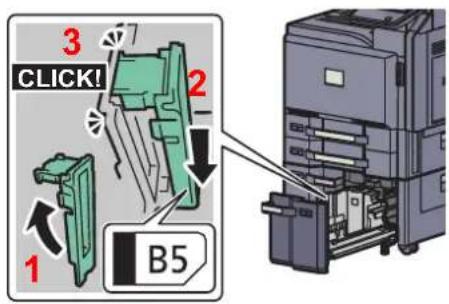
text_image
3 CLICK! 2 1 B5Letter
The Paper Size Guide (B) is not attached.
With the bottom of the cassette pressed all the way down, press the hook on the side of the Paper Size Guide (C) to release it and pull out the Paper Size Guide (C).
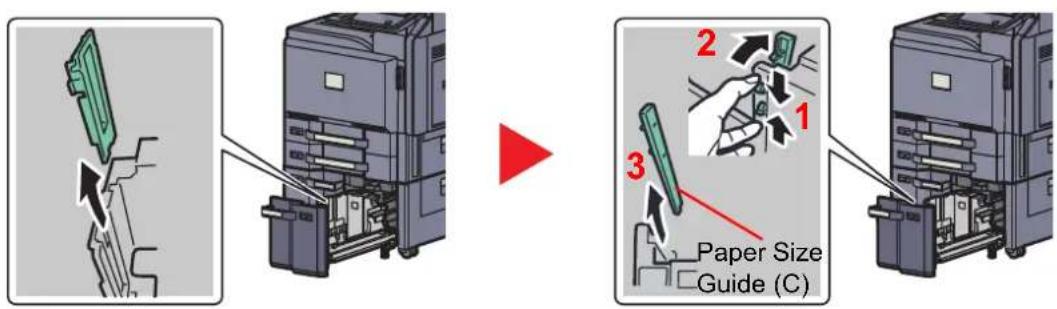
text_image
Diagram illustrating the process of paper size guidance using a printer, showing step-by-step assembly and packaging steps.3 Load paper.
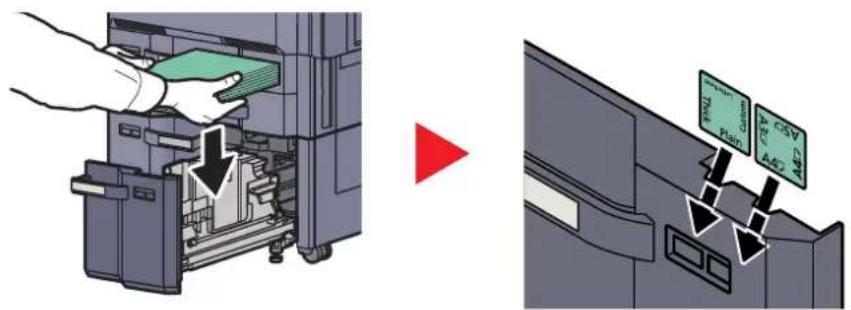
text_image
Diagram illustrating printer operation with labeled components and directional arrow, showing file transfer from printer to computer interface.
IMPORTANT
- Load the paper with the print side facing up.
• After removing new paper from its packaging, fan the paper before loading it in the multi-purpose tray.
Before Loading Paper (page 3-17) - Before loading the paper, be sure that it is not curled or folded. Paper that is curled or folded may cause paper jams.
- Ensure that the loaded paper does not exceed the level indicator (see illustration below).

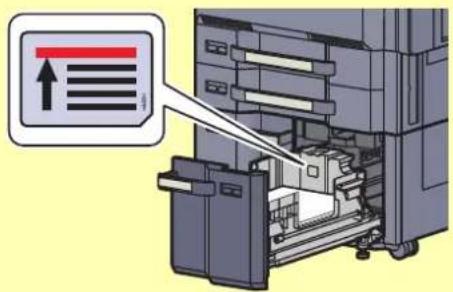
text_image
Diagram showing a printer's internal structure with an upward arrow and a red rectangle highlighting the top section.4 Gently push the cassette back in.

NOTE
- If the machine will not be used for a prolonged period, protect all paper from humidity by removing it from the cassettes and sealing it in the paper storage bag.
- Select the media type (plain, recycled, etc.) loaded in the cassette.

Specifying Paper Size and Media Type for the Cassettes (page 3-30)
Side Feeder (3,000-sheet) (Option)
The optional side feeder hold up to 3,000 sheets of plain paper (80 g/m ^2 ).
The following paper sizes are supported: A4, B5 and Letter.
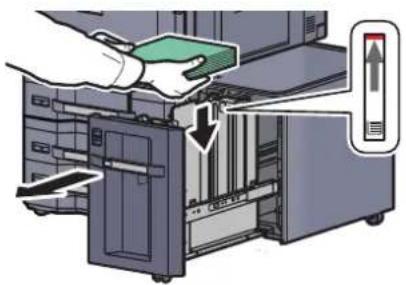
text_image
Diagram showing a hand cleaning a server rack with a green tool, indicating file movement or status change.Pull the cassette out toward you until it stops and insert the paper into the cassette. After loading paper, gently push the cassette back in.

NOTE
The default paper size setting is A4. If you need the paper size changed to B5 or Letter, contact your service representative.

IMPORTANT
- When loading the paper, keep the print side facing down.
- Before loading the paper, be sure that it is not curled or folded. Paper that is curled or folded may cause paper jams.
- Ensure that the loaded paper does not exceed the level indicator (see illustration above).
Loading Paper in the Multi Purpose Tray
The multi purpose tray will hold up to 150 sheets of A4 or smaller plain paper (80 g/m ^2 ) (or up to 165 sheets of 64 g/m ^2 plain paper) or up to 50 sheets of plain paper (80 g/m ^2 ) (or up to 55 sheets of 64 g/m ^2 plain paper) larger than A4.
The multi purpose tray accepts paper sizes from A3 to A6-R and Hagaki and from Ledger to Statement-R, 12 x 18", 8K, 16K and 16K-R. Be sure to use the multi purpose tray when you print on any special paper.

IMPORTANT
When using media types other than plain paper (such as recycled or colored paper), always specify the media type and paper weight settings.

Specifying Paper Size and Media Type for the Multi Purpose Tray (MP Tray Setting) (page 3-33) Media Type Setting (page 8-13)
If you are using a paper weight of 106 g/m^2 or more, set the media type to Thick and set the weight of the paper you are using.
The capacity of the multi purpose tray is as follows.
- A4 or smaller plain paper (80 g/m ^2 ), recycled paper or color paper: 150 sheets (64 g/m ^2 plain paper : 165 sheets)
- B4 or larger plain paper (80 g/m ^-2 ), recycled paper or color paper: 50 sheets (64 g/m ^2 plain paper : 55 sheets)
- Hagaki: 30 sheets
• OHP film: 10 sheets
- Envelope DL, Envelope C4, Envelope C5, Envelope #10 (Commercial #10), Envelope #9 (Commercial #9), Envelope #6 (Commercial #6), Monarch, Youkei 4, Youkei 2: 10 sheets
- Banner paper: 470.1 mm (18.51") to a maximum of 1220.0 mm (48"): 1 sheet (manual feed), 10 sheets (when optional banner tray is attached)

NOTE
When you load custom size paper, enter the paper size by referring to Specifying Paper Size and Media Type for the Multi Purpose Tray (MP Tray Setting) on page 3-33.
When you use special paper such as transparencies or thick paper, select the media type by referring to Specifying Paper Size and Media Type for the Multi Purpose Tray (MP Tray Setting) on page 3-33.
1 Open the multi purpose tray.
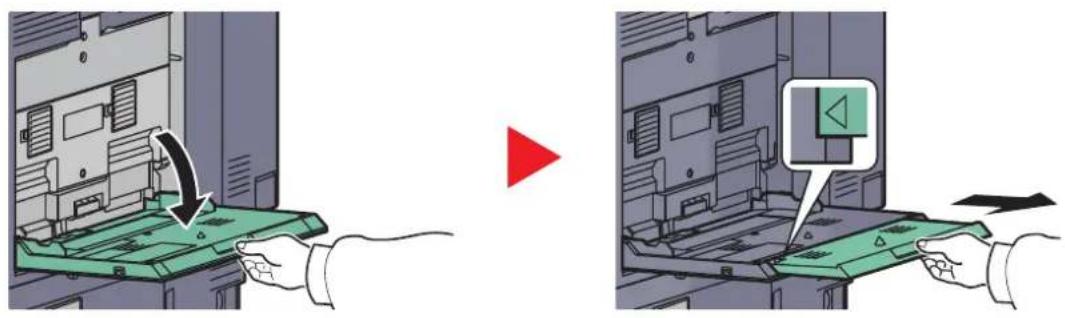
text_image
Diagram illustrating the process of inserting a device into a computer, showing a hand pressing down and then moving to a green device with a play button.When loading paper sizes 12 x 18" and from A3 to B4 and Ledger to Legal, extend the support tray section of the multi purpose tray until the " " mark is fully appeared.
2 Adjust the multi purpose tray size.
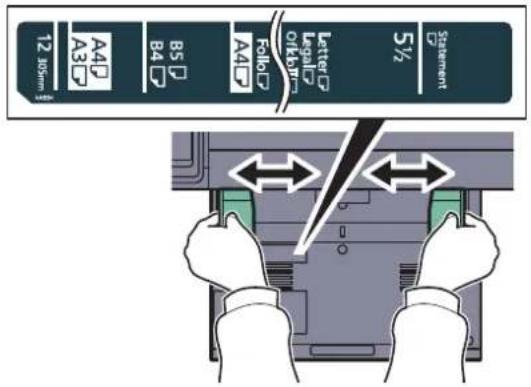
text_image
Statement 5½ Letter Legal Offload 12.10mm A4D A3D B4D B5D A4D Follo 5½3 Load paper.
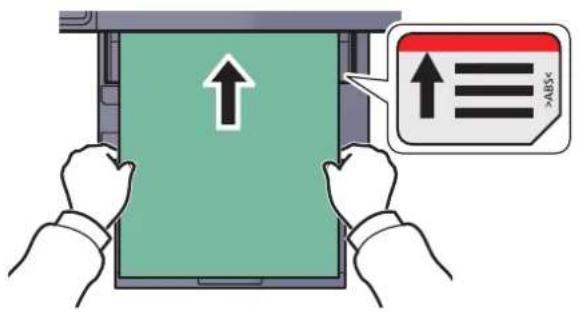
text_image
Diagram showing hands installing a green screen with an upward arrow and a speech bubble containing 'AB$' text.Insert the paper along the paper width guides into the tray until it stops.
After removing new paper from its packaging, fan the paper before loading it in the multi-purpose tray.

Before Loading Paper (page 3-17)

IMPORTANT
- When loading the paper, keep the print side facing down.
- Curled paper must be uncurled before use.
- Straighten the top edge if it is curled.
- When loading paper into the multi purpose tray, check that there is no paper left over in the tray from a previous job before loading the paper. If there is just a small amount of paper left over in the multi purpose tray and you want to add more, first remove the left-over paper from the tray and include it with the new paper before loading the paper back into the tray.
- If there is a gap between the paper and the paper width guides, readjust the guides to fit the paper in order to prevent skewed feeding and paper jams.
- Ensure that the loaded paper does not exceed the level indicator (see illustration above).
When you load envelopes or cardstock in the multi purpose tray
Load the paper with the print side facing down. For the procedure for printing, refer to the Printing System Driver User Guide.
Example: When printing the address.
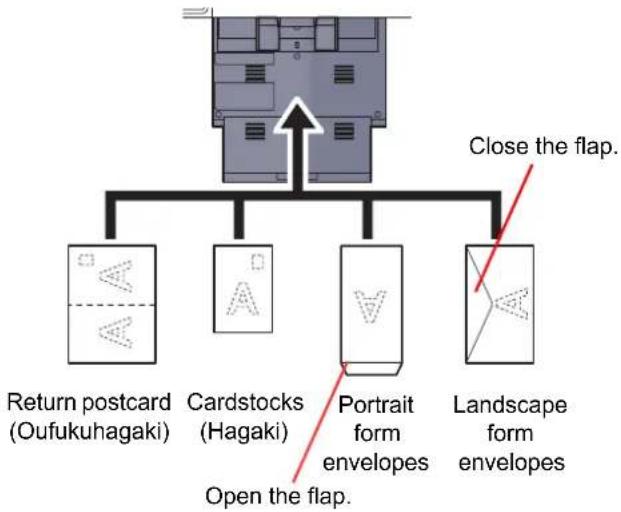
flowchart
graph TD
    A["Return postcard (Oufukuhagaki)"] --> B["Cardstocks (Hagaki)"]
    B --> C["Open the flap."]
    D["Portrait form envelopes"] --> E["Landscape form envelopes"]
    F["Close the flap."] --> A

IMPORTANT
- Use unfolded return postcard (Oufukuhagaki).
- How to load envelopes (orientation and facing) will differ depending on the type of envelope. Be sure to load it in correctly, otherwise printing may be done in the wrong direction or on the wrong face.

NOTE
When you load envelopes in the multi purpose tray, select the envelope type by referring to Specifying Paper Size and Media Type for the Multi Purpose Tray (MP Tray Setting) on page 3-33.
When you load index paper in the multi purpose tray
Load the paper with the print side facing down and the tab further side from the machine. For the procedure for printing, refer to the Printing System Driver User Guide.
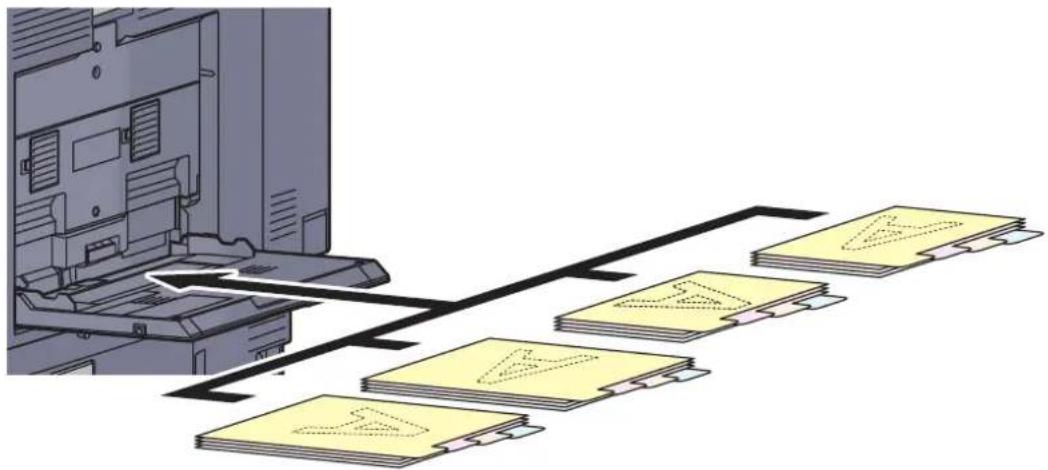
flowchart
graph TD
    A["Input"] --> B["Processing Unit"]
    B --> C["Output 1"]
    B --> D["Output 2"]
    B --> E["Output 3"]
    B --> F["Output 4"]
Index paper must meet the following conditions.
| Item Description | |
| Paper size A4/Letter | |
| Paper weight 136 to 256 g/m | ^2 |
| Number of tabs 1 to 15 | |
| Length of tabs 30 mm or less |
Paper stopper
To use the sheet ejection stopper, open as shown below. (Example: A3, B4, Ledger, Legal)
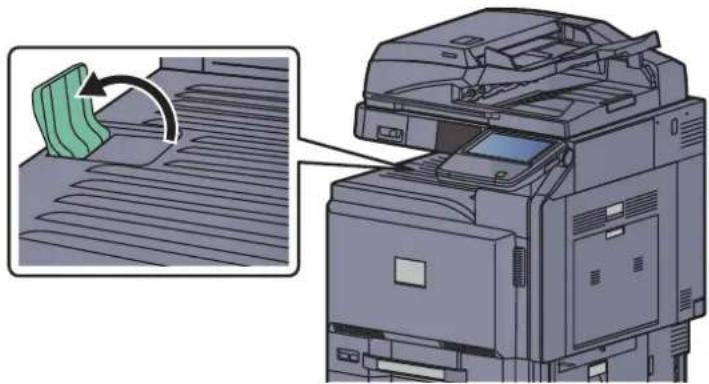
natural_image
Illustration of a printer with a green paper feed being inserted, showing the printer's internal structure and page layout (no text or symbols present)Specifying Paper Size and Media
The default paper size setting for cassettes 1 and 2, for the multi purpose tray and for the optional paper feeder (cassettes 3 to 5) is "Auto", and the default media type setting is "Plain".
To fix the type of paper to be used in cassettes, specify the paper size and media type setting. (Refer to Specifying Paper Size and Media Type for the Cassettes on page 3-30.) To fix the type of paper to be used in multi purpose tray, specify the paper size setting. (Refer to Specifying Paper Size and Media Type for the Multi Purpose Tray (MP Tray Setting) on page 3-33.)
Specifying Paper Size and Media Type for the Cassettes
To fix the type of paper to be used in cassettes 1 or 2 or the optional paper feeders (cassettes 3 to 5), specify the paper size. Also, if you use a media type other than plain paper, specify the media type setting.
| Selection Item Selectable Size/Type | ||
| Paper Size | Auto | Paper size is automatically detected and selected.Values: Metric, Inch |
| Standard Sizes 1*1 | Available options are as follows:Values:Metric models: A3, A4, A4-R, A5-R, B4, B5, B5-R, Folio, 216 x 340 mmInch models: Ledger, Letter, Letter-R, Legal, Statement, 12 x 18", Oficio II | |
| Standard Sizes 2*1 | Select from standard size except Standard Sizes 1.Values:Metric models: Ledger, Letter, Letter-R, Legal, Statement, 12 x 18", Oficio II, 8K, 16K, 16K-RInch models: A3, A4, A4-R, A5-R, B4, B5, B5-R, Folio, 216x340 mm, 8K, 16K, 16K-R | |
| Size Entry*2 | Enter a size not displayed in the standard sizes.Values:MetricX : 182 to 457 mm (in 1 mm increments),Y : 140 to 304 mm (in 1 mm increments),InchX : 7.17 to 18.00" (in 0.01" increments)Y : 5.51 to 12.00" (in 0.01" increments) | |
| Media type Select the media type. | Values: Plain (60 - 105 g/m2), Rough, Vellum (60 - 105 g/m2), Recycled, Preprinted*, Bond*, Color, Prepunched*, Letterhead*, Thick (106g/m2 or more)*4, High Quality, Custom 1 - 8*4 | |
*1 When using the optional Large Capacity Feeders (1,500-sheet x 2), you can only specify A4, Letter, or B5.
*2 Can be set when cassette 1 or cassette 2 is selected.
*3 To print on preprinted or prepunched paper or on letterhead, refer to Special Paper Action on page 8-12.
*4 To change to a media type other than Plain, refer to Media Type Setting on page 8-10. When the paper weight settings shown below are selected, the media indicated for each setting cannot be selected.
Rough: "Heavy 4" or "Heavy 5
Preprinted: "Heavy 4" or "Heavy 5"
Letterhead: "Heavy 4" or "Heavy 5"
Thick: "Heavy 4" or "Heavy 5"
Bond: "Heavy 4"
Custom 1 to 8: "Heavy 4", "Heavy 5", or "Extra Heavy"

NOTE
If the optional FAX kit is installed, the available media types for printing received faxes are as shown below.
Plain, Recycled, Bond, Vellum, Color, Thick, High Quality, Rough and Custom 1 to 8
Set the paper size of the cassette used for fax reception as follows:
Inch models: Press [Auto] and then [Inch].
Metric models: Press [Auto] and then [Metric].
If the above setting is changed, it will not be possible to print faxes.
1 Display the screen.
1 Press the [System Menu] key.
System Menu

2 Press [Cassette/MP Tray Settings].
2 Configure the settings.
1 In "Cassette Setting", select one of [Cassette 1] - [Cassette 5], and press [Next]. Then in "Paper Size", press [Change].
2 For automatic detection of the paper size, press [Auto] and select [Metric] or [Inch] as the unit. To select the paper size, press [Standard Sizes 1] or [Standard Sizes 2] and select the paper size.
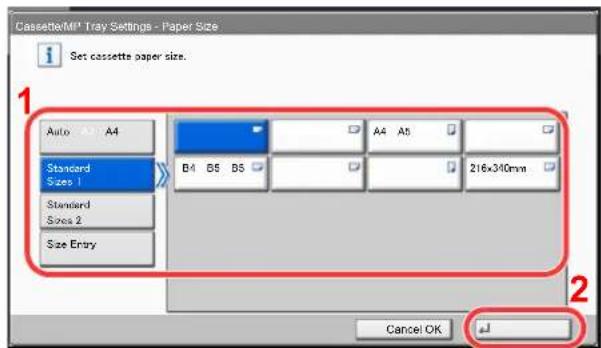
text_image
Cassette/Mi² Tray Settings - Paper Size Set cassette paper size. Auto A4 A4 Standard Sizes 1 Standard Sizes 2 Size Entry A4 A5 B4 B5 B6 216x340mm Cancel OKWhen cassette 1 or 2 is selected, a size not displayed in the standard sizes can be set.
Select [Size Entry], press [+], [-] to enter "X" (horizontal) and "Y" (vertical) dimensions. By pressing [# Keys], you can use the numeric keys.
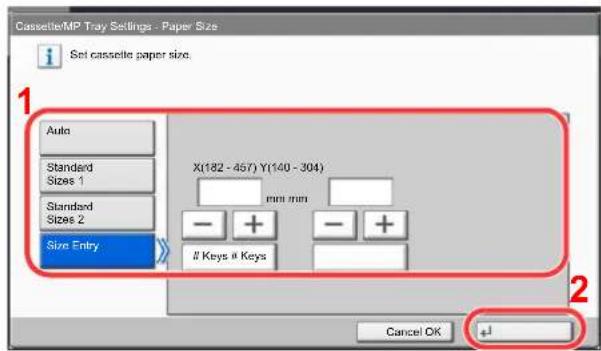
text_image
Cassette/MP Tray Settings - Paper Size Set cassette paper size. Auto Standard Sizes 1 Standard Sizes 2 Size Entry X(182 - 457) Y(140 - 304) mm mm - + - +Keys # Keys
Cancel OK +J
NOTE
[Cassette 3] to [Cassette 5] are shown when the optional paper feeder is installed.
3 Press [OK].
The previous screen reappears.
4 Press [Change] of "Media Type" to select the media type and press [OK].
![Utax 3555i - Press [OK]. - 1](/content/2026/05/780633/images/f0bf0aab21acb9582252e813499703810ffc8e59b0e58e4e257a9aa46473ee85.jpg)
text_image
Common Settings - Media Type Select type of paper in Cassette 1. 1 Rough Vellum PreprintedRecycled Bond Color LetterheadPrepunched Thick High Quality Custom 2Custom 1Custom 3 Custom 4 Custom 5 Custom 7Custom 8 Custom 8 Cancel OK 2Specifying Paper Size and Media Type for the Multi Purpose Tray (MP Tray Setting)
To fix the type of paper to be used in the multi purpose tray, specify the paper size. When using other than a plain paper, specify the media type.
| Item Description | ||
| Paper Size | Auto | Paper size is automatically detected and selected.Values: Metric, Inch |
| Standard Sizes 1 Available options are as follows:Values:Metric models: A3, A4, A4-R, A5-R, A6-R, B4, B5, B5-R, B6-R, Folio, 216 x 340 mmInch models: Ledger, Letter, Letter-R, Legal, Statement, Executive, 12x18", Oficio II | ||
| Standard Sizes 2 Select from the standard sizes *1 not included in Standard Sizes 1.Values:Metric models: Ledger, Letter, Letter-R, Legal, Statement, Executive, 12 x 18", Oficio II,8K, 16K, 16K-RInch models: A3, A4, A4-R, A5-R, A6-R, B4, B5, B5-R, B6-R, Folio, 8K, 16K, 16K-R, 216 x 340 mm | ||
| Others | Select from special standard sizes and custom sizes.Values: ISO B5, Envelope #10, Envelope #9, Envelope #6, Envelope Monarch,Envelope DL, Envelope C5, Envelope C4, Hagaki, Oufuku hagaki, Youkei4, Youkei2 | |
| Size Entry Enter a size | not displayed in the standard sizes.ValueMetricX: 148 to 457 mm (in 1 mm increments)Y: 98 to 304 mm (in 1 mm increments)InchX: 5.83 to 18.00" (in 0.01" increments)Y: 3.86 to 12.00" (in 0.01" increments) | |
| Media Type Select the media type. | Values: Plain (60 - 105 g/m2), Rough, Transparency, Vellum (60 - 105 g/m2), Labels, Recycled, Preprinted*2, Bond, Cardstock, Color, Prepunched*2,Letterhead*2, Envelope, Thick (106 g/m2 or more), Coated, High Quality,Index Tab Dividers*3, Custom 1-8 | |
*1 To change to a media type other than "Plain", refer to Media Type Setting on page 8-10.
*2 To print on preprinted or prepunched paper or on letterhead, refer to Special Paper Action on page 8-12.
*3 If you print from the printer driver, you can enter text on the tab. For details, refer to the Printing System Driver User Guide.

NOTE
If the optional FAX kit is installed, the available media types for printing received faxes are as shown below. Plain, Labels, Recycled, Bond, Vellum, Color, Coated, Cardstock, Envelope, Thick, High Quality, Rough and Custom 1 to 8
1 Display the screen.
1 Press the [System Menu] key.
System Menu
2 Press [Cassette/MP Tray Settings], [Next] of "MP Tray Setting", and then [Change] of "Paper Size".
2 Configure the settings.
1 For automatic detection of the paper size, press [Auto] and select [Metric] or [Inch] as the unit.
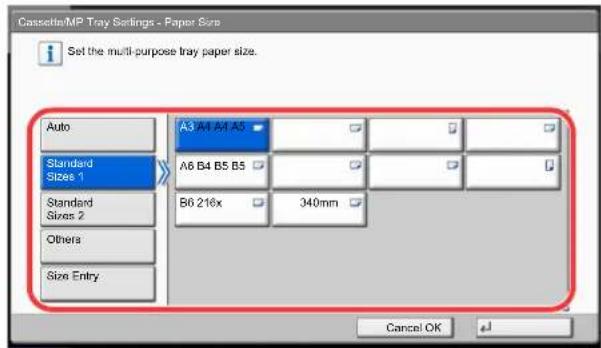
text_image
Cassette/MP Tray Settings - Paper Size Set the multi-purpose tray paper size. Auto Standard Sizes 1 A3 A4 A5 A5 A6 B4 B5 B5 B6 216x 340mm Standard Sizes 2 Others Size Entry Cancel OKTo select the paper size, press [Standard Sizes 1], [Standard Sizes 2], [Others] or [Size Entry] and select the paper size.
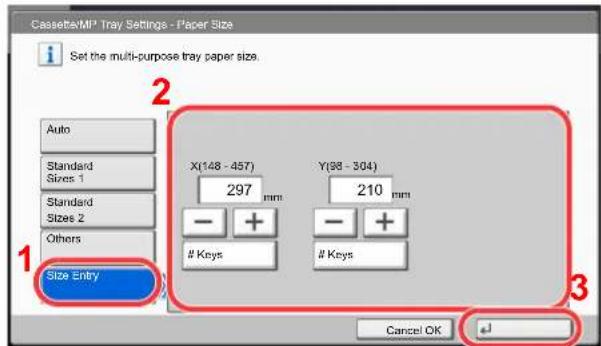
text_image
Cassette/MP Tray Settings - Paper Size Set the multi-purpose tray paper size. Auto Standard Sizes 1 Standard Sizes 2 Others Size Entry X(148 - 457) 297 mm Y(98 - 304) 210 mm - +Keys
#Keys
Cancel OKIf you select [Size Entry], press [+], [-] to enter "X" (horizontal) and "Y" (vertical) dimensions. By pressing [# Keys], you can use the numeric keys.
2 Press [OK].
The previous screen reappears.
3 Press [Change] of "Media Type" to select the media type and press [OK].
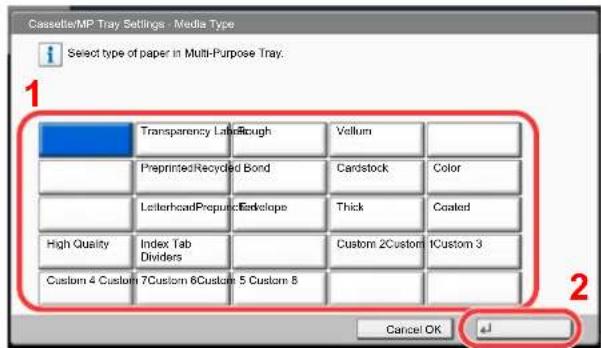
text_image
Cassette/MP Tray Settings - Media Type Select type of paper in Multi-Purpose Tray. 1 Transparency Labs/Rough Vellum Preprinted/Recycled Bond Cardstock Color Letterhead/Preprint/Endotope Thick Coated High Quality Index Tab Dividers Custom 2Custom 1Custom 3 Custom 4 Custom 7Custom 6Custom 5 Custom 8 Cancel OKPreparation for Sending a Document to a PC
Check the information that needs to be set on the machine and create a folder to receive the document on your computer. Screens of Windows 7 are used in the following explanation. The details of the screens will vary in other versions of Windows.

NOTE
Log on to Windows with administrator privileges.
Making a note of the computer name and full computer name
Check the name of the computer name and full computer name.
1 Display the screen.
From [Start] button on the Windows, select [Computer] and then [System Properties].
In Windows XP, right-click [My Computer] and select [Properties]. The [System Properties] dialog box appears. Click the [Computer Name] tab in the window that appears.
In Windows 8, select the desktop in the Start screen, right-click [Computer] from [Libraries], and then select [Properties].
2 Check the computer name.

text_image
Computer name, domain, and Computer names: PC001 Full computer name: PC001.abcnet.com Computer descriptions: Domains: abcnet Windows optimizationCheck the computer name and full computer name.
Screen example:
Computer name: PC001
Full computer name: PC001.abcdnet.com
Windows XP:
If the full computer name does not have a dot (.), the full computer name and the computer name are the same.
If the full computer name has a dot (.), the text string in front of the dot (.) in the full computer name is the computer name.
Example: PC001.abcdnet.com
PC001 is the computer name
PC001.abcdnet.com is the full computer name
After checking the computer name, click the [Close] button to close the
"System Properties" screen.
In Windows XP, after checking the computer name, click the [Cancel] button to close the "System Properties" screen.
Making a note of the user name and domain name
Check the domain name and user name for logging onto Windows.
1 Display the screen.
From [Start] button on the Windows, select [All Programs] (or [Programs]), [Accessories] and then [Command Prompt].
In Windows 8, display [Apps] on [Search] in charms on the Start screen, and select [Command Prompt].
The Command Prompt window appears.
2 Check the domain name and user name.
At the Command Prompt, enter "net config workstation" and then press [Enter].
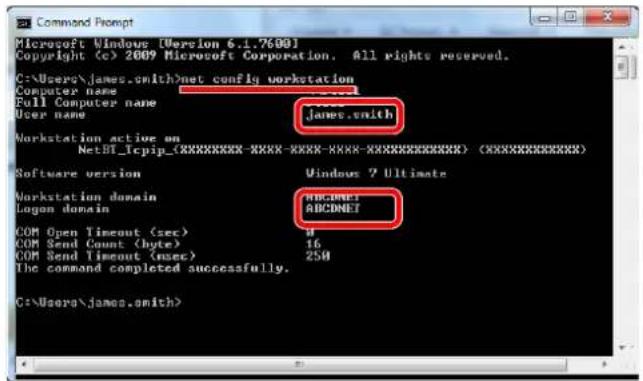
text_image
Microsoft Windows [Version 6.1.7600] Copyright (c) 2009 Microsoft Corporation. All rights reserved. C:\Users\james.smith>net config workstation Computer name Full Computer name User name James.smith Workstation active on NetBT_1cpip_(XXXXXXXX-XXXX-XXXX-XXXX-XXXXXXXX) (XXXXXXXX) Software version Windows 7 Ultimate Workstation domain Logan domain ABCDNET COM Open Timeout (sec) COM Send Count (byte) COM Send Timeout (msec) The command completed successfully. C:\Users\james.smith>Check the user name and domain name.
Screen example:
User Name: james.smith
Domain Name: ABCDNET
Creating a Shared Folder, Making a Note of a Shared Folder
Create a shared folder to receive the document in the destination computer.

NOTE
If there is a workgroup in System Properties, configure the settings below to limit folder access to a specific user or group.
1 From [Start] button on the Windows, select [Control Panel], [Appearance and Personalization], and then [Folder Options].
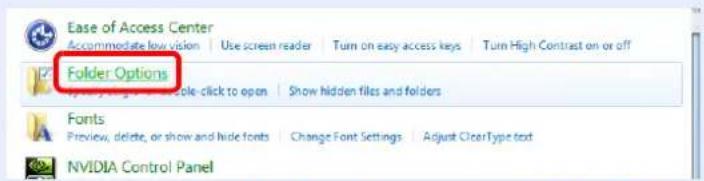
text_image
Ease of Access Center Accommoderate low vision | Use screen reader | Turn on easy access keys | Turn High Contrast on or off Folder Options Apply to a key button to open | Show hidden files and folders Fonts Preview, delete, or show and hide fonts | Change Font Settings | Adjust ClearType text NVIDIA Control PanelIn Windows XP, click [My Computer] and select [Folder Options] in [Tools].
In Windows 8, select [Settings] in charms on Desktop, and select [Control Panel], [Appearance and Personalization], and then [Folder Options].
2
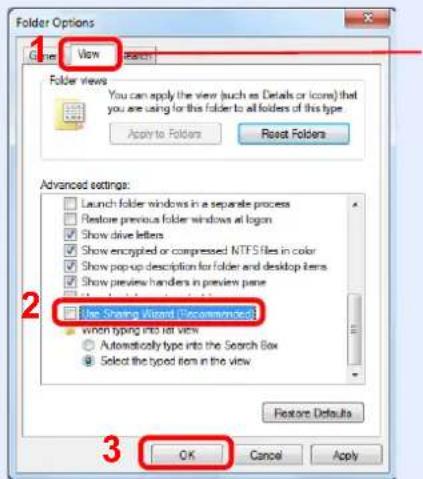
text_image
Folder Options View Folder views You can apply the view (such as Details or Icons) that you are using for this folder to all folders of this type. Apply to Folders Reset Folders Advanced settings: Launch folder windows in a separate process Restore previous folder windows at logon Show drive letters Show encrypted or compressed. NTFS files in color Show pop-up description for folder and desktop items Show preview handlers in preview pane Show Shoring Wizard Occumenced when typing into let view Automatically type into the Search Box Select the typed items in the view 3 OK Cancel ApplyMake sure that the [View] tab is selected.
Remove the checkmark from [Use Sharing Wizard (Recommended)] in "Advanced settings".
In Windows XP, click the [View] tab and remove the checkmark from
[Use Simple File Sharing (Recommended)] in "Advanced settings".
1 Create a folder.
1 Create a folder on your computer.
For example, create a folder with the name "scannerdata" on the desktop.
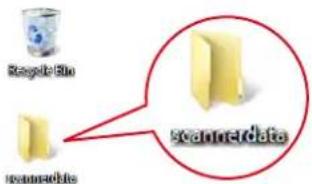
text_image
ScanerData ScanerData2 Right-click the "scannerdata" folder and click [Share] and [Advanced sharing]. Click the [Advanced Sharing] button.
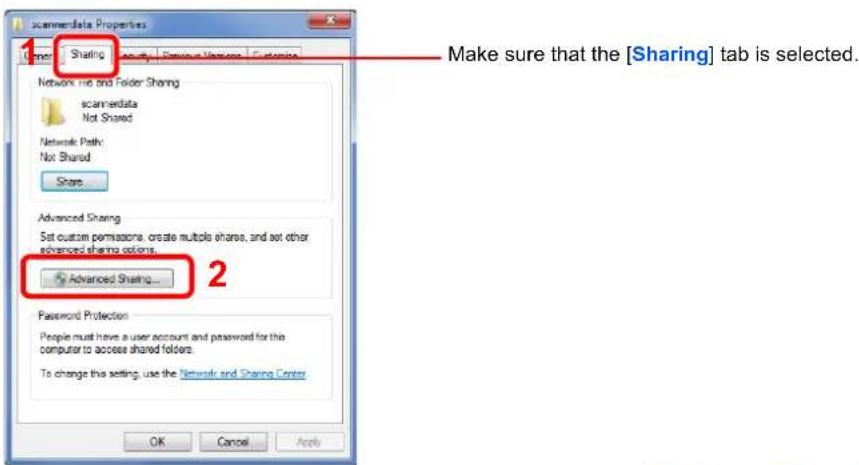
text_image
ScanernData Properties Share Network Path: Not Shared Share Advanced Sharing Set custom permissions, create multiple shares, and set other advanced sharing colors. Advanced Sharing... Password Protection People must have a user account and password for this computer to access shared folders. To change this setting, use the [Sharing] tab is selected. OK Cancel Apply Make sure that the [Sharing] tab is selected.In Windows XP, right-click the "scannerdata" folder and select [Sharing and Security] (or [Sharing]).
2 Configure permission settings.
1 Select the [Share this folder] checkbox and click the [Permissions] button.
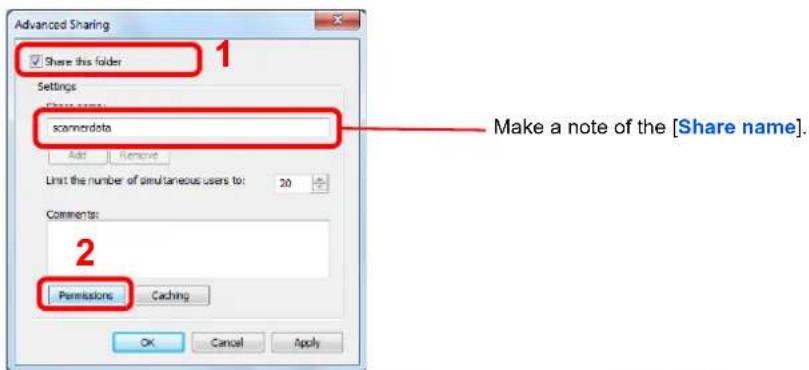
text_image
Advanced Sharing Share this folder Settings Scamordata Add Remove Limit the number of simultaneous users to: 20 Comments: 2 Permissions Caching OK Cancel Apply Make a note of the [Share name]In Windows XP, select [Share this folder] and click the [Permissions] button.
2 Click the [Add] button.
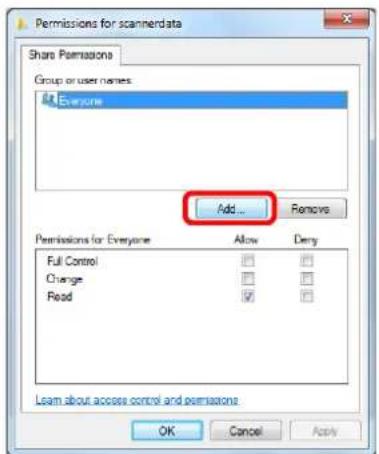
text_image
Permissions for scannerdata Share Permissions Group or user names Everyone Add... Remove Permissions for Everyone Allow Deny Full Control Change Read OK Cancel Apply Learn about access control and permissions3
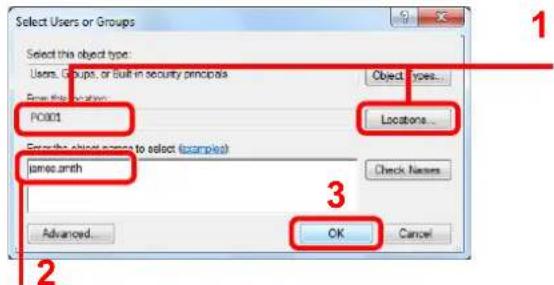
text_image
Select Users or Groups Select this object type: Users, Groups, or built-in security principals Object types... Enter the location: PO001 Locations... Every the object name to select (examples) Jamesarth Check Names Advanced... OK CancelEnter the user name that you made a note of on page Making a note of the user name and domain name on page 3-36 in the text box, and click the [OK] button.
If the computer name that you made a note of on page Making a note of the computer name and full computer name on page 3-35 is the same as the domain name: If the computer name is not shown in "From this location", click the [Locations] button, select the computer name, and click the [OK] button. Example: PC001
If the computer name that you made a note of on page Making a note of the computer name and full computer name on page 3-35 is not the same as the domain name: If the text after the first dot (.) in the full computer name that you made a note of does not appear in "From this location", click the [Locations] button, select the text after the dot (.), and click the [OK] button. Example: abcdnet.com
4
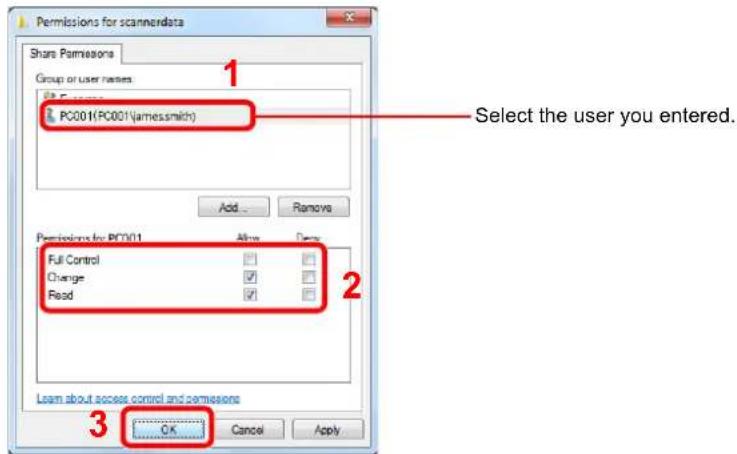
text_image
Permissions for scannerdata Share Permissions Group or user names PC001(PC001\ames.smith) Add... Remove Permissions for PC001 Full Control Change Read Select the user you entered. OK Cancel ApplySelect the [Allow] checkbox of the "Change" and "Read" permissions and press [OK]. In Windows XP, go to step 6.

NOTE
"Everyone" gives sharing permission to everyone on the network. To strengthen security, it is recommended that you select "Everyone" and remove the "Read" [Allow] checkmark.
5 Click the [OK] button in the "Advanced Sharing" screen to close the screen.
6
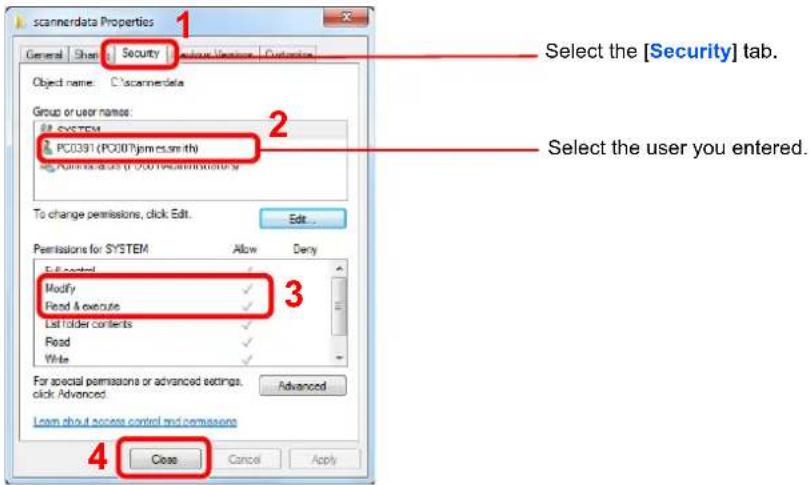
text_image
scatterdata Properties General Share Security Allow Version Customing Object name: C:\scannerdata Group or user name: PC0391 (PC0397\prom.csm.th) To change permissions, click Edit. Select the [Security] tab. Select the user you entered. Edit... Permissions for SYSTEM Allow Deny Edit control Modify Read & execute List folder contents Read Write For special permissions or advanced settings. click Advanced. Advanced Learn about access control and permissions Close Cancel ApplyMake sure that checkmarks appear on [Allow] checkbox for the "Modify" and "Read & execute" permissions, and click the [Close] button.
In Windows XP, make sure that checkmarks appear on [Allow] checkbox for the "Modify" and "Read & execute" permissions, and click the [OK] button.
Configuring Windows Firewall (for Windows 7)
Permit sharing of files and printers and set the port used for SMB transmission.

NOTE
Log on to Windows with administrator privileges.
1 Check file and printer sharing.
1 From [Start] button on the Windows, select [Control Panel], [System and Security], and [Allow a program through Windows Firewall].
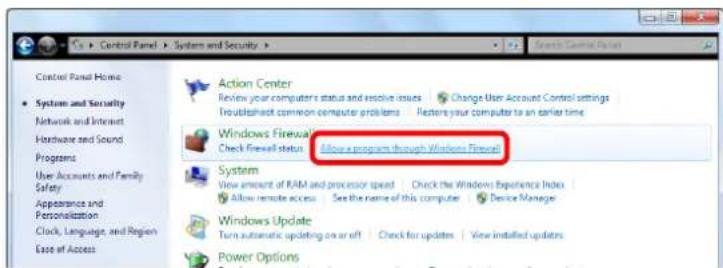
text_image
Control Panel Home System and Security Network and Internet Hardware and Sound Programs User Accounts and Family Safety Appearance and Personalization Clock, Language, and Region Ease of Access Action Center Review your computer's status and resolve issues Troubleshoot common computer problems Change User Account Control settings Resters your computer to an earlier time Windows Firewall Check Firewall status Allow a program through Windows Firewall System View amount of RAM and processor speed Check the Windows Experience Index Allow remote access See the name of this computer Device Manager Windows Update Turn automatic updating on or off Check for updates View installed updates Power Options
NOTE
If the User Account Control dialog box appears, click the [Continue] button.
2
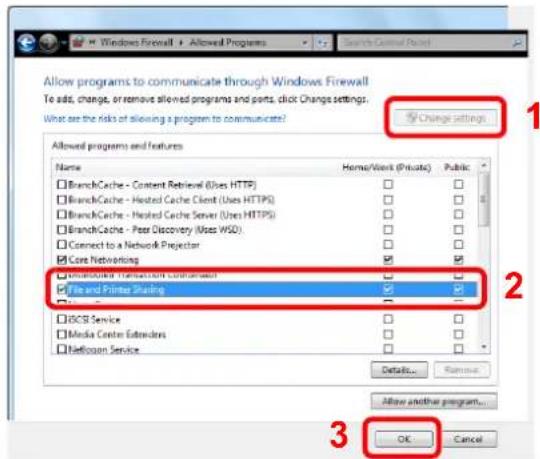
text_image
Allow programs to communicate through Windows Firewall To add, change, or remove allowed programs and parts, click Change settings. What are the risks of allowing a program to communicate? Change settings Allowed programs and features Name Home/Work (Private) Public BranchCache - Content Retrieval (Uses HTTP) □ □ BranchCache - Hosted Cache Client (Uses HTTPS) □ □ BranchCache - Hosted Cache Server (Uses HTTPS) □ □ BranchCache - Peer Discovery (Uses WSD) □ □ Connect to a Network Projector □ □ Core Networking ☑ ☑ Downloading (Repeated) confirmation □ □ File and Printer Sharing ☑ ☑ I2CST Service □ □ Media Center Extenders □ □ Helloogen Service □ □ Details... Romuse... Allow another program... OK CancelSelect the [File and Printer Sharing] checkbox.
2 Add a port.
1 From [Start] button on the Windows, select [Control Panel], [System and Security], and [Check firewall status].
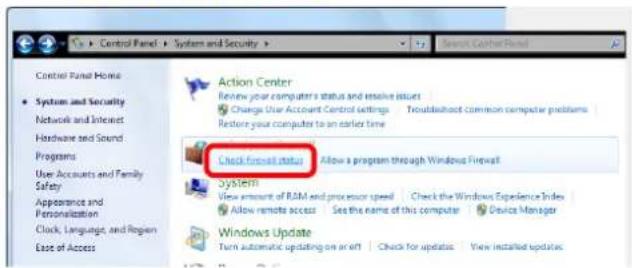
text_image
Control Panel Home • System and Security Network and Internet Hardware and Sound Programs User Accounts and Family Safety Appearance and Personalization Clock, Language, and Region Ease of Access Action Center Review your computer's status and resolve issues Charge User Account Control Settings Troubadshoot common computer problems Restore your computer to an earlier time Check firewall status Allow a program through Windows Firewall SYSTEM View amount of RAM and processor speed Check the Windows Experience Index Allow remote access See the name of this computer Device Manager Windows Update Turn automatic updating on or off Check for updates View installed updates2
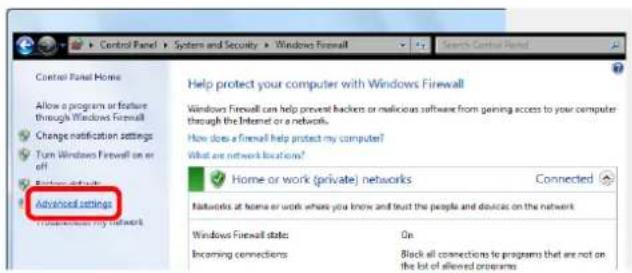
text_image
Control Panel Home Allow a program or feature through Windows Firewall Change notification settings Turn Windows Firewall on or off Windows Firewall Advanced settings Access to the network Help protect your computer with Windows Firewall Windows Firewall can help prevent hackers or malicious software from gaining access to your computer through the Internet or a network. How does a firewall help protect my computer? What are network locations? Home or work (private) networks Connected Networks at home or work where you know and trust the people and devices on the network Windows Firewall state On Incoming connections Black all connections to programs that are not on the list of allowed programs3
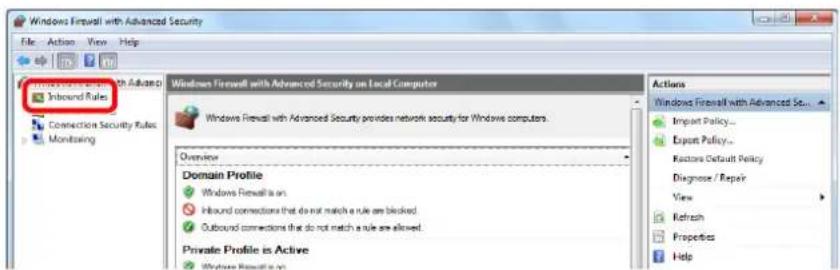
text_image
Windows Firewall with Advanced Security File Action View Help Inbound Rules Connection Security Rules Monitoring Windows Firewall with Advanced Security on Local Computer Windows Firewall with Advanced Security provides network security for Windows computers. Overview Domain Profile Windows Firewall is on. Inbound connections that do not match a rule are blocked. Outbound connections that do not match a rule are allowed. Private Profile is Active Windows Firewall is on Actions Windows Firewall with Advanced Security... Import Policy... Export Policy... Restore Default Policy Diagnose / Repair View Refresh Properties Help4
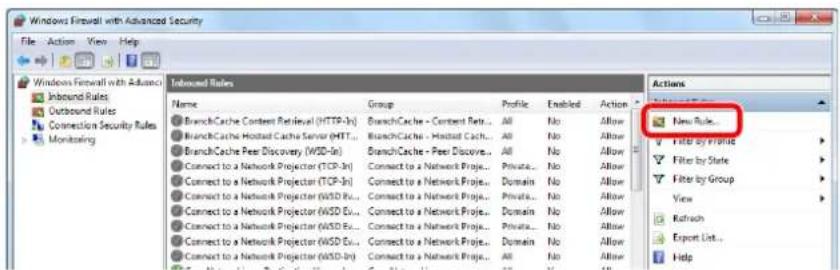
text_image
Windows Firewall with Advanced Security File Action View Help Inbound Rules Name Group Profile Enabled Action BranchCache Context Retrieval (HTTP-1s) BranchCache - Context Retra... All No Allow BranchCache Hostload Cache Server (HIT... BranchCache - Hostload Cache... All No Allow BranchCache Peer Discovery (WSD-1s) BranchCache - Peer Discover... All No Allow Connect to a Network Projector (TCP-1s) Connect to a Network Projector... Private... No Allow Connect to a Network Projector (TCP-1s) Connect to a Network Projector... Domain... No Allow Connect to a Network Projector (WSD Eu... Connect to a Network Projector (WSD Eu... Connect to a Network Projector (WSD Eu... Connect to a Network Projector (WSD Eu... Connect to a Network Projector (WSD Eu... Connect to a Network Projector (WSD Eu... Connect to a Network Projector (WSD Eu... New Rule... Filter by Profile Filter by State Filter by Group View Refresh Export List... Help5
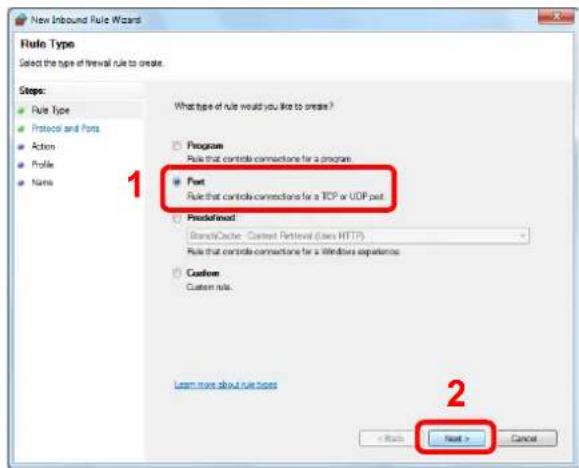
text_image
New Inbound Rule Wizard Rule Type Select the type of firewall rule to create. Steps: Rule Type Protocol and Ports Action Profile Name What type of rule would you like to create? Program Rule that controls connections for a program. Port Rule that controls connections for a TCP or UDP port Predefined Brand/Cycle: Context Retrieval (Uses HTTP) Rule that controls connections for a Windows Experience Custom Custom rule. Learn more about rule types Next > Cancel6
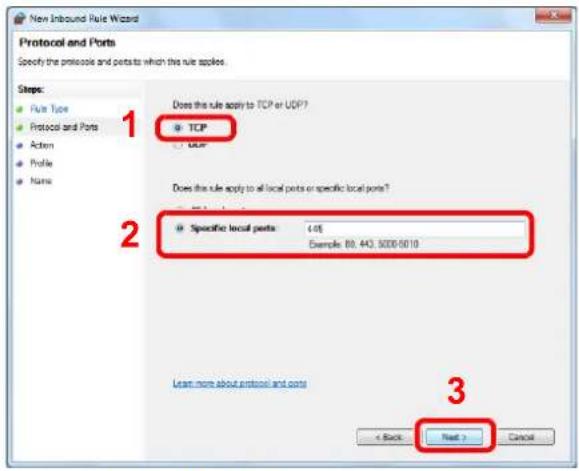
text_image
New Inbound Rule Wizard Protocol and Ports Specify the protocols and ports to which the rule applies. Steps: Rule Type Protocol and Ports Action Profile Name 1 Does this rule apply to TCP or UDP? TCP 2 Does this rule apply to all local ports or specific local ports? Specific local ports 4.05 Example: 80.443.5000-5010 3 Learn more about protocol and ports < Back Next > CancelSelect [Specific local ports], and enter "445".
7
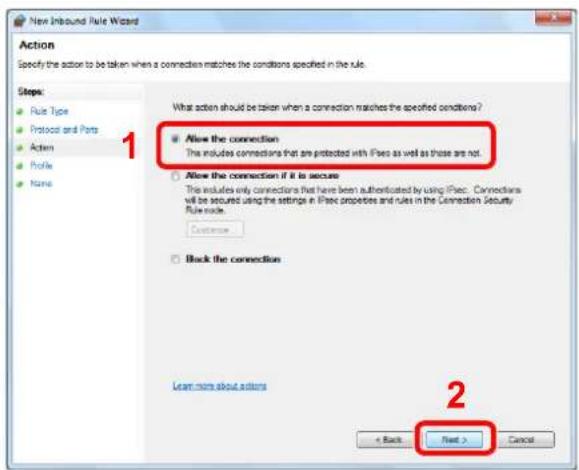
text_image
New Inbound Rule Wizard Action Specify the action to be taken when a connection matches the conditions specified in the rule. Steps: Rule Type Protocol and Port Acten Profile Name What action should be taken when a connection matches the specified conditions? Allow the connection The includes connections that are protected with iPiec as well as those are not. Allow the connection if it is secure This includes only connections that have been authenticated by using iPiec. Connections will be secured using the settings in iPiec properties and rules in the Connection Security Rule code. Customize Block the connection Learn more about actions < Back Next > Cancel8
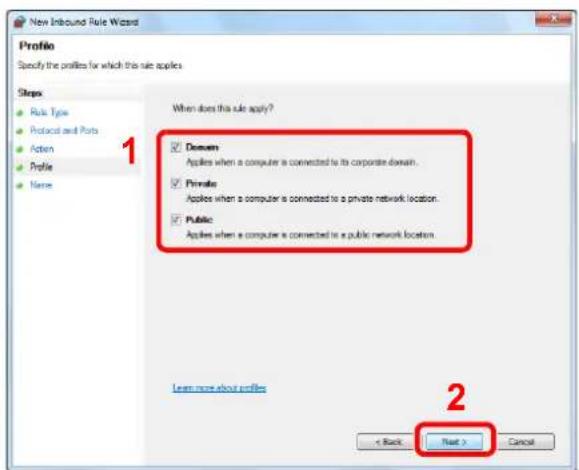
text_image
New Inbound Rule Wizard Profile Specify the profiles for which this role applies Steps Rule Type Protocol and Ports Action Profile Name When does this role apply? Domurn Applies when a computer is connected to its corporate domain. Private Applies when a computer is connected to a private network location. Public Applies when a computer is connected to a public network location. Learn more about profiles < Back Next > CancelMake sure all checkboxes are selected.
9
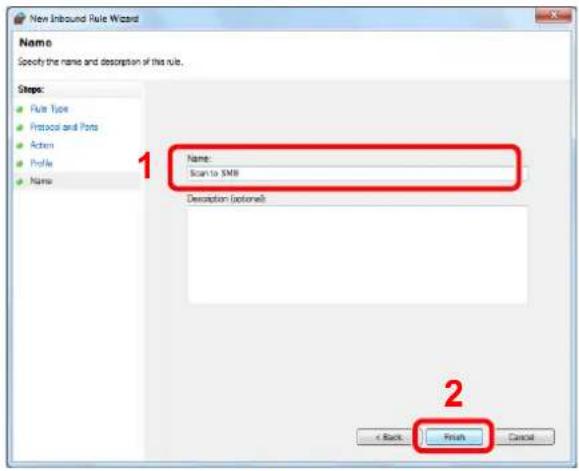
text_image
New Inbound Rule Wizard Name Specify the name and description of this rule. Steps: Rule Type Protocol and Port Action Profile Name 1 Name: Scan to SMR Description (option) 2 < Back Finish CancelEnter "Scan to SMB" in "Name" and click [Finish].
In Windows XP or Windows Vista
1 In Windows XP, from [Start] button on the Windows, select [Control Panel], and then [Windows Firewall].
In Windows Vista, from [Start] button on the Windows, select [Control Panel], [Security], and then [Turn Windows Firewall on or off].
If the User Account Control dialog box appears, click the [Continue] button.
2 Click the [Exceptions] tab and then the [Add port...] button.
3 Specify Add a Port settings.
Enter any name in "Name" (example: Scan to SMB). This will be the name of the new port. Enter "445" in "Port Number". Select [TCP] for "Protocol".
4 Click [OK] button.
In Windows 8
1 In charms on Desktop, click [Settings], [Control Panel], [System and Security], and then [Windows Firewall]. If the User Account Control dialog box appears, click the [Continue] button.
2 Configure the settings, refer to Configuring Windows Firewall (for Windows 7) on page 3-41.
Registering Destinations in the Address Book
Save frequently used destinations to the Address Book or One Touch Keys. The saved destinations can be changed. The destinations are available for Send as E-mail, Send to Folder, and Fax Transmission (optional).

NOTE
- Registering and editing of the Address Book can also be done in Embedded Web Server RX.

Registering Destinations (page 2-40)
Adding a Destination (Address Book)
Add a new destination to the Address Book. There are two registering methods, contacts and groups. When adding a group, enter the group name and select group members from the Address Book.

NOTE
If user login administration is enabled, you can only edit destinations in the Address Book by logging in with administrator privileges.
Contact
A maximum of 2,000 contact addresses can be registered. Each address can include the information such as destination name, E-mail address, FTP server folder path, computer folder path, and FAX No. (optional).
1 Display the screen.
1 Press the [System Menu] key.
System Menu
2 Press in the following sequence: [ ∨ ], [Edit Destination], [Add/Edit] in "Address Book", [Add], [Contact], and then [Next].
2 Add the name.
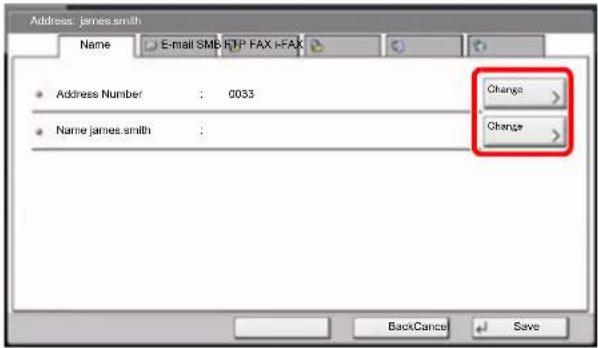
text_image
Address: james.smith Name E-mail SMB RTP FAX -FAX • Address Number : 0033 • Name james.smith : Change Change BackCancel Save1 To specify the "Address Number", press [Change] in Address Number.
2 Use [+] / [-] or the numeric keys to enter an address number (1 to 2500).
To have the number assigned automatically, enter "0000".

NOTE
Address Number is an ID for a destination. You can select any available number out of 2,000 numbers for contacts and 500 numbers for groups.
If you specify an address number that is already in use, an error message appears when you press [Save] and the number cannot be registered. If you set "0000" as the address number, the address is registered under the lowest available number.
3 Press [OK].
The screen shown in step 1 reappears.
4 Press [Change] of "Name".
5 Enter the destination name (up to 32 characters) to be displayed on the Address Book and press [OK].
The screen shown in step 1 reappears.

NOTE
Refer to the Character Entry Method on page 11-10 for details on entering characters.
3 Add the address.
1 Press [E-mail] to add an E-mail address, [SMB] to add a folder on the PC, or [FTP] to add an FTP folder.
The procedure differs depending on the transmission method selected.
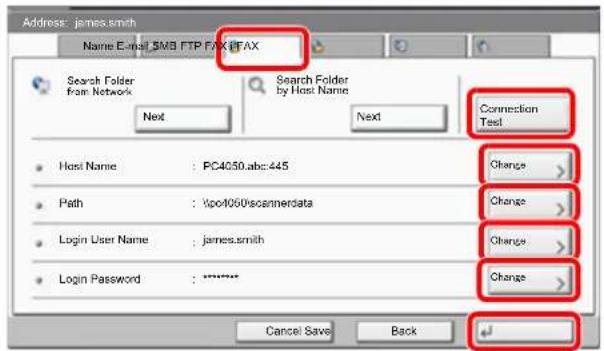
text_image
Address: james.smith Name E-mail: $MB FTP FAX@FAX Search Folder from Network Next Search Folder by Host Name Next Connection Test Host Name : PC4050.abc:445 Path : \ipo4060scanmerdata Login User Name : james.smith Login Password : ***** Change > Change > Change > Change > Cancel Save BackE-mail Address
Press [Change] of "E-mail Address", enter the E-mail address and press [OK]. The table below explains the items to be entered.

NOTE
Refer to the Character Entry Method on page 11-10 for details on entering characters.
The Folder (SMB) Address
Press [Change] of "Host Name", "Path", "Login User Name" and "Login Password", enter the information for each item and press [OK].
The table below explains the items to be entered.

NOTE
For the computer name, share name, domain name, and user name, enter the information that you noted when you created the shared folder. For details on creating shared folders, refer to Preparation for Sending a Document to a PC on page 3-35.
| Item Description | Max. No. of Characters |
| Host Name* Computer name Up to | 64 characters |
| Path Share nameFor example: scannerdataIf saving in a folder in the shared folder:"share name\folder name in shared folder" | Up to128 characters |
| Login User Name If the computer name and domain name are the same:User NameFor example: james.smithIf the computer name and domain name are different:Domain name\User nameFor example: "abcdnet\james.smith" | Up to64 characters |
| Login Password Windows logon password(Case sensitive.) | Up to64 characters |
* To specify a port number different from the default (445), enter using the format
"Host name: port number" (Example: SMBhostname:140).
To enter the IPv6 address, enclose the address in brackets [].
(Example: [3ae3:9a0:cd05:b1d2:28a:1fc0:a1:10ae]:140)
To search for a folder on a PC on the network, press [Next] of "Search Folder from Network" or "Search Folder by Host Name".
If you selected "Search Folder from Network", you can enter the "Domain/Workgroup", and "Host Name" to search PCs on the network for the destination.
If you pressed "Search Folder by Host Name", you can search all PCs on the network for a destination.
A maximum of 500 addresses can be displayed. Select the host name (PC name) that you want to specify in the screen that appears, and press [Next]. The login user name and login password entry screen appears.

NOTE
Refer to the Character Entry Method on page 11-10 for details on entering characters.
Press [Connection Test] to check the connection to the server you chose. If the connection fails, check the entries you made.
2 Check if the destination entry is correct and press [Save]. The destination is added to the Address Book.
To register the registered address in a one-touch key, press [Yes] in the pop-up screen that appears after [Save] is pressed.

NOTE
To register a new One Touch Key, refer to Adding a Destination on One Touch Key (One Touch Key) on page 3-53.
The Folder (FTP) Address
Press [Change] of "Host Name", "Path", "Login User Name" and "Login Password", enter the information for each item and press [OK].
The table below explains the items to be entered.
| Item Descriptions | Max. No. of Characters | |
| Host Name* Host name | or IP address of FTP server Up to | 64 characters |
| Path Path for the file to be storedFor example, "User\ScanData".If no path is entered, the file is stored in the home directory. | Up to128 characters | |
| Login User Name FTP | server login user name Up to | 64 characters |
| Login Password FTP | server login password Up to | 64 characters |
* If you specify a port number other than the default (21), use the "Host name: port number" (Example: FTPhostname:140).
To enter the IPv6 address, enclose the address in brackets [ ].
(Example: [3ae3:9a0:cd05:b1d2:28a:1fc0:a1:10ae]:140)

NOTE
• Refer to the Character Entry Method on page 11-10 for details on entering characters.
- Press [Connection Test] to check the connection to the FTP server you chose. If the connection fails, check the entries you made.
Group
Compile two or more contacts into a group. Designations in the group can be added at the same time. When adding a group, a maximum of 500 groups can be added in the Address Book.

NOTE
To add a group, you need individually added destinations. Register one or more individual destinations as needed before proceeding. Up to 100 destinations for the E-mail, 500 destinations for the FAX, and a total of 10 destinations for the FTP and SMB can be registered per group.
1 Display the screen.
1 Press the [System Menu] key.
System Menu

2 Press [ ] Edit Destination], [Add/Edit] of "Address Book", [Add], [Group]; and then [Next].
2 Add the name.

text_image
Address: ABCABC Name Member • Address Number : 0022 • Name : ABCABC Change > Change > Cancel Save Back1 To specify the "Address Number", press [Change] in Address Number.
2 Use [+] / [-] or the numeric keys to enter an address number (1 to 2,500). To have the number assigned automatically, set "0000".

NOTE
Address Number is an ID for a group. You can select any available number out of 2,000 numbers for contacts and 500 numbers for groups. If you specify an address number that is already in use, an error message appears when you press [Save] and the number cannot be registered. If you set "0000" as the address number, the address is registered under the lowest available number.
3 Press [OK]. The "Add Group" screen reappears.
4 Press [Change] of "Name".
5 Enter the group name displayed on the Address Book not more than 32 characters and press [OK].
3 Select the members (destinations).
1 Press [Member] and then [Add].
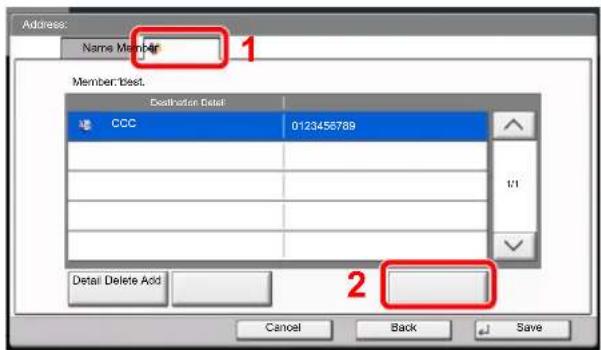
text_image
Address: Name Member 1 Member best. Destination Date: CCC 0123456789 1/1 Detail Delete Add Cancel Back Save2 Select destinations (contacts) to add to the group.

NOTE
Destinations can be sorted or searched by destination name or address number. For details, refer to Specifying Destination on page 5-26.
3 Press [OK].
If you have more destinations to add, repeat Steps 2 to 4.
4 Check if the selected destination was added to the group and press [Save]. Now the group is added to the Address Book.
To register the registered address in a one-touch key, press [Yes] in the pop-up screen that appears after [Save] is pressed.

NOTE
To register a new One Touch Key, refer to Adding a Destination on One Touch Key (One Touch Key) on page 3-53.
Editing and Deleting Address Book Entries
Edit and delete the destinations (contacts) you added to the Address Book.
1 Display the screen.
1 Press the [System Menu] key.
System Menu

2 Press [ ], Edit Destination] and then [Add/Edit] of "Address Book".
3 Select a destination or group to edit.

NOTE
Destinations can be sorted or searched by destination name or address number. For details, refer to Specifying Destination on page 5-26.
4 Press [Detail].
The procedure differs depending on the details to be edited.
2 Edit or delete a favorite.
Editing a Contact
1 Change "Address Number", "Name" and destination type and address. Refer to Contact on page 3-45 for the details.
2 After you have completed the changes, press [Save].
3 Press [Yes] in the change confirmation screen to register the changed destination.
Editing a Group
1 Change "Address Number" and "Name". Refer to Group on page 3-50 for the details.
2 Press [Member].
3 To delete any destination from the group, select the destination and press [Delete]. Press [Yes] on the screen to confirm the deletion.
To add the destination, press [Add].
4 After you have completed the changes, press [Save].
5 Press [Yes] in the change confirmation screen to register the changed group.
Deleting a Contact or Group
Press [Delete]. Press [Yes] on the screen to confirm the deletion.
Adding a Destination on One Touch Key (One Touch Key)
One Touch Key Add a new destination (contact or group). A maximum of 1,000 destinations can be registered.

NOTE
- Refer to Specifying Destination on page 5-26 for use of One Touch Key.
- You can add One Touch keys and change their settings on Embedded Web Server RX.

Registering Destinations (page 2-40)
1 Display the screen.
1 Press the [System Menu] key.
System Menu

2 Press in the following sequence: [ √ ], [Edit Destination], and then [Add/Edit] in "One Touch Key".
2 Add One Touch Keys.
1 Select a One Touch Key number (0001 to 1000) for the destination, and press [Add/Edit]. Pressing [Quick No. Search] key or [No.] enables direct entry of a One Touch Key number. Select a One Touch Key with no registered destination.
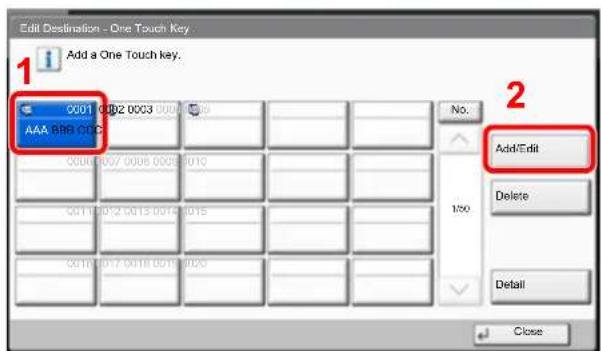
text_image
Edit Destination - One Touch Key 1 Add a One Touch key. No. Add/Edit Delete Detail Close2 Press [Change] of "Display Name".
3 Enter the One Touch Key name (up to 24 characters) displayed in the send base screen, and press [OK].

NOTE
Refer to the Character Entry Method on page 11-10 for details on entering characters.
4 Press [Change] of "Destination". The address book appears.
5 Select a destination (contact or group) to add to the One Touch Key number, and press [OK]. Pressing [Detail] shows the detailed information of the selected destination.

NOTE
Destinations can be sorted or searched by destination name or address number. For details, refer to Specifying Destination on page 5-26.
6 Press [Save].
The destination will be added to the One Touch Key.
Editing and Deleting One Touch Key
Edit/delete the destinations you added to One Touch Key.
1 Display the screen.
1 Press the [System Menu] key.
System Menu

2 Press [ ∨ ], [Edit Destination] and then [Add/Edit] of "One Touch Key".
3 Select a One Touch Key number (0001 to 1000) for the destination.
Pressing [Quick No. Search] key or [No.] enables direct entry of a One Touch Key number.
The procedure differs depending on the details to be edited.
2 Edit and delete the destinations you added to One Touch Key.
Changing the Registered Information
1 Press [Add/Edit].
2 Select a new destination (Contact or group). Pressing [Detail] shows the detailed information of the selected destination.

NOTE
Destinations can be sorted or searched by destination name or address number. For details, refer to Specifying Destination on page 5-26.
3 Press [OK].
4 Press [Yes] on the screen to add the destination to the One Touch Key.
Deleting the Registered Information
1 Press [Delete].
2 Press [Yes] on the screen to confirm the deletion of the data registered in the One Touch Key.
4 Printing from PC
This chapter explains the following topics:
Printing from PC 4-2
Printer driver print settings screen 4-5
Printer Driver Help 4-6
Changing the default printer driver settings (Windows 7) 4-6
Canceling printing from a computer 4-6
Banner printing 4-7
Printing Data Saved on the Printer 4-14
Private Print/Stored Job 4-14
Quick Copy/Proof and Hold 4-16
Printing from PC
Follow the steps below to print documents from applications.

NOTE
• To print the document from applications, install the printer driver on your computer from the supplied DVD (Product Library).
- In some environments, the current settings are displayed at the bottom of the printer driver.
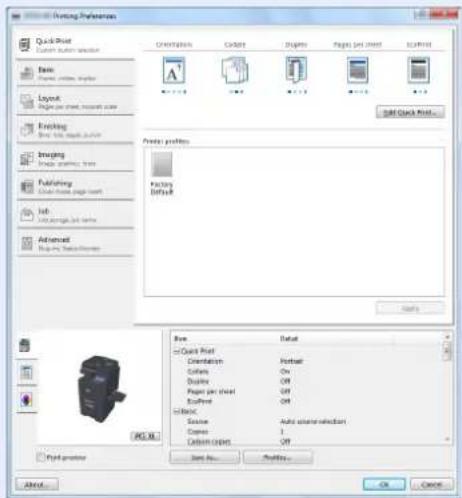
text_image
Drawing Preferences Quick Print Custom Sub-Section Name: Pure format: print Layout Page per sheet, output size Smiling New file, new output Smiling Preview profiles Packing Details Raw Default Quick Print Orientation Portrait Colors On Displays Off Pages per sheet Off EcoPrint Off Basic Squeeze Auto transformation Cabinet 1 Custom Paper Off Print profile Save As... Finish... OK Cancel- When printing the cardstock or envelopes, load the cardstock or envelopes before performing the following procedure.
(Refer to When you load envelopes or cardstock in the multi purpose tray on page 3-28.)
1 Display the screen.
Click [File] and select [Print] in the application.
2 Configure the settings.
1 Select the machine from the "Name" menu and click the [Properties] button.
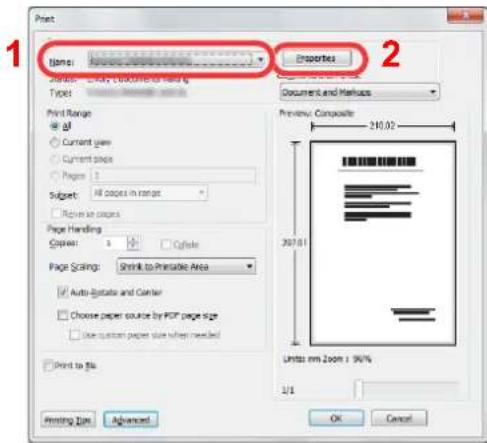
text_image
Print 1 Name: www-valueprint.com Properties 2 Print Range ● All ○ Current page ○ Current page ○ Page 1 Subject: All pages in range ○ Pages in pages Page Handling Cyper: 1 ○ Cylicate Page Scaling: Shrink to Printable Area □ Auto-Batchrate and Center □ Choose paper source by PDF page size □ Use print paper size when needed □ Print to file Printing Opt Advanced Preview: Composite 240.02 397.01 Units mm Zoom : 96% 1/1 OK Cancel2 Select the [Basic] tab.
3 Click "Print size" menu and select the paper size to use for printing.
To load the paper of size that is not included in print sizes of the machine such as cardstock or envelopes, the paper size needs to be registered.

Registering the Original Size (page 4-3)
To print on the special paper such as thick paper or transparency, click "Media type" menu and select the media type.
When a document length from 470.1 mm (18.51") to a maximum of 1220.0 mm (48") is specified for printing, the print job is treated as banner printing.

Banner printing (page 4-7)
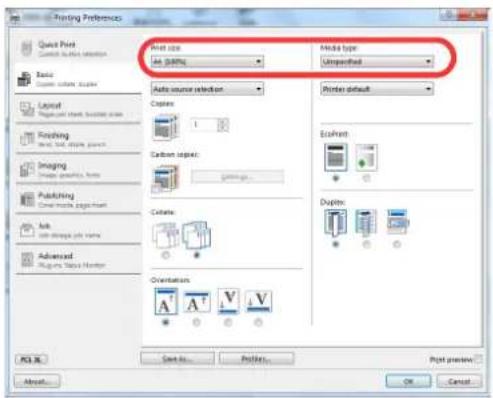
text_image
Printing Preferences Quick Print Control buttons selection Auto Current buttons: double Layout Images on left, bottom left Fishing View text, image view Imaging Images properties: info Publishing Show icons, image chart Job Show icons job name Advanced Rules Status History Print size An size: Media type Unspeeded Auto source selection Copies: 100% Carbon source: Gelons... Centers: Orientation: A A' V V Print default EcoPrint Duplex: PCB ML Start to... Finish... Print preview... OK Cancel4 Click [OK] button to return to the Print dialog box.
3 Start printing.
Click the [OK] button.
Registering the Original Size
If you loaded a paper size that is not included in the print sizes of the machine, register the paper size in the [Basic] tab of the print settings screen of the printer driver.
The registered size can be selected from the "Print size" menu.

NOTE
To execute printing at the machine, set the paper size and type in Specifying Paper Size and Media Type for the Cassettes on page 3-30.
1 Display the print settings screen.
2 Register the paper size.
1 Click the [Basic] tab.
2 Select [Custom] in the "Print size" menu.
3 Click the [New] button.
4 Enter the name of the paper.
5 Enter the paper size.
When a document length from 470.1 mm (18.51") to a maximum of 1220.0 mm (48") is specified for printing, refer to Banner printing on page 4-7.
6 Click the [OK] button.
7 In the "Print size" menu, select the paper size (name) that you registered in steps 4 to 7.
8 Click [MP tray] in the "Source" menu.
9 Select the type of paper in the "Media type" menu.
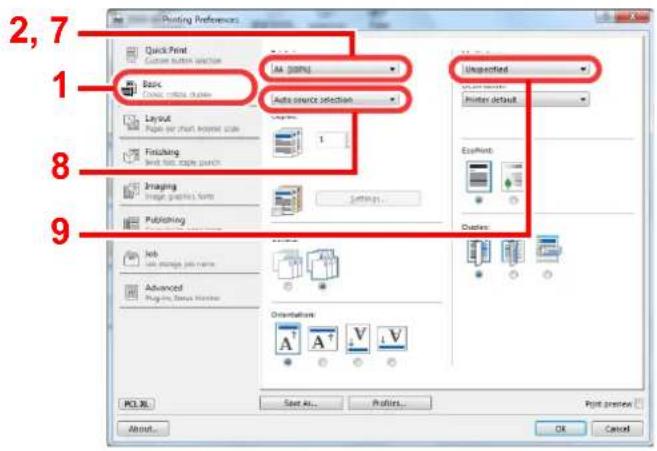
text_image
2,7 1 Quick Print Auto insert selection Auto insert selection Unspecified Printer default Layout 1 Fixing Options... Printing Publishing Web Auto insert jobs name Advanced Playing Tools Window Orientation A A V V PC XL Start All... Printers... Print preview About... OK Cancel
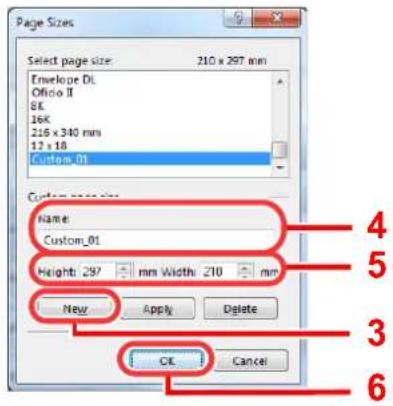
text_image
Page Sizes Select page size: 210 x 297 mm Envelope DL Oficio II 8K 16K 216 x 340 mm 12 x 18 Custom_01 Name: Custom_01 Height: 297 mm Width: 210 mm New Apply Delete OK Cancel
NOTE
- If you loaded a postcard or envelope, select [Cardstock] or [Envelope] in the "Media type" menu.
- To select the 4,000-sheet Finisher tray or 1,000-sheet Finisher tray for the output tray when printing envelopes, select the following:
4,000-sheet Finisher
| Print paper size Output tray | |
| Envelopes other than Envelope C4 Tray | C (facedown) |
| Envelope C4 Tray B (facedown) |
1,000-sheet Finisher
| Print paper size Output tray |
| All envelopes Finisher Top Tray (facedown) |
Printer driver print settings screen
The printer driver print settings screen allows you to configure a variety of print-related settings. For more information, refer to the Printing System Driver User Guide on the DVD.
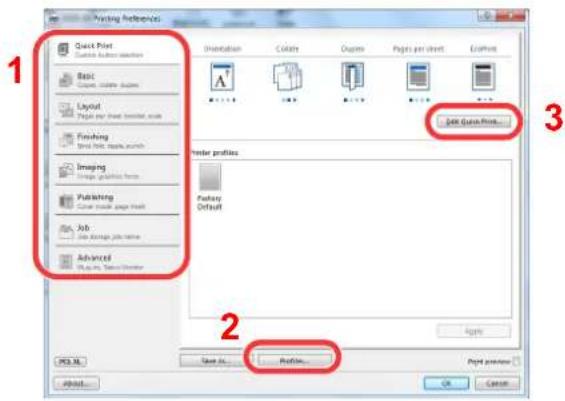
text_image
1 Quick Print 2 Basic Page 1.0 (Layer 1) Layout Page 1.0 (Layer 1) Flanking New Print, double print Imaging Image graphics forms Publishing Cover inside page print Job File Storage Practice Advanced View in: Textile Director 3 Insert Quick Print... 2 Preview Default Copy... Print preview... OK CancelNo. Description
1
[ Quick Print] tab
Provides icons that can be used to easily configure frequently used functions. Each time you click an icon, it changes to an image resembling the print results and applies the settings.
![Utax 3555i - [ Quick Print] tab - 1](/content/2026/05/780633/images/6006ab1b5c3ac2ff9f1519e380486073c2e164122f5999ff626f32a1286bbd61.jpg)
text_image
Printing references Quick Print Insert: New Text Basic New text styles Layout New text style Orientation Coliate Duplex Fages per sheet ExcelPrint[Basic] tab
This tab groups basic functions that are frequently used. You can use it to configure the paper size, destination, and duplex printing.
[Layout] tab
This tab lets you configure settings for printing various layouts, including booklet printing, combine mode, poster printing, and scaling.
[Finishing] tab
This tab lets you configure settings related to finishing of printed media, including binding and stapling.
[Imaging] tab
This tab lets you configure settings related to the quality of the print results.
[Publishing] tab
This tab lets you create covers and inserts for print jobs and put inserts between sheets of OHP film.
[Job] tab
This tab lets you configure settings for saving print data from the computer to the machine. Regularly used documents and other data can be saved to the machine for easy printing later. Since saved documents can be printed directly from the machine, this function is also convenient when you wish to print a document that you don't want others to see.
[Advanced] tab
This tab lets you configure settings for adding text pages or watermarks to print data.
2
[Profiles]
Printer driver settings can be saved as a profile. Saved profiles can be recalled at any time, so it's a convenient practice to save frequently used settings.
3
[ Reset]
Click to revert settings to their initial values.
Printer Driver Help
The printer driver includes Help. To learn about print settings, open the printer driver print settings screen and display Help as explained below.
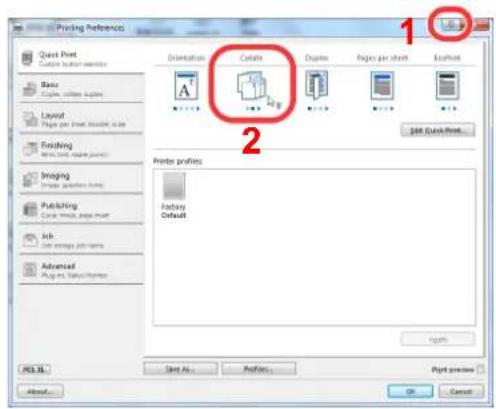
text_image
Drawing References Quest Print Customs (color)... Basic Image colors image Layout Page per sheet, double, to be Enabling New (New Image) color Imaging Image colors form Publishing Core image, copy text Job Sub-merge file name Advanced Images status/Properties Presentation profiles Factory Default Print preview Start As... Finish... OK Cancel PCB XL About...- Click the [?] button in the upper right corner of the screen and then click the item you want to know about.
- Click the item you want to know about and press the [F1] key on your keyboard.
Changing the default printer driver settings (Windows 7)
The default printer driver settings can be changed. By selecting frequently used settings, you can omit steps when printing. For the settings, refer to Printing System Driver User Guide.
1 Click [Start] button on the Windows, and then click [Devices and Printers].
2 Right-click the printer driver icon of the machine, and click the [Printer properties] menu of the printer driver.
3 Click the [Basic] button on the [General] tab.
4 Select the default settings and click the [OK] button.
Canceling printing from a computer
To cancel a print job executed using the printer driver before the printer begins printing, do the following:

NOTE
When canceling printing from this machine, refer to Canceling Jobs on page 5-18.
1 Double-click the printer icon ( ) displayed on the taskbar at the bottom right of the Windows desktop to display a dialog box for the printer.
2 Click the file for which you wish to cancel printing and select [Cancel] from the "Document" menu.
Banner printing
When a document length from 470.1 mm (18.51") to a maximum of 1220.0 mm (48") is specified for printing, the print job is treated as banner printing.
| Max. number of sheets | 1 sheet (manual feed), 10 sheets (when optional banner tray is attached*) |
| Paper width 210 to 304.8 mm (8.26" to 12") | |
| Paper length Max. 1220 mm (48") | |
| Paper weight 136 to 163 g/m ^2 | |
| Media type Heavy 2 | |
* When the banner tray (option) is used, up to 10 sheets of banner paper can be fed continuously. (Refer to Using the Banner Tray (Option) on page 4-10.)
Follow the steps below to set banner paper in the printer driver.
1 Display the screen for registering the original size.

text_image
Print reference 1 2 Print size: All (50%) Media type: Unspecified Destinations: Printer default New New source image Auto source selection Copies Carbon copies: Settings1 Click the [Basic] tab.
2 Select [Custom] in the "Print size" menu.
2 Register the original size.
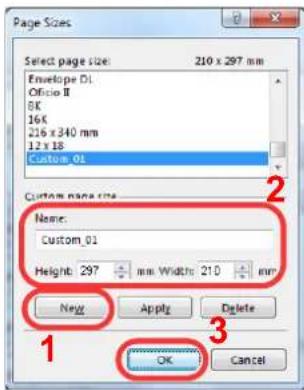
text_image
Page Sizes Select page size: 210 x 297 mm Envelope DI: Oficio II 8K 16K 216 x 340 mm 12 x 18 Custom_01 Custom page site Name: Custom_01 Height: 297 mm Width: 210 mm New Apply Delete OK Cancel1 Click the [New] button.
2 Enter the name, length (470.1 mm (18.51") or longer), and width of the custom paper size being registered.
3 Click the [OK] button.
3 Setting the print paper size.
1 Select the custom paper size that you registered in the "Print size" menu.
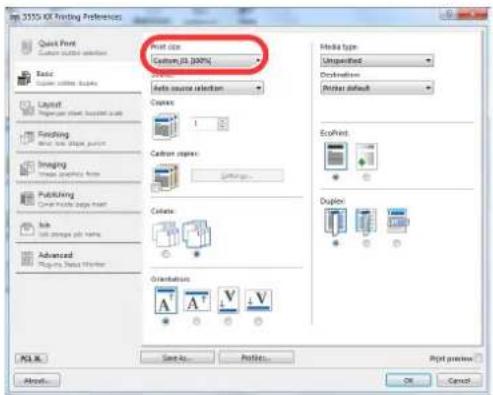
text_image
Print 3550 XO Printing Preferences Print size Custom J1 (100%) Auto source selection Copies Carbon copies: Catalents Orientation Print size Print type: Unspecified Destination: Printer default EcoPrint Duplex Print version... Print... About... OK Cancel2 Click the [OK] button.

NOTE
When KPDL is used for "PDL" Settings of the printer driver, a length setting of 470.5 mm (18.53") or longer is handled as banner print.
When you execute printing in this case, a message appears on the machine's operation panel. Place the paper in the multipurpose tray, continue to support it so that it does not fall, and press [Continue]. To cancel printing, press [Cancel].
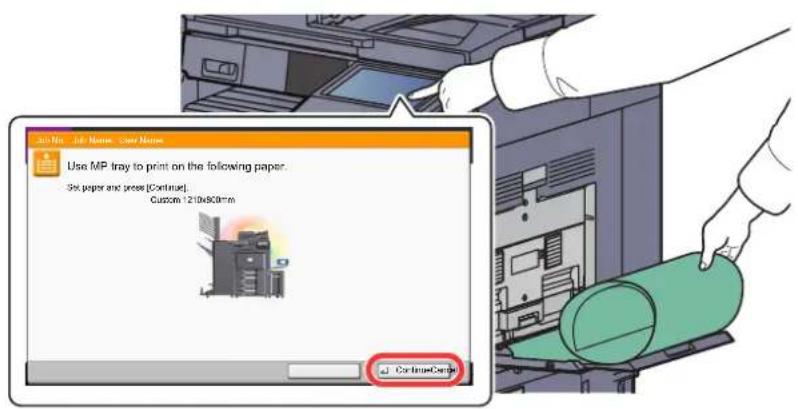
text_image
Job No Job Name User Name Use MP tray to print on the following paper: 3x paper and press [Continue] Custom 1210x800mm ContinueCard
IMPORTANT
If an output tray that cannot be used for banner printing such as Mailbox (option) is selected in the printer driver, the output tray automatically changes to a tray that can be used.
To print on multiple sheets using the multi purpose tray, place each sheet after the previous sheet is printed, and press [Continue].
After pressing [Continue], support the paper with both hands so that it feeds in correctly.
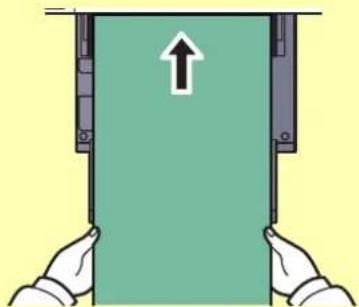
natural_image
Illustration of hands holding a green rectangular object with an upward arrow, no text or symbols presentAfter printing starts, catch the paper when it is output so that it does not fall. When using the inner tray as the output location, do not stand up the stopper.
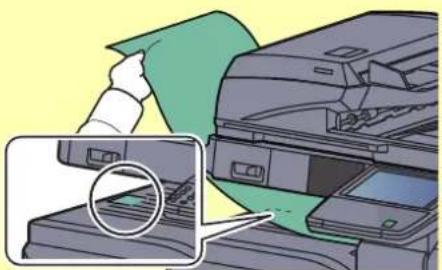
natural_image
Illustration of a printer being inserted into a paper airplane, showing the blade and paper (no text or symbols present)Using the Banner Tray (Option)
When the banner tray (option) is used, up to 10 sheets of banner paper can be fed continuously.

NOTE
The paper length supported in banner tray is 900 to 1220 mm.
1 Open the multi purpose tray.
Open the multi purpose tray until it stops.
Do not extend the multi purpose auxiliary tray.
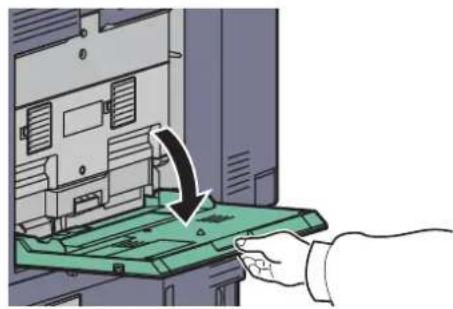
natural_image
Illustration of a hand inserting a green plastic tray into a computer case (no text or symbols visible)2 Attach the banner tray.
1 Release the paper width guide lock on the banner tray and open to the maximum width.

text_image
Diagram showing a device with a component being inserted, labeled with an icon and directional arrows indicating movement or assembly.2 Attach the banner tray to the multi purpose tray.
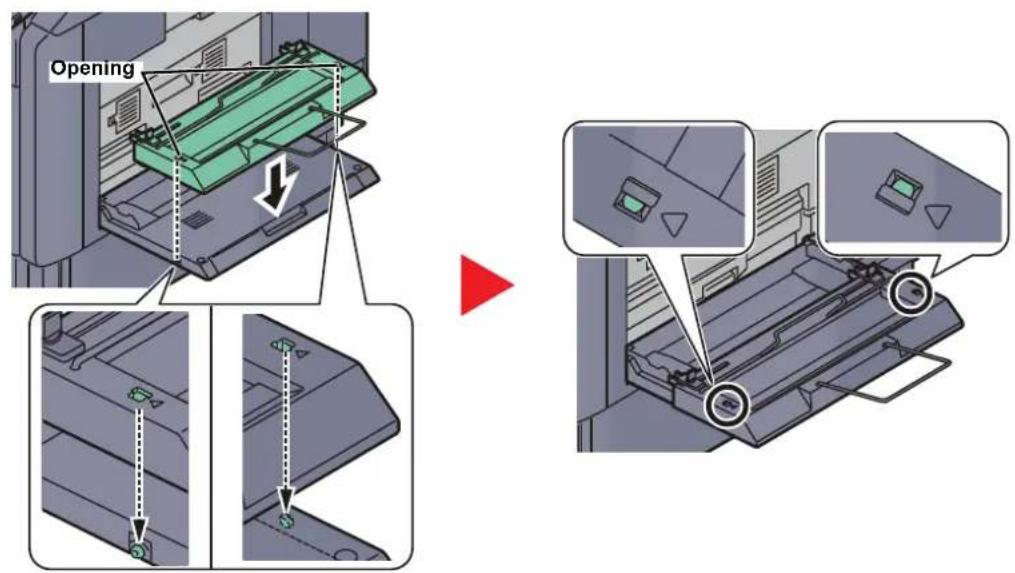
text_image
OpeningFit the openings on the sides of the banner tray onto the tabs on the sides of the multi purpose tray, and press into place.
3 Load paper.
1 Open the paper width guides on the multi purpose tray to the maximum width.
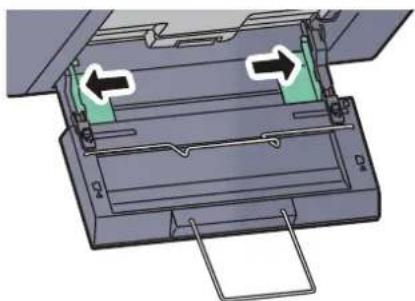
natural_image
Diagram of a printer drawer with two arrows indicating movement or force, no text or symbols presentMake sure that the banner tray is attached so that the paper width guides on the banner tray are outside the paper width guides on the multi purpose tray.
2 Load banner paper so that it passes under the paper clamp bar.
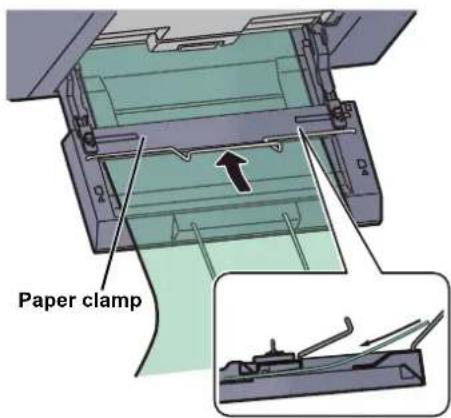
text_image
Paper clamp3 Loop the banner paper back and place the end on the paper support.
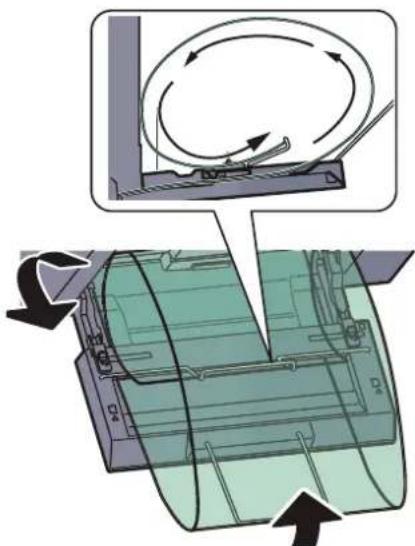
text_image
Diagram illustrating a mechanical or electrical system with labeled components and directional arrows indicating motion or flow.4 Adjust the paper width guides to the width of the paper.
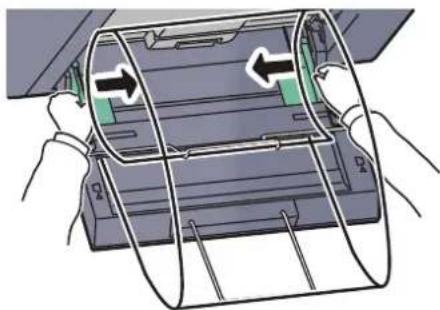
natural_image
Illustration of hands installing or adjusting a printer's cover with arrows indicating process (no text or symbols present)
IMPORTANT
If there is a gap between the paper and the paper width guides, readjust the guides to fit the paper in order to prevent skewed feeding and paper jams.
5 Adjust the paper width guides on the banner tray to the same width as the paper width guides on the multi purpose tray and lock.
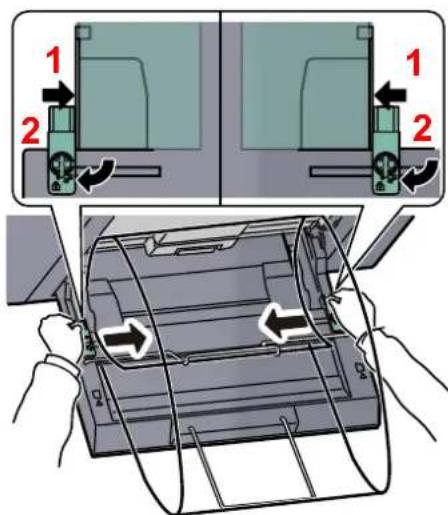
text_image
Diagram showing printer operation with labeled parts and directional arrows indicating process flow
IMPORTANT
Remove the paper when banner printing finishes, or when you are not using the banner tray.

NOTE
The print confirmation screen can be set in System Menu to not appear when the banner tray is attached. This will allow continuous printing on multiple sheets. (Refer to Message Banner Print on page 8-25.)
Printing Data Saved on the Printer
If you configure settings in the [Job] tab of the printer driver and then print, the print job will be saved in the Job Box (memory) and printing can be executed at the machine.
Private Print/Stored Job
Private Print/Stored Job Box stores the print data which is printed by using the printer driver as a Private Print/Stored Job. Refer to the Printing System Driver User Guide on how to print a job as Private Print or Stored Job using the printer driver.
Printing and Deleting the Document
Print/delete the documents stored in a Private Print/Stored Job box.
The procedure is as follows.
1 Display the screen.
1 Press [Job Box] in the home screen.
text_image
Home Job Box2 Select [Private Print/Stored Job] and press [Open].
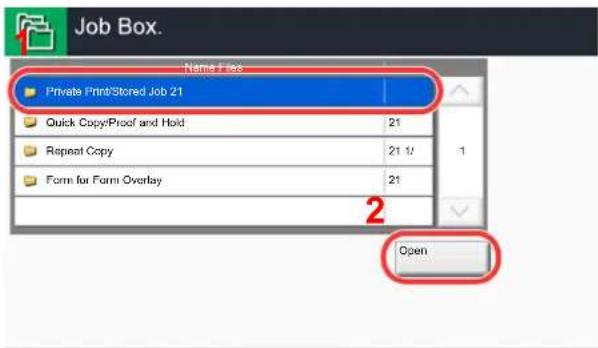
text_image
Job Box. Name Files Private Print/Stored Job 21 Quick Copy/Proof and Hold 21 Repeat Copy 21 1/2 Form for Form Overlay 21 Open2 Print and delete the document.
Printing the document
1 Select the creator of the document and press [Open].
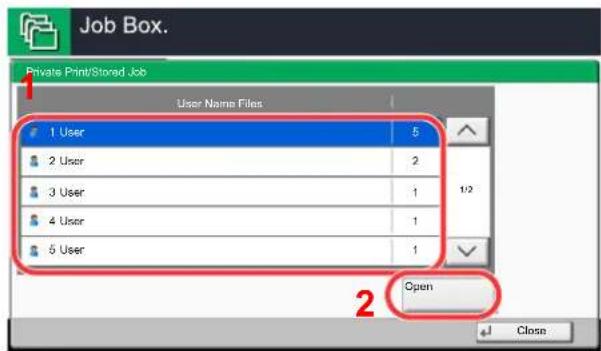
text_image
Job Box. Private Print/Stored Job User Name Files 1 User 5 2 User 2 3 User 1 4 User 1 5 User 1 Open 2 Close2 Select the document to print and press [Print].
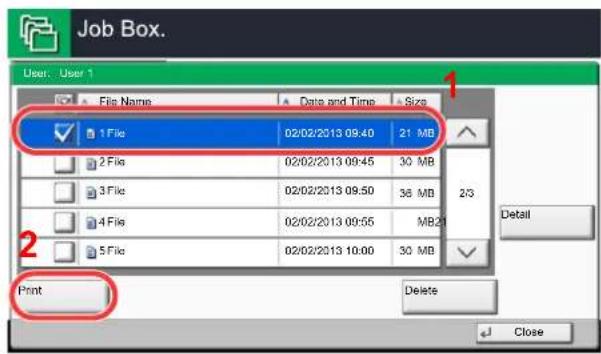
text_image
Job Box. User: User 1 File Name Data and Time Size 1 File 02/02/2013 09:40 21 MB 2 File 02/02/2013 09:45 30 MB 3 File 02/02/2013 09:50 36 MB 4 File 02/02/2013 09:55 MB 5 File 02/02/2013 10:00 30 MB Print Delete Close
NOTE
If the document is protected by an access code, the password entry screen will be displayed. Enter the password using the numeric keys.
3 Specify the number of copies to print as desired.
4 Press [Start Print].
Printing starts.
Upon completion of printing, the Private Print job is automatically deleted.
Deleting the document
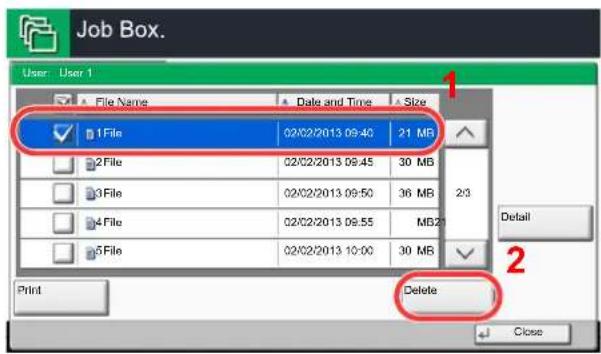
text_image
Job Box. User: User 1 File Name Date and Time Size 1File 02/02/2013 09:40 21 MB 2File 02/02/2013 09:45 30 MB 3File 02/02/2013 09:50 36 MB 4File 02/02/2013 09:55 MB 5File 02/02/2013 10:00 30 MB Print Delete Close Detail 21 Select the document to delete and press [Delete].

NOTE
If the document is protected by an access code, the password entry screen will be displayed. Enter the password using the numeric keys.
2 Press [Yes] in the confirmation screen.
Quick Copy/Proof and Hold
Quick Copy/Proof and Hold box stores the print data which is printed by using the printer driver as a Quick Copy or Proof and Hold Print job. Refer to the Printing System Driver User Guide on how to print a job as Quick Copy or Proof and Hold Print job using the printer driver.

NOTE
To maintain free space on the hard disk, you can set the maximum number of stored jobs. For details, refer to Quick Copy Job Retention on page 8-34.
Printing and Deleting the Document
You can print/delete the documents stored in the Quick Copy/Proof and Hold box.
The procedure is as follows.
1 Display the screen.
1 Press [Job Box] in the home screen.
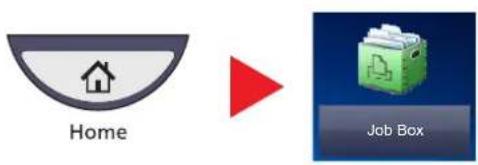
text_image
Home Job Box2 Select [Quick Copy/Proof and Hold].
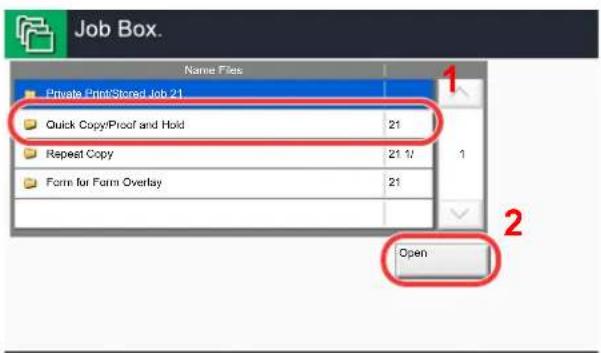
text_image
Job Box. Name Files Private Print/Stored Job 21 Quick Copy/Proof and Hold 21 Repeat Copy 21 1/2 Form for Form Overlay 21 Open3 Press [Open].
2 Print and delete the document.
Printing the document
1 Select the creator of the document and press [Open].
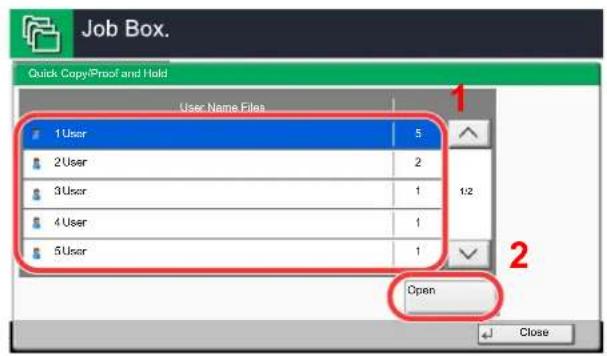
text_image
Job Box. Quick Copy/Proof and Hold User Name Files 1 User 5 2 User 2 3 User 1 4 User 1 5 User 1 Open Close2 Select the document to print and press [Print].
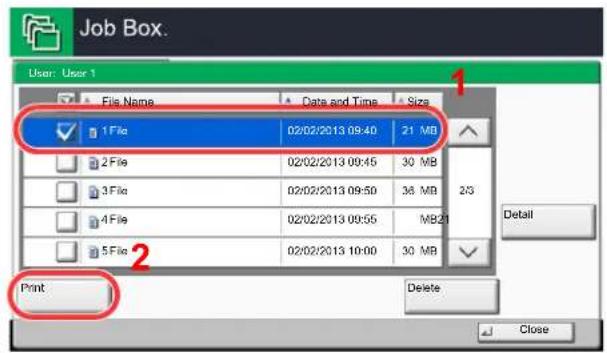
text_image
Job Box. User: User 1 File Name Date and Time Size 1 File 02/02/2013 09:40 21 MB 2 File 02/02/2013 09:45 30 MB 3 File 02/02/2013 09:50 36 MB 2/3 4 File 02/02/2013 09:55 MB21 5 File 02/02/2013 10:00 30 MB Print Delete Close3 Specify the number of copies to print as desired.
4 Press [Start Print].
Printing starts.
Deleting the document
1 Select the document to delete and press [Delete].
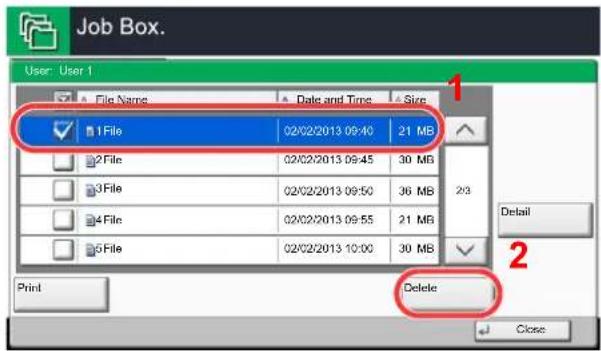
text_image
Job Box. User: User 1 File Name Date and Time Size 1 File 02/02/2013 09:40 21 MB 2 File 02/02/2013 09:45 30 MB 3 File 02/02/2013 09:50 36 MB 4 File 02/02/2013 09:55 21 MB 5 File 02/02/2013 10:00 30 MB Print Delete Close Detail 22 Press [Yes] in the confirmation screen.
The document is deleted.
5 Operation on the Machine
This chapter explains the following topics:
Loading Originals 5-2
Placing Originals on the Platen 5-2
Loading Originals in the Document Processor 5-3
Checking the Equipment's Serial Number 5-5
Program 5-6
Registering Programs 5-7
Recalling Programs 5-7
Editing and Deleting Programs 5-9
Application 5-10
Installing Applications 5-10
Activating/Deactivating Application 5-11
Deleting Applications 5-13
Registering Shortcuts (Copy, Send, and Document Box Settings) 5-14
Adding Shortcuts 5-14
Editing and Deleting Shortcuts 5-15
Using the Internet Browser 5-16
Launching and Exiting the Browser 5-16
Using the Browser Screen 5-17
Canceling Jobs 5-18
Canceling Jobs 5-18
Canceling printing from a computer 5-19
Copying 5-20
Basic Operation 5-20
Reserve Next 5-21
Interrupt Copy 5-22
Sending 5-23
Basic Operation 5-24
Specifying Destination 5-26
Checking and Editing Destinations 5-34
Confirmation Screen of Destinations 5-35
Sending to Different Types of Destinations (Multi Sending) 5-36
WSD Scan/DSM Scan 5-37
Scanning using TWAIN 5-41
Scanning a document placed in the machine 5-41
Scanning a document stored in a custom box 5-43
Scanning with FMU Connection 5-45
Using FMU Connection to scan an original 5-45
What is Document Box? 5-46
Basic Operation for Document Box 5-47
Using a Custom Box 5-52
Creating a New Custom Box (Add/Edit Box) 5-52
Editing Custom Box 5-54
Storing Documents (Store File) 5-55
Printing Documents (Print) 5-56
Sending Documents (Send) 5-57
Editing Documents 5-59
Deleting Documents 5-63
Job Box 5-64
Outputting Repeat Copy Jobs 5-64
Form for Form Overlay 5-65
Printing Documents Stored in Removable USB Memory 5-67
Saving Documents to USB Memory (Scan to USB) 5-69
Check the USB memory information 5-70
Removing USB Memory 5-71
Manual Staple 5-72
Loading Originals
Placing Originals on the Platen
You may place books or magazines on the platen in addition to ordinary sheet originals.
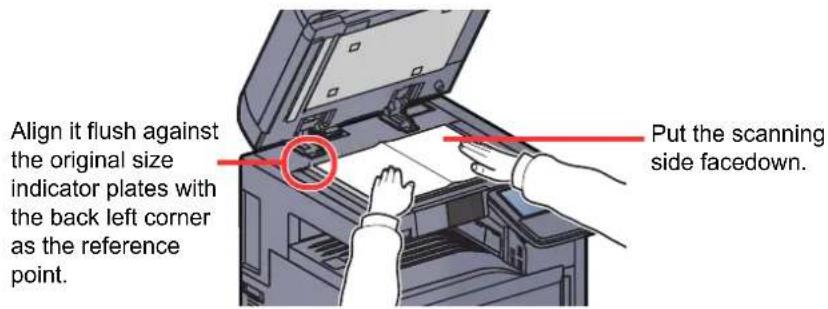
text_image
Align it flush against the original size indicator plates with the back left corner as the reference point. Put the scanning side facedown.
NOTE
For details on Original Orientation, refer to Original Orientation on page 6-16.

CAUTION
Do not leave the platen cover or the optional document processor open as there is a danger of personal injury.

IMPORTANT
Do not push the platen cover or the optional document processor forcefully when you close it. Excessive pressure may crack the platen glass.
When placing books or magazines on the machine, do so with the platen cover or the optional document processor in the open position.
Loading Originals in the Document Processor
The optional document processor automatically scans each sheet of multiple originals. Both sides of two-sided originals are scanned.
Originals Supported by the Document Processor
The document processor supports the following types of originals.
| Detail | Document Processor (Automatic 2-Sided) | Document Processor (Dual scan DP) |
| Weight 45 to 160 g/m | ^2 (duplex: 50 to 120 g/m ^2 ) 35 to 220 | g/m ^2 (duplex: 50 to 220 g/m ^2 )Sizes smaller than B6-R are 50 to 105 g/m ^2 (one-side/duplex) |
| Sizes Maximum A3 | to Minimum A5-RMaximum Ledger to Minimum Statement-R | Maximum A3 to Minimum A6-RMaximum Ledger to Minimum Statement-R |
| No. of sheets Plain | paper (80 g/m ^2 ), Colored paper, Recycled paper, High Quality:100 sheets (Mixed size originals: 30 sheets)Thick paper (157 g/m ^2 ): 50 sheetsThick paper (120 g/m ^2 ): 66 sheetsArt paper: 1 sheet | Plain paper (80 g/m ^2 ), Colored paper, Recycled paper, High Quality:175 sheets (Mixed size originals: 30 sheets)Thick paper (157 g/m ^2 ): 89 sheetsThick paper (120 g/m ^2 ): 116 sheetsArt paper: 1 sheet |
Originals Not Supported by the Document Processor
Do not use the document processor for the following types of originals.
- Soft originals such as vinyl sheets
• Transparencies such as OHP film - Carbon paper
• Originals with very slippery surfaces
• Originals with adhesive tape or glue - Wet originals
• Originals with correction fluid which is not dried - Irregularly shaped (non-rectangular) originals
• Originals with cut-out sections - Crumpled paper
- Originals with folds (Straighten the folds before loading. Failure to do so may cause the originals to jam.)
- Originals bound with clips or staples (Remove the clips or staples and straighten curls, wrinkles or creases before loading. Failure to do so may cause the originals to jam.)
How to Load Originals

IMPORTANT
- Before loading originals, be sure that there are no originals left on the original eject table. Originals left on the original eject table may cause the new originals to jam.
- Do not make an impact on the document processor top cover, such as aligning the originals on the top cover. It may cause an error in the document processor.
1 Adjust the original width guides.
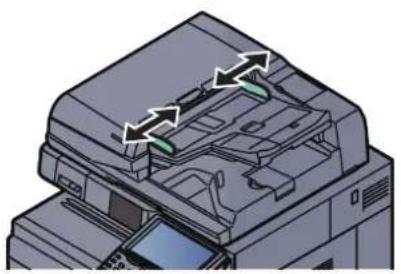
natural_image
Illustration of a printer with arrows indicating motion or movement, no text or symbols present2 Place the originals.
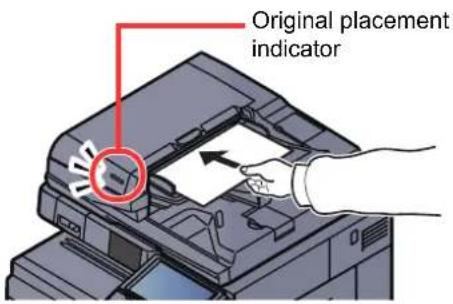
text_image
Original placement indicatorPut the side to be scanned (or the first side of two-sided originals) face-up. Slide the leading edge into the document processor as far as it will go. The original loaded indicator lights when the original is placed correctly.

NOTE
For details on Original Orientation, refer to Original Orientation on page 6-16.

IMPORTANT
Confirm that the original width guides exactly fit the originals. If there is a gap, readjust the original width guides. The gap may cause the originals to jam.
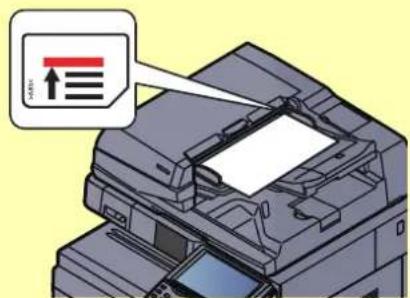
text_image
400Ensure that loaded originals do not exceed the level indicator. Exceeding the maximum level may cause the originals to jam.
Originals with punched holes or perforated lines should be placed in such a way that the holes or perforations will be scanned last (not first).
Checking the Equipment's Serial Number
The equipment's serial number is printed in the location shown in the figure.
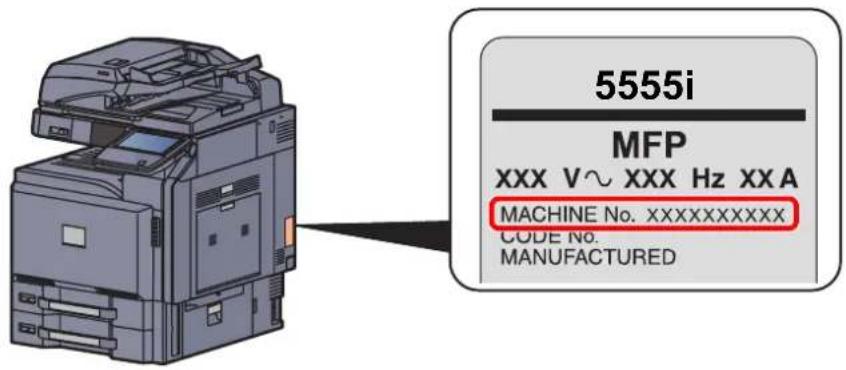
text_image
5555i MFP XXX V~ XXX Hz XX A MACHINE No. xxxxxxxxxxxx CODE NO. MANUFACTURED
NOTE
You'll need the equipment's serial number when contacting your Service Representative. Please check the number before contacting your Service Representative.
Program
By registering sets of frequently used functions as a single program, you can simply press the program number as needed to recall those functions. You can also name the programs for easy identification when recalling.
The programs below have been preregistered. The registered contents can be re-registered for easier use in your environment.
| Number | Program name | Description | Default Registration |
| 01 ID Card | Copy Use this when you want to copy a ____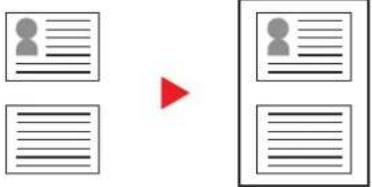 | driver's license or an insurance card.When you scan the front and back of the card, both sides will be combined and copied onto a single sheet. | Copying FunctionsCombine: [2 in 1]Continuous Scan: [On]Original Size: A5-RPaper Selection: Cassette 1Zoom: Auto Zoom |
| 02 Eco Copy | Use this to save toner consumption ____ ____ | when printing.This lightens the density to reduce toner consumption. | Copying FunctionsEcoPrint: [On] (Level [5]) |
| 03 Newspaper | Copy Use this when you want to copy a 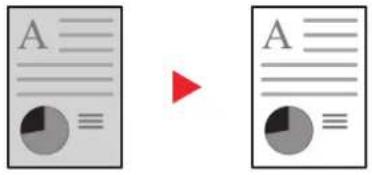 | newspaper article, or other originals printed on a colored substrate.This adjusts the image quality so that the color of the substrate or the text on the reverse side will not show on the copy. | Copying FunctionsPrevent Bleed-thru: [On]Background Density Adj.: [Auto] |
| 04 Technical | Drawing Copy Use this when you want to copy a 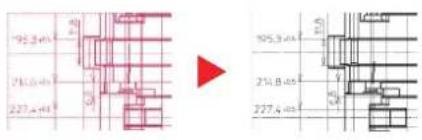 | drawing that contains shapes drawn with lines, and graphics. | Copying FunctionsOriginal Image: [Text]Sharpness (All): [+3]Background Density Adj.: [Auto] |

NOTE
Up to 50 functions combining copying and sending can be registered in the program.
If user login administration is enabled, you can only register functions by logging in with administrator privileges.
Registering Programs
Use the procedure below to register a program.
The following procedure is an example of registering the copying function.
1 Display the screen.
1 Press [Copy] on the Home screen.
text_image
Home Copy2 Press the [Program] tab while the copy mode is accessed.
2 Register the program.
1 Press [Add] and press a number (01 to 50) for the program number.

If you select a program number already registered, the currently registered functions can be replaced with a new set of functions.
2 Press [Next].
3 Enter the new program name and press [Save].
The program is registered.
To display a registered program on the Home screen, press [Yes] on the confirmation screen that appears, proceed to step 2-4.
4 Specify the position in which you want to display the icon of registered program.
5 Press [Save].
Recalling Programs
Use the procedure below to recall a registered program.
1 Recall the program.
1 Press [Program] in the Home screen, or the key of the registered program.
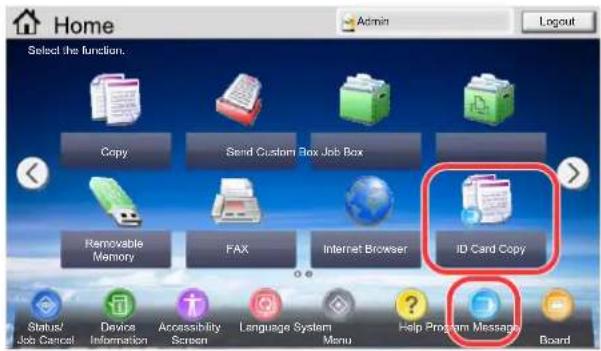
text_image
Home Admin Logout Select the function. Copy Send Custom Box Job Box Removable Memory FAX Internet Browser ID Card Copy Status/ Job Cancel Device Information Accessibility Screen Language System Menu Help Program Messages BoardPressing the key of the registered program will recall the program. If you pressed [Program], proceed to step 1-2.
2 Press the key for the program number you want to recall.
Press the [Quick No. Search] key or [No.] to enter the program number (01 to 50) directly for recalling.
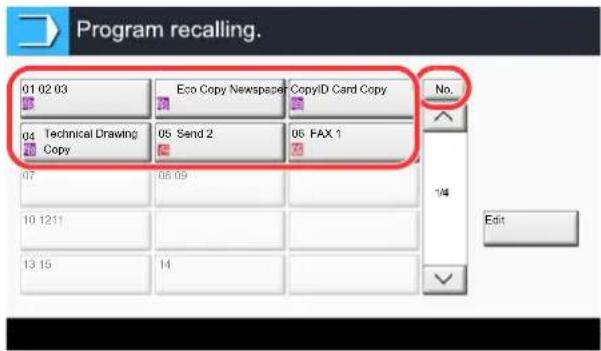
text_image
Program recalling. 01 02 03 Eco Copy Newspaper CopyID Card Copy No. 04 Technical Drawing Copy 05 Send 2 06 FAX 1 07 08 09 10 1211 13 15 14 EditNOTE
If the program cannot be recalled, the Document Box or the form overlay specified in the program might have been deleted. Check the Document Box.
2 Execute the program.
Place the originals and press the [Start] key.

NOTE
[Program] can be pressed in each function to call up the program registered for the function.
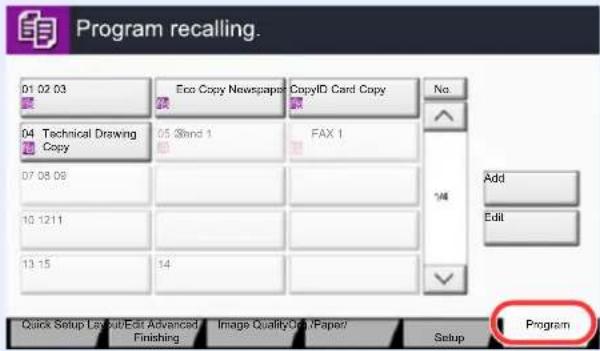
text_image
Program recalling. 01 02 03 Eco Copy Newspaper CopyID Card Copy No. 04 Technical Drawing Copy 05 Shnd 1 FAX 1 07 08 09 10 1211 13 15 14 Add Edit Quick Setup Layout/Edit Advanced Image Quality/Off/Paper/ Finishing Setup ProgramEditing and Deleting Programs
You can change program number and program name, or delete program.
Use the procedure below to edit or delete a program.

NOTE
To modify the settings of a registered program, recall the program you want to change, change its settings, then refer to Registering Programs on page 5-7 to re-register the changed program.
1 Display the screen.
1 Press [Program] on the Home screen.
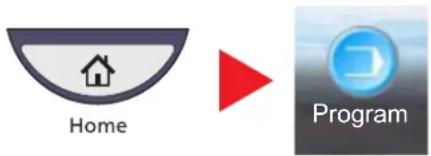
text_image
Home Program2 Press [Edit].
2 Edit the program.
To edit a program
1 Press the key(s) corresponding to the program number (01 to 50) to change.
2 Press [Edit], and refer to Registering Programs on page 5-7 to change the program number and program name.
3 Press [Save].
4 Press [Yes] in the confirmation screen.
To delete
1 Press the key(s) corresponding to the program number (01 to 50) to delete.
2 Press [Delete].
3 Press [Yes] in the confirmation screen.
Application
The functionality of the machine can be expanded by installing applications.
Applications that help you perform your daily more efficiently such as a scan feature and an authentication feature are available.
For details, consult your sales representative or dealer.

For application settings, refer to Application on page 8-60.
Installing Applications
The procedure is as follows.
1 Display the screen.
1 Press the [System Menu] key.
System Menu
2 Press [√] and then [Application].

NOTE
If the user authentication screen appears, enter your login user name and login password and press [Login]. For this, you need to login with administrator privileges. The factory default login user name and login password are set as shown below.
| Model Name Login | User Name Login Password | |
| 3555i 3500 3500 | ||
| 4555i 4500 4500 | ||
| 5555i 5500 5500 |
2 Install the application.
1 Press [Add].
2 Insert the removable memory containing the application to be installed into the USB Port (A1).

NOTE
When the message "Removable Memory was recognized. Displaying files. Are you sure?" is displayed, press [No].
3 Select the application to be installed and press [Install].
You can view detailed information on the selected application by pressing [Detail].
4 Press [Yes] in the confirmation screen.
Installation of the application begins. Depending on the application being installed, the installation may take some time.
Once the installation ends, the original screen reappears.

NOTE
To install another application, repeat steps 2-3 and 2-4.
To remove the removable memory, press [Remove Memory] and wait until the message "Removable Memory can be safely removed." appears. Then remove the removable memory.
Activating/Deactivating Application
The procedure is as follows.
1 Display the screen.
1 Press the [System Menu] key.
System Menu
2 Press [ ] and then [Application].

NOTE
If the user authentication screen appears, enter your login user name and login password and press [Login]. For this, you need to login with administrator privileges. The factory default login user name and login password are set as shown below.
| Model Name Login User Name Login Password | |
| 3555i 3500 3500 | |
| 4555i 4500 4500 | |
| 5555i 5500 5500 | |
2 Activate/Deactivate the application.
1 Select the desired application and press [Activate].
You can view detailed information on the selected application by pressing [Detail].

NOTE
To exit the application, press [Deactivate].
2 Enter the license key and press [Official].
Some applications do not require you to enter a license key. If the license key entry screen does not appear, go to step 2-3. To use the application as a trial, press [Trial] without entering the license key.
3 Press [Yes] in the confirmation screen.

NOTE
- If you change the date/time while using the trial version of an application, you will no longer be able to use the application.
- Icons of activated application are displayed in the Home screen.
3 Press the application icon in the Home screen to activate the application.
Press the application icon.
The application will start up.

NOTE
To exit the application, press [x].
When the application exit confirmation screen appears, press [Yes].
The procedure for exiting some applications may differ.
Deleting Applications
The procedure is as follows.

NOTE
Be sure to set [Deactivate] for the application you want to delete.

Registering Programs on page 5-7
1 Display the screen.
1 Press the [System Menu] key.
System Menu

2 Press [ ] and then [Application].

NOTE
If the user authentication screen appears, enter your login user name and login password and press [Login]. For this, you need to login with administrator privileges. The factory default login user name and login password are set as shown below.
| Model Name Login User Name Login Password | ||
| 3555i 3500 3500 | ||
| 4555i 4500 4500 | ||
| 5555i 5500 5500 | ||
2 Delete the application.
1 Select the application you want to delete, and press [Delete].
You can view detailed information on the selected application by pressing [Detail].
2 When the deletion confirmation screen appears, press [Yes].
Registering Shortcuts (Copy, Send, and Document Box Settings)
You can register shortcuts in the Quick Setup screen for easy access to the frequently used functions. The settings for the selected function can also be registered. A function name linked to a registered shortcut can be changed as necessary. You can register up to 6 shortcuts for copying functions, sending functions, and functions set for document box.
Adding Shortcuts
Shortcut registration is performed in the setup screen of each function. Shortcuts can be registered for all functions in which [Add Shortcut] appears on the screen.
Use the procedure below to register a shortcut.
1 In each function, display the configuration screen you want to register.
2 Register the shortcuts.
1 Select the setting you want to add.
2 Press [Add Shortcut].
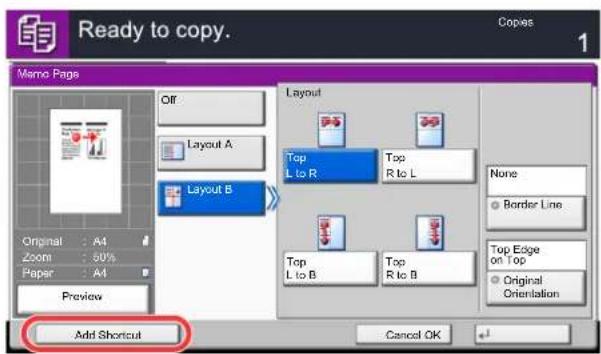
text_image
Ready to copy. Copes 1 Memo Page Off Layout A Layout B Layout Top L to R Top R to L None Border Line Top Edge on Top Original Orientation Original : A4 Zoom : 50% Paper : A4 Preview Add Shortcut Cancel OK3 Press the keys corresponding to the shortcut number (01 to 06) to register.

NOTE
If you select a shortcut number already registered, the currently registered shortcut can be replaced with a new one.
4 Enter the shortcut name and press [Save].
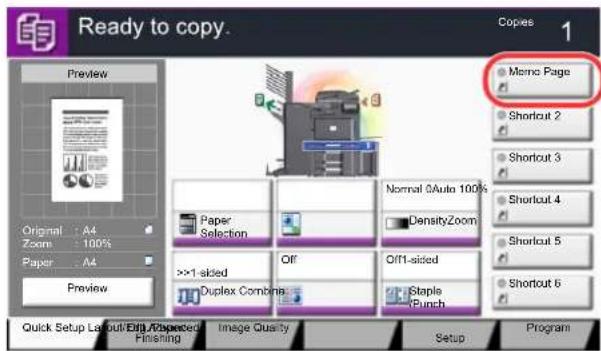
text_image
Ready to copy. Copes 1 Preview Original : A4 Zoom : 100% Paper : A4 Preview Original Zoom Paper Preview Memo Page Shortcut 2 Shortcut 3 Shortcut 4 Shortcut 5 Shortcut 6 Quick Setup Layout/Edit/Reported Finishing Image Quality Setup Program Paper Selection Normal 0Auto 100% DensityZoom >>1-sided Off Off1-sided Duplex Combina Staple PunchThe shortcut is registered.
Editing and Deleting Shortcuts
Follow the steps shown below to change a shortcut number/name or delete a shortcut.
1 In the setup screen of each function, press [Add Shortcut] in the bottom of the screen.
2 Edit the shortcut.
1 Press [Edit].
2 Press the shortcut key you want to edit/delete.
To edit a shortcut
3 Press [Change] of "Shortcut No." or "Shortcut Name".
4 Change the settings, and press [OK].
5 Press [Save].
To delete
3 Press [Delete this Shortcut].
4 Press [Yes] in the confirmation screen.
Using the Internet Browser
If the machine is connected to the network, you can browse the Internet on the touch panel.

NOTE
To use the internet browser, "Internet Browser Setting" must be set to [On] in Internet on page 8-60.
Launching and Exiting the Browser
Use the procedure below to launch and exit the Internet browser.
Display the screen.
1 Press [Internet Browser] on the Home screen.
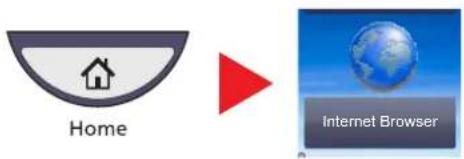
text_image
Home Internet BrowserThe Internet browser starts up.
2 Use the browser screen to browse web pages.

For information on how to use the browser screen, refer to Using the Browser Screen on page 5-17.
3 To exit the browser, press [X] (Close) and then press [Yes] in the exit confirmation screen.

NOTE
You can specify preferences such as the way the Internet browser screen is displayed. For details, refer to Browser Environment on page 8-60.
Using the Browser Screen
The operations available in the Internet browser screen are shown below.
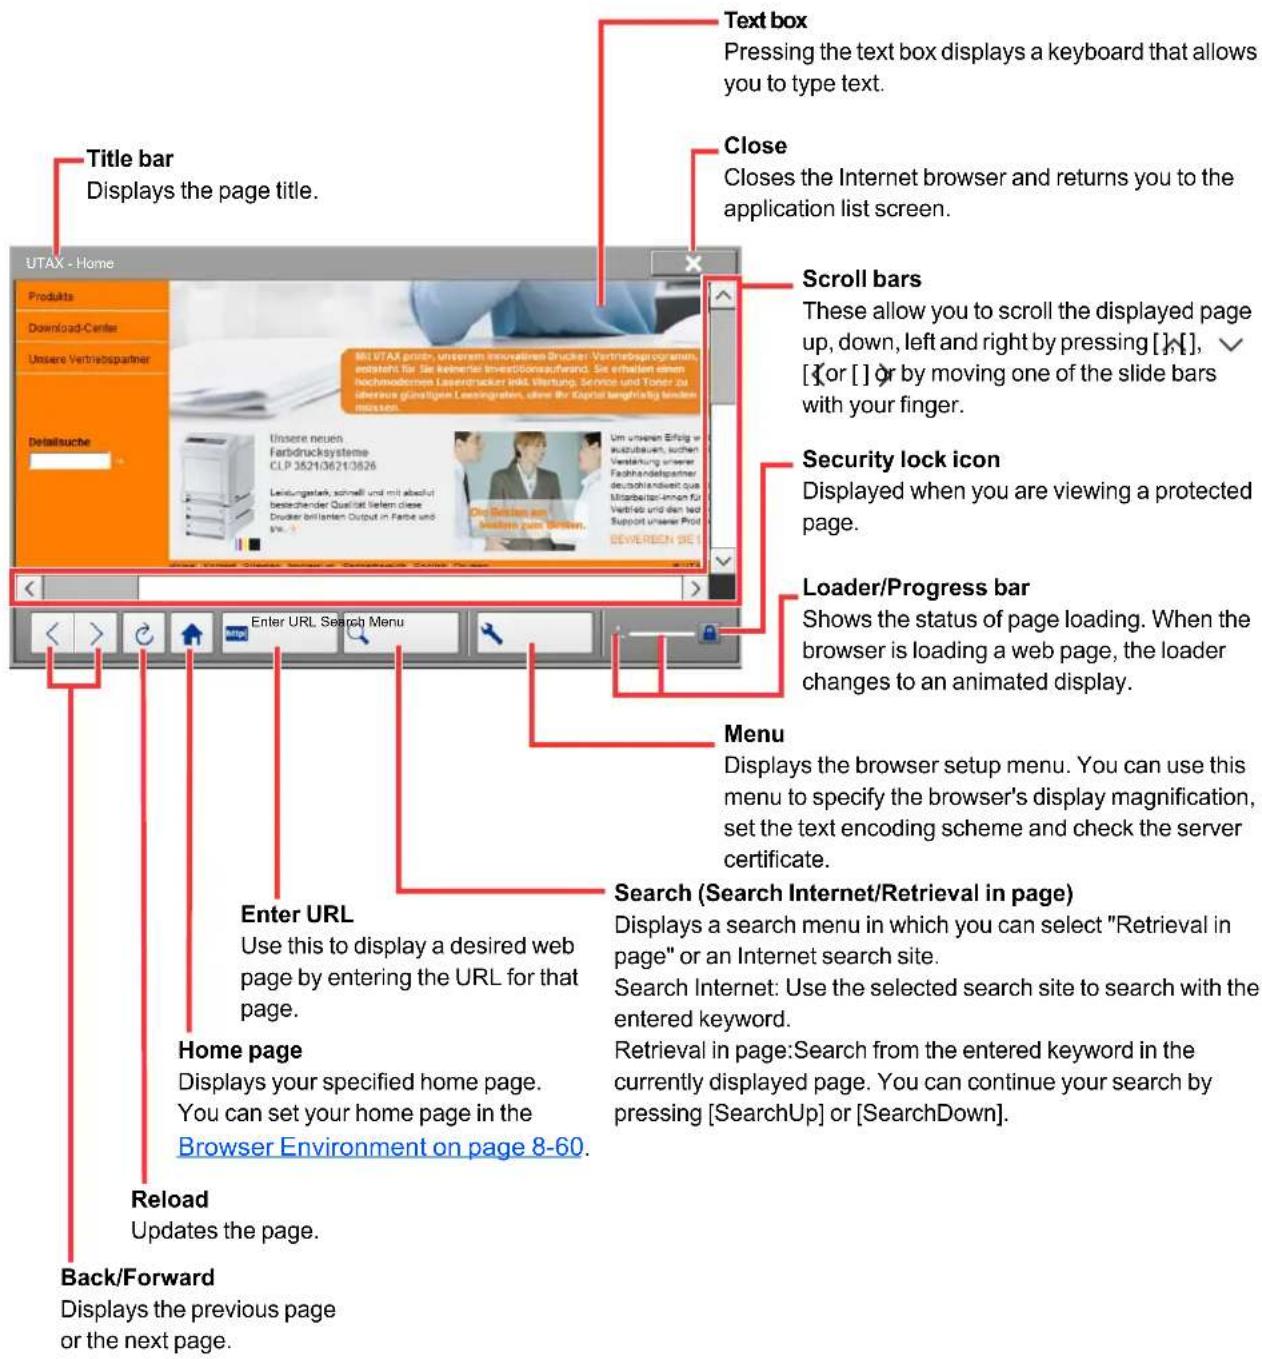
text_image
Text box Pressing the text box displays a keyboard that allows you to type text. Close Closes the Internet browser and returns you to the application list screen. Title bar Displays the page title. UTAX - Home Products Download-Center Umsere Vertriebspartner Detailsuche Umsere neuen Farbdrucksysteme CLP 3521/3621/3626 Leistungstark, schnell und mit absolut besachender Quafizat Selem. Diese Drucker brillanten Output in Fabric und vio. 1 Enter URL Search Menu Enter URL Use this to display a desired web page by entering the URL for that page. Home page Displays your specified home page. You can set your home page in the Browser Environment on page 8-60. Reload Updates the page. Back/Forward Displays the previous page or the next page. Scroll bars These allow you to scroll the displayed page up, down, left and right by pressing [ ]+, ✓ [ ] or [] or by moving one of the slide bars with your finger. Security lock icon Displayed when you are viewing a protected page. Loader/Progress bar Shows the status of page loading. When the browser is loading a web page, the loader changes to an animated display. Menu Displays the browser setup menu. You can use this menu to specify the browser's display magnification, set the text encoding scheme and check the server certificate. Search (Search Internet/Retrieval in page) Displays a search menu in which you can select "Retrieval in page" or an Internet search site. Search Internet: Use the selected search site to search with the entered keyword. Retrieval in page:Search from the entered keyword in the currently displayed page. You can continue your search by pressing [SearchUp] or [SearchDown]. Back/Forward
NOTE
Pressing the [Reset] key while the Internet browser is displayed will exit the browser and return you to the application list screen without displaying the browser exit.
Canceling Jobs
Follow the steps below to cancel any print or send job being executed.
Canceling Jobs
You can also cancel jobs by pressing the [Stop] key.
Printing jobs
1 Press the [Stop] key with the copy screen or send screen displayed.
Cancelling job screen appears. The current print job is temporarily interrupted.
2 To cancel printing, select [Cancel], and then press [Yes] in the confirmation screen.
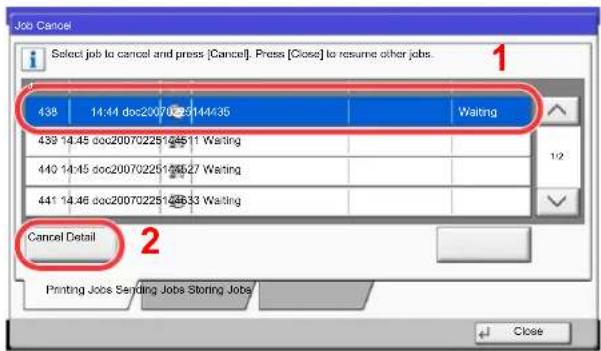
text_image
Job Cancel Select job to cancel and press [Cancel]. Press [Close] to resume other jobs. 1 438 14:44 doc20070225144435 Waiting 439 14.45 doc20070225144511 Waiting 440 14.45 doc20070225144527 Waiting 441 14.46 doc20070225144533 Waiting Cancel Detail 2 Printing Jobs Sending Jobs Storing Jobs CloseSending jobs
1 Press the [Stop] key with the copy screen or send screen displayed.
Job Cancel appears.

NOTE
Pressing the [Stop] key will not temporarily stop a job that you have already started sending.
2 To cancel printing, select [Cancel], and then press [Yes] in the confirmation screen.

NOTE
If Reserve Next Priority on page 8-29 is set to [Off], the Copying screen appears in the touch panel. In such case, pressing the [Stop] key or [Cancel] will cancel the printing job in progress.
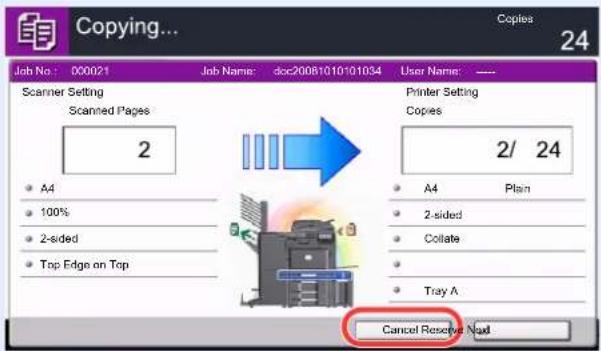
text_image
Copying... Job No: 000021 Job Name: doc20081010101034 User Name: ---- Scanner Setting Scanned Pages 2 Printer Setting Copies 2/ 24 A4 Plain 100% 2-sided 2-sided Top Edge on Top A4 2-sided Collate Tray A Cancel Reserve NextCanceling printing from a computer
To cancel a print job executed using the printer driver before the printer begins printing, do the following:
1 Double-click the printer icon ( [icon] ) displayed on the taskbar at the bottom right of the Windows desktop to display a dialog box for the printer.
2 Click the file for which you wish to cancel printing and select [Cancel] from the "Document" menu.
Copying
Basic Operation
Follow the steps as below for basic copying.
1 Press [Copy] on the Home screen.
![Utax 3555i - Press [Copy] on the Home screen. - 1](/content/2026/05/780633/images/b2d346569a7dfc8a16ebd89d76520ebef0d8a3a694fe21a918e19d5aaaf289e9.jpg)
text_image
Home Copy2 Place the originals.
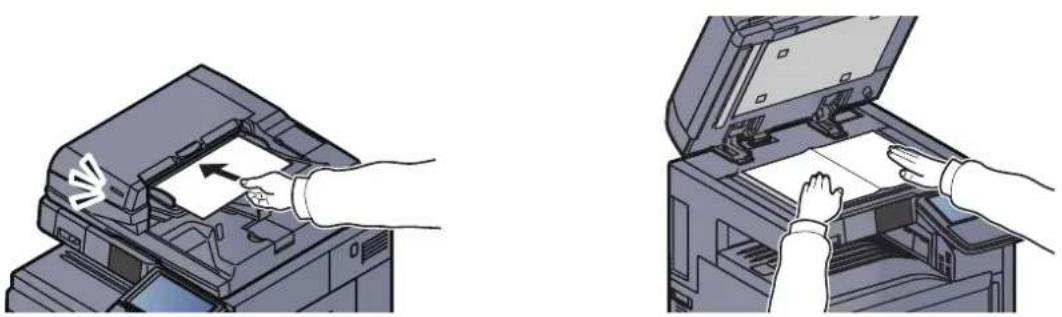
natural_image
Illustration of two hands inserting a printer into an open file (no text or symbols visible)
For loading instructions, refer to Loading Originals on page 5-2.
3 Select the functions.
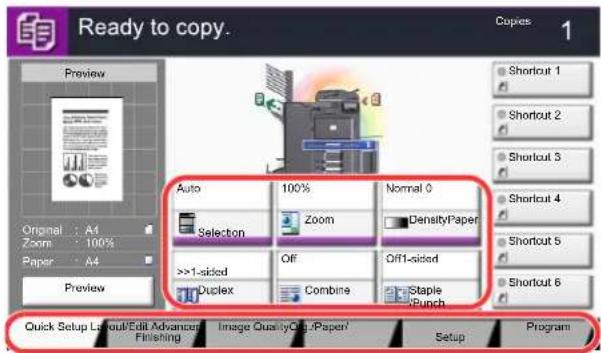
text_image
Ready to copy. Copies 1 Preview Original : A4 Zoom : 100% Paper : A4 Preview Auto 100% Normal 0 Selection Zoom Density/Paper >>1-sided Off Off1-sided Duclex Combine Staple Punch Quick Setup Layout/Edit Advanced Image Quality/Capaper/ Finishing Setup ProgramSelect the copier functions to use.
Press tabs to display other functions.

4 Use the numeric keys to enter the copy quantity.
Specify the desired number up to 999.
5 Press the [Start] key.
Copying begins.
Reserve Next
This function allows you to reserve the next job during printing. Using this function, the original will be scanned while the machine is printing. When the current print job ends, the reserved copy job is printed. The procedure differs depending on the Reserve Next Priority (refer to Reserve Next Priority on page 8-29).
If "Reserve Next Priority" is set to [On]
The Copy function default screen appears on the touch panel during printing.
1 Place the originals onto the machine for reserving copy, and configure the copy settings.
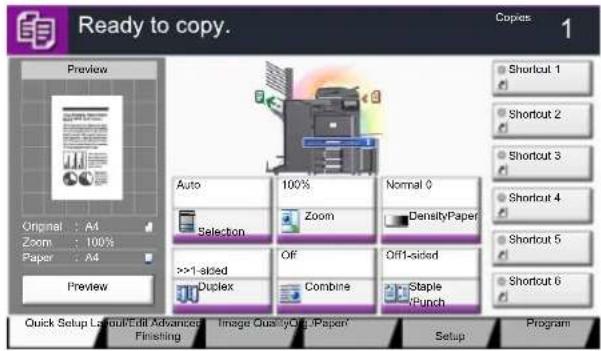
text_image
Ready to copy. Copies 1 Preview Original : A4 Zoom : 100% Paper : A4 Preview Auto 100% Zoom Normal 0 DensityPaper Selection >>1-sided Duplex Off Combine Off1-sided Staple /Punch Quick Setup Layout/Edit Advanced Finishing Image QualityOf.../Paper' Setup Program2 Press the [Start] key.
The machine starts scanning the originals.
When the current print job ends, the reserved copy job is printed.
If "Reserve Next Priority" is set to [Off]
The Copying screen appears on the touch panel during printing.
1 Press [Reserve Next].
![Utax 3555i - Press [Reserve Next]. - 1](/content/2026/05/780633/images/c8a35db81b962187d1a7aac31ac3bc43f9f4a745ed99470f073b0ab025a6e2db.jpg)
text_image
Copying... Job No.: 00021 Job Name: doc20081010101034 User Name: ---- Scanner Setting Scanned Pages 2 Printer Setting Copies 2/ 24 A4 Plain 100% 2-sided 2-sided Top Edge on Top A4 Plain 2-sided Collate Tray A Cancel Reserve NextThe default screen for copying appears.
2 Place the originals onto the machine for reserving copy, and configure the copy settings.
3 Press the [Start] key.
The machine starts scanning the originals.
When the current print job ends, the reserved copy job is printed.
Interrupt Copy
This function allows you to pause the current jobs in progress when you need to make copies immediately.
When the interruption copy ends, the machine resumes the paused print jobs.

NOTE
- If the machine is left unused for 60 seconds in interrupt copy mode, interrupt copying is automatically cancelled and printing resumes.
You can change the delay until interrupt copying is canceled. Change the delay as required.

Interrupt Clear Timer (page 8-55)
- The interrupt copy function may be unavailable depending on the status of document finisher usage. In this case, try the priority override.

Priority Override (page 6-55)
1 Configure the settings.
1 Press the [Interrupt] key.
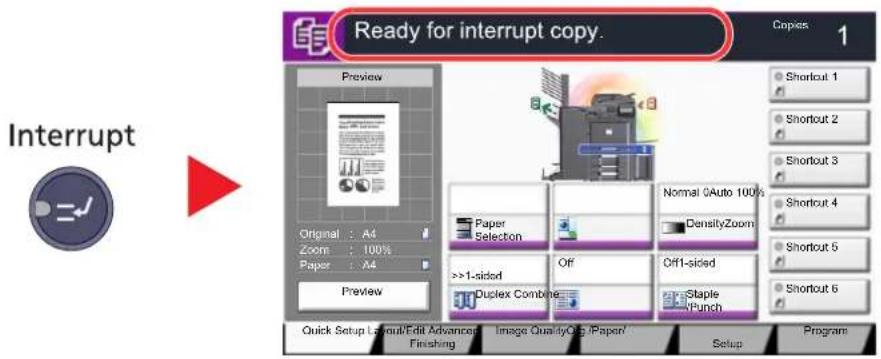
text_image
Interrupt Ready for interrupt copy. Copies 1 Preview Original : A4 Zoom : 100% Paper : A4 Preview Paper Selection Normal 0Auto 100% DensityZoom >>1-sided Off Off1-sided Duplex Combine Staple Punch Quick Setup Layout/Edit Advanced Finishing Image QualityOg /Paper/ Setup ProgramThe current print job is temporarily interrupted.
2 Place the originals onto the machine for interrupt copy, and configure the copy settings.
2 Press the [Start] key.
Interrupt copying begins.
3 When interrupt copying ends, press the [Interrupt] key.
The machine resumes the paused print jobs.
Sending
This machine can send a scanned image as an attachment of an E-mail message or to a PC linked to the network. In order to do this, it is necessary to register the sender and destination (recipient) address on the network.
A network environment which enables the machine to connect to a mail server is required in order to send E-mail. It is recommended that a Local Area Network (LAN) be used to assist with transmission speed and security issues.
At the same time as you send a scanned image, you can also print the image or send it to the Job Box.
To use the transmission function, verify the following:
- Program the settings, including the E-mail setting on the machine.
- Use Embedded Web Server RX (the internal HTML web page) to register the IP address, the host name of the SMTP server, and the recipient.
- Register the destination in the Address Book or One Touch keys.
- Create a share folder in the destination computer, when a folder (SMB/FTP) is selected as the destination. Consult your network administrator concerning destination folder sharing settings.
- Create/Register a Custom Box (Using a custom box for sending).
- Select detailed transmission settings (to select a Document Box as the destination or to print and send the image at the same time).
Follow the steps below for basic sending. The following five options are available.
- Send as E-mail (E-mail Addr Entry): Sends a scanned original image as an E-mail attachment. (Refer to page 5-29.)
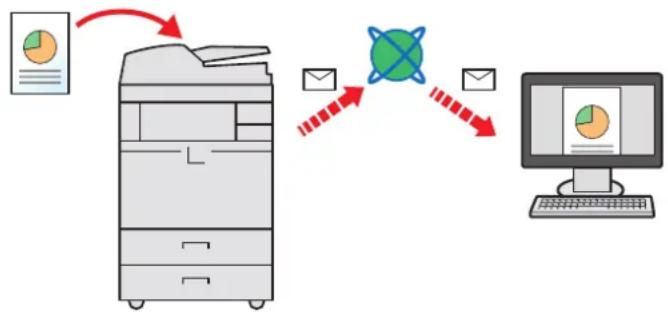
flowchart
graph TD
    A["Printer"] -->|Data Flow| B["Global Icon"]
    B --> C["Computer"]
- Send to Folder (SMB): Stores a scanned original image in a shared folder of any PC. (Refer to page 5-32.)
- Send to Folder (FTP): Stores a scanned original image in a folder of an FTP server. (Refer to page 5-33.)
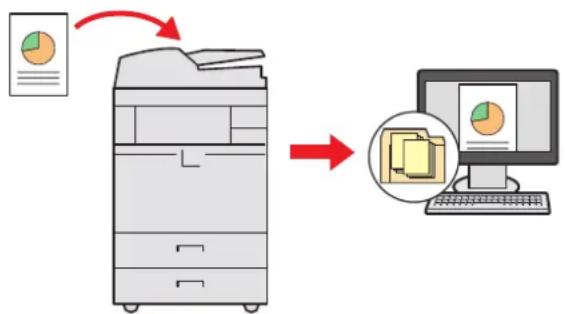
flowchart
graph TD
    A["Printer"] -->|Red Arrow| B["Computer Monitor"]
    style A fill:#f9f,stroke:#333
    style B fill:#ccf,stroke:#333
- Send to Custom Box: Sends a document stored in a document box on this machine. (Refer to page 5-57.)
- Image Data Scanning with TWAIN / WIA: Scan the document using a TWAIN or WIA compatible application program. (Refer to page 5-41.)

NOTE
Different sending options can be specified in combination. Refer to Sending to Different Types of Destinations (Multi Sending) on page 5-36.
The fax function can be used when the optional fax kit has been installed. For details about this function, refer to the FAX Operation Guide.
Basic Operation
1 Press [Send] on the Home screen.
![Utax 3555i - Press [Send] on the Home screen. - 1](/content/2026/05/780633/images/84986755809ddbaa10d138e09e063ab2cd2b24f9ab833642134a6765b5609aaa.jpg)
flowchart
graph LR
    A["Home"] --> B["Send"]
2 Place the originals.
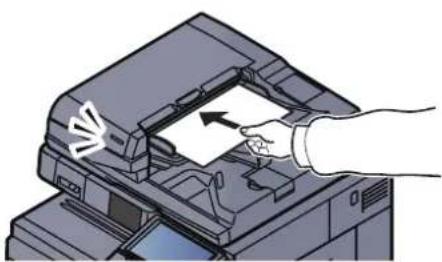
natural_image
Illustration of a hand inserting a document into a printer (no text or symbols visible)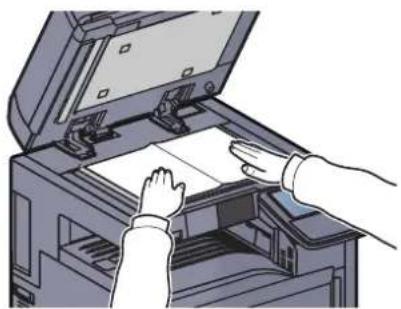
natural_image
Illustration of hands operating a printer with an open lid (no text or symbols visible)Loading Originals (page 5-2)
3 Specify the destination.
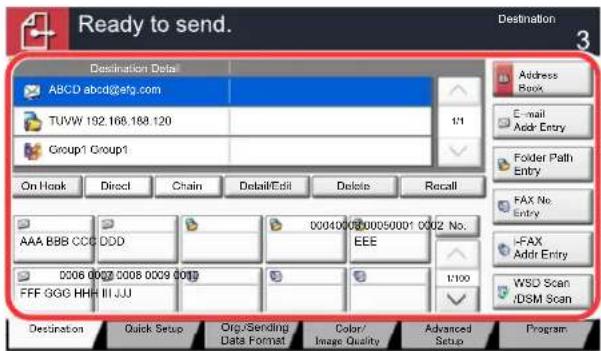
text_image
Ready to send. Destination 3 Destination Delay ABCD abcd@stg.com TUVW 192.168.188.120 Group1 Group1 On Hook Direct Chain DetailEdit Delete Recall AAA BBB CCC DDD 0004000000050001 0002 No. EEE 0006 0007 0008 0009 0019 FFF GGG HHH III JU Address Box E-mail Addr Entry Folder Path Entry FAX No. Entry I-FAX Addr Entry WSD Scan /DSM Scan Destination Quick Setup Org./Sending Data Format Color/ Image Quality Advanced Setup ProgramSelect the destination to which to send an image.
Specifying Destination (page 5-26)
4 Select the functions.
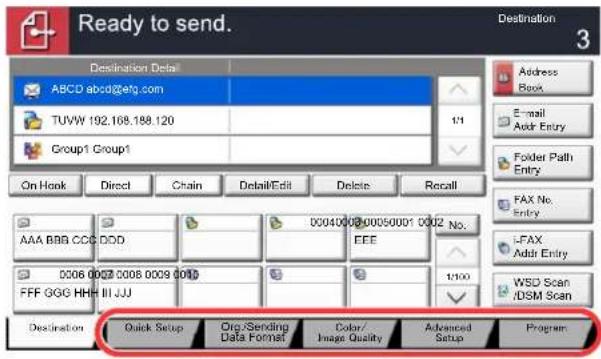
text_image
Ready to send. Destination 3 Destination Detail ABCD abcd@eq.com TUVW 192.168.188.120 Group1 Group1 On Hook Direct Chain Detail/Edit Delete Recall Address Book E-mail Addr Entry Folder Path Entry FAX No. Entry L-FAX Addr Entry WSD Scan /DSM Scan Destination Quick Setup Org/Sending Data Format Color/ Image Quality Advanced Setup ProgramPress tabs to display other functions.

Send (page 6-4)
5 Press the [Start] key.
Sending starts.
Specifying Destination
Select the destination using either of the following methods:
• Choosing from the Address Book (page 5-26)
• Choosing from the One Touch Key (page 5-28)
- Choosing from the Speed Dial (page 5-29)
- Entering a New E-mail Address (page 5-29)
• Specifying a New PC Folder (page 5-31)

NOTE
You can set the machine up so that the address book screen appears when you press the [Send] key. For details, refer to Default Screen on page 8-9.
When the optional fax kit has been installed, you can specify the fax destination. Enter the other party number using the numeric keypad.
Choosing from the Address Book
Select a destination registered in the Address Book.
For more information about how to register destinations in the Address Book, refer to Registering Destinations in the Address Book on page 3-45.
1 In the basic screen for sending, press [Address Book].
![Utax 3555i - In the basic screen for sending, press [Address Book]. - 1](/content/2026/05/780633/images/66e2a1e9a7dfbf59ffbe8f76a7c61cdb99f250e67398dcc7b0a7e97f817e632d.jpg)
text_image
Ready to send. On Hook Destination Detail Address Book E-mail Addr Entry 1/1 On Hook Direct Chain Detail/Edit Delete Recall AAA BBB CCC DDD 0004000000050001 0002 No. EEE 0006 0007 0008 0009 0010 FFF GGG HHH III JJJ 1/100 Destination Quick Setup Org/Sending Data Format Color/Image Quality Advanced Setup Program2 Select the destinations.
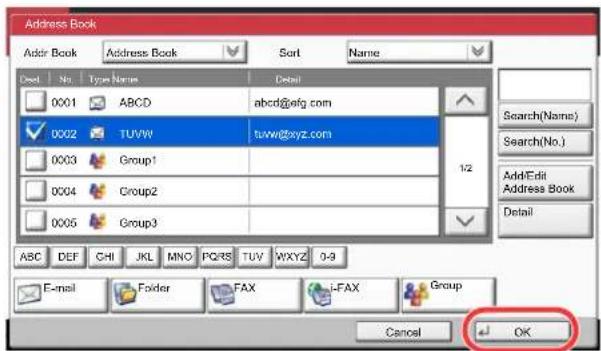
text_image
Address Book Add Book Address Book Sort Name Del No Type Name Detail 0001 ABCD abc@efg.com 0002 TUVW tuww@xyz.com 0003 Group1 0004 Group2 0005 Group3 Search(Name) Search(No.) AddE-di Address Book Detail ABC DEF CHI JKL MNO PQRS TUV WXYZ 0-9 E-mail Folder FAX L-FAX Group Cancel OKPress the checkbox to select the desired destination from the list. You may choose multiple destinations. The selected destinations are indicated by a checkmark in the check box. To use an address book on the LDAP server, select [Ext Address Book] from the "Addr Book" pull-down menu.
You can change the order in which the destinations are listed by selecting [Name] or [No.] from the "Sort".

NOTE
To deselect, press the checkbox again and remove the checkmark.
For details on the External Address Book, refer to Embedded Web Server RX User Guide.
Destination Search
Destinations registered in the Address Book can be searched. Advanced search by type or by initial letter is also available.
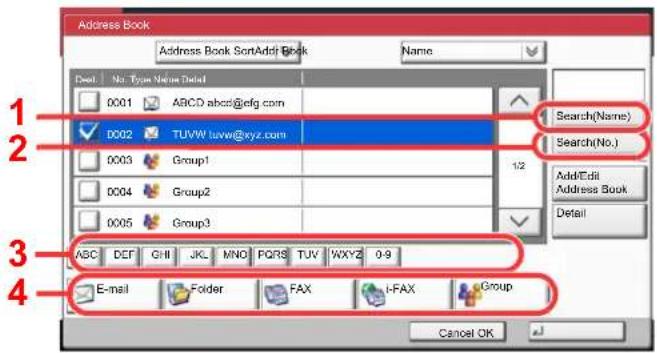
text_image
Address Book Address Book SortAddi Book Name Deo: No. Type Name Delad 0001 ABCD abcc@efg.com D002 TUVW tuver@xyz.com 0003 Group1 0004 Group2 0005 Group3 Search(Name) Search(No.) AddEdit Address Book Detail 1/2 3 4 ESC DEF GHI JKL MNO PQRS TUV WXYZ 0-9 E-mail Folder FAX i-FAX Group Cancel OK| Keys used | Search type Subjects | searched |
| 1 | Search by name | Search by registered name. |
| 2 | Search by number | Search by registered address number. |
| 3 | Advanced search by initial letter | Advanced search by initial letter of registered name. |
| 4 | Advanced search by destination | Advanced search by type of registered destination (E-mail, Folder (SMB/FTP), FAX, i-FAX or Group). (FAX: Only when the optional fax kit is installed. i-FAX: Only when the optional Internet FAX Kit is installed.)You can set this function up so that destination types are selected when the address book is displayed. For details, refer to Narrow Down on page 8-53. |
The procedures for using the different search modes are explained below.
Search by name
Press [Search(Name)] and enter the required name.
Search by number
Press [Search(No.)] and enter the address number you wish to search.
Advanced search by destination
Press any of [E-mail], [Folder], [FAX], [i-FAX] or [Group]. The destinations registered by that type are displayed.
Advanced search by initial letter
Press the key for the required initial letter.
3 Accept the destination, and press [OK].
![Utax 3555i - Accept the destination, and press [OK]. - 1](/content/2026/05/780633/images/8c5f98a6beed40477787a4faedb8ea0a674ab41296847755a8b8aa71dc03674b.jpg)
text_image
Address Book Address Book SortAddrBook Name Dest. No. Type Name Detail 0001 ABCD abcd@etg.com 0002 TUVW tuww@cyz.com 0003 Group1 0004 Group2 0005 Group3 1/2 Search(Name) Search(No.) Add/Edit Address Book Detail GHASC DEF JKL MNO PDRS TUV WXYZ 09 E-mail Folder FAXFAX Group Cancel OK![Utax 3555i - Accept the destination, and press [OK]. - 2](/content/2026/05/780633/images/39c6f0095ab171644e5a522027315c2a70badb57aff1b399611af5b9a3768f35.jpg)
NOTE
To delete the destination, select the destination you want to delete and press [Delete]. You can set the default "Sort" settings. For details, refer to Sort on page 8-53.
Choosing from the One Touch Key
Select the destination using the One Touch Keys.
In the basic screen for sending, press the One Touch Keys where the destination is registered.

NOTE
If the One Touch Keys for the desired destination is hidden on the touch panel, press [√] or [^] to scroll and view next or previous One Touch Keys. This procedure assumes that One Touch Keys have already been registered. Refer to Adding a Destination on One Touch Key (One Touch Key) on page 3-53 for more information on adding One Touch keys.
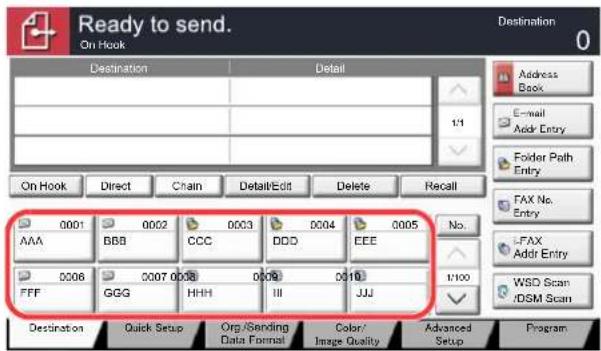
text_image
Ready to send. On Hook Destination Detail Address Book E-mail Addr Entry Folder Path Entry FAX No. Entry FAX Addr Entry WSD Scan /DSM Scan On Hook Direct Chain Detail/Edit Delete Recall 0001 AAA 0002 BBB 0003 CCC 0004 DDD 0005 No. 0006 FFF 0007 GGG 0008 HHH 0009 III 0010 JJJ 1/100 Destination Quick Setup Org /Sending Data Format Color/ Image Quality Advanced Setup ProgramChoosing from the Speed Dial
Access the destination by specifying the 4-digit (0001 to 1000) One Touch Key number (speed dial).
In the basic screen for sending, press the [Quick No. Search] key or [No.] and use the numeric keys to enter the One Touch key number in the numeric entry screen.

NOTE
if you entered the speed dial in 1 to 3-digit, press [OK].
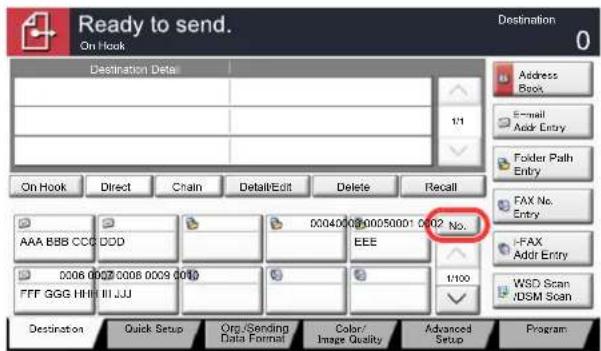
text_image
Ready to send. On Hook Destination Detail Address Book E-mail Addr Entry Folder Path Entry FAX No. Entry FAX Addr Entry WSD Scan /DSM Scan Destination Quick Setup Org./Sending Data Format Color/ Image Quality Advanced Setup ProgramEntering a New E-mail Address
Enter the desired E-mail address.

NOTE
Access the Embedded Web Server RX beforehand and specify the settings required for sending E-mail. For details, refer to Sending E-mail on page 2-37.
1 In the basic screen for sending, press [E-mail Addr Entry].
![Utax 3555i - In the basic screen for sending, press [E-mail Addr Entry]. - 1](/content/2026/05/780633/images/26be00c9b15d10c59e65aea7fa43bdf115965d8a48fa9e08bbc7248deac374d3.jpg)
text_image
Ready to send. On Hook Destination Detail Address Book E-mail Addr Entry Folder Path Entry FAX No. Entry i-FAX Addr Entry WSD Scan /DSM Scan Destination Quick Setup Org /Sending Data Format Color/ Image Quality Advanced Setup Program2 Enter destination E-mail address.
1 Press [E-mail Address], and enter the address.
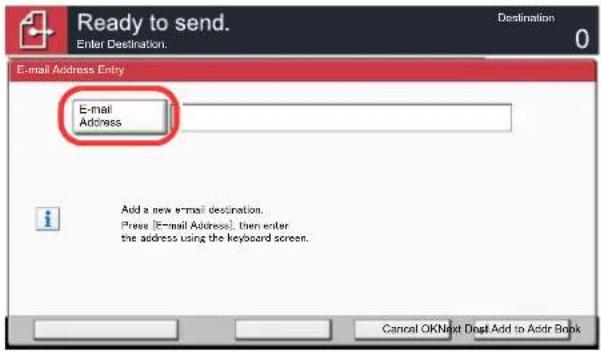
text_image
Ready to send. Enter Destination. Destination 0 E-mail Address Entry E-mail Address Add a new e-mail destination. Press [E-mail Address], then enter the address using the keyboard screen. Cancel OKNext Dept.Add to Addr BookThe maximum length of the E-mail address is 128 characters.

Entering Characters (page 11-12)
2 Press [OK].
3 Press [OK].
![Utax 3555i - Press [OK]. - 1](/content/2026/05/780633/images/3222ff84dbe12cd5077fef125b4cb76f60dadf1cc6bf310fd31cd97eef923890.jpg)
text_image
Ready to send. Enter Destination. Destination 0 E-mail Address Entry E-mail Address sbod@efg.com Add a new e-mail destination. Press [E-mail Address], then enter the address using the keyboard screen. Cancel OKNext Del Add to Addr BookTo enter multiple destinations, press [Next Destination] and enter the next destination. Up to 100 E-mail addresses can be specified.
You can register the entered mail address in the Address Book by pressing [Add to Address Book]. You can also replace the information for a previously registered destination.
![Utax 3555i - Press [OK]. - 2](/content/2026/05/780633/images/76bb12b3eafea267d8cd55740e3bd73bb29647c06891679ee8b16f3420ad3940.jpg)
Destinations can be changed later. Refer to Checking and Editing Destinations on page 5-34.
Specifying a New PC Folder
Specify either the desired shared folder on a computer or an FTP server as the destination.

NOTE
Refer to Creating a Shared Folder, Making a Note of a Shared Folder on page 3-37 for details on how to share a folder.
Be sure that SMB Protocol or FTP in the Embedded Web Server RX is On. For details, refer to the Embedded Web Server RX User Guide.
In the basic screen for sending, press [Folder Path Entry].
![Utax 3555i - In the basic screen for sending, press [Folder Path Entry]. - 1](/content/2026/05/780633/images/9f48bf16415ec56f7b0a27e47e860c9b87ab6d7129c79d38835e12a848d59c5e.jpg)
text_image
Ready to send. On Hook Destination Detail Address Back E-mail Addr Entry Folder Path Entry 1/1 On Hook Direct Chain Detail/Edit Delete Recall AAA BBB CCC DDD 0004000000050001 0002 No EEE 0006 0007 0008 0009 000 FFF GGG HHH III JJJ 1/100 WSD Scan /DSM Scan Destination D Quick Setup Org/Sending Data Format Color/Image Quality Advanced Setup Program2 Enter the destination information.
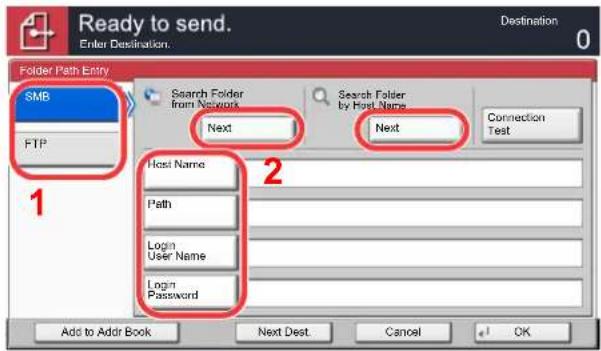
text_image
Ready to send. Enter Destination. Destination Folder Path Entry SMB FTP Search Folder from Network Next Search Folder by Host Name Next Connection Test Host Name Path Login User Name Login Password Add to Addr Book Next Dest. Cancel OK1 Press [SMB] or [FTP].
2 Enter the destination information.
Press the key of each item to first display the entry screen.
Enter the destination data and press [OK].

Entering Characters (page 11-12)
The table below explains the items to be entered.
For send to folder (SMB)
| Item Detail | Max. characters | |
| Host Name* | Computer name Up to | 64 characters |
| Path Share name | For example: scannerdataIf saving in a folder in the shared folder:"share name\folder name in shared folder" | Up to128 characters |
| Login User Name If the computer name and domain name are the same:User NameFor example: james.smithIf the computer name and domain name are different:Domain name\User nameFor example: "abcdnet\james.smith" | Up to64 characters | |
| Login Password Windows logon password(Case sensitive.) | Up to64 characters |
* To specify a port number different from the default (445), enter using the format
"Host name: port number" (Example: SMBhostname:140).
To enter the IPv6 address, enclose the address in brackets [].
(Example: [3ae3:9a0:cd05:b1d2:28a:1fc0:a1:10ae]:140)
To search for a folder on a PC on the network, press [Next] of "Search Folder from Network" or "Search Folder by Host Name".
If you selected "Search Folder from Network", you can enter the "Domain/Workgroup", and "Host Name" to search PCs on the network for the destination.
If you pressed "Search Folder by Host Name" you can search all PCs on the network for a destination.
A maximum of 500 addresses can be displayed. Select the host name (PC name) that you want to specify in the screen that appears, and press [Next]. The login user name and login password entry screen appears.
After you enter the login user name and login password name of the destination PC, the shared folders appear. Select the folder that you want to specify and press [Next]. The address of the selected shared folder is set.
Select the folder from the Search Results list.
For send to folder (FTP)
| Item Data to be entered | Max. characters | |
| Host Name* | Host name or IP address of FTP server Up to 64 | characters |
| Path Path to the receiving folderFor example, "\User\ScanData".Otherwise the data will be saved in the home directory. | Up to 128 characters | |
| Login User Name FTP server login user name Up to 64 | characters | |
| Login Password FTP server login password(Case sensitive.) | Up to 64 characters | |
* To specify a port number different from the default (21), enter using the format
"Host name: port number" (Example: FTHostname:140).
To enter the IPv6 address, enclose the address in brackets [].
(Example: [3ae3:9a0:cd05:b1d2:28a:1fc0:a1:10ae]:140)
3 Check the status.
1 Check the information.
Change the delay as required.
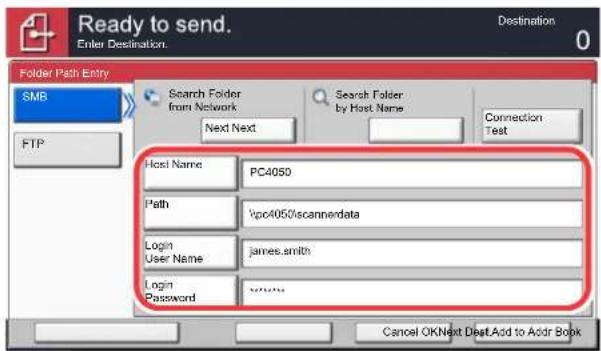
text_image
Ready to send. Enter Destination. Destination 0 Folder Path Entry SMB FTP Search Folder from Network Next Next Search Folder by Host Name Connection Test Host Name PC4050 Path \pco4050/scannerdata Login User Name james.smith Login Password www. Cancel OKNext Dest.Add to Addr Book2 Press [Connection Test] to check the connection.
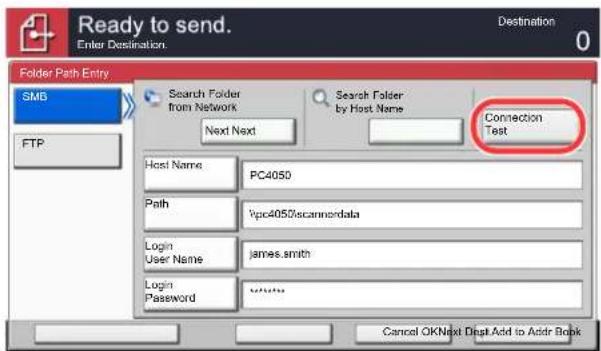
text_image
Ready to send. Enter Destination. Destination Folder Path Entry SMB FTP Search Folder from Network Next Next Search Folder by Host Name Connection Test Host Name PC4050 Path \psc4050\scannordata Login User Name james.smith Login Password \wetee Cancel OKNext Diag.Add to Addr Book"Connected." appears when connection to the destination is correctly established. If "Cannot connect." appears, review the entry.
To enter multiple destinations, press [Next Destination] and enter the next destination. You can specify a combined total of up to 10 SMB and FTP destination folders.
You can register the entered information in the Address Book by pressing [Add to Address Book].
4 Accept the destination.
Press [OK].
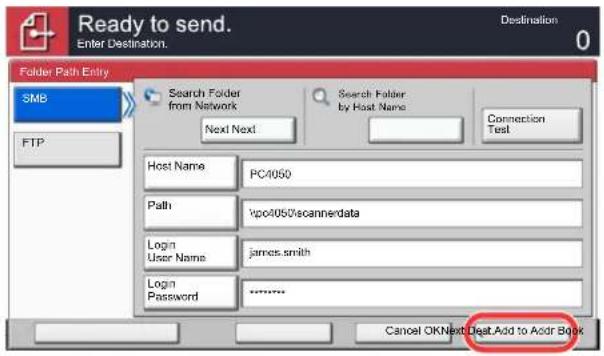
text_image
Ready to send. Enter Destination. Destination 0 Folder Path Entry SMB FTP Search Folder from Network Next Next Search Folder by Host Name Connection Test Host Name PC4050 Path wpc4050/scannerdata Login User Name james.smith Login Password ****** Cancel OKNext Dest.Add to Addr Book
Destinations can be changed later. Refer to Checking and Editing Destinations on page 5-34.
Checking and Editing Destinations
Check and edit a selected destination.
1 Display the screen.
Referring to Specifying Destination on page 5-26, specify the destination.
2 Check and edit the destination.
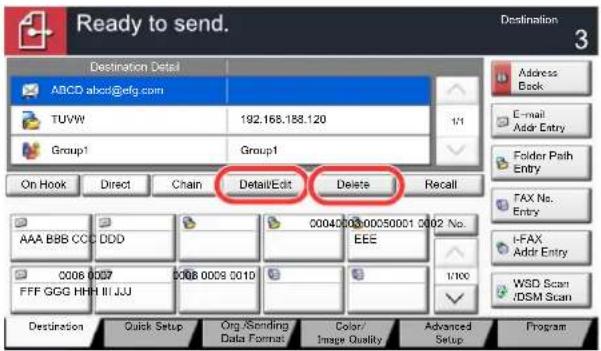
text_image
Ready to send. Destination 3 Destination Detail ABCD abcd@efg.com TUVW 192.168.188.120 Group1 Group1 On Hook Direct Chain DetailEdit Delete Recall AAA BBB CCC DDD 000400000000001 0002 No. EEE 0006 0007 0008 0009 0010 1/100 FFF GGG HHH III JJJ Destination Quick Setup Org /Sampling Data Format Color/ Image Quality Advanced Setup Program Address Book E-mail Asar Entry Folder Path Entry FAX No. Entry I-FAX Addr Entry WSD Scan IDSM ScanSelect a destination and press [Detail/Edit] to check and edit it. Edit the delay as required.
Select a destination and press [Delete] to remove the destination from the list.

NOTE
When selecting [On] for Entry Check for New Destination (Entry Check for New Dest. on page 8-29), the confirmation screen appears. Enter the same host name and path again, and press [OK].
When selecting [On] for Destination Check before Send (Dest. Check before Send on page 8-29), the confirmation screen appears after pressing the [Start] key. For details, refer to Confirmation Screen of Destinations on page 5-35.
Confirmation Screen of Destinations
When selecting [On] for Destination Check before Send (Dest. Check before Send on page 8-29), the confirmation screen of destinations appears after pressing the [Start] key.
Follow the steps below to confirm the destinations.
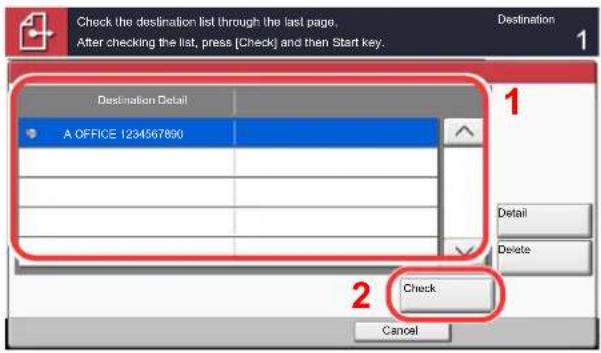
text_image
Check the destination list through the last page. After checking the list, press [Check] and then Start key. Destination 1 Destination Detail A OFFICE 1234567890 1 Detail Delete 2 Check Cancel1 Press [ ] or [ ] to confirm all destination.
Pressing [Detail] shows the detailed information of the selected destination.
To delete the destination, select the destination you want to delete and press [Delete]. Press [Yes] in the confirmation screen. The destination is deleted.
To add the destination, press [Cancel] and then return to the destination screen.
2 Press [Check].

NOTE
Be sure to confirm all destination by displaying them on the touch panel. You cannot press [Check] unless you have confirmed all destination.
Sending to Different Types of Destinations (Multi Sending)
You can specify destinations that combine E-mail addresses, folders (SMB or FTP) and fax numbers*. This is referred to as Multi Sending. This is useful for sending to different types of destination (E-mail addresses, folders, etc.) in a single operation.
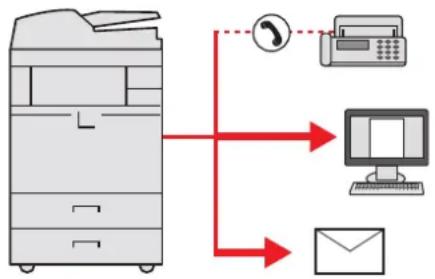
flowchart
graph TD
    A["Printer"] -->|Red Line| B["Computer"]
    A -->|Red Line| C["Email"]
    A -->|Red Line| D["Telephone"]
    style A fill:#f9f,stroke:#333
    style B fill:#ccf,stroke:#333
    style C fill:#cfc,stroke:#333
    style D fill:#fcc,stroke:#333
* Requires the optional fax kit.
No. of broadcast items
E-mail: Up to 100
Folders (SMP, FTP): Total of 10 SMB and FTP
FAX: Up to 500
i-FAX: Up to 100
Also, depending on the settings, you can send and print at the same time.
Procedures are the same as used in specifying the destinations of respective types. Continue to enter E-mail address or folder path so that they appear in the destination list. Press the [Start] key to start transmission to all destinations at one time.

NOTE
If the destinations include a fax, the images sent to all destinations will be black and white.
WSD Scan/DSM Scan
WSD Scan
WSD Scan saves images of originals scanned on this machine as files on a WSD-compatible computer.

NOTE
To use WSD Scan, confirm that the computer used for WSD scanning and the machine is network-connected, and WSD Scan on page 8-45 is set to [On] in the network settings.
For information on operating the computer, refer to the computer's help or the operation guide of your software.
Installing Driver Software (for Windows 7)
1 Click the [Start] button on the Windows, and then click [Network].
In Windows 8, select the Desktop in the Start screen and click [Libraries], and then [Network].
![Utax 3555i - Click the [Start] button on the Windows, and then click [Network]. - 1](/content/2026/05/780633/images/533e09e65a66d9b9d6733f6931a2ed63c0dd0237975bd69df6eb51a2285b7ccf.jpg)
NOTE
When [Network] does not appear in the Start menu, perform the following procedure.
1 Right-click [Start] and click [Property] in the menu that appears.
2 Select the [[Start] menu] tab in the "Task bar and [Start] menu properties" screen, and click [Customize].
3 When the "Customize [Start] menu" screen appears, select the "Network" check box and click [OK].
2 Install the driver.
Right-click the machine's icon (Brand Name: XXX:XXX) and then click [Install].

NOTE
If the "User Account Control" window appears, click [Continue]. If the "Found New Hardware" window appears, click [Cancel].
During the installation, double-click the icon shown on the task bar to display the "Driver Software Installation" screen. When "Your devices are ready to use" is displayed on the [Driver Software Installation] screen, the installation is completed.
WSD scan
1 Press [Send] on the Home screen.
![Utax 3555i - Press [Send] on the Home screen. - 1](/content/2026/05/780633/images/ca9bb97ad8bbf12b0d16f176cf697a0e268fc3430b8f552957edd9130b84df14.jpg)
text_image
Home Send2 Place the originals.
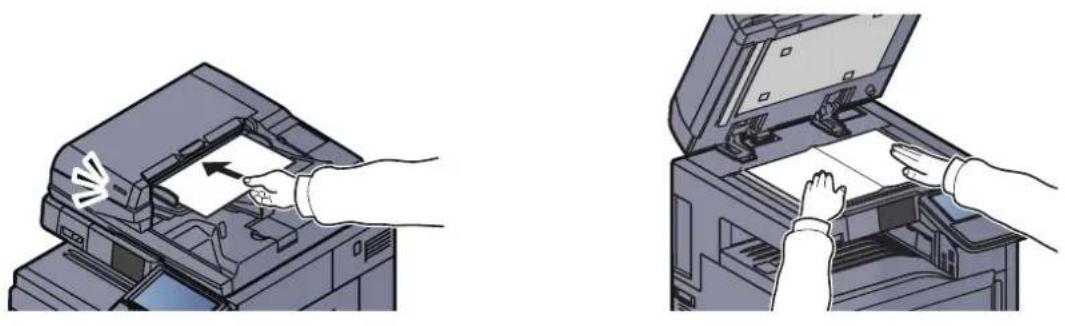
natural_image
Illustration of two hands operating a printer in the open circuit, showing paper handling and print (no text or symbols present)
Loading Originals (page 5-2)
3 Display the screen.
Press [WSD Scan/DSM Scan].
If DSM Scan on page 8-45 is set to [Off] in the network settings, press [WSD Scan] and go to step 4.
4 Scan the originals.
Procedure using this machine
1 Select [From Operation Panel] and press [Next].
2 Select the destination computer and press [OK].
Press [Reload] to reload the computer list.

text_image
WSD Scan - Selecting Computer Select the destination computer and press [OK]. Computer Name pc000101 pc000102 pc000103 pc000104 pc000105 1 1/1 Reload Detail Back OKCancelYou can view information on the selected computer by pressing [Detail].
3 Set the type of original, file format, etc., as desired.
4 Press the [Start] key.
Sending begins and the software installed on the computer is activated.
Procedure from Your Computer
1 Press [From Computer] and press [Next].
2 Use the software installed on the computer to send the images.
DSM Scan (Windows Server 2008 R2 or Windows Server 2012 Only)
A scanned document can be automatically saved in any format or sent to any destination by reading a scan process from Active Directory.

NOTE
If you are performing DSM scan, check the items below.
- The machine is connected to an Active Directory on the network that the scan process can reference.
- "DSM Scan" and "LDAP" are set to [On] in Protocol Settings (page 8-45) in Network.
- "SSL" is set to [On] in Security Settings (page 8-46) in Network.
• [Network Authentication] is set in User Login (page 9-4).
If the Active Directory that the scan process can reference is not on the network authentication server, DSM must be set in Embedded Web Server RX. For details, refer to the Embedded Web Server RX User Guide.
1 Press [Send] on the Home screen.
![Utax 3555i - Press [Send] on the Home screen. - 1](/content/2026/05/780633/images/265ceb3a879d0c2a03d8555db3334748f748b0853f04d46d7e858d76fef0f1b6.jpg)
text_image
Home Send![Utax 3555i - Press [Send] on the Home screen. - 2](/content/2026/05/780633/images/8d7254260f71c139d18f6abab59997cc0f73d98a60af2fce48a3342f39c2479b.jpg)
NOTE
Depending on the settings, the address book screen may appear. In this event, press [Cancel] to display the screen for sending.
2 Place the originals.
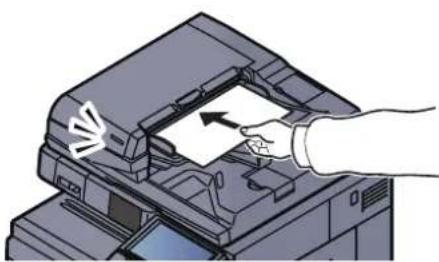
natural_image
Illustration of a hand inserting a document into a printer (no text or symbols visible)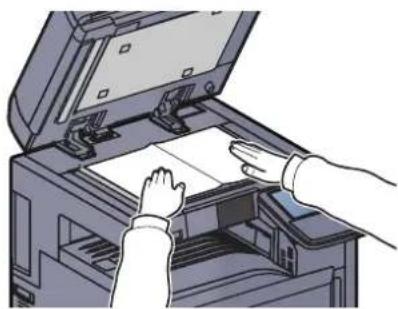
natural_image
Illustration of hands operating a printer with an open lid (no text or symbols visible)
Loading Originals (page 5-2)
3 Press [WSD Scan/DSM Scan].
If WSD Scan on page 8-45 is set to [Off] in the network settings, press [DSM Scan] and go to step 5.
4 Select [DSM Scan] and press [Next].
5 Select the scan process to be used and press [OK].
![Utax 3555i - Select the scan process to be used and press [OK]. - 1](/content/2026/05/780633/images/9625a0a51dad87a43e6074593c26e6d46c67c0afbfbc07a5107aef08197a0fa4.jpg)
text_image
DSM Scan - Selecting Scan Process Select the scan process and press (OK). Scan Process Name ScanProcess001 ScanProcess002 ScanProcess003 ScanProcess004 ScanProcess005 Reload Detail Back OKCancelPress [Reload] to reload the computer list.
To check the settings, press [Detail].
6 Change the settings and add destinations as needed.
Only E-mail addresses can be added as destinations.
In the send base screen, press [Detail/Edit], [Destination], and then [Address Book] or [E-mail Addr Entry], and add a destination.
In some scan processes, it may not be possible to change settings or add destinations.
7 Press the [Start] key.
Sending starts.
Scanning using TWAIN
This section explains how to scan an original using TWAIN. The machine's TWAIN/WIA can be used for two types of scanning: scanning a document placed in the machine, and scanning a document that has been stored in a custom box.
The procedure for scanning using the TWAIN driver is explained as an example. The WIA driver is used in the same way.
Scanning a document placed in the machine
1 Display the screen.
1 Activate the TWAIN compatible application software.
2 Select the machine using the application and display the TWAIN dialog box.

NOTE
For selecting the machine, see the Operation Guide or Help for each application software.
2 Configure the scan settings.
Select scanning settings in the TWAIN dialog box that opens.
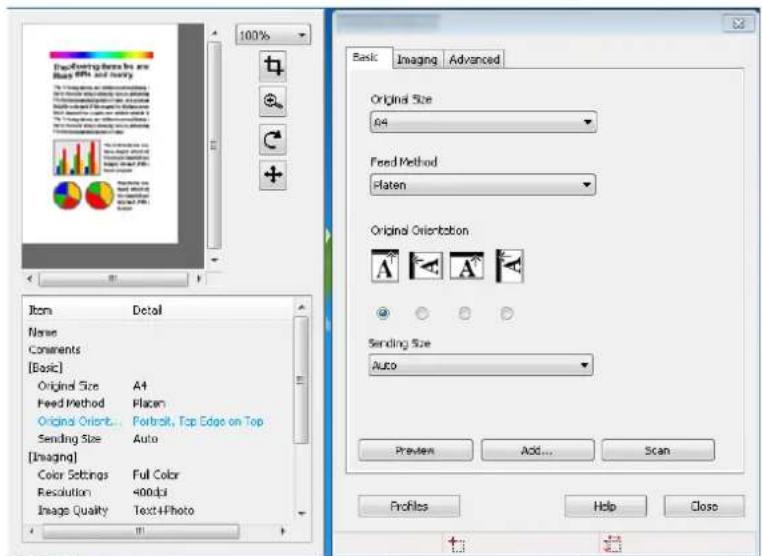
text_image
100% Existing Items is are Blue 89% and nearly To Find the image in the image. The image contains an image with a color palette and a patterned background. The image is designed to be a visual or abstract visual (or text). It is designed to create a new graphic design tool. It is designed to create a new graphic design tool. It is designed to create a new graphic design tool. It is designed to create a new graphic design tool. It is designed to create a new graphic design tool. It is designed to create a new graphic design tool. It is designed to create a new graphic design tool. It is designed to create a new graphic design tool. It is designed to create a new graphic design tool. It is designed to create a new graphic design tool. If you want to create a new graphic design tool, you should not create a new graphic design tool. If you want to create a new graphic design tool, you should not create a new graphic design tool. If you want to create a new graphic design tool, you should not create a new graphic design tool. If you want to create a new graphic design tool, you should not create a new graphic design tool. If you want to create a new graphic design tool, you should not create a new graphic design tool. If you want to create a new graphic Design Tool, you should not create a new graphic Design Tool, you should not create a new graphic Design Tool, you should not create a new graphic Design Tool, you should not create a new graphic Design Tool, you should not create a new graphic Design Tool, you should not create a new graphic Design Tool, you should not create a new graphic Design Tool, you should not create a new graphic Design Tool, you should not create a new graphic Design Tool, you should not create a new graphic Design Tool, you should then use the original image as an image file named 'image.png'.The settings that appear in the TWAIN dialog box are as follows.
| Item Detail | ||
| Basic | Original Size | This setting sets the size of the scan area. The available sizes vary based on the scanner model and the size of the original. |
| Feed Method | This setting specifies the feed method of the original. Select the feed method from the list. | |
| Original Orientation | This setting specifies the orientation of the original. | |
| Sending Size This setting specifies the image size. The available sizes vary based on the scanner model and the scan area selected in the preview panel. | ||
| Imaging | Color Settings | This setting specifies the type of color for the image. |
| Resolution | This setting specifies the dpi (dots per inch), or sharpness, for the image. | |
| Image Quality | This setting specifies the overall image quality. Make sure your selection matches the original that you are scanning. | |
| Exposure Level | This setting specifies the sharpness and clarity of the image. If the "Auto" check box is selected, then the slider bar and edit box are unavailable, and the exposure level is automatically set to the default setting. | |
| Contrast | This setting specifies the contrast between light and dark areas of the image. This feature cannot be used when [Black & White] is selected in the [Color Settings]. | |
| Advanced | Reverse Image | This setting scans images like a photo negative, reversing the black and white areas of the image. |
| Prevent Bleed-through | This setting prevents the image on one side of the paper from showing through to the other side when scanned. | |
| Scan Profiles | This is used to check current settings and store frequently used settings. When the [Configuration] button is clicked, a setting screen opens with buttons for [Add], [Edit], and [Delete]. | |
| Add The current settings can be saved as a Scan Profile. | ||
| Edit The name and comments of the selected Scan Profile can be changed. | ||
| Delete Delete saved Scan Profiles. | ||
3 Place the originals.
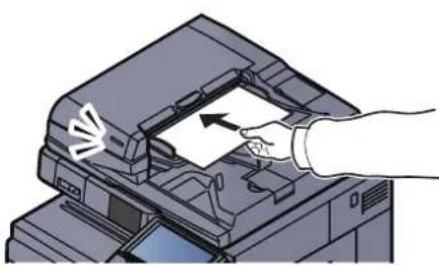
natural_image
Illustration of a hand inserting a document into a printer (no text or symbols visible)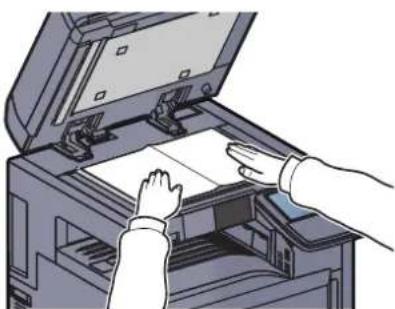
natural_image
Illustration of hands operating a printer with an open lid (no text or symbols visible)
Loading Originals (page 5-2)
4 Scan the originals.
Click the [Scan] button. The document data is scanned.
Scanning a document stored in a custom box

NOTE
To scan a document stored in a custom box, select a model name with (Box) from "Model" in the TWAIN driver settings screen.
1 Display the TWAIN dialog box.
1 Activate the TWAIN compatible application software.
2 Select the machine using the application and display the TWAIN dialog box.

NOTE
For selecting the machine, see the Operation Guide or Help for each application software.
2 Display list of documents.
1 Select the Custom Box containing the document file to be scanned from [Box List].
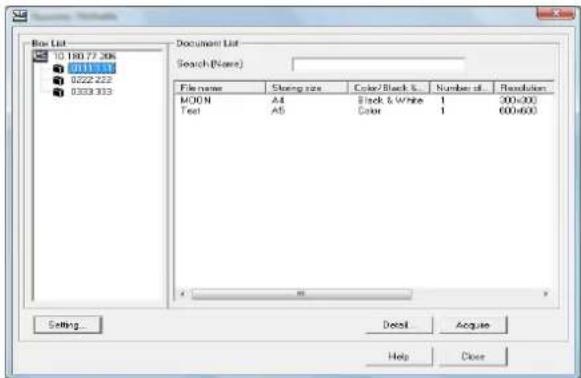
text_image
Box List 10.180.77.206 0011.11 0222.223 0333.333 Document List Search (Name) File name Storage size Color/Black &... Number of... Resolution MOON All Black & White 1 300x300 Test AS Color 1 600x600 Setting... Detail Acquire Help CloseIf a password has been set for the box, the password entry screen appears. Enter the password and click the [OK] button. When you select a box, the document files in the Custom Box appear in [Document List].
2 Set how to display the document data. Click the [Setting] button to select each item.
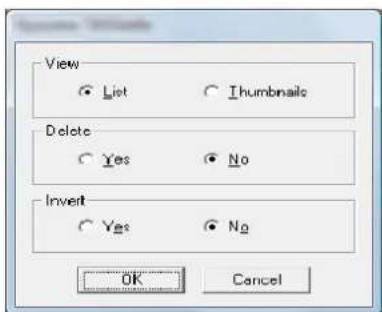
text_image
View ● List ○ Iumbnaile Delete ○ Yes ○ No Invert ○ Yes ○ No OK Cancel| Item Detail |
| View Change the display in the Document List field to List or Thumbnails. |
| Delete After scanning the document data, delete the data from the Custom Box. |
| Invert Invert the document data color to start scanning. |
3 Click [OK] button.
3 Scan the originals.
1 Select the document data to be scanned from [Document List].
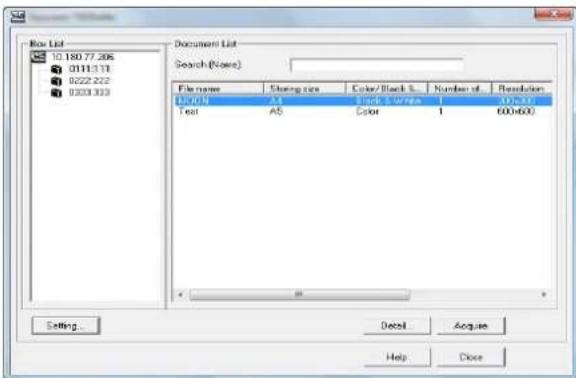
text_image
Box List 10.180.77.206 01113.11 0222.222 0333.333 Document List Search (None) File name Storage size Color/Black L Number of Resolution ECON A4 Black & White 1 30x300 Test A5 Color 1 600x600 Setting... Detail Acquire Help DoseEnter the document data name in the Search (Name) to find the data having the same document data name or the document data name with the same beginning.
Click the [Detail] button to display the selected document data. When the document data includes multiple pages, select the checkbox beside the pages you want to scan. The selected pages will be scanned.
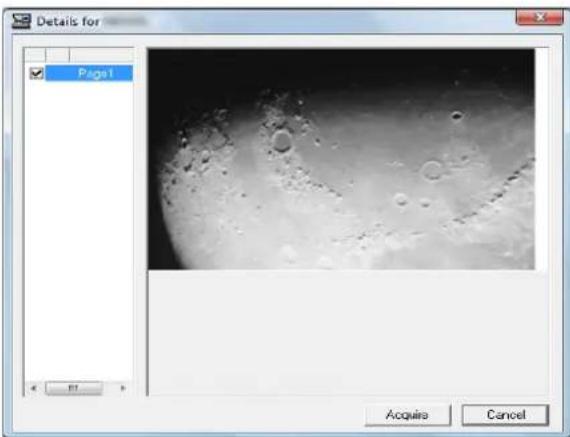
text_image
Details for Page1 Acquire CancelNOTE
In this case, the scanned page or the selected document data will not be deleted from the Custom Box.
2 Click the [Acquire] button.
The document data is scanned.
Scanning with FMU Connection
"FMU Connection" is installed on the machine as a standard application.
FMU Connection can be used to scan an original according to the settings configured with "File Management Utility" on the provided DVD, and save the image data and scanning information on a specified server or in a specified folder. Unlike regular transmission functions, this application lets you use metadata such as the scan date and time and the data format.

NOTE
The first time you use FMU Connection, you must enable it in System Menu. For details, refer to Application on page 8-60.
To use FMU Connection, you must install File Management Utility on your computer and configure settings for the multifunction machine to be used, scanning conditions, and the file save location. To install File Management Utility, refer to Installing Software on page 2-13.
For information on using File Management Utility, see File Management Utility User Guide on the DVD.
Using FMU Connection to scan an original
1 Make sure that File Management Utility is running on the computer (or server) on which File Management Utility is installed.
2 Place the original.
3 Press [FMU Connection].
FMU Connection starts.
4 Follow the on-screen instructions to enter the necessary information and press [Next].
5 When the scan settings screen appears, press each item and configure the necessary settings.
The features that can be set depend on File Management Utility.
6 Press the [Start] key.
Sending starts.
What is Document Box?
Document Box contains four types of component boxes which provide the following functions.
The following types of document boxes are available.
Custom Box (page 5-52)
Custom Box is a component box which you can create within the Document Box and store data for later retrieval. You can create or delete a Custom Box, and manipulate data in various ways as described below:

Creating a New Custom Box (Add/Edit Box) (page 5-52)
Storing Documents (Store File) (page 5-55)
Printing Documents (Print) (page 5-56)
Sending Documents (Send) (page 5-57)
Editing Documents (page 5-59)
Deleting Documents (page 5-63)
Job Box
Job Box is a generic name for the "Private Print/Stored Job Box", "Quick Copy/Proof and Hold Box", "Repeat Copy Box", and "Form for Form Overlay Box". These Job Boxes cannot be created or deleted by a user.

NOTE
You can set up the machine so that temporary documents in job boxes are automatically deleted. For details, refer to Deletion of Job Retention on page 8-34.
Private Print/Stored Job Box (page 4-14)
In Private Printing, you can specify that a job is not to be printed until you operate the machine. When sending the job from the application software, specify a 4-digit access code in the printer driver. The job is released for printing by entering the access code on the operation panel, ensuring confidentiality of the print job. The data will be deleted upon completion of the print job or after the main power switch is turned off.
In Stored Job, the print data sent from the application is saved to the machine. You can set up an access code as necessary. If you set up an access code, enter the access code when printing. Print data will be stored in the hard disk after printing. This will allow printing of the same print data repeatedly.
Quick Copy/Proof and Hold Box (page 4-16)
Quick Copy feature facilitates additional prints of a document already printed. Activating Quick Copy and printing a document using the printer driver allow the print data to be stored in the Quick Copy Job Box. When additional copies are required, you can reprint the required number of copies from the operation panel. By default, up to 32 documents can be stored. When power is turned off, all stored jobs will be deleted.

NOTE
When you attempt to store documents in excess of the above maximum, the oldest document data will be overwritten by the latest document data.
The Proof and Hold feature produces only a single proof print of multiple-print job and holds printing of the remaining copies. Printing a multiple-print job in Proof and Hold using the printer driver allows only a single copy to be printed while maintaining the document data in the Job Box. To continue to print the remaining copies, use the operation panel. You can change the number of copies to print.
Repeat Copy Box (page 5-65)
Repeat Copy feature stores the copied original document data in the Job Box and allows you to print additional copies later. By default, up to 32 documents can be stored. When power is turned off, all stored jobs will be deleted.

NOTE
Repeat Copy function is not available when the optional Data Security Kit is installed.
Form for Form Overlay Box (page 5-64)
Image Overlay feature copies the original document overlaid with a form or image. This Job Box is used to store the forms or images for overlaying.
Removable Memory Box (page 5-67)
A USB memory stick can be connected to the USB port (A1) on the machine to print a saved PDF file. You can print PDF data directly from the USB memory without a PC. Image files scanned using this machine can also be saved to USB memory in the PDF, TIFF, JPEG, XPS or high compression PDF format (Scan to USB).
Fax Box
Fax Box stores the fax data received. For details, refer to the FAX Operation Guide.
Basic Operation for Document Box
This section explains basic operations for document boxes, using examples where tasks are carried out with custom boxes.

NOTE
In the following explanation, it is assumed that user login administration is enabled. For details on User Logon privileges, refer to Editing Custom Box on page 5-54.
Box List
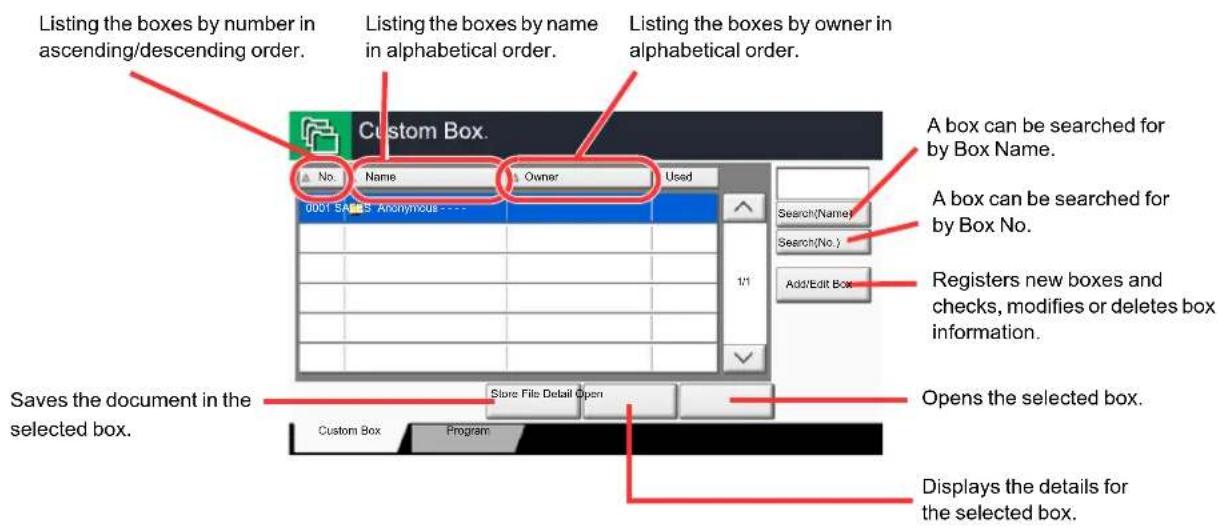
text_image
Listing the boxes by number in ascending/descending order. Listing the boxes by name in alphabetical order. Listing the boxes by owner in alphabetical order. Custom Box. No. Name Owner Used 0001 SA#S Anonymous A box can be searched for by Box Name. A box can be searched for by Box No. 1/1 Add/Edit Box Registers new boxes and checks, modifies or deletes box information. Saves the document in the selected box. Store Files Detail Open Opens the selected box. Custom Box Program Displays the details for the selected box.Document List
The document list is a list of the documents stored in the custom box. Documents can be listed either by name or as thumbnails. The list can be used as shown below.
List
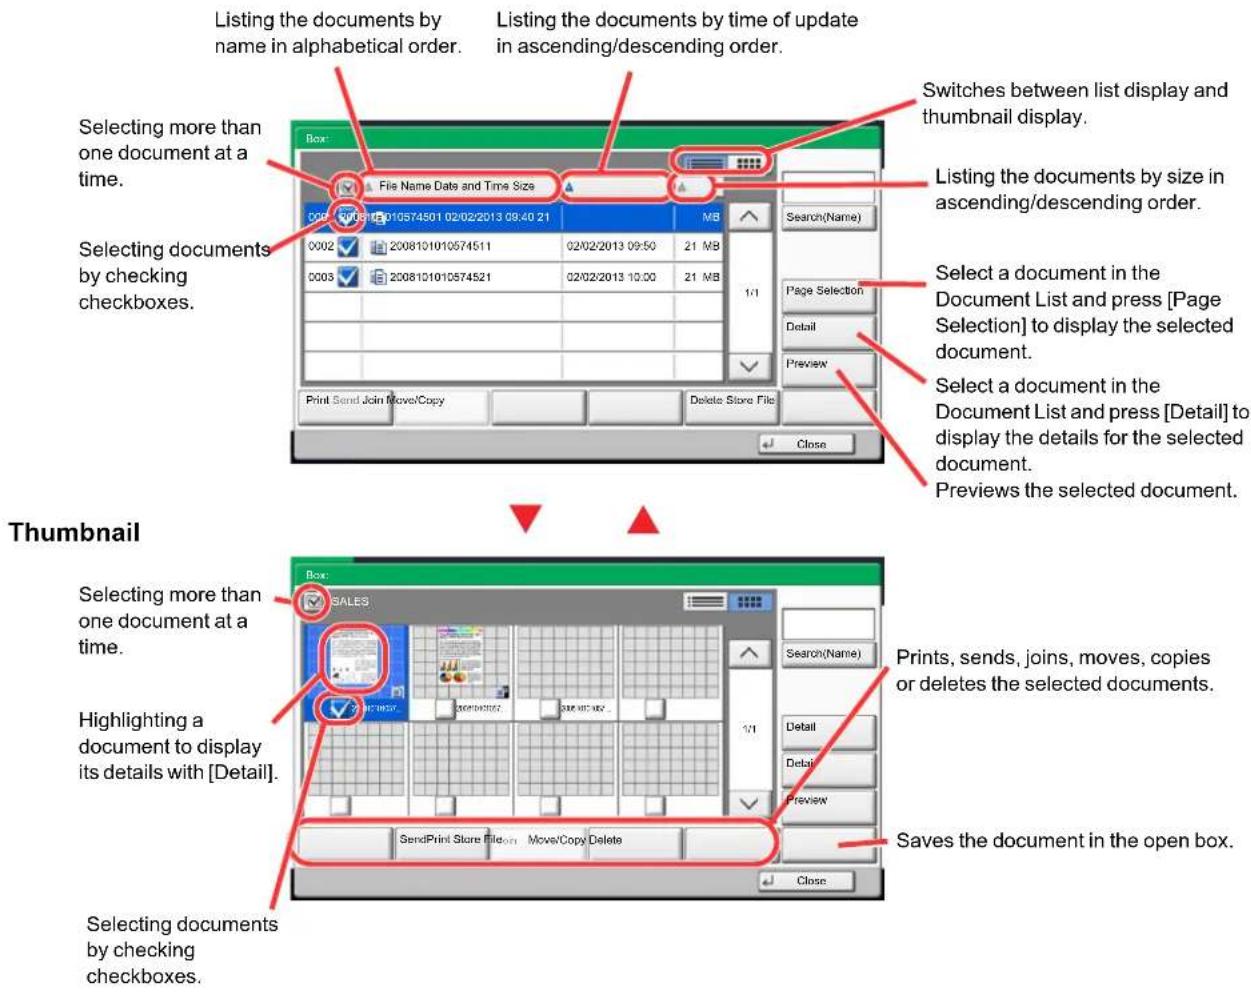
text_image
Listing the documents by name in alphabetical order. Listing the documents by time of update in ascending/descending order. Switches between list display and thumbnail display. Selecting more than one document at a time. File Name Date and Time Size Listing the documents by size in ascending/descending order. Selecting documents by checking checkboxes. 0002 2008101010574511 02/02/2013 09:50 21 MB 0003 2008101010574521 02/02/2013 10:00 21 MB Search(Name) 1/1 Page Selection Detail Preview Print Send Join Move/Copy Delete Store File Close Select a document in the Document List and press [Page Selection] to display the selected document. Select a document in the Document List and press [Detail] to display the details for the selected document. Previews the selected document. Thumbnail Selecting more than one document at a time. Highlighting a document to display its details with [Detail]. Box: SALES Search(Name) 1/1 Detail Detail Preview SendPrint Store Files or Moves/Copy Delete Saves the document in the open box. Close Selecting documents by checking checkboxes.
NOTE
You can select multiple documents by pressing the respective document checkboxes. However, note that you cannot select multiple documents when you are sending documents.
Viewing/Editing Box Details
You can check and modify box information.
Use the procedure below.
1 Press [Add/Edit Box] in the box list screen.
2 Highlight the box whose box details you wish to check or edit and press [Detail/Edit].
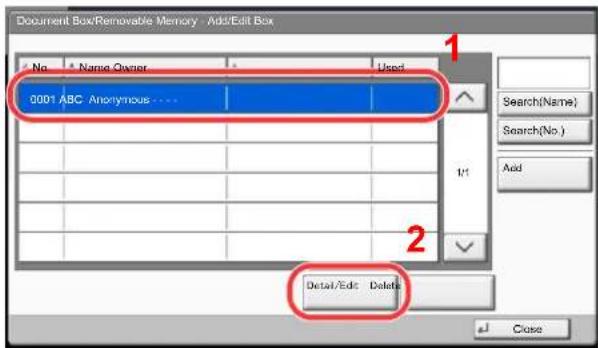
text_image
Document Box/Removable Memory - Add/Edit Box No Name Owner Used 0001 ABC Anonymous .... 1/1 Detail/Edit Delete Search(Name) Search(No.) Add Close
If a custom box is protected by a password, enter the correct password.
3 Check the box details.
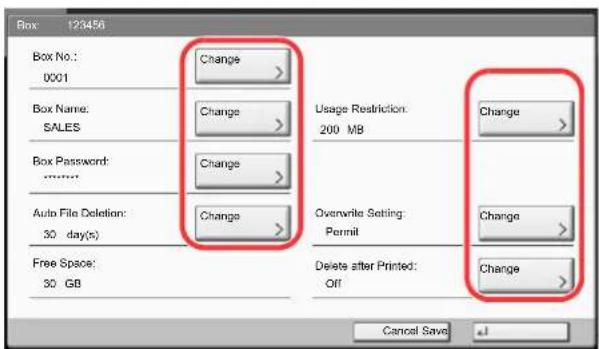
text_image
Box: 123456 Box No.: Change 0001 Box Name: Change SALES Box Password: Change Auto File Deletion: Change 30 day(s) Free Space: Change 30 GB Usage Restriction: 200 MB Overwrite Setting: Permit Delete after Printed: Off Change Change Change Change Cancel Save ✓To edit details, press [Change] of the detail you wish to edit. Edit the detail as desired and press [OK].
4 If you have changed the details, press [Save] and then press [Yes] in the confirmation screen.
If you do not change the details, press [No].
5 Press [Close].
The display returns to the default Document Box screen.
Previewing Documents/Checking Document Details
You can use this function to preview the documents stored in a document box or display the document details for checking.
1 Select (highlight) a document to preview and then press [Preview] or [Detail].
2 Preview the document or check the document details.
The operations available in the preview screen are shown below.
When you have zoomed in, you can use these keys to move the displayed area.
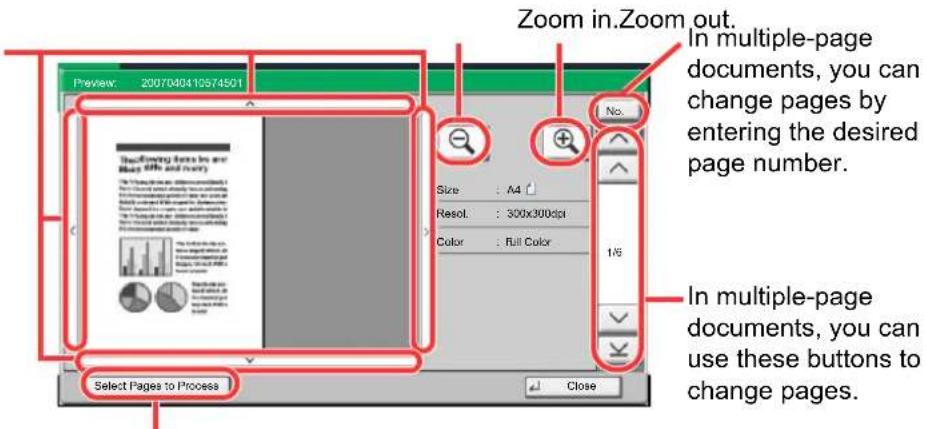
text_image
Zoom in Zoom out. In multiple-page documents, you can change pages by entering the desired page number. Size : A4 Reset: 300x300dpi Color : full Color 1/6 Select Pages to Process ClosePress to select any page of the open document and print, send or copy to removable memory.

Selecting a page (page 5-51)

NOTE
The preview display can be controlled by moving your finger(s) on the touch panel.

Using the Preview Screen (page 3-10)
3 Confirm the document(s) and press [Close].
Selecting a page
When printing, sending, or copying a document within a Custom Box, you can specify any pages at will.
Press [Page Selection] in the document list screen of the Custom Box, or [Select Pages to Process] in the Preview screen, to display the page selection screen.
Select the pages you want to work with, and press [Print], [Send], or [Copy to Memory].
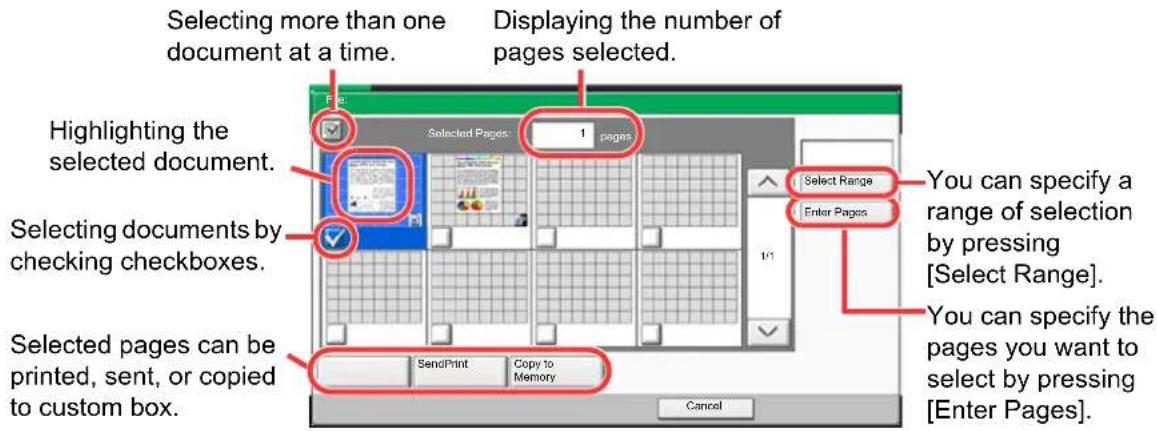
text_image
Selecting more than one document at a time. Displaying the number of pages selected. Highlighting the selected document. Selecting documents by checking checkboxes. Selected pages can be printed, sent, or copied to custom box. SendPrint Copy to Memory Select Range Enter Pages 1/1 Cancel You can specify a range of selection by pressing [Select Range]. You can specify the pages you want to select by pressing [Enter Pages].
Printing Documents (Print) (page 5-56)
Sending Documents (Send) (page 5-57)
Moving a Document/Copying a Document (Move/Copy) (page 5-59)
Using a Custom Box
Creating a New Custom Box (Add/Edit Box)

NOTE
If user login administration is enabled, you can only change the settings by logging in with administrator privileges. The factory default login user name and login password are set as shown below.
| Model Name Login User Name Login Password | ||
| 3555i 3500 3500 | ||
| 4555i 4500 4500 | ||
| 5555i 5500 5500 | ||
If user login administration is enabled, log in with administrator privileges to perform the following operations. They cannot be performed with user privileges.
- Creating a box
- Deleting a box of which owner is another user.
1 Press [Custom Box] on the Home screen.
![Utax 3555i - Press [Custom Box] on the Home screen. - 1](/content/2026/05/780633/images/8ebc7b2e711ac38d640399e76104b8e7b53790dc695b8f75da79b673ec669206.jpg)
text_image
Home Custom Box2 Press [Add/Edit Box].
![Utax 3555i - Press [Add/Edit Box]. - 1](/content/2026/05/780633/images/ddbfd69c776f4b93973f7064ccbe6cd4aa5899b8dcd76b3f53e252e0dfcc1da3.jpg)
text_image
Custom Box. No. ▲ Name ▲ Owner Used 0001 SA#S Anonymous ---- Search(Name) Search(No.) Add/Edit Box Store File Detail Open Custom Box Program3 Select [Add].
4 Press [Change] for each item.
5 Enter the information and then press [OK].
The table below lists the items to be set.
| Item Description | |
| Box No. | Enter the box number by pressing [+], [-] or number keys. The box number can be from 0001 to 1000. A Custom Box should have a unique number. If you enter 0000, the smallest number available will be automatically assigned. |
| Owner* | Set the owner of the box. Select the owner from the user list that appears. |
| Box Name | Enter a box name consisting of up to 32 characters. Refer to Entering Characters on page 11-12 for details on entering characters. |
| Usage Restriction | To preserve the hard disk capacity, the storage capacity for a box can be restricted. To enable a capacity restriction enter a value for the storage capacity of the Custom Box in megabytes by pressing [-], [+] or number keys. You can enter a limit between 1 and 30,000 (MB). |
| Box Password | User access to the box can be restricted by specifying a password to protect the box. Entering a password is not mandatory. Enter the same password of up to 16 characters in both [Password] and [Confirm Password]. |
| Permission* Select whether to share the box. | |
| Auto File Deletion | Automatically deletes stored documents after a set period of time. Press [On] to enable automatic deletion and then use [+] and [-] or the numeric keys to enter the number of days for which documents are stored. You can enter any number between 1 and 31 (day(s)). To disable automatic file deletion, press [Off]. |
| Overwrite Setting | Specifies whether or not old stored documents are overwritten when new documents are stored. To overwrite old documents, press [Permit]. To retain old documents, press [Prohibit]. |
| Free Space Displays the free space on the box. | |
| Delete after Printed | Automatically delete a document from the box once printing is complete. To delete the document, press [On]. To retain the document, press [Off]. |
* Displayed when the user login administration is enabled.
6 Check the details you have entered and then press [Save].
The Custom Box is created.
Editing Custom Box
1 Referring to Creating a New Custom Box (Add/Edit Box) on page 5-52, display the screen for editing the custom box.
2 Select the box you want edit, and press [Detail/Edit].

NOTE
When you have logged in as a user, you can only delete the box whose owner is set to that user.
When you have logged in as administrator, you can edit all boxes.
3 Edit the custom box.
When user login administration is enabled, the settings that can be changed varies depending on the privileges of the logged in user.
| Privileges Settings that can be changed | |
| Administrator Box No. | |
| Owner | |
| Box Name | |
| Usage Restriction | |
| Box Password | |
| Permission | |
| Auto File Deletion | |
| Overwrite Setting | |
| Delete after Printed | |
| User Box Name | |
| Box Password | |
| Permission | |
| Auto File Deletion | |
| Overwrite Setting | |
| Delete after Printed | |
For details, refer to Creating a New Custom Box (Add/Edit Box) on page 5-52.
Storing Documents (Store File)
The procedure for storing documents in a custom box is explained below.
1 Press [Custom Box] on the Home screen.
![Utax 3555i - Press [Custom Box] on the Home screen. - 1](/content/2026/05/780633/images/22c8465bd583c464424537a062379e755689952ebdd7dd21bd2dfd248eefa356.jpg)
flowchart
graph LR
    A["Home"] --> B["Custom Box"]
2 Place the originals.
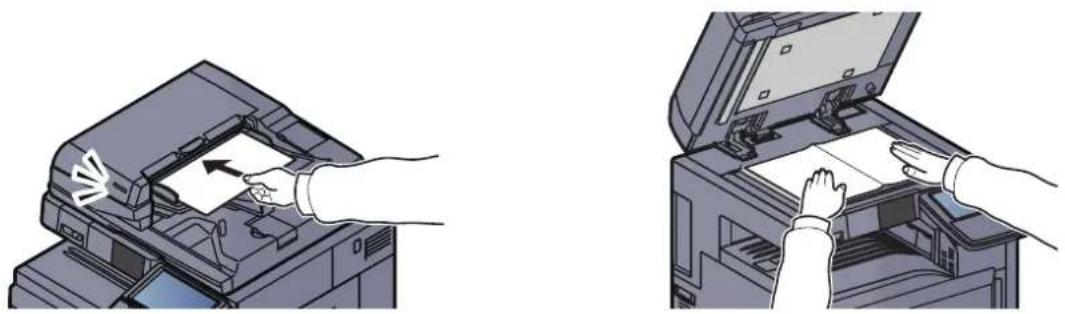
natural_image
Two-step illustration of a printer's open circuit, showing hand placement and press application (no text or symbols)3 Select the box where the document will be stored and then press [Store File].
![Utax 3555i - Select the box where the document will be stored and then press [Store File]. - 1](/content/2026/05/780633/images/4a6a4c7880c44f8963720a9d46c8f9267cd87d43f37132e77cab9cddee885ae7.jpg)
text_image
Custom Box. 1 0001 S###S Anonymous ---- 1/1 2 Store File Detail Open Custom Box Program4 Select the type of originals, scanning density, etc., as necessary.
For the features that can be selected, refer to Custom Box (Store File, Printing, Send) (page 6-6).
5 Press the [Start] key.
The original is scanned and the data is stored in the specified Custom Box.
![Utax 3555i - Press the [Start] key. - 1](/content/2026/05/780633/images/619fd68dfda81ca0809cdcf76dc274c3a4e22e7aec03935067f6182234216008.jpg)
Enter up to 32 characters as the file name.
Printing Documents (Print)
The procedure for printing documents in a custom box is explained below.
1 Display the screen.
1 Press [Custom Box] on the Home screen.
text_image
Home Custom Box2 Select the box containing the document you want to print.
3 Press [Open].

NOTE
If a custom box is protected by a password, enter the correct password.
2 Print the document.
1 Select the document you wish to print by checking the checkbox.
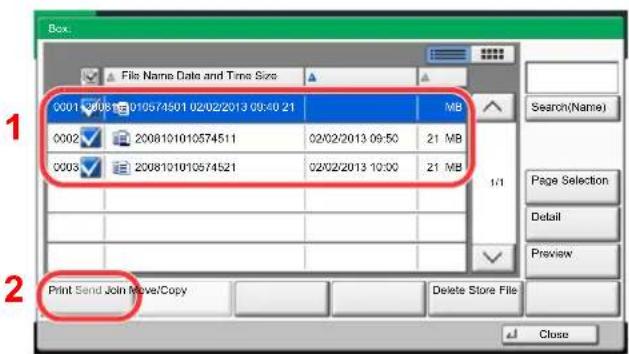
text_image
File Name Date and Time Size 0001 0008 010574501 02/02/2013 09:40 21 MB 0002 2008101010574511 02/02/2013 09:50 21 MB 0003 2008101010574521 02/02/2013 10:00 21 MB 1/1 Search(Name) Page Selection Detail Preview Print Send Join Move/Copy Delete Store File CloseThe document is marked with a checkmark.

NOTE
To deselect, press the checkbox again and remove the checkmark.
2 Press [Print].
3 Set the paper selection, duplex printing, etc., as desired.
For the features that can be selected, refer to Custom Box (Store File, Printing, Send) (page 6-6).
If a document stored from a computer is selected, the print settings selection screen appears.
• To use the settings used at the time of printing (when the document was saved), press [Print As Is]. Press [Start Print] to start printing.
- To change the print settings, press [Print after Change Settings] and change the print settings.
After a document saved in the machine is selected, the [Use File Settings] key may appear in the setting screen for the feature to be used.
- To use the settings saved with the document, press [Use File Settings].
- If you need to change the print settings, press [Print after Change Settings].
4 Press the [Start] key. Printing of the selected document begins.
Sending Documents (Send)
The procedure for sending documents in a custom box is explained below.
1 Display the screen.
1 Press [Custom Box] on the Home screen.
text_image
Home Custom Box2 Select the box containing the document you want to send.
3 Press [Open].

NOTE
If a custom box is protected by a password, enter the correct password.
2 Send the document.
1 Select the document you wish to send by checking the checkbox.
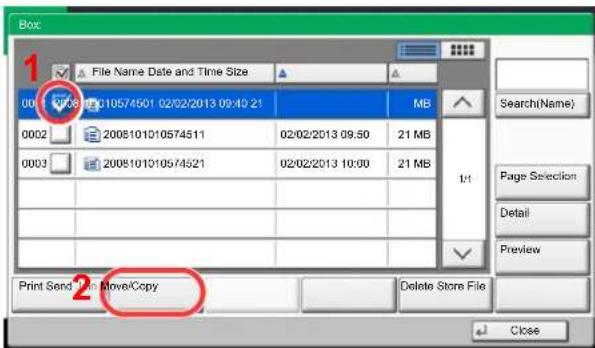
text_image
Box: 1 File Name Date and Time Size 00/08/01 01/05/4501 02/02/2013 09:40 21 MB 0002 2008101010574511 02/02/2013 09:50 21 MB 0003 2008101010574521 02/02/2013 10:00 21 MB 1/1 Search(Name) Page Selection Detail Preview Print Send: 1st Move/Copy Delete Store File CloseThe document is marked with a checkmark.

NOTE
You cannot select and send multiple documents.
To deselect, press the checkbox again and remove the checkmark.
2 Press [Send].
The screen for sending appears.

NOTE
Depending on the settings, the address book screen may appear.
3 Set the destination.

NOTE
For more information on selecting destinations, refer to Specifying Destination on page 5-26.
4 Set the sending size, original image, etc., as desired.
For the features that can be set, refer to Custom Box (Store File, Printing, Send) (page 6-6).
5 Press the [Start] key.
Sending of the selected document begins.
Editing Documents
This function allows you to move or copy documents stored in custom boxes into other boxes or to join multiple documents together. You can also copy documents to USB memory connected to this machine.
Moving a Document/Copying a Document (Move/Copy)
The procedure for moving or copying documents is explained below.
1 Display the screen.
1 Press [Custom Box] on the Home screen.
text_image
Home Custom Box2 Select the box containing the document you want to move or copy.
3 Press [Open].

If a custom box is protected by a password, enter the correct password.
2 Move or copy documents.
1 Select the document in the list that you want to move or copy by pressing the checkbox.
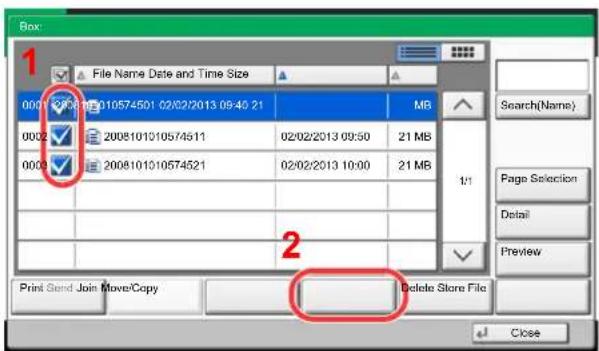
text_image
1 File Name Date and Time Size 0007 0061 010574501 02/02/2013 09:40 21 MB 0002 ✓ 2008101010574511 02/02/2013 09:50 21 MB 0003 ✓ 2008101010574521 02/02/2013 10:00 21 MB Search(Name) Page Selection Detail Preview Print Send Join Move/Copy Delete Store File CloseThe document is marked with a checkmark.

To deselect, press the checkbox again and remove the checkmark.
2 Press [Move/Copy].
3 Select the function you want to execute.
To move the document, press [Move to Custom Box].
To copy the document, press [Copy to Custom Box] or [Copy to Memory].
4 Press [Next].
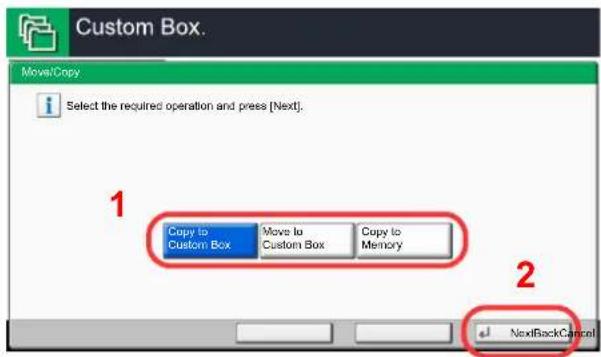
text_image
Custom Box. MovieCopy Select the required operation and press [Next]. 1 Copy to Custom Box Move to Custom Box Copy to Memory 2 NextBackCancel5 Select the destination of copy or move.
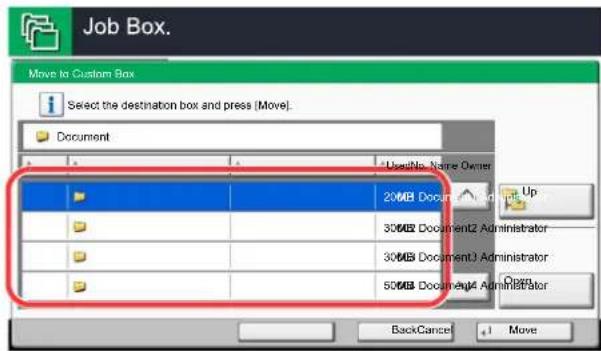
text_image
Job Box. Move to Custom Box Select the destination box and press (Move). Document UseNo Name Owner 20MB Document1 & Up Up 30MB Document2 Administrator 30MB Document3 Administrator 50MB Document4 Administrator BackCancel MoveTo copy or move the document to a custom box, select the destination box.
To copy the document to USB memory, select the destination folder and press [Next]. If necessary, set the saved file size and the file format, etc.
6 Press [Move] or [Copy] and then press [Yes] in the confirmation screen.
The selected document is moved or copied.
NOTE
If the box to which the document is to be moved or copied is protected by a password, enter the correct password.
Joining Documents (Join)
You can join documents within a custom box into one file.

NOTE
You can only join a document to other documents in the same custom box. If necessary, move the documents to be joined beforehand.
1 Display the screen.
1 Press [Custom Box] on the Home screen.
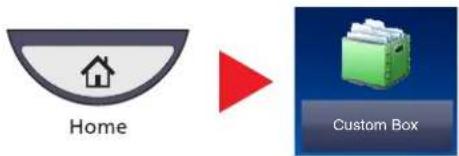
text_image
Home Custom Box2 Select the box containing the documents you want to join and press [Open].

NOTE
If a custom box is protected by a password, enter the correct password.
2 Join the document.
1 Select the documents in the list that you wish to join by pressing the checkbox.
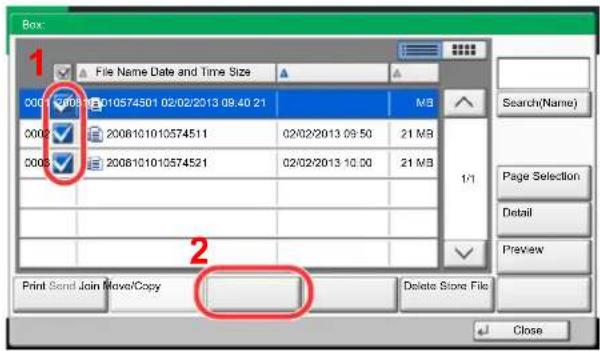
text_image
Box: 1 File Name Date and Time Size 008 010574501 02/02/2013 09:40 21 008 2008101010574511 02/02/2013 09:50 21 MB 008 2008101010574521 02/02/2013 10:00 21 MB Search(Name) Page Selection Detail Preview Print Send Join Move/Copy Delete Store File CloseThe document is marked with a checkmark.
You can join up to 10 documents.

NOTE
To deselect, press the checkbox again and remove the checkmark.
2 Press [Join].
3 Arrange the documents into the order in which they are to be joined.
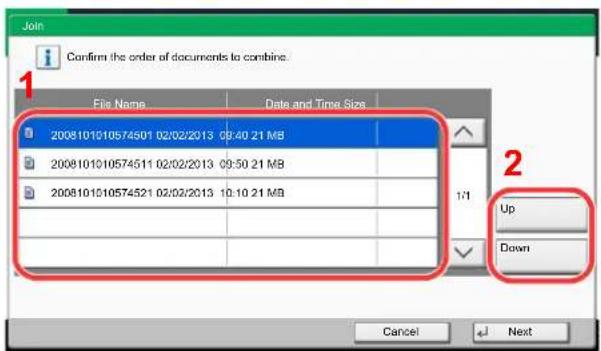
text_image
Join Confirm the order of documents to combine 1 File Name Date and Time Size 2008101010574501 02/02/2013 09:40 21 MB 2008101010574511 02/02/2013 09:50 21 MB 2008101010574521 02/02/2013 10:10 21 MB 1/1 Up Down Cancel NextHighlight the document you want to rearrange and press [Up] or [Down] to move it to the correct place in the sequence.
4 Press [Next].
5 Press [File Name], enter the file name for the joined document and press [OK].

NOTE
Enter up to 64 characters as the file name.
6 Press [Join] and then press [Yes] in the confirmation screen.
The documents are joined.

NOTE
After joining, the original documents are left unchanged. Delete the documents if they are no longer needed.
Deleting Documents
The procedure for deleting documents in a custom box is explained below.
1 Display the screen.
1 Press [Custom Box] on the Home screen.
text_image
Home Custom Box2 Select the box containing the document you want to delete and press [Open].

If a custom box is protected by a password, enter the correct password.
2 Delete the document.
1 Select the document you wish to delete by checking the checkbox.
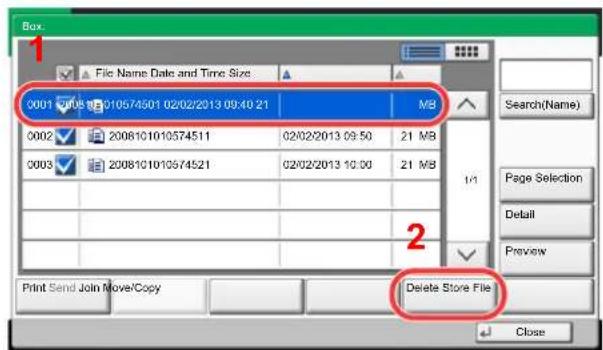
text_image
Box 1 File Name Date and Time Size 0001 02/08 02/10574501 02/02/2013 09:40 21 MB 0002 2008101010574511 02/02/2013 09:50 21 MB 0003 2008101010574521 02/02/2013 10:00 21 MB Search(Name) Page Selection Detail Preview Print Send Join Move/Copy Delete Store File CloseThe document is marked with a checkmark.

[Delete] is disabled until a document is selected. To deselect, press the checkbox again and remove the checkmark.
2 Press [Delete]. The delete confirmation screen appears.
3 Press [Yes]. The document is deleted.
Job Box
This section explains the Repeat Copy Box and the Form for Form Overlay Box. For Private Print/Stored Job Box and Quick Copy/Proof and Hold Box, refer to Private Print/Stored Job on page 4-14 and Quick Copy/Proof and Hold on page 4-16.
Outputting Repeat Copy Jobs
Repeat Copy feature stores the copied original document data in the Job Box and allows you to print additional copies later. By default, up to 32 documents can be stored. When power is turned off, all stored jobs will be deleted. This section explains how to print documents saved by the Repeat Copy function.

Repeat Copy (page 6-55)
1 Display the screen.
1 Press [Job Box] on the Home screen.
text_image
Home Custom Box2 Select [Repeat Copy] box, and press [Open].
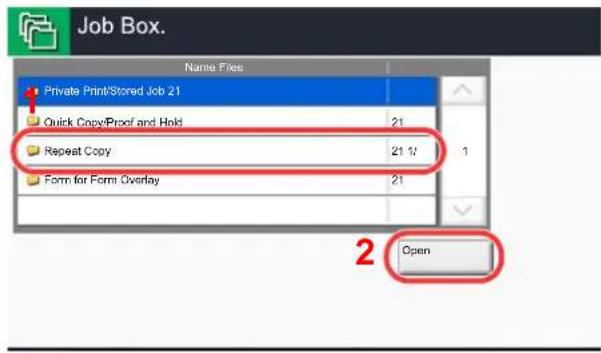
text_image
Job Box. Name Files Private Print/Stored Job 21 Quick Copy/Proof and Hold 21 Repeat Copy 21 # Form for Form Overlay 21 2 Open2 Print the document.
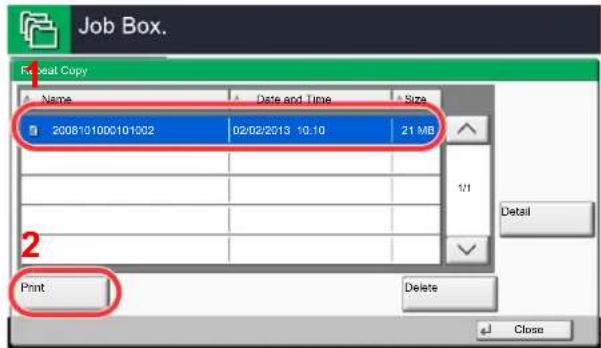
text_image
Job Box. Foot Copy Name Date and Time Size 200810100C101002 02/02/2013 10:10 21 MB 1/1 Detail 2 Print Delete Close1 Select the document to print and press [Print]. If the document is protected by a password, enter the password using the numeric keys.
2 Specify the number of copies to print as desired.
3 Press [Start Print].
Printing begins. The Repeat Copy box job will be deleted when the main power switch is turned off.
Form for Form Overlay
Image Overlay feature copies the original document overlaid with a form or image. This Job Box is used to store the forms or images for overlaying.
Storing a Form
You can store forms to be used for the form overlay in the job box. One page can be registered in one form.
1 Place the original in the document processor or on the platen.
2 Display the screen.
1 Press [Job Box] on the Home screen.
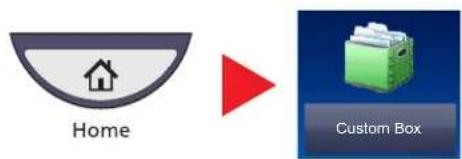
text_image
Home Custom Box2 Select [Form for Form Overlay] and press [Open].
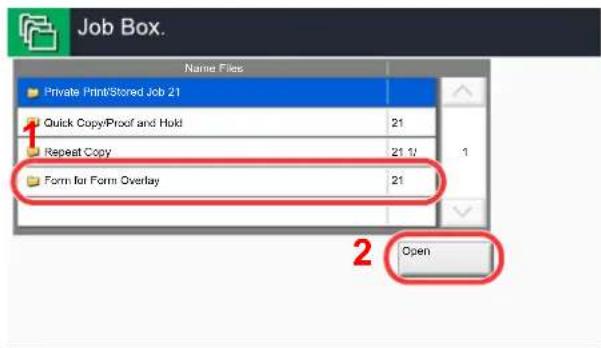
text_image
Job Box. Name Files Private Print/Stored Job 21 Quick Copy/Proof and Hold 21 Repeat Copy 21 1/ Form for Form Overlay 21 1 2 Open3 Store the forms.
1 Press [Store File].
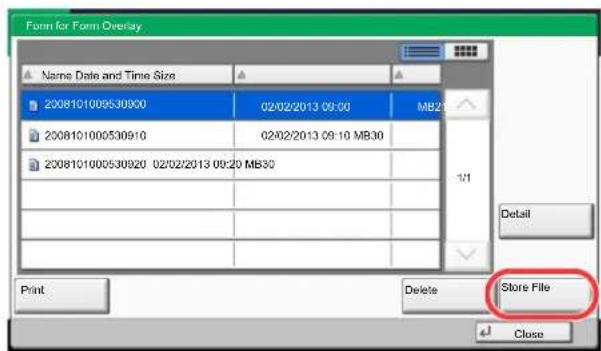
text_image
Form for Form Overlay Name Date and Time Size 2008101000530000 02/02/2013 09:00 MB20 2008101000530910 02/02/2013 09:10 MB30 2008101000530920 02/02/2013 09:20 MB30 1/1 Detail Print Delete Store File Close2 If necessary, select the image quality of original, scanning density, etc. before the original is scanned.
3 Press the [Start] key.
The original is scanned and stored in the [Form for Form Overlay] box.
Deleting a Form Stored
You can delete the form stored in the job box
1 Display the screen.
1 Press [Job Box] on the Home screen.
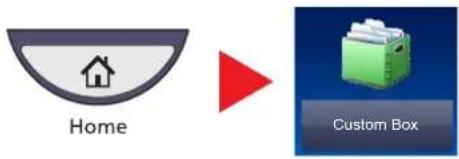
text_image
Home Custom Box2 Select [Form for Form Overlay] and press [Open].
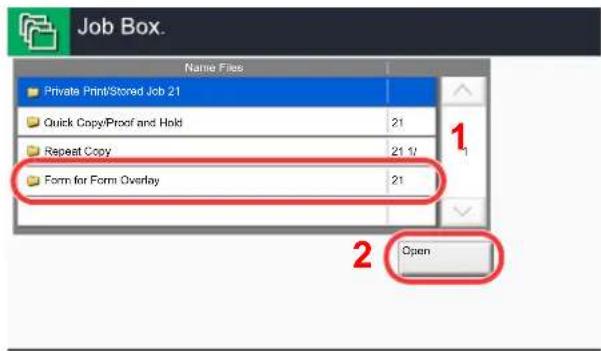
text_image
Job Box. Name Files Private Print/Stored Job 21 Quick Copy/Proof and Hold 21 Repeat Copy 21.12 Form for Form Overlay 21 1 2 Open2 Delete the forms.
1 Select the form to delete and press [Delete].
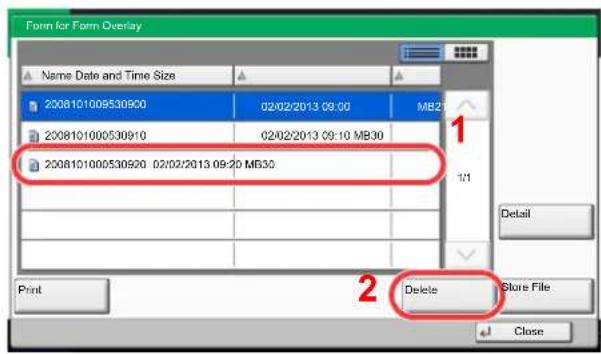
text_image
Form for Form Overlay Name Date and Time Size 2008101000530900 02/02/2013 09:00 MB20 2008101000530910 02/02/2013 09:10 MB30 2008101000530920 02/02/2013 09:20 MB30 1/1 Detail Print Delete Store File CloseThe delete confirmation screen appears.
2 Press [Yes].
The form is deleted.
Printing Documents Stored in Removable USB Memory
Plugging USB memory directly into the machine enables you to quickly and easily print the files stored in the USB memory without having to use a computer.
The following file types can be printed:
• PDF file (Version 1.7 or older)
• TIFF file (TIFF V6/TTN2 format)
- JPEG file
- XPS file
- Encrypted PDF file
- PDF files you wish to print should have an extension (.pdf).
- Files to be printed should be saved no further down than the top 3 folder levels, including the root folder.
- Use USB memory properly formatted by this machine.
- Plug the USB memory directly into the USB Port (A1).
1 Plug the USB memory.
1 Plug the USB memory into the USB Port (A1).
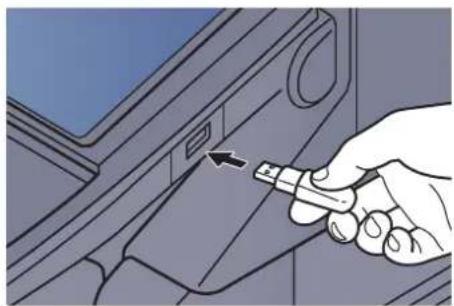
natural_image
Hand holding a tool interacting with a device panel (no text or symbols visible)2 When the machine reads the USB memory, "Removable Memory is recognized. Displaying files. Are you sure?" may appear. Press [Yes].
Displays the removable memory screen.

IMPORTANT
Use USB memory properly formatted by this machine. If a USB memory formatted by any other device is used, "The removable memory is not formatted." may appear. To format the USB memory, refer to Device/Communication on page 7-17.

NOTE
If the message does not appear, press [Removable Memory].
2 Print the document.
1 Select the folder containing the file to be printed and press [Open].
The machine will display documents in the top 3 folder levels, including the root folder.

NOTE
1,000 documents can be displayed.
To return to a higher level folder, press [Up].
2 Select the file to be printed and press [Print].
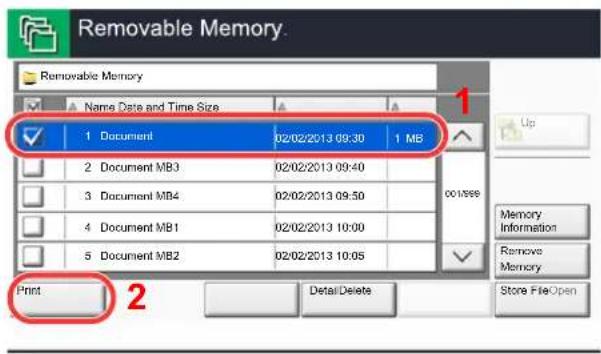
text_image
Removable Memory Name Data and Time Size 1 Document 02/02/2013 09:30 1 MB 2 Document MB3 02/02/2013 09:40 3 Document MB4 02/02/2013 09:50 4 Document MB1 02/02/2013 10:00 5 Document MB2 02/02/2013 10:05 Print 2 Detail Delete Up Memory Information Remove Memory Store FileOpen3 Change the number of copies, duplex printing, etc. as desired.
For the features that can be selected, refer to Removable Memory (Store File, Printing Documents) (page 6-9).
After a document saved in the machine is selected, [Use File Settings] may appear in the setting screen for the feature to be used.
- To use the settings saved with the document, press [Use File Settings].
- If you need to change the print settings, select the desired feature.
4 Press the [Start] key.
Printing of the selected file begins.
Saving Documents to USB Memory (Scan to USB)
This function allows you to store scanned image files in USB memory connected to the machine. You can store files in PDF, TIFF, JPEG, XPS or high-compression PDF format.

NOTE
The maximum number of the storable files is 1000.
1 Place the originals.
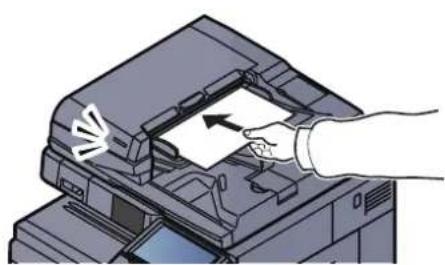
natural_image
Illustration of a hand inserting a document into a printer (no text or symbols visible)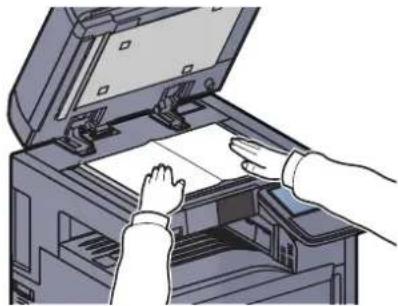
natural_image
Illustration of hands operating a printer with an open lid (no text or symbols visible)
Refer to Loading Originals on page 5-2.
2 Plug the USB memory.
Plug the USB memory into the USB Port (A1).
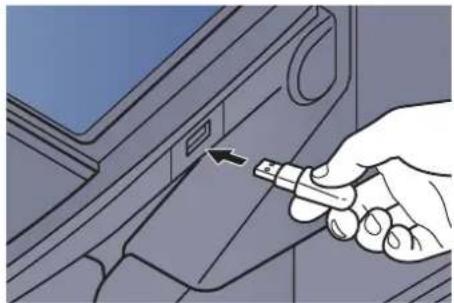
natural_image
Hand holding a tool interacting with a car interior panel (no text or symbols visible)When the machine reads the USB memory, "Removable Memory is recognized. Displaying files. Are you sure?" may appear. Press [Yes] to display the removable memory screen.

IMPORTANT
Use USB memory properly formatted by this machine. If a USB memory formatted by any other device is used, "The removable memory is not formatted." may appear. To format the USB memory, refer to Device/Communication on page 7-17.
When [Format] is pressed, all data in the external media is erased.

NOTE
If the message does not appear, press [Removable Memory].
3 Store the document.
1 Select the folder where the file will be stored and press [Open]. The machine will display the top 3 folder levels, including the root folder.
2 Press [Store File].
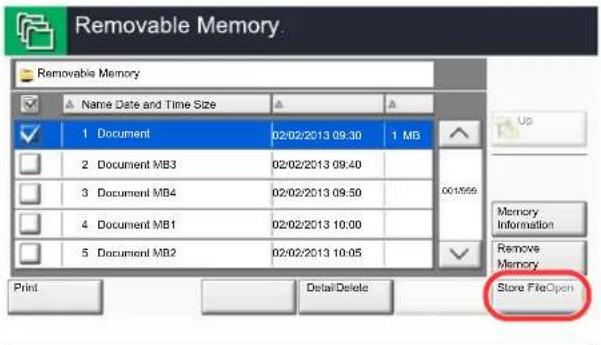
text_image
Removable Memory Removable Memory Name Date and Time Size 1 Document 02/02/2013 09:30 1 MB 2 Document MB3 02/02/2013 09:40 3 Document MB4 02/02/2013 09:50 4 Document MB1 02/02/2013 10:00 5 Document MB2 02/02/2013 10:05 Print DetailDelete Up Memory Information Remove Memory Store FileOpen3 Set the type of original, file format, etc., as desired. For the features that can be set, refer to Removable Memory (Store File, Printing Documents) (page 6-9).
4 Press the [Start] key. The original is scanned and the data is stored in the USB memory.
Check the USB memory information
You can check the USB memory information.
In the removable memory screen, press [Memory Information].
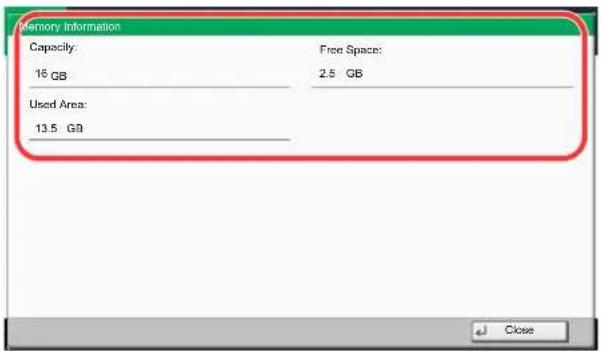
text_image
Memory Information Capacity: 16 GB Used Area: 13.5 GB Free Space: 2.5 GB CloseOnce you confirm the information, press [Close].
Removing USB Memory
Follow the steps below to remove the USB memory.

IMPORTANT
Be sure to follow the proper procedure to avoid damaging the data or USB memory.
1 Press [Removable Memory].
2 Press [Remove Memory].
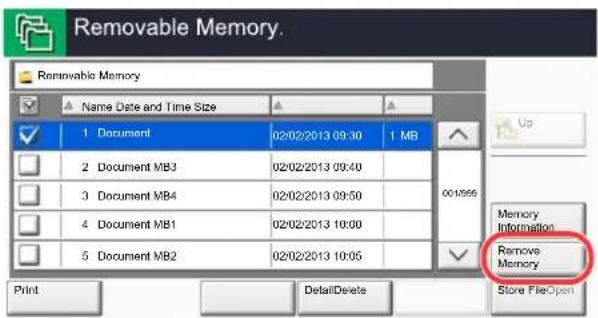
text_image
Removable Memory. Name Date and Time Size 1 Document 02/02/2013 09:30 1 MB 2 Document MB3 02/02/2013 09:40 3 Document MB4 02/02/2013 09:50 4 Document MB1 02/02/2013 10:00 5 Document MB2 02/02/2013 10:05 Remove Memory Information Remove Memory Store FileOpen Print DetailDeletePress [OK], and remove the USB memory after "Removable Memory can be safely removed." is displayed.

NOTE
USB memory can also be removed after checking the status of the device. Refer to Removing the USB Memory on page 7-18.
Manual Staple
You can staple copied paper manually without any copying operation. It is useful when you have forgotten to set the staple sort mode before starting copying, or when you want to staple originals.

NOTE
If there are no staples when manual stapling is performed, the stapling position lamps and stapling position key LEDs all blink. Add staples. For details, refer to Replacing Staples on page 10-12.
Manual stapling cannot be executed when the machine is in operation.
Maximum number of sheets available for manual stapling
| Paper size | Paper weight | |
| - 90 g / m(- 24.0 lb. Bond) | 91 - 105 g/m2(24.3 - 28.0 lb. Bond) | |
| A4, A4-R, B5, Letter, 16K 65 sheets 50 sheets | ||
| A3, B4, Folio 30 sheets 30 sheets | ||
Use the keys on the control section of the Finisher (optional) for manual stapling.

text_image
Stapling position key Stapling key / lampStapling position lamps1 Press the stapling position key on the stapling control section.
The shutter of the paper exit area is opened and this equipment enters into the manual staple mode.
2 Set the staple position.
Press the stapling position key to select the stapling position
(Back /Front /2Points).
Operation is not possible while the stapling position lamps are blinking. Operate after the lamps light solidly.
3 Load the paper.
Straighten the edges of the paper well and place the paper front side down in the shutter opening of the output unit.
If the near side of the paper ( ) will be stapled, place the paper against the front guide (A).
If the far side of the paper ( 1 ) will be stapled, place the paper against the back guide (B).
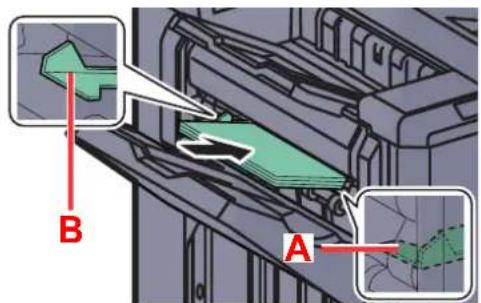
text_image
B AIf the edge of the paper (☐) will be stapled at
two points, place the paper with the center aligned to the center point between the two side guides (A and B).

CAUTION
Do not insert your hand inside the open shutter.

NOTE
- Press the stapling position key before you place the paper. Once the paper is placed, the stapling position key cannot be used.
• The stapling lamp lights when the paper is properly placed. If it does not light, replace the paper.
4 Staple the paper.
Let go of the paper, and then press the stapling key.
Stapling starts. Stapling finishes and the output is delivered to tray A.

CAUTION
Be sure that your hands are away from the paper while stapling is in progress.
Finishing the manual staple mode
Press the stapling position key several times until the stapling position lamps turn off. The shutter of the paper exit area closes. It means that manual stapling is finished.
If no operation is performed for approx. 10 seconds, the manual staple mode will be automatically finished.

NOTE
The time after which manual staple mode is automatically exited can be changed. For details, refer to Manual Staple on page 8-24.
6 Using Various Functions
This chapter explains the following topics:
Functions Available on the Machine 6-2
Copy 6-2
Send 6-4
Custom Box (Store File, Printing, Send) ...... 6-6
Removable Memory (Store File, Printing Documents) 6-9
Functions 6-11
Original Size 6-11
Paper Selection 6-12
Mixed Size Originals 6-14
Original Orientation 6-16
Fold 6-17
Collate/Offset 6-18
Staple/Punch 6-19
Paper Output 6-22
Density 6-22
Original Image 6-23
EcoPrint 6-24
Color Selection 6-24
Sharpness 6-25
Background Density Adj. 6-25
Prevent Bleed-thru 6-26
Zoom 6-27
Combine 6-31
Margin/Centering, Margin, Centering 6-33
Border Erase 6-34
Booklet 6-36
Duplex 6-39
Cover 6-42
Form Overlay 6-43
Page # 6-44
Memo Page 6-46
Image Repeat 6-47
Text Stamp 6-48
Bates Stamp 6-50
Continuous Scan 6-52
Auto Image Rotation 6-53
Negative Image 6-53
Mirror Image 6-53
Job Finish Notice 6-54
File Name Entry 6-54
Priority Override 6-55
Repeat Copy 6-55
DP Read Action 6-56
Skip Blank Page 6-56
2-sided/Book Original 6-57
Sending Size 6-58
File Format 6-59
File Separation 6-62
Scan Resolution, Resolution 6-62
E-mail Subject/Body 6-62
Send and Print 6-63
Send and Store 6-63
FTP Encrypted TX 6-64
File Size Confirmation 6-64
Delete after Printed 6-64
Delete after Transmitted 6-64
Storing Size 6-65
Encrypted PDF Password 6-65
JPEG/TIFF Print 6-66
XPS Fit to Page 6-66
Functions Available in the Home Screen 6-67
Send to Me (E-mail) 6-67
Send to Me from Box (E-mail) 6-67
Functions Available on the Machine
Copy
To configure the settings for functions, select the tab and press the function key.
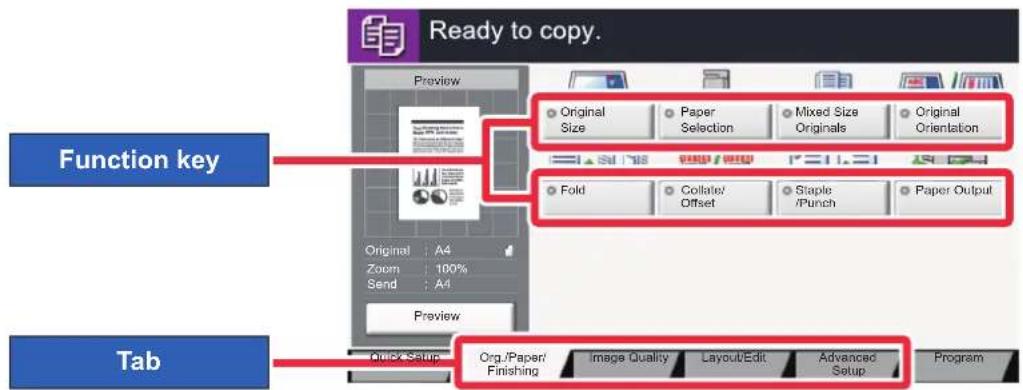
text_image
Ready to copy. Preview Original Size Paper Selection Mixed Size Originals Original Orientation Fold Collate/ Offset Staple /Punch Paper Output Function key Original A4 Zoom 100% Send A4 Tab Quick Setup Org./Paper/ Finishing Image Quality Layout/Edit Advanced Setup ProgramFor details on each function, see the table below.
| Tab Function |  | description | Reference page | |
| Org./Paper/ Finishing | Original Scan Specify the original size to be scanned. page 6-11 | |||
| Paper Selection Select the cassette or multi-purpose tray that contains the required paper size. | page 6-12 | |||
| Mixed Size Originals Scans all sheets in the document processor, even if they are of different sizes. | page 6-14 | |||
| Original Orientation Select the orientation of the original document top edge to scan correct direction. | page 6-16 | |||
| Fold Folds the finished documents. page 6-17 | ||||
| Collate/Offset Offsets the output by page or set. page 6-18 | ||||
| Staple/Punch Staples or punches printed documents. page 6-19 | ||||
| Paper Output | Set paper output to document finisher or job separator tray. | page 6-22 | ||
| Image Quality |  | Density | Adjust density using 7 or 13 levels. | page 6-22 |
| Original Image | Select original image type for best results. | page 6-23 | ||
| EcoPrint | EcoPrint saves toner when printing. | page 6-24 | ||
| Sharpness | Adjusts the sharpness of image outlines. | page 6-25 | ||
| Background Density Adj. | Removes dark background from originals, such as newspapers. | page 6-25 | ||
| Prevent Bleed-thru | Hides background colors and image bleed-through when scanning thin original. | page 6-26 | ||
| Tab |
| Layout/EditConfigure the settings for duplex printing and stamp. |
| Function key | Description | Reference page |
| Zoom Adjusts the zoom | to reduce or enlarge the image. page 6-27 | |
| Combine Combines 2 or 4 original sheets into 1 printed page. page 6-31 | ||
| Margin/Centering Margin | Add margins (white space). In addition, you can set the margin width and the back page margin. Centering: Centers the original image on the paper when copying onto paper different from the original size. | page 6-33 |
| Border Erase Erases the black border that forms around the image. page 6-34 | ||
| Booklet Prints documents to 2-sided open book sheets. page 6-36 | ||
| Duplex Produces two-sided copies. You can also create single-sided copies from two-sided originals or originals with facing pages such as books. | page 6-39 | |
| Cover Adds a cover to the finished documents. page 6-42 | ||
| Form | Prints the original document overlaid with a form or image. | page 6-43 |
| Page # | Adds page numbers to the finished documents. | page 6-44 |
| Memo Page | Delivers copies with a space for adding notes. | page 6-46 |
| Image Repeat | Tiles the original image on one sheet of paper. | page 6-47 |
| Text Stamp | You can add a text stamp on the documents. | page 6-48 |
| Bates Stamp | You can add a bates stamp on the documents. | page 6-50 |
| Advanced SetupConfigure the settings for continuous scanning, mirror image copies, and Skip Blank Page function. |
| Continuous Scan | Scans a large number of originals in separate batches and then produce as one job. | page 6-52 |
| Auto Image Rotation | Automatically rotates the image 90 degrees when the sizes of the original and the loaded paper matches but the orientations are different. | page 6-53 |
| Negative Image | Inverts black and white portions of the image for printing. | page 6-53 |
| Mirror Image | Copies the mirrored image of the original. | page 6-53 |
| Job Finish Notice | Sends E-mail notice when a job is complete. | page 6-54 |
| File Name Entry | Adds a file name. | page 6-54 |
| Priority Override | Suspends the current job and gives a new job top priority. | page 6-55 |
| Repeat Copy | Enables additional copies in the desired quantity as necessary after a copy job is completed. | page 6-55 |
| DP Read Action | When the document processor is used, select the scanning operation for the document processor. | page 6-56 |
| Skip Blank Page | When there are blank pages in a scanned document, this function skips the blank pages and prints only pages that are not blank. | page 6-56 |
Send
To configure the settings for functions, select the tab and press the function key.
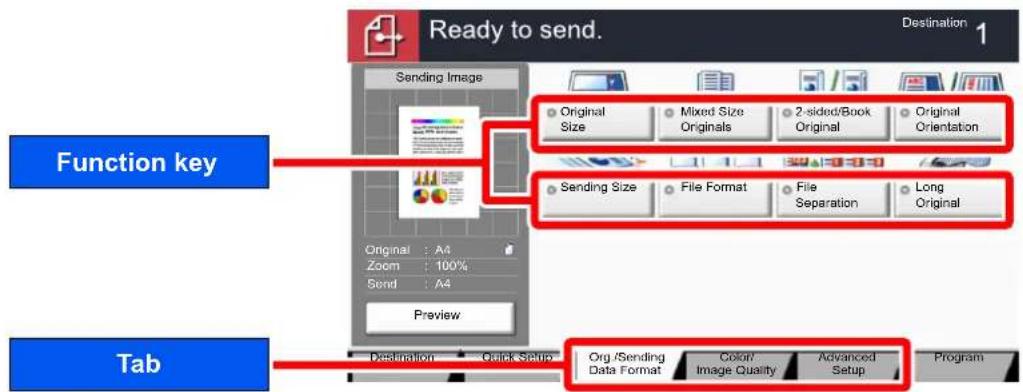
text_image
Ready to send. Destination 1 Sending Image Original Size Mixed Size Originals 2-sided/Book Original Original Orientation Function key Sending Size File Format File Separation Long Original Original : A4 Zoom : 100% Send : A4 Preview Tab Destination Quick Setup Org /Sending Data Format Color/ Image Quality Advanced Setup ProgramFor details on each function, see the table below.
| Tab FunctionOrg./Sending Data FormatConfigure the settings for original type and file format. | 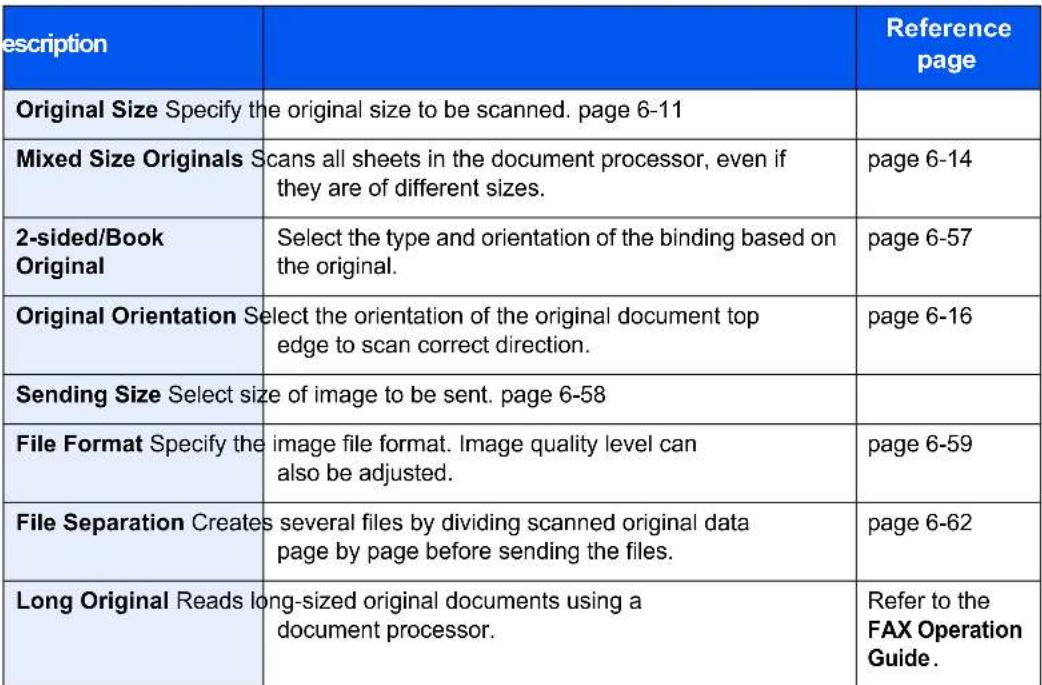 | ||
| Color/Image QualityConfigure the settings for density, quality of copies, and color balance. | Density | Adjust density using 7 or 13 levels. | page 6-22 |
| Original Image | Select original image type for best results. | page 6-23 | |
| Scan Resolution | Select fineness of scanning resolution. | page 6-62 | |
| FAX TX Resolution | Select fineness of images when sending FAX. | Refer to the FAX Operation Guide. | |
| Color Selection | Select the color mode setting. | page 6-24 | |
| Sharpness | Adjusts the sharpness of image outlines. | page 6-25 | |
| Background Density Adj. | Removes dark background from originals, such as newspapers. | page 6-25 | |
| Prevent Bleed-thru | Hides background colors and image bleed-through when scanning thin original. | page 6-26 | |
| Density | Adjust density using 7 or 13 levels. | page 6-22 |
| Original Image | Select original image type for best results. | page 6-23 |
| Scan Resolution | Select fineness of scanning resolution. | page 6-62 |
| FAX TX Resolution | Select fineness of images when sending FAX. | Refer to the FAX Operation Guide. |
| Color Selection | Select the color mode setting. | page 6-24 |
| Sharpness | Adjusts the sharpness of image outlines. | page 6-25 |
| Background Density Adj. | Removes dark background from originals, such as newspapers. | page 6-25 |
| Prevent Bleed-thru | Hides background colors and image bleed-through when scanning thin original. | page 6-26 |
Tab
Advanced Setup
Configure the settings for transmission copy, encrypted transmission, and file size confirmation.

| Function key | Description | Reference page |
| Zoom Adjusts the zoom | to reduce or enlarge the image. page 6-27 | |
| Centering Centering: | Centers the original image on the paper when copying onto paper different from the original size. | page 6-33 |
| Border Erase Erases the black border that forms around the image. page 6-34 | ||
| FAX Delayed Transmission | Set a send time. Refer to the | FAX Operation Guide. |
| Continuous Scan | Scans a large number of originals in separate batches and then produce as one job. | page 6-52 |
| Job Finish Notice Sends E-mail notice when a job is complete. page 6-54 | ||
| File Name Entry Adds a file name. page 6-54 | ||
| E-mail Subject/Body | Adds subject and body when sending a document. | page 6-62 |
| i-FAX Subject/Body | Adds subject and body when sending a document by i-FAX. | Refer to the FAX Operation Guide. |
| FAX Direct Transmission | Sends FAX directly without reading original data into memory. | Refer to the FAX Operation Guide. |
| FAX Polling RX | Automatically makes a machine with a stored document send the document to your machine. | Refer to the FAX Operation Guide. |
| Send and Print | Allows you to print a copy of the document being sent. | page 6-63 |
| Send and Store | Allows you to store a copy of the document being sent in a Custom Box. | page 6-63 |
| FTP Encrypted TX | Encrypts images when sending via FTP. | page 6-64 |
| Text Stamp | You can add a text stamp on the documents. | page 6-48 |
| Bates Stamp | You can add a bates stamp on the documents. | page 6-50 |
| File Size Confirmation | Checks the file size before sending/storing the original. | page 6-64 |
| FAX TX Report | Prints a report when transmission of a document is successful, or when an error occurs and transmission fails. | Refer to the FAX Operation Guide. |
Custom Box (Store File, Printing, Send)
To configure the settings for functions, select the tab and press the function key.
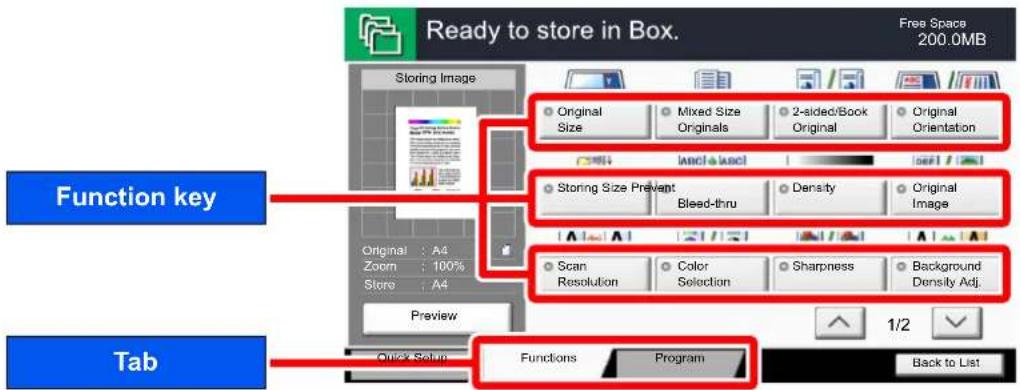
text_image
Ready to store in Box. Free Space 200.0MB Storing Image Original Size Mixed Size Originals 2-sided/Book Original Orientation and a load Storing Size Prevent Bleed-thru Density Original Image Scan Resolution Color Selection Sharpness Background Density Adj. 1/2 Tab Functions Program Back to ListFor details on each function, see the table below.
Store File
| Tab Function |
| FunctionsConfigure the color settings when storing the document in the Custom Box. |
| Tab Function | description | Reference page | |
| FunctionsConfigure the settings for paper selection and duplex printing when printing from the Custom Box. | Paper Selection Select | the cassette or multi-purpose tray that contains the required paper size. | page 6-12 |
| Collate/Offset Offsets | the output by page or set. page 6-18 | ||
| Staple/Punch Staples | or punches printed documents. page 6-19 | ||
| Paper Output | Set paper output to document finisher or job separator tray. | page 6-22 | |
| Combine Combines 2 | or 4 original sheets into 1 printed page. page 6-31 | ||
| Margin/Centering Margin: Add margins (white space). In addition, you can set the margin width and the back page margin. Centering: Centers the original image on the paper when copying onto paper different from the original size. | page 6-33 | ||
| Booklet | Prints documents to 2-sided open book sheets. | page 6-36 | |
| Duplex | Produces two-sided copies.You can also create single-sided copies from two-sided originals or originals with facing pages such as books. | page 6-41 | |
| Cover | Adds a cover to the finished documents. | page 6-42 | |
| Form Overlay | Copies the original document overlaid with a form or image. | page 6-43 | |
| Page # | Adds page numbers to the finished documents. | page 6-44 | |
| Job Finish Notice | Sends E-mail notice when a job is complete. | page 6-54 | |
| File Name Entry | Adds a file name. | page 6-54 | |
| Delete after Printed | Automatically deletes a document from the box once printing is complete. | page 6-64 | |
| Priority Override | Suspends the current job and gives a new job top priority. | page 6-55 | |
| EcoPrint | EcoPrint saves toner when printing. | page 6-24 | |
| Zoom | Adjusts the zoom to reduce or enlarge the image. | page 6-27 | |
| Fold | Folds the finished documents. | page 6-17 | |
| Text Stamp | You can add a text stamp on the documents. | page 6-48 | |
| Bates Stamp | You can add a bates stamp on the documents. | page 6-50 | |
| Image QualityConfigure the settings for density, quality of copies, and color balance. | Density | Adjust density using 7 or 13 levels. | page 6-22 |
| Original Image | Select original image type for best results. | page 6-23 | |
| Sharpness | Adjusts the sharpness of image outlines. | page 6-25 | |
| Background Density Adj. | Removes dark background from originals, such as newspapers. | page 6-25 | |
| Prevent Bleed-thru | Hides background colors and image bleed-through when scanning thin original. | page 6-26 | |
Send
| Tab Function | description | Reference page | |
| FunctionsConfigure the settings for file format and FAX transmission when sending from the Custom Box. | Sending Size Select size of image to be sent. page 6-58 | ||
| File Format Specify the image file format. Image quality level can also be adjusted. | page 6-59 | ||
| FAX TX Resolution Select fineness of images when sending FAX. Refer to the | FAX Operation Guide. | ||
| Centering Centers the original image on the paper when copying onto paper different from the original size. | page 6-33 | ||
| FAX Delayed Transmission | Set a send time. Refer to the | FAX Operation Guide. | |
| Job Finish Notice Sends E-mail notice when a job is complete. page 6-54 | |||
| File Name Entry Adds a file name. page 6-54 | |||
| E-mail Subject/Body | Adds subject and body when sending a document. | page 6-62 | |
| i-FAX Subject/Body | Adds subject and body when sending a document by i-FAX. | Refer to the FAX Operation Guide. | |
| FTP Encrypted TX | Encrypts images when sending via FTP. | page 6-64 | |
| Delete after Transmitted | Automatically deletes a document from the box once transmission is complete. | page 6-64 | |
| Zoom | Adjusts the zoom to reduce or enlarge the image. | page 6-27 | |
| File Separation | Creates several files by dividing scanned original data page by page before sending the files. | page 6-62 | |
| Text Stamp | You can add a text stamp on the documents. | page 6-48 | |
| Bates Stamp | You can add a bates stamp on the documents. | page 6-50 | |
| File Size Confirmation | Checks the file size before sending/storing the original. | page 6-64 | |
| FAX TX Report | Prints a report when transmission of a document is successful, or when an error occurs and transmission fails. | Refer to the FAX Operation Guide. | |
| Color/Image QualityConfigure the settings for density, quality of copies, and color balance. | Density | Adjust density using 7 or 13 levels. | page 6-22 |
| Original Image | Select original image type for best results. | page 6-23 | |
| Resolution | Select fineness of scanning resolution. | page 6-62 | |
| Color Selection | Select the color mode setting. | page 6-24 | |
| Sharpness | Adjusts the sharpness of image outlines. | page 6-25 | |
| Background Density Adj. | Removes dark background from originals, such as newspapers. | page 6-25 | |
| Prevent Bleed-thru Hides background colors and image bleed-through when scanning thin original. | page 6-26 | ||
Removable Memory (Store File, Printing Documents)
To configure the settings for functions, select the tab and press the function key.
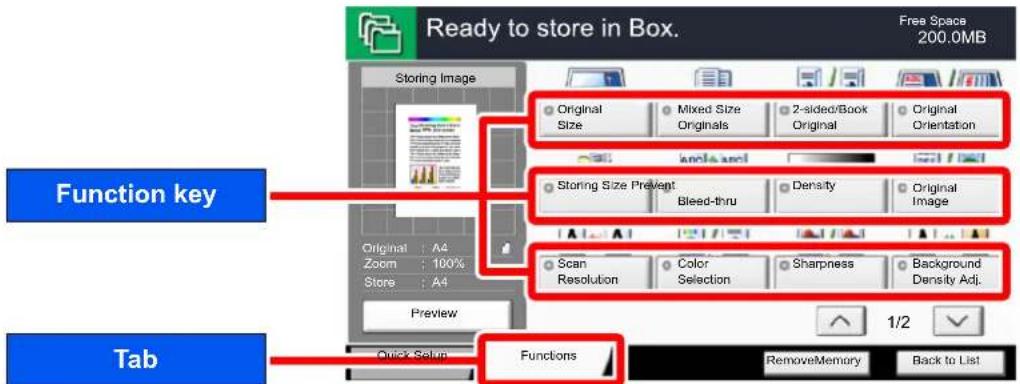
text_image
Ready to store in Box. Free Space 200.0MB Storing Image Original Size Mixed Size Originals 2-sided/Book Original Orientation Storing Size Prevent Bleed-thru Density Original Image Scan Resolution Color Selection Sharpness Background Density Adj. 1/2 Tab Quick Setup Functions RemoveMemory Back to ListFor details on each function, see the table below.
Store File
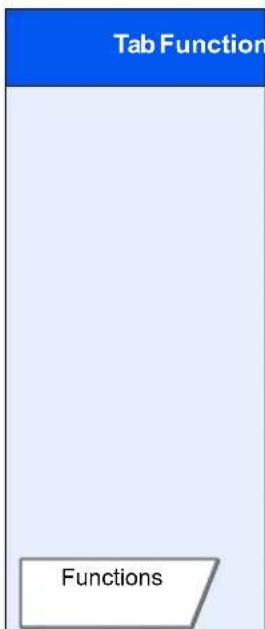
text_image
Tab Function FunctionsConfigure the settings for color selection and document name when storing the document in the removable memory.

| description | Reference page | |
| Original Size Specify the original size to be scanned. page 6-11 | ||
| Mixed Size Originals Scans all sheets in the document processor, even if they are of different sizes. | page 6-14 | |
| 2-sided/Book Original | Select the type and orientation of the binding based on the original. | page 6-57 |
| Original Orientation Select the orientation of the original document top edge to scan correct direction. | page 6-16 | |
| Storing Size Select size of image to be stored. page 6-65 | ||
| Prevent Bleed-thru Hides background colors and image bleed-through when scanning thin original. | page 6-26 | |
| Density | Adjust density using 7 or 13 levels. | page 6-22 |
| Original Image | Select original image type for best results. | page 6-23 |
| Scan Resolution | Select fineness of scanning resolution. | page 6-62 |
| Color Selection | Select the color mode setting. | page 6-24 |
| Sharpness | Adjusts the sharpness of image outlines. | page 6-25 |
| Background Density Adj. | Removes dark background from originals, such as newspapers. | page 6-25 |
| Zoom | Adjusts the zoom to reduce or enlarge the image. | page 6-27 |
| Centering | Centers the original image on the paper when copying onto paper different from the original size. | page 6-33 |
| Border Erase | Erases the black border that forms around the image. | page 6-34 |
| Continuous Scan | Scans a large number of originals in separate batches and then produce as one job. | page 6-52 |
| Job Finish Notice | Sends E-mail notice when a job is complete. | page 6-54 |
| File Name Entry | Adds a file name. | page 6-54 |
| File Format | Specify the image file format. Image quality level can also be adjusted. | page 6-59 |
| File Separation | Creates several files by dividing scanned original data page by page before sending the files. | page 6-62 |
| Text Stamp | You can add a text stamp on the documents. | page 6-48 |
| Bates Stamp | You can add a bates stamp on the documents. | page 6-50 |
Printing Documents
Tab Function
Functions
Configure the settings for paper selection and duplex printing when printing from the removable memory.

| escription | Reference page | |
| Paper Selection Select | the cassette or multi-purpose tray that contains the required paper size. | page 6-12 |
| Collate/Offset Offsets | the output by page or set. page 6-18 | |
| Staple/Punch Staples | or punches printed documents. page 6-19 | |
| Paper Output Set paper | output to document finisher or job separator tray. | page 6-22 |
| Margin Add margins (white space). In addition, you can set the margin width and the back page margin. | page 6-33 | |
| 2-sided Print a document | to 1-sided or 2-sided sheets. page 6-41 | |
| Job Finish Notice | Sends E-mail notice when a job is complete. | page 6-54 |
| Priority Override | Suspends the current job and gives a new job top priority. | page 6-55 |
| EcoPrint | EcoPrint saves toner when printing. | page 6-24 |
| Fold | Folds the finished documents. | page 6-17 |
| Text Stamp | You can add a text stamp on the documents. | page 6-48 |
| Bates Stamp | You can add a bates stamp on the documents. | page 6-50 |
| Encrypted PDF Password | Enter the preassigned password to print the PDF data. | page 6-65 |
| JPEG/TIFF Print | Select the image size when printing JPEG or TIFF files. | page 6-66 |
| XPS Fit to Page | Reduces or enlarges the image size to fit to the selected paper size when printing XPS file. | page 6-66 |
Functions
Original Size

Org./Paper Finishing

Org./Sending Data Format

Functions
[Non-Text]

Functions
Specify the original size to be scanned.
Press [Standard Sizes 1], [Standard Sizes 2], [Others] or [Size Entry] to select the original size.
| Item Value Description | ||
| Standard Sizes 1 | Metric models: Auto, A3, A4, A4-R, A5, A5-R, A6-R, B4-R, B5, B5-R, B6, B6-R, Folio, 216x340 mmInch models: Auto, Ledger, Letter, Letter-R, Legal, Statement, Statement-R, 11 x 15", Oficio II | Have the size of original detected automatically, or select from the standard sizes. |
| Standard Sizes 2 M | Metric models: Ledger, Letter, Letter-R, Legal-R, Statement, Statement-R, 11 x 15", Oficio II, 8K, 16K, 16K-RInch models: A3, A4, A4-R, A5, A5-R, A6-R, B4, B5, B5-R, B6, B6-R, Folio, 8K, 16K, 16K-R, 216 x 340 mm | Select from standard sizes except Standard Sizes 1. |
| Others Hagaki, Oufuku hagaki, Custom 1 to 4*1 | Select from envelope, postcard or the custom sized originals*1. | |
| Size Entry Metric | X: 50 to 432 mm (in 1 mm increments)Y: 50 to 297 mm (in 1 mm increments) | Enter the size not included in the standard sizes 1 and 2.*2When you have selected [Size Entry], press [+] or [-] to set the sizes of "X" (horizontal) and "Y" (vertical). Press [# Keys] to use the numeric keys for entry. |
| InchX: 2.00 to 17.00" (in 1" increments)Y: 2.00 to 11.69" (in 1" increments) | ||
*1 For instructions on how to specify the custom original sizes (Custom 1 to 4), refer to Custom Original Size on page 8-10. If "Custom Original Size" is set to [Off], this does not appear.
*2 The input units can be changed in System Menu. For details, refer to Measurement on page 8-14.

NOTE
Be sure to always specify the original size when using custom size originals.
Paper Selection

Org./Paper/Finishing

Functions

Functions
Select the cassette or multi-purpose tray that contains the required paper size.
Select from [1] (Cassette 1) to [5] (Cassette 5) to use the paper contained in that cassette.
If [Auto] is selected, the paper matching the size of the original is selected automatically.

NOTE
- Specify in advance the size and type of the paper loaded in the cassette (refer to Cassette/MP Tray Settings on page 8-7).
- When printing on paper that is wider than the paper previously used, dirt on the conveying guide may soil the edges of the paper infrequently. If you find that the paper is soiled, use the provided cleaning cloth to clean the conveying guide.

Conveying Guide (page 10-4)
- Cassette 3 to Cassette 5 are displayed when the optional paper feeder is installed.
To select [MP tray], press [Paper Settings] and specify the paper size and the media type. The available paper sizes and media types are shown in the table below.
| Item Value Description | |||
| Paper Settings | Standard Sizes 1 | Metric models: A3, A4, A4-R, A5-R, A6-R, B4, B5, B5-R, B6-R, Folio, 216 x 340 mmInch models: Ledger, Letter, Letter-R, Legal, Statement, Executive, Oficio II | Select from the standard size. |
| Standard Sizes 2 | Metric models: Ledger, Letter, Letter-R, Legal-R, Statement, Executive, Oficio II, 8K, 16K, 16K-RInch models: A3, A4, A4-R, A5-R, A6-R, B4, B5, B5-R, B6-R, Folio, 8K, 16K, 16K-R, 216 x 340 mm | Select from standard sizes except Standard Sizes 1. | |
| Others | ISO B5, Envelope #10 (Commercial #10), Envelope #9 (Commercial #9), Envelope #6 (Commercial #6 3/4), Envelope Monarch, Envelope DL, Envelope C5, Envelope C4, Hagaki, Oufuku hagaki, Youkei 4, Youkei 2 and Custom 1 to 4^*1 | Select from special standard sizes and custom sizes. | |
| Size Entry | MetricX: 148 to 457 mm (in 1 mm increments)Y: 98 to 304 mm (in 1 mm increments) | Enter the size not included in the standard size. ^*2 When you have selected [Size Entry], press [+] or [-] to set the sizes of "X" (horizontal) and "Y" (vertical).Press [# Keys] to use the numeric keys for entry. | |
| InchX: 5.83 to 18.00" (in 0.01" increments)Y: 3.86 to 12.00" (in 0.01" increments) | |||
| Media type Plain (105 g/m ^2 or less), Transparency, Rough, Vellum (60 to 105 g/m ^2 ), Labels, Recycled, Preprinted ^*3 , Bond, Cardstock, Color, Prepunched ^*3 , Letterhead ^*3 , Thick (106 g/m ^2 and more), Envelope, Coated, High Quality, Index Tab Dividers, Custom 1-8^3 | |||
*1 For instructions on how to specify the custom paper sizes (Custom 1 to 4), refer to Custom Paper Size on page 8-10.
*2 The input units can be changed in System Menu. For details, refer to Measurement on page 8-14.
*3 For instructions on how to specify the custom paper types 1 to 8, refer to Media Type Setting on page 8-13. To print on preprinted or prepunched paper or on letterhead, refer to Special Paper Action on page 8-12.

IMPORTANT
When paper size and the media type for MP tray is specified, [Paper Settings] is selected. Note that if [Multipurpose tray] is pressed at this point, the settings will be canceled.

NOTE
- You can conveniently select in advance the size and type of paper that will be used often and set them as default (refer to MP Tray Setting on page 8-8).
- If the specified size of paper is not loaded in the paper source cassette or multi purpose tray, a confirmation screen appears. When [Auto] is selected and the same size of paper as the detected original size is not loaded, a paper confirmation screen appears. Load the required paper in the multi purpose tray and press [Continue] to start copying.
Mixed Size Originals

Org./Paper/Finishing
Send
Org./Sending Data Format
Custom Box
Functions
[Non-Text]

Functions
Scans all sheets in the document processor, even if they are of different sizes.
Copying
Metric Models
| Item Value Description | |||
| Off | |||
| Mixed Size Copies | Original Width | Same Width, Different Width Select options for the width of set original. | |
| Same Size Copies | Original Width | Same Width, Different Width Select options for the width of set original. | |
| Top Page Direction | Long Edge Left, Short Edge Left Select the original orientation of the first page. | ||
Inch Models
| Item Value Description | |||
| Off | |||
| Mixed Size Copies | — | Originals are detected individually for size and copied to the same size paper as originals. | |
| Same Size Copies | Top Page Direction | Long Edge Left, Short Edge Left Select | the original orientation of the first page. |
Sending/Storing
| Item Value Description | ||
| Mixed Size Originals | Off | |
| Same Width Scans and sends multiple | sheets of the same width using the document processor. | |
| Different Width Scans and sends multiple | sheets of different width using the document processor. | |
Supported Combinations of Originals
Same Width
When the original widths are the same, the combinations of originals that can be placed are as follows.

NOTE
When mixing the original sizes as using the following combination: Folio and A4-R, make sure to set "Auto Detect Original Size" to [On] for "Folio". For details, refer to Auto Detect Original Size on page 8-11.
• B4 and B5
• Ledger and Letter (A3 and A4)
• Legal and Letter-R (Folio and A4-R)
Example: B4 and B5
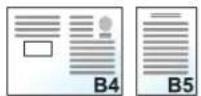
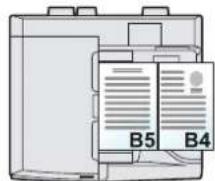
text_image
B5 B4Different Width (Available for metric models only)
The supported combinations of originals are as follows.

NOTE
- Up to 30 sheets can be placed in the document processor.
- When mixing the original sizes as using the following combination: A4-R, B5-R, and Folio, make sure to set "Auto Detect Original Size" to [On] for "Folio". For details, refer to Auto Detect Original Size on page 8-11.
• A3, B4, A4, B5
• B4, A4-R, B5
• A 4 - R, B 5 - R, F o l i o
Example: A3, B4, A4, B5

text_image
A3 B4 A4 B5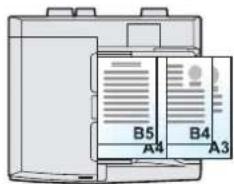
text_image
B5 A4 B4 A3
IMPORTANT
When placing originals of different width, arrange the originals so that their left sides and top sides are aligned, and place the originals in alignment with the far width guide. If the originals are not aligned in this way, they may not be scanned correctly, and skewing or original jams may result.
Selecting How to Copy Originals
Set the paper size (copy size) when printing scanned document. Select whether you wish to create individual copies on different size paper matching the original sizes or to produce all copies on the same size paper.

NOTE
This function is available regardless of whether originals have the same width or not.
Mixed Size Copies
Originals are detected individually for size and copied to the same size paper as originals.

flowchart
graph LR
    A["Document"] --> B["Document"]
    B --> C["Output"]
    style A fill:#f9f,stroke:#333
    style B fill:#ccf,stroke:#333
    style C fill:#cfc,stroke:#333
Same Size Copies
Originals are all copied to the same size paper.

flowchart
graph LR
    A["Document"] --> B["Image 1"]
    B --> C["Document 2"]
    C --> D["Output"]
    style A fill:#f9f,stroke:#333
    style B fill:#ccf,stroke:#333
    style C fill:#cfc,stroke:#333
    style D fill:#fcc,stroke:#333
Original Orientation

Org./Paper/Finishing
Send
Org./Sending Data Format

Functions
Box

Functions
Select the orientation of the original document top edge to scan correct direction.
To use any of the following functions, the document's original orientation must be set.
- Zoom (XY Zoom)*
• D u p l e x * - Margin/Centering*
- Border Erase
- Combine*
-
Memo mode*
-
Page #*
- Booklets*
• Stapling/Punch (optional feature)*
• 2-sided/Book Original - Text Stamp*
- Bates Stamp*
* When making copies

NOTE
If [On] is selected in the setting for Orientation Confirmation (page 8-16) in System Menu, the selection screen for original orientation appears when you select any of the above functions.
Select original orientation from [Top Edge on Top] or [Top Edge on Left].
| Item Image | |
| Top Edge on Top | 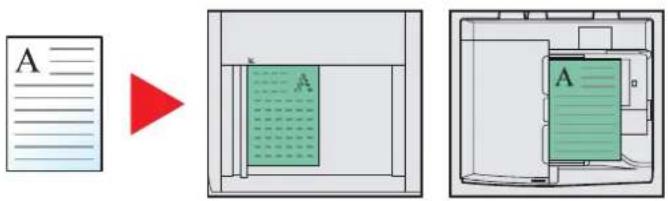 Original Original orientation Original Original orientation |
| Top Edge on Left | 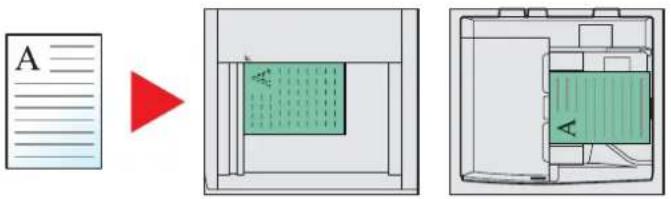 Original Original orientation Original Original orientation |

NOTE
The default setting for Original Orientation can be changed. Refer to Orientation Confirmation on page 8-16 for details.
Fold

Org./Paper/Finishing

Functions

Functions
Folds the finished documents.
Select the fold method.
The following folding options and orientations are available.
| Original orientation | Orientation: Landscape | Orientation: Portrait | ||||
| Item |  |  |  |  | ||
| Bi-Fold |  |  | ||||
| Saddle Stitch |  |  | ||||
| Tri-Fold Inside R to L/B | to T |  |  | |||
| L to R/T to B |  |  | ||||
| Outside R to L/B to T |  |  | ||||
| L to R/T to B |  |  | ||||

NOTE
Folding requires the optional 4,000-sheet finisher and the folding unit.
For details on paper sizes and numbers of sheets that can be folded, refer to Center-Folding Unit (Option) on page 11-30.
Collate/Offset

Org./Paper/Finishing

Functions

Functions
Offsets the output by page or set.
| Item Image | Description | |
Collate Scans multiple originals and delivers complete sets of copies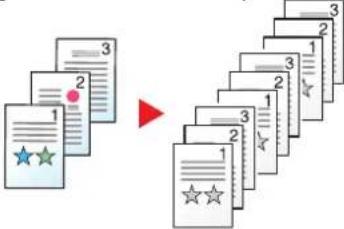 | as required according to page number. | |
| Offset | Without Document Finisher (Option)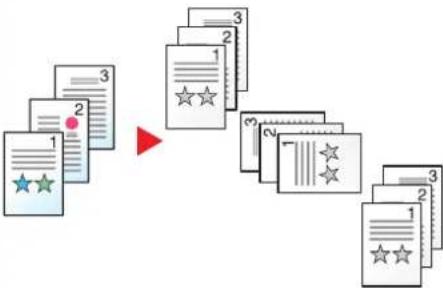 | When offsetting is used, printed copies are produced after rotating each set (or page*) by 90 degrees.NOTETo use offsetting, the same size of paper as the selected paper tray must be loaded in a different orientation in a different paper tray.The paper sizes supported in Offset are A4, B5, Letter and 16K. |
With Document Finisher (Option)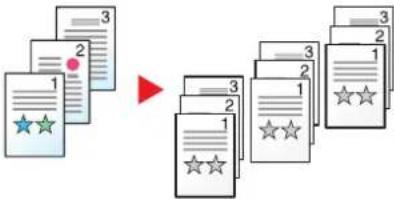 | When offsetting is used, printed copies are produced after rotating each set (or page*) by 90 degrees.NOTEThe optional 1,000-sheet finisher or 4,000-sheet finisher is required.The paper sizes supported in Offset are A3, B4, A4, B5, Letter, Legal, Ledger, Oficio II, 8K, 16K, 216 x 340 mm and Folio. | |
* If [Off] is selected for "Collate" setting, [Each Page] appears. When [On] is selected, [Each Set] appears.
Staple/Punch

Org./Paper/Finishing

Functions

Functions
Staple
Staples the finished documents. The staple position can be selected.
| Item Value Description | ||
| Staple Top Left Select the staple position. For details on original orientation and staple position, refer to Original Orientation and Staple Position on page 6-19. | ||
| Saddle Stitch | Select whether to fold the finished documents in two with staples in the center.When placing originals, be sure to place the cover page at the bottom. For details on saddle stitching, refer to Booklet on page 6-36. | |
| Original Orientation | Top Edge on Top, Top Edge on Left Select the orientation of the original document top edge to scan correct direction. Press [Original Orientation] to choose orientation of the originals, either [Top Edge on Top] or [Top Edge on Left]. Then press [OK]. | |

NOTE
Stapling requires the optional 1,000-sheet finisher or 4,000-sheet finisher. Note also that saddle stitching (center stapling) requires the folding unit.
For details on paper sizes and numbers of sheets that can be stapled, refer to 1,000-sheet Finisher (Option) on page 11-28 or 4,000-sheet Finisher (Option) on page 11-29.
Original Orientation and Staple Position
| Original orientation Paper orientation | Top Edge on Top Top Edge on Left | |||
 |  |  |  | |
| Cassette paper load direction |  |  |  | 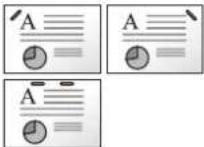 |
Cassette paper load direction  | 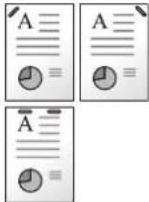 | 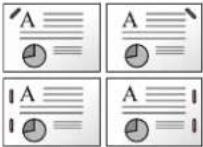 | 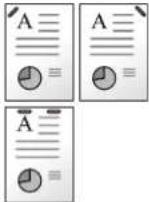 | 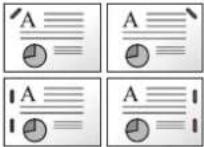 |

NOTE
B5-R and 16K-R "one staple" is not diagonal.
Mixed Size Stapling
Even with mixed paper sizes, if the sizes have the same width or same length as shown in the combinations below, the output can be stapled. Up to 30 sheets can be stapled.
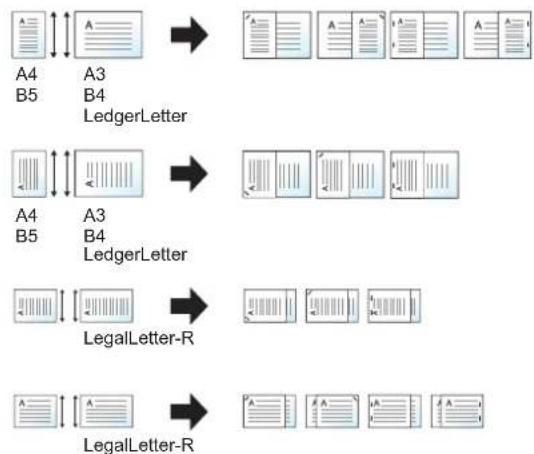
flowchart
graph TD
    A1["A4"] --> A2["A3"]
    B1["B5"] --> B2["B4"]
    A2 --> A3["-->"]
    B2 --> B3["LedgerLetter"]
    A3 --> A4["A4"]
    B3 --> B4["B5"]
    A4 --> A5["A4"]
    B5 --> B6["B4"]
    A5 --> A7["-->"]
    B6 --> B8["LedgerLetter"]
    A6["A4"] --> A9["A3"]
    B7["B5"] --> B10["B4"]
    A9 --> A10["-->"]
    B10 --> B11["LedgerLetter-R"]
    A10 --> A12["-->"]
    B11 --> B12["LedgerLetter-R"]
- A3 and A4
• B4 and B5 - Ledger and Letter
• Ledger and Letter-R - 8K and 16K

NOTE
When performing Mixed Size Stapling, refer to Mixed Size Originals on page 6-14.
Punch
Punches holes in sets of finished documents.

NOTE
- The optional document finisher (1,000-sheet finisher or 4,000-sheet finisher) and punching unit are required.
- For details on paper sizes that can be punched, refer to Hole Punch Unit (Option) on page 11-29.
- The inch model provides two-hole and three-hole punching. The metric model provides two-hole and four-hole punching.
| Item Value Description | ||
| Punch 2 holes Left | Select the position of punch holes. For details on original orientation and position of punch holes, refer to Original Orientation and Punch Hole Position on page 6-21. | |
| 2 holes Top | ||
| 2 holes Right | ||
| 3 holes Left | ||
| 3 holes Top | ||
| 3 holes Right | ||
| 4 holes Left | ||
| 4 holes Top | ||
| 4 holes Right | ||
| Original Orientation | Top Edge on Top, Top Edge on Left Select the orientation of the original document top edge to scan correct direction. Press [Original Orientation] to choose orientation of the originals, either [Top Edge on Top] or [Top Edge on Left]. Then press [OK]. | |
Original Orientation and Punch Hole Position
| Image Original orientation | |||
| Original | Print results | Glass platen | Document processor |
 |  | 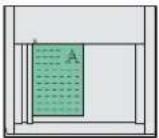 | 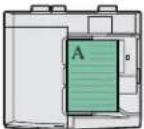 |
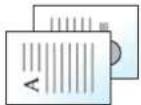 |  | 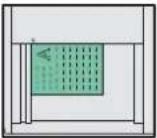 | 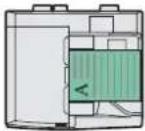 |
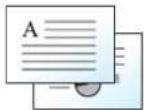 | 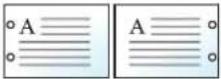 | 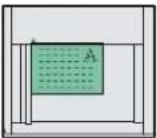 | 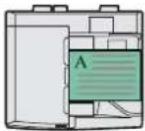 |
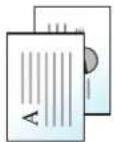 | 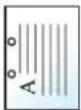 | 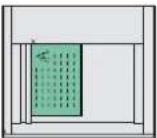 | 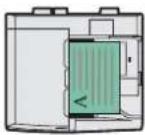 |

NOTE
The inch model provides two-hole and three-hole punching. The metric model provides two-hole and four-hole punching.
Paper Output

Org./Paper/Finishing

Functions

Functions
Set paper output to document finisher or job separator tray.
| Item Description | |
| Inner Tray* | Inner tray of the machine (where copies are stored) |
| Finisher Left Tray, Finisher Top Tray Tray of the optional 1,000-sheet finisher | |
| Tray A, Tray B, Tray C Trays A to C in the optional 4,000-sheet finisher | |
| Right Tray Optional right job separator | |
| Job Separator* Optional inner job separator | |
| Tray 1 to 7 Trays 1 to 7 in the optional mailbox (tray 1 is the top tray) | |
* This cannot be selected when the optional 1,000-sheet finisher or 4,000-sheet finisher is installed.

NOTE
- The setting for this function can be configured only when the optional job separator and/or document finisher (1,000-sheet finisher or 4,000-sheet finisher) are installed.
- The default setting for Paper Output can be changed. For details, refer to Paper Output on page 8-16.
- When [Heavy 3] (164 g/m ^2 -) or higher is set in Paper Weight and Mailbox (Option) is set for the output destination, the output destination is automatically changed to a tray that can be used.
Density

Image Quality

Color/ Image Quality

Functions Image Quality

Functions
Adjust density using 7 or 13 levels.
Adjust density pressing [-3] (Lighter) to [+3] (Darker). You can change the density level
[-3] (Lighter) to [+3] (Darker) in half-steps.
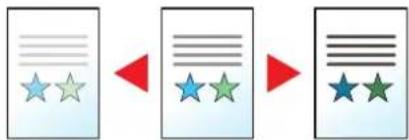
flowchart
graph LR
    A["Star Rating"] --> B["Red Arrow"]
    B --> C["Star Rating"]
    C --> D["Green Arrow"]
    D --> E["Star Rating"]
Original Image

Image Quality
The Ground Truth image displays a single, solid horizontal line. According to Rule 2 (UNDERSCORE & LINE RULES), this is a stylistic or background line, not a placeholder underscore. Therefore, the OCR result must ignore it. The provided OCR content is "____", which consists of four underscores. This is an incorrect interpretation of the line as a placeholder, violating the rule that stylistic lines must be ignored. The OCR has hallucinated underscores where none should exist based on the GT's visual context. Hence, the OCR result is inconsistent with the Ground Truth.
Send
Color/ Image Quality
Custom Box
Functions
[Non-Text]
Image Quality
The Ground Truth image displays a single, solid horizontal line. According to Rule 2 (UNDERSCORE & LINE RULES), this is a stylistic or background line, not a placeholder underscore. Therefore, the OCR result must ignore it. The provided OCR content is "____", which consists of four underscores. This is an incorrect interpretation of the line as a placeholder, violating the rule that stylistic lines must be ignored. The OCR has hallucinated text (underscores) where none should exist. Hence, the result is inconsistent with the Ground Truth.
USB Memory
Functions
Select original image type for best results.
Copying/Printing
| Item Value Description | ||
| Text+Photo * | Printer Output Best for mixed text and photo documents printed on this machine originally. | |
| Book/Magazine Best for mixed text and photos printed in a magazine, etc. | ||
| Photo Printer Output | Best for photos printed on this machine originally. | |
| Book/Magazine Best for photos printed in a magazine, etc. | ||
| Photo Paper Best for photos taken with a camera. | ||
| Text Off | (Light Text/Fine Line) | Best for documents that are mostly text and were originally printed on this machine. |
| On (Light Text/Fine Line) | Sharply renders pencil text and fine lines. | |
| Graphic/Map Printer | Output Best for maps and diagrams printed on this machine originally. | |
| Book/Magazine Best for maps and diagrams printed in a magazine. | ||
* If gray text is not printed completely using [Text + Photo], selecting [Text] may improve the result.
Sending/Storing
| Item Description | |
| Text+Photo Best for mixed text and photo documents. | |
| Photo | Best for photos taken with a camera. |
| Text* | Sharply renders pencil text and fine lines. |
* The setting "for OCR" can be configured. (Value: [Off] / [On]) When [On] is selected, scanning produces an image that is suitable for OCR. This function is only available when Color Selection is set to Black and White. For details, refer to Color Selection on page 6-24. The setting "for OCR" can be configured. When [On] is selected, scanning produces an image that is suitable for OCR. This function is only available when Color Selection is set to Black and White.
EcoPrint

Image Quality
广力云智慧零售收银系统

Functions
[Non-Text]

Functions
[Non-Text]
EcoPrint saves toner when printing. Use this function for test prints or any other occasion when high quality print is not required. Adjustment can be made in 5 levels.

natural_image
Two leaf icons: a green leaf with white veins and a gray leaf with white vein, separated by a red play triangle (no text or symbols)| Item Value Description | ||
| Off | ||
| On [1] (Low) to [5] (High) Adjust the Toner Save | Level. | |
Color Selection

Color/ Image Quality

Functions Color/
m = 311
Image Quality

Functions
(1) 本次股东大会的决议
Select the color mode setting.
| Item Description | |
| Auto Color (Color/Gray) | Automatically recognizes whether the document is color or black and white, and scan color documents in Full Color and black and white documents in Grayscale. |
| Auto Color (Color/B & W) | Automatically recognizes whether the document is color or black and white, and scan color documents in Full Color and black and white documents in Black and White. |
| Full Color Scans the document in full color. | |
| Grayscale | Scans the document in grayscale. Produces a smooth, detailed image. |
| Black & White Scans the document in black and white. | |
Sharpness

Image Quality
Send
Color/ Image Quality
Custom Box
Functions Color/
Image Quality
Image Quality

Functions
Adjusts the sharpness of image outlines.
When copying penciled originals with rough or broken lines, clear copies can be taken by adjusting sharpness toward "Sharpen". When copying images made up of patterned dots such as magazine photos, in which moire* patterns appear, edge softening and weakening of the moire effect can be obtained by setting the sharpness toward "Blur".
When [All] is selected, press [-3] to [3] (Blur - Sharpen) to adjust the sharpness.
When [Text/Fine Line] is selected, press [0] to [3] (Normal - Sharpen) to adjust the sharpness.
Less Sharp

natural_image
Colorful paperclip samples scattered on a white background (no text or symbols visible)Original

natural_image
Colorful paperclip samples arranged in a scattered pattern (no text or symbols visible)More Sharp

natural_image
Colorful paperclip samples arranged in a scattered pattern (no text or symbols visible)| Item Value Description | ||
| All 1 to 3 (Sharpen) | Emphasizes the image outline. | |
| -1 to -3 (Blur) Blurs the image outline. Can weaken a Moire* effect. | ||
| Text/Fine Line 0 to 3 | (Normal - Sharpen) | Makes letters and lines appear sharper.Only text and fine lines are emphasized. |
* Patterns that are created by irregular distribution of halftone dots.
Background Density Adj.

Image Quality
Send
Color/ Image Quality
Custom Box
Functions Image
Quality
Color/ Image Quality

Functions
Removes dark background from originals, such as newspapers. This feature is used with full color and auto color. Background Density Adjust is disabled if Auto Color detects black and white originals.
If the ground color is obtrusive, select [Auto]. If [Auto] does not remove the ground color, select [Manual] and adjust the density of the ground color.
| Item Description | |
| Off Does not adjust the ground color. | |
| Auto Automatically adjusts | the background density based on the original. |
| Manual | Manually adjust the density in 5 levels. When [Manual] is selected, press [1] to [5] (Lighter - Darker) to adjust the background density. |
Item Description
Prevent Bleed-thru

flowchart
graph LR
    A["Copy"] --> B["Image Quality"]
    B --> C["Send"]
    C --> D["Color/ Image Quality"]
    D --> E["Custom Box"]
    E --> F["Functions"]
    F --> G["Image Quality"]
    G --> H["Color/ Image Quality"]
    H --> I["USB Memory"]
    I --> J["Functions"]
Hides background colors and image bleed-through when scanning thin original.
(Value: [Off] / [On])
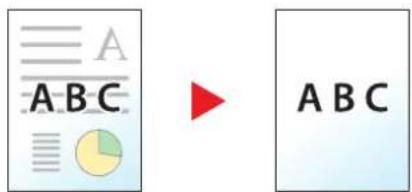
text_image
A A B C A B CZoom

Layout/Edit

Send
Advanced
Setup
Custom
Box
Functions
[Non-Text]

Functions

Adjust the zoom to reduce or enlarge the image.
Copying
The following zoom options are available.
Auto
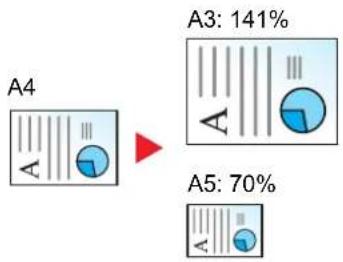
pie
| Category | Value (%) | |---|---| | A3 | 141 | | A5 | 70 |Adjusts the image to match the paper size.
Standard Zoom
Reduces or enlarges at preset magnifications.
| Model Zoom Level(Original Copy) | Model Zoom Level(Original Copy) | ||
| Inch Models Auto | 400% (Max.)200% (STMT >>Ledger)154%(STMT >> Legal)129% (Letter >> Ledger)121% (Legal >> Ledger)100%78% (Legal >> Letter)77% (Ledger >> Legal)64% (Ledger >> Letter)50% (Ledger >> STMT)25% (Min.) | Metric Models Auto | 400% (Max.)200% (A5 >> A3)141% (A4 >> A3, A5 >> A4)127% (Folio >> A3)106% (11×15" >> A3)100%90% (Folio >> A4)75% (11×15" >> A4)70% (A3 >> A4, A4 >> A5)50%25% (Min.) |
| Metric Models(Asia Pacific) | Auto400% (Max.)200% (A5 >> A3)141% (A4 >> A3, B5 >> B4)122% (A4 >> B4, A5 >> B5)115% (B4 >> A3, B5 >> A4)100%86% (A3 >> B4, A4 >> B5)81% (B4 >> A4, B5 >> A5)70% (A3 >> A4, B4 >> B5)50%25% (Min.) | ||
Zoom Entry
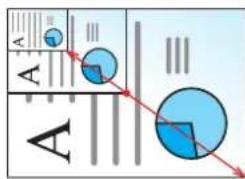
text_image
A AManually reduces or enlarges the original image in 1% increments between 25% and 400%.
XY Zoom
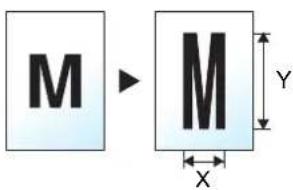
text_image
M M Y XSelect vertical and horizontal magnifications individually. Magnifications can be set in 1% increments between 25% and 400%.
| Item Value Description | ||
| Standard Zoom Metric | [# Keys] 25 to 400% (in 1% increments)100%, Auto, 400% Max.,200% A5>>A3,141% A4>>A3 B5>>B4,127% Folio>>A3,106% 11x15">>A3,90% Folio>>A4,75% 11x15" >>A4,70% A3>>A4 A4>>A5,50%, 25% Min.Metric (Asia Pacific)[# Keys] 25 to 400% (in 1% increments)100%, Auto, 400% Max.,200% A5>>A3,141% A4>>A3 B5>>B4,122% A4>>B4 A5>>B5,115% B4>>A3 B5>>A4,86% A3>>B4 A4>>B5,81% B4>>A4 B5>>A5,70% A3>>A4 B4>>B5,50%, 25% Min.Inch[# Keys] 25 to 400% (in 1% increments)Auto, 100%, 400% Max.,200% STMT>>Ledger,154% STMT>>Legal,129% Letter>>Ledger,121% Legal>>Ledger,78% Legal>>Letter,77% Ledger>>Legal,64% Ledger>>Letter,50% Ledger>>STMT,25% Min. | |
| XY Zoom X: 25 to 400% (in 1 mm increments)Y: 25 to 400% (in 1 mm increments) | Select vertical and horizontal magnifications individually.Press [+] or [-] to change the displayed magnifications of "X" (horizontal) and "Y" (vertical).Press [# Keys] to use the numeric keys for entry. | |
| Original Orientation | Top Edge on Top, Top Edge on Left Select the orientation of the original document top edge to scan correct direction.Press [Original Orientation] to choose orientation of the originals, either [Top Edge on Top] or [Top Edge on Left]. Then press [OK]. | |
Printing/Sending/Storing
| Item Description |
| 100% Reproduces the original size. |
| Auto Reduces or enlarges original to printing/sending/storing size. |

NOTE
- To reduce or enlarge the image, select the paper size, sending size, or storing size.

Paper Selection (page 6-12) Sending Size (page 6-58) Storing Size (page 6-65)
- Some combinations of original size and paper size or sending size may cause the image to be positioned at the edge of the paper. To center the original vertically and horizontally on the page, use the Centering function described in Margin/Centering, Margin, Centering on page 6-33.
Combine

Layout/Edit


Functions

Combines 2 or 4 original sheets into 1 printed page. You can select the page layout and the type of boundary lines around the pages.
The following types of the boundary lines are available.
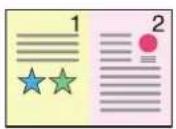
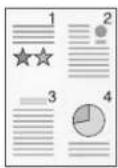

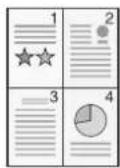
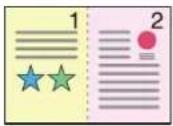
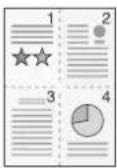
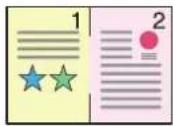
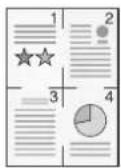
None Dotted LineSolid Line Positioning Mark
Press [2 in 1] or [4 in 1], and select the page layout from "Layout".
| Item Value Description | |||
| Off | |||
| 2 in 1 | Layout | L to R/T to B, R to L/B to T | Select the page layout of scanned originals. |
| Border Line None, Solid Line | Dotted Line, Positioning Mark | Select the boundary line type. Press [Border Line] to select the page boundary line, and press [OK]. | |
| Original Orientation | Top Edge on Top, Top Edge on Left | Select the orientation of the original document top edge to scan correct direction. Press [Original Orientation] to choose orientation of the originals, either [Top Edge on Top] or [Top Edge on Left]. Then press [OK]. | |
| 4 in 1 Layout | Right then Down, Left then | Down, Down then Right, Down then Left | Select the page layout of scanned originals. |
| Border Line None, Solid Line | Dotted Line, Positioning Mark | Select the boundary line type. Press [Border Line] to select the page boundary line, and press [OK]. | |
| Original Orientation | Top Edge on Top, Top Edge on Left | Select the orientation of the original document top edge to scan correct direction. Press [Original Orientation] to choose orientation of the originals, either [Top Edge onTop] or [Top Edge on Left]. Then press [OK]. | |
Layout image
| Item Image | ||
| 2 in 1 L to R/T to B | 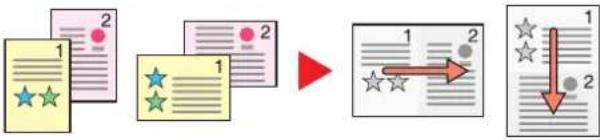 | |
| 4 in 1 Right then Down | 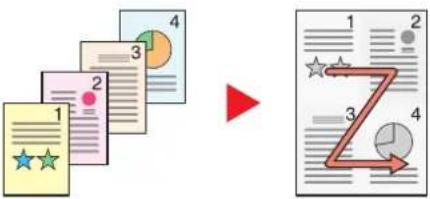 | |

NOTE
The paper sizes supported in Combine mode are A3, A4-R, A4, A5-R, B4, B5-R, B5, Folio, 216 x 340 mm, Ledger, Letter-R, Letter, Legal, Statement-R, Oficio II, 8K, 16K-R and 16K.
When placing the original on the platen, be sure to copy the originals in page order.
Margin/Centering, Margin, Centering

Layout/Edit
[Non-Text]
Send
Advanced Setup
Custom Box
Functions
[Non-Text]
USB Memory
Functions
Copying/Printing
Add margins (white space). In addition, you can set the margin width and the back page margin.
Centering: Centers the original image on the paper when copying onto paper different from the original size.

NOTE
The default setting for margin width can be changed. For details, refer to Margin Default on page 8-18.
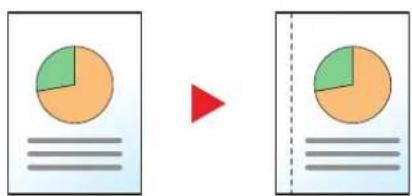
text_image
Diagram showing a split pie chart before and after transformation, with a red arrow pointing to the right side.| Item Value Description | |||
| Off | |||
| Margin Left/Right Metric: -18 mm to +18 mm (in 1 mm increments) Inch: -0.75 to +0.75" (in 0.01" increments) | Set the margin width.* ^1 Use [+] or [-] to enter the margins for "Left/Right" and "Top/Bottom". Press [# Keys] to use the numeric keys for entry. | ||
| Top/Bottom | |||
| Back Page Auto, Manual For duplex copying, press [Back Page] and select [Auto] or [Manual].When [Auto] is selected, an appropriate margin is applied automatically on the rear page depending on a margin specified for the front page and a binding orientation.When [Manual] is set, you can set a different margin than the front on the back. Set the margin in the screen that is displayed. The setting selections are the same as for the front. | |||
| Original Orientation | Top Edge on Top, Top Edge on Left Select the orientation of the original document top edge to scan correct direction.Press [Original Orientation] to choose orientation of the originals, either [Top Edge on Top] or [Top Edge on Left]. Then press [OK]. | ||
| Centering*2 | Original Orientation | Top Edge on Top, Top Edge on Left Select the orientation of the original document top edge to scan correct direction.Press [Original Orientation] to choose orientation of the originals, either [Top Edge on Top] or [Top Edge on Left]. Then press [OK]. | |
*1 The input units can be changed in System Menu. For details, refer to Measurement on page 8-14.
*2 Not displayed when printing from removable memory.
Sending/Storing
When you have sent/stored the original after specifying the original size and sending size, depending on these sizes, a margin is created at the bottom, left, or right side of paper. By using the Centering function, the image is placed with a margin equally created for all edges.
(Value: [Off] / [On])
Border Erase

flowchart
graph LR
    A["Copy"] --> B["Layout/Edit"]
    B --> C["Send"]
    C --> D["Advanced Setup"]
    D --> E["Custom Box"]
    E --> F["Functions"]
    F --> G["USB Memory"]
    G --> H["Functions"]
Erases the black border that forms around the image. The following modes are available.
Border Erase Sheet
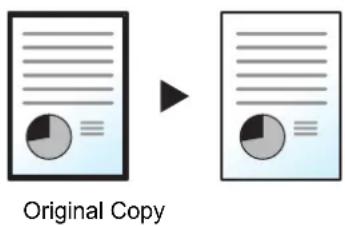
text_image
Original CopyErases black borders around the single sheet original.
Border Erase Book
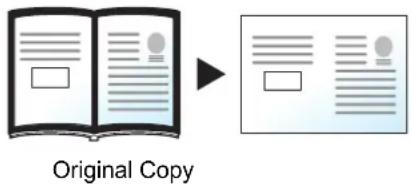
text_image
Original CopyErases black borders around the edges and in the middle of the original such as a thick book. You can specify the widths individually to erase the borders around the edges and in the center of the book.
Individual Border Erase
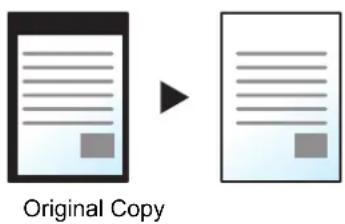
text_image
Original CopyYou can specify border erase widths individually for all edges.

NOTE
- The default setting for border erase width can be changed. For details, refer to Border Erase Default on page 8-17.
- The default width for back page can be changed. For details, refer to Border Erase to Back Page on page 8-17.
| Item Value Description | |||
| Border Erase Sheet | Border Metric: 0 mm to 50 mm(in 1 mm increments)Inch: 0.00 to 2.00"(in 0.01" increments) | Set the border erase width.*Set the value by pressing [+] or [-].Press [# Keys] to use the numeric keys for entry. | |
| Back Page | Same as Front Page, Do Not Erase | For 2-sided originals, press [Back Page] and then press [Same as Front Page] or [Do Not Erase]. | |
| Border Erase Book | Border Metric: 0 mm to 50 mm(in 1 mm increments)Inch: 0.00 to 2.00"(in 0.01" increments) | Set the border erase width.*Set the value by pressing [+] or [-].Press [# Keys] to use the numeric keys for entry. | |
| Gutter | |||
| Back Page | Same as Front Page, Do Not Erase | For 2-sided originals, press [Back Page] and then press [Same as Front Page] or [Do Not Erase]. | |
| Individual Border Erase | Top Metric: 0 mm to 50 mm(in 1 mm increments)Inch: 0.00 to 2.00"(in 0.01" increments) | Set the border erase width.*Set the value by pressing [+] or [-].Press [# Keys] to use the numeric keys for entry. | |
| Bottom | |||
| Left | |||
| Right | |||
| Back Page | Same as Front Page, Do Not Erase | For 2-sided originals, press [Back Page] and then press [Same as Front Page] or [Do Not Erase]. | |
| Original Orientation | Top Edge on Top, Top Edge on Left Select the orientation of the original document top edge to scan correct direction. Press [Original Orientation] to choose orientation of the originals, either [Top Edge on Top] or [Top Edge on Left]. Then press [OK]. | ||
* The input units can be changed in System Menu. For details, refer to Measurement on page 8-14.
Booklet

Layout/Edit

Functions
The Booklet option allows you to copy sheet originals and produce booklets such as small brochures or pamphlets. A booklet, such as a magazine, is made by folding at the center.
You can print the cover page onto colored paper or thick paper. Paper for the cover is supplied from the multi purpose tray. To feed the cover paper from the cassette, refer to Paper Source for Cover on page 8-12.

NOTE
Using the optional 4,000-sheet finisher and the folding unit enables you to saddle stitch your copies (fold them in two with staples in the center). Supported paper sizes are A3, B4, A4-R, Ledger, Legal, Letter-R, and 8K.
| Type of original Original size Paper size | ||
| One-sided original, Two-sided original | All* | A3, B4, A4, A4-R, B5, B5-R, Ledger, Legal, Letter and Letter-R |
| Book Original A3, B4, | A4-R, B5-R, A5-R, Ledger, Letter-R and 8K | |
* Except for custom sized originals.
Binding on the left side
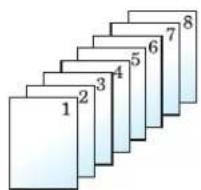
Original


Copy
The folded copies can be read from left to right.
Binding on the right side
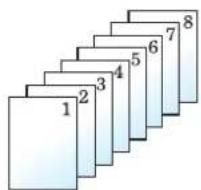
Original Copy

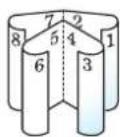
The folded copies can be read from right to left.
Top binding
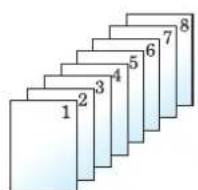
Original Copy

The folded copies can be read from top to bottom.
| Item Value Description | ||||
| Off | ||||
| 1-sided>> Booklet | Finishing Binding Left, | Binding Right, Binding Top | Select the binding orientation of copies. | |
| Cover Off | ||||
| Cover: Front Cover Print Setting | Not Print, Front Only, Back Only, Duplex | Select whether to add the cover. Select the printing method for the cover to be inserted. Press [Cover], and then [Cover], and specify the print setting for the cover to be inserted. Select from [Not Print], [Back Only], [Front Only], and [Duplex], and press [OK]. | ||
| Cover: Back Cover Print Setting | Not Print, Front Only, Back Only, Duplex | |||
| Staple/Fold Fold Only, Saddle Stitch To fold finished copies in half, press [Staple/ Fold] and then press [Fold Only]. To use saddle stitching, press [Staple/Fold] and then press [Saddle Stitch]. | ||||
| Original Orientation Top Edge on Top, Top Edge on Left | Select the orientation of the original document top edge to scan correct direction. Press [Original Orientation] to choose orientation of the originals, either [Top Edge on Top] or [Top Edge on Left]. Then press [OK]. | |||
| 2-sided>> Booklet | Original Binding Left/Right, | Binding Top | Select the binding direction of originals. | |
| Finishing | Binding Left, Binding Right, Binding Top | Select the binding orientation of copies. | ||
| Cover Off | ||||
| Cover: Front Cover Print Setting | Not Print, Front Only, Back Only, Duplex | Select whether to add the cover. Select the printing method for the cover to be inserted. Press [Cover], and then [Cover], and specify the print setting for the cover to be inserted. Select from [Not Print], [Back Only], [Front Only], and[Duplex], and press [OK]. | ||
| Cover: Back Cover Print Setting | Not Print, Front Only, Back Only, Duplex | |||
| Staple/Fold Fold Only, Saddle Stitch To fold finished copies in half, press [Staple/ Fold] and then press [Fold Only]. To use saddle stitching, press [Staple/Fold] and then press [Saddle Stitch]. | ||||
| Original OrientationTop Edge on Top, Top Edge on Left | Select the orientation of the original document top edge to scan correct direction. Press [Original Orientation] to choose orientation of the originals, either [Top Edge on Top] or [Top Edge on Left]. Then press [OK]. | |||
| Book>>Booklet | Original Binding Left, | Binding Right | Select the binding direction of originals. | |
| Finishing Binding Left, | Binding Right | Select the binding orientation of copies. | ||
| Cover Off, Cover Select whether to add the cover. Press | [Cover] to select [Cover], and press [OK]. | |||
| Staple/Fold Fold Only, Saddle Stitch To fold finished copies in half, press [Staple/Fold] and then press [Fold Only].To use saddle stitching, press [Staple/Fold] and then press [Saddle Stitch]. | ||||
| Original Orientation Top Edge on | Top,Top Edge on Left | Select the orientation of the original document top edge to scan correct direction. Press [Original Orientation] to choose orientation of the originals, either [Top Edge on Top] or [Top Edge on Left]. Then press [OK]. | ||

NOTE
- The number of sheets that can be folded or Saddle Stitch stapled varies depending on paper weight. For details, refer to Center-Folding Unit (Option) on page 11-30.
- When placing the original on the platen, be sure to place the originals in page order.
Duplex

Layout/Edit

Custom
Box
Functions
1

Functions
[Non-Text]
Produces two-sided copies.
You can also create single-sided copies from two-sided originals or originals with facing pages such as books.
The following modes are available.
One-sided to Two-sided
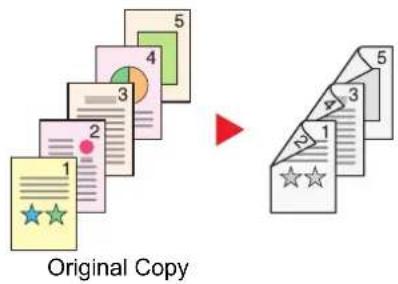
text_image
Original CopyProduces two-sided copies from one-sided originals. In case of an odd number of originals, the back side of the last copy will be blank.
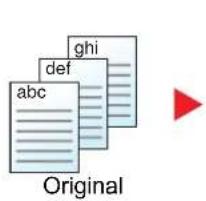
text_image
abc ghi def OriginalA
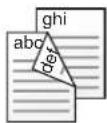
Copy
B
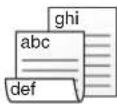
The following binding options are available.
A Original Left/Right to Binding Left/Right: Images on the second sides are not rotated.
B Original Left/Right to Binding Top: Images on the second sides are rotated 180 degrees. Copies can be bound on the top edge, facing the same orientation when turning the pages.
Two-sided to One-sided

Original


Copy
Copies each side of a two-sided original onto two individual sheets. The optional document processor is required.
The following binding options are available.
- Binding Left/Right: :Images on the second sides are not rotated.
- Binding Top: Images on the second sides are rotated 180 degrees.
Two-sided to Two-sided
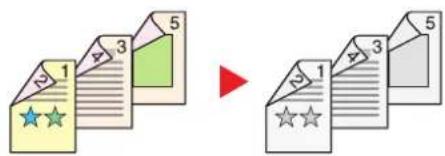
text_image
Diagram showing two document pages with star symbols and numbered sections, one pointing to a red arrow.Original Copy
Produces two-sided copies from two-sided originals. The optional document processor is required.

NOTE
The paper sizes supported in Two-sided to Two-sided mode are A3, B4, A4, A4-R, B5, B5-R, A5-R, Ledger, Legal, Letter, Letter-R, Executive, Statement-R, Oficio II, 216 x 340 mm and Folio.
Book to One-sided
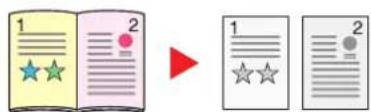
text_image
Illustration showing an open book with two stars and a red play button, followed by two blank text boxes with star ratings.Original Copy
Produces a 1-sided copy of a 2-sided or open book original.
The following binding options are available.
Binding Left: Originals with facing pages are copied from left to right.
Binding Right: Originals with facing pages are copied from right to left.
NOTE
The original sizes supported in Book to One-sided mode are Ledger, Letter-R, A3, A4-R, A5-R, B4, B5-R and 8K.
The supported paper sizes are A4, B5, Letter and 16K. You may change paper size and reduce or enlarge copy to match that size.
Book to Two-sided
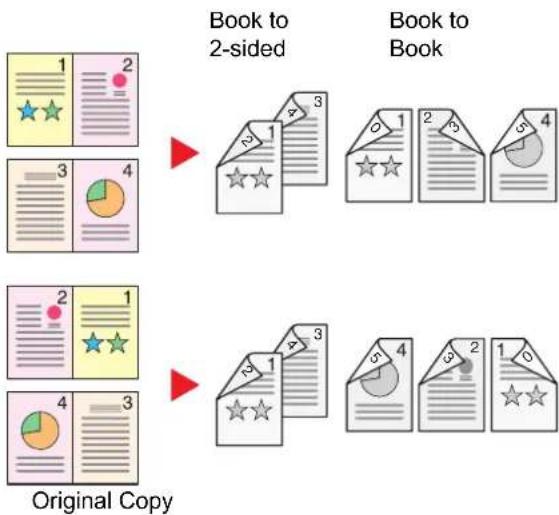
flowchart
graph TD
    A["Original Copy"] --> B["Book to 2-sided"]
    A --> C["Book to Book"]
    D["Original Copy"] --> E["Book to 2-sided"]
    D --> F["Book to Book"]
Produces two-sided copies from an open book original with facing pages.
NOTE
The original sizes supported in Book to Two-sided mode are A3, B4, A4-R, B5-R, A5-R, Ledger, Letter-R and 8K. The supported paper sizes are A4, B5 and Letter.
Copying
Prints 1-sided or open book originals to 2-sided, or 2-sided or open book originals to 1-sided. Select the binding orientation for original and finished documents.
| Item Value Description | |||
| 1-sided>>1-sided | — | Disables the function. | |
| 1-sided>>2-sided | Finishing | Binding Left/Right, Binding Top | Select the binding orientation of copies. |
| Original Orientation | Top Edge on Top, Top Edge on Left Select the orientation of the original document top edge to scan correct direction. Press [Original Orientation] to choose orientation of the originals, either [Top Edge on Top] or [Top Edge on Left]. Then press [OK]. | ||
| 2-sided>>1-sided | Original | Binding Left/Right, Binding Top | Select the binding orientation of originals. |
| Original Orientation | Top Edge on Top, Top Edge on Left Select the orientation of the original document top edge to scan correct direction. Press [Original Orientation] to choose orientation of the originals, either [Top Edge on Top] or [Top Edge on Left]. Then press [OK]. | ||
| 2-sided>>2-sided | Original | Binding Left/Right, Binding Top | Select the binding direction of originals. |
| Finishing Binding Left/Right, Binding Top Select the binding orientation of copies. | |||
| Original Orientation | Top Edge on Top, Top Edge on Left Select the orientation of the original document top edge to scan correct direction. Press [Original Orientation] to choose orientation of the originals, either [Top Edge on Top] or [Top Edge on Left]. Then press [OK]. | ||
| Book>>1-sided | Original | Binding Left, Binding Right | Select the binding direction of originals. |
| Original Orientation | Top Edge on Top, Top Edge on Left Select the orientation of the original document top edge to scan correct direction. | ||
| Book>>2-sided | Original | Binding Left, Binding Right | Select the binding direction of originals. |
| Finishing Book>>2-sided, Book>>Book Select the desired Duplex option. | |||
| Original Orientation | Top Edge on Top, Top Edge on Left Select the orientation of the original document top edge to scan correct direction. Press [Original Orientation] to choose orientation of the originals, either [Top Edge on Top] or [Top Edge on Left]. Then press [OK]. | ||
When placing the original on the platen, consecutively replace each original and press the [Start] key.
After scanning all originals, press [Finish Scan] to start copying.
Printing
Print a document to 1-sided or 2-sided sheets.
| Item | Value | Description |
| 1-sided | — | Disables the function. |
| 2-sided | Left/Right | Prints a 2-sided document so that the sheets are aligned properly for binding on the left or right. |
| Top | Prints a 2-sided document so that the sheets are aligned properly for binding on the top. |
Cover

Layout/Edit
[Non-Text]
Custom Box
Functions
m = 311
Adds a cover to the finished copies. You can print the first page and/or the last page onto colored paper or thick paper fed from the different paper source than the regular one. The following two options are available. Paper for the cover is supplied from the multi purpose tray. To feed the cover paper from the cassette, refer to Paper Source for Cover on page 8-12.
The printing method can be set for the covers. Specify a print setting for each cover.
| Item Value Description | |||
| Front Cover Not Print, Front Only, Back Only, Duplex | Different paper is inserted for the first page of the document.Select [Stop Printing], [Front Only], [Back Only], or [Duplex] for the print setting of the inserted paper. | ||
| Front and Back Covers | Front Cover Print Setting | Not Print, Front Only, Back Only, Duplex | Different paper is inserted for the first page and last page of the document.Select [Stop Printing], [Front Only], [Back Only], or [Duplex] for the print setting of the inserted paper. |
| Back Cover Print Setting | Not Print, Front Only, Back Only, Duplex | ||
Form Overlay

Layout/Edit
[Non-Text]

Functions
[Non-Text]
Prints the original document overlaid with a form or image. Once you scan and register the form, the form is overlaid onto the original. You can also use a form that is already registered in the Job Box.
Place the original for the form on top of the other originals. When using the optional document processor, the first page of the originals should be placed on the top.
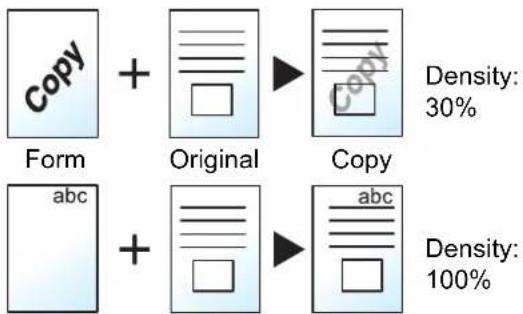
text_image
Copy Form + Original Copy abc + Original Copy Density: 30% abc Density: 100%| Item Value Description | |||
| Off | |||
| Select Stored Form | Density 10% to 100 | % Specify the density of the form to be overlaid. Press [+] or [-] in "Density". | |
| Finishing Image Transparent The form is overlaid on the document. | |||
| Form on Original Image The form is placed on top of the document. | |||
| Original Image on Form The form is placed under the document. | |||
| Select Form* | — | Select the form to be overlaid from Job Box. Press [Select Form] to display the document boxes that store documents which can be used as a form. Select the desired form from the list and press [OK]. | |
| Scan New Form | Density | 10% to 100% | Specify the density of the form to be overlaid. Press [+] or [-] in "Density". |
| Finishing Image Transparent The form is overlaid on the document. | |||
| Form on Original Image The form is placed on top of the document. | |||
| Original Image on Form The form is placed under the document. | |||
* Form must be previously registered in Job Box. For details, refer to Form for Form Overlay on page 5-65.
Page #

Layout/Edit
m = 311

Functions
[Non-Text]
Adds page numbers to the finished documents. The available formats for numbering are [-1-], [P.1] and [1/n]. The format [1/n] prints the total number of pages in the place of "n".
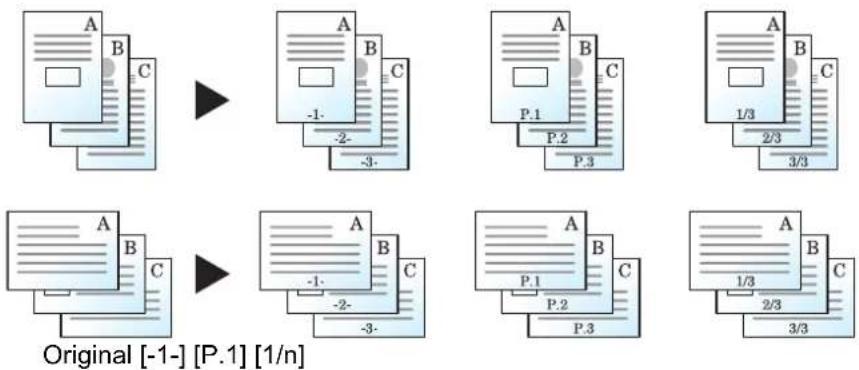
Select the numbering format from [-1-], [P.1] or [1/n].
| Item Value Description | |||
| Off | |||
| -1-, P.1, 1/n | Position Top Left, Top Middle | Select the print position of page number.Press [Detail] to set the stamp position using numeric values,and to set the stamp position ([Same as Front Page], [MirrorFront Page]) when a stamp is placed on the back side of thepaper in duplex printing. | |
| 1st Page 1 to 10 To start | page other than the first page,press [+] or [-] in "1st Page" to specify the starting page. Press[# Keys] to use the numeric keys for entry. | ||
| Start # 1 to 999 To start | the numbering with a number other than 1, press [+] or[-] in "Start Number" to specify the starting number. Press [#Keys] to use the numeric keys for entry. | ||
| Last Page -10 to 0 If you do not want page numbering through to the last page,press [Last Page]. Select [Manual] and use [+] or [-] to specifythe final page to be numbered (a negative number of pagescounting backwards from the last page), and then press [OK].Specify the desired number up to -10. Press [# Keys] to usethe numeric keys for entry. | |||
| Font | Size | Font sizes registered inText (Text Stamp) on page8-20are displayed. | |
| Style | None, Bold, Italic,Bold/Italic | ||
| Font | Courier, Letter Gothic | ||
| Color | Black, White | ||
| Density | 10 to 100%(in 10% increments) | ||
| DisplayPattern | Transparent, Clipping,Overwrite | ||
| Denominator#* | Auto, Manual (1 to 999) | ||
| Original Orientation | Top Edge on Top,Top Edge on Left | ||
* This item appears when [1/n] is selected.
Memo Page

Layout/Edit
Delivers copies with a space for adding notes. You can also print two originals onto the same sheet with a space or add lines to indicate page boundaries.
Press [Layout A] or [Layout B] and select the page layout from "Layout".

NOTE
The paper sizes supported in Memo mode are A3, B4, A4, A4-R, B5, B5-R, A5-R, Ledger, Legal, Oficio II, 216 x 340 mm, Letter, Letter-R, Statement-R, Folio, 8K, 16K and 16K-R.
Layout A
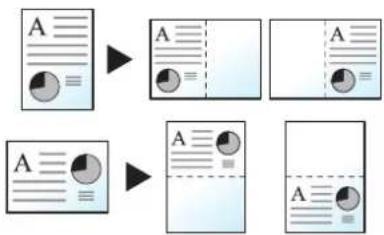
flowchart
graph TD
    A1["Document Image"] --> A2["Blank Space"]
    A3["Document Image"] --> A4["Empty Space"]
    A5["Document Image"] --> A6["Empty Space"]
Original Copy
Reduces images of each original page for printing onto half of a page, leaving the other half blank for notes.
Layout B
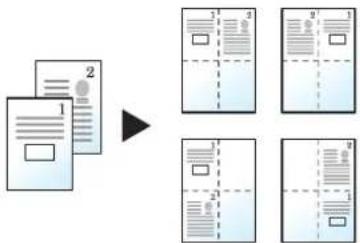
flowchart
graph TD
    A["Document 1"] --> B["Document 2"]
    B --> C["Output 1"]
    B --> D["Output 2"]
    D --> E["Output 3"]
Original Copy
Reduces images of two original pages for printing onto half of a page, leaving the other half blank for notes.
| Item Value Description | |||
| Off | |||
| Layout A | Layout | Left/Top, Right/Bottom | Select how to lay out the pages of scanned original. |
| Border Line None, | Solid Line, Dotted Line, Positioning Mark | Select the boundary line type. Press [Border Line] to select the page boundary line, and press [OK]. | |
| Original Orientation | Top Edge on Top, Top Edge on Left | Select the orientation of the original document top edge to scan correct direction. Press [Original Orientation] to choose orientation of the originals, either [Top Edge on Top] or [Top Edge on Left]. Then press [OK]. | |
| Layout B Layout | Top L to R, Top R to L, Top L to B, Top R to B | Select how to lay out the pages of scanned original. | |
| Border Line None, | Solid Line, Dotted Line, Positioning Mark | Select the boundary line type. Press [Border Line] to select the page boundary line, and press [OK]. | |
| Original Orientation | Top Edge on Top, Top Edge on Left | Select the orientation of the original document top edge to scan correct direction. Press [Original Orientation] to choose orientation of the originals, either[Top Edge on Top] or [Top Edge on Left]. Then press [OK]. | |
Image Repeat

Layout/Edit
Tiles the 1 copied sheet with an original image. You can also specify the area of the original to repeat.
| Item Value Description | |||||
| Off | |||||
| Zoom Priority 25 to 400% (in 1% increments) Set the default screen. | Press [+] or [-] to change the displayed magnification as desired. Press [# Keys] to use the numeric keys for entry. | ||||
| [855Y] |  Original Copy Original Copy | Specify Repeat Area | Off | ||
| On: Start | MetricX1: 0 to 431 mmY1: 0 to 296 mmInchX1: 0.00 to 16.99"Y1: 0.00 to 11.68" | To set the area of the original to be repeated, press [On] for "Specify Repeat Area".Press [+] or [-] to input the area of the original to be repeated.*Press [# Keys] to use the numeric keys for entry.Y1: Length from top left of platen to top edge of repeat areaX1: Length from top left of platen to left edge of repeat areaY2: Height of repeat areaX2: Width of repeat area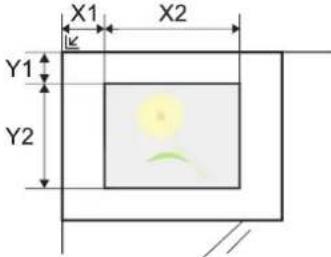 | |||
| On: Area | MetricX2: 1 to 432 mmY2: 1 to 297 mmInchX2: 0.01 to 17.00"Y2: 0.01 to 11.69" | ||||
Double Copy |  Original Copy Original Copy | — | Makes 2 copies of the same original on a single sheet.For example, you can double-copy an A4 original onto an A3 sheet which you then cut in half to make 2 copies that are identical to the original. | ||
* The input units can be changed in System Menu. For details, refer to Measurement on page 8-14.
Text Stamp

Layout/Edit
Send
Advanced Setup
Custom Box
Functions
USB Memory
Functions
You can add a text stamp on the documents.

NOTE
This cannot be set when Text Stamp is set in the system settings. For details, refer to Print Job Status on page 8-21.
Copying/Printing
| Item Value Description | ||||
| Off | ||||
| On | Stamp | Keyboard, Template 1 to 8 | Press [Keyboard] and enter the text string to be printed, or select a text stamp from the displayed templates. ⚪ NOTE Templates that have been set will appear. For details on registering templates, refer to Text (Text Stamp) on page 8-20. | |
| Stamp Method Each Print | Page, Each Original Page | Select the stamp method. Press [Stamp Method] and set the stamp method for text stamp. | ||
| Position Top Left, Top Middle | Middle, Top Right, Middle Left, Center, Middle Right, Bottom Left, Bottom Middle, Bottom Right, Detail | Set the stamp position to be printed. Press [Position] and select the text stamp position. Press [Detail] to set the stamp position using numeric values, and to set the stamp position and angle when a stamp is placed on the back side of the paper in duplex printing. | ||
| Font Size Registered font sizes are displayed. For details on registering font sizes, refer to Font (Text Stamp) on page 8-20 | Set the font size of text stamp. | |||
Sending/Storing
| Item Value Description | ||||
| Off | ||||
| On | Stamp | Keyboard, Template 1 to 8 | Press [Keyboard] and enter the text string to be printed, or select a text stamp from the displayed templates. ⚪ NOTE Templates that have been set will appear. For details on registering templates, refer to Text (Text Stamp) on page 8-20. | |
| Position Top Left, Top Middle | Middle, Top Right, Middle Left, Center, Middle Right, Bottom Left, Bottom Middle, Bottom Right, Detail | Set the stamp position to be printed. Press [Position] and select the text stamp position. Press [Detail] to set the stamp position using numeric values, and to set the stamp angle. | ||
| Font Size | Registered font sizes are displayed. For details on registering font sizes, refer to Font (Text Stamp) on page 8-20. | Set the font size of text stamp. | ||
| Character Border | Off, Circle, Rectangle, Underline Set the character border and underline. | |||
| Style None, Bold, Italic, Bold/Italic Set the font style of text stamp. | ||||
| Font Courier | Letter Gothic Set the font of text stamp. | |||
| Color | Black, Red, Green, Blue, Cyan, Magenta, Yellow, White | Set the color of text stamp. | ||
| Density | 10 to 100% (in 10% increments) | Set the density of text stamp color. Set the value by pressing [+] or [-]. | ||
| Display Pattern | Transparent, Clipping, Overwrite | Set the display method of text stamp. | ||
| Original Orientation | Top Edge on Top, Top Edge on Left | Select the orientation of the original document top edge to scan correct direction. Press [Original Orientation] to choose orientation of the originals, either [Top Edge on Top] or [Top Edge on Left]. Then press [OK]. | ||
Bates Stamp

Layout/Edit
[Non-Text]
Send
Advanced
Setup
Custom
Box
Functions
[Non-Text]
USB
Memory
Functions
You can add a bates stamp on the documents.

NOTE
This cannot be set when Text Stamp is set in the system settings. For details, refer to Print Job Status on page 8-21.
Copying/Printing
| Item Value Description | ||||
| Off | ||||
| On Stamp Date, User Name, Serial Number, Numbering, Text 1, Text 2 | Set the stamp to be printed.When [Text 1] or [Text 2] is selected, press[Change] below and enter the text string.If you selected [Date], press [Date Format] andselect [MM/DD/YYYY], [DD/MM/YYYY], or[YYYY/MM/DD] to set the date format.To set [Numbering], press [Numbering Default] andset the starting sequence number (1 to 9999999). | |||
Sending/Storing
| Item Value Description | ||||
| Off | ||||
| On | Stamp | Date, User Name, Serial Number, Numbering, Text 1, Text 2 | Set the stamp to be printed.When [Text 1] or [Text 2] is selected, press [Change] below and enter the text string.If you selected [Date], press [Date Format] and select [MM/DD/YYYY], [DD/MM/YYYY], or [YYYY/MM/DD] to set the date format.To set [Numbering], press [Numbering Default] and set the starting sequence number (1 to 9999999). | |
| Position Top Left, Top Middle | Middle, Top Right,Middle Left, Center, Middle Right,Bottom Left, Bottom Middle,Bottom Right, Detail | Set the stamp position to be printed.Press [Position] and select the text stamp position.Press [Detail] to specify the stamp position using numeric values. | ||
| Font Size Registered font sizes are displayed. For details on registering font sizes, refer to Font (Bates Stamp) on page 8-20. | Set the font size of bates stamp. | |||
Continuous Scan

Advanced Setup
Send
Advanced Setup
Custom Box
Functions
[Non-Text]

Functions
Scans a large number of originals in separate batches and then produce as one job. Originals will be scanned continuously until you press [Finish Scan].
Select [On] to use continuous scanning. To use Job Build, select [Job Build]. You can set the functions that appear on the screen during scanning.
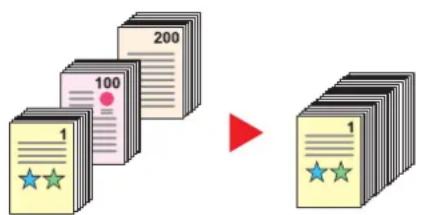
text_image
100 200 1 ★ ★ 1Job Build
When [Job Build] is selected when copying or printing, the binding orientation for finished documents can be selected from [Binding Left], [Binding Right] or [Binding Top].
The following functions can be selected during scanning.
| Item Description | |
| Next Copy: On Back | In duplex copying, prints on the back side if the next page is to be printed on the front side. Press [Next Copy: On Back] to use this function. |
| Next Copy: On Front | In duplex copying, prints on the front side if the next page is to be printed on the back side. Press [Next Copy: On Front] to use this function. |
| Sheet Insertion | Inserts a blank paper in the next page. Press [Sheet Insertion] to use this function. |
Auto Image Rotation

Advanced Setup
Automatically rotates the image 90 degrees when the sizes of the original and the loaded paper matches but the orientations are different.
(Value: [Off] / [On])

NOTE
- You can select whether to rotate the image automatically in the default settings. For details, refer to Auto Image Rotation (Copy) on page 8-18.
- When you have enabled this function, you can select how the images are rotated. For details, refer to Auto Image Rotation Action on page 8-28.
Negative Image

Advanced Setup
Inverts black and white portions of the image for printing.
(Value: [Off] / [On])
Mirror Image

Advanced Setup
Copies the mirrored image of the original.
(Value: [Off] / [On])
Job Finish Notice

Advanced Setup
Send
Advanced Setup
Custom Box
Functions
USB Memory
Functions
Sends E-mail notice when a job is complete.
Users can be notified of the completion of a job while working at a remote desk, saving the time spent waiting beside the machine to finish.
Example of Job Finish Notice:
| To: h_pttr@owl-net.net | |
| Subject: 1234 Job | end report mail |
| Job No.: 000002Result: OKEnd Time: Sat 02 Feb 2013 10:10:10File Name: doc27042005145608Job Type: Copy | |
| 1234[00:c0:ee:d0:01:14] | |

NOTE
PC should be configured in advance so that E-mail can be used. For details, refer to Embedded Web Server RX on page 2-33.
E-mail can be sent to a single destination.
| Item Description | ||
| Off | ||
| Address Book | Select the notification destination from the address book. | |
| Detail Information on the selected destination can be viewed. | ||
| Address Book Select the notification destination on the address book screen, then press [OK]. | ||
| Address Entry | Enter E-mail address directly. Press [E-mail Address], enter the address (up to 128 characters) and press [OK]. | |
File Name Entry

Advanced Setup
Send
Advance Setup
Custom Box
Functions
USB Memory
Functions
Adds a file name. Additional information such as job number and date and time can also be set. You can check a job history or job status using the file name, date and time, or job number specified here.
Press [File Name], enter the file name (up to 32 characters), and press [OK].
To add date and time, press [Date and Time]. To add job number, press [Job No.]. The added information will be displayed in "Additional Info".
Priority Override

Advanced Setup

Functions

Functions
Suspends the current job and gives a new job top priority. The suspended job resumes after the other job is finished. (Value: [Off] / [On])

NOTE
This function is not available if current job was an override.
Priority override may not be available depending on the status of the current print job and memory usage. In this case, try the interrupt copy.

Interrupt Copy (page 5-22)
Repeat Copy

Advanced Setup
Enables additional copies in the desired quantity as necessary after a copy job is completed. For confidential documents, you can set up a password for the use of Repeat Copy. In such a case, the correct password must be entered to perform Repeat Copy.
To register a password, press [# Keys] and enter a 4-digit password.

IMPORTANT
- A Repeat Copy job is cleared when the main power switch is turned off.
- If you forget the password, Repeat Copy cannot be performed for that document. Make a note of the password beforehand if necessary.
Repeat Copy is not available when the machine is equipped with the optional Data Security Kit.
When the maximum number of Repeat Copy jobs to retain in the document box is set to 0 (zero), this function cannot be used. (Refer to Repeat Copy Job Retention on page 8-34.)
You can select Repeat Copy as the default setting. For details, refer to Repeat Copy on page 8-20.
Giving a file name to a copy job will facilitate identification of the data when copying. (Refer to File Name Entry on page 6-54.)
Repeat Copy
The Repeat Copy jobs are stored in the Job Box. Refer to Outputting Repeat Copy Jobs on page 5-64 to print out the Repeat Copy jobs.
DP Read Action

Advanced Setup
When the document processor is used, select the scanning operation for the document processor.
| Item Description | |
| Speed Priority Gives priority to scanning speed. | |
| Quality Priority | Gives priority to image quality at a slightly slower scan speed. |

NOTE
- This function is displayed when the document processor is installed.
- This feature cannot be used when [On] is selected in Document Guard on page 8-51.
Skip Blank Page

Advanced Setup
When there are blank pages in a scanned document, this function skips the blank pages and prints only pages that are not blank. When set to [High], the level at which blank paper is recognized is higher.
The machine detects blank pages, saving unnecessary printing without the need to check for blank pages in the document.
Select [Low], [Middle] or [High] in "Blank Detection Level".

NOTE
The originals with punched holes or originals printed on a colored substrate may not be recognized as blank pages.
2-sided/Book Original

Org./Sending Data Format

Functions

Functions
Select the type and orientation of the binding based on the original.
| Item Value Description | |||
| 1-sided — "2-sided/Book Original" is not set. | |||
| 2-sided Binding | Binding Left/Right, | Binding Top | Select the binding orientation of originals. |
| Original Orientation | Top Edge on Top, Top Edge on Left | Select the orientation of the original document top edge to scan correct direction. Press [Original Orientation] to choose orientation of the originals, either [Top Edge on Top] or [Top Edge on Left]. Then press [OK]. | |
| Book Binding | Binding Left, | Binding Right | Select the binding orientation of originals. |
| Original Orientation | Top Edge on Top, Top Edge on Left | Select the orientation of the original document top edge to scan correct direction. Press [Original Orientation] to choose orientation of the originals, either [Top Edge on Top] or [Top Edge on Left]. Then press [OK]. | |
Sample image
| Value Image | ||
| 2-sided Binding | Left/Right* |  |
| Binding Top* |  | |
| Book Binding Left |  | |
* Available when the optional document processor is used.
Sending Size

Org./Sending Data Format

Functions
Select size of image to be sent.
Press [Standard Sizes 1], [Standard Sizes 2], or [Others] to select the sending size.
| Item Value Description | ||
| Standard Sizes 1 Metric | models: Same as Original Size, A3, A4, A5, A6,B4, B5, B6, Folio, 216 × 340 mmInch models: Same as Original Size, Ledger, Letter,Legal, Statement, 11 × 15", Oficio II | Select from Same as Original Size or Standard Size. |
| Standard Sizes 2 Metric | models: Ledger, Letter, Legal, Statement, 11 × 15",Oficio II, 8K, 16KInch models: A3, A4, A5, A6, B4, B5, B6, Folio, 8K, 16K,216 × 340 mm | Select from standard sizes except Standard Sizes 1. |
| Others Hagaki, Oufuku | hagaki Select from Hagaki. | |
Relationship between Original Size, Sending Size, and Zoom
Original Size (page 6-11), Sending Size, and Zoom (page 6-27) are related to each other. For details, see the table below.
| Original size and sending size are the same different | ||
| Original Size (page 6-11) Specify as necessary. | Specify as necessary. | |
| Sending Size | Select [Same as Original]. | Select the desired size. |
| Zoom (page 6-27) | Select [100%] (or [Auto]). | Select [Auto]. |

NOTE
When you specify the sending size that is different from the original size, and select the zoom of [100%], you can send the image as the actual size (No Zoom).
File Format

Org./Sending Data Format

Functions

Functions
Specify the image file format. Image quality level can also be adjusted.
Select the file format from [PDF], [TIFF], [JPEG], [XPS], and [High Comp. PDF].
When the color mode in scanning has been selected for Grayscale or Full Color, set the image quality. If you selected [PDF] or [High Comp. PDF], you can specify encryption or PDF/A settings.
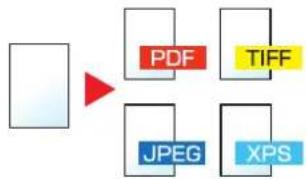
flowchart
graph TD
    A["Input"] --> B["PDF"]
    B --> C["TIFF"]
    B --> D["JPEG"]
    B --> E["XPS"]
| Item Value Color mode | ||
| PDF *1*2 | 1 Low Quality (High Comp.) to 5 High Quality (Low Comp.) | Auto Color (Color/Grayscale), Auto Color (Color/Black and White), Full Color, Grayscale, Black and White |
| TIFF 1 Low Quality (High Comp.) | to 5 High Quality (Low Comp.) | Auto Color (Color/Grayscale), Auto Color (Color/Black and White), Full Color, Grayscale, Black and White |
| JPEG 1 Low Quality (High Comp.) | to 5 High Quality (Low Comp.) | Auto Color (Color/Grayscale), Full Color, Grayscale |
| XPS 1 Low Quality (High Comp.) | to 5 High Quality (Low Comp.) | Auto Color (Color/Grayscale), Auto Color (Color/Black and White), Full Color, Grayscale, Black and White |
| High Comp. PDF *1*2 | Compression Ratio Priority, Standard, Quality Priority | Auto Color (Color/Grayscale), Auto Color (Color/Black and White), Full Color, Grayscale |
*1 The file format can be set (Value: [Off] / [PDF/A-1a] / [PDF/A-1b]).
*2 You can create Searchable PDF file by running OCR on the scanned document. For details, refer to OCR Text Recognition (Option) on page 6-60.

NOTE
- When [High Comp. PDF] is selected, you cannot adjust the image quality.
- You can use PDF encryption functions. For details, refer to PDF Encryption Functions on page 6-61.
- If encryption is enabled, PDF/A settings cannot be specified.
OCR Text Recognition (Option)
When PDF or high compression PDF is selected for the file format, you can create Searchable PDF file by running OCR on the scanned document. Press [OCR Text Recognition], and then [On], select the language of the document, and press [OK].
| Item Description | ||
| Off Do not create Searchable PDF file. | ||
| On Create Searchable PDF file. | Select the language to extract from the options displayed on the touch panel. | |
| Auto Image Rotation | Rotates image automatically by recognizing text orientation.Value: Off, On | |

NOTE
- This function can only be used when the optional OCR Scan Activation Kit is installed.

Scan extension kit(A) "OCR Scan Activation Kit" (page 11-7)
- If the proper language is not selected, the PDF creation time may be taken or the creation may be failed. The default language can be changed in System Menu. For details, refer to Primary OCR Language on page 8-19.
-
If the original orientation is not correct, texts on the original cannot be recognized as texts or the PDF creation time may be taken. Check the following:
-
The original orientation is correct.
- When setting the originals with the mixed orientation at once, [On] is selected for [Auto Image Rotation]. If you frequently use the originals with the mixed orientation, the default of [Auto Image Rotation] can be changed in System Menu. For details, refer to Auto Image Rotation (OCR) on page 8-19.
-
The accuracy of the text recognition depends on the original condition. The following condition may result in decreasing the recognition accuracy.
-
Repeatedly copied documents (as copied copy)
- Received faxes (with low resolution)
- Originals with the character space too narrow or wide
- Originals with the lines on the text
- Originals with the special fonts
- Binding part of the book
- A handwritten texts
PDF Encryption Functions
If you have selected PDF or High Comp. PDF for file format, you can restrict the access level for displaying, printing, and editing PDF's by assigning a secure password.
Select [PDF] or [HighComp.PDF] in [File Format], and press [Encryption].
Items that can be set vary depending on the setting selected in "Compatibility".
When [Acrobat 3.0 or later] is selected
| Item Value Description | |||
| Password to Open Document Off, On Enter the password to open the PDF file. | Press [Password], enter a password (up to 256 characters) and then press [OK].Press [Confirmation] to enter the password again for confirmation, and press [OK]. | ||
| Password to Edit/Print Document Off, On Enter the password to edit the PDF file. | Press [Password], enter a password (up to 256 characters) and then press [OK].Press [Confirmation] to enter the password again for confirmation, and press [OK].When you have entered the password to edit/print document, you can specifically limit the operation. | ||
| Detail | Printing Allowed | Not Allowed, Allowed | Restricts printing of the PDF file. |
| Changes Allowed | Not Allowed Disables the change to the PDF file. | ||
| Commenting Can only add commenting. | |||
| Page Layout except extracting Pages Can change the page layout except extracting the pages of the PDF file. | |||
| Any except extracting Pages Can conduct all operations except extracting the pages of the PDF file. | |||
| Copying of Text/Images/Others | Disable, Enable Restricts the copying of text and objects on the PDF file. | ||
When [Acrobat 5.0 or later] is selected
| Item Value Description | ||||
| Password to Open Document Off, On Enter the password to open the PDF file. | Press [Password], enter a password (up to 256 characters) and then press [OK].Press [Confirmation] to enter the password again for confirmation, and press [OK]. | |||
| Password to Edit/Print Document Off, On Enter the password to edit the PDF file. | Press [Password], enter a password (up to 256 characters) and then press [OK].Press [Confirmation] to enter the password again for confirmation, and press [OK].When you have entered the password to edit/print document, you can specifically limit the operation. | |||
| Detail | Printing Allowed | Not Allowed | Disables the printing of PDF file. | |
| Allowed (Low Resolution only) Can print the PDF file only in low resolution. | ||||
| Allowed | Can print the PDF file in original resolution. | |||
| Changes Allowed | Not Allowed Disables the change to the PDF file. | |||
| Inserting/Deleting/Rotating Pages | Can only insert, delete, and rotate the pages of the PDF file. | |||
| Commenting Can only add commenting. | ||||
| Any except extracting Pages Can conduct all operations except extracting the pages of the PDF file. | ||||
| Copying of Text/Images/Others | Disable, Enable Restricts the copying of text and objects on the PDF file. | |||
File Separation

Org./Sending Data Format

Functions

Functions
Creates several files by dividing scanned original data page by page, and sends the files.
(Value: [Off] / [Each Page])
Press [Each Page] to set File Separation.

flowchart
graph LR
    A["1: 1, 2 stars"] --> B["1: 1, 2 stars"]
    B --> C["2: 2, red arrow"]
    C --> D["3: 3, blank text"]

NOTE
A three-digit serial number such as "abc_001.pdf, abc_002.pdf..." is attached to the end of the file name.
Scan Resolution, Resolution

Color/ Image Quality

Functions Color/

Functions
Select fineness of scanning resolution.
The selectable resolution is [600 x 600dpi], [400 x 400dpi Ultra Fine], [300 x 300dpi], [200 x 400dpi Super Fine], [200 x 200dpi Fine], or [200 x 100dpi Normal].


NOTE
The larger the number, the better the image resolution. However, better resolution also means larger file sizes and longer send times.
E-mail Subject/Body

Advanced Setup

Functions
Adds subject and body when sending a document.
Press [Subject] / [Body] to enter the E-mail subject/body.
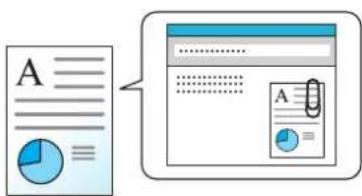
text_image
A .......... A
NOTE
- The subject can include up to 60 characters, and the body can include up to 500 characters.
- Press [Body 1], [Body 2], or [Body 3] to enter stored text for the body text. For details on registering templates, refer to E-mail Subject/Body on page 8-19.
Send and Print

Advanced Setup
Prints a copy of the document being sent.
(Value: [Off] / [On])

flowchart
graph TD
    A["Send"] --> B["Print"]
    B --> C["Send and Print"]
    C --> D["Review/Approval/Approval/Approval/Approval/Approval/Approval/Approval/Approval/Approval/Approval/Approval/Approval/Approval/Approval/Approval/Approval/Approval/Approval/Approval/Approval/Approval/Approval/Approval/Approval/Approval/Approval/Approval/Approval/Approval/Approval/Approval/Approval/Approval/Approval/Approval/Approval/Approval/Approval/Approval/Approval/Approval/Approval/Approval/Approval/Approval/Approval/Approval/Approval/Approval/Approval/Review"]
Send and Store

Advanced Setup
Stores a copy of the document being sent in a Custom Box.
(Value: [Off] / [On])

NOTE
When [On] is selected, select the Custom Box in which the copy is to be stored. If a password entry screen for the Custom Box appears, enter the password. You can view information on the selected Custom Box by pressing [Detail].
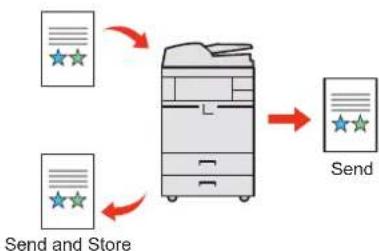
flowchart
graph TD
    A["Input Data 1: ★★"] --> C["Server"]
    B["Input Data 2: ★★"] --> C
    C --> D["Output: ★★☆"]
    E["Send and Store"] --> C
FTP Encrypted TX

Advanced Setup

Functions
Encrypts images when sending via FTP. Encryption secures the document transmission.
(Value: [Off] / [On])

NOTE
You can only change the settings by logging in with administrator privileges.
The factory default login user name and login password are set as shown below.
| Model Name Login | User Name Login Password | |
| 3555i 3500 3500 | ||
| 4555i 4500 4500 | ||
| 5555i 5500 5500 |
Click [Security Settings], and then [Network Security] in the Embedded Web Server RX. Be sure that "SSL" of Secure Protocol Settings is "On" and one or more effective encryption are selected in Client side settings.
For details, refer to the Embedded Web Server RX User Guide.
File Size Confirmation

Advanced Setup

Functions
Checks the file size before sending the original.
(Value: [Off] / [On])
Delete after Printed

Functions
Automatically deletes a document from the box once printing is complete.
Delete after Transmitted

Functions
Automatically deletes a document from the box once transmission is complete.
Storing Size


Select size of image to be stored.
Press [Standard Sizes 1], [Standard Sizes 2], or [Others] to select the storing size.
| Item Value Description | ||
| Standard Sizes 1 Metric | models: Same as Original Size, A3, A4, A5, A6,B4, B5, B6, Folio, 216 × 340 mmInch models: Same as Original Size, Ledger, Letter,Legal, Statement, 11 × 15", Oficio II | Select from Same as Original Size or Standard Size. |
| Standard Sizes 2 Metric | models: Ledger, Letter, Legal, Statement, 11 × 15",Oficio II, 8K, 16KInch models: A3, A4, A5, A6, B4, B5, B6, Folio, 8K, 16K,216 × 340 mm | Select from standard sizes except Standard Sizes 1. |
| Others Hagaki, Oufuku | hagaki Select from Hagaki. | |
Relationship between Original Size, Storing Size, and Zoom
Original Size (page 6-11), Storing Size, and Zoom (page 6-27) are related to each other. For details, see the table below.
| Original Size and the size you wish to store as are | the same different | |
| Original Size (page 6-11) Specify as necessary. | Specify as necessary. | |
| Storing Size | Select [Same as Original]. | Select the desired size. |
| Zoom (page 6-27) | Select [100%] (or [Auto]). | Select [Auto]. |

NOTE
When you select Storing Size that is different from Original Size, and select the Zoom [100%], you can store the image as the actual size (No Zoom).
Encrypted PDF Password

Enter the preassigned password to print the PDF data.
Press [Password] to enter the Password, and press [OK].

NOTE
For details on entering the password, refer to Character Entry Method on page 11-10.
JPEG/TIFF Print

Functions
Select the image size when printing JPEG or TIFF files.
Select [Fit to Paper Size], [Image Resolution] or [Fit to Print Resolution].
| Item Description |
| Fit to Paper Size Fits the image size to the selected paper size. |
| Image Resolution Prints at resolution of the actual image. |
| Fit to Print Resolution Fits the image size to the print resolution. |
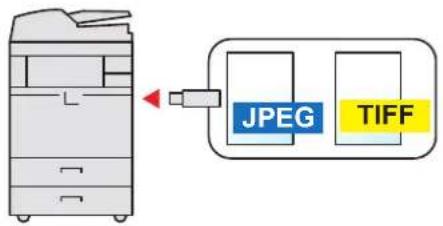
text_image
JPEG TIFFXPS Fit to Page

Functions
Reduces or enlarges the image size to fit to the selected paper size when printing XPS file.
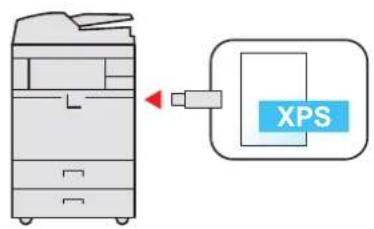
text_image
Diagram showing a printer next to an XPS device with labeled ports and a red arrow indicating direction.Functions Available in the Home Screen
Send to Me (E-mail)
When user login is enabled, the document is sent to the E-mail address of the logged in user.

NOTE
- To use this function, the function icon must be displayed in the home screen.

Editing the Home Screen (page 3-5)
- An E-mail address must be set in user login for the user who logs in.

Adding a User (Local User List) (page 9-8)
Send to Me from Box (E-mail)
When user login is enabled, documents in the user box are sent to the E-mail address of the logged in user.

NOTE
• To use this function, the function icon must be displayed in the home screen.

Editing the Home Screen (page 3-5)
- An E-mail address must be set in user login for the user who logs in.

Adding a User (Local User List) (page 9-8)
- When this function is used, functions other than transmission cannot be used.
7 Status/Job Cancel
This chapter explains the following topics:
Checking Job Status 7-2
Details of the Status Screens 7-4
Checking Detailed Information of Jobs 7-9
Checking Job History 7-11
Checking the Detailed Information of Histories 7-13
Sending the Log History 7-13
Pause and Resumption of Jobs 7-14
Canceling of Jobs 7-14
Priority Override for Waiting Jobs 7-15
Reordering Print Jobs 7-16
Device/Communication 7-17
Removing the USB Memory 7-18
Canceling FAX Communication 7-19
Checking the Remaining Amount of Toner and Paper (Paper/Supplies) 7-20
Checking Job Status
Check the status of jobs being processed or waiting to be printed.
Available Status Screens
The processing and waiting statuses of jobs are displayed as a list on the touch panel in four different screens - Printing Jobs, Sending Jobs, Storing Jobs, and Scheduled Jobs. The following job statuses are available.
| Status Display Job status to be displayed | |
| Print Job Status • Copy | PrinterFAX receptioni-FAX receptionE-mail receptionPrinting from Document BoxPrinting data from removable memoryApplicationJob Report/List |
| Send Job Status • FAX transmission | i-FAX transmissionE-mailFolder transmissionApplicationMultiple destinationSending Job FAX using Delayed transmission |
| Store Job Status • Scan | FAXi - FAXPrinterJoin Box DocumentCopy Box Document |
| Scheduled Job • Sending Job | FAX using Delayed transmission |
Displaying Status Screens
1 Display the screen.
Press the [Status/Job Cancel] key.
Status/Job Cancel
2 Press the tab of the job you want to check.
To check the scheduled transmission job, press [Sending Jobs] and then [Scheduled Job].
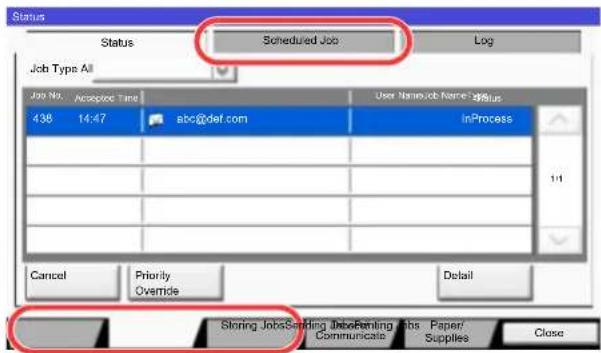
text_image
Status Job Type All Job No. Accepted Time User Name/Job Name/Job Status 438 14:47 abc@def.com InProcess Cancel Priority Detail Overside Storing JobsSending Job/Faming Jobs Paper/ Communicate Supplies ClosePrint Job Status Screen (page 7-4) Send Job Status screen (page 7-6) Store Job Status screen (page 7-7) Scheduled Job Status Screen (page 7-8)
Details of the Status Screens

NOTE
You can show the job statuses of all users, or only the statuses of your own jobs. For details, refer to Display Status/Log on page 8-25. This setting can also be changed from Embedded Web Server RX. For details, refer to the Embedded Web Server RX User Guide.
Print Job Status Screen
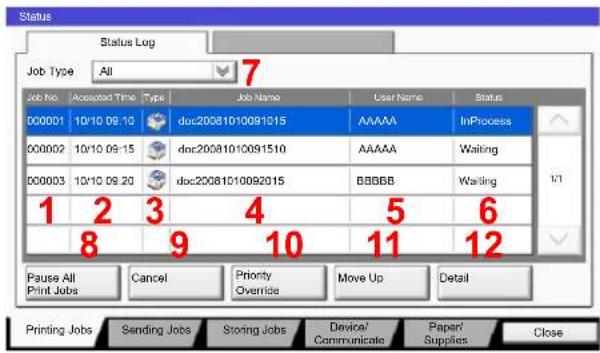
text_image
Status Job Type All 7 Job No Accessed Time Type Job Name User Name Status 000001 10/10 09:10 doc20081010091015 AAAAA InProcess 000002 10/10 09:15 doc20081010091510 AAAAA Waiting 000003 10/10 09:20 doc20081010092015 BBBBB Waiting 1 2 3 4 5 6 8 9 10 11 12 Pause All Cancel Priority Move Up Detail Printing Jobs Sending Jobs Storing Jobs Device/ Paper/ Print Jobs Communicate Supplies Close| No. Item Description | ||
| 1 Job No. Acceptance No. of job | ||
| 2 Accepted Time Accepted Time of job | ||
| 3 Type Icons that indicate the job type | ||
| 4 Job Name Job Name or file name | ||
| 5 User Name User Name for the executed job | ||
| 6 Status Status of job | InProcess: The status before starting to print.Printing: PrintingWaiting: Print WaitingPause: Pausing print job or errorCanceling: Canceling the job | |
| 7 | [√] of "Job Type" | Only selected type of jobs is displayed. |
| No. | Item Description | |
| 8 | [Pause All Print Jobs] | Pauses all the printing jobs. By pressing this key again, the printing jobs will be resumed. |
| 9 | [Cancel] Select the job you | want to cancel from the list, and press this key. |
| 10 | [Priority Override] Select | the job to be overridden, and press this key. (Refer to Priority Override for Waiting Jobs on page 7-15.) |
| 11 | [Move Up] | In the list, select the job that you want to move up the job queue and press this key. (Refer to Reordering Print Jobs on page 7-16.) |
| 12 | [Detail]* Select the job who | ose detailed information you want to display from the list, and press this key. (Refer to Checking Detailed Information of Jobs on page 7-9.)You can press [Change] in “Copies” in the detailed information screen to change the number of copies that are printed. |
* This item is displayed when user login administration is enabled and the user has logged in as administrator.

NOTE
The job name and user name can be changed to other information if needed. For details, refer to Customize Status Display on page 8-26. This setting can also be changed from Embedded Web Server RX. For details, refer to the Embedded Web Server RX User Guide.
Send Job Status screen
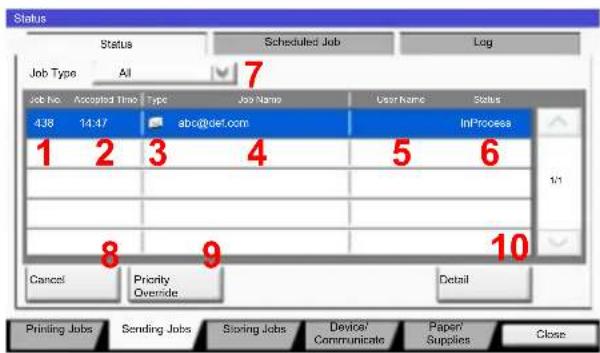
text_image
Status Job Type All 7 Job No Accepted Time Type Job Name User Name Status 438 14:47 abc@def.com InfProcess 1 2 3 4 5 6 1/1 Cancel Priority Overside 10 Detail Printing Jobs Sending Jobs Storing Jobs Device/Communicate Paper/Supplies Close| No. Item Description | ||
| 1 Job No. Acceptance No. of job | ||
| 2 Accepted Time Accepted Time of job | ||
| 3 Type Icons that indicate the job typeSending Job FAXSending Job i-FAXSending Job E-mailSending Job FolderSending Job ApplicationMulti Sending | ||
| 4 | Destination | Destination (Either destination name, FAX number, E-mail address, or server name) |
| 5 User Name User Name for the executed job | ||
| 6 Status Status of job | InProcess: The status before starting sending such as during scanning originalsSending: SendingWaiting: Waiting SendingCanceling: Canceling the jobPause: Pausing the job | |
| 7 | [✓] of "Job Type" | Only selected type of jobs is displayed. |
| 8 | [Cancel] | Select the job you want to cancel from the list, and press this key. |
| 9 | [Priority Override] | Select the job to be overridden, and press this key.*Only displayed when the optional fax kit is installed. |
| 10 | [Detail]* | Select the job whose detailed information you want to display from the list, and press this key. (Refer to Checking Detailed Information of Jobs on page 7-9.) |
* This item is displayed when user login administration is enabled and the user has logged in as administrator.

NOTE
The address and user name can be changed to other information if needed. For details, refer to Customize Status Display on page 8-26. This setting can also be changed from Embedded Web Server RX. For details, refer to the Embedded Web Server RX User Guide.
Store Job Status screen
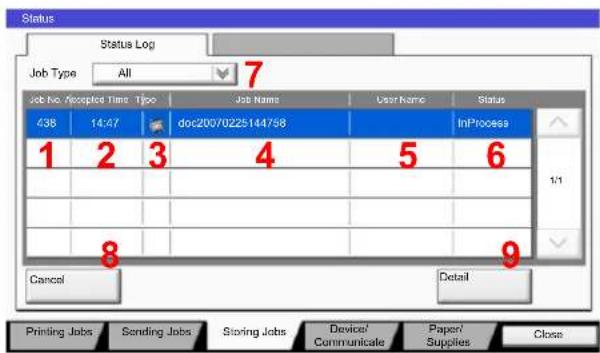
text_image
Status Status Log Job Type All 7 Job No. Accepted Time Tipo Job Name User Name Status 438 14:47 doc20070225144758 InProcess 1 2 3 4 5 6 1/1 Cancel Detail Printing Jobs Sending Jobs Storing Jobs Devices' Communicale Paper' Supplies Close| No. Item Description | ||
| 1 Job No. Acceptance No. of job | ||
| 2 Accepted Time Accepted Time of job | ||
3 Type Icons that indicate the job type Storing Job Scan Storing Job Scan Storing Job Printer Storing Job Printer Storing Job FAX Storing Job FAX Storing Job i-FAX Storing Job i-FAX Join Box Document Join Box Document Copy Box Document Copy Box Document | ||
| 4 Job Name Job name or file name is displayed. | ||
| 5 User Name User Name for the executed job | ||
| 6 Status Status of job | InProcess: The status before starting to save such as during scanning originalsStoring: Storing DataCanceling: Canceling the jobPause: Pausing the job | |
| 7 [ ] of 'Job Type' Only selected type of jobs is displayed. | ||
| 8 | [Cancel] | Select the job you want to cancel from the list, and press this key. |
| 9 | [Detail]* | Select the job whose detailed information you want to display from the list, and press this key. (Refer to Checking Detailed Information of Jobs on page 7-9.) |
* This item is displayed when user login administration is enabled and the user has logged in as administrator.

NOTE
The job name and user name can be changed to other information if needed. For details, refer to Customize Status Display on page 8-26. This setting can also be changed from Embedded Web Server RX. For details, refer to the Embedded Web Server RX User Guide.
Scheduled Job Status Screen
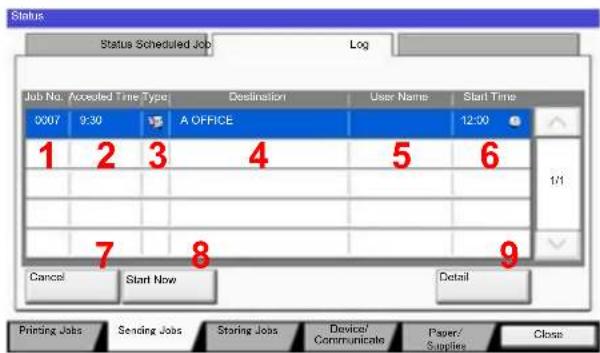
text_image
Status Status Scheduled Job Log Job No. Accessed Time Type Destination User Name Start Time 0007 9:30 A OFFICE 12:00 1 2 3 4 5 6 Cancel Start Now Detail Printing Jobs Sending Jobs Staring Jobs Device/Communicate Paper/Supplies Close| No. Item Description | ||
| 1 Job No. Acceptance No. of job | ||
| 2 Accepted Time Accepted Time of job | ||
| 3 Type Icons that indicate the job typeStoring Job FAX | ||
| 4 | Destination | Destination (Either destination name, FAX number, or No. of broadcast items) |
| 5 User Name User Name for the executed job | ||
| 6 Start Time Time to start the scheduled job | ||
| 7 [Cancel] Select the job you want to cancel from the list, and press this key. | ||
| 8 [Start Now] Select the job you want to send immediately from the list, and press this key. | ||
| 9 [Detail]* Select the job whose detailed information you want to display from the list, and press this key. (Refer to Checking Detailed Information of Jobs on page 7-9.) | ||
* This item is displayed when user login administration is enabled and the user has logged in as administrator.
Checking Detailed Information of Jobs
Check the detailed information of each job.

NOTE
This is displayed when user login administration is enabled and the user has logged in as administrator.
1 Display the screen.
Referring to Details of the Status Screens on page 7-4, display the screen.
2 Check the information.
1 Select the job whose details you wish to check from the list, and press [Detail].
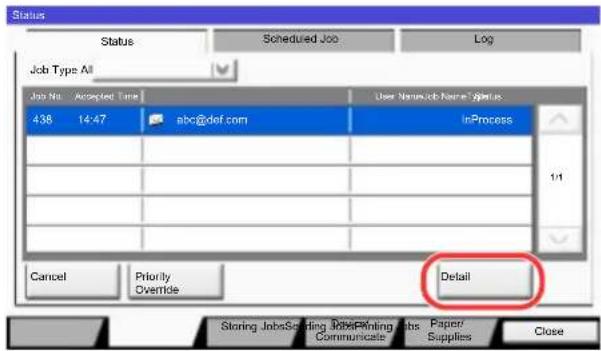
text_image
Status Status Scheduled Job Log Job Type All Job No. Accepted Time User Name Job Name Status 438 14:47 abc@def.com InProcess 1/1 Cancel Priority Override Detail Storing JobsScholding JobPrinting Jobs Paper/ Communicate Supplies CloseDetailed information of the selected job is displayed.
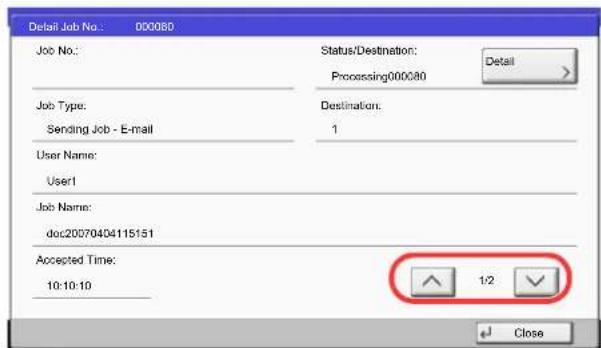
text_image
Desai Job No.: 000080 Job No.: Status/Destination: Processing000080 Detail Job Type: Destination: Sending Job - E-mail 1 User Name: User1 Job Name: doc20070404115151 Accepted Time: 10:10:10 1:2 CloseUse [Yor [ ] to see the next or previous page of information.
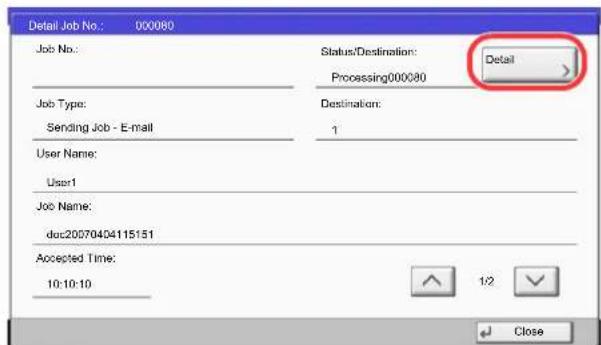
text_image
Detail Job No.: 000080 Job No: Status/Destination: Detail Processing000080 Job Type: Destination: Sending Job - E-mail 1 User Name: User1 Job Name: doc20070404115151 Accepted Time: 10:10:10 1/2 CloseIn Sending Jobs, you can check the destination by pressing [Detail] in "Destination" or "Status/Destination".
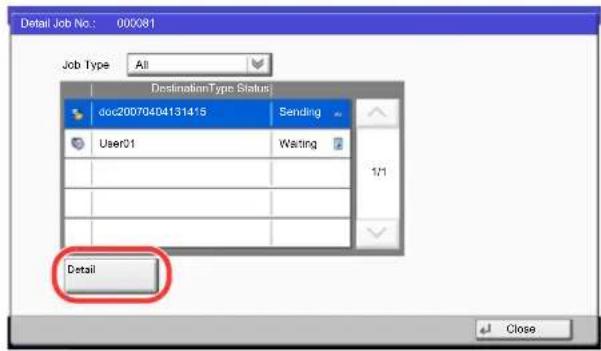
text_image
Detail Job No: 000081 Job Type All DestinationType Status doc200704D4131415 Sending User01 Waiting 1/1 Detail Close"Status/Destination" is displayed when address is selected. Press [Detail] to display the list. Press [√] or [^], select a destination and press [Detail]. Information on the selected job is displayed for checking.
2 To exit from the detailed information, press [Close].
Checking Job History
Check the history of completed jobs.

NOTE
Job history is also available by Embedded Web Server RX or NETWORK PRINT MONITOR from the computer.
You can show the job log of all users, or only your own job log. For details, refer to Display Status/Log on page 8-25. This setting can also be changed from Embedded Web Server RX. For details, refer to the Embedded Web Server RX User Guide.
Available Job History Screens
The job histories are displayed separately in three screens - Printing Jobs, Sending Jobs, and Storing Jobs. The following job histories are available.
| Screen Job histories to be displayed | |
| Print Job Log • Copy | PrinterFAX receptioni-FAX receptionE-mail receptionPrinting from Document BoxJob Report/ListPrinting data from removable memory |
| Send Job Log • FAX | i - F A XE-mailFolderApplicationMultiple destination |
| Store Job Log • Scan | FAXi - F A XPrinterJoin Box DocumentCopy Box Document |
Displaying Job History Screen
1 Display the screen.
Press the [Status/Job Cancel] key.
Status/Job Cancel
2 Press the tab of the job you want to check, and press the [Log] tab.
![Utax 3555i - Press the tab of the job you want to check, and press the [Log] tab. - 1](/content/2026/05/780633/images/32955f315be0f2b678e169b5da76706f8f5706ac094d4a72d158dd959ca21306.jpg)
text_image
Status Status Log Job Type All Job No. Find Date Type Job Name User Name Result doc20070225141427 Completed000 doc20070225142253 Completed000081 01/25 14:22 doc20070225142310 Completed000082 01/25 14:23 doc20070225142458 Error000083 01/25 14:24 doc20070225143034 Completed000084 01/25 14:30 1 Detail Slaring JobsScolding DataPrinting Jobs Paper/ Communicate Supplies CloseNOTE
If the user authentication screen appears, enter your login user name and login password and press [Login]. For this, you need to login with administrator privileges. The factory default login user name and login password are set as shown below.
| Model Name Login User Name Login Password | |
| 3555i 3500 3500 | |
| 4555i 4500 4500 | |
| 5555i 5500 5500 | |
Checking the Detailed Information of Histories
Check the detailed information of each history.
1 Display the screen.
Referring to Displaying Job History Screen on page 7-12, display the screen.
2 Check the information.
1 Select the job to check details from the list, and press [Detail]. Detailed information of the selected job is displayed.
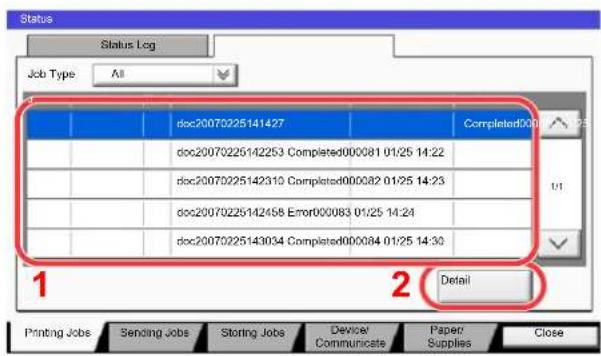
text_image
Status Job Type All Status Log doc20070225141427 doc20070225142253 Completed000081 01/25 14:22 doc20070225142310 Completed000082 01/25 14:23 doc20070225142458 Error000083 01/25 14:24 doc20070225143034 Completed000084 01/25 14:30 1 2 Detail 1 2 Printing Jobs Sending Jobs Storing Jobs Device/ Communicate Paper/ Supplies Close
NOTE
To check the information of the next/previous page, press [] or [].
2 To exit from the detailed information, press [Close].
Sending the Log History
You can send the log history by E-mail. You can either send it manually as needed or have it sent automatically whenever a set number of jobs is reached. For details, refer to Sending Log History on page 8-39.
Pause and Resumption of Jobs
Pause/resume all printing jobs in printing/waiting.
1 Display the screen.
Press the [Status/Job Cancel] key.
Status/ Job Cancel
2 Press [Pause All Print Jobs] on the printing jobs status screen.
Printing is paused.
![Utax 3555i - Press [Pause All Print Jobs] on the printing jobs status screen. - 1](/content/2026/05/780633/images/8fbb2aa9aa6bf59d586f0230fab23936d63037858a6aa33d44a8f1b4b4718bb8.jpg)
text_image
Status Job Type All Job No: Registered Type Job/Name User Name Status 000001 10/10 09:10 doc20081010091015 AAAAA InProcess 000002 10/10 09:15 doc20081010091510 Waiting AAAAA 000003 10/10 09:20 doc20081010092015 WaitingBBBBB Pause All Cancel Priority Move Up Detail Print Jobs Sending Send Printing Jobs Paper Communicate Supplies Close Storing Jobs Sending Send Printing Jobs Paper SuppliesWhen resuming the printing of jobs that have been paused, press [Resume All Print Jobs].
Canceling of Jobs
Cancel all printing jobs in printing/waiting.
1 Display the screen.
Press the [Status/Job Cancel] key.
Status/Job Cancel
2 Select the job to be canceled from the list, and press [Cancel].
![Utax 3555i - Select the job to be canceled from the list, and press [Cancel]. - 1](/content/2026/05/780633/images/a17b3144a787eca132578166ab679531de5bb3b3518677761cb66f22974770fd.jpg)
text_image
Status Job No: Accepted Type: Job Name User Name Status 000001 10/10 09:10 doc20081010091015 AAAAA InProcess 000002 10/10 09:15 doc20081010091510 Waiting AAAAA 000003 10/10 09:20 doc20081010092015 WaitingBBB Pause All Cancel Priority Move Up Detail Print Jobs Communicate Paper/ Supplies Close Storing JobsSpending DataPrinting Jobs Paper/3 Press [Yes] in the confirmation screen.
Priority Override for Waiting Jobs
Priority Override function suspends the current job and prints the job in waiting first.
1 Display the screen.
Press the [Status/Job Cancel] key.
Status/ Job Cancel
2 Press [Printing Jobs].
3 Select the job to be given priority, and press [Priority Override].
![Utax 3555i - Select the job to be given priority, and press [Priority Override]. - 1](/content/2026/05/780633/images/d7191db1ce48f0ab70bbde09f4ca239ae42242091d39408a825b94a7796dab8b.jpg)
text_image
Job No. Accepted Time Type Job Name User Name Status 000001 10/10 09:15 doc20081010091015 AAAA InProcess 000002 10/10 09:15 doc20081010091510 Waiting AAAA 000003 10/10 09:20 dE20081010092015 Waiting Pause All Cancel Priority Move Up Detail Print Jobs Starting Jobs Sailing Tools Fanning Jobs Paper/ Communicate Supplies Close4 Press [Yes] in the confirmation screen.
The current job in printing is suspended, and the job for override printing starts.
When the Priority Override is completed, the printing job that has been suspended will be resumed.
Reordering Print Jobs
This function allows you to select a queued print job and raise its output priority.
1 Display the screen.
Press the [Status/Job Cancel] key.
Status/ Job Cancel
2 Press [Printing Jobs].
3 Select the job to be assigned a higher priority and press [Move Up].
The priority of the selected job is increased by 1.
To further raise the job's priority, press [Move Up] again. Each time you press [Move Up], the priority increases by 1.
![Utax 3555i - Select the job to be assigned a higher priority and press [Move Up]. - 1](/content/2026/05/780633/images/f3ce614937b152fbcf9265c7e6baf158b942c5420bd5becb04be11c319397f50.jpg)
text_image
Job No. Adopted Time Type Job Name User Name Status 000001 10/10 09:10 doc20081010091015 AAAAA InProcess 000002 10/10 09:15 doc20081010091510 Waiting AAAAA 000003 10/10 09:20 doc20081010092015 BBBBB Waiting 000004 10/10 09:25 doc20081010092515 BBBBB Waiting Pause All Cancel Priority Move Up Detail Print Jobs Ordering Data/Painting Jobs Paper/Commuclers Close Storing JobsSending Data/Painting Jobs Paper/Supplies CloseDevice/Communication
Configure the devices/lines installed or connected to this machine or check their status. You can also control devices depending on their status.
1 Display the screen.
1 Press the [Status/Job Cancel] key.
Status/Job Cancel
2 Press [Device/Communicate].

text_image
Status Scanner Ready. Printer Ready. Removable Memory 2GB/16GB Format Remove FAX Port 1 Receiving... Receiving... Line Off Manual FX LogFAX Hard Disk Overwriting... FAX Port 2 Line Off I-FAX Check New FAX Printing Jobs Sending Jobs Storing Jobs Device/ Communicate Paper/ Supplies CloseThe screen to check the status or configure the devices is displayed.
2 Check the status.
The items you can check are described below.
"Scanner"
The status of an original scanning or the error information (paper jam, opened cover, etc.) is displayed.
"Printer"
Error information such as paper jam, out of toner, or out of paper, and status such as waiting or printing are displayed.
"Hard Disk"
The information such as formatting, overwriting for erasure, and error occurrence is displayed.
"Removable Memory (USB Memory)"
- The usage and capacity of the external media connected to this machine are displayed.
- Press [Format] to format external media.

IMPORTANT
When [Format] is pressed, all data in the external media is erased.
- Press [Remove] to safely remove the external media. For details, refer to Removing the USB Memory on page 7-18.
"FAX Port 1", "FAX Port 2"
- The information such as sending/receiving and dialing is displayed.
- Press [Line Off] to cancel a fax in sending/receiving. For details, refer to Canceling FAX Communication on page 7-19.
- Press [Manual RX] to start receiving fax. Use this function when you want to talk to the sender before receiving the fax originals. For details, refer to the FAX Operation Guide.
- Press [Log] to display the fax transmission history. For details, refer to the FAX Operation Guide.
"i-FAX"
When [Check New FAX] is pressed, the machine connects to the mail server and starts reception of any new i-faxes.
Removing the USB Memory
Follow the steps below to remove USB memory safely.
1 Display the screen.
Press the [Status/Job Cancel] key.
Status/Job Cancel

2 Press the [Device/Communicate] tab.
3 Press [Remove] in "Removable Memory".
When "Removable memory can be safely removed." is displayed, remove the USB memory.
![Utax 3555i - Press [Remove] in "Removable Memory". - 1](/content/2026/05/780633/images/2274a8202b66a5aeb12e0d396d8dbd565deb64f663184ef6b752e526a184fe87.jpg)
text_image
Status Scanner Ready Printer Ready Removable Memory 2GB/16GB Format Remove... FAX Port 1 Receiving... Receiving... Line Off Manual RX LogFAX 1 Device/ Communicate Hard Disk Overwriting... FAX Port 2 Line Off i-FAX Check New FAX Printing Jobs Sending Jobs Storing Jobs Paper/ Supplies CloseCanceling FAX Communication
Cancel fax communication.
1 Display the screen.
Press the [Status/Job Cancel] key.
Status/ Job Cancel
2 Press the [Device/Communicate] tab.
3 Press [Line Off] in "FAX Port 1" or "FAX Port 2".
![Utax 3555i - Press [Line Off] in "FAX Port 1" or "FAX Port 2". - 1](/content/2026/05/780633/images/cefa0f9ef77253c3a3bb562ef24c63a9d78f4179f18ce4c8c898e28db9ea07eb.jpg)
text_image
Status Scanner Ready Printer Ready Removable Memory 2GB/16GB Format Remove FAX Part 1 Receiving...Receiving... Line Off Manual RX LogFAX 1 2 Line Off I-FAX Check New FAX Printing Jobs Setting Jobs Storing Jobs Device/ Communicate Paper/ Supplies Close Hard Disk Overwriting...4 Press [Yes] in the confirmation screen.
The line is disconnected, and the fax communication is canceled.
Checking the Remaining Amount of Toner and Paper (Paper/Supplies)
Check the remaining amount of toner, paper, and staples on the touch panel.
1 Display the screen.
1 Press the [Status/Job Cancel] key.
Status/Job Cancel
2 Press [Paper/Supplies].
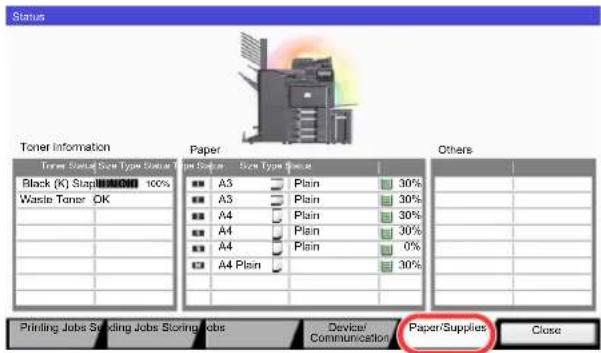
text_image
Status Toner Information Paper Others Toner Status/Size Type Status Black (K) Stap/100% Waste Tone OK A3 Plain 30% A3 Plain 30% A4 Plain 30% A4 Plain 30% A4 Plain 0% A4 Plain 30% A4 Plain 30% Printing Jobs Stolding Jobs Storing Jobs Device/Communication Paper/Supplies Close2 Check the status.
Check the remaining amount of toner and the status of the waste toner box in "Toner Information", and the remaining amount of paper in each paper source in "Paper".
The items you can check are described below.
"Toner Information"
Remaining amount of toner
You can check the remaining amount of toner level from 100 to 0%
(1% increments).
Status of the waste toner box
You can check the status of waste toner box.
"Paper"
You can check the size, orientation, type, and remaining amount of paper in each paper source. The remaining amount of paper is shown by 5 levels as 100, 80, 50, 30, and 0%, however, the paper in the multi purpose tray is shown by 2 levels as 100% and 0%.
If the remaining amount of paper cannot be detected, "----" appears.
"Others"
You can check the status of staples and punch waste box.

If the optional document finisher (1,000-sheet finisher or 4,000-sheet finisher) and punch unit are installed, the "Others" section provides the status of the punch waste box and whether or not staples are available.
8 Setup and Registration (System Menu)
This chapter explains the following topics:
System Menu 8-2
Operation Method 8-2
System Menu Settings 8-4
Cassette/MP Tray Settings 8-7
Common Settings 8-9
Home 8-28
Copy 8-28
Send 8-29
Document Box/Removable Memory 8-34
FAX 8-35
Printer 8-35
Report 8-37
System/Network 8-43
Edit Destination 8-53
User Login/Job Accounting 8-53
User Property 8-54
Date/Timer/Energy Saver 8-54
Adjustment/Maintenance 8-57
Internet 8-60
Application 8-60
System Menu
Configure settings related to overall machine operation.
Operation Method
System Menu is operated as follows:
1 Display the screen.
Press the [System Menu] key.
System Menu
2 Select a function.
Displays the System Menu items.
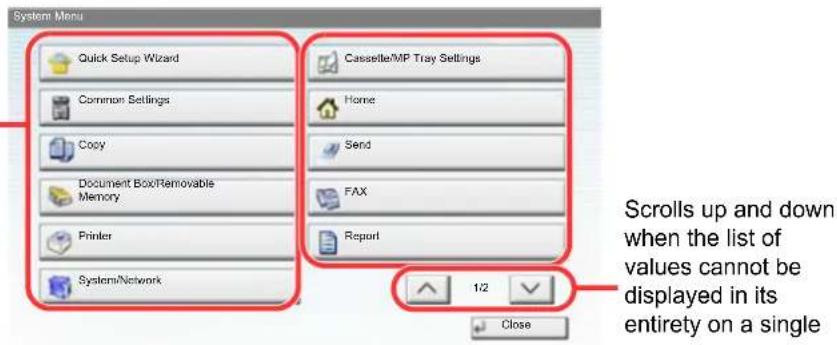
text_image
System Menu Quick Setup Wizard Common Settings Copy Document Box/Removable Memory Printer System Network Cassette/MP Tray Settings Home Send FAX Report 1/2 Close Scrolls up and down when the list of values cannot be displayed in its entirety on a singleDisplays setting items
Press the key of a function to display the setting screen.
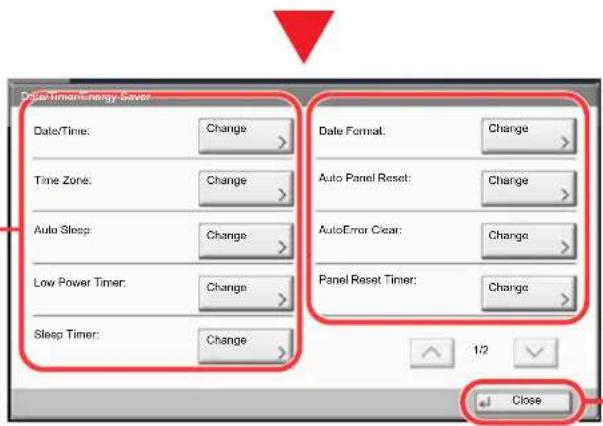
text_image
Data/Timer/Energy Saver Date/Time: Change > Time Zone: Change > Auto Sleep: Change > Low Power Timer: Change > Sleep Timer: Change > Date Format: Change > Auto Panel Reset: Change > AutoError Clear: Change > Panel Reset Timer: Change > CloseReturns to the previous screen.
3 Configure the settings.
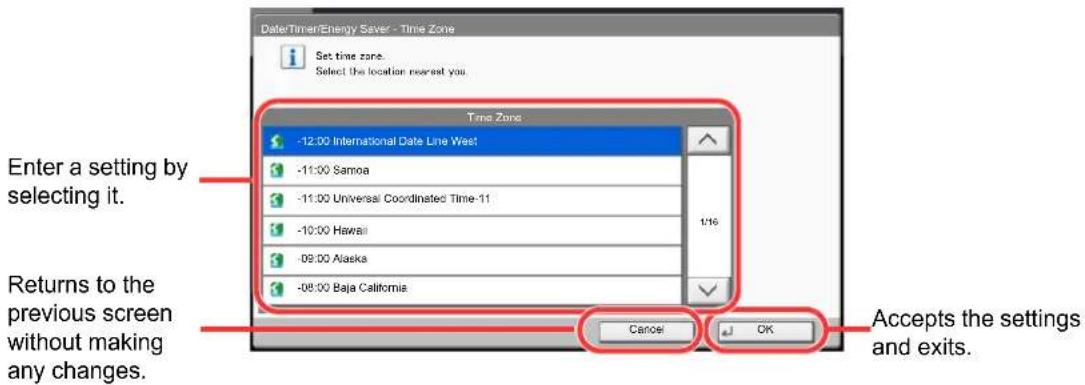
text_image
Date/Timer/Energy Saver - Time Zone Set time zone. Select the location nearest you. Time Zone: -12:00 International Date Line West -11:00 Samoa -11:00 Universal Coordinated Time-11 -10:00 Hawaii -09:00 Alaska -08:00 Baja California Enter a setting by selecting it. Returns to the previous screen without making any changes. Accepts the settings and exits. Cancel OK
NOTE
In order to change settings that require administer privileges, you must log in with administrator privileges.
The factory default login user name and login password are set as shown below.
| Model Name Login User Name Login Password | ||
| 3555i 3500 3500 | ||
| 4555i 4500 4500 | ||
| 5555i 5500 5500 | ||
Refer to System Menu Settings on the following page and configure as needed.
System Menu Settings
This section explains the functions that can be configured in System Menu. To configure the settings, select the item in System Menu and press the setting item. For details on each function, see the table below.
| Item Description | Reference Page | ||
| Quick Setup Wizard | The Quick Setup Wizard configures Fax and Energy Saver settings. | page 2-28 | |
| Cassette/MP Tray Settings | Select paper size and media type for Cassettes and multi purpose tray. | page 8-7 | |
| Cassette 1 (to 5) Select type of paper in Cassette 1 (to 5). page 8-7 | |||
| MP Tray Setting Select type of paper in multi purpose tray. page 8-8 | |||
| Common Settings Configure overall machine operation. page 8-9 | |||
| Language Select the language displayed on the touch panel. page 8-9 | |||
| Default Screen | Select the screen appearing right after start-up (default screen). | page 8-9 | |
| Sound | Set options for buzzer sound during the machine operations. | page 8-9 | |
| Originals Setup | Configure settings for originals and paper. | page 8-10 | |
| Measurement | Select inch or metric for the unit for paper dimensions. | page 8-14 | |
| Error Handling | Select whether to cancel or continue the job when error has occurred. | page 8-14 | |
| Paper Output | Select output tray respectively for copy jobs, print jobs from Document Box, computers, and FAX RX data. | page 8-16 | |
| Orientation Confirmation | Check the orientation of original. | page 8-16 | |
| Function Defaults | Defaults are the values automatically set after the warm-up is completed or the [Reset] key is pressed.Set the defaults for available settings such as copying and sending. Setting the frequently-used values as defaults makes subsequent jobs easier.IMPORTANTIf you want to enable the changed defaults immediately, move to the function screen and press the [Reset] key. | page 8-17 | |
| Keyboard Layout | Change the layout of the touch panel keyboard used to enter characters. | page 8-20 | |
| System Stamp | Configure settings for header, footer, and stamp. | page 8-20 | |
| Manual Staple | Configure settings for manual staple. | page 8-24 | |
| Offset Documents by Job | Select whether to offset documents by Job. | page 8-24 | |
| Low Toner Alert Level | Set the amount of remaining toner to alert low toner. | page 8-25 | |
| Offset One Page Documents | Set whether one-page documents are sorted. | page 8-25 | |
| Display Status/Log | Set the display method of the Status/Log. | page 8-25 | |
| Message Banner Print | Select whether the confirmation screen appears before each sheet is printed when printing multiple banner sheets. | page 8-25 | |
| Customize Status Display | Select the item to use for the printing jobs status. | page 8-26 | |
| Function Key Usage | Configure settings for function key on the operation panel. | page 8-26 | |
| Message Board Settings | Configure settings for message board. | page 8-27 | |
| Remote Printing | Configure settings for remote printing. | page 8-27 | |
| Home Configure settings for Home screen | page 3-4 | ||
| Copy | Configure settings for copying functions. | page 8-28 | |
| Item | Description | Reference Page | |
| Send Configure settings for sending functions. page 8-29 | |||
| Document Box/Removable Memory | Configure settings related to the Custom Box, Job Box, FAX Box, and Polling Box. For details on FAX Box and Polling Box, refer to theFAXOperation Guide. | page 8-34 | |
| FAX | Configure settings for fax functions. For details, refer to theFAXOperation Guide. | — | |
| Printer When printing from computers, settings are generally made on the application software screen. However, the following settings are available for configuring the defaults to customize the machine. | page 8-35 | ||
| Report | Print reports to check the machine settings, status, and history. Settings for printing reports can also be configured. | page 8-37 | |
| Print Report Configure settings for printing reports and histories. page 8-37 | |||
| Admin Report Settings | Refer to theFAXOperationGuide. | ||
| Result Report Settings page 8-38 | |||
| Sending Log History page 8-39 | |||
| Login History Settings page 8-40 | |||
| Device Log History Settings page 8-41 | |||
| Secure Comm. Error Log page 8-42 | |||
| System/Network | Configure machine system settings. | page 8-43 | |
| Network | Configure network settings. | page 8-43 | |
| Optional Network | Configure settings for the optional Network Interface Kit or Wireless Interface Kit. | page 8-47 | |
| Network Interface (Send) | Specify the network interface card to be used for send function and connecting to external address book. | page 8-49 | |
| Security Level | The Security Level setting is primarily a menu option used by service personnel for maintenance work. There is no need for customers to use this menu. | — | |
| Interface Block Setting | This allows you to protect this machine by blocking the interface with external devices such as USB hosts or optional interfaces. | page 8-50 | |
| Data Security | Configure settings for data stored in the machine's hard disk and memory. | page 8-50 | |
| Document Guard | When the optional Printed Document Guard Kit is installed, careless copying and sending of documents that contain confidential or personal information is prevented. | page 8-51 | |
| Optional Function | You can activate the optional applications installed on this machine. | page 8-52 | |
| Restart Entire Device | Restart the CPU without turning the main power switch off. Use this to deal with any unstable operation by the machine. (Same as the computer restart.) | page 8-52 | |
| Edit Destination | Configure settings for Address Book and One Touch Key. For details on Address Book, refer toRegistering Destinations in the Address Book on page 3-45, and for details on One Touch Key, refer toAdding a Destination on One Touch Key (One Touch Key) on page 3-53. | page 8-53 | |
| Item Description | Reference Page | ||
| User Login/Job Accounting | Configure settings related to machine management. For details on User Login, refer toUser Login on page 9-4, and for details on Job Accounting, refer toJob Accounting on page 9-29. | — | |
| User Property Check and change information related to the logged in user. page 8-54 | |||
| Date/Timer/Energy Saver Configure settings related to the date and time. page 8-54 | |||
| Adjustment/Maintenance | Adjust printing quality and conduct machine maintenance. | page 8-57 | |
| Internet Configure Internet settings for applications. page 8-60 | |||
| Application | Configure settings for the optional applications installed on this machine. | page 8-60 | |
Cassette/MP Tray Settings
Select paper size and media type for Cassettes and multi purpose tray.
Cassette1 (to 5)
System Menu


Cassette/MP Tray Settings
To fix the type of paper to be used in cassettes 1 or 2 or the optional paper feeders (cassettes 3 to 5), specify the paper size.
| Selection Item Selectable Size/Type | ||
| Paper Size | Auto | Paper size is automatically detected and selected. Value: Metric, Inch |
| Standard Sizes 1*1 | Available options are as follows: ValueMetric models: A3, A4-R, A4, A5-R, B4, B5-R, B5, Folio, 216 x 340 mmInch models: Ledger, Letter-R, Letter, Legal, Statement, 12 x 18", Oficio II | |
| Standard Sizes 2*1 | Select from standard sizes except Standard Sizes 1. ValueMetric models: Ledger, Letter-R, Letter, Legal, Statement, 12 x 18", Oficio II, 8K, 16K-R, 16KInch models: A3, A4-R, A4, A5-R, B4, B5-R, B5, Folio, 216 x 340 mm, 8K, 16K-R, 16K | |
| Size Entry*2 | Enter a size not displayed in the standard sizes. ValueMetricX : 182 to 457 mm (in 1 mm increments)Y : 140 to 304 mm (in 1 mm increments)InchX : 7.17 to 18.00" (in 0.01" increments)Y : 5.51 to 12.00" (in 0.01" increments) | |
| Media type | Select the media type. Plain (60 to 105 g/m2), Rough, Vellum, Recycled, Preprinted*3, Bond*4, Color, Prepunched*3, Letterhead*3, Thick (106 g/m2 and more)*4, High Quality and Custom 1-8*1 | |
*1 Only A4, Letter, and B5 can be specified when the optional Large Capacity Feeder (1,500-sheet x 2) is used.
*2 Can be set when cassette 1 or cassette 2 is selected.
*3 To print on preprinted or prepunched paper or on letterhead, refer to Special Paper Action on page 8-12.
*4 To change to a media type other than Plain, refer to Media Type Setting on page 8-10. When the paper weight settings shown below are selected, the media indicated for each setting cannot be selected.
Rough: "Heavy 4" or "Heavy 5"
Preprinted: "Heavy 4" or "Heavy 5"
Letterhead: "Heavy 4" or "Heavy 5"
Thick: "Heavy 4" or "Heavy 5"
Bond: "Heavy 4"
Custom 1 to 8: "Heavy 4", "Heavy 5" or "Extra Heavy"
MP Tray Setting
System Menu


Cassette/MP Tray Settings
To fix the type of paper to be used in the multi purpose tray, specify the paper size.
| Item Description | ||
| Paper Size | Auto | Paper size is automatically detected and selected. Value: Metric, Inch |
| Standard Sizes 1 Available options are as follows: ValueMetric models: A3, A4-R, A4, A5-R, A6-R, B4-R, B5-R, B5, B6-R, Folio, 216 x 340 mmInch models: Ledger, Letter-R, Letter, Legal, Statement, Executive, 12 x 18", Oficio II | ||
| Standard Sizes 2 Select from standard size *1 except Standard Sizes 1. ValueMetric models: Ledger, Letter-R, Letter, Legal, Statement, Executive, 12 x 18", Oficio II, 8K, 16K-R, 16KInch models: A3, A4-R, A4, A5-R, A6-R, B4-R, B5-R, B5, B6-R, Folio, 8K, 16K-R, 16K, 216 x 340 mm | ||
| Others Select from non-standard sizes and custom sizes. Value: ISO B5, Envelope #10 (Commercial #10), Envelope #9 (Commercial #9), Envelope #6 (Commercial #6 3/4), Envelope Monarch, Envelope DL, Envelope C5, Envelope C4, Hagaki, Oufuku hagaki, Youkei 4, Youkei 2 | ||
| Size Entry Enter the size not included in the standard size. ValueMetricX: 148 to 457 mm (in 1 mm increments)Y: 98 to 304 mm (in 1 mm increments)InchX: 5.83 to 18.00" (in 0.01" increments)Y: 3.86 to 12.00" (in 0.01" increments) | ||
| Media type Select the media type. | Value: Plain (60 to 105 g/m2), Transparency, Rough, Vellum, Labels, Recycled, Preprint*2, Bond, Cardstock, Color, Prepunched*2, Letterhead*2, Envelope, Thick (106 g/m2 and more), Coated, High Quality, Index Tab Dividers, Custom 1-8 | |
*1 To change to a media type other than "Plain", refer to Media Type Setting on page 8-10.
*2 To print on preprinted or prepunched paper or on letterhead, refer to Special Paper Action on page 8-12.

NOTE
If the optional FAX kit is installed, the available media types for printing received faxes are as shown below.
Plain, Rough, Vellum, Labels, Recycled, Bond, Cardstock, Color, Envelope, Thick, Coated, High Quality and Custom 1-8
Common Settings
Configure overall machine operation.
Language
System Menu


Common Settings
| Item Description | |
| Language Select the language displayed on the touch panel. | |
Default Screen
System Menu


Common Settings
| Item Description | |
| Default screen | Select the screen appearing right after start-up (default screen).Value: Home, Copy, Send, FAX*1, Status, Custom Box, Job Box,Removable Memory, FAX Box#, Program, Home (Accessibility), Accessibility Copy,Accessibility Send, Accessibility FAX*1, Internet Browser*,2, Application Name*3[644Y]  If a screen other than [Home] is set, [Power Saving Recovery] in [EnergySaverRecoveryLevel]will not operate if selected. If a screen other than [Home] is set, [Power Saving Recovery] in [EnergySaverRecoveryLevel]will not operate if selected. |
*1 Displayed only when the optional fax kit is installed.
*2 Referring to Internet on page 8-60 and configure necessary settings for Internet Browser.
*3 The running application will be displayed. For details, refer to Application on page 5-10.
Sound
System Menu


Common Settings
| Item Description | ||
| Buzzer Set options for buzzer sound during the machine operations. | ||
| Volume Set the buzzer volume level. Value: 0 (Mute), 1 (Minimum), 2, 3 (Medium), 4, 5 (Maximum) | ||
| Key Confirmation | Emit a sound when the operation panel and touch panel keys are pressed. Value: Off, On | |
| Job Finish Emit a sound when a print job is normally completed. Value: Off, On, FAX Reception Only* | ||
| Ready Emit a sound when the warm-up is completed. Value: Off, On | ||
| Warning Emit a sound when errors occur. Value: Off, On | ||
| USB Keyboard Emit a sound to confirm keypresses with a sound. Value: Off, On | ||
| FAX Speaker Volume* | For details, refer to the FAX Operation Guide. | |
| FAX Monitor Volume* | For details, refer to the FAX Operation Guide. | |
* Displayed only when the optional fax kit is installed.
Keyboard Layout
| Item Description | |
| Keyboard Layout Set the layout of the keyboard. Value: QWERTY, QWERTZ, AZERTY | |
Original/Paper Settings

Common Settings
| Item Description | ||||||
| Custom Original Size Set up frequently-used custom original size. | ||||||
| Custom Paper Size | Set up a maximum of four frequently-used custom paper sizes.To register a custom paper size, press [On] and enter the desired size. The custom size options are displayed on the screen to select original size. Up to four custom original sizes can be added.*ValueCustom 1 to 4: Off, OnSize Entry:MetricX: 50 to 432 mm (in 1 mm increments)Y: 50 to 297 mm (in 1 mm increments)InchX: 2.00 to 17.00" (in 0.01" increments)Y: 2.00 to 11.69" (in 0.01" increments) | |||||
| Custom Paper Size | Set up a maximum of four frequently-used custom paper sizes.To register a custom paper size, press [On] and enter the desired size. The custom size option is displayed on the screen to select paper set in the multi purpose tray. Up to four custom paper sizes can be added.Select media type for each paper size. Select [Media Type], and select paper type.*ValueCustom 1 to 4: Off, OnSize Entry:MetricX: 148 to 457 mm (in 1 mm increments)Y: 98 to 304 mm (in 1 mm increments)InchX: 5.83 to 18.00" (in 0.01" increments)Y: 3.86 to 12.00" (in 0.01" increments)Media Type: Plain, Transparency, Rough, Vellum, Labels, Recycled, Preprinted, Bond, Cardstock,Color, Prepunched, Letterhead, Thick, Envelope, Coated, High Quality, Index Tab Dividers, Custom 1-8 | |||||
| Media Type Setting Set weight for each media type.For Custom 1-8, settings for duplex printing and media type name can be changed.For details on setting value, refer to Media Type Setting on page 8-13. | ||||||
| Default Paper Source Select paper cassette for default setting. Value: Cassette 1 to 5, Multi Purpose TrayNOTE[Cassette 3] to [Cassette 5] are displayed when the following options are installed.[Cassette 3]: When a paper feeder (500-sheet x 2) or large capacity paper feeder (1,500-sheet x 2) is installed[Cassette 4]: When a paper feeder (500-sheet x 2) or large capacity paper feeder (1,500-sheet x 2) is installed[Cassette 5]: When a side feeder (3,000-sheet) is installed | ||||||
| Auto Switch | When the optional large capacity feeder is selected, the cassette can be switched to another large capacity feeder depending on your usage.Value: Off, On | |||||
| Auto Detect Original Size(Available for metric models only) | Select whether to automatically detect originals of special or non-standard size. | |||||
| Media for Auto (B&W) | Select a default media type for auto paper selection when [Auto] is selected of Paper Selection. If [Plain] is selected, the paper source with plain paper loaded in the specific size is selected. Select [All Media Types] for the paper source with any kind of paper loaded in the specific size.Value: All Media Types, Plain, Transparency, Vellum, Rough, Labels, Recycled, Preprinted, Bond, Cardstock, Color, Prepunched, Letterhead, Envelope, Thick, Coated, High Quality, Index Tab Dividers, Custom 1-8 | |||||
| Paper Source for Cover | Select the paper source in which the cover paper used for the Cover function is placed.*Value:Cassette 1 to 5, Multi Purpose TrayNOTE[Cassette 3] to [Cassette 5] are displayed when the following options are installed.[Cassette 3]: When a paper feeder (500-sheet x 2) or large capacity paper feeder (1,500-sheet x 2) is installed[Cassette 4]: When a paper feeder (500-sheet x 2) or large capacity paper feeder (1,500-sheet x 2) is installed[Cassette 5]: When a side feeder (3,000-sheet) is installed | |||||
| Special Paper Action | When printing on Prepunched, Preprint, and Letterhead, punch-holes might not be aligned or the print direction might be upside-down depending on how originals are set and the combination of copying functions. In such a case, select [Adjust Print Direction] to adjust the print direction. When paper orientation is not important, select [Speed Priority].If [Adjust Print Direction] is selected, load paper according to the steps below.Example: copying on Letterhead 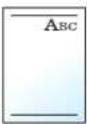  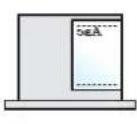 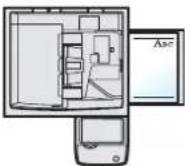 Original Paper Finishing Cassette MP Tray Original Paper Finishing Cassette MP Tray   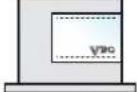 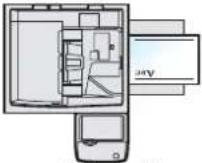 MP TrayCassetValue: Adjust Print Direction, Speed Priority MP TrayCassetValue: Adjust Print Direction, Speed Priority | |||||
* If you want to enable the changed defaults immediately, move to the function screen and press the [Reset] key.
Media Type Setting
The following settings can be selected. Y (default): Default setting, Y: Available, N: Not available
| Paper Weight | Light*1 | Normal 1*1 | Normal 2*1 | Normal 3*1 | Heavy 1*1 | Heavy 2 | Heavy 3 | Heavy 4 | Heavy 5 | Extra Heavy |
| Weight (g/m2), Media Type | 52 g/m2to 59 g/m2 | 60 g/m2to 74 g/m2 | 75 g/m2to 90 g/m2 | 91 g/m2to 105 g/m2 | 106 g/m2to 135 g/m2 | 136 g/m2to 163 g/m2 | 164 g/m2to 220 g/m2 | 221 g/m2to 256 g/m2 | 257 g/m2to 300 g/m2 | Transpa rencies |
| Plain N Y | Y (default) | Y | N | N | N | N | N | N | ||
| Rough N Y Y | Y (default) | Y | Y | Y | Y*2 | Y*2 | N | |||
| V e | I | I | u | m | Y (default) | N Y | Y Y | Y Y*2 | Y Y*2 | N |
| Labels N Y | *2 | Y*2 | Y*2 | Y*2 | Y*2 (default) | Y*2 | Y*2 | Y*2 | N | |
| Recycled N Y | Y (default) | Y | N | N | N | N | N | N | ||
| Preprinted N Y | Y (default) | Y | Y | Y | Y | Y2 | Y*2 | N | ||
| Bond | N Y Y | Y (default) | Y | Y | Y | Y*2 | N | N | ||
| Cardstock | N | N | N | N | Y*2 | Y*2 | Y*2 | Y*2 (default) | Y*2 | N |
| Color | N Y Y | Y (default) | Y | Y | Y | Y*2 | Y*2 | N | ||
| Prepunched | N Y | Y (default) | Y | N | N | N | N | N | N | |
| Letterhead | N Y | Y (default) | Y | Y | Y | Y | Y2 | Y*2 | N | |
| Envelope | N | N | N | N | Y*2 | Y*2 (default) | Y*2 | Y*2 | Y*2 | N |
| Thick | N | N | N | N | Y | Y (default) | Y | Y*2 | Y*2 | N |
| Coated | N Y | *2 | Y*2 | Y*2 | Y*2 (default) | Y*2 | Y*2 | Y*2 | Y*2 | N |
| High Quality | N Y | Y (default) | Y | Y | Y | N | N | N | N | |
| Index Tab Dividers | N | N | N | N | N | Y*2 | Y*2 | Y*2 (default) | N | N |
| Transparencies | N | N | N | N | N | N | N | N | N | Y (default) |
| Custom 1-8 | Y Y | Y (default) | Y | Y | Y | Y | Y2 | Y*2 | Y |
*1 The maximum number of sheets that can be stapled varies depending on the paper weight. For details, see 1,000-sheet Finisher (Option) on page 11-28 and 4,000-sheet Finisher (Option) on page 11-29.
*2 The media type cannot be selected for the cassettes.
For Custom 1-8, settings for duplex printing and media type name can be changed.
| Item Description | ||
| Duplex Print Proh | ibit Duplex printing | not allowed. |
| Permit Duplex printing allowed. | ||
| Name Change names for Custom 1-8. Names should be not more than 16 characters. Selecting media type at multi purpose tray, the name after change will be displayed. [GGSH] Character Entry Method (page 11-10) | ||
Measurement
System Menu


Common Settings
| Item Description | |
| Measurement | Select inch or metric for the unit for paper dimensions. Value: mm, inch |
Error Handling
System Menu


Common Settings
| Item Description | |
| Duplexing Error | Set what to do when duplex printing is not possible for the selected paper sizes and media types. Value1-sided: Printed in 1-sidedDisplay Error: Message to cancel printing is displayed. |
| Finishing Error | Set alternative actions when finishing (Staple/Punch/Offset/Fold/Auto Image Rotation) is not available for the selected paper size or media type. ValueIgnore: The setting is ignored and the job is printed. Display Error: Message to cancel printing is displayed. |
No Staple Error Set what to do when staples run out during printing. ValueIgnore: Printing continues without stapling. Display Error: Message to cancel printing is displayed. [03AT]  Requires the optional 1,000-sheet finisher or 4,000-sheet finisher. Requires the optional 1,000-sheet finisher or 4,000-sheet finisher. | |
| Finished Pages Exceeded | Set what to do when finishing (stapling or offsetting) capacity is exceeded during printing. ValueIgnore: Printing continues without finishing. Display Error: Message to cancel printing is displayed.   Requires the optional 1,000-sheet finisher or 4,000-sheet finisher. Requires the optional 1,000-sheet finisher or 4,000-sheet finisher. |
| Punch Waste Full Error | Set what to do when the punch waste box becomes full during printing.ValueIgnore: Printing continues without punching.Display Error: Message to cancel printing is displayed.[1442] NOTERequires the optional 1,000-sheet finisher or 4,000-sheet finisher. |
| Paper Mismatch Error | Set what to do when the selected paper size or type does not match paper size or type loaded in the specified paper source while printing from the computer by specifying the cassette or multi-purpose tray.ValueIgnore: The setting is ignored and the job is printed.Display Error: Message to cancel printing is displayed. |
| Inserted Paper Mismatch | Set what to do when it is detected that the cassette paper size setting does not match the actual paper size that is fed.ValueIgnore: The setting is ignored and the job is printed.Display Error: Message to cancel printing is displayed. |
| Paper Jam before Staple | The page from which printing is resumed when a paper jam occurs during a job with stapling can be selected.ValueResume at Top of Page: Resume printing from the first page of the document.Resume at Jammed Page: Resume printing from the page where the jam occurred.[IMAGE] NOTERequires the optional 1,000-sheet finisher or 4,000-sheet finisher. |
| Skewed or multi originals | When skewed originals while scanning, select whether to print by ignoring the error or display an error.ValueIgnore: The error is ignored and the job is printed.Display Error: Error message to cancel scanning is displayed.[IMAGE] NOTEThis setting is displayed when an optional document processor (dual scan DP) is installed. |
Paper Output
System Menu


Common Settings
If you want to enable the changed defaults immediately, move to the function screen and press the [Reset] key.
| Item Description | |
| Paper Output | Select the output tray respectively for copy jobs, print jobs from Document Box, computers, and FAX RX data. Value: Inner Tray: Outputs to the Inner Tray of the machine. Tray A, Tray B, Tray C: Outputs to Trays A to C of the optional 4,000-sheet Finisher. Finisher Left Tray, Finisher Top Tray: Outputs to the Left Tray or Top Tray of the optional 1,000-sheet Finisher. Right tray: Outputs to the optional Right Job Separator. Job Separator: Outputs to the optional Inner Job Separator. Tray 1 to 7: Outputs to trays 1 to 7 (tray 1 is the uppermost tray) of the optional Mailbox.  NOTE [Inner Tray] cannot be selected when the optional 1,000-sheet finisher or 4,000-sheet finisher is installed. When [Heavy 3] ( 164 g/m^2 - ) or higher is set in Paper Weight and Mailbox (Option) is set for the output destination, the output destination is automatically changed to a tray that can be used. FAX RX data output can be specified when the optional fax kit is installed. NOTE [Inner Tray] cannot be selected when the optional 1,000-sheet finisher or 4,000-sheet finisher is installed. When [Heavy 3] ( 164 g/m^2 - ) or higher is set in Paper Weight and Mailbox (Option) is set for the output destination, the output destination is automatically changed to a tray that can be used. FAX RX data output can be specified when the optional fax kit is installed. |
Orientation Confirmation
System Menu


Common Settings
| Item Description | |
| Orientation Confirmation | Select whether to display a screen for selecting the orientation of the originals to be placed on the platen when using the following functions.Refer toOriginal Orientation on page 6-16for details.· Zoom (XY Zoom) · Page #· Duplex · Book l e t· Margin/Centering · Staple/Punch (optional feature)· Border Erase · 2-sided/Book Original· Combine · Text Stamp· Memo Page · Bates StampValue: Off, On |
Function Defaults

Common Settings
If you want to enable the changed defaults immediately, move to the function screen and press the [Reset] key.
| Item Description | |
| Original Orientation Set the original orientation defaults. Value: Top Edge on Top, Top Edge on Left | |
| Original Image (Copy) Set the default original document type for copying. Value: Text+Photo (Printer), Text+Photo (Magazine), Photo (Printer), Photo (Magazine), Photo (Photo Paper), Text, Text (Fine Line), Graphic/Map (Printer), Graphic/Map (Magazine) | |
| Org. Image (Send/Store) Set the default original document type for sending/storing. Value: Text + Photo, Photo, Text, Text (for OCR) | |
| Scan Resolution Select the default scanning resolution. Value: 600×600dpi, 400×400dpi Ultra Fine, 300×300dpi, 200×400dpi Super Fine, 200×200dpi Fine, 200×100dpi Normal | |
| FAX TX Resolution* | For details, refer to the FAX Operation Guide. |
| Color Selection Select the default color mode for scanning documents. Value: Auto Color (Color/Gray), Auto Color (Color/B & W), Full Color, Grayscale, Black & White | |
| File Format Set the default type of the files. Value: PDF, TIFF, JPEG, XPS, High Comp. PDF | |
| File Separation | Select the default file separation setting. Value: Off, Each Page |
| Backgrnd Density (Copy) Set the default Backgrnd Density (Copy). Value: Off, Auto, Manual (Darker 5) | |
| BackgrndDens.(Send/Store) Set the default Backgrnd Density (Send/Store). Value: Off, Auto, Manual (Darker 5) | |
| Prevent Bleed-thru (Copy) Set the default value for preventing bleed-through (Copy). Value: Off, On | |
| Prevent Bleed(Send/Store) | Set the default Prevent Bleed (Send/Store). Value: Off, On |
| Zoom | Select the enlarged/reduced default when paper size/sending size changed after the originals set. Value: 100%, Auto |
| Border Erase Default | Set the default width to be erased as a border. Value Metric: 0 to 50 mm (in 1 mm increments) Inch: 0 to 2" (in 0.01" increments) NOTE To specify border erase widths around original, set the value in "Border". To specify border erase widths in the middle of original, set the value in "Gutter". |
| Border Erase to Back Page | Select the Border Erase Method for Back Page of a sheet. Value: Same as Front Page, Do Not Erase |
| Item | Description |
| Margin Default Set the default margin. | |
| ValueMetricLeft/Right: -18 to 18 mm (in 1 mm increments)Top/Bottom: -18 to 18 mm (in 1 mm increments)InchLeft/Right: -0.75 to 0.75" (in 0.01" increments)Top/Bottom: -0.75 to 0.75" (in 0.01" increments) | |
| Auto Image Rotation (Copy) Select the default Auto Image Rotation setting. | |
| Value: Off, On | |
| EcoPrint Select the EcoPrint default. | |
| Value: Off, On | |
| Toner Save Level (EcoPrint) | Select the default Toner Save Level (EcoPrint).Value: [1](Low) to [5](High)NOTERaising the level reduces toner consumption, but image quality falls. |
| High Comp. PDF Image Select the default quality setting for high compressed PDF files. | |
| Value: Compression Ratio Priority, Standard, Quality Priority | |
| Color TIFF Compression | Select the compression method for sending the color documents in the TIFF format.Value: [TIFF V6], [TTN2] |
| Image Quality (File Format) | Select the default PDF/TIFF/JPEG/XPS file quality.Value: 1 Low Quality (High Comp.) to 5 High Quality (Low Comp.) |
| Collate/Offset Set the defaults for Collate/Offset. | |
| ValueCollate: Off, OnOffset: Off, Each Set (If [Off] is selected of Collate, it is set to [Each Page].) | |
| JPEG/TIFF Print | Select the image size (resolution) when printing JPEG or TIFF file.Value: Fit to Paper Size, Image Resolution, Fit to Print Resolution |
| XPS Fit to Page | Set the default value for the XPS fit to page function.Value: Off, On |
| PDF/A Select the default PDF/A setting. | |
| Value: Off, PDF/A-1a, PDF/A-1b | |
| Cont. Scan (Except FAX) Set the continuous scan defaults. | |
| Value: Off, On | |
| Continuous Scan (FAX)* | For details, refer to the FAX Operation Guide. |
| File Name Entry | Set an automatically entered name (default) for jobs. Additional information such as Date and Time and Job No. can also be set.ValueFile Name: Up to 32 characters can be entered.Additional Info: None, Date and Time, Job No., Job No. & Date and Time, Date and Time & Job No. |
| Item Description | |
| E-mail Subject/Body | Set the subject and body automatically entered (default subject and body) when sending the scanned originals by E-mail. Three body messages can be registered, and the initial template can be used to choose which body message is used.ValueSubject: Up to 60 characters can be entered.Body 1 to 3: Up to 500 characters can be entered. |
| i-FAX Subject/Body | Set the subject and body automatically entered (default subject and body) when sending the scanned originals by i-FAX.ValueSubject: Up to 60 characters can be entered.Body: Up to 500 characters can be entered.NOTEThis function is displayed when the optional Internet FAX Kit is installed.Internet FAX Kit(A) "Internet FAX Kit" (page 11-7)[SWTC] |
| DP Read Action | Set the operation when a document is scanned from the document processor.Value: Speed Priority, Quality Priority[SH44K]NOTEThis function is displayed when the optional document processor is installed.When Document Guard is set to [On], this function will not be displayed. |
OCR Text Recognition Set the default OCR Text Recognition.Value: Off, On[TH07]NOTEThis function can only be used when the optional OCR Scan Activation Kit is installed.Scan extension kit(A) "OCR Scan Activation Kit" (page 11-7) | |
| Primary OCR Language | Set the default language of the text to be extracted. ([English] is selected as a default.)Value: English, English+German, English+French, English+Spanish, English+Italian, English+Dutch, English+Russian, English+Portugal (Brazil), English+Greek, English+Portugal (Portugal), English+Finnish, English+Hungarian, English+Catalan, English+Romanian, English+Czech, English+Danish, English+Swedish, English+Norwegian, English+Polish, English+Turkish, English+Japanese, English+Korean, English+Chinese(Simplified), English+Chinese(Traditional)[760H]NOTEThis function can only be used when the optional OCR Scan Activation Kit is installed.Scan extension kit(A) "OCR Scan Activation Kit" (page 11-7)[H805] |
| Auto Image Rotation (OCR) Set the default Auto Image Rotation (OCR).Value: Off, On[380W]NOTEThis function can only be used when the optional OCR Scan Activation Kit is installed.[Y074]Scan extension kit(A) "OCR Scan Activation Kit" (page 11-7)If you frequently use the originals with the mixed orientation, select [On]. | |
| Repeat Copy Select the Repeat Copy default. | Value: Off, On(HATY) NOTEThis function will not be displayed when the optional Data Security Kit is installed.This function will not be displayed when Repeat Copy Job Retention is set to 0. |
| Skip Blank Page Select the default Skip Blank Page settings. | Value: Off, On |
* Displayed only when the optional fax kit is installed.
USB Keyboard Type
System Menu


Common Settings
| Item Description | |
| USB Keyboard Type Set the type | of USB keyboard that is connected. Value: US-English, US-English with Euro, French, German |
System Stamp
System Menu


Common Settings
| Item Description | |||
| Basic Configure settings for stamps. | |||
| Text (Text Stamp) | Press [Add/Edit] to edit the test string for a template. Up to 8 templates can be registered. Press [Delete] to delete a template. | ||
| Font (Page #) Set the font size for page numbers when printing them. Value: 6.0 to 64.0 pt | |||
| Font (Bates Stamp) | When a bates stamp is used, set the font sizes that can be set. Value: 6.0 to 64.0 pt | ||
| Font (Text Stamp) Set the font size for stamps when printing them. Value: 6.0 to 64.0 pt | |||
| Print Job Status Configure settings for stamps when a document is printed. After configuring the setting, return to the Copying Functions or Custom Box (Printing a Document) screen from System Menu, and press the [Reset] key. | |||
Text Stamp Select whether to print a text stamp on all printing jobs. Value: Off, On  NOTE When [On] is selected, the Text Stamp settings cannot be changed when printing. NOTE When [On] is selected, the Text Stamp settings cannot be changed when printing. | |||
| Edit Text Stamp Set the default text stamp. | |||
| Stamp | Select a text string to be stamped from templates, or press [Stamp] and enter a maximum of 32 characters for the text string. [D0ZH] NOTE Templates that have been set will appear. For details on registering templates, refer to Text (Text Stamp) on page 8-20. | ||
| Stamp Method | Select the stamp method for the text stamp. Value: Each Print Page, Each Original Page | ||
| Position Set | the text stamp position. Value: Top Left, Top Middle, Top Right, Middle Left, Center, Middle Right, Bottom Left, Bottom Middle, Bottom Right, Detail [T260] NOTE Press [Detail] to set the stamp position using numeric values, and to set the stamp position and angle when a stamp is placed on the back side of the paper in duplex printing. | ||
| Font Set the | font of the text stamp. Value Size: Font sizes registered in Font (Text Stamp) on page 8-20 are displayed. Character Border: Off, Circle, Rectangle, Underline Style: None, Bold, Italic, Bold/Italic Font: Courier, Letter Gothic Color: Black, White Density: 10 to 100% (in 10% increments) Display Pattern: Transparent, Clipping, Overwrite | ||
| Bates Stamp Select whether to print a bates stamp on all printing jobs. Value: Off, On [BHAT] NOTE When [On] is selected, the Bates Stamp settings cannot be changed when printing. | |||
| Edit Bates Stamp Set the default Bates Stamp. Value: Date, User Name, Serial Number, Numbering, Text 1, Text 2, Date Format, Numbering Default, Position, Font [T27T] NOTE To set [Text 1] or [Text 2], press [Change] below and enter a maximum of 32 characters for the text string. To set [Date], press [Date Format] and set the date display format. To set [Numbering], press [Numbering Default] and set the starting sequence number (1 to 9999999). Press [Detail] in "Positon" to set the stamp position using numeric values, and to set the stamp position to be placed on the back side of the paper in duplex printing. | |||
| Sending Jobs Configure stamp settings for sending documents. | |||
| After configuring the setting, return to the Sending Functions or Custom Box (Sending Documents) screen from System Menu, and press the [Reset] key. | |||
| Text Stamp Select whether to print a text stamp on all sending jobs. Value: Off, On [3x24] NOTE When [On] is selected, the Text Stamp settings cannot be changed when sending. | |||
| Edit Text Stamp Set the default text stamp. | |||
| Stamp | Select a text string to be stamped from templates, or press [Stamp] and enter a maximum of 32 characters for the text string. [P627] NOTE Templates that have been set will appear. For details on registering templates, refer to Text (Text Stamp) on page 8-20. | ||
| Position Set | the text stamp position. Value: Top Left, Top Middle, Top Right, Middle Left, Center, Middle Right, Bottom Left, Bottom Middle, Bottom Right, Detail [T5Y9] NOTE Press [Detail] to set the stamp position using numeric values, and to set the stamp angle. | ||
| Font Set the font of the text stamp. Value Size: Font sizes registered in Font (Text Stamp) on page 8-20 are displayed. Character Border: Off, Circle, Rectangle, Underline Style: None, Bold, Italic, Bold/Italic Font: Courier, Letter Gothic Color: Black, Red, Green, Blue, Cyan, Magenta, Yellow, White Density: 10 to 100% (in 10% increments) Display Pattern: Transparent, Clipping, Overwrite | |||
| Bates Stamp Select whether to print a bates stamp on all sending jobs. Value: Off, On NOTE When [On] is selected, the Bates Stamp settings cannot be changed when sending. | |||
| Edit Bates Stamp Set the default Bates Stamp. Value: Date, User Name, Serial Number, Numbering, Text 1, Text 2, Date Format, Numbering Default, Position, Font NOTE To set [Text 1] or [Text 2], press [Change] below and enter a maximum of 32 characters for the text string. To set [Date], press [Date Format] and set the date display format. To set [Numbering], press [Numbering Default] and set the starting sequence number (1 to 9999999). When you press [Detail] in "Position", the stamp position can be specified using numeric values. | |||
| Storing Jobs Configure stamp settings for storing documents in removable memory. After configuring the setting, return to the Custom Box (Storing Documents) screen from System Menu, and press the [Reset] key. | |||
| Text Stamp | Select whether to print a text stamp on all storing jobs. Value: Off, On [7255] NOTE When [On] is selected, the Text Stamp settings cannot be changed when storing. | ||
| Edit Text Stamp Set the default text stamp. | |||
| Stamp Select a text string to be stamped from templates, or press [Stamp] and enter a maximum of 32 characters for the text string. [CTT] NOTE Templates that have been set will appear. For details on registering templates, refer to Text (Text Stamp) on page 8-20. | |||
| Position Set the text stamp position. Value: Top Left, Top Middle, Top Right, Middle Left, Center, Middle Right, Bottom Left, Bottom Middle, Bottom Right, Detail [DTV] NOTE Press [Detail] to set the stamp position using numeric values, and to set the stamp angle. | |||
| Font Set the font of the text stamp. Value Size: Font sizes registered in Font (Text Stamp) on page 8-20 are displayed. Character Border: Off, Circle, Rectangle, Underline Style: None, Bold, Italic, Bold/Italic Font: Courier, Letter Gothic Color: Black, Red, Green, Blue, Cyan, Magenta, Yellow, White Density: 10 to 100% (in 10% increments) Display Pattern: Transparent, Clipping, Overwrite | |||
| Bates Stamp Select whether to print a bates stamp on all storing jobs. Value: Off, On NOTE When [On] is selected, the Bates Stamp settings cannot be changed when storing. | |||
| Edit Bates Stamp Set the default Bates Stamp. Value: Date, User Name, Serial Number, Numbering, Text 1, Text 2, Date Format, Numbering Default, Position, Font NOTE To set [Text 1] or [Text 2], press [Change] below and enter a maximum of 32 characters for the text string. To set [Date], press [Date Format] and set the date display format. To set [Numbering], press [Numbering Default] and set the starting sequence number (1 to 9999999). When you press [Detail] in "Position", the stamp position can be specified using numeric values. | |||
Manual Staple
System Menu


Common Settings

NOTE
Only displayed when the optional 4,000-sheet finisher is installed.
| Item Description | |
| Manual Staple Select whether to use Manual Staple. Value: Off, OnNOTEIf you selected [On], set the time until manual stapling mode is automatically cancelled. The setting range is 5 to 60 seconds (in 5-second increments). | |
| Staple Position Set the default Staple Position. Value: A4 Long Edge, Letter Long Edge | |
Offset Documents by Job
System Menu


Common Settings
| Item Description | |
| Offset Documents by Job Select | whether to offset documents by Job. Value: Off, OnNOTEThis function is displayed when an optional 1,000-sheet finisher or 4,000-sheet finisher is installed. |
Offset One Page Documents
System Menu


Common Settings
| Item Description | |
| Offset One Page Documents Set | whether one-page documents are sorted. Value: Off, OnNOTEThis function is displayed when an optional 1,000-sheet finisher or 4,000-sheet finisher is installed. |
Low Toner Alert Level

Common Settings
| Item Description | |
Low Toner Alert Level Set the amount of remaining toner to alert low toner. Value: Off, On [BYWCZ]  Selecting [Off] alerts you low toner when the amount of remaining toner becomes 5%. If [On] is selected, set the amount of remaining toner to alert. The setting range is 5 to 100% (in 1% increments). Selecting [Off] alerts you low toner when the amount of remaining toner becomes 5%. If [On] is selected, set the amount of remaining toner to alert. The setting range is 5 to 100% (in 1% increments). | |
Display Status/Log

Common Settings
| Item Description | ||
| Display Status/Log Set the display method of the Status/Log. | ||
| Display Jobs Detail Status | Value: Show All, My Jobs Only, Hide All | |
| Display Jobs Log | Value: Show All, My Jobs Only, Hide All | |
| Display FAX Log* | Value: Show All, Hide All | |
* Displayed only when the optional fax kit is installed.
Message Banner Print

Common Settings
| Item Description | |
| Message Banner Print | Set whether the confirmation screen appears before each sheet is printed when printing multiple banner sheets.Value: Off, On |
Customize Status Display

Common Settings
| Item Description | ||
| Customize Status Display | Set the items that appear in the status screens for printing jobs, sending jobs, and storing jobs. | |
| Printing Jobs Column 1 | Value:Job Name, User Name, Print Pages x Copies, Total Printed Pages | |
| Printing Jobs Column 2 | Value:Job Name, User Name, Print Pages x Copies, Total Printed Pages | |
| Sending Jobs Column 1 | Value:Job Name, User Name, Destination, Original Pages, Color/Black & White | |
| Sending Jobs Column 2 | Value:Job Name, User Name, Destination, Original Pages, Color/Black & White | |
| Storing Jobs Column 1 | Value:Job Name, User Name, Original Pages, Color/Black & White | |
| Storing Jobs Column 2 | Value:Job Name, User Name, Original Pages, Color/Black & White | |
Function Key Usage


Common Settings
| Item Description | ||
| Function Key Usage | Select whether to enable the Copy Key, Send Key, and FAX Key on the operation panel. | |
* Displayed only when the optional fax kit is installed.
Message Board Settings

Common Settings
| Item Description | ||
| Message Board Select whether to | use the Message Board. Value: Off, On | |
| Message List Configure settings for the registered message board. | ||
| Add Add a new message board. | ||
| Device to Show Select where to show the message. Value Hide: Displays no message. Operation Panel: Displays on the operation panel. Embedded Web Server: Displays a message in Embedded Web Server RX. Panel + Web Server: Displays a message in the operation panel and Embedded Web Server RX. | ||
| Message Type Select the message type. Value: Normal, Alert, Prohibition | ||
| Place to Show Select where to show the message in the operation panel. Value: Login Screen: Login screen of user login administration Home Screen: Home Screen Login Screen+Home Screen: Login screen and Home screen of user login administration | ||
| Priority Show Displays the message on the message board. Value: Off, On | ||
| Title Enter a maximum of 30 characters for the title to display on the message board. | ||
| Body Enter a maximum of 300 characters for the body to display on the message board. | ||
| Delete Deletes the message board selected on the list. | ||
| Raise Priority Raise the priority of the message board selected on the list. | ||
| Lower Priority Lower the priority of the message board selected on the list. | ||
| Detail Display information on the selected message board. | ||
Remote Printing

Common Settings
| Item Description | |
| Remote Printing | Select whether to prohibit printing that is performed without operating the machine. When [Prohibit] is selected, you can print the document that you have stored in the document box by operating at the machine. This prevents another person from seeing that document.Value: Prohibit, PermitNOTEIf [Prohibit] is selected, printing and storing using Quick Copy and Proof and Hold functions are disabled. Printing a received FAX (optional) is not prohibited. |
Home
System Menu


Home
Configure settings for Home screen.

Editing the Home Screen (page 3-5)
Copy
System Menu


Copy
Configure settings for copying functions.
| Item Description | |
| Paper Selection Set the default paper selection. Value: Auto, Default Paper Source | |
| Auto Image Rotation Action | Set whether the image is rotated when the orientation of the document to be printed is different from the orientation of the paper. Value Unrotated Manual Copy: If a paper source or zoom ratio is specified, the image is not rotated. Apply All: Rotates all images. Follow Image Size: The image is rotated if the rotated image fits on the paper. NOTE This function is only enabled when [On] is selected in Auto Image Rotation on page 6-53. |
| Auto Paper Selection | If [Auto] is selected for Paper Selection, set the paper size selection method when the zoom changes.*1 Value Most Suitable Size: Selects paper size based on the current zoom and the size of the original. Same as Original Size: Selects paper that matches the size of the original, regardless the zoom. |
| Auto % Priority | When a paper source of different size from the original is selected, select whether automatic zoom (reduce/zoom) is performed.*1 Value: Off, On |
| Paper Size for Small Original | Specify the paper size to be used for a case where the original is too small to be detected in the Auto Paper Selection mode. Value: Default Paper Source, A4, A4-R, A5-R, A6-R, B5, B5-R, B6-R, Letter, Letter-R, Statement-R |
| Preset Limit | Restrict the number of copies that can be made at one time. Value: 1 to 999 copies |
| Reserve Next Priority | Specify whether the default screen appears when a subsequent copy job is reserved while printing is in progress. To have the default screen appear, select [On].Value: Off, On |
| Quick Setup Registration Select | the functions to be registered for Quick Setup.Six keys of the Quick Setup screen are allocated to typical functions but can be changed as necessary.Six items in the following options are available.Value: Paper Selection, Zoom, Staple/Punch ^2 , Density, Duplex, Combine, Collate/Offset, Original Image, Original Size, Original Orientation, Continuous Scan, Background Density Adj. |
*1 If you want to enable the changed defaults immediately, move to the function screen and press the [Reset] key.
*2 This setting is displayed when the optional 1,000-sheet finisher or 4,000-sheet finisher is installed. When a punching unit is not installed, this item name is "Staple".
Send
System Menu


Send
Configure settings for sending functions.
| Item Description | ||
| Quick Setup Registration | Select the functions to be registered for Quick Setup. Six keys of the Quick Setup screen are allocated to typical functions but can be changed as necessary.Six items in the following options are available.Value:Original Size, 2-sided/Book Original*1, Sending Size, Original Orientation, File Format, Density, Original Image, Scan Resolution, FAX TX Resolution*2, Color Selection, Zoom, Continuous Scan, Background Density Adj. | |
| Dest. Check before Send | Select whether to display the confirmation screen of destinations after pressing the [Start] key when performing sending jobs.Value:Off, On | |
| Color Type Set the color type when you send color documents.Value:[RGB], [sRGB] | ||
| Entry Check for New Dest. | When adding new destination, select whether to display the entry check screen to check the entered destination.Value:Off, On | |
| Default Screen | Set the default screen displayed when you press the [Send] key.Value:Destination, Address Book | |
| Item | Description | |
| Send and Forward | Select whether to forward the original to another destination when sending images. | |
| Forward Select whether to | forward the original. Value: Off, On [7W22] NOTE When selecting [On], select rules to forward from [E-mail], [Folder(SMB)], [Folder(FTP)], [FAX] ^2 , [i-FAX(Via server-On)] ^3 , and [i-FAX(Via server-Off)] ^3 . | |
| Destination | Set the destination to which the original is forwarded. One destination can be set. Follow the steps below to register the destination. • Address Book • Address Entry (E-mail) • Address Entry (folder) Specifying Destination (page 5-26) | |
| Color Setting Configure the color settings for forwarded original. Value: Auto Color (Color/Gray), Auto Color (Color/B & W), Full Color, Grayscale, Black & White | ||
| Scan Resolution Select resolution for stored original. Value: 600x600dpi, 400x400dpi Ultra Fine, 300x300dpi, 200x400dpi Super Fine, 200x200dpi Fine, 200x100dpi Normal | ||
| File Format | Select the file format of forwarded original. For details on setting value, refer to File format for Send and Forward on page 8-31. | |
| File Separation | Set whether originals are divided into multiple files before being forwarded. Value: Off, Each Page | |
| E-mail Subject Enter a maximum of 60 characters for the subject of forwarded E-mail. Character Entry Method (page 11-10) | ||
| FTP Encrypted TX Set whether originals are encrypted before being forwarded. Value: Off, On [7ZZA] NOTE This function is displayed when SSL is set to [On] in Security Settings. Security Settings (page 8-46) | ||
| New Destination Entry Select whether to permit direct entry of destination. Value: Prohibit, Permit | ||
| Recall Destination | Select whether to permit usage of [Recall] on the Send screen. Value: Prohibit, Permit | |
| OCR Text Recognition Act. | Configure settings for OCR Text Recognition Action. Value: Speed Priority, Quality Priority [23-40] NOTE This function can only be used when the optional OCR Scan Activation Kit is installed.  Scan extension kit(A) "OCR Scan Activation Kit" (page 11-7) Scan extension kit(A) "OCR Scan Activation Kit" (page 11-7) | |
| HighCompressionPDF Mode | Select the compression method for sending High-Compression PDF. Value: Text Priority, File Size Priority | |
*1 When the optional document processor is not installed, this is set to "Book Original".
*2 Displayed only when the optional fax kit is installed.
*3 Displayed only when the optional Internet FAX Kit is installed.
File format for Send and Forward
Send Send and Forward
Select the file format for forwarded original.
The table below lists the file formats and their details.
| File format Adjustable range of image quality Color setting | ||
| PDF* | 1 Low Quality (High Comp.) to5 High Quality (Low Comp.) | Auto Color (Color/Grayscale), Auto Color (Color/Black and White), Full Color, Grayscale, Black and White |
| TIFF 1 Low Quality (High Comp.) to5 High Quality (Low Comp.) | Auto Color (Color/Grayscale), Auto Color (Color/Black and White), Full Color, Grayscale, Black and White | |
| JPEG 1 Low Quality (High Comp.) to5 High Quality (Low Comp.) | Auto Color (Color/Grayscale), Full Color, Grayscale | |
| XPS 1 Low Quality (High Comp.) to5 High Quality (Low Comp.) | Auto Color (Color/Grayscale), Auto Color (Color/Black and White), Full Color, Grayscale, Black and White | |
| High Comp. PDF* | Compression Ratio Priority, Standard,Quality Priority | Auto Color (Color/Grayscale), Auto Color (Color/Black and White), Full Color, Grayscale |
* File format can be selected. (Value: [Off] / [PDF/A-1a] / [PDF/A-1b])

NOTE
When [High Comp. PDF] is selected, you cannot adjust the image quality.
PDF Encryption Functions
If you have selected PDF or High Comp. PDF for file format, you can restrict the access level for displaying, printing, and editing PDF's by assigning a secure password.
Items that can be set vary depending on the setting selected in "Compatibility".
When [Acrobat 3.0 or later] is selected
System Menu
![Utax 3555i - When [Acrobat 3.0 or later] is selected - 1](/content/2026/05/780633/images/2015dad76b66c32276f4df832dd9a1078a8e6e55ee03d2f42bb044d519147cf3.jpg)
![Utax 3555i - When [Acrobat 3.0 or later] is selected - 2](/content/2026/05/780633/images/9a1ab08a6b6865c8af81a21ec77d32e30338c69f0a8bfa7d3a555feb68dbeaee.jpg)
Send Send and Forward PDF/High Comp. PDF
| Item Value Description | |||
| Password to Open Document Off, | On Enter the password to open the PDF file.Press [Password], enter a password (up to 256 characters) and then press [OK].Press [Confirmation] to enter the password again for confirmation, and press [OK]. | ||
| Password to Edit/Print Document | Off, On Enter the password to edit the PDF file.Press [Password], enter a password (up to 256 characters) and then press [OK].Press [Confirmation] to enter the password again for confirmation, and press [OK].When you have entered the password to edit/print document, you can specifically limit the operation. | ||
| Detail Printing Allowed | Not Allowed, Allowed Restricts printing of the PDF file. | ||
| Changes Allowed | Not Allowed Disables the change to the PDF file. | ||
| Commenting Can only add commenting. | |||
| Page Layout except extracting PagesCan change the page layout except extracting the pages of the PDF file. | |||
| Any except extracting PagesCan conduct all operations except extracting the pages of the PDF file. | |||
| Copying of Text/Images/Others | Disable, Enable Restricts the copying of text and objects on the PDF file. | ||
When [Acrobat 5.0 or later] is selected
System Menu
![Utax 3555i - When [Acrobat 5.0 or later] is selected - 1](/content/2026/05/780633/images/213a2ee4b28e6f575aaaeeea6ea2da5f2044953adc95f9a5cfa7f9ca7f879977.jpg)
![Utax 3555i - When [Acrobat 5.0 or later] is selected - 2](/content/2026/05/780633/images/33291f178d03e92fb3147ad24a2e06d1eed0c964b95c393f7e99b800bea33560.jpg)
Send Send and Forward PDF/High Comp. PDF
| Item Value Description | ||||
| Password to Open Document Off, | On Enter the password to open the PDF file.Press [Password], enter a password (up to 256 characters) and then press [OK].Press [Confirmation] to enter the password again for confirmation, and press [OK]. | |||
| Password to Edit/Print Document | Off, On Enter the password to edit the PDF file.Press [Password], enter a password (up to 256 characters) and then press [OK].Press [Confirmation] to enter the password again for confirmation, and press [OK].When you have entered the password to edit/print document, you can specifically limit the operation. | |||
| Detail Printing Allowed | Not Allowed Disables the printing of PDF file. | |||
| Allowed(Low Resolution only) | Can print the PDF file only in low resolution. | |||
| Allowed Can print the PDF file in original resolution. | ||||
| Changes Allowed | Not Allowed Disables the change to the PDF file. | |||
| Inserting/Deleting/Rotating Pages | Can only insert, delete, and rotate the pages of the PDF file. | |||
| Commenting Can only add commenting. | Commenting. | |||
| Any except extracting Pages | Can conduct all operations except extracting the pages of the PDF file. | |||
| Copying of Text/Images/Others | Disable, Enable Restricts the copying of text and objects on the PDF file. | |||
Document Box/Removable Memory
System Menu


Document Box/Removable Memory
| Item Description | ||
| Custom Box Configure settings for Custom Box. | ||
| Add/Edit Box | For details, refer to Using a Custom Box on page 5-52. | |
| Default Setting | Auto File Deletion TimeSet the time to automatically delete stored documents. | |
| FAX Box *1 | For details, refer to the FAX Operation Guide. | |
| Job Box Configure settings for Job Box. | ||
| Quick Copy Job Retention | To maintain free space on the hard disk, you can set the maximum number of stored jobs.Value: number between 0 and 300NOTEWhen 0 is set, Quick Copy cannot be used. | |
| Repeat Copy Job Retention | To maintain free space on the hard disk, you can set the maximum number of stored jobs.Value: number between 0 and 50NOTEThis function will not be displayed when the optional Data Security Kit is activated.When 0 is set, Repeat Copy cannot be used. | |
| Deletion of Job Retention | This setting specifies that documents, such as Private Printing, Quick Copying, or Proof and Hold Printing, saved temporarily in the job box are automatically deleted after they have been saved for a set time.Value: Off, 1 hour, 4 hours, 1 day, 1 weekNOTEThis function is valid for documents saved after the function is set. Regardless of this function setting, temporary documents are deleted when the main power switch is turned off. | |
| Polling Box*1 | For details, refer to the FAX Operation Guide. | |
| Quick Setup Registration | Select the functions to be registered for Quick Setup. Six keys of the Quick Setup screen are allocated to typical functions but can be changed as necessary. | |
| Store File Select the functions to be registered for Store File Quick Setup.Color Selection, Storing Size, Density, 2-sided/Book Original2, Scan Resolution, Zoom, Original Orientation, Original Size, Original Image, Continuous Scan, Background Density Adj.Value: Off, Key 1 to 6 | ||
| Print Select the functions to be registered for Print Quick Setup.Paper Selection, Collate/Offset, Staple/Punch3, Duplex, Combine, Delete after Printed Value: Off, Key 1 to 6 | ||
| Send Select the functions to be registered for Send Quick Setup.Sending Size, FAX TX Resolution*1, File Format, Delete after TransmittedValue: Off, Key 1 to 6 | ||
*1 Displayed only when the optional fax kit is installed.
*2 When the optional document processor is not installed, this is set to "Book Original".
*3 This setting is displayed when the optional 1,000-sheet finisher or 4,000-sheet finisher is installed. When a punching unit is not installed, this item name is "Staple".
FAX
System Menu


FAX
Configure settings for FAX. For details, refer to the FAX Operation Guide.
Printer
System Menu


Printer
When printing from computers, settings are generally made on the application software screen. However, the following settings are available for configuring the defaults to customize the machine.
| Item Description | ||
| Emulation | Set the emulation for operating this machine by commands oriented to other types of printers.Value:PCL6, IBM Proprinter, Line Printer, EPSON LQ-850, KPDL, KPDL(Auto)NOTEIBM Proprinter, Line Printer, and EPSON LQ-850 are displayed when the optional Emulation Upgrade Kit is installed.If you selected [KPDL(Auto)], set "Alternative Emulation", too.When you have selected [KPDL] or [KPDL(Auto)], set "KPDL Error Report", too. | |
| Alt Emulation | When you have selected [KPDL(Auto)] as emulation mode, you can switch between KPDL and another emulation mode (alternative emulation) automatically according to the data to print.Value:PCL6, IBM Proprinter, Line Printer, EPSON LQ-850NOTEIBM Proprinter, Line Printer, and EPSON LQ-850 are displayed when the optional Emulation Upgrade Kit is installed. | |
| EcoPrint | EcoPrint conserves toner when printing. This is recommended for test copies where lighter printing is not a problem.Value:Off, On | |
| Toner Save Level (EcoPrint) Select the default Toner Save Level (EcoPrint).Value:1 (Low) to 5 (High)NOTERaising the level reduces toner consumption, but image quality falls. | ||
| Override A4/Letter | Select whether to treat A4 size and Letter, which are similar in size, as the same size when printing.ValueOff:A4 and Letter are not regarded as the same in size.On:A4 and Letter are regarded as the same in size. The machine will use whichever size is in the paper source. | |
| Duplex Select binding orientation for duplex mode.Value:1-sided, 2-sided(Bind Long Edge), 2-sided(Bind Short Edge) | ||
| Copies Set the default number of copies, from 1 to 999.Value:1 to 999 copies | ||
| Item Description | |
| Orientation | Set the default orientation, [Portrait] or [Landscape].Value: Portrait, Landscape |
| Form Feed Timeout | Receiving print data from the computer, the machine may sometimes wait if there is no information signaling that the last page does not have any more data to be printed. When the preset timeout passes, the machine automatically prints the document. The options are between 5 and 495 seconds.Value: 5 to 495 seconds |
| LF Action | Set the line feed action when the machine receives the line feed code (character code 0AH).Value: LF Only, LF and CR, Ignore LF |
| CR Action | Set the character return action when the machine receives the character return code (character code 0DH).Value: CR Only, LF and CR, Ignore CR |
| Job Name Set whether the job name set in the printer driver is displayed.Value: Off, OnNOTEWhen selecting [On], select the job name to be displayed from [Job Name], [Job No. & Job Name], or [Job Name & Job No.]. | |
| User Name Set whether the user name set in the printer driver is displayed.Value: Off, On | |
| Paper Feed Mode | While printing from the computer, select how to feed paper when the paper source and type are specified.ValueAuto: Search the paper source that matches the selected paper size and type.Fixed: Print on paper loaded in the specified paper source. |
| KIR | The machine is equipped with the smoothing function, which realizes an excellent printing of about 9600 dpi (600 dpi × 15 gradation) × 600 dpi.Value: Off, On |
Report
Print reports to check the machine settings and status. Default settings for printing the result reports can also be configured.
Print Report
Report
| Item Description | |
| Status Page | Prints the status page, allowing you to check the information including current settings, available memory space, and optional equipment installed. |
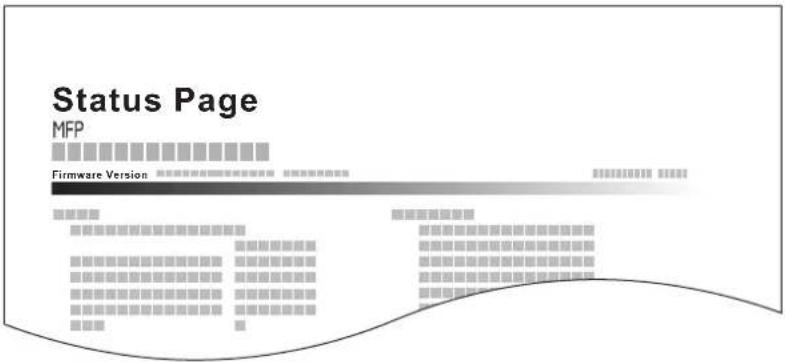 | |
| Font List | Prints the font list, allowing you to check the font samples installed in the machine. |
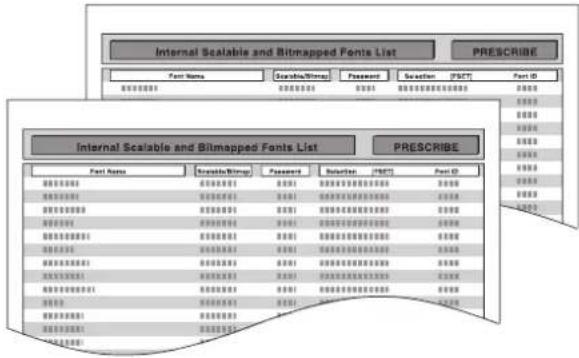 | |
| Network Status | Prints the network status, allowing you to check the information including network interface firmware version, network address and protocol. |
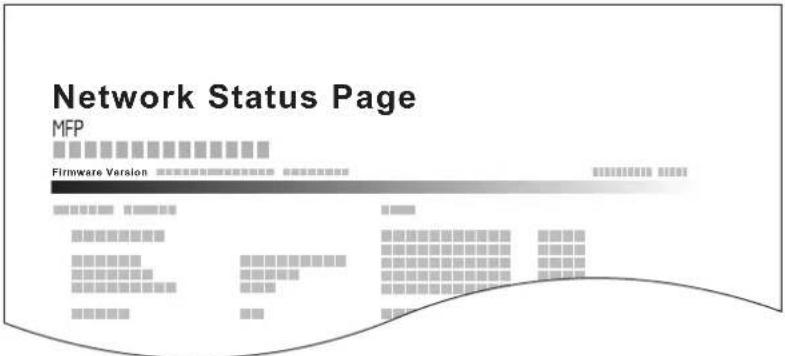 | |
| Service Status | Prints the service status. More detailed information is available than on the Status Page. Service personnel usually print the service status pages for maintenance purpose. |
| Optional Network Status | Prints the optional network status, allowing you to check the information including optional network interface firmware version, network address and protocol.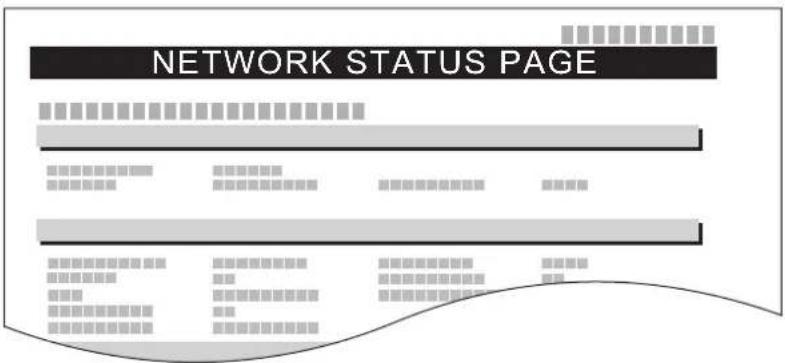 NOTEThis function is displayed when the optional Network Interface Kit is installed. NOTEThis function is displayed when the optional Network Interface Kit is installed. |
Admin Report Settings

Report
Configure settings for fax functions. For details, refer to the FAX Operation Guide.
Result Report Settings

Report
| Item Description | |||
| Send Result Report | Automatically print a report of transmission result when a transmission is complete. | ||
| E-mail/Folder Print a report of E-mail/Folder transmission results.Value: Off, On, Error Only | |||
| FAX^*1 | For details, refer to the FAX Operation Guide. | ||
| Canceled before Sending | Print a send result report when the job is canceled before being sent.Value: Off, On | ||
| Recipient Format Select the Recipient Format for the send result report.Value: Name or Destination, Name and Destination | |||
| FAX TX Resolution^*1 | For details, refer to the FAX Operation Guide. | ||
| Job Finish Notice Setting*1 | For details, refer to the FAX Operation Guide. | ||
| RX Result Report Type*1*2 | For details, refer to the FAX Operation Guide. | ||
*1 Displayed only when the optional fax kit is installed.
*2 This is not displayed if you selected [Off] for FAX RX Result Report.
Sending Log History

Report
| Item Description | |
| Auto Sending | This function automatically sends the log history to the specified destinations whenever a set number of jobs has been logged.Value: Off, OnNOTEIf [On] is selected, specify the number of job histories. The setting range is 1 to 1,500. |
| Sending Log History | You can also send the log history to the specified destinations manually. |
| Destination | Set the destination to which log histories are sent. Only E-mail address can be set. |
| Job Log Subject | Set the subject automatically entered when sending log histories by E-mail.Value: Up to 60 characters |
| Personal Information Select whether to include personal information in the job log.Value: Include, Exclude | |
Login History Settings
System Menu


Report
| Item Description | |
Login History Select whether to record the Login History. Value: Off, On   If [On] is selected, set the number of histories to be recorded. The setting range is 1 to 1,000. If [On] is selected, set the number of histories to be recorded. The setting range is 1 to 1,000. | |
| Auto Sending | Select whether the login history is automatically sent to the set address when the number of entries reaches the number set in "Login History". Value: Off, On [DBHD]  This function is displayed when "Login History" is set to [On]. This function is displayed when "Login History" is set to [On]. |
| Destination | Set the destination to which login histories are sent. E-mail address only can be set as destination. [XHET]  This function is displayed when "Login History" is set to [On]. This function is displayed when "Login History" is set to [On]. |
| Subject | Set the subject automatically entered when sending login histories by E-mail. Value: Up to 60 characters [OACT]  This function is displayed when "Login History" is set to [On]. This function is displayed when "Login History" is set to [On]. |
| Log Reset Resets the recorded login histories. | |

NOTE
If the user authentication screen appears, enter your login user name and login password and press [Login]. For this, you need to login with administrator privileges. The factory default login user name and login password are set as shown below.
| Model Name Login User Name Login Password | |
| 3555i 3500 3500 | |
| 4555i 4500 4500 | |
| 5555i 5500 5500 | |
Device Log History Settings
System Menu


Report
| Item Description | |
| Device Log History | Select whether to record the device log history.Value: Off, On NOTEIf [On] is selected, set the number of histories to be stored. The setting range is 1 to 1,000. NOTEIf [On] is selected, set the number of histories to be stored. The setting range is 1 to 1,000. |
| Auto Sending | Select whether the device log history is automatically sent to the set address when the number of entries reaches the number set in "Device Log History".Value: Off, On[YYK]NOTEThis function is displayed when "Device Log History" is set to [On]. |
| Destination | Set the destination to which device log histories are sent. E-mail address only can be set as destination. NOTEThis function is displayed when "Device Log History" is set to [On]. NOTEThis function is displayed when "Device Log History" is set to [On]. |
| Subject | Set the subject automatically entered when sending device log histories by E-mail.Value: Up to 60 characters NOTEThis function is displayed when "Device Log History" is set to [On]. NOTEThis function is displayed when "Device Log History" is set to [On]. |

NOTE
If the user authentication screen appears, enter your login user name and login password and press [Login]. For this, you need to login with administrator privileges. The factory default login user name and login password are set as shown below.
| Model Name Login User Name Login Password | ||
| 3555i 3500 3500 | ||
| 4555i 4500 4500 | ||
| 5555i 5500 5500 | ||
Secure Comm. Error Log
System Menu


Report
| Item Description | |
| Secure Comm. Error Log | Select whether to record the secure communication error log history.Value: Off, On NOTEIf [On] is selected, set the number of histories to be stored. The setting range is 1 to 1,000. NOTEIf [On] is selected, set the number of histories to be stored. The setting range is 1 to 1,000. |
| Auto Sending | Select whether the secure communication error log history is automatically sent to the set address when the number of entries reaches the number set in "Secure Comm. Error Log".Value: Off, On[GSDA]NOTEThis function is displayed when "Secure Communication Error Log History" is set to [On]. |
| Destination | Set the destination to which secure communication error log histories are sent. E-mail address only can be set as destination. NOTEThis function is displayed when "Secure Communication Error Log History" is set to [On]. NOTEThis function is displayed when "Secure Communication Error Log History" is set to [On]. |
| Subject | Set the subject automatically entered when sending secure communication error log histories by E-mail.Value: Up to 60 characters[DHTS]NOTEThis function is displayed when "Secure Communication Error Log History" is set to [On]. |

NOTE
If the user authentication screen appears, enter your login user name and login password and press [Login]. For this, you need to login with administrator privileges. The factory default login user name and login password are set as shown below.
| Model Name Login User Name Login Password | |
| 3555i 3500 3500 | |
| 4555i 4500 4500 | |
| 5555i 5500 5500 | |
System/Network
Configure machine system settings.
Network
System Menu


System/Network
Configure network settings.
Host Name
| Item Description | |
| Host Name | Check the host name of the machine. Host name can be changed from Embedded Web Server RX. Changing Host Name (page 2-36) Changing Host Name (page 2-36) |
TCP/IP Setting
| Item Description | ||
| TCP/IP Select whether to use TCP | /IP Protocol. Value: Off, On | |
| IPv4 | Set up TCP/IP (IPv4) to connect to the network. This setting is available when [TCP/IP] is set to [On]. | |
IP Address Set the IP addresses. Value: ####.###.###.###  NOTE When DHCP is set to [On], this function will be grayed out and the value cannot be entered. NOTE When DHCP is set to [On], this function will be grayed out and the value cannot be entered. | ||
Subnet Mask Set the IP subnet masks. Value: ####.###.###.###  NOTE When DHCP is set to [On], this function will be grayed out and the value cannot be entered. NOTE When DHCP is set to [On], this function will be grayed out and the value cannot be entered. | ||
Default Gateway Set the IP gateway addresses. Value: ####.###.###.###  NOTE When DHCP is set to [On], this function will be grayed out and the value cannot be entered. NOTE When DHCP is set to [On], this function will be grayed out and the value cannot be entered. | ||
| DHCP Select whether to use the DHCP (IPv4) server. Value: Off, On | ||
| Auto-IP Select whether to use Auto-IP. Value: Off, On | ||

IMPORTANT
After changing the setting, restart the network or turn the machine OFF and then ON.
| Item Description | ||
| IPv6 | Set up TCP/IP (IPv6) to connect to the network. This setting is available when [TCP/IP] is [On]. | |
| IPv6 Select whether to use IPv6.Value: Off, OnNOTESelecting [On] displays IP address in [IP Address (Link Local)] after restarting the network. | ||
| RA (Stateless) Select whether to use RA (Stateless).Value: Off, OnNOTEThis function is displayed when [IPv6] is set to [On].Selecting [On] displays IP address in [IP Address (Stateless)] after restarting the network. | ||
| Manual SettingManually specify the IP address, prefix length, and gateway address of TCP/IP (IPv6).ValueIP Address (Manual): (numbers (128 bit in total) separated by colons)Prefix Length: 0 to 128Default Gateway: ####.###.###.###NOTEThis function is displayed when [IPv6] is set to [On].To enter "Default Gateway", set [RA (Stateless)] to [Off]. | ||
| DHCP Select whether to use the DHCP (IPv6) server.Value: Off, OnNOTEThis function is displayed when [IPv6] is set to [On].Selecting [On] displays IP address in [IP Address (Stateful)] after restarting the network. | ||
| Bonjour Select whether to use Bonjour.Value: Off, On | ||
| IPSec Select whether to use IPSec.Value: Off, On | ||

IMPORTANT
After changing the setting, restart the network or turn the machine OFF and then ON.
Protocol Settings
| Item Description | ||
| SMTP (E-mail TX) Select whether | to send E-mail using SMTP. Value: Off, On | |
| POP3 (E-mail RX) Select whether | to receive E-mail using POP3. Value: Off, On | |
| FTP Client (Transmission) | Select whether to send documents using FTP. When selecting [On], set the FTP Port Number. Use the default port 21. Value: Off, On (Port Number: 1 to 65535) | |
| FTP Server (Reception) Select whether to receive documents using FTP. *1 Value: Off, On | ||
| SMB Client (Transmission): | Select whether to send documents using SMB. When selecting [On], set the SMB Port Number. Use the default port 139. Value: Off, On (Port Number: 1 to 65535) | |
| NetBEUI Selects whether to receive documents using NetBEUI. *1 Value: Off, On | ||
| WSD Scan Select whether to use WSD Scan. *1 Value: Off, On | ||
| WSD Print Select whether to use WSD Print. *1 Value: Off, On | ||
| i-FAX Select whether to use i-FAX. Value: Off, On [ACDA] NOTE This function is displayed when the optional Internet FAX Kit is activated. | ||
| DSM Scan Select whether to use DSM scan. Value: Off, On | ||
| ThinPrint | Select whether to use ThinPrint. When selecting [On], set the SMB default Port Number. Use the default port 4000.*1,*2 Value: Off, On (Port Number: 1 to 32767) NOTE This function is displayed only when the optional ThinPrint Option is activated. | |
Thin Print over SSL To use Thin Print over SSL, press [Thin Print over SSL] and select [On]. Value: Off, On  NOTE When selecting [On], the certificates must be installed. For details, refer to the Embedded Web Server RX User Guide. NOTE When selecting [On], the certificates must be installed. For details, refer to the Embedded Web Server RX User Guide. | ||
| LPD | Selects whether to receive documents using LPD.*1 Value: Off, On | |
| Raw | Select whether to receive documents using Raw Port.*1 Value: Off, On | |
| IPP | Selects whether to receive documents using IPP. When selecting [On], set the IPP Port Number. Use the default port 631.*1,*2 Value: Off, On | |
| IPP over SSL | Selects whether to receive documents using IPP over SSL. When selecting [On], set the IPP default Port Number. Use the default port 443.*1,*2 Value: Off, On (Port Number: 1 to 32767) NOTE When selecting [On], the certificates must be installed. For details, refer to the Embedded Web Server RX User Guide. | |
HTTP Select whether to communicate using HTTP. *1
Value: Off, On
HTTPS Select whether to communicate using HTTPS. *1, *2
Value: Off, On
LDAP Select whether to use LDAP.
Value: Off, On
SNMPv1/v2c Select whether to communicate using SNMP. *1
Value: Off, On
SNMPv3 Select whether to communicate using SNMPv3. *1
Value: Off, On
Enhanced WSD Select whether to use Enhanced WSD. *1
Value: Off, On
Enhanced WSD over SSL Select whether to use Enhanced WSD (SSL). *1, *2
Value: Off, On
NOTE
Selecting [Off] will disable the functionality of WIA, TWAIN and Network FAX drivers.
*1 The setting will be changed after restarting the device or network.
*2 Set "SSL" to [On] in Security Settings on page 8-46.
IMPORTANT
After changing the setting, restart the network or turn the machine OFF and then ON.
Security Settings
SSL Select whether to use SSL for communication.
Value: Off, On
LAN Interface
LAN Interface Specify the settings for the LAN interface to be used.
Value: Auto, 10BASE-T Half, 10BASE-T Full, 100BASE-T Half, 100BASE-TX Full, 1000BASE-T
IMPORTANT
After changing the setting, restart the network or turn the machine OFF and then ON.
Restart Network
Restart Network Restarts the network.
Proxy
| Item Description | ||
| Proxy Set the proxy for connection | to the Internet from an application. Value: Off, On | |
Optional Network
System Menu


System/Network

NOTE
This function is displayed when the optional Network Interface Kit is installed.
Basic
| Item Description | |
| Host Name | Check the host name of the machine. Host name can be changed from Embedded Web Server RX.Changing Host Name (page 2-36) |
| TCP/IP Setting | For details on setting value, refer to TCP/IP Setting on page 8-43. |
| NetWare Use NetWare to receive | documents.See the Operation Guide for the optional network interface card for details.Value: Off, On |
| AppleTalk Selects whether to receive documents using AppleTalk.Value: Off, On | * |
LAN Interface Select the LAN Interface type.Value: Auto, 10BASE-T Half, 10BASE-T Full, 100BASE-T Half, 100BASE-T Full, 1000BASE-T NOTEThis function is displayed when the optional Network Interface Kit is installed. NOTEThis function is displayed when the optional Network Interface Kit is installed. | * |
| MAC Address Filter Select whether to use MAC Address Filter.See the Operation Guide for the optional network interface card for details.Value: Off, On | |
| Restart Network | Restarts the network. |
* The setting will be changed after restarting the device or network.
Wireless Network

NOTE
This function is displayed when the optional Wireless Interface Kit is installed.
| Item Description | |||
| Connection Status | When the optional Wireless Interface Kit is installed, you can check the wireless LAN status. | ||
| Quick Setup Wizard | If the machine will connect to an access point that supports the automatic wireless network setup, connection settings can be configured by Quick Setup. | ||
| Available Network Displays access points to which the machine can connect. | |||
| Push Button Method | If the access point supports the push button method, wireless settings can be configured using the push button. This setting executes push button, and the connection is started by pressing the push button on the access point. | ||
| PIN Code Method(Device) | Starts connection using the machine's PIN code. Enter the PIN code into the access point. The PIN code of the machine is automatically generated. | ||
| PIN Code Method(Terminal) | Starts connection using the PIN code of the access point. Enter the PIN code of the access point. | ||
| Custom Setup The detailed settings for wireless LAN can be changed. | |||
| Network Name(SSID) | Set the SSID (Service Set Identifier) of the wireless LAN to which the machine connects. | ||
| NOTEUp to 32 characters can be entered. | |||
| Connection Mode Set the connection mode. Value: Ad Hoc, InfrastructureNOTEAd Hoc: Directly communicates with the device without going through an access point. This method cannot be used to connect to two or more devices. Infrastructure: Performs communication through an access point. | |||
| Channel Set channel. | Use [-] / [+] or the numeric keys to enter a number. Value: 1 to 11 | ||
| Network Authentication Select network authentication type.To select other options, open the device home page from a computer. Value: Open, Shared, WPA-PSK*1, WPA2-PSK*1 | |||
| Encryption | Select encryption method and enter the Preshared key. The setting values vary depending on the Network Authentication setting.When Network Authentication is set to [Open] or [Shared]Value: Disable, WEPWhen Network Authentication is set to [PA-PSK] or [PA-PSK]Value: TKIP *2, AES, Auto *2, Preshared KeyNOTEIf [WEP] is selected, enter the WEP key. Up to 26 characters can be entered.If [Preshared Key] is selected, enter the Preshared key. Enter the value in 8 to 64 characters. | ||
*1 Not displayed if you selected [Ad Hoc] for "Connection Mode".
*2 Not displayed if you selected [WPA2-PSK] for "Network Authentication".
Network Interface (Send)
System Menu


System/Network

NOTE
This function is displayed when the optional Network Interface Kit is installed.
| Item Description | |
| Network Interface (Send) | Specify the network interface card to be used for send function and connecting to external address book.Value: Standard, Optional Network |
Security Level
System Menu


System/Network
| Item Description | |
| Security Level Specify the security level. | Value:Low: This is the mode in which the service personnel performs maintenance work.Do not set to this mode.High: This is the security setting we recommend. Use this setting normally.Very High: In addition to [High] setting, this setting disables the machine settings to be changed from external command. |
Interface Block Setting

System/Network
This allows you to protect this machine by blocking the interface with external devices such as USB hosts or optional interfaces.
| Item Description | |
| USB Host This locks and protects | the USB port (A1) or USB port (A2) (USB host).Value: Unblock, Block |
| USB Device This locks and protects | ts the USB interface connector (B1) (USB Device).*Value: Unblock, Block |
| USB Storage This locks and protects | ts the USB memory slot (A1).Value: Unblock, Block[HTTP]  This function is available when USB Host is set to [Unblock]. This function is available when USB Host is set to [Unblock]. |
| Optional Interface 1 This locks and protects the optional interface slots (OPT1 or OPT2). | d protects the optional interface slots (OPT1 or OPT2).Value: Unblock, Block |
| Optional Interface 2 |

IMPORTANT
After changing the setting, restart the system or turn the machine OFF and then ON.
Data Security

System/Network
Configure settings for data stored in the machine's hard disk and memory.
| Item Description | |
| Hard Disk Initialization | Initializes the system and the erasure method for data stored on the machine's hard disk. For details, refer to the Data Security Kit (E) Operation Guide.[ZW24]  This function is displayed when the optional Data Security Kit is activated. This function is displayed when the optional Data Security Kit is activated. |
| Data Sanitization | Completely erases address information and image data saved in the machine.[X346]NOTEUp to 8 hours is required to complete this processing, depending on the amount of data stored.Once in progress, the processing cannot canceled.Before executing this function, disconnect modular, network, and other cables.Do not turn off the main power switch while sanitizing the data. If the main power is turned off during data erasing, erasing will be executed automatically when the power is restored, however, complete erasure cannot be guaranteed. |
| Software Verification Verify the installed software.Press [Start] to start verification.If an error occurs during software verification, contact your dealer or service representative. | |
Information erased
| Category Data erased | |
| Devices/jobs • Job settings configured by users• Network settings• Image data saved in Document Box, etc.• Data registered in One Touch keys• Job histories• User information (user list, address book, Document Box registered by the user, etc.)• Account information of job accounting• Network certificates• Initial screen on machine changed by service representative | |
| FAX* | • Fax settings configured by users• Communication restriction settings• Encryption key settings• Transmission histories• Scheduled jobs• Conditional reception/forwarding settings |
| Application/program • Application/program added by a user or service representative• Trial functions |
* Only when the optional fax kit is installed.
Document Guard
System Menu


System/Network

NOTE
This function is displayed when the Printed Document Guard Kit is installed.
| Item Description | |
| Document Guard | When the optional Printed Document Guard Kit is installed, careless copying and sending of documents that contain confidential or personal information is prevented.The guard pattern can be embedded in a document using the Security Watermark setting, which is an advanced function of the printer driver. (Refer to the Printing System Driver User Guide.)It is recommended that you check the effects of this function in your usage environment.Value: Off, OnNOTEWhen the Document Guard is enabled, restrictions apply to the operation of the machine. For details, refer to Limitations on page 8-52. |
Limitations

System/Network
Operation after guard pattern is detected
| Item Description | |
| All functions | A message indicating that a confidential document was detected is displayed. Scanning of the remaining document pages stops. |
| Copying function Printed blank from the point where the guard pattern is detected. | |
| Sending Functions Stops the sending operation. * | |
| Document Box Documents are not saved on the machine's hard disk. | |
| FAX The document is not sent. | |
* When sending by file separation, document pages scanned prior to detection are sent. If file separation is not performed, the document is not sent.
Restrictions
• The DP Read Action (page not of be selected.
- Faxes are sent by memory transmission.
Disclaimer
• This function does not prevent leakage of information.
We do not bear any liability for damages occurring due to use of the function or inability to use the function.
• The guard pattern may not be detected if printed on paper other than white paper or special paper with a pattern.
• The integrity of detection is not guaranteed.
If misdetection occurs, contact your service representative.
Optional Function

System/Network
| Item Description | |
Optional Function You can use the optional applications installed on this machine. | Optional Applications (page 11-8) |
Restart Entire Device

System/Network
| Item Description | |
| Restart Entire Device | Restart the CPU without turning the main power switch off. Use this to deal with any unstable operation by the machine. (Same as the computer restart.) |
Edit Destination
Address Book
System Menu


Edit Destination
Configure settings for address book.

Adding a Destination (Address Book) (page 3-45)
One Touch Key
System Menu


Edit Destination
Configure settings for One Touch Key.

Adding a Destination on One Touch Key (One Touch Key) (page 3-53)
Print list
System Menu


Edit Destination
For details, refer to the FAX Operation Guide.
Address Book Defaults
System Menu


Edit Destination
| Item Description | |
| Sort | Select the default sort setting of the address for the address book. Value: No., Name |
| Narrow Down | This procedure can be used to filter (narrow down) the types of destination listed when the address book is displayed. Value: Off, E-mail, Folder, FAX*, i-FAX*, Group |
| Address Book Type | Select whether the machine's address book or the External Address Book appears when the address book is displayed. Value: Address Book, Ext Address Book |
* Displayed only when the optional fax kit is installed.
User Login/Job Accounting
System Menu


User Login/Job Accounting
Configure settings related to machine management.

User Login Setting (page 9-2)
Job Accounting Setting (page 9-27)
Unknown ID Job (page 9-41)
User Property
System Menu


User Property
Allows you to view information about logged in users and edit some of that information.

User Login (page 9-4)
Date/Timer/Energy Saver
System Menu


Date/Timer/Energy Saver
Configure settings related to the date and time.
| Item Description | ||
| Date/Time | Set the date and time for the location where you use the machine. If you perform Send as E-mail, the date and time set here will be displayed on the header.Value: Year (2000 to 2037), Month (1 to 12), Day (1 to 31), Hour (00 to 23), Minute (00 to 59), Second (00 to 59)[2TY6]  If you change the date/time while using the trial version of an application, you will no longer be able to use the application. If you change the date/time while using the trial version of an application, you will no longer be able to use the application. | |
| Date Format | Select the display format of year, month, and date. The year is displayed in Western notation.Value: Month/Day/Year, Day/Month/Year, Year/Month/Day | |
| Time Zone | Set the time difference from GMT. Choose the nearest listed location from the list. If you select a region that utilizes summer time, configure settings for summer time.Setting Date and Time (page 2-23)[24HZ] | |
| Auto Panel Reset | If no jobs are run for a certain period of time, automatically reset settings and return to the default setting. Select to use Auto Panel Reset or not.Value: Off, On NOTEThe time allowed to elapse before the panel is reset is set with thePanel Reset Timer on page 8-55. NOTEThe time allowed to elapse before the panel is reset is set with thePanel Reset Timer on page 8-55. | |
| Auto Error Clear | If an error occurs during processing, processing stops to wait for the next step to be taken by the user. In the Auto Error Clear mode, automatically clear the error after a set amount of time elapses. For details, refer toResponding to Messages on page 10-23.Value: Off, On | |
| Low Power Timer | Set amount of time before entering the Low Power mode.Value:For Europe1 to 120 minutes (1 minute increments)Except for Europe1 to 240 minutes (1 minute increments)Low Power Mode and Auto Low Power Mode (page 3-14)[WIT26] | |
| Panel Reset Timer | If you select [On] for Auto Panel Reset, set the amount of time to wait before Auto Panel Reset. Value: 5 to 495 seconds (in 5 second increments)NOTEThis function is displayed when [Device Log History] is set to [On]. | |
| Sleep Timer | Set amount of time before entering Sleep. Value:For Europe1 to 120 minutes (1 minute increments)Except for Europe1 to 240 minutes (1 minute increments)[SWHEO]NOTEThis function is displayed when [Auto Sleep] is set to [On]. | |
| Interrupt Clear Timer | Set the period after which the machine reverts to Normal mode when it has been set to Interrupt Copy mode and then left unused. Value: 5 to 495 seconds (in 5 second increments) | |
| Error Job Skip | Set whether a job for which a "Add paper in cassette #" or "Add paper in Multi Purpose tray" error occurred when the job was started is automatically skipped after a set period of time elapses. Value: Off, On[AS37]NOTEWhen a job is skipped, it is moved to the end of the job queue.If [On] is selected, set the time until the job is skipped. The setting range is 5 to 90 (5 second increments). | |
| Error Clear Timer | If you select [On] for Auto Error Clear, set the amount of time to wait before automatically clearing errors. Value: 5 to 495 seconds (in 5 second increments)[CTCW]NOTEThis function is displayed when [Auto Error Clear] is set to [On]. | |
| Unusable Time*1 | For details, refer to the FAX Operation Guide. | |
| Sleep Rules (models for Europe) | Select whether to use the Sleep mode for the following functions individually:• N e t w o r k• USB Cable• Card Reader*2• FAX*1• A p p l i c a t i o nValue: Off, On[WWZZ]NOTEIf the sleep condition is not turned off, the machine will not wake from sleep mode even if it receives a print job from a computer connected by USB cable. Also, the ID card cannot be recognized. | |
| Sleep Level (models except for Europe) | Select the sleep level. Set the Energy Saver mode to reduce power consumption even more than normal Sleep mode. Value: Quick Recovery, Energy Saver [WAX] NOTE This function will not be displayed when the optional Network Interface Kit is installed. | |
| Sleep Rules Select whether to use the Energy Saver mode for the following functions individually: • N e t w o r k • USB Cable • Card Reader* 2 • FAX* 1 • A p p l i c a t i o n Value: Off, On [ASSY] NOTE When the machine has entered sleep mode with Energy Saver setting, it does not wake from sleep mode when it receives print data from a PC connected by USB cable. Also, the ID card cannot be recognized. | ||
| EnergySaver RecoveryLevel | Select the method of recovery from energy saver. Value: Full Recovery: This mode enables the use of all functions immediately. However, this mode saves less energy. Normal Recovery: In this mode, you can select the method from the following: enabling the use of all functions immediately or enabling the use of desired functions only. If you want to use all functions immediately, press the [Power] key to execute recovery. Power Saving Recovery: This mode enables the use of desired functions only. This mode saves energy most effectively. | |
| Weekly Timer Settings | Configure settings for switching the machine into Sleep mode and waking it automatically at a specified time for each day of the week. | |
| Weekly Timer Select whether to use Weekly Timer. Value: Off, On | ||
| Schedule Specify the time for each day of the week at which the machine enters Sleep mode and recovers. | ||
| Retry Times Set the number of retry to switch the machine into Sleep mode. Value: Limited Retries, Unlimited Retries [YKDA] NOTE If [Limited Retries] is selected, set the number of retry. The setting range is 0 to 10. Retry is not performed when "0" is set. If [Unlimited Retries] is selected, retry is performed until the machine enters Sleep mode. | ||
| Retry Interval Set the retry interval. Use [-] / [+] to enter a number. Value: 10 to 60 seconds (increments of 10 seconds) | ||
*1 Displayed only when the optional fax kit is installed.
*2 This is displayed when the optional Card Authentication Kit is installed.
Adjustment/Maintenance
System Menu

Adjustment/Maintenance
Adjust printing quality and conduct machine maintenance.
| Item Description | ||
| Density Adjustment Adjust density. | ||
| Copy Adjust copy density. | Adjustment can be made in 7 levels. Value: -3 (Lighter), -2, -1, 0 (Normal), +1, +2, +3 (Darker) | |
| Send/Box | Adjust scan density when sending or storing the data in Document Box. Adjustment can be made in 7 levels. Value: -3 (Lighter), -2, -1, 0 (Normal), +1, +2, +3 (Darker) | |
| FAX* | For details, refer to the FAX Operation Guide. | |
| Background Density Adj. Darkens or lightens overall background density adjustment. | ||
| Copy (Auto) | Darkens or lightens overall background density adjustment during copying. Adjustment can be made in 7 levels. Value: -3 (Lighter), -2, -1, 0 (Normal), +1, +2, +3 (Darker) | |
| Send/Box (Auto) | Darkens or lightens overall background density when sending images or storing them in the Document Box. Adjustment can be made in 7 levels. Value: -3 (Lighter), -2, -1, 0 (Normal), +1, +2, +3 (Darker) | |
| Correcting Black Lines | Correct fine lines (streaks caused by contamination), which may appear on the image, when the document processor is used. Value Off: No correction performed. On (Low): Correction performed. The reproduction of fine lines on the original may become lighter than when using [Off]. On (High): Select this item if a streak remains after using [On (Low)]. The reproduction of fine lines on the original may become lighter than when using [On (Low)]. | |
| System Initialization | Initialize the hard disk installed on the machine to return it to the factory defaults. [WZH4]  This function will not be displayed when the optional Data Security Kit is activated. This function will not be displayed when the optional Data Security Kit is activated. | |
| Display Brightness Set the brightness of the touch panel. Value: 1 (Darker), 2, 3, 4 (Lighter) | ||
| Silent Mode | Make after-printing process run more quietly. Select this mode when the running noise is uncomfortable. Value: Off, On [WZH4]  When [On] is selected, preparation for the next printing may take longer. When [On] is selected, preparation for the next printing may take longer. | |
| Memory Diagnostics | Perform this function to check the machine memory. | |
* Displayed only when the optional fax kit is installed.
| Item Description | |
| Auto Color Correction | This setting allows you to adjust the detection level used by the machine to determine whether the original is color or black and white in Auto Color Selection Mode. Setting a lower value will result in more originals being identified as color, while a larger value will tend to increase the number of originals being identified as black and white. Value: 1 (Color), 2, 3, 4, 5 (B & W) |
| Tone Curve Adjustment | After prolonged use, or from the effects of surrounding temperature or humidity, the printed output tone may differ from the original. Perform this function to ensure consistency with the original tone. For the procedure, refer to Tone Curve Adjustment on page 10-36. |
| Drum Refresh 1 | Refresh the drum when image blur appear on images in copies. Takes about 85 seconds. For more information, refer to the Drum Refresh1 on page 10-37.  NOTE Drum Refresh1 cannot be performed while printing. Execute Drum Refresh1 after the printing is done. NOTE Drum Refresh1 cannot be performed while printing. Execute Drum Refresh1 after the printing is done. |
| Drum Refresh 2 | Use this mode when white spots appear on images. Takes about 85 seconds. To use [Drum Refresh2], load Ledger or A3 size paper into the Multi Purpose tray. When you run [Drum Refresh 2], the machine makes a vibrating sound for about 85 seconds until drum refreshing is completed. The toner soiling on the ejected paper is normal and does not indicate a fault. For more information, refer to the Drum Refresh2 on page 10-37. [CHOX] NOTE Drum Refresh2 cannot be performed while printing. Execute Drum Refresh2 after the printing is done. |
| Developer Refresh | Adjust the printed image that is too light or incomplete, even though there is enough toner. In addition, Black or color dots appear on the white background when white original is scanned can be removed. For the procedure, refer to Developer Refresh on page 10-38.  NOTE Waiting time may be longer when the toner is refilled during developer refresh. NOTE Waiting time may be longer when the toner is refilled during developer refresh. |
| Color Calibration Cycle Set the calibration cycle. Value: Short: Priority is given to image quality. Standard: Balances image quality and print speed. Long: Priority is given to print speed. [KSSX] NOTE When [Custom] is displayed as setting item, the setting cannot be changed. | |
| Calibration Calibrate the device to | ensure consistency with the original grayscale.For the procedure, refer to Calibration on page 10-38. |
| NOTEIf you find that the grayscale is not improved by this calibration, use Tone Curve Adjustment (page 10-36). | |
| Correct Paper Curl | Some paper types and paper stored in certain conditions may curl. This feature can be used to correct paper curling.Value: Auto, Reduce Downcurl, Reduce Upcurl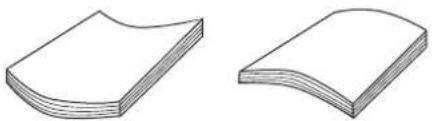 Upcurl DowncurlNOTEThis function is displayed when the optional 1,000-sheet finisher or 4,000-sheet finisher is installed. Upcurl DowncurlNOTEThis function is displayed when the optional 1,000-sheet finisher or 4,000-sheet finisher is installed. |
Internet
System Menu


Internet
| Item Description | |
| Internet Browser Select whether to use the Internet browser. Value: Off, On | |
| Browser Environment | This specifies Internet browser preferences such as your home page setting and how pages are displayed. Value: Home page: (Enter the address for Home page.) Text Size: Large, Medium, Small Display Mode: Normal, Just-Fit Rendering, Smart-Fit Rendering Cookie: Accept All, Reject All, Prompt before Accepting NOTE [706] This is not displayed if [Off] is selected in Internet Browser on page 8-60. |

NOTE
To use proxy from Internet Browser, refer to Proxy on page 8-47 to configure settings.
Application
System Menu


Configure application settings.

Application (page 5-10)
9 User Authentication and Accounting (User Login, Job Accounting)
This chapter explains the following topics:
User Login 9-2
First User Login Administration 9-2
User Login Setting 9-2
User Login 9-4
Authentication Security 9-6
Adding a User (Local User List) 9-8
Changing User Properties 9-11
Local Authorization 9-15
Group Authorization Set. 9-15
Guest Authorization Set. 9-18
Obtain NW User Property 9-21
Simple Login Settings 9-23
ID Card Settings 9-26
Job Accounting Setting 9-27
First Job Accounting Setup 9-27
Job Accounting Setting 9-27
Job Accounting 9-29
Login/Logout 9-29
Job Accounting Access 9-30
Job Accounting (Local) 9-31
Accounting List 9-32
Managing Accounts 9-33
Default Setting 9-36
Counting the Number of Pages Printed 9-38
Apply Limit 9-40
Copier/Printer Count 9-40
Unknown ID Job 9-41
User Login
User login administration specifies how the user access is administered on this machine. Enter a correct login user name and password for user authentication to login.
Access are in three levels - User, Administrator, and Machine Administrator. The security levels can be modified only by the Machine Administrator.
Users that are not able to log in to the machine can be allowed to use the functions of the machine on a restricted basis. The users can use the machine without performing authentication, and thus this feature is convenient when the majority of users are managed with the same authority. You can prohibit the box store function in "Guest Authorization Set." so that the box store function cannot be used unless the user logs in. If "To use this function, press Authentication key and login" appears while operating the machine, you must press the [Authentication/Logout] key and log in as a user for whom the function is not prohibited.
First User Login Administration
Follow these steps for the first user login administration.
Enable user login administration. (page 9-4)

Add a user. (page 9-8)

Log out. (page 2-22)

The registered user logs in for operations. (page 9-29)
User Login Setting
1 Display the screen.
1 Press the [System Menu] key.
System Menu

2 Press [ ] and then [User Login/Job Accounting].
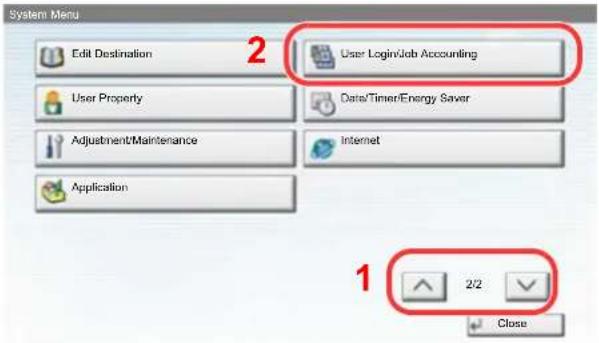
text_image
System Menu Edit Destination User Login/Job Accounting User Property Data/Timer/Energy Saver Adjustment/Maintenance Internet Application 1 2/2 Close
NOTE
If the user authentication screen appears, enter your login user name and login password and press [Login]. For this, you need to login with administrator privileges.
The factory default login user name and login password are set as shown below.
| Model Name Login User Name Login Password | |
| 3555i 3500 3500 | |
| 4555i 4500 4500 | |
| 5555i 5500 5500 | |
3 Press [Next] of "User Login Setting".
The user login administration setting screen appears.
![Utax 3555i - Press [Next] of "User Login Setting". - 1](/content/2026/05/780633/images/ba9b08413eacc6fc367852a9043e264c36a26e00de1d4e74344a8305326b6779.jpg)
text_image
User Login/Job Accounting User Login Setting: Next Job Accounting Setting: Next Unknown ID Job: Change Close2
Configure the settings.
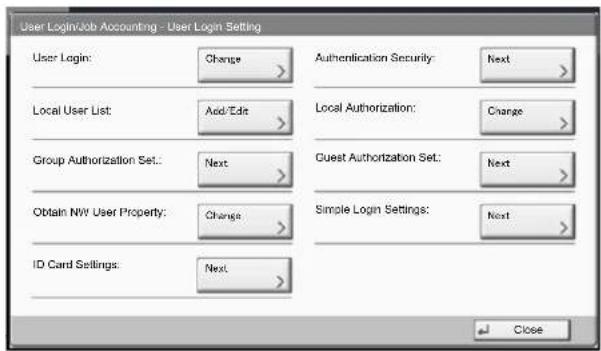
text_image
User Login/Job Accounting - User Login Setting User Login: Change Authentication Security: Next Local User List: Add/Edit Local Authorization: Change Group Authorization Set: Next Guest Authorization Set: Next Obtain NW User Property: Change Simple Login Settings: Next ID Card Settings: Next Close
User Login (page 9-4)
Authentication Security (page 9-6)
Adding a User (Local User List) (page 9-8)
Local Authorization (page 9-15)
Group Authorization Set. (page 9-15)
Guest Authorization Set. (page 9-18)
Obtain NW User Property (page 9-21)
Simple Login (page 9-23)
ID Card Settings (page 9-26)
User Login
This enables user login administration. Select one of the following authentication methods:
| Item Descriptions | |
| Local Authentication | User authentication based on user properties on the local user list stored in the machine. |
| Network Authentication | User authentication based on Authentication Server. Use a user property stored in Authentication Server to access the network authentication login page. |
1 Display the screen.
1 Referring to User Login Setting on page 9-2, display the user login setting screen.
2 Press [Change] of "User Login".
2 Configure the settings.
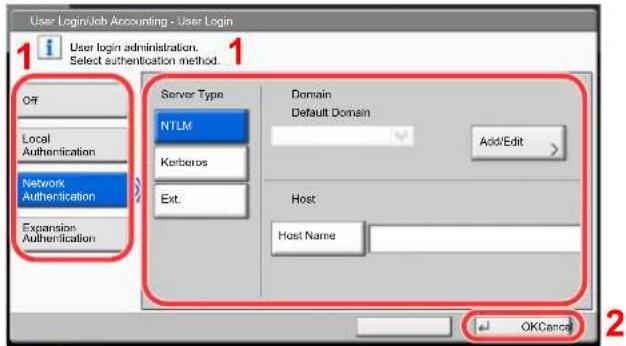
text_image
User Login/Job Accounting - User Login 1 User login administration. Select authentication method. Off Local Authentication Network Authentication Expansion Authentication Server Type NTLM Kerberos Ext. Domain Default Domain Add/Edit > Host Host Name OKCancel1 Select [Local Authentication] or [Network Authentication].
Select [Off] to disable user login administration.
If you select [Network Authentication], enter the host name (64 characters or less) and domain name (256 characters or less) for the Authentication Server. Select [NTLM], [Kerberos] or [Ext.] as the server type.
When selecting [Ext.] as the server type, enter the port number.

NOTE
Pressing [Add/Edit] of "Domain" displays the domain registration list. In the domain registration list screen, press [Add/Edit], and enter the domain name. Up to 10 domain names can be registered.
2 Press [OK].
If [Local Authentication] is selected, "Do you want to add a new function to the home screen?" appears when [OK] is pressed.
To add a new function, press [Yes]. The selection screen for functions displayed in the home screen will appear.

Available Functions to Display on Desktop (page 3-6)

NOTE
If the login user name and password are rejected, check the following settings.
• Network Authentication setting of the machine
- User property of the Authentication Server
- Date and time setting of the machine and the Authentication Server
If you cannot login because of the setting of the machine, login with any administrator registered in the local user list and correct the settings.
Up to 10 domains can be registered for network authentication.
Authentication Security
If user authentication is enabled, configure the user authentication settings.
User Account Lockout Set.
Configure these settings to restrict the operation for the user being authenticated.
1 Display the screen.
1 Referring to User Login Setting on page 9-2, display the user login setting screen.
2 Press [Next] of "Authentication Security" and then [Next] of "User Account Lockout Set.".
2 Configure the settings.
The following settings can be selected.
| Item Descriptions | |
| Lockout Select whether or | not account lockout policy is enabled. Value: Off, On |
| Lockout Policy | Specify the conditions and the extent to which the account lockout is applied. Value Number of Retries until Locked: Specify how many login retries are allowed until the account is locked out. (1 to 10 times) Lockout Duration: Specify how long the account is to be locked out until it is unlocked. (1 to 60 minutes) Lockout Target Specify the extent to which the account lockout is applied. You can select from [All] or [Remote Login Only]. Remote Login Only locks out all operations from outside the operation panel. |
| Locked out Users List | Displays a list of locked out users. You can unlock a user by selecting the user in the list, and pressing [Unlock]. |
Password Policy Settings
You can prohibit the setting and use of passwords that do not comply with the password policy.
Setting the Password Policy makes it more difficult to break the password.
1 Display the screen.
1 Referring to User Login Setting on page 9-2, display the user login setting screen.
2 Press [Next] of "Authentication Security" and then [Next] of "Password Policy Settings".
2 Configure the settings.
The following settings can be selected.
| Item Descriptions | |
| Password Policy Select wh | whether or not password policy is enabled. Value: Off, On |
| Minimum password length | Set the minimum password length of characters for password. Value: Off, On (1 to 64 characters) |
| Password complexity Set | the password complexity. Value No more than two consecutive identical char: Off, On At least one uppercase letter (A-Z): Off, On At least one lowercase letter (a-z): Off, On At least one number (0-9): Off, On At least one symbol: Off, On |
| Maximum password age | Set the maximum password age. Value: Off, On (1 to 180 days) |
| Policy Violated User List | List of users do not meet password policy requirements. |
Adding a User (Local User List)
This adds a new user. You can add up to 1,000 users (including the default login user name).

NOTE
By default, one of each default user with machine administrator rights and administrator privileges is already stored. Each user's properties are:
Machine Administrator
User Name: DeviceAdmin
Login User Name: 3555i: 3500, 4555i: 4500, 5555i: 5500
Login Password: 3555i: 3500, 4555i: 4500, 5555i: 5500
Access Level: Machine Administrator
Administrator
User Name: Admin
Login User Name: Admin
Login Password: Admin
Access Level: Administrator
* Upper case and lower case letters are distinguished (case sensitive).
It is recommended to periodically change the user name, login user name and login password regularly for your security.
1 Display the screen.
1 Referring to User Login Setting on page 9-2, display the user login setting screen.
2 Press [Add/Edit] of "Local User List" and then [Add].
2 Enter the user information.
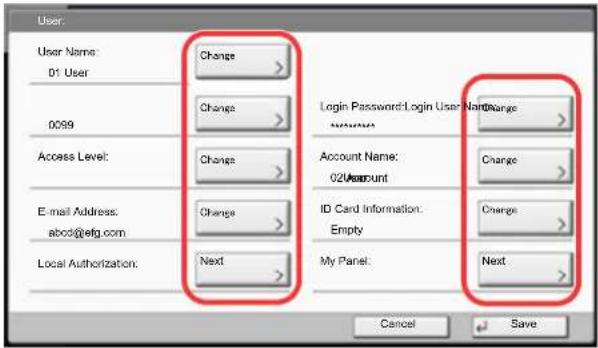
text_image
User: User Name: Change 01 User 0099 Change Access Level: Change E-mail Address: Change abcd@efg.com ID Card Information: Change Local Authorization: Next Login Password: Login User Name Change Account Name: 02 Account Change ID Card Information: Empty Change My Panel: Next Cancel SaveThe table below explains the user information to be registered.
| Item Descriptions | |
| User Name*1 | Enter the name displayed on the user list (up to 32 characters). |
| Login User Name*1 | Enter the login user name to login (up to 64 characters). The same login user name cannot be registered. |
| Login Password Enter the password to login (up to 64 characters). | |
| Access Level*1 | Select "Administrator" or "User" for user access privileges. |
| Account Name Add an account where the user belongs. The user, who registered his/her account name, can login without entering the account ID. Refer toJob Accounting Setting on page 9-27[0767]NOTESelect [Name] or [ID] from the "Sort" to sort the account list.Press [Search(Name)] or [Search(ID)] to search by account name or account ID. | |
| E-mail Address | The user can register his/her E-mail address. The registered address will be automatically selected for subsequent operations that need any E-mail function. |
| ID Card Information | Register ID card information.Place the ID card on the ID card reader, and press [Read].[0077]NOTEThis function is displayed when the optional ID Card Authentication Kit is activated.Card Authentication Kit(B) "Card Authentication Kit" (page 11-6) |
| Local Authorization | Set usage authority for each user. Local Authorization must be enabled.(Refer to page 9-15.)The following restriction items are available:Print Restriction:Select whether or not use of the print function of the printer is prohibited.Print Restriction (Color):Select whether or not use of the print function (color) of the printer is prohibited.Copy Restriction:Select whether or not use of the copy print function is prohibited.Copy Restriction (Color):Select whether or not use of the copy print function (color) is prohibited.Copy Restriction (Full Color):Select whether or not use of the copy print function (full color) is prohibited.Duplex Restriction:Select whether only duplex printing is allowed.Combine Restriction:Specify whether only Combine is allowed.EcoPrint Restriction:Specify whether only EcoPrint is allowed.Send Restriction:Select whether or not use of the send function is prohibited.FAX TX Restriction*2:Select whether or not use of the fax send function is prohibited.Storing Restr. in Box:Select whether or not use of the box store function is prohibited.Storing Restr. in Memory:Select whether or not use of the removable memory store function is prohibited. |
| My Panel You can register the language selection and initial screen settings for each user.Settings registered here can be applied simply by logging in. | |
*1 Mandatory at user registration.
*2 Displayed only when the optional fax kit is installed.

NOTE
Refer to the Entering Characters on page 11-12 for details on entering characters.
If you selected [Send], select the screen to display from [Destination], [Machine Address Book], or [Ext Address Book].
3 Press [Save].
A new user is added on the local user list.
![Utax 3555i - Press [Save]. - 1](/content/2026/05/780633/images/0f1c8346c98a33950b04dea348c15340631116eed900bf368fa944b2ab12634c.jpg)
NOTE
If simple login is enabled, a confirmation screen appears when new registration is finished asking if you will configure simple login settings. To configure simple login settings, press [Yes]. For the procedure for configuring simple login settings, refer to Simple Login Settings on page 9-23. If you select [No], you will return to the user list screen.
Changing User Properties
User properties can be changed. Types of user properties that could be changed may be different depending on user access privilege.

NOTE
To change the user information of the machine administrator, you must log in with machine administrator authority. You can only view user information if you log in as a regular user.
The factory default login user name and login password are set as shown below.
| Model Name Login User Name Login Password | ||
| 3555i 3500 3500 | ||
| 4555i 4500 4500 | ||
| 5555i 5500 5500 | ||
For a user with administrator rights who logs in
User properties can be changed and users can be deleted. The items, which can be added, are all able to be changed.
1 Display the screen.
1 Referring to User Login Setting on page 9-2, display the user login setting screen.
2 Press [Add/Edit] of "Local User List".
2 Change the user properties.
1 Select the user whose properties you wish to change.

NOTE
Select [Name] and [Login Name] from the "Sort" to sort the user list.
Press [Search(Name)] or [Search(Login)] to search by name or login user name.
2 Change the user properties.
Changing user properties
1 Press [Detail].
2 Refer to step 2 of Adding a User to change a user property.
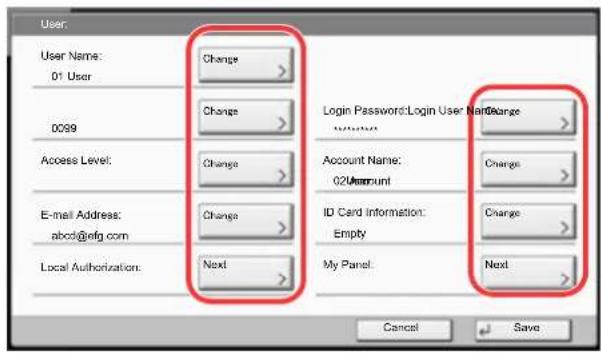
text_image
User: User Name: 01 User 0099 Access Level: E-mail Address: abcd@efg.com Local Authorization: Change > Change > Change > Change > Change > Change > Next > Login Password: Login User Name Change Account Name: 02Account ID Card Information: Empty My Panel: Next > Cancel Save3 Press [Save].
4 Press [Yes] in the registration confirmation screen. The user information is changed.
Deleting a user
1 Press [Delete].
2 Press [Yes] in the deletion confirmation screen. The selected user will be deleted.

NOTE
The default user with administrator rights cannot be deleted.
To change the user information of logged in user (User Property)
These users can partially change their own user properties including user name, login password, and E-mail address. Although "Login User Name", "Access Level", or "Account Name" cannot be changed, the users can check the present status.
1 Display the screen.
1 Press the [System Menu] key.
System Menu
2 Press [ ] and then [User Property].
2 Change the user properties.
1 Refer to step 2 of Adding a User to change a user property.
Press [Detail] of "Login User Name" or "Account Name" to check the present status.
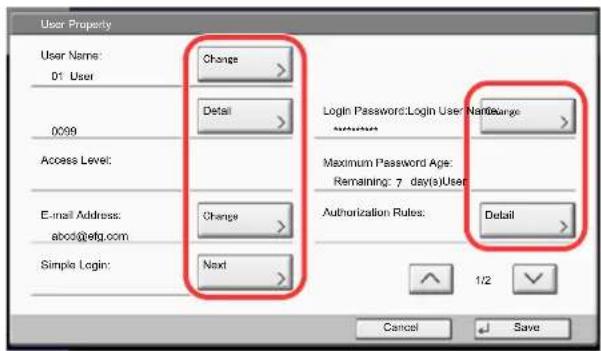
text_image
User Property User Name: 01 User Change Detail Login Password: Login User Name: Charge Access Level: E-mail Address: abcd@efg.com Change Authorization Rules: Next 1/2 Cancel Save| Item Description | |
| User Name Changes the | name shown on the user list. Up to 32 characters can be entered. |
| Login User Name Displays | the login user name that is entered at login. |
| Login Password Changes | the password that is entered at login. Up to 64 characters can be entered. |
| Access Level Displays the | user's access level. |
| Maximum Password Age | Displays the term of validity of the login password. NOTEThis function does not appear when Password Policy is set to [Off] or the term of validity of the password is set to [Off]. NOTEThis function does not appear when Password Policy is set to [Off] or the term of validity of the password is set to [Off]. |
| E-mail Address Changes | the user's e-mail address. Up to 128 characters can be entered.[DZWG]NOTEThis function appears when Local Authorization is set to [On], Group Authorization is set to [On], and Guest Authorization Setting is set to [On]. |
| Authorization Rules Dis | ays the usage restriction that is set for the logged in user.[KCSC]NOTE[Job Accounting Rules] shows the account name set for the logged in user and the usage restrictions that are set for that account. This function appears when job accounting is set to [On]. For information on job accounting, refer toJob Accounting Setting(page 9-27). |
| Simple Login When simple | login is enabled, changes associated settings.[T000]NOTEThis function does not appear when Simple Login is set to [Off] or the user is not registered in Simple Login. |
| ID Card Information | Displays the ID card information of the logged in user.[DW20]NOTEThis function is displayed when the optional ID Card Authentication Kit is activated. [SDYT]Card Authentication Kit(B) "Card Authentication Kit" (page 11-6)This function does not appear when the server type is set to [Ext.] in Network Authentication, and logged in with the user account certificated in the server specified as the [Ext.] server type. |
| My Panel Register the language and default screen for each user. Once registered,the setting will be applied simply by login. Network users are not displayed. | |
2 Press [Save].
The user information is changed.
Local Authorization
Select whether or not to use Local Authorization.

NOTE
When using Local Authorization, the user authentication type must be set to [Local Authentication].
For details, refer to User Login on page 9-4.
1 Display the screen.
1 Referring to User Login Setting on page 9-2, display the user login setting screen.
2 Press [Change] of "Local Authorization".
2 Configure the setting.
1 Select [Off] or [On].
2 Press [OK].
Group Authorization Set.
Set restrictions of the machine usage by each individual group registered in the authentication server.

NOTE
To use the group authorization settings, [Network Authentication] must be selected for the authentication method in User Login on page 9-4. Select "On" for "LDAP" in Protocol Settings on page 8-45.
Group Authorization
Use the group authorization.
1 Display the screen.
1 Referring to User Login Setting on page 9-2, display the user login setting screen.
2 Press [Next] of "Group Authorization Set.", and then [Change] of "Group Authorization".
2 Configure the setting.
1 Press [On].
2 Press [OK].
Group List
Register the groups that are restricted the machine usage. Up to 20 groups can be individually registered. Other users and groups belong to "Others".
The table below explains the group information to be registered.
| Item Descriptions | |
| Group ID*1 | Enter the ID displayed on the group list (between 1 and 4294967295). |
| Group Name Enter the name displayed on the group list (up to 32 characters). | |
| Access Level Select [Administrator] or [User] for group access privileges. | |
| Print Restriction | Select whether or not to reject usage of print functions for the printer. |
| Copy Restriction Select whether or not to reject usage of copy functions. | |
| Duplex Restriction Select whether only duplex printing is allowed. | |
| Combine Restriction Specify whether only Combine is allowed. | |
| EcoPrint Restriction Specify whether only EcoPrint is allowed. | |
| Send Restriction Select whether or not to reject usage of the send functions. | |
| FAX TX Restriction*2 | Select whether or not to reject usage of the FAX transmissions. |
| Storing Restr. in Box | Select whether or not to reject usage of storing in the document boxes. |
| Storing Restr. in Memory | Select whether or not to reject usage of storing in the removable memory. |
*1 For "Group ID", specify PrimaryGroupID assigned by Active Directory of Windows. If you are using Windows Server 2008, check Attribute Editor tab of user properties. If you are using Windows Server 2000/2003, check ADSIEdit. ADSIEdit is a support tool included on the installation DVD for Windows Server OS (under \SUPPORT\TOOLS).
*2 These items are displayed when the optional fax kit is installed.
1 Display the screen.
1 Referring to User Login Setting on page 9-2, display the user login setting screen.
2 Press [Next] of "Group Authorization Set.", [Next] of "Group List" and then [Add].
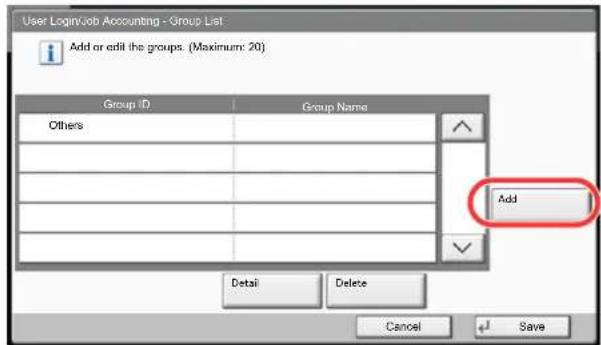
text_image
User Login/Job Accounting - Group List Add or edit the groups. (Maximum: 20) Group ID Group Name Others Add Detail Delete Cancel Save2 Configure the settings.
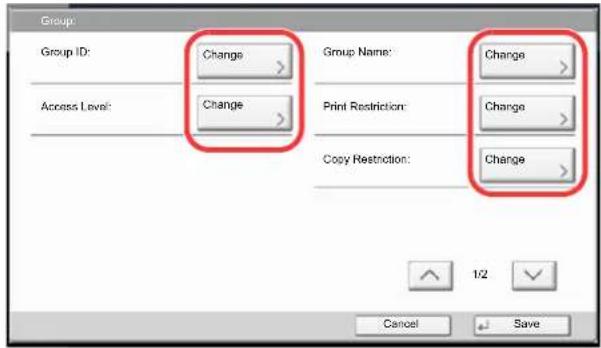
text_image
Group: Group ID: Change Access Level: Change Group Name: Change Print Restriction: Change Copy Restriction: Change 1/2 Cancel Save1 Press [Change] of "Group ID".
2 Enter the group ID and press [OK].
3 Press [Change] of "Group Name".
4 Enter the group name and press [OK].

NOTE
Refer to Entering Characters on page 11-12 for details on entering characters.
5 Press [Change] of "Access Level".
6 Select the group access privileges and press [OK].
7 Press [Change] of "Print Restriction".
8 Select [Reject Usage] or [Off] and press [OK].
9 Similar to steps 7 and 8, set "Copy Restriction", "Duplex Restriction", "Combine Restriction", "EcoPrint Restriction", "Send Restriction", "Fax TX Restriction", "Storing Restr. in Box", and "Storing Restr. in Memory".
3 Register the group.
Press [Save]. A new group is added on the group list.
Guest Authorization Set.
When User Login Administration is enabled, set the functions that guest users who cannot log in to the machine are allowed to use.

NOTE
To use Guest Authorization Set., User Login Administration must be enabled in User Login on page 9-4. Cannot be used when the Key Counter option is used.
Guest Authorization
Use the guest authorization.
1 Display the screen.
1 Referring to User Login Setting on page 9-2, display the user login setting screen.
2 Press [Next] of "Guest Authorization Set.", and then [Change] of "Guest Authorization".
2 Configure the setting.
1 Select [On] or [Off].
2 Press [OK].

NOTE
If the guest authentication setting is enabled, the [Authentication/Logout] key must be pressed when logging in.
In the guest user default settings, only monochrome copying can be used. If you wish to use a different function, log in as a user who can use that function, or change the settings in the guest properties.
Guest Property
Register guest user information and functions that are restricted.
The table below explains the user information to be registered.
| Item Descriptions | |
| User Name Enter the name displayed on the user list (up to 32 characters).The default setting is "Guest User". | |
| Access Level | The authority of the user appears. This cannot be changed. |
| Account Name Add an account where the user belongs.If the user does not belong to any account, select [Other Account]. | |
| Item Descriptions | |
| Authorization Rules Set usage authority for each user. | The items you can restrict the access level with are as follows. |
| Print Restriction:Select whether or not use of the print function of the printer is prohibited. | |
| Copy Restriction:Select whether or not use of the copy print function is prohibited. | |
| Duplex Restriction:Select whether only duplex printing is allowed. | |
| Combine Restriction:Specify whether only Combine is allowed. | |
| EcoPrint Restriction:Specify whether only EcoPrint is allowed. | |
| Send Restriction:Select whether or not use of the send function is prohibited. | |
| FAX TX Restriction*:Select whether or not use of the fax send function is prohibited. | |
| Storing Restr. in Box:Select whether or not use of the box store function is prohibited. | |
| Storing Restr. in Memory:Select whether or not use of the removable memory store function is prohibited. | |
* These items are displayed when the optional fax kit is installed.
1 Display the screen.
1 Referring to User Login Setting on page 9-2, display the user login setting screen.
2 Press [Next] of "Guest Authorization Set.", and then [Change] of "Guest Property".
2 Configure the settings.
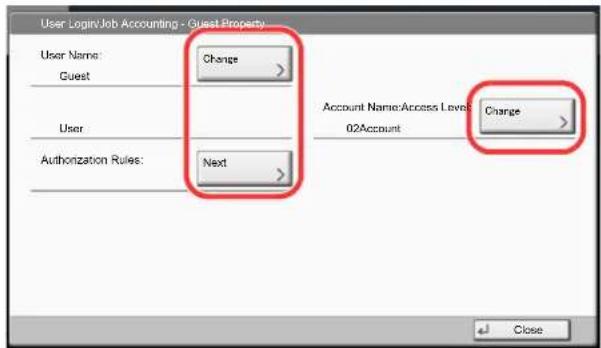
text_image
User LoginJob Accounting - Guest Property User Name: Guest Change Account Name:Access Level: 02Account Change User Authorization Rules: Next Close1 Press [Change] of "User Name".
2 Enter the user name and press [OK].

NOTE
Refer to the Entering Characters on page 11-12 for details on entering characters.
3 Press [Change] of "Account Name".
4 Select the account and press [OK].

NOTE
Select [Name] or [ID] from the "Sort" to sort the account list.
Press [Search(Name)] or [Search(ID)] to search by account name or account ID.
5 Press [Next] of "Authorization Rules".
6 Press [Change] of "Print Restriction".
7 Select [Reject Usage] or [Off] and press [OK].
9 Press [Close].
8 Repeat steps 7 and 8, set "Copy Restriction", "Duplex Restriction", "Combine Restriction", "EcoPrint Restriction", "Send Restriction", "Fax TX Restriction", "Storing Restr. in Box", and "Storing Restr. in Memory".
3 Register the guest property.
Press [Save].
Obtain NW User Property
Set the required information to obtain the network user property from the LDAP server. The user name and E-mail address obtained with this setting is shown in the user information, the status confirmation screen, and the header of E-mail.

NOTE
To obtain the network user property from the LDAP server, [Network Authentication] must be selected for the authentication method in User Login on page 9-4. Select "On" for "LDAP" in Protocol Settings on page 8-45.
The table below explains the required information to be registered.
| Item Descriptions | |
| Server Name*1 | Enter the LDAP server name or the IP address (up to 64 characters). If a server name is not entered, user information will be acquired from the server set for Network Authentication. |
| Port Set the LDAP port number or | use the default port 389. |
| Name 1*2 | Enter the LDAP Attribute to obtain the user name to be displayed from the LDAP server (up to 32 characters). |
| Name 2*3 | Enter the LDAP Attribute to obtain the user name to be displayed from the LDAP server (up to 32 characters). |
| E-mail Address*4 | Enter the LDAP Attribute to obtain the E-mail address from the LDAP server (up to 32 characters). |
| Authentic at Type*5 | Set the authentication method. Select [Simple] or [SASL]. After changing the setting, restart the system or turn the power off and then on. |
| Search Timeout | Set the amount of time to wait before time-out in seconds (from 5 to 255 seconds). |
| LDAP Security | Select the type of encryption according to the type of security employed by the LDAP server. The value is [Off], [SSL/TLS] or [STARTTLS]. |
*1 If using Active Directory of Windows, the server name may be the same as the server name entered in the network authentication.
*2 If using Active Directory of Windows, displayName of Attribute may be used as "Name 1".
*3 "Name 2" can be left out. When you assign displayName in "Name 1" and department in "Name 2", and if the value of displayName is "Mike Smith" and the value of department is "Sales" in Active Directory of Windows, the user name appears as "Mike Smith Sales".
*4 If using Active Directory of Windows, mail of Attribute may be used as E-mail Address.
*5 Appears when the server type is set to "Kerberos" in "Network Authentication".
1 Display the screen.
1 Referring to User Login Setting on page 9-2, display the user login setting screen.
2 Press [Change] of "Obtain Network User Property".
2 Configure the settings.
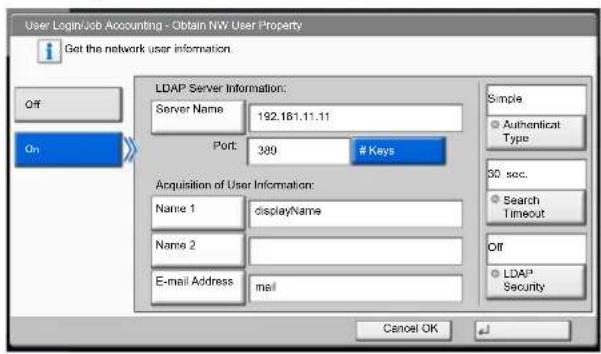
text_image
User Login/Job Accounting - Obtain NW User Property Get the network user information. Off On LDAP Server Information: Server Name 192.161.11.11 Port: 380 # Keys Acquisition of User Information: Name 1 displayName Name 2 E-mail Address mail Simple Authenticat Type 30 sec. Search Timeout Off LDAP® Security Cancel OK1 Press [On].
2 Press [Server Name].
3 Enter the LDAP server name or the IP address and press [OK].
4 Press [# Keys] to enter the LDAP port number using the numeric keys.
5 Press [Name 1].
6 Enter the LDAP Attribute to obtain the user name to be displayed and press [OK].
7 Similar to steps 5 and 6, set [Name 2].
8 Press [E-mail Address].
9 Enter the LDAP Attribute to obtain the E-mail address and press [OK].
10 If you set the server type to "Kerberos", press [Authentication Type] and set the authentication method.
11 Press [Search Timeout] to set the amount of time to wait before time-out.
12 Press [+], [-] or the numeric keys to enter the time and press [OK].
13 Press [LDAP Security] to select the type of encryption according to the type of security employed by the LDAP server.
14 Select [Off], [SSL/TLS], or [STARTTLS] and press [OK].
Simple Login Settings
The simple login function allows users to log in simply by selecting a user name. Users must be registered in advance to use this functionality.

NOTE
For user registration, refer to Adding a User (Local User List) on page 9-8. To use Simple Login, User Login Administration must be enabled in User Login on page 9-4. If the guest authentication setting is enabled, Simple login cannot be enabled.
Simple Login
Select whether or not simple login is enabled.
1 Display the screen.
1 Referring to User Login Setting on page 9-2, display the user login setting screen.
2 Press [Next] of "Simple Login Settings", and then [Change] of "Simple Login".
2 Configure the setting.
1 Select [On] or [Off].
2 Press [OK].
Simple Login Key
Register users to use simple login. You can add up to 20 users.
1 Display the screen.
1 Referring to User Login Setting on page 9-2, display the user login setting screen.
2 Press [Next] of "Simple Login Settings", and then [Next] of "Simple Login Key".
2 Enter the user information.
1 Press the key to which you want to register a user.
2 Press [Add/Edit].
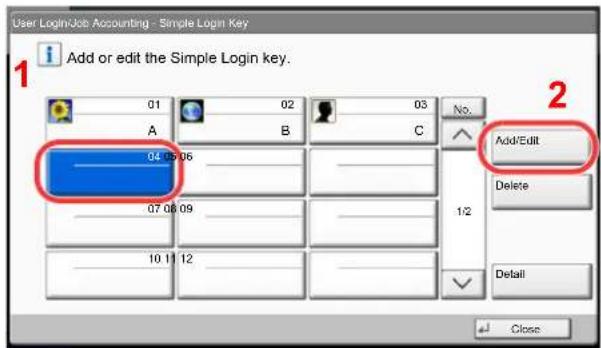
text_image
User Login/Job Accounting - Simple Login Key 1 Add or edit the Simple Login key. 01 02 03 A B C 04 05 06 07 08 09 10 11 12 No. Add/Edit Delete Detail Close3 Press [Change] in "Display Name", enter the user name to be displayed, and press [OK].
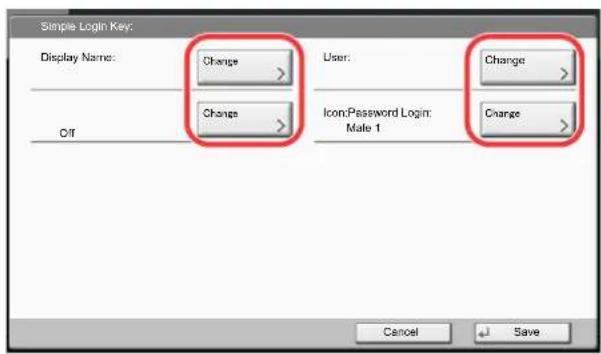
text_image
Simple Login Key: Display Name: Change User: Change Change Icon:Password Login: Change Male 1 Off Cancel Save
NOTE
Refer to Entering Characters on page 11-12 for details on entering characters.
4 Press [Change] of "User".
5 To specify the user from local users, select [Local User]. To specify from network users, select [Network User]. Press [Next].
The procedure differs depending on the transmission method selected.
Specifying the user from local users
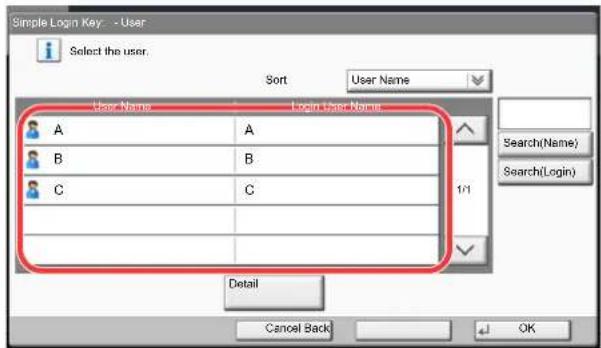
text_image
Simple Login Key: - User Select the user. Sort User Name Login User Name A A B B C C 1/1 Search(Name) Search(Login) Detail Cancel Back OKSelect the user to be set for simple login.

NOTE
Destinations can be sorted or searched by destination name or address number. For details, refer to Specifying Destination on page 5-26.
Specifying the user from network users
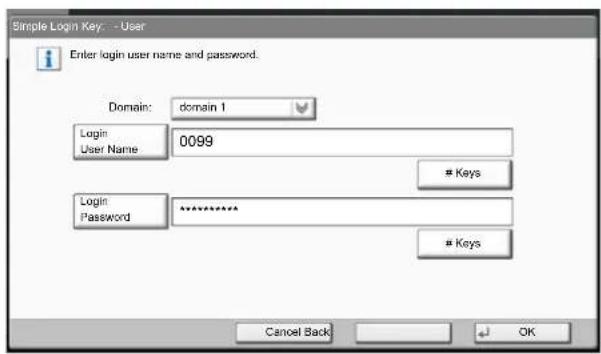
text_image
Simple Login Key: -- User Enter login user name and password. Domain: domain 1 Login: 0099 User NameKeys
Login: ********** PasswordKeys
Cancel Back OKPress [Login User Name] and [Login Password], enter the information of the user to be registered, and press [OK].
If you are specifying a user for whom a domain is set in network authentication, press the "Domain" and select the domain where the user is registered.

NOTE
Refer to Entering Characters on page 11-12 for details on entering characters.
5 Press [Change] of "Password Login".
6 Press [On] or [Off] and then press [OK].
7 Press [Change] of "Icon".
8 Select the user icon to be displayed and press [OK].
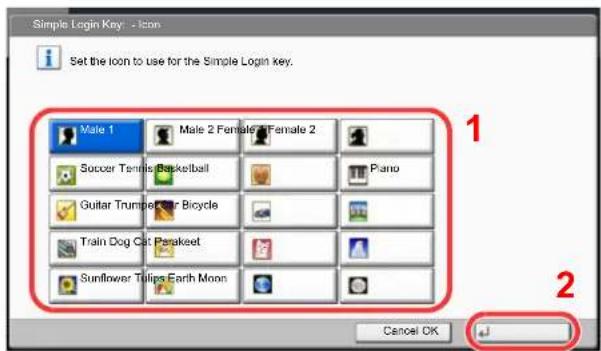
text_image
Simple Login Key: - Icon Set the Icon to use for the Simple Login key. Male 1 Male 2 Female 3 Female 2 Soccer Tennis Basketball Piano Guitar Trumpet Car Bicycle Train Dog Cat Parakeet Sunflower Tails Earth Moon Cancel OK3 Register the user.
Press [Save].
ID Card Settings
If ID card authentication is enabled, select the authentication type.

NOTE
This functions appears when the Card Authentication kit is activated.

Card Authentication Kit(B) "Card Authentication Kit" on page 11-6
This function does not appear when the user logs in as a network authentication user.
1 Display the screen.
1 Referring to User Login Setting on page 9-2, display the user login setting screen.
2 Press [Next] of "User Login Setting", and then [Next] of "ID Card Settings".
2 Configure the settings.
The following settings can be selected.
| Item Descriptions | |
| Keyboard Login | When ID card authentication is enabled, select whether or not login by keyboard is allowed.Value: Prohibit, Permit |
| Password Login | Select whether or not to require password entry after authenticating by ID card.Value: Off, On |
Job Accounting Setting
Job accounting manages the copy/print count accumulated by individual accounts by assigning an ID to each account. Job accounting helps the following activities in business organizations.
- Manageability of up to 1,000 individual accounts.
• Availability for account IDs with as many as eight digits (between 0 and 99999999) for security. - Integrated management of printing and scanning statistics through the use of an identical account ID.
- Tracking the print volume for each account and for all accounts combined.
- Restricting the print counter in one-page increments up to 9,999,999 copies.
- Resetting the print counter for each account or for all accounts combined.
First Job Accounting Setup
Follow these steps for the first job accounting setup.
Enable job accounting. (page 9-29)

Log out. (page 2-22)

Other users login for operations. (page 9-29)
Job Accounting Setting
1 Display the screen.
1 Press the [System Menu] key.
System Menu

2 Press [ ] and then [User Login/Job Accounting].
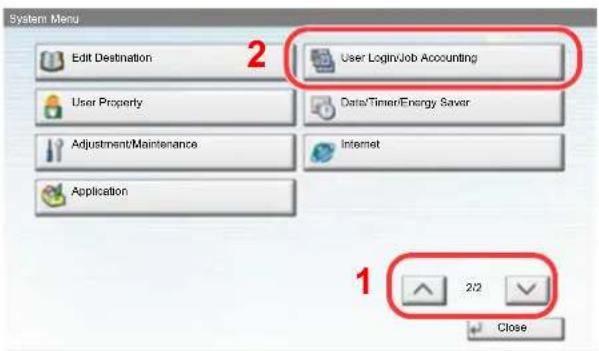
text_image
System Menu Edit Destination User Login/Job Accounting User Property Data/Timer/Energy Saver Adjustment/Maintenance Internet Application 2 1 2:2 Close
NOTE
If the user authentication screen appears, enter your login user name and login password and press [Login]. For this, you need to login with administrator privileges.
The factory default login user name and login password are set as shown below.
| Model Name Login User Name Login Password | ||
| 3555i 3500 3500 | ||
| 4555i 4500 4500 | ||
| 5555i 5500 5500 | ||
3 Press [Next] of "Job Accounting Setting".
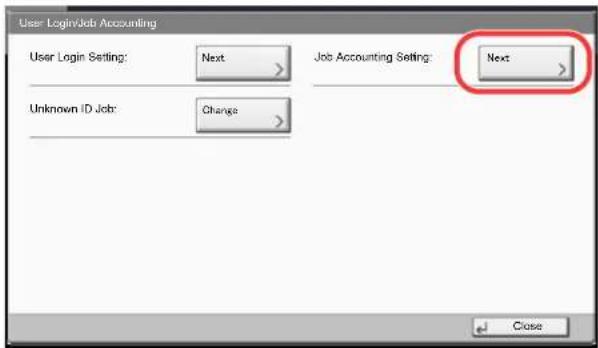
text_image
User Login/Job Accounting User Login Setting: Next Job Accounting Setting: Next Unknown ID Job: Change Close2 Configure the settings.
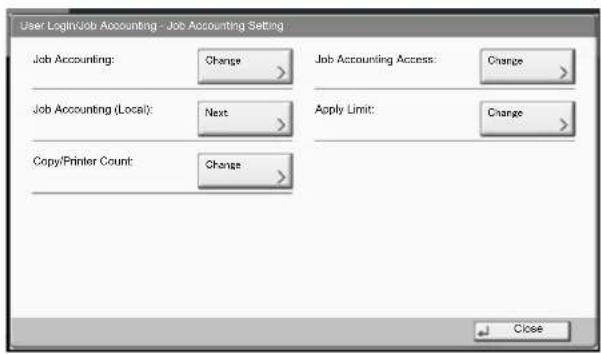
text_image
User Login/Job Accounting - Job Accounting Setting Job Accounting: Change > Job Accounting Access: Change > Job Accounting (Local): Next > Apply Limit: Change > Copy/Printer Count Change > Close
Job Accounting (page 9-29)
Job Accounting Access (page 9-30)
Job Accounting (Local) (page 9-31)
Apply Limit (page 9-40)
Copier/Printer Count (page 9-40)
Job Accounting
Enable job accounting. Use the procedure below.
1 Display the screen.
1 Referring to Job Accounting Setting on page 9-27, display the job accounting access screen.
2 Press [Change] of "Job Accounting".
2 Configure the settings.
1 Press [On].
To disable job accounting, press [Off].
2 Press [OK].

NOTE
When the display returns to System Menu default screen, logout is automatically executed and the screen to enter the Account ID appears. To continue the operation, enter the Account ID.
Login/Logout
If job accounting is enabled, an account ID entry screen appears each time you use this machine.
Use the procedure below to login and logout.
Login
1 In the screen below, enter the account ID using the numeric keys and press [Login].
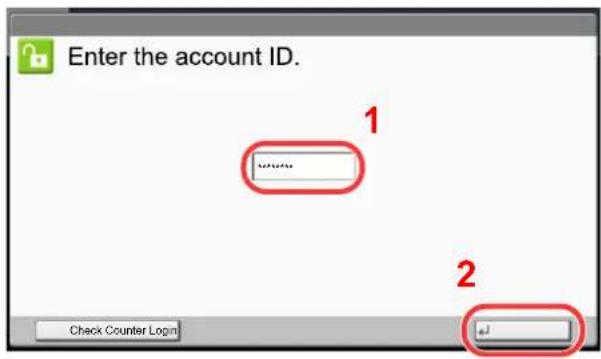
text_image
Enter the account ID. 1 2 Check Counter Login
NOTE
If you entered a wrong character, press the [Clear] key and enter the account ID again.
If the entered account ID does not match the registered ID, a warning beep will sound and login will fail. Enter the correct account ID.
By pressing [Check Counter], you can refer to the number of pages printed and the number of pages scanned.
When the screen to enter the login user name and password appears
If user login administration is enabled, the screen to enter the login user name and password appears. Enter a login user name and password to login. (Refer to Adding a User (Local User List) on page 9-8.) If the user has already registered the account information, the account ID entry would be skipped. (Refer to Adding a User (Local User List) on page 9-8.)
2 Proceed to complete the rest of the steps.
Logout
When the operations are complete, press the [Authentication/Logout] key to return to the account ID entry screen.
Authentication/Logout

Job Accounting Access
Set the job accounting access.
1 Display the screen.
1 Referring to Job Accounting Setting on page 9-27, display the job accounting access screen.
2 Press [Change] of "Job Accounting Rules".
2 Configure the settings.
Select [Local] or [Network] and press [OK].

NOTE
To select [Network], network authentication must be enabled and [Ext.] must be selected for server type.

User Login (page 9-4)
Job Accounting (Local)
Perform job accounting, such as printing counts and reports for each account.
Print Accounting Report
The total pages counted of all relevant accounts can be printed as an accounting report.
Reports have different formats depending on how the count of copiers and printers is administered.
When "Individual" is selected for Managing the Copy/Printer Count
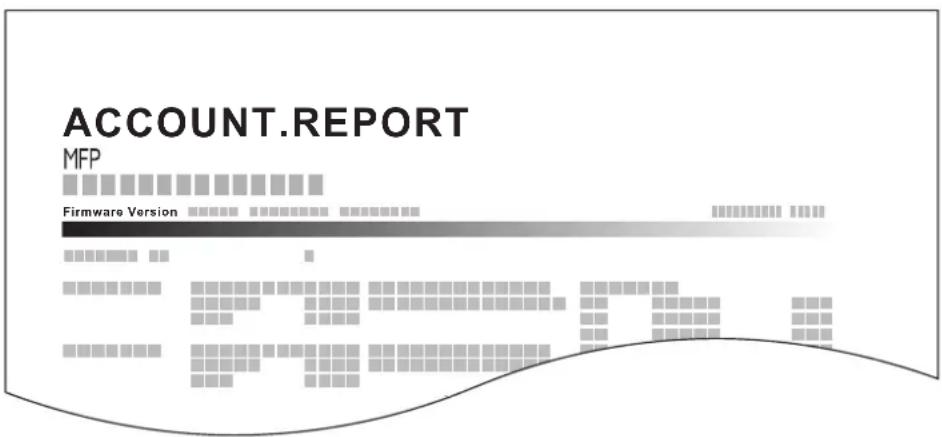
text_image
ACCOUNT.REPORT MFP Firmware VersionFor the count by paper size, the report will be printed by size.
Use the procedure below to print a job accounting report.
1 Prepare paper.
Check that A4 or Letter paper is loaded in the cassette.
2 Display the screen.
1 Referring to Job Accounting Setting on page 9-27, display the job accounting access screen.
2 Press [Next] of "Job Accounting (Local)".
3 Print the report.
1 Press [Print] of "Print Accounting Report".
2 Press [Yes] on the screen to confirm the printing.
Accounting report is printed.
Accounting List
Adding an Account
Manage accounts.
| Item Descriptions | |
| Account Name Enter the account name (up to 32 characters). | |
| Account ID | Enter the account ID as many as eight digits (between 0 and 99999999). |
| Restriction | This prohibits printing/scanning or restricts the number of sheets to load. Refer to Restricting the Use of the Machine on page 9-34. |
1 Display the screen.
1 Referring to Job Accounting Setting on page 9-27, display the job accounting access screen.
2 Press [Next] of "Job Accounting (Local)", [Add/Edit] of "Accounting List", and then [Add].
2 Enter the account information.
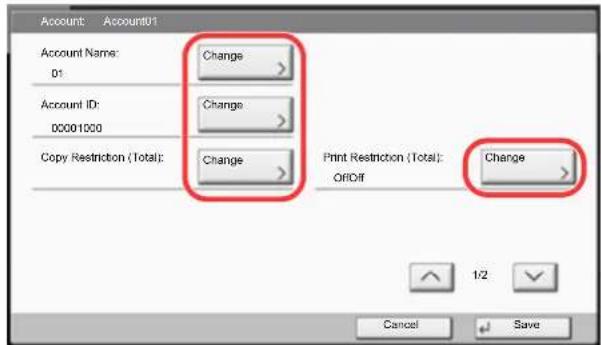
text_image
Account Account01 Account Name: Change 01 Account ID: Change 00001000 Copy Restriction (Total): Change Print Restriction (Total): Change OROff 1/2 Cancel Save1 Press [Change] of "Account Name".
2 Enter the account name and press [OK].
The "Account" screen reappears.

NOTE
Refer to Entering Characters on page 11-12 for details on entering characters.
3 Similar to steps 1 and 2, enter the "Account ID".

NOTE
Any "Account ID" that has already registered cannot be used. Enter any other account ID.
4 Activate or deactivate restriction.

Refer to Restricting the Use of the Machine on page 9-34.
5 Press [Save].
A new account is added on the Account List.
Managing Accounts
This changes the registered account information or deletes the account.
1 Display the screen.
1 Referring to Job Accounting Setting on page 9-27, display the job accounting access screen.
2 Press [Next] of "Job Accounting (Local)", and then [Add/Edit] of "Accounting List".
2 Edit an account.
1 Select an account to change or delete.
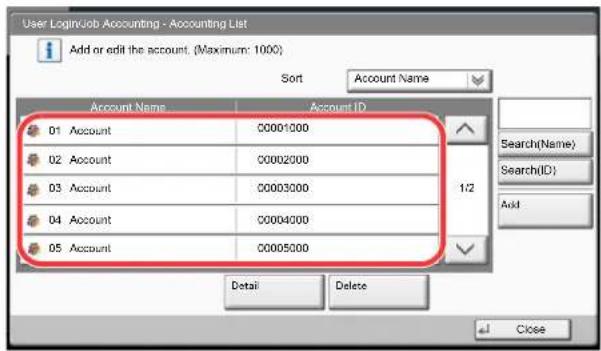
text_image
User LoginJob Accounting - Accounting List Add or edit the account. (Maximum: 1000) Sort Account Name Account Name Account ID 01 Account C0001000 02 Account C0002000 03 Account C0003000 04 Account C0004000 05 Account C0005000 1/2 Search(Name) Search(ID) Add Detail Delete Close
NOTE
Select [Name] or [ID] from the "Sort" to sort the account names.
Press [Search(Name)] or [Search(ID)] to search by account name or account ID.
The procedure differs depending on the details to be edited.
Changing account information
2 Press [Detail].
3 Refer to step 2 of Adding an Account and step 2 of Restricting Using the Machine to change account information.
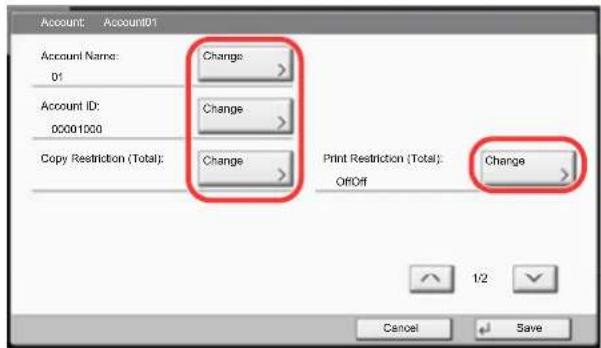
text_image
Account Account01 Account Name: Change 01 Account ID: Change 00001000 Copy Restriction (Total): Change Print Restriction (Total): Change OffOff 1/2 Cancel Save4 Press [Save].
5 Press [Yes] in the registration confirmation screen.
The account information is changed.
Deleting an account
2 Press [Delete].
3 Press [Yes] in the deletion confirmation screen.
The account is deleted.
Restricting the Use of the Machine
This section explains how to restrict the use of the machine by account or the number of sheets available.
The items that can be restricted differ depending on whether "Individual" or "Total" is selected for Copier/Printer Count on page 9-40.
Restriction Items
"Individual" selected for Copy/Printer Count
| Item Descriptions | |
| Copy Restriction (Total) Limits the number of sheets used for copying. | |
| Print Restriction (Total) Limits the number of sheets used for printing. | |
| Scan Restriction (Others) Limits the number of sheets scanned (excludes copying). | |
| FAX TX Restriction | Limits the number of sheets sent by fax. This is displayed when the optional fax kit is installed. |
| FAX Port Restriction | Restricts the ports used for faxing. This is displayed when two optional FAX kits are installed. |
"Total" selected for Copy/Printer Count
| Item Descriptions | |
| Print Restriction (Total) | Limits the total number of sheets used for copying and printing. |
| Scan Restriction (Others) Limits the | number of sheets scanned (excludes copying). |
| FAX TX Restriction | Limits the number of sheets sent by fax. This is displayed when the optional fax kit is installed. |
| FAX Port Restriction | Restricts the ports used for faxing. This is displayed when two optional FAX kits are installed. |

IMPORTANT
Select [Off], [Use Port 1 Only] or [Use Port 2 Only] as the "FAX Port Restriction" setting.
Applying Restriction
Restriction can be applied in the following modes:
| Item Descriptions | |
| Off No restriction is applied. | |
| Counter Limit | Restricts the print counter in one-page increments up to 9,999,999 copies. |
| Reject Usage Restriction is applied. | |
1 Display the screen.
1 Referring to Adding an Account on page 9-32, display the screen to add an account.
2 Press [Change] for the item to be restricted.
2 Configure the settings.
1 Select the restriction mode.
If [Counter Limit] is selected, press [+] , [-] or numeric keys to enter the number of pages.
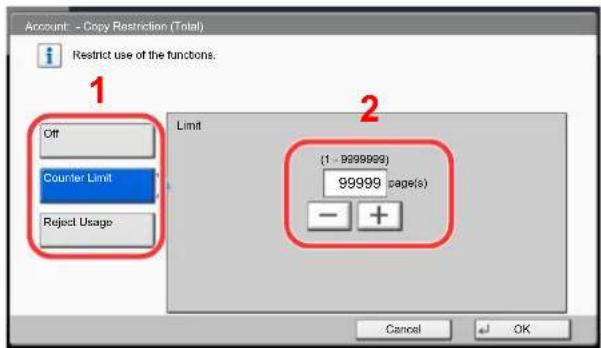
text_image
Account - Copy Restriction (Total) Restrict use of the functions. 1 Off Counter Limit Reject Usage Limit (1 - 9999999) 99999 page(s) - + Cancel OK2 Press [OK].
3 Repeat steps 1 and 2 for other accounts to be restricted.
4 Press [Save].
The restricted account is added.
Default Setting
Select the default value for usage limit, and whether or not to enable counting by paper size.
Default Counter Limit
When you add a new account, you can change the default restrictions on the number of sheets used. You can set any number from 1 to 9,999,999.
The items that can be set differ depending on whether "Individual" or "Total" is selected for Copier/Printer Count on page 9-40.
Available Settings
"Individual" selected for Copy/Printer Count
| Item Descriptions | |
| Copy Restriction (Total) | Sets the default restriction on the number of sheets used for copying. |
| Print Restriction (Total) | Sets the default restriction on the number of sheets used for printing. |
| Scan Restriction (Others) | Sets the default restriction on the number of sheets used for scanning (excludes copying). |
| FAX TX Restriction | Sets the default restriction on the number of sheets used for sending faxes. This is displayed when the optional fax kit is installed. |
"Total" selected for Copy/Printer Count
| Item Descriptions | |
| Print Restriction (Total) | Sets the default restriction on the total number of sheets used for copying and printing. |
| Scan Restriction (Others) | Sets the default restriction on the number of sheets used for scanning (excludes copying). |
| FAX TX Restriction | Sets the default restriction on the number of sheets used for sending faxes. This is displayed when the optional fax kit is installed. |
1 Display the screen.
1 Referring to Job Accounting Setting on page 9-27, display the job accounting access screen.
2 Press [Next] of "Job Accounting (Local)", [Next] of "Default Setting" and then [Next] of "Default Counter Limit".
2 Configure the settings.
1 Press [Change] for the item you want to modify and then press [+], [-] or use the numeric keys to enter the default restriction on the number of sheets.
2 Press [OK].
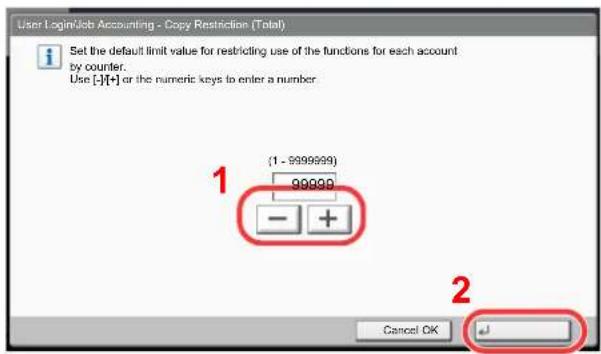
text_image
User LoginJob Accounting - Copy Restriction (Total) Set the default limit value for restricting use of the functions for each account by counter. Use [+] or the numeric keys to enter a number 1 (1 - 9999999) 99999 - + 2 Cancel OK3 To set another default restriction, repeat steps 1 and 2.
Count by Paper Size
This counts the number of pages by paper size (e.g. Letter).

NOTE
Paper size is available in five types, 1 to 5. These types are specified in accounting reports. Refer to Print Accounting Report on page 9-31.
In addition to paper size, media type can also be specified (e.g. count the letter-size color paper used). If you do not specify the media type, the number of used sheets will be counted for the specified sheet size, regardless of the media type.
1 Display the screen.
1 Referring to Job Accounting Setting on page 9-27, display the job accounting access screen.
2 Press [Next] of "Job Accounting (Local)", [Next] of "Default Setting", [Next] of "Count by Paper Size", [Change] of Paper Size 1 to 5.
2 Configure the settings.
1 Press [On].
2 Select the paper size.
3 Press [Media Type] to specify media type.
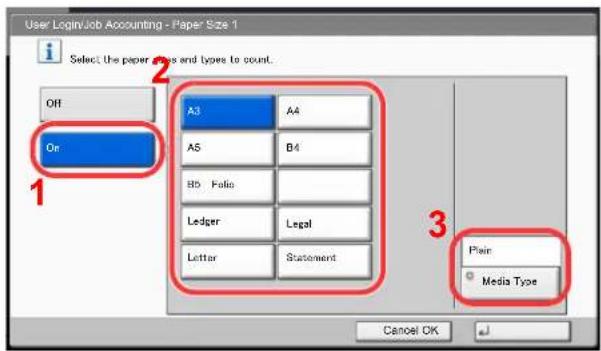
text_image
User Login/Job Accounting - Paper Size 1 Select the paper sizes and types to count. Off Or A3 A4 A5 B4 BD Folio Ledger Legal Letter Statement Pair Media Type Cancel OK4 Select the media type and press [OK].
5 Press [OK].
Counting the Number of Pages Printed
This counts the number of pages printed. Counts are classified into Total Job Accounting and Each Job Accounting. A new count can also be started after resetting the count data which was stored for a certain period of time.
Types of the counts are as follows.
| Item Descriptions | |
| Printed Pages Displays | the number of pages copied and printed, and the total number of pages used. You can also use "Count by Paper Size" and "Count by Duplex/Combine" to check the number of pages used.You can use "Count by Paper Size" to check the number of pages used in the paper size set in Count by Paper Size on page 9-37 as well as the number of pages used in other paper sizes.You can use the "Count by Duplex/Combine" to check the number of pages used in Duplex (1-sided) mode, Duplex (2-sided) mode and the total for both, as well as the pages used in Combine (None) mode, Combine (2 in 1) mode, Combine (4 in 1) mode and the total for all three. |
| Scanned Pages Displays | the number of pages scanned for copying, faxing * and other functions, as well as the total number of pages scanned. |
| FAX Transmission Pages | Displays the number of pages faxed. |
| FAX Transmission Time | Displays the total duration of fax transmissions. |
Total Job Accounting
This counts the number of pages for all accounts and resets the counts for those accounts together at the same time.
1 Display the screen.
1 Referring to Job Accounting Setting on page 9-27, display the job accounting access screen.
2 Press [Next] of "Job Accounting (Local)", and then [Next] of "Total Job Accounting".
2 Check the number of pages.
1 Press [Check] at the function to check the count.
The results will be displayed.
Confirm the count and press [Close].
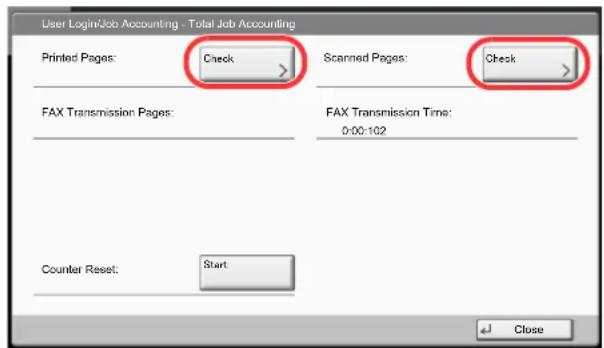
text_image
User Login/Job Accounting - Total Job Accounting Printed Pages: Check Scanned Pages: Check FAX Transmission Pages: FAX Transmission Time: 0:00-102 Counter Reset: Start Close2 Press [Start] of "Counter Reset" to reset the counter.
3 Press [Yes] in the confirmation screen.
The counter will be reset.
Each Job Accounting
This counts the number of pages for each account and resets the counts by account.
1 Display the screen.
1 Referring to Job Accounting Setting on page 9-27, display the job accounting access screen.
2 Press [Next] of "Job Accounting (Local)", and then [Check] of "Each Job Accounting".
2 Check the number of pages.
1 Select the account to check the count.
2 Press [Detail].
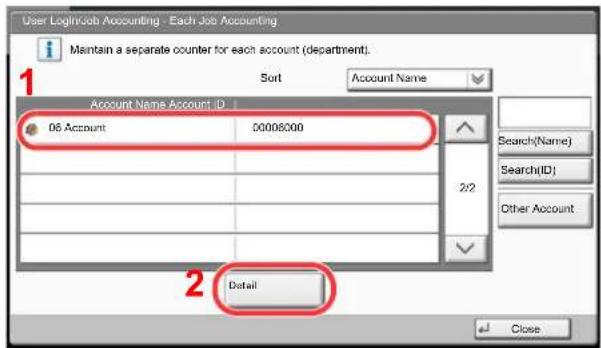
text_image
User LoginJob Accounting - Each Job Accounting Maintain a separate counter for each account (department): Sort Account Name Account Name Account ID 06 Account 00008000 2/2 Search(Name) Search(ID) Other Account 2 Detail CloseNOTE
Select [Name] or [ID] from the "Sort" to sort the account names.
Press [Search(Name)] or [Search(ID)] to search by account name or account ID.
To display an account other than your own account, press [Other Account].
3 Press [Check] at the function to check the count.
The results will be displayed.
Confirm the count and press [Close].
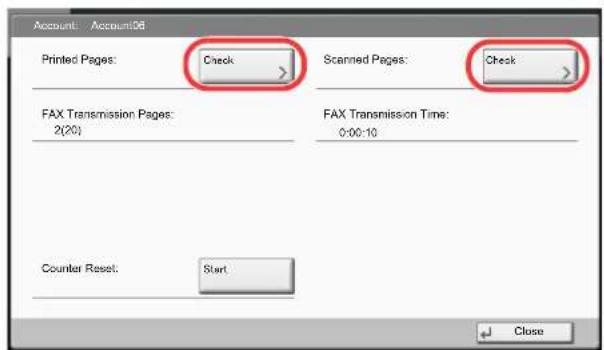
text_image
Account: Account08 Printed Pages: Check Scanned Pages: Check FAX Transmission Pages: 2(20) FAX Transmission Time: 0:00:10 Counter Reset: Start Close4 Press [Start] of "Counter Reset" to reset the counter.
5 Press [Yes] in the confirmation screen.
The counter will be reset.
Apply Limit
This specifies how the machine behaves when the counter has reached the limit of restriction. The table below describes the action taken.
| Item Descriptions | |
| Immediately* | Job stops when the counter reaches its limit. |
| Subsequently Printing/scanning of the job continues but the subsequent job will be rejected. | |
| Alert Only Job continues while displaying an alert message. | |
* The next job will be prohibited in sending or in storing in the box.
1 Display the screen.
1 Referring to Job Accounting Setting on page 9-27, display the job accounting access screen.
2 Press [Change] of "Apply Limit".
2 Configure the settings.
1 Select [Immediately], [Subsequently], or [Alert Only].
2 Press [OK].
Copier/Printer Count
You can select how the copying and printing page counts are shown - either the total of both or each of copying and printing individually. The selection may influence restriction on the count and count method. For details, refer to Restricting the Use of the Machine (page 9-34), Counting the Number of Pages Printed (page 9-38), and Print Accounting Report (page 9-31).
1 Display the screen.
1 Referring to Job Accounting Setting on page 9-27, display the job accounting access screen.
2 Press [Change] of "Copier/Printer Count".
2 Configure the settings.
1 Press [Total] or [Individual].
2 Press [OK].
Unknown ID Job
This specifies the behavior for handling the jobs sent with unknown login user names or User ID (i.e. unsent IDs). If the User Login is set to invalid and Job Accounting is set to valid, follow the procedure when the Account ID is unknown. The setting items are as follows.
| Item Descriptions |
| Permit The job is permitted to be printed. |
| Reject The job is rejected (not printed). |
1 Display the screen.
1 Referring to User Login Setting on page 9-2, display the user login setting screen.
2 Press [Change] of "Unknown ID Job".
2 Configure the settings.
1 Press [Reject] or [Permit].
2 Press [OK].
10 Troubleshooting
This chapter explains the following topics:
Regular Maintenance 10-2
Cleaning 10-2
Toner Container Replacement 10-6
Waste Toner Box Replacement 10-9
Replacing Staples 10-12
Disposing of the Punch Waste 10-16
Troubleshooting 10-18
Solving Malfunctions 10-18
Responding to Messages 10-23
Adjustment/Maintenance 10-36
Clearing Paper Jams 10-39
Clearing a Staple Jam 10-63
Regular Maintenance
Cleaning
Clean the machine regularly to ensure optimum printing quality.

CAUTION
For safety, always unplug the power cord before cleaning the machine.
Platen Cover/Glass Platen
Wipe the backside of the platen cover, the inside of the document processor and the glass platen with a soft cloth dampened with alcohol or mild detergent.

IMPORTANT
Do not use thinner or other organic solvents.
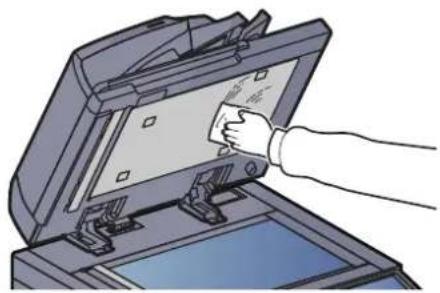
natural_image
Illustration of a hand inserting a card into an open computer case (no text or symbols visible)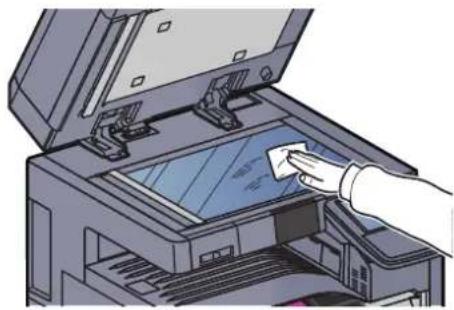
natural_image
Illustration of a hand using a handheld device to clean or dispose of paper inside an open printer (no text or symbols visible)Slit Glass/Dual scanning area
If black streaks or dirt appears in copies when using the optional document processor, clean the slit glass with the supplied cleaning cloth. When using the document processor that features dual scanning, clean the dual scanning unit also.

NOTE
Wipe the slit glasses with the dry accessory cloth. Do not use water, soap or solvents for cleaning.
1
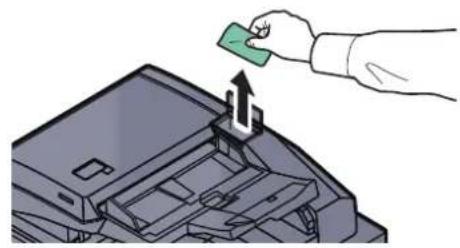
natural_image
Illustration of a hand inserting a green card into a device component (no text or symbols visible)2
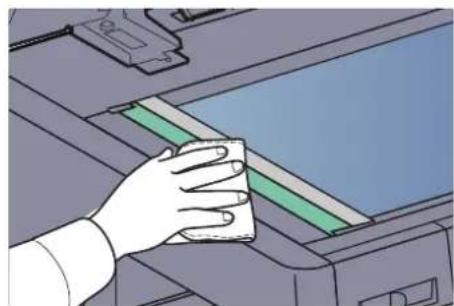
natural_image
Hand cleaning a printer's edge with a cloth (no text or symbols visible)
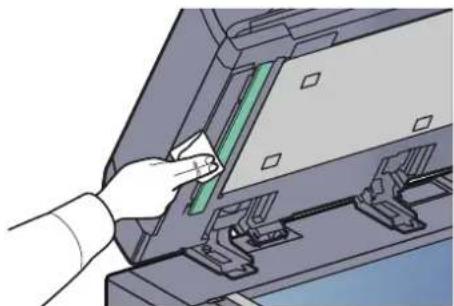
natural_image
Illustration of a hand inserting a green component into a mechanical device (no text or symbols visible)3
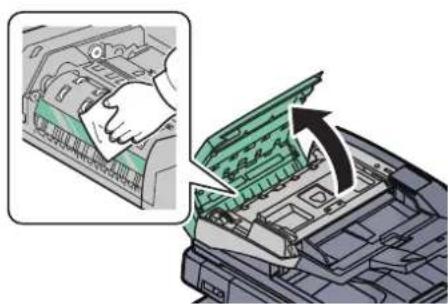
natural_image
Diagram showing a hand inserting a green cover into an open device, with an arrow indicating the process (no text or symbols present)
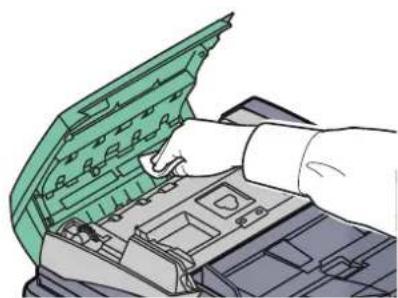
natural_image
Illustration of a hand installing or adjusting a green car engine compartment (no text or symbols visible)Conveying Guide
Clean the conveyor guide regularly (at least monthly) to ensure optimum printing quality.

NOTE
Wipe the slit glasses with the dry accessory cloth. Do not use water, soap or solvents for cleaning. Do not touch the photoconductor drum.
1
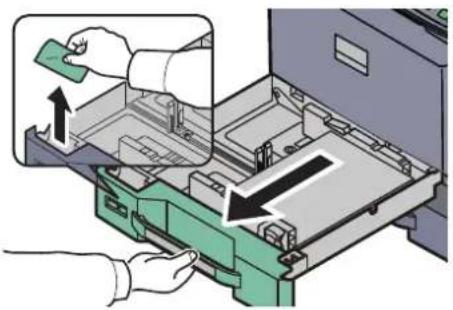
natural_image
Illustration of a hand using a green tool to clean or adjust internal components, with arrows indicating process direction (no text or symbols present)
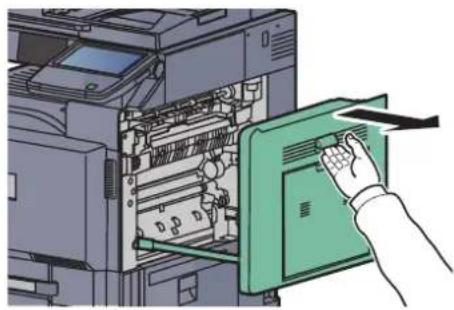
natural_image
Illustration of a printer's internal structure with a hand inserting a green cover (no text or symbols visible)2
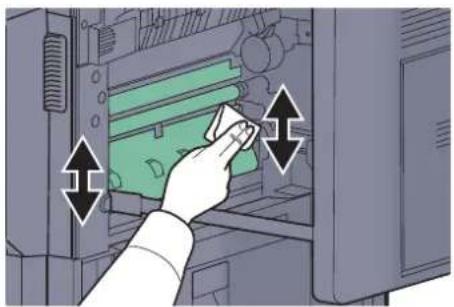
natural_image
Illustration of a hand inserting a green component into a computer tower (no text or symbols visible)
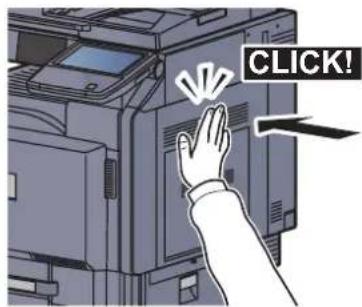
text_image
CLICK!Separator
Clean the separator regularly (at least monthly) to ensure optimum printing quality.
1
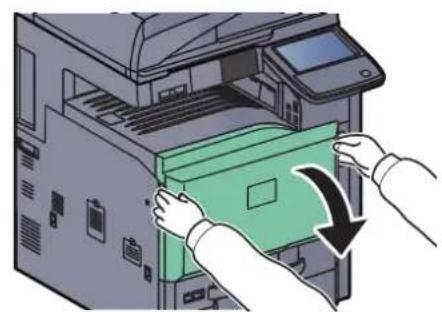
natural_image
Illustration of hands inserting a green folder into a computer file (no text or symbols visible)
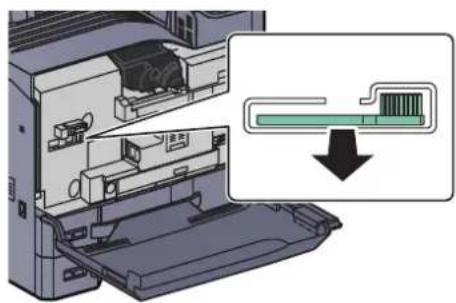
natural_image
Diagram of a printer internal structure showing internal components and a magnified view of the internal structure (no text or symbols)2
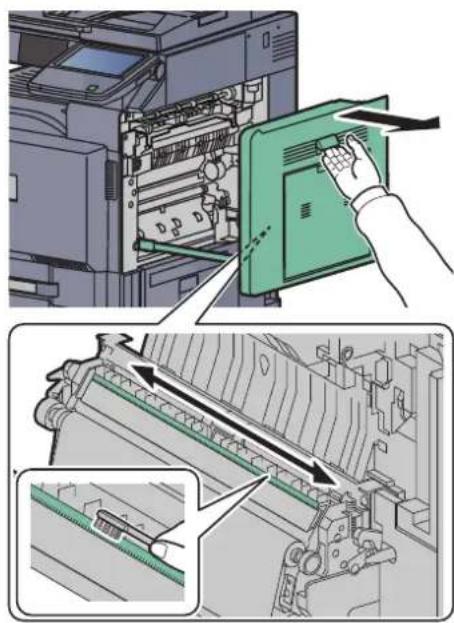
text_image
Technical diagram showing printer operation with labeled parts and a hand interacting with a green device3
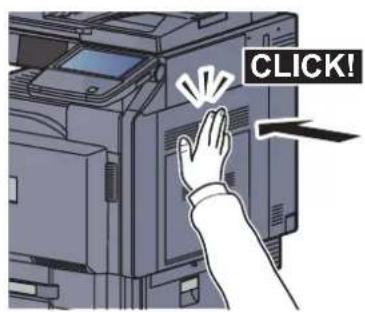
text_image
CLICK!Toner Container Replacement
When toner runs low, "Toner is running out" appears in the touch panel. Make sure you have a new toner container available for replacement.
When the touch panel displays "Toner is empty.", replace the toner.

NOTE
- For the toner container, always use a genuine toner container. Using a toner container that is not genuine may cause image defects and product failure.
- The memory chip in the toner container of this product stores information necessary for improving customer convenience, operation of the recycling system for used toner containers, and planning and development of new products. The stored information does not include information that makes it possible to identify individuals, and is only used anonymously for the above purposes.

CAUTION
Do not attempt to incinerate parts which contain toner. Dangerous sparks may cause burns.
1
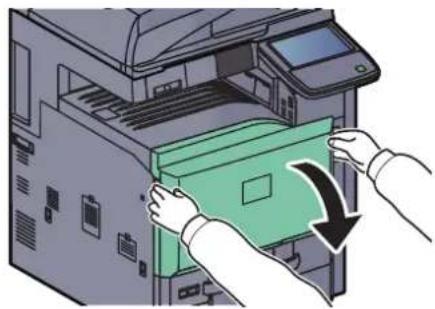
natural_image
Illustration of hands inserting a green folder into an open file into a printer (no text or symbols visible)2
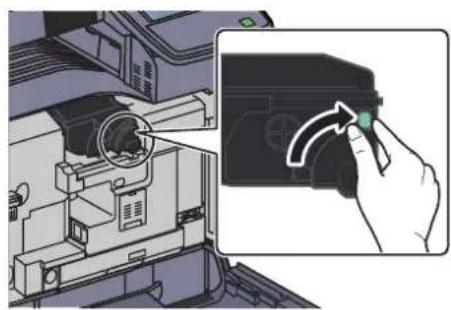
natural_image
Illustration of a computer monitor with an inset showing a hand holding a green circular button (no text or symbols present)
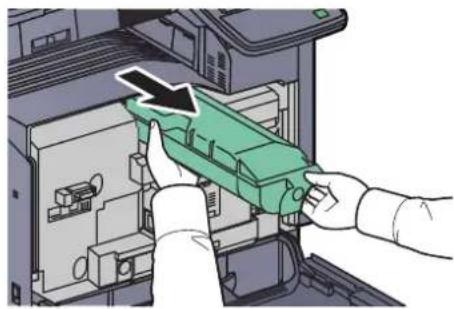
natural_image
Person inserting a green plastic device into a machine (no text or symbols visible)3
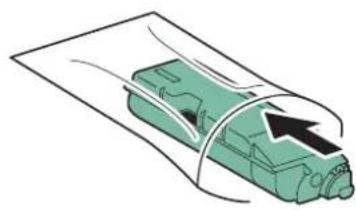
natural_image
Illustration of a green electronic device wrapped in a plastic sheet, with an arrow indicating the component (no text or symbols present)4
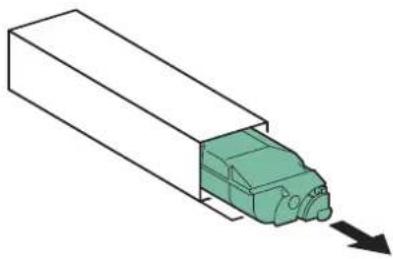
natural_image
Diagram of a mechanical component with green internal structure and black arrow indicating direction (no text or symbols)5
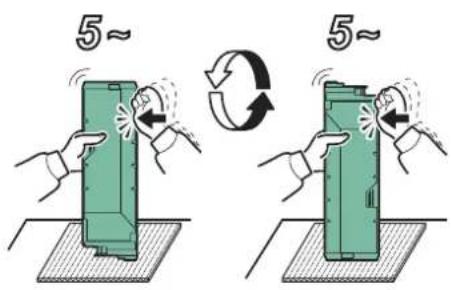
text_image
5~ 5~
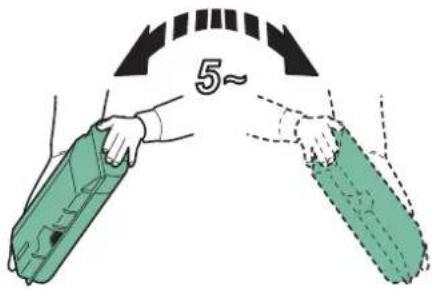
text_image
5~6
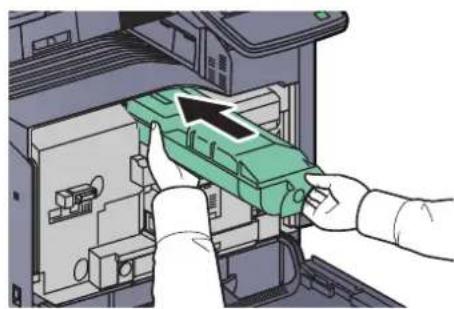
natural_image
Illustration of hands inserting a green plastic component into an open industrial machine (no text or symbols visible)
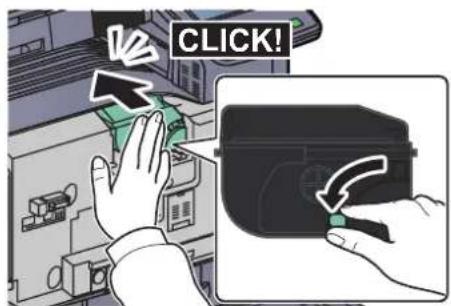
text_image
CLICK!7
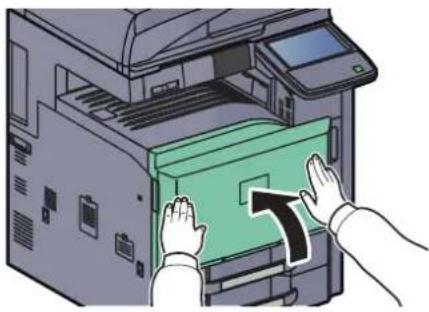
natural_image
Illustration of hands inserting a green card into a printer (no text or symbols visible)
NOTE
Return the exhausted toner container and waste toner box to your dealer or service representative. The collected toner container and waste toner box will be recycled or disposed in accordance with the relevant regulations.
Waste Toner Box Replacement
When "Waste toner box almost full" appears in the touch panel, make sure you have a new waste toner box available for replacement.
When the touch panel shows "Check waste toner box.", immediately replace the waste toner box.

CAUTION
Do not attempt to incinerate parts which contain toner. Dangerous sparks may cause burns.
1
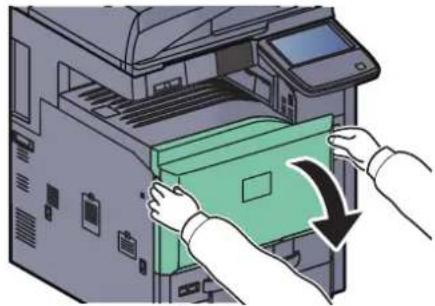
natural_image
Illustration of hands inserting a green folder into a printer (no text or symbols visible)2
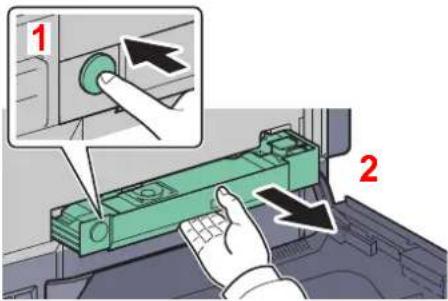
text_image
Diagram showing a hand pressing a green component with arrows indicating movement, labeled with numbers 1 and 2.3
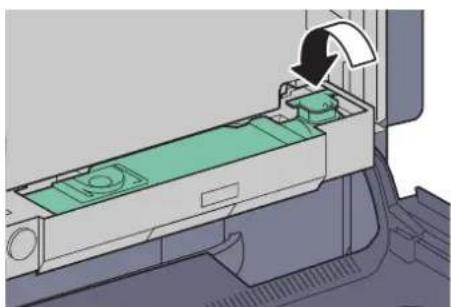
natural_image
Diagram of a mechanical device with green internal components and an arrow indicating motion (no text or symbols)
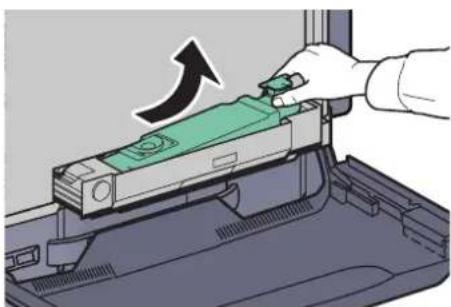
natural_image
Illustration of a hand pressing a green component into a machine (no text or symbols visible)4
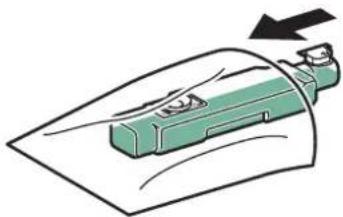
natural_image
Illustration of a green mechanical component being cut with an arrow indicating motion (no text or symbols)5
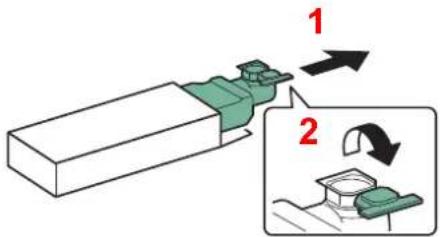
text_image
Diagram showing a mechanical component with labeled parts and directional arrows, including a zoomed-in view of the component.6
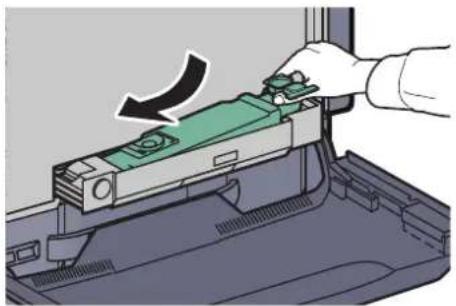
natural_image
Hand inserting a green component into a device (no text or symbols visible)
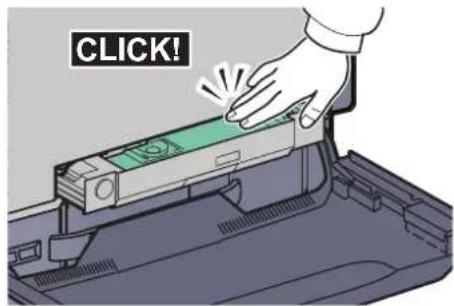
text_image
CLICK!7
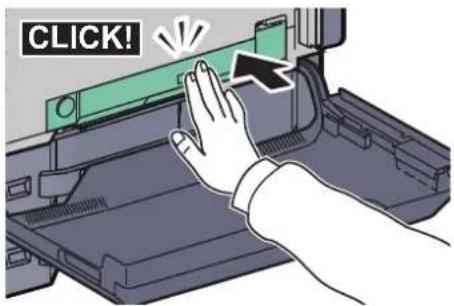
text_image
CLICK!8
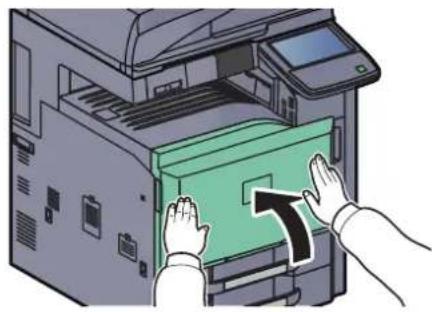
natural_image
Illustration of hands operating a printer with a green cover and arrow indicating a process (no text or symbols present)
NOTE
Return the exhausted toner container and waste toner box to your dealer or service representative. The collected toner container and waste toner box will be recycled or disposed in accordance with the relevant regulations.
Replacing Staples
A staple cartridge is installed in the optional 1,000-sheet finisher, 4,000-sheet finisher, and center-fold unit.
If a message displays indicating that staples have run out, the staple cartridge holder need to be replenished with staples.

NOTE
If the Staple Unit runs out of staples, contact your service representative or the place of purchase.
Follow the steps below to refill staples.
1,000-sheet Finisher (Option)
1
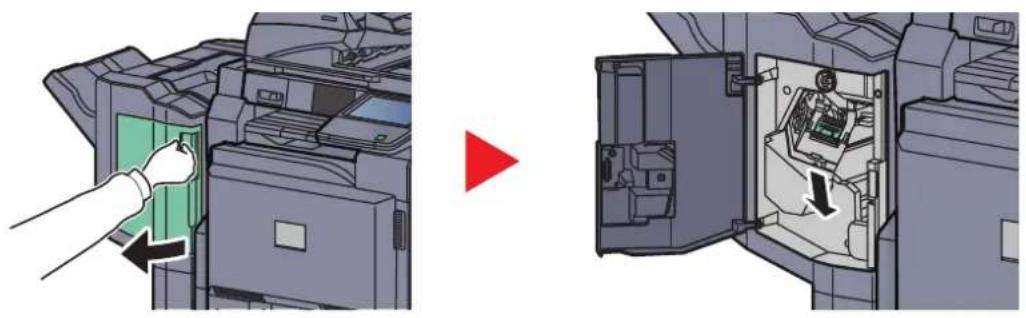
natural_image
Diagram showing a printer's internal structure before and after processing, with no visible text or symbols.2
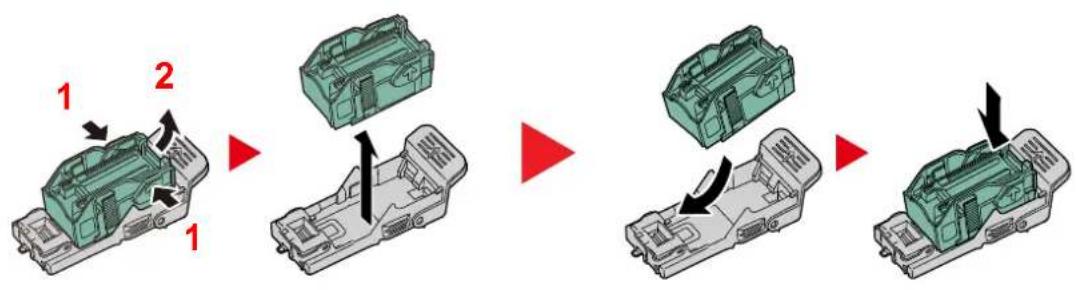
flowchart
graph TD
    A["Vehicle chassis with 1 and 2 parts"] --> B["Assembly of a green box with black arrows"]
    B --> C["Assembly of a green box with red arrows"]
    C --> D["Final car body with red arrow indicating motion"]

NOTE
The staple cartridge can only be removed when it contains no more staples.
3
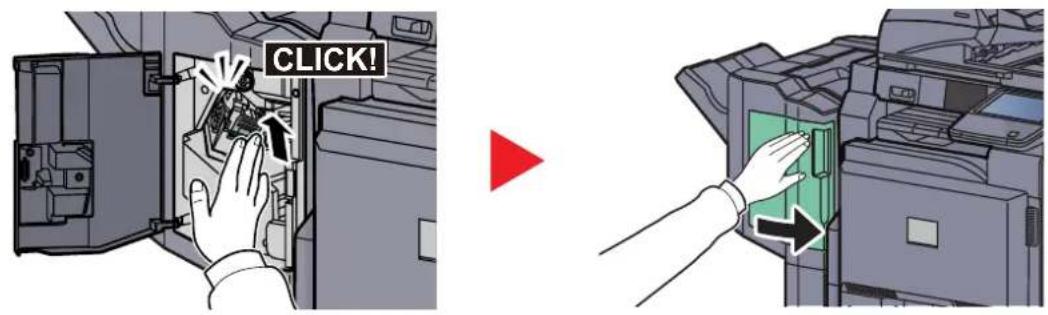
text_image
CLICK!4,000-sheet Finisher (Option)
The 4,000-sheet finisher contains staple cartridge holder A.
The optional folding unit contains staple cartridge holders B and C. The refill procedure for staple cartridge holders B and C are the same as for staple cartridge holder A.
Refilling Staple Cartridge Holder A

NOTE
See page 10-14 to refill staple cartridge holder B/C of the optional folding unit.
1
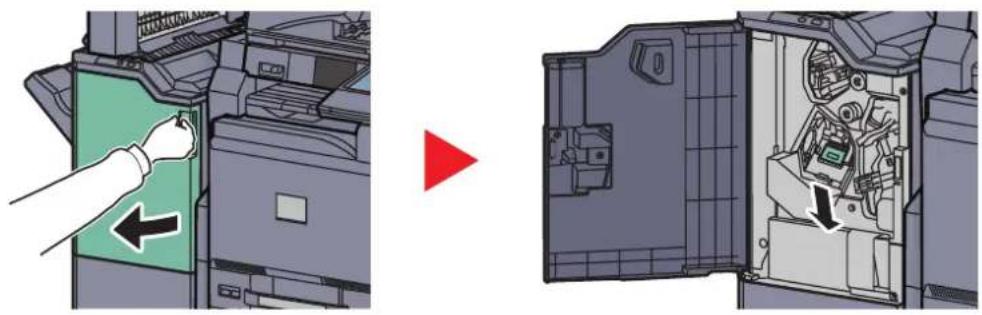
text_image
Diagram showing printer operation with a hand inserting a green cover into the printer and a red arrow indicating the process.2
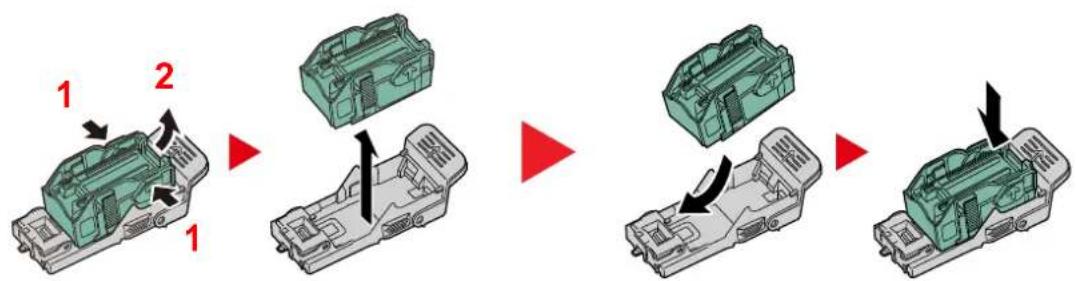
flowchart
graph TD
    A["1: Car Body with Internal Component"] --> B["2: Internal Component with Internal Component"]
    B --> C["3: Assembly of Internal Component"]
    C --> D["4: Assembly of Internal Component with Internal Component"]
    D --> E["5: Assembly of Internal Component with Internal Component"]

NOTE
The staple cartridge can only be removed when it contains no more staples.
3
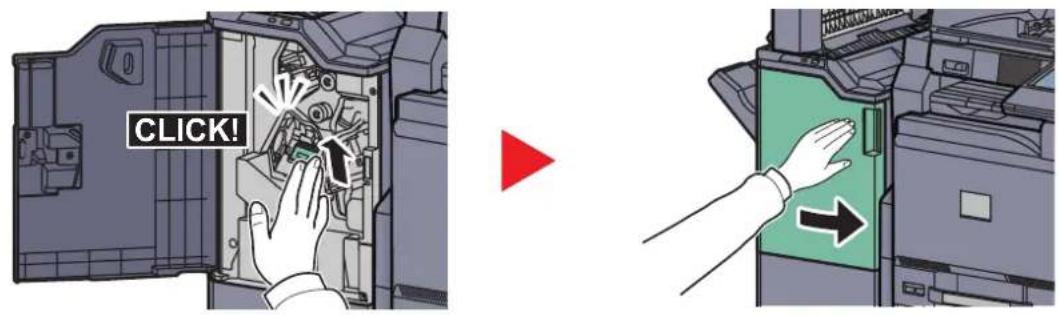
text_image
CLICK!Refilling Staple Cartridge Holders B/C (Option)
Follow the steps below to refill staples for the optional folding unit. Follow the same procedure to refill staple cartridge holders B and C.
1
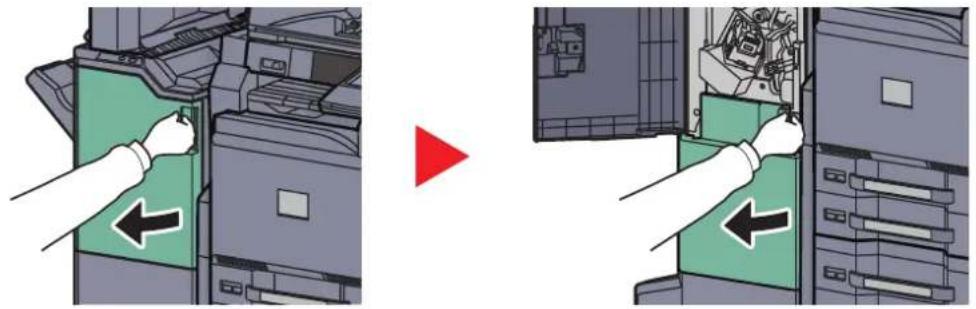
text_image
Diagram illustrating a process of file transfer or assembly, showing left-hand and right-hand states with directional arrows indicating movement.2
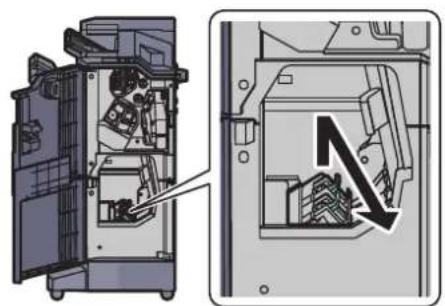
natural_image
Technical diagram of a mechanical device showing internal components and a close-up view with an arrow indicating a specific section (no text or symbols present)3
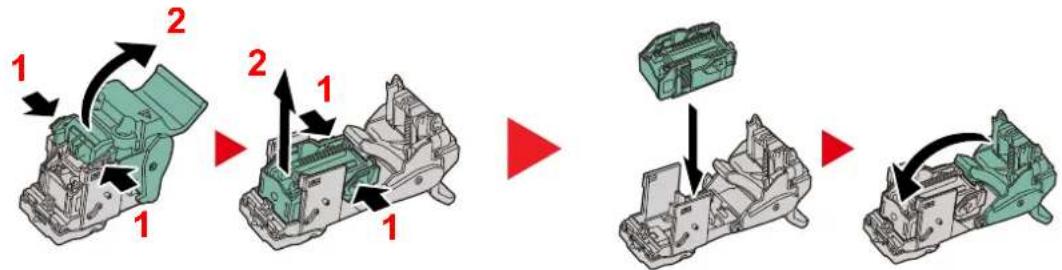
flowchart
graph TD
    A["Assembly Step 1: Green Vehicle Body"] --> B["Assembly Step 2: Internal Components"]
    B --> C["Assembly Step 3: Internal Components with Component 1, 2, 1, 1"]
    C --> D["Assembly Step 4: Internal Components with Component 1, 2, 1, 1"]
    D --> E["Assembly Step 5: Internal Components with Component 1, 2, 1, 1"]

NOTE
The staple cartridge can only be removed when it contains no more staples.
4
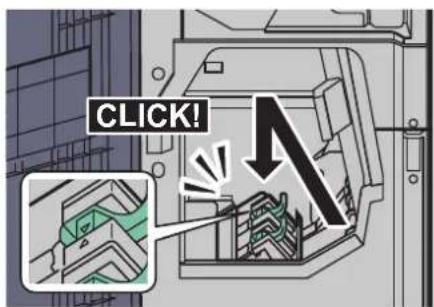
text_image
CLICK!5
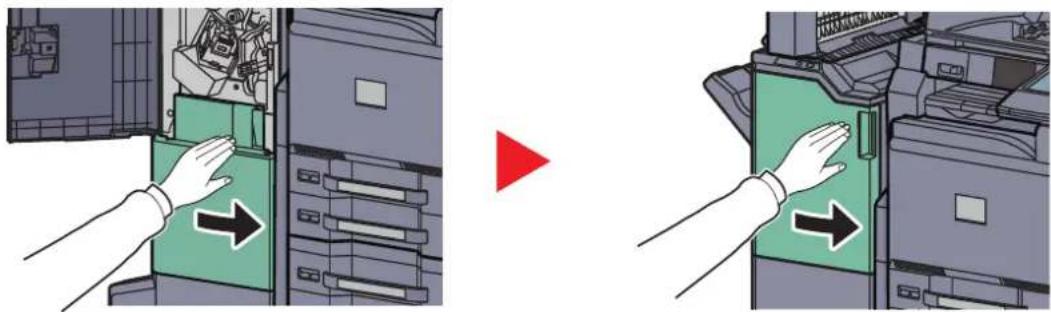
natural_image
Illustration showing two hands inserting a green folder into a computer interface, with directional arrows indicating movement (no text or symbols present)Disposing of the Punch Waste
If a message is displayed on the machine operation panel indicating that the waste punch box is full, be sure to empty the scraps in the punch waste box.
Leave the main power switch on the machine switched ON ( | ) while performing this procedure.
1,000-sheet Finisher (Option)
1

natural_image
Illustration of a printer's internal processing step showing green cover being inserted into a printer (no text or symbols present)
NOTE
Take care not to spill the waste hole punch scraps when removing the container.
2
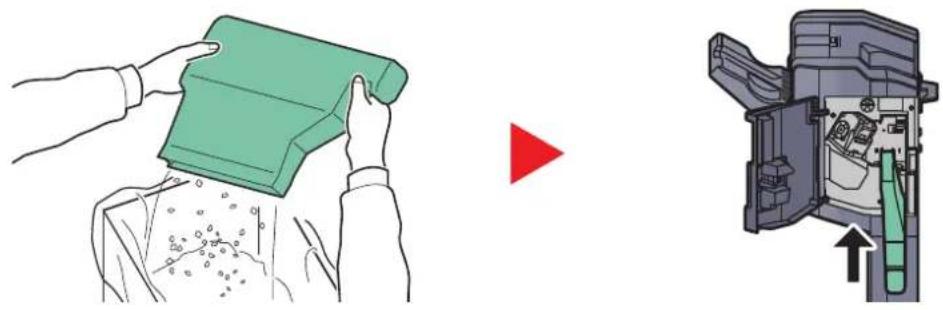
natural_image
Illustration showing a person applying a green cover to another person, and a device with an arrow indicating the process (no text or symbols present)3
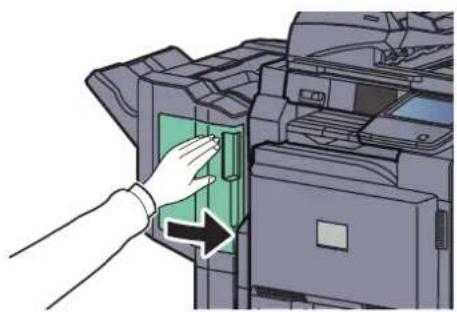
natural_image
Illustration of a hand inserting a green folder into an open printer (no text or symbols visible)4,000-sheet Finisher (Option)
1

text_image
Diagram illustrating a printer's internal mechanism with labeled parts and directional arrows indicating process flow.
NOTE
Take care not to spill the waste hole punch scraps when removing the container.
2
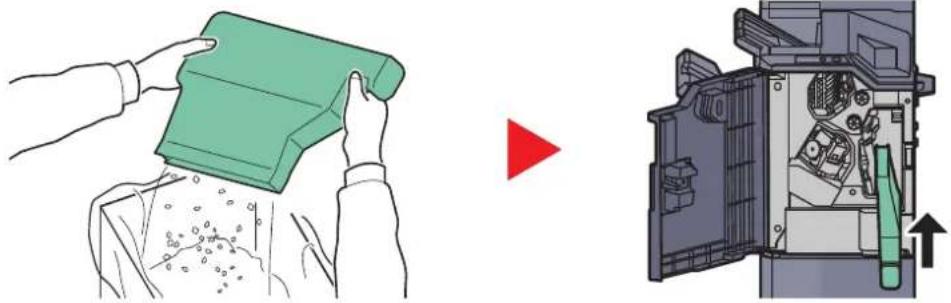
natural_image
Illustration showing a person applying a green cover to another device, with a red arrow indicating transformation (no text or symbols present)3
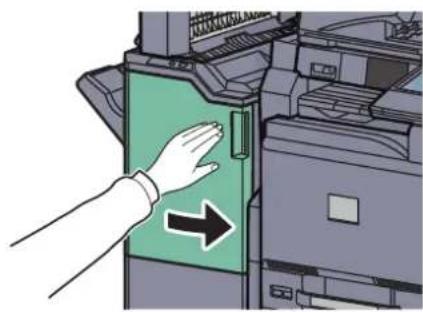
natural_image
Illustration of a hand opening a green file into a printer (no text or symbols visible)Troubleshooting
Solving Malfunctions
The table below provides general guidelines for problem solving.
If a problem occurs with your machine, look into the checkpoints and perform procedures indicated on the following pages. If the problem persists, contact your Service Representative.
| Symptom Checkpoints Corrective Actions | Reference Page | ||
| An application does not start. | Is the Auto Panel Reset time short? Set the Auto Panel Reset time to 30 seconds or more. | page 8-54 | |
| The screen does not respond when the main power switch is turned on. | Is the machine plugged in? Plug the power cord into an AC outlet. page 2-9 | ||
| Pressing the [Start] key does not produce copies. | Is there a message on the screen? Determine the appropriate response to the message and respond accordingly. | page 10-23 | |
| Is the machine in Sleep mode? | Press the [Power] key to recover the machine from Sleep mode. | page 3-15 | |
Blank sheets are ejected. | Are the originals loaded correctly? | When placing originals on the platen, place them face-down and align them with the original size indicator plates. | page 5-2 |
| When placing originals in the document processor, place them face-up. | page 5-3 | ||
| — Check that the settings of the | application software. | — | |
| Printouts are totally too light. Is the paper damp? Replace the paper with new paper. page 3-16 | |||
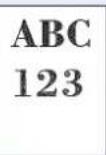 ABC 123 ABC 123 | Have you changed the density? Select appropriate density level. page 6-22 | page 8-57 | |
| Is the toner distributed evenly within the toner container? | Shake the toner container from side to side several times. | page 10-6 | |
| Is EcoPrint mode enabled? | Disable [EcoPrint] mode. | page 8-18 | |
| — Run [Drum Refresh 1]. | page 10-37 | ||
| — Run [Developer Refresh]. | page 10-38 | ||
| — Make sure the paper type setting is correct for the paper being used. | page 8-10 | ||
Printouts are too dark even though the background of the scanned original is white. | Have you changed the density? Select appropriate density level. page 6-22 | page 8-57 | |
| — Run [Calibration]. | page 10-38 | ||
| — Run [Developer Refresh]. | page 10-38 | ||
| Symptom | Checkpoints | Corrective Actions | Reference Page |
Copies have a moire pattern (dots grouped together in patterns and not aligned uniformly). | Is the original a printed photograph? Set the original image to [Printer Output] or [Book/Magazine] in [Photo]. | page 6-23 | |
Texts are not clearly printed. Did you choose appropriate image quality for the original?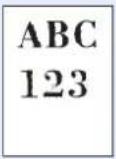 | Select appropriate image quality. page 6-23 | ||
Black or color dots appear on the white background when white original is scanned. | Is the original holder or the glass platen dirty? | Clean the original holder or the glass platen. | page 10-2 |
| Is the conveying guide dirty? Clean the conveying guide. page 10-4 | |||
| — Run [Developer Refresh]. page 10-38 | |||
Printouts are fuzzy. Is the machine  | chine being used in conditions of very humid, or humidity or temperature rapidly changes? | Use in an environment that has suitable humidity. | — |
| — Run [Drum Refresh 1]. page 10-37 | |||
Images are skewed. Are the original  | originals loaded correctly? | When placing originals on the platen, align them with the original size indicator plates. | page 5-2 |
| When placing originals in the document processor, align the original width guides securely before placing the originals. | page 5-3 | ||
| Is the paper loaded correctly? Check the position of the paper width guides. | page 3-18page 3-26 | ||
| Paper often jams. | Is the paper loaded correctly? | Load the paper correctly. | page 3-18page 3-26 |
| — Turn the orientation 180 degrees around in which the paper is positioned. | page xivpage 3-18page 3-26 | ||
| Is the paper of the supported type? Is it in good condition? | Remove the paper, turn it over, and reload it. | page 3-18 | |
| Is the paper curled, folded or wrinkled? | Replace the paper with new paper. | page 3-18 | |
| Are there any loose scraps or jammed paper in the machine? | Remove any jammed paper. | page 10-39 | |
2 or more sheets are overlaps when ejected.(multi feed) | — Load the paper correctly. page 3-18 | page 3-26 | |
Printouts are wrinkled. | Are the originals loaded correctly? | Load the paper correctly. | page 3-18page 3-26 |
| — Clean the paper separator. page 10-5 | |||
| — Turn the orientation 180 degrees around in which the paper is positioned. | page xivpage 3-18page 3-26 | ||
| Is the paper damp? Replace the paper with new paper. page 3-16 | |||
Printouts are curled. | — | Turn the paper over in the cassette, or turn the orientation 180 degrees around in which the paper is positioned. | page xivpage 3-18page 3-26 |
| Is the paper damp? Replace the paper with new paper. page 3-16 | |||
| Is the paper printed out to the finisher? Change the [Correct Paper Curl]. page 8-59 | |||
| — Check the specified cassette and | change its paper type to Custom 8.NOTEIf you specify the paper type to Custom 8, copy speed or printing speed becomes slower. | page 3-30 | |
| Cannot print. | Is the machine plugged in? | Plug the power cord into an AC outlet. | — |
| Is the machine powered on? | Turn on the main power switch. | page 2-10 | |
| Are the printer cable and network cable connected? | Connect the correct printer cable and network cable securely. | page 2-6 | |
| Was the machine powered on before the printer cable was connected? | Power on the machine after connecting the printer cable. | — | |
| Is the print job paused? | Resume printing. | page 7-4 | |
| Cannot print with USB memory.USB memory not recognized. | Is the USB host blocked? | Select [Unblock] in the USB host settings. | page 8-50 |
| — Check that the USB memory is securely plugged into the machine. | — | ||
Printouts have vertical lines. | Are the slit glass and the Dual scanning area dirty? | Clean the slit glass and the Dual scanning area. | page 10-3 |
| Symptom Checkpoints Corrective Actions | Reference Page | ||||
Dirt on the top edge or back of the paper. 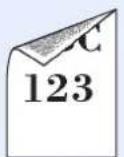 | Check the machine interior. Open the right cover. If the machine interior is dirty with toner, clean it using soft, dry, lint-free cloth. | — | |||
Part of the image is periodically faint or shows white lines.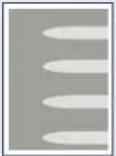 | — Run [Drum Refresh 1]. page 10-37 | ||||
| — Run [Developer Refresh]. page 10-38 | |||||
Print on the back of the sheet is visible on the front. | — Set [Prevent Bleed-through] to [On]. page 6-26 | page 8-17 | |||
White dots appear on the image. | — Run [Drum Refresh2]. page 10-37 | ||||
| Colors appear different than you anticipated. | — Run [Tone Curve Adjustment]. page 10-36 | 10-36 | |||
| Perform Tone Curve Adjustment in the System Menu. is displayed. | Over long periods of use, the effects of the ambient temperature and humidity can cause output hues to vary slightly. | Run [Tone Curve Adjustment]. page 10-36 | |||
| Cannot create Searchable PDF file. | Is the proper language selected? Check the language to extract. page 6-60 | ||||
| Can the texts on the original not be recognized as texts, or is the PDF creation time taken? | Check the following:• The original orientation is correct.• When setting the originals with the mixed orientation at once, [On] is selected for [Auto Image Rotation]. | page 6-60 | |||
| Symptom | Checkpoints | Corrective Actions | Reference Page | ||
| Cannot search a text that you want to search on the PDF file. | Have you set [OCR Recognition] in [File Format]? | Set [OCR Recognition] in [File Format]. page 6-60 | |||
| Are the texts of the scanned original fainted or too light? | Set [Density] to darker level. page 6-22 | ||||
| Is the background of the scanned original too dark and the texts are difficult to recognize? | Set [Background Density Adj.] to [On] or [Manual] and manually adjust the density lighter. Otherwise, set [Density] to darker level. | page 6-22page 6-25 | |||
| Is the text or image on the back of the original visible on the front? | Set [Prevent Bleed-through] to [On]. page 6-26 | ||||
| Cannot send via SMB. Is the network cable connected? Connect the correct network cable securely. | page 2-6 | ||||
| Page 8-43 | |||||
| — | |||||
| — | |||||
| Page 5-31 | |||||
| Page 5-31 | |||||
| Page 5-31 | |||||
| Page 5-31 | |||||
| Page 5-31 | |||||
| Page 5-31 | |||||
| Page 5-31 | |||||
| Page 5-31 | |||||
| Page 5-31 | |||||
| Page 5-31 | |||||
| Page 5-31 | |||||
| Page 5-31 | |||||
| Page 5-31 | |||||
| Page 5-31 | |||||
| Page 5-31 | |||||
| Page 5-31 | |||||
| Page 5-31 | |||||
| Page | |||||
| Page 5-31 | |||||
| Page 5-31 | |||||
| Page 5-31 | |||||
| Page 5-31 | |||||
| Page 5-31 | |||||
| Page 5-31 | |||||
| Page 5-31 | |||||
| Page 5-31 | |||||
| Has [Host Name] been entered properly? *1 | Check the name of the computer to which data is being sent. | page 5-31 | |||
| Has [Path] been entered properly? Check the share name for the shared folder. | the share name for the shared folder. | page 5-31 | |||
| Has [Login User Name] been entered properly? *1*2 | Check the domain name and login user name. | page 5-31 | |||
| Has the same domain name been used for [Host Name] and [Login User Name]? | Delete the domain name and backslash ("") from [Login User Name]. | page 5-31 | |||
| Has [Login Password] been entered properly? | Check the login password. page 5-31 | ||||
| Have exceptions for Windows Firewall been configured properly? | Configure exceptions for Windows Firewall properly. | page 3-41 | |||
| Do the time settings for the equipment, domain server, and data destination computer differ? | Set the equipment, domain server, and data destination computer to the same time. | — | |||
| Is the screen displaying Send error? | Refer to Responding to Send Error. | page 10-33 | |||
| Cannot send via the e-mail. | Is the E-mail send size limit set in the SMTP server registered on the machine? | Check the limit value is entered to "E-mail Size Limit" of [E-mail] setting in Embedded Web Server RX and change the value as necessary. | page 2-37 | ||
*1 You can also enter a full computer name as the host name (for example, pc001.abcdnet.com).
*2 You can also enter login user names in the following formats:
Domain_name/user_name (for example, abcdnet/james.smith)
User_name@domain_name (for example, james.smith@abcdnet)
Responding to Messages
If the touch panel or the computer displays any of these messages, follow the corresponding procedure.
A
| Message Checkpoints Corrective Actions | Reference Page | ||
| Acceptable fold count exceeded. | Is the acceptable number of sheets exceeded? | Press [Continue] to print using Fold per acceptable number of sheets. Press [Cancel] to cancel the job. | page 6-17 |
| Acceptable staple count exceeded.* | Is the acceptable number of sheets exceeded? | Press [Continue] to print without using Staple. Press [Cancel] to cancel the job. | — |
| Activation error. | — | Failed to activate the application. Contact administrator. | — |
| — Expansion Authentication is | disabled. Turn the main power switch off and on. If the error exists, contact administrator. | — | |
| Add paper in cassette #. Is the indicated cassette out of paper? | Load paper. Select the available paper. Press [Continue] to print. | page 3-16 | |
| Add paper in Multi Purpose tray. | Is the paper of the selected size loaded in the multi purpose tray? | Load paper. Select the available paper. Press [Continue] to print. | page 3-26 |
| Adjusting Scanner. — The machine is under the | adjustment to maintain its quality. Please wait. | — | |
* When Auto Error Clear is set to [On], processing resumes automatically after a set amount of time elapses.
B
| Message Checkpoints Corrective Actions | Reference Page | |
| Box is not found. — The specified box cannot be found. | Job is canceled. Press [End]. | — |
| Box limit exceeded.*Is [End] displayed on the screen? The specified box is full, and no further storage is available. Job is canceled. Press [End]. Try to perform the job again after printing or deleting data from the box. The job is canceled. Press [End]. Refer to Responding to Send Error for the error code and corrective actions. | — | — |
| — Repeat Copy box is full, and no further repeat copy is available. Press [Continue] to print scanned pages. Press [Cancel] to cancel the job. | — | — |
* When Auto Error Clear is set to [On], processing resumes automatically after a set amount of time elapses.
C
| Message Checkpoints Corrective Actions | Reference Page | ||
| Calibrating... — The machine is under the | adjustment to maintain its quality. Please wait. | — | |
| Cannot connect to Authentication Server.* | — Set machine time to match the | server's time. | page 2-23 |
| — Check the domain name. page 9-2 | |||
| — Check the domain name. page 9-2 | |||
| — Check the connection status with | the server. | — | |
| Cannot connect to Server. | — Check the connection status with | the server. | — |
| Cannot duplex print on this paper.* | Did you select a paper size/type that cannot be duplex printed? | If the selected paper is not changed and [Continue] is pressed, duplex is released.Select the available paper. Press [Continue] to print. | page 6-39 |
| Cannot find the destination computer. Check the computer. | Is the machine and the PC to which the scanned image is to be sent connected to the network? | Check the network and SMB settings.The network cable is connected.The hub is not operating properly.The server is not operating properly.Host name and IP addressPort number | page 2-6 |
| Is the account information (user ID, password) used to access the shared folder to which the scanned image is to be sent incorrect? | Check the following settings of the PC to which the scanned image is to be sent.H o s t n a m eP a t hLogin user nameNOTEIf the sender is a domain user, specify the domain name.[Login User ID]@[Domain Name]Example: sa720XXXX@kmLogin passwordFolder share permissions of the recipient | — | |
| Cannot fold this paper. Did you select a paper size/type that cannot be folded? | If the selected paper is not changed and [Continue] is pressed, fold is released.Select the available paper. Press [Continue] to print. | page 6-17 | |
| Message Checkpoints Corrective Actions | Reference Page | ||
| Cannot offset this paper.* | Did you select a paper size/type that cannot be offset? | If the selected paper is not changed and [Continue] is pressed, offset is released.Select the available paper. Press [Continue] to print. | page 6-18 |
| Cannot perform print from remote. | — Remote printing is prohibited. | The job is canceled. Press [End]. | page 8-27 |
| Cannot print the specified number of copies.* | — Only one copy is available. Press | [Continue] to continue printing.Press [Cancel] to cancel the job. | — |
| Cannot process this job.* | — Restricted by Authorization settings. | The job is canceled. Press [End]. | — |
| — Restricted by Job Accounting. The job is canceled. Press [End]. | page 9-29 | ||
| Cannot punch at the specified position. | Have you selected a position that cannot be punched? | If the selected paper is not changed and [Continue] is pressed, punch is released.Select the available paper. Press [Continue] to print. | page 6-20 |
| Cannot punch this paper. | Did you select a paper size/type that cannot be punched? | If the selected paper is not changed and [Continue] is pressed, punch is released.Select the available paper. Press [Continue] to print. | page 6-20 |
| Cannot staple at the specified position. | Have you selected a position that cannot be stapled? | If the selected paper is not changed and [Continue] is pressed, staple is released.Select the available paper. Press [Continue] to print. | page 6-19 |
| Cannot staple this paper.* | Did you select a paper size/type that cannot be stapled? | If the selected paper is not changed and [Continue] is pressed, staple is released.Select the available paper. Press [Continue] to print. | page 6-19 |
| Cannot use #### due to a failure. | — Call service. — | ||
| Check the document processor. | Is the top cover of the document processor open? | Close the document processor cover. | — |
| Is the document processor open? Close the document processor. — | |||
| Check the main unit right tray. | Is the main unit right tray closed? Open the main unit right tray. — | ||
| Is the acceptable storage capacity exceeded? | Remove the paper. Printing then resumes. | — | |
| Check the paper in the multi purpose tray. | — The paper size is different. Set | selected size paper and press [Continue]. | page 3-33 |
| Check the side feeder. — | The side feeder is not installed | correctly. Attach the side feeder. | — |
| Message Checkpoints Corrective Actions | Reference Page | |
| Check waste toner box. — | The waste toner box is not installed | page 10-9 |
| Is the waste toner box full? Replace the waste toner box. page 10-9 | ||
| Confidential document was detected. | — The machine detects the document | — |
| guard pattern. Job is canceled. Press [End]. |
* When Auto Error Clear is set to [On], processing resumes automatically after a set amount of time elapses.
E
| Message Checkpoints Corrective Actions | Reference Page | |
| Empty the punch waste box. | Is the punch waste box full? Follow the instructions on the screen. and empty the punch waste box. | page 10-16 |
| Error occurred at cassette #. | — Open the cassette. Check inside the machine and remove the paper. | — |
| Error occurred at the multi purpose tray. | — Remove the paper from the multi purpose tray. | — |
F
| Message Checkpoints Corrective Actions | Reference Page | |
| Failed to specify Job Accounting.* | — Failed to specify Job Accounting | — |
| when processing the job externally. The job is canceled. Press [End]. | ||
| Failed to store job retention data. | — The job is canceled. Press [End]. — | |
| Finisher left tray is full of paper. | Is the acceptable storage capacity exceeded? | Remove the paper. Printing then resumes. |
| Is the paper curled? Check the checkpoints of "Printouts are curled." in Solving Malfunctions and take the corrective actions. | page 10-20 | |
| Folding tray is full of paper. | Is the acceptable storage capacity exceeded? | Remove the paper. Printing then resumes. |
* When Auto Error Clear is set to [On], processing resumes automatically after a set amount of time elapses.
H
| Message Checkpoints Corrective Actions | Reference Page | |
| Hard Disk error. — An error has occurred on the hard | disk. Job is canceled. Press [End].The possible error codes and their descriptions are as follows.01: The amount of data that can be saved at once has been exceeded.Restart the system or turn the power OFF/ON. If the error still occurs, divide the file into smaller files.If the error occurs after the file is divided, the hard disk is damaged.Execute [System Initialization].04: Insufficient space on the hard disk to complete this operation.Move data or delete unneeded data. | — |
|
| Message Checkpoints Corrective Actions | Reference Page | |
| Incorrect account ID.* | — The account ID was incorrect when processing the job externally. The job is canceled. Press [End]. | — |
| Incorrect box password. — | The box password was incorrect when processing the job externally. The job is canceled. Press [End]. | — |
| Incorrect Login User Name or Password.* | — The login user name or password was incorrect when processing the job externally. The job is canceled. Press [End]. | — |
| Install the punch waste box. | — Follow the instructions on the screen. and install the punch waste box. | page 10-16 |
| Invalid configuration. | Are the originals loaded correctly? When placing originals on the platen, place them face-down and align them with the original size indicator plates.When placing originals in the document processor, place them face-up. | — |
* When Auto Error Clear is set to [On], processing resumes automatically after a set amount of time elapses.
J
| Message Checkpoints Corrective Actions | Reference Page | |
| Job Accounting restriction exceeded.* | Is the acceptable printing count restricted by Job Accounting exceeded? | The printing count exceeded the acceptable count restricted by Job Accounting. Cannot print any more. The job is canceled. Press [End]. |
| Job separator tray is full of paper. | Is the acceptable storage capacity exceeded? | Remove the paper and press [Continue]. Printing then resumes. |
| Is the paper curled? Check the checkpoints of "Printouts are curled." in Solving Malfunctions and take the corrective actions. | page 10-20 |
* When Auto Error Clear is set to [On], processing resumes automatically after a set amount of time elapses.
K
| Message Checkpoints Corrective Actions | Reference Page | |
| KPDL error. * | — PostScript error has occurred. The job is canceled. Press [End]. | — |
* When Auto Error Clear is set to [On], processing resumes automatically after a set amount of time elapses.
M
| Message Checkpoints Corrective Actions | Reference Page | |
| Machine failure. | — | Internal error has occurred. Make a note of the error code displayed on the screen. Call service. |
| Mailbox tray is full of paper. | Is the acceptable storage capacity exceeded? | Remove the paper. Printing then resumes. |
| Main unit inner tray is full of paper. | Is the acceptable storage capacity exceeded? | Remove the paper. Printing then resumes. |
| Is the paper curled? Check the checkpoints of "Printouts are curled." in Solving Malfunctions and take the corrective actions. | page 10-20 | |
| Main unit upper left tray is full of paper. | Is the acceptable storage capacity exceeded? | Remove the paper and press [Continue]. Printing then resumes. |
| Maximum number of scanned pages. | Is the acceptable scanning count exceeded? | Cannot scan pages any more. Follow the instructions on the screen. |
| Memory is full.* | — The memory is full and the job | — |
| — The process cannot be performed | due to insufficient memory. If only [End] is available, press [End]. The job will be canceled. |
* When Auto Error Clear is set to [On], processing resumes automatically after a set amount of time elapses.
P
| Message Checkpoints Corrective Actions | Reference Page | |
| Paper jam. — If a paper jam occurs, the machine | will stop and the location of the jam will be indicated on the screen.Leave the machine on and follow the instructions to remove the jammed paper. | page 10-39 |
| Paper left. — Remove paper from the document | finisher. | — |
| Performing Drum Refresh... | — The machine is under the adjustment to maintain its quality.Please wait. | — |
| Perform Tone Curve Adjustment in the System Menu. | Over long periods of use, the effects of the ambient temperature and humidity can cause output hues to vary slightly. | Run [Tone Curve Adjustment]. page 10-36 |
| Preparing to print. — The machine is under the | adjustment to maintain its quality.Please wait. | — |
R
| Message Checkpoints Corrective Actions | Reference Page | |
| Regulating the temperature... | — The machine is under the adjustment to maintain its quality. Please wait. | — |
| Removable memory error.* | Is writing to a removable memory prohibited? | An error occurred in the removable memory. The job stopped. Press [End].The possible error codes and their descriptions are as follows.01: Connect a removable memory that can be written to. |
| — An error occurred in the removable memory. The job stopped. Press [End].The possible error codes and their descriptions are as follows.01: The amount of data that can be saved at once has been exceeded. Restart the system or turn the power OFF/ON. If the error still occurs, divide the file into smaller files.If the error still occurs, the removable memory is not compatible with the machine. Use the removable memory formatted by this machine.If the removable memory cannot be formatted, it is damaged. Connect a compatible removable memory. | page 5-67 | |
| Removable Memory is full.* | — The job is canceled. Press [End]. | — |
| Insufficient free space in the removable memory. Delete unneeded files. | ||
| Remove originals in the document processor. | Are there any originals left in the document processor? | Remove originals from the document processor. |
| Replace all originals and press [Continue]. | — Remove originals from the | document processor, put them back in their original order, and place them again. Press [Continue] to resume printing. Press [Cancel] to cancel the job. |
* When Auto Error Clear is set to [On], processing resumes automatically after a set amount of time elapses.
s
| Message Checkpoints Corrective Actions | Reference Page | |
| Scanner memory is full.* | — Scanning cannot be performed due to insufficient memory of the scanner. Follow the instructions on the screen. | — |
| Send Error.* | — An error has occurred during transmission. The job is canceled. Press [End]. Refer to Responding to Send Error for the error code and corrective actions. | page 10-33 |
| Skewed originals fed. | — | — |
| Staple is empty. (Manual Staple) | Has staple cartridge holder A run out of staples? | Add staples to staple cartridge holder A. page 10-13 |
| Staple is empty.* | Has staple cartridge holder run out of staples? | If the staples are depleted, the machine will stop and the location of staple depletion will be indicated on the screen. Leave the machine on and follow the instructions to replace the staple case. Press [Continue] to print without stapling. Press [Cancel] to cancel the job. page 10-12 |
| Staple jam. — If a staple jam occurs, the machine | will stop and the location of the jam will be indicated on the screen. Leave the machine on and follow the instructions to remove the jammed staple. page 10-63 | |
| System error. — System error has occurred. Follow | the instructions on the screen. — | |
* When Auto Error Clear is set to [On], processing resumes automatically after a set amount of time elapses.
T
| Message Checkpoints Corrective Actions | Reference Page | |
| The cover is open. Is there | any cover which is open? Close the cover indicated on the screen. | — |
| The folding unit is open. — | Close the folding unit. — | |
| The password does not meet password policy. | Is the password expired? Change the login password.The job is canceled. Press [End]. | page 9-7page 9-8 |
| Is the password policy requirement (such as password length or required characters) changed? | Confirm the password policy requirements and change the login password.The job is canceled. Press [End]. | |
| The print system connected to the current port is not supported by the printer driver.Use a printer driver for this port that matches the print system. | Is the printer driver for this product used? | Check the product name of the machine and reinstall the printer driver. |
| The removable memory is not formatted. | Is the removable memory formatted by this machine? | Perform [Format] on this machine. — |
| The slit glass requires cleaning. | — Clean the slit glass using the cleaning cloth supplied with the document processor. | page 10-3 |
| This user account is locked out. | — Contact administrator. | — |
| Toner is empty. — Replace | the toner container to our specified toner container. | page 10-6 |
| Toner is low. (Replace when empty.) | — It is almost time to replace the toner container. Obtain a new toner container. | — |
| Tray # is full of paper. Is the acceptable storage capacity exceeded? | Remove the paper. Printing then resumes. | — |
| Is the paper curled? Check the check points of "Printouts are curled." in Solving Malfunctions and take the corrective actions. | page 10-20 |
U
| Message Checkpoints | Corrective Actions | Reference Page |
| Unknown toner installed. | Is the installed toner container our own brand? | We will not be liable for any damage caused by the use of third party supplies in this machine. |
| Unknown Toner Installed. PC | Does the installed toner container's regional specification match the machine's? | Install the specified container. |
W
| Message Checkpoints Corrective Actions | Reference Page | |
| Warning for high temperature. Adjust the room temperature. | — Print quality may be deteriorated. | — |
| Warning for low temperature. Adjust the room temperature. | — Print quality may be deteriorated. | — |
| Warning low memory. — Cannot start the job. Try again later. — | ||
| Waste toner box almost full. | — It is almost time to replace the | — |
Y
| Message Checkpoints Corrective Actions | Reference Page | |
| You cannot use this box. — You cannot use the specified box. | Job is canceled. Press [End]. | — |
Responding to Send Error
| Error Code | Message Corrective | Actions | Reference Page |
| 1101 Failed to | send the e-mail. Failed to send i-FAX. | Check the host name of the SMTP server on the Embedded Web Server RX. | page 2-33 |
| Failed to send via FTP. Check the | host name of FTP. — | ||
| Failed to send via SMB. Check the | host name of SMB. — | ||
| 1102 Failed to | send via SMB. Check the SMB settings. | • Login user name and login password _CBSK NOTEIf the sender is a domain user, specify the domain name.• Host name• Path | — |
| Failed to send the e-mail. Check the | following on the Embedded Web Server RX.• SMTP login user name and login password• POP3 login user name and login password• E-mail size limit | — | |
| Failed to send i-FAX. Check the | lowing on the Embedded Web Server RX.• SMTP login user name and login password• POP3 login user name and login password | — | |
| Failed to send via FTP. Check the | FTP settings.• Login user name and login password _DYKC NOTEIf the sender is a domain user, specify the domain name.• Path• Folder share permissions of the recipient | — | |
| 1103 Failed to | send via SMB. Check the SMB settings. | • Login user name and login password _TW7D NOTEIf the sender is a domain user, specify the domain name.• Path• Folder share permissions of the recipient | page 5-31 |
| Failed to send via FTP. Check the | FTP settings.• Path• Folder share permissions of the recipient | — |
NOTE
NOTE
NOTE
| Error Code | Message Corrective | Actions | Reference Page | |
| 1104 Failed to | send the e-mail. Check the E-mail | address. | page 5-35 | |
| NOTEIf the address is rejected by the domain, you cannot send the E-mail. | ||||
| Failed to send i-FAX. Check the i-FAX address. | NOTEIf the address is rejected by the domain, you cannot send the E-mail. | Refer to FAX Operation Guide. | ||
| 1105 Failed to | send via SMB. Select [On] of the SMB settings on the Embedded Web Server RX. | page 2-33 | ||
| Failed to send the e-mail. Select [On] of the SMTP settings on the Embedded Web Server RX. | page 2-33 | |||
| Failed to send via FTP. Select [On] of the FTP settings on the Embedded Web Server RX. | page 2-33 | |||
| Failed to send i-FAX. Select [On] of the i-FAX settings on the Embedded Web Server RX. | Refer to FAX Operation Guide. | |||
| 1106 Failed to | send the e-mail. | Check the sender address of SMTP on the Embedded Web Server RX. | page 2-33 | |
| Failed to send i-FAX. | ||||
| 1131 | Failed to send via FTP. | Select [On] of the secure protocol settings on the Embedded Web Server RX. | page 2-33 | |
| 1132 Failed to | send via FTP. Check the following of the FTP server.• Is FTPS available?• Is the encryption available? | page 2-33 | ||
| 2101 Failed to | send via SMB. Check the network and SMB settings.• The network cable is connected.• The hub is not operating properly.• The server is not operating properly.• Host name and IP address• Port number | — | ||
| Failed to send via FTP. Check the network and FTP settings.• The network cable is connected.• The hub is not operating properly.• The server is not operating properly.• Host name and IP address• Port number | — | |||
| Failed to send the e-mail. | Check the network and Embedded Web Server RX.• The network cable is connected.• The hub is not operating properly.• The server is not operating properly.• POP3 server name of the POP3 user• SMTP server name | — | ||
| Error Code | Message Corrective Actions | Reference Page | ||
| 21022103 | Failed to send via FTP. Check the | network and SMB settings.The network cable is connected.The hub is not operating properly.The server is not operating properly. | — | |
| Check the following of the FTP server.Is FTP available?The server is not operating properly. | — | |||
| Failed to send the e-mail. Failed to send i-FAX. | Check the network and SMB settings.The network cable is connected.The hub is not operating properly.The server is not operating properly. | — | ||
| 2201220222032231 | Failed to send the e-mail. Failed to send via FTP. Failed to send via SMB. Failed to send i-FAX. | Check the network and SMB settings.The network cable is connected.The hub is not operating properly.The server is not operating properly. | — | |
| 2204 Failed to send the e-mail. Failed to send i-FAX. | Check the E-mail size limit of the SMTP settings on the Embedded Web Server RX. | — | ||
| 3101 Failed to send the e-mail. Failed to send i-FAX. | Check the authentication methods of both the sender and the recipient. | — | ||
| Failed to send via FTP. Check the | network and SMB settings.The network cable is connected.The hub is not operating properly.The server is not operating properly. | — | ||
| 3201 Failed to send the e-mail. Failed to send i-FAX. | Check the authentication methods of both the sender and the recipient. | — | ||
| 0007420147015101510251035104710171027103720f | — Turn the main power switch off | and back on. If this error occurs several times, make a note of the displayed error code and contact your service representative. | — | |
| 9181 — The scanned original exceeds the acceptable number of pages of 999. Send the excess pages separately. | — | |||
Adjustment/Maintenance
Tone Curve Adjustment
After prolonged use, or from the effects of surrounding temperature or humidity, the printed output tone may differ from the original. Perform this function to ensure consistency with the original tone. Before executing Tone Curve Adjustment, execute calibration (see page 10-38).

NOTE
To perform tone curve adjustment, verify that either Letter or A4 paper is loaded into a cassette.
A total of 2 pattern pages (No. 1 and 2) are printed during adjustment. The printed patterns are read sequentially during the adjustment.
1 Display the screen.
1 Press the [System Menu] key.
System Menu

2 Press [√], [Adjustment/Maintenance], [√] and then [Next] of "Tone Curve Adjustment".
2 Adjust the tone curve.
1 Press [Start]. A pattern is printed.
Check that the number "1" is printed at the bottom of the pattern.
2 As shown in the illustration, place the printed side down on the platen with the edge with the arrows toward the back.
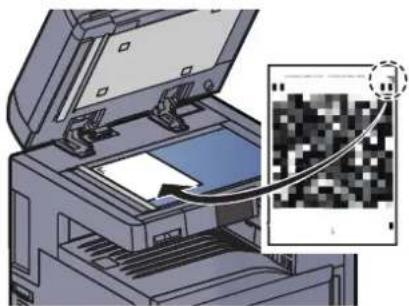
natural_image
Illustration of a printer with an open lid and a QR code overlay (no text or symbols on the diagram itself)3 Press [Start]. The pattern is read and adjustment begins.
The second pattern is output.
4 Check that the number "2" is printed at the bottom of the pattern and repeat steps 2 to 3 to read the pattern.
5 Press [OK] in the adjustment end confirmation screen.
Drum Refresh1
Refresh the drum when image blur appear on images in copies. Takes about 85 seconds.

NOTE
Drum Refresh1 cannot be performed while printing. Execute Drum Refresh1 after the printing is done.
1 Display the screen.
1 Press the [System Menu] key.
System Menu

2 Press [√], [Adjustment/Maintenance], [√] and then [Next] of "Drum Refresh1".
2 Perform the Drum Refresh 1.
Press [Start] to perform Drum Refresh1.
Drum Refresh2
Use this mode when white spots appear on images. Takes about 85 seconds. To use [Drum Refresh2], load Ledger or A3 size paper into the Multi Purpose tray.
When you run [Drum Refresh 2], the machine makes a vibrating sound for about 85 seconds until drum refreshing is completed. The toner soiling on the ejected paper is normal and does not indicate a fault.

NOTE
Drum Refresh2 cannot be performed while printing. Execute Drum Refresh2 after the printing is done.
1 Display the screen.
1 Press the [System Menu] key.
System Menu

2 Press [√], [Adjustment/Maintenance], [√] and then [Next] of "Drum Refresh2".
2 Perform the Drum Refresh 2.
Press [Start] to perform Drum Refresh2.
Developer Refresh
Adjust the printed image that is too light or incomplete, even though there is enough toner. In addition, Black or color dots appear on the white background when white original is scanned can be removed.
1 Display the screen.
1 Press the [System Menu] key.
System Menu
2 Press [√], [Adjustment/Maintenance], [√] and then [Next] of "Developer Refresh".
2 Perform the developer refresh.
Press [Start]. "Developer Refresh" begins.

NOTE
Waiting time may be longer when the toner is refilled during developer refresh.
Calibration
Calibrate the device to ensure consistency with the original grayscale. If you find that the grayscale is not improved by this calibration, use Tone Curve Adjustment (page 10-36).
1 Display the screen.
1 Press the [System Menu] key.
System Menu

2 Press [√], [Adjustment/Maintenance], [√] and then [Next] of "Calibration".
2 Perform the calibration.
Press [Start]. "Calibration" begins.
Clearing Paper Jams
If a paper jam occurs, the touch panel will display "Paper Jam". and the machine will stop. Refer to these procedures to remove the jammed paper.
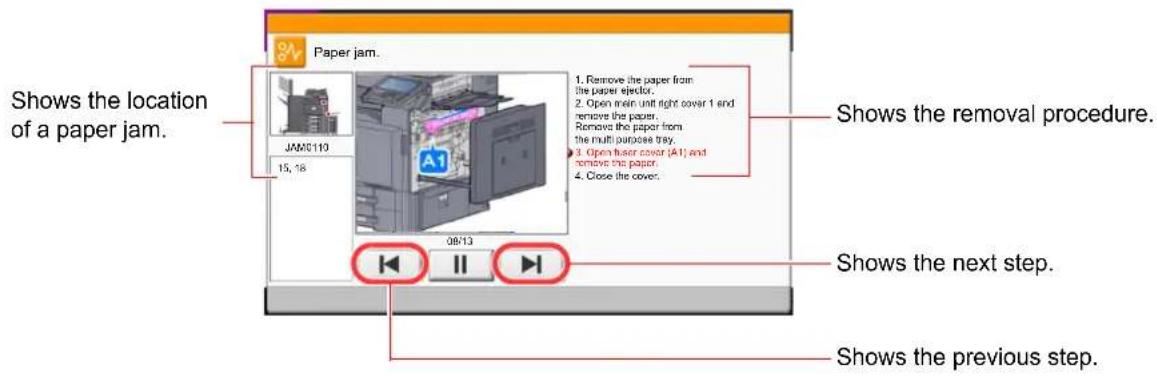
text_image
Shows the location of a paper jam. JAM5113 15, 18 Q8/13 1. Remove the paper from the paper ejector. 2. Open main unit right cover 1 and remove the paper. Remove the paper from the multi purpose tray. 3. Open fuser cover (A1) and remove the paper. 4. Close the cover. Shows the removal procedure. Shows the next step. Shows the previous step.Jam Location Indicators
If a paper jam occurs, the location of the jam will be displayed on the touch panel as well as the cleaning instructions.
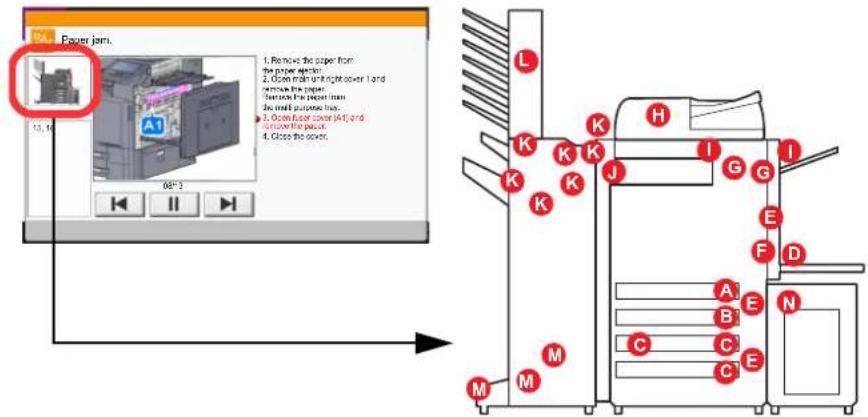
text_image
Paper jam. 1. Remove the paper from the paper system. 2. Open main unit right cover 1 and remove the paper. 3. Open paper from do mail purpose box. 4. Open paper cover (A1), and to cover the paper. 5. Close the paper.| Paper Jam Location Indicator | Paper Jam Location | Reference Page |
| A | Cassette 1 | page 10-41 |
| B | Cassette 2 | page 10-42 |
| C | Cassette 3 or 4 (Option) | page 10-43 |
| D | Multi Purpose Tray | page 10-46 |
| E | Inside the right cover 1, 3 or 4 | page 10-47 |
| F | Duplex unit | page 10-48 |
| G | Fixing unit | page 10-51 |
| H | Document processor (Option) | page 10-52 |
| I | Job Separator (Option) | page 10-53 |
| J | Bridge Unit | page 10-54 |
| K | 1,000-sheet Finisher (Option) | page 10-55 |
| 4,000-sheet Finisher (Option) | page 10-56 | |
| L | Mailbox (Option) | page 10-59 |
| M | Center-Folding Unit (Option) | page 10-60 |
| N | Cassette 5 (Option) | page 10-62 |
After you remove the jam, the machine will warm up again and the error message will be cleared. The machine resumes with the page that was printing when the jam occurred.
Precautions with Paper Jams
- Do not reuse jammed papers.
- If the paper tears during removal, be sure to remove any loose scraps of paper from inside the machine. Scraps of paper left in the machine could cause subsequent jamming.
• After clearing the paper jam, close the cassette and cover in the reverse procedure. - Discard paper that has jammed in the optional document finisher. A page affected by a paper jam will be printed again.

CAUTION
The fixing unit is extremely hot. Take sufficient care when working in this area, as there is a danger of getting burned.
Cassette 1
1
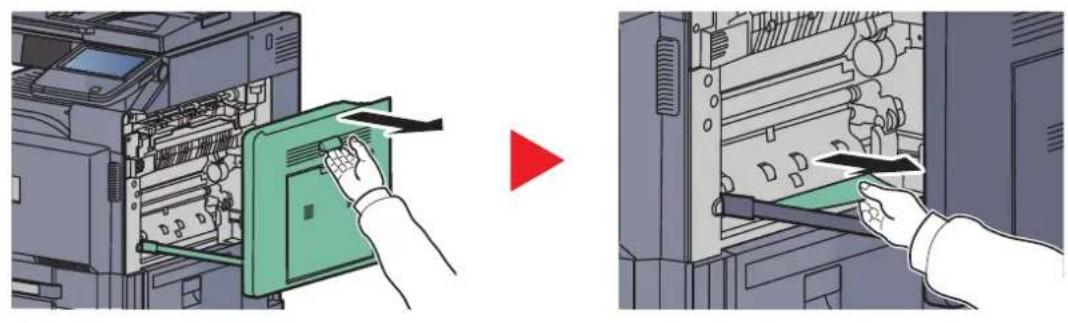
natural_image
Illustration showing two steps of inserting a device into a computer tower, with no visible text or symbols.2
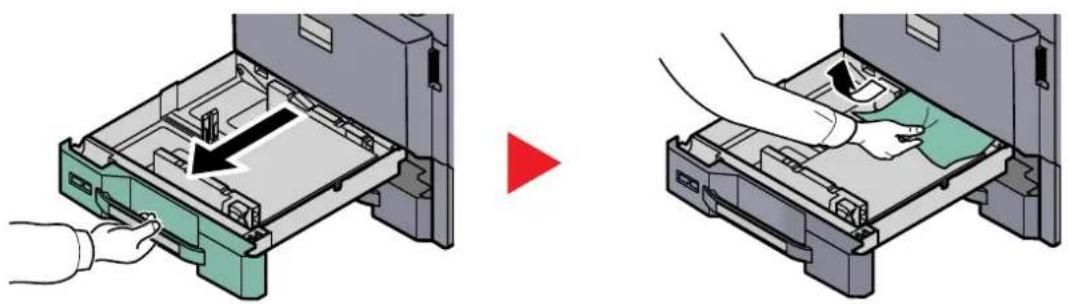
natural_image
Two-step diagram showing a hand inserting a green device into a device casing, with a red arrow indicating the process (no text or symbols present)
NOTE
To remove paper which is difficult to get access to, the inner part of the cassette can be removed.
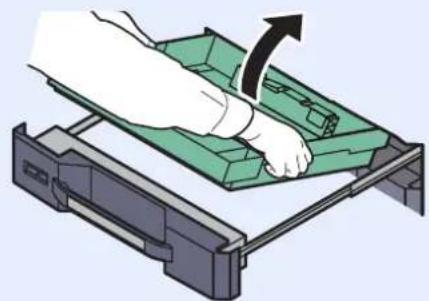
natural_image
Illustration of a hand using a green tool to adjust a green tray (no text or symbols visible)Cassette 2
1
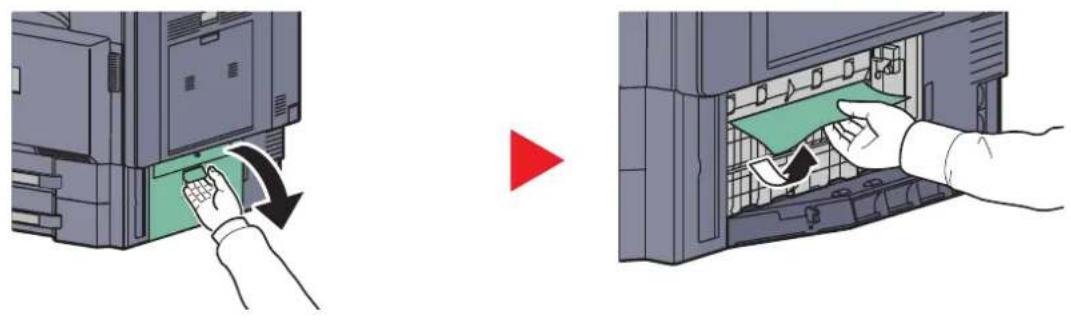
natural_image
Illustration showing two steps of inserting a computer into a device, with no visible text or symbols.2
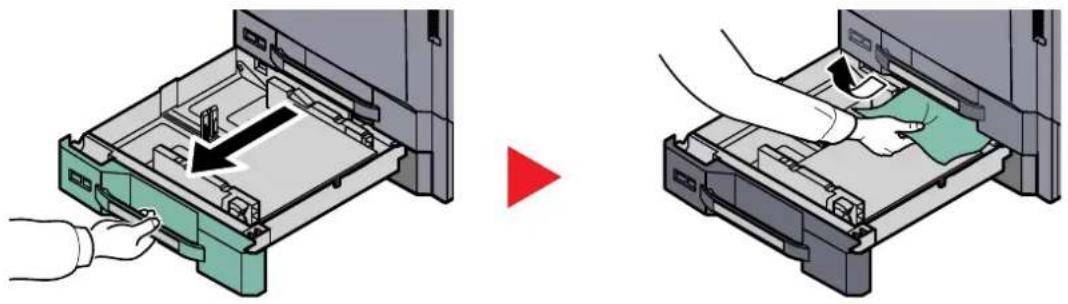
natural_image
Two-step diagram showing a device being inserted into a tray, with no visible text or symbols.
NOTE
To remove paper which is difficult to get access to, the inner part of the cassette can be removed.
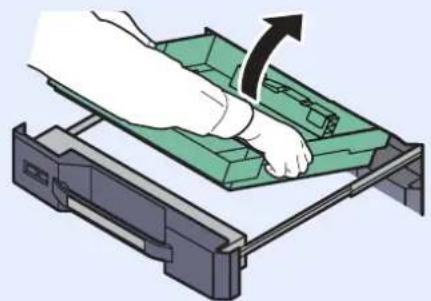
natural_image
Illustration of a hand using a green tray to adjust or install a green tray into a mechanical device (no text or symbols visible)Optional Cassettes 3 and 4
Paper Feeder (500-sheet x 2)
1
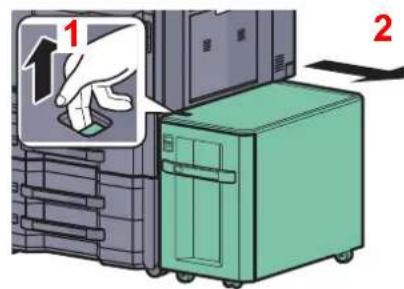
text_image
1 22
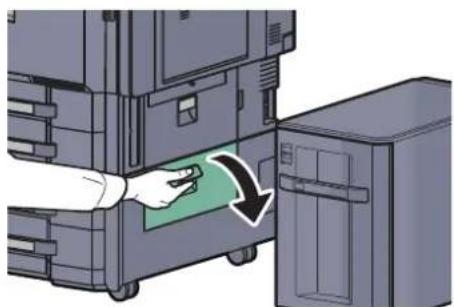
natural_image
Illustration of a hand inserting a green arrow into a computer tower (no text or symbols)
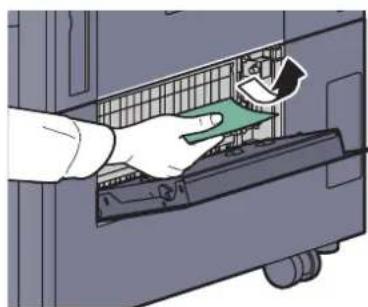
natural_image
Hand inserting a green component into a device panel (no text or symbols visible)3
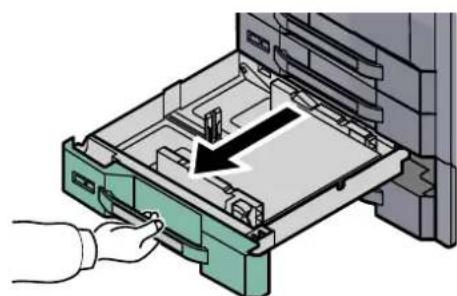
natural_image
Illustration of a hand inserting a green plastic tray into a rack with an arrow indicating the process (no text or symbols present)
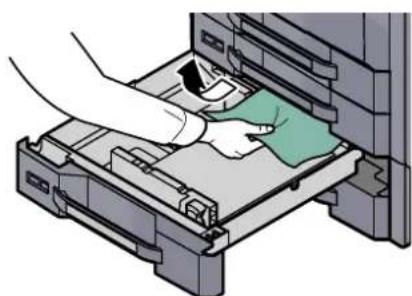
natural_image
Illustration of a hand inserting a green cloth into a file holder (no text or symbols visible)
NOTE
To remove paper which is difficult to get access to, the inner part of the cassette can be removed.
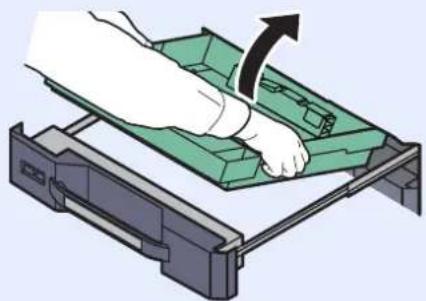
natural_image
Illustration of a hand using a green tray to press or install a green tray, with an arrow indicating the process (no text or symbols present)Large Capacity Feeder (1,500-sheet x 2)
1
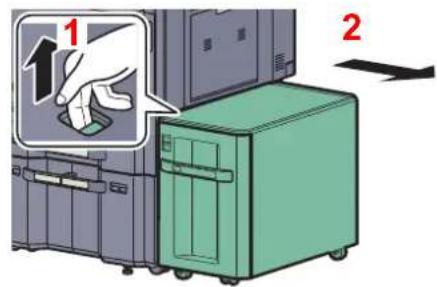
text_image
1 22
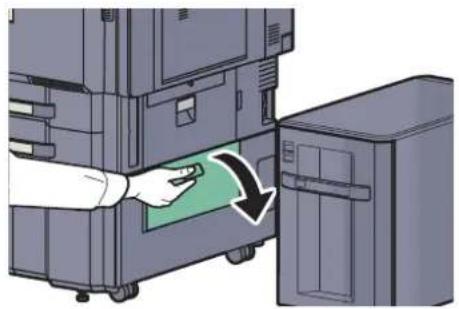
natural_image
Illustration of a hand inserting a green arrow into a computer tower (no text or symbols)
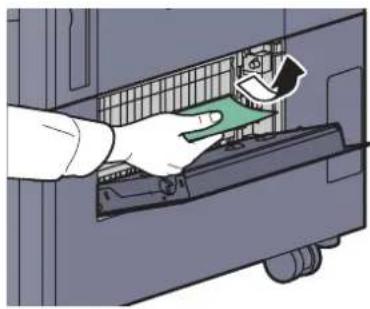
natural_image
Illustration of a hand using a wrench to adjust or install a device into a cabinet (no text or symbols visible)3
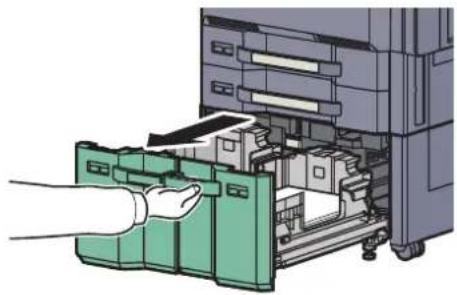
natural_image
Illustration of a hand inserting a green folder into an open file rack (no text or symbols visible)
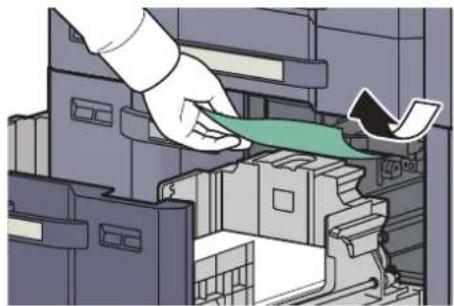
natural_image
Illustration of a hand inserting a green ribbon into a file folder (no text or symbols visible)4
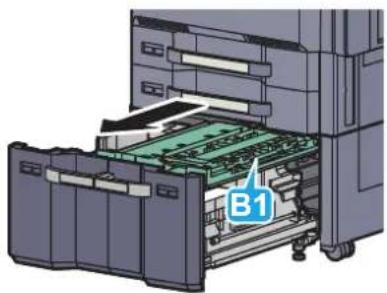
natural_image
3D mechanical assembly diagram showing a printer with green circuit board and labeled component B1 (no text or symbols beyond label)
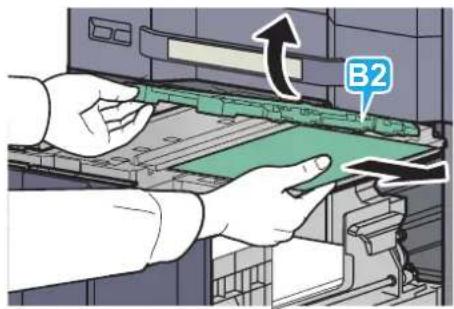
text_image
B2Multi Purpose Tray
1
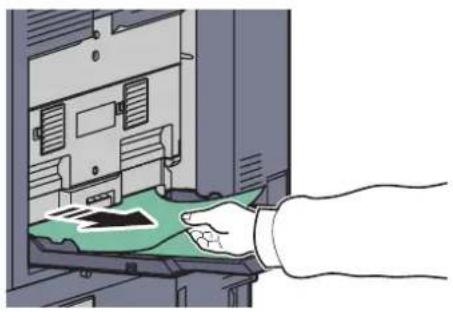
natural_image
Illustration of a hand inserting a green card into a computer tower (no text or symbols visible)
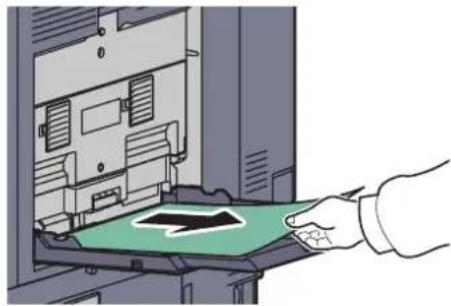
natural_image
Illustration of a hand inserting a card into a computer tower (no text or symbols visible)2
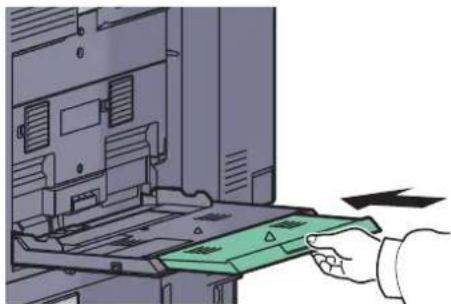
natural_image
Illustration of a hand inserting a green card into a computer tower (no text or symbols visible)3
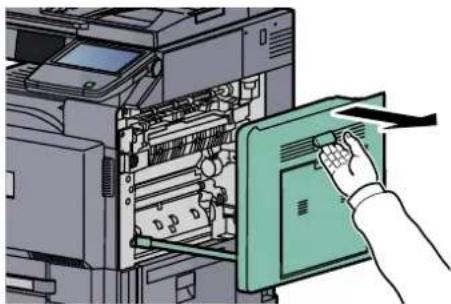
natural_image
Illustration of a hand inserting a green tablet into an open file into a printer (no text or symbols visible)4
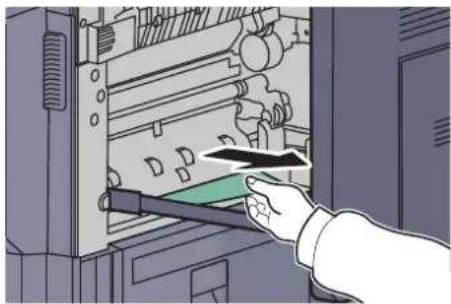
natural_image
Illustration of a hand inserting a card into a computer drive (no text or symbols visible)Inside the Right Covers 1, 3 and 4
1
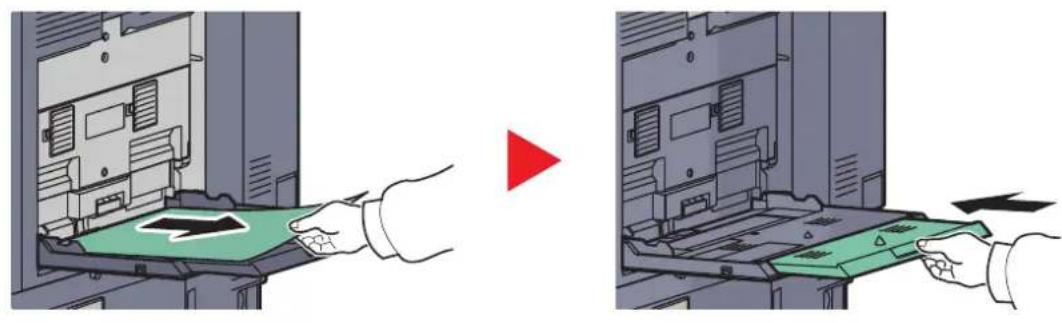
natural_image
Illustration showing two steps of inserting a device into a computer case, with no visible text or symbols.2
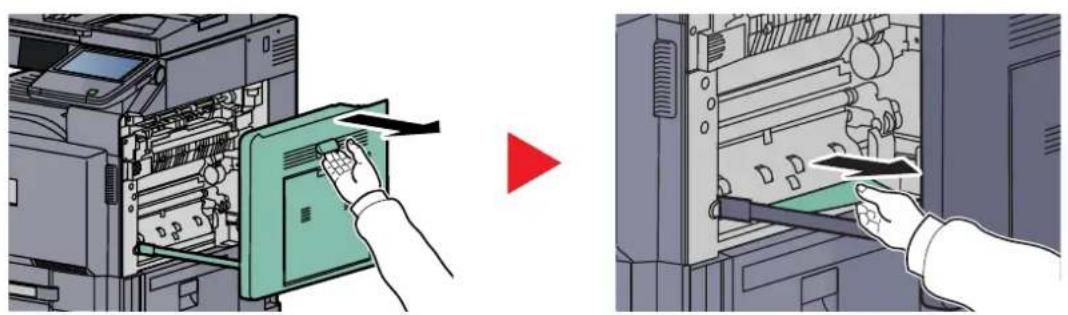
natural_image
Illustration showing two steps of inserting a computer into an open storage unit, with hands holding tools (no text or symbols present)If you are using the optional document finisher, follow step on page 10-54 to remove jammed paper in the optional bridge unit.
Duplex unit
1
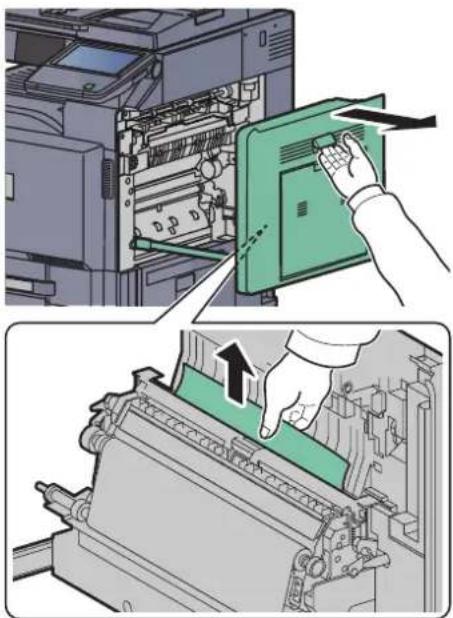
natural_image
Illustration showing a printer's internal structure being inserted into a machine, with a hand inserting a green cover (no text or symbols present)2
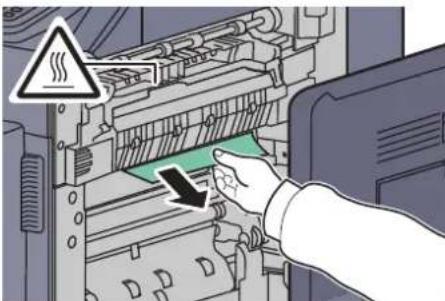
natural_image
Illustration of a printer's internal structure with a hand inserting a cable into the case (no text or symbols visible)Duplex Unit and Cassette 1
1
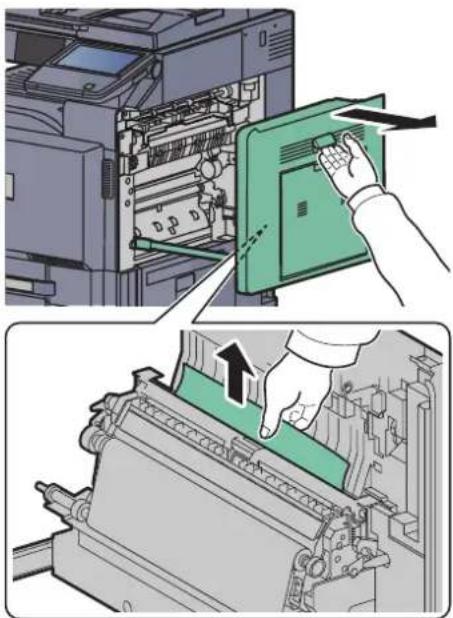
natural_image
Illustration showing a printer's internal structure being inserted into a machine, with a hand inserting a green cover (no text or symbols present)2
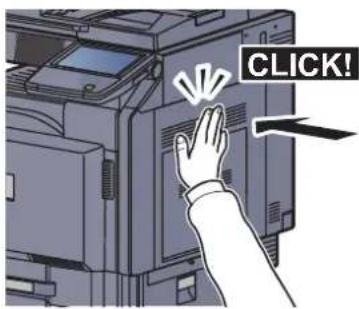
text_image
CLICK!3
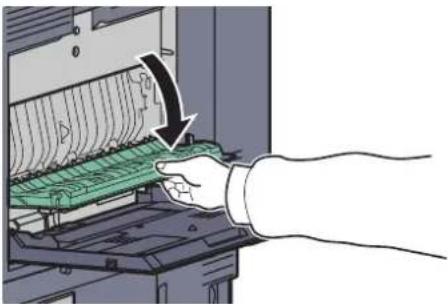
natural_image
Illustration of a hand inserting a green component into a machine (no text or symbols visible)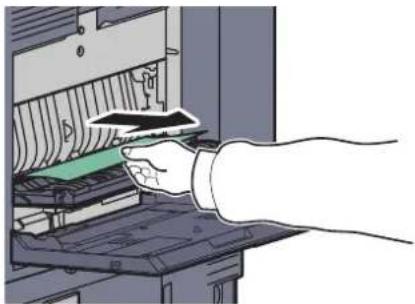
natural_image
Illustration of a hand inserting a card into a computer monitor (no text or symbols visible)4
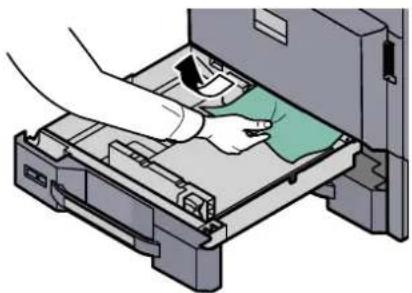
natural_image
Illustration of a hand cleaning a mechanical device with a green cloth (no text or symbols visible)
NOTE
To remove paper which is difficult to get access to, the inner part of the cassette can be removed.
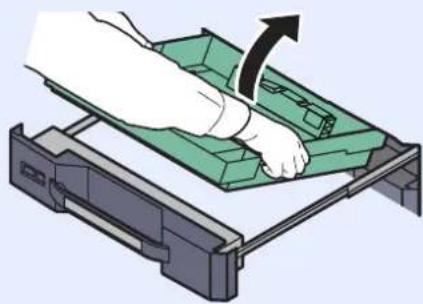
natural_image
Illustration of a hand using a green tool to press or install a green tray (no text or symbols visible)Fixing unit
1
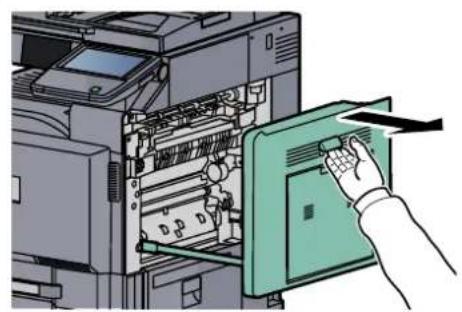
natural_image
Illustration of a printer's internal structure being inserted into a machine, with a hand inserting a green paper tray (no text or symbols visible)
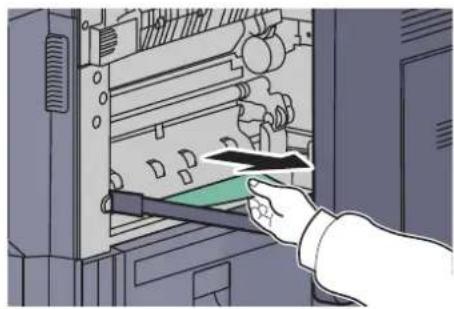
natural_image
Illustration of a hand inserting a device into a computer rack (no text or symbols visible)2
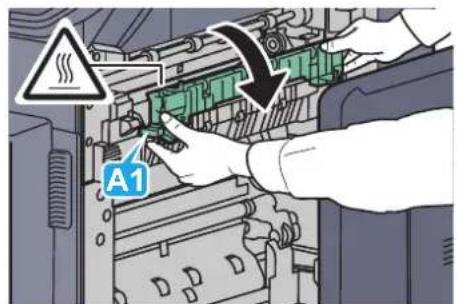
text_image
A1

natural_image
Illustration of hands installing a green component on an electronic device (no text or symbols visible)3
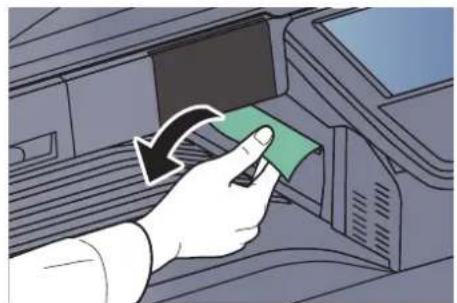
natural_image
Hand inserting a green card into a printer's case, with a black arrow indicating the process (no text or symbols present)Optional Document Processor
1
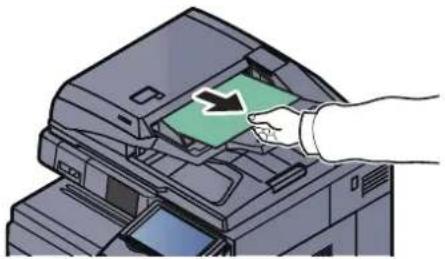
natural_image
Illustration of a hand inserting a green card into a printer (no text or symbols visible)
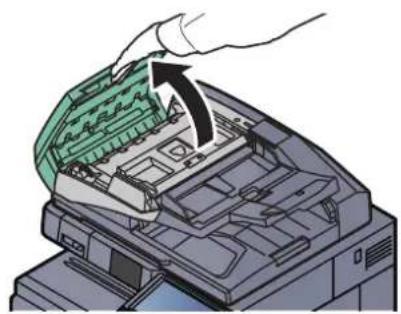
natural_image
Illustration of a printer's internal structure being inserted, showing green cover and black arrow indicating assembly (no text or symbols)2
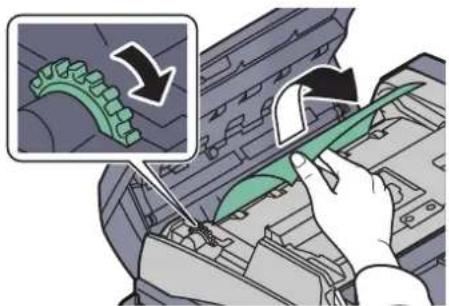
natural_image
Mechanic using a tool to adjust a tire component, with an inset showing the gear being removed (no text or symbols visible)If the original is difficult to remove, turn the dial. The original will scroll out to a position where it can be removed easily.
If you are using the document processor (Automatic 2-Sided), go to step 3.
3

natural_image
Close-up of hands installing or adjusting a green plastic component on a mechanical device (no text or symbols visible)
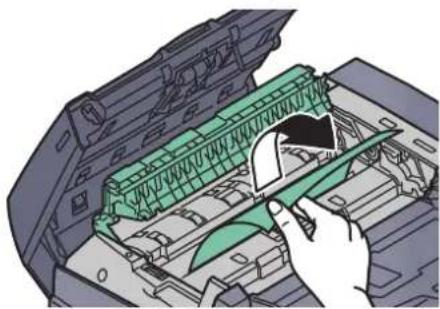
natural_image
Illustration of a hand using a green tool to clean or adjust internal components (no text or symbols visible)Optional Job Separator
Inner Job Separator
1
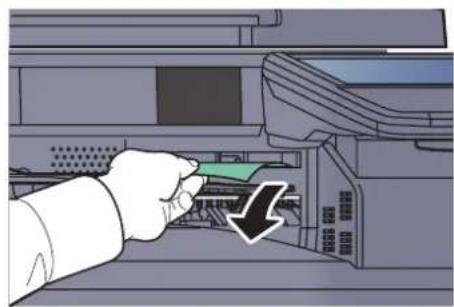
natural_image
Illustration of a hand inserting a green card into a printer's internal structure (no text or symbols visible)2
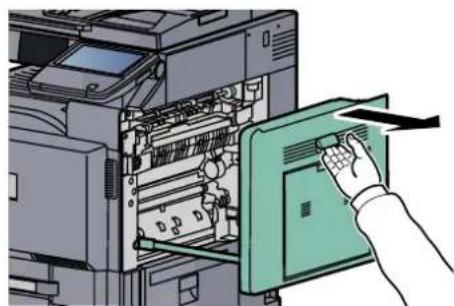
natural_image
Illustration of a hand inserting a green tablet into an open printer case (no text or symbols visible)3
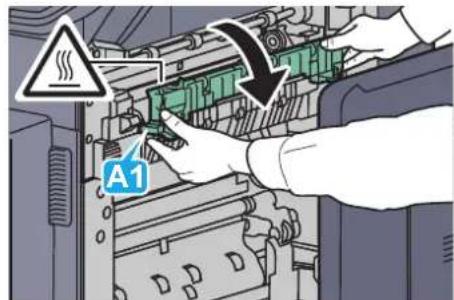
text_image
A1
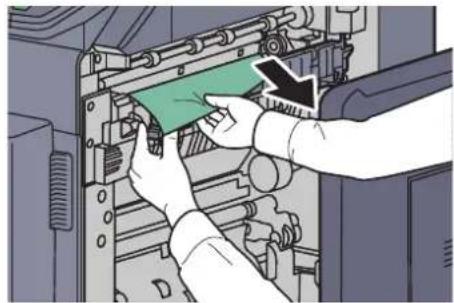
natural_image
Illustration of hands installing a green component on an electronic device (no text or symbols visible)Right Job Separator
1
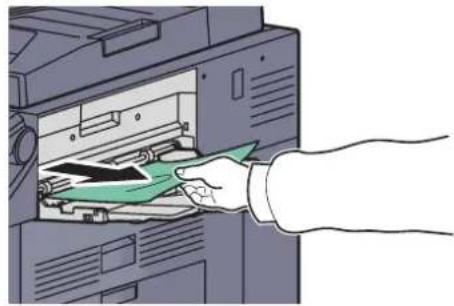
natural_image
Illustration of a hand inserting a green folder into an open computer (no text or symbols visible)2
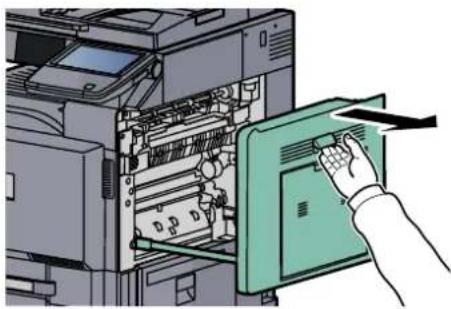
natural_image
Illustration of a hand inserting a green electronic device into an open printer (no text or symbols visible)3
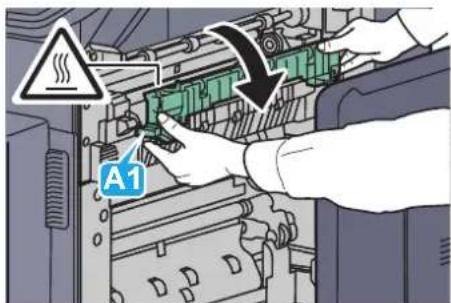
text_image
A1
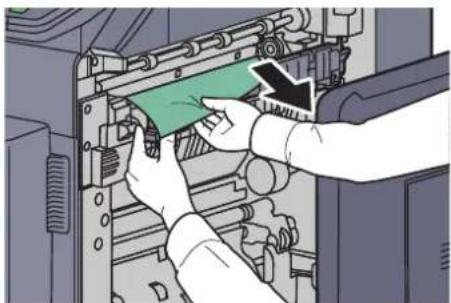
natural_image
Illustration of hands installing or adjusting a green component on an electronic device (no text or symbols visible)Bridge Unit (Option)
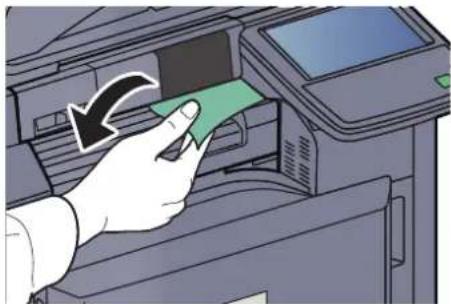
natural_image
Hand inserting a green card into an open printer (no text or symbols visible)

text_image
Diagram showing two hands operating a printer with arrows indicating process flow, labeled with numbers 1 and 2.1,000-sheet Finisher (Option)
1
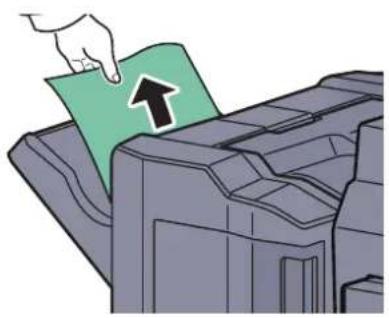
natural_image
Illustration of a hand inserting a green card into a printer (no text or symbols)
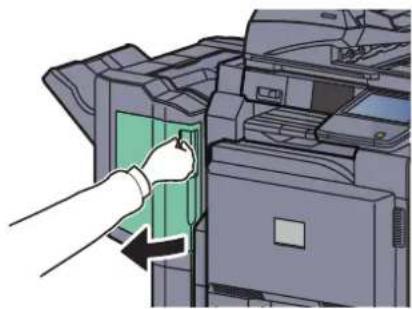
natural_image
Illustration of a hand inserting a green card into an open printer (no text or symbols visible)2
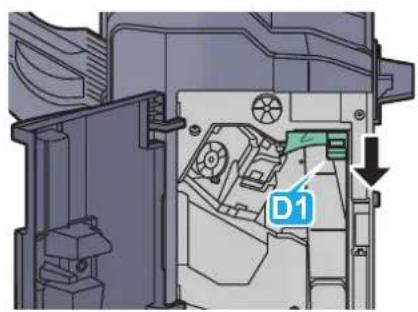
text_image
D1
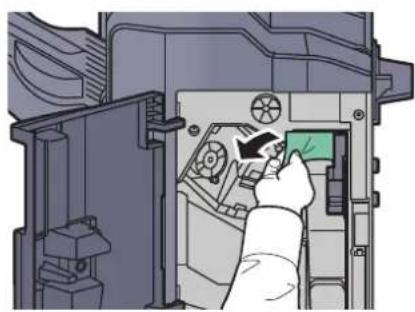
natural_image
Illustration of a hand inserting a component into a device (no text or symbols visible)3
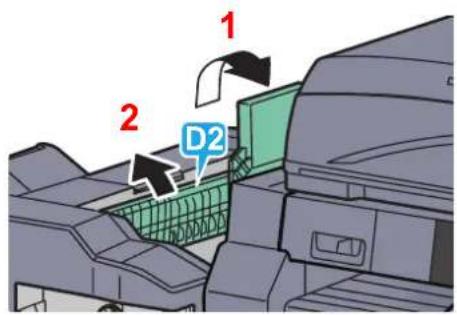
text_image
1 2 D2
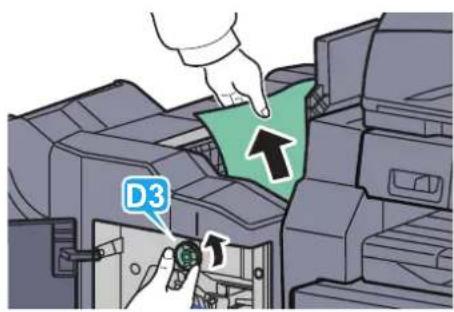
text_image
D34,000-sheet Finisher (Option)
Coupling Section
1
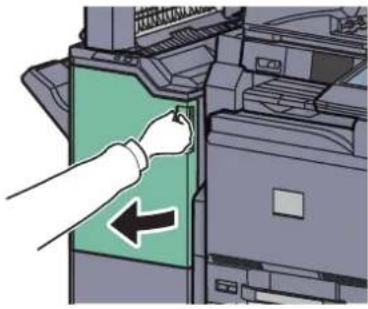
natural_image
Illustration of a printer's door panel being inserted, with a hand pointing to the green cover (no text or symbols visible)2
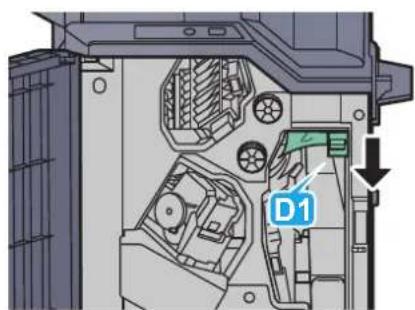
text_image
D1
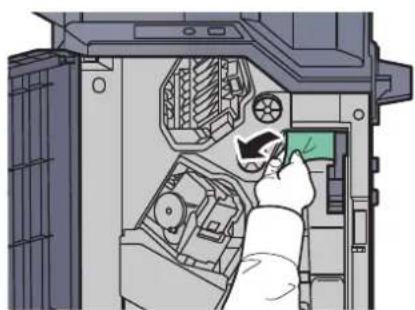
natural_image
Illustration of a hand inserting a device into a computer case, showing internal components and a green control panel (no text or symbols)Tray A
1
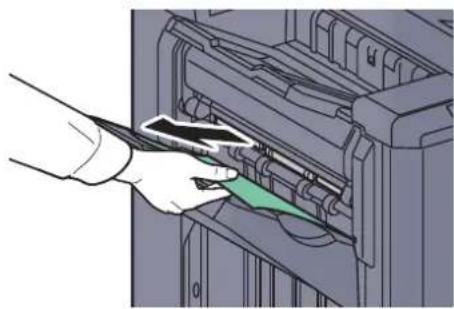
natural_image
Illustration of a hand inserting a green card into a device panel (no text or symbols visible)
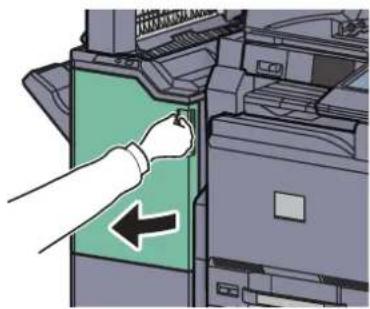
natural_image
Illustration of a hand inserting a green folder into an open printer (no text or symbols visible)2
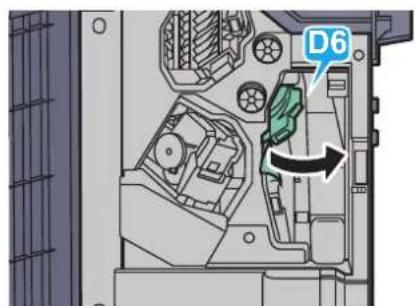
text_image
D6
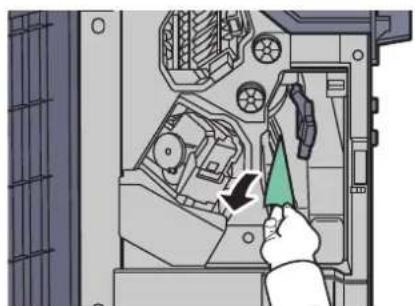
natural_image
Diagram of a device interior showing a hand inserting a green arrow into a folder with mechanical components (no text or symbols visible)3
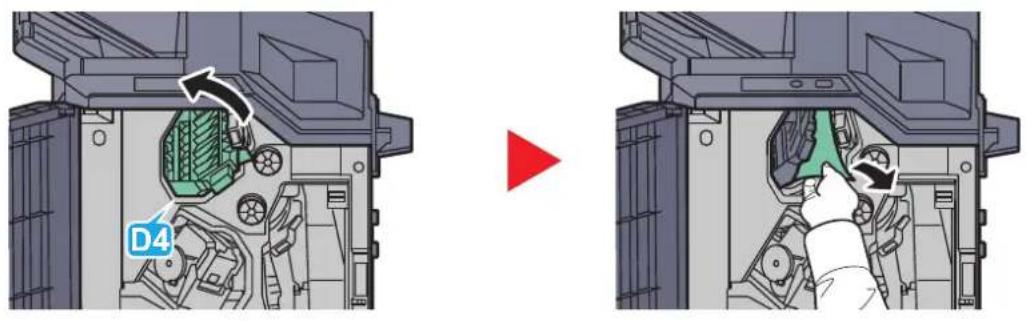
text_image
D4
NOTE
If it is difficult to remove the jammed paper, turn feed knob D3 until the jammed paper is in a location where it is easy to remove.
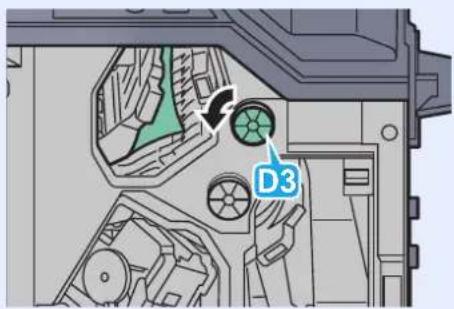
text_image
D3Tray B
1
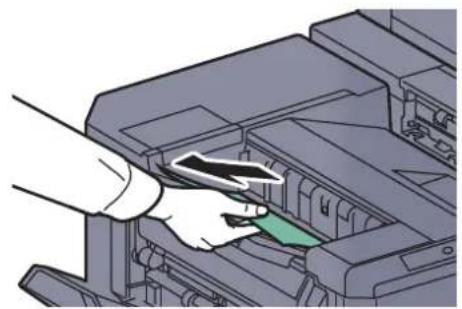
natural_image
Illustration of a hand inserting a green component into a mechanical device (no text or symbols visible)2
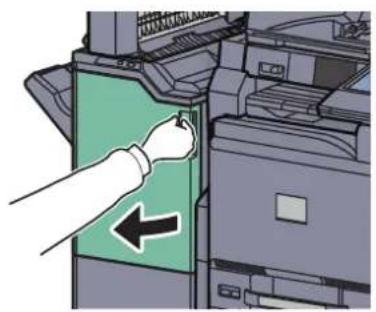
natural_image
Illustration of a hand inserting a green folder into a printer (no text or symbols visible)
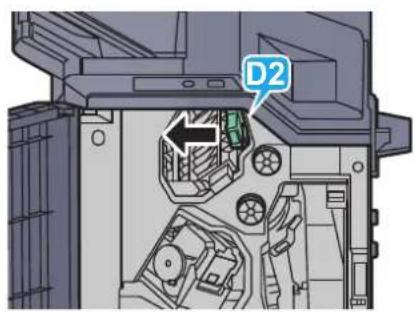
text_image
D23
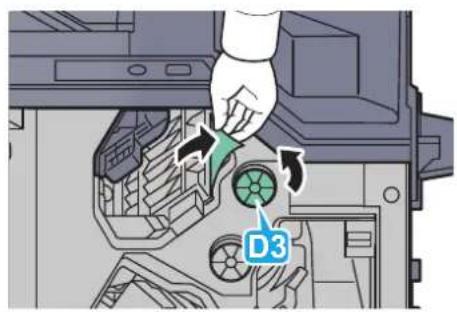
text_image
Diagram showing a hand inserting a component into a device with labeled parts D3 and directional arrows indicating flow or movement.Tray C
1
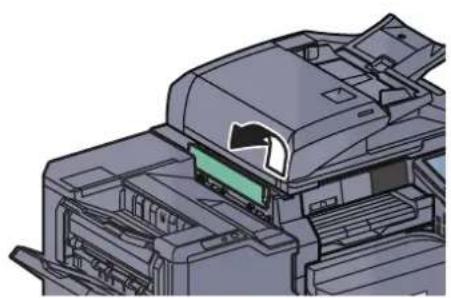
natural_image
3D mechanical assembly diagram showing internal components with no visible text or symbols
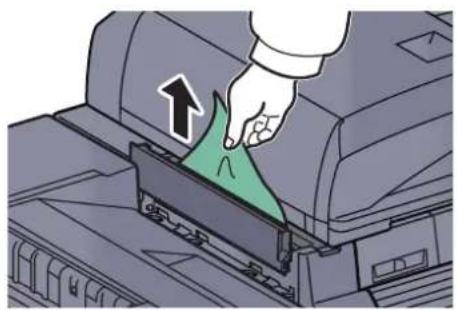
natural_image
Illustration of a printer's internal structure with a hand inserting a green leaf into it (no text or symbols)Conveyor/Inner Tray
2
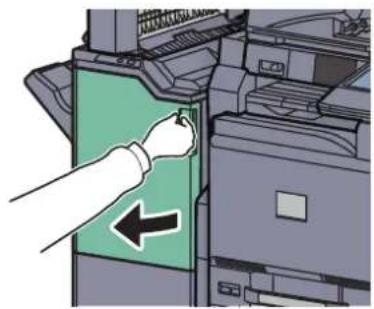
natural_image
Illustration of a hand inserting a green folder into an office machine (no text or symbols visible)
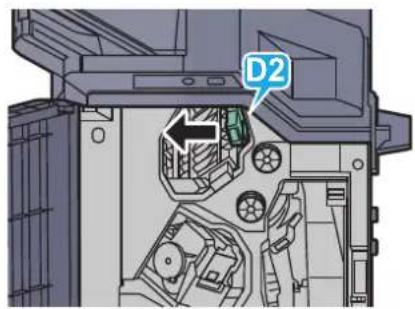
text_image
D23
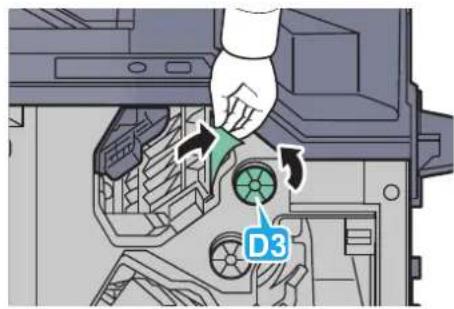
text_image
D3Mailbox (Option)
1
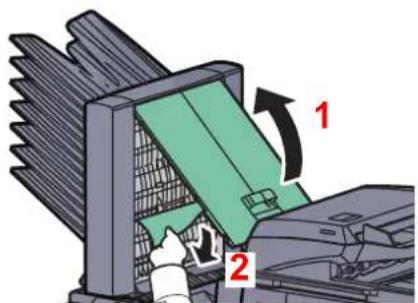
text_image
Diagram showing a printer or printer with labeled parts and directional arrows indicating process flow or movement.Center-Folding Unit (Option)
Ejection Section
1
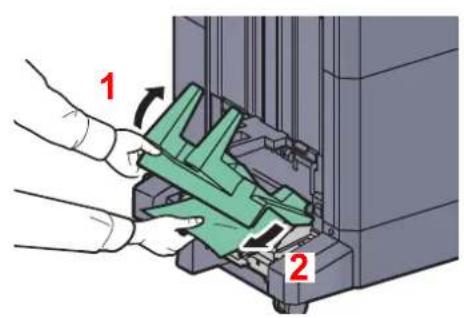
text_image
Diagram showing two labeled steps (1 and 2) of a mechanical assembly or device with green components being inserted.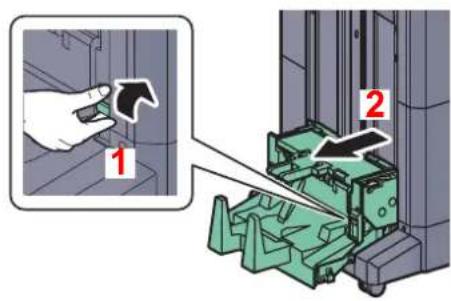
text_image
Diagram showing a hand inserting a component into a mechanical device, with labeled parts 1 and 2.2
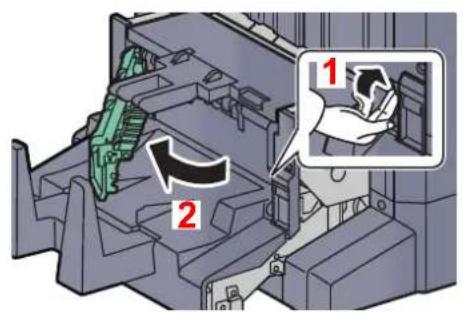
text_image
Technical diagram showing mechanical assembly with labeled parts and a magnified inset highlighting component 1
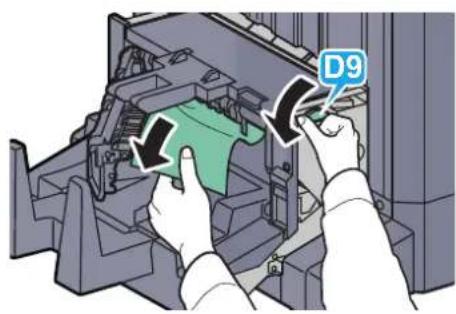
text_image
D93
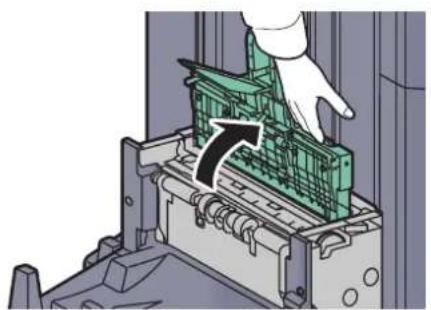
natural_image
Close-up of a hand pressing down on a green mechanical component into a machine casing (no text or symbols visible)
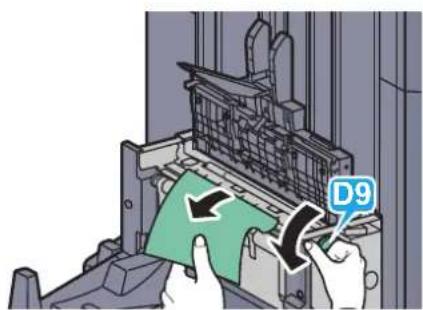
text_image
D9Conveyor Section
1
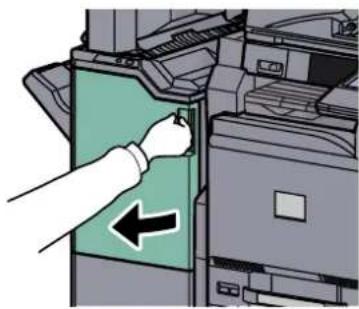
natural_image
Illustration of a printer's door panel with a hand inserting a green cover, showing no text or symbols.2
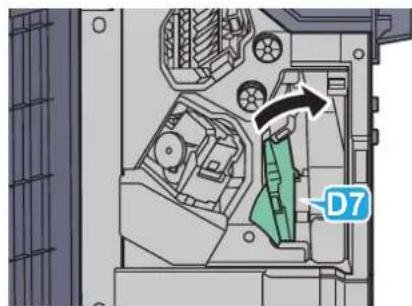
text_image
D7
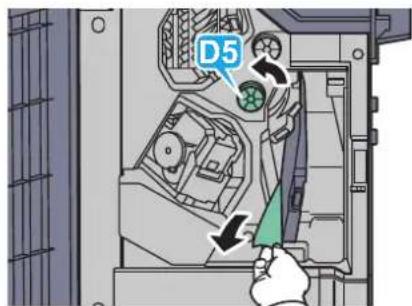
text_image
D5If there is no paper jam in the conveyor guide (D7), proceed to the following step.
3
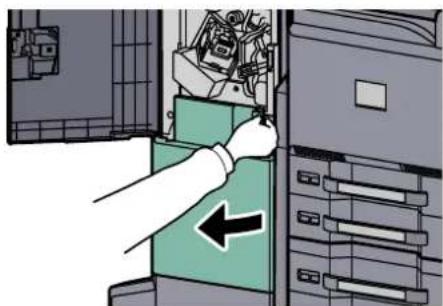
natural_image
Illustration of a hand inserting a device into a server rack with an arrow indicating left-side motion (no text or symbols present)4
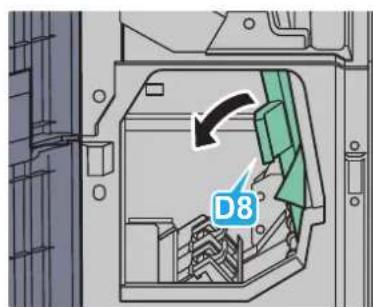
text_image
D8
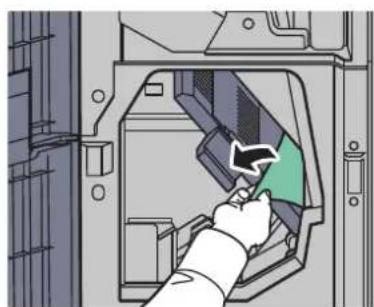
natural_image
Illustration of a hand inserting a device into a device casing (no text or symbols visible)5
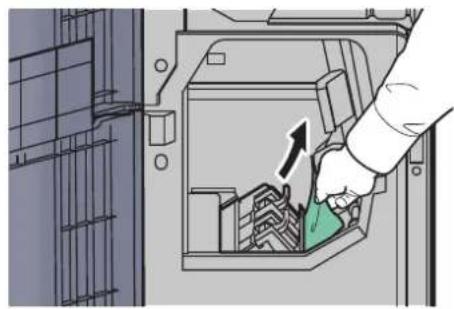
natural_image
Illustration of a hand inserting a green component into a device casing (no text or symbols visible)Cassette 5 (Option)
1
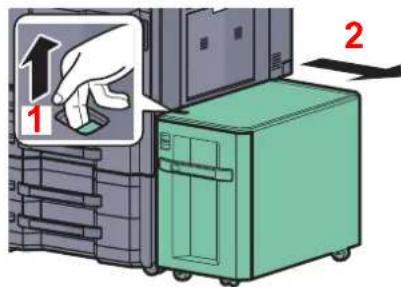
text_image
1 2
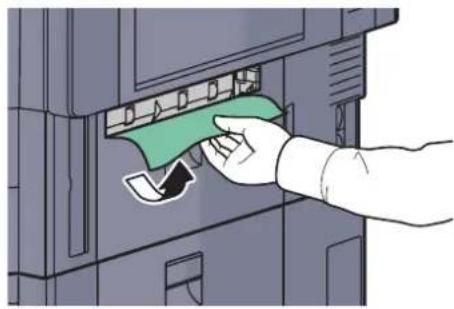
natural_image
Hand inserting a green card into a computer drive (no text or symbols visible)2
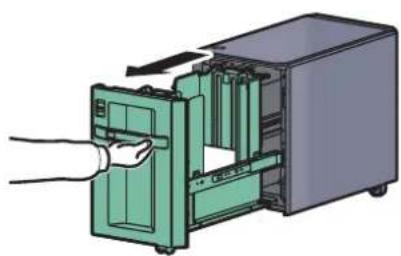
natural_image
Illustration of a computer tower with a hand inserting a green drive into the internal compartment (no text or symbols visible)

natural_image
Illustration of a hand inserting a green packet into a computer tower (no text or symbols visible)Clearing a Staple Jam
1,000-sheet Finisher
1
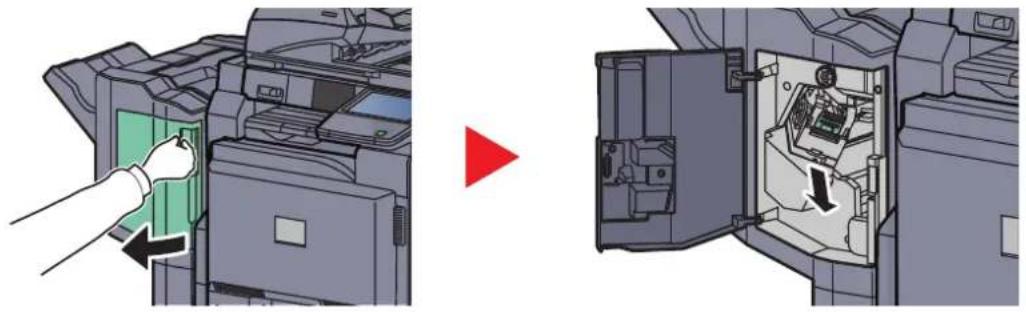
natural_image
Diagram showing a printer's internal structure before and after assembly, with no visible text or symbols.2
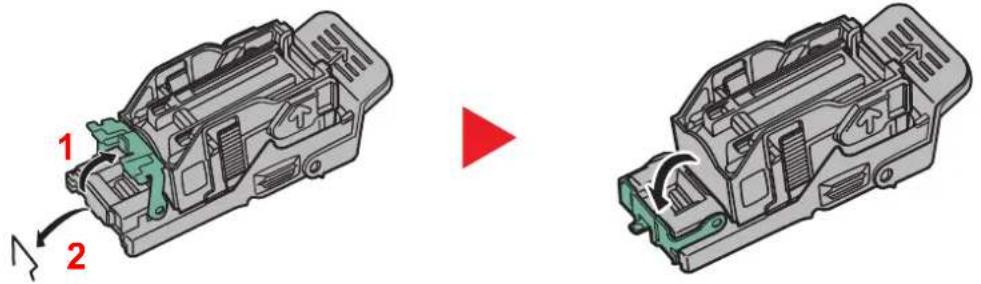
text_image
Technical diagram showing a device component before and after assembly, with numbered parts and directional arrow indicating motion.3
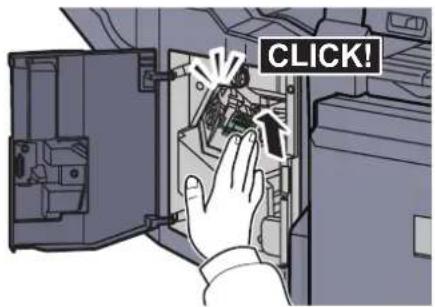
text_image
CLICK!4,000-sheet Finisher
Staple cartridge holder A
1
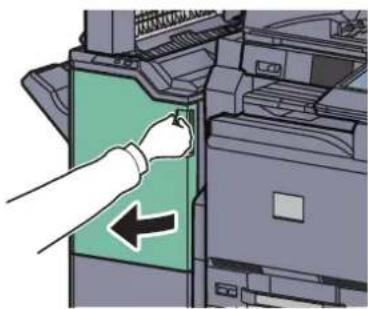
natural_image
Illustration of a hand inserting a green card into a printer (no text or symbols visible)▶
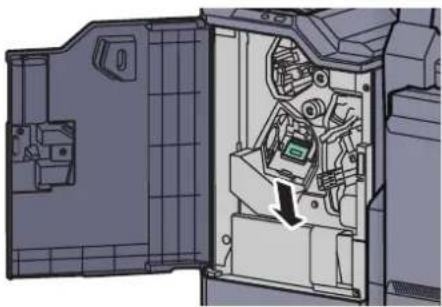
natural_image
Technical diagram of an open mechanical device with internal components and a downward arrow indicating a component (no text or symbols present)2
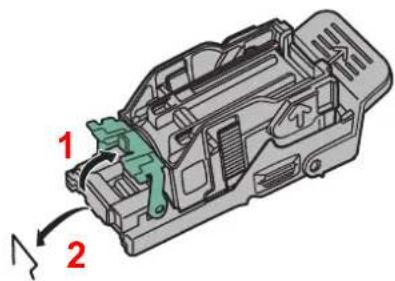
text_image
Technical diagram of a mechanical component with numbered parts and directional arrows indicating assembly or flow.▶
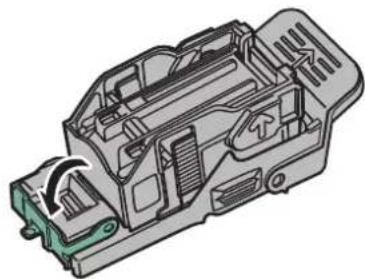
natural_image
Technical line drawing of a mechanical component with internal channels and a green valve (no text or symbols)3
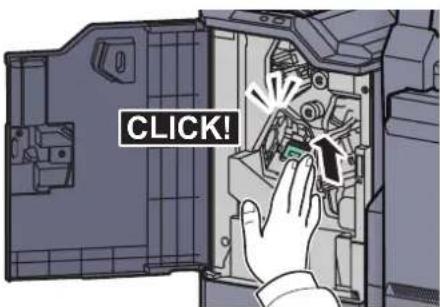
text_image
CLICK!Staple cartridge holder B/C
1
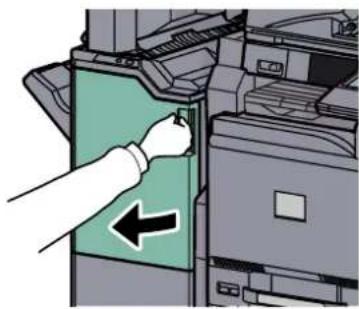
natural_image
Illustration of a hand inserting a green cover into an office machine (no text or symbols visible)
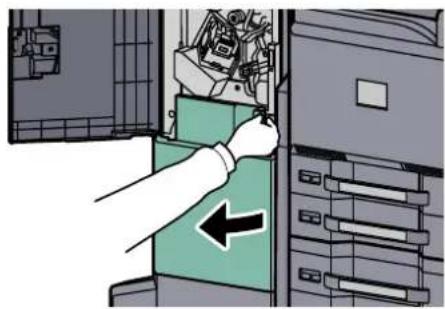
natural_image
Illustration of a server rack with a hand inserting a device into the rack (no text or symbols visible)2
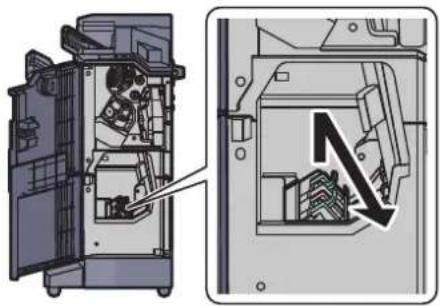
natural_image
Technical diagram of a mechanical device showing internal components and a directional arrow indicating motion (no text or symbols present)3
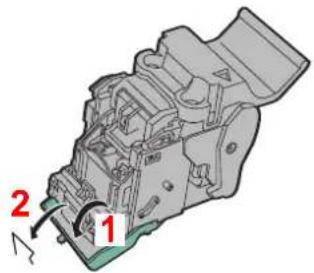
text_image
Technical diagram of a mechanical component with numbered parts and directional arrows indicating motion or assembly.
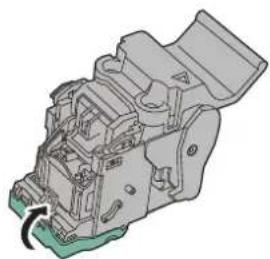
natural_image
3D mechanical assembly diagram showing internal components and a green curved arrow indicating rotation (no text or symbols)4
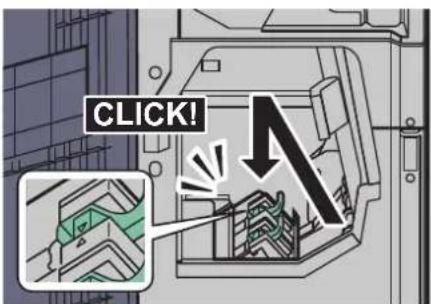
text_image
CLICK!11 Appendix
This chapter explains the following topics:
Optional Equipment 11-2
Overview of Optional Equipment 11-2
Optional Applications 11-8
Character Entry Method 11-10
Entry Screens 11-10
Entering Characters 11-12
Paper 11-13
Basic Paper Specifications 11-13
Choosing the Appropriate Paper 11-14
Special Paper 11-17
Specifications 11-22
Common functions 11-22
Copy functions 11-24
Printer functions 11-25
Scanner functions 11-25
Document Processor (Option) 11-26
Paper Feeder (500-sheet x 2) (Option) 11-26
Large Capacity Feeder (1,500-sheet x 2) (Option) 11-27
Side Feeder (3,000-sheet) (Option) 11-27
1,000-sheet Finisher (Option) 11-28
4,000-sheet Finisher (Option) 11-29
Hole Punch Unit (Option) 11-29
Mailbox (Option) 11-30
Center-Folding Unit (Option) 11-30
Inner Job Separator (Option) 11-31
Inner Job Separator (JS-732) (Option) 11-31
Right Job Separator (Option) 11-32
Banner Tray (Option) 11-32
Glossary 11-33
Optional Equipment Overview of Optional Equipment
The following optional equipment is available for the machine.
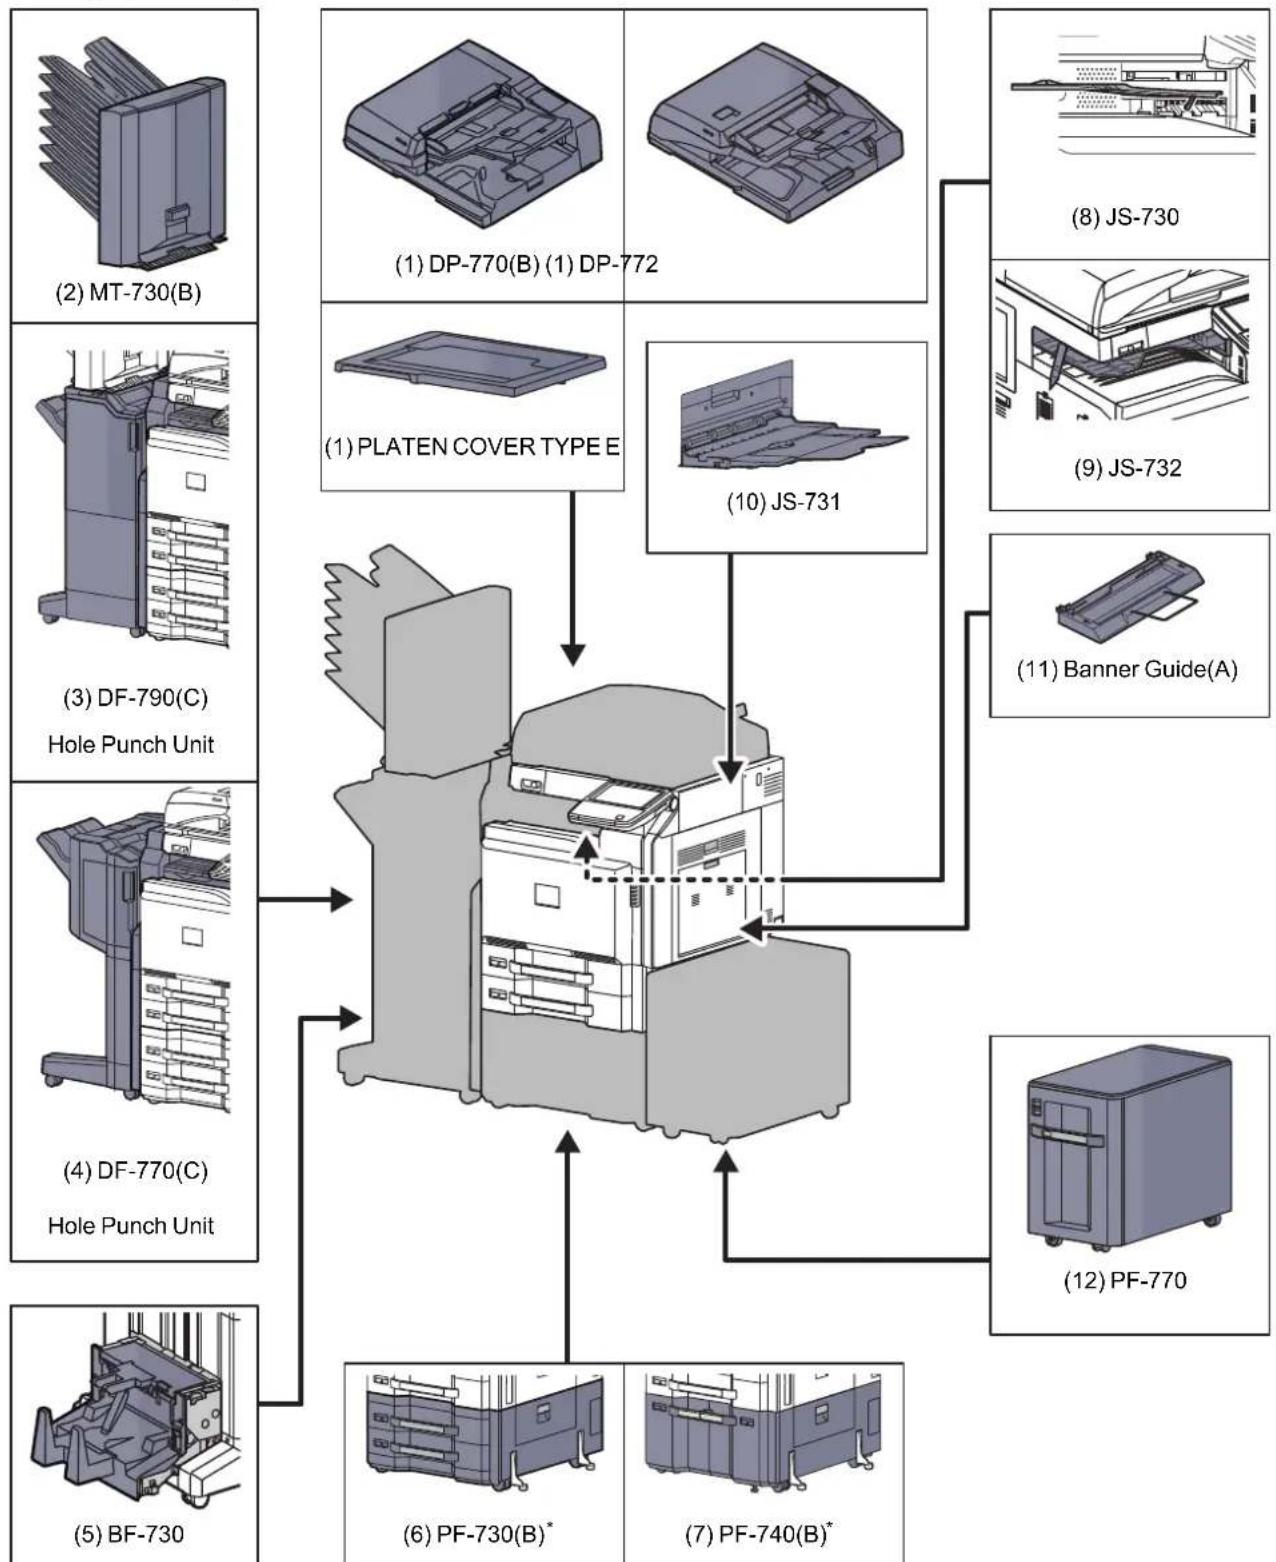
flowchart
graph TD
    A["(2) MT-730(B)"] --> B["Central Printer"]
    C["(3) DF-790(C) Hole Punch Unit"] --> B
    D["(4) DF-770(C) Hole Punch Unit"] --> B
    E["(5) BF-730"] --> B
    F["(6) PF-730(B)*"] --> B
    G["(7) PF-740(B)*"] --> B
    H["(8) JS-730"] --> I["Printer"]
    J["(9) JS-732"] --> I
    K["(10) JS-731"] --> I
    L["(11) Banner Guide(A)"] --> I
    M["(12) PF-770"] --> I
* If neither a document finisher nor a side feeder is installed, the toppling prevention kit must be installed.
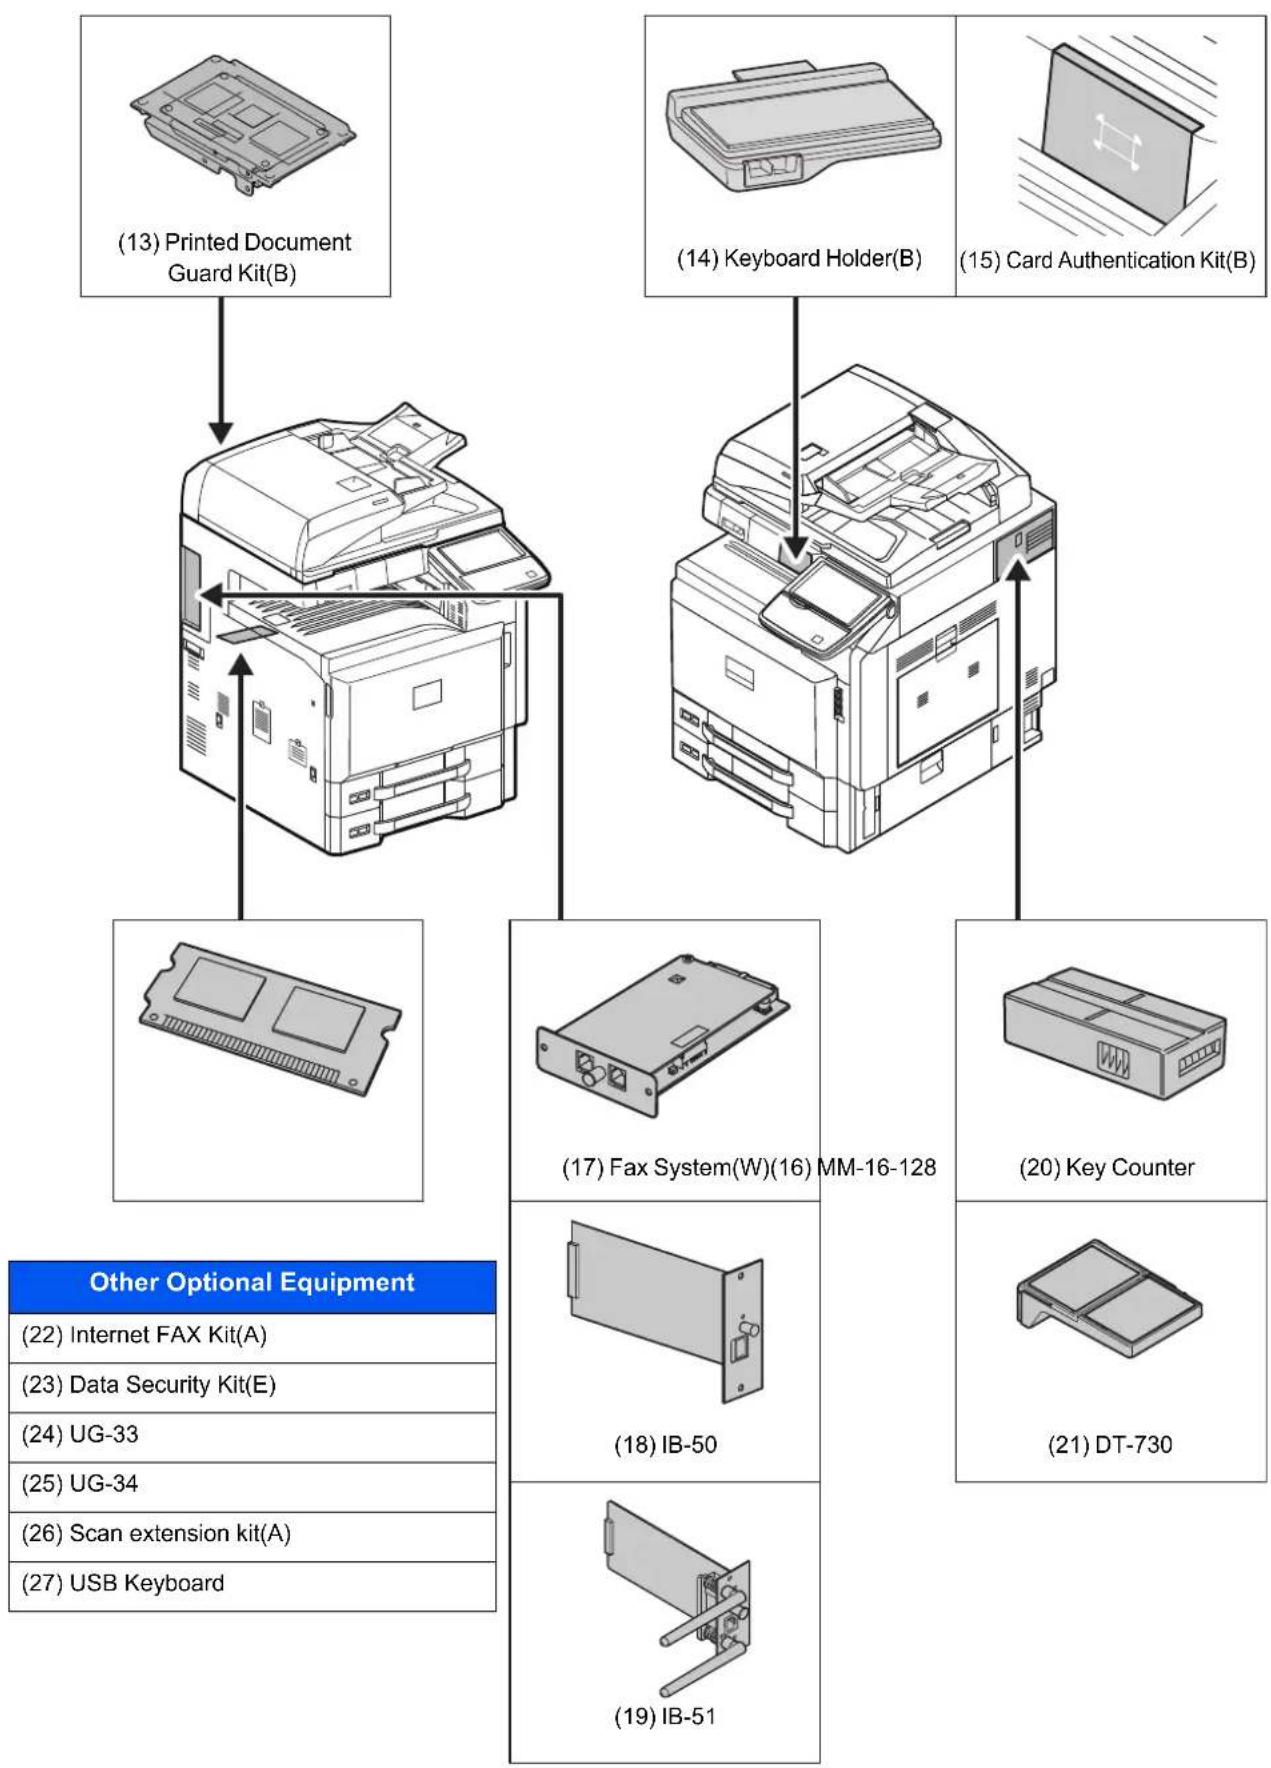
flowchart
graph TD
    A["(13) Printed Document Guard Kit(B)"] --> B["Printer"]
    C["(14) Keyboard Holder(B)"] --> D["Printer"]
    E["(15) Card Authentication Kit(B)"] --> F["Printer"]
    G["Other Optional Equipment"] --> H["(22) Internet FAX Kit(A)"]
    G --> I["(23) Data Security Kit(E)"]
    G --> J["(24) UG-33"]
    G --> K["(25) UG-34"]
    G --> L["(26) Scan extension kit(A)"]
    G --> M["(27) USB Keyboard"]

    B --> N["Printer"]
    D --> O["Printer"]
    F --> P["Printer"]
    H --> Q["Printer"]
    I --> R["Printer"]
    J --> S["Printer"]
    K --> T["Printer"]
    L --> U["Printer"]
    M --> V["Printer"]

    N --> W["(17) Fax System(W)(16) MM-16-128"]
    O --> X["(20) Key Counter"]
    P --> Y["(18) IB-50"]
    Q --> Z["(21) DT-730"]
    R --> AA["(19) IB-51"]
(1) DP-770(B) "Document Processor (Reverse Automatic)" DP-772 "Document Processor (Dual Scan)" PLATEN COVER TYPE E "Platen"
Automatically scans originals. Also you can perform duplex copying and split copying.
For document processor operation, refer to Loading Originals in the Document Processor on page 5-3.
When the document processor is not used, please use the PLATEN COVER TYPE E.
(2) MT-730(B) "Mailbox"
Makes it easy to sort output into separate trays. Installing this option adds 7 output trays. When multiple computer users share the printer, each user can print to a specified tray. Installs on the 4,000-sheet Finisher.

NOTE
To deliver output to the mail box, change the Paper Output selection on the operation panel or in the printer driver, or change in the default settings. (For details, refer to Paper Output on page 6-22.)
(3) DF-790(C) "4,000-sheet Finisher"
This is a large-capacity document finisher capable of holding large print runs and of separating and offsetting multiple copies of a printout into individual copies. It can also staple or hole-punch (optional) the offset printouts.
User can select manual staple by operation button. A mail box and folding unit are also available as options.
(4) DF-770(C) "1,000-sheet Finisher"
This is a document finisher capable of holding large print runs and of separating and offsetting multiple copies of a printout into individual copies. It can also staple or hole-punch (optional) the offset printouts.
(5) BF-730 "Folding Unit"
Folds printed output at the center or in tri-fold to enable the creation of simple booklets. Installs on the 4,000-sheet Finisher.
(6) PF-730(B) "Paper Feeder (500-sheet x2)"
Two additional cassettes identical to the printer's cassette can be installed in the printer. Paper capacity and loading method are the same as the standard cassettes. Refer to Standard cassettes on page 3-18 for loading paper.
(7) PF-740(B) "Large Capacity Feeder (1,500-sheet x 2)"
In addition to the printer's cassettes, you can also install an optional large capacity feeder (1,500-sheet x 2) capable of holding up to 3,000 sheets of A4, B5 or Letter paper. Refer to The Large Capacity Feeder (1,500-sheet x 2) (Option) on page 3-21 for loading paper.
(8) JS-730 "Inner Job Separator"
Separate paper according to output tray for easier sorting. Specify as the output tray for copy or print jobs. Or, specify as the default output tray for printing from the copy or Document Box screen, printing from the PC, and printing of the received fax data.

IMPORTANT
Note that some paper types have a tendency to curl and may jam in the paper eject unit.
If the ejected paper slips or stacks unevenly, turn the paper in the cassette over and try again.
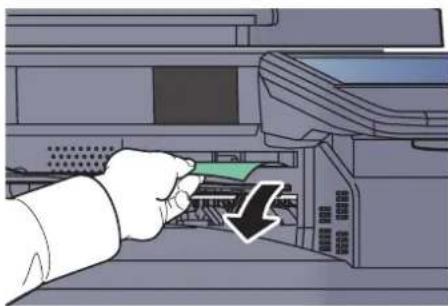
natural_image
Illustration of a hand inserting a card into a printer (no text or symbols visible)
NOTE
To ensure that paper is delivered to the Inner Job Separator, select the output destination or change the default setting. (For details, refer to the Paper Output on page 6-22.)
(9) JS-732 "Inner Job Separator (JS-732)"
Separate paper according to output tray for easier sorting. Specify as the output tray for copy or print jobs. Or, specify as the default output tray for printing from the copy or Document Box screen, printing from the PC, and printing of the received fax data.

IMPORTANT
Note that some paper types have a tendency to curl and may jam in the paper eject unit.
If the ejected paper slips or stacks unevenly, turn the paper in the cassette over and try again.
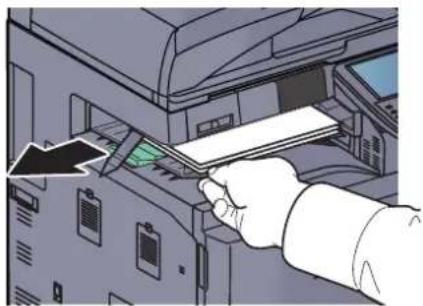
natural_image
Illustration of a hand inserting a card into a computer (no text or symbols visible)
NOTE
- To ensure that paper is delivered to the Inner Job Separator (JS-732), select the output destination or change the default setting. (For details, refer to the Paper Output on page 6-22.)
- If the paper is A3, B4, Ledger, or Legal, pull out the auxiliary tray.
- The busy light stays on until the output is removed from the Inner Job Separator (JS-732).
(10) JS-731 "Right Job Separator"
Separate paper according to output tray for easier sorting. Specify as the output tray for copy or print jobs. Or, specify as the default output tray for printing from the copy or Document Box screen, printing from the PC, and printing of the received fax data.
(11) Banner Guide(A) "Banner Tray"
This tray enables continuous feeding of banner paper. Up to 10 sheets of banner paper can be loaded. To attach the tray and load paper, refer to Using the Banner Tray (Option) on page 4-10.
(12) PF-770 "Side Feeder (3,000-sheet)"
In addition to the printer's cassettes, you can also install an optional side feeder (3,000-sheet) capable of holding up to 3,000 sheets of A4, B5 or Letter paper. Refer to Side Feeder (3,000-sheet) (Option) on page 3-25 for loading paper.
(13) Printed Document Guard Kit(B) "Printed Document Guard Kit"
This prevents the unauthorized copying and/or transmission of documents that contain important confidential or personal information. When a document is printed from a computer, this feature imprints a special pattern on the document. When anyone attempts to copy or send that document on this machine, the machine detects the pattern and protects the information by printing the document in blank and prohibiting transmission.
(14) Keyboard Holder(B) "Keyboard Holder"
A USB keyboard connected to the machine can be placed here.
(15) Card Authentication Kit(B) "Card Authentication Kit"
User login administration can be performed using ID cards. To do so, it is necessary to register ID card information on the previously registered local user list. For more information about how to register this information, refer to the Card Authentication Kit(B) Operation Guide.
(16) MM-16-128 "FAX Expansion Memory"
Image storage memory (128 MB) that allows the machine to receive more pages of incoming faxed originals. Expansion memory should only be installed or removed by the service representative.
(17) Fax System(W) "FAX Kit"
By installing the FAX kit, fax send/receive is enabled. Also, it is possible to use it as a network fax, by using it with a computer. When two FAX kits are installed, the units can be connected to two different telephone lines which will enable quicker message transmission to a number of recipients. If one of the lines is dedicated to receiving, the busy line time can be reduced. For further details, refer to FAX Operation Guide.
(18) IB-50 "Network Interface Kit"
The Network Interface Kit provides a high-speed connection for the Gigabit-per-second interface. Since the kit was designed to work with TCP/IP, NetWare, NetBEUI, and AppleTalk protocols, it fulfills the network printing demands on Windows, Macintosh, and UNIX environments. This expansion kit is also compatible with ThinPrint.
(19) IB-51 "Wireless Network Interface Kit"
This is a wireless LAN interface card which supports the wireless LAN specifications IEEE802.11n (Max 300 Mbps) and 11 g/b. With the utilities supplied, settings are possible for a variety of OS and network protocols.
(20) Key Counter "Key Counter"
Use the key counter to monitor machine usage. The key counter offers a convenient solution for centralized management of copy volume for different departments in a large company.
Inserting the Key Counter
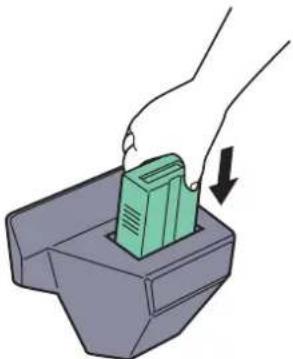
natural_image
Illustration of a hand inserting a green card into a gray container with a downward arrow (no text or symbols)Insert the key counter securely into the key counter slot.

NOTE
When the key counter function is activated, copies can only be made when a key counter is inserted. If the key counter is not inserted, "Insert key counter". will be displayed.
(21) DT-730 "Document Table"
Place original or other documents when using the machine. It has a drawer to accommodate clips.
(22) Internet FAX Kit(A) "Internet FAX Kit"
Activating the Internet FAX Kit sends and receives faxes via the Internet without using a phone line. It can only be added when the FAX Kit is installed.
(23) Data Security Kit(E) "Data Security Kit"
The Data Security Kit overwrites all unnecessary data in the storage area of the hard disk so that it cannot be retrieved. The Data Security Kit encrypts data before storing it in the hard disk. It guarantees higher security because no data cannot be decoded by ordinary output or operations.
(24) UG-33 "ThinPrint Option"
This application allows print data to be printed directly without a print driver.
(25) UG-34 "Emulation Upgrade Kit"
Enables emulation whereby the machine operates using commands for other printers. Installing this option enables IBM Proprinter, Line Printer, and EPSON LQ-850 emulation.
(26) Scan extension kit(A) "OCR Scan Activation Kit"
This option enables the use of the OCR function in the applications of the machine.
(27) USB Keyboard "USB Keyboard"
A USB keyboard can be used to enter information into the text fields on the operation panel. A special mount is also available to install the keyboard on the MFP. Please contact your dealer or service representative for information on keyboards that are compatible with your MFP before you purchase one.
Optional Applications
Overview of the Applications
The applications listed below are installed on this machine.
| Application |
| Data Security Kit |
| Internet FAX Kit |
| Card Authentication Kit |
| ThinPrint Option* |
| Emulation Upgrade Kit |
| OCR Scan Activation Kit* |
* This can be used on a trial basis for a limited time.

NOTE
Restrictions such as the number of times the application can be used during the trial period differ depending on the application.
If you change the date/time while using the trial version of an application, you will no longer be able to use the application.
Starting Application Use
Use the procedure below to start using an application.
1 Press the [System Menu] key.
System Menu
2 Press [System/Network], [Next] of "Optional Function".

NOTE
If the user authentication screen appears, enter your login user name and login password and press [Login]. For this, you need to login with administrator privileges. The factory default login user name and login password are set as shown below.
| Model Name Login | User Name Login Password | |
| 3555i 3500 3500 | ||
| 4555i 4500 4500 | ||
| 5555i 5500 5500 |
3 Select the desired application and press [Activate].
You can view detailed information on the selected application by pressing [Detail].
4 Press [Official] in the license key entry screen.
Some applications do not require you to enter a license key. If the license key entry screen does not appear, go to Step 5.
To use the application as a trial, press [Trial] without entering the license key.
5 Press [Yes] in the confirmation screen.

NOTE
Icons of activated application are displayed in the Home screen.
Checking Details of Application
Use the procedure below to check the details of application.
1 Press the [System Menu] key.
System Menu

2 Press [System/Network], and [Next] of "Optional Function".

NOTE
If the user authentication screen appears, enter your login user name and login password and press [Login]. For this, you need to login with administrator privileges. The factory default login user name and login password are set as shown below.
| Model Name Login | User Name Login Password | |
| 3555i 3500 3500 | ||
| 4555i 4500 4500 | ||
| 5555i 5500 5500 |
3 Select the desired application and press [Detail].
You can view detailed information on the selected application.
Character Entry Method
To enter characters for a name, use the on-display keyboard in the touch panel following the steps as explained below.

NOTE
Keyboard Layout
"QWERTY", "QWERTZ" and "AZERTY" are available as keyboard layouts the same as a PC keyboard. Press the [System Menu] key, [Common Settings] and then [Change] of "Keyboard Layout" to choose the desired layout. "QWERTY" layout is used here as an example. You may use another layout following the same steps.
Entry Screens
Lower-case Letter Entry Screen
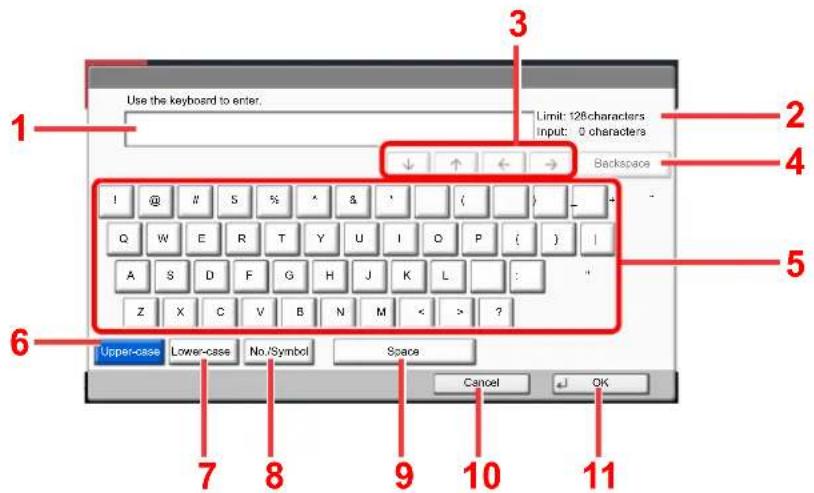
text_image
Use the keyboard to enter. Limit: 126characters Input: 0 characters Backspace 1 2 3 4 5 6 Upper-case Lower-case No./Symbol Space Cancel OK| No. | Display/Key Description | |
| 1 | Display Displays entered characters. | |
| 2 | Limit Display Displays maximum number of characters. | |
| 3 | Cursor Key Press to move the cursor on the display. | |
| 4 | [Backspace] | Press to delete a character to the left of the cursor. |
| 5 | Keyboard Press a character to enter. | |
| 6 | [Upper-case] Press to use upper-case letters. | |
| 7 | [Lower-case] Press to use lower-case letters. | |
| 8 | [No./Symbol] Press to enter numbers and symbols. | |
| 9 | [Space] Press to insert a space. | |
| 10 | [Cancel] | Press to cancel entered characters and return to the screen before the entry. |
| 11 | [OK] | Press to finalize entry and return to the screen before the entry. |
Upper-case Letter Entry Screen
text_image
Use the keyboard to enter. Limit: 128 characters Input: 0 characters ↓ ↑ ← → Backspace I #@ # $ % ^ & * ( ) Q W E R T Y U I D A S D F G H J K L: Z X C V B N M < > ? Upper-case Lower-case No/Symbol Space Cancel OK +JNumber/Symbol Entry Screen
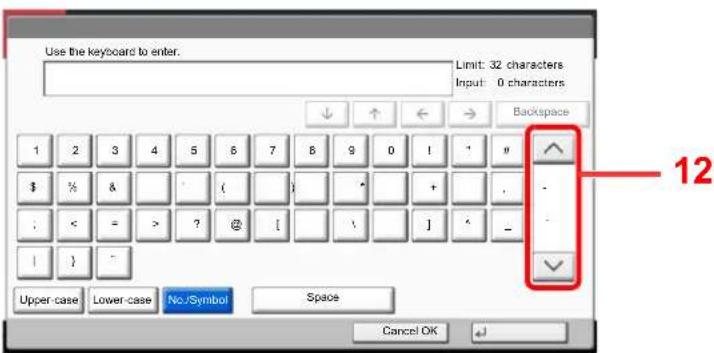
text_image
Use the keyboard to enter. Limit: 32 characters Input: 0 characters Backspace 1 2 3 4 5 6 7 8 9 0 ! * # $ % 8 & ( ) * + ; < = > ? @ [ \ ] ^ _ | } * Upper-case Lower-case No/Symbol Space Cancel OK 12| No. | Display/Key Description |
| 12 [ ] | [ ]To enter a number or symbol not shown in the keyboard, press the cursor key and scroll the screen to view other numbers or symbols to enter. |
Entering Characters
Follow the steps shown below to enter "List A-1" for example.
1 Press [Upper-case].
2 Press [L]. The letter "L" is shown on the display.
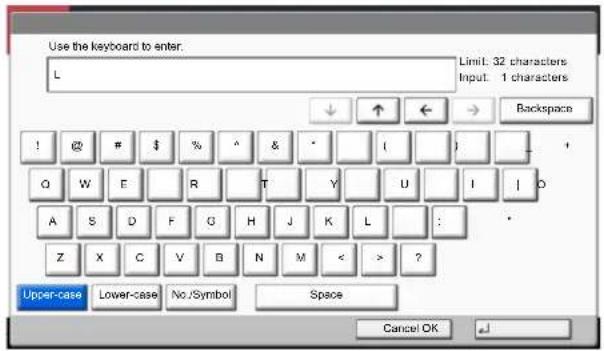
text_image
Use the keyboard to enter. L Limit: 32 characters Input: 1 characters ↓ ↑ ← → Backspace ! @ # $ % ^ & · ( ) Q W E R T Y U I D A S D F G H J K L : Z X C V B N M < > ? Upper-case Lower-case No./Symbol Space Cancel OK3 Press [Lower-case].
4 Press [i], [s], [t] and [Space].
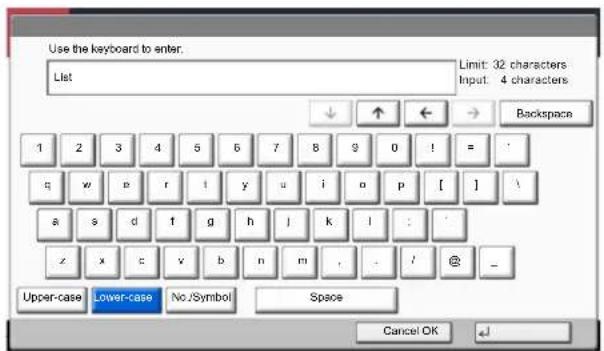
text_image
Use the keyboard to enter. List Limit: 32 characters Input: 4 characters ↓ ↑ ← → Backspace 1 2 3 4 5 6 7 8 9 0 ! = / g w e r i y u i o p [ ] \ a s d f g h j k l : : z x c v b n m , . / @ _ Upper-case Lower-case No./Symbol Space Cancel OK5 Press [Upper-case].
6 Press [A].
7 Press [No./Symbol].
8 Press [] or [] repeatedly to view the keyboard containing [-] and [1].
9 Press [-] and [1].
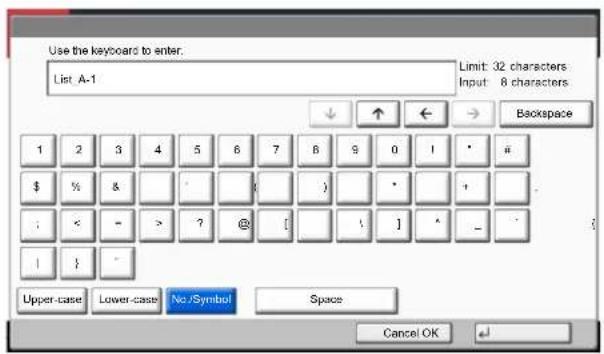
text_image
Use the keyboard to enter: List A-1 Limit: 32 characters Input: 8 characters ↓ ↑ ← → Backspace 1 2 3 4 5 6 7 8 9 0 1 * # $ % & ( ) * + ; < - > ? @ [ ] * _ - | } Upper-case Lower-case No /Symbol Space Cancel OK10 Check that the entry is correct. Press [OK].
Paper
This section explains the paper sizes and types that can be used in the paper source.

For details on the sizes, types, and number of sheets of paper that can be loaded in each paper tray, refer to Specifications on page 11-22.
Basic Paper Specifications
This machine is designed to print on standard copy paper as used in regular ('dry') copiers and page printers such as laser printers. It also supports a variety of other types of paper that conform to the specifications given in this appendix.
Be careful when choosing paper. Paper unsuitable for the machine may cause jams or may be wrinkled.
Supported Paper
Use standard copy paper for regular copiers or laser printers. The printing quality will be affected by the quality of paper. Poor quality paper may result in unsatisfactory output.
Basic Paper Specifications
The following table lists the specifications of paper that is supported with this machine. Refer to the subsequent sections for further details.
| Criteria Specifications | |
| Weight Cassettes: 60 to 220 g/m ^2 | |
| Multi purpose tray: 60 to 300 g/m ^2 | |
| Dimensional accuracy ± 0.7 mm | |
| Squareness of corners 90° ± 0.2^ | |
| Moisture content 4 to 6% | |
| Pulp content 80% or more | |

NOTE
Some recycled paper does not meet requirements for use with this machine as listed in the Basic Paper Specifications shown below, such as moisture or pulp content. For this reason, we recommend purchasing a small amount of recycled paper as a sample for testing prior to use. Choose recycled paper that gives the best printing results and contains low levels of paper dust.
We are not responsible for the problems occurred from the use of paper that does not conform to our specifications.
Choosing the Appropriate Paper
This section describes guidelines for choosing paper.
Condition
Avoid using paper with bent corners or that is curled, dirty, or torn. Do not use paper that has a rough surface or paper fiber lint, or that is especially delicate. Use of paper in any of these conditions will not only deliver poor copies but may also cause jams and shorten the useful life of the machine. Choose paper with a smooth and even surface; however, avoid coated paper or paper with a treated surface as it may damage the drum or fusing unit.
Ingredients
Do not use paper such as paper that has been coated or surface-treated or paper that contains plastic or carbon. Those types of paper may produce harmful fumes from the heat of printing and may damage the drum.
Be sure to use the standard paper that contains at least 80% pulp, i.e., not more than 20% of the total paper content consists of cotton or other fibers.
Supported Paper Sizes
Paper of the following sizes is supported by the machine.
Measurements in the table take into account a ±0.7 mm dimensional accuracy for length and width. Corner angles must be 90^ ± 0.2^ .
| Multi Purpose Tray Cassette or Multi Purpose Tray | |
| A6-R (105 × 148 mm) A3 (297 × 420 mm) | |
| B6-R (128 × 182 mm) B4 (257 × 364 mm) | |
| Hagaki (100×148 mm) A4 (297 × 210 mm) | |
| Oufuku hagaki (148 × 200 mm) A4-R (210 × 297 mm) | |
| Executive (7 1/4 × 10 1/2") B5 (257 × 182 mm) | |
| Envelope DL (110 × 220 mm) B5-R (182 × 257 mm) | |
| Envelope C5 (162 × 229 mm) A5-R (148 × 210 mm) | |
| Envelope C4 (229 × 324 mm) Folio (210 × 330 mm) | |
| ISO B5 (176 × 250 mm) Ledger | |
| Envelope #10 (Commercial #10) (4 1/8 × 9 1/2") Legal | |
| Envelope #9 (Commercial #9) (3 7/8 × 8 7/8") Letter | |
| Envelope #6 (Commercial #6 3/4) (3 5/8 × 6 1/2") Letter-R | |
| Envelope Monarch (3 7/8 × 7 1/2") Statement-R | |
| Youkei 2 (114 × 162 mm) Oficio II | |
| Youkei 4 (105 × 235 mm) | 12 × 18" |
| Size Entry (98 × 148 to 297 × 432 mm) | 8K (273 × 394 mm) |
| 16K (273 × 197 mm) | |
| 16K-R (197 × 273 mm) | |
| 216 × 340 mm | |
| Size Entry (140 × 182 to 304 × 457 mm) | |
Smoothness
The paper surface should be smooth, but it must be uncoated. With paper that is too smooth and slippery, several sheets may accidentally be supplied at once, causing jams.
Basis Weight
In countries that use the metric system, basis weight is the weight in grams of one sheet of paper one square meter in area. In the United States, basis weight is the weight in pounds of one ream (500 sheets) of paper cut to the standard size (or trade size) for a specific grade of paper. Paper that is too heavy or too light may be supplied incorrectly or cause paper jams, which may cause excessive wear of the machine. Mixed paper weight (i.e., thickness) may cause several sheets to be supplied at once accidentally and may also cause blurring or other printing problems if the toner fails to adhere correctly.
Moisture Content
Paper moisture content is the ratio of moisture to dryness expressed as a percentage. Moisture affects how the paper is supplied, the electrostatic chargeability of the paper, and how the toner adheres.
Paper moisture content varies depending on the relative humidity in the room. High relative humidity causes paper to become damp, making the edges expand so it appears wavy. Low relative humidity causes paper to lose moisture, making the edges tighten and weakening print contrast.
Wavy or tight edges may cause the paper to slip when it is supplied. Try to keep the moisture content between 4 to 6%.
To maintain the right level of moisture content, bear in mind the following considerations.
- Store paper in a cool, well-ventilated place.
- Store paper flat and unopened in the package. Once the package is opened, reseal it if the paper is not to be used for a while.
- Store paper sealed in the original package and box. Put a pallet under the carton to keep it raised above the floor. Especially during rainy seasons keep the paper a sufficient distance away from wooden or concrete floors.
- Before using paper that has been stored, keep it at the proper moisture level for at least 48 hours.
- Do not store paper where it is exposed to heat, sunlight, or dampness.
Other Paper Specifications
Porosity: The density of the paper fibers
Stiffness: Paper must be stiff enough or it may buckle in the machine, causing jams.
Curl: Most paper naturally tends to curl after the package is opened. When paper passes through the fixing unit, it curls upward slightly. To deliver flat printouts, load the paper so that the curl faces towards the bottom of the paper tray.
Static electricity: During printing, paper is electrostatically charged so that the toner adheres. Choose paper that can be discharged quickly so that copies do not cling together.
Whiteness: Paper whiteness affects print contrast. Use whiter paper for sharper, brighter copies.
Quality: Machine problems may occur if sheet sizes are not uniform or if corners are not square, edges are rough, sheets are uncut, or edges or corners are crushed. In order to prevent these problems, be especially careful when you cut the paper yourself.
Packaging: Choose paper that is properly packaged and stacked in boxes. Ideally, the packaging itself should have been treated with a coating to inhibit moisture.
Specially treated paper: We do not recommend printing onto the following types of paper, even if it conforms to the basic specifications. When you use these kinds of paper, purchase a small amount first as a sample to test.
- Glossy paper
- Watermarked paper
• Paper with an uneven surface - Perforated paper
Special Paper
This section describes printing onto special paper and print media.
The following paper and media can be used.
- Transparencies
- Preprinted paper
- Bond paper
- Recycled paper
- Thin paper (from 60g / m^2 to 64g / m^2 or less)
- Letterhead
- Colored paper
- Prepunched paper
- Envelopes
- Cardstocks (Hagaki)
- Thick paper (from 106g / m^2 to 300g / m^2 or less)
- Labels
- Coated paper
• High-quality paper - Index Tab Dividers
When using these paper and media, choose those that are designed specifically for copiers or page printers (such as laser printers). Use the multi purpose tray for transparencies, thick paper, envelopes, cardstocks, and label paper.
Choosing Special Paper
Although special paper that meets the following requirements can be used with the machine, print quality will vary considerably due to differences in the construction and quality of special paper. Thus, special paper is more likely than regular paper to cause printing problems. Before purchasing special paper in volume, try testing a sample to ensure the print quality is satisfactory. General precautions when printing onto special paper are given below. Note that we are not responsible for any harm to the user or damage to the machine caused by moisture or specifications of special paper.
Select a cassette or multi purpose tray for special paper.
Transparencies
Transparencies must be able to withstand the heat of printing. Transparencies must meet the following conditions.
| Heat resistance Must withstand at least 190°C | |
| Thickness 0.100 to 0.110 mm | |
| Material Polyester | |
| Dimensional accuracy ±0.7 mm | |
| Squareness of corners 90° ±0.2° | |
To avoid problems, use the multi purpose tray for transparencies and load transparencies with the long side facing the machine.
If transparencies jam frequently at output, try pulling the leading edge of sheets gently as they are ejected.
Label
Be sure to feed labels from the multi purpose tray.
For selecting labels, use extreme care so that the adhesive may not come in direct contact with any part of the machine and that the labels are not easily peeled from the carrier sheet. Adhesives that stick to the drum or rollers and peeled labels remaining in the machine may cause a failure.
When printing onto labels, you must be liable for the print quality and possible trouble.
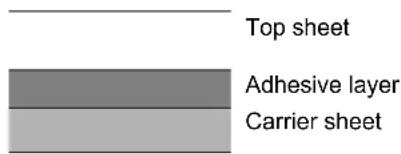
text_image
Top sheet Adhesive layer Carrier sheetLabels consist of three layers as shown in the illustration. The adhesive layer contains materials that are easily affected by the force applied in the machine. The carrier sheet bears the top sheet until the label is used. This composition of labels may cause more problems.
The label surface must be covered completely with the top sheet. Gaps between labels may cause peeling of labels, resulting in a serious failure.
Some label paper has large margins on the top sheet. When using such paper, do not peel these margins from the carrier sheet before completing output.

text_image
Not allowedAllowed Top sheet Carrier sheetUse label paper that conforms to the following specifications.
| Top sheet weight 44 to 74 g/m2 | |
| Basis weight(overall paper weight) | 104 to 151 g/m2 |
| Top sheet thickness 0.086 to 0.107 mm | |
| Overall paper thickness 0.115 to 0.145 mm | |
| Moisture content 4 to 6 % (composite) | |
Hagaki
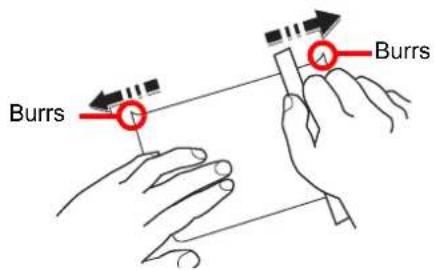
text_image
Burrs A BurrsBefore loading Hagaki into the multi purpose tray, fan them and align the edges. If the Hagaki paper is curled, straighten it before loading. Printing onto curled Hagaki may cause jams.
Use unfolded Oufuku hagaki (available at post offices). Some Hagaki may still have rough edges developed by a paper cutter on the back side. Remove any such rough edges by placing the Hagaki on a flat surface and rubbing the edges gently a few times with a ruler.
Envelopes
Use the multi purpose tray for envelopes.
Due to the structure of envelopes, printing evenly over the entire surface may not be possible in some cases. Thin envelopes in particular may be wrinkled by the machine in some cases as they pass through. Before purchasing envelopes in volume, try testing a sample to ensure the print quality.
Storing envelopes for a long period may cause them to become wrinkled. Thus, keep the package sealed until you are ready to use them.
Keep the following points in mind.
- Do not use envelopes with exposed adhesive. In addition, do not use the type of envelope in which the adhesive is exposed after the top layer is peeled off. Serious damage may be caused if the paper covering the adhesive comes off in the machine.
- Do not use envelopes with certain special features. For example, do not use envelopes with a grommet for winding a string to close the flap or envelopes with an open or film-covered window.
- If paper jams occur, load fewer envelopes at once.
- To prevent paper jams when printing onto multiple envelopes, do not allow more than ten envelopes to remain in the Inner tray at once.
Thick Paper
Before loading thick paper in the multi purpose tray, fan it and align the edges. Some thick paper may still have rough edges developed by a paper cutter on the back side. Remove any such rough edges just as with Hagaki by placing the paper on a flat surface and rubbing the edges gently a few times with a ruler. Printing onto paper with rough edges may cause jams.

NOTE
If the paper is not supplied correctly even after it is smoothed, load the paper in the multi purpose tray with the leading edge raised a few millimeters.
Colored Paper
Colored paper must conform to the specifications listed on page 11-13. In addition, the pigments in the paper must be able to withstand the heat of printing (up to 200^ C or 392^ F).
Preprinted Paper
Preprinted paper must conform to the specifications listed on page 11-13. The colored ink must be able to withstand the heat of printing. It must be resistant to silicone oil as well. Do not use paper with a treated surface such as glossy paper used for calendars.
Recycled Paper
Recycled paper must conform to the specifications listed on page 11-13; however, its whiteness may be considered separately.

NOTE
Before purchasing recycled paper in volume, try testing a sample to ensure satisfactory print quality.
Coated Paper
Coated paper is created by treating the surface of the base paper with a coating that provides higher printing quality than plain paper. Coated paper is used for particularly high quality printing.
The surface of high-quality or medium-quality paper is coated with special agents that improve ink adhesion by making the paper surface smoother. These agents are used either to coat both sides of the paper or just one side. The coated side appears slightly glossy.

IMPORTANT
When printing on coated paper in very humid environments, ensure that the paper is kept dry as moisture may cause sheets to stick together when they are fed into the machine. If printing in very humid environments, set coated paper for one sheet each.
Specifications

IMPORTANT
Specifications are subject to change without notice.

NOTE
For more information on using the FAX, refer to the FAX Operation Guide.
Common functions
| Item Description | ||
| Type Desktop | ||
| Printing Method Electrophotography by semiconductor laser | ||
| Paper Weight Cassette 1, 2 60 to 220 g/m ^2 | ||
| Multi Purpose Tray | 60 to 300 g/m ^2 | |
| Paper Type | Cassette 1, 2 | Plain, Rough, Vellum, Recycled, Preprinted, Bond, Color (Colour),Prepunched, Letterhead, Thick, High Quality,Custom 1 to 8 (Duplex: Same as Simplex) |
| Multi Purpose Tray | Plain, Transparency (OHP film), Rough, Vellum, Labels, Recycled,Preprinted, Bond, Cardstock, Color (Colour), Prepunched,Letterhead, Thick, Coated, Envelope, High Quality,Index Tab Dividers, Custom 1 to 8 | |
| Paper Size | Cassette 1, 2 | A3, B4, A4, A4-R, B5, B5-R, A5-R, Ledger, Legal, Oficio II, 12 × 18",Letter-R, Letter, Statement-R, Folio, 8K, 16K, 16K-R, 216 × 340 mm,Size Entry (Metric: X; 182 to 457 mm (in 1 mm increments),Y; 140 to 304 mm (in 1 mm increments), Inch: X; 7.17 to 18.00"(in 0.01" increments), Y; 5.51 to 12.00" (in 0.01" increments)) |
| Multi Purpose Tray | A3, B4, A4, A4-R, B5, B5 (ISO), B5-R, A5-R, B6-R, A6-R,Oufuku hagaki, Hagaki, Envelope DL, Envelope C5, Envelope C4,Envelope #10 (Commercial #10), Envelope #9 (Commercial #9),Envelope #6 (Commercial #6 3/4), Envelope Monarch, Youkei 2,Youkei 4, Ledger, Legal, Oficio II, 12 × 18", Letter, Letter-R,Statement-R, Executive, Folio, 216 × 340 mm, 8K, 16K, 16K-R,Custom (98 × 148 mm to 304.8 × 1,220.0 mm) | |
| Warm-up Time(22°C/71.6°F,60%) | Power on 3555i: 23 seconds or less4555i: 23 seconds or less5555i: 23 seconds or less | |
| Low Power 3555i: 10 seconds or less4555i: 10 seconds or less5555i: 10 seconds or less | ||
| Sleep 3555i: 16 seconds or less4555i: 16 seconds or less5555i: 16 seconds or less | ||
| Paper Capacity Cassette 1 500 sheets (80 g/m ^2 ) | ||
| Item | Description | |
| Output Tray Capacity | Inner tray 250 sheets (80 g/m ^2 )(When the inner job separator (JS-732) is installed, 180 sheets.) | |
| with optionalinner jobseparator | 30 sheets (80 g/m ^2 ) | |
| with optionalinner jobseparator(JS-732) | 100 sheets (80 g/m ^2 ) | |
| with optionalright jobseparator | 70 sheets (80 g/m ^2 ) | |
| Image Write System Semiconductor laser and electrophotography | ||
| Memory 2GB | ||
| Hard Disk 160GB or more | ||
| Interface Standard | USB Interface Connector: 1 (USB Hi-Speed)Network interface: 1 (10 BASE-T/100 BASE-TX/1000 BASE-T)USBPort: 2 (Hi-Speed USB) | |
| Option Fax: 2 | Network interface: 1 (10 BASE-T/100 BASE-TX/1000 BASE-T)A maximum of two interface options can be installed.Only one network interface can be installed.When a network interface is installed, only one fax line can be installed. | |
| Operating Environment | Temperature 10 to 32.5°C/50 to 90.5°F | |
| Humidity 15 to 80 % | ||
| Altitude 2,500 m/8,202 ft maximum | ||
| Brightness 1,500 lux maximum | ||
| Dimension (W × D × H)(Main unit only) | 25 33/64 × 30 3/16 ×29 13/32"668 × 767 × 747 mm | |
| Weight 189.6 lb/85.98 kg | ||
| Space Required (W × D)(Using multi purpose tray) | 38 29/64 × 30 3/16"977 × 767 mm | |
| Power Source 120 V Specification Model:120 V AC 60 Hz 12.0 A230 V Specification Model:220 to 240 V AC 50/60 Hz 7.2 A | ||
| Options | Refer to Optional Equipment on page 11-2. | |
Copy functions
| Item Description | ||
| Copy Speed 3555i | 4555i | A4/Letter 35 sheets/minA4-R/Letter-R 24 sheets/minA3/Ledger 17 sheets/minB4/Legal 21 sheets/minB5 35 sheets/minB5-R 24 sheets/minA5-R 17 sheets/minA4/Letter 45 sheets/minA4-R/Letter-R 31 sheets/minA3/Ledger 22 sheets/minB4/Legal 27 sheets/minB5 45 sheets/minB5-R 31 sheets/minA5-R 22 sheets/minA4/Letter 55 sheets/minA4-R/Letter-R 38 sheets/minA3/Ledger 27 sheets/minB4/Legal 33 sheets/minB5 55 sheets/minB5-R 38 sheets/minA5-R 27 sheets/min |
| 5555i | ||
| First Copy Time (A4, feed from Cassette) | Black and White | 3555i: 4.5 seconds or less4555i: 3.6 seconds or less5555i: 3.1 seconds or less |
| Zoom Level Manual mode: 25 to 400%, 1% incrementsAuto mode: Preset Zoom | ||
| Continuous Copying 1 to 999 sheets | ||
| Resolution 600 × 600 dpi | ||
| Supported Original Types | Sheet, Book, 3-dimensional objects (maximum original size: Ledger/A3) | |
| Original Feed System Fixed | ||
Printer functions
| Item Description | ||
| Printing Speed 355i | A4/Letter 35 sheets/minA3/Ledger 17 sheets/min | |
| First Print Time (A4, feed from Cassette) | Black and White | 3555i: 6.0 seconds or less4555i: 5.3 seconds or less5555i: 4.9 seconds or less |
| Resolution 600 × 600 dpi | ||
| Operating System | Windows XP, Windows Server 2003, Windows Vista, Windows 7, Windows 8, Windows Server 2008, Windows Server 2012, Mac OS 10.x | |
| Interface | Standard | USB Interface Connector: 1 (USB Hi-Speed)Network interface: 1 (10 BASE-T/100 BASE-TX/1000 BASE-T)Optional Interface (Option): 1 (For IB-50/IB-51 mounting) |
| Page Description Language PRESCRIBE | ||
| Emulations | PCL6 (PCL5e, PCL-XL), KPDL3 (PostScript3 compatible) | |
Scanner functions
| Item Description | ||
| System requirements | CPU: Celeron 266 MHz or higherRAM: 300 MB or more | |
| Resolution | 600 dpi, 400 dpi, 300 dpi, 200 dpi, 200 ×100 dpi, 200 × 400 dpi(Resolution in FAX mode included) | |
| File Format | PDF (high compressive, encrypted, PDF/A), JPEG, TIFF, XPS | |
| Scanning Speed*1 | 3555i4555i5555i | 1-sided B/W 80 Images/minColor 50 Images/min2-sided B/W 160 Images/minColor 80 Images/min(A4 landscape, 300 dpi, Image quality: Text/Photo original) |
| Interface | Ethernet (10 BASE-T/100 BASE-TX/1000 BASE-T) | |
| Network Protocol | TCP/IP | |
| Transmission System | SMB, SMTP, FTP, FTP over SSL, USB, TWAIN ^2 , WIA ^3 , WSD | |
*1 When using the dual scan document processor (except TWAIN and WIA scanning)
*2 Available Operating System : Windows XP, Windows Server 2003, Windows Vista, Windows Server 2008, Windows Server 2008 R2, Windows 7, Windows Server 2012
*3 Available Operating System : Windows Vista, Windows Server 2003, Windows Server 2008, Windows Server 2008 R2, Windows 7, Windows Server 2012
Document Processor (Option)
| Item | Description | |
| Document Processor | Document Processor (Dual scan DP) | |
| Original Feed Method Automatic feed | ||
| Supported Original Types | Sheet originals | |
| Paper Size Maximum: Ledger/A3Minimum: Statement-R/A5-R | Maximum: Ledger/A3Minimum: Statement-R/A6-RSizes smaller than B6-R are 50 to 105 g/m2 (one-side/duplex) | |
| Paper Weight 1-sided: 45 to 160 g/m22-sided: 50 to 120 g/m2 | 1-sided: 35 to 220 g/m22-sided: 50 to 220 g/m2 | |
| Loading Capacity 100 sheets (50 to 80 g/m2) maximumWhen originals have different widths:30 sheets (50 to 80 g/m2) maximum | 175 sheets (50 to 80 g/m2) maximumWhen originals have different widths:30 sheets (50 to 80 g/m2) maximum | |
| Dimensions(W) × (D) × (H) | 22 23/32 × 21 13/64 × 7 5/64"577 × 534 × 180 mm | 23 5/8 × 20 13/64 × 6 45/64"600 × 513 × 170 mm |
| Weight 32 lbs. or less /14.5 kg or less | ||
Paper Feeder (500-sheet x 2) (Option)
| Item Description | |
| Paper Supply Method Feed & reverse roller method(No. Sheets: 500, 80 g/m2, 2 cassettes/No. Sheets: 550, 64 g/m2, 2 cassettes) | |
| Paper Size | A3, B4, A4, A4-R, B5, B5-R, A5-R, Folio, Ledger, Legal, Oficio II, 12 × 18",Letter, Letter-R, Statement-R, 8K, 16K, 16K-R, 216 × 340 mm |
| Supported Paper Paper weight: 60 - 256 g/m2Media types: Plain, Recycled, Thick | |
| Dimensions(W) × (D) × (H) | 23 35/64 × 27 35/64 × 12 13/32"598 × 699.6 × 315 mm |
| Weight Approx. 66.1 lbs. / Approx. 30 kg | |
Large Capacity Feeder (1,500-sheet x 2) (Option)
| Item Description | |
| Paper Supply Method Feed & reverse roller method(No. Sheets: 3,000 (80 g/m2)/No. Sheets: 3,500 (64 g/m2)) | |
| Paper Size A4, B5, Letter | |
| Supported Paper Paper weight: 60 - 256 g/m2Media types: Plain, Recycled, Thick | |
| Dimensions(W) × (D) × (H) | 23 35/64 × 27 52/64 × 12 26/64"598 × 706.6 × 315 mm |
| Weight Approx. 63.93 lbs / | Approx. 29 kg |
Side Feeder (3,000-sheet) (Option)
| Item Description | |
| Paper Supply Method Feed & reverse roller method(No. Sheets: 3,000, 80 g/m2/No. Sheets: 3,500 64 g/m2) | |
| Paper Size A4, B5, Letter | |
| Supported Paper Paper weight: 60 - 300 g/m2Media types: Plain, Recycled, Thick | |
| Dimensions(W) × (D) × (H) | 12 41/64 × 24 13/32 × 19 27/32"321 × 620 × 504 mm |
| Weight Approx. 55.1 lbs. / Approx. 25 kg | |
1,000-sheet Finisher (Option)
| Item Description | |||
| Number of Trays 2 trays | |||
| Paper Size (80 g/m2) | Tray A (Non-stapling) | A3, B4, Ledger, Legal, Oficio II, Folio, 8K, 16K-R, 216 × 340 mm, Statement-R, Executive, Foolscap, A3 Wide(310 × 433 mm), Ledger Wide(310 × 440 mm), 12 × 18": 500 sheetsA4, A4-R, B5, A5-R, B6-R, B5-R, Letter, Letter-R, 16K, Custom (98 × 148 mm to 297 × 432 mm): 1,000 sheets | |
| Tray B | A3, B4, A4, A4-R, B5, B5 (ISO), B5-R, A5-R, A6-R, B6-R, Letter, Letter-R, Ledger, Legal, Oficio II, 12 × 18", Statement-R, Folio, 8K, 16K, 16K-R, 216 × 340 mm, Oufuku hagaki, Cardstock, Envelope DL, Envelope C5, Envelope C4, Envelope #10 (Commercial #10), Envelope #9 (Commercial #9), Envelope #6 (Commercial #6 3/4), Envelope Monarch, Youkei 2, Youkei 4, Statement-R, Executive, Foolscap, A3 Wide(310 × 433 mm), Ledger Wide(310 × 440 mm), 13 × 19", Custom (98 × 148 mm to 297 × 432 mm) : 100 sheets | ||
| Supported Paper Weight | Stapling: 90 g/m2 or less | ||
| Stapling Number of Sheets | A3, B4, B5-R, Ledger, Legal, Oficio II, 12 × 18", 216 × 340 mm, Folio, 8K, 16K-R | 30 sheets (60 to 90 g/m2)20 sheets (91 to 105 g/m2)2 cover sheet only (106 g/m2 to 256 g/m2) | |
| A4, A4-R, B5, Letter, Letter-R, 16K | 50 sheets (60 to 90 g/m2)40 sheets (91 to 105 g/m2)2 cover sheet only (106 g/m2 to 256 g/m2) | ||
| Media types | Plain, Recycled, Prepunched, Preprinted, Bond, Letterhead, Color, Coated, Thick, High Quality, Rough, Vellum, Transparency, Labels, Envelope, Cardstock, Custom 1 to 8 | ||
| Dimensions (W) × (D) × (H) | 26 7/32 × 24 11 × 32 × 42 5/8"666 × 618.5 × 1,083 mm | ||
| Weight Approx. 66.1 lbs. or less / Approx. 30 kg or less | |||
4,000-sheet Finisher (Option)
| Item Description | |||
| Number of Trays 3 trays | |||
| Paper Size (80 g/m2) | Tray A (Non-Stapling) | A3, B4, B5-R, Ledger, Legal, 12 × 18", 8K, 13 × 19": 1,500 sheetsA4, A4-R, B5, Letter, Letter-R, 16K, 16K-R, Folio, Custom (98 × 148 mm to 297 × 432 mm): 4,000 sheets*A5-R, B6, Statement-R: 500 sheets | |
| Tray B | A3, B4, A4, A4-R, B5, B5-R, A5, A5-R, Folio, Ledger, Legal, 12 × 18", 8K, Letter, 13 × 19", Letter-R, Statement-R, 16K, 16K-R, Custom (98 × 148 mm to 297 × 432 mm): 200 sheets | ||
| Tray C | A4, B5, B5 (ISO), B5-R, B6-R, A5-R, A6-R, Letter, Statement-R, 16K, Cardstock, Oufuku hagaki, Custom (98 × 148 mm to 297 × 432 mm): 100 sheets | ||
| Stapling | Maximum Number | A3, B4, B5-R, Ledger, Legal, Oficio II, 12 × 18", 216 × 340 mm, Folio, 8K, 16K-R | 30 sheets (52 to 90 g/m2)30 sheets (91 to 105 g/m2)2 cover sheet only (106 g/m2 to 256 g/m2) |
| A4, A4-R, B5, Letter, Letter-R, 16K | 65 sheets (52 to 90 g/m2)55 sheets (91 to 105 g/m2)2 cover sheet only (106 g/m2 to 256 g/m2) | ||
| Media types | Plain, Recycled, Prepunched, Preprinted, Bond, Letterhead, Color, Coated, Thick, High Quality, Rough, Vellum, Transparency, Labels, Envelope, Cardstock, Custom 1 to 8 | ||
| Dimensions (W) × (D) × (H) | 23 29/32 × 26 5/16 × 41 25/32"607.2 × 668.5 × 1,061.3 mm | ||
| Weight Approx. 88.2 lbs or less / Approx. 40 kg or less | |||
* When the Folding Unit is installed, 3000 sheets.
Hole Punch Unit (Option)
| Item Description | |||
| Paper Size | 2 Hole | A3, A4, A4-R, A5-R, B4, B5, B5-R, Letter-R, Legal, 12 × 18", Statement, Folio, 8K, 16K, 16K-R | |
| 3 Hole, 4 Hole | A3, A4, Letter, Ledger, 12 × 18", 8K, 16K | ||
| Paper Weight 45 - 300 g/m | 2 | ||
| Media types 4,000-sheet Finisher Plain, Transparency, Preprinted, Bond, Recycled, Rough, Letterhead, Color (Colour), Prepunched, Thick, Coated, High Quality | |||
| 1,000-sheet Finisher Plain, Transparency, Preprinted, Bond, Recycled, Rough, Letterhead, Color (Colour), Prepunched, Thick, Coated, High Quality | |||
Mailbox (Option)
| Item Description | |
| Number of Trays 7 trays | |
| Paper Size(80 g/m2) | A3, B4, Ledger, Legal: 50 sheetsA4, A4-R, B5, B5-R, A5-R, Foolscap, Letter, Letter-R, 216 × 340 mm, Executive, Executive-R, Folio, 8K, 16K, 16K-R, Statement-R, Oficio II: 100 sheets |
| Dimensions(W) × (D) × (H) | 20 1/16 × 15 3/4 × 18 1/2"510 mm × 400 mm × 470 mm |
| Weight Approx. 22 lbs. / Approx. 10 kg | |
Center-Folding Unit (Option)
| Item Description | ||
| Sizes Bi-Fold A3, B4, A4-R | Ledger, Legal, Letter-R, Oficio II, 8K | |
| Saddle Stitch A3, B4, A4-R, Ledger, Legal, Letter-R, Oficio II, 8K | ||
| Tri-Fold A4-R, Letter-R | ||
| Number of Sheets Bi-Fold | 5 sheets (60 to 90 g/m ^2 )3 sheets (91 to 120 g/m ^2 )1 sheet (121 to 256 g/m ^2 ) | |
| Saddle Stitch 16 | sheets (60 to 90 g/m ^2 )13 sheets (91 to 105 g/m ^2 )1 cover sheet only (106 g/m ^2 or heavier) | |
| Tri-Fold 5 sheets | (60 to 90 g/m ^2 )3 sheets (91 to 120 g/m ^2 ) | |
| Maximum Number for Storage (80 g/m ^2 ) | Bi-Fold 5 sheets | or less per set: 30 sets or more6 to 10 sheets per set: 20 sets or more11 to 16 sheets per set: 10 sets or more. |
| Saddle Stitch 5 | sheets or less per set: 30 sets or more6 to 10 sheets per set: 20 sets or more11 to 16 sheets per set: 10 sets or more. | |
| Tri-Fold 1 sheet | per set: 30 sets or more2 to 5 sheets per set: 5 sets or more | |
| Media types Bi-Fold Plain, | Recycled, Thick, | Coated |
| Saddle Stitch Plain, Recycled, Thick, Coated | ||
| Tri-Fold Plain, Recycled, Thick | ||
Inner Job Separator (Option)
| Item Description | |
| Number of Trays 1 tray | |
| Maximum Sheets 30 sheets (80 g/m ^2 ) | |
| Paper Size | A3, B4, A4, A4-R, B5, B5-R, A5-R, Folio, Ledger, Legal, Letter, Letter-R, Executive, Executive-R, Foolscap, Oficio II, Statement-R, 8K, 16K, 16K-R, 216 × 340 mm |
| Paper Type Paper weight: | 60 - 256 g/m ^2 Paper type: Plain, Preprinted, Bond, Rough, Recycled, Letterhead, Color (Colour), Prepunched, Coated, Thick, High Quality, Custom 1 to 8 |
| Dimensions(W) × (D) × (H) | 17 7/16 × 15 7/16 × 4 1/64"443 × 392 × 102 mm |
| Weight 1.76 lbs. / 0.8 kg | |
Inner Job Separator (JS-732) (Option)
| Item Description | |
| Number of Trays 1 tray | |
| Maximum Sheets 100 sheets (80 g/m ^2 ) | |
| Paper Size | A3, B4, A4, A4-R, B5, B5-R, A5-R, Folio, Ledger, Foolscap, Legal, Letter, Letter-R, Executive, Executive-R, Oficio II, Statement-R, 8K, 16K, 16K-R, 216×340 mm |
| Paper Type Paper weight: | 60 - 256 g/m ^2 Paper type: Plain, Preprinted, Bond, Rough, Recycled, Letterhead, Color (Colour), Prepunched, Coated, Thick, High Quality, Custom 1 to 8 |
| Dimensions(W) × (D) × (H) | 18 1/2 × 17 43/64 × 4 1/64"470 × 449 × 102 mm |
| Weight Approx. 4.63 lbs. / | Approx. 2.1 kg |
Right Job Separator (Option)
| Item Description | |
| Number of Trays 1 tray | |
| Maximum Sheets | A4, A4-R, B5, Letter, Letter-R, B5-R, A5-R, Executive, Executive-R, Statement-R, 16K, 16K-R: 70 sheets (80 g/m2)A3, B4, Folio, Ledger, Legal, Foolscap, Oficio II, 8K, 216 × 340 mm: 30 sheets (80 g/m2) |
| Paper Size | A3, B4, A4, A4-R, B5, B5-R, A5-R, Folio, Ledger, Foolscap, Legal, Letter, Letter-R, Executive, Executive-R, Oficio II, Statement-R, 8K, 16K, 16K-R, 216 × 340 mm |
| Paper Type Paper weight: | 60 - 256 g/m2Paper type: Plain, Preprinted, Bond, Rough, Recycled, Letterhead, Color (Colour), Prepunched, Coated, Thick, High Quality, Custom 1 to 8 |
| Dimensions(W) × (D) × (H) | 14 27/32 × 17 13/32 × 5 29/32"377 × 442 × 150 mm |
| Weight 5.1 lbs. / 2.3 kg |
Banner Tray (Option)
| Item Description | |
| Max. number of sheets 10 | sheets (Multi Purpose tray) |
| Paper length 210 (8.26") to | 304.8 (12") mm |
| Paper weight Max. 1220.0 | (48 1/64") mm |
| Paper Type Paper weight: | 136 to 163 g/m ^2 Paper type: Heavy 2 |
| Dimensions(W) × (D) × (H) | 9 27/32 × 14 23/32 × 5 63/64"250 × 374 × 152 mm |
| Weight Approx. 0.78 lbs. / | Approx. 0.352 kg |

NOTE
Consult your dealer or service representative for recommended paper types.
Glossary
Accessibility
The machine is designed featuring good accessibility even for the elderly and those who are physically challenged or visually impaired. Touch panel characters can be enlarged while the touch panel is adjustable in two angles.
AppleTalk
AppleTalk, which comes with Apple Computer's Mac OS, is a network protocol. AppleTalk enables file/printer sharing and also enables you to utilize application software that is on another computer on the same AppleTalk network.
Auto Form Feed Timeout
During data transmission, the machine may sometimes have to wait until receiving the next data. This is the auto form feed timeout. When the preset timeout passes, the machine automatically prints output. However, no output is performed if the last page has no data to be printed.
Auto-IP
Auto-IP is a module that enables dynamic IPv4 addresses to be assigned to a device on startup. However, DHCP requires a DHCP server. Auto-IP is a server-less method of choosing an IP address. IP addresses between 169.254.0.0 to 169.254.255.255 are reserved for Auto-IP and assigned automatically.
Auto Paper Selection
A function to automatically select paper in the same size as originals when printing
Auto Sleep
A mode designed for electrical power saving, activated when the machine is left unused or there is no data transfer for a specific period. In Sleep mode, power consumption is kept to a minimum.
Bonjour
Bonjour, also known as zero-configuration networking, is a service that automatically detects computers, devices and services on an IP network. Bonjour, because an industry-standard IP protocol is used, allows devices to automatically recognize each other without an IP address being specified or DNS server being set. Bonjour also sends and receives network packets by UDP port 5353. If a firewall is enabled, the user must check that UDP port 5353 is left open so that Bonjour will run correctly. Some firewalls are set up so as to reject only certain Bonjour packets. If Bonjour does not run stably, check the firewall settings and ensure that Bonjour is registered on the exceptions list and that Bonjour packets are accepted. If you install Bonjour on Windows XP Service Pack 2 or later, the Windows firewall will be set up correctly for Bonjour.
Default Gateway
This indicates the device, such as a computer or router, that serves as the entrance/exit (gateway) for accessing computers outside the network that you are on. When no specific gateway is designated for a destination IP address, data is sent to the host designated as the Default Gateway.
DHCP (Dynamic Host Configuration Protocol)
Dynamic Host Configuration Protocol (DHCP) that automatically resolves IP addresses, subnet masks, and gateway addresses on a TCP/IP network. DHCP minimizes the load of network management employing a large number of client computers because it relieves individual clients including printers from the IP address being assigned.
DHCP (IPv6)
DHCP (IPv6) is the next-generation of the Internet's Dynamic Host Configuration Protocol and supports IPv6. It extends the BOOTP startup protocol that defines the protocols used for transferring configuration information to hosts on the network. DHCP (IPv6) permits the DHCP server to use its expanded functionality to send configuration parameters to an IPv6 node. Because the network addresses that can be used are allocated automatically, the IPv6 node management workload is reduced in systems where the administrator has to exercise close control over IP address allocation.
dpi (dots per inch)
A unit for resolution, representing the number of dots printed per inch (25.4 mm).
EcoPrint Mode
A printing mode that helps save toner. Copies made in this mode are thus lighter than normal.
Emulation
The function to interpret and execute other printers' page description languages. The machine emulates operation of PCL6, KPDL3 (PostScript 3 compatible).
FTP (File Transfer Protocol)
A protocol to transfer files on the TCP/IP network, whether the Internet or an intranet. Along with HTTP and SMTP/POP, FTP is now frequently used on the Internet.
Grayscale
A computer color expression. Displayed images of this sort are typically composed of shades of gray, varying from black at the weakest intensity to white at the strongest, without any other colors. Gray levels are displayed in numerical levels: that is, white and black only for 1 bit; 256 gray levels (including white and black) for 8 bits; and 65,536 gray levels for 16 bits.
Help
A [Help] key is provided on this machine's operation panel. If you are unsure of how to operate the machine, would like more information on its functions or are having problems getting the machine to work properly, press the [Help] key to view a detailed explanation on the touch panel.
IP Address
An Internet protocol address is a unique number that represents a specific computer or related device on the network. The format of an IP address is four sets of numbers separated by dots, e.g. 192.168.110.171. Each number should be between 0 and 255.
IPP
IPP (Internet Printing Protocol) is a standard that uses TCP/IP networks such as the Internet to enable print jobs to be sent between remote computers and printers. IPP is an extension of the HTTP protocol used to view websites and enables printing to be carried out via routers on printers in remote locations. It also supports the HTTP authentication mechanisms along with SSL server and client authentication as well as encryption.
KPDL (Kyocera Page Description Language)
Kyocera's PostScript page description language compatible with Adobe PostScript Level 3.
Multi Purpose (MP) Tray
The paper supply tray on the right side of the machine. Use this tray instead of the cassettes when printing onto envelopes, Hagaki, transparencies, or labels.
NetBEUI (NetBIOS Extended User Interface)
An interface, developed by IBM in 1985, as an update from NetBIOS. It enables more advanced functions on smaller networks than other protocols such as TCP/IP, etc. It is not suitable for larger networks due to lack of routing capabilities to choose the most appropriate routes. NetBEUI has been adopted by IBM for its OS/2 and Microsoft for its Windows as a standard protocol for file sharing and printing services.
NetWare
Novell's network management software that is able to run on a variety of operating systems.
PDF/A
This is "ISO 19005-1. Document management - Electronic document file format for long-term preservation - Part 1: Use of PDF (PDF/A)", and is a file format based on PDF 1.4. It has been standardized as ISO 19005-1, and is a specialization of PDF, which has been mainly used for printing, for long-term storage. A new part, ISO 19005-2 (PDF/A-2), is currently being prepared.
POP3 (Post Office Protocol 3)
A standard protocol to receive E-mail from the server in which the mail is stored on the Internet or an intranet.
PostScript
A page description language developed by Adobe Systems. It enables flexible font functions and highly-functional graphics, allowing higher quality printing. The first version called Level 1 was launched in 1985, followed by Level 2 that enabled color printing and two-byte languages (e.g. Japanese) in 1990. In 1996, Level 3 was released as an update for the Internet access and PDF format as well as gradual improvements in implementation technologies.
This indicates the number of A4 size printouts made in one minute.
Printer Driver
The software to enable you to print data created on any application software. The printer driver for the machine is contained in the DVD enclosed in the package. Install the printer driver on the computer connected to the machine.
RA(Stateless)
The IPv6 router communicates (transmits) information such as the global address prefix using ICMPv6. This information is the Router Advertisement (RA). ICMPv6 stands for Internet Control Message Protocol, and is a IPv6 standard defined in the RFC 2463 "Internet Control Message Protocol (ICMPv6) for the Internet Protocol Version 6 (IPv6) Specification".
Send as E-mail
A function to send the image data stored in the machine as an E-mail attachment. E-mail addresses can be selected from the list or entered at each time.
SMTP (Simple Mail Transfer Protocol)
A protocol for E-mail transmission over the Internet or an intranet. It is used for transferring mail between mail servers as well as for sending mail from clients to their servers.
Status Page
The page lists machine conditions, such as the memory capacity, total number of prints and scans, and paper source settings.
Subnet Mask
The subnet mask is a way of augmenting the network address section of an IP address. A subnet mask represents all network address sections as 1 and all host address sections as 0. The number of bits in the prefix indicates the length of the network address. The term "prefix" refers to something added to the beginning and, in this context, indicates the first section of the IP address. When an IP address is written, the length of the network address is indicated by the prefix length after a forward slash (/). For example, "24" in the address "133.210.2.0/24". In this way, "133.210.2.0/24" denotes the IP address "133.210.2.0" with a 24-bit prefix (network section). This new network address section (originally part of the host address) made possible by the subnet mask is referred to as the subnet address. When you enter the subnet mask, be sure to set the "DHCP" setting to "Off".
TCP/IP (Transmission Control Protocol/Internet Protocol)
TCP/IP is a suite of protocols designed to define the way computers and other devices communicate with each other over a network.
TCP/IP (IPv6)
TCP/IP (IPv6) is based on the current Internet protocol, TCP/IP (IPv4). IPv6 is the next-generation Internet protocol and expands the available address space, which resolves the problem of the lack of addresses under IPv4, while also introducing other improvements such as additional security functionality and the capacity to prioritize data transmission.
TWAIN (Technology Without An Interesting Name)
A technical specification for connecting scanners, digital cameras, and other image equipment to computers. The TWAIN compatible devices enable you to process image data on any relevant application software. TWAIN is adopted on a large amount of graphic software (e.g. Adobe Photoshop) and OCR software.
USB (Universal Serial Bus) 2.0
A USB interface standard for Hi-Speed USB 2.0. The maximum transfer rate is 480 Mbps. This machine is equipped with USB 2.0 for high-speed data transfer.
WIA (Windows Imaging Acquisition)
A function to import images supported after Windows Me/XP from digital cameras and other peripheral devices. This function replaces what TWAIN used to do. The feature is provided as a part of Windows functions and improves ease of operation, so that you import images directly to My Computer without using any application.
Index
(Paper Width Guide) Lock 2-3
Numerics
1,000-sheet Finisher 11-4
2-sided/Book Original 6-57
4,000-sheet Finisher 11-4
A
Accessibility 11-33
Accessibility Functions 3-13
Adding a Destination 3-45
Adjusting the Operation Panel Angle 3-3
Adjustment/Maintenance
Auto Color Correction 8-58
Background Density Adj. 8-57
Calibration 8-59, 10-38
Color Calibration Cycle 8-58
Correct Paper Curl 8-59
Correcting Black Lines 8-57
Density Adjustment 8-57
Developer Refresh 8-58, 10-38
Display Brightness 8-57
Drum Refresh1 8-58
Drum Refresh2 8-58
Memory Diagnostics 8-57
Silent Mode 8-57
System Initialization 8-57
Tone Curve Adjustment 8-58, 10-36
Apache License (Version 2.0) 1-10
AppleTalk 11-33
Settings 8-47
Application 5-10, 8-60
Auto Form Feed Timeout 11-33
Auto Image Rotation
Default 8-18
Auto Low Power Mode 3-14
Auto Paper Selection 11-33
Auto Sleep 3-15, 11-33
Auto-IP
Settings 8-43
Automatic 2-Sided Copy Function 1-13
B
Background Density Adj. 6-25, 8-57
Default 8-17
Banner printing 4-7
Banner Tray 11-6
Bates Stamp 6-50
Bonjour 11-33
Settings 2-27, 8-44
Booklet
Binding Left 6-36
Binding Right 6-36
Binding Top 6-36
Border Erase 6-34
C
Calibration 10-38
Canceling Jobs 5-18
Cassette
Paper Size and Media 8-7
Loading Paper 3-18
Cassette 1 2-2
Cassette 2 2-2
Cassette 3 to 5 2-5
Cassette 5
Paper Jams 10-62
Cassette Settings 3-30
Cassette/MP Tray Settings 8-7
Center-Folding Unit
Paper Jams 10-60
Centering 6-33
Character Entry Method 11-10
Checking the Counter 2-30
Cleaning
Conveying Guide 10-4
Dual scanning area 10-3
Platen Cover / Glass Platen 10-2
Separator 10-5
Slit Glass 10-3
Cleaning Brush 2-4
Cleaning Cloth Compartment 2-2
Clip Holder 2-3
Coated Paper 11-21
Collate/Offset 6-18
Default 8-18
Color Selection
Default 8-17
Combine 6-31
Common Settings 8-9
Customize Status Display 8-26
Default Screen 8-9
Display Status/Log 8-25
Error Handling 8-14
Function Defaults 8-17
Function Key Usage 8-26
Keyboard Layout 8-10
Language 8-9
Low Toner Alert Level 8-25
Manual Staple 8-24
Measurement 8-14
Message Banner Print 8-25
Message Board Settings 8-27
Offset Documents by Job 8-24
Offset One Page Documents 8-24
Orientation Confirmation 8-16
Original/Paper Settings 8-10
Paper Output 8-16
Remote Printing 8-27
Sound 8-9
System Stamp 8-20
USB Keyboard Type 8-20
Connecting
LAN Cable 2-8
Power Cable 2-9
USB cable 2-9
Connecting Power Cable 2-9
Connection Method 2-6
Continuous Scan
Default 8-18
Conventions Used in This Guide Xi
Conveyor Guide
Cleaning 10-4
Copy 5-20, 11-6
Copy Speed 11-24
Copying Settings
Auto % Priority 8-28
Auto Image Rotation Action 8-28
Auto Paper Selection 8-28
Paper Selection 8-28
Preset Limit 8-28
Quick Setup Registration 8-29
Reserve Next Priority 8-29
Counting the Number of Pages Printed
Count by Paper Size 9-37
Counter 2-30
Each Job Accounting 9-39
Print Accounting Report 9-31
Total Job Accounting 9-38
Unknown ID Job 9-41
Cover 6-42
Custom Box
Creating a New Box 5-52
Delete 5-63
Edit 5-59
Printing Documents 5-56
Send 5-57
Storing Documents 5-55
D
Daily Maintenance
Replacing Staples 10-12
Toner Container Replacement 10-6
Waste Toner Box Replacement 10-9
Data Sanitization 8-50
Data Security 8-50
Data Security Kit 11-7
Date/Timer/Energy Saver 8-54
Auto Error Clear 8-54
Auto Panel Reset 8-54
Date Format 8-54
Date/Time 8-54
EnergySaver RecoveryLevel 8-56
Error Clear Timer 8-55
Error Job Skip 8-55
Interrupt Clear Timer 8-55
Low Power Timer 8-55
Panel Reset Timer 8-55
Sleep Level (models except for Europe) 8-56
Sleep Rules (models for Europe) 8-55
Sleep Timer 8-55
Time Zone 8-54
Unusable Time 8-55
Weekly Timer Settings 8-56
Default
Auto Image Rotation (Copy) 8-18
Auto Image Rotation (OCR) 8-19
Backgrnd Density (Copy) 8-17
BackgrndDens.(Send/Store) 8-17
Border Erase Default 8-17
Border Erase to Back Page 8-17
Collate/Offset 8-18
Color Selection 8-17
Color TIFF Compression 8-18
Cont. Scan (Except FAX) 8-18
Continuous Scan 8-18
Continuous Scan (FAX) 8-18
DP Read Action 8-19
EcoPrint 8-18
E-mail Subject/Body 8-19
FAX TX Resolution 8-17
File Format 8-17
File Name Entry 8-18
File Separation 8-17
High Comp. PDF Image 8-18
i-FAX Subject/Body 8-19
Image Quality (File Format) 8-18
JPEG/TIFF Print 8-18
Margin 8-18
OCR Text Recognition 8-19
Org. Image (Send/Store) 8-17
Original Image (Copy) 8-17
Original Orientation 8-17
PDF/A 8-18
Prevent Bleed(Send/Store) 8-17
Prevent Bleed-thru (Copy) 8-17
Primary OCR Language 8-19
Repeat Copy 8-20
Scan Resolution 8-17
Skip Blank Page 8-20
Toner Save Level (EcoPrint) 8-18
XPS Fit to Page 8-18
Zoom 8-17
Default Gateway 11-33
Settings 8-43
Default Screen 8-9
Delete after Printed 6-64
Delete after Transmitted 6-64
Density 6-22
Density Adjustment 8-57
Destination
Address Book 5-26
Address Book Type 8-53
Check before Send 8-29
Checking and Editing 5-34
Confirmation Screen of Destinations 5-35
Entering a New E-mail Address 5-29
Entry Check for New Dest. 8-29
Multi Sending 5-36
Narrow Down 8-53
Search 5-27
Sort 8-53
Specifying a New PC Folder 5-31
Speed Dial 5-29
Device
Canceling FAX Communication 7-19
USB Memory 4-2, 7-18
DHCP 11-33
Settings 8-43
DHCP (IPv6) 11-34
Settings 8-44
Disposing of the Punch Waste
1,000-sheet Finisher 10-16
4,000-sheet Finisher 10-17
Document Box/Removable Memory
Custom Box 8-34
Job Box 8-34
Quick Setup Registration 8-34
Document Finisher 2-5
Document Processor 2-2, 11-4, 11-26
Part Names 2-2
Document processor
How to Load Originals 5-3
Loading Originals 5-3
Originals Not Supported by the Document
Processor 5-3
Originals Supported by the Document
Processor 5-3
Document Table 11-7
DP Read Action 6-56
dpi 11-34
DSM Scan
Protocol Settings 8-45
Duplex 6-39
E
EcoPrint
Default 8-18
Printer 8-35
EcoPrint Mode 11-34
Edit Destination
Address Book 8-53
Address Book Defaults 8-53
Contact 3-45
Group 3-50
One Touch Key 3-53, 8-53
Print list 8-53
E-mail Subject/Body 6-62
Send to Folder (FTP) 5-23
Send to Folder (SMB) 5-23
E-mail Subject/Body
Default 8-19
Embedded Web Server RX 2-33
Emptying the Punch Waste Box (Option)
1,000-sheet Finisher (Option) 10-16
4,000-sheet Finisher (Option) 10-17
Emulation 11-34
Selection 8-35
Emulation Upgrade Kit 11-7
Encrypted PDF Password 6-65
Energy Saver Recovery Level 3-14, 3-15, 8-56
Energy Saving Control Function 1-13
Energy Star (ENERGY STAR®) Program 1-14
Enhanced WSD
Protocol Settings 8-46
Enhanced WSD over SSL
Protocol Settings 8-46
Enlarged Display 3-13
Enter key 3-11
Entry
File Name 6-54
Subject 6-62
Environment 1-3
Error Handling 8-14
F
FAX 8-35
FAX Expansion Memory 11-6
FAX Kit 11-6
File
Format 6-59
PDF 6-61
Separation 6-62
File Format
Default 8-17
File Name Entry 6-54
Default 8-18
File Separation 6-62
Default 8-17
File Size Confirmation 6-64
First Copy Time 11-24
First Print Time 11-25
Fixing unit 10-51
FMU Connection 5-45
Fold 6-17
Folding Unit 2-5, 11-4
Form Overlay
Storing a Form 5-65
Front Cover 2-2, 2-5
FTP 11-34
G
Gigabit Ethernet Board 11-6
Glossary 11-33
GPL/LGPL 1-8
Grayscale 11-34
Group Authorization Set. 9-15
Group Authorization 9-15
Group List 9-16
Guest Authorization Set. 9-18
Guest Authorization 9-18
Guest Property 9-18
Guides Provided with the Machine ix
H
Handle 2-2
Hard Disk Initialization 8-50
Help 11-34
Home 8-28
Customize Desktop 3-5
Customize Taskbar 3-5
Wallpaper 3-5
Home Screen 3-4
Host Name 8-43
HTTP
Protocol Settings 8-46
HTTPS
Protocol Settings 8-46
1
Image Repeat 6-47
Inner Job Separator 11-5
Inner Job Separator (JS-732) 11-5
Inner Tray 2-2
Install
Macintosh 2-17
Software 2-13
Windows 2-14
Internet
Proxy 8-47
Internet Browser
Instructions for use 5-16
Internet Fax Kit 11-7
Interrupt Copy 5-22
IP Address 11-34
Settings 8-43
IPP 11-34
Protocol Settings 8-45
IPP over SSL
Protocol Settings 8-45
IPSec
Settings 8-44
J
Job
Available Status 7-2
Canceling 7-14
Checking History 7-11
Checking Status 7-2
Detailed Information 7-9
Detailed Information of Histories 7-13
Details of the Status Screens 7-4
Displaying History Screen 7-12
Displaying Status Screens 7-3
Pause and Resumption 7-14
Priority Override for Waiting Jobs 7-15
Reordering 7-16
Sending the Log History 7-13
Job Account Settings
Adding an Account 9-32
Counting the Number of Pages Printed 9-38
Default Setting 9-36
Enabling/Disabling 9-29
Login 9-29
Logout 9-30
Managing Accounts 9-33
Print Accounting Report 9-31
Restricting the Use of the Machine 9-34
Job Accounting Settings
Counting the Number of Pages Printed 9-27
Job Box
Deletion of Job Retention 8-34
Form for Form Overlay 5-65
Form Overlay 5-65
Private Print/Stored Job 4-14
Quick Copy Job Retention 8-34
Quick Copy/Proof and Hold 4-16
Repeat Copy Job Retention 8-34
JPEG/TIFF Print
Default 8-18
K
Key Counter 11-7
KIR 8-36
Knopflerfish License 1-10
KPDL 11-34
L
Label 11-19
LAN Cable 2-7
Connecting 2-8
LAN Interface 8-46
Language 8-9
Large Capacity Feeder (1,500-sheet x 2) 11-4
LDAP
Protocol Settings 8-46
Legal Information 1-7
Legal Restriction on Copying 1-6
Legal Restriction on Scanning 1-6
Limitations 8-52
Loading Originals
Loading Originals in the Document Processor 5-3
Placing Originals on the Platen 5-2
Local Authorization 9-15
Combine Restriction 9-16
Copy Restriction 9-16
Duplex Restriction 9-16
EcoPrint Restriction 9-16
FAX TX Restriction 9-16
Print Restriction 9-16
Send Restriction 9-16
Storing Restr. in Box 9-16
Storing Restr. in Memory 9-16
Login 2-21
Logout 2-22
Low Power Mode 3-14
LPD
Protocol Settings 8-45
M
Mailbox 2-5, 11-4
Main Power Switch 2-2
Management 9-1
Manual Setting (IPv6) 8-44
Manual Staple 5-72
Margin 6-33
Default 8-18
Margin/Centering 6-33
Measurement 8-14
Media Type Setting 8-10
Memo Page 6-46
Memory Diagnostics 8-57
Mirror Image 6-53
Mixed Size Originals
Combinations 6-14
Copy Size 6-15
Mixed Size Stapling 6-20
Monotype Imaging License Agreement 1-9
Multi Purpose Tray 2-3
Paper Size and Media Type 3-33
Multi Sending 5-36
N
Negative Image 6-53
NetBEUI 11-35
Protocol Settings 8-45
NetWare 11-35
Settings 8-47
Network
Preparation 2-25
Settings 8-43
Network Cable 2-7
Network Interface 2-7
Network Interface (Send) 8-49
Network Interface Connector 2-4
Network Interface Kit 11-6
New E-mail Address 5-29
New PC Folder 5-31
0
One Touch Key
Deleting the Registered Information 3-54
Editing 3-54
One Touch keys
Changing the Registered Information 3-54
OpenSSL License 1-8
Operation Panel 2-2
Option
1,000-sheet Finisher 11-4
4,000-sheet Finisher 11-4
Banner Tray 11-6
Card Authentication Kit 11-6
Data Security Kit 11-7
Document Processor 11-4
Document Table 11-7
Emulation Upgrade Kit 11-7
FAX Expansion Memory 11-6
Folding Unit 11-4
Inner Job Separator 11-5
Inner Job Separator (JS-732) 11-5
Internet Fax Kit 11-7
Key Counter 11-7
Large Capacity Feeder (1,500-sheet x 2) 11-4
Mailbox 11-4
Network Interface Kit 11-6
OCR Scan Activation Kit 11-7
Overview 11-2
Paper Feeder (500-sheet x2) 11-4
Printed Document Guard Kit 11-6
Right Job Separator 11-6
Side Feeder (3,000-sheet) 11-6
ThinPrint Option 11-7
USB Keyboard 11-7
Wireless Network Interface Kit 11-6
Option Interface 2-4
Optional Function 8-52
Optional Network
Basic 8-47
Wireless Network 8-48
Original
Automatic Detection 8-11
Custom 8-10
Settings 8-10
Size 1-xiv
Original eject table 2-2
Original Image 6-23
Default 8-17
Original Loaded Indicator 2-2
Original Orientation
Default 8-17
Orientation Confirmation 8-16
Original Preview 3-9
Original Size 6-11
Original Size Indicator Plates 2-2
Original SSLeay License 1-8
Original stopper 2-2
Original Table 2-2
Original Width Guides 2-2
P
Page # 6-44
Paper
Checking the Remaining Amount of Paper 7-20
Appropriate Paper 11-14
Cassette 8-7
Custom Paper Size 8-10
Default Paper Source 8-11
Index Tab Dividers 3-29
Loading Envelopes 3-28
Loading Paper 3-16
Loading Paper in the Cassettes 3-18
Loading Paper in the Multi Purpose Tray 3-26
Media Type Setting 8-10
MP Tray 8-8
Paper Source for Cover 8-12
Size and Media 8-7, 11-13
Size and Media Type 3-30
Special Paper 11-17
Special Paper Action 8-12
Specifications 11-13
Weight 8-13
Paper Before Loading 3-17
Paper Feeder (500-sheet x2) 11-4
Paper Jams 10-39
1,000-sheet Finisher 10-55
4,000-sheet Finisher 10-56
Bridge Unit 10-54
Cassette 1 10-41
Cassette 2 10-42
Cassette 5 10-62
Cassettes 3 and 4 10-43
Center-Folding Unit 10-60
Document Processor 10-52
Duplex unit 10-48
Fixing unit 10-51
Inside the Right Covers 1, 3 and 4 10-47
Jam Location Indicators 10-39
Mailbox 10-59
Multi Purpose Tray 10-46
Optional Job Separator 10-53
Paper Length Guide 2-3
Paper Output 6-22, 8-16
Paper stopper 2-2
Paper Width Adjusting Tab 2-3
Paper Width Guides 2-3, 3-19
Part Names 2-1
PDF/A 11-35
Platen 2-2
Platen Cover 2-5
POP3 11 -35
POP3 (E-mail RX)
Protocol Settings 8-45
PostScript 11-35
Power Cable: Connecting 2-9
Power Management 1-13
Power Off 2-11
PPM 11-35
Precautions for Use 1-4
Preparing Cables 2-7
Prevent Bleed-thru
Default 8-17
Print Report
Font List 8-37
Network Status 8-37
Optional Network Status 8-38
Service Status 8-38
Status Page 8-37
Print Settings 4-5
Printed Document Guard Kit 11-6
Printer 8-35
Banner printing 4-7
Copies 8-35
CR Action 8-36
Duplex 8-35
EcoPrint 8-35
Emulation 8-35
Form Feed Timeout 8-36
Job Name 8-36
KIR 8-36
LF Action 8-36
Orientation 8-36
Override A4/Letter 8-35
Paper Feed Mode 8-36
Toner Save Level (EcoPrint) 8-35
User Name 8-36
Printer Driver 11-35
Help 4-6
Printing
Print setting 4-5
Printing from PC 4-2
Printing from PC 4-2
Printing Speed 11-25
Priority Override 6-55, 7-15
Product Library ix
Program 5-6
Editing and Deleting 5-9
Recalling 5-7
Registering 5-7
Punch 6-20
Q
Quick No. Search key 3-11
Quick Setup Registration 8-29, 8-34
Quick Setup Wizard 2-28
R
RA (Stateless) 11-35
Settings 8-44
Recycled Paper 11-21
Regarding Trade Names 1-7
Regular Maintenance 10-2
Disposing of the Punch Waste 10-16
Replacing Staples 10-12
Toner Container Replacement 10-6
Waste Toner Box Replacement 10-9
Release Button 2-4
Remaining amount of toner 7-20
Repeat Copy
Default 8-20
Printing 6-55
Repeat Copy Job Retention 8-34
Replacing Staples
1,000-sheet Finisher 10-12
4,000-sheet Finisher 10-13
Report
Admin Report Settings 8-38
Device Log History Settings 8-41
Login History Settings 8-40
Print Report 8-37
Result Report Settings 8-38
Secure Comm. Error Log 8-42
Sending Log History 8-39
Reserve Next 5-21
Reserved copy 5-21
Resolution 6-62, 11-24, 11-25
Responding to Messages 10-23
Restart Entire Device 8-52
Restart Network 8-46
Right Cover 1 Lever 2-3
Right Cover 2 2-3
Right Cover 2 Lever 2-3
Right Cover 3 Lever 2-3
Right Job Separator 11-6
S
Safety Conventions 1-2
Safety Conventions in This Guide 1-2
Scan Resolution
Default 8-17
Security Level 8-49
Send 8-29
Send and Forward
File format 8-31
PDF Encryption Functions 8-32
Send and Print 6-63
Printing 6-63
Storing 6-63
Send and Store 6-63
Send Result Report 8-38
Send Settings
Color Type 8-29
Default Screen 8-29
Dest. Check before Send 8-29
Entry Check for New Dest. 8-29
HighCompressionPDF Mode 8-30
New Destination Entry 8-30
OCR Text Recognition Act. 8-30
Quick Setup Registration 8-29
Recall Destination 8-30
Send and Forward 8-30
Send to Folder (FTP) 5-23
Send to Folder (SMB) 5-23
Sending
Preparation for Sending a Document to a PC 3-35
Separator
Cleaning 10-5
Serial Number 5-5
Setting Date and Time 2-23
Setting TWAIN Driver 2-19
Sharpness 6-25
Shortcuts
Adding 5-14
Editing and Deleting Shortcuts 5-15
Side Feeder (3,000-sheet) 11-6
Simple Login 2-22
Simple Login Settings
Simple Login 9-23
Simple Login Key 9-23
Skip Blank Page 6-56
Sleep 3-15
Slit Glass 2-2
Slit Glass/Dual scanning area 10-3
SMB Client (Transmission)
Protocol Settings 8-45
SMTP 11-35
SMTP (E-mail TX)
Protocol Settings 8-45
SNMPv1/v2c
Protocol Settings 8-46
SNMPv3
Protocol Settings 8-46
Solving Malfunctions 10 -18
Specifications 11-22
1,000-sheet Finisher 11-28
4,000-sheet Finisher 11-29
Banner Tray 11-32
Center-Folding Unit 11-30
Common functions 11-22
Document Processor 11-26
Hole Punch Unit 11-29
Inner Job Separator 11-31
Inner Job Separator (JS-732) 11-31
Large Capacity Feeder 11-27
Mailbox 11-30
Paper Feeder (500-sheet x 2) 11-26
Printer functions 11-25
Right Job Separator 11-32
Scanner functions 11-25
Specifying Destination 5-26
SSL 8-46
Staple 6-19
Staple Jam 10-63
1,000-sheet Finisher 10-63
4,000-sheet Finisher 10-64
Staple/Punch 6-19
Status Page 11-36
Status/Job Cancel 7-1
Storing Size 6-65
Subnet Mask 11-36
Settings 8-43
Supplies
Checking the Remaining Amount 7-20
Support Tray Section of the Multi Purpose Tray 2-3
Symbols 1-2
System Initialization 8-57
System Menu 8-2
Adjustment/Maintenance 8-57
Application 8-60
Cassette/MP Tray Settings 8-7
Common Settings 8-9
Copy 8-28
Date/Timer/Energy Saver 8-54
Document Box/Removable Memory 8-34
Edit Destination 8-53
FAX 8-35
Home 3-4
Internet 8-60
Printer 8-35
Quick Setup Wizard 2-28
Report 8-37
Send 8-29
System/Network 8-43
User Login/Job Accounting 8-53
User Property 8-54
System/Network 8-43
Data Security 8-50
Document Guard 8-51
Interface Block Setting 8-50
Network 8-43
Network Interface (Send) 8-49
Optional Function 8-52
Optional Network 8-47
Restart Entire Device 8-52
Security Level 8-49
T
TCP/IP 11-36
Settings 8-43
TCP/IP (IPv4)
Settings 8-43
Setup 2-25
TCP/IP (IPv6) 11-34
Settings 8-44
Thin Print over SSL
Protocol Settings 8-45
ThinPrint
Protocol Settings 8-45
ThinPrint Option 11-7
Tone Curve Adjustment 8-58, 10-36
Toner Container (Black) 2-4
Toner Container Release Lever 2-4
Toner Container Replacement 10-6
Touch Panel 3-4
TWAIN 11-36
Scanning using TWAIN 5-41
U
USB 11-36
USB cable
Connecting 2-9
USB Interface 2-7
USB Interface Connector (B1) 2-4
USB Keyboard 11-7
USB Keyboard Type 8-20
USB Memory
Printing 5-67
Remove 5-71
Save 5-69
USB Port (A1) 2-2
USB Port (A2) 2-4
User Login Setting 9-2
Adding a User 9-8
Changing User Properties 9-11
Group Authorization Set. 9-15
Guest Authorization Set. 9-18
Local Authentication 9-15
Local User List 9-8
Obtain NW User Property 9-21
Simple Login Settings 9-23
User Login/Job Accounting
Job Accounting Setting 9-27
Unknown ID Job 9-41
User Login Setting 9-2
User Property 8-54
W
Waste Toner Box Status 2-4
Waste Toner Tray 2-4
White space 6-46
WIA 11-36
Setting WIA Driver 2-20
Wireless Network Interface Kit 11-6
WSD Print
Protocol Settings 8-45
WSD Scan
Protocol Settings 8-45
X
XPS Fit to Page
Default 8-18
Z
Zoom 6-27
Default 8-17