GCR1888DABBT - Alarm clock radio Goodmans - Free user manual and instructions
Find the device manual for free GCR1888DABBT Goodmans in PDF.


User questions about GCR1888DABBT Goodmans
0 question about this device. Answer the ones you know or ask your own.
Ask a new question about this device
Download the instructions for your Alarm clock radio in PDF format for free! Find your manual GCR1888DABBT - Goodmans and take your electronic device back in hand. On this page are published all the documents necessary for the use of your device. GCR1888DABBT by Goodmans.
USER MANUAL GCR1888DABBT Goodmans
DAB Digital and FM Radio
User Guide
text_image
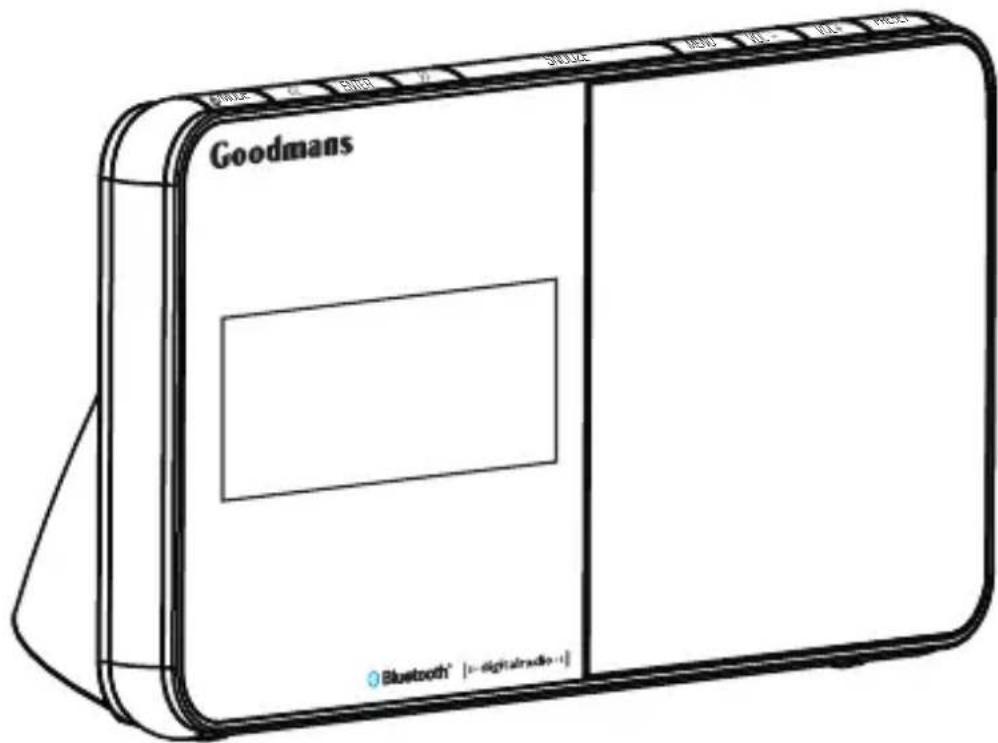
Goodmans Bluetooth® | -digitalradio -1 | S302E MDD IO-- IO-+ MDDIntroduction
Thank you for buying this GOODMANS Digital Radio. The following instructions will assist you in operating all the features of this product.
You may already be familiar with using a similar unit, but please take the time to read the instructions relevant for your model.
Your safety is very important, so please ensure you read the safety instructions before you operate this unit.
If you need help setting up or using your Digital Radio, please contact our UK call centre on 0871 230 1777, or alternatively refer to our support section at www.goodmans.co.uk.
Contents
01 Safety Instructions 4
02 Your DAB Radio....5
03 What Is DAB....6
04 Getting Started 7-8
05 Operating Instructions....9-12
06 Troubleshooting/Specifications....13
07 Guarantee.... 14
01 Safety Instructions
Please ensure that you read all of the safety instructions before using this unit.
Safety Considerations
- Position the power cable and other connected cables so that they are not likely to be walked on, pinched or where items can be placed on or against them.
- Do not use the unit in humid or damp conditions.
- Do not allow the unit to get wet.
- Never allow children to insert foreign objects into holes or slots on the unit.
- The ventilation should not be impeded by covering the openings with items such as news-papers, tablecloths, curtains, etc.
- No naked flame sources, such as lit candles, should be placed on the unit.
- Do not expose the unit to dripping or splashing and no objects filled with liquids, such as vases, should not be placed on the unit.
- Do not place the unit in closed bookcases or racks without proper ventilation.
Cleaning
- Disconnect the unit from the mains supply before cleaning.
- Do not use any liquids or aerosol cleaners, as this may damage the unit. Use a soft, dust free cloth.
Servicing
- There are no user serviceable parts in the unit. When servicing, refer to qualified service personnel.
- Consult your dealer if you are ever in doubt about the installation/operation/safety of the product.
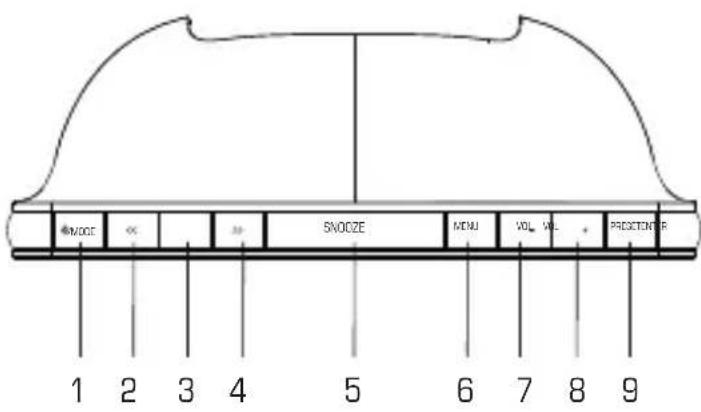
Top view
text_image
SMOZE MENU VOL VOL PROSETENTER 1 2 3 4 5 6 7 8 9Front view
text_image
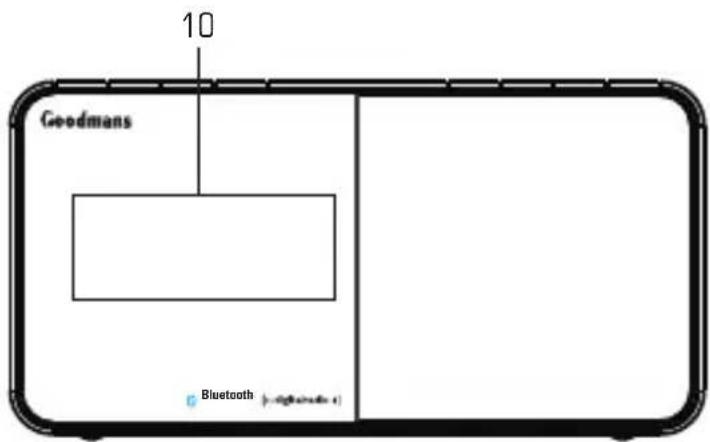
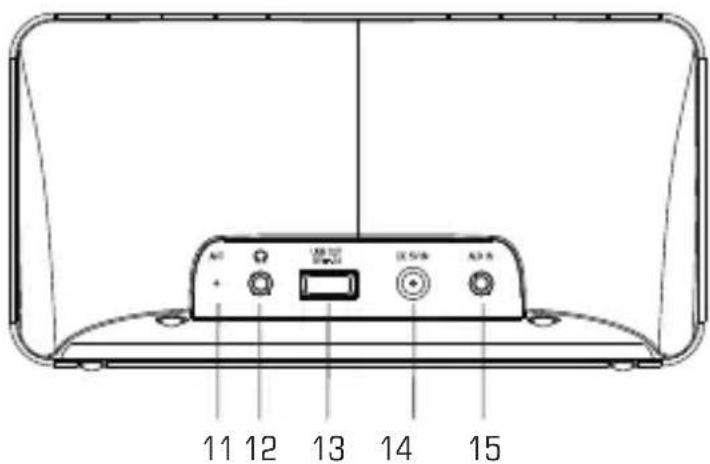
10 Goodmans Bluetooth (p-8192456.4)Back view
text_image
11 12 13 14 151. ⏻/MODE
Press to turn on the product, press and hold to go to STANDBY mode. Press to switch DAB, FM, Bluetooth, AUX IN mode when the power is on.
2/4.<>
Press to previous/next music or selection. Press to tune the radio.
3. ENTER
Press to confirm the selection. Play/ Pause in Bluetooth mode.
5.SNOOZE
Press to enter SNOOZE mode. Press to adjust the backlight. Press and hold to set alarm.
6.MENU
Press to view channel/time/date/RDS.
7/8.VOL-/VOL+
Press to adjust the volume level.
9.PRESET
Press to store and preset radio stations.
10.DISPLAY
LED display showing all information on the radio.
11.ANTENNA
The radio comes with a pigtail antenna. Adjust the antenna for best reception.
12. (HEADPHONE)
You can connect your headphone to this unit for personal listening.
13.USB PORT
For Mobile phone charge.
14.DC 5V IN
Use this to the enclosed DC power supply.
15.AUX IN
Use 3.5mm audio cable to connect to audio device.
03 What Is DAB
Digital DAB was developed in Europe by a consortium of broadcasters and manufactures. DAB uses digital compression techniques to transform the source material, i.e. music and speech, into better quality audio.
Interference free reception
Analogue systems suffer from an effect called "multipath distortion". This is caused because waves do not behave in a orderly fashion, but bounce and reflect off buildings etc. DAB sees this as an advantage and uses the direct and reflected signals to actually reinforce the end result, allowing for better service most of the time.
No need to re-tune
A signal DAB frequency can be used to cover the whole of U.K., solving many of the problems experienced with the earlier analogue DAB scan automatically tunes in all of the available stations in your area.
Scrolling Test
Broadcasters can transmit text to your radio, this way you can read the name of the DJ, Artist, song title or any other information they choose.
DAB Coverage
Check your local coverage at www.getdigitalradio.com to check if you are in a DAB broadcast area.
Getting Started
04
Carefully remove your DAB receiver from the box (we recommend you keep the package for future reference).
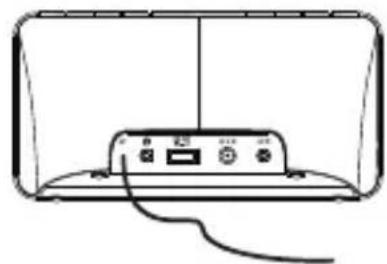
1 Connect the power Extend the telescopic ae 2

natural_image
Simple line drawing of a device connected to a wall-mounted cable, no text or symbols presentConnect the power adaptor provided to the unit and then connect to you wall outlet and turn on the power.
natural_image
Line drawing of a device rear panel with cables, no text or symbols presentExtend the antenna aerial for the best reception possible.
3 Turning on the radio
text_image
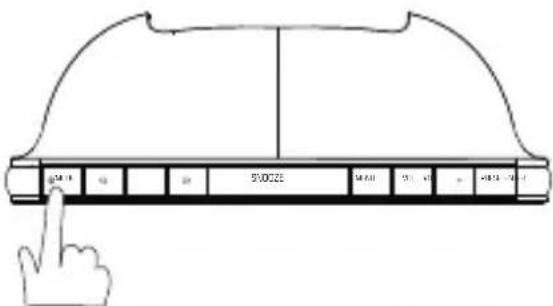
SWOZZE SWOZZE SWOZZE SWOZZE SWOZZE SWOZZE SWOZZE SWOZZE SWOZZE SWOZZE SWOZZE SWOZZE SWOZZE SWOZZE SWOZZE SWOZZE SWOZZE SWOZZE SWOZZE SWOZZE SWOZZE- Press the ⏻/MODE button to turn on the radio.
- Press the ⏻/MODE button and hold to enter STANDBY mode.
Note:
- This unit is designed to enter STANDBY mode automatically after 15 minutes of inactivity. Press ⏻MODE the button to wake the unit.
- It is recommended that the unit is switched off and adapter is removed from the power outlet during storms or if being left unused for long periods of time.
04 | Getting Started
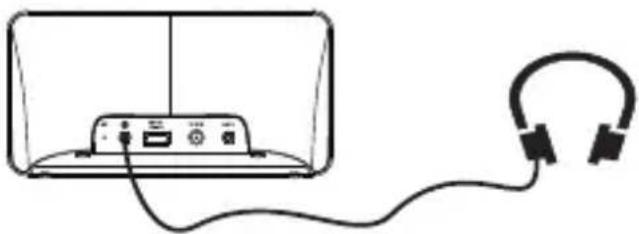
4 Connecting headphones
natural_image
Simple line drawing of a portable electronic device connected to an ear (no text or symbols)Connect your headphones to the 3.5mm headphone socket on the back of the unit as shown above.
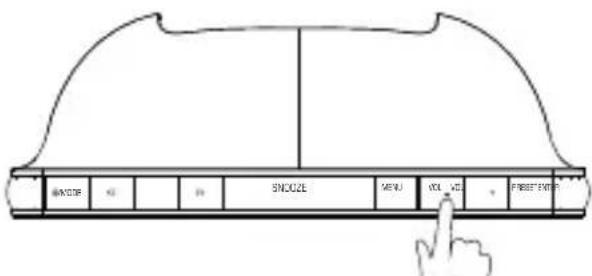
5 Changing the volume
text_image
BANCOF SNOOZE MENU KOL VIZ PRESER EXTERAdjust the volume level by pressing the VOL+ button to increase the volume or decrease the volume by pressing the VOL- button.
Operating Instructions
05
Playing your DAB radio
① Please make sure your unit is switched on.
② Press the ⏻/MODE button to select the DAB radio mode.
3 Press the <
4 To scan for all new stations or to rescan for weak stations, please go to the Full Scan function, then the radio will scan and store all available stations. We recommend scanning for new stations every so often to pick up any newly launched digital radio stations.
Storing a station preset
You can store up to 10 DAB station presets for easy playback.
② Select the station you wish to preset, press and hold the PRE-SET button until the display shows, then release the button.
③ Using the << and>> buttons choose the preset number(1-10) you wish to use, then press the ENTER button to store the station.
4 Repeat this access to preset all 10 stations.
Preset Store
< 1: (Empty) >
Recalling a station preset
① Press the PRESET button and use the « and » buttons to select your desired pre-set station. (This is to override any station you have pre-set which you no longer set in your list)
② Press the ENTER button to play the station.
Using the menu in DAB mode
Press the MENU button to view the radio information.
Radio information
Press the MENU button to view the various radio information provided by the station broadcaster, the information will be displayed on the second line. Press the MENU button repeatedly to scroll though the information provided, please refer to the below.
Note: Once you reach the last info setting the next command will return you to the first setting.
Audio mode-This shows if the current station is broadcast in stereo or mono.
DLS(Dynamic label segment)-This is the scrolling message that the broadcaster may include with their transmissions.
Signal strength-This shows the signal transmission level.
Program type-This is the type and description of the program provided by the DAB station.
Time and Date-This shows the current time and date provided by the broadcaster.
Channel frequency-This displays the channel number and the transmission frequency.
Signal error-If the transmission signal contains any error, it will apply corrections.
The amount of signal corrections are displayed as a numerical value between 0 and 99, as the value increases, you will hear the signal degrade. To improve reception, try adjusting the position of the antenna.
05 | Operating Instructions
Press and hold the MENU button to enter the main menu, press the « and » buttons to scroll through the options listed: Full scan, Manual tune, DRC, Prune, Alarm set, Sleep set, Reset and SW version. After that press ENTER to select.
① In the main menu, use the navigation buttons to select the Full scan menu.
② Press the ENTER button to confirm and the unit will perform a Full scan and store all available DAB stations.
You can also choose to manually scan for your favourite DAB station to obtain optimum reception.
In the main menu, use the navigation buttons to select the manual tune menu.
2 Press the ENTER button to confirm.
③ Use the navigation buttons to scroll through the available frequencies.
4 Press the ENTER button to confirm and play.
You can also press and hold the ENTER button to enter the Manual tune mode directly and then repeat the step 2\~4.
Dynamic range control (DRC) adds or removes a degree of compensation for the differences in the dynamic range between radio stations.
Press the MENU button to access the main menu.
2 Press the « and » buttons until DRC is displayed.
3 Press the ENTER button to confirm.
4 Using the « and» buttons to select off, low or high to prune and then press the ENTER button to confirm.
If your station list includes that you can no longer receive, you can select the Prune option to remove any stations that can no longer be received form the station list.
① Press the MENU button to access the main menu.
2 Press the « and » buttons until Prune is displayed.
3 Press the ENTER button to confirm.
4 Use the << and» buttons to select Yes or No to prune and then press the ENTER button to confirm.
Operating Instructions
05
In Standby/Power on mode, press and hold the SNOOZE button; or in Power on mode, press and hold the MENU button and select the Alarm set both can set the alarms.
Setting ALARM1 or ALARM2 is simple, when you enter the Alarm set mode, follow the below steps:
1 Press the « and » buttons to select ALARM1 or ALARM2, then press ENTER to confirm. Press the « and » buttons to select OFF/ON, after that press the ENTER button to confirm.
② Press the «and» buttons to adjust the Hours, then press the ENTER button to confirm; press the «and» button to adjust minutes then press the ENTER button to confirm.
3 Press the « and » buttons to select the ALARM mode (once, daily, weekends, weekdays), then press the ENTER button to confirm.
4 Press the « and » buttons to select ALARM type (DAB, FM, Beep tone1, Beep tone2), then press the ENTER button to confirm. If you select DAB or FM, you should select station you desired.
5 Press the « and » buttons to adjust alarm volume as desired, then press the ENTER button to confirm.
6 To turn off the alarm you will need to change the ON setting to OFF.
To silence the alarm, press the ⏻/MODE button.
NOTE: The alarm will keep sounding for 60 minutes if you do not press the ⏻MODE button.
Press the « and » buttons to cycle OFF, 15 mins, 30 mins, 45 mins, 60 mins, 90 mins and then press ENTER button to confirm. The product will shut off automatically when the time is up.
The product will reset the system and perform a full scan and store all available DAB stations.
NOTE: All the station presets will be updated when the product reset is complete.
In the main menu, you can find the software version for your DAB radio. This option will display the version number of the software currently installed in your radio. This will be helpful to a technician who is servicing the radio.
Snooze function
When the alarm sounds, press the SNOOZE button to stop the alarm sounding. The alarm will sound again after a 9 minute period.
② Press and hold the SNOOZE button to enter Alarm set mode.
Brightness function
Press the SNOOZE button to cycle through the 10 display backlight setting.
05 | Operating Instructions
Playing your FM radio
① Press the ⏻/MODE button to select the FM mode.
② Press the «and» buttons to tune the radio.
3 Press and hold the <<and» buttons to tune the radio automatically to the next station.
4 Press and hold the ENTER button to adjust the FM radio received sensitivity.
⑤ In the FM mode, storing and recalling a station preset is the same as the functions in DAB mode.
AUX connection
The radio has an auxiliary input. This can be used to connect an external devices such as MP3 players and other audio devices by using the included 3.5mm cable.
Press the ⏻/MODE button to select the AUX mode.
2 Connect the 3.5mm cable to your radio and to your external device.
③ Press the VOL- and VOL+ buttons to adjust volume level.
Bluetooth connection
① Press the ⏻/MODE button to enter Bluetooth mode (operate your Bluetooth device to pair with the speaker).
② LCD will displace "pairing" after when you enter Bluetooth mode, it will keep flashing until successfully paired.
3 LCD will display "paired" after successful pairing, press ENTER button to play music.
4 Press the « and » buttons to move to the previous or next tracks.
5 Press the ENTER button to Play/Pause music playing.
NOTE: The Bluetooth name is "GCR1888DABBT".
You will need to re-pair again if your Bluetooth device is not within the available distance.
You can press and hold the ENTER button to search and pair another Bluetooth device.
Clock setting
The radio clock can be set manually as below;
① Press and hold the ⏻MODE button to enter standby mode.
2 Press and hold the MENU button to enter clock settings.
3 Press « and» buttons to select 12H or 24H, then press the ENTER button to confirm.
4 Press the « and » buttons to adjust the Hours, then press the ENTER button to confirm.
5 Press the « and » buttons to adjust Minutes, then press the ENTER button to confirm.
6 Press the « and » buttons to select Year, then press the ENTER button to confirm.
Press the « and » buttons to select Month, then press the ENTER button to confirm.
Press the « and » buttons to select Day, then press the ENTER button to confirm.
Troubleshooting/Technical specifications
06
If a fault occurs, first check the points listed below before taking the set to repair. If you are unable to remedy a problem by following these hints, consult you retailer or service centre.
WARNING: Under no circumstances should you try to repair the set yourself, as this would void your guarantee. Where the MAINS plug is used as the disconnect device, the disconnect device shall remain readily operable
Troubleshooting
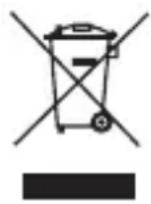
All electrical and electronic products must not be disposed of with household waste. Please refer to the retailer from whom you purchase this item for disposal instructions.
Packaging materials can be recycled using your local collection facilities.
| PROBLEM | POSSIBLE | REMEDY |
| Poor reception | 1.Weak radio aerial signal interference caused by other electrical equipment.2.The station is not tuned in. | 1.Extend and aim the aerial for the best reception possible, keep the unit away from other electrical equipment.2.Fine tune the station. |
| No radio sound | 1.Volume may not be adjusted.2.Headphones are connected.3.Power is not correctly connected. | 1.Increase the volume level.2.Disconnect Headphones.3.Check the Power properly. |
| No AUX input sound | 1.Volume may not be adjusted.2.Headphone are connected.3.Power is not correctly connected.4.3.5mm cable not connected correctly. | 1.Increase the volume level.2.Disconnect Headphone.3.Check the Power and connect power properly.4.Connect 3.5mm cable connect. |
| No Bluetooth | 1.Unit not in Bluetooth mode.2.Audio device not open in Bluetooth mode. | 1.Put unit in Bluetooth mode.2.Open audio device in Bluetooth mode. |
Technical specification
Bluetooth standard :Bluetooth V3.0+EDR
Transmission power: CLASS 2
Bluetooth Frequency range: 2.402GHz-2.480GHz
Wireless transmission range: 10Metre
Supply voltage: DC 5V=2A
DAB: 174-240MHz
FM: 87.5-108MHz
07 Guarantee
This Digital Radio is guaranteed for twelve months from the date of original purchase. If you have a defect due to faulty materials or workmanship, contact the Goodmans Helpline - 0871 230 1777.
Please have your receipt of purchase on hand.
The guarantee is subject to the following provisions:
- It is only valid within the boundaries of the country of purchase.
- The product must be correctly installed and operated in accordance with the instructions contained in this User Guide.
- This Digital Radio must be used solely for domestic purposes.
- The guarantee will be rendered invalid if the Digital Radio is re-sold or has been damaged by inexpert repair.
- The manufacturer disclaims any liability for incidental or consequential damages.
- The guarantee is in addition to and does not diminish your statutory or legal rights.