
UFE 370-S - Satellite receiver KATHREIN - Free user manual and instructions
Find the device manual for free UFE 370-S KATHREIN in PDF.


| Product Type | Digital Terrestrial TV Receiver (DVB-T) |
| Model | UFE 370-S (Order No. 20210052) |
| Dimensions (W x H x D) | 298 x 65 x 223 mm |
| Weight | 1.5 kg |
| Power Supply | AC 230 V / 50 Hz ±10% |
| Power Consumption | Operation: <14 W; Standby: <10 W |
| RF Input Frequency Range | 177.5–226.5 MHz (VHF) and 474–858 MHz (UHF) |
| Channel Bandwidth | 7/8 MHz switchable |
| Modulation | COFDM (2k, 8k); QPSK, 16 QAM, 64 QAM |
| Guard Interval | 1/4, 1/8, 1/16, 1/32 |
| FEC Rates | 1/2, 2/3, 3/4, 5/6, 7/8 |
| Input Level Range | 28–98 dBµV / 75 Ω |
| Processor | 81 MHz, 1 MB Flash, 8 MB SDRAM |
| Video Output | MPEG-2, PAL/NTSC/SECAM auto, CVBS and RGB via Scart |
| Audio Output | MPEG-1/2, stereo, digital audio (SPDIF) |
| Connections | 2× Scart (TV/VCR), 3× Cinch (video/audio), S-VHS, RS-232, RF input/output |
| Program Memory | 1000 channels (TV and radio) |
| Timer | 8 programmable events via EPG or manual |
| Features | EPG, teletext, parental control, antenna level indicator (visual + acoustic), software update via PC |
| Remote Control | Infrared with batteries included |
| Antenna Power Supply | 5 V / 75 mA via antenna input for active indoor antennas |
| Safety | CE certified; follow safety instructions for cleaning, ventilation, and electrical connection |
| Reparability | Repairs by qualified personnel only; user-replaceable batteries in remote control |
Frequently Asked Questions - UFE 370-S KATHREIN
User questions about UFE 370-S KATHREIN
0 question about this device. Answer the ones you know or ask your own.
Ask a new question about this device
Download the instructions for your Satellite receiver in PDF format for free! Find your manual UFE 370-S - KATHREIN and take your electronic device back in hand. On this page are published all the documents necessary for the use of your device. UFE 370-S by KATHREIN.
USER MANUAL UFE 370-S KATHREIN
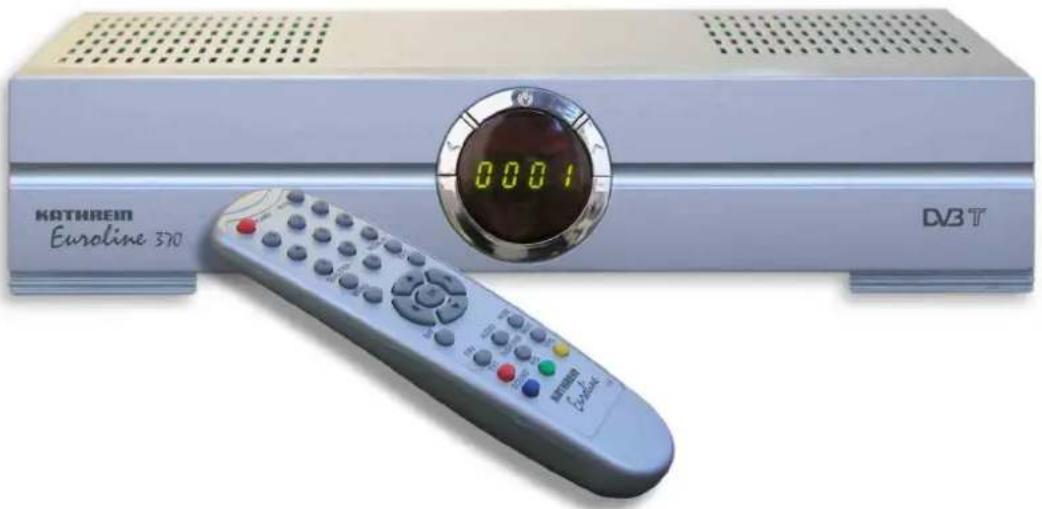
DVB-T Receiver UFE 370/S
natural_image
Exterior view of a KATHREIN Euroline 370 TV box with D3T branding and remote control (no readable text beyond branding)Order no. 20210052
Dear customer,
This Operating Manual is intended to help you make the fullest use of the extensive range of functions offered by your new DVB-T receiver.
We have tried to make the operating instructions as easy as possible to understand, and to keep them as concise as possible.
The power switch is an environmentally friendly feature. If you will not be using your receiver for a longer period, you should therefore use the power switch to disconnect it from the power supply to save energy. For shorter breaks, you can switch the receiver to standby on the remote control, which uses only a minimal amount of energy.
We wish you good reception and much pleasure using your new DVB-T receiver.
Your
KATHREIN Euroline ® team
Important Information
If you unexpectedly encounter problems with your receiver, please contact your authorised dealer.
The channels available are subject to continual change. This means the channel presets have to be regularly updated, though the factory presetting always represents the latest updated version. The information for this reset can be found on the Internet or in relevant magazines.
Your receiver is factory fitted with the latest software version. We are, however, constantly working on adapting the software to the wishes of our customers and to developments in technology. The "Software Update" section provides more information on this.
Please keep the original packaging in case you need to return the product at any time.
Contents
Preface....3
Contents 4
Views and Connections .... 5
Front view....5
Rear view 5
Remote Control....6
Guide to the Remote Control 7
Using the Remote Control....8
Inserting Batteries in the Remote Control 8
Safety Instructions 9
Operation....10
First Installation....10
Channel Selection (TV and Radio) 11
Channel Information.... 12
Videotext (Teletext) 12
Electronic Programme Guide (EPG)....13
Audio 14
Pause and Zoom....14
The Quality Button (Antenna Adjustment Help Function).... 15
Main menu 16
Accessing the Main Menu (MENU Button) 16
Timer Setting (Automatic Programming).... 17
Organising Channels and Favourites.... 18
Installation Menu 20
Antenna Type....21
Scan 21
System Configuration.... 23
Language Settings....23
TV Settings 24
OSD Settings....24
Time Settings.... 25
System Information....26
Factory Reset 26
Parental Control 27
Software Update 28
Games 29
Tetris 30
Snake 30
Functions and technical data.... 31
Connection Diagram....33
DVB-T indoor antenna BZD 30 34
For your notes.... 35
Front view

1) Power/Standby button
2) Channel select buttons
3) Channel display
Rear view

1) TV antenna input socket
2) TV antenna input (looped-through signal)
3) RS 232 data port for serial data transfer during service (only with special cable)
4) Scart connection for TV set
5) Scart connection for video recorder
6) S-VHS output
7) Video output Cinch socket
8) Audio outputs for stereo system (left and right): Cinch sockets
9) Power switch (On/Off)
10) Mains power cable
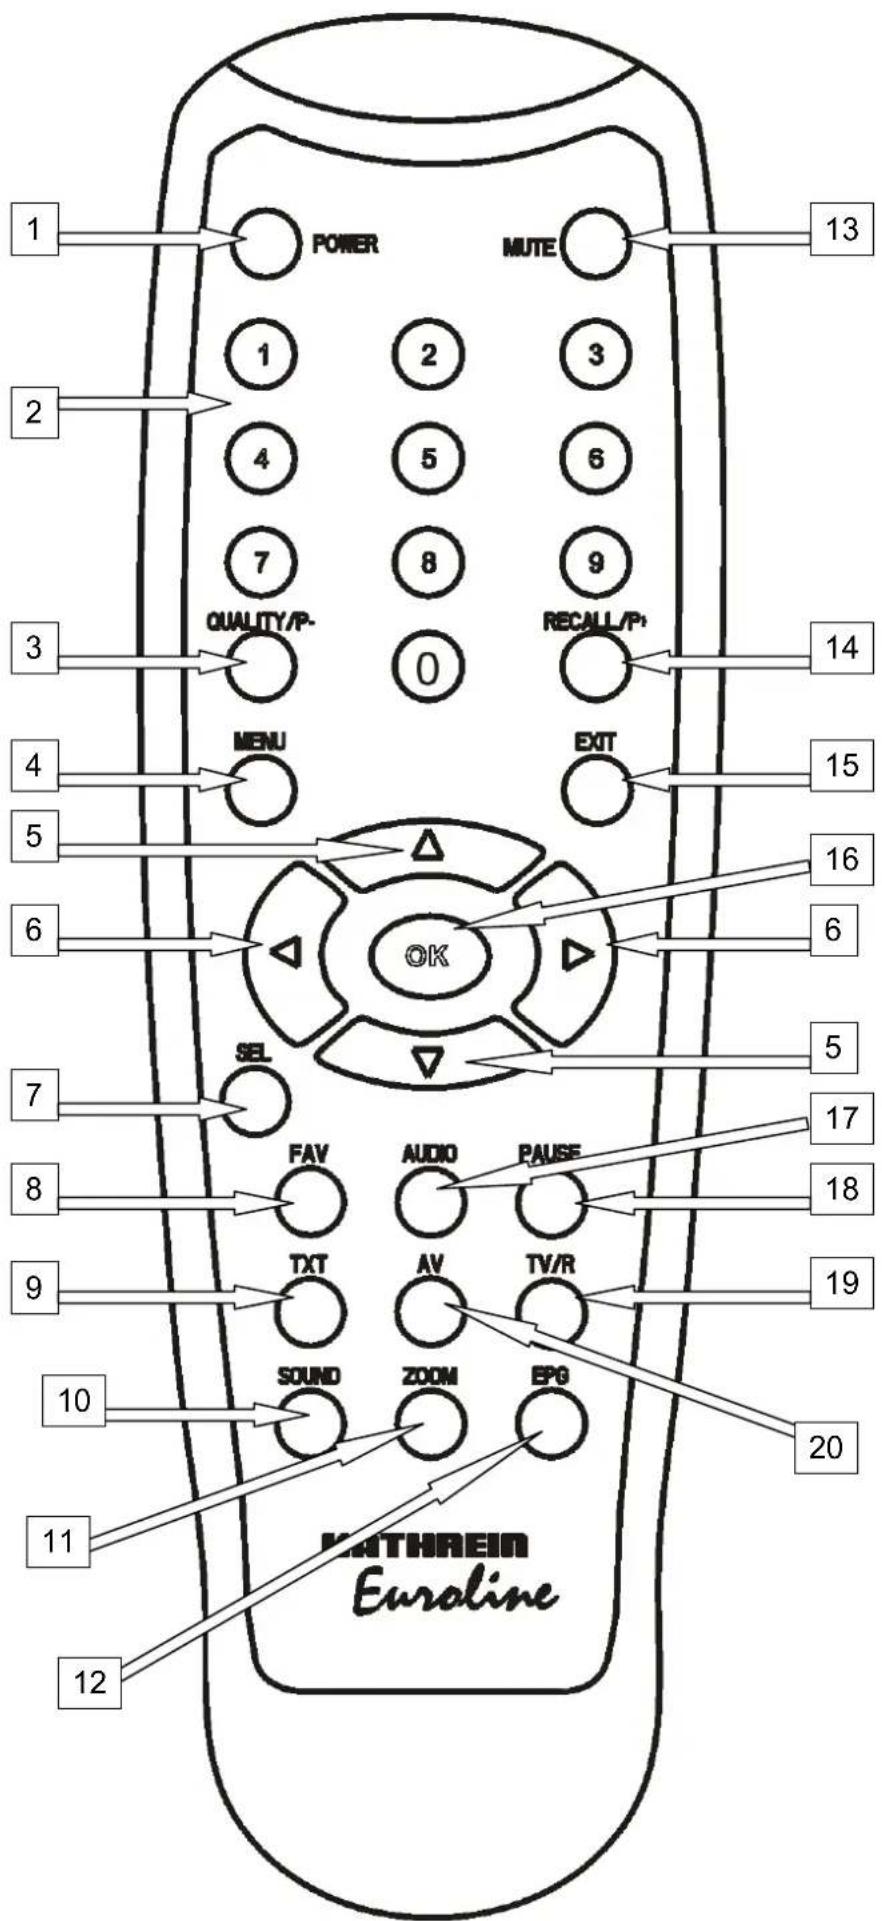
Guide to the Remote Control
1) POWER:
Receiver standby and power-on
2) Number pad (0-9):
To enter channel numbers or menu parameters
3) QUALITY/P-:
Display of DVB-T signal level of current channel being received. Also used for antenna adjustment and scrolling (-) through the lists
4) MENU:
Select main menu
5) Up/Down:
Switch channel and/or navigate through the menus
6) Left/Right:
Volume control and/or navigation through menus
7) SEL: Not used!
8) FAV:
Display list of favourite channels (press this button repeatedly to view the various lists)
9) TXT
Shows detailed information on the current channel being received (can also be displayed by way of the EPG menu)
10) SOUND:
Select sound from Left/Right/Stereo and the blue function button in the menus
11) ZOOM: Reduce the picture size
12) EPG:
Electronic Programme Guide and yellow function button in the menus. Press this button to access the Electronic Programme Guide (where available)
13) MUTE: Sound muting function
14) RECALL/P+:
Retrieves the last channel displayed or selected from the list (+)
15) EXIT:
Quit the menu or switch from a submenu to the next highest menu level
16) OK:
Press this button to view the channel list or to confirm selected options in the various menus
17) AUDIO:
Select language or audio channel for multilingual broadcasts
18) PAUSE: Freeze-frame
19) TV/R:
Switch between radio and TV mode (if supported by channel provider. DVB-T does not currently broadcast radio programmes in Germany.)
20) AV:
Switch the TV Scart socket (pin 8) between TV and AV reception
Using the Remote Control
Press the OK button to confirm menu settings or to access lower menu levels.
Change the settings line by line and confirm your input by pressing the OK button.
Press the EXIT button to quit the menu or to switch from a submenu to the next highest menu level.
Use the ▲/▼ buttons to navigate through the menus. Use the ◀/▶ buttons to edit the individual fields. You can also key in values in the fields using the number pad.
The coloured buttons are used for the functions within the various submenus. These functions are displayed on-screen for the respective menus.
In each menu a line is displayed at the bottom of the screen explaining the various functions available.
Inserting Batteries in the Remote Control
Remove the cover on the rear of the remote control. Insert the two batteries supplied into the remote control, ensuring correct polarity which is shown on the base of the battery compartment.
Slide the cover back onto the housing until it locks in place.
Used batteries are special waste. Do not throw used batteries into your household waste; take them to a collection point for old batteries!
Electronic equipment is not household waste - in accordance with directive 2002/96/EC OF THE EUROPEAN PARLIAMENT AND THE COUNCIL dated 27 th January 2003 on used electrical and electronic equipment, it must be disposed of properly.
At the end of its service life, take this unit for disposal at a designated public collection point.

Safety Instructions

DANGER!
This page contains important information about the operation, installation location and connection of the unit.
Read these instructions carefully before starting to use the unit.
Mains cable
Make sure that the mains cable (power supply cable) is not damaged. Units with a damaged mains cable must be disconnected from the mains (disconnect mains connector) and repaired by a qualified engineer before setup. Only use the power pack supplied (if available).
Risk of death due to electric shock.
Cleaning
Disconnect the mains connector before cleaning the unit. Only use a dry cloth for cleaning and only clean the outer surface. Never open the unit.
Touching the parts inside the unit carries a risk of death due to electric shock.
Playing children
Make sure that children do not push any objects into the ventilation slots.
Risk of death due to electric shock.

WARNING!
Earth connection
The antenna system must be earthed as specified or equipotentially bonded. EN 60728/11 and any national regulations must be complied with.
Danger due to surge voltages, lightning strikes.
Mains voltage
Only operate the unit with the specified mains voltage (marked on the rear of the-unit or on the external power pack). The unit may only be connected to the mains and turned on once it has been connected to the antenna and to the TV set or the cable network and PC.
If the mains voltage is too high, there is a risk of fire.
Repairs
Ensure that any repairs to your unit are carried out by qualified personnel. Opening the unit and attempting to repair it yourself voids all warranty claims.
Improper work on the unit can jeopardise the electrical safety of the unit.
The manufacturer accepts no liability for accidents caused by the user opening the unit.

CAUTION!
Connections
Incorrect wiring of the connections can lead to malfunctions or defects on the unit.
Long periods of absence / storms
Always turn off the unit at the mains switch if you will be absent for a long time or there is a storm. If your unit does not have a mains switch, you can disconnect it from the mains by unplugging the mains connector. This also applies to the other equipment connected to the unit. Isolation from the cable network is also recommended. Note any timer programs (receiver) and turn the unit on again promptly before the recording time.
Installation location
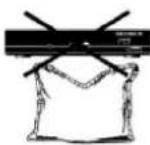
All electronic equipment generates heat. However, the heating of this unit lies within the permissible range. Sensitive furniture surfaces and veneers may become discoloured by the effects of constant heat over time. The feet of the unit can also cause colour changes to treated furniture surfaces. If necessary, place the unit on a suitable stable and flat base.

Ventilation
The heat generated in this unit is adequately dissipated. However, the unit should never be installed in a cupboard or on shelves with inadequate ventilation. Never cover the cooling slots on the unit (e.g. with other equipment, magazines, tablecloths or curtains).
Do not place any objects on top of the unit and maintain a clearance of at least 10cm above the unit, so that the heat generated can be dissipated with no obstructions.
Moisture, sunlight, heat
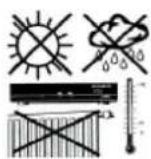
Protect the unit against moisture, dripping and splashed water (do not place any filled objects such as vases on top of the unit). Do not place the unit close to a heater or expose it to direct sunlight and do not operate it in damp locations. Only use the unit in a moderate climate, not in tropical conditions.
First Installation
Once you have connected up your receiver in the correct way, turn it on at the power switch on the rear of the unit. The following screen appears:

Select the menu language you want using the ◀ / ▶ buttons. If you are using a DVB-T indoor antenna (e.g. the BZD 30 from Kathrein), the antenna will need a 5 V supply (only if the antenna does not have its own power supply). The default setting is 5V OFF (inactive). You can use the ◀ / ▶ buttons to activate the 5 V supply (5V ON).
Press the OK button to confirm your settings. The receiver then jumps automatically to the channel search menu and start autoscanning the complete frequency range.
The channels found by the receiver are stored in the preset channel list. You can then use the ▲/▼ buttons as usual to switch between the channels.
Channel Selection (TV and Radio)
The receiver is shipped with the most popular channels programmed in to it. For ideal reception your terrestrial antenna must be optimally aligned.
Note:
DVB-T does not currently broadcast radio programmes in Germany.
Press the OK button to call up the list of pre-programmed channels.

Select the channel using the ▲/▼ buttons and press the OK button.
Note:
You can also call up the channel list by directly pressing the OK button.
To select a channel, key in its number using the remote control.
Press the TV/R button to switch from the TV list to the radio list, and press the FAV button to view your Favourites (4 lists).
You can scroll through the lists using the Quality/P- and Recall/P+ buttons or the ◀ / ▶ button(s). Press EXIT to hide the list.
Channel Information

When you switch channels, the following information is displayed on-screen:
- Channel type: TV or radio
- The channel name
- EPG (Electronic Programme Guide) reception is indicated by the letter "E"
- Videotext (Teletext) reception is indicated by the letter "T"
- Current channel being received, and time
Videotext (Teletext)
The receiver continuously transmits the Videotext/Teletext signal, if available, to the TV set.
You can call up and use the Videotext/Teletext as usual by way of your TV's remote control.
Electronic Programme Guide (EPG)

The EPG (Electronic Programme Guide) button displays programme information, provided the information is transmitted by the programme provider.
Use the ▲/▼ buttons to switch between the displayed programmes.
To switch to the next/previous day, press the Recall/P+ or Quality/P-button as appropriate.
To preset a programme, automatically press the blue button: The timer is then automatically set.
To view the details (Advanced mode), press the red button. The following OSD (on-screen display) is shown:

You can also view the details directly while the current programme is running by pressing the red button. You then see the information you need about the current TV programme without having to switch to EPG mode (see screenshot).

To be able to view the programme information you must leave the programme in question on for a few moments. If you press the red button while the current programme is running, you are switched to "Advanced mode". This displays details on the current programme. You can still view the programme in the background.
Audio
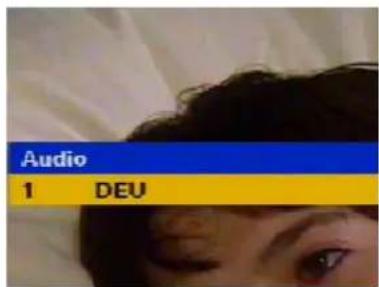
Press the Audio button to view the sound mode (TV or radio) being broadcast over the receiving channel. Select the sound mode and press the OK button to save it. If the channel is not transmitting language information the receiver shows «Unknown». Switch between Left/Right/Stereo sound using the SOUND button.
Pause and Zoom
With these buttons, the picture can be reduced in size or frozen.
Operation
The Quality Button (Antenna Adjustment Help Function)
In addition to displaying the reception strength and quality, the receiver also features an audible-signal help function to aid in adjusting the antenna:
Adjust the receiver to the channel you want to receive and press the Quality button.
As soon as the Quality display is activated, the receiver starts transmitting an audio signal at a frequency and repetition rate corresponding to the received signal.

Press the MENU button to access the main menu. Select the submenu you want and press the OK button.
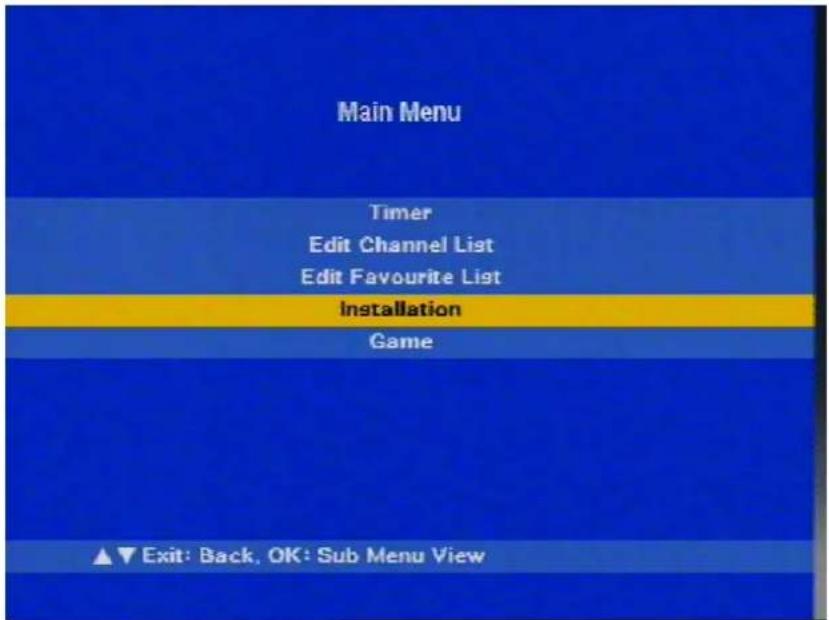
Five submenus are available, as detailed below:
1) Timer
Menu for preset programme recording or for automatic stop
2) Edit Channel List
Sort, edit and delete channels
3) Edit Favourite List
Organise channels (save, sort, edit and move)
4) Installation
Menus to set up the antenna, the channels, the system menu and the parental control
5) Game
Two games are available
Timer Setting (Automatic Programming)
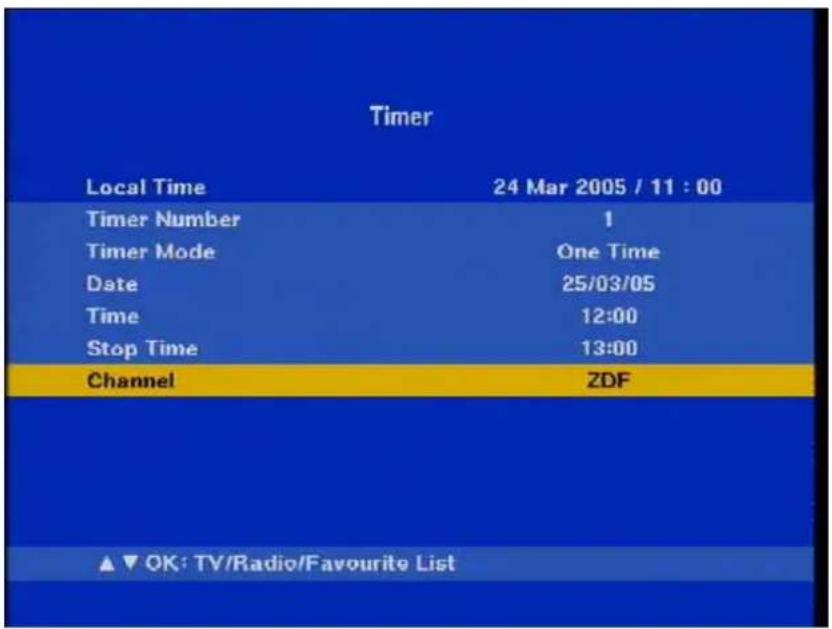
Note: The timer can be programmed either by way of the EPG (Electronic
Programme Guide; see page 14) or as follows:
The clock must be correctly set so the timer is ready for programming (see "Installation Menu/System Setup/Setting the Time").
Programme the event number (1 to 8), and activate the timer to enable programming.
- To select the date, press the OK button while in the "Date" field.
- A calendar appears, and you can then select the desired date using the ▲/▼ ◀/▶ buttons.
- Press OK to confirm your selection.
=> Alternatively: Move to the date field, select the day, month and year using the ◀ / ▶ buttons and key in the desired number using the number pad.
- Then select the start and end times and the number of the channel you want to record.
- To select the channel, press the OK button while in the "Channel" field.
- The channel list appears, and you can then select the channel you want using the ◀ / ▶ buttons.
- Press OK to confirm your selection and programme it into the timer.
Organising Channels and Favourites
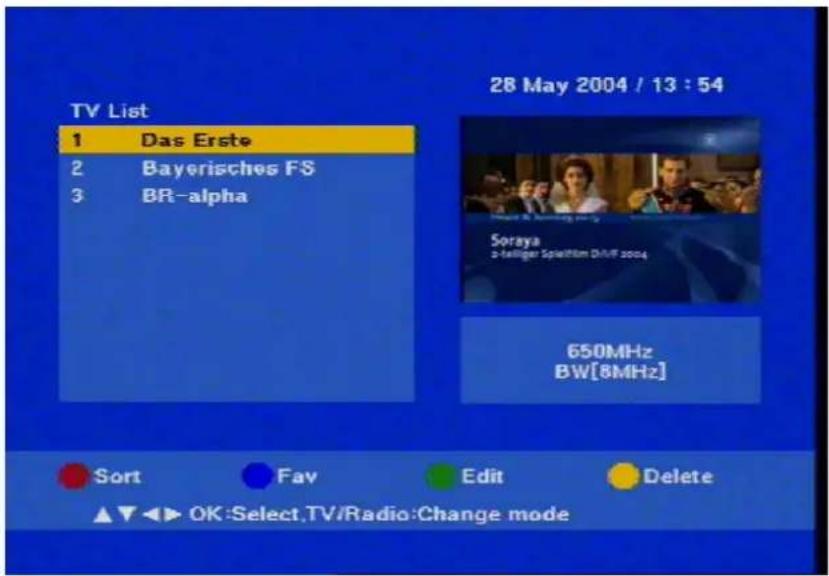
![Sort Channels 1 Das Erste 2 Bayerisches FS 3 BR-alpha 28 May 2004 / 13 : 56 650MHz BW[8MHz] Name Table Network Manual OK:Select.TV/Radio:Change mode](/content/2026/05/778629/images/4369ec748bc672cfb6c6dd0fc60ecf2f890f1952bc24c908b474b59b89d8e540.jpg)
Sort:
- Press the "Menu" button to access the receiver's menu.
- Choose "Edit Channel List" and press "OK" to confirm.
- Then select the channel you want to move using the cursor buttons (the channel is highlighted in yellow).
- Then press the red "Sort" button, followed by the yellow "Manual" button.
- Using the number pad on your remote, key in the number of the channel location you want to move to in the field underneath "Move to..." and confirm with "OK".
- Press the "Exit" button to quit the menu.
- Press "OK" to confirm the "Save sort order?" prompt.
- Key in the required PIN number using the number pad (the factory default is "0000").
- Press the "Exit" button to quit the menu.
Important!
Once you have confirmed a sort order you can no longer access the previous list.
Fav:
- Press the "Menu" button to access the receiver's menu.
- Choose "Edit Channel List" and press "OK" to confirm.
- Press the blue button to access the "Favourites" menu.
- The four Favourites lists are displayed.
- Use the ▲/▼ buttons to switch between the displayed channels (the selected channel is highlighted yellow).
- You can then assign the selected channel to the various Favourites lists by pressing the button in the colour of the relevant Favourites list.
- When you press the coloured button the number of the selected Favourites list is displayed after the channel (to undo your selection just press the same coloured button again). You can assign any channel to all four Favourites lists.
- Press the "Exit" button to quit the menu.
Edit:
- Press the "Menu" button to access the receiver's menu.
- Choose "Edit Channel List" and press "OK" to confirm.
- Press the green button to access the "Edit" menu.
- Use the ▲/▼ buttons to switch between the displayed channels (the selected channel is highlighted yellow).
- You then have two options:
- Block a channel by pressing the red button.
(You are prompted to enter the PIN code), or - Skip a channel by pressing the blue button.
- To undo a channel block or skip, press the same coloured button again.
- Press the "Exit" button to quit the menu.
Delete:
- Press the "Menu" button to access the receiver's menu.
- Choose "Edit Channel List" and press "OK" to confirm.
- Press the yellow button to access the "Delete" menu.
- Use the ▲/▼ buttons to switch between the displayed channels (the selected channel is highlighted yellow).
- To delete one or more channels, press the red button (an "X" is displayed after the channel you are deleting).
- Press the "Menu" button to delete the selected channel. You are returned to the main menu.
- To delete all the channels, press the blue button (a warning is displayed) and press "OK" to confirm your selection.
- You must then enter your PIN and press "OK" to confirm. To quit the menu without saving your changes, press the "Exit" button.
Caution:
If you delete one or more channels you will only be able to relocate them by running a new channel search.
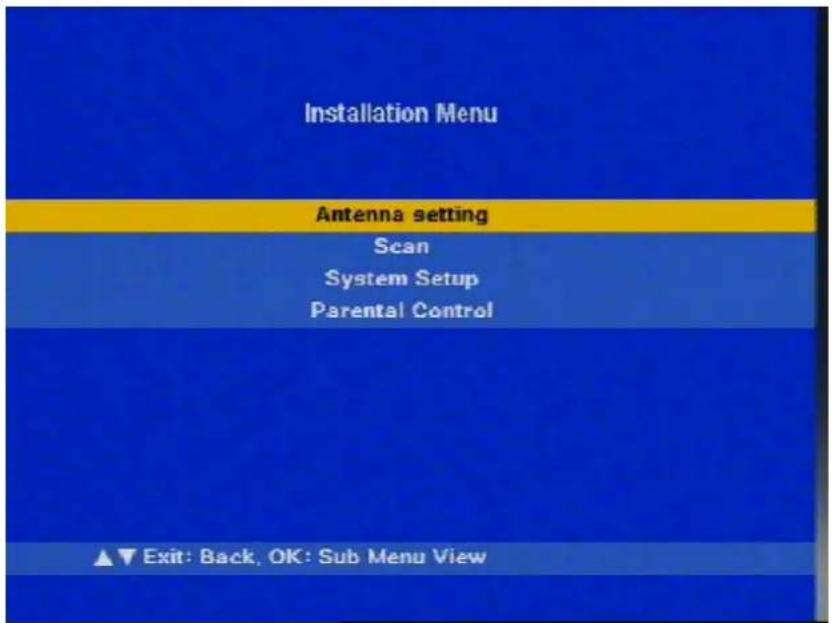
Adapting the receiver to your reception system:
1) Antenna setting
Antenna 5V supply (on/off) option
2) Scan
Auto Scan (full scan), Net Scan (network scan), TP Scan (specific channels) and PID Scan (search for a specific channel by its PID).
3) System Setup
Adapt to your TV set; additional customisation settings or reset to factory defaults: You can restore the factory default settings with which your receiver was shipped.
Important!
This action will cancel all the changes you have made to your receiver's setup.
4) Parental Control
Block menu access and password change
Note: The receiver is pre-programmed and shipped with an installation menu protected by the default password "0000".
Antenna Type

Note:
If you are using a DVB-T indoor antenna (e.g. the BZD 30 from Kathrein), the antenna will need a 5 V supply. If the antenna has its own power supply, the default "5V OFF (inactive)" setting must be retained.
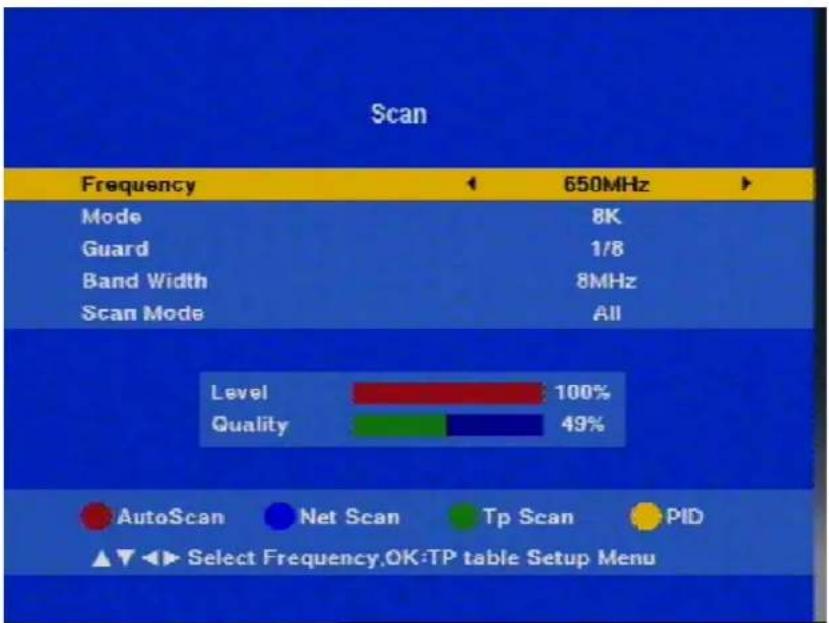
Scan
bar
| Category | Value (%) | |---|---| | Mode | 8K | | Guard | 1/8 | | Band Width | 8MHz | | Scan Mode | All | | Level | 100% | | Quality | 49% | AutoScan Net Scan Tp Scan PID Select Frequency,OK:TP table Setup MenuAlthough the receiver is pre-programmed, it may be necessary to update the channel list.
In this menu you can run the scan.
1) AutoScan
All channels in the 177 to 858 MHz frequency range are scanned for programmes.
2) Net Scan
The complete network is scanned for network information (The result only appears if the information is broadcast by the provider).
3) TP Scan
This can be used to locate specific channels.
4) PID
Enter audio and video PID for detailed searching for specific channels.
5) Scan Mode
Select the scan: All or FTA (free-to-air programmes only) - If you scan for all programmes, all programmes will be stored, including the encrypted ones; otherwise only the FTA programmes are stored.
Channel search:
Note: In addition to displaying the reception strength and quality, the
receiver also features an audio-signal help function to aid in adjusting the antenna. It can be activated in this menu using the Mute button.
Press the red button to start scanning the complete frequency range.
The receiver asks you if you want to delete the existing channels. If you answer «Yes», all the assigned channels are deleted and the new setup is placed on the main list (in the order of the factory pre-programming).
If you answer by pressing «EXIT», the scan is not started.
Note: If you are in a catchment area covered by two DVB-T networks,
it may be that the AutoScan causes some programmes to be duplicated in your channel list. You can simply leave them, or you can choose to use the channel offering the best picture (reception) and delete the other one.
Press the green button to scan for a specific channel. The channels found are placed at the end of the channel list.
PID (Programme Identification) input:
Press the yellow button. Key in the video and audio PID, and press the yellow button again. The channel is placed at the end of the main list, tagged «TV CH».
System Configuration
Language Settings
Access to the language menus: The following menu language options are available: German, Spanish, Italian, Czech and English. You can also select your preferred languages for audio and subtitles here. Use the ▲/▼ and ◀/▶ buttons. Press the OK button to confirm your settings.

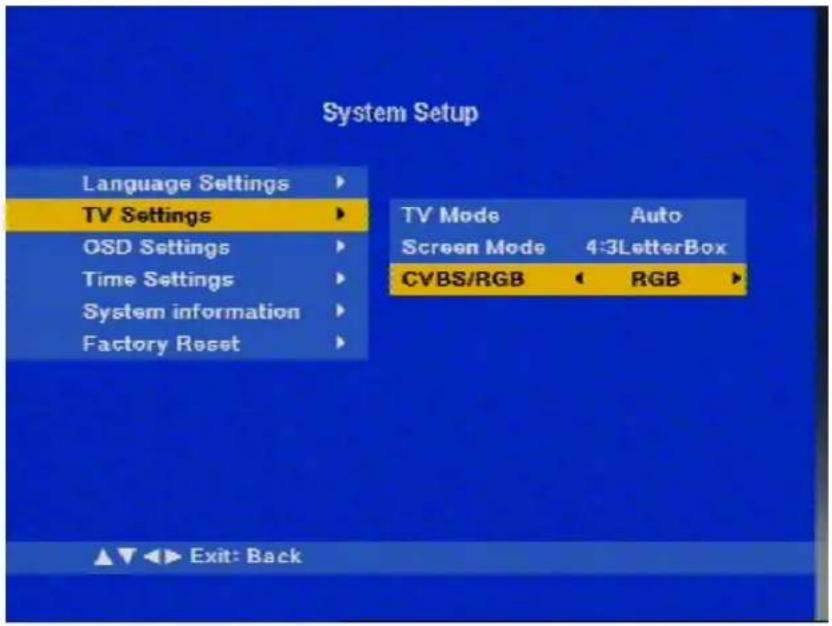
TV Settings
Select the video output standard (PAL, NTSC, SECAM, AUTO), screen mode (4:3 or 16:9) and output signal at the TV output: CVBS: composite colour video signal RGB: Individual signals for Red/Green/Blue
Note: Selection of the screen mode (4:3 or 16:9) always depends on your TV set, and not on the channel you selected!
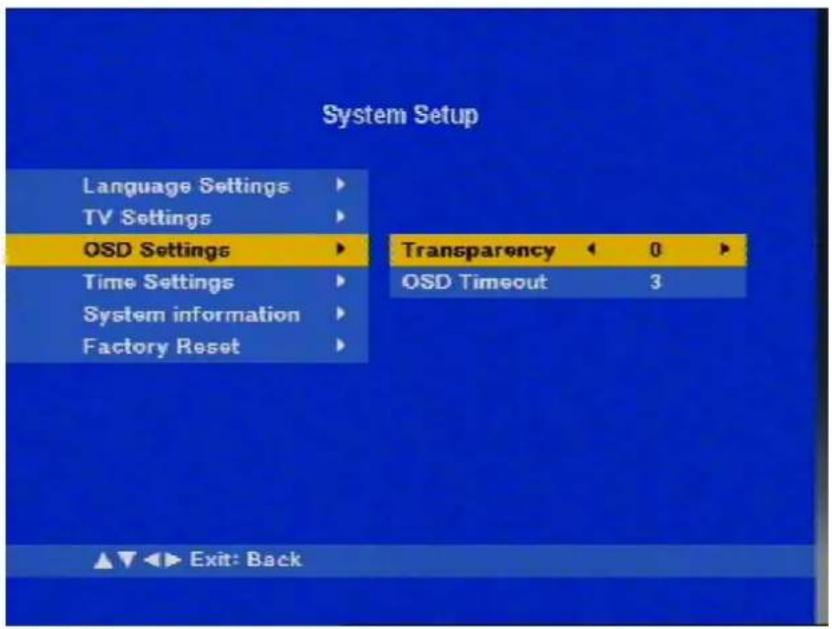
OSD Settings
Select the various colours and display parameters using the ◀ / ▶ buttons.
Installation Menu
Time Settings
The time and date must be programmed to enable the receiver to display the correct information in information messages and for operation of the timer (as well as on the front panel in Standby mode).
The internal clock is set as follows:
a) Apply the broadcast time (default). In this case the time difference between GMT and the location (in Germany + 2 hours in Summer, + 1 hour in Winter) must be allowed for.
b) If you select «Off» in the first field, you will need to enter the time and date manually using the number pad.
Note:
It may be that some channels do not transmit the correct GMT time. In this case the receiver will display an incorrect time. To display the previous time, tune in to a different European channel and wait a few minutes for the receiver to display the correct time again.

System Information
Display of the receiver's hardware and software versions.

Factory Reset
This menu is protected by the default password "0000". If you have changed the receiver's programming and want to reset it to its original setup when shipped, select this line. Press the OK button and key in the password. After about a minute the memory will be updated. Turn the receiver off and back on again at its power switch. The same display appears as during first installation.
Important:
The receiver is reset to its factory configuration. Any changes you may have made are lost.
Parental Control
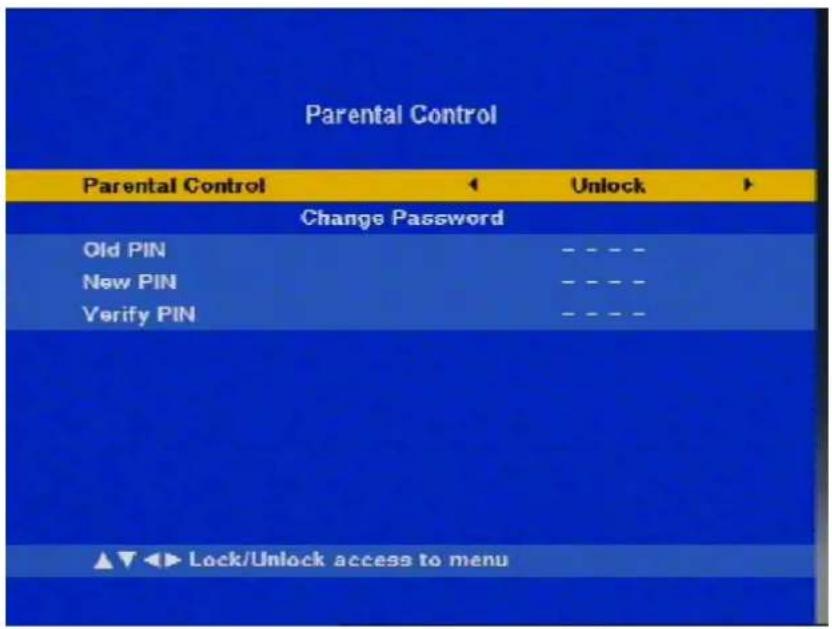
In this menu you can lock all the menus to prevent incorrect settings from accidentally being made.
To activate the parental control you need to lock all the menus.
Important:
If you change the password, be sure to make a note of it. If you forget your password the unit will require reprogramming at the factory, which is not covered by warranty.
Software Update
Important: Updating requires a PC and a null-modem cable!
If there is a new software release for your DVB-T receiver, you can download it from:
The website also provides information and tips on software updating via the receiver's RS 232 data port. You can also order the necessary zero-modem cable from ESC at the following address:
ESC Electronic Service
Chiemgau GmbH
Bahnhofstrasse 108
83224 Grassau
Germany
Tel.: +49 8641 9545-0
Fax.: +49 8641 9545-35 & 9545-36
e-mail: service@esc-kathrein.de
A factory settings reset is required following a successful software download. Your old password will no longer be valid following the software update. You will have to enter the global default password (0786).
For details of how to perform the factory reset refer to page 27.
Games
From the main menu, choose "Game" using the ▲/▼ buttons and press the OK button. Display:

You can then choose one of the two games.
Note:
After selecting a game, follow the instructions given on-screen. Games are controlled using the buttons as indicated below:

natural_image
Symmetrical abstract diagram with four curved arrows pointing inward and a central 'OK' circle (no text or symbols beyond the label)Games
Tetris
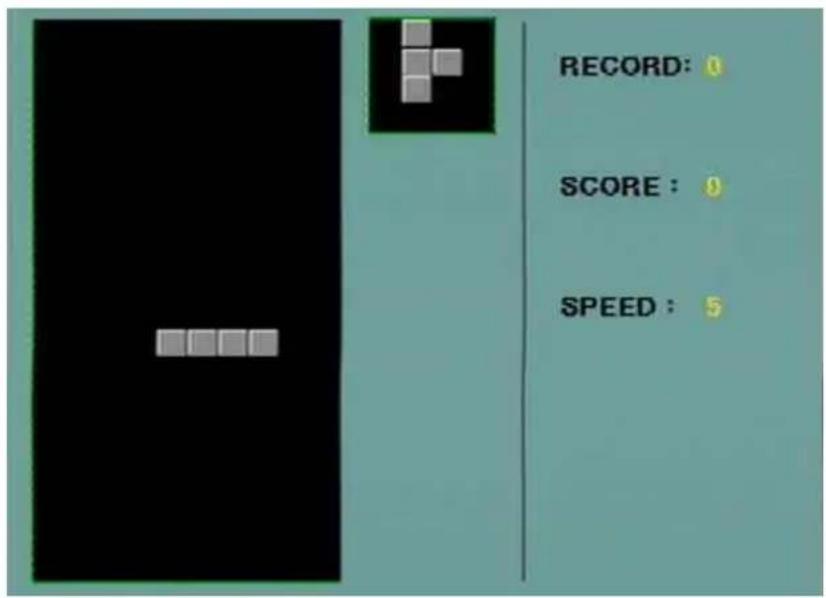
Snake
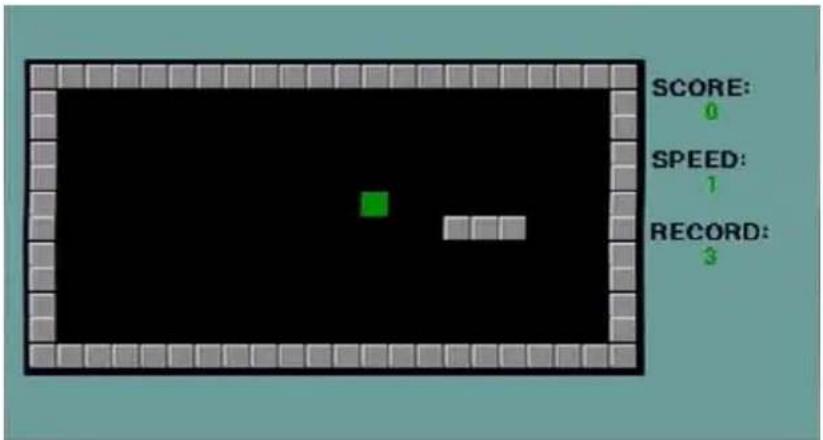
- Reception of FTA digital terrestrial TV and radio programmes 1)
• 1,000 programme memory positions
• Electronic Programme Guide (EPG) showing information on current and succeeding programmes 2) - 8 timers - timer programming also possible using EPG
- Suitable for software updates via PC (RS 232)
- On-screen display (OSD) in five languages (D, GB, I, ESP, CZ)
- Videotext/Teletext generation (for viewing on TV)
• 4:3 and 16:9 format recognition - Manual entry of PID data possible
• Automatic date and time setting via DVB data stream - Channel search
• TV Scart socket with composite colour and RGB signal
• VCR Scart socket with composite colour signal
• Video/audio output via Cinch sockets - S-VHS output
• Digital audio output (SPDIF format) - Radio button
- Antenna level indicator (visual and acoustic)
• Volume control and mute
• 4-character LED display on unit - Operation of an active indoor antenna (e.g. BZD 30 from Kathrein) possible with no additional power supply unit
- IR remote control
- Power switch
1) DVB-T does not currently broadcast radio programmes in Germany
2) Content depends on the programme provider
| Type | UFD 370/S | |
| Order number | 20210052 | |
| CE | ||
| RF range | ||
| Input frequency range MHz 177.5-226.5 | and 474-858 | |
| Channel bandwidth MHz | 7/8 | switchable |
| Modulation mode COFDM 2k, 8k | ||
| Mapping QPSK, 16 QAM, 64 QAM | ||
| Guard interval 1/4, 1/8, 1/16, 1/32 | ||
| FEC 1/2, 2/3, 3/4, 5/6, 7/8 | ||
| Input level range/impedance | dBμV/Ω | 28-98/75 |
| FM threshold | dB | Typical 3.6 |
| TV system - Video | ||
| Modulation, FEC, demultiplexer | DVB-T standard EN 300 744 | |
| Video resolution | CCIR 601 (720 x 576 lines) | |
| Video decoding | MPEG2-compatible, ISO/IEC 13818-2 (Main@Layer) | |
| Input data rate | MSymbol/s | 5-31 |
| Video bit rate | MBit/s | 1-15 |
| Frequency range | MHz | 0.02-5 |
| Output voltage/impedance | V/Ω | 1/75 |
| S/N | dB | = 53 typ. |
| TV system - Audio | ||
| Audio decoding | MPEG1 and 2-compatible, ISO/IEC 13818-3 (Layer 1 and 2) | |
| Sampling rate | kHz 32/44,1/48 | |
| Frequency range | kHz | 0.04-20 |
| Output voltage/impedance (to 10 kΩ) | mV/Ω | 770/75 |
| S/N | dB | ≥ 65 |
| Processor | ||
| Memory | ||
| - Flash | MByte | 1 |
| -SDRAM | MByte | 8 |
| Processor clock rate | MHz 81 | |
| Power supply | ||
| Mains voltage | V/Hz | 230/50 ± 10 % |
| Power consumption Power/Standby | W | < 14/10 |
| DC supply | V/mA | 5/75 (via antenna input) |
| Connections | ||
| RF input/output | IEC socket/pin | |
| TV/VCR connection | 2 x scart socket, 21-pin | |
| Video/audio output | 3 x Cinch socket | |
| Digital audio output | Cinch socket | |
| S-VHS output | Hosiden socket | |
| Data port | RS 232 Sub-D, 9-pin | |
| General | ||
| Permissible ambient temperature | °C | +5 to +40 |
| Unit dimensions (W x H x D) | mm | 298 x 65 x 223 |
| Weight | kg | 1.5 |
Connection Diagram

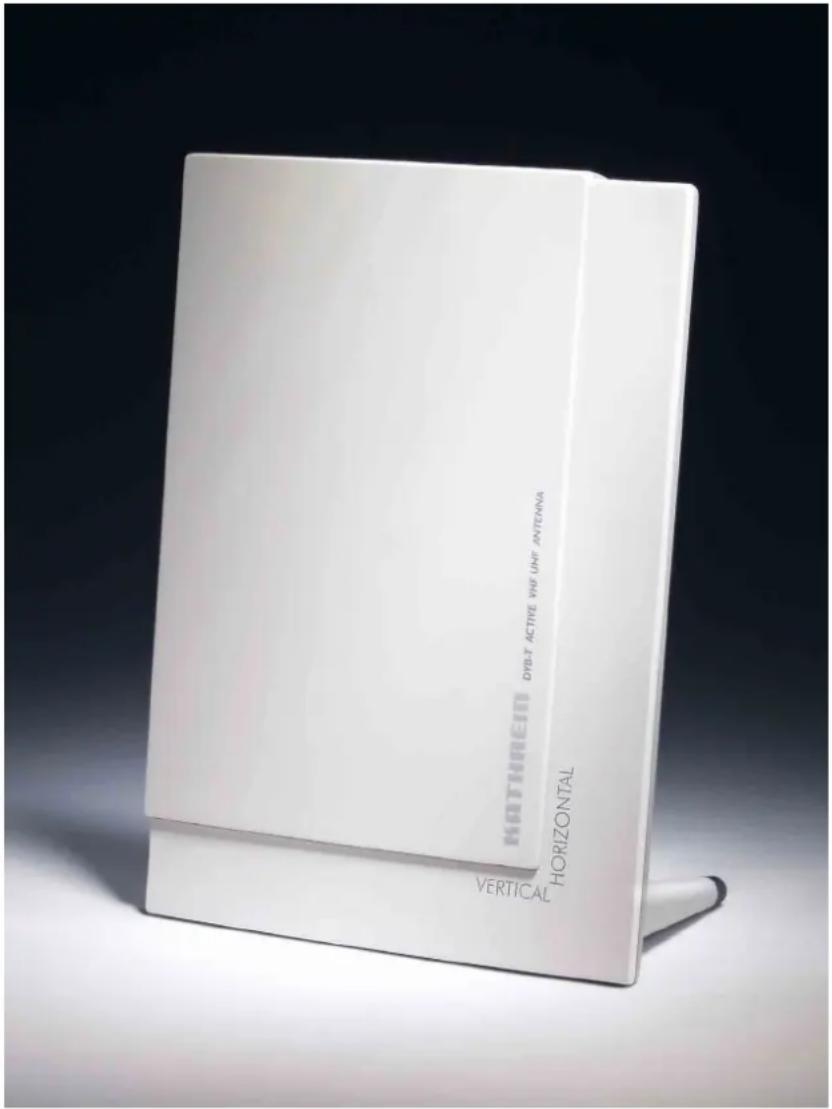
The antenna's reception range is 174-230 MHz in the VHF band and 470-862 MHz in the UHF band. As the BZD 30 is virtually omni-directional, no special alignment is required.
Depending on the mode of installation, both vertical and horizontal polarisation can be received. The remote feed (5 V/30 mA) is provided via the antenna output from the connected DVB-T receiver, e.g. Kathrein UFD 570/S or KATHREIN Euroline® UFE 370/S. The antenna offers an extremely low noise figure, and also features a filter to block GSM interference.
Its stylish design and compact size (140 x 195 mm) means the antenna will be a space-saving and attractive enhancement to any interior decor.
The supplied accessories include a pedestal for ease of installation, a wall bracket with fixings, and a 2 metre connecting cable.


- DVB-T Receiver UFE 370/S
- Important Information
- Contents
- Preface....3
- Contents 4
- Views and Connections .... 5
- Remote Control....6
- Safety Instructions 9
- Operation....10
- Main menu 16
- Installation Menu 20
- Games 29
- Functions and technical data.... 31
- Connection Diagram....33
- DVB-T indoor antenna BZD 30 34
- For your notes.... 35
- Guide to the Remote Control
- Using the Remote Control
- Inserting Batteries in the Remote Control
- Safety Instructions
- Mains cable
- Cleaning
- Playing children
- Earth connection
- Mains voltage
- Repairs
- Connections
- Long periods of absence / storms
- Installation location
- Ventilation
- Moisture, sunlight, heat
- First Installation
- Channel Selection (TV and Radio)
- Channel Information
- Videotext (Teletext)
- Electronic Programme Guide (EPG)
- Audio
- Pause and Zoom
- Operation
- The Quality Button (Antenna Adjustment Help Function)
- Timer Setting (Automatic Programming)
- Organising Channels and Favourites
- Sort:
- Important!
- Fav:
- Edit:
- Delete:
- Antenna Type
- Scan
- 1) AutoScan
- 2) Net Scan
- 3) TP Scan
- 4) PID
- 5) Scan Mode
- Channel search:
- System Configuration
- Language Settings
- TV Settings
- OSD Settings
- Installation Menu
- Time Settings
- Note:
- System Information
- Factory Reset
- Important:
- Parental Control
- Software Update
- Games
- Tetris
- Snake
- Connection Diagram
Brand : KATHREIN
Model : UFE 370-S
Category : Satellite receiver